La página se está cargando...

Documentazione
Tecnica
M70
rev. 3.4
08/2005
©
CAME
CANCELLI
AUTOMATICI
SERIE
CORSA
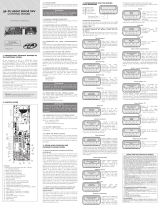
CANCELLI AUTOMATICI 119PM70
AUTOMAZIONE PER PORTE SCORREVOLI
fino a %# kg per anta
AUTOMAZIONE PER PORTE SCORREVOLI
CON SISTEMA DI COMANDO E CONTROLLO
A MICROPROCESSORE
ENTRYEXIT
CLOSED
EMERGENCY
SELECTION

PAGINA LASCIATA INTENZIONALMENTE BIANCA
PAGINA LASCIATA INTENZIONALMENTE BIANCA

ATTENZIONE!
importanti istruzioni per la sicurezza delle persone:
LEGGETE ATTENTAMENTE!
Premessa
• Il prodotto dovrà essere destinato solo all’uso per il quale è
stato espressamente concepito. Ogni altro uso è da conside-
rarsi quindi pericoloso. La CAME cancelli automatici s.p.a. non
è responsabile per eventuali danni causati da usi impropri, er-
ronei ed irragionevoli • Conservate queste avvertenze assieme
ai manuali di installazione e d’uso dei componenti l’impianto di
automazione.
Prima dell’installazione
(verifi ca dell’esistente: nel caso di valutazione
negativa, non procedete prima di aver ottemperato
agli obblighi di messa in sicurezza)
• Controllate che la parte da automatizzare sia in buono stato
meccanico, che sia bilanciata e in asse, e che si apra e si chiu-
da correttamente. Verifi cate inoltre che siano presenti adeguati
fermi meccanici di arresto • Se l’automazione deve essere in-
stallata a un’altezza inferiore ai 2,5 m dal pavimento o da altro
livello di accesso, verifi cate la necessità di eventuali protezioni
e/o avvertimenti • Qualora vi siano aperture pedonali ricavate
nelle ante da automatizzare, ci deve essere un sistema di
blocco della loro apertura durante il movimento • Assicuratevi
che l’apertura dell’anta automatizzata non causi situazioni di
intrappolamento con le parti fi sse circostanti • Non montate
l’automazione rovesciata o su elementi che potrebbero piegarsi.
Se necessario, aggiungete adeguati rinforzi ai punti di fi ssaggio
• Non installate su ante poste in salita o discesa (non in piano)
• Controllate che eventuali dispositivi di irrigazione non possa-
no bagnare il motoriduttore dal basso verso l’alto.
Installazione
• Segnalate e delimitate adeguatamente tutto il cantiere
per evitare incauti accessi all’area di lavoro ai non addetti,
specialmente minori e bambini • Fate attenzione nel maneg-
giare automazioni con peso superiore ai 20 kg (vedi manuale
d’installazione). Nel caso, premunitevi di strumenti per la movi-
mentazione in sicurezza • Tutti i comandi di apertura (pulsanti,
selettori a chiave, lettori magnetici etc.) devono essere installati
ad almeno 1,85 m dal perimetro dell’area di manovra del can-
cello, oppure dove non possano essere raggiunti dall’esterno
attraverso il cancello. Inoltre i comandi diretti (a pulsante, a
sfi oramento etc) devono essere installati a un’altezza minima
di 1,5 m e non devono essere accessibili al pubblico • Tutti i
comandi in modalità “azione mantenuta”, devono essere posti
in luoghi dai quali siano completamente visibili le ante in movi-
mento e le relative aree di transito o manovra • Applicate, ove
mancasse, una etichetta permanente che indichi la posizione
del dispositivo di sblocco • Prima della consegna all’utente, ve-
rifi cate la conformità dell’impianto alla norma EN 12453 (prove
d’impatto), assicuratevi che l’automazione sia stata regolata
adeguatamente e che i dispositivi di sicurezza e protezione
e lo sblocco manuale funzionino correttamente • Applicate
ove necessario e in posizione chiaramente visibile i Simboli di
Avvertimento (es. targa cancello).
Istruzioni e raccomandazioni
particolari per gli utenti
• Tenete libere da ingombri e pulite le aree di manovra del can-
cello. Mantenete sgombro dalla vegetazione il raggio d’azione
delle fotocellule • Non permettete ai bambini di giocare con
i dispositivi di comando fi ssi, oppure nell’area di manovra del
cancello. Tenete fuori dalla loro portata i dispositivi di coman-
do a distanza (trasmettitori) • Controllate frequentemente
l’impianto, allo scopo di verifi care eventuali anomalie e segni
di usura o danni alle strutture mobili, ai componenti dell’auto-
mazione, a tutti i punti e dispositivi di fi ssaggio, ai cavi e alle
connessioni accessibili. Mantenete lubrifi cati e puliti i punti di
snodo (cerniere) e di attrito (guide di scorrimento) • Eseguite
controlli funzionali a fotocellule e bordi sensibili ogni sei mesi.
Assicurate una costante pulizia dei vetrini delle fotocellule
(utilizzate un panno leggermente inumidito con acqua; non
utilizzate solventi o altri prodotti chimici) • Nel caso si rendano
necessarie riparazioni o modifi che alle regolazioni dell’impianto,
sbloccate l’automazione e non utilizzatela fi no al ripristino delle
condizioni di sicurezza • Togliete l’alimentazione elettrica prima
di sbloccare l’automazione per aperture manuali. Consultate le
istruzioni • È fatto DIVIETO all’utente di eseguire OPERAZIONI
NON ESPRESSAMENTE A LUI RICHIESTE E INDICATE nei
manuali. Per le riparazioni, le modifi che alle regolazioni e per
le manutenzioni straordinarie, RIVOLGETEVI ALL’ASSISTENZA
TECNICA • Annotate l’esecuzione delle verifi che sul registro
delle manutenzioni periodiche.
Istruzioni e raccomandazioni
particolari per tutti
• Evitate di operare in prossimità delle cerniere o degli organi
meccanici in movimento • Non entrate nel raggio di azione
dell’automazione mentre è in movimento • Non opponetevi
al moto dell’automazione poiché può causare situazioni di
pericolo • Fate sempre e comunque particolare attenzione
ai punti pericolosi che dovranno essere segnalati da appositi
pittogrammi e/o strisce giallo-nere • Durante l’utilizzo di un
selettore o di un comando in modalità “azione mantenuta”,
controllate continuamente che non ci siano persone nel raggio
d’azione delle parti in movimento, fi no al rilascio del comando
• Il cancello può muoversi in ogni momento senza preavviso •
Togliete sempre l’alimentazione elettrica durante le operazioni
di pulizia o di manutenzione.

PAGINA LASCIATA INTENZIONALMENTE BIANCA
PAGINA LASCIATA INTENZIONALMENTE BIANCA


2
SERIE CORSA
DIMENSIONAMENTO (1)(1)
(1)(1)
(1)
Le dimensioni fondamentali necessarie alla fabbricazione di un automatismo CAME per ingressi automatici
sono la larghezza A dell'anta (o del totale delle due ante) e la lunghezza complessiva T della trave di
alloggiamento dell'automatismo; la relazione tra le due grandezze è la seguente:
T = A x 2 + 20 mm
AUTOMATISMO PER INGRESSO
A 2 ANTE
** In fase di ordinazione, indicare
sempre il senso di apertura porta
(vedi scheda ordine)
AUTOMATISMO PER INGRESSO
AD 1 ANTA**
DIMENSIONI COMPLEMENTARI
Vp= Vano passaggio
s = Sovrapposizione tra anta/e mobile/i e
parti fisse (opere murarie e/o ante fisse)
DIMENSIONI BASILARI
T = Lunghezza totale della trave
A = Larghezza totale delle ante complete di guarnizioni
(1)
A
TTENZIONE
!
nel caso di utilizzo dei ns. profili serie 20 e serie 40
per la costruzione delle ante, il dimensionamento può
essere anche diverso da quello indicato. Vedi la docu-
mentazione relativa.
M
ssVp
A
T
M
ssVp
A
T
Controllare che le apparecchiature di comando, di sicurezza e gli accessori siano originali CAME; ciò garantisce e rende l'impianto di facile esecuzione e manutenzione.
Descrizione:
Sistema per l'apertura automatica di
porte scorrevoli.
Progettato e costruito interamente
dalla CAME CANCELLI AUTOMATI-
CI S.p.A., con grado di protezione
IP40. Garantito 12 mesi salvo
manomissioni.
Accessori a richiesta:
-MA7012 Elettroblocco;
-MA7032 Sistema antipanico a
batteria;
-MA7041 Selettore funzioni;
-MS9502 Interruttore a sfioramento;
-MF9011/9111 Fotocellule di coman
do e sicurezza;
-MR8001/8002 Radar a infrarosso;
- MR8104/8105 Radar a microonde;
-MR8334-70-90
Sensore di sicurezza;
-MP8030/8060 Pedane sensibili;
- MRT001 Telecomando per MR8104 e
MR8105
CARATTERISTICHE GENERALI
(1) Possibilità di alimentare l'automazione con tensione diverse su richiesta
(2) Servizio intensivo
12
EHCINCETEHCITSIRETTARAC
.TNEMILA AZNEUQERF ETNERROC EROTOMXAM ETNERROC ELANIMON XAMAZNETOP ATIBROSSA AZNETTIMRETNI OROVAL OPIT ENOIZART AZROF AMISSAM ID'ATICOLEV ARUTREPA ARUTAREPMET OIZICRESEID
.c.aV032 .c.aV42 zH06/05A6)V032( A6,0 W07enoizamotuA W02irosseccA
aihgnic atatned M8DTH gK5 1asroCs/mc75 2asroCs/mc201 °07+<°02-
Modelli:
-CORSA 1, motoriduttore reversibile a
fino a 3300 mm con peso max. 75 Kg.
-CORSA 2, motoriduttore reversibile a
24V con quadro elettrico incorporato.
Automazione per ingressi a 2 ante fino
a 3300 mm con peso max. 75 Kg per
anta.

3
SERIE CORSA
24
75
A
300
126
29±6
151
30±0,5
85±0,513±6
18
169
69
TRAVE CON
CASSONETTO
COPRI-PROFILO
SERIE 001LC00
E TAPPI LTC
TRAVE CON
CASSONETTO
COPRI-PROFILO
SERIE 001LD00
E TAPPI LTD
Il sistema copri-profilo Serie
001LD00 prevede tappi
laterali LTD in ABS
e staffe di
incernieramento che
permettono di
sostenere il copri-
profilo in posizione
di apertura.
DIMENSIONI CASSONETTI COPRI-PROFILI
20
70
250 x
n°
passi
250250250250
T = lunghezza della traversa
lato destro/vista interna
=
punto di partenza
della foratura a passo
A
A
Sez. A-A
Rispettare le misure di
apertura ingombro
copri-profilo e la
misura (A) per lo
sgancio del profilo in
posizione di massima
apertura, 2 cm circa.
+
1
2
151
195
30±0,5
85±0,5
29±6
135
13±6
73
44
Foratura predisposta per il fissaggio del profilo

4
SERIE CORSA SCHEMI ANTE IN CRISTALLO
V =
H - 22 mm
Y - 40 mm
V =
H - 70 mm
Y - 88 mm
10
10
PATTINO GUIDA
INTERNO
ZEPPA PER
CENTRATURA
VETRO
PROFILO-GUIDA
INFERIORE
PATTINO
GUIDA
ESTERNO
V
SOLUZIONE ANTA IN
CRISTALLO SENZA
ZOCCOLO INFERIORE
SOLUZIONE ANTA IN
CRISTALLO CON
ZOCCOLO INFERIORE
PROFILO DI SUPPORTO
H
V
Y
10
13±6
29±6
Y = altezza di fissaggio trave
= H + 18 mm
H = altezza passaggio utile
V = altezza cristallo
16
20
80
3417.5
2021.5
ø 4.8
18
40
1622
17
53
70
PROFILO-AGGANCIO
CRISTALLO

5
SERIE CORSA
SCHEMI ANTE IN CRISTALLO
ANTA/E IN CRISTALLO
SENZA ZOCCOLO INFERIORE
ANTA/E IN CRISTALLO
CON ZOCCOLO INFERIORE
QUOTE DI FORATURA PER CRISTALLO E TRAVERSO SUPERIORE
MA 7370 = L 1000 mm
MA 7470 = L 1500 mm
MA 7570 = L 2000 mm
MA 7353 = L 1000 mm
MA 7453 = L 1500 mm
MA 7553 = L 2000 mm
MA 7370 = L 1000 mm
MA 7470 = L 1500 mm
MA 7570 = L 2000 mm
L
L
L
L
ø 16
ø 8.5
32
18
101
100 min. 300 100
101
L anta
L anta - 2 mm
Profilo
Cristallo (max 10 mm)

6
SERIE CORSA
Y
I
SCHEMI ANTE INTELAIATE
10
PATTINO
GUIDA
ESTERNO
H
PATTINO
GUIDA
INTERNO
I
10
30
I =
H - 28 mm
Y - 46 mm
I =
H - 48 mm
Y - 66 mm
I =
H - 28 mm
Y - 46 mm
I
10
13±6
29±6
SOLUZIONE ANTA
INTELAIATA CON
PROFILO-GUIDA
INFERIORE APPLICATA
ESTERNAMENTE
SOLUZIONE ANTA
INTELAIATA SENZA
PROFILO-GUIDA
INFERIORE
SOLUZIONE ANTA
INTELAIATA CON
PROFILO-GUIDA
INFERIORE INSERITO
INTERNAMENTE
PROFILO-AGGANCIO
INTELAIATE
PROFILO-GUIDA
INFERIORE
20
2
20
4718 11
40
4.5 10 8 4
26.5
Y = altezza di fissaggio trave
= H + 18 mm
H = altezza passaggio utile
I = altezza dell'anta intelaiata

7
SERIE CORSA
SCHEMI ANTE INTELAIATE
ANTA/E INTELAIATA
SENZA PROFILO-GUIDA
INFERIORE
ANTA/E INTELAIATA
CON PROFILO-GUIDA
INFERIORE
L
L
MA 7371= L 1000 mm
MA 7471= L 1500 mm
MA 7571= L 2000 mm
MA 7351 = L 1000 mm
MA 7451 = L 1500 mm
MA 7551 = L 2000 mm
MA 7371= L 1000 mm
MA 7471= L 1500 mm
MA 7571= L 2000 mm

8
SERIE CORSA MONTAGGIO TRAVE
3) Praticare dei fori sul profilo in corrispondenza dei cavi di alimentazio-
ne e di collegamento dei sensori (fotocellule-radar)
4) Centrare l'automazione rispetto al vano passaggio
5) Fissare l'automazione alla struttura utilizzando i fori predisposti, e
verificare il corretto allineamento orizzontale (livellamento)
2 b) Allentare i dadi dei
rullini “antideragliamento”
lasciandoli scendere;
1) Togliere, se presente, il cassonetto copri-profilo (fornito a richiesta)
2) Togliere i carrelli dal profilo di supporto come segue:
2 a) Scollegare dalla staffa di
attacco i carrelli vincolati alla
cinghia, agendo sulle viti di
fissaggio;
2 c) Sollevare i carrelli quanto basta
per toglierli dalla guida di scorrimen-
to;
CARRELLO CON ATTACCO PER
CINGHIA SUPERIORE
CARRELLO CON ATTACCO
PER CINGHIA INFERIORE

9
SERIE CORSA
MONTAGGIO ANTE
modello CORSA 1 (anta singola) con apertura a
DESTRA
con apertura a
SINISTRA
NON A CONTATTO
120120
120120
120 150150
150150
150
110110
110110
110
8585
8585
85 8585
8585
85 110110
110110
110 110110
110110
110
110110
110110
110
130 130
130 130
130 CON ELETTROBLOCCO
modello CORSA 2 (anta doppia)
1) Fissare i carrelli alle ante secondo il seguente schema:
2) Sollevare le ante e
posizionarle correttamente
sulla guida di scorrimento;
4) Ricollegare i carrelli ai
relativi attacchi cinghia;
3) Sollevare e fissare i rullini
antideragliamento, senza
forzare contro il profilo;

10
SERIE CORSA
+6 mm
- 6 mm
10
+6 mm
- 6 mm
13
4
+4 mm
- 4 mm
44
REGOLAZIONI MECCANICHE
Tramite i carrelli sono possibili le se-
guenti regolazioni negli allineamenti
delle ante:
- regolazione verticale RV, con
bulloneria A e B
- regolazione trasversale RT, con
bulloneria C
- regolazione orizzontale RO, con
bulloneria D e E
D
B
C
A
E

11
SERIE CORSA
REGOLAZIONE TRASVERSALE RT
Il piano verticale delle ruote di scorrimento dei carrelli deve essere sempre parallelo alla trave,
perciò se viene rilevato un disallineamento (es.: scorri-
mento difficoltoso) agire come segue:
- Allentare la bulloneria C;
- Allineare i carrelli alla guida di scorrimento (ad es.
rilevando la quota Q della distanza tra il corpo del
carrello e il profilo della trave);
- Fissare e verificare, muovendo manualmente l’anta,
l’assenza di attriti tra anta/e mobile e parti/ante fisse
lungo tutta la linea di movimento.
- Stringere
accurata-
mente la
bulloneria
di fissag-
gio dei car-
relli.
REGOLAZIONI MECCANICHE
REGOLAZIONE VERTICALE RV
Per ottenere un corretto allineamento verticale delle
ante intervenire sui carrelli di movimento :
- Allentare le viti A.
- Girare la vite di regolazione verticale B fino ad
ottenere la massima perpendicolarità dell’anta/e. Nel
caso di automatismo a due ante scorrevoli, regolare in
modo da ottenere un accostamento privo di luci tra le
ante stesse.
- Dopo aver completato le regolazioni stringere le viti A
e verificare, muovendo manualmente l’anta, l’assenza
di attriti tra anta/e mobile e la pavimentazione lungo
tutta la linea di movimento.
Qualora sia necessario è possibile alzare integral-
mente l’anta regolando entrambi i carrelli
REGOLAZIONE ORIZZONTALE RO
(solo per Corsa 2)
Per una regolazione fine (± 4
mm) del punto d'incontro delle
due ante, allentare la bulloneria
D e spostare le due ante assie-
me.
Per un allineamento superiore,
bisogna scollegare l'aggancio
alla cinghia allentando la bullo-
neria E.
Al termine della regolazione,
ribloccare opportunamente i
bulloni.
Guida di scorrimentoGuida di scorrimento
Guida di scorrimentoGuida di scorrimento
Guida di scorrimento
AntaAnta
AntaAnta
Anta
Profilo traveProfilo trave
Profilo traveProfilo trave
Profilo trave

12
SERIE CORSA
Vite fissaggio
REGOLAZIONI MECCANICHE
Vite fissaggio
REGOLAZIONE TENSIONE
DELLA CINGHIA
Qualora sia necessario,
regolare la tensione cin-
ghia mediante il gruppo
puleggia di rinvio:
1) Allentare le viti di
fissaggio della puleggia.
2) Girare la vite di rego-
lazione per ottenere la
corretta tensione della
cinghia.
3) Stringere accurata-
mente le viti di fissag-
gio in modo da mantere
la corretta tensione.
VitI fissaggio puleggiaVite regolazione tensione
STAFFA ANTIVIBRAZIONE CASSONETTO DI CHIUSURA
Limita le oscillazioni e la deformazione longitudinale
del cassonetto (opzionale) di chiusura; è consigliato
montare una staffa fino a m 2.80, entrambe se la
trave supera tale misura. Eventualmente deformar-
ne manualmente la sagoma
POSIZIONAMENTO
ARRESTI MECCANICI
E
STAFFE ANTIVIBRAZIONI
REGOLAZIONE ARRESTI MECCANICI
Gli arresti meccanici servono a determinare e
regolare l’apertura delle ante, impedendo anche
eventuali oltrecorsa.
Per posizionarli, agire sulla vite di fissaggio.
N.B.: Un corretto alloggiamento e fissaggio de-
gli arresti meccanici non danneggia la guida di
scorrimento consentendo eventuali regolazioni

13
SERIE CORSA
REGOLAZIONI MECCANICHE
Vite fissaggio
supporto cinghia
SUPPORTO CINGHIA
Il supporto cinghia è il dispositivo per il controllo delle vibrazioni della cinghia; Va installato
al centro degli automatismi a due ante con profilo di supporto superiore ai 3020 mm. Se
necessario, deformarne manualmente la sagoma.
N.B. Verificare che durante il funzionamento il supporto cinghia non ostacoli parti in
movimento.
VERIFICA MONTAGGIO
Al termine del montaggio della trave e delle regolazioni
meccaniche, verificare sempre che:
_ non vi siano rimasti residui di lavorazione sulla guida di
scorrimento a danno della medesima e/o delle ruote dei
carrelli;
_ non vi siano rimasti oggetti estranei e/o attrezzature di
lavoro all'interno della trave;
_ sia stato eseguito il regolare allineamento delle ante e
posizionati i fermi meccanici, come indicato precedente-
mente.
Allo scopo, eseguire degli azionamenti di apertura e chiusu-
ra manuali, agendo direttamente sulle ante, prima di avviare
elettricamente l'automazione.

14
SERIE CORSA
10
11
1
2
C1
Ri
M
R2
R1
2
F1 F2 ES ES TX RX GND 1 2 3 4 5 6 7
MF9011 - MF9111 MA7032
12345678
21 345678910O
N2134O
N
RESET
APRE
MA7012 BUSSOLA MA7041
P.R.AP AP/PARZ TCA V.RALL.CH V/CH V/AP P.R.CH FRENO V.RALL.AP.
FUSIBILE
ACCESSORI
1,6A
-
+
M
N
E+
S
S
E -
-
BATT.
+
24AC
24AC
MORSETTIERA COLLEGAMENTO
ACCESSORI
COLLEGAMENTO MOTORE-ENCODER
BATTERIE- ALIMEN.24V
LEDS DI CONTROLLO
FUSIBILE ACCESSORI 1.6A
RAPIDO TASTO RESET
DIP-SWITCH SELEZIONI
TRIMMERS DI REGOLAZIONE
INNESTO SCHEDA FOTOCELLULA
MF9011-9111
INNESTO SCHEDA ANTIPANICO MA7032
COLLEGAMENTO ELETTROBLOCCO
MA7012
COLLEGAMENTO SISTEMA BUSSOLA
COLLEGAMENTO SELETTORE FUNZIONI
MA7041
QUADRO ELETTRICO ZP7
TASTO APRE
MORSETTIERA COLLEGAMENTO ACCESSORI
10 - 11 Alimentazione accessori a 24V a.c./d.c.
1- 2 Pulsante Stop, contatto normalmente chiuso (N.C.)
2- C1Fotocellule, eseguono la riapertura durante la chiusura (N.C.)
2- RiContatto normalmente aperto (N.O.) sensore centrale interblocco
(solo con bussola)
2- R1Contatto normalmente aperto (N.O.) sensore esterno (escludibile)
2- R2Contatto normalmente aperto (N.O.) sensore interno
2- M Comando "passo-passo" (pulsante manuale), contatto normalmente
aperto (N.O.).
- I contatti 1-2 e 2-C1 sono normalmente chiusi (N.C.) e ponticellati all'origine. Per utilizzare queste funzioni,
sostituire i ponti con gli appositi dispositivi.
- Il contatto 2-C1 viene utilizzato in caso si desideri inserire un sistema di sicurezza (es. fotocellule o altro
dispositivo di controllo), che non sia possibile accogliere nell'apposita sede ad innesto. Nota: Se non viene inserita
la scheda fotocellula MA9011/9111 o se inserita si desideri disattivarla, posizionare il dip 3 in ON (modulo a 4 vie).
- Il contatto 2-M è normalmente aperto (N.O.) e ha una doppia funzionalità:
1) Nella situazione di normale funzionamento è abilitato all'apertura, anche se il selettore funzioni MA7041 è
selezionato in "porte chiuse". Questa funzione può essere utilizzata per passaggio preferenziale, (es. chiusura
serale, comando di apertura su selettori a chiave o magnetici).
2) Selezionando il dip 5 in ON (modulo a 10 vie) si ha la funzione di apertura "passo-passo" (premendo il pulsante
l'anta apre, ripremendo chiude). Attenzione, utilizzando questa funzione i contatti 2-R1 e 2-R2 vengono esclusi.
10
11
1
2
C1
Ri
M
R2
R1
2
F1 F2 ES
E
MA701
2
P.R.AP
-
+
+
-
MORSETTIERA COLLEGAMENTO ALIMENTAZIONE
24V Alimentazione del motoriduttore (predisposto)
Collegamento a terra
230V Alimentazione di linea (50/60 Hz)
Fusibile di linea da 2A
(vedi pagina 22)
230V
24V

15
SERIE CORSA
QUADRO ELETTRICO ZP7
IMPORTANTE:
Ogni operazione di collegamento/cablaggio o sostituzioni schede, va effettuata esclusivamente dopo aver
MA7032
678
2134O
N
RESET
APRE
Tasto RESET, ripristina i dati e fà ripartire l'automazione in verifica.
Tasto APRE, avvia l'automazione a compiere un ciclo di apertura.
Attenzione: la funzione del tasto apre viene esclusa se il dip 5
(modulo a 10 vie) è posizionato in ON.
MF9011 - MF9111
1
O
N
P.R.AP AP/PARZ TCA V.RALL.CH V/CH V/AP P.R.CH FRENO V.RALL.AP.
-
+
!#%'
" $ &
REGOLAZIONI TRIMMERS
REGOLAZIONE TRIMMERS
N° 1 2 3 4 5 6 7 8 9
FUNZIONE
PUNTO
INIZIO
RALLENTA-
MENTO
APERTURA
APERTURA
PARZIALE
CHIUSURA
AUTOMA-
TICA
VELOCITÁ
DI
RALLENTA-
MENTO IN
CHIUSURA
VELOCITÁ DI
CHIUSURA
VELOCITÁ DI
APERTURA
PUNTO
INIZIO
RALLENTA-
MENTO
CHIUSURA
INTENSITÁ DI
FRENATA
NELLA FASE
INIZIALE DEL
RALLENTAMEN-
TO
VELOCITÁ
DI
RALLENTA-
MENTO IN
APERTURA
MISURA PUNTO
D'INIZIO 60 ÷ 90 % 0.5 ÷ 13
SEC.
5 ÷ 12
CM/SEC.
CORSA 1
8,6÷57
CM/SEC.
CORSA 2
17,2÷102
CM/SEC.
CORSA 1
8,6÷57
CM/SEC.
CORSA 2
17,2÷102
CM/SEC.
PUNTO
D'INIZIO .................. 5 ÷ 12
CM/SEC.

16
SERIE CORSA SELEZIONE FUNZIONI
LED SEGNALE SIGNIFICATO
1 lampeggia -Encoder fuori uso
1 acceso -Encoder fuori uso
2(*) -batterie antipanico scariche
3 acceso -alimentazione 24V a.c. presente
4 acceso -contatto fotocellula aperto
5 acceso -funzione interblocco presente (vedi "applicazione bussola")
6 acceso -anomalia funzionamento elettroblocco
7 acceso -sensore amperometrico in funzione
8 lampeggia -chiusura automatica in funzione
8 lampeggia -errore di lettura durante la taratura
6/7/8 accesi -fase di taratura terminata
(*) in questo caso, il segnale del led rimane acceso ad indicare che le batterie antipanico sono scariche solo se il
controllo stato batterie di emergenza è disattivato (il dip 2 a 10 vie in OFF), mentre lampeggia se il controllo delle
batterie è attivato (dip 2 a 10 vie in ON).
FUNZIONI LED DI CONTROLLO 12345678
S
IBILE
ESSORI
eiv01apiD ATATILIBAENOIZNUF
1NO .)71gapametsisenoizavittaidev(enoizazziromeM
2NO .)81.gapidev,2307AMnoc(aznegremeideirettabotatsollortnoC
3- .»FFO«enoizisopnipidlierenet,otazzilitunoN
4NO .arusuihcnietnatsocatnipS
5NO .)41.gap,M-2ottatnocidev("ossap-ossap"odnamoC
6NO .)02.gap"alossubenoiznuf"idev(enoizamotuaartlanococcolbretnI
8/7 NO .)91.gapidev(occolborttele'lledotnemanoiznufledenoisulcsE
7
8NO FFO 91.gapidev)esuihcoetrepaetropoiggaccolbrep(ounitnocoizivresnioccolborttelE
7
8FFO NO 91.gapidev)esuihcetropoiggaccolbrep(ounitnocoizivresnioccolborttelE
8/7 FFO )91.gapidev,1407AMinoiznuferottelesladotitseg(otaicnagsoccolborttelE
01/9 NO )81.gapidev(eduihcocinapitnA
9
01 FFO NO )81.gapidev(erpaocinapitnA
01/9 FFO )81.gapidev(enopmataenoizatnemilA
eiv4apiD ATATILIBAENOIZNUF
1NO nietnatsocatnipsNOni4pidliehcnaeranoizisop(acitsaleaciracaocinapitnaenoizavittA .)91.gapidev,pid01aoludom,arusuihc
2 - .»FFO«enoizisopnipidlierenet,otazzilitunoN
3NO ordauqlenatiresni1119FMo1109FMadehcs(elullecotofelledenoiznufalledenoisulcsE )22.gap,odnamoc
4 - .»FFO«enoizisopnipidlierenet,otazzilitunoN

17
SERIE CORSA
ATTIVAZIONE SISTEMA
VERIFICHE PRELIMINARI
Prima dell'avviamento controllare che:
"l'elettroblocco (se presente) sia sbloccato manualmente,
"vi sia un corretto tensionamento della cinghia (pag.12),
"siano verificate le condizioni descritte a pag.13 (verifica montaggio),
"non vi siano oggetti sulle linee di transito delle ante,
"tutte le viterie siano correttamente bloccate,
"i sensori siano correttamente allineati e non ostruiti,
"che le funzioni desiderate siano correttamente selezionate sui dip-switch (pag.16),
"i trimmers siano regolati in posizione mediana (pag.15).
AVVIAMENTO / TARATURA
1. Dare tensione all'apparecchiatura
- accensione del led n.ro 3
2. Selezionare il dip-switch 1 in posizione ON
- spegnimento del led n.ro 3 e accensione del led n.ro 8
- inizia una manovra di chiusura e di apertura, a velocità ridotta, dopo la quale l'automazione si
posizionerà sul punto di massima apertura(1)
- accensione dei leds n.ro 6, 7 e 8
3. Selezionare il dip-switch 1 in posizione OFF
- spegnimento dei leds n.ro 6, 7 e 8 e accensione del led n.ro 3
4. Verificare, se presente, che sul selettore MA7041 sia selezionata una funzione di apertura (con i
led accesi in sequenza)
5. Comandare un azionamento "apre" su 2-R1/2-R2 o premendo il tasto apre (vedi pag.15)
- l'automazione si posizionerà sul punto di chiusura
6. Dare un impulso di apertura
- l'automazione eseguirà una manovra completa
7. Fare una completa regolazione del movimento delle ante tramite trimmers (vedi pag.15)
8. Scegliere, sul trimmer 3, il tempo di chiusura automatica più opportuno
9. Il trimmer 2 può essere regolato solo se presente il dispositivo di selezione funzioni MA7041, sul
quale va preliminarmente selezionata l'apertura parziale
10. Riabilitare, se presente, l'elettroblocco tramite la levetta del dispositivo di sblocco manuale
(1) s
e l'automazione si ferma in chiusura, è possibile che le polarità del motore siano invertite; in questo caso agire nel
seguente modo:
-togliere tensione
- portare il dip-switch 1 in OFF
- invertire le polarità M-N sulla morsettiera motore (a dx) del quadro
- riprendere dal punto 1.
FUNZIONI DI SICUREZZA - Comportamento automazione
Quando il sensore di sicurezza rileva un ostacolo, il microprocessore comanda
una riapertura, se l'automazione sta chiudendo;
uno stop, se l'automazione sta aprendo. Richiuderà quindi dopo il conteggio di
chiusura automatica.
Se l'ostacolo permane,
in chiusura, l'automazione esegue autonomamente, 4 manovre di tentata chiusurae poi si
ferma in apertura, in attesa di un nuovo comando;
in apertura, l'automazione si ferma appoggiata all'ostacolo, richiudendo al momento dell'in-
tervento del TCA; ripete l'operazione di verifica ad ogni comando di apertura e
si resetta con la manovra successiva all'eliminazione dell'ostacolo.
(in ambedue i casi, ad ostacolo rimosso, viene automaticamente ristabilito il funzionamento tarato)
Trasformazione verso di apertura (Corsa 1)
- A porta ferma, invertire la polarità del motore sui morsetti M-N sulla morsettiera dx del quadro di comando;
- Riallineare , se presente, l'elettroblocco MA7012
- Premere il tasto RESET sul quadro comando (fà ripartire l'automazione in verifica)
- Avviare (o riavviare) l'automazione come da capitolo sopra descritto.

18
SERIE CORSA INSERIMENTO ACCESSORI (a richiesta)
MA7032 - Antipanico a batteria
Dispositivo di apertura d'emergenza in caso di mancanza di tensione di linea, composto da una coppia di
batterie da 12V per 1,2Ah e da una scheda caricabatterie che ne assicura la costante ricarica.
Sul quadro comando, attraverso i dip-switch 9 e 10 (modulo a 10 vie), è possibile predisporre i seguenti tipi di
funzionamento del dispositivo al momento della caduta della tensione di linea.
Nota: Nel caso di funzionamento interbloccato (vedi pag.20), le seguenti funzioni vanno selezionate ugualmen-
te su entrambe le automazioni.
12345678910
12345678910
12345678910
9 OFF Solo apertura. Le porte si aprono e restano aperte
10 ON fino al ritorno della tensione di linea. Si verifica lo
stesso anche se il selettore funzioni MA7041 è
selezionato in "porte chiuse".
9ON Solo chiusura. Le porte chiudono e restano chiuse
10 ON anche in presenza di selezione "porte aperte" su
MA7041, fino al ritorno della tensione.
9 OFF Funzionamento normale. Le porte continuano a
10 OFF funzionare fino a quando la tensione delle batterie
scende al di sotto del livello di sicurezza, in questo
caso le porte si fermano. Se il selettore funzioni
MA7041 è selezionato in "porte chiuse", le porte
possono essere aperte solamente dando un coman
do sul contatto 2-M.
12345678910
Antipanico con la presenza del controllo costante delle batterie
Posizionando il dip switch 2 in ON del modulo a 10 vie (nel sistema
interblocco, posizionarlo su entrambi i quadri), si attiva il controllo
costante di carica delle batterie tampone, che nella condizione di
normale funzionamento, solo con tensione di rete "230V", ne verifica il
limite minimo di carica delle batterie "20V" e nel caso in cui questa scenda
sotto tale limite (nel sistema interblocco la tensione delle batterie di una delle due automazioni), attiva una
procedura di sicurezza. Questa procedura provoca l'apertura oppure la chiusura delle porte (a seconda delle
selezioni dei dip. 9 e 10). Mentre nella situazione di interblocco, la procedura di sicurezza (segnalata da un
lampeggio continuo del LED n°2 presente nel quadro MASTER) provoca l'apertura delle porte su entrambe le
automazioni. Dopo il ripristino delle batterie, il LED si spegne e il funzionamento riprenderà normalmente dopo
un comando di apertura.
N.B.: In caso di installazione di automazione singola, l'attivazione del controllo sulle batterie disattiva il
funzionamento normale (dip 9OFF - 10OFF).
Se presente MA7041, verificare che sia inserita la funzione "EMERGENCY", segnalata dal LED GIALLO
acceso e intermittente.
In ogni caso, al ripristino della tensione, si riattiverà il funzionamento della porta, preesistente al black-out.
Nota: nel caso non sia collegato il selettore MA7041
e si voglia comunque ottenere la funzione antipanico,
ponticellare i contatti 1-3 come indicato in figura.
1 2 3 4 5 6 7
R
XGND 1 2 3 4 5 6 7
MF9011 - MF9111
S
SOLA MA7041

19
SERIE CORSA
INSERIMENTO ACCESSORI (a richiesta)
MA7012 - Elettroblocco
Dispositivo di bloccaggio elettromeccanico delle ante, a sblocco elettrico e aggancio meccanico per caduta.
Blocca l'anta/e in posizione chiusa (e/o in posizione aperta) agganciando una staffa fissata ad un carrello.
Sul quadro comando, attraverso i dip-switch 7 e 8 (modulo a 10 vie), è possibile predisporre i seguenti tipi di
funzionamento dell'elettroblocco:
7 ON Disattivato. Settaggio a dispositivo assente.
8 ON
7 OFF Blocco a porte chiuse. E' il funzionamento normale:
8 ON si aggancia ad ogni chiusura e si sblocca elettrica-
mente ad ogni comando apre. E' il settaggio di
default.
7 ON Blocco a porte chiuse e aperte. Aggancia sia in
8 OFF chiusura che in apertura (opportunamente posizio-
nato (1)) e si sblocca elettricamente ad ogni comando
apre e chiude.
7 OFF Blocco sospeso. Si sblocca con il primo comando
8 OFF apre dopo l'attivazione o un ripristino di tensione,
oppure selezionando "porte aperte" su MA7041. Si
blocca selezionando "porte chiuse" o "solo uscita" su
MA7041.
1234
MI1010 - Antipanico a carica elastica
Dispositivo meccanico di apertura delle ante, composto da un sistema elastico ad azionamento in assenza
di tensione di linea. In presenza di questo dispositivo operare sui dip-switch come indicato.
12345678910
4 ON Attivazione spinta costante in chiusura
(modulo a 10 vie)
1 ON Attivazione antipanico a carica elastica
(modulo a 4 vie)
12345678910
12345678910
12345678910
12345678910
DIP SWITCH
A 10 VIE DIP SWITCH
A 4 VIE

20
SERIE CORSA
F1 F2 Es Es
1
0
11
1
2
C
1
Ri
M
R2
R1
2
M
N
E+
S
S
E -
-
BATT
.
+
24A
C
24A
C
ENTR Y EX IT
CLOS ED EME RG EN CY
SEL ECT IO N
Cancel li Automatici
!
$
#
1
0
11
1
2
C
1
Ri
M
R2
R1
2
M
N
E+
S
S
E -
-
BATT
.
+
24A
C
24A
C
!
#
#
"
"
F1 F2 Es Es
FUNZIONE BUSSOLA
Funzionamento
Al rilevamento di presenza di uno dei radar (esterno o interno), l'automazione apre la relativa porta e
contemporaneamente viene bloccata l'altra, innescando una sequenza di operazioni che termina con la
chiusura della 2a porta.
SEQUENZA STANDARD:RILEVAMENTO PRESENZA DA SENSORE ESTERNO O INTERNO
APERTURA 1A PORTA / BLOCCO SENSORE OPPOSTO
CHIUSURA 1A PORTA
APERTURA 2A PORTA
CHIUSURA 2A PORTA / SBLOCCO SENSORE OPPOSTO
Il sensore centrale (intermedio) collegato sui morsetti 2 - Ri, rileva la presenza di persone tra le due
automazioni, e abilita il microprocessore a riaprire l'automazione opposta a quella che ha eseguito l'ultima
apertura, sempre con funzione di interbloccaggio.
1 1 o 2 copie di fotocellule
2 Scheda (MA9011-MA9111)
3 Scheda antipanico MA7032
SCHEMA DI DUE AUTOMAZIONE AD INTERBLOCCO
AUTOMAZIONE ESTERNA (MASTER)
AUTOMAZIONE INTERNA (SLAVE)
4 Elettroblocco MA7012
5 Radar (MR8002-MR8104)
6 Selettore funzioni MA7041

21
SERIE CORSA
Collegamenti specifici
Collegare gli accessori ai due quadri e tra loro mediante morsetto bussola secondo lo schema illustrato.
Selezionare, sull'automazione esterna, il dip-switch 6 in ON: ciò assegna a questa il comando di gestione
(MASTER).
Sull'automazione MASTER (che comanderà l'automazione gemella) vanno collegati tutti i sensori di comando
e l'eventuale MA7041 selettore di funzioni.
Le fotocellule e l'antipanico devono essere indipendenti su entrambe le automazioni.
Le regolazioni dei trimmers vanno fatte indipendentemente sulle due automazioni.
Se non sono utilizzati i contatti 1-2 e 2-C1, devono essere ponticellati su entrambe le automazioni.
10
11
1
2
C1
Ri
M
R2
R1
2
F1F2ESES TXRXGND 1234567
MF9011 - MF9111 MA70 32
MA7012 BUSSOLA MA7041
P.R.AP AP/PARZ TCA V.RALL.CH V/CH V/AP P.R.CH FRENO V.RA LL.AP.
-
+
M
N
E+
S
S
E -
-
B ATT.
+
24AC
24AC
F1 F2 Es Es
Collegare
all' MA 7012
Collegare
all' MA 7041
C Nc 1 0 A2 C1 A1
A C
+
_
Batterie Tampone
+
_
12 V 1.2Ah 12 V 1.2Ah
Ponte per batterie in serie
10
11
1
2
C1
Ri
M
R2
R1
2
F1F2ESES TXRXGND1 234567
MF9011 - MF9111 MA70 32
MA7012 BUSSOLA MA7041
P.R.AP AP/PARZ TCA V.RALL.CH V/CH V/AP P.R.CH FRENO V.RALL.AP.
-
+
M
N
E+
S
S
E -
-
B ATT.
+
24AC
24AC
C Nc 1 0 A2 C1 A1
A C
+
_
+
_
12 V 1.2Ah 12 V 1.2Ah
F1 F2 Es Es
Radar esterno
(2-R1)
Radar centrale
o intermedio
(2-Ri)
Radar interno
(2-R2)
Collegare
all' MA 7012
MF9011-9111 MA7032
MF9011-9111 MA7032
BUSSOLA
TX RX GND
TX RX GND
QUADRO
COMANDO
(MASTER)
QUADRO
COMANDO
(SLAVE)
BUSSOLA
1 2 3 4 5 6 7
ENTRY EXIT
CLOSED EMERGENCY
SELECTION
Cancel li Automati ci
Batterie Tampone
Ponte per batterie in serie

22
SERIE CORSA COLLEGAMENTI ACCESSORI AL QUADRO
PREMESSA
Per facilitare le operazioni di cablaggio elettrico, è stato previsto sulla trave uno spazio appositamente studiato
per l'alloggiamento e la distribuzione dei cavi lungo la trave stessa.
Sulla morsettiera di collegamento accessori è stato duplicato il morsetto comune 2.
L'ingresso dei cavi di alimentazione va preferibilmente predisposto sul lato sinistro della trave,
dove è alloggiato il trasformatore al quale va collegata la tensione di linea ed il filo di protezione
di terra.
SEQUENZA DEI COLLEGAMENTI
"sensore esterno su morsetti 2-R1 del quadro
"sensore interno su morsetti 2-R2 del quadro
"alimentazione sensori su morsetti 10-11 del quadro
"alimentazione di linea(1) su morsetti relativi del trasformatore(2) (vedi pag.14)
"protezione a terra sul consueto morsetto del trasformatore
(1)
protetta con differenziale da 30mA + magnetotermico da 5A (Legge 46/90)
(2)
se l'alimentazione è a 24Va.c., è possibile collegarsi direttamente alla morsettiera del quadro, proteggendo la
linea con fusibile da 5A.
Per 001MA7032
I fili per il collegamento delle due batterie sono sempre predisposti. Basta eseguire il collegamento tra queste con
(cavetto-ponte) in dotazione.
Per 001MF9011-9111
Basta inserire la scheda amplificatore nell'apposita sede dopo aver collegato opportunamente i sensori.
N.B.: Se non viene utilizzata la scheda, posizionare il dip 3 in ON (modulo a 4 vie).
Non servono collegamenti supplementari. Rimane inserito il ponte 2-C1
10
11
1
2
C1
Ri
M
R2
R1
2
F1 F2 ES ES TX RX GND 1 2 3 4 5 6 7
MF9011 - MF9111 MA7032
12345678
21 345678910O
N21 34O
N
RESET
APRE
MA7012 BUSSOLA MA7041
P.R.AP AP/PAR Z TCA V.RALL.CH V/CH V/A P P.R .CH FRENO V.RA LL.AP.
FUSIBILE
ACCESSORI
1,6A
-
+
M
N
E+
S
S
E -
-
BATT.
+
24AC
24AC
1 2 3 4 5 6 7
ENTRY EXIT
CLOSED EMERGENCY
SELECTION
Cancelli Automatici
Colle
g
are all' MA 7012
Colle
g
are all' MA 7041
C Nc 1 0 A2 C1 A1
A C
L1 L2
Alimentazione
230V a.c.
Fusibile 2A 250V
+
_
Batterie Tam
p
one
+
_
12 V 1.2Ah 12 V 1.2Ah
Ponte per batterie in serie
MF9011-9111 MA7032
F1 F2 Es Es
230V24V

PER ANTE INTELAIATE
Dotazione completa per il fissaggio di ante intelaiate a,
con pattini guida a pavimento interni (da usare con
MA7371/7471/7571)
MA 7351 L 1000 mm
MA 7451 L 1500 mm
MA 7551 L 2000 mm
Dotazione completa per il fissaggio di ante intelaiate,
con pattini guida a pavimento esterni
MA 7371 L 1000 mm
MA 7471 L 1500 mm
MA 7571 L 2000 mm
PER ANTE IN CRISTALLO (spessore max10 mm)
Dotazione completa per il fissaggio di ante in cristallo
da 10 mm, con pattini guida a pavimento interni (da
usare con MA7370/7470/7570)
MA 7353 L 1000 mm
MA 7453 L 1500 mm
MA 7553 L 2000 mm
Dotazione completa per il fissaggio di ante in cristallo da
10 mm, con pattini guida a pavimento esterni
MA 7370 L 1000 mm
MA 7470 L 1500 mm
MA 7570 L 2000 mm
MAM 600 Guarnizione centrale di tenuta per cristalli
scorrevoli (confezione 30 m.)
MAM 601 Guarnizione laterale di tenuta per cristalli
fissi e scorrevoli (confezione 30 m.)
ACCESSORI
DI SICUREZZA
MF 9011 Coppia fotocellule portata 7 m.
MF 9111 Doppia coppia fotocellule
portata 7 m.
MA 7012 Elettroblocco completo di cordino
di sblocco
MA 7032 Sistema antipanico completo di
batterie tampone per sistemi COR-
SA e RODEO
DI COMANDO
MA 7041 Selettore funzioni
MR 8001 Radar campo stretto
MR 8002 Radar campo largo
MP 8030 Pedana sensibile 800 mm x 300 mm
MP 8060 Pedana sensibile 800 mm x 600 mm
MR 8104 Radar a microonde 3 m max
MR 8105 Radar a microonde 5 m max
MS 9502 Sensore di apertura a sfioramento
MR 8334-70-90 Radar di sicurezza K4
MRT001 Telecomando per MR8104 e MR8105
SONO INOLTRE DISPONIBILI I NOSTRI SISTEMI S20 ED S40 PER LA COSTRUZIONE COMPLETA DI PORTE
SCORREVOLI IN ALLUMINIO, APPOSITAMENTE PROGETTATI PER L'USO CON LA SERIE CORSA.
N.B. Tutti i profili per la costruzione e movimentazione delle ante sono in alluminio anodizzato argento
SISTEMA ANTIPANICO A SFONDAMENTO per:
MI 6010 1 anta mobile (L=1100 mm per anta)
MI 6110 1 anta mobile (L=1500 mm per anta)
MI 6020 2 ante mobili (L=1100 mm per anta)
MI 6120 2 ante mobili (L=1500 mm per anta)
MI 6030 1 anta mobile e 1 anta fissa (L=1100 mm per anta)
MI 6130 1 anta mobile e 1 anta fissa (L=1500 mm per anta)
MI 6040 2 ante mobili e 2 ante fisse (L=1100 mm per anta)
MI 6140 2 ante mobili e 2 ante fisse (L=1500 mm per anta)

SERIE CORSA
Tutti i dati sono stati controllati con la
massima cura. Non ci assumiamo co-
munque alcuna responsabilità per
eventuali errori od omissioni.
All data checked with the maximum care.
However, no liability is accepted for any error
or omission.
Toutes les données ont été contrôlées
très soigneusement. Nous n’assumons
de toute façon aucune responsabilité pour
les erreurs ou omissions éventuelles.
Die Daten wurden mit höchster Sorgfalt
geprüft. Für eventuelle Fehler oder
Auslassungen übernehmen wir keine
Haftung.
Todos los datos se han controlado con
la máxima atención. No obstante no nos
responsabilizamos de los posibles
errores u omisiones.
CANCELLI AUTOMATICI
CAME CANCELLI AUTOMATICI S.P.A.
DOSSON DI CASIER (TREVISO)
(+39) 0422 490960 (+39) 0422 490944
SISTEMA QUALITÀ
CERTIFICATO
ASSISTENZA TECNICA
NUMERO VERDE
800 295830
WEB
www.came.it
E-MAIL
info@came.it
RIFERIMENTI
A - B - C - D - E - F - J - K - N - S - T - U - V - X - Z
D - E - F - G - H - K - I - J - N - R - S - V - Z
C - D - K - O - P - Q - S - V - W - X - Y - Z
C - H - K - O - P - Q - S - V - W - X - Z
S - Q - W - V - X - Y
O - P - Q - S - V - W - X - Y - Z
E - S - T - U
E - G - H - I - S
E - J - S
D - L - M - N - V - W - X - Y
V - W - X - Y
POSSIBILI CAUSE
AAlimentazione - mancante inadeguata
BFusibili fuori uso
CProgrammazione iniziale - mancante o inadeguata
DSelettore funzioni (MA7041) - selezione errata
ECollegamenti errati
FPonte 1-2 mancante
GContatti 2 -C1 privi di dispositivo di sicurezza o non cortocircuitati
HFotocellule di sicurezza non allineate o non funzionanti
IDip 3 (modulo a 4 vie) da selezionare
JErrato collegamento del motore
KEncoder fuori uso
LScheda antipanico (MA7032) fuori uso
MBatterie esaurite
NDip 2 (modulo a 10 vie) attivato (verifica funzione a pag.18)
ORegolazioni dei rallentamenti (apre e chiude) inadeguate
PRegolazioni dei punti di rallentamento (apre e chiude) inadeguate
QRegolazioni delle velocità (apre e chiude) inadeguate
RRegolazione TCA, eccessiva
SScheda generale ZP7 fuori uso
TMicrointerruttore dell'elettroblocco non funzionante
UStaffa di aggancio elettroblocco - verificare allineamento - eliminare i
contatti
VAttriti tra ante mobili e fisse - eliminare cause contatti
WParticolari di traino ostacoli nel movimento - tra carrelli e cavi del cablaggio
XEventuali residui/oggetti presenti sulla guida di scorrimento
YTensione/cinghia- inadeguata
ZArresti meccanici - da allineare
DISFUNZIONI
- L’automatismo non apre.
- L’automatismo non chiude.
- L’automatismo non apre totalmente
- L’automatismo non chiude totalmente
- L'automatismo funziona sempre a velocità ridotta
- L'automatismo non mantiene le regolazioni iniziali
- L’elettroblocco non permette l'apertura
- Le fotocellule non funzionano
- Il funzionamento non coincide con la funzione
impostata sul selettore
- L’antipanico non funziona
- Eccessiva rumorosità del sistema
VEDI ANCHE "FUNZIONI LEDS DI CONTROLLO"
CENTRO DI ASSISTENZA NOTE DATA

1
Documentazione
Tecnica
M70
rev. 3.4
08/2005
©
CAME
CANCELLI
AUTOMATICI
SERIES
CORSA
CANCELLI AUTOMATICI 119PM70
AUTOMATION SYSTEM FOR SLIDING DOORS
AUTOMATION SYSTEM FOR SLIDING DOORS,
WITH MICROPROCESSOR CONTROL
for door wings weighting
up to %# kg each
ENTRYEXIT
CLOSED
EMERGENCY
SELECTION

THIS PAGE LEFT INTENTIONALLY BLANK
THIS PAGE LEFT INTENTIONALLY BLANK

WARNING!
Important instructions for the safety of people:
READ CAREFULLY!
Foreword
• Use of the products must be restricted to its intended use
(i.e. that for which it was expressly built for). Any other use is
to be considered dangerous. Came Cancelli Automatici S.p.A.
is not liable for any damage resulting from improper, wrongful
or unreasonable use • Keep these warnings with the installa-
tion and use manuals issued with the automated system.
Before installing
(preliminary check: in case of a negative
outcome, do not proceed before having
complied with the safety obligations)
• Make sure that the parts you intend to automate are in
good working order, and that they are properly balanced
and aligned. Also, make sure that proper mechanical stops
are already in place • If the operator will be installed at a
height of less than 2.5 m from the ground or other access
level, check whether you will need any protections and/or
warnings • Any gate leaves, fi tted with pedestrian entrances,
onto which you will install an operator, must have a blocking
mechanism when the gate is in motion • Make sure that the
opening of the automated gate is not an entrapment hazard
as regards any surrounding fi xed parts • Do not mount the
operator upside down or onto any elements that may fold
under its weight. If needed, add suitable reinforcements at
the points where it is secured • Do not install onto gates on
either an upward or downward slope (i.e. that are not on fl at,
level ground) • Check that any lawn watering devices will not
wet the gearmotor from the bottom up.
Installation
• Carefully section off the entire site to prevent unauthorised
access, especially by minors and children • Be careful when
handling operators that weigh more than 20 Kg (see installa-
tion manual). In such cases, employ proper weight handling
safety equipment • All opening commands (e.g. buttons, key
selectors, magnetic detectors, etc.) must be installed at least
1.85 m from the gate’s area of operation perimeter - or where
they cannot be reached from the outside of the gate. Also,
the direct commands (e.g. push button, or proximity devices,
etc.) must be installed at a height of at least 1.5 m and must
not be accessible to the public • All ‘maintained action’ com-
mands, must be placed where the moving gate leaves, transit
areas and driveways are completely visible • If missing, ap-
ply a permanent label that shows the position of the release
mechanism • Before delivering to the client, verify that the
system is EN 12453 (impact test) standard compliant. Make
sure that the operator has been properly adjusted and that the
safety and protection devices, as well as the manual release
are working properly • Where necessary and in plain sight,
apply the Warning Sings (e.g. gate plate).
Special instructions and
advice for users
• Keep the gate’s area of operation clean and clear of any
obstacles. Trim any vegetation that may interfere with the
photocells • Do not allow children to play with the fi xed com-
mand devices, or in the gate’s area of operation. Keep any
remote control devices (i.e. transmitters) away from the chil-
dren as well • Frequently check the system, to see whether
any anomalies or signs of wear and tear appear on the moving
parts, on the component parts, on the securing points, on the
cables and any accessible connections. Keep any joints (i.e.
hinges) lubricated and clean, and do the same where fric-
tion may occur (i.e. slide rails) • Perform functional tests on
photocells and sensitive edges, every six months. Keep glass
panels constantly clean (use a slightly water-moistened cloth;
do not use solvents or any other chemical products) • If the
system requires repairs or modifi cations, release the operator
and do not use it until safety conditions have been restored
• Cut off the power supply before releasing the operator for
manual openings. See instructions • Users are FORBIDDEN
to carry out ANY ACTIONS THAT THEY HAVE NOT BEEN
EXPRESSLY ASKED TO DO OR SO INDICATED in the manu-
als. Any repairs, modifi cations to the settings and extraor-
dinary maintenance MUST BE DONE BY THE TECHNICAL
ASSISTANCE STAFF • On the periodic maintenance log, note
down the checks you have done.
Special instructions and
advice for all
• Avoid working near the hinges or moving mechanical parts
• Stay clear of the gate’s area of operation when in motion •
Do not resist the direction of movement of the gate; this may
present a safety hazard • At all times be extremely careful
about dangerous points that must be indicated by proper
pictograms and/or black and yellow stripes • When using
a selector or command in ‘maintained action’ mode, keep
checking that there are no people in the area of operation of
the moving parts. Do this until you release the command •
The gate may move at any time without warning • Always cut
the power when cleaning performing maintenance.

THIS PAGE LEFT INTENTIONALLY BLANK
THIS PAGE LEFT INTENTIONALLY BLANK


SERIE CORSA
2
DIMENSIONS (1)
The basic dimensions necessary for building a CAME automation system for automatic entrance control are
door wing width A (or the total width of the two door wings) and the overall length T of the beam which contains
the automation mechanism. The relationship between these two dimensions is as follows:
T = A x 2 + 20 mm
AUTOMATION SYSTEM FOR
ENTRANCES WITH 2 DOOR WINGS
** When placing the order, be
sure to specify the direction in
which door opens (see the order
form).
AUTOMATION SYSTEM FOR
ENTRANCES WITH 1 DOOR WING**
OTHER DIMENSIONS
Vp= Passage area
s = Overlap between moving door wing(s) and
fixed parts (walls and/or non-moving door wings)
BASIC DIMENSIONS
T = Total length of beam
A = Total width of door wings, complete with weather stripping
(1)
A
TTENTION
!
When our series 20 and series 40 profiles are used to
construct the door wings, different dimensions from
those indicated above may result. See the printed
information supplied with the profiles.
M
ssVp
A
T
M
ssVp
A
T
Description:
System for sliding doors automatic
opening.
Designed and built entirely by CAME
CANCELLI AUTOMATICI S.p.A. whit
IP40 protection level. 12-month
warranty subject to tampering.
Models:
-CORSA 1, reversible 24V gear motor
with integrated circuit board.
Automation for single-door entrances
up to 3,300 mm with weight max. 75
Kg.
-CORSA 2, reversible 24V gear motor
with integrated circuit board.
Automation for entrances with 2 door
up to 3,300 mm with weight max. 75 Kg
per door.
GENERAL CHARACTERISTICS
(1) Upon request, there is the possibility of powering up the automation with a different voltage
(2) Heavy-duty-service
For easy installation and maintenance, be sure to use CAME original control equipment, safety systems and accessories.
SNOITACIFICEPSLACINHCET
EGATLOV YCNEUQERF XAMROTOM TNERRUC LANIMON TNERRUC NOITPMUSNOCREWOP ELCYCYTUD EVIRD METSYS
.XAM ECROF DETREXE DEEPSGNINEPO GNITAREPO ERUTAREPMET
.c.aV032 .c.aV42 zH06/05A6)V032( A6,0 W07noitamotuA W02seirosseccA
M8DTH dehtoot tleb gK5 1asroCs/mc75 2asroCs/mc201 °07+<°02-
12
Optional accessories:
-MA7012 Electric lock;
-MA7032 Battery-powered anti-panic
system;
-MA7041 Function selector;
-MS9502 Touch-activated switch;
-MF9011/9111 Command and safety
photocells;
-MR8001/8002 Infrared radar;
- MR8104/8105 Microwave radar;
-MR8334-70-90 Activ infrared safety
sensor;
-MP8030/8060 Pressure-sensitive;
- MRT001 remote control for MR8104
e MR8105.

SERIE CORSA
3
20
70
250 x
n°
step
250250250250
T = Length of the beam
Right side/internal view
=
point of departure
of the step drilling
24
75
A
300
126
29±6
151
30±0,5
85±0,513±6
18
169
69
BEAM WITH
SECTION-
COVERING BOX
SERIES 001LC00
AND LTC
STOPPERS
The section-covering
system Series
001LD00 has LTD
side plugs in ABS
and brackets that
allow the section-
covering to be
supported in
opening position.
SECTION-COVERING BOXES DIMENSIONS
A
A
Sez. A-A
Respect the section-
covering opening
measurements and
measurement (A) for
releasing the section
in maximum-opening
position, 2 cm
approximately.
+
1
2
151
195
30±0,5
85±0,5
29±6
135
13±6
73
44
Drilling for fixing the section
BEAM WITH
SECTION-
COVERING BOX
SERIES 001LD00
AND LTD
STOPPERS

SERIE CORSA
4
DIAGRAMS OF GLASS DOOR WINGS
SOLUTION FOR GLASS
DOOR WING WITHOUT
LOWER SKIRT
SOLUTION FOR GLASS
DOOR WING WHIT
LOWER SKIRT
V =
H - 22 mm
Y - 40 mm
V =
H - 70 mm
Y - 88 mm
10
10
INNER GUIDE
ROLLER
CAPS FOR
CENTERING
GLASS DOOR
WING
LOWER
PROFILE/GUIDE
OUTER
GUIDE
ROLLER
V
SUPPORT PROFILE
H
V
Y
10
13±6
29±6
16
20
80
3417.5
2021.5
ø 4.8
18
40
1622
17
53
70
ATTACH SECTION
CRYSTAL
Y = height at which beam is
mounted
= H + 18 mm
H = working height of passage
V = height of glass door

SERIE CORSA
5
DIAGRAMS OF GLASS DOOR WINGS
ø 16
ø 8.5
32
18
101
100 min. 300 100
101
GLASS DOOR WING(S) WITHOUT
LOWER SKIRT
GLASS DOOR WING(S) WITH
LOWER SKIRT
DRILL POINTS FOR INSTALLING THE UPPER GLASS PANEL AND BEAMBEAM
Profile
Glass (max 10 mm)
L wing - 2 mm
L wing
MA 7370 = L 1000 mm
MA 7470 = L 1500 mm
MA 7570 = L 2000 mm
MA 7353 = L 1000 mm
MA 7453 = L 1500 mm
MA 7553 = L 2000 mm
MA 7370 = L 1000 mm
MA 7470 = L 1500 mm
MA 7570 = L 2000 mm
L
L
L
L

SERIE CORSA
6
DIAGRAMS OF DOOR WINGS WITH FRAME
SOLUTION FOR
FRAMED DOOR WING
WITH BOTTOM
PROFILE/GUIDE
INSTALLED
EXTERNALLY
SOLUTION FOR
FRAMED DOOR WING
WITH BOTTOM
PROFILE/GUIDE
INSTALLED
INTERNALLY
10
OUTER GUIDE
ROLLER INNER GUIDE
ROLLER
I
10
30
I =
H - 28 mm
Y - 46 mm
I =
H - 48 mm
Y - 66 mm
I =
H - 28 mm
Y - 46 mm
I
10
LOWER
PROFILE/GUIDE
20
2
20
4718 11
40
4.5 10 8 4
26.5
ATTACH SECTION
FRAMED
Y = height at which beam is
mounted
= H + 18 mm
H = working height of passage
I = height of door wing with frame
SOLUTION FOR
FRAMED DOOR WING
WITHOUT BOTTOM
PROFILE/GUIDE
Y
I
H
13±6
29±6

SERIE CORSA
7
DIAGRAMS OF DOOR WINGS WITH FRAME
DOOR WING(S) WITH
FRAME, WITH LOWER
GUIDE PROFILE
DOOR WING(S) WITH
FRAME, WITHOUT LOWER
GUIDE PROFILE
L
L
MA 7371= L 1000 mm
MA 7471= L 1500 mm
MA 7571= L 2000 mm
MA 7351 = L 1000 mm
MA 7451 = L 1500 mm
MA 7551 = L 2000 mm
MA 7371= L 1000 mm
MA 7471= L 1500 mm
MA 7571= L 2000 mm

SERIE CORSA
8
INSTALLING THE BEAM
3) Drill holes in the profile to allow passage of the power cables and
sensor leads (photocells-radar);
4) Centre the automation system with the passage area;
5) Using the holes provided, fasten the automation system to the
structure and check the system for correct horizontal alignment
(levelling).
2 b) Loosen the nuts on
the “derailing prevention”
rollers and allow the
rollers to descend;
1) Remove the profile housing (optional at extra cost), if present
2) Remove the trolleys from the support profile by proceeding as follows:
2 c) Raise the trolleys as required for
removal from the guide track;
TROLLEY WITH UPPER
ATTACHMENT SYSTEM
FOR BELT
TROLLEY WITH LOWER
ATTACHMENT SYSTEM
FOR BELT
2 a) Loosen the mounting
screws to disconnect the
trolleys (which are engaged by
the belt) from the connecting
bracket;

SERIE CORSA
9
INSTALLING THE DOOR WINGS
model CORSA 1 (single door wing) which opens toward
the RIGHT
which opens toward
the LEFT
WITH CONTACT-FREE
120120
120120
120 150150
150150
150
110110
110110
110
8585
8585
85
8585
8585
85 110110
110110
110 110110
110110
110
110110
110110
110
130 130
130 130
130 WITH ELECTRIC LOCK
model CORSA 2 (double door wing)
1) Fasten the trolleys to the door wings by proceeding as follows:
2) Raise the door wings and
place them correctly on the
guide track;
4) Re-connect the trolleys to
their belt attachment systems;
3) Lift and fasten the derailing
prevention rollers without forcing
them against the profile;

SERIE CORSA
10
+6 mm
- 6 mm
10
+6 mm
- 6 mm
13
4
+4 mm
- 4 mm
44
MECHANICAL ADJUSTMENTS
The trolleys can be used to adjust the
alignment of the door wings as follows:
- vertical adjustment RV, with bolts
and nuts A and B
- transverse adjustment RT, with
bolts and nuts C
- horizontal adjustment RO, with
bolts and nuts D and E
DD
DD
D
BB
BB
B
CC
CC
C
AA
AA
A
EE
EE
E

SERIE CORSA
11
MECHANICAL ADJUSTMENTS
HORIZONTAL ADJUSTMENT RO
(for Corsa 2, only)
For fine adjustment (± 4 mm) of
the point where the two door
wings meet, loosen nuts and
bolts D and move the two door
wings at the same time.
To obtain a coarser adjustment,
remove the belt attachment
system by loosening nuts and
bolts E.
After adjustment, tighten the
bolts back down.
VERTICAL ADJUSTMENT RV
To obtain correct vertical alignment of the door wings, adjust
the trolleys as follows :
- Loosen screws A.
- Turn vertical adjustment screw B until the door wing(s) is/
are as perpendicular to the ground as possible. If the
automation system is being used to power two sliding door
wings, adjust this screw so that no gap is left between the
door wings when they are closed.
- After completing the adjustments, tighten screws A and
move the door wing manually to make sure that there is no
mechanical interference between the moving door wing(s)
and the pavement along the entire line of movement.
If necessary, the entire door wing can be raised by adjusting
both trolleys.
TRANSVERSE ADJUSTMENT RT
The vertical plane of the rollers on the trolleys must be parallel with the beam. If the trolleys are
out of alignment (i.e., if the door wing does not slide easily),
proceed as follows:
- Loosen nuts and bolts C;
- Align the trolleys with the guide track (for example, by
measuring distance Q between the body of the trolley and
the beam);
- Move the door wing manually to make sure that there is
no mechanical interference between the moving door
wing(s) and
non-moving
parts/door
wings along the
entire line of
movement.
- Tighten the
bolts firmly to
fasten the
trolleys.
Guide track
Door wing
Profile of beam
Profile of beam
Guide track
Door wing

SERIE CORSA
12
Mounting screw
MECHANICAL ADJUSTMENTS
Mounting screw
ADJUSTING THE BELT TENSION
If necessary, the idle pulley
can be used to adjust the
tension on the belt. Proceed
as follows:
1) Loosen the mounting
screws on the pulley.
2)Rotate the adjustment
screw until the correct belt
tension is obtained.
3)Tighten the mounting
screws carefully to maintain
the correct tension.
Pulley clamping crewsScrew for adjusting belt tension
ANTI-VIBRATION BRACKET ON THE PROFILE HOUSING
This bracket prevents the (optional) profile housing from
oscillating and bending longitudinally. One bracket can be
installed when the beam is mounted at a height of up to 2.80
m, while both brackets should be installed if beam height
exceeds 2.80 m. If necessary, the bracket may be bent into
the required shape.
ADJUSTING THE MECHANICAL STOPS
The mechanical stops are used to set and adjust the
opening width of the door wings so that they do not move
beyond the ends of their travel.
Loosen the mounting screws and move these stops to
the proper positions.
N.B.: The mechanical stops must be correctly placed
and tightened to prevent damage to the guide track and
permit its adjustment.
PLACEMENT OF
MECHANICAL STOPS
AND
ANTI-VIBRATION
BRACKETS

SERIE CORSA
13
MECHANICAL ADJUSTMENTS
Mouting screw
Belt support
BELT SUPPORT
The belt support is used to control belt vibration. It is installed at the centre of automation
systems powering two door wings whose support profile exceeds 3020 mm in length. If
necessary, the support may be bent into the required shape.
N.B. Make sure that the belt support does not come into contact with moving parts during
operation.
CHECKING FOR PROPER ASSEMBLY
After the beam has been installed and all mechanical
adjustments have been made, made sure that:
_ no scraps of materials left by manufacturing processes
remain on the guide track, which would damage the track
and/or the trolley wheels;
_ no foreign objects and/or tools have been left on the inside
of the beam;
_ the door wings are properly aligned and the mechanical
stops have been correctly positioned as described above.
Before applying power to the automation system, check for
proper operation by opening and closing the system manually
(push directly on the door wings to perform this check).

SERIE CORSA
14
ZP7 ELECTRICAL CABINET
10
11
1
2
C1
Ri
M
R2
R1
2
F1 F2 ES ES TX RX GND 1 2 3 4 5 6 7
MF9011 - MF9111 MA7032
12345678
21 345678910O
N2134O
N
RESET
APRE
MA7012 BUSSOLA MA7041
P.R.AP AP/PARZ TCA V.RALL.CH V/CH V/AP P.R.CH FRENO V.RALL.AP.
FUSIBILE
ACCESSORI
1,6A
-
+
M
N
E+
S
S
E -
-
BATT.
+
24AC
24AC
TERMINAL BOARD FOR CONNECTION
OF ACCESSORIES
TERMINAL BOARD FOR CONNECTION OF
MOTOR-ENCODER- BATTERY-POWER
SUPPLY 24V
INDICATOR LEDS
RAPID-BLOW 1.6A FUSE ON
ACCESSORIES RESET KEY
DIP-SWITCHES
ADJUSTMENT TRIMMERS
SEAT FOR PHOTOCELL CARD
MF9011-9111 SEAT FOR EMERGENCY OPERATION CARD
MA7032
CONNECTION FOR ELECTRIC LOCK
MA7012
CONNECTION FOR "COMPASS"
OPERATING SYSTEM
CONNECTION FOR FUNCTION SWITCH
MA7041
OPEN KEY
TERMINAL BOARD FOR CONNECTION OF ACCESSORIES
10 - 11 24V a.c./d.c. power to accessories
1- 2 Pushbutton Stop, normally close contact (N.C.)
2- C1Photocells, re-opening during closing (N.C.)
2- RiNormally open contact (N.O.) for central sensor (used only
when interface system is installed)
2- R1Normally open contact (N.O.) external sensor (can be excluded)
2- R2Normally open contact (N.O.) internal sensor
2- M Normally open contact (N.O.), for "step-by-step" operation
(manual button)
- Contact 1-2 and 2-C1 are normally closed (N.C.) and bridged together at the factory. To use these functions, replace
the bridge connections with the relative devices.
- The 2-C1 contact is used when a security system is desired (for example, photoelectric cells or other control
devices), which is not capable of being housed in the special clip-in seat. Note: if the MA9011/9111 photoelectric cell
card is not enabled, or if it is enabled and you wish to disable it, set dip switch 3 to ON (4-way module).
- The 2-M contact is normally open (N.O.), and has a double function:
1) During normal functioning it is enabled for opening, even if the MA7041 function selector is set on “doors closed”.
This function can be used for preferential passage, (e.g., evening closure, opening command on key or magnetic
switches).
2) By setting dip switch 5 to ON (10-way module), the “stepper” opening function is enabled (by pressing the button
the door opens; pressing it again closes the door). Attention, by using this function contacts 2-R1 and 2-R2 are
excluded.
10
11
1
2
C1
Ri
M
R2
R1
2
F1 F2 ES ES
MA7012
P.R.AP
-
+
+
-
POWER SUPPLY CONNECTION TERMINAL BOARD
24V Reduction gear power supply (supplied standard)
Earth connection
230V Power supply (50/60 Hz)
Line fuse 2A
(see page 22)
230V
24V

SERIE CORSA
15
ZP7 ELECTRICAL CABINET
IMPORTANT:
Do not perform the following operations, electrical connections/wiring or replacement of circuit cards unless the
mains power has been disconnected and the “+” (red) power terminal has been removed from the emergency
battery (if installed).
MA7032
678
2134O
N
RESET
APRE
The RESET key, resets the data and restarts the automation in
question.
The APRE key, starts automation and completes an opening cycle.
Attention: The function of the open key is excluded if dip switch 5
(10-way module) is set to ON.
MF9011 - MF9111
1
O
N
P.R.AP AP/PARZ TCA V.RALL.CH V/CH V/AP P.R.CH FRENO V.RALL.AP.
-
+
!#%'
" $ &
ADJUSTMENT TRIMMERS
ADJUSTMENTS TRIMMERS
N° 1 2 3 4 5 6 7 8 9
FUNCTION
START
POINT OF
OPENING
SLOWDO-
WN
PARTIAL
OPENING
AUTOMA-
TIC
CLOSING
SLOWDO-
WN
CLOSING
CLOSING SPEED OPENING SPEED
START
POINT OF
CLOSING
SLOWDO-
WN
BRAKING
INTENSITY IN
THE INITIAL
SLOWDOWN
PHASE
SLOWDO-
WN
OPENING
VALUE STARTING
POINT 60 ÷ 90 % 0.5 ÷ 13
SEC.
5 ÷ 12
CM/SEC.
CORSA 1
8,6÷57
CM/SEC.
CORSA 2
17,2÷102
CM/SEC.
CORSA 1
8,6÷57
CM/SEC.
CORSA 2
17,2÷102
CM/SEC.
STARTING
POINT .................. 5 ÷ 12
CM/SEC.

SERIE CORSA
16
SELECTION FUNCTIONS
LED STATUS SIGNAL
1 flashing -Encoder is inoperative
1 lit -Encoder is inoperative
2(*) -emergency battery is discharged
3 lit -pilot light on 24V a.c.
4 lit -photocell contact open
5 lit -interface function activated (see "installing the interface")
6 lit -malfunction on electrick lock
7 lit -pilot light on amperometric sensor
8 flashing -automatic closing cycle in progress
8 flashing -"read" error during automatic calibration cycle
6/7/8 lits -automatic calibration procedure terminated
(*) in this case, the LED signal remains lit to indicate that the anti-panic device batteries are run down only if the
emergency battery status check is disabled (10-way dip 2 set to OFF); whereas it flashes if the battery check is activated
(10-way dip 2 set to ON).
FUNCTIONS OF INDICATOR LED
12345678
S
IBILE
ESSORI
yaw-01piD SNOITCNUFNOITCELES
1NO .)71.gapnoitarbilacgniruddesu(egarotsretemaraP
2NO .)81.gapees,2307AMtihw(ycnegremeehtnolevelegrahcehtgnikcehC
3- .»FFO«noitisopnipidehtpeek,desutoN
4NO gnisolcelihwhsuptnatsnoC
5NO .)41.gap,M-2tcatnocees(noitarepo"pets-yb-petS"
6NO .)02.gap"metsysecafretniehtgnillatsni"ees(metsysnoitamotuarehtohtiwecafretnI
8/7 NO .)91.gapees(kcolcirtceledelbasiD
7
8NO FFO 91.gapees)desolcdnaneposroodskcol(kcolfonoitareposuounitnoC
7
8FFO NO 91.gapees)desolcsroodskcol(kcolfonoitareposuounitnoC
8/7 FFO 91.gap)1407AMhctiwsnoitcnufybdellortnoc(lortnoclacolmorfdegagnesidkcolcirtcelE
01/9 NO )81.gapees(eruliafrewopfoesacnisroodsesolcmetsysycnegremE
9
01 FFO NO )81.gapees(eruliafrewopfoesacnisroodsnepometsysycnegremE
01/9 FFO )81.gapees(eruliafrewopfoesacniyrettabycnegremeybderewopnoitarepolamroN
yaw-4piD SNOITCNUFNOITCELES
1NO ,gnisolcelihwhsuptnatsnoc,NOot4hctiwspidtes(ecivedcinap-itnadedaol-gnirpsfonoitavitcA .)91.gapees,rotcelesnoitcnufpid-01
2 - »FFO«noitisopnipidehtpeek,desutoN
3NO ,draoblortnocehtotnidetresnidrac1119FMro1109FM(noitcnuflleccirtceleotohpehtsedulcxE )22.gap
4 - »FFO«noitisopnipidehtpeek,desutoN

SERIE CORSA
17
STARTING UP THE SYSTEM
VERIFICHE PRELIMINARI
Before start-up, make sure that:
4The electric lock (if installed) has been manually released;
4The proper tension has been applied to the belt (see p. 12);
4The checks described on p. 13 (checking for proper assembly) have been performed;
4No objects are present along the path taken by the door wings as they move;
4All mounting hardware has been properly tightened;
4The sensors are correctly aligned and are not blocked;
4The desired functions have been correctly selected on the dip switches (see p. 16);
4The trimmers have been set to their midpoints (see p. 15),
START-UP/CALIBRATION
1. Turn on the power to the unit
- LED no. 3 will light up
2. Move dip switch 1 to ON
- LED no. 3 will turn off and LED no. 8 will light up
- The system will execute an closing and opening cycle at reduced speed and will stop at the maximum open
position (1) at the end of the cycle
- LEDs no. 6-7-8 will light up
3. Move dip switch 1 to OFF
- LEDs no. 6-7-8 will turn off and LED no. 3 will light up
4. Make sure that function switch MA7041 (if installed) has been set to the “open” position (with the LEDs lit in
sequence)
5. Enter an "open" command on 2-R1/2-R2 or by pressing the open key (see p.15).
-the automation will position itself at the closing point
6. Send an opening signal -
-the automation will perform a complete manoeuvre
7. Adjust the movement of the doors using the door trimmers (see p.15).
8. Adjust trimmer 3 to obtain the desired delay before automatic closing
9. Trimmer 2 can be adjusted only if function switch MA7041 has been installed and if this switch has been set
to the “partial opening” position
10. Use the lever on the manual release system to re-arm the electric lock (if installed)
(
1) If the automation system stops during the closing cycle, the motor polarity may be incorrect. If this occurs, proceed as
follows:
-
Disconnect the mains power
-
Make sure dip switch 1 is set to OFF
-
Reverse connections M-N on the terminal board for the motor, which is located in the electrical
cabinet (on the right)
-
Begin another start-up/calibration procedure starting from point 1.
SAFETY FUNCTIONS - Actions taken by the automation system when a safety device trips
When the safety sensor detects an obstacle, the microprocessor control system in the electrical cabinet
actuates:
re-opening, if the automation system is closing;
a stop, if the automation system is opening. The system will then re-close when
actuated by the automatic closing timer.
If the obstacle is still detected:
during closing the automation will automatically try 4 times to close the doors, and then it
will stop them in the open position, awaiting a new command.
during opening the automation system will stop with the door wings resting against the
obstacle and will re-close when actuated by the automatic closing timer.
It repeats the checking operation at every opening command and resets with
the following manoeuvre when the obstacle has been eliminated.
(In both cases, normal operation with the programmed settings will automatically resume when the obstacle
is removed )
Changing the direction of door opening (Corsa 1)
- With the door stopped, reverse connections M-N on the terminal board for the motor, which is located in the
electrical cabinet (on the right);
- Re-align electric lock MA7012.
- Press the RESET key on the electrical cabinet (if the unit has already been calibrated, the relative settings
will be deleted).
- Start up (or restart) the automation system as described in the section on start-up.

SERIE CORSA
18
INSTALLATION OF ACCESSORIES (available upon request)
MA7032 - Battery-powered emergency system
This emergency system opens the door in case of power failure. It includes a pair of 12V (1.2Ah) batteries as
well as a circuit card that keeps the batteries charged and distributes power to the automation system.
By using dip switches 9 and 10 (10-way module), the emergency system can be programmed to operate in the
following ways when the power fails:
Note: When functioning is interlocked (see p. 20), the following functions are selected equally for both auto-
mations.
12345678910
12345678910
12345678910
9 OFF Opening only. The doors open and remain open
10 ON until current returns to the line. The same occurs
even if the MA7041 selector is set to “doors closed”.
9ON Closing only. The doors closes and stays closed
10 ON (even if "door open" has been selected on MA7041)
until the mains power is restored.
9 OFF Normal functioning. The doors continue to function
10 OFF until the current in the batteries drops below the
safety level, in which case they stop. If the MA7041
function selector is set to “doors closed”, the doors
can only be opened by entering a command on the
2-M contact.
12345678910
Anti-panic device with constant battery control
Setting dip switch 2 of the 10-way module to the ON position (on the
interlock system, set it on both panels) activates the constant control of
the battery charge buffer, which during normal functioning with 230V
power mains voltage checks the minimum charge of the 20V batteries; if
it falls below this level (on the interlock system the voltage of the batteries
of one of the two automations) the function activates a safety procedure. This procedure consists in the opening
or closing of the doors (depending on the settings of dip switches 9 and 10). For the interlock system, the safety
procedure (signalled by a continual flashing of LED No. 2 on the MASTER panel) causes the doors to open on
both the automatic system. After reset of the batteries, the LED goes out and the system re-starts normally after
an ‘open’ command.
N.B.: For single automation installations, activating the battery control deactivates normal functioning (dip 9
OFF – 10 OFF).
- If function switch MA7041 is installed, make sure that the “
EMERGENCY
” function has been selected (which
is indicated by a flashing yellow LED).
- In any event, normal operation with the programmed settings will automatically resume when the mains power
is restored.
Note: in case the MA7041 selector is not connected
and you wish to activate the antipanic function, bond
contacts 1-3 as shown in the figure.
1 2 3 4 5 6 7
R
XGND 1 2 3 4 5 6 7
MF9011 - MF9111
S
SOLA MA7041

SERIE CORSA
19
INSTALLATION OF ACCESSORIES (available upon request)
MA7012 - Electric lock
Electro-mechanical system for locking the door wings, with gravity-powered mechanical locking action and
electric unlocking system. This device locks the door wing(s) in the closed position (and/or in the open position)
by engaging a bracket installed on one of the trolleys.
By using dip switches 7 and 8 (10-way module), the electric lock can be programmed to operate as follows:
7 ON Deactivated. Use this setting when the electric lock is
8 ON not installed.
7 OFF Locking with doors closed. This is normal operation:
8 ON the unit locks on closure and is released electrically when
the open command is given. This is the default setting.
7 ON Locking with doors closed and open. The unit locks
8 OFF both when open and closed (when positioned correctly
(1)), and is released electrically by each open and close
command.
7 OFF Delayed locking. The electric lock is unlocked when
8 OFF the first “open” command is given at initial start-up or
after a power failure, or when “door open” is selected
on MA7041. The lock is locked when “door closed” or
"output only" is selected on MA7041.
1234
MI1010 - Spring-loaded Anti-panic device
Mechanical device to open the doors, made up of a spring-loaded system which operates without electric
power supply. With this device, use the dip-switches as indicated.
12345678910
4 ON Activation of constant push while closing.
(10-way dip switch)
1 ON Activation of spring-loaded anti-panic device.
(4-way dip switch)
12345678910
12345678910
12345678910
12345678910
DIP SWITCH
10-WAY DIP SWITCH
4-WAY

SERIE CORSA
20
F1 F2 Es Es
1
0
11
1
2
C
1
Ri
M
R2
R1
2
M
N
E+
S
S
E -
-
BATT
.
+
24A
C
24A
C
ENTR Y EX IT
CLOS ED EME RG EN CY
SEL ECT IO N
Cancel li Automatici
!
$
#
1
0
11
1
2
C
1
Ri
M
R2
R1
2
M
N
E+
S
S
E -
-
BATT
.
+
24A
C
24A
C
!
#
#
"
"
F1 F2 Es Es
INTERFACE FUNCTION
Operation
When one of the radars is detected (internal or external), the automation opens the relative door and at the
same time locks the other door, triggering a sequence of operations ending with the closing of the second door.
STANDARD SEQUENCE:DETECTION OF OBJECT BY OUTER OR INNER SENSOR
OPENING OF 1ST DOOR / DEACTIVATION OF OPPOSITE SENSOR
CLOSING OF 1ST DOOR
OPENING OF 2ND DOOR
CLOSING OF 2ND DOOR / ACTIVATION OF OPPOSITE SENSOR
The central sensor (intermediate) connected to clamps 2-RI detects the presence of persons between the two
automations, and enables the microprocessor to reopen the automatic system opposite the one that was last
opened, as always using the interlock function.
1 1 or 2 copies of photoelectric cells
2 Board (MA9011-MA9111)
3 Anti-panic board MA7032
DIAGRAM OF TWO INTERLOCKED AUTOMATION
EXTERNAL AUTOMATION (MASTER)
INTERNAL AUTOMATION (SLAVE)
4 Electric lock MA7012
5 Radar (MR8002-MR8104)
6 Function selector MA7041

SERIE CORSA
21
Connections required
Connect the accessories to the two panels and to each other using the compass clamp (bussola) according
to the illustrated diagram.
Set dip switch 6 on the outer automation system to ON, which will assign MASTER control status to that system.
All control sensors and function switch MA7041 (if installed) must be connected to the MASTER automation
system, which controls the other automation system.
The photoelectric cells and the anti-panic device must be independent on both automations.
The trimmer adjustments on the two automation system act independently.
If contacts 1-2 and 2-C1 are not used, they must be connected by jumpers on both automations.
10
11
1
2
C1
Ri
M
R2
R1
2
F1 F2 ES ES TX RX GND 1 2 3 4 5 6 7
MF9011 - MF9111 MA7032
MA7012 BUSSOLA MA7041
P.R.A P AP/PARZ T CA V.RA LL.C H V/CH V/AP P.R.CH F RENO V.RA LL.AP.
-
+
M
N
E
+
S
S
E
-
-
BATT.
+
24AC
24AC
F1 F2 Es Es
Connection
for electric lock
MA 7012
Connection for
function switch MA 7041
C Nc 1 0 A2 C1 A1
A C
+
_
Emer
g
ency Battery
+
_
12 V 1.2Ah 12 V 1.2Ah
Bridge connection
for set of batteries
10
11
1
2
C1
Ri
M
R2
R1
2
F1F2ESES TXRXGND 1234567
MF9011 - MF9111 MA7032
MA7012 BUSSOLA MA7041
P.R.A P AP/PARZ T CA V.RA LL.CH V/CH V/A P P.R.CH F RE NO V. RA LL. AP.
-
+
M
N
E+
S
S
E -
-
BATT.
+
24AC
24AC
C Nc 1 0 A2 C1 A1
A C
+
_
+
_
12 V 1.2Ah 12 V 1.2Ah
F1 F2 Es Es
Outer Radar
(2-R1)
Central Radar
or middle
(2-Ri)
Inner Radar
(2-R2)
MF9011-9111 MA7032
MF9011-9111 MA7032
BUSSOLA
TX RX GND
TX RX GND
CONTROL
PANEL
(MASTER)
CONTROL
PANEL
(SLAVE)
BUSSOLA
1 2 3 4 5 6 7
ENTRY EXIT
CLOSED EMERGENCY
SELECTION
Canc elli Au tomati ci
Connection
for electric lock
MA 7012
Emer
g
ency Battery
Bridge connection
for set of batteries

SERIE CORSA
22
CONNECTION OF ACCESSORIES TO THE PANEL
FOREWORD
To facilitate the wiring procedure, the entire length of the beam is equipped with a space for lodging and distributing
the cables.
Two no.2 (common) terminals have been provided on the terminal board for connection of accessories.
The power cables should be arranged on the left side of the beam, where the transformer is located.
The mains power and ground connection are connected to this transformer.
SEQUENCE OF CONNECTIONS
4CONNECT OUTER SENSOR TO TERMINALS 2-R1 ON THE TERMINAL BOARD IN THE ELECTRICAL CABINET
4CONNECT INNER SENSOR TO TERMINALS 2-R2 ON THE TERMINAL BOARD IN THE ELECTRICAL CABINET
4CONNECT SENSOR POWER TO TERMINALS 10-11 ON THE TERMINAL BOARD IN THE ELECTRICAL CABINET
4CONNECT MAINS POWER(1) TO THE RELATIVE TERMINALS ON THE TRANSFORMER(2)
4CONNECT THE GROUND LEAD TO THE RELATIVE TERMINAL ON THE TRANSFORMER
(1)
PROTECTED BY 30MA DIFFERENTIAL SAFETY SWITCH + 5A CIRCUIT BREAKER (AS FOR ITALIAN LAW 46/90)
(2)
IF 24V A.C. POWER IS USED, THIS CONNECTION CAN BE MADE DIRECTLY ON THE TERMINAL BOARD IN THE ELECTRICAL CABINET.
For 001MA7032
The leads for connecting the two batteries have been provided. Simply connect the batteries together using the
bridge connection cable supplied with the system.
For 001MF9011-9111
All that is needed is to insert the amplifier card into its appropriate place after connecting the sensors.
N.B.: If the card is not used, set dip switch 3 to ON (4-way dip switch).
No other connections are required. Bridge connection 2-C1 remains connected.
10
11
1
2
C1
Ri
M
R2
R1
2
F1 F2 ES ES TX RX GND 1 2 3 4 5 6 7
MF9011 - MF9111 MA7032
12345678
21 34567 8910O
N21 34O
N
RESET
APRE
MA7012 BUSSOLA MA7041
P.R.AP AP/PAR Z TCA V.RALL.CH V/CH V/AP P.R .CH FRENO V.RA LL.AP.
FUSIBILE
ACCESSORI
1,6A
-
+
M
N
E+
S
S
E -
-
BATT.
+
24AC
24AC
1 2 3 4 5 6 7
ENTRY EXIT
CLOSED EMERGENCY
SELECTION
Cancelli Automatici
Connection for function
switch MA 7012
Connection for function
switch MA 7041
C Nc 1 0 A2 C1 A1
A C
L1 L2
230V a.c.
Power supply
Fuse 2A 250V
+
_
Emer
g
enc
y
batter
y
+
_
12 V 1.2Ah 12 V 1.2Ah
Bridge connection
for set of batteries
MF9011-9111 MA7032
F1 F2 Es Es
230V24V

SERIE CORSA
23
FOR DOOR WINGS WITH FRAME FOR GLASS DOOR WINGS
(with max thickness of 10 mm.)
ACCESSORIES
SAFETY
MF 9011 Pair of photocells with range of 7m.
MF 9111 Double pair of photocells
with range of 7 m.
MA 7012 Electric lock, complete with release
cord.
MA 7032 Emergency system, complete with
batteries, for CORSA and RODEO
systems.
CONTROL
MA 7041 Function switch
MR 8001 Narrow-field radar
MR 8002 Wide-field radar
MP 8030 Sensitive platform, 800 mm x 300 mm
MP 8060 Sensitive platform, 800 mm x 600 mm
MR 8104 Radar microware, 3 m max
MR 8105 Radar microware, 5 m max
MS 9502 Opening Sensor touch-type
MR 8334-70-90 Safety radar K4
MRT001 Remote control for MR8104 e MR8105
OUR S20 AND S40 SYSTEMS ARE ALSO AVAILABLE FOR THE COMPLETE CONSTRUCTION OF
SLIDING ALUMINIUM DOORS. THESE SYSTEMS ARE SPECIALLY DESIGNED FOR USE WITH
CORSA AUTOMATION SYSTEMS.
N.B. All profiles used for the construction and movement of door wings are built in anodised aluminium with
a silvery finish
BREAKTHROUGH ANTI-PANIC SYSTEM for:
MI 6010 1 mobile door (L=1,100 mm per door)
MI 6110 1 mobile door (L=1,500 mm per door)
MI 6020 2 mobile doors (L=1,100 mm per door)
MI 6120 2 mobile doors (L=1,500 mm per door)
MI 6030 1 mobile door and 1 fixed door (L=1,100 mm per door)
MI 6130 1 mobile door and 1 fixed door (L=1,500 mm per door)
MI 6040 2 mobile doors and 2 fixed doors (L=1,100 mm per door)
MI 6140 2 mobile doors and 2 fixed doors (L=1,500 mm per door)
Complete kit for connecting with EXTERNAL floor
guidE RUNNERS to 10-mm GLASS doors (to be
used with MA7370/7470/7570)
MA 7353 L 1000 mm
MA 7453 L 1500 mm
MA 7553 L 2000 mm
Complete kit for connecting with INTERNAL floor
guidE RUNNERS to Framed doors (to be used with
MA7371/7471/7571)
MA 7351 L 1000 mm
MA 7451 L 1500 mm
MA 7551 L 2000 mm
Kit complet pour fixer les VANTAUX En VERRE de
10mm, avec patinS DE guidaGE INTERNES au sol (a
utiliser avec MA7370/7470/7570)
MA 7353 L 1000 mm
MA 7453 L 1500 mm
MA 7553 L 2000 mm
Complete kit for connecting with EXTERNAL floor
guidE RUNNERS to 10-mm GLASS doors
MA 7370 L 1000 mm
MA 7470 L 1500 mm
MA 7570 L 2000 mm
MAM 600 Central weather stripping for sliding glass
doors (package of 30 m.)
MAM 601 Lateral weather stripping for non-moving
and sliding glass doors (package of 30 m.)

SERIE CORSA
Tutti i dati sono stati controllati con la
massima cura. Non ci assumiamo co-
munque alcuna responsabilità per
eventuali errori od omissioni.
All data checked with the maximum care.
However, no liability is accepted for any error
or omission.
Toutes les données ont été contrôlées
très soigneusement. Nous n’assumons
de toute façon aucune responsabilité pour
les erreurs ou omissions éventuelles.
Die Daten wurden mit höchster Sorgfalt
geprüft. Für eventuelle Fehler oder
Auslassungen übernehmen wir keine
Haftung.
Todos los datos se han controlado con
la máxima atención. No obstante no nos
responsabilizamos de los posibles
errores u omisiones.
CANCELLI AUTOMATICI
CAME CANCELLI AUTOMATICI S.P.A.
DOSSON DI CASIER (TREVISO)
(+39) 0422 490960 (+39) 0422 490944
SISTEMA QUALITÀ
CERTIFICATO
ASSISTENZA TECNICA
NUMERO VERDE
800 295830
WEB
www.came.it
E-MAIL
info@came.it
SERVICE CENTRE NOTES DATE
MALFUNCTIONS
- The automation system does not open
- The automation system does not close
- The automation system does not open completely
- The automation system does not close completely
- The automation system operates at reduced
speed, only
- The automation does not maintain the initial settings
- The electric lock does not unlock to allow the door to open
- The photocells do not operate
- The automation system does not operate in the
manner selected on the function switch
- The emergency system does not operate
- The automation system is excessively noisy
ALSO
,
SEE
THE
SECTION
ON
THE
"
FUNCTIONS
OF
INDICATOR
LEDS
"
POSSIBLE CAUSES
ANo power or incorrect power is being supplied from the power mains.
BThe fuses are blown.
CInitial programming - lacking or unsuitable
DFunction switch is set to the wrong position.
EElectrical connections are wrong.
FBridge connection 1-2 is missing
GSafety devices are not connected to contacts 2 -C1 and the contacts
have not been short-circuited.
HSafety photocells are improperly aligned or inoperative.
IDip 3 (4-way module) to select
JMotor connections are wrong.
KEncoder is inoperative.
LCircuit card MA7032 for the emergency system is inoperative.
MBatteries are dead.
NDip 2 (10-way module) activated (function verification on page 18)
OSlow-down adjustments (open and close) inadequate
PAdjustments of the slow-down points (open and close)
QSpeed adjustments (open and close) inadequate
RTCA adjustment, excessive
SZP7 main board is inoperative.
TMicroswitch on electric lock is inoperative.
UThe bracket that engages the electric lock to the trolley is incorrectly
positioned.
VMechanical interference is occurring between moving door wings and
non-moving parts (for example: door wings/pavement; non-moving door
wings/moving door wings; moving door wings/pavement-mounted
guides; weather stripping/non-moving door wings)
WThere is mechanical interference with the drive system (for example:
interference between trolleys and cables).
XScraps of materials / objects are present in guide track.
YBelt tension is incorrect.
ZMechanical stops are incorrectly positioned.
RIFERIMENTI
A - B - C - D - E - F - J - K - N - S - T - U - V - X - Z
D - E - F - G - H - K - I - J - N - R - S - V - Z
C - D - K - O - P - Q - S - V - W - X - Y - Z
C - H - K - O - P - Q - S - V - W - X - Z
S - Q - W - V - X - Y
O - P - Q - S - V - W - X - Y - Z
E - S - T - U
E - G - H - I - S
E - J - S
D - L - M - N - V - W - X - Y
V - W - X - Y

1
SERIÉ
CORSA
CANCELLI AUTOMATICI AUTOMATISME POUR PORTES COULISSANTES
Documentazione
Tecnica
M70
rev. 3.4
08/2005
©
CAME
CANCELLI
AUTOMATICI
119PM70
jusqu'à %# kg par vantail
AUTOMATISME POUR PORTES COULISSANTES
AVEC SYSTEME DE COMMANDE ET CONTROLE
A MICROPROCESSEUR
ENTRYEXIT
CLOSED
EMERGENCY
SELECTION

NOUS AVONS LAISSÉ EXPRÈS CETTE PAGE BLANCHE
NOUS AVONS LAISSÉ EXPRÈS CETTE PAGE BLANCHE

ATTENTION !
Instructions importantes pour la sécurité des personnes :
À LIRE ATTENTIVEMENT !
Introduction
• Le produit devra être uniquement destiné à l’usage pour
lequel il a été spécifi quement conçu. Tout autre usage sera
donc considéré comme dangereux. La société CAME Cancelli
Automatici S.p.A. ne peut être considérée comme responsable
des éventuels dommages provoqués par des usages impropres,
erronés et déraisonnables • Conservez ces avertissements
avec les manuels d’instruction et d’utilisation des composants
de l’installation d’automatisme.
Avant l’installation
(vérifi cation de l’installation existante : en cas
d’évaluation négative, ne continuez pas avant d’avoir
respecté les obligations de mise en sécurité)
• Contrôlez que la partie à automatiser est en bon état mécani-
que, qu’elle est équilibrée et dans l’axe et qu’elle s’ouvre et se
ferme correctement. Vérifi ez également que les butées mécani-
ques d’arrêt nécessaires sont présentes • Si l’automatisme doit
être installé à une hauteur inférieure à 2,5 m du sol ou d’un autre
niveau d’accès, vérifi ez le besoin d’éventuelles protections et / ou
éventuels avertissements • Au cas où des ouvertures pour les
piétons seraient réalisées dans les portes, il faut que soit installé
un système de blocage de leur ouverture pendant le mouvement
• Vérifi ez que l’ouverture de la porte automatisée n’entraîne pas
de situations de blocage avec les pièces fi xes environnantes •
Ne montez pas l’automatisme retourné ou sur des éléments qui
pourraient plier. Si nécessaire, ajoutez les renforts nécessaires
sur les points de fi xation • N’installez pas le système sur des
portes en montée ou en descente (qui ne seraient pas planes) •
Contrôlez que les éventuels dispositifs d’irrigation ne risquent pas
de mouiller le motoréducteur du bas vers le haut.
Installation
• Signalez et délimitez soigneusement tout le chantier afi n d’évi-
ter des accès imprudents dans la zone de travail de la part de
personnes étrangères au chantier et spécialement de mineurs et
d’enfants • Faites attention en manœuvrant les automatismes
pesant plus de 20 kg (voir manuel d’installation). Si nécessaire,
équipez-vous des moyens nécessaires au déplacement en sécu-
rité • Toutes les commandes d’ouverture (boutons poussoirs, sé-
lecteurs à clé, lecteurs magnétiques, etc.) doivent être installés à
au moins 1,85 m du périmètre de la zone de manœuvre du portail,
ou bien là où elles ne peuvent être attrapées depuis l’extérieur à
travers le portail. En outre, les commandes directes (à touche, à
effl eurement, etc.) doivent être installées à une hauteur minimale
de 1,5 m et ne doivent pas être accessibles au public • Toutes les
commandes en modalité « action maintenue » doivent être instal-
lées dans des endroits d’où les portes en mouvement et les zones
de transit ou de manœuvre correspondantes sont entièrement vi-
sibles • Mettez, s’il n’y en avait pas, une étiquette permanente qui
indique la position du dispositif de déblocage • Avant la remise
à l’utilisateur, vérifi ez la conformité de l’installation avec la norme
EN 12453 (essai d’impact), assurez-vous que l’automatisme a
correctement été réglé et que les dispositifs de sécurité et de
protection et le déblocage manuel fonctionnent correctement •
Mettez, là où c’est nécessaire et dans une position bien visible,
les Symboles d’Avertissement (Ex. plaque du portail).
Instructions et recommandations
particulières pour les utilisateurs
• Conservez la zone de manœuvre du portail propre et sans rien
qui risque de l’encombrer. Retirez la végétation se trouvant dans
le rayon d’action des photocellules • Ne laissez pas les enfants
jouer avec les dispositifs de commande fi xes ou dans la zone de
manœuvre du portail. Conservez hors de leur portée les disposi-
tifs de commande à distance (émetteurs) • Contrôlez fréquem-
ment l’installation afi n de vérifi er les éventuelles anomalies et
les signes d’usure ou d’endommagements des parties mobiles
de l’automatisme, et de tous les points et dispositifs de fi xation,
des câbles et des branchements accessibles. Maintenez correc-
tement graissés et propres les points d’articulation (charnières) et
de frottement (guides de coulissement) • Effectuez des contrôles
fonctionnels des photocellules et des bords sensibles tous les six
mois. Gardez constamment propres les lames des photocellules
(utilisez un chiffon légèrement humidifi é avec de l’eau ; n’utili-
sez pas de solvants ou autres produits chimiques) • Au cas où
il serait nécessaire d’effectuer des réparations ou des modifi ca-
tions sur les réglages de l’installation, débloquez l’automatisme
et ne l’utilisez plus jusqu’à ce que les conditions de sécurité aient
été rétablies • Coupez l’alimentation électrique avant de déblo-
quer l’automatisme pour permettre les ouvertures manuelles.
Consultez les instructions • Il est INTERDIT à l’utilisateur de réa-
liser DES OPERATIONS QUI NE LUI SONT PAS EXPRESSEMENT
DEMANDEES ET INDIQUEES dans les manuels. Pour les répa-
rations, les modifi cations des réglages et pour les opérations
d’entretien extraordinaires, ADRESSEZ-VOUS A L’ASSISTANCE
TECHNIQUE • Notez la réalisation des vérifi cations dans le regis-
tre des entretiens réguliers.
Instructions et recommandations
particulières pour tous
• Evitez de travailler à proximité des charnières ou des organes
mécaniques en mouvement • Ne pénétrez pas dans le rayon
d’action de l’automatisme pendant que celui-ci est en mouve-
ment • Ne vous opposez pas au mouvement de l’automatisme car
cela pourrait entraîner des situations de danger • Faites toujours
particulièrement attention aux points dangereux signalés par les
pictogrammes appropriés et/ou les bandes jaunes et noires •
Pendant l’utilisation d’un sélecteur ou d’une commande en moda-
lité « action maintenue », contrôlez continuellement que personne
ne se trouve dans le rayon d’action des parties en mouvement,
jusqu’au relâchement de la commande • Le portail peut bouger
à n’importe quel moment sans avertissement • Coupez toujours
l’alimentation électrique pendant les opérations de nettoyage ou
d’entretien.

NOUS AVONS LAISSÉ EXPRÈS CETTE PAGE BLANCHE
NOUS AVONS LAISSÉ EXPRÈS CETTE PAGE BLANCHE


SERIE CORSA
2
DIMENSIONNEMENT (1)(1)
(1)(1)
(1)
Les dimensions fondamentales nécessaires à la fabrication d’un automatisme CAME pour entrées automatiques
sont la largeur A du vantail (ou celle totale des deux vantaux) et la longueur totale T de la poutre de logement
de l’automatisme; la relation entre les deux grandeurs est la suivante :
T = A x 2 + 20 mm
AUTOMATISME POUR ENTREE
À 2 VANTAUX
** Au moment de la commande,
indiquer toujours le sens d'ouver-
ture des portes (cf. modules de
commande)
AUTOMATISME POUR ENTREE À
1 VANTAIL**
DIMENSIONS COMPLÉMENTAIRES
Vp= Ouverture passage
s = Superposition entre vantail/vantaux mobile/s et
parties fixes (ouvrages de maçonnerie et/ou vantaux
fixes)
DIMENSIONS FONDAMENTALES
T = Longueur totale de la poutre
A = Largeur totale des vantaux avec joints
(1)
A
TTENTION
!
dans le cas d’utilisation de nos profilés série 20 et série
40 pour la construction des vantaux, on peut également
prévoir des dimensions différentes de celles indiquées.
Se référer à la documentation correspondante.
M
ssVp
A
T
M
ssVp
A
T
Controllare che le apparecchiature di comando, di sicurezza e gli accessori siano originali CAME; ciò garantisce e rende l'impianto di facile esecuzione e manutenzione.
Description:
Système pour l'ouverture
automatique de portes coulissantes.
Conçu et construit entièrement par
CAME CANCELLI AUTOMATICI
S.p.A., avec degré de protection
IP40. Garantie 12 mois sauf an cas
d'altérations.
Modèles:
-CORSA 1, motoréducteur réversible à
24V avec tableau électrique incorporé.
Automation pour entrées à 1 vantail
jusqu'à 3300 mm avec poids max. de
75 Kg.
-CORSA 2, motoréducteur réversible à
24V avec tableau électrique incorporé.
Automation pour entrées à 2 portes
jusqu'à 3300 mm avec poids max. de
75 Kg par vantail.
Accessoires sur demande:
-MA7012 Blocage elétrique;
-MA7032 Système anti-panique à
batterie;
-MA7041 Sélecteur des fonctions;
-MS9502 Interrupteur a effleurement;
-MF9011/9111 Photocellules e
commande et de sécurite;
-MR8001/8002 Radar à infrarouge;
- MR8104/8105 Radar à micro-ondes;
-MR8334-70-90 Capteur de securité a
infrarouges actifs;
-MP8030/8060 Supports sensibles.
- MRT001 Télécommande pour
MR8104 e MR8105
CARACTERISTIQUES GENERALES
(1) Possibilité d'alimenter l'automation avec une tension différente sur demande
(2) Service intensif
SEUQINHCETSEUQITSIRETCARAC
.TNEMILA ECNEUQERF ECNASSIUP EEBROSBA NOITPOSBA ELANIMIN ECNASSIUP EEBROSBA ECNETTIMRETNI LIAVARTED EPYT NOITCART EESSUOP MUMIXAM EDESSETIV ERUTREVUO
ERUTAREPMET ED -MENNOITCNOF TNE
.c.aV032 .c.aV42 zH06/05A6)V032( A6,0 W07emsitamotuA W02seriosseccA
eiorruocà eétned M8DTH gK5 1asroCs/mc75 2asroCs/mc201 °07+<°02-
12

SERIE CORSA
3
20
70
250 x
n°
pas
250250250250
T = Longueur de la poutre
côté droit/vue intérieure
=
point de départ
du perçage à pas
24
75
A
300
126
29±6
151
30±0,5
85±0,513±6
18
169
69
POUTRES AVEC
CAISSON
COUVRE-PROFILE
SERIE 001LC00 ET
BOUCHONS LTC
Le système couvre-profilé
Série 001LD00 prévoit
des bouchons
latéraux LTD en
ABS et des
charnières pour
portes qui
permettent de
soutenir le couvre-
profilé en position
d'ouverture.
DIMENSIONS CAISSONS COUVRE-PROFILES
A
A
Sez. A-A
Respecter les
mesures d'ouverture
encombrement du
couvre-profilé et la
mesure (A) pour le
décrochage du profilé
en position d'ouverture
maximum, environ 2
cm.
+
1
2
151
195
30±0,5
85±0,5
29±6
135
13±6
73
44
Trous déjà percés pour fixer le profilé
POUTRES AVEC
CAISSON
COUVRE-PROFILE
SERIE 001LD00 ET
BOUCHONS LTD

SERIE CORSA
4
SCHEMAS VANTAUX EN CRISTAL
V =
H - 22 mm
Y - 40 mm
V =
H - 70 mm
Y - 88 mm
10
10
PATIN DE
GUIDAGE
INTERNE
BOUCHONS
POUR
CENTRAGE
VANTAUX EN
CRISTAL
PROFILÉ DE GUIDAGE
INFERIEUR
PATIN
GUIDAGE
EXTERNE
V
SOLUTION VANTAIL
EN CRISTAL SANS
PROFILÉ DE GUIDAGE
INFERIEUR
SOLUTION VANTAIL
EN CRISTAL AVEC
PROFILÉ DE GUIDAGE
INFERIEUR
PROFILÉ DE SUPPORT
H
V
Y
10
13±6
29±6
Y = hauteur de fixation poutre
= H + 18 mm
H = hauteur passageutile
V = hauteur vantail en cristal
16
20
80
3417.5
2021.5
ø 4.8
18
40
1622
17
53
70
PROFILÉ-ACCROCHAGE
CRISTAL

SERIE CORSA
5
ø 16
ø 8.5
32
18
101
100 min. 300 100
101
SCHEMAS VANTAUX EN CRISTAL
COTES POUR LE PERÇAGE DU CRISTAL ET DE LA TRAVERSE SUPÉRIEURE
MA 7053 (L= 1400 mm)
MA 7153 (L= 2000 mm)
VANTAIL/VANTAUX EN CRISTAL
AVEC PROFILÉ DE GUIDAGE
INFERIEUR
VANTAIL/VANTAUX EN CRISTAL
SANS PROFILÉ DE GUIDAGE
INFERIEUR
Profilé
Cristal (max 10 mm)
L vantail - 2 mm
L vantail
MA 7370 = L 1000 mm
MA 7470 = L 1500 mm
MA 7570 = L 2000 mm
MA 7353 = L 1000 mm
MA 7453 = L 1500 mm
MA 7553 = L 2000 mm
MA 7370 = L 1000 mm
MA 7470 = L 1500 mm
MA 7570 = L 2000 mm
L
L
L
L

SERIE CORSA
6
SCHEMAS VANTAUX AVEC CHASSIS
PATIN DE
GUIDAGE
INTERNE
PATIN
GUIDAGE
EXTERNE
I
10
30
I =
H - 28 mm
Y - 46 mm
I =
H - 48 mm
Y - 66 mm
I =
H - 28 mm
Y - 46 mm
I
10
SOLUTION VANTAIL
AVEC CHASSIS AVEC
PROFILÉ DE GUIDAGE
INFERIEUR EXTERNE
SOLUTION VANTAIL
AVEC CHASSIS AVEC
PROFILÉ DE GUIDAGE
INFERIEUR INTERNE
PROFILÉ-ACCROCHAGE
AVEC BÂTI
PROFILÉ
DE GUIDAGE
INFERIEUR
20
2
20
4718 11
40
4.5 10 8 4
26.5
Y = hauteur de fixation poutre
= H + 18 mm
H = hauteur passageutile
I = hauteur du vantail avec châssis
Y
I
10
H
13±6
29±6
SOLUTION VANTAIL
AVEC CHASSIS SANS
PROFILÉ DE GUIDAGE
INFERIEUR

SERIE CORSA
7
SCHEMAS VANTAUX AVEC CHASSIS
VANTAIL/VANTAUX AVEC
CHASSIS SANS PROFILE DE
GUIDAGE INFERIEUR
VANTAIL/VANTAUX AVEC
CHASSIS AVEC PROFILE DE
GUIDAGE INFERIEUR
L
L
MA 7371= L 1000 mm
MA 7471= L 1500 mm
MA 7571= L 2000 mm
MA 7351 = L 1000 mm
MA 7451 = L 1500 mm
MA 7551 = L 2000 mm
MA 7371= L 1000 mm
MA 7471= L 1500 mm
MA 7571= L 2000 mm

SERIE CORSA
8
MONTAGE POUTRE
3) Percer des trous sur la poutre en face des câbles d’alimentation et
de connexion des capteurs (photocellules/radar)
4) Centrer l’automatisme par rapport à l’ouverture de passage
5) Fixer l’automatisme à la structure en utilisant les trous déjà prévus,
et vérifier le correct alignement horizontal (mise à niveau)
2 b) Desserrer les écrous des
rouleaux “anti-déraillement”
en les laissant descendre ;
1) Enlever, si présent, le panneau d’habillage (fourni sur demande)
2) Enlever les chariots du profilé de support de la manière suivante :
2 a) Détacher de l’étrier
d’enclenchement les chariots
assujettis à la courroie, en
agissant sur les vis de fixation
;
2 c) Soulever les chariots de manière à
pouvoir les enlever du rail de coulissement ;
CHARIOT AVEC ETRIER D'ENCLENCHEMENT
POUR COURROIE INFERIEURE
CHARIOT AVEC ETRIER D'ENCLENCHEMENT
POUR COURROIE SUPERIEURE

SERIE CORSA
9
MONTAGE VANTAUX
modèle CORSA 1 (vantail unique) avec ouverture à
GAUCHE
avec ouverture à
DROITE
NONNON
NONNON
NON
ENEN
ENEN
EN
CONTACTCONTACT
CONTACTCONTACT
CONTACT
120120
120120
120 150150
150150
150
110110
110110
110
8585
8585
85 8585
8585
85 110110
110110
110 110110
110110
110
modèle CORSA 2 (vantail double)
1) Fixer les chariots aux vantaux de la façon indiquée sur le schéma suivant :
2) Soulever les vantaux et
les positionner correctement
sur le rail de coulissement ;
4) Accrocher de nouveau les chariots
aux étriers d’enclenchement pour
courroie correspondants ;
3) Soulever et fixer les
rouleaux anti-déraillement,
sans forcer contre la poutre ;
110110
110110
110
130 AVEC BLOCAGE ÉLECTRIQUE

SERIE CORSA
10
+6 mm
- 6 mm
10
+6 mm
- 6 mm
13
4
+4 mm
- 4 mm
44
REGLAGES MECANIQUES
On peut obtenir les réglages suivants
de l’alignement des vantaux à l’aide
des chariots:
- réglage vertical RV, avec
boulonnerie A et B
- réglage transversal RT, avec
boulonnerie C
- réglage horizontal RO, avec
boulonnerie D et E
DD
DD
D
BB
BB
B
CC
CC
C
AA
AA
A
EE
EE
E

SERIE CORSA
11
REGLAGES MECANIQUES
REGLAGE VERTICAL RV
Pour obtenir un alignement vertical des vantaux correct,
intervenir sur les chariots de mouvement :
- Desserrer les vis A.
- Tourner la vis de réglage vertical B jusqu’à obtenir la
perpendicularité maximale du/des vantail/vantaux.
Dans le cas où l’automatisme commande deux vantaux
coulissants, procéder au réglage de façon à ce que les
vantaux se referment sans qu’il n’y ait aucun espace
au milieu.
- Après avoir effectué les réglages, serrer les vis A et
vérifier, en déplaçant manuellement le vantail,
l’absence de frottement entre vantail/vantaux mobile/
s et plancher tout le long de la ligne de mouvement.
Si nécessaire, il est possible de rehausser tout le
vantail en réglant les deux chariots.
REGLAGE HORIZONTAL RO
(seulement pour Corsa 2)
Pour un réglage fin (± 4 mm) du
point de contact des deux vantaux,
desserrer la boulonnerie D et
déplacer en même temps les deux
vantaux.
Pour l’alignement supérieur, il faut
décrocher l’étrier d’enclenchement
de la courroie en desserrant la
boulonnerie E.
Une fois le réglage terminé, bloquer
à nouveau et avec soin les boulons.
REGLAGE TRANSVERSAL RT
Le plan vertical des roues de coulissement des chariots doit toujours être parallèle à la poutre.
C’est pourquoi, si on constate un alignement erroné (par ex. : en cas de coulissement difficile),
il faut agir de la manière suivante :
- Desserrer la boulonnerie C;
- Aligner les chariots avec le rail de coulissement (par ex. en
vérifiant la cote Q de la distance entre le corps du chariot et
le profil de la poutre);
- Fixer et vérifier, en déplaçant manuellement le vantail,
l’absence de frottements entre vantail/vantaux mobile/s et
parties/vantaux fixes tout le long de la ligne de
mouvement.
- Serrer avec soin la
boulonnerie de
fixation des chariots.
rail de coulissement
rail de coulissement
vantail
Profil poutre
Profil poutre
vantail

SERIE CORSA
12
Vis de fixation
REGLAGES MECANIQUES
Vis de fixation
REGLAGE TENSION DE LA
COURROIE
Si nécessaire, régler la
tension de la courroie à
l’aide du groupe poulie
de renvoi :
1) Desserrer les vis de
fixation de la poulie.
2) Tourner la vis de
réglage pour obtenir la
tension correcte de la
courroie.
3) Serrer avec soin les
vis de fixation de façon à
maintenir la tension
correcte.
Vis de fixation poulieVis de fixation tension
ETRIER ANTIVIBRATIONS POUR PANNEAU D'HABILILLAGE
Il limite les oscillations et la déformation longitudinale du
panneau d’habillage (en option). Si la poutre ne dépasse pas
m 2,80, il est conseillé de monter un seul étrier et, en cas
contraire, de monter les deux. Eventuellement, modifier
manuellement leur ouverture.
REGLAGE ARRETS MÉCANIQUES
Les arrêts mécaniques ont pour fonction de déterminer
et régler l’ouverture des vantaux ainsi que d’en limiter la
course.
Pour les positionner, agir sur la vis de fixation.
N.B.:
Afin de ne pas endommager le rail de coulissement
et de pouvoir effectuer d’éventuels réglages, positionner
et fixer correctement les arrêts mécaniques.
POSITIONNEMENT ARRÊTS
MÉCANIQUES ET
ÊTRIERSANTIVIBRATIONS

SERIE CORSA
13
REGLAGES MECANIQUES
Vis de fixation
support courroie
SUPPORT COURROIE
Le support courroie est le dispositif qui limite les vibrations de la courroie. Il doit être installé
au centre des automatismes à deux vantaux lorsque le profilé de support est de plus de
3020 mm. Si nécessaire, adapter manuellement sa forme.
N.B.
Vérifier, durant le fonctionnement, que le support courroie ne fait pas obstacle à des
parties en mouvement.
CONTROLE MONTAGE
Une fois le montage de la poutre et les réglages mécaniques
terminés, vérifier toujours que:
_ aucun déchet dû à l’installation et pouvant endommager
les roues des chariots et/ou le rail de coulissement n’est
resté sur ce dernier ;
_ il n’y a pas d’objets étrangers et/ou d’outils de travail à
l’intérieur de la poutre;
_ l’alignement des vantaux a été effectué correctement et
que les arrêts mécaniques ont été positionnés de la façon
précédemment indiquée.
Dans ce but, avant de mettre en marche électriquement
l’automatisme, exécuter des manoeuvres manuelles d’ou-
verture et fermeture en agissant directement sur les vantaux.

SERIE CORSA
14
10
11
1
2
C1
Ri
M
R2
R1
2
F1 F2 ES ES TX RX GND 1 2 3 4 5 6 7
MF9011 - MF9111 MA7032
12345678
21 345678910O
N2134O
N
RESET
APRE
MA7012 BUSSOLA MA7041
P.R.AP AP/PARZ TCA V.RALL.CH V/CH V/AP P.R.CH FRE NO V.RALL.AP .
FUSIBILE
ACCESSORI
1,6A
-
+
M
N
E+
S
S
E -
-
BATT.
+
24AC
24AC
ARMOIRE ÉLECTRIQUE ZP7
PLAQUE À BORNES BRANCHEMENT
ACCESSOIRES
PLAQUE À BRANCHEMENT MOTEUR
ENCODER - BATTERIES - ALIMEN. 24V
LEDS DE CONTRÔLE
FUSIBLE ACCESSOIRES
1.6A RAPIDE TOUCHE RESET
DIP-SWITCH SÉLECTIONS
TRIMMERS DE RÉGLAGE
CONNEXION PHOTOCELLULE
MF9011-9111
CONNEXION CARTE ANTIPANIQUE MA7032
BRANCHEMENT BLOCAGE ÉLECTRIQUE
MA7012
BRANCHEMENT SYSTÈME SAS
BRANCHEMENT SÈLECTEUR FONCTIONS
MA7041
TOUCHE OUVRE
PLAQUE A BORNES BRANCHEMENT ACCESSOIRES
10 - 11 Alimentation Accessoires à 24V c.a./c.c.
1- 2 Bouton-poussoir Stop, contact normalment fermée (N.F.)
2- C1Photocellules, réouverture pendant la fermeture (N.F.)
2- RiContact normalment ouvert (N.O.) senseur central blocage
interdépendant (seulement avec SAS)
2- R1Contact normalment ouvert (N.O.) senseur externe (que l'on peut
exclure)
2- R2Contact normalment ouvert (N.O.) senseur interne
2- M Commande "pas à pas" (bouton poussoir manuel), contact
normalment ouvert (N.O.).
- Les contacts 1-2 et 2-C1 sont de type (N.F.) et sont court-circuités à l'origine. Pour l'utilisation de ces fonctions,
remplacer les pontets par les dispositifs prévus à cet effet.
- Le contact 2-C1 est utilisé si l’on souhaite intégrer un système de sécurité (ex. photocellule ou tout autre dispositif
de contrôle), qui ne peut être mis dans le siège à greffe prévu à cet effet. Note: Si la fiche photocellule MA9011/
9111 n’est pas introduite ou si elle est insérée mais que l’on veuille la désactiver, positionner le dip 3 sur ON (module
à 4 voies.)
- Le contact 2-M est normalement ouvert (N.O) est à une double fonctionnalité:
1) En situation de fonctionnement normal il est habilité à l’ouverture, même si le sélecteur fonctions MA7040 est
sélectionné en “portes fermées”. Cette fonction peut être utilisée par passage préférentiel, (ex. fermeture sérielle,
commande d’ouverture sur des sélecteurs à clés ou magnétiques).
2) En sélectionnant le dip 5 sur ON (modules à 10 voies) on a la fonction d’ouverture “pas à pas” (en appuyant sur
le bouton la porte ouvre, en appuyant de nouveau elle ferme). Attention, en utilisant cette fonction les contacts
2-R1 et 2-R2 sont exclus.
10
11
1
2
C1
Ri
M
R2
R1
2
F1 F2 ES ES
MA7012
P.R.AP
-
+
+
-
PLAQUE A BORNES BRANCHEMENT ALIMENTATION
24V Alimentation du motoréducteur (prévue)
Branchement à la terre
230V Alimentation de ligne (50/60 Hz)
Fusible de ligne de 2A
(voir pàg. 22)
230V
24V

SERIE CORSA
15
ARMOIRE ÉLECTRIQUE ZP7
IMPORTANT:
Toute opération de branchement/câblage, remplacement cartes ne doit être effectuée qu'après avoir
débranché la tension de réseau et la polarité "+" (rouge) de l'éventuelle batterie du systéme antipanique.
MA7032
678
2134O
N
RESET
APRE
Touche RESET, reprend les donnees et fait repartir l'automatisation
de la verification.
Touche APRE, envoie l'automatisation accomplir un cycle d'ouver-
ture.
Attention: la fonction de la touche ouvre est exclue le dip 5 (module
à 10 voies) est positionnée sur ON.
MF9011 - MF9111
1
O
N
P.R.AP AP/PARZ TCA V.RALL.CH V/CH V/AP P.R.CH FRENO V.RALL.AP.
-
+
!#%'
" $ &
REGLAGE TRIMMERS
N° 1 2 3 4 5 6 7 8 9
FONCTION
POINT DE
DÉPART
RALENTIS-
SEMENT
OUVERTU-
RE
OUVERTURE
PARTIELLE
FERMETU-
RE
AUTOMA-
TIQUE
VITESSE DE
RALLENTIS-
SEMENT EN
FERMETURE
VITESSE DE
FERMETURE
VITESSE DE
OUVERTURE
POINT DE
DÉPART
RALENTISS-
EMENT
FERMETU-
RE
INTENSITÉ DE
FREINAGE
LORS DE LA
PHASE INITIALE
DU RALENTIS-
SEMENT
VITESSE DE
RALLENTISS-
EMENT EN
OUVERTURE
MESURE POINT DE
DÉBUT 60 ÷ 90 % 0.5 ÷ 13
SEC.
5 ÷ 12
CM/SEC.
CORSA 1
8,6÷57
CM/SEC.
CORSA 2
17,2÷102
CM/SEC.
CORSA 1
8,6÷57
CM/SEC.
CORSA 2
17,2÷102
CM/SEC.
POINT DE
DÉBUT .................. 5 ÷ 12
CM/SEC.
REGLAGE TRIMMERS

SERIE CORSA
16
LED SIGNAL SIGNIFICATION
1 clignotant -Encoder hors d'usage
1 allumé -Encoder hors d'usage
2(*) -batteries antipanique déchargées
3 allumé -présence alimentation 24V c.a.
4 allumé -contact photocellule ouvert
5 allumé -présence fonction blocage interdépendant (voir "application SAS")
6 allumé -anomalie fonctionnement blocage électrique
7 allumé -sensor ampèremétrique en fonction
8 clignotant -fermeture automatique en fonction
8 clignotant -erreur de lecture pendant le réglage
6/7/8 allumés -phase de réglage terminée
(*) dans ce cas, le signal du del reste allumé indiquant que les batteries anti-panique sont déchargées seulement
si le contrôle du niveau des batteries d’émergence est désactivé (le dip 2 à 10 voies sur OFF), tandis qu’il clignote
si le contrôle des batteries est allumé (dip 2 à 10 voies sur ON).
12345678
S
IBILE
SELECTION FONCTIONS
FONCTIONS LED DE CONTRÔLE
seiov01apiD EUVERPNOITCNOF
1NO .)71.gapemetsysnoitavitcariov(noitasiroméM
2NO .)81.gapidev,2307AMceva(ecnegru'dseirettabtatéelôrtnoC
3- »FFO«ruselucsabàruetatummocelredrag,ésilitusaP
4NO erutemrefneetnatsnoceéssuoP
5NO .)41.gap,M-2tcatnocriov("sapàsap"ednammoC
6NO .)02.gap"elbodetropnoitcnof"riov(emsitamotuaertuanuàtropparraptnadnepédretniegacolB
8/7 NO .)91.gapriov(euqirtceléegacolbtnemennoitcnofnoisulcxE
7
8NO FFO 91.gapriov)eémrefuoerutrevuosetropegacolbruop(unitnocecivresneeuqirtceléegacolB
7
8FFO NO 91.gapriov)eémrefsetropegacolbruop(unitnocecivresneeuqirtceléegacolB
8/7 FFO )91.gapriov,1407AMsnoitcnofruetceléselrapérèg(éhcnarbèdeuqirtceléegacolB
01/9 NO )81.gapriov(erutemrefrusélgéreuqinapitnafitisopsiD
9
01 FFO NO )81.gapriov(erutrevuorusélgéreuqinapitnafitisopsiD
01/9 FFO )81.gapriov(nopmateirettabrapnoitatnemilA
Dip a 4 voies FONCTION PREVUE
1ON Mise en marche de l'anti-panique à chargeélectrostatique (positionner également le dip 4 sur ON
poussée constante en fermeture, sélecteur fonctionsà 10 dip, voir pag.19).
2 - Pas utilisé, garder le commutateur à bascule sur «OFF»
3ON Exclut la fonction des photocellules (carte MF9011 ou MF9111 insérée dans la pupitre de
commande, pag.22)
4 - Pas utilisé, garder le commutateur à bascule sur «OFF»

SERIE CORSA
17
ACTIVATION SYSTEME
CONTROLES PRELIMINAIRES
Avant la mise en fonction, contrôler que :
"le blocage électrique (si présent) a été débloqué manuellement,
"la courroie a une tension adéquate (page 12),
"les conditions décrites en page 13 sont respectées (contrôle montage),
"aucun objet n’est présent sur les lignes de mouvement des vantaux,
"toutes les visseries sont bloquées correctement,
"les capteurs sont alignés correctement et ne sont pas obstrués,
"les fonctions désirées sont sélectionnées sur les dip-switchs d’une façon correcte (page 16),
"les trimmers sont réglés en position moyenne (page 15).
MISE EN FONCTION / REGLAGE
1. Mettre l’appareillage sous tension
- le led n. 3 s’allume
2. Régler le dip-switch 1 sur position ON
- le led n. 3 s’éteint et le led n. 8 s’allume
- une manoeuvre de fermeture et d'ouverture débute, à vitesse réduite. Ensuite, l’automatisme se
positionnera sur le point d’ouverture(1) maximale
- les leds n. 6,7 et 8 s’allument
3. Régler le dip-switch 1 sur position OFF
- les leds n. 6,7 et 8 s’éteignent et le led n. 3 s’allume
4. Vérifier, si présent, qu’une fonction d’ouverture est sélectionnée sur le sélecteur MA7041 (les leds s’allument
en séquence)
5. Commander un actionnement “ouvre” sur 2-R1 / 2-R2 ou en appuyant sur la touche (voir p.15)
-l’automatisme se positionnera sur le point de fermeture.
6. Donner une impulsion d'ouverture
- l’automatisme effectuera une manoeuvre complète
7. Faire un réglage complet du mouvement des portes par les trimmers (voir p.15).
8. Choisir, sur le trimmer 3, le temps de fermeture automatique le plus adéquat.
9. Le trimmer 2 peut être réglé seulement si le dispositif de sélection fonctions MA7041 est présent.
Sur ce dispositif, il faut sélectionner préalablement l’ouverture partielle
10. Autoriser à nouveau, si présent, le blocage électrique à l’aide du levier du dispositif de déblocage manuel
(1)
si l’automatisme s’arrête en fermeture, il est possible que les polarités du moteur soient inversées; dans ce cas, agir
de la manière suivante :
-
mettre hors tension
- déplacer le dip-switch 1 sur OFF
- inverser les polarités M-N sur la plaque à bornes moteur (à droite) de l’armoire
- recommencer à partir du point 1.
FONCTIONS DE SÉCURITÉ - Comportement de l'automatisme
Lorsque le capteur de sécurité détecte un obstacle, le microprocesseur de l’armoire commande:
une réouverture, si l’automatisme est en phase de fermeture;
un arrêt, si l’automatisme est en phase d’ouverture. Puis il refermera aprés le
comptage automatique de fermeture.
Si l’obstacle persiste,
en fermeture, l’automatisme effectue de maniére autonome, 4 manoeuvres de tentative de fermeture
et puis s'arrête en ouverture, dans l'attente d'une nouvelle commande.
en ouverture, l’automatisme s’arrête appuyé sur l’obstacle, en se refermant après
l’intervention du TCA; il répète l’opération de contrôle à chaque commande d’ouverture et remettre à
zéro avec la manœuvre suivante quand l’obstacle a été éliminé.
(dans les deux cas, quand on enlève l’obstacle, le fonctionnement est rétabli automatiquement selon les réglages
précédents)
Changement sens d'ouverture (Corsa 1)
- uand la porte est arrêtée, inverser la polarité du moteur sur les bornes M-N de la plaque à bornes droite de l’armoire
de commande;
- Aligner, si présent, le blocage électrique MA7012
- Appuyer sur la touche RESET située sur l’armoire de commande (si un réglage a déjà été mémorisé, il est effacé
- Mettre en fonction (ou redémarrer) l’automatisme comme indiqué dans le chapitre spécifique

SERIE CORSA
18
ADJONCTION ACCESSOIRES (sur demande)
MA7032 - Dispositif antipanique à batteries
Dispositif d’ouverture d’urgence en cas d’absence de tension de ligne. Il est constitué d’un couple de batteries
de 12V et 1,2Ah et d’une carte électrique qui en assure constamment la charge ainsi qu’une distribution
optimale du potentiel au système.
Sur l’armoire de commande, à l’aide des dip-switchs 9 et 10 (module à 10 voies), il est possible de prévoir les
types suivants de fonctionnement du dispositif lors d’une interruption de la tension de ligne:
Note: En cas de fonctionnement de l’espace arrêt-marche (voir p. 20), les fonctions suivantes sont quand
même sélectionnées sur les deux automatisations.
12345678910
12345678910
12345678910
9 OFF Ouverture seulement. Les portes s'ouvrent et
10 ON restent ouvertes jusqu'au retour de la tension de
ligne. La même chose se vérifie même is le sélecteur
fonctions MA 7041 est sélectionné en "portes
fermées".
9ON Fermeture seulement. Les portes se ferment et
10 ON restent fermées, même en cas de sélection “portes
ouvertes” sur MA7041, jusqu’au rétablissement de
la tension.
9 OFF Fonctionnement normal. les portes continuent à
10 OFF fonctionner jusqu’à ce que la tension des batteries
descende en dessous du niveau de sécurité, dans
ce cas les portes se ferment. Si le sélecteur fonctions
MA7041 est sélectionné en ”portes fermées”, les
portes peuvent être ouvertes seulement en donnant
une commande sur le contact 2-M.
12345678910
Anti-panique avec la présence du contrôle constant des batteries
En positionnant le dip switch 2 sur ON du module à 10 voies (dans le
système espace arrêt-marche, le positionner sur les deux pupitres), on met
en marche le contrôle de recharge des batteries tampons, qui en
condition de fonctionnement normal, seulement avec la tension de réseau
“230V”, en vérifie la limite minimum de recharge des batteries “20 V” et si
la tension descend en-dessous de cette limite (dans le système espace arrê-marche la tension des batteries
de l’une des deux automatisations), met en marche une procédure de sécurité. Cette procédure consiste en
l’ouverture ou bien la fermeture des portes (selon les sélections des dip. 9 et 10). Tandis que dans la situation
d’espace arrêt-marche, la procédure de sécurité (signalée par une lumière clignotante continue du DEL n°2
présente dans le cadre MASTER) provoquée reprendra normalement après une commande d’ouverture.
N.B.: En cas d'installation d'une seule automatisation, la mise en marche du contrôle sur les batteries arrête
le fonctionnement normal (dip 9OFF - 10OFF).
- En cas de présence du MA7041, vérifier que la fonction “EMERGENCY” est insérée, ce qui est signalé par
le led jaune allumé et clignotant.
- Dans tous les cas, au moment du rétablissement de la tension, le fonctionnement de la porte sera activé à
nouveau avec les modalités programmées avant la coupure.
Nota: si le sélecteur MA7041 n'est pas connecté et
que l'on veuille quand même obtenir la fonction
anti-panique, mettre en pontet les contacts 1-3
comme il est indiqué sur la figure.
1 2 3 4 5 6 7
R
XGND 1234567
MF9011 - MF9111
S
SOLA MA7041

SERIE CORSA
19
ADJONCTION ACCESSOIRES (sur demande)
MA7012 - Blocage électrique
Dispositif de blocage électromécanique des vantaux, à déclenchement électrique et enclenchement mécanique
par chute. Il bloque le vantail/vantaux en position fermée (et/ou en position ouverte) en enclenchant un étrier
fixé à un chariot.
Sur l’armoire de commande, à l’aide des dip-switchs 7 et 8 (module à 4 voies), il est possible de prévoir les
types suivants de fonctionnement du blocage électrique :
7 ON Désactivé. Réglage avec dispositif absent.
8 ON
7 OFF Blocage avec portes fermées. C'est le fonctionnement
8 ON normal: il s'insère à chaque fermeture et se débloque
électriquement à chaque commande d'ouverture. C'est le
réglage par défaut.
7 ON Blocage avec portes fermées et ouvertures. Il s'insère
8 OFF aussi bien en fermeture qu'en ouve (positionné
adéquatement (1)) et se débloque électriquement à chaque
commande d'ouverture et de fermeture.
7 OFF Blocage suspendu. Il se débloque par la première
8 OFF commande “ouverture” après la mise en fonction, lors
d’un rétablissement de tension ou en sélectionnant
“portes ouvertes” sur le MA7041. Il se bloque en
sélectionnant “portes fermées” ou "seulement sortie" sur
le MA7041.
1234
MI1010 - Anti-panique à charge élastique
Dispositif mécanique d'ouverture des portes, composé d'un système élastique à actionnement en l'absence
de tension de ligne. En présence de ce dispositif opérer sur les dip-switch comme il est indiqué.
12345678910
4 ON Mise en marche poussée constante en
fermeture (dip 10 voies)
1 ON Mise en marche anti-panique à charge
élastique (dip 4 voies)
DIP SWITCH
10 VOIES DIP SWITCH
4 VOIES
12345678910
12345678910
12345678910
12345678910

SERIE CORSA
20
F1 F2 Es Es
1
0
11
1
2
C
1
Ri
M
R2
R1
2
M
N
E+
S
S
E -
-
BATT
.
+
24A
C
24A
C
ENTR Y EX IT
CLOS ED EME RG EN CY
SEL ECT IO N
Cancel li Automatici
!
$
#
1
0
11
1
2
C
1
Ri
M
R2
R1
2
M
N
E+
S
S
E -
-
BATT
.
+
24A
C
24A
C
!
#
#
"
"
F1 F2 Es Es
FONCTION PORTE DOBLE
Fonctionament
Au relevé de présence d’un des deux radars (externe ou interne), l’automatisation ouvre la porte correspon-
dante et en même temps l’autre est bloquée, amorçant une séquence d’opérations qui se termine avec la
fermeture de la 2sde porte.
SÉQUENCE STANDARD:DÉTECTION PRÉSENCE PAR CAPTEUR EXTERNE OU INTERNE
OUVERTURE 1ÉRE PORTE / BLOCAGE CAPTEUR OPPOSÉ
FERMETURE 1ÉRE PORTE
OUVERTURE 2ÉRE PORTE
FERMETURE 2ÉRE PORTE / DÉBLOCAGE CAPTEUR OPPOSÉ
Le senseur central (intermédiaire) relié sur les bornes 2 - Ri, relève la présence de personnes entre les deux
automatisations, est habilite le microprocesseur à ouvrir de nouveau l’automatisation opposée à celle qui a
effectué la dernière ouverture, toujours avec la fonction d’espace arrêt-marche.
1 1 ou 2 couples de photocellules
2 Carte (MA9011-MA9111)
3 Carte anti-panique MA7032
SCHEMA DE DEUX AUTOMATISATIONS A ESPACE ARRET-MARCHE
AUTOMATISATION EXTERNE (MASTER)
AUTOMATISATION INTERNE (SLAVE)
4 Blocage électrique MA7012
5 Radar (MR8002-MR8104)
6 Sélecteur fonction MA7041

SERIE CORSA
21
Branchements spécifiques
Relier les accessoires aux deux pupitres et entre eux à l'aide de la borne bussola selon le schéma illustré.
Placer, sur l'automatisme extérieur, le dip-switch 6 sur ON: on confie ainsi à celui-ci la commande de gestion
(MASTER).
Il faut brancher tous les capteurs de commande ainsi que l'éventuel sélecteur de fonctions MA7041 sur
l'automatisme MASTER (qui commandera l'automatisme jumeau).
Les photocellules et l'antipanique doivent être indépendants sur les deux automatisations.
Les réglages effectués par trimmer agissent de manière indépendante sur les deux automatismes.
Si les contacts 1-2 et 2-C1 ne sont pas utilisés, ils doivent être reliés par un pontet sur les deux automatisations.
10
11
1
2
C1
Ri
M
R2
R1
2
F1 F2 ES ES TX RX G ND 1 2 3 4 5 6 7
MF9011 - MF9111 MA70 32
MA7012 BUSSOLA MA7041
P.R.AP AP/PARZ TCA V.RALL.CH V/CH V/AP P.R.CH FRENO V.RALL.AP.
-
+
M
N
E+
S
S
E -
-
B ATT.
+
24AC
24AC
F1 F2 Es Es
Branchement sélecteur
fonction
MA 7041
Branchement blocage
électrique
all' MA 7012
C Nc 1 0 A2 C1 A1
A C
+
_
Batterie tampons
+
_
12 V 1.2Ah 12 V 1.2Ah
Pontets pour série batteries
10
11
1
2
C1
Ri
M
R2
R1
2
F1F2ESES TXRXGND 1234567
MF9011 - MF9111 MA70 32
MA7012 BUSSOLA MA7041
P.R.AP AP/PARZ TCA V.RALL.CH V/CH V/AP P.R.CH FRENO V.RALL.AP.
-
+
M
N
E+
S
S
E -
-
B ATT.
+
24AC
24AC
C Nc 1 0 A2 C1 A1
A C
+
_
+
_
12 V 1.2Ah 12 V 1.2Ah
F1 F2 Es Es
Radar externe
(2-R1)
Radar central
ou intermédiaire
(2-Ri)
Radar interne
(2-R2)
MF9011-9111 MA7032
MF9011-9111 MA7032
BUSSOLA
TX RX GND
TX RX GND
ARMOIRE
COMMANDE
(MASTER)
ARMOIRE
COMMANDE
(SLAVE)
BUSSOLA
1 2 3 4 5 6 7
ENTRY EXIT
CLOSED EMERGENCY
SELECTION
Cancel li Automati ci
Batterie tampons
Pontets pour série batteries
Branchement blocage
électrique
all' MA 7012

SERIE CORSA
22
INTRODUCTION
Afin de faciliter les opérations de câblage électrique, un espace, conçu expressément pour le logement et la
disposition rationnelle des câbles le long de la poutre, a été prévu sur cette dernière.
Sur la plaque à bornes de branchement accessoires, la borne commune 2 a été dupliquée.
L’entrée des câbles d’alimentation doit être prévue de préférence sur le côté gauche de la
poutre où est logé le transformateur auquel doivent être branchés la tension de ligne et le
conducteur de protection.
BRANCHEMENT ACCESSOIRES DU ARMOIRE
SEQUENCE DES BRANCHEMENTS
"capteur externe sur les bornes 2-R1 de l’armoire
"capteur interne sur les bornes 2-R2 de l’armoire
"alimentation capteurs sur les bornes 10-11 de l’armoire
"alimentation de ligne(1) sur les bornes du transformateur(2) correspondantes
"mise à la terre sur l’habituelle borne du transformateur
(1)
protégée par interrupteurs différentiel de 30mA + magnétothermique de 5A (Loi Italie 46/90).
(2)
si l’alimentation est à 24V c.a., il est possible de se brancher directement à la plaque à bornes de l’armoire.
10
11
1
2
C1
Ri
M
R2
R1
2
F1 F2 ES ES TX RX GND 1 2 3 4 5 6 7
MF9011 - MF9111 MA7032
12345678
21 345678910O
N21 34O
N
RESET
APRE
MA7012 BUSSOLA MA7041
P.R.AP AP/PAR Z TCA V.RALL.CH V/CH V/A P P.R .CH FRENO V.RA LL.AP.
FUSIBILE
ACCESSORI
1,6A
-
+
M
N
E+
S
S
E -
-
BATT.
+
24AC
24AC
1 2 3 4 5 6 7
ENTRY EXIT
CLOSED EMERGENCY
SELECTION
Cancelli Automatici
Branchement
bloca
g
e électri
q
ue MA 7012
C Nc 1 0 A2 C1 A1
A C
L1 L2
Alimentation
230V c.a.
Fusible 2A 250V
+
_
Batterie Tam
p
ons
+
_
12 V 1.2Ah 12 V 1.2Ah
Pontets pour série batteries
MF9011-9111 MA7032
F1 F2 Es Es
Branchement
sélecteur fonctions MA 7041
Pour 001MA7032
Les câbles pour le branchement des deux batteries sont toujours prévus. Il suffit d'effectuer le branchement
decelles-ci avec le câble-pontet fourni.
Pour 001MF9011÷9111.
Il suffit d'insérer la carte amplificatrice dans le siège prévu à cet effet après avoir relié de manière opportune les
senseurs. N.B.: Si la carte n'est pas utilisée, positionner le dip 3 sur ON (dip-switch à 4 voies)
Des branchements supplémentaires ne sont pas nécessaires. Le pontet 2-C1 reste connecté.

SERIE CORSA
23
POUR VANTAUX AVEC CHÂSSIS POUR VANTAUX EN CRISTAL
(épaisseur max 10mm)
ACCESSOIRES
DE SÉCURITÈ
MF 9011 Couple photocellules portée 7 m.
MF 9111 Double couple photocellules
pottée portée 7 m.
MA 7012 Blocage électrique avec cordelette
de déblocage
MA 7032 Systéme antipanique avec bat-
teries tampon pour systémes
CORSA et RODEO
DE COMMANDE
MA 7041 Sélecteur fonctions
MR 8001 Radar champ réduit
MR 8002 Radar champ large
MP 8030 Support sensible 800 mm x 300 mm
MP 8060 Support sensible 800 mm x 600 mm
MR 8104 Radar à micro-ondes max. 3 m
MR 8105 Radar à micro-ondes max. 5 m
MS 9502 Capteur d'ouverture par frôlement
MR 8334-70-90 Radar de sécurité K4
MRT001 Télécommande pour MR8104 e MR8105
NOUS AVONS ÉGALEMENT A DISPOSITION NOS SYSTÈMES S20 ET S40 POUR L’INSTALLATION
COMPLÈTE DE PORTES COULISSANTES EN ALUMINIUM, CONÇUS EXPRESSÉMENT POUR L’EMPLOI
AVEC LA SÉRIE CORSA.
N.B. Tous les profilés servant à l’installation et au déplacement des vantaux sont réalisés en aluminium
anodisé argent
SYSTEME ANTI-PANIQUE A DEFONCEMENT pour:
MI 6010 1 vantail mobile (L=1100 mm par vantail)
MI 6110 1 vantail mobile (L=1500 mm par vantail)
MI 6020 2 vantaux mobiles (L=1100 mm par vantail)
MI 6120 2 vantaux mobiles (L=1500 mm par vantail)
MI 6030 1 vantail mobile et 1 vantail fixe (L=1100 mm par vantail)
MI 6130 1 vantail mobile et 1 anta fixe (L=1500 mm par vantail)
MI 6040 2 vantaux mobiles et 2 vantaux fixes (L=1100 mm par vantail)
MI 6140 2 vantaux mobiles et 2 vantaux fixes (L=1500 mm par vantail)
Kit complet pour fixer les VANTAUX AVEC BATI
aux, avec patinS DE GUIDAGE INTERNES au sol
(a utiliser avec MA7371/7471/7571)
MA 7351 L 1000 mm
MA 7451 L 1500 mm
MA 7551 L 2000 mm
Kit complet pour fixer les VANTAUX En VERRE de
10 mm, avec patins de guidage externes au sol
MA 7370 L 1000 mm
MA 7470 L 1500 mm
MA 7570 L 2000 mm
Kit complet pour fixer les VANTAUX En VERRE de
10mm, avec patinS DE guidaGE INTERNES au sol (a
utiliser avec MA7370/7470/7570)
MA 7353 L 1000 mm
MA 7453 L 1500 mm
MA 7553 L 2000 mm
Kit complet per fixer les VANTAUX AVEC BATI, avec
patins DE guidaGE EXTERNES au sol
MA 7371 L 1000 mm
MA 7471 L 1500 mm
MA 7571 L 2000 mm
MAM 600 Joint central d'étanchéité pour cristaux
coulissants (30m)
MAM 601 Joint latéral d'étanchéité pour cristaux
fixes et coulissants (30m)

SERIE CORSA
Tutti i dati sono stati controllati con la
massima cura. Non ci assumiamo co-
munque alcuna responsabilità per
eventuali errori od omissioni.
All data checked with the maximum care.
However, no liability is accepted for any error
or omission.
Toutes les données ont été contrôlées
très soigneusement. Nous n’assumons
de toute façon aucune responsabilité pour
les erreurs ou omissions éventuelles.
Die Daten wurden mit höchster Sorgfalt
geprüft. Für eventuelle Fehler oder
Auslassungen übernehmen wir keine
Haftung.
Todos los datos se han controlado con
la máxima atención. No obstante no nos
responsabilizamos de los posibles
errores u omisiones.
CANCELLI AUTOMATICI
CAME CANCELLI AUTOMATICI S.P.A.
DOSSON DI CASIER (TREVISO)
(+39) 0422 490960 (+39) 0422 490944
SISTEMA QUALITÀ
CERTIFICATO
ASSISTENZA TECNICA
NUMERO VERDE
800 295830
WEB
www.came.it
E-MAIL
info@came.it
CAUSES POSSIBLES
AL’alimentation de ligne est absente ou inadéquate.
BFusibles hors d’usage.
CProgrammation initiale - absente ou inadéquate.
DSélection erronée sur le sélecteur fonctions.
EBranchements erronés.
FPontet 1-2 absent.
GDispositif de sécurité absent sur Contacts 2 -C1 ou ces mêmes contacts
ne sont pas court-circuités.
HPhotocellules de sécurité non alignées ou non fonctionnantes.
ICommutateur à bascule 3 (module à 4 voies) à sélectionner.
JBranchement moteur erroné.
KEncodeur endommagé.
LCarte dispositif antipanique MA7032 endommagée.
MBatteries épuisées.
NCommutateur à bascule 2 (module à 10 voies) activé ( contrôle de la
function à la page 18)
ORèglages du ralentissement (ouverture/fermeture) inadéquats.
PRéglages des points de ralentissement (ouverture/fermeture) inadéquats.
QRéglages de la vitesse (ouverture/fermeture) inadéquats.
RRéglage TCA, excessif.
SCarte générale ZP7 endommagée.
TMicrocontact sur le blocage électrique non fonctionnant.
UEtrier d’enclenchement chariot/blocage électrique positionné erronément.
VFrottements entre les vantaux mobiles et les parties fixes (par ex.: vanta
ux/sol ; vantaux fixes/vantaux mobiles ; vantaux mobiles/accessoires de
guidage au sol ; joints/vantaux fixes).
WEléments de traction entravés dans le mouvement (par ex. : câbles
entravant les chariots).
XEventuels déchets / objets présents sur le rail de coulissement.
YTension de la courroie erronée.
ZArrêts mécaniques positionnés erronément.
CENTRE SERVICE APRES VENTE REMARQUES DATE
REFERENCES
A - B - C - D - E - F - J - K - N - S - T - U - V - X - Z
D - E - F - G - H - K - I - J - N - R - S - V - Z
C - D - K - O - P - Q - S - V - W - X - Y - Z
C - H - K - O - P - Q - S - V - W - X - Z
S - Q - W - V - X - Y
O - P - Q - S - V - W - X - Y - Z
E - S - T - U
E - G - H - I - S
E - J - S
D - L - M - N - V - W - X - Y
V - W - X - Y
ANOMALIES
- L'automatisme n'ouvre pas.
- L'automatisme ne ferme pas.
- L'automatisme n'ouvre pas totalement.
- L'automatisme ne ferme pas totalement.
- L'automatisme fonctionne toujours à vitesse rèduite
- L'automatisme ne conserve pas le réglage initial.
- Le blocage électrique ne permet pas l'ouverture.
- Les photocellules ne fonctionnement pas.
- Le fonctionnement ne coïncide pas avec
la fonction programmée sur le sélecteur.
- Le dispositif antipanique ne fonctionnes pas.
- Le systéme est excessivement bruyant.
VOIR AUSSI "FONCTION LEDS DE CONTRÔLE"

1
Documentazione
Tecnica
M70
rev. 3.4
08/2005
©
CAME
CANCELLI
AUTOMATICI
REIHE
CORSA
CANCELLI AUTOMATICI 119PM70
SCHIEBETÜREN-ANTRIEB
SCHIEBETÜREN-ANTRIEB MIT MIKROPROZESSOR-STEUER-
UND-KONTROLLSYSTEM
für Torflügel bis zu %# kg Gewicht
ENTRYEXIT
CLOSED
EMERGENCY
SELECTION

DIE SEITE WURDE ABSICHLICH LEER GELASSEN
DIE SEITE WURDE ABSICHLICH LEER GELASSEN

ACHTUNG!
Wichtige Sicherheitshinweise:
BITTE SORGFÄLTIG DURCHLESEN!
Vorwort
• Das Gerät ist ausschließlich für den vorgegebenen Zweck zu
verwenden. Anderweitige Verwendung des Geräts ist demzu-
folge gefährlich. Die CAME Cancelli Automatici S.p.A. haftet
nicht für durch ungeeignete, unsachgemäße und fehlerhaf-
te Verwendung verursachte Schäden • Bewahren Sie diese
Sicherheitshinweise zusammen mit der Montage- und Ge-
brauchsanweisung der Anlage auf.
Vor der Montage
(Überprüfung der vorhandenen Anlage, bei negativer
Bewertung vor der Montage zunächst dafür sorgen,
dass die Anlage sicher ist)
• Überprüfen, dass die zu automatisierenden Teile in guter
mechanischer Verfassung sind, dass sie ausbalanciert und
auf einer Achse sind und dass sie sich problemlos öffnen und
schließen. Zudem kontrollieren, dass geeignete mechanische
Toranschläge vorhanden sind • Sollte der Antrieb in weniger als
2,5 m Höhe vom Boden oder von einer anderen Zugangsebene
montiert werden, überprüfen, ob etwaige Schutzanlagen bzw.
Warnschilder anzubringen sind • Sollten die zu automatisieren-
den Torfl ügel über Fußgängertore verfügen, muss ein System,
das deren Öffnen während der Torbewegung verhindert, vor-
handen sein • Überprüfen, dass die Torfl ügelbewegung keine
Quetschgefahr mit den umliegenden Mauerwerken bewirkt •
Den Antrieb nicht verkehrt herum oder auf Teile montieren, die
sich biegen könnten. Wenn nötig die Befestigungspunkte in
geeigneter Weise verstärken • Nicht auf bergauf bzw. bergab
liegenden Torfl ügeln (nicht eben liegenden) montieren • Über-
prüfen, dass etwaige Bewässerungsanlagen den Getriebemotor
nicht von unten befeuchten können.
Montage
• Die Baustelle in geeigneter Weise begrenzen und sichern, da-
mit sich Unbefugte, vor allem Minderjährige, nicht der Baustel-
le nähern können • Bei Antrieben, die mehr als 20 kg wiegen
(siehe Montageanleitung) ist besondere Vorsicht gegeben. In
diesem Fall, benötigt man geeignete Geräte, um den Antrieb
sicher bewegen zu können • Sämtliche Auf-Befehlsgeräte
(Taster, Schlüsseltaster, Magnetkartenleser usw.) müssen
mindestens 1,85 m vom Torbereich bzw. so installiert werden,
dass man sie nicht von außen erreichen kann. Zudem müssen
sämtliche Befehsgeräte (Taster, Annäherungsschalter usw.) in
mindestens 1,5 m Höhe und so installiert werden, dass sie nicht
von Unbefugten betätigt werden können • Sämtliche Befehls-
geräte in “Totmannbedienung” müssen so installiert werden,
dass die sich bewegenden Torfl ügel und der Zufahrtsbereich
gut überblickbar sind • Wenn nicht vorhanden, einen die Ent-
riegelungsanheit anzeigenden Aufkleber anbringen • Vor Über-
gabe an den Verwender überprüfen, dass die Anlage der Norm
EN 12453 (Tornorm) entspricht und sicher stellen, dass die Au-
tomation in geeigneter Weise eingestellt wurde sowie, dass die
Sicherheits- und Schutzeinrichtungen bzw. die manuelle Entrie-
gelungseinheit in korrekter Weise funktionieren • Wenn nötig
Warnhinweise (z. B. Torwarnschild) gut sichtbar anbringen.
Anweisungen und Empfehlungen
für den Verwender
• Dafür sorgen, dass der Torbereich sauber und Hindernisfrei
ist. Den Funktionsbereich der Lichtschranken von Pfl anzen-
wuchs frei halten • Kindern das Spielen mit den festen Befehls-
geräten bzw. im Torbereich untersagen. Funkbefehlsgeräte
(Handsender) nicht in Reichweite von Kindern aufbewahren •
Die Anlage regelmäßig überprüfen, um etwaige Fehlfunktionen,
Verschleißerscheinungen bzw. Schäden an den beweglichen
Teilen, an den Antriebskomponenten sowie an allen Befesti-
gungspunkten, Kabeln und zugänglichen Kabelverbindungen
festzustellen. Sämtliche Gelenke (Scharniere) und Reibungs-
stellen (Laufschienen) schmieren und sauber halten • Alle
sechs Monate die Funktionstüchtigkeit von Lichtschranken und
Sicherheitsleisten überprüfen. Die Lichtschranken regelmäßig
säubern (verwenden Sie dafür ein mit Wasser befeuchtetes
Tuch und vermeiden Sie Lösungsmittel sowie andere Chemi-
kalienl) • Sollten Reparaturen oder Einstellungsänderungen
erforderlich sein, den Antrieb entriegeln und bis zur erneuten
Sicherung nicht verwenden • Vor der Entriegelung der Anlage
zur manuellen Toröffnung die Stromversorgung unterbrechen.
Anleitungen befolgen. NICHT AUSDRÜCKLICH IN den Anwei-
sungen AUFGEFÜHRTE TÄTIGKEITEN sind dem Verwender
UNTERSAGT. Für Reparaturen, Einstellungsänderungen und
außerplanmäßige Wartungsmaßnahmen WENDEN SIE SICH
BITTE AN DEN WARTUNGSDIENST • Das Ergebnis der Über-
prüfung der Anlage im Wartungsbuch aufführen.
Anweisungen und Empfehlungen
für alle
• Tätigkeiten in Nähe der Scharniere bzw. der sich bewegenden
mechanischen Teile vermeiden • Den Funktionsbereich des sich
bewegenden Tores vermeiden • Nicht gegen die Antriebskraft
einwirken, da dadurch Gefahrsituationen entstehen können • In
den Gefahrzonen, die durch entsprechende Warnhinweise bzw.
schwarz-gelbe Färbung zu kennzeichnen sind, besonders vor-
sichtig sein • Während der Betätigung eines Tasters bzw. eines
Befehlsgerätes im „Totmannbetrieb” ständig kontrollieren, dass
sich bis zum Schluss keine Personen im Bereich der sich bewe-
genden Torfl ügel befi nden • Das Tor kann sich jederzeit ohne
Vorwarnung in Bewegung setzen. • Während der Säuberung
und Wartung immer die Stromversorgung unterbrechen.

DIE SEITE WURDE ABSICHLICH LEER GELASSEN
DIE SEITE WURDE ABSICHLICH LEER GELASSEN


REIHE CORSA
2
DIMENSIONIERUNG (1)
Die für die Herstellung eines automatischen CAME-Türantriebs erforderlichen Grundmaße sind die Breite A des
Türflügels (bzw. die Gesamtbreite beider Türflügel) und die Gesamtlänge T des Antriebs-Trägerprofils; die
beiden Größen können folgendermaßen bestimmt werden:
T = A x 2 + 20 mm
ANTRIEBSSYSTEM FÜR EINGANGSTÜREN
MIT 2 FLÜGELN
** Bei Bestellung immer die Tür-
Öffnungsrichtung angeben (siehe
Bestellformular)
ANTRIEBSSYSTEM FÜR EINGANGSTÜREN
MIT 1 FLÜGEL**
GRUNDMASSE
T = Gesamtlänge des Antriebs-Trägerprofils
A = Gesamtbreite der Türflügel mit Dichtungen
(1)
A
CHTUNG
!
bei Verwendung unserer Profile Reihe 20 bzw. Reihe 40
für die Torflügelkonstruktion kann die entsprechende
Dimensionierung auch von der angegebenen abweichen.
Siehe entsprechende Unterlagen.
M
ssVp
A
T
M
ssVp
A
T
ZUSÄTZLICHE MASSE
Vp= Durchgangsbreite
s = Überlagerung zwischen beweglichem/n Türflügel/n und
festen Teilen (Mauerwerk und/oder festmontierte Türflügel)
Beschrelbung:
System für das automatische Öffnen
von Schiebetüren.
Entworfen und vollständig konstruiert
von der Fa. CAME CANCELLI
AUTOMATICI S.p.A. mit
Schutzklasse IP40. 12 Monate
Garantie. Bei Öffnen der
Mechanismen und Veränderungen
gleich welcher Art verfällt der
Garantieanspruch mit sofortiger
Wirkung.
Modelle:
-CORSA 1, Umkehrbares
Untersetzungsgetriebe mit 24V und
eingebauter Schalttafel.
Automatisierung von einflügeligen
Eingangstüren mit einer Größe von bis
zu 3300 mm und einem Gewicht von
max. 75 Kg.
-CORSA 2, Umkehrbares
Untersetzungsgetriebe mit 24V und
eingebauter Schalttafel.
Automatisierung von zweiflügeligen
Eingangstüren mit einer Größe von bis
zu 3300 mm und einem Gewicht von
max. 75 Kg pro Türflügel.
Accessori a richiesta:
-MA7012 Elektrosperre;
-MA7032 Panikschutzsystem mit
Batterie;
-MA7041 Wählschalter für
Torfunktionen;
-MS9502 Touch-Schalter;
-MF9011/9111 Steuerung-und
Sicherheitsphotozellen;
-MR8001/8002 Infrarot-Radar;
- MR8104/8105 Mikrowellen-Radar;
-MR8334-70-90 Sicherheitssensoren
mit aktiven infrarotstrahlen;
-MP8030/8060 Empfindliche
Trittbereiche;
- MRT001 fernbedienung für MR8104
e MR8105
ALLGEMEINE MERKMALE
Wir empfehlen original CAME-Schalt-und-Sicherheitsvorrichtungen mit entsprechendem Zubehör zu montieren, um die einwandfreie Montage und die problemlose
Wartung der Anlage zu gewährleisten.
(1) Auf Wunsch besteht die Möglichkeit, den Antrieb auch mit einer anderen Spannung zu versoren
(2) Intensivbetrieb
EHCINCETSACINCETSACITSIRETCARAC
.TNEMILA AICNEUCERF ETNEIRROC AMIXAM ROTOM
ETNEIRROC ELANIMON XAMAICNETOP ADIBROSBA AICNETIMRETNI OJABART OPIT NOICCART AZREUF AMIXAM EDDADICOLEV ARUTREPA ARUTAREPMET OICICREJEED
.c.aV032 .c.aV42 zH06/05A6)V032( A6,0 W07nóicazitamotuA W02soiroseccA
aerroca adatned M8DTH gK5 1asroCs/mc75 2asroCs/mc201 °07+<°02-
12

3
REIHE CORSA
20
70
250 x
n°
Schritten
250250250250
T = Länge vom Querträger
rechte Seite / Innenansicht
=
Ausgangspunkt
für Schrittlochung
24
75
A
300
126
29±6
151
30±0,5
85±0,513±6
18
169
69
QUERTRÄGER MIT
KASTEN ZUR
PROFILABDECKUNG
SERIE 001LC00 UND
VERSCHLUSSDECKELN
LTC
Das System zur
Profilabdeckung Serie
001LD00 sieht
seitliche
Verschlußdeckel
Typ LTD aus ABS
vor, sowie
Klappbügel, mit
denen die
Profilabdeckung bei
offener Tür gehalten wird.
ABMESSUNGEN KASTEN ZUR PROFILABDECKUNG
A
A
Sez. A-A
Die
Öffnungsabmessungen
vom Raumbedarf der
Profilabdeckung und
die Abmessung (A) zur
Entriegelung vom Profil
bei maximaler
Türöffnung (ca. 2 cm)
beachten.
+
1
2
151
195
30±0,5
85±0,5
29±6
135
13±6
73
44
Mit Bohrungen für die Befestigung vom Profil
QUERTRÄGER MIT
KASTEN ZUR
PROFILABDECKUNG
SERIE 001LD00 UND
VERSCHLUSSDECKELN
LTD

REIHE CORSA
4
MONTAGESCHEMATA GLASTÜRSEGMENTE
V =
H - 22 mm
Y - 40 mm
V =
H - 70 mm
Y - 88 mm
10
10
INNEN-
GLEITBACKE
GLASSEGMENT-
ZENTRIER-
EINSATZE
UNTERES
GLEITPROFIL
AUSSEN-
GLEITBACKE
V
GLASTÜRSEGMENT
OHNE SOCKEL
GLASTÜRSEGMENT
MIT SOCKEL
TRÄGERPROFIL
H
V
Y
10
13±6
29±6
Y = Montagehöhe Trägerprofil
(Deckengleitschiene)
= H + 18 mm
H = lichete Durchgangshöhe
V = Höhe des Glastürsegments
16
20
80
3417.5
2021.5
ø 4.8
18
40
1622
17
53
70
PROFIL-KUPPLUNG
SCHEIBE

5
REIHE CORSA
ø 16
ø 8.5
32
18
101
100 min. 300 100
101
MONTAGESCHEMATA GLASTÜRSEGMENTE
BOHRRICHTMAßE FÜR GLASTÜRSEGMENT UND OBEREN QUERTRÄGER
Profil
L flügel - 2 mm
L flügel
Glassegment (max 10 mm)
MA 7370 = L 1000 mm
MA 7470 = L 1500 mm
MA 7570 = L 2000 mm
MA 7353 = L 1000 mm
MA 7453 = L 1500 mm
MA 7553 = L 2000 mm
L
L
GLASTÜRSEGMENT/E
OHNE SOCKEL
GLASTÜRSEGMENT/E
MIT SOCKEL
MA 7370 = L 1000 mm
MA 7470 = L 1500 mm
MA 7570 = L 2000 mm
L
L

REIHE CORSA
6
MONTAGESCHEMATA RAHMENTÜREN
AUSSEN-
GLEITBACKE INNEN-
GLEITBACKE
I
10
30
I =
H - 28 mm
Y - 46 mm
I =
H - 48 mm
Y - 66 mm
I =
H - 28 mm
Y - 46 mm
I
10
RAHMENTÜR MIT AUßEN
ANGEBRACHTEM,
UNTEREM GLEITPROFIL
RAHMENTÜR MIT
INTERNEM, UNTEREM
GLEITPROFIL
PROFIL-KUPPLUNG
EINGEFAßT
UNTERES
GLEITPROFIL
20
2
20
4718 11
40
4.5 10 8 4
26.5
Y = Montagehöhe Trägerprofil
(Deckengleitschiene)
= H + 18 mm
H = lichte Durchgangshöhe
I = Rahmentürhöhe
Y
I
10
H
13±6
29±6
RAHMENTÜR
OHNE UNTERES
GLEITPROFIL

7
REIHE CORSA
MONTAGESCHEMATA RAHMENTÜREN
RAHMENTÜR/EN OHNE UNTERES
GLEITPROFIL
RAHMENTÜR/EN MIT UNTEREM
GLEITPROFIL
L
L
MA 7371= L 1000 mm
MA 7471= L 1500 mm
MA 7571= L 2000 mm
MA 7371= L 1000 mm
MA 7471= L 1500 mm
MA 7571= L 2000 mm
MA 7351 = L 1000 mm
MA 7451 = L 1500 mm
MA 7551 = L 2000 mm

REIHE CORSA
8
MONTAGE DES TRAGERPROFILS
3) Die Bohrungen für den Netzanschlußkabel- und den Sensorkabel-
Durchgang (Lichtschranken-Radar) auf dem Profil ausführen.
4) Den Antrieb im Verhältnis zum Durchgangsbereich mittig ausrichten.
5) Den Antrieb mittels Vorbohrungen an der Struktur befestigen und
dessen korrekt horizontale Ausrichtung (Nivellierung) überprüfen.
2 b) Die Schraubenmuttern der
“ausgleitsicheren” Laufrollen lockern
und Laufrollen herabsenken.
1) Die Profilkastenblende, falls vorhanden, entfernen (wird nur auf Anfrage geliefert)
2) Die Laufschlitten folgendermaßen vom Trägerprofil entfernen:
2 c) Die Laufschlitten aus der
Decken-Laufschiene heben.
LAUFSCHLITTEN MIT HALTERUNG
FÜR OBEREN ANTRIEBSRIEMEN
2 a) die mit dem Antriebsriemen
verbundenen Laufschlitten durch
Losschrauben der Befestigungs-
schrauben vom Befestigungs-
bügel trennen.
AUFSCHLITTEN MIT HALTERUNG
FÜR UNTEREN ANTRIEBSRIEMEN

9
REIHE CORSA
MONTAGE DER TÜRSEGMENTE
Modell CORSA 1 (einflügelig) RECHTSöffnend
LINKSöffnend
NICHTNICHT
NICHTNICHT
NICHT
ININ
ININ
IN
BERÜHRUNGBERÜHRUNG
BERÜHRUNGBERÜHRUNG
BERÜHRUNG
120120
120120
120 150150
150150
150
110110
110110
110
8585
8585
85
8585
8585
85 110110
110110
110 110110
110110
110
110110
110110
110
130 130
130 130
130 MITMIT
MITMIT
MIT
ELEKTROSPERREELEKTROSPERRE
ELEKTROSPERREELEKTROSPERRE
ELEKTROSPERRE
Modell CORSA 2 (zweiflügelig)
1) Die Türsegment-Laufschlitten dem folgenden Montageschema entsprechend befestigen:
2) die Türsegmente anheben und
korrekt in die Decken-Gleitschiene
einsetzen;
4) Die Laufschlitten wieder mit den
entsprechenden Antriebsriemen-
Halterungen verbinden;
3) Die “ausgleitsicheren” Laufrollen
anheben und befestigen, ohne jedoch
dabei Druck auf das Profil auszuüben;

REIHE CORSA
10
+6 mm
- 6 mm
10
+6 mm
- 6 mm
13
4
+4 mm
- 4 mm
44
MECHANISCHE EINSTELLUNGEN
Über die Laufschlitten können bei
Ausrichtung der Türflügel folgende
Einstellungen ausgeführt werden:
- Vertikaleinstellung RV, mit die
Kaltgesenkbolzen A und B
- Quereinstellung RT, mit die
Kaltgesenkbolzen C
- Horizontaleinstellung RO, mit
die Kaltgesenkbolzen D und E
DD
DD
D
BB
BB
B
CC
CC
C
AA
AA
A
EE
EE
E

11
REIHE CORSA
MECHANISCHE EINSTELLUNGEN
VERTIKALEINSTELLUNG RV
Zur korrekten vertikalen Ausrichtung der Türflügel
folgendermaßen auf die Laufschlitten einwirken:
- die Schrauben A lockern.
- Die Vertikal-Einstellschraube B so lange drehen, bis
der bzw. die Türflügel perfekt senkrecht ausgerichtet
ist bzw. sind. Bei zweiflügeligen Türen die Türflügel so
ausrichten, daß sie perfekt bündig bzw. ohne
Zwischenräume gegeneinander schließen.
- Nach Ausführung der Einstellungen die Schrauben A
wieder festziehen und durch Bewegen der Tür von
Hand überprüfen, ob während des Türlaufs zwischen
beweglichem/n Türflügel/n und Boden Reibung auftritt.
Falls erforderlich, kann der Türflügel zur Einstellung
beider Laufschlitten ganz hochgehoben werden.
HORIZONTALEINSTELLUNG RO
(nur für Corsa 2)
Zur Feineinstellung (± 4 mm) des
Berührungspunkts der beiden
Türflügel die Schrauben D lockern
und die beiden Türflügel gemeinsam
verschieben.
Zum perfekten Ausrichten oben
muß die Antriebsriemen-Halterung
durch Losschrauben der Schrauben
E abgetrennt werden.
Nach erfolgter Einstellung alle
Schrauben wieder festziehen.
QUEREINSTELLUNG RT
Die vertikale Ebene der Laufschlitten-Rollen sollte immer parallel zum Antriebs-Trägerprofil ausgerichtet
sein. Sollte dies nicht der Fall sein (z.B.: bei schwerem Gleiten), folgendermaßen vorgehen:
- die Schrauben C lockern.
- Laufschlitten und Laufschiene ausrichten (z.B.: durch Abmessen des Abstands Q zwischen dem
Laufschlitten-Körper und dem Antriebs-Trägerprofil).
- Die Einheit wieder befestigen und durch manuelles Hin- und
Herbewegen des Türflügels überprüfen, ob zwischen
beweglichem Türflügel bzw. beweglichen Türflügeln und festen
Teilen bzw. Türflügeln während des Türlaufs Reibung auftritt.
- Die Laufschlitten-Befestigungsschrauben wieder sorgfältig
festziehen
Trägerprofil
Türflügel
Türflügel
Trägerprofil
Gleitschiene
Gleitschiene

REIHE CORSA
12
Befestigungsschraub
MECHANISCHE EINSTELLUNGEN
Vite fissaggio
Scheiben-BefestigungsschraubenSpannungs-Einstellschraube
SCHWINGUNSDAMPFENDER KASTENBLENDEN-HALTEBÜGEL
Dieser Bügel dient zur Verminderung von Schwingungen und
Longitudinaldeformation der Trägerprofil-Kastenblende
(Lieferung auf Anfrage). Bei einer Trägerprofillänge von bis zu
2,80 m empfiehlt sich die Montage von einem Bügel. Bei
längeren Trägerprofilen sind zwei zu montieren. Die Bügelform
kann eventuell von Hand verändert werden.
POSITIONIERUNG DER
MECHANISCHEN ENDANSCHLÄGE
UND DER
SCHWINGUNGSDÄMPFENDEN BÜGEL
EINSTELLUNG DER MECHANISCHEN ENDANSCHLÄGE
Die mechanischen Endanschläge dienen zur Festlegung
und Einstellung der Türöffnungsweite und verhindern
einen eventuellen Tür-Überlauf. Zu deren Positionierung
auf die Befestigungsschraube einwirken.
Hinweis: bei korrektem Sitz bzw. bei korrekter Befestigung
der mechanischen Endanschläge sind Beschädigungen
der Laufschiene absolut ausgeschlossen und eventuell
erforderliche Einstellungen möglich.
EINSTELLUNG DER ANTRIEB-
SRIEMENSPANNUNG
Bei erforderlicher Einstellung
der Antriebsriemenspannung
über die Umlenkscheiben-
Einheit ist folgendermaßen
vorzugehen:
1) die Befestigungsschrauben
der Scheibe lockern.
2) Die betreffende Einstell-
schraube so lange drehen, bis
der Antriebsriemen korrekt
gespannt ist.
3) Die Befestigungsschrauben
wieder sorgfältig festziehen,
damit die korrekte Antrieb-
sriemenspannung erhalten
bleibt.

13
REIHE CORSA
MECHANISCHE EINSTELLUNGEN
Befestigungsschraub
Antriebsriemenhalterung
ANTRIEBSRIEMENHALTERUNG
Die Antriebsriemenhalterung dient zur Vermeidung von Antriebsriemenschwingungen.
Sie ist bei zweiflügeligen Türen mit einem über 3020 mm langen Trägerprofil mittig
anzubringen. Die Form der Riemenhalterung kann, falls erforderlich, von Hand verändert
werden.
Hinweis: überprüfen Sie bitte, ob die Antriebsriemenhalterung während des Betriebs in
Bewegung befindliche Teile behindert.
MONTAGEKONTROLLE
Nach beendeter Montage des Antriebs-Trägerprofils bzw.
nach Ausführung der mechanischen Einstellungen immer
überprüfen, ob:
_ Bearbeitungsrückstände, die die Gleitschiene und/oder die
Laufschlittenrollen beschädigen könnten, auf der Gleitschiene
zurückgeblieben sind;
_ ob Fremdkörper und/oder Werkzeug im Inneren des
Trägerprofils zurückgeblieben sind;
_ ob die Türflügel korrekt ausgerichtet und die mechanischen
Endanschläge, wie oben angegeben, positioniert sind.
Zu diesem Zweck vor dem elektrischen Anschluß bzw. vor
Inbetriebnahme des Türantriebs die Tür mehrmals von Hand
öffnen und schließen.

REIHE CORSA
14
SCHALTTAFEL ZP7
10
11
1
2
C1
Ri
M
R2
R1
2
F1 F2 ES ES TX RX GND 1 2 3 4 5 6 7
MF9011 - MF9111 MA7032
12345678
21 345678910O
N2134O
N
RESET
APRE
MA7012 BUSSOLA MA7041
P.R.AP AP/PARZ TCA V.RALL.CH V/CH V/AP P.R.CH FRENO V.RALL.AP.
FUSIBILE
ACCESSORI
1,6A
-
+
M
N
E+
S
S
E -
-
BATT.
+
24AC
24AC
KLEMMLEISTE ZUBEHÖRANSCHLUSS
ANSCHLUSS-KLEMMLEISTE MOTOR
ENCODER-BATTERIEN-SPEISUNG 24V
KONTROLLEUCHTEN
FLINKE SICHERUNG ZUBEHÖR 1.6ARESET-TASTE
FUNKTIONSWAHL-DIP-SWITCH
EINSTELLUNGS TRIMMERS
STECKANSCHLUß LICHTSCHRANKEN-
PLATINE MF9011-9111 STECKANSCHLUß ANTIPANIK-PLATINE
MA7032
ANSCHLUß ELEKTROSPERRE
MA7012
ANSCHLUß WINDFANGSYSTEM
ANSCHLUß FUNKTIONSWAHLSCHALTER
MA7041
ÖFFNUN-TASTE
KLEMMLEISTE FÜR DEN ZUBEHÖRANSCHLUSS
10 - 11 Stromversorgung 24V Wechselstrom/Gleichstrom
1- 2 Stop Taste, Normally-Close-Kontakt (N.C.)
2- C1Lichtschranken (Wiederöffnen beim Schließen) (N.C.)
2- RiNormally-Open-Kontakt (N.O.) Zwischenblockungs-Sensor
(für Windfangfunktion)
2- R1Normally-Open-Kontakt (N.O.) externer Sensor
(kann ausgeschlossen werden)
2- R2Normally-Open-Kontakt (N.O.) innere Sensor
2- M "Schritt-Schritt"-Steuerung (Taster Handbetrieb)
Normally-Open-Kontakt (N.O.).
10
11
1
2
C1
Ri
M
R2
R1
2
F1 F2 ES ES
MA7012
P.R.AP
-
+
+
-
- Die kontakte 1-2 und 2-C1 sind normalerweise geschlossene und ursprünglich gebrückte kontakte. Für den
Einsatz dieser Funktionen die Brücken durch die entsprechenden Vorrichtungen ersetzen.
- Der kontakt 2-C1 wird dann verwendet, wenn ein Sicherheitssystem installiert werden soll (z.B. Lichtschranken
oder andere Kontrollvorrichtungen), die nicht im entsprechenden Steckplatz untergebracht werden können.
Hinweis: Wenn die Karte für die Lichtschranke MA9011/9111 nicht eingesteckt wird oder eingesteckt ist und
ausgeschlossen werden soll, bitte den Dip-Schalter 3 auf ON stellen (4-Weg-Modul).
Der Kontakt 2-M ist ein Normally-Open-Kontakt (NO) und hat eine doppelte Funktion:
1) Bei normaler Funktionsweise ist er auf Öffnen geschaltet, auch wenn der Wählschalter für die Funktionen
MA7041 auf "Tore geschlossen" steht. Diese Funktion kann für Durchfahrten mit Präferenz verwendet werden (z.B.
Schließen am Abend, Öffnungsbefehl mit Schlüssel oder Magnetschalter).
2) Wenn der Dip-Schalter 5 auf ON gestellt wird (10-Weg-Modul), wird die Funktion "schrittweises Öffnen" aktiviert
(bei Drücken des Knopfes öffnet sich das Tor, bei erneutem Drücken schließt es sich wieder. Achtung! Wenn diese
Funktion aktiviert ist, werden die Kontakte 2-R1 und 2-R2 ausgeschlossen.
KLEMMBRETT FÜR STROMANSCHLUSS
24V Stromversorgung Untersetzungsgetriebe (ausgeführt)
Erdung
230V Versorgung aus Stromnetz (50/60 Hz)
2A-Sicherung für Stromleitung
(siehe Seite 22)
230V
24V

15
REIHE CORSA
SCHALTTAFEL ZP7
WICHTIG:
Jeder Vorgang, wie Anschluß/Verkabelung oder Auswechseln der Platinen, ist ausschließlich bei spannungsfrei
geschaltetem Gerät, d.h. nach Unterbrechung der Stromzufuhr und nach dem Abtrennen des “+”-Pols (rot)
einer eventuell vorhandenen Batterie des Antipanik-Sicherheitssystems auszuführen.
MA7032
678
2134O
N
RESET
APRE
Mit der Taste RESET wird ein Reset der Daten durchgeführt und die
geprüfte Automatiksteuerun wird wieder eingeschaltet
Mit der Taste APRE wird von der Automatiksteuerung das Öffnen
des Tors ausgelöst.
Achtung: Das Funktionieren der Taste APRE wird ausgeschlossen,
wenn der Dip-Schalter 5 (10-Weg-Modul) auf ON gestellt ist.
MF9011 - MF9111
1
O
N
P.R.AP AP/PARZ TCA V.RALL.CH V/CH V/AP P.R.CH FRENO V.RALL.AP.
-
+
13111511719
2 4 6 8
TRIMMER-EINSTELLUNG
TRIMMER-EINSTELLUNG
N° 1 2 3 4 5 6 7 8 9
FUNKTION
START-
PUNKT
ABBREM-
SEN BEIM
ÖFFNEN
TEI L -
ÖFFNUNG
SCHLIEß-
AUTOMA-
TIK
LAUF-
VERZÖGER-
UNG
SCHLIEßEN
SCHLIEß-
GESCHWINDIGKEIT
ÖFFNUNGS-
GESCHWINDIGKEIT
START-
PUNKT
ABBREM-
SEN BEIM
SCHLIEßEN
BREMSSTÄRKE
IN DER
AUFANGSPUN-
KT FÜR
SCHRITT-
LOCHRUNG
LAUF-
VERZÖGE-
RUNG
ÖFFNUNG
EINSTEL-
LUNG BEGINN 60 ÷ 90 % 0.5 ÷ 13
SEK.
5 ÷ 12
CM/S.
CORSA 1
8,6÷57
CM/S.
CORSA 2
17,2÷102
CM/S.
CORSA 1
8,6÷57
CM/S.
CORSA 2
17,2÷102
CM/S.
BEGINN .................. 5 ÷ 12
CM/SEK.

REIHE CORSA
16
FUNKTIONSWAHL
LED BETRIEBSZUST.SIGNALBEDEUTUNG
1 blinkt -Encoder außer Betrieb
1 leuchtet -Encoder außer Betrieb
2(*) -Batterien Antipaniksystem erschöpft
3 leuchtet -Stromversorgung 24V A.C. zugeschaltet
4 leuchtet -Lichtschranken-Kontakt offen
5 leuchtet -Zwischenblockungsfunktion zugeschaltet (siehe "Anwendung Windfangfunktion")
6 leuchtet -Betriebsstörung Elektrosperre
7 leuchtet -amperemetrischer Sensor in Betrieb
8 blinkt -Schließautomatik in Betrieb
8 blinkt -Lesungsfehler während Eichungsvorgang
6/7/8 leuchten -Eichungsvorgang beendet
(*) In diesem Fall bleibt die Kontrolleuchte, die anzeigt, daß die Antipanik-Batterien leer sind, nur dann eingeschaltet
wenn die Kontrolle der Notbatterien abgeschaltet ist (Dip-Schalter 2 mit 10 Funktionen steht auf OFF). Sie blinkt
dagegen, wenn die Kontrolle der Notbatterien eingeschaltet ist (Dip-Schalter 2 mit 10 Funktionen steht auf ON).
12345678
S
IBILE
piD-geW-01 NOITKNUFETREIVITKA
1NO .)71etieSsmetsyssedemhanbeirtebnieheis(gnurehciepS
2NO .)81etieSeheis(2307AMtimsdnatsuzneirettabtoNsedgnuhcawrebÜ
3- .nehets»FFO«fuaretlahcS-piDnedeiSnessal,hcuarbeGnithcin
4NO .neßeilhcSmiebbuhcSregißämhcielG
5NO .)41etieS,M-2tkatnokeheis(gnureuetS"ttirhcS-ttirhcS"
6NO .)02etieS"noitknufgnafdniWgnudnewnA"eheis(metsyssbeirtnAmerednatimgnukcolbnehcsiwZ
8/7 NO .)91etieSeheis(errepsortkelEßulhcssuA
7
8NO FFO eheis)legülfrüTrenessolhcseg.wzblegülfrüTreneffognureikcolBrüf(errepsortkelEbeirtebreuaD 91etieS
7
8FFO NO 91etieSeheis)legülfrüTrenessolhcseggnureikcolBrüf(errepsortkelEbeirtebreuaD
8/7 FFO )91etieS,1407AMretlahcslhawsnoitknuFrebügnureuetS(tnnertegbaerrepsortkelE
01/9 NO )81etieSeheis(tßeilhcsmetsysstiehrehciS-kinapitnA
9
01 FFO NO )81etieSeheis(tenffömetsysstiehrehciS-kinapitnA
01/9 FFO )81etieSeheis(eirettabreffuPrebügnugrosrevmortS
KONTROLLEUCHTEN-FUNKTION
piD-geW-4 NOITKNUFETREIVITKA
1NO 01timretlahcS-piDnedhcuaettib(gnudaLrehcsitsaletimnoitknufkinapitnAgnureivitkA .)91etieSeheis,nenoitknuF
2 - nehets»FFO«fuaretlahcS-piDnedeiSnessal;hcuarbeGnithcin
3NO tkcetsegniegnureuetSrednaeid,1119FMredo1109FMetraK(baneknarhcsthciLeidtetlahcS )22etieS,dnis
4 - nehets»FFO«fuaretlahcS-piDnedeiSnessal;hcuarbeGnithcin

17
REIHE CORSA
INBETRIEBNAHME DES SYSTEMS
VORPRUFUNGEN
Vor Inbetriebnahme überprüfen, ob:
"die Elektrosperre (falls vorhanden) manuell entblockt ist,
"der Antriebsriemen korrekt gespannt ist (siehe Seite 12),
"die auf Seite 13 beschriebenen Voraussetzungen überprüft worden sind (Montagekontrolle),
"sich Gegenstände auf den Türflügel-Gleitschienen befinden,
"alle Schrauben korrekt und fest angezogen sind,
"die Sensoren korrekt ausgerichtet und frei bzw. sauber sind,
"die gewünschten Funktionen korrekt über den Dip-Schalter (Seite 16) gewählt worden sind,
"die Trimmer sich in Mittelstellung befinden (Seite 15).
INBETRIEBNAHME / EICHUNG
1. Das Gerät mit Spannung versorgen,
- die Led Nr. 3 leuchtet auf.
2. Den Dip-Switch 1 auf Stellung ON positionieren,
- die Led Nr. 3 erlischt und die Led. Nr. 8 leuchtet auf:
- der Antrieb führt mit reduzierter Geschwindigkeit ein Schließ- und ein Öffnungsmanöver durch
und positioniert sich dann in maximaler Öffnungsstellung (1)
- die Leds 6,7 und 8 leuchten auf.
3. Den Dip-Switch 1 auf Stellung OFF positionieren,
- die Leds 6,7 und 8 erlöschen und die Led 3 leuchtet auf.
4. Überprüfen, ob auf dem Wahlschalter MA7041 (falls vorhanden) eine Öffnungsfunktion eingestellt ist (die
Kontrolleuchten leuchten nacheinander auf).
5. Wenn die Bewegung "öffnen" am Kontakt 2-R1 / 2-R2 oder durch Drücken der Taste APRE (siehe S.15)
ausgelöst wird,
- positioniert sich die Automatiksteuerung am Schließpunkt.
6. Wenn Sie eine Öffnen-Impuls geben,
- führt die Automatiksteuerung ein komplettes Manöver aus.
7. Führen Sie eine vollständige Einstellung der Bewegung der Türflügel mithilfe der Trimmer (s. S.15) durch.
8. Über Trimmer 3 die geeignetste Schließautomatik-Zeit einstellen
9. Der Trimmer 2 kann nur dann eingestellt werden, wenn die Funktionswahl-Vorrichtung MA7041, über die
die Teilöffnung eingestellt wird, zugeschaltet ist.
10. Die Elektrosperre, falls vorhanden, mittels Hebel der manuellen Entriegelungsvorrichtung wieder
ansprechfähig machen
(1) wenn das Antriebssystem beim Schließen stoppt, dann kann das ein Zeichen dafür sein, daß die Motor-Polung
umgepolt worden ist. In diesem Fall ist folgendermaßen vorzugehen:
-Netzspannung abschalten
- Dip-Switch 1 auf OFF positionieren
- Die Pole M-N auf der rechts auf der Schalttafel befindlichen Motor-Klemmleiste umpolen
- wieder mit Punkt 1 beginnen.
Änderung der Öffnungsrichtung (Corsa 1)
- Bei stillstehender Tür die Motorpolung über die Klemmen M-N auf der rechten Schalttafel-Klemmleiste
umpolen.
- Die Elektrosperre MA7012, falls vorhanden, wieder ausrichten.
- Die auf der Schalttafel befindliche “RESET”-Taste drücken (bewirkt die neuerliche Inbetriebnahme des
Antriebs).
- Den Antrieb, wie im entsprechenden Abschnitt beschrieben, in Betrieb nehmen (bzw. wieder in Betrieb
nehmen).
SICHERHEITSFUNKTIONEN - Verhalten des Antriebssystems
Wenn der Sicherheitssensor ein Hindernis meldet, befiehlt der Mikroprozessor,
ein Wiederöffnen, wenn sich die Tore gerade schließen;
einen Stop, wenn sich die Tore gerade öffnen, und ein anschließendes Schließen nach
Ablauf der Wartezeit für das automatische Schließen.
Wenn das Hindernis nach wie vor vorhanden ist,
führt die Automatiksteuerung beim Schließen vier Versuche zum erfolgreichen Schließen
durch. Sind diese nicht erfolgreich, bleiben die Tore offen und die Steuerung wartet auf einen
neuen Befehl.
Beim Öffnen bleibt der Antrieb am Hindernis stehen, schließt beim Ansprechen des TCA, bei
jedem Öffnungsbefehl wird die Kontrolle wiederholt. Der Automatikantrieb führt beim ersten
Manöver nach Beseitigung des Hindernisses ein Reset durch.
(in beiden Fällen wird nach Entfernung des Hindernisses automatisch der vorher geeichte Betriebszustand
wieder hergestellt)

REIHE CORSA
18
ZUSCHALTEN DES ZUBEHÖRS (auf Anfrage)
MA7032 - Antipanik-Sicherheitssystemmit Batterie
Steuersystem zur Notöffnung des Tores bei Netzspannungsausfall, das aus zwei 12-V-Batterien (1,2Ah) und
einer elektrischen Platine, die das konstante Wiederaufladen der Batterie und die optimale Verteilung des
Potentials auf das System gewährleistet, zusammengesetzt ist.
Über die auf der Schalttafel befindlichen Dip-Switches 9 und 10 (Dip-Schaltet mit 10 Funktionen) können
folgende Betriebsarten der Vorrichtung für den Fall von Stromausfall eingestellt werden:
Hinweis: Bei verblocktem Funktionieren (siehe S. 20) werden trotzdem folgende Funktionen an beiden
Automatiksteuerungen gewählt:
12345678910
12345678910
12345678910
9 OFF Nur Öffnen. Die Tore öffnen sich und bleiben dann
10 ON geöffnet, bis die Stromversorgung wieder hergestellt
ist. Diese Funktion ist auch dann aktiviert, wenn der
Wählschalter für Funktionen MA7041 auf "Tore
geschlossen" steht.
9ON Nur schließen. Die Türflügel schließen sich und
10 ON bleiben auch bei über MA7041 erfolgter Funktion
swahl "Türflügel offnen" bis zur neuerlichen Versorg-
ung mit Netzspannung geschlossen.
9 OFF Normalbetrieb. Die Tore funktionieren so lange
10 OFF normal weiter, bis die Spannung an den Batterien
unter die Sicherheitsschwelle absinkt. Wenn der
Schwellenwert unterschritten wird, werden die Tore
blockiert. Wenn der Wählschalter für Funktionen
MA7041 auf "Tore geschlossen" steht, können die
Tore in diesem Fall nur durch einen Befehl am
Kontakt 2-M geöffnet werden.
12345678910
Antipanikfunktion mit konstanter Batteriekontrolle
Wenn der Dip-Schalter 2 mit 10-Weg-Modul auf ON gestellt wird (beim
verblockten System den Schalter an beiden Steuerungen auf ON stellen),
wird die konstante Kontrolle der Ladung der Notbatterien eingeschal-
tet. Das bedeutet bei Normalbetrieb, daß nur dann, wenn die Netzspan-
nung unter den Wert von "230V" sinkt, vom System überprüft wird, ob die
Batterieladung über dem Schwellenwert von 20 V liegt. Sinkt die Batterie-
ladung unter diesen Wert (beim verblockten System genügt es, wenn die Ladung der Batterien von einer der
beiden Automatiksteuerungen unter den Schwellenwert sinkt), wird eine Sicherheitsprozedur eingeleitet. Diese
Prozedur veranlaßt entweder das Öffnen oder das Schließen der Tore, je nachdem, was am Dip-Schalter 9 mit
10-Weg-Modul eingestellt worden ist. Beim verblockten System dagegen wird die Sicherheitsprozedur von
anhaltenden Blinken der Kontrolleuchte Nr.2 an der MASTER-Steuerung angezeigt und veranlaßt das Öffnen
der Tore beider Automatiksteuerungen. Nach Wiederherstellung der Batterieladung erlischt die Kontrolleuchte
und das System nimmt seine normale Funktion wieder auf, nachdem der Öffnungsbefehl gegeben worden ist.
Hinweis: Bei Installation einer einzelnen Automatiksteuerung löst das Einschalten der Batteriekontrolle
gleichzeitig das Abschalten des Normalbetriebes aus (Dip-Schalter 9 OFF - 10 OFF).
Bei zugeschaltetem MA7041 überprüfen, ob die “EMERGENCY”-Funktion, die durch die leuchtende bzw.
blinkende gelbe Kontrolleuchte angezeigt wird, zugeschaltet ist.
Bei neuerlicher Netzspannungszufuhr wird auf jeden Fall der ursprüngliche Betriebszustand vor dem Blackout
wieder hergestellt.
Hinweis: falls der Wählschalter MA7041 nicht
angeschlossen sein sollte und trotzdem die
Panikschutzfunktion aktiviert werden soll, bitte die
Kontakte 1 und 3 wie auf der Abbildung dargestellt
überbrücken.
1 2 3 4 5 6 7
R
XGND 1234567
MF9011 - MF9111
S
SOLA MA7041

19
REIHE CORSA
ZUSCHALTEN DES ZUBEHÖRS (auf Anfrage)
MA7012 - Elektrosperre
Elektromechanische Vorrichtung zur Blockierung der Türflügel, mit elektrischem Auslöser und mechanischem
Fallbügel. Der bzw. die Türflügel werden in geschlossener Stellung (und/oder in geöffneter Stellung) durch
Einhaken eines auf einem Laufschlitten befestigten Bügels blockiert.
Über die auf der Schalttafel befindlichen Dip-Switches 7 und 8 (Dip-Schaltet mit 10 Funktionen) sind folgende
Elektrosperren-Funktionen möglich:
7 ON Ausgeschaltet. Einstellung bei nicht vorhandener
8 ON Vorrichtung.
7 OFF Sperre bei geschlossenen Türen. Das ist die normale
8 ON Funktionsweise: sie wird bei jeder Schließbewegung
verriegelt und bei der Öffnung elektrisch entriegelt
(Default-Einstellung).
7 ON Sperre bei geschlossenen und geöffneten Türen.
8 OFF Verriegelung beim Schließen und Öffnen (bei
entsprechender Positionierung (1)) und elektrische
Entriegelung jewells beim Auslösen der Schließ- bzw.
Öffnungsbewegung.
7 OFF Vorübergehende Blockierung. Entblockt sich beim
8 OFF ersten Öffnungs-Steuerimpuls nach Inbetriebnahme
bzw. bei Wiederversorgung mit Netzspannung oder
bei Funktionswahl “Türflügel offen” über MA7041.
Blockiert sich bei Funktionswahl “Türflügel
geschlossen” oder "nur Ausgang" über MA7041.
1234
MI1010 - Antipanikfunktion mit elastischer Ladung
Mechanische Vorrichtung zum Öffnen der Torflügel, die aus einem elastischen System besteht, das bei
Stromausfall zugeschaltet wird. Wenn diese Vorrichtung vorhanden ist, die Dip-Schalter bitte folgendermaßen
einstellen:
12345678910
4 ON Aktivierung konstanter Schub beim
Schließen (10-Weg-Dip-Schalter)
1 ON Aktivierung Antipanikfunktion mit
elastischer Ladung (4-Weg-Dip-Schalter)
12345678910
12345678910
12345678910
12345678910
10-WEG
DIP-SCHALTER 4-WEG
DIP-SCHALTER

REIHE CORSA
20
WINDFANGFUNKTION
F1 F2 Es Es
1
0
11
1
2
C
1
Ri
M
R2
R1
2
M
N
E+
S
S
E -
-
BATT
.
+
24A
C
24A
C
ENTR Y EX IT
CLOS ED EME RG EN CY
SEL ECT IO N
Cancel li Automatici
!
$
#
1
0
11
1
2
C
1
Ri
M
R2
R1
2
M
N
E+
S
S
E -
-
BATT
.
+
24A
C
24A
C
!
#
#
"
"
F1 F2 Es Es
Funktion
Wenn eines der beiden Radarsignale empfangen wird (extern oder intern), öffnet die Automatiksteuerung das
entsprechende Tor und blockiert dabei gleichzeitig das andere Tor. Dabei wird eine Arbeitssequenz
ausgelöst, die mit dem Schließen des zweiten Tors beendet wird.
STANDARDABFOLGE:ANSPRECHEN DES AUSSEN- ODER INNENSENSORS
ÖFFNUNG TÜR 1 / BLOCKUNG GEGENÜBERLIEGENDER SENSOR
SCHLIESSUNG TÜR 1
ÖFFNUNG TÜR 2
SCHLIESSUNG TÜR 2 / ENTBLOCKUNG GEGENÜBERLIEGENDER SENSOR
Der zentrale Sensor (in der Mitte), der an die Klemmen 2-Ri angeschlossen ist, zeigt an, ob sich zwischen den
beiden automatischen Toren eine Person aufhält, und löst am Mikroprozessor das erneute Öffnen des
automatischen Tors aus, das dem zuletzt geöffneten gegenüberliegt, wobei die Systeme allerdings verblockt
sein müssen.
1 1 oder 2 Photozellenpaare
2 Platine (MA9011-MA9111)
3 Antipanik-platine MA7032
SCHEMATISCHE DARSTELLUNG DER BEIDEN VERBLOCKTEN
AUTOMATIKSTEUERUNGEN
EXTERNE AUTOMATIKSTEUERUNG (MASTER)
INTERNE AUTOMATIKSTEUERUNG (SLAVE)
4 Elektrosperre MA7012
5 Radar (MR8002-MR8104)
6 Funktionswahlschalter MA7041

21
REIHE CORSA
Spezifische Anschlüsse
Das Zubehör an die beiden Steuerungen anschließen und miteinander über die Klemmbuchse verbinder.
Gehen Sie dabei wie auf der Abbildung dargestellt vor.
Auf dem Außenantrieb den Dip-Schalter 6 auf "ON" stellen: dadurch wird dieser Antrieb zum MASTER-
Antrieb.
Auf dem MASTER-Antrieb (der den zweiten dazugehörigen Antrieb steuert) sind alle Steuersensoren und der
eventuell vorhandene Funktionswahlschalter (MA7041) anzuschließen.
Die Lichtschranken und die Antipanikfunktion müssen bei beiden Automatiksteuerungen unabhängig sein.
Die Trimmer-Einstellungen funktionieren auf beiden Antriebssystemen völlig unabhängig voneinander.
Wenn die Kontakte 1-2 und 2-C1 nicht benützt werden, müssen sie an beiden Automatiksteuerungen
überbrückt werden.
10
11
1
2
C1
Ri
M
R2
R1
2
F1F2ESES TXRXGND 1234567
MF9011 - MF9111 MA70 32
MA7012 BUSSOLA MA7041
P.R.AP AP/PARZ TCA V.RALL.CH V/CH V/AP P.R.CH FRENO V.RALL.AP.
-
+
M
N
E+
S
S
E -
-
B ATT.
+
24AC
24AC
F1 F2 Es Es
Anschluß
Elektrosperre
MA 7012
Anschluß
Funktionswahlschalter
MA 7041
C Nc 1 0 A2 C1 A1
A C
+
_
Batterien
+
_
12 V 1.2Ah 12 V 1.2Ah
Brücke für Batterien-Satz
10
11
1
2
C1
Ri
M
R2
R1
2
F1F2ESES TXRXGND1 234567
MF9011 - MF9111 MA70 32
MA7012 BUSSOLA MA7041
P.R.AP AP/PARZ TCA V.RALL.CH V/CH V/AP P.R.CH FRENO V.RA LL.AP.
-
+
M
N
E+
S
S
E -
-
B ATT.
+
24AC
24AC
C Nc 1 0 A2 C1 A1
A C
+
_
+
_
12 V 1.2Ah 12 V 1.2Ah
F1 F2 Es Es
Externe Radar
(2-R1)
Zentral Radar
oder
zwischenliegend
(2-Ri)
Interne Radar
(2-R2)
MF9011-9111 MA7032
MF9011-9111 MA7032
BUSSOLA
TX RX GND
SCHALTTAFEL
(MASTER)
SCHALTTAFEL
(SLAVE)TX RX GND
BUSSOLA
1 2 3 4 5 6 7
ENTRY EXIT
CLOSED EMERGENCY
SELECTION
Cancel li Automati ci
Anschluß
Elektrosperre
MA 7012
Brücke für Batterien-Satz
Batterien

REIHE CORSA
22
ANSCHLUß VOM ZUBEHÖR AN DIE SCHALTTAFEL
VORBEMERKUNGEN
Zur Vereinfachung der elektrischen Verkabelung ist auf dem Trägerprofil eigens ein Bereich für die Unterbringung
und die rationelle Verteilung der entlang des Trägerprofils verlaufenden Kabel vorgesehen worden.
Auf der für den Zubehöranschluß vorgesehenen Klemmleiste ist die allgemeine Klemme 2 eine Doppelklemme.
Es empfiehlt sich, den Anschlußkabeldurchgang auf der linken Seite des Trägerprofils
und zwar dort, wo sich der Transformator für den Anschluß der elektrischen Zuleitung und
des Erdleiters befindet, vorzusehen.
ABFOLGE DER AUSZUFÚHRENDEN ANSCHLÚSSE
"Außensensor über Klemmen 2-R1 der Schalttafel
"Innensensor über Klemmen 2-R2 der Schalttafel
"Sensor-Stromversorgung über Klemmen 10-11 der Schalttafel
"Netzanschlußleitung(1) über die entsprechenden Klemmen am Transformator(2)
"Erdleiter über die übliche, am Transformator befindliche Klemme
(1)
durch eine Fehlerstromschutzeinrichtung mit einem Differentialwert von 30mA + magnetothermischem Schutz
von 5A (Rechtsvorschrift Italien 46/90) geschützt.
(2)
bei Versorgungsspannung 24Va.c., kann der Anschluß direkt über die Klemmleiste der Schalttafel erfolgen.
Für 001MA7032
Die Drähte für den Anschluß der beiden Batterien, die nur mit dem zum Lieferumfang gehörenden Brückenkabel
miteinander verbunden werden müssen, sind schon vorbereitet.
Für 001MF9011-9111
Einfach nur die Verstärkerkarte in den entsprechenden Steckplatz stecken, nachdem die Sensoren richtig
angeschlossen worden sind. Hinweis: Wenn diese Karte nicht verwendet wird, bitte den Dip-Schalter 3 auf ON
stellen (4-Weg-Dip-Schalter). Es sind keine weiteren Anschlüsse erforderlich. Die Brücke 2-C1 bleibt zugeschaltet.
1 2 3 4 5 6 7
ENTRY EXIT
CLOSED EMERGENCY
SELECTION
Cancelli Automatici
10
11
1
2
C1
Ri
M
R2
R1
2
F1 F2 ES ES TX RX GND 1 2 3 4 5 6 7
MF9011 - MF9111 MA7032
12345678
21 345678910O
N21 34O
N
RESET
APRE
MA7012 BUSSOLA MA7041
P.R.AP AP/PAR Z TCA V.RALL.CH V/CH V/A P P.R .CH FRENO V.RA LL.AP.
FUSIBILE
ACCESSORI
1,6A
-
+
M
N
E+
S
S
E -
-
BATT.
+
24AC
24AC
Anschluß Elektros
p
erre
MA 7012
Anschluß Funktionswahlschalter
MA 7041
C Nc 1 0 A2 C1 A1
A C
L1 L2
Stromversorgung
230V Wechselstrom
+
_
Batterien
+
_
12 V 1.2Ah 12 V 1.2Ah
Brücke für Batterien-Satz
MF9011-9111 MA7032
F1 F2 Es Es
2A-Sicherung 250V

23
REIHE CORSA
FÜR RAHMENTÜREN
Komplette Ausstattung für die befestigung von
gerahmten türflügeln, mit inneren
bodennführungsschienen (anzuwenden bei
MA7371/7471/7571)
MA 7351 L 1000 mm
MA 7451 L 1500 mm
MA 7551 L 2000 mm
Komplette Ausstattung für die befestigung von
gerahmten türflügeln, mit äusseren
bodenführungsschienen
MA 7371 L 1000 mm
MA 7471 L 1500 mm
MA 7571 L 2000 mm
FÜR GLASTÜREN (Stärke mindestens 10 mm)
ZUBEHÖR
SICHERHEITSZUBEHÖR
MF 9011 Photozellenpaar (Lichtschranken),
Reichweite 7 m
MF 9111 Doppel-Photozellenpaar (Licht-
schrankenparr), Reichweite 7 m.
MA 7012 Elektrosperre mit Entriegelungsseil
MA 7032 Antipanik-Sicherheitssystem mit
Pufferbatterie für Systeme CORSA
und RODEO
STEUERZUBEHÖR
MA 7041 Funktionswahlschalter
MR 8001 Schmalfeldradar
MR 8002 Breitfeldradar
MP 8030 empfindliches Trittbrett 800 mm x 300 mm
MP 8060 empfindliches Trittbrett 800 mm x 600 mm
MP 8104 Mikrowellen-Radar Reichweite max. 3 m
MP 8105 Mikrowellen-Radar Reichweite max. 5 m
MS 9502 auf Berührung reagierender Öffnungs-
Sensor
MR 8334-70-90 Sicherheits-Radar K4
MRT001 Fernbedienung für MR8104 e MR8105
AUSSERDEM SIND UNSERE SYSTEME S20 UND S40 FÜR DIE KOMPLETTE KONSTRUKTION VON
ALUMINIUMSCHIEBETÜREN, DIE EIGENS FÜR DIE VERWENDUNG MIT DER REIHE CORSA
ENTWICKELT WORDEN SIND, LIEFERBAR.
HINWEIS: Alle Profile für Konstruktion und Bewegung der Türflügel sind aus silbereloxiertem Aluminium
ANTI PANIK-TÜREINSTOßSYSTEM für:
MI 6010 1 mobiler Türflügel (L=1100 mm pro Türflügel)
MI 6110 1 mobiler Türflügel (L=1500 mm pro Türflügel)
MI 6020 2 mobile Türflügel (L=1100 mm pro Türflügel)
MI 6120 2 mobile Türflügel (L=1500 mm pro Türflügel)
MI 6030 1 mobiler Türflügel und 1 fester Türflügel (L=1100 mm pro Türflügel)
MI 6130 1 mobiler Türflügel und 1 fester Türflügel (L=1500 mm pro Türflügel)
MI 6040 2 mobile Türflügel und 2 feste Türflügel (L=1100 mm pro Türflügel)
MI 6140 2 mobile Türflügel und 2 feste Türflügel (L=1500 mm pro Türflügel)
Komplette Ausstattung für die befestigung von 10 mm-
kristallglastürflügeln, mit inneren
bodenführungsschienen (anzuwenden bei MA7370/
7470/7570)
MA 7353 L 1000 mm
MA 7453 L 1500 mm
MA 7553 L 2000 mm
Komplette Ausstattung für die befestigung von 10 mm-
kristallglastürflügeln, mit äusseren
bodenführungsschienen
MA 7370 L 1000 mm
MA 7470 L 1500 mm
MA 7570 L 2000 mm
MAM 600 Zentrale Dichtlippe für bewegliche
Glassegmente (Packung 30 m.)
MAM 601 Seitliche Dichtlippe für feste und bewegliche
Glassegmente (Packung 30 m.)

Tutti i dati sono stati controllati con la
massima cura. Non ci assumiamo co-
munque alcuna responsabilità per
eventuali errori od omissioni.
All data checked with the maximum care.
However, no liability is accepted for any error
or omission.
Toutes les données ont été contrôlées
très soigneusement. Nous n’assumons
de toute façon aucune responsabilité pour
les erreurs ou omissions éventuelles.
Die Daten wurden mit höchster Sorgfalt
geprüft. Für eventuelle Fehler oder
Auslassungen übernehmen wir keine
Haftung.
Todos los datos se han controlado con
la máxima atención. No obstante no nos
responsabilizamos de los posibles
errores u omisiones.
CANCELLI AUTOMATICI
CAME CANCELLI AUTOMATICI S.P.A.
DOSSON DI CASIER (TREVISO)
(+39) 0422 490960 (+39) 0422 490944
SISTEMA QUALITÀ
CERTIFICATO
ASSISTENZA TECNICA
NUMERO VERDE
800 295830
WEB
www.came.it
E-MAIL
info@came.it
KUNDENDIENSTSTELLE ANMERKUNGEN DATUM
MOGLICHE URSACHEN
AEs erfolgt keine Netzstromversorgung bzw. die Stromversorgung ist
nicht geeignet
BSchmelzsicherungen funktionieren nicht
CAnfangsprogrammierung - fehlt oder unangemessen
DFunktionswahl (mittels Funktionswahlschalter) nicht korrekt
EAnschlüsse falsch ausgeführt
FBrücke 1-2 fehlt
GKontakte 2-C1 ohne Sicherheitsvorrichtung bzw. nicht kurzgeschlossen
HSicherheitsphotozellen (Lichtschranken) nicht perfekt ausgerichtet bzw.
funktionieren nicht
JMotor falsch angeschlossen
K Encoder außer Funktion
IDip 3 (4-Weg-Model) muß gewählt werden
LAntipanik-Sicherheitssystem-Platine MA7032 außer Funktion
MBatterien erschöpft
NDip 2 (10-Weg-Modul) aktiviert (Funktion auf S. 18 kontrollieren)
OEinstellungen Laufverzögerung (Öffnen und Schließen) unangemessen
PEinstellungen Laufverzögerung Punkte (Öffnen und Schließen)
unangemessen
QEinstellungen der Geschwindigkeiten (Öffnen und Schließen)
unangemessen
REinstellungen TCA zu hoch
SHauptplatine ZP7 außer Betrieb
TMikroschalter auf Elektrosperre funktioniert nicht
ULaufschlitten-Elektrosperren-Bügel nicht korrekt positioniert
VReibung zwischen beweglichen Türsegmenten und festen Teilen (z.B.:
Türsegmente/Fußboden; feste Türsegmente/bewegliche Türsegmente;
bewegliche Türsegmente/Boden-Gleitschienenzubehör; Dichtungen/
feste Türsegmente)
WBewegung der Zugmechanismen gehemmt (z.B.: zwischen
Laufschlitten
und Verkabelung)
XEventuelle Rückstände/Gegenstände auf der Gleitschiene
YAntriebsriemen nicht korrekt gespannt
Zmechanische Endanschläge nicht korrekt positioniert
BEZUGSBUCHSTABE
A - B - C - D - E - F - J - K - N - S - T - U - V - X - Z
D - E - F - G - H - K - I - J - N - R - S - V - Z
C - D - K - O - P - Q - S - V - W - X - Y - Z
C - H - K - O - P - Q - S - V - W - X - Z
S - Q - W - V - X - Y
O - P - Q - S - V - W - X - Y - Z
E - S - T - U
E - G - H - I - S
E - J - S
D - L - M - N - V - W - X - Y
V - W - X - Y
BETRIEBSSTÖRUNGEN
- Der Antriebsmechanismus öffnet nicht.
- Der Antriebsmechanismus schließt nicht.
- Der Antriebsmechanismus öffnet nicht vollständig.
- Der Antriebsmechanismus schließt nicht vollständig.
- Der Antriebsmechanismus funktioniert nur mit reduzierter
Geschwindigkeit.
- Das Automatiksystem behält die
Anfangseiinstellungen nicht bei
- Die Elektrosperre ermöglicht keine Öffnung.
- Die Lichtschranken funktionieren nicht.
- Der Betrieb stimmt nicht mit der auf dem
Wahlschalter eingestellten Funktion überein.
- Das Antipanik-Sicherheitssystem funktioniert nicht.
- Starke Geräuschentwicklung des Antriebssystems.
IEHE AUCH "KONTROLLEUCHTEN-FUNKTION"

1
Documentazione
Tecnica
M70
rev. 3.4
08/2005
©
CAME
CANCELLI
AUTOMATICI
SERIE
CORSA
CANCELLI AUTOMATICI 119PM70
AUTOMATIZACIÓN PARA PUERTAS CORREDERAS
AUTOMATIZACION PARA PUERTAS CORREDERAS CON
SISTEMA DE MANDO Y CONTROL A MICROPROCESADOR
de hasta %# kg por puerta
ENTRYEXIT
CLOSED
EMERGENCY
SELECTION

PÁGINA DEJADA EN BLANCO INTENCIONALMENTE
PÁGINA DEJADA EN BLANCO INTENCIONALMENTE

¡ATENCIÓN!
Importantes instrucciones de seguridad:
¡LEER ATENTAMENTE!
Condiciones preliminares
• Este producto deberá destinarse sólo para el uso para el
cual ha sido expresamente fabricado. Cualquier uso diferente,
se debe considerar impropio y por lo tanto peligroso. CAME
cancelli automatici s.p.a. no se hace responsable por eventuales
daños causados debido a una utilización inadecuada, errónea o
desmedida • Conservar estas advertencias junto a los manuales
de instalación y utilización de los componentes de la instalación
de automatización.
Antes de la instalación
(verifi cación preliminar de la instalación: en caso de
resultado negativo, no proceder sin haber cumplido
previamente las condiciones de puesta en seguridad)
• Controlar que la parte a automatizar esté en buen estado
mecánico, balanceada y alineada y que se abra y cierre co-
rrectamente. Verifi car además que existan adecuados bloqueos
mecánicos de parada • Si la automatización debe instalarse a
una altura inferior de 2,5 m desde el pavimento o desde otro
nivel de acceso, verifi car si se necesitan eventuales protecciones
y/o advertencias • En caso que existan aperturas peatonales en
las hojas a automatizar, debe existir un sistema de bloqueo de
la apertura durante el movimiento • Cerciorarse que la apertura
de la hoja automatizada no provoque situaciones de entrampado
con las partes fi jas circunstantes • No montar la automatización
al revés o en elementos que pudieran plegarse. Si es necesario,
agregar adecuados refuerzos en los puntos de fi jación • No ins-
talar en hojas colocadas en subidas o en bajada (que no estén
sobre un plano) • Controlar que los eventuales dispositivos de
riego no mojen el motorreductor de abajo hacia arriba.
Instalación
• Señalar y delimitar adecuadamente toda la obra para evitar
accesos imprudentes por parte de personas no pertinentes a
los trabajos, especialmente niños • Prestar mucha atención a
la manipulación de automatizaciones con un peso superior de
20 kg (véase manual de instalación). En dicho caso, utilizar ins-
trumentos idóneos para su movimiento en condiciones seguras
• Todos los mandos de apertura (botones, selectores de llave,
lectores magnéticos, etc.) deben instalarse a una distancia de
1,85 m como mínimo desde el perímetro del área de maniobra
de la cancela, o bien donde no puedan alcanzarse desde afuera
de la cancela. Además los mandos directos (de botón, de mem-
brana, etc.) deben instalarse a una altura mínima de 1,5 m y
no deben ser accesibles al público • Todos los mandos en la
modalidad “acción mantenida”, deben ponerse en sitios desde
los cuales sean completamente visibles las hojas en movimiento
y las relativas áreas de tránsito o maniobra • Aplicar donde falte,
una etiqueta permanente que indique la posición del dispositivo
de desbloqueo • Antes de la entrega al usuario, verifi car la con-
formidad de la instalación a la norma EN 12453 (pruebas de
impacto), cerciorarse que la automatización haya sido regulada
adecuadamente y que los dispositivos de seguridad y protección
y el desbloqueo manual funcionen correctamente • Aplicar don-
de sea necesario y en forma visible los Símbolos de Advertencias
(ej. placa cancela).
Instrucciones y recomendaciones particulares
para los usuarios
• Mantener limpia y sin obstrucciones las zonas de maniobra de
la cancela. Mantener limpio de vegetación el radio de acción de
las fotocélulas • No permitir a los niños jugar con los dispositivos
de mando fi jos o en las zonas de maniobra de la cancela. Tener
fuera del alcance de los mismos los dispositivos de mando a
distancia (emisores) • Controlar frecuentemente la instalación
para verifi car eventuales anomalías y desgastes o daños a las
estructuras móviles, a los componentes de la automatización,
a todos los puntos y dispositivos de fi jación, a los cables y a las
conexiones accesibles. Mantener lubricados y limpios los puntos
de articulación (goznes) y de rozamiento (guías de deslizamiento)
• Efectuar controles funcionales a fotocélulas y bordes sensibles
cada seis meses. Cerciorarse que los cristales de las fotocélulas
estén limpios (utilizar un paño ligeramente húmedo; no utilizar
solventes u otros productos químicos) • Si fuese necesario
efectuar reparaciones o modifi caciones a las regulaciones de la
instalación, desbloquear la automatización y no utilizarla hasta
que no se restablezcan las condiciones de seguridad • Quitar la
alimentación eléctrica antes de desbloquear la automatización
para aperturas manuales. Consultar las instrucciones • SE
PROHIBE al usuario efectuar OPERACIONES NO REQUERIDAS
EXPRESAMENTE AL MISMO E INDICADAS en los manuales.
Por reparaciones, modifi caciones a las regulaciones o para
operaciones de mantenimiento extraordinario, DIRIGIRSE A LA
ASISTENCIA TÉCNICA • Anotar la ejecución de las verifi cacio-
nes en el registro de mantenimiento periódico.
Instrucciones y recomendaciones particulares
para todos en general
• Evitar operar cerca de goznes u órganos mecánicos en mo-
vimiento • No entrar en el radio de acción de la automatización
mientras está en movimiento • No oponerse al movimiento de
la automatización porqué se podrían crear situaciones de pe-
ligro • Prestar mucha atención a los puntos peligrosos. Estos
deberán estar señalados por los relativos pictogramas y/o
bandas amarillos-.negras • Durante la utilización de un selector
o de un mando en la modalidad “acción mantenida”, controlar
continuamente que no haya personas en el radio de acción de
la partes en movimiento hasta que no se suelte el mando • ¡La
cancela puede moverse en cualquier momento! • Quitar siempre
la alimentación eléctrica durante las operaciones de limpieza o
de mantenimiento.

PÁGINA DEJADA EN BLANCO INTENCIONALMENTE
PÁGINA DEJADA EN BLANCO INTENCIONALMENTE


2
SERIE CORSA
CARACTERISTICAS GENERALES
Las dimensiones fundamentales necesarias para la fabricación de un automatismo CAME para entradas
automáticas son la anchura A de la puerta (o del total de las dos puertas) y la longitud total T de la viga de
alojamiento del automatismo; la relación entre las dos dimensiones es la siguiente:
T = A x 2 + 20 mm
AUTOMATISMO PARA
ENTRADA A 2 PUERTAS
** En el pedido, indicar siempre el
sentido de apertura de la puerta
(véase ficha pedido)
AUTOMATISMO PARA ENTRADA
A 1 PUERTA**
DIMENSIONES COMPLEMENTARIAS
Vp= Vano de paso
s = Sobreposición entre puerta/as móvil/es y partes
fijas (trabajos de albañilería y/o puertas fijas)
DIMENSIONES BASICAS
T = Longitud total de la viga
A = Anchura total de las puertas con juntas
(1)
A
TENCIÓN
!
En el caso de uso de nuestros perfiles serie 20 y serie
40 para la construcción de las puertas, el cálculo de
las dimensiones puede ser diferente del indicado.
Véase la documentación correspondiente.
M
ssVp
A
T
M
ssVp
A
T
CALCULO DE LAS DIMENSIONES(1)
Descripción:
Sistema para la apertura automática
de puertas de corredera.
Diseñado y fabricado completamente
por CAME CANCELLI AUTOMATICI
S.p.A., con grado de protección IP40.
Garantía 12 meses salvo
modificaciones del equipo
Modelos:
-CORSA 1, motorreductor reversible a
24V con cuadro eléctrico incorporado.
Automación para entradas de 1 hoja de
hasta 3300 mm con peso máx. 75 Kg.
-CORSA 2, motorreductor reversible a
24V con cuadro eléctrico incorporado.
Automación para entradas de 2 hojas
de hasta 3300 mm con peso máx. 75
Kg por hoja.
Accesorios a encargo:
-MA7012 Bloqueo eléctrico;
-MA7032 Sistema antipánico de
batería;
-MA7041 Selector de las funciones;
-MS9502 Interruttore a sfioramento;
-MF9011/9111 Fotocélulas de mando
y de seguridad;
-MR8001/8002 Radar de rayos
infrarrojos;
- MR8104/8105 Radar de microondas;
-MR8334-70-90 Sensor de seguridad
de infrarrojos;
-MP8030/8060 Plataformas sensibles.
- MRT001 Telemando por MR8104 e
MR8105
Comprobar que los equipos de mando, de seguridad y los acesorios sean originales CAME; lo cual garantiza y facilita el uso y el mantenimiento del aparato.
(1) A pedido, posibilidad de alimentar la automatización con otra tensión.
(2) Service intensif.
EHCINCETSACINCETSACITSIRETCARAC
.TNEMILA AICNEUCERF ETNEIRROC AMIXAM ROTOM
ETNEIRROC ELANIMON XAMAICNETOP ADIBROSBA AICNETIMRETNI OJABART OPIT NOICCART AZREUF AMIXAM EDDADICOLEV ARUTREPA ARUTAREPMET OICICREJEED
.c.aV032 .c.aV42 zH06/05A6)V032( A6,0 W07nóicazitamotuA W02soiroseccA
aerroca adatned M8DTH gK5 1asroCs/mc75 2asroCs/mc201 °07+<°02-
12

3
SERIE CORSA
20
70
250 x
n°
Pasos
250250250250
T = Longitud de la viga
lado derecho/vista interna
=
punto de salida del
taladrado por paso
DIMENSIONES CAJAS CUBRE-PERFILES
24
75
A
300
126
29±6
151
30±0,5
85±0,513±6
18
169
69
TRAVESAÑO CON
CAJA CUBRE-
PERFIL SERIE
001LC00 Y
TAPONES LTC
El sistema cubre-perfil
Serie 001LD00 tiene
tapones laterales
LTD de ABS y
estribos de bisagras
que permiten soste-
ner el cubre-perfil
abierto.
A
A
Sez. A-A
Respete las medidas
del espacio necesario
para la apertura del
cubre-perfil y la
medida (A) para el
desenganche del
perfil en posición de
apertura máxima,
alrededor de 2 cm.
+
1
2
151
195
30±0,5
85±0,5
29±6
135
13±6
73
44
Taladros hechos para la fijación del perfil
TRAVESAÑO CON
CAJA CUBRE-
PERFIL SERIE
001DC00 Y
TAPONES LTD

4
SERIE CORSA ESQUEMAS PUERTAS DE CRISTAL
V =
H - 22 mm
Y - 40 mm
V =
H - 70 mm
Y - 88 mm
10
10
PATÍN GUÍA
INTERNA
TAPONES
PARA
CENTRADO
DEL VIDRIO
PERFIL-GUÍA
INFERIOR
PATÍN GUÍA
EXTERNA
V
SOLUCIÓN PUERTA
DE CRISTAL SIN
ZOCCOLO INFERIOR
SOLUCIÓN PUERTA
DE CRISTAL CON
ZOCCOLO INFERIOR
PERFIL DE SOPORTE
H
V
Y
10
13±6
29±6
Y = altura de fijado viga
= H + 18 mm
H = altura paso útil
V = altura cristal
16
20
80
3417.5
2021.5
ø 4.8
18
40
1622
17
53
70
PERFIL-ENGANCHE
CRISTAL

5
SERIE CORSA
ø 16
ø 8.5
32
18
101
100 min. 300 100
101
ESQUEMAS PUERTAS DE CRISTAL
PUERTA/S DE CRISTAL SIN
ZOCALO INFERIOR
COTAS DE TALADRO PARA CRISTAL Y TRAVESANO SUPERIOR
PUERTA/S CRISTAL CON
ZOCALO INFERIOR
Perfil
L puerta - 2 mm
L puerta
Cristal (max 10 mm)
MA 7370 = L 1000 mm
MA 7470 = L 1500 mm
MA 7570 = L 2000 mm
MA 7353 = L 1000 mm
MA 7453 = L 1500 mm
MA 7553 = L 2000 mm
MA 7370 = L 1000 mm
MA 7470 = L 1500 mm
MA 7570 = L 2000 mm
L
L
L
L

6
SERIE CORSA
ESQUEMAS PUERTAS ARMADAS
PATÍN GUÍA
EXTERNA PATÍN GUÍA
INTERNA
I
10
30
I =
H - 28 mm
Y - 46 mm
I =
H - 48 mm
Y - 66 mm
I =
H - 28 mm
Y - 46 mm
I
10
SOLUCIÓN PUERTA
ARMADA CON PERFIL-
GUÍA INFERIOR
INTRODUCIDO
INTERNAMENTE
PERFIL - ENGANCHE
CON ARMADAS
PERFIL-GUÍA
INFERIOR
20
2
20
4718 11
40
4.5 10 8 4
26.5
Y = altura de fijado viga
= H + 18 mm
H = altura paso útil
I = altura de la puerta armada
SOLUCIÓN PUERTA
ARMADA CON PERFIL-
GUÍA INFERIOR
INTRODUCIDO
EXTERNAMENTE
Y
I
10
H
13±6
29±6
SOLUCIÓN PUERTA
ARMADA SIN PERFIL-
GUÍA INFERIOR

7
SERIE CORSA
ESQUEMAS PUERTAS ARMADAS
PUERTA/S ARMADA SIN
PERFIL GUIA INFERIOR
PUERTA/S ARMADA CON
PERFIL GUIA INFERIOR
L
L
MA 7371= L 1000 mm
MA 7471= L 1500 mm
MA 7571= L 2000 mm
MA 7351 = L 1000 mm
MA 7451 = L 1500 mm
MA 7551 = L 2000 mm
MA 7371= L 1000 mm
MA 7471= L 1500 mm
MA 7571= L 2000 mm

8
SERIE CORSA MONTAJE VIGA
3) Taladrar el perfil coincidiendo con los cables de alimentación y de
conexión de los sensores (fotocélulas radar).
4) Centrar la automatización respecto al vano de paso
5) Fijar la l'automatización a la estructura utilizando los taladros ya
efectuados y comprobar que el alineado horizontal (nivelación) sea
correcto.
2 b) Aflojar las tuercas de
los rodillos “anti-derrape”
dejándolos bajar;
1) Extraer, si la hubiera, la caja cubre perfil (suministrado a encargo)
2) Extraer del perfil de soporte los carros de la siguiente manera:
2 a) Actuando en los tornillos
de fijación, separar del estribo
de anclaje los carros unidos a
la correa;
2 c) Levantar los carros lo que fuera
necesaro para extraerlos de la guía
de deslizamiento;
CARRO CON ANCLAJE
PARA CORREA SUPERIOR
CARRO CON ANCLAJE
PARA CORREA INFERIOR

9
SERIE CORSA
MONTAJE PUERTAS
modelo CORSA 1 (puerta individual) con apertura a
LA DCHA
con apertura a
LA IZDA
NONO
NONO
NO
ENEN
ENEN
EN
CONTACTOCONTACTO
CONTACTOCONTACTO
CONTACTO
120120
120120
120 150150
150150
150
110110
110110
110
8585
8585
85
8585
8585
85 110110
110110
110 110110
110110
110
110110
110110
110
130 130
130 130
130 CON BLOQUEO ELÉCTRICO
modelo CORSA 2 (puerta doble)
1) Fijar los carros a las puertas según el esquema siguiente:
2) Levantar las puertas y
colocarlas correctamente en
la guía de deslizamiento;
4) Volver a unir los carros a los
anclajes a correa correspondientes;
3) Levantar y fijar los
rodillos anti-derrape, sin
forzar, contra el perfil;

10
SERIE CORSA
+6 mm
- 6 mm
10
+6 mm
- 6 mm
13
4
+4 mm
- 4 mm
44
AJUSTES MECANICOS
DD
DD
D
BB
BB
B
CC
CC
C
AA
AA
A
EE
EE
E
Mediante los carros es posible realizar los
siguientes ajustes en los alineados de las
puertas:
- ajuste vertical RV, con pernos A y B
- ajuste transversal RT, con pernos C
- ajuste horizontal RO, con pernos D y E

11
SERIE CORSA
AJUSTES MECANICOS
AJUSTE VERTICAL RV
Para obtener un correcto alineado vertical de las
puertas, actuar en los carros en movimiento:
- Desenroscar los tornillos A.
- Girar el tornillo de ajuste vertical B hasta obtener la
máxima perpendicularidad de la/s puerta/s. En el caso
de automatización con dos puertas deslizantes, ajustar
de forma que las puertas se acerquen sin separación
entre ellas).
- Una vez terminado el ajuste, enroscar los tornillos A
y comprobar, moviendo manualmente la puerta, que
no haya roce entre puerta/s móvil y el suelo a lo largo
de toda la línea de movimiento.
En el caso de que sea necesario, es posible levantar
integralmente la puerta, ajustando ambos carros.
AJUSTE HORIZONTAL RO
(sólo para Corsa 2)
Para obtener un ajuste fino (± 4
mm) del punto de encuentro de
las dos puertas, desenroscar
los pernos D y desplazar las
dos puertas juntas.
Para un alineado superior es
preciso soltar el enganche a la
correa desenroscando los
pernos E.
Una vez terminado el ajuste,
volver a bloquear los pernos.
AJUSTE TRANSVERSAL RT
El plano vertical de las ruedas de deslizamiento de los carros debe estar siempre paralelo a la viga
por lo tanto, en el caso de que se verificara una falta de
alineado (p.ej.: deslizamiento difícil), actuar de la siguiente
manera:
- Desenroscar el conjunto de pernos C.
- Alinear los carros a la guía de deslizamiento (p.ej.:
midiendo la distancia Q entre el cuerpo del carro y el
perfil de la viga);
- Fijar y comprobar, moviendo manualmente la puerta,
que no haya roce entre puerta/s móvil y partes/puertas
fijas a lo lar-
go de toda
la línea de
movimiento.
- Enroscar
con cuidado
los pernos de
anclaje de los
carros.
Guida di scorrimento
Profilo trave
Anta

12
SERIE CORSA
Tornillo fijación
AJUSTES MECANICOS
Tornillo fijación
AJUSTE TENSION DE LA
CORREA
En el caso de que fuera
necesario, ajustar la
tensión de la correa me-
diante el grupo polea de
renvío:
1) Desenroscar los
tornillos de fijación de la
polea.
2) Girar el tornillo de
ajuste para obtener la
correcta tensión de la
correa.
3) Enroscar con cuidado
los tornillos de fijación de
manera que se manten-
ga la tensión correcta.
Tornillos fijación poleaTornillo ajuste tensión
ESTRIBO ANTI-VIBRACION CAJA DE CIERRE
Limita las oscilaciones y la deformación longitudinal de la
caja (opcional) de cierre. Hasta los 2,80 m de altura se
aconseja montar un estribo; en el caso de que la viga supere
dicha medida, se aconseja montar los dos estribos. Si fuera
necesario, deformarlo manualmente.
COLOCACION TOPES
MECANICOS Y ESTRIBOS
ANTI-VIBRACIONES
AJUSTE TOPES MECANICOS
Los topes mecánicos sirven para determinar y regular la
apertura de las puertas, impidiendo que se supere la
carrera.
Para colocarlos en posición correcta, actuar en el tornillo
de fijación.
Nota: Un correcto alojamiento y fijado de los topes
mecánicos no daña la guía de deslizamiento permitiendo
los ajustes que fueran necesarios.

13
SERIE CORSA
AJUSTES MECANICOS
Tornillo fijación
soporte correa
OPORTE CORREA
El soporte correa es el dispositivo para el control de las vibraciones de la correa. Se instala
en el centro de los automatismos a dos puertas con perfil de soporte superior a los 3020
mm. Si fuera necesario, deformarlo manualmente.
Nota: comprobar que durante el funcionamiento el soporte correa no obstaculice las
partes en movimiento.
COMPROBACION DEL MONTAJE
Una vez terminado el montaje de la viga y de los ajustes
mecánicos, comprobar siempre que:
_ no queden residuos de elaboración en la guía de
deslizamiento que puedan producir daño a la misma y/o a
las ruedas de los carros;
_ no queden objetos extraños y/o útiles de trabajo en el
interior de la viga;
_ haya sido efectuado el correcto alineado de las puertas y
colocados los topes mecánicos, como indicado arriba.
A este fin, efectuar algunas operaciones de apertura y cierre
manuales, actuando directamente en las puertas antes de
accionar eléctricamente la automatomatización.

14
SERIE CORSA
10
11
1
2
C1
Ri
M
R2
R1
2
F1 F2 ES ES TX RX GND 1 2 3 4 5 6 7
MF9011 - MF9111 MA7032
12345678
21 345678910O
N2134O
N
RESET
APRE
MA7012 BUSSOLA MA7041
P.R.AP AP/PARZ TCA V.RALL.CH V/CH V/AP P.R.CH FRE NO V.RALL.AP .
FUSIBILE
ACCESSORI
1,6A
-
+
M
N
E+
S
S
E -
-
BATT.
+
24AC
24AC
CAJA DE BORNES CONEXIÓN
ACCESORIOS
CAJA DE BORNES CONEXIÓN MOTOR
ENCODER-BATERÍAS-ALIM.24V
LEDS DE CONTROL
FUSIBLE ACCESORIOS
1.6A RÁPIDO TECLA REACTIVACIÓN
DIP-SWITCH SELECCIÓN
TRIMMERS DE REGULACIÓN
CONEXIÓN TARJETA FOTOCÉLULA
MF9011-9111
CONEXIÓN TARJETA ANTIPÁNICO MA7032
CONEXIÓN BLOQUEO ELÈCTRICO
MA7012
CONEXIÓN SISTEMA CASQUILLO
CONEXIÓN SELECTOR FUNCIONES MA7041
CUADRO ELECTRICO ZP7
TECLA ABRIR
CAJA DE BORNES CONEXION ACCESORIOS
10 - 11 Alimentación accesorios a 24V a.c./d.c.
1- 2 Tecla Parada, contacto normalmente cierre (N.C.)
2- C1Conexión fotocélulas, reapertura durante el cierre (N.C.)
2- RiContacto normalmente abierto (N.O.) sensor central
interbloqueo (sólo con casquillo)
2- R1Contacto normalmente abierto (N.O.) sensor externo
(excluible)
2- R2Contacto normalmente abierto (N.O.) sensor interno
2- M Mando "paso-paso" (tecla manual), contacto
normalmente abierto (N.O.).
- Los contactos 1-2 y 2-C1 son de tipo (N.C.) y puenteados al origen. Para la utilización de estas funciones, sostituir
los puentes con los dispositivos correspondientes.
- El contacto 2-C1 se utiliza cuando se desea instalar un sistema de seguridad (p. ej. fotocélulas u otro dispositivo
de control), que no pueda alojarse en el asiento con empalme. Nota: Si no se instala la placa fotocélula MA9011/9111
o si, habiéndose instalado, se desea desactivarla, situar el dip 3 en ON (módulo de 4 vías).
- El contacto 2-M es del tipo normalmente abierto (N.O.) y desempeña dos funciones:
1) Durante el funcionamiento normal está habilitado para la apertura, aunque el selector de funciones MA7041 se
encuentre en la posición de «puertas cerradas «. Esta función puede utilizarse para un pasaje de preferencia (p. ej.
cierre nocturno, mando de apertura en selectores de llave o magnéticos).
2) Situando el dip 5 en ON (módulo de 10 vías) se obtiene la función de apertura «paso a paso» (oprimiendo el
pulsador la hoja se abre, al oprimirlo de nuevo se cierra). Atención, utilizando esta función los contactos 2-R1 y 2-
R2 se inhabilitan.
10
11
1
2
C1
Ri
M
R2
R1
2
F1 F2 ES ES
MA7012
P.R.AP
-
+
+
-
CAJA DE BORNES DE CONEXIÓN LA ALIMENTACIÓN
24V Alimentación del motorreductor (preajustado)
Conexión a tierra
230V Alimentación de línea (50/60 Hz)
Fusible de línea de 2A
(mirar pág. 22)
230V
24V

15
SERIE CORSA
CUADRO ELECTRICO ZP7
II
II
IMPORTANTE:
Toda operación de conexión/cableado o sustitución tarjetas, se efectúa exclusivamente después de
desconectar la tensión de red y el polo “+” (rojo) de la batería del sistema antipánico si la hubiera.
MA7032
678
2134O
N
RESET
APRE
Tecla RESET, restablece los datos y pone en marcha la automatiza-
ción en el modo comprobación.
Tecla APRE, ordena un ciclo de apertura de la automatización.
Atención: la función de la tecla apre se inhabilita si el dip 5 (módulo
de 10 vías) se encuentra en ON.
MF9011 - MF9111
1
O
N
P.R.AP AP/PARZ TCA V.RALL.CH V/CH V/AP P.R.CH FRENO V.RALL.AP.
-
+
1 3 1 1 15 1 17 19
2 4 6 8
AJUSTE TRIMMERS
AJUSTE TRIMMERS
N° 1 2 3 4 5 6 7 8 9
FONCION
PUNTO DE
INICIO
DECELERA-
CIÓN
APERTURA
APERTURA
PARCIAL
CIERRE
AUTOMÁ-
TICO
VELOCIDAD
DE
RALENTA-
MIENTO EN
CIERRE
VELOCIDAD DE
CIERRE
VELOCIDAD DE
APERTURA
PUNTO DE
INICIO
DECELERA-
CIÓN
CIERRE
INTENSIDAD DE
FRENADO EN
LA FASE INICIAL
DE
DECELERACIÓN
VELOCIDAD
DE
RALENTA-
MIENTO EN
APERTURA
MEDIDA PUNTO DE
INICIO 60 ÷ 90 % 0.5 ÷ 13
SEC.
5 ÷ 12
CM/SEC.
CORSA 1
8,6÷57
CM/SEC.
CORSA 2
17,2÷102
CM/SEC.
CORSA 1
8,6÷57
CM/SEC.
CORSA 2
17,2÷102
CM/SEC.
PUNTO DE
INICIO .................. 5 ÷ 12
CM/SEC.

16
SERIE CORSA SELECCION FUNCIONES
LL
LL
LED ESTADO SEÑAL
1 parpadea -Encoder fuera de uso
1 encendido -Encoder fuera de uso
2(*) -batería antipánico descargada
3 encendido -alimentación 24V a.c. presente
4 encendido -contacto fotocélula abierto
5 encendido -función interbloqueo presente (ver "aplicación casquillo")
6 encendido -anomalía funcionamiento bloqueo eléctrico
7 encendido -sensor amperométrico en funcionamiento
8 parpadea -cierre automático en funcionamiento
8 parpadea -error de lectura durante el tarado
6/7/8 encendidos -fase de tarado terminada
(*) en este caso, la señal del led permanece encendida indicando que las baterías antipánico están agotadas sólo
si el control del estado de las baterías de emergencia está desactivado (dip 2 de 10 vías en OFF), mientras parpadea
si el control de las baterías está activado (dip 2 de 10 vías en ON).
12345678
IBILE
FUNCIONES LED DE CONTROL
saív01apiD ADATILIBAHNÓICNUF
1NO .)71.gápametsisnoicavitcarev(nóicaziromeM
2NO .)81.gáprev,2307AMnoc(aicnegremeedsaíretabodatselortnoC
3- »FFO«nóicisopnepidleagnetnam,azilituesoN
4NO erreicneetnatsnocejupmE
5NO .)41.gáp,M-2otcatnocrev("osap-osap"odnaM
6NO .)02.gáp"olliuqsacóicacilpa"rev(nóicazitamotuaartonocoeuqolbretnI
8/7 NO .)91.gáprev(ocirtcéleoeuqolbotneimanoicnufeyulcxE
7
8NO FFO 91.gáprev)sadarrecosatreibasatreupedoeuqolbarap(ounitnocoicivresneocirtcéleoeuqolB
7
8FFO NO 91.gáprev)sadarrecsatreupedoeuqolbarap(ounitnocoicivresneocirtcéleoeuqolB
8/7 FFO )91.gáprev,1407AMsenoicnufrotcelesropodalortnoc(odahcnagnesedocirtcéleoeuqolB
01/9 NO )81.gáprev(arreicocinápitnA
9
01 FFO NO )81.gáprev(erbaocinápitnA
01/9 FFO )81.gáprev(nópmatanóicatnemilA
saíV4apiD ADATILIBAHNÓICNOF
1NO rotceles,erreicneetnatsnocejupmeNOne4idlerautis(acitsáleagracnococinápitnanóicavitcA .)91.gáprev,pid01nocsenoicnufed
2 - .»FFO«nóicisopnepidleagnetnam,azzilituesoN
3NO edordaucleneadalatsni1119FMo1109FMatejrat(salulécotofsalednóicnufaladatilibahnI .)22.gáp,odnam
4 - .»FFO«nóicisopnepidleagnetnam,azzilituesoN

17
SERIE CORSA
ACTIVACION SISTEMA
COMPROBACIONES PRELIMINARES
Antes del accionamiento comprobar que:
"el bloqueo eléctrico (si presente) esté desbloqueado manualmente,
"haya una correcta puesta en tensión de la correa (pág.12),
"se hayan cumplido las condiciones descritas en la pág.13 (Comprobación montaje),
"no haya objetos en el recorrido de las puertas,
"todos los tornillos estén correctamente bloqueados,
"los sensores estén correctamente alineados y no obstruidos,
"las funciones deseadas estén correctamente seleccionadas en los dip-switch (pág. 16),
"los trimers estén ajustados en la posición central (pág. 15).
PUESTA EN MARCHA / TARADO
1. Dar tensión al aparato
- encendido del LED n.° 3.
2. Seleccionar el dip-switch 1 en la posición ON
- apagado del LED n° 3 y encendido del LED n° 8
- empienza una maniobra de cierre y de apertura, a velocidad reducida, después de la cual la
automatización se colocará en el punto de máxima apertura(1)
- encendido de los LEDS n.° 6, 7 y 8.
3. Seleccionar el dip-switch 1 en la posición OFF
- apagado de los LEDS n.° 6, 7 y 8 y ecendido del LED n.° 3.
4. Comprobar, si estuviera presente, que en el selector MA7041 esté seleccionada una función de
apertura (con LED encendidos consecutivamente).
5. Ordenar un accionamiento "abrir" en 2-R1/2-R2 o aprimiendo la tecla "APRE" (ver pág.15)
- la automatización se situará en el punto de cierre.
6. Dar un impulso de apertura
- la automatización efectuará una maniobra completa.
7. Realizar un ajuste completo del movimiento de las hojas mediante trimmer (ver pág.15)
8. Seleccionar, en el trimmer 3, el tiempo de cierre automático más adecuado.
9. El trimmer 2 puede ser regulado sólo si está presente el dispositivo de selección de funciones MA7041,
en el cual debe haber sido seleccionada anteriormente la apertura parcial.
10. Volver a habilitar, si estuviera presente, el bloqueo eléctrico a través de la palanca del dispositivo de
desbloqueo manual.
(1)
si la automatización se para en la fase de cierre, es posible que las polaridades del motor estén invertidas;
en este caso actuar de la siguiente manera;
- quitar tensión
- llevar el dip-switch 1 a la posición OFF
- invertir las polaridades M-N en la caja de bornes motor (a la dcha.) del cuadro
- volver a empezar desde el punto 1.
Trasformación del sentido de apertura (Corsa 1)
- Con la puerta parada, invertir las polaridades del motor en los bornes M-N en la caja de bornes dcha. del cuadro
de mando;
- Realinear, si estuviera presente, el bloqueo eléctrico MA7012
- Pulsar la tecla RESET en el cuadro de mando (reactiva la automatización en comprobación)
- Poner en marcha (o volver a poner en marcha) la automatización como se indica en el capítulo específico.
FUNCIONES DE SEGURIDAD - Comportamiento de la automatización
Cuando el sensor de seguridad detecta un obstáculo el microprocesador ordena:
una re-apertura, si la automatización se está cerrando;
una parada, si la automatización se está abriendo. Cerrará tras el cálculo de cierre automático.
Si el ostáculo persiste,
en cierre, la automatización efectúa de modo autónomo 4 maniobras intentando el cierre y
luego se para en apertura, en espera de un nuevo mando;
en apertura, la automatización se para apoyada en el obstáculo, volviendo a cerrar en el
momento de la intervención del TCA; repite el control de cada mando de
apertura y se reajusta con la maniobra siguiente tras eliminar el obstáculo.
(en los dos casos, una vez eliminado el obstáculo, se restablece automáticamente el funcionamiento tarado).

18
SERIE CORSA ACCESORIOS ANADIBLES (a encargo)
MA7032 - Antipánico a batería
Dispositivo de apertura de emergencia en caso de falta de tensión de línea, compuesto por una pareja de
baterías de 12V por 1,2Ah y de una tarjeta eléctrica que asegura la recarga constante de la misma y la mejor
distribución del potencial al sistema.
En el cuadro de mando, a través de los dip-switch 9 y 10 (módulo de 10 vías), se pueden programar los
siguientes tipos de funcionamiento del dispositivo en el momento de la caída de la tensión de línea.
Nota: En el caso de funcionamiento interbloqueado (ver pág.20), las funciones siguientes están seleccionadas
igualmente en ambas automatizaciones.
12345678910
12345678910
12345678910
9 OFF Sólo apertura. Las puertas se abren y permanecen
10 ON abiertas hasta que se restablezca la tensión de la
línea. Lo mismo ocurre si el selector de funciones
MA7041 se encuentra en la posición “puertas
cerradas”.
9ON Sólo cierre. Las puertas se cierran y permanencen
10 ON cerradas, incluso si se ha seleccionado "puertas
abiertas" en MA7041, hasta que vuelve la tensión.
9 OFF Funcionamiento normal. Las puertas siguen fun-
10 OFF cionando hasta que la tensión de las baterías llegue
por debajo del nivel de seguridad, en este caso las
puertas se cierran. Si el selector de funciones MA
7041 se encuentra en la posición “puertas cerradas”,
las puertas pueden abrirse sólo dando un mando en
el contacto 2-M.
12345678910
Antipánico con control constante de las baterías
Situando en ON el dip switch 2 del módulo de 10 vías (en el sistema
interbloqueo, situarlo en ambos cuadros), se activa el control constante
de la carga de la baterías tampón que en condiciones de funcionamiento
normal, sólo con tensión de la línea “230V”, comprueba el límite mínimo de
carga de las baterías “20V” y, al llegar la carga por debajo de dicho límite
(en el sistema interbloqueo la tensión de las baterías de una de las dos automatizaciones), activa un
procedimiento de seguridad. Este procedimiento causa la apertura o el cierre de las puertas (dependiendo de
las selecciones de los dip 9 y 10). Mientras en la situación de interbloqueo el procedimiento de seguridad
(indicada por un parpadeo continuo del LED n°2 presente en el cuadro MASTER) causa la apertura de ambas
automatizaciones. Tra el restablecimiento de las baterías, el led se apaga y el funcionamento reanudarà
normalmente tras un mando de apertura.
NOTA: En caso de instalación de una automatización única, la activación del control de las baterías desactiva
el funcionamiento normal (dip 9OFF - 10OFF).
Si está presente MA7041, comprobar que esté activada la función "EMERGENCY", señalada por el LED
amarillo encendido e intermitente.
En cualquier caso, cuando vuelva la tensión, se reactivará el funcionamiento de la puerta antes de la caída de
tensión.
Nota: si no está conectado el selector MA7041 pero
se quiere obtener la función antipánico, conectar en
derivación los contactos 1-3 como se indica en la
figura.
1 2 3 4 5 6 7
R
XGND 1 2 3 4 5 6 7
MF9011 - MF9111
S
SOLA MA7041

19
SERIE CORSA
ACCESORIOS ANADIBLES (a encargo)
MA7012 - Bloqueo eléctrico
Dispositivo de bloqueo electromecánico de las puertas, con desenganche eléctrico y enganche mecánico por
caída.Bloquea la puerta/s en posición cerrada (y/o en posición abierta) enganchando un estribo fijado a un
carro.
En el cuadro de mando, por medio de los dip-switch 7 y 8 (módulo de 4 vías) se pueden programar los
siguientes tipos de funcionamiento de bloqueo electrónico.
7 ON Desactivado. Regulación con dispositivo no presente.
8 ON
7 OFF Bloqueo con puertas cerradas. Es el funcionamiento
8 ON normal: se engancha en cada cierre y se desbloquea
eléctricamente cada vez que se ordena la apertura. Es
la regulación por defecto.
7 ON Bloqueo a puertas cerradas y abiertas. Engancha
8 OFF tanto en el cierre como en la apertura (oportunamente
colocado (1)) y se desbloquea eléctricamente cada vez
vez que se ordenan la apertura y el cierre.
7 OFF Bloqueo eliminado. Se desbloquea con el primer
8 OFF accionamiento “abre” después de la activación o de
volver a dar tensión o seleccionando “puertas abiertas”
en MA7041. Se bloquea seleccionando “puertas cerradas"
o "sólo salida" en MA7041.
1234
MI1010 - Antipánico con carga elástica
Dispositivo mecánico de apertura de las hojas, formado por un sistema elástico de accionamiento ante un fallo
de tensión de la línea. Si está instalado este dispositivo hay que plantear los dip-switch como se indica a
continuación.
12345678910
4 ON Activación empuje constante en cierre
(dip 10 vías)
1 ON Activación antipánico con carga elástica
(dip 4 vías)
12345678910
12345678910
12345678910
DIP SWITCH
A 10 VÍAS DIP SWITCH
A 4 VÍAS
12345678910

20
SERIE CORSA
F1 F2 Es Es
1
0
11
1
2
C
1
Ri
M
R2
R1
2
M
N
E+
S
S
E -
-
BATT
.
+
24A
C
24A
C
ENTR Y EX IT
CLOS ED EME RG EN CY
SEL ECT IO N
Cancel li Automatici
!
$
#
1
0
11
1
2
C
1
Ri
M
R2
R1
2
M
N
E+
S
S
E -
-
BATT
.
+
24A
C
24A
C
!
#
#
"
"
F1 F2 Es Es
FUNCION BRUJULA
Funcionamiento
Al detectar la presencia de uno de los radares (externo o interno), la automatización abre la puerta
correspondiente al mismo tiempo que se bloquea la otra, lo cual lanza una secuencia de operaciones que se
termina con el cierre de la 2ª puerta
SECUENCIA NORMAL:DETECCIÓN PRESENCIA DEL SENSOR EXT. O INT.
APERTURA PRIMERA PORTA / BARRA BLOQUEO SENSOR OPUESTO
CIERRE PRIMERA PUERTA
APERTURA SEGUNDA PUERTA
CIERRE SEGUNDA PUERTA / DESBLOQUEO SENSOR OPUESTO
El sensor central (intermedio) conectado en los bornes 2 - Ri, detecta si hay alguien entre las dos
automatizaciones y habilita el microprocesador para que abra de nuevo la puerta opuesta a la que ha
efectuado la última apertura, siempre con la función de interbloqueo.
1 1 o 2 pares de fotocélulas
2 Tarjeta (MA9011-MA9111)
3 Tarjeta antipánico MA7032
ESQUEMA DE FUNCIONAMIENTO CON DOS AUTOMATIZACIONES
CON INTERBLOQUEO
AUTOMATIZACIÓN EXTERNA (MASTER)
AUTOMATIZACIÓN INTERNA (SLAVE)
4 Bloqueo eléctrico MA7012
5 Radar (MR8002-MR8104)
6 Selector funciones MA7041

21
SERIE CORSA
Conexiones especiales
Conectar los accesorios a los dos cuadros y entre sí mediante el borne "bussola" según el esquema ilustrado.
Seleccionar, en la automatización externa, el dip-switch 6 en ON: esto sirve para dar a la misma el mando de
gestión (MASTER).
En la automatización MASTER (que manderá la automatización gemela) se conectan todos los sensores de
mando y, posiblemente, el MA7041 selector de funciones.
Las fotocélulas y el antipánico tienen que ser independientes en ambas automatizaciones.
Las regulaciones de trimer actúan independientemente de las dos automatizaciones.
Si no se utilizan, los contactos 1-2 y 2-C1 setienen que puentear en ambas automatizaciones.
10
11
1
2
C1
Ri
M
R2
R1
2
F1F2ESES TXRXGND 1 234567
MF9011 - MF91 11 MA7032
MA7012 BUSSOLA MA7041
P.R.A P AP/PARZ T CA V.RA LL.CH V/C H V/AP P.R.CH FRE NO V.RALL.AP.
-
+
M
N
E+
S
S
E -
-
BAT T.
+
24AC
24AC
F1 F2 E s E s
Conexión
bloqueo eléctrico
MA 7012
Conexión selector
funciones MA 7041
C Nc 1 0 A2 C1 A1
A C
+
_
Baterie Tampon
+
_
12 V 1.2Ah 12 V 1.2Ah
Puente para serie baterías
10
11
1
2
C1
Ri
M
R2
R1
2
F1F2ESES TXRXGND 1 234567
MF9011 - MF91 11 MA7032
MA7012 BUSSOLA MA7041
P.R.A P AP/PARZ TCA V. RA LL.CH V/CH V/AP P.R.CH F RE NO V.RA LL.AP.
-
+
M
N
E
+
S
S
E
-
-
BAT T.
+
24AC
24AC
C Nc 1 0 A2 C1 A1
A C
+
_
+
_
12 V 1.2Ah 12 V 1.2Ah
F1 F2 E s E s
Radar externo
(2-R1)
Radar central
o intermedio
(2-Ri)
Radar interno
(2-R2)
MF9011-9111 MA7032
MF9011-9111 MA7032
BUSSOLA
TX RX GND
TX RX GND
CUADRO
DE MANDO
(MASTER
)
CUADRO
DE MANDO
(SLAVE)
BUSSOLA
1 2 3 4 5 6 7
ENTRY EXIT
CLOSED EMERGENCY
SELECTION
Cance lli A uto matici
Baterie Tampon
Puente para serie baterías
Conexión
bloqueo eléctrico
MA 7012

22
SERIE CORSA CONEXION ACCESORIOS AL CUADRO
INTRODUCCION
Para facilitar las operaciones de cableado eléctrico ha sido previsto en la viga un espacio adecuadamente
estudiado para el alojamiento y la distribución racional de los cables a lo largo de viga.
En la caja de bornes de conexión accesorios ha sido duplicado el borne común 2.
La entrada de los cables de alimentación es preferible predisponerla en el lado izquierdo
de la viga, donde está alojado el transformador al que se conecta la tensión de línea y el hilo
de protección de tierra.
SECUENCIA DE LAS CONEXIONS
"sensor externo en bornes 2-R1 del cuadro
"sensor interno en bornes 2-R2 del cuadro
"alimentación sensores en bornes 10-11 de cuadro
"alimentación de línea(1) en los bornes relativos al transformador(2)
"protección a tierra en el borne del trasformador
(1)
protegida con diferencial de 30mA + magnetotérmico de 5A (ley Italia 46/90)
(2)
si la alimentación es a 24V a.c. es posible conectarse directamente a la caja de bornes del cuadro.
Para 001MA7032
Los hilos para la conexión de las dos baterías están siempre preparados. Basta efectuar la conexión entre éstas
con (cable-puente) suministrado.
Para 001MF9011-9111
Basta con instalar la placa amplificadora en el asiento dedicado tras conectar adecuadamente los sensores.
NOTA: Si no se utiliza la placa, situar el dip 3 en ON (dip switch de 4 vías).
No son necesarias conexiones suplementarias. Permanece activado el puente 2-C1.
10
11
1
2
C1
Ri
M
R2
R1
2
F1 F2 ES ES TX RX GND 1 2 3 4 5 6 7
MF9011 - MF9111 MA7032
12345678
21 345678910O
N21 34O
N
RESET
APRE
MA7012 BUSSOLA MA7041
P.R.AP AP/PAR Z TCA V.RALL.CH V/CH V/A P P.R .CH FRENO V.RA LL.AP.
FUSIBILE
ACCESSORI
1,6A
-
+
M
N
E+
S
S
E -
-
BATT.
+
24AC
24AC
1 2 3 4 5 6 7
ENTRY EXIT
CLOSED EMERGENCY
SELECTION
Cancelli Automatici
Conexion blo
q
ueo
eléctrico MA 7012
Conexion selector
funciones MA 7041
C Nc 1 0 A2 C1 A1
A C
L1 L2
Alimentación
230V a.c.
Fusible 2A 250V
+
_
Batería Tam
p
on
+
_
12 V 1.2Ah 12 V 1.2Ah
Puente para serie baterías
MF9011-9111 MA7032
F1 F2 Es Es

23
SERIE CORSA
ACCESORIOS
PARA PUERTAS ARMADAS PARA PUERTAS DE CRISTAL
(espesor máx.10 mm)
DE SEGURIDAD
MF 9011 Pareja de fotocélulas alcance 7
m.
MF 9111 Pareja doble de fotocélulas
alcance 7 m.
MA 7012 Bloqueo eléctrico con cuerda de
desbloqueo.
MA 7032 Sistema antipánico bateriás
tampón para los sistemas COR-
SA y RODEO.
DE MANDO
MA 7041 Selector funciones
MR 8001 Radar campo estrecho
MR 8002 Radar campo ancho
MP 8030 Base sensible 800 mm x 300 mm
MP 8060 Base sensible 800 mm x 600 mm
MR 8104 Radar por microondas 3 m máx
MR 8105 Radar por microondas 5 m máx
MS 9502 Sensor de apertura por contacto
MR 8334-70-90 Radar de seguridad K4
MRT001 Telemando por MR8104 e MR8105
SE PUEDE DISPONER ADEMÁS DE NUESTROS SISTEMAS S20 Y S40 PARA LA CONSTRUCCIÓN
COMPLETA DE PUERTAS CORREDERAS DE ALUMINIO, PROYECTADAS ESPECIALMENTE PARA EL
USO CON LA SERIE CORSA.
Nota: Todos los perfiles para la construcción y movimentación de las puertas son de aluminio anodizado plata.
SISTEMA ANTIPÁNICO POR ABATIMIENTO per:
MI 6010 1 hoja móvil (L=1100 mm para hoja)
MI 6110 1 hoja móvil (L=1500 mm para hoja)
MI 6020 2 hojas móviles (L=1100 mm para hoja)
MI 6120 2 hojas móbiles (L=1500 mm para hoja)
MI 6030 1 hoja móvil y 1 hoja fija (L=1100 mm para hoja)
MI 6130 1 hoja móvil y 1 hoja fija (L=1500 mm para hoja)
MI 6040 2 hojas móviles y 2 hojas fijas (L=1100 mm para hoja)
MI 6140 2 hojas móviles y 2 hojas fijas (L=1500 mm para hoja)
Equipamiento completo para la sujeción de HOJAS
ENMARCADAS, con PATINES DE GUÍA internOS
en el piso (a utilizar con MA7371/7471/7571)
MA 7351 L 1000 mm
MA 7451 L 1500 mm
MA 7551 L 2000 mm
Equipamiento completo para la sujeción de HOJAS
ENMARCADAS, con PATINES DE GUÍA EXTER OS
en elpiso
MA 7371 L 1000 mm
MA 7471 L 1500 mm
MA 7571 L 2000 mm
Equipamiento completo para la sujeción de HOJAS
DE CRISTAL de 10 mm, con PATINES DE GUÍA
internOS en el piso (a utilizar con MA7370/7470/
7570)
MA 7353 L 1000 mm
MA 7453 L 1500 mm
MA 7553 L 2000 mm
Equipamiento completo para la sujeción de HOJAS
DE CRISTAL de 10 mm , con PATINES DE GUÍA
EXTERNOS en el piso
MA 7370 L 1000 mm
MA 7470 L 1500 mm
MA 7570 L 2000 mm
MAM 600 Junta central de cierre para cristales
correderos (rollo de 30 m.)
MAM 601 Junta lateral de cierre para cristales fijos y
correderos (rollo de 30 m.)

SERIE CORSA
Tutti i dati sono stati controllati con la
massima cura. Non ci assumiamo co-
munque alcuna responsabilità per
eventuali errori od omissioni.
All data checked with the maximum care.
However, no liability is accepted for any error
or omission.
Toutes les données ont été contrôlées
très soigneusement. Nous n’assumons
de toute façon aucune responsabilité pour
les erreurs ou omissions éventuelles.
Die Daten wurden mit höchster Sorgfalt
geprüft. Für eventuelle Fehler oder
Auslassungen übernehmen wir keine
Haftung.
Todos los datos se han controlado con
la máxima atención. No obstante no nos
responsabilizamos de los posibles
errores u omisiones.
CANCELLI AUTOMATICI
CAME CANCELLI AUTOMATICI S.P.A.
DOSSON DI CASIER (TREVISO)
(+39) 0422 490960 (+39) 0422 490944
SISTEMA QUALITÀ
CERTIFICATO
ASSISTENZA TECNICA
NUMERO VERDE
800 295830
WEB
www.came.it
E-MAIL
info@came.it
ANOMALIAS
- El automatismo no abre
- El automatismo no cierra
- El automatismo no abre totalmente
- El automatismo no cierra totalmente
- El automatismo funciona siempre a velocidad
reducida
- El automatismo no mantiene las regulaciones
iniciales
- El bloqueo eléctrico no permite la apertura
- Las fotocélulas no funcionan
- El funcionamiento no coincide con la función
seleccionada en el selector
- El antipánico no funciona
- Ruido excesivo del sistema
VÉASE
TAMBIÉN
"
FUNCIONES
LEDS
DE
CONTROL
"
POSIBLES CAUSAS
AFalta la alimentación de línea o la alimentación no es la adecuada
BFusibles fuera de uso
CProgrammación inicial - inexistente o inadecuada
DSelección no correcta en el selector de funciones
EConexiones equivocadas
FFalta el puente 1-2
GContactos 2-C1 sin dispositivos de seguridad o no cortocircuitados
HFotocélulas de seguridad no alineadas o estropeadas
IDip 3 (módulo de 4 vías) por seleccionar
JError en la conexión del motor
KEncoder fuera de uso
LTarjeta antipánico MA7032 fuera de uso
MBaterías gastadas
NDip 2 (módulo de 10 vías) activo (verifique función en pág. 18)
ORegulaciones de las desaceleraciones (abrir y cerrar) inadecuadas
PRegulaciones de los puntos de desaceleración (abrir y cerrar) inadecuadas
QRegulaciones de las velocidades (abrir y cerrar) inadecuadas
RRgulación de TCA, excesiva
STarjeta general ZP7 fuera de uso
TMicrointerruptor de bloqueo eléctrico estropeado
UEstribo de enganche carro-bloqueo eléctrico no colocado correcta mente
VRoces entre puerta móvil y parte fija (p. ej.: puerta/pavimento; puerta fija/
puerta móvil; puerta móvil/accesorios de guía en el suelo; junta/puerta fija)
WElementos de arrastre obstaculizados en su movimiento
(p.ej.: entre los carros y los cables)
XPosibles residuos/objetos presentes en la guía de deslizamiento
YTensión no correcta de la correa
ZTopes mecánicos colocados no correctamente
REFERENCIAS
A - B - C - D - E - F - J - K - N - S - T - U - V - X - Z
D - E - F - G - H - K - I - J - N - R - S - V - Z
C - D - K - O - P - Q - S - V - W - X - Y - Z
C - H - K - O - P - Q - S - V - W - X - Z
S - Q - W - V - X - Y
O - P - Q - S - V - W - X - Y - Z
E - S - T - U
E - G - H - I - S
E - J - S
D - L - M - N - V - W - X - Y
V - W - X - Y
CENTRO DE ASISTENCIA NOTAS FECHAS
1/140