MasterCool 52230 Instrucciones de operación
- Categoría
- Medición
- Tipo
- Instrucciones de operación
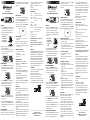
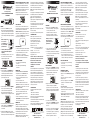
El MasterCool 52230 es un higrómetro tipo lápiz que mide la temperatura y la humedad relativa del aire. Cuenta con una pantalla LCD que muestra ambas lecturas simultáneamente, y tiene una resolución de 0.1˚C / 0.1˚F / 0.1%. El dispositivo también tiene una función de retención de datos, que le permite congelar la lectura actual en la pantalla. Además, tiene una función de registro de datos, que le permite almacenar hasta 99 lecturas de temperatura y humedad.
El MasterCool 52230 es un higrómetro tipo lápiz que mide la temperatura y la humedad relativa del aire. Cuenta con una pantalla LCD que muestra ambas lecturas simultáneamente, y tiene una resolución de 0.1˚C / 0.1˚F / 0.1%. El dispositivo también tiene una función de retención de datos, que le permite congelar la lectura actual en la pantalla. Además, tiene una función de registro de datos, que le permite almacenar hasta 99 lecturas de temperatura y humedad.

Transcripción de documentos
Press the HOLD button to cancel the Hold function. The Hold function can be used for Humidity and Temperature. Note: Make sure you have rotated the sensor cap to the open position. CLOSE 2. “AIR” icon shows the current environment temperature and humidity. 3. The default temperature display setting can be ˚F or ˚C. You can press the F/C button to change the temperature display. MIN/MAX FUNCTION 1. Press the MIN/MAX button, MIN appears on the display. The LCD screen is now showing the minimum humidity and temperature readings stored in memory. 2. Press the MIN/MAX button again, MAX then appears on display. The LCD screen is now showing the maximum humidity and temperature readings stored in memory. 3. To return to normal measuring mode, press MIN/MAX button until MIN or MAX disappears from the display. 4. To clear current MIN and MAX readings from memory, press and hold the RESET button until the full display appears. The data is now cleared from the memory. DATA HOLD FUNCTION Press the HOLD button until “HLD” appears in the display. The current reading is now being held and will not change until the Hold function is cancelled. ➀ REPLACE BATTERY 1. Turn off the meter, use a coin to open the battery cover. 2. Put the battery (CR2032 - Lithium Coin Cell) with the “+” facing out into the battery compartment, place the battery cover back and lock it with a coin. OPERACION 1. Presione el botón ON/OFF para encender el higrómetro. Se vera la pantalla completamente encendida por un segundo. El higrómetro comenzara a medir la temperatura y humedad; las dos lecturas se verán simultáneamente en la pantalla. Nota: Asegúrese de haber girado la tapa del censor a la posición “OPEN.” Remember Low Batteries will tend to give inaccurate readings. Please do not immerse probe into liquids as this will cause permanent damage to the sensor. WARRANTY OPTIONAL ACCESSORIES • 33% Salt solution (for calibration) part # 52733 • 75% Salt solution (for calibration) part # 52775 This product warrants against defects in material and workmanship for a period of one year. This warranty does not cover failure due to abuse, improper usage, or progressive wear and tear. Warranty becomes valid to the original user, effective on the purchase date. A copy of an invoice must be sent to 1 Aspen Drive, Randolph, NJ 07869 to validate the warranty. For further service please contact (973) 252-9119. TROUBLESHOOTING POWER ON BUT THERE ISN’T A DISPLAY • Make sure to press the ON/OFF button more than 1 second. • Make sure the battery is correctly in place • Replace the battery • Remove the battery. Press ON/OFF button for 10 seconds. Install the battery and try again. DISPLAY DISAPPEARS • Check whether low battery indicator was displayed before the unit turned off. If yes, please replace the battery. • Turn on the meter by pressing the ON/OFF + HOLD button to disable the Auto Power Off function. CE APPROVAL The meter conforms to the following standards: * EN 50081-1/1992 : EN 55022 * EN 50082-1/1997 : EN 55024 (EN 61000-4-2/-3/-8, ENV 50204) the meter complies with the essential protection requirements of Council Directive 89/336/EEC on the approximation of the laws of the Member States relating to electromagnetic compatibility. ERROR CODES [E02] Problem: Measured temperature is lower than the lowest limit. Temperature sensor and circuit is damaged. Solution: Put the meter in room temperature for 30 minutes. If E02 still appears, send back for repair. [E03] Problem: Measured temperature is higher than the highest limit. Temperature sensor and circuit are damaged. Solution: Put the meter in room temperature for 30 minutes. If E03 still appears, send back for repair. [E04] Problem: Temperature measurement has an error code. Solution: Put the meter in room temperature for 30 minutes. If E04 still appears, send back for repair. [E11] Problem: Humidity calibration failed. Humidity sensor or circuit is damaged. ➁ CLOSE 2. El icono “AIR” muestra la temperatura y humedad actual del medio ambiente. 3. La pantalla puede mostrar la temperatura en “F” o “C”. Ud. puede cambiar la unidad de la temperatura presionando el botón F/C. FUNCION MINIMA/MAXIMA 1. Presione el botón MIN/MAX, la pantalla mostrara MIN. La pantalla de LCD mostrara las lecturas de humedad y temperatura mínimas almacenadas en la memoria. 2. Presione nuevamente el botón MIN/MAX, la pantalla mostrara MAX. La pantalla de LCD mostrara las lecturas de humedad y temperatura máximas almacenadas en la memoria. 3. Para volver al modo de lectura normal, presione el botón MIN/MAX hasta que MIN o MAX desa parezcan de la pantalla. 4. Para borrar las lecturas MIN y MAX, mantenga presionado el botón RESET hasta que se vea la pantalla completa. La información ha sido borrada de la memoria. USA: PH (973) 252-9119 BELGIUM: TEL. + 32 (0) 3 777 28 48 www.mastercool.com cancela la función Hold. Presione el botón HOLD para cancelar la función Hold. La función Hold se puede usar para la Humedad y Temperatura. Manual de Instrucciones 52230 HIGRÓMETRO TIPO LÁPIZ SPECIFICATIONS Size: 17.5cm x 4.2cm x 1.6cm Battery: (1) CR2032 (Lithium Coin Cell) Battery Life: 100 hrs. Sensor: Electronic Capacitance Polymer Film Sensor Temperature Range: -20 to 60˚C RH Range: 0 to 100% Accuracy: ±3% from 10 to 95% RH at 25˚C ±1% from other RH range Resolution: 0.1˚C / 0.1˚F / 0.1% Storage Temperature: -10 to 60˚C Storage RH%: <95% ���������������������������� OPERATION 1. Press the ON/OFF button to turn the meter on. You will see a full display on the screen for one second. The meter will start measuring the temperature and humidity; and display both readings at the same time. AUTO POWER OFF The unit will turn itself off after 20 minutes. To override the auto power off function turn the unit off. Press the ON/OFF and HOLD buttons simultaneously. The display shows “n” on the screen. When “n” appears release the ON/OFF button. Auto power off is now disabled. ESPAÑOL ����������������� ���������������������������� ����������������� CLOSE Instruction Manual 52230 PEN TYPE HYGROMETER Solution: Re-calibrate the RH. If E11 still appears after calibration, send back for repair. [E33] Problem: Humidity sensor or circuit is damaged. Solution: Send back for repair. CLOSE ENGLISH ➂ FUNCIÓN GUARDAR INFORMACIÓN Presione el botón HOLD hasta que aparezca “HLD” en la pantalla. La lectura actual de la pantalla se guardara y no se cambiara hasta que no se ➀ APAGADO AUTOMÁTICO La unidad se apagara automáticamente en 20 minutos. Para cancelar el apagado automático, apague la unidad. Presione simultáneamente los botones ON/OFF y HOLD. Aparecerá una “n” en la pantalla. Deje de presionar los botones ON/OFF y HOLD. El apagado automático ha sido desactivado. REEMPLAZO DE LA BATERIA 1. Apague la unidad, use una moneda para abrir la cubierta de la batería. 2. Ponga la batería (CR2032) – Lithium Cell) con el signo “+” hacia la parte exterior del compartimiento de la batería, cierre la cubierta de la batería y asegúrela con la moneda. ACCESORIOS OPCIONALES • 33% Solución de sal (para calibración) # de parte 52733 • 75% Solución de sal (para calibración) # de parte 52775 PROBLEMAS / SOLUCIONES AL ENCENDER NO HAY PANTALLA • Asegúrese de presionar el botón de encendido por un segundo. • Asegúrese que la batería este correctamente instalada. • Reemplace la batería • Remueva la batería. Presione el botón ON/OFF por 10 segundos. Instale la batería y pruebe de nuevo. DESAPARECE LA PANTALLA • Verifique si el indicador “batería baja” había aparecido antes que la unidad se apagara. Si la respuesta es SI, por favor reemplace la batería. • Encienda el medidor presionando el botón ON/OFF + HOLD para desactivar la función Auto Power Off. ERROR CODES [E02] Problema: La temperatura medida es más baja que el límite mas bajo. El censor de temperatura y el circuito están dañados. Solución: Coloque el medidor en un lugar a temperatura ambiente por 30 minutos. Si aun aparece el código E02, devolverlo para reparación. [E03] Problema: La temperatura medida es más alta que el límite más alto. El censor de temperatura y el circuito están dañados. Solución: Coloque el medidor en un lugar a temperatura ambiente por 30 minutos. Si aun aparece el código E03, devolverlo para reparación. [E04] Problema: La temperatura medida tiene un código de error. ➁ Solución: Coloque el medidor en un lugar a temperatura ambiente por 30 minutos. Si aun aparece el código E04, devolverlo para reparación. [E11] Problema: La calibración de Humedad falla. El censor de Humedad o el circuito esta dañado. Solución: Re-calibrar el RH. Si aun aparece el código E11 después de la calibración, devolverlo para reparación. [E33] Problema: El censor de Humedad o el circuito está dañado. Solución: Devolverlo para reparación. ESPECIFICACIONES Medidas: 17.5cm x 4.2cm x 1.6cm Batería: (1) CR2032 (Lithium Coin Cell) Vida útil: 100 hrs. Censor: Electronic Capacitance Polymer Film Sensor Rango de temperatura: -20 to 60˚C Rango de RH: 0 a 100% Precisión: ±3% del 10 a 95% RH a 25˚C ±1% de otros rango de RH Resolución: 0.1˚C / 0.1˚F / 0.1% Temperatura de almacenamiento: -10 a 60˚C Almacenamiento RH%: <95% Recuerde: Las baterías que tienen carga baja tenderán a dar lecturas incorrectas. Por favor no introducir la sonda en líquidos ya que causan daños permanentes al censor. GARANTIA Este producto esta garantizado contra defectos de material y fabricación por el periodo de un año. Esta garantía no cubre fallas por abuso, uso inapropiado, o desgaste progresivo de su uso normal. La garantía es efectiva para el comprador original a partir de la fecha de la compra. Para validar la garantía se debe enviar copia de la factura a: Mastercool, Inc., 1 Aspen Drive, Randolph, NJ 07869, USA. Para Servicios adicionales favor contactarnos al teléfono (973) 252-9119. APROBACION CE El medidor cumple con las siguientes normas standards: * EN 50081-1/1992 : EN 55022 * EN 50082-1/1997 : EN 55024 (EN 61000-4-2/-3/-8, ENV 50204) el medidor cumple con los requerimientos de protección esenciales del Council Directive 89/336/EEC en la aproximación de las leyes de los Estados Miembros relacionados a la compatibilidad electromagnética. USA: PH (973) 252-9119 BELGIUM: TEL. + 32 (0) 3 777 28 48 www.mastercool.com ➂-
 1
1
-
 2
2


MasterCool 52230 Instrucciones de operación
- Categoría
- Medición
- Tipo
- Instrucciones de operación
El MasterCool 52230 es un higrómetro tipo lápiz que mide la temperatura y la humedad relativa del aire. Cuenta con una pantalla LCD que muestra ambas lecturas simultáneamente, y tiene una resolución de 0.1˚C / 0.1˚F / 0.1%. El dispositivo también tiene una función de retención de datos, que le permite congelar la lectura actual en la pantalla. Además, tiene una función de registro de datos, que le permite almacenar hasta 99 lecturas de temperatura y humedad.
en otros idiomas
- français: MasterCool 52230 Mode d'emploi
- English: MasterCool 52230 Operating instructions
- Deutsch: MasterCool 52230 Bedienungsanleitung
Artículos relacionados
Otros documentos
-
Amprobe TH-1 Manual de usuario
-
Amprobe LOGGER El manual del propietario
-
-
 MRC 445715_ Manual de usuario
-
-
General Tools & Instruments MMD5NP Manual de usuario
-
-
Intermec EasyCoder 601XP Supplementary Manual
