
JENN-AIRGAS
DOWNDRAFT SLIDE-IN RANGE
i¸¸i_i¸¸i_i¸¸i_i¸¸i_i¸¸i_i¸¸i_i¸¸i_i¸¸i_i¸¸i_i¸¸i_i¸¸i_i¸¸i_i¸¸i_i¸¸i_i¸¸i_i¸¸i_i¸¸i_i¸¸i_i¸¸i_i¸¸i_i¸¸i_i¸¸i_i¸¸i_i¸¸i_i¸¸i_i¸¸i_i¸¸i_i¸¸i_i¸¸i_i¸¸i_i¸¸i_i¸¸i_i¸¸i_i¸¸i_i¸¸i_i¸¸i_i¸¸i_i¸¸i_i¸¸i_i¸¸i_i¸¸i_i¸¸i_i¸¸i_i¸¸i_i¸¸i_i¸¸i¸i¸¸i¸i¸¸i¸i¸¸i¸i¸¸i¸i¸¸i¸i¸¸i¸i¸¸i¸i¸¸i¸i¸¸i¸i¸¸i¸i¸¸i¸i¸¸i¸i¸¸i¸i¸¸i¸i¸¸i¸i¸¸i¸i¸¸i¸i¸¸i¸i¸¸i¸i¸¸i¸i¸¸i¸i¸¸i¸i¸¸i¸i¸¸i¸i¸¸i¸i¸¸i¸i¸¸i¸i¸¸i¸i¸¸i¸i¸¸i¸i¸¸i¸i¸¸i¸i¸¸i¸i¸¸i¸i¸¸i¸i¸¸i¸i¸¸i¸i¸¸i¸i¸¸i¸i¸¸i¸i¸¸i¸i¸¸i¸i¸¸i¸i¸¸i¸i¸¸i¸i¸¸i¸i¸¸i¸i¸¸i¸i¸¸i¸i¸¸i¸i¸¸i¸i¸¸i¸i¸¸i¸i¸¸i¸i¸¸i¸i¸¸i¸i¸¸i¸i¸¸i¸i¸¸i¸i¸¸i¸i¸¸i¸i¸¸i¸i¸¸i¸i¸¸i¸i¸¸i¸i¸¸i¸i¸¸i¸i¸¸i¸i¸¸i¸i¸¸i¸i¸¸i¸i¸¸i¸i¸¸i¸i¸¸i¸i¸¸i¸i¸¸i¸i¸¸i¸i¸¸i¸i¸¸i¸i¸¸i¸i¸¸i¸i¸¸i¸i¸¸i¸i¸¸i¸i¸¸i¸i¸¸i¸i¸¸i¸i¸¸i¸i¸¸i¸i¸¸i¸i¸¸i¸i¸¸il¸_i_i_i_i_i_i_i_i_i_i_i_i_i_i_i_i_i_i_i_i_i_i_i_i_i_i_i_i_i_i_i_i_i_i_i_i_i_i_i_i_i_i_i_i_i_i_i_i_i_i_i_i_i_i_i____i
TABLE OF CONTENTS
Important Safety Instructions .....................................1-4
Ducting Information ...........................................................5
Care & Cleaning ..............................................................5-8
Maintenance .....................................................................8-9
Troubleshooting .........................................................10-11
Surface Cooking .........................................................12-14
Oven Cooking ..............................................................15-20
Options ..........................................................................21-23
Favorites ........................................................................23-24
Setup ..............................................................................24-26
Accessories .........................................................................26
Warranty & Service ...........................................................27
Guide d'utilisation et d'entretien .................................28
Guia de uso y cuidado ....................................................58
JENN-AIE
Form No. A/11/05 Part No. 8113P529 60
@2005 Maytag Appliances Sales Co.
Litho U.S.A.

technician. Do not attempt to adjust, repair, service,
or replace any part of your appliance unless it is
specifically recommended in this guide. All other
servicing should be referred to a qualified servicer.
Always disconnect power to appliance before servicing.
M PORTANT SAFETY
|NSTRU
Warning and important Safety instructions appearing in
this guide are not meant to cover all possible conditions
and situations that may occur. Common sense, caution,
and care must be exercised when installing,
maintaining, or operating the appliance.
Always contact the manufacturer about problems or
conditions you do not understand.
Recognize Safety Symbols, Words, Labels
General Instructions
Read and follow all instructions before using this
appliance to prevent the potential risk of fire, electric
shock, personal injury or damage to the appliance as a
result of improper usage of the appliance. Use appliance
only for its intended purpose as described in this guide.
To ensure proper and safe operation: Appliance
must be properly installed and grounded by a qualified
To check if device is properly installed, look underneath
range with a flashlight to make sure one of the rear
1

levelinglegsisproperlyengagedinthebracketslot.The
anti-tipdevicesecurestherearlevelinglegtothefloor
whenproperlyengaged.Youshouldcheckthisanytime
therangehasbeenmoved.
Child Safety
To Prevent Fire or
Smoke Damage
Be sure all packing materials are removed from the
appliance before operating it.
Keep area around appliance clear and free from
combustible materials. Flammable materials should not
be stored in an oven.
Many plastics are vulnerable to heat. Keep plastics away
from parts of the appliance that may become warm or
hot. Do not leave plastic items on the cooktop as they
may melt or soften if left too close to the vent or a
lighted surface burner.
To prevent grease fires, do not let cooking grease or
other flammable materials accumulate in or near the
appliance.
If appliance is installed near a window, proper
precautions should be taken to prevent curtains from
blowing over burners.
NEVER leave any items on the cooktop. The hot air from
the vent may ignite flammable items and may increase
pressure in closed containers which may cause them to
burst.
Many aerosol-type spray cans are EXPLOSIVE when
exposed to heat and may be highly flammable. Avoid
their use or storage near an appliance.
To eliminate the hazard of reaching over hot surface
burners, cabinet storage should not be provided
directly above a unit. If storage is provided, it should be
limited to items which are used infrequently and which
are safely stored in an area subjected to heat from an
appliance. Temperatures may be unsafe for some items,
such as volatile liquids, cleaners or aerosol sprays.
in Case of Fire
Turn off appliance and ventilating hood to avoid
spreading the flame. Extinguish flame, then turn on
hood to remove smoke and odor.
* Cooktop: Smother fire or flame in a pan with a lid or
cookie sheet.
NEVER pick up or move a flaming pan.
* Oven: Smother fire or flame by closing the oven door.
Do not use water on grease fires. Use baking soda, a
dry chemical or foam-type extinguisher to smother fire
or flame.
NEVER leave children alone or unsupervised near the
appliance when it is in use or is still hot. Children should
never be allowed to sit or stand on any part of the
appliance as they could be injured or burned.
Children must be taught that the appliance and utensils zn
it can be hot. Let hot utensils cool in a safe place, out of
reach of small children. Children should be taught that an
appliance is not a toy. Children should not be allowed to
play with controls or other parts of the appliance.
About Your Appliance
Avoid touching oven vent area while oven is on and for
several minutes after oven is turned off. Some parts of
the vent and surrounding area become hot enough to
cause burns. After oven is turned off, do not touch the
oven vent or surrounding areas until they have had
sufficient time to cool.
Other potentially hot surfaces include cooktop, areas
facing the cooktop, oven vent, surface near the vent
opening, oven door, area around the oven door and oven
window.
Cont.

Do not touch a hot oven light bulb with a damp cloth as
the bulb could break. Should the bulb break, disconnect
power to the appliance before removing bulb to avoid
electrical shock.
To prevent potential hazard to the user and damage to
the appliance, do not use appliance as a space heater to
heat or warm a room. Also, do not use the oven as a
storage area for food or cooking utensils.
NEVER use aluminum foil to cover an oven rack or oven
bottom. Misuse could result in risk of electric shock, fire,
or damage to the appliance. Use foil only as directed in
this guide.
Cooking Safety
Always place a pan on a surface burner before turning it
on. Be sure you know which knob controls which surface
burner. Make sure the correct burner is turned on and
that the burner has ignited. When cooking is completed,
turn burner off before removing pan to prevent exposure
to burner flame.
Always adjust surface burner flame so that it does not
extend beyond the bottom edge of the pan. An excessive
flame is hazardous, wastes energy and may damage the
appliance, pan or cabinets above the appliance.
NEVER leave a surface cooking operation unattended,
especially when using a high heat setting or when deep
fat frying. Boilovers cause smoking and greasy spillovers
may ignite. Clean up greasy spills as soon as possible.
Do not use high heat for extended cooking operations.
NEVER heat an unopened container on the surface
burner or in the oven. Pressure build-up may cause
container to burst resulting in serious personal injury or
damage to the appliance.
Use dry, sturdy potholders. Damp potholders may cause
burns from steam. Dish towels or other substitutes
should never be used as potholders because they can
trail across hot surface burners and ignite or get caught
on appliance parts.
Always let quantities of hot fat used for deep fat frying
cool before attempting to move or handle.
Do not let cooking grease or other flammable materials
accumulate in or near the appliance, hood or vent fan.
Clean hood frequently to prevent grease from
accumulating on hood or filter. When flaming foods
under the hood, turn the fan on.
NEVER wear garments made of flammable material or
loose fitting or long-sleeved apparel while cooking.
Clothing may ignite or catch utensil handles.
Always place oven racks in the desired positions while
oven is cool. Slide oven rack out to add or remove food,
using dry, sturdy potholders. Always avoid reaching into
the oven to add or remove food. If a rack must be
moved while hot, use a dry potholder. Always turn the
oven off at the end of cooking.
Use care when opening the oven door. Let hot air or
steam escape before moving or replacing food.
PREPARED FOOD WARNING: Follow food
manufacturer's instructions. If a plastic frozen food
container and/or its cover distorts, warps, or is otherwise
damaged during cooking, immediately discard the food
and its container. The food could be contaminated.
NEVER use aluminum foil to cover oven racks or oven
bottom. This could result in risk of electric shock, fire, or
damage to the appliance. Use foil only as directed in this
guide.
Utensil Safety
Use pans with flat bottoms and handles that are easily
grasped and stay cool. Avoid using unstable, warped,
easily tipped or loose-handled pans. Also avoid using
pans, especially small pans, with heavy handles as they
could be unstable and easily tip. Pans that are heavy to
move when filled with food may also be hazardous.
Be sure utensil is large enough to properly contain food
and avoid boilovers. Pan size is particularly important in
deep fat frying. Be sure pan will accommodate the
volume of food that is to be added as well as the bubble
action of fat.
To minimize burns, ignition of flammable materials and
spillage due to unintentional contact with the utensil, do
not extend handles over adjacent surface burners.
Always turn pan handles toward the side or back of the
appliance, not out into the room where they are easily hit
or reached by small children.
Never let a pan boil dry as this could damage the utensil
and the appliance.
Follow the manufacturer's directions when using oven
cooking bags.
Only certain types of glass, glass/ceramic, ceramic or
glazed utensils are suitable for cooktop or oven usage
without breaking due to the sudden change in
temperature. Follow manufacturer's instructions when
using glass.
This appliance has been tested for safe performance
using conventional cookware. Do not use any devices
or accessories that are not specifically recommended in
3

this guide. Do not use element covers for the surface
units, stovetop grills, or add-on oven convection
systems. The use of devices or accessories that are not
expressly recommended in this guide can create serious
safety hazards, result in performance problems, and
reduce the life of the components of the appliance.
Deep Fat Fryers
Use extreme caution when moving the grease pan or
disposing of hot grease. Allow grease to cool before
attempting to move pan.
Ventilating Hoods
Clean range hood and filters frequently to prevent
grease or other flammable materials from accumulating
on hood or filter and to avoid grease fires.
When flaming foods under the hood, turn the fan on.
Cleaning Safety
Clean cooktop with caution. Turn off all controls and
wait for appliance parts to cool before touching or
cleaning. Use care to avoid steam burns if a wet sponge
or cloth is used to wipe spills on a hot surface. Some
cleaners can produce noxious fumes if applied to a hot
surface,
Clean only parts listed in this guide.
Self-Clean Oven
Do not clean door gasket. The door gasket is essential
for a good seal. Care should be taken not to rub,
damage, or move the gasket.
Do not use oven cleaners or oven liners of any kind in or
around any part of the self-clean oven.
important Safety Notice
and Warning
The California Safe Drinking Water and Toxic
Enforcement Act of 1986 (Proposition 65) requires the
Governor of California to publish a list of substances
known to the State of California to cause cancer or
reproductive harm, and requires businesses to warn
customers of potential exposures to such substances.
Users of this appliance are hereby warned that when
the oven is engaged in the self-clean cycle, there may
be some low-level exposure to some of the listed
substances, including carbon monoxide. Exposure to
these substances can be minimized by properly venting
the oven to the outdoors by opening the windows and/
or door in the room where the appliance is located
during the self-clean cycle.
IMPORTANT NOTICE REGARDING PET BIRDS:
Never keep pet birds in the kitchen or in rooms where
the fumes from the kitchen could reach. Birds have a
very sensitive respiratory system. Fumes released during
an oven self-cleaning cycle may be harmful or fatal to
birds. Fumes released due to overheated cooking oil, fat,
margarine and overheated non-stick cookware may be
equally harmful.
Save These Instructions for Future Reference
4

Jenn-Air's ventilation system is designed to capture both
cooking fumes and smoke from the cooktop surface. If
the system does not, here are some ducting installation
situations to check:
• 6" diameter round or 3 114"x 10" rectangular ducting
should be used for duct lengths 10'-60'.
Important: 5" diameter round ducting may be used if
the duct length is 10' or less.
• No more than three 90 ° elbows should be used.
Distance between elbows should be at least 18".
,, Recommended Jenn-Air wall cap MUSTbe used.
Make sure damper moves freely when ventilation
system is operating.
• There should be a minimum clearance of 6" for
cooktop installed near a side wall.
If there is not an obvious improper installation, there
may be a concealed problem such as a pinched joint,
obstruction in the pipe, etc. Installation is
the responsibility of the installer and
questions should be addressed first by the
installer. The installer should very carefully
check the ducting installation instructions.
Use the Flow Tester Card provided with
your appliance to check the air flow.
FLOW TESTER
t
._;_;;;_,_;;_;÷;;...
CARE CLEANING
Self-Clean Oven
2. Remove broiler pan, all pans, and oven racks from the
oven. The oven racks will discolor and may not slide easily
after a self-clean cycle if they are not removed.
Important: Removethe air grille from the cooking surface
before self-cleaning.
The self-clean cycle uses above-normal cooking temperatures
to automatically clean the oven interior.
The oven should be cleaned regularly by wiping up spillovers 5.
to prevent excessive smoke and flare-ups. Do not allow a
heavy build-up of soil to accumulate in the oven.
During the cleaning process, the kitchen should be well 6.
ventilated to get rid of normal odors associated with cleaning.
Before Self-Cleaning
1. Turn off the oven light before cleaning. The oven light may
burn out during the clean cycle.
To set Serf=Clean:
1. Press Clean pad.
Clean oven frame, door frame, area outside of gasket, and
around the opening in the door gasket with a nonabrasive
cleaner such as Ban Ami* or detergent and water. The
self-cleaning process does not clean these areas. They
should be cleaned to prevent soil
from baking on during the clean
cycle. (The gasket is the seal
around the oven door and window.)
To prevent damage, do not clean
or rub the gasket around the oven
door. The gasket is designed to
seal in heat during the clean cycle.
Wipe up excess grease or spill-overs from the oven
bottom. This prevents excessive smoking, flare-ups or
flaming during the clean cycle.
Wipe up sugary and acidic spillovers such as sweet
potatoes, tomato, or milk-based sauces. Porcelain enamel
is acid-resistant, not acid-proof. The porcelain finish may
discolor if acidic or sugary spills are not wiped up before a
self-clean cycle.
/, .......
( Clean
" .......... /
2. REMOVE RACKSwill bedisplayed. Remove the racks.
* Brand names for cleaning products are registered trademarks of the respective manufacturers.
5

3. SelectCONTINUE using the Quickset pad. The Quickset
pads are located on either side of the control panel dsplay.
4. Set LIGHT soil level by entering 200 using the number
pads for two hours of cleaning time. Press the Enter pad.
OR
Select MEDIUM for a moderately soiled oven and three
hours of cleaning time.
OR
Select HEAVY for a heavily soiled oven and four hours of
cleaning time.
5. CLEAN, TIME, LOCKED and the cleaning time countdown
will be displayed while the oven is cleaning. OVEN
COOLING will appear in the display when the cleaning
time has been completed and the oven is still locked.
Important: The door lock will disengage approximately one
hour after the cleaning time is completed. OVEN COOLING
will go off in the display when the oven door has unlocked.
To Delay a Self=Clean Cycle:
1. Press Clean pad.
2. REMOVE RACKSwill be displayed.
Remove the racks.
// ................... ,\
( Clean
\ .................. /
3,
4.
Select CONTINUE using the Quickset pad..
Set LIGHT soil level by entering 200 using the number
pads for two hours of cleaning time. Press the Enter pad.
OR
Select MEDIUM for a moderately soiled oven and three
hours of cleaning time,
OR
Select HEAVY for a heavily soiled oven and four hours of
cleaning time.
The door will lock. CLEAN,TIME, LOCKED and the
cleaning time countdown will be displayed
6. After door locks, press the Mere Options pad.
7. Select DELAY using the Quickset pad.
8. Select the number of hours you want to delay the start of the
self-clean cycle.
9. The delay time and cleaning time will be displayed.
After Self=Cleaning
About one hour after the end of the clean cycle, the lock
will disengage a/td OVEN COOLING will go off in the
display. At this point, the doer can be opened.
Some soil may leave a light gray, powdery ash which can be
removed with a damp cloth. If soil remains, it indicatesthat
the clean cycle was not long enough. The soil will be removed
during the next clean cycle.
If the oven racks were left in the oven and do not slide
smoothly after a clean cycle, wipe racks and embossed rack
supports with a small amount of vegetable oil to restore ease
of movement.
A white discoloration may appear after cleaning if acidic or
sugary foods were not wiped up before the clean cycle. This is
normal and will NOT affect performance.
Notes:
• If the oven door is left open, CLOSEDOORwill appear in
the display until the door is closed.
• If more than 30 seconds elapse between pressing the
Clean pad and pressing a number pad, the program will
automatically return to the previous display.
• The oven door will be damaged if it is forced to open
during cleaning or cooling process.
• The first few times the oven is cleaned, some smoke and
odor may be detected. This is normal and will lessen or
disappear with use. If the oven is heavily soiled, or if the
broiler pan was accidently left in the oven, excessive
smoke and odor may occur.
• As the oven heats and cools, you may hear sounds of
metal parts expanding and contracting. This is normal
and will not damage your appliance.
6 Cont.

Cleaning Procedures
Brand names are registered trademarks of the
respective manufacturers.
** To order call 1-800-JENNAIR (1-800-536-6247].
Broiler Pan
and Insert
Burner Caps
and Sealed
Gas Burners
Burner Grates
Porcelain on
Cast Iron
Cooktop -
Porcelain
Enamel
Clock and
Control Pad
Area
Never cover insert with aluminum foil as this prevents the fat from draining to the pan below.
• Place soapy cloth over insertand pan; let soak to loosen soil.
° Wash in warm, soapy water. Use scouring pad to remove stubborn soil.
° Broiler pan and insertcan be cleaned in dishwasher.
Removable Burner Caps
° Allow burner to cool. Remove burner cap and wash in soapy water with a plastic scouring pad. For
stubborn soils, clean with a soap-filled, nonabrasive pad or Cooktop Cleaning Creme_
(Part #20000001] _*and a sponge.
° Do not clean in the dishwasher or self-cleaning oven.
Sealed Gas Burners
• Clean frequently. Allow burner to cool. Clean with soap and plastic scouring pad. Forstubborn or
dried-on soils, clean with a soap-filled, nonabrasive pad, stiff brush, toothbrush, the soft rubber tip on
the toothbrush (if equipped] or a straight pin. Do not enlarge or distort holes.
° Be careful not to get water into burner ports.
• Use care when cleaning the ignitor. If the ignitor iswet or damaged the surface burner will not light.
• Wash with warm, soapy water and a nonabrasive, plastic, scrubbing pad. For stubborn soils,
clean with a soap-filled, nonabrasive, plastic pad or Cooktop Cleaning Creme_and a sponge. If soil
remains, reapply Cooktop Cleaning Creme_,cover with a damp paper towel and soak for 30 minutes.
Scrub again, rinse and dry.
• Do not clean in the dishwasher or self-cleaning oven.
Porcelain enamel is glass fused on metal and may crack or chip with misuse. It is acid-resistant, not acid-
proof. All spillovers, especially acidic or sugary spillovers, should be wiped up immediately with a dry cloth.
• When cool, wash with soapywater, rinse and dry.
• Never wipe off a warm or hot surface with a damp cloth. This may cause cracking or chipping.
° Never use oven cleaners, abrasive or caustic cleaning agents on exterior finish of range.
o
o
o
To activate control lock for cleaning, see Locking the Control, page 16.
Wipe with damp cloth. Dry thoroughly.
Glasscleaners may be used if sprayedon a cloth first. DO NOTspray directly on contrelpads and
display area.
Do not use other cleaning sprays,abrasive cleaners or large amounts of water on the panel.
o
Control Knobs • Removeknobs in the OFFposition by pulling forward.
• Wash, rinse and dry. Do not use abrasivecleaning agents as they may scratch the finish.
° Turn on each element to be sure the knobs have been correctly replaced.
Oven Window ° Avoid using excessiveamounts of water which may seep under or behind glass, causing staining.
and Door = ° Wash with soap and water. Rinsewith clear water and dry. Glasscleaner can be used if sprayed on a cloth.
Glass • Do not useabrasive materials such as scouring pads, steel wool or powdered cleaners as they will scratch.
Oven Interior • Follow instructions on pages 5-6 to set a self-clean cycle.
Oven Racks
o
o
o
Clean with warm, soapy water.
Remove stubborn soil with cleansing powder or soap-filled scouring pad. Rinse and dry.
Racks will permanently discolor and may not slide smoothly if left in the oven during a self-clean
operation. If this occurs, wipe the rack edge and rack support with a small amount of vegetable oil to
restore ease of movement, then wipe off excess oil.

_i:ij:ijii!i_ii_i_Ti iiii!,!i_ii_ii_ii_ii_ii_ii_ii_ii_ii_ii_ii_ii_ii_ii_ii_ii_ii_ii_ii_ii_ii_ii!iii_ii_!iiiiiliiiii_ii_iIiiiiiiiiiiiii!iiiii!i!i!i!ili!_=__ii,li_i,_ii_ii_!i_i!_i!ii_iE! i!i!i!i!i!iIi!iii!_ii_!iiiiiiiiiilililiiiiiiiiiiiiiiiiiiiiiiiiiiiiiiii!iiiii!iiiii!iiiiiiiiil,ilililililililililililililililililililililililililililililililili_i!_ii_ii_i!_i!_i!_i!_i!_i!_i!_i!_i!_i!_i!_i!_i!_i!_i!_i!_i!_i!_i!_i!_i!_i!_i!_i!_i!_i!_i!_i!_i!_i!_i!_i!_i!_i!_i!_i!_i!_i!_i!_i!_i!_i!_i!_ii_iiii_ii_ii_ii_iiiiiiiiiiiiii_ii,ii_iiiiiiiiiiiiiiiiiiiiiiiiiiiiiiiiiii!iiiii!!i,ilililililililililiIil,il,ililii!_!i_!i_!i_!i_!i_!i_!i_!i_!i_!i_ii_!i_ii_!i_!i!!_iiiii!_ii_iiiiiiiiiiiiiiiiiiiiiiiiiiiiiiiiiiiiiiiiiiiiiiiiiiiiii!iiiii!iiiii!i!iiiii!ii,liiiiiiiii!ii!!ii_ii_iii_i_ii!i_!i_i_i_i_i_i_i_i_i_i_i_i_i_i_i_i_i_i_i_i_i_!_i_!i_i!!!ii_i_!ii_i_!ii_i_iiii_ii_i!_ii_ii_ii_ii_ii_ii_ii_ii_ii_ii_ii_ii_ii_ii_ili_i!_i!iiiiiiiiiiiii!i!,!i!i!iii!iii!iii!i!i!!_!!i!i!!!!!!!!!!!!!!!ii!_ii!iiii!iiiiiiiiiiiiiiiiiiiiiiiiiiiiiiiiiiiiiiiiiiiii_ii_i!_!i!iiiii!_!iiiiiiiiiiiiiiiiiiiiiiiiiiiiiiiiiiiiiiiiiiiiiiiiiiiiiiiiiiiiiiiiiiiiiiiiiiii_ii_ii_i!_!i_i!_!iii!_!iiiii_!i_iiiiiiii!!i!!ii!ii!i!!!iiiii!iii_i!,!i_i!i!ii!ii!ii!ii!ii!ii!ii!ii!ii!ii!ii!ii!ii!ii!i!!i!ii!!!i!i!i!i!i!i!!!_!i_iIi!ii!!i!ii!!!!ii!!!!i,!Iii!ii!!_!!_!i_!!_!i_!!_!i_!ii_!!i!_iliiii_ii_!iiii!ii!ii!!i!!i!!i!!i!!i!!i!!i!iii!!i!i!ii_il'I
Side Panels, • When cool, wash with warm, soapy water, rinse and dry. Never wipe a warm or hot surface with a damp
and Door cloth as this may damage the surface and may cause a steam burn.
Handles - • Forstubborn soil, use mildly abrasive cleaning agents such as baking soda paste or Ben Ami*. Do not use
Painted Enamel abrasive cleaners such as steel wool pads or oven cleaners. These products will scratch or permanently
damage the surface.
Note: Use a dry towel or cloth to wipe up spills, especially acidic or sugary spills. Surface may
discolor or dull if soil is not immediately removed. This is especially important for white surfaces.
Stainless Steel ° DO NOT USEANY CLEANING PRODUCT CONTAINING CHLORINE BLEACH.
(select models:) ° DO NOT USEABRASIVE OR ORANGE CLEANERS.
• ALWAYS WIPE WITH THE GRAIN WHEN CLEANING.
• Daily Cleaning/Light Soil -- Wipe with one of tile following - soapy water, white vinegar/water solution,
Formula 409 Glass and Surface Cleaner* or a similar glass cleaner - using a sponge or soft cloth. Rinse
and dry. To polish and help prevent fingerprints, follow with Stainless Steel Magic Spray* (Part No.
20000008)**.
° IVloderate/Heavy Soil -- Wipe with one of the following - Ben Ami, Smart Cleanser, or Soft Scrub* -
using a damp sponge or soft cloth. Rinse and dry. Stubborn soils may be removed with a damp multi-
purpose Scotch-Brite* pad; rub evenly with the grain. Rinse and dry. To restore luster and remove streaks,
follow with Stainless Steel Magic Spray_.
• Discoloration -- Using a damp sponge or soft cloth, wipe with Cameo Stainless Steel Cleaner*. Rinse
immediately and dry. To remove streaks and restore luster, follow with StainlessSteel Magic Spray*.
• Brand names for cleaning products are registered trademarks of the respective manufacturers.
•* To order direct, call 1-800-JENNAIR (1-800-536-6247:).
A|NTENANCE
Oven Door
2. Align slots in the door with the hinge arms on the range.
3. Slide the door down onto the hinge arms until the door is
completely seated on the hinges. Push down on the top
corners of the door to completely seat door on hinges.
Door should not appear crooked.
Important: The oven door on a new range may feel "spongy"
when it isclosed. This is normal and will decrease with use.
• NEVER attempt to open or close door or operate oven until
door is properly replaced.
• NEVER place fingers between hinge and front oven frame.
Hinge arms are spring mounted. If accidentally hit, the
hinge will slam shut against oven frame and could injure
your fingers.
To remove:
1. When cool, open the oven door
to the broil stop position
(opened about four inches:).
2. Grasp door at each side. Do not
use the door handle to lift door.
3. Lift up evenly until door clears
hinge arms.
To replace:
1. Grasp door at each side.
Oven Window
To protect the oven door window:
1. Do not use abrasive cleaning agents such as steel wool
scouring pads or powdered cleansers as they may scratch
the glass.
2. Do not hit the glass with pots, pans, furniture, toys, or
other objects.
3. Do not close the oven door until the oven racks are in
place.
Scratching, hitting, jarring or stressing the glass may weaken
its structure causing an increased risk of breakage at a later
date.
Cent.

Oven Light
To assure the proper replacement bulb is used, order bulb
from Jenn-Air. Call 1-800-JENNAIR (1-800-536-6247), ask for
part number 74004458 - halogen bulb.
To Replace Oven Light Bulb:
1. Disconnect power to the oven.
2. When oven iscool, use fingertips to grasp edge of bulb
cover. Pull out and remove.
3. Carefully remove old bulb by pulling straight out of
ceramic base.
4. To avoid damaging or decreasing the life of the new bulb,
do not touch the bulb with bare hands or fingers. Hold
with a dry cloth or paper towel. Push new bulb prongs
straight into small holes of ceramic base.
5. Replace bulb cover by snapping into place.
6. Reconnect power to the oven. Reset clock.
Leveling Legs
Be sure the range is leveled when installed. If
Removal of Gas Appliance
Gasappliance connectors used to connect this appliance to
the gas supply are not designed for continuous movement.
Once installed, DO NOT repeatedly move this gas appliance
for cleaning or to relocate. If this appliance has to be moved
and/or removed for servicing, follow the procedure described
in the installation instructions. For information, contact Jenn-
Air Customer Service at 1-800-JENNAIR (1-800-536-6247).
To prevent range from accidentally tipping, range must be
secured to the floor by sliding rear leveling leg into the anti-
tip bracket.
Electrical Connection
Appliances which require electrical
power are equipped with a three=prong
grounding plug which must be plugged
directly into a properly grounded three-
hole 120 volt electrical outlet.
Always disconnect power to appliance before servicing,
The three-prong grounding plug offers protection against
shock hazards. DO NOT CUT OR REMOVE THE THIRD
GROUNDING PRONG FROM THE POWER CORD PLUG.
If an ungrounded, two-hole or other type electrical outlet is
encountered, it is the personal responsibility of the
appliance owner to have the outlet replaced with a
properly grounded three=hole electrical outlet.
the
range is not level, turn the leveling legs, [4
located at each corner of the range, until range J I
islevel, oh I
ANTI RACKET
\ LEVELING LEG
9

T UBLE NG
For most concerns, • Check if oven controls have been properly set.
try these first. • Check to be sure plug is securely inserted intoreceptacle.
• Check or re-set circuit breaker. Check or replace fuse.
• Check power supply.
Part or all of appliance does
not work.
Clock, indicator words, and/or
lights operate but oven does
not heat.
• Check if surface and/or oven controls have been properly set. See pgs. 12 & 17.
• Check ifoven door is unlocked after self-clean cycle. See pg. 6.
• Check ifoven isset for a delayed cook or clean program. See pgs. 17 & 6.
• Check ifControl Lock is activated. See pg. 16.
• Check ifcontrol is in Sabbath Mode. See pg. 25.
• Oven may be set for a Cook & Hold or delay function.
• Control Lock may have been set. See pg. 16.
Surface burner fails to light. • Check to be sure unit isproperly connected to power supply.
• Check for a blown circuit fuse or a tripped main circuit breaker.
• Check to be sure ignitor is dry and clicking. Burner will not light if ignitor is damaged,
soiled or wet. If ignitor doesn't click, turn control knob OFF.
• Burner ports may be clogged.
• Check to be sure a pan is sitting on the grate above.
The flame is uneven.
Surface burner flame lifts
off ports.
Food is not broiling properly
or smokes excessively.
Baking results are not as •
expected or differ from
previous oven. •
o
°
°
°
°
Oven will not self=clean. •
o
°
°
• Check oven rack positions. Food may be too close to flame.
• Aluminum foil was incorrectly used. Never line the broiler insert with foil.
• Trim excess fat from meat before broiling.
• A soiled broiler pan was used.
• Preheat oven for 2-3 minutes before placing food in the oven.
° Broil with the oven door closed.
Check the oven temperature selected. Make sure oven is preheated when recipe
or directions recommend preheat.
Make sure the oven vent has not been blocked. See page 20 for location.
Check to make sure range is level.
Temperatures often vary between a new oven and an old one. As ovens age, the oven
temperature often "drifts" and may become hotter or cooler. See page 25 for
instructions on adjusting the oven temperature. Important: It isnot recommended
to adjust the temperature if only one or two recipes are in question.
Usecorrect pan. Dark pans produce dark browning. Shiny pans produce light browning.
Check rack positions and pan placement. Stagger pans when using two racks. Allow
1-2 inches between pans and oven wall.
Check the use of foil in the oven. Never use foil to cover an entire oven rack. Place
a small piece of foil on the rack below the pan to catch spillovers.
Check to make sure the cycle is not set for a delayed start. See pg. 6.
Check if door is closed.
Check if control is in Sabbath Mode. See pg. 25.
Oven may be over 400° F.Oven temperature must be below 400° Fto program a
clean cycle.
10 Cont.

Ovendid not clean properly.
Oven door will not unlock after
self=clean cycle.
There are no beeps and
no display.
Moisture collects on oven
window or steam comes from
oven vent=
There is a strong odor or light •
smoke when oven isturned on.
o
o
Ventilation system is not
capturing smoke efficiently.
o
o
Fault Codes
®
o
Noises may be heard. °
°
SAb flashing and then
displayed continuously.
Cannot add another Favorite.
° Longercleaning time may be needed.
• Excessivespillovers, especially sugary and/or acidic foods, were not removed prior
to the self-clean cycle.
° Oven interioris still hot. Allow about one hour for the oven to cool after the
completion of a self-clean cycle, The door can be opened when the LOCK indicator
word is not displayed,
° The control and door may be locked, See pg. 6.
• Oven may be in Sabbath Mode. See page 25.
• This is normal when cooking foods high in moisture.
• Excessivemoisture was used when cleaning the window.
This is normal for a new range and will disappear after a few uses. Initiating a clean
cycle will "burn off" the odors more quickly.
Turning on a ventilation fan will help remove the smoke and/or odor.
Excessivefood soils on the oven bottom. Use a self-clean cycle.
Check on cross ventilation in room or make up air.
Outside wall cap may be trapped shut.
Rangemay be improperly installed; check ducting information. See pg. 5.
Air filter may be improperly installed. See pg. 14.
The oven may detect a fault during programming or during operation. If a fault is
detected, the message FAULTDETECTED- PRESSPOWERTO CLEARor FAULT
DETECTED- PRESSENTERTO TRYAGAIN may appear. Follow directions in the display.
If the fault reappears or does not clear, call an authorized servicer or the toll-free number
in the display.
If the same operation is attempted before having the oven repaired, the message
FEATURENOT AVAILABLE will appear. The feature will remain inoperable until service
isobtained.
If the oven is heavily soiled, excessive fiareups may result in a fault code during cleaning.
Pressthe CANCEL padand allow the oven to cool completely, wipe out excess soil, then
reset the clean cycle. If the fault code reappears, contact an authorized servicer.
The oven makes several low-level noises.You may hear the oven relays as they go on
and off. This is normal.
As the oven heats and cools, you may hear sounds of metal parts expanding and
contracting. This is normal and will not damage your appliance.
• Oven isinSabbath Mode. To cancel, press and hold the Setup pad for five seconds.
° Favorites is full. To delete a favorite and add another, see page 23.
11

SURFACE COOKING
Low: Use to simmer foods, keep foods
warm and melt chocolate or butter. Some
cooking may take place on the Low
setting if the pan iscovered. It is possible
to reduce the heat by rotating the knob
toward OFF. Be sure flame isstable.
High: Use to bring liquid to a boil, or reach
pressure in a pressure cooker. Always
reduce setting to a lower heat when liquids
begin to boil or foods begin to cook.
An intermediate flame size is used to
continue cooking. Food will not cook any
faster when a higher flame setting is used
than needed to maintain a gentle boil.
Water boils at the same temperature
whether boiling gently or vigorously.
Surface Controls
Setting the controls:
The size and type of cookware will affect the heat setting.
1. Place a pan on the burner grate.
* The burner flame may lift off or appear separated from
the port if a pan is not placed on the grate.
2. Push in and turn the knob to the desired setting.
A clicking (spark] sound will be heard and the burner
will light.
Important: Eachsurface burner isequipped to provide
automatic reignition ifthe flame should somehow get
blown out.
Pilotless ignition
Pilotless ignitioneliminates the
need for a constant standing
pilot light. Eachsurface burner
has a spark ignitor.Use care
when cleaning around the
surface burner.
If the surface burner does
not light, check if ignitor is
broken, soiled or wet.
BURNER CAP
BURNER BASE
Surface Control Knobs
Use to turn on the surface burners. An infinitechoice of heat
settings is available from Low to High. At the High setting a
detent or notch may be felt. The knobs can be set on or
between any of the settings.
Graphics next to the knob identify which burner
It the knob controls. For example, the graphic at left
OFront shows the right front burner location.
12
Operating During a
Power Failure
1. Hold a lighted match to the desired surface burner head.
2. Push in and turn the control knob slowly on.
3. Adjust the flame to the desired level.

Cooktop
To prevent the cooktop from discoloring
or staining:
• Clean cooktop after each use.
• Wipe acidic or sugary spills as soon as the cooktop has
cooled as these spills may discolor the
porcelain.
Unlike a range with standard gas burners,
this cooktop does not lift up nor isit
removable. Do not attempt to lift the
cooktop for any reason.
Burner Grates
The grates must be properly positioned before cooking.
When installing the grates, place the tab ends toward the
center, matching the straight bars.
Improper installation of the grates may result in chipping of
the cooktop.
Sealed Burners
The sealed burners of your range are secured to the cooktop
and are not designed to be removed. Since the burners are
sealed into the cooktop, boilovers or spills will not seep
underneath the cooktop.
However, the burner should be cleaned after each use. The
cap portion of the burner is easily removed for cleaning. (See
page 7 for cleaning directions.]
The burner caps must be correctly placed on the burner base
for proper operation of the burner.
High Performance Burner
There isone 16,000BTU* high speed burner on your range,
located in the right front position. This burner offers higher
speed cooking that can be used to quickly bring water to a
boil and for large-quantity cooking.
Low Turn Down Burner
This burner is located in the right rear
position. The Simmer setting can be
used to steam or poach foods, to cook
delicate sauces or continue cooking
covered foods. The ultra-low Melt
setting is best for melting
chocolate and butter.
important: When using the normal settings
for preparing foods, it may take a few minutes for the cooking
area to cool to the Melt heat setting.
BTU ratings will vary when using LP gas.
Dual Ring Burner (selectmodels)
The cooking surface isequipped with a dual
ring burner located in the left front _
position. To operate, push in on the
control knob and turn counterclockwise
to light the burner. Continue turning
until the desired setting is reached. The
lighting sequence is:inner burner on
High, then inner burner on Low,then bot
rings on High, then both rings on Low.
Do not operate the burners without a pan on the grate.
The grate's porcelain finish may chip without a pan to
absorb the heat from the burner flame.
Use care when stirring food in a pot/pan sitting on the burner
grate. The grates have a smooth finish for ease of cleaning.
The pot/pan will slide if the handle is not held. This may result
in spilling of hot food items and may be a burn hazard.
Although the burner grates are durable, they will gradually
lose their shine and/or discolor, due to the high temperatures
of the gas flame.
Notes:
• A properly adjusted burner with clean ports will light
within a few seconds. If using natural gas, the flame
will be blue with a deeper blue inner cone.
If the burner flame isyellow or is noisy, the air/gas
mixture may be incorrect.Contact a service technician
to adjust. (Adjustments are not covered by the
warranty.)
With LPgas, slight yellow tips on the flames are
acceptable. This isnormal and adjustment isnot
necessary.
With some types of gas, you may hear a "popping"
sound when the surface burner is turned off. This is a
normal operating sound of the burner.
• Ifthe control knob is turned very quickly from High to
Low, the flame may go out, particularly ifthe burner is
cold. If this occurs, turn the knob to the OFF position,
wait several seconds and relight the burner.
The flame should be adjusted so it does not extend
beyond the edge of the pan.
13

Ventilation System
The built-in ventilation system removes cooking vapors, odors
and smoke from foods prepared on your cooktop and grill.
• To operate the ventilation
system manually, push the .... F_,_,,,_
T_M_T
o,,or
Vent Fan pad located on the ..... _,_,_,,
electronic control. Push once ............
for Low, push again for High _,_,I_:,I,o'_0'_,_
V_nt
and a thirdtime to turn the _"
fan Off.
• The ventilation system will operate automatically when the
grill element is in use.
• The fan can be used to remove strong odors from the
kitchen as when chopping onions near the fan.
Care and Cleaning of the
Ventilation System
° Air Grille: Tile air grille lifts off easily.Wipe clean or wash in
dishwasher or sink with mild household detergents. To
prevent scratching the surface, do not use abrasive
cleaners or scrubbing pads.
FILTER
° Filter: Turn off ventilation system before removing. The filter
is a permanent type and should be cleaned when soiled.
Clean in sink with warm water and detergent or in
dishwasher.
iMPORTANT: DO NOT OPERATESYSTEMWITHOUT
FILTER.Filter should always be placed at an angle. As you
face the front of the range, the top of the filter should rest
against the left side of the vent opening. The bottom should
rest against the right side of the vent chamber at the
bottom. Important: If filter is flat against the fan wall,
ventilation effectiveness is reduced.
° Ventilation Chamber: This area,which houses the filter,
should be cleaned in the event of spills or whenever it
becomes coated with a film of grease. It can be cleaned with
paper towel, damp cloth, or sponge and mild household
detergent or cleanser.
Important: The oven vent islocated under the right side of
the air grille. When using or cleaning the oven, hot and
moist air may be noticed in this area. The area near the vent
may become hot enough to cause burns. Be careful not to
spill anything intothis vent. The air grille must be
removed before the self=clean cycle.
14

OVENCOOK=NG
Control Panel
AB CD
.............C_ "PavorJteSon/o_On'_el_LIp/ Off
Clean
Rapid More
-- Preheat iis_
J KL
TIMER1
On/Off
Vent OVeR
Fan Light CANCEL
°ni° I t
N N 0
G
TIMER2
On/Off
P
H
! ,
2 3
ABC DEF
4 5 6
GHI JI(L MNO
7 8 9
PQRS TtJV WXYZ
Back 0 Enter
1 Space I
lock
The control panel is designed for ease in programming. The display window shows options for each function and moves from step
to step through the programming process. Control panel features vary by model. Oven display above is programmed for a bake
operation.
Rapid Preheat
Convect
Bake
Broil
TIMER 1
Display
TIMER 2
Number Pads
Favorites
More Options
Clean
Setup
Vent Fan
Oven Light
CANCEL
Quickset pads
Use to decrease preheating time.
Use for convection baking and roasting.
Use for baking and roasting.
Use for broiling and top browning.
Sets timer.
Displays oven functions, options and
window time of day.
Sets timer.
Use to enter time and temperature,
or to enter Favorites names.
Use to access, program or save
baking cycles.
Use to access additional features.
Use to set self-clean cycle.
Use to view or change factory
default settings.
Activates the ventilation fan on
the cooktop.
Use to turn the oven light on or off.
Cancels all operations except Timer,
Clock, Favorites, Setup and Vent Fan.
Use to select options in display
window (next to display window
on both sides].
Quickset Pads
Quickset pads are located on each side of tile display window
and are used to select the desired function or option in the
display window. To select the option or function, press the
Quickset pad next to the word.
If you need to back out of a function or option in the display,
press the Back pad. When your programming is complete,
press the Enter pad or wait four seconds and the function will
start automatically.
Up arrows indicate additional screens with additional options.
Pressthe Quickset pads next to the arrows to scroll through
the display.
Important: Fourseconds after entering the function,
option, number or letter, the function will automatically be
entered. If more than 30 seconds elapse between steps in
programming, the function will be canceled and the
display will return to the previous display.
Clock
Setting the Clock: jj.............
1. Press the Setup pad. Setup !
k On/Off /
2. Select CLOCK using the Quickset pads. ...........
3. Select TIME.
4. Enter the time using the number pads.
5. Press Enter pad.
6. Select AM or PM in 12 hour mode. (For 24 hour clock, see
page 16.]
7. To exit the Setup mode, press Setup pad.
15

Activating and canceling the clock/day
of week display: ...................
1. Press Setup pad. /setup
On/Off/
2. Select CLOCK. J
3. Press the arrow to scroll until DISABLE is displayed.
4. Select DISABLE.
5. Select TIME.
6. Select OFF to turn the clock display off, or select ON to turn
the clock display on.
7. Select OFF to turn the day of the week display off Select
ON to turn the weekday display on.
8. To exit the Setup mode, press Setup pad.
Entering the day of the week:
1. Press Setup pad.
2. Select CLOCK.
/, ...............
; Setup
, On / Off/
3. Press the arrow to scroll until DAY is displayed.
4. Use Quickset arrow to scroll through the days.
5. Select day desired.
6. To exit the Setup mode, press Setup pad.
To set the clock for a 12 or 24 hour format:
The clock can be set to display time in either a 12 hour or 24
hour format. /.........................
/ Setup
1. Press the Setup pad.
On/Off/
2. Select CLOCK. " ..........
3. Use the arrow to scroll to the next screen.
4. Select 12/24 HOUR.
5. Select 12 HB or 24 HR.
6. To exit Setup mode, press Setup pad.
Timers
Setting the Timers (Timer 1 or Timer 2):
1. Press TIMER 1 or TIMER 2 pad. _TIMER 1
2. Press one of the displayed times using the , On / Off /
Quickset pads, or press the number pads to ...........
enter the desired time.
Important: Eachpress of the displayed time choices adds
additional time. Forexample, pressing "10 MIN" three
times provides 30 minutes on the timer (0:30).
3. Press Enter pad.
Changing the amount of time entered once the
Timer starts:
1. PresstileTIMER 1 or TIMER 2 pad once. "TIMER1
On / Off /
2. Press the displayed times on the Quickset ..................................
pads repeatedly until the desired time is entered.
OR
3. Press the number pads to enter the new desired time.
4. Press Enter pad.
Canceling the Timer:
1. Press the TIMER 1 or TIMER 2 pad twice.
If both Timers are active:
/ TIMER1 .....
On/Off
If the desired Timer is already in the foreground, press once
for edit mode and twice to cancel the Timer. If the desired
Timer is not in the foreground, follow the steps below.
1. Press the desired TIMER pad once. The selected Timer will
come to the foreground.
2. Press the TIMER pad a secondtime to access the edit
mode in order to make changes.
3. Pressing the TIMER pad a thirdtime will cancel the Timer.
Changing the Timer beeps:
The signal beeps for TIMER 1 and TIMER 2 can be changed.
The options available are two beeps every thirty seconds, two
beeps every sixty seconds or one beep only. The default
setting is one beep.
1. Press the Setup pad. / Setup
2. SelectthearrowtoscrolluntilTONES On /Off/
/
isdisplayed. ........
3. Select TONES,
4. Select TIMERS TONES.
5. Select the desired timer beep format [2-30 SEC,2-60 SEC
or 1 BEEP).
6. Press Setup pad to exit Setup mode.
Locking the Control and Oven Door
The oven control and oven door can be locked to prevent
accidental programming. If an oven function is currently
being used, the control and door cannot be locked.
To lock the control and door:
Press the Back and Enter pads at the same time, holding for
three seconds or until CONTROL LOCKED appears in the
display.
To unlock the control and door:
Press the Back and Enter pads at the same time, holding for
three seconds. UNLOCKING DOORwill appear in the display
when the control and door are unlocking.
Back 0 Enter
16

Baking
/ ................
To set Bake: J
Bake
1. Press the Bake pad.
2. Select the oven temperature using the Quickset pads.
OR
Enter the desired temperature using the number pads.
Press Enter pad to set.
• The temperature can be set from 170° Fto 550° F
in 5° increments.
• After three seconds, the oven will begin to preheat.
BAKE and PREHEATwill appear in the display along
with 100°or the actual oven temperature, whichever
ishigher.
• The temperature in the display will increasein 1°
incrementsuntil the oven reaches the preset
temperature. Allow about 15 minutes for the oven
to preheat.
° When the oven ispreheated, the oven will beep and
PREHEATwill no longer be displayed.
3. At the end of cooking, turn the oven off by J_............ ,,
pressing the CANCEL pad. Remove food CANCEL
from the oven. The oven will continue ..............
operating until the CANCEL pad ispressed.
Notes:
° If more than thirty seconds elapse between pressing a
pad and pressing a number pad, the display will return
to the previous display.
• Whenever the temperature appears in the display, the
oven isheating.
° To change the oven temperature during cooking, press
the Bake pad and select a displayed temperature or use
the number pads to enter the desired temperature.
• The oven will automatically shut off after 12 hours if it is
accidentally left on. To set a Sabbath Mode, see Sabbath
Mode, page 25.
Bake Options
Cook & Hold and Delay options are available when baking.
When using the Cook & Hold option, the oven begins to heat
immediatelyafter the control has been set. Then, the oven
cooks for a specified length of time. When that time has
elapsed, the oven will automatically reduce temperature to
170° Fand keep the food warm for up to an hour and then
automatically turn off.
When using Delay, the oven begins to cook later in the day.
Set the amount of time that you want to delay before the oven
turns on and how long you want to cook. The oven begins to
heat at the selected time and cooks for the specified length of
time. When that time has elapsed, the oven will keep the food
warm for up to an hour then automatically turn off.
To set Cook & Hold:
1. After Bake has been programmed, press
the More Options pad.
2. Select COOK/NLD.
/ ............
/ More
,,Options
/
3. Select the amount of time you want to bake by pressing
the Quickset pads or the number pads.
4. Press ENTER.
5. COOK TIME, the cook time countdown, PREHEAT,BAKE
and the actual temperature will be displayed.
The oven will cook for the selected time, then keep food warm
for one hour.
To set a Delay:
/"
1. After Bake has been programmed, press More "
the More Options pad. Options
/
2. Select DELAY.
3. Select the amount of time you want to delay the start of
cooking using the displayed times or the number pads.
4. Select the amount of time you want to cook using the
displayed times or the number pads.
5. The display will show BAKE,the temperature, the delay
time and the cook time countdown.
6. When the delay time has expired, the oven will begin
heating. COOKTIME, the cook time countdown, PREHEAT,
BAKE and the actual oven temperature will be displayed.
Conveot
Convection uses a fan to circulate hot air evenly over, under and
around the food. As a result, foods are evenly cooked and
browned, often in shorter times, at lower temperatures and with
the flexibility of using more than one rack at a time.
Convect Options
Cook & Hold and Delay
options are available when
convect cooking. See
page 21 for information on
how to program a Cook &
Hold or Delay option.
17
Multiple-Rack
Baking of
Cookies/Biscuits
Breads
Casseroles
Whole Chicken
Whole Turkey
Vegetables
Pork Roasts
Beef Roasts
Tarts/Tortes
Cakes

Notes:
, The oven control comes from the factory set for Auto
Convect Conversion. When using Convect Bake enter the
conventional baking temperature. The control
automatically converts the temperature to 25° less than
the conventional temperature.
• When using Convect Roastthe temperature will not be
automatically reduced. Enterthe conventional roasting
temperature and time. The control then lets you know
when 750/0of the time has elapsed and alerts you to check
the food for doneness.
• To turn Auto Convect Conversion off, see page 24.
Convect Bake
To set Convect Bake:
1. Pressthe Convect pad. Coiqvect
2. Select CNVT BAKE using the Quickset pads.
3. Select the oven temperature using the Quickset pads
OR
Enter the desired temperature using the number pads.
Press Enter pad to set.
• The temperature can be set from 195° Fto 550° F
degrees in 5° increments.
• After three seconds, the oven will begin to preheat. CNVT
BAKEand PREHEATwill appear in the display along with
100° or the actual oven temperature, whichever is higher.
° The temperature in the display will increase in 1°
increments until the oven reaches the preset temperature.
Allow about 15 minutes for the oven to preheat.
• When the oven is preheated, the oven will beep, and
PREHEATwill turn off and CNVT BAKE will be displayed.
AUTO will be displayed if Auto Convect Conversion
feature is turned on.
• Placefood in the oven.
4. At the end of cooking, turn the oven off by pressing the
CANCEL pad. Remove food from the oven. The oven will
continue operating until the CANCEL pad is pressed.
Convect Roast
To set Convect Roast:
1. Placefood in the oven.
2. Pressthe Convect pad.
3. Select CNVT ROAST using the Quickset pads.
4. Select the oven temperature using the Quickset pads.
OR
Enter the desired temperature using the number pads.
PressEnter pad to set.
• The temperature can be set from 195° Fto 550° F
degrees in 5° increments. If Auto Convect Conversion is
turned off, you can set 170° F.
5. Enter desired cook time. Enter the conventional roasting
time using the number pads.
• After three seconds, the oven will begin to heat. CNVT
ROASTwill appear in the display along with 100° or the
actual oven temperature, whichever is higher.
• The temperature in the display will increase in 1°
increments until the oven reaches the preset
ternperature.
° Cook time will begin to count down.
6. At 750/0of the cooking time the oven will beep to let you
know to check food. Check food using a meat thermom-
eter. If food is done, take food out of oven and press
CANCEL pad to turn oven off.
7. If food is not done, continue roasting.
Once the set time has elapsed the oven will automatically
go intoKeep Warm mode for 1 hour. If /............................,
food is taken from the oven before the hour { CANCEL i
has elapsed, press CANCEL pad. "....................................
NOteS:
• If the recipe suggests preheating the oven, add time to
cook time.
• If Auto isoff, roast time will not be required.
Rapid Preheat
Use to decrease preheating time when usHlg Bake or Convect
Bake. Use for all foods when baking on one rack.
° After Bake or Convect Bake has been programmed and
activated, press the Rapid Preheat pad.
• 1 RACK ONLY will display, after 10 seconds the display will
show RAPIDand PREHEAT.
To return to Standard Preheat:
Press Rapid Preheat pad again. This will provide standard
preheat and PREHEATand the selected function will be
displayed. Cant.
18

Notes:
• For best results, use rack position 2 or 3 when using the
Rapid Preheat option.
• For optimum baking and browning results, Rapid Preheat
is not recommended when baking on multiple racks.
Broil
For optimal results, preheat for five minutes with tile door
closed and use a pan designed for broiling. Oven door should
be open to the broil stop position (about 4 inches) when
broiling.
To set Broil:
1. Placethe oven rack in the proper rack position (see
Broiling Chart).
2. Pressthe Broil pad. Broil :
3. Select HIGH - 550° Ffor high broil. "...................."
OR
Select LOW - 450° Ffor low broil.
4,
5.
• The oven has a variable broil feature which means that
a lower broil temperature can be selected (3000-550° El.
To select a lower temperature, press the appropriate
number pads. Press Enter pad to set the lower
ternperature.
Preheat the oven for five minutes.
Placefood in the oven and close the door to the broil stop
position.
j ..........
Pressthe CANCEL pad when broiling : CANCEL
isdone. ...........
Notes:
° See Broiling Chartfor foods and broiling times.
• If more than 30 seconds elapse between pressing the Broil
pad, Quickset pads, or number pads, the oven will not be
set and the display will return to the previous display.
° HIGH isused for most broiling. Use a lower broil
temperature when broiling longer-cookingfoods. The
lower temperature allows food to cook to the well done
stage without excessive browning.
° Expect broil times to increaseand browning to be slightly
lighter ifthe appliance is installedon a 208 volt circuit.
• Food should be turned halfway through broiling time.
• Broil times may be longer when lower broiling
temperatures are selected.
Broiling Chart
Beef (broiled to 165° F)
6 Hamburgers, 1/2" thick
2 Ribeye Steaks, 1" thick
2 New York Strip Steaks, 1" thick
2 T-Bone Steaks, 1" thick
Poultry (broiled to 170° Fon Low)
4 Boneless/Skinless Breasts
4 Bone-In Chicken Breasts
Pork (broiled to 160° F)
4 Boneless Pork Chops, 1" thick
4 Bone-In Pork Chops, 1" thick
Ham Slice, 1"thick
Fish (broiled to 140° El
4 Swordfish Steaks, 1" thick
2 Halibut Steaks, 1" thick
Orange Roughy, 1 "thick
Shrimp (16-20 ct. per lb.)
2 Salmon Fillets, 1/2" thick
2 Salmon Steaks, 1" thick
m
i i i i i i i i i i i i i i iiiiiiiiiiii i i i!! ! ! i !i iii!!i!i!i!i!!iiiii i !i i! ! !! ! ! !!!!!i! i! i! i! !!!!!!!iiiii!i!ii!ii!i!iiiiiiiiiiiiiiiiiiiiiiiiiiiiiiiii!! i i
10 - 12 minutes
18 - 22 minutes
18 - 22 minutes
18 - 22 minutes
Low Broil
12 - 15 minutes
20 - 33 minutes
20 - 28 minutes
25 - 28 minutes
12 - 16 minutes
10- 14 minutes
10- 14 minutes
10 - 12 minutes
8 - 10 minutes
8 - 12 minutes
10- 14 minutes
4
4
4
4
4
3
4
4
4
3
3
4
4
4
3
*Important: To reduce browning and excess smoke when broiling, usea lower rack position and increase
the broil time.
19

Oven Fan
A convection fan is used to circulate hot air in the oven when
the convection feature is selected.
Important: The convection fan will automatically stop when
the oven door is opened.
Oven Vent
The oven vent is incorporatedinto the downdraft ventilation
system on the cooking surface.
When the oven is in use, the area near the oven vent may
become hot enough to cause burns. For best baking results,
do not block the vent opening.
Oven Light
The oven light automatically comes on when / .................
the door is opened. When the door is closed, / Over3
press the Oven Light pad to turn the oven
light on and off. A beep will sound every time
the Oven Light pad is pressed. If the oven light is on when the
door is opened, the light will go off when the door is closed.
Oven Bottom
Protect ovenbottom against spillovers, especially acidic or
sugary spills, as they may discolor the porcelain enamel. Use
the correct pan size to avoid spillovers and boilovers. Do not
place utensils or aluminum foil directly on the oven
bottom.
Oven Racks
Rack Positions
RACK 5 (highest
position):
Used for two-rack
cooking and broiling.
RACK 4:
Used for two-rack
baking and broiling.
RACK 3:
2 Flat
1 Flat
Three-rack Convection Cooking
Used for most baked goods on a cookie sheet or jelly roll
pan, layer cakes, fruit pies, or frozen convenience foods.
RACK 2:
Used for roasting small cuts of meat, casseroles, baking
loaves of bread, bundt cakes, custard pies, frozen pies or
two-rack baking.
RACK 1:
Used for roasting large cuts of meat and poultry, dessert
souffles, angel food cake, or two-rack baking.
MULTIPLE RACK COOKING:
Two rack: Use rack positions 2 and 5 o 1 and 4.
Three rack Cconvectiononly): Use rack positions 1,3
and 5 Cseeillustratior0.
Notes:
* When convect baking on two or three racks, check foods
at the minimum suggested time to avoid over-browning
or over-cooking.
* Do not cover an entire rack with aluminum foil or place foil
on the oven bottom. Baking results will be affected and
damage may occur to the oven bottom.
Baking Layer Cakes on Two Racks
2. Lift up on the front of
the rack and pull out.
To replace:
1.
Three standard flat racks were packaged for the oven.
To remove:
1. Pull forward to the
"stop" position.
Place rack on the rack support in the oven.
2. Tilt the front end up slightly; slide rack back until it clears
the lock-stop position,
3. Lower front and slide into the oven.
rack as shown.
?
2O

OPT|
More Options
Cook & Hold
1. Press the More Options pad.
2. Select COOK/HOLD.
JJJMore .............
Options
3. Enter cook time using Quickset pads or the number pads.
4. Select BAKE or CONVECT.
5. When BAKE is pressed, select the temperature using
Quickset pads or the number pads.
6. When CONVECTis pressed, select CNVT RAKE or CNVT
ROAST then select the desired temperature using the
Quickset pads or the number pads.
The oven will cook for the selected time, then Keep Warm for
one hour. The oven will automatically turn off.
Important: If the recipe recommends preheating the oven,
add 15 minutes to the cook time.
Delay
1. Press the More Options pad.
2. Press the arrow until DELAY is displayed.
3. Select DELAY.
J"More
Options
4. Select Delay time using Quickset pads or the number
pads.
5. Select RAKE, CONVECT or CLEAN, then select
temperature using the Quickset or number pads.
To set Delay Bake:
1. Follow "Delay" steps 1-4 (see above_).
2. Select from the displayed temperatures or use the
number pads to enter the temperature.
3. Select the time to cook from the displayed times or use
the number pads to enter the cooking time.
4. The display will show DELAY TIME, the selected function,
the preset temperature and the delay time countdown.
When the delay time has expired, the cook time will be
displayed and the oven will begin to preheat.
To set Delay Convect:
1. Follow "Delay" steps 1-4 (see above_).
2. Select BAKE or ROAST.
3. Select from the displayed temperatures or use the
number pads to enter the temperature.
4. Select the time to cook from the displayed times or use
the number pads to enter the cooking time.
5. The display will show CONVECT DELAY, the selected function,
the preset temperature and the delay time countdown. When
the delay time has expired, the cook time will be displayed and
the oven will begin to preheat.
To set Delay Clean:
1. Follow "Delay" steps 1-4 (see below le%
2. REMOVE RACKSwill show in the display. Removethe racks
from the oven and select CONTINUE.
Set LIGHT soil level by entering 200 using the number pads
for two hours of cleaning time. Select MEDIUM or HEAVY
soil level using the Quickset pads. There is a brief delay while
the door locks.
4. DELAY CLEAN,the cleaning time, the delay time and unlock
time (based on the selected soil level) will show in the display.
When the delay time has expired, the clean time will be
displayed and the oven will begin to preheat.
For more information on self-cleaning, see pages 5-6.
Proofing
The Proofing feature can be used to raise yeast-based bread
products prior to baking. There are two proofing methods
available - Rapid and Standard.
Standard proofing in the oven protects dough from room
temperature changes or drafts that commonly affect proofing
done on the countertop.
Rapid proofing provides faster proofing results than countertop
or Standard proofing, without harming the yeast.
1. Press More Options pad.
2. Select PROOFING.
3. Select RAPID or STANDARD.
Options ,_
................... /
CANCEL
4. When proofing is complete, remove the ...................
dough from the oven and press the CANCEL pad.
Notes:
For any dough that requires one rise, either Standard or
Rapid Proofing can be used.
When using frozen bread dough, choose RAPID PROOFING.
There is no need to thaw dough before proofing.
For dough requiring two rises, Standard Proofing must be
used for the first rising period. Either Standard or Rapid
Proofing can be used for the second rise.
If oven temperature is too high for proofing, OVEN COOLING
will appear in the display.
21

Keep Warm
The Keep Warm feature is used to safely keep hot foods warm
or for warming breads and plates,
1. Press More Options pad. /More
2. Press the arrow to scroll. Options
............................. /
3. Select KEEP WARM.
4. Select one of the displayed temperatures or enter desired
temperature using the number pads, Temperatures can be
selected between 145° and 190° F.
5. KEEPWARM and the temperature will be displayed.
6. When oven has preheated, a beep sounds and KEEP
WARM and the temperature will be displayed.
/ ........ \
7. When finished, press the CANCEL pad and CANCEL :
remove food or plates from the oven. "................ J
To Warm Dinner Rolls:
• Cover rolls loosely with foil and place in oven.
• Press More Options pad.
° Select KEEPWARM.
• Select 170°temperature. Warm for 12-15 minutes.
To Warm Plates:
• Placetwo stacks of up to four plates each in the oven.
• Press More Options pad.
• Select KEEP WARM.
• Select 170°temperature.
,Options
........ /
• Warm for five minutes. Turn off the oven by pressing the
CANCEL pad and leave plates in the oven for 15 minutes
more.
• Use only oven-safe plates, check with the manufacturer.
• Bo not set warm dishes on a cold surface as rapid
temperature changes could cause crazing or breakage.
Notes:
° Food should be hot when placed in oven.
• Foroptimal food quality, foods should be kept warm for
no Iongerthan 1 hour.
• To keep foods from drying, cover loosely with foil or a
glass lid.
Meat Probe
Using the probe supplied with your oven assures excellent
roasting results every time.
1. Insert the probe into the food item. For meats, the probe
tip should be located in the center of the thickest part of
the meat and not into the fat or touching a bone.
2. Insert the probe plug into the
receptacle located on the top
right of the oven. Be sure to
insert plug into the receptacle
all the way.
3. Press More Options pad.
4. Press the arrow to scroll.
!More-¸.......
5. Select MEAT PROBE. ,Options
............. /
6. Setthe internal food temperature desired by selecting
one of the displayed temperatures or enter the
temperature using the number pads. The probe
temperature can be set from 100° - 185° F. If the meat
probe is not inserted, INSERTPROBEwill be displayed.
7. Select BAKE or CONVECT.
8. Setthe oven temperature by selecting one of the
displayed temperatures or enter the temperature using
the number pads.
Important: If the probe is removed from the oven
receptacle at any time during the cooking process, the
control will prompt INSERTPROBE.If the probe is not
reinserted within 30 seconds, the program will be canceled
and the oven will turn off.
When BAKE is selected:
• The display will briefly show the selected temperatures
for the oven and probe.
° After 10 seconds, the display will show the actual oven
temperature and actual probe temperature.
When CONVECT is selected:
• Select CNVT BAKE or CNVT ROAST.
• Set the oven temperature by selecting one of the
displayed temperatures or enter the temperature using
the number pads.
• The display will briefly show the selected temperatures
for the oven and probe.
• After 10 seconds, the display will show the actual oven
temperature and actual probe temperature.
Cent.
22

9. When the selected internal temperature of the food has
been reached, the oven will shut off and a beep will sound.
10. Remove the probe from the oven receptacle. The probe
will be hot. Hold probe plug with an oven mitt or
potholder when removing from the oven.
Suggested |nternal Food Temperatures
Ground Beef 165° F
FreshBeef,Veal, Lamb Medium Rare 145° F
Medium 160° F
Well Done 170° F
Chicken,Turkey Whole 180° F
Breast 170° F
Pork Medium 160° F
Well Done 170° F
Ham,Precooked 140° F
Notes:
• The probe must be removed from the oven when it is not
being used.
• Because of the excellent insulation of the oven, the
retained heat continues to cook the food after the beep
has sounded and the oven has turned off. For this
reason, it is important to remove the food from the oven
as soon as the beep sounds.
• Use the handle of the probe for inserting or removing.
Do not pull on the cable.
• The probe is hot after cooking - use a potholder or
oven mitt to remove.
° To clean cooled probe, wipe with a soapy dishcloth.
Do not submerge probe in water or wash in
dishwasher.
FAVORITE:
Favorites
Favorites stores the oven mode, cook time and temperature
for up to 10 of your favorite recipes. Convection ovens come
with five preprogrammed recipes.
To select a recipe from the preset Recipe List:
1. Press Favorites pad.
2. Select RECIPE LIST.
3. Select desired recipe on screen or press
arrow key to scroll to the desired recipe.
4.
/ Favorites
On/Off
Once the recipe is selected, oven will begin preheating to
the set program.
• You may press the More Options pad to add
COOK/HOLD or DELAY.
5. When finished, press the CANCEL pad and remove food
from the oven.
To Save the Last Recipe Completed:
CBake,Convect Bake, Convect Roast, Broil, Keep Warm)
1. Press Favorites pad.
// .................................. \
2. Select SAVE LAST. / Favorites"
3. Enter the name using the keypads. '\ On / Off //
Forexample, to save lasagna, press the <JKL> pad
three times for "L"; Press the <ARC> pad once for "A";
press the <STU> pad once for "S". Continue until you've
finished the word.
4. After each desired letter appears, wait three seconds or
press Enter pad before moving on the next letter.
• Up to 14 letters including spaces can be used.
5. When the recipe name has been entered, the last settings
will be displayed for a few seconds.
6. RECIPELISTwill then be displayed to scroll through the
list.
7. Press Favorites pad to exit the Favorites menu.
To Create a New Favorite Recipe: _............................................
1. Press Favorites pad. Favorites
On/Off //
2. Pressarrow key to scroll through selections. ..........
3. Select CREATE NEW with touchpad on left.
4. Enter the name using the keypads.
• Forexample, to save lasagna, press the <31{L_ pad three
times for "L'; Pressthe <ARC> pad once for "A"; press
the <STU> pad once for "S". Continue until you've
finished the word.
• After each desired letter wait three seconds until an
underline appears in the next space or press
Enter pad before moving on the next letter.
• Up to 14 letters including spaces can be used.
23

5. Select ENTERto save name.
6. Select cooking mode, such as BAKE, CONVECT BAKE,
CONVECT ROAST, etc.
7. Select the oven temperature using the Quickset pads.
OR
Enter the desired temperature using the number pads.
8. Add Cook/Hold by selecting YES or omit Cook/Hold by
selecting NO.
9. If you selected YES,enter cook time using the Quickset
pads or the number pads.
10.Add Delay by selecting YES or omit Delay by selecting
NO.
11.If you selected YES,enter the delay time by using the
Quickset pads or the number pads.
12.The control will display programmed settings then return
to the Favorites menu.
13.Press Favorites pad to exit the Favorites menu.
/x .......
To Edit a Saved Recipe: / Favorites
1. Press Favorites pad. On/Off /
2. Pressarrow key to scroll.
3. Select EDIT RECIPE.
4. Select desired recipe to edit. You may need to press arrow
key to find desired recipe.
5. Follow menu to revise recipe settings as desired.
6. The display will return to the Favorites menu. RECIPELIST
will be displayed.
PressFavorites pad to exit Favorites menu.
Delete a Favorite Recipe:
PressFavorites pad.
Pressarrow key to scroll.
Select DELETERECIPE.
7,
To
1.
2.
3.
4.
jr ..............
/ Favorites
Find recipe to be deleted. You may need to press arrow
key to find desired recipe.
5. The Control will ask again to make sure you want to delete
that recipe. Select YES or NO.
6. PressFavorites pad to exit Favorites menu.
To exit out of Favorites at any time, press the Favorites pad.
S p ..................
etu " setup
(
1. Press the Setup pad. On / Off/
2. Use the arrow to scroll through the Setup options.
3. Select the desired option by pressing the Quickset pads.
Note -=To back out of a screen without making any
changes, press the Setup pad. The display will return to
the time of day.
Clock
See pages 15-16 for more details. Use the Clock option to:
• Set the time of day.
• Set day of week.
• Select AM or PM (12-hour mode only]. AM or PM will not
show with the time of day in the display.
° Choose a 12 or 24 hour clock display.
° Disable the clock display.
Language
Tile language of the screens in the display window can be
set to English, French or Spanish. To change the display
language from English: _............
1. PressSetup pad. " Setup
On / Off /
2. Select LANGUAGE. "...............................
3. Use the arrow to scroll to next screen, if needed.
4. Select the desired language.
5. PressSetup pad to exit the Setup menu.
Auto Convect Conversion
The oven comes from the factory set for Auto Convect
Conversion.
Auto Convect Conversion automatically reduces the set
temperature by 25° for Convect Bake.
For Convect Roastthe control will alert you at 750/0of the
programmed roasting time to check foods for doneness.
Convect roast temperatures are not reduced.
To deactivate Anto Convect Conversion:
1. PressSetup pad. Setup '
2. Select AUTO CONVECT. , On / Off /
\ /"
3. Select OFF.
4. PressSetup pad to exit the Setup menu.
24 Cont.

To reactivate Auto Convect Conversion:
1. PressSetup pad.
2. Select AUTO CONVECT.
3. Select ON.
4. PressSetup pad to exit the Setup menu.
/ Setup
On/Off/
Notes:
• When using Convect Bake and Convect Pastrywith the
Auto Convect Conversion option turned off, reduce the
set temperature by 25° F.
° If Convect Roasting with the Auto Convect Conversion
option turned off, you will not be required to program a
cooking time. Check food at 750/0of the conventional
time.
C/F
Tile displayed temperature scale can be changed from
Fahrenheit to Celsius.
To change the scale:
1. PressSetup pad.
2. Use the arrow to scroll to the next screen.
" Setup
On / Off
..................... ,/
3. Select C/F.
4. Select the desired temperature scale.
5. PressSetup pad to exit the Setup menu.
Sabbath Mode
The oven isset to shut off after 12 hours if you accidentally
leave it on. The Sabbath Mode overrides the 12-hour shut-off
and can either be set to come on automatically or can be set
manually as desired.
Only Bake or Cook/Hold Bakewill operate when the oven is in
Sabbath Mode. All other functionsare invalid. Ifa function other
than Bake or Cook/Hold Bake is in operation when Sabbath
Mode starts, the function will be canceled.
To activate Sabbath Mode:
/ .......
1. PressSetup pad. Setup '
, On / Off
2. Pressthe arrow to scroll. ".................
3. Select SABBATH.
4. Select AUTO or MANUAL.
• AUTO will automatically prompt you to enter a Bake
temperature on Friday at 2 pm and stay in Sabbath
mode for 33 hours, SABBATH and SABBATH ENABLE
appear in the display for 90 minutes, If Bake or Cook/
Hold Bake are desired during Sabbath Mode, they must
be programmed during this 90 minute time before AUTO
Sabbath Mode is active,
• MANUAL sets the oven to Sabbath Mode for 72 hours.
SABBATH and SABBATH ENABLEappear in the display
for five minutes. If Bake or Cook/Hold Bake are desired
during Sabbath Mode, they must be programmed during
this five minute time before the MANUAL Sabbath Mode
isactive.
5. Select ON or OFF.
6. PressSetup pad to exit the Setup menu.
To cancel Sabbath Mode:
Press and hold the Setup pad for five seconds.
The Bake mode may be cancelled by pressing
the CANCEL pad during Sabbath.
/ Setup
On/Off ,'
\ .......... /
Notes:
• The oven must be idle to program Sabbath Mode.
• Sabbath Mode cannot be turned on if the keypads are
locked out or when the door is locked.
° If the oven is baking when Auto Sabbath Mode starts,
there will be no audible beeps.
• All prompts, messages and beeps are deactivated when
the Sabbath Mode is active.
• If the oven light is desired while in Sabbath Mode, it
must be turned on before the Sabbath Mode is set.
° The self-clean cycle and automatic door lock do not
operate during the Sabbath Mode.
• The Bake temperature can be changed during an Active
Sabbath Mode. Simply press the Bake pad and then
enter the desired temperature using the Quick set pads.
• Pressing the CANCEL pad will cancel a Bake cycle,
however the control will stay in the Sabbath Mode.
• The day of the week and AM/PM must be set for
Sabbath Mode to operate correctly.
Temp Adjust
Oven temperatures are carefully tested at the factory. It is
normal to notice some baking time or browning differences
between a new oven and an old one. As ovens get older, the
oven temperature can shift.
You may adjust the oven temperature if you think the oven is
not baking or browning correctly. To decide how much to
change the temperature, set the oven temperature 25° Fhigher
or lower than the temperature in your recipes, then bake. The
results of the first bake should give you an idea of how much to
adjust the temperature.
To adjust the oven temperature: ...................................
' Setup
1. PressSetup pad. On / Off /
" ........ /
2. Pressthe arrow to scroll.
3. Select TEMP ADJUST.
4. Enter the desired temperature change using the number
pads.
5. Select "+/=" to indicate an increase or decrease in
temperature. The temperature change is displayed at the
top of the window.
6. PressEnter pad or wait three seconds to accept the change.
7. Press Setup pad to exit the menu.
The oven temperature does not need to be readjusted if there is
a power failure or interruption.
:25 Broiling and cleaning temperatures cannot be adjusted.

Tones (beeps)
The number of beeps heard at the end of cooking and at the
end of timer operation and their volume can be adjusted.
To adjust the beeps:
1. PressSetup pad.
2. Use the arrow to scroll.
3. Select TONES.
/ ..............
" Setup
, On / Off
To change the beeps at the end of cooking:
1. Follow "Tones" steps 1-3 (see above).
2. Select COOK TONE.
3. Use the arrow to scroll.
4. Select 1=30 MIN to hear one beep every thirty seconds.
OR
Select 1=60 MIN to hear one beep every sixty seconds.
OR
Select 1 BEEP to hear one beep only at the end of cooking.
5. Pressthe Setup pad to exit.
To change the timer beeps:
1. Follow "Tones" steps 1-3 (see above).
2. Select TIMERS TONES.
3. Use the arrow to scroll.
4. Select 2-30 SEC to hear two beeps every thirty seconds.
OR
Select 2-60 SEC to hear two beeps every sixty seconds.
OR
Select 1 BEEP to hear one beep only at the end of the
set time. ,..............,
Setup
h
5. Pressthe Setup pad to exit. '
On/Off/
To change the volume of the beeps: ..........
1. Follow "Tones" steps 1-3 Cseeabove).
2. Pressthe arrow to scroll.
3. Select VOLUME.
4. Select HIGH for the highest volume.
OR
Select MEDIUM for medium volume.
OR
Select LOW for the lowest volume.
5. Pressthe Setup pad to exit.
12 H R Shutoff
The oven will automatically turn off at the end of 12 hours if
you accidentally leave it on.
To turn off this feature:
1. PressSetup pad.
2. Use the arrow to scroll.
Setup
,On/Off/
/
26
3. Select 12HR SHUTOFF.
3. Select ON or OFF using the Quickset pads.
4. Pressthe Setup pad to exit.
Energy Saver
To save energy, the display can be set to go dark if it isnot
being used.
To set the Energy Saver feature:
1. PressSetup pad.
2. Use the arrow to scroll.
3. Select ENERGY SAVER.
i Setup
On / Off,
\ /
4. Select ON or OFF using the Quickset pads.
5. Pressthe Setup pad to exit.
Press any pad to "wake up" the display.
Service
This area of the oven control displays the Jenn-Air Customer
Service toll-free phone number,
1. PressSetup pad. Setup
2. Use the arrow to scroll. On / Off /
\ ......... ./
3. Select SERVICE.
4. Pressthe Setup pad to exit.
[}elTIO
When Demo is selected, you will see a short presentation
highlighting the features of your new Jenn-Air range.
1. PressSetup pad. / .................
/ Setup
2. Use the arrow to scroll On / Off /
/
3. Select DEMO. ............
4. Select ON or OFF using the Quickset pads.
5. Pressthe Setup pad to exit.
AC
Accessories
Gas or Electric Wok Accessory - NIodel A0142
Ideal for stir frying, steaming,
braising, and stewing. Wok has
nonstick finish, wood handles, cover,
steaming rack, rice paddles and
cooking tips. Flat bottom wok can be
used on ALL cartridges.

WARRANTY & SERVICE
What is Not Covered By These Warranties
1. Conditions and damages resulting from any of the following:
a. Improper installation, delivery,or maintenance.
b. Any repair, modification, alteration, or adjustment not authorized bythe
manufacturer or an authorized servicer.
c. Misuse, abuse,accidents, unreasonable use,or acts of God.
d. Incorrect electric current, voltage, or supply.
e. Improper setting of any control.
2. Warranties are void if the original serial numbers havebeen removed,altered, or
cannot be readily determined.
3. Light bulbs.
4. Products purchased for commercial or industrial use.
5. The cost of serviceor servicecall to:
a. Correct installation errors.
b. Instruct the useron the proper use of the product.
c. Transport the appliance to the servicer and back.
6. Consequentialor incidental damages sustained by any personas a result of any
breach of these warranties.
Somestates do not allow the exclusion or limitation of consequential or incidental
damages,sothe aboveexclusion may not apply.
If You Need Service
Firstsee the Troubleshooting section in your Use and CareGuide or call Maytag
Services, LLC,Jenn-Air Customer Assistance at 1-800-JENNAIR (1-800-536-6247]
U.S.A.and Canada.
To Obtain Warranty Service
To locate an authorized service company in your area, contact the dealer from
whom your appliance was purchased or call Maytag Services, LLC, Jenn-Air
Customer Assistance. Should you not receive satisfactory warranty service,
call or write:
Maytag Services, LLC
Attn: CAIR_ Center
P.O.Box 2370,Cleveland, TN 37320-2370
U.S. and Canada 1-800-JENNAIR (1-800-536=6247)
U.S.customers using TrY for deaf, hearing impaired or speech
impaired,call 1-800-688-2080.
NOte: When contacting Maytag Services,LLC,Jenn-Air Customer
Assistanceabout a serviceproblem, pleaseinclude the following:
a.Your name,addressand telephone number;
b.Model number and serial number of your appliance;
c. Name and address of your dealer and date appliance was purchased;
d.A clear description of the problem you are having;
e. Proofof purchase.
Use and Care guides, service manuals and parts information are available from Maytag Services, LLC, Jenn-Air Customer Assistance.
27

CUISlNIF_RE ENCASTRABLE A GAZ
A F_VACUATIONDESCENDANTE JENN-AIR '_:
TABLE DES MATII_RES
Instructions de securite importantes ..................29-32
Informations sur les conduits .......................................33
Entretien et nettoyage ..............................................33-36
Entretien ........................................................................36-37
D@annage ...................................................................38-39
Cuisson sur la surface .............................................40-42
Cuisson au four ..........................................................43-49
Options ..........................................................................50-52
R6glage favori .............................................................52-53
Reglage ..........................................................................53-56
Accessoires .........................................................................56
Garantie et service ...........................................................57
Guia de uso y cuidado ....................................................58
ISJENN-AIR

Pour assurer une utilisation appropri_e et en route s_curit_ :
Seul un technicien qualifie devrait installer I'appareil et le mettre
la terre. Ne tentez pas de r_gler, reparer ou remplacer un
composant de I'appareil, _ moins que cela ne soit
specifiquement recommande dans ce guide. Toute autre
reparation doit etre effectuee par un technicien qualifie.
Debranchez toujours I'appareil avantd'en faire I'entretien.
DE
Lesinstructions de securite importantes et les avertissements
paraissant dans ce guide ne sont pasdestines _ couvrir toutes
les situations et conditions eventuelles qui peuvent se presenter.
IIfaut faire preuve de bon sens, de prudence et de soin Iors de
I'installation, de I'entretien ou du fonctionnement de I'appareil.
Communiquez toujours avec le fabricant si vous ne comprenez
pas un probleme ou une situation.
Reconnaissez les _tiquettes,
paragraphes et symboles sur la s6curit_
instructions g n6rales
Lisez routes les instructions avant d'utiiiser cet appareil;
observez toutes les instructions pour eliminer les risques

Utilisezunelampetorchepourdeterminersilabride
antibasculementestconvenablementinstalleesousla
cuisiniere.L'undespiedsdemise_niveauarrieredoitetre
convenablementengagedanslafentedelabride.Lorsquela
cuisiniereestconvenablementcalee,labrideantibasculement
immobiliselepiedarrierecontrelesol.Assurez-vousquela
cuisiniereestbienancreeausolapreschaque deplacement.
Pour eviter un incendie ou des
dornmages causes par la
fumee
Assurez-vous que tout le materiel d'embailage est retire de
rappareil avantde mettre cehi-ci en marche.
Gardezles materiaux combustibles bien eloignes de I'appareil.
Ne rangez pus de materiaux inflammablesdarts un four.
De nombreux articles en plastique peuvent etre deteriores par la
chaleur. Gardezles plastiques eloignes des pieces de rappareil
pouvant devenir chaudes. Ne laissez pus des articles en
plastique sur la table de cuisson; un article en plastique trop
pros de I'eventdu four ou d'un brQleurallume pourrait se
deformer ou fondre.
Pour empecher un feu de graisse, _vitez route accumulation de
graisse ou autre matiere inflammable _ I'interieur ou pros de
rappareil.
Si I'appareil est instalie prosd'une fenetre, des precautions
doivent etre prises pour eviter que le vent entraine les rideaux
au-dessus des brQleurs.
NE laissez JAMAIS des articles sur la table de cuisson. L'air
chaud de revent peut lesenflammer et mettre egalement sous
pression des contenants fermes qui pourraient aiors exploser.
De nombreux flacons d'aerosol peuvent EXPLOSERIorsqu'on
lesexpose _ la chaleur, et ils peuvent contenir un produit tres
inflammable. Evitezd'utiliser ou de remiser un flacon d'aerosol
proximite de I'appareil.
Pour eliminer le besoin d'atteindre quelque chose par-dessus
les brQleursde surface, il est preferable qu'il n'y ait aucune
armoire de cuisine directement au-dessus de I'appareil.S'il ya
une armoire, vous ne devriez y remiser que des articles peu
frequemment utilises et capables de resister _ la chaleur Cruise
par I'appareil. Latemperature pourrait etre excessivepour
certains articles, comme liquides volatils, produits de nettoyage
ou flacons d'aerosol.
• NE saisissez ou d_placez JAMAIS un ustensiie de cuisine
enfiamm&
• Four : Fermezlaporte du four pour etouffer lesflammes.
Ne jetez pus d'eau sur un feu de graisse. Utilisez du
bicarbonate de sodium, un extincteur _ mousse ou un produit
chimique sec pour eteindre lesflammes.
Securite des enfants
NE laissez JAMAIS des enfants seuis ou sans supervision
Iorsque I'appareil est en service ou encore chaud. Ne laissez
jaraais un enfant s'asseoir ou setenir sur une partie
queiconque de I'appareil. II pourrait se blesser ou se brQier.
II est important d'enseigner aux enfants que la cuisiniere et les
ustensiles places dessus ou _ I'interieur peuvent etre chauds.
Laissezrefroidir lesustensiles en un lieu sQr,hors d'atteinte des
enfants. Lesenfants doivent comprendre que rappareil n'est
pas un jouet, lis ne doivent pus jouer avec les boutons ou
toute autre piece de I'appareil.
Familiarisation avec rappareil
EBcas d'incendie
Debranchez I'appareil et la hotte de ventilation, pour minimiser
la propagation des flammes. Eteignezles flammes, puis mettez
la hotte en marche pour evacuer la fumee et lesodeurs.
• Table de cuisson : Utiiisez un couvercle ou une plaque
biscuits pour etouffer les fiammes d'un feu qui sedeclare
darts un ustensiie de cuisine.
3O
Suite

EvitezdetoucherlaregionentourantreventdufourIorsquele
fourestutiliseetplusieursminutesapresrarretdufour.
Certainscomposantsdereventetlazonevoisinepeuvent
devenirsuffisammentchaudspourprovoquerdesbrQlures.
Apresrarretdufour,ne touchez pas revent du four ou la zone
voisine avant que ces composants aient pu se refroidir
suffisamment.
Autres surfaces potentiellement chaudes :table de cuisson,
zones faisant face _ la table de cuisson, event du four, zone
voisine de revent, porte du four et zone voisine de la porte et
du hublot.
Ne touchez pas rampoule chaude du four avec un linge
humide car elle pourrait se casser. Si rampoule se casse,
debranchez rappareil avant de retirer rampoule afin d'eviter un
choc electrique.
N'utiiisez JAMAIS de feuiiie d'aluminium pour recouvrir la
sole ou une grille du four. Ceci pourrait endommager rappareil
ou causer un risque de choc electrique ou d'incendie. Utiiisez le
papier d'aiuminium uniquement selon les instructions donnees
darts ce guide.
Caisson et s6curit6
Placez toujours un ustensile surun brQleur de la table de
cuisson avant de raliumer. Veiiiez _ bien connaitre la
correspondance entre les boutons de commande et les
brQieurs.Veiiiez _aliumer le bon brQieur et verifiez que le
brQieur s'allume effectivement. A la fin de la periode de
cuisson, eteignez le brQieur avantde retirer rustensiie, pour
eviter une exposition aux fiammes du brQieur.
Veiiiez _ toujours ajuster correctement la tailie des fiammes
pour qu'elies ne d@assent pas sur les cotes de rustensile. Des
fiammes de trop grande taille surun brQleur sont dangereuses;
eiies entrainent un gaspiiiage d'energie et elies peuvent faire
subir des dommages _ rustensiie, _ rappareil ou au placard
situe au-dessus.
NE laissez JAMAIS un breleur de surface allume sans
surveillance, particulierement avec un reglage de puissance
elevee ou Iors d'un type de friture. Un debordement pourrait
provoquer la formation de fumee et des produits gras
pourraient s'enflammer. Eliminez des que possible les produits
gras renverses. N'utilisez pas un reglage de puissance eleve
pendant une periode prolongee.
NE faites JAMAIS chauffer un recipient non ouvert darts le
four. L'accumulation de pression darts lerecipient pourrait
provoquer son eclatement et de graves dommages materiels ou
corporels.
Utilisez des maniques robustes et seches. Des maniques
humides peuvent provoquer la formation de vapeur brQlante.
N'utilisez jarnais un linge _ vaisselle ou autre article textile _ la
place de maniques; un tel article pourrait trainer surun brQleur
et s'enflammer, ou accrocher un ustensile ou un composant de
rappareil.
31
Laissez toujours refroidir un recipient d'huile de friture chaude
avantde tenter de le d@lacer et le manipuler.
Ne laissez pas [agraisse de cuisson ou autre materiau
inflammable s'accumuler dans ou pres de rappareil, de la
hotte ou du ventihteur. Nettoyez frequemment la hotte de la
cuisiniere pour empecher la graisse de s'accumuler sur la
hotte ou sur le filtre. Si vous fiambez des aliments sous la
hotte, mettez le ventilateur en marche.
NE portez JAMAIS, Iors de rutilisation de rappareil, des
vetements faits d'un materiau inflammable, amples ou
manches Iongues. De tels vetements peuvent s'enflammer ou
accrocher la poignee d'un ustensile.
Placez toujours les grilles _ la position appropriee dans le four
Iorsqu'il est froid. Faitescoulisser la grille vers rexterieur avant
d'ajouter ou d'enlever un plat _ raide de maniques robustes et
seches. Evitezd'introduire la main dans le four pour d@oser
ou retirer un plat. S'il est necessaire de d@lacer une grille
Iorsqu'elle est chaude, utilisez une manique seche.Arretez
toujours le four _ la fin d'une periode de cuisson.
Ouvrez toujours la porte du four tres prudemment. Laissezrair
chaud ou la vapeur s'echapper avant de retirer ou d'introduire
un plat.
AVERTISSEMENT - METS PRI_PAR[_S: Suivez les
instructionsdu fabricant. Si le contenant ou le couvercle en
plastique d'un mets surgele se ddorme ou est endommage
durant la cuisson, jetez immediatementle recipient et son
contenu. Les aliments pourraient etre contamines.
N'UTILISEZ JAMAIS la feuille d'aluminium pour recouvrir la
sole ou une grille du four. Ceci pourrait endommager rappareil
ou causer un risque de choc electrique ou d'incendie. Utilisez
le papier d'aluminium uniquement selon les instructions
donnees darts ce guide.
Ustensiles et s6curitO
Utiiisez des ustensiles _ fond plat comportant une ou des
poignees que vous pouvez facilement saisir et qui restent
froides. Evitezd'utiliser un ustensile instable ou ddorme, qui
pourrait facilement basculer, ou dont la poignee est mal fixee.
Evitezegalement d'utiliser des ustensiles de petite taille
comportant une ou des poignees Iourdes; ces ustensiles sont
generalement instables et peuvent facilement basculer. Un
ustensile Iourd Iorsqu'il est rempli peut egalement etre
dangereux Iors des manipulations.
Veillez _ utiliser un ustensile de taille suffisante pour que le
contenu ne risque pas de deborder. Ceci est particulierement
important pour un ustensile rempli d'huile de friture. Verifiez
que la taille de rustensile est suffisante pour qu'il puisse
recevoir les produits alimentaires _ cuire et absorber
raugmentation de volume suscitee par rebullition de la graisse.
Pour minimiser les risques de brQlure,d'infiammation des
matieres combustibles et de renversement par contact non

intentionnel avec un ustensib, n'arientez pas la poigne,ed'un
ustensile vers un brQleur adjacent. Orientez toujours la
poigne,ed'un ustensib vers le ce,te,ou rarrie,re de rappareil; ne
laissez pas non plus la poigne,ed'un ustensile de,passer
ravant de rappareil, ou un jeune enfant pourrait facilement la
saisir.
Ne laissez jamais le contenu liquide d'un ustensile
s'e,vaporercomple,tement; rustensile et rappareil pourraient
subir des dommages.
Suivez les instructions du fabricant Iors de remploi d'un sachet
pour cuisson au four.
Seuls certains mate,riauxde verre, vitroce,ramique,ce,ramiqueou
certains ustensiles vitrifie,s/e,maille,speuvent e,treutilise,ssur la
table de cuisson ou dans le four sans risque de bris sous reffet
du choc thermique. Observezles instructions du fabricant Iors
de rutilisation d'un ustensile en verre.
La se,curite,de fonctionnement de cet appareil a e,te,teste,e
raide d'ustensiles de cuisine conventionnels. N'utilisez pas
un ustensile ou accessoire qui n'est pas spe,cifiquement
recommande, dans ce guide. Ne raettez pas de couvre-
brQleur ni de gril sur la table de cuisson et n'utilisez pas de
syste,mede convection additionnel. L'utilisation d'un dispositif
ou accessoire qui n'est pas expresse,ment recommande,clans
ce guide peut de,graderla se,curite,de rappareil ousa
performance, ou re,duirela Ionge,vite,des composants.
Friteuses
Exercezune prudence extra,meIors du de,placement du
re,cipient de graisse ou Iors de re,limination de graisse chaude.
Laissezla graisse refroidir avant de de,placer rustensile.
Hottes d'e×traction
Nettoyez fre,quemment les filtres et la hotte de la cuisinie,re,
pour empe,cherla graisse ou d'autres produits inflammables
de s'accumuler sur le filtre ou la hotte et provoquer des feux
de graisse.
Si vous flambez des aliments sous la hotte, mettez le
ventilateur en marche.
Nettoyage et s curit
Nettoyez la table de cuisson avec pre,caution. Arre,tezroutes
les commandes et attendez le refroidissement de tous les
composants avantde les toucher ou d'entreprendre le
nettoyage. Travaillez prudemment afin d'e,viterles brQlures par
[avapeur si vous utilisez un chiffon ou une e,pongehumide
pour nettoyer les renversements sur une surface chaude.
Certains produits de nettoyage peuvent ge,ne,rerdes vapeurs
nocives [orsqu'ils sont applique,s sur une surface chaude.
Nettoyez uniquement [es pie,cesmentionne,es dans ce guide.
Four autonettoyant
Ne nettayez pas lejoint de porte. Lejoint estessentiel
re,tanche,ite,de rappareil. Veillez _ ne pas frotter,
endommager ou de,placer le joint.
N'utilisez pas de protection pour couvrir la sole ou de
nettoyant pour four _ rinte,rieur du four autonettoyant ou pre,s
de ses composants.
Avertissement et avis
importants
Envertu de la <<California Safe Drinking Water and Toxic
Enforcement Act >>de 1986 (Proposition 65), le gouverneur de
la Californie doit publier une liste des substances qui, selon
re,tatde la Californie, causent le cancer ou pre,sentent un
risque pour la reproduction. Enoutre, les entreprises doivent
avertir leurs clients de rexposition potentielle _ de relies
substances.
Nous informons les utilisateurs de cet appareil que lots d'une
ape,ration d'autonettoyage, ils peuvent e,treexpose,s_ une
faible concentration de certaines substances figurant dans la
liste mentionne,eci-dessus, dont le monoxyde de carbone.
Pour minimiser I'exposition, veillez _ ce que la pie,ceou se
trouve le four soit convenablement ae,re,edurant une ape,ration
d'autonettoyage, par rouverture d'une fene,treou d'une porte.
AVIS IMPORTANT - OISEAUX FAMlUERS : Ne gardez
jamais un oiseau familier dans [a cuisine ou dans une pie,ce
ou i[ pourrait e,treexpose,aux fume,es.Lesoiseaux ant un
syste,merespiratoire tre,ssensible. Les vapeurs qui
s'e,chappent du four pendant rautonettoyage peuvent bur e,tre
nocives ou me,me fatales. Lesvapeurs qui s'e,chappent [ors de
la surchauffe de rhuile de cuisson, des corps gras, de la
margarine et des ustensiles _ reve,tementantiadhe,sif peuvent
e,galemente,trenocives.
Conservez ces instructions pour consultation ult rieure
32

Le systeme de ventilation de Jenn-Air est con_u pour capter
les vapeurs et fumees de cuisson emanant de la surface de
cuisson. Si le systeme ne fonctionne pas, veuillez vous assurer
que rinstallation comporte leselements suivants :
• Un conduit rond de 15,24cm (6 po) de diametre ou
rectangulaire de 8,26 cm (3 %po) x 10 po (25,4 cm) doit etre
utilise pour des canalisations mesurant de 3 _ 18 m (10 pi
60 pi) de Iongueur.
important : Un conduit rond de 12,7cm (5 po) de diametre
peut etre utilise si la canalisation fait moins de 3 m (10 pi) de
Iongueur.
• N'utilisez pas plus de trois coudes de 90°. La distance entre
ces coudes doit etre d'au moins 45 cm (18 po).
• La bouche d'aeration murale Jenn-Air recommandee DOE
etre utilisee. Assurez-vous que le clapet fonctionne bien
Iorsque la ventilation est en marche.
• II doit y avoir un degagement minimal de 15,2cm (6 po)
Iorsque la table de cuisson est installee pres d'un mur
lateral.
S'il n'y a aucune evidence d'une installation inappropriee, il
peut cependant y avoir un probleme dissimule comme un joint
coinc& une obstruction dans le conduit, etc.
L'installation demeure la responsibilite de ,Lo_';;_'_;,
rinstallateur et toute question doit etre d'abord ......:,.......
traitee par rinstallateur. L'installateur doit
verifier tres soigneusement les instructions
d'installation des conduits.
• Utilisez la carte de verification du debit
fournie avec votre appareil pour tester le
debit d'air.
ENTRET|EN ET NETTOYAGE
Four autonettoyant
Lecycled'autonettoyageutilisedestemperaturesde cuisson
superieuresa la normaleafin de nettoyerautomatiquementrinterieur
du four.
Lefour dolt 6trenettoy6reguli_rement.Lesc!claboussuresdoivent
6treessuyeespour c!viterune productionexcessivede fumeeou
I'apparitionde flammes.Nelaissezpasde residuss'accumulerdansle
four.
Durantleprocessusd'autonettoyage,il convientde bien aererla
cuisine pourc!liminerlesodeursnormalementc!misesdurant le
nettoyage.
Avant I'autonettoyage
1. Eteignezla lampede four avantle nettoyage.Celle-cirisquerait
de griller durant le cyclede nettoyage.
2. Enlevezla I_chefrite,tous lesplats etlesgrillesdu four.Si vous
n'enlevezpaslesgrilles,ellesrisquentdeseti!!colorer etde ne
plusglisseraussifacilementapr_sle cycled'autonettoyage.
Important :Avant rautonettoyage,enlevezla grille d'aSrationde
lasurfacedecuisson.
Nettoyezle cadredu four,lecadrede
laporte,lazonea rext_rieurdu joint et
autourde I'ouverturedu joint de la
porte_ I'aided'eauetde d_tergentou
d'un nettoyantnonabrasifcommeBon
Ami*. Leprocessusd'autonettoyagene
nettoiepasceszones. Ellesdoivent
_tre nettoyeespour emp_cherla salet_des'incrusterpendantle
cyclede nettoyage. (Lejoint assureI'Qtanch_it8autourde la
porteet du hublotdu four.)
PourempQchertout dommage,nenetteyez paset ne frottez
paslejoint qui setrouveautourde la portedu four. Cejoint est
con9upour _viterlespertesdechaleurpendantle cycle
d'autonettoyage.
Eliminezlesr_!sidusdegraisseou de produitsrenvers_ssurla
soleavantlenettoyage. Ceciemp_chelaformationdeflammes
ou de fum_!edurant le nettoyage.
* Lesnomsde marquedesproduitsde nettoyagesontdesmarquesd_pos_esdescliff,rentsfabricants.
33

Essuyezlesresidussucresetacides,commelespatatesdeuces,
latomateou lessauces_ basede lait.L'emailvitrifi6 poss_de
uneresistancelimiteeauxcomposesacides. IIpeutsedecolorer
si lesresidusacidesousucresne sentpasenlevesavantle cycle
d'autonettoyage.
Programmation de i'autonettoyage :
1. Appuyezsur latoucheClean (Nettoyage).
2. ENLEVERGRILLEseraaffich& Retirezlesgrilles.
Clean
\
3. SelectionnezCONTINIIER a I'aidede latouche rapide.Les
touches rapidessent situeesdechaquecotede I'afficheurdu
tableaude commande.
4. Choisissezle niveaudesaleteLEGERenentrant 200_ I'aidedes
touchesnumeriquesafin deprogrammerdeuxheuresde
nettoyage.Appuyezsur latouche Enter[Entre0.
Oil
Choisissezle niveaudesaleteMOYEN ettrois heuresde
nettoyage,pour un niveaude salet6moderee.
Oil
SelectionnezINTENSEet quatreheuresdenettoyage,pour un
niveaude saleteimportant.
5. NETTOYAGE,TIME(Duree),VERROUILLAGEet le compte
reboursde laduree de nettoyageserontaffichespendantle
nettoyagedu four. REFROIDISSs'afficheraIorsquele nettoyage
seratermine,lefour etanttoujours verrouill&
important: La porteseradeverrouilleeenvironune heureapr_sla
fin du nettoyage.LamentionREFROIDISSdisparaitrade I'afficheur
Iosquela porteseradeverrouillee.
Pour differer I'autonettoyage :
// .........................\
1. Appuyezsur latouche Clean. Clean
.............. /
2. ENLEVERGRILLEseraaffich& Retirezlesgrilles.
3. SelectionnezCONTINUER ) I'aidede la touche rapide.Les
touches rapidessentsitueesde chaquec6te de I'afficheurdu
tableaudecommande.
/4. Choisissezle niveaude saleteLEGERen entrant200a I'aidedes
touchesnumeriquesafinde programmerdeuxheuresde
nettoyage.Appuyezsurla toucheEnter [Entre0.
Oil
Choisissezle niveaude saleteMOYENet trois heuresde
nettoyage,pour un niveaude saletemoderee.
Oil
SelectionnezINTENSEet quatreheuresde nettoyage,pour un
niveaudesaleteimportant.
5. Laporteseverrouillera.NETTOYAGE,TIME,VERROUILLAGEet le
compte_ reboursde la dureede nettoyageserontaffiches.
6. Apr_sle verrouillagede laporte,appuyezsur latouche Mere
Options [Autresoptions).
7. SelectionnezDEMARR DIFFEREa I'aidede latouche rapide.
8. Choisissezle nombred'heuresd'attenteavantque necommencele
cycled'autonettoyage.
9. La dureedu delai etla dureedu nettoyageserontaffichees.
Aprbs I'autonettoyage
Environune heureapr_s la fin du cycledenettoyage,la porte
sera d#verrouilldeet la mention REFROIDISSdisparaitra de
I'afficheur. A partir de ce moment, la porte peut #tre ouverte.
Lasaletepeutavoirlaiss6au fond du four un residugris poudreuxqui
peutetreenleveavecun linge humide.S'il restede lasalete,cela
indiqueque le cyclede nettoyagen'a paseteassezlong.Cettesalete
seraenleveeau prochaincycled'autonettoyage.
Silesgrillesdu four ontete laissees_ I'interieurpendantle cycle
d'autonettoyageetqu'ellesglissentreal,enduisezcelles-ci,ainsique
leurssupports,d'une finecouched'huile vegetale.
Unedecelerationblanchepeutapparaitreapresle nettoyagesi des
d@6tsacidesou sucresfront paseteessuyesavant I'autonettoyage.
Ceciestnormalet N'affectePASla performancede I'appareil.
Remarques :
• Sila portedu four resteouverte,FERMERPORTEseraaffiche
jusqu'_ceque la portesoit fermee.
• Siplusde 30secondess'ecoulententrele momentouvous
appuyezsur latouche Clean[Nettoyage)et celuioQvous
appuyezsurune touche numerique,la programmation
retourneraautomatiquement_ I'affichageprecedent.
• Vousendommagerezla portedu foursi vousforcezson
ouverturedurantle nettoyageou le refroidissement.
• IIpeuty avoirpresenced'odeuretde fumeedurant les
premiersnettoyagesdu four. Ceciest normalet diminueraou
disparaitraavecletemps.Si lefour esttr_s saleou si la
lechefritea atelaisseedanslefour, il peutyavoirune presence
excessivede fumeeet d'odeur.
Alors quele fourse rechauffeetserefroidit,il est possibleque
vousentendiezdesbruits causesparla dilatationet la
contraction despiecesmetalliques.Ceciest normalet
n'endommagepasI'appareil.
34

Techniques de nettoyage
Loshemsde marquesentdesmarquesd6posc!esdes
diff6rentslubricants.
**Pourcommanderdirectement,composezle1-800-JENNAIR
(1-800-536-6247].
L_chefrite
et sa grille
Chapeaux de
hrQieur et
hr_ieurs _ gaz
Grillesde
hr_leur=En
porceiainesur
Tableaude
coiTnTlan_e
et horloge
Boutonsde
eomlnaRde
Dosseretettable
decuisson-
Emailvitrifl_
Panneaux et
la Poign_e
depo_e=
peintesemail
Ne couvrezjamais la grille de papier d'aluminium; cola emp_che la graisse de couler dans la I_chefrite
• Recouvrezla16chefriteetsagrilled'unlingesavonneux;laisseztremperpourddtacherlosrdsidus.
• LavezavecdeI'eausavonneusetilde. Utilisezuntampona r6curerpourdliminerlossouillurestenaces.
• Onpoutplacerlosdeuxcomposantsdela16chefritedartsun lave-vaisselle.
Chapeauxde br_ieur amovibles
• LaissezlebrQleurrefroidir.EnievezlechapeaudebrQleurpour lelaverdunsde I'eausavonneuseavecuntampona r6curer
enplastique.Pourlostachestenaces,nettoyez-lesavecuntamponr6cureurnonabrasif,remplidesavonouavecunesceil_s
crbmedenettoyagepourtabledecuisson*(Pibceno20000001)**etunec!ponge.
• N'effectuezpaslenettoyageaulave-vaisselleou dunslefourautonettoyant.
BrQieurs_ gaz sceii_s
• Nettoyezfr_quemment.LaissezlebrQleurrefroidir.Nettoyezavecdusavonetun tampon_r6curerenplastique.Pourlos
tachestenacesous6ch6es,nettoyezavecunedpongenonabrasiverempliedesavon,unebrossedure,une brosseadents
(ousonbouten caoutchouc,sielleen estdot6e)ouune6pingledroite.N'agrandissezpas ouneddormezpuslostrous.
• Veillez_ nepusintroduired'eaudunslosorificesdubrQleur.
• TravaillezprudemmentIorsdu nettoyagederallumeur.Sirallumeurestendommag6ou mouill6,losbrQleursde latablede
cuissonnepourrontpuss'allumer.
• Lavezlosgrillesavecde I'eausavonneusetilde etuntampona rdcurerenplastiquenonabrasit Pourlostachestenaces,
lostachestenaces,nettoyez-lesavecun tampon rdcureurnon abrasifremplide savon,ou unecrbmede nettoyagepour
tabledecuisson*etune6ponge.S'ilrestedessouillures,appliquezdenouveaulacrbmepourtabledecuisson,recouvrez[onto
avecun essuie-touthumide,etlaisseztremperpendant30 minutes.Frottezdenouveau,rincezetfaitess6cher.
• N'effeetuezpus lenettoyageaulave-vaisselleou dunslefourautonettoyant.
• Pour verrouiller los commandos pendant le nettoyage,reportez-vous _ la section Verrouillagedescommandosde la page 44.
• Essuyezavecun linge humide.Sdchez bien. N'utilisez pas nettoyants abrasifs sur le tableau.
•Les nettoyants pour verrepeuvent 6tre utilisds s'ils sent d'abord pulvdris6s sur un chiffon. NEpulv_risez PAS le produit
directement sur los touches de commando et I'afficheur.
• N'utilisez pas d'autres produits a vaporiser, nettoyants abrasifs ou de grandes quantitds d'eau sur letableau.
• Placezlesboutons_ lapositionOFF(Arr6t_et retirer-lesentirant.
• Lavez,rincezets6chez.N'utilisez pasun agentde nettoyageabrasifsusceptiblederayerlefini.
• Faitesfonctionnerbri_vementchaque616mentpourv6rifierquelosboutonsontdt6correctementr6install6s.
L'dmailvitrifi6estfaitdeverreli_au m6talparfusion.IIpoutsefissurerou s'6caillers'ilestrealutilis_.IIposs6deune
r6sistancelimit6eauxcompos_sacides.Essuyezimm6diatementtout renversementavecun lingosec,particuli_rements'il
s'agitdecomposdsacidesou sucrds.
•Unefoisrefroidi,lavezavecde I'eausavonneuse,rincezetsdchez.
• N'essuyezjamais unesurfacetilde ouchaudeavecun lingohumide.Ellepourraitsefissurerous'dcailler.
• N'utilisez jamais de nettoyantspourfour,d'agentsde nettoyagecaustiquesouabrasifssurlefiniextdrieurdelacuisini_re.
• Unefoislospi_ces_f_idies, lave,z-los_reausavonneusetilde, rincezetsdchez.N'essuyezjamaisunesu_ce tilde ouchaude
avecun lingehumide,carcelapourraitabimerlasurfaceetprovoquerdesbrQluresparlavapeur.
• Pourlostachestenaces,utilisezdesagentsde nettoyageI_g_rementabrasifscommelap_teau bicarbonatedesoudeou
BenAmi*.N'utilisez pasde nettoyantsabrasifscommelostamponsen lained'acierou losnettoyantspourfour.Cos
produitsrayeraientouendommageraientlasurface.
Important:Uti/isezunlingoou untorchonsecpouressuyerlosproduitsrenvers_s,surtouts_lssentacides ou
sucres. Lasurfacepourrait seddcolorer ou se temir si lasalet_ n'_tait pasimmddiatement enlevde.Ceci
estparticuli_rement important danslecas de surfaces blanches.
35

Heblot et porte , Evitezd'utilisertropd'eau,carellarisqueraitdes'infiltrersousouderriereleverre,causantainsidestachessurle hublot.
du fear - • Lavez_ reauetausavon.Rincez_ reauclaireetsGchez.Unnettoyantpourverrepeut6treutilis6sivousle pulvGrisez
Verre d'abordsurun chiffon.
, N'atilisez pusdeproduitsabrasifscommalostampons_ r6curer,lalained'acieroulesnettoyantsenpoudrequi
peuventrayerleverre.
Int_rieurdefour • Suivezlesinstructionsprdsent6esauxpages33-34pourI'autonettoyagedufour.
Grillesde four , Nettoyeza I'eausavonneuse.
• Eliminezlessaletdstenacesavecunepoudrede nettoyageouun tampon) rGcurersavonneux.Rincezetsdchez.
° Lesgrillesseddcolorentetglissentdifficilementsiellessentlaissdesdunslefourpendantlecycled'autonettoyage.
Sicelaseproduit,enduisezleborddesgrillesetleurssupportsavecunpeud'huilevGgGtalepourleurpermettrede
glisser_ nouveau,puisessuyezrexc_s.
Acierinoxydable • N'UTIUSF_ZPASDEPRODUITSDENETTOYAGECONTENANTUNAGENTDEBLANCHIMENTCHLORt-.
(certainsmod_les) • N'UTIUSEZPASDENETTOYANTSABRASIESOUA BASED'ORANGE
° ESSUYEZTOUJOURSDANSLESENSDU GRAINPENDANTLENETTOYAGEo
° Nettoyagejoumaiier/saiet_I_g_re-- Nettoyez_ raideun lingodouxou d'une@ongeetun desproduitssuivants:eau
savonneuse,mdlangevinaigreblanc/eau,nettoyantpourverreetsurfaceFormula409*ouun produitsemblablepourverre.
Rincezetsdchez.Pourpoliretaider_ pr6venirlestracesdedoigts,appliquezStainlessSteelMagicSpray*[piecen°
20000008)**1
• Salet_ moder_e/imporlante --Nettoyez a I'aided'un lingodouxou d'une_pongehumideetI'undesproduitssuivants:
BenAmi,SmartCleanserouSoftScrub*.Rincezetsdchez.Lostachesrebellespeuvent6treenlevdesenfrottantclansle
sonsdugrainavecuntampontoutusageScotch-Brite*humide.RincezetsGchez.Pourretirerlosmarquesetredonnerdu
lustre,terminezle nettoyageavecleproduitpouracierinoxydableMagicSpray*.
° Deceleration -- Avecunchiffondouxouunedpongehumide,appliquezlenettoyantpouracierinoxydableCameo*.Rincez
immddiatementetsdchez.Pourrotiferlosmarquesetredonnerdulustre,terminezlenettoyageaveclevaporisateurpouracier
inoxydableMagicSpray*.
Loshemsde marquedesproduitsde nettoyagesentdesmarquesd@osGesdesdiffGrentslubricants.
•* Pourcommanderdirectement,composezle 1-800-JENNAIR(1-800-536-6247].
ENTRETIEN
Porte du four
2. Tenezla portedechaquecOt& Ne soulevezpusla portepar la
poignc!e.
3. Tirezversle hautsanssaccadesjusqu'_ceque la porteait pass6
lesbrasde charni_re.
Remise de la porte :
1. Tenezla portedechaquecGt&
• N'essayez JAMAIS d'ouvrirou deformer la porteou de mettrele
four en marchesi la porten'estpusbien remiseen place.
• Ne placez JAMAIS losdoigts entrela charniGreet lecadreavant
du four. Losbrasde charni_resent munis d'un ressort.S'ilssent
accidentellementheurtds,ilsserabattentviolemmentcentrele____.
cadredufour et risquentde vousblesser ___-
lesdoigts.
D_pose de la porte :
1. Unelois la cuisini_refroide,ouvrezla
portedu fourjusqu'a la positiond'arr6t
pourle gril (environ10cm/4 po). _ ....
36
2. Alignezlesfentesde la porteet losbrasde charni_re.
3. Faitesglisserlaportesur lesbrasde charni_re,jusqu'ace qu'elle
reposecompl_tementsur lescharni_res.Poussezsur lescoins
sup6rieursde la portepour qu'ellesoit bien assisesurles
charni_res.La portedolt 6tredroite.
important: Laporte d'unecuisini_reneuvepoutsembler
{{spongieuse>>Iorsqu'elleestferm6e.Ceciestnormaletdiminuera
avecletemps.
Suite

Hublot du four Pieds de raise niveau
Protection des hublots :
1. N'utilisez pasde produitsnettoyantsabrasifscommeles
tampons_ r6cureren lained'acier ou lesproduitsde nettoyage
en poudrequi peuventrayerleverre.
2. Ne heurtez pasle verreavecun ustensile,un meuble,unjouet
ou tout autreobjet.
3. Ne fermez pas laportedu four avantd'avoir replac6losgrilles.
Toutede!gradationdu verre(rayure,choc,tension,etc.)peutaffaiblir
sastructure et augmenterle risquede bris_ unedateult6rieure.
i clairage du four
PourremplacerI'ampoulepar uneampouleappropri6e,
commandez-laaupr_sde Jenn-Air.T61@honezau 1-800-JENNAIR
(1-800-536-6247)et commandezune ampoulehalog_ne,piecen°
74004458.
Pour remplacer I'ampoule du four :
1. Dc!branchezla cuisini_re.
2. Unefois lefour froid, saisissezle reborddu couvre-ampouledu
boutdesdoigts.Enlevez-leentirant.
3. Enlevezsoigneusementlavieilleampouleen la tirant tout droit
du socleen c6ramique.
4. Pour6viterd'endommagerI'ampouleneuveou de diminuersa
dur6e,ne la touchez pas ) mains hues.Tenez-laavecun lingo
secou de I'essuie-tout.Enfonceztout droit lesbrochesde
I'ampouledartslospetitstrous du socleen c6ramique.
5. Remettezle couvre-ampouleen I'enclenchanten place.
6. Rebranchezla cuisini_re.RemettezI'horlogea I'heure.
Assurez-vousque lacuisini_reestd'aplomb unefois
install6e.Dartslecascontraire,tournezlosplodsde
raise_ niveau,_ chacundesanglesde la cuisiniSre,
jusqu'aceque celle-cisoit d'aplomb.
&_ BRIDE
ANTIBASCULEMENT
PIED DE MISE A
NIVEAU
Raccordement lectrique
Losappareilsn_cessitantune alimentation
_lectrique comportentunefiche de raise_ la torte
trois broches qui doit 6trebranch6e
directementsurune prisede 120volts_ trois
cavit6set correctementmisea la terre.
Toujoursd4branchezI'appareilavantd'yfairede
I'entrefien.
Lafiche de raisea la torte a trois brochesoffre une protectioncontre
le risquede choc c!lectrique.NECOUPEZPASOUN'ENLEVEZ
PASLABROCHEDETERREDU CORDOND'AUlVlENTATION.
Sila prisene comporteque deuxcavitc!s,n'estpasmise_ laterreou
n'estpasappropric!e,le propri_tairede I'appareil a la
responsahilit_defake remplacer la prisepar une prise_ trois
cavit_scorrectementraise_ latorte.
D placement d'un appareil
gaz
Lesraccordsdesappareils_ gazutilis6ssurcet appareilne sontpas
conguspour desd@lacementsfrc!quents.Unelois I'appareilinstall&
NEle deplacez PASde fagonr@c!t6epour le nettoyerou le
changerde place.Si cet appareildoit 6tredc!m6nag6et/ou enlevc!
pour6tre r@ar& suivezla m6thoded_crite danslesinstructions
d'installation.Pourtoute information,prenezcontactavecle service
la clientSledeJenn-Airau 1-800-JENNAIR[1-800-536-6247).
IIfaut que le pied arriSrede la cuisini_resoit enclench_dansla
brideantibasculementpour que la cuisiniSrenepuissebasculer
accidentellement.
37

f
EPANNAGE
Pourla plupartdesproblbmes
observ6s, essayezd'abordce quisuit.
Une partieou la totaiit6 de la
cuisini_renefonctionne pas.
L'horloge,rafficheur et/ou
leslampesfonctionnent, mais le four
nechauffe pas.
Un brSleur de surface ne
s'allume pas.
Flammesnonuniformes.
Laflamme du brSleurs'61oigne
desorifices.
Lesr6sultats de la cuisson
differentde ceuxdu
four pr6c6dent.
V6rifiezque loscommandosdu foursont correctementrc!gl6es.
V6rifiezsi lafiche est bienbranch6esur la prise.
Inspectez/r6armezle disjoncteur. Inspectez/remplacezlefusible.
V6rifiezla sourced'alimentation61ectrique.
o
o
V@ifiezsilasurfaceet/ou lescommandosdufoursont bienrc!gl6es.Voyezlespages40et45.
V6rifiezsi laportedu four est dc!verrouill6eapr_sun autonettoyage.Voyezlapage34.
V6rifiezsile fourestr6918pourunecuissondiff6rc!eoupourunautonettoyage.Voyezlospages
45et34.
V6rifiezsile verrouillagedescommandosestactiv6.Voyezla page44.
V6rifiezsi lacommandoesten modesabbat.Voyezla page54.
Lefour pout6treprogramm6pour une fonctiondiff6r6eou de cuissonet maintien.
Leverrouillagedescommandosest peut-6treactiv6.Voyezla page44.
o
o
V6rifiezque I'appareilestcorrectementraccord6a la sourced'c!lectricitc!.
D6terminezsi I'alimentation61ectriqueestinterrompue(fusiblegrillddisjoncteur ouvert).
V6rifiezque I'allumeurestsec etqu'il c!metdesc!tincelles.Le br01eurnepeuts'allumersi
I'allumeurestendommagc!,souill6ou mouill6.SiI'allumeurneg6n_repasd'c!tincelles,
ramenezleboutonde commandoa la positionOFF(Arr6t).
Losorificesdu brClleursont peut-6tre obstru6s.
• Assurez-vousqu'un ustensilereposesur la grille.
e
V6rifiezquelatemp6ratures61ectionn6eestcorrecte.Assurez-vousque lefourestpr6chauffc!
quandcelaest pr6cisc!dansla recette.
D6terminezsi 1'6ventdu four est obstru_. Voyezson emplacement_ la page48.
Assurez-vousque la cuisini6reest d'aplomb.
Losr6glagesdetemp6raturevarientsouvententreun four neufet lefour qu'il remplace.
Avec%godesfours,latemp@atureestsouventdc!cal_eetdevientpluschaudeouplusfroide.
Voyezla page55 pour obtenirlosinstructionssur le rc!glagedela temp6raturedu four.
important: II n'estpasrecommand6de r6glerlatemp@aturesi un probl_mesemanifesto
avecuneou deuxrecettesseulement.
Utilisezlosbonsustensiles.Losustensilesfonc6sdonnentunbrunissementdecouleurfoncc!e,
lesustensilesbrillants,un brunissementplusclair.
V6rifiezla positiondesgrillesetdesustensiles.Lorsde la r@artitionsur deuxgrilles,ne
superposezpaslosplats.Veilleza laisserun espacede2,5_ 5 cm (1_2 po)entrelosplatset
lospatoisdu four.
ContrOlezI'utilisationdefeuilled'aluminiumclanslefour.Nerecouvrezjamais compl_tement
unegrilledufour avecdu papierd'aluminium.Placezunpetit morceaudefeuilled'aluminium
sur la grille sousle platpour rc!cup6rerlesmati6resrenversc!es.
Lesaliments negrillent pas , V6rifiezla positiondesgrilles.Losalimentssontpeut-6tretrop prochesdu brt_Jleur.
correctementou d6gagent Lepapierd'aluminiuma 6tc!mal utilis6.Ne garnissez jamais la grille de la I_chefriteavec
beaucoupde fum6e, du papierd'ahminium.
EnlevezI'exc_sde graissesurla pi6cedeviandeavantla cuissonau gril.
Une16chefritesalea 6tc!utilis6e.
Pr_chauffezlefour pendant2 a3 minutesavantde placerle platdartslefour.
Portedu four fermc!edurant lacuissonau gril.
38 Suite

iiiiii,_i_i_i!_ii_!i_i!_i!iiiiiiiiiiiiiiiiii!iii!i!iii!ili!ii!i_iii!i!i!i!i!i!!!!!!!!!!!!!!!!!!!!!!!!!!!!!i!!!i!!!i!!!i!!!iiillill!!i!iiiiiiiiiiiiiiiiii!!iiiiiiiiilliil!i!!!!!!i!i_i!!i!_i!!i!i!i!!!i!!i!!i!!i!!ilili_ii_i_!_ii_ii_ii_!ii!!i!ii!ii!ii!ii!ii!_i!_ii_ii_ii_ii_ii_ilif!ii!i!ii!i_iii_ii_ii_!i_i!_!i_!_i!_!i_!_i!ii_i_!_il!ii!i_!i_!i_!if!ii'if'il'if'il'ii'if'if'if!if'ii'ii'ii'ii'ii'ii'ii_ii_!_!!i_!ii!iii!ii!ii!ii!ii!iiiii!iiiiiiiii_!_!i_iii!ii!ii!ii!ii!ii!ii!ii!ii!ii!ii!ii!ii!ii!ii!ii!ii!ii!ii!ii!ii!iiiiliiiiiliiiliiliiliiliiliiliiiiiiiiiiii_ii_il_ii_ii_ii_ii_ii_ii_ii_ii_ii_ii_ii_ii_iiii_ii_ii_ii_ii_ii_ii_ii_i!_!i_i!_!i_ii_ii_ii_ii_ii_ii_ii_ii_!i_ii_!i_ii_!i_ii_!i_ii_ii_ii_i!_!i_i!_!i_i_i!_ii_ii_ii_ii_ii_ii_ii_ii_ii_ii_ii_ii_ii_ii_ii_ii_ii_ii_ii_ii_ii_ii_ii_ii_ii_ii_i!_!i_i!_!i_i!i!iiiiiiiiiiiiii_ii_ii_iiiiii!i!!i!!i!!i!!i!!i!!i!!i!!i!!i!!i!!i!!i!!i!!i!!i!!i!!i!!_!!_!!_!!_!!_!!_!!_!!_!!_!!_!_i__!i_ii_ii_ii_ii_ii_ii_i_iii!ii!i!!!i!!!!i!i!i!ii!ii!i!!!!!i!!_!_i!ii!!i!!i!!i!!i!!i!!i!!i!!i!!i!i!!!i_i_!_i!ii!ii!ii_ii_ii_ii_ii!_i_i_i_i_i__i_i_i_i_i_i_i_i__i_i_i_i_i_i_i_i__i_i_i_i_i_i_!_!_i_i_i_!!_!!_i!_iiii_i_i_i_i_i_i__i__i_ii!!i!i!!!!!i!ii!ii!i i_i_i_i_i_i_i_i_i_i,i,!,!!!!!!ii
L'autonettoyagenese fair pas. • D6terminezsi I'appareila6t6 programm_!pour un autonettoyagediff_!r_!.Voyezla page34.
° V6rifiezquela porteestferm6e.
• V_!rifiezsi lacommandoest en modesabbat.Voyezla page54.
° Lefour est pout_trea unetemp_!raturesup_!rieure_204° C(400°F).Latemp6raturedu four
dolt 6treinf6rieurea 204°C (400° F)pour pouvoirprogrammerun cycled'autonettoyage.
Lefournese nettoie pas • Untempsde nettoyagepluslong peut6tre n_cessaire.
correctement. • AvantI'op6rationd'autonettoyage,vousn'avezpas61imin6losaccumulationsexcessivesde
r_!sidus,particuli_rementlosr_sidusd'alimentsacidesou sucr_!s.
Laporte du four ne , L'int6rieurdu fourest encorechaud. Laissezle four refroidirpendantenvironune heureapr_s
se d_verrouille pas apr_s un cycled'autonettoyage.IIest possibled'ouvrirla porteIorsquele messageLOCK
le cycled'autonettoyage. (Verrouillage)n'estplusaffich_!.
• Lacommandeet la portesontpeut-6treverrouill6es.Voyezlapage44.
[I n'y a pas de bips et • Lefour pout6treen modesabbat.Voyezla page54.
I'afficheurnefonctionne pas.
De I'humidit_se d_pose sur le • Ceciestnormalavecdesaliments_ teneur_lev_!een humidit_!.
hublotca de lavapeur , Lenettoyagedu hublota produittropd'humidit_!.
s'_chappede I'_vent.
Odeur forte ou fum_e I_g_re • Ceciestnormalpourunecuisini_reneuveetdisparaitapr_squelquesutilisations.Un
la raise enmarche du four. autonettoyage_!limineralosodeursplusrapidement.
• Laraiseenmarched'un ventilateurd'extractionaidea enleverfum_!eet odeur.
, Salet_importantesurlasole. Ex_!cutezuneopt!rationd'autonettoyage.
Lesyst_mede ventilation • V_rifiezla ventilationcrois_ede Fairde lapieceou I'airde renouvellement.
ne captepaslafum_e • Leclapetde la bouched'a_rationmuraleestpout_trecoinc_!.
efficacement. • Latabledecuissonpout_treincorrectementinstall_e.V_rifiezlesinformationssurlosconduits.
Voyezla page33.
• Lefiltre _ airpout8trerealinstall&Voyezla page42.
Codes d'anomalie • Lefour peutd_celeruneanomalieIorsde laprogrammationou du fonctionnement.Encas
d'anomalie,le messageDEFAUTDETECTE- APPUYEZENTERPOURREESSAYERpeuvent
apparaitre.Suivrelosindicationsde raffichage.SiI'anomalier_!apparaitoune s'effacepas,appeler
un r_parateuragr_!_ou composerlenum_!rosansfraisde I'afficheur.
° Sila m_meopt!rationestessay_eavantque lefour nesoit r_!par_!,lemessageCARACTERISTIO,UE
NONDISPONIBLE- APPUYEZAIDEparaitra.Lacaract_!ristiqueseradansI'incapacit_!de
fonctionnertant que lar_!parationn'aurapas_!t_effectu_!e.
• Silefour esttr_ssale,losflamm_chespeuventproduireun coded'anomalieaucoursdu cycle
d'autonettoyage.AppuyersurCANCEL(Annuler)etlaisserlefour refroidircompl_tement,essuyer
lasalet_!enexc_spuisreprogrammerI'autonettoyage.Sile coded'anomalier_apparait,prendre
contactavecun r_!parateuragr_!&
Desbruits se font entendre. . Lefour peutfairediff,!rentsbruits I_!gers.Vouspouvezentendrelosrelaisfonctionnerets'arr_ter.
Ceciest normal.
• Lachaleurdartsle four,puisle refroidissement,peuventproduiredesbruitsdecontractionou de
dilatationdu m_!tal.Ceciestnormalet n'endommagepasI'appareil.
SAbclignotepuis, • Lefourest enmodesabbat.Pourannuler,appuyezsurlatoucheSetup (R_glage)pendantcinq
s'affichecontinuellement, secondes.
impossibled'ajouter un • Lalistedesfavorisest pleine.Poureffacerun favori eten ajouterun nouveau,consultezlos
autre favori, instructionsa la page52.
39

CU N R LA RFACE
low (Basse): S'utilisepour le mijotageou le
maintiende la tempc!ratured'un mets,ou pour
la fusion dechocolatou beurre.Lorsquele plat
ou I'ustensileestcouvert,un d6butde cuisson
peutseproduire aveclapuissancede
chauffageLow. Pourr_duire lapuissancede
chauffage,tournezle boutona la positionOFF
(Arr6t).Vdrifiezlastabilit6desflammessur le
brQleur.
Commandes de la
surface de cuisson
Allumage sans flamme
High [Elev6e): S'utilisepour porterun liquide
6bullitionou atteindrela bonnepressiondans
un autocuiseur.Rdduisezensuitela puissance
de chauffageapr_sle ddbutde I'_bullitionou de
la cuissondesaliments.
Unepuissancede chauffageinterm_diaireest
utilis6epour la poursuitede lacuisson.Les
alimentsne cuisentpasplusrapidementsi vous
utilisezune puissancedechauffageplus61ev6e
que n6cessairepour le maintiend'unedouce
6bullition.L'eaubouttoujoursa la m6me
tempc!rature,que 1'6bullitionsoittranquilleou
vigoureuse.
entrelespositionsLowetHigh. Vouspouvezpercevoirune dc!tente
de calagea laposition High.Vouspouvezmettrelesboutonssur ces
deuxpositionsou _ tout autreendroit.
Unsch6maprosdechaqueboutonidentifie le brQleur
--[_ desurfacecommand_ bouton.Par le
par
ce exemple,
Front sch6maa gaucheidentifie le brQleuravantdroit.
R_glage des commandes :
Lapuissance_ employerdc!penddu type etde la taillede
I'ustensileutilis&
de veille
Ledispositifd'allurnagenefait
interveniraucuneflammede
veille.Chaquebr01eurde la
tablede cuissoncomporteun
allumeurpar6tincelle.Travaillez
prudemmentlots du
nettoyageautourdes
brCJleursde latablede
cuissorl.
Si un brCJleurde la tablede
cuissonnes'allumepas,
dcgterminezsi I'allumeurest
bris6,sailou mouilld.
CHAPEAU DE BBOLEUR
ORIFIC LLUMEUR
BASE DE BRULEUR
Boutons de comrnande de la
surface de cuisson
Utilisezcesboutonspour commanderI'allumagedesbr01eursde
surface. Vousdisposezd'un choixinfini de rdglagesde puissance
1. Placezun ustensilesurla grille du brCJleur.
• Si aucunustensilen'estplac6sur la grille du brQleur,les
fiammespeuventavoirtendance_ ses6parerdu brQleur.
2. Enfoncezle boutonde commandeettournez-lejusqu'_ la
positionvoulue.
• Vouspouvezpercevoirlecliquetiscorrespondant_ la
productiondescgtincelleset le brQleurs'allume.
important: ChaquebrQleurde surfaceestcon_upour serallumer
automatiquementsi laflammes'c!teint.
Utilisation durant une
panne d'_lectricit_
1. Approchezuneallumetteenflamm6edu brQleura utiliser.
2. Enfoncezle boutonettoumez-ledoucement.
3. Ajusterlesflammes_ la tailled6sir6e.
4O

Surface de cuisson
Pour _viter la formation de taches ou un
changement de couleur de la surface de cuisson :
• Nettoyezlasurfacede cuissonapr_schaqueutilisation.
• EnlevezlesrGsidusrenversGsde produitsacidesou sucresd_s
que la surfacede cuissona refroidi;ces produitsrenvers_s
peuventfairechangerla couleurde 1'Gmail.
A a diffGrenced'unecuisini_redotGede br01eurs
gazstandard,lasurfacede cuissondecette
cuisini_ren'est pas amovibleourelevable. Ne
tentezpas derelever lasurface decuissen,
uelle qu'enseit la raison.
Br leurs scell s
Lesbr01eursscelk!sde la cuisini_resent fixGssur latable de
cuisson;ils nesent pasconguspour6treenlevGs.Commeles
br01eurssent scell_s,un produit qui dGborded'un ustensilene
s'infiltrerapassous lasurfacede cuisson.
Vousdevezcependantnettoyerlesbr01eursapr_schaqueutilisation.
Le chapeaudu br01eurs'enl_vefacilementpour 6trenettoy&G/oyez
lesinstructionsde nettoyage_ la page35.)
Pourle ben fonctionnementdu br01eur,latGtede br01eurdolt 6tre
correctementplacc!esurla basedu br01eur.
Br leurs de haute
performance
Cettecuisini_reest dotGed'un br01eurde 16000BTU*,a haute
vitesse,plac__ I'avantdroit.Cebr01eurpermetune cuisson_ vitesse
plusrapide,utilepour fairebouillir rapidementde I'eauou cuireune
grandequantit6 d'aliments.
Br leur de faible puissance
Cebr01eurest situc!a I'arri_redroit. LerGglage
Simmer(mijotage)peut6tre utilis_pour faire /
mljoter lesalimentsou lespocher,pour preparer
dessaucesdGlicatesou pour continuer lacuisson , ,.
d'un metsdartsun rGcipientcouvert.Le rGglage
ultra-has Melt (fusion)estideal pourfairefondre I_
chocolatetle beurre.
Important :LorsquevousutilisezlesrGglagescourantspour
prGparerdesaliments,quelquesminutespeuvent6trenGcessaires
pour que lazonede cuissonrefroidissejusqu'aatteindrele rc!glage
Melt [fusion).
Lapuissancethermique(BTU)desbrdeurs estdiff4renteavecune
alimentationaugazdep4troleliqudi4.
Br leur & deu× anneau×
(certains modeles)
La table de cuisson comporte un br01eur
deux anneaux situ6 au centre gauche. Pour
allumer ce br01eur,appuyez sur le bouton et
tournez-le vers la gauche. Tournez le bouton
jusqu'b ce que vous obteniez le rGglage dGsir6
41
LebrOleur s'allumera selon lasGquence suivante : I'anneau
intGrieur est b High (€lev_], I'anneau intSrieur est b Low (Bas],
puis les deux anneaux sent _ High, et finalement, les deux
anneaux sent b Low.
Grilles de br leur
Avantune operationde cuisson,v_rifiezque la grille est
correctementplac_e. Lorsde I'installationdesgrilles,placez
I'extr_mit_!avecpattesvers lecentre,au niveaudesbarresdroites.
Unegrille de br01eurincorrectementinstall_!epeut _caillerla surface
de cuisson.
Nefaites pas[enctienner un brSleur sans qu'unustensile soit
plac_ surla grille. ['_mail de lagrille peut s'_cailler s'il n'y a
aucun ustensilecapable d'abserberla cbaleur _mise par le
brSleur.
TravaillezprudemmentIorsqu'ilfaut remuerdesalimentsdansun
ustensileplac_!sur lagrille de br01eur.Lesgrillescomportentun fini
lissequi facilitele nettoyage.Lesmarmites/casserolesglisserontsi
ellesne sent pasmaintenues.Cecipeutentrainerun renversementde
nourritureschaudesetdoric causerdesbr01ures.
MSmesi lesgrillessent trGsdurables,ellesfinissentpar perdreleur
_clatou sedGcolorenta causede la tempSrature81evSedesflammes.
_eilrlarqlles :
• Unbr01eurconvenablementr_gl_ etdent lesorificessent
propress'allumeen quelquessecondes.Lorsde I'alimentation
augaznaturel,lesflammessent bleues,avecun cGneinterne
bleu intense.
Si lesflammesd'un br01eursent jaunesou si la combustionest
bruyante,le ratioaidgaz peut_treincorrect.Demandez_ un
techniciend'effectuerle r_glage.(Lagarantiene couvrepasce
r_!glage.)
Lorsde I'alimentationau gazdep_!troleliqudi& il est
acceptableque I'extr_mit_desflammessoitjaune.Ceciest
normal;aucunr_glagen'estn_!cessaire.
Avec certainstypesde gaz,vouspouvezpercevoirun petit bruit
d'explosionIorsde I'extinctiond'un br01eurde surface.Ceciest
normal.
• Sivous faitespasserrapidementle boutonde commandede la
positionHigh_ la positionLow, lesfiammespeuvents'_teindre,
particuli_rementsi le br01eurestfroid. Siceci seproduit,placez
le boutondecommande_ la positionOFF(ArrSt]etattendez
quelquessecondesavantd'allumerde nouveaulebr01eur.
• Ajustezla puissancedechauffagedetelle mani_reque les
flammesne d_bordentpasa la p_!riph_!riede I'ustensile.

Syst me de ventilation
Lesyst_mede ventilationincorpor6retirelesvapeursde cuisine,les
odeurset lafumde 6manantde la nourritureprdpar6esur latablede
cuissonet legril.
Favar_tr _
Bake a, al
. Pourmettreen marchele ......o,
_ro_J se,up
syst_medeventilation '.........
manuellement,appuyezsur la .............
MO,.
touche Vent Fan Nentilateur] _._:_4..........
situ6esur le tableaude
commandedlectronique.Appuyezsurla touche uneloispour le
r6glageLow [Bas),unesecondefoispour Nigh etune troisi_me
lois pourarr6terle ventilateurOff.
• Lesyst_mede ventilationfonctionneautomatiquement Iorsque
I'dldmentdegril est utilisd.
• Leventilateurpeut6treutilis6pour 61iminerlesodeursfortes
provenantde la cuisine,commeIorsquevouscoupezdesoignons.
IFntretien et nettoyage du
syst me de ventilation
• Grille d'a_ration : Lagrille d'a6rations'enl_vefacilement.
Essuyez-laou lavez-laau lave-vaisselleoudartsI'dvieravecun
d6tergentdomestiquedoux.Pournepasrayerlasurface,n'utilisez
pas de nettoyantsabrasifsni de tamponsa rdcurer.
GRILLE D'AERATION
° Filtre :Arr6tez leventilateuravantde retirerle filtre.Cefiltre est
permanentetdolt 6trenettoydIorsqu'ilestsale.Nettoyez-leclans
I'dvieravecde I'eautilde etdu d6tergent,ou au lave-vaisselle.
IMPORTANT: NEFAITESPASFONCTIONNERLEVENTILATEUR
SANSLEFILTRE.Placeztoujours lefiltre en positioninclin6e.
Lorsquevous6tesen face de lacuisiniSre,lehautdu filtre doltse
trouver contrela gauchede I'@ent.Le basdu filtre doltsetrouver
contre la droitede la chambred'extraction,danslapattie
inf@ieure.Important: $i le filtre est _ plat centre lapare/du
ventilateur, I'efficacitd de/'extraction est r_duite.
• Chamhre d'extraction: Nettoyezla zoneou seIogelefiltre sides
produits ontdtd renvers6sou sielle est encrass_epar la graisse.
Utilisezun essuie-tout,une@onge ou un chiffon humideavecun
nettoyantou ddtergentdomestiquedoux.
important : L'6ventdu four estsituc!sousle c6tddroit de la grille
remarquerlaprdsenced'air chaudet humideclanscettezone. La
zoneprosde 1'6ventpeut6tresuffisammentchaudepour causer
desbrQlures.Veilleza ne rien renverserdans1'6vent.Lagrille
d'a_ration dolt_tre enlev_e avantun cycled'autonettoyage.
42

CU|SSON AU FOUR
Tableau de commande
AB CD
...............l iiii!(
- Favorites
On / Off
&etup
On / Off
Clean
• More
J
E F
TIMER 1
On / Off
G
TIMER2
On/Off
H
2 3
ABC DEF
KL
Vent Oven
Fan Light CANCEL
I t
M N 0
4 5 6
GHI JKL MNO
7 8 9
PORS IUV WXYZ
Back 0 Enter
[ Space
lock
Letableaudecommandeestcongupourfaciliterlaprogrammation.Laconsoleafficheleaoptionsdechaquefonctionetvousguidepas_pasdurant
laprogrammation.Leacaract6ristiquesdutableaudecommandevarientselonlemodule.L'afficheurdufour illustr_ci-dessusestprogramm6pour
effectuerune opc!rationde cuisson.
iiiiiiiiiiiiiiii
iiiiiiiHHHH_,
iiiiiiKi!;!i_i;i
iiiiiiip!i!i!i!i!
Rapid Preheat
(Prdchauffage rapide)
Convect
(Convection)
Bake (Cuisson
au four)
Broil (Cuisson au gril)
TIMER1 (Minuterie)
Display(Afficheur)
TIMER1 (Minuterie)
Touchesnumc!riques
Favorites(Favoris)
MoreOptions
(Autresoptions)
Clean(Nettoyage)
Setup(R6glage)
VentFan(Ventilateur)
OvenLight (Lampe
defour)
CANCEL(Annuler)
QuicksetPads
O-ouchesrapides)
Pourdiminuerladur6edepr_chauffage.
Pourlacuissonaufouretle r6tissage
convection.
Pour la cuisson au four et le r6tissage.
Pourlacuissonaugril etlebrunissage
de lapartiesup_!rieure.
Programmelaminuterie.
Affichelosfonctionsdu four,los
optionset I'horloge.
Programmelaminuterie.
Pourprogrammerla dur6eet la
tempc!ratureou pourentrerlenorades
programmesfavoris.
Pourafficher,programmerou
sauvegarderdescyclesdecuisson.
Pouracc6derauxcaractc!ristiques
additionnelles.
Pourprogrammerlecycled'autonettoyage.
Pourafficherou modifierlosr6glages
parddaut de I'usine.
Met enmarcheleventilateursur
latabledecuisson.
Pourallumerou 6teindrela lampe
de four.
Annuletouteslosop6rationssaulla
minuterie,rhorloge,lesr6glagesfavoris,
lerc!glageetle ventilateur.
Pourchoisirlesoptionsaffich6essur
laconsole(ac6t6de laconsole
surlosdeuxc6t6s).
Touches rapides
Lestouchesrapidessontsitu6esde chaquecOt6de la consoleet
sontutilisc!espoursc!lectionnerlafonction dc!sir6eou I'option
affichc!e.Pourchoisir I'optionou la fonction,appuyezsurla touche
rapide prosdu mot.
Sivousd6sirezretourner_ 1'6cranprc!c6dentde lafonction ou de
I'option,appuyezsurla toucheBack (Pr6c6dent).Lorsquevous
avezterrain6la programmation,appuyezsur latouche Eater (Entrer)
ou attendezquatresecondeset la fonctiond_butera
automatiquement.
LosfDches pointantversle haut indiquentla pr6senced'6crans
additionnelsaffichant plusd'options. Appuyezsurlesteaches
rapides prosdesfDchespour fairede!filerlos_crans.
Important : quatre secondesapr_sI'entrc!ede la fonction,de I'option,
du nombreou de la lettre,lafonction seraentr6eautomatiquement.Si
plusde 30secondess'6coulententre losc!tapesde programmation,la
fonctionseraannuk!eet I'afficheurretourna_ I'_cranpr_!cSdent.
Horloge
Reglage de I'horloge :
1.
2.
3.
/4.
5.
6.
7,
43
M ............. •'••
/ Setup
Appuyezsurla toucheSetup. On / Off/
%lectionnezHORLOGEa I'aidedestouchesrapides.
S_lectionnezHEURE.
Entrezrheure _ I'aidedestouchesnum_!riques.
Appuyezsurla touche Eater.
%lectionnezAM ou PM en modede 12heures.(PourI'horloge
de 24heures,voyezla page4/4.)
Pourquitter le modede r_!glage,appuyezsur latouche Setup.

Pour activer et annuler l'affichage de
I'horloge/jour de la semaine :
1. Appuyezsur latouche Setup (R_glage).
2. S6lectionnezHORLOGE.
Setup
On/Off/
\
3. Appuyezsur la %che pour afficherle mot DESACTIVER.
4. S61ectionnezDESAOTWER.
5. S6lectionnezHEURE.
6. ChoisissezOFF(Arr6t)pour annulerI'affichagede I'horloge,ou
s61ectionnezON (Marche)pour afficherI'horloge.
7. %lectionnez OFFpourannulerI'affichagedujour dela semaine.
S61ectionnezONpour afficherlejour de lasemaine.
8. Pourquitter le modede rdglage,appuyezsur latouche Setup.
Entree du jour de la semaine :
1. Appuyezsur latouche Setup. Setup '
On/Off/
2. S61ectionnezHORLOGE.
3. Appuyezsur la fl_chepour afficherle mot JOUR.
4. Utilisezla touche rapidede lafl_che pour fairedc!filerlesjours.
5. S61ectionnezlejour d6sir6e.
6. Pourquitter le modede r(!glage,appuyezsur latouche Setup.
R6glage de I'horloge pour 12 ou 24 heures :
L'horlogepout6treprogramm6epour afficher12ou 24 heures.
/, .................
1. Appuyezsur latouche Setup. Setup '
2. S61ectionnezHORLOGE. ,, On / Off
\ ............ /
3. Utilisezla fl_che pourpassera N!cransuivant.
4. S6lectionnez12/24 N.
5. S61ectionnez 12 HR ou 24 HR.
6. Pourquitter le modede rc!glage,appuyezsur latouche Setup.
3. Appuyezsur lestouchesnum6riquespour entrerla nouvelle
durc!evoulue.
4. Appuyezsur latouche Eater.
Pour annuJer la minuterie :
Appuyezdeuxloissur latouche TIMER 1 ou
TIMER 2.
Si les deu× minuteries sont actives :
/ TIMER 1
J
, On / Off /
Si laminuterievoulueestdc!j_affichc!e,appuyezunefoissur la
touche pour le moded'6ditionet deuxfoispour annulerla minuterie.
Si laminuterievouluen'estpusaffichc!e,suivezlesc!tapes
c!num6r6esci-dessous.
1. Appuyezsur latouche TIMER unelois.Laminuteriechoisiesera
affich(!e.
2. Appuyezsur latouche TIMER une deuxiemelois pouraccc!der
au moded'6dition afinde faireloschangements.
3. Appuyezsur latouche TIMER une troisiemelois pour annuler la
minuterie.
Modifier les sonneries de la minuterie :
LesignalsonoredesMINUTERIE1 etMINUTERIE2 pout6tre
modifi& Losoptionsdisponiblessont deuxhipsatoutes les30
secondes,deuxbipsatouteslos60secondesou un soulbip. Le
r_glagepar ddaut estd'un seulbip. ,...................
1. Appuyezsur latouche Setup. Setup
On/Off/
2. %lectionnez lafl_che pourafficher ...............
SlGNAUXSONOR.
3. %lectionnezSIGNAUX SONOR.
4. %lectionnezSIGNAUX MINUTE.
5. %lectionnez lesignalsonored6sir6[2-30SEC,2-60SECor1
BEEP(Bip)).
6. Pourquitter le modede r6glage,appuyezsurla touche Setup.
Minuteries
Reglage des minuteries (Minuterie 1 et
iMER7
Minuterie 2) : ,
1. Appuyezsur latouche TIMER 1 (Minuterie 1)ou
On/Off
TIMER 2 [Minuterie2). .................
2. Appuyezsur I'unedesdur6esaffich(gesenutilisantlestouches
rapidesou appuyezsur lestouchesnum6riquespour entrerla
durc!ed6sir6e.
Important : Chaquelois quevousappuyezsurleschoix de
durc!eaffich6s,vousen augmentezladur6e. Parexemple,en
appuyantsur_ 10MIN>>troislois,vousafficherez30minutes_ la
minuterie(0:30).
3. Appuyezsur latouche Eater (Entrer).
Pour modifier la duree entree une lois la
minuterie activee :
1. Appuyezunelois"surlatoucheTIMER 1 ou "TIMER
TIMER 2. ,,On / Off/
2. Appuyezplusieursfois sur lesdur6esdestouchesrapides
jusqu'_ceque la dur_edc!sirc!esoit r6gl6e.
OU
Verrouillage des commandos et de la
porte du four
Lescommandoset la portedu four peuvent6treverrouill6espour
pr@enirtoute programmationaccidentelle. Si une fonctiondu four
est en coursd'utilisation,loscommandosetla portene peuventpas
6treverrouill6es.
Pour verrouiller los commandos et la porte de four :
Appuyezsur lostouchesBack (Pr6c6dent)etEnteren m6metemps
et maintenez-lesenfonc6espendanttroissecondesoujusqu'ace
que la mentionCOMMVERROUILLs'affiche.
Pour deverrouifler los commandos et la porte
du four :
Appuyezsur lostouchesBack et Eater en m6metempset
maintenez-lesenfonc6espendanttrois secondes. Lorsquelos
commandesetla portesont d6verrouill6es,la mention
DEVERROUILLAGEapparait_ I'afficheur.
Back 0 Enter
44

Cuisson au four
Programmation de la cuisson au four : ,_....................
Bake
1. Appuyezsur latouche Bake (Cuissonau four3.
2. SClectionnezlatempCraturedu four _ I'aidedestouchesrapides.
OU
EntrezlatempCraturedCsirCeDI'aidedestouchesnumCriques.
Appuyezsur latouche Enter (Entrer)pour validerlatempCrature.
• LatempCraturepout6treprogrammCede75 D285° C 070
550° F]par intervallesde3° C(5° F].
• AprCstroissecondes,lefour semet DprCchauffer.CUISSON
et PREHEAT(Prechauffage]apparaissenta I'afficheuravecla
mention_ 100°>>ou latempCratureactuelledu four (laplus
61evCedesdeux).
LorsquecettedurCeest 6coulCe,le four rCduitautomatiquementla
tempCratureD75° C070° F)et gardela nourritureau chaud
pendantune heureau maximum,puiss'Cteintautomatiquement.
Avec lafonctionde dCpartdiffCrC,le fourse meten marcheplustard
dartsla journCe. Programmezla durCed'attentedCsirCeavantquele
four nese mottoen marcheet la durCede cuissondCsirCe.Lefour
commenceDchauffer_ I'heuresClectionnCeet cult pour la durCe
spCcifiCe.LorsquecettedurCes'est6coulCe,le four maintientla
nourritureau chaudpendantune heureau maximum,puiss'Cteint
automatiquement.
Pour programmer la cuisson et maintien :
1. Apr_savoirrc!gl6lafonction de cuissonaufour, appuyezsurla
toucheMore Options (Autresoptions].
2. SClectionnezCUI/CHD. ,Options
• LatemperatureaffichCeaugmenteparintervallesde1°
jusqu'_ceque lefour atteigne latemp(!ratureprCrCglCe.
AIIouezenviron 15minutespour le prCchauffage.
• Lorsquelefour est pr_chauff&unsignalsonoreretentitet
la mentionPREHEATs'c!teint.
3. A la fin de lacuisson,c!teignezlefour en appuyantsur latouche
CANCEL(Annulet). Retirezla nourrituredu ...................
four. Le four continuede fonctionnerjusqu'a ce CANCEL :
que vousappuyiezsurla toucheCANCEL. ......................
Reilrlarques :
* Si plusde30 secondess'Ccoulententre lemomento_ vous
appuyezsurunetouche et le momento_ vousappuyezsur une
touche numCrique,I'afficheurretournera_ I'_cranprc!cCdent.
o Lefour chauffechaquefois qu'unetempCratureapparait
I'afficheur.
• Pourmodifier latempc!raturedu four durantla cuisson,appuyez
sur latouche Bake et choisissezune tempCratureaffichCeou
utilisezlostouchesnumc!riquespourentrer latempCrature
d_sirc!e.
• Lefour s'arrCteautomatiquementaprCs12heuress'i[ a6t6
accidentellementlaiss6en marche. Pourprogrammerle mode
sabbat,voyezModesabbata la page54.
3. SClectionnezla durdede cuissonsouhaitCea I'aidedestouches
rapidesou destouchesnumCriques.
4. SClectionnezsur latouche Enter.
5. COOKTIME(Dur_ede cuisson],le comptea reboursde la dur6e
de cuisson,PREHEAT,CUISSONet latemp6ratureactuelleseront
affich6s.
Lefour effectuela cuissonpour la durCechoisie,puisgarde les
alimentsau chaudpendantune heure.
Pour programmer une cuissou differee :
1. Apr_savoirrCgl(!la fonctionde cuissonaufour, More
appuyezsurla touche More Options. Options
2. SClectionnezDM DIF.
3. SClectionnezla dur_esouhaitSeavant leddbutde cuisson,en
utilisantlosdur_esaffich_esou lostouchesnumdriques.
4. Sdlectionnezla durdede cuissond_!sir_eenutilisantlosdurdes
affichdesou lostouchesnum_riques.
5. Le mot CUISSON,la temperature,led_!laiet lecompte_ rebours
de la durdede cuissons'affichent.
6. Lorsqueleddlais'est _coul&le four commence_chauffer.COOK
TIME,le compte_ reboursde ladur_ede cuisson,PREHEAT,
CUISSONetla tempdratureactuelleseront affichds.
Options de cuisson au four
Lesoptions de Cuissonet maintienetde D@art diff_!r_sont
disponiblespour la cuissonau four. Lots de I'utilisationde I'option
Cuissonet maintien,le fourse meta chaufferimm_diatementapr_s
le r_!glage.Puis,le fourfonctionnependantla dur_!esp_cifi_e.
45

Convection
Laconvectionutilise unventilateurpourfaire circulerI'airchaudtout
autourdesaliments. Cettem6thodecult et brunit lesalimentsde
fa_onplus uniforme,souventen moisde tempseta des
temp6raturesplus basses,en plusde permettreI'utilisationde
plusieursgrillesa lafois.
Remarques :
. Le r6gulateurdu four est rc!gl(gfi I'usinepour la conversion
automatiquepour convection.Lorsquevous utilisezConvect
Bake(Cuisson_ convection)entrezla temp6raturede cuisson
conventionnelle.Lerc!gulateurr6duitautomatiquementla
tempc!ratureconventionnellede 25°.
• EnmodeConvectRoast(ROtissage_ convection),la
temp(gratureneserapasrc!duiteautomatiquement.Entrezla
temp(gratureconventionnelleainsiquela durcgede rOtissage.
Le r6gulateurvousavertitIorsque75% du tempss'estc!coulc!
etvousdemandede v_rifierla cuisson.
• Pourd_sactiverlaconversionautomatiquepourconvection,
voyezlapage54.
Options de
convection
Losoptionsde cuissonet
maintienetde cuisson
diffc!r_esent disponiblesIors
de lacuisson) convection.
Voyezla page45 pour plus
d6tailsconcernantla
programmationde la cuisson
etmaintienet de la cuisson
diffc!rc!e.
Plusieursgrilles
Cuissonde
G_teauxsecs/
Biscuits
Pains
Metsensauce
Tartes/Tourti6res
G_teaux
Pouletentier
Dindeenti_re
L_gumes
R6tisdeporc
R6tisdebceuf
Cuisson convection
Programmation de la cuisson _ convection :
1. Appuyezsur latouche Cenvect (Convection).
2. S61ectionnezCUISSONCONVECa I'aidedes _............. -
touchesrapides. ( Convect
• Latempc!raturepeut 6treprogramm6ede 90_ 285°C [195
550°F] par intervallesde 3°C (5°F).Sila conversion
automatiquepourconvectionestdc!sactivc!e,latempc!rature
pout6tre rc!gl6ea partir de 170°C(77°F).
• Apr_strois secondes,lefourse meta pr_chauffer.
CUISSONCONVECetPREHEAT(Prechauffage]apparaissent
I'afficheuraveclamention{{100°>>ou latempc!ratureactuelle
du four (la plus61ev6edesdeux].
° Latemp(gratureaffichc!eaugmentepar intervallesde 1°
jusqu'ace que lefour atteignela temp6raturepr6rc!gl6e.
AIIouezenviron15minutespourle pr6chauffage.
• Lorsquele four estpr6chauff_g,un signalsonoreretentitet
le mot PREHEATs'_teint etla mentionCUISSONCONVEC
s'affiche.AUTOs'affichesila caract_gristiquede conversion
automatiquepourconvection (certainsmod_les]est activ_ge.
• Placezla nourrituredansle four.
/ .......................................
A la fin de la cuisson,6teignezle four en ( CANCEL i
appuyantsur latouche CANCEL(Annulet]. ................
Retirezla nourrituredu four. Lefour continuede fonctionner
jusqu'_ceque vousappuyiezsurla touche CANCEL.
Rapid Preheat (Prechauffagerapide)
Pourr_duire laduroc du pr_chauffageIorsquevous utilisezBakeou
ConvectBake.Utilisezpour tous losalimentsa cuireaufour sur une
seulegrille.
• Apr_savoirprogramm_!etactiv_!Bakeou ConvectBake,appuyez
sur latouche Rapid Preheat.
• Lamention 1GRILLESEULs'affichepuis,apr_s10secondes,
I'afficheurindique RAPIDEet PREHEAT.
Pour retoumer au pr_chauffage standard :
• Appuyezsur latouche RapidPreheat _ nouveau.Vousacc_!dez
ainsiau pr_chauffagestandardet PREHEATainsique la fonction
choisies'affichent.
Relnarques :
• Pourde meilleursr_sultats,placezla grille a la position2 ou 3
IorsquevousutilisezI'optionRapidPreheat.
• Pourobtenirdesr_!sultatsoptimauxde cuissonet de
brunissage,nousvousd_!conseillonsI'usagedu pr_chauffage
rapideIorsquevous utilisezplusieursgrilles.
3. S6lectionnezlatemp_!rature_ I'aidedestouchesrapides
OU
Entrezlatemp_!ratured_!sir_ea I'aidedestouchesnum_riques.
Validezle r6glageen appuyantsurla touche Enter (Entre0.
46

Convect Roast
(R6tissage a convection)
Programmation du rStissage _ convection :
1. Placezla nourritureclanslefour. ,J............... ,
( Convect
2. Appuyezsur latouche Cenvect (Convection].
3. %lectionnez ROTISSCONVECT) I'aidedestouchesrapides.
4. %lectionnez latemp6raturedu four a raide destouchesrapides.
Cuisson au gril
Pourobtenir desr6sultatsoptimaux,pr6chauffezle four pendant5
minutesla porteferm6eet utilisezune I_chefriteconguepour la
cuissonaugril. Laportedu four dolt 6treouvertejusqu'ala but6ede
la cuissonau gril (environ10cm/4 pouces]durant lacuissonau gril.
Programmation de la cuisson au gril :
1. Placezla grille defour _ la positionappropric!e(voyez
le Tableaude cuissonaugril). _......................."
Broil
2. Appuyersur latouche Broil (Grill. "......................"
3. S61ectionnezHAUT - 285° C (550°F] pour la cuissonau gril
tempc!rature61ev6e.
OU
S61ectionnezBAS - 230° C[450° F] pour lacuissonaugril
tempc!raturebasse.
OU
Entrezlatemp(!raturedc!sirc!ea raide destouches
numc!riques.Validezle rc!glageenappuyantsurla toucheEnter
(Entre0.
• Latemp6raturepeut6treprogrammc!ede90 a 285° C (170
550° F)par intervallesde3° C(5° F].
5. Entrezladur6e decuissond6sirc!e.Entrezla dur6ede rOtissage
conventionnela raide destouchesnumc!riques.
• Apr_strois secondes,lefour commencea chauffer.ROTISS
CONVECTapparaita I'afficheuravecla mention{{100° >>ou la
tempc!raturedu four actuelle(la plusc!levcgedesdeux).
• Latemp6ratureaffich6eaugmentepar intervallesde 1°
jusqu'aceque le fouratteigne latemp6ratureprc!r6glc!e.
• Ledc!comptede la durc!ede la cuissoncommence.
8. Lefour c!metun signalsonoreIorsque75 %du tempss'est
c!coulc!pour quevouspuissiezv6rifierla cuissondesaliments.
V6rifiezla cuissona I'aided'un thermom_tre_viande.Si la
cuissonesttermin_e,retirezlesalimentsdu fouret appuyezsur
CANCEL(Annule0 pour _teindrele four.
7. Si la cuissonn'estpasterminc!e,poursuivezle rOtissage.
Unefois le temps6coul6,le fourpasseautomatiquementau
modede maintienau chaudpendant1heure,
j ..............
puiss'6teint. Si leaalimentssent retir6sdu four (CANCEL ii
avantque rheure nesoit c!coulc!e,appuyezsur
latouche CANCEL.
Rellrlarques :
, si la recettesugg_rede pr_chaufferle four, augmentezla durc!e
de cuissona 15minutes.
, Si la caract_!ristiquede conversionautomatiquepourconvection
est d_sactiv_!,unedur_!ede r6tissagen'estpasrequise.
, Lefourposs_deune caract_ristiquede cuissonau gril variable.
Vouspouvezdoncchoisir unetemperaturede cuissonau gril
plusbasse(149_ 288° Cou300 a550° F).Pourchoisir une
temperatureplusbasse,appuyezsur lestouchesnum_riques
appropri_es.Appuyezsur latouche Enter (Entre0pour
programmerlatemperaturela plusbasse.
4. Pr_!chauffezle four pendantcinq minutes.
5. Placezlesalimentsdanslefour et poussezla portejusqu'_la
butSede la cuissonau gril.
/ .......
6. Appuyezsur latouche CANCEL(Annule0 (CANCEL
quand la cuissonat]gril termin_!e.
Reilrlarques :
• Voyezle Tableaude cuissonaudd pour connaitrelesdur_esde
cuissonrecommand_es.
Si plusde 30secondess'_!coulententrele momentouvous
appuyezsur latouche Broil etceluiou vousappuyezsur les
touchesrapidesou lestouchesnum_griques,le four neserapas
programm_!et rafficheurretourneraI'_!cranpr6c_!dent.
Utilisezle r_glageHAUTpourla plupartdescuissonsau gril.
Utilisezla temp_!ratureplusbassepour la cuissonau gril de
metsdevantcuireplus Iongtemps.Unetemp_!raturebasseleur
permetde biencuiresanstrop brunir.
Pr6voyezdesdur_esde cuissonau gril plus Ionguesetun
brunissageI_g_rementmoinsprononc_siI'appareilfonctionne
sur un circuit de208volts.
Retournezla nourritureIorsquela moiti6de la dur_!epr6vue
pour lacuissonaugril s'est6coulee.
Lesdur_esde cuissonatJgril peuvent_treplus Ionguessivous
choisissezdestemp_!raturesplus basses.
47

Tableau de cuisson au gril
Boeuf (at]gril a74° Cou 165°F]
6 harnbourgeois,env.1crn0/2 po]d'c!paisseur
2 biftecksdefaux-filet,2,5crn[1po] d'c!paisseur
2 contrefilets,2,5crn(l po] d'6paisseur
2 biftecksd'aloyau,2,5crn(1po] d'c!paisseur
Volaille (augril a 77° Cou 170° F,a bassetempc!rature]
4 poitrinesdc!soss6es/sanspeau
4 poitrinesde pouletavecos
Pore (au gril_ 71° Cou 160° F)
4 c0telettesdeporcd6soss_es,2,5crn[1 po]d'6paisseur
4 cOtelettesdeporcavecos,2,5crn(1po] d'6paisseur
Tranchedejarnbon,2,5crn[1po] d'c!paisseur
Poisson[augril_ 60° Cou 140° F]
4 damesd'espadon,2,5cm (1po] d'6paisseur
2 damesde fl(!tan,2,5crn(1po] d'6paisseur
Hoplost_teorange,2,5crn(1po] d'6paisseur
Crevettes(16-20par livre]
2 filetsde saurnon,env.1crn 0/2 po]d'6paisseur
2 damesde saurnon,2,5crn [1po) d'6paisseur
10 a 12minutes
18 a 22 minutes
18 a 22 minutes
18 a 22 minutes
Gril BAS
12 a 15minutes
20 _33 minutes
20 a 28 minutes
25 _ 28 minutes
12 _ 16 minutes
10 a 14minutes
10 _ 14 minutes
10 ) 12 minutes
8 a 10 minutes
8 a 12 minutes
10 a 14minutes
4
4
4
4
4
3
4
4
4
3
3
4
4
4
3
*important : Pourrc!duirele brunissageet I'exc_sde furn6edurantla cuissonau gril,abaissezla grille etaugmentezladurc!ede lacuisson.
Ventilateur du four
Unventilateurde convectionperrnetde faire circulerrair chaudclans
le four Iorsquela caract6ristiquede convectionest s_lectionn_e.
Important :Leventilateurde convections'arr6teautomatiquement
Iorsquevousouvrezla porte.
f
Event du four
L'6ventdu fourest incorpor6dansle systSmedeventilation
6vacuationdescendantede la tablede cuisson.
Lorsquele fourfonctionne,lessurfacesprosde I'c!ventpeuvent
devenirassezchaudespourcauserdesbr01ures.Pourde meilleurs
rc!sultatsdecuisson,ne bloquez pas I'ouverturedeI'c!vent.
Lampe du four
Lalarnpedu fours'allurneautornatiquernenta ..............
I'ouverturedela porte. Lorsquelaporteest ferrn6e, Over3
appuyezsur latouche Oven Light (Lampedu four] Light /
pourallumerou _teindrela lampe.Lefour produit
un signalsonorechaquelois quevousappuyezsur OvenLight.Sila
larnpedu four estallurn6eIorsquela porteest ouverte,elles'_teindra
Iorsquela porteseraferm6e.
Sole du four
Prot6gezla soledesproduits renversc!s,en particulierceuxacidesou
sucrc!s,puisqu'ilspeuventd_colorerI'c!rnailvitrifi6. Utilisezdes
ustensilesde la bonnedimensionpour #viterlesrenversernentset
lesdc!bordernentspendant1'6bullition.Be placez pasd'ustensiles
ou depapier d'aluminium directement surla sole dufour.
48

Grilles de four
Troisgrillesstandardplatessont inclusesavecle four.
Pourretirer une grille :
1. Tirezsur la grillejusqu'a la
but@.
2. Soulevez-lapar I'avantet
tirezversvous.
Pourremettre une grille
en place :
1. Placezla grillesur lossupportsdanslefour.
2. SoulevezI_g_rementI'avant;faitesglisserla grille versI'arri_re,
au-deB de la position decalage.
3. AbaissezI'avantde lagrille et faites-laglisserdanslefour.
Positions des grilles
POSITION 5 @osition la ...............................................................................
Utilisez cette position _ L /_,_ 5Plate
deux grilles et la Plate
cuisson augril. I1 ¢
POSITION 4 : 1Plate
Utilisez cette position caisson avecconvection
pour la cuisson sur sur trois grilles
deux grilles et la cuisson au gril.
POSITION 3 :
Utilisez cette position pour la cuisson de la plupart des
p_tisseries sur plaque _ biscuits ou dans un moule _ gel6e,
pour la cuisson de g_teaux _ 6tages, tartes aux fruits ou
mets pr6par6s surgel6s.
POSITION 2 :
Utilisez cette position pour le rOtissage de petits morceaux
de viande, les plats mijot6s, le pain, les savarins, los tartes
la cr_me, los tartes surgel6es ou pour la cuisson sur deux
grilles.
POSITION 1 :
Utilisez cette position pour le rOtissage de gros morceaux de
viande, la volaille, les souffl6s, les g_teaux des anges ou
pour la cuisson sur deux grilles.
CUISSON SUR PLUSIEURS GRILLES :
Beux grilles : Utilisez les positions 2 et 5 ou 1 et 4.
Trois grilles (avec convection seulemen0 : Utilisez les
positions 1,3 et 5 (voyez rillustration].
Reilrlarques :
• Pour lacuissonavecconvectionsurdeuxou trois grilles,
v@ifiezlosaliments_ la dur@ minimalesugg6r@pour@iter
de trop cuireou detrop brunir.
=Necoavrezpastoutelasurfaced'unegrilleoulasoledufouravec
du papierd'aluminium. Vousaffecterezlosr6sultatsde cuissonet
vouspourriezendommagerlasoledu four.
49

Autres options
Cuisson et maintien
1. Appuyezsur latouche More Options (Autres
options).
2. Sc!lectionnezCUISS/CHAUD.
iM0re,
,Options
\ /
3. Entrezladurc!ede cuissona I'aidedestouchesrapidesou des
touchesnumc!riques.
4. S61ectionnezCUISSou CONVECT.
5. Apr_savoirappuy6sur CUBS,s61ectionnezla tempc!raturea I'aide
destouchesrapidesou destouchesnumc!riques.
6. Apr_savoirappuy6sur CONVECT,s61ectionnezCUISSON
CONVECou ROTISSCONVECTpuiss(_lectionnezlatemp6rature
I'aidedestouchesrapidesou destouchesnum6riques.
Lefour effectuela cuissonpour ladur6echoisie,puisgarde los
alimentsau chaudpendantuneheure.Lefour s'arr6tera
automatiquement.
Important : Si la recetterecommandede pr6chaufferle four,
augmentezla dur6ede cuisson_ 15minutes.
Demarrage differ6 "
1. Appuyezsur latouche More Options. ,Options
2. Appuyezsur la fl_chepour afficherDEMARRDIFFERE.
3. S61ectionnezDEMARRDIFFERE.
4. Entrezladurc!ede d6laisouhait6savantle d6butde I'op6ration
I'aidedestouchesrapidesou destouchesnum6riques.
5. S_lectionnezCUISSON,CONVECTou NE'n'OYAGE,puis
sc!lectionnezlatemperature_ I'aidedestouchesrapidesou des
touchesnumc!riques.
Programmation de ia cuisson diff_r6e :
1. Suivezles6tapes1a 4 du _d_marragediffc!rc!_[voir ci-dessus).
2. S61ectionnezlatempc!ratureparmicellosaffich(!esouutilisezles
touchesnumc!riquespour entrerlatemp6raturede votrechoix.
3. S61ectionnezladur6e decuissond_sir6een utilisant losdur6es
affich6esou lestouchesnumc!riques.
4. Lamention DELAY(Diff6r6)apparaita I'afficheur,lafonction
choisie,la temperaturepr6dc!finieet le d6comptede ladurc!edu
d61ai.Lorsquele d6compteesttermin& la dur6ede cuisson
s'afficheet le fourcommencea pr6chauffer.
Programmation de la cuisson _ convection diff_r6e :
1. Suivezlosc!tapes1a/4du _dc!marragediff6rc!_(voira gauche).
2. S_lectionnezCUISSONCONVECou ROTISSCONVECT.
3. S61ectionnezlatempSratureparmicellesaffich_esou utilisezlos
touchesnum6riquespour entrerlatemp6raturede votre choix.
/4. S61ectionnezla dur_ede cuissond_sir6een utilisantlosdur_!es
affich_esou lostouchesnum6riques.
5. Lamention DELAYapparaita I'afficheur,lafonction choisie,la
temp(!raturepr_ddinie etle d_!comptedela dur_!edu d_!lai.
Lorsquele d6compteesttermin& la dur6ede cuissons'afficheet
le fourcommencea pr_!chauffer.
Programmation de I'autonettoyage diff_r_ :
1. Suivezlos_tapes1a/4du {_d_!marragediff_!r_!>>[voira gauche).
2. ENLEVERGRILLEapparaita I'afficheur.Retirezlosgrillesdu four
ets_lectionnezCONTINUER.
3. Choisissezle niveaudesalet_LEGERen entrant 200) I'aidedes
touchesnum_riquesafin deprogrammerdeuxheuresde
nettoyage.Choisissezle niveaude salet_MOYENou iNTENSE
I'aidedestouchesrapides.Attendezquelquesinstantspendant
que la porteseverrouille.
4. DELAYapparaita I'afficheur,ainsique ladur_e du nettoyage,le
d_laiet le d(!verrouillage(solonle niveaude salet_choisi).
Lorsquele d_compteesttermin& la dur_edu nettoyages'affiche
etle four commencea pr_!chauffer.
Pourplusde d_tailsconcernantI'autonettoyage,voyezla page34.
Fermentation
La caract_ristiquede fermentation est utilis(!epour faire leverdes
produitsde boulangeriea basede levureavantde loscuire. IIyadeux
m_thodesdefermentationdisponible: rapideetstandard.
La fermentationstandardeffectu_!edartsle four protegela p_tedes
changementsdetemp(!ratureou descourantsd'air qui affectent
courammentlosr_!sultatsd'unefermentationfaite sur lecomptoir.
La m_!thodede fermentationrapidepermetd'obtenirune
fermentationplusrapidesansfairedetort a la lewJre.
1. Appuyezsurla toucheMore Options.
2. S_!lectionnezFERMENTATION.
3. S_!lectionnezRAPIDEou NORMALE.
4. Lorsquela fermentationesttermin_!e,retirezla
p_tedu fouret appuyezsurla touche
CANCEL(Annulet).
re ",,
,Options/
/
CANCEL i:
Suite
5O

Reilrlarques :
• Pourla p_tequi n6cessiteuneseulelevde,lesdeuxm6thodes
(normaleou rapide) peuvent6treutilis6es.
• Sivousutilisezde la p_te_ pain surgel_e,choisissezla
FERMENTATIONRAPIDE.II n'estpasn6cessairede
ddcongelerla p_teavant lafermentation.
, Pourla p_tequi demandedeuxlev6es,la rn6thodestandard
doit6tre utilis_ependantlapremierelevde.Pourla deuxi_me
levee,utilisezI'une desdeuxm6thodes.
• Si latempdraturedu four esttrop c!levdepour la fermentation,
REFROIDISSapparait_ I'afficheur.
IVlaintien au chaud
Lacaract6ristiquede maintienau chaudestutilis6epour garderau
chauddesalimentscultsou pour rdchaufferpainset assiettes.
1. Appuyezsur latouche More Options (Autresoptions).
2. Appuyezsur lafi_che pourfaireddfiler I'c!cran. /More ......
3. SdlectionnezMAINTIEN CHAUD. Uptionsj
Relnarques :
• Losalimentsdoivent6trechaudsIorsqu'ilssontplacc!sdansle
four.
, Pourconserverlaqualitc!optimaledesaliments,ne losgardez
pasauchaudpendantplusd'une heure.
• Pouremp6cherlesalimentsde sedess_cher,recouvrez-lessans
serrerde papierd'aluminiumou d'un couvercleenverre.
Sonde thermique
L'utilisationde lasondefournieavecvotre fourassured'excellents
rc!sultatsde rOtissage.
1. Ins_rezlasondedartsI'aliment.
Pourlosviandes,lebout de la
sondedoit 6treplac6au centre
de la partiela plus@aisse,sans
toucher augrasou auxos.
2. Ins6rezlafiche de la sondeclans
la prisesitu_esur lec6td droitsupdrieurdu four. Assurez-vous
de bien enfoncerlafiche clansla prise.
3. Appuyezsur latouche More Options. _............ \
/ More ....
4. Appuyezsur laflSchepour faireddiler I'dcran. , Options /
....... ,/
5. Sc!lectionnezSONDETHERMIQ.
4. ChoisissezI'une destempdraturesaffich6esou entrezcellode
votrechoix en utilisantlestouchesnumdriques.Vouspouvez
choisir unetemp@atureentre63et 88°C [145et 190° F].
5. La mentionMAINTIENCHAUDetla temp6ratures'affichent.
6. Lorsquele prdchauffageestterminal,un signalsonoreretentit,
puisMAINTIENCHAUDet latempdratures'affichent.
7. Lorsquevousaveztermine!,appuyezsurla ...................,
touche CANCEk(Annule0 et retirezla (CANCEL
nourritureou lesassiettesdu four.
Pour r_chauffer des petits pains :
° Recouvrezlospetitspainsde papierd'aluminium,sansserrer,puis
placez-lesaufour.
° AppuyezsurMore Options. Options )
• SdlectionnezM/\INTIEN CI-IAUD. "............................
° Sdlectionnezlatemp@ature075°.R6chauffezpendant12a 15
minutes.
Pour rechauffer des assiettes :
• Placezdeuxpilesdequatreassiettesmaximumdansle four.
• AppuyezsurMore Options.
° SdlectionnezMAINTIEN CHAUD.
° Sdlectionnezlatemp@ature075°.
• R6chauffezpendantcinq minutes. Eteignezlefour en appuyantsur
latouche CANCELet laissezlosassiettesdanslefour pendant
encore 15minutes.
° N'utilisezque desassiettespouvantallerau four. [V6rifiezavecle
fabricant.]
°Ne posez pas d'assietteschaudessurunesurfacefroide.Los
changementsrapidesde tempdraturepourraientloscasserou los
fendiller.
51
6,
Rdglezla tempdratureinterned6sir6een choisissantparmi
cellosaffich6esou entrez-la_ I'aidedestouchesnum@iques.
Latemp6raturede lasondepout6trer6gl6eentre38et 85 °C
(100° et 185°F).Si lasondethermique n'estpasinsdrde,la
mentionINSERERSONDEs'affiche.
7. S61ectionnez CUISS ou CONVECT.
8. R6glezla tempdraturedufour en choisissantI'unedes
tempdraturesaffichdesou utilisezlostouchesnumdriquespour
entrer latempdratureddsirc!e.
Important :Si la sondeest d6branchdede la prisedu four atout
momentdurantla cuisson,le r6gulateurafficherale message
INSERERSONDE.Si la sonden'estpasr6ins6rdedartslos30
secondessuivantes,le programmeest annuk!et lefour s'c!teint.
Si vous choisissez CUISS :
•Les tempc!raturess_lectionn_espourle four et lasonde
s'affichentbriSvement.
• Apr6s 10secondes,I'afficheurindique latemp6ratureactuelle
du fouret la temperatureactuellede la sonde.
Si vous choisissez CONVECT :
• S_lectionnezCUISSONCONVECou ROTISSCONVECT.
• R_glezla tempdraturedufour en choisissantI'unedes
tempdraturesaffichdesou utilisezlostouchesnumdriquespour
entrer latempdratureddsirde.
° Lostempdraturess_lectionn_espourle four et lasonde
s'affichentbri_vement.

9,
10.
• Apr_s 10secondes,I'afficheurindique latemp6ratureactuelle
du four et latempc!ratureactuellede la sonde.
LorsqueI'alimentatteint latemp6ratureinternechoisie,le four
s'6teintetun signalsonoraretentit.
D6branchezla sondede la prisedu four. La sonde sara
chaade. Utilisezun gantde cuisineou une maniquepourretirer
la fiche de la sondedu four.
Temp6ratures internes sugg6r6es
Bceufhach6 7/4°C 065° F)
Bceuf,veau,agneau[frais) Saignant 63°C [145° F)
A point 71°C[160° F)
Biencult 77°C 070° F)
Poulet,dinde Entier 82°C [180° F)
Poitrine 77°C [170° F)
Porc A point 71°C[160° F)
Biencuit 77°C [WO° F)
Jambon,pr6cuit 60°C [1/40° F)
Reilrlarques :
• La sondedoit 6treretir6edu four Iorsqu'ellen'estpasutilis6e.
• Puisquele fouresttr_s bienisol6,la chaleurqu'il contient
poursuit la cuissonde la nourriturem6mesile signalsonoraa
retenti et lefour s'est6taint. Pourcette raison,il est importantde
retirer lesalimentsdu four aussit6tqua lesignalsonoraretentit.
• Utilisezla poignc!ede lasondepour I'ins_rerou la retirer. Ne
tirez pas sur le c_ble.
• La sonde est chaude apr_s la cuisson.Utilisezune manique
ou un gant de cuisinepour la retirer.
• Pour nettoyerlasondeunelois refroidie,essuyez-la_ I'aided'un
lingo a vaissellesavonneux.N'immersez pas la sonde darts
reau et ne la lavez pasau lave-vaisselie.
f
EGLAGE FAVOR|
R6glage favori
a fonctionR6glagefavorivouspermetde garderen m6moirele
mode,dur6ede cuissonet la temp6raturede cuissonde 10devos
recettesprd6r6es. Lesfours _ convectionsont livr6savec5 recettes
pr@rogramm6es.
Pour s61ectionuer une recette de la liste
preetablie :
1. Appuyezsur latouche Favorites(R6glagefavori). Favorites
On/Off
2. S61ectionnezLISTERECETTES. .........
3. Choisissezla recetted6sirc!eou appuyezsur
la fl_chepour faireddiler 1'6cran.
/4. Unefois la recettes61ectionn6e,lefour commencele
pr6chauffagesolonle programme6tabli.
, Vouspouvezappuyersur latouche More Options (Autres
options)pour ajouterunefonctionde CUI/CHDou DEMDIF.
5. Lorsquevousavezterrain6,appuyezsur latouche CANCEL
[AnnuM) et retirezla nourrituredu four.
Pour sauvegarder la derniere recette
compl6t6e :
(Cuisson au four, Cuisson_convection,R6tissageaconvection,Gril
convection,Dc!shydratation,Maintien auchaud,Fermentation)
1. Appuyezsur latouche Favorites. z...........
Favorites
2. Sc!lectionnezGARDERDERNIER. ,, On / Off
.......... /
3. Entrezle noma I'aidedestouches.
52
• Parexample,pour sauvegarderune lasagne,appuyezsur la
touche<.JKL>troislois pour la lettre _{L>>;appuyezsur la
touche<.ABC>une foispour la lettre_{A>>;appuyezsur la
touche<STU> unefoispour la lettre{{S>>.Continuezjusqu'a
cequa vousoyezcompl6t6le mot.
/4. Chaquefois que la lettre recherch6eapparait,attendeztrois
secondespourqua le prochainespacesoitsoulign6ou appuyez
sur latouche Enter(Entrer)avantde passera la prochainelettre.
• Vouspouvezutiliserun maximumde 1/4lettresincluantlos
espaces.
5. Lorsquele norade la recetteestentr6,losderniersr6glages
s'affichentpendantquelquessecondes.
6. LamentionLISTERECETTESapparaitpour loire ddiler 1'6cran.
7. Appuyezsur latouche Favoritespour quitter le menudes
r6glagesfavoris.
Pour cr6er une nouvelle recette favorite :
S \
1. Appuyezsur latouche Favorites. Favorites
2. Appuyezsur laflSchepour loire d6filerloschoix. On / Off /
3. S61ectionnezCREERNOUVEAU_ I'aidede la touche_ gauche.
Suite

4. Entrez le nom _ I'aide des touches.
• Parexernple,poursauvegarderune lasagne,appuyezsur la
touche<,JKL>troislois pour la lettre _{L>>;appuyezsur la
touche<ABC> une foispour la lettre_{A>>;appuyezsurla
touche<STU> unefoispour la lettre{{S _>.Continuezjusqu'_
ceque vousayezcompk!tc!le mot.
• Chaqueloisque la lettre recherch(geapparait,attendeztrois
secondespour que le prochainespacesoit soulign6ou appuyez
surla toucheEnter avantde passera laprochainelettre.
• Vouspouvezutiliser un maximumde 14lettresincluant los
espaces.
5. S61ectionnezENTERpoursauvegarderle nora.
6. S61ectionnezle modedecuisson,par exemple:CUISSON,
CUISSONCONVEC,ROTISSCONVECT,etc.
7. S61ectionnezlaternpdraturedu four a I'aidedestouchesrapides.
OU
Entrezlatempc!ratured6sirc!ea I'aidedestouchesnum6riques.
8. Ajoutezla fonctionde Cuissonetmaintienen choisissantOLIIou
cuisinezsansCuissonet maintienenchoisissantNON.
9. Sivouss61ectionnezYES,entrezla dur_edecuisson_ I'aidedes
touchesrapidesou destouchesnurn6riques.
10.Ajoutezla fonctionde D@art diff6r_ en choisissantOUI ou
cuisinezsansD@art diff6r6en choisissantNON.
11.Sivouss61ectionnezOUI,entrezla dur6edu d61aia I'aidedes
touchesrapidesou destouchesnurn6riques.
12.Ler6gulateuraffichelosr6glagesprograrnrn6s,puisretourneau
menudesrc!glagesfavoris.
13.Appuyezsur latouche Favorites[R6glagefavori) pourquitter
le menudesr_glagesfavoris.
Pour modifier uue recette sauvegard_e :
1. Appuyezsur latouche Favorites. Favorites
2. Appuyezsur laflSchepourfaire driller I'_cran. ',, On / Off
3. S61ectionnezMODIF RECETTE.
4. Choisissezla recette_ modifer. Au besoin,utilisezlosfl_ches
pour rep6rerla recetted6sirc!e.
5. Modifer lesr6glagesde la recetteen suivantle menu.
6. L'afficheur retourneau menudesr6giagesfavoris.La mention
LISTERECETTESs'affiche.
7. Appuyezsur latouche Favoritespour quitter le menudes
rc!glagesfavoris.
Pour supprimer uue recette favorite :
1. Appuyezsurla toucheFavorites.
// .........................
2. Appuyezsurla fl_chepour fairedriller 1'6cran. / Favorites '
3. S61ectionnezEFFACRECETTE.
4. Trouvezla recettea supprirner.Au besoin,utilisezlosfl_ches
pour rep6rerla recettedc!sirc!e.
5. Lerc!gulateurvousdernandera_ nouveausivousd6sirez
supprirnercette recette. S61ectionnezOLI[ou NON.
6. Appuyezsurla toucheFavoritespourquitter le menudes
recettesfavorites.
Entout temps,vous pouvezquitter le menudes rc!glagesfavorisen
appuyantsur la toucheFavorites.
f
.EGLAGE
Reglage , Setup
1. Appuyezsur la toucheSetup [Reglage). On / Off/
............... /
2. Utilisezlafl_chepourfairedriller lesoptionsde I'c!cranderc!glage.
3. ChoisissezI'optiondc!sir_een appuyantsur lestouchesrapides.
, R6glerlejour de lasernaine.
• S_lectionnerAM ouPM [modede12heuresseulernent).L'heurene
serapasaffich6eavecI'indicationAM ou PM.
• ChoisirI'affichage_ 12ou 2/4heures.
° Dc!sactiverI'affichagede I'horloge.
_e[irlar_ue : Pourquitter 1'6cransansfairede changements,i
[appuyezsur latoucheSetup. L'heuredu jour apparait_ I'afficheur.]
Horloge
our instructionsdc!taill&voyezlaspages43-44.UtilisezI'optionClock
[Horloge)pour :
Langue
Les6cransde laconsolepeuvent_treaffich_s enanglais,frangais
ou espagnol. Pourchoisirune autrelangueque I'anglais:
........ \
1. Appuyezsur latouche Setup. " Setup "
2. S_lectionnezLANGLIES. On / Off
....... /
3. Au besoin,utilisezla fl_chepour passera 1'6cransuivant.
4. Choisissezla langued6sir6e.
5. Appuyezsur latouche Setup pourquitter le menude r6glage.
° R_glerI'heure.
53

Conversion automatique pour
convection
Lefour est rc!gk!_ I'usinepour laconversionautomatiquepour
convection.
Laconversionautomatiquepour convectionr_duitautomatiquement
latempc!raturer6gl6ede 25° pour lescaract6ristiquesde Cuisson
convection.
Pourle ROtissage_ convection,le r6gulateurvousavertitIorsque
75% du tempsde r6tissages'estc!coul_et vousdemandedev6rifier
la cuisson.Lestemp6raturesnesont pusrc!duitespour le rOtissage
convection.
Pour d_sactiver la conversion automatique
pour convection :
1. Appuyezsur latouche Setup (R6glage).
2. S6lectionnezCONVECTAUTO.
3. S61ectionnezARRET.
" Setup
On/Off '
, /
4. Appuyezsur latouche Setuppour quitter le menude r6glage.
Pour r_activer la conversion automatique pour
convection :
1. Appuyez sur la touche Setup.
2. S61ectionnezCONVECTAUTO.
3. Choisissez MARCHE.
" Setup
OntOff
\ /
4. Appuyezsur latouche Setuppour quitter le menude r6glage.
Remarques :
• Lorsquevousutilisez[aCuisson_convectionet la P_tisserie
convectionalorsque I'optionde Conversionautomatiquepour
convectionestd_sactivc!e,rc!duisezlatempc!raturedecuisson
de 14° C(25° F).
• SiI'optionROtissage_ convectionavecConversionautomatique
pour convectionestd6sactiv6e,vousn'aurezpasbesoinde
programmerladur6e de lacuisson.V_rifiezlesalimentsIorsque
75 %de la dur_e habituellede la cuissonest6couk!e.
C/F
L'_!chelledetempc!raturepeut6tre indiquc!eenFahrenheitou en
Celsius.
Pour modifier l'_chelle de temperature :
/, ...........................
1. Appuyezsur latouche Setup. Setup
2. Utilisezla fDchepour passer_ I'c!cransuivant. ,_On / Off,,/
3. S6lectionnezC/F.
4. ChoisissezI'c!chellede temp6ratured6sirc!e.
5. Appuyezsur latouche Setup pour quitter le menude r6glage.
IVlode sabbat
Lefour est programm6pours'6teindreapr_s12heuress'il est
accidentellementlaiss6en marche.Lemodesabbatannule I'arr6t
automatiqueapr_s12heureset peut6tre r6gl6pours'activer
automatiquementou manuellement,auchoix.
Le modesabbatpermetle fonctionnementde lacuissonaufour et dela
cuissonetmaintienseulement.Touteslesautresfonctionssontd6sactiv6es.
Siunefonctionautrequelacuissonaufour ou lacuissonetmaintienest
utilisc!equand le modesabbatcommence,cettefonction seraannuk!e.
Pour activer le mode sabbat :
/ .....
1. Appuyezsurla toucheSetup. " Setup
2. Appuyezsurla fl_chepour Dire driller I'c!cran. On / Off
3. SelectionnezSABBAT.
4. Sc!lectionnezAUTOou MANUEL.
• LafonctionAUTOvousdemandeautomatiquementd'entrer
unetemp6raturedecuissonpourvendredia 14h et demeure
en modesabbatpendant33 heures.La mentionSABBATet
MODESABBAACTapparaita I'afficheurpendant90minutes.Si
vousdc!sirezutiliserla fonctionde cuissonau four ou decuisson
et maintien,durantle modesabbat,vousdevezlesprogrammer
pendantles90 minutes,avantque le modesabbat
automatiquene soit activ6.
• LafonctionMANUALr_gle lefour pour le modesabbatde72
heures.LesmentionsSABBATet MODESABBAACT
apparaissent_ I'afficheurpendant cinq minutes. Si vous
d6sirez utiliser la fonction de cuisson au four ou de
cuisson et maintien durant le mode sabbat, celle-ci dolt
_,tre programm_e pendantlescinq minutes,avant que le
mode sabbat MANUEL ne soit active.
5. S_lectionnez MAROHE ou ARRET.
6. Appuyez sur la touche Setup pour quitter le menu de
r_glage.
Reilrlarques :
• Lefourdolt 6tre inactifpour programmerle modesabbat.
• Lemodesabbat nepeutpus_tre misen marchesi lestouches
ou la portesont verrouill_es.
• Si la cuissonaufour est en coursIorsquele modesabbatse
meten marche,il n'y aurapusde signalsonore.
• Touslesmessageset leshipssontd_!sactiv_!sIorsquele mode
sabbatesten marche.
• Sivousvoulezque la lampedu foursoit allum_!ependantle
modesabbat,allumez-laavantde r_!glerle mode.
• L'autonettoyageet leverrouillageautomatiquedesportesne
fonctionnentpuspendantle modesabbat.
• Latemperaturede cuissonpeut _trechang_ependantque le
modesabbatestactif.Appuyezsimplementsurla touche
Bake (Cuissonau fou0 etentrezensuitelatemperature
d_sir_e_ I'aidedestouchesrapides.
• Appuyezsur latouche OANCEL(Annuler)pour annulerla
cuissonau four. Le r_!gulateurdemeureraen modesabbat.
• Lejour de la semaineetAM/PM (matin/soir)doivent_tre
r_!gl_spourque le modeSabbatfonctionnecorrectement.
54 Suite

Pour annulet le mode sabbat :
AppuyezsurlatoucheSetu. R olage etmaintenez-la
enfoncc!ependantcinq secondes.Vouspouvezannuler "_"_-_ _rl,,
' un / Urr/
le modede cuissonen appuyantsur la toucheCANCEL .....................
[Annuler] durantle modesabbat.
Ajustement de ia temperature
Laprc!cisiondesr6glagesdetempc!raturea 6t6soigneusement
vc!rifi6e_ I'usine. II est normalde remarquerquelquesdiff6rences
dunsladur6ede cuissonentreun fourneufet un four plusancien.
Latemp6raturedesfourspoutc!ventuellementsedc!caler.
Vouspouvezajusterlatemp6raturedu foursivous pensezqu'il ne
cuit pasou ne dorepuscorrectement. Pourde!ciderde I'ajustement
apporter,r6glezle four a unetemp6raturede 14° C(25° F)plus
_lev_eou plus basseque la temp6ratureindiquc!edunsla recette,
puisfaitescuire la pr@aration. Losrc!sultatsdu premieressaide
cuissondoiventdonnerune idc!edu nombrede degr_spar lequella
temperaturedoit 6treajust6e.
Pour ajaster la temperature da four :
1. Appuyezsur latouche Setup.
2. Appuyezsur lafl_che pour faireddiler 1'6cran.
3. S61ectionnezREGLERTEMP.
// .....
Setup
.....On/Off
4. Entrezlamodificationde tempc!raturedc!sirc!ea I'aidedes
touchesnumc!riques.
5. S61ectionnez_ +/= _ pour indiquerune augmentationouune
rc!ductionde temperature. La modificationdetemperatureest
affich6een hauLde I'c!cran.
6. Appuyezsur latouche Enter[Entrer)ou attendezpendanttrois
secondespour validerlechangement.
7. Appuyezsur la toucheSetup pour quitter le menu.
II n'estpasn6cessairede r_ajusterlatemp6raturedu four encas de
panneou d'interruptionde courant.
Lestemp(!raturesde cuissonaugril etde nettoyagene peuventpus
6treajustc!es.
Signau× sonores (bips)
Vouspouvezajusterle volumeet le nombrede bipsentendus_ la fin
de la cuissonetdu dc!comptede la minuterie.
Pour ajaster les hips :
1. Appuyezsur latouche Setup (R_glage). _"Setup
2. Appuyezsur laflSchepourfaire ddiler I'_cran. On.........../ Off,_i
3. SelectionnezSIGNAUX SONOR.
Pour modifier les hips euteudas _ la fin
de la caisson :
1. Suivezles6tapesI a3 de lasection_Signauxsonores>>ci-dessus.
2. S61ectionnezSIGNAUX CUISS.
3. Appuyezsur lafl_che pourfaire ddiler 1'6cran.
4. S_lectionnez1=30MIN pour entendreun hip _ toutesles30
secondes.
OU
S61ectionnez1=60MIN pour entendreun hip _ toutesles60
secondes.
OU
S_lectionnez1 BIP pour entendreun soulbip a la fin de la
CUiSSOn.
5. Appuyezsur latouche Setup pourquitter lemenu.
Pour modifier les sonueries de la miuaterie :
1. Suivezlos_tapesI a3 de lasection_Signauxsonores>>ci-dessus.
2. SelectionnezSIGNAUX MINUTE.
3. Appuyezsur lafl_che pourfaire ddiler I'_cran.
4. S_lectionnez2-30 MIN pour entendredeuxbips_toutes les30
secondes.
OU
S_lectionnez2=60 MIN pourentendredeuxbips_toutes les60
secondes.
OU
S_lectionnez1 BEEP(Bip) pourentendreun soulbip _ la fin de
la dur_e r_gk!e. ,......................
/Setup'
5. Appuyezsur latouche Setup pourquitter lemenu. On / Off
Pour modifier le volume des hips : ..........
1. Suivezles_tapes1 a3 de lasection_Signauxsonores>>ci-dessus.
2. Appuyezsur lafl_che pourfaire ddiler I'_cran.
3. S_lectionnezVOLUME.
4. S_lectionnezHAU'[ pour levolumele plus_!lev_!.
OU
S_lectionnezMOYEN pour un volumemoyen.
OU
S_lectionnezBAS pour levolumele plusbas.
5. Appuyezsur latouche Setup pourquitter lemenu.
55

Arr_t automatique 12 heures
Lefour s'arr6teautomatiquementapr_s12heuress'il est
accidentellementlaiss6en marche.
Pour d_sactiver cette caract_ristique : ,,.............................
1. Appuyezsur latouche Setup [R6glage]. Setup '
2. Appuyezsur lafl_che pour faireddiler 1'6cran. On........../ Off,,
3. S61ectionnezARRETALrl" 12 H.
3. S61ectionnezMARCHE ou ARRETa I'aidedestouchesrap/des.
4. Appuyezsur latouche Setuppour quitter le menu.
Economie d'6nergie
Pour_conomiserI'c!nergie,I'afficheurpeut6tre rc!gk!pour s'c!teindre
Iorsqu'iln'estpusen fonction.
Pour r_gler la caract_ristique
d'_couomie d'_nergie :
1. Appuyezsur latouche Setup.
2. Appuyezsur lafl_che pour faireddiler 1'6cran.
3. S61ectionnezECONOMENERGIE.
/, ...................
i Setup
, On / Off
.......... /
4. S61ectionnezMARCHE ou ARRET a I'aide des touches rapides.
5. Appuyez sur la touche Setup pour quitter le menu.
Appuyer sur n'importe quelle touche pour rc!activer rafficheur.
Service _ ia clientele
Cettezonedu r6gulateurdefour affichele num6rosansfrais du
servicea laclienteleJenn-Air. _.............
Setup
1. Appuyezsur latouche Setup. On / Off
2. Appuyezsur laflSchepourfaire ddiler I'_cran. ...........................
3. S61ectionnezENTRETIEN.
4. Appuyezsur latouche Setup pourquitter lemenu.
D_monstration
Sivouss61ectionnezla d_monstration,vousverrezunecourte
pr6sentationdescaract6ristiquesprincipalesde votre nouvelle
cuisini_reJenn-Air. ,..................
1. Appuyezsur latouche Setup. / Setup ',
, On/Off
2. Appuyezsur lafl_che pourfaire ddiler 1'6cran. "...................
3. S61ectionnezDEMO.
4. S61ectionnezMARCHEou ARRET a I'aidedestouchesrap/des.
5. Appuyezsur latouche Setup pourquitter lemenu.
ACCESSO|RE
Wek _leetrique eu _ gaz en aecessoire - Mod_le A0142
Id6alpour la cuisson_ la vapeur,sautc!e,brais_eou a I'c!tuv6e.Le
wok poss_deun fin/anti-adh(!sif, despoign6esen bois,un
couvercle,une grille pour cuisson_ la
vapeur,desspatulesa rizet une
brochurede conseilsdecuisson. Lewok
fond plat peut6treutilisc!surTOUSles
modules.
56

ARANT|E ET ERV|CE
Ne sont pas couverts par ces garanties
1. Lesdommagesou d6rangementsdus_ cequi suit :
a. Installation,livraisonou entretieneffectu6sincorrectement.
b. Toute r@aration,modification,alt6rationettout r6glagenonautoris6spar
le fabricantou parun prestatairede serviceapr_s-venteagr_6.
c. Mauvaisemploi,emploiabusif,accidents,usagenon raisonnable,ou catastrophe
naturelle.
d. Alimentation61ectrique[tension,intensit6)incorrecte.
e. R6glageinappropric!detoute commande.
2. Lesgarantiesne peuvent6trehonor6essi lesnum_rosde sc!ried'origine ont€!t6
enlev6s,modific!sou nesont pasfacilementlisibles.
3. Lesampoules.
4. Lesproduitsachet6sa desfins commercialesou industrielles.
5. Lesfraisde d@annageou de visitepour:
a. Correctiond'erreursd'installation.
b. Initiationde I'utilisateura I'emploide I'appareil.
c. Assurerle transportde I'appareiljusqu'_I'entreprisedeserviceapr_s-venteet
son retour.
6. Dommagesindirectsou accessoiressuns partoute personne_ la suited'une
quelconqueviolationdesgaranties.
Certains_tatsou provincesne permettentpasI'exchsion oula limitationde responsabilit6
en cequi concernelesdommagesdirectsou indirects.L'exclusionci-dessuspeuten
consequencene pass'appliquer_ votrecas.
Si vous avez besoin d'aide
Consultezd'abord lasectionsurle dc!pannagedu manueld'utilisationet d'entretienou
appelezleservice_ la clientelede Maytag,LLC,soci6t6a responsabilit6limit(!e,Service_ la
clientelede Jenn-Airau 1-800-JENNAIR[1-800-536-6247)auxEtats-Uniset au Canada.
Pour obtenir un service en vertu de la garantie
PourIocaliserune agenceagr66ede serviceapr_s-venteclansvotre r6gion,prenez
contactavecle d6taillantoQvousavezachet6I'appareil;ou appelezMaytagServices,
LLC,soci6t6a responsabilit6limit6e,Servicea la clientelede Jenn-Air.Si le service
obtenuenvertu de la garantiene voussatisfaitpas,veuilleztc!lc!phonerou c!crirea :
MaytagServices,LLC,soci6t6a responsabilitc!limit6e
I'attentiondu CAIR:_Center
P.O.Box2370,Cleveland,TN37320-2370ETATS-UNIS
Etats=Uniset Canada: 1=800-JENNAIR(1=800=536=6247)
Flelnarl:lue : Lorsde tout contact aupr_sde MaytagServices,LLC,socic!tc!
responsabilit6limit(_e,servicea laclientelede Jenn-Airconcernantun probl6me,
veuillezfournir I'informationsuivante•
a.Vosnom,adresseet num6rodet61@hone;
b.Lesnum6rosde moduleetde s(!riede votre appareil;
c. Lenomet I'adressedud_!taillantet la dated'achat deI'appareil;
d.Unedescriptionclairedu probl_meobserw!;
e.Une _reuved'achat.
Lesguidesd'utilisation,lesmanuelsdeserviceet lesrenselgnementssur lespi_cessont disponiblesaupr_sde MaytagServices,LLC,
ci_!t__ responsabilit8limit_!e,Service_ la clientelede Jenn-Air.
57

ESTUFAA GAS DESLIZANTE
DE CORRIENTE DESCENDENTE JENN-AIR
]]]]]]]]]]]]]]]]]]]]]]]]]]]]]]]]]]]]]]]]]]]]]]]]]]]]]]]]]]]]]]]]]]]]]]]]]]]]]]]]]]]]]]]]]]]]]]]]]]]]]]]]]]]]]]]]]]]]]]]]]]]]]]]]]]]]]]]]]]]]]]]]]]]]]]]]]]]]]]]]]]]]]]]]]]]]]]]]]]]]]]]]]]]]]]]]]]]]]]]]]]]]]]]]]]]]]]]]]]]]]]]]]]]]]]]]]]]]]]]]]]]]]]]]]]]]]]]]]]]]]
i¸i¸i¸i¸i¸i¸i¸i¸i¸i¸i¸i¸i¸i¸i¸i¸i¸i¸i¸i¸i¸i¸i¸i¸i¸i¸i¸i¸i¸i¸i¸i¸i¸i¸i¸i¸i¸i¸i¸i¸i¸i¸i¸i¸i¸i¸i¸i¸i¸i¸i¸i¸i¸i¸i¸i¸i¸i¸i¸i¸i¸i¸i¸i¸i¸i¸i¸i¸i¸i¸i¸i¸i¸i¸i¸i¸i¸i¸i¸i¸i¸i¸i¸i¸i¸i¸i¸i¸i¸i¸i¸i¸i¸i¸i¸i¸i¸i¸i¸i¸i¸i¸i¸i¸i¸i¸i¸i¸i¸i¸i¸i¸i¸i¸i¸i¸i¸i¸i¸i¸i¸i¸i¸i¸i¸i¸i¸i¸i¸i¸i¸i¸i¸i¸i¸i¸i¸i¸i¸i¸i¸i¸i¸i¸i¸i¸i¸i¸i¸i¸i¸i¸i¸i¸i¸i¸i¸i¸i¸i¸i¸i¸i¸i¸i¸i¸i¸i¸i¸i¸i¸i¸i¸i¸i¸i¸i¸i¸i¸i¸i¸i¸i¸i¸i¸i¸i¸i¸i¸i¸i¸i¸i¸i¸i¸i¸i¸i¸i¸i¸i¸i¸i¸i¸i¸i¸i¸i¸i¸i¸i¸i¸i¸i¸i¸i¸i¸i¸i¸i¸i¸i¸i¸i¸i¸i¸i¸i¸i¸i¸i¸i¸i¸i¸i¸i¸i¸i¸i¸i¸i¸i¸i¸i¸i¸i¸i¸i¸i¸i¸i¸i¸i¸i¸i¸i¸i¸i¸i¸i¸i¸i¸i¸i¸i¸i¸i¸i¸i¸i¸i¸i¸i¸i¸i¸i¸i¸i¸i¸i¸i¸i¸i¸i¸i¸i¸i¸i¸i¸i¸i¸i¸i¸i¸i¸i¸i¸i¸i¸i¸i¸i¸i¸i¸i¸i¸i¸i¸i¸i¸i¸i¸i¸i¸i¸i¸i¸i¸i¸i¸i¸i¸i¸i¸i¸i¸i¸i¸i¸i¸i¸i¸i¸i¸i¸i¸i¸i¸i¸i¸i¸i¸i¸i¸i¸i¸i¸i¸i¸i¸i¸i¸i¸i¸i¸i¸i¸i¸i¸i¸i¸i¸i¸i¸i¸i¸i¸i¸i¸i¸i¸i¸i¸i¸i¸i¸i¸i¸i¸i¸i¸i¸i¸i¸i¸i¸i¸i¸i¸i¸i¸i¸i¸i¸i¸i¸i¸i¸i¸i¸i¸i¸i¸i¸i¸i¸i¸i¸i¸i¸i¸i¸i¸i¸i¸i¸i¸i¸i¸i¸i¸i¸i¸i¸i¸i¸i¸i¸i¸i¸i¸i¸i¸i¸i¸i¸i¸i¸i¸i¸i¸i¸i¸i¸i¸i¸i¸i¸i¸i¸i¸i¸i¸i¸i¸i¸i¸i¸i¸i¸i¸i¸i¸i¸i¸i¸i¸i¸i¸i¸i¸i¸i¸i¸i¸i¸i¸i¸i¸i¸i¸i¸i¸i¸i¸i¸i¸i¸i¸i¸i¸i¸i¸i¸i¸i¸i¸i¸i¸i¸i¸i¸i¸i¸i¸i¸i¸i¸i¸i¸i¸i¸i¸i¸i¸i¸i¸i¸i¸i¸i¸i¸i¸i¸i¸i¸i¸i
iiiiiiiiiiiiiiiiiiiiiiiiiiiiiiiiiiiiiiiiiiiiiiiiiiiiiiiiiiiiiiiiiiiiiiiiiiiiiiiiiiiiiiiiiiiiiiiiiiiiiiiiiiiiiiiiiiiiiiiiiiiiiiiiiiiiiiiiiiiiiiiiiiiiiiiiiiiiiiiiiiiiiiiiiiiiiiiiiiiiiiiiiiiiiiiiiiiiiiiiiiiiiiiiiiiiiiiiiiiiiiiiiiiiiiiiiiiiiiiiiiiiiiiiiiiiiiiiiiiiiiiiiiiiiiiiiiiiiiiiiiiiiiiiiiiiiiiiiiiiiiiiiiiiiiiiiiiiiiiiiiiiiiiiiiiiiiiiiiiiiiiiiiiiiiiiiiiiiiiiiiiiiiiiiiiiiiiiiiiiiiiiiiiiiiiiiiiiiiiiiiiiiiiiiiiiiiiiiiiiiiiiiiiiiiiiiiiiiiiiiiiiiiiiiiiiiiiiiiiii_ii
TABLA DE CONTENIDO
Instrucciones importantes sobre seguridad ....59-63
Informaci0n sobre los conductos ...............................63
Cuidado y limpieza ....................................................64-66
Mantenimiento ...........................................................67-68
Localizaci0n y soluci0n de averias ......................68-70
Cocci0n en la cubierta .............................................70-72
Cocci0n en el homo .................................................73-79
Opciones .......................................................................80-82
Favoritos ........................................................................82-83
Ajuste .............................................................................83-86
Accesorios ...........................................................................86
Garantia y servicio ....................................01tima pdgina
I JENN-AIR

Lea y siga todas las instrucciones antes de usar este
electrodorn_stico para evitar el riesgo potencial de incendio,
choque electrico, lesiones personales o da_o al
electrodomestico como resultado de su uso inapropiado.
Utilice este electrodomestico solamente para el prop6sito para
el cual ha sido destinado seg_n se describe en esta gu{a.
Para asegurar el funcionamiento correcto y seguro del
electrodorn_stico: Elelectrodomestico debe ser instalado
debidamente y puesto a tierra por un tecnico calificado. No
instente ajustar, reparar, realizar servicio o reemplazar
cualquier pieza de su electrodomestico a menos que se
recomiende espedficamente en esta gu{a.Todaslas demos
reparaciones deben set hechas por un tecnico calificado.
Siernpre desenchufe el electrodomestico antes de realizar
reparaciones.
NSTRU
|M PORTANTES
R|DAD
Lasadvertencias e instrucciones importantes sobre seguridad
que aparecen en esta gufa no est_n destinadas a cubrir todas
las posibles circunstancias y situaciones que puedan ocurrir.
Se debe ejercer sentido com_n, precauci6n y cuidado cuando
se instale, se realice mantenimiento o se haga funcionar el
electrodomestico.
Siempre p6ngase en contacto con el fabricante si surgen
problemas o condiciones que no entienda.
Reconozca los simbolos, advertencias y
etiquetas de seguridad
59

Instrucciones generales
Para verificar si el dispositivo est_ debidamente instalado, mire
debajo de la estufa con una linterna para asegurarse de que
uno de los tornillos niveladores traseros est6 debidamente
enganchado en la ranura del soporte. El dispositivo antivuelco
asegura el tornillo nivelador trasero al piso cuando est_
debidamente enganchado. Verifique este dispositivo coda vez
que la estufa sea movida.
Para evitar da os a causa de
un incendio o hurno
Aseg_rese de que se hayan retirado todos los materiales de
empaque del electrodom6stico antesde su uso.
Mantenga el _ireaque rodeo el electrodom6stico libre de
materiales combustibles. Los materiales combustibles no
deben ser almacenados en el interior de un horno.
Muchos pl_isticos son afectados por el calor. Mantenga los
pl_sticos alejados de las piezas del electrodom6stico que se
puedan entibiar o calentar. No deje artfculos de pl_stico sobre
la cubierta de la estufa pues se pueden derretir o ablandar si
est_indemasiado cerca del respiradero o de un quemador
superior encendido.
Para evitar incendios de grasa, no deje que se acumule grasa
de cocinar ni otros materiales inflamabies en la estufa o cerca
de ella.
Si el electrodom6stico es instalado cerca de una ventana,
tome las precauciones necesarias para evitar que las cortinas
vuelen sobre los quemadores.
NUNCA deje articulos sobre la cubierta de la estufa. Elaire
caliente del respiradero puede encender los artfculos
infiamables y aumentar la presi6n en los envases cerrados
hasta hacerlos reventar.
Muchos envases de tipo aerosol son EXPLOSIVOScuando son
expuesto al calory pueden ser altamente infiamables. Evitesu
uso o su almacenamiento cerca de un electrodom6stico.
Para eliminar el riesgo de pasar sobre los quemadores
superiores calientes, no se deben guardar artfculos en los
armarios que est_indirectamente sobre la estufa. Si existen
armarios sobre la cubierta, los mismos s61odeben contener
artfculos que no se usen frecuentemente y que est6n seguros
en un _ireaen la que estar_n expuestos al color de un
electrodom6stico. Las altas temperaturas pueden set
peligrosas para algunos artfculos tales como los Ifquidos
vol_itiles,los limpiadores o los aerosoles.
En case de incendio
Apague el electrodom6stico y la campana de ventilaci6n para
evitar esparcir las llamas.Apague las llamas y luego encienda
la campana para expulsar el humo y el olor.
• En la cubierta: Apague el fuego o la llama en una sart6n
con una tapa o una bandeja de hornear.
• NUNCA levante o mueva una sart6n en llamas.
• En el horno: Apague el fuego o la llama del homo cerrando
la puerta del horno.
No use agua en los incendios de grasa. Use bicarbonato de
sodio, un producto qufmico seco o un extinguidor de espuma
para apagar un incendio o llama.
Seguridad para los ni os
NUNCA deje a los ni_os solos o sin supervisi6n cerca del
electrodom6stico cuando est6 en uso o est6 caliente. Nunea
permita que los ni_os se sienten o se paren en ninguna parte
del electrodom6stico pues se pueden lesionar o quemar.
Sele debe ense_ar a los ni_os que el electrodom6stico y los
utensilios que est_inen 61pueden estar calientes. Deje enfriar
los utensilios calientes en un lugar seguro, fuera del alcance
de los ni_os peque_os. Sele debe ense_ar a los ni_os que un
electrodom6stico no es un juguete. No se debe permitir que
los ni_os jueguen con los controles u otras piezas del
electrodom6stico.
Cont.
6O

Inforrnaci6n sobre su
electrodom stico
Evite tocar el _rea del respiradero mientras el homo est6
encendido y durante varios minutos despu6s de haberlo
apagado. Algunas partes del respiradero y del _rea que Io
rodea se calientan Io suficiente como para causar quemaduras.
Despu6s de apagar el homo, no toque el respiradero o el _rea
que Io rodea hasta que haya tenido suficiente tiempo para
enfriarse.
Otras superficies que pueden estar calientes incluyen la
cubierta, las _reas orientadas hacia la cubierta, el respiradero
del homo, la superficie cercana a la abertura del respiradero, la
puerta del homo y el _rea que la rodea, y la ventanilla del
homo.
No toque una bombilla de homo caliente con un paffo h_medo
ya que se puede romper. Si la bombilla se rompe, desconecte el
suministro el6ctrico al electrodom6stico antes de retirar la
bombilla para evitar un choque el6ctrico.
Para evitar exporter al usuario a un potencial riesgo y para
evitar daffos al electrodom6stico, no use este electrodom6stico
como calefactor de _rea o para calentar una habitaci6n.
Tampoco utilice el homo como _rea de almacenamiento para
alimentos o utensilios de cocina.
NUNCA use papel de ahminio para cubrir una parrilla o la
parte inferior del horno. El mal uso puede crear riesgos de
choque el6ctrico, incendio o daffos al electrodom6stico. Use el
papel de aluminio solamente como se indica en esta gufa.
Inforrnaci6n de seguridad
sobre la cocci6n
Siempre coloque el utensilio sobre el quemador superior antes
de encenderlo. Aseg_rese de saber cu_l perilla corresponde al
quemador superior que va a utilizar. Aseg_rese de haber
activado el quemador correcto y de que el mismo se haya
encendido. Unavez que haya terminado la cocci6n, apague el
quemador antes de retirar el utensilio para evitar exponerse a la
llama.
Siempre ajuste la llama del quemador superior para que la
misma no se extienda m_s all_ del borde inferiordel utensilio.
Una llama excesiva es peligrosa, malgasta energfa y puede
daffar el electrodom6stico, el utensilio o los armarios que se
encuentran sobre la cubierta.
NUNCA deje alimentos cocin_ndose sin supervisi6n,
especialmente cuando utilice ajustes de temperatura altos o
cuando fffa en aceite. Los derrames pueden causar humo, y los
derrames de grasa se pueden encender. Limpie los derrames
de grasa tan pronto como sea posible. No use un ajuste de
calor alto para cocinar durante tiempos prolongados.
NUNCA caliente un envase cerrado en un quemador superior o
en el horno. La acumulaci6n de presi6n puede hacer que el
envase explote y causar lesiones personales graves o daffos al
electrodom6stico.
Use tomaollas secos y gruesos. Los tomaollas h_medos pueden
causar quemaduras por vapor. Nunca use paffos para secar
platos u otros artfculos similares como tomaollas ya que
pueden arrastrarse sobre la superficie caliente de los
quemadores y se pueden encender o enredar en las piezas del
electrodom6stico.
Siempre permita que el aceite utilizado para frefr se enfffe antes
de mover o manipular el utensilio.
No permita que el aceite para cocinar u otros materiales
inflamablesse acumulen en el electrodom6stico, en la campana
de ventilaci6n, en el respiradero o en las _reas cercanas a
estos. Limpie la campana de ventilaci6n con frecuencia para
evitar que la grasa se acumule en la campana o en el filtro.
Cuando flamee alimentos debajo de la campana, encienda el
ventihdor.
NUNCA use ropa fabricada con materiales inflamableso ropa
holgada o de mangas largas para cocinar. La ropa se puede
encender o se puede enganchar en las manijas de los
utensilios.
Siempre coloque las parrillas del horno en las posiciones
deseadas cuando el homo est6 fifo. Deslice la parriiia hacia
afuera para colocar o retirar alimentos usando tomaollas secos
y gruesos. Siempre evite introducirsus manos en el homo para
colocar o retirar alimentos. Si se debe mover una parrilla
mientras est_ caliente, use un tomaollas seco. Siempre apague
el homo al terminar la cocci6n.
61

Tenga cuidado cuando abra la puerta del horno. Permita que
el aire o vapor caliente escape antes de mover o colocar el
alimento.
ADVERTENCIA SOBRE AUNIENTGS PREPARADOS: Siga
las instrucciones del fabricante. Si un envase de pl_stico con
alimento congelado y/o su tapa se deforman, se comban o se
da_an de alguna manera durante la cocci6n, elimine el
alimento y el envase. Elalimento puede estar contaminado.
NUNCA use papel de aluminio para cubrir las parrfllas o la
parte inferior del horno. Estopuede crear riesgos de choque
electrico, incendio o da_os al electrodomestico. Use el papel
de aluminio solamente como se indica en esta guia.
Inforrnaci6n de seguridad
sobre los utensilios
Use utensilios con fondos pianos y manijas que sean f_ciles
de sostener y que se mantengan frias. Evite usar utensilios
inestables, deformados, que se puedan volcar f_cilmente o
con manijas sueltas. Tambien evite usar utensilios,
especialmente utensilios pequeffos, que tengan manijas
pesadas, ya que los mismos pueden perder su estabflidad y
volcarse f_cilmente. Los utensilios que son pesados cuando
contienen alimentos tambien pueden set peligrosos al
moverlos.
Asegdrese de que el utensilio sea Io suficientemente grande
para el alimento y para evitar derrames. Eltamafio del
utensilio es especialmente importante cuando fria en aceite.
Asegdrese de que el utensilio sea del tama_o adecuado para
la cantidad de alimento que va a cocinar y para el burbujeo
del aceite.
Para minimizar las quemaduras, el encendido de materiales
infiamables y los derrames por el contacto accidental con el
utensilio, no extienda las manijas sobre los quemadores
superiores adyacentes. Siempre gire las manijas hacia un lado
o hacia la parte trasera del electrodomestico, y no hacia la
habitaci6n donde puedan set f_cilmente alcanzadas o
golpeadas por ni_os pequefios.
Nunea deje que un utensilio hierva hasta quedar seco pues
esto puede da_ar la cubierta y el utensilio.
Siga las instrucciones del fabricante cuando utflice bolsas
para hornear.
Solamente ciertos tipos de utensilios de vidrio, vidrio/cer_mico,
cer_mica o porcelanizados son convenientes para cocinar en la
cubierta o en el homo sin que sequiebren debido al repentino
cambio de temperatura. Siga las instrucciones del fabricante
del utensilio cuando usevidrio.
El rendimiento y funcionamiento seguro de este
electrodomestico se han comprobado usando utensilios de
cocina convencionales. No use ningdn dispositivo o accesorio
que no haya sido especfficamente recomendado en esta gufa.
No use cubiertas para los elementos superiores, parrillas para
cubiertas o sistemas adicionales de convecci6n para hornos.
El uso de dispositivos o accesorios que no sean expresamente
recomendados en esta gufa puede crear peligros graves de
seguridad, afectar el rendimiento y reducir la vida dtil de los
componentes de este electrodomestico.
Ollas freidoras
Sea extremadamente cuidadoso cuando mueva la olla con
aceite o descarte la grasa caliente. Deje que la grasa se enfrie
antes de intentar mover la olla.
Campanas de ventilaci6n
Limpie lacampana de ventilaci(3nde la estufa y losfiltros con
frecuencia para evitar que se acumule grasa u otros
materiales infiamables en la campana o en el filtro y tambien
para evitar incendiosde grasa.
Cuando fiamee alimentos debajo de la campana, encienda el
ventilador.
Informaci6n de seguridad
sobre la limpieza
Limpie la cubierta con cuidado. Apague todos los controles y
espere hasta que las piezas del electrodomestico se enfrfen
antes de tocadas o limpiarlas. Tenga cuidado si utiliza un patio
o esponja mojada para limpiar derrames en una superficie
caliente para evitar quemaduras por vapor. Algunos
limpiadores pueden producir vapores nocivos si se aplican a
una superficie caliente.
Limpie dnicamente las piezas que se indican en esta gufa.
Homo autolimpiante
Limpie dnicamente las piezas que se indican en esta gufa. No
limpie lajunta de lapuerta. La junta de la puerta esesencial
para obtener un sellado hermetico. Tenga cuidado de no frotar,
dafiar o mover lajunta.
No use limpiadores o forros para hornos de ningdn tipo dentro
o cerca de ninguna pieza del homo autolimpiante.
62

Aviso y adverntencia
importantes de seguridad
La propuesta 65 de la Leysobre Seguridad y Contaminaci6n
del Agua Potable del estado de California de 1986 (California
Safe Drinking Water and Toxic Enforcement Act of 1986) exige
que el gobernador de California publique una Nstade las
sustancias que segQnel Estado de California causan c_ncer o
da_os al sistema reproductor, y exige que los negocios
adviertan a sus clientes de la exposici6n potencial a tales
sustancias.
Los usuarios de este electrodom6stico quedan advertidos de
que cuando el homo est6 en el ciclo de autoNmpieza,puede
resultar en una exposici6n de bajo nivel a algunas de las
sustancias pubNcadas,incluyendo el mon6xido de carbono. La
exposici6n a estas sustancias puede set minimizada
ventilando el homo adecuadamente al exterior durante el ciclo
de autoNmpieza abriendo las ventanas y/o la puerta de la
habitaci6n donde se encuentra el electrodom6stico.
AVISO IMPORTANTE RESPECTOA LOS PAJAROS
DONIESTICOS: Nunca mantenga a los p_jaros dom6sticos
en la cocina o en habitaciones hasta donde puedan Negarlos
humos de la cocina. Los p_jaros tienen un sistema respiratorio
muy sensible. Losvapores producidos durante el ciclo de
autolimpieza del homo pueden ser perjudiciales o mortales
para los p_jaros. Los vapores que despiden el aceite de
cocina, la grasa y la margarina sobrecalentados y la vajiNa
antiadherente sobrecalentada pueden tambi6n set
perjudiciales.
Conserve estas instrucciones para referencia futura
f
El sistema de ventilaci6n Jenn-Air fue dise_ado para capturar
el vapor producido durante la cocci6n y el humo de la
superficie de la cubierta. Si el sistema no funciona, verifique
las siguientes situaciones en la instalaci6n de los conductos:
• Se deben usar conductos redondos de 15,24cm (6"] o
rectangulares de 8,26cm (3 V4"]x 25,4cm (1"] para longi-
tudes de 3 a 18 m (10 a 60 pies).
Irnportante: Si la Iongitud del conducto es de 3 m (10 pies) o
menos, se puede usar un conducto redondo de 12,7cm (5"] de
di_metro.
• No se deben utJlizarm_s de tres codos de 90°. La distancia
entre los codos debe ser de por Io menos 45 cm [18"].
• Se DEBEusar la tapa de pared Jenn-Air recomendada.
Aseg_rese de que el humidificador se mueva libremente
cuando el sistema est6 en funcionamiento.
• Debe haber una distancia mfnima de despeje de 15,24cm
(6"] entre lascubiertas que sean instaladascerca de una
pared lateral y la pared.
Si no existen problemas obvios de instalaci6n,puede existir un
problema oculto tal como una junta atascada, un conducto
obstruido, etc. La instalaci6nes responsabilidad del instalador,
y las preguntas deben ser dirigidas al mismo en
primer lugar. El instaladordebe verificar muy
cuidadosamente las instruccionesde instalaci6n
de los conductos.
• Use la tarjeta de pruebas de flujo
proporcionada con su electrodom6stico para
verificar el flujo de aire.
FLOW TESTER
t
63

CU|DAD Y L|MP|EZA
Homo autolimpiante
porcelanasepuededecolorarsi losderramesacidoso
azucaradosno selimpianantesde un ciclo deautolimpieza.
Para programar la autolirnpieza: _"Clean
1. Oprimalatecla "Clean" [Limpieza). .
2. RETPARRILLASsedesplegara.RetireInsparrillas.
3. SeleccioneCONTINUARusandola tecla rapid& Lasteclas
rapidasestanubicadasa cadalade de lapantalladel panelde
control.
4, Seleccioneel nivelde suciedadLEVEintroduciendoel nOmero
200con Insteclasnum6ricasparaprogramardoshornsde
limpieza.Oprimalatecla Enter.
O
Elciclo deautolimpiezausatemperaturassuperioresa Ins
temperaturasnormalesde cocci6nparalimpiarautomaticamenteel
interiordel homo.
SeleccioneMEDy tres hornsde tiempode limpiezasi el homo
esta moderada.
Limpieel homoconfrecuenciaremoviendolosderramesparaevitar
humoexcesivoy Ilamaradas.Nopermitaque seacumuledemasiado
sucio en el homo.
Duranteel procesode autolimpieza,ventile bien la cocinapara
deshacersede losoloresnormalesasociadoscon lalimpieza.
Antes de la autolimpieza
1. Apaguela luzdel horno antesde la autolimpieza.Laluzdel horno
sepuedefundir duranteel ciclode autolimpieza.
2. Retirela asadera,todoslosutensiliosy Insparrillasdel homo.Si
no seretirandel homo,Insparrillasse decoloraranysedeslizaran
condificultad despu_sdel ciclo deautolimpieza.Impertante:
Retirela rejillade ventilaciOnde la superficiede cocci6nantesde
la autolimpieza.
3. Limpieel marcodel homo,el marcode ._.. /
la puertayel areapor fuerade lajunta -,,,
yalrededorde la aberturade la misma
conun limpiadornoabrasivotal como
el "Bon AmP o detergentey agua.El
procesodeautolimpiezano limpia
estasareas.Lasmismasdebenset
limpiadasparaevitarque el suciosefije
duranteel ciclo de autolimpieza.(Lajuntaesel selloalrededorde
la puertayde la ventanadel homo.)
4. Paraevitarda_os,ne limpieo frote lajunta alrededorde la puerta
del homo. Lajuntaestadise_adaparasellarel calordentrodel
homo duranteel ciclo de autolimpieza.
5. Limpieel excesodegrasao losderramesdel fondodel homo.
Estoevita el humoexcesivo,Insllamasy InsIlamaradasduranteel
ciclo de autolimpieza.
6. Limpielosderramesazucaradosyacidostalescomo losderrames
de batatas,tomateo salsasa basede leche.La porcelanaes
resistenteal acido,no a pruebadel mismo.Elacabadode
O
SeleccioneINTENSOy cuatro hornsdetiempo de limpiezasi el
homo estamuysucio.
5. LIMPIEZA,"TIME" 0-iempo),BLOQUEOy el conteoregresivode
la autolimpiezasedesplegaranen pantallamientrasel homose
limpia.Cuandotermineel tiempode limpiezay la puertatodavia
estc!bloqueada,ENFRIAMIENTOapareceraenpantalla.
Impertante: Elbloqueode la puertase desenganchara
aproximadamenteuna horndespu6sde quese hayaterminado la
limpieza.ENFRIAMIENTOdesaparecerade lapantallacuandola
puertadel homosehayadesbloqueado.
Para diferir un cicio de autolimpieza:
1. Oprimalatecla "Clean".
2. RETPARRILLASsedesplegara.RetireInsparrillas.
3. SeleccioneCONTINUARusandola tecla rapid&
4.
( Clean
...................... /
Seleccioneel nivelde suciedadLEVEintroduciendoel nL_mero
200con Insteclasnum(!ricasparaprogramardoshornsde
limpieza.Oprimalatecla Enter.
O
SeleccioneMEDy tres horasde tiempode limpiezasi el homo
esta moderada.
0
5,
SeleccioneINTENSOy cuatro hornsdetiempo de limpiezasi el
homo estamuysucio.
La puertase bloquear&LIMPIEZA,"TIME",BLOQUEOyel conteo
regresivode la autolimpiezasedesplegaranen pantalla
Cent,
* Los nombres de los productos son marcas registradas de sus respectivos fabricantes.
64

6. Despu6sde que la puertasebloquee,oprimala tecla "More
Options" (M_isopciones].
7. SeleccioneDIFERIRusandolatecla r4pida.
8. Seleccionelacantidadde horasquedeseadiferirel iniciodelciclo
de autolimpieza.
9. Eltiempodiferidoyeltiempodelimpiezaaparecer_nen lapantalla.
Despu6s de la autolimpieza
Apreximadamente una hera despu_s de! fin del title de
limpieza, el blequee se desenganchar_ y ENFRIAMIENTO
desaparecer_ de la pantalla. En este memento se pedr_
abrir la puerta.
Algunas manchas pueden dejar una ligera ceniza gris que
puede ser removida con un paso ht_medo.Si la suciedad
permanece despu6s de limpiar las cenizas, el ciclo de
autolimpieza no fue Io suficientemente largo. La suciedad
ser4 removida durante el siguiente ciclo de autolimpieza.
Si se dejaron las parrillas en el horno y las mismas no se
deslizan con facilidad despu6s de un ciclo de autolimpieza,
limpie lasparrillas y los soportes con una peque_a cantidad
de aceite vegetal para facilitar su movimiento.
Puede apareceruna decoloraci6nblancadespu6sde la
autolimpiezasino selimpiaronlosderrames4cidoso
azucaradosantesde iniciarelciclode autolimpieza.Estoes
normaly NO afectar4elrendimiento.
Notas:
• Si sedejala puertaabierta,CIERREPUERTAsedesplegar4en
la pantallahastaquesecierrela puerta
• Si pasanm_isde30 segundosentrela activaci6nde la tecla
"Clean" (Limpieza]y laactivaci6nde unatecla num6rica,el
programaregresar_autom4ticamentealdespliegueanterior.
• La puertadel homoseda_ar_si intenta abrirlaa la fuerza
durantela limpiezao enfriamiento.
• Lasprimerasvecesquese uselaautolimpieza,esnormalver
humoysentir un olor.Estoesnormalyse reducir_io
desaparecer_conel uso.Siel homoest,1muysucio osi la
asaderasedej6 accidentalmenteenel homo,puedensalir
humoy olor excesivos.
• A medidaque el homosecalientayseenfr[a,esposible
escucharel sonidode laspiezasde metala medidaquese
expandeny contraen.Estoesnormaly no da_ar_el
electrodom6stico.
Procedimientos de limpieza
* Loshombresde losproductossonmamasregistradasde
susrespectivosfabricantes.
** Parahacerun pedido Ilameal 1-800-JENNAIR
(1-800-536-6247].
Asadera
e Inserto
Tapasde los
quemadoresy
quemaderes
selladosa gas
Rejillas de los
quemaderes =
Percelanasabre
hierrofundido
Nunca cubra el inserto can papel de aluminio ya que el mismo evita que la grasa se drene hasta la asadera.
• Coloqueunpasojabonososobreel insertoy laasaderay dejeremojarparasuavizarla suciedad.
. Laveenaguatibia conjabOn.Useunaesponjade restregarparaquitarlasmanchasdificiles.
° Laasaderay el insertopuedenlavarseenel lavavajillas.
Tapas removiblesde los quemadores
• Espema que seenfrieel quemador.Retirela tapadel quemadory I_velaen agujajabonosaconuna esponjapl_istica
de restreganParalasmanchasdiffciles,limpieconuna esponjajabonosanoabrasivao con lacremade limpiezapara
cubiertas'CooktopCleaningCreme'*(PiezaN°20000001]** y unaesponja.
° No limpieen el lavavajillaso en el homo autolimpiante.
QaemadoresSellados a Gas
• Limpieconfrecuencia.Esperea que seenfr[eel quemador.LimpieconjabOny unaesponjade pl_sticopara
restregar.Paramanchasdiffcileso secas,limpiecon unaesponjajabonosano abrasiva,un cepillo duro,un cepillode
dientes,la puntade gomasuavedel cepillode dientes(sivieneequipado]o un alfiler recto.No aumenteo
distorsionelosagujeros.
• Tengacuidadode no permitirque entreaguaen losorificiosde losquemadores.
• Tengacuidadocuandolimpieel encendedor.Siel mismose mojao seda_a,el quemadorsuperiornoseencender&
• Laveconaguacalienteyjabonosaycon unaesponjapl_isticade restregarno abrasiva.Paralasmanchasdificiles,
limpiecon una esponjajabonosano abrasivao conla cremade limpiezaparacubiertas'CooktopCleaningCreme"
y unaesponja. Si quedaalgunasuciedad,vuelvaa aplicarlacrema,cubracon unatoallade papelhQmeday remoje
durante30 minutos.Vuelvaa restregar,enjuagueyseque.
, No limpieen el lavavajillaso en el homo autolimpiante.
65

Par=elde control • Paraactivarel bloqueode controlesparala limpieza,veala secci6nBloqueodel controlen lap_gina74.
, Limpieconun pasomojado.Sequebien.
• Sepuedenusarlimpiadoresdevidriosiserocfaen un pasoprimero.NOrecie el limpiadordirectamentesebre el
#tea de/as teclasdecontroly delapantalla.
Perillasde • RetireInsperillastirandode eliashaciaafueracuandoest6nen laposiciOn"OFF"(apagado).
control • Limpie,enjuagueyseque.No useagentesdelimpiezaabrasivosyaque losmismospuedenrayarelacabado.
• Enciendacadaelementoparaasegurarsedeque Insperillasfueronreinstaladascorrectamente.
Cubierta- Laporcelanaesvidriofundidosobreel metaly puedeagrietarseo picarsesi noseusacorrectamente.Laporcelanaes
PorceJar=a resistenteal _cido,no a pruebadel mismo.Todoslosderrames,en especiallosderrames_cidoso azucarados,deben
esmaltada limpiarseinmediatamenteconun pasoseco.
• Cuandolasuperficieest6fria, limpieconaguajabonosa,enjuaguey seque.
• Bur=calimpieunasuperficietibia o calienteconun paso hOmedo.Laporcelanasepuedeagrietaro picar.
• Nut=causelimpiadoresparahornoso agentesde limpiezaabrasivosoc_usticosenel acabadoexteriorde unaestufa.
Par=eles • Cuandola superficieest6frfa,limpiecon aguajabonosatibia, enjuaguey seque.Nut=calimpieuna superficietibia
lateraiesy o calienteconun paso hQmedoyaque puededa_arla superficieycausarquemaduraspotvapor.
mar=ijasde la ° Paramanchasdiffciles,useun agentede limpiezaabrasivosuavetal comocremade bicarbonatode sodioo 'Bon
puerta =Esmalte Ami'*.No uselimpiadoresabrasivostalescomoesponjasde lanade aceroo limpiadoresparahornos.Estos
pir=tado productosrayar_no da_ar_inpermanentementelasuperficie.
Importante:Useuna toallao pa_o h#medopara limpiarderrames,especialmente si losmismosson#cidos o
azucarados.Lasuperficie puede y mar=ijasdecolorarseu opacarse si no se limpianinmediatamente. Esto
es especialmente importante para Inssuperficies blancas.
Ver=tanillay • Eviteusarcantidadesexcesivasde agua,yaquepuedeescurrirsedebajoo detr_sdelvidrioymancharlo.
puertade[ • LaveconaguayjabOn.Enjuagueconagualimpiayseque.Sepuedenusarlimpiadoresdevidriosi seroda en un
homo= Vidrio pasoprimero.
• No usematerialesabrasivostalescomoesponjasderestregar,lanade aceroo limpiadoresenpolvoyaque losmismos
rayar_inelvidrio.
Ir=teriordel • SignInsinstruccionesen Insp_ginas64y 65paraprogramarun ciclode autolimpieza.
homo
Parrillasdel • Laveconaguajabonosa.
homo • Limpielasmanchasdificilesconun limpiadoren polvoocon unaesponjade restregarjabonosa.Enjuagueyseque.
• Lasparrillassedecolorar_inpermanentementey puedeque nosedeslicenbiensisedejanen el homoduranteun ciclo
deautolimpieza.Siestosucede,limpieel bordede la parrillay elsoportecon unapeque_acantidaddeaceitevegetal
pararestaurarla facilidadde movimiento.Limpieel excesode aceite.
Acero Jr=oxidable• NOUSENINGONPRODUCTODELIMPIEZA QUECONTENGABLANQUEADORA BASEDECLORO.
0nodelosselectos) • NOUSELIMPIADORESABRASlVOSO DENARANJA.
, SIEMPRELIMPIE LASSUPERFICIESDEACEROA FAVORBELGRANO.
• Limpiezadiaria/suciedadlove - Limpieconuno de lossiguientes- aguaconjabOn,unasoluciOndeaguayvinagre
blanco,limpiadorparasuperficiesyvidrio"Formula409"*o unlimpiadorparavidriosimilar- usandounaesponjaoun
pasosuave.Enjuagueyseque.Parapulir yevitarmarcasde losdodos,useel producto"StainlessSteelMagicSpray"*
(PiezaNo20000008)**.
• Suciedadmoderada/mar=chas rebeldes- Limpieconunode lossiguientes- "BonAmi","SmartCleanser"o "Soft
Scrub"*- usandouna esponjahOmedao unpasosuave.Enjuaguey seque.Lasmanchasdificilespuedenserquitadas
conunaesponja"Scotch-Brite'*multiusoh_medafrotandoafavordel grano.Enjuagueyseque.Pararestaurarel lustrey
sacarInsmarcas,vetas,aplique"StainlessSteelMagicSpray"*.
° Decoloraci6r=-- Usandounaesponjamojadao un pasosuave,limpieconel limpiadorparaaceroinoxidable"Cameo
StainlessSteelCleaner"*.Enjuagueinmediatamenteyseque.ParasacarInsvetasy restaurarel lustre,utilice "Stainless
SteelMagicSpray"*.
•Loshombresde losproductosson marcasregistradasdesus respectivosfabricantes.
•* Parahacerpedidosdirectamente,Ilameal 1-800-JENNAIR(1-800-536-6247).
BB

ANTEN|M|
Puerta del homo Tornillos niveladores
NUNCA intenteabrir o cerrarlapuertao hacerfuncionarel homo
hastaquesohayareinstaladocorrectamentela puerta.
• NUNCA coloquelosdedosentrela bisagray la partedelanteradel
marcodel homo.Losbrazosde lasbisagrasest_ninstaladosa
resorte.Sisegolpeaaccidentalmente,la bisagrasocerrardcontra
el marcodel homoypodrfalesionarsusdodos.
Para retirar:
1. Cuandoelhornoest6fr[o,abra la
puertahastala posici6ndo asar W/_---_-_--------_----7_
[aproximadamente10cm o 4").
2. Sostengalapuertaa cadalado. No use
la manijado lapuertaparalevantarla.
3. Levantelapuertade manerauniforme
hastaque la mismasalgadelosbrazosde lasbisagras.
Para velvet a instalar:
1. Sostenga la puerta a cada lado.
2. Alinee lasranuras de la puerta con los brazos de las bisagras de
la estufa.
Deslicelapuertahaciaabajosobrelosbrazosde lasbisagras
hastaque la puertaest6completamenteasentadasobrelas
bisagras.Empujelasesquinassuperioresde la puertahaciaabajo
paraterminarde asentarla puertasobrelasbisagras.Lapuerta
nosedebevertorcida.
Irnportante: Lapuertadel homode una estufanuevapuedesentirse
"esponjosa"cuandosecierra.Estoesnormaly sereducir_conel uso.
Ventanilla del homo
Para proteger la ventana de la puerta
del homo:
1. No useagentesde limpiezaabrasivostales comolasesponjasde
restregarde lanade aceroo limpiadoresenpolvoyaque los
mismospuedenrayarel vidrio.
2. No golpeeelvidrio conutensilios,sartenes,muebles,juguetesu
otros objetos.
3. No cierrela puerta del homo hastaque lasparrillasest6nensu
lugar.
Sise ray&se golpea,sesacudeo sepresiona,el vidrio puede
debilitarsey aumentarel riesgode queseromparodsadelante.
Aseg0resede que la estufaestd niveladacuando
est6instalada.Si la estufano eat4nivelada,gire los
tornillos niveladoresqueseencuentranencada
esquinade la estufahastaque la mismaest6
nivelada. __ SOPORTE
ANTIVUELCO
TORNILLO NIVELADOR
Luz del homo
Paraasegurarsede instalarla bombillade repuestocorrecta,
pida una bombillade Jenn-Air.Llameal 1-800-JENNAIR
[1-800-536-6247)y pida la piezan0mero-74004458- bombilla
de hal6geno.
Para reempiazar la bombilla del homo:
Desconecteel suministroelc!ctricoal electrodom6stico.],
2.
3,
4.
Cuandoel homo est6frio, usela puntade susdedospara
sostenerel bordede la cubiertade la bombilla.Tirehaciaafueray
retirela.
Retirecuidadosamentela bombillausadotirando de elladerecho
hacia afuera de la basedecer_mica.
Paraevitarda_aro reducirla vida0til de la bombillanueva,no la
toquecon susmanoso sus dedosdescubiertos.Sost6ngalocon
un pasosecoo conuna toallade papel.Oprimalasclavijasde la
bombillanuevadireetamente dentro de lospeque_osagujeros
de la basede cer_mica.
5. Vuelvaa instalarla cubiertadela bombillaencajdndolaen su
lugar.
6. Vuelvaa conectarel suministroel6ctricoal homo.Vuelvaa
programarel reloj.
67

Conexi6n el ctrica
Loselectrodom_sticosque requierenenergia
el_ctrica vienenequipadoscon un enchufede
tres ¢lavijascon puesta a tierra, el cualdebe
serconectadodirectamentea un
tomacorrientede tres alv6olosde 120V
debidamentepuestoa tierra.
Siempredesenchufeelelectrodom#sticoantesde realizar
reparacione&
Elenchufede tres clavijasconpuestaatierra ofreceprotecci6n
contra losriesgosde choqueel6ctrico.NO CORTEO REMUEVALA
TERCERACLAVIJADELENCFIUFEDELCORDONELECTRICO.
Si s61osecuentacon un tomacorrientede dosalv6olosode otro tipo
sin conexiOna tierra,es responsabilidaddel propietariodel
eleetrodom_sticoreemplazarloper un tomaeorriente detres
alveolos debidamentepuestoa tierra.
Desinstalaci6n de an
electrodornestico a gas
Losconectoresque seusanparaconectarloselectrodom6sticosa
gasal suministrode gasno est_ndise_adosparaser movidos
constantemente.Unavezque est6instalado,NO muevaeste
electrodom6sticoa gaspara abrir espacioo parareubicarlo.Si este
electrodom_sticodebeserreubicadoo desinstaladoparahacer
reparaciones,sigael procedimientodescritoen lasinstruccionesde
instalaci6n.Paramayorinformaci6n,p6ngaseen contactocon el
Servicioal Clientede Jenn-Airal 1-800-JENNAIR(1-800-536-6247).
Paraevitarque la estufasevuelqueaccidentalmente,debe
asegurarlaal pisohaciendodeslizarel tornillo niveladortrasero
hastacalzarloen elsoporte antivuelco.
LOCAL|
Y LU
f
DE AVER|A
Parala mayoria de las • Verifiquesiloscontrolesdel homo fueronprogramadoscorrectamente.
situaciones, siga las siguientes , Verifiquequeel enchufeest6bien conectadoen eltomacorriente.
soluciones. • Verifiqueo restablezcael disyuntor. Verifiqueo reemplaceelfusible.
• Verifiqueel suministroel6ctrico.
Una parte o latotalidad del
electrodombsticono funciona.
Elreloj, las palabrasindicaderas
y/o las laces funcionan peroel
homono calienta.
Losquemadoressuperiores
nose eneienden.
Lallama es dispareja.
Lallama del quemadorsuperior
se eleva de los orificios
° Verifiquesiloscontrolessuperioresy/o losdel homofueronprogramadoscorrectamente.
Vealasp_ginas70y 75.
° Verifiquesila puertadel homosedesbloque6despu6sdelciclo de autolimpieza.Veala p_gina64.
° Verifiquesiel homorue programadoparaun ciclo de cocci6no deautolimpiezadiferido.Vealas
p_ginas75y 64.
, Verifiquesiel bloqueode loscontrolesest,1activado.Veala p_gina74.
, Verifiquequeel homo no est6en modosab_tico.Veala p_gina84.
° Elhomopuedeestar programadoparauna funci6n de Cocinary MantenerCalientediferida.
° Elbloqueode loscontrolespuedeestaractivado.Veala p_igina74.
, Asegt_resede queel electrodom6sticoest6debidamenteconectadoal suministrode energfa.
, Verifiquesihayun fusibledel circuito fundidoo sise hadisparadoel disyuntorprincipal.
, AsegQresede queel encendedorest6secoy emitiendochispas.Elquemadornoseencender_isiel
encendedorest_da_ado,sucio o mojado.Si el encendedorno emitechispas,gire la perilla a la
posici6n"OFF" (Apagado).
° Losorificiosdel quemadorpuedenestartapados.
, AsegQresede quehayaun utensiliosobrela rejilla.
Coat,
68

Losresultadosdel horneado
no son losesperados o difieren
de losobtenidoscon an
homo usado.
Elalimento no hierve
adecuadamente o genera
demasiadohumo.
EJhomo nose autoiimpia.
EJhomo nose lirnpi6
adecuadamente.
Lapuerta del homo no se
desbloqueadespu_sdel eieio
de autoiimpieza.
NO se eseuchan senaJes sonoras
y la pantalla est_ apagada.
Lahumedadse aeumula en
laventanadel homo o salevapor
deJrespiraderodel homo.
Se pereibe un fuerte olor o
humo leve cuando se
enciende eJhomo.
EIsistemadeventilaci6nno
eapturaelhumodemanera
eficiente.
• Verifiquela temperaturaprogramadadel homo.Aseg0resedeprecalentarel homocuandola receta
o lasinstruccionesIorecomienden.
• Aseg0resedeque el respiraderodel homo no hayasidobloqueado.Veala ubicaciOnen la p_gina79.
• Aseg0resedeque la estufaest6nivelada.
• Frecuentemente,lastemperaturasvarianentreun homo nuevoy unousado.A medidaque seusan
loshornos,latemperaturatiendea cambiary puedehacersem_scalienteo m_sfr[a.Veaen la
p_gina85lasinstruccionesparaajustarla temperaturadelhomo.Importante:Noserecomienda
ajustarlatemperaturasi el problemaIopresentans01ouna o dosrecetas.
. Useel utensiliocorrecto.Losutensiliososcurosproducenun doradom_isoscuro.Losutensilios
brillantesproducenun dorado m_sclaro.
. Verifiquela posici0nde lasparrillasy la colocaci0nde losutensilios.Alternelosutensilioscuando
usedosparrillas.Deje2,54cm [1")a 5,08cm (2")de espacioentrelosutensiliosy lapareddel homo.
• Reviseelusodepapelde aluminioen el homo.Nunca usepapeldealuminiopara cubriruna parrilla
completa.Coloqueun pedazopeque_ode papelde aluminiodebajodel utensiliopararecogerlos
derrames.
• Verifiquelasposicionesde lasparrillasdel homo. Elalimentopuedeestardemasiadocerca
de la llama.
. Elpapelde aluminionose us0apropiadamente.Nunca cubrael insertode la asaderaconpapel
de aluminio.
. Recorteel excesodegrasade lacame antesde asarla.
• Seus0unaasaderastJcia.
• Precalienteel homodurante2 o 3 minutosantesde colocarelalimentoen el homo.
• Asecon la puertadel homocerrada.
• AsegOresede que no hayaprogramadoun ciclode autolimpiezadiferido.Veala p_gina64.
• Verifiqueque la puertaest_!cerrada.
• Verifiqueque el homono est_!en modosab_itico.Veala p_gina84.
. Elhomo puedeestarsobrelos204°C [400°F).Latemperaturadebeser menorde 204° C [400° F)
parapoder programarun ciclo deautolimpieza.
• Esposibleque serequieraun ciclo deautolimpiezam_slargo.
. Losderramesexcesivos,en especiallosderramesazucaradosy/o _cidos,no selimpiaronantesdel
ciclo deautolimpieza.
• Elinteriordel homotodav[aest,1caliente. Espereaproximadamenteunahora paraque el homo
se enfr[edespu_sdeque el ciclo de autolimpiezahayafinalizado.Lapuertapuedeabrirseuna
vezque la luz indicadoraBLOQUEOno est_en la pantalla.
• Elcontroly laspuertaspuedenestarbloqueados.Veala p_gina74.
• Elhomo puedeestaren modosab_tico.Veala p_gina84.
. Estoesnormalcuandosecocinanalimentosconaltocontenidode humedad.
. Se us0humedadexcesivacuandoselimpi0laventana.
• Estoesnormalenunaestufanuevay desaparecer_despu_sdevariosusos. Unciclode
autolimpiezanuevo"quemar_"losoloresm_sr_pidamente.
° Sienciendeunventiladorayudar_a eliminarel humoy/u olor.
. Haysuciedaddealimentosexcesivaenla parteinferiordel homo. Useun ciclode autolimpieza.
• Verifiqueel airecruzadoenla habitaci0no lacompensaci0ndeaire.
• Latapadela paredexteriorpuedeestaratascada.
• Esposibleque lacubiertahayasidorealinstalada.Verifiquelainformaci0nsobrelosconductos.
Veala p_gina63.
• Elfiltro de airepuedeestarrealinstalado.Vealap_igina72.
69

C6digosdefallas
Se escuchanruidos.
• Elhomopuededetectarunafalladurantela programaci6noduranteel funcionamiento.Sisedetecta
unafall& puedeaparecerel mensajeFALLADETECTADA- PILSEENTERY TRATEDENUEVO.Siga
lasinstruccionesenla pantalla.Si lafallavuelveaaparecero no desaparece,Ilamea untc!cnicode
servicioautorizadoo al nt3merogratisque apareceenla pantalla.
• SiseintentausarlamismafunciOnantesdequeel homoseareparado,sedesplegar_el
mensajeCARACTER[STICANODISPONIBLEPULSEAYUDA. Lacaracter[sticapermanecer_inactiva
hastaqueseareparada.
• Siel homoest_demasiadosucio,puedenocurrirdemasiadasIlamaradasIocualresultar_en un
cOdigode errordurantela limpieza.Oprimalatecla"CANCEL" [Cancelar)y dejeque el homose
enfrfecompletamente,limpieel excesode suciedady luegovuelvaa programarel ciclode limpieza.
Siel cOdigodeerror reaparece,Ilameaun tc!cnicoautorizado.
• Elhomohacevariosruidosde bajonivel.Esposibleque puedaescucharlosrel6sdel homocuandose
enciendeny seapagan.Estoesnormal.
• A medidaqueel homosecalientayseenfria,esposibleescucharelsonidode laspiezasde metal
a medidaque seexpandenycontraen.Estoesnormaly nodafiar_el electrodomc!stico.
"SAb" desteiia y luego • Elhomoestden modosabdtico.ParaanularestafunciOn,oprimaymantengaoprimidalatecla
se despliegacontinuamente. "Setup" [Ajuste)durantecincosegundos.
No se puedeafiadirotra
recetafavorita.
• Lalistade recetasfavoritasest_lien& Paraborraruna recetafavoritay afiadiruna nueva,vealas
instruccionesen lap_igina82.
COCC|ON EN LA CUB|ERTA
'Low' [Bajo):Useesteajustepara cocinar
alimentosafuego lento,manteneralimentos
calientesy paraderretirchocolateo mantequilla.
Partede la cocci6npuede realizarseenel ajuste
"Low" siel utensilioest_cubierto.Esposible
reducirel calorgirandola perilla haciala
posici6n"OFF" (Apagado).Aseg0resedequela
llamaseaestable.
Controles superiores
"High" [Alto): Useesteajusteparahacerhervir
un I[quidoo paraalcanzarla presi6nde cocci6n
en una ollaa presiOn.Siemprereduzcael ajuste
a un calor masbajocuandolos%uidos
comiencena herviro cuandolosalimentos
comiencena cocinarse.
Useuna llamaintermediaparacontinuarla
cocciOn.Elalimentonosecocinar_m_s
r_pidamenteen un ajustemayorqueen un
ajustequepermita mantenerun hervorlento.El
aguahiervea lamismatemperaturayaseaque
seestc!haciendohervirr_pidao lentamente.
Encendido sin piloto
Elencendidosinpiloto eliminala TAPADELQUEMADOR
necesidadde teneruna luzpiloto
encendidaconstantemente.Cada
quemadorsuperiorcuentaconun
encendedorde chispa.Tengacuidado
cuandolimpieel areaalrededordel
quemadorsuperior. _E
Siel quemadorsuperiorno o,,F,o,os
seenciende,verifiquesi el NoENo_Do,
encendedorest,1roto,sucio o
mojado.
70 BAsEOELOUEMAOO,

Perillas de control de los
elementos superiores
Useestoscontrolespara encenderlosquemadoressuperiores.Una
selecci6ninfinita de ajustesdecalorest_disponibleentre"Low"y
"High". Sentir_iun topeo ranuraen la posici6n"HIGH".Lasperillas
puedencolocarseen cualquierade estosajusteso entreolios.
Losgr_ficosque seencuentranjunto a cadaperilla
i_0 identificanel quemador dichaperillacontrol& Por
que
Front ejemplo,el gr_ificoa la izquierdamuestrael quemador
delanteroderecho.
Ajuste de los controles:
Eltamafioytipo de utensilioafectael ajustede calor.
1. Coloqueun utensiliosobrela rejilla delquemador.
• Lallamadel quemadorpuedeelevarseo parecerque se
encuentraseparadadel orificio si el utensiliono secoloca
sobrela rejilla.
2. Optimay gire la perillade control al ajustedetemperatura
deseado.
• Escuchar_el sonidode unachispay el quemadorse
encender&
Importante: Cadaquemadorruedisefiadopara proporcionar
reencendidoautom_iticosi la llamaIlegaraa apagarse.
Funcionamiento durante
una falla ei@ctrica
Quemadores sellados
Losquemadoresselladosdesu estufaest_nfijadosa la cubiertay
no est_indisefiadosparaset removidos.Debidoaque los
quemadoresest_nselladosa la cubierta,losderramesno se
escurrir_ndebajode la cubierta.
Sinembargo,el quemadordebelimpiarsedespuc!sde cadauso.El
conjuntode la tapadel quemadorse puederetirarf_cilmentepara la
limpieza.[Veala p_gina65para lasinstruccionesdelimpieza.)
Lastapasde losquemadoresdebenestarcolocadasdemanera
apropiadaen la basedel quemadorparaque el mismofuncione
correctamente.
Quemador de alto rendimiento
Suestufacuenta conun quemadorde altavelocidadde 16.000BTU*
y seencuentraen laposiciOndelanteraderechade la cubierta.Este
quemadorproporcionauna mayorvelocidadde cocciOnquese
puedeusarpara Ilevarel agua r@idamenteal hen/ory paracocinar
grandescantidadesde alimentos.
Quemador
de Rivel
baooi .......
Estequemadorseencuentraen la posici6ntrasera
derecha.Elajustedecocci6na fuegolentopuede
serusadoparacocinaral vaporo escalfar
ahmentos,coclnarsalsasdehcadaso contlnuar la _
cocci6nde alimentoscubiertos.Elajusteultra bajo _//_
(paraderretir)ese mejorparaderretirchocoateo "-_--4_
mantequilla.
Importante:Cuandouselosajustesnormalespara preparar
alimentos,puedetomar algunosminutosparaque el dreadecocci6n
seenfriehastael ajustede calor"Melt" (derretiO.
* LapotenciavarfacuandoseusagasLR
1. Sostengauna cerillasobreel quemadorque deseeutilizar.
2. Oprimalaperilla decontrol ygffela lentamente.
3. Ajuste lallamaal niveldeseado.
Cubierta
Para evitar que la cubierta se decolore o manche:
• Limpielacubiertadespu6sde cadauso.
• Limpielosderrames_cidoso azucaradostan prontocomosehaya
enfriadola cubierta,yaque estosderrames
_-_:-_ puedendecolorarla porcelana.
A diferenciade lasestufasconquemadores
normalesde gas,esta cubiertano selevantani
sepuederemover. No intente levantar la
cubierta per ningunarazdn.
Quemador de anillo doble
(modelos selectos)
LasuperficiedecocicOnest,1equipadaconun
elementode anillo done ubicadoen laposici6n
delanteraizquierda.Parausarestequemador,
oprimala perillade controly gffelaa laizquierda.
ContinOegirando la perillahastaalcanzarel ajuste
deseado.Lasecuenciadeencendidoeslasiguiente:
quemadorinterioren "High" (Alto),luego el quemadorinterioren
"Low" (Bajo),luegoambosanillosen "High" y luegoambosanillos
en "Low".
71
Rejillas de los quemadores
Lasrejillasdebenestaren la posici6ncorrectaantesde la cocci6n.
Cuandoinstalelasrejillas,coloquelosextremoscon lengOetashacia
el centrode maneraque concuerdencon lasbarrasrectas.
La instalaci6ninadecuadade lasrejillaspuedecausarpicadurasen
la cubierta.

No haga funcionarlos quemadoressin unutensiliosobrela
rejilla. Eiacabado de porcelanade la rejillapuede picarsesin
un utensilioque ahsorba el calorde la llama del quernador.
Tengacuidadocuandoagite alimentosen un utensilioquese
encuentresobrela rejilla.Lasrejillastienenun acabadolisopara
facilitar sulimpieza.Elutensiliosedeslizarasi nosesostienesu
manija.Estopuedeprovocarderramesde alimentoscalientesy
riesgosde sufrir quemaduras.
A pesarde que lasrejillassonduraderas,lasmismasperderanel
brillo y/o sedecoloraranper lasaltastemperaturasde lasllamasdel
gas.
Notas:
* Unquemadorajustadode maneracorrectay conorificios
limpiosse encenderaal cabode pocossegundos.Siesta
usandogas natural,la llamaseraazulconun cone interne
azul osouro.
Si la llamadel quemadoresamarillay ruidosa,la mezcla
aire/gaspuedeserincorrecta.P6ngaseen contactoconun
t6cnicode servicioparaajustarla llama•[Losajustesde la
llamano estancubiertosper lagarant[a.)
Conel gasLPesaceptableque laspuntasde lasllamassean
ligeramenteamarillas.Estoesnormaly no esnecesario
realizarajustes.
• Conalgunostipos de gas,esposibleque escucheun
golpeteocuandoseapagueel quemadorsuperior.Esteesun
sonidonormaldefuncionamientodelquemador.
• Sila perillasegira rapidamentede 'High' [Alto) a 'Low'
[Bajo),esposibleque la llamaseapague,especialmentesi el
quemadorestafifo. Si estoocurre,gire la perillaa la
posiciOn'OFF' (Apagado),esperevariessegundosyvuelvaa
encenderel quemador.
• Lallamadebe set ajustadade maneraque noseextienda
masalia del horde inferiordel utensilio.
Sistema de ventilaci6n
Elsistemade ventilaci6nintegradoremuevelosvaporesde la
cocciOn,losoloresy el humoproducidoper losalimentos
preparadosen la cubiertayen la
parrilla .........
• Ba_e c_ c_
T_MER_
o o.
• Parausarel sistemade ..... s....
ventilaciOnmanualmente, c...........
optima latecla "Vent Fan" p_;_:_g,o';_J°'O_qs V_r_l
[Ventilado0 ubicadaen el ......._,,
controlelectrOnico.Oprimala
tecla unavezparael ajustedevelocidad"Lew", unasegundavez
parael ajuste"High" y una terceravezparaapagar el ventilador.
Elsistemade ventilaci6nfuncionaraaatomdticamente cuandoel
elementode asara la parrilla est6enuse.
Elventiladorpuedeserusadopararemoveroloresfuertesde la
cocinatalescomelosproducidosal picarcebollascercadel
ventilador.
Cuidado y limpieza dei sistema
de ventilaci6n
• Rejilladeaire: Larejilla deaire selevantafacilmente.Limpiecon
un patioo laveen el lavavajillaso en el fregaderocondetergente
del hogarsuave•Paraevitarrayarlasuperficie,no use limpiadores
abrasiveso esponjasde restregar.
, Filtro:Apagueel sistemade ventilaci6nantesde retirarel filtro. El
filtro esdetipo permanenteydebeser limpiadocuandoest6sucio.
Limpieen el fregaderoconaguatibia y detergenteo en el
lavavajillas.
F|LTRO DEL VENTILADOR
IMPORTANTE:NO USEELS/STEMASINELFILTRO.Elfiltro
siempredebeserinstaladoen angulo.Si observala partedelantera
de laestufa,la partesuperiordel filtro debe estarapoyadasobreel
ladeizquierdode la aberturade ventilaci6n.La parteinferiordebe
estarapoyadasobreel lade derechode la c_imaradeventilaciOn
en su parteinferior• Impertante:Si el filtre est_ insta/ado
paralele y centra lapared de/ventilader, se reducir_la
efectividad dela ventilaciSn.
• C_mara de ventilaci6n"Estaarea,lacual alojaal filtro,debeser
limpiadaen casede derrameso carlavezquequede recubiertade
grasa.Puedeser limpiadacon unatoallade papel,un patio
h0medoo unaesponjay un detergenteo limpiadorsuavedel
begat.
Irnpertante:El respiraderodelhomoestaubicadodebajodel lade
derechode la rejillade aire.Cuandouseo limpieel homo, podra
sentir airecalientey h0medoen estaarea. Elareacercanaal
respiraderopuedecalentarseIosuficientecomepara causar
quemaduras.Tengacuidadode no derramarnadadentrode este
respiradero.Larejiiia deaire debe serrernevidaantesdel
cicle deautelimpieza.
72

Cocci"
EN EL HOR
Panel de Control
AB CD E
1 iii_ -Favorites
Bake On / Off
TIMER1
On / Off
&etup
On/Off
Clean
More
J KL
F
Vent Oven
Fan Light CANCEL
i t
M N 0
G
TtMER2
Oil / Off
P
H
, ] ,
1 2 3
ABC DEF
4 5 6
GHt JKL MNO
7 8 9
PORS fUV WXYZ
Back 0 Enter
I Space I
lock
Elpanelde controlest_dise_adoparauna programaciOnsencilla. LapantallamuestralasopcionesparacadafunciOnyva indicandolospasos
delprocesodeprogramaci6n.Lascaracteristicasdelpaneldecontrolvarianseg0nel modelo.Lapantalladelhomoest_programadaparahorneado.
"RapidPreheat"
(Precalentamiento
r_pido)
"Convect"
(ConvecciOn)
"Bake"
(Horneado)
"Broil" (Asado)
"TIMER"1
(Temporizado0
Pantalla
"TIMER"2
(Temporizador)
Teclasnum6ricas
"Favorites"
(Favoritos)
"More Options"
(M_sopciones)
"Clean"__impieza)
"Setup" [Ajuste)
"Vent Fan"
(Ventilado0
"OvenLight"
(Luzdel homo)
"CANCEL"
(Anula0
Teclasr@idas
Useestafunci6nparareducireltiempode
arecalentamiento.
Useparahorneary asarporconvecci6n.
Usepara horneary asara la parrilla.
Useparaasara laparrillay paradorar.
Programael ternporizador.
Muestralasfunciones,opcionesy horadel
dfadel homo.
Programael temporizador.
Useparaprogramareltiempo y la
temperaturao para programarnombresde
configuracionesfavoritas.
Usepara acceder,programaro guardarlos
ciclosde cocci0n.
UseestaopciOnparaaccedera
caracterfsticasadicionales.
Useparaprogramarel ciclode autolimpieza.
Useestafunci6n paravero cambiarlos
ajustesde f_brica.
Activael ventiladoren lacubierta.
Useparaencendero apagarlaluzdelhomo.
Anulatodaslasfuncionesexceptoel
temporizador,el relojlasrecetasfavoritas,los
ajustesy elventilador.
Seusanparaseleccionaropcionesen la
pantalla(juntoa la pantallaen amboslados).
Teclas r_pidas
Lasteclasr_pidasest_inubicadasa cadalado de lapantallayse
utilizanparaseleccionarlafunci6n u opci6ndeseadaen la pantalla.
Paraseleccionarlaopci6no funci6n,oprimalatecla rzipida que
est6junto a lapalabra.
Siusted necesitavolveratr_scuandoest,1en una funci6n u opciOn
en el indicador,oprimala tecla"Back" (Atr_is).Cuandoterminela
programaciOn,oprimalatecla "Enter" (Acepta0 o esperecuatro
segundosy lafunciOncomenzar_autom_ticamente.
Lasflechashaciaarriba indicanpantallasadicionalesconopciones
adicionales.Oprimalasteclas rztpidasqueest_njunto alas flechas
paradesplegarlasopcionescontenidasen la pantalla.
Importante:Cuatrosegundosdespuc!sde haberseleccionadola
funciOn,opci6n,n0meroo letra,lafunci6n ser_autom_ticamente
programada. Sitranscurrenm_sde 30segundosentre lospasos
de la programaci0n,la funci6nser_canceladay lapantalla
volver_al despliegueanterior.
R=,,=_e..., ...........................
Programaci6n del reloj: Setup '
1. Oprimalatecla "Setup". ....,On / Offj
\ .........
2. SeleccioneRELOJusandolasteclasr_pidas.
3. Seleccionela HORA.
4. Programeeltiempo usandolasteclasnumc!ricas.
5. Optimalatecla "Enter".
6. SeleccioneAM o PM en el modode 12horas.(paracambiarel
reloja 24 horas,veala p_gina74.)
7. Parasalirdel mododeajuste,optima la tecla"Setup".
73

Activaci6n y anulaci6n del despliegue del reloj/
alia de la semana:
f, ...........
1. Oprimalatecla "Setup" (Ajuste}. " Setup '
on/off/
2. SeleccioneRELOJ. "................
3. Optimalaflecha para navegarentrelasopcioneshastaque se
muestreel DESACTIVAR.
4. SeleccioneDESACTIVAR.
5. SeleccioneNORA.
6. Seleccione"OFF" [Apagar}paradesactivarel desplieguedelrelojo
seleccione"ON" [Encende0paraactivarel desplieguedelreloj.
7. Seleccione"OFF"paraeliminarel desplieguedeldfade la semana.
Seleccione"ON" paramostrarel dfade lasemanaenpantalla.
8. Parasalirdel modede ajuste,oprimala tecla"Setup".
Programaci6n del alia de la semana: _........... ,
1. Oprimalatecla "Setup". Setup
, on/off;
2. SeleccioneRELOJ. "............
3. Optimalaflecha para navegarentrelasopcioneshastaque se
muestreel DIA.
4. Uselatecla r@ida flechadaparanavegarentrelasopciones de
dfas.
5. Seleccioneeldfa deseado.
6. Parasalirdel modede ajuste,oprimala tecla"Setup".
Para pregramar el reloj en formate de
12 o 24 horas:
Elreloj puedeset ajustadopara desplegarla heraya seaen formate
de 12horaso 24horas.
j .....
1. Optimalatecla "Setup". " Setup
i i
2. SeleccioneRELOJ. , On / Off /
/
3. Uselaflecha parapasara la pantallasiguiente.
4. Seleccione12/24 NR.
5. Seleccione12NR o 24HR.
6.
Parasalirdel modede ajuste,oprimala tecla"Setup".
"Timers" (Temporizadores)
Pregramaci6n de los temporizadores ("Timer
1" o "Timer 2"):
1. Optimalatecla "TIMER 1" o"TIMER 2".
2. Optimauno de lostiemposmostradosusando
lasteclasr@idaso presioneuna de lasteclas
num6ricaspara programarel tiempo deseado.
/TIMER1
On/Off,
Importante" Cadavezque oprimeunade Insopc=onesdetiempo
mostradas,seagregatiempo adicional. Perejemplo,sioprime"10
MIN."tresveces,agrega30 minutesenel temporizador[0:30}.
3. Optima la tecla "Enter" [Aceptar}.
Para cambiar el tiempo programado aria vez
que el temporizador comienza:
,, ,, ,, ,,
1. Optimalatecla TIMER 1 o TIMER2 unavez, j.....................
2. Seleccioneunode lostiemposdesplegados / TIMER l
usandorepetidamenteInsteclasr@idas hastaque''On / Off,/
el tiempo deseadoquedeprogramado. 74
3. Optimalasteclasnumc!ricaspara programarel tiempo nuevo
deseado.
4. Optimala tecla "Enter".
/ .............
Anulaci6n del temporizador: /TIMER1
Oprimala tecla"TIMER 1" o"TIMER 2" dos veces., On / Off ,
Si ambes temperizadores est_n actives:
Si el temporizadordeseadoyaseencuentraen la pantalla,oprimala
tecla una vezparaentraren lafunci6n de edici6ny dosvecespara
anularel temporizador.Siel temporizadordeseadono est_en
pantalla,sigaestospasos:
1. Optimala tecla "TIMER" deseadauna vez.Eltemporizador
seleccionadoaparecer_ien pantalla.
2. Optimala tecla "TIMER" una segundavezparaactivarla funci6n
de edici6nparahacerloscambios.
3. Sioprime latecla "TIMER" una terceravez,anular_el
temporizador.
Cambio de las so,ales sonoras del temporizador:
Lasso,ales sonorasparael TEMPORIZADOR1y parael
TEMPORIZADOR2 puedensercambiadas.Lasopciones
disponiblessondossefialescadatreinta segundos,dosso,ales cada
sesentasegundoso una sepalsolamente. Elajustepredeterminado
esunasolasepal.
/ .................
1. Optimala tecla "Setup". / Setup
2. Seleccionela flechay oprimalahastaque On / Off
......... /
SONIDOSaparezcaen pantalla.
3. SeleccioneSONIDOS.
4. SeleccioneSONIDOSTEMPOR.
5. Seleccioneel formatedeseadodela sepalsonoradel
temporizador(2-30SEC,2-60SECo 1 BIP}.
6. Parasalirdel modede ajuste,optima latecla "Setup".
Bloqueo dei control y de la puerta
del homo
Loscontrolesdel homoyde lapuertadel borne puedenser
bloqueadospara evitarprogramaciOnaccidental.Siseest,1usando
una funciOndel homo, el controly la puertano puedenser
bloqueados.
Para bloquear los controles y la puerta:
OprimaInsteclas"Rack" (Atrds}y "Enter" al mismotiempo,
mantenidndolasoprimidasdurantetres segundoso hastaque las
palabrasCONTROLBLOQaparezcanen la pantalla.
Para desbloquear los centreles y la puerta
del homo:
OptimaInsteclas"Back" y "Eater" al mismotiempo,
manteni6ndolasoprimidasdurantetres segundos. DESBLOQUEO
aparecer4en la pantallacuandoel controly la puertase est6n
desbloqueando.
Back O Enter
l 72 1

Horneado
Para hornear: , ..................
1. Oprimalatecla "Bake" [Horneado). Bake
............ /
2. Seleccionelatemperaturadel homousandolasteclasr_pidas.
O
Programela temperaturadeseadausandolasteclasnum6ricas.
Optima latecla "Enter" (Aceptar)paraguardar el ajuste.
, Latemperaturapuedeprogramarseentre77°C (170° F)
y288° C[550° F)en incrementosde 5°.
, Despu6sde tressegundos,el homocomenzar_a precalentarse.
HORNEARy "PREHEAT"(Precalentamiento)aparecerdnen la
pantallajunto con "100°" o latemperaturaactualdel homo (la
opci6nm_salta).
espedficode tiempo. Cuandoesetiemposeacabe,el homo
reducir_latemperaturaautom_ticamentea 77° C(170° F),
mantendr_el alimentocalienteduranteuna horay luegoseapagard
automdticamente.
Cuandoseusalafunci6n "Delay",el homocomienzaa cocinar m_s
tarde en el dfa. Programela cantidaddetiempo que usteddesea
esperarantesdeencenderel homoyel tiempo decocci6n. Elhomo
comenzarda calentarsea latemperaturaseleccionadaycocinard
duranteel tiempo programatic.Cuandoesetiempo acaba,el homo
mantendr_el alimentocalientehastapor una horay luegose
apagar_autom_ticamente.
Para programar la funci6n "Cook & Hold"
(Cocinar y mantener caliente):
1. Despu_sde programarel horneado,oprima
latecla "More Options" (Mdsopciones). , Options/
2. SeleccioneCOOC/CALEN. ..............
• Latemperaturaenel indicadoraumentar_en incrementosde
1°hastaque el homo Ileguea la temperaturaprogramada.
Espereaproximadamente15minutosparaqueel homose
precaliente.
• Cuandoel homose ha precalentado,seescuchar_una
sepalsonoray "PREHEAT"seapagar_en la pantalla.
AI finalde la cocciOn,apagueel homo _.........................,
oprimiendolatecla"CANCEL" (Anular). Retire CANCEL )
el alimentodel homo. Elhomo continuar_ .......................................J
funcionandohastaqueseoptima la tecla "CANCEL".
Notas:
• Sitranscurrenm_sde treintasegundosal oprimir unateclay
unatecla num6rica,lapantallavolverdal despliegueanterior.
. Siempreque latemperaturaapareceen la pantalla,el homo
est_calentando.
. Paracambiarlatemperaturadel homo duranteel procesode
cocciOn,oprimalatecla "Bake" y seleccioneuna de las
temperaturasdesplegadaso uselasteclasnum6ricaspara
programarlatemperaturadeseada.
° Elhomoseapagar_autom_ticamentedespu6sde 12horassi
se dejaaccidentalmenteencendido. Paraprogramarun modo
sabdtico,veala secciOn"Modosab#tico",enla p%ina 84.
Opciones de horneado
Lasopciones"Cook& Hold" [Cocinary mantenercaliente)y "Delay"
[Diferido)est_ndisponiblescuandosehome& Cuandousela
opci6n"Cook& Hold" [modelosselectos),elhomocomienzaa
calentarinmediatamentedespudsdeque el control hasido
programado.A continuaciOn,el homo cocinapot un periodo
3. Selecionelacantidadde tiempoque vaa hornearusandolas
teclasrdpidaso lasteclasnumc!ricas.
4. Oprimalatecla "Eater".
5. "COOKTIME"0-iempode cocciOn),elconteo regresivodel
tiempode cocciOn,"PREHEAT",HORNEARy latemperatura
actualse desplegar_nen pantalla.
Elhomo cocinar_duranteel tiemposeleccionadoy luegomantendrd
el alimentocalienteduranteuna hora.
Para programar la funci6n "Delay" (Diferido):
1. Despu_sde programarel horneado,oprima
latecla "NIore Options". ,,Options
2. Seleccionelafunci6n DIE ..........
3. Seleccionelacantidadde tiempo que usteddeseadiferir el
comienzode la cocciOnusandolostiemposdesplegadoso las
teclasnumdricas.
4. Seleccione la cantidad de tiempo que usted desea cocinar
usando los tiempos desplegados o las teclas numdricas.
5. El indicador mostrard HORNEAR, la temperatura, el tiempo
diferido y el conteo regresivo del tiempo de cocci6n.
6. Cuando el tiempo diferido se ha acabado, el homo comenzard a
calentar. "COOK TIME", el conteo regresivo del tiempo de
cocci6n, "PREHEAT",HORNEAR y la temperatura actual del
homo se desplegardn en pantalla.
75

"Oo[|vect" (Conveccion)
La cocci6nper convecci6nusaun ventiladorparacircular aire
calienteuniforrnementesobre,debajoy alrededordel alimento.
Comeresultado,losalirnentossecocinanydoran uniformemente,a
menudoen tiemposm_scortes,a temperaturasrn_sbajasycon la
flexibilidadde usarm_isdeuna parrilla al mismotiempo.
Notas:
• Elcontroldel homo vieneprograrnadodesdela f4bricapara
"Auto ConvectConversion"(ConversiOnautom_iticaa
convecci6n).Cuandoseusa"ConvectBake" (Horneadoper
convecci6n)programelaternperaturade horneado
convencional.Elcontrolautom_ticamenteconviertela
temperaturaa 15° C(25° F)menosque latemperatura
tradicionaldel homo.
• Cuandouseel asadoper convecci6n,la temperaturanose
reducir_autom_ticamente.Programeel tiempoy latemperatura
de asadoconvencional.Elcontrol luego lehacesabercuando
haacabadoun 75%deltiempo yle adviertequeverifiqueel
grade de cocci6ndel alimento.
• Paradesactivarlaconversionautom4ticade convecciOn,yeala
p4gina84.
Opciones de
convecci6n
Lasopciones"Cook& Hold"
(Cocinary mantenercaliente)y
"Delay"(Diferido)est_n
disponiblescuandosecocina
per convecci6n.Veala p_gina
80 paraobtenerinformaciOn
sobrec6mo programarla
funci6n "Cook& Hold"o
"Delay".
Parrillasm01tiples
Horneadode
Galletas/Bizcochos
Panes
Cacerolas
Tartasfrortas
Tortas
Polioentero
Paveentero
Verduras
Asadosdecerdo
Asadosde res
"Convect Bake"
(Horneado per convecci6n)
Para hornear per convecci6n:
1. Oprirnalatecla "Convect" (Convecci6n].
( Convect i
\ ............. ,
2. SeleccioneHORNEABOCONV usandolasteclasr_pidas.
3. SeleccionelaopciOndeseadausandolasteclasr_pidas
ProgramelatemperaturadeseadausandolasteclasnumOricas.
Optimala tecla"Inter" (Acepta0 paraguardarel ajuste.
• Latemperaturadel homopuede programarseentre91° C
(195° F]y 288° C (550°F] en incrementosde 1° C(5° F).Sila
convecciOnautom_ticaest4apagada,puedeprogramarla
temperaturadesdelos170° F.
. DespuOsdetres segundos,el homo comenzar_a
precalentarse.HORNEADOCONVy "PREHEAT"
(Precalentamiento)aparecer4nenla pantallajunto con "100°"
o latemperaturaactualdel homo 0aopciOnm4salta].
• Latemperaturaen el indicadoraumentar4en incrementosde
1° hastaqueel homoIleguea la temperaturaprogramada.
Espereaproximadamente15minutesparaque el homose
precaliente.
• Cuandoel homoseha precalentado,seescuchar4unasehal
sonoray"PREHEAT"seapagar_ysedesplegar4HORNEADO
CONV."AUTO"(Autom4tico]aparecer4enla pantallasi la
funciOnde conversionautom_ticade convecciOn(modelos
selectos]estdactivada.
. Coloqueel alimentoen el homo.
AI finalde lacocciOn,apagueel homo
oprimiendola tecla"CANOE[" (Anula0.Retire
el alimentodel homo. El homocontinuar4
funcionandohastaque seoptima latecla "CANCEL".
CANCEL i
............................... Y
"Rapid Preheat"
(Precalentamiento Mpido)
Usepara reducireltiempo de precalentamientocuandouselas
funcionesde horneadoo de horneadoper convecci6n.Useparatodos
losalimentoscuandohorneeenuna solaparrilla.
• DespuOsde haberprogramaticyactivadoel horneadooel
horneadoper convecci6n,optimala tecla "Rapid Preheat".
° SOLO1 REJILLAsedesplegar_en la pantalla;despuOsde 10
segundoslapantallamostrar_RAPIDOy "PREHEAT".
Para regresar al precalentamiento normal:
• Oprimalatecla "Rapid Preheat"nuevaraente.Estoproporcionar_i
precalentamientoest4ndary "PREHEAT"y lafunci6n seleccionada
semostrar4nen pantalla.
Notas:
° Paraobtenerlosmejoresresultados,coloquela parrillaen la
posici6n2 o 3 con laopci6nde precalentamientor_pido.
° Paraobtenerlosmejoresresultadosde horneadoydorado,no
serecomiendael usede precalentamientor4pidocuandose
usenm01tiplesparrillas.
76

"Convect Roast"
(Asado por convecci0n)
Para asar per convecci6n:
1. Coloqueel alimentoen el horno.
2. Optimalatecla "Cenvect" (ConvecciOn).
3. SeleccioneASAR PORCONV usandolas
teclasrdpidas.
Convect ;
\ /
4. Seleccionelatemperaturadel homousandolasteclasr_pidas.
"Broil" (Asa0
Paraobtenerlosmejoresresultados,precalienteel homodurante
cinco minutoscon la puertacerraday useuna bandejadisehada
paraasar.Lapuertadel homodebe estarabiertaen eltope de asar
(aprox.5 cm o 4"] cuandoasealimentos.
Para asar a la parrilla:
1. Coloquela parrilla del hornoen la posici6napropiada.[Veala
Tabladeasar].
2. Optimalatecla "Broil". Broil
3. Seleccioneel nivelALTO- 288° C(550° F). .....................
O
Seleccioneel nivelBAJO- 232° C(450° F}.
O
Programela temperaturadeseadausandolasteclasnumOricas.
Optima latecla "Enter" (Acepta0para guardarel ajuste.
• Latemperaturadel homopuedeprogramarseentre77° C
(170° F]y 288° C(550° F]en incrementosde 1° C (5° F].
5. Programeel tiempo decocciOndeseado.Programeel tiempode
asadoconvencionalusandolasteclasnumdricas.
• DespuOsde tres segundos,el homocomenzar_a calentar.
ASARPORCONVaparecerdnen la pantallajunto con "100°''
o latemperaturaactualdel homo (la opciOnm4salta).
, Latemperaturaen el indicadoraumentarden incrementosde
1°hastaque el homo Ileguea latemperaturaprogramada.
• Elconteo regresivodeltiempo decocci6ncomenzar_.
6. AI completarse75%deltiempo de cocciOn,el homoemitirduna
sehalsonoraparaadvertirleque reviseel alimento.Verifiquela
cocci6ndel alimentousandoun termOmetrodecame.Siel
alimentoestdcocinado,retirelodel homoyoptima la tecla
"CANCEL" (Anular)paraapagarel homo.
7. Si el alimentonoest_ listo,continQeasando.
Unavezqueel tiempo programadohaacabado,el homo
autom_ticamentepasar_al modo"KeepWarm"(Mantener
caliente)por una horay luegoseapagard.Si el " ........... ,,
alimentoesretiradodel homoantesde que la {CANCEL
horahayaacabado,optimala tecla "CANCEL". ...................
Netas:
° Sila recetasugiereprecalentarel homo, ahada15minutosa la
duraci6nde la cocci6n.
• SilafunciOndeconversionautomdticade convecciOnest_
apagado,no ser_necesarioprogramarel tiempode asado.
• El homotiene unacaracteristicavariablede asara laparrilla Io
que significaque sepuedeseleccionarunatemperaturam_s
baja paraasara la parrilla (149° Ca 288°Co 300° Fa 550°F).
Paraseleccionarunatemperaturam_sbaja,optima lasteclas
numOricascorrespondientes.Oprimalatecla "Enter"
(Aceptar]paraguardar el ajustedetemperaturarodsbajo.
4. Precalienteel homoduratecinco minutos.
5. Coloqueel alimentoen el homoycierre la puertahastael tope
de asar.
/ ........
6. Oprimalatecla "CANCEL" cuandotermine (CANCEL
de asar. ...................
Notas:
Vea la Tablade asarparaobtenerinformaciOnsobrelos
alimentosy tiemposde asado.
Sipasanm_sde 30segundosentrelaactivaciOnde latecla
"Broil"y laactivaciOnde lasteclasrdpidaso num_ricas,el
homono quedar_programadoy la pantallamostrar_el
despliegueanterior.
Useel ajusteALTOparaasarla mayoriade losalimentos. Use
latemperaturade asadorodsbajacuandoasealimentosque
requieranmayortiempode cocciOn.Latemperaturam_sbaja
permiteclueelalimento quedebiencocido sinquesedore
demasiado.
Lostiemposde asara la parrillaaumentar_nyel dorado ser_
m_sclarosiel electrodomdsticoesinstaladoen un circuitode
208voltios.
o
o
Elalimentodebevoltearsea la mitad deltiempo de asado.
Lostiemposde asara la parrillapuedenserrodslargoscuando
sehartseleccionadotemperaturasm_sbajasde asara la
parrilla.
77

Tabla de asar
Came deres (asadoa 7/4° Co 165° F)
6 hamburguesasde 1,3cm (1/2")de grueso
2 filetes,2,5cm (1")degrueso
2 filetesde res"New YorkStrip",2,5cm (1") degrueso
2 filetes"T-Bone",2,5cm (1") degrueso
Came deave (asadoa 77°Co 170° F)
4 pechugasdeshuesadas/sinpellejo
4 pechugasde poliocon hueso
Came decerdo(asadoa 71°Co 160°F)
4 chuletasde cerdodeshuesadas,2,5cm (1")de grueso
4 chuletasde cerdocon hueso,2,5cm (1")de grueso
RebanadadejamOn,2,5cm (1")de grueso)
Pescado (asadoa60° Co 140° F)
4 filetesde pezespada,2,5cm (1")de grueso
2 filetesde mero,2,5cm (1")de grueso
Relojanaranjado,2,5cm (1")de grueso
Camarones(16a20 camaronesporlibra)
2 filetesde salmon,1,3cm (1/2")degrueso
2 filetesde salmon,2,5cm (1")de grueso
10a 12 minutos
18a 22 minutos
18a 22 minutos
18a 22 minutos
Asado BAJO
12a 15 minutos
20 a 33 minutos
20 a 28 minutos
25 a 28 minutos
12a 16 minutos
10a 14 minutos
10a 14 minutos
10a 12 minutos
8 a 10 minutos
8 a 12minutos
10a 14 minutos
4
4
4
4
4
3
4
4
4
3
3
4
4
4
3
*lmportante: Parareducirel doradoy el humoexcesivoduranteel asado,useuna posiciOnde parrilla bajayaumenteeltiempo de asado.
Ventilador del homo
Elventiladorde convecciOn(modelosselectos)seusaparahacer
circular airecalienteen el homocuandoseseleccionalafunciOnde
convecciOn.
Importante:Elventiladorde convecciOnsedetendr_
autom_ticamentecuandoseabrala puertadel homo.
Respiradero del homo
Elrespiraderodelhornoest_ incorporadoalsistemade ventilaciOn
descendenteen la superficiede cocciOn.
Cuandoel homoestden uso,el areacercanaal respiraderodel
homopuedecalentarseIosuficientecomo paracausarquemaduras.
Paraobtenerlos mejoresresultados,no bloqueeel respiradero.
Luz del homo
Laluzdel horno seenciendeautom_ticamente
cuandoseabre la puertadel homo. Cuandola
puertaest6cerrada,oprimala tecla "Oven Light"
(Luzdel homo)paraencendero apagarla luzdel
homo.Cadavezqueoprimala tecla "OvenLight" escuchar_una
sepalsonora.Sila luzdel homo est,1encendidacuandoseabre la
puerta,la luzseapagar_cuandosecierrela puerta.
y ...........
/ Oven
Parte inferior del homo
Protejala parteinferior de loshornoscontraderrames,
especialmentelosderrames_cidoso azucarados,yaque pueden
decolorarla porcelana.Useutensiliosde tama_oadecuadopara
evitarderrames.No coloqueutensilioso papelde aluminio
direetamentesobre el rondodel homo.
78

Parrillas del homo
Elhomo incluyetres parrillasplanasnormales.
Para retirarla puertadel homo:
1. Tirede la parrillahastael _,
tope.
2. Levantela partedelantera
de la parrillay tirede ella
parasacarla.
Paravelvet a instalar:
1. Coloquela parrilla enel
soportecorrespondienteen el homo.
2. Incline levementeelextremodelantero;deslicela parrillahacia
atr_shastaque paseel tope.
3. Bajeel extremodelanteroy deslicela parrilla enel homo.
Posiciones de las parrillas
PARRILLA5 (posici6nm_isalta]:
Seusaparahornear
condosparrillasy para
asar.
PARRILLA4:
Seusaparahornear
condosparrillasy para
asar.
PARRILLA3:
Seusaparala mayoria
Plana
1 Plana
Homeado pot convection en ires
parrillas
de losalimentosquese horneanen una bandejade galletaso de
dulces,tortasdecapas,pastelesde frutaso alimentos
congelados.
PARRILLA2:
Seusaparaasarcortespequehosde carney cacerolas,para
hornearpanes,pastelitoso flanes,pastelescongeladosy para
hornearcondosparrillas.
PARRILLA1:
Seusaparaasarcortesgrandesdecarnede resy de ave,suflc!so
tortasde _ingelypara hornearcon dosparrillas.
COCClONCONVARIAS PARRILLAS.
Dosparrillas:Uselasparrillasen lasposiciones2 y5 o 1y 4.
Tres parrillas (convecci6nsolamente]:Uselasposiciones1,3 y 5
(yeala ilustraciOn].
Notas:
• CuandohorneepotconvecciOnen doso tres parrillas,
verifique losalimentosaltranscurrirel tiempo mfnimosugerido
paraevitarel doradoexcesivoo lasobrecocciOn.
• Ne cubra una parrilla completa con papel de aluminimo ni
coloquepapeldealuminioenelfondodelhomo. Estoafectar_los
resultadosde la cocci6ny puedeocasionardahosal rondo del
homo.
Homeado de tetras de capas en dos parrillas
Paraobtenerlosmejores
resultadoscuandohornee
tortasen dosrejillas(:cono
sin convecci6n),uselas
parrillas1y 4.
Coloquelastortasen las
parrillascomosemuestra.
79

OPC|ONES
IVies opciones
"Cook & Hold" (Cocinar y mantener caliente)
1. Optimala teela"More Options" [M_isopciones).
2. SeleccioneCOCCION/CALENT. Options
, /
3. Programeeltiempo de cocciCnusandolasteclasrdpidaso las
teclasnumCricas.
4. Seleccionela funciOnHORNo CONVEC.
5. Cuandooptima HORNEAR,seleccionelatemperaturausandolas
teclasr_pidaso lasteclasnumCricas.
6. Cuandooptima la tecla CONVEC,seleccioneHORNEADOCONV
o ASARPORCONVy programela tempera-turadeseadausando
lasteclasr_pidaso lasteclasnumCricas.
El homococinar4duranteel tiempo seleccionadoy luegomantendr_
el alimentocalienteduranteuna hora.Elhomoseapagard
autom_ticamente.
Importante:Si la recetarecomiendaprecalentarel homo,a_ada15
minutosa la duraciCnde la cocciOn.
"Delay" (DiferiO
1. Oprimala tecla"More Options".
2. Oprimala flechapara navegarentrelasopciones
hastaque semuestreDIFERIRen pantalla.
3. Seleccionela funciCnDIFERIR.
,Options
4. Programeeltiempo a diferirusandolasteclasr_pidaso lasteclas
numdricas.
5. SeleccioneHORNEADO,CONVECo LIMPIEZAy programela
temperaturausandolasteclasrdpidaso lasteclasnumdricas.
Para programar un horneado diferido:
1. Siga lospasosI a 4 de lafunci6n "Delay"(yeaarriba].
2. Elijaunade lastemperaturasdesplegadaso uselasteclas
numCricaspara programarlatemperatura.
3. Elijael tiempo de cocciCnde lostiemposdesplegadoso uselas
teclasnumCricasparaprogramarel tiempode cocciCn.
4. La pantallamostrar_"DELAY",lafunciCnseleccionada,la
temperaturaprogramaday el conteoregresivodel tiempodiferido.
Cuandoel tiempo diferidotermina,semuestraeltiempo de
cocciCny el homocomienzaa precalentar.
Para programar un horneado per convecci6n diferido:
1. Siga lospasos1 a 4 de lafunci6n "Delay"[veaabajoa la
izquierda).
2. Seleccionela funciCnHORNEADOoASAR.
3. Elijaunade lastemperaturasdesplegadaso uselasteclas
numCricasparaprogramarlatemperatura.
4. Elijaeltiempo de cocciOndelostiemposdesplegadoso uselas
teclasnumc!ricasparaprogramarel tiempo decocciOn.
5. La pantallamostrar_i"DELAY",lafunciCnseleccionada,la
temperaturaprogramadayel conteo regresivodel tiempo diferido.
Cuandoeltiempo diferidotermina,semuestrael tiempode
cocciCny el homo comienzaa precalentar.
Para programar la autoiimpieza diferida:
1. SigalospasosI a 4 de la funciCn"Delay"(veaabajoa la
izquierda).
2. RETPARRILLASsedesplegar_en la pantalla.Retirelasparrillas
del homoyseleccione CONTiNUAR.
3. Seleccioneel nivelde suciedadLEVEintroduciendoel nOmero
200conlasteclasnumc!ricaspara programardoshorasde
limpieza.Seleccioneel nivelde suciedadMED o INTENSO
usandolasteclasr_pidas.Hayuna esperabrevemientrasla
puertasebloquea.
4. La pantallamostrar_"DELAY",eltiempo de limpiezay eltiempo
de desbloqueode la puerta(on baseal nivelde suciedad
seleccionado).Cuandoel tiempo diferidotermine,semostrar_el
tiempode limpiezay el homocomenzar_a precalentar.
ParamayorinformaciCnsobreautolimpieza,yeala p4gina6/4.
"Proofing" (Espajamiento)
Estacaracter[sticaseutilizapara que losproductosde pande
levaduraseeleveny fermentenantesdel horneado.Haydos
mCtodosde espajamientodisponibles- RAPIDOyNORMAL.
Elfermentadoest4ndaren el homo protegela masaeontralos
cambiosdetemperaturay lascorrientesquecomL_nmenteafectan
los resultadosdel espajamientoefectuadofueradel homo.
Elfermentador4pidoproporcionaresultadosm_isr_ipidossin da_ar
la levaduraquesi seusaelfermentadoest4ndaro se dejala masa
Options;
• .......... /
reposarfueradel homo.
1. Optimalatecla "More Options".
2. SeleccioneESP/UAMIENTO.
3.
/4.
SeleccioneRAPIDOo NORMAL. ( CANCEL
Cuandose hayacompletadoel espajamiento,retire
la masadel homoy optima latecla "CANCEL" [Anula0.
Cont.
8O

Notas:
, Paracualquiermasaque requieralevantarseuna vez,sepuede
usarel espajamientonormalo r_ipido.
, Cuandouse masade pancongelada,elija laopci6nde ESPONJ
RAPIDA.No esnecesariodescongelarla masaantesde
fermentarla.
• Parala masaque requieralevantarsedosveces,sedebeusarel
espajamientonormalparael primerciclo de espajamiento.Se
puedeusarcualquierade losdosciclosde espajamientoparael
segundolevantamiento.
, Si la temperaturadel homoesdemasiadoalta parael
espajamiento,ENFRIAMIENTOaparecer4en pantalla.
, No coloquelosplatescalientessobresuperficiesfrfaspuesel cambio
r_pidodetemperaturapuede hacerque serompano causarfisuras.
Notas:
, Losalimentosdebenestarcalientescuandosecolocanen el homo.
, Paraobtenerla meiercalidadde losalimentos,losmismosdeben
mantenersecalientesdurantenorn4sde I hera.
° Paraevitarque losalimentossesequen,ct_bralosligeramentecon
papelde aluminioo con unatapade vidrio.
"Meat Probe" (Sonda para came)
Elusede la sondasuministradaconsu
homo asegurasiempreexcelentes
resultadoscon losasados.
"Keep Warm" (Mantener caliente) 1.
La caracter[stica"KeepWarm"se usapara mantenercalientes
alimentosqueest_ncalienteso para calentarpanesy plates.
1. Oprimalatecla "More Options" (M_isopciones]./_..............More
2. Oprimalaflecha para navegarentrelasopciones.Options' 2.
3. SeleccioneMANT CALJENTE.
4. Seleccioneunade lastemperaturasdesplegadaso programela
temperaturadeseadausandolasteclasnum6ricas.Puede
seleccionartemperaturasentre63° C(145° F)y 88° C[190° F].
5. MANTENCALIENTy latemperaturaaparecer_inen pantalla.
6. Cuandoel homo sehayaprecalentado,escuchar4una sepal
sonoray MANTENCALIENTy latemperaturasedesplegar_inen
la pantalla.
/ .............. .....
7. Cuandotermine,oprimala tecla "CANCEL" "C__AN(ZEL"
(Anuar) y retiree a imentoo capatos de homo.- ........... "
Para calentar panecilles:
° Cubralospanecilloslevementeconpapelde aluminioy
col6quelosen el homo.
° Optimala tecla "More Options". More
,Options )
° SeleccioneMANT CALIENTE. , .........................../
• Elijaunatemperaturade77°C (170° F].Calientedurante
12a 15minutes.
Para caientar plates:
° Coloquedosfilasde hastacuatroplatescadauna en el homo.
• Oprimala tecla "More Options".
, SeleccioneMANT CALiENTE.
° Elijaunatemperaturade 77°C [170° F].
° Calientedurantecinco minutes. Apagueel homooprimiendola
tecla"CANCEL" y dejelosplatesen el homo durante15minutes
m_is.
Usesolamenteplatesresistentesal homo; verifiqueconel
fabricante.
3,
4.
Insertela sondaen el alimento.
Paralascarnes,la puntade lasonda
debeubicarseenel centrede la
partem_sgruesade la camey no
en la grasao tocandoun hueso.
Inserteel enchufede la sondaen el tomacorrientesituadoen el lade
superiorderechodel homo. AsegL_resede queel enchufequede
bien insertadoen el tomacorriente.
Oprimala tecla "More Options". ( Ontions__,.
Oprimala flechapara navegarentrelasopciones. "...............................
5. SeleccioneSONDACARNE.
6. Programelatemperaturainternadeseadaparael alimento
seleccion-andounade lastemperaturasdesplegadaso programe
latempera-turausandolasteclasnum_ricas. Latemperaturade la
sondapuedeprogramarseentre38° C(100° F)y 85° C(185° F].Si
lasondano est_insertada,INSERTESONDAsedesplegar4en la
pantalla.
7. Seleccionela funci6nHORNo CONVEC.
8. Programelatemperaturadel homodeseadaseleccionandouna de
lastemperaturasdesplegadaso programela temperaturausando
lasteclasnum6ricas.
Importante:Sise retiralasondadel recept4culodel homoduranteel
procesode cocciOn,lapantallamostrar4el mensajeINSERTESONDA.Si
lasondano esinsertadadurantelossiguientes30 segundos,el
programaseanular_yel homoseapagar&
Cuando se selecciona HORN:
• Elindicadormostrar_ibrevementelatemperaturaseleccionada
parael homoy parala send&
° Despu6sde 10segundos,la pantallamostrar_la temperatura
realdel homoy latemperaturarealde lasonda.
Cuando se selecciona CONVEC:
° Seleccionela funci6nHORNEADOCONV o ASARPeR CONV.
Programelatemperaturadel homodeseadaseleccionandouna
de lastemperaturasdesplegadaso programelatemperatura
usandolasteclasnumdricas.
81

• Lapantallamostrar_ibrevementela temperaturaseleccionada
parael homoy parala sonda.
• Despu@de 10segundos,la pantallamostrar_la temperatura
realdel homoy latemperaturarealde lasonda.
9. Cuandose Iogralatemperaturainternaseleccionadadel
alimento,el homo seapagar&y seoir_ unasepalsonora.
10. Retirela sondadel tomacorrientedel homo. La sonda estar_
caliente. Sujeteel enchufede la sondacon guantesde homo o
tomaollascuandolasaquedel homo.
Temperaturas internas para los alimentos
Camede resmolida 74°C(165° F}
Camefrescaderes,temera, Semicruda 63°C(145° F)
cordero Tdrminomedio 71°C(160° F}
Biencocida 77°C(170° F}
Polio,Pavo Entero 82°C(180° F}
Pechuga 77°C(170° F}
Cerdo T6rminomedio 71°C(160° F]
Biencocida 77°C(170° F]
Jam6n,precocid_ 60°C(140° F_
Netas:
• Lasondadebesersacadadel homocuandono est6siendo
usada.
Debidoal excelenteaislamientodel homo,el calorretenido
contint3acocinandoel alimentohastadespu6sde que ha
sonadolasepaly el homo sehaapagado. Porestaraz6nes
importantesacarel alimentodel homo tanprontocomosuene
lasepalsonora.
, Uselamanijade la sondaparainsertarlao retirarla. No tire
del cable.
• La sonda est_ caliente despu_sdela cocci6n- useun
tomaollaso un guantede horno parasacarla.
• Paralimpiarunasondafr[a,fr6tela conun pasoconjab6n.
No sumerjalasonda en agua ni la lave enel lavavajillas.
AVOR
"Favorites" (Favoritos)
Laopci6n"Favorites"(favoritos}guarda lafunci6n del homo,tiempo
decocci6ny latemperaturahastapara 10desus recetasfavoritas.
Loshornosde convecci6nvienenconcinco recetas
preprogramadas.
Para seleccionar una receta de la lista
de recetas preprogramadas:
1. Optima latecla "Favorites".
2. Seleccionelaopci6nLISTA RECETAS.
/ Favorites
On / Off
3. Seleccionela recetadeseadaen la pantallau opnmala flecha
paradesplazarsea la recetadeseada.
4. Unavezque la recetaesseleccionada,el homo comenzar_a
precalentarde acuerdoconel programaseleccionado.
• Puedeoprimirla tecla"More Options" (M_sopciones}para
a_adirlasfuncionesCOCC/CALENo DIF.
5. Cuandotermine,optimala tecla "CANCEL" (Anular}y retireel
alimentodel homo.
Para guardar la altima receta terminada:
(Hornear,Horneadopor convecci6n,Asadopot convecci6n,Asadoa
la parrilla por convecci6n,Mantener caliente} ......................
1. Oprimala tecla"Favorites". Favorites
', On / Off
\
2. Seleccionela opciOnGUARDARULTIMA. .............................
3. Introduzcael nombreusandolasteclas.
, Porejemplo,paraguardar"lasagna",optimala tecla<JKL>
tiesvecespara la letra"L"; oprimalatecla/--,ABC>unavez
parala letra'W'; oprimala tecla<S'[U> unavezpara la letra
"S".ContinOeas[hastaque hayaterminadola palabra.
4. Despuc!sde programarcadaletra,esperetressegundoshasta
queaparezcauna lineaen el siguienteespaciou oprimalatecla
"Enter" (Acepta0 antesde pasara lasiguiente letra.
° Sepueden usarhasta 14letrasincluyendolosespacios.
5. Cuandoel nornbrede la recetahayasidoprogramado,los
t21timosajustessedesplegar_ndurantevariossegundos.
6. LISTARECETASsedesplegar_en la pantallapara navegarpor
lasopciones.
7. Oprimala tecla"Favorites" parasalirdel menQ
de recetasfavoritas.
82

Para crear una nueva receta favorita: _...................
1. Oprimalatecla "Favorites" (Favoritos). "Favorites
On / Off ,/
2. Oprimalaflecha paranavegarpor lasopciones. ....................................
3. SeleccioneCREARNUEVAcon latecla a la izquierda.
4. Introduzcael hombreusandolasteclas.
• Potejemplo,paraguardar"lasagna",optima latecla <JKL> tres
vecesparala letra"L"; optimalatecla <.ABO>unavezpara la
letra"A"; optima latecla <ST[J> unavezpara la letra"S".
Contint3easfhastaque hayaterminadola palabra.
° Despu_sde programarcadaletra,esperetres segundoshasta
que aparezcauna lineaen el siguienteespaciou optima la tecla 5.
"Eater" antesde pasara la siguienteletra.
• Sepuedenusarhasta14letrasincluyendolosespacios.
5. Seleccionetecla "Eater" paraguardarel nombre.
6. Seleccioneel tipo de cocci6n,como pot ejemploHORNEAR,
HORNEADOCONV,ASARA LA PARR,etc.
7. Seleccionelatemperaturadel homousandolasteclasr_pidas.
O 1.
Programela temperaturadeseadausandolasteclasnum6ricas. 2.
8. Afiadala funciOn"Cook/Hold"(Cocinar/Mantenercaliente) 3.
seleccionandola opciOnSI o sakeestafunciOnseleccionandoNO.
4.
9. Si eligeSI,programeel tiempo de cocciOnusandolasteclas
r@idaso lasteclasnumc!ricas. 5.
10.Mada lafunciOn"Delay"(Diferido)seleccionandolaopciOnSIo
sakeestafunci6n seleccionandoNO. 6.
11.Si eligeSI,programeel tiempo diferidousandolasteclasr@idaso
lasteclasnum6ricas.
12.Lapantallamostrar_lasopcionesprogrmadasy luegoregresar_
al mem_de recetasfavoritas.
13.Oprimalatecla "Favorites"para salir del mem_
de recetasfavoritas.
Para editar una receta guardada:
1.
2.
3. Seleccionelaopci6nEDiTARRECETA.
4.
/ Favorites
Optima latecla "Favorites". , On / Off J,
.... ......... /
Optima laflecha paranavegarentre lasopciones.
Elijala recetaquedeseaeditar. Esposibleque debaoprimirlas
teclasflechadasparaencontrar la receta.
Sigael mem_paracambiarlasopcionesde la recetasegt_nIo
desee.
6. La pantallamostrar_el ment3de recetasfavoritasnuevamente.
LISTARECETASaparecer_en pantalla.
7. Oprimalatecla "Favorites" parasalirdel mere1de recetas
favoritas.
Para borrar una receta favorita: ,_J...............
Favorites
/
Optima latecla "Favorites". ' On / Off
\ ,/
Optima laflecha paranavegarentre lasopciones.
Seleccionelaopci6nBORRARRECETA.
Busquela recetaque deseaborrar.Esposibleque debaoprimir
lasteclasflechadasparaencontrar la receta.
Elcontrol le preguntar_siest_segurode quedeseaborraresa
receta. SeleccioneSIo NO.
Oprimalatecla "Favorites" parasalirdel mere1de recetas
favoritas.
Parasalirdel men0de recetasfavoritasen cualquiermomento,
oprimalatecla "Favorites".
"Setup" (Ajuste)
1. Optima latecla "Setup".
/f ........... •....
/ Setup
', On/Off/
2. Usela flecha paradesplazarsepot lasopcionesde "Setup".
3. Seleccionelaopci6ndeseadausandolasteclasr_pidas.
• Seleccionar"AM" o "PM" (modode 12 horassolamente)."AM" o
"PM" noaparecer_nen lapantallaconla horadelalia.
° Seleccionarunformatode 12o 24 horasparael reloj.
• Apagarel reloj.
Nora: Parasalirde una pantallasin hacerning0n cambio,oprima
latecla "Setup". Lapantallavolverda desplegarla horadel d[a.
"Clock" (Reloj)
Param_sinformaci6nverlasp_ginas73-74.Uselaopci6n"Clock"para:
|dioma
Elidiomade laspantallaspuedeserprogramadoeningles,franc_so
espafiol. Paracambiarel idiomade ingl6sa otro d oma/_ .....
_etup
1. Oprimalatecla "Setup". , On / Off /
/
2. ElijaIDIOMA. ....................
3. Usela flechapara pasara la pantallasiguientede set necesario.
4. Seleccioneel idiomadeseado.
5. Oprimalatecla "Setup" parasalirdel mem_de configuraci6n.
° Programarla horadel d[a.
• Programarel d[ade lasemana. 83

"Auto Conveot" (ConvecciOn autom4tica)
Elhomovieneprogramaticdesdelaf_brica parala conversion
autom_iticade convecci6n.
"Auto ConvectConversion"reduceautomdticamentela temperatura
programadaen 15° C(25°F)parala funcione "ConvectBake"
[Horneadoper convecci6n).
Parala funciOn"ConvectRoast"[AsadoperconvecciOn)el control le
advertir_cuandohayatranscurridoel 750/0deltiempo de asado
programadoparaque verifiqueel gradede cocci6nde losalimentos.
Lastemperaturasde asadoper convecci6nnose reducir_n.
Para desactivar la conversi6n autom;itica
de convecci6n:
1. Oprimalatecla "Setup" [Ajuste].
2. Seleccionelaopci6nCONVECCAUTOM.
3. SeleccioneDESACTIV.
4. Oprimalatecla "Setup" parasalirdel menQde configuraci6n.
Para reactivar la conversi6n autom;itica
de convecci6m
1. Oprimalatecla "Setup".
2. SeleccionelaopciOnCONVECCAUTOM.
3. SeleccioneAOTIV.
/, ..........
Setup
On/Off
...................... /
4. Optima latecla "Setup" parasalirdel men[_de configuraciOn.
Netas:
Cuandouse"ConvectBake"(HorneadoperconvecciOn)conla
opci6n"Auto ConvectConversion"[ConversiOnautom_ticade
convecci6n)apagada,reduzcalatemperaturaprogramadaen
25° F[15°C).
Si usael asadoper convecci6ncon la opciOndeconversion
autom4ticade convecci6napagada,noser4necesarioprogramar
un tiempo decocci6n.Verifiqueel alimentocuandohaya
transcurridoel 75%del tiernpotradicional.
C/F
Laescaladetemperaturadesplegadapuedeset cambiadade
Fahrenheita Celsius.
Para cambiar la escala:
1. Optima latecla "Setup".
2. Usela flecha parapasara la pantallasiguiente.
3. SeleccioneC/F.
" Setup "
, On/Off,
........... /
4. Seleccionelaescaladetemperaturadeseada.
5. Optima latecla "Setup" parasalirdel menL_de configuraci6n.
Mode sab tico
Elhornoest,1programadoparaapagarsedespuOsde 12horussi
ustedIodejaaccidentalmenteencendido.Elmodesab_ticotiene
prioridadsobreeste cierreautom_iticode 12horusy puedeser
programadoparaque seactiveautom4ticamenteo puedeser
programaticmanualmentecomesedesee.
%1opuedeusarla fuci6n "Bake" [Hornear)o "Cook/HoldBake"
[Horneadocon cocinarymantenercaliente)cuandoel homo est,1en
el modesab_itico.Todaslasdemosfuncionessondesactivadas.Si
cualquierfunciOnque no sea"Bake"o "Cook/HoldBake"cuando
comienzael modesab_itico,dichafunci6n ser_anulada.
Para activar el mode sub;trice: z............. ,
1. Oprimalatecla "Setup".
2. Oprimalaflecha paranavegarentre lasopciones.
3. Seleccionelaopci6nSABATICO.
4. SeleccioneAUTO o MANUAL.
i Setup
on / off)
"Auto" [Autom_itico]le pedir_que programela temperaturade
horneadoelviernesalas 2:00p.m.y permanecer4en mode
sab4ticoper 33 horus.SABATICOy MODOSABATACTse
despliegaen la pantallaper 90 minutes.Sideseausar"Bake"o
"Cook/HoldBake"duranteel modesab_tico,debenser
programadosduranteeste periodode 90 minutespreviosa la
activaciOndel modesab_iticoautom_tico.
"Manual" colocaal homo en modesab_ticoinstant_ineamente
durante72 horus.SABATICOy MODOSABATACT
aparecer_inen la pantalladurantecinco minutes. Si
deseausar"Bake"o "Cook/HoldBake"duranteel mode
sab_itico,debenset programados
duranteesteper[odede cinco minutespreviosa laactivaci6n
del modesab_iticoautom_tico.
5. SeleccioneACTIV o DESACTIV.
6. Oprimalatecla "Setup" parasalirdel mem_de configuraci6n.
Para anular el mode sab;itico:
Optimaymantengaoprimidala tecla "Setup" durantecinco
segundos.Elmodede horneadopuedeseranuladooprimiendola
tecla "CANCEL" [Anular)duranteel modesab_tico.
Notas:
Elhomono debeestaren useparapoder programarel mode
sab_itico.
Elmodesab_ticono puedeactivarsesiel teclado o la puerta
est_nbloqueados.
Siel homoest,1funcionandocuandoel modesab4tico
comienza,noescuchar_seffalessonoras.
Todoslosavisos,mensajesy se_alessonorasestar_n
desactivadoscuandoel modesab_ticoest6activado.
Sideseautilizarla luzdel homoen modesab_tico,la misma
debeestarencendidaantesde activarestafunciOn.
Elciclo de autolimpiezay el bloqueoautom_iticode laspuertas
nofuncionanduranteel modesab_itico.
Latemperaturade horneadopuedeset cambiadaduranteel
modesab_ticoactive.Simplementeoprimalatecla "Bake" y
luegointroduzcalatemperaturadeseadausandolasteclasde
programaci6nr_pida.
Sioprime latecla "CANCEL" sedetendr_el ciclode
homeado,peroel control permanecer_ien modesab_itico.
Eld[ade la semanay"AM/PM" debenserprogramadospara
que el modesab_iticofuncione correctamente.
84

"Temp Adjust" (Ajuste de la temperatura)
Lastemperaturasdel homosoncuidadosamenteprobadasen la
f_brica. Esnormalnotaruna diferenciaentrelatemperaturade
horneadoo en el doradoentreun homonuevoy un homousado.
A medidaque seusanloshornos,la temperaturade losmismos
puedecambiar.
Ustedpuedeajustarla temperaturadel homosiconsideraqueel
mismono est_horneandoo dorandocorrectamente. Paradecidir
cuantodebecambiarla temperatura,programelatemperaturadel
homoa 15° C[25° F)rodsaltao m_sbajaque latemperatura
indicadaen surecetay luegohomee. Losresultadosdel primer
horneadole dardnuna me/orideade cu_ntodebe ajustarla
temperatura.
Para ajustar la temperatura del homo:
1. Oprimalatecla "Setup" (Ajuste).
2. Oprimalaflecha paranavegarentrelasopciones.
3. SeleccioneAJUSTARTEMP.
; Setup
On!Off
\ .......... /
4. Programela temperaturadeseadausandolasteclasnumOricas.
5. Seleccione"+/J' para indicarun aumentoo reducci0nde la
temperatura. Elcambiode temperaturasedespliegaen la parte
superiorde laventana.
6. Optima latecla "Enter" [Aceptar)o esperetres _....................
segundosparaaceptar loscambios. _ Setup ',
On/Off/
/
7. Optimalatecla "Setup" parasalirdel men& ..........
Latemperaturadel homo no necesitaserreajustadasi hayuna falla
o interrupciOnde la energfaelOctrica.
Las temperaturas de asado y de autolimpieza no se pueden ajustar.
Tones (Bips)
Se puedeajustarel nOmeroyel volumende lasseOalessonoras
emitidasal fin de la cocciOny alfin de lafunciOndel temporizador.
Para ajustar las so,ales sonoras:
1. Oprimalatecla "Setup".
2. Oprimalaflecha paranavegarentrelasopciones.
3. SeleccionelaopciOnSONIDOS.
Para cambiar las so,ales sonoras al fin
de la cocci6n:
Setup
,, On / Off/
1. Sigalospasos1a 3 de la funciOn"Tones"(Tones)(yeaarriba).
2. SeleccioneSONIDOSCOCO.
3. Oprimalaflecha paranavegarentrelasopciones.
4. Seleccione1-30 MIN paraoff unaserialsonoracadatreinta
segundos.
O
Seleccione1=60MIN parao[runa serialsonoracadasesenta
segundos.
O
Seleccione1 BIP paraoir sOlouna serialsonoraal final de la
cocci0n.
5. Oprimalatecla "Setup" parasalir.
Para cambiar las se_ales sonoras del temporizador:
1. Sigalospasos1a 3 de la funciOn"Tones"(veaarriba).
2. SeleccioneSONIDOSTEMPOR.
3. Optima laflecha paranavegarentre lasopciones.
4. Seleccione2-30 SECpara off dossefialessonorascadatreinta
segundos.
O
Seleccione2-60 SECparaoff dossefialessonorascadasesenta
segundos.
O
Seleccione1 BIP paraoir s01ouna serialsonoraal final del tiempo
programado.
5. Optima latecla "Setup" parasalir.
Para cambiar el volumen de las se_ales sonoras:
1. Sigalospasos1a 3 de la funciOn"Tones"(veaarriba).
2. Optima laflecha paranavegarentre lasopciones.
3. SeleccioneVOLUMEN.
4. SeleccioneALTOpara elvolumenm_salto.
O
SeleccioneMEDIANOparaun nivelde volumenintermedio.
O
SeleccionesBAIO parael volumenrodsbajo.
5. Optima latecla "Setup" parasalir.
"12 Hr Shutoff" (Apagado despues de 12 horas)
Elhomoseapagardautomdticamentedespudsde 12horusde
funcionamientosi Iodeja encendidoaccidentalmente.
Para desactivar esta caracteristica: _.................,
1. Oprimalatecla "Setup". Setup
,\on/off
2. Oprimalaflecha paranavegarentre lasopciones. ............
3. SeleccioneAPAGADODE 12H.
3. SeleccioneACTIV o DESACTIVusandolasteclasr_pidas.
4. Optima latecla "Setup" parasalir.
85

Energy Saver (Ahorro de energfaD
Paraahorrarenergfa,la pantallapuedeserconfiguradapara
apagarsesi noest_en uso.
Para programar la caracteristica de ahorro de
energia: _........................,
1. Oprimalatecla "Setup" [Ajuste). / Setup
On / Off j)
2. Oprimalaflecha paranavegarentrelasopciones. ........ J
3. SeleccioneAHORROENERG|A
4. SeleccioneACTIV o DESACTIVusandolasteclasr_pidas.
5. Optima latecla "Setup" parasalir.
Optimacualquiertecla paraactivarel indicador.
"Sewice" (Servicio)
Esta_readel controldel homo despliegael nOmerogratisde
atenci6nal clientede Jenn-Air. / .........................
Setup "
1. Oprimalatecla "Setup". On / Off
\
2. Oprimalaflecha paranavegarentrelasopciones.
3. Seleccionelaopci6nSERVICIO.
4. Optima latecla "Setup"para salir.
Acc
Accesoriode wok para modelos
el_etrieoso a gas - ModeloA0142
idealparaprepararalimentossalteados,
cocinaral vapor,ablandaralimentosy
prepararguisos. Elwoktiene un acabado
antiadherente,asasde madera,tapa,rejilla paracocci6nal vapor,
paletaspara arrozyconsejosde cocci6n. Elwok derondo piano
puedeserusadoen TODOSloscartuchos.
"Demo" (DemostraciOn)
Cuandoseseleccionalafunci6n "Demo"ustedver_una pequeSa
presentaci6ndescribiendolascaracterfsticasdesu nuevaestufa
Jenn-Air.
1. Oprimalatecla "Setup".
2. Oprimalaflecha paranavegarentrelasopciones.
3. Seleccionelaopci6nDEMO.
/4. SeleccioneACTIV o DESACTIVusandolasteclasr_pidas.
5. Optima latecla "Setup" parasalir.
/y ........ .
i Setup
On/Off/
\ /
86

GARANT|A Y S
Lo que no cubren estas garantias
1. Situacionesydafios resultantesde cualquierade lassiguienteseventualidades:
a. Instalaci6n,entregao mantenimientoinapropiados.
b. Cualquierreparaci6n,modificaci6n,alteraci6no ajusteno autorizadopor
el fabricanteo pot un t6cnicode servicioautorizado.
c. Maluso,abuso,accidentes,usoirrazonableo hechosfotuitos.
d. Corrienteelc!ctrica,voltaje o suministroincorrectos.
e. Programaci0nincorrectadecualquierade loscontroles.
2. Lasgarant[asquedanhulassi los n_merosdeserieoriginaleshansido retirados,
alteradoso nosonf_cilmentelegibles.
3. Bombillas.
4. Losproductoscompradosparausocomercialo industrial.
5. Elcostodel servicioo Ilamadade serviciopara:
a. Corregirerroresde instalaciOn.
b. Instruiral usuariosobreel usocorrectodel producto.
c. Transportarel electrodomc!sticoal establecimientodeservicioy elretornodel
productoal cliente.
6. Losdafiosconsecuenteso incidentalessufridosper cualquierpersonacomo resultado
del incumplimientode estagarant[a.
Enalgunosestadosnosepermite laexclusiono limitaci6nde dafiosconsecuenteso
incidentales,por Iotanto la limitaci6no exclusionanteriorpuedeno aplicarseensu caso.
Si necesita servicio
Primeroleala secci6nde Iocalizaci6nysoluci6nde averfasen sugu_ade usoy cuidado
o Ilamealdepartamentode atenci0nal cliente de MaytagServices,LLC,Jenn-Airal
1-800-JENNAIR(1-800-536-6247)en losEstadosUnidosyCanada.
Para obtener servicio bajo la garantia
Paraubicarunacompafi[ade servicioautorizadoensu Iocalidad,p6ngaseen contacto
conel distribuidordonde adquirkisuelectrodom6sticoo Ilameal departamentode
atenci0nal cliente de MaytagServices,LLC,Jenn-Air.Sino recibeserviciosatisfactorio
bajola garantfa,pot favor Ilameo escribaa:
MaytagServices,LLC
Attn: CAIR_R:Center
P.O.Box2370,Cleveland,TN37320-2370
Enlos EstadosUnidosy Canad_ Ilame al 1-8OO-JENNAIR(1=800=536=6247)
_Ota: Cuandosepongaen contactocon el departamentode atenciOnal
cliente de MaytagServices,LLC,Jenn-Airacercadeun problema,pot favor
incluyalasiguiente informaciOn:
a.Su hombre,direcciOny n8merodeteldono;
b.Losn8merosde modeloyde seriede su electrodom6stico;
c. Nombrey direcciOndesu distribuidory lafecha de compradelelectrodom6stico;
d. UnadescripciOnclaradel problemaqueest_ experimentando;
e. Pruebade compra.
Lasgu[asde usoycuidado,losmanualesde servicioy la informaci6nsobrelaspiezaspuedensersolicitadasal departamento
de atenci6nal clientede MaytagServices,LLC,Jenn-Air.
Form No. A/11/05 Part No. 8113P529 60 @2005 Maytag Appliances Sales Co. Litho U.S.A.
-
 1
1
-
 2
2
-
 3
3
-
 4
4
-
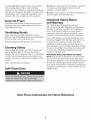 5
5
-
 6
6
-
 7
7
-
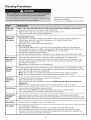 8
8
-
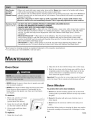 9
9
-
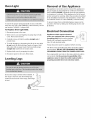 10
10
-
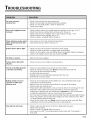 11
11
-
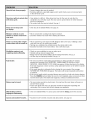 12
12
-
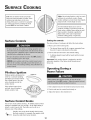 13
13
-
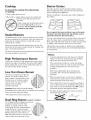 14
14
-
 15
15
-
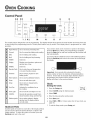 16
16
-
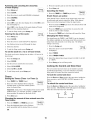 17
17
-
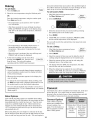 18
18
-
 19
19
-
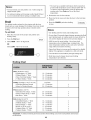 20
20
-
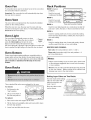 21
21
-
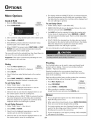 22
22
-
 23
23
-
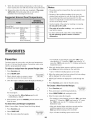 24
24
-
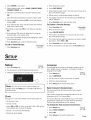 25
25
-
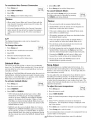 26
26
-
 27
27
-
 28
28
-
 29
29
-
 30
30
-
 31
31
-
 32
32
-
 33
33
-
 34
34
-
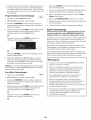 35
35
-
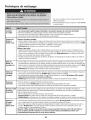 36
36
-
 37
37
-
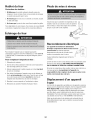 38
38
-
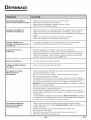 39
39
-
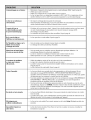 40
40
-
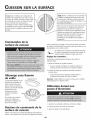 41
41
-
 42
42
-
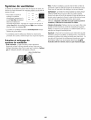 43
43
-
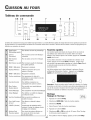 44
44
-
 45
45
-
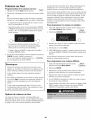 46
46
-
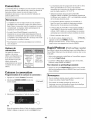 47
47
-
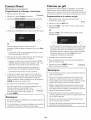 48
48
-
 49
49
-
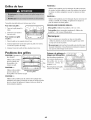 50
50
-
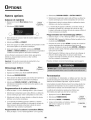 51
51
-
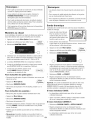 52
52
-
 53
53
-
 54
54
-
 55
55
-
 56
56
-
 57
57
-
 58
58
-
 59
59
-
 60
60
-
 61
61
-
 62
62
-
 63
63
-
 64
64
-
 65
65
-
 66
66
-
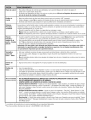 67
67
-
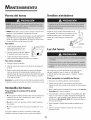 68
68
-
 69
69
-
 70
70
-
 71
71
-
 72
72
-
 73
73
-
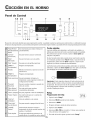 74
74
-
 75
75
-
 76
76
-
 77
77
-
 78
78
-
 79
79
-
 80
80
-
 81
81
-
 82
82
-
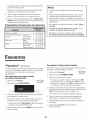 83
83
-
 84
84
-
 85
85
-
 86
86
-
 87
87
-
 88
88


Jenn-Air JGS9900BDF El manual del propietario
- Tipo
- El manual del propietario
- Este manual también es adecuado para
en otros idiomas
- français: Jenn-Air JGS9900BDF Le manuel du propriétaire
- italiano: Jenn-Air JGS9900BDF Manuale del proprietario
- English: Jenn-Air JGS9900BDF Owner's manual
Artículos relacionados
-
Jenn-Air JES9900BAS0 El manual del propietario
-
-
-
-
Maytag JGS8850BDB El manual del propietario
-
-
Jenn-Air JDR8880RDB El manual del propietario
-
-
-