Olimpia Splendid Peler 6C Manual de usuario
- Categoría
- Humidificadores
- Tipo
- Manual de usuario

PELER 6C
IT
EN
FR
DE
ES
ISTRUZIONI PER INSTALLAZIONE, USO E MANUTENZIONE
INSTRUCTIONS FOR INSTALLATION, USE AND MAINTENANCE
INSTRUCTIONS POUR L’INSTALLATION, L’EMPLOI ET L’ENTRETIEN
HANDBUCH FÜR INSTALLATION, GEBRAUCH UND WARTUNG
INSTRUCCIONES PARA LA INSTALACIÓN, USO Y MANTENIMIENTO


AVVERTENZE
1. L’apparecchio può essere utilizzato da bambini di età non
inferiore a 8 anni e da persone con ridotte capacità siche,
sensoriali o mentali, o prive di esperienza o della necessaria
conoscenza, purché sotto sorveglianza oppure dopo che
le stesse abbiano ricevuto istruzioni relative all’uso sicuro
dell’apparecchio e alla comprensione dei pericoli ad esso
inerenti. I bambini non devono giocare con l’apparecchio.
La pulizia e la manutenzione destinata ad essere eettuata
dall’utilizzatore non deve essere eettuata da bambini
senza sorveglianza (applicabile per i paesi dell’Unione
Europea).
2. L’apparecchio può essere utilizzato da persone (inclusi i
bambini) con ridotte capacità siche, sensoriali o mentali, o
prive di esperienza o della necessaria conoscenza, purché
sotto sorveglianza oppure dopo che le stesse abbiano
ricevuto istruzioni relative all’uso sicuro dell’apparecchio
da una persona responsabile per la loro sicurezza
(applicabile solo per i paesi fuori dall’Unione Europea).
3. Se il cavo di alimentazione è danneggiato, esso deve essere
sostituito dal costruttore o dal suo servizio assistenza
tecnica o comunque da una persona con qualica similare,
in modo da prevenire ogni rischio.
4. Per prevenire ogni rischio di folgorazione è indispensabile
scollegare la spina dalla presa di corrente prima di eettuare
ogni operazione di manutenzione sull’apparecchio.
5. Per il corretto funzionamento dell’apparecchio, rispettare
le distanze minime e le indicazioni riportate nel presente
manuale (vedere gura B)
6. Per il corretto collegamento elettrico dell’apparecchio,
seguire le indicazioni riportate nel paragrafo 2.3.
IT

WARNINGS
1. This appliance can be used by children aged from 8 years
and above and person with reduced physical, sensory or
mental capabilities or lack of experience and knowledge if
they have been given supervision or instruction concerning
use of the appliance in a safe way and understand
the hazards involved. Children shall not play with the
appliance. Cleaning and user maintenance shall not be
made by children without supervision. (be applicable for
the European Countries).
2. This appliance is not intended for use by persons
(including childern) with reduced physical, sensory or
mental capabilities or lack of experience and knowledge,
unless they have been given supervision or instruction
concerning use of the appliance by a person responsible
for their safety. (be applicable for other countries except
the European Countries).
3. If the power cable is damaged, it must be replaced by the
manufacturer or by its technical support service or by
similarly qualied personnel, to prevent any risk to the
user.
4. To prevent any electrocution risk, it is essential to disconnect
the plug from the power socket before performing any
maintenance operation on the appliance.
5. For the correct operation of the appliance, observe the
minimum distances and the indications written in this
manual (see gure B).
6. For the correct electrical connection of the appliance,
follow the indications in paragraph 2.3.
EN

AVERTISSEMENTS
1. Cet appareil peut être utilisé par des enfants âgés de moins
de 8 ans et par des personnes dont les des capacités
physiques, sensorielles ou mentales sont limitées, qui
manquent d’expérience ou des connaissances nécessaires,
à condition qu’elles soient sous surveillance ou après
avoir reçu des instructions concernant l’utilisation en toute
sécurité de l’appareil et la compréhension des dangers qui
lui sont inhérents. Les enfants ne doivent pas jouer avec
cet appareil. Le nettoyage et l’entretien qui incombent à
l’utilisateur ne doivent pas être eectués par les enfants
sans surveillance. (applicable pour les pays de l’Union
européenne).
2. Cet appareil peut être utilisé par des personnes (y compris
les enfants) dont les des capacités physiques, sensorielles
ou mentales sont limitées, qui manquent d’expérience ou
des connaissances nécessaires, à condition qu’elles soient
sous surveillance ou après avoir reçu des instructions
concernant l’utilisation en toute sécurité (uniquement pour
les pays en dehors de l’Union Européenne).
3. Si le cordon d’alimentation est abîmé, il doit être remplacé
par le fabricant ou par son service d’assistance technique
ou, dans tous les cas, par une personne ayant une
qualication similaire, de façon à prévenir tout risque.
4. Pour éviter tout risque d’électrochoc, il est essentiel de
débrancher la che de la prise de courant avant de procéder
à toute opération de maintenance de l’appareil.
5. Pour un fonctionnement correct de l’appareil, respectez
les distances minimales et les indications de ce manuel
(voir gure B).
6. Pour raccorder correctement l’appareil, suivez les
instructions du paragraphe 2.3.
FR

WARNHINWEISE
1. Kindern ab 8 Jahren und Personen mit eingeschränkten
körperlichen, sinnlichen oder geistigen Fähigkeiten, von
unerfahrenen oder unwissenden Personen können das
Gerät benutzen, wenn diese überwacht werden oder
Anleitungen zum sicheren Gebrauch des Geräts erhalten
und dessen Gefahren verstanden haben. Kinder dürfen
nicht mit dem Gerät spielen. Reinigungen und Wartungen,
die der Benutzer ausführen kann, dürfen nicht von Kindern
ohne Aufsicht vorgenommen werden (gilt für Länder der
Europäischen Union).
2. Das Gerät kann von Personen (Kinder inbegrien) mit
eingeschränkten körperlichen, sinnlichen oder geistigen
Fähigkeiten oder von unerfahrenen oder unwissenden
Personen unter Überwachung benutzt werden oder
nachdem sie entsprechende Anleitungen zum sicheren
Gebrauch des Geräts durch eine, für ihre Sicherheit
verantwortliche Person, erhalten haben (nur in Ländern
außerhalb der Europäischen Union anwendbar).
3. Wenn das Stromkabel beschädigt ist, muss dieses zur
Vermeidung jeglicher Gefahren vom Hersteller oder von
dessen Technischem Kundendienst beziehungsweise
durch gleichermaßen qualifiziertes Personal ersetzt
werden, um jeglicher Gefahr vorzubeugen.
4. Um jegliche Gefahr von Stromschlägen zu vermeiden,
muss der Stecker vor jedem Wartungseingri am Gerät
aus der Steckdose gezogen werden.
5. Damit das Gerät einwandfrei funktioniert, die
Minimalabstände und Anleitungen dieses Handbuchs
beachten (siehe Abbildung B)
6. Um das Gerät korrekt an den Strom anzuschließen, den
Anleitungen in Abschnitt 2.3 Folge leisten.
DE

ADVERTENCIAS
1. El aparato puede utilizarse por niños con una edad
no inferior a los 8 años y por personas con reducidas
capacidades físicas, sensoriales o mentales, o sin
experiencia ni el necesario conocimiento, siempre y
cuando bajo supervisión o después de que las mismas
hayan recibido instrucciones relativas al uso seguro del
aparato y a la comprensión de los peligros inherentes.
Los niños no deben jugar con el aparato. La limpieza y
el mantenimiento que deben efectuarse por el usuario no
deben efectuarse por niños sin supervisión (aplicable para
los países de la Unión Europea).
2. El aparato puede utilizarse por personas (incluso niños)
con reducidas capacidades físicas, sensoriales o mentales,
o sin experiencia ni el necesario conocimiento, siempre
y cuando bajo supervisión o después de que las mismas
hayan recibido instrucciones relativas al uso seguro del
aparato por una persona responsable de su seguridad
(sólo aplicable para los países fuera de la Unión Europea).
3. En caso de deterioro del cable de alimentación, debe ser
sustituido por el fabricante, por el servicio de asistencia
técnica o por una persona con cualicación similar, para
prevenir cualquier riesgo.
4. Para prevenir cualquier riesgo de electrocución, es
indispensable desconectar el enchufe de la toma de
corriente antes de que se efectúe cualquiera operación
de mantenimiento en el aparato.
5. Para el correcto funcionamiento del aparato, respete las
distancias mínimas y las indicaciones indicadas en este
manual (vea gura B).
6. Para la correcta conexión eléctrica del aparato, siga las
indicaciones en el párrafo 2.3.
ES

PELER 6C
5
17
14
16
15
18
6
7
8
34
11
12
8
20
19
10
9
2
13
1
A

min.
15cm
min.
15cm
~6m
18
T1
23
18
T1
1
B
D
F
C
E
G

6
7
7
12
22
7
13
19
H
L
N
M

17
16
15
22
3
4
6
7
O
P
R
Q

ITALIANO
IT - 1
0 - AVVERTENZE
0.1 - INFORMAZIONI GENERALI
Desideriamo innanzitutto ringraziarVi per aver deciso di accordare
la vostra preferenza ad un apparecchio di nostra produzione.
0.2 - SIMBOLOGIA
I pittogrammi riportati nel seguente capitolo consentono di fornire
rapidamente ed in modo univoco informazioni necessarie alla cor
-
retta utilizzazione della macchina in condizioni di sicurezza.
Service
Contrassegna situazioni nelle quali si deve informare il SERVICE
aziendale interno:
SERVIZIO ASSISTENZA TECNICA CLIENTI
Indice
Iparagraprecedutidaquestosimbolocontengonoinformazioni
e prescrizioni molto importanti, particolarmente per quanto
riguarda la sicurezza.
Il mancato rispetto può comportare:
- pericolo per l’incolumità degli operatori
- perdita della garanzia contrattuale
- declinazionediresponsabilitàdapartedelladittacostruttrice.
Indice
INDICE GENERALE
L’indice generale del presente manuale
è riportato a pagina “IT-3”
ILLUSTRAZIONI
Le illustrazioni sono raggruppate nella seconda pagina
e nella penultima pagina del manuale.

PELER 6C
ITALIANO
IT - 2
Mano alzata
Contrassegna azioni che non si devono assolutamente fare.
TENSIONE ELETTRICA PERICOLOSA
Segnala al personale interessato che l’operazione descritta
presenta, se non effettuata nel rispetto delle normative di
sicurezza,ilrischiodisubireunoshockelettrico.
PERICOLO GENERICO
Segnala al personale interessato che l’operazione descritta
presenta, se non effettuata nel rispetto delle normative di
sicurezza,ilrischiodisubiredannisici.
PERICOLO DI FORTE CALORE
Segnala al personale interessato che l’operazione descritta
presenta, se non effettuata nel rispetto delle normative di
sicurezza, il rischio di subire bruciature per contatto con
componenti con elevata temperatura.
NON COPRIRE
Segnala al personale interessato che è vietato coprire
l’apparecchio per evitarne il surriscaldamento.
ATTENZIONE
• Segnalacheilpresentedocumentodeveesserelettocon
attenzione prima di installare e/o utilizzare l’apparecchio.
• Indica che il personale di assistenza deve maneggiare
l’apparecchio attenendosi al manuale di installazione.
ATTENZIONE
• Segnalachepotrebberoessercidelleinformazioniaggiuntive
su manuali allegati.
• Indicachesonodisponibiliinformazioninelmanualed’uso
o nel manuale di installazione.
ATTENZIONE
Indica che il personale di assistenza deve maneggiare
l’apparecchio attenendosi al manuale di installazione.

ITALIANO
IT - 3
0.3 - AVVERTENZE GENERALI
QUANDO SI UTILIZZANO APPARECCHIATURE ELETTRICHE,
È SEMPRE NECESSARIO SEGUIRE PRECAUZIONI DI SICUREZZA DI BASE
PER RIDURRE RISCHI DI INCENDIO, SCOSSE ELETTRICHE E INFORTUNI
A PERSONE, INCLUSO QUANTO SEGUE:
1. Documento riservato ai termini di legge con divieto di riprodu-
zione o di trasmissione a terzi senza esplicita autorizzazione
della ditta OLIMPIA SPLENDID.
Le macchine possono subire aggiornamenti e quindi presen
-
tare particolari diversi da quelli ragurati, senza per questo
costituire pregiudizio per i testi contenuti in questo manuale.
2. Leggere attentamente il presente manuale prima di procedere
con qualsiasi operazione (installazione, manutenzione, uso)
ed attenersi scrupolosamente a quanto descritto nei singoli
capitoli.
3. Conservare con cura questo libretto per ogni ulteriore consul
-
tazione.
4. Dopo aver tolto l’imballaggio assicurarsi dell’integrità dell’appa
-
recchio; gli elementi dell’imballaggio non devono essere lasciati
alla portata dei bambini in quanto potenziali fonti di pericolo.
0 - AVVERTENZE .................................................................................1
1 - PRINCIPALI CARATTERISTICHE E FUNZIONAMENTO .......10
2 - INSTALLAZIONE ..........................................................................11
3 - USO DELL’APPARECCHIO ......................................................... 12
4 - MANUTENZIONE E PULIZIA ......................................................20
5 - PRIMA DI RIPORRE L’APPARECCHIO A FINE STAGIONE ...21
6 - SMALTIMENTO .............................................................................22
7 - DATI TECNICI ...............................................................................22
INDICE GENERALE

PELER 6C
ITALIANO
IT - 4
5. LA DITTA COSTRUTTRICE NON SI ASSUME RESPONSABILITÀ
PER DANNI A PERSONE O COSE DERIVANTI DALLA MANCATA
OSSERVANZA DELLE NORME CONTENUTE NEL PRESENTE LI
-
BRETTO.
6. La ditta costruttrice si riserva il diritto di apportare modiche in
qualsiasi momento ai propri modelli, fermo restando le caratteri
-
stiche essenziali descritte nel presente manuale.
7. Installazioni eseguite al di fuori delle avvertenze fornite dal pre
-
sente manuale e l’utilizzo al di fuori dei limiti di temperatura pre-
scritti fanno decadere la garanzia.
8. L’ordinaria manutenzione dei ltri, la pulizia generale esterna
possono essere eseguite anche dall’utente, in quanto non com
-
portano operazioni dicoltose o pericolose.
9. Durante il montaggio, e ad ogni operazione di manutenzione, è
necessario osservare le precauzioni citate nel presente manua
-
le, e sulle etichette apposte all’interno o sull’apparecchio, non-
ché adottare ogni precauzione suggerita dal comune buonsenso
e dalle Normative di Sicurezza vigenti nel luogo d’installazione.
10. Durante le operazioni di riempimento e pulizia, staccare la spina
dalla presa di corrente.
11. In caso di sostituzione di componenti utilizzare esclusiva-
mente ricambi originali OLIMPIA SPLENDID.
12. Non utilizzare detergenti liquidi o corrosivi per pulire l’appa-
recchio, non spruzzare acqua o altri liquidi sull’apparecchio
in quanto potrebbero danneggiare i componenti in plastica o,
addirittura, provocare scosse elettriche.
13.
In caso di anomalie di funzionamento (per esempio: rumore anoma-
lo, cattivo odore, fumo, innalzamento anomalo della temperatura, di-
spersioni elettriche, ecc.) spegnere immediatamente l’apparecchio e
scollegare la spina dalla presa di corrente. Per l’eventuale riparazione
rivolgersi esclusivamente ai centri di assistenza tecnica autorizzati dal
costruttore e richiedere l’utilizzo di ricambi originali. Il mancato rispet
-
to di quanto sopra può compromettere la sicurezza dell’apparecchio.

ITALIANO
IT - 5
14. Non scollegare la spina di alimentazione durante il funziona-
mento. Rischio di incendio o scosse elettriche.
15. Non appoggiare oggetti pesanti o caldi sopra l’apparecchio.
16. Prima di collegare elettricamente l’apparecchio accertarsi che i
dati targa siano rispondenti a quelli della rete di distribuzione
elettrica. La targa (23) è situata sui lati dell’apparecchio (Fig.C).
17. Installare l’apparecchio secondo le istruzioni del costruttore.
Un’errata installazione può causare danni a persone, animali o
cose, nei confronti dei quali il costruttore non può essere consi
-
derato responsabile.
18. In caso di incompatibilità tra la presa e la spina dell’apparec
-
chio, far sostituire la presa con altra di tipo adatto da personale
professionalmente qualicato, il quale accerti che la sezione dei
cavi della presa sia idonea alla potenza assorbita dall’apparec
-
chio. In generale è sconsigliato l’uso di adattatori e/o prolunghe;
se il loro uso si rendesse indispensabile, devono essere confor
-
mi alle vigenti norme di sicurezza e la loro portata di corrente (A)
non deve essere inferiore a quella massima dell’apparecchio.
19. Questo apparecchio non è destinato a essere fatto funzionare
per mezzo di un temporizzatore esterno o con un sistema di co
-
mando a distanza separato.
20. Usare l’apparecchio sempre e soltanto in posizione verticale.
21. Non ostruire in alcun modo le griglie di entrata aria e quelle di
uscita.
22. Non inserire oggetti estranei nelle griglie di entrata ed uscita aria
in quanto vi è il rischio di scosse elettriche, incendio o danni
all’apparecchio.
23. Non utilizzare l’apparecchio:
- con le mani bagnate o umide;
- a piedi nudi.

PELER 6C
ITALIANO
IT - 6
24. Non tirare il cavo di alimentazione o l’apparecchio stesso, per
staccare la spina dalla presa di corrente.
25. Non utilizzare l’apparecchio in ambienti con temperature ecces
-
sivamente alte o basse ed evitare la sua esposizione alla luce
diretta del sole.
26. Non utilizzare l’apparecchio nelle vicinanze di liquidi inam-
mabili o in atmosfera esplosiva.
27. Non spruzzare insetticida o gas inammabili vicino all’apparec
-
chio.
28. Collocare sempre l’apparecchio su una supercie stabile, piana
e livellata.
29. Lasciare almeno 15cm di spazio libero sui lati e dietro l’apparec
-
chio e lasciare almeno 30cm di spazio libero sopra l’apparecchio
(Fig.B).
30. Non collocare l’apparecchio vicino a una presa elettrica.
31. La presa di corrente deve essere facilmente accessibile in modo
da poter disinserire con facilità la spina in caso di emergenza.
32. Non maneggiare la spina con le mani bagnate.
33. Non piegare eccessivamente, attorcigliare, tirare o danneggiare
il cavo di alimentazione.
34. Non svolgere il cavo di alimentazione elettrica sotto a tappeti,
coperte o guide. Sistemare il cavo in zone non di passaggio in
modo da evitare inciampi.
35. Scollegare il cavo quando l’apparecchio non è in uso per un pe
-
riodo di tempo prolungato e/o quando nessuno si trova in casa.
36. Non utilizzare l’apparecchio all’esterno o su superci bagnate.
Evitare il versamento di liquidi sull’apparecchio. Non utilizzare
l’apparecchio vicino a lavelli o rubinetti.
37. Non immergere l’apparecchio in acqua o altri liquidi.
38.
Per mantenere l’apparecchio pulito, cambiare l’acqua di frequente.

ITALIANO
IT - 7
39. Non esporre l’apparecchio a gocce o a spruzzi di acqua.
40. Non posizionare l’apparecchio in spazi ristretti, come ad esem
-
pio su una mensola o all’interno di un armadietto.
41.
Prima di procedere all’introduzione dell’acqua, spegnere l’ap-
parecchio e staccare la spina dalla presa di corrente. Fare
attenzione a non superare il livello massimo indicato con la
scritta “MAX”.
42. Per qualsiasi operazione di regolazione o riparazione, rivolgersi
esclusivamente a personale specializzato.
43.
Per ridurre il rischio di incendio o scosse elettriche, non utiliz-
zare il prodotto vicino ad alcun altro dispositivo elettronico.
44. Evitare di posizionare il prodotto all’aperto. Non soare aria di-
rettamente verso le persone, in particolare verso bambini e an-
ziani.
45. Assicurarsi che la spina sia sempre inserita completamente
nella presa di corrente.
46. Il livello dell’acqua nel serbatoio (7) non deve essere inferiore
al livello minimo consigliato quando la funzione rareddatore/
umidicatore è attiva.
47. Dopo aver riempito il serbatoio (7) con acqua, non inclinare o
urtare l’apparecchio durante gli spostamenti per evitare spruzzi
d’acqua.
48.
Se l’apparecchio non viene utilizzato per un periodo di tempo pro-
lungato con acqua nel serbatoio (7), scollegare la spina dalla pre-
sa di corrente, vuotare e pulire il serbatoio prima di riutilizzarlo.
49. E’ severamente vietato rimuovere o installare il ltro dell’aria (17)
o il ltro in carta bagnato (18) durante il funzionamento come
umidicatore.
50. Pulire l’apparecchio con un panno umido; non utilizzare prodotti
o materiali abrasivi. Per la pulizia dei ltri vedere l’apposito pa
-
ragrafo.

PELER 6C
ITALIANO
IT - 8
51. La causa più comune di surriscaldamento è il deposito di polve-
re o lanugine nell’apparecchio. Rimuovere regolarmente questi
accumuli scollegando l’apparecchio dalla presa di corrente ed
aspirando le griglie.
52. Non utilizzare l’apparecchio in ambienti con notevoli sbalzi di
temperatura in quanto si potrebbe formare condensa all’interno
dello stesso.
53. Installare l’apparecchio ad almeno 2 metri da altri apparecchi
elettronici (TV, radio, computer, lettore dvd, ecc.) onde evitare
interferenze.
54. Non utilizzare l’apparecchio se nel locale è stato da poco spruz
-
zato insetticida a gas o in presenza di incensi accesi, vapori chi-
mici o residui oleosi.
55. Non utilizzare l’apparecchio senza i ltri correttamente posizio
-
nati.
56. Lo smontaggio, riparazione o riconversione da parte di una per
-
sona non autorizzata potrebbe comportare gravi danni e annul-
lerà la garanzia del fabbricante.
57. Non utilizzare l’apparecchio in caso o di guasto o cattivo funzio
-
namento, se il cavo o spina sono danneggiati, o se è stato fatto
cadere o è danneggiato in qualsiasi modo. Spegnere l’apparec
-
chio, scollegare la spina dalla presa di corrente e farlo controlla-
re da personale professionalmente qualicato.
58. Non smontare, né apportare modiche all’apparecchio.
59. Riparare da se l’apparecchio è estremamente pericoloso.
60. Nel caso in cui si decida di non utilizzare più un apparecchio di
questo tipo, si raccomanda di renderlo inoperante tagliando il
cavo di alimentazione, dopo avere staccato la spina dalla pre
-
sa di corrente. Si raccomanda inoltre di rendere innocue quelle
parti dell’apparecchio suscettibili di costituire un pericolo, spe
-
cialmente per i bambini che potrebbero servirsi dell’apparecchio
fuori uso per i propri giochi.

ITALIANO
IT - 9
0.4 - USO PREVISTO
• L’apparecchio deve essere utilizzato esclusivamente per rinfresca-
re, rareddare e umidicare con il solo scopo di rendere confortevo-
le la temperatura nell’ambiente.
• Questo apparecchio è destinato solo per un utilizzo domestico o
similare.
• Un uso improprio dell’apparecchio con eventuali danni causati a
persone, cose o animali esulano OLIMPIA SPLENDID da ogni re-
sponsabilità.
0.5 - ZONE DI RISCHIO
• L’apparecchio non deve essere installato in ambienti con presenza
di gas inammabili, gas esplosivi, in ambienti molto umidi (lavan-
derie, serre, ecc.), o in locali dove sono presenti altri macchinari
che generano una forte fonte di calore, in prossimità di una fonte di
acqua salata o acqua sulfurea.
• NON usare gas, benzine o altri liquidi inammabili vicino all’appa-
recchio.
• Utilizzare solo i componenti forniti in dotazione. L’utilizzo di parti
non standard può causare perdite d’acqua, scosse elettriche, incen-
di e lesioni o danni alle cose.
Questo prodotto deve essere utilizzato unicamente
secondo le speciche indicate nel presente manuale.
L’utilizzo diverso da quanto specicato potrebbe
comportare gravi infortuni.
LA DITTA COSTRUTTRICE NON SI ASSUME
RESPONSABILITÀ PER DANNI A PERSONE O COSE
DERIVANTI DALLA MANCATA OSSERVANZA DELLE
NORME CONTENUTE NEL PRESENTE MANUALE.

PELER 6C
ITALIANO
IT - 10
1 - PRINCIPALI CARATTERISTICHE E
FUNZIONAMENTO
• Funzioniraffreddatoreeumidicatore;
• Funzionetimer:da1a12h;
• Telecomandoainfrarossi;
• Ripristinolivelloconaggiuntadiacquadall’altoomedianterimo-
zionedelserbatoio;
• Funzionediprotezionecontrolamancanzad’acqua;
• Trelivellidivelocità:alta,mediaebassa;
• Modalitàventilatore:Normale,naturaleeriposo;
• Comanditouch;
• Direzioneussoverticalemanuale,direzioneussoorizzontale
automatico;
• Faciledaspostaregraziealleruotepiroettanti;
• Funzioneionizzante;
• Avvisoacusticopressionetasti.
1.1 -
SCHEMA E FUNZIONI (Fig.A)
1 - Coperchio riempimento acqua
2 - Pannello comandi
3 - Supporto pompa acqua
4 - Pompa acqua
5 - Cavo di alimentazione
6 - Ganciodissaggioserbatoio
acqua
7 - Serbatoioacqua
8 - Ruote
9 - Ricevitore telecomando
10 - Flaporizzontale
11 - Flapverticale
12 - Indicatore livello acqua
13 - Vano acqua superiore
14 - Impugnatura
15 - Supportoltri
16 - Filtroaria
17 - Filtroincarta
18 - Telecomando
19 - Icebox(2)
20 - Librettoistruzioni

ITALIANO
IT - 11
2 - INSTALLAZIONE
2.1 -
TRASPORTO DELL’APPARECCHIO
• Il trasporto e la movimentazione dell’apparecchio deve avvenire in
posizione verticale.
AVVERTENZA
Trasporto del raffrescatore su pavimenti delicati (es. pavimenti in
legno):
• Svuotarel’acquadaiserbatoi.
• Prestare particolarmenteattenzioneduranteglispostamenti del
raffrescatoreinquantoleruotepotrebberosegnareilpavimento.
Le ruote pur essendo in materiale rigido e piroettanti, possono
esseredanneggiatedall’usooesseresporche.
Siraccomandadivericarecheleruoterisultinopuliteeliberenel
loro movimento.
2.2 -
AVVERTENZE
Lamancataosservanzadiquantoseguepuòesserecausadidanni
all’apparecchio.
a. Installare l’apparecchio su superci
piane,stabilieapavimento.
b. Collegare l’apparecchio solo a prese di
corrente dotate di messa a terra.
c. Assicurarsichetendeoaltrioggettinon
ostruiscanoiltridiaspirazionearia.
d. Assicurarsidimanteneretrailraffresca
-
toreelegureadiacentiunadistanza
minimadi15cm(Fig.B).
e. L’apparecchio deve essere sempre posto in uso facendo attenzione
che non ci siano ostacoli per l’aspirazione e l’uscita d’aria.

PELER 6C
ITALIANO
IT - 12
f. L’apparecchionondeveessereutilizzatoinlocaliadibitialavanderia.
g. Installare l’apparecchio solo in locali asciutti.
h. Il raffrescatore non deve essere messo in funzione in presenza di ma
-
teriali, vapori o liquidi pericolosi.
i. Pulireiltridell’ariaalmenounavoltaasettimana.
2.3 - COLLEGAMENTO ELETTRICO
L’apparecchio è dotato di un cavo di alimentazione con spina.
Prima di collegare il raffrescatore assicurarsi che:
• Ivaloridellatensioneefrequenzadiali-
mentazionerispettinoquantospecicato
sui dati di targa dell’apparecchio.
• Lalineadialimentazionesiadotatadi
unefcacecollegamentoaterraesia
correttamente dimensionata per il mas-
simoassorbimentodelraffrescatore.
3 - USO DELL’APPARECCHIO
Le modalità di funzionamento dell’apparecchio possono essere selezionate
sia tramite il telecomando che dal pannello comandi.
La ricezione della funzione selezionata viene confermata dall’emissione di
un“beep”dapartedelcicalino.

A1 A2 A3 A4
B5B1
B6B2
B4B3
A6 A1
A7 A2
A8 A3
A9 A4
A5
B7
A6 A7 A8 A9
1
ITALIANO
IT - 13
3.1 - PANNELLO COMANDI E TELECOMANDO (Fig.1)
A1. TastoON/OFF
A2. TastoRaffreddatore/Umidicatore
A3. Tastomodalità
A4. Tastoilluminazione/spegnimento
display
A5. Display
A6. Tastovelocitàaria
A7. Tastooscillazione
A8. TastoON/OFF funzione ionizzante
A9. Tastotimer
B1. LEDmodalità“normale”
B2. LEDmodalità“naturale”
B3. LEDmodalità“riposo”
B4. LEDRaffreddatore/Umidicatore
B5. LED oscillazione
B6. LED modalità funzione “ionizzan-
te”
B7. Temperaturaambienterilevata

PELER 6C
ITALIANO
IT - 14
3.2 - USO DEL TELECOMANDO
Il telecomando fornito a corredo dell’ap-
parecchio è lo strumento che Vi permette
di utilizzare l’apparecchio nel modo più
comodo.
E’ uno strumento da maneggiare con
cura ed in particolare:
• Evitaredibagnarlo(nonvapulitocon
acquaolasciatoalleintemperie).
• Evitare che cada per terra o urti
violentemente.
• Evitare l’esposizione diretta ai raggi solari.
• Iltelecomandofunzionaconlatecnologiaainfrarosso.
• Durantel’usononinterporreostacolifrailtelecomandoel’apparecchio.
• Nelcasoincuinell’ambientevenganoutilizzatialtriapparecchidotatiditelecomando
(TV,gruppistereo,ecc...),sipotrebberovericaredelleinterferenze.
• Lampadeelettronicheeuorescentipossonointerferirenelletrasmissionitratele-
comandoel’apparecchio.
• Estrarrelebatteriedialimentazionenelcasodiinutilizzoprolungatodeltelecomando.
3.2.a - Inserimento delle batterie
Lebatteriedialimentazionesonocompresenellafornitura.
Perinserirecorrettamentelebatterie:
a. Slarelosportello(T1)delvanobatterie(Fig.E).
b.Inserirelebatterienell’appositovano(Fig.E).
Rispettarescrupolosamentelepolaritàindicatesulfondodelvanobatterie.
c. Richiuderecorrettamentelosportello(Fig.F).
3.2.b - Sostituzione delle batterie
Lebatterievannosostituitesepremendounodeitastinonsisenteil“beep”
di ricezione del segnale dell’apparecchio.

ITALIANO
IT - 15
Utilizzaresemprebatterienuove.
L’utilizzodibatterievecchieoditipodiversopotrebbegenerareunmalfunzio-
namento del telecomando.
Iltelecomandoutilizzaduebatteriealcalineaseccoda1,5V(tipoAAA)(Fig.E).
Unavoltascariche,lebatterievannosostituiteentrambeedeliminate
negli appositi centri di raccolta o come previsto dalle normative locali.
• Se non si utilizza il telecomando per alcune settimane o anche più, togliere
lebatterie.
Eventuali perdite delle batterie potrebbero danneggiare il telecomando.
Nonricaricareosmontarelebatterie.Nongettatelebatterienelfuoco.
Possonobruciareoesplodere.
Seilliquidodellebatteriecadesullapelleosuivestiti,lavareconcura
conacquapulita.Nonutilizzareiltelecomandoconbatteriechehanno
avuto perdite.
Iprodottichimicicontenutinellebatteriepossonoprovocarebruciature
odaltririschiperlasalute.
3.2.c - Posizione del telecomando
Tenereiltelecomandoinunaposizionedallaqualeilsegnalepuòraggiungere
ilricevitoredell’apparecchio(distanzamassimacirca6metri-conlebatterie
cariche)(Fig.D).
Lapresenzadiostacoli(mobili,tende,pareti,ecc.)trailtelecomandoel’ap-
parecchio riduce la portata del telecomando.
3.3 - UTILIZZO DELL’ APPARECCHIO
Per utilizzare l’apparecchio operare come segue.

PELER 6C
ITALIANO
IT - 16
3.3.a - Operazioni preliminari
• Posizionare l’apparecchio su un piano stabile, non inclinato, ad
almeno15cm.dallapareteodaqualsiasialtrooggetto,alnediga-
rantirelacorrettacircolazionedell’aria.Collocarlosuunasupercie
resistenteall’acquaperchél’eventualefuoriuscitadiacquapotrebbe
danneggiaremobiliopavimento.
• Noncollocarel’apparecchiodirettamentesutappeti,asciugamani,
coperteoaltresuperciassorbenti.
• Inserirelaspinanellapresadicorrente;l’apparecchioemetteun
“beep”esuldisplaysivisualizzalatemperaturaambientein°C.
Primadicollegareelettricamentel’apparecchioaccertarsicheidatitarga
sianorispondentiaquellidellaretedidistribuzioneelettrica.
3.3.b - Riempimento
E’ necessario aggiungere acqua nel serbatoio (7) prima che la funzione
raffreddatore/umidicatoresiaaccesa.
L’acqua può essere aggiunta dalla parte superiore dell’apparecchio o rimuo-
vendoilserbatoio(7)dell’acqua:
- Per aggiungere acqua dalla parte superiore, aprire il coperchio di riem-
pimento(1)(g.G),versarelentamentel’acquanelserbatoio(7)quindi
richiudereilcoperchio(1).
- Perrimuovereilserbatoioacqua(7)dalcorpoapparecchio(g.H):
• premereilgancio(6)eslareilserbatoio(7);
• versarel‘acquanelserbatoio(7);
• riposizionareilserbatoio(7)nell‘apparecchio.
• Vericare il livello dell’acqua nel serbatoio (7) tramite
l’indicatoredilivello(12)(g.L).
•Nonriempireilserbatoio(7)oltreillivellomassimoindicato.
•Utilizzaresempreacquapulita.
• L’apparecchiopotrebbeprodurreunleggeroodoreol’acquanelserba-
toio(7)potrebbeessereleggermentecoloritaduranteilprimoutilizzo;
questieventisononormaliedassolutamentenonnociviperlasalute
dell’utilizzatore.

ITALIANO
IT - 17
3.4 - ISTRUZIONI DI FUNZIONAMENTO
a. Inserire la spina nella presa di corrente.
Quandol’apparecchiovieneaccesoperlaprimavoltaemetteun“beep”esiposiziona
instand-by;tuttiitastisonodisabilitatiadeccezionedeltastoON/OFF.
Lefunzionipossonoessereabilitateomodicatesiadalpannellocomandichedal
telecomando.
b. Per accendere l’apparecchio premere il tasto ON/OFF(A1)(sisenteun
beep).
c. Per spegnere l’apparecchio premere di nuovo il tasto ON/OFF(A1)(si
senteunbeep).
Adognipressionediuntastosisenteunbeep.
d. Sollevaremanualmenteiaporizzontalicomedesiderato.
3.4.a - Tasto ON/OFF (A1)
Inmodalitàstand-bytuttiitastisonodisabilitati,adeccezionedeltastoON/OFF.
Premerloperaccenderel’apparecchio;sivisualizzalatemperaturaambiente(in°C).
Lavelocitàinizialedell’ariaèimpostatadidefaultsu“bassa”elamodalitàdifun-
zionamentosu“normale”;l’icona(B1)siaccende.Tuttelefunzionisonodisponibili.
3.4.b - Tasto velocità aria (A6)
Lavelocitàdell’ariapuòesserecambiatasecondoquestasequenza:
Bassa ---
>
Media ---
>
Alta ---
>
Bassa ---
> ...
- Asecondadellavelocitàimpostatasuldisplaysivisualizza:
01(bassa)
02(media)
03(alta)
- Dopo qualche secondo sul display torna a visualizzarsi la temperature
ambienterilevata.

PELER 6C
h
ITALIANO
IT - 18
3.4.c - Tasto oscillazione (A7)
Quando l’apparecchio è acceso, premere questo tasto per avviare o spegnere la
funzionedidirezionamentodell’ariatramiteiapverticali(11)(destraesinistra).
Premerlounavoltaperavviarelafunzione;ilLEDoscillazione(B5)siaccende.
Premerlo una seconda volta per spegnere la funzione.
3.4.d - Tasto modalità (A3)
All’accensionelamodalitàimpostatadidefaultèquella“normale”.
Premendoquestotastolamodalitàcambiasecondoquestasequenza:
Normale ---> Naturale ---> Riposo ---> Normale ---> Naturale ---> ..
IlLEDmodalitàcambiadiconseguenza(lemodalità“naturale”(B1)e“riposo”
(B2)nonsonodisponibiliallavelocità“silenzioso”(B3)).
Le diverse modalità funzionano come segue:
1 - Normale(B1):l’apparecchiofunzionacostantementeallavelocità
impostata.
2 - Naturale(B2):
l’apparecchio funziona variando in continuo la velo-
cità dell’aria.
3 - Riposo(B3):
l’apparecchio funziona variando in continuo la velo-
cità dell’aria
,riducendolanoalvaloreminimo.
3.4.e - Tasto timer (A9)
Quando l’apparecchio è acceso, premendo
questotastoiltimercambiasecondoquesta
sequenza:
00h (spento) ---> 01h ---> 02h --->
03h ---> .. 12h ---> 00h (spento) ---> ..
3.4.f - Tasto “LIGHT” (A4)
Quando l’apparecchio è acceso, premendo questo tasto si spegne il display
(l’apparecchiocontinuaafunzionare).
Premere di nuovo questo tasto per riaccendere il display.

ITALIANO
IT - 19
3.4.g - Tasto funzione “ionizzante” (A8)
Quando l’apparecchio è acceso, premendo questo tasto si attiva la funzione
ionizzanteeilLED(B5)siaccende,lafunzionerendel’ariaambientepiùfresca.
Premere di nuovo il tasto per disattivare la funzione.
3.4.h - Tasto rareddatore/umidicatore (A2)
Quando l’apparecchio è acceso, premere questo tasto per avviare o spegnere
lafunzioneraffreddatore/umidicatore.
Premerlounavoltaperavviarelafunzione;lapompa(4)edilLEDraffreddatore/
umidicatore(B4)siaccendono.
Premerlo una seconda volta per spegnere la funzione.
3.4.i - Funzione mancanza acqua
Quandolafunzioneraffreddatoreèaccesa(LED“B4”acceso)sel’apparecchio
rilevamancanzadiacquaper5-10secondiconsecutiviemetteun“beep“,illed
(B4)lampeggia,lapompa(4)smettedifunzionareelafunzionesidisattiva.
3.4.l - Utilizzo dei contenitori Ice box (19)
Indotazioneconl’apparecchiosonofornitidue“Icebox”(19)chepossonoessere
utilizzati per raffrescare l’aria emessa dall’apparecchio.
L’utilizzodellafunzione“raffreddatore”conun“Icebox”(19)ghiacciatoposizio-
natonelserbatoioacqua,permettediridurrerapidamentelatemperaturadell’aria
emessadall’apparecchiodicirca3°C.
Per utilizzare questa funzione:
a. Posizionaregli“Icebox”nelcongelatoreedattenderechesianoghiacciati.
b. Posizionareun“Icebox”ghiacciatonelserbatoioacqua(7)onelvanoacqua
superiore(g.M).
c. Versareacqua(preferibilmentefredda)nelserbatoioonelvanoacquasu-
periore senza superare il livello “MAX”indicato.
d. Avviarel’apparecchioeselezionarelafunzionepremendoiltasto(A2);illed
(B4)siaccende.
Persfruttarealmassimolafunzione,sostituire“Icebox”conquellonelcongelatore
quando lo stesso non è più ghiacciato.

PELER 6C
ITALIANO
IT - 20
4 - MANUTENZIONE E PULIZIA
Primadiprocedereadunqualsiasiinter-
ventodimanutenzioneepuliziaaccer-
tarsi sempre di aver staccato la spina di
alimentazionedallapresadell’impianto.
Nonutilizzareacquaperpulirelepartiinternedell’apparecchio;
rischiodiprovocarescosseelettriche.
4.1 - PULIZIA
4.1.a - Pulizia dell’apparecchio e del telecomando
a. Utilizzareunpannoasciuttoperpulirel’apparecchioeiltelecomando.
b. E’possibileutilizzareunpannoinumiditoconacquafreddaperpulirel’ap-
parecchio se questo è molto sporco.
Nonutilizzareunpannotrattatochimicamenteoantistaticoperpulire
l’apparecchio.
Nonutilizzare,benzina,solvente,pastaperlucidare,osolventisimilari.
Questiprodottipotrebberoprovocarelarotturaoladeformazionedella
supercieinplastica.
4.1.b - Pulizia ltri
Operare come segue:
a. Conuncacciaviteastella(nonfornitoacorredo)rimuovereleviti(22)(g.N).
b. Rimuovereilsupportoltri(15)dalcorpoapparecchio(g.O).
c. Slaredalsupporto(15)illtroincarta(17)eilltroaria(16).
d. Pulireentrambiiltri(16e17)conacquaedetergenteneutro.Sciacquare
beneiltriconacquapulita.
e. Senecessarioutilizzareunpennelloasetolemorbideperpulireafondoilltro
aria(16).
f. Farasciugareiltriquindiriposizionarlinelsupporto(15).

10
ITALIANO
IT - 21
g. Fissareilsupporto(15)conentrambeleviti(22)(g.P).
Nonusarel’apparecchiosenzailtricorrettamenteposizionatiosegli
stessi sono danneggiati o consumati.
4.1.c - Pulizia serbatoio
Se non si intende utilizzare l’apparecchio per un periodo di tempo prolungato:
a. Scollegare la spina dalla presa di corrente.
b. Premereilgancio(6)eslareilserbatoio(7)(g.Q).
c. Sganciareilsupportopompa(3)edestrarrelapompa(4)dalserbatoio(7)
(g.R).
d. Rimuoverecompletamenteilserbatoio(7)dalcorpoapparecchio.
e. Pulireedasciugareaccuratamenteilserbatoio(7).
f. Riposizionareilserbatoionelcorpoapparecchioeassicurarsichelapompa
(4)eilrelativosupporto(3)sianocorrettamenteposizionati.
g. Richiudereilserbatoionelcorpoapparecchio.
h. Sollevareilcoperchio(1)quindipulireeasciugareilvanoacqua.
5 - PRIMA DI RIPORRE L’APPARECCHIO A FINE
STAGIONE
• Pulireiltriseguendoleistruzionifor-
nite.
• Assicurarsiquindichesianoasciuttie
vericare che il serbatoio dell’acqua
non contenga acqua residua.
• Richiuderemanualmenteiaporizzon-
tali(10).
• Riporre l’apparecchio nella sua con-
fezione originale e conservarlo in un
luogo fresco e asciutto.

PELER 6C
ITALIANO
IT - 22
6 - SMALTIMENTO
Ilsimbolosuilprodottoosullaconfezioneindicacheilprodottonondeve
essereconsideratocomeunnormaleriutodomestico,madeveessere
portato nel punto di raccolta appropriato per il riciclaggio di apparecchiature
elettriche ed elettroniche. Provvedendo a smaltire questo prodotto i n
modo appropriato, si contribuisce a evitare potenziali conseguenze
negativeperl’ambienteeperlasalute,chepotrebberoderivaredauno
smaltimento inadeguato del prodotto.
Per informazioni più dettagliate sul riciclaggio di questo prodotto, contattare
l’ufciocomunale,ilserviziolocaledismaltimentoriutioilnegozioinqui
è stato acquistato il prodotto.
Questadisposizioneèvalidasolamenteneglistatimembridell’UE.
7 - DATI TECNICI
Peridatitecniciconsultarelatargadati(23)caratteristiciapplicatasulprodotto.

ENGLISH
EN - 1
0 - WARNINGS
0.1 - General information
First of all, we would like to thank you for choosing our appliance.
0.2 - SYMBOLS
The pictograms in the next chapter provide the necessary informa-
tion for correct, safe use of the machine in a rapid, unmistakable
way.
Service
Refers to situations in which you should inform the SERVICE
department in the company:
CUSTOMER TECHNICAL SERVICE
Index
Paragraphs marked with this symbol contain very important
information and recommendations, particularly as regards
safety.
Failure to comply with them may result in:
- danger of injury to the operators
- loss of the warranty
- refusal of liability by the manufacturer.
Index
MAIN INDEX
The main index of this manual
is given on page “EN-3”
ILLUSTRATIONS
The illustrations are grouped on the initial pages of the
manual

PELER 6C
ENGLISH
EN - 2
Raised hand
Refers to actions that absolutely must not be performed.
Danger of high voltage
Signals to the personnel that the operation described could
cause electrocution if not performed according to the safety
rules.
Generic danger
It informs the personnel concerned that if the operation is not
carried out in compliance with the safety regulations, it presents
the risk of suffering physical damage.
DANGER DUE TO HEAT
It informs the personnel concerned that if the operation is not
carried out in compliance with the safety regulations, it presents
the risk of burns due to contact with components at very high
temperatures.
Do not cover
Indicates to the personnel concerned, that it is prohibited to
cover the appliance, to prevent over-heating.
ATTENTION
• Indicatesthatthisdocumentmustbereadcarefullybefore
installing and/or using the appliance.
• Indicates that the assistance personnel must handle the
appliance following the installation manual.
ATTENTION
• Indicatesthattheremaybeadditionalinformationinattached
manuals.
• Indicatesthatinformationisavailableintheusermanualor
in the installation manual.
ATTENTION
Indicates that the assistance personnel must handle the
appliance following the installation manual.

ENGLISH
EN - 3
0.3 - GENERAL WARNINGS
WHEN USING ELECTRICAL EQUIPMENT, BASIC SAFETY
PRECAUTIONS MUST ALWAYS BE FOLLOWED IN ORDER TO REDUCE
RISKS OF FIRE, ELECTRIC SHOCKS AND INJURY, INCLUDING THE
FOLLOWING:
1.
This document is restricted in use to the terms of the law and
may not be copied or transferred to third parties without the ex
-
press authorization of the manufacturer, OLIMPIA SPLENDID.
Our machines are subject to change and some parts may ap-
pear dierent from the ones shown here, without this aecting
the text of the manual in any way.
2. Read this manual carefully before performing any operation
(installation, maintenance, use) and follow the instructions
contained in each chapter.
3. Keep the manual carefully for future reference.
4. After removing the packaging, check that the appliance is in per
-
fect condition. The packaging materials must not be left within
reach of children as they can be dangerous.
0 - WARNINGS .....................................................................................1
1 - MAIN FEATURES AND FUNCTIONING ....................................10
2 - INSTALLATION ............................................................................. 11
3 - USE OF THE APPLIANCE ........................................................... 12
4 - MAINTENANCE AND CLEANING ..............................................20
5 - BEFORE STORING THE APPLIANCE
AT THE END OF THE SEASON ..................................................21
6 - DISPOSAL .....................................................................................22
7 - SPECIFICATIONS.........................................................................22
MAIN INDEX

PELER 6C
ENGLISH
EN - 4
5. THE MANUFACTURER IS NOT RESPONSIBLE FOR DAMAGES
TO PERSONS OR PROPERTY CAUSED BY FAILURE TO FOL
-
LOW THE INSTRUCTIONS IN THIS MANUAL.
6. The manufacturer reserves the right to make any changes it
deems advisable to its models, although the essential features
described in this manual remain the same.
7. Failing to comply with the instructions contained in this manual,
and using the unit with temperatures exceeding the permissible
temperature range will invalidate the warranty.
8. Routine maintenance of the lters and general external cleaning
can be done by the user as these operations are not dicult or
dangerous.
9. During assembly and at each maintenance operation, it is neces
-
sary to respect the precautions indicated in this manual and on
the labels located inside or on the appliance, as well as to take all
the precautions suggested by common sense and by the Safety
Regulations in force in the country of installation.
10. Unplug the appliance during lling and cleaning.
11. In case of replacement of parts, use only original OLIMPIA
SPLENDID parts.
12. Do not use liquid or corrosive detergents to clean the unit,
do not spray water or other liquids onto the unit, since they
could damage the plastic components or even cause electric
shocks.
13.
In case of functioning anomalies (for example: abnormal noise,
bad smell, smoke, abnormal increase in temperature, electrical
dispersions, etc.), immediately switch o the appliance and dis
-
connect the plug from the power socket.
For repair work contact solely the technical service centres au
-
thorised by the manufacturer and ask for original spare parts to be
used. Failure to do this can aect the safety of the appliance.

ENGLISH
EN - 5
14. Do not disconnect the power plug during functioning.
Fire or electrical shocks hazard.
15. Do not place heavy or hot objects on top of the appliance.
16. Before electrically connecting the appliance, make sure the plate
data correspond to those of the distribution network. The plate
(23) is located on the sides of the appliance (Fig.C).
17. Install the appliance according to the manufacturer’s instruc
-
tions. An incorrect installation can cause damage to people, ani-
mals or property for which the manufacturer accepts no respon-
sibility.
18. If the appliance’s plug is incompatible with the socket, have the
socket replaced with a suitable one by a qualied technician,
who must ascertain that the section of the socket cables is com
-
patible with the power absorbed by the appliance. We do not rec-
ommend using adaptors and/or extension cables. If they cannot
be avoided, however, they must comply with current safety reg
-
ulations and their ampacity (A) must not be below the maximum
ampacity of the appliance.
19. This appliance is not intended to be run via an external timer or
with a separate remote control system.
20. Always and only use the appliance in a vertical position.
21. Do not obstruct the air inlet and outlet grids in any manner.
22. Do not insert extraneous items in the air inlet and outlet grids as
this will create the risk of electrical shocks, re or damages to
the appliance.
23. Do not use the appliance:
- with wet or damp hands;
- barefoot.
24. Do not pull the power cable or the appliance itself to remove the
plug from the socket.

PELER 6C
ENGLISH
EN - 6
25. Do not use the unit in areas where the temperature is extremely
high or low where it may be exposed to direct sunlight.
26. Do not operate the unit near ammable liquids or in explosive
atmospheres.
27. Do not spray insecticide or ammable gasses near the appli
-
ance.
28. Always place the appliance on a stable, plane and levelled sur
-
face.
29. Leave at least 15cm of free space on both sides and behind the
appliance and leave at least 30cm of free space above it (Fig.B).
30. Do not place the appliance near a power socket.
31. The socket must be easily accessible so that the plug can be
removed easily in an emergency.
32. Do not handle the plug with wet hands.
33. Do not excessively bend, twist, pull or damage the power cord.
34. Do not run the cord under carpeting, throw rugs or runners etc.
Arrange cord away from trac areas so that it will not be tripped
over.
35. Unplug the cord when unit is not in use for an extended period of
time and/or when no one is home.
36. Do not use the appliance outdoors or on wet surfaces. Avoid
dropping liquids on the appliance. Do not use the appliance near
sinks and taps.
37. Do not immerse the appliance in water or in other liquids.
38. Change the water frequently to keep it clean.
39. This unit shall not be exposed to dripping or splashing water.

ENGLISH
EN - 7
40. Do not install the unit in a conned space, such as a bookcase
or built-in cabinet.
41.
Switch OFF and unplug the unit before lling with water.
Make sure the water is below the “MAX” water level line.
42. The unit should not be adjusted or repaired by anyone except
specialized technicians.
43. To reduce the risk of re or electric shock, do not use this
product near any other electronic device.
44. Avoid positioning the product outdoors. Do not blow air directly
towards people, especially children and elderly.
45. Make sure the plug is always completely inserted in the pow-
er socket.
46. The water level in the tank (7) must not be lower than the mini
-
mum advised level when the cooling/humidier is running.
47. After lling the tank (7) with water, neither tilt nor bump into the
appliance while moving in order to avoid water splashes.
48. If the appliance has not been used for a prolonged period of time
with water in the tank (7), disconnect the plug from the power
socket, empty and clean the tank before reusing it.
49. It is severely prohibited to remove or install the air lter (17) or
the wet paper lter (18) during while the humidier function is
running.
50. Clean the appliance with a damp cloth; do not use abrasive prod
-
ucts or materials. See the appropriate paragraph for the lters
cleaning.
51. The most common cause of overheating is dust or lint deposit in
the appliance. Regularly remove these accumulations by discon
-
necting the appliance from the power socket and vacuuming the
grids.

PELER 6C
ENGLISH
EN - 8
52. Do not use the appliance in environments subject to signicant
temperature changes as condensation could form inside the ap
-
pliance itself.
53. Install the appliance at least 2 meters from other electronic de
-
vices (TV, radio, computer, dvd player, etc.) in order to avoid dis-
turbances.
54. Do not use the appliance if insecticide gas has just been sprayed
in the room or in the presence of burning incenses, chemical
vapours or oily residues.
55. Do not use the appliance if the lters are not positioned correct
-
ly.
56. Disassembly, repair or reconversion performed by an unauthor
-
ized person could cause heavy damages and will cancel the
manufacturer warranty.
57. Do not use the appliance in case of malfunctioning or faults, if
the cord or plug are damaged, or if it has been dropped or dam
-
aged in any manner. Turn the appliance o, disconnect the plug
from the socket and let it be checked by professionally qualied
personnel.
58. Neither disassemble nor modify the appliance.
59. Repairing the appliance by yourself is extremely dangerous.
60. If you no longer wish to use this appliance, it must be made in
-
operative by cutting the power supply cable after removing the
plug from the power socket. Hazardous parts of the appliance
must be rendered harmless, especially as there is a risk of chil
-
dren playing with it.

ENGLISH
EN - 9
0.4 - PROPER USE
• The appliance must only be used to refresh, cool down and humid-
ify, with the single purpose of making the temperature in the room
comfortable.
• This appliance is only intended for a domestic use or similar.
• An improper use of the appliance with possible damages caused
to people, things or animals releases OLIMPIA SPLENDID from any
responsibility.
0.5 - HAZARDOUS ZONES
• The appliance must not be installed in places with inammable gas-
es, explosive gases or excess humidity (laundries, greenhouses,
etc.), or in places with other machines that generate a strong heat
source, in proximity of a sources of salt water or sulphurous water.
• DO NOT use gas, gasoline or other inammable liquids near the
appliance.
• Only use supplied components. The use of non-standard parts may
cause water leaks, electric shocks, res and injuries or damages to
things.
This product must be used exclusively according to
the specications indicated in this manual. Use dierent
to that specied, could cause serious injuries.
THE MANUFACTURER IS NOT LIABLE FOR INJURY/
DAMAGE TO PERSONS/OBJECTS DERIVING FROM
FAILURE TO COMPLY WITH THE REGULATIONS
CONTAINED IN THIS MANUAL.

PELER 6C
ENGLISH
EN - 10
1 - MAIN FEATURES AND FUNCTIONING
• Coolingandhumidierfunctions;
• Timerfunction:from1to12h;
• Infraredremotecontrol;
• Levelrestorationwithwateradditionfromthetoporthroughthe
tankremoval;
• Watershortageprotection;
• Threespeedlevels:high,medium,andlow;
• Fanmode:Normal,naturalandsleep;
• Touchcontrols;
• Manualverticalowdirection,automatichorizontalowdirection;
• Easytomovethankstothepirouettingwheels;
• Ionizingfunction;
• Keyspressacousticwarning.
1.1 - A
PPEARANCE AND FUNCTIONS (Fig.A)
1 - Waterllingcover
2 - Control panel
3 - Waterpumpsupport
4 - Waterpump
5 - Power cord
6 - Watertankxinghook
7 - Watertank
8 - Wheels
9 - Remote control receiver
10 - Horizontalap
11 - Verticalap
12 - Waterlevelgauge
13 - Upper water compartment
14 - Handle
15 - Filter support
16 - Airlter
17 - Paperlter
18 - Remote control
19 - Icebox(2)
20 - Instruction booklet

ENGLISH
EN - 11
2 - INSTALLATION
2.1 -
HANDLING THE APPLIANCE
• Transport and handling of the appliance must be carried out in ver-
tical position.
CAUTION
Moving the cooler on delicate ooring (e.g. wooden ooring):
• Empty the water compartments.
• Take great care when moving the cooler as the wheels could mark
the ooring. Although the wheels are made from a rigid material
and are swivelling, they could get damaged by use or excessive
dirt.
It is recommended to check that the wheels are clean and that
they can move freely.
2.2 -
WARNINGS
A failure to respect what follows may cause damages to the
appliance.
a. Install the appliance on a at, stable
surfaceandontheoor.
b. The appliance must only be connected
to earthed power outlets.
c. Makesurethatcurtainsorotherobjects
donotobstructtheairsuctionlters.
d. Makesuretokeepaminimumdistance
of15cm(Fig.B)betweenthecoolerand
theadjacentgures.
e. The appliance must always be activated paying attention that there are
no obstacles for air suction and output.

PELER 6C
ENGLISH
EN - 12
f. Do not use the appliance in places used as laundry rooms.
g. The appliance must only be installed in dry places.
h. The cooler must not be started in presence of dangerous materials,
steams or liquids.
i. Cleantheairltersatleastonceaweek.
2.3 - ELECTRICAL CONNECTION
Theapplianceisttedwithapowercablewithplug.
Beforeconnectingthecoolerensurethat:
• Thevoltageandpowerfrequencyvalues
matchthosespeciedontheappliance
plate data.
• Thepowerlineisequippedwithanef-
fective earth connection and is correctly
sizedformaximumpowerconsumption
of the cooler.
3 - USE OF THE APPLIANCE
The appliance operating modes can be selected either using the remote
control supplied or the control panel.
Thereceptionoftheselectedfunctionisconrmedbytheemissionofa
“beep”bythebuzzer.

A1 A2 A3 A4
B5B1
B6B2
B4B3
A6 A1
A7 A2
A8 A3
A9 A4
A5
B7
A6 A7 A8 A9
1
ENGLISH
EN - 13
3.1 - CONTROL PANEL AND REMOTE CONTROL (Fig.1)
A1. ON/OFF key
A2. Cooling/Humidierkey
A3. Modekey
A4. Display light on/off button
A5. Display
A6. Air speed key
A7. Oscillation key
A8. IonizingfunctionON/OFF button
A9. Timer key
B1. “Normal”modeLED
B2. “Natural”modeLED
B3. “Rest”modeLED
B4. Cooling/HumidierLED
B5. OscillationLED
B6. “Ionizing”functionmodeLED
B7. Room temperature detected

PELER 6C
ENGLISH
EN - 14
3.2 - USE OF THE REMOTE CONTROL
The remote control supplied with the
appliance is the instrument that will allow
you to use the appliance in the most
comfortable way possible.
It should be handled with care and in
particular:
• Keepitdry(donotcleanitwithwater
orleaveitoutdoorsinbadweather).
• Avoiddroppingorbumpingit.
• Keepitoutofdirectsunlight.
• The remote control operates by means of an infrared beam.
• Avoid obstacles between the remote control and the appliance during use.
• If other appliances in the room have remote controls (TV, stereo, etc...), there may
be interference.
• Electronic and uorescent lights may interfere with the transmissions between
remote control and appliance.
• Remove the batteries in case of prolonged disuse of the remote control.
3.2.a - Insertion of batteries
The batteries are supplied with the machine.
To insert the batteries correctly:
a. Removethebatteriescompartmentcover(T1)(gureE).
b.Insertthebatteriesintotherelevantcompartment(Fig.E).
heck the polarity indicated on the bottom of the compartment .
c. Closethecompartmentcorrectly(Fig.F).
3.2.b - Replacement of batteries
Replace the batteries when you no longer hear a beep from the appliance
when pressing any key on the remote control.

ENGLISH
EN - 15
Always use new batteries.
The use of old or different batteries could generate malfunctioning of the remote
control.
Theremotecontrolusestwodryalkaline1.5Vbatteries(AAA.)(Fig.E).
When replacing batteries, replace both and dispose of the dead batteries
in the appropriate collection centres and as required by law.
• If the remote control is not used for several weeks or longer, remove the
batteries.
Any leaks from the batteries could damage the remote control.
Do not re-charge or disassemble the batteries. Do not throw the batteries
into the re.
They can burn and explode.
If the battery liquid falls onto the skin or clothes, wash well with clean
water. Do not use the remote control with batteries that have leaked.
The chemical products contained in the batteries can cause burns or
other risks to health.
3.2.c - Location of the remote control
Keeptheremotecontrolinapositionfromwhichthesignalcanreachthe
receiver of the appliance (maximum distance is approx. 6 metres - with
chargedbatteries)(gureD).
Thepresenceofobstacles(furniture,curtains,walls,etc.)betweentheremote
control and the appliance reduces the remote control range.
3.3 - USE OF THE APPLIANCE
Workasfollowsinordertousetheappliance.

PELER 6C
ENGLISH
EN - 16
3.3.a - Preliminary operations
• Place the appliance on a stable and not inclined base, at least 15
cm. from the wall or from any other object, in order to ensure the
correct air circulation. Place it on a water-resistant surface since the
possible water leakage could damage furniture or the oor.
• Do not place the appliance directly on carpets, towels, blankets or
other absorbent surfaces.
• Insert the plug in the power socket; the appliance beeps and the
display shows room temperature in °C.
Before electrically connecting the appliance, make sure the plate data
correspond to those of the electricity distribution network.
3.3.b - Filling
It is necessary to add water in the tank (7) before the cooling/humidier
function is activated.
Watercanbeaddedfromtheupperpartoftheapplianceorbyremovingthe
watertank(7):
- Toaddwaterfromtheupperpart,openthelid(1)(g.G),slowlypour
waterinthecompartment(7),thenclosethelid(1)again.
- Toremovethewatercompartment(7)fromthebodyoftheappliance
(Fig.H):
• Pressthehook(6)andslideoutthecompartment(7);
• Pourwaterintothecompartment(7);
• Replacethecompartment(7)intheappliance.
• Checkthewaterlevelinthetank(7)throughthewater
levelgauge(12)(g.L).
• Do not ll the tank (7) beyond the maximum indicated level.
• Always use clean water.
• The appliance could produce a slight smell or the water in the tank (7)
could be slightly coloured during rst use; this events are normal and
absolutely harmless for the user’s health.

ENGLISH
EN - 17
3.4 - INSTRUCTIONS FOR OPERATION
a. Insert the plug in the power socket.
When the appliance is switched on for the rst time, you will hear a beep and it will
go into stand-by. All buttons will be disabled, with the exception of the ON/OFF one.
The functions can be enabled or modied either from the control panel or from the
remote control.
b. Press th ON/OFFkey(A1)toswitchtheapplianceon(abeepisheard).
c. ON/OFFkey(A1)againtoswitchtheapplianceoff(abeeeepisheard).
A beep is heard every time a key is pressed.
d. Manuallyliftthehorizontalapsasdesired.
3.4.a - ON/OFF key (A1)
Whentheapplianceisinstand-by,allbuttonsaredisabled,withtheexception
of the ON/OFF button.
Press the ON/OFF button to turn the appliance on. The display will show room
temperature in °C.
Thedefaultinitialfanspeedis“low”andthedefaultoperatingmodeis“normal”;
therelativeicon(B1)willlightup.Allfunctionsareavailable.
3.4.b - Air speed key (A6)
Air speed can be changed according to this sequence:
Low ---
> Medium
---
> High
---
> Low
---
> ...
- According to the set speed, the display will show:
01(Low)
02(Medium)
03(High)
- After a few seconds, the display will go back to showing the room temper-
ature detected.

PELER 6C
h
ENGLISH
EN - 18
3.4.c - Oscillation key (A7)
Whentheapplianceison,pressthisbuttontostartorstoptheairorientation
functionthroughtheverticalaps(11)(rightandleft).
Pressitoncetostartthefunction;theoscillationLEDswitcheson.
Press it a second time to stop the function.
3.4.d - Mode key (A3)
Whentheapplianceisswitchedon,“normal”modeissetbydefault.
Press this key and the mode changes according to this sequence:
Normal ---> Natural ---> Sleep ---> Normal ---> Natural ---> ...
ThemodeLEDchangesaccordingly(the“natural”(B1)and“sleep”(B2)modes
arenotavailableat“silent”speed(B3)).
The various modes work as follows:
1 - Normal(B1): theapplianceworksconstantlyatthesetspeed.
2 - Natural(B2):
the appliance works changing air speed continuous-
ly.
3 - Sleep(B3):
the appliance works changing air speed continuous-
ly, reducing it down to the minimum value.
3.4.e - Timer key (A9)
Whentheapplianceison, press this key
and the timer changes according to this
sequence:
00h (off) ---> 01h ---> 02h --->
03h ---> .. 12h ---> 00h (off) ---> ..
3.4.f - “LIGHT” button (A4)
Whentheapplianceison,pressingthisbuttonwillmakethedisplaygooff(the
appliancecontinuestorun).
Press it again to make the display light up.

ENGLISH
EN - 19
3.4.g - “Ionizing” function button (A8)
Whentheapplianceison,pressingthisbuttonwillactivatetheionizingfunctionand
therelativeLED(B5)willlightup.Thisfunctionleavestheairfresherintheroom.
Press the button again to deactivate the function.
3.4.h - Cooling/humidier key (A2)
Whentheapplianceisrunning,pressthiskeytostartorstopthecooling/humid-
ierfunction.
Pressitoncetostartthefunction;thepump(4)andthecooling/humidierLED
(B4)switchon.
Press it a second time to stop the function.
3.4.i - Water shortage function
Whenthecoolingfunctionison(“B4”LEDon),iftheappliancedetectslackof
waterfor5-10consecutiveseconds,itwillsoundabeep,the(B4)LEDwillash,
thepump(4)willstopworkingandthefunctionwillbedisabled.
3.4.l - Use of ice box containers (19)
Theappliancecomeswithtwoiceboxes(19)thatcanbeusedtocooldownthe
air it emits.
Theuseofthe“cooling”functionwithanicebox(19)placedinthewatercom-
partment quickly reduces the temperature of the air emitted by the appliance by
3° C approximately.
To use this function:
a. Puttheiceboxesinthefreezerandwaituntiltheyarefrozen.
b. Placeafrozeniceboxinthewaterreservoir(7)orintheupperwatercom-
partment(g.M).
c. Pourwater(preferablycold)inthereservoirorintheupperwatercompart-
ment, without exceeding the “MAX” level indicated.
d. Starttheapplianceandselectthefunctionbypressingthebutton(A2);the
correspondingLED(B4)willlightup.
Toexploitthefunctionaswellaspossible,keepaniceboxinthefreezeranduse
ittoreplacetheoneinusewhennolongerfrozen.

PELER 6C
ENGLISH
EN - 20
4 -
MAINTENANCE AND CLEANING
Before proceeding with any maintenance
and cleaning intervention, always make
sure you disconnected the power plug
from the power socket.
Do not use water to clean the internal parts of the appliance;
risk of electric shocks.
4.1 - CLEANING
4.1.a - Cleaning the appliance and the remote control
a. Use a dry cloth to clean the appliance and the remote control.
b. It is possible to use a cloth moistened with cold water to clean the appliance
in case it’s very dirty.
Do not use a chemically treated or antistatic cloth to clean the appliance.
Do not use gasoline, solvent, polish or similar solvents.
These products could cause the breakage or deformation of the plastic
surface.
4.1.b - Cleaning the lters
Operate as follows:
a. UseaPhillipsheadscrewdriver(notincluded)toremovethescrews(22)(g.N).
b. Removetheltersupport(15)fromthebodyoftheappliance(g.O).
c. Slideoutfromthesupport(15)thepaperlter(17)andtheairlter(16).
d. Cleanbothlters(16and17)withwaterandneutralsoap.Rinsethelters
well with clean water.
e. Ifnecessary,useasoftbrushtocleantheairltermoredeeply(16).
f. Lettheltersdry,thenreplacethemintotheirsupport(15).

10
ENGLISH
EN - 21
g. Fixthesupport(15)withbothscrews(22)(g.P).
Do not use the appliance unless the lters are properly installed. Do not
use the appliance if the lters are damaged or worn
4.1.c - Cleaning the reservoir
If the appliance is not going to be used for a long period of time:
a. Unplug it from the power outlet.
b. Pressthehook(6)andslideoutthereservor(7)(g.Q).
c. Unhookthepumpsupport(3)andremovethepump(4)fromthereservoir(7)
(g.R).
d. Completelyremovethereservoir(7)fromthebodyoftheappliance.
e. Carefullycleananddrythereservoir(7).
f. Replace the reservoir in the body of the appliance and make sure the pump
(4)anditsrelativesupport(3)arepositionedcorrectly.
g. Close the reservoir in the body of the appliance.
h. Liftthelid(1),thencleananddrythewatercompartment.
5 - BEFORE STORING THE APPLIANCE AT THE END
OF THE SEASON
• Cleanthe lters according to the in-
structions.
• Then,makesurethey’redryandcheck
that the water tank doesn’t contain any
residual water.
• Manuallyclosethehorizontalaps(10).
• Place the appliance in its original
packaging and store it in a fresh and
dry environment.
6 - DISPOSAL

PELER 6C
ENGLISH
EN - 22
This symbol on the product or its packaging indicates that the appliance
cannot be treated as normal domestic trash, but must be handed in at a
collection point for recycling electric and electronic appliances.
Your contribution to the correct disposal of this product protects the
environment and the health of your fellow men.
Health and the environment are endangered by incorrect disposal.
Further information about the recycling of this product can be obtained
from your local town hall, your refuse collection service, or in the store at
which you bought the product.
This regulation is valid only in EU member states.
7 - SPECIFICATIONS
Forthetechnicaldata,consultthecharacteristicsplate(23)afxedtothe
product.

ITALIANO
FRANÇAIS
FR - 1
0 - MISES EN GARDE
0.1 - INFORMATIONS GÉNÉRALES
Tout d’abord, nous tenons à vous remercier pour avoir décidé d’ac-
corder votre préférence à un appareil de notre production.
0.2 - SYMBOLOGIE
Les pictogrammes reportés au chapitre suivant permettent de
fournir rapidement et de manière univoque les informations néces
-
saires pour une utilisation correcte de la machine dans des condi-
tions de sécurité.
Service
Indique des situations où il faut informer le SERVICE interne
de la société:
SERVICE APRES-VENTE CLIENTS
Index
Les paragraphes précédés par ce symbole contiennent des
informations et des prescriptions très importantes, notamment
pour ce qui concerne la sécurité.
Le non-respect peut comporter:
- danger pour la sécurité des opérateurs.
- perte de la garantie du contrat.
- dégagement de la responsabilité du fabricant.
Index
TABLE DES MATIÈRES GÉNÉRALE
La table des matières générales de cette notice
gure à la page « FR-3 »
ILLUSTRATIONS
Les illustrations sont regroupées dans les pages
initiales de la notice.

PELER 6C
FRANÇAIS
FR - 2
Main levée
Indique les actions qu’il ne faut absolument pas accomplir.
TENSION ÉLECTRIQUE DANGEREUSE
Signale au personnel concerné que l’opération décrite présente,
si elle n’est pas effectuée conformément aux normes de sécurité,
le risque de provoquer une décharge électrique.
DANGER GÉNÉRAL
Il signale au personnel concerné que l’opération décrite
présente, si elle n’est pas effectuée conformément aux normes
de sécurité, le risque de subir des lésions physiques.
DANGER DE TEMPÉRATURE ÉLEVÉE
Il indique au personnel concerné que l’opération décrite
présente, si elle n’est pas effectuée conformément aux normes
de sécurité, le risque de subir des brûlures par contact avec
des composants à haute température.
NE PAS COUVRIR
Il indique au personnel concerné qu’il est interdit de couvrir
l’appareil an d’en éviter la surchauffe.
ATTENTION
• Il indique que ce document doit être lu attentivement avant
d’installer et / ou d’utiliser l’appareil.
• Indique que le personnel préposé à la réparation doit gérer
l’appareil conformément à la notice d’installation.
ATTENTION
• Il signale la possibilité d’avoir des informations supplémentaires
sur les manuels joints.
• Il indique que des informations sont disponibles dans la notice
d’utilisation ou dans la notice d’installation.
ATTENTION
Indique que le personnel préposé à la réparation doit gérer
l’appareil conformément à la notice d’installation.

ITALIANO
FRANÇAIS
FR - 3
0.3 - MISES EN GARDE GÉNÉRALES
LORSQUE VOUS UTILISEZ DES APPAREILS ÉLECTRIQUES, IL EST TOUJOURS
NÉCESSAIRE DE SUIVRE SCRUPULEUSEMENT LES CONSIGNES DE
SÉCURITÉ FONDAMENTALES AFIN DE RÉDUIRE LES RISQUES D’INCENDIE ET
D’ÉLECTROCHOCS ET ACCIDENTS A PERSONNES, Y COMPRIS CE QUI SUIT :
1. Document réservé aux termes de la loi avec interdiction de
reproduction ou de transmission à tiers sans l’autorisation ex
-
presse de la société OLIMPIA SPLENDID.
Les machines peuvent subir des mises à jour et par consé
-
quent présenter des éléments diérents de ceux qui sont re-
présentés, sans que cela constitue pour autant un préjudice
pour les textes contenus dans ce manuel.
2. Lire attentivement le présent manuel avant de procéder à toute
opération (installation, entretien, utilisation) et suivre scrupu
-
leusement ce qui est décrit dans chacun des chapitres.
3. Conserver soigneusement le présent livret pour toute consul
-
tation ultérieure.
4.
Après avoir retiré l’emballage, s’assurer que l’appareil est en parfait état.
Les éléments de l’emballage ne doivent pas être laissés à portée des
enfants pour qui ils représentent des sources potentielles de danger.
0 - MISES EN GARDE .........................................................................1
1 - PRINCIPALES ..............................................................................10
2 - INSTALLATION ............................................................................. 11
3 - UTILISATION DE L’APPAREIL ...................................................12
4 - MAINTENANCE ET NETTOYAGE ..............................................20
5 - AVANT DE RANGER L’APPAREIL À LA FIN DE LA SAISON .21
6 - ÉLIMINATION ................................................................................ 22
7 - DONNÉES TECHNIQUES ............................................................ 22
TABLE DES MATIÈRES GÉNÉRALE

PELER 6C
FRANÇAIS
FR - 4
5.
LE FABRICANT DECLINE TOUTE RESPONSABILITE EN CAS DE
DOMMAGES AUX PERSONNES OU AUX BIENS DERIVANT DU
NON-RESPECT DES NORMES CONTENUES DANS LE PRESENT
LIVRET.
6. Le fabricant se réserve le droit d’apporter à tout moment des
modications à ces modèles, tout en conservant les caractéris
-
tiques essentielles décrites dans le présent manuel.
7. Les installations eectuées en dehors des instructions fournies
par le présent manuel et l’utilisation en dehors des limites de
température prescrites annulent la garantie.
8. L’entretien courant des ltres, le nettoyage général extérieur
peuvent être eectués même par l’utilisateur, étant donné que
ces opérations ne comportent pas de diculté ou de danger.
9. Durant le montage, et à chaque opération d’entretien, respecter
les précautions mentionnées dans ce manuel et sur les étiquettes
appliquées dans les appareils, et prendre toutes les précautions
suggérées par le bon sens commun et par les Réglementations
de Sécurité en vigueur dans le lieu d’installation.
10. Durant les opérations de remplissage et de nettoyage, débran
-
cher la che de la prise de courant.
11. En cas de remplacement de composants, utiliser exclusive-
ment des pièces de rechange originales OLIMPIA SPLENDID.
12. N’utilisez pas de détergents liquides ou corrosifs pour net-
toyer l’appareil, ne vaporisez pas d’eau ou d’autres liquides
sur l’unité car ils pourraient endommager les composants en
plastique et même causer des chocs électriques.
13.
En cas de défaillance (par exemple : bruit anormal, mauvaise
odeur, fumée, élévation anormale de température, fuites élec
-
triques, etc.), couper immédiatement l’alimentation électrique.
Pour toute réparation, s’adresser exclusivement aux services
après-vente agréés par le constructeur et exiger l’utilisation de
pièces de rechange originales. Le non-respect de ce qui précède
peut compromettre la sécurité de l’appareil.

ITALIANO
FRANÇAIS
FR - 5
14. Ne pas débrancher la che secteur pendant le fonctionne-
ment. Risque d’incendie ou de choc électrique.
15. Ne pas appuyer d’objets lourds ou chauds sur l’appareil.
16. Avant de connecter l’électroménager électriquement, assu
-
rez-vous que les données de la plaque signalétique corres-
pondent à celles du réseau de distribution d’énergie électrique.
La plaque (23) se trouve sur le côté de l’appareil (gure C).
17. Installer l’appareil selon les instructions du constructeur. Une
mauvaise installation peut entraîner des dommages aux per
-
sonnes, animaux et choses, au sujet desquels le constructeur
décline toute responsabilité.
18. En cas d’incompatibilité entre la prise et la che de l’appareil,
faire remplacer la prise par une autre de type approprié par du
personnel professionnellement qualié, qui devra s’assurer que
la section des câbles de la prise est appropriée à la puissance
absorbée par l’appareil. En général, l’utilisation d’adaptateurs et/
ou de rallonges est déconseillée; si leur utilisation devait être
indispensable, ils devraient être conformes aux normes de sé
-
curité en vigueur et leur capacité (A) ne doit pas être inférieure à
la capacité maximum de l’appareil.
19. Cet appareil n’est pas destiné à fonctionner au moyen d’un tem
-
porisateur externe ou avec un système de télécommande sépa-
ré.
20. Utiliser l’appareil toujours et uniquement en position verticale.
21. Ne jamais couvrir de quelque façon que ce soit les grilles res
-
pectivement d’entrée et de sortie d’air.
22. Ne pas insérer d’objets étrangers dans les grilles d’entrée et sor
-
tie an d’éviter tout risque de choc électrique, incendie ou dom-
mage à l’appareil.
23. Ne pas utiliser l’appareil:
- avec les mains mouillées ou humides;
- pieds nus.

PELER 6C
FRANÇAIS
FR - 6
24. Ne pas tirer le câble de alimentation ou l’appareil lui-même pour
débrancher la che de la prise de courant.
25. Ne pas utiliser l’appareil dans des pièces avec des températures
excessivement basses ou élevées et éviter son exposition à la
lumière directe du soleil.
26. Ne pas utiliser l’appareil près des liquides inammables ou
dans une atmosphère explosive.
27. Ne pas pulvériser d’insecticide ou de gaz inammables près de
l’appareil.
28. Toujours placer l’appareil sur une surface stable, plane et à ni
-
veau
29.
Laisser au moins 15 cm d’espace libre sur les côtés et derrière l’ap-
pareil et laisser au moins
30
cm d’espace libre au-dessus de l’appa-
reil (Fig.B).
30. Ne pas placer l’appareil près d’un prise électrique.
31. La prise de courant doit être facilement accessible de façon à
pouvoir débrancher avec facilité la che en cas d’urgence.
32. Ne pas manipuler la che les mains mouillées.
33. Ne pas plier, tordre, tirer ou endommager excessivement le cor
-
don d’alimentation.
34. Ne pas dérouler le câble sous des tapis, couvertures et car
-
pettes. Placer le câble dans des zones sans passage de façon à
éviter des trébuchements.
35. Débrancher le cordon d’alimentation quand l’unité n’est pas uti
-
lisée de façon prolongée et/ou quand personne n’est à la mai-
son.
36. Ne pas utiliser l’appareil à l’extérieur ou sur des surfaces mouil
-
lées. Éviter le déversement de liquides sur l’appareil. Ne pas uti-
liser l’appareil à proximité d’éviers ou de robinets.
37. Ne pas immerger l’appareil dans de l’eau ou autres liquides.

ITALIANO
FRANÇAIS
FR - 7
38. Pour que l’appareil reste propre, changer l’eau fréquemment.
39. Ne pas exposer l’appareil aux gouttes ou aux jets d’eau.
40. Ne pas positionner l’appareil dans des espaces étroits comme,
par exemple, sur une étagère ou dans une armoire.
41.
Avant d’introduire l’eau, éteindre l’appareil et débrancher la
che de la prise de courant. Faire attention à ne pas dépasser
le niveau maximum indiqué par la mention « MAX ».
42. Pour toute opération de réglage ou de réparation, s’adresser ex-
clusivement au personnel spécialisé.
43. Pour réduire le risque d’incendie ou des décharges élec-
triques, ne pas utiliser le produit près d’un autre dispositif
électronique.
44.
Éviter de placer le produit en plein air. Ne pas souer de l’air direc-
tement vers les personnes, notamment vers les enfants et les per-
sonnes âgées.
45. S’assurer que la che est correctement insérée dans la prise
de courant.
46. Le niveau de l’eau dans le réservoir (7) ne doit pas être inférieur
au niveau minimal conseillé quand la fonction refroidisseur/hu
-
midicateur est active.
47.
Après avoir rempli le réservoir (7) avec l’eau, ne pas incliner ni heur-
ter l’appareil durant les déplacements pour éviter des jets d’eau.
48.
Si l’appareil n’est pas utilisé pendant une période de temps prolon-
gée avec l’eau dans le réservoir (7), débrancher la che de la prise
de courant, vider et nettoyer le réservoir avant de le réutiliser.
49. Il est sévèrement interdit d’enlever ou d’installer le ltre à air (17)
ou le ltre en papier mouillé (18) durant le fonctionnement en
tant qu’humidicateur.
50.
Nettoyer l’appareil à l’aide d’un chion humide ; ne pas utiliser pro-
duits ou matériaux abrasifs. Pour nettoyer les ltres voir le paragraphe
approprié.

PELER 6C
FRANÇAIS
FR - 8
51. La cause la plus fréquente de surchaue est le dépôt de pous-
sière ou de peluches dans l’appareil. Éliminer régulièrement ces
accumulations en débranchant l’appareil de la prise électrique et
en aspirant les grilles.
52. Ne pas utiliser l’appareil dans des environnements avec des
écarts de température considérables car la condensation pour
-
rait se former à l’intérieur de l’appareil lui-même.
53. Installer le dispositif à au moins 2 mètres des autres appareils
électroniques (téléviseur, radio, ordinateur, lecteur DVD, etc.)
pour éviter les interférences.
54. Ne pas utiliser l’appareil aussitôt après la pulvérisation de l’in
-
secticide à gaz ou en présence d’encens qui brûlent, de vapeurs
chimiques ou de résidus huileux.
55. Ne pas utiliser l’appareil sans les ltres correctement position
-
nés.
56. Le démontage, la réparation ou la reconversion par une per
-
sonne non autorisée pourrait comporter des dommages graves
et entraîner l’annulation de la garantie du fabricant.
57. Ne pas utiliser l’appareil en cas de panne ou de dysfonctionne
-
ment, si le câble ou la che est endommagé ou si l’appareil est
tombé ou endommagé de quelque façon que ce soit. Éteindre
l’appareil, débrancher la che de la prise de courant et la faire
vérier par du personnel qualié.
58. Ne pas démonter ni modier abusivement l’appareil.
59. Réparer l’appareil tout seul est extrêmement dangereux.
60. Si vous décidiez de ne plus utiliser un appareil de ce type, il
est recommandé de le mettre hors d’usage en coupant le câble
d’alimentation, après avoir dé-branché la che de la prise de
courant. Il est en outre recommander de rendre inoensives les
éléments de l’appareil susceptibles de constituer un danger, no
-
tamment pour les enfants, qui pourraient se servir de l’appareil
hors d’usage pour jouer.

ITALIANO
FRANÇAIS
FR - 9
0.4 - UTILISATION PRÉVUE
• L’appareil doit être utilisé exclusivement pour rafraichir, refroidir
et humidier, dans le seul but de rendre la température ambiante
agréable.
• Cet appareil est conçu UNIQUEMENT pour une utilisation domes-
tique ou semblable.
• Un usage impropre de l’appareil avec d’éventuels dommages cau-
sés aux personnes, biens ou animaux déchargent OLIMPIA SPLEN-
DID de toute responsabilité.
0.5 - ZONES À RISQUE
• L’appareil ne doit pas être installé dans des lieux avec présence de
gaz inammables, gaz explosifs ou encore dans des espaces très
humides (laveries, serres, etc.) ou dans des pièces où d’autres ma-
chines qui génèrent une forte source de chaleur, à proximité d’une
source d’eau salée ou sulfureuse.
• NE PAS utiliser de gaz, d’essence ou d’autres liquides inam-
mables à proximité de l’appareil.
• Utilisez uniquement les composants fournis. L’utilisation de pièces
non d’origine peut entraîner des fuites d’eau, des électrochocs, des
incendies, des lésions corporelles ou des dommages matériels.
N’utilisez ce produit que conformément aux
spécications indiquées dans cette notice. Toute
utilisation autre que celle spéciée risque d’entraîner
de graves lésions.
LE FABRICANT N’ASSUME AUCUNE RESPONSABILITÉ
EN CAS DE DOMMAGES À DES PERSONNES OU
À DES BIENS DUES A LA NON-OBSERVATION DES
CONSIGNES CONTENUES DANS CETTE NOTICE.

PELER 6C
FRANÇAIS
FR - 10
1 - PRINCIPALES CARACTÉRISTIQUES ET
FONCTIONNEMENT
• Fonction refroidisseur et humidicateur;
• Fonction minuteur: de 1 à 12h;
• Télécommande à infrarouges;
• Rétablissement du niveau en ajoutant de l’eau du haut ou en
enlevant le réservoir;
• Fonction de protection contre le manque d’eau;
• Trois niveaux de vitesse : élevée, moyenne et basse;
• Mode ventilateur : Normal, naturel et repos;
• Commandes tactiles;
• Direction du ux vertical manuel, direction du ux horizontal auto-
matique;
• Facile à déplacer grâce aux roues pivotantes;
• Fonction ionisante;
• Bip acoustique de pression des touches.
1.1 -
SCHÉMAS ET FONCTIONS (Fig.A)
1 - Couvercle remplissage d’eau
2 - Panneau de commande
3 - Support de la pompe à eau
4 - Pompe à eau
5 - Câble d’alimentation
6 - Crochet de xation du réservoir
d’eau
7 - Réservoir à eau
8 - Roues
9 - Récepteur de télécommande
10 - Déecteur horizontal
11 - Déecteur vertical
12 - auge du niveau d’eau
13 - Compartiment d’eau supérieur
14 - Poignée
15 - Support de ltres
16 - Filtre à air
17 - Filtre en papier
18 - Télécommande
19 - Bac à glace (2)
20 - Notice d’instructions

ITALIANO
FRANÇAIS
FR - 11
2 - INSTALLATION
2.1 -
TRANSPORT DE L’APPAREIL
• Le transport et la manutention de l’appareil doivent être eectués en
position verticale.
RECOMMANDATION
Déplacement du refroidisseur sur sols délicats (ex. planchers en
bois):
• Viderl’eaudesréservoirs.
• Faire très attentionlorsdesdéplacementsdurefroidisseur, car
lesroulettespourraientrayerlesol.Lesroulettes,bienqu’elles
soientréaliséesdansunmatériaurigideetqu’ellessoientpivo-
tantes,peuvents’abîmeràl’usageous’encrasser.
Ilestrecommandédevérierquelesrouessontpropresetlibres
dansleurmouvement.
2.2 -
MISES EN GARDE
Le non-respect de ce qui suit peut entraîner des dommages à
l’appareil.
a. Installer l’appareil sur une surface plane,
stable et au sol.
b. Brancher l’appareil uniquement à des
prises de courant équipées de mise à
la terre.
c. Assurez-vous que les rideaux ou les
autres objets ne colmatent pas les ltre
d’aspiration d’air .
d. Assurez-vous de d’avoir une distance
minimale de 15 cm entre le refroidisseur
et les appareils adjacents (Fig.B).
e. Mettez toujours l’appareil en marche en veillant à ce que l’aspiration et
la sortie d’air ne soient pas entravées.

PELER 6C
FRANÇAIS
FR - 12
f. L’appareil ne doit pas être utilisé dans des pièces de type buanderie.
g. Installer l’appareil uniquement dans des pièces sèches.
h. Le refroidisseur ne doit pas être mis en service en présence des ma
-
tériaux, des vapeurs ou des liquides dangereux.
i. Nettoyez les ltres à air au moins une fois par semaine.
2.3 - RACCORDEMENT ELECTRIQUE
L’appareil est livré avec un cordon d’alimentation avec prise.
Avant de connecter le refroidisseur, assurez-vous que:
• Les valeurs de la tension et la fréquence
sont conformes aux spécications rela-
tives aux données de la machine.
• La ligne d’alimentation est équipé d’une
prise de terre efcace et est correctement
dimensionné pour l’absorption maximale
du refroidisseur.
3 - UTILISATION DE L’APPAREIL
Les modes de fonctionnement de l’appareil peuvent être sélectionnés à partir
de la télécommande ou du panneau de commande.
La réception de la fonction sélectionnée est conrmée par l’émission d’un
« bip » de l’avertisseur.

A1 A2 A3 A4
B5B1
B6B2
B4B3
A6 A1
A7 A2
A8 A3
A9 A4
A5
B7
A6 A7 A8 A9
1
ITALIANO
FRANÇAIS
FR - 13
3.1 -
PANNEAU DE COMMANDES ET TÉLÉCOMMANDE (Fig.1)
A1. Touche ON/OFF
A2. Touche Refroidissement/Humidi-
cateur
A3. Touche mode
A4. Touche allumage/extinction de
l’écran
A5. Écran d’afchage
A6. Touche vitesse de l’air
A7. Touche oscillation
A8.
Touche ON/OFF de fonction ionisante
A9. Touche Minuteur
B1. Voyant mode « normal »
B2. Voyant mode « naturel »
B3. Voyant mode « repos »
B4.
LED Refroidissement/Humidicateur
B5. LED oscillation
B6.
Voyant mode de fonctionnement
«ionisant»
B7. Température ambiante détectée

PELER 6C
FRANÇAIS
FR - 14
3.2 - MODE D’EMPLOI DE LA TELECOMMANDE
La télécommande fournie avec l’appareil
est l’instrument qui vous permet d’utiliser
l’appareil de la manière la plus confor-
table possible.
C’est un instrument à manipuler avec soin
et en particulier:
• Evitez de le mouiller (il ne doit pas être
nettoyé avec de l’eau ou laissé aux
intempéries).
• Evitez qu’il ne tombe par terre ou les
chocs violents.
• Evitez l’exposition directe aux rayons de soleil.
• La télécommande fonctionne avec la technologie de l’infrarouge.
• Nepasplacerd’obstaclesentrelatélécommandeetl’appareildurantl’utilisation.
• Si dans la même pièce, on utilise d’autres appareils dotés de télécommande (TV,
chaîne stéréo, etc...), quelques interférences pourraient se vérier.
• Leslampesélectroniquesetuorescentespeuventinterférerdanslestransmissions
entrelatélécommandeetl’appareil.
• Retirer les piles d’alimentation en cas de non utilisation prolongée de la télécom-
mande.
3.2.a - Mise en place des piles
Les piles fournies sont comprises dans la fourniture.
Pour insérer les piles correctement:
a. Retirez le cache (T1) du compartiment des piles (Fig.E).
b. Insérez les piles dans le compartiment (Fig.E).
Respecterscrupuleusementlessignesdepolaritéindiquésaufondducompartiment.
c. Fermez le cache correctement (Fig.F).
3.2.b - Remplacement des piles
Les piles doivent être remplacées en absence de bip sonore lorsque les touches
sont enfoncées, indiquant l’absence de réception du signal par l’appareil.

ITALIANO
FRANÇAIS
FR - 15
Utiliseztoujoursdenouvellespiles.
L’utilisationdepilesusagéesoudifférentespeutentraînerunedéfaillancede
la télécommande.
La télécommande utilise deux piles alcalines sèches de 1,5 V (type AAA.)
(Fig.E).
Unfoisdéchargées,touteslespilesdoiventêtreremplacéesenmême
tempsetjetéesauxpointsderécolteprévusàceteffetouconformément
auxnormeslocalesenvigueur.
• Si vous n’utilisez pas la télécommande pendant quelques semaines ou
plus, retirez les piles.
D’éventuelles fuites des piles risquent d’endommager la télécommande.
Ne rechargez pas ou ne démontez pas les piles. Ne jetez pas les piles
dans le feu.
Ellespeuventbrûlerouexploser.
Sileliquidedespilestombesurlapeauoulesvêtements,lavezsoi-
gneusementavecàl’eaupropre.N’utilisezpaslatélécommandeavec
despiles,siellesprésententdesfuites.
Les produitschimiquescontenusdansles pilespeuventcauserdes
brûluresoud’autresrisquespourlasanté.
3.2.c - Position de la télécommande
Tenez la télécommande dans une position à partir de laquelle le signal peut
atteindre le récepteur de l’appareil (distance maximum d’environ 6 mètres -
avec les piles chargées) (Fig.D).
La présence d’obstacles (meubles, rideaux, murs, etc.) entre la télécommande
et l’appareil réduit le rayon d’action de la télécommande.
3.3 - UTILISATION DE L’APPAREIL
Pour utiliser l’appareil, procéder comme suit.

PELER 6C
FRANÇAIS
FR - 16
3.3.a - Opérations préliminaires
• Placezl’appareilsurunplanstable,nonincliné,d’aumoins15cm.
dumuroudetoutautreobjet,and’assureruneaérationcorrecte
del’air.Placez-lesurunesurfacerésistanteàl’eau,cartoutefuite
d’eaupourraitendommagerlesmeublesoulesol.
• Neplacezpasl’appareildirectementsurdestapis,desserviettes,
descouverturesoud’autressurfacesabsorbantes.
• Introduisez la che dans la prise de courant; l’appareil émet un
«bip»sonorepuislatempératureambiantes’afcheàl’écranen
degrés Celsius (°C).
Avantdeconnecterl’électroménagerélectriquement,assurez-vousque
lesdonnéesdelaplaquesignalétiquecorrespondentàcellesduréseau
dedistributiond’énergieélectrique.
3.3.b - Remplissage
Il est nécessaire d’ajouter de l’eau dans le réservoir (7) avant que la fonction
refroidisseur/humidicateur s’allume.
L’eau peut être ajoutée de la partie supérieure de l’appareil ou en enlevant
le réservoir (7) de l’eau :
- Pour ajouter de l’eau depuis la partie supérieure, ouvrir le couvercle de
remplissage (1) (g.G), verser lentement l’eau dans le réservoir (7) et
refermer le couvercle (1).
- Pour retirer le réservoir d’eau (7) du corps de l’appareil (g.H) :
• appuyer sur le crochet (6) et retirer le réservoir (7),
• verser l’eau dans le réservoir (7),
• replacer le réservoir (7) dans l’appareil.
• Vérier le niveau de l’eau dans le réservoir (7) à l’aide de
la jauge (12) (g.L).
•Nepasremplirleréservoir(7)au-delàduniveaumaximumindiqué.
•Utilisertoujoursdel’eaupropre.
• L’appareilpourraitémettreunelégèreodeuroul’eaudansleréservoir
(7)pourraitêtrelégèrementcoloréeaucoursdesapremièreutilisation;
cesévénementssontnormauxetabsolumentpasnocifspourlasanté
del’utilisateur.

ITALIANO
FRANÇAIS
FR - 17
3.4 - CONSIGNES DE FONCTIONNEMENT
a. Insérer la che dans la prise de courant.
Lorsdupremierallumagedel’appareil,celui-ciémetdeux«bips»sonoresetpasse
enmodeveille.Touteslestouchessontdésactivéesàl’exceptiondelatoucheON/
OFF.
Lesfonctionspeuventêtreactivéesoumodiéesàpartirdupanneaudecommande
et de la télécommande.
b. Pour allumer l’appareil presser la touche ON/OFF (A1) (on entend un bip
sonore).
c. Pour éteindre l’appareil presser la touche ON/OFF (A1) (on entend un
biiip sonore).
Un « bip » sonore retentit à chaque fois qu’une touche est pressée.
d. Soulever manuellement les déecteurs horizontaux comme souhaité.
3.4.a - Touche ON/OFF (A1)
En mode veille, toutes les touches sont désactivées à l’exception de la touche
ON/OFF.
Appuyer sur cette touche pour allumer l’appareil. La température ambiante s’af-
chera en degrés Celsius (°C).
Par défaut, la vitesse initiale de l’air est réglée sur « basse » et le mode de fonction-
nement sur « normal ». L’icône (B1) s’allume. Toutes les fonctions sont disponibles.
3.4.b - Touche vitesse de l’air (A6)
La vitesse de l’air peut être changée comme suit :
Basse ---
> Moyenne
---
> Élevée
---
> Basse
---
> ...
- Selon la vitesse congurée, l’écran d’afchage indiquera :
01 (Basse)
02 (Moyenne)
03 (Élevée)
- Après quelques secondes, la température ambiante détectée sera à nou-
veau afchée à l’écran.

PELER 6C
h
FRANÇAIS
FR - 18
3.4.c - Touche oscillation (A7)
Lorsque l’appareil est allumé, appuyer sur cette touche pour activer ou désactiver la
fonction d’orientation de l’air à l’aide des déecteurs verticaux (11) (droit et gauche).
La presser une fois pour mettre la fonction en marche ; la LED oscillation s’allume.
Presser une seconde fois la touche pour éteindre la fonction.
3.4.d - Touche mode (A3)
Au moment de l’allumage le mode programmé par défaut est le mode « normal ».
En pressant cette touche le mode change comme suit :
Normal ---> Naturel ---> Repos---> Normal ---> Naturel ---> ...
Le mode LED change, par conséquent, (les modes « naturel » (B1) et « repos »
(B2) ne sont pas disponibles à la vitesse « silencieux » (B3)).
Les différents modes fonctionnent comme suit :
1 - Normal (B1): l’appareil fonctionne constamment à la vitesse
programmée.
2 - Naturel (B2):
l’appareil fonctionne en variant constamment la
vitesse de l’air.
3 - Repos (B3):
l’appareil fonctionne en variant constamment la vitesse
de l’air, en la réduisant jusqu’à la valeur minimale.
3.4.e - Touche minuteur (A9)
Lorsque l’appareil est allumé, en pressant
cette touche le minuteur change comme
suit :
00h (éteint) ---> 01h ---> 02h --->
03h ---> .. 12h ---> 00h (éteint) ---> ..
3.4.f - Touche « LIGHT » (A4)
Lorsque l’appareil est allumé, appuyer sur cette touche pour éteindre l’écran
(l’appareil continue de fonctionner).
Appuyer à nouveau sur cette touche pour rallumer l’écran.

ITALIANO
FRANÇAIS
FR - 19
3.4.g - Touche de fonction « ionisante » (A8)
Lorsque l’appareil est allumé, appuyer sur cette touche pour activer la fonction d’io-
nisation. Le voyant (B5) s’allume. Cette fonction permet de refroidir l’air de la pièce.
Appuyer à nouveau sur cette touche pour désactiver la fonction.
3.4.h - Touche refroidisseur/humidicateur (A2)
Quand l’appareil est allumé, presser cette touche pour mettre en marche ou
éteindre la fonction refroidisseur/humidicateur.
La presser une fois pour mettre la fonction en marche; la pompe (4) et la LED
refroidisseur/humidicateur (B4) s’allument.
Presser une seconde fois pour éteindre la fonction.
3.4.i - Fonction de manque d’eau
Lorsque la fonction de refroidissement est activée (voyant « B4 » allumé), si
l’appareil détecte un manque d’eau pendant 5 à 10 secondes consécutives, il
émettra alors un « bip » sonore. Le voyant (B4) se mettra à clignoter, la pompe
(4) cessera de fonctionner et la fonction sera désactivée.
3.4.l - Utilisation de bacs à glace (19)
Deux « bacs à glace » (19) sont fournis avec l’appareil et peuvent être utilisés
pour refroidir l’air émis par l’appareil.
La fonction « refroidissement » avec « bac à glace » gelé (19) placé dans le
réservoir d’eau permet de réduire rapidement la température de l’air émis par
l’appareil d’environ 3 °C.
Pour utiliser cette fonction :
a. Placer les « bacs à glace » dans le congélateur et attendre qu’ils gèlent.
b. Placer un « bac à glace » gelé dans le réservoir d’eau (7) ou dans le com-
partiment supérieur (g.M).
c. Verser de l’eau (de préférence froide) dans le réservoir ou dans le compar-
timent supérieur sans dépasser le niveau « MAX » indiqué.
d. Démarrer l’appareil et sélectionner la fonction en appuyant sur la touche
(A2). Le voyant (B4) s’allume.
Pour tirer le meilleur parti de cette fonction, remplacer le « bac à glace » par celui
se trouvant dans le congélateur lorsque le premier n’est plus gelé.

PELER 6C
FRANÇAIS
FR - 20
4 -
MAINTENANCE ET NETTOYAGE
Avantdeprocéderàdesopérationsd’en-
tretienetdenettoyage,veillezàtoujours
débrancherlecâbled’alimentationdela
prisesystème.
Nepasutiliserd’eaupournettoyerlespartiesinternesdel’appareil;
risquedecauserdesélectrochocs.
4.1 - NETTOYAGE
4.1.a - Nettoyage de l’appareil et de la télécommande
a. Utiliser un chiffon sec pour nettoyer l’appareil et la télécommande.
b. Il est possible d’utiliser un chiffon humidié à l’eau froide pour nettoyer
l’appareil s’il est très sale.
N’utilisezpasdechiffontraitéchimiquementouantistatiquepournet-
toyerl’appareil.
N’utilisezpasd’essence,desolvant,depâteàpoliroudesolvantssi-
milaires.
Cesproduitspeuvententraînerlaruptureouladéformationdelasurface
enplastique.
4.1.b Nettoyage des ltres
Procéder comme suit :
a. Avec un tournevis cruciforme (non fourni), retirer les vis (22) (Fig.N).
b. Retirer le support de ltres (15) du corps de l’appareil (g.O).
c. Retirer le ltre en papier (17) et le ltre à air (16) du support (15).
d. Nettoyer les deux ltres (16 et 17) avec de l’eau et un produit détergent neutre.
Bien rincer les ltres avec de l’eau propre.
e. Si nécessaire, utiliser une brosse à poils doux pour nettoyer le ltre à air (16)
en profondeur.

10
ITALIANO
FRANÇAIS
FR - 21
f. Laisser sécher les ltres puis les remettre dans le support (15).
g. Fixer le support (15) avec les deux vis (22) (g.P).
Nepasutiliserl’appareilsansquelesltresdesréservoirsnesoient
correctementinstallésous’ilssontendommagésouusés.
4.1.c - Nettoyage du réservoir
Si l’appareil ne doit pas être utilisé pendant une période prolongée :
a. Débrancher la prise de courant.
b. Appuyer sur le crochet (6) et retirer le réservoir (7) (g.Q).
c. Décrocher le support de pompe (3) et retirer la pompe (4) du réservoir (7)
(g.R).
d. Retirer complètement le réservoir (7) du corps de l’appareil.
e. Nettoyer et sécher soigneusement le réservoir (7).
f. Repositionner le réservoir dans le corps de l’appareil et s’assurer que la pompe
(4) et le support correspondant (3) sont correctement positionnés.
g. Fermer le réservoir dans le corps de l’appareil.
h. Soulever le couvercle (1) puis nettoyer et sécher le compartiment à eau.
5 - AVANT DE RANGER L’APPAREIL À LA FIN DE LA
SAISON
• Nettoyer les ltres en suivant les ins-
tructions fournies.
• S’assurer ensuite qu’ils sont secs et vé-
rier que le réservoir d’eau ne contient
pas d’eau résiduelle.
• Fermer manuellement les déecteurs
horizontaux (10).
• Ranger l’appareil dans son emballage
d’origine et le conserver dans un lieu
frais et sec.

PELER 6C
FRANÇAIS
FR - 22
6 - ÉLIMINATION
Le symbole sur le produit ou sur l’emballage indique que le produit ne
doit pas être considéré comme un normal déchet ménager, mais qu’il doit
être amené sur le point de collecte approprié pour recycler les appareils
électriques et électroniques.
L’élimination de ce produit d’une manière appropriée contribue à éviter
les éventuelles conséquences négatives pour l’environnement et pour
la santé qui pourraient dériver d’une élimination inadéquate du produit.
Pour des informations plus détaillées sur le recyclage de ce produit,
contacter le bureau municipal, le service local d’élimination des déchets
ou le magasin où le produit a été acheté.
Cette disposition est uniquement valable dans les États-membres de
l’UE.
7 - DONNÉES TECHNIQUES
Pour des informations d’ordre technique, consulter la plaque signalétique
(23) apposée sur le produit.

DE - 1
DEUTSCH
0 - HINWEISE
0.1 - ALLGEMEINE HINWEISE
Wir möchten uns zunächst dafür bedanken, dass Sie sich für ein
Gerät unserer Herstellung entschieden haben.
0.2 - BILDSYMBOLE
Die im folgenden Kapitel aufgeführten Bildsymbole liefern schnell
und eindeutig Informationen zum korrekten und sicheren Gebrauch
des Gerätes.
Kundendienst
Kennzeichnet Situationen, in denen der interne KUNDENDIENST
der Firma zu benachrichtigen ist:
KUNDENDIENST
Inhaltsverzeichnis
Die Paragrafen, denen dieses Symbol vorausgeht, enthalten
sehr wichtige Informationen und Vorschriften, insbesondere
bezüglich der Sicherheit.
Die Nichtbeachtung dieser Informationen und Vorschriften kann
dazu führen, dass:
-
die Unversehrtheit des Personals an den Geräten gefährdet ist
- die vertragliche Garantie verfällt
- dieHerstellerrmajedeVerantwortungablehnt.
Inhaltsver-
zeichnis
ALLGEMEINES INHALTSVERZEICHNIS
Das allgemeine Inhaltsverzeichnis des
HandbuchsndenSieaufSeite“DE-3”
ILLUSTRATIONEN
Die Illustrationen sind auf den Anfangsseiten des Handbuchs
zusammengefasst

PELER 6C
DE - 2
DEUTSCH
Erhobene Hand
Kennzeichnet Handlungen, die absolut verboten sind.
GEFÄHRLICHE ELEKTRISCHE SPANNUNG
Zeigt dem betreffenden Personal an, dass bei der beschriebenen
Tätigkeit die Gefahr eines elektrischen Schlags besteht, wenn diese
nicht unter Beachtung der Sicherheitsvorschriften durchgeführt wird.
ALLGEMEINE GEFAHR
Weist das betroffene Personal darauf hin, dass der beschriebene
Vorgang das Risiko für körperliche Schäden (Verletzungsgefahr)
birgt, wenn er entgegen der Sicherheitsvorschriften ausgeführt wird.
GEFAHR DURCH STARKE HITZE
Weist das betroffene Personal darauf hin, dass der beschriebene
Vorgang das Risiko für Verbrennungen an heißen Komponenten
birgt, wenn er entgegen der Sicherheitsvorschriften ausgeführt wird.
NICHT BEDECKEN
Weist das betroffene Personal darauf hin, dass es verboten
ist, das Gerät wegen Überhitzungsgefahr zu bedecken.
ACHTUNG
• Weistdaraufhin,dassdiesesDokumentvorderInstallation
und/oder vor dem Gebrauch des Geräts aufmerksam gelesen
werden muss.
• Zeigtan,dassdasAssistenzpersonalbeimUmgangdesGeräts
auf die Anweisungen im Installationshandbuch zu achten hat.
ACHTUNG
• WeistaufmöglicheZusatzinformationenindenbeiliegenden
Handbüchern hin.
• Zeigt an,dassimGebrauchs-oderInstallationshandbuch
weiterer Informationen verfügbar sind.
ACHTUNG
Zeigt an, dass das Assistenzpersonal beim Umgang des Geräts
auf die Anweisungen im Installationshandbuch zu achten hat.

DE - 3
DEUTSCH
0.3 - ALLGEMEINE HINWEISE
BEIM UMGANG MIT ELEKTROGERÄTEN MÜSSEN STETS GEWISSE
GRUNDLEGENDE SICHERHEITSMASSNAHMEN BEACHTET WERDEN, UM
DIE GEFAHR VON BRAND, STROMSCHLÄGEN UND VERLETZUNGEN ZU
REDUZIEREN, DARUNTER:
1.
Laut Gesetz ist dies ein vertrauliches Dokument, daher gilt das
Verbot der Vervielfältigung oder Übermittlung an Dritte ohne
ausdrückliche Genehmigung der Firma OLIMPIA SPLENDID. An
den Geräten können technische Neuerungen vorgenommen
werden, d.h. Einzelteile können u.U. anders aussehen als auf
den Abbildungen, was jedoch die Gültigkeit der Anweisungen in
diesem Benutzerhandbuch in keiner Weise beeinträchtigt.
2. Bevor Sie mit einer Tätigkeit beginnen (Installation, Instand-
haltung, Gebrauch), lesen Sie aufmerksam das vorliegende
Benutzerhandbuch und halten Sie sich strengstens an die in
den einzelnen Kapiteln dargelegten Anweisungen.
3. Bewahren Sie das Handbuch sorgfältig auf, damit Sie es bei
Bedarf stets zur Hand haben.
4. Überprüfen Sie das Gerät nach dem Auspacken auf einwandfrei
-
en Zustand. Die Verpackungsrückstände nie in Reichweite von
Kindern lassen, da sie für diese eine Gefahrenquelle darstellen.
0 - HINWEISE .......................................................................................1
1 -
WICHTIGSTE EIGENSCHAFTEN UND FUNKTIONSWEISEN
..10
2 - INSTALLATION ............................................................................. 11
3 - GEBRAUCH DES GERÄTS .........................................................12
4 - WARTUNG UND REINIGUNG .....................................................20
5 - VOR DER EINLAGERUNG DES GERÄTES
AM ENDE DER SAISON ..............................................................21
6 - ENTSORGUNG .............................................................................22
7 - TECHNISCHE DATEN ..................................................................22
ALLGEMEINES INHALTSVERZEICHNIS

PELER 6C
DE - 4
DEUTSCH
5.
DIE HERSTELLERFIRMA ÜBERNIMMT KEINERLEI VERANTWOR-
TUNG FÜR SCHÄDEN AN PERSONEN ODER SACHEN, DIE DURCH
NICHTBEACHTUNG DER IM VORLIEGENDEN BENUTZERHAND
-
BUCH ENTHALTENEN SICHERHEITSVORSCHRIFTEN ENTSTEHEN.
6.
Die Herstellerrma behält sich das Recht vor, an ihren Modellen jederzeit
Veränderungen vorzunehmen, wobei die wesentlichen im vorliegenden Be
-
nutzerhandbuch beschriebenen Geräteeigenschaften unverändert bleiben.
7.
Installationen die nicht entsprechend den im vorliegenden Handbuch ent-
haltenen Anweisungen sowie der Einsatz unter Nichtbeachtung der vorge-
schriebenen Temperaturgrenzen, geben keinerlei Anspruch auf Garantie.
8.
Die gewöhnliche Instandhaltung der Filter und die allgemeine äußer-
liche Reinigung können auch durch den Benutzer durchgeführt wer-
den, da sie keine schwierigen oder gefährlichen Tätigkeiten erfordern.
9.
Bei der Montage oder bei anderen Wartungen, die in diesem Hand-
buch und auf den Etiketten im oder am Gerät angegebenen Vor-
sichtsmaßnahmen beachten sowie jene, die an den gesunden
Menschenverstand appellieren und die durch die geltenden Si
-
cherheitsvorschriften des Installationsortes vorgeschrieben sind.
10. Ziehen Sie beim Befüllen und Reinigen den Netzstecker aus der
Steckdose.
11. Bei der Auswechslung von Einzelteilen bitte ausschließlich
original OLIMPIA SPLENDID-Ersatzteile verwenden.
12. Zur Reinigung des Geräts weder üssige oder korrosive Rei-
niger verwenden; kein Wasser oder andere Flüssigkeiten auf
das Gerät spritzen, da diese die Kunststokomponenten be
-
schädigen oder gar Stromschläge verursachen können.
13.
Bei Funktionsstörungen (z.B.: ungewöhnliche Geräusche, unan-
genehmer Geruch, Rauch, ungewöhnliche Überhitzung, elektri-
sche Dispersion, usw.) muss das Gerät umgehend ausgeschaltet
und die Stromversorgung getrennt werden. Etwaige Reparaturen
dürfen ausschließlich von den Vertrags-Servicezentren und unter
Verwendung von Originalersatzteilen aus-geführt werden. Bei Zu
-
widerhandeln ist die Betriebssicherheit des Gerätes gefährdet.

DE - 5
DEUTSCH
14. Den Versorgungsstecker nicht während des Betriebs tren-
nen. Brand- oder Stromschlaggefahr.
15. Keine schweren oder heißen Gegenstände auf das Gerät legen.
16. Bevor das Gerät an die Stromversorgung angeschlossen wird,
sicherstellen, dass die Angaben auf dem Typenschild mit denen
des Stromnetzes übereinstimmen. Das Typenschild (23) bendet
sich auf den Seiten des Geräts (Abb.C).
17. Installieren Sie das Gerät nach den Anweisungen des Herstel
-
lers.Eine fehlerhafte Installation kann Schäden an Personen, Tie-
ren oder Gegenständen verursachen, für die der Hersteller nicht
haftbar gemacht werden kann.
18.
Inkompatibilität zwischen der Steckdose und dem Gerätestecker
lassen Sie die Steckdose von qualiziertem Fachpersonal durch
eine passende ersetzen. Dabei ist sicherzustellen, dass der Quer
-
schnitt der Steckdosenkabel geeignet für die vom Gerät aufgenom-
mene Leistung ist. Sollte sich ihre Verwendung als unverzichtbar er-
weisen, müssen sie in Übereinstimmung stehen mit den geltenden
Sicherheitsvorschriften, und ihre Stromaufnahme (Ampere) darf
nicht geringer als die maximale Stromaufnahme des Geräts sein.
19. Dieses Gerät ist nicht für den Betrieb durch eine externe Zeit-
schaltuhr oder mit einem separaten Fernbedienungssystem aus-
gelegt.
20.
Das Gerät darf ausschließlich in senkrechter Stellung betrieben
werden.
21. Die Lufteinlass- und Luftauslassgitter keinesfalls auf irgendeine
Art bedecken.
22. In die Lufteinlass- und Luftauslassgitter keine Fremdgegenstän
-
de einführen, da die Gefahr eines Stromschlags, eines Brands
oder einer Beschädigung des Geräts besteht.
23. Das Gerät nicht:
- mit nassen oder feuchten Händen;
- oder barfuß benutzen.

PELER 6C
DE - 6
DEUTSCH
24. Ziehen Sie nicht am Stromkabel oder am Gerät selbst, um den
Stecker aus der Steckdose zu ziehen.
25. Verwenden Sie das Gerät nicht in Umgebungen mit zu hohen
oder niedrigen Temperaturen und setzen Sie es nicht direkter
Sonneneinstrahlung aus.
26. Verwenden Sie das Gerät nicht in der Nähe von brennbaren
Flüssigkeiten oder in einer explosiven Atmosphäre.
27. Versprühen Sie keine Insektizide oder brennbaren Gase in die
Nähe des Gerätes.
28. Das Gerät immer auf eine stabile, ebene, nivellierte Fläche stel
-
len.
29. An den Seiten und hinter dem Gerät mindestens 15 cm und über
dem Gerät mindestens 30 cm frei lassen (Abb.B).
30. Das Gerät nicht in der Nähe einer Stromsteckdose aufstellen.
31. Die Steckdose muss leicht zugänglich sein, damit sich der Ste
-
cker im Notfall leicht ziehen lässt.
32. Berühren Sie den Stecker nicht mit feuchten Händen.
33. Biegen, verdrehen, oder ziehen Sie das Versorgungskabel nicht
zu stark und beschädigen Sie dieses nicht.
34. Das Kabel darf nicht unter Teppichen, Decken oder Führungen
abgewickelt werden. Beachten Sie, dass niemand über das aus
-
gelegte Kabel stolpern kann.
35. Trennen Sie das Kabel, wenn die Einheit für längere Zeit außer
Betrieb ist oder sich niemand im Haus bendet.
36. Das Gerät nicht im Freien oder auf nassen Flächen benutzen.
Vermeiden, dass Flüssigkeiten auf das Gerät gelangen. Das Ge
-
rät nicht in der Nähe von Wasch-/Spülbecken oder Wasserhäh-
nen benutzen.
37. Das Gerät nicht in Wasser oder andere Flüssigkeiten tauchen.

DE - 7
DEUTSCH
38.
Um das Gerät sauber zu halten, wechseln Sie das Wasser regelmäßig.
39. Setzen Sie das Gerät keinem Tropf- oder Spritzwasser aus.
40. Stellen Sie das Gerät nicht in engen Räumen auf, z. B. in einem
Regal oder in einem Schrank.
41.
Vor dem Einfüllen von Wasser schalten Sie das Gerät aus und zie-
hen Sie den Netzstecker. Achten Sie darauf, dass Sie den durch die
Aufschrift „MAX“ angegebenen Maximalwert nicht überschreiten.
42. Wenden Sie sich für Einstell- und Reparaturarbeiten nur an Fach-
personal.
43.
Um das Risiko von Bränden oder Stromschlägen zu verringern, ver-
wenden Sie das Produkt nicht in der Nähe von anderen elektronischen
Geräten.
44.
Stellen Sie das Produkt nicht im Freien auf. Richten Sie die das Gebläse
nicht direkt auf Personen, insbesondere Kinder und ältere Menschen.
45. Vergewissern Sie sich, dass der Stecker ganz in die Steckdo-
se gesteckt wurde.
46. Der Wasserstand im Tank (7) darf bei aktiver Kühler-/Luftbe
-
feuchterfunktion nicht unter dem empfohlenen Mindeststand lie-
gen.
47. Nach dem Befüllen des Tanks (7) mit Wasser darf das Gerät zur
Vermeidung von Spritzwasser während eines Umsetzens nicht
gekippt oder angestoßen werden.
48. Wenn das Gerät mit Wasser im Tank (7) längere Zeit nicht be
-
nutzt wird, ziehen Sie den Stecker aus der Steckdose, entleeren
und reinigen Sie vor einer erneuten Verwendung den Tank.
49.
Es ist strengstens verboten, den Luftlter (17) oder den nassen Papier-
lter (18) während des Betriebs als Befeuchter auszubauen oder zu
installieren.
50. Das Gerät mit einem feuchten Tuch reinigen, keine Scheuermit-
tel oder Scheuerschwämme verwenden. Zur Reinigung der Filter
siehe entsprechenden Abschnitt.

PELER 6C
DE - 8
DEUTSCH
51. Die häugste Ursache von Überhitzung ist die Ablagerung von
Staub oder Flusen im Gerät. Diese Ablagerungen regelmäßig
entfernen, dazu den Gerätestecker aus der Steckdose ziehen
und die Gitter absaugen.
52. Das Gerät nicht in Räumen mit erheblichen Temperaturschwan
-
kungen benutzen, da sich in seinem Innern Kondenswasser bil-
den könnte.
53. Das Gerät mindestens 2 Meter von anderen elektronischen Gerä
-
ten (TV, Radio, Computer, DVD-Player usw.) entfernt aufstellen,
um Störungen zu vermeiden.
54. Das Gerät nicht benutzen, wenn im Raum vor kurzem ein Insek
-
tizid gesprüht wurde oder Räucherstäbchen angezündet oder
Chemikaliendämpfe oder ölige Rückstände vorhanden sind.
55. Das Gerät nicht ohne die richtig platzierten Filter benutzen.
56. Der Ausbau, die Reparatur oder die Umstellung durch eine unbe
-
fugte Person könnte schwere Schäden herbeiführen und bewirkt
den Verfall der Herstellergarantie.
57. Das Gerät nicht benutzen, falls ein Defekt oder eine Betriebs
-
störung vorliegt, wenn Kabel oder Stecker beschädigt sind oder
wenn es fallen gelassen oder auf irgendeine Weise beschädigt
wurde. Das Gerät ausschalten, den Stecker aus der Netzsteck
-
dose ziehen und es von Fachpersonal kontrollieren lassen.
58. Das Gerät weder zerlegen, noch abändern.
59. Es ist äußerst gefährlich, das Gerät selbst zu reparieren.
60. Bei der Entsorgung des Gerätes das Netzkabel durchschneiden
und alle Teile entfernen, mit denen Kinder spielen und sich dabei
verletzen können.

DE - 9
DEUTSCH
0.4 - BESTIMMUNGS-GEMÄSSE VERWENDUNG
• Das Gerät darf ausschließlich zur Kühlung und Befeuchtung mit
dem einzigen Zweck benutzt werden, die Raumtemperatur komfor-
tabel zu gestalten.
• Dieses Gerät ist nur für den Hausgebrauch oder ähnliche Zwecke
bestimmt.
• Der unsachgemäße Gebrauch des Geräts enthebt OLIMPIA SPLEN-
DID von jeglicher Haftung für Schäden an Personen, Gegenständen
und Tieren.
0.5 - GEFAHRENBEREICHE
• Das Gerät darf nicht in Räumen mit Vorliegen von brennbaren, ex-
plosiven Gasen und in sehr feuchten Räumen eingesetzt werden
(Waschküche, Gewächshaus, usw.) oder in Räumen, in denen wei-
tere Maschine eine große Hitzequelle darstellen. Auch nicht in der
Nähe von Salz- oder Schwefelwasserquellen.
• In der Nähe des Geräts ist der Gebrauch von Gas, Benzin oder
anderen brennbaren Flüssigkeiten VERBOTEN.
• Nur die mitgelieferten Bauteile verwenden. Die Verwendung von
nicht standardmäßigen Teilen kann zu Wasserverlust, Stromschlä-
gen, Brand, Verletzungen oder Schäden an Gegenständen führen.
Das Gerät darf ausschließlich gemäß den
Anweisungen in diesem Handbuch gebraucht werden.
Jeder anderweitige Gebrauch kann zu schweren
Unfällen führen.
DER HERSTELLER ÜBERNIMMT KEINE HAFTUNG
FÜR PERSONEN- ODER SACHSCHÄDEN, DIE DURCH
NICHTBEACHTUNG DER IN DIESER ANLEITUNG
ENTHALTENEN VORSCHRIFTEN ENTSTEHEN.

PELER 6C
DE - 10
DEUTSCH
1 - WICHTIGSTE EIGENSCHAFTEN UND
FUNKTIONSWEISEN
• Kühler-undBefeuchterfunktionen;
• Timerfunktion: von1bis12h;
• Infrarot-Fernbedienung;
• NachfüllendurchZugabevonWasservonobenoderdurchAb-
nehmendesTanks;
• SchutzfunktiongegenWassermangel;
• DreiGeschwindigkeitsstufen:hoch,mittelundniedrig;
• Lüftermodus:Normal,natürlichundRuhe;
• Berührungssteuerung;
• SenkrechteLuftussrichtungvonHand,waagerechteLuftlussrich-
tungautomatisch;
• LeichtzubewegendankderLenkrollen;
• Ionisierungs-Funktion;
• AkustischesSignalbeiTastendruck.
1.1 -
SCHEMA UND FUNKTIONEN (Abb.A)
1 - Wasserfülldeckel
2 - Bedienfeld
3 - Wasserpumpenhalterung
4 - Wasserpumpe
5 - Netzkabel
6 - Haken zur Befestigung des Was-
sertanks
7 - Wassertank
8 - Lenkrollen
9 - Fernbedienungsempfänger
10 - HorizontaleLuftleitlamellen
11 - VertikaleLuftleitlamellen
12 - Wasserstandsanzeige
13 - Oberer Wasserbehälter
14 - Griff
15 - Filterhalterung
16 - Luftlter
17 - Papierlter
18 - Fernbedienung
19 - Ice-Box (2)
20 - Gebrauchsanweisung

DE - 11
DEUTSCH
2 - INSTALLATION
2.1 -
TRANSPORT DES GERÄTS
• Das Gerät muss in senkrechter Position bewegt und gehandhabt
werden.
Hinweis
Transport des Kühler auf empndlichen Fußböden (z.B.
Holzfußböden.):
• Das Wasser aus den Tanks leeren.
• Handeln Sie mit besonderer Vorsicht bei der Versetzung des Küh-
ler, da die Räder den Fußboden zeichnen könnten. Obwohl die
Räder aus steifen Material und drehbar sind, können sie durch
den Gebrauch beschädigt werden oder verschmutzt sein.
Es wird empfohlen zu überprüfen, dass die Räder sauber sind und
sich frei bewegen können.
2.2 -
HINWEISE
Werden die nachfolgenden Punkte nicht beachtet, kann das Gerät
Schaden nehmen.
a. Das Gerät auf ebenen und stabilen
OberächenundamBodenaufstellen.
b. Das Gerät nur an geerdete Steckdosen
anschließen.
c. Sicherstellen, dass Gardinen oder an
-
dereGegenständenichtdieLuftansaug-
lterverstopfen.
d. Sicherstellen, dass ein Abstand von
mindestens 15 cm (Abb. B) zwischen
dem Kühler und den umliegenden Ge
-
genständen vorhanden ist.
e. DasGerätmussimmersobenutztwerden,dassdieLuftzufuhrund
-abfuhr nicht behindert werden.

PELER 6C
DE - 12
DEUTSCH
f. Das Gerät darf nicht in einem zur Waschküche bestimmtem Raum
installiert werden.
g. Das Gerät nur in trockenen Räumen aufstellen.
h. Die Kühler darf nicht in Gegenwart von gefährlichen Materialien, Dämp
-
fen oder Flüssigkeiten in Betrieb genommen werden.
i. DieLuftltermindestenseinmalproWochereinigen.
2.3 - STROMANSCHLUSS
Das Gerät kommt mit einem Netzkabel mit Stecker.
Bevor Sie die Kühler anschließen, stellen Sie sicher, dass:
• DieWertederSpannungundFrequenz
mitdenSpezikationenfürdenMaschi-
nendaten entsprechen.
• DieStromleitungmiteinerleistungsfä-
higen Erdverbindung ausgestattet und
richtig für die maximale Absorption der
Kühler dimensioniert ist.
3 - GEBRAUCH DES GERÄTS
Die Betriebsweisen des Geräts können sowie mit der Fernsteuerung als auch
am Bedienfeld gewählt werden.
Wurde die ausgewählte Funktion empfangen, dann sendet der Summer ein
„Beep“ aus.

A1 A2 A3 A4
B5B1
B6B2
B4B3
A6 A1
A7 A2
A8 A3
A9 A4
A5
B7
A6 A7 A8 A9
1
DE - 13
DEUTSCH
3.1 - BEDIENFELD UND FERNBEDIENUNG (Abb.1)
A1. Taste ON/OFF
A2. Taste Kühler/Befeuchter
A3. Modus-Taste
A4. Taste Ein- bzw. Ausschaltung
Display-Beleuchtung
A5. Display
A6. TasteLuftgeschwindigkeit
A7. Taste Schwingfunktion
A8.
ON/OFF-Taste Ionisierungs-Funktion
A9. Timer-Taste
B1. LEDNormalmodus
B2. LEDNatürlicherModus
B3. LEDRuhemodus
B4. LEDKühler/Befeuchter
B5. LEDSchwingfunktion
B6. LEDIonisierungsmodus
B7. Gemessene Raumtemperatur

PELER 6C
DE - 14
DEUTSCH
3.2 - BENUTZUNG DER FERNBEDIENUNG
Die mit dem Kühler mitgelieferte Fern-
steuerung ist die Vorrichtung, mit der Sie
dasGerätbequembenutzenkönnen.
Gehen Sie bitte sehr sorgfältig mit der
Fernbedienung um, insbesondere:
• solltesienichtnassgemachtwerden
(nicht mit Wasser reinigen oder in den
Regen legen).
• darfsienichtfallengelassenwerden
oder heftige Stöße erleiden.
• darfsienichtdirekterSonneneinstrahlungausgesetztwerden.
• Die Fernbedienung arbeitet mit Infrarot-Technologie.
• Während der Benutzung dürfen zwischen Fernbedienung und Gerät keine Hinder-
nisse vorliegen.
• Werden in der Nähe des Kühleres auch andere Geräte mit Fernbedienung benutzt
(TV, Stereoanlagen usw.), kann es zu Interferenzen kommen.
• Elektronische Leuchten und Leuchtstofampen können die Übertragung zwischen
Fernbedienung und Gerät stören.
•
Wird die Fernbedienung längere Zeit nicht benutzt, sind die Batterien herauszunehmen.
3.2.a - Die Fernbedienung wird ohne Batterien geliefert
Die Fernsteuerung wird mit Batterien geliefert.
Zum ordnungsgemäßen Einlegen der Batterien:
a. Die Klappe (T1) des Batteriefachs abziehen (Abbildung.E).
b. Die Batterien ins Batteriefach einlegen (Abbildung.E).
Die auf dem Boden des Batteriefachs angezeigte Polarität ist strikt einzuhalten.
c. Klappe wieder korrekt schließen (Abb.F).
3.2.b - Austausch der Batterien
Die Batterien sind zu ersetzen, wenn bei Drücken einer der Tasten nicht der
„Piepton“ des Signalempfangs des Geräts zu hören ist.

DE - 15
DEUTSCH
Immer neue Batterien verwenden.
Die Verwendung alter Batterien oder Batterien verschiedenen Typs können die
Funktionsweise der Fernbedienung beeinträchtigen.
Die Fernbedienung funktioniert mit zwei 1,5V Alkalibatterien (Typ AAA) (Abb.E).
Wenn die Batterien leer sind, müssen sie jeweils paarweise ausgetauscht
und den vorgesehenen Sammelbehältern zugeführt oder gemäß den
örtlichen Vorschriften entsorgt werden.
• Wird die Fernbedienung für ein paar Wochen oder länger nicht benutzt,
nehmen Sie die Batterien heraus.
Etwaige Leckagen der Batterien können die Fernbedienung beschädigen.
Die Batterien nicht auaden oder auseinander nehmen. Die Batterien
nicht ins Feuer werfen. Sie können Feuer fangen oder explodieren.
Tropft die Batterieüssigkeit auf Haut oder Kleidung muss sie mit sau-
berem Wasser gründlich abgewaschen werden. Die Fernbedienung nicht
mit Batterien benutzen, an denen bereits Leckagen aufgetreten sind.
Die in den Batterien enthaltenen Chemikalien können Verbrennungen
oder andere Gesundheitsrisiken hervorrufen.
3.2.c - Position der Fernbedienung
Die Fernbedienung in einer Position halten, aus der das Signal den Emp-
fänger des Geräts erreicht (max. Abstand ca. 6 Meter - bei vollen Batterien)
(Abbildung D).
Durch Hindernisse (Möbel, Vorhänge, Wände, usw.) zwischen der Fernbe-
dienung und dem Gerät wird die Reichweite der Fernbedienung reduziert.
3.3 - BEDIENUNG DES GERÄTS
Um das Gerät zu benutzen, folgendermaßen vorgehen.

PELER 6C
DE - 16
DEUTSCH
3.3.a - Vorbereitende Maßnahmen
• Das Gerät auf eine stabile, nicht geneigte Oberäche stellen, die min-
destens 15 cm von der Wand oder anderen Gegenständen entfernt
ist, um eine einwandfreie Luftzirkulation zu garantieren. Auf einer
wasserfesten Oberäche aufstellen, denn eventuell austretendes
Wasser kann Möbel oder den Boden beschädigen.
• Das Gerät nicht direkt auf Teppiche, Handtücher, Decken oder andere
saugende Oberächen stellen.
• Den Stecker in die Steckdose stecken; das Gerät gibt einen „Piepton“
aus und am Display wird die Raumtemperatur in °C angezeigt.
Bevor das Gerät an die Stromversorgung angeschlossen wird, sicherstellen, dass
die Angaben auf dem Typenschild mit denen des Stromnetzes übereinstimmen.
3.3.b - Auüllen
Vor dem Einschalten der Kühler-/Befeuchterfunktion muss dem Tank (7)
Wasser zugeführt werden.
Das Wasser kann von der Oberseite des Gerätes oder durch Abnehmen des
Wassertanks (7) zugeführt werden:
- Zum Einfüllen des Wassers von oben, den Einfülldeckel (1) (Abb. G)
öffnen, das Wasser langsam in den Tank (7) gießen und den Deckel (1)
wieder schließen.
- Um den Wassertank (7) aus dem Gerät zu nehmen (Abb.H):
• DenHaken(6)drückenunddenTank(7)herausziehen;
• WasserindenTank(7)gießen;
• DenTank(7)erneutimGerätplatzieren.
• DenWasserstandimTank(7)mitderFüllstandsanzeige
(12)überprüfen(Abb.L).
• Den Tank (7) nicht über den angegebenen Maximalfüllstand hinaus
befüllen.
• Immer sauberes Wasser verwenden.
• Das Gerät kann einen leichten Geruch entwickeln oder das Wasser im
Tank (7) kann sich bei der ersten Benutzung leicht verfärben; dies ist
normal und absolut nicht gesundheitsschädlich für den Benutzer.

DE - 17
DEUTSCH
3.4 - BETRIEBSANWEISUNGEN
a. Den Stecker in die Steckdose stecken.
Beim ersten Einschalten gibt das Gerät einen „Piepton“ von sich und wechselt in den
Standby-Modus; alle Tasten bis auf die ON/OFF-Taste sind deaktiviert.
Die Funktionen können sowohl vom Bedienfeld als von der Fernbedienung aus aktiviert
bzw. geändert werden.
b. Zum Einschalten des Geräts auf die ON/OFF (A1) drücken (ein Piepton
ertönt).
c. Zum Ausschalten des Geräts erneut auf die ON/OFF (A1) drücken (ein
langer Piepton ertönt).
BeijedemDrückeneinerderTastengibtdasGeräteinenPieptonab.
d. VonHanddiewaagerechtenLamellennachBeliebenanheben.
3.4.a - ON/OFF-Taste (A1)
Im Standby-Modus sind alle Tasten außer der ON/OFF-Taste deaktiviert.
Diesedrücken,umdasGeräteinzuschalten;eswirddieRaumtemperatur(in°C)
angezeigt.
DieAnfangsgeschwindigkeit der Luft ist werksseitig auf „Niedrig“ und der Be-
triebsmodusauf„Normal“eingestellt;dasIcon(B1)leuchtetauf.AlleFunktionen
stehen zur Verfügung.
3.4.b - Taste luftgeschwindigkeit (A6)
DieLuftgeschwindigkeitkannmitfolgenderSequenzgeändertwerden:
Niedrig ---
> Mittel
---
> Hoch
---
> Niedrig
---
> ...
- Je nach der eingestellten Geschwindigkeit wird auf dem Display angezeigt:
01 (Niedrig)
02 (Mittel)
03 (Hoch)
- Nach einigen Sekunden wird auf dem Display die gemessene Raumtem-
peratur angezeigt.

PELER 6C
h
DE - 18
DEUTSCH
3.4.c - Taste schwingfunktion (A7)
Bei eingeschaltetem Gerät diese Taste drücken, um die Luftleitfunktion über
diesenkrechtenLamellen(11)zustartenoderzustoppen(rechtsundlinks)zu
starten oder zu stoppen.
DieTasteeinmaldrücken,umdieFunktionzustarten;dieLEDderSchwingfunktion
leuchtet auf. Die Taste ein zweites Mal drücken, um die Funktion abzuschalten.
3.4.d - Modus-taste (A3)
Beim Einschalten ist der Standardmodus „normal“.
DurchDrückendieserTasteändertsichderModusmitderfolgendenSequenz:
Normal ---> Natürlich ---> Ruhe ---> Normal ---> Natürlich ---> ...
DieModus-LEDändertsichentsprechend(dieModi„natürlich“(B1)und„Ruhe“
(B2) Modi sind bei der Geschwindigkeit „leise“ (B3) nicht verfügbar).
Die verschiedenen Modi funktionieren wie folgt:
1 - Normal (B1): Das Gerät arbeitet kontinuierlich mit der einge-
stellten Geschwindigkeit.
2 -
Natürlich (B2)
:
Das Gerät arbeitet mit kontinuierlicher Änderung
derLuftgeschwindigkeit.
3 - Ruhe (B3):
Das Gerät arbeitet mit kontinuierlicher Änderung
derLuftgeschwindigkeit,undreduziertdieseauf
den Minimalwert.
3.4.e - Timer-taste (A9)
Wenn das Gerät eingeschaltet ist, durch
Drücken dieser Taste ändert sich der Timer
mitderfolgendenSequenz:
00h (ausgeschaltet) ---> 01h ---> 02h --->
03h ---> .. 12h ---> 00h (ausgeschaltet)
---> ..
3.4.f - „LIGHT“-Taste (A4)
Ist das Gerät eingeschaltet, wird das Display bei Drücken dieser Taste ausge-
schaltet (das Gerät lauft weiter).
Diese Taste erneut drücken, um das Display wieder einzuschalten.

DE - 19
DEUTSCH
3.4.g - Taste „Ionisierungs“-Funktion (A8)
Bei Drücken dieser Taste bei eingeschaltetem Gerät wird die Ionisierungs-Funktion
aktiviertunddieLED(B5)leuchtetauf,dieFunktionmachtdieRaumluftfrischer.
Die Taste nochmals drücken, um die Funktion auszuschalten.
3.4.h - Taste kühler/befeuchter (A2)
Bei eingeschaltetem Gerät auf diese Taste drücken, um die Kühler/Befeuchter-
funktion zu starten oder zu stoppen.
DieTasteeinmaldrücken,umdieFunktionzustarten;diePumpe(4)unddie
LEDKühler/Befeuchter(B4)werdeneingeschaltet.
Die Taste ein zweites Mal drücken, um die Funktion abzuschalten.
3.4.i - Wassermangelfunktion
WenndieKühlfunktion eingeschaltetist(LEDB4leuchtet)unddas Gerätfür
5-10 aufeinander folgende Sekunden einen Wassermangel feststellt, ertönt
einPiepton,dieLED(B4)blinkt,diePumpe(4)stelltihrenBetriebeinunddie
Funktion schaltet sich aus.
3.4.l - Gebrauch der Ice-Box-Behälter (19)
Zur Ausstattung des Geräts gehören zwei Ice-Boxen (19), die verwendet werden
können,umdievomGerätausgegebeneLuftzukühlen.
Der Gebrauch der Funktion „Kühlung“ mit einer im Wassertank platzierten, gefro-
renen „Ice-Box“ (19) erlaubt, schnell die Temperatur der vom Gerät ausgegebenen
Luftumetwa3°Czusenken.
Um diese Funktion zu nutzen:
a.
Die „Ice-Boxen“ in den Gefrierschrank legen und warten, bis sie gefroren sind.
b. Eine „Ice-.Box“ im Wassertank (7) oder im oberen Wasserbehälter (Abb. M)
platzieren.
c. Wasser (vorzugsweise kaltes) in den Tank oder den oberen Wasserbehälter
gießen, ohne die Höchstmarke „MAX“ zu überschreiten.
d. DasGerätstartenunddurchDrückenderTaste(A2)dieFunktionwählen;
dieLED(B4)leuchtetauf.
UmdieFunktionaufsBestezunutzen,die„Ice-Box“durchdiejenigeausdem
Gefrierschrank ersetzen, wenn sie nicht mehr gefroren ist.

PELER 6C
DE - 20
DEUTSCH
4 - WARTUNG UND REINIGUNG
Vor Wartungseingriffen und Reinigungen
immer sicherstellen, dass der Stecker
aus der Steckdose gezogen wurde.
Zur Reinigung der Innenteile des Klimageräts kein Wasser verwenden;
eine erhöhte Stromschlaggefahr bewirken.
4.1 - REINIGUNG
4.1.a - Das Gerät und die Fernbedienung reinigen
a. Das Gerät und die Fernbedienung mit einem trockenen Tuch reinigen.
b. EskannaucheinmitkaltemWasserangefeuchteterLappenzurReinigung
des Geräts verwendet werden, falls dieses stark verschmutzt ist.
Zur Reinigung des Geräts keine chemisch behandelten oder antistati-
schen Lappen verwenden.
Weder Benzin, Lösungsmittel, Poliermittel, Lösungsmittel oder Ähnliches
verwenden.
Diese Produkte können Brüche oder Verformungen der Kunststoffober-
äche verursachen.
4.1.b - Reinigung der Filter
Wie folgt vorgehen:
a. MiteinemKreuzschlitzschraubenzieher(nichtimLieferumfangenthalten)die
Schrauben (22) entfernen (Abb. N).
b. Die Filterhalterung (15) aus dem Gerätekörper herausnehmen (Abb. O).
c. DenPapierlter(17)unddenLuftlter(16)ausderHalterung(15)ziehen.
d. Beide Filter (16 und 17) mit Wasser und neutralem Reinigungsmittel reinigen.
Die Filter mit sauberem Wasser gut ausspülen.
e. Fallserforderlich,einenPinselmitweichenBorstenverwenden,umdenLuftlter
(16) gründlich zu reinigen.

10
DE - 21
DEUTSCH
f. Die Filter trocknen lassen und erneut in der Halterung (15) platzieren.
g. Die Halterung (15) mit beiden Schrauben (22) befestigen (Abb. P).
Das Gerät nicht ohne die ordnungsgemäß eingesetzten Filter benutzen
oder wenn diese beschädigt oder verbraucht sind.
4.1.c - Reinigung des Tanks
Wenn man beabsichtigt, das Gerät für einen längeren Zeitraum nicht zu benutzen:
a. Den Stecker aus der Steckdose ziehen.
b Den Haken (6) drücken und den Tank (7) herausziehen (Abb. Q).
c. Die Pumpenhalterung (3) aushaken und die Pumpe (4) aus demTank (7)
herausnehmen (Abb. R).
d Den Tank (7) vollständig aus dem Gerätekörper nehmen.
e. Den Tank (7) reinigen und sorgfältig trocknen.
f. Den Tank erneut im Gerätekörper platzieren und sich vergewissern, dass die
Pumpe(4)unddieentsprechendeHalterung(3)ordnungsgemäßeingesetzt
sind.
g. Den Tank im Gerätekörper erneut verschließen.
h. Den Deckel (1) anheben und den Wasserbehälter reinigen und trocknen.
5 - VOR DER EINLAGERUNG DES GERÄTES AM
ENDE DER SAISON
• Die Filter gemäß den Anweisungen
reinigen.
• Danachsicherstellen,dasssietrocken
sind und der Wassertank kein Restwas-
ser enthält.
• DiewaagerechtenLamellenvonHand
(10) verschließen.
• DasGerätinseinerOriginalverpackung
an einem kühlen, trockenen Ort lagern.

PELER 6C
DE - 22
DEUTSCH
6 - ENTSORGUNG
Das Symbol auf dem Produkt oder auf der Verpackung zeigt an, dass
das Produkt nicht als normaler Hausmüll betrachtet werden darf, sondern
zur entsprechenden Sammelstelle für das Recycling von Elektro- und
Elektronikgeräten gebracht werden muss.
Die ordnungsgemäße Entsorgung dieses Produkts trägt dazu bei, mögliche
negative Auswirkungen auf Umwelt und Gesundheit zu vermeiden, die sich
aus einer unsachgemäßen Entsorgung des Produkts ergeben könnten.
Für weitere Informationen zum Recycling dieses Produkts wenden Sie sich
bitte an die zuständige Gemeindestelle, Ihren örtlichen Entsorgungsdienst
oder an die Verkaufsstelle, in der Sie das Produkt erworben haben.
Diese Bestimmung gilt nur in den EU-Mitgliedstaaten.
7 - TECHNISCHE DATEN
Die technischen Daten entnehmen Sie dem am Gerät angebrachten Typen-
schild (23).

ESPAÑOL
ES - 1
0 - ADVERTENCIAS
0.1 - INFORMACIONES GENERALES
En primer lugar, deseamos darle las gracias por haber elegido uno
de nuestros aparatos.
0.2 - SIMBOLOGÍA
Los pictogramas presentes en este capítulo permiten suministrar
rápidamente y de manera unívoca informaciones necesarias para
la correcta utilización de la máquina en condiciones de seguridad.
Servicio
Indica situaciones en las cuales se debe informar al SERVICE
empresarial interno:
SERVICIO ASISTENCIA TÉCNICA A CLIENTES
Índice
Los párrafos precedidos por este símbolo, contienen
informaciones y prescripciones muy importantes, particularmente
por lo que respecta a la seguridad.
La falta de observación de los mismos puede comportar:
- peligro para la incolumidad de los operadores
- pérdida de la garantía de contrato
- declinación de las responsabilidades de la empresa
constructora.
Índice
ÍNDICE GENERAL
El índice general de este manual
se proporciona en la página “ES-3”
ILUSTRACIONES
Las ilustraciones están agrupas en las páginas iniciales del
manual.

PELER 6C
ESPAÑOL
ES - 2
Mano levantada
Indica acciones que no se deben hacer en absoluto.
TENSIÓN ELÉCTRICA PELIGROSA
Señala al personal interesado que la operación descripta
presenta, si no es realizada respetando las normativas de
seguridad, el riesgo de sufrir un shock eléctrico.
PELIGRO GENÉRICO
Señala al personal implicado que, si la operación descrita no
se realiza respetando las normas de seguridad, existe el riesgo
de sufrir daños físicos.
PELIGRO DE FUERTE CALOR
Señala al personal implicado que, si la operación descrita no
se realiza respetando las normas de seguridad, existe el riesgo
de sufrir quemaduras a causa del contacto con componentes
a temperatura elevada.
NO CUBRIR
Señala al personal implicado que está prohibido cubrir el
aparato para evitar que se recaliente.
ATENCIÓN
• Señalaqueestedocumentosetienequeleerconatención
antes de instalar y/o utilizar el aparato.
• Indicaqueelpersonaldeasistenciadebemanejarelaparato
ateniéndose al manual de instalación.
ATENCIÓN
• Señalaquepuedehaberinformaciónadicionalenmanuales
adjuntos.
• Indicaqueseencuentradisponibleinformaciónenelmanual
de uso o en el manual de instalación.
ATENCIÓN
Indicaqueelpersonaldeasistenciadebemanejarelaparato
ateniéndose al manual de instalación.

ESPAÑOL
ES - 3
0.3 - ADVERTENCIAS GENERALES
CUANDO SE UTILIZAN APARATOS ELÉCTRICOS, PARA REDUCIR EL RIESGO
DE INCENDIO, DE DESCARGAS ELÉCTRICAS Y DE PROVOCAR DAÑOS A
PERSONAS, ES NECESARIO TOMAR SIEMPRE LAS MEDIDAS DE SEGURIDAD
ADECUADAS Y TENER EN CUENTA LOS SIGUIENTES CONSEJOS:
1.
Documento reservado según la ley con prohibición de reproduc-
ción o transmisión a terceros sin la expresa autorización de la
empresa OLIMPIA SPLENDID.
Las máquinas pueden ser actualizadas y por lo tanto presentar de-
talles distintos respecto a aquellos representados, sin constituir por
ello, perjuicio para los textos contenidos en el presente manual.
2. Leer atentamente el presente manual antes de realizar cual-
quier tipo de operación (instalación, mantenimiento, uso) y
abstenerse escrupulosamente a todo lo que se encuentra en
cada uno de los capítulos.
3. Conserven con cuidado este manual para consultas posterio
-
res.
4. Unavezquitadoelembalaje,veriquenqueelaparatoestéínte
-
gro, los elementos del embalaje no deben dejarse al alcance de
los niños ya que son potenciales fuentes de peligro.
0 - ADVERTENCIAS ............................................................................1
1 -
CARACTERÍSTICAS PRINCIPALES Y FUNCIONAMIENTO
... 10
2 - INSTALACIÓN ..............................................................................11
3 - USO DEL APARATO .....................................................................12
4 - MANTENIMIENTO Y LIMPIEZA ..................................................20
5 - ANTES DE GUARDAR EL APARATO
AL FINAL DE LA TEMPORADA .................................................. 21
6 - ELIMINACIÓN ...............................................................................22
7 - DATOS TÉCNICOS ......................................................................22
ÍNDICE GENERAL

PELER 6C
ESPAÑOL
ES - 4
5.
LA EMPRESA CONSTRUCTORA NO ASUME NINGUNA RESPONSABI-
LIDAD POR DAÑOS EN PERSONAS O COSAS QUE DERIVEN DE LA
FALTA DE OBSERVACIÓN DE LAS NORMAS CONTENIDAS EN EL PRE
-
SENTE MANUAL.
6.
Laempresaconstructorasereservaelderechodeaportarmodica-
ciones en cualquier momento en los propios modelos, manteniendo,
sin embargo, las características esenciales descritas en el presente
manual.
7.
Si las instalaciones son llevadas a cabo sin respetar las adverten-
cias indicadas en el presente manual y la utilización no observa
los límites de temperatura prescritos decae automáticamente la
garantía.
8. Elordinario mantenimientode losltros y la limpieza general
externa pueden ser realizadas incluso por el usuario, ya que no
comportanoperacionesdicultosasopeligrosas.
9. Durante el montaje, y en cada operación de mantenimiento, es
necesario respetar las precauciones citadas en este manual y
enlasetiquetasdentrodelosobreelaparato,ytambiénadoptar
cualquiera precaución sugerida por el sentido común y por las
Normativas de Seguridad vigentes en el lugar de instalación.
10. Durante las operaciones de llenado y limpieza, desconecte el en
-
chufe de la toma de corriente.
11. En caso de substitución de componentes utilizar exclusiva-
mente repuestos originales OLIMPIA SPLENDID.
12. No utilice detergentes líquidos o corrosivos para limpiar la
unidad ni pulverice agua u otros líquidos en ella, ya que es
-
tos productos pueden dañar los componentes de plástico o,
incluso,provocardescargaseléctricas.
13. En el caso de anomalías de funcionamiento (por ejemplo: rui-
do anormal, mal olor, fumo, aumento anómalo de la tempera-
tura,dispersioneseléctricas,etc.),apagueinmediatamenteel
aparato y desconecte el enchufe de la toma de corriente.

ESPAÑOL
ES - 5
Para eventuales reparaciones diríjanse solamente a un cen-
trodeasistenciatécnicaautorizadoporelfabricanteysoli-
citen el empleo de piezas de recambio originales. La falta de
respeto de todo lo antes expuesto puede poner en peligro la
seguridad del aparato.
14. No desconecte el enchufe de alimentación durante el funcio-
namiento.Riesgodeincendioodescargaseléctricas.
15. No apoyen objetos pesados o calientes sobre el aparato.
16.
Antesdeconectareléctricamenteelaparato,asegúresedequelos
datosdelaplacacorrespondanalosdelareddedistribucióneléc
-
trica. La placa (23) se coloca en los lados del aparato (Fig.C).
17.
Despuésinstalarlosegúnlainstruccionesdelfabricante.Unains-
talación errónea puede causar da os a personas, animales o cosas,
de las cuales el fabricante no podrá ser considerado responsable.
18. En caso de incompatibilidad entre la toma y la clavija del apa-
rato, haga sustituir la toma con otra del tipo adecuado por per-
sonal profesionalmente cualicado; éste debe vericar que la
sección de los cables de la toma sea adecuada a la potencia del
aparato. En general se desaconseja el uso de adaptadores y/o
alargaderas;sisuusoesindispensable,debenresponderalas
normas de seguridad vigentes y su capacidad de corriente (A)
no debe ser inferior a la absorción máxima del aparato.
19. Este aparato no está diseñado para funcionar con temporizado
-
res externos o con sistemas de mando a distancia separados.
20. Utilizar el aparato siempre y solamente en posición vertical.
21. No obstruya en modo alguno las rejillas de entrada y salida aire.
22. No inserta objetos extraños en las rejillas de entrada y salida
aireyaquehayelriesgodedescargaseléctricas,incendiooda
-
ños al aparato.
23. No utilice el aparato:
-conlasmanosmojadasohúmedas;
- descalzo.

PELER 6C
ESPAÑOL
ES - 6
24. No tire del cable de alimentación o del aparato para desconectar
la clavija de la toma de corriente.
25. No utilice el aparato en ambientes con temperaturas excesiva
-
mente altas o bajas, y evite su exposición a la luz directa del sol.
26.No utilice el aparato cerca de líquidos inamables o en at-
mósferas explosivas.
27. Norocíeinsecticidaogasesinamablescercadelaparato.
28. Siemprecoloqueelaparatosobreunasupercieestable,llanay
nivelada.
29. Deje por lo menos 15cm de espacio libre a los lados y detrás del
aparato deje por lo menos 30cm de espacio libre sobre el apara
-
to (Fig.B).
30. No coloque el aparato cerca de una toma de corriente.
31. La toma de corriente debe ser fácilmente accesible para poder
desconectar fácilmente la clavija en caso de emergencia.
32. No manipule la clavija con las manos mojadas.
33. Evite plegar excesivamente, retorcer, tirar o dañar el cable de
alimentación.
34. No extienda el cable debajo de alfombras, mandas o guías. No
coloque el cable en zonas de paso para evitar tropiezos.
35. Desconecte el cable cuando la unidad no se utiliza por un perío
-
do prolongado y/o cuando no hay nadie en casa.
36. Noutiliceelaparatoenelexteriorosobresuperciesmojadas.
Evite la caída de líquidos sobre el aparato. No utilice el aparato
cerca de lavamanos o grifos.
37. No sumerge el aparato en agua o en otros líquidos.
38. Para mantener el aparato limpio, cambie el agua frecuentemen
-
te.

ESPAÑOL
ES - 7
39. No exponga el aparato a gotas o chorros de agua.
40. No coloque el aparato en espacios reducidos (por ejemplo, una
ménsulaounarmario.
41.
Antes de introducir agua, apague el aparato y extraiga el en-
chufe de la toma de corriente. No supere el nivel máximo, indi-
cado por la palabra “MAX”.
42. Para cualquier operación de regulación o reparación, diríjase ex-
clusivamente a personal especializado.
43.Parareducirelriesgodeincendioodescargaseléctricas,no
utilice el aparato cerca de ningún otro dispositivo electróni
-
co.
44. Evite posicionar el producto al aire libre. No sople aire directa
-
mente hacía personas, sobre todo hacía niños y ancianos.
45. Asegúrese de que el enchufe sea siempre insertado comple-
tamente en la toma de corriente.
46.
El nivel de agua en el tanque (7) no debe ser inferior al nivel mí-
nimo aconsejado cuando la función refrigerador/humidicador
está activa.
47. Despuésdehaberllenadoeltanque(7)conagua,niinclineni
golpee el aparato durante los movimientos para evitar salpica
-
duras de agua.
48. Si el aparato no está en uso por un periodo de tiempo prolonga
-
do con agua en el tanque (7), desconecte el enchufe de la toma
de corriente, vacíe y limpie el tanque antes de volver a utilizarlo.
49. Estáseveramenteprohibidoremoveroinstalarelltrodelaire
(17)oelltrodepapelmojado(18)duranteelfuncionamiento
comohumidicador.
50.
Limpieelaparatoconunpañohúmedo;noutiliceproductosomate-
rialesabrasivos.Paralalimpiezadelosltros,verelpárrafocorres-
pondiente.

PELER 6C
ESPAÑOL
ES - 8
51. La causa más común de recalentamiento es el deposito de polvo
o pelusa en el aparato. Remover regularmente estas acumula
-
ciones desconectando el aparato de la toma de corriente y suc-
cionando las rejillas.
52. No utilice el aparato en lugares con considerables cambios de
temperatura ya que se podría formar condensación en el propio
aparato.
53. Instalar el aparato al menos a 2 metros de los otros aparatos
electrónicos (televisión, radio, computadora, reproductor de
dvd, etc.) para evitar interferencias.
54. No utilice el aparato si, en el lugar, si recientemente ha sido ro
-
ciado insecticida de gas o en presencia de di inciensos encendi-
dos, vapores químicos o residuos oleaginosos.
55.
Noutiliceelaparatosilosltrosnoestáposicionadoscorrecta-
mente.
56. El desmontaje, la reparación o la o reconversión por parte de
una persona no autorizada podría causar daños graves y anula
-
rá la garantía del fabricante.
57. No utilice el aparato en caso de avería o de malo funcionamien
-
to, si el cable o el enchufe están dañados, o si se dejó caer o si
está dañado en cualquier modo. Apagar el aparato, desconectar
el enchufe de la toma de corriente y dejarlo controlar por perso
-
nalprofesionalmentecualicado.
58. Nodesmontenimodiqueelaparato.
59. Reparar el aparato por si mismos es extremamente peligroso.
60. En caso de que se decida no utilizar más un aparato de este
tipo se recomienda hacerlo inutilizable cortando el cable de ali
-
mentación,despuésdehaberquitadoelenchufedelatomade
corriente. Se recomienda además inutilizar las partes del apara
-
to susceptibles de constituir un peligro, especialmente para los
niños que podrían usar el aparato fuera de uso para sus propios
juegos.

ESPAÑOL
ES - 9
0.4 - USO PREVISTO
• Elaparatosólopuedeutilizarsepararefrigerar,enfriaryhumidicar
con el único propósito de hacer que la temperatura en el ambiente
sea confortable.
• Esteaparatosedestinarásóloparaunutilizodomésticoosimilares.
• Unusoinapropiadodelaparatoconeventualesdañoscausadosa
personas, cosas o animales liberan OLIMPIA SPLENDID de cual-
quiera responsabilidad.
0.5 - ZONAS DE RIESGO
• Elaparatonodebeinstalarseenambientesconpresenciadegases
inamables, gases explosivos o en ambientes muy húmedos (la-
vanderías,invernaderos,etc.);tampocodebeninstalarseenlocales
donde haya otras máquinas que sean una fuerte fuente de calor ni
cerca de una fuente de agua salada o sulfurosa.
• NO utilice gas, gasolina u otros líquidos inamables cerca del
aparato.
• Sóloutilicenloscomponentessuministrados.Elusodepartesque
nosonestándarpodríacausarperdidasdeagua,descargaseléctri-
cas, incendios y lesiones o daños a cosas.
Este aparato debe utilizarse únicamente según las
especicacionesindicadasenelpresentemanual.Un
usodiferentedelespecicadopuedecomportargraves
accidentes.
EL FABRICANTE DECLINA TODA RESPONSABILIDAD
POR CUALQUIER DAÑO PERSONAL O MATERIAL
OCASIONADO POR EL INCUMPLIMIENTO DE LAS
NORMAS ILUSTRADAS EN ESTE MANUAL.

PELER 6C
ESPAÑOL
ES - 10
1 - CARACTERÍSTICAS PRINCIPALES Y
FUNCIONAMIENTO
• Funcionesrefrigeradoryhumidicador;
• Funcióntemporizador:de1a12h;
• Controlremotodeinfrarrojos;
• Recuperaciónnivelconadicióndeaguadesdearribaoatravés
delaremocióndeltanque;
• Funcióndeproteccióncontralaescasezdeagua;
• Tresnivelesdevelocidad:alta,mediaybaja;
• Modoventilador:Normal,naturalyreposo;
• Controlestáctiles;
• Direcciónujoverticalmanual,direcciónujohorizontalautomático;
• Semuevefácilmentegraciasalasruedasgiratorias;
• Funciónionizante;
• Advertenciaacústicapresióndelasteclas.
1.1 -
ESQUEMA Y FUNCIONES (Fig.A)
1 - Tapadellenadoagua
2 - Panel de mandos
3 - Soporte bomba de agua
4 - Bomba agua
5 - Cable de alimentación
6 - Ganchodejacióntanquedel
agua
7 - Tanquedelagua
8 - Ruedas
9 - Receptor mando a distancia
10 - Flaphorizontal
11 - Flapvertical
12 - Indicador nivel del agua
13 - Compartimento agua superior
14 - Mango
15 - Soporteltros
16 - Filtrodelaire
17 - Filtrodepapel
18 - Mandoadistancia
19 - Icebox(2)
20 - Manualdeinstrucciones

ESPAÑOL
ES - 11
2 - INSTALACIÓN
2.1 -
TRANSPORTE DEL APARATO
• Eltrasportoylamanipulacióndelaparatodebenocurrirenposición
vertical.
Advertencia
Transporte del refrigerador sobre pavimentos delicados (por
ejemplo, pavimentos de madera):
• Vaciarelaguadelosdepósitos.
• Presteparticularatencióndurantelosdesplazamientosdelrefri-
gerador,yaquelasruedaspodríanmarcarelpavimento.Apesar
deser pivotantes y de material rígido, las ruedaspuedenestar
suciasodeterioradasporeluso.
Serecomiendaaveriguarquelasruedasesténlimpiasyquese
muevanlibremente.
2.2 -
ADVERTENCIAS
Lafaltaderespetodeloquesiguepodríacausardañosalaparato.
a. Instaleelaparatoensuperciesplanas,
estables y en el suelo.
b. Conecteelaparatoúnicamenteatomas
de corriente conectadas a tierra.
c. Asegúresedequecortinasuotrosobje
-
tosnoobstruyanlosltrosdeaspiración
del aire.
d.
Asegúresedequesemantengaunadistan-
ciamínimade15cmentreelrefrigerador
ylasgurasadyacentes(Fig.B).
e. El aparato siempre debe colocarse en uso teniendo cuidado de que no
existan obstáculos para la aspiración y las salidas del aire.

PELER 6C
ESPAÑOL
ES - 12
f. El aparato no debe utilizarse en los lavaderos.
g. Instalar el aparato solo en locales sin humedad.
h. El refrigerador no debe encenderse en presencia de materiales, vapores
o líquidos peligrosos.
i. Limpielosltrosdelairealmenosunavezporsemana.
2.3 - CONEXIÓN ELÉCTRICA
Elaparatoestádotadodeuncabledealimentaciónconclavija.
Antesdeconectarelrefrigerador,veriqueque:
• losvaloresdetensiónyfrecuenciade
alimentación respeten lo especicado
enlaplacadelaparato;
• la línea de alimentación esté dotada
deunaecazconexiónatierrayesté
correctamente dimensionada para la
máxima absorción del refrigerador.
3 - USO DEL APARATO
Los modos de funcionamiento del aparato se pueden seleccionar tanto con
el mando a distancia suministrado como desde el panel de mandos.
Larecepcióndelafunciónseleccionadaseconrmaporlaemisióndeun
“bip” por el zumbador

A1 A2 A3 A4
B5B1
B6B2
B4B3
A6 A1
A7 A2
A8 A3
A9 A4
A5
B7
A6 A7 A8 A9
1
ESPAÑOL
ES - 13
3.1 - PANEL DE MANDOS Y MANDO A DISTANCIA (Fig.1)
A1. TeclaON/OFF
A2. TeclaRefrigerador/Humidicador
A3. Teclamodo
A4. Botón iluminación/apagado panta-
lla
A5. Pantalla
A6. Teclavelocidadaire
A7. Teclaoscilación
A8. Botón ON/OFF función ionizante
A9. Teclatemporizador
B1. LEDmodalidad“normal”
B2. LEDmodalidad“natural”
B3. LEDmodalidad“reposo”
B4. LEDRefrigerador/Humidicador
B5. LEDoscilación
B6. LEDmodalidadfunción“ionizante”
B7. Temperaturaambientedetectada

PELER 6C
ESPAÑOL
ES - 14
3.2 - USO DEL CONTROL REMOTO
El mando a distancia suministrado con
el aparato es el instrumento que le per-
mite utilizarlo de la forma más cómoda
posible.
Eselinstrumentoquehayquemanejar
con cuidado y particularmente hay que:
• Evitarmojarlo(nohayquelimpiarlo
conaguaodejarloalaintemperie).
• Evitarque secaiga al suelo o se
golpee violentamente.
• Evitarlaexposicióndirectaalosrayossolares.
• Elcontrolremotofuncionaconlatecnologíadelinfrarrojo.
•
Nocoloqueningúnobstáculoentreelmandoadistanciayelaparatodurantesuuso.
• Encasoenqueenelambienteseanutilizadosotrosaparatosdotadosdecontrol
remoto(TV,gruposestéreo,etc.),sepodríanproducirinterferencias.
• Laslámparaselectrónicasyuorescentespuedeninterferirenlatransmisiónentre
elmandoadistanciayelaparato.
• Extraerlaspilasdealimentaciónsielcontrolremotonoesutilizadodurantelargos
períodosdetiempo.
3.2.a - Inserción de las baterías
Las baterías se suministran con el aparato.
Para colocar correctamente las baterías:
a. Extraigalatapa(T1)delcompartimentodelasbaterías(Fig.E).
b.Coloquelasbateríasensucompartimento(Fig.E).
Respetarescrupulosamentelaspolaridadesindicadasenelfondodelespacio.
c. Cierrecorrectamentelatapa(Fig.F).
3.2.b - Substitución de las pilas
Las pilas deben ser reemplazadas si no oye el “bip” cuando pulsa uno de los
botones para recibir la señal del aparato.

ESPAÑOL
ES - 15
Siempreutilicebateríasnuevas.
Elusodebateríasviejasodetipodiferentepuedehacerqueelcontrolremoto
funcionemal.
Elcontrolremotoutilizadosbateríasalcalinasensecode1,5V(tipoAAA.)
(Fig.E).
Unavezdescargadas,ambaspilastienenquesersubstituidasyelimi-
nadasenlosapropiadoscentrosderecolecciónocomoestáprevisto
porlasnormativaslocales.
• Si no va a utilizar el control remoto durante varias semanas o más, quite
las baterías.
Eventualespérdidasdelasbateríaspodríandañarelcontrolremoto.
Norecarguenidesarmelasbaterías.Noarrojelasbateríasalfuego.
Puedenquemarseoexplotar.
Siellíquidodelasbateríascaesobrelapielolaropa,laveconabun-
danteagualimpia.Noutiliceelcontrolremotoconbateríasquehayan
sufridopérdidas.
Losproductosquímicosdelasbateríaspuedenprovocarquemaduras
uotrosriesgosparalasalud.
3.2.c - Posición del control remoto
Mantengaelcontrolremotoenunaposicióndesdelacuallaseñalpueda
llegar al receptor del aparato (distancia máxima unos 6 metros - con las
bateríascargadas)(Fig.D).
Lapresenciadeobstáculos(muebles,cortinas,paredes,etc.)entreelcontrol
remoto y el aparato reduce el alcance del control remoto.
3.3 - USO DEL APARATO
Obre como sigue para utilizar el aparato.

PELER 6C
ESPAÑOL
ES - 16
3.3.a - Operaciones preliminares
• Posicione el aparato en una supercie estable, no inclinada, al
menosa15cm.desdelaparedodesdecualquierotroobjeto,para
quesegaranticelacorrectacirculacióndelaire.Colóqueloenuna
supercieresistentealaguayaqueelposibleescapedeaguapodría
dañarlosmueblesoelsuelo.
• Nocoloqueelaparatodirectamenteenalfombras,toallas,mantas
uotrassuperciesabsorbentes.
• Inserteelenchufeenlatomadecorriente; elaparatoemiteun“bip”
yenlapantallaaparecelatemperaturaambienteen°C.
Antesdeconectareléctricamenteelaparato,asegúresedequelosdatos
delaetiquetacorrespondanconlosdelareddedistribucióneléctrica.
3.3.b - Llenado
Esnecesarioañadiraguaeneltanque(7)antesdequelafunciónrefrigera-
dor/humidicadorseaactivada.
El agua puede ser añadida desde la parte superior del aparato o quitando
eltanque(7)delagua:
- Paraañadiraguadesdearriba,abralatapadellenado(1)(g.G),vierta
lentamenteelaguaeneldepósito(7)ycierrelatapa(1).
- Desmontareldepósitodeagua(7)delcuerpodelaparato(g.H):
• presioneelgancho(6)ysaqueeldepósito(7);
• viertaelaguaeneldepósito(7);
• vuelvaacolocareldepósito(7)enelaparato.
• Veriqueelniveldeaguaeneltanque(7)atravésdel
indicadordenivel(12)(g.L).
•Nolleneeltanque(7)másalládelnivelmáximoindicado.
•Siempreutiliceagualimpia.
• Elaparatopodríaproducirunligerooloroelaguaeneltanque(7)podría
serligeramentecoloreadaduranteelprimerutilizo;estoseventosson
normalesyabsolutamentenopeligrososparalasaluddelusuario.

ESPAÑOL
ES - 17
3.4 - INSTRUCCIONES DE FUNCIONAMIENTO
a. Inserte el enchufe en la toma de corriente.
Cuandoeldispositivoseenciendeporprimeravez,emiteun“bip”ypasaalmodode
espera;todoslosbotonesestándesactivadosexceptoelbotónON/OFF.
Lasfuncionespuedenactivarseomodicarsedesdeelpaneldecontrolodesdeel
mandoadistancia.
b. Para encender el aparato, presione la tecla ON/OFF(A1)(seoyeunbip).
c. Para apagar el aparato, presione la tecla ON/OFF(A1)(seoyeunbip).
Se oye un bip cada vez que se presiona una tecla.
d. Levantemanualmentelosapshorizontalescomodesee.
3.4.a - Tecla ON/OFF (A1)
En el modo de espera se desactivan todos los botones, excepto la tecla ON/OFF.
Pulsarparaencenderelaparato;sevisualizalatemperaturaambiente(en°C).
Lavelocidadinicialdelaireseajustapordefectoa“baja”yelmododefunciona-
mientoa“normal”;elicono(B1)seenciende.Todaslasfuncionesestándisponibles.
3.4.b - Tecla velocidad aire (A6)
Lavelocidaddelairepuedesercambiadasegúnestasecuencia:
Baja ---
> Media
---
>
Alta ---
> Baja
---
> ...
- Dependiendodelavelocidadajustadaapareceenlapantalla.
01(Baja)
02(Media)
03(Alta)
- Despuésdeunossegundos,lapantallavuelveamostrarlatemperatura
ambiente medida.

PELER 6C
h
ESPAÑOL
ES - 18
3.4.c - Tecla oscilación (A7)
Cuando el aparato esté encendido, pulse este botón para iniciar o detener la función
dedireccióndelaireatravésdelosapsverticales(11) (derechaeizquierda).
Presiónelaunavezparainiciarlafunción;elLEDoscilaciónseenciende.
Presiónela una segunda vez para apagar la función.
3.4.d - Tecla modo (A3)
Elmodo“normal”esloconguradoalarranquepordefecto.
Presionandoestateclaelmodocambiasegúnestasecuencia:
Normal ---> Natural ---> Reposo ---> Normal ---> Natural ---> ...
ElLEDmodocambiaenconsecuencia(losmodos“natural”(B1)y“reposo”(B2)
noestándisponiblesalavelocidad“silencioso”(B3)).
Los diferentes modos funcionan como sigue:
1 - Normal(B1): elaparatofuncionaconstantementealavelocidad
seleccionada.
2 - Natural(B2):
el aparato funciona variando continuamente la velo-
cidad del aire.
3 - Reposo(B3):
el aparato funciona variando continuamente la velo-
cidad del aire, reduciéndola hasta el valor mínimo.
3.4.e - Tecla temporizador (A9)
Cuando el aparato está encendido, presio-
nando esta tecla el temporizador cambia
segúnestasecuencia:
00h (apagado) ---> 01h ---> 02h --->
03h ---> .. 12h ---> 00h (apagado) ---> ..
3.4.f - Botón “LIGHT” (A4)
Cuando se enciende el aparato, al pulsar este botón se apaga la pantalla (el
aparatosiguefuncionando).
Presione de nuevo este botón para volver a encender la pantalla.

ESPAÑOL
ES - 19
3.4.g - Botón función “ionizante” (A8)
Alencenderelaparato,alpulsarestebotónseactivalafunciónionizanteyel
LED(B5)seenciende,haciendoqueelairedelambienteseenfríe.
Presione de nuevo este botón para desactivar la función.
3.4.h-Teclarefrigerador/humidicador(A2)
Cuando el aparato está encendido, presione esta tecla para iniciar o apagar la
funciónrefrigerador/humidicador.
Presiónelaunavezparainiciarlafunción;labomba(4)yelLEDrefrigerador/
humidicador(B4)seencienden.
Presiónela una segunda vez para apagar la función.
3.4.i - Función escasez de agua
Cuandolafunciónderefrigeraciónestáactivada(LED“B4”encendido),sielaparato
detectaunafaltadeaguadurante5-10segundosconsecutivosemiteun“bip”,
elLED(B4)parpadea,labomba(4)dejadefuncionarylafunciónsedesactiva.
3.4.l - Uso de los recipientes del Ice box (19)
Conelaparatosesuministrandos“Icebox”(19)quesirvenpararefrigerarel
aire emitido por el aparato.
Elusodelafunción“refrigerador”conun“Icebox”(19)heladosituadoenel
depósito de agua, permite reducir rápidamente la temperatura del aire emitido
porelaparatoenunos3°C.
Para usar esta función:
a. Coloque los “Ice box” en el congelador y espere a que se congelen.
b. Coloqueun“Icebox”heladoeneldepósitodeagua(7)oenelcompartimento
deaguasuperior(g.M).
c. Viertaagua(preferiblementefría)eneldepósitooenelcompartimentode
agua superior sin superar el nivel “MÁX” indicado.
d. Pongaenmarchaelaparatoyseleccionelafunciónpulsandoelbotón(A2);
elLED(B4)seenciende.
Para aprovechar al máximo la función, sustituya el “Ice box” por el que se en-
cuentra en el congelador cuando ya no esté congelado.

PELER 6C
ESPAÑOL
ES - 20
4 - MANTENIMIENTO Y LIMPIEZA
Antesdeprocederconcualquierainter-
vención de mantenimiento y limpieza,
siempreasegúresedequeelenchufede
alimentaciónhayasidodesconectadode
latomadecorriente.
Noutiliceaguaparalimpiarlaspartesinternasdelaparato;
riesgodeprovocardescargaseléctricas.
4.1 - LIMPIEZA
4.1.a - Limpieza del aparato y del control remoto
a. Utilice un paño seco para limpiar el aparato y el control remoto.
b. Se puede utilizar un paño humedecido con agua fría para limpiar el aparato
si está muy sucio.
Noutiliceunpañotratadoquímicamenteoantiestáticoparalimpiarel
aparato.
Noutilicegasolina,solventes,pastasparalimpiarnisolventessimilares.
Estosproductospuedenprovocarlaroturaoladeformacióndelasu-
perciedeplástico.
4.1.b-Limpiezadelosltros
Proceda como se indica a continuación:
a. Retirelostornillos(22)conundestornilladorenformadeestrella(nosuminis-
trado)(g.N).
b. Desmonteelsoportedelosltros(15)delcuerpodelaparato(g.O).
c. Quitardelsoporte(15)elltrodepapel(17)yelltrodeaire(16).
d. Limpieambosltros(16y17)conaguaydetergenteneutro.Enjuaguebien
losltrosconagualimpia.
e. Siesnecesario,utiliceunpinceldecerdassuavesparalimpiarafondoelltro
deaire(16).

10
ESPAÑOL
ES - 21
f. Secarlosltrosluegovolveracolocarlosenelsoporte(15).
g. Fijarelsoporte(15)conambostornillos(22)(g.P).
Nouseel aparatosinlos ltroscolocadoscorrectamente osiestán
dañadosodesgastados.
4.1.c - Limpieza depósito
Si no tiene intención de utilizar el dispositivo durante un período de tiempo pro-
longado:
a. Desconecteelenchufedelatomadecorriente.
b. Presioneelgancho(6)yretireeldepósito(7)(g.Q).
c. Desconecteelsoportedelabomba(3)yretirelabomba(4)deldepósito(7)
(g.R).
d. Extraigacompletamenteeldepósito(7)delcuerpodelaparato.
e. Limpieysequebieneldepósito(7).
f. Vuelvaacolocareldepósitoenelcuerpodelaparatoyasegúresedequela
bomba(4)ysusoporte(3)esténcorrectamentecolocados.
g. Cierre el depósito en el cuerpo del aparato.
h. Levantelatapa(1)ylimpieysequeelcompartimentodeagua.
5 - ANTES DE GUARDAR EL APARATO AL FINAL DE
LA TEMPORADA
• Limpielos ltrosde acuerdocon las
instrucciones proporcionadas.
• Luegoasegúresedequeesténsecos
yveriquequeeltanquedelaguano
contenga agua residual.
• Cierremanualmentelosapshorizon-
tales(10).
• Posicione el aparato en su envase
original y presérvelo en un lugar fresco
y seco.

PELER 6C
ESPAÑOL
ES - 22
6 - ELIMINACIÓN
Elsímbolopresenteenelaparatooenelembalajeindicaqueelproducto
no debe ser considerado como un residuo doméstico normal; por el
contrario, debe ser transportado a un punto de recogida apropiado para
elreciclajedeaparatoseléctricosyelectrónicos.
La correcta eliminación de este aparato contribuye a evitar potenciales
consecuencias negativas para el ambiente y para la salud.
Para información más detallada sobre el reciclaje de este producto,
contacteconlaocinacomunal,conelserviciolocaldeeliminaciónde
residuos o con la tienda en la que el mismo ha sido adquirido.
Esta disposición es válida solamente en los estados miembros de la UE.
7 - DATOS TÉCNICOS
Paralosdatostécnicosconsultelaplacadedatoscaracterísticos(23)apli-
cada en el producto.


262095A
-
 1
1
-
 2
2
-
 3
3
-
 4
4
-
 5
5
-
 6
6
-
 7
7
-
 8
8
-
 9
9
-
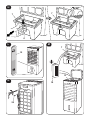 10
10
-
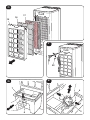 11
11
-
 12
12
-
 13
13
-
 14
14
-
 15
15
-
 16
16
-
 17
17
-
 18
18
-
 19
19
-
 20
20
-
 21
21
-
 22
22
-
 23
23
-
 24
24
-
 25
25
-
 26
26
-
 27
27
-
 28
28
-
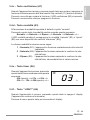 29
29
-
 30
30
-
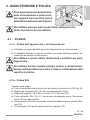 31
31
-
 32
32
-
 33
33
-
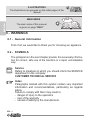 34
34
-
 35
35
-
 36
36
-
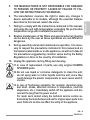 37
37
-
 38
38
-
 39
39
-
 40
40
-
 41
41
-
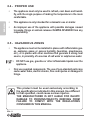 42
42
-
 43
43
-
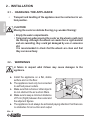 44
44
-
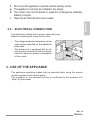 45
45
-
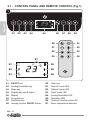 46
46
-
 47
47
-
 48
48
-
 49
49
-
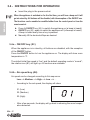 50
50
-
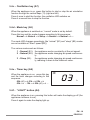 51
51
-
 52
52
-
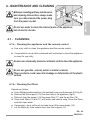 53
53
-
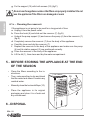 54
54
-
 55
55
-
 56
56
-
 57
57
-
 58
58
-
 59
59
-
 60
60
-
 61
61
-
 62
62
-
 63
63
-
 64
64
-
 65
65
-
 66
66
-
 67
67
-
 68
68
-
 69
69
-
 70
70
-
 71
71
-
 72
72
-
 73
73
-
 74
74
-
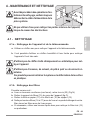 75
75
-
 76
76
-
 77
77
-
 78
78
-
 79
79
-
 80
80
-
 81
81
-
 82
82
-
 83
83
-
 84
84
-
 85
85
-
 86
86
-
 87
87
-
 88
88
-
 89
89
-
 90
90
-
 91
91
-
 92
92
-
 93
93
-
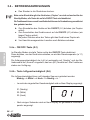 94
94
-
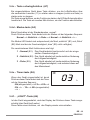 95
95
-
 96
96
-
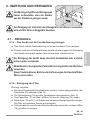 97
97
-
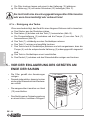 98
98
-
 99
99
-
 100
100
-
 101
101
-
 102
102
-
 103
103
-
 104
104
-
 105
105
-
 106
106
-
 107
107
-
 108
108
-
 109
109
-
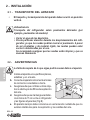 110
110
-
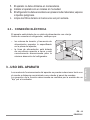 111
111
-
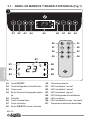 112
112
-
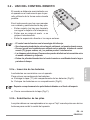 113
113
-
 114
114
-
 115
115
-
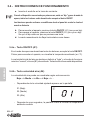 116
116
-
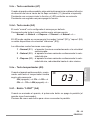 117
117
-
 118
118
-
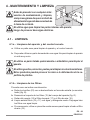 119
119
-
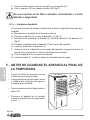 120
120
-
 121
121
-
 122
122
-
 123
123
-
 124
124


Olimpia Splendid Peler 6C Manual de usuario
- Categoría
- Humidificadores
- Tipo
- Manual de usuario
en otros idiomas
- français: Olimpia Splendid Peler 6C Manuel utilisateur
- italiano: Olimpia Splendid Peler 6C Manuale utente
- English: Olimpia Splendid Peler 6C User manual
- Deutsch: Olimpia Splendid Peler 6C Benutzerhandbuch
Artículos relacionados
-
 Olimpia Splendid Peler 8 Manual de usuario
-
 Olimpia Splendid Peler Tower Manual de usuario
-
 Olimpia Splendid Peler 4D Manual de usuario
-
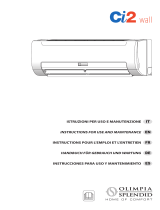 Olimpia Splendid Ci2 Wall Series Manual de usuario
-
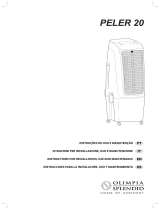 Olimpia Splendid Pelèr 20 Manual de usuario
-
 Olimpia Splendid Caldo Crystal Manual de usuario
-
 Olimpia Splendid Pelèr 5 Manual de usuario
-
 Olimpia Splendid Peler Chill Manual de usuario
-
 DOLCECLIMA DOLCECLIMA Air Pro 14 HP Manual de usuario
-
 Olimpia Splendid Astomi Sound Manual de usuario


