ProfiCare PC-BS 3037 A Manual de usuario
- Categoría
- Aspiradoras portátiles
- Tipo
- Manual de usuario

Bedienungsanleitung / Garantie
Gebruiksaanwijzing • Mode d’emploi • Manual de instrucciones • Istruzioni per l’uso
Instruction Manual • Instrukcja obsługi / Gwarancja • Használati utasítás
Руководство по эксплуатации •
PC-BS3037A_IM 27.05.19
Akku-Bodenstaubsauger
PC-BS 3037 A
Vloerstofzuiger met accu • Aspirateur de sol avec batterie • Aspirapolvere per pavimenti a batteria
Aspirapolvere per pavimenti a batteria • Battery Floor Vacuum Cleaner • Akumulatorowy odkurzacz do podłóg
Akkumulátoros padlóporszívó • Аккумуляторный пылесос для пола •

PC-BS3037A_IM 27.05.19
Bedienungsanleitung ....................................................................................Seite 4
Gebruiksaanwijzing ................................................................................... Pagina 13
Mode d’emploi............................................................................................... Page 21
Manual de instrucciones .......................................................................... Página 29
Istruzioni per l’uso .....................................................................................Pagina 37
Instruction Manual ........................................................................................ Page 45
Instrukcje obsługi .......................................................................................Strona 53
Használati utasítás .......................................................................................Oldal 62
Руководство по эксплуатации .................................................................. стр. 70
85
....................................................................................................................
2

PC-BS3037A_IM 27.05.19
3
Übersicht der Bedienelemente
Overzicht van de bedieningselementen • Liste des différents éléments de commande
Indicación de los elementos de manejo • Elementi di comando • Overview of the Components
Przegląd elementów obsługi • A kezelőelemek áttekintése
Обзор деталей прибора •

4
PC-BS3037A_IM 27.05.19
Bedienungsanleitung
Vielen Dank, dass Sie sich für unser Produkt entschieden
haben. Wir wünschen Ihnen viel Freude mit dem Gerät.
Symbole in dieser Bedienungsanleitung
Wichtige Hinweise für Ihre Sicherheit sind besonders ge-
kennzeichnet. Beachten Sie diese Hinweise unbedingt, um
Unfälle und Schäden am Gerät zu vermeiden:
WARNUNG:
Warnt vor Gefahren für Ihre Gesundheit und zeigt mög-
liche Verletzungsrisiken auf.
ACHTUNG:
Weist auf mögliche Gefährdungen für das Gerät oder
andere Gegenstände hin.
HINWEIS:
Hebt Tipps und Informationen für Sie hervor.
Inhalt
Übersicht der Bedienelemente ..........................................3
Allgemeine Hinweise .......................................................... 4
Spezielle Sicherheitshinweise für dieses Gerät ..............5
Lithium-Ionen-Akkus (Li-Ion) .............................................6
Sicherer Umgang mit Li-Ion-Akkus .................................. 6
Die Lebenszeit des Li-Ion-Akkus verlängern ................... 6
Auspacken des Gerätes ..................................................... 6
Übersicht der Bedienelemente / Lieferumfang ................6
Anwendungshinweise ........................................................ 7
Das Gerät einschalten / ausschalten ................................7
Inbetriebnahme ...................................................................7
Saugrohr ...........................................................................7
Bodendüse mit Turbo-Bürste ........................................... 7
Kombinierte Fugen- / Bürsten- / Polsterdüse (3 in 1) ........ 7
Ausziehbare Spezialbürste .............................................. 8
Montage der Wandhalterung .............................................8
Netzteil-Stecker einsetzen ...............................................8
Wandhalterung befestigen ...............................................8
Auaden des Akkus............................................................8
Benutzung des Gerätes......................................................8
Betrieb beenden ...............................................................9
Wartung ................................................................................ 9
Das Filtersystem ..............................................................9
Entleeren des Staubbehälters .........................................9
Reinigung der Filter ..........................................................9
Montage der Filtereinheit .................................................9
Ersatz Filter ......................................................................9
Reinigung ...........................................................................10
Bodendüse ..................................................................... 10
Staubbehälter mit Filtereinheit .......................................10
Aufbewahrung ...................................................................10
Störungsbehebung ...........................................................11
Technische Daten .............................................................11
Hinweis zur Richtlinienkonformität ................................ 11
Garantie ..............................................................................11
Garantiebedingungen .................................................... 11
Garantieabwicklung .......................................................12
Entsorgung ........................................................................ 12
Akku- / Batterieentsorgung .............................................12
Bedeutung des Symbols „Mülltonne“ .............................12
Allgemeine Hinweise
Lesen Sie vor Inbetriebnahme dieses Gerätes die Be-
dienungsanleitung sehr sorgfältig durch und bewahren
Sie diese inkl. Garantieschein, Kassenbon und nach
Möglichkeit den Karton mit Innenverpackung gut auf. Falls
Sie das Gerät an Dritte weitergeben, geben Sie auch die
Bedienungsanleitung mit.
• Benutzen Sie das Gerät ausschließlich für den privaten
und den dafür vorgesehenen Zweck. Dieses Gerät ist
nicht für den gewerblichen Gebrauch bestimmt.
• Das Netzteil ist nur zur Benutzung in trockenen Räumen
geeignet.
• Überprüfen Sie, ob Ausgangsstrom, -spannung und die
Polarität des Netzteils mit den Angaben auf dem ange-
schlossenen Gerät übereinstimmen!
• Berühren Sie das angeschlossene Netzteil nicht mit
feuchten Händen!
• Zur Reinigung trennen Sie das Gerät ggf. vom Netzteil.
• Achten Sie darauf, dass das Kabel des Netzteils nicht
geknickt, eingeklemmt, überfahren wird oder mit Hitze-
quellen in Berührung kommt.
• Benutzen Sie kein beschädigtes Netzteil.
• Reparieren Sie das Gerät nicht selbst, sondern suchen
Sie einen autorisierten Fachmann auf.
• Das Gerät und das Netzkabel müssen regelmäßig auf
Zeichen von Beschädigungen untersucht werden. Wird
eine Beschädigung festgestellt, darf das Gerät nicht
mehr benutzt werden.
• Verwenden Sie nur Original-Zubehör.
• Zur Sicherheit Ihrer Kinder lassen Sie keine
Verpackungs teile (Plastikbeutel, Karton, Styropor, etc.)
erreichbar liegen.
WARNUNG:
Lassen Sie kleine Kinder nicht mit Folie spielen.
Es besteht Erstickungsgefahr!

5
PC-BS3037A_IM 27.05.19
Spezielle Sicherheitshinweise für dieses Gerät
• Dieses Gerät kann von Kindern ab 8 Jahren und darüber sowie
von Personen mit verringerten physischen, sensorischen oder
mentalen Fähigkeiten oder Mangel an Erfahrung und Wissen be-
nutzt werden, wenn sie beaufsichtigt werden oder bezüglich des
sicheren Gebrauchs des Gerätes unterwiesen wurden und die
daraus resultierenden Gefahren verstehen.
• Kinder dürfen nicht mit dem Gerät spielen.
• Reinigung und Benutzer-Wartung dürfen nicht von Kindern ohne
Beaufsichtigung durchgeführt werden.
• Das Gerät ist für den Betrieb mit Sicherheitskleinspannung aus-
gelegt. Es darf nur an die auf dem Typenschild aufgedruckte Ver-
sorgungsspannung angeschlossen werden.
• Wenn die Netzanschlussleitung dieses Gerätes beschädigt wird,
muss sie durch eine besondere Anschlussleitung ersetzt werden,
die vom Hersteller oder seinem Kundendienst erhältlich ist.
• Benutzen Sie kein anderes als das im Lieferumfang enthaltene
Netzteil.
• Saugen Sie nichts Brennbares oder Flüssigkeiten auf!
• Verwenden Sie dieses Gerät nicht zum Entfernen von Toner aus
dem Laserdrucker oder Kopierer, um Feuer oder Explosion zu
vermeiden.
• Saugen Sie keine heiße Asche, spitze oder scharfe Gegen-
stände!
• Saugen Sie niemals ohne Filter.

6
PC-BS3037A_IM 27.05.19
Lithium-Ionen-Akkus (Li-Ion)
Das Gerät ist mit Li-Ion-Akkus ausgestattet. Daraus er-
geben sich viele Vorteile gegenüber anderen Batterien und
Akkus:
• Eine hohe Zellenspannung (mehr Volt)
• Keinen Memory-Effekt
• Eine geringe Selbstentladung
Sicherer Umgang mit Li-Ion-Akkus
Allgemein sind Li-Ion-Akkus als sicher anzusehen. Dennoch
können sich Gefahren durch mechanische Beschädigun-
gen, elektrische Fehler sowie thermische Einwirkungen
ergeben.
Durch mechanische Beschädigungen können gasförmige
oder üssige Stoffe austreten, welche stark reizend, brenn-
bar oder sogar giftig wirken können.
Ein elektrischer Fehler, z. B. ein Kurzschluss, kann zur
Überhitzung und zum Brand führen.
Auch schon die äußere Erwärmung eines Li-Ion-Akku, z. B.
durch Sonneneinstrahlung oder Heizung, kann zum Brand
oder zur Explosion führen.
Bei ordnungsgemäßem Umgang sind Li-Ion-Akkus sicher.
Nur bei unsachgemäßer Benutzung oder Lagerung können
sie gefährlich werden. Deshalb gilt:
• Vermeiden Sie Temperaturen über 40 °C und unter 0 °C.
• Lassen Sie das Gerät oder den Akku nicht fallen.
• Sollte der Li-Ion-Akku nach einem Sturz beschädigt sein,
verwenden Sie diesen nicht weiter.
• Kleben Sie die Pole bei Lagerung und Entsorgung ab,
damit keine Kurzschlüsse entstehen.
• Entsorgen Sie alte Akkus sachgerecht in Sammelboxen
beim Handel oder bei kommunalen Sammelstellen.
Die Lebenszeit des Li-Ion-Akkus verlängern
Für Li-Ion-Akkus gilt mehr noch als bei anderen Akkus, dass
durch ihre richtige Behandlung die Lebensdauer verlängert
werden kann. Einfache Regeln beim Laden und Lagern
helfen Ihnen die Kapazität des Akkus zu erhalten:
• Temperatur: Eine Temperatur zwischen 10 - 25 °C ist für
diese Akkus optimal. Temperaturen darüber können zu
einer vorzeitigen Alterung führen.
• Ladung und Entladung: Bei den Ladezyklen sollten
sowohl die Vollladung als auch die Tiefentladung ver-
mieden werden.
Ist die Auadung des Akkus abgeschlossen, sollten Sie
unmittelbar darauf das Ladegerät abstecken. Eine 90 %
Auadung gilt als optimal.
Umgekehrt ist es für den Akku verträglicher, wenn er
nicht bis 0 % entladen wird. Wenn sich die Möglichkeit
ergibt, sollten Sie den Akku bereits ab einem Ladezu-
stand von 30 % wieder auaden.
• Lagerung: Lagern Sie Akkus trocken und bei gemäßig-
ten Temperaturen zwischen 10 °C und 20 °C.
Bedenken Sie auch den Effekt der Selbstentladung! Ist
der Akku bereits leer, kann dieser Effekt zur Tiefenent-
ladung führen und den Akku beschädigen. Soll der Akku
längere Zeit gelagert werden, können Sie diesem Effekt
entgegenwirken. Dann empfehlen wir den Akku vor der
Lagerung auf ca. 40 % aufzuladen. Nach spätestens
einem Monat sollten Sie den Ladezustand kontrollieren.
Auspacken des Gerätes
1. Nehmen Sie das Gerät aus seiner Verpackung.
2. Prüfen Sie den Lieferumfang auf Vollständigkeit.
3. Überprüfen Sie das Gerät auf eventuelle Transportschä-
den, um Gefährdungen zu vermeiden.
HINWEIS:
Sollten Sie einen Transportschaden feststellen,
wenden Sie sich umgehend an Ihren Händler. Ein be-
schädigtes Gerät nicht in Betrieb nehmen!
Übersicht der Bedienelemente /
Lieferumfang
Abbildung A
1 Staubbehälter
2 Motorgehäuse
3 Taste MAX
4 Ein- / Aus-Taste
5 Akku-Pack
6 Entriegelung für den Akku-Pack
7 Verriegelung des Staubbehälters
Abbildung B
1 Staubbehälter
2 Motorgehäuse
8 Kontrollleuchten
9 Tragegriff
10 Netzteil-Anschlussbuchse
11 Handgerät (Abbildung A)
12 Entriegelung für das Saugrohr
13 Halterung für die Düse
14 Entriegelung für das Gelenk des Saugrohrs
15 Bodendüse mit Turbo-Bürste
16 Entriegelung der Bodendüse
17 Saugrohr
18 Entriegelung für die kombinierte Düse
19 Kombinierte Fugen- / Bürsten- / Polsterdüse
20 Ausziehbare Spezialbürste
Abbildungen C und D
Wandhalterung
Ohne Abbildung
1 × Netzteil
2 × Dübel
2 × Schraube

7
PC-BS3037A_IM 27.05.19
Anwendungshinweise
• Das Gerät ist sehr gut geeignet, um schnell kleine Men-
gen trockenen Schmutz oder Staub aufzusaugen.
• Der Betrieb des Gerätes erfolgt über den aufgeladenen
Akku. Die Auadung erfolgt über das mitgelieferte Netz-
teil.
• Ein direkter Netzbetrieb mit dem Netzteil ist nicht mög-
lich.
• Hängen Sie das Gerät in die im Lieferumfang enthaltene
Wandhalterung, wenn Sie das Gerät nicht benutzen. Sie
dient gleichzeitig als Ladestation.
ACHTUNG:
Das Gerät kann nicht selbstständig stehen. Wenn Sie
die Wandhalterung nicht nutzen, legen Sie den Staub-
sauger vorsichtig auf den Boden.
• Der Akku-Sauger ist kein vollwertiger Ersatz für einen
herkömmlichen Bodenstaubsauger. Speziell auf lang-
origem Teppich reicht die Reinigungsleistung konstruk-
tionsbedingt nicht aus.
• Verschmutzte Filter verringern die Saugleistung des
Staubsaugers, daher empfehlen wir eine regelmäßige
Reinigung der vorhandenen Schmutzlter.
• Idealerweise reinigen Sie die Filter nach jedem längeren
Gebrauch.
• Bitte prüfen und reinigen Sie regelmäßig die elektrische
Bodendüse.
• Stark verschmutzte Fußböden reinigen Sie bei Bedarf
bitte mehrfach und / oder nutzen Sie dafür einen her-
kömmlichen 230 V~ Bodenstaubsauger.
Das Gerät einschalten / ausschalten
• Mit der Taste (4) im Griff schalten Sie das Gerät ein und
aus.
• Drücken Sie die Taste MAX an der Rückseite des
Handgerätes, um zwischen der niedrigen und der hohen
Leistungsstufe umzuschalten.
Inbetriebnahme
Saugrohr
• Das Saugrohr ist mit einem Gelenk ausgestattet. Im
geneigten Zustand erleichtert es Ihnen, an schlecht zu-
gänglichen Stellen zu saugen. Für ein starres Saugrohr
lassen Sie die Gelenkverbindung hörbar einrasten.
• Stecken Sie das Saugrohr mit den zwei Kontaktstiften in
den Anschluss am Handgerät. Es muss hörbar einrasten.
• Um das Saugrohr zu lösen, drücken Sie auf die Entrie-
gelung (12) und ziehen es gleichzeitig ab.
Bodendüse mit Turbo-Bürste
• Die Bodendüse ist bis auf langorigen Teppich für jeden
Bodenbelag geeignet.
• Während des Betriebs leuchten die LED‘s an der Boden-
düse zur besseren Sicht in dunklen Bereichen.
ACHTUNG:
Die LED‘s können nicht von Ihnen gewechselt
werden.
• Stecken Sie das untere Ende des Saugrohres auf den
Anschluss an der Bodendüse. Beachten Sie die Kontakt-
stifte an der Bodendüse. Das Saugrohr muss hörbar
einrasten.
• Um das Saugrohr zu lösen, drücken Sie auf die Entrie-
gelung (16) und ziehen es gleichzeitig ab.
Kombinierte Fugen- / Bürsten- / Polsterdüse (3 in 1)
• Dieses Zubehör haben Sie immer griffbereit, wenn Sie
es mit der Halterung am Saugrohr oberhalb der Gelenk-
verbindung befestigen.
• Nutzen Sie diese Düse als Fugendüse, können Sie
damit Schmutz aus Ecken, Fugen und kleinen Zwischen-
räumen saugen.
• Benutzen Sie die Düse mit arretierter Bürsten- / Polster-
düse, um die zu reinigende Oberäche nicht zu beschä-
digen. Damit holen Sie Schmutz schonend aus Schlitzen
von Polstern und Matratzen. Auch zur Staubaufnahme
auf empndlichen Oberächen wie Möbel oder Gardinen
geeignet.
• Um die Bürsten- / Polsterdüse an der Fugendüse zu be-
festigen, drücken Sie die seitlichen Tasten und schieben
die Düse bis zum Einrasten auf. (Siehe nachfolgende
Abbildung)
• Um die Arretierung zu lösen, drücken Sie wieder auf
beide Tasten.
• Sie haben zwei Möglichkeiten, diesen kombinierten
Düsenaufsatz am Gerät anzuschließen:
Anschluss am Handgerät
• Stecken Sie die Fugendüse mit der Entriegelung nach
oben in den Anschluss am Handgerät. Sie muss hörbar
einrasten.
• Um die Düse zu lösen, drücken Sie auf die Entriegelung
und ziehen sie gleichzeitig ab.
Anschluss am Saugrohr
Am unteren Ende des Saugrohrs bendet sich der gleiche
Steckanschluss wie am Handgerät. Montieren / demontieren
Sie die Düse wie zuvor beschrieben.

8
PC-BS3037A_IM 27.05.19
Ausziehbare Spezialbürste
• Diese Düse ist besonders gut für die schonende Reini-
gung größerer empndlicher Oberächen geeignet.
• Sie können die Aufnahmeäche für den Schmutz ver-
größern indem Sie das Bürstenteil bis zum Anschlag
herausziehen.
• Sie können diese Bürste sowohl direkt auf den An-
schluss am Handgerät als auch auf den Anschluss des
bereits montierten Saugrohrs stecken.
• Um die Düse zu lösen, ziehen Sie diese einfach ab.
Montage der Wandhalterung
Betrachten Sie die Abbildungen C und D auf Seite 3.
Netzteil-Stecker einsetzen
Möchten Sie die Wandhalterung gleichzeitig als Ladestation
nutzen, befestigen Sie zuerst den Netzteil-Stecker (Abb. C).
1. Stecken Sie den Netzteil-Stecker in den Steckplatz auf
der Rückseite der Ladestation.
2. Drücken Sie den Stecker fest in die Klemmen. Er muss
hörbar einrasten.
3. Fixieren Sie das Kabel in der rechten oder linken Kabel-
führung.
Wandhalterung befestigen
WARNUNG:
Vergewissern Sie sich vorher, ob sich Leitungen in der
Wand verbergen, die Sie beschädigen könnten!
ACHTUNG:
Platzieren Sie die Wandhalterung so, dass das Gerät
keiner direkten Sonneneinstrahlung oder anderen Wär-
mequellen ausgesetzt ist.
HINWEIS:
Möchten Sie die Wandhalterung gleichzeitig als Lade-
station nutzen, muss sich eine Steckdose in der Nähe
benden.
1. Messen Sie die Höhe für die Wandhalterung. Halten Sie
den Staubsauger an die Wand, wenn er komplett mit
dem Saugrohr und der Bodendüse montiert ist.
2. Halten Sie die Wandhalterung, wie auf Seite 3 abgebil-
det, an die Wand (Abb. D). Zeichnen Sie 2 Löcher an.
3. Bohren Sie die Löcher und setzen Sie die Dübel in die
Wand.
4. Stecken Sie die Schrauben durch die Bohrlöcher der
Wandhalterung.
5. Drehen Sie die Schrauben mit einem Schraubenzieher
handfest.
Auaden des Akkus
ACHTUNG:
Laden Sie den Akku nicht unbeaufsichtigt.
1. Schalten Sie das Gerät aus.
2. Verbinden Sie das Netzteil mit der Anschlussbuchse
(10).
Wenn Sie die Wandhalterung als Ladestation vorbereitet
haben, hängen Sie das Gerät darin ein.
3. Schließen Sie das Netzteil an einer geprüften Steckdose
an. Laden Sie das Gerät vor der ersten Benutzung ca.
5 Stunden auf.
HINWEIS:
• Die Kontrollleuchten zeigen Ihnen den Ladezustand
des Akkus an (25 %, 50 %, 100 %).
• Das Gerät hat eine elektronische Ladekontrolle,
welche eine Überladung verhindert.
• Der Ladevorgang ist beendet, wenn alle 3 Kontroll-
leuchten leuchten.
• Entfernt man das Gerät aus der Ladestation oder
trennt man es vom Netzteil, erlöschen die Kontroll-
leuchten.
• Es ist normal, dass sich das Gerät während des
Auadens erwärmt.
4. Ist der Akku vollständig ge-
laden, ziehen Sie das Netzteil
aus der Steckdose.
5. Um das Gerät aus der Lade-
station zu entfernen, drücken
Sie die Entriegelung an der
Oberseite der Wandhalterung.
HINWEIS:
Auch im ausgeschalteten
Zustand entlädt sich der Akku
stetig. Falls Sie das Gerät
längere Zeit nicht verwenden,
laden Sie den Akku mindes-
tens alle 4 bis 6 Wochen auf.
Benutzung des Gerätes
Sie können das Gerät als Bodenstaubsauger oder als
Handstaubsauger (Grundgerät) benutzen.
1. Trennen Sie das Gerät vom Netzteil.
2. Schalten Sie das Gerät ein.
3. Möchten Sie das Saugrohr an dem Gelenk neigen,
drücken Sie die Entriegelung (14).
HINWEIS:
• Wenn Sie das Gerät mit der Bodendüse benutzen,
empfehlen wir die höhere Leistungsstufe. Drücken Sie
die Taste MAX.
• Während des Betriebs leuchten je nach Ladekapazität
des Akkus 1 bis 3 Kontrollleuchten.

9
PC-BS3037A_IM 27.05.19
HINWEIS:
• Wir empfehlen, den Akku erneut aufzuladen, wenn die
Kontrollleuchten nur noch 25 % Kapazität anzeigen.
• Wenn die Kapazität des Akkus zu Ende geht, blinkt die
letzte Kontrollleuchte. Der Motor schaltet das Gerät
aus, bevor der Akku tiefenentladen wird. Laden Sie
den Akku wieder auf.
Betrieb beenden
1. Schalten Sie das Gerät aus.
2. Wenn Sie die Wandhalterung zuvor montiert haben,
hängen Sie den Staubsauger darin ein.
Wartung
Das Filtersystem
Ihr Gerät verfügt über 3 Filter. Das herkömmliche Staub-
beutelsystem wurde ersetzt durch einen transparenten
Staubbehälter. In ihm werden grober Schmutz und kleinste
Schwebepartikel durch die hohe Strömungsgeschwindigkeit
aus der „Saugluft“ gewirbelt.
Der Erwerb von Staubbeuteln entfällt.
Die Filter müssen regelmäßig gereinigt werden.
ACHTUNG:
• Waschen Sie die Filter niemals in der Waschmaschine.
• Verwenden Sie keinen Haartrockner zum Trocknen.
• Nehmen Sie das Gerät nur wieder in Betrieb, wenn alle
Filter vollständig trocken und korrekt montiert sind.
Die Filtereinheit
Die Filtereinheit besteht aus:
• Feinstofflter
• Groblter
Um die Filtereinheit zu reinigen gehen Sie
wie folgt vor:
Entleeren des Staubbehälters
1. Trennen Sie das Gerät vom Netzteil.
2. Lösen Sie gegebenenfalls das Saugrohr oder den Dü-
senaufsatz vom Gerät.
3. Betrachten Sie die Abbildung A auf Seite 3. Drücken Sie
die Taste
am Staubbehälter, um diesen vom Hand-
gerät zu lösen.
4. Nehmen Sie den Feinstofflter an dem farbigen Stoffteil
heraus.
5. Ziehen Sie den Groblter an seinem Griff aus dem
Staubbehälter heraus.
6. Entleeren Sie den Inhalt des Staubbehälters.
Reinigung der Filter
1. Klopfen Sie beide Filter über einen Mülleimer aus. Den
Feinstofflter können Sie auch ausbürsten. Bei stärkeren
Verschmutzungen reinigen Sie die Filter unter ießen-
dem Wasser.
2. Lassen Sie die Filter an der Luft vollständig trocknen,
bevor Sie sie wieder einsetzen!
3. Den Staubbehälter können Sie mit einem feuchten Tuch
auswischen. Trocknen Sie ihn danach ab.
Montage der Filtereinheit
1. Setzen Sie den Groblter in den Staubbehälter. Beach-
ten Sie die Aussparung am Rand des Staubbehälters.
Drücken Sie den Groblter nach unten, so dass er mittig
im Staubbehälter platziert ist.
2. Setzen Sie den Feinstofflter (mit dem farbigen Stoffteil
nach oben zeigend) auf den Groblter. Drücken Sie den
Feinstofflter fest an.
3. Befestigen Sie den Staubbehälter wieder am Handgerät.
Setzen Sie den Staubbehälter zuerst oben am Motor-
gehäuse an. Drücken Sie den Staubbehälter nach unten.
Die Verriegelung am Staubbehälter muss einrasten.
Auslasslter
Des Weiteren verfügt Ihr Gerät über einen Auslasslter.
Dieser bendet sich an der Oberseite des Motorgehäuses.
ACHTUNG:
Diesen Filter können Sie nicht ausbauen.
Ersatz Filter
Diese können Sie über unser Internet-Serviceportal
www.sli24.de
unter „Ersatzteile & Zubehör“ bestellen.

10
PC-BS3037A_IM 27.05.19
Reinigung
WARNUNG:
• Trennen Sie das Gerät vor der Reinigung immer vom Netzteil!
• Das Motorgehäuse auf keinen Fall zum Reinigen in Wasser
tauchen. Es könnte zu einem elektrischen Schlag oder Brand
führen.
ACHTUNG:
• Benutzen Sie keine Drahtbürste oder andere scheu-
ernde Gegenstände.
• Benutzen Sie keine scharfen oder scheuernden
Reinigungsmittel.
• Die einzelnen Bauteile sind nicht für die Reinigung in
der Spülmaschine geeignet.
• Das Gehäuse kann mit einem leicht feuchten Tuch ab-
gewischt werden.
• Das Netzteil können Sie mit einem trockenen Tuch
abwischen.
Bodendüse
1. Lösen Sie die Bodendüse vom Saugrohr.
2. Drehen Sie die Bodendüse herum, dass Sie die Unter-
seite sehen. Nehmen
Sie eine kleine Münze
oder ein anderes
Werkzeug zur Hilfe,
um die Verriegelung
zu öffnen. Dreh-
richtung: Entgegen
dem Uhrzeigersinn.
Klappen Sie die Ab-
deckung auf.
3. Ziehen Sie die Bürstenwalze heraus.
4. Entfernen Sie Fäden und Haare, die sich an der Bürste
aufgerollt haben. Nehmen Sie gegebenenfalls eine
Schere zur Hilfe.
5. Montage:
5.1 Setzen Sie die Bürstenwalze zuerst mit der stern-
förmigen Aussparung zurück in das Fach.
5.2 Führen Sie das andere Ende der Bürstenwalze mit
dem eckigen Lager in die Aussparung unter die Ab-
deckung.
6. Schließen Sie die Verriegelung der Bürstenwalze.
Staubbehälter mit Filtereinheit
Für die Reinigung dieser Bauteile lesen Sie bitte im Kapitel
„Wartung“.
Aufbewahrung
• Reinigen Sie das Gerät wie beschrieben und lassen Sie
es vollständig trocknen.
• Zur Aufbewahrung nutzen Sie die zuvor montierte Wand-
halterung oder legen Sie das Gerät vorsichtig auf den
Boden.
• Wir empfehlen, das Gerät in der Original-Verpackung
aufzubewahren, wenn Sie es über einen längeren Zeit-
raum nicht benutzen möchten.
HINWEIS zur Akku-Lebensdauer:
Auch im ausgeschalteten Zustand entlädt sich der
Akku stetig. Falls Sie das Gerät längere Zeit nicht
verwenden, laden Sie den Akku mindestens alle 4 bis
6 Wochen auf.
• Lagern Sie das Gerät immer außerhalb der Reichweite
von Kindern an einem gut belüfteten und trockenen Ort.
• Die Lagertemperatur sollte zwischen 0 °C und 40 °C
liegen.

11
PC-BS3037A_IM 27.05.19
Störungsbehebung
Störung Mögliche Ursache Abhilfe
Das Gerät ist ohne
Funktion.
Das Netzteil ist angeschlossen. Trennen Sie das Gerät vom Netzteil.
Der Akku ist defekt. Wenden Sie sich an unseren Service oder an Ihren
Händler.
Beim Versuch, das Gerät
einzuschalten, blinken
alle Kontrollleuchten.
Der Akku ist leer. Laden Sie den Akku auf.
Schwache Saugleistung. Der Akku ist fast leer. Laden Sie den Akku auf.
Der Staubbehälter ist voll. Entleeren Sie den Staubbehälter.
Die Filter sind verschmutzt. Reinigen Sie die Filter wie unter „Wartung“ beschrieben.
ACHTUNG:
Nehmen Sie den Betrieb nur mit trockenen Filtern wieder
auf!
Laute Geräusche
während des Betriebs.
Es bendet sich ein aufgesaugter
Fremdkörper in der Bodendüse.
Entfernen Sie den Fremdkörper. Wenn nötig, trennen Sie
die Bodendüse vom Saugrohr.
Die Bodendüse mit
Turbo-Bürste funktioniert
nicht.
Die Bürstenwalze ist mit Schmutz
blockiert.
Reinigen Sie die Bodendüse wie unter „ Reinigung“
beschrieben.
Das Saugrohr und / oder die Boden-
düse sind nicht richtig montiert.
Überprüfen Sie die Montage der Teile.
Der Akku hält die
Auadung nicht.
Der Akku hat das Ende seiner
Lebensdauer erreicht.
Wenden Sie sich an unseren Service oder an Ihren
Händler.
Technische Daten
Modell: ............................................................. PC-BS 3037 A
Nettogewicht
(Handgerät mit Saugrohr und Bodendüse): ............ca. 2,4 kg
Netzteil
Schutzklasse: .......................................................................
Eingang: .......................AC 100 - 240 V, 50 / 60 Hz, 0,8 A MAX
Ausgang: ......................................................DC 35 V, 500 mA
Polarität: .....................................................................
Akku: ............................................... 29,6 V, 2200 mAh Li-Ion
Laufzeit: ..................................................30 Minuten maximal
Ladezeit: ........................................................ ca. 4,5 Stunden
Technische und gestalterische Änderungen im Zuge stetiger
Produktentwicklungen vorbehalten.
Hinweis zur Richtlinienkonformität
Hiermit erklärt der Hersteller, dass sich das Gerät
PC-BS 3037 A in Übereinstimmung mit den folgenden
Anforderungen bendet:
• Europäische Niederspannungsrichtlinie 2014 / 35 / EU
• EU-Richtlinie für elektromagnetische Verträglichkeit
2014 / 30 / EU
• Ökodesign Richtlinie 2009 / 125 / EG
• RoHS-Richtlinie 2011 / 65 / EU
Garantie
Garantiebedingungen
1. Gegenüber Verbrauchern gewähren wir bei privater
Nutzung des Geräts eine Garantie von 24 Monaten ab
Kaufdatum.
Ist das Gerät zur gewerblichen Nutzung geeignet, ge-
währen wir beim Kauf durch Unternehmer für das Gerät
eine Garantie von 12 Monaten.
Die Garantiezeit für Verbraucher reduziert sich auf
12 Monate, sofern sie ein zur gewerblichen Nutzung
geeignetes Gerät – auch teilweise – gewerblich nutzen.
2. Voraussetzung für unsere Garantieleistungen sind der
Kauf des Geräts in Deutschland bei einem unserer Ver-
tragshändler sowie die Übersendung einer Kopie des
Kaufbelegs und dieses Garantiescheins an uns.
3. Bendet sich das Gerät zum Zeitpunkt des Garantiefalls
im Ausland, muss es auf Kosten des Käufers uns zur
Erbringung der Garantieleistungen zur Verfügung gestellt
werden.
4. Mängel müssen innerhalb von 14 Tagen nach Erkenn-
barkeit uns gegenüber schriftlich angezeigt werden.
Besteht der Garantieanspruch zu Recht, entscheiden wir,
auf welche Art der Schaden / Mangel behoben werden
soll, ob durch Reparatur oder durch Austausch eines
gleichwertigen Geräts.

12
PC-BS3037A_IM 27.05.19
5. Garantieleistungen werden nicht für Mängel erbracht, die
auf der Nichtbeachtung der Gebrauchsanweisung, un-
sachgemäßer Behandlung oder normaler Abnutzung des
Geräts beruhen. Garantieansprüche sind ferner ausge-
schlossen für leicht zerbrechliche Teile, wie zum Beispiel
Glas oder Kunststoff. Schließlich sind Garantieansprüche
ausgeschlossen, wenn nicht von uns autorisierte Stellen
Arbeiten an dem Gerät vornehmen.
6. Durch Garantieleistungen wird die Garantiezeit nicht
verlängert. Es besteht auch kein Anspruch auf neue
Garantieleistungen. Diese Garantieerklärung ist eine
freiwillige Leistung von uns als Hersteller des Geräts.
Die gesetzlichen Gewährleistungsrechte (Nacherfüllung,
Rücktritt, Schadensersatz und Minderung) werden durch
diese Garantie nicht berührt.
Stand 06 2012
Garantieabwicklung
24 Stunden am Tag, 7 Tage in der Woche
Sollte Ihr Gerät innerhalb der Garantiezeit einen Mangel
aufweisen, steht Ihnen die schnellste und komfortabelste
Möglichkeit der Reklamationsanmeldung über unser SLI -
Internet-Serviceportal zur Verfügung.
www.sli24.de
Bitte melden Sie direkt den Servicevorgang auf unserem
Online Serviceportal www.sli24.de an. Sie erhalten wenige
Sekunden nach Abschluss der Anmeldung ein kostenloses
Versandticket per E-Mail übermittelt. Zusätzlich erhalten Sie
weitere Informationen zur Abwicklung Ihrer Reklamation.
Mit Ihren persönlichen Zugangsdaten, die direkt nach Ihrer
Anmeldung per E-Mail an Sie übermittelt werden, können
Sie den Status Ihres Vorgangs auf unserem Serviceportal
www.sli24.de online verfolgen.
Sie brauchen das kostenlose Versandticket nur noch auf die
Verpackung Ihres gut verpackten Gerätes zu kleben und
das Paket bei der nächsten Annahmestelle der Deutschen
Post / DHL abzugeben. Der Versand erfolgt für Sie kostenlos
an unser Servicecenter bzw. Servicepartner.
So einfach kann Service sein!
1. Anmelden
2. Einpacken
3. Ab zur Post damit
Fertig, so einfach geht es!
Bitte vergessen Sie nicht, dem Gerät eine Kopie Ihres
Kaufbeleges (Kassenbon, Rechnung, Lieferschein) als Ga-
rantienachweis beizulegen, da wir sonst keine kostenlosen
Garantieleistungen erbringen können.
Unser Serviceportal www.sli24.de bietet Ihnen weitere
Leistungen an:
• Downloadbereich für Bedienungsanleitungen
• Downloadbereich für Firmwareupdates
• FAQ‘s, die Ihnen Problemlösungen anbieten
• Kontaktformular
• Zugang zu unseren Zubehör- und Ersatzteile-
Webshops
Auch nach der Garantie sind wir für Sie da! –
Kostengünstige Reparaturen zum Festpreis!
Bitte nehmen Sie in keinem Fall eine unfreie Einsendung
Ihres Gerätes vor. Unfreie Lieferungen werden von uns
nicht angenommen. Es entstehen Ihnen damit erhebliche
Kosten.
Stand 06 2012
Entsorgung
Akku- / Batterieentsorgung
Das Gerät enthält einen wiederauadbaren
Akku. Verbrauchte Batterien / Akkumulatoren
(Akkus) gehören nicht in den Hausmüll.
Der Akku muss entnommen werden, bevor
das Produkt entsorgt wird. Drücken Sie die
Entriegelung (6) und ziehen Sie den Akku-Pack aus dem
Handgerät.
Informationen, wo Batterien / Akkus zu entsorgen sind,
erhalten Sie über Ihre Kommunen oder die Gemeindever-
waltungen.
Bedeutung des Symbols „Mülltonne“
Schonen Sie unsere Umwelt, Elektrogeräte
gehören nicht in den Hausmüll.
Nutzen Sie die für die Entsorgung von Elektro-
geräten vorgesehenen Sammelstellen und
geben dort Ihre Elektrogeräte ab, die Sie nicht
mehr benutzen werden.
Sie helfen damit die potenziellen Auswirkungen durch
falsche Entsorgung auf die Umwelt und die menschliche
Gesundheit zu vermeiden.
Sie leisten damit Ihren Beitrag zur Wiederverwertung, zum
Recycling und zu anderen Formen der Verwertung von
Elektro- und Elektronik-Altgeräten.
Informationen, wo die Geräte zu entsorgen sind, erhalten
Sie über Ihre Stadt oder die Gemeindeverwaltung.

PC-BS3037A_IM 27.05.19
13
Gebruiksaanwijzing
Dank u voor het kiezen van ons product. Wij hopen dat u
het gebruik van het apparaat zult genieten.
Symbolen in deze gebruiksaanwijzing
Belangrijke aanwijzingen voor uw veiligheid zijn speciaal
gekenmerkt. Neem deze aanwijzingen strikt in acht om
ongevallen en schade aan het apparaat te vermijden:
WAARSCHUWING:
Waarschuwt voor gevaren voor uw gezondheid en toont
mogelijk letselrisico’s.
LET OP:
Wijst op mogelijke gevaren voor het apparaat of andere
voorwerpen.
OPMERKING: Kenmerkt tips en informatie voor u.
Inhoud
Overzicht van de bedieningselementen ...........................3
Algemene opmerkingen ................................................... 13
Speciale veiligheidsinstructies voor dit apparaat ........14
Oplaadbare lithium-ionaccu (li-ion) ................................14
Veilige hantering van oplaadbare lithium-ionaccu’s ......14
De levensduur van de
oplaadbare li-ionaccu verlengen ....................................15
Het apparaat uitpakken ....................................................15
Overzicht van de bedieningselementen /
Omvang van de levering ..................................................15
Opmerkingen voor het gebruik .......................................15
Het apparaat aan / uitschakelen ..................................... 16
Ingebruikname ..................................................................16
Zuigbuis .......................................................................... 16
Vloerzuigmond met turboborstel ....................................16
Gecombineerd spleet- / borstel- /
bekledingmondstuk (3-in-1) ...........................................16
Uitschuifbare speciale borstel ........................................ 16
Muurhouder installeren ....................................................16
Aansluiten van de voedingseenheid .............................. 16
Wandhouder monteren ..................................................17
De accu opladen ...............................................................17
Het apparaat gebruiken ....................................................17
Einde van de werking .....................................................17
Onderhoud .........................................................................18
Het ltersysteem ............................................................18
Legen van de stofcontainer ...........................................18
De lters reinigen ...........................................................18
Het monteren van de ltereenheid ................................18
Reiniging ............................................................................ 18
Vloerzuigmond ...............................................................19
Stofcontainer met ltereenheid ......................................19
Opslaan .............................................................................. 19
Probleemoplossing ..........................................................19
Technische gegevens .......................................................20
Verwijdering .......................................................................20
Batterijen / accu’s verwijdering .......................................20
Betekenis van het symbool “vuilnisemmer” ................... 20
Algemene opmerkingen
Lees vóór de ingebruikname van dit apparaat de handlei-
ding uiterst zorgvuldig door en bewaar deze goed, samen
met het garantiebewijs, de kassabon en zo mogelijk de
doos met de binnenverpakking. Geef ook de handleiding
mee wanneer u de machine aan derden doorgeeft.
• Gebruik het apparaat uitsluitend privé en uitsluitend
voor de voorgeschreven toepassing. Dit apparaat is niet
geschikt voor commercieel gebruik.
• De voedingsadapter alleen in droge omgevingen
gebruiken.
• Controleer of uitgangsvermogen, voltage en polariteit
van de voedingsadapter overeenkomen met de speci-
caties aangegeven op het aangesloten apparaat!
• De voedingsaansluitingen niet met natte handen aan-
raken!
• Het apparaat voor het reinigen indien nodig loskoppelen
van de voedingsadapter.
• Zorg ervoor dat de kabel van de voedingsadapter niet
wordt geknikt, bekneld, overreden of in contact komt met
warmtebronnen.
• Het apparaat niet gebruiken als de adapter is bescha-
digd.
• Het apparaat niet zelf repareren, maar een erkende
specialist raadplegen.
• Het apparaat en de netkabel moeten regelmatig op zicht-
bare schade worden gecontroleerd. Wanneer u schade
vaststelt, mag het apparaat niet meer worden gebruikt.
• Gebruik alleen originele reserveonderdelen.
• Laat om veiligheidsredenen geen verpakkingsdelen
(plasticzak, doos, piepschuim, enz.) binnen het bereik
van uw kinderen liggen.
WAARSCHUWING:
Laat kleine kinderen niet met de folie spelen. Er
bestaat gevaar voor verstikking!

PC-BS3037A_IM 27.05.19
14
Speciale veiligheidsinstructies voor dit apparaat
• Dit apparaat kan alleen worden gebruikt door kinderen vanaf
8 jaar, personen met verminderde fysieke, zintuiglijke of mentale
vermogens, of personen met onvoldoende kennis en ervaring als
zij begeleid worden of zijn geïnstrueerd in het veilig gebruik van
het apparaat en de gevaren begrijpen.
• Kinderen mogen niet met het apparaat spelen.
• Reinigen en gebruikersonderhoud mag niet door kinderen wor-
den uitgevoerd zonder begeleiding.
• Het apparaat is bedoeld om te worden gebruikt met een zeer lage
veiligheidsspanning. Uitsluitend aansluiten op een stroomtoevoer
die overeenkomt met de specicaties op het typeplaatje.
• Als de aansluitkabel van dit apparaat is beschadigd, dient deze
te worden vervangen met een speciale aansluitkabel die verkrijg-
baar is bij de fabrikant.
• Gebruik alleen de meegeleverde voeding.
• Zuig geen ontvlambare substanties of vloeistoffen op!
• Gebruik dit apparaat niet voor het verwijderen van tonerdeeltjes
van een laserprinter of kopieerapparaat om een brand of explosie
te vermijden.
• Zuig nooit hete as, spitse of scherpe voorwerpen op!
• Nooit stofzuigen zonder geïnstalleerde lter.
Oplaadbare lithium-ionaccu (li-ion)
Het apparaat is uitgerust met een oplaadbare li-ionaccu.
Dit resulteert in vele voordelen in vergelijking met andere
batterijen en accu’s:
• Een hoge celspanning (meer volt)
• Geen geheugeneffect
• Een lage zelfontlading
Veilige hantering van oplaadbare lithium-ionaccu’s
Li-ionaccu’s worden over het algemeen als veilig be-
schouwd. Gevaren kunnen echter optreden door mechani-
sche schade, elektrische defecten en thermische effecten.
Mechanische schade kan leiden tot het lekken van gassen
of vloeistoffen die zeer irriterend, ontvlambaar of zelf giftig
kunnen zijn.
Een elektrische fout, zoals een kortsluiting, kan leiden tot
oververhitting en een brand.
Zelfs het verwarmen van de behuizing van een li-ionaccu,
bijv. door zonlicht of een verwarmingselement, kan leiden
tot een brand of een explosie.
Li-ionaccu’s zijn echter veilig wanneer ze op een juiste
manier worden gehanteerd. Alleen wanneer ze verkeerd
worden gebruikt of opgeslagen, zijn ze gevaarlijk. Daarom:

PC-BS3037A_IM 27.05.19
15
• Vermijd een temperatuur boven 40 °C of onder 0 °C.
• Laad het apparaat of de oplaadbare accu niet vallen.
• Als de li-ionaccu gevallen en nu beschadigd is, gebruik
het niet langer.
• Wanneer het apparaat wordt opgeborgen of afgedankt,
bedek de aansluitklemmen met tape om kortsluiting te
vermijden.
• Lever afgedankte accu’s in bij de winkel waar u het hebt
gekocht of een gepast inzamelpunt in uw gemeente.
De levensduur van de oplaadbare li-ionaccu verlengen
Bij li-ionaccu’s, zelfs meer dan bij andere accu’s, kan
de levensduur worden verlengd door ze op een juiste
manier te hanteren. De volgende eenvoudige oplaad- en
opslaginstructies zorgen voor een langdurig behoud van het
accuvermogen:
• Temperatuur: Het ideale temperatuurbereik voor deze
accu is tussen 10 en 25 °C. Een hogere temperatuur kan
tot vroegtijdige veroudering leiden.
• Opladen en ontladen: Vermijd tijdens oplaadcycli zowel
een volledige oplading als diepe ontlading.
Wanneer het oplaadproces van de accu is voltooid, ont-
koppel de lader meteen. Een oplading tot 90 % is ideaal.
De accu heeft tevens een langere levensduur wanneer
deze niet tot 0 % wordt ontladen. Wanneer mogelijk,
laad de accu altijd op zodra het een laadstatus van 30 %
bereikt.
• Opslag: Berg accu’s altijd op in een droge plaats en op
een gematigde temperatuur tussen 10 °C en 20 °C.
Houd tevens rekening met het effect van zelfontlading.
Als de accu reeds leeg is, kan dit effect leiden tot een
diepe ontlading en schade aan de accu. Als u denkt de
accu langere tijd niet te gebruiken, kunt u dit effect ophef-
fen. Wij bevelen vervolgens aan om de accu voor opslag
tot ca. 40 % op te laden. Controleer ten laatste binnen de
maand de laadstatus van de accu.
Het apparaat uitpakken
1. Verwijder het apparaat uit de verpakking.
2. Controleer de levering op volledigheid.
3. Controleer het apparaat op transportschade, om gevaren
te voorkomen.
OPMERKING:
In het geval van transportschade dient u onmiddellijk
contact op te nemen met de dealer. Gebruik nooit een
beschadigd apparaat!
Overzicht van de bedieningselementen /
Omvang van de levering
Afbeelding A
1 Stofcontainer
2 Motorbehuizing
3 MAX toets
4 Aan / uit toets
5 Oplaadbare batterijpakket
6 Ontgrendeling van oplaadbare batterijpakket
7 Slot van de stofcontainer
Afbeelding B
1 Stofcontainer
2 Motorbehuizing
8 Controlelampjes
9 Handvat
10 Aansluiting vor de voedingseenheid
11 Handset (Afbeelding A)
12 Zuigbuisontgrendeling
13 Mondstukhouder
14 Ontgrendeling voor zuigbuisverbinding
15 Vloerzuigmond met turboborstel
16 Losmaken van de zuigmond
17 Zuigbuis
18 Ontgrendeling van gecombineerd mondstuk
19 Gecombineerd spleet- / borstel- / bekledingmondstuk
20 Uitschuifbare speciale borstel
Afbeeldingen C en D
Wandhouder
Niet afgebeeld
1 × Voedingsadapter
2 × Plug
2 × Schroef
Opmerkingen voor het gebruik
• Het apparaat is met name geschikt voor het snel opzui-
gen van kleine hoeveelheden droog vuil of stof.
• Het apparaat wordt aangedreven met behulp van een
opgeladen accu. Opladen doet u via de meegeleverde
voedingseenheid.
• Directe stroomtoevoer via de voedingsadapter is niet
mogelijk.
• Hang het apparaat op de meegeleverde muurbevesti-
ging wanneer u het niet gebruikt. Het dient ook als een
laadstation.
LET OP:
Het apparaat kan niet zelfstandig rechtop staan. Als u
de muurbevestiging niet gebruikt, plaatst u de stofzui-
ger voorzichtig op de vloer.

PC-BS3037A_IM 27.05.19
16
• Deze stofzuiger met oplaadbare batterijen is geen ade-
quate vervanging voor een conventionele vloerstofzuiger.
Vooral op hoogpolig tapijt is de reinigingsprestatie niet
voldoende vanwege het ontwerp.
• Verontreinigde lters verminderen de zuigkracht van
de stofzuiger. Daarom raden we aan om de bestaande
vuillters regelmatig te reinigen.
• In het ideale geval reinigt u de lters wanneer ze langdu-
rig zijn gebruikt.
• Controleer regelmatig en reinig het elektrische vloer-
mondstuk.
• Reinig zwaar vervuilde vloeren indien nodig meerdere
malen en / of gebruik een conventionele 230 V~ vloerstof-
zuiger.
Het apparaat aan / uitschakelen
• De toets (4) schakelt het apparaat aan en uit.
• Druk op de MAX toets aan de achterkant van de handset
om te schakelen tussen lage en hoge vermogensni-
veaus.
Ingebruikname
Zuigbuis
• De zuigbuis is uitgerust met een verbinding. Wanneer u
deze kantelt, kunt u gemakkelijker stofzuigen op moeilijk
bereikbare plaatsen. Laat voor een stijve zuigbuis het
scharniergewricht hoorbaar op zijn plaats vastklikken.
• Druk de zuigbuis met de twee contactpunten in de
aansluiting op de handhouder. Het moet hoorbaar
vastklikken.
• Om de zuigbuis los te koppelen drukt u op de toets (12)
en trekt tegelijkertijd aan de buis.
Vloerzuigmond met turboborstel
• Het vloermondstuk is geschikt voor alle vloerbedekkin-
gen behalve hoogpolige tapijten.
• Tijdens het gebruik gaan de LEDs op de zuigmond bran-
den, zodat u op donkere plekken beter kunt zien.
LET OP: U kunt de LEDs niet vervangen.
• Schuif het onderste deel van de zuigbuis op de aanslui-
ting van de zuigmond. Let op de contactpennen op het
vloermondstuk. De zuigbuis moet hoorbaar vastklikken.
• Om de zuigbuis los te koppelen drukt u op de toets (16)
en trekt tegelijkertijd aan de buis.
Gecombineerd spleet- / borstel- / bekledingmondstuk
(3-in-1)
• Deze accessoires zijn altijd direct beschikbaar als u
ze met behulp van de beugel op de zuigbuis boven de
scharnierverbinding bevestigt.
• Bij gebruik van dit mondstuk als een spleetmondstuk,
zult u vuil uit hoeken, groeven en kleine openingen
kunnen zuigen.
• Gebruik het spleetmondstuk samen met de vergren-
delde borstel- / bekledingmondstuk om het te reinigen
oppervlak te beschermen tegen krassen. Hiermee kunt u
voorzichtig vuil uit sleuven in de bekleding en matrassen
verwijderen. Ook geschikt voor het verwijderen van stof
van kwetsbare oppervlakken zoals meubels of gordijnen.
• Om het borstel- / bekledingmondstuk op het spleetmond-
stuk te bevestigen, drukt u eerst op de toetsen aan de
zijkant en schuift u het mondstuk erop en laat u deze
hoorbaar op zijn plaats vastklikken. (zoals in onder-
staande afbeelding weergegeven).
• Om de vergrendeling te ontgrendelen, drukt u eenvoudig
opnieuw op beide toetsen.
• Er zijn twee verschillende manieren om dit gecombi-
neerde mondstukhulpstuk op het apparaat aan te sluiten:
Aansluiting op de handhouder
• Plaats het spleetmondstuk met de ontgrendeling naar
boven in de aansluiting op de handset. Het moet hoor-
baar vastklikken.
• Om het mondstuk te ontgrendelen, drukt u op de ont-
grendelingsknop en trekt u deze tegelijkertijd eruit.
Aansluiting op de zuigbuis
Aan de onderkant van de zuigbuis vindt u dezelfde stek-
kerverbinding als op de handset. Monteer / demonteer het
mondstuk zoals hierboven beschreven.
Uitschuifbare speciale borstel
• Dit mondstuk is bijzonder goed geschikt voor het voor-
zichtig reinigen van grotere gevoelige oppervlakken.
• U kunt het vuilopvangoppervlak vergroten door de bor-
stelcomponent helemaal uit te trekken.
• U kunt deze borstel zowel direct op de aansluiting op de
handset als op de aansluiting van de reeds gemonteerde
zuigbuis bevestigen.
• Om het mondstuk los te maken, trekt u het eenvoudig-
weg eraf.
Muurhouder installeren
Zie ook de afbeeldingen (C en D) op pagina 3.
Aansluiten van de voedingseenheid
Als u de wandhouder ook als oplaadstation wilt gebruiken,
sluit dan eerst de stekker van de voedingseenheid aan
(Afb. C).

PC-BS3037A_IM 27.05.19
17
1. Sluit de voedingsstekker aan op de aansluiting aan de
achterkant van de laadeenheid.
2. Duw de stekker stevig in de aansluitingen. Het moet
hoorbaar vastklikken.
3. Bevestig de kabel in de kabelgeleider rechts of links.
Wandhouder monteren
WAARSCHUWING:
Controleer eerst of er geen kabels in de muur zitten die
beschadigd kunnen raken!
LET OP:
Plaats de wandhouder zo, dat het apparaat niet in direct
zonlicht of dicht bij andere warmtebronnen hangt.
OPMERKING:
Als u de muurbevestiging tegelijkertijd als laadstation wilt
gebruiken, moet er een stopcontact in de buurt zijn.
1. Meet de hoogte voor de muurhouder. Houd de stofzuiger
tegen de muur als deze volledig gemonteerd is met de
zuigbuis en de zuigmond.
2. Plaats de wandhouder tegen de muur, zoals getoond op
pagina 3 (Afb. D). Teken de 2 boorgaten af.
3. Boor de gaten en plaats de pluggen in de muur.
4. Voer de schroeven door de gaten van de muurhouder.
5. Draai de schroeven met de schroevendraaier vast.
De accu opladen
LET OP:
Laad de oplaadbare batterij niet op zonder dat u er zicht
op hebt.
1. Schakel het apparaat uit.
2. Sluit de voedingseenheid aan op de aansluiting (10).
Als u de wandhouder als oplaadstation gebruikt, maak
dan het apparaat los van de wandhouder.
3. Verbind de voedingsadapter met een gecerticeerd stop-
contact. Laad het apparaat ong. 5 uur op voor het eerste
gebruik.
OPMERKING:
• De indicatielampjes geven de laadtoestand van de
oplaadbare batterij aan. (25 %, 50 %, 100 %)
• Het apparaat regelt het opladen elektronisch, wat te
ver opladen voorkomt.
• Het opladen is voltooid wanneer alle 3 indica-
tielampjes branden.
• Als het apparaat uit het laadstation wordt verwijderd
of van de voeding wordt losgekoppeld, gaan de
indicatielampjes uit.
• Het is normaal dat het apparaat warm wordt tijdens
het opladen.
4. Trek de stekker uit de
voedingseenheid zodra de
oplaadbare batterij volledig is
opgeladen.
5. Om het apparaat uit het
laadstation te verwijderen,
drukt u op de ontgrendeling
aan de bovenzijde van de
muurbevestiging.
OPMERKING:
Zelfs wanneer het apparaat
is uitgeschakeld, zal de op-
laadbare batterij voortdurend
ontladen. Als het apparaat
niet in gebruik is gedurende
een langere periode, laad
de oplaadbare batterij dan
minstens één keer elke 4 tot 6
weken op.
Het apparaat gebruiken
U kunt het apparaat gebruiken om de vloer mee te stofzui-
gen, of als een rechtopstaande stofzuiger (basiseenheid).
1. Het apparaat zonodig loskoppelen van de voedings-
adapter.
2. Schakel het apparaat in.
3. Als u de zuigbuis bij de verbinding wilt kantelen, drukt u
op de ontgrendeling (14).
OPMERKING:
• Wij raden bij het gebruik van de zuigmond de hoge
zuigkracht aan. Druk op de MAX toets.
• Tijdens bedrijf, afhankelijk van de oplaadcapaciteit
van de oplaadbare batterij, zijn 1 tot 3 indicatielampjes
verlicht.
• We raden aan de batterij op te laden als de indi-
catielampjes een restcapaciteit van slechts 25%
weergeven.
• Zodra de capaciteit van de oplaadbare batterij bijna
op is, knippert het laatste indicatielampje. Om een
volledige ontlading van de oplaadbare batterij te
voorkomen, schakelt de motor het apparaat dienover-
eenkomstig uit. Laad de batterij op.
Einde van de werking
1. Schakel het apparaat uit.
2. Als u de muurhouder al geïnstalleerd hebt, kunt u de
stofzuiger ophangen.

PC-BS3037A_IM 27.05.19
18
Onderhoud
Het ltersysteem
Uw apparaat beschikt over 3 lters. Het gewone stofzaksys-
teem is vervangen door een transparante stofcontainer. De
hogere doorstroomsnelheid van de container maakt het
mogelijk om grof vuil en de kleinste zwevende deeltjes te
scheiden van de “aangezogen lucht”.
Het is niet nodig om stofzakken te kopen.
De lters moeten regelmatig worden gereinigd.
LET OP:
• Was het lter nooit in de wasmachine.
• Gebruik geen haardroger om het te drogen.
• Gebruik het apparaat pas weer als alle lters volledig
droog en correct zijn gemonteerd.
De ltereenheid
Het lter bestaat uit:
• Fijn-materiaallter
• Grof lter
Ga als volgt te werk om de ltereenheid te
reinigen:
Legen van de stofcontainer
1. Het apparaat zonodig loskoppelen van de voedings-
adapter.
2. Indien nodig, verwijdert u de zuigbuis of het mondstuk
van het apparaat.
3. Zie afbeelding A op pagina 3. Druk op de toets
op het
stofreservoir om deze uit de handset te verwijderen.
4. Trek het jn-materiaallter aan het gekleurde stuk stof
eruit.
5. Trek het groflter aan de handgreep eruit om het uit de
stofcontainer te verwijderen.
6. Leeg de inhoud van de stofcontainer.
De lters reinigen
1. Houd beide lters boven een vuilnisbak en klop het stof
eruit. U kunt ook het jn-materiaallter uitborstelen. In
geval van zware vlekken, reinigt u de lters onder lopend
water.
2. Laat de lters volledig aan de lucht drogen alvorens ze
weer terug te plaatsen!
3. Veeg het stofcontainer af met een vochtige doek en
droog hem dan af.
Het monteren van de ltereenheid
1. Plaats het groflter in de stofcontainer. Let op de
uitsparing op de rand van de stofcontainer. Druk nu het
groflter naar beneden zodat het in het midden van de
stofcontainer wordt geplaatst.
2. Plaats het jn-materiaallter (met het gedeelte van het
gekleurde stof naar boven gericht) op het groflter. Druk
stevig op het jn-materiaallter.
3. Plaats vervolgens het stofreservoir weer op de handset.
Plaats eerst de stofcontainer bovenop de motorbe-
huizing. Duw nu de stofcontainer naar beneden. De
vergrendeling op de stofcontainer moet hoorbaar op zijn
plaats vastklikken.
Uitlaatlter
Uw apparaat beschikt tevens over een uitlaatlter. Het
bevindt zich aan de bovenkant van de motorbehuizing.
LET OP: U kunt dit lter niet verwijderen.
Reiniging
WAARSCHUWING:
• Het apparaat altijd loskoppelen van de voedingsadapter voor
het reinigen!

PC-BS3037A_IM 27.05.19
19
WAARSCHUWING:
• Dompel de motorbehuizing voor de reiniging in geen geval on-
der in water. Dit zou tot een elektrische schok of brand kunnen
leiden.
LET OP:
• Gebruik geen draadborstel of andere schurende
voorwerpen.
• Gebruik geen scherpe of schurende reinigingsmid-
delen.
• De afzonderlijke onderdelen zijn niet vaatwasserbe-
stendig.
• De behuizing kan met een licht bevochtigde doek afge-
veegd worden.
• Veeg de voedingsadapter altijd af met een droge doek.
Vloerzuigmond
1. Maak de zuigmond los van de zuigbuis.
2. Draai de zuigmond,
zodat u de onderkant
kunt zien. Gebruik een
klein muntstuk of een
ander gereedschap
om de grendel te
openen. Draairichting:
Linksom Kantel de
klep open.
3. Trek de rolborstel eruit.
4. Verwijder om de borstel gedraaide draadjes en haar.
Gebruik indien nodig een schaar.
5. Montage:
5.1 Plaats de borstelrol eerst met de stervormige
uitsparing terug in het compartiment.
5.2 Plaats het andere uiteinde van de borstelrol met het
vierkante lager in de uitsparing onder de klep.
6. Sluit de vergrendeling van de rolborstel.
Stofcontainer met ltereenheid
Voor het reinigen van deze onderdelen leest u het hoofd-
stuk “Onderhoud”.
Opslaan
• Reinig het apparaat zoals beschreven en laat het
drogen.
• Gebruik voor het opbergen de eerder gemonteerde
muurbeugel of plaats het apparaat voorzichtig op de
vloer.
• Wij raden aan het apparaat in de originele verpakking op
te bergen wanneer u het voor langere tijd niet gebruikt.
OPMERKING t.a.v. de levensduur van de
oplaadbare batterij:
Zelfs wanneer het apparaat is uitgeschakeld, zal de
oplaadbare batterij voortdurend ontladen. Als het appa-
raat niet in gebruik is gedurende een langere periode,
laad de oplaadbare batterij dan minstens één keer elke
4 tot 6 weken op.
• Berg het apparaat altijd op buiten bereik van kinderen en
op een droge, goed geventileerde plek.
• De opslagtemperatuur moet tussen 0 °C en de 40 °C
zijn.
Probleemoplossing
Probleem Mogelijke oorzaak Oplossing
Het apparaat werkt niet. De voedingseenheid is aangesloten. Het apparaat zonodig loskoppelen van de voedings-
adapter.
De oplaadbare batterij is defect. Neem contact op met onze dienst of een specialist.
Wanneer het apparaat is
ingeschakeld, gaan alle
indicatielampjes knipperen.
De oplaadbare batterij is leeg. Laat de batterij op.

PC-BS3037A_IM 27.05.19
20
Probleem Mogelijke oorzaak Oplossing
Weinig zuigkracht. De oplaadbare batterij is bijna leeg. Laat de batterij op.
De stofcontainer is vol. Leeg de stofcontainer.
De lters zijn vervuild. Maak de lters schoon, zoals beschreven onder
“Onderhoud”.
LET OP:
Gebruik het apparaat pas weer met droge lters.
Luid geluid tijdens gebruik. Een vreemd voorwerp is in de zuig-
mond vast komen te zitten.
Verwijder het voorwerp. Maak indien nodig de zuig-
mond los van de zuigbuis.
De zuigmond met turbo-
borstel doet het niet.
De rolborstel is geblokkeerd door vuil. Reinig de zuigmond zoals beschreven in “Reiniging”.
Zuigbuis en / of zuigmond niet goed
gemonteerd.
Controleer de juiste montage van de componenten.
De oplaadbare batterij
houdt geen lading vast.
De oplaadbare batterij is aan het
einde van zijn levensduur.
Neem contact op met onze dienst of een specialist.
Technische gegevens
Model:.............................................................. PC-BS 3037 A
Nettogewicht
(Handset met zuigbuis en vloermondstuk): .......... ong. 2,4 kg
Voedingsadapter
Beschermingsklasse: ...........................................................
Voeding: .......................AC 100 - 240 V, 50 / 60 Hz, 0,8 A MAX
Vermogen: .................................................... DC 35 V, 500 mA
Polariteit: ....................................................................
Oplaadbare batterij: ........................29,6 V, 2200 mAh Li-ion
Gebruikduur: ........................................30 minuten maximaal
Oplaadtijd: ........................................................... ong. 4,5 uur
Het recht om technische en ontwerpaanpassingen te ma-
ken in de loop van voortdurende productontwikkeling blijft
voorbehouden.
Dit apparaat is gekeurd conform de op dit moment van toe-
passing zijnde CE-richtlijnen zoals bijvoorbeeld elektromag-
netische compatibiliteit en laagspanningsvoorschriften en is
geconstrueerd volgens de nieuwste veiligheidstechnische
voorschriften.
Verwijdering
Batterijen / accu’s verwijdering
Het apparaat bevat een oplaadbare batterij.
Batterijen / accu’s dienen niet weggegooid te
worden met het normale huisafval.
De batterijen / accu’s moeten worden verwijderd
alvorens het product weg te gooien. Druk op de
ontgrendeling (6) en verwijder het oplaadbare batterijpakket
uit de handset.
Informatie over waar batterijen / accu’s kunnen worden
afgevoerd kan bij uw gemeente worden verkregen.
Betekenis van het symbool “vuilnisemmer”
Bescherm ons milieu, elektrische apparaten
horen niet in het huisafval.
Maak voor het afvoeren van elektrische
apparaten gebruik van de voorgeschreven
verzamelpunten en geef daar de elektrische
apparaten af die u niet meer gebruikt.
Daardoor helpt u de potentiële effecten te voorkomen
die een verkeerde afvoer op het milieu en de menselijke
gezondheid kunnen hebben.
Op deze wijze levert u uw bijdrage aan het hergebruik, de
recycling en andere verwerkingsvormen voor oude elektro-
nische en elektrische apparaten.
Voor informatie over verzamelpunten voor uw apparaten
kunt u contact opnemen met uw gemeente of gemeentead-
ministratie.

PC-BS3037A_IM 27.05.19
21
Mode d’emploi
Merci d’avoir choisi notre produit. Nous espérons que vous
saurez proter votre appareil.
Symboles de ce mode d’emploi
Les informations importantes pour votre sécurité sont
particulièrement indiquées. Veillez à bien respecter ces
indications an d’éviter tout risque d’accident ou d’endom-
magement de l’appareil :
AVERTISSEMENT :
Prévient des risques pour votre santé et des risques
éventuels de blessure.
ATTENTION :
Indique les risques pour l’appareil ou tout autre appareil.
NOTE :
Attire votre attention sur des conseils et informations.
Sommaire
Liste des différent éléments de commande ....................3
Notes générales ................................................................21
Conseils de sécurité spéciques à cet appareil ...........22
Batteries au lithium-ion rechargeables (Li-ion) .............22
Manipulation en toute sécurité des batteries au
lithium-ion rechargeables ............................................... 22
Prolonger la durée de vie des batteries
Li-ion rechargeables.......................................................23
Déballage de l’appareil ..................................................... 23
Liste des différent éléments
de commande / Contenu de la livraison .........................23
Notes d’utilisation ............................................................. 23
Allumer / éteindre l’appareil ............................................24
Mise en service .................................................................24
Tuyau d’aspiration .......................................................... 24
Suceur à plancher avec brosse turbo ............................ 24
Suceur combiné recoins / brosse /
meubles rembourrés (3 en 1) ........................................24
Brosse spéciale extensible ............................................24
Assemblage du support mural ........................................25
Branchement de la che du bloc d’alimentation ............ 25
Fixation du support mural ..............................................25
Chargement de la batterie rechargeable ........................25
Utilisation de l’appareil.....................................................25
Fin de fonctionnement ...................................................25
Entretien .............................................................................26
Le système de ltre ........................................................ 26
Vider le collecteur de poussière ..................................... 26
Nettoyer les ltres ..........................................................26
Assembler le dispositif de ltration ................................26
Nettoyage ...........................................................................26
Suceur à plancher .......................................................... 27
Bac à poussière avec élément ltrant ............................27
Stockage ............................................................................27
Dépannage .........................................................................27
Données techniques .........................................................28
Élimination .........................................................................28
Accumulateur / Mise au rebut de la batterie ................... 28
Signication du symbole « Poubelle » ........................... 28
Notes générales
Lisez attentivement ce mode d’emploi avant de mettre l’ap-
pareil en marche pour la première fois. Conservez le mode
d’emploi ainsi que le bon de garantie, votre ticket de caisse
et si possible, le carton avec l’emballage se trouvant à
l’intérieur. Si vous remettez l’appareil à des tiers, veuillez-le
remettre avec son mode d’emploi.
• N’utilisez cet appareil que pour un usage privé et pour
les taches auxquelles il est destiné. Cet appareil n’est
pas prévu pour une utilisation professionnelle.
• L’adaptateur électrique ne convient que pour une utilisa-
tion dans des pièces sèches.
• Vériez que le courant de sortie, la tension et la polarité
de l’adaptateur électrique correspondent aux informa-
tions sur l’appareil branché !
• Ne touchez pas l’adaptateur électrique branché avec des
mains humides !
• En cas de nettoyage, débranchez l’appareil de l’adapta-
teur électrique.
• Assurez-vous que le câble de l’adaptateur électrique ne
soit pas entortillé, coincé, bloqué par un obstacle ou en
contact avec des sources de chaleur.
• N’utilisez pas un adaptateur électrique endommagé.
• Ne réparez pas l’adaptateur vous-même, mais consultez
un spécialiste autorisé.
• Il y a lieu d’inspecter l’appareil et le bloc d’alimentation
régulièrement en vue d’éventuels signes d’endom-
magements. Lorsqu’un endommagement est détecté,
l’appareil ne doit plus être utilisé.
• N’utilisez que les accessoires d’origine.
• Par mesure de sécurité vis-à-vis des enfants, ne
laissez pas les emballages (sac en plastique, carton,
polystyrène) à leur portée.
AVERTISSEMENT :
Ne pas laisser les jeunes enfants jouer avec le lm.
Il y a risque d’étouffement !

PC-BS3037A_IM 27.05.19
22
Conseils de sécurité spéciques à cet appareil
• Cet appareil peut être utilisé par les enfants d’âge supérieur
à 8 ans et par les personnes aux capacités sensorielles, phy-
siques ou mentales réduites, ainsi que par les personnes sans
expérience ou connaissances, tant qu’elles sont supervisées et
instruites à l’utilisation de l’appareil en sécurité et tant qu’elles en
comprennent les risques.
• Les enfants ne doivent pas jouer avec l’appareil.
• Le nettoyage et l’entretien utilisateur ne doivent pas être effectués
par les enfants sans supervision.
• L’appareil est conçu pour une utilisation avec une très basse
tension de sécurité. Branchez uniquement à une alimentation
conforme aux caractéristiques inscrites sur la plaque signalétique.
• Si le câble de connexion de cet appareil est endommagé, il doit
être remplacé par un câble de connexion spécial disponible au-
près du fabricant ou de son service client.
• Utilisez uniquement le bloc d’alimentation fourni avec le produit.
• N’aspirez pas de substances combustibles ou de liquides !
• Ne pas utiliser cet appareil pour aspirer les particules d’encre
d’une imprimante laser ou d’une photocopieuse, pour éviter les
risques d’incendie ou d’explosion.
• N’aspirez jamais de cendres chaudes, d’objets pointus ou tran-
chants !
• N’aspirez jamais sans le ltre montés.
Batteries au
lithium-ion rechargeables (Li-ion)
L’appareil est équipé de batteries Li-ion rechargeables. Ce
type de batterie présente un certain nombre d’avantages
comparé à d’autres batteries ou accumulateurs :
• Une haute tension par cellule (plus de volts)
• Pas d’effet mémoire
• Un taux de décharge naturelle faible
Manipulation en toute sécurité des batteries au
lithium-ion rechargeables
En général, les batteries Li-ion sont considérées comme
sûres. Cependant, il existe toujours des risques entraînés
par les dommages mécaniques, les défaillances électriques
et les effets thermiques.
Un dommage mécanique peut entraîner la fuite de subs-
tances gazeuses ou liquides, qui peuvent être hautement
irritantes, inammables ou même toxiques.

PC-BS3037A_IM 27.05.19
23
Une défaillance électrique, telle un court-circuit, peut entraî-
ner la surchauffe et créer un incendie.
Même l’exposition de la surface d’une batterie Li-ion à la
chaleur, par exemple la lumière du soleil ou une autre source
de chaleur, peut causer un incendie ou une explosion.
Cependant, les batteries Li-ion sont sûres si elles sont
manipulées correctement. Elles peuvent se révéler dan-
gereuses seulement si elles sont utilisées ou stockées de
manière inappropriée. En conséquence :
• Évitez d’exposer la batterie à des températures supé-
rieures à 40 °C et en dessous de 0 °C.
• Ne faites pas tomber l’appareil ni la pile rechargeable.
• Si la batterie Li-ion a subi une chute et présente mainte-
nant des signes de dommages, cessez son utilisation.
• Lorsque vous stockez ou éliminez l’appareil, collez de
l’adhésif isolant sur les terminaux électriques pour éviter
les courts-circuits.
• Éliminez les accumulateurs en n de vie utile dans les
conteneurs spécialisés chez les revendeurs ou aux
points de collecte municipaux.
Prolonger la durée de vie des batteries
Li-ion rechargeables
Vous pouvez préserver la durée de vie des batteries en les
entretenant correctement, et c’est d’autant plus vrai dans
le cas des batteries Li-ion. Les règles de recharge et de
stockage simples suivantes vous aideront à préserver la
capacité de charge de la batterie :
• Température : La température idéale pour ces batteries
se trouve entre 10 - 25 °C. Les températures supérieures
peuvent entraîner l’usure prématurée.
• Charger et décharger : Pendant les cycles de charge, il
est recommandé d’éviter de surcharger et de décharger
totalement la batterie.
Lorsque la batterie est pleinement chargée, débranchez
le chargeur immédiatement. Il est préférable de rechar-
ger la batterie à 90 %.
En revanche, il est recommandé de ne pas laisser le ni-
veau de la batterie descendre à 0 %. Si possible, chargez
la batterie lorsque son niveau de charge atteint 30 %.
• Rangement : Stockez toujours les batteries dans un
lieu sec et à température modérée située entre 10 °C
et 20 °C.
Prenez également en compte les effets de la décharge
naturelle ! Si l’accumulateur est déjà vide, cet effet peut
entraîner une décharge profonde, pouvant endommager
la batterie. Si vous prévoyez de stocker la batterie pen-
dant une durée prolongée, vous pouvez empêcher cet
effet. Nous vous recommandons de charger la batterie
à environ 40 % avant de la stocker. Vériez le niveau de
charge tous les mois au plus.
Déballage de l’appareil
1. Retirez l’appareil de son emballage.
2. Vériez que la liste des accessoires soit au complet.
3. Vériez que l’appareil n’ait pas subi de dégâts pendant le
transport, pour éviter tout risque.
NOTE :
S’il y a eu des dégâts dûs au transport, contactez votre
revendeur immédiatement. N’utilisez pas un appareil
endommagé !
Liste des différent éléments
de commande / Contenu de la livraison
Figure A
1 Collecteur de poussière
2 Boîtier du moteur
3 Bouton MAX
4 Bouton marche / arrêt
5 Batterie rechargeable
6 Bouton de libération de la batterie rechargeable
7 Verrou du collecteur de poussière
Figure B
1 Collecteur de poussière
2 Boîtier du moteur
8 Voyants lumineux
9 Poignée
10 Prise de connexion du bloc d’alimentation
11 Poignée (Figure A)
12 Bouton de libération du tuyau d’aspiration
13 Porte-tube d’aspiration
14 Bouton de libération de la jointure du tube d’aspiration
15 Suceur à plancher avec brosse turbo
16 Déverrouillage du suceur à plancher
17 Tuyau d’aspiration
18 Bouton de libération du tube et du suceur
19 Suceur combiné recoins / brosse / meubles rembourrés
20 Brosse spéciale extensible
Figures C et D
Support mural
Non illustré
1 × Adaptateur secteur
2 × Cheville
2 × Vis
Notes d’utilisation
• L’appareil est spécialement conçu pour aspirer rapi-
dement des petites quantités de saletés sèches ou de
poussières.
• L’appareil fonctionne via une batterie chargée. La charge
se fait par le bloc d’alimentation fourni.

PC-BS3037A_IM 27.05.19
24
• Une alimentation directe via un adaptateur électrique est
impossible.
• Suspendez l’appareil sur le support mural lorsque vous
ne vous en servez pas. Il fait également ofce de station
de charge.
ATTENTION :
L’appareil ne peut pas tenir en position verticale sans
support. Si vous n’utilisez pas le support mural, alors
posez-le sur le sol avec délicatesse.
• Cet aspirateur à batterie rechargeable ne peut pas rem-
placer un aspirateur conventionnel de manière adéquate.
Ses performances d’aspiration ne sont pas sufsantes,
spécialement si vous possédez un tapis épais
• Les ltres contaminés réduisent la puissance d’aspiration
de l’aspirateur. C’est pourquoi nous recommandons le
nettoyage régulier des ltres à poussière.
• Dans l’idéal, nettoyez les ltres après chaque période
prolongée d’utilisation.
• Inspectez et nettoyez régulièrement le suceur électrique.
• Si nécessaire, nettoyez plusieurs fois sur les sols très
sales, et /ou utilisez un aspirateur conventionnel de
230 V~.
Allumer / éteindre l’appareil
• Le bouton (4) permet d’allumer et d’éteindre l’appareil.
• Appuyez sur le bouton MAX situé sur l’arrière de l’appa-
reil pour basculer entre la basse et la haute puissance.
Mise en service
Tuyau d’aspiration
• Le tube d’aspiration est articulé. Lorsque vous le pliez, il
est plus facile d’aspirer dans les lieux difciles d’accès.
Pour que le tube soit rigide, enclenchez l’articulation
avec un déclic audible.
• Insérez le tuyau d’aspiration avec les deux broches de
contact dans le raccord sur l’unité manuelle. Il doit s’em-
boîter en faisant un bruit.
• Pour détacher le tuyau d’aspiration, appuyez sur le
bouton de déverrouillage (12) et sortez le tuyau en
même temps.
Suceur à plancher avec brosse turbo
• Le suceur à plancher convient à n’importe quel revête-
ment de sol, sauf pour les tapis épais.
• Pendant le fonctionnement de l’appareil, les LED sur le
suceur à plancher s’allument pour améliorer la visibilité
dans les zones sombres.
ATTENTION :
Vous ne pouvez pas changer les LED.
• Glissez l’extrémité inférieure du tuyau d’aspiration dans
le raccord sur le suceur à plancher. Notez la présence
des broches de contact sur le suceur à plancher. Le
tuyau d’aspiration doit s’emboîter en faisant un bruit.
• Pour détacher le tuyau d’aspiration, appuyez sur le
bouton de déverrouillage (16) et sortez le tuyau en
même temps.
Suceur combiné recoins / brosse / meubles rembourrés
(3 en 1)
• Ces accessoires sont toujours à portée de main lorsque
vous les attachez au support sur le tube d’aspiration,
au-dessus de l’articulation.
• Lorsque vous utilisez ce suceur comme suceur à re-
coins, vous pouvez aspirer les saletés dans les coins, les
renfoncements et les petits espaces.
• Utilisez le suceur avec l’embout brosse / meubles
rembourrés verrouillé pour éviter de rayer la surface à
nettoyer. Cela permet d’enlever délicatement la saleté
des fentes dans les meubles et les matelas. Convient
également pour enlever la poussière des surfaces sen-
sibles telles que les meubles ou les rideaux.
• Pour attacher l’embout brosse / meubles rembourrés au
suceur de recoins, appuyez d’abord sur les boutons sur
les côtés, puis glissez-y le suceur. Il doit s’enclencher de
manière audible (comme illustré dans l’image qui suit).
• Pour déverrouiller, appuyez simplement sur les deux
boutons de nouveau.
• Vous pouvez connecter cette combinaison du suceur à
l’appareil de deux manières :
Raccordement sur l’unité manuelle
• Insérez le suceur à recoins, le symbole de déverrouillage
orienté vers le haut. Il doit s’emboîter en émettant un
bruit.
• Pour détacher le suceur, appuyez sur le bouton de
libération en tirant dessus simultanément.
Raccordement au tuyau d’aspiration
Vous trouverez un raccord identique sur l’extrémité
inférieure du tube d’aspiration. Suivez la procédure décrite
ci-dessus pour attacher / détacher le suceur.
Brosse spéciale extensible
• Ce suceur convient particulièrement au nettoyage en
douceur de surfaces sensibles plus grandes.
• Vous pouvez élargir la surface d’aspiration des saletés
en déployant complètement l’accessoire de brosse.
• Vous pouvez attacher cette brosse directement sur le
connecteur de l’appareil, ainsi que sur un tube d’aspira-
tion déjà installé.
• Pour libérer le suceur, tirez simplement dessus.

PC-BS3037A_IM 27.05.19
25
Assemblage du support mural
Consultez les gures (A et D) à la page 3.
Branchement de la che du bloc d’alimentation
Si vous voulez aussi utiliser le support mural en tant que
socle de charge, branchez d’abord la che du bloc d’alimen-
tation (Fig. C).
1. Branchez la prise de l’adaptateur secteur au connecteur
à l’arrière de la base de charge.
2. Poussez la prise fermement dans les bornes. Elle doit
s’emboîter en émettant un bruit.
3. Fixez le câble dans le guide de câble de gauche ou de
droite.
Fixation du support mural
AVERTISSEMENT :
Assurez-vous préalablement qu’il n’y a pas de câbles
dans le mur pouvant être endommagés !
ATTENTION :
Placez le support mural de façon à ce que l’appareil ne
soit pas exposé aux rayons du soleil ni à d’autres sources
de chaleur.
NOTE :
Si vous souhaitez utiliser le support mural comme station
de charge, installez-le à proximité d’une prise murale.
1. Mesurez la hauteur pour le support mural. Tenez
l’aspirateur contre le mur avec le tuyau d’aspiration et le
suceur installé.
2. Tenez le support mural contre le mur comme à la page 3
(Fig. D). Marquez 2 trous de perçage.
3. Percez les trous et insérez les chevilles dans le mur.
4. Insérez les vis dans les trous du support mural.
5. Serrez les vis à la main avec un tournevis.
Chargement de la batterie rechargeable
ATTENTION :
Ne laissez pas la batterie rechargeable se charger sans
surveillance.
1. Éteignez l’appareil.
2. Branchez le bloc d’alimentation à la prise de
connexion (10). Si vous avez préparé le support mural
en tant que socle de charge, accrochez-y l’appareil.
3. Branchez l’adaptateur électrique sur une prise de cou-
rant certiée. Chargez l’appareil pendant environ
5 heures avant la première utilisation.
NOTE :
• Le voyant de charge indique l’état de chargement
de la batterie rechargeable. (25 %, 50 %, 100 %)
• L’appareil a une régulation de charge électronique,
qui empêche la surcharge.
NOTE :
• La charge est terminée quand les 3 voyants sont
allumés.
• Le voyant s’éteint lorsque vous retirez l’appareil de
la station de charge ou débranchez l’alimentation
électrique.
• Pendant le chargement, il est normal que l’appareil
chauffe.
4. Débranchez le bloc d’ali-
mentation de la prise secteur
une fois que la batterie
rechargeable est entièrement
chargée.
5. Pour retirer l’appareil de la
station de charge, appuyez
sur le bouton de libération sur
le dessus du support mural.
NOTE :
Même si l’appareil est éteint,
la batterie rechargeable se
décharge en permanence. Si
vous n’utilisez pas l’appareil
pendant longtemps, rechargez
la batterie rechargeable au
moins une fois toutes les 4 à 6
semaines.
Utilisation de l’appareil
Vous pouvez utiliser l’appareil comme aspirateur de plan-
cher ou aspirateur de table (unité de base).
1. Débranchez l’appareil du bloc d’alimentation.
2. Mettez en marche l’appareil.
3. Pour incliner le tuyau d’aspiration à la position de join-
ture, appuyez sur le bouton libération (14).
NOTE :
• Nous recommandons niveau de puissance max. pour
utiliser l’appareil avec le suceur à plancher. Appuyez
sur le bouton MAX.
• Pendant l’utilisation, entre 1 et 3 voyants s’illuminent
pour indiquer la capacité de la batterie rechargeable.
• Nous vous recommandons de recharger la batterie
lorsque les voyants de la batterie indiquent une capa-
cité restante de 25 % .
• Le voyant indicateur clignote pour indiquer que la
capacité de la batterie rechargeable est bientôt nulle.
Pour éviter les décharges profondes de la batterie
rechargeable, le moteur de l’appareil se coupe alors.
Chargez la batterie.
Fin de fonctionnement
1. Éteignez l’appareil.

PC-BS3037A_IM 27.05.19
26
2. Si vous avez déjà installé le support mural, accrochez
l’aspiration.
Entretien
Le système de ltre
Votre appareil dispose de 3 ltres. Le système de sac à
poussière habituel a été remplacé par un collecteur de
poussière transparent. La vitesse supérieure du débit du
collecteur permet à la poussière lourde et aux particules les
plus petites qui ottent de se séparer de l’« air aspiré ».
Il n’est donc pas nécessaire d’acheter des sacs à poussière.
Les ltres doivent être nettoyés régulièrement.
ATTENTION :
• Ne lavez jamais le ltre dans la machine à laver.
• N’utilisez pas un sèche-cheveux pour sécher.
• Remettez l’appareil en marche quand tous les ltres
sont entièrement secs et correctement assemblés.
Le dispositif de ltration
Le dispositif de ltration est constitué par :
• Filtre à particules
• Filtre grossier
Procéder comme suit pour nettoyer le dispo-
sitif de ltration :
Vider le collecteur de poussière
1. Débranchez l’appareil du bloc d’alimentation.
2. Si nécessaire, détachez le tube d’aspiration ou l’acces-
soire d’aspiration qui sont sur l’appareil.
3. Consultez la gure A de la page 3. Appuyez sur le bou-
ton
du bac à poussière pour le libérer de l’appareil.
4. Retirez le ltre à particules n sur le morceau de tissu
coloré.
5. Sortez le ltre grossier en le tenant par la poignée pour
l’ôter du bac à poussière.
6. Videz le contenu du collecteur de poussière.
Nettoyer les ltres
1. Tenez les deux ltres au-dessus d’une poubelle et tapo-
tez-les pour en faire tomber la poussière. Vous pouvez
également utiliser une brosse sur le ltre à particules. En
cas de salissures importantes, nettoyez les ltres à l’eau
courante.
2. Laissez les ltres complètement sécher à l’air libre avant
de les réinstaller !
3. Essuyez le collecteur de poussière avec un tissu humide
et séchez-le.
Assembler le dispositif de ltration
1. Placez le ltre grossier dans le bac à poussière. Prenez
note des renfoncements sur le bord du bac à poussière.
Appuyez maintenant sur le ltre grossier, pour le posi-
tionner au centre du bac à poussière.
2. Placez le ltre à particules n (la partie colorée tournée
vers le haut) sur le ltre grossier. Appuyez fermement sur
le ltre à particules n.
3. Rattachez le bac à poussière sur l’appareil. Installez
d’abord le bac à poussière sur le dessus du carter du
moteur. Poussez maintenant le bac à poussière vers le
bas. Le loquet sur le bac à poussière doit s’emboîter en
émettant un bruit. Le verrou sur le collecteur de pous-
sière doit s’actionner.
Filtre d’échappement
Votre appareil est en outre équipé d’un ltre d’échappe-
ment. Il est installé sur le dessus du carter du moteur.
ATTENTION :
Vous ne pouvez pas démonter ce ltre.
Nettoyage
AVERTISSEMENT :
• Débranchez toujours l’appareil du bloc d’alimentation avant de
le nettoyer !

PC-BS3037A_IM 27.05.19
27
AVERTISSEMENT :
• En aucun cas plonger le boîtier moteur dans de l’eau pour le
nettoyer. Vous risqueriez de provoquer une électrocution ou un
incendie.
ATTENTION :
• Ne pas utiliser de brosse en l de fer ou autres objets
abrasifs.
• Ne pas utiliser de détergents agressifs ou abrasifs.
• Chaque élément ne va pas au lave-vaisselle.
• Le boîtier peut être nettoyé à l’aide d’un chiffon légère-
ment humide.
• Vous pouvez essuyer le bloc d’alimentation avec un
chiffon sec.
Suceur à plancher
1. Débranchez le suceur à plancher du tuyau d’aspiration.
2. Retournez le suceur à
plancher pour pouvoir
voir le côté inférieur.
Utilisez une petite
pièce de monnaie,
ou un autre outil
pour ouvrir le loquet.
Dévissez dans le sens
antihoraire. Soulevez
le cache pour l’ouvrir.
3. Sortez la brosse à roulettes.
4. Enlevez les ls et les cheveux enroulés sur la brosse.
Utilisez des ciseaux, si nécessaire.
5. Assemblage :
5.1 Positionnez la brosse à rouleau, le renfoncement en
forme d’étoile en premier, dans le compartiment.
5.2 Insérez l’autre extrémité de la brosse à rouleau en
mettant l’embout carré dans le renfoncement situé
sous le cache.
6. Fermez le verrou de la brosse à roulettes.
Bac à poussière avec élément ltrant
Veuillez lire le chapitre « Entretien » pour le nettoyage de
ces composants.
Stockage
• Nettoyez l’appareil comme il est décrit et laissez-le
sécher.
• Pour ranger l’appareil, utilisez le support mural installé
précédemment, ou posez soigneusement l’appareil sur
le sol.
• Nous vous recommandons de conserver l’appareil dans
son emballage d’origine si vous ne l’utilisez pas pendant
longtemps.
NOTE concernant la durée de vie de la batterie
rechargeable :
Même si l’appareil est éteint, la batterie rechargeable
se décharge en continu. Si vous n’utilisez pas l’appa-
reil pendant longtemps, rechargez la batterie rechar-
geable au moins une fois toutes les 4 à 6 semaines.
• Conservez toujours l’appareil hors de portée des enfants
dans un endroit sec et bien aéré.
• Le lieu de rangement doit être d’une température com-
prise entre 0 °C et 40 °C.
Dépannage
Problème Cause possible Solution
L’appareil ne fonctionne pas. Le bloc d’alimentation est branché. Débranchez l’appareil du bloc d’alimentation.
L’accumulateur est défectueuse. Contactez notre service après-vente ou votre
revendeur.
Lorsque l’appareil est allumé,
tous les indicateurs clignotent.
L’accumulateur est vide. Rechargez l’accumulateur.

PC-BS3037A_IM 27.05.19
28
Problème Cause possible Solution
Puissance d’aspiration faible. L’accumulateur est presque déchargée. Rechargez l’accumulateur.
Le bac de poussière est plein. Videz le bac à poussière.
Les ltres sont sales. Nettoyez les ltres comme indiqué dans
« Entretien ».
ATTENTION :
Redémarrez l’appareil uniquement avec les
ltres secs.
Bruit pendant le
fonctionnement.
Un corps étranger a été aspiré dans le
suceur à plancher.
Enlevez le corps étranger. Si nécessaire,
débranchez le suceur à plancher du tuyau
d’aspiration.
Le suceur à plancher avec
brosse turbo ne fonctionne
pas.
La brosse à roulettes est bloquée par
des saletés.
Nettoyez le suceur à plancher comme indiqué
dans « Nettoyage ».
Raccordement incorrect du tuyau
d’aspiration ou du suceur à plancher.
Vériez que le montage de tous les composants
est correct.
La batterie rechargeable ne
maintient pas la charge.
La batterie rechargeable a atteint la n
de sa durée de vie.
Contactez notre service après-vente ou votre
revendeur.
Données techniques
Modèle : .......................................................... PC-BS 3037 A
Poids net
(Appareil avec le tuyau
d’aspiration ou le suceur à plancher) : ...................env. 2,4 kg
Chargeur d’accus
Classe de protection : ..........................................................
Entrée : ......................... CA 100 - 240 V, 50 / 60 Hz, 0,8 A MAX
Sortie : ..........................................................CC 35 V, 500 mA
Polarité : .....................................................................
Batterie rechargeable : ...................29,6 V, 2200 mAh Li-ion
Temps de fonctionnement :..................30 minutes maximum
Temps de mise en charge :............................env. 4,5 heures
Nous nous réservons le droit d’apporter des modications
techniques ainsi que des modications de conception dans
le cadre du développement continu de nos produits.
Cet appareil a été contrôlé d’après toutes les directives
européennes actuelles applicables, comme par exemple
concernant la compatibilité électromagnétique et la basse
tension. Cet appareil a été fabriqué en respect des régle-
mentations techniques de sécurité les plus récentes.
Élimination
Accumulateur / Mise au rebut de la batterie
L’appareil contient une batterie rechargeable.
Les batteries / accumulateurs (batteries rechar-
geables) usagés ne doivent pas être jetés avec
les déchets ménagers.
La batterie doit être enlevée avant que l’appa-
reil ne soit recyclé. Appuyez sur le bouton de libération (6)
et enlevez la batterie rechargeable de l’appareil.
Vous pouvez demander à votre municipalité où sont les
sites de collecte pour batteries / accumulateurs.
Signication du symbole « Poubelle »
Protégez votre environnement, ne jetez pas
vos appareils électriques avec les ordures
ménagères.
Utilisez, pour l’élimination de vos appareils
électriques, les bornes de collecte prévues à
cet effet où vous pouvez vous débarrasser des
appareils que vous n’utilisez plus.
Vous contribuez ainsi à éviter les impacts potentiels dans
l’environnement et sur la santé de chacun, causés par une
mauvaise élimination de ces déchets.
Vous contribuez aussi au recyclage sous toutes ses formes
des appareils électriques et électroniques usagés.
Vous trouverez toutes les informations sur les bornes
d’élimination des appareils auprès de votre commune ou de
l’administration de votre communauté.

PC-BS3037A_IM 27.05.19
29
Manual de instrucciones
Gracias por elegir nuestro producto. Esperamos que dis-
frute de su utilización.
Símbolos en este manual de instrucciones
Advertencias importantes para su seguridad están seña-
ladas en especial. Siga estas advertencias incondicional-
mente, para evitar accidentes y daños en el aparato:
AVISO:
Advierte ante los peligros para su salud y demuestra
posibles riesgos de herida.
ATENCIÓN:
Indica los posibles riesgos para el aparato u otros objetos.
NOTA:
Pone en relieve consejos e informaciones para usted.
Contenidos
Indicación de los elementos de manejo ..........................3
Notas generales ................................................................29
Indicaciones especiales de
seguridad para este aparato ............................................30
Baterías de litio-ión recargables (Li-Ion) ........................30
Manipulación segura de baterías
recargables de Litio-Ión .................................................30
Ampliar la vida útil de la batería Li-ión recargable.........31
Desembalaje del aparato..................................................31
Indicación de los elementos de manejo /
Contenido en la entrega ...................................................31
Notas de uso .....................................................................31
Encendido / apagado del aparato ...................................32
Puesta en marcha .............................................................32
Tubo de aspiración .........................................................32
Boquilla para suelos con cepillo turbo ...........................32
Boquilla combinada ranuras / cepillo / tapicería (3 en 1)
.. 32
Cepillo especial extensible .............................................32
Montaje de soporte de pared ...........................................32
Introducción de la toma de la unidad de alimentación .. 32
Instalación del soporte de pared ....................................33
Cargar la batería recargable ............................................33
Utilización del aparato ......................................................33
Terminar el funcionamiento ............................................33
Mantenimiento ...................................................................34
Sistema de ltro .............................................................34
Vaciado del compartimento del polvo ............................34
Limpieza de los ltros.....................................................34
Montaje de la unidad de ltro .........................................34
Limpieza ............................................................................. 34
Boquilla para suelos .......................................................35
Recipiente para polvo con unidad de ltro ....................35
Almacenamiento ...............................................................35
Solución de problemas ....................................................35
Datos técnicos ..................................................................36
Eliminación ........................................................................ 36
Eliminación de acumulador / batería ..............................36
Signicado del símbolo “Cubo de basura” ....................36
Notas generales
Antes de la puesta en servicio de este aparato lea deteni-
damente el manual de instrucciones y guarde éste bien in-
cluido la garantía, el recibo de pago y si es posible también
el cartón de embalaje con el embalaje interior. En caso de
dejar el aparato a terceros, también entregue el manual de
instrucciones.
• Solamente utilice el aparato para el uso privado y para el
n previsto. Este aparato no está destinado para el uso
profesional.
• El adaptador de corriente solo debe utilizarse en habita-
ciones secas.
• ¡Compruebe que la corriente de salida, el voltaje y la
polaridad del adaptador de corriente coinciden con la
información del aparato conectado!
• ¡No toque un adaptador de corriente conectado con las
manos mojadas!
• Cuando sea necesario realizar una limpieza, desconecte
el aparato del adaptador de corriente.
• Asegúrese de que el cable del adaptador de corriente no
se doble, se anude, sea atropellado o entre en contacto
con fuentes de calor.
• No utilice un adaptador de corriente dañado.
• No repare el aparato usted mismo. Acuda a un especia-
lista autorizado.
• El aparato y el cable de alimentación de red se deben
controlar regularmente para garantizar que no estén
dañados. En caso de que se comprobara un daño, no se
podrá seguir utilizando el aparato.
• Solamente utilice accesorios originales.
• Para la seguridad de sus niños no deje material de
embalaje (Bolsas de plástico, cartón, poliestireno etc.) a
su alcance.
AVISO:
No deje jugar a los niños con la lámina. ¡Existe peli-
gro de asxia!

PC-BS3037A_IM 27.05.19
30
Indicaciones especiales de seguridad para este aparato
• Pueden utilizar este aparato niños mayores de 8 años y personas
con minusvalías físicas, sensoriales o mentales, o sin experiencia
ni conocimientos, siempre que se les someta a supervisión o se
les instruya respecto a su uso de forma segura y de manera que
entiendan los peligros existentes.
• Los niños no deben jugar con el aparato.
• La limpieza y el mantenimiento no deben realizarlo niños sin su-
pervisión.
• El aparato está diseñado para ser utilizado con voltaje extra bajo
de seguridad. Conecte el aparato solamente a una fuente de
alimentación conforme a las especicaciones de la etiqueta de
clasicación.
• Si el cable de alimentación está dañado, debe cambiarlo por
un cable especíco que le podrá proporcionar el fabricante o su
agente de servicio.
• Utilice exclusivamente la alimentación incluida en la entrega.
• ¡No aspire sustancias combustibles ni líquidos!
• No use este aparato para eliminar partículas de tóner de una im-
presora láser o fotocopiadora para evitar incendio o explosión.
• ¡No aspiren nunca cenizas calientes, objetos agudos o cortantes!
• Nunca aspire sin los ltros colocada.
Baterías de litio-ión recargables (Li-Ion)
El aparato está equipado con baterías recargables Li-ión.
Esto representa numerosas ventajas comparado con otras
baterías y acumuladores.
• Una elevada tensión de célula (más voltios)
• Sin efecto de memoria
• Baja descarga independiente
Manipulación segura de baterías recargables de Litio-Ión
En general las baterías Li-ión se consideran seguras. Sin
embargo, pueden producirse riesgos a causa de daños
mecánicos, averías eléctricas y efectos térmicos.
Los daños mecánicos pueden resultar en la fuga de
sustancias gaseosas o líquidas que pueden ser altamente
irritantes, inamables o incluso tóxicas.
Una avería eléctrica, como un cortocircuito, puede provocar
sobrecalentamiento y causar un incendio.
Incluso el calentamiento de la carcasa exterior de una ba-
tería Li-ión, por ejemplo por la luz solar o una estufa, puede
provocar incendio o explosión.
Sin embargo, las baterías Li-ión son seguras cuando se
manipulen correctamente. Solamente si se usan o guardan
incorrectamente pueden ser peligrosas. Por lo tanto:

PC-BS3037A_IM 27.05.19
31
• Evite temperaturas superiores a 40 °C e inferiores a 0 °C.
• No deje caer el producto ni la batería recargable.
• Si la batería Li-ión a caído y se ha dañado, deje de
usarla.
• Cuando guarde o deseche el aparato, cubra los termina-
les para evitar cortocircuitos.
• Deseche adecuadamente los acumuladores usados
en recipientes de recogida en el comercio o puntos de
recogida municipales.
Ampliar la vida útil de la batería Li-ión recargable
Con las baterías Li-ión, aún más que con otros acumu-
ladores, se puede ampliar su duración tratándolas ade-
cuadamente. Las siguientes sencillas normas de carga y
guardado le ayudan a mantener la capacidad de la batería:
• Temperatura: La temperatura ideal de estas baterías
es de 10 - 25 °C. Las temperaturas superiores pueden
causar un desgaste prematuro.
• Carga y descarga: Durante los cilcos de carga deben
evitarse tanto la carga completa como una descarga en
profundidad.
Cuando termine el proceso de carga de la batería debe-
ría desconectar de inmediato el cargador. Se considera
óptima una carga de hasta el 90 %.
Igualmente, se conserva mejor la batería si no se des-
carga al 0 %. Si surge la posibilidad, debería recargar la
batería cuando llegue a un estado de carga del 30 %.
• Almacenamiento: Guarde siempre las baterías en un
lugar seco y a temperaturas moderadas, entre 10 °C y
20 °C.
Tenga en cuenta también el efecto de la descarga
autónoma. Cuando el acumulador ya esté gastado,
este efecto puede causar una descarga en profundidad,
dañando la batería. Si quiere guardar la batería durante
un tiempo prolongado, puede evitar este efecto. Reco-
mendamos que cargue la batería a aproximadamente el
40 % antes de guardarla. Debería comprobar el estado
de la carga pasado no más de un mes.
Desembalaje del aparato
1. Extraiga el aparato de su embalaje.
2. Compruebe el ámbito de entrega para su nalización.
3. Compruebe el aparato para ver si tiene algún daño
debido a su transporte, para evitar posibles peligros.
NOTA:
En caso daños debidos al transporte, póngase en
contacto con su proveedor de inmediato. ¡No utilice el
aparato dañado!
Indicación de los elementos de manejo /
Contenido en la entrega
Ilustración A
1 Depósito de polvo
2 Carcasa del motor
3 Botón MAX
4 Botón de encendido / apagado
5 Paquete de baterías recargables
6 Botón de liberación del paquete de baterías recargables
7 Bloqueo del recogedor de polvo
Ilustración B
1 Depósito de polvo
2 Carcasa del motor
8 Testigos indicadores
9 Asa de transporte
10 Toma de conexión de la unidad de alimentación
11 Unidad manual (Ilustración A)
12 Botón de liberación del tubo de aspiración
13 Soporte de la boquilla
14 Botón de liberación del conector del tubo de aspiración
15 Boquilla para suelos con cepillo turbo
16 Desbloqueo de la boquilla para suelos
17 Tubo de aspiración
18 Botón de liberación de la boquilla combinada
19 Boquilla combinada ranuras / cepillo / tapicería
20 Cepillo especial extensible
Ilustraciones C y D
Soporte de pared
No mostrado
1 × Adaptador de corriente
2 × Tacos
2 × Tornillos
Notas de uso
• El aparato es especialmente adecuado para aspirar
rápidamente pequeñas cantidades de suciedad seca o
polvo.
• El aparato funciona mediante batería. La carga se rea-
liza con el dispositivo de alimentación incluida.
• No se puede conectar directamente a la corriente por
medio de un adaptador.
• Cuando no utilice el aparato, cuélguelo en el soporte
de pared que se incluye. También sirve como estación
de carga.
ATENCIÓN:
El aparato no se mantiene por sí solo en posición verti-
cal. Si no utiliza el soporte de pared, deje con cuidado
la aspiradora en el suelo.

PC-BS3037A_IM 27.05.19
32
• Esta aspiradora con batería recargable no sustituye
a una aspiradora de suelo convencional. Debido a su
diseño, este aparato no es apropiado para limpiar ade-
cuadamente alfombras de pelo largo.
• Los ltros sucios reducen la potencia de succión de la
aspiradora. Por lo tanto, le recomendamos que limpie los
ltros periódicamente.
• Lo ideal es limpiar los ltros siempre que se haya utili-
zado el aparato durante un tiempo prolongado.
• Revise y limpie regularmente la boquilla eléctrica para
suelos.
• Si es necesario, o si el suelo está muy sucio, límpielo va-
rias veces o use una aspiradora de suelo convencional
de 230 V~ .
Encendido / apagado del aparato
• El botón (4) enciende y apaga el aparato.
• Pulse el botón MAX de la parte posterior de la unidad
manual para alternar entre la potencia alta y baja.
Puesta en marcha
Tubo de aspiración
• El tubo de aspiración viene equipado con un conector.
Cuando está inclinado, facilita la aspiración en lugares
de difícil acceso. Para que el tubo de aspiración quede
rígido, deje que la articulación encaje en su lugar.
• Introduzca el tubo de aspiración con las dos puntas de
contacto en la conexión de el dispositivo manual. Debe
encajar de forma audible.
• Para desconectar el tubo de aspiración, pulse la libera-
ción (12) y saque el tubo simultáneamente.
Boquilla para suelos con cepillo turbo
• La boquilla para suelos es adecuada para todos los tipos
de suelo, excepto para las alfombras de pelo largo.
• Durante el funcionamiento, los LED de la boquilla para
suelos se encienden para ver mejor en lugares oscuros.
ATENCIÓN:
No puede sustituir los LED.
• Deslice el extremo inferior del tubo de aspiración en el
conector de la boquilla para suelos. Preste atención a
las puntas de contacto de la boquilla para suelos. El tubo
de aspiración debe encajar de forma audible.
• Para desconectar el tubo de aspiración, pulse la libera-
ción (16) y saque el tubo simultáneamente.
Boquilla combinada ranuras / cepillo / tapicería (3 en 1)
• Estos accesorios los tendrá siempre disponibles si los
mantiene unidos al tubo de aspiración por encima de la
articulación utilizando el soporte.
• Con la boquilla para ranuras, podrá aspirar la suciedad
de las esquinas, ranuras y pequeñas grietas.
• Para evitar que se raye la supercie a limpiar, use la
boquilla para ranuras junto con la boquilla para tapicería/
cepillo bloqueada. Esto le permitirá eliminar suavemente
la suciedad de las ranuras de tapicería y colchones.
También es adecuada para eliminar polvo de supercies
sensibles, como muebles o cortinas.
• Para colocar la boquilla para tapicería / cepillo en la
boquilla para ranuras, primero presione los botones late-
rales y luego deslice la boquilla sobre ella, dejando que
encaje de forma audible en su lugar (como se muestra
en la siguiente imagen).
• Para desbloquearla, simplemente, pulse de nuevo
ambos botones.
• Puede conectar al aparato este accesorio de boquilla
combinado de dos formas:
Conexión en la unidad manual
• Inserte la boquilla con el desbloqueo hacia arriba en el
conector de la unidad manual. Debe oírse un chasquido
cuando encaje en su sitio.
• Para soltar el accesorio de boquilla, pulse el botón de
liberación y saque el accesorio al mismo tiempo.
Conexión al tubo de aspiración
En el extremo inferior del tubo de aspiración, encontrará
el mismo conector que en la unidad manual. Monte y des-
monte la boquilla como se describe anteriormente.
Cepillo especial extensible
• Esta boquilla es especialmente adecuada para limpiar
con suavidad supercies delicadas grandes.
• Para limpiar más supercie, estire el cepillo por com-
pleto.
• Puede colocar este cepillo tanto directamente en la uni-
dad manual como en el conector del tubo de aspiración
una vez montado.
• Para extraer la boquilla, simplemente tire de ella.
Montaje de soporte de pared
Consulte las ilustraciones (C y D) en la página 3.
Introducción de la toma de la unidad de alimentación
Si desea usar el soporte de pared como estación de carga,
conecte primero el enchufe de la unidad de alimentación
(Ilustración C).
1. Conecte el enchufe de la fuente de alimentación en la
ranura de la parte posterior de la unidad de carga.

PC-BS3037A_IM 27.05.19
33
2. Presione con rmeza el enchufe en los terminales. Debe
oírse un chasquido cuando encaje en su sitio.
3. Fije el cable en la guía para cable derecha o izquierda.
Instalación del soporte de pared
AVISO:
¡Cerciórese previamente de que no haya ningún cable en
la pared que pueda dañarse!
ATENCIÓN:
Coloque el soporte de pared de forma que el aparato no
se exponga a la luz solar directa ni otras fuentes de calor.
NOTA:
Si desea utilizar al mismo tiempo el soporte de pared
como estación de carga, debe tener cerca una toma de
corriente.
1. Mida la altura para el soporte de pared. Aguante la
aspiradora contra la pared con el conducto de succión y
la boquilla para suelo instaladas.
2. Aguante el soporte de pared contra la pared como se
indica en la página 3 (Ilustración D). Marque 2 oricios
de taladro.
3. Taladre los oricios e inserte los tacos de pared en la
pared.
4. Inserte los tornillos en los oricios del soporte de pared.
5. Apriete los tornillos con un destornillador manual.
Cargar la batería recargable
ATENCIÓN:
No cargue la batería recargable sin supervisión.
1. Apague el aparato.
2. Conecte la unidad de alimentación con la toma de
conexión (10).
Si ha preparado el soporte de pared como estación de
carga, cuelgue el aparato del soporte de pared.
3. Conecte el adaptador a una fuente de alimentación de
pared aprobada. Cargue el aparato durante aprox. 5 ho-
ras antes de usarlo por primera vez.
NOTA:
• Los testigos indicadores muestran el estado de
carga de la batería recargable. (25 %, 50 %, 100 %)
• El aparato tiene un control electrónico de carga que
evita la sobrecarga.
• La carga se habrá completado cuando se encien-
dan los 3 testigos indicadores.
• Cuando se retire el aparato de la estación de carga
o se desconecte de la fuente de alimentación, los
testigos indicadores se apagarán.
• Es normal que el aparato se caliente durante la
carga.
4. Desconecte la unidad de ali-
mentación de la toma cuando
se haya cargado por com-
pleto la batería recargable.
5. Para retirar el aparato de la
estación de carga, presione
el botón de liberación de la
parte superior del soporte
de pared.
NOTA:
Incluso cuando el aparato
está desconectado, la batería
recargable se descarga
continuamente. Si el aparato
está fuera de uso por un largo
período de tiempo, cargue la
batería recargable al menos
una vez cada 4 a 6 semanas.
Utilización del aparato
Puede usar el aparato como aspiradora para suelos o como
aspiradora manual y derecha (unidad básica).
1. Desconecte el aparato de la unidad de alimentación.
2. Encienda el aparato.
3. Si desea inclinar el tubo de aspiración en el conector,
pulse el botón de liberación (14).
NOTA:
• Recomendamos los niveles de potencia más altos
para usar el aparato con la boquilla para suelos. Pulse
el botón MAX.
• Mientras el aparato esté en funcionamiento, depen-
diendo de la capacidad de carga de la batería recarga-
ble, se encenderán entre 1 y 3 testigos indicadores.
• Recomendamos recargar la batería cuando los testi-
gos indicadores muestren que la capacidad restante
es de solo un 25 % .
• Cuando la carga de la batería recargable se esté
agotando, parpadeará la última luz del testigo. Para
evitar que la batería recargable se descargue com-
pletamente, el motor apagará el aparato. Recargue
la batería.
Terminar el funcionamiento
1. Apague el aparato.
2. Si ya ha instalado el soporte de pared, cuelgue la
aspiradora.

PC-BS3037A_IM 27.05.19
34
Mantenimiento
Sistema de ltro
El aparato dispone de 3 ltros. El sistema común de bolsa
de polvo se ha sustituido por un compartimento del polvo
transparente. Una mayor velocidad del ujo permite separar
las partículas que otan de la suciedad fuerte y ligera del
aire aspirado.
Por tanto, no es necesario comprar bolsas de polvo.
Los ltros deben limpiarse periódicamente.
ATENCIÓN:
• No lave el ltro en la lavadora.
• No utilice un secador para sacarlo.
• Vuelva a poner el aparato en funcionamiento cuando
todos los ltros se hayan secado por completo y se
hayan ensamblado correctamente.
Unidad de ltro
La unidad de ltro se compone de:
• Filtro no
• Filtro grueso
Proceda de la siguiente manera para limpiar
la unidad de ltro:
Vaciado del compartimento del polvo
1. Desconecte el aparato de la unidad de alimentación.
2. Si es necesario, retire el tubo de aspiración o el conector
de boquilla del aparato.
3. Observe la ilustración A de la página 3. Pulse el botón
del depósito de polvo para extraerlo de la unidad
manual.
4. Saque el ltro no que hay en el trozo de tela de color.
5. Saque el ltro grueso de la unidad manual para retirarlo
del depósito de polvo.
6. Vacíe el contenido del recogedor de polvo.
Limpieza de los ltros
1. Sostenga ambos ltros sobre un cubo de basura y
sacuda el polvo. También puede cepillar el ltro no. En
caso de manchas resistentes, limpie los ltros debajo
del agua.
2. Deje secar los ltros al aire completamente antes de
volver a colocarlos.
3. Limpie el compartimento del polvo con un paño húmedo
y luego seque con otro.
Montaje de la unidad de ltro
1. Coloque el ltro basto en el recipiente de polvo. Para
ello, preste atención a las ranuras de los lados del depó-
sito de polvo. Ahora presione el ltro grueso hacia abajo
para colocarlo en el centro del depósito de polvo.
2. Coloque el ltro no (con la parte de tela de color hacia
arriba) sobre el ltro grueso. Presione rmemente sobre
el ltro no.
3. Luego, vuelva a colocar el depósito de polvo en la uni-
dad manual. Primero, coloque el depósito de polvo en la
parte superior de la carcasa del motor. Ahora, empuje el
depósito de polvo hacia abajo. El pestillo del depósito de
polvo debe encajar de forma audible.
Filtro de salida:
Su aparato también dispone de un ltro de salida. Se en-
cuentra en la parte superior de la carcasa del motor.
ATENCIÓN: No puede retirar este ltro.
Limpieza
AVISO:
• ¡Desconecte siempre el aparato de la toma de corriente antes
de limpiarlo!

PC-BS3037A_IM 27.05.19
35
AVISO:
• Para su limpieza, en ningún caso sumerja en agua la carcasa
motor. Podría causar un electrochoque o un incendio.
ATENCIÓN:
• No utilice un cepillo de alambre u objetos abrasivos.
• No utilice detergentes agresivos o abrasivos.
• Las piezas individuales no son aptas para lavavajillas.
• La carcasa se puede limpiar con un paño ligeramente
húmedo.
• Puede limpiar la unidad de alimentación con una
gamuza seca.
Boquilla para suelos
1. Desconecte la boquilla para suelos del tubo de aspira-
ción.
2. Gire la boquilla para
suelos de forma que
pueda ver el lado infe-
rior. Use una moneda
pequeña o cualquier
otra herramienta
para abrir el pestillo.
Dirección de rotación:
en sentido contrario a
las agujas del reloj. Gire la cubierta para abrirla.
3. Quite el rodillo de cepillo.
4. Saque los hilos y pelo enrollados en el cepillo. Use
tijeras si es necesario.
5. Ensamblaje:
5.1 Coloque el rodillo del cepillo de nuevo dentro del
compartimento con la hendidura en forma de estre-
lla primero.
5.2 Inserte el otro extremo del rodillo de cepillo con el
soporte cuadrado en el hueco debajo de la cubierta.
6. Cierre el bloqueo del rodillo de cepillo.
Recipiente para polvo con unidad de ltro
Lea el capítulo “Mantenimiento” para limpiar estos compo-
nentes.
Almacenamiento
• Limpie el aparato tal como se describe y deje que se
seque.
• Para guardar el aparato, use el soporte de pared
montado previamente o deje con cuidado la aspiradora
en el suelo.
• Le recomendamos que guarde el aparato en el embalaje
original si no va a utilizarlo durante un largo período de
tiempo.
NOTA sobre la duración de la batería recargable:
Incluso cuando el aparato está desconectado, la
batería recargable se descarga continuamente. Si
el aparato está fuera de uso por un largo período de
tiempo, cargue la batería recargable al menos una vez
cada 4 a 6 semanas.
• Mantenga siempre el aparato fuera del alcance de los
niños en un lugar seco y bien ventilado.
• La temperatura de almacenamiento debe estar entre
0 °C y 40 °C.
Solución de problemas
Problema Causa posible Solución
El aparato no funciona. Unidad de alimentación conectada. Desconecte el aparato de la unidad de
alimentación.
La batería recargable está defectuosa. Contacte con nuestro departamento de servicio
o su vendedor.
Cuando se enciende el apa-
rato, todos los testigos indica-
dores comienzan a parpadear.
La batería recargable está agotada. Cargue la batería recargable.

PC-BS3037A_IM 27.05.19
36
Problema Causa posible Solución
Baja potencia de succión. Batería recargable casi descargada. Cargue la batería recargable.
Recipiente para polvo lleno. Vacíe el recipiente del polvo.
Los ltros están sucios. Limpie los ltros como se describe en
“Mantenimiento”.
ATENCIÓN:
¡Vuelva a utilizar la aspiradora exclusivamente
con ltros secos!
Ruidos durante el uso. Se ha aspirado un cuerpo extraño en
la boquilla para suelos.
Saque el cuerpo extraño. En caso necesario,
desconecte la boquilla para suelos del conducto
de succión.
La boquilla para suelos con
cepillo turbo no funciona.
Rodillo de cepillo obstruido por
suciedad.
Limpie la boquilla para suelos como se describe
en “Limpieza”.
Instalación incorrecta del conducto de
succión y / o la boquilla para suelos.
Compruebe que todos los elementos están
montados correctamente.
La batería recargable no
mantiene la carga.
La batería recargable ha llegado al
nal de su vida útil.
Contacte con nuestro departamento de servicio
o su vendedor.
Datos técnicos
Modelo: ........................................................... PC-BS 3037 A
Peso neto (unidad manual con tubo
de aspiración y boquilla de suelo): .................... aprox. 2,4 kg
Toma de corriente
Clase de protección: ............................................................
Entrada: ........................ CA 100 - 240 V, 50 / 60 Hz, 0,8 A MAX
Salida: ..........................................................CC 35 V, 500 mA
Polaridad: ...................................................................
Batería recargable: .........................29,6 V, 2200 mAh Li-ión
Tiempo de funcionamiento: ...............Máximo de 30 minutos
Tiempo de carga: ..........................................aprox. 4,5 horas
El derecho de realizar modicaciones técnicas y de diseño
en el curso del desarrollo continuo del producto está
reservado.
Este aparato se ha examinado según las normativas
actuales y vigentes de la Comunidad Europea, como p.ej.
compatibilidad electromagnética y directiva de baja tensión
y se ha construido según las más nuevas especicaciones
en razón de la seguridad.
Eliminación
Eliminación de acumulador / batería
La unidad contiene una batería recargable. Las
baterías / acumuladores usados (baterías recar-
gables) no se corresponden con los residuos
domésticos.
La batería debe retirarse antes de reciclar el
producto. Pulse el pestillo de liberación (6) y extraiga la
batería recargable de la unidad manual.
Puede obtener información del lugar de eliminación de
baterías / acumuladores de su autoridad local o municipal.
Signicado del símbolo “Cubo de basura”
Proteja nuestro medio ambiente, aparatos eléc-
tricos no forman parte de la basura doméstica.
Haga uso de los centros de recogida previstos
para la eliminación de aparatos eléctricos y
entregue allí sus aparatos eléctricos que no
vaya a utilizar más.
Ayudará en evitar las potenciales consecuencias, a causa
de una errónea eliminación de desechos, para el medio
ambiente y la salud humana.
Con ello, contribuirá a la recuperación, al reciclado y a otras
formas de reutilización de los aparatos viejos eléctricos y
electrónicos.
La información cómo se debe eliminar los aparatos, se
obtiene en su ayuntamiento o su administración municipal.

PC-BS3037A_IM 27.05.19
37
Istruzioni per l’uso
Grazie per aver scelto il nostro prodotto. Vi auguriamo un
buon utilizzo del dispositivo.
Simboli per questo manuale di istruzioni per l’uso
Le indicazioni importanti per la propria sicurezza sono
indicati appropriatamente. Osservare assolutamente queste
indicazioni, per evitare incidenti e danni all’apparecchio:
AVVISO:
Previene i rischi della propria salute ed indica possibili
rischi di ferite.
ATTENZIONE:
Indica possibili pericoli per l’apparecchio o altri oggetti.
NOTA: Mette in risalto consigli ed informazioni.
Indice
Elementi di comando ..........................................................3
Note generali .....................................................................37
Avvertenze speciali di sicurezza
per questo apparecchio ...................................................38
Batterie ricaricabili agli Ioni di litio (Li-Ion) ....................38
Manipolazione sicura delle
batterie ricaricabili agli ioni di litio ...................................38
Prolungamento della durata di vita utile della
batteria ricaricabile agli ioni di litio .................................39
Disimballaggio ..................................................................39
Elementi di comando / Nella fornitura .............................39
Note per l’uso ....................................................................39
Accensione / spegnimento dell’apparecchio ..................40
Messa in funzione ............................................................. 40
Tubo di aspirazione ........................................................ 40
Ugello da pavimento con spazzola turbo.......................40
Bocchetta combinata con spazzola / interstizi /
tappezzeria (3 in 1) ........................................................40
Spazzola speciale estendibile ........................................40
Montaggio del supporto da parete .................................41
Inserire la spina dell’alimentatore ..................................41
Fissaggio supporto a muro ............................................41
Caricamento della batteria ricaricabile ..........................41
Usando l’apparecchio ......................................................41
Fine operazione .............................................................42
Manutenzione .................................................................... 42
Il sistema di filtraggio ......................................................42
Svuotamento del collettore della polvere .......................42
Pulizia dei filtri ................................................................42
Montaggio dell’unità filtro ...............................................42
Pulizia ................................................................................. 42
Ugello pavimento ...........................................................43
Contenitore della polvere con unità filtro .......................43
Conservazione ..................................................................43
Ricerca dei guasti .............................................................43
Dati tecnici ......................................................................... 44
Smaltimento ......................................................................44
Smaltimento della batteria / accumulatore .....................44
Significato del simbolo “Eliminazione” ...........................44
Note generali
Prima di mettere in funzione questo apparecchio, leggere
molto attentamente le istruzioni per l’uso e conservarle con
cura unitamente al certificato di garanzia, allo scontrino
e, se possibile, alla scatola di cartone con la confezione
interna. Se passate l’apparecchio a terzi, consegnate anche
le istruzioni per l’uso.
• Utilizzare l’apparecchio esclusivamente per scopi privati
e conformemente al tipo di applicazione previsto. Questo
prodotto non è stato concepito ai fini di un impiego in
ambito industriale.
• L’adattatore è adatto solo all’uso in ambienti asciutti.
• Verificare se la corrente in uscita, la tensione e la polarità
dell’adattatore corrispondano alle informazioni sul dispo-
sitivo connesso!
• Non toccare l’adattatore con mani bagnate!
• Se necessario durante la pulizia scollegare l’apparecchio
dall’adattatore.
• Verificare che il cavo dell’adattatore non sia piegato,
schiacciato, o a contatto con fonti di calore.
• Non usare un adattatore danneggiato.
• Non riparare da soli l’apparecchio, ma contattare un
tecnico qualificato.
• Controllare regolarmente che l’apparecchio e il cavo
non presentino tracce di danneggiamento. In tal caso
l’apparecchio non deve più essere utilizzato.
• Utilizzare esclusivamente accessori originali.
• Per sicurezza tenere l’imballaggio (sacchetto di plastica,
scatola, polistirolo, ecc.) fuori dalla portata dei bambini.
AVVISO:
Non lasciar giocare i bambini piccoli con la pellicola.
Pericolo di soffocamento!

PC-BS3037A_IM 27.05.19
38
Avvertenze speciali di sicurezza per questo apparecchio
• L’apparecchio può essere utilizzato dai bambini da 8 anni in su
e dalle persone con ridotte abilità fisiche, sensoriali o mentali o
mancanza di esperienza e conoscenza sotto la diretta super-
visione o dietro istruzioni sull’uso sicuro dell’apparecchio e sui
possibili pericoli derivanti dal suo utilizzo.
• I bambini non devono giocare con l’apparecchio.
• Pulizia e manutenzione non devono essere eseguiti da bambini
senza supervisione.
• L’apparecchio è destinato all’uso con tensione extra bassa di
sicurezza. Collegare solo ad un’alimentazione secondo le specifi-
che indicate sull’etichetta del modello.
• Se il cavo di connessione di questo dispositivo è danneggiato,
deve essere sostituito con un cavo di connessione special dispo-
nibile dal produttore o servizio assistenza.
• Usare solo l’alimentatore fornito in dotazione.
• Non aspirare sostanze combustibili o liquidi!
• Non utilizzare il presente apparecchio allo scopo di rimuovere le
particelle di toner da una stampante o copiatrice laser per evitare
incendi o esplosioni.
• Non utilizzare l’apparecchio per aspirare ceneri ancora calde op-
pure oggetti affilati o acuminati!
• Non aspirare senza il filtro installato.
Batterie ricaricabili agli Ioni di litio (Li-Ion)
L’apparecchio è dotato di batterie ricaricabili agli ioni di litio.
Ciò determina numerosi vantaggi rispetto ad altre tipologie
di batterie e accumulatori:
• Una tensione elevata della cella (più volt)
• Nessun effetto memoria
• Una ridotta autoscarica
Manipolazione sicura delle
batterie ricaricabili agli ioni di litio
Generalmente, le batterie agli ioni di litio sono considerate
sicure. Tuttavia, i pericoli possono essere determinati da
danni di natura meccanica, guasti elettrici ed effetti termici.
I danni di natura meccanica possono provocare la fuoriu-
scita di sostanze gassose o liquide che possono essere
altamente irritanti, infiammabili o persino tossiche.
Un guasto elettrico, come ad esempio un cortocircuito, può
indurre il surriscaldamento e provocare un incendio.

PC-BS3037A_IM 27.05.19
39
Anche il riscaldamento dell’involucro esterno di una batteria
agli ioni di litio, ad esempio a causa della luce solare o di un
elemento riscaldante, può provocare incendi o esplosioni.
Tuttavia, le batterie agli ioni di litio sono sicure se maneg-
giate correttamente. Solo se utilizzate o conservate impro-
priamente possono diventare pericolose. Pertanto:
• Evitare temperature superiori a 40 °C e inferiori a 0 °C.
• Non far cadere l’apparecchio o la batteria ricaricabile.
• Se la batteria agli ioni di litio è caduta e risulta danneg-
giata, interromperne l’utilizzo.
• Durante la conservazione o lo smaltimento dell’ap-
parecchio, isolare i morsetti per prevenire eventuali
cortocircuiti.
• Smaltire correttamente gli accumulatori esausti in conte-
nitori di raccolta appositi presso il rivenditore o in punti di
ritiro municipali.
Prolungamento della durata di vita utile della
batteria ricaricabile agli ioni di litio
Per le batterie agli ioni di litio, ancor più che con altri accu-
mulatori, la loro durata di vita utile può essere incrementata
mediante un utilizzo appropriato. Le seguenti semplici
regole per la ricarica e la conservazione consentono di
preservare la capacità della batteria:
• Temperatura: La temperatura ideale di utilizzo di queste
batterie varia da 10 - 25 °C. Temperature più elevate
possono determinare un invecchiamento precoce.
• Carica e scarica: Durante i cicli di carica, devono essere
evitate sia la carica totale che la scarica profonda.
Al termine del processo di carica, scollegare immediata-
mente il caricabatterie. Una carica non superiore al 90 %
è considerata la scelta ottimale.
Per contro, la batteria si preserva maggiormente quando
non viene scaricata fino a un livello di carica pari allo
0 %. Se possibile, ricaricare la batteria quando raggiunge
uno stato di carica pari al 30 %.
• Conservazione: Conservare sempre le batterie in un
luogo asciutto e a temperature medie comprese tra
10 °C e 20 °C.
Considerare inoltre l’effetto di autoscarica! Quando
l’accumulatore è ormai scarico, tale effetto può causare
uno scarico profondo con conseguente danneggiamento
della batteria. Se si prevede di conservare la batteria
per un lungo periodo di tempo, è possibile contrastare
questo effetto. Raccomandiamo quindi di caricare la
batteria a un livello di carica approssimativamente pari al
40 % prima di riporla. Si consiglia di controllare lo stato di
carica entro e non oltre il limite temporale di un mese.
Disimballaggio
1. Estrarre l’apparecchio dall’imballaggio.
2. Controllare che la spedizione sia completa.
3. Controllare che l’apparecchio non abbia subito danni
durante il trasporto per prevenire pericoli.
NOTA:
Se si sono verificati danni durante il trasporto, contat-
tare immediatamente il rivenditore. Non utilizzare un
dispositivo danneggiato!
Elementi di comando / Nella fornitura
Figura A
1 Contenitore della polvere
2 Alloggiamento del motore
3 Tasto MAX
4 Tasto di accensione / spegnimento
5 Pacco batteria ricaricabile
6 Meccanismo di sblocco del pacco batteria ricaricabile
7 Meccanismo di blocco del contenitore della polvere
Figura B
1 Contenitore della polvere
2 Alloggiamento del motore
8 Indicatori luminosi
9 Impugnatura
10 Presa elettrica per l’alimentazione
11 Apparecchio portatile (Figura A)
12 Meccanismo di sblocco del contenitore della polvere
13 Supporto della bocchetta
14 Meccanismo di sblocco dello snodo per il tubo di
aspirazione
15 Ugello da pavimento con spazzola turbo
16 Meccanismo di sblocco della bocchetta per pavimenti
17 Tubo di aspirazione
18 Meccanismo di sblocco della bocchetta combinata
19 Bocchetta combinata con spazzola / interstizi /
tappezzeria
20 Spazzola speciale estendibile
Illustrazioni C e D
Supporto a parete
Non in figura
1 × Adattatore di potenza
2 × Tassello
2 × Vite
Note per l’uso
• L’apparecchio è adatto in particolare per aspirare veloce-
mente piccolo quantità di polvere o sporco asciutti.
• L’apparecchio è utilizzato tramite la batteria ricaricabile.
La ricarica avviene tramite l’alimentatore in dotazione.
• Non è possibile l’alimentazione di corrente diretta tramite
l’adattatore di corrente.
• Appendere l’apparecchio al supporto da parete in dota-
zione quando non è in uso. Funge anche da stazione di
ricarica.

PC-BS3037A_IM 27.05.19
40
ATTENZIONE:
L’apparecchio non è in grado di rimanere in piedi
autonomamente. Se non si utilizza il supporto a
parete, posizionare delicatamente l’aspirapolvere sul
pavimento.
• Questo aspirapolvere a batteria ricaricabile non sostitui-
sce in modo opportuno un tradizionale aspirapolvere per
pavimenti. Soprattutto su tappeti a pelo lungo, le presta-
zioni di pulizia non sono sufficienti a causa del design.
• I filtri contaminati riducono la potenza di aspirazione
dell’aspirapolvere. Si consiglia pertanto di pulire regolar-
mente i filtri antisporco esistenti.
• Per una maggiore efficacia, pulire i filtri ogni volta che
sono stati sottoposti ad un uso prolungato.
• Controllare e pulire regolarmente la bocchetta elettrica
per pavimenti.
• Se necessario, pulire più volte i pavimenti molto sporchi
e / o utilizzare un tradizionale aspirapolvere da 230 V~.
Accensione / spegnimento dell’apparecchio
• Il tasto (4) consente di accendere e spegnere l’appa-
recchio.
• Premere il pulsante MAX sul retro dell’apparecchio por-
tatile per scorrere tra i livelli di potenza bassa e alta.
Messa in funzione
Tubo di aspirazione
• Il tubo di aspirazione è dotato di uno snodo. Quando è
inclinato, rendere più semplice utilizzare l’aspirapolvere
in luoghi difficile da raggiungere. Per un tubo di aspira-
zione rigido, far scattare in posizione il giunto a snodo.
• Inserire il tubo di aspirazione con i due perni di contatto
nel collegamento dell’unità di base. Deve bloccarsi
emettendo un rumore.
• Per scollegare il tubo di aspirazione, premere il bottone
di rilascio (12) ed estrarre allo stesso tempo il tubo.
Ugello da pavimento con spazzola turbo
• La bocchetta per pavimenti è adatta a tutti i rivestimenti
per pavimenti, ad eccezione dei tappeti a pelo lungo.
• Durante il funzionamento, i LED sulla spazzola da
pavimento si accendono per una migliore visibilità nelle
aree buie.
ATTENZIONE: Non è possibile sostituire i LED.
• Attaccare l’estremità inferiore del tubo di aspirazione sul
connettore della bocchetta per pavimenti. Osservare i
perni di contatto sulla bocchetta per pavimenti. Il tubo di
aspirazione deve scattare in posizione in modo udibile.
• Per scollegare il tubo di aspirazione, premere il bottone
di rilascio (16) ed estrarre allo stesso tempo il tubo.
Bocchetta combinata con spazzola / interstizi /
tappezzeria (3 in 1)
• Questi accessori sono sempre a portata di mano quando
li si tiene attaccati al tubo di aspirazione sopra il giunto a
snodo, utilizzando il supporto.
• Durante l’utilizzo della bocchetta come bocchetta per
interstizi, sarà possibile aspirare lo sporco da angoli,
scanalature e piccoli interstizi.
• Per evitare di graffiare la superficie da pulire, utilizzare
la bocchetta per interstizi con la spazzola o la bocchetta
per tappezzeria bloccata. In questo modo è possibile
rimuovere delicatamente lo sporco dalle cavità di tap-
pezzerie e materassi. Adatto anche per la rimozione di
polvere da superfici sensibili come mobili oppure tende.
• Per fissare la spazzola / la bocchetta per tappezzeria alla
bocchetta per interstizi, premere prima i pulsanti laterali
e poi far scorrere la bocchetta su di essa, facendola
scattare in posizione. (come mostrato nell’immagine
seguente).
• Per rilasciare il blocco è sufficiente premere nuovamente
entrambi i pulsanti.
• Ci sono due modi diversi per collegare questa bocchetta
combinata all’apparecchio:
Collegamento all’unità di base
• Inserire la bocchetta per interstizi con lo sblocco rivolto
verso l’alto nel connettore dell’apparecchio portatile.
Deve essere udito lo scatto in posizione.
• Per sbloccare la bocchetta, premere il tasto di rilascio ed
estrarla contemporaneamente.
Connessione alla pompa di aspirazione
All’estremità inferiore del tubo di aspirazione si trova
lo stesso connettore dell’apparecchio portatile. Mon-
tare / smontare la bocchetta come descritto in precedenza.
Spazzola speciale estendibile
• Questa bocchetta è particolarmente buona per una
pulizia delicata di superfici sensibili più ampie.
• È possibile ingrandire la superficie di raccolta dello
sporco tirando il componente della spazzola fino in
fondo.
• Questa spazzola può essere montata sia direttamente
sul connettore dell’apparecchio portatile che sul raccordo
del tubo di aspirazione già montato.
• Per sbloccare il bocchetta, è sufficiente estrarla.

PC-BS3037A_IM 27.05.19
41
Montaggio del supporto da parete
Dare un’occhiata alle figure C e D a pagina 3.
Inserire la spina dell’alimentatore
Se si desidera utilizzare il supporto a parete anche come
stazione di ricarica, collegare prima la spina dell’alimenta-
tore (Fig. C).
1. Collegare la spina di alimentazione allo slot sul retro del
caricabatterie.
2. Inserire saldamente la spina nei terminali. Deve essere
udito lo scatto in posizione.
3. Fissare il cavo nel passacavo destro o sinistro.
Fissaggio supporto a muro
AVVISO:
Accertarsi prima se ci sono cavi nella parete che possono
essere danneggiati!
ATTENZIONE:
Posizionare il supporto a parete in modo che l’apparec-
chio non sia esposto alla luce diretta del sole o altre fonti
di calore.
NOTA:
Se si desidera utilizzare contemporaneamente il supporto
a parete come stazione di ricarica, è necessario disporre
di una presa di corrente nelle vicinanze.
1. Misurare l’altezza per il montaggio del supporto da pa-
rete. Attaccare l’aspirapolvere contro il muro con il tubo
di aspirazione e la spazzola da pavimento installata.
2. Attaccare il supporto muro contro il muro, come indicato
a pagina 3 (Fig. D). Segnare i 2 punti da forare.
3. Forare e inserire i tasselli nel muro.
4. Inserire le viti nei fori del supporto.
5. Stringere le viti saldamente con il giravite.
Caricamento della batteria ricaricabile
ATTENZIONE:
Non caricare la batteria ricaricabile senza supervisione.
1. Spegnere l’apparecchio.
2. Collegare l’alimentatore con la presa di collegamento (10).
Se avete predisposto il supporto a parete come una
stazione di ricarica, staccare l’apparecchio dal supporto
a parete.
3. Collegare l’adattatore di corrente ad una presa a parete
certificata. Caricare l’apparecchio per ca. 5 ore prima del
primo utilizzo.
NOTA:
• Gli indicatori luminosi indicano lo stato di carica
della batteria ricaricabile. (25 %, 50 %, 100 %)
• L’apparecchio è dotato di controllo di carica elettro-
nica, che impedisce il sovraccarico.
NOTA:
• La carica è completata quando tutte e 3 gli indicatori
luminosi sono accesi.
• Se l’apparecchio viene rimosso dalla stazione di
ricarica o scollegato dall’alimentazione elettrica, gli
indicatori luminosi si spengono.
• È normale se l’apparecchio si riscalda durante il
caricamento.
4. Quando la batteria ricarica-
bile è completamente carica,
scollegare l’alimentatore dalla
presa.
5. Per rimuovere l’apparecchio
dalla stazione di ricarica, pre-
mere il fermo di sgancio sulla
parte superiore del supporto
a parete.
NOTA:
Anche quando l’apparecchio è
spento, la batteria ricaricabile
si scarica continuamente. Se
l’apparecchio non è utilizzato
per un lungo periodo, cam-
biare la batteria ricaricabile
almeno una volta ogni 4 - 6
settimane.
Usando l’apparecchio
L’apparecchio può essere utilizzato come aspirapolvere da
pavimento o come aspirapolvere verticale a mano (unità
di base).
1. Scollegare l’apparecchio dall’alimentatore.
2. Accendere l’apparecchio.
3. Se si desidera inclinare il tubo di aspirazione in corri-
spondenza del giunto, premere il meccanismo di sblocco
(14).
NOTA:
• Si consiglia il livello superiore di potenza per utilizzare
l’apparecchio con la spazzola per pavimenti. Premere
il tasto MAX.
• Durante il funzionamento, a seconda della capacità di
carica della batteria ricaricabile, si accendono da 1 a
3 indicatori.
• Si consiglia di ricaricare la batteria quando gli indicatori
luminosi mostrano una capacità residua pari sola-
mente al 25 % .
• Quando la capacità della batteria ricaricabile sta per
raggiungere la sua fine, l’ultimo indicatore luminoso
lampeggia. Per evitare una scarica profonda della
batteria ricaricabile, il motore spegne l’apparecchio di
conseguenza. Ricaricare la batteria.

PC-BS3037A_IM 27.05.19
42
Fine operazione
1. Spegnere l’apparecchio.
2. Se il supporto da parete è già stato installato, appendervi
l’aspirapolvere.
Manutenzione
Il sistema di filtraggio
L’apparecchio dispone di 3 filtri. Il comune sistema a
sacchetto è stato sostituito da un collettore della polvere
trasparente. La superiore velocità di flusso del collettore
consente di separare dall’aria aspirata sia lo sporco pesante
che le particelle più piccole.
Non è quindi necessario acquistare sacchetti.
I filtri devono essere puliti periodicamente.
ATTENZIONE:
• Non lavare mai il filtro in lavatrice.
• Non usare un asciugacapelli per asciugarlo.
• Rimettere l’apparecchio in funzione quando tutti i filtri
sono completamente asciutti e montati correttamente.
L’unità filtro
L’unità filtro è costituita da:
• Filtro per materiali fini
• Filtro grossolano
Per pulire l’unità filtro, procedere nel seguente
modo:
Svuotamento del collettore della polvere
1. Scollegare l’apparecchio dall’alimentatore.
2. Se necessario, rimuovere il tubo di aspirazione o la
bocchetta dall’apparecchio.
3. Dare un’occhiata alla figura A a pagina 3. Premere il
tasto
sul contenitore della polvere per sganciarlo
dall’apparecchio portatile.
4. Estrarre il filtro per materiali fini sul pezzo di tessuto
colorato.
5. Estrarre il filtro grossolano sull’impugnatura per rimuo-
verlo dal contenitore della polvere.
6. Svuotare il contenuto del raccoglitore di polvere.
Pulizia dei filtri
1. Tenere entrambi i filtri su un bidone dell’immondizia ed
eliminare la polvere. Il filtro per materiali fini, eventual-
mente, può anche essere spazzolato. In caso di macchie
pesanti, lavare i filtri sotto l’acqua corrente.
2. Far asciugare completamente i filtri all’aria prima di
rimontarli!
3. Pulire il collettore della polvere con un panno umido e
poi asciugarlo.
Montaggio dell’unità filtro
1. Collocare il filtro grossolano nel contenitore della polvere.
Notare l’incavo sul bordo del contenitore della polvere. A
questo punto spingere il filtro grossolano verso il basso
in modo che venga posizionato al centro del contenitore
della polvere.
2. Mettere il filtro per materiali fini (con la parte in tessuto
colorato rivolta verso l’alto) sul filtro grossolano. Premere
con forza sul filtro per materiali fini.
3. Successivamente riattaccare il contenitore della polvere
all’apparecchio portatile. Per prima cosa, posizionare
il contenitore della polvere sopra l’alloggiamento del
motore. Ora spingere verso il basso il contenitore della
polvere. Il fermo del contenitore della polvere deve scat-
tare in posizione in modo udibile.
Filtro di scarico
L’apparecchio dispone inoltre di un filtro di scarico. Si trova
nella parte superiore dell’alloggiamento del motore.
ATTENZIONE:
Non è possibile rimuovere questo filtro.
Pulizia
AVVISO:
• Scollegare sempre l’apparecchio dall’alimentatore prima di pulire!

PC-BS3037A_IM 27.05.19
43
AVVISO:
• In nessun caso immergere la custodia del motore in acqua per
la pulizia. Ne potrebbe conseguire un corto circuito o incendio.
ATTENZIONE:
• Non usare pagliette o altri oggetti abrasivi.
• Per la pulizia non usare detersivi forti o abrasivi.
• I singoli componenti non sono lavabili in lavastoviglie.
• Il corpo dell’apparecchio può essere pulito con un panno
leggermente inumidito.
• L’unità di alimentazione può essere pulita con un panno
asciutto.
Ugello pavimento
1. Scollegare la bocchetta per pavimenti dalla pompa di
aspirazione.
2. Girare la bocchetta
per pavimenti intorno,
in modo che si veda
il lato inferiore.
Utilizzare una piccola
moneta o qualsiasi
altro strumento per
aprire il meccanismo
di chiusura. Senso di
rotazione: Antiorario. Aprire il coperchio.
3. Estrarre il rullo della spazzola.
4. Rimuovere fili e capelli dalla spazzola. Se necessario,
usare delle forbici.
5. Assemblaggio:
5.1 Riposizionare la spazzola a rullo, con prima l’incavo
a forma di stella, nel vano.
5.2 Inserire l’altra estremità della spazzola a rullo con il
cuscinetto quadrato nell’incavo sotto il coperchio.
6. Chiudere la sicura del rullo della spazzola.
Contenitore della polvere con unità filtro
Si prega di leggere il capitolo “Manutenzione” per la pulizia
di questi componenti.
Conservazione
• Pulire l’apparecchio come descritto e lasciarlo asciugare.
• Per lo stoccaggio, utilizzare il supporto a parete montato
in precedenza o posizionare con cautela l’apparecchio
sul pavimento.
• Si consiglia di tenere l’apparecchio nella confezione ori-
ginale se l’apparecchio non sarà usato per lunghi periodi.
NOTA riguardante la durata della batteria
ricaricabile:
Anche quando l’apparecchio è spento, la batteria rica-
ricabile si scarica continuamente. Se l’apparecchio non
è utilizzato per un lungo periodo, cambiare la batteria
ricaricabile almeno una volta ogni 4 - 6 settimane.
• Tenere sempre l’apparecchio fuori dalla portata dei
bambini in un luogo asciutto e ben ventilato.
• La temperatura di stoccaggio deve essere compresa tra
0 °C e 40 °C.
Ricerca dei guasti
Problema Possibile causa Rimedio
L’apparecchio non funziona. L’alimentatore è collegato. Scollegare l’apparecchio dall’alimentatore.
La batteria ricaricabile è difettosa. Contattare il centro assistenza o il vostro rivenditore.
Quando l’apparecchio è ac-
ceso, tutte gli indicatori lumi-
nosi iniziano a lampeggiare.
La batteria ricaricabile é scarica. Ricaricare la batteria.
Potenza di aspirazione
debole.
La batteria ricaricabile è quasi
scarica.
Ricaricare la batteria.
Il contenitore della polvere è pieno. Svuotare il contenitore della polvere.
I filtri sono sporchi. Pulire i filtri come descritto in “Manutenzione”.
ATTENZIONE:
Riutilizzare l’apparecchio solo una volta puliti i filtri!

PC-BS3037A_IM 27.05.19
44
Problema Possibile causa Rimedio
Forte rumore durante il
funzionamento.
Un corpo estraneo è stato aspirato
nell’ugello.
Rimuovere il corpo estraneo. Qualora necessario,
scollegare la bocchetta per pavimenti dalla pompa
di aspirazione.
La bocchetta per pavimenti
con la spazzola turbo non è
funzionante.
Il rullo della spazzola è bloccato
dallo sporco.
Pulire la bocchetta per pavimenti come descritto in
“Pulizia”.
Collegamento errato della pompa di
aspirazione / o della bocchetta per
pavimenti.
Controllare il corretto montaggio dei componenti.
La batteria ricaricabile non
mantiene la carica.
La batteria ricaricabile ha raggiungo
la massima durata della sua vita.
Contattare il centro assistenza o il vostro rivenditore.
Dati tecnici
Modello: ........................................................... PC-BS 3037 A
Peso netto (Apparecchio portatile con
tubo di aspirazione e bocchetta per pavimenti): ......ca. 2,4 kg
Adattatore
Classe di protezione: ...........................................................
Ingresso: ......................AC 100 - 240 V, 50 / 60 Hz, 0,8 A MAX
Uscita: ..........................................................DC 35 V, 500 mA
Polarità: ......................................................................
Batteria ricaricabile: ...................... 29,6 V, 2200 mAh Li-Ion
Tempo di esercizio: .................................. 30 minuti massimo
Tempo di ricarica: ................................................... ca. 4,5 ore
Si riserva il diritto di apportare modifiche tecniche e di
design nel corso dello sviluppo del prodotto.
Questo apparecchio è stato controllato sulla base di tutte
le direttive CE attuali in vigore in questo settore, quali per
esempio la normativa in materia di compatibilità elettro-
magnetica e la direttiva in materia di bassa tensione, ed è
stato costruito conformemente alle norme di sicurezza più
moderne.
Smaltimento
Smaltimento della batteria / accumulatore
L’apparecchio è dotato di batteria ricaricabile.
Non gettare batterie e accumulatori usati (batte-
rie ricaricabili) insieme ai rifiuti domestici.
La batteria deve essere rimossa prima che il
prodotto venga riciclato. Premere il fermo di
sgancio (6) e rimuovere la batteria ricaricabile dall’apparec-
chio portatile.
Informazioni riguardo dove batterie e accumulatori possono
essere smaltiti, possono essere ottenute presso le proprie
autorità locali o municipali.
Significato del simbolo “Eliminazione”
Salvaguardare l’ambiente, gli elettrodomestici
non vanno eliminati come rifiuti domestici.
Per l’eliminazione degli elettrodomestici, fare
uso dei posti di raccolta previsti per questo tipo
e porre quegli elettrodomestici che non sono
più in uso.
Si contribuisce così ad evitare un effetto potenziale sull’am-
biente e sulla salute, dovuto magari ad una eliminazione
sbagliata.
Questo significa un contributo personale alla riutilizzazione,
al riciclaggio e altre forme di utilizzazione di elettrodomestici
ed apparecchi elettronici usati.
Si possono trovare le corrispondenti informazioni sugli
appositi luoghi di raccolta, nelle amministrazioni dei comuni.

PC-BS3037A_IM 27.05.19
45
Instruction Manual
Thank you for selecting our product. We hope that you will
enjoy use of the appliance.
Symbols in these Instruction Manual
Important information for your safety is specially marked.
It is essential to comply with these instructions in order to
avoid accidents and prevent damage to the appliance:
WARNING:
This warns you of dangers to your health and indicates
possible injury risks.
CAUTION:
This refers to possible hazards to the appliance or other
objects.
NOTE: This highlights tips and information.
Contents
Overview of the Components ............................................3
General Notes ....................................................................45
Special Safety Instructions for this Appliance .............. 45
Rechargeable Lithium-Ion Batteries (Li-Ion) .................46
Safe Handling of Rechargeable Lithium-Ion Batteries ..46
Extending the Life of the Rechargeable Li-Ion Battery ..46
Unpacking the Appliance .................................................47
Overview of the Components / Scope of Delivery ......... 47
Notes for Use .....................................................................47
Switching the Appliance On / Off ....................................47
Start-Up ..............................................................................47
Suction Pipe ...................................................................47
Floor Nozzle with Turbo Brush .......................................47
Combined Gap / Brush / Upholstery Nozzle (3 in 1) .......48
Extendable Special Brush .............................................. 48
Assembly the Wall Holder ................................................48
Inserting the Plug of the Power Adapter ........................ 48
Fastening the Wall Holder ..............................................48
Charging the Rechargeable Battery ...............................48
Using the Appliance .........................................................49
End of Operation ............................................................ 49
Maintenance ......................................................................49
The Filter System ........................................................... 49
Emptying the Dust Collector ..........................................49
Cleaning the Filters ........................................................49
Assembly of the Filter Unit ............................................. 50
Cleaning ............................................................................. 50
Floor Nozzle ...................................................................50
Dust Container with Filter Unit .......................................50
Storage ............................................................................... 50
Troubleshooting ................................................................51
Technical Data ................................................................... 51
Disposal .............................................................................51
Accumulator / Battery Disposal .......................................51
Meaning of the “Dustbin” Symbol ..................................52
General Notes
Read the operating instructions carefully before putting the
appliance into operation and keep the instructions including
the warranty, the receipt and, if possible, the box with the
internal packing. If you give this appliance to other people,
please also pass on the operating instructions.
• The appliance is designed exclusively for private use and
for the envisaged purpose. This appliance is not t for
commercial use.
• The power adapter is only suitable for use in dry rooms.
• Check if the output current, voltage and the polarity of
the power adapter match the information on the con-
nected appliance!
• Do not touch the connected power adapter with wet
hands!
• If necessary, disconnect the appliance from the power
adapter.
• Ensure that the cable of the power adapter does not be-
come kinked, jammed, driven over or come into contact
with heat sources.
• Do not use a damaged power adapter.
• Do not repair the appliance yourself, but visit an author-
ized specialist.
• The appliance and the mains lead have to be checked
regularly for signs of damage. If damage is found the
appliance must not be used.
• Use only original spare parts.
• In order to ensure your children’s safety, please keep all
packaging (plastic bags, boxes, polystyrene etc.) out of
their reach.
WARNING:
Do not allow small children to play with the foil. There
is a danger of suffocation!
Special Safety Instructions for this Appliance
• This appliance can be used by children aged from 8 years and
above and persons with reduced physical, sensory or mental ca-
pabilities or lack of experience and knowledge if they have been

PC-BS3037A_IM 27.05.19
46
given supervision or instruction concerning use of the appliance in
a safe way and understand the hazards involved.
• Children shall not play with the appliance.
• Cleaning and user maintenance shall not be made by children
without supervision.
• The appliance is intended for use with safety extra-low voltage.
Connect only to a power supply according to the specications on
the rating label.
• If the connection cable of this appliance has been damaged, it
must be replaced with a special connection cable available from
the manufacturer or its customer service.
• Use only the power adapter included in the scope of deliveries.
• Do not suck in combustible substances or liquids!
• Do not use this appliance to remove toner particles from a laser
printer or copier to prevent re or explosion.
• Do not suck up hot ashes or pointed or sharp objects!
• Never vacuum without the lter installed.
Rechargeable Lithium-Ion Batteries (Li-Ion)
The appliance is equipped with rechargeable Li-ion batter-
ies. This results in numerous advantages compared to other
batteries and accumulators:
• A high cell voltage (more volts)
• No memory effect
• A low self-discharge
Safe Handling of Rechargeable Lithium-Ion Batteries
In general, Li-ion batteries are considered safe. Never-
theless, hazards may result from mechanical damage,
electrical faults and thermal effects.
Mechanical damage may result in the leakage of gaseous
or liquid substances that can be highly irritating, ammable
or even toxic.
An electrical fault, such as a short circuit, may lead to over-
heating and cause a re.
Even the heating of the outer shell of a Li-ion battery, e. g.
due to sunlight or a heating element, may lead to re or an
explosion.
However, Li-ion batteries are safe when handled properly.
Only if used or stored improperly they may become danger-
ous. Therefore:
• Avoid temperatures above 40 °C and below 0 °C.
• Do not drop the appliance or the rechargeable battery.
• In case the Li-Ion battery has been dropped and is now
damaged, stop using it.
• When storing or disposing of the appliance, mask the
terminals to prevent short circuits.
• Dispose of old accumulators properly in collecting con-
tainers at the trader or at municipal collection points.
Extending the Life of the Rechargeable Li-Ion Battery
For Li-ion batteries, even more than with other accumula-
tors, their life can be extended by treating them properly.
The following simple rules for charging and storing help you
keeping the capacity of the battery:
• Temperature: The ideal temperature for these batteries
ranges from 10 - 25 °C. Temperatures above may lead to
premature aging.
• Charging and discharging: During charging cycles,
both full charge and deep discharge should be avoided.

PC-BS3037A_IM 27.05.19
47
When the charging process of the battery is completed,
you should disconnect the charger immediately. A charge
up to 90 % is considered best.
Conversely, it is also preserving the battery more when
it is not discharged to 0 %. If the possibility arises, you
should already recharge the battery when it is reaching a
charge state of 30 %.
• Storage: Always store batteries in a dry place and at
moderate temperatures between 10 °C and 20 °C.
Also consider the effect of self-discharge! When the
accumulator is already empty, this effect may lead to
a deep discharge resulting in damaging the battery. If
you intend to store the battery for an extended period of
time, you can counteract this effect. We then recommend
charging the battery to approx. 40 % before storage. You
should check the state of charge after not more than a
month.
Unpacking the Appliance
1. Remove the appliance from its packaging.
2. Check the delivery scope for completeness.
3. Check the appliance for any transport damage, in order
to prevent hazards.
NOTE:
In case of any transport damage, contact your dealer
immediately. Do not use a damaged appliance!
Overview of the Components /
Scope of Delivery
Figure A
1 Dust container
2 Motor housing
3 MAX button
4 On / off button
5 Rechargeable battery pack
6 Rechargeable battery pack release
7 Dust container latch
Figure B
1 Dust container
2 Motor housing
8 Indicator lights
9 Carrying handle
10 Power supply connection socket
11 Hand set (Figure A)
12 Suction pipe release
13 Nozzle holder
14 Release for suction pipe joint
15 Floor nozzle with turbo brush
16 Floor nozzle release
17 Suction pipe
18 Combined nozzle release
19 Combined gap / brush / upholstery nozzle
20 Extendable special brush
Figures A and D
Wall holder
Not shown
1 × Power adapter
2 × Wall plug
2 × Screw
Notes for Use
• The appliance is especially suitable for quickly vacuum-
ing small amounts of dry dirt or dust.
• The appliance is operated via charged battery. Charging
is done via the supplied power adapter.
• Direct power supply via power adapter is not possible.
• Hang the appliance onto the supplied wall mount when
not in use. It also serves as a charging station.
CAUTION:
The appliance can not stand upright on its own. If you
are not using the wall mount, gently place the vacuum
cleaner on the oor.
• This rechargeable battery vacuum cleaner is no
adequate replacement for a conventional oor vacuum
cleaner. Especially on shag-pile carpet, the cleaning
performance is not sufcient owing to its design.
• Contaminated lters reduce the suction power of the vac-
uum cleaner. Therefore, we recommend regular cleaning
of the existing dirt lters.
• Ideally, clean the lters whenever they have been subject
to a prolonged use.
• Please regularly check and clean the electric oor
nozzle.
• If necessary, clean heavily soiled oors multiple times
and / or use a conventional 230 V~ oor vacuum cleaner.
Switching the Appliance On / Off
• The button (4) turns the appliance on and off.
• Press the MAX button on the back of the handset to
toggle between low and high power levels.
Start-Up
Suction Pipe
• The suction pipe is equipped with a joint. When tilted,
it makes it easier for you to vacuum in places that are
hard to reach. For a rigid suction pipe, let the hinge joint
audibly snap into place.
• Insert the suction pipe with the two contact pins into the
connection on the hand unit. It must audibly engage.
• To disconnect the suction pipe, press the release (12)
and pull out the pipe at the same time.
Floor Nozzle with Turbo Brush
• The oor nozzle is suitable for all oor coverings except
for shag-pile carpets.

PC-BS3037A_IM 27.05.19
48
• During operation, the LEDs on the oor nozzle light up
for better visibility in dark areas.
CAUTION: You cannot replace the LEDs.
• Stick the lower end of the suction pipe onto the connec-
tor on the oor nozzle. Note the contact pins on the oor
nozzle. The suction pipe must audibly s snap into place.
• To disconnect the suction pipe, press the release (16)
and pull out the pipe at the same time.
Combined Gap / Brush / Upholstery Nozzle (3 in 1)
• These accessories are always readily available when
you keep them attached to the suction pipe above the
hinge joint, using the bracket.
• While using this nozzle as a gap nozzle, you will be able
to suck dirt out of corners, grooves and small gaps.
• To prevent scratching of the surface to be cleaned, use
the gap nozzle along with the locked brush / upholstery
nozzle. This enables you to gently remove dirt from slits
in upholstery and mattresses. Also suitable for removing
dust from sensitive surfaces such as furniture or curtains.
• To attach the brush / upholstery nozzle to the gap nozzle,
rst press the buttons on the side and then slide the noz-
zle onto it, letting it audibly snap into place. (as shown in
the following picture)
• To release the lock, simply press both buttons again.
• There are two different ways for connecting this com-
bined nozzle attachment to the appliance:
Connection at the Hand Unit
• Insert the gap nozzle with the unlocking facing up into
the connection on the handset. It must audibly snap into
place.
• To release the nozzle, press the release button and pull it
out at the same time.
Connection to the Suction Pipe
At the lower end of the suction pipe, you will nd the same
plug connection as on the handset. Mount / dismount the
nozzle as described above.
Extendable Special Brush
• This nozzle is particularly well suited for gentle cleaning
of larger sensitive surfaces.
• You may enlarge the dirt receiving surface by pulling the
brush component all the way out.
• You may attach this brush both directly onto the connec-
tion on the handset as well as onto the connection of the
already mounted suction pipe.
• To release the nozzle, simply pull it off.
Assembly the Wall Holder
Please take a look at Figures C and D on page 3.
Inserting the Plug of the Power Adapter
If you want to use the wall holder also as the charging sta-
tion, attach the plug of the power adapter rst (Fig. C)
1. Connect the power supply plug to the slot on the back of
the charging unit.
2. Firmly push the plug into the terminals. It must audibly
snap into place.
3. Secure the cable in the right or left cable guide.
Fastening the Wall Holder
WARNING:
Make sure beforehand whether there are cables in the
wall which could be damaged!
CAUTION:
Place the wall holder so that the appliance is not exposed
to direct sunlight or other heat sources.
NOTE:
If you would like to simultaneously use the wall mount as
a charging station, there must be a power outlet nearby.
1. Measure the height for the wall holder. Hold the vacuum
cleaner against the wall with the suction pipe and the
oor nozzle installed.
2. Hold the wall holder against the wall as shown on page 3
(Fig. D). Mark 2 drill holes.
3. Drill the holes and insert the wall plugs into the wall.
4. Insert the screws through the holes of the wall holder.
5. Tighten the screws with a screwdriver hand-tight.
Charging the Rechargeable Battery
CAUTION:
Do not charge the rechargeable battery unsupervised.
1. Turn off the appliance.
2. Connect the power adapter with the connection
socket (10). If you have prepared the wall holder as a
charging station, suspend the appliance from the wall
holder.
3. Connect the power adapter to a certied wall socket.
Charge the appliance for approx. 5 hours before rst-
time use.

PC-BS3037A_IM 27.05.19
49
• You may attach this brush both directly onto the connec-
tion on the handset as well as onto the connection of the
already mounted suction pipe.
• To release the nozzle, simply pull it off.
Assembly the Wall Holder
Please take a look at Figures C and D on page 3.
Inserting the Plug of the Power Adapter
If you want to use the wall holder also as the charging sta-
tion, attach the plug of the power adapter rst (Fig. C)
1. Connect the power supply plug to the slot on the back of
the charging unit.
2. Firmly push the plug into the terminals. It must audibly
snap into place.
3. Secure the cable in the right or left cable guide.
Fastening the Wall Holder
WARNING:
Make sure beforehand whether there are cables in the
wall which could be damaged!
CAUTION:
Place the wall holder so that the appliance is not exposed
to direct sunlight or other heat sources.
NOTE:
If you would like to simultaneously use the wall mount as
a charging station, there must be a power outlet nearby.
1. Measure the height for the wall holder. Hold the vacuum
cleaner against the wall with the suction pipe and the
oor nozzle installed.
2. Hold the wall holder against the wall as shown on page 3
(Fig. D). Mark 2 drill holes.
3. Drill the holes and insert the wall plugs into the wall.
4. Insert the screws through the holes of the wall holder.
5. Tighten the screws with a screwdriver hand-tight.
Charging the Rechargeable Battery
CAUTION:
Do not charge the rechargeable battery unsupervised.
1. Turn off the appliance.
2. Connect the power adapter with the connection
socket (10). If you have prepared the wall holder as a
charging station, suspend the appliance from the wall
holder.
3. Connect the power adapter to a certied wall socket.
Charge the appliance for approx. 5 hours before rst-
time use.
NOTE:
• The indicator lights show the state of charge of the
rechargeable battery. (25 %, 50 %, 100 %)
• The appliance has electronic charge control, which
prevents overcharging.
• Charging is completed when all 3 indicator lights
are lit.
• In case the appliance is removed from the charging
station or disconnected from the power adapter, the
indicator lights go out.
• It is normal for the appliance to heat up during
charging.
4. Disconnect the power
adapter from the outlet once
the rechargeable battery has
been charged completely.
5. To remove the appliance
from the charging station,
press the release latch on top
of the wall mount.
NOTE:
Even when switched off,
the rechargeable battery
discharges continuously. If the
appliance is out of use for a
longer period of time, charge
the rechargeable battery at
least once every 4 to 6 weeks.
Using the Appliance
You can use the appliance as a oor vacuum cleaner or as
a handheld and upright vacuum cleaner (basic unit).
1. Disconnect the appliance from the power adapter.
2. Turn on the appliance.
3. If you would like to tilt the suction pipe at the joint, press
the release (14).
NOTE:
• We recommend the higher power level for using the
appliance with the oor nozzle. Press the MAX button.
• During operation, depending on the charging capacity
of the rechargeable battery, 1 to 3 indicator are lit.
• We recommend recharging the battery once the indica-
tor lights show a remaining capacity of only 25 %.
• Once the capacity of the rechargeable battery is al-
most reaching its end, the last indicator light will ash.
To avoid a deep discharge of the rechargeable battery,
the motor will shut off the appliance accordingly. Re-
charge the battery.
End of Operation
1. Turn off the appliance.
2. If you have already installed the wall holder, hang up the
vacuum cleaner.
Maintenance
The Filter System
Your appliance features 3 lters. The common dust bag
system has been replaced by a transparent dust collector.
The higher ow speed of the collector allows for heavy dirt
and smallest oating particles to be separated from the
“sucked-in air”.
It is thus not necessary to buy dust bags.
The lters must be cleaned periodically.
CAUTION:
• Never wash the lter in the washing machine.
• Do not use a hairdryer for drying.
• Only put the appliance back into operation when all
lters are completely dry and correctly assembled.
The Filter Unit
The lter unit is composed of:
• Fine material lter
• Coarse lter
Proceed as follows to clean
the lter unit:
Emptying the Dust Collector
1. Disconnect the appliance from the power adapter.
2. If necessary, remove the suction tube or the nozzle
attachment from the appliance.
3. Please take a look at Figure A on page 3. Press the
button on the dust container to release it from the
handset.
4. Pull out the ne material lter on the coloured piece of
fabric.
5. Pull out the coarse lter on its handle to remove it from
the dust container.
6. Empty the contents of the dust collector.
Cleaning the Filters
1. Hold both lters over a garbage can and tap out the dust.
You may also brush out the ne material lter. In case of
heavy staining, clean the lters under running water.
2. Let the lters air-dry completely before retting them!
3. Wipe the dust collector with a damp cloth and then wipe
it dry.

PC-BS3037A_IM 27.05.19
50
Assembly of the Filter Unit
1. Place the coarse lter in the dust container. Please note
the recess on the edge of the dust container. Now push
the coarse lter down so that it is placed in the center of
the dust container.
2. Put the ne material lter (with the coloured fabric part
facing up) onto the coarse lter. Firmly press on the ne
material lter.
3. Then reattach the dust container to the handset. First,
place the dust container on top of the motor housing.
Now push the dust container down. The latch on the dust
container must audibly snap into place.
Outlet Filter
The appliance is also equipped with an exhaust lter. It is
located at the top of the motor housing.
CAUTION: You cannot remove this lter.
Cleaning
WARNING:
• Always disconnect the appliance from the power adapter before
cleaning!
• Under no circumstances should you immerse the motor housing
in water in order to clean it. Otherwise this might result in an
electric shock or re.
CAUTION:
• Do not use a wire brush or any abrasive items.
• Do not use any acidic or abrasive detergents.
• The single components are not dishwasher-safe.
• Wipe the casing with a damp cloth.
• You can wipe the power adapter unit with a dry cloth.
Floor Nozzle
1. Disconnect the oor nozzle from the suction pipe.
2. Turn the oor nozzle
around, so that you
see the lower side.
Use a small coin or
any other tool to open
the latch. Direction of
rotation: Counterclock-
wise. Flip the cover
open.
3. Pull out the brush roller.
4. Remove threads and hair wound to the brush. Use
scissors, if required.
5. Assembly:
5.1 Put the brush roller, with the star-shaped recess
rst, back into the compartment.
5.2 Insert the other end of the brush roller with the
square bearing into the recess underneath the
cover.
6. Close the lock of the brush roller.
Dust Container with Filter Unit
Please read the chapter “Maintenance” for cleaning of these
components.
Storage
• Clean the appliance as described and allow it to dry.
• For storage, use the previously mounted wall bracket or
carefully place the appliance on the oor.
• We recommend that you keep the appliance in the origi-
nal packaging if it will not be used for long periods.

PC-BS3037A_IM 27.05.19
51
NOTE concerning the life of the rechargeable
battery:
Even when switched off, the rechargeable battery dis-
charges continuously. When the appliance is out of use
for a longer period of time, charge the rechargeable
battery at least once every 4 to 6 weeks.
• Always store the appliance out of the reach of children in
a dry, well ventilated place.
• The storage temperature should be between 0 and
40 °C.
Troubleshooting
Problem Possible cause Remedy
The appliance does not
function.
The power adapter is connected. Disconnect the appliance from the power adapter.
The rechargeable battery is defect. Contact our service or your dealer.
When the appliance is
switched on, all indicator
lights start ashing.
The rechargeable battery is empty. Charge the rechargeable battery.
Weak suction power. The rechargeable battery is nearly
discharged.
Charge the rechargeable battery.
The dust container is full. Empty the dust container.
The lters are dirty. Clean the lters as described under “Maintenance”.
CAUTION:
Restart operation only with dry lters.
Noise during operation. A foreign body has been sucked
into the oor nozzle.
Remove the foreign body. If required, disconnect the
oor nozzle from the suction pipe.
The oor nozzle with turbo
brush is not operating.
The brush roller is blocked by dirt. Clean the oor nozzle as described under “Cleaning”.
Incorrect assembly of suction pipe
and / or oor nozzle.
Check the assembling of the parts.
The rechargeable battery
does not keep the charge.
The rechargeable battery has
reached the end of its life.
Contact our service or your dealer.
Technical Data
Model:.............................................................. PC-BS 3037 A
Net weight
(Handset with suction pipe and oor nozzle): .. approx. 2.4 kg
Power Adapter
Protection class: ...................................................................
Input: ............................AC 100 - 240 V, 50 / 60 Hz, 0.8 A MAX
Output:..........................................................DC 35 V, 500 mA
Polarity: ......................................................................
Rechargeable battery: ................... 29.6 V, 2200 mAh Li-Ion
Operating time:.....................................30 minutes maximum
Charging time: .............................................approx. 4.5 hours
The right to make technical and design modications in
the course of continuous product development remains
reserved.
This appliance has been tested according to all relevant
current CE guidelines, such as electromagnetic compatibil-
ity and low voltage directives, and has been constructed in
accordance with the latest regulations.
Disposal
Accumulator / Battery Disposal
The unit contains a rechargeable battery. Used
batteries / accumulators (rechargeable batteries)
do not belong in household waste.
The battery must be removed before the prod-
uct is recycled. Press the release latch (6) and
remove the rechargeable battery pack from the handset.
Information, where batteries / accumulators are to be
disposed of can be obtained from your local or municipal
authorities.

PC-BS3037A_IM 27.05.19
52
Meaning of the “Dustbin” Symbol
Protect our environment: do not dispose of
electrical equipment in the domestic waste.
Please return any electrical equipment that
you will no longer use to the collection points
provided for their disposal.
This helps avoid the potential effects of incorrect disposal
on the environment and human health.
This will contribute to the recycling and other forms of re-
utilisation of electrical and electronic equipment.
Information concerning where the equipment can be dis-
posed of can be obtained from your local authority.

PC-BS3037A_IM 27.05.19
53
Instrukcje obsługi
Dziękujemy za wybór naszego produktu. Mamy nadzieję, że
korzystanie z urządzenia sprawi Państwu radość.
Symbole użyte w tej instrukcji obsługi
Ważne informacje dotyczące bezpieczeństwa użytkownika
są specjalnie wyróżnione. Koniecznie stosuj się do tych
wskazówek, aby uniknąć wypadków i uszkodzenia urzą-
dzenia:
OSTRZEŻENIE:
Ostrzega przed zagrożeniami dla zdrowia i wskazuje na
potencjalne ryzyka obrażeń.
UWAGA:
Wskazuje na potencjalne zagrożenia dla urządzenia lub
innych przedmiotów.
WSKAZÓWKA:
Wyróżnia porady i informacje ważne dla użytkownika.
Spis treści
Przegląd elementów obsługi .............................................3
Ogólne uwagi ....................................................................53
Specjalne wskazówki bezpieczeństwa dla urządzenia
..54
Akumulatory litowo-jonowe (Li-Ion) ...............................54
Bezpieczna obsługa akumulatorów litowo-jonowych ....54
Wydłużanie żywotności
akumulatorów litowo-jonowych ...................................... 55
Rozpakowanie urządzenia ............................................... 55
Przegląd elementów obsługi / Zakres dostawy..............55
Wskazówki dotyczące użytkowania ...............................55
Przełączanie urządzenia wł. / wył. (On / Off) ...................56
Uruchomienie .................................................................... 56
Rura ssąca .....................................................................56
Dysza do podłogi z turboszczotką ................................. 56
Łączona ssawka szczelinowa / szczotka /
ssawka do tapicerki (3 w 1) ............................................56
Wydłużana szczotka specjalna ...................................... 56
Montaż uchwytu ściennego ............................................. 57
Wsuwanie wtyczki zasilacza .......................................... 57
Zamocowanie uchwytu ściennego .................................57
Ładowanie akumulatora ...................................................57
Obsługa urządzenia .......................................................... 57
Zakończenie pracy urządzenia ...................................... 58
Konserwacja ...................................................................... 58
System ltrów ................................................................. 58
Opróżnianie pojemnika na pył .......................................58
Czyszczenie ltrów.........................................................58
Montaż zespołu ltra ......................................................58
Czyszczenie ....................................................................... 58
Dysza do podłóg ............................................................59
Pojemnik na pył z zespołem ltra ..................................59
Przechowywanie ...............................................................59
Wykrywanie i usuwanie usterek......................................59
Dane techniczne ................................................................60
Warunki gwarancji ............................................................60
Usuwanie ...........................................................................61
Utylizacja akumulatora / baterii ....................................... 61
Znaczenie symbolu „Pojemnik na śmieci” ..................... 61
Ogólne uwagi
Przed uruchomieniem urządzenia proszę bardzo dokładnie
przeczytać instrukcję obsługi. Proszę zachować ją wraz
z kartą gwarancyjną, paragonem i w miarę możliwości rów-
nież kartonem z opakowaniem wewnętrznym. Przekazując
urządzenie innej osobie, oddaj jej także instrukcję obsługi.
• Proszę wykorzystywać urządzenie jedynie dla prywat-
nego celu, jaki został przewidziany dla urządzenia. Urzą-
dzenie to nie zostało przewidziane do użytku w ramach
działalności gospodarczej.
• Adapter sieciowy jest odpowiedni do użytkowania tylko
w suchych pomieszczeniach.
• Sprawdzić, czy natężenie prądu na wyjściu, napięcie
oraz bieguny adaptera sieciowego pasują do informacji
na podłączonym urządzeniu!
• Nie dotykać podłączonego zasilacza sieciowego mo-
krymi rękami!
• W razie konieczności wyczyszczenia odłączyć urządze-
nie od zasilacza sieciowego.
• Sprawdzić, czy kabel zasilacza sieciowego nie jest
skręcony, zablokowany, naciśnięty ani nie styka się ze
źródłami gorąca.
• Nie używać uszkodzonego zasilacza sieciowego.
• Nie naprawiać urządzenia samodzielnie, ale skon-
sultować się z uprawnionym i wyspecjalizowanym
fachowcem.
• Należy regularnie sprawdzać, czy urządzenie i kabel
sieciowy nie są uszkodzone. W razie uszkodzenia należy
przestać korzystać z urządzenia.
• Proszę stosować tylko oryginalne akcesoria.
• Dla bezpieczeństwa dzieci proszę nie zostawiać swo-
bodnie dostępnych części opakowania (torby plastikowe,
kartony, styropian itp.).
OSTRZEŻENIE:
Nie pozwalaj dzieciom bawić się folią. Niebezpieczeń-
stwo uduszenia!

PC-BS3037A_IM 27.05.19
54
Specjalne wskazówki bezpieczeństwa dla urządzenia
• Urządzenie to może być używane przez dzieci w wieku lat 8 lub
starsze, osoby z obniżoną sprawnością zyczną, zmysłową lub
umysłową, osoby z brakiem doświadczenia i wiedzy, jeśli są one
nadzorowane lub gdy je poinstruowano jak korzystać z tego urzą-
dzenia w bezpieczny sposób, i gdy zdają sobie sprawę z istnieją-
cych niebezpieczeństw.
• Dzieci nie powinny bawić się tym urządzeniem.
• Czyszczenie i konserwacja nie powinny być wykonywane przez
dzieci bez nadzoru.
• Urządzenie to jest przeznaczone do użytku przy bezpiecznym
bardzo niskim napięciu. Należy je podłączać wyłącznie do źródeł
zasilania zgodnych ze specykacjami na tabliczce znamionowej.
• Jeśli kabel połączeniowy urządzenia zostanie uszkodzony, musi
zostać wymieniony na specjalny kabel połączeniowy, który można
uzyskać od producenta lub w dziale obsługi klienta.
• Używaj wyłącznie zasilacza wchodzącego w zakres dostawy.
• Nie zasysaj substancji palnych ani cieczy!
• Odkurzacza nie należy stosować do usuwania tonera z drukarek
lub kopiarek laserowych, gdyż grozi to pożarem lub wybuchem.
• Proszę nie wciągać odkurzaczem gorącego popiołu, przedmiotów
ostrych i ostro zakończonych!
• Nie wolno nigdy odkurzać bez zainstalowanego ltra.
Akumulatory litowo-jonowe (Li-Ion)
Odkurzacz zasilany jest akumulatorami litowo-jonowymi.
W porównaniu z innymi akumulatorami, akumulatory
litowo-jonowe charakteryzują się wieloma zaletami:
• Wysokim napięciem ogniw (więcej woltów)
• Brakiem zjawiska pamięci
• Niskim poziomem samowyładowania
Bezpieczna obsługa akumulatorów litowo-jonowych
Akumulatory litowo-jonowe uważane są za bezpieczne,
jednak zagrożenia związane z ich użytkowaniem mogą wy-
nikać z uszkodzeń mechanicznych, usterek elektrycznych
i efektów cieplnych.
Uszkodzenia mechaniczne mogą skutkować wyciekiem
związków gazowych lub ciekłych, które mogą być wysoce
drażniące, palne lub nawet toksyczne.
Usterka elektryczna, np. zwarcie, może prowadzić do prze-
grzewania akumulatora, i być przyczyną pożaru.

PC-BS3037A_IM 27.05.19
55
Nawet rozgrzanie zewnętrznej powierzchni akumulatora
litowo-jonowego, na przykład w wyniku działania promieni
słonecznych lub źródła ciepła, może prowadzić do pożaru
lub wybuchu.
Jednakże, przy zachowaniu właściwych warunków eksplo-
atacji akumulatory litowo-jonowe są bezpieczne. Zagrożenie
stanowią jedynie w sytuacji, gdy są użytkowane lub składo-
wane w nieodpowiedni sposób. Zatem:
• Należy unikać temperatury powyżej 40 °C oraz poniżej
0 °C.
• Nie dopuszczać do upadku urządzenia lub akumulatora.
• Jeśli w wyniku upadku akumulator litowo-jonowy ulegnie
uszkodzeniu, nie należy go dalej użytkować.
• Na czas składowania urządzenia lub oddając je do likwi-
dacji zaciski akumulatora należy osłonić, by nie dopuścić
do zwarcia.
• Zużyte akumulatory należy likwidować wrzucając je do
przeznaczonych do tego celu pojemników w punktach
sprzedaży lub oddając do punktów zbiórki zużytego
sprzętu AGD.
Wydłużanie żywotności akumulatorów litowo-jonowych
Okres żywotności akumulatorów litowo-jonowych można
wydłużyć eksploatując je w prawidłowy sposób. Przestrze-
ganie poniższych prostych zasad ładowania i składowania
przyczyni się do utrzymania pełnej sprawności akumulatora:
• Temperatura: Najlepszą temperaturą dla tego rodzaju
akumulatorów jest temperatura w zakresie od 10 °C
do 25 °C. Temperatury wyższe mogą przyczynić się do
przedwczesnego starzenia się akumulatorów.
• Ładowanie i rozładowanie: Podczas cykli ładowania
należy unikać zarówno pełnego naładowania, jak i głębo-
kiego rozładowania.
Po zakończeniu ładowania akumulatora należy nie-
zwłocznie odłączyć ładowarkę. Za najlepsze uznaje się
ładowanie do poziomu 90 %.
I odwrotnie, akumulatora nie należy rozładowywać do
0 %. Jeśli jest taka możliwość, akumulator należy doła-
dować, gdy osiągnie poziom naładowania 30 %.
• Składowanie: Akumulatory należy składować w suchym
miejscu, w temperaturze pomiędzy 10 °C a 20 °C.
Należy również wziąć pod uwagę zjawisko samowyłado-
wania! W sytuacji, gdy akumulator jest niemal całkowicie
rozładowany, zjawisko to może prowadzić do głębokiego
rozładowania skutkującego uszkodzeniem akumulatora.
W przypadku planów składowania akumulatora przez
dłuższy okres można temu zjawisku zapobiec. Przed
odłożeniem urządzenia w miejsce składowania zalecamy
naładowanie akumulatora do około 40 % jego pojemno-
ści. Stan naładowania akumulatora należy sprawdzić nie
później, niż po miesiącu.
Rozpakowanie urządzenia
1. Wyjąć urządzenie z opakowania.
2. Sprawdzić kompletność zakupionego zestawu.
3. Sprawdzić urządzenie, czy nie ma usterek powstałych
podczas transportu, aby uniknąć zagrożeń.
WSKAZÓWKA:
W przypadku zauważonej usterki należy natychmiast
skontaktować się z miejscowym dystrybutorem lub
sprzedawcą. Nie użytkować uszkodzonego urządzenia!
Przegląd elementów obsługi /
Zakres dostawy
Rysunek A
1 Pojemnik na kurz
2 Obudowa silnika
3 Przycisk MAX
4 Przycisk wł / wył
5 pakiet akumulatorów
6 odblokowanie pakietu akumulatorów
7 Zatrzask pojemnika na kurz
Rysunek B
1 Pojemnik na kurz
2 Obudowa silnika
8 Kontrolki
9 Uchwyt do przenoszenia
10 Gniazdo łączenia zasilania
11 Zestaw ręczny (Rysunek A)
12 Odblokowanie rury ssącej
13 Adapter dyszy
14 Odblokowanie przegubu rury ssącej
15 Dysza do podłogi z turboszczotką
16 Odblokowanie ssawki do podłóg
17 Rura ssąca
18 Odblokowanie ssawki łączonej
19 Łączona ssawka szczelinowa / szczotka / ssawka do
tapicerki
20 Wydłużana szczotka specjalna
Rysunki C i D
Uchwyt ścienny
Brak na rysunku
1 × Zasilacz
2 × Kołek rozporowy
2 × Śruba
Wskazówki dotyczące użytkowania
• Urządzenie nadaje się w szczególności do szybkiego
odkurzania niewielkich ilości suchego brudu lub kurzu.
• Urządzenie jest zasilane z naładowanej baterii. Ła-
dowanie odbywa się za pośrednictwem dołączonego
zasilacza.

PC-BS3037A_IM 27.05.19
56
• Bezpośrednie zasilanie z zasilacza sieciowego nie jest
możliwe.
• Zawieś urządzenie na dostarczonym uchwycie ścien-
nym, gdy nie jest ono w użyciu. Służy także jako stacja
ładowania.
UWAGA:
Urządzenie nie może stać pionowo samo z siebie. Je-
żeli nie używasz uchwytu ściennego, delikatnie połóż
odkurzacz na podłodze.
• Odkurzacz akumulatorowy nie jest właściwym zamienni-
kiem odkurzacza konwencjonalnego do podłóg. Szcze-
gólnie na dywanach o długim włosiu jego wydajność
czyszczenia nie jest wystarczająca - ze względu na jego
konstrukcję.
• Zabrudzone ltry zmniejszają moc ssania odkurzacza.
Dlatego zalecamy regularne czyszczenie istniejących
ltrów.
• Najlepiej czyścić ltry, gdy były używane przez dłuższy
czas.
• Regularnie sprawdzaj i czyść elektryczną ssawkę do
podłóg.
• W razie potrzeby mocno zabrudzone podłogi czyść wiele
razy lub stosuj zwykły odkurzacz 230 V~ do podłóg.
Przełączanie urządzenia wł. / wył. (On / Off)
• Przycisk (4) włącza i wyłącza urządzenie.
• Wciskaj przycisk MAX z tyłu uchwytu, aby przełączać
między niskim i wysokim poziomem mocy.
Uruchomienie
Rura ssąca
• Rura ssąca jest wyposażona w przegub. Przy prze-
chyleniu ułatwia to odkurzanie w miejscach trudno
dostępnych. Aby uzyskać sztywną rurę ssącą, zablokuj
przegub na miejscu.
• Wsunąć rurę ssawną z dwoma wypustami w złącze ze-
społu przenośnego. Zabezpieczeniu urządzenia będzie
towarzyszył dźwięk.
• Aby odłączyć rurę ssawną, nacisnąć przycisk zwalnia-
jący (12) i jednocześnie wyciągnąć rurę.
Dysza do podłogi z turboszczotką
• Ssawka do podłóg nadaje się do wszystkich podłóg
z wyjątkiem dywanów o długim włosiu.
• W trakcie pracy świecą się diody LED w celu zapewnie-
nia lepszej widoczności w ciemnych zakamarkach.
UWAGA: Diody LED są niewymienialne.
• Wsuń dolny koniec rury ssawnej w złącze ssawki pod-
łogowej. Zważaj na kołki stykowe na ssawce do podłóg.
Rura ssawna musi w sposób słyszalny zatrzasnąć na
miejscu.
• Aby odłączyć rurę ssawną, nacisnąć przycisk zwalnia-
jący (16) i jednocześnie wyciągnąć rurę.
Łączona ssawka szczelinowa / szczotka / ssawka do
tapicerki (3 w 1)
• Te akcesoria są zawsze łatwo dostępne, gdy przymocu-
jesz je wspornikiem na rurze ssawnej nad przegubem.
• Korzystając z tej ssawki będziesz mógł usunąć brud
z narożników, rowków i małych szczelin.
• Aby zapobiec rysowaniu czyszczonej powierzchni, stosuj
ssawkę razem z zablokowaną szczotką/ ssawką do ta-
picerki. To umożliwia delikatne odkurzanie szczelin w ta-
picerce i materacach. Nadaje się także do odkurzania
delikatnych powierzchni, takich jak meble lub zasłony.
• Aby zamocować szczotkę / ssawkę do tapicerki na
ssawce szczelinowej, wciśnij najpierw przyciski z boku,
a następnie wsuń ssawkę na nią ze słyszalnym zatrza-
śnięciem na miejscu. (jak przedstawiono na poniższym
rysunku).
• Aby zwolnić blokadę, po prostu wciśnij oba przyciski
ponownie.
• Są dwa różne sposoby łączenia tej ssawki kombinowa-
nej z urządzeniem:
Podłączanie do zespołu przenośnego
• Włóż ssawkę szczelinową z odblokowaniem, zwróconą
do góry ku łączeniu z uchwytem. Musi słyszalnie zatrza-
snąć się na swoim miejscu.
• Aby odłączyć ssawkę, nacisnąć przycisk zwalniający,
jednocześnie ją wyciągając.
Podłączanie do rury ssawnej
Na drugim końcu rury ssawnej znajdziesz takie samo złącze
wtykowe, jak na uchwycie. Montaż / demontaż ssawki, jak
opisano wyżej.
Wydłużana szczotka specjalna
• Ta ssawka szczególnie nadaje się do delikatnego odku-
rzania większych powierzchni wrażliwych.
• Możesz rozszerzyć powierzchnię odkurzania wyciągając
cały czas element szczotki.
• Możesz zamocować tę szczotkę zarówno bezpośrednio
na złączu z uchwytem, jak też na złączu z już założoną
rurą ssawną.
• Aby rozłączyć ssawkę, po prostu ją wyciągnij.

PC-BS3037A_IM 27.05.19
57
Montaż uchwytu ściennego
Spójrz na rysunki C i D na stronie 3.
Wsuwanie wtyczki zasilacza
W przypadku wykorzystywania uchwytu ściennego także
jako stanowiska ładowania, należy najpierw podłączyć
wtyczkę zasilacza (Rys. C).
1. Połącz wtyczkę zasilania ze szczeliną z tyłu ładowarki.
2. Mocno wciśnij wtyczkę w zaciski. Musi słyszalnie zatrza-
snąć się na swoim miejscu.
3. Zabezpiecz przewód prawą lub lewą prowadnicą.
Zamocowanie uchwytu ściennego
OSTRZEŻENIE:
Przed przystąpieniem do montażu należy upewnić się, że
w danym miejscu w ścianie nie ma kabli, które mogłyby
zostać uszkodzone!
UWAGA:
Uchwyt ścienny umieścić w taki sposób, aby urządzenie
nie było narażone na bezpośrednie działanie promieni
słonecznych lub innych źródeł ciepła.
WSKAZÓWKA:
Jeżeli chcesz równocześnie korzystać z uchwytu
ściennego jako ładowarki, w pobliżu musi być gniazdko
zasilające.
1. Zmierzyć wysokość uchwytu ściennego. Wieszać odku-
rzacz przy ścianie z zamontowaną rurą ssawną i ssawką
podłogową.
2. Przytrzymać uchwyt ścienny na ścianie, jak pokazano na
stronie 3 (Rys. D). Zaznaczyć 3 otwory.
3. Nawiercić otwory i włożyć kołki do ściany.
4. Włożyć śruby do otworów w uchwycie ściennym.
5. Wkręty dokręcić ręcznie śrubokrętem do oporu.
Ładowanie akumulatora
UWAGA:
Nie należy ładować akumulatora wielokrotnego ładowania
bez nadzoru.
1. Wyłącz urządzenie.
2. Kabel zasilania podłączyć do gniazdka wejściowego (10).
W przypadku przygotowania uchwytu ściennego do
pracy jako stanowisko ładowania, urządzenie należy
wieszać na uchwycie ściennym.
3. Podłącz zasilacz sieciowy do gniazda elektrycznego
z certykatem. Przed pierwszym użyciem urządzenie
należy ładować przez ok. 5 godzin.
WSKAZÓWKA:
• Wskaźnik ładowania wskazuje stan naładowania
akumulatora. (25 %, 50 %, 100 %)
WSKAZÓWKA:
• Urządzenie posiada elektroniczne sterowanie pro-
cesem ładowania akumulatora, co zapobiega jego
nadmiernemu naładowaniu.
• Ładowanie kończy się, kiedy wszystkie 3 lampki
wskaźnikowe się świecą.
• W razie, gdy urządzenie zostanie zdjęte ze stacji
ładowania lub odłączone do zasilania, lampki
wskaźnikowe gasną.
• Nagrzewanie się urządzenia podczas ładowania
jest normalnym zjawiskiem.
4. Odłączyć zasilacz od
gniazdka elektrycznego, gdy
akumulator wielokrotnego
ładowania jest w pełni nała-
dowany.
5. Aby zdjąć urządzenie ze
stacji ładowania, wciśnij za-
trzask zwalniający na górze
uchwytu ściennego.
WSKAZÓWKA:
Nawet wyłączony akumulator
wielokrotnego ładowania
wciąż się rozładowuje.
W przypadku przewidy-
wanego dłuższego okresu
nieużytkowania urządzenia,
akumulator urządzenia należy
doładowywać przynajmniej raz
na 4 do 6 wygodni.
Obsługa urządzenia
Urządzenia można używać jako odkurzacza do podłóg lub
jako małego odkurzacza ręcznego (moduł podstawowy).
1. Odłączyć urządzenie od zasilacza.
2. Włączyć urządzenie.
3. Jeżeli chcesz przechylić rurę ssawną na przegubie,
wciśnij zwalniacz (14).
WSKAZÓWKA:
• Zalecamy wyższy poziom mocy w przypadku używania
urządzenia do pracy z ssawką podłogową. Wciśnij
przycisk MAX.
• W czasie pracy zapalone są lampki wskaźnikowe, od 1
do 3, zależnie od stanu naładowania akumulatora.
• Zalecamy ponowne ładowanie akumulatora, gdy
lampki wskaźnikowe sygnalizują stan naładowania
tylko 25 % .
• Gdy naładowanie akumulatora prawie osiągnęło
swój koniec, ostatnia lampka wskaźnikowa miga. Aby
uniknąć głębokiego rozładowania akumulatora, silnik
urządzenia wyłączy się odpowiednio. Ponownie ładuj
akumulator.

PC-BS3037A_IM 27.05.19
58
Zakończenie pracy urządzenia
1. Wyłącz urządzenie.
2. Jeśli już zainstalowano uchwyt ścienny, zawiesić na nim
odkurzacz.
Konserwacja
System ltrów
Urządzenie zawiera 3 ltry. Powszechnie stosowany układ
torby na pył został zastąpiony przezroczystym pojemnikiem
na pył. Im większa prędkość przepływu powietrza przez
odkurzacz pozwala na usuwanie silnych zabrudzeń
i oddzielenie najmniejszych przepływających z powietrzem
cząstek od „zassanego powietrza”.
Zatem nie ma potrzeby zakupu worków na pył.
Filtry muszą być okresowo czyszczone.
UWAGA:
• Nigdy nie prać ltra w pralce automatycznej.
• Do suszenia nie używać suszarki do włosów.
• Urządzenie może działać z powrotem, kiedy wszystkie
ltry są całkowicie suche i prawidłowo zamontowane.
Zespół ltra
Zespół ltra składa się z poniższych elementów:
• Filtr dokładny
• Filtr wstępnego oczyszczania
Aby wyczyścić zespół ltra, należy wykonać
poniższe czynności:
Opróżnianie pojemnika na pył
1. Odłączyć urządzenie od zasilacza.
2. W razie konieczności zdjąć rurę ssącą oraz dyszę
z urządzenia.
3. Spójrz na rysunek A na stronie 3. Wciśnij przycisk na
pojemniku kurzu
aby odłączyć go od uchwytu.
4. Wyjmij ltr dokładny na kolorowym kawałku tkaniny.
5. Wyjmij ltr zgrubny razem z uchwytem, aby usunąć go
z pojemnika na kurz.
6. Opróżnić zawartość zbiornika kurzowego.
Czyszczenie ltrów
1. Przytrzymaj oba ltry nad kubłem na śmieci i wytrzep je.
Filtr dokładny możesz także wyszczotkować. W przy-
padku silnego zabrudzenia umyć ltry pod bieżącą wodą.
2. Przed ponownym montażem pozwolić ltrom na całkowi-
cie wyschnięcie na wolnym powietrzu!
3. Pojemnik na pył wytrzeć za pomocą wilgotnej ściereczki,
a następnie wytrzeć go do sucha.
Montaż zespołu ltra
1. Filtr zgrubny umieścić w pojemniku na kurz. Zwróć
uwagę na wycięcie na krawędzi pojemnika na kurz. We-
pchnij teraz ltr zgrubny w dół, aby znalazł się w środku
pojemnika.
2. Ułóż ltr dokładny (kolorową tkaniną do góry) na ltrze
zgrubnym. Mocno wciśnij ltr dokładny.
3. Na powrót zamocuj pojemnik na uchwycie. Najpierw
umieść pojemnik na kurz na górze obudowy silnika.
Teraz wepchnij pojemnik w dół. Zatrzask na pojemniku
musi słyszalnie zatrzasnąć na miejscu.
Filtr wylotowy
Dodatkowo urządzenie wyposażone jest w ltr wylotowy.
Znajduje się on na górze obudowy silnika.
UWAGA: Tego ltra nie wolno usuwać.
Czyszczenie
OSTRZEŻENIE:
• Zawsze przed czyszczeniem odłączać urządzenie od zasilacza
sieciowego!

PC-BS3037A_IM 27.05.19
59
OSTRZEŻENIE:
• Obudowy silnika nie wolno do czyszczenia zanurzać w wodzie.
Może to doprowadzić do porażenia elektrycznego lub pożaru.
UWAGA:
• Nie używaj szczotki drucianej ani innych podobnych
przedmiotów.
• Nie używaj ostrych lub ściernych środków czyszczą-
cych.
• Żadna część nie nadaje się do mycia w zmywarce do
naczyń.
• Obudowę można wytrzeć miękką, wilgotną ściereczką.
• Jednostkę zasilającą możesz przetrzeć suchą ście-
reczką.
Dysza do podłóg
1. Odłączyć ssawkę podłogową od rury ssawnej.
2. Obróć ssawkę podło-
gową tak, aby była wi-
doczna strona spodnia
ssawki. Aby otworzyć
zatrzask, posłuż się
małą monetą lub in-
nym narzędziem. Kie-
runek obrotu: W lewo.
Odchyl pokrywę.
3. Wyciągnąć wałek szczotki.
4. Usuń nici i włosy, które mogły nawinąć się na szczotkę.
W razie konieczności użyj nożyczek.
5. Montaż:
5.1 Włóż wałek szczotki, najpierw wycięciem gwiazdo-
wym, z powrotem w przegródkę.
5.2 Włóż drugi koniec wałka szczotki z łożyskiem kwa-
dratowym w wycięcie pod pokrywą.
6. Zamknąć blokadę wałka szczotki.
Pojemnik na pył z zespołem ltra
Aby oczyścić te elementy składowe, najpierw należy uważ-
nie przeczytać rozdział „Konserwacja”.
Przechowywanie
• Oczyścić urządzenie zgodnie z opisem i poczekać, aż
wyschnie.
• W celu złożenia wykorzystaj poprzednio zamontowany
wspornik ścienny lub ostrożnie ułóż urządzenie na
podłodze.
• Zalecamy przechowywanie urządzenia w oryginalnym
opakowaniu, jeśli nie jest używane przez dłuższe okresy
czasu.
WSKAZÓWKA dotycząca żywotności
akumulatora:
Nawet wyłączony akumulator wielokrotnego ładowania
wciąż się rozładowuje. W przypadku przewidywanego
dłuższego okresu nieużytkowania urządzenia, akumu-
lator urządzenia należy doładowywać przynajmniej raz
na 4 do 6 wygodni.
• Zawsze trzymać urządzenie poza zasięgiem dzieci,
w suchym i dobrze wentylowanym miejscu.
• Temperatura przechowywania powinna mieścić się
między 0 °C i 40 °C.
Wykrywanie i usuwanie usterek
Problem Możliwa przyczyna Sposób naprawy
Urządzenie nie działa. Zasilacz jest podłączony. Odłączyć urządzenie od zasilacza.
Uszkodzony akumulator
wielokrotnego ładowania.
Skontaktować się z punktem serwisowym lub
sprzedawcą.
Gdy urządzenie jest włączone,
wszystkie lampki wskaźnikowe
zaczynają migać.
Bateria wielokrotnego ładowania jest
wyczerpana.
Naładuj akumulator.

PC-BS3037A_IM 27.05.19
60
Problem Możliwa przyczyna Sposób naprawy
Słaba moc ssania. Akumulator jest niemal rozładowany. Naładuj akumulator.
Pojemnik na pył jest zapełniony. Opróżnić pojemnik na pył.
Filtry są zabrudzone. Wyczyść ltry zgodnie z opisem w sekcji
„Konserwacja”.
UWAGA:
Urządzenie można uruchomić ponownie tylko
z suchymi ltrami.
Hałas podczas pracy. Do dyszy podłogowej został wessane
ciało obce.
Usuń ciało obce. W razie konieczności odłączyć
ssawkę podłogową od rury ssawnej.
Ssawka podłogowa z turbo
szczotką nie działają.
Wałek szczotki jest unieruchomiony
przez brud.
Wyczyścić ssawkę jak opisano w rozdziale
„Czyszczenie”.
Nieprawidłowe zamocowanie rury
ssawnej i / lub ssawki podłogowej.
Sprawdź prawidłowość montażu elementów.
Akumulator wielokrotnego
ładowania nie trzyma ładunku.
Akumulator wielokrotnego ładowania
wyczerpał swoją żywotność.
Skontaktować się z punktem serwisowym lub
sprzedawcą.
Dane techniczne
Model:.............................................................. PC-BS 3037 A
Waga netto (Uchwyt ręczny z rurą
ssawną i ssawka do podłóg): ...................................ok. 2,4 kg
Zasilacz sieciowy
Klasa ochrony: .....................................................................
Wejście: ........................AC 100 - 240 V, 50 / 60 Hz, 0,8 A MAX
Wyjście: ........................................................DC 35 V, 500 mA
Bieguny: .....................................................................
Akumulator: .................................... 29,6 V, 2200 mAh Li-Ion
Czas pracy: .........................................maksymalnie 30 minut
Czas ładowania: ............................................... ok. 4,5 godzin
Zastrzegamy sobie prawo wprowadzania zmian technicz-
nych i projektowych w trakcie ciągłego rozwoju produktu.
Niniejsze urządzenie odpowiada wymaganiom normy
bezpieczeństwa użytkowania oraz spełnia wymagania
dyrektywy niskonapięciowej i kompatybilności elektroma-
gnetycznej.
Warunki gwarancji
Przyznajemy 24 miesiące gwarancji na produkt licząc od
daty zakupu.
W tym okresie będziemy bezpłatnie usuwać w terminie
14 dni od daty dostarczenia wadliwego sprzętu z kartą
gwarancyjną do miejsca zakupu wszystkie uszkodzenia
powstałe w tym urządzeniu na skutek wady materiałów
lub wadliwego wykonania, naprawiając oraz wymieniając
wadliwe części lub (jeśli uznamy za stosowne) wymieniając
całe urządzenie na nowe.
Sprzęt do naprawy powinien być dostarczony w komplecie
wraz z dowodem zakupu oraz z ważną kartą gwarancyjną
do sprzedawcy w miarę możliwości w oryginalnym opako-
waniu lub innym odpowiednim dla zabezpieczenia przed
uszkodzeniem. W razie braku kompletnego opakowania fa-
brycznego, ryzyko uszkodzenia sprzętu podczas transportu
do i z miejsca zakupu ponosi reklamujący.
Naprawa gwarancyjna nie dotyczy czynności przewidzia-
nych w instrukcji obsługi, do wykonania których zobowią-
zany jest użytkownik we własnym zakresie i na własny
koszt.
Gwarancja nie obejmuje:
• mechanicznych, termicznych, chemicznych uszkodzeń
sprzętu i wywołanych nimi wad,
• uszkodzeń powstałych w wyniku działania sił zewnętrz-
nych takich jak wyładowania atmosferyczne, zmiana
napięcia zasilania i innych zdarzeń losowych,
• nieprawidłowego ustawienia wartości napięcia elektrycz-
nego, zasilanie z nieodpowiedniego gniazda zasilania,
• sznurów połączeniowych, sieciowych, żarówek, baterii,
akumulatorów,
• uszkodzeń wyrobu powstałych w wyniku niewłaściwego
lub niezgodnego z instrukcją jego użytkowania, przecho-
wywania, konserwacji, samowolnego zrywania plomb
oraz wszelkich przeróbek i zmian konstrukcyjnych doko-
nanych przez użytkownika lub osoby niepowołane,
• roszczeń z tytułu parametrów technicznych wyrobu, o ile
są one zgodne z podanymi przez producenta,
• prawidłowego zużycia i uszkodzeń, które mają nieistotny
wpływ na wartość lub działanie tego urządzenia.
Karta gwarancyjna bez pieczątki sklepu, daty sprzedaży,
nie wypełniona, źle wypełniona, ze śladami poprawek,
nieczytelna wskutek zniszczenia, bez możliwości ustalenia
miejsca sprzedaży oraz dołączonego dowodu zakupu jest
nieważna.

PC-BS3037A_IM 27.05.19
61
Korzystanie z usług gwarancyjnych nie jest możliwe po
upływie daty ważności gwarancji. Gwarancja na części lub
całe urządzenie, które są wymieniane kończy się, wraz
z końcem gwarancji na to urządzenie.
Wszystkie inne roszczenia, wliczając w to odszkodowania
są wykluczone chyba, że prawo przewiduje inaczej. Rosz-
czenia wykraczające poza tą umowę nie są uwzględniane
przez tą gwarancję.
Gwarancja na sprzedany towar konsumpcyjny nie wyłącza,
nie ogranicza ani nie zawiesza uprawnień kupującego
wynikających z niezgodności towaru z umową.
Gwarancja oraz zawarte w niej warunki obowiązują na
terenie Rzeczpospolitej Polskiej.
Dystrybutor:
CTC Clatronic Sp. z o.o
Ul. Brzeska 1
45-960 Opole
Usuwanie
Utylizacja akumulatora / baterii
Urządzenie posiada akumulator. Zużytych bate-
rii / akumulatorów nie należy wyrzucać do zwy-
kłych odpadów domowych.
Akumulator należy wyjąć, zanim produkt zo-
stanie poddany recyklingowi. Wciśnij zatrzask
zwalniacza (6) i wyjmij pakiet akumulatora z uchwytu.
Informacje na temat utylizacji baterii / akumulatorów można
uzyskać od władz lokalnych lub miejskich.
Znaczenie symbolu „Pojemnik na śmieci”
Proszę oszczędzać nasze środowisko, sprzęt
elektryczny nie należy do śmieci domowych.
Proszę korzystać z punktów zbiorczych,
przewidzianych do zdawania sprzętu elektrycz-
nego, i tam proszę oddawać sprzęt elektryczny,
którego już nie będą Państwo używać.
Tym sposobem pomagają Państwo unikać potencjalnych
następstw niewłaściwego usuwania odpadów, mających
wpływ na środowisko i zdrowie ludzi.
Tą drogą przyczyniają się Państwo do ponownego użycia,
do recyklingu i do innych form wykorzystania starego
sprzętu elektrycznego i elektronicznego.
Informacje, gdzie można zdać sprzęt, otrzymają Państwo
w swoich urzędach komunalnych lub w administracji gminy.

PC-BS3037A_IM 27.05.19
62
Használati utasítás
Köszönjük, hogy a termékünket választotta. Reméljük, hogy
örömét leli majd a készülék használatában.
A használati útmutatóban található szimbólumok
Az Ön biztonságára vonatkozó utasítások kifejezetten meg
vannak különböztetve. Kérjük, mindenképpen ügyeljen
ezekre annak érdekében, hogy elkerülje a baleseteket és a
készülék károsodását:
FIGYELMEZTETÉS:
Egészségét károsító veszélyforrásokra gyelmeztet és
rámutat a lehetséges sérülési lehetőségekre.
VIGYÁZAT:
Lehetséges veszélyre utal, mely a készülékben vagy más
tárgyakban kárt tehet.
MEGJEGYZÉS:
Tippeket és információkat emel ki.
Tartalom
A kezelőelemek áttekintése ...............................................3
Általános megjegyzések ..................................................62
A készülékre vonatkozó speciális
biztonsági szabályok ........................................................ 63
Újratölthető lítium-ion telepek (li-ion) ............................. 63
Újratölthető lítium-ion telepek biztonságos kezelése ....63
Li-Ion telep élettartamának növelése ............................. 64
A készülék kicsomagolása ..............................................64
A kezelőelemek áttekintése / A csomag tartalma ..........64
Megjegyzések használatra ...............................................64
A készülék be / ki kapcsolása ......................................... 65
Használatba vétel ..............................................................65
Szívócső .........................................................................65
Padlófúvóka turbó kefével..............................................65
Kombinált rés- / kefe- / kárpit-csővég (3 az 1-ben) .........65
Hosszabbítható speciális kefe .......................................65
Fali rögzítő felszerelése ...................................................65
A tápegység csatlakoztatása .........................................65
A fali rögzítő felszerelése ...............................................65
Az akkumulátor feltöltése ................................................66
A készülék használata ...................................................... 66
A használat befejezése ..................................................66
Karbantartás ...................................................................... 66
A szűrőrendszer .............................................................66
A porgyűjtő kiürítése .......................................................67
A szűrők cseréje ............................................................. 67
A szűrőegység összeszerelése .....................................67
Tisztogatás ........................................................................67
Padlófúvóka ...................................................................67
Portartály szűrőbetéttel ..................................................68
Tárolás ...............................................................................68
Hibaelhárítás......................................................................68
Műszaki adatok .................................................................68
Hulladékkezelés ................................................................69
Az akkumulátor / elemek ártalmatlanítása .....................69
A „kuka” piktogram jelentése..........................................69
Általános megjegyzések
A készülék használatba vétele előtt gondosan olvassa végig
a használati utasítást, és őrizze meg a garancialevéllel, a
pénztári nyugtával és lehetőleg a csomagolókartonnal, ill. az
abban lévő bélésanyaggal együtt! Amennyiben a készüléket
harmadik személynek adja tovább, a használati útmutatót is
adja a készülékhez.
• Kizárólag személyi célra használja a készüléket, és
csupán arra, amire való! A készülék nem ipari jellegű
használatra készült.
• A hálózati adapter csak száraz beltéri használatra
alkalmas.
• Ellenőrizze, hogy a hálózati adapteren feltüntetett ki-
menő áramerősség, feszültség, és polaritás megegyezik
a csatlakoztatott készüléken található adatokkal!
• Ne érjen nedves kézzel a csatlakoztatott hálózati
adapterhez!
• Tisztításkor válassza le a készüléket a hálózati adapter-
ről, ha szükséges.
• Biztosítsa, hogy a hálózati adapter kábele nem szorul,
nem csípődik be sehova, és nem érintkezik hőforrások-
kal.
• Sérült hálózati adaptert ne használjon.
• Saját kezűleg ne javítsa a készüléket, hanem keressen
fel engedéllyel rendelkező szakembert.
• A készüléket és a hálózati kábelt rendszeresen elle-
nőrizni kell, hogy nincs-e rajta sérülés jele. Ha sérülést
lát rajta, a készüléket nem szabad használni.
• Csak eredeti tartozékokat használjon.
• Gyermekei biztonsága érdekében ne hagyja általuk
elérhető helyen a csomagolóelemeket (műanyag zacskó,
karton, sztiropor stb.).
FIGYELMEZTETÉS:
Kisgyermekeket ne engedjen a fóliával játszani.
Fulladás veszélye állhat fenn!

PC-BS3037A_IM 27.05.19
63
A készülékre vonatkozó speciális biztonsági szabályok
• A készüléket 8 éves és idősebb gyerekek és csökkent zikai,
érzékszervi vagy értelmi képességű személyek és akiknek nincs
meg a tapasztalatuk és tudásuk ehhez, csak akkor használhatják,
ha felügyelet alatt állnak vagy a készülék biztonságos használa-
tára megtanították őket és megértették az érintett veszélyeket.
• A gyerekek nem játszhatnak a készülékkel.
• A tisztítást és karbantartást gyerekek felügyelet nélkül nem vé-
gezhetik.
• A készülék csak biztonságos extra kis feszültségről való műkö-
désre tervezték. Csak az adattáblán megadottaknak megfelelő
tápellátáshoz csatlakoztassa.
• Ha a készülék csatlakozókábele megsérült, azt a gyártótól vagy a
szervizképviselettől beszerezhető speciális csatlakozókábellel kell
kicserélni.
• Csak a csomagban mellékelt tápegységet használja.
• Ne szívjon fel gyúlékony anyagokat vagy folyadékokat!
• Ne használja a készüléket lézernyomtató vagy lézermásoló toner
részecskéinek eltávolítására, mert tűz vagy robbanás keletkezhet.
• Ne szívjon fel forró hamut, hegyes vagy éles tárgyakat!
• Soha ne porszívózzon felhelyezett szűrőbetét nélkül.
Újratölthető lítium-ion telepek (li-ion)
A készülék újratölthető lítium-ion telepekkel van felszerelve.
Ez számos előnnyel jár az egyéb elemekkel és akkumuláto-
rokkal szemben:
• Magas cellafeszültség (több Volt)
• Nincs memóriahatás
• Alacsony önürülés
Újratölthető lítium-ion telepek biztonságos kezelése
A lítium-ion telepek általában biztonságosak. Mindazonáltal
kockázatok léphetnek fel mechanikus sérülés, elektromos
hibák vagy hőhatás következtében.
A mechanikus sérülés gáznemű vagy folyékony anyagok
szivárgását okozhatja, ami nagyon irritáló, gyúlékony vagy
akár mérgező is lehet.
Elektromos hiba, mint például rövidzárlat, túlhevülést és
tüzet okozhat.
A li-ion telep külső burkolatának felhevülése is, pl. napsu-
gárzás vagy hőforrás által, tüzet vagy robbanást okozhat.
A li-ion telepek azonban biztonságosak, ha megfelelően
kezeljük őket. Csak nem megfelelő használat vagy tárolás
következtében válhatnak veszélyessé. Ezért:
• Kerüljük a 40 °C feletti és 0 °C alatti hőmérsékleteket.
• Ne ejtsük el a készüléket vagy az újratölthető telepet.
• Ha leejtettek egy Li-ion telepet, és az megsérült, ne
használjuk tovább.

PC-BS3037A_IM 27.05.19
64
• Tároláskor és ártalmatlanításkor fedjük le a csatlakozó-
kat, hogy elkerüljük a rövidzárlatokat.
• Ártalmatlanítsuk a használt akkumulátorokat a keres-
kedő tárolóiban vagy az önkormányzati gyűjtőhelyeken.
Li-Ion telep élettartamának növelése
A li-ion telepek élettartama, még jobban, mint egyéb akku-
mulátoroké, megnövelhető, ha megfelelően kezeljük őket.
Az alábbi egyszerű töltési és tárolási szabályok betartása
hozzájárulhat a telep kapacitásának fenntartásához:
• Hőmérséklet: A telepek ideális hőmérsékleti tartománya
10 - 25 °C. Magasabb hőmérsékletek idő előtti elhaszná-
lódást okozhatnak.
• Töltés és ürítés: Töltési ciklusok alkalmával kerüljük
mind a teljes feltöltést, mind a teljes kiürülést.
Amikor a telep töltési folyamata befejeződött, azonnal
válasszuk le a töltőt. A 90 %-os töltés a legjobb.
Másrészről, jobban megőrizzük a telepet, ha nem ürítjük
le 0 %-ra. Ha lehetőség van rá, töltsük fel a telepet ha
már eléri a 30 %-os töltöttségi szintet.
• Tárolás: A telepeket mindig száraz helyen tároljuk, 10 °C
és 20 °C közötti mérsékelt hőmérsékleten.
Vegyük gyelembe az önürülési hatást is! Ha az akku-
mulátor már üres, az mély lemerültséget és a telep káro-
sodását okozhatja. Ha hosszabb időn át kívánjuk tárolni
a telepet, megelőzhetjük ezt a hatást. Javasoljuk, hogy
ilyenkor töltse fel a telepet mintegy 40 %-ra a tárolás
előtt. Legalább havonta ellenőrizze a töltöttségi szintet.
A készülék kicsomagolása
1. Vegye ki a készüléket a csomagolásból.
2. Ellenőrizze a szállítólevelet, hogy semmi nem hiányzik
a csomagból.
3. A veszélyek elkerülése érdekében ellenőrizze a készülé-
ket a lehetséges szállítási sérülések tekintetében.
MEGJEGYZÉS:
Bármilyen szállítási sérülés esetén azonnal vegye fel
a kapcsolatot a forgalmazóval. Ne használjon sérült
készüléket!
A kezelőelemek áttekintése /
A csomag tartalma
„A” ábra
1 Portartály
2 Motorház
3 MAX gomb
4 Be / ki gomb
5 Újratölthető telepcsomag
6 Újratölthető telepcsomag kioldó
7 Portartály retesz
„B” ábra
1 Portartály
2 Motorház
8 Jelzőlámpák
9 Hordozófül
10 Áramellátó aljzat
11 Kézi készülék („A” ábra)
12 Szívócső kioldó
13 Csővég-tartó
14 Szívócső csatlakozó kioldó
15 Padlófúvóka turbó kefével
16 Padló-csővég kioldó
17 Szívócső
18 Kombinált csővég kioldó
19 Kombinált rés- / kefe- / kárpit-csővég
20 Hosszabbítható speciális kefe
„C” és „D” ábrák
Fali tartó
Nem látható
1 × Tápadapter
2 × Tipli
2 × Csavar
Megjegyzések használatra
• A készülék különösen alkalmas kis mennyiségű száraz
szennyeződés és por felszívására.
• A készülék működtethető feltöltött akkumulátorról. A
töltés a mellékelt tápegységgel végezhető el.
• A készülék közvetlenül a hálózatról nem üzemeltethető.
• Akassza a készüléket a tartozék fali tartóra, ha nem
használja. Ez töltőállomásként is szolgál.
VIGYÁZAT:
A készülék magában nem áll meg állítva. Ha nem
használja a fali tartót, noman tegye le a porszívót a
padlóra.
• Ez az újratölthető telepes porszívó nem váltja ki a
hagyományos porszívót. Különösen hosszú szálú
szőnyegeknél a tisztítóteljesítmény nem elegendő a
dizájn következtében.
• Az elszennyeződött szűrők befolyásolják a porszívó
szívóerejét. Ezért javasoljuk a meglévő koszszűrők
rendszeres tisztítását.
• Legjobb, ha a szűrőket minden hosszabb használat után
megtisztítja.
• Kérjük, rendszeresen ellenőrizze és tisztítsa meg a
padló-csővéget.
• Szükség esetén tisztítsa meg a súlyosan szennyezett
padlókat többször is, és / vagy használjon hagyományos
230 V~ padlóporszívót.

PC-BS3037A_IM 27.05.19
65
A készülék be / ki kapcsolása
• Ez a gomb (4) kapcsolja be és ki a készüléket.
• Nyomja meg a MAX gombot a kézi készülék hátoldalán
az alacsony és magas teljesítményszint kiválasztásához.
Használatba vétel
Szívócső
• A szívócső csatlakozóval rendelkezik. Megdöntve
könnyebben kiszívhatók a nehezen elérhető helyek. Ha
merev csövet kíván, kattintsa be hallhatóan az elforduló
csatlakozót.
• Illessze be a szívócsövet a két csatlakozó érintkezővel
a kézi egység csatlakozójába. A rögzülést hanghatás
kíséri.
• A szívócső leválasztásához nyomja meg a kioldót (12),
és ugyanakkor húzza ki a csövet.
Padlófúvóka turbó kefével
• A padlócsővég alkalmas minden padlófelülethez, kivéve
a hosszú szálú szőnyegeket.
• Használat közben a padlófúvókán található LED-ek a
sötét területeken való jobb látás elősegítése érdekében
kigyulladnak.
VIGYÁZAT: A LED-eket nem tudja cserélni.
• Dugja rá a szívócső alsó végére a padlócsővég csatlako-
zóját. Ügyeljen a csatlakozópeckekre a padló-csővégen.
A szívócsőnek hallhatóan a helyére kell kattannia.
• A szívócső leválasztásához nyomja meg a kioldót (16),
és ugyanakkor húzza ki a csövet.
Kombinált rés- / kefe- / kárpit-csővég (3 az 1-ben)
• Ezek a kiegészítők mindig elérhetőek, ha a szívócsövön,
az elforduló csatlakozó felett tartja őket a keret haszná-
latával.
• Amikor a rés-csővéget használja, a koszt ki lehet szívni
sarkokból, mélyedésekből és kis résekből.
• A tisztítandó felület megkarcolódásának elkerülésére
használja a rés-csővéget a lezárt kefe- / kárpit-csővéggel
együtt. Ezzel ki lehet tisztítani a koszt kárpitok és matra-
cok hasadékaiból. Érzékeny felületekről is, mint például
bútorok vagy függönyök, el lehet távolítani a port.
• A kefe- / kárpit-csővég felhelyezéséhez először nyomja
meg az oldalsó gombokat, ezután csúsztassa fel a cső-
véget, míg az hallhatóan bekattan a helyére. (Az alábbi
ábra szerint)
• A zár kioldásához egyszerűen nyomja meg ismét a két
gombot.
• Két különböző módon lehet a kombinált csővéget a
készülékre csatlakoztatni:
Csatlakoztatás a kézi egységre
• Helyezze fel a rés-csővéget a retesszel felfelé a kézi
készülék csatlakozójába. Hallhatóan a helyére kell
kattannia.
• A csővég kioldásához nyomja meg a kioldó gombot, és
egyidejűleg húzza ki.
Csatlakoztatás a szívócsőre
A szívócső alsó végén ugyanolyan csatlakozó található,
mint a kézi készüléken. Szerelje fel vagy le a csővéget a
fent leírtak szerint.
Hosszabbítható speciális kefe
• Ez a csővég különösen jól alkalmas nagy, érzékeny
felületek kíméletes tisztítására.
• Meg lehet nagyobbítani a koszfogó felületet a keferész
teljes kihúzásával.
• Ezt a kefét fel lehet szerelni közvetlenül a kézi készülék
csatlakozójára vagy a már felszerelt szívócső csatlako-
zójára.
• A csővég kioldásához egyszerűen húzza le.
Fali rögzítő felszerelése
Kérjük, nézze meg a „C” és „D” ábrákat a 3. oldalon.
A tápegység csatlakoztatása
Ha a fali tartót töltőállomásként akarja használni, először
csatlakoztassa a tápegység csatlakozóját („C” ábra).
1. Csatlakoztassa az áramdugót a töltőegység hátulján
lévő nyílásba.
2. Határozottan tolja a dugót a csatlakozóba. Hallhatóan a
helyére kell kattannia.
3. Helyezze a kábelt a jobb vagy bal kábeltartóba.
A fali rögzítő felszerelése
FIGYELMEZTETÉS:
Előzetesen ellenőrizze, hogy nincsenek olyan kábelek a
falban a felszerelés helyén, amelyek esetleg megsérül-
hetnek!
VIGYÁZAT:
Úgy helyezze el a fali tartót, hogy a készülék ne legyen
kitéve közvetlen napfénynek vagy más hőforrásoknak.

PC-BS3037A_IM 27.05.19
66
MEGJEGYZÉS:
Ha a fali tartót egyszersmind töltőállomásként is használni
kívánja, a közelben áramkonnektornak kell lennie.
1. Mérje ki a fali rögzítő magasságát. Tartsa a porszívót a
falhoz felszerelt szívócsővel és padlófúvókával.
2. Tartsa a fali tartót a falhoz a 3. oldalon található ábra
szerint („D” ábra). Jelölje meg a 2 furat helyét.
3. Fúrja ki a furatokat, és helyezze be a mellékelt tipliket.
4. Illessze be a csavarokat a fali rögzítőn lévő furatokon
keresztül.
5. Kézzel húzza be a csavarokat egy csavarhúzóval.
Az akkumulátor feltöltése
VIGYÁZAT:
Ne töltse felügyelet nélkül az akkumulátort.
1. Kapcsolja ki a készüléket.
2. Csatlakoztassa a tápegységet a csatlakozóaljzattal (10).
Ha a fali tartót töltőállomásként készítette elő, akassza
fel a készüléket a fali tartóra.
3. Csatlakoztassa a tápadaptert a fali aljzatba. A legelső
használat előtt töltse az akkumulátort kb. 5 órán át.
MEGJEGYZÉS:
• A jelzőlámpák az újratölthető telep töltési állapotát
jelzik. (25 %, 50 %, 100 %)
• A készülék el van látva elektronikus töltésvezérlő-
vel, ami megakadályozza a túltöltést.
• A feltöltés akkor van készen, ha mind a 3 lámpa
világít.
• Ha leveszi a készüléket a töltőállomásról, vagy
leválasztja az áramellátásról, a jelzőlámpák kial-
szanak.
• Nem szokatlan, ha a készülék a töltés során
felmelegszik.
4. Válassza le a tápegységet az
aljzatból, amikor az akkumu-
látor teljesen feltöltődött.
5. A készülék eltávolításához a
fali tartóról nyomja meg a fali
tartó tetején lévő reteszt.
MEGJEGYZÉS:
Még ha ki is van kapcsolva,
az akkumulátor folyamatosan
merül. Ha a készülék hosz-
szabb ideig nincs használat-
ban, 4 - 6 hetenként egyszer
töltse fel az akkumulátort.
A készülék használata
A készüléket használhatja padlóporszívóként vagy kézi és
álló porszívóként (alapegység).
1. Válassza le a készüléket a tápegységről.
2. Kapcsolja be a készüléket.
3. Ha meg akarja dönteni a szívócsövet a csatlakozónál,
nyomja meg a kioldót (14).
MEGJEGYZÉS:
• A padlófúvókával való használathoz a legmagasabb
teljesítményszintet javasoljuk. Nyomja meg a MAX
gombot.
• Működés közben, az újratölthető töltési teljesítménye
függvényében 1 - 3 jelzőlámpa világít.
• Javasoljuk a telep újratöltését, ha a jelzőlámpák már
csak 25 % fennmaradó teljesítményt jeleznek.
• Amikor az újratölthető telep már majdnem elérte
teljesítménye végét, az utolsó jelzőlámpa villog. Az
újratölthető telep mély lemerülésének elkerülésére a
motor kikapcsolja a készüléket. Töltse újra a telepet.
A használat befejezése
1. Kapcsolja ki a készüléket.
2. Amennyiben már felszerelte a fali rögzítőt, akassza fel
rá a porszívót.
Karbantartás
A szűrőrendszer
A készülék 3 szűrővel van ellátva. Az általános porzsák-
rendszer egy átlátszó porgyűjtőre lett kicserélve. A gyűjtő
nagyobb áramlási sebessége lehetővé teszi a nehéz szeny-
nyeződések és a kisebb lebegő részecskék elkülönítését a
„beszívott levegőtől”.
Ezért nincs szükség porzsákok vásárlására.
A szűrőrendszert adott időközönként meg kell tisztítani.
VIGYÁZAT:
• Ne mossa ki a szűrőt mosógépben.
• Ne használjon hajszárítót a szárításhoz.
• A készüléket csakis akkor helyezze újra üzembe, ha
valamennyi szűrő teljesen megszáradt és a helyére
került.
A szűrőegység
A szűrőegység a következő elemekből áll:
• Finom szűrő
• Durva szűrő
A szűrőegység tisztítása:

PC-BS3037A_IM 27.05.19
67
A porgyűjtő kiürítése
1. Válassza le a készüléket a tápegységről.
2. Szükség esetén vegye le a készülékről a szívócsövet és
a szívófejet.
3. Kérjük, nézze meg az „A” ábrát a 3. oldalon Nyomja
meg a
gombot a portartályon, hogy leoldja a kézi
készülékről.
4. Húzza ki a nom szűrőt a színes felénél fogva.
5. Húzza ki a durva szűrőt a fogantyújánál fogva, hogy
kivegye a portartályból.
6. Ürítse ki a porgyűjtőt.
A szűrők cseréje
1. Tartsa mindkét szűrőt szeméttároló fölé, és ütögesse ki a
port. A nom szűrőt ki is kefélheti. Erős lerakódás esetén
folyó víz alatt tisztítsa ki a szűrőket.
2. Visszahelyezés előtt teljesen szárítsa meg a szűrőket.
3. Nedves ruhával törölje át, és utána törölje szárazra a
porgyűjtőt.
A szűrőegység összeszerelése
1. Helyezze a durva szűrőt a portartályba. Kérjük, ügyeljen
a portartály szélén lévő vájatra. Nyomja lefelé a durva
szűrőt, hogy a portartály közepébe kerüljön.
2. Helyezze a nom szűrőt (a színes felével felfelé) a durva
szűrőre. Határozottan nyomja fel a nom szűrőt.
3. Helyezze vissza a portartályt a kézi készülékre. Először
helyezze a portartályt a motorház felső részére. Ezután
tolja le a portartályt. A portartályon lévő retesznek hallha-
tóan be kell kattannia a helyére.
Kibocsátólter
A készüléken kifúvószűrő is van. A motorház tetején
található.
VIGYÁZAT: Ez a szűrő nem távolítható el.
Tisztogatás
FIGYELMEZTETÉS:
• Mindig válassza le a készüléket a tápegységről, mielőtt tisztí-
taná azt!
• A motor burkolatát semmiképpen nem szabad vízbe meríteni
tisztításkor. Ez elektromos áramütést vagy tüzet okozhat.
VIGYÁZAT:
• Ne használjon drótkefét vagy más súroló hatású
tárgyat.nde Gegenstände.
• Ne használjon agresszív vagy súroló hatású tisztító-
szert.
• A különálló tartozékok nem rakhatók mosogatógépbe.
• A burkolatot enyhén nedves vászonnal töröljük le.
• A tápegységet egy száraz ruhával törölheti át.
Padlófúvóka
1. Válassza le a padlófúvókát a szívócsőről.
2. Forgassa körbe a
padlófúvókát, hogy
lássa az alsó oldalát.
Kis érmével vagy
egyéb szerszámmal
nyissa meg a reteszt.
Forgásirány: Az óra
járásával ellentétes.
Billentse fel a fedelet.
3. Húzz ki a kefehengert.
4. Távolítsa el a kefére tekeredett cérnát és hajat. Ha szük-
séges használjon ollót.

PC-BS3037A_IM 27.05.19
68
5. Összeszerelés:
5.1 Helyezze vissza a kefegörgőt, először a csillag
alakú mélyedést, a rekeszbe.
5.2 Helyezze a kefegörgő másik végét a négyszögű
végével a fedél alatt lévő mélyedésbe.
6. Zárja be a kefehenger rögzítőjét.
Portartály szűrőbetéttel
Ezen részek tisztításához olvassa el a „Karbantartás” című
fejezetet.
Tárolás
• A leírtaknak megfelelően tisztítsa meg a készüléket,
hagyja teljesen megszáradni.
• Tárolásra használja az előzetesen felszerelt fali keretet,
vagy tegye noman a készüléket a padlóra.
• Javasoljuk, hogy az eredeti csomagolásban tartsa a
készüléket, ha hosszabb ideig nem fogja használni.
MEGJEGYZÉS: Az akkumulátor élettartamával
kapcsolatos:
Még ha ki is van kapcsolva, az akkumulátor folya-
matosan merül. Ha a készülék hosszabb ideig nincs
használatban, 4 - 6 hetenként egyszer töltse fel az
akkumulátort.
• Mindig gyerekektől távol a tárolja a készüléket, egy jól
szellőztetett helyiségben.
• A tárolási hőmérséklet 0 és 40 °C között legyen.
Hibaelhárítás
Probléma Lehetséges ok Elhárítás
A készülék nem működik. A tápegység csatlakoztatva van. Válassza le a készüléket a tápegységről.
Az akkumulátor meghibásodott. Lépjen kapcsolatba a szervizünkkel vagy a
márkakereskedővel.
Amikor a készülék be
van kapcsolva, minden
jelzőlámpa elkezd villogni.
Az akkumulátor lemerült. Töltse fel az akkumulátort.
Gyenge szívóerő. Az akkumulátor majdnem lemerült. Töltse fel az akkumulátort.
A portartály megtelt. Ürítse ki a portartályt.
A szűrők szennyezettek. Tisztítsa meg a szűrőket a „Karbantartás” részben
leírtak szerint.
VIGYÁZAT:
Csak száraz szűrőkkel folytassa a készülék használatát!
Zaj használat közben. Idegen test került felszívásra a
padlófúvókába.
Távolítsa el az idegen testet. Ha szükséges, válassza le
a padlófúvókát a szívócsőről.
A padlófúvóka a
turbókefével nem működik.
A kefegörgőt szennyeződés
akadályozza.
Tisztítsa meg a padlófúvókát a „Tisztítás” részben leírtak
szerint.
Nem megfelelő szívócső és / vagy
padlófúvóka feltét.
Ellenőrizze az összetevők megfelelő összeszerelését.
Az akkumulátor nem tartja
a töltést.
Az akkumulátor elérte az
élettartamának végét.
Lépjen kapcsolatba a szervizünkkel vagy a
márkakereskedővel.
Műszaki adatok
Modell: ............................................................. PC-BS 3037 A
Össztömeg
(Kézi készülék szívócsővel és padló-csővéggel): ...kb. 2,4 kg
Hálózati adapter
Védelmi osztály: ...................................................................
Bemenet: ......................AC 100 - 240 V, 50 / 60 Hz, 0,8 A MAX
Kimenet: .......................................................DC 35 V, 500 mA
Polaritás: ....................................................................
Akkumulátor: .................................. 29,6 V, 2200 mAh Li-Ion
Üzemidő: ....................................................maximum 30 perc
Töltési idő: ..............................................................kb. 4,5 óra
A műszaki és kivitelezési módosítások jogát a folyamatos
termékfejlesztés miatt fenntartjuk.
Ezt a készüléket az Európa Tanács minden vonatkozó ak-
tuális irányelve szerint (pl. elektromágnesesség-elviselő ké-
pesség vagy kisfeszültség-elviselő képesség) ellenőriztük,
és a legújabb biztonságtechnikai előírások szerint készült.

PC-BS3037A_IM 27.05.19
69
Hulladékkezelés
Az akkumulátor / elemek ártalmatlanítása
A készülékben akkumulátor található. A hasz-
nált elemek / akkumulátorok nem tartoznak a
háztartási hulladékhoz.
Az akkumulátort a termék újrahasznosítása
után el kell távolítani. Nyomja meg a kioldóre-
teszt (6), és vegye ki az újratölthető telepcsomagot a kézi
készülékből.
Az akkumulátorok ártalmatlanítására szolgáló helyekkel
kapcsolatos információ a helyi önkormányzattól szerezhető
be.
A „kuka” piktogram jelentése
Kímélje környezetünket, az elektromos készü-
lékek nem a háztartási szemétbe valók!
Használja az elektromos készülékek ártalmat-
lanítására kijelölt gyűjtőhelyeket, ott adja le
azokat az elektromos készülékeit, amelyeket
többé már nem kíván használni!
Ezzel segítséget nyújt ahhoz, hogy elkerülhetők legyenek
azok a hatások, amelyeket a helytelen „szemétre dobás”
gyakorolhat a környezetre és az emberi egészségre.
Ezzel hozzájárul az újrahasznosításhoz, a recyclinghoz és
a kiöregedett elektromos és elektronikus készülékek értéke-
sítésének egyéb formáihoz.
Az önkormányzatoknál vagy a polgármesteri hivatalokban
tájékoztatást kaphat arról, hogy hova viheti a kiselejtezett
készülékeket.

PC-BS3037A_IM 27.05.19
70
Руководство по эксплуатации
Благодарим за покупку нашего изделия. Мы надеемся,
что вы с удовольствием будете пользоваться им.
Символы, используемые в этих инструкциях
Важная для вас информация обозначается специаль-
ным образом. Необходимо соблюдать эти инструкции
по избежание несчастных случаев или повреждения
прибора.
ПРЕДУПРЕЖДЕНИЕ:
Предупреждает об опасности для здоровья и возмож-
ном риске получения травмы.
ВНИМАНИЕ:
Указывает на возможную опасность для изделия и
других окружающих предметов.
ПРИМЕЧАНИЯ: Дает советы и информацию.
Содержание
Обзор деталей прибора ...................................................3
Общая информация .......................................................70
Специальные указания по
безопасности для этого прибора ................................71
Ионно-литиевые аккумуляторные батареи (Li-Ion)
..72
Безопасное обращение с ионно-литиевыми
аккумуляторными батареями .....................................72
Продление срока службы ионно-литиевой
аккумуляторной батареи .............................................72
Распаковка устройства ..................................................72
Обзор деталей прибора / Комплект поставки ...........72
Примечания по использования ................................... 73
Включение / выключение прибора .............................. 73
Начало работы ................................................................73
Трубка всасывания ......................................................73
Сопло для пола с турбо-щеткой ................................. 73
Комбинированная насадка для узких мест /
щетка / мебельной обивки (3-в-1) ................................73
Удлиняющая специальная щетка ..............................74
Монтаж настенного держателя ....................................74
Вставка вилки в блок питания.....................................74
Монтаж настенного держателя ...................................74
Заряд аккумуляторов .....................................................74
Эксплуатация прибора ..................................................75
Закончить пользование прибором .............................75
Обслуживание .................................................................75
Система фильтров ....................................................... 75
Опустошение пылесборника .......................................75
Очистка фильтров ........................................................ 75
Сборка блока фильтров ..............................................76
Чистка ................................................................................ 76
Насадка для пола ......................................................... 76
Пылесборник с блоком фильтров ..............................76
Хранение ........................................................................... 77
Поиск и устранение неисправностей .........................77
Технические данные ......................................................77
Утилизация ....................................................................... 78
Утилизация батарей / аккумуляторных батареек ...... 78
Значение символа «корзина» .....................................78
Общая информация
Перед началом эксплуатации прибора внимательно
прочитайте прилагаемую инструкцию по эксплуатации и
сохраните ее в надежном месте, вместе с гарантийным
талоном, кассовым чеком и, по возможности, картонной
коробкой с упаковочным материалом. Если даете ко-
му-либо попользоваться прибором, обязательно дайте
в придачу данную инструкцию по эксплуатации.
• Пользуйтесь прибором только частным образом и по
назначению. Прибор не предназначен для коммерче-
ского использования.
• Сетевой адаптер пригоден для использования
только в сухих помещениях.
• Проверьте согласованность выходного тока, напря-
жения и полярности сетевого адаптера с информа-
цией на подключаемом приборе!
• Не прикасайтесь к сетевому адаптеру влажными
руками!
• Когда необходима чистка, отключите прибор от
сетевого адаптера.
• Убедитесь, что кабель сетевого адаптера не изогнут,
не пережат, не натянут и не касается источников
тепла.
• Не применяйте поврежденный сетевой адаптер.
• Не пытайтесь самостоятельно ремонтировать
прибор обратитесь к уполномоченному на это
специалисту.
• Прибор и кабель сетевого питания необходимо
регулярно обследовать на наличие следов повреж-
дения. При обнаружении повреждения пользоваться
прибором запрещается.
• Используйте только оригинальные запчасти.
• Из соображений безопасности для детей не остав-
ляйте лежать упаковку (пластиковые мешки, картон,
пенопласт и т.д.) без присмотра.
ПРЕДУПРЕЖДЕНИЕ:
Не позволяйте детям играть с полиэтиленовой
пленкой. Опасность удушья!

PC-BS3037A_IM 27.05.19
71
Специальные указания по безопасности
для этого прибора
• Этим прибором могут пользоваться дети старше 8 лет и лица
с ограниченными физическими, осязательными и психиче-
скими способностями или не имеющие опыта или знаний,
если они находятся под надзором или проинструктированы
в отношении безопасного пользования прибором и знают о
связанных с этим опасностях.
• Не позволяйте детям играть с прибором.
• Чистка и уход за прибором не должны проводиться детьми
без надзора.
• Устройство предназначено для работы от безопасного низ-
кого напряжения. Подключайте к источнику питания согласно
информации на информационной табличке.
• Если соединительный кабель устройства поврежден, его
необходимо заменить на специальный соединительный
кабель, поставляемый изготовителем и службой клиентской
поддержки.
• Используйте только источник питания из комплекта поставки.
• Не всасывайте горючие вещества и жидкости!
• Не используйте данный прибор для удаления частиц тонера
из лазерного принтера или копировального устройства, по-
скольку это может вызвать возгорание или взрыв.
• Не всасывайте горячий пепел или остроконечные или
острые предметы!
• Ни в коем случае не эксплуатируйте пылесос без фильтра.

PC-BS3037A_IM 27.05.19
72
Ионно-литиевые
аккумуляторные батареи (Li-Ion)
Устройство оборудовано ионно-литиевыми аккуму-
ляторными батареями. Они обладают множеством
преимуществ в сравнении с другими типами батарей и
аккумуляторов:
• Высокое напряжение элементов (больше вольт)
• Отсутствие эффекта памяти
• Низкий саморазряд
Безопасное обращение с ионно-литиевыми
аккумуляторными батареями
В целом ионно-литиевые батареи считаются безопас-
ными. Тем не менее, механические повреждения, по-
вреждения в электрической цепи и тепловые эффекты
могут стать источником опасности.
Механическое повреждение может привести к утечке
газообразных или жидких веществ, которые могут вы-
звать сильное раздражение, могут быть горючими или
даже токсичными.
Повреждение в электрической цепи, например, корот-
кое замыкание, может привести к перегреву и стать
причиной пожара.
Даже нагрев наружной оболочки ионно-литиевой ба-
тареи, например, под действием солнечного света или
нагревательного элемента, может вызвать возгорание
или взрыв.
Однако при правильном обращении ионно-литиевые
батареи безопасны. Они могут представлять опасность
только при неправильном использовании или хранении.
Следовательно:
• Избегайте температур выше 40 °C и ниже 0 °C.
• Не роняйте прибор или аккумуляторную батарею.
• Если ионно-литиевая батарея упала и получила
повреждения, прекратите ее использовать.
• При хранении или утилизации прибора замаскируйте
клеммы, чтобы предотвратить короткое замыкание.
• Правильно утилизируйте старые аккумуляторы в
контейнерах для сбора, передав их продавцу или в
муниципальные пункты сбора.
Продление срока службы ионно-литиевой
аккумуляторной батареи
Правильное обращение с ионно-литиевыми батареями
может продлить срок их службы даже в большей сте-
пени, чем при использовании других аккумуляторов. Со-
хранить емкость батареи помогут следующие простые
правила зарядки и хранения:
• Температура: Идеальная температура для этих
батарей варьирует в диапазоне 10 - 25 °C. Более
высокие температуры могут привести к преждевре-
менной потере свойств.
• Зарядка и разрядка: Во время циклов зарядки необ-
ходимо избегать как полного заряда, так и глубокой
разрядки.
По окончании процесса зарядки батареи необходимо
сразу же отсоединить зарядное устройство. Счита-
ется, что лучше всего заряжать до 90 %.
В то же время батарея прослужит дольше, если
не давать ей разряжаться до 0 %. При появлении
возможности всегда перезаряжайте батарею, когда
уровень зарядки достигает 30 %.
• Хранение: Всегда храните батареи в сухом месте
при средних температурах в диапазоне от 10 °C до
20 °C.
Также учитывайте эффект саморазряда! Если акку-
мулятор уже разряжен, этот эффект может привести
к глубокой разрядке, вызывающей повреждение
батареи. Если вы намерены хранить батарею
продолжительное время, этот эффект можно ней-
трализовать. В этом случае мы рекомендуем перед
хранением зарядить батарею примерно до 40 %.
Необходимо проверить уровень зарядки не позднее
чем через месяц.
Распаковка устройства
1. Выньте устройство из его упаковки.
2. Проверьте наличие всех компонентов комплекта
поставки.
3. Проверьте устройство на наличие каких-либо
повреждений при транспортировке для того, чтобы
избежать опасных ситуаций.
ПРИМЕЧАНИЯ:
В случае каких-либо повреждений при транспорти-
ровке обратитесь к вашему продавцу немедленно.
Не пользуйтесь поврежденным устройством!
Обзор деталей прибора /
Комплект поставки
Рис. A
1 Контейнер пыли
2 Кожух двигателя
3 Кнопка MAX (максимально)
4 Кнопка включения / выключения
5 Перезаряжаемый аккумуляторный комплект
6 Освобождение перезаряжаемого аккумуляторного
комплекта
7 Защелка контейнера пыли
Рис. B
1 Контейнер пыли
2 Кожух двигателя
8 Индикаторные лампочки
9 Ручка для переноски
10 Розетка подключения электропитания

PC-BS3037A_IM 27.05.19
73
11 Ручной комплект (Рис. A)
12 Освобождение трубки всасывания
13 Держатель насадки
14 Освобождение сочленения трубки всасывания
15 Сопло для пола с турбо-щеткой
16 Освобождение насадки для пола
17 Трубка всасывания
18 Освобождение комбинированной насадки
19 Комбинированная насадка для узких мест / щетка /
мебельной обивки
20 Удлиняющая специальная щетка
Рис. C и D
Настенный держатель
Не показано
1 × Адаптер питания
2 × Дюбеля
2 × Винт
Примечания по использования
• Устройство прекрасно подходит для быстрой уборки
незначительных объемов сухой грязи или пыли.
• Прибор работает от заряда аккумулятора. Зарядка
производится с помощью поставляемого в комплекте
блока питания.
• Прямое подключение к электрической сети помеще-
ния невозможно.
• Когда прибор не используется, повесьте его на
настенный крепеж из комплекта поставки. Он также
служит станцией зарядки.
ВНИМАНИЕ:
Прибор не может сам стоять вертикально. Если
не используется настенный крепеж, положите
пылесос на пол.
• Этот перезаряжаемый аккумуляторный пылесос не
является полноценной заменой традиционным ва-
куумным пылесосам. Особенно на длинноворсовых
коврах его мощности всасывания будет недоста-
точно из-за особенностей конструкции.
• Заполненные фильтры снижают мощность всасыва-
ния пылесоса. Поэтому мы рекомендуем регулярно
чистить пылевые фильтры.
• В идеале чистите фильтры после любого длитель-
ного использования.
• Пожалуйста, регулярно проверяйте и чистите на-
садку для пола.
• При необходимости, чистите сильного загрязненные
полы несколько раз и/или используйте обычный
пылесос с электропитанием от сети 230 В~.
Включение / выключение прибора
• Кнопка (4) служит для включения и выключения
прибора.
• Нажмите кнопку MAX на задней стороне ручного ком-
плекта для переключения между уровнями высокой и
низкой мощности.
Начало работы
Трубка всасывания
• Трубка всасывания имеет сочленение. При сгибании
будет проще чистить пылесосом в труднодоступных
местах. Для закрепления трубки всасывания шарнир-
ное соединение (сочленение) должно зацепится со
слышимым щелчком.
• Вставьте всасывающую трубу с двумя контактными
штырями в соединение на ручном блоке. Она должна
войти в зацепление со звуком.
• Для отсоединения всасывающей трубы нажмите на
кнопку освобождения (12), одновременно вытягивая
трубу.
Сопло для пола с турбо-щеткой
• Насадка для пола подходит для любого напольного
покрытия, кроме длинноворсовых ковров.
• Во время работы на насадке для пола загораются
светодиоды, обеспечивая повышенную видимость в
темных местах.
ВНИМАНИЕ:
Светодиоды замене не подлежат.
• Прикрепите нижний конец всасывающей трубки к
соединителю насадки для пола. Обратите внимание
на соединительные контакты насадки для пола. Вса-
сывающая трубка должна зацепиться со слышимым
щелчком.
• Для отсоединения всасывающей трубы нажмите на
кнопку освобождения (16), одновременно вытягивая
трубу.
Комбинированная насадка для узких мест / щетка /
мебельной обивки (3-в-1)
• Эти принадлежности всегда готовы к работе, если
хранить их прикрепленными к кронштейну на трубке
всасывания выше шарнирного соединения.
• Если использовать насадку в положении для узких
мест, то можно чистить пыль в углах, щелях и других
узких местах.
• Для предотвращения царапин на очищаемой
поверхности используйте насадку для узких мест с
закрепленной насадкой-щеткой или с насадкой для
мебельной обивки. Это позволит аккуратно удалить
пыль из складок мебельной обивки и матрасов.
Насадка также подходит для удаления пыли с дели-
катных поверхностей, например с мебели или штор.
• Для присоединения насадки-щетки или насадки для
мебельной обивки к насадке для узких мест сначала
нажмите кнопки сбоку, затем вдвиньте туда насадку

PC-BS3037A_IM 27.05.19
74
до зацепления со слышимым щелчком (см. следую-
щий рисунок).
• Для освобождения зацепления просто снова на-
жмите кнопки.
• Существуют два разных способа крепления комбини-
рованной насадки к прибору:
Подсоединение к ручному блоку
• Вставьте насадку для узких мест с разблокированной
лицевой стороной вверх в соединение ручного ком-
плекта. Должен быть слышен звук зацепления.
• Для освобождения насадки нажмите кнопку освобо-
ждения, одновременно вытягивая насадку.
Подсоединение к всасывающей трубе
На нижнем конце всасывающей трубки находится такой
же соединитель для вставки, что и на ручном ком-
плекте. Установите / снимите насадку, как указано выше.
Удлиняющая специальная щетка
• Эта насадка особенно хорошо подходит для аккурат-
ной чистки больших деликатных поверхностей.
• Можно удлинить поверхность сбора пыли за счет
работы щетки.
• Такую щетку можно прикрепить прямо к соединителю
ручного комплекта, либо к соединителю, уже уста-
новленному на трубке всасывания.
• Чтобы снять насадку, просто вытащите ее.
Монтаж настенного держателя
Пожалуйста, см. рисунки C и D на стр. 3.
Вставка вилки в блок питания
Если вы хотите использовать настенный держатель
также в качестве базы для зарядки, сначала подклю-
чите вилку к блоку питания (рис. C).
1. Подключите вилку электропитания к розетке на
задней стороне зарядной станции.
2. Аккуратно вставьте вилку в клеммы. Должен быть
слышен звук зацепления.
3. Закрепите кабель в правой или левой направляющей
для кабеля.
Монтаж настенного держателя
ПРЕДУПРЕЖДЕНИЕ:
Предварительно убедитесь в отсутствии в стене кабе-
лей (проводки), которые могут быть повреждены!
ВНИМАНИЕ:
Размещайте настенный держатель таким образом,
чтобы прибор не подвергался действию прямых сол-
нечных лучей или других источников тепла.
ПРИМЕЧАНИЯ:
Если нужно одновременно использовать настенное
крепление в качестве зарядной станции, рядом
должна быть настенная электрическая розетка.
1. Измерьте высоту для монтажа настенного держа-
теля. Прижмите пылесос к стене с установленной
всасывающей трубой и насадкой для пола.
2. Прижмите настенный держатель к стене, как пока-
зано на странице 3 (рис. D). Отметьте 2 места для
высверливания отверстий.
3. Просверлите отверстия и вставьте в стену дюбели.
4. Вставьте винты через отверстия в настенном дер-
жателе. Вверните винты с настенным держателем
в дюбели.
5. Затяните винты вручную до упора с помощью
отвертки.
Заряд аккумуляторов
ВНИМАНИЕ:
Не заряжайте аккумуляторную батарею без присмотра.
1. Выключите устройство.
2. Подключите блок питания к соединительному разъ-
ему (10).
Если вы подготовили настенный держатель в каче-
стве базы для зарядки, повесьте на нем прибор.
3. Подключите сетевой адаптер к сертифицированной
электрической розетке. Заряжайте устройство прим.
5 часов перед первым использованием.
ПРИМЕЧАНИЯ:
• Индикаторные лампочки показывают состояние
зарядки перезаряжаемой аккумуляторной бата-
реи. (25 %, 50 %, 100 %)
• Прибор снабжен электронным устройством кон-
троля зарядки, предотвращающим перезарядку.
• Зарядка завершена, когда горят все 3 индика-
торные лампочки.
• Если прибор снят с зарядной станции или
отключен от электропитания, индикаторные
лампочки погаснут.
• Нагрев устройства при зарядке является нор-
мальным.

PC-BS3037A_IM 27.05.19
75
Монтаж настенного держателя
ПРЕДУПРЕЖДЕНИЕ:
Предварительно убедитесь в отсутствии в стене кабе-
лей (проводки), которые могут быть повреждены!
ВНИМАНИЕ:
Размещайте настенный держатель таким образом,
чтобы прибор не подвергался действию прямых сол-
нечных лучей или других источников тепла.
ПРИМЕЧАНИЯ:
Если нужно одновременно использовать настенное
крепление в качестве зарядной станции, рядом
должна быть настенная электрическая розетка.
1. Измерьте высоту для монтажа настенного держа-
теля. Прижмите пылесос к стене с установленной
всасывающей трубой и насадкой для пола.
2. Прижмите настенный держатель к стене, как пока-
зано на странице 3 (рис. D). Отметьте 2 места для
высверливания отверстий.
3. Просверлите отверстия и вставьте в стену дюбели.
4. Вставьте винты через отверстия в настенном дер-
жателе. Вверните винты с настенным держателем
в дюбели.
5. Затяните винты вручную до упора с помощью
отвертки.
Заряд аккумуляторов
ВНИМАНИЕ:
Не заряжайте аккумуляторную батарею без присмотра.
1. Выключите устройство.
2. Подключите блок питания к соединительному разъ-
ему (10).
Если вы подготовили настенный держатель в каче-
стве базы для зарядки, повесьте на нем прибор.
3. Подключите сетевой адаптер к сертифицированной
электрической розетке. Заряжайте устройство прим.
5 часов перед первым использованием.
ПРИМЕЧАНИЯ:
• Индикаторные лампочки показывают состояние
зарядки перезаряжаемой аккумуляторной бата-
реи. (25 %, 50 %, 100 %)
• Прибор снабжен электронным устройством кон-
троля зарядки, предотвращающим перезарядку.
• Зарядка завершена, когда горят все 3 индика-
торные лампочки.
• Если прибор снят с зарядной станции или
отключен от электропитания, индикаторные
лампочки погаснут.
• Нагрев устройства при зарядке является нор-
мальным.
4. После полной зарядки
аккумуляторной батареи
отсоедините блок питания
от розетки.
5. Чтобы снять прибор с
зарядной станции, нажмите
защелку освобождения
вверху настенного кре-
пления.
ПРИМЕЧАНИЯ:
Даже при выключенном
приборе аккумуляторная
батарея постоянно разря-
жается. Если прибор не
используется в течение дли-
тельного периода времени,
заряжайте аккумуляторную
батарею не реже, чем раз в
4 - 6 недель.
Эксплуатация прибора
Можно использовать прибор в качестве пылесоса для
пола или в виде переносного пылесоса для вертикаль-
ной очистки (базовый блок).
1. Отключите прибор от блока питания.
2. Включите прибор.
3. Чтобы согнуть всасывающую трубку в сочленении,
нажмите кнопку освобождения (14).
ПРИМЕЧАНИЯ:
• При использовании прибора с насадкой для пола
рекомендуется самый высокий уровень мощности.
Нажмите кнопку MAX.
• Во время работы, в зависимости от уровня зарядки
перезаряжаемого аккумулятора горит от 1 до 3
индикаторов.
• Мы рекомендуем заряжать аккумулятор, когда ин-
дикаторные лампочки покажут оставшийся уровень
зарядки только 25 %.
• Когда уровень зарядки перезаряжаемого аккуму-
лятора почти закончится, последняя индикаторная
лампочка начнет мигать. Чтобы не допустить
глубокую разрядку перезаряжаемого аккумулятора,
при этом выключится мотор прибора. Зарядите
аккумулятор.
Закончить пользование прибором
1. Выключите устройство.
2. После монтажа настенного держателя повесьте на
него пылесос.
Обслуживание
Система фильтров
В устройстве предусмотрено 3 фильтра. Обычная си-
стема с мешком для сбора пыли была заменена на про-
зрачный пылесборник. Более высокая скорость сбора
пыли позволяет разделять тяжелую пыль и малейшие
частицы в засасываемом воздуха.
Таким образом, отсутствует необходимость покупать
мешки.
Фильтры требуют периодической очистки.
ВНИМАНИЕ:
• Запрещается мыть фильтр в стиральной машине.
• Запрещается использовать фен для сушки.
• Возвращать устройство в работу можно в том
случае, если все фильтры абсолютно сухие и
правильно собраны.
Блок фильтров
Блок фильтров включает в себя следующее:
• Фильтр мелких частиц
• Фильтр грубой очистки
Для очистки блока фильтров выполните
следующее:
Опустошение пылесборника
1. Отключите прибор от блока питания.
2. При необходимости удалите с устройства всасываю-
щую трубу или насадку.
3. Пожалуйста, см. рисунок A на стр. 3. Нажмите кнопку
на контейнере пыли для его отделения от ручного
комплекта.
4. Вытащите фильтр мелких частиц из кусочков цвет-
ной ткани.
5. За ручку вытащите фильтр грубой очистки для его
извлечения из контейнера пыли.
6. Опорожните пылесборник.
Очистка фильтров
1. Держа оба фильтра над мусорным ведром, стрях-
ните пыль. Также можно очистить щеткой фильтр
мелких частиц. В случае сильного загрязнения
промойте фильтры под проточной водой.
2. Дайте фильтры полностью высохнуть перед установ-
кой на место!

PC-BS3037A_IM 27.05.19
76
3. Протрите пылесборник влажной тканью, затем
вытрите насухо.
Сборка блока фильтров
1. Установите фильтр грубой очистки в контейнер пыли.
Обратите внимание на выемки на краях контейнера
пыли. Теперь вдвиньте фильтр грубой очистки вниз,
чтобы он встал по центру контейнера пыли.
2. Поставьте фильтр мелких частиц (чтобы часть с
цветной тканью смотрела вверх) в фильтр грубой
очистки. Аккуратно надавите на фильтр мелких
частиц.
3. Снова подсоедините контейнер пыли к ручному ком-
плекту. Сначала поставьте контейнер пыли на верх
корпуса мотора. Затем вдвиньте контейнер пыли
вниз. Должен быть слышен звук зацепления защелки
на контейнере пыли.
Выпускной фильтр
Прибор также имеет выпускной фильтр. Он находится
вверху корпуса мотора.
ВНИМАНИЕ:
Вы не можете удалять этот фильтр.
Чистка
ПРЕДУПРЕЖДЕНИЕ:
• Перед очисткой всегда отключайте прибор от блока пита-
ния!
• Ни в коем случае не окунайте корпус двигателя для мытья
в воду. Это может быть причиной электрического удара или
пожара.
ВНИМАНИЕ:
• Не используйте проволочные щётки или другие
царапающие предметы.
• Не используйте сильные или царапающие чистя-
щие средства.
• Отдельные компоненты не предназначены для
посудомоечной машины.
• Корпус можно протирать слегка влажной тряпкой.
• Можно вытирать блок электропитания сухой тканью.
Насадка для пола
1. Отсоедините насадку для пола от всасывающей
трубы.
2. Поверните насадку
для пола так, чтобы
увидеть ее нижнюю
сторону. Исполь-
зуйте небольшую
монетку или другой
инструмент для
открытия защелки.
Направление вращения: против часовой стрелки.
Откиньте на отверстии крышки.
3. Вытяните роликовую щетку.
4. Удалите щеткой нитки и волосы. Используйте нож-
ницы, при необходимости.
5. Сборка:
5.1 Сначала вставьте обратно ролик щетки в звез-
дообразную выемку отсека.
5.2 Вставьте другой конец ролика щетки с квадрат-
ной опорой в выемку под крышкой.
6. Закройте замок роликовой щетки.
Пылесборник с блоком фильтров
Для очистки этих компонентов прочитайте, пожалуйста,
главу «Обслуживание».

PC-BS3037A_IM 27.05.19
77
Хранение
• Почистите устройство как описано в руководстве, и
дайте ему полностью высохнуть.
• Для хранения используйте ранее установленный
кронштейн настенного монтажа, либо аккуратно
положите прибор на пол.
• Рекомендуется хранить устройство в его оригиналь-
ной упаковке, если оно не используется длительное
время.
ПРИМЕЧАНИЕ по сроку службы аккумуля-
торной батареи:
Даже при выключенном приборе аккумуляторная
батарея постоянно разряжается. Если прибор не
используется в течение длительного периода вре-
мени, заряжайте аккумуляторную батарею не реже,
чем раз в 4 - 6 недель.
• Всегда храните устройство в сухом, хорошо вентили-
руемом месте, недоступном для детей.
• Температура хранения от 0 до 40 °C.
Поиск и устранение неисправностей
Проблема Возможная причина Способ устранения
Устройство не работает. Подключен блок питания. Отключите прибор от блока питания.
Аккумуляторная батарея неисправна. Обратитесь в наш сервисный центр или
к своему продавцу.
Когда прибор включается,
начинают мигать все
индикаторные лампочки.
Аккумулятор разрежен. Зарядите аккумулятор.
Малая мощность
всасывания.
Аккумулятор почти разряжен. Зарядите аккумулятор.
Пылесборник переполнен. Опустошите пылесборник.
Грязные фильтры. Очистите фильтры, как указано в разделе
«Обслуживание».
ВНИМАНИЕ:
Возобновление работы может быть только
с сухими фильтрами.
Шум во время работы. Посторонний предмет попал в насадку
для пола.
Извлеките посторонний предмет. При
необходимости отсоедините насадку для
пола от всасывающей трубы.
Насадка для пола
с турбо-щеткой не
работает.
Роликовая щетка забита грязью. Очистите насадку для пола, как описано
в разделе «Чистка».
Неправильное крепление всасывающей
трубы и / или насадки для пола.
Проверьте правильность сборки всех
компонентов.
Аккумуляторная батарея
не держит заряд.
Аккумуляторная батарея достигла
окончания своего срока службы.
Обратитесь в наш сервисный центр или
к своему продавцу.
Технические данные
Модель: .......................................................... PC-BS 3037 A
Вес нетто (ручной комплект с трубкой
всасывания и насадкой для пола): ................прибл. 2,4 кг
Сетевой адаптер
Класс защиты: ....................................................................
Вход: ..... Перем. ток (AC) 100 - 240 В, 50 / 60 Гц, 0,8 А макс
Выход: ......................................Пост. ток (DC) 35 В, 500 мА
Полярность: ..............................................................
Аккумулятор: ........ 29,6 V, 2200 мА-час Ионно-литиевый
Время работы: ...................................... 30 минут максимум
Время зарядки: ..........................................прибл. 4,5 часов
Сохранено право на технические и конструкционные
изменения в рамках продолжающейся разработки
продукта.
Это изделие прошло все необходимые и актуальные
проверки, предписанные директивой СЕ, к прим. на
электромагнитную совместимость и соответствие
требованиям к низковольтной технике, оно было также
сконструировано и построено с учетом последних тре-
бований по технике безопасности.

PC-BS3037A_IM 27.05.19
78
Утилизация
Утилизация батарей / аккумуляторных батареек
Прибор содержит аккумуляторную бата-
рейку. Использованные батарейки / аккуму-
ляторы (перезаряжаемые батарейки) не от-
носятся к бытовым отходам.
Батарейка должна быть извлечена перед
утилизацией прибора. Нажмите защелку освобождения
(6) и извлеките перезаряжаемый аккумуляторный ком-
плект из ручного комплекта.
Информацию о местах утилизации батареек / аккумуля-
торов можно получить в местных или муниципальных
органах власти.
Значение символа «корзина»
Защита окружающей среды: не допускается
утилизация электроприборов вместе с
бытовыми отходами.
Утилизация устаревшей техники и неис-
правных электроприборов производится в
городских приёмных пунктах.
Не допускайте неправильной утилизации отходов. Это
наносит вред окружающей среде и оказывает негатив-
ное воздействие на здоровье людей.
Оказывайте содействие программе утилизации и дру-
гим формам переработки электронной и электрической
техники.
Информацию о пунктах утилизации бытовой техники
можно получить в местных органах власти.

PC-BS3037A_IM 27.05.19
79
PC-BS 3037 A ................................................................................ :
)
2,4 .......................................................... :(
II ............................................................................................. :
0,8 60/50 - 240-100 .............:
500 - 35 ..................................................:
........................................................................................:
29,6 .........................................................:
2200 ...........................................................
30 ............................................................... :
4,5 .........................................................................:
.
CE
.
/
.
) /
.
(
.
. (6)
. /
" "
:
.
.
.
.
."" .
.
. . /
.
.
.

PC-BS3037A_IM 27.05.19
80
:
•!
• .
.
:
•.
•.
•.
•.
•.
1 ..
2 .
.
.
:
.
.
3 .
.
4 . .
.
5 .:
5.1
.
5.2
.
6 ..
. ""
•.
•
.
•.
:
.
.
6 4
•.
•. 40 0
. .
.
. .
. .
.
. . .
. .
."" .
:
.
.
.
. .

PC-BS3037A_IM 27.05.19
81
2 ..
3 .
.(14)
:
• .
.( ) MAX
•
3 1
.
•
. %25
•
.
.
1 ..
2 ..
3
.
." "
.
.
:
•.
•.
•
.
:
•
•
:
1 ..
2 ..
3 . .3
.
4 ..
5 ..
6 ..
1 . .
.
.
2 .!
3 ..
1 . .
.
.
2 . )
. .(
3 . .
. .
.
.
.
. :

PC-BS3037A_IM 27.05.19
82
• /
.
( )
•.
•:
•
.
•.
. / .
•.
•
.
•
.
•.
.3 D C
.(C )
1 .
.
2 . .
.
3 ..
:
!
:
.
:
.
1 . .
.
2 . .(D )
.2
3 ..
4 ..
5 ..
:
.
1 ..
2 . .(10)
.
3 . .
. 5
:
•(%100 ,%50 ,%25) .
•
.
•.
•
.
•.
4 .
.
5 .
.
:
.
.
6 4
.( )
1 ..

PC-BS3037A_IM 27.05.19
83
:
.
!
/
A
1
2
( ) MAX 3
/ 4
5
6
7
B
1
2
8
9
10
(A ) 11
12
13
14
15
16
17
18
// 19
20
D C
×1
×2
×2
•
.
• .
.
•.
• .
.
:
.
.
•
.
• .
.
•.
•.
•
. ~230
/
•. (4)
• ( ) MAX
.
•
.
•
.
.
• (12)
.
•.
• LED
.
.LED :
• .
.
.
• (16)
.
(1 3) //
•
.
•
.
•
. /
.

PC-BS3037A_IM 27.05.19
84
:
•( )
•
•
.
.
.
.
: .
•: 0 40
•.
•.
•
.
•
.
.
:
• :
. 25-10
.
• :
.
.
. %90
. %0
.%30
• :
. 20 10
!
.
.
%40
.
1 ..
2 ..
3 .
.
•.
• .
.
•
.
•.
•!
•
.
•!
•.

PC-BS3037A_IM 27.05.19
85
• 8
.
•.
. .
.
:
:
.
:
.
:
.
3 .......................................................................
85 ....................................................................................
85 ....................................................
84 .............................................
84 ............
84 ..........................
84 .......................................................................
83 ............................................... /
83 .............................................................................
83 .............................................................. /
83 .......................................................................................
83 ......................................................................................
83 ..............................................................
83 ........................(1 3) //
82.............................................................
82 .......................................................................
82...........................................................
82.............................................................................
82 ...................................................................................
82 ..................................................................................
81 ........................................................................................
81 ..............................................................................................
81 ............................................................................................
81 ...............................................................................
81 .................................................................................
81 ...............................................................................
80 ............................................................................................
80 ...................................................................................
80 ........................................................
80 .............................................................................................
80 ...............................................................
79 ....................................................................................
79 .............................................................................
79...................... /
79......................................................................" "
.
.
.
• .
.
•.
•
!
•!
•.
•
.
•.
•.
• .
.
.
• .
• )
. (
:
!

PC-BS3037A_IM 27.05.19
Stand 04 / 2019
Internet: www.procare-germany.de
Made in P.R.C.
PC-BS 3037 A
-
 1
1
-
 2
2
-
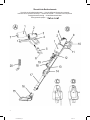 3
3
-
 4
4
-
 5
5
-
 6
6
-
 7
7
-
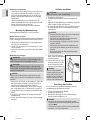 8
8
-
 9
9
-
 10
10
-
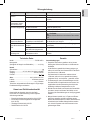 11
11
-
 12
12
-
 13
13
-
 14
14
-
 15
15
-
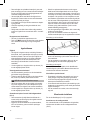 16
16
-
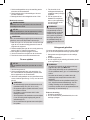 17
17
-
 18
18
-
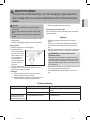 19
19
-
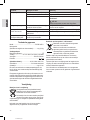 20
20
-
 21
21
-
 22
22
-
 23
23
-
 24
24
-
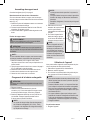 25
25
-
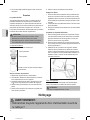 26
26
-
 27
27
-
 28
28
-
 29
29
-
 30
30
-
 31
31
-
 32
32
-
 33
33
-
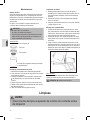 34
34
-
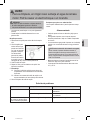 35
35
-
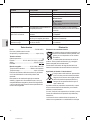 36
36
-
 37
37
-
 38
38
-
 39
39
-
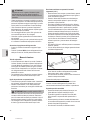 40
40
-
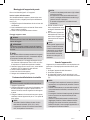 41
41
-
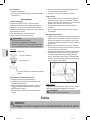 42
42
-
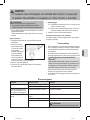 43
43
-
 44
44
-
 45
45
-
 46
46
-
 47
47
-
 48
48
-
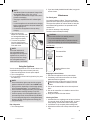 49
49
-
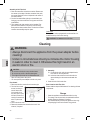 50
50
-
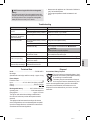 51
51
-
 52
52
-
 53
53
-
 54
54
-
 55
55
-
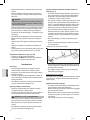 56
56
-
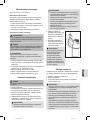 57
57
-
 58
58
-
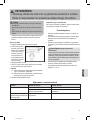 59
59
-
 60
60
-
 61
61
-
 62
62
-
 63
63
-
 64
64
-
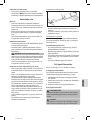 65
65
-
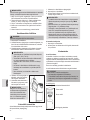 66
66
-
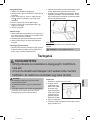 67
67
-
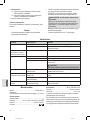 68
68
-
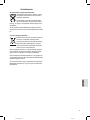 69
69
-
 70
70
-
 71
71
-
 72
72
-
 73
73
-
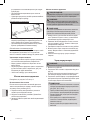 74
74
-
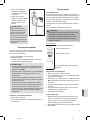 75
75
-
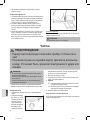 76
76
-
 77
77
-
 78
78
-
 79
79
-
 80
80
-
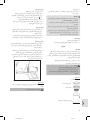 81
81
-
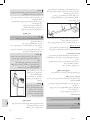 82
82
-
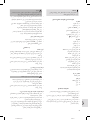 83
83
-
 84
84
-
 85
85
-
 86
86


ProfiCare PC-BS 3037 A Manual de usuario
- Categoría
- Aspiradoras portátiles
- Tipo
- Manual de usuario
En otros idiomas
- français: ProfiCare PC-BS 3037 A Manuel utilisateur
- italiano: ProfiCare PC-BS 3037 A Manuale utente
- Deutsch: ProfiCare PC-BS 3037 A Benutzerhandbuch
- polski: ProfiCare PC-BS 3037 A Instrukcja obsługi
Documentos relacionados
-
ProfiCare PC-BS 3036 A Manual de usuario
-
ProfiCare PC-AKS 3034 Manual de usuario
-
-
-
-
-
-
-
-
Otros documentos
-
Clatronic BS 1312 Manual de usuario
-
-
Bosch BSS81POW UNLIMITED El manual del propietario
-
Amica VM 9002 Joran PET Manual de usuario
-
Clatronic CB 967 Instrucciones de operación
-
BOMANN BS 1948 CB N Instrucciones de operación
-
Silvercrest SHAZ 22.2 A1 Operating Instructions Manual
-
-
-
CTC Union BR 816 Manual de usuario