BOMANN EWB 6068 CB Instrucciones de operación
- Tipo
- Instrucciones de operación

EWB 6068 CB
EWB6068CB_IM 06.07.23
Bedienungsanleitung
Instruction Manual • Gebruiksaanwijzing • Mode d’emploi
Manual de instrucciones • Istruzioni per l’uso • Instrukcja obsługi / Gwarancja
Használati utasítás • Руководство по эксплуатации •
EISWÜRFELBEREITER
Ice Cube Maker • IJsblokjesmachine • Machine à glaçons
Máquina de hacer cubitos de hielo • Macchina per cubetti di ghiaccio • Kostkarka do lodu
Jégkocka készítő • Льдогенератор кубикового льда •

EWB6068CB_IM 06.07.23
Bedienungsanleitung ....................................................................................Seite 4
Instruction Manual ........................................................................................ Page 9
Gebruiksaanwijzing ................................................................................... Pagina 14
Mode d’emploi............................................................................................... Page 19
Manual de instrucciones .......................................................................... Página 24
Istruzioni per l’uso .....................................................................................Pagina 29
Instrukcja obsługi .......................................................................................Strona 34
Használati utasítás .......................................................................................Oldal 40
Руководство по эксплуатации .................................................................. стр. 45
54 ....................................................................................................................
2

EWB6068CB_IM 06.07.23
3
Übersicht der Bedienelemente
Overview of the Components • Overzicht van de bedieningselementen
Liste des différents éléments de commande • Indicación de los elementos de manejo
Elementi di comando • Przegląd elementów obsługi • A kezelőelemek áttekintése
Обзор деталей прибора •

4
EWB6068CB_IM 06.07.23
WICHTIG:
Lesen Sie unbedingt zuerst die separat beiliegenden Sicherheits-
hinweise.
Bedienungsanleitung
Vielen Dank, dass Sie sich für unser Produkt entschieden
haben. Wir wünschen Ihnen viel Freude mit dem Gerät.
Lesen Sie vor Inbetriebnahme dieses Gerätes die Bedie-
nungsanleitung und die separat beiliegenden Sicherheitshin-
weise sehr sorgfältig durch. Bewahren Sie diese Unterlagen
inkl. Garantieschein, Kassenbon und nach Möglichkeit den
Karton mit Innenverpackung gut auf. Falls Sie das Gerät an
Dritte weitergeben, geben Sie auch immer alle dazugehöri-
gen Unterlagen mit.
Symbole in dieser Bedienungsanleitung
Wichtige Hinweise für Ihre Sicherheit sind besonders ge-
kennzeichnet. Beachten Sie diese Hinweise unbedingt, um
Unfälle und Schäden am Gerät zu vermeiden:
WARNUNG:
Warnt vor Gefahren für Ihre Gesundheit und zeigt mög-
liche Verletzungsrisiken auf.
ACHTUNG:
Weist auf mögliche Gefährdungen für das Gerät oder
andere Gegenstände hin.
Inhalt
Übersicht der Bedienelemente ..........................................3
Auspacken des Gerätes ..................................................... 4
Übersicht der Bedienelemente / Lieferumfang ................4
Warnhinweise für die Benutzung des Gerätes ................ 5
Anwendungshinweise ........................................................ 5
Standort ............................................................................5
Elektrischer Anschluss ..................................................... 5
Standby-Modus (Bereitschaftszustand)...........................5
Eco Save (Energiesparmodus) ........................................5
Unterbrechungen des Betriebs ........................................ 5
Eiswürfel ...........................................................................5
Bedienung............................................................................5
Eiswürfel herstellen .......................................................... 5
Eiswürfelproduktion unterbrechen ...................................6
Kontrollleuchte ICE FULL (Eiswürfelbehälter voll)...........6
Kontrollleuchte ADD WATER (Wassermangel) ...............6
Betrieb beenden ...............................................................6
Reinigung und Wartung .....................................................6
Reinigungsprogramm.......................................................7
Restwasser ablassen ....................................................... 7
Eiswürfelbehälter ..............................................................7
Filtersieb ........................................................................... 7
Gehäuse und Innenraum ................................................. 7
Aufbewahrung .....................................................................7
Störungsbehebung .............................................................7
Technische Daten ...............................................................8
Entsorgung .......................................................................... 8
Bedeutung des Symbols „Mülltonne“ ...............................8
Auspacken des Gerätes
ACHTUNG:
Achten Sie beim Auspacken und Entfernen der Ver-
packung darauf, dass das Gerät nicht um mehr als 45 °
gekippt wird, da sonst der Kühlkompressor beschädigt
werden kann.
1. Nehmen Sie das Gerät aus seiner Verpackung.
2. Entfernen Sie sämtliches Verpackungsmaterial, wie
Folien, Füllmaterial, Kabelbinder und Kartonverpackung.
Entfernen Sie auch das Klebeband im Wassertank, das
zum Fixieren beweglicher Teile angebracht ist.
3. Prüfen Sie den Lieferumfang auf Vollständigkeit.
4. Sollte der Verpackungsinhalt unvollständig oder Beschä-
digungen feststellbar sein, nehmen Sie das Gerät nicht in
Betrieb. Bringen Sie es umgehend zum Händler zurück.
5. Am Gerät können sich noch Staub oder Produktions-
reste benden. Wir empfehlen Ihnen, das Gerät wie
unter „Reinigung und Wartung“ beschrieben zu säubern.
Übersicht der Bedienelemente /
Lieferumfang
1 Deckel
2 Gefriereinheit
3 Eiswürfel-Schieber
4 Lufteinlass
5 Luftauslass
6 Filtersieb
7 Wasserablassöffnung
8 Gehäuse
9 Taste (ein- / ausschalten)
10 Kontrollleuchten:
ICE FULL (Eiswürfelbehälter voll)
ADD WATER (Wassermangel)
LARGE (große Eiswürfel)
SMALL (kleine Eiswürfel)

5
EWB6068CB_IM 06.07.23
11 Wassertank
12 Eiswürfelbehälter
13 Sensor für den Füllstand der Eiswürfel im Behälter
14 Eisschaufel
Warnhinweise für die
Benutzung des Gerätes
WARNUNG:
Das Gerät enthält im Kältemittelkreislauf das Kältemittel
Isobutan (R600a), ein Naturgas mit hoher Umweltverträg-
lichkeit, welches brennbar ist. Achten Sie beim Transport
und Aufstellen des Gerätes darauf, dass das Gerät nicht
herunter fällt. Der Kältemittelkreislauf darf nicht beschä-
digt werden.
Bei Beschädigung des Kältemittelkreislaufes:
• Offenes Feuer und Zündquellen unbedingt vermeiden.
• Den Netzstecker des Gerätes aus der Steckdose
ziehen.
• Den Raum, in dem das Gerät steht, durchlüften.
ACHTUNG:
• Halten Sie unbedingt die Wartezeit von 2 Stunden, bei
Erstinbetriebnahme oder nach Transport ein, damit
sich das Kältemittel absenken kann. Andernfalls würde
der Kühlkompressor beschädigt werden.
• Wenn Sie die Eiswürfelproduktion mit der Taste un-
terbrechen, warten Sie mindestens 3 Minuten, bevor
Sie das Gerät erneut einschalten, um den Kompressor
nicht zu beschädigen.
• Trennen Sie das Gerät nicht vom Stromnetz, während
das Reinigungsprogramm läuft!
• Gerät nie ohne das Filtersieb betreiben!
Anwendungshinweise
Standort
• Stellen Sie das Gerät auf eine stabile, waagerechte,
wasserresistente und ebene Fläche. Halten Sie einen
Abstand von mindestens 10 cm zu Wänden oder Gegen-
ständen.
• Stellen Sie das Gerät nicht auf oder in unmittelbarer
Nähe von Wärmequellen wie z. B. Öfen, Heizkörpern etc.
Elektrischer Anschluss
• Prüfen Sie, ob die Netzspannung, die Sie benutzen
wollen, mit der des Gerätes übereinstimmt. Die Angaben
dazu nden Sie auf dem Typenschild.
• Schließen Sie das Gerät nur an eine vorschriftsmäßig
installierte Schutzkontaktsteckdose an.
Standby-Modus (Bereitschaftszustand)
Die Kontrollleuchte SMALL blinkt.
Eco Save (Energiesparmodus)
Das Gerät schaltet sich aus, wenn der Eiswürfelbehälter voll
ist. Sie protieren von der erhöhten Sicherheit und einem
geringeren Stromverbrauch.
Unterbrechungen des Betriebs
Nach einer Unterbrechung aufgrund von Wassermangel,
vollem Eiswürfelbehälter, manuellem Stopp oder Strom-
ausfall startet der Kompressor mit einer Verzögerung von
3 Minuten nach dem Wiedereinschalten.
Eiswürfel
• Sie können zwischen zwei Größen auswählen:
- SMALL (klein)
- LARGE (groß)
• Eiswürfel aus dem ersten Produktionszyklus sollten aus
hygienischen Gründen nicht verwendet werden.
• Die besten Ergebnisse werden bei einer Wassertempe-
ratur zwischen 7 °C und 20 °C und einer Umgebungs-
temperatur zwischen 16 °C und 25 °C erzielt.
• Je nach Wasser- und Umgebungstemperatur sind die
ersten Eiswürfel kleiner. Erst in den folgenden Zyklen
werden die Eiswürfel größer.
• Durch das schnelle Gefrieren können die Eiswürfel
„milchig“ aussehen. Dabei handelt es sich um im Wasser
eingeschlossene Luft. Die Qualität der Eiswürfel wird
dadurch nicht beeinträchtigt.
• Wenn Sie Eiswürfel mit klarem Aussehen wünschen,
verwenden Sie Trinkwasser, das zuvor abgekocht und
abgekühlt wurde.
Bedienung
Bei Erstinbetriebnahme oder wenn Sie das Gerät längere
Zeit nicht benutzt haben, reinigen Sie das Gerät wie im
Kapitel „Reinigung und Wartung“ beschrieben. Verwenden
Sie das Reinigungsprogramm des Geräts.
Eiswürfel herstellen
1. Stellen Sie sicher, dass die Wasserablassöffnung an der
Unterseite des Gerätes fest verschlossen ist.
2. Öffnen Sie den Deckel und nehmen Sie den Eiswürfel-
behälter heraus.
3. Am Boden des Wassertanks bendet sich ein Filter.
Achten Sie darauf, dass dieser fest eingesetzt ist.
4. Im Wassertank bendet sich unterhalb der Markierung
MAX ein Pfeil. Füllen Sie ca. 1 Liter frisches Wasser in
den Wassertank, maximal bis unter den Pfeil (Mindest-
menge: 500 ml). Verwenden Sie ausschließlich Trink-
wasser zum Herstellen von Eiswürfeln.
5. Setzen Sie den Eiswürfelbehälter wieder ein und schlie-
ßen Sie den Deckel.
6. Stecken Sie den Netzstecker in die Steckdose.

6
EWB6068CB_IM 06.07.23
7. Drücken Sie einmal auf die Taste . Die Kontrollleuchten
LARGE und SMALL blinken abwechselnd. Das Gerät
bendet sich im Auswahlmodus für die Eiswürfelgröße.
8. Wenn die Kontrollleuchte der gewünschten Eiswürfel-
größe leuchtet, drücken Sie die Taste erneut. Der
Kompressor schaltet sich ein. Die Eiswürfelproduktion
beginnt.
- Halten Sie den Deckel während der Eiswürfelproduk-
tion geschlossen.
- Ein Zyklus der Eiswürfelherstellung dauert zwischen 8
und 10 Minuten.
Eiswürfelproduktion unterbrechen
Drücken Sie die Taste , um die Eiswürfelproduktion zu
stoppen. Die Kontrollleuchte SMALL blinkt.
• Bei einer manuellen Betriebsunterbrechung wird das
nicht benötigte Wasser in den Wassertank zurückgeführt.
Erst dann schaltet das Gerät ab. Halbfertige Eiswürfel
bleiben an den Kühlstangen hängen. Sobald sie etwas
angetaut sind, lösen sie sich und fallen ab.
• Bitte beachten Sie, dass sich Eissplitter bilden können,
die den Eiswürfelschieber blockieren. In diesem Fall wird
der Mechanismus nach dem Einschalten so lange hin-
und herbewegt, bis er wieder frei ist.
- Wenn Sie die Eissplitter selbst entfernen wollen, zie-
hen Sie zuerst den Netzstecker aus der Steckdose.
• Beachten Sie die Wartezeit von mindestens 3 Minuten,
wenn Sie den Betrieb fortsetzen wollen.
• Sie können die Größe der Eiswürfel verändern, solange
der Kompressor ausgeschaltet ist.
Kontrollleuchte ICE FULL (Eiswürfelbehälter voll)
Sobald der Eiswürfelbehälter voll ist, wird die Produktion
gestoppt. Die Kontrollleuchte ICE FULL leuchtet. Der Kom-
pressor schaltet sich aus.
1. Entnehmen Sie die Eiswürfel. Verwenden Sie ggf. die
beigelegte Eisschaufel. Beim Entnehmen des Eiswürfel-
behälters tropft etwas Wasser durch die Löcher am
Boden.
2. Nachdem die Kontrollleuchte ICE FULL erlischt, startet
nach einiger Zeit die Eiswürfelproduktion wieder auto-
matisch.
Kontrollleuchte ADD WATER (Wassermangel)
Die Kontrollleuchte zeigt an, wenn zu wenig Wasser im
Wassertank ist. Die Eiswürfelproduktion wird automatisch
unterbrochen.
1. Öffnen Sie den Deckel.
2. Entleeren Sie den Eiswürfelbehälter.
3. Füllen Sie Trinkwasser nach, wie unter „Eiswürfel her-
stellen“ beschrieben. Da sich noch Restwasser im Gerät
benden kann, beachten Sie die MAX-Markierung im
Wassertank.
4. Setzen Sie den Eiswürfelbehälter wieder ein und schlie-
ßen Sie den Deckel.
5. Drücken Sie die Taste . Die Kontrollleuchte
ADD WATER erlischt. Das Gerät bendet sich wieder
im Standby-Modus. Sie können mit der Bedienung
fortfahren.
Betrieb beenden
1. Drücken Sie die Taste , um die Eiswürfelproduktion zu
stoppen. Die Kontrollleuchte SMALL blinkt.
2. Ziehen Sie den Netzstecker aus der Steckdose.
3. Entnehmen Sie den Eiswürfelbehälter.
4. Lassen Sie das Restwasser ab, wie unter „Reinigung
und Wartung“ beschrieben.
5. Lassen Sie den Deckel des Gerätes offen stehen, damit
sich keine Pilzkulturen oder Bakterien bilden können.
Reinigung und Wartung
WARNUNG:
• Schalten Sie das Gerät vor der Wartung und der Reinigung aus.
Ziehen Sie den Netzstecker aus der Steckdose.
• Das Gerät auf keinen Fall zum Reinigen in Wasser tauchen. Es
könnte zu einem elektrischen Schlag oder Brand führen.

7
EWB6068CB_IM 06.07.23
ACHTUNG:
• Benutzen Sie keine Drahtbürste oder andere scheu-
ernde Gegenstände.
• Benutzen Sie keine scharfen oder scheuernden
Reinigungsmittel.
• Verwenden Sie keine Chemikalien, Säuren, Benzin
oder Öl.
Reinigungsprogramm
Mit diesem Programm wird das Wassersystem mehrmals
durchgespült. Der Vorgang dauert ca. 5 Minuten.
Wichtig! Während des Reinigungsprogramms darf das Ge-
rät nicht vom Stromnetz getrennt werden.
1. Im Wassertank bendet sich unterhalb der Markierung
MAX ein Pfeil. Füllen Sie ca. 1 Liter frisches Wasser in
den Wassertank, maximal bis unter den Pfeil.
2. Während sich das Gerät im Standby-Modus bendet,
halten Sie die Taste circa 2 Sekunden gedrückt. Das
Gerät startet das Reinigungsprogramm. Die vier Kontroll-
leuchten blinken abwechselnd.
3. Das Gerät schaltet automatisch in den Standby-Modus,
wenn das Reinigungsprogramm beendet ist.
4. Lassen Sie das Wasser aus dem Gerät ab. Entsorgen
Sie das Wasser.
Restwasser ablassen
Lassen Sie das Restwasser nach jeder Benutzung des
Gerätes oder am Ende des Tages ab.
1. Stellen Sie das Gerät an eine Tischkante. Halten Sie
eine Schüssel unter die Wasserablassöffnung.
2. Ziehen Sie den Verschluss am Boden heraus.
3. Nachdem das Restwasser abgeossen ist, setzen Sie
den Verschluss wieder in die Öffnung.
Eiswürfelbehälter
Entnehmen Sie den Eiswürfelbehälter. Reinigen Sie diesen
im warmen Spülwasser unter Zusatz von etwas Handspül-
mittel. Spülen Sie mit klarem Wasser nach.
Filtersieb
Reinigen Sie das Filtersieb in regelmäßigen Abständen, um
Kalkablagerungen zu entfernen.
1. Ziehen Sie das Filtersieb vom Boden des Wassertanks
ab.
2. Spülen Sie das Filtersieb unter ießendem Wasser aus.
Sie können eine Nylonbürste zur Hilfe nehmen.
3. Stecken Sie das Filtersieb wieder auf die Stifte am
Boden des Wassertanks.
ACHTUNG:
Benutzen Sie das Gerät nie ohne das Filtersieb!
Gehäuse und Innenraum
• Reinigen Sie das Gehäuse und das Innere des Gerätes
mit einem feuchten Tuch. Achten Sie darauf, dass keine
Feuchtigkeit in die Lufteinlass- oder Luftauslassöffnun-
gen gelangt.
• Verwenden Sie eine verdünnte Lösung aus Essig und
Wasser.
• Wischen Sie den Innenraum des Gerätes trocken.
Aufbewahrung
• Lassen Sie den Innenraum des Gerätes vollständig
trocknen, bevor Sie den Deckel schließen und das Gerät
verstauen.
• Wir empfehlen, das Gerät in der Original-Verpackung
aufzubewahren, wenn Sie es über einen längeren Zeit-
raum nicht benutzen möchten.
• Lagern Sie das Gerät immer außerhalb der Reichweite
von Kindern an einem gut belüfteten und trockenen Ort.
Störungsbehebung
Problem Mögliche Ursache Abhilfe
Das Gerät ist ohne Funktion. Das Gerät hat keine Stromversorgung. Überprüfen Sie die Steckdose mit einem
anderen Gerät.
Setzen Sie den Netzstecker richtig ein.
Kontrollieren Sie die Haussicherung.
Das Gerät ist defekt. Wenden Sie sich an unseren Service oder
an einen Fachmann.
Der Kompressor macht abnor-
male Geräusche.
Die Netzspannung ist zu gering. Schalten Sie das Gerät aus und prüfen
Sie die Netzspannung.
Die Kontrollleuchte ADD WATER
leuchtet.
Wassermangel. Füllen Sie Wasser nach wie im Kapitel
„Bedienung“ „Eiswürfel herstellen“
beschrieben.

8
EWB6068CB_IM 06.07.23
Problem Mögliche Ursache Abhilfe
Die Kontrollleuchte ICE FULL
leuchtet.
Der Eiswürfelbehälter ist voll. Entleeren Sie den Eiswürfelbehälter.
Die Eiswürfel sind zu klein. Die Umgebungstemperatur ist zu hoch. Stellen Sie das Gerät an einen kühleren
Ort. Sorgen Sie für eine ausreichende
Luftzirkulation um das Gerät.
Die Wassertemperatur ist zu hoch. Stoppen Sie die Eiswürfelproduktion. Las-
sen Sie etwas Wasser ab und füllen Sie
kaltes Wasser (max. 20 °C) nach.
Eiswürfelgröße falsch ausgewählt. Wählen Sie mit der Taste die Größe
LARGE, während sich das Gerät im
Auswahlmodus für die Eiswürfelgröße
bendet.
Bei den ersten Zyklen sind kleinere Eis-
würfel normal.
Die Eiswürfel sind zu groß und
kleben zusammen.
Die Wassertemperatur oder die Umge-
bungstemperatur ist zu niedrig.
Stoppen Sie die Eiswürfelproduktion. Las-
sen Sie etwas Wasser ab und füllen Sie
lauwarmes Wasser (max. 35 °C) nach.
Der Eiswürfelbehälter ist voll,
die Kontrollleuchte ICE FULL
leuchtet aber nicht.
Der Sensor für „Eiswürfelbehälter ist voll“
ist beschädigt.
Wenden Sie sich an unseren Service oder
an einen Fachmann.
Das Gerät ist in Betrieb, produ-
ziert aber keine Eiswürfel.
Verstopfung oder Leck der Kältemittel-
leitung.
Wenden Sie sich an unseren Service oder
an einen Fachmann.
Der Kompressor ist beschädigt.
Der Lüftermotor ist defekt.
Technische Daten
Modell: ............................................................. EWB 6068 CB
Spannungsversorgung: ............................ 220 – 240 V~, 50 Hz
Leistungsaufnahme:......................................................120 W
Eiswürfelkapazität: ........................................ 8 – 10 kg / 24 Std.
Wasserbehälterkapazität: .......................................ca. 1 Liter
Kältemittel:........................................................... R600a / 14 g
Isolationsblähgas: .................................. C5H10 (Cyclopentan)
Klimaklasse: .................................................................. SN / N
Schutzklasse: .........................................................................
Nettogewicht: ...........................................................ca. 6,5 kg
Technische und gestalterische Änderungen im Zuge stetiger
Produktentwicklungen vorbehalten.
Dieses Gerät wurde nach allen zutreffenden, aktuellen
CE-Richtlinien geprüft und nach den neuesten sicherheits-
technischen Vorschriften gebaut.
Entsorgung
Bedeutung des Symbols „Mülltonne“
Schonen Sie unsere Umwelt, Elektrogeräte ge-
hören nicht in den Hausmüll.
Nutzen Sie die für die Entsorgung von Elektro-
geräten vorgesehenen Sammelstellen und
geben dort Ihre Elektrogeräte ab, die Sie nicht
mehr benutzen werden.
Sie helfen damit die potenziellen Auswirkungen, durch
falsche Entsorgung, auf die Umwelt und die menschliche
Gesundheit zu vermeiden.
Sie leisten damit Ihren Beitrag zur Wiederverwertung, zum
Recycling und zu anderen Formen der Verwertung von
Elektro- und Elektronik-Altgeräten.
Informationen, wo die Geräte zu entsorgen sind, erhalten
Sie über Ihre Kommunen oder die Gemeindeverwaltungen.
Ihr Händler und Vertragspartner ist ebenfalls zur kosten-
freien Rücknahme des Altgerätes verpichtet.

EWB6068CB_IM 06.07.23
9
IMPORTANT:
Be sure to read the separately enclosed safety instructions rst.
Instruction Manual
Thank you for choosing our product. We hope you will enjoy
using the appliance.
Read the instruction manual and the separately enclosed
safety instructions very carefully before using this appliance.
Keep these documents, including the warranty certicate,
receipt and, if possible, the box with the inner packaging in
a safe place. If you pass the appliance on to a third party,
always include all the relevant documents.
Symbols in this Instruction Manual
Important information for your safety is specially marked.
It is essential to comply with these instructions in order to
avoid accidents and prevent damage to the appliance:
WARNING:
This warns you of dangers to your health and indicates
possible injury risks.
CAUTION:
This refers to possible hazards to the appliance or other
objects.
Content
Overview of the Components ............................................3
Unpacking the Appliance ...................................................9
Overview of the Components / Scope of Delivery ........... 9
Warnings for the Use of the Appliance ..........................10
Notes for Use .....................................................................10
Location .......................................................................... 10
Electrical Connection .....................................................10
Standby Mode (Ready state) .........................................10
Eco Save (Energy Saving Mode) ..................................10
Interruption of Operation ................................................10
Ice Cubes .......................................................................10
Operation ...........................................................................10
Making Ice Cubes ..........................................................10
Interrupting Ice Cube Production ...................................10
ICE FULL Control Lamp (Ice Cube Container Full) ....... 11
ADD WATER Control Lamp (Water Shortage) .............. 11
Ending Operation ........................................................... 11
Cleaning and Maintenance .............................................. 11
Cleaning Programme ..................................................... 11
Draining Residual Water ................................................ 11
Ice Cube Container ........................................................12
Filter Sieve .....................................................................12
Housing and Interior ....................................................... 12
Storage ............................................................................... 12
Troubleshooting ................................................................12
Technical Data ................................................................... 13
Disposal .............................................................................13
Meaning of the “Dustbin” Symbol ..................................13
Unpacking the Appliance
CAUTION:
When unpacking the appliance and removing the packag-
ing, make sure that the appliance is not tilted more than
45 °, otherwise the cooling compressor may be damaged.
1. Remove the appliance from its packaging.
2. Remove all packaging material, such as foils, lling
material, cable ties and cardboard packaging. Also
remove the tape in the water tank that is attached to x
moving parts.
3. Check the scope of delivery for completeness.
4. If the contents of the packaging are incomplete or if
damage can be detected, do not operate the appliance.
Return it to the dealer immediately.
5. There may still be dust or production residues on the
appliance. We recommend that you clean the appliance
as described under “Cleaning and Maintenance”.
Overview of the Components /
Scope of Delivery
1 Lid
2 Freezing unit
3 Ice cube slider
4 Air inlet
5 Air outlet
6 Filter sieve
7 Water drainage opening
8 Housing
9 button (switching on / off)
10 Control lamps:
ICE FULL (ice cube container full)
ADD WATER (water shortage)
LARGE (large ice cubes)
SMALL (small ice cubes)
11 Water tank
12 Ice cube tray
13 Sensor for the ice cube level in the container
14 Ice scoop

EWB6068CB_IM 06.07.23
10
Warnings for the Use of the Appliance
WARNING:
The appliance contains the refrigerant isobutane
(R600a) in the refrigerant circuit, a natural gas with high
environmental compatibility, which is ammable. When
transporting and setting up the appliance, make sure that
the appliance does not fall down. The refrigerant circuit
should not be damaged.
If the Refrigerant Circuit is Damaged:
• Avoid open ames and sources of ignition at all costs.
• Pull the appliance’s mains plug out of the socket.
• Ventilate the room in which the appliance is located.
CAUTION:
• Be sure to observe the waiting time of 2 hours when
using the appliance for the rst time or after transport,
so that the refrigerant can settle. Otherwise, the refrig-
eration compressor would be damaged.
• If you interrupt ice cube production with the button,
wait at least 3 minutes before switching the appliance
on again to avoid damaging the compressor.
• Do not disconnect the appliance from the mains while
the cleaning programme is running!
• Never operate the appliance without the lter sieve!
Notes for Use
Location
• Place the appliance on a stable, horizontal, water-resist-
ant and level surface. Keep a distance of at least 10 cm
from walls or objects.
• Do not place the appliance on or in the immediate vicinity
of heat sources such as stoves, radiators, etc.
Electrical Connection
• Check that the mains voltage you intend to use matches
that of the appliance. You will nd the information on the
type plate.
• Only connect the appliance to a properly installed
earthed socket.
Standby Mode (Ready state)
The control lamp SMALL ashes.
Eco Save (Energy Saving Mode)
The appliance switches off when the ice cube container
is full. You benet from increased safety and lower power
consumption.
Interruption of Operation
After an interruption due to lack of water, full ice cube con-
tainer, manual stop or power failure, the compressor starts
with a delay of 3 minutes after it is switched on again.
Ice Cubes
• You can choose between two sizes:
- SMALL (small)
- LARGE (large)
• Ice cubes from the rst production cycle should not be
used for hygienic reasons.
• The best results are achieved at a water temperature
between 7 °C and 20 °C and an ambient temperature
between 16 °C and 25 °C.
• Depending on the water and ambient temperature, the
rst ice cubes are smaller. Only in the following cycles do
the ice cubes become larger.
• Due to the rapid freezing, the ice cubes may look “milky”.
This is air trapped in the water. This does not affect the
quality of the ice cubes.
• If you want ice cubes with a clear appearance, use drink-
ing water that has previously been boiled and cooled.
Operation
When using the appliance for the rst time or if you have
not used it for a long time, clean the appliance as described
in the chapter “Cleaning and Maintenance”. Use the appli-
ance’s cleaning programme.
Making Ice Cubes
1. Make sure that the water drain opening at the bottom of
the appliance is tightly closed.
2. Open the lid and remove the ice cube container.
3. There is a lter at the bottom of the water tank. Make
sure that it is rmly inserted.
4. There is an arrow in the water tank below the MAX mark.
Fill approx. 1 litre of fresh water into the water tank, up
to a maximum of below the arrow (minimum quantity:
500 ml). Only use drinking water to make ice cubes.
5. Reinsert the ice cube container and close the lid.
6. Insert the mains plug into the socket.
7. Press the button once. The control lamps LARGE and
SMALL ash alternately. The appliance is in ice cube
size selection mode.
8. When the control lamp of the desired ice cube size lights
up, press the button again. The compressor switches
on. Ice cube production starts.
- Keep the lid closed during ice cube production.
- One ice cube production cycle takes between 8 and
10 minutes.
Interrupting Ice Cube Production
Press the button to stop ice cube production. The control
lamp SMALL ashes.
• If operation is interrupted manually, the water that is not
needed is returned to the water tank. Only then does the
appliance switch off. Half-nished ice cubes remain stuck
on the cooling bars. As soon as they have thawed a little,
they detach and fall off.

EWB6068CB_IM 06.07.23
11
• Please note that ice splinters can form and block the ice
cube slide. In this case, after switching on, the mecha-
nism is moved back and forth until it is free again.
- If you want to remove the ice splinters yourself, rst
pull the mains plug out of the socket.
• Note the waiting time of at least 3 minutes if you want to
continue the operation.
• You can change the size of the ice cubes as long as the
compressor is switched off.
ICE FULL Control Lamp (Ice Cube Container Full)
As soon as the ice cube container is full, production stops.
The ICE FULL control lamp lights up. The compressor
switches off.
1. Remove the ice cubes. If necessary, use the enclosed
ice scoop. When removing the ice cube container, some
water drips through the holes at the bottom.
2. After the ICE FULL control lamp goes out, ice cube pro-
duction starts again automatically after a while.
ADD WATER Control Lamp (Water Shortage)
The control lamp indicates when there is not enough water
in the water tank. Ice cube production is automatically
interrupted.
1. Open the lid.
2. Empty the ice cube container.
3. Rell with drinking water as described in “Making Ice
Cubes”. As there may still be residual water in the appli-
ance, observe the MAX marking in the water tank.
4. Reinsert the ice cube container and close the lid.
5. Press the button. The ADD WATER control lamp goes
out. The appliance is in standby mode again. You can
continue with the operation.
Ending Operation
1. Press the button to stop ice cube production. The
control lamp SMALL ashes.
2. Unplug the mains plug from the socket.
3. Remove the ice cube container.
4. Drain the remaining water as described in “Cleaning and
Maintenance”.
5. Leave the lid of the appliance open so that no fungal
cultures or bacteria can form.
Cleaning and Maintenance
WARNING:
• Switch off the appliance before maintenance and cleaning. Pull
the mains plug out of the socket.
• Never immerse the appliance in water for cleaning. It could
cause an electric shock or re.
CAUTION:
• Do not use a wire brush or other abrasive objects.
• Do not use harsh or abrasive cleaners.
• Do not use chemicals, acids, petrol or oil.
Cleaning Programme
With this programme, the water system is rinsed several
times. The process takes about 5 minutes.
Important! The appliance should not be disconnected from
the mains during the cleaning programme.
1. There is an arrow in the water tank below the MAX mark.
Fill approx. 1 litre of fresh water into the water tank, up to
a maximum of below the arrow.
2. While the appliance is in standby mode, press and hold
the button for about 2 seconds. The appliance starts
the cleaning programme. The four control lamps ash
alternately.
3. The appliance automatically switches to standby mode
when the cleaning programme is nished.
4. Drain the water from the appliance. Dispose of the water.
Draining Residual Water
Drain the residual water after each use of the appliance or
at the end of the day.
1. Place the appliance on the edge of a table. Hold a bowl
under the water drain opening.
2. Pull out the plug at the bottom.
3. After the residual water has drained off, put the plug back
in the opening.

EWB6068CB_IM 06.07.23
12
Ice Cube Container
Remove the ice cube container. Clean it in warm rinse water
with a little hand dishwashing liquid. Rinse with clean water.
Filter Sieve
Clean the lter sieve at regular intervals to remove limes-
cale deposits.
1. Pull the lter sieve off the bottom of the water tank.
2. Rinse the lter sieve under running water. You can use a
nylon brush to help.
3. Put the lter sieve back on the pins at the bottom of the
water tank.
CAUTION:
Never use the appliance without the lter sieve!
Housing and Interior
• Clean the housing and the inside of the appliance with a
damp cloth. Make sure that no moisture gets into the air
inlet or air outlet openings.
• Use a diluted solution of vinegar and water.
• Wipe the inside of the appliance dry.
Storage
• Allow the interior of the appliance to dry completely
before closing the lid and storing the appliance.
• We recommend storing the appliance in its original
packaging if you do not intend to use it for a long period
of time.
• Always store the appliance out of the reach of children in
a well-ventilated and dry place.
Troubleshooting
Problem Possible Cause Remedy
The appliance has no
function.
The appliance has no power supply. Check the power socket with another appliance.
Insert the mains plug correctly.
Check the house fuse.
The appliance is defective. Contact our service or a specialist.
The compressor makes
abnormal noises.
The mains voltage is too low. Switch off the appliance and check the mains
voltage.
The ADD WATER control
lamp lights up.
Water shortage. Rell with water as described in the chapter
“Operation” “Making ice cubes”.
The ICE FULL control lamp
lights up.
The ice cube container is full. Empty the ice cube container.
The ice cubes are too small. The ambient temperature is too high. Move the appliance to a cooler place. Ensure
sufcient air circulation around the appliance.
The water temperature is too high. Stop the ice cube production. Drain some water
and rell with cold water (max. 20 °C).
Ice cube size incorrectly selected. Select the LARGE size with the button while
the appliance is in ice cube size selection mode.
Smaller ice cubes are normal for the
rst few cycles.
The ice cubes are too big and
stick together.
The water temperature or the ambient
temperature is too low.
Stop the ice cube production. Drain some water
and rell with lukewarm water (max. 35 °C).
The ice cube container is full,
but the ICE FULL control lamp
does not light up.
The sensor for “ice cube container is
full” is damaged.
Contact our service or a specialist.
The appliance is operating but
not producing ice cubes.
Blockage or leakage of the refrigerant
pipe.
Contact our service or a specialist.
The compressor is damaged.
The fan motor is defective.

EWB6068CB_IM 06.07.23
13
Technical Data
Model:.............................................................. EWB 6068 CB
Power supply:........................................... 220 – 240 V~, 50 Hz
Power consumption: .....................................................120 W
Ice cube production: ................................... 8 – 10 kg / 24 hours
Water container volume: ................................... approx. 1 litre
Refrigerant: ......................................................... R600a / 14 g
Insulation blowing gas:......................... C5H10 (Cyclopentane)
Climate class: ................................................................ SN / N
Protection class: .....................................................................
Net weight: ....................................................... approx. 6.5 kg
The right to make technical and design modications in
the course of continuous product development remains
reserved.
This appliance has been tested according to all applicable,
current CE directives and built according to the latest safety
regulations.
Disposal
Meaning of the “Dustbin” Symbol
Protect our environment: do not dispose of elec-
trical equipment in the domestic waste.
Please return any electrical equipment that
you will no longer use to the collection points
provided for their disposal.
This helps avoid the potential effects of incorrect disposal
on the environment and human health.
This will contribute to the recycling and other forms of
re-utilisation of electrical and electronic equipment.
Information concerning where the equipment can be
disposed of can be obtained from your local authority. Your
dealer and contractual partner is also obliged to take back
the old appliance free of charge.

EWB6068CB_IM 06.07.23
14
BELANGRIJK:
Lees eerst de apart bijgevoegde veiligheidsinstructies.
Gebruiksaanwijzing
Dank u voor het kiezen van ons product. Wij hopen dat u
het gebruik van het apparaat zult genieten.
Lees de gebruiksaanwijzing en de apart bijgevoegde
veiligheidsinstructies zorgvuldig door voordat u dit apparaat
in gebruik neemt. Bewaar deze documenten, inclusief het
garantiebewijs, de kassabon en, indien mogelijk, de doos
met de binnenverpakking op een veilige plaats. Als u het
apparaat aan een derde doorgeeft, voeg dan altijd alle
relevante documenten bij.
Symbolen in deze gebruiksaanwijzing
Belangrijke aanwijzingen voor uw veiligheid zijn speciaal
gekenmerkt. Neem deze aanwijzingen strikt in acht om
ongevallen en schade aan het apparaat te vermijden:
WAARSCHUWING:
Waarschuwt voor gevaren voor uw gezondheid en toont
mogelijk letsel risico’s.
LET OP:
Wijst op mogelijke gevaren voor het apparaat of andere
voorwerpen.
Inhoud
Overzicht van de bedieningselementen ...........................3
Het apparaat uitpakken ....................................................14
Overzicht van de bedieningselementen /
Omvang van de levering ..................................................14
Waarschuwingen voor het gebruik van het apparaat...15
Opmerkingen voor het gebruik .......................................15
Locatie ............................................................................ 15
Elektrische aansluiting ...................................................15
Stand-by modus (Gereedstatus) ...................................15
Eco Save (Energiebesparingsmodus) ........................... 15
Onderbreking van de werking ........................................ 15
IJsblokjes ........................................................................15
Bediening ...........................................................................15
Ijsblokjes maken .............................................................15
De productie van ijsblokjes onderbreken .......................16
Controlelampje ICE FULL (bakje met ijsblokjes vol) .....16
Controlelampje ADD WATER (tekort aan water) ........... 16
Beëindigen van de werking ............................................ 16
Reiniging en onderhoud ..................................................16
Reinigingsprogramma ....................................................16
Restwater afvoeren ........................................................ 17
IJsblokjescontainer .........................................................17
Filterzeef .........................................................................17
Behuizing en interieur ....................................................17
Bewaren .............................................................................17
Problemen oplossen ........................................................17
Technische gegevens .......................................................18
Verwijdering .......................................................................18
Betekenis van het symbool “vuilnisemmer” ...................18
Het apparaat uitpakken
LET OP:
Zorg er bij het uitpakken van het apparaat en het verwij-
deren van de verpakking voor dat het apparaat niet meer
dan 45 ° gekanteld wordt, anders kan de koelcompressor
beschadigd raken.
1. Neem het apparaat uit de verpakking.
2. Verwijder al het verpakkingsmateriaal, zoals folies,
vulmateriaal, kabelbinders en kartonnen verpakkingen.
Verwijder ook de tape in de watertank die vastzit aan
bewegende delen.
3. Controleer de inhoud van de verpakking op volledigheid.
4. Als de inhoud van de verpakking onvolledig is of als er
beschadigingen kunnen worden vastgesteld, mag u het
apparaat niet in gebruik nemen. Breng het onmiddellijk
terug naar de dealer.
5. Er kunnen zich nog stof- of productieresten op het appa-
raat bevinden. Wij adviseren u het apparaat te reinigen
zoals beschreven onder “Reiniging en onderhoud”.
Overzicht van de bedieningselementen /
Omvang van de levering
1 Deksel
2 Vriesvak
3 Schuif voor ijsblokjes
4 Luchtinlaat
5 Luchtuitlaat
6 Filterzeef
7 Opening voor waterafvoer
8 Behuizing
9 toets (in- / uitschakelen)
10 Controlelampjes:
ICE FULL (bakje met ijsblokjes vol)
ADD WATER (tekort aan water)
LARGE (grote ijsblokjes)
SMALL (kleine ijsblokjes)
11 Waterreservoir
12 IJsblokjesbakje
13 Sensor voor het ijsblokjesniveau in het bakje
14 Ijslepel

EWB6068CB_IM 06.07.23
15
Waarschuwingen voor het
gebruik van het apparaat
WAARSCHUWING:
Het apparaat bevat het koelmiddel isobutaan (R600a) in
het koelcircuit, een natuurlijk gas met een hoge milieu-
compatibiliteit, dat brandbaar is. Let er bij het transporte-
ren en opstellen van het apparaat op dat het niet valt. Het
koelcircuit mag niet worden beschadigd.
Als het koelmiddelcircuit beschadigd is:
• Vermijd open vuur en ontstekingsbronnen.
• Trek de stekker van het apparaat uit het stopcontact.
• Ventileer de ruimte waarin het apparaat zich bevindt.
LET OP:
• Zorg ervoor dat u de wachttijd van 2 uur in acht neemt
wanneer u het apparaat voor het eerst of na transport
gebruikt, zodat het koelmiddel kan bezinken. Anders
zou de koelcompressor beschadigd raken.
• Als u de productie van ijsblokjes onderbreekt met de
toets, wacht dan ten minste 3 minuten voordat u het
apparaat weer inschakelt om schade aan de compres-
sor te voorkomen.
• Haal de stekker van het apparaat niet uit het stopcontact
terwijl het reinigingsprogramma loopt!
• Gebruik het apparaat nooit zonder lterzeef!
Opmerkingen voor het gebruik
Locatie
• Plaats het apparaat op een stabiele, horizontale, water-
bestendige en vlakke ondergrond. Houd minstens 10 cm
afstand tot muren of voorwerpen.
• Plaats het apparaat niet op of in de onmiddellijke nabij-
heid van warmtebronnen zoals kachels, radiatoren, enz.
Elektrische aansluiting
• Controleer de netspanning die u wilt gebruiken overeen-
komt met die van het apparaat. U vindt de informatie op
het typeplaatje.
• Sluit het apparaat alleen aan op een correct geïnstal-
leerd geaard stopcontact.
Stand-by modus (Gereedstatus)
Het controlelampje SMALL knippert.
Eco Save (Energiebesparingsmodus)
Het apparaat schakelt uit wanneer het ijsblokjesreservoir
vol is. U proteert van meer veiligheid en een lager stroom-
verbruik.
Onderbreking van de werking
Na een onderbreking door watergebrek, een volle ijsblok-
jescontainer, handmatige stop of stroomuitval start de
compressor met een vertraging van 3 minuten nadat hij
weer is ingeschakeld.
IJsblokjes
• U kunt kiezen uit twee formaten:
- SMALL (klein)
- LARGE (groot)
• IJsblokjes uit de eerste productiecyclus mogen om hygi-
enische redenen niet worden gebruikt.
• De beste resultaten worden bereikt bij een watertempe-
ratuur tussen 7 °C en 20 °C en een omgevingstempera-
tuur tussen 16 °C en 25 °C.
• Afhankelijk van de water- en omgevingstemperatuur
zijn de eerste ijsblokjes kleiner. Pas in de volgende cycli
worden de ijsblokjes groter.
• Door het snelle bevriezen kunnen de ijsblokjes er “mel-
kachtig” uitzien. Dit is lucht die in het water gevangen zit.
Dit heeft geen invloed op de kwaliteit van de ijsblokjes.
• Als je ijsblokjes met een helder uiterlijk wilt, gebruik dan
drinkwater dat van tevoren gekookt en afgekoeld is.
Bediening
Als u het apparaat voor het eerst gebruikt of als u het lange
tijd niet hebt gebruikt, reinig het dan zoals beschreven in het
hoofdstuk “Reiniging en onderhoud”. Gebruik het reinigings-
programma van het apparaat.
Ijsblokjes maken
1. Zorg ervoor dat de waterafvoeropening aan de onder-
kant van het apparaat goed gesloten is.
2. Open het deksel en verwijder het ijsblokjesreservoir.
3. Er zit een lter op de bodem van het waterreservoir. Zorg
ervoor dat het goed vastzit.
4. Er staat een pijl in het waterreservoir onder de MAX-mar-
kering. Vul ongeveer 1 liter vers water in het waterreser-
voir, tot maximaal onder de pijl (minimumhoeveelheid:
500 ml). Gebruik alleen drinkwater om ijsblokjes te
maken.
5. Plaats het ijsblokjesreservoir terug en sluit het deksel.
6. Steek de stekker in het stopcontact.
7. Druk één keer op de toets. De controlelampjes
LARGE en SMALL knipperen afwisselend. Het apparaat
staat in de selectiemodus voor ijsblokjesformaat.
8. Wanneer het controlelampje van het gewenste ijsblok-
jesformaat brandt, drukt u nogmaals op de toets. De
compressor wordt ingeschakeld. De ijsblokjesproductie
start.
- Houd het deksel gesloten tijdens de ijsblokjespro-
ductie.
- Eén ijsblokjesproductiecyclus duurt tussen de 8 en
10 minuten.

EWB6068CB_IM 06.07.23
16
De productie van ijsblokjes onderbreken
Druk op de toets om de ijsblokjesproductie te stoppen.
Het controlelampje SMALL knippert.
• Als de bediening handmatig wordt onderbroken, wordt
het water dat niet nodig is teruggevoerd naar het
waterreservoir. Pas dan schakelt het apparaat uit. Half
afgewerkte ijsblokjes blijven aan de koelstaven hangen.
Zodra ze een beetje ontdooid zijn, komen ze los en
vallen ze eraf.
• Let op: er kunnen zich ijssplinters vormen die de ijsblok-
jesslede blokkeren. In dit geval wordt het mechanisme
na het inschakelen heen en weer bewogen tot het weer
vrij is.
- Als je de ijssplinters zelf wilt verwijderen, trek dan
eerst de stekker uit het stopcontact.
• Houd rekening met een wachttijd van minstens 3 minu-
ten als je de bediening wilt voortzetten.
• U kunt de grootte van de ijsblokjes wijzigen zolang de
compressor uitgeschakeld is.
Controlelampje ICE FULL (bakje met ijsblokjes vol)
Zodra de ijsblokjescontainer vol is, stopt de productie. Het
controlelampje ICE FULL gaat branden. De compressor
schakelt uit.
1. Verwijder de ijsblokjes. Gebruik indien nodig het bijge-
leverde ijsschepje. Wanneer u de ijsblokjescontainer
verwijdert, druppelt er wat water door de gaten aan de
onderkant.
2. Nadat het controlelampje ICE FULL dooft, start de pro-
ductie van ijsblokjes na enige tijd automatisch weer.
Controlelampje ADD WATER (tekort aan water)
Het controlelampje geeft aan wanneer er niet genoeg water
in het waterreservoir zit. De productie van ijsblokjes wordt
automatisch onderbroken.
1. Open het deksel.
2. Maak de container met ijsblokjes leeg.
3. Vul bij met drinkwater zoals beschreven in “Ijsblokjes
maken”. Let op de MAX-markering in het waterreservoir
omdat er nog restwater in het apparaat kan zitten.
4. Plaats de ijsblokjescontainer terug en sluit het deksel.
5. Druk op de toets. Het controlelampje ADD WATER
gaat uit. Het apparaat staat weer in stand-by. U kunt
doorgaan met de bediening.
Beëindigen van de werking
1. Druk op de toets om de productie van ijsblokjes te
stoppen. Het controlelampje SMALL knippert.
2. Verwijder de container met ijsblokjes.
3. Laat het resterende water weglopen zoals beschreven in
“Reiniging en onderhoud”.
4. Laat het deksel van het apparaat open zodat zich geen
schimmelculturen of bacteriën kunnen vormen.
Reiniging en onderhoud
WAARSCHUWING:
• Schakel het apparaat uit voor onderhoud en reiniging. Trek de
stekker uit het stopcontact.
• Dompel het apparaat nooit onder in water om het schoon te ma-
ken. Dit kan een elektrische schok of brand veroorzaken.
LET OP:
• Gebruik geen staalborstel of andere schurende
voorwerpen.
• Gebruik geen agressieve of schurende reinigingsmid-
delen.
• Gebruik geen chemicaliën, zuren, benzine of olie.
Reinigingsprogramma
Met dit programma wordt het watersysteem meerdere keren
gespoeld. Het proces duurt ongeveer 5 minuten.
Belangrijk! Het apparaat mag tijdens het reinigingspro-
gramma niet van het lichtnet worden losgekoppeld.
1. Er staat een pijl in het waterreservoir onder de MAX-mar-
kering. Vul ongeveer 1 liter vers water in het waterreser-
voir, tot maximaal onder de pijl.
2. Terwijl het apparaat in stand-by staat, houdt u de toets
ongeveer 2 seconden ingedrukt. Het apparaat start het
reinigingsprogramma. De vier controlelampjes knipperen
afwisselend.
3. Het apparaat schakelt na aoop van het reinigingspro-
gramma automatisch terug naar de stand-bymodus.
4. Laat het water uit het apparaat lopen. Gooi het water
weg.

EWB6068CB_IM 06.07.23
17
Restwater afvoeren
Laat het restwater na elk gebruik van het apparaat of aan
het einde van de dag weglopen.
1. Plaats het apparaat op de rand van een tafel. Houd een
kom onder de waterafvoeropening.
2. Trek de stop aan de onderkant eruit.
3. Nadat het restwater is weggelopen, steekt u de stop
weer in de opening.
IJsblokjescontainer
Verwijder de ijsblokjescontainer. Maak het schoon in warm
spoelwater met een beetje handafwasmiddel. Spoel na met
schoon water.
Filterzeef
Reinig de lterzeef regelmatig om kalkafzetting te verwij-
deren.
1. Trek de lterzeef van de bodem van het waterreservoir.
2. Spoel de lterzeef af onder stromend water. Je kunt
hierbij een nylon borstel gebruiken.
3. Zet de lterzeef terug op de pinnen onder in het water-
reservoir.
LET OP:
Gebruik het apparaat nooit zonder de lterzeef!
Behuizing en interieur
• Maak de behuizing en de binnenkant van het apparaat
schoon met een vochtige doek. Zorg ervoor dat er geen
vocht in de luchtinlaat- of luchtuitlaatopeningen komt.
• Gebruik een verdunde oplossing van azijn en water.
• Veeg de binnenkant van het apparaat droog.
Bewaren
• Laat de binnenkant van het apparaat volledig drogen
voordat u het deksel sluit en het apparaat opbergt.
• Wij raden aan het apparaat in de oorspronkelijke verpak-
king op te bergen als u het langere tijd niet gebruikt.
• Bewaar het apparaat altijd buiten het bereik van kinderen
op een goed geventileerde en droge plaats.
Problemen oplossen
Probleem Mogelijke oorzaak Remedie
Het apparaat werkt niet. Het apparaat heeft geen stroomvoor-
ziening.
Controleer het stopcontact met een ander
apparaat.
Steek de netstekker er goed in.
Controleer de huiszekering.
Het apparaat is defect. Neem contact op met onze service of een
specialist.
De compressor maakt abnormale
geluiden.
De netspanning is te laag. Schakel het apparaat uit en controleer de
netspanning.
Het controlelampje ADD WATER
gaat branden.
Watergebrek. Vul water bij zoals beschreven in het
hoofdstuk “Bediening” “Ijsblokjes
maken”.
Het controlelampje ICE FULL
gaat branden.
De ijsblokjescontainer is vol. Maak de container met ijsblokjes leeg.
De ijsblokjes zijn te klein. De omgevingstemperatuur is te hoog. Verplaats het apparaat naar een koelere
plaats. Zorg voor voldoende luchtcirculatie
rond het apparaat.
De watertemperatuur is te hoog. Stop de productie van ijsblokjes. Laat wat
water weglopen en vul het opnieuw met
koud water (max. 20 °C).
De grootte van de ijsblokjes is verkeerd
gekozen.
Selecteer het formaat LARGE met de
toets terwijl het apparaat in de selectie-
modus voor ijsblokjes staat.
Kleinere ijsblokjes zijn normaal tijdens de
eerste paar cycli.

EWB6068CB_IM 06.07.23
18
Probleem Mogelijke oorzaak Remedie
De ijsblokjes zijn te groot en
plakken aan elkaar.
De watertemperatuur of de omgevings-
temperatuur is te laag.
Stop de productie van ijsblokjes. Giet
wat water af en vul het bij met lauw water
(max. 35 °C).
De container met ijsblokjes is
vol, maar het controlelampje
ICE FULL gaat niet branden.
De sensor voor “ijsblokjescontainer is vol”
is beschadigd.
Neem contact op met onze service of een
specialist.
Het apparaat werkt, maar produ-
ceert geen ijsblokjes.
Verstopping of lekkage van de koelmid-
delleiding.
Neem contact op met onze service of een
specialist.
De compressor is beschadigd.
De ventilatormotor is defect.
Technische gegevens
Model:.............................................................. EWB 6068 CB
Stroomvoorziening: .................................. 220 – 240 V~, 50 Hz
Stroomverbruik: .............................................................120 W
Productie van ijsblokjes: ................................8 – 10 kg / 24 uur
Volume watercontainer: .........................................ong. 1 liter
Koelmiddel: ......................................................... R600a / 14 g
Isolatie blaasgas: ................................. C5H10 (Cyclopentaan)
Klimaatklasse: ............................................................... SN / N
Beschermingsklasse: .............................................................
Nettogewicht: ........................................................ ong. 6,5 kg
Het recht om technische en ontwerpaanpassingen te ma-
ken in de loop van voortdurende productontwikkeling blijft
voorbehouden.
Dit apparaat is getest volgens alle van toepassing zijnde,
huidige CE-richtlijnen en gebouwd volgens de meest
recente veiligheidsvoorschriften.
Verwijdering
Betekenis van het symbool “vuilnisemmer”
Bescherm ons milieu, elektrische apparaten ho-
ren niet in het huisafval.
Maak voor het afvoeren van elektrische appara-
ten gebruik van de voorgeschreven verzamel-
punten en geef daar de elektrische apparaten af
die u niet meer gebruikt.
Daardoor helpt u de potentiële effecten te voorkomen
die een verkeerde afvoer op het milieu en de menselijke
gezondheid kunnen hebben.
Op deze wijze levert u uw bijdrage aan het hergebruik, de
recycling en andere verwerkingsvormen voor oude elektro-
nische en elektrische apparaten.
Voor informatie over verzamelpunten voor uw apparaten
kunt u contact opnemen met uw gemeente of gemeen-
teadministratie. Uw dealer en contractpartner is bovendien
verplicht het oude apparaat gratis terug te nemen.

EWB6068CB_IM 06.07.23
19
IMPORTANT :
Veillez à lire d’abord les instructions de sécurité jointes séparé-
ment.
Mode d’emploi
Merci d’avoir choisi notre produit. Nous espérons que vous
saurez proter votre appareil.
Lisez très attentivement le mode d’emploi et les consignes
de sécurité jointes séparément avant d’utiliser cet appareil.
Conservez ces documents, y compris le certicat de garan-
tie, le reçu et, si possible, la boîte avec l’emballage intérieur
dans un endroit sûr. Si vous transmettez l’appareil à un
tiers, joignez toujours tous les documents pertinents.
Symboles de ce mode d’emploi
Les informations importantes pour votre sécurité sont
particulièrement indiquées. Veillez à bien respecter ces
indications an d’éviter tout risque d’accident ou d’endom-
magement de l’appareil :
AVERTISSEMENT :
Prévient des risques pour votre santé et des risques
éventuels de blessure.
ATTENTION :
Indique les risques pour l’appareil ou tout autre appareil.
Sommaire
Liste des différents éléments de commande ..................3
Déballage de l’appareil ..................................................... 19
Liste des différents éléments de commande /
Contenu de la livraison ....................................................19
Avertissements pour l’utilisation de l’appareil..............20
Notes d’utilisation ............................................................. 20
Emplacement .................................................................20
Branchement électrique ................................................. 20
Mode veille (état prêt) ....................................................20
Eco Save (Mode économie d’énergie) ..........................20
Interruption du fonctionnement ......................................20
Glaçons ..........................................................................20
Utilisation ........................................................................... 20
Fabrication de glaçons ................................................... 20
Interruption de la production de glaçons .......................21
Témoin de contrôle ICE FULL
(récipient à glaçons plein) ..............................................21
Témoin de contrôle ADD WATER (manque d’eau) .......21
Fin de l’opération ............................................................21
Nettoyage et maintenance ............................................... 21
Programme de nettoyage ..............................................22
Vidange de l’eau résiduelle ............................................22
Récipient à glaçons ........................................................ 22
Tamis du ltre .................................................................22
Boîtier et intérieur ........................................................... 22
Stockage ............................................................................22
Dépannage .........................................................................22
Données techniques .........................................................23
Élimination .........................................................................23
Signication du symbole « Poubelle » ...........................23
Déballage de l’appareil
ATTENTION :
Lorsque vous déballez l’appareil et que vous détachez
l’emballage, veillez à ce que l’appareil ne soit pas incliné
à plus de 45 °, sous peine d’endommager le compresseur
de refroidissement.
1. Sortez l’appareil de son emballage.
2. Retirez tous les matériaux d’emballage, tels que les
feuilles, les matériaux de remplissage, les attaches de
câbles et les emballages en carton. Retirez également
le ruban adhésif dans le réservoir d’eau qui est attaché
pour xer les pièces mobiles.
3. Vériez que le contenu de la livraison est complet.
4. Si le contenu de l’emballage est incomplet ou si des dom-
mages peuvent être détectés, n’utilisez pas l’appareil.
Retournez-le immédiatement au revendeur.
5. L’appareil peut encore contenir de la poussière ou
des résidus de production. Nous vous recommandons
de nettoyer l’appareil comme indiqué dans la section
« Nettoyage et maintenance ».
Liste des différents éléments de
commande / Contenu de la livraison
1 Couvercle
2 Unité de congélation
3 Glissière à glaçons
4 Entrée d’air
5 Sortie d’air
6 Tamis du ltre
7 Orice d’évacuation de l’eau
8 Boîtier
9 Bouton (marche / arrêt)
10 Témoins de contrôle :
ICE FULL (récipient à glaçons plein)
ADD WATER (manque d’eau)
LARGE (gros glaçons)
SMALL (petits glaçons)

EWB6068CB_IM 06.07.23
20
11 Réservoir d’eau
12 Bac à glaçons
13 Capteur de niveau de glaçons dans le récipient
14 Pelle à glaçons
Avertissements pour
l’utilisation de l’appareil
AVERTISSEMENT :
L’appareil contient dans le circuit frigorique de l’iso-
butane (R600a), un gaz naturel à haute compatibilité
environnementale, qui est inammable. Lors du transport
et de l’installation de l’appareil, veillez à ce que l’appareil
ne tombe pas. Le circuit de réfrigération ne doit pas être
endommagé.
Si le circuit frigorique est endommagé :
• Évitez à tout prix les ammes nues et les sources
d’inammation.
• Débranchez la che secteur de l’appareil.
• Aérez la pièce dans laquelle se trouve l’appareil.
ATTENTION :
• Lors de la première utilisation de l’appareil ou après
le transport, veillez à respecter le temps d’attente de
2 heures an que le réfrigérant puisse se stabiliser.
Dans le cas contraire, le compresseur frigorique
serait endommagé.
• Si vous interrompez la production de glaçons à l’aide
du bouton , attendez au moins 3 minutes avant de
remettre l’appareil en marche an d’éviter d’endomma-
ger le compresseur.
• Ne débranchez pas l’appareil lorsque le programme de
nettoyage est en cours !
• Ne jamais faire fonctionner l’appareil sans le ltre à
tamis !
Notes d’utilisation
Emplacement
• Placez l’appareil sur une surface stable, horizontale,
résistante à l’eau et plane. Gardez une distance d’au
moins 10 cm par rapport aux murs ou aux objets.
• Ne pas placer l’appareil sur ou à proximité immédiate de
sources de chaleur telles que poêles, radiateurs, etc.
Branchement électrique
• Vériez que la tension secteur que vous souhaitez utili-
ser correspond à celle de l’appareil. Vous trouverez ces
informations sur la plaque signalétique.
• Ne branchez l’appareil que sur une prise de courant
correctement installée et reliée à la terre.
Mode veille (état prêt)
Le témoin de contrôle SMALL clignote.
Eco Save (Mode économie d’énergie)
L’appareil s’éteint lorsque le récipient à glaçons est plein.
Vous bénéciez d’une sécurité accrue et d’une consomma-
tion d’énergie réduite.
Interruption du fonctionnement
Après une interruption due à un manque d’eau, à un
récipient à glaçons plein, à un arrêt manuel ou à une panne
de courant, le compresseur démarre avec un délai de 3 mi-
nutes après sa remise en marche.
Glaçons
• Vous avez le choix entre deux tailles :
- SMALL (petit)
- LARGE (grand)
• Les glaçons issus du premier cycle de production ne
doivent pas être utilisés pour des raisons d’hygiène.
• Les meilleurs résultats sont obtenus avec une tempéra-
ture de l’eau comprise entre 7 °C et 20 °C et une tempé-
rature ambiante comprise entre 16 °C et 25 °C.
• En fonction de la température de l’eau et de la tempéra-
ture ambiante, les premiers glaçons sont plus petits. Ce
n’est qu’au cours des cycles suivants que les glaçons
deviennent plus gros.
• En raison de la congélation rapide, les glaçons peuvent
avoir un aspect « laiteux ». Il s’agit d’air emprisonné
dans l’eau. Cela n’affecte pas la qualité des glaçons.
• Si vous souhaitez obtenir des glaçons d’aspect clair, utili-
sez de l’eau potable préalablement bouillie et refroidie.
Utilisation
Lorsque vous utilisez l’appareil pour la première fois ou si
vous ne l’avez pas utilisé depuis longtemps, nettoyez-le
comme décrit dans le chapitre « Nettoyage et mainte-
nance ». Utilisez le programme de nettoyage de l’appareil.
Fabrication de glaçons
1. Assurez-vous que l’orice d’évacuation de l’eau situé en
bas de l’appareil est bien fermé.
2. Ouvrez le couvercle et retirez le récipient à glaçons.
3. Un ltre se trouve au fond du réservoir d’eau. Assu-
rez-vous qu’il est bien inséré.
4. Une èche se trouve dans le réservoir d’eau sous le
repère MAX. Remplissez le réservoir d’eau avec environ
1 litre d’eau fraîche, jusqu’à un maximum situé sous la
èche (quantité minimale : 500 ml). N’utilisez que de
l’eau potable pour faire des glaçons.
5. Remettez le récipient à glaçons en place et fermez le
couvercle.
6. Branchez la che d’alimentation dans la prise de
courant.
7. Appuyez une fois sur le bouton . Les témoins de
contrôle LARGE et SMALL clignotent alternativement.

EWB6068CB_IM 06.07.23
21
L’appareil est en mode de sélection de la taille des
glaçons.
8. Lorsque le témoin de contrôle de la taille de glaçons
souhaitée s’allume, appuyez à nouveau sur le bouton
. Le compresseur se met en marche. La production de
glaçons commence.
- Laissez le couvercle fermé pendant la production de
glaçons.
- Un cycle de production de glaçons dure entre 8 et
10 minutes.
Interruption de la production de glaçons
Appuyez sur le bouton pour arrêter la production de
glaçons. Le témoin de contrôle SMALL clignote.
• Si le fonctionnement est interrompu manuellement, l’eau
non utilisée est renvoyée dans le réservoir d’eau. Ce
n’est qu’ensuite que l’appareil s’éteint. Les glaçons à
moitié terminés restent coincés sur les barres de refroi-
dissement. Dès qu’ils ont un peu dégelé, ils se détachent
et tombent.
• Veuillez noter que des éclats de glace peuvent se former
et bloquer la glissière à glaçons. Dans ce cas, après la
mise en marche, le mécanisme est déplacé d’avant en
arrière jusqu’à ce qu’il soit à nouveau libre.
- Si vous souhaitez retirer vous-même les éclats de
glace, débranchez d’abord la che secteur de la prise
de courant.
• Respectez le temps d’attente d’au moins 3 minutes si
vous souhaitez poursuivre l’opération.
• Vous pouvez modier la taille des glaçons tant que le
compresseur est éteint.
Témoin de contrôle ICE FULL (récipient à glaçons plein)
Dès que le récipient à glaçons est plein, la production
s’arrête. Le témoin de contrôle ICE FULL s’allume. Le
compresseur s’arrête.
1. Retirez les glaçons. Si nécessaire, utilisez la cuillère à
glace fournie. Lorsque vous retirez le bac à glaçons, un
peu d’eau s’écoule par les trous situés au fond.
2. Lorsque le témoin de contrôle ICE FULL s’éteint, la
production de glaçons reprend automatiquement au bout
d’un certain temps.
Témoin de contrôle ADD WATER (manque d’eau)
Le témoin de contrôle indique qu’il n’y a pas assez d’eau
dans le réservoir d’eau. La production de glaçons est auto-
matiquement interrompue.
1. Ouvrez le couvercle.
2. Videz le récipient à glaçons.
3. Remplissez-le à nouveau avec de l’eau potable, comme
indiqué dans la section « Fabrication de glaçons ».
Comme il peut rester de l’eau résiduelle dans l’appareil,
respectez le marquage MAX dans le réservoir d’eau.
4. Remettez le récipient à glaçons en place et fermez le
couvercle.
5. Appuyez sur le bouton . Le témoin de contrôle
ADD WATER s’éteint. L’appareil est à nouveau en mode
veille. Vous pouvez poursuivre l’opération.
Fin de l’opération
1. Appuyez sur le bouton pour arrêter la production de
glaçons. Le témoin de contrôle SMALL clignote.
2. Débranchez la che d’alimentation de la prise de
courant.
3. Retirez le récipient à glaçons.
4. Videz l’eau restante comme indiqué dans la section
« Nettoyage et maintenance ».
5. Laissez le couvercle de l’appareil ouvert an d’éviter la
formation de cultures fongiques ou de bactéries.
Nettoyage et maintenance
AVERTISSEMENT :
• Éteignez l’appareil avant de procéder à l’entretien et au net-
toyage. Retirez la che de la prise de courant.
• Ne plongez jamais l’appareil dans l’eau pour le nettoyer. Cela
pourrait provoquer un choc électrique ou un incendie.

EWB6068CB_IM 06.07.23
22
ATTENTION :
• N’utilisez pas de brosse métallique ou d’autres objets
abrasifs.
• Ne pas utiliser de nettoyants agressifs ou abrasifs.
• Ne pas utiliser de produits chimiques, d’acides, d’es-
sence ou d’huile.
Programme de nettoyage
Ce programme permet de rincer plusieurs fois le système
d’eau. L’opération dure environ 5 minutes.
Important ! L’appareil ne doit pas être débranché pendant
le programme de nettoyage.
1. Une èche se trouve dans le réservoir d’eau sous le
repère MAX. Remplissez le réservoir d’eau avec environ
1 litre d’eau fraîche, jusqu’à un maximum situé sous la
èche.
2. Lorsque l’appareil est en mode veille, appuyez sur le
bouton et maintenez-le enfoncé pendant environ
2 secondes. L’appareil démarre le programme de
nettoyage. Les quatre témoins de contrôle clignotent
alternativement.
3. L’appareil passe automatiquement en mode veille
lorsque le programme de nettoyage est terminé.
4. Videz l’eau de l’appareil. Jetez l’eau.
Vidange de l’eau résiduelle
Videz l’eau résiduelle après chaque utilisation de l’appareil
ou à la n de la journée.
1. Placez l’appareil sur le bord d’une table. Placez un bol
sous l’orice d’évacuation de l’eau.
2. Retirez le bouchon situé en bas de l’appareil.
3. Une fois l’eau résiduelle évacuée, remettez le bouchon
dans l’ouverture.
Récipient à glaçons
Retirez le récipient à glaçons. Nettoyez-le dans de l’eau
de rinçage tiède additionnée d’un peu de liquide vaisselle.
Rincer à l’eau claire.
Tamis du ltre
Nettoyez le tamis du ltre à intervalles réguliers pour élimi-
ner les dépôts de calcaire.
1. Retirez le ltre du fond du réservoir d’eau.
2. Rincez le ltre à l’eau courante. Vous pouvez utiliser une
brosse en nylon pour vous aider.
3. Replacez le tamis du ltre sur les goupilles au fond du
réservoir d’eau.
ATTENTION :
N’utilisez jamais l’appareil sans le ltre !
Boîtier et intérieur
• Nettoyez le boîtier et l’intérieur de l’appareil avec un chif-
fon humide. Veillez à ce que l’humidité ne pénètre pas
dans les ouvertures d’entrée et de sortie d’air.
• Utilisez une solution diluée de vinaigre et d’eau.
• Essuyez l’intérieur de l’appareil pour le sécher.
Stockage
• Laissez l’intérieur de l’appareil sécher complètement
avant de fermer le couvercle et de ranger l’appareil.
• Nous vous recommandons de ranger l’appareil dans
son emballage d’origine si vous n’avez pas l’intention de
l’utiliser pendant une longue période.
• Rangez toujours l’appareil hors de portée des enfants,
dans un endroit sec et bien ventilé.
Dépannage
Problème Cause possible Remède
L’appareil ne fonctionne
pas.
L’appareil n’est pas alimenté en courant. Vériez la prise de courant avec un autre appareil.
Insérez la che secteur correctement.
Vériez le fusible de la maison.
L’appareil est défectueux. Contactez notre service ou un spécialiste.
Le compresseur émet
des bruits anormaux.
La tension du réseau est trop faible. Éteignez l’appareil et vériez la tension du réseau.
Le témoin de contrôle
ADD WATER s’allume.
Manque d’eau. Remplir d’eau comme décrit dans le chapitre
« Utilisation » « Fabrication de glaçons ».
Le témoin de contrôle
ICE FULL s’allume.
Le récipient à glaçons est plein. Videz le récipient à glaçons.

EWB6068CB_IM 06.07.23
23
Problème Cause possible Remède
Les glaçons sont trop
petits.
La température ambiante est trop
élevée.
Déplacez l’appareil dans un endroit plus frais.
Veillez à ce que l’air circule sufsamment autour
de l’appareil.
La température de l’eau est trop élevée. Arrêtez la production de glaçons. Videz un peu
d’eau et remplissez-la d’eau froide (max. 20 °C).
La taille des glaçons n’a pas été sélec-
tionnée correctement.
Sélectionnez la taille LARGE à l’aide du bouton
lorsque l’appareil est en mode de sélection de la
taille des glaçons.
Des glaçons plus petits sont normaux
pendant les premiers cycles.
Les glaçons sont trop
gros et se collent les uns
aux autres.
La température de l’eau ou la tempéra-
ture ambiante est trop basse.
Arrêtez la production de glaçons. Videz un peu
d’eau et remplissez-la d’eau tiède (max. 35 °C).
Le récipient à glaçons
est plein, mais le témoin
de contrôle ICE FULL ne
s’allume pas.
Le capteur de « récipient à glaçons
plein » est endommagé.
Contactez notre service ou un spécialiste.
L’appareil fonctionne
mais ne produit pas de
glaçons.
Blocage ou fuite du tuyau de réfrigérant. Contactez notre service ou un spécialiste.
Le compresseur est endommagé.
Le moteur du ventilateur est défectueux.
Données techniques
Modèle : .......................................................... EWB 6068 CB
Alimentation électrique : ...........................220 – 240 V~, 50 Hz
Puissance absorbée : ...................................................120 W
Production de glaçons : ........................... 8 – 10 kg / 24 heures
Volume du récipient d’eau : ................................... env. 1 litre
Réfrigérant : ........................................................ R600a / 14 g
Gaz de soufage de l’isolation : ........... C5H10 (Cyclopentane)
Classe climatique : ........................................................SN / N
Classe de protection : ............................................................
Poids net : ..............................................................env. 6,5 kg
Nous nous réservons le droit d’apporter des modications
techniques ainsi que des modications de conception dans
le cadre du développement continu de nos produits.
Cet appareil a été testé conformément à toutes les direc-
tives CE applicables et actuelles et a été construit selon les
dernières réglementations en matière de sécurité.
Élimination
Signication du symbole « Poubelle »
Protégez votre environnement, ne jetez pas vos
appareils électriques avec les ordures ména-
gères.
Utilisez, pour l’élimination de vos appareils
électriques, les bornes de collecte prévues à
cet effet où vous pouvez vous débarrasser des
appareils que vous n’utilisez plus.
Vous contribuez ainsi à éviter les impacts potentiels dans
l’environnement et sur la santé de chacun, causés par une
mauvaise élimination de ces déchets.
Vous contribuez aussi au recyclage sous toutes ses formes
des appareils électriques et électroniques usagés.
Vous trouverez toutes les informations sur les bornes
d’élimination des appareils auprès de votre commune ou
de l’administration de votre communauté. Votre revendeur
et partenaire contractuel est également tenu de reprendre
gratuitement l’ancien appareil.

EWB6068CB_IM 06.07.23
24
IMPORTANTE:
Asegúrese de leer primero las instrucciones de seguridad adjun-
tas por separado.
Manual de instrucciones
Le agradecemos la conanza depositada en este producto
y esperamos que disfrute de su uso.
Lea atentamente el manual de instrucciones y las instruc-
ciones de seguridad adjuntas por separado antes de utilizar
este aparato. Guarde estos documentos, incluyendo el
certicado de garantía, el recibo y, si es posible, la caja
con el embalaje interior en un lugar seguro. Si entrega el
aparato a un tercero, incluya siempre todos los documentos
pertinentes.
Símbolos en este manual de instrucciones
Advertencias importantes para su seguridad están seña-
ladas en especial. Siga estas advertencias incondicional-
mente, para evitar accidentes y daños en el aparato:
AVISO:
Advierte ante los peligros para su salud y demuestra
posibles riesgos de herida.
ATENCIÓN:
Indica los posibles riesgos para el aparato u otros
objetos.
Índice
Indicación de los elementos de manejo ..........................3
Desembalaje del aparato..................................................24
Indicación de los elementos de manejo /
Volumen de entrega ..........................................................24
Advertencias para el uso del aparato .............................25
Notas de uso .....................................................................25
Ubicación ........................................................................25
Conexión eléctrica ..........................................................25
Modo de espera (estado listo) .......................................25
Eco Save (modo de ahorro de energía) ........................25
Interrupción del manejo .................................................25
Cubitos de hielo .............................................................25
Manejo ................................................................................ 25
Hacer cubitos de hielo ...................................................25
Interrupción de la producción de cubitos de hielo ......... 26
Lámpara de control ICE FULL
(recipiente de cubitos de hielo lleno) .............................26
Lámpara de control ADD WATER (falta agua) ..............26
Finalización del funcionamiento .....................................26
Limpieza y mantenimiento ...............................................26
Programa de limpieza .................................................... 27
Drenaje del agua residual ..............................................27
Recipiente para cubitos de hielo ....................................27
Tamiz ltrante .................................................................27
Carcasa e interior ........................................................... 27
Almacenamiento ...............................................................27
Solución de problemas ....................................................27
Datos técnicos ..................................................................28
Eliminación ........................................................................ 28
Signicado del símbolo “Cubo de basura” ....................28
Desembalaje del aparato
ATENCIÓN:
Al desembalar el aparato y retirar el embalaje, asegúrese
de que el aparato no esté inclinado más de 45 °, ya
que de lo contrario podría dañarse el compresor de
refrigeración.
1. Saque el aparato de su embalaje.
2. Retire todo el material de embalaje, como las láminas, el
material de relleno, las bridas para cables y el embalaje
de cartón. Retire también la cinta adhesiva que hay en el
depósito de agua para jar las piezas móviles.
3. Compruebe que el volumen de entrega está completo.
4. Si el contenido del embalaje está incompleto o si se
detectan daños, no utilice el aparato. Devuélvalo inme-
diatamente al distribuidor.
5. Es posible que todavía haya polvo o residuos de
producción en el aparato. Le recomendamos que limpie
el aparato como se describe en el apartado “Limpieza y
mantenimiento”.
Indicación de los elementos de manejo /
Volumen de entrega
1 Tapa
2 Unidad de congelación
3 Deslizador de cubitos de hielo
4 Entrada de aire
5 Salida de aire
6 Tamiz ltrante
7 Abertura de drenaje de agua
8 Carcasa
9 Botón (encendido / apagado)
10 Lámparas de control:
ICE FULL (recipiente de cubitos de hielo lleno)
ADD WATER (falta agua)
LARGE (cubitos grandes)
SMALL (cubitos pequeños)

EWB6068CB_IM 06.07.23
25
11 Depósito de agua
12 Cubitera
13 Sensor del nivel de cubitos en el recipiente
14 Cuchara para hielo
Advertencias para el uso del aparato
AVISO:
El aparato contiene en el circuito refrigerante isobutano
(R600a), un gas natural de alta compatibilidad medioam-
biental, que es inamable. Al transportar y montar el
aparato, asegúrese de que no se caiga. El circuito
refrigerante no debe sufrir daños.
Si se daña el circuito de refrigerante:
• Evite a toda costa las llamas abiertas y las fuentes de
ignición.
• Desenchufe el aparato de la toma de corriente.
• Ventile la habitación en la que se encuentra el
aparato.
ATENCIÓN:
• Asegúrese de respetar el tiempo de espera de
2 horas cuando utilice el aparato por primera vez o
después del transporte, para que el refrigerante pueda
asentarse. De lo contrario, se dañaría el compresor de
refrigeración.
• Si interrumpe la producción de cubitos de hielo con el
botón , espere al menos 3 minutos antes de volver a
encender el aparato para evitar dañar el compresor.
• ¡No desconecte el aparato de la red eléctrica mientras
se esté ejecutando el programa de limpieza!
• ¡No utilice nunca el aparato sin el tamiz ltrante!
Notas de uso
Ubicación
• Coloque el aparato sobre una supercie estable,
horizontal, resistente al agua y nivelada. Mantenga una
distancia de al menos 10 cm de paredes u objetos.
• No coloque el aparato sobre o cerca de fuentes de calor
como estufas, radiadores, etc.
Conexión eléctrica
• Compruebe que la tensión de red que va a utilizar coin-
cide con la del aparato. Encontrará la información en la
placa de características.
• Conecte el aparato únicamente a una toma de corriente
con toma de tierra.
Modo de espera (estado listo)
La lámpara de control SMALL parpadea.
Eco Save (modo de ahorro de energía)
El aparato se apaga cuando el recipiente de cubitos de
hielo está lleno. Usted se benecia de una mayor seguridad
y de un menor consumo de energía.
Interrupción del manejo
Tras una interrupción por falta de agua, recipiente de cu-
bitos de hielo lleno, parada manual o corte de corriente, el
compresor se pone en marcha con un retardo de 3 minutos
tras volver a encenderse.
Cubitos de hielo
• Puede elegir entre dos tamaños:
- SMALL (pequeño)
- LARGE (grande)
• Los cubitos de hielo del primer ciclo de producción no
deben utilizarse por razones higiénicas.
• Los mejores resultados se obtienen con una temperatura
del agua entre 7 °C y 20 °C y una temperatura ambiente
entre 16 °C y 25 °C.
• Dependiendo de la temperatura del agua y del ambiente,
los primeros cubitos de hielo son más pequeños. Sólo
en los ciclos siguientes los cubitos se hacen más
grandes.
• Debido a la rápida congelación, los cubitos de hielo
pueden tener un aspecto “lechoso”. Se trata de aire
atrapado en el agua. Esto no afecta a la calidad de los
cubitos.
• Si desea obtener cubitos de hielo de aspecto transpa-
rente, utilice agua potable previamente hervida y enfriada.
Manejo
Cuando utilice el aparato por primera vez o si no lo ha utili-
zado durante mucho tiempo, límpielo como se describe en
el capítulo “Limpieza y mantenimiento”. Utilice el programa
de limpieza del aparato.
Hacer cubitos de hielo
1. Asegúrese de que la abertura de vaciado de agua
situada en la parte inferior del aparato está bien cerrada.
2. Abra la tapa y saque el recipiente de los cubitos de hielo.
3. En la parte inferior del depósito de agua hay un ltro.
Asegúrese de que está bien colocado.
4. En el depósito de agua hay una echa debajo de la
marca MAX. Llene aprox. 1 litro de agua potable en el
depósito de agua, hasta un máximo por debajo de la e-
cha (cantidad mínima: 500 ml). Utilice sólo agua potable
para hacer cubitos de hielo.
5. Vuelva a colocar el recipiente para cubitos de hielo y
cierre la tapa.
6. Inserte el enchufe en la toma de corriente.
7. Pulse una vez el botón . Las lámparas de control
LARGE y SMALL parpadean alternativamente. El apa-

EWB6068CB_IM 06.07.23
26
rato se encuentra en el modo de selección del tamaño
de los cubitos de hielo.
8. Cuando se encienda la lámpara de control del tamaño
de cubitos deseado, pulse de nuevo el botón . El
compresor se enciende. Comienza la producción de
cubitos de hielo.
- Mantenga la tapa cerrada durante la producción de
cubitos de hielo.
- Un ciclo de producción de cubitos de hielo dura entre
8 y 10 minutos.
Interrupción de la producción de cubitos de hielo
Pulse el botón para detener la producción de cubitos de
hielo. La lámpara de control SMALL parpadea.
• Si el manejo se interrumpe manualmente, el agua que
no se necesita se devuelve al depósito de agua. Sólo
entonces se apaga el aparato. Los cubitos de hielo a
medio terminar se quedan pegados en las barras enfria-
doras. En cuanto se hayan descongelado un poco, se
desprenden y caen.
• Tenga en cuenta que pueden formarse astillas de hielo y
bloquear el deslizador de cubitos. En este caso, después
de encenderlo, se mueve el mecanismo hacia adelante y
hacia atrás hasta que quede libre de nuevo.
- Si desea retirar usted mismo las astillas de hielo, des-
conecte primero el enchufe de la toma de corriente.
• Tenga en cuenta el tiempo de espera de al menos 3 mi-
nutos si desea continuar con el manejo.
• Puede cambiar el tamaño de los cubitos de hielo mien-
tras el compresor esté apagado.
Lámpara de control ICE FULL
(recipiente de cubitos de hielo lleno)
En cuanto el contenedor de cubitos de hielo está lleno, la
producción se detiene. La lámpara de control ICE FULL se
enciende. El compresor se apaga.
1. Retire los cubitos de hielo. Si es necesario, utilice la
cuchara para hielo incluida. Al retirar el recipiente de
cubitos de hielo, gotea un poco de agua por los oricios
de la parte inferior.
2. Cuando se apaga el piloto de control ICE FULL, la pro-
ducción de cubitos de hielo se reanuda automáticamente
al cabo de un rato.
Lámpara de control ADD WATER (falta agua)
La lámpara de control indica cuando no hay suciente agua
en el depósito de agua. La producción de cubitos de hielo
se interrumpe automáticamente.
1. Abra la tapa.
2. Vacíe el depósito de cubitos de hielo.
3. Rellene con agua potable como se describe en “Hacer
cubitos de hielo”. Como todavía puede quedar agua re-
sidual en el aparato, observe la marca MAX del depósito
de agua.
4. Vuelva a colocar el recipiente de cubitos de hielo y cierre
la tapa.
5. Pulse el botón . La lámpara de control ADD WATER
se apaga. El aparato vuelve a estar en modo de espera.
Puede continuar con el manejo.
Finalización del funcionamiento
1. Pulse el botón para detener la producción de cubitos
de hielo. La lámpara de control SMALL parpadea.
2. Desconecte el enchufe de la toma de corriente.
3. Retire el recipiente de cubitos de hielo.
4. Vacíe el agua restante como se describe en “Limpieza y
mantenimiento”.
5. Deje la tapa del aparato abierta para que no se formen
cultivos de hongos ni bacterias.
Limpieza y mantenimiento
AVISO:
• Desconecte el aparato antes de realizar tareas de manteni-
miento y limpieza. Saque el enchufe de la toma de corriente.
• No sumerja nunca el aparato en agua para limpiarlo. Podría
provocar una descarga eléctrica o un incendio.

EWB6068CB_IM 06.07.23
27
ATENCIÓN:
• No utilice cepillos de alambre ni otros objetos abra-
sivos.
• No utilice limpiadores fuertes o abrasivos.
• No utilice productos químicos, ácidos, gasolina ni
aceite.
Programa de limpieza
Con este programa, el sistema de agua se enjuaga varias
veces. El proceso dura unos 5 minutos.
¡Importante! El aparato no debe desconectarse de la red
eléctrica durante el programa de limpieza.
1. En el depósito de agua hay una echa debajo de la
marca MAX. Llene aprox. 1 litro de agua potable en el
depósito de agua, hasta un máximo por debajo de la
echa.
2. Mientras el aparato está en modo de espera, mantenga
pulsado el botón durante unos 2 segundos. El aparato
inicia el programa de limpieza. Las cuatro lámparas de
control parpadean alternativamente.
3. El aparato pasa automáticamente al modo de espera
cuando naliza el programa de limpieza.
4. Vacíe el agua del aparato. Elimine el agua.
Drenaje del agua residual
Vacíe el agua residual después de cada uso del aparato o
al nal del día.
1. Coloque el aparato en el borde de una mesa. Coloque
un recipiente debajo de la abertura de vaciado de agua.
2. Extraiga el tapón de la parte inferior.
3. Después de que el agua residual se haya drenado,
vuelva a colocar el tapón en la abertura.
Recipiente para cubitos de hielo
Retire el recipiente para cubitos de hielo. Límpielo con agua
tibia y un poco de detergente lavavajillas a mano. Aclárelo
con agua limpia.
Tamiz ltrante
Limpie el tamiz del ltro a intervalos regulares para eliminar
los depósitos de cal.
1. Extraiga el tamiz ltrante del fondo del depósito de agua.
2. Aclárelo con agua corriente. Puede utilizar un cepillo de
nailon como ayuda.
3. Vuelva a colocar el tamiz ltrante en los pasadores de la
parte inferior del depósito de agua.
ATENCIÓN:
No utilice nunca el aparato sin el tamiz ltrante.
Carcasa e interior
• Limpie la carcasa y el interior del aparato con un paño
húmedo. Asegúrese de que no entre humedad en las
aberturas de entrada y salida de aire.
• Utilice una solución diluida de vinagre y agua.
• Seque el interior del aparato.
Almacenamiento
• Deje que el interior del aparato se seque completamente
antes de cerrar la tapa y guardarlo.
• Le recomendamos que guarde el aparato en su emba-
laje original si no va a utilizarlo durante un largo periodo
de tiempo.
• Guarde siempre el aparato fuera del alcance de los
niños, en un lugar seco y bien ventilado.
Solución de problemas
Problema Posible causa Solución
El aparato no funciona. El aparato no tiene alimentación eléc-
trica.
Compruebe la toma de corriente con otro
aparato.
Inserte el enchufe correctamente.
Compruebe el fusible de la casa.
El aparato está defectuoso. Póngase en contacto con nuestro servicio
técnico o con un especialista.
El compresor hace ruidos
anormales.
La tensión de red es demasiado baja. Apague el aparato y compruebe la tensión
de red.
La lámpara de control
ADD WATER se enciende.
Falta agua. Rellene con agua como se describe en
el capítulo “Manejo” “Hacer cubitos de
hielo”.
La lámpara de control de
ICE FULL se enciende.
El recipiente de cubitos de hielo está
lleno.
Vacíe el recipiente de los cubitos de hielo.

EWB6068CB_IM 06.07.23
28
Problema Posible causa Solución
Los cubitos de hielo son dema-
siado pequeños.
La temperatura ambiente es demasiado
alta.
Traslade el aparato a un lugar más fresco.
Asegúrese de que haya suciente circula-
ción de aire alrededor del aparato.
La temperatura del agua es demasiado
alta.
Detenga la producción de cubitos de
hielo. Vacíe un poco de agua y rellene con
agua fría (máx. 20 °C).
El tamaño de los cubitos no se ha selec-
cionado correctamente.
Seleccione el tamaño LARGE con el
botón mientras el aparato está en el
modo de selección del tamaño de los
cubitos de hielo.
Es normal que los cubitos de hielo sean
más pequeños durante los primeros
ciclos.
Los cubitos son demasiado gran-
des y se pegan entre sí.
La temperatura del agua o la temperatura
ambiente es demasiado baja.
Detenga la producción de cubitos de
hielo. Vacíe un poco de agua y rellene con
agua templada (máx. 35 °C).
El recipiente de los cubitos de
hielo está lleno, pero el piloto
de control ICE FULL no se
enciende.
El sensor de “recipiente de cubitos de
hielo lleno” está dañado.
Póngase en contacto con nuestro servicio
técnico o con un especialista.
El aparato está funcionando pero
no produce cubitos de hielo.
Obstrucción o fuga de la tubería de
refrigerante.
Póngase en contacto con nuestro servicio
técnico o con un especialista.
El compresor está dañado.
El motor del ventilador está defectuoso.
Datos técnicos
Modelo: ........................................................... EWB 6068 CB
Alimentación: ............................................ 220 – 240 V~, 50 Hz
Consumo de energía: ...................................................120 W
Producción de cubitos de hielo: ................. 8 – 10 kg / 24 horas
Volumen del depósito de agua: ..........................aprox. 1 litro
Refrigerante: ....................................................... R600a / 14 g
Gas de soplado de aislamiento: ............ C5H10 (ciclopentano)
Clase climática: ............................................................. SN / N
Clase de protección: ..............................................................
Peso neto: .......................................................... aprox. 6,5 kg
El derecho de realizar modicaciones técnicas y de diseño
en el curso del desarrollo continuo del producto esta
reservado.
Este aparato ha sido probado de acuerdo con todas las
directivas CE vigentes y construido de acuerdo con las
últimas normas de seguridad.
Eliminación
Signicado del símbolo “Cubo de basura”
Proteja nuestro medio ambiente, aparatos eléc-
tricos no forman parte de la basura doméstica.
Haga uso de los centros de recogida previstos
para la eliminación de aparatos eléctricos y
entregue allí sus aparatos eléctricos que no
vaya a utilizar más.
Ayudará en evitar las potenciales consecuencias, a causa
de una errónea eliminación de desechos, para el medio
ambiente y la salud humana.
Con ello, contribuirá a la recuperación, al reciclado y a otras
formas de reutilización de los aparatos viejos eléctricos y
electrónicos.
La información cómo se debe eliminar los aparatos, se
obtiene en su ayuntamiento o su administración municipal.
Su distribuidor y socio contractual también está obligado a
recuperar el aparato antiguo sin coste alguno.

EWB6068CB_IM 06.07.23
29
IMPORTANTE:
Assicuratevi di leggere prima le istruzioni di sicurezza allegate
separatamente.
Istruzioni per l’uso
Grazie per aver scelto il nostro prodotto. Vi auguriamo un
buon utilizzo del dispositivo.
Prima di utilizzare l’apparecchio, leggere attentamente
le istruzioni per l’uso e le istruzioni di sicurezza allegate
separatamente. Conservare questi documenti, compreso il
certificato di garanzia, la ricevuta e, se possibile, la scatola
con l’imballaggio interno in un luogo sicuro. Se si cede
l’apparecchio a terzi, includere sempre tutti i documenti
pertinenti.
Simboli per questo manuale di istruzioni per l’uso
Le indicazioni importanti per la propria sicurezza sono
indicati appropriatamente. Osservare assolutamente queste
indicazioni, per evitare incidenti e danni all’apparecchio:
AVVISO:
Previene i rischi della propria salute ed indica possibili
rischi di ferite.
ATTENZIONE:
Indica possibili pericoli per l’apparecchio o altri oggetti.
Indice
Elementi di comando ..........................................................3
Disimballaggio dell’apparecchio ....................................29
Elementi di comando / Nella fornitura .............................29
Avvertenze per l’uso dell’apparecchio ........................... 30
Note per l’uso ....................................................................30
Posizione ........................................................................30
Collegamento elettrico ...................................................30
Modalità standby (stato di pronto) .................................30
Eco Save (modalità di risparmio energetico) .................30
Interruzione dell’utilizzo .................................................. 30
Cubetti di ghiaccio .......................................................... 30
Utilizzo ................................................................................30
Preparazione dei cubetti di ghiaccio .............................. 30
Interruzione della produzione di cubetti di ghiaccio .......31
Lampada di controllo ICE FULL
(contenitore dei cubetti di ghiaccio pieno) .....................31
Lampada di controllo ADD WATER
(mancanza d’acqua) ......................................................31
Fine del funzionamento ..................................................31
Pulizia e manutenzione ....................................................31
Programma di pulizia .....................................................31
Scarico dell’acqua residua ............................................. 32
Contenitore per cubetti di ghiaccio ................................32
Filtro a setaccio ..............................................................32
Alloggiamento e interno .................................................32
Conservazione ..................................................................32
Risoluzione dei problemi .................................................32
Dati tecnici ......................................................................... 33
Smaltimento ......................................................................33
Significato del simbolo “Eliminazione” ...........................33
Disimballaggio dell’apparecchio
ATTENZIONE:
Quando si disimballa l’apparecchio e si rimuove l’imbal-
laggio, assicurarsi che l’apparecchio non sia inclinato
più di 45 °, altrimenti il compressore di raffreddamento
potrebbe danneggiarsi.
1. Togliere l’apparecchio dal suo imballaggio.
2. Rimuovere tutto il materiale d’imballaggio, come pelli-
cole, materiale di riempimento, fascette e imballaggi di
cartone. Rimuovere anche il nastro adesivo nel serbatoio
dell’acqua che è attaccato per fissare le parti mobili.
3. Controllare la completezza del contenuto dell’imballaggio.
4. Se il contenuto dell’imballaggio è incompleto o se si
rilevano danni, non mettere in funzione l’apparecchio.
Restituirlo immediatamente al rivenditore.
5. Sull’apparecchio potrebbero esserci ancora polvere o
residui di produzione. Si consiglia di pulire l’apparecchio
come descritto al punto “Pulizia e manutenzione”.
Elementi di comando / Nella fornitura
1 Coperchio
2 Unità di congelamento
3 Cursore per cubetti di ghiaccio
4 Ingresso aria
5 Uscita dell’aria
6 Filtro a setaccio
7 Apertura per il drenaggio dell’acqua
8 Alloggiamento
9 Tasto (accensione / spegnimento)
10 Lampade di controllo:
ICE FULL (contenitore dei cubetti di ghiaccio pieno)
ADD WATER (mancanza d’acqua)
LARGE (cubetti di ghiaccio grandi)
SMALL (cubetti di ghiaccio piccoli)
11 Serbatoio dell’acqua
12 Vaschetta per i cubetti di ghiaccio
13
Sensore per il livello dei cubetti di ghiaccio nel contenitore
14 Paletta per il ghiaccio

EWB6068CB_IM 06.07.23
30
Avvertenze per l’uso dell’apparecchio
AVVISO:
L’apparecchio contiene nel circuito refrigerante l’iso-
butano (R600a), un gas naturale ad alta compatibilità
ambientale, che è infiammabile. Durante il trasporto e
l’installazione dell’apparecchio, assicurarsi che l’apparec-
chio non cada. Il circuito del refrigerante non deve essere
danneggiato.
Se il circuito del refrigerante è danneggiato:
• Evitare assolutamente fiamme libere e fonti di accen-
sione.
• Estrarre la spina dell’apparecchio dalla presa di
corrente.
• Ventilare il locale in cui si trova l’apparecchio.
ATTENZIONE:
• Quando si utilizza l’apparecchio per la prima volta o
dopo il trasporto, rispettare il tempo di attesa di 2 ore
per consentire al refrigerante di stabilizzarsi. In caso
contrario, il compressore frigorifero potrebbe subire
danni.
• Se si interrompe la produzione di cubetti di ghiaccio
con il tasto , attendere almeno 3 minuti prima di
riaccendere l’apparecchio per evitare di danneggiare
il compressore.
• Non scollegare l’apparecchio dalla rete elettrica mentre è
in corso il programma di pulizia!
• Non mettere mai in funzione l’apparecchio senza il filtro!
Note per l’uso
Posizione
• Posizionare l’apparecchio su una superficie stabile, oriz-
zontale, impermeabile e piana. Mantenere una distanza
di almeno 10 cm da pareti o oggetti.
• Non collocare l’apparecchio sopra o nelle immediate
vicinanze di fonti di calore come stufe, radiatori, ecc.
Collegamento elettrico
• Verificare che la tensione di rete che si intende utilizzare
corrisponda a quella dell’apparecchio. Le informazioni
sono riportate sulla targhetta di identificazione.
• Collegare l’apparecchio solo a una presa di corrente
correttamente installata con messa a terra.
Modalità standby (stato di pronto)
La lampada di controllo SMALL lampeggia.
Eco Save (modalità di risparmio energetico)
L’apparecchio si spegne quando il contenitore dei cubetti di
ghiaccio è pieno. In questo modo si ottiene una maggiore
sicurezza e un minore consumo di energia.
Interruzione dell’utilizzo
Dopo un’interruzione dovuta alla mancanza d’acqua, al
contenitore dei cubetti di ghiaccio pieno, all’arresto manuale
o a un’interruzione di corrente, il compressore si avvia con
un ritardo di 3 minuti dalla riaccensione.
Cubetti di ghiaccio
• È possibile scegliere tra due dimensioni:
- SMALL (piccolo)
- LARGE (grande)
• I cubetti di ghiaccio del primo ciclo di produzione non
devono essere utilizzati per motivi igienici.
• I migliori risultati si ottengono con una temperatura
dell’acqua compresa tra 7 °C e 20 °C e una temperatura
ambiente compresa tra 16 °C e 25 °C.
• A seconda della temperatura dell’acqua e dell’ambiente,
i primi cubetti di ghiaccio sono più piccoli. Solo nei cicli
successivi i cubetti di ghiaccio diventano più grandi.
• A causa del rapido congelamento, i cubetti di ghiaccio
possono sembrare “lattiginosi”. Si tratta di aria intrap-
polata nell’acqua. Questo non influisce sulla qualità dei
cubetti di ghiaccio.
• Se si desidera ottenere cubetti di ghiaccio dall’aspetto
chiaro, utilizzare acqua potabile precedentemente bollita
e raffreddata.
Utilizzo
Quando si usa l’apparecchio per la prima volta o se non lo
si usa da molto tempo, pulirlo come descritto nel capitolo
“Pulizia e manutenzione”. Utilizzare il programma di pulizia
dell’apparecchio.
Preparazione dei cubetti di ghiaccio
1. Assicurarsi che l’apertura di scarico dell’acqua sul fondo
dell’apparecchio sia ben chiusa.
2. Aprire il coperchio e rimuovere il contenitore dei cubetti
di ghiaccio.
3. Sul fondo del serbatoio dell’acqua è presente un filtro.
Assicurarsi che sia ben inserito.
4. Nel serbatoio dell’acqua è presente una freccia sotto il
segno MAX. Riempire il serbatoio dell’acqua con circa
1 litro di acqua fresca, fino a un massimo sotto la freccia
(quantità minima: 500 ml). Per la preparazione dei cubetti
di ghiaccio utilizzare solo acqua potabile.
5. Reinserire il contenitore dei cubetti di ghiaccio e chiudere
il coperchio.
6. Inserire la spina nella presa di corrente.
7. Premere una volta il tasto . Le lampade di controllo
LARGE e SMALL lampeggiano alternativamente. L’ap-
parecchio è in modalità di selezione delle dimensioni dei
cubetti di ghiaccio.
8. Quando la lampada di controllo della dimensione dei
cubetti di ghiaccio desiderata si accende, premere

EWB6068CB_IM 06.07.23
31
nuovamente il tasto . Il compressore si accende. Inizia
la produzione di cubetti di ghiaccio.
- Tenere il coperchio chiuso durante la produzione di
cubetti di ghiaccio.
- Un ciclo di produzione di cubetti di ghiaccio dura tra gli
8 e i 10 minuti.
Interruzione della produzione di cubetti di ghiaccio
Premere il tasto per interrompere la produzione di cubetti
di ghiaccio. La lampada di controllo SMALL lampeggia.
• Se l’utilizzo viene interrotto manualmente, l’acqua non
necessaria viene riportata nel serbatoio dell’acqua. Solo
allora l’apparecchio si spegne. I cubetti di ghiaccio finiti
a metà rimangono bloccati sulle barre di raffreddamento.
Non appena si sono un po’ scongelati, si staccano e
cadono.
• Tenere presente che possono formarsi schegge di
ghiaccio che bloccano la slitta per i cubetti di ghiaccio.
In questo caso, dopo l’accensione, il meccanismo va
spostato avanti e indietro finché non si libera.
- Se si desidera rimuovere da soli le schegge di ghiac-
cio, estrarre prima la spina dalla presa di corrente.
• Tenere presente il tempo di attesa di almeno 3 minuti se
si desidera continuare l’utilizzo.
• È possibile modificare le dimensioni dei cubetti di ghiac-
cio finché il compressore è spento.
Lampada di controllo ICE FULL
(contenitore dei cubetti di ghiaccio pieno)
Non appena il contenitore dei cubetti di ghiaccio è pieno, la
produzione si arresta. La lampada di controllo ICE FULL si
accende. Il compressore si spegne.
1. Rimuovere i cubetti di ghiaccio. Se necessario, utilizzare
la paletta per ghiaccio in dotazione. Quando si rimuove
il contenitore dei cubetti di ghiaccio, un po’ d’acqua
gocciola attraverso i fori sul fondo.
2. Quando la lampada di controllo ICE FULL si spegne, la
produzione di cubetti di ghiaccio riprende automatica-
mente dopo un po’.
Lampada di controllo ADD WATER (mancanza d’acqua)
La lampada di controllo indica quando non c’è abbastanza
acqua nel serbatoio dell’acqua. La produzione di cubetti di
ghiaccio viene interrotta automaticamente.
1. Aprire il coperchio.
2. Svuotare il contenitore dei cubetti di ghiaccio.
3. Riempire con acqua potabile come descritto in “Prepa-
razione dei cubetti di ghiaccio”. Poiché potrebbe esserci
ancora dell’acqua residua nell’apparecchio, osservare la
dicitura MAX nel serbatoio dell’acqua.
4. Reinserire il contenitore dei cubetti di ghiaccio e chiudere
il coperchio.
5. Premere il tasto . La lampada di controllo ADD WATER
si spegne. L’apparecchio è di nuovo in modalità standby.
È possibile continuare l’utilizzo.
Fine del funzionamento
1. Premere il tasto per interrompere la produzione di
cubetti di ghiaccio. La lampada di controllo SMALL
lampeggia.
2. Scollegare la spina dalla presa di corrente.
3. Rimuovere il contenitore dei cubetti di ghiaccio.
4. Scaricare l’acqua residua come descritto in “Pulizia e
manutenzione”.
5. Lasciare aperto il coperchio dell’apparecchio per evitare
la formazione di colture fungine o batteriche.
Pulizia e manutenzione
AVVISO:
• Spegnere l’apparecchio prima di procedere alla manutenzione e
alla pulizia. Estrarre la spina dalla presa di corrente.
• Non immergere mai l’apparecchio in acqua per la pulizia. Po-
trebbe causare scosse elettriche o incendi.
ATTENZIONE:
• Non utilizzare spazzole metalliche o altri oggetti
abrasivi.
• Non utilizzare detergenti aggressivi o abrasivi.
• Non utilizzare prodotti chimici, acidi, benzina o olio.
Programma di pulizia
Con questo programma, l’impianto idrico viene risciacquato
più volte. Il processo dura circa 5 minuti.
Importante! L’apparecchio non deve essere scollegato
dalla rete elettrica durante il programma di pulizia.

EWB6068CB_IM 06.07.23
32
1. Nel serbatoio dell’acqua è presente una freccia sotto il
segno MAX. Riempire il serbatoio dell’acqua con circa
1 litro di acqua fresca, fino a un massimo sotto la freccia.
2. Mentre l’apparecchio è in modalità standby, tenere pre-
muto il tasto per circa 2 secondi. L’apparecchio avvia
il programma di pulizia. Le quattro lampade di controllo
lampeggiano alternativamente.
3. Al termine del programma di pulizia, l’apparecchio passa
automaticamente alla modalità standby.
4. Scaricare l’acqua dall’apparecchio. Smaltire l’acqua.
Scarico dell’acqua residua
Scaricare l’acqua residua dopo ogni utilizzo dell’apparec-
chio o alla fine della giornata.
1. Posizionare l’apparecchio sul bordo di un tavolo. Tenere
una ciotola sotto l’apertura di scarico dell’acqua.
2. Estrarre il tappo in basso.
3. Una volta scaricata l’acqua residua, reinserire il tappo
nell’apertura.
Contenitore per cubetti di ghiaccio
Rimuovere il contenitore dei cubetti di ghiaccio. Pulirlo con
acqua calda e un po’ di detersivo per piatti. Risciacquare
con acqua pulita.
Filtro a setaccio
Pulire il filtro a intervalli regolari per rimuovere i depositi di
calcare.
1. Estrarre il filtro dal fondo del serbatoio dell’acqua.
2. Sciacquare il filtro sotto l’acqua corrente. È possibile
utilizzare una spazzola di nylon.
3. Rimettere il filtro a setaccio sui perni sul fondo del serba-
toio dell’acqua.
ATTENZIONE:
Non utilizzare mai l’apparecchio senza il filtro!
Alloggiamento e interno
• Pulire l’alloggiamento e l’interno dell’apparecchio con un
panno umido. Assicurarsi che l’umidità non penetri nelle
aperture di ingresso e di uscita dell’aria.
• Utilizzare una soluzione diluita di aceto e acqua.
• Asciugare l’interno dell’apparecchio.
Conservazione
• Lasciare asciugare completamente l’interno dell’apparec-
chio prima di chiudere il coperchio e riporlo.
• Si consiglia di riporre l’apparecchio nella sua confezione
originale se non si intende utilizzarlo per un lungo
periodo di tempo.
• Conservare sempre l’apparecchio fuori dalla portata dei
bambini in un luogo ben ventilato e asciutto.
Risoluzione dei problemi
Problema Possibile causa Rimedio
L’apparecchio non funziona. L’apparecchio non ha alimentazione. Controllare la presa di corrente con un
altro apparecchio.
Inserire correttamente la spina di rete.
Controllare il fusibile di casa.
L’apparecchio è difettoso. Contattare il nostro servizio o uno spe-
cialista.
Il compressore emette rumori
anomali.
La tensione di rete è troppo bassa. Spegnere l’apparecchio e controllare la
tensione di rete.
La lampada di controllo
ADD WATER si accende.
Manca l’acqua. Riempire d’acqua come descritto nel capi-
tolo “Utilizzo” “Preparazione dei cubetti
di ghiaccio”.
Si accende la lampada di con-
trollo ICE FULL.
Il contenitore dei cubetti di ghiaccio è
pieno.
Svuotare il contenitore dei cubetti di
ghiaccio.

EWB6068CB_IM 06.07.23
33
Problema Possibile causa Rimedio
I cubetti di ghiaccio sono troppo
piccoli.
La temperatura ambiente è troppo alta. Spostare l’apparecchio in un luogo più
fresco. Assicurare una circolazione d’aria
sufficiente intorno all’apparecchio.
La temperatura dell’acqua è troppo alta. Interrompere la produzione di cubetti di
ghiaccio. Scaricare l’acqua e riempirla con
acqua fredda (max. 20 °C).
La dimensione dei cubetti di ghiaccio non
è stata selezionata correttamente.
Selezionare il formato LARGE con il
tasto mentre l’apparecchio è in modalità
di selezione del formato dei cubetti di
ghiaccio.
I cubetti di ghiaccio più piccoli sono
normali per i primi cicli.
I cubetti di ghiaccio sono troppo
grandi e si attaccano tra loro.
La temperatura dell’acqua o dell’am-
biente è troppo bassa.
Interrompere la produzione di cubetti di
ghiaccio. Scaricare l’acqua e riempirla con
acqua tiepida (max. 35 °C).
Il contenitore dei cubetti di
ghiaccio è pieno, ma la lampada
di controllo ICE FULL non si
accende.
Il sensore per il “contenitore dei cubetti di
ghiaccio è pieno” è danneggiato.
Contattare il nostro servizio o uno spe-
cialista.
L’apparecchio è in funzione ma
non produce cubetti di ghiaccio.
Blocco o perdita del tubo del refrigerante. Contattare il nostro servizio o uno spe-
cialista.
Il compressore è danneggiato.
Il motore del ventilatore è difettoso.
Dati tecnici
Modello: ........................................................... EWB 6068 CB
Alimentazione:.......................................... 220 – 240 V~, 50 Hz
Consumo di energia: ..................................................... 120 W
Produzione di cubetti di ghiaccio: .................. 8 – 10 kg / 24 ore
Volume del contenitore dell’acqua: .......................... ca. 1 litro
Refrigerante: ....................................................... R600a / 14 g
Gas isolante: .......................................... C5H10 (ciclopentano)
Classe climatica: ........................................................... SN / N
Classe di protezione: .............................................................
Peso netto: ...............................................................ca. 6,5 kg
Si riserva il diritto di apportare modiche tecniche e di
design nel corso dello sviluppo del prodotto.
Questo apparecchio è stato testato secondo tutte le
direttive CE in vigore e costruito secondo le ultime norme
di sicurezza.
Smaltimento
Significato del simbolo “Eliminazione”
Salvaguardare l’ambiente, gli elettrodomestici
non vanno eliminati come riuti domestici.
Per l’eliminazione degli elettrodomestici, fare
uso dei posti di raccolta previsti per questo tipo
e porre quegli elettrodomestici che non sono
più in uso.
Si contribuisce così ad evitare un effetto potenziale sull’am-
biente e sulla salute, dovuto magari ad una eliminazione
sbagliata.
Questo signica un contributo personale alla riutilizzazione,
al riciclaggio e altre forme di utilizzazione di elettrodomestici
ed apparecchi elettronici usati.
Si possono trovare le corrispondenti informazioni sugli
appositi luoghi di raccolta, nelle amministrazioni dei comuni.
Il vostro rivenditore e partner contrattuale è anche obbligato
a riprendere gratuitamente il vecchio apparecchio.

EWB6068CB_IM 06.07.23
34
WAŻNE:
Najpierw należy zapoznać się z oddzielnie załączoną instrukcją
bezpieczeństwa.
Instrukcja obsługi
Dziękujemy za wybór naszego produktu. Mamy nadzieję, że
korzystanie z urządzenia sprawi państwu radość.
Przed rozpoczęciem użytkowania urządzenia przeczytaj
uważnie instrukcję obsługi oraz oddzielnie załączone
wskazówki bezpieczeństwa. Przechowuj te dokumenty
wraz z kartą gwarancyjną, paragonem i, jeśli to możliwe,
pudełkiem z opakowaniem wewnętrznym w bezpiecznym
miejscu. Jeżeli przekazujesz urządzenie osobom trzecim,
dołącz zawsze wszystkie istotne dokumenty.
Symbole użyte w tej instrukcji obsługi
Ważne informacje dotyczące bezpieczeństwa użytkownika
są specjalnie wyróżnione. Koniecznie stosuj się do tych
wskazówek, aby uniknąć wypadków i uszkodzenia urzą-
dzenia:
OSTRZEŻENIE:
Ostrzega przed zagrożeniami dla zdrowia i wskazuje na
potencjalne ryzyka obrażeń.
UWAGA:
Wskazuje na potencjalne zagrożenia dla urządzenia lub
innych przedmiotów.
Spis treści
Przegląd elementów obsługi .............................................3
Rozpakowanie urządzenia ............................................... 34
Przegląd elementów obsługi / Zakres dostawy..............34
Ostrzeżenia dotyczące użytkowania urządzenia ..........35
Uwagi dotyczące użytkowania ........................................35
Lokalizacja ......................................................................35
Podłączenie elektryczne ................................................35
Tryb czuwania (stan gotowości).....................................35
Eco Save (tryb oszczędzania energii) ...........................35
Przerwanie pracy ...........................................................35
Kostki lodu ...................................................................... 35
Obsługa .............................................................................. 35
Tworzenie kostek lodu ...................................................35
Przerywanie produkcji kostek lodu ................................36
Lampka kontrolna ICE FULL
(pojemnik na kostki lodu pełny) .....................................36
Lampka kontrolna ADD WATER (brak wody) ................ 36
Zakończenie operacji .....................................................36
Czyszczenie i konserwacja .............................................. 36
Program czyszczenia ..................................................... 37
Spuszczanie pozostałej wody ........................................ 37
Pojemnik na kostki lodu .................................................37
Sito ltra..........................................................................37
Obudowa i wnętrze ........................................................37
Przechowywanie ...............................................................37
Rozwiązywanie problemów .............................................37
Dane techniczne ................................................................38
Warunki gwarancji ............................................................38
Usuwanie ...........................................................................39
Znaczenie symbolu „Pojemnik na śmieci” ..................... 39
Rozpakowanie urządzenia
UWAGA:
Podczas rozpakowywania urządzenia i zdejmowania
opakowania należy upewnić się, że urządzenie nie jest
przechylone o więcej niż 45 °, w przeciwnym razie może
dojść do uszkodzenia sprężarki chłodzącej.
1. Wyjmij urządzenie z opakowania.
2. Usuń wszystkie materiały opakowaniowe, takie jak folie,
materiały wypełniające, opaski kablowe i opakowania
kartonowe. Usuń również taśmę w zbiorniku wody, która
jest przymocowana do ruchomych części.
3. Sprawdź, czy zawartość opakowania jest kompletna.
4. Jeżeli zawartość opakowania jest niekompletna lub
jeżeli widoczne są uszkodzenia, nie używaj urządzenia.
Natychmiast zwróć je do sprzedawcy.
5. Na urządzeniu może nadal znajdować się kurz lub
pozostałości po produkcji. Zalecamy wyczyszczenie
urządzenia zgodnie z opisem w punkcie „Czyszczenie
i konserwacja”.
Przegląd elementów obsługi /
Zakres dostawy
1 Pokrywa
2 Jednostka zamrażająca
3 Suwak kostek lodu
4 Wlot powietrza
5 Wylot powietrza
6 Sito ltra
7 Otwór odprowadzania wody
8 Obudowa
9 Przycisk (włączanie / wyłączanie)
10 Lampki kontrolne:
ICE FULL (pojemnik na kostki lodu pełny)
ADD WATER (brak wody)
LARGE (duże kostki lodu)
SMALL (małe kostki lodu)

EWB6068CB_IM 06.07.23
35
11 Zbiornik na wodę
12 Pojemnik na kostki lodu
13 Czujnik poziomu kostek lodu w pojemniku
14 Łyżka do lodu
Ostrzeżenia dotyczące
użytkowania urządzenia
OSTRZEŻENIE:
Urządzenie zawiera w obiegu czynnika chłodniczego izo-
butan (R600a), gaz ziemny o wysokiej kompatybilności
środowiskowej, który jest łatwopalny. Podczas transportu
i ustawiania urządzenia należy zwrócić uwagę, aby urzą-
dzenie nie spadło. Nie należy uszkadzać obiegu czynnika
chłodniczego.
W przypadku uszkodzenia
obiegu czynnika chłodniczego:
• Za wszelką cenę unikać otwartego ognia i źródeł
zapłonu.
• Wyciągnąć wtyczkę sieciową urządzenia z gniazdka.
• Przewietrzyć pomieszczenie, w którym znajduje się
urządzenie.
UWAGA:
• Należy pamiętać o przestrzeganiu czasu oczekiwania
2 godzin przy pierwszym użyciu urządzenia lub po
transporcie, aby czynnik chłodniczy mógł się osadzić.
W przeciwnym razie dojdzie do uszkodzenia sprężarki
chłodniczej.
• W przypadku przerwania produkcji kostek lodu za
pomocą przycisku należy odczekać co najmniej
3 minuty przed ponownym włączeniem urządzenia,
aby uniknąć uszkodzenia kompresora.
• Nie wolno odłączać urządzenia od sieci elektrycznej
podczas trwania programu czyszczenia!
• Nigdy nie używaj urządzenia bez sita ltrującego!
Uwagi dotyczące użytkowania
Lokalizacja
• Urządzenie należy ustawić na stabilnej, poziomej, wodo-
odpornej i równej powierzchni. Zachować odległość co
najmniej 10 cm od ścian lub przedmiotów.
• Nie umieszczaj urządzenia na lub w bezpośrednim są-
siedztwie źródeł ciepła, takich jak piece, grzejniki itp.
Podłączenie elektryczne
• Sprawdź, czy napięcie sieciowe, z którego zamierzasz
korzystać, odpowiada napięciu urządzenia. Informacje
na ten temat znajdują się na tabliczce znamionowej.
• Urządzenie należy podłączać wyłącznie do prawidłowo
zainstalowanego gniazda z uziemieniem.
Tryb czuwania (stan gotowości)
Lampka kontrolna SMALL miga.
Eco Save (tryb oszczędzania energii)
Urządzenie wyłącza się, gdy pojemnik na kostki lodu jest
pełny. Zwiększa to bezpieczeństwo i obniża zużycie energii.
Przerwanie pracy
Po przerwie spowodowanej brakiem wody, pełnym pojem-
nikiem na kostki lodu, zatrzymaniem ręcznym lub awarią
zasilania, sprężarka uruchamia się z opóźnieniem 3 minut
po ponownym włączeniu.
Kostki lodu
• Do wyboru są dwa rozmiary:
- SMALL (małe)
- LARGE (duża)
• Ze względów higienicznych nie należy używać kostek
lodu z pierwszego cyklu produkcyjnego.
• Najlepsze rezultaty uzyskuje się przy temperaturze wody
od 7 °C do 20 °C i temperaturze otoczenia od 16 °C do
25 °C.
• W zależności od temperatury wody i otoczenia pierwsze
kostki lodu są mniejsze. Dopiero w kolejnych cyklach
kostki lodu stają się większe.
• Ze względu na szybkie zamrażanie kostki lodu mogą
wyglądać „mlecznie”. Jest to spowodowane powietrzem
uwięzionym w wodzie. Nie ma to wpływu na jakość
kostek lodu.
• Aby uzyskać kostki lodu o wyraźnym wyglądzie, należy
użyć wody pitnej, która została wcześniej przegotowana
i schłodzona
Obsługa
W przypadku korzystania z urządzenia po raz pierwszy lub
jeśli urządzenie nie było używane przez dłuższy czas, na-
leży je wyczyścić w sposób opisany w rozdziale „Czyszcze-
nie i konserwacja”. Użyj programu czyszczenia urządzenia.
Tworzenie kostek lodu
1. Upewnij się, że otwór spustowy wody w dolnej części
urządzenia jest szczelnie zamknięty.
2. Otwórz pokrywę i wyjmij pojemnik na kostki lodu.
3. Na dnie zbiornika na wodę znajduje się ltr. Upewnij się,
że jest on dobrze włożony.
4. W zbiorniku na wodę poniżej oznaczenia MAX znajduje
się strzałka. Wlej około 1 litra świeżej wody do zbiornika
wody, maksymalnie do poziomu poniżej strzałki (mini-
malna ilość: 500 ml). Do wytwarzania kostek lodu należy
używać wyłącznie wody pitnej.
5. Ponownie włóż pojemnik na kostki lodu i zamknij
pokrywę.
6. Włóż wtyczkę sieciową do gniazdka.

EWB6068CB_IM 06.07.23
36
7. Naciśnij raz przycisk . Lampki kontrolne LARGE
i SMALL będą migać naprzemiennie. Urządzenie znaj-
duje się w trybie wyboru rozmiaru kostek lodu.
8. Gdy zaświeci się lampka kontrolna żądanego rozmiaru
kostek lodu, ponownie naciśnij przycisk . Włączy się
sprężarka. Rozpocznie się produkcja kostek lodu.
- Podczas produkcji kostek lodu pokrywa powinna być
zamknięta.
- Jeden cykl produkcji kostek lodu trwa od 8 do
10 minut.
Przerywanie produkcji kostek lodu
Naciśnij przycisk , aby zatrzymać produkcję kostek lodu.
Lampka kontrolna SMALL zacznie migać.
• Jeśli praca urządzenia zostanie przerwana ręcznie, nie-
potrzebna woda zostanie zwrócona do zbiornika wody.
Dopiero wtedy urządzenie wyłączy się. Połówki kostek
lodu pozostają na listwach chłodzących. Gdy tylko nieco
się rozmrożą, odczepiają się i spadają.
• Należy pamiętać, że odłamki lodu mogą blokować pro-
wadnicę kostek lodu. W takim przypadku po włączeniu
należy poruszać mechanizmem w przód i w tył, aż do
jego ponownego uwolnienia.
- Jeśli chcesz samodzielnie usunąć odłamki lodu,
najpierw wyjmij wtyczkę z gniazdka.
• Jeśli chcesz kontynuować operację, odczekaj co naj-
mniej 3 minuty.
• Rozmiar kostek lodu można zmieniać, dopóki sprężarka
jest wyłączona.
Lampka kontrolna ICE FULL
(pojemnik na kostki lodu pełny)
Gdy pojemnik na kostki lodu jest pełny, produkcja zostaje
zatrzymana. Lampka kontrolna ICE FULL zaświeci się.
Sprężarka wyłączy się.
1. Wyjmij kostki lodu. W razie potrzeby użyj dołączonej szu-
felki do lodu. Podczas wyjmowania pojemnika na kostki
lodu przez otwory w dnie kapie trochę wody.
2. Po zgaśnięciu lampki kontrolnej ICE FULL produkcja
kostek lodu rozpocznie się automatycznie po pewnym
czasie.
Lampka kontrolna ADD WATER (brak wody)
Lampka kontrolna sygnalizuje brak wystarczającej ilości
wody w zbiorniku. Produkcja kostek lodu zostanie automa-
tycznie przerwana.
1. Opróżnij pojemnik na kostki lodu.
2. Uzupełnij wodą pitną zgodnie z opisem w sekcji „Two-
rzenie kostek lodu”. Ponieważ w urządzeniu mogą nadal
znajdować się resztki wody, należy zwrócić uwagę na
oznaczenie MAX na zbiorniku wody.
3. Ponownie włóż pojemnik na kostki lodu i zamknij
pokrywę.
4. Naciśnij przycisk . Lampka kontrolna ADD WATER
zgaśnie. Urządzenie ponownie znajduje się w trybie
gotowości. Można kontynuować pracę.
Zakończenie operacji
1. Naciśnij przycisk , aby zatrzymać produkcję kostek
lodu. Lampka kontrolna SMALL zacznie migać.
2. Odłącz wtyczkę zasilania od gniazdka.
3. Wyjmij pojemnik na kostki lodu.
4. Spuść pozostałą wodę zgodnie z opisem w sekcji
„Czyszczenie i konserwacja”.
5. Pozostaw pokrywę urządzenia otwartą, aby nie doszło
do rozwoju grzybów lub bakterii.
Czyszczenie i konserwacja
OSTRZEŻENIE:
• Przed przystąpieniem do konserwacji i czyszczenia należy wy-
łączyć urządzenie. Wyciągnij wtyczkę sieciową z gniazdka.
• Nigdy nie zanurzaj urządzenia w wodzie w celu czyszczenia.
Może to spowodować porażenie prądem lub pożar.

EWB6068CB_IM 06.07.23
37
UWAGA:
• Nie używać szczotki drucianej ani innych przedmiotów
ściernych.
• Nie używać ostrych lub ściernych środków czyszczą-
cych.
• Nie używać środków chemicznych, kwasów, benzyny
ani oleju.
Program czyszczenia
W tym programie system wodny jest kilkakrotnie płukany.
Proces ten trwa około 5 minut.
Ważne! Podczas trwania programu czyszczenia urządzenie
nie powinno być odłączone od zasilania.
1. W zbiorniku na wodę poniżej oznaczenia MAX znajduje
się strzałka. Wlej około 1 litra świeżej wody do zbiornika
wody, maksymalnie do poziomu poniżej strzałki.
2. Gdy urządzenie znajduje się w trybie gotowości, naciśnij
i przytrzymaj przycisk przez około 2 sekundy. Urzą-
dzenie rozpocznie program czyszczenia. Cztery lampki
kontrolne migają naprzemiennie.
3. Po zakończeniu programu czyszczenia urządzenie
automatycznie przełączy się w tryb gotowości.
4. Spuść wodę z urządzenia. Zutylizuj wodę.
Spuszczanie pozostałej wody
Wodę należy spuszczać po każdym użyciu urządzenia lub
na koniec dnia.
1. Umieść urządzenie na krawędzi stołu. Przytrzymaj miskę
pod otworem spustowym wody.
2. Wyciągnij korek znajdujący się na dole.
3. Po spuszczeniu resztek wody włóż korek z powrotem
do otworu.
Pojemnik na kostki lodu
Wyjmij pojemnik na kostki lodu. Umyj go w ciepłej wodzie
z niewielką ilością płynu do ręcznego mycia naczyń. Prze-
płucz czystą wodą.
Sito ltra
Sito ltra należy czyścić w regularnych odstępach czasu
w celu usunięcia osadów kamienia.
1. Zdejmij sitko ltra z dna zbiornika na wodę.
2. Przepłucz sitko ltra pod bieżącą wodą. Można w tym
celu użyć nylonowej szczotki.
3. Umieść sito ltra z powrotem na kołkach w dolnej części
zbiornika na wodę.
UWAGA:
Nigdy nie używaj urządzenia bez sitka ltrującego!
Obudowa i wnętrze
• Wyczyść obudowę i wnętrze urządzenia wilgotną
szmatką. Upewnij się, że do otworów wlotu i wylotu
powietrza nie dostała się wilgoć.
• Użyj rozcieńczonego roztworu octu i wody.
• Wytrzyj wnętrze urządzenia do sucha.
Przechowywanie
• Przed zamknięciem pokrywy i schowaniem urządzenia
odczekać, aż jego wnętrze całkowicie wyschnie.
• Jeśli urządzenie nie będzie używane przez dłuższy
czas, zalecamy przechowywanie go w oryginalnym
opakowaniu.
• Urządzenie należy zawsze przechowywać w suchym
i dobrze wentylowanym miejscu, poza zasięgiem dzieci.
Rozwiązywanie problemów
Problem Możliwa przyczyna Środek zaradczy
Urządzenie nie działa. Urządzenie nie jest zasilane. Sprawdzić gniazdo sieciowe za pomocą
innego urządzenia.
Włożyć prawidłowo wtyczkę sieciową.
Sprawdzić bezpiecznik domowy.
Urządzenie jest uszkodzone. Skontaktuj się z naszym serwisem lub
specjalistą.
Sprężarka wydaje nietypowe
dźwięki.
Napięcie sieciowe jest zbyt niskie. Wyłącz urządzenie i sprawdź napięcie
sieciowe.
Lampka kontrolna ADD WATER
świeci się.
Brak wody. Uzupełnij wodę zgodnie z opisem w roz-
dziale „Obsługa” „Tworzenie kostek
lodu”.
Lampka kontrolna ICE FULL
świeci się.
Pojemnik na kostki lodu jest pełny. Opróżnij pojemnik na kostki lodu.

EWB6068CB_IM 06.07.23
38
Problem Możliwa przyczyna Środek zaradczy
Kostki lodu są zbyt małe. Temperatura otoczenia jest zbyt wysoka. Przenieś urządzenie w chłodniejsze
miejsce. Zapewnić odpowiednią cyrkulację
powietrza wokół urządzenia.
Temperatura wody jest zbyt wysoka. Zatrzymaj produkcję kostek lodu. Spuść
trochę wody i uzupełnij ją zimną wodą
(maks. 20 °C).
Nieprawidłowo wybrano rozmiar kostek
lodu.
Wybierz rozmiar LARGE za pomocą
przycisku , gdy urządzenie znajduje się
w trybie wyboru rozmiaru kostek lodu.
Mniejsze kostki lodu są normalne przez
kilka pierwszych cykli.
Kostki lodu są zbyt duże i sklejają
się.
Temperatura wody lub otoczenia jest
zbyt niska.
Zatrzymaj produkcję kostek lodu. Spuść
trochę wody i uzupełnij ją letnią wodą
(maks. 35 °C).
Pojemnik na kostki lodu jest
pełny, ale lampka kontrolna
ICE FULL nie świeci się.
Czujnik „pojemnik na kostki lodu jest
pełny” jest uszkodzony.
Skontaktuj się z naszym serwisem lub
specjalistą.
Urządzenie działa, ale nie wytwa-
rza kostek lodu.
Zablokowany lub nieszczelny przewód
czynnika chłodniczego.
Skontaktuj się z naszym serwisem lub
specjalistą.
Sprężarka jest uszkodzona.
Silnik wentylatora jest uszkodzony.
Dane techniczne
Model:.............................................................. EWB 6068 CB
Zasilanie: .................................................. 220 – 240 V~, 50 Hz
Pobór mocy: .................................................................. 120 W
Produkcja kostek lodu: ............................ 8 – 10 kg / 24 godziny
Pojemność pojemnika na wodę: ................................ ok. 1 litr
Czynnik chłodniczy: ............................................ R600a / 14 g
Gaz do wdmuchiwania izolacji: ...............C5H10 (cyklopentan)
Klasa klimatyczna: ........................................................ SN / N
Klasa ochronności: .................................................................
Waga netto: ..............................................................ok. 6,5 kg
Zastrzegamy sobie prawo wprowadzania zmian technicz-
nych i projektowych w trakcie ciągłego rozwoju produktu.
To urządzenie zostało przetestowane zgodnie z wszystkimi
obowiązującymi, aktualnymi dyrektywami CE i zbudowane
zgodnie z najnowszymi przepisami bezpieczeństwa.
Warunki gwarancji
Przyznajemy 24 miesiące gwarancji na produkt licząc od
daty zakupu.
W tym okresie będziemy bezpłatnie usuwać w terminie
14 dni od daty dostarczenia wadliwego sprzętu z kartą
gwarancyjną do miejsca zakupu wszystkie uszkodzenia
powstałe w tym urządzeniu na skutek wady materiałów
lub wadliwego wykonania, naprawiając oraz wymieniając
wadliwe części lub (jeśli uznamy za stosowne) wymieniając
całe urządzenie na nowe.
Sprzęt do naprawy powinien być dostarczony w komplecie
wraz z dowodem zakupu oraz z ważną kartą gwarancyjną
do sprzedawcy w miarę możliwości w oryginalnym opako-
waniu lub innym odpowiednim dla zabezpieczenia przed
uszkodzeniem. W razie braku kompletnego opakowania fa-
brycznego, ryzyko uszkodzenia sprzętu podczas transportu
do i z miejsca zakupu ponosi reklamujący.
Naprawa gwarancyjna nie dotyczy czynności przewidzianych
w instrukcji obsługi, do wykonania których zobowiązany jest
użytkownik we własnym zakresie i na własny koszt.
Gwarancja nie obejmuje:
• mechanicznych, termicznych, chemicznych uszkodzeń
sprzętu i wywołanych nimi wad,
• uszkodzeń powstałych w wyniku działania sił zewnętrz-
nych takich jak wyładowania atmosferyczne, zmiana
napięcia zasilania i innych zdarzeń losowych,
• nieprawidłowego ustawienia wartości napięcia elektrycz-
nego, zasilanie z nieodpowiedniego gniazda zasilania,
• sznurów połączeniowych, sieciowych, żarówek, baterii,
akumulatorów,
• uszkodzeń wyrobu powstałych w wyniku niewłaściwego
lub niezgodnego z instrukcją jego użytkowania, przecho-
wywania, konserwacji, samowolnego zrywania plomb
oraz wszelkich przeróbek i zmian konstrukcyjnych doko-
nanych przez użytkownika lub osoby niepowołane,
• roszczeń z tytułu parametrów technicznych wyrobu, o ile
są one zgodne z podanymi przez producenta,

EWB6068CB_IM 06.07.23
39
• prawidłowego zużycia i uszkodzeń, które mają nieistotny
wpływ na wartość lub działanie tego urządzenia.
Karta gwarancyjna bez pieczątki sklepu, daty sprzedaży, nie
wypełniona, źle wypełniona, ze śladami poprawek, nieczy-
telna wskutek zniszczenia, bez możliwości ustalenia miejsca
sprzedaży oraz dołączonego dowodu zakupu jest nieważna.
Korzystanie z usług gwarancyjnych nie jest możliwe po
upływie daty ważności gwarancji. Gwarancja na części lub
całe urządzenie, które są wymieniane kończy się, wraz
z końcem gwarancji na to urządzenie.
Wszystkie inne roszczenia, wliczając w to odszkodowania
są wykluczone chyba, że prawo przewiduje inaczej. Rosz-
czenia wykraczające poza tą umowę nie są uwzględniane
przez tą gwarancję.
Gwarancja na sprzedany towar konsumpcyjny nie wyłącza,
nie ogranicza ani nie zawiesza uprawnień kupującego
wynikających z niezgodności towaru z umową.
Gwarancja oraz zawarte w niej warunki obowiązują na
terenie Rzeczpospolitej Polskiej.
Dystrybutor:
CTC Clatronic Sp. z o.o
Ul. Brzeska 1
45-960 Opole
Usuwanie
Znaczenie symbolu „Pojemnik na śmieci”
Proszę oszczędzać nasze środowisko, sprzęt
elektryczny nie należy do śmieci domowych.
Proszę korzystać z punktów zbiorczych, prze-
widzianych do zdawania sprzętu elektrycznego,
i tam proszę oddawać sprzęt elektryczny,
którego już nie będą Państwo używać.
Tym sposobem pomagają Państwo unikać potencjalnych
następstw niewłaściwego usuwania odpadów, mających
wpływ na środowisko i zdrowie ludzi.
Tą drogą przyczyniają się Państwo do ponownego użycia,
do recyklingu i do innych form wykorzystania starego
sprzętu elektrycznego i elektronicznego.
Informacje, gdzie można zdać sprzęt, otrzymają Państwo
w swoich urzędach komunalnych lub w administracji gminy.
Twój sprzedawca i partner umowny jest również zobowią-
zany do bezpłatnego odbioru starego urządzenia.

EWB6068CB_IM 06.07.23
40
FONTOS:
Először feltétlenül olvassa el a külön mellékelt biztonsági utasítá-
sokat.
Használati utasítás
Köszönjük, hogy a termékünket választotta. Reméljük,
elégedetten használja majd a készüléket.
A készülék használata előtt nagyon gyelmesen olvassa
el a használati útmutatót és a külön mellékelt biztonsági
utasításokat. Tartsa ezeket a dokumentumokat, beleértve
a jótállási jegyet, a blokkot és lehetőség szerint a belső
csomagolással ellátott dobozt is, biztonságos helyen. Ha a
készüléket harmadik félnek adja tovább, mindig mellékelje
az összes vonatkozó dokumentumot.
A használati útmutatóban található szimbólumok
Az ön biztonságára vonatkozó utasítások kifejezetten meg
vannak különböztetve. Kérjük, mindenképpen ügyeljen
ezekre annak érdekében, hogy elkerülje a baleseteket és a
készülék károsodását:
FIGYELMEZTETÉS:
Egészségét károsító veszélyforrásokra gyelmeztet és
rámutat a lehetséges sérülési lehetőségekre.
VIGYÁZAT:
Lehetséges veszélyre utal, mely a készülékben vagy más
tárgyakban kárt tehet.
Tartalom
A kezelőelemek áttekintése ...............................................3
A készülék kicsomagolása ..............................................40
A kezelőelemek áttekintése / A csomag tartalma ..........40
A készülék használatára vonatkozó gyelmeztetések
...41
Használati megjegyzések ................................................41
Helyszín ..........................................................................41
Elektromos csatlakozás .................................................41
Készenléti üzemmód (készenléti állapot) ......................41
Eco Save (energiatakarékos üzemmód) .......................41
Működés megszakítása .................................................41
Jégkockák ......................................................................41
Működés .............................................................................41
Jégkockák készítése ...................................................... 41
A jégkockakészítés megszakítása ................................. 42
ICE FULL ellenőrző lámpa (a jégkockatartály megtelt)
...42
ADD WATER ellenőrző lámpa (vízhiány) ......................42
A művelet befejezése ..................................................... 42
Tisztítás és karbantartás .................................................. 42
Tisztítási program ........................................................... 42
A maradék víz leengedése ............................................43
Jégkockatartály ..............................................................43
Szűrőszita .......................................................................43
Ház és belső tér .............................................................43
Tárolás ...............................................................................43
Hibaelhárítás......................................................................43
Műszaki adatok .................................................................44
Hulladékkezelés ................................................................44
A „kuka” piktogram jelentése..........................................44
A készülék kicsomagolása
VIGYÁZAT:
A készülék kicsomagolásakor és a csomagolás eltá-
volításakor ügyeljen arra, hogy a készülék ne legyen
45 °-nál jobban megdöntve, különben a hűtőkompresszor
megsérülhet.
1. Vegye ki a készüléket a csomagolásából.
2. Távolítson el minden csomagolóanyagot, például fóliá-
kat, töltőanyagot, kábelkötegelőket és kartoncsomago-
lást. Távolítsa el a víztartályban lévő szalagot is, amely a
mozgó alkatrészek rögzítéséhez van rögzítve.
3. Ellenőrizze a szállítási terjedelem teljességét.
4. Ha a csomagolás tartalma hiányos, vagy ha sérülések
észlelhetők, ne működtesse a készüléket. Azonnal
juttassa vissza a kereskedőhöz.
5. A készüléken még lehetnek por- vagy gyártási marad-
ványok. Javasoljuk, hogy tisztítsa meg a készüléket a
„Tisztítás és karbantartás” pontban leírtak szerint.
A kezelőelemek áttekintése /
A csomag tartalma
1 Fedél
2 Fagyasztóegység
3 Jégkocka csúszka
4 Légbeömlőnyílás
5 Levegő kimeneti nyílás
6 Szűrőszita
7 Vízelvezető nyílás
8 Ház
9 gomb (be- / kikapcsolás)
10 Vezérlő lámpák:
ICE FULL (a jégkockatartály megtelt)
ADD WATER (vízhiány)
LARGE (nagy jégkockák)
SMALL (kis jégkockák)
11 Víztartály
12 Jégkockatartály

EWB6068CB_IM 06.07.23
41
13 A tartályban lévő jégkocka szintjének érzékelője
14 Jégkanalat
A készülék használatára
vonatkozó gyelmeztetések
FIGYELMEZTETÉS:
A készülék a hűtőközegkörben izobután (R600a) hűtőkö-
zeget tartalmaz, amely egy magas környezeti kompatibi-
litású földgáz, amely gyúlékony. A készülék szállításakor
és felállításakor ügyeljen arra, hogy a készülék ne essen
le. A hűtőközegkör nem sérülhet meg.
Ha a hűtőközeg-kör megsérült:
• Mindenképpen kerülje a nyílt lángot és a gyújtóforrá-
sokat.
• Húzza ki a készülék hálózati dugaszát a konnektorból.
• Szellőztesse ki a helyiséget, amelyben a készülék
található.
VIGYÁZAT:
• A készülék első használatakor vagy szállítás után min-
denképpen tartsa be a 2 órás várakozási időt, hogy
a hűtőközeg le tudjon ülepedni. Ellenkező esetben a
hűtőkompresszor megsérülhet.
• Ha a gombbal megszakítja a jégkockakészítést,
várjon legalább 3 percet, mielőtt újra bekapcsolja a ké-
szüléket, hogy elkerülje a kompresszor károsodását.
• Ne válassza le a készüléket a hálózatról, amíg a tisztítási
program fut!
• Soha ne működtesse a készüléket a szűrőszita nélkül!
Használati megjegyzések
Helyszín
• Helyezze a készüléket stabil, vízszintes, vízálló és
vízszintes felületre. Tartson legalább 10 cm távolságot a
falaktól vagy tárgyaktól.
• Ne helyezze a készüléket hőforrásokra vagy azok köz-
vetlen közelébe, például kályhára, radiátorra stb.
Elektromos csatlakozás
• Ellenőrizze, hogy a használni kívánt hálózati feszültség
megfelel-e a készülék feszültségének. Az információt a
típustáblán találja.
• A készüléket csak megfelelően felszerelt, földelt aljzat-
hoz csatlakoztassa.
Készenléti üzemmód (készenléti állapot)
A vezérlőlámpa SMALL villog.
Eco Save (energiatakarékos üzemmód)
A készülék kikapcsol, ha a jégkockatartály megtelt.
Nagyobb biztonságot és alacsonyabb energiafogyasztást
élvezhet.
Működés megszakítása
Vízhiány, teli jégkockatartály, kézi leállítás vagy áramszünet
miatti megszakítás után a kompresszor 3 perces késlelte-
téssel indul újra a bekapcsolást követően.
Jégkockák
• Két méret közül választhat:
- SMALL (kicsi)
- LARGE (nagy)
• Az első gyártási ciklusból származó jégkockákat higiéniai
okokból nem szabad felhasználni.
• A legjobb eredményt 7 °C és 20 °C közötti vízhőmérsék-
leten és 16 °C és 25 °C közötti környezeti hőmérsékleten
érheti el.
• A víz- és környezeti hőmérséklettől függően az első jég-
kockák kisebbek. Csak a következő ciklusokban lesznek
nagyobbak a jégkockák.
• A gyors fagyasztás miatt a jégkockák „tejszerűnek”
tűnhetnek. Ez a vízben megrekedt levegő miatt van. Ez
nem befolyásolja a jégkockák minőségét.
• Ha tiszta megjelenésű jégkockákat szeretne, használjon
olyan ivóvizet, amelyet előzőleg felforrtak és lehűtöttek.
Működés
Ha először használja a készüléket, vagy ha hosszabb ideje
nem használta, tisztítsa meg a készüléket a „Tisztítás és
karbantartás” fejezetben leírtak szerint. Használja a készü-
lék tisztítási programját.
Jégkockák készítése
1. Ügyeljen arra, hogy a készülék alján lévő vízleeresztő
nyílás szorosan zárva legyen.
2. Nyissa ki a fedelet, és vegye ki a jégkockatartályt.
3. A víztartály alján található egy szűrő. Győződjön meg
róla, hogy az szilárdan be van-e helyezve.
4. A víztartályon a MAX jelzés alatt egy nyíl található. Tölt-
sön kb. 1 liter friss vizet a víztartályba, maximum a nyíl
alatt lévő mennyiségig (minimális mennyiség: 500 ml).
Kizárólag ivóvizet használjon jégkockák készítéséhez.
5. Helyezze vissza a jégkockatartályt, és zárja le a fedelet.
6. Helyezze be a hálózati dugót a konnektorba.
7. Nyomja meg egyszer a gombot. A vezérlőlámpák
LARGE és SMALL felváltva villognak. A készülék jég-
kocka méretválasztó üzemmódban van.
8. Amikor a kívánt jégkockaméret kontrolllámpája kigyullad,
nyomja meg újra a gombot. A kompresszor bekapcsol.
A jégkocka előállítása megkezdődik.
- A jégkockakészítés alatt tartsa zárva a fedelet.
- Egy jégkockakészítési ciklus 8 – 10 percig tart.

EWB6068CB_IM 06.07.23
42
A jégkockakészítés megszakítása
A jégkockakészítés leállításához nyomja meg a gombot.
A vezérlőlámpa SMALL villog.
• Ha a működést kézzel szakítja meg, a nem szükséges
víz visszakerül a víztartályba. A készülék csak ezután
kapcsol ki. A félig kész jégkockák a hűtőrudakon marad-
nak. Amint egy kicsit felolvadtak, leválnak és leesnek.
• Vegye gyelembe, hogy jégszilánkok képződhetnek
és eltömíthetik a jégkockacsúszdát. Ebben az esetben
a bekapcsolás után a mechanizmust előre-hátra kell
mozgatni, amíg újra szabaddá nem válik.
- Ha a jégszilánkokat saját maga szeretné eltávolítani,
először húzza ki a hálózati dugót a konnektorból.
• Vegye gyelembe a legalább 3 perces várakozási időt,
ha folytatni kívánja a műveletet.
• A jégkockák méretét mindaddig változtathatja, amíg a
kompresszor ki van kapcsolva.
ICE FULL ellenőrző lámpa (a jégkockatartály megtelt)
Amint a jégkockatartály megtelt, a termelés leáll. Az
ICE FULL ellenőrző lámpa kigyullad. A kompresszor
kikapcsol.
1. Vegye ki a jégkockákat. Szükség esetén használja a
mellékelt jégkanalat. A jégkockatartály eltávolításakor
némi víz csöpög az alján lévő lyukakon keresztül.
2. Miután az ICE FULL ellenőrző lámpa kialszik, a jégkoc-
kakészítés egy idő után automatikusan újraindul.
ADD WATER ellenőrző lámpa (vízhiány)
A kontroll-lámpa jelzi, ha nincs elég víz a víztartályban. A
jégkockakészítés automatikusan megszakad.
1. Nyissa ki a fedelet.
2. Ürítse ki a jégkockatartályt.
3. Töltse fel újra ivóvízzel a „Jégkockák készítése” című
fejezetben leírtak szerint. Mivel a készülékben még
mindig lehet vízmaradék, gyeljen a víztartályon lévő
MAX jelölésre.
4. Helyezze vissza a jégkockatartályt, és zárja le a fedelet.
5. Nyomja meg a gombot. A ADD WATER ellenőrző
lámpa kialszik. A készülék ismét készenléti üzemmódban
van. Folytathatja a műveletet.
A művelet befejezése
1. Nyomja meg a gombot a jégkockakészítés leállításá-
hoz. A vezérlőlámpa SMALL villog.
2. Húzza ki a hálózati csatlakozót a konnektorból.
3. Vegye ki a jégkockatartályt.
4. A maradék vizet a „Tisztítás és karbantartás” című feje-
zetben leírtak szerint ürítse le.
5. Hagyja nyitva a készülék fedelét, hogy ne alakulhassa-
nak ki gombakultúrák vagy baktériumok.
Tisztítás és karbantartás
FIGYELMEZTETÉS:
• Karbantartás és tisztítás előtt kapcsolja ki a készüléket. Húzza
ki a hálózati dugót a konnektorból.
• Tisztításkor soha ne merítse a készüléket vízbe. Ez áramütést
vagy tüzet okozhat.
VIGYÁZAT:
• Ne használjon drótkefét vagy más koptató tárgyakat.
• Ne használjon durva vagy súroló hatású tisztítósze-
reket.
• Ne használjon vegyszereket, savakat, benzint vagy
olajat.
Tisztítási program
Ezzel a programmal a vízrendszer többször átöblítésre
kerül. A folyamat körülbelül 5 percig tart.
Fontos! A készüléket a tisztítási program alatt nem szabad
leválasztani a hálózatról.
1. A víztartályon a MAX jelzés alatt egy nyíl található. Tölt-
sön kb. 1 liter friss vizet a víztartályba, maximum a nyíl
alatt lévő mennyiségig.
2. Miközben a készülék készenléti üzemmódban van,
nyomja meg és tartsa lenyomva a gombot kb. 2 má-
sodpercig. A készülék elindítja a tisztítási programot. A
négy vezérlőlámpa felváltva villog.
3. A készülék automatikusan készenléti üzemmódba kap-
csol, amikor a tisztítási program befejeződik.
4. Engedje le a vizet a készülékből. Dobja ki a vizet.

EWB6068CB_IM 06.07.23
43
A maradék víz leengedése
A maradék vizet a készülék minden egyes használata után
vagy a nap végén engedje le.
1. Helyezze a készüléket egy asztal szélére. Tartson egy
tálat a vízleeresztő nyílás alá.
2. Húzza ki az alján lévő dugót.
3. Miután a maradék víz lecsöpögött, helyezze vissza a
dugót a nyílásba.
Jégkockatartály
Vegye ki a jégkockatartályt. Tisztítsa meg meleg öblítővíz-
ben, kevés kézi mosogatószerrel. Öblítse ki tiszta vízzel.
Szűrőszita
Rendszeres időközönként tisztítsa meg a szűrőszitát a
vízkőlerakódások eltávolítása érdekében.
1. Húzza le a szűrőszitát a víztartály aljáról.
2. Öblítse ki a szűrőszitát folyó víz alatt. Segítségül hasz-
nálhat egy nejlonkefét.
3. Tegye vissza a szűrőszitát a víztartály alján lévő csa-
pokra.
VIGYÁZAT:
Soha ne használja a készüléket a szűrőszita nélkül!
Ház és belső tér
• Tisztítsa meg a készülékház és a készülék belsejét
nedves ruhával. Ügyeljen arra, hogy a levegő be- és
kimeneti nyílásokba ne kerüljön nedvesség.
• Használjon ecet és víz hígított oldatát.
• Törölje szárazra a készülék belsejét.
Tárolás
• Hagyja teljesen megszáradni a készülék belsejét, mielőtt
lezárja a fedelet és tárolja a készüléket.
• Javasoljuk, hogy a készüléket az eredeti csomagolásban
tárolja, ha hosszabb ideig nem kívánja használni.
• A készüléket mindig gyermekek elől elzárva, jól szellőző
és száraz helyen tárolja.
Hibaelhárítás
Probléma Lehetséges ok Megoldás
A készülék nem működik. A készüléknek nincs tápellátása. Ellenőrizze a hálózati aljzatot egy másik
készülékkel.
Helyesen dugja be a hálózati dugót.
Ellenőrizze a házi biztosítékot.
A készülék meghibásodott. Forduljon szervizünkhöz vagy szakem-
berhez.
A kompresszor rendellenes
hangokat ad ki.
A hálózati feszültség túl alacsony. Kapcsolja ki a készüléket, és ellenőrizze a
hálózati feszültséget.
Az ADD WATER ellenőrző lámpa
kigyullad.
Vízhiány. Töltse fel vízzel a „Működés” „Jégkoc-
kák készítése” című fejezetben leírtak
szerint.
A ICE FULL ellenőrző lámpa
világít.
A jégkockatartály megtelt. Ürítse ki a jégkockatartályt.
A jégkockák túl kicsik. A környezeti hőmérséklet túl magas. Vigye a készüléket hűvösebb helyre.
Gondoskodjon a készülék körüli megfelelő
légáramlásról.
A víz hőmérséklete túl magas. Állítsa le a jégkockakészítést. Engedjen le
egy kis vizet, és töltse fel újra hideg vízzel
(max. 20 °C).
A jégkocka mérete helytelenül van
kiválasztva.
Válassza ki a LARGE méretet a gomb-
bal, miközben a készülék jégkocka méret-
választó üzemmódban van.
Az első néhány ciklusban a kisebb jég-
kockák normálisak.

EWB6068CB_IM 06.07.23
44
Probléma Lehetséges ok Megoldás
A jégkockák túl nagyok és össze-
tapadnak.
A vízhőmérséklet vagy a környezeti
hőmérséklet túl alacsony.
Állítsa le a jégkockakészítést. Engedjen
le egy kis vizet, és töltse fel újra langyos
vízzel (max. 35 °C).
A jégkockatartály megtelt, de az
ICE FULL ellenőrző lámpa nem
világít.
A „a jégkockatartály megtelt” érzékelője
megsérült.
Forduljon szervizünkhöz vagy szakem-
berhez.
A készülék működik, de nem állít
elő jégkockákat.
A hűtőközegcső eltömődése vagy
szivárgása.
Forduljon szervizünkhöz vagy szakem-
berhez.
A kompresszor megsérült.
A ventilátor motorja meghibásodott.
Műszaki adatok
Modell: ............................................................. EWB 6068 CB
Tápegység: .............................................. 220 – 240 V~, 50 Hz
Energiafogyasztás: .......................................................120 W
Jégkocka előállítása: ...................................... 8 – 10 kg / 24 óra
Víztartály térfogata: .................................................. kb. 1 liter
Hűtőközeg: .......................................................... R600a / 14 g
Szigetelő fúvógáz: ................................... C5H10 (Ciklopentán)
Éghajlati osztály: ........................................................... SN / N
Védelmi osztály: .....................................................................
Nettó súly: ................................................................kb. 6,5 kg
A műszaki és kivitelezési módosítások jogát a folyamatos
termékfejlesztés miatt fenntartjuk.
Ezt a készüléket az összes vonatkozó, hatályos CE-irány-
elvnek megfelelően tesztelték, és a legújabb biztonsági
előírásoknak megfelelően gyártották.
Hulladékkezelés
A „kuka” piktogram jelentése
Kímélje környezetünket, az elektromos készülé-
kek nem a háztartási szemétbe valók.
Használja az elektromos készülékek ártalmat-
lanítására kijelölt gyűjtőhelyeket, ott adja le
azokat az elektromos készülékeit, amelyeket
többé már nem kíván használni.
Ezzel segítséget nyújt ahhoz, hogy elkerülhetők legyenek
azok a hatások, amelyeket a helytelen „szemétre dobás”
gyakorolhat a környezetre és az emberi egészségre.
Ezzel hozzájárul az újrahasznosításhoz, a recyclinghoz és a
kiöregedett elektromos és elektronikus készülékek értékesí-
tésének egyéb formáihoz.
Az önkormányzatoknál vagy a polgármesteri hivatalokban
tájékoztatást kaphat arról, hogy hova viheti a kiselejtezett
készülékeket. Az Ön kereskedője és szerződéses partnere
köteles a régi készüléket is ingyenesen visszavenni.

EWB6068CB_IM 06.07.23
45
ВАЖНО:
Обязательно сначала прочитайте отдельно прилагаемые
инструкции по технике безопасности.
Руководство по эксплуатации
Спасибо за выбор нашего продукта. Надеемся, он вам
понравится.
Перед использованием данного прибора внимательно
прочитайте инструкцию по эксплуатации и отдельно
прилагаемые инструкции по технике безопасности.
Храните эти документы, включая гарантийный талон,
чек и, по возможности, коробку с внутренней упаковкой
в надежном месте. Если вы передаете прибор третьему
лицу, всегда прикладывайте к нему все соответствую-
щие документы.
Символы применяемые в
данном руководстве пользователя
Важные рекомендации для обеспечения вашей без-
опасности обозначены по особенному. Обязательно
следуйте этим рекомендациям, чтобы предотвратить
несчастный случай или поломку изделия:
ПРЕДУПРЕЖДЕНИЕ:
Предупреждает об опасности для здоровья и возмож-
ном риске получения травмы.
ВНИМАНИЕ:
Указывает на возможную опасность для изделия и
других окружающих предметов.
Содержание
Обзор деталей прибора ...................................................3
Распаковка прибора ....................................................... 45
Обзор деталей прибора / Комплект поставки ...........45
Предупреждения по использованию прибора.........46
Примечания по использования ................................... 46
Расположение ..............................................................46
Электрическое подключение ......................................46
Режим ожидания (состояние готовности) ..................46
Eco Save (режим экономии энергии) ..........................46
Прерывание работы ....................................................46
Кубики льда ...................................................................46
Эксплуатация ................................................................... 46
Приготовление кубиков льда ......................................47
Прерывание производства кубиков льда ..................47
Контрольная лампа ICE FULL
(контейнер для кубиков льда полон) ..........................47
Контрольная лампа ADD WATER (нехватка воды) ...47
Завершение работы.....................................................47
Чистка и обслуживание .................................................47
Программа очистки ......................................................48
Слив остаточной воды .................................................48
Контейнер для кубиков льда ....................................... 48
Сито фильтра ...............................................................48
Корпус и внутренняя часть .......................................... 48
Хранение ........................................................................... 48
Устранение неполадок ................................................... 48
Технические данные ......................................................49
Утилизация ....................................................................... 49
Значение символа «корзина» .....................................49
Распаковка прибора
ВНИМАНИЕ:
При распаковке прибора и снятии упаковки убеди-
тесь, что прибор не наклонен более чем на 45 °,
иначе можно повредить компрессор охлаждения.
1. Извлеките прибор из упаковки.
2. Удалите все упаковочные материалы, такие как
фольга, наполнитель, кабельные стяжки и картонная
упаковка. Также удалите ленту в резервуаре для
воды, которая прикреплена для фиксации движу-
щихся частей.
3. Проверьте комплект поставки на комплектность.
4. Если содержимое упаковки неполное или если можно
обнаружить повреждения, не эксплуатируйте прибор.
Немедленно верните его дилеру.
5. На приборе может оставаться пыль или производ-
ственные остатки. Мы рекомендуем очистить прибор,
как описано в разделе «Чистка и обслуживание».
Обзор деталей прибора /
Комплект поставки
1 Крышка
2 Морозильный блок
3 Заслонка для кубиков льда
4 Впуск воздуха
5 Выход воздуха
6 Сетчатый фильтр
7 Отверстие для слива воды
8 Корпус
9 Кнопка (включение / выключение)

EWB6068CB_IM 06.07.23
46
10 Контрольные лампы:
ICE FULL (контейнер для кубиков льда полон)
ADD WATER (нехватка воды)
LARGE (большие кубики льда)
SMALL (маленькие кубики льда)
11 Резервуар для воды
12 Лоток для кубиков льда
13 Датчик уровня кубиков льда в емкости
14 Совок для льда
Предупреждения по
использованию прибора
ПРЕДУПРЕЖДЕНИЕ:
Прибор содержит в контуре хладагента изобутан
(R600a), природный газ с высокой экологической
совместимостью, который является легковоспламе-
няющимся. При транспортировке и установке прибора
следите за тем, чтобы он не упал. Контур хладагента
не должен быть поврежден.
При повреждении контура хладагента:
• Избегайте открытого огня и источников воспламе-
нения любой ценой.
• Выньте сетевую вилку прибора из розетки.
• Проветрите помещение, в котором находится
прибор.
ВНИМАНИЕ:
• Обязательно соблюдайте время ожидания в 2 часа
при первом использовании прибора или после
транспортировки, чтобы хладагент мог осесть. В
противном случае холодильный компрессор будет
поврежден.
• Если вы прервали производство кубиков льда с
помощью кнопки , подождите не менее 3 минут
перед повторным включением прибора, чтобы не
повредить компрессор.
• Не отключайте прибор от сети во время выполнения
программы очистки!
• Никогда не эксплуатируйте прибор без фильтра-сита!
Примечания по использования
Расположение
• Установите прибор на устойчивую, горизонтальную,
водонепроницаемую и ровную поверхность. Рассто-
яние от стен или предметов должно составлять не
менее 10 см.
• Не ставьте прибор на источники тепла, такие как
печи, радиаторы и т.д., или в непосредственной
близости от них.
Электрическое подключение
• Убедитесь, что напряжение сети, которую вы соби-
раетесь использовать, соответствует напряжению
прибора. Информация об этом указана на фирмен-
ной табличке.
• Подключайте прибор только к правильно установлен-
ной заземленной розетке.
Режим ожидания (состояние готовности)
Контрольная лампа SMALL мигает.
Eco Save (режим экономии энергии)
Прибор выключается, когда контейнер для кубиков льда
заполнен. Вы выигрываете от повышения безопасности
и снижения энергопотребления.
Прерывание работы
После перерыва в работе, вызванного отсутствием
воды, полным контейнером для кубиков льда, ручной
остановкой или отключением питания, компрессор
запускается с задержкой в 3 минуты после повторного
включения.
Кубики льда
• Вы можете выбрать один из двух размеров:
- SMALL (маленький)
- LARGE (большой)
• Кубики льда из первого производственного цикла не
следует использовать по гигиеническим соображе-
ниям.
• Наилучшие результаты достигаются при темпера-
туре воды от 7 °C до 20 °C и температуре окружаю-
щей среды от 16 °C до 25 °C.
• В зависимости от температуры воды и окружающей
среды первые кубики льда имеют меньший размер.
Только в последующих циклах кубики льда стано-
вятся крупнее.
• Из-за быстрого замораживания кубики льда могут
выглядеть «молочными». Это воздух, застрявший в
воде. Это не влияет на качество кубиков льда.
• Если вы хотите получить прозрачные кубики льда,
используйте питьевую воду, предварительно про-
кипяченную и охлажденную.
Эксплуатация
При первом использовании прибора или если вы давно
им не пользовались, очистите прибор, как описано
в главе «Чистка и обслуживание». Используйте про-
грамму очистки прибора.

EWB6068CB_IM 06.07.23
47
Приготовление кубиков льда
1. Убедитесь, что отверстие для слива воды в нижней
части прибора плотно закрыто.
2. Откройте крышку и извлеките контейнер для кубиков
льда.
3. На дне резервуара для воды находится фильтр.
Убедитесь, что он плотно вставлен.
4. В резервуаре для воды под отметкой MAX находится
стрелка. Залейте в резервуар для воды примерно
1 литр свежей воды, до максимума ниже стрелки (ми-
нимальное количество: 500 мл). Для приготовления
кубиков льда используйте только питьевую воду.
5. Установите на место контейнер для кубиков льда и
закройте крышку.
6. Вставьте сетевую вилку в розетку.
7. Нажмите кнопку один раз. Контрольные лампы
LARGE и SMALL мигают попеременно. Прибор нахо-
дится в режиме выбора размера кубиков льда.
8. Когда загорится контрольная лампа нужного размера
кубиков льда, снова нажмите кнопку . Включается
компрессор. Начинается производство кубиков льда.
- Во время производства кубиков льда держите
крышку закрытой.
- Один цикл изготовления кубиков льда занимает от
8 до 10 минут.
Прерывание производства кубиков льда
Нажмите кнопку , чтобы остановить производство
кубиков льда. Контрольная лампа SMALL мигает.
• Если работа прерывается вручную, ненужная вода
возвращается в резервуар для воды. Только после
этого прибор выключается. Полуготовые кубики льда
остаются застрявшими на охлаждающих решетках.
Как только они немного оттаивают, они отделяются
и падают.
• Обратите внимание, что осколки льда могут обра-
зоваться и заблокировать горку для кубиков льда.
В этом случае после включения механизм двигают
вперед-назад, пока он снова не освободится.
- Если вы хотите самостоятельно удалить ледяные
осколки, сначала выньте сетевую вилку из розетки.
• Обратите внимание на время ожидания не менее
3 минут, если вы хотите продолжить операцию.
• Вы можете изменять размер кубиков льда, пока
компрессор выключен.
Контрольная лампа ICE FULL
(контейнер для кубиков льда полон)
Как только контейнер для кубиков льда заполняется,
производство останавливается. Загорается контроль-
ная лампа ICE FULL. Компрессор выключается.
1. Извлеките кубики льда. При необходимости исполь-
зуйте прилагаемый совок для льда. При извлечении
контейнера для кубиков льда немного воды вытекает
через отверстия на дне.
2. После того как контрольная лампа ICE FULL погас-
нет, через некоторое время производство кубиков
льда начнется автоматически.
Контрольная лампа ADD WATER (нехватка воды)
Контрольная лампа показывает, когда в резервуаре для
воды недостаточно воды. Производство кубиков льда
автоматически прерывается.
1. Откройте крышку.
2. Опорожните контейнер для кубиков льда.
3. Долейте питьевую воду, как описано в разделе
«Приготовление кубиков льда». Поскольку в приборе
может оставаться остаток воды, следите за отметкой
MAX на резервуаре для воды.
4. Установите контейнер для кубиков льда на место и
закройте крышку.
5. Нажмите кнопку . Контрольная лампа ADD WATER
погаснет. Прибор снова находится в режиме ожида-
ния. Вы можете продолжить работу.
Завершение работы
1. Нажмите кнопку , чтобы остановить производство
кубиков льда. Контрольная лампа SMALL мигает.
2. Выньте вилку сетевого шнура из розетки.
3. Извлеките контейнер для кубиков льда.
4. Слейте оставшуюся воду, как описано в разделе
«Чистка и обслуживание».
5. Оставьте крышку прибора открытой, чтобы не обра-
зовались грибковые культуры или бактерии.
Чистка и обслуживание
ПРЕДУПРЕЖДЕНИЕ:
• Выключайте прибор перед обслуживанием и чисткой. Выта-
щите сетевую вилку из розетки.

EWB6068CB_IM 06.07.23
48
ПРЕДУПРЕЖДЕНИЕ:
• Никогда не погружайте прибор в воду для очистки. Это
может привести к поражению электрическим током или
пожару.
ВНИМАНИЕ:
• Не используйте проволочную щетку или другие
абразивные предметы.
• Не используйте жесткие или абразивные чистящие
средства.
• Не используйте химикаты, кислоты, бензин или
масло.
Программа очистки
С помощью этой программы система водоснабжения
промывается несколько раз. Процесс занимает около
5 минут.
Важно! Во время выполнения программы очистки при-
бор нельзя отключать от сети.
1. В резервуаре для воды под отметкой MAX находится
стрелка. Залейте в резервуар для воды примерно
1 литр свежей воды, до максимума ниже стрелки.
2. Когда прибор находится в режиме ожидания, на-
жмите и удерживайте кнопку около 2 секунд. При-
бор начнет программу очистки. Четыре контрольные
лампы мигают поочередно.
3. По окончании программы очистки прибор автомати-
чески переключается в режим ожидания.
4. Слейте воду из прибора. Утилизируйте воду.
Слив остаточной воды
Сливайте остатки воды после каждого использования
прибора или в конце дня.
1. Поставьте прибор на край стола. Подставьте миску
под отверстие для слива воды.
2. Вытащите пробку снизу.
3. После того как остатки воды стекут, вставьте пробку
обратно в отверстие.
Контейнер для кубиков льда
Снимите контейнер для кубиков льда. Вымойте его в
теплой воде с небольшим количеством жидкости для
мытья посуды. Ополосните чистой водой.
Сито фильтра
Регулярно чистите сито фильтра, чтобы удалить извест-
ковый налет.
1. Снимите сито фильтра со дна резервуара для воды.
2. Промойте сито фильтра под проточной водой. Для
этого можно использовать нейлоновую щетку.
3. Установите сито фильтра обратно на штифты на дне
резервуара для воды.
ВНИМАНИЕ:
Никогда не используйте прибор без сита фильтра!
Корпус и внутренняя часть
• Очистите корпус и внутреннюю часть прибора влаж-
ной тканью. Следите за тем, чтобы влага не попала в
отверстия для впуска и выпуска воздуха.
• Используйте разбавленный раствор уксуса и воды.
• Вытрите внутреннюю поверхность прибора насухо.
Хранение
• Дайте прибору полностью высохнуть, прежде чем
закрыть крышку и убрать прибор на хранение.
• Мы рекомендуем хранить прибор в оригинальной
упаковке, если вы не собираетесь использовать его в
течение длительного периода времени.
• Всегда храните прибор в недоступном для детей,
хорошо проветриваемом и сухом месте.
Устранение неполадок
Проблема Возможная причина Устранение
Прибор не работает. Прибор не имеет электропитания. Проверьте розетку с другим прибором.
Правильно вставьте сетевую вилку.
Проверьте предохранитель в доме.
Прибор неисправен. Обратитесь в нашу сервисную службу или к
специалисту.

EWB6068CB_IM 06.07.23
49
Проблема Возможная причина Устранение
Компрессор издает
ненормальные звуки.
Напряжение в сети слишком низкое. Выключите прибор и проверьте напряжение
в сети.
Загорается контрольная
лампа ADD WATER.
Нехватка воды. Залейте воду, как описано в главе «Эксплу-
атация» «Изготовление кубиков льда».
Загорается контрольная
лампа ICE FULL.
Контейнер для кубиков льда переполнен. Опорожните контейнер для кубиков льда.
Кубики льда слишком
маленькие.
Слишком высокая температура окружа-
ющей среды.
Переместите прибор в более прохладное
место. Обеспечьте достаточную циркуля-
цию воздуха вокруг прибора.
Слишком высокая температура воды. Остановите производство кубиков льда.
Слейте воду и залейте холодную воду
(макс. 20 °C).
Неправильно выбран размер кубиков
льда.
Выберите размер LARGE с помощью
кнопки , пока прибор находится в режиме
выбора размера кубиков льда.
Маленькие кубики льда являются
нормальным явлением для первых
нескольких циклов.
Кубики льда слишком
большие и слипаются.
Температура воды или окружающей
среды слишком низкая.
Остановите производство кубиков льда.
Слейте воду и залейте теплую воду (макс.
35 °C).
Контейнер для куби-
ков льда полон, но
контрольная лампа
ICE FULL не горит.
Поврежден датчик «контейнер для куби-
ков льда заполнен».
Обратитесь в нашу сервисную службу или к
специалисту.
Прибор работает, но не
производит кубики льда.
Засорение или утечка в трубе хлада-
гента.
Обратитесь в нашу сервисную службу или к
специалисту.
Поврежден компрессор.
Неисправен двигатель вентилятора.
Технические данные
Модель: .......................................................... EWB 6068 CB
Электропитание: .....................................220 – 240 В~, 50 Гц
Потребляемая мощность: ......................................... 120 Вт
Производство кубиков льда: ......................8 – 10 кг / 24 часа
Объем контейнера для воды: .....................прибл. 1 литра
Хладагент: ........................................................... R600a / 14 г
Изоляционный дутьевой газ: .............C5H10 (циклопентан)
Климатический класс: ................................................. SN / N
Класс защиты: ......................................................................
Вес нетто: ..........................................................прибл. 6,5 кг
Сохранено право на технические и конструкционные
изменения в рамках продолжающейся разработки
продукта.
Данный прибор был протестирован в соответствии со
всеми применимыми действующими директивами CE
и изготовлен в соответствии с последними правилами
безопасности.
Утилизация
Значение символа «корзина»
Защита окружающей среды: не допускается
утилизация электроприборов вместе с быто-
выми отходами.
Утилизация устаревшей техники и неис-
правных электроприборов производится в
городских приёмных пунктах.
Не допускайте неправильной утилизации отходов. Это
наносит вред окружающей среде и оказывает негатив-
ное воздействие на здоровье людей.
Оказывайте содействие программе утилизации и дру-
гим формам переработки электронной и электрической
техники.
Информацию о пунктах утилизации бытовой техники
можно получить в местных органах власти. Ваш дилер
и партнер по договору также обязан бесплатно принять
старый прибор.

EWB6068CB_IM 06.07.23
50
EWB 6068 CB ..................................................................................:
50 240–220 ...................................:
120 .................................................................................:
24/10–8 .....................................................:
1 ........................................................................... :
.......................................................................................:
() C5H10 ............................................................:
SN/N ................................................................................:
I ..................................................................................................:
65 ...................................................................:
.
.
« »
:
.
.
.
.
.
.

EWB6068CB_IM 06.07.23
51
.
.
.
.
.
20)
.(
.
LARGE
.
.
.
.
.
35 )
.(
.
.
.
»
. «
ICE FULL
.
.
.
.
.
.
• .
.
•.
•.
•
.
•
.
•
.
.
.
.
.
.
.
./
.
.
.
«»
.« »
.
.ADD WATER
.
.
.ICE FULL

EWB6068CB_IM 06.07.23
52
•
.
.
-
.
• 3
.
•.
( ) ICE FULL
.
. ICE FULL
1 . .
.
2 . ICE FULL
.
( ) ADD WATER
.
.
1 ..
2 ..
3 . »
MAX .«
.
4 ..
5 . ADD WATER .
.
.
1 . .
. SMALL
2 ..
3 ..
4 ..« »
5 ..
:
•
.
.
:
•
.
:
•.
•.
•.
.
. 5
!
.
1 . MAX
1
.
2 . . 2
. .
3 ..
4 .. .
.
1 .. .
2 ..
3 ..
.
. .
.
1 ..
2 . .
.
3 .
.
:
!

EWB6068CB_IM 06.07.23
53
•: 2
- () SMALL
-
() LARGE
•.
• 7
16 20
. 25
•
.
.
• . « »
.
.
•
.
.« »
.
1 ..
2 ..
3 .. .
4 . MAX
1
.(500 : )
.
5 ..
6 ..
7 . LARGE .
. SMALL
.
8 .
. .
.
- .
- . 10 8
.
. SMALL
• .
.
.
.
:
(R600a)
.
.
:
•
.
•.
•.
:
•
.
•
. 3
•
!
•!
• .
. 10
•
.
• .
.
•.
( )
. SMALL
( )
.
.
3
.

EWB6068CB_IM 06.07.23
54
:
.
. .
. .
.
.
.
:
:
.
:
.
3 .......................................................................
53 .......................................................................
53 ............................................... /
53 ..................................................................
52 .....................................................................
52.......................................................................................
52.....................................................................................
52..................................................................( )
52.......................................................( )
52....................................................................................
52.......................................................................................
52 ............................................................................................
52..............................................................................
52.........................................................
51 ............................ ( ) ICE FULL
51 .............................( ) ADD WATER
51 .......................................................................................
51 ...............................................................................
51 ....................................................................................
51 ...........................................................................
51 ............................................................................
51 .......................................................................................
51 ...................................................................
51 .............................................................................................
50 ...............................................................
50 ....................................................................................
50 .............................................................................
50 ..............................................................« »
:
45
.
1 ..
2 .
.
.
3 ..
4 .
. .
5 . .
.« »
/
1
2
3
4
5
6
7
8
( /) 9
: 10
( ) ICE FULL
( ) ADD WATER
( ) LARGE
( ) SMALL
11
12
13
14

EWB6068CB_IM 06.07.23

EWB6068CB_IM 06.07.23

EWB6068CB_IM 06.07.23

C. Bomann GmbH
Internet: www.bomann-germany.de
Made in P.R.C.
EWB 6068 CB
EWB6068CB_IM 06.07.23
Stand 06 / 2023
-
 1
1
-
 2
2
-
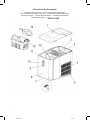 3
3
-
 4
4
-
 5
5
-
 6
6
-
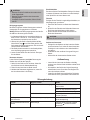 7
7
-
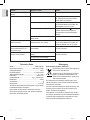 8
8
-
 9
9
-
 10
10
-
 11
11
-
 12
12
-
 13
13
-
 14
14
-
 15
15
-
 16
16
-
 17
17
-
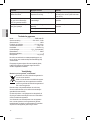 18
18
-
 19
19
-
 20
20
-
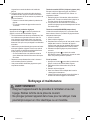 21
21
-
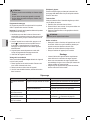 22
22
-
 23
23
-
 24
24
-
 25
25
-
 26
26
-
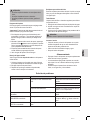 27
27
-
 28
28
-
 29
29
-
 30
30
-
 31
31
-
 32
32
-
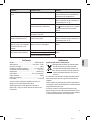 33
33
-
 34
34
-
 35
35
-
 36
36
-
 37
37
-
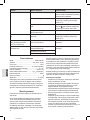 38
38
-
 39
39
-
 40
40
-
 41
41
-
 42
42
-
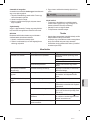 43
43
-
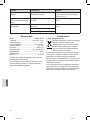 44
44
-
 45
45
-
 46
46
-
 47
47
-
 48
48
-
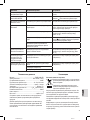 49
49
-
 50
50
-
 51
51
-
 52
52
-
 53
53
-
 54
54
-
 55
55
-
 56
56
-
 57
57
-
 58
58


BOMANN EWB 6068 CB Instrucciones de operación
- Tipo
- Instrucciones de operación
En otros idiomas
- français: BOMANN EWB 6068 CB Mode d'emploi
- italiano: BOMANN EWB 6068 CB Istruzioni per l'uso
- Deutsch: BOMANN EWB 6068 CB Bedienungsanleitung
- polski: BOMANN EWB 6068 CB Instrukcja obsługi
Documentos relacionados
Otros documentos
-
ProfiCook PC-EWB 1253 Instrucciones de operación
-
Clatronic EWB 3785 Manual de usuario
-
ProfiCook PC-EWB 1187 Manual de usuario
-
-
Profi Cook PC-EWB 1187 inox Manual de usuario
-
ProfiCook PC-EWB 1007 Manual de usuario
-
Unold 48946 Instructions For Use Manual
-
-
-
Arendo 20190828FS002 Manual de usuario