Electrolux EWW1486HDW Manual de usuario

Categoría
Lavadoras
Tipo
Manual de usuario
EWW 1486 HDW
WASHER DRYER
LAVADORA-SECADORA
EN
ES
USER MANUAL 2
MANUAL DE INSTRUCCIONES 31
CONTENTS
1. SAFETY INFORMATION...................................................................................... 3
2. SAFETY INSTRUCTIONS.....................................................................................5
3. PRODUCT DESCRIPTION................................................................................... 7
4. CONTROL PANEL...............................................................................................8
5. PROGRAMMES ..................................................................................................9
6. CONSUMPTION VALUES..................................................................................13
7. OPTIONS...........................................................................................................13
8. SETTINGS......................................................................................................... 14
9. BEFORE FIRST USE..........................................................................................15
10. DAILY USE - WASHING ONLY........................................................................ 15
11. DAILY USE - DRYING......................................................................................18
12. DAILY USE - WASHING & DRYING................................................................. 20
13. HINTS AND TIPS............................................................................................. 21
14. CARE AND CLEANING....................................................................................23
15. TROUBLESHOOTING......................................................................................27
16. TECHNICAL DATA...........................................................................................29
WE’RE THINKING OF YOU
Thank you for purchasing an Electrolux appliance. You’ve chosen a product that
brings with it decades of professional experience and innovation. Ingenious and
stylish, it has been designed with you in mind. So whenever you use it, you can be
safe in the knowledge that you’ll get great results every time.
Welcome to Electrolux.
Visit our website for:
Get usage advice, brochures, trouble shooter, service information:
www.electrolux.com
Register your product for better service:
www.registerelectrolux.com
Buy Accessories, Consumables and Original spare parts for your appliance:
www.electrolux.com/shop
CUSTOMER CARE AND SERVICE
Always use original spare parts.
When contacting our Authorised Service Centre, ensure that you have the following
data available: Model, PNC, Serial Number.
The information can be found on the rating plate.
Warning / Caution-Safety information
General information and tips
Environmental information
Subject to change without notice.
www.electrolux.com2
1. SAFETY INFORMATION
Before the installation and use of the appliance, carefully
read the supplied instructions. The manufacturer is not
responsible if an incorrect installation and use causes
injuries and damages. Always keep the instructions with
the appliance for future reference.
1.1 Children and vulnerable people safety
WARNING!
Risk of suffocation, injury or permanent disability.
This appliance can be used by children aged from 8
years and above and persons with reduced physical,
sensory or mental capabilities or lack of experience and
knowledge if they have been given supervision or
instruction concerning use of the appliance in a safe
way and understand the hazards involved.
Do not let children play with the appliance.
Children of less than 3 years should be kept away
unless continuously supervised.
Keep all packaging away from children.
Keep all detergents away from children.
Keep children and pets away from the appliance door
when it is open.
If the appliance has a child safety device, we
recommend you activate it.
Cleaning and user maintenance shall not be made by
children without supervision.
1.2 General Safety
Do not change the specification of this appliance.
The appliance can be installed as freestanding or below
the kitchen counter with correct space.
Do not install the appliance behind a lockable door, a
sliding door or a door with a hinge on the opposite side,
where the appliance door can not be fully opened.
ENGLISH
3
Connect the mains plug to the mains socket only at the
end of the installation. Make sure that there is access to
the mains plug after the installation.
The ventilation openings in the base (if applicable) must
not be obstructed by a carpet.
Ensure you have good ventilation in the installation room
to avoid the back flow of gases into the room from
appliances burning other fuels, including open fires.
Exhaust air must not be discharged into a flue which is
used for exhausting fumes from appliances burning gas
or other fuels (if applicable).
The operating water pressure (minimum and maximum)
must be between 0,5 bar (0,05 MPa) and 8 bar (0,8
MPa).
Obey the maximum load volume of 8 kg (refer to the
“Programme chart” chapter).
The appliance is to be connected to the water mains
using the new supplied hose-sets. Old hose sets must
not be reused.
If the supply cord is damaged, it must be replaced by
the manufacturer, its Authorised Service Centre or
similarly qualified persons in order to avoid a hazard.
Wipe away lint that has accumulated around the
appliance.
Items that have been soiled with substances such as
cooking oil, acetone, alcohol, petrol, kerosene, spot
removers, turpentine, waxes and wax removers should
be washed in hot water with an extra amount of
detergent before being dried in the wash dryer.
Do not use the appliance if industrial chemicals have
been used for cleaning.
Do not dry unwashed items in the wash dryer.
Items such as foam rubber (latex foam), shower caps,
waterproof textiles, rubber backed articles and clothes
or pillows fitted with foam rubber pads should not be
dried in the wash dryer.
www.electrolux.com4
Fabric softeners, or similar products, should be used as
specified by the fabric softener instructions.
Remove all objects from pockets such as lighters and
matches.
Never stop the wash dryer before the end of the drying
cycle unless all items are quickly removed and spread
out so that the heat is dissipated.
The final part of a wash dryer cycle occurs without heat
(cool down cycle) to ensure that the items are left at a
temperature that ensures that the items will not be
damaged.
Do not use water spray and steam to clean the
appliance.
Clean the appliance with a moist soft cloth. Only use
neutral detergents. Do not use abrasive products,
abrasive cleaning pads, solvents or metal objects.
Before maintenance, deactivate the appliance and
disconnect the mains plug from the mains socket.
2. SAFETY INSTRUCTIONS
2.1 Installation
Remove all the packaging and the
transit bolts.
Keep the transit bolts. When you move
the appliance again you must block the
drum.
Always be careful when you move the
appliance because it is heavy. Always
wear safety gloves.
Do not install or use a damaged
appliance.
Obey the installation instruction
supplied with the appliance.
Do not install or use the appliance
where the temperature is less than 0
°C or where it is exposed to the
weather.
Make sure that the floor where you
install the appliance is flat, stable, heat
resistant and clean.
Do not install the appliance where the
appliance door can not be fully
opened.
Always move the appliance vertically.
The rear surface of the appliance must
be put against the wall.
Make sure that there is air circulation
between the appliance and the floor.
Adjust the feet to have the necessary
space between the appliance and the
carpet.
When the appliance is put in its
permanent position, check if it is fully
level with the aid of a spirit level. If it is
not, adjust the feet until it is.
2.2 Electrical Connection
WARNING!
Risk of fire and electrical
shock.
The appliance must be earthed.
Always use a correctly installed
shockproof socket.
Do not use multi-plug adapters and
extension cables.
Do not pull the mains cable to
disconnect the appliance. Always pull
the mains plug.
ENGLISH
5
Do not touch the mains cable or the
mains plug with wet hands.
Only for UK and Ireland: The appliance
has a 13 amp mains plug. If it is
necessary to change the fuse in the
mains plug, use a 13 amp ASTA (BS
1362) fuse.
This appliance complies with the E.E.C.
Directives.
2.3 Water Connection
Make sure not to cause damage to the
water hoses.
Before you connect the appliance to
new pipes or pipes not used for a long
time, let the water flow until it is clean.
The first time you use the appliance,
make sure that there is no leakage.
2.4 Use
WARNING!
Risk of injury, electrical shock,
fire, burns or damage to the
appliance.
Use this appliance in a household only.
Do not change the specification of this
appliance.
Do not put flammable products or
items that are wet with flammable
products in, near or on the appliance.
Do not touch the glass of the door
while a programme operates. The
glass can be hot.
Do not dry the damaged items which
contain padding or fillings.
If you have washed your laundry with a
stain remover start an extra rinse cycle
before you start the dryer.
Make sure that you remove all metal
objects from the laundry.
Only dry fabrics which are applicable to
dry in the tumble dryer. Follow the
instructions on the fabric label.
Plastic items are not heat resistant.
If you use a detergent ball, remove
it before you set the drying
programme.
Do not use a detergent ball when
you set a non-stop programme.
WARNING!
Risk of injury or damage to the
appliance.
Do not sit or stand on the open door.
Do not dry dripping wet clothes in the
appliance.
2.5 Disposal
Disconnect the appliance from the
mains supply.
Cut off the mains cable and discard it.
Remove the door catch to prevent
children and pets to get closed in the
appliance.
www.electrolux.com6
3. PRODUCT DESCRIPTION
3.1 Appliance overview
1
2
3
5
6
7
4
1
Worktop
2
Detergent dispenser
3
Control panel
4
Door handle
5
Rating plate
6
Drain pump filter
7
Feet for the appliance level
3.2 How to activate the child
safety device
This device prevents children or pets to be
closed in the drum.
Turn the device clockwise, until the groove
is horizontal.
You cannot close the door.
To close the door, turn the device
anticlockwise until the groove is vertical.
3.3 Fixing plate kit (4055171146)
Available from your authorized dealer.
If you install the appliance on a plinth,
secure the appliance in the fixing plates.
Read carefully the instructions supplied
with the kit.
ENGLISH
7
4. CONTROL PANEL
4.1 Control panel description
arut
a
r
e
pm
eT
o
dagufir
tneC
a
s
u
a
P/oic
in
I
reganaM
e
miT
Extra
Aclarado/
Enxag.
Tiempo/
Tempo de
sec.
Inicio
Diferido
Nivel de
sec.
Edredón
Lana/Lãs
Secar
lana/lãs
Delicados
Sintéticos
Algod. Eco
Algod.+Prelava.
Algod.
Refrescar
Anti-arrugas
Anti-rugas
Secar
sintét.
Secar
algod.
Centrif./
Descarga
Aclarado/
Enxaguar
On/Off
53 4
1011
8
7
9
6
1 2
1
On Off button (On/Off
2
Programme knob
3
Spin reduction touchpad
(Centrifugar)
4
Temperature touchpad
(Temperatura)
5
Display
6
Drying time touchpad (Tiempo/
Tempo de sec.)
7
Delay start touchpad ( Inicio
Diferido)
8
Extra rinse touchpad (Extra
Aclarado/Enxag.)
9
Drying level touchpad (Nivel de
sec.)
10
Start/Pause touchpad (Inicio/
Pausa)
11
Time Manager touchpads
(Time Manager)
www.electrolux.com8
4.2 Display
A B C
D
E
F
GH
I
J
K
A) The Temperature area:
: Temperature indicator
: Cold water indicator
B) : Time Manager indicator.
C) The time area:
: the programme duration
: the delay start
: the alarm codes
: the message of error
: the programme is completed.
D) : The drying phase.
E) : The steam phase.
F)
: The Extra rinse permanent option.
G) , , : The indicators of dryness
level.
H) The spin area:
: the Spin speed indicator
: the No Spin indicator
: the Rinse Hold indicator
I)
: The washing phase.
J)
: The child safety lock indicator.
K) : The door locked indicator
5. PROGRAMMES
5.1 Programme Chart
Programme
Temperature
range
Maximum
load
Maximum
spin speed
Programme description
(Type of load and soil level)
Washing programmes
Algod.
90°C - Cold
8 kg
1400 rpm
White cotton and coloured cotton. Normal soil
and light soil.
Algod. + Prel-
ava.
90°C - Cold
8 kg
1400 rpm
White cotton and coloured cotton. Heavy soil
and normal soil.
Algod. Eco1)
60°C - 40°C
8 kg
1400 rpm
White cotton and colour-fast cotton. Normal
soil. The energy consumption decreases and the
time of the washing programme is extended.
ENGLISH
9
Programme
Temperature
range
Maximum
load
Maximum
spin speed
Programme description
(Type of load and soil level)
Sintéticos
60°C - Cold
4 kg
1200 rpm
Synthetic items or mixed fabric items. Normal
soil.
Delicados
40°C - Cold
4 kg
1200 rpm
Delicate fabrics as acrylics, viscose, polyest-
er items. Normal soil.
Lana/Lãs
40°C - Cold
2 kg
1200 rpm
Machine washable wool, hand washable wool
and delicate fabrics with «hand washing» care
symbol.2)
Edredón
60°C - 30°C
3 kg
800 rpm
Special programme for one synthetic blanket,
duvet, bedspread and so on.
Aclarado/
Enxaguaguar
8 kg
1400 rpm
To rinse and spin the laundry. All fabrics.
Centrif./
Descarga3)
8 kg
1400 rpm
To spin the laundry and to drain the water in the
drum. All fabrics.
Drying programmes
Secar
Lana/Lãs
1 kg Drying programme for woollen.
Secar Sintét.
3 kg Drying programme for synthetic items.
Secar Algod.
6 kg Drying programme for cotton items.
Steam programmes4)
Steam can be used for dried, washed or worn once laundry. These programmes can
reduce creases and odours and make your laundry more soft.
Do not use any detergent. If necessary, remove stains by washing or using localized
stain removal.
Steam programmes do not perform any hygienic cycle.
Do not set a Steam programme with these types of items:
items where it is not specified on the care label as being suitable for tumble drying.
all items with plastic, metal, wooden parts or alike.
Refrescar
40°C
1.5 kg Steam programme for cotton and synthetic
items. This cycle removes odours from the laun-
dry.5)
www.electrolux.com10
Programme
Temperature
range
Maximum
load
Maximum
spin speed
Programme description
(Type of load and soil level)
Anti-arru-
gas/Anti-rugas
40°C
1.5 kg Steam programme for cotton and synthetic
items. This cycle helps to dewrinkle the laundry.
1)
Cottons energy saving programme. This programme at a 60ºC with a load of 8 is the refer-
ence programme for data entered in the energy label, in compliance with EEC 92/75 stand-
ards. Set this programme to have a good washing results and decrease the energy consump-
tion. The time of the washing programme is extended.
2)
During this cycle the drum rotates slowly to ensure a gentle washing. It can seem that the
drum doesn't rotate or doesn't rotate properly. Consider this as a normal functioning of the ap-
pliance.
3)
Set the spin speed. Make sure it agrees with the laundry. If you set No Spin option the only
drain phase is available.
4)
If you set a Steam programme with dried laundry, at the end of the cycle the laundry could
be humid. It is better to expose the items to the fresh air for about 10 minutes to let the humid-
ity dry. When the programme is completed, quickly remove the laundry from the drum. After a
steam cycle, items may to be ironed anyway, but with less effort!
5)
Steam does not remove animal odours.
Programme options compatibility
Programme
with Prewash
Eco
1)
1)
Set the spin speed. Make sure it agrees with the laundry. If you set No Spin option the only
drain phase is available.
ENGLISH
11
5.2 Programmes for automatic drying
Dryness Level Type of fabric Load
Extra Dry
For towelling materials
Cottons and Linen
(bathrobes, bath towels, etc)
up to 6 kg
Cupboard Dry1)
For items to put away
Cottons and Linen
(bathrobes, bath towels, etc)
up to 6 kg
Synthetics and mixed fab-
rics
(jumpers, blouses, underwear,
household linen)
up to 3 kg
Iron Dry
Suitable for ironing
Cottons and Linen
(sheets, tablecloths, shirts,
etc)
up to 6 kg
1)
Hints for test institute The test performance, in accordance with EN 50229, must be car-
ried out with a FIRST drying load of the maximum declared drying capacity (load composition
according to EN61121) by setting the AUTOMATIC CUPBOARD DRY programme for Cotton.
The SECOND drying load with the residual load must be tested by setting the AUTOMATIC
CUPBOARD DRY programme for Cotton.
5.3 Programmes for timed drying
Dryness Level Type of fabric Load
(kg)
Spin
speed
(rpm)
Suggested
duration
(mins)
Extra Dry
For towelling materials
Cottons and Linen
(bathrobes, bath towels,
etc)
6 1400 225 - 245
4 1400 135 - 155
2 1400 95 - 105
Cupboard Dry
For items to put away
Cottons and Linen
(bathrobes, bath towels,
etc)
6 1400 215 - 235
4 1400 125 - 145
2 1400 85 - 95
Cupboard Dry
For items to put away
Synthetics and mixed
fabrics
(jumpers, blouses, under-
wear, household linen)
3 1200 135 - 145
1 1200 40 - 50
Iron Dry
Suitable for ironing
Cottons and Linen
(sheets, tablecloths, shirts,
etc)
6 1400 185 - 205
4 1400 95 - 115
2 1400 75 - 85
Wool dry Wool
(wool jumpers)
1 1200 110 - 130
www.electrolux.com12
6. CONSUMPTION VALUES
The data of this table are approximate. Different causes can change the da-
ta: the quantity and type of laundry, the water and ambient temperature.
At programme start the display shows the duration programme for the maxi-
mum load capacity. During the washing phase the programme duration is
automatically calculated and can be greatly reduced if the laundry load is
lower than the maximum load capacity (e.g. Cotton 60°C, maximum load
capacity 8 kg, the programme duration exceeds 2 hours; real load 1 kg, the
programme duration don’t reach 1 hour). When the appliance is calculating
the real programme duration a dot blinks in the display.
Programmes Load
(kg)
Energy
con-
sumption
(kWh)
Water con-
sumption
(litre)
Approximate pro-
gramme duration
(minutes)
Cottons 60 °C 8 1.60 72 168
Cotton Energy Saving Pro-
gramme 60 °C
1)
8 1.04 59 225
Cottons 40 °C 8 1.00 72 164
Synthetics 40 °C 4 0.60 50 110
Delicates 40 °C 4 0.70 60 91
Wool/Handwash 30 °C 2 0.35 57 58
1)
«Cotton Energy Saving programme » at 60°C with a load of 8 kg is the reference pro-
gramme for the data entered in the energy label, in compliance with EEC 92/75 standards.
7. OPTIONS
7.1 Temperatura
Set this option to change the default
temperature.
Indicator = cold water.
The display shows the set temperature.
7.2 Centrifugar
With this option you can decrease the
default spin speed.
The display shows the indicator of the set
speed.
Additional spin options:
No Spin
Set this option to remove all spin
phases.
Set it for very delicate fabrics.
The rinse phase uses more water for
some washing programmes.
The display shows the indicator
.
Rinse Hold
Set this option to prevent the laundry
creases.
The washing programme stops with
the water in the drum. The drum turns
regularly to prevent the laundry
creases.
The door stays locked. You must drain
the water to unlock the door.
ENGLISH
13
The display shows the indicator .
To drain the water refer to ‘At
the end of the programme’.
7.3 Tiempo/Tempo de sec.
With this option you can set the time for
the fabrics you have to dry. The display
shows the set value.
Each time you press this touchpad the
time value increases by 5 minutes.
You cannot set all time values
for different types of fabrics.
7.4 Inicio Diferido
With this option you can delay the start of
a programme from 30 minutes to 20
hours.
The display shows the related indicator.
7.5 Extra Aclarado/Enxag.
With this option you can add some rinses
to a washing programme.
Use this option for persons allergic to
detergents and in areas where the water is
soft.
The related indicator comes on.
7.6 Nivel de sec.
With this option you can set an automatic
level of dryness for the laundry. The
display shows the symbol of the set level.
Extra dry level for cotton items
Cupboard dry level for cotton and
synthetic items
Iron dry level for cotton items
7.7
Time Manager
When you set a washing programme, the
display shows the default duration.
Press or to decrease or increase
the programme duration.
The Time Manager is available only with
the programmes in the table.
In-
di-
ca-
tor
1) 1)
2)
3) 3)
3)
4)
3) 3)
3)
1)
If available.
2)
Shortest: to fresh the laundry.
3)
Programme default duration.
4)
Longest: Increasing the programme dura-
tion gradually decreases the energy con-
sumption. The optimized heating phase
saves energy and the longer duration main-
tains the same washing results (specially for
normal soil).
8. SETTINGS
8.1 Child Lock
With this option you can prevent that the
children play with the control panel.
To activate/deactivate this option,
press and at the same time until
the indicator comes on/goes off.
You can activate this option:
www.electrolux.com14
After you press : the options and
the programme knob are locked.
Before you press : the appliance
cannot start.
8.2 Permanent Extra Rinse
With this option you can permanently have
an extra rinse when you set a new
programme.
To activate/deactivate this option
press
and at the same time until
the indicator comes on/goes off.
8.3 Acoustic signals
The acoustic signals operate when:
The programme is completed.
The appliance has a malfunction.
To deactivate/activate the acoustic
signals, press and at the same time
for 6 seconds.
If you deactivate the acoustic
signals, they continue operate
when the appliance has a
malfunction.
9. BEFORE FIRST USE
1. Put 2 litre of water in the detergent
compartment for washing phase.
This activates the drain system.
2. Put a small quantity of detergent in the
compartment for washing phase.
3. Set and start a programme for cotton
at the highest temperature without
laundry.
This removes all possible dirt from the
drum and the tub.
10. DAILY USE - WASHING ONLY
10.1 Loading the laundry
1. Open the appliance door
2. Put the laundry in the drum, one item
at a time.
3. Shake the items before you put them
in the appliance.
Make sure not to put too much laundry in
the drum.
4. Close the door.
CAUTION!
Make sure that no laundry stays between
the seal and the door. There is a risk of
water leakage or damage to the laundry.
10.2 Using detergent and
additives
1. Measure out the detergent and the
fabric conditioner.
2. Carefully close the detergent drawer
ENGLISH
15
10.3 Detergent compartments
Detergent compartment for prewash phase.
Detergent compartment for washing phase.
Compartment for liquid additives (fabric conditioner, starch).
Flap for powder or liquid detergent.
10.4 Liquid or powder detergent
1.
A
2.
3.
B
4.
Position A for powder detergent (factory setting).
Position B for liquid detergent.
When you use the liquid detergent:
Do not use gelatinous or thick liquid detergents.
Do not put more liquid then the maximum level.
Do not set the prewash phase.
Do not set the delay start.
10.5 Activating the appliance
Press the button to activate or
deactivate the appliance. A tune sounds
when the appliance is activated.
10.6 Setting a programme
1. Turn the programme knob and set the
programme:
www.electrolux.com16
The related programme indicator
comes on.
The indicator of the flashes.
The display shows the level of the
Time Manager, the programme
duration and the indicators of the
programme phases.
2. If necessary, change the temperature,
the spin speed, the cycle duration or
add available options. When you
activate an option, the indicator of the
set option comes on.
If you set something incorrect,
the display shows the message
.
10.7 Starting a programme
without the delay start
Press the .
The indicator of the stops to
flash and stays on.
The indicator starts to flash on
the display.
The programme starts, the door
locks, the display shows the
indicator .
The drain pump can operate for a
short time when the appliance fills
water.
After approximately 15 minutes
from the start of the
programme:
The appliance adjusts
automatically the
programme duration agree
with the laundry load.
The display shows the new
value.
10.8 Starting a programme with
the delay start
1. Press again and again until the
display shows the delay you want to
set.
The related indicator comes on the
display.
2. Press :
The appliance starts the
countdown.
When the countdown is
completed, the programme starts
automatically.
You can cancel or change the
set of the delay start before
you press the . To cancel
the delay start:
Press to set the
appliance to pause.
Press until the
display shows '.
Press
again to start
the programme
immediately.
10.9 Interrupting a programme
and changing the options
You can change only some options before
they operate.
1. Press .
The indicator flashes.
2. Change the options.
3. Press
again.
The programme continues.
10.10 Cancelling a programme
1. Press the button for some seconds
to cancel the programme and to
deactivate the appliance.
2. Press the same button again to
activate the appliance. Now, you can
set a new washing programme.
Before starting the new
programme the appliance
drains the water. Make sure
that the detergent is still in the
detergent compartment, if not
fill the detergent again.
10.11 Opening the door when
the delay start operates
While the delay start operates, the
appliance door is locked and the display
shows the indicator .
ENGLISH
17
1. Press to pause the appliance.
2. Wait until the door lock indicator
goes off.
3. Open the door.
4. Close the door.
5. Press
again.
The delay start continues to operate.
10.12 Opening the door when
the programme operates
While the programme operates, the
appliance door is locked and the display
shows the indicator .
CAUTION!
If the temperature and level of
the water in the drum are too
high, you cannot open the
door.
1. Press the button for some seconds
to deactivate the appliance.
2. Wait for some minutes and then open
carefully the appliance door.
3. Close the appliance door.
4. Set the programme again.
10.13 At the end of the
programme
The appliance stops automatically.
The acoustic signal operates (if it is
activated).
In the display comes on.
The indicator of the goes off.
The door lock indicator goes off.
You can open the door.
Remove the laundry from the
appliance. Make sure that the drum is
empty.
Close the water tap.
Press the button for some seconds
to deactivate the appliance.
Keep the door ajar, to prevent the
mildew and odours.
The washing programme is
completed, but there is water in the
drum:
The drum turns regularly to prevent the
creases in the laundry.
The door lock indicator is on. The
door stays locked.
You must drain the water to open the
door.
To drain the water:
1. Press . The appliance drains the
water and spins.
2. To make the appliance drain only, set
. If necessary, decrease the
spin speed.
3. When the programme is completed
and the door lock indicator goes
off, you can open the door.
4. Press the button for some seconds
to deactivate the appliance.
The appliance drains and spins
automatically after
approximately 18 hours (except
for Wool programme).
10.14 AUTO Stand-by option
The AUTO Stand-by option automatically
deactivates the appliance to decrease the
energy consumption when:
You do not use the appliance for 5
minutes before you press
.
Press the button to activate the
appliance again.
After 5 minutes from the end of the
washing programme
Press the button to activate the
appliance again.
The display shows the end of the last
set programme.
Turn the programme knob to set a new
cycle.
11. DAILY USE - DRYING
WARNING!
Refer to Safety chapters.
www.electrolux.com18
11.1 Drying setting
WARNING!
Open the water tap. Put the drain
hose in the sink or connect to the
drain pipe.
1. Press On/Off for some seconds to
activate the appliance.
2. Load the laundry one item at a time.
3. Turn the programme dial to the
programme applicable for the items to
dry. The display shows the drying
indicator .
To have a good drying
performance do not exceed
the maximum drying loads
recommended in the user
manual. Do not set a spin
speed lower than the
automatic speed of the set
programme.
11.2 Drying at automatic levels
The laundry can be dried at pre-defined
levels of dryness:
1. Press again and again until the
display shows one of the dryness level
indicator:
: IRON DRY level indicator for
cotton items
: CUPBOARD DRY level
indicator for cotton and synthetic
items
: EXTRA DRY level indicator for
cotton items
The display shows a time value, calculated
on the default load size. If the amount of
your laundry is more or less than the
default size, the appliance adjusts
automatically the time value during the
cycle.
2. Press to start the programme.
The display shows the door locked
indicator . The drying indicator
starts to flash.
You cannot set all dryness
levels for any type of laundry.
11.3 Timed drying
The laundry can also be dried with a
manual timed drying:
1. Press again and again to set the
time value (see the «Programmes for
timed drying» table).
The display shows 10 minutes.
Each time you press this touchpad
the time value increases by 5
minutes.
The display shows the set time
value: for example – .
After some seconds the display
shows a new time value:
. The
appliance calculates also the
duration of the anti-crease and the
cooling phases.
2. Press to start the programme.
The display shows regularly a new
time value.
The drying indicator starts to
flash.
The display shows the door locked
indicator
.
If you set only 10 minutes of drying, the
appliance performs only a cooling phase.
If the laundry is not sufficient dry, set again
a short drying time.
11.4 End of the drying
programme
The appliance stops automatically.
The acoustic signals operate (if they
are active).
In the display
comes on.
The indicator goes off.
The last minutes of the drying cycle the
appliance performs a cooling and anti-
crease phase. The door is still locked.
When the door locked goes off in the
display, you can open the door.
1. Press the button for some seconds
to deactivate the appliance.
ENGLISH
19
After some minutes from the end of the
programme, the energy saving function
automatically deactivates the appliance.
2. Remove the laundry from the
appliance.
Make sure that the drum is empty.
3. Keep the door ajar, to prevent mildew
and odours.
4. Close the water tap.
12. DAILY USE - WASHING & DRYING
WARNING!
Refer to Safety chapters.
12.1 Non-Stop programme
1. Press On/Off for some seconds to
activate the appliance.
2. Load the laundry one item at a time.
To have a good drying
performance do not exceed
the maximum drying loads
recommended in the user
manual. Do not set a spin
speed lower than the
automatic speed of the set
programme.
3. Put the detergent and the additives in
the appropriate compartment.
4. Turn the programme dial to the
washing programme.
The display shows the indicators of the
different washing phases.
5. Set the available options.
12.2 Washing & Automatic
drying
1. Press again and again until the
display shows one of the dryness level
indicator:
: IRON DRY level indicator for
cotton items
: CUPBOARD DRY level
indicator for cotton and synthetic
items
: EXTRA DRY level indicator for
cotton items
The display shows the indicator . The
time value on the display is the duration of
the washing + drying cycles, calculated on
a default load size.
To have a good drying the
appliance does not let you set
a too low spin speed for the
items to be washed and dried.
2. Press to start the programme.
In the display the indicator of the set
dryness level stays on.
The door locked indicator goes on.
The display shows regularly a new time
value.
The last minutes of the drying
cycle the appliance performs
the anti-crease and the cooling
phases.
12.3 Washing & Timed Drying
To have a good drying the appliance does
not let you set a too low spin speed for
the items to be washed and dried.
1. Press to set the drying time value.
The display shows 10 minutes.
The indicator comes on in the display.
The display shows the set drying value
time. for example: . After some
seconds the display shows the final time
value , that is the total duration of
the washing and drying cycles (washing +
drying + anti-crease + cooling phases).
If you set only 10 minutes of
drying after washing, the
appliance calculates also the
duration of the anti-crease and
the cooling phases.
2. Press to start the programme.
In the display the indicator comes on.
The door is locked. The display shows
regularly a new time value.
www.electrolux.com20
12.4 End of the programme
The appliance stops automatically. The
acoustic signals operate (if they are
active).
For more information see 'At the end of
the drying programme " of the previous
chapter.
1. Remove the laundry from the
appliance.
Make sure that the drum is empty.
2. Keep the door ajar, to prevent mildew
and odours.
3. Close the water tap.
12.5 Fluff in the fabrics
During the washing and/or drying phase,
some types of fabric, (sponge, wool,
sweatshirt) could release fluff.
The released fluff could stick to the fabrics
during the next cycle.
This inconvenient increases with technical
fabrics.
To prevent the fluff in your laundry, we
recommend that you:
To do not wash dark fabrics after you
washed and dried light coloured fabrics
(new sponge, wool, sweatshirt ) and
the contrary.
To dry this type of fabrics at open air
when they are washed the first time.
To clean the drain filter.
After the drying phase, clean the empty
drum, the gasket and the door with a
wet cloth.
12.6 How to remove the fluff in
the garments
To remove the fluff inside the drum, set a
special programme:
1. Empty the drum.
2. Clean the drum, the gasket and the
door with a wet cloth.
3. Set the rinse programme.
4. Press at the same time
and to
activate the cleaning function until the
display shows CLE.
5. Press
to start the programme.
13. HINTS AND TIPS
WARNING!
Refer to Safety chapters.
13.1 The laundry load
Divide the laundry in: white, coloured,
synthetics, delicates and wool.
Obey the washing instructions that are
on the laundry care labels.
Do not wash together white and
coloured items.
Some coloured items can discolour
with the first wash. We recommend
that you wash them separately for the
first times.
Button up pillowcases, close zippers,
hooks and poppers. Tie up belts.
Empty the pockets and unfold the
items.
Turn inside out multilayered fabrics,
wool and items with painted
illustrations.
Remove hard stains.
Wash with a special detergent heavy
soil stains.
Be careful with the curtains. Remove
the hooks or put the curtains in a
washing bag or pillowcase.
Do not wash in the appliance laundry
without hems or with cuts. Use a
washing bag to wash small and/or
delicate items (e.g. underwired bras,
belts, tights, etc. ).
A very small load can cause balance
problems with the spin phase. If this
occurs, adjust manually the items in
the tub and start the spin phase again.
13.2 Stubborn stains
For some stains, water and detergent is
not sufficient.
We recommend that you remove these
stains before you put the items in the
appliance.
ENGLISH
21
Special stain removers are available. Use
the special stain remover that is applicable
to the type of stain and fabric.
13.3 Detergents and additives
Only use detergents and additives
specially made for washing machines:
powder detergents for all types of
fabric,
powder detergents for delicate
fabrics (40 °C max) and woollens,
liquid detergents, preferably for low
temperature wash programmes (60
°C max) for all types of fabric, or
special for woollens only.
Do not mix different types of
detergents.
To help the environment, do not use
more than the correct quantity of
detergent.
Obey the instructions that you find on
the on packaging of these products.
Use the correct products for the type
and colour of the fabric, the
programme temperature and the level
of soil.
If your appliance has not the detergent
dispenser with the flap device, add the
liquid detergents with a dosing ball
(supplied by the detergent's
manufacturer).
13.4 Ecological hints
Set a programme without the prewash
phase to wash laundry with normal soil.
Always start a washing programme
with the maximum load of laundry.
If necessary, use a stain remover when
you set a programme with a low
temperature.
To use the correct quantity of the
detergent, check the water hardness of
your domestic system
13.5 Water hardness
If the water hardness in your area is high
or moderate, we recommend that you use
a water softener for washing machines. In
areas where the water hardness is soft it is
not necessary to use a water softener.
To know the water hardness in your area,
contact your local water authority.
Use the correct quantity of the water
softener. Obey the instructions that you
find on the packaging of the product.
13.6 Drying hints
Prepare the drying cycle
Open the water tap.
Do a check if the connection of the
drain hose is correct. Refer to
installation chapter for more
information.
For the maximum laundry load of the
drying programmes, refer to the drying
programmes table.
13.7 Items to do not dry
Do no not set a drying programme for
this laundry:
Very delicate items.
Synthetic curtains.
Pieces of clothing with metal inserts.
Nylon stockings.
Quilts.
Bed covers.
Duvets.
Anoraks.
Sleeping bags
Fabrics with residue of hair sprays, nail
solvents or similar.
Garments with foam-rubber or
materials similar to foam-rubber.
13.8 Garment labels
When you dry the laundry, obey the
indications on the labels of the
manufacturers:
= The item can be tumble dried
= The drying cycle is at high
temperature
= The drying cycle is at reduced
temperature
= The item can not be tumble dried.
13.9 Drying cycle duration
The drying time can change depending
on:
speed of the last spin
dryness level
type of laundry
weight of the load size
www.electrolux.com22
13.10 Additional drying
If, at the end of the drying programme, the
laundry is still damp, set a short drying
cycle again.
WARNING!
To avoid creases of fabrics
or shrinks of the clothing do
not over dry the laundry.
13.11 General Tips
Refer to the «Drying programmes» table to
find the average drying times.
The experience will help you to dry the
laundry in a more correct way. Take note
of the duration drying time of the cycles
done before.
To avoid the static charge at the end of
the drying cycle:
1. Use fabric conditioner in the washing
cycle.
2. Use special fabric conditioner for
tumble dryers.
When the drying programme is completed
remove the laundry in a short time.
14. CARE AND CLEANING
WARNING!
Refer to Safety chapters.
14.1 External cleaning
Clean the appliance only with soap and
warm water. Fully dry all the surfaces.
CAUTION!
Do not use alcohol, solvents or
chemical products.
14.2 Descaling
If the water hardness in your area is high
or moderate, we recommend that you use
a water softener for washing machines.
Regularly examine the drum to prevent
limescale and rust particles.
To remove rust particles use only special
products for washing machine. Do this
separately from the laundry wash.
Always obey the instructions
that you find on the packaging
of the product.
14.3 Maintenance wash
With the low temperature programmes it is
possible that some detergent stays in the
drum. Make regularly a maintenance
wash. To do this:
Remove the laundry from the drum.
Set the cotton programme with the
highest temperature with a small
quantity of detergent.
14.4 Door seal
Regularly examine the seal and remove all
objects from the inner part.
ENGLISH
23
14.5 Cleaning the detergent dispenser
1.
1
2
2.
3. 4.
14.6 Cleaning the drain filter
WARNING!
Do not clean the drain filter if
the water in the appliance is
hot.
1.
1
2
2.
2
11
www.electrolux.com24
3. 4.
1
2
5.
1
2
6.
7. 8.
1
2
9.
1
2
ENGLISH
25
14.7 Cleaning the inlet hose and the valve filter
1.
1
2
3
2.
3. 4.
14.8 Emergency drain
Because of a malfunction, the appliance
cannot drain the water.
If this occurs, do steps (1) through (9) of
'Cleaning the drain filter'. If necessary,
clean the pump.
When you drain the water with the
emergency drain procedure, you must
activate again the drain system:
1. When you drain the water with the
emergency drain procedure, you must
activate again the drain system: Put 2
litres of water in the main wash
compartment of the detergent
dispenser.
2. Start the programme to drain the
water
14.9 Frost precautions
If the appliance is installed in an area
where the temperature can be less than
0° C, remove the remaining water from the
inlet hose and the drain pump.
1. Disconnect the mains plug from the
mains socket.
2. Close the water tap.
3. Put the two ends of the inlet hose in a
container and let the water flow out of
the hose.
4. Empty the drain pump. Refer to the
emergency drain procedure.
5. When the drain pump is empty, install
the inlet hose again.
WARNING!
Make sure that the
temperature is more than 0 °C
before you use the appliance
again. The manufacturer is not
responsible for damages
caused by low temperatures.
www.electrolux.com26
15. TROUBLESHOOTING
WARNING!
Refer to Safety chapters.
15.1 Introduction
The start of the appliance does not occur
or it stops during operation.
First try to find a solution to the problem
(refer to the table). If not, contact the
Authorised Service Centre.
With some problems, the acoustic
signals operate and the display shows
an alarm code:
- The appliance does not fill with
water properly.
- The appliance does not drain
the water.
- The appliance door is open or
not closed correctly. Please check the
door!
- The mains supply is unstable.
Wait until the mains supply is stable.
WARNING!
Deactivate the appliance
before you do the checks.
15.2 Possible failures
Problem Possible solution
The programme does
not start.
Make sure that the mains plug is connected to the mains
socket.
Make sure that the appliance door is closed.
Make sure that there is not a damaged fuse in the fuse box.
Make sure that the Start/Pause has been pressed.
If the delay start is set, cancel the setting or wait for the end
of countdown.
Deactivate the Child Lock function if it is on.
The appliance does not
fill with water properly.
Make sure that the water tap is open.
Make sure that the pressure of the water supply is not too
low. For this information, contact your local water authority.
Make sure that the water tap is not clogged.
Make sure that the filter of the inlet hose and the filter of the
valve are not clogged. Refer to “Care and cleaning”.
Make sure that the inlet hose has no kinks or bends.
Make sure that the connection of the water inlet hose is cor-
rect.
The appliance does not
fill with water and drain
immediately.
Make sure that the drain hose is in the correct position. The
hose may be too low.
The appliance does not
drain the water.
Make sure that the sink spigot is not clogged.
ENGLISH
27
Problem Possible solution
Make sure that the drain hose has no kinks or bends.
Make sure that the drain filter is not clogged. Clean the filter,
if necessary. Refer to 'Care and cleaning'.
Make sure that the connection of the drain hose is correct.
Set the drain programme if you set a programme without
drain phase.
Set the drain programme if you set an option which ends
with water in the tub.
The spin phase does not
operate or the washing
cycle lasts longer than
usually.
Set the spin programme.
Make sure that the drain filter is not clogged. Clean the filter,
if necessary. Refer to 'Care and cleaning'.
Adjust manually the items in the tub and start the spin phase
again. This problem may be caused by balance problems.
There is water on the
floor.
Make sure that the couplings of the water hoses are tight
and there is not water leakages.
Make sure that the drain hose have no damages.
Make sure you use the correct detergent and the correct
quantity of it.
You cannot open the
appliance door.
Make sure that the washing programme is finished.
Set the drain or the spin programme if there is water in the
drum.
The appliance makes an
unusual noise.
Make sure the levelling of the appliance is correct. Refer to
'Installation'.
Make sure that the packaging and/or the transit bolts are re-
moved. Refer to 'Installation'.
Add more laundry in the drum. The load may be too small.
The cycle is shorter than
the time displayed.
The appliance calculates a new time according to the laundry
load. See the ‘Consumption Values’ chapter.
The cycle is longer than
the time displayed.
An unbalanced laundry load increases the duration time. This
is a normal behaviour of the appliance.
The washing results are
not satisfactory.
Increase the detergent quantity or use a different detergent.
Use special products to remove the stubborn stains before
you wash the laundry.
www.electrolux.com28
Problem Possible solution
Make sure that you set the correct temperature.
Decrease the laundry load.
You cannot set an op-
tion.
Make sure that you press only the wanted touch button(s).
The appliance does not
dry or does not dry cor-
rectly.
Turn the water tap on.
Make sure the drain filter is not clogged.
Reduce the laundry load.
Make sure you have set the correct cycle. if necessary ,set
again a short drying time.
The laundry is full of dif-
ferent colours fluff.
The fabrics washed in the previous cycle released fluff of a
different colour:
The drying phase helps to eliminate some fluff.
Clean the clothes with a fluff remover.
In case of an excessive amount of fluff in the drum run the
special programme to clean it (refer to “Fluff in the fabrics" for
more details).
After the check, activate the appliance. The programme continues from the point of
interruption.
If the problem occurs again, contact the Authorised Service Centre.
If the display shows other alarm codes. Deactivate and activate the appliance. If the problem
continues, contact the Authorised Service Centre.
16. TECHNICAL DATA
Dimension Width/ Height/ Depth/
Total depth
600 mm/ 850 mm/ 605 mm/ 639
mm
Electrical connection Voltage
Overall power
Fuse
Frequency
230 V
2200 W
10 A
50 Hz
Level of protection against ingress of solid parti-
cles and moisture ensured by the protective cov-
er, except where the low voltage equipment has
no protection against moisture
IPX4
Water supply pressure Minimum
Maximum
0,5 bar (0,05 MPa)
8 bar (0,8 MPa)
Maximum wash load Cotton 8 kg
Maximum dry load Cotton
Synthetics
6
3
ENGLISH
29
Spin Speed Maximum 1400 rpm
17. ENVIRONMENTAL CONCERNS
Recycle the materials with the symbol .
Put the packaging in applicable containers
to recycle it. Help protect the environment
and human health and to recycle waste of
electrical and electronic appliances. Do
not dispose appliances marked with the
symbol with the household waste.
Return the product to your local recycling
facility or contact your municipal office.
www.electrolux.com30
CONTENIDO
1. INFORMACIÓN SOBRE SEGURIDAD................................................................32
2. INSTRUCCIONES DE SEGURIDAD................................................................... 34
3. DESCRIPCIÓN DEL PRODUCTO...................................................................... 36
4. PANEL DE MANDOS.........................................................................................37
5. PROGRAMAS ...................................................................................................38
6. VALORES DE CONSUMO................................................................................. 42
7. OPCIONES........................................................................................................43
8. AJUSTES...........................................................................................................44
9. ANTES DEL PRIMER USO.................................................................................45
10. USO DIARIO - LAVADO SÓLO........................................................................ 45
11. USO DIARIO - SECADO.................................................................................. 49
12. USO DIARIO - LAVADO Y SECADO................................................................ 50
13. CONSEJOS.....................................................................................................52
14. MANTENIMIENTO Y LIMPIEZA........................................................................54
15. SOLUCIÓN DE PROBLEMAS.......................................................................... 58
16. DATOS TÉCNICOS..........................................................................................60
PENSAMOS EN USTED
Gracias por adquirir un aparato Electrolux. Ha escogido un producto que contiene
décadas de experiencia e innovación profesionales. Ingenioso y elegante, se ha
diseñado pensando en usted. Así pues, siempre que lo utilice, puede tener la
seguridad de que conseguirá excelentes resultados.
Bienvenido a Electrolux.
Consulte en nuestro sitio web:
Obtener consejos, folletos, soluciones a problemas e información de servicio:
www.electrolux.com
Registrar su producto para recibir un mejor servicio:
www.registerelectrolux.com
Adquirir accesorios, artículos de consumo y recambios originales para su
aparato:
www.electrolux.com/shop
ATENCIÓN Y SERVICIO AL CLIENTE
Le recomendamos que utilice recambios originales.
Al contactar con nuestro centro autorizado de servicio técnico, cerciórese de tener
la siguiente información a mano: Modelo, PNC, Número de serie.
La información se puede encontrar en la placa de características.
Advertencia / Precaución-Información sobre seguridad
Información general y consejos
Información medioambiental
Salvo modificaciones.
ESPAÑOL
31
1. INFORMACIÓN SOBRE SEGURIDAD
Antes de instalar y utilizar el aparato, lea atentamente las
instrucciones facilitadas. El fabricante no se hace
responsable de los daños y lesiones causados por una
instalación y uso incorrectos. Guarde siempre las
instrucciones junto con el aparato para futuras consultas.
1.1 Seguridad de niños y personas vulnerables
ADVERTENCIA!
Existe riesgo de sufrir asfixia, lesiones o
incapacidad permanente.
Este electrodoméstico puede ser utilizado por niños de
8 años en adelante y personas cuyas capacidades
físicas, sensoriales o mentales estén disminuidas o que
carezcan de la experiencia y conocimientos suficientes
para manejarlo, siempre que cuenten con las
instrucciones o la supervisión sobre el uso del
electrodoméstico de forma segura y comprendan los
riesgos.
No deje que los niños jueguen con el aparato.
Es necesario mantener alejados a los niños de menos
de 3 años salvo que estén bajo supervisión continua.
Mantenga los materiales de embalaje fuera del alcance
de los niños.
Mantenga todos los detergentes fuera del alcance de
los niños.
Mantenga a los niños y mascotas alejados del aparato
cuando la puerta se encuentre abierta.
Si el aparato dispone de dispositivo de seguridad para
niños, se recomienda activarlo.
La limpieza y el mantenimiento no podrán realizarlas
niños sin supervisión.
1.2 Instrucciones generales de seguridad
No cambie las especificaciones de este aparato.
www.electrolux.com32
El aparato se puede instalar de forma independiente o
debajo de una encimera con el espacio adecuado.
El aparato no se debe instalar detrás de puertas que
puedan bloquearse, de puertas correderas o de puertas
con bisagras por el lado contrario al del aparato, donde
su puerta no se pueda abrir completamente.
Conecte el enchufe a la toma de corriente únicamente
cuando haya terminado la instalación. Asegúrese de
tener acceso al enchufe del suministro de red una vez
finalizada la instalación.
Vigile que ninguna alfombra obstruya las aberturas de
ventilación de la base (si existen).
Asegúrese de que el recinto de instalación esté bien
ventilado para evitar el revoco de gases en el recinto
procedentes de aparatos que utilicen otros
combustibles, incluyendo llamas al aire libre
El aire de extracción no debe descargarse en un tubo
de ventilación usado para evacuar humos de aparatos
que funcionen con gas u otros combustibles (en su
caso).
La presión de trabajo del agua (mínima y máxima) debe
oscilar entre 0,5 bares (0,05 MPa) y 8 bares (0,8 MPa)
Respete la carga máxima de 8 kg (consulte el capítulo
“Tabla de programas”).
El aparato debe conectarse a la toma de agua
utilizando los nuevos juegos de tubos suministrados.
No se deben reutilizar los juegos de tubos antiguos.
Si el cable eléctrico sufre algún daño, el fabricante, su
Servicio técnico autorizado o un profesional tendrán
que cambiarlo para evitar riesgos
Limpie las pelusas que se hayan acumulado alrededor
del aparato.
Las prendas que se hayan ensuciado con sustancias
como aceite de cocina, acetona, alcohol, gasolina,
queroseno, quitamanchas, aguarrás, ceras y quitaceras
se deben lavar en agua caliente con una cantidad
ESPAÑOL
33
adicional de detergente antes de secarlas en la
lavadora-secadora.
No utilice el aparato si se han utilizado productos
químicos industriales para la limpieza.
No utilice la lavadora-secadora para secar prendas no
lavadas.
Las prendas como gomaespuma (espuma de látex),
gorros de ducha, tejidos impermeables, prendas y
artículos forrados de goma o almohadas con rellenos
de gomaespuma no se deben secar en la lavadora-
secadora.
Los suavizantes o productos similares se deben utilizar
tal y como se especifica en las instrucciones del
fabricante.
Retire todos los objetos, como encendedores y cerillas,
de los bolsillos.
No detenga nunca una lavadora-secadora de tambor
antes de finalizar el ciclo de secado a menos que todas
las prendas se retiren rápidamente y se extiendan para
disipar el calor
La parte final de un ciclo de secado se produce sin
calor (ciclo de enfriamiento) para garantizar que las
prendas queden a una temperatura que no las dañe.
No utilice pulverizadores ni vapor de agua para limpiar
el aparato.
Limpie el aparato con un paño suave humedecido.
Utilice solo detergentes neutros. No utilice productos
abrasivos, estropajos duros, disolventes ni objetos
metálicos.
Antes de proceder con el mantenimiento, apague el
aparato y desconecte el enchufe de la red.
2. INSTRUCCIONES DE SEGURIDAD
2.1 Instalación
Retire todo el embalaje y los pasadores
de transporte.
Guarde los pasadores de transporte.
Cuando vuelva a mover el aparato
debe bloquear el tambor.
El aparato es pesado, tenga cuidado
siempre cuando lo mueva. Utilice
siempre guantes de protección.
No instale ni utilice un aparato dañado.
Siga las instrucciones de instalación
suministradas con el aparato.
www.electrolux.com34
No instale ni utilice el aparato si la
temperatura es inferior a 0 °C o si está
expuesto a la intemperie.
Asegúrese de instalar el aparato en un
suelo plano, estable, resistente al calor
y limpio.
No coloque el aparato donde la puerta
no se pueda abrir completamente.
Desplace siempre el aparato en
vertical.
La superficie posterior del aparato se
debe colocar contra la pared.
Compruebe que el aire circula
libremente entre el aparato y el suelo.
Ajuste las patas para disponer del
espacio necesario entre el aparato y la
moqueta.
Cuando el aparato esté colocado en su
posición permanente, compruebe si
está totalmente nivelado con ayuda de
un nivel. De no estarlo, ajuste las patas
hasta que lo esté.
2.2 Conexión eléctrica
ADVERTENCIA!
Riesgo de incendios y
descargas eléctricas.
El aparato debe conectarse a tierra.
Utilice siempre una toma con
aislamiento de conexión a tierra
correctamente instalada.
No utilice adaptadores de enchufes
múltiples ni cables prolongadores.
No desconecte el aparato tirando del
cable de conexión a la red. Tire
siempre del enchufe.
No toque el cable de red ni el enchufe
con las manos mojadas.
Solo para Reino Unido e Irlanda. El
aparato tiene un enchufe de
alimentación de 13 amperios. Si es
necesario cambiar el fusible del
enchufe de alimentación, utilice un
fusible ASTA de 13 amperios (BS
1362).
Este aparato cumple las directivas
CEE.
2.3 Conexión de agua
Asegúrese de no provocar daños en
los tubos de agua.
Antes de conectar el aparato a las
nuevas tuberías o a tuberías que no se
hayan usado durante mucho tiempo,
deje correr el agua hasta que esté
limpia.
La primera vez que utilice el aparato,
asegúrese de que no haya fugas.
2.4 Uso del aparato
ADVERTENCIA!
Podrían producirse lesiones,
descargas eléctricas,
incendios, quemaduras o
daños en el aparato.
Utilice este aparato en entornos
domésticos solamente.
No cambie las especificaciones de este
aparato.
No coloque productos inflamables ni
objetos mojados con productos
inflamables dentro, cerca o encima del
aparato.
No toque el cristal de la puerta
mientras esté en marcha un programa.
El cristal puede estar caliente.
No seque prendas dañadas que
tengan acolchados o rellenos.
Si ha lavado la ropa con un
quitamanchas, deberá iniciar un ciclo
de aclarado adicional antes de iniciar la
secadora.
Asegúrese de sacar todos los objetos
metálicos de la colada.
Seque únicamente prendas aptas para
secadora de tambor. Siga las
instrucciones de la etiqueta de la
prenda.
Los elementos de plástico no son
resistentes al calor.
Si utiliza una bola dosificadora de
detergente, retírela antes de
seleccionar el programa de
secado.
No utilice una bola dosificadora de
detergente si selecciona un
programa sin pausas.
ADVERTENCIA!
Podría sufrir lesiones o dañar el
aparato.
No se siente ni se ponga de pie sobre
la puerta abierta.
No utilice el aparato para secar
prendas que goteen.
ESPAÑOL
35
2.5 Desecho
Desconecte el aparato de la red.
Corte el cable de conexión a la red y
deséchelo.
Retire el pestillo de la puerta para evitar
que los niños y las mascotas queden
encerrados en el aparato.
3. DESCRIPCIÓN DEL PRODUCTO
3.1 Descripción general del aparato
1
2
3
5
6
7
4
1
Encimera
2
Dosificador de detergente
3
Panel de control
4
Tirador de la puerta
5
Placa de características
6
Filtro de la bomba de desagüe
7
Pata para nivelación del aparato
3.2 Cómo activar el dispositivo
de seguridad para niños
Este dispositivo evitará que los niños o
mascotas queden encerrados en el
tambor.
Gire el dispositivo hacia la derecha hasta
que la ranura esté en posición horizontal.
No se puede cerrar la puerta.
Para cerrar la puerta, gire el dispositivo
hacia la izquierda hasta que la ranura esté
en posición vertical.
3.3 Kit de la placa de fijación
(4055171146)
Disponible en su distribuidor autorizado.
Si instala el aparato en un zócalo,
asegúrelo con las placas de fijación.
Lea atentamente las instrucciones que se
suministran con el kit.
www.electrolux.com36
4. PANEL DE MANDOS
4.1 Descripción del panel de control
arut
a
r
e
pm
eT
o
dagufir
tneC
a
s
u
a
P/oic
in
I
reganaM
e
miT
Extra
Aclarado/
Enxag.
Tiempo/
Tempo de
sec.
Inicio
Diferido
Nivel de
sec.
Edredón
Lana/Lãs
Secar
lana/lãs
Delicados
Sintéticos
Algod. Eco
Algod.+Prelava.
Algod.
Refrescar
Anti-arrugas
Anti-rugas
Secar
sintét.
Secar
algod.
Centrif./
Descarga
Aclarado/
Enxaguar
On/Off
53 4
1011
8
7
9
6
1 2
1
Tecla de encendido/apagado (On/
Off)
2
Selector de programas
3
Placa táctil de reducción del
centrifugado (Centrifugar)
4
Placa táctil de temperatura
(Temperatura)
5
Pantalla
6
Placa táctil de tiempo de secado
(Tiempo/Tempo de sec.)
7
Placa táctil de inicio diferido ( Inicio
Diferido)
8
Placa táctil de aclarado extra (Extra
Aclarado/Enxag.)
9
Placa táctil de nivel de secado
(Nivel de sec.)
10
Placa táctil de Inicio/Pausa (Inicio/
Pausa)
11
Placas táctiles de Time Manager
(Time Manager)
ESPAÑOL
37
4.2 Pantalla
A B C
D
E
F
GH
I
J
K
A) Área de temperatura:
: indicador de temperatura
: indicador de agua fría
B) : inicador del Administrador de
tiempo.
C) Área de tiempo:
: duración del programa
: inicio diferido
: códigos de alarma
: mensaje de error
: el programa se termina.
D) : La fase de secado.
E) : La fase de vapor.
F) : la opción permanente de aclarado
extra.
G)
, , : Los indicadores de nivel
de secado.
H) Área de centrifugado:
: indicador de velocidad de
centrifugado
: indicador de no
centrifugado
: indicador de agua en la cuba
I) : La fase de lavado.
J)
: El indicador de bloqueo de
seguridad para niños.
K) : El indicador de puerta
bloqueada.
5. PROGRAMAS
5.1 Tabla de programas
Programa
Margen de
temperatura
Carga máxi-
ma
Velocidad
máxima de
centrifugado
Descripción del programa
(Tipo de carga y grado de suciedad)
Programas de lavado
Algod.
90°C - Frío
8 kg
1400 rpm
Algodón blanco y de color. Suciedad normal y
ligera.
www.electrolux.com38
Programa
Margen de
temperatura
Carga máxi-
ma
Velocidad
máxima de
centrifugado
Descripción del programa
(Tipo de carga y grado de suciedad)
Algod. + Prel-
ava.
90°C - Frío
8 kg
1400 rpm
Algodón blanco y de color. Suciedad normal y
ligera.
Algod. Eco1)
60°C - 40°C
8 kg
1400 rpm
Algodón blanco y de colores resistentes. Su-
ciedad normal. El consumo de energía se reduce y
se amplía la duración del programa de lavado.
Sintéticos
60°C - Frío
4 kg
1200 rpm
Prendas de tejidos sintéticos o mezclas. Su-
ciedad normal.
Delicados
40°C - Frío
4 kg
1200 rpm
Prendas de tejidos delicados, como acrílicos,
viscosa o poliéster. Suciedad normal.
Lana/Lãs
40°C - Frío
2 kg
1200 rpm
Lana lavable a máquina, lana lavable a mano
y tejidos delicados con el símbolo «lavado a
mano». 2)
Edredón
60°C - 30°C
3 kg
800 rpm
Programa especial para una sola manta sintéti-
ca, un edredón, una colcha, etc.
Aclarado/
Enxaguaguar
8 kg
1400 rpm
Para aclarar y centrifugar prendas. Todos los teji-
dos.
Centrif./
Descarga3)
8 kg
1400 rpm
Para centrifugar la colada y drenar el agua en el
tambor. Todos los tejidos.
Programas de secado
Secar
Lana/Lãs
1 kg Programa de secado para lana.
Secar Sintét.
3 kg Programa de secado para prendas sintéticas.
Secar Algod.
6 kg Programa de secado para prendas de algodón.
ESPAÑOL
39
Programa
Margen de
temperatura
Carga máxi-
ma
Velocidad
máxima de
centrifugado
Descripción del programa
(Tipo de carga y grado de suciedad)
Programas de vapor 4)
El vapor se puede usar para las prendas secadas, lavadas o que se han puesto una
vez. Estos programas pueden reducir la cantidad de arrugas y los olores y suavizar las
prendas.
No utilice detergente. Si es necesario, elimine las manchas lavando o con quitaman-
chas en las zonas manchadas.
Los programas de vapor no realizan un ciclo higiénico.
No ajuste el programa de vapor para este tipo de prendas:
prendas cuya etiqueta de instrucciones no especifique claramente que pueden se-
carse en secadora
prendas con plástico, metal, madera o similares.
Refrescar
40°C
1,5 kg Programa de vapor para prendas de algodón y
sintéticas. Este ciclo elimina los olores de la cola-
da.5)
Anti-arru-
gas/Anti-rugas
40°C
1,5 kg Programa de vapor para prendas de algodón y
sintéticas. Este ciclo ayuda a reducir las arrugas
de la colada.
1)
Programa de algodón de bajo consumo energético Este programa a una temperatura de
60°C con una carga de 8 kg es el programa de referencia de los datos incluidos en la etiqueta
energética de conformidad con las normas CEE 92/75. Ajuste este programa para obtener
unos buenos resultados de lavado y reducir el consumo de energía. Se amplía la duración del
programa de lavado.
2)
Durante este ciclo, el tambor gira lentamente para asegurar un lavado suave. Puede parec-
er que el tambor no gira o que no lo hace adecuadamente. Es un comportamiento normal del
aparato.
3)
Ajuste la velocidad de centrifugado. Asegúrese de que coincide con la colada. Si se ajusta
la opción Sin centrifugado solo está disponible la fase de desagüe.
4)
Si ajusta un programa de vapor con la colada seca, al final del ciclo las prendas tienen un
tacto húmedo. Es mejor exponer las prendas al aire fresco durante unos 10 minutos para que
se seque la humedad. Una vez terminado el programa, saque rápidamente la colada del tam-
bor. Después de un ciclo de vapor, quizá deba planchar de todos modos, ¡pero con menos
esfuerzo!
5)
El vapor no elimina los olores de animales.
Compatibilidad con opciones de programa
Programa
www.electrolux.com40
Programa
con Prelavado
Eco
1)
1)
Ajuste la velocidad de centrifugado. Asegúrese de que coincide con la colada. Si se ajusta
la opción Sin centrifugado solo está disponible la fase de desagüe.
5.2 Programas de secado automático
Nivel de secado Tipo de tejido Carga
Extra Seco
Para materiales de felpa
Algodón y lino
(albornoces, toallas de baño,
etc.)
hasta 6 kg
Seco Armario1)
Para prendas que pueden guar-
darse
Algodón y lino
(albornoces, toallas de baño,
etc.)
hasta 6 kg
Tejidos sintéticos y mez-
clas
(jerséis, blusas, ropa interior,
ropa de hogar)
hasta 3 kg
Seco Plancha/ Engomar
Adecuado para prendas que de-
ben plancharse
Algodón y lino
(sábanas, manteles, camisas,
etc.)
hasta 6 kg
1)
Consejos para los institutos de pruebas La prueba de rendimiento, conforme a EN
50229, debe llevarse a cabo con una PRIMERA carga para secar de la capacidad de secado
máxima declarada (composición de la carga de acuerdo con EN61121) ajustando el programa
AUTOMÁTICO SECO ARMARIO para algodón. La SEGUNDA carga para secar con la carga
residual debe probarse ajustando el programa AUTOMÁTICO SECO ARMARIO para algodón.
ESPAÑOL
41
5.3 Programas de secado por tiempo
Nivel de secado Tipo de tejido Carga
(kg)
Veloci-
dad de
centri-
fugado
(rpm)
Duración
sugerida
(min)
Extra Seco
Para materiales de fel-
pa
Algodón y lino
(albornoces, toallas de ba-
ño, etc.)
6 1400 225 - 245
4 1400 135 - 155
2 1400 95 - 105
Seco Armario
Para prendas que
pueden guardarse
Algodón y lino
(albornoces, toallas de ba-
ño, etc.)
6 1400 215 - 235
4 1400 125 - 145
2 1400 85 - 95
Seco Armario
Para prendas que
pueden guardarse
Tejidos sintéticos y mez-
clas
(jerséis, blusas, ropa interi-
or, ropa de hogar)
3 1200 135 - 145
1 1200 40 - 50
Seco Plancha/ En-
gomar
Adecuado para pre-
ndas que deben plan-
charse
Algodón y lino
(sábanas, manteles, cami-
sas, etc.)
6 1400 185 - 205
4 1400 95 - 115
2 1400 75 - 85
Secado de lana Lana/Lãs
(suéteres de lana)
1 1200 110 - 130
6. VALORES DE CONSUMO
Los datos de esta tabla son aproximados. Los datos pueden cambiar por
varios motivos: la cantidad y tipo de colada, el agua y la temperatura ambi-
ente.
Al inicio del programa, la pantalla muestra la duración para la capacidad de
carga máxima. Durante la fase de lavado, la duración del programa se cal-
cula automáticamente y se puede reducir mucho si la carga es inferior a la
capacidad de carga máxima (p. ej., algodón 60°C, capacidad de carga
máxima 8 kg, la duración del programa supera 2 horas; carga real 1 kg, la
duración del programa no alcanza 1 hora). Cuando el aparato está calculan-
do la duración real del programa, un punto parpadea en la pantalla.
www.electrolux.com42
Programas Carga
(kg)
Consu-
mo ener-
gético
(KWh)
Consumo
de agua (li-
tros)
Duración aproxi-
mada del programa
(minutos)
Algodón 60 °C 8 1.60 72 168
Programa Algodón ECO 60
°C
1)
8 1.04 59
225
Algodón 40 °C 8 1.00 72 164
Sintéticos 40 °C 4 0.60 50 110
Delicados 40 °C 4 0.70 60 91
Lana/ Lavado a mano 30
°C
2 0.35 57 58
1)
El "programa Algodón ECO" a 60 °C con una carga de 8 kg es el programa de referencia
de los datos incluidos en la etiqueta energética de conformidad con las normas CEE 92/75.
7. OPCIONES
7.1 Temperatura
Ajuste esta opción para cambiar la
temperatura predeterminada.
Indicador = agua fría.
En la pantalla aparece la temperatura
seleccionada.
7.2 Centrifugar
Con esta opción puede reducir la
velocidad de centrifugado
predeterminada.
En la pantalla aparece el indicador de la
velocidad ajustada.
Opciones adicionales de centrifugado:
Sin centrifugado
Ajuste esta opción para eliminar todas
las fases de centrifugado.
Ajústelo para tejidos muy delicados.
La fase de aclarado utiliza más agua
para algunos programas de lavado.
La pantalla muestra el indicador
.
Agua en la cuba
Ajuste esta opción para evitar arrugas
en los tejidos.
El programa de lavado se detiene con
el agua en el tambor. El tambor gira
regularmente para evitar arrugas en las
prendas.
La puerta permanece bloqueada. Debe
drenar el agua para desbloquear la
puerta.
La pantalla muestra el indicador
.
Para vaciar el agua, consulte
"Al finalizar el programa".
7.3 Tiempo/Tempo de sec.
Con esta opción puede ajustar el tiempo
de los tejidos que se van a secar. La
pantalla muestra el valor ajustado.
Cada pulsación de la placa táctil aumenta
el valor de tiempo en 5 minutos
No se pueden ajustar todos los
valores de tiempo para
diferentes tipos de tejidos.
7.4 Inicio Diferido
Con esta opción puede retrasar el inicio
de un programa entre 30 minutos y 20
horas.
La pantalla muestra el indicador
correspondiente.
ESPAÑOL
43
7.5 Extra Aclarado/Enxag.
Con esta opción, puede añadir algunos
aclarados a un programa de lavado.
Utilice esta opción para personas
alérgicas al detergente y en zonas en las
que el agua sea blanda.
Se enciende el indicador.
7.6 Nivel de sec.
Con esta opción puede ajustar el nivel
automático de secado de la colada. En la
pantalla aparece el símbolo del nivel
ajustado.
Nivel extra seco para prendas de
algodón
Nivel seco armario para prendas de
algodón y sintéticas
Nivel seco plancha para prendas de
algodón
7.7 Administrador de tiempo
Cuando se ajusta un programa de lavado,
la pantalla muestra la duración
predeterminada.
Pulse o para reducir o aumentar la
duración del programa.
El administrador de tiempo solo está
disponible con los programas de la tabla.
Pi-
loto
de
con
trol
1) 1)
2)
Pi-
loto
de
con
trol
1) 1)
3) 3)
3)
4)
3) 3)
3)
1)
Si está disponible.
2)
Más corto: para airear la colada.
3)
Duración predeterminada del programa.
4)
Más largo: Al aumentar la duración del
programa se reduce gradualmente el consu-
mo de energía. La fase de calentamiento op-
timizada ahorra energía y la mayor duración
produce el mismo resultado de lavado (espe-
cialmente con suciedad normal).
8. AJUSTES
8.1 Bloqueo de seguridad para
niños
Con esta opción puede evitar que los
niños jueguen con el panel de control.
Para activar/desactivar esta opción,
pulse y al mismo tiempo hasta
que se ilumine/apague el indicador .
Puede activar esta opción:
www.electrolux.com44
Después de pulsar : se bloquean
las opciones y el selector de
programas.
Antes de pulsar : el aparato no se
puede iniciar.
8.2 Aclarado extra permanente
Con esta opción puede tener de forma
permanente un aclarado extra cuando
ajuste un nuevo programa.
Para activar/desactivar esta opción,
pulse
y al mismo tiempo hasta
que se ilumine/apague el indicador .
8.3 Señales acústicas
Se activan las señales acústicas cuando:
El programa se termina.
Se ha producido algún fallo en el
aparato.
Para desactivar/activar las señales
acústicas, pulse y al mismo tiempo
durante 6 segundos.
Si se desactivan las señales
acústicas, siguen funcionando
cuando el aparato presenta
una avería.
9. ANTES DEL PRIMER USO
1. Ponga 2 l de agua en el
compartimento de detergente para la
fase de lavado.
Así se activa el sistema de desagüe.
2. Ponga una pequeña cantidad de
detergente en el compartimento para
la fase de lavado.
3. Ajuste e inicie un programa para
algodón a la temperatura más alta sin
colada.
De esta forma se elimina toda la posible
suciedad del tambor y de la cuba.
10. USO DIARIO - LAVADO SÓLO
10.1 Cargar la colada
1. Abra la puerta del aparato
2. Introduzca las prendas en el tambor,
una por una.
3. Sacuda las prendas antes de
colocarlas en el aparato.
Asegúrese de no colocar demasiada
colada en el tambor.
4. Cierre la puerta.
PRECAUCIÓN!
Asegúrese de que no quedan prendas
enganchadas entre la puerta y el cierre.
Podría provocar fugas de agua y dañar la
colada.
10.2 Utilización del detergente y
los aditivos
1. Dosifique el detergente y el
suavizante.
2. Cierre con cuidado el dosificador de
detergente.
ESPAÑOL
45
10.3 Compartimento del detergente
Compartimento de detergente para fase de prelavado.
Compartimento de detergente para la fase de lavado.
Compartimento para aditivos líquidos (suavizante, almidón).
Tapa abatible para detergente líquido o en polvo.
10.4 Detergente líquido o en
polvo
1.
A
2.
www.electrolux.com46
3.
B
4.
Posición A para detergente en polvo (ajuste de fábrica).
Posición B para detergente líquido.
Cuando use detergente líquido:
No utilice detergentes líquidos gelatinosos ni espesos.
No cargue más líquido del nivel máximo.
No ajuste la fase de prelavado.
No ajuste el inicio diferido.
10.5 Puesta en marcha del
aparato
Pulse la tecla para encender o apagar
el aparato. El aparato emite un tono
cuando se enciende.
10.6 Ajuste de un programa
1. Gire el selector de programas para
ajustar el programa:
Se ilumina el indicador de
programa correspondiente.
Parpadea el indicador de
.
La pantalla muestra el nivel del
Administrador de tiempo, la
duración del programa y los
indicadores de las fases del
programa.
2. Si fuera necesario, cambie la
temperatura, la velocidad de
centrifugado y la duración del ciclo o
añada funciones disponibles. Cuando
se activa una opción, se enciende el
indicador de la opción ajustada.
Si hay algo incorrecto, la
pantalla muestra el mensaje
.
10.7 Inicio de un programa sin
inicio diferido
Pulse .
El indicador de deja de
parpadear y permanece iluminado.
El indicador empieza a
parpadear en la pantalla.
El programa se inicia, la puerta se
bloquea y la pantalla muestra el
indicador .
La bomba de desagüe puede
funcionar un momento cuando el
aparato llena agua.
Después de unos 15 minutos
del inicio del programa:
El aparato ajusta
automáticamente la
duración del programa de
acuerdo con la carga de la
colada.
La pantalla muestra el
nuevo valor.
10.8 Inicio de un programa con
el inicio diferido
1. Pulse repetidamente hasta que la
pantalla muestre el retardo que desee
ajustar.
ESPAÑOL
47
Se enciende en la pantalla el indicador
correspondiente.
2. Pulse :
El aparato inicia la cuenta atrás.
El programa de lavado se pone en
marcha de forma automática
cuando termina la cuenta atrás.
Puede cancelar o cambiar el
ajuste del inicio diferido antes
de pulsar . Para cancelar el
inicio diferido:
Pulse para dejar el
aparato en pausa.
Pulse hasta que la
pantalla muestre '.
Pulse
de nuevo
para iniciar el programa
inmediatamente.
10.9 Interrupción de un
programa y cambio de las
opciones
Puede cambiar únicamente algunas
opciones antes de usarlas.
1. Pulse
.
El indicador parpadea.
2. Cambie las opciones.
3. Vuelva a pulsar
.
El programa continúa.
10.10 Cancelación de un
programa
1. Pulse la tecla unos segundos para
cancelar el programa y apagar el
aparato.
2. Vuelva a pulsar la misma tecla para
encender el aparato. Ahora puede
ajustar un nuevo programa de lavado.
Antes de empezar un nuevo
programa, el aparato drena el
agua. Asegúrese de que queda
detergente en el
compartimento, de lo contrario,
rellénelo.
10.11 Abrir la puerta del aparato
cuando esté funcionando el
inicio diferido
Mientras el inicio diferido está en marcha,
la puerta del aparato está bloqueada y la
pantalla muestra el indicador
.
1. Pulse
para realizar una pausa en
el aparato.
2. Espere hasta que el indicador de
bloqueo de la puerta
se apague.
3. Abra la puerta.
4. Cierre la puerta del aparato.
5. Vuelva a pulsar
.
El inicio diferido continúa funcionando.
10.12 Abrir la puerta cuando
está funcionando el programa
Mientras el programa está en marcha, la
puerta del aparato está bloqueada y la
pantalla muestra el indicador .
PRECAUCIÓN!
Si la temperatura y el nivel de
agua del tambor son
demasiado elevados, no se
puede abrir la puerta.
1. Pulse la tecla durante unos
segundos para apagar el aparato.
2. Espere unos minutos y abra con
cuidado la puerta del aparato.
3. Cierre la puerta del aparato.
4. Vuelva a ajustar el programa.
10.13 Al finalizar el programa
El aparato se para automáticamente.
Suena la señal acústica, si está
activada.
Se enciende en la pantalla.
El indicador de se apaga.
El indicador de bloqueo de la puerta
se apaga.
Puede abrir la puerta.
Retire la colada del aparato. Asegúrese
de que el tambor está totalmente
vacío.
Cierre la llave de paso.
www.electrolux.com48
Pulse la tecla durante unos
segundos para apagar el aparato.
Deje la puerta entreabierta para evitar
la formación de moho y olores
desagradables.
El programa de lavado ha finalizado,
pero hay agua en el tambor:
El tambor gira regularmente para evitar
arrugas en las prendas.
Se ilumina el indicador de bloqueo de
la puerta . La puerta permanece
bloqueada.
Debe vaciar el agua para abrir la
puerta.
Para descargar el agua:
1. Pulse . El aparato desagua y
centrifuga.
2. Para que el aparato sólo seque, ajuste
. Si fuera necesario, reduzca la
velocidad de centrifugado.
3. Cuando el programa termina y el
indicador de bloqueo de la puerta
se apaga, puede abrir la puerta.
4. Pulse la tecla durante unos
segundos para apagar el aparato.
El aparato desagua y
centrifuga automáticamente
después de unas 18 horas
(excepto con el programa de
lana).
10.14 Opción Espera AUTO
La opción Espera AUTO apaga
automáticamente el aparato para reducir
el consumo de energía cuando:
No se utiliza el aparato durante 5
minutos antes de pulsar .
Pulse la tecla para encender el
aparato de nuevo.
Transcurridos 5 minutos desde el final
del programa de lavado
Pulse la tecla para encender el
aparato de nuevo.
La pantalla muestra el final del último
programa seleccionado.
Gire el selector de programas para
ajustar un nuevo ciclo.
11. USO DIARIO - SECADO
ADVERTENCIA!
Consulte los capítulos sobre
seguridad.
11.1 Ajuste de secado
ADVERTENCIA!
Abra el grifo. Coloque la manguera de
desagüe en la pila o conéctela al tubo
de descarga.
1. Pulse On/Off durante unos segundos
para activar el aparato.
2. Cargue las prendas una a una.
3. Gire el selector de programas hasta el
programa adecuado para secar las
prendas. La pantalla muestra el
indicador de secado
.
Para obtener unos buenos
resultados de secado, no
supere las cargas de secado
máximas recomendadas en el
Manual del usuario. No ajuste
una velocidad de centrifugado
inferior a la velocidad
automática del programa
ajustado.
11.2 Secado a niveles
automáticos
La colada se puede secar a niveles
predefinidos de secado:
1. Pulse repetidamente hasta que
aparezca en pantalla un indicador de
nivel de secado:
: indicador de nivel SECO
PLANCHA para prendas de
algodón
ESPAÑOL
49
: indicador de nivel SECO
ARMARIO para prendas de
algodón y sintéticas
: indicador de nivel EXTRA
SECO para prendas de algodón
En la pantalla aparece un valor de tiempo
calculado con la carga predeterminada. Si
la colada es mayor o menor que la carga
predeterminada, el aparato ajusta
automáticamente la duración durante el
ciclo.
2. Pulse para iniciar el programa.
La pantalla muestra el indicador de puerta
cerrada . El indicador de secado
comienza a parpadear.
No se pueden ajustar todos los
niveles de secado para todo
tipo de tejidos.
11.3 Tiempo de secado
La colada también se puede secar con un
secado manual temporizado:
1. Pulse repetidamente para ajustar
el valor del tiempo (consulte la tabla
“Programa para secado
temporizado”).
La pantalla muestra 10 minutos.
Cada pulsación de la placa táctil
aumenta el valor de tiempo en 5
minutos
La pantalla muestra el valor de
tiempo ajustado: por ejemplo:
.
Tras unos segundos, la pantalla
muestra un nuevo valor de tiempo:
. El aparato también calcula la
duración de las fases antiarrugas y
de enfriamiento.
2. Pulse para iniciar el programa.
La pantalla va mostrando
periódicamente un nuevo valor de
tiempo.
El indicador de secado
comienza a parpadear.
La pantalla muestra el indicador de
puerta cerrada .
Si ajusta sólo 10 minutos de secado, el
aparato sólo ejecuta una fase de
enfriamiento.
Si la colada no está suficientemente seca,
vuelva a ajustar un tiempo de secado
corto.
11.4 Final del programa de
secado
El aparato se para automáticamente.
Suenan las señales acústicas, si están
activadas.
Se enciende en la pantalla.
El indicador se apaga.
En los últimos minutos del ciclo de
secado, el aparato realiza una fase de
enfriamiento y antiarrugas. La puerta
sigue bloqueada.
Cuando el bloqueo de la puerta
desaparece de la pantalla, puede abrirla.
1. Pulse la tecla durante unos
segundos para apagar el aparato.
Unos minutos después de finalizar el
programa, la función de ahorro de energía
apaga automáticamente el aparato.
2. Retire la colada del aparato.
Asegúrese de que el tambor está
totalmente vacío.
3. Deje la puerta entreabierta para evitar
la formación de moho y olores
desagradables.
4. Cierre la llave de paso.
12. USO DIARIO - LAVADO Y SECADO
ADVERTENCIA!
Consulte los capítulos sobre
seguridad.
12.1 Programa sin pausas
1. Pulse On/Off durante unos segundos
para activar el aparato.
2. Cargue las prendas una a una.
www.electrolux.com50
Para obtener unos buenos
resultados de secado, no
supere las cargas de secado
máximas recomendadas en el
Manual del usuario. No ajuste
una velocidad de centrifugado
inferior a la velocidad
automática del programa
ajustado.
3. Coloque el detergente y los aditivos
en el compartimento adecuado.
4. Gire el selector hasta el programa de
lavado.
En la pantalla aparecen los indicadores de
las diferentes fases de lavado.
5. Ajuste las opciones disponibles.
12.2 Lavado y secado
automático
1. Pulse repetidamente hasta que
aparezca en pantalla un indicador de
nivel de secado:
: indicador de nivel SECO
PLANCHA para prendas de
algodón
: indicador de nivel SECO
ARMARIO para prendas de
algodón y sintéticas
: indicador de nivel EXTRA
SECO para prendas de algodón
La pantalla muestra el indicador . El
valor de tiempo de la pantalla es la
duración de los ciclos de lavado y de
secado, calculados con una carga
predeterminada.
Para obtener un buen secado,
el aparato no permite ajustar
una baja velocidad de
centrifugado con las prendas
que van a lavarse y secarse.
2. Pulse para iniciar el programa.
En la pantalla permanece el indicador del
nivel de secado ajustado.
El indicador de bloqueo de la puerta
se enciende.
La pantalla va mostrando periódicamente
un nuevo valor de tiempo.
En los últimos minutos del ciclo
de secado, el aparato realiza
las fases de enfriamiento y
antiarrugas.
12.3 Lavado y secado
temporizados
Para obtener un buen secado, el aparato
no permite ajustar una baja velocidad de
centrifugado con las prendas que van a
lavarse y secarse.
1. Pulse para ajustar el valor de
tiempo de secado. La pantalla
muestra 10 minutos.
El indicador aparece en la pantalla. La
pantalla muestra el valor de tiempo de
secado ajustado, por ejemplo: . Tras
unos segundos, la pantalla muestra el
valor final de tiempo ; se trata de la
duración total de los ciclos de lavado y
secado (lavado + secado + antiarrugas +
enfriamiento).
Si ajusta solo 10 minutos de
secado tras el lavado, el
aparato también calcula la
duración de las fases
antiarrugas y de enfriamiento.
2. Pulse para iniciar el programa.
En la pantalla se enciende el indicador
. La puerta está bloqueada. La
pantalla va mostrando periódicamente un
nuevo valor de tiempo.
12.4 Fin del programa
El aparato se detiene automáticamente.
Suenan las señales acústicas, si están
activadas.
Para obtener más información, consulte
"Al final del programa de secado“ en el
capítulo anterior.
1. Retire la colada del aparato.
Asegúrese de que el tambor está
totalmente vacío.
2. Deje la puerta entreabierta para evitar
la formación de moho y olores
desagradables.
3. Cierre la llave de paso.
ESPAÑOL
51
12.5 Pelusa en las prendas
Durante la fase de lavado y/o secado,
algunos tipos de tejidos, como esponja,
lana o sudaderas, pueden soltar pelusa.
La pelusa podría adherirse a los tejidos en
el siguiente ciclo.
Este inconveniente aumenta con los
tejidos técnicos.
Para evitar las pelusas en la colada, le
recomendamos:
No lavar tejidos oscuros tras haber
lavado y secado tejidos claros (toallas,
lana y sudaderas) y viceversa.
Secar al aire este tipo de tejidos la
primera vez que los lave.
Para limpiar el filtro de desagüe.
Después de la fase de secado, limpie
el tambor vacío, la junta y la puerta con
un paño húmedo.
12.6 Cómo eliminar pelusas de
las prendas
Para eliminar la pelusa que haya dentro
del tambor, ajuste un programa especial:
1. Vacíe el tambor.
2. Limpie el tambor, la junta y la puerta
con un paño húmedo.
3. Ajuste el programa de aclarado.
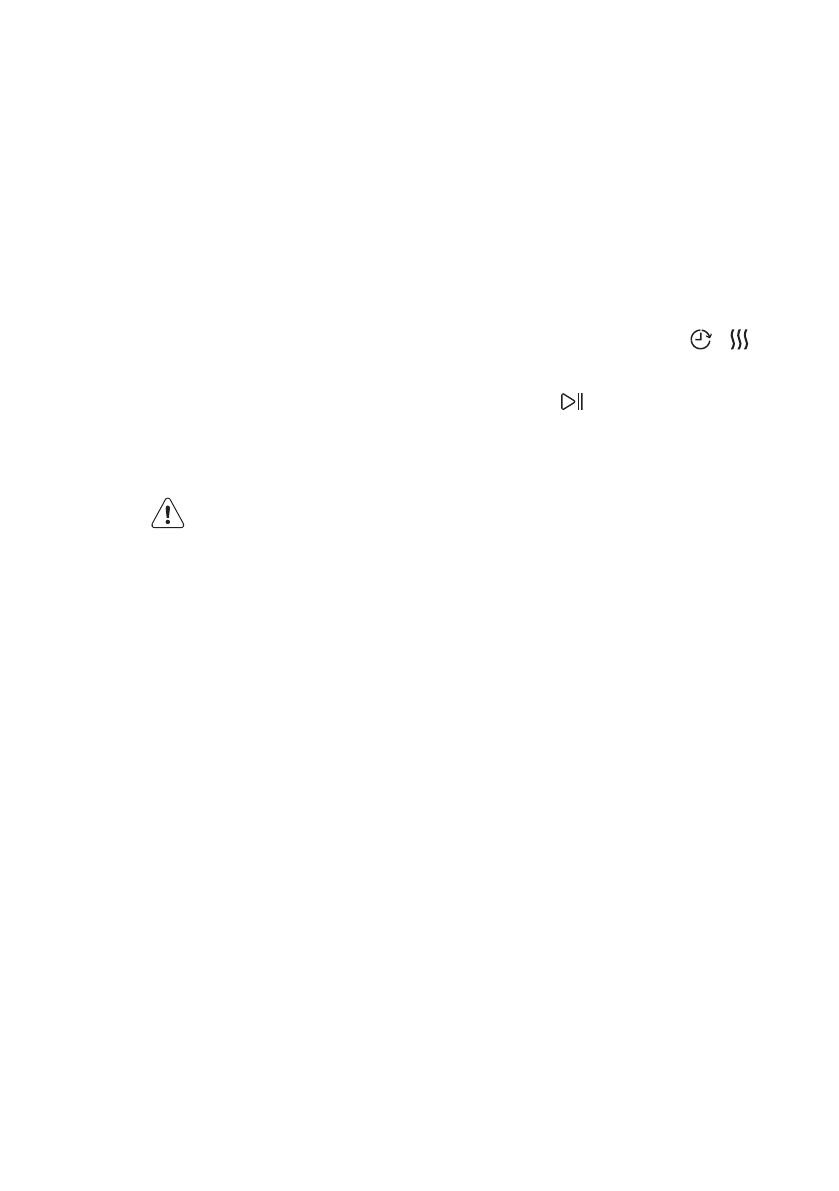
4. Pulse simultáneamente
y para
activar la función de limpieza hasta
que la pantalla muestre CLE.
5. Pulse
para iniciar el programa.
13. CONSEJOS
ADVERTENCIA!
Consulte los capítulos sobre
seguridad.
13.1 Introducir colada
Divida la colada en: ropa blanca, ropa
de color, ropa sintética, prendas
delicadas y prendas de lana.
Siga las instrucciones de lavado que se
encuentran en las etiquetas de las
prendas.
No lave juntas las prendas blancas y
de color.
Algunas prendas de color pueden
desteñir en el primer lavado. Se
recomienda lavarlas por separado la
primera vez.
Abotone las fundas de almohadas y
cierre las cremalleras, los ganchos y
los broches. Ate las correas.
Vacíe los bolsillos y despliegue las
prendas.
Dé la vuelta a las prendas de varias
capas, de lana y con motivos pintados.
Retire las manchas difíciles.
Lave con detergente especial las
manchas difíciles.
Tenga cuidado con las cortinas. Quite
los ganchos o coloque las cortinas en
una bolsa para lavadora o funda de
almohada.
No lave en el aparato prendas sin
dobladillos o desgarradas. Use una
bolsa para lavadora para lavar las
prendas pequeñas y delicadas (p. ej.,
sujetadores con aros, cinturones,
medias, etc.).
Una carga muy pequeña puede
provocar problemas de desequilibrio
en la fase de centrifugado. Si esto
ocurre, ajuste manualmente las
prendas en la cuba e inicie de nuevo la
fase de centrifugado.
13.2 Manchas difíciles
Para algunas manchas, el agua y el
detergente no son suficientes.
Se recomienda eliminar estas manchas
antes de colocar las prendas en el
aparato.
Existen quitamanchas especiales. Utilice el
quitamanchas especial adecuado al tipo
de mancha y tejido.
13.3 Detergentes y aditivos
Utilice solo detergentes y aditivos
especialmente fabricados para
lavadoras:
detergente en polvo para todo tipo
de prendas,
detergente en polvo para prendas
delicadas (40 °C máx.) y lana,
www.electrolux.com52
detergente líquido para todo tipo
de tejidos o especial para lana,
preferiblemente para programas de
lavado a baja temperatura (60 °C
máx.).
No mezcle diferentes tipos de
detergentes.
Para respetar el medio ambiente, no
ponga más detergente del necesario.
Siga siempre las instrucciones que se
encuentran en el envase de estos
productos.
Use los productos adecuados para el
tipo y color del tejido, la temperatura
del programa y el grado de suciedad.
Si el aparato no tiene el dosificador de
detergente con dispositivo de
compuerta, añada los detergentes
líquidos con una bola dosificadora
(suministrada por el fabricante del
detergente).
13.4 Consejos ecológicos
Ajuste un programa sin la fase de
prelavado para lavar ropa con
suciedad normal.
Empiece siempre un programa de
lavado con la carga de colada máxima.
Si fuera necesario, utilice un
quitamanchas cuando ajuste un
programa a baja temperatura.
Para utilizar la cantidad correcta de
detergente, compruebe la dureza del
agua de su sistema doméstico
13.5 Dureza del agua
Si la dureza del agua de su zona es alta o
moderada, se recomienda usar un
descalcificador de agua para lavadoras.
En las zonas en las que la dureza del agua
sea baja, no es necesario utilizar un
descalcificador.
Póngase en comunicación con las
autoridades correspondientes para
conocer la dureza del agua de su zona.
Utilice la cantidad correcta de
descalcificador. Siga las instrucciones que
encontrará en el envase del producto.
13.6 Consejos de secado
Prepare el ciclo de secado
Abra la llave de paso.
Compruebe la correcta conexión de la
manguera de descarga. Para obtener
más información, consulte el capítulo
de instalación.
Para conocer la carga máxima de los
programas de secado, consulte la
tabla de los programas de secado.
13.7 Las prendas no se secan
No seleccione un programa de
secado para los siguientes tipos de
ropa:
Prendas muy delicadas.
Cortinas sintéticas.
Ropa con adornos metálicos.
Medias de nailon.
Colchas.
Mantas.
Edredones.
Anoraks.
Sacos de dormir.
Tejidos con restos de lociones o lacas
para el cabello, quitaesmaltes o
similares.
Artículos que contengan gomaespuma
o materiales similares a ella.
13.8 Etiquetas de las prendas
Para el secado de la ropa, siga las
indicaciones de las etiquetas de los
fabricantes:
= La prenda puede secarse en
secadora
= El ciclo de secado es de alta
temperatura
= El ciclo de secado es de baja
temperatura
= La prenda no puede secarse en
secadora
13.9 Duración del ciclo de
secado
El tiempo de secado puede variar
dependiendo de:
la velocidad del último centrifugado
el nivel de secado
el tipo de prenda
el peso de las prendas que se han
cargado en la máquina
ESPAÑOL
53
13.10 Secado adicional
Si las prendas siguen húmedas al final del
programa, vuelva a seleccionar un ciclo de
secado corto.
ADVERTENCIA!
Para evitar la formación de
arrugas o que la ropa se
encoja, no la seque en
exceso.
13.11 Consejos generales
Consulte en la tabla «Programas de
secado» los tiempos de secado medios.
La experiencia le ayudará a secar la ropa
de forma más correcta. Anote la duración
de los ciclos de secado ya finalizados.
Para evitar la carga estática al final del
ciclo de secado:
1. Utilice el suavizante en el ciclo de
lavado.
2. Utilice un suavizante especial para
secadoras de tambor.
Cuando haya finalizado el programa de
secado, retire la ropa lo antes posible.
14. MANTENIMIENTO Y LIMPIEZA
ADVERTENCIA!
Consulte los capítulos sobre
seguridad.
14.1 Limpieza del exterior
Limpie el aparato solo con agua templada
y jabón. Seque completamente todas las
superficies.
PRECAUCIÓN!
No utilice alcohol, disolventes
ni otros productos químicos.
14.2 Descalcificación
Si la dureza del agua de su zona es alta o
moderada, se recomienda usar un
descalcificador de agua para lavadoras.
Examine periódicamente el tambor para
evitar la formación de cal y partículas de
óxido.
Para eliminar partículas de oxidación,
utilice productos especiales para
lavadoras. Hágalo de forma separada del
lavado de la colada.
Siga siempre las instrucciones
que encontrará en el envase
del producto.
14.3 Lavado de mantenimiento
Con los programas a baja temperatura, es
posible que quede algo de detergente en
el tambor. Realice periódicamente un
lavado de mantenimiento. Para ello:
Saque las prendas del tambor.
Ajuste el programa de algodón con la
temperatura más alta y utilice una
pequeña cantidad de detergente.
14.4 Junta de estanqueidad de
la puerta
Examine periódicamente la junta y extraiga
todos los objetos de la pieza interior.
www.electrolux.com54
14.5 Limpieza del dosificador de detergente
1.
1
2
2.
3. 4.
14.6 Limpieza del filtro de desagüe
ADVERTENCIA!
No limpie el filtro si el agua del
aparato está caliente.
1.
1
2
2.
2
11
ESPAÑOL
55
3. 4.
1
2
5.
1
2
6.
7. 8.
1
2
9.
1
2
www.electrolux.com56
14.7 Limpieza del tubo de entrada y el filtro de la válvula
1.
1
2
3
2.
3. 4.
14.8 Desagüe de emergencia
Debido a una avería, el aparato no puede
desaguar.
Si esto ocurre, realice los pasos 1) a 9) del
apartado "Limpieza del filtro de desagüe".
Limpie la bomba si fuera necesario.
Cuando se desagua con el procedimiento
de drenaje de emergencia, se debe activar
de nuevo el sistema de desagüe:
1. Cuando se desagua con el
procedimiento de drenaje de
emergencia, se debe activar de nuevo
el sistema de desagüe: Eche 2 litros
de agua en el compartimento de
lavado principal del dosificador de
detergente.
2. Inicie el programa para desaguar.
14.9 Medidas anticongelación
Si el aparato está instalado en una zona
donde la temperatura puede llegar a ser
inferior a 0°, retire el agua restante del
tubo de entrada y la bomba de desagüe.
1. Desenchufe el aparato de la toma de
red.
2. Cierre la llave de paso.
3. Coloque los dos extremos del tubo de
entrada en un recipiente y deje que
salga el agua.
4. Vacíe la bomba de descarga.
Consulte el procedimiento de desagüe
de emergencia.
5. Cuando la bomba esté vacía, coloque
de nuevo la manguera.
ADVERTENCIA!
Asegúrese de que la
temperatura es superior a 0 °C
antes de usar de nuevo el
aparato. El fabricante no se
hace responsable de los daños
derivados de las bajas
temperaturas.
ESPAÑOL
57
15. SOLUCIÓN DE PROBLEMAS
ADVERTENCIA!
Consulte los capítulos sobre
seguridad.
15.1 Introducción
El aparato no se pone en marcha o se
detiene durante el funcionamiento.
Primero, intente buscar una solución al
problema (consulte la tabla). Si no la
encuentra, póngase en contacto con el
servicio técnico.
Con algunos problemas, las señales
acústicas funcionan y la pantalla
muestra un código de alarma:
- El aparato no carga agua
correctamente.
- El aparato no desagua.
- La puerta del aparato está
abierta o no está bien cerrada. Revise
la puerta.
- La corriente eléctrica es
inestable. Espere hasta que la corriente
eléctrica se estabilice.
ADVERTENCIA!
Apague el aparato antes de
realizar las comprobaciones.
15.2 Fallo posible
Problema Posible solución
El programa no se pone
en marcha.
Asegúrese de que el enchufe está conectado a la toma de
corriente.
Asegúrese de que la puerta del aparato está cerrada.
Asegúrese de que no hay ningún fusible dañado en la caja
de fusibles.
Asegúrese de que se ha pulsado Inicio/Pausa.
Si se ha ajustado el inicio diferido, cancele el ajuste o espere
hasta el final de la cuenta atrás.
Desactive la función de bloqueo de seguridad para niños si
está activada.
El aparato no carga
agua correctamente.
Compruebe que el grifo está abierto.
Asegúrese de que la presión del agua no sea demasiado ba-
ja. Solicite información a la compañía local de suministro de
agua.
Compruebe que el grifo no esté obstruido.
Asegúrese de que el filtro de la manguera de entrada y el fil-
tro de la válvula no están obstruidos. Consulte el capítulo
"Mantenimiento y limpieza".
Asegúrese de que la manguera de entrada no esté doblada
ni retorcida.
Compruebe que la manguera de entrada de agua está con-
ectada correctamente.
www.electrolux.com58
Problema Posible solución
El aparato no se llena de
agua y desagua inme-
diatamente.
Asegúrese de que el tubo de desagüe se encuentra en la
posición correcta. Es posible que la manguera esté demasia-
do baja.
El aparato no desagua. Compruebe que el desagüe no esté obstruido.
Asegúrese de que el tubo de desagüe no esté doblado ni re-
torcido.
Compruebe que el filtro de desagüe no está obstruido. Lim-
pie el filtro si fuera necesario. Consulte el capítulo "Manteni-
miento y limpieza".
Compruebe que la manguera de desagüe está conectada
correctamente.
Ajuste el programa de descarga si selecciona un programa
sin la fase de descarga.
Ajuste el programa de descarga si selecciona una opción
que termina con agua en la cuba.
La fase de centrifugado
no funciona o el ciclo de
lavado dura más de lo
normal.
Seleccione el programa de centrifugado.
Compruebe que el filtro de desagüe no está obstruido. Lim-
pie el filtro si fuera necesario. Consulte el capítulo "Manteni-
miento y limpieza".
Ajuste manualmente las prendas en la cuba e inicie de nuevo
la fase de centrifugado. Este problema puede deberse a
problemas de equilibrio.
Hay agua en el suelo. Cerciórese de que los acoplamientos de los tubos de agua
están bien apretados y de que no hay pérdidas de agua.
Compruebe que la manguera de desagüe no está dañada.
Asegúrese de que usa el detergente adecuado y la cantidad
correcta.
No se puede abrir la pu-
erta del aparato.
Asegúrese de que el programa de lavado ha terminado.
Ajuste el programa de centrifugado o descarga si hay agua
en el tambor.
El aparato produce un
ruido extraño.
Compruebe que el aparato está correctamente nivelado.
Consulte el apartado "Instalación".
Asegúrese de que se ha quitado el material de embalaje y los
pasadores de transporte. Consulte el apartado "Instalación".
Añada más colada en el tambor. Es posible que la carga sea
demasiado pequeña.
ESPAÑOL
59
Problema Posible solución
El ciclo es más corto
que el tiempo mostra-
do.
El aparato calcula una nueva duración en función de la carga
de colada. Consulte el capítulo "Valores de consumo".
El ciclo es más largo
que el tiempo mostra-
do.
Una carga no equilibrada aumenta la duración. Es un com-
portamiento normal del aparato.
Los resultados del lava-
do no son satisfactorios.
Aumente la cantidad de detergente o utilice otro diferente.
Use productos especiales para eliminar las manchas difíciles
antes de lavar las prendas.
Asegúrese de ajustar la temperatura correcta.
Reduzca la carga.
No es posible seleccio-
nar opciones.
Asegúrese de pulsar solo las teclas táctiles apropiadas.
El aparato no seca o no
lo hace adecuadamente.
Abra el grifo.
Compruebe que el filtro de desagüe no está obstruido.
Reduzca la carga.
Asegúrese de ajustar el ciclo correcto. Si es necesario, vuel-
va a ajustar un tiempo de secado breve.
La colada está llena de
pelusas de diferente col-
or.
Las prendas que lavó en el ciclo anterior dejaron pelusas de
un color diferente:
La fase de secado ayuda a eliminar algo de pelusa.
Limpie las prendas con un quitapelusas.
En caso de que quede una cantidad excesiva de pelusas en
el tambor, seleccione el programa especial para limpiarlo
(consulte “Pelusa en las prendas” para obtener más detalles).
Una vez finalizada la revisión, conecte el aparato. El programa continuará a partir del punto en
que se haya interrumpido.
Si el problema se vuelve a producir, póngase en contacto con el servicio técnico autorizado.
Si la pantalla muestra otros códigos de alarma. Encienda y apague el aparato. Si el problema
persiste, póngase en contacto con el servicio técnico autorizado.
16. DATOS TÉCNICOS
Medidas Ancho / Alto / Fondo /
Fondo total
600 mm / 850 mm / 605 mm / 639
mm
Conexión eléctrica Voltaje
Potencia total
Fusible
Frecuencia
230 V
2200 W
10 A
50 Hz
www.electrolux.com60
El nivel de protección contra la entrada de partícu-
las sólidas y humedad está garantizado por la ta-
pa protectora, excepto si el equipo de baja ten-
sión no tiene protección contra la humedad.
IPX4
Presión del suministro
de agua
Mínima
Máxima
0,5 bares (0,05 MPa)
8 bares (0,8 MPa)
Carga máxima de lava-
do
Algodón 8 kg
Carga máxima para se-
cado
Algodón
Sintéticos
6
3
Velocidad de centrifu-
gado
Máxima 1400 rpm
17. ASPECTOS MEDIOAMBIENTALES
Recicle los materiales con el símbolo .
Coloque el material de embalaje en los
contenedores adecuados para reciclarlo.
Ayude a proteger el medio ambiente y la
salud pública, así como a reciclar residuos
de aparatos eléctricos y electrónicos. No
deseche los aparatos marcados con el
símbolo junto con los residuos
domésticos. Lleve el producto a su centro
de reciclaje local o póngase en contacto
con su oficina municipal.
*
ESPAÑOL
61
www.electrolux.com62
ESPAÑOL
63
www.electrolux.com/shop
132920983-A-062014
  • Page 1 1
  • Page 2 2
  • Page 3 3
  • Page 4 4
  • Page 5 5
  • Page 6 6
  • Page 7 7
  • Page 8 8
  • Page 9 9
  • Page 10 10
  • Page 11 11
  • Page 12 12
  • Page 13 13
  • Page 14 14
  • Page 15 15
  • Page 16 16
  • Page 17 17
  • Page 18 18
  • Page 19 19
  • Page 20 20
  • Page 21 21
  • Page 22 22
  • Page 23 23
  • Page 24 24
  • Page 25 25
  • Page 26 26
  • Page 27 27
  • Page 28 28
  • Page 29 29
  • Page 30 30
  • Page 31 31
  • Page 32 32
  • Page 33 33
  • Page 34 34
  • Page 35 35
  • Page 36 36
  • Page 37 37
  • Page 38 38
  • Page 39 39
  • Page 40 40
  • Page 41 41
  • Page 42 42
  • Page 43 43
  • Page 44 44
  • Page 45 45
  • Page 46 46
  • Page 47 47
  • Page 48 48
  • Page 49 49
  • Page 50 50
  • Page 51 51
  • Page 52 52
  • Page 53 53
  • Page 54 54
  • Page 55 55
  • Page 56 56
  • Page 57 57
  • Page 58 58
  • Page 59 59
  • Page 60 60
  • Page 61 61
  • Page 62 62
  • Page 63 63
  • Page 64 64

Electrolux EWW1486HDW Manual de usuario

Categoría
Lavadoras
Tipo
Manual de usuario

En otros idiomas