Beurer FT 100+ El manual del propietario
- Categoría
- Termómetros corporales digitales
- Tipo
- El manual del propietario

FT 100
D
Kontaktloses Thermometer
Gebrauchsanweisung ..........................2-22
G
Non-contact thermometer
Instructions for use ...........................23–43
F
Thermomètre sans contact
Mode d’emploi ...................................44–65
E
Termómetro sin contacto
Instrucciones de uso ......................... 66–86
I
Termometro senza contatto
Istruzioni per l’uso ...........................87–107
T
Temassız Termometre
Kullanım Kılavuzu ..........................108–127
r
Бесконтактный термометр
Инструкция по применению ....... 128–150
Q
Termometr bezdotykowy
Instrukcja obsługi ..........................151–171
ELECTROMAGNETIC COMPATIBILITY
INFORMATION .......................................172–175

2
DEUTSCH
Inhalt
1. Zeichenerklärung ................................................. 3
2. Bestimmungsgemäßer Gebrauch........................4
3. Warn- und Sicherheitshinweise ........................... 5
3.1 Gefahren für den Anwender ........................5
3.2 Gefahren für das Gerät ...............................6
3.3 Hinweise zum Umgang mit Batterien .........6
4. Informationen zu diesem Thermometer ..............7
5. Gerätebeschreibung ............................................9
6. Inbetriebnahme .................................................10
7. Thermometer einschalten und einstellen ..........11
8. Messen an der Stirn ..........................................14
9.
Messen der Objekttemperatur / Raumtemperatur..
16
10. Fehleranzeigen ...................................................17
11. Batterien ...........................................................18
12. Gerät reinigen ....................................................19
13. Gerät lagern ...................................................... 19
14. Gerät entsorgen .................................................19
15. Technische Daten ..............................................20
16. Richtlinien ......................................................... 21
17. Garantie .............................................................22
Lesen Sie diese Gebrauchsanweisung sorgfältig
durch, bewahren Sie sie für den späteren Geb-
rauch auf, machen Sie sie anderen Benutzern
zugänglich und beachten Sie die Hinweise.
Sehr geehrte Kundin, sehr geehrter Kunde,
wir freuen uns, dass Sie sich für ein Produkt unseres
Sortimen tes entschieden haben. Unser Name steht für
hoch wertige und eingehend geprüfte Qualitätsprodukte
aus den Bereichen Wär me, Sanfte Therapie, Blutdruck/
Diagnose, Gewicht, Massage und Luft.
Bitte lesen Sie diese Gebrauchsanweisung aufmerksam
durch, und beachten Sie die Hinweise.
Mit freundlicher Empfehlung
Ihr Beurer-Team
Lieferumfang
Überprüfen Sie den Lieferumfang auf äußere Unver-
sehrtheit der Kartonverpackung und auf die Vollständig-
keit des Inhalts. Vor dem Gebrauch ist sicherzustellen,
dass das Gerät und Zubehör keine sichtbaren Schäden
aufweisen und jegliches Verpackungsmaterial entfernt
wird. Benutzen Sie es im Zweifelsfall nicht und wenden
Sie sich an Ihren Händler oder an die angegebene Kun-
dendienstadresse.

3
•F
ieberthermometer
•2
x 1,5 V Batterien AAA (LR03)
•A
ufbewahrungstasche
•G
ebrauchsanweisung
1. Zeichenerklärung
Folgende Symbole werden in dieser Gebrauchsanweisung und auf dem Gerät verwendet:
WARNUNG
Warnhinweis auf Verletzungsgefahren oder Gefahren für Ihre Gesundheit.
ACHTUNG
Sicherheitshinweis auf mögliche Schäden am Gerät/Zubehör.
Hinweis
Hinweis auf wichtige Informationen.
Gebrauchsanweisung beachten
Anwendungsteil Typ BF
Entsorgung gemäß Elektro- und Elektronik-Altgeräte EG-Richtlinie – WEEE (Waste Electrical
and Electronic Equipment)
Die CE-Kennzeichnung bescheinigt die Konformität mit den grundlegenden Anforderungen der
Richtlinie 93/42/EEC für Medizinprodukte.

4
Hersteller
Storage
Zulässige Aufbewahrungs- und Transporttemperatur und -luftfeuchtigkeit
Operating
Zulässige Betriebstemperatur und -luftfeuchtigkeit
IP 22
Gerät geschützt gegen Fremdkörper ≥12,5 mm und gegen schräges Tropfwasser
Seriennummer
Wichtige Information/Tipp
w
Querverweis auf einen anderen Absatz.
Zertifizierungszeichen für Produkte, die in die Russische Föderation und in die Länder der GUS
exportiert werden.
2. Bestimmungsgemäßer Gebrauch
Dieses Thermometer dient der kontaktlosen Messung der Stirn-, Objekt- und Raumtemperatur. Das Thermometer
ist für die Messung zu Hause geeignet. Sie können damit schnell und einfach die Körpertemperatur ermitteln. Die
Werte werden automatisch gespeichert.

5
3. Warn- und Sicherheitshinweise
3.1 Gefahren für den Anwender
•W
enden Sie das Gerät nur an, nachdem Sie diese Gebrauchsanweisung gelesen und verstanden haben.
•
B
ewahren Sie diese Gebrauchsanweisung auf. Die Gebrauchsanweisung muss für alle Benutzer zugänglich
sein. Alle Hinweise müssen befolgt werden.
•
B
ewahren Sie das Gerät mindestens 30 Minuten vor der Messung in dem Raum auf, in dem die Messung
durchgeführt wird.
•W
arten Sie nach sportlicher Aktivität, nach einem Bad oder wenn Sie im Freien waren, ca. 30 Minuten bevor
Sie eine Messung an der Stirn vornehmen.
•D
as FT 100-Thermometer ist nur für den in der Gebrauchsanweisung angegebenen Messort am menschlichen
Körper konzipiert.
•
F
ühren Sie aufgrund der Messergebnisse keine Selbstdiagnose oder -behandlung ohne Rücksprache mit Ihrem
behandelnden Arzt durch. Setzen Sie insbesondere nicht eigenmächtig eine neue Medikation an und führen Sie
keine Änderungen in Art und / oder Dosierung einer bestehenden Medikation durch.
•D
as Gerät ist nur für den in dieser Gebrauchsanweisung angegebenen Zweck bestimmt.
•
D
er Hersteller haftet nicht für Schäden, die durch unsachgemäßen oder falschen Gebrauch verursacht wurden.
•K
inder dürfen das Gerät nicht verwenden. Medizinprodukte sind kein Spielzeug.
•P
rüfen Sie vor jeder Anwendung, ob die Linse intakt ist. Sollte diese beschädigt sein, wenden Sie sich bitte an
die Händler- oder Serviceadresse.
•B
erühren Sie die Linse nicht mit dem Finger.
•
D
ie von Ihnen ermittelten Messwerte dienen nur zu Ihrer Information, sie ersetzen keine ärztliche Untersuchung!
Bevor Sie medizinische Handlungen vornehmen, konsultieren Sie einen Arzt.
•R
einigen Sie das Thermometer nach jeder Benutzung (
w
12. Gerät reinigen).
•
H
aben Sie noch Fragen zur Anwendung des Geräts, so wenden Sie sich bitte an Ihren Händler oder an den
Kundenservice.

6
3.2 Gefahren für das Gerät
•S
etzen Sie das Gerät keinen mechanischen Stößen aus und lassen Sie es nicht fallen.
•
S
etzen Sie das Gerät nicht direkter Sonneneinstrahlung, extremen Temperaturen oder hoher Luftfeuchtigkeit aus.
•S
etzen Sie das Gerät keinen Flüssigkeiten aus. Das Gerät ist nicht wasserdicht. Vermeiden Sie jeden direkten
Kontakt mit Wasser oder anderen Flüssigkeiten.
•
Ö
ffnen oder reparieren Sie das Gerät nicht selbst. Lassen Sie das Gerät nur von autorisierten Servicestellen
reparieren, sonst erlischt Ihr Garantieanspruch.
•
Tragbare und mobile HF-Kommunikationseinrichtungen können das Gerät beeinflussen. Genauere Angaben können
Sie unter der angegebenen Kundenservice-Adresse anfordern oder am Ende der Gebrauchsanweisung nachlesen.
3.3 Hinweise zum Umgang mit Batterien
•W
enn Flüssigkeit aus einer Batteriezelle mit Haut oder Augen in Kontakt kommt, die betroffene Stelle mit Was-
ser auswaschen und ärztliche Hilfe aufsuchen.
•
Verschluckungsgefahr! Kleinkinder könnten Batterien verschlucken und daran ersticken. Daher Batterien
für Kleinkinder unerreichbar aufbewahren!
•A
uf Polaritätskennzeichen Plus (+) und Minus (-) achten.
•
W
enn eine Batterie ausgelaufen ist, Schutzhandschuhe anziehen und das Batteriefach mit einem trockenen
Tuch reinigen.
•S
chützen Sie Batterien vor übermäßiger Wärme.
•
Explosionsgefahr! Keine Batterien ins Feuer werfen.
•B
atterien dürfen nicht geladen oder kurzgeschlossen werden.
•B
ei längerer Nichtbenutzung des Geräts die Batterien aus dem Batteriefach nehmen.
•V
erwenden Sie nur denselben oder einen gleichwertigen Batterietyp.
•I
mmer alle Batterien gleichzeitig auswechseln.
•K
eine Akkus verwenden!
•K
eine Batterien zerlegen, öffnen oder zerkleinern.

7
4. Informationen zu diesem Thermometer
Der gemessene Temperaturwert schwankt, abhängig von der gemessenen Körperstelle. Die Abweichung kann
bei gesunden Menschen an unterschiedlichen Körperstellen zwischen 0,2 °C bis 1 °C (0,4 °F bis 1,8 °F) liegen.
Normaler Temperaturbereich bei unterschiedlichen Thermometern:
Messwerte Verwendetes Thermometer
Stirntemperatur 35,8 °C bis 37,6 °C (96,4 °F bis 99,7 °F) Stirnthermometer
Ohrtemperatur 36,0 °C bis 37,8 °C (96,8 °F bis 100,0 °F) Ohrthermometer
Oraltemperatur 36,0 °C bis 37,4 °C (96,8 °F bis 99,3 °F) konventionelles Thermometer
Rektaltemperatur 36,3 °C bis 37,8 °C (97,3 °F bis 100,0 °F) konventionelles Thermometer
Beurer-Tipp
•V
ergleichen Sie nie mit verschiedenen Thermometern gemessene Tempera turen miteinander.
•S
agen Sie Ihrem Arzt, mit welchem Thermometer Sie die Körpertemperatur gemessen haben und an
welcher Körperstelle. Berücksichtigen Sie dies auch bei einer Selbstdiagnose.
Wird das Thermometer vor der Messung zu lange in der Hand gehalten, führt dies zur Erwärmung des
Gerätes. Dadurch kann das Messergebnis verfälscht werden.

8
Einflüsse auf die Körpertemperatur
•I
ndividueller, personenabhängiger Stoffwechsel
•L
ebensalter
Die Körpertemperatur ist bei Säuglingen und Kleinkindern höher als bei Erwachsenen. Bei Kindern treten höhere
Temperaturschwankungen schneller und häufiger auf. Mit zunehmendem Alter sinkt die normale Körpertem-
peratur.
•K
leidung
•A
ußentemperatur
•T
ageszeit
Die Körpertemperatur ist am Morgen niedriger und steigt im Laufe des Tages zum Abend an.
Aktivitäten
•K
örperlichen Aktivitäten und, mit geringerem Einfluss, mentale Aktivitäten erhöhen die Körper temperatur.
Beurer-Tipp
Die Körpertemperaturmessung liefert den aktuellen Messwert eines Menschen. Wenn Sie sich bei der
Interpretation der Ergebnisse unsicher sind, oder wenn abnorme Werte (z.B. Fieber) auftreten, sollten
Sie sich an Ihren Hausarzt wenden. Dies gilt auch bei geringen Temperaturveränderungen, wenn weitere
Krankheitssymptome hinzutreten, wie z.B. Unruhe, starkes Schwitzen, Hautrötung, hohe Pulsfrequenz,
Kollapsneigung usw.

9
5. Gerätebeschreibung
1
Display
2
MODE/MEM-Taste
3
Fieber-/ Abstandsindikator
4
LIGHT/SET-Taste
5
Messsensor
6
Abstandssensor
7
/
SCAN-Taste
8
Batteriefachdeckel
Tasten Funktionen
MODE/MEM
MODE
Einstellung des Messmodus.
MEM
Anzeige der gespeicherten Messwerte.
LIGHT/SET
LIGHT
Manuelles Zuschalten der
Displaybeleuchtung.
SET
Einstellung der Grundfunktionen.
SCAN
Gerät ein- und ausschalten.
Temperaturmessung starten.
1
2
3
4
5
6
7
8

10
Displaybeschreibung
1
Jahr-/Datum-/Uhrzeit-Anzeige
YEAR
AM
PM
MEM
DATE
1
2
3
4
5
6
7
8
9
10
11
12
13
14
2
Modus Raumtemperatur
3
Modus Stirntemperatur
4
Modus Objekt temperatur
5
Temperaturwert-/Speicher platz nummer-Anzeige
6
Signalton-Symbol
7
Displaybeleuchtungs-Symbol
8
Jahr
9
Speicherfunktion
10
Datum
11
Messergebnis ≥ 38,0°C (≥ 100,4°F) „Fieber“
12
Messergebnis < 37,5°C (< 99,5°F) „kein Fieber“
13
Batteriestandanzeige
14
Temperaturmesseinheit (Celsius/Fahrenheit)
6. Inbetriebnahme
Falls vorhanden, ziehen Sie den Batterie-Isolationsstreifen am Batteriefachdeckel beziehungsweise
entfernen Sie die Schutzfolie der Batterie und setzen Sie die Batterie gemäß Polung ein.
•S
chieben Sie den Batteriefachdeckel auf.
•S
etzen Sie die zwei im Lieferumfang enthaltenen Batterien gemäß der Polung ein.
•
Schieben Sie den Batteriefachdeckel wieder auf das Thermometer bis er hör- und spürbar fest einrastet.
•
Das Thermometer geht nun automatisch in das Einstellungsmenü (w 7. Thermometer einschalten
und einstellen).

11
7. Thermometer einschalten und einstellen
Um das Thermometer einzuschalten, drücken Sie kurz auf die
/
SCAN-Taste.
Nach einem kurzen Selbsttest und zwei kurzen Pieptönen ist das Thermometer zum Messen der Temperatur an
der Stirn bereit. Das Gerät startet immer im Modus Stirntemperatur
.
Grundfunktionen einstellen
In diesem Menü haben Sie die Möglichkeit, folgende Funktionen nacheinander individuell einzustellen.
Zeitformat
•
Legen Sie die Batterien neu ein oder halten Sie die LIGHT/SET-Taste beim
eingeschalteten Thermometer 4 Sekunden gedrückt. Im Display blinkt die
Zeitformat-Anzeige (Abb. 1).
•
Stellen Sie mit der MODE/MEM-Taste Ihr gewünschtes Zeitformat ein und
bestätigen Sie mit der LIGHT/SET-Taste.
AM
Abb. 1
Datum
Im Display blinkt die Jahreszahl (Abb. 2).
•
Stellen Sie mit der MODE/MEM-Taste das Jahr ein und bestätigen Sie mit
der LIGHT/SET-Taste.
Im Display blinkt Tag/Monat (Abb. 3).
•
Stellen Sie mit der MODE/MEM-Taste den Tag und den Monat ein und
bestätigen Sie m it der LIGHT/SET-Taste.
Wenn als Stundenformat 12 h eingestellt ist, ist die Reihenfolge der Tages-
und Monatsanzeige vertauscht. Sie sollten Datum und Uhrzeit korrekt ein-
stellen. Nur so können Sie Ihre Messwerte korrekt mit Datum und Uhrzeit
speichern und später abrufen.
DATE
Abb. 3
YEAR
Abb. 2
Temperatur-
messeinheit
Display-
beleuchtung
Zeitformat Datum Uhrzeit
Signalton

12
Uhrzeit
Im Display blinkt die Stunde (Abb. 4).
•
Stellen Sie mit der MODE/MEM-Taste die Stunde ein und bestätigen Sie
mit der LIGHT/SET-Taste.
Im Display blinkt die Minute (Abb. 5).
•
Stellen Sie mit der MODE/MEM-Taste die Minute ein und bestätigen Sie
mit der LIGHT/SET-Taste.
Im 12-h-Zeitformat wird die Uhrzeit mit AM/PM angezeigt.
Abb 5
Abb. 4
Temperaturmesseinheit
Im Display blinkt die Temperaturmesseinheit (Abb. 6).
Sie können sich Ihre Messergebnisse in der Temperaturmesseinheit Grad Cel-
sius (°C) oder Grad Fahrenheit (°F) anzeigen lassen.
•
Um die Messergebnisse in Celsius anzuzeigen, wählen Sie mit der MODE/
MEM-Taste °C und bestätigen Sie mit der LIGHT/SET-Taste.
•
Um die Messergebnisse in Fahrenheit anzuzeigen, wählen Sie mit der MODE/
MEM-Taste °F und bestätigen Sie mit der LIGHT/SET-Taste.
Abb. 6
Signalton
Im Display blinkt das Signalton-Symbol (Abb. 7).
Sie können die Signaltöne (Einschalten des Geräts, während der Messung,
Abschluss der Messung) ein- oder ausschalten.
•
Um die Signaltöne einzuschalten, wählen Sie mit der MODE/MEM-Taste
und bestätigen Sie mit der LIGHT/SET-Taste.
•
Um die Signaltöne auszuschalten, wählen Sie mit der MODE/MEM-Taste
und bestätigen Sie mit der LIGHT/SET-Taste.
Abb. 7

13
Displaybeleuchtung
Im Display blinkt das Displaybeleuchtungs-Symbol (Abb. 8).
Sie können die automatische Displaybeleuchtung (erscheint nach Messung
der Stirntemperatur) ein- oder ausschalten.
•
Um die automatische Displaybeleuchtung einzu schalten, wählen Sie mit
der MODE/MEM-Taste und bestätigen Sie mit der LIGHT/SET-Taste.
•
Um die automatische Displaybeleuchtung auszu schalten, wählen Sie mit
der MODE/MEM-Taste und bestätigen Sie mit der LIGHT/SET-Taste.
Abb. 8
Außerdem haben Sie die Möglichkeit die Display beleuchtung manuell einzuschalten, indem Sie die LIGHT/
SET-Taste kurz drücken.
Das Display ist 5 Sekunden beleuchtet.
Die automatische und die manuelle Displaybeleuchtung kann nicht während des Messvorgangs ver-
wendet werden.

14
8. Messen an der Stirn
Beurer-Tipp
Berücksichtigen Sie, dass
•
k
örperliche Betätigung, grundsätzlich erhöhte Schweißbildung auf der Stirn, Einnahme von gefäßveren-
genden Medikamenten und Hautirritationen das Messergebnis verfälschen können,
•d
ie Stirn, beziehungsweise Schläfe, frei von Schweiß und Kosmetika sein muss.
•
W
ir empfehlen Ihnen, drei Messungen an der Stirn vorzunehmen. Sollten sich die drei Messergebnisse
unterscheiden, nehmen Sie den höchsten Messwert.
Modus Stirntemperatur
•U
m das Thermometer einzuschalten, drücken Sie kurz auf die
/
SCAN-
Taste. Nach einem kurzen Selbsttest ist das Gerät zur Temperaturmessung
an der Stirn bereit. Das Gerät befindet sich im Modus Stirntemperatur. Dies
erkennen Sie am Symbol im Display.
Abb. 9
•
H
alten Sie das Thermometer 4 bis 6 cm vor die Messstelle an der Stirn
(Abb. 10). Drücken Sie die
/
SCAN-Taste. In der Displayanzeige erscheint
der geforderte Messabstand von 4-6 cm.
Abb. 10

15
Modus Stirntemperatur
Messabstand beträgt
4-6 cm
Messabstand beträgt
NICHT 4-6 cm
Sobald das Thermometer den kor-
rekten Messabstand von 4 bis 6 cm
erfasst hat, beginnt es automatisch mit
der Messung. Der Fieber-/ Abstand-
sindikator leuchtet nun dauerhaft blau.
Nach wenigen Sekunden erscheint im
Display das Messergebnis (Abb. 12).
Das Ende der Messzeit wird mit einem
langen Piepton signalisiert.
Wenn der Messabstand nicht 4 bis 6 cm
beträgt, blinkt der Fieber-/ Abstandsin-
dikator blau (bei eingeschaltetem Sig-
nalton ertönt zusätzlich ein Piepsen)
und es erscheint
4-6
im Display (Abb.
11). Sollte nach 20 Sekunden der kor-
rekte Messabstand nicht gefunden wer-
den, wird die Messung automatisch
beendet.
Wenn das Messergebnis unter 37,5°C (99,5°F) liegt, leuchtet der
Fie-
ber-/ Abstandsindikator
grün und im Display erscheint für kein Fieber,
das signalisiert, dass die Körpertemperatur im normalen Bereich liegt.
Wenn das Messergebnis zwischen 37,5°C und 37,9°C liegt, leuchtet der
Fieber-/ Abstandsindikator gelb, das signalisiert, dass die Körpertempera-
tur im erhöhten Bereich liegt (Abb. 13).
Wenn das Messergebnis über 38°C (100,4°F) liegt, leuchtet der
Fie-
ber-/ Abstandsindikator
rot und im Display erscheint (Abb. 14), dass die
Körpertemperatur überhalb des normalen Bereichs liegt.
Abb. 13
Abb. 12
Abb. 11
Abb. 14
Der Messwert wird automatisch mit Datum/Uhrzeit und Einstufung „Fieber“
/ „kein Fieber“ gespeichert.
Das Gerät signalisiert mit zwei kurzen Pieptönen und einem nicht mehr blin
-
kenden Stirnsymbol , dass das Gerät für eine weitere Messung bereit ist.

16
Gespeicherte Messwerte anzeigen
Das Gerät speichert ausschließlich Messwerte im Modus Stirntemperatur . Das Gerät speichert automatisch
die Messwerte von den letzten 60 Messungen ab.
Werden die 60 Speicherplätze überschritten, wird der jeweils älteste Wert gelöscht.
•D
er Speicher kann wie folgt abgerufen werden:
•
Halten Sie die MODE/MEM-Taste bei eingeschaltetem Thermometer 5 Sekunden gedrückt.
Der jüngste Messwert wird angezeigt.
•
B
ei jedem weiteren Drücken der MODE/MEM-Taste wird zunächst die Speicherplatznummer angezeigt und
beim Loslassen der Taste der Messwert.
•I
n der oberen Zeile wird abwechselnd Uhrzeit und Datum angezeigt.
9. Messen der Objekttemperatur / Raumtemperatur
Modus Objekttemperatur
Wenn Sie Objekttemperatur mit diesem Thermometer messen wollen, müs-
sen Sie in den Modus Objekttemperatur wechseln.
•
D
azu drücken Sie kurz beim eingeschalteten Thermometer die MODE/
MEM-Taste. Das Gerät schaltet in den Modus Objekttemperatur (Abb. 15).
•H
alten Sie das Thermometer 2 bis 3 cm vor die gewünschte Messstelle.
Drücken Sie kurz auf die
/
SCAN-Taste und lesen Sie die Temperatur
vom Display ab (Abb. 16).
Messwerte im Modus Objekttemperatur werden nicht gespeichert.
Abb. 16Abb. 15

17
Modus Raumtemperatur
Wenn Sie das Thermometer zum Messen der Raumtemperatur nutzen wollen,
müssen Sie in den Modus Raumtemperatur wechseln.
•
D
azu drücken Sie kurz beim einge schal teten Thermometer zweimal die
MODE/MEM-Taste.
Das Gerät schaltet in den Modus Raumtemperatur
.
•D
ie Raumtemperatur wird direkt angezeigt (Abb. 17).
Messwerte im Modus Raumtemperatur werden nicht gespeichert.
Abb. 17
10. Fehleranzeigen
Fehler-
meldung
Problem Lösung
Messung während des Selbst test, Gerät noch
nicht messbereit.
Warten bis das Stirnsymbol nicht mehr blinkt.
Raumtemperatur unter 10 °C oder über 40 °C
(<50 °F, >104 °F).
Raumtemperatur muss zwischen 10 °C und 40 °C lie-
gen (50 °F - 104 °F).
(1) Modus Stirntemperatur: Die ermittelte
Temperatur ist höher als 42,2 °C (108 °F).
(2) Modus Objekttemperatur: Die ermit telte
Temperatur ist höher als 80 °C (176 °F).
Betreiben Sie das Thermometer nur innerhalb der
angegebenen Temperaturbereiche. Bei wiederholter
Fehleranzeige an Fachhändler oder Kundenservice
wenden.
(1) Modus Stirntemperatur: Die ermittelte
Temperatur ist geringer als 34 °C (93,2 °F).
(2) Modus Objekttemperatur: Die ermit telte
Temperatur ist niedriger als -22 °C (-7,6 °F).
Betreiben Sie das Thermometer nur innerhalb der
angegebenen Temperaturbereiche. Bei wiederholter
Fehleranzeige an Fachhändler oder Kundenservice
wenden.

18
Fehler-
meldung
Problem Lösung
Die Batterien sind verbraucht. Erneuern Sie die Batterien.
11. Batterien
Batterien wechseln
Das Gerät benötigt zwei Batterien, Typ AAA, LR03.
•Ö
ffnen Sie das Batteriefach.
Schieben Sie dazu das Batteriefach nach unten.
•N
ehmen Sie die verbrauchten Batterien aus dem Batteriefach.
•S
etzen Sie neue Batterien ein.
Achten Sie darauf, dass die Batterien entsprechend der Polung korrekt ausgerichtet sind.
•V
erschließen Sie das Batteriefach.
Batterien entsorgen
•D
ie verbrauchten, vollkommen entladenen Batterien müssen Sie über speziell gekennzeichnete Sammelbehäl-
ter, Sondermüllannahmestellen oder über den Elektrohändleentsorgen. Sie sind gesetzlich dazu verpflichtet,
die Batterien zu entsorgen.
•D
iese Zeichen finden Sie auf schadstoffhaltigen Batterien:
Pb = Batterie enthält Blei,
Cd = Batterie enthält Cadmium,
Hg = Batterie enthält Quecksilber.

19
12. Gerät reinigen
•D
er Messsensor ist der empfindlichste Teil des Thermometers. Behandeln Sie den Messsensor mit
größter Vorsicht bei der Reinigung.
•V
erwenden Sie keine aggressiven Reinigungsmittel.
•B
efolgen Sie stets alle Sicherheitshinweise für Anwender und Gerät.
w
3. Warn- und Sicherheitshinweise
Reinigen Sie nach jedem Gebrauch den Messsensor. Verwenden Sie dazu ein weiches Tuch oder ein Wattestäb
-
chen, welche mit Desinfektionsmittel oder 70 % Alkohol angefeuchtet werden können.
Zur Reinigung des gesamten Gerätes verwenden Sie bitte ein weiches, leicht mit leichter Seifenlauge angefeuch-
tetes Tuch. Es darf keinesfalls Wasser in das Gerät eindringen.
Benutzen Sie das Gerät erst wieder, wenn es vollständig trocken ist.
13. Gerät lagern
Das Gerät darf nicht bei zu hoher oder niedriger Temperatur oder Luftfeuchtigkeit (
w
15. Technische Daten), im
Sonnenlicht, in Verbindung mit elektrischem Strom oder an staubigen Orten gelagert oder benutzt werden. Es
kann sonst zu Messungenauigkeiten kommen.
Bei geplanter längerer Lagerung entfernen Sie die Batterien.
14. Gerät entsorgen
Im Interesse des Umweltschutzes darf das Gerät am Ende seiner Lebensdauer nicht mit dem Hausmüll entsorgt
werden.
Die Entsorgung kann über entsprechende Sammelstellen in Ihrem Land erfolgen. Entsorgen Sie das Gerät gemäß
der Elektro- und Elektronik Altgeräte EG-Richtlinie – WEEE (Waste Electrical and Electronic Equipment).
Bei Rückfragen wenden Sie sich an die für die Entsorgung zuständige kommunale Behörde.

20
15. Technische Daten
Bei Verwendung des Gerätes außerhalb der Spezifikation ist eine einwandfreie Funktion nicht gewährleistet!
Die Genauigkeit dieses Thermometers wurde sorgfältig geprüft und wurde im Hinblick auf eine lange nutzbare
Lebensdauer entwickelt.
Bei Verwendung des Gerätes in der Heilkunde sind Messtechnische Kontrollen mit geeigneten Mitteln durchzu
-
führen. Genaue Angaben zur Überprüfung der Genauigkeit können unter der Service-Adresse angefragt werden.
Technische Änderungen zur Verbesserung und Weiterentwicklung des Produktes behalten wir uns vor.
Typ FT 100
Messmethode Kontaktlose Infrarot Messung
Basisfunktionen Stirntemperaturmessung
Objekttemperaturmessung
Raumtemperaturmessung
Maßeinheiten Celsius (°C) oder Fahrenheit (°F)
Betriebsbedingungen 10 °C bis 40 °C (50 °F bis 104 °F)
bei einer relativen Luftfeuchtigkeit < 95 %
Aufbewahrungs- und Transport-
bedingungen
-20 °C bis 50 °C (-4 °F bis 122 °F)
bei einer relativen Luftfeuchtigkeit < 95 %
Messabstand 4 bis 6 cm Abstand zur Messstelle
Messbereiche und Genauigkeit
Stirntemperaturmessung
Stirntemperaturmessung
34 °C bis 42,2 °C (93,2 °F bis 108 °F)
Messgenauigkeit 34 °C bis 42,2 °C: ± 0,2 °C (93,2 °F bis 108 °F: ± 0,4 °F)
Klinische Wiederholpräzision 0,23 °C (0,41 °F)
Messbereiche und Genauigkeit
Objekttemperaturmessung
Objekttemperaturmessung -22 °C bis 80 °C (-7,6 °F bis 176 °F)
Messgenauigkeit ± 4% oder ± 2 °C (± 4 °F)

21
Speicherfunktion
Körpertemperaturmessung
Speichert automatisch die letzten 60Messwerte.
Signalton Beim Einschalten des Gerätes, während der Messung, beim Abschluss der
Messung (einstellbar).
Anzeige LCD-Display
Energiesparfunktionen Gerät schaltet nach 1 Minute automatisch aus.
Abmessungen
Breite x Tiefe x Höhe
ca. 40,9 mm x 68,2 mm x 199,0 mm
Gewicht 82 g (ohne Batterien)
Batterie 2 x AAA, LR03 Betriebsdauer für ca. 2000 Messungen
Zusätzlich aktivierte Funktionen wie Signalton oder Displaybeleuchtung
verkürzen die Lebensdauer der Batterie.
Die Seriennummer befindet sich auf dem Gerät oder im Batteriefach.
16. Richtlinien
Das Gerät entspricht der EU-Richtlinie für Medizinprodukte 93/42/EEC, dem Medizinproduktegesetz, der ASTM
E 1965 - 98, sowie der europäischen Norm EN60601-1-2 und unterliegt besonderen Vorsichtsmaßnahmen hin
-
sichtlich der elektromagnetischen Verträglichkeit.

22
17. Garantie
Wir leisten 3 Jahre Garantie ab Kaufdatum für Material- und Fabrikationsfehler des Produktes. Die Garantie gilt nicht:
•ImFallevonSchäden,dieaufunsachgemäßerBedienungberuhen.
•FürVerschleißteile.
•BeiEigenverschuldendesKunden.
•SobalddasGerätdurcheinenichtautorisierteWerkstattgeöffnetwurde.
Die gesetzlichen Gewährleistungen des Kunden bleiben durch die Garantie unberührt. Für Geltendmachung eines
Garantiefalles innerhalb der Garantiezeit ist durch den Kunden der Nachweis des Kaufes zu führen. Die Garantie
ist innerhalb eines Zeitraumes von 3 Jahren ab Kaufdatum gegenüber der Beurer GmbH, Ulm (Germany) geltend
zu machen.
Bitte wenden Sie sich im Falle von Reklamationen an unseren Service unter folgendem Kontakt:
Service Hotline:
Tel.: +49 (0) 731 / 39 89-144
E-Mail: kd@beurer.de
www.beurer.com
Fordern wir Sie zur Übersendung des defekten Produktes auf, ist das Produkt an folgende Adresse zu
senden:
Beurer GmbH
Servicecenter
Lessingstraße 10 b
89231 Neu-Ulm
Germany
Irrtum und Änderungen vorbehalten

23
ENGLISH
Contents
1. Signs and symbols ............................................24
2. Intended use ......................................................25
3. Warnings and safety notes ................................ 26
3.1 Risks to the user .......................................26
3.2 Risks to the device ................................... 27
3.3 Notes on handling batteries .....................27
4. Information about this thermometer ..................28
5. Device description .............................................30
6. Initial use ...........................................................31
7. Switching on and setting the thermometer ......32
8. Forehead measurement .....................................36
9.
Measuring object temperature/room temperature
..38
10. Error messages .................................................39
11. Batteries ...........................................................40
12. Cleaning the device ........................................... 41
13. Storing the device ............................................41
14. Disposing of the device ..................................... 41
15. Technical data ...................................................42
16. Guidelines .........................................................43
Read these instructions for use carefully and
keep them for later use, be sure to make them
accessible to other users and observe the infor-
mation they contain.
Dear customer,
Thank you for choosing one of our products. Our name
stands for high-quality, thoroughly tested products for
applications in the areas of heat, gentle therapy, blood
pressure/diagnosis, weight, massage and air.
Please read these instructions for use carefully and
observe the information they contain.
With kind regards,
Your Beurer team
Included in delivery
Check that the delivery has not been tampered with and
make sure that all components are present. Before use,
ensure that there is no visible damage to the device or
accessories and that all packaging material has been
removed. If you have any doubts, do not use the device
and contact your retailer or the specified Customer Ser-
vice address.

24
•C
linical thermometer
•2
x 1.5V AAA batteries (LR03)
•S
torage bag
•I
nstructions for use
1. Signs and symbols
The following symbols appear in these instructions for use and on the device:
WARNING
Warning notice indicating a risk of injury or damage to health.
IMPORTANT
Safety note indicating possible damage to the device/accessory.
Note
Note on important information.
Observe the instructions for use
Application part, type BF
Disposal in accordance with the Waste Electrical and Electronic Equipment EC Directive –
WEEE
The CE labelling certifies that the product complies with the essential requirements of Directive
93/42/EEC on medical devices.

25
Manufacturer
Storage
Permissible storage and transport temperature and humidity
Operating
Permissible operating temperature and humidity
IP 22
Device protected against foreign objects ≥ 12.5 mm and against water dripping at an angle
Serial number
Important information/tip
w
Cross-reference with another section
Certification symbol for products that are exported to the Russian Federation and CIS countries.
2. Intended use
This thermometer is intended for non-contact measurement of forehead, object and room temperature. The ther-
mometer is suitable for domestic use. It allows you to quickly and easily measure body temperature. Values are
saved automatically.

26
3. Warnings and safety notes
3.1 Risks to the user
•O
nly use the device once you have read and understood these instructions for use.
•R
etain these instructions for use. The instructions for use must be accessible to all users. All instructions must
be followed.
•
T
he thermometer needs to be in the room in which the measurement is taken for at least 30 minutes before use.
•A
fter physical activity, a bath or spending time outdoors, wait approx. 30 minutes before you take a measure-
ment on your forehead.
•T
he FT 100 thermometer is only designed for the measuring area on the human body stated in the instructions
for use.
•
D
o not self-diagnose or self-medicate on the basis of the measurements without consulting your doctor. In
particular, do not start taking any new medication or change the type and/or dosage of any existing medication
without prior approval.
•T
he device is only intended for the purpose stated in these instructions for use.
•T
he manufacturer is not liable for damage resulting from improper or careless use.
•C
hildren must not be allowed to use the device. Medical devices are not toys.
•
C
heck before each use that the lens is intact. If it is damaged, please contact your retailer or the service address.
•D
o not touch the lens with your fingers.
•T
he measurements taken by you are for your information only – they are no substitute for a medical examina-
tion. Consult a doctor before you undertake any medical treatment.
•C
lean the thermometer after each use (
w
12. Cleaning the device).
•
S
hould you have any questions about using the device, please contact either your retailer or Customer Services.

27
3.2 Risks to the device
•D
o not drop the device or subject it to any mechanical impacts.
•D
o not expose the device to direct sunlight, extreme temperatures or high humidity.
•D
o not expose the device to liquids. The device is not waterproof. Avoid all direct contact with water or other
liquids.
•D
o not open or repair the device yourself. Have the device repaired by authorised service centres only, other-
wise its warranty is invalidated.
•
Portable and mobile HF communication systems may interfere with this device. More details can be requested
from the stated Customer Services address or found at the end of the instructions for use.
3.3 Notes on handling batteries
•I
f your skin or eyes come into contact with battery fluid, rinse the affected area with water and seek medical
assistance.
•
Choking hazard! Small children may swallow and choke on batteries. Store the batteries out of the reach
of small children.
•O
bserve the plus (+) and minus (-) polarity signs.
•I
f a battery has leaked, put on protective gloves and clean the battery compartment with a dry cloth.
•P
rotect batteries from excessive heat.
•
Risk of explosion! Do not throw batteries into a fire.
•D
o not charge or short-circuit batteries.
•I
f the device is not to be used for a relatively long period, take the batteries out of the battery compartment.
•U
se identical or equivalent battery types only.
•A
lways replace all batteries at the same time.
•D
o not use rechargeable batteries.
•D
o not disassemble, split or crush the batteries.

28
4. Information about this thermometer
The temperature measurement varies depending on the part of the body where the measurement is taken. In
a healthy person, the variance can be between 0.2°C and 1°C (0.4°F and 1.8°F) in different parts of the body.
Normal temperature range with various thermometers:
Measurements Thermometer used
Forehead temperature 35.8°C to 37.6°C (96.4°F to 99.7°F) Forehead thermometer
Ear temperature 36.0°C to 37.8°C (96.8°F to 100.0°F) Ear thermometer
Oral temperature 36.0°C to 37.4°C (96.8°F to 99.3°F) Conventional thermometer
Rectal temperature 36.3°C to 37.8°C (97.3°F to 100.0°F) Conventional thermometer
Beurer tip
•T
emperatures measured with different thermometers should never be compared with one another.
•T
ell your doctor what type of thermometer you used to take your temperature and on what part of the
body. Also bear this in mind if you are diagnosing yourself.
Holding the thermometer in your hand for too long before taking a measurement can cause the device
to warm up. This means the measurement could be incorrect.

29
Influences on body temperature
•A
person's individual metabolism
•A
ge
Body temperature is higher in babies and toddlers than in adults. Greater temperature fluctuations occur faster
and more often in children. Normal body temperature decreases with age.
•C
lothing
•O
utside temperature
•T
ime of day
Body temperature is lower in the morning and increases throughout the day towards evening.
Activities
•P
hysical and, to a lesser extent, mental activities increase body temperature.
Beurer tip
Taking the body temperature provides a current measurement of a person's temperature. If you are uncer-
tain about interpreting the results or if the values are abnormal (e.g. fever), please consult your doctor.
This also applies in the case of slight temperature changes if there are other symptoms of illness such as
agitation, heavy sweating, flushed skin, fast pulse rate, tendency to collapse, etc.

30
5. Device description
1
Display
2
MODE/MEM button
3
Fever/distance indicator
4
LIGHT/SET button
5
Measuring sensor
6
Distance sensor
7
/
SCAN button
8
Battery compartment lid
Buttons Functions
MODE/MEM
MODE
Sets the measurement mode.
MEM
Displays the saved measurements.
LIGHT/SET
LIGHT
Manual activation of
illuminated display.
SET
Sets the basic functions.
SCAN
Turns the device on and off.
Starts the temperature
measurement.
1
2
3
4
5
6
7
8

31
Display description
1
Year/date/time display
YEAR
AM
PM
MEM
DATE
1
2
3
4
5
6
7
8
9
10
11
12
13
14
2
Room temperature mode
3
Forehead temperature mode
4
Object temperature mode
5
Temperature/memory space number display
6
Acoustic signal symbol
7
Illuminated display symbol
8
Year
9
Memory function
10
Date
11
Measurement ≥ 38.0°C (≥ 100.4°F) “fever”
12
Measurement < 37,5°C (< 99,5°F) “no fever”
13
Battery status indicator
14 Temperature measurement unit (Celsius/Fahrenheit)
6. Initial use
If present, remove the battery insulating strip on the battery compartment lid and remove the protective
film from the battery, then insert the battery the correct way round.
•P
ush open the battery compartment lid.
•I
nsert the two batteries included in delivery so that they are the correct way round.
•
Push the battery compartment lid back onto the thermometer until you can feel and hear it click firmly
into place.

32
•
The thermometer now automatically goes to the settings menu (w 7. Switching on and setting the thermometer).
7. Switching on and setting the thermometer
To switch on the thermometer, briefly press the
/
SCAN button.
After a brief self-test and two short beeps the thermometer is ready for forehead measurement. The device always
starts up in forehead temperature mode .
Setting the basic functions
This menu allows you to set the following functions individually, one after another.
Time format
•
Insert the batteries or press and hold the LIGHT/SET button for 4 seconds
when the thermometer is switched on. The time format flashes on the dis
-
play (Fig. 1).
•
Use the MODE/MEM button to set your preferred time format, and confirm
with the LIGHT/SET button.
AM
Fig. 1
Temperature
measurement
unit
Illuminated
display
Time format Date Time
Acoustic
signal

33
Date
The year flashes on the display (Fig. 2).
•
Use the MODE/MEM button to set the year, and confirm with the LIGHT/
SET button.
The day/month flashes on the display (Fig. 3).
•
Use the MODE/MEM button to set the day and month, and confirm with
the LIGHT/SET button.
If the hour format is set as 12 h, the day/month display sequence is
reversed. Be sure to set the date and time correctly. Otherwise, you will
not be able to save your measured values correctly with a date and time
and access them again later.
DATE
Fig. 3
YEAR
Fig. 2
Time
The hour flashes on the display (Fig. 4).
•
Use the MODE/MEM button to set the hour, and confirm with the LIGHT/
SET button.
The minute flashes on the display (Fig. 5).
•
Use the MODE/MEM button to set the minute, and confirm with the LIGHT/
SET button.
In the 12 h format, the time is displayed with AM/PM.
Fig. 5Fig. 4

34
Temperature measurement unit
The temperature measurement unit flashes on the display (Fig. 6).
You can set the device to display the temperature in degrees Celsius (°C) or
degrees Fahrenheit (°F).
•
To display the temperature in Celsius, select °C using the MODE/MEM but-
ton and confirm with the LIGHT/SET button.
•
To display the temperature in Fahrenheit, select °F using the MODE/MEM
button and confirm with the LIGHT/SET button.
Fig. 6
Acoustic signal
The acoustic signal symbol flashes on the display (Fig. 7).
You can activate/deactivate the acoustic signals (device activation, measure
-
ment in progress, measurement completion).
•
To activate the acoustic signals, use the MODE/MEM button to select ,
and confirm with the LIGHT/SET button.
•
To deactivate the acoustic signals, use the MODE/MEM button to select
, and confirm with the LIGHT/SET button.
Fig. 7

35
Illuminated display
The illuminated display symbol flashes on the display (Fig. 8).
You can activate or deactivate the automatic illuminated display (appears fol
-
lowing forehead temperature measurement).
•
To activate the automatic illuminated display, use the MODE/MEM button
to select
, and confirm with the LIGHT/SET button.
•
To deactivate the automatic illuminated display, use the MODE/MEM button
to select , and confirm with the LIGHT/SET button.
Fig. 8
You can also activate the illuminated display manually by briefly pressing the LIGHT/SET button.
The display lights up for 5 seconds.
The automatic and manual illuminated display cannot be used while measurement is in progress.

36
8. Forehead measurement
Beurer tip
Remember:
•P
hysical activity, increased perspiration on the forehead, taking vasoconstrictive medication and skin
irritations can distort the measurement.
•T
he forehead, or the temples, must be free from perspiration and cosmetics.
•
W
e recommend that you take three measurements on the forehead. If the three measurements are
different, use the highest value.
Forehead temperature mode
•T
o switch on the thermometer, briefly press the
/
SCAN button. After a
short self-test, the device is ready for forehead temperature measurement.
The device is in forehead temperature mode. You can tell this from the
symbol on the display.
Fig. 9
•H
old the thermometer 4 to 6cm in front of the forehead measuring point
(Fig. 10). Press the
/
SCAN button. The display shows the required meas
-
uring distance of 4-6cm.
Fig. 10

37
Forehead temperature mode
The measuring distance is
4-6cm
The measuring distance is NOT
4-6cm
Once the thermometer has detected
the correct measuring distance of 4
to 6 cm, the measurement starts auto-
matically. The fever/distance indica-
tor now lights up continuously in blue.
After a few seconds, the measurement
appears on the display (Fig. 12). The
end of the measurement is signalled
by a long beep.
If the measuring distance is not 4 to
6 cm, the fever/distance indicator
flashes blue (the device also beeps if
the acoustic signal is switched on) and
4-6 appears on the display (Fig. 11). If
the correct measuring distance is not
found after 20 seconds, the measure-
ment ends automatically.
If the measurement is less than 37.5°C (99.5°F), if the
fever/distance indica-
tor
lights up in green and if appears on the display to indicate no fever,
this indicates that the body temperature is in the normal range.
If the measurement is between 37.5°C and 37.9°C, the fever/distance
indicator lights up yellow. This indicates that the body temperature is in
an increased range (Fig. 13).
If the measurement is more than 38°C (100.4°F), if the
fever/distance indica-
tor
lights up in red and if appears on the display (Fig. 14), this indicates
that the body temperature is above the normal range.
Fig. 13
Fig. 12
Fig. 11
Fig. 14
The measurement is automatically saved with the date/time and the “fever”
/ “no fever” classification.
The device is ready to take another measurement when two short beeps sound
and the forehead symbol stops flashing.

38
Displaying stored measurements
The device only stores measurements in forehead temperature mode . The device automatically stores the
values from the last 60 measurements.
When 60 memory spaces are exceeded, the oldest value is deleted.
•T
he memory can be called up as follows:
•
With the thermometer switched on, press and hold the MODE/MEM button for 5 seconds.
The most recent measurement is displayed.
•W
ith each subsequent pressing of the MODE/MEM button, first the memory space number is displayed, fol-
lowed by the measurement when the button is released.
•I
n the upper line, the time and date are displayed alternately.
9. Measuring object temperature/room temperature
Object temperature mode
If you want to measure an object temperature with this thermometer, switch
to object temperature mode.
•W
ith the thermometer switched on, briefly press the MODE/MEM button.
The device switches to the object temperature mode
(Fig. 15).
•
H
old the thermometer 2 to 3cm from the measuring point. Briefly press the
SCAN button and read the temperature on the display (Fig. 16).
Measurements taken in object temperature mode are not stored.
Fig. 16Fig. 15

39
Room temperature mode
If you want to use the thermometer to measure the room temperature you
need to switch to room temperature mode.
•W
ith the thermometer switched on, briefly press the MODE/MEM button
twice.
The device switches to room temperature mode
.
•T
he room temperature is immediately displayed (Fig. 17).
Measurements taken in room temperature mode are not stored.
Fig. 17
10. Error messages
Error
message
Problem Solution
Measurement during self-test, device not yet
ready for measurement.
Wait until the forehead symbol stops flashing.
Room temperature below 10°C or above
40°C (<50°F, >104°F).
Room temperature must be between 10°C and 40°C
(50°F - 104°F).
(1) Forehead temperature mode: The tempera-
ture recorded is higher than 42.2°C (108°F).
(2) Object temperature mode: The temperature
recorded is higher than 80°C (176°F).
Operate the thermometer only within the specified
temperature ranges. In the event of a repeated error
message, contact your retailer or Customer Services.
(1) Forehead temperature mode: The temper-
ature recorded is lower than 34°C (93.2°F).
(2) Object temperature mode: The tempera-
ture recorded is lower than -22°C (-7.6°F).
Operate the thermometer only within the specified
temperature ranges. In the event of a repeated error
message, contact your retailer or Customer Services.

40
Error
message
Problem Solution
The batteries are empty. Replace the batteries.
11. Batteries
Changing the batteries
The device requires two AAA (LR03) batteries.
•O
pen the battery compartment.
To do this, push the battery compartment down.
•T
ake the used batteries out of the battery compartment.
•I
nsert new batteries.
Make sure that the batteries are inserted the correct way round.
•C
lose the battery compartment.
Disposing of batteries
•E
mpty, completely flat batteries must be disposed of through specially designated collection boxes, recycling
points or electronics retailers. You are legally required to dispose of the batteries.
•T
he codes below are printed on batteries containing harmful substances:
Pb = Battery contains lead
Cd = Battery contains cadmium
Hg = Battery contains mercury

41
12. Cleaning the device
•T
he measuring sensor is the most sensitive part of the thermometer. Be very careful with the meas-
uring sensor when cleaning the device.
•D
o not use any harsh cleaning products.
•A
lways observe all safety notes for users and the device.
w
3. Warnings and safety notes
Clean the measuring sensor after each use. Use a soft cloth or cotton bud that can be moistened with disinfect
-
ant or 70% alcohol.
To clean the entire device, please use a soft cloth slightly moistened with a mild soapy solution. Under no circum-
stances may liquid enter the device.
Do not use the device again until it is completely dry.
13. Storing the device
The device must not be stored or used at an excessively high or low temperature or humidity (
w
15. Technical
data), in sunlight, in association with an electrical current or in dusty locations. Measurement inaccuracies can
otherwise occur.
If prolonged storage is planned, you should remove the batteries.
14. Disposing of the device
For environmental reasons, do not dispose of the device in the household waste at the end of its useful life.
Dispose of the device at a suitable local collection or recycling point. Dispose of the device in accordance with
EC Directive – WEEE (Waste Electrical and Electronic Equipment).
If you have any questions, please contact the local authorities responsible for waste disposal.

42
15. Technical data
If the device is not used according to the instructions specified, perfect functionality cannot be guaranteed!
The accuracy of this thermometer has been carefully checked and developed with regard to a long useful life.
If using the device for commercial medical purposes, it must be regularly tested for accuracy by appropriate means.
Precise instructions for checking accuracy may be requested from the service address.
We reserve the right to make technical changes to improve and develop the product.
Type FT 100
Measurement method Non-contact infrared measurement
Basic functions Forehead temperature measurement
Object temperature measurement
Room temperature measurement
Measurement units Celsius (°C ) or Fahrenheit (°F)
Operating conditions 10°C to 40°C (50°F to 104°F)
at a relative humidity of < 95%
Storage and transport conditions -20°C to 50°C (-4°F to 122°F)
at a relative humidity of < 95%
Measuring distance 4 to 6cm from the measuring point
Measurement range and accuracy
of forehead temperature measure-
ment
Forehead temperature measurement
34°C to 42.2°C (93.2°F to 108°F)
Measurement accuracy 34°C to 42.2°C: ± 0.2°C (93.2°F to 108°F: ± 0.4°F)
Clinical repeat precision 0.23°C (0.41°F)
Measurement range and accuracy
Object temperature measurement
Object temperature measurement -22°C to 80°C (-7.6°F to 176°F)
Measurement accuracy ± 4% or ± 2°C (± 4°F)

43
Memory function
Body temperature measurement
Automatically stores the last 60measurements.
Acoustic signal With device activation, during measurement, when measurement is com
-
plete (can be set).
Display LCD display
Energy saving functions Device automatically switches off after 1 minute.
Dimensions
Width x depth x height
Approx. 40.9 mm x 68.2 mm x 199.0 mm
Weight 82 g (without batteries)
2 x AAA (LR03) batteries Batteries last for approx. 2000 measurements
Extra activated functions such as acoustic signal or illuminated display
reduce the battery life.
The serial number is located on the device or in the battery compartment.
16. Guidelines
This device complies with EU Medical Devices Directive 93/42/EEC, the German Medical Devices Act (Medizin-
produktegesetz), the ASTM (American Society for Testing and Materials) E 1965 - 98 and the European Standard
EN60601-1-2 and is subject to particular precautions with regard to electromagnetic compatibility.
Subject to errors and changes

44
FRANÇAIS
Sommaire
1. Symboles utilisés ...............................................45
2. Utilisation conforme aux recommandations ......46
3.
Consignes d’avertissement et de mise en garde
47
3.1 Risques pour l’utilisateur ...........................47
3.2 Risques pour l’appareil ............................48
3.3 Remarques relatives aux piles .................48
4. Informations concernant ce thermomètre .........49
5. Description de l’appareil ....................................51
6. Mise en service..................................................52
7. Allumer et régler le thermomètre ......................53
8. Mesure au niveau du front .................................57
9. Mesure de la température d’objet/température
ambiante ............................................................59
10. Achage des erreurs ........................................60
11. Piles .................................................................. 61
12. Nettoyer l’appareil .............................................62
13. Entreposer l’appareil ........................................62
14. Éliminer l’appareil ..............................................62
15. Données techniques ..........................................63
16. Directives .......................................................... 65
Lisez attentivement ce mode d’emploi, conser-
vez-le pour un usage ultérieur, mettez-le à dis-
position des autres utilisateurs et suivez les
consignes qui y figurent.
Chère cliente, cher client,
Nous vous remercions d’avoir choisi l’un de nos pro-
duits. Notre société est réputée pour l’excellence de
ses produits et les contrôles de qualité approfondis
auxquels ils sont soumis dans les domaines suivants:
chaleur, thérapie douce, diagnostic de pression arté-
rielle, contrôle de poids, massage et purification d’air.
Lisez attentivement ce mode d´emploi et respectez les
instructions d’utilisation.
Sincères salutations,
Votre équipe Beurer
Contenu
Vérifiez si l’emballage carton extérieur du kit est intact
et si tous les éléments sont inclus. Avant l’utilisation,
assurez-vous que l’appareil et les accessoires ne pré-
sentent aucun dommage visible et que la totalité de
l’emballage a bien été retirée. En cas de doute, ne l’uti-
lisez pas et adressez-vous à votre revendeur ou au ser-
vice client indiqué.

45
•T
hermomètre médical
•2
piles AAA LR03 1,5V
•P
ochette de rangement
•M
ode d’emploi
1. Symboles utilisés
Les symboles suivants sont employés dans ce mode d’emploi et sur l’appareil:
AVERTISSEMENT
Ce symbole vous avertit des risques de blessures ou des dangers pour votre santé.
ATTENTION
Ce symbole vous avertit des éventuels dommages au niveau de l’appareil ou d’un accessoire.
Remarque
Ce symbole indique des informations importantes.
Respecter les consignes du mode d’emploi
Appareil de type BF
Élimination conformément à la directive européenne WEEE (Waste Electrical and Electronic
Equipment) relative aux déchets d’équipements électriques et électroniques
Le sigle CE atteste de la conformité aux exigences fondamentales de la directive 93/42/EEC
relative aux dispositifs médicaux.

46
Fabricant
Storage
Température et taux d’humidité de conservation et de transport admissibles
Operating
Température et taux d’humidité d’utilisation admissibles
IP 22
Appareil protégé contre les corps solides ≥ 12,5mm et contre les chutes de gouttes d’eau en
biais
Numéro de série
Informations importantes/conseils
w
Renvoi à un autre paragraphe.
Marque de certification pour les produits exportés en Fédération de Russie et dans les pays
de la CEI.
2. Utilisation conforme aux recommandations
Ce thermomètre permet la mesure sans contact de la température du front, d’objets et d’air ambiant. Le thermo-
mètre est adapté aux mesures à domicile. Vous pouvez connaître rapidement et simplement votre température
corporelle. Les valeurs s’enregistrent automatiquement.

47
3. Consignes d’avertissement et de mise en garde
3.1 Risques pour l’utilisateur
•N
’utilisez pas l’appareil avant d’avoir lu et compris le présent mode d’emploi.
•
C
onservez ce mode d’emploi. Tous les utilisateurs doivent avoir accès à ce mode d’emploi. Toutes les remarques
doivent être respectées.
•P
lacez l’appareil au moins 30 minutes avant la mesure dans la pièce dans laquelle la mesure sera effectuée.
•A
près une activité physique, après un bain ou si vous étiez à l’extérieur, attendez environ 30minutes avant de
prendre votre température au niveau du front.
•
L
e thermomètre FT 100 est conçu uniquement pour les points de mesure du corps humain décrits dans le
mode d’emploi.
•V
ous ne devez pas pratiquer d’auto-diagnostic ni d’auto-médication sur la base des résultats de mesure sans
avoir discuté avec votre médecin. Ne prenez pas, de vous même, un nouveau médicament et ne modifiez ni le
type ni la posologie d’un traitement existant.
•L
’appareil est conçu pour l’utilisation décrite dans ce mode d’emploi.
•
L
e fabricant ne peut être tenu pour responsable des dommages causés par une utilisation inappropriée ou
non conforme.
•L
es enfants ne doivent pas utiliser l’appareil. Un produit médical n’est pas un jouet.
•A
vant chaque utilisation, vérifiez que la lentille est intacte. Si elle est endommagée, veuillez vous adresser au
vendeur ou au service après-vente.
•N
e touchez pas à la lentille avec les doigts.
•L
es mesures que vous avez établies servent juste à vous tenir informé de votre état, elles ne remplacent pas
un examen médical. Consultez un médecin avant tout acte médical.
•N
ettoyez le thermomètre après utilisation (
w
12. Nettoyer l’appareil).
•P
our toute question concernant l’utilisation de cet appareil, adressez-vous à votre revendeur ou à notre ser-
vice clients.

48
3.2 Risques pour l’appareil
•É
vitez de heurter ou de faire tomber l’appareil.
•N
’exposez pas l’appareil à la lumière directe du soleil, à des températures extrêmes ou à une forte humidité.
•N
e soumettez l’appareil à aucun liquide. L’appareil n’est pas étanche. Évitez tout contact direct avec l’eau ou
d’autres liquides.
•N
’ouvrez ou ne réparez pas l’appareil vous-même. Ne faites réparer l’appareil que dans un centre de service
autorisé, sous peine d’annulation de la garantie.
•
Les dispositifs de communication HF portables et mobiles sont susceptibles d’influer sur cet appareil. Pour plus de
détails, veuillez contacter le service après-vente à l’adresse mentionnée ou vous reporter à la fin du mode d’emploi.
3.3 Remarques relatives aux piles
•S
i du liquide de la cellule de pile entre en contact avec la peau ou les yeux, rincez la zone touchée avec de
l’eau et consultez un médecin.
•
Risque d’ingestion! Les enfants en bas âge pourraient avaler des piles et s’étouffer. Veuillez donc conser-
ver les piles hors de portée des enfants en bas âge!
•R
espectez les signes de polarité plus (+) et moins (-).
•S
i une pile a coulé, enfilez des gants de protection et nettoyez le compartiment à piles avec un chiffon sec.
•P
rotégez les piles d’une chaleur excessive.
•
Risque d’explosion! Ne jetez pas les piles dans le feu.
•L
es piles ne doivent être ni rechargées ni court-circuitées.
•E
n cas de non-utilisation prolongée de l’appareil, sortez les piles du compartiment à piles.
•U
tilisez uniquement des piles identiques ou équivalentes.
•R
emplacez toujours l’ensemble des piles simultanément.
•N
’utilisez pas d’accumulateur!
•N
e démontez, n’ouvrez ou ne cassez pas les piles.

49
4. Informations concernant ce thermomètre
La valeur de la température mesurée varie selon l’endroit du corps où elle est prise. Chez une personne en bonne
santé, cet écart entre différentes zones du corps peut aller de 0,2°C à 1°C (0,4°F à 1,8°F).
Plage de température normale entre différents thermomètres:
Valeurs mesurées Thermomètre utilisé
Température frontale 35,8°C à 37,6°C (96,4°F à 99,7°F) Thermomètre frontal
Température auriculaire 36,0°C à 37,8°C (96,8°F à 100,0°F) Thermomètre auriculaire
Température buccale 36,0°C à 37,4°C (96,8°F à 99,3°F) thermomètre ordinaire
Température rectale 36,3°C à 37,8°C (97,3°F à 100,0°F) thermomètre ordinaire
Conseil Beurer
•N
e comparez jamais des températures prises avec des thermomètres différents.
•
I
ndiquez à votre médecin avec quel thermomètre vous avez mesuré la température corporelle et à quel
endroit du corps. Tenez-en également compte lors d’un auto-diagnostic.
Le thermomètre peut se réchauffer s’il est gardé trop longtemps en main avant la prise de température.
Cela peut fausser le résultat de l’opération.

50
Éléments influant la température corporelle
•M
étabolisme individuel propre à chaque personne
•Â
ge
Chez les nourrissons et les enfants en bas âge, la température corporelle est plus élevée que chez les adultes.
Chez les enfants, des variations de température plus importantes se produisent plus rapidement et fréquem
-
ment. Avec l’âge, la température corporelle normale diminue.
•V
êtements
•T
empérature extérieure
•M
oment de la journée
Le matin, la température corporelle est plus basse et monte au cours de la journée jusqu’au soir.
Activités
•L
es activités physiques et, dans une moindre mesure, les activités cérébrales augmentent la température cor-
porelle.
Conseil Beurer
La mesure de la température corporelle donne une valeur de mesure actuelle pour une personne. Si vous
n’êtes pas certain de l’interprétation des résultats ou obtenez des valeurs anormales (par ex.: fièvre),
consultez votre médecin traitant. Ceci s’applique aussi en cas de légères variations de température lorsque
d’autres symptômes de maladie s’y ajoutent, par ex. agitation, forte transpiration, rougeurs, fréquence
cardiaque élevée, collapsus cardio-vasculaire, etc.

51
5. Description de l’appareil
1
Écran
2
Touche MODE/MEM
3
Indicateur de fièvre/de distance
4
Touche LIGHT/SET
5
Capteur de mesure
6
Capteur de distance
7
Touche
/
SCAN
8
Couvercle du compartiment à piles
Touches Fonctions
MODE/MEM
MODE
Réglage du mode de mesure.
MEM
Affichage des mesures enregistrées.
LIGHT/SET
LIGHT
Activation manuelle de l’éclai
-
rage de l’écran.
SET
Réglage des fonctions de base.
/ SCAN
Allumer et éteindre l’appareil.
Démarrer la mesure de la température.
1
2
3
4
5
6
7
8

52
Description de l’affichage
1 Affichage de l’année/date/heure
YEAR
AM
PM
MEM
DATE
1
2
3
4
5
6
7
8
9
10
11
12
13
14
2 Mode Température ambiante
3 Mode Température frontale
4 Mode température d’objet
5 Affichage de la valeur de la température/du numéro de
l’emplacement de sauvegarde
6 Symbole de signal sonore
7 Symbole d’éclairage de l’écran
8 Année
9 Fonction d’enregistrement
10 Date
11 Résultat de la mesure ≥ 38,0°C (≥ 100,4°F) «fièvre»
12 Résultat de la mesure < 37,5°C (< 99,5°F) «pas de
fièvre»
13 Affichage du niveau des piles
14 Unité de mesure de la température (Celsius/Fahrenheit)
6. Mise en service
Tirez éventuellement sur la languette isolante de la pile sur le couvercle du compartiment à piles ou
retirez le film de protection de la pile et introduisez-la en respectant la polarité.
•F
ermez le couvercle du compartiment à piles.
•I
nsérez les deux piles fournies en respectant leur polarité.

53
•
Refermez le couvercle du compartiment à piles sur le thermomètre jusqu’à l’entendre et le sentir s’enclencher.
•
Le thermomètre passe automatiquement au menu Paramètres (w 7. Allumer et régler le thermomètre).
7. Allumer et régler le thermomètre
Pour allumer le thermomètre, appuyez brièvement sur la touche
/
SCAN.
Après un bref auto-test et deux bips courts, le thermomètre est prêt à mesurer la température au niveau du front.
L’appareil démarre en mode Température frontale
.
Régler les fonctions de base
Dans ce menu, vous avez la possibilité de régler individuellement les fonctions suivantes.
Format horaire
•
Insérez à nouveau les piles ou maintenez la touche LIGHT/SET enfoncée
pendant 4secondes lorsque le thermomètre est allumé. Le format de l’heure
clignote à l’écran (Fig.1).
•
Avec la touche MODE/MEM, réglez le format de l’heure souhaité et confir-
mez avec la touche LIGHT/SET.
AM
Fig.1
Unité de mesure
de la température
Éclairage de
l'écran
Format
horaire
Date
Heure
Signal sonore

54
Date
L’année clignote à l’écran (Fig.2).
•
Avec la touche MODE/MEM, réglez l’année et confirmez avec la touche
LIGHT/SET.
Le jour/mois clignote à l’écran (Fig.3).
•
Avec la touche MODE/MEM, réglez le jour et le mois et confirmez avec la
touche LIGHT/SET.
Si le format de l’heure est réglé sur 12h, l’ordre d’affichage du jour et du
mois est inversé. Vous devez régler correctement la date et l’heure. Sans
ces réglages, il est impossible d’enregistrer et de consulter correctement
vos mesures avec la date et l’heure.
DATE
Fig.3
YEAR
Fig.2
Heure
L’heure clignote à l’écran (Fig.4).
•
Avec la touche MODE/MEM, réglez l’heure et confirmez avec la touche
LIGHT/SET.
Les minutes clignotent à l’écran (Fig.5).
•
Avec la touche MODE/MEM, réglez les minutes et confirmez avec la touche
LIGHT/SET.
Au format 12h, l’heure s’affiche avec AM/PM.
Fig.5Fig.4

55
Unité de mesure de la température
L’unité de mesure de la température clignote à l’écran (Fig.6).
Vous pouvez afficher vos résultats de mesure dans l’unité de mesure de la
température degrés Celsius (°C) ou degrés Fahrenheit (°F).
•
Pour afficher les résultats de mesure en Celsius, choisissez °C avec la touche
MODE/MEM et confirmez avec la touche LIGHT/SET.
•
Pour afficher les résultats de mesure en Fahrenheit, choisissez °F avec la
touche MODE/MEM et confirmez avec la touche LIGHT/SET.
Fig.6
Signal sonore
Le symbole du signal sonore clignote à l’écran (Fig.7).
Vous pouvez activer ou désactiver les signaux sonores (activation de l’appareil,
pendant la mesure, fin de la mesure).
•
Pour activer les signaux sonores, choisissez avec la touche MODE/MEM
et confirmez avec la touche LIGHT/SET.
•
Pour désactiver les signaux sonores, choisissez avec la touche MODE/
MEM et confirmez avec la touche LIGHT/SET.
Fig.7

56
Éclairage de l’écran
Le symbole d’éclairage de l’écran clignote à l’écran (Fig.8).
Vous pouvez activer ou désactiver l’éclairage automatique de l’écran (s’affiche
après la mesure de la température frontale).
•
Pour activer l’éclairage automatique de l’écran, choisissez avec la touche
MODE/MEM et confirmez avec la touche LIGHT/SET.
•
Pour désactiver l’éclairage automatique de l’écran, choisissez avec la
touche MODE/MEM et confirmez avec la touche LIGHT/SET.
Fig.8
Vous pouvez également activer manuellement l’éclairage de l’écran en appuyant brièvement sur la touche
LIGHT/SET.
L’écran s’allume 5secondes.
L’éclairage automatique et manuel de l’écran ne peut pas être utilisé pendant la mesure.

57
8. Mesure au niveau du front
Conseil Beurer
Notez que
•
l
’activité physique, une formation accrue de transpiration sur le front, la prise de médicaments
vasoconstricteurs et les irritations cutanées peuvent fausser le résultat de la mesure,
•l
e front ou les tempes doivent être exempts de transpiration et de cosmétiques.
•
N
ous vous recommandons d’effectuer trois mesures au niveau du front. Si les trois résultats de mesure
sont différents, prenez en compte la valeur la plus élevée.
Mode Température frontale
•P
our allumer le thermomètre, appuyez brièvement sur la touche
/
SCAN.
Après un bref auto-test, l’appareil est prêt à mesurer la température au niveau
du front. L’appareil se trouve toujours en mode Température frontale. Celui-ci
est représenté à l’écran par le symbole .
Fig.9
•
T
enez le thermomètre 4 à 6 cm devant le lieu de mesure du front
(Fig.10). Appuyez sur la touche
/
SCAN. La distance de mesure recom
-
mandée de 4 à 6cm s’affiche à l’écran.
Fig.10

58
Mode Température frontale
La distance de mesure se trouve
entre 4 et 6cm
La distance de mesure ne se
trouve PAS entre 4 et 6cm
Dès que le thermomètre détecte la
distance de mesure correcte de 4 à
6cm, la mesure commence automa-
tiquement. L’indicateur de fièvre/de
distance s’allume alors durablement
en bleu. Après quelques secondes, le
résultat de mesure s’affiche à l’écran
(Fig.12). La fin du temps de mesure
est signalée par un long bip.
Lorsque la distance de mesure ne se
trouve pas entre 4 et 6cm, l’indicateur
de fièvre/de distance clignote en bleu (si
les signaux sonores sont activés, l’ap-
pareil émet un bip) et 4-6 s’affiche à
l’écran (Fig. 11). Si, après 20secondes,
la distance de mesure correcte n’est
pas atteinte, l’appareil met automati
-
quement fin à la mesure.
Si le résultat de mesure est inférieur à 37,5°C (99,5°F), l’
indicateur de fièvre/
de distance
s’allume en vert et s’affiche à l’écran pour indiquer que la
température corporelle se trouve dans la plage normale.
Si le résultat de mesure se situe entre 37,5°C et 37,9°C, l’indicateur de
fièvre/de distance s’allume en jaune pour indiquer que la température cor-
porelle est légèrement trop élevée (Fig.13).
Si le résultat de mesure est supérieur à 38°C (100,4°F), l’
indicateur de
fièvre/de distance
s’allume en rouge et s’affiche à l’écran (Fig.14) pour
indiquer que la température corporelle dépasse la plage normale.
Fig. 13
Fig. 12
Fig. 11
Fig. 14
La valeur mesurée est automatiquement enregistrée avec la date et l’heure
ainsi que la classification «fièvre» / «pas de fièvre» .
L’appareil signale avec deux bips brefs et un symbole de front
fixe qu’il
est prêt pour une autre mesure.

59
Afficher les valeurs de mesure enregistrées
L’appareil enregistre exclusivement les valeurs de mesure en mode Température frontale . L’appareil enregistre
automatiquement les valeurs des 60dernières mesures.
Si les 60emplacements de sauvegarde sont dépassés, la valeur la plus ancienne est supprimée.
•L
a mémoire peut être appelée comme suit:
•
Maintenez la touche MODE/MEM enfoncée pendant 5secondes lorsque le thermomètre est allumé.
La dernière valeur de mesure est affichée.
•À
chaque nouvelle pression de la touche MODE/MEM, le numéro de mémoire s’affiche d’abord, puis la valeur
de mesure quand vous relâchez la touche.
•L
’heure et la date s’affichent à tour de rôle dans la ligne supérieure.
9. Mesure de la température d’objet/température ambiante
Mode température d’objet
Si vous voulez mesurer la température d’un objet avec ce thermomètre, vous
devez passer en mode Température d’objet.
•P
our cela, appuyez brièvement sur la touche MODE/MEM sur le thermo-
mètre allumé. L’appareil passe en mode Température d’objet (Fig. 15).
•
T
enez le thermomètre 2 à 3cm devant la zone de mesure souhaitée.
Appuyez brièvement sur la touche
/
SCAN et lisez la température sur
l’écran (Fig.16).
En mode Température d’objet, les valeurs de mesure ne sont pas enregistrées.
Fig.16Fig.15

60
Mode Température ambiante
Si vous voulez utiliser le thermomètre pour mesurer la température ambiante,
vous devez passer au mode Température ambiante.
•P
our cela, appuyez brièvement deux fois sur la touche MODE/MEM sur
le thermomètre allumé.
L’appareil passe en mode Température ambiante
.
•L
a température ambiante s’affiche directement (Fig. 17).
En mode Température ambiante, les valeurs de mesure ne sont pas enre-
gistrées.
Fig.17
10. Affichage des erreurs
Message
d’erreur
Problème Solution
Mesure pendant l’auto-test, appareil pas
encore prêt à la mesure.
Attendre que le symbole du front ne clignote plus.
Température ambiante inférieure à 10°C ou
supérieure à 40°C (<50°F, >104°F).
La température ambiante doit se situer entre 10°C et
40°C (50°F - 104°F).
(1) Mode Température frontale: la température
établie est supérieure à 42,2°C (108°F).
(2) Mode Température d’objet: la température
établie est supérieure à 80°C (176°F).
Utilisez le thermomètre uniquement dans les plages
de température indiquées. En cas d’affichages d’er
-
reur répétés, consultez le revendeur ou le service
client.

61
Message
d’erreur
Problème Solution
(1) Mode Température frontale: la tempéra-
ture établie est supérieure à 34°C (93,2°F).
(2) Mode Température d’objet: la température
établie est inférieure à -22°C (-7,6°F).
Utilisez le thermomètre uniquement dans les plages
de température indiquées. En cas d’affichages d’er
-
reur répétés, consultez le revendeur ou le service
client.
Les piles sont usées. Changez les piles.
11. Piles
Remplacer les piles
L’appareil fonctionne avec deux piles, de type AAA, LR03.
•O
uvrez le compartiment à piles.
Faites glisser le compartiment à piles vers le bas.
•R
etirez les piles usées du compartiment.
•I
nsérez les nouvelles piles.
Faites attention à respecter la polarité des piles.
•F
ermez le compartiment à piles.
Éliminer les piles
•L
es piles usagées et complètement déchargées doivent être mises au rebut dans des conteneurs spéciaux ou
aux points de collecte réservés à cet usage ou bien déposées chez un revendeur d’appareils électriques. L’éli
-
mination des batteries est une obligation légale qui vous incombe.
•C
es pictogrammes se trouvent sur les piles à substances nocives:
Pb = pile contenant du plomb,
Cd = pile contenant du cadmium,
Hg = pile contenant du mercure.

62
12. Nettoyer l’appareil
•L
e capteur de mesure est la partie la plus sensible du thermomètre. Manipulez-le avec le plus grand
soin lors du nettoyage.
•N
’utilisez pas de produits nettoyants agressifs.
•S
uivez toujours toutes les consignes de sécurité pour l’utilisateur et l’appareil.
w
3. Consignes d’avertissement et de mise en garde
Nettoyez le capteur de mesure après chaque utilisation. Pour cela, utilisez un chiffon doux ou un bâtonnet ouaté
qui peut être humidifié avec du désinfectant ou de l’alcool à 70%.
Pour nettoyer l’appareil entier, veuillez utiliser un chiffon doux légèrement humidifié avec de la lessive douce. En
aucun cas de l’eau ne doit pénétrer dans l’appareil.
Ne réutilisez l’appareil que lorsqu’il est tout à fait sec.
13. Entreposer l’appareil
L’appareil ne doit pas être stocké ou utilisé à des températures ou une humidité de l’air trop élevées ou trop
basses (
w
15. Données techniques), à la lumière du soleil, connecté au courant électrique ou dans des endroits
poussiéreux. Sinon, cela pourrait entraîner des imprécisions de mesure.
Si vous prévoyez un stockage prolongé, retirez la pile.
14. Éliminer l’appareil
Dans l’intérêt de la protection de l’environnement, l’appareil ne doit pas être jeté avec les ordures ménagères à
la fin de sa durée de service.
L’élimination doit se faire par le biais des points de collecte compétents dans votre pays. Veuillez éliminer l’ap
-
pareil conformément à la directive européenne – WEEE (Waste Electrical and Electronic Equipment) relative
aux appareils électriques et électroniques usagés.

63
Pour toute question, adressez-vous aux collectivités locales responsables de l’élimination et du recyclage de
ces produits.
15. Données techniques
En cas d’utilisation de l’appareil en dehors des spécifications, un fonctionnement irréprochable ne peut pas être
garanti!
La précision de ce thermomètre a été correctement testée et sa durabilité a été conçue en vue d’une utilisation
à long terme.
Dans le cadre d’une utilisation médicale de l’appareil, des contrôles techniques de mesure doivent être menés
avec les moyens appropriés. Pour obtenir des informations précises sur la vérification de la précision de l’appa
-
reil, vous pouvez faire une demande par courrier au service après-vente.
Nous nous réservons le droit d’effectuer des modifications techniques pour améliorer et faire évoluer le produit.
Type FT 100
Mode de mesure Mesure par infrarouge sans contact
Fonctions de base Mesure de la température frontale
Mesure de la température d’objets
Mesure de la température ambiante
Unités de mesure Celsius (°C) ou Fahrenheit (°F)
Conditions d’utilisation 10°C à 40°C (50°F à 104°F)
avec une humidité de l’air relative <95%
Conditions de conservation et de
transport
-20°C à 50°C (-4°F à 122°F)
avec une humidité de l’air relative <95%
Distance de mesure 4 à 6cm de distance avec la zone de mesure

64
Plages de mesure et précision
de la mesure de la température
frontale
Mesure de la température frontale
34°C à 42,2°C (93,2°F à 108°F)
Précision de mesure 34°C à 42,2°C: ± 0,2°C (93,2°F à 108°F: ± 0,4°F)
Reproductibilité en usage
clinique
0,23°C (0,41°F)
Plages de mesure et précision
Mesure de la température
d’objets
Mesure de la température d’objets -22°C à 80°C (-7,6°F à 176°F)
Précision de mesure ± 4% ou ± 2°C (4°F)
Fonction d’enregistrement
Mesure de la température
corporelle
Enregistre automatiquement les 60dernières valeurs de mesure.
Signal sonore Lors de l’allumage de l’appareil, pendant la mesure, à la fin de la mesure
(réglable).
Affichage Écran LCD
Fonctions d’économie d’énergie L’appareil s’éteint automatiquement après 1minute.
Dimensions
Largeur x profondeur x hauteur
env. 40,9mm x 68,2mm x 199,0mm
Poids 82g (sans les piles)
2piles AAA, LR03 Utilisation pour environ 2000mesures
Les fonctions supplémentaires activées comme le signal sonore ou l’éclai
-
rage de l’écran réduisent la durée de vie des piles.
Le numéro de série se trouve sur l’appareil ou sur le compartiment à piles.

65
Sous réserve d'erreurs et de modifications
16. Directives
L’appareil est conforme aux exigences de la directive européenne 93/42/EEC sur les produits médicaux, de la loi
sur les produits médicaux, de la norme ASTM E 1965 - 98 et de la norme européenne EN60601-1-2 et répond
aux exigences de sécurité spéciales relatives à la compatibilité électromagnétique.

66
ESPAÑOL
Índice
1. Símbolos ...........................................................67
2. Uso correcto ......................................................68
3. Indicaciones de advertencia y de seguridad .....69
3.1 Peligros para el usuario ............................. 69
3.2 Peligros para el aparato ...........................70
3.3
Indicaciones para la manipulación de pilas
70
4. Información sobre este termómetro ..................71
5. Descripción del aparato ....................................73
6. Puesta en funcionamiento ................................. 74
7. Encendido y ajuste del termómetro .................75
8. Medición en la frente ......................................... 79
9. Medición de la temperatura de objetos/tempera
-
tura ambiente ....................................................81
10. Visualización de errores ....................................82
11. Pilas .................................................................. 83
12. Limpieza del aparato .........................................84
13. Almacenamiento del aparato ............................84
14. Eliminación del aparato .....................................84
15. Datos técnicos ...................................................85
16. Directrices ........................................................86
Lea atentamente estas instrucciones de uso,
consérvelas para su futura utilización, póngalas
a disposición de otros usuarios y respete las indi-
caciones.
Estimada clienta, estimado cliente:
Nos alegramos de que haya elegido un producto de
nuestra colección. Nuestro nombre es sinónimo de pro-
ductos de calidad de primera clase sometidos a un
riguroso control en los ámbitos del calor, las terapias
no agresivas, la tensión arterial/el diagnóstico, el peso,
los masajes y el aire.
Lea detenidamente estas instrucciones de uso y tenga
en cuentas las indicaciones.
Atentamente,
El equipo de Beurer
Artículos suministrados
Compruebe que el envoltorio de los artículos suminis-
trados esté intacto y que su contenido esté completo.
Antes de utilizar el aparato deberá asegurarse de que
ni este ni los accesorios presentan daños visibles y de
que se retira el material de embalaje correspondiente.
En caso de duda no lo use y póngase en contacto con
su distribuidor o con la dirección de atención al cliente
indicada.

67
•T
ermómetro clínico
•2
pilas AAA de 1,5 V (LR03)
•B
olsa
•I
nstrucciones de uso
1. Símbolos
En estas instrucciones de uso y en el aparato se utilizan los siguientes símbolos:
ADVERTENCIA
Aviso sobre riesgos de lesiones u otros peligros para la salud.
ATENCIÓN
Indicación de seguridad sobre posibles desperfectos del aparato o de los accesorios.
Nota
Indicación de información importante.
Respete las instrucciones de uso
Pieza de aplicación tipo BF
Eliminación según la Directiva europea sobre residuos de aparatos eléctricos y electrónicos
(RAEE)
El sello CE certifica que este aparato cumple con los requisitos establecidos en la Directiva
93/42/EEC relativa a los productos sanitarios.

68
Fabricante
Storage
Temperatura y humedad de almacenamiento y transporte admisibles
Operating
Temperatura y humedad de funcionamiento admisibles
IP 22
Aparato protegido contra cuerpos extraños ≥12,5 mm y contra goteo oblicuo de agua
Número de serie
Información importante/Sugerencia
w
Referencia cruzada a otro párrafo.
Símbolo de certificación para aquellos productos que se exportan a la Federación de Rusia y
a los países de la CEI.
2. Uso correcto
Este termómetro permite medir sin contacto la temperatura de la frente, de objetos y de espacios cerrados. El
termómetro está diseñado para medir la temperatura en el hogar. Permite medir con rapidez y sencillez la tem
-
peratura corporal. Los valores medidos se guardan automáticamente.

69
3. Indicaciones de advertencia y de seguridad
3.1 Peligros para el usuario
•N
o utilice el aparato hasta que haya leído y comprendido estas instrucciones de uso.
•C
onserve estas instrucciones de uso. Las instrucciones de uso deben encontrarse a disposición de todos los
usuarios. Deben respetarse todas las indicaciones.
•A
ntes de realizar la medición, mantenga el aparato durante al menos 30 minutos en la habitación en la que se
vaya a realizar dicha medición.
•
D
espués de hacer deporte, de tomar un baño o si ha estado al aire libre, espere unos 30 minutos antes de
realizar una medición en la frente.
•E
l termómetro FT 100 solo está diseñado para usarse en el punto de medición del cuerpo humano indicado
en las instrucciones de uso.
•N
o realice un autodiagnóstico ni se automedique en función de los resultados de medición sin consultar pre-
viamente a su médico. Y en particular, no tome ninguna medicación nueva por su cuenta, y no cambie la pre-
sentación ni la dosis de la medicación que esté tomando.
•E
ste aparato está diseñado solo para el propósito que se indica en estas instrucciones de uso.
•P
or lo tanto, el fabricante declinará toda responsabilidad por daños y perjuicios debidos a un uso inadecuado
o incorrecto.
•L
os niños no deben utilizar el aparato, ya que los productos sanitarios no son juguetes.
•A
ntes de cada uso, compruebe que la lente esté intacta. En el caso de que esté dañada, póngase en contacto
con su distribuidor o con el servicio de asistencia técnica.
•N
o toque la lente con el dedo.
•L
os valores de medición que calcula usted mismo solo sirven para su información, no sustituyen un examen
médico. Consulte a su médico antes de realizar tratamientos médicos.
•L
impie el termómetro cada vez que lo use (
w
12. Limpieza del aparato).
•S
i todavía tiene dudas sobre cómo usar el aparato, póngase en contacto con su distribuidor o con el servicio
de atención al cliente.

70
3.2 Peligros para el aparato
•I
mpida que el aparato reciba golpes y no deje que se caiga.
•N
o exponga el aparato a la luz directa del sol, a temperaturas extremas ni a una alta humedad ambiental.
•N
o moje el aparato, no es impermeable. Evite cualquier contacto directo con agua o con otros líquidos.
•N
o abra ni repare el aparato usted mismo. Solo los centros de servicio técnico autorizados deben reparar el
aparato; de lo contrario, se extinguirá el derecho de garantía.
•
Los equipos de comunicación HF portátiles y móviles pueden influir en el funcionamiento de este aparato. Puede
solicitar información más precisa al servicio de atención al cliente en la dirección indicada en este documento o
leer el final de las instrucciones de uso.
3.3 Indicaciones para la manipulación de pilas
•E
n caso de que el líquido de una pila entre en contacto con la piel o los ojos, lave la zona afectada con agua
y busque asistencia médica.
•
¡Peligro de asfixia! Los niños pequeños podrían tragarse las pilas y asfixiarse. Guarde las pilas fuera del
alcance de los niños.
•F
íjese en los símbolos más (+) y menos (-) que indican la polaridad.
•S
i se derrama el líquido de una pila, póngase guantes protectores y limpie el compartimento de las pilas con
un paño seco.
•P
roteja las pilas de un calor excesivo.
•
¡Peligro de explosión! No arroje las pilas al fuego.
•L
as pilas no se pueden cargar ni cortocircuitar.
•S
i no va a utilizar el aparato durante un periodo de tiempo prolongado, retire las pilas del compartimento.
•U
tilice únicamente el mismo tipo de pila o un tipo equivalente.
•C
ambie siempre todas las pilas a la vez.
•¡
No utilice baterías!
•N
o despiece, abra ni triture las pilas.

71
4. Información sobre este termómetro
El valor obtenido al medir la temperatura oscila en función de la parte del cuerpo en la que se realice la medición.
La oscilación en personas sanas cuando se toma la temperatura en diferentes partes del cuerpo es de 0,2 °C a
1 °C (0,4 °F a 1,8 °F).
Margen de temperatura normal en diferentes termómetros:
Valores de medición Termómetro utilizado
Temperatura en la frente de 35,8 °C a 37,6 °C (de 96,4 °F a 99,7 °F) Termómetro frontal
Temperatura en el oído de 36,0 °C a 37,8 °C (de 96,8 °F a 100,0 °F) Termómetro para el oído
Temperatura oral de 36,0 °C a 37,4 °C (de 96,8 °F a 99,3 °F) Termómetro convencional
Temperatura rectal de 36,3 °C a 37,8 °C (de 97,3 °F a 100,0 °F) Termómetro convencional
Sugerencia de Beurer
•N
o compare nunca las temperaturas medidas con distintos termómetros.
•
I
ndique a su médico con qué termómetro ha medido la temperatura corporal y en qué parte del cuerpo.
Téngalo en cuenta también en el caso de un autodiagnóstico.
Si antes de realizar la medición se sostiene el termómetro en la mano durante mucho tiempo, se calen-
tará. Esto puede falsear el resultado de las mediciones.

72
Factores que influyen en la temperatura corporal
•E
l metabolismo particular de cada persona.
•L
a edad.
La temperatura corporal de los lactantes y de los niños pequeños es más alta que la de los adultos. Las gran
-
des oscilaciones de temperatura son más rápidas y frecuentes en los niños. Con la edad desciende la tempe-
ratura normal del cuerpo.
•L
a ropa.
•L
a temperatura exterior.
•L
a hora del día.
La temperatura corporal es más baja por la mañana y aumenta a medida que transcurre el día, hasta la tarde.
Realizar actividades.
•L
as actividades corporales y, en menor medida, las actividades mentales aumentan la temperatura corporal.
Sugerencia de Beurer
La medición de la temperatura corporal proporciona el valor de medición actual de una persona. Si no
está seguro de cómo interpretar el resultado de la medición o si los valores mostrados son anómalos
(por ejemplo: fiebre), consulte a su médico de familia. Hágalo también si, además de producirse ligeros
cambios en su temperatura corporal, aparecen otros síntomas como p. ej., desasosiego, sudoración
intensa, enrojecimiento de la piel, pulso acelerado, desmayos frecuentes, etc.

73
5. Descripción del aparato
1
Pantalla
2
Botón MODE/MEM
3
Indicador de fiebre y de distancia
4
Botón LIGHT/SET
5
Sensor de medición
6
Sensor de distancia
7
Botón
/SCAN
8
Tapa del compartimento de las pilas
Botones Funciones
MODE/MEM
MODE
Ajuste del modo de medición.
MEM
Indicación de los valores de medición guardados.
LIGHT/SET
LIGHT
Encendido manual de la iluminación de la pantalla.
SET
Ajuste de las funciones básicas.
/ SCAN
Conexión y desconexión del aparato.
Inicio de la medición de la temperatura.
1
2
3
4
5
6
7
8

74
Descripción de la pantalla
1 Indicación del año/fecha/hora
YEAR
AM
PM
MEM
DATE
1
2
3
4
5
6
7
8
9
10
11
12
13
14
2 Modo temperatura ambiente
3 Modo temperatura de la frente
4 Modo temperatura objeto
5 Indicación del valor de la temperatura/número de
posición de memoria
6 Símbolo de la señal acústica
7 Símbolo de iluminación de la pantalla
8 Año
9 Función de almacenamiento
10 Fecha
11 Resultado de medición ≥ 38,0°C (≥ 100,4°F) “Fiebre”
12 Resultado de medición < 37,5°C (< 99,5°F) “Sin fiebre”
13 Indicación del estado de las pilas
14 Unidad de temperatura (Celsius/Fahrenheit)
6. Puesta en funcionamiento
En caso de que estén presentes, retire las tiras aislantes de las pilas de la tapa del compartimento
de las pilas o retire la lámina de protección de las pilas y coloque las pilas respetando la polaridad.
•A
bra con cuidado la tapa del compartimento de las pilas.
•C
oloque las dos pilas suministradas en el compartimento respetando la polaridad.
•
Vuelva a colocar la tapa hasta que oiga y note que encaja.

75
•
El termómetro pasa ahora automáticamente al menú de ajuste (w 7. Encendido y ajuste del termómetro).
7. Encendido y ajuste del termómetro
Para encender el termómetro, pulse brevemente el botón
/
SCAN.
Tras una breve comprobación automática y dos pitidos cortos, el termómetro está listo para medir la temperatura
en la frente. El aparato se enciende siempre en el modo temperatura de la frente .
Ajuste de las funciones básicas
Desde este menú podrá ajustar sucesivamente de forma individualizada las siguientes funciones.
Formato de la hora
•
Vuelva a insertar las pilas o mantenga pulsado el botón LIGHT/SET con el
termómetro encendido durante 4 segundos. En la pantalla parpadeará la
indicación del formato de la hora (fig. 1).
•
Ajuste con el botón MODE/MEM el formato de hora que desee y confírmelo
con el botón LIGHT/SET.
AM
Fig. 1
Unidad de medición
de la temperatura
Iluminación
de la pantalla
Formato de la
hora
Fecha Hora
Señal
acústica

76
Fecha
En la pantalla parpadeará el año (fig. 2).
•
Ajuste con el botón MODE/MEM el año y confírmelo con el botón LIGHT/
SET.
En la pantalla parpadeará el día/mes (fig. 3).
•
Ajuste con el botón MODE/MEM el día y el mes y confírmelos con el botón
LIGHT/SET.
Si está ajustado el formato de 12 horas, se invierte el orden de la indicación
del día y del mes. Debe ajustar correctamente la fecha y la hora, ya que
solo así se podrán almacenar los datos de sus mediciones con la fecha y
hora correctas para su posterior consulta.
DATE
Fig. 3
YEAR
Fig. 2
Hora
En la pantalla parpadeará la hora (fig. 4).
•
Ajuste con el botón MODE/MEM la hora y confírmela con el botón LIGHT/
SET.
En la pantalla parpadeará el minuto (fig. 5).
•
Ajuste con el botón MODE/MEM el minuto y confírmelo con el botón LIGHT/
SET.
En el formato de 12 horas, la hora se indica con AM/PM.
Fig. 5Fig. 4

77
Unidad de medición de la temperatura
En la pantalla parpadeará la unidad de medición de la temperatura (fig. 6).
Puede elegir que los resultados de la medición se muestren en grados Celsius
(ºC) o en grados Fahrenheit (ºF).
•
Para que los resultados de la medición se muestren en grados Celsius, selec-
cione con el botón MODE/MEM °C y confirme con el botón LIGHT/SET.
•
Para que los resultados de la medición se muestren en grados Fahrenheit,
seleccione con el botón MODE/MEM °F y confirme con el botón LIGHT/SET.
Fig. 6
Señal acústica
En la pantalla parpadeará el símbolo de la señal acústica (fig. 7).
Puede encender o apagar las señales acústicas que suenan al encenderse el
aparato, durante la medición y al finalizar esta.
•
Para encender las señales acústicas, seleccione con el botón MODE/MEM
y confirme con el botón LIGHT/SET.
•
Para apagar las señales acústicas, seleccione con el botón MODE/MEM
y confirme con el botón LIGHT/SET.
Fig. 7

78
Iluminación de la pantalla
En la pantalla parpadeará el símbolo de iluminación de la pantalla (fig. 8).
Puede encender o apagar la iluminación automática de la pantalla que aparece
después de medir la temperatura en la frente.
•
Para encender la iluminación automática de la pantalla, seleccione con el
botón MODE/MEM
y confirme con el botón LIGHT/SET.
•
Para apagar la iluminación automática de la pantalla, seleccione con el botón
MODE/MEM y confirme con el botón LIGHT/SET.
Fig. 8
Además, puede encender manualmente la iluminación de la pantalla pulsando brevemente el botón LIGHT/
SET.
La pantalla se ilumina durante 5 segundos.
La iluminación tanto automática como manual de la pantalla no se puede utilizar durante el proceso
de medición.

79
8. Medición en la frente
Sugerencia de Beurer
Tenga en cuenta lo siguiente:
•L
a actividad física, una mayor sudoración en la frente, la ingesta de medicamentos vasoconstrictores
y las irritaciones de la piel pueden alterar el resultado de las mediciones.
•L
a frente, o las sienes, no deben tener ni sudor ni maquillaje.
•L
e recomendamos que realice tres mediciones en la frente. Si los resultados de las tres son distintos,
tome el valor más alto.
Modo temperatura de la frente
•
P
ara encender el termómetro, pulse brevemente el botón
/
SCAN. Tras
una breve comprobación automática, el aparato está listo para medir la
temperatura en la frente. Al encenderse, el aparato está siempre en el modo
temperatura de la frente. Esto se reconoce por el símbolo en la pantalla.
Fig. 9
•M
antenga el termómetro entre 4 y 6 cm por encima del punto de medición
en la frente (fig. 10). Pulse el botón
/
SCAN. En la indicación en pantalla
aparece la distancia de medición necesaria de 4-6 cm.
Fig. 10

80
Modo temperatura de la frente
La distancia de medición
es 4-6 cm
La distancia de medición
NO es 4-6 cm
En cuanto el termómetro ha registrado
la distancia de medición correcta de 4
a 6 cm, comienza automáticamente a
medir. El indicador de fiebre y de dis
-
tancia se ilumina permanentemente en
azul. Tras unos segundos aparece en
la pantalla el resultado de la medición
(fig. 12). El final del tiempo de medición
se indica con un pitido largo.
Si la distancia de medición no es de 4
a 6 cm, el indicador de fiebre y de dis
-
tancia parpadea en azul (con la señal
acústica encendida suena también
un pitido) y aparece 4-6 en la pantalla
(fig.11). Si después de 20 segundos no
se ha encontrado la distancia de medi-
ción correcta, la medición finaliza auto-
máticamente.
Si el resultado de la medición está por debajo de 37,5°C (99,5°F), el
indica-
dor de fiebre y de distancia
se ilumina en verde y en la pantalla aparece
para indicar que no hay fiebre, lo que indica que la temperatura corporal
se encuentra en un rango normal.
Si el resultado de la medición está entre 37,5°C y 37,9°C, el indicador de
fiebre y de distancia se ilumina en amarillo, lo que indica que la tempera
-
tura corporal se encuentra en un rango alto (fig. 13).
Si el resultado de la medición está por encima de 38°C (100,4°F), el
indi-
cador de fiebre y de distancia
se ilumina en rojo y en la pantalla aparece
(fig. 14), que indica que la temperatura corporal se encuentra por encima
del rango normal.
Fig. 13
Fig. 12
Fig. 11
Fig. 14
El valor medido se almacena automáticamente con la fecha/hora y la clasifi
-
cación “fiebre” /“sin fiebre” . Cuando emite dos pitidos cortos y el sím-
bolo de la frente deja de parpadear, el aparato indica que está listo para
una nueva medición.

81
Mostrar valores guardados
El aparato guarda exclusivamente valores de medición en el modo temperatura de la frente . El aparato guarda
automáticamente los valores de medición de las últimas 60 mediciones.
Una vez sobrepasadas las 60 posiciones de memoria, se comenzarán a borrar valores empezando por el más
antiguo.
•L
a memoria se puede consultar de la siguiente manera:
•
Mantenga pulsado el botón MODE/MEM durante 5 segundos con el termómetro encendido.
Se mostrará el valor de medición más reciente.
•S
i sigue pulsando el botón MODE/MEM, en primer lugar se mostrará el número de posición de memoria y, al
soltar el botón, el valor de medición.
•E
n la fila superior aparecen alternativamente la hora y la fecha.
9. Medición de la temperatura de objetos/temperatura ambiente
Modo temperatura objeto
Si desea medir la temperatura de un objeto con este termómetro, debe cam-
biar al modo temperatura de objeto.
•
P
ara ello, pulse brevemente el botón MODE/MEM con el termómetro
encendido. El aparato cambia al modo temperatura de objeto (fig. 15).
•
M
antenga el termómetro entre 2 y 3 cm delante del punto de medición
que desee. Pulse brevemente el botón
/
SCAN y lea la temperatura de
la pantalla (fig. 16).
Los valores de medición en el modo temperatura de objeto no se guardan.
Fig. 16Fig. 15

82
Modo temperatura ambiente
Si desea utilizar el termómetro para medir la temperatura ambiente, debe
cambiar al modo temperatura ambiente.
•P
ara ello, pulse dos veces brevemente el botón MODE/MEM con el ter-
mómetro encendido.
El aparato cambia al modo temperatura ambiente
.
•L
a temperatura ambiente se indica directamente (fig. 17).
Los valores de medición en el modo temperatura ambiente no se guardan.
Fig. 17
10. Visualización de errores
Aviso de
errores
Problema Solución
Medición durante la comprobación automá-
tica, el aparato aún no está listo para medir.
Espere hasta que el símbolo de la frente deje de par
-
padear.
Temperatura ambiente inferior a 10 °C o
superior a 40 °C (<50 °F, >104 °F).
La temperatura ambiente debe estar entre 10 °C y
40 °C (50 °F - 104 °F).
(1) Modo temperatura de la frente: la tempera-
tura medida es superior a 42,2 °C (108 °F).
(2) Modo temperatura de objeto: la tempera-
tura medida es superior a 80 °C (176 °F).
Use el termómetro solo dentro del rango de tem-
peraturas indicado. Si el aparato da error de forma
continuada, póngase en contacto con un distribuidor
especializado o con el servicio de atención al cliente.

83
Aviso de
errores
Problema Solución
(1) Modo temperatura de la frente: la tempe-
ratura medida es inferior a 34°C (93,2°F).
(2) Modo temperatura de objeto: la tempera-
tura medida es inferior a -22 °C (-7,6 °F).
Use el termómetro solo dentro del rango de tem-
peraturas indicado. Si el aparato da error de forma
continuada, póngase en contacto con un distribuidor
especializado o con el servicio de atención al cliente.
Las pilas están agotadas. Cambie las pilas.
11. Pilas
Cambiar las pilas
El aparato requiere dos pilas AAA LR03.
•A
bra el compartimento de las pilas.
Desplace para ello hacia abajo el compartimento de las pilas.
•E
xtraiga del compartimento las pilas usadas.
•C
oloque pilas nuevas.
Asegúrese de que las pilas están colocadas con la polaridad correcta.
•C
ierre el compartimento de las pilas.
Eliminación de las pilas
•L
as pilas usadas, completamente descargadas, deben eliminarse a través de contenedores de recogida seña-
lados de forma especial, los puntos de recogida de residuos especiales o a través de los distribuidores de
equipos electrónicos. Los usuarios están obligados por ley a eliminar las pilas correctamente.
•E
stos símbolos se encuentran en pilas que contienen sustancias tóxicas:
Pb = la pila contiene plomo,
Cd = la pila contiene cadmio,
Hg = la pila contiene mercurio.

84
12. Limpieza del aparato
•E
l sensor de medición es la pieza más sensible del termómetro. Trátelo con la máxima precaución a
la hora de limpiarlo.
•N
o utilice ningún producto de limpieza agresivo.
•S
iga siempre todas las indicaciones de seguridad para el usuario y el aparato.
w
3. Indicaciones de advertencia y de seguridad
Limpie el sensor de medición tras cada uso. Para ello, utilice un paño suave o un bastoncillo de algodón mojados
con desinfectante o alcohol de 70º.
Para limpiar todo el aparato utilice un paño suave humedecido ligeramente con lejía jabonosa suave. Bajo ningún
concepto debe entrar agua en el aparato.
No utilice el aparato hasta que esté completamente seco.
13. Almacenamiento del aparato
El aparato no se debe guardar ni utilizar con una temperatura o una humedad ambiental demasiado altas o dema-
siado bajas (
w
15. Datos técnicos), expuesto a la luz solar, en contacto con la corriente eléctrica o en lugares
polvorientos. De lo contrario, podría realizar mediciones imprecisas.
Si no va a usar el termómetro durante mucho tiempo, extraiga las pilas.
14. Eliminación del aparato
Para proteger el medio ambiente, no se debe desechar el aparato al final de su vida útil junto con la basura
doméstica.
Llévelo a los puntos de recogida adecuados disponibles en su localidad. Deseche el aparato según la Directiva
europea sobre residuos de aparatos eléctricos y electrónicos (RAEE).
Para más información, póngase en contacto con la autoridad municipal competente en materia de elimina
-
ción de residuos.

85
15. Datos técnicos
¡No garantizamos el correcto funcionamiento de este aparato si se usa al margen de las especificaciones!
La precisión de este termómetro ha sido comprobada minuciosamente y su diseño ha sido desarrollado con vis
-
tas a una larga vida útil del aparato.
Si se utiliza el aparato en el ejercicio de la medicina, deberán realizarse controles metrológicos con los medios
adecuados. Puede solicitar más información sobre la comprobación de la precisión del aparato al servicio de
asistencia técnica en la dirección indicada.
Nos reservamos el derecho de efectuar modificaciones técnicas para mejorar y perfeccionar el producto.
Tipo FT 100
Método de medición Medición infrarroja sin contacto
Funciones básicas Medición de la temperatura de la frente
Medición de la temperatura de objetos
Medición de la temperatura ambiente
Unidades de medida Celsius (°C) o Fahrenheit (°F)
Condiciones de servicio De 10 °C a 40 °C (de 50 °F a 104 °F)
con una humedad relativa < 95 %
Condiciones de almacenamiento
y transporte
De -20 °C a 50 °C (de -4 °F a 122 °F)
con una humedad relativa < 95 %
Distancia para la medición De 4 a 6 cm de distancia al punto de medición
Rangos de medición y precisión
de la medición de la temperatura
de la frente
Medición de la temperatura de la frente
de 34 °C a 42,2 °C (de 93,2 °F a 108 °F)
Precisión de la medición 34 °C a 42,2 °C: ± 0,2 °C (de 93,2 °F a 108 °F:
±0,4 °F)
Precisión clínica de repetición 0,23 °C (0,41 °F)

86
Rangos de medición y precisión
Medición de la temperatura de
objetos
Medición de la temperatura de objetos de -22 °C a 80 °C (de -7,6 °F a
176 °F)
Precisión de la medición ± 4% o ± 2 °C (± 4 °F)
Función de almacenamiento
Medición de temperatura
corporal
Guarda automáticamente los últimos 60 valores de medición.
Señal acústica Al encender el aparato, durante la medición, al finalizar la medición
(ajustable).
Indicación Pantalla LCD
Funciones de ahorro de energía El aparato se apaga automáticamente tras un minuto.
Medidas
Anchura x profundidad x altura
Aprox. 40,9 mm x 68,2 mm x 199,0 mm
Peso 82 g (sin pilas)
Dos pilas AAA, LR03 Autonomía para alrededor de 2000 mediciones
Las funciones activadas adicionalmente, como la señal acústica o la ilumi
-
nación de la pantalla, acortan la vida útil de la pila.
El número de serie se encuentra en el aparato o en el compartimento de las pilas.
16. Directrices
Este aparato cumple las disposiciones de la Directiva europea n° 93/42/EEC relativa a los productos sanitarios,
la ley alemana sobre productos sanitarios, la ASTM E 1965 - 98 y la norma europea EN60601-1-2 y está sujeto
a las medidas especiales de precaución relativas a la compatibilidad electromagnética.
Salvo errores y modificaciones

87
ITALIANO
Contenuto
1. Spiegazione dei simboli.....................................88
2. Uso conforme .................................................... 89
3. Segnalazioni di rischi e indicazioni di sicurezza 90
3.1 Pericoli per l'utilizzatore ............................90
3.2 Pericoli per l'apparecchio .........................91
3.3 Avvertenze sull'uso delle batterie .............91
4. Informazioni relative al termometro ...................92
5. Descrizione dell'apparecchio ............................94
6. Messa in funzione ..............................................95
7. Accensione e spegnimento del termometro ....96
8. Misurazione sulla fronte .....................................99
9. Misurazione della temperatura superficiale/tempe
-
ratura ambiente ...............................................101
10. Messaggi di errore ...........................................103
11. Batterie ...........................................................104
12. Pulizia dell'apparecchio ...................................104
13. Conservazione dell'apparecchio ....................105
14. Smaltimento dell'apparecchio ......................... 105
15. Dati tecnici .......................................................105
16. Direttive ..........................................................107
Leggere attentamente le presenti istruzioni per
l'uso, conservarle per impieghi futuri, renderle
accessibili ad altri utenti e attenersi alle indica-
zioni.
Gentile cliente,
siamo lieti che Lei abbia scelto un prodotto del nostro
assortimento. Il nostro marchio è garanzia di prodotti di
elevata qualità, controllati nei dettagli, relativi ai settori
calore, terapia dolce, pressione/diagnosi, peso, mas-
saggio e aria.
La preghiamo di leggere attentamente le presenti istru-
zioni per l'uso e di attenersi alle indicazioni.
Cordiali saluti
Il team Beurer
Fornitura
Controllare l'integrità esterna della confezione e del
contenuto. Prima dell'uso assicurarsi che l'apparecchio
e gli accessori non presentino nessun danno palese
e che il materiale di imballaggio sia stato rimosso. In
caso di dubbio non utilizzare l'apparecchio e consul-
tare il proprio rivenditore o contattare il Servizio clienti
indicato.

88
•T
ermometro per febbre
•2
batterie AAA da 1,5 V (LR03)
•C
ustodia
•I
struzioni per l'uso
1. Spiegazione dei simboli
I seguenti simboli sono utilizzati nelle Istruzioni per l'uso e sull'apparecchio:
AVVERTENZA
Segnalazione di rischio di lesioni o pericoli per la salute.
ATTENZIONE
Segnalazione di rischi di possibili danni all'apparecchio/agli accessori.
Nota
Nota che fornisce informazioni importanti.
Seguire le istruzioni per l'uso
Parte applicativa tipo BF
Smaltimento secondo le norme previste dalla Direttiva CE sui rifiuti di apparecchiature elettri-
che ed elettroniche (RAEE).
Il marchio CE certifica la conformità ai requisiti di base della direttiva 93/42/EEC sui dispositivi
medici.

89
Produttore
Storage
Temperatura e umidità di trasporto e conservazione consentite
Operating
Temperatura e umidità di esercizio consentite
IP 22
Apparecchio protetto contro la penetrazione di corpi solidi ≥ 12,5 mm e contro la caduta
inclinata di gocce d'acqua
Numero di serie
Informazione importante/Suggerimento
w
Riferimento incrociato a un altro paragrafo.
Marchio di certificazione per i prodotti esportati nella Federazione Russa e nei paesi CSI.
2. Uso conforme
Questo termometro serve per misurare senza contatto la temperatura della fronte, di un oggetto o di un locale. Il
termometro è adatto per le misurazioni in casa. In questo modo è possibile conoscere in modo semplice e veloce
la temperatura corporea. I valori vengono memorizzati automaticamente.

90
3. Segnalazioni di rischi e indicazioni di sicurezza
3.1 Pericoli per l'utilizzatore
•U
tilizzare l'apparecchio solo dopo aver letto e compreso le presenti istruzioni per l'uso.
•
C
onservare queste istruzioni per l'uso. Le istruzioni per l'uso devono essere accessibili a tutti gli utilizzatori.
Seguire tutte le indicazioni.
•P
rima di effettuare la misurazione conservare il termometro per almeno 30 minuti nella stanza in cui verrà effet-
tuata la misurazione.
•D
opo l'attività sportiva, un bagno o la permanenza all'aperto, attendere ca. 30 minuti prima di effettuare una
misurazione sulla fronte.
•I
l termometro FT 100 è stato concepito solo per la zona di misurazione del corpo umano indicata nelle istru-
zioni per l'uso.
•N
on procedere ad alcun tipo di autodiagnosi o autotrattamento basandosi sull'esito della misurazione senza
prima consultare il proprio medico curante. In particolare non assumere alcun nuovo farmaco di propria iniziativa
e non variare la tipologia e/o il dosaggio di un farmaco prescritto per un trattamento in corso.
•L
'apparecchio è concepito solo per l'uso descritto nelle presenti istruzioni.
•I
l produttore non risponde di danni causati da un uso inappropriato o non conforme.
•N
on lasciar utilizzare l'apparecchio a bambini. I dispositivi medici non sono giocattoli.
•P
rima di ogni utilizzo, verificare che la lente sia intatta. Nel caso in cui la lente sia danneggiata rivolgersi al pro-
prio rivenditore o al Servizio clienti.
•N
on toccare la lente con il dito.
•I
valori misurati con l'apparecchio servono unicamente a scopo informativo, in nessun caso possono sostituire
una visita medica! Prima di adottare trattamenti medici, consultare il proprio medico.
•P
ulire il termometro dopo ogni utilizzo (
w
12. Pulizia dell’apparecchio).
•P
er ulteriori domande sull'utilizzo delle apparecchiature, rivolgersi al proprio rivenditore o al Servizio clienti.

91
3.2 Pericoli per l'apparecchio
•N
on esporre l'apparecchio a urti meccanici e non farlo cadere.
•N
on esporre l'apparecchio alla luce diretta del sole, alle alte temperature o a elevata umidità.
•E
vitare che l'apparecchio entri in contatto con dei liquidi. Il termometro non è impermeabile. Evitare qualunque
contatto diretto con acqua o altri liquidi.
•
N
on aprire o riparare l'apparecchio autonomamente. Far riparare l'apparecchio solo da centri di assistenza
autorizzati, in caso contrario la garanzia decade.
•
Gli apparecchi per la comunicazione portatili e mobili ad alta frequenza possono influire sul funzionamento dell'ap-
parecchio. Per informazioni più dettagliate, rivolgersi all'Assistenza clienti oppure consultare la parte finale delle
istruzioni per l'uso.
3.3 Avvertenze sull'uso delle batterie
•
S
e il liquido della batteria viene a contatto con la pelle e con gli occhi, sciacquare le parti interessate con acqua
e consultare il medico.
•
Pericolo d'ingestione! I bambini possono ingerire le batterie e soffocare. Tenere quindi le batterie lontano
dalla portata dei bambini!
•P
restare attenzione alla polarità positiva (+) e negativa (-).
•I
n caso di fuoriuscita di liquido dalla batteria, indossare guanti protettivi e pulire il vano batterie con un panno
asciutto.
•P
roteggere le batterie dal caldo eccessivo.
•
Rischio di esplosione! Non gettare le batterie nel fuoco.
•L
e batterie non devono essere ricaricate o mandate in cortocircuito.
•Q
ualora l'apparecchio non dovesse essere utilizzato per un periodo prolungato, rimuovere le batterie dal vano
batterie.
•U
tilizzare solo tipologie di batterie uguali o equivalenti.
•S
ostituire sempre tutte le batterie contemporaneamente.

92
•N
on utilizzare batterie ricaricabili!
•N
on smontare, aprire o frantumare le batterie.
4. Informazioni relative al termometro
La temperatura misurata varia a seconda del punto del corpo in cui viene rilevata. Nei soggetti sani si parla di uno
scostamento compreso tra 0,2 °C e 1 °C (0,4 °F - 1,8 °F) nei diversi punti del corpo.
Intervalli di temperatura normali con termometri diversi:
Valori misurati Termometro utilizzato
Temperatura della fronte da 35,8 °C a 37,6 °C (da 96,4 °F a 99,7 °F) Termometro frontale
Temperatura all'orecchio da 36,0 °C a 37,8 °C (da 96,8 °F a 100,0 °F) Termometro per orecchio
Temperatura orale da 36,0 °C a 37,4 °C (da 96,8 °F a 99,3 °F) Termometro convenzionale
Temperatura rettale da 36,3 °C a 37,8 °C (da 97,3 °F a 100,0 °F) Termometro convenzionale
Suggerimento Beurer
•N
on confrontare mai le temperature misurate con termometri diversi.
•I
nformare il proprio medico sul tipo di termometro usato e sulla parte del corpo in cui si è misurata la
temperatura. Tenere in considerazione questo aspetto anche per l'autovalutazione.
Se si tiene in mano il termometro troppo a lungo prima della misurazione, l'apparecchio si riscalda e
pertanto il risultato della misurazione potrebbe essere falsato.

93
Fattori che influenzano la temperatura corporea
•M
etabolismo individuale, dipendente dalla persona
•E
tà
La temperatura corporea dei neonati e dei bambini piccoli è più alta di quella degli adulti. Nei bambini si verificano
sbalzi di temperatura più repentini e frequenti. Con l'aumentare dell'età la temperatura corporea normale si abbassa.
•A
bbigliamento
•T
emperatura esterna
•O
ra del giorno
Al mattino la temperatura corporea è più bassa e tende ad alzarsi nel corso della giornata.
Attività
•L
e attività fisiche e, in modo più limitato, le attività mentali aumentano la temperatura corporea.
Suggerimento Beurer
La misurazione della temperatura corporea fornisce il valore attuale di una persona. Se non si è sicuri
dell'interpretazione dei risultati o se risultano dei valori anomali (ad es. febbre), è consigliabile rivolgersi
al proprio medico curante. Lo stesso dicasi in caso di lievi oscillazioni della temperatura in presenza di
altri sintomi quali agitazione, intensa sudorazione, arrossamento della pelle, elevata frequenza cardiaca,
svenimenti, ecc.

94
5. Descrizione dell'apparecchio
1
Display
2
Pulsante MODE/MEM
3
Indicatore distanza/febbre
4
Pulsante LIGHT/SET
5
Sensore di misurazione
6
Sensore di distanza
7
Pulsante
/
SCAN
8
Coperchio vano batterie
Pulsanti Funzioni
MODE/MEM
MODE
Impostazione della modalità di misurazione.
MEM
Visualizzazione dei valori misurati memorizzati.
LIGHT/SET
LIGHT
Accensione manuale dell'illumina
-
zione del display.
SET
Impostazione delle funzioni di base.
/ SCAN
Accensione e spegnimento dell'apparecchio.
Avvio della misurazione della temperatura.
1
2
3
4
5
6
7
8

95
Descrizione del display
1
Indicatore anno/data/ora
YEAR
AM
PM
MEM
DATE
1
2
3
4
5
6
7
8
9
10
11
12
13
14
2
Modalità di misurazione della temperatura ambiente
3
Modalità di misurazione della temperatura della fronte
4
Modalità di misurazione superficiale
5
Indicatore del valore misurato/numero di posizione
6
Simbolo del segnale acustico
7
Simbolo illuminazione display
8
Anno
9
Funzione di memoria
10
Data
11
Risultato di misurazione ≥ 38,0 °C (≥ 100,4 °F) "febbre"
12
Risultato di misurazione < 37,5°C (< 99,5°F) "assenza
di febbre"
13
Indicatore di carica delle batterie
14
Unità temperatura (Celsius/Fahrenheit)
6. Messa in funzione
Rimuovere l'eventuale linguetta isolante delle batterie sul coperchio del vano batterie o rimuovere la
pellicola protettiva della batteria e inserire la batteria rispettando la polarità.
•F
are scorrere il coperchio del vano batterie.
•I
nserire le due batterie fornite in dotazione rispettando la polarità corretta.
•
Fare scorrere il coperchio del vano batterie sul termometro finché non scatta in posizione.
•
Il termometro passa ora automaticamente al menu impostazioni (w 7. Accensione e spegnimento
del termometro).

96
7. Accensione e spegnimento del termometro
Per accendere il termometro, premere brevemente il pulsante
/
SCAN.
Dopo un breve autotest e un doppio segnale acustico il termometro è pronto per misurare la temperatura sulla
fronte. L'apparecchio si avvia sempre in modalità Temperatura frontale
.
Impostazione delle funzioni di base
In questo menu è possibile impostare singolarmente in sequenza le seguenti funzioni.
Formato ora
•
Reintrodurre le batterie oppure tenere premuto il pulsante LIGHT/SET con
il termometro acceso per 4 secondi. Nel display lampeggia l'indicatore del
formato ora (fig. 1).
•
Impostare il formato ora desiderato con il pulsante MODE/MEM e confer-
mare con il pulsante LIGHT/SET.
AM
Fig. 1
Data
Nel display lampeggia l'indicatore del formato anno (fig. 2).
•
Impostare l'anno con il pulsante MODE/MEM e confermare con il pulsante
LIGHT/SET.
Nel display lampeggia il giorno/mese (fig. 3).
•
Impostare il giorno e l'ora con il pulsante MODE/MEM e confermare con il
pulsante LIGHT/SET.
Se si imposta il formato dell'ora in 12 h, la sequenza dell'indicazione del
giorno e del mese è invertita. La data e l'ora devono essere impostate cor
-
rettamente. Solo in questo modo è possibile memorizzare correttamente le
misurazioni con data e ora per poterle richiamare in seguito.
DATE
Fig. 3
YEAR
Fig. 2
Unità di misura
della temperatura
Illuminazione
display
Formato ora Data Ora
Segnale
acustico

97
Ora
Nel display lampeggia l'ora (fig. 4).
•
Impostare l'ora con il pulsante MODE/MEM e confermare con il pulsante
LIGHT/SET.
Nel display lampeggiano i minuti (fig. 5).
•
Impostare i minuti con il pulsante MODE/MEM e confermare con il pulsante
LIGHT/SET.
Nel formato 12h la visualizzazione dell'ora è AM/PM.
Fig. 5
Fig. 4
Unità di misura della temperatura
Nel display lampeggiano l'unità della temperatura (fig. 6).
I risultati della temperatura misurata possono essere visualizzati in gradi Cel
-
sius (°C) e Fahrenheit (°F).
•
Per visualizzare i risultati della misurazione in gradi Celsius selezionare °C con
il pulsante MODE/MEM e confermare con il pulsante LIGHT/SET.
•
Per visualizzare i risultati della misurazione in gradi Fahrenheit selezionare
°F con il pulsante MODE/MEM e confermare con il pulsante LIGHT/SET.
Fig. 6
Segnale acustico
Nel display lampeggia il simbolo del segnale acustico (fig. 7).
I segnali acustici (all'accensione dell'apparecchio, durante la misurazione, alla
fine della misurazione) possono essere attivati o disattivati.
•
Per attivare i segnali acustici usare il pulsante MODE/MEM per selezionare
e confermare con il pulsante LIGHT/SET.
•
Per disattivare i segnali acustici utilizzare il pulsante MODE/MEM per sele-
zionare e confermare con il pulsante LIGHT/SET.
Fig. 7

98
Illuminazione display
Nel display lampeggia il simbolo dell'illuminazione del display (fig. 8).
L'illuminazione automatica del display (che appare dopo aver misurato la tem-
peratura della fronte) può essere attivata o disattivata.
•
Per attivare l'illuminazione del display utilizzare il pulsante MODE/MEM per
selezionare e confermare con il pulsante LIGHT/SET.
•
Per disattivare l'illuminazione del display utilizzare il pulsante MODE/MEM
per selezionare
e confermare con il pulsante LIGHT/SET.
Fig. 8
Inoltre è possibile attivare manualmente l'illuminazione del display premendo brevemente il pulsante LIGHT/
SET.
Il display si illumina per 5 secondi.
L'illuminazione manuale e automatica del display non può essere modificata durante il processo di
misurazione.

99
8. Misurazione sulla fronte
Suggerimento Beurer
Tenere presente che
•l
'attività fisica, una sudorazione della fronte particolarmente elevata, l'assunzione di medicinali vaso-
costrittori e le irritazioni della pelle possono alterare i risultati della misurazione,
•l
a fronte e in particolare le tempie devono essere libere da sudore e cosmetici.
•
S
i consiglia di effettuare tre misurazioni sulla fronte. Nel caso i risultati dovessero differire, tenere in
considerazione il valore più alto.
Modalità di misurazione della temperatura della fronte
•
P
er accendere il termometro, premere brevemente il pulsante
/
SCAN.
Dopo un breve autotest l'apparecchio è pronto per la misurazione della
temperatura sulla fronte. L'apparecchio è sempre in modalità Temperatura
frontale, che si può riconoscere dal simbolo
sul display.
Fig. 9
•
T
enere il termometro a una distanza di 4-6 cm dal punto di misurazione
sulla fronte (fig. 10). Premere il pulsante
/
SCAN. Sul display compare la
distanza di misurazione richiesta di 4-6 cm.
Fig. 10

100
Modalità di misurazione della temperatura della fronte
Distanza di misurazione 4-6 cm La distanza di misurazione NON
è 4-6 cm
Non appena il termometro rileva la
distanza di misurazione corretta tra 4 e
6 cm, inizia automaticamente la misu-
razione. L'indicatore distanza/febbre
è ora acceso fisso in blu. Dopo alcuni
secondi compare sul display il risultato
della misurazione (fig. 12). La misura-
zione si ritiene conclusa quando viene
emesso un segnale acustico lungo.
Se la distanza non è compresa tra 4 e
6 cm, l'indicatore distanza/febbre lam
-
peggia in blu (se il segnale acustico è
attivo viene inoltre emesso un bip) e
sul display compare
4-6 (fig. 11). Se
dopo 20 secondi non viene rilevata
la distanza di misurazione corretta, la
misurazione viene terminata automa-
ticamente.
Se il risultato è inferiore a 37,5 °C (99,5 °F),
l'indicatore distanza/febbre
è
verde e sul display compare
per assenza di febbre, che segnala che la
temperatura corporea è a un livello normale.
Se il risultato di misurazione è compreso tra 37,5 °C e 37,9 °C, l’indicatore
distanza/febbre è giallo, che segnala che la temperatura corporea è a un
livello aumentato (fig 13).
Se il risultato è superiore a 38 °C (100,4 °F),
l'indicatore distanza/febbre
è
rosso e sul display compare
(fig. 14), che segnala che la temperatura
corporea è a un livello superiore alla norma.
Fig. 13
Fig. 12
Fig. 11
Fig. 14
Il valore misurato viene memorizzato in automatico con l'indicazione Data/Ora
e la classificazione "Febbre" /"Assenza di febbre" .
Un doppio segnale acustico e il simbolo della fronte non più lampeggiante
segnalano che l'apparecchio è pronto per una nuova misurazione.

101
Visualizzazione dei valori memorizzati
L'apparecchio memorizza esclusivamente valori misurati in modalità Temperatura frontale e ne memorizza
automaticamente le ultime 60 misurazioni.
Se le 60 posizioni di memoria sono tutte occupate, viene di volta in volta cancellato il valore più remoto.
•P
er richiamare la memoria:
•
A termometro acceso tenere premuto il pulsante MODE/MEM per 5 secondi.
Viene visualizzato il valore misurato più recente.
•O
gni volta che si preme nuovamente il pulsante MODE/MEM, viene visualizzata la posizione di memoria e se
si rilascia il pulsante appare il valore misurato.
•N
ella riga superiore vengono visualizzate alternativamente l'ora e la data.
9. Misurazione della temperatura superficiale/temperatura ambiente
Modalità di misurazione superficiale
Se si desidera misurare la temperatura superficiale con questo termometro,
è necessario selezionare la modalità Temperatura superficiale.
•
A
termometro acceso premere il pulsante MODE/MEM. L'apparecchio
passa alla modalità di Temperatura superficiale (fig. 15).
•
T
enere il termometro 2-3 cm davanti all'oggetto di misurazione deside-
rato. Premere brevemente il pulsante
/
SCAN e leggere la temperatura
dal display (fig. 16).
I valori misurati in modalità temperatura superficiale non vengono memorizzati.
Fig. 16Fig. 15

102
Modalità di misurazione della temperatura ambiente
Se si desidera usare il termometro per misurare la temperatura dell'ambiente,
è necessario passare alla modalità della Temperatura ambiente.
•A
termometro acceso premere due volte il pulsante MODE/MEM.
L'apparecchio passa alla modalità di Temperatura ambiente
.
•L
a temperatura ambiente viene mostrata direttamente (fig. 17).
I valori misurati in modalità temperatura ambiente non vengono memorizzati.
Fig. 17

103
10. Messaggi di errore
Messag-
gio di
errore
Problema Soluzione
Misurazione durante l'autotest, apparecchio
non ancora pronto.
Attendere finché il simbolo della fronte smette di lam-
peggiare.
Temperatura ambiente inferiore a 10 °C o
superiore a 40 °C (<50 °F, >104 °F).
La temperatura ambiente deve essere compresa tra
10 °C e 40 °C (50 °F - 104 °F).
(1) Modalità di misurazione della temperatura
frontale: la temperatura rilevata è superiore
a 42,2 °C (108 °F).
(2) Modalità di misurazione superficiale: la
temperatura rilevata è superiore a 80 °C
(176 °F).
Utilizzare il termometro esclusivamente entro gli inter-
valli di temperatura indicati. Se il messaggio di errore
persiste, rivolgersi al rivenditore o al Servizio clienti.
(1) Modalità di misurazione della temperatura
frontale: la temperatura rilevata è inferiore
a 34 °C (93,2 °F).
(2) Modalità di misurazione superficiale: la
temperatura rilevata è inferiore a -22 °C
(-7,6 °F).
Utilizzare il termometro esclusivamente entro gli inter-
valli di temperatura indicati. Se il messaggio di errore
persiste, rivolgersi al rivenditore o al Servizio clienti.
Le batterie sono esauste. Cambiare le batterie.

104
11. Batterie
Sostituzione delle batterie
L'apparecchio necessita di due batterie, tipo AAA, LR03.
•A
prire il vano batterie.
Fare scorrere il vano batterie verso il basso.
•E
strarre le batterie esauste dal vano batterie.
•I
nserire batterie nuove.
Accertarsi che le batterie siano orientate correttamente in base alla polarità.
•C
hiudere il vano batterie.
Smaltimento delle batterie
•S
maltire le batterie esauste e completamente scariche negli appositi punti di raccolta, nei punti
di raccolta per rifiuti tossici o presso i negozi di elettronica. Lo smaltimento delle batterie è un obbligo di legge.
•I
simboli riportati di seguito indicano che le batterie contengono sostanze tossiche.
Pb = batteria contenente piombo,
Cd = batteria contenente cadmio,
Hg = batteria contenente mercurio
12. Pulizia dell'apparecchio
•I
l sensore di misurazione è la parte più delicata del termometro. Durante la pulizia maneggiare il sen-
sore di misurazione con la massima attenzione.
•N
on utilizzare detergenti aggressivi.
•S
eguire sempre tutte le indicazioni di sicurezza per l'utilizzatore e l'apparecchio.
w
3. Segnalazioni di rischi e indicazioni di sicurezza

105
Pulire il sensore di misurazione dopo ogni utilizzo. A tale scopo utilizzare un panno morbido o un cotton fioc imbe-
vuto di disinfettante o di alcol al 70%.
Per la pulizia dell'intero apparecchio utilizzare un panno morbido leggermente inumidito con acqua e sapone.
Evitare assolutamente di lasciar penetrare acqua nell'apparecchio.
Utilizzare l'apparecchio solo quando è completamente asciutto.
13. Conservazione dell'apparecchio
Non utilizzare né riporre l'apparecchio in luoghi esposti a temperature o umidità troppo alte o troppo basse
(
w
15. Dati tecnici), alla luce solare, alla corrente elettrica o alla polvere. Diversamente le misurazioni potrebbero
non essere corrette.
Se si prevede di non utilizzare l'apparecchio per un lungo periodo, rimuovere le batterie.
14. Smaltimento dell'apparecchio
A tutela dell'ambiente, al termine del suo utilizzo l'apparecchio non deve essere smaltito nei rifiuti domestici.
Lo smaltimento va effettuato negli appositi centri di raccolta. Smaltire l'apparecchio secondo la direttiva europea
sui rifiuti di apparecchiature elettriche ed elettroniche (RAEE).
In caso di dubbi, rivolgersi agli enti comunali responsabili in materia di smaltimento.
15. Dati tecnici
In caso di utilizzo dell'apparecchio al di fuori di quanto specificato nelle presenti istruzioni non è possibile garan-
tire un funzionamento corretto.
La precisione di questo termometro è stata accuratamente testata ed è stata sviluppata per una lunga durata di
vita utile.

106
Se l'apparecchio viene utilizzato a scopo professionale, è necessario effettuare controlli tecnici con gli strumenti
adeguati. Richiedere informazioni dettagliate sulla verifica della precisione all'indirizzo indicato del servizio assi
-
stenza.
Ci riserviamo il diritto di apportare modifiche tecniche al fine del miglioramento e del continuo sviluppo del prodotto.
Tipo FT 100
Metodo di misurazione Misurazione a infrarossi senza contatto
Funzioni di base Misurazione della temperatura frontale
Misurazione della temperatura superficiale
Misurazione della temperatura ambiente
Unità di misura Celsius (°C) o Fahrenheit (°F)
Condizioni di funzionamento da 10 °C a 40 °C (da 50 °F a 104 °F)
con un'umidità relativa < 95%
Condizioni conservazione e
trasporto
da -20 °C a 50 °C (da -4 °F a 122 °F)
con un'umidità relativa < 95 %
Distanza misurazione Per effettuare la misurazione tenere una distanza di 4-6 cm
Intervalli di misurazione e
precisione della misurazione
della temperatura frontale
Misurazione della temperatura frontale
da 34 °C a 42,2 °C (da 93,2 °F a 108 °F)
Precisione di misurazione da 34 °C a 42,2 °C: ± 0,2 °C (da 93,2 °F a 108 °F:
±0,4 °F)
Precisione di ripetizione clinica 0,23 °C (0,41 °F)
Intervalli di misurazione e
precisione
Misurazione della temperatura
superficiale
da -22 °C a 80 °C (da -7,6 °F a 176 °F)
Precisione di misurazione ± 4% o ± 2 °C (± 4 °F)

107
Funzione di memoria
Misurazione della temperatura
corporea
Memorizza automaticamente gli ultimi 60 valori misurati.
Segnale acustico All'accensione dell'apparecchio, durante la misurazione, a misurazione
conclusa (impostabile).
Visualizzazione Display LCD
Funzioni di risparmio energetico L'apparecchio si spegne automaticamente dopo 1 minuto.
Ingombro
Larghezza x profondità x altezza
ca. 40,9 mm x 68,2 mm x 199,0 mm
Peso 82 g (senza batterie)
2 batterie AAA, LR03 Autonomia per ca. 2.000 misurazioni
L'attivazione di funzioni aggiuntive come il segnale acustico o l'illumina
-
zione del display diminuiscono la durata delle batterie.
Il numero di serie si trova sull’apparecchio o nel vano batterie.
16. Direttive
L'apparecchio è conforme ai requisiti della direttiva europea per i dispositivi medici 93/42/EEC, alla legge sui
dispositivi medici, alla norma ASTM E 1965 - 98 e alla norma europea EN60601-1-2, e necessita di precauzioni
d'impiego particolari per quanto riguarda la compatibilità elettromagnetica.
Salvo errori e modifiche

108
TÜRKÇE
İçindekiler
1. İşaretlerin açıklaması .......................................109
2. Amacına uygun kullanım .................................110
3. Uyarılar ve güvenlik yönergeleri .......................111
3.1 Kullanıcıya yönelik tehlikeler ...................111
3.2 Cihaza yönelik tehlikeler .........................112
3.3 Pillerin kullanımıyla ilgili yönergeler ........112
4. Bu termometre hakkında bilgiler .....................113
5. Cihaz açıklaması ..............................................115
6. Çalıştırma.........................................................116
7. Termometrenin açılması ve ayarlanması .........117
8. Alından ölçüm ..................................................120
9. Nesne sıcaklığının/oda sıcaklığının ölçülmesi ..122
10. Hataların gösterimi ..........................................123
11. Piller ................................................................124
12. Cihazın temizlenmesi ....................................... 125
13. Cihazın saklanması ......................................... 125
14. Cihazın bertaraf edilmesi .................................125
15. Teknik veriler ....................................................126
16. Direktifler ........................................................127
Lütfen bu kullanım kılavuzunu dikkatle okuyun,
ileride kullanmak üzere saklayın, diğer kullanıcı-
ların erişebilmesini sağlayın ve içindeki yönerge-
lere uyun.
Sayın müşterimiz,
Ürünlerimizden birini seçtiğiniz için teşekkür ederiz. Isı,
yumuşak terapi, kan basıncı/diyagnoz, ağırlık, masaj ve
hava konularında değerli ve titizlikle test edilmiş kaliteli
ürünlerimiz, dünyanın her tarafında tercih edilmektedir.
Lütfen bu kullanım kılavuzunu dikkatli bir şekilde okuyun
ve içindeki açıklamalara uyun.
Yeni cihazınızı iyi günlerde kullanmanızı dileriz
Beurer Ekibiniz
Teslimat kapsamı
Teslimat kapsamını kontrol ederek karton ambalajın dış-
tan hasar görmemiş ve içeriğin eksiksiz olduğundan
emin olun. Cihazı kullanmadan önce, cihazda ve akse-
suarlarında gözle görülür hasarlar olmadığından ve tüm
ambalaj malzemelerinin çıkarıldığından emin olunmalıdır.
Şüpheli durumlarda kullanmayın ve satıcınıza veya belir
-
tilen müşteri hizmetleri adresine başvurun.

109
•T
ermometre
•2
x 1,5 V AAA pil (LR03)
•S
aklama çantası
•K
ullanım kılavuzu
1. İşaretlerin açıklaması
Aşağıdaki semboller kullanım kılavuzunda ve cihaz üzerinde kullanılmıştır:
UYARI
Yaralanma tehlikelerine veya sağlığınızla ilgili tehlikelere yönelik uyarı.
DİKKAT
Cihaz ve aksesuarlarında olabilecek hasarlar için güvenlik uyarısı.
Not
Önemli bilgilere yönelik not.
Kullanım kılavuzunu dikkate alın
Uygulama parçası tip BF
Elektrikli ve elektronik hurda cihazlarla ilgili AB direktifine (WEEE - Waste Electrical and
Electronic Equipment) uygun şekilde bertaraf edilmelidir
CE işareti, tıbbi ürünler için 93/42/EEC direktifinin temel şartları ile uyumluluğu belgeler.

110
Üretici
Storage
İzin verilen saklama ve taşıma sıcaklığı ve hava nemi
Operating
İzin verilen çalışma sıcaklığı ve hava nemi
IP 22
Cihaz 12,5 mm ve daha büyük yabancı cisimlere ve eğimli bir şekilde damlayan suya karşı
korumalıdır
Seri numarası
Önemli bilgi/öneri
w
Başka bir bölüme referans.
Rusya ve Bağımsız Devletler Topluluğu ülkelerine ihraç edilecek ürünler için sertifika işareti.
2. Amacına uygun kullanım
Bu termometre alın, nesne ve oda sıcaklığının temassız ölçümü için kullanılır. Bu termometre evde ölçüm yapılması
için uygundur. Bununla vücut sıcaklığınızı hızlı ve basit biçimde ölçebilirsiniz. Değerler otomatik olarak kaydedilir.

111
3. Uyarılar ve güvenlik yönergeleri
3.1 Kullanıcıya yönelik tehlikeler
•C
ihazınızı ancak bu kullanım kılavuzunu okuyup anladıktan sonra kullanın.
•
B
u kullanım kılavuzunu saklayın. Kullanım kılavuzuna tüm kullanıcılar erişebilmelidir. Tüm talimat ve uyarılara
uyulmalıdır.
•C
ihazı, ölçüm yapmadan en az 30 dakika önce ölçüm yapılacak olan odada muhafaza edin.
•
S
portif bir aktiviteden, banyo yaptıktan veya dışarıdan geldikten sonra, alından ölçüm yapmak için yakl. 30dakika
kadar bekleyin.
•F
T 100 termometre, insan vücudunda yalnızca kullanım kılavuzunda belirtilen ölçüm yerinde kullanılmak üzere
tasarlanmıştır.
•Ö
lçüm sonuçlarına dayanarak doktorunuzla görüşmeden kendi kendinize teşhis koymayın veya kendi kendinizi
tedavi etmeyin. Özellikle kendi kendinize yeni ilaçlar belirlemeyin ve mevcut ilaçlarınızın türünde ve/veya doza
-
jında değişiklik yapmayın.
•C
ihaz sadece kullanım kılavuzunda açıklanan şekilde kullanım için tasarlanmıştır.
•A
macına uygun olmayan ve yanlış kullanımdan ötürü oluşacak hasarlardan üretici firma sorumlu değildir.
•C
ihaz çocuklar tarafından kullanılamaz. Tıbbi ürünler oyuncak değildir.
•H
er kullanımdan önce lensin sağlam olup olmadığını kontrol edin. Hasarlı olması halinde satıcınıza veya servi-
sinize başvurun.
•L
ense parmağınızla dokunmayın.
•
Ö
lçümler ile belirlediğiniz değerler sadece bilgilendirme amaçlıdır ve doktor muayenesi yerine geçmez! Tıbbi bir
tedaviye başlamadan önce mutlaka doktorunuza danışın.
•T
ermometreyi her kullanımdan sonra temizleyin (
w
12. Cihazın temizlenmesi).
•C
ihazın kullanımıyla ilgili başka sorularınız varsa, lütfen satıcınıza veya müşteri hizmetlerine başvurun.

112
3.2 Cihaza yönelik tehlikeler
•C
ihazı hiçbir şekilde mekanik darbelere maruz bırakmayın ve yere düşürmeyin.
•C
ihazı doğrudan güneş ışığına, yüksek sıcaklıklara veya yüksek hava nemine maruz bırakmayın.
•
C
ihazı herhangi bir sıvıya maruz bırakmayın. Cihaz su geçirmez değildir. Su veya her türlü sıvıyla doğrudan
temas ettirmekten kaçının.
•
C
ihazın içini açmayın veya cihazı kendiniz onarmaya çalışmayın. Cihazın yalnızca yetkili servisler tarafından
onarılmasını sağlayın, aksi takdirde garanti hakkınız ortadan kalkar.
•
Taşınabilir veya mobil HF iletişim sistemleri bu cihazı etkileyebilir. Ayrıntılı bilgileri belirtilen müşteri hizmetleri adre-
sinden talep edebilir veya kullanım kılavuzunun son kısmında bulabilirsiniz.
3.3 Pillerin kullanımıyla ilgili yönergeler
•P
ilden sızan sıvı cilt veya gözlerle temas ettiğinde, ilgili yeri suyla yıkayın ve bir doktora başvurun.
•
Yutma tehlikesi! Küçük çocuklar pilleri yutabilir ve bunun sonucunda boğulabilir. Bu nedenle pilleri, küçük
çocukların erişemeyeceği yerlerde saklayın!
•A
rtı (+) ve eksi (-) kutup işaretlerine dikkat edin.
•B
ir pil aktığında koruyucu eldiven giyin ve pil bölmesini kuru bir bezle temizleyin.
•P
illeri aşırı ısıya karşı koruyun.
•
Patlama tehlikesi! Pilleri ateşe atmayın.
•P
iller şarj edilmemeli veya kısa devre yaptırılmamalıdır.
•C
ihazı uzun süre kullanmayacağınız durumlarda pilleri pil bölmesinden çıkarın.
•S
adece aynı tip veya eşdeğer tip piller kullanın.
•H
er zaman tüm pilleri aynı anda değiştirin.
•Ş
arj edilebilir pil kullanmayın!
•P
illeri parçalarına ayırmayın, açmayın veya parçalamayın.

113
4. Bu termometre hakkında bilgiler
Ölçülen sıcaklık değeri, ölçümün yapıldığı vücut bölgesine bağlı olarak değişiklik gösterir. Fark, sağlıklı bireylerde
farklı vücut bölgelerinde 0,2 °C - 1 °C (0,4 °F - 1,8 °F) arasında olabilir.
Farklı termometrelerde normal sıcaklık aralığı:
Ölçüm değerleri Kullanılan termometre
Alın sıcaklığı 35,8 °C - 37,6 °C (96,4 °F - 99,7 °F) Alın termometresi
Kulak sıcaklığı 36,0 °C - 37,8 °C (96,8 °F - 100,0 °F) Kulak termometresi
Ağız sıcaklığı 36,0 °C - 37,4 °C (96,8 °F - 99,3 °F) Geleneksel termometre
Rektal sıcaklık 36,3 °C - 37,8 °C (97,3 °F - 100,0 °F) Geleneksel termometre
Beurer önerisi
•F
arklı termometrelerle ölçülmüş sıcaklıkları asla birbiriyle karşılaştırmayın.
•D
oktorunuza vücut sıcaklığınızı hangi termometre ile ve vücudunuzun hangi bölgesinde ölçtüğünüzü
söyleyin. Bunu kendi kendinize yaptığınız teşhiste de göz önünde bulundurun.
Termometre ölçümden önce çok uzun süre elde tutulursa ısınır. Bu durumda ölçüm sonucu yanlış olabilir.

114
Vücut sıcaklığını etkileyen faktörler
•B
ireysel, kişiye bağlı metabolizma
•Y
aş
Vücut sıcaklığı, emzirilme dönemindeki bebeklerde ve küçük çocuklarda yetişkinlerdekinden daha yüksektir.
Çocuklarda sıcaklık değişiklikleri daha çabuk ve sık ortaya çıkar. Artan yaşla birlikte normal vücut sıcaklığı da düşer.
•G
iysiler
•D
ış sıcaklık
•G
ünün saati
Vücut sıcaklığı sabahları daha düşüktür ve gün içerisinde akşam saatlerine doğru artış gösterir.
Aktiviteler
•V
ücut aktiviteleri ile etkisi daha düşük olan zihinsel aktiviteler vücut sıcaklığını arttırır.
Beurer önerisi
Vücut sıcaklığının ölçümü bir kimsenin güncel ölçüm değerini verir. Eğer sonuçları doğru yorumladığınızdan
emin olamıyorsanız veya anormal değerler (örn. ateş) ortaya çıkarsa, doktorunuza başvurun. Bu durum
huzursuzluk, yoğun terleme, ciltte kızarıklık, şiddetli kalp atışı, bayılma eğilimi gibi hastalık belirtilerinin
ortaya çıktığı küçük sıcaklık değişimlerinde de geçerlidir.

115
5. Cihaz açıklaması
1
Ekran
2
MODE/MEM düğmesi
3
Ateş/mesafe göstergesi
4
LIGHT/SET düğmesi
5
Ölçüm sensörü
6
Mesafe sensörü
7
/
SCAN düğmesi
8
Pil bölmesi kapağı
Düğmeler Fonksiyonlar
MODE/MEM
MODE
Ölçme modu ayarı.
MEM
Kaydedilen ölçüm değerlerini gösterir.
LIGHT/SET
LIGHT
Ekran aydınlatmasını manuel olarak açar.
SET
Temel fonksiyonların ayarlanması.
/
SCAN
Cihazı açar ve kapatır.
Sıcaklık ölçümünü başlatır.
1
2
3
4
5
6
7
8

116
Ekran açıklaması
1 Yıl, tarih, saat göstergesi
YEAR
AM
PM
MEM
DATE
1
2
3
4
5
6
7
8
9
10
11
12
13
14
2 Oda sıcaklığı modu
3 Alın sıcaklığı modu
4 Nesne sıcaklığı modu
5 Sıcaklık değeri ve kayıt yeri numarası göstergesi
6 Sinyal sesi sembolü
7 Ekran aydınlatma sembolü
8 Yıl
9 Kayıt fonksiyonu
10 Tarih
11 Ölçüm sonucu ≥ 38,0°C (≥ 100,4°F) “Ateş”
12 Ölçüm sonucu < 37,5°C (< 99,5°F) “Ateş yok”
13 Pil durumu göstergesi
14 Sıcaklık ölçüm birimi (Santigrat/Fahrenheit)
6. Çalıştırma
Varsa, pil bölmesi kapağındaki pil yalıtım bandını çekin veya pillerdeki koruma folyosunu çıkarıp pilleri
kutuplarına uygun şekilde yerleştirin.
•P
il bölmesi kapağını dikkatle kapatın.
•T
eslimat kapsamındaki iki pili, kutupları doğru konumda olacak şekilde yerleştirin.
•
Pil bölmesi kapağını, yerine oturduğu duyulana ve hissedilene kadar tekrar termometrenin üzerine itin.
•
Termometre şimdi otomatik olarak ayar menüsüne geçer (w 7. Termometrenin açılması ve ayarlanması).

117
7. Termometrenin açılması ve ayarlanması
Termometreyi açmak için
/
SCAN düğmesine kısa süreyle basın.
Termometre kendi kendine kısa bir test uygulayıp iki kısa bip sesi çıkardıktan sonra, alın bölgesinde sıcaklık ölçümü
yapmaya hazırdır. Cihaz her zaman alın sıcaklığı modunda çalışmaya başlar .
Temel fonksiyonların ayarlanması
Bu menüde aşağıdaki fonksiyonlar art arda kişiselleştirilebilir.
Saat formatı
•
Pilleri yeniden yerleştirin veya termometre açıkken 4 saniye süreyle LIGHT/
SET düğmesine basın. Saat formatı göstergesi ekranda yanıp söner (Şek. 1).
•
MODE/MEM düğmesine basarak istediğiniz saat formatını ayarlayın ve
LIGHT/SET düğmesine basarak onaylayın.
AM
Şek. 1
Tarih
Yıl ekranda yanıp söner (Şek. 2).
•
MODE/MEM düğmesine basarak istediğiniz yılı ayarlayın ve LIGHT/SET
düğmesine basarak onaylayın.
Gün/ay ekranda yanıp söner (Şek. 3).
•
MODE/MEM düğmesine basarak istediğiniz günü ve ayı ayarlayın ve LIGHT/
SET düğmesine basarak onaylayın.
Saat formatı olarak 12 h (12 saat) ayarlanmışsa, gün ve ay göstergesinin
sırası değişir. Tarihi ve saati doğru ayarlamalısınız. Yalnızca doğru ayarı
yaptığınızda ölçüm değerlerinizi tarih ve saat ile kaydedebilir ve daha sonra
tekrar bakabilirsiniz.
DATE
Şek. 3
YEAR
Şek. 2
Sıcaklık
ölçüm birimi
Ekran
aydınlatması
Saat formatı Tarih Saat
Sinyal sesi

118
Saat
Saat ekranda yanıp söner (Şek. 4).
•
MODE/MEM düğmesine basarak saati ayarlayın ve LIGHT/SET düğmesine
basarak onaylayın.
Dakika ekranda yanıp söner (Şek. 5).
•
MODE/MEM düğmesine basarak dakikayı ayarlayın ve LIGHT/SET düğ-
mesine basarak onaylayın.
12 saatlik formatta saat, AM/PM olarak gösterilir.
Şek. 5
Şek. 4
Sıcaklık ölçüm birimi
Sıcaklık ölçüm birimi ekranda yanıp söner (Şek. 6).
Sıcaklık sonucunuzu derece Santigrat (°C) ya da derece Fahrenheit (°F) sıcaklık
birimi cinsinden görüntüleyebilirsiniz.
•
Ölçüm sonuçlarını Santigrat cinsinden görüntülemek için MODE/MEM düğ-
mesine basarak °C öğesini seçin ve LIGHT/SET düğmesine basarak onay-
layın.
•
Ölçüm sonuçlarını Fahrenheit cinsinden görüntülemek için MODE/MEM
düğmesine basarak °F öğesini seçin ve LIGHT/SET düğmesine basarak
onaylayın.
Şek. 6
Sinyal sesi
Sinyal sesi sembolü ekranda yanıp söner (Şek. 7).
Sinyal sesini (cihaz açıkken, ölçüm sırasında, ölçüm sonrasında) açabilir veya
kapatabilirsiniz.
•
Sinyal sesini açmak için MODE/MEM düğmesine basarak öğesini seçin
ve LIGHT/SET düğmesine basarak onaylayın.
•
Sinyal sesini kapatmak için MODE/MEM düğmesine basarak öğesini
seçin ve LIGHT/SET düğmesine basarak onaylayın.
Şek. 7

119
Ekran aydınlatması
Ekran aydınlatması sembolü ekranda yanıp söner (Şek. 8).
Otomatik ekran aydınlatmasını (alın sıcaklığını ölçtükten sonra görünür) açabilir
veya kapatabilirsiniz.
•
Otomatik ekran aydınlatmasını açmak için MODE/MEM düğmesine basarak
öğesini seçin ve LIGHT/SET düğmesine basarak onaylayın.
•
Otomatik ekran aydınlatmasını kapatmak için MODE/MEM düğmesine basa-
rak öğesini seçin ve LIGHT/SET düğmesine basarak onaylayın.
Şek. 8
Bunun yanı sıra ekran aydınlatmasını, LIGHT/SET düğmesine kısaca basarak manuel olarak da çalıştıra-
bilirsiniz.
Ekran 5 saniye boyunca aydınlanır.
Otomatik ve manuel ekran aydınlatması, ölçüm işlemi esnasında kullanılamaz.

120
8. Alından ölçüm
Beurer önerisi
Şunları göz önünde bulundurun:
•
F
iziksel aktivite, alın bölgesinde aşırı terleme, damar büzücü ilaçlar ve cilt kızarıklıkları ölçüm sonucunu
etkileyebilir.
•A
lın bölgesinin veya şakakların terden ve kozmetik ürünlerden arındırılmış olması gerekmektedir.
•
A
lından üç ölçüm yapmanızı tavsiye ederiz. Üç ölçümden farklı sonuçlar elde ederseniz, en yüksek
ölçüm değerini dikkate alın.
Alın sıcaklığı modu
•T
ermometreyi açmak için
/
SCAN düğmesine kısa süreyle basın. Cihaz
kendini kısa bir süre test eder ve alından sıcaklık ölçümü için hazır hale
gelir. Cihaz alın sıcaklığı modundadır. Bunu ekrandaki sembolünden
anlayabilirsiniz.
Şek. 9
•T
ermometreyi, alnınızdaki ölçüm yerine 4 - 6 cm yaklaşacak şekilde tutun
(Şek. 10). Şimdi
/
SCAN düğmesine basın. Ekran göstergesinde, talep
edilen 4-6 cm ölçüm mesafesi gösterilir.
Şek. 10

121
Alın sıcaklığı modu
Ölçüm mesafesi 4 - 6 cm Ölçüm mesafesi 4 - 6 cm DEĞİL
Termometre, doğru ölçüm mesafesi
olan 4 - 6 cm konumuna geldiğinde,
ölçme işlemine otomatik olarak baş-
lar. Ateş/mesafe göstergesi şimdi
sürekli olarak mavi renkte yanar. Birkaç
saniye sonra ekranda ölçüm sonucu
görüntülenir (Şek. 12). Ölçüm süresi-
nin sonunda uzun bir bip sesi duyulur.
Ölçüm mesafesi 4 - 6 cm değilse, ateş/
mesafe göstergesi mavi renkte yanıp
söner (sinyal sesi açıksa bir bip sesi
de duyulur) ve ekranda
4 - 6 görünür
(Şek. 11). 20 saniye içinde doğru ölçüm
mesafesi bulunamazsa, ölçüm otomatik
olarak sona erdirilir.
Ölçüm sonucu 37,5°C (99,5°F) değerinin altındaysa,
ateş/mesafe göstergesi
yeşil renkte yanar ve ekranda ateşinizin olmadığını belirten görünür, bu
da vücut sıcaklığınızın normal aralıkta olduğu anlamına gelir.
Ölçüm sonucu 37,5°C ile 37,9°C değerleri arasındaysa, ateş/mesafe gös
-
tergesi sarı renkte yanar ve bu da vücut sıcaklığının yüksek olduğunu gös-
terir (Şek. 13).
Ölçüm sonucu 38°C (100,4°F) değerinin üzerindeyse,
ateş/mesafe göster-
gesi
kırmızı renkte yanar ve ekranda görünür (Şek. 14) ve bu da vücut
sıcaklığınızın normal aralığın üzerinde olduğu anlamına gelir.
Şek. 13
Şek. 12
Şek. 11
Şek. 14
Ölçüm değeri, tarih/saat ve “Ateş”
/ “Ateş yok” sınıflandırmasıyla oto-
matik olarak kaydedilir.
Cihaz, iki kısa bip sesi ve artık yanıp sönmeyen bir alın sembolü ile bir son-
raki ölçüme hazır olduğunu gösterir.

122
Kaydedilen ölçüm değerlerinin görüntülenmesi
Cihaz, sadece alın sıcaklığı modunda elde edilen ölçüm değerlerini kaydeder. Cihaz, ölçülen son 60 değeri
otomatik olarak kaydeder.
60 kayıt yeri aşıldığında, en eski değer silinir.
•K
ayıtlar şu şekilde görüntülenebilir:
•
Termometre çalışır durumdayken, 5 saniye boyunca MODE/MEM düğmesine basın.
En yeni ölçüm değeri görünür.
•
MODE/MEM düğmesine her bastığınızda önce kayıt yeri numarası, düğmeyi bıraktığınızda ise ölçüm değeri
görünür.
•Ü
st satırda dönüşümlü olarak saat ve tarih görüntülenir.
9. Nesne sıcaklığının/oda sıcaklığının ölçülmesi
Nesne sıcaklığı modu
Bu termometreyle nesne sıcaklığını ölçmek istiyorsanız, termometreyi nesne
sıcaklığı moduna almanız gerekir.
•
B
unun için termometre çalışır durumdayken MODE/MEM düğmesine kısa
süreyle basın. Cihaz nesne sıcaklığı moduna geçer (Şek. 15).
•
T
ermometreyi ölçüm yapmak istediğiniz yerin 2 - 3 cm önünde tutun.
/
SCAN düğmesine kısaca basın ve ekranda görünen sıcaklığı okuyun.
(Şek. 16).
Nesne sıcaklığı modundaki ölçüm değerleri kaydedilmez.
Şek. 16Şek. 15

123
Oda sıcaklığı modu
Termometreyi oda sıcaklığı ölçmede kullanmak istiyorsanız, oda sıcaklığı
moduna almanız gerekir.
•
B
unun için termometre açıkken MODE/MEM düğmesine iki kez kısa süreyle
basın.
Cihaz oda sıcaklığı moduna
geçer.
•O
da sıcaklığı doğrudan gösterilir (Şek. 17).
Oda sıcaklığı modundaki ölçüm değerleri kaydedilmez.
Şek. 17
10. Hataların gösterimi
Hata
mesajı
Sorun Çözüm
Kendi kendine test sırasında ölçüm. Cihaz
ölçüm yapmaya hazır değil.
Alın sembolünün yanıp sönmesi durana kadar bek-
leyin.
Oda sıcaklığı 10 °C altında veya 40 °C üze-
rinde (<50 °F, >104 °F).
Oda sıcaklığı 10 °C ve 40 °C (50 °F - 104 °F) arasında
olmalıdır.
(1) Alın sıcaklığı modu: Ölçülen sıcaklık 42,2 °C
(108 °F) üzerinde.
(2) Nesne sıcaklığı modu: Ölçülen sıcaklık
80 °C (176 °F) üzerinde.
Termometreyi yalnızca belirtilen sıcaklık aralıkları içe
-
risinde kullanın. Yeniden hata gösterilirse, yetkili satı-
cınıza veya müşteri hizmetlerine danışın.
(1) Alın sıcaklığı modu: Ölçülen sıcaklık 34 °C
(93,2 °F) altında.
(2) Nesne sıcaklığı modu: Ölçülen sıcaklık
-22 °C (-7,6 °F) altında.
Termometreyi yalnızca belirtilen sıcaklık aralıkları içe
-
risinde kullanın. Yeniden hata gösterilirse, yetkili satı-
cınıza veya müşteri hizmetlerine danışın.

124
Hata
mesajı
Sorun Çözüm
Piller bitmiş. Pilleri değiştirin.
11. Piller
Pillerin değiştirilmesi
Cihaz AAA, LR03 tipinde iki pille çalışır.
•P
il bölmesini açın.
Bunun için pil bölmesi kapağını aşağıya doğru kaydırın.
•B
itmiş pilleri pil bölmesinden çıkarın.
•Y
eni pilleri yerleştirin.
Pil kutuplarının doğru yönde yerleştirilmiş olmasına dikkat edin.
•P
il bölmesini kapatın.
Pillerin bertaraf edilmesi
•
K
ullanılmış, tamamen boşalmış piller özel işaretli toplama kutularına atılarak, özel atık toplama yerlerine veya
elektrikli cihaz satıcılarına teslim edilerek bertaraf edilmelidir. Pillerin bertaraf edilmesi, yasal olarak sizin sorum-
luluğunuzdadır.
•B
u işaretler, zararlı madde içeren pillerin üzerinde bulunur:
Pb = Pil kurşun içerir,
Cd = Pil kadmiyum içerir,
Hg = Pil cıva içerir.

125
12. Cihazın temizlenmesi
•Ö
lçüm sensörü, termometrenin en hassas parçasıdır. Ölçüm sensörünü temizlerken çok dikkat edin.
•A
şındırıcı temizlik maddesi kullanmayın.
•K
ullanıcıya ve cihaza yönelik güvenlik yönergelerine uyun.
w
3. Uyarılar ve güvenlik yönergeleri
Ölçüm sensörünü her kullanımdan sonra temizleyin. Bunun için dezenfektan veya %70 alkol ile nemlendirebile
-
ceğiniz yumuşak bir bez veya pamuklu çubuk kullanın.
Tüm cihazı temizlemek için lütfen yumuşak, sabunlu su ile hafifçe nemlendirilmiş bir bez kullanın. Cihaza kesin
-
likle su girmemelidir.
Cihazı tamamen kuruyana dek kullanmayın.
13. Cihazın saklanması
Cihaz çok yüksek veya düşük sıcaklıktaki veya nemli ortamlarda (
w
15. Teknik veriler), güneş ışığında, elektrik akımı
ile bağlantılı olarak veya tozlu yerlerde saklanamaz veya kullanılamaz. Aksi takdirde ölçümlerde yanlışlık olabilir.
Uzun süreli saklama planlanıyorsa, piller çıkarılmalıdır.
14. Cihazın bertaraf edilmesi
Çevrenin korunması amacıyla, kullanım ömrü dolan cihazlar evsel atıklar ile birlikte bertaraf edilmemelidir.
Cihaz, ülkenizdeki uygun atık toplama merkezleri aracılığıyla bertaraf edilmelidir. Cihazı, elektrikli ve elektronik
hurda cihazlarla ilgili AB direktifine (WEEE - Waste Electrical and Electronic Equipment) uygun şekilde ber-
taraf edin.
Bertaraf etmeyle ilgili diğer sorularınızı, bertaraf etmeden sorumlu yerel makamlara iletebilirsiniz.

126
15. Teknik veriler
Cihaz belirtilen şartlar dışında kullanılırsa, kusursuz çalışması garanti edilemez!
Bu termometrenin doğruluğu hassas bir şekilde kontrol edilmiştir ve cihaz uzun bir kullanım ömrü amaçlanarak
geliştirilmiştir.
Cihazın tedavi amacıyla kullanılması halinde, uygun araçlarla ölçüm kontrolleri yapılmalıdır. Doğruluk kontrolü ile
ayrıntılı bilgileri servis adresinden talep edebilirsiniz.
Ürünü iyileştirmek ve geliştirmek için teknik değişiklik yapma hakkımız saklıdır.
Tip FT 100
Ölçüm yöntemi Temassız kızılötesi ölçüm
Temel fonksiyonlar Alın sıcaklığı ölçümü
Nesne sıcaklığı ölçümü
Oda sıcaklığı ölçümü
Ölçüm birimleri Santigrat (°C) veya Fahrenheit (°F)
Kullanım koşulları 10 °C - 40 °C (50 °F - 104 °F)
Bağıl hava nemi < %95
Saklama ve nakliye koşulları -20 °C - 50 °C (-4 °F - 122 °F)
Bağıl hava nemi < %95
Ölçme mesafesi Ölçüm yerine 4 - 6 cm uzaklık
Ölçüm aralığı ve alın sıcaklığı
ölçümünün doğruluğu
Alın sıcaklığı ölçümü
34 °C - 42,2 °C (93,2 °F - 108 °F)
Ölçüm doğruluğu 34 °C - 42,2 °C: ± 0,2 °C (93,2 °F - 108 °F: ± 0,4 °F)
Klinik tekrarlama hassasiyeti 0,23 °C (0,41 °F)
Ölçüm aralığı ve doğruluğu
Nesne sıcaklığı ölçümü
Nesne sıcaklığı ölçümü -22 °C - 80 °C (-7,6 °F - 176 °F)
Ölçüm doğruluğu ± %4 veya ± 2 °C (± 4 °F)

127
Kayıt fonksiyonu
Vücut sıcaklığı ölçümü
Son 60 ölçüm değerini otomatik olarak kaydeder.
Sinyal sesi Cihazı açarken, ölçüm yaparken, ölçümün sonunda (ayarlanabilir).
Gösterge LCD ekran
Enerji tasarrufu fonksiyonları Cihaz 1 dakika sonra otomatik olarak kapanır.
Ölçüler
Genişlik x Derinlik x Yükseklik
yakl. 40,9 mm x 68,2 mm x 199,0 mm
Ağırlık 82 g (piller hariç)
2 adet AAA, LR03 pil Yaklaşık 2000 ölçüme yeten çalışma ömrü
Sinyal sesi ya da ekran aydınlatması gibi ilave olarak etkinleştirilen
fonksiyonlar pilin ömrünü kısaltmaktadır.
Seri numarası, cihazın üzerinde veya pil bölmesindedir.
16. Direktifler
Bu cihaz, 93/42/EEC sayılı AB tıbbi cihazlar direktifine, tıbbi ürünler kanununa, ASTM E 1965 - 98 standardına,
EN60601-1-2 Avrupa standardına uygundur ve elektromanyetik uyumluluk bakımından özel önlemlere tabidir.
Hata ve değişiklik hakkı saklıdır

128
РУССКИЙ
Оглавление
1. Пояснения ксимволам ..................................129
2. Использование поназначению ....................130
3. Предостережения иуказания потехнике
безопасности .................................................131
3.1 Опасности для пользователя ...............131
3.2 Опасности для прибора .......................132
3.3 Обращение сбатарейками .................. 132
4. Информация отермометре ..........................133
5. Описание прибора .........................................135
6. Ввод вэксплуатацию ....................................137
7. Включение инастройка термометра ..........137
8. Измерение температуры на лбу ................... 141
9. Измерение температуры объекта/комнатной
температуры ..................................................143
10. Индикация неисправностей .......................... 144
11. Батарейки ...................................................... 145
12. Очистка прибора ...........................................146
13. Хранение прибора ........................................146
14. Утилизация прибора ...................................... 147
15. Технические характеристики ........................ 147
16. Директивы ..................................................... 149
17. Гарантия..........................................................149
Внимательно прочтите данную инструкцию
поприменению, сохраните ее для последую-
щего использования, храните ее вместе,
доступном для других пользователей, исле-
дуйте ее указаниям.
Уважаемый покупатель!
Благодарим Вас завыбор продукции нашей фирмы.
Мы производим высококачественные итщательно
протестированные изделия для обогрева, мягкой
терапии, измерения артериального давления ивеса,
диагностики, массажа, очистки воздуха.
Внимательно прочтите эту инструкцию по примене-
нию иследуйте ее указаниям.
Снаилучшими пожеланиями,
компания Beurer
Комплект поставки
Проверьте комплектность поставки иубедитесь
в том, что на картонной упаковке нет внешних
повреждений. Перед использованием убедитесь
втом, что прибор иего принадлежности неимеют
видимых повреждений, иудалите все упаковочные
материалы. При наличии сомнений неиспользуйте
прибор иобратитесь кпродавцу или всервисную
службу поуказанному адресу.

129
•М
едицинский термометр
•2
батарейки AAA на 1,5В (LR03)
•С
умка для хранения
•И
нструкция по применению
1. Пояснения ксимволам
Вданной инструкции поприменению ина приборе используются следующие символы.
ПРЕДОСТЕРЕЖЕНИЕ
Предупреждает об опасности травмирования или ущерба для здоровья.
ВНИМАНИЕ
Указывает на возможность повреждения прибора/деталей.
Указание
Отмечает важную информацию.
Соблюдайте инструкцию поприменению.
Рабочая часть типа BF.
Утилизация прибора всоответствии сдирективой ЕСпоотходам электрического
иэлектронного оборудования EC— WEEE (Waste Electrical and Electronic Equipment).
СимволCE подтверждает соответствие основным требованиям директивы
омедицинских изделиях93/42/EEC.

130
Изготовитель.
Storage
Допустимая температура ивлажность воздуха при хранении итранспортировке.
Operating
Допустимая рабочая температура ивлажность воздуха.
IP22
Прибор защищен от проникновения твердых тел размером ≥12,5мм икапель воды,
падающих под углом.
Серийный номер.
Важная информация/совет.
w
Перекрестная ссылка на другой абзац.
Соответствие изделий стандартам Таможенного союза «ЕАС».
2. Использование поназначению
Данный термометр предназначен для бесконтактного измерения температуры лба, температуры предмета
итемпературы помещения. Термометр подходит для измерения вдомашних условиях. Сего помощью
Выможете быстро ипросто определить температуру тела. Измеренные значения сохраняются автома-
тически.

131
3. Предостережения иуказания потехнике безопасности
3.1 Опасности для пользователя
•
И
спользуйте прибор только после того, как прочтете данную инструкцию по применению иусвоите
содержащуюся вней информацию.
•С
охраните данную инструкцию. Инструкция по применению должна быть доступна для всех пользова-
телей. Соблюдайте все указания.
•
П
рибор перед измерением должен не менее 30минут находиться втом помещении, вкотором будет
проводиться измерение.
•
П
осле занятий спортом, принятия душа или ванны или нахождения на открытом воздухе подождите
ок.30минут, прежде чем измерять температуру на лбу.
•
Т
ермометр FT100 предназначен для измерения температуры тела только вместе, указанном винструк-
ции по применению.
•Н
е пытайтесь сами поставить себе диагноз на основании результатов измерений спомощью прибора
ине проводите самолечение без консультации сВашим лечащим врачом. Вчастности, не следует само-
вольно принимать новые лекарства или менять вид и(или) дозировку назначенных лекарств.
•П
рибор должен использоваться только вцелях, описываемых вданной инструкции по применению.
•
И
зготовитель не несет ответственности за ущерб, вызванный неквалифицированным или ненадлежа-
щим использованием прибора.
•И
спользование прибора детьми запрещено. Не разрешайте детям играть смедицинскими изделиями.
•
П
еред каждым применением проверяйте, не повреждена ли линза. Вслучае ее повреждения обратитесь
кпоставщику или всервисный центр.
•Н
е касайтесь линзы пальцами.
•П
олученные результаты измерений носят информативный характер ине могут заменить медицинского
обследования! Не принимайте никаких мер по лечению до консультации сврачом.
•О
чищайте термометр после каждого использования (
w
12. Очистка прибора).

132
•
Е
сли уВас есть какие-либо вопросы по применению прибора, обратитесь ксвоему поставщику или
всервисную службу.
3.2 Опасности для прибора
•Б
ерегите прибор от механических ударов ипадений.
•
Н
е подвергайте прибор воздействию прямого солнечного излучения, экстремальных температур или
высокой влажности воздуха.
•
Н
е допускайте контакта прибора сжидкостями. Прибор не является водонепроницаемым. Избегайте
прямого контакта сводой или другими жидкостями.
•Н
е вскрывайте ине ремонтируйте прибор самостоятельно. Доверяйте ремонт прибора только автори-
зованным сервисным центрам, иначе гарантия утратит свою силу.
•
Переносные имобильные высокочастотные коммуникационные устройства могут оказывать влияние
наработу прибора. Более точные данные можно запросить по указанному адресу сервисной службы или
найти вконце инструкции по применению.
3.3 Обращение сбатарейками
•П
ри попадании жидкости из аккумулятора на кожу или вглаза необходимо промыть соответствующий
участок большим количеством воды иобратиться кврачу.
•
Опасность проглатывания мелких частей! Маленькие дети могут проглотить батарейки ипода-
виться ими. Поэтому батарейки необходимо хранить внедоступном для детей месте!
•О
бращайте внимание на обозначение полярности: плюс (+) иминус (–).
•
Е
сли батарейка потекла, очистите отделение для батареек сухой салфеткой, предварительно надев
защитные перчатки.
•З
ащищайте батарейки от чрезмерного воздействия тепла.
•
Опасность взрыва! Не бросайте батарейки вогонь.
•Н
е заряжайте ине замыкайте батарейки накоротко.
•Е
сли прибор длительное время не используется, извлеките из него батарейки.

133
•И
спользуйте батарейки только одного типа или равноценных типов.
•З
аменяйте все батарейки сразу.
•Н
е используйте перезаряжаемые аккумуляторы!
•Н
е разбирайте, не открывайте ине разбивайте батарейки.
4. Информация отермометре
Измеренное значение температуры зависит от части тела, на которой она измеряется. Различия темпера-
туры разных частей тела здорового человека могут составлять от 0,2 до 1°C (от 0,4 до 1,8°F).
Нормальный диапазон температуры уразличных термометров
Измеренные значения Используемый термометр
Температура на лбу От 35,8 до 37,6°C (от 96,4 до 99,7°F) Термометр для измерения
температуры на лбу
Температура вухе От 36,0 до 37,8°C (от 96,8 до 100,0°F) Термометр для измерения
температуры вухе
Оральная температура От 36,0 до 37,4°C (от 96,8 до 99,3°F) Обычный термометр
Ректальная температура От 36,3 до 37,8°C (от 97,3 до 100,0°F) Обычный термометр
Совет от Beurer
•Н
икогда не сравнивайте между собой температуры, измеренные разными термометрами.
•С
ообщите врачу, каким термометром Вы мерили температуру ив каком месте. Учитывайте это
также при самодиагностике.
Если перед проведением измерения слишком долго держать термометр вруке, прибор может
нагреться. Это может привести кневерным результатам измерения.

134
Факторы влияния на температуру тела
•И
ндивидуальный обмен веществ
•В
озраст
Температура тела умладенцев ималеньких детей выше, чем увзрослых. Удетей колебания температуры
возникают быстрее ичаще. Свозрастом нормальная температура тела снижается.
•О
дежда
•Т
емпература окружающей среды
•В
ремя дня
Температура тела утром ниже иповышается втечение дня, достигая максимума квечеру.
Активность
•Ф
изическая активность, атакже умственная деятельность (вменьшей степени) повышают температуру
тела.
Совет от Beurer
Измерение дает значение температуры тела человека вданный момент. Если возникли сомнения
втолковании результатов измерения или имеют место необычные значения (например, жар), обра-
титесь клечащему врачу. Это относится также кнезначительным изменениям температуры, когда
кним добавляются дополнительные симптомы заболевания, например беспокойство, сильное пото-
отделение, покраснение кожных покровов, высокая частота пульса, склонность кколлапсам ит.д.

135
5. Описание прибора
1.
Дисплей
2.
Кнопка MODE/MEM
3.
Индикатор повышенной темпера
-
туры/расстояния
4.
Кнопка LIGHT/SET
5.
Измерительный датчик
6.
Датчик расстояния
7.
Кнопка
/
SCAN
8.
Крышка отделения для батареек
Кнопки Функции
MODE/MEM
(режим/
память)
MODE
Настройка режима измерения.
MEM
Индикация сохраненных измеренных значений.
LIGHT/
SET (свет/
настройка)
LIGHT
Включение подсветки дисплея вручную.
SET
Настройка основных функций.
SCAN
Включение ивыключение прибора.
Начало измерения температуры.
1
2
3
4
5
6
7
8

136
Описание дисплея
1. Индикация года/даты/времени
YEAR
AM
PM
MEM
DATE
1
2
3
4
5
6
7
8
9
10
11
12
13
14
2. Режим измерения комнатной температуры
3. Режим измерения температуры лба
4. Режим измерения температуры объекта
5.
Индикация значения температуры/номера
ячейки памяти
6. Символ звукового сигнала
7. Символ подсветки дисплея
8. Год
9. Функция памяти
10. Дата
11. Результат измерения ≥38,0°C (≥100,4°F)—
повышенная температура
12.
Результат измерения < 37,5°C (< 99,5°F)— нет
повышенной температуры
13. Индикация состояния батареи
14.
Единица измерения температуры (градус
Цельсия/Фаренгейта)

137
6. Ввод вэксплуатацию
Удалите изоляционный слой при его наличии на крышке для батареек или удалите защитную
пленку сбатареек ипоставьте батарейки, соблюдая полярность.
•С
двиньте крышку отсека для батареек.
•В
ставьте две батарейки, входящие вкомплект поставки, соблюдая полярность.
•
Снова задвиньте крышку отсека для батареек на термометре до щелчка.
•
Термометр автоматически перейдет вменю настроек (w 7. Включение инастройка термометра).
7. Включение инастройка термометра
Для включения термометра коротко нажмите кнопку
/
SCAN.
После быстрой самопроверки идвух коротких звуковых сигналов термометр готов кизмерению темпера-
туры на лбу. Прибор всегда включается врежиме измерения температуры на лбу .
Настройка основных функций
Вэтом меню можно последовательно настроить следующие функции.
Формат времени
•
Повторно вставьте батарейки или нажмите иудерживайте кнопку
LIGHT/SET при включенном термометре втечение 4секунд. На дис-
плее мигает индикация формата времени (рис.1).
•
Спомощью кнопки MODE/MEM выберите нужный формат времени
иподтвердите нажатием кнопки LIGHT/SET.
AM
Рис.1
Единица измерения
температуры
Подсветка
дисплея
Формат
времени
Дата Время
Звуковой
сигнал

138
Дата
На дисплее мигает индикация года (рис.2).
•
Спомощью кнопки MODE/MEM установите год иподтвердите ввод
нажатием кнопки LIGHT/SET.
На дисплее мигает индикация дня/месяца (рис.3).
•
Спомощью кнопки MODE/MEM установите день имесяц иподтвердите
ввод нажатием кнопки LIGHT/SET.
Если выбирается 12-часовой формат, последовательность отобра-
жения дня имесяца меняется. Настраивайте дату ивремя правильно.
Только так можно корректно сохранять измеренные значения сдатой
ивременем ипозже выводить их на дисплей.
DATE
Рис.3
YEAR
Рис.2
Время
На дисплее мигает индикация часов (рис.4).
•
Спомощью кнопки MODE/MEM установите часы иподтвердите ввод
нажатием кнопки LIGHT/SET.
На дисплее мигает индикация минут (рис.5).
•
Спомощью кнопки MODE/MEM установите минуты иподтвердите ввод
нажатием кнопки LIGHT/SET.
Врежиме 12ч. время отображается вформате AM/PM.
Рис.5Рис.4

139
Единица измерения температуры
На дисплее мигает индикация единицы измерения температуры (рис.6).
Отображение результатов измерения возможно вградусах Цельсия (°C)
или градусах Фаренгейта (°F).
•
Для просмотра результатов измерения вградусах Цельсия спомо-
щью кнопки MODE/MEM выберите °Cи подтвердите выбор нажатием
кнопки LIGHT/SET.
•
Для просмотра результатов измерения вградусах Фаренгейта спомо-
щью кнопки MODE/MEM выберите °Fи подтвердите выбор нажатием
кнопки LIGHT/SET.
Рис.6
Звуковой сигнал
На дисплее мигает символ звукового сигнала (рис.7).
Вы можете включить или выключить звуковые сигналы (включение при
-
бора, измерение, завершение измерения).
•
Для включения звуковых сигналов спомощью кнопки MODE/MEM
выберите иподтвердите выбор нажатием кнопки LIGHT/SET.
•
Для выключения звуковых сигналов спомощью кнопки MODE/MEM
выберите иподтвердите выбор нажатием кнопки LIGHT/SET.
Рис.7

140
Подсветка дисплея
На дисплее мигает символ подсветки дисплея (рис.8).
Вы можете включить или выключить автоматическую подсветку дисплея
(включается после измерения температуры на лбу).
•
Для включения автоматической подсветки дисплея спомощью кнопки
MODE/MEM выберите иподтвердите выбор нажатием кнопки LIGHT/
SET.
•
Для выключения автоматической подсветки дисплея спомощью кнопки
MODE/MEM выберите иподтвердите выбор нажатием кнопки
LIGHT/SET.
Рис.8
Кроме того, подсветку дисплея можно включить вручную, коротко нажав кнопку LIGHT/SET.
Подсветка дисплея включится на 5секунд.
Автоматическую иручную подсветку дисплея нельзя использовать впроцессе измерения.

141
8. Измерение температуры на лбу
Совет от Beurer
Учитывайте, что
•
ф
изическая активность, постоянное повышенное потоотделение на лбу, прием сосудосуживаю-
щих медикаментов икожные раздражения могут привести кискажению результатов измерения;
•н
а лбу или висках не должно быть пота икосметики;
•
м
ы рекомендуем выполнить три измерения на лбу. Если результаты трех измерений различаются,
ориентируйтесь на самое высокое показание.
Режим измерения температуры лба
•Д
ля включения термометра коротко нажмите кнопку
/
SCAN. После
быстрой самопроверки прибор готов кизмерению температуры на лбу.
Прибор находится врежиме измерения температуры на лбу. Об этом
свидетельствует символ
на дисплее.
Рис.9
•
У
держивайте термометр на расстоянии 4–6см от точки измерения на лбу
(рис.10). Нажмите кнопку
/
SCAN. На дисплее появится индикация
необходимого для измерения расстояния 4–6см.
Рис.10

142
Режим измерения температуры лба
Расстояние 4–6см Расстояние НЕ 4–6см
Как только термометр распознает
расстояние до точки измерения
4–6 см, автоматически начнется
процесс измерения. Индикатор
повышенной температуры/рассто-
яния подсвечен голубым светом.
Через несколько секунд на дис
-
плее появляется результат измере-
ния (рис.12). Об истечении времени
измерения сообщит длительный зву-
ковой сигнал.
Если расстояние до точки измерения
не лежит вдиапазоне 4–6см, инди-
катор повышенной температуры/
расстояния мигает голубым светом
(если включен звуковой сигнал, раз-
дается писк) ина дисплее появляется
надпись 4–6 (рис.11). Если втечение
20секунд не удается установить под-
ходящее расстояние до точки изме-
рения, измерение автоматически
завершается.
Если результат измерения ниже 37,5°C (99,5°F),
индикатор повышен-
ной температуры/расстояния
подсвечен зеленым светом ина дисплее
появляется символ , что означает нормальную температуру тела.
Если результат измерения находится в диапазоне от 37,5°C до 37,9°C,
то индикатор повышенной температуры/расстояния подсвечен жел-
тым светом, что говорит о повышенной температуре тела
(рис.13)
.
Если результат измерения выше 38°C (100,4°F), индикатор повышенной
температуры/расстояния подсвечен красным светом ина дисплее появ-
ляется символ (рис.14), что означает повышенную температуру тела.
Рис.13
Рис.12
Рис.11
Рис.14
Значение измерения автоматически сохранится суказанием даты/вре
-
мени иоценки «жар» /«нет жара» .
Когда прибор будет готов кновому измерению, прозвучат два коротких
звуковых сигнала иперестанет мигать символ лба
.

143
Индикация сохраненных измеренных значений
Прибор сохраняет впамяти значения исключительно врежиме температуры лба . Прибор автоматиче-
ски сохраняет значения 60последних измерений.
Когда все 60ячеек памяти заполнятся, новое значение будет записано вячейку ссамым старым из пре
-
дыдущих значений.
•П
амять можно вызвать следующим образом.
•
При включенном термометре нажмите иудерживайте кнопку MODE/MEM втечение 5секунд.
Отобразится самое последнее измеренное значение.
•
П
ри каждом последующем нажатии кнопки MODE/MEM сначала будет отображаться номер ячейки
памяти, апри отпускании кнопки— значение измерения.
•В
верхней строке попеременно отображаются время идата.
9. Измерение температуры объекта/комнатной температуры
Режим измерения температуры объекта
Для измерения температуры объекта спомощью этого термометра необ-
ходимо перейти врежим измерения температуры объекта.
•
Д
ля этого коротко нажмите кнопку MODE/MEM при включенном тер-
мометре. Прибор переключится врежим измерения температуры объ-
екта (рис.15).
•
У
держивайте прибор на расстоянии 2–3см от желаемой точки измере-
ния. Коротко нажмите кнопку
/
SCAN исчитайте температуру сдис
-
плея (рис.16).
Значения, определенные врежиме измерения температуры объекта,
несохраняются впамяти.
Рис.16Рис.15

144
Режим измерения комнатной температуры
Для использования термометра сцелью измерения комнатной темпера-
туры необходимо перейти врежим измерения комнатной температуры.
•
Д
ля этого дважды коротко нажмите кнопку MODE/MEM при вклю-
ченном термометре.
Прибор переключится врежим измерения комнатной температуры
.
•Н
а дисплее отображается температура впомещении (рис.17).
Значения, определенные врежиме измерения комнатной температуры,
не сохраняются впамяти.
Рис.17
10. Индикация неисправностей
Сооб-
щение
об
ошибке
Проблема Решение
Измерение впроцессе самопроверки, при-
бор еще не готов кизмерению.
Подождите, пока не перестанет мигать символ
лба.
Комнатная температура ниже 10°C или
выше 40°C (<50°F, >104°F).
Комнатная температура должна находиться впре-
делах от 10 до 40°C (от 50 до 104°F).

145
Сооб-
щение
об
ошибке
Проблема Решение
(1) Режим измерения температуры лба.
Измеренная температура превышает
42,2°C (108°F).
(2) Режим измерения температуры объекта.
Измеренная температура превышает
80°C (176°F).
Используйте термометр только для измерений
впределах указанного диапазона температур.
При повторной индикации неисправности обрати-
тесь кспециализированному дилеру или вслужбу
сервиса.
(1) Режим измерения температуры лба.
Измеренная температура ниже 34°C
(93,2°F).
(2) Режим измерения температуры объекта.
Измеренная температура ниже –22°C (–7,6°F).
Используйте термометр только для измерений
впределах указанного диапазона температур.
При повторной индикации неисправности обрати-
тесь кспециализированному дилеру или вслужбу
сервиса.
Батарейки разряжены. Замените батарейки.
11. Батарейки
Замена батареек
Вприборе используются две батарейки типа AAA, LR03.
•О
ткройте отделение для батареек.
Для этого сдвиньте крышку вниз.
•И
звлеките использованные батарейки из отделения.
•В
ставьте новые батарейки.
Соблюдайте полярность.
•З
акройте отделение для батареек.

146
Утилизация батареек
•
У
тилизируйте использованные иполностью разряженные батарейки вконтейнеры со специальной мар-
кировкой, сдавайте впункты приема спецотходов или вмагазины электрооборудования. Закон обязы-
вает пользователей обеспечить утилизацию батареек.
•С
ледующие знаки предупреждают оналичии вбатарейках токсичных веществ.
Pb= батарейка содержит свинец.
Cd= батарейка содержит кадмий.
Hg= батарейка содержит ртуть.
12. Очистка прибора
•И
змерительный датчик— это самая чувствительная часть термометра. При очистке обращай-
тесь сизмерительным датчиком очень аккуратно.
•Н
е используйте агрессивные чистящие средства.
•В
сегда соблюдайте указания по технике безопасности для пользователей иприбора.
w
3. Предостережения иуказания потехнике безопасности
Производите очистку измерительного датчика после каждого применения. Используйте для этого мягкую
салфетку или ватную палочку, смоченную дезинфекционным средством или 70%-мспиртом.
Для очистки всего прибора используйте мягкую салфетку, слегка смоченную слабым мыльным раствором.
Не допускайте попадания жидкости внутрь прибора.
Используйте прибор снова лишь после того, как он полностью высохнет.
13. Хранение прибора
Запрещается хранить прибор или использовать его при слишком высокой или низкой температуре или
влажности воздуха (
w
15. Технические характеристики), на ярком солнечном свете, под воздействием
электрического тока или впыльных местах. Впротивном случае возможны неточности измерения.

147
При запланированном длительном хранении прибора извлеките из него батарейки.
14. Утилизация прибора
Вцелях защиты окружающей среды поокончании срока службы следует утилизировать прибор отдельно
отбытового мусора.
Утилизация должна производиться через соответствующие пункты сбора ввашей стране. Прибор следует
утилизировать согласно директиве ЕС поотходам электрического иэлектронного оборудования—
WEEE (Waste Electrical and Electronic Equipment).
При возникновении вопросов обращайтесь вместную организацию, занимающуюся утилизацией.
15. Технические характеристики
Если способ иусловия применения прибора не соответствуют спецификации, безупречное функциони-
рование не гарантируется!
Точность данного термометра была тщательно проверена; прибор был разработан срасчетом на длитель-
ный срок эксплуатации.
При использовании прибора вмедицинских учреждениях следует выполнять метрологический контроль
спомощью соответствующих средств. Точные данные для проверки точности прибора можно запросить
всервисном центре.
Мы оставляем за собой право на технические изменения всвязи смодернизацией иусовершенствова
-
нием продукта.
Тип FT100
Метод измерения Бесконтактное инфракрасное измерение
Базовые функции Измерение температуры на лбу
Измерение температуры объекта
Измерение комнатной температуры

148
Единицы измерения Градусы Цельсия (°C) или Фаренгейта (°F)
Условия эксплуатации От 10 до 40°C (от 50 до 104°F)
при относительной влажности воздуха <95%
Условия хранения
итранспортировки
От –20 до 50°C (от –4 до 122°F)
при относительной влажности воздуха <95%
Расстояние при измерении Расстояние от точки измерения 4–6см
Диапазоны измерения
иточность измерения
температуры на лбу
Измерение температуры на лбу
От 34 до 42,2°C (от 93,2 до 108°F)
Точность измерения от 34 до 42,2°C: ±0,2°C (от 93,2до 108°F:
±0,4°F)
Клиническая точность
воспроизведения результатов
0,23°C (0,41°F)
Диапазоны измерения
иточность
Измерение температуры
объекта
Измерение температуры объекта от –22 до 80°C (от –7,6 до 176°F)
Точность измерения ±4% или ±2°C (±4°F)
Функция памяти
Измерение температуры тела
Автоматическое сохранение последних 60измеренных значений
Звуковой сигнал При включении прибора, впроцессе измерения, при завершении
измерения (настраивается)
Индикация ЖК-дисплей
Функции энергосбережения Прибор отключается автоматически через 1минуту
Размеры
Ширинаxглубинаxвысота
Ок. 40,9x68,2x199мм

149
Вес 82г (без батареек)
2батарейки AAA, LR03 Срок службы ок. 2000 измерений
Дополнительно активированные функции, такие как акустический
сигнал или подсветка дисплея, могут приводить куменьшению срока
службы батареек
Серийный номер находится на приборе или в отделении для батареек.
16. Директивы
Данный прибор соответствует требованиям европейской директивы омедицинских изделиях93/42/EEC,
закону омедицинских изделиях, директиве ASTME1965-98, европейскому стандартуEN60601-1-2 итре
-
бует соблюдения особых мер предосторожности вотношении электромагнитной совместимости.
17. Гарантия
Мы предоставляем гарантию на дефекты материалов и изготовления этого прибора на срок 12 месяцев
со дня продажи через розничную сеть.
Гарантия не распространяется:
– на случаи ущерба, вызванного неправильным использованием,
– на быстроизнашивающиеся части (батарейки),
– на дефекты, о которых покупатель знал в момент покупки,
– на случаи собственной вины покупателя,
– при отсутствии кассового чека.

150
Срок эксплуатации изделия: мин. 5 лет
Фирма-изготовитель: Бойрер Гмбх,
Софлингер штрассе 218,
89077-УЛМ, Германия
Фирма-импортер: OOO БОЙРЕР,
109451 г. Москва,
ул. Перерва 62, корп. 2, офис 3
Сервисный центр: 109451 г. Москва,
ул. Перерва 62, корп. 2,
Тел(факс) 495–658 54 90
Дата продажи
Подпись продавца
Штамп магазина
Подпись покупателя
Возможны ошибки иизменения

151
POLSKI
Spis treści
1. Objaśnienie symboli ........................................152
2. Użytkowanie zgodne zprzeznaczeniem .........153
3. Ostrzeżenia iwskazówki dotyczące
bezpieczeństwa ............................................... 154
3.1 Zagrożenia dla użytkownika .................... 154
3.2 Zagrożenia dla urządzenia .....................155
3.3 Wskazówki dotyczące postępowania zbate
-
riami .......................................................155
4. Informacje na temat termometru ..................... 156
5. Opis urządzenia ............................................... 158
6. Uruchomienie ..................................................159
7. Włączanie iustawianie termometru ................160
8. Pomiar temperatury na czole ...........................163
9. Pomiar temperatury obiektu / temperatury wpo
-
mieszczeniu .....................................................165
10. Symbole błędów ..............................................166
11. Baterie ............................................................167
12. Czyszczenie urządzenia ..................................168
13. Przechowywanie urządzenia ..........................168
14. Utylizacja urządzenia ....................................... 168
15. Dane techniczne .............................................. 169
16. Przepisy ..........................................................171
Należy dokładnie przeczytać izachować niniej-
szą instrukcję obsługi, przechowywać ją wmiej-
scu dostępnym dla innych użytkowników
iprzestrzegać podanych wniej wskazówek.
Drodzy Klienci,
cieszymy się, że zdecydowali się Państwo na zakup
naszego produktu. Nasza marka jest znana zwysokiej
jakości produktów poddawanych surowej kontroli, prze-
znaczonych do ogrzewania, łagodnej terapii, pomiaru
ciśnienia ibadania krwi, pomiaru ciężaru ciała, masażu
iuzdatniania powietrza.
Należy uważnie przeczytać instrukcję obsługi istoso
-
wać się do zawartych wniej wskazówek.
Zpozdrowieniami
Zespół Beurer
Zawartość opakowania
Przesyłkę należy sprawdzić pod kątem zewnętrznych
uszkodzeń opakowania kartonowego oraz kompletno-
ści zawartości. Przed użyciem należy upewnić się, że
urządzenie iakcesoria nie wykazują żadnych widocz-
nych uszkodzeń iże wszystkie elementy opakowania
zostały usunięte. Wrazie wątpliwości należy zaprzestać

152
korzystania zurządzenia oraz zwrócić się do przedstawiciela handlowego lub działu obsługi klienta na podany
adres.
•T
ermometr lekarski
•2
baterie 1,5 VAAA (LR03)
•P
okrowiec
•I
nstrukcja obsługi
1. Objaśnienie symboli
Wniniejszej instrukcji ina urządzeniu zastosowano następujące symbole:
OSTRZEŻENIE
Ostrzeżenie przed zagrożeniem obrażeniami ciała lub utratą zdrowia
UWAGA
Ostrzeżenie przed niebezpieczeństwem uszkodzenia urządzenia/akcesoriów
Wskazówka
Ważne informacje
Należy przestrzegać instrukcji obsługi
Część aplikacyjna typu BF
Utylizacja zgodnie zdyrektywą WE wsprawie zużytego sprzętu elektrycznego
ielektronicznego – WEEE (Waste Electrical and Electronic Equipment)

153
Oznakowanie CE potwierdza zgodność zzasadniczymi wymogami dyrektywy 93/42/WE
wsprawie wyrobów medycznych
Producent
Storage
Dopuszczalna temperatura przechowywania oraz temperatura iwilgotność powietrza podczas
transportu
Operating
Dopuszczalna temperatura iwilgotność powietrza podczas pracy
IP 22
Ochrona urządzenia przed ciałami obcymi owielkości ≥12,5 mm iprzed kroplami wody
spadającymi ukośnie
Numer seryjny
Ważna informacja/wskazówka
w
Przekierowanie do innego akapitu
Oznakowanie certyfikacyjne dla produktów eksportowanych do Federacji Rosyjskiej oraz
państw WNP
2. Użytkowanie zgodne zprzeznaczeniem
Termometr służy do bezdotykowego pomiaru temperatury ciała (czoło), obiektu ipomieszczenia. Termometr jest
dostosowany do przeprowadzania pomiarów wwarunkach domowych. Umożliwia łatwy iszybki pomiar tempe
-
ratury ciała. Wartości są zapisywane automatycznie.

154
3. Ostrzeżenia iwskazówki dotyczące bezpieczeństwa
3.1 Zagrożenia dla użytkownika
•U
rządzenia można używać wyłącznie po przeczytaniu ze zrozumieniem niniejszej instrukcji obsługi.
•N
ależy zachować niniejszą instrukcję obsługi. Instrukcja obsługi musi być dostępna dla wszystkich użytkow-
ników. Należy przestrzegać wszystkich wskazówek.
•
T
ermometr powinien się znajdować wpomieszczeniu, wktórym dokonywany będzie pomiar, co najmniej
30minut przed pomiarem.
•P
omiar temperatury ciała na czole należy przeprowadzać najwcześniej 30 min. po podjęciu aktywności rucho-
wej, kąpieli lub przebywaniu na świeżym powietrzu.
•P
omiar temperatury za pomocą termometru FT 100 należy przeprowadzać wyłącznie na tych częściach ciała,
na które wskazuje instrukcja obsługi.
•
N
a podstawie wyników pomiaru nie wolno podejmować samodzielnej diagnostyki ileczenia bez konsultacji
zlekarzem. Wszczególności nie wolno stosować na własną rękę żadnych nowych leków ani zmieniać rodzaju
idozowania przepisanych.
•U
rządzenie jest przeznaczone wyłącznie do używania wcelu określonym wniniejszej instrukcji obsługi.
•P
roducent nie ponosi odpowiedzialności za szkody wynikające zniewłaściwego użytkowania urządzenia.
•U
rządzenia nie mogą używać dzieci. Produkty medyczne nie służą do zabawy.
•
P
rzed każdym użyciem należy sprawdzić, czy soczewka nie jest uszkodzona. Wprzypadku uszkodzenia soczewki
należy się skontaktować ze sprzedawcą lub serwisem.
•N
ie należy dotykać soczewki palcem.
•
W
artości pomiaru określone za pomocą urządzenia mają wyłącznie charakter informacyjny inie zastępują bada-
nia lekarskiego! Przed rozpoczęciem leczenia skonsultuj się zlekarzem.
•T
ermometr należy czyścić po każdym użyciu (
w
12. Czyszczenie urządzenia).
•W
przypadku dalszych pytań dotyczących użytkowania urządzenia należy skontaktować się zdystrybutorem
lub serwisem producenta.

155
3.2 Zagrożenia dla urządzenia
•N
ie należy narażać urządzenia na uderzenia mechaniczne lub upadki.
•C
hronić urządzenie przed bezpośrednim działaniem promieni słonecznych, wysoką temperaturą iwilgotnością
powietrza.
•
U
ważać, aby urządzenie nie miało kontaktu zpłynami. Urządzenie nie jest wodoszczelne. Unikać każdego bez-
pośredniego kontaktu zwodą iinnymi płynami.
•N
ie otwierać inie naprawiać urządzenia samodzielnie. Urządzenie może być naprawiane wyłącznie wautory-
zowanych punktach serwisowych. Wprzeciwnym razie następuje utrata gwarancji.
•
Przenośne imobilne urządzenia komunikacyjne pracujące na wysokich częstotliwościach mogą zakłócać działa-
nie urządzenia. Szczegółowe dane można uzyskać pod podanym adresem obsługi klienta lub na końcu instrukcji
obsługi.
3.3 Wskazówki dotyczące postępowania zbateriami
•
J
eśli dojdzie do kontaktu elektrolitu ze skórą lub oczami, należy przemyć je wodą iskontaktować się zlekarzem.
•
Istnieje niebezpieczeństwo połknięcia! Małe dzieci mogłyby połknąć baterie isię nimi udusić. Dlatego
baterie należy przechowywać wmiejscach niedostępnych dla dzieci.
•N
ależy zwrócić uwagę na znak polaryzacji plus (+) iminus (-).
•
J
eśli zbaterii wyciekł elektrolit, należy założyć rękawice ochronne iwyczyścić przegrodę na baterie suchą
szmatką.
•B
aterie należy chronić przed nadmiernym działaniem wysokiej temperatury.
•
Zagrożenie wybuchem! Nie wrzucać baterii do ognia.
•N
ie wolno ładować ani zwierać baterii.
•W
przypadku niekorzystania zurządzenia przez dłuższy czas wyjąć baterie zprzegrody.
•U
żywać tylko tego samego lub równoważnego typu baterii.
•Z
awsze wymieniać jednocześnie wszystkie baterie.
•N
ie należy używać akumulatorów!
•N
ie wolno rozmontowywać, otwierać ani rozdrabniać baterii.

156
4. Informacje na temat termometru
Zmierzona temperatura waha się wzależności od miejsca pomiaru na ciele. Odchylenie to uzdrowych ludzi wróż-
nych miejscach ciała może wynosić od 0,2°Cdo 1°C(od 0,4°Fdo 1,8°F).
Normalny zakres temperatury wróżnych termometrach:
Wartości pomiaru Użyty termometr
Temperatura na czole Od 35,8°Cdo 37,6°C(od 96,4°Fdo 99,7°F) Termometr na skroń
Temperatura wuchu Od 36,0°Cdo 37,8°C(od 96,8°Fdo 100,0°F) Termometr do ucha
Temperatura przy pomiarze wustach Od 36,0°Cdo 37,4°C(od 96,8°Fdo 99,3°F) Termometr tradycyjny
Temperatura przy pomiarze rektalnym Od 36,3°Cdo 37,8°C(od 97,3°Fdo 100,0°F) Termometr tradycyjny
Wskazówka firmy Beurer
•N
ie należy porównywać ze sobą temperatur mierzonych za pomocą różnych termometrów.
•
L
ekarzowi należy udzielić informacji, jakim termometrem iw jakim miejscu na ciele mierzona była tem-
peratura. Należy to również uwzględnić wprzypadku samodzielnej diagnozy.
Jeśli przed pomiarem termometr będzie zbyt długo trzymany wdłoni, spowoduje to ogrzanie urządzenia.
Może to doprowadzić do zafałszowania wyników pomiaru.

157
Czynniki wpływające na temperaturę ciała
•I
ndywidualna, uzależniona od osoby przemiana materii
•W
iek
Temperatura ciała uniemowląt imałych dzieci jest wyższa niż uosób dorosłych. Udzieci wahania temperatury
występują szybciej iczęściej. Wraz zwiekiem normalna temperatura ciała obniża się.
•U
branie
•T
emperatura na zewnątrz
•P
ora dnia
Temperatura ciała rano jest niższa iwzrasta wciągu dnia.
Aktywność
•A
ktywność fizyczna oraz wmniejszym stopniu aktywność umysłowa podwyższają temperaturę ciała.
Wskazówka firmy Beurer
Pomiar temperatury ciała wskazuje aktualną wartość temperatury ciała człowieka. Wprzypadku nie-
pewności podczas interpretacji wyniku lub nietypowej wartości (np. gorączka) należy skontaktować się
zlekarzem. Dotyczy to również nieznacznych zmian temperatury, jeśli występują inne objawy choroby
takie jak np. niepokój, silne pocenie się, zaczerwienienie skóry, wysokie tętno, skłonność do zapaści itp.

158
5. Opis urządzenia
1
Wyświetlacz
2
Przycisk MODE/MEM
3
Czujnik temperatury/odległości
4
Przycisk LIGHT/SET
5
Czujnik pomiarowy
6
Czujnik odległości
7
/
Przycisk SCAN
8
Osłona przegrody na baterie
Przyciski Funkcje
MODE/MEM
MODE
Ustawianie trybu pomiaru.
MEM
Wskazanie zapisanych wartości pomiaru.
LIGHT/SET
LIGHT
Ręczne włączanie podświetlenia wyświetlacza.
SET
Ustawianie podstawowych funkcji.
SCAN
Włączanie iwyłączanie urządzenia.
Rozpoczęcie pomiaru temperatury.
1
2
3
4
5
6
7
8

159
Opis wyświetlacza
1 Wskaźnik rok/data/godzina
YEAR
AM
PM
MEM
DATE
1
2
3
4
5
6
7
8
9
10
11
12
13
14
2 Tryb Temperatura wpomieszczeniu
3 Tryb Temperatura na czole
4 Tryb Temperatura obiektu
5 Wskaźnik wartości temperatury/numeru miejsca
wpamięci
6 Symbol sygnału dźwiękowego
7 Symbol podświetlenia wyświetlacza
8 Rok
9 Funkcja zapisywania
10 Data
11 Wynik pomiaru ≥38,0°C(≥100,4°F) „gorączka”
12 Wynik pomiaru < 37,5°C (< 99,5°F) „brak gorączki”
13 Wskaźnik stanu baterii
14 Jednostka pomiaru temperatury: Celsjusz/Fahrenheit
6. Uruchomienie
Jeśli na osłonie komory baterii znajduje się pasek izolacyjny, wyjmij go, ewentualnie usuń folię ochronną
zbaterii iwłóż baterie zgodnie zoznaczeniem biegunów.
•D
okładnie zamknij osłonę przegrody baterii.
•W
łóż znajdujące się wzestawie baterie do komory baterii zgodnie zoznaczeniem biegunów.
•
Wsuń osłonę komory baterii, aż wyraźnie zablokuje się wsposób słyszalny iwyczuwalny.
•
Termometr automatycznie przechodzi do menu ustawień (w 7. Włączanie iustawianie termometru).

160
7. Włączanie iustawianie termometru
Aby włączyć termometr, krótko naciśnij przycisk
/
SCAN.
Po krótkim automatycznym teście idwóch krótkich sygnałach dźwiękowych termometr jest gotowy do pomiaru
temperatury na czole. Urządzenie uruchamia się zawsze wtrybie Temperatura na czole
.
Ustawianie podstawowych funkcji
WMenu można po kolei indywidualnie ustawić poniższe funkcje.
Format czasu
•
Włóż ponownie baterie lub przytrzymaj przycisk LIGHT/SET przy włączonym
termometrze przez 4 sekundy. Na wyświetlaczu zacznie migać wskazanie
formatu czasu (rys. 1).
•
Za pomocą przycisku MODE/MEM ustaw wybrany format czasu ipotwierdź
przyciskiem LIGHT/SET.
AM
Rys. 1
Data
Na wyświetlaczu zacznie migać wskazanie roku (rys. 2).
•
Za pomocą przycisku MODE/MEM ustaw rok ipotwierdź przyciskiem
LIGHT/SET.
Na wyświetlaczu zacznie migać wskazanie dnia/miesiąca (rys. 3).
•
Za pomocą przycisku MODE/MEM ustaw dzień imiesiąc anastępnie
potwierdź przyciskiem LIGHT/SET.
Jeśli jako format godziny ustawiono 12 h, nastąpi zmiana kolejności wyświe-
tlania dnia imiesiąca. Ustaw prawidłową datę igodzinę. Tylko wten spo-
sób można poprawnie zapisać iodczytać wartości pomiaru wraz zdatą
igodziną.
DATE
Rys. 3
YEAR
Rys. 2
Jednostka pomiaru
temperatury
Podświetlenie
wyświetlacza
Format
czasu
Data Godzina
Sygnał
dźwiękowy

161
Godzina
Na wyświetlaczu zacznie migać wskazanie godziny (rys. 4).
•
Za pomocą przycisku MODE/MEM ustaw godzinę ipotwierdź przyciskiem
LIGHT/SET.
Na wyświetlaczu zacznie migać wskazanie minut (rys. 5).
•
Za pomocą przycisku MODE/MEM ustaw minuty ipotwierdź przyciskiem
LIGHT/SET.
Wformacie 12-godzinnym (12 h) godzina wyświetlana jest zoznaczeniem
AM/PM.
Rys. 5
Rys. 4
Jednostka pomiaru temperatury
Na wyświetlaczu zacznie migać jednostka pomiaru temperatury (rys. 6).
Wyniki pomiaru można wyświetlać wstopniach Celsjusza (°C) lub Fahrenhe-
ita (°F).
•
Aby wyniki pomiaru były wyświetlane wstopniach Celsjusza, należy za
pomocą przycisku MODE/MEM wybrać °Ci potwierdzić przyciskiem LIGHT/
SET.
•
Aby wyniki pomiaru były wyświetlane wstopniach Fahrenheita, należy za
pomocą przycisku MODE/MEM wybrać °Fi potwierdzić przyciskiem LIGHT/
SET.
Rys. 6
Sygnał dźwiękowy
Na wyświetlaczu zacznie migać symbol sygnału dźwiękowego (rys. 7).
Sygnały dźwiękowe (włączanie urządzenia, podczas pomiaru, zakończenie
pomiaru) można włączać lub wyłączać.
•
Aby włączyć sygnały dźwiękowe, należy użyć przycisku MODE/MEM i
potwierdzić za pomocą przycisku LIGHT/SET.
•
Aby wyłączyć sygnały dźwiękowe, należy użyć przycisku MODE/MEM i
potwierdzić za pomocą przycisku LIGHT/SET.
Rys. 7

162
Podświetlenie wyświetlacza
Na wyświetlaczu zacznie migać symbol podświetlenia wyświetlacza (rys. 8).
Automatyczne podświetlenie wyświetlacza (pojawia się po dokonaniu pomiaru
temperatury na czole) można włączyć lub wyłączyć.
•
Aby włączyć automatyczne podświetlenie wyświetlacza, należy użyć przyci-
sku MODE/MEM ipotwierdzić za pomocą przycisku LIGHT/SET.
•
Aby wyłączyć automatyczne podświetlenie wyświetlacza, należy użyć przy-
cisku MODE/MEM ipotwierdzić za pomocą przycisku LIGHT/SET.
Rys. 8
Poza tym istnieje możliwość ręcznego włączania podświetlenia wyświetlacza poprzez krótkie naciśnięcie
przycisku LIGHT/SET.
Wyświetlacz jest podświetlany przez 5 sekund.
Podczas pomiaru nie można używać automatycznego ani ręcznego podświetlania wyświetlacza.

163
8. Pomiar temperatury na czole
Wskazówka firmy Beurer
Należy pamiętać, że:
•
a
ktywność fizyczna, nadmierna potliwość na czole, przyjmowanie leków zwężających naczynia ipodraż-
nienie skóry może zafałszować wyniki pomiaru.
•c
zoło lub skronie nie mogą być spocone imuszą być wolne od kosmetyków.
•
z
alecane jest wykonanie trzech pomiarów na czole. Jeśli wyniki pomiaru są rozbieżne, za właściwy
rezultat należy przyjąć najwyższą wartość pomiaru.
Tryb Temperatura na czole
•
A
by włączyć termometr, krótko naciśnij przycisk
/
SCAN. Po krótkim auto
-
matycznym teście termometr jest gotowy do pomiaru temperatury na czole.
Urządzenie znajduje się wtrybie Temperatura na czole. Na wyświetlaczu
pojawi się odpowiedni symbol .
Rys. 9
•
P
rzytrzymaj termometr 4–6 cm od miejsca pomiaru na czole (rys. 10).
Naciśnij przycisk
/
SCAN. Na wyświetlaczu pojawi się wymagany odstęp
pomiaru 4–6 cm.
Rys. 10

164
Tryb Temperatura na czole
Odstęp pomiaru wynosi
4–6 cm
Odstęp pomiaru NIE wynosi
4–6 cm
Termometr rozpoczyna automatyczny
pomiar natychmiast po zarejestro-
waniu odstępu 4–6 cm. Wskaźnik
temperatury/odległości świeci się na
niebiesko wsposób ciągły. Po kilku
sekundach na wyświetlaczu pojawia
się wynik pomiaru (rys. 12). Koniec
czasu pomiaru sygnalizowany jest dłu-
gim sygnałem dźwiękowym.
Jeśli odstęp pomiaru nie wynosi
4–6cm, wskaźnik temperatury/odległo-
ści miga na niebiesko (przy włączonym
sygnale dźwiękowym dodatkowo sły-
chać pikanie), ana wyświetlaczu poja-
wia się wskazanie 4-6 (rys. 11). Jeśli
przez 20 sekund termometr nie zareje-
struje prawidłowej odległości, pomiar
zostanie automatycznie zakończony.
Jeśli wynik pomiaru temperatury wynosi mniej niż 37,5°C(99,5°F),
wskaźnik
temperatury/odległości
na wyświetlaczu świeci się wkolorze zielonym ,
sygnalizując brak gorączki, czyli temperaturę ciała wprawidłowym zakresie.
Jeśli wynik pomiaru wynosi między 37,5°C a 37,9°C, wskaźnik tempera-
tury/odległości świeci się na żółto, co oznacza, że ciało ma podwyższoną
temperaturę (rys. 13).
Jeśli wynik pomiaru temperatury wynosi więcej niż 38°C(100,4°F),
wskaźnik
temperatury/odległości
na wyświetlaczu świeci się wkolorze czerwonym
(rys. 14), sygnalizując, że pomiar wykracza poza zakres prawidłowej
temperatury ciała.
Rys.13
Rys.12
Rys.11
Rys.14
Wartość pomiaru zapisywana jest automatycznie wraz zdatą/godziną ikla-
syfikacją „gorączka” / „brak gorączki” .
Dwoma krótkimi sygnałami dźwiękowymi ibrakiem migania symbolu czoła
urządzenie sygnalizuje, że jest gotowe do kolejnego pomiaru.

165
Wyświetlanie zapisanych wartości pomiaru
Urządzenie zapisuje wyłącznie wartości pomiaru wtrybie Temperatura na czole . Urządzenie automatycznie
zapisuje wartości pomiaru zostatnich 60 pomiarów.
Po przekroczeniu 60 miejsc wpamięci usuwana jest najstarsza wartość.
•P
amięć można sprawdzić wnastępujący sposób:
•
Przytrzymaj przez 5 sekund przycisk MODE/MEM przy włączonym termometrze.
Zostanie wyświetlona najnowsza wartość pomiaru.
•
K
ażde kolejne naciśnięcie przycisku MODE/MEM powoduje wyświetlenie następnego numeru miejsca
wpamięci, apuszczenie przycisku wyświetlenie wartości pomiaru.
•W
górnym wierszu wyświetla się na zmianę godzina idata.
9. Pomiar temperatury obiektu / temperatury wpomieszczeniu
Tryb Temperatura obiektu
Aby za pomocą tego termometru zmierzyć temperaturę obiektu, należy prze-
łączyć go na tryb Temperatura obiektu.
•
W
tym celu przy włączonym termometrze nacisnąć krótko przycisk MODE/
MEM. Urządzenie przełączy się na tryb Temperatura obiektu (rys. 15).
•
P
rzytrzymać termometr 2–3 cm od wybranego miejsca pomiaru. Nacisnąć
krótko przycisk
/
SCAN iodczytać temperaturę na wyświetlaczu (rys.16).
Wartości pomiaru wtrybie temperatury obiektu nie są zapisywane.
Rys. 16Rys. 15

166
Tryb Temperatura wpomieszczeniu
Jeśli termometr ma być wykorzystany do pomiaru temperatury wpomiesz-
czeniu, należy go przełączyć na tryb Temperatura wpomieszczeniu.
•W
tym celu przy włączonym termometrze nacisnąć krótko dwa razy przy-
cisk MODE/MEM.
Urządzenie przełączy się na tryb Temperatura wpomieszczeniu
.
•B
ezpośrednio wyświetli się temperatura wpomieszczeniu (rys. 17).
Wartości pomiaru wtrybie Temperatura wpomieszczeniu nie są zapisywane.
Rys. 17
10. Symbole błędów
Komu-
nikat
obłędzie
Problem Rozwiązanie
Pomiar podczas testu automatycznego, urzą-
dzenie nie jest jeszcze gotowe do pomiaru.
Poczekać, aż symbol czoła przestanie migać.
Temperatura wpomieszczeniu poniżej
10°Club powyżej 40°C(<50°F, >104°F).
Temperatura pomieszczenia musi mieścić się wzakre-
sie od 10°Cdo 40°C(50–104°F).
(1) Tryb Temperatura na czole: Pomiar tem-
peratury wynosi więcej niż 42,2°C(108°F).
(2) Tryb Temperatura obiektu: Pomiar tempera-
tury wynosi więcej niż 80°C(176°F).
Używaj termometru wyłącznie wpodanych zakresach
temperatur. Jeśli błąd pojawi się ponownie, należy
skontaktować się ze sprzedawcą lub serwisem.

167
Komu-
nikat
obłędzie
Problem Rozwiązanie
(1) Tryb Temperatura na czole: Pomiar tempe-
ratury wynosi mniej niż 34°C(93,2°F).
(2) Tryb Temperatura obiektu: Pomiar tempera-
tury wynosi mniej niż -22°C(-7,6°F).
Używaj termometru wyłącznie wpodanych zakresach
temperatur. Jeśli błąd pojawi się ponownie, należy
skontaktować się ze sprzedawcą lub serwisem.
Baterie są zużyte. Wymienić baterie.
11. Baterie
Wymiana baterii
Do eksploatacji urządzenia potrzebne są dwie baterie typu AAA, LR03.
•O
twórz przegrodę na baterie.
Wysuń przegrodę na baterie.
•W
yjmij zużyte baterie.
•W
łóż nowe baterie.
Uważaj na zachowanie prawidłowej biegunowości podczas wkładania baterii.
•Z
amknij komorę baterii.
Utylizacja baterii
•
Z
użyte, całkowicie rozładowane baterie należy wyrzucać do specjalnie oznakowanych pojemników zbiorczych,
przekazywać do punktów zbiórki odpadów specjalnych lub do sklepu ze sprzętem elektrycznym. Użytkownik
jest zobowiązany do utylizacji baterii zgodnie zprzepisami.
•N
a bateriach zawierających szkodliwe związki znajdują się następujące oznaczenia:
Pb = bateria zawiera ołów,
Cd = bateria zawiera kadm,
Hg = bateria zawiera rtęć.

168
12. Czyszczenie urządzenia
•
C
zujnik pomiarowy to najbardziej wrażliwy element termometru. Podczas czyszczenia należy się znim
obchodzić znajwyższą ostrożnością.
•N
ie używać agresywnych środków czyszczących.
•Z
awsze przestrzegać wskazówek bezpieczeństwa dla użytkownika iurządzenia.
w
3. Ostrzeżenia iwskazówki dotyczące bezpieczeństwa
Po każdym użyciu należy wyczyścić czujnik pomiarowy. Wtym celu należy użyć szmatki lub wacika nasączonego
środkiem do dezynfekcji lub alkoholem (70%).
Do czyszczenia całego urządzenia należy używać miękkiej szmatki lekko zwilżonej wodą zmydłem. Do urządze
-
nia nie może dostać się woda.
Urządzenia można używać dopiero po całkowitym wysuszeniu.
13. Przechowywanie urządzenia
Urządzenia nie wolno przechowywać ani używać wmiejscu ozbyt wysokiej bądź zbyt niskiej temperaturze
iwilgotności powietrza (
w
15. Dane techniczne), nie należy go narażać na działanie promieni słonecznych ani
stosować wpołączeniu zprądem elektrycznym lub wzakurzonych miejscach. Mogłoby to spowodować niedo
-
kładność pomiaru.
Jeśli termometr nie będzie używany przez dłuższy czas, należy wyjąć baterie.
14. Utylizacja urządzenia
Wzwiązku zwymogami ochrony środowiska po zakończeniu eksploatacji nie wolno usuwać urządzenia zodpa-
dami domowymi.

169
Utylizację należy zlecić wodpowiednim punkcie zbiórki wdanym kraju. Urządzenie należy zutylizować zgodnie
zdyrektywą WE ozużytych urządzeniach elektrycznych ielektronicznych – WEEE (Waste Electrical and
Electronic Equipment).
Wrazie pytań należy zwrócić się do lokalnego urzędu odpowiedzialnego za utylizację odpadów.
15. Dane techniczne
Wrazie stosowania urządzenia niezgodnie ze specyfikacją nie ma gwarancji prawidłowego działania!
Dokładność termometru została starannie sprawdzona. Ponadto został on zaprojektowany do długotrwałego
użytku.
Wprzypadku korzystania zurządzenia wpraktyce lekarskiej należy przeprowadzać kontrole pomiarowe za pomocą
odpowiednich środków. Dokładne dane dotyczące sprawdzania dokładności można uzyskać, kontaktując się
zdziałem obsługi klienta.
Producent zastrzega sobie prawo do zmian technicznych, mających na celu ulepszenie konstrukcji urządzenia.
Typ FT 100
Metoda pomiaru Bezdotykowy pomiar zwykorzystaniem podczerwieni
Funkcje podstawowe Pomiar temperatury na czole
Pomiar temperatury obiektu
Pomiar temperatury wpomieszczeniu
Jednostki pomiarowe Stopnie Celsjusza (°C) lub Fahrenheita (°F)
Warunki eksploatacji Od 10°Cdo 40°C(od 50°Fdo 104°F)
przy względnej wilgotności powietrza < 95%
Warunki przechowywania
itransportu
Od -20°Cdo 50°C(od -4°Fdo 122°F)
przy względnej wilgotności powietrza < 95%
Odległość pomiarowa 4–6 cm od miejsca pomiaru

170
Zakresy pomiaru idokładność
pomiaru temperatury na czole
Pomiar temperatury na czole
Od 34°Cdo 42,2°C(od 93,2°Fdo 108°F)
Dokładność pomiaru od 34°Cdo 42,2°C: ± 0,2°C(93,2°Fdo 108°F: ± 0,4°F)
Kliniczna powtarzalność
pomiarów
0,23°C(0,41°F)
Zakresy pomiaru idokładność
Pomiar temperatury obiektu
Pomiar temperatury obiektu od -22°Cdo 80°C(od -7,6°Fdo 176°F)
Dokładność pomiaru ± 4% lub ± 2°C(± 4°F)
Funkcja zapisywania
Pomiar temperatury ciała
Automatyczny zapis ostatnich 60 wartości pomiaru.
Sygnał dźwiękowy Podczas włączenia urządzenia, podczas pomiaru, po zakończeniu pomiaru
(zmożliwością regulacji).
Wyświetlanie Wyświetlacz LCD
Funkcje oszczędzania energii Urządzenie wyłącza się automatycznie po upływie 1 minuty.
Wymiary
Szerokość × głębokość ×
wysokość
ok. 40,9 × 68,2 × 199,0 mm
Waga 82 g(bez baterii)
Baterie: 2 × AAA, LR03 Czas pracy ok. 2000 pomiarów
Dodatkowo aktywowane funkcje, takie jak sygnał dźwiękowy lub
podświetlenie wyświetlacza, skracają trwałość baterii.
Numer seryjny znajduje się na urządzeniu lub w komorze baterii.

171
16. Przepisy
Urządzenie jest zgodne zdyrektywą Unii Europejskiej wsprawie produktów medycznych 93/42/EEC, ustawą opro-
duktach medycznych, standardem ASTM E1965 - 98 oraz europejską normą EN60601-1-2 iwymaga zachowania
szczególnych środków ostrożności wzakresie kompatybilności elektromagnetycznej.
Prawo do pomyłek izmian zastrzeżone

172
Electromagnetic Compatibility Information
Table 1
For all ME EQUIPMENT and ME SYSTEMS
Guidance and manufacturer’s declaration – electromagnetic emissions
The FT 100 is intended for use in the electromagnetic environment specified below.
The customer or the user of the FT 100 should assure that it is used in such an environment.
Emissions test Compliance Electromagnetic environment – guidance
RF emissions CISPR 11 Group 1 The FT 100 uses RF energy only for its internal function. Therefore, its RF emissions are very low
and are not likely to cause any interference in nearby electronic equipment.
RF emissions CISPR 11 Class B The FT 100 is suitable for use in all establishments other that domestic and those directly con
-
nected to the public low-voltage power supply network that supplies buildings used for domes-
tic purposes.
Harmonic emissions IEC 61000-3-2 Not applicable
Voltage fluctuations/flicker emissions
IEC 61000-3-3
Not applicable

173
Table 2
For all ME EQUIPMENT and ME SYSTEMS
Guidance and manufacturer’s declaration – electromagnetic immunity
The FT 100 is intended for use in the electromagnetic environment specified below.
The customer or the user of the FT 100 should assure that it is used in such an environment.
Immunity test IEC 60601 test level Compliance level Electromagnetic environment – guidance
Electrostatic discharge
(ESD)
IEC 61000-4-2
6 kV contact
8 kV air
6 kV contact
8 kV air
Floors should be wood, concrete or ceramic tile. If floors are covered with
synthetic material, the relative humidity should be at least 30 %.
Electrical fast transient/
burst
IEC 61000-4-4
2 kV for power supply lines
1 kV for input/output lines
Not applicable
Mains power quality should be that of a typical commercial or hospital
environment.
Surge
IEC 61000-4-5
1 kV line(s) to line(s)
2 kV line(s) to earth
Not applicable
Mains power quality should be that of a typical commercial or hospital
environment.
interruptions and voltage
variations on power supply
input lines
IEC 61000-4-11
< 5 % UT (> 95 % dip in UT)
for 0.5 cycle
40 % UT (60 % dip in UT) for
5 cycles
70 % UT (30 % dip in UT) for
25 cycles
< 5 % UT (> 95 % dip in UT)
for 5 sec
Not applicable
Mains power quality should be that of a typical commercial or hospital
environment. If the user of the FT 100 requires continued operation during
power mains interruptions, it is recommended that the FT 100 be powered
from an uninterruptible power supply or a battery.
Power frequency (50/60 Hz)
magnetic field
IEC 61000-4-8
3 A/m 3 A/m
Power frequency magnetic fields should be at levels characteristic of a
typical location in a typical commercial or hospital environment.
NOTE UT is the a.c. mains voltage prior to application of the test level.

174
Table 3
For ME EQUIPMENT and ME SYSTEMS that are not LIFE-SUPPORTING
Guidance and manufacturer’s declaration – electromagnetic immunity
The FT 100 is intended for use in the electromagnetic environment specified below.
The customer or the user of the FT 100 should assure that it is used in such an environment.
Immunity test
IEC 60601 test
level
Compliance
level
Electromagnetic environment – guidance
Conducted RF
IEC 61000-4-6
Radiated RF
IEC 61000-4-3
3 Vrms
150 kHz to 80 MHz
3 V/m
80 MHz to 2.5 GHz
3 Vrms
3 V/m
Portable and mobile RF communications equipment should be used no closer to any part of the
FT 100, including cables, than the recommended separation distance calculated from the equation
applicable to the frequency of the transmitter.
Recommended separation distance
d = 1.2
d = 1.2 80 MHz to 800 MHz
d = 2.3
800 MHz to 2.5 GHz
where P is the maximum output power rating of the transmitter in watts (W) according to the trans
-
mitter manufacturer and d is the recommended separation distance in meters (m).
Field strengths from fixed RF transmitters, as determined by an electromagnetic site survey
a,
should be less than the compliance level in each frequency range
b
.
Interference may occur in the vicinity of equipment marked with the following symbol:
NOTE 1 At 80 MHz and 800 MHz, the higher frequency range applies.
NOTE 2 These guidelines may not apply in all situations.
Electromagnetic propagation is affected by absorption and reflection from structures, objects and people.
a
. Field strengths from fixed transmitters, such as base stations for radio (cellular/cordless) telephones and land mobile radios, amateur radio, AM and FM
radio broadcast and TV broadcast cannot be predicted theoretically with accuracy. To assess the electromagnetic environment due to fixed RF transmit
-
ters, an electromagnetic site survey should be considered. If the measured field strength in the location in which the FT 100 is used exceeds the applicable
RF compliance level above, the FT 100 should be observed to verify normal operation. If abnormal performance is observed, additional measures may be
necessary, such as reorienting or relocating the FT 100.
b
. Over the frequency range 150 kHz to 80 MHz, field strengths should be less than [V1] V/m.

175
Table 4
For ME EQUIPMENT and ME SYSTEMS that are not LIFE-SUPPORTING
Recommended separation distances between portable and mobile RF communications equipment and the FT100
The FT 100 is intended for use in an electromagnetic environment in which radiated RF disturbances are controlled. The customer or
the user of the FT 100 can help prevent electromagnetic interference by maintaining a minimum distance between portable and mobile
RF communications equipment (transmitters) and the FT 100 as recommended below, according to the maximum output power of the
communications equipment.
Rated maximum output
power of transmitter
W
Separation distance according to frequency of transmitter
m
150 kHz to 80 MHz
d = 1.2
80 MHz to 800 MHz
d = 1.2
800 MHz to 2.5 GHz
d = 2.3
0.01 0.12 0.12 0.23
0.1 0.38 0.38 0.73
1 1.2 1.2 2.3
10 3.8 3.8 7.3
100 12 12 23
For transmitters rated at a maximum output power not listed above, the recommended separation distance d in meters (m) can be esti
-
mated using the equation applicable to the frequency of the transmitter, where P is the maximum output power rating of the transmitter
in watts (W) according to the transmitter manufacturer.
NOTE 1 At 80 MHz and 800 MHz, the separation distance for the higher frequency range applies.
NOTE 2 These guidelines may not apply in all situations. Electromagnetic propagation is affected by absorption and reflection from
structures, objects and people.

176
758.627 – 0317
BeurerGmbH•SöflingerStraße218•89077Ulm,Germany•www.beurer.com
www.beurer-gesundheitsratgeber.com•www.beurer-healthguide.com
-
 1
1
-
 2
2
-
 3
3
-
 4
4
-
 5
5
-
 6
6
-
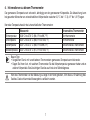 7
7
-
 8
8
-
 9
9
-
 10
10
-
 11
11
-
 12
12
-
 13
13
-
 14
14
-
 15
15
-
 16
16
-
 17
17
-
 18
18
-
 19
19
-
 20
20
-
 21
21
-
 22
22
-
 23
23
-
 24
24
-
 25
25
-
 26
26
-
 27
27
-
 28
28
-
 29
29
-
 30
30
-
 31
31
-
 32
32
-
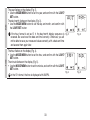 33
33
-
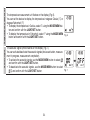 34
34
-
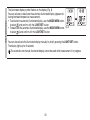 35
35
-
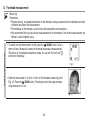 36
36
-
 37
37
-
 38
38
-
 39
39
-
 40
40
-
 41
41
-
 42
42
-
 43
43
-
 44
44
-
 45
45
-
 46
46
-
 47
47
-
 48
48
-
 49
49
-
 50
50
-
 51
51
-
 52
52
-
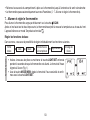 53
53
-
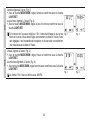 54
54
-
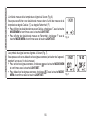 55
55
-
 56
56
-
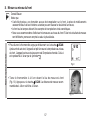 57
57
-
 58
58
-
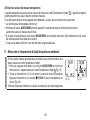 59
59
-
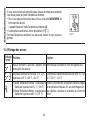 60
60
-
 61
61
-
 62
62
-
 63
63
-
 64
64
-
 65
65
-
 66
66
-
 67
67
-
 68
68
-
 69
69
-
 70
70
-
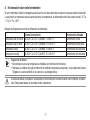 71
71
-
 72
72
-
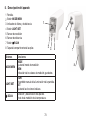 73
73
-
 74
74
-
 75
75
-
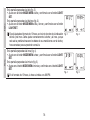 76
76
-
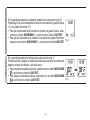 77
77
-
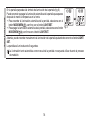 78
78
-
 79
79
-
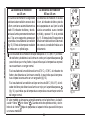 80
80
-
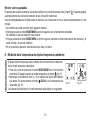 81
81
-
 82
82
-
 83
83
-
 84
84
-
 85
85
-
 86
86
-
 87
87
-
 88
88
-
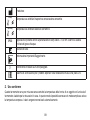 89
89
-
 90
90
-
 91
91
-
 92
92
-
 93
93
-
 94
94
-
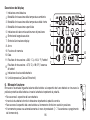 95
95
-
 96
96
-
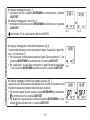 97
97
-
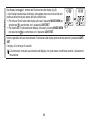 98
98
-
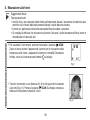 99
99
-
 100
100
-
 101
101
-
 102
102
-
 103
103
-
 104
104
-
 105
105
-
 106
106
-
 107
107
-
 108
108
-
 109
109
-
 110
110
-
 111
111
-
 112
112
-
 113
113
-
 114
114
-
 115
115
-
 116
116
-
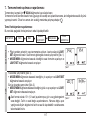 117
117
-
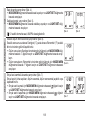 118
118
-
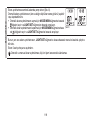 119
119
-
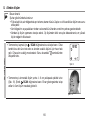 120
120
-
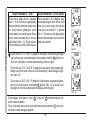 121
121
-
 122
122
-
 123
123
-
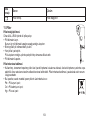 124
124
-
 125
125
-
 126
126
-
 127
127
-
 128
128
-
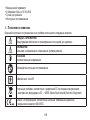 129
129
-
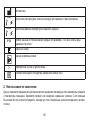 130
130
-
 131
131
-
 132
132
-
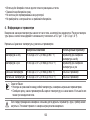 133
133
-
 134
134
-
 135
135
-
 136
136
-
 137
137
-
 138
138
-
 139
139
-
 140
140
-
 141
141
-
 142
142
-
 143
143
-
 144
144
-
 145
145
-
 146
146
-
 147
147
-
 148
148
-
 149
149
-
 150
150
-
 151
151
-
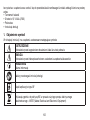 152
152
-
 153
153
-
 154
154
-
 155
155
-
 156
156
-
 157
157
-
 158
158
-
 159
159
-
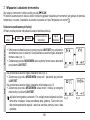 160
160
-
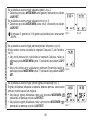 161
161
-
 162
162
-
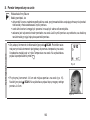 163
163
-
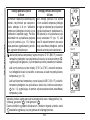 164
164
-
 165
165
-
 166
166
-
 167
167
-
 168
168
-
 169
169
-
 170
170
-
 171
171
-
 172
172
-
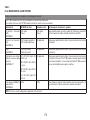 173
173
-
 174
174
-
 175
175
-
 176
176


Beurer FT 100+ El manual del propietario
- Categoría
- Termómetros corporales digitales
- Tipo
- El manual del propietario
en otros idiomas
- français: Beurer FT 100+ Le manuel du propriétaire
- italiano: Beurer FT 100+ Manuale del proprietario
- Deutsch: Beurer FT 100+ Bedienungsanleitung
- polski: Beurer FT 100+ Instrukcja obsługi
- Türkçe: Beurer FT 100+ El kitabı
Artículos relacionados
Otros documentos
-
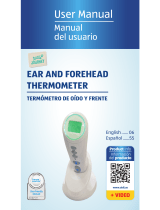 Little Journey V4916DSO364 Manual de usuario
-
Medisana TM A79 El manual del propietario
-
Medisana TM A77 El manual del propietario
-
Salter Infrared Thermometer El manual del propietario
-
-
Medisana FTN El manual del propietario
-
Silvercrest SSOT 6 B2 Operating Instructions Manual
-
boso Bosotherm Diagnostic Manual de usuario
-
Silvercrest HealthForYou SFT76 Instructions For Use And Safety Notes
-
Eks 0610 El manual del propietario
