
ES/EN
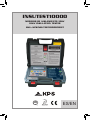
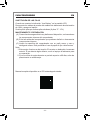
INSUTEST10000
MEDIDOR DE AISLAMIENTO 10KV
10KV INSULATION TESTER
SKU: KPSINSUTEST10000CBINT

- 3 -

MEDIDOR DE AISLAMIENTO 10KV ES
- 3 -
DESCRIPCIÓN ................................................................................4
PRECAUCIONES DE SEGURIDAD ...............................................4
ESPECIFICACIONES .....................................................................6
MEDICIONES .................................................................................. 8
(A) Prueba de medición de resistencia de aislamiento ....................... 8
(B) Medición de tensión (Voltímetro) ..................................................... 9
(C) Ajuste de fecha/hora (Ajuste de reloj de tiempo real).................. 10
(D) Ajuste de tiempo de medición (Temporización) ........................... 11
(E) Visualización de los datos almacenados
(Visualización del registro) ...................................................................12
(F) Borrado de datos almacenados (Borrado de registro) ................ 13
SUSTITUCIÓN DE LAS PILAS ....................................................14
MANTENIMIENTO Y REPARACIÓN ............................................14
ENGLISH MANUAL ......................................................................15
ÍNDICE DE CONTENIDOS

INSUTEST10000 ES
- 4 -
- 5 -
DESCRIPCIÓN
Este instrumento es un comprobador de aislamiento de alta tensión de 10kV
con tensiones de prueba de 1000V, 2500V, 5000V y 10000V.
La parte superior de la pantalla muestra el tiempo transcurrido desde el inicio
de la prueba. La lectura digital del tiempo total se mantendrá en la pantalla
incluso después de nalizar la prueba.
El instrumento proporciona una señal acústica y una advertencia visual de
tensión si existe en el circuito tensión AC o DC antes de inyectar la tensión
de prueba.
PRECAUCIONES DE SEGURIDAD
La electricidad puede causar lesiones severas incluso a bajas tensiones y
con pequeñas corrientes. Con lo cual, es extremadamente importante que
lea la información siguiente antes de utilizar su medidor de aislamiento de
alta tensión.
a. Este instrumento debe ser únicamente utilizado por personal entrenado
y siguiendo las instrucciones de manera estricta. NO se aceptaran
responsabilidades por lesiones o daños debido a un uso inadecuado
o producidos por no cumplir los procedimientos de seguridad y las
instrucciones.
b. No se debe utilizar este equipo en circuitos en tensión. Asegúrese de que
todos los circuitos son desenergizados antes de la comprobación. Observe
el apartado sobre las advertencias proporcionadas por el instrumento al
conectarlo a un sistema en tensión.
c. Inspecciones siempre el medidor de aislamiento de alta tensión y los
cables de prueba antes de su utilización para comprobar si existe alguna
anormalidad o defecto. Si se detecta alguna situación anormal (cables
de prueba rotos, carcasa agrietada, fallo en la pantalla, etc…) no intente
realizar ninguna medida o usar el instrumento. Envíe su comprobador de
aislamiento de alta tensión al distribuidor más cercano para su reparación.
d. El comprobado de aislamiento de alta tensión ha sido diseñado con la
intensión de salvaguardar su seguridad. Sin embargo, ningún diseño
puede proteger completamente frente a un uso inadecuado. Los circuitos
eléctricos pueden ser peligrosos y/o letales cuando no se es precavido o
las prácticas de seguridad son pobres.
e. Preste atención a las precauciones y advertencias que le informan de
procedimiento potencialmente peligrosos.

MEDIDOR DE AISLAMIENTO 10KV ES
- 4 -
- 5 -
f. El comprobador de aislamiento de alta tensión incorpora un zumbador de
advertencia de circuito en tensión. Si se conecta el equipo a un circuito
energizado, se escuchará una señal acústica intermitente acelerada. No
continúe con la prueba y desconecte inmediatamente el instrumento del
circuito. Además, el comprobador mostrará un mensaje de advertencia.
g. Condiciones ambientales nominales:
1) Uso interior.
2) Categoría de instalación IV.
3) Grado de polución 2.
4) Altitud de hasta 2000 metros.
5) Humedad relativa de máx. 80%
6) Temperatura ambiente entre 0ºC y 40ºC.
h. Observe los símbolos eléctricos internacionales indicados a continuación:
El comprobador está protegido por un doble aislamiento o un
aislamiento reforzado.
¡Advertencia! Riesgo de descarga eléctrica.
¡Precaución! Consulte este manual antes de usar el comprobador.
Tierra

INSUTEST10000 ES
- 6 -
- 7 -
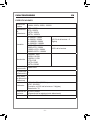
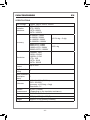
ESPECIFICACIONES
Tensión de
prueba 1000V, 2500V, 5000V, 10000V
Resistencia
de
aislamiento
2TΩ / 1000V
5TΩ / 2500V
10TΩ / 5000V
20TΩ / 10000V
Precisión
0~200GΩ / 1000V
0~500GΩ / 2500V
0~1000GΩ / 5000V
0~2000GΩ / 10000V
±(5.0% de la lectura + 5
dígitos)
200G~2TΩ / 1000V
500G~5TΩ / 2500V
1000G~10TΩ / 5000V
2000G~20TΩ / 10000V
±20% de la lectura
Resolución
1000MΩ: 1MΩ
10GΩ: 0.01GΩ
100GΩ: 0.1GΩ
1TΩ: 1GΩ
10TΩ: 10GΩ
20TΩ: 100GΩ
Corriente de
cortocircuito Hasta 5mA
PI (Índice de
polarización) √
DAR (Ratio
de Absorción
Dieléctrica)
√
Voltímetro
VAC: 30~600V (50/60Hz)
VDC: 30~600V
Precisión: ±(2.0% de la lectura + 3 dígitos)
Resolución: 1V
Medición de
corriente
0.5nA~0.55mA
(Depende de la resistencia de aislamiento)
Alimentación 8 pilas alcalinas “C” 1.5V

MEDIDOR DE AISLAMIENTO 10KV ES
- 6 -
- 7 -
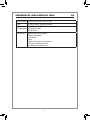
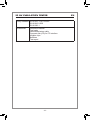
Dimensiones 330 (L) x 260 (A) x 160 (P) mm
Peso 4724 gr. apróx. (pilas incluidas)
Normativas
de seguridad
EN 61010-1 CATIV 600V
EN 61010-2-030
EN 61326-1
Accesorios Manual de instrucciones
Cables de prueba
Cocodrilos
Pilas
Cable de transmisión de datos
CD con el software de PC
Certicado de calibración

INSUTEST10000 ES
- 8 -
- 9 -
MEDICIONES
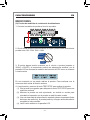
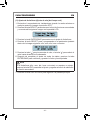
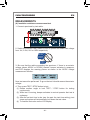
(A) Prueba de medición de resistencia de aislamiento
1. Conecte los cables de prueba al circuito a prueba.
2. Gire la rueda selectora para encender el equipo y seleccionar la tensión de
prueba entre 1kV, 2.5kV, 5kV o 10kV.
VAC/DC
(30~600V)
OFF
1kV/2TΩ
2.5kV/5TΩ
5kV/10TΩ
10kV/20TΩ
3. Si existe alguna tensión presente en el circuito a prueba (superior a
30VAC o 30VDC), el instrumento emitirá una advertencia acústica y en la
pantalla LCD se mostrara la medición de la tensión AC/DC como se muestra
a continuación:
En ese momento no se puede realizar la prueba. Para continuar con la
misma se debe retirar la tensión externa.
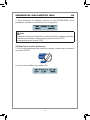
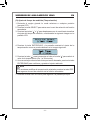
4. A continuación, presione la tecla TEST/STOP para realizar la prueba.
(1) Gire la tecla unos grados para bloquear la tecla TEST/STOP para una
medición continua
(2) Mientras la prueba se está ejecutando, se emitirá un sonido para
recordarle al operador que la prueba se está llevando a cabo.
(3) Una vez alcanzada la temporización ajustada (véase el apartado Ajuste
de tiempo de medición), la prueba parará y el equipo automáticamente
congelará el valor medido.
(4) Lea el valor medido en la pantalla LCD.

MEDIDOR DE AISLAMIENTO 10KV ES
- 8 -
- 9 -
5. Para almacenar el resultado, presione la tecla ENTER/SAVE. En la
pantalla se mostrará una indicación como la siguiente:
Nota
Al realizar la prueba de aislamiento, conecte siempre los cables de prueba
al objeto que se desea medir antes de presionar la tecla TEST.
No presione primero la tecla TEST.
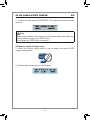
(B) Medición de tensión (Voltímetro)
1. Gire la rueda selectora para encender el equipo y seleccionar la medición
de tensión AC/DC.
VAC/DC
(30~600V)
OFF
1kV/2TΩ
2.5kV/5TΩ
5kV/10TΩ
10kV/20TΩ
2. Lea el valor medido en la pantalla LCD.

INSUTEST10000 ES
- 10 -
- 11 -
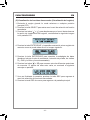
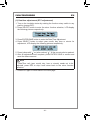
(C) Ajuste de fecha/hora (Ajuste de reloj de tiempo real)
1. Enciende el comprobador de instalaciones girando la rueda selectora a
cualquier posición (excepto la posición OFF).
2. Presione la tecla SELECT para entrar en el menú de funciones secundarias
y se mostrará la siguiente imagen en la pantalla LCD:
3. Presione la tecla ENTER/SAVE para entrar en el ajuste de fecha/hora.
4. Presione la tecla SELECT para ir progresando en el parámetro ajustado
dentro de la imagen siguiente: año, mes, día, hora o minutos.
5. Presione la tecla “ ” para incrementar el valor, o la tecla “ ” para reducir el
valor hasta alcanzar la cifra deseada.
6. Después de completar el ajuste de todos los datos, presione la tecla
ENTER/SAVE para conrmar y guardar le fecha y hora ajustada.
Nota
Si la fecha/hora (año, mes, día, hora o minutos) no requiere un ajuste,
presione la tecla ESC para saltar el ajuste y regresar al menú de selección
de función secundaria.
7. Presione la tecla ESC de nuevo para regresar a la pantalla principal.

MEDIDOR DE AISLAMIENTO 10KV ES
- 10 -
- 11 -
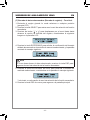
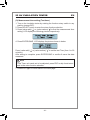
(D) Ajuste de tiempo de medición (Temporización)
1. Encienda el equipo girando la rueda selectora a cualquier posición
(excepto OFF).
2. Presione la tecla SELECT para entrar en el menú de selección de función
secundaria.
3. Presione las teclas “ ” o “ ” para desplazarse por el menú hasta visualizar
el ajuste del tiempo de medición, mostrándose la siguiente imagen en la
pantalla LCD:
4. Presione la tecla ENTER/SAVE y la pantalla mostrará el ajuste de la
temporización como se puede observar en la imagen siguiente:
5. Presione la tecla “ ” para incrementar el valor o la tecla “ ” para reducir el
valor de la temporización (De 1 a 30 minutos).
6. Una vez se haya seleccionado la temporización deseada, presione la tecla
ENTER/SAVE para conrmar y guardar el ajuste realizado.
Nota
Si no se desea modicar la temporización ajustada, presione la tecla ESC
para regresar al menú de selección de la función secundaria.
7. Presione la tecla ESC de nuevo para regresar a la pantalla principal.

INSUTEST10000 ES
- 12 -
- 13 -
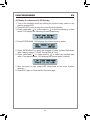
(E) Visualización de los datos almacenados (Visualización del registro)
1. Encienda el equipo girando la rueda selectora a cualquier posición
(excepto OFF).
2. Presione la tecla SELECT para entrar en el menú de selección de función
secundaria.
3. Presione las teclas “ ” o “ ” para desplazarse por el menú hasta alcanzar
la opción de visualización del registro, mostrándose la siguiente imagen
en la pantalla LCD:
4. Presione la tecla ENTER/SAVE y la pantalla mostrará el primer registro de
memoria como se puede observar en la imagen siguiente:
5. Presione la tecla ENTER/SAVE para consultar la subpágina de datos
(donde se incluye el valor de resistencia, la tensión de prueba, los índices
PI y DAR y la fecha y hora almacenadas).
6. Presione las teclas “ ” o “ ” para moverse entre las diferentes posiciones
de memoria. Si alguna de ellas esta vacía, se mostrará el siguiente
mensaje en pantalla:
7. Una vez nalizada la consulta, presione la tecla ESC para regresar al
menú de selección de funciones secundarias.
8. Presione la tecla ESC de nuevo para regresar a la pantalla principal.

MEDIDOR DE AISLAMIENTO 10KV ES
- 12 -
- 13 -
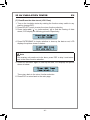
(F) Borrado de datos almacenados (Borrado de registro) – Función 4
1. Encienda el equipo girando la rueda selectora a cualquier posición
(excepto OFF).
2. Presione la tecla SELECT para entrar en el menú de selección de función
secundaria.
3. Presione las teclas “ ” o “ ” para desplazarse por el menú hasta hasta
alcanzar la opción de borrado del registro, mostrándose la siguiente
imagen en la pantalla LCD:
4. Presione la tecla ENTER/SAVE para solicitar la conrmación del borrado
del dato almacenado en la posición de memoria seleccionada, y la pantalla
mostrará el mensaje siguiente:
Nota
Si no se desea borrar el dato seleccionado, presione la tecla ESC para
regresar al menú de selección de la función secundaria.
5. Presione la tecla ENTER/SAVE de nuevo para conrmar el borrado del
resultado seleccionado, mostrándose en la pantalla el mensaje siguiente:
Y volviendo, a continuación al menú de selección de la función secundaria.
6. Presione la tecla ESC de nuevo para regresar a la pantalla principal.

- 15 -
INSUTEST10000 ES
- 14 -
SUSTITUCIÓN DE LAS PILAS
Cuando se muestra la indicación “Low Battery” en la pantalla LCD.
Desconecte los cables de prueba del medidor de aislamiento de alta tensión
de 10kV y apague el equipo.
Sustituya las pilas por nuevas pilas alcalinas (8 pilas “C” 1.5V).
MANTENIMIENTO Y REPARACIÓN
(A) Para evitar descargas eléctricas y daños en el dispositivo, no humedezca
los componentes internos del comprobador.
(B) Evite las caídas del comprobador que pudiesen dañarlo o desconectar
componentes internos.
(C) Limpie la supercie del comprobador con un paño suave y seco y
detergente suave. Está prohibido el uso de papel de lija o disolventes.
Nota:
1. Este equipo funciona a alta tensión. El usuario no debe abrir la carcasa
exterior. Si se detecta algún defecto, envíe el equipo al fabricante para
su reparación.
2. Si no se utiliza el equipo durante un periodo superior a 60 días, retire las
pilas durante su almacenaje.
Manual completo disponible en el CD o descárguelo desde:

10 KV INSULATION TESTER EN
- 15 -
- 14 -
DESCRIPTION ..............................................................................16
SAFETY PRECAUTIONS .............................................................16
SPECIFICATIONS ......................................................................... 18
MEASUREMENTS ........................................................................20
(A) Insulation resistance measurement test ....................................... 20
(B) Measure voltaje (Voltage meter) .................................................... 21
(C) Date/time adjustement (RTC adjustement) ................................... 22
(D) Measurement time setting (Test timer) .......................................... 23
(E) Display the data stored (LOG Display) .......................................... 24
(F)Clear/Erase the data stored (LOG Clear) ........................................ 25
BATTERY REPLACEMENT .......................................................... 26
MAINTENANCE & REPAIR ..........................................................26
CONTENT INDEX

INSUTEST10000 EN
- 16 -
- 17 -
DESCRIPTION
This is a 10kV high voltage insulation tester, which has output voltages of
1000V, 2500V, 5000V, 10000V.
The top line of the display shows the elapsed time at the start of the test.
Digital readout of the total time will remain displayed even after testing has
ceased.
This instrument displays a voltage warning and sounds when AC or DC is
present before injecting the test voltage.
SAFETY PRECAUTIONS
La electricidad puede causar lesiones severas incluso a bajas tensiones y
con pequeñas corrientes. Con lo cual, es extremadamente importante que
lea la información siguiente antes de utilizar su medidor de aislamiento de
alta tensión.
a. This Instrument must only be used and operated by a competent trained
person and in strict accordance with the instructions. We will not accept
liability for any damage or injury caused by misuse or non compliance with
instructions and safety procedures.
b. This instrument must not be used on live circuits. Ensure all circuits are
de-energised before testing. see paragraph for details of built-in warning
features should your high voltage insulation tester be connected to a live
system.
c. Always inspect your high voltage insulation tester and test leads before
use for any sign of abnormality or damage. If any abnormal conditions
exist (broken test leads, cracked case, display faulty etc...) do not attempt
to take any measurement or use the tester. Return your high voltage
insulation tester to your nearest distributor for service.
d. Your high voltage insulation tester has been designed with your safety in
mind. However, no design can completely protect against incorrect use.
Electrical circuits can be dangerous and / or lethal when a lack of caution
or poor safety practice is used.
e. Pay attention to cautions and warnings, which will inform you of potentially
dangerous procedures.
f. Your high voltage insulation tester has a live circuit warning beeper. If it is
connected to a live circuit, a rapid pulsating bleep will be heard. DO NOT
proceed to test and immediately disconnect the instrument from the circuit.

10 KV INSULATION TESTER EN
- 16 -
- 17 -
In addition, your tester will display the warning message.
g. Rated environmental conditions :
1) Indoor use.
2) Installation Category IV.
3) Pollution Degree 2.
4) Altitude up to 2000 meters.
5) Relative humidity 80% max.
6) Ambient temperature 0ºC~40ºC.
h. Observe the international Electrical Symbols listed below:
Meter is protected throughout by double insulation or reinforced
insulation.
Warning ! Risk of electric shock.
Caution ! Refer to this manual before using the meter.
Earth

INSUTEST10000 EN
- 18 -
- 19 -
SPECIFICATIONS
Test Voltage 1000V, 2500V, 5000V, 10000V
Insulation
resistance
2TΩ / 1000V
5TΩ / 2500V
10TΩ / 5000V
20TΩ / 10000V
Accuracy
0~200GΩ / 1000V
0~500GΩ / 2500V
0~1000GΩ / 5000V
0~2000GΩ / 10000V
±(5.0% rdg + 5 dgt)
200G~2TΩ / 1000V
500G~5TΩ / 2500V
1000G~10TΩ / 5000V
2000G~20TΩ / 10000V
±20% rdg
Resolution
1000MΩ: 1MΩ
10GΩ: 0.01GΩ
100GΩ: 0.1GΩ
1TΩ: 1GΩ
10TΩ: 10GΩ
20TΩ: 100GΩ
Short circuit
current Up to 5mA
PI (Polarization
Index) √
DAR (Diellectric
Absorption
Ratio)
√
Voltmeter
ACV: 30~600V (50/60Hz)
DCV: 30~600V
Accuracy: ±(2.0%rdg + 3dgt)
Resolution: 1V
Current
measurement
0.5nA ~ 0.55mA
(Depending on the insulation resistance)
Power source 1.5V “C” × 8 Alkaline batteries
Dimensions 330 (L) x 260 (A) x 160 (P) mm
Weight Approx. 4724g (battery included)

10 KV INSULATION TESTER EN
- 18 -
- 19 -
Safety standard EN 61010-1 CATIV 600V
EN 61010-2-030
EN 61326-1
Accessories Instruction manual
Test leads
Data transmission cable
Compact disk (CD) for PC interface
Alligator clips
Batteries
Test report

INSUTEST10000 EN
- 20 -
- 21 -
MEASUREMENTS
(A) Insulation resistance measurement test
1. Connect speciment by test cable..
2. Switch the function rotary switch to turn on power and select test voltage
from 1kV, 2.5kV, 5kV or 10kV respectively.
VAC/DC
(30~600V)
OFF
1kV/2TΩ
2.5kV/5TΩ
5kV/10TΩ
10kV/20TΩ
3. Be sure that the cable connecting the specimen, if there is an exterior
voltage (above AC30V or DC30V) exerted, beeper activates in response;
and LCD displays the warning picture as shown in the AC/DC voltage
measurement function:
Now, test cannot be performed. To go on the test it should remove the exterior
voltage.
4. Then, press TEST / STOP button to test.
(1) Rotate another angle to lock TEST / STOP button for testing
continuously.
(2) While test is running, beeper activates to remind operator that test is
underway.
(3) After the set test time is due (see the part: the test time setting), test
stops and system will automatically lock down the test value.
(4) To read the test value on the LCD display

10 KV INSULATION TESTER EN
- 20 -
- 21 -
5. To store the data, press ENTER/SAVE; LCD displays the picture shown
in below:
Note
When do the insulation test, always connect the test leads to the object we
want to measure pressing the TEST button.
Do not press the TEST button in advance.
(B) Measure voltaje (Voltage meter)
1. Switch the function rotary switch to turn on power and select AC/DC
voltage measurement.
VAC/DC
(30~600V)
OFF
1kV/2TΩ
2.5kV/5TΩ
5kV/10TΩ
10kV/20TΩ
2. Read the data measured from LCD display.

INSUTEST10000 EN
- 22 -
- 23 -
(C) Date/time adjustement (RTC adjustement)
1. Turn on the insulation tester by rotating the function rotary switch to any
position (except OFF).
2. Press SELECT button to enter the minor function selection, LCD display
the following pictures respectively:
3. Press ENTER/SAVE button to enter the Date/Time Adjustment.
4. Press SELECT button to select year, month, day, hour or minute for
adjustment, LCD display the following pictures respectively:
5. Press (value-add) “ ” or (value-reduce) “ ” “ till the correct value is reached.
6. After all adjustments are complete, press ENTER/ SAVE to conrm and
save the data measured.
Note
if Date/Time unit (year, month, day, hour or minute) needs not to be
adjusted, press ESC to skip it and return back to the minor function
selection.
7. Press ESC again to return back to the main page.

10 KV INSULATION TESTER EN
- 22 -
- 23 -
(D) Measurement time setting (Test timer)
1. Turn on the insulation tester by rotating the function rotary switch to any
position (except OFF).
2. Press SELECT button to enter the minor function selection.
3. Press (value-add) “ ” or (value-reduce) “ ” to nd the measurement time
setting, LCD display the following pictures respectively:
4. Press ENTER/SAVE, LCD displays the picture shown in below:
Press (value-add) “ ” or (value-reduce) “ ” to set the test Time (form 1 to 30
minutes).
After setting is complete, press ENTER/SAVE to conrm & save the data
measured.
Note
If Test Timer unit needs not to be adjusted, press ESC to skip it and return
back to the minor function selection.
7. Press ESC again to return back to the main page.

INSUTEST10000 EN
- 24 -
- 25 -
(E) Display the data stored (LOG Display)
1. Turn on the insulation tester by rotating the function rotary switch to any
position (except OFF).
2. Press SELECT button to enter the minor function selection.
3. Press (value-add) “ ” or (value-reduce) “ ” to nd the displaying of data
stored, LCD display the following pictures respectively:
4. Press ENTER/SAVE, LCD displays the picture shown in below:
5. Press ENTER/SAVE to query the subpage of data (include Resistance
value, testing voltage, PI, DAR, Saving Date & Time).
6. Press (value-add) “ ” or (value-reduce) “ ” to select the required data
value. If no data available, LCD displays the picture shown in below:
7. After the query is over, press ESC return back to the minor function
selection.
8. Press ESC again to return back to the main page.

10 KV INSULATION TESTER EN
- 24 -
- 25 -
(F) Clear/Erase the data stored (LOG Clear)
1. Turn on the insulation tester by rotating the function rotary switch to any
position (except OFF).
2. Press SELECT button to enter the minor function selection.
3. Press (value-add) “ ” or (value-reduce) “ ” to nd the Erasing of data
stored, LCD display the following pictures respectively:
4. Press ENTER/SAVE to inquire whether to clear up the data or not; LCD
displays the picture shown in below:
Note
If the erasing unit needs not to be done, press ESC to skip it and return
back to the minor function selection.
5. Press ENTER/SAVE again to clear up the data; LCD displays the picture
shown in below:
Then return back to the minor function selection.
6. Press ESC to return back to the main page.

INSUTEST10000 EN
- 26 -
BATTERY REPLACEMENT
When “Low Battery” info shows on the LCD.
Disconnect the test leads from the 10kV high voltage insulation tester, and
turn off the power.
Replace with new Alkaline batteries (1.5V “C” × 8).
MAINTENANCE & REPAIR
(A) To avoid and electric-shock or device damage, do not wet inner part of
the tester.
(B) Avoid the tester from being dropped down that would damage or
disconnect devices apart.
(C) Wipe the tester surface with soft, dry cloth and mild detergent. Prohibit
from using sand paper or solvent.
Note:
1. This tester is HV operated; user should not open the outer casing. If any
damage occurs, take the tester back to manufacturer for repair.
2. If the tester is not used for over 60 days, remove the batteries for storage.
Complete manual available on CD or download it from:

- 26 -

APAC: MGL GLOBAL SOLUTIONS LTD
Flat 4-1, 4/F, No. 35, Section 3 Minquan East Road. Taipei, Taiwan.
Tel: +886 2-2508-0877
EMEA: MGL EUMAN S.L.
Parque Empresarial Argame, 33163 Morcín. Asturias, Spain.
Tel: +34 985-08-18-70
AMERICAS: MGL AMERICA, LLC.
US East Coast: 2810 Coliseum Centre Drive, Ste. 100. Charlotte,
North Carolina, 28217 USA
Tel: +1 833 533-5899
US West Coast: 760 Challenger Street. Brea,
California, 92821 USA
Tel: +1 310-728-6220
www.mgl-intl.com
-
 1
1
-
 2
2
-
 3
3
-
 4
4
-
 5
5
-
 6
6
-
 7
7
-
 8
8
-
 9
9
-
 10
10
-
 11
11
-
 12
12
-
 13
13
-
 14
14
-
 15
15
-
 16
16
-
 17
17
-
 18
18
-
 19
19
-
 20
20
-
 21
21
-
 22
22
-
 23
23
-
 24
24
-
 25
25
-
 26
26
-
 27
27
-
 28
28


