La página se está cargando...

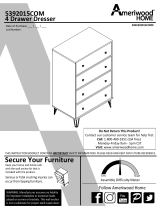
5581500COM
5DrawerDresser
B345581500COM0
THISINSTRUCTIONBO OKLETCONTAINS
IMPORTANT
SAFETYINFORMATION.PLEASEREADANDKEEPFORFUTUREREFERENCE.
FollowAmeriwoodHome
Tube
You
DateofPurchase___/___/___
LotNumber:
DoNotReturnThisProduct!
Contactourcustomerserviceteamforhelpfirst.
Call:1‐800‐489‐3351(tollfree)
Monday‐Friday9am‐5pmCST
Visit:www.ameriwoodhome.com
AssemblyDifficultyMeter
Easy
Tough
SecureYourFurniture
Keepyourhomeandfamilysafe
withthewallanchorkitthatis
includedwiththeproduct.
Seriousorfatalcrushinginjuriescan
occurfromtippingfurniture.
WARNING:Manufacturerassumesnoliability
forimproperinstallationorexcessiveloads
placedonscrewsorbracket.Thiswallanchor
isnotasubstituteforproperadultsupervision.

ContactUs!
HelpfulHints
2
ameriwoodhome.com
DoNOTreturnthisproduct!
Contactourfriendlycustomerserviceteamfirstforhelp.
Callus!
1‐800‐489‐3351
Monday‐Friday
9am‐5pmCST
Visitameriwoodhome.comtoviewthe
limitedwarrantyvalidintheU.S.andCanada.
AssemblyTips
‐Openyouritemintheareayouplantokeepittoavoidexcessivehea vylifting.
‐Identify,sortandcountthe partsbeforeattemptingassembly.
‐Compressiondowelsarelightlytappedinwithahammer.
‐Slidesarelabeledwitha
R
(right)and
L
(left)forproperplacement.
‐MakesuretoalwaysfacethepointonthetopoftheCamLocktowardsthe
outeredge.
‐Useallthenailsprovidedforthebackpanelandspreadthemoutequally.
‐Backpanelmustbeusedtomakesureyourunitissturdy.
‐Do
NOTuseharshchemicalsorabrasivecleanersonthisitem.
‐Neverpush,pull,ordragyourfurniture.
Tube
You
Tube
You
PEOPLENEEDEDFORASSEMBLY:1‐2
ESTIMATEDASSEMBLYTIME:2‐3HOURS

3
ameriwoodhome.com
BeforeYouStart
Q
u
i
c
k
T
i
p
A
s
s
e
m
b
l
y
CamLockFasteningSystem
ThisCamLockFasteningSystem willbeusedthroughouttheassemblyprocess.
1
3
2
4
Tube
You
Readthrougheachstepcarefullyandfollowtheproperorder
Separateandcountallyourpartsandhardware
Giveyourselfenoughroomfortheassemblyprocess
Havethefollowingtools:FlatHeadScrewdriver,#2PhillipsHead
ScrewdriverandHammer
Caution:Ifusingapowerdrillorpowerscrewdriverforscr ewing,
pleasebeawaretoslowdownandstopwhenscrewistight.
Failuretodosomayresultinstrippingthescrew.

4
ameriwoodhome.com
BoardIdentification
Notactualsize
LeftPanel
35581340010
Bottom
35581340040
FrontBaseRail
35581340060
LeftBaseRail
35581340080
Top
35581340030
x4
Support
35581340050
BackBaseRail
35581000070
RightPanel
35581340020
RightBaseRail
35581340090
x2
FrontVerticalMolding
35581340100
x2
RearVerticalMolding
35581340110
x5
DrawerBrace
35538000121
UpperDrawerFront
35581333130
x5
DrawerBottom
39991340071310D
x2
FrontRail
35581340170
x4
DrawerFront
35581333140
x4
SideMolding
35581340160
x2
UpperSideMolding
35581340180
UpperFrontMolding
35581340190
A
B
C
D
E
F
G
H
I
J
K
L
M
N
O
P
Q
R
S

5
ameriwoodhome.com
BoardIdentification
Notactualsize
BackPanel
K558100000
Thispieceispaperboard
construction.Itisnotmade
fromwood,butisrequired
fortheassemblyofyour
unit.
x5
DrawerBack
39991167070350B
x10
DrawerSide
39991167346200C
T
DWR
BACK
DWR
SIDE
DWR
BACK
DWR
BACK
DWR
SIDE
DWR
SIDE
DWR
SIDE
DWR
SIDE
N
M
L
L
O
O
T
Upper Drawer
A
B
C
D
E
E
E
E
F
H
I
J
J
K
K
P
P
P
P
Q
Q
R
S

6
ameriwoodhome.com
PartList
ActualSize
10
3
11
4
2
5
1
6
7
8
12
(x60)
#A12120
#8x7/16"panhead
(x50)
#A11080
#6x7/16"flathead
(x8)
#A21660
wooddowel
(x25)
#A22610
cambolt
(x25)
#A22620
camlock
(x4)
#A22910
connectorbolt
(x4)
#A22920
connector
(x10)
#A53600
anglebracket
(x36)
#A21110
nail
(x5)
#A21520
compressiondowel
(x10)
#A17250
8‐32x5/8"truss
(x30)
#A21970
drivefastener
(x4)
#A23030
confirmatscrew
(x10)
#A13020
#8x1‐1/2"pan
head
(x24)
#A12950
#8x1‐1/8"flat
head
13
14
(x4)
#A21550
wooddowel
9
17
15

7
ameriwoodhome.com
PartList
LeftCabinetMember
RightCabinetMember
LeftDrawerMember
RightDrawerMember
(x5)
#A56750
drawer slide pkg.
18b
18c
18d
18a
#A84050
safetybracketkit
(x10)
#A54520
drawerbracket
19a
19b
19c
19d
(x5)
#A50875
handle
20
21

8
ameriwoodhome.com
STEP
1
(x8)
#A12950
finishededge
15
15
15
15
15
15
15
A
J
K
Usingscrews(15),attachthefrontverticalmolding(J)andrear
verticalmolding(K)totheleftpanel(A).
Pleasebesuretoscrewintothesurfaceofthefrontvertical
moldingwiththepilotholes.
Donotfullytightenthescrewsuntilnextstepiscompleted.
Pilotholeinfront
verticalmolding.
15
15

9
ameriwoodhome.com
STEP2
(x4)
#A12950
Usingscrews(15),attachthesidemoldings(P)totheleftpanel
(A).
Nowtightenthescrewsthatwereleftloseintheprevious
step.
P
P
P
K
J
A
Note:Thesidemolding(P)hasanextraholeinit.Thisisa
referencehole.Thisistoindicatethatthisisthefrontend
ofthesidemolding.
frontend
frontend
15
15
15
15
frontend

10
ameriwoodhome.com
STEP3
4
(x2)
#A22620
(x4)
#A22610
(x15)
#A11080
18a
(x5)
#A56750
marked with a "L"
1
1
2
2
18a
4
2
2
2
1
18a
18a
18a
18a
18a
A
J
Proper orientation of CAM LOCK
Tip
Assembly
Quick

11
ameriwoodhome.com
STEP
4
Usingscrews(15),attachthefrontverticalmolding(J)andrear
verticalmolding(K)totherightpanel(B).
Pleasebesuretoscrewintothesurfaceofthefrontvertical
moldingwiththepilotholes.
Donotfullytightenthescrewsuntilnextstepiscompleted.
Pilotholeinfront
verticalmolding.
finishededge
15
15
15
15
15
15
15
J
K
B
(x8)
#A12950
15
15

12
ameriwoodhome.com
STEP
5
Usingscrews(15),attachthesidemoldings(P)totherightpanel
(B).Nowtightenthescrewsthatwereleftloseintheprevious
step.
Note:Thesidemolding(P)hasanextraholeinit.Thisisa
referencehole.Thisistoindicatethatthisisthefrontend
ofthesidemolding.
(x4)
#A12950
B
J
K
P
P
P
15
15
frontend
frontend
15
15
frontend

13
ameriwoodhome.com
STEP
6
Proper orientation of CAM LOCK
Tip
Assembly
Quick
1
2
4
2
1
(x2)
#A22620
(x4)
#A22610
(x15)
#A11080
(x5)
#A56750
marked with a "R"
18b
1
2
2
2
18b
18b
18b
18b
18b
18b
4
B
J

14
ameriwoodhome.com
STEP
7
14
17
(x10)
#A13020
(x4)
#A21550
14
14
14
14
14
14
14
14
17
17
C
R
R
S
flatedge
flatedge
Insertfourlongwooddowels(17)intothelargerholes
inthetop(C).Pressthetwouppersidemoldings(R)
ontothewooddowels(17)andpressuntilseatedonto
thetop(C).Fastentothetop(C)withscrews(14)as
shown.Positiontheupperfrontmolding(S)as
shown
andattachwithscrews(14)asshown.
finishededge
Besuretousetheholesshown.

15
ameriwoodhome.com
STEP8
5
8
19b
19a
(x4)
#A22610
(x6)
#A12120
(x3)
#A53600
#A84050
safetybracketkit
2
2
2
2
2
5
5
8
19a
19b
sideview
C
Q
S
Donottightenthisscrew.

16
ameriwoodhome.com
STEP9
Proper orientation of CAM LOCK
Tip
Assembly
Quick
1
1
3
(x8)
#A22620
(x8)
#A21660
1
3
3
E
x4

17
ameriwoodhome.com
STEP10
Youwillneedtotaptheconnector(7)
withahammertofullyinsert.Besure
theconnectorispositionedasshown
beforetappingintohole.
Proper orientation of CAM LOCK
Tip
Assembly
Quick
1
2
(x4)
#A22620
(x4)
#A22610
(x4)
#A22920
7
1
1
2
7
7
7
7
2
2
H
I

18
ameriwoodhome.com
STEP
11
1
5
8
(x2)
#A12120
(x2)
#A53600
(x4)
#A22620
1
1
5
8
Proper orientation of CAM LOCK
Tip
Assembly
Quick
G

19
ameriwoodhome.com
STEP12
8
5
2
(x2)
#A12120
(x2)
#A53600
finishededge
(x4)
#A22610
2
8
5
2
F

20
ameriwoodhome.com
STEP13
6
(x4)
#A22910
6
6
6
6
finishededge
rawsurface
D
Besuretouseholesclosesttotheedge.

21
ameriwoodhome.com
STEP
14
finishededge
7
Turnscrewclockwisetolockinplace.
Presstherightbaserail(I)ontothebottom(D)sotheconnectors(7)
engagetheconnectorbolts(6).Turnthescrewintheconnectorclockwise
tolockinplace.
D
I

22
ameriwoodhome.com
STEP
15
I
D
G
U
N
L
O
C
K
LO
C
K
Attachedthebackbaserail(G)totherightbaserail(I)asshown.

23
ameriwoodhome.com
STEP
16
U
N
L
O
C
K
L
O
C
K
D
G
H
7
Turnscrewclockwisetolockinplace.
Presstheleftbaserail(H)ontothebackbaserail(G)asshownmakingsuretheconnectors(7)
intheleftbaserail(H)engagetheconnectorbolts(6)inthebottom(D).Securely fasten the
camlocks(1)andconnectors(7).Attach
thebackbaserail(G)tothebottom(D)usingtwo
screws(5).
5
(x2)
#A12120
5

24
ameriwoodhome.com
STEP
17
U
N
L
O
C
K
L
O
C
K
5
(x2)
#A12120
D
H
I
F
Securethefrontbaserail(F)totheleftandrightbaserails(H&I)asshownthensecureto
thebottom(D)withtwoscrews(5).
5

25
ameriwoodhome.com
STEP18
13
(x2)
#A23030
13
13
A
D
F
J

26
ameriwoodhome.com
STEP19
U
N
L
O
C
K
L
O
C
K
A
E
E
E
E
finishededge

27
ameriwoodhome.com
STEP20
13
(x2)
#A23030
13
13
E
E
E
E
D
B
J

28
ameriwoodhome.com
STEP21
U
N
L
O
C
K
L
O
C
K
C
A
B
R
R
Q

29
ameriwoodhome.com
STEP22
(x36)
#A21110
IMPORTANT!
THEBACKPANELISASTRUCTURALPARTOFTHISUNIT
ANDMUSTBEINSTALLEDPROPERLY.
Withthehelpofanotherperson,carefullyturnyourunitoveronitsfrontsideasshown.Position
thebackpanelasshownmakingsurebottomedgeisflushwiththeedgeofthebottomandside
edgesarealignedsquarelywiththeleftandrightpanels.Nailstraightintothe
backedgeofthe
leftandrightpanels,topandbottomasshown.
9
9
Assurethattheunitissquare.
Distancefromcornertocorner
mustbeequalasshown.
Bottomedgeofbackpaneltobe
flushwithbottomedgeofthe
bottom(D).
Makesurethenotchintheback
panelispositionedhere.
D
T

30
ameriwoodhome.com
STEP23
8
5
(x6)
#A12120
(x3)
#A53600
Q
Q
5
5
5
5
Carefullystandtheunitupright.Attachthreeangle
brackets(8)toafrontrail(Q)asshown.Position
thefrontrail(Q)ontothebottom(D)andsecure
withthreescrews(5).
5
Q
8

31
ameriwoodhome.com
STEP24
5
(x20)
#A12120
(x5)
#A22610
5
2
2
M
N
x1
x4
(x10)
#A54520
20
20
20
5
5
5
Youwillstartthedrawerassemblyinthisstep.All5drawersassemblethesameway.Theonly
differenceistheupperdrawerfront(M)isshorterinheight.
x5

32
ameriwoodhome.com
STEP25
5
(x20)
#A12120
5
5
5
5
M
N
x1
x4
DWR
SIDE
DWR
SIDE
Attachdrawersidestoallfivedrawerfronts(M&N)asshownusingscrews(5).Besurethe
groovesinthedrawersidesarecenteredwiththegrooveinthedrawerfronts.
x5

33
ameriwoodhome.com
STEP26
Proper orientation of CAM LOCK
Tip
Assembly
Quick
U
N
L
O
C
K
L
O
C
K
(x5)
#A22620
(x5)
#A21520
1
1
10
10
N
M
x4
x1
Insertacamlock(1)andcompressiondowel(10)into
allfivedrawerbraces(L).Attachadrawerbrace(L)to
eachdrawerfrontasshown.
L
DWR
SIDE
DWR
SIDE
x5
x5
L

34
ameriwoodhome.com
STEP27
M
N
L
DWR
SIDE
DWR
SIDE
x1
x4
O
rawsurface
x5

35
ameriwoodhome.com
STEP28
DWR
SIDE
L
DWR
SIDE
M
N
DWR
BACK
(x30)
#A21970
x5
12
12
12
12
12
12
Attachadrawerbacktothedrawersidesanddrawerbrace
asshown.Youwillneedahammertolightlytapthedrive
fasteners(12)
.

36
ameriwoodhome.com
STEP29
4
18d
18c
21
(x20)
#A11080
(x10)
#A17250
(x5)
#A56750
(x5)
#A50875
leftdrawerside
rightdrawerside
18c
18d
21
11
11
11
4
4
DWR
SIDE
DWR
SIDE
M
N
x5
Attachedtheslidesfirstandthenthehandle.
markedwitha"L"
markedwitha"R"

37
ameriwoodhome.com
STEP30
For Masonry, Concrete, or other
wall materials:
Consult your local hardware store
for appropriate anchors to securely
attach the safety bracket.
IMPORTANT:THISUNITMUSTBESECURETOTHEWALLTOHELPPREVENTTIPOVER.FOLLOW
THESEINSTR UCTIONSTOINSTALLTHEANTI‐TIPPINGSAFETYBRACKETPROVIDEDWITHTHIS
PRODUCT.
WARNING
Seriousorfatalcrushinginjuriescan
occurfromfurnituretipover.
Topreventtipover:
*Installtipoverrestraintprovided
*placeheaviestitemsin
thelowest
drawers
*Unlessspecificallydesignedto
accomodate,donotsetTVsorother
heavyobjectsonthetopofthisproduct
*Neverallowchildrentoclimborhang
ondrawers,door,orshelves
*Neveropenmorethanonedrawerata
time
Useoftipoverrestraintsmayonly
reduce,but
noteliminatetheriskof
tipover
OPTION1:Attachmentintoawallstud(preferredmethod)
Usingastudfinder,locateastudinthewall.Placeyourunitagainstthewall,withthesafetybracketaligned
inthislocation.Tomakedrivingthescreweasier,youcandrilla1/8"diameterpilothole(3mm)throughthe
safetybracketintothestud.Drivethescrewthroughthe
safetybracketintothewallstud.Tightenthescrew
thatwasnotfullytightenedinstep8.
OPTION2:Attachmentintodrywall
Locate yourunitwheredesiredagainstawallandmarkthewallthroughthesafetybracket,thenmoveyour
unitaside.Drilla3/16"diameterhole(5mm)intothewallboard.Tapthewallanchorintotheholeuntilitis
flush.Moveyourunitintolocationandfastenthewallbracket
tothewallanchorwiththescrew.Tightenthe
screwthatwasnotfullytightenedinstep8.
stud
wallboard
hole
(x1)
#A84050
19c
19d
19c
19d

38
ameriwoodhome.com
STEP31
cabinet member
roller
drawer runner
roller
Note:Thedrawerbracketholesareslotted.Drawer
frontscanbeadjustedbylooseningscrews,making
neededadjustmentsandretighteningscrews.
M
N
N
N
N
Note:Drawerwithshorterdrawer
front(M),goesinthetopdrawer
position.

39
ameriwoodhome.com
MaximumLoads
Warning:Riskofinjurytopersons‐donotplaceatelevisiononthisfurniture.Thisfurnitureis
notapprovedforusewithatelevision.
35lbs
15.8kg
(each drawer)
CertificateofConformity
1.ThiscertificateappliestotheDorelHomeFurnishings,Inc.productidentifiedbythisinstructionmanual.
2.ThiscertificateappliestocomplianceofthisproductwiththeCPSCBanonLead‐ContainingPaint(16CFR1303).
3.Thisproductisdistributedby:DorelHomeFurnishings,Inc.
410
EastFirstStreetSouth
WrightCity,MO63390
636‐745‐3351
4.SiteofManufacture:TiffinOH
5.Seefrontpageofinstructionmanualfordateofmanufacture.
50lbs
22.6kg
Thisunithasbeendesignedtosupportthemaximumloadsshown.Exceedingtheseloadlimits
couldcausesagging,instability,productcollapse,and/orseriousinjury.

40
ameriwoodhome.com
Registeryourproducttoreceivethefollowing:
*Newtrenddetails‐sneakpeekonwhat'snew
*Surveys‐haveavoicewithinourcommunity
*Exclusivedealsanddiscountcodes
*Quickandeasyreplacementpartservice
Toregisteryourproduct,visitameriwoodhome.com
Visityourlocalretailer'swebsite,rateyourpurchased
productandleaveussomefeedback!
Wewouldlike
toextendabig"ThankYou"toallof
ourcustomersfortakingthetimetoassemblethis
AmeriwoodHomeproduct,andtogiveusyour
valuablefeedback.

41
ameriwoodhome.com
CubiertaDelantera
Estelibrodeinstruccionescontieneinformación
IMPORTANTE
deseguridad.Porfavorleaymanténgalopara
referenciaenelfuturo.
NoRegreseesteproducto!
Comuniqueseconnuestroamistosoequipodeservicioalclienteparaobtener
ayuda.
Llamenosal:1‐800‐489‐3351(Gratis)Lunes‐Viernes9am‐5pmCST
Visitar:
www.ameriwoodhome.com
PRECAUCION
Estemueblepuedevolcarseycausargravesheridasy/omuerte.
Anclarelmuebleaunpostedemaderaenlapared(siestoserequiere).
NoPermitaquelosniñosmontenelmueble.
Mantengalosartículosmáspesadosenloscajonesdeabajo.
ConsejosÚtiles(página2)
‐Abrasuartículoeneláreadondeustedplaneautilizarloparaevitarlevantarymoverlomenos
‐Identificar,ordenarycontarlaspiezasantesdeintentarensamblar
‐Lasclavijasdecompresiónsegolpeanconunmartillo
‐LasdiapositivasestánmarcadasconunaR(derecha)yL(izquierda)paralacolocacióncorrecta
‐
Asegúresedequesiempreesteelpuntolocaizadoenlapartesuperiordebloqueadordeleva
estevolteadohaciabordeexterior
‐Utilizartodoslosclavosparaelpaneldeatrasydistribuirlosporigual
‐Elpaneldeatrasdebeutilizarseparaasegurarsedequelaunidadquedefijayfirme
‐Nouse
quimicasfuertesnilimpiadoresabrasivosenestearticulo
‐Nuncaempuje,tireniarrastrelosmuebles
AntesdeQueEmpieces(página3)
‐Leacuidadosamentecadapasoysigaelordencorrecto
‐Separarycontartodassuspiezasyhardware
‐Désesuficienteespacioparaelprocesodeensamble
‐Tengalassiguientesherramientas:destornilladordecabezaplana,#2cabezaPhillips
Destornilladorymartillo
‐Precaución:Siusauntaladroelectrónicooundestornilladoreléctricoparaatornillar,
porfavorasegúrese
quedejedeatornillarcuandoeltonillosesteapretado.Fallarhacerestopuedecausarbarrereltornillo.
Sistemadefijarelbloqueodeleva(página3)
Estasistemadefijarelbloqueodelevaserausadoentodoelprocesoensamble.
Español

42
ameriwoodhome.com
Español
Página8
Fijelamolduraverticaldelantera(J)ylamolduraverticaltrasera(K)enelpanelizquierdo(A)conlos
tornillos(15).
Asegúresedeatornillarenlasuperficiedelamolduraverticaldelanteraconlosagujerosguía.
Página9
Fijelasmolduraslaterales(P)enelpanelizquierdo(A)conlos
tornillos(15).
Nota:lamolduralateral(P)tieneunagujeroadicional.Esteesunagujerodereferencia.Estoespara
indicarqueesteeselfrentedelamolduralateral.
Página11
Fijelamolduraverticaldelantera(J)ylamolduraverticaltrasera(K)enelpanelderecho(B)conlos
tornillos(15).
Asegúresedeatornillarenlasuperficiedelamolduraverticaldelanteraconlosagujerosguía.
Página12
Fijelasmolduraslaterales(P)enelpanelderecho(B)conlostornillos(15).
Nota:lamolduralateral(P)tieneunagujeroadicional.Esteesunagujerodereferencia.Estoespara
indicar
queesteeselfrentedelamolduralateral.
Página14
Insertecuatroclavijasdemaderalargas(17)enlosagujerosmásgrandesenlapartesuperior(C).
Presionelasdosmolduraslateralessuperiores(R)sobrelasclavijasdemadera(17)ypresionehasta
quecalcenenlapartesuperior(C).Fije
alapartesuperior(C)conlostornillos(14)comosemuestraen
lafigura.Coloquelamolduradelanterasuperior(S)yfíjelaconlostornillos(14)comosemuestraenla
figura.
Asegúresedeutilizarlosagujerosquesemuestran.
Página15
Noaprieteestetornillo.
Página17
Golpeeelconector(7)conunmartilloparainsertarloporcompleto.Asegúresedequeelconectoresté
colocadocomosemuestraenlafiguraantesdeinsertarloenelagujero.
Página20
Asegúresedeutilizarlosagujerosmáscercanosalborde.

43
ameriwoodhome.com
Español
Página21
Presioneelrieldelabasederecha(I)enlaparteinferior(D)paraquelosconectores(7)enganchenlospernos
delconector(6).Gireeltornilloenelconectorenelsentidodelasmanecillasdelrelojparafijarloensulugar.
Gireeltornilloenelsentido
delasmanecillasdelrelojparafijarloensulugar.
Página22
Fijeelrieldelabasetrasera(G)alrieldelabasederecha(I)comosemuestraenlafigura.
Página23
Presioneelrieldelabaseizquierda(H)enelrieldelabasetrasera(G)
comosemuestraenlafigura,
asegurándosedequelosconectores(7)enelrieldelabaseizquierda(H)enganchenlospernosdelconector
(6)enlaparteinferior(D).Asegurefirmementelossegurosdeleva(1)ylosconectores(7).
Gireeltornilloenelsentidodelasmanecillas
delrelojparafijarloensulugar.
Acontinuación,fijeelrieldelabasetrasera(G)alaparteinferior(D)condostornillos(5).
Página24
Asegureelrieldelabasedelantera(F)alosrielesdelasbasesizquierdayderecha(HeI)comosemuestra
en
lafigurayluegoasegúreloalaparteinferior(D)condostornillos(5).
Página29
¡IMPORTANTE!
ELPANELTRASEROESUNAPARTEESTRUCTURALDEESTAUNIDADYTIENEQUEINSTALARSE
CORRECTAMENTE.
Conlaayudadeotrapersona,girecuidadosamentelaunidadsobresupartefrontalcomosemuestraenla
figura.Coloqueelpaneltraserocomosemuestraenlafigura,asegurándosedequeelbordeinferior
estéalras
conelbordeinferioryquelosbordeslateralesesténalineadosconlospanelesizquierdoyderecho.Clavede
formarectaenelbordetraserodelospanelesizquierdoyderecho,arribayabajocomosemuestraenla
figura.
Asegúresedequelamuescaenelpanel
traseroestécolocadaaquí.
Asegúresedequelaunidadseacuadrada.
Ladistanciadeesquinaaesquinadebeserigualalaquesemuestra.
Elbordeinferiordelpaneltraserodebeestaralrasconelbordeinferiordelaparteinferior(D).
Página30
Coloquecuidadosamentelaunidadenposición
vertical.Fijetressoportesangulares(8)aunrieldelantero(Q)
comosemuestraenlafigura.Coloqueelrieldelantero(Q)enlaparteinferior(D)yasegúrelocontrestornillos
(5).

44
ameriwoodhome.com
Español
Página31
Comenzaráelensamblajedelcajónenestepaso.Loscincocajonesseensamblandelamismamanera.
Laúnicadiferenciaesqueelfrentedelcajónsuperior(M)esmáscortoenaltura.
Página32
Fijelosladosdelcajónaloscincofrentesdeloscajones(MyN)
comosemuestraenlafiguraconlos
tornillos(5).Asegúresedequelasranurasenlosladosdelcajónesténcentradasconlaranuraenlos
frentesdelcajón.
Página33
Inserteunsegurodelevas(1)yunpasadordecompresión(10)enloscincosoportesdeloscajones(L).
Fijeunsoportedecajón(L)acadafrentedelcajóncomosemuestraenlafigura.
Página35
Fijeuncajóntraseroalosladosysoportedelcajóncomosemuestraenlafigura.Necesitaráunmartillo
paragolpearligeramentelossujetadoresdelaunidad(12).
Página36
Fijelascorrederas
primeroyluegolamanilla.
Página37
Paramampostería,concretouotrotipodeparedes:
Acudeatuferreteríalocalparaobtenerlosanclajesadecuadosparafijardeformaseguraelsoportede
seguridad.
IMPORTANTE:ESTAUNIDADDEBEASEGURARSEAUNAPAREDPARAEVITARQUESEVUELQUE.SIGUE
ESTASINSTRUCCIONESPARAINSTALARELSOPORTEDESEGURIDADANTICAÍDA
QUESEPROPORCIONA
JUNTOCONESTEPRODUCTO.
ADVERTENCIA
Unmueblealvolcarsepuedeprovocarheridasporaplastamientoquepuedenresultargraveso
mortales.
Paraprevenirqueunmueblesevuelque:
*Instalaeldispositivocontracaídasqueseproporciona
*Colocalosartículosmáspesadosenloscajonesdemásabajo
*
Amenosqueestéespecíficamentediseñadoparatalfin,nocoloquestelevisionesniningúnotro
objetopesadosobreestemueble
*Nuncapermitasquelosniñossesubanocuelguendeloscajones,puertasorepisas.
*Nuncaabrasmásdeuncajónalavez
Elusodelosdispositivos
contracaídaspuedereducir,peronoeliminarporcompletoelriesgodequeel
mueblesevuelque.

45
ameriwoodhome.com
OPCIÓN1:acopladoauntravesañodelapared(métodorecomendado)
Ubicauntravesañoenlaparedutilizandounlocalizadordetravesaños.Colocatuunidadcontrala
pared,conelsoportedeseguridadalineadoeneselugar.Parafacilitarlaentradadeltornillo,puedes
perforarunagujeroguíade1/8"(3
mm)dediámetroatravésdelsoportedeseguridadhastallegaral
travesaño.Introduceeltornilloeneltravesañodelaparedatravésdelsoportedeseguridad.Aprietael
tornilloquenoapretastecompletamenteenelpaso5.
OPCIÓN2:acopladoaunpaneldepared
Colocatuunidaden
ellugardeseadocontraunaparedymarcalaparedatravésdelsoportede
seguridad,luegoretiratuunidadhaciaunlado.Perforaunagujerode3/16"dediámetro(5mm)enel
tablerodelapared.Golpeaelanclajedeparedparaintroducirloenelagujerohastaquequede
aras.
Vuelveacolocartuunidadensulugarysujetaelsoportedeparedalanclajedeparedconeltornillo.
Aprietaeltornilloquenoapretastecompletamenteenelpaso10.
Página38
Nota:elcajónconelfrentedecajónmáscorto(M),vaenlaposición
superiordelcajón.
Página39
CARGAMAXIMA
Estaunidadhasidodiseñadaparasoportarlacargamáximaanotada.Elexcederestoslímitespuede
causarinestabilidad,colapsarsey/ocausarseriaslesiones.
ADVERTENCIA:Riesgodelesionesalaspersonas‐nocoloqueuntelevisorsobremuebles.Estemueble
noestáaprobadoparasuuso
conuntelevisor.
Página40
Registresuproductopararecibirlosiguiente:
*Detallesdenuevastendencias‐Vistazoalonuevo
*Encuestas‐alecsuvozentresucomunidad
*Códigosdeofertasydescuentosexclusivos
*Fácilyrápidoserviciodepartesderemplace
Pararegistrarsuproducto,visiteameriwoodhome.com
Clasificasiónde5
estrellas
Visiteelsitiowebdesutiendalocal,califiquesucomprado
ydenossuscomentarios!
Nosgustaríaenviarungran"Agradecimiento"atodosnuestrosclientesportomarseeltiempode
ensamblaresteproductodeAmeriwoodHome,ypordarnossusvaliososcomentarios.
Gracias
Español

46
ameriwoodhome.com
CouvertureAvant
CELIVRETD'INSTRUCTIONCONTIENTDESINFORMATIONS
IMPORTANTES
SURLASÉCURITÉ.VEUILLEZLIRE
ETGARDERPOURUNERÉFÉRENCEFUTURE
Neretournezpasceproduit!
Contacteznotreéquipedeserviceàlaclientèleamicaled'abordpourobtenir
del'aide.
Appelez‐nous:
1‐800‐489‐3351(sansfrais)duLundiauVendredide9hà17hHeureCentrale
Visitez:
www.ameriwoodhome.com
ATTENTION
Lemeublepeutbasculeretcauserdesblessuresgravesoulamort.
Ancrerlemeubleàuneplanchemuraledanslemur(siindiqué).
Nelaissezpaslesenfantsgrimpersurlemeuble.
Placezlesarticleslourdssurlesétagèresoudanslestiroirsinférieurs.
AstucesUtiles(page2)
‐Ouvrezvotrearticledanslazonequevousprévoyezdelegarderpourmoinsdelevagelourd
‐Identifier,trieretcompterlespiècesavantd'essayerd'assembler
‐LesgoujonsdecompressionsonttaraudésavecunMarteau
‐Lesglissièressontmarquéesd'unR(droit)etd'unL(gauche)pourunbonplacement
‐
Assurez‐voustoujoursdefairefacelapointesituésurlehautdelaSerruredeCameverslebordextérieur
‐Utilisertouslesclousfournispourlepanneauarrièreetlesrépartirégalement
‐Lepanneauarrièredoitêtreutilisépourvousassurerquevotreappareilestrobuste
‐N'utilisezpasde
produitschimiquesagressifsoudenettoyantsabrasifssurcetappareil
‐Nejamaispousser,tirer,oufaireglisservotremeuble
AvantdeCommencer(page3)
‐Lisezattentivementchaqueétapeetsuivezlebonordre
‐Séparezetcompteztoutesvospiècesetmatériaux
‐Donnez‐voussuffisammentdeplacepourl'assemblage
‐Avoirlesoutilssuivants:tournevisàtêteplate,#2tournevisPhillips,etMarteau
‐
Attention:Sivousutilisezuneperceuseélectriqueouuntournevisélectriquepourvisser,veillezàralentir
etarrêterlorsquelavisestbienserrée.Lenon‐respectdecetteconsignepeutendommagerlavis.
SystèmedeFixationdeCame(page3)
CeSystèmedeFixationdeCameserautilisétoutaulongdel'assemblage
Français

47
ameriwoodhome.com
Français
Page8
Àl'aidedesvis(15),attachezlamoulureverticaleavant(J)etlamoulureverticalearrière(K)aupanneau
degauche(A).
Veuillezs'assurerdevisserdanslasurfacedumoulureverticalavantaveclestrouspilotes.
Page9
Attachezlesmoulureslatérales(P)aupanneaudegauche(A)àl'aide
desvis(15).
Remarque:Lamoulurelatérale(P)comporteuntrousupplémentaire.C'estuntrouderéférence.C'est
pourindiquerquec'estl'extrémitéavantdelamoulurelatérale.
Page11
Àl'aidedesvis(15),attachezlamoulureverticaleavant(J)etlemoulureverticalarrière(K)aupanneau
de
droite(B).
Veuillezs'assurerdevisserdanslasurfacedumoulureverticalavantaveclestrouspilotes.
Page12
Attachezlesmoulureslatérales(P)aupanneaudedroite(b)àl'aidedesvis(15).
Remarque:Lamoulurelatérale(P)comporteuntrousupplémentaire.C'estuntrouderéférence.C'est
pourindiquer
quec'estl'extrémitéavantdelamoulurelatérale.
Page14
Insérezquatrelongueschevillesenbois(17)danslestrouslesplusgrandsdanslehaut(C).Appuyezsur
lesdeuxmoulureslatéralessupérieures(R)surleschevillesenbois(17)etappuyezjusqu'àcequ'elles
soientposéessurledessus
(C).Fixezsurledessus(C)aveclesvis(14)commeindiqué.Positionnezla
moulureavantsupérieure(S)commeindiquéetfixez‐laaveclesvis(14)commeindiqué.
Assurez‐vousd'utiliserlestrousindiqués.
Page15
Nepasserrercettevis.
Page17
Vousdevrezfrapperleconnecteur(3)avecunmarteaupourl'insérercomplètement.Assurez‐vousque
leconnecteurestpositionnételquedémontréavantdelepousserdansletrou.
Page20
Veillezàutiliserlestrouslesplusprochesdubord.

48
ameriwoodhome.com
Français
Page21
Appuyezsurleraildebasedroit(I)danslefond(D)desortequelesconnecteurs(7)s'engagentdans
lesboulonsdeconnecteur(6).Tournezlavisdansleconnecteurdanslesensdesaiguillesd'une
montrepourverrouillerenplace.
Tournezlavisdanslesensdesaiguilles
d'unemontrepourlaverrouiller.
Page22
Fixezleraildebasearrière(G)auraildebasedroit(I)commeindiqué.
Page23
Appuyezsurleraildebasegauche(H)surleraildebasearrière(G)commeindiquéenvousassurant
quelesconnecteurs(7)duraildebase
gauche(H)engagentlesboulonsdeconnecteur(6)danslebas
(D).Fixezsolidementlesverrousàcame(1)etlesconnecteurs(7).
Tournezlavisdanslesensdesaiguillesd'unemontrepourlaverrouiller.
Ensuite,fixezleraildebasearrière(G)aufond(D)àl'aidededeux
vis(5).
Page24
Fixezleraildebaseavant(F)auxrailsdebasegaucheetdroit(HetI)commeindiqué,puisfixez‐lesau
fond(D)àl'aidededeuxvis(5).
Page29
IMPORTANT!LEPANNEAUARRIÈREESTUNEPARTIESTRUCTURELLEDECETTEUNITÉETDOITÊTRE
INSTALLÉCORRECTEMENT.
Avecl'aided'uneautrepersonne,retournezsoigneusementvotreunitésursafaceavantcomme
indiqué.Positionnezlepanneauarrièrecommeindiquéenvousassurantquelebordinférieurest
alignéavecleborddubasetquelesbordslatérauxsontalignésaveclespanneauxgaucheetdroit.
Clouezdirectement
surlebordarrièredespanneauxgaucheetdroit,enhautetenbascommeindiqué
Assurez‐vousquel'encochedupanneauarrièreestpositionnéeici.
Assurez‐vousquel'unitéestcarrée.
Ladistanced'uncoinàl'autredoitêtreégaleàcelleindiquée.
Lebordinférieurdupanneauarrièredoit
êtrealignéaveclebordinférieurdufond(D).
Page30
Tenezl'unitéavecprécaution.Fixeztroiséquerres(8)àunrailavant(Q)commeindiqué.Positionnezle
railavant(Q)surlefond(D)etfixez‐leavectroisvis(5).

49
ameriwoodhome.com
Français
Page31
Vousallezdémarrerl'assemblagedutiroirdanscetteétape.Tousles5tiroirss'assemblentdelamême
manière.Laseuledifférenceestquel'avantdutiroirsupérieur(M)estpluscourt.
Page32
Fixezlescôtésdutiroirsurlescinqfacesdutiroir(MetN)commeindiquéà
l'aidedesvis(5).
Assurez‐vousquelesrainuresdanslescôtésdutiroirsontcentréesaveclarainuredanslesfaçadesdes
tiroirs.
Page33
Insérezunverrouàcame(1)etunechevilledecompression(10)danslescinqsupportsdetiroir(L).
Fixezunsupportdetiroir(L)
àchaquefaçadedutiroircommeindiqué.
Page35
Fixezunarrièredetiroirsurlescôtésdetiroiretlesupportdetiroircommeindiqué.Vousaurezbesoin
d'unmarteaupourtaperlégèrementsurlesattaches(12).
Page36
Fixezlesglissoiresd'abord,puislapoignée.
Page37
Pourlamaçonnerie,
lebétonoud'autresmatériauxdemur:
Visitervotrequincaillerielocalepourobtenirdesancresappropriéesquipermettrontdefixer
solidementlesupportdesécurité.
IMPORTANT:CEMEUBLEDOITETRESÉCURISÉAUMURPOUREVITERQU'ILNEBASCULE.SUIVRECES
INSTRUCTIONSPOURINSTALLERLESUPPORTDESÉCURITÉANTI‐BASCULEMENT
FOURNIAVECCE
PRODUIT.
AVERTISSEMENT
Desblessuresgravesoumortellespeuventseproduireencasdebasculementdesmeubles.
Pouréviterlebasculement:
*Installerlapièceanti‐basculementfournie
*Placerlesobjetslespluslourdsdanslestiroirslesplusbas
*Saufsispécifiquementconçupouryetre
installé,nepasposerdetéléviseuroud'autresobjetslourds
surdeceproduit
*Nejamaislaisserenfantsgrimperous'accrochersurlestiroirs,lesportesoulesétagères
*Nejamaisouvrirplusd'untiroiràlafois
L'utilisationdespiècesanti‐basculementpeutuniquementréduire,maispaséliminerle
risquede
basculement.

50
ameriwoodhome.com
OPTION1:ancragesuruncolombage(méthod eprivilégiée)
Localisezuncolombagedanslemuràl'aided'undétecteurdecolombage.Placezvotremeublecontre
lemurenmaintenantlesupportdesécuritéalignéaumemeendroit.Pourfaciliterl'insertiondelavis,
ilestrecommandédeperceruntroud'essai
de1/8"dediamètre(3mm)àtraverslesupportde
sécuritédanslecolombage.Passerlavisàtraverslesupportdesécuritépourl'insérerdansle
colombage.Serrerlavisquin'apasétécomplètementserréeàl'étape10.
OPTION2:ancragedanslacloisonsèche
Positionnezvotre
meublesurlazonecibléecontreunmuretfaitesunemarquesurlemuràtraversle
supportdesécurité,puisdéplacezvotremeubledecôté.Percezuntroude3/16"dediamètre(5mm)
danslepanneaumural.Tapezsurl'ancremuralepourl'introduiredansletroujusqu'àce
qu'ilsoit
parfaitementalignéetinstallé.Placezvotremeublesursonemplacementetfixerlesupportmuralà
l'ancremuraleaveclavis.Serrezlavisquin'apasétécomplètementserréeàl'étape10.
Page38
Remarque:Letiroiravecl'avantdutiroirlepluscourt(M)seplace
danslapositionsupérieuredutiroir.
Page39
CHARGESMAXIMALES
Cemeubleaétéconçupoursupporterleschargesmaximalesindiquées.Enexcédantceslimites de
charge,lemeublepourraitdevenirinstable,s'effondrer,et/oucauserdesblessuresgraves.
AVERTISSEMENT:Risquedeblessurecorporelle‐nepasplacerunetélévisionsurcemeuble.Ce
meublen'estpasapprouvépouruneutilisationavecunetélévision.
Page40
Enregistrezvotreproduitpourrecevoirlesélémentssuivantes:
*Détailssurlesnouvellestendances‐unaperçusurlesnouveautés
*Sondages‐avoirunevoixauseindenotrecommunauté
*Offresexclusivesetcodespromo
*Servicedepiècesderechange
rapideetfacile
Pourenregistrervotreproduit,visitezameriwoodhome.com
5Étoiles
VisitezlesiteWebdevotredétaillantlocal,évaluezvotreproduit
achetéetlaissez‐nousquelquescommentaires!
Noustenonsàoffrirungrand"Merci"àtousnosclientspouravoirprisletempsd'assemblerceproduit
"AmeriwoodHome",etdenous
donnervoscommentairesprécieux.
Merci
Français
1/50