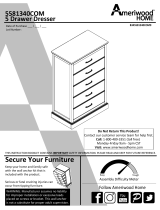
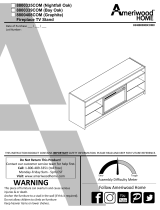
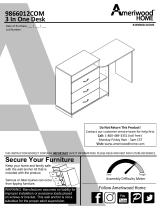
Ameriwood Home 7226213EBL Manual de usuario

Tipo
Manual de usuario

Ameriwood Home 7226213EBL es un armario de 3 puertas con un diseño elegante y funcional que se adapta a cualquier habitación de tu hogar. Está fabricado con materiales de alta calidad y cuenta con un acabado resistente a los arañazos y las manchas. El armario tiene un amplio espacio de almacenamiento con 3 estantes ajustables y una barra para colgar ropa. También incluye un kit de anclaje de pared para mayor seguridad.

Ameriwood Home 7226213EBL es un armario de 3 puertas con un diseño elegante y funcional que se adapta a cualquier habitación de tu hogar. Está fabricado con materiales de alta calidad y cuenta con un acabado resistente a los arañazos y las manchas. El armario tiene un amplio espacio de almacenamiento con 3 estantes ajustables y una barra para colgar ropa. También incluye un kit de anclaje de pared para mayor seguridad.

7226213EBL
3DoorWardrobe
B347226213EBL0
THISINSTRUCTIONBO OKLETCONTAINS
IMPORTANT
SAFETYINFORMATION.PLEASEREADANDKEEPFORFUTUREREFERENCE.
FollowAmeriwoodHome
Tube
You
DateofPurchase___/___/___
LotNumber:
DoNotReturnThisProduct!
Contactourcustomerserviceteamforhelpfirst.
Call:18004893351(tollfree)
MondayFriday9am‐5pmCST
Visit:www.ameriwoodhome.com
AssemblyDifficultyMeter
Easy
Tough
Keepyourhomeandfamilysafe
withthewallanchorkitthatis
includedwiththeproduct.
Seriousorfatalcrushinginjuriescan
occurfromtippingfurniture.
SecureYourFurniture
WARNING:Manufacturerassumesnoliability
forimproperinstallationorexcessiveloads
placedonscrewsorbracket.Thiswallanchor
isnotasubstituteforproperadultsupervision.
ContactUs!
HelpfulHints
2
ameriwoodhome.com
DoNOTreturnthisproduct!
Contactourfriendlycustomerserviceteamfirstforhelp.
Callus!
18004893351
MondayFriday
9am‐5pmCST
Visitameriwoodhome.comtoviewthe
limitedwarrantyvalidintheU.S.andCanada.
AssemblyTips
‐Openyouritemintheareayouplantokeepittoavoidexcessiveheavylifting.
‐Identify,sortandcountthe partsbeforeattemptingassembly.
‐Compressiondowelsarelightlytappedinwithahammer.
‐Slidesarelabeledwitha
R
(right)and
L
(left)forproperplacement.
‐MakesuretoalwaysfacethepointonthetopoftheCamLocktowardsthe
outeredge.
‐Useallthenailsprovidedforthebackpanelandspreadthemoutequally.
‐Backpanelmustbeusedtomakesureyourunitissturdy.
‐Do
NOTuseharshchemicalsorabrasivecleanersonthisitem.
‐Neverpush,pull,ordragyourfurniture.
Tube
You
PEOPLENEEDEDFORASSEMBLY:12
ESTIMATEDASSEMBLYTIME:2HOURS
3
ameriwoodhome.com
BeforeYouStart
Q
u
i
c
k
T
i
p
A
s
s
e
m
b
l
y
Readthrougheachstepcarefullyandfollowtheproperorder
Separateandcountallyourpartsandhardware
Giveyourselfenoughroomfortheassemblyprocess
Havethefollowingtools:FlatHeadScrewdriver,#2PhillipsHead
ScrewdriverandHammer
Caution:Ifusingapowerdrillorpowerscrewdriverforscrewing,
pleasebeawaretoslowdownandstopwhenscrewistight.
Failuretodosomayresultinstrippingthescrew.
4
ameriwoodhome.com
BoardIdentification
Notactualsize
Thispartispaperboard
construction.Itisnotmade
fromwood,butisrequiredfor
theassemblyofyourunit.
LeftPanel
37226213010
RightPanel
37226213020
Partition
37226213030
Bottom
37226213050
Top
37226213040
Shelf
37226213060
SmallShelf
37226213070
x2
Adjustableshelf
37226213080
x2
kick
37226213090
x3
door
37226213100
BackPanel
K722600000
A
B
C
D
E
F
G H
I
J
K
5
ameriwoodhome.com
BoardIdentification
Notactualsize
Thispartispaperboard
construction.Itisnotmade
fromwood,butisrequiredfor
theassemblyofyourunit.
K
A
B
C
D
E
F
G
H
H
I
J
J
J
6
ameriwoodhome.com
PartList
ActualSize
(x24)
#A23030
confirmatscrew
(x20)
#A21660
wooddowel
(x4)
#A53600
anglebracket
(x8)
#A12210
#8x1/2"panhead
(x2)
#A11080
#6x7/16"flathead
(x2)
#A82020
rodbracket
(x44)
#A21110
nail
(x8)
#A80250
shelfsupport
(x20)
#A24037
screwheadcap
(x6)
#A89210
pad
(x6)
#A12700
#8x7/8"panhead
1
2
3
4
5
6
7
8
9
10
11
7
ameriwoodhome.com
PartList
NotActualSize
(x9)
#A65615
hinge
(x3)
#A50690
handle
(x1)
#A84050
safetybracketkit
(x1)
#I20410
wardroberod
12
13
14a
14b
14c
14d
15
8
ameriwoodhome.com
STEP
1
12
10
5
(x3)
#A65615
(x1)
#A82020
(x1)
#A11080
12
Loosenscrewandseparate
hingeplatefromhingearm.
5
10
12
finishededge
A
9
ameriwoodhome.com
STEP2
5
10
12
12
2
(x1)
#A11080
Loosenscrewandseparate
hingeplatefromhingearm.
finishededge
(x1)
#A82020
(x3)
#A65615
(x4)
#A21660
2
2
5
10
12
Notice,thewooddowels(2)willinsertintothelargerendholes.
C
2
2
10
ameriwoodhome.com
STEP3
12
12
(x3)
#A65615
Loosenscrewandseparate
hingeplatefromhingearm.
finishededge
B
12
11
ameriwoodhome.com
STEP
4
2
14b
14a
2
2
(x4)
#A21660
(x1)
#A84050
14a
14b
2
2
D
finishededge
Notice,thewooddowels(2)willinsertintothelargerendholes.
Donotfullytightenthisscrew.
unfinished
surface
12
ameriwoodhome.com
STEP
5
2
2
2
(x8)
#A21660
Notice,thewooddowels(2)willinsertintothelargerendholes.
2
2
2
2
F
G
13
ameriwoodhome.com
STEP
6
2
2
2
Notice,thewooddowels(2)willinsertintothelargerendholes.
3
4
(x4)
#A21660
(x4)
#A53600
(x8)
#A12210
finishededge
2
2
E
I
I
3
4
4
14
ameriwoodhome.com
STEP
7
1
(x4)
#A23030
1
1
finishededge
unfinished
surface
unfinished
surface
C
F
G
*rawedgesareshaded
rod bracket on this surface
15
ameriwoodhome.com
STEP8
1
1
1
(x4)
#A23030
finishededge
finishededge
finished
surface
G
C
F
1
1
E
D
*rawedgesareshaded
16
ameriwoodhome.com
STEP9
1
(x16)
#A23030
finishededge
1
1
finishededge
*rawedgesareshaded
1
1
1
1
1
1
1
1
A
B
C
D
E
F
G
17
ameriwoodhome.com
STEP10
IMPORTANT!
THEBACKPANEL ISASTRUCTURALPARTOFTHISUNIT
ANDMUSTBEINSTALLEDPROPERLY.
Attachedthebackpanelasshownnailingstraightintotherawedges.
Assurethattheunitissquare.Distancefromcornertocornermustbeequalasshown.
(x44)
#A21110
7
Besurethebackpanelisflush
withthebottomedgeofthe
bottom(E).
Assurethattheunitissquare.Distance
fromcornertocornermustbeequalas
shown.
7
K
unfinished
surface
18
ameriwoodhome.com
STEP
11
6
13
12
(x6)
#A12700
(x9)
#A65615
(x3)
#A50690
12
6
13
J
x3
12
12
6
19
ameriwoodhome.com
STEP12
For Masonry, Concrete, or other
wall materials:
Consult your local hardware store
for appropriate anchors to securely
attach the safety bracket.
IMPORTANT:THISUNITMUSTBESECURETOTHEWALLTOHELPPREVENTTIPOVER.FOLLOW
THESEINSTR UCTIONSTOINSTALLTHEANTITIPPINGSAFETYBRACKETPROVIDEDWITHTHIS
PRODUCT.
WARNING
Seriousorfatalcrushinginjuriescan
occurfromfurnituretipover.
Topreventtipover:
*Installtipoverrestraintprovided
*Placeheaviestitemsin
thelowest
drawers
*Unlessspecificallydesignedto
accomodate,donotsetTVsorother
heavyobjectsonthetopofthisproduct
*Neverallowchildrentoclimborhang
ondrawers,door,orshelves
*Neveropenmorethanonedrawerata
time
Useoftipoverrestraintsmayonly
reduce,
butnoteliminatetheriskof
tipover
OPTION1:Attachmentintoawallstud(preferredmethod)
Usingastudfinder,locateastudinthewall.Placeyourunitagainstthewall,withthesafetybracketaligned
inthislocation.Tomakedrivingthescreweasier,youcandrilla1/8"diameterpilothole(3mm)throughthe
safetybracketintothestud.Drivethescrewthroughthe
safetybracketintothewallstud.Tightenthescrew
thatwasnotfullytightenedinstep4.
OPTION2:Attachmentintodrywall
Locate yourunitwheredesiredagainstawallandmarkthewallthroughthesafetybracket,thenmoveyour
unitaside.Drilla3/16"diameterhole(5mm)intothewallboard.Tapthewallanchorintotheholeuntilitis
flush.Moveyourunitintolocationandfastenthewallbracket
tothewallanchorwiththescrew.Tightenthe
screwthatwasnotfullytightenedinstep4.
stud
wallboard
hole
14d
14c
(x1)
#A84050
14c
14d
20
ameriwoodhome.com
STEP13
Loosen screw C
Adjust door.
Tighten screw C
*side view
Suelte el tornillo C
Acomode la puerta.
Ajuste el tornillo C
*la vista lateral
Défaites le vis C
Ajustez la porte.
Serrez le vis C
*le côté envisagent
Loosen screw C
Turn screw B to
move door.
Tighten screw C
Suelte el tornillo C
Dé vuelta el tornillo B
para mover la puerta.
Ajuste el tornillo C
Défaites le vis C
Le vis du tour B
déplacer la porte.
Serrez le vis C
Loosen screw A
Adjust door.
Tighten screw A
Suelte el tornillo A
Acomode la puerta.
Ajuste el tornillo A
Défaites le vis A
Ajustez la porte.
Serrez le vis A
12
A
A
C
B
Slide hinge arm onto hinge plate
and tighten screw.
J
J
J
11
(x6)
#A89210
11
11
Applyrubberpadontotopand
bottomcornerswheredoor
meetsshelf.
DoorAdjustment
21
ameriwoodhome.com
STEP
14
9
8
(x8)
#A80250
(x20)
#A24037
15
H
H
8
8
9
9
9
9
Insert closet rod (15) into
rod brackets (10). Insert
shelf supports (8) at the
desired location and place
the adjustable shelves (H)
onto the supports (8).
Press the screw head caps
(9) over any exposed screw
heads. You may need to
tap lightly with a hammer to
securely fasten.
15
(x1)
#I20410
22
ameriwoodhome.com
MaximumLoads
Warning:Riskofinjurytopersons‐donotplaceatelevisiononthisfurniture.Thisfurnitureis
notapprovedforusewithatelevision.
0lbs
0kg
CertificateofConformity
1.ThiscertificateappliestotheDorelHomeFurnishings,Inc.productidentifiedbythisinstructionmanual.
2.ThiscertificateappliestocomplianceofthisproductwiththeCPSCBanonLeadContainingPaint(16CFR1303).
3.Thisproductisdistributedby:DorelHomeFurnishings,Inc.
410
EastFirstStreetSouth
WrightCity,MO63390
6367453351
4.SiteofManufacture:TiffinOH
5.Seefrontpageofinstructionmanualfordateofmanufacture.
25lbs
11.3kg
Thisunithasbeendesignedtosupportthemaximumloadsshown.Exceedingtheseloadlimits
couldcausesagging,instability,productcollapse,and/orseriousinjury.
50lbs
22.6kg
(closet rod)
25lbs
11.3kg
25lbs
11.3kg
25lbs
11.3kg
25lbs
11.3kg
25lbs
11.3kg
23
ameriwoodhome.com
Registeryourproducttoreceivethefollowing:
*Newtrenddetails‐sneakpeekonwhat'snew
*Surveys‐haveavoicewithinourcommunity
*Exclusivedealsanddiscountcodes
*Quickandeasyreplacementpartservice
Toregisteryourproduct,visitameriwoodhome.com
Visityourlocalretailer'swebsite,rateyourpurchased
productandleaveussomefeedback!
Wewouldlike
toextendabig"ThankYou"toallof
ourcustomersfortakingthetimetoassemblethis
AmeriwoodHomeproduct,andtogiveusyour
valuablefeedback.
24
ameriwoodhome.com
CubiertaDelantera
Estelibrodeinstruccionescontieneinformación
IMPORTANTE
deseguridad.Porfavorleaymanténgalo
parareferenciaenelfuturo.
NoRegreseesteproducto!
Comuniqueseconnuestroamistosoequipodeservicioalclienteparaobtener
ayuda.
Llamenosal:18004893351(Gratis)Lunes‐Viernes9am‐5pmCST
Visitar:
www.ameriwoodhome.com
PRECAUCION
Estemueblepuedevolcarseycausargravesheridasy/omuerte.
Anclarelmuebleaunpostedemaderaenlapared(siestoserequiere).
NoPermitaquelosniñosmontenelmueble.
Mantengalosartículosmáspesadosenloscajonesdeabajo.
ConsejosÚtiles(página2)
‐Abrasuartículoeneláreadondeustedplaneautilizarloparaevitarlevantarymoverlomenos
‐Identificar,ordenarycontarlaspiezasantesdeintentarensamblar
‐Lasclavijasdecompresiónsegolpeanconunmartillo
‐LasdiapositivasestánmarcadasconunaR(derecha)yL(izquierda)paralacolocacióncorrecta
‐
Asegúresedequesiempreesteelpuntolocaizadoenlapartesuperiordebloqueadordeleva
estevolteadohaciabordeexterior
‐Utilizartodoslosclavosparaelpaneldeatrasydistribuirlosporigual
‐Elpaneldeatrasdebeutilizarseparaasegurarsedequelaunidadquedefijayfirme
‐Nouse
quimicasfuertesnilimpiadoresabrasivosenestearticulo
‐Nuncaempuje,tireniarrastrelosmuebles
AntesdeQueEmpieces(página3)
Leacuidadosamentecadapasoysigaelordencorrecto
Separarycontartodassuspiezasyhardware
Désesuficienteespacioparaelprocesodeensamble
Tengalassiguientesherramientas:destornilladordecabezaplana,#2cabezaPhillips
Destornilladorymartillo
Precaución:Siusauntaladroelectrónicooundestornilladoreléctricoparaatornillar,
porfavorasegúrese
quedejedeatornillarcuandoeltonillosesteapretado.Fallarhacerestopuedecausarbarrereltornillo.
Sistemadefijarelbloqueodeleva(página3)
Estasistemadefijarelbloqueodelevaserausadoentodoelprocesoensamble.
Página8
Aflojeeltornilloyseparelapaladelabisagradelsoporte.
Español
25
ameriwoodhome.com
Español
Página9
Aflojeeltornilloyseparelapaladelabisagradelsoporte.
Fíjeseenquelospernosdemadera(2)seinsertenenlosorificiosmásgrandesdelosextremos.
Página10
Aflojeeltornilloyseparelapaladelabisagradelsoporte.
Página11
Noaprieteestetornillodel
todo.
Fíjeseenquelospernosdemadera(2)seinsertenenlosorificiosmásgrandesdelosextremos.
Página12
Fíjeseenquelospernosdemadera(2)seinsertenenlosorificiosmásgrandesdelosextremos.
Página13
Fíjeseenquelospernosdemadera(2)seinsertenen
losorificiossgrandesdelosextremos.
Página17
¡IMPORTANTE!ELPANELTRASEROESUNAPARTEESTRUCTURALDEESTAUNIDADYSEDEBEINSTALAR
CORRECTAMENTE.
Acopleelpaneltraserocomosemuestraclavandodirectamenteenlosbordesdelapieza.
Asegúresedequelaunidadestéaescuadra.Ladistanciadeesquinaaesquinadebeserigualalaindicada.
Asegúresedequelaunidadestéaescuadra.Ladistanciadeesquinaaesquinadebeser
igualalaindicada.
Asegúresedequeelpaneltraseroestéarasconelbordeinferiordelaparteinferior(E).
Página19
Paramampostería,concretouotrotipodeparedes:
Acudeatuferreteríalocalparaobtenerlosanclajesadecuadosparafijardeformaseguraelsoportede
seguridad.
IMPORTANTE:ESTAUNIDADDEBEASEGURARSEAUNAPAREDPARAEVITARQUESEVUELQUE.SIGUE
ESTASINSTRUCCIONESPARAINSTALARELSOPORTEDESEGURIDADANTICAÍDA
QUESEPROPORCIONA
JUNTOCONESTEPRODUCTO.
ADVERTENCIA
Unmueblealvolcarsepuedeprovocarheridaspor aplastamientoquepuedenresultargraveso
mortales.
Paraprevenirqueunmueblesevuelque:
*Instalaeldispositivocontracaídasqueseproporciona
26
ameriwoodhome.com
*Instalaeldispositivocontracaídasqueseproporciona
*Colocalosartículosmáspesadosenloscajonesdemásabajo
*Amenosqueestéespecíficamentediseñado paratalfin,nocoloquestelevisionesniningúnotro
objetopesadosobreestemueble
*Nuncapermitasquelosniñossesubanocuelguen
deloscajones,puertasorepisas.
*Nuncaabrasmásdeuncajónalavez
Elusodelosdispositivoscontracaídaspuedereducir,peronoeliminarporcompletoelriesgodeque
elmueblesevuelque.
OPCIÓN1:acopladoauntravesañodelapared(métodorecomendado)
Ubicauntravesañoenlaparedutilizandounlocalizadordetravesaños.Colocatuunidadcontrala
pared,conelsoportedeseguridadalineadoeneselugar.Parafacilitarlaentradadeltornillo,puedes
perforarunagujeroguíade1/8"(3
mm)dediámetroatravésdelsoportedeseguridadhastallegaral
travesaño.Introduceeltornilloeneltravesañodelaparedatravésdelsoportedeseguridad.Aprieta
eltornilloquenoapretastecompletamenteenelpaso4.
OPCIÓN2:acopladoaunpaneldepared
Colocatuunidadenellugardeseadocontraunaparedymarcalaparedatravésdelsoportede
seguridad,luegoretiratuunidadhaciaunlado.Perforaunagujerode3/16"dediámetro(5mm)enel
tablerodelapared.Golpea
elanclajedeparedparaintroducirloenelagujerohastaquequedearas.
Vuelveacolocartuunidadensulugarysujetaelsoportedeparedalanclajedeparedconeltornillo.
Aprietaeltornilloquenoapretastecompletamenteenelpaso4.
Página20
Desliceelsoportedelabisagrasobrelapalayaprieteeltornillo.
Coloqueunaalmohadilladegomaenlasesquinassuperioreinferiordondelapuertaseuneconelestante.
Página21
Insertelavarilladelarmario(15)enlossoportesdelavarilla(10).Ubiquelossoportes
delestante(8)enel
lugardeseadoycoloquelosestantesajustables(H)sobrelossoportes(8).Coloquelostaponesroscados(9)
sobrelostornillosquequedendescubiertos.Esposiblequelosdebagolpearsuavementeconunmartillopara
quequedenbienajustados.
Español
27
ameriwoodhome.com
Español
Página22
CARGAMAXIMA
Estaunidadhasidodiseñadaparasoportarlacargamáximaanotada.Elexcederestoslímitespuede
causarinestabilidad,colapsarsey/ocausarseriaslesiones.
ADVERTENCIA:Riesgodelesionesalaspersonas‐nocoloqueuntelevisorsobremuebles.Este
mueblenoestáaprobadoparasuusoconuntelevisor.
Página23
Registresuproductopararecibirlosiguiente:
*Detallesdenuevastendencias‐Vistazoalonuevo
*Encuestas‐alecsuvozentresucomunidad
*Códigosdeofertasydescuentosexclusivos
*Fácilyrápidoserviciodepartesderemplace
Pararegistrarsuproducto,visiteameriwoodhome.com
Clasificasiónde5estrellas
Visiteel
sitiowebdesutiendalocal,califiquesucomprado
ydenossuscomentarios!
Nosgustaríaenviarungran"Agradecimiento"atodosnuestrosclientesportomarseeltiempode
ensamblaresteproductodeAmeriwoodHome,ypordarnossusvaliososcomentarios.
Gracias
  • Page 1 1
  • Page 2 2
  • Page 3 3
  • Page 4 4
  • Page 5 5
  • Page 6 6
  • Page 7 7
  • Page 8 8
  • Page 9 9
  • Page 10 10
  • Page 11 11
  • Page 12 12
  • Page 13 13
  • Page 14 14
  • Page 15 15
  • Page 16 16
  • Page 17 17
  • Page 18 18
  • Page 19 19
  • Page 20 20
  • Page 21 21
  • Page 22 22
  • Page 23 23
  • Page 24 24
  • Page 25 25
  • Page 26 26
  • Page 27 27

Ameriwood Home 7226213EBL Manual de usuario

Tipo
Manual de usuario

Ameriwood Home 7226213EBL es un armario de 3 puertas con un diseño elegante y funcional que se adapta a cualquier habitación de tu hogar. Está fabricado con materiales de alta calidad y cuenta con un acabado resistente a los arañazos y las manchas. El armario tiene un amplio espacio de almacenamiento con 3 estantes ajustables y una barra para colgar ropa. También incluye un kit de anclaje de pared para mayor seguridad.

En otros idiomas