Blackstar HT20R MkII El manual del propietario
- Categoría
- Amplificador de instrumentos musicales
- Tipo
- El manual del propietario

11
Owner’s Manual
Blackstar Amplification Ltd, Beckett House, 14 Billing Road, Northampton, NN1 5AW, UK
For the latest information go to: www.blackstaramps.com
Whilst the information contained herein is correct at the time of publication, due to our policy of constant improvement
and development, Blackstar Amplification Ltd reserves the right to alter specifications without prior notice.
Designed and Engineered by
Blackstar Amplification UK
126400M-1 01/19
HT-5R MkII / HT-5RH MkII
HT-20R MkII / HT-20RH MkII

32
USA / Canada
IMPORTANT SAFETY INSTRUCTIONS
1. Read these instructions.
2. Keep these instructions.
3. Heed all warnings.
4. Follow all instructions.
5. Do not use this apparatus near water.
6. Clean only with dry cloth.
7. Do not block any ventilation openings.
8. Install in accordance with the manufacturer’s instructions.
9. Do not install near any heat sources such as radiators, heat registers, stoves, or
other apparatus (including ampliers) that produce heat.
10. Do not defeat the safety purpose of the polarized or grounding-type plug. A
polarized plug has two blades with one wider than the other. A grounding type
plug has two blades and a third grounding prong. The wide blade or the third
prong are provided for your safety. If the provided plug does not t into your outlet,
consult an electrician for replacement of the obsolete outlet.
11. Protect the power cord from being walked on or pinched particularly at plugs,
convenience receptacles, and the point where they exit from the apparatus.
12. Only use attachments/accessories specied by the manufacturer.
13. Unplug this apparatus during lightning storms or when unused for long periods of
time.
14. Refer all servicing to qualied service personnel. Servicing is required when the
apparatus has been damaged in any way, such as power-supply cord or plug is
damaged, liquid has been spilled or objects have fallen into the apparatus, the
apparatus has been exposed to rain or moisture, does not operate normally, or
has been dropped.
“TO COMPLETELY DISCONNECT THIS APPARATUS FROM THE AC MAINS,
DISCONNECT THE POWER SUPPLY CORD PLUG FROM THE AC RECEPTACLE”.
“WARNING: TO REDUCE THE RISK OF FIRE OR ELECTRIC SHOCK, DO NOT
EXPOSE THIS APPARATUS TO RAIN OR MOISTURE AND OBJECTS FILLED WITH
LIQUIDS, SUCH AS VASES, SHOULD NOT BE PLACED ON THIS APPARATUS”.
This symbol is intended to alert the user to the presence of important operation
and maintenance (servicing) instructions in the literature accompanying the
appliance.
This symbol is intended to alert the user to the presence of uninsulated
“dangerous voltage” within the product’s enclosure that may be of sucient
magnitude to constitute a risk of electric shock to persons.

54
English
English
Warning!
Important safety information!
READ THE FOLLOWING INFORMATION CAREFULLY. SAVE ALL
INSTRUCTIONS FOR FUTURE REFERENCE!
Follow all warnings and instructions marked on the product!
Danger! High internal operating voltages.
Do not open the equipment case. There are no user serviceable parts in this
equipment. Refer all servicing to qualied service personnel.
Clean only with dry cloth.
Condensation can form on the inside of an amplier if it is moved from a cold
environment to a warmer location. Before switching the unit on, it is recommended
that the unit be allowed to reach room temperature.
Unauthorised modication of this equipment is expressly forbidden by Blackstar
Amplication Ltd.
Never push objects of any kind into ventilation slots on the equipment casing.
Do not expose this apparatus to rain, liquids or moisture of any type.
Do not place this product on an unstable trolley, stand or table. The product may
fall, causing serious damage to the product or to persons!
Do not cover or block ventilation slots or openings.
This product should not be placed near a source of heat such as a stove, radiator,
or another heat producing amplier.
Use only the supplied power cord which is compatible with the mains voltage
supply in your area.
Power supply cords should always be handled carefully and should be replaced if
damaged in any way.
Never break o the earth (ground) pin on the power supply cord.
The power supply cord should be unplugged when the unit is to be unused for long
periods of time.
Before the unit is switched on, the loudspeaker should be connected as described
in the handbook using the lead recommended by the manufacturer.
Always replace damaged fuses with the correct rating and type.
Never disconnect the protective mains earth connection.
High loudspeaker levels can cause permanent hearing damage. You should
therefore avoid the direct vicinity of loudspeakers operating at high levels. Wear
hearing protection if continuously exposed to high levels.
If the product does not operate normally when the operating instructions are
followed, then refer the product to a qualied service engineer.
The U.S. Government´s Occupational Safety and Health Administration (OSHA) has
specied the following permissible noise level exposures:
Duration Per Day In Hours Sound Level dBA, Slow Response
8 90
6 92
4 95
3 97
2 100
1½ 102
1 105
½ 110
¼ or less 115
According to OSHA, any exposure in excess of the above permissible limits could
result in some hearing loss.
Ear plug protectors in the ear canals or over the ears must be worn when operating
this amplication system in order to prevent a permanent hearing loss if exposure
is in excess of the limits as set forth above. To ensure against potentially dangerous
exposure to high sound pressure levels, it is recommended that all persons
exposed to equipment capable of producing high sound pressure levels such as
this amplication system be protected by hearing protectors while this unit is in
operation.
All electrical and electronic products should be disposed of separately
from the municipal waste stream via designated collection facilities
appointed by the government or the local authorities.

76
English
English
Introduction
Thank you for purchasing this Blackstar HT MkII amplier. Like all our products, this
amp is the result of countless hours of painstaking Research and Development by
our world-class design team. Based in Northampton (UK), the Blackstar team are
all experienced musicians themselves and the sole aim of the development process
is to provide guitarists with products which are the ultimate tools for self-expression.
All Blackstar products are subjected to extensive laboratory and road testing to
ensure that they are truly uncompromising in terms of reliability, quality and above
all TONE.
This manual covers the following models;
HT-5R MkII
HT-5RH MkII
HT-20R MkII
HT-20RH MkII
The HT MkII’s exible two channel design features the unique patented ISF (Innite
Shape Feature) control and although it has a comprehensive control set, it is still
simple and intuitive to use. Please read through this handbook carefully to ensure
you get the maximum benet from your new Blackstar product.
If you like what you hear and want to nd out more about the Blackstar range of
products please visit our website at www.blackstaramps.com.
Thanks!
The Blackstar Team
Features
The HT-5R MkII and HT-20R MkII are highly versatile ampliers suited to a wide
range of playing styles and situations, by including the great tone and innovative
features of the award-winning HT Venue MkII range.
The Clean Channel has two voices; one based on a classic American circuit and
the other based on a classic British tone. The Voice switch recongures the preamp
voicing, EQ and valve gain structure, as well as the power amplier damping. This
produces a clean, bright and tight but solid bass response for the American tone
and a highly responsive ‘chime’ with looser bottom for the British tone that can be
pushed into a midrange overdrive when driven hard. The Voice setting can also be
selected via footswitch.
These ampliers also have two voices on the Overdrive Channel, which share a
common EQ section. These two voices provide a broad palette of overdriven tones.
As with the Clean Channel, each of these voices can also be selected by footswitch.
The Overdrive voices are characterised by a tone which is high in gain, but avoids
any of the detached top-end ‘zz’ often found in other designs. This is a result of
unique preamplier and power amplier shaping techniques, which also benet the
player in the way the overdrives clean up beautifully as the guitar volume is reduced.
Even at the most extreme settings, the Overdrive voices remain natural sounding.
The patented ISF (Innite Shape Feature) control is unique to Blackstar Amplication
and represents a major step forward in tone shaping exibility. The ISF control
shifts the response of the three control tone stack between, a US type response
at one end, and at the other, a UK type response. Importantly, in between the two
extremes lie an innite number of alternative tone choices that would be otherwise
unavailable.
The amplier features naturally sounding digital reverb that can be adjusted via the
Reverb control on the front panel.
A Power switch is provided on the front panel to switch the amplier between full
power and 10% power. This means that the full tonal depth of the power valve
stage can be enjoyed at any volume, retaining the distinctive sound of power valves
working hard.
A USB connector allows for sending a speaker emulated output into a computer for
recording purposes.
Two further outputs on the rear, a stereo jack socket and balanced XLR, also allow
the speaker emulated signal(s) to be connected to external devices for practicing,
recording or live use.

98
English
English
Front Panel
1. Input
Plug your guitar in here. Always use a good quality screened guitar lead.
Clean Channel
2. Clean Volume
This controls the volume of the Clean Channel. Turning it clockwise increases
the volume. At extreme clockwise settings the preamplifer will start to overdrive,
particularly in the ‘British’ mode.
3. Clean Voice Switch
This switch selects between the two clean voices. With the switch out, the ‘American’
setting is very clean and bright but with a solid and tight low end. When this Voice is
selected, the Voice LED is unlit. With the switch in, the ‘British’ setting has a looser
bass response with warmer mid-range and is very sensitive to the output level of the
guitar and the player’s dynamics. When this Voice is selected, the green Voice LED is
lit. The EQ voicing and valve gain structure is completely recongured between each
voice.
4. Tone
This is a dual control that eectively adjusts the treble and bass for the Clean
Channel at the same time. Fully counter clockwise (CCW) will be darker and bassy
in character. Rotating the control clockwise (CW) will progressively brighten the
sound and thin the bass.
OD (Overdrive) Channel
5. OD Select Switch
Press this switch to select the OD Channel. When the yellow LED is on, the OD
Channel is selected. When the yellow LED is o, the Clean Channel is selected.
6. OD Gain
The OD Gain control adjusts the amount of this Channel’s overdrive or distortion.
Low settings (anti-clockwise) will deliver a clean sound on the edge of break-up.
As the Gain control is increased clockwise the sound will become more overdriven,
moving through crunch tones until, at its maximum position, a full distorted tone is
reached.
7. OD Voice Switch
This is a momentary switch that selects between the two voices of the OD Channel.
When the small red LED is unlit, this channel has a ‘classic’ but ‘hot-rodded’ overdrive,
with medium power amp damping. With the red LED lit the overdrive sound has a
more ‘modern’ voicing that includes a strong mid-emphasised pre-overdrive boost,
as well as a looser, more aggressive sound due to reduced power amp damping.
8. OD Volume
This control adjusts the overall volume of the OD Channel. Turning it clockwise
increases the volume.
9. Bass
The Bass control adjusts the amount of low-end frequencies in your tone. This amp
has an advanced tone shaping circuit which allows the tone to be varied from tight
and cutting when counter clockwise, to warm and thumping when fully clockwise.
10. Middle
The Middle control adjusts the amount of middle frequencies in your tone. The middle
frequencies are particularly important in setting the amount of ‘body’ your tone has.
With the Middle control set to its minimum position (fully counter clockwise) the sound
will be aggressive and scooped, a tone ideal for aggressive rhythm playing. As the
Middle control is increased (clockwise) the amount of ‘body’ is increased, which is
more suitable for sustained lead guitar tones.
11. Treble
The Treble control allows exact adjustment of the treble frequencies within the
sound. At low settings (counter clockwise) the sound will be warm and darker in
character. As the Treble control is increased (clockwise) the sound will become
brighter. At the maximum settings the sound will be aggressive and cutting.
12. ISF (Infinite Shape Feature)
The patented ISF control works in conjunction with
the Bass, Middle and Treble controls. It allows you to
choose the exact tonal signature you prefer. Fully counter
clockwise has a more American characteristic with a
tight bottom-end and more aggressive middle, and fully
clockwise has a British characteristic which is more
‘woody’ and less aggressive.
Unlike conventional ‘contour’ controls and parametric equalisation systems, the Bass,
Middle and Treble controls remain interactive with each other just like in a traditional
guitar amplier tone stack. This leads to a very familiar, musical response.
US
AU
K

1110
Master
13. Reverb
The Reverb control sets the overall level of the reverb eect. With the control fully
counter clockwise there will be no reverb. Turning the control clockwise will increase
the amount of reverb.
14. Volume (HT-20R/RH MkII ONLY)
This controls the overall volume of your amplier. Turning it clockwise increases the
volume.
15. Power Switch
This switch allows the reduction of the output stage from full power down to 10%
power. This means the full tonal depth of the valve power amplier can be enjoyed
at lower volumes, therefore making the HT MkII ideal for recording, smaller gigs and
home practise use. Working in conjunction with the power amplier voltages, this
method of power reduction suers none of the loss in tone of other power reduction
systems.
16. Power Indicator Light
The Power Indicator will light when the amplier is switched on.
17. Power
This switch is used to turn the amplier on and o.
NOTE: There is no standby switch on these ampliers. The valves will warm up as
normal and the amplier will automatically switch to standby mode if either the Input
or Speaker Output jacks are not in use.
Rear Panel
1. Mains Fuse
The value of the Mains Fuse is specied on the rear panel. Never use a fuse of the
incorrect value or attempt to bypass it.
2. Mains Input
The supplied detachable mains lead is connected here. The lead should only be
connected to a power outlet that is compatible with the voltage, power and frequency
requirements stated on the rear panel. If in doubt get advice from a qualied technician.
3. H.T. Fuse
The value of the H.T. Fuse is specied on the rear panel. Never use a fuse of the
incorrect value or attempt to bypass it.
English
English
4. Speaker Outputs
The output marked ‘1x16 Ohm’ is for the connection of a single 16 Ohm extension
speaker cabinet.
The outputs marked ‘1x8 Ohm or 2x16 Ohm’ are for the connection of either a
single 8 Ohm extension cabinet or two 16 Ohm cabinets.
‘1x16 Ohm’ output ‘ 1x8 Ohm or 2x16 Ohm’ outputs
Internal 16 Ohm combo speaker X X
Internal 16 Ohm combo speaker X
plus one 16 Ohm extension cab
One 16 Ohm extension cabinet X X
Two 16 Ohm extension cabinets X
Single 8 Ohm extension cabinet X X
WARNING: The output marked ‘1x16 Ohm’ should never be used at the same time
as any of the outputs marked ‘1x8 Ohm or 2x16 Ohm’. Failure to correctly match
the impedance of the amplier and speakers will damage the amplier.
5. Emulated Output Mono Balanced XLR Socket
This output emulates the tonal characteristics of a guitar speaker cabinet and
provides a natural valve overdrive tone for connection to a recording device or
mixing desk. Using a good quality screened lead, the balanced XLR connection
provides a high quality signal free of noise.
6. Emulated Output Stereo Jack Socket
This output emulates the tonal characteristics of a guitar speaker cabinet and provides
a natural valve overdrive tone for connection to a recording device or mixing desk.
Always use a good quality screened lead. The stereo jack socket accommodates
connection of headphones to this output, allowing you to practice silently.
7. Emulated Output Cabinet Switch
The switch enables you to select either a 4x12 closed back or a 1x12 open back
cabinet emulation for the Speaker Emulated Output. This will apply to both the
balanced XLR and stereo jack outputs.
Ring
Screen
Tip
Left channel
to mixer
Right channel
to mixer

1312
8. MP3 / Line In
This is a stereo mini jack input. Connect the output of your audio device here and
adjust the player’s volume to match that of your guitar to enable you to play along.
NOTE: This connection is stereo, and will remain stereo from the Emulated Output
Stereo Jack Socket (6). All others outputs will mix the incoming stereo signal and
output a mono version.
9. Effects Loop Level
The Eects Loop Level switch sets the eects loop to either +4dBV/-10dBV, which
enables you to use it with either professional equipment (+4dBV setting), or with
guitar level eects such as eects pedals (-10dBV setting).
10. Effects Loop Return
Connect the (mono) output of an external eects unit here.
11. Effects Loop Send
Connect the (mono) input of an external eects unit here.
12. Footswitch
A 2-way footswitch can be connected here. The footswitch will enable the selection
of the Clean and Overdrive channels, and the two voices on each Channel.
NOTE: Using a footswitch will disable the front panel channel and voice switches.
Therefore, full control via the footswitch is granted irrespective of how the amplier
is set.
EXTERNAL SWITCHING: This can also be used by people who wish to control
the main features of the amp using an external switching device that connects via
the TRS connection of the socket.
The following external conditions will switch the channels and voices as follows:
TIP RING CHANNEL VOICE
Closed Closed Clean Voice 1
Closed Open Clean Voice 2
Open Closed Overdrive Voice 1
Open Open Overdrive Voice 2
English
English
13. Emulated Output USB Socket
This B-type USB socket is for connection to a computer via a suitable lead (not
supplied). The output will be a stereo, fully processed guitar signal complete with
speaker cabinet emulation and stereo reverb.
Standard audio drivers are used to connect the amplier to a PC, Mac or other
applicable recording device. No specic drivers are required.
For a guide on low latency USB recording visit:
www.blackstaramps.com/usbrecording
NOTE: Always connect the amplier via a main USB port, often found on the rear of
the computer. The amplier will appear as an audio capture device within recording
software.
14. Kensington Lock
Also known as a Kensington Security Slot or K-Slot this is a specically sized hole
for connecting a compatible Kensington Lock to secure the amplier to a xed
point. For more information please refer to www.kensington.com

1514
Technical Specification
HT-5R MkII
Power (RMS): 5 Watts
Valves: 1 x 12BH7, 1 x ECC83
Weight (kg): 12.4
Dimensions (mm): 441 x 410.5 x 249
Footswitch: FS-16 included
Speaker: Custom Designed 12"
HT-5RH MkII
Power (RMS): 5 Watts
Valves: 1 x 12BH7, 1 x ECC83
Weight (kg): 6.8
Dimensions (mm): 396 x 217.5 x 220
Footswitch: FS-16 included
HT-20R MkII
Power (RMS): 20 Watts
Valves: 2 x EL84, 2 x ECC83
Weight (kg): 15.9
Dimensions (mm): 513 x 487 x 270
Footswitch: FS-16 included
Speaker: Custom Designed 12"
HT-20RH MkII
Power (RMS): 20 Watts
Valves: 2 x EL84, 2 x ECC83
Weight (kg): 9.6
Dimensions (mm): 473 x 244 x 222
Footswitch: FS-16 included
English
English

1716
Deutsch
WICHTIGE SICHERHEITSHINWEISE
1. Lesen Sie diese Anleitung.
2. Bewahren Sie diese Anleitung auf.
3. Beachten Sie alle Warnungen.
4. Leisten Sie allen Anweisungen Folge.
5. Betreiben Sie dieses Gerät nicht in der Nähe von Wasser.
6. Verwenden Sie zum Reinigen des Geräts ausschließlich ein trockenes Tuch.
7. Die Lüftungsschlitze dürfen nicht verdeckt werden!
8. Beachten Sie bei der Inbetriebnahme die Hinweise des Herstellers.
9. Stellen Sie das Gerät nicht in der Nähe von Heizkörpern, Öfen oder anderen
Wärmequellen auf.
10.
Kleben Sie in keinem Fall den Schutzkontakt des Steckers ab. Ein verpolungssicherer
Stecker besitzt zwei Kontakte, von denen ein Kontakt breiter ist als der andere.
Ein Schukostecker besitzt zwei Kontakte und einen dritten Erdungskontakt. Der
breitere Kontakt des verpolungssicheren Steckers bzw. der Erdungskontakt des
Schukosteckers dient Ihrer Sicherheit. Sollte der Stecker des mitgelieferten Netzkabels
nicht in Ihre Steckdose passen, besorgen Sie sich im Fachhandel ein passendes
Kabel.
11. Treten Sie nicht auf das Netzkabel, knicken Sie es nicht und behandeln Sie
Stecker und Buchsen besonders vorsichtig.
12. Verwenden Sie ausschließlich Zubehör, das vom Hersteller für das Gerät
vorgesehen ist.
13. Ziehen Sie den Netzstecker des Geräts bei Gewitter oder wenn Sie das Gerät
längere Zeit nicht verwenden.
14. Lassen Sie alle Wartungsarbeiten von qualifiziertem Fachpersonal ausführen.
Der Service-Fall tritt ein, wenn z.B. Netzkabel oder -stecker beschädigt sind,
wenn Flüssigkeit oder Fremdkörper in das Gehäuse gelangt sind, das Gerät
Regen oder Feuchtigkeit ausgesetzt war, das Gerät nicht ordnungsgemäß
funktioniert, fallen gelassen oder anderweitig beschädigt wurde.
„UM DAS GERÄT VÖLLIG STROMLOS ZU MACHEN, ZIEHEN SIE DAS
NETZTEILKABEL AUS DER GERÄTEBUCHSE.“
„WARNUNG: UM BRÄNDE ODER STROMSCHLÄGE ZU VERMEIDEN, SETZEN SIE
DAS GERÄT NIEMALS REGEN ODER FEUCHTIGKEIT AUS. SORGEN SIE DAFÜR,
DASS KEINE FLÜSSIGKEIT AUF DAS GERÄT TROPFT BZW. GESPRITZT WIRD
UND STELLEN SIE NIEMALS FLÜSSIGKEITSBEHÄLTER (Z.B. VASEN) DARAUF.“
Dieses Symbol soll den Anwender auf nicht isolierte Leitungen und
Kontakte im Geräteinneren hinweisen, an denen hohe Spannungen
anliegen, die im Fall einer Berührung zu lebensgefährlichen
Stromschlägen führen können.
Dieses Symbol soll den Anwender auf wichtige Bedien- sowie
Service-Hinweise in den zugehörigen Handbüchern aufmerksam
machen.

1918
Warnung!
Wichtige Sicherheitshinweise!
LESEN SIE DIE FOLGENDEN INFORMATIONEN SORGFÄLTIG DURCH.
HEBEN SIE ALLE ANLEITUNGEN FÜR REFERENZWECKE AUF!
Beachten Sie alle Warnungen und folgen Sie den auf dem Produkt
angebrachten Anweisungen!
Gefahr! Hohe interne Betriebsspannungen.
Önen Sie niemals das Gehäuse. Es benden sich keine vom Anwender
austauschbaren Teile im Gerät. Lassen Sie alle Wartungsarbeiten von qualiziertem
Fachpersonal ausführen.
Verwenden Sie zum Reinigen des Geräts ausschließlich ein trockenes Tuch.
Im Inneren von Verstärkern kann sich Kondensfeuchtigkeit bilden, wenn der
Verstärker aus einer kalten in eine wärmere Umgebung gebracht wird. Warten Sie
vor dem Einschalten, bis das Gerät die Raumtemperatur erreicht hat.
Nicht autorisierte Modikationen am Gerät sind von Blackstar Amplication Ltd.
ausdrücklich untersagt.
Führen Sie in keinem Fall irgendwelche Gegenstände in die Lüftungsschlitze im
Gehäuse ein.
Setzen Sie das Gerät niemals Regen oder Feuchtigkeit aus.
Platzieren Sie das Gerät nicht auf instabilen Rollwagen, Ständern oder Tischen.
Andernfalls könnte das Gerät herunterfallen und schwere Schäden am Produkt
oder Verletzungen verursachen.
Die Lüftungsschlitze dürfen nicht verdeckt werden.
Dieses Produkt darf nicht in der Nähe von Wärmequellen wie Öfen, Heizkörpern
oder einem anderen Wärme produzierenden Verstärker betrieben werden.
Verwenden Sie ausschließlich das mitgelieferte, mit dem Stromnetz in Ihrer Region
kompatible Netzkabel.
Netzkabel müssen sehr sorgfältig behandelt und bei jeglichem Defekt umgehend
ausgetauscht werden.
Entfernen Sie niemals den Erdungskontakt des Netzkabels.
Wenn Sie das Gerät längere Zeit nicht verwenden, ziehen Sie das Netzkabel.
Vor dem Einschalten muss der Lautsprecher wie in diesem Handbuch beschrieben
mit dem vom Hersteller empfohlenen Kabel angeschlossen werden.
Ersetzen Sie beschädigte Sicherungen immer durch Sicherungen gleichen Typs.
Manipulieren Sie niemals den Schutzleiter des Netzsteckers.
Hohe Lautsprecherpegel können zu dauerhaften Hörschäden führen. Halten Sie sich
nicht in direkter Nähe von mit hoher Lautstärke betriebenen Lautsprechern auf. Falls
Sie längere Zeit hohen Lautstärken ausgesetzt sind, verwenden Sie einen Gehörschutz.
Wenn das Gerät oenbar nicht normal arbeitet, obwohl Sie die Inbetriebnahme wie
beschrieben vorgenommen haben, wenden Sie sich an einen qualizierten Service-
Techniker.
Das amerikanische Amt für Sicherheit und Gesundheitsschutz am Arbeitsplatz
(OSHA) hat folgende Grenzwerte für Lärmbelastung festgelegt:
Dauer pro Tag in Stunden Lärmpegel in dBA, langsame Ansprechzeit
8 90
6 92
4 95
3 97
2 100
1½ 102
1 105
½ 110
¼ oder weniger 115
Gemäß der OSHA kann eine anhaltende Beschallung über diese Grenzwerte hinaus
zu Hörverlusten führen.
Für den Betrieb dieses Verstärkersystems empehlt es sich, einen Hörschutz im
Gehörkanal oder über den Ohren zu tragen, um einen dauerhaften Hörverlust zu
vermeiden, wenn die genannten Grenzwerte nicht eingehalten werden. Um sich
gegen die potenziellen Gefahren hoher Schalldruckpegel zu schützen sollten alle
Personen, die mit Geräten, die zur Ausgabe hoher Schalldruckpegel geeignet sind
(z. B. dieser Verstärker), für die Dauer des Betrieb solcher Geräte einen Gehörschutz
tragen.
Elektrische und elektronische Geräte dürfen nicht in den Hausmüll
gegeben, sondern müssen entsprechend den staatlichen bzw.
kommunalen Vorgaben entsorgt werden.
Deutsch
Deutsch

2120
Einleitung
Vielen Dank, dass Sie sich für den Blackstar HT MkII Verstärker entschieden
haben. Dieser Amp ist wie alle unsere Verstärker das Ergebnis unzähliger Stunden
akribischer Arbeit durch unser erstklassiges Entwickler-Team. Die erfahrenen
Musiker des Blackstar-Teams aus Northampton (UK) verfolgen ein einziges Ziel:
Gitarristen das bestmögliche Equipment zur Verfügung zu stellen, damit diese sich
optimal selbstverwirklichen können.
Alle Blackstar-Produkte wurden sowohl in unseren Labors als auch im Live-Betrieb
auf Herz und Nieren getestet, um sicherzustellen, dass sie in puncto Zuverlässigkeit,
Qualität und SOUND absolut kompromisslose Ergebnisse liefern.
In diesem Handbuch werden die folgenden Modelle beschrieben:
• HT-5R MkII
• HT-5RH MkII
• HT-20R MkII
• HT-20RH MkII
Das exible Design des HT MkII mit zwei Kanälen zeichnet sich durch die patentierte
ISF-Schaltung (Innite Shape Feature) aus. Dabei bleibt der Verstärker trotz
umfangreicher Regelmöglichkeiten stets einfach und intuitiv zu bedienen. Bitte lesen
Sie dieses Handbuch aufmerksam durch, um Ihr neues Blackstar-Produkt optimal
nutzen zu können.
Wenn Sie mehr über die Blackstar-Produktreihe erfahren möchten, besuchen Sie
unsere Webseite unter www.blackstaramps.com.
Vielen Dank!
Das Blackstar-Team
Merkmale
Bei den Modellen HT-5R MkII und HT-20R MkII handelt es sich um extrem vielseitige
Verstärker, die sich dank ihres fantastischen Klangs und innovativer Merkmale aus
der preisgekrönten HT Venue MkII Baureihe für ganz unterschiedliche Stilistiken und
Anwendungen eignen.
Der Clean-Kanal bietet zwei Voicings, die auf einem amerikanischen bzw. britischen
Schaltungsdesign basieren. Über die Voice-Taste wird die Ansprache der Vorstufe,
des EQ sowie das Gain-Verhalten der Röhren und die Dämpfung der Endstufe
variiert. Der amerikanisch inspirierte Sound steht dabei für eine cleane, höhenreiche
und direkte Ansprache mit einem druckvollen Bassfundament, während der
britische Sound deutlich dynamischer anspricht, jedoch weniger Bass bietet: Dafür
übersteuert der Sound im Mittenbereich schneller, wenn man mit die Dynamik
variiert. Die gewünschte Voice-Einstellung kann auch über einen Fußschalter
gewählt werden.
Diese Verstärker bieten zudem zwei Voices für den Overdrive-Kanal, die über
eine gemeinsame EQ-Sektion verfügen. Über diese zwei Voices lassen sich ganz
unterschiedliche Overdrive-Sounds realisieren.
Wie im Clean-Kanal kann jedes Voicing auch über einen Fußschalter aufgerufen
werden.
Die Overdrive-Voices zeichnen sich durch einen Sound aus, der ausreichend Gain-
Reserven bietet, jedoch kein übermäßiges Top-End liefert, wie man es von anderen
Schaltungen kennt. Das ist das Ergebnis der einzigartigen Shaping-Technologien
in der Vor- und Endstufe: Dabei werden Sie als Gitarrist sicher zu schätzen wissen,
dass Sie allein mit Hilfe des Volume-Potis zwischen Overdrive- und wunderschönen
Clean-Sounds variieren können. Selbst bei extremen Einstellungen klingen die
Overdrive-Voices immer natürlich und oen.
Die patentierte ISF-Steuerung (Innite Shape Feature) gibt es nur bei Blackstar:
Sie stellt einen großen Fortschritt in Bezug auf eine exible Klangregelung dar. Der
ISF-Regler erlaubt es, die Klangfarbe der 3-Band-Klangregelung zwischen einer
Ansprache nach US-amerikanischen Vorbild auf der einen und britischem Charakter
auf der anderen Seite zu variieren. Natürlich liegen zwischen diesen beiden Extremen
unendlich viele andere Klangfärbungen, die sich mit anderen Schaltungen gar nicht
realisieren lassen.
Der Verstärker integriert zudem ein natürlich klingendes Digital-Reverb, das über
den Reverb-Regler auf der Vorderseite eingestellt werden kann.
Über den Power-Schalter auf der Vorderseite schalten Sie den Verstärker zwischen
maximaler und reduzierter Leistung (10%) um. Das bedeutet, dass Sie die
Klangtiefe der Röhrenendstufe in jeder Lautstärke ausschöpfen können und der für
Endstufenröhren unter Volllast typische Sound erhalten bleibt.
Über einen USB-Anschluss kann der Ausgang mit der Lautsprecher-Simulation zu
Aufnahmezwecken auf einen Computer gespeist werden.
Über zwei weitere Ausgänge auf der Rückseite (Stereoklinken- und symmetrische
XLR-Buchsen) können Sie das Signal der Lautsprechersimulation zum Üben oder
für den Live-Einsatz bzw. die Aufnahme auf externe Geräte speisen.
Deutsch
Deutsch

2322
Bedienfeld
1. Input
Hier schließen Sie Ihre Gitarre an. Verwenden Sie in jedem Fall ein hochwertiges
geschirmtes Gitarrenkabel.
Clean-Kanal
2. Clean Volume
Mit diesem Regler steuern Sie die Lautstärke im Clean-Kanal. Im Uhrzeigersinn
heben Sie die Lautstärke an. Im Rechtsanschlag des Reglers setzt insbesondere im
„British“-Betrieb bereits eine Übersteuerung ein.
3. Voice-Schalter Clean
Damit schalten Sie zwischen den zwei Clean-Voicings um. Wenn der Schalter
nicht gedrückt ist, klingt der Amp in der Einstellung „American“ sehr sauber und
höhenreich und liefert gleichzeitig einen kräftigen, denierten Bass. Wenn diese Voice
aktiv ist, leuchtet die Voice-LED nicht. Wenn Sie den Schalter auf „British“ einstellen,
ist die Bassansprache weniger druckvoll, dafür klingen die Mitten wärmer und der
Verstärker reagiert stärker auf den Ausgangspegel der Gitarre und die Dynamik
des Gitarristen. Dieses Voicing ist aktiv, wenn die grüne Voice-LED leuchtet. Wenn
Sie zwischen beiden Voicings umschalten, wird neben dem EQ- auch das Gain-
Verhalten der Röhren geändert.
4. Tone
Hierbei handelt es sich um einen dual ausgelegten Regler, der die Höhen- und
Bassanteile für den Clean-Kanal gleichzeitig steuert. Im Linksanschlag (gegen den
Urzeigersinn) ist der Charakter dumpfer und betont die Bassanteile. Wenn Sie ihn
nun im Uhrzeigersinn aufdrehen, wird der Sound immer höhenreicher, während die
Ansprache im Bass zurückgenommen wird.
Kanal OD (Overdrive)
5. Wahlschalter OD
Mit diesem Schalter aktivieren Sie den Kanal OD. Wenn die gelbe LED leuchtet, ist
der Kanal OD aktiv. Wenn die gelbe LED nicht leuchtet, ist der Clean-Kanal aktiv.
6. OD Gain
Mit dem OD Gain-Regler steuern Sie den Übersteuerungs- oder Verzerrungsgrad
in diesem Kanal. Niedrige Einstellungen (gegen den Uhrzeigersinn) liefern cleane
bis angezerrte Sounds. Wenn der Gain-Regler (im Uhrzeigersinn) aufgedreht wird,
nimmt der Verzerrungsgrad mehr und mehr zu und wechselt von crunchigen
Sounds bis hin zu stark übersteuerten Sounds in der Maximalstellung.
7. Voice-Schalter OD
Mit diesem Drucktaster schalten Sie zwischen den zwei Voicings für den Kanal
OD um. Wenn die rote LED nicht leuchtet, liefert der Kanal eine „klassische“, aber
Deutsch
Deutsch

2524
singendere Übersteuerung mit einer mittleren Dämpfung der Endstufe. Wenn die
rote LED leuchtet, klingt das Voicing für den Overdrive-Sound moderner und bietet
einen kräftigen Mittenboost vor der Overdrive-Stufe sowie aufgrund der geringeren
Endstufen-Dämpfung einen aggressiveren Grundcharakter.
8. OD Volume
Mit diesem Regler steuern Sie die Gesamtlautstärke im Kanal OD. Im Uhrzeigersinn
heben Sie die Lautstärke an.
9. Bass
Der Bass-Regler steuert den Anteil der tiefen Frequenzen im Gesamt-Sound.
Dieser Verstärker bietet eine umfangreiche Klangregelung, mit der Sie den Sound
zwischen knackig und aggressiv (gegen den Uhrzeigersinn) oder warm und mächtig
(im Uhrzeigersinn) einstellen können.
10. Middle
Der Middle-Regler steuert den Anteil der Mittenfrequenzen im Gesamt-Sound. Die
Mitten sind insbesondere für den Grundsound entscheidend. In der Minimalposition
(komplett gegen den Uhrzeigersinn) ist der Sound sehr aggressiv und hohl, was sich
speziell für knackige Rhythmus-Parts eignet. Wenn der Mitten-Regler angehoben
wird (im Uhrzeigersinn), nimmt der Grundton-Anteil zu, was sich für singende Lead-
Sounds empehlt.
11. Treble
Mit dem Regler Treble können Sie gezielt den Höhenanteil im Gesamt-Sound
einstellen. Bei niedrigen Einstellungen (gegen den Uhrzeigersinn) erhält der Sound
einen wärmeren und dumpferen Charakter. Wenn der Treble-Regler angehoben
wird (im Uhrzeigersinn), wird der Sound immer höhenreicher. In der Maximalposition
klingt der Sound schließlich aggressiv und schneidend.
12. ISF (Infinite Shape Feature)
Der patentierte ISF-Regler arbeitet mit den Reglern für Bass, Middle und Treble
zusammen. Mit seiner Hilfe nden Sie die genau die Klangfärbung, die Sie suchen.
Bei Einstellungen gegen den Uhrzeigersinn bietet der
Amp einen „amerikanischen“ Klangcharakter mit einem
knackigen Bassfundament und aggressiveren Mitten.
Bei Einstellungen im Uhrzeigersinn erzeugt der Amp
einen „britischen“ Sound, der deutlich „erdiger“ und
weniger aggressiv klingt.
Im Gegensatz zu herkömmlichen „Contour“-Reglern
und parametrischen EQ-Systemen beeinussen sich
die Regler für Bass, Middle und Treble gegenseitig – so wie man das aus klassischen
Gitarren-Stacks her kennt. Das führt letztlich zu einem vertrauten, musikalischen
Verhalten.
Master
13. Reverb
Mit dem Reverb-Regler wird die Gesamtlautstärke des Reverb-Eekts ausgesteuert.
Im Linksanschlag des Reglers ist kein Reverb hörbar. Wenn der Regler im
Uhrzeigersinn aufgedreht wird, nimmt der Reverb-Anteil zu.
14. Volume
Dieser Regler steuert die Gesamtlautstärke Ihres Verstärkers. Im Uhrzeigersinn
heben Sie die Lautstärke an.
15. Power-Schalter
Mit diesem Schalter lässt sich die Leistung der Ausgangsstufe von maximal auf 10%
reduzieren. Das bedeutet, dass Sie die Klangtiefe der Röhrenendstufe auch bei
niedriger Lautstärke voll ausschöpfen können, wodurch sich der HT MkII bestens
für Aufnahmen, kleinere Gigs oder das Üben zuhause empehlt. Da diese Schaltung
direkt mit der Spannungsversorgung der Endstufe zusammenarbeitet, treten bei
diesem Verfahren keine Klangverluste auf, wie man sie von anderen Systemen zur
Leistungsreduktion kennt.
16. Power-LED
Die Power-LED leuchtet, wenn der Verstärker eingeschaltet ist.
17. Power
Mit diesem Schalter schalten Sie den Verstärker ein bzw. aus.
ANMERKUNG:
Diese Verstärker bieten keinen Standby-Schalter. Die Röhren werden ganz normal
aufgewärmt und der Verstärker schaltet sich automatisch auf Standby, wenn die
Buchsen Input und Speaker Output nicht belegt sind.
Rückseite
1. Sicherung
Der Wert für die Sicherung ist auf der Rückseite vermerkt. Verwenden Sie in keinem
Fall eine Sicherung mit falschen Werten und versuchen Sie nicht, die Sicherung zu
überbrücken.
2. Netzanschluss
Hier wird das mitgelieferte Kaltgerätenetzkabel angeschlossen. Das Kabel muss
an einer Netzsteckdose angeschlossen werden, die in puncto Spannung, Leistung
und Netzfrequenz den auf der Rückseite vermerkten Spezikationen entspricht. Im
Zweifelsfall wenden Sie sich an einen qualizierten Techniker/Elektriker.
3. H.T.- Sicherung
Der Wert für die H.T.- Sicherung ist auf der Rückseite vermerkt. Verwenden Sie
in keinem Fall eine Sicherung mit falschen Werten und versuchen Sie nicht, die
Sicherung zu überbrücken.
4. Speaker-Ausgänge
Der mit „1x16 Ohm“ beschriftete Ausgang dient zum Anschluss einer einzelnen
Deutsch
Deutsch
US
AU
K

2726
16-Ohm-Lautsprecherbox.
Die mit „1x8 Ohm or 2x16 Ohm“ beschrifteten Ausgänge dienen zum Anschluss
einer einzelnen 8-Ohm- oder von zwei 16-Ohm-Lautsprecherboxen.
„1x16 Ohm“ Ausgang „ 1x8 Ohm or 2x16 Ohm“ Ausgänge
Interner 16-Ohm-Combo-Speaker ✓ X X
Interner 16 Ohm Combo-Speaker X ✓ ✓
plus eine 16-Ohm-Lautsprecherbox
Eine 16-Ohm-Lautsprecherbox ✓ X X
Zwei 16-Ohm-Lautsprecherboxen X ✓ ✓
Einzelne 8-Ohm-Lautsprecherbox X ✓ X
WARNING: Der mit „1x16 Ohm“ bezeichnete Ausgang darf niemals parallel zu den
Ausgängen „1x8 Ohm or 2x16 Ohm“ betrieben werden. Wenn die Impedanz von
Verstärker und Lautsprecher nicht übereinstimmen, kann der Verstärker ernsthaft
beschädigt werden.
5. Symmetrische Mono-XLR-Buchse Emulated Output
Dieser Ausgang emuliert den Klangcharakter einer Gitarren-Lautsprecherbox und
sorgt in Kombination mit einem Aufnahmegerät oder Mischpult für eine natürlich
klingende Röhrenübersteuerung. Bei Verwendung eines hochwertigen geschirmten
Kabels liefert der XLR-Anschluss ein störungsfreies Signal.
6. Stereoklinkenbuchse Emulated Output
Dieser Ausgang emuliert den Klangcharakter einer Gitarren-Lautsprecherbox und
sorgt in Kombination mit einem Aufnahmegerät oder Mischpult für eine natürlich
klingende Röhrenübersteuerung. Verwenden Sie in jedem Fall hochwertige
geschirmte Kabel. Die stereophone Klinkenausgangsbuchse erlaubt zudem den
Anschluss eines Kopfhörers für ein geräuschloses Üben.
7. Schalter Emulated Output Cabinet
Mit diesem Schalter können Sie die Emulation einer geschlossenen 4x12-er oder
einer auf der Rückseite oenen 1x12-Box für den Speaker Emulated Output
anwählen. Diese Einstellung bezieht sich auf die XLR- und Stereoklinkenausgänge.
8. MP3 / Line In
Hierbei handelt es sich um einen stereophonen Eingang als Miniklinke. Zum Üben
schließen Sie hier den Ausgang Ihres Wiedergabegeräts an und passen dann die
Lautstärke der externen Quelle an den Pegel Ihrer Gitarre an.
ANMERKUNG: Dieser Anschluss ist stereo ausgeführt und sein Signal wird auch
stereo über die Ausgangsbuchse Emulated Output (6) ausgegeben. Bei allen
übrigen Ausgängen werden anliegende Stereosignale zusammengemischt und
monophon ausgegeben.
9. Effects Loop Level
Mit dem Schalter Eects Loop Level können Sie den Eekt-Loop wahlweise
mit +4 dBV oder -10 dBV betreiben: Entsprechend können Sie professionelles
Equipment (Einstellung +4 dBV) oder Eektpedale mit einem für Gitarren ausgelegten
Pegel (Einstellung -10 dBV) anschließen.
10. Effects Loop Return
Hier schließen Sie den (Mono-)Ausgang eines externen Eektgeräts an.
11. Effects Loop Send
Hier schließen Sie den (Mono-)Eingang eines externen Eektgeräts an.
12. Footswitch
Hier wird der mitgelieferte 2-Wege-Fußschalter angeschlossen. Mit dem Fußschalter
FS-15 können Sie zwischen dem Clean- und dem Overdrive-Kanal und zudem in
jedem Kanal zwischen den beide Voices umschalten.
ANMERKUNG: Bei Anschluss eines Fußschalters haben die Bedienelemente zur
Kanal- und Voice-Auswahl auf der Vorderseite keine Funktion. Unabhängig von den
Verstärkereinstellungen haben Sie über den Fußschalter volle Kontrolle über den
Verstärker.
EXTERNAL SWITCHING: Diese Option empehlt sich für Anwender, welche
die Hauptfunktionen des Verstärkers mit Hilfe eines externen Schalters aufrufen
möchten, der über die TRS-Kontakte dieser Buchse angeschlossen wird.
Die Kanäle und Voices können dann wie folgt extern umgeschaltet werden:
SPITZE RING KANAL VOICE
Geschlossen Geschlossen Clean Voice 1
Geschlossen Oen Clean Voice 2
Oen Geschlossen Overdrive Voice 1
Oen Oen Overdrive Voice 2
13. USB-Buchse Emulated Output
Diese USB-Buchse vom Typ B dient zum Anschluss an einen Computer über ein geeignetes
(optionales) Kabel. Dieser Ausgang gibt ein stereophones, bearbeitetes Gitarrensignal mit
Lautsprecher-Simulation und Stereo-Reverb aus.
Die Kommunikation des Verstärkers mit einem PC, Mac oder einem anderen kompatiblen
Aufnahmegerät erfolgt über Standard-Audiotreiber. Es werden keine spezischen Treiber
benötigt.
Eine kurze Anleitung zur USB-Aufnahme mit minimaler Latenz nden Sie unter:
www.blackstaramps.com/usbrecording
ANMERKUNG: Schließen Sie den Verstärker immer über einen Haupt-USB-Port
des Computers an (meist auf der Rückseite zu nden). Der Verstärker erscheint
Deutsch
Deutsch

2928
innerhalb der Aufnahme-Software auf dem Computer als Audio-Interface.
15. Kensington-Schloss
Diese speziell geformte Önung wird als Kensington Security Slot oder K-Slot
bezeichnet und dient dazu, den Verstärker über ein kompatibles Kensington-
Schloss gegen Diebstahl zu schützen. Weitere Informationen nden Sie unter www.
kensington.com
Deutsch
Deutsch
Technische Spezifikationen
HT-5R MkII
Leistung (RMS): 5Watt
Röhren: 1 x 12BH7, 1 x ECC83
Gewicht (kg): Noch nicht bestätigt
Abmessungen (mm): 443 x 405 x 252
Fußschalter: FS-16, im Lieferumfang
Lautsprecher: Sonderanfertigung, 12“
HT-5RH MkII
Leistung (RMS): 5Watt
Röhren: 1 x 12BH7, 1 x ECC83
Gewicht (kg): Noch nicht bestätigt
Abmessungen (mm): 398 x 213 x 222
Fußschalter: FS-16, im Lieferumfang
HT-20R MkII
Leistung (RMS): 20Watt
Röhren: 2 x EL84, 2 x ECC83
Gewicht (kg): Noch nicht bestätigt
Abmessungen (mm): 503 x 455 x 271
Fußschalter: FS-16, im Lieferumfang
Lautsprecher: Sonderanfertigung, 12“
HT-20RH MkII
Leistung (RMS): 20Watt
Röhren: 2 x EL84, 2 x ECC83
Gewicht (kg): Noch nicht bestätigt
Abmessungen (mm): 468 x 245 x 222
Fußschalter: FS-16, im Lieferumfang

3130
Français
Français
Les éléments électriques et électroniques doivent être jetés séparément, dans les
vide-ordures prévus à cet eet par votre municipalité.
Consignes de sécurités importantes !
LISEZ LES INFORMATIONS SUIVANTES ATTENTIVEMENT. CONSERVEZ
TOUTES LES CONSIGNES POUR RÉFÉRENCE ULTÉRIEURE !
Respectez tous les avertissements et toutes les consignes figurant sur
le produit !
Danger ! Hautes tensions internes.
N’ouvrez pas le boîtier de l’appareil. Cet appareil ne possède aucune pièce sur laquelle
l’utilisateur puisse intervenir. Conez toutes les réparations à un réparateur qualié
.
Nettoyez l’appareil avec un chion sec uniquement.
Il est possible que de la condensation se forme à l’intérieur d’un amplicateur s’il
est transféré d’un environnement froid à un endroit plus chaud. Il est conseillé
d’attendre que l’appareil ait atteint la température ambiante avant de l’allumer.
La modication non autorisée de cet appareil est expressément interdite par
Blackstar Amplication plc.
N’introduisez jamais d’objets dans les fentes de ventilation du boîtier de l’appareil.
N’exposez pas cet appareil à la pluie, à des liquides ni à aucune forme d’humidité.
Respectez tous les avertissements et toutes les consignes gurant sur le produit !
Evitez de poser un contenant rempli de liquide au dessus de l’appareil!
Ne placez pas ce produit sur un chariot, un guéridon ou une table instable. Il pourrait
tomber et ce faisant sérieusement s’endommager ou causer des blessures !
Ne couvrez pas les fentes de ventilation ni les ouvertures et ne les obstruez pas
non plus.
Évitez de placer ce produit près d’une source de chaleur telle qu’un poêle, un
radiateur ou un autre amplicateur produisant de la chaleur.
Utilisez uniquement le cordon d’alimentation fourni car il est compatible avec la
tension de l’alimentation générale de votre secteur.
Manipulez toujours les cordons d’alimentation avec le plus grand soin. Remplacez-
les s’ils sont endommagés.
Ne détachez jamais la prise de terre du cordon d’alimentation.
Débranchez le cordon d’alimentation en cas d’inutilisation prolongée de l’appareil.
Avant d’allumer l’appareil, branchez l’enceinte de la manière décrite dans la notice
d’emploi à l’aide du cordon recommandé par le fabricant.
Remplacez toujours les fusibles endommagés par des fusibles du type et du calibre
appropriés.
Ne débranchez jamais la connexion à la terre de protection.
À des niveaux élevés, le volume des enceintes peut causer des pertes auditives
dénitives. Par conséquent, évitez de rester à proximité des enceintes lorsque le
volume est élevé. Portez des protecteurs d’oreilles en cas d’exposition continue à
des niveaux sonores élevés.
Si le produit ne fonctionne pas normalement alors que vous respectez la notice
d’emploi, conez-le à un réparateur qualié.
La loi américaine sur la santé et la sécurité du travail indique la durée d’exposition
autorisée à diérents niveaux sonores :
Durée par jour en heures Niveau sonore (dBA), réponse lente
8 90
6 92
4 95
3 97
2 100
1½ 102
1 105
½ 110
¼ ou moins de 115
D’après cette loi, toute exposition d’une durée supérieure aux limites autorisées ci-
dessus peut entraîner une perte auditive.
Des protecteurs d’oreilles doivent être portés dans le canal auditif ou sur l’oreille
lors de l’utilisation de ce système d’amplication an d’éviter toute perte auditive
permanente si l’exposition dépasse les limites susmentionnées. An d’éviter toute
exposition potentiellement dangereuse à des niveaux de pression acoustique
élevés, il est conseillé que toutes les personnes exposées à des appareils capables
de produire des niveaux de pression acoustique élevés tels que ce système
d’amplication utilisent des protecteurs d’oreilles lors de l’utilisation de l’appareil.

3332
Introduction
Merci d‘avoir acheté cet amplicateur HT MkII Blackstar. Comme tous nos produits,
cet ampli est le résultat d‘innombrables heures de recherche et de développement
sans relâche menés par notre équipe de conception de réputation mondiale. Basée
à Northampton (R-U), l‘équipe Blackstar est composée de musiciens chevronnés
dont le seul but est de fournir aux guitaristes des produits qui soient leurs outils
d‘expression ultimes.
Tous les produits Blackstar sont soumis à des tests complets en laboratoire et en
situation pour s’assurer qu’ils sont vraiment sans compromis en termes de abilité,
de qualité, et surtout de SON.
Ce manuel concerne les modèles suivants :
• HT-5R MkII
• HT-5RH MkII
• HT-20R MkII
• HT-20RH MkII
Le HT MkII bénécie d’une conception exible à deux canaux, d’un contrôle unique
sur le circuit breveté ISF (Innite Shape Feature) et, bien qu‘il dispose d‘un jeu de
commandes complet, il reste simple et intuitif à utiliser. Veuillez lire attentivement la
totalité de ce manuel pour vous garantir de proter au maximum de votre nouveau
produit Blackstar.
Si vous aimez ce que vous entendez et désirez en savoir plus sur la gamme des
produits Blackstar, veuillez visiter notre site web à l‘adresse www.blackstaramps.
com.
Merci !
L‘équipe Blackstar
Caractéristiques
Les HT-5R MkII et HT-20R MkII sont des amplicateurs très polyvalents adaptés à
un large éventail de styles de jeu et de situations, avec le son exceptionnel et les
fonctionnalités innovantes de la gamme primée HT Venue MkII.
Le canal Clean (son clair) a deux voicings, l‘un basé sur un circuit américain
traditionnel et l‘autre sur un son britannique classique. Le commutateur Voice
recongure le voicing du préampli, l‘égaliseur et la structure de gain des lampes,
ainsi que le facteur d‘amortissement de l‘ampli de puissance. Cela produit une
réponse en basses propre, brillante et vive mais solide pour le son américain et un
côté « sonore » très réactif avec des graves moins raides pour le son britannique
qui peut être amené jusqu’à la saturation des médiums lorsqu‘on le pousse dans
ses derniers retranchements. Le réglage Voice peut également être sélectionné au
pied par pédalier.
Ces amplicateurs ont aussi deux voicings sur le canal Overdrive, qui partagent une
section d‘égalisation commune. Ces deux voicings fournissent une large palette de
sons saturés.
Comme pour le canal Clean, chacun de ces voicings peut également être sélectionné
au pied.
Les voicings du canal Overdrive se caractérisent par un son à gain élevé, mais
évitent les « zz » qui se détachent souvent des aigus dans d‘autres modèles. C‘est
le résultat de techniques de mise en forme uniques du préampli et de l‘ampli de
puissance, qui protent également au musicien par la façon dont les sons saturés
brillent magniquement lorsqu’on réduit le volume de la guitare. Même avec les
réglages les plus extrêmes, les voicings d’Overdrive restent naturels.
Le contrôle du circuit breveté ISF (Innite Shape Feature) est propre à Blackstar
Amplication et représente un grand pas en avant pour un façonnage exible du
son. La commande ISF change la réponse des trois commandes de tonalité entre
une réponse de type américain d’un côté et une réponse de type britannique de
l‘autre. Il est important de noter qu‘entre ces deux extrêmes, il y a un nombre inni
d’autres sons qui ne seraient pas disponibles autrement.
L‘amplicateur est doté d‘une réverbération numérique à sonorité naturelle qui se
règle avec la commande Reverb de la face avant.
En face avant, un interrupteur d‘alimentation Power fait alterner l‘amplicateur entre
pleine puissance et puissance réduite à 10 %. Cela signie que toute la profondeur
sonore de l‘étage de puissance peut être appréciée quel que soit le volume, tout
en conservant le son caractéristique des lampes de puissance quand elles sont
durement sollicitées.
Un connecteur USB permet l’envoi de la sortie à émulation de bae dans un
ordinateur pour enregistrement.
Deux autres sorties à l‘arrière, sur jack stéréo et sur XLR symétrique, permettent
également d’adresser le ou les signaux avec émulation de bae à des appareils
externes pour répéter, enregistrer ou jouer en live.
Français
Français

3534
Face avant
1. Entrée
Branchez ici votre guitare. Utilisez toujours un câble de guitare blindé de bonne
qualité.
Canal Clean (son clair)
2. Volume du canal Clean
Contrôle le volume du canal Clean. Le tourner dans le sens horaire augmente
le volume. Aux réglages extrêmes dans le sens horaire, le préamplicateur
commencera à saturer, en particulier en mode « britannique ».
3. Sélecteur de voicing du canal Clean
Ce sélecteur permet de choisir l’un des deux voicings du canal Clean. S’il est éteint,
le réglage « américain » donne un son très propre et très brillant, mais avec des
graves solides et vifs. Quand ce voicing est sélectionné, la LED Voice est éteinte. Si
le sélecteur est enclenché, le réglage « britannique » a une réponse moins raide dans
les basses avec des médiums plus chauds et est très sensible au niveau de sortie de
la guitare et à la dynamique de jeu. Quand ce voicing est sélectionné, la LED Voice
verte est allumée. La structure de correction de l‘égaliseur et de gain des lampes est
complètement recongurée d’un voicing à l’autre.
4. Tone
Il s‘agit d‘une double commande qui règle en fait simultanément les aigus et
les graves pour le canal Clean. À fond dans le sens anti-horaire, le son aura un
caractère plus sombre et plus grave. Tourner la commande dans le sens horaire
éclaircira progressivement le son et anera les basses.
Canal OD (Overdrive)
5. Sélecteur d’Overdrive
Pressez ce sélecteur pour activer le canal Overdrive (OD). Lorsque la LED jaune
est allumée, le canal OD est sélectionné. Lorsque la LED jaune est éteinte, le canal
Clean est sélectionné.
6. Gain du canal OD
La commande Gain du canal OD règle l’ampleur de la saturation ou de la distorsion
de ce canal. Les réglages bas (dans le sens anti-horaire) donnent un son clair à la
limite de la saturation. Quand on monte la commande Gain dans le sens horaire, le
son devient plus saturé, passant par des sons crunch jusqu‘à un son à distorsion
totale en position maximale.
7. Sélecteur de voicing du canal Overdrive
C‘est un sélecteur sans enclenchement qui permet de choisir l’un des deux
voicings du canal OD. Quand la petite LED rouge est éteinte, ce canal a une
saturation « classique » mais « poussée », avec un facteur d‘amortissement moyen
de l‘ampli de puissance. Avec la LED rouge allumée, le son saturé a un timbre plus
« moderne » avec une forte accentuation pré-overdrive des médiums, ainsi qu‘un
Français
Français
8. Interrupteur OD Voice
Contrôle le volume général du canal OD. Le tourner dans le sens horaire augmente
le volume.
9. Graves
La commande Bass détermine la quantité de basses fréquences (graves) dans
votre son. Cet ampli a un circuit de façonnage sonore sophistiqué qui permet de
passer d’un son nerveux et tranchant (dans le sens anti-horaire) à un son chaud et
lourd (à fond dans le sens horaire).
10. Médiums
La commande Middle détermine la quantité de fréquences moyennes (médiums)
dans votre son. Les fréquences moyennes sont particulièrement importantes pour
le « corps » du son. Avec la commande Middle au minimum (à fond dans le sens
anti-horaire), le son sera agressif et creusé, idéal pour un jeu rythmique agressif.
Quand on monte (dans le sens horaire) la commande Middle, le « corps » prend
de l’importance, ce qui convient mieux aux sons de guitare « lead » avec sustain.
11. Aigus
La commande Treble permet le réglage précis des hautes fréquences (aigus) dans
votre son. Avec des réglages bas (dans le sens anti-horaire), le son aura un caractère
chaud et sourd. Plus on monte la commande Treble (dans le sens horaire) et plus
le son devient brillant. Avec un réglage extrême, le son sera agressif et tranchant.
12. ISF (Infinite Shape Feature)
Le réglage Treble permet d’ajuster les hautes fréquences du son. À des réglages
bas (sens inverse des aiguilles d’une montre) le son aura un caractère chaud et plus
sombre. S’il est augmenté (tourné dans le sens des aiguilles d’une montre), le son
deviendra plus brillant. Au réglage maximal, le son sera plus agressif et incisif.
13. ISF (Infinite Shape Feature)
La commande brevetée ISF fonctionne en conjonction avec les commandes Bass,
Middle et Treble. Elle vous permet de choisir la signature tonale exacte que vous
préférez. À fond dans le sens anti-horaire, elle donne
un caractère plus américain avec des graves nerveux
et des médiums plus agressifs, tandis qu‘à fond dans
le sens horaire, elle donne un caractère britannique,
avec un côté « bois » moins agressif.
Contrairement aux commandes « Contour » et aux
systèmes d‘égalisation paramétrique conventionnels,
les commandes Bass, Middle et Treble continuent
d’interagir entre elles, comme dans un étage de correction d‘ampli de guitare
traditionnel. Cela donne une réponse musicale très familière.
US
AU
K

3736
Master
13. Reverb
La commande Reverb détermine le niveau global de l‘eet de réverbération. Avec
la commande à fond dans le sens anti-horaire, il n‘y aura pas de réverbération.
Tourner la commande dans le sens horaire augmente la quantité de réverbération.
14. Volume (HT-20R/RH MkII UNIQUEMENT)
Cette commande contrôle le volume général de votre amplicateur. La tourner dans
le sens horaire augmente le volume.
15. Commutateur d‘alimentation
Ce commutateur permet de faire varier l‘étage de sortie de sa pleine puissance
jusqu‘à 10 % de celle-ci. Cela signie que toute la profondeur sonore de l‘étage de
puissance peut être appréciée à des volumes plus faibles, ce qui rend le HT MkII
idéal pour l‘enregistrement, les petits concerts et la pratique à domicile. Travaillant
en conjonction avec les tensions de l‘amplicateur de puissance, cette méthode de
réduction de puissance ne soure d’aucune des pertes de son des autres systèmes
de réduction de puissance.
16. Voyant d‘alimentation
Le voyant d‘alimentation s‘allume quand l‘amplicateur est sous tension.
17. Interrupteur d’alimentation Power
Cet interrupteur sert à allumer et à éteindre l‘amplicateur.
REMARQUE: il n‘y a pas de commutateur Standby de mise en veille sur ces
amplicateurs. Les lampes chaueront normalement et l‘amplicateur passera
automatiquement en veille si les prises d‘entrée ou de sortie pour bae restent
inutilisées.
Face arrière
1. Fusible d’alimentation
La valeur du fusible secteur est indiquée sur la face arrière. N‘utilisez jamais un fusible
de valeur incorrecte et n‘essayez jamais de le court-circuiter.
2. Entrée d’alimentation secteur
Le cordon d‘alimentation secteur détachable fourni se branche ici. Le cordon ne
doit être branché qu‘à une prise secteur compatible avec les besoins électriques
de tension, puissance et fréquence indiqués en face arrière. En cas de doute,
demandez conseil à un technicien qualié.
3. H.T. Fuse (fusible haute tension)
La valeur du fusible haute tension est spéciée en face arrière. N‘utilisez jamais un
fusible de valeur incorrecte et n‘essayez jamais de le court-circuiter.
4. Sorties pour baffle
Français
Français
La sortie « 1x16 Ohm » sert à la connexion d’un seul bae d’extension 16 Ohm.
Les sorties « 1x8 Ohm or 2x16 Ohm » sont conçues pour la connexion d’un seul
bae d’extension 8 Ohm ou de deux baes 16 Ohm.
Sortie « 1x16 Ohm » Sorties « 1x8 Ohm or 2x16 Ohm »
Bae interne 16 Ohm ✓ X X
Bae interne 16 Ohm X ✓ ✓
plus un bae d’extension 16 Ohm
Simple bae d’extension 16 Ohm ✓ X X
Deux baes d’extension 16 Ohm X ✓ ✓
Simple bae d’extension 8 Ohm X ✓ X
AVERTISSEMENT: la sortie « 1x16 Ohm » ne doit jamais être utilisée en même
temps qu‘une des sorties « 1x8 Ohm or 2x16 Ohm ». Ne pas faire correspondre
correctement l‘impédance de l‘amplicateur et celle des baes endommagera
l‘amplicateur.
5. Prise XLR de sortie symétrique mono à émulation de baffle
Cette sortie émule les caractéristiques tonales d‘un bae de guitare et produit une
saturation de lampe naturelle pour le branchement à un enregistreur ou à une table
de mixage. Avec un bon câble blindé, la connexion XLR symétrique fournit un signal
de haute qualité, sans parasites.
6. Prise jack de sortie stéréo à émulation de baffle
Cette sortie émule les caractéristiques tonales d‘un bae de guitare et produit une
saturation de lampe naturelle pour le branchement à un enregistreur ou à une table
de mixage. Utilisez toujours un câble blindé de bonne qualité. La prise jack stéréo
accepte le branchement d’un casque pour vous permettre de travailler en silence.
7. Sélecteur d’émulation de baffle
Ce sélecteur vous permet de choisir le bae émulé par la sortie concernée entre
un modèle 4x12 à dos fermé et un modèle 1x12 à dos ouvert. Cette sélection
s‘applique aux sorties XLR symétrique et jack stéréo.
8. Entrée MP3 / ligne
Il s‘agit d‘une entrée sur mini-jack stéréo. Branchez ici la sortie de votre appareil
audio et réglez son volume en fonction de celui de votre guitare pour jouer avec.
REMARQUE: cette connexion est stéréo et restera stéréo par la prise jack de
sortie stéréo à émulation de bae (6). Toutes les autres sorties mixeront le signal
stéréo entrant et produiront une version mono.
9. Niveau de boucle d‘effets
Le commutateur Eects Loop Level règle la boucle d‘eets sur +4 dBV ou −10 dBV,
ce qui vous permet de l‘utiliser avec un équipement professionnel (réglage +4 dBV)
ou des eets de niveau guitare tels que des pédales d‘eets (réglage −10 dBV).

3938
10. Retour de boucle d‘effets
Connectez ici la sortie (mono) d‘une unité d‘eets externes.
11. Départ de boucle d‘effets
Branchez ici l‘entrée (mono) d‘une unité d‘eets externe.
11. Départ de boucle d’effets
Branchez ici l’entrée (mono) d’un appareil d’eets externe.
12. Pédalier
Un pédalier à deux boutons peut être connecté ici. Le pédalier permet de choisir
entre les canaux Clean et Overdrive, ainsi qu’entre les deux voicings de chaque
canal.
REMARQUE: l‘utilisation d‘un pédalier désactivera les sélecteurs de canal et de
voicing de la face avant. Par conséquent, le contrôle complet par le pédalier est
assuré quelle que soit la façon dont l‘amplicateur est réglé.
COMMUTATION EXTERNE: cette prise peut également être utilisée par ceux qui
souhaitent contrôler les principales fonctionnalités de l‘ampli depuis un dispositif de
commutation externe qui se connecte aux 3 points de la prise jack.
Les conditions d’ouverture/fermeture de contact suivantes permettent de commuter
les canaux et les voicings comme suit :
POINTE BAGUE CANAL VOICING
Fermé Fermé Clean Voice 1
Fermé Ouvert Clean Voice 2
Ouvert Fermé Overdrive Voice 1
Ouvert Ouvert Overdrive Voice 2
13. Prise USB de sortie à émulation de baffle
Cette prise USB de type B sert à connecter un ordinateur au moyen d’un câble approprié
(non fourni). La sortie sera un signal de guitare stéréo entièrement traité avec émulation
de bae et réverbération stéréo.
Des pilotes audio standard sont utilisés pour connecter l‘amplicateur à un PC, Mac ou
autre périphérique d‘enregistrement utilisable. Aucun pilote spécique n‘est requis.
Pour des renseignements sur l‘enregistrement USB à faible latence, consultez :
www.blackstaramps.com/usbrecording
REMARQUE: branchez toujours l‘amplicateur à un port USB principal, souvent à
l‘arrière de l‘ordinateur. L’amplicateur apparaîtra dans le logiciel d’enregistrement
comme un périphérique de capture audio.
La sortie audio par USB de votre amplicateur directement sur votre ordinateur est
Français
Français
transportée sur quatre canaux indépendants et simultanés:
14. Antivol Kensington
Aussi connu sous le nom d‘encoche de sécurité Kensington ou K-Slot, il s‘agit
d‘un orice de taille spécique pour installer un cadenas compatible Kensington an
d‘arrimer l‘amplicateur à un point xe. Pour plus d‘informations, veuillez consulter
le site www.kensington.com

4140
Français
Français
Spécifications techniques
HT-5R MkII
Puissance (RMS): 5watts
Lampes: 1 x 12BH7, 1 x ECC83
Poids (kg): À confirmer
Dimensions (mm): 443 x 405 x 252
Pédalier: FS-16 inclus
Haut-parleur: 12” spécialement conçu
HT-5RH MkII
Puissance (RMS): 5watts
Lampes: 1 x 12BH7, 1 x ECC83
Poids (kg): À confirmer
Dimensions (mm): 398 x 213 x 222
Pédalier: FS-16 inclus
HT-20R MkII
Puissance (RMS): 20watts
Lampes: 2 x EL84, 2 x ECC83
Poids (kg): À confirmer
Dimensions (mm): 503 x 455 x 271
Pédalier: FS-16 inclus
Haut-parleur: 12” spécialement conçu
HT-20RH MkII
Puissance (RMS): 20watts
Lampes: 2 x EL84, 2 x ECC83
Poids (kg): À confirmer
Dimensions (mm): 468 x 245 x 222
Pédalier: FS-16 inclus

4342
Español
Español
¡AVISO!
Importante Información de seguridad
LEA LAS SIGUIENTE INFORMACIîN DETENIDAMENTE Y CONSERVE LAS
INSTRUCCIONES PARA FUTURAS CONSULTAS.
SIGA TODOS LOS AVISOS E INSTRUCCIONES MARCACADAS EN LOS
PRODUCTOS.
PELIGRO! Alto voltaje interno.
NO ABRA LA TAPA DEL EQUIPO. NO HAY PARTES UTILIZABLES PARA OTROS
FINES EN ESTE EQUIPO. REMITA CUALQUIER ANOMALÍA AL SERVICIO TÉCNICO
CUALIFICADO.
UTILICE TRAPOS SECOS PARA LIMPIAR.
SE PUEDE FORMAR CONDENSACIÓN DENTRO DEL AMPLIFICADOR SI ESTE SE
HA MOVIDO DE UN LUGAR FRIO A OTRO MÁS CALIDO. EN EL CASO DE QUE
SE MOVIERA EL AMPLIFICADOR DE UN SITIO MÁS FRIO A OTRO MÁS CALIDO
O A LA INVERSA, DEJE UN RATO EL AMPLIFICADOR SIN ENCENDER PARA QUE
ESTE ALCANCE LA TEMPERATURA MEDIA DEL NUEVO LUGAR.
LAS MODIFICACIONES NO AUTORIZADAS ESTÁN EXPRESAMENTE PROHIBIDAS
POR BLACKSTAR AMPLIFICATIO LTD.
NUNCA APOYE OBJETOS EN NINGUNO DE LOS AGUJEROS DE VENTILACIîN
LOCALIZADOS EN LAS TAPAS DEL EQUIPO.
NO EXPONGA LOS EQUIPOS A LA LLUVIA, LIQUIDOS O HUMEDAD DE
CUALQUIER TIPO.
SIGA TODOS LOS AVISOS E INSTRUCCIONES MARCADAS EN EL PRODUCTO.
NO PONGA LOS EQUIPOS EN CARRETILLAS INESTABLES O MESAS
NORMALES. EL EQUIPO PUEDE CAER CAUSANDOSE SERIOS DAÑOS ASÍ
COMO A PERSONAS.
NO CUBRA O BLOQUEE LOS AGUJEROS DE APERTURA Y VENTILACIÓN.
ESTE PRODUCTO NO DEBE SER PUESTO CERCA DE UNA FUENTE DE CALOR
COMO PUEDE SER UN RADIADOR, ESTUFA O CUALQUIER PRODUCTOR O
AMPLIFICADOR DE CALOR.
USE SOLO LA FUENTE DE ALIMENTACIÓN QUE SEA COMPATIBLE CON LOS
VOLTAJES UTILIZADOS EN EL ARE EN DONDE ESTÉ.
LA FUENTE DE ALIMENTACIÓN DEBE DE SER MANEJADA CON CUIDADO Y
DEBE DE SER REMPLAZADA EN CASO DE CUALQUIER DAÑO.
NUNCA ROMPA LA TOMA DE TIERRA SOBRE EL CABLE DE CORRIENTE.
EL CABLE DE CORRIENTE DEBERÁ DE SER DESCONECTADO CUANDO LA
UNIDAD NO VAYA A SER USADA DURANTE UN TIEMPO.
ANTES DE ENCENDER UN CABEZAL, LA PANTALLA DEBERA ESTAR
CONECTADA COMO SE DESCRIBE EN EL LIBRO DE INSTRUCCIONES
UTILIZANDO LOS CONDUCTORES RECOMENDADOS POR EL FABRICANTE.
REEMPLAZE SIEMPRE LOS FUSIBLES DAÑADOS POR OTROS DE
CARACTERISTICAS IDENTICAS.
NUNCA DESCONECTE EL PROTECTOR DE LA TOMA DE TIERRA.
LA POTENCIA DE SONIDO DE LOS ALTAVOCES CUANDO LOS NIVELES SON
ALTOS PUEDEN CAUSAR UN DAÑO PERMANENTE. USTED DEBERÁ POR
TANTO EVITAR LA EXPOSICIÓN DIRECTA A LOS ALTAVOCES CUANDO ESTOS
ESTÉN OPERANDO A UN NIVEL ALTO. PONGASE PROTECTORES DE OIDOS SI
DEBE DE ESTAR CONTINUAMENTE EXPUESTO.
SI EL PRODUCTO NO FUNCIONARA UNA VEZ SEGUIDAS TODAS LAS
INSTRUCCIONES, REMÍTALO AUN SERVICIO TÉCNICO CUALIFICADO.
LA OFICINA AMERICANA DE PROTECCIÓN DE LA SALUD HA ESPECIFICADO
LOS SIGUIENTES NIVELES ADMISIBLES DE EXPOSICIÓN DE RUIDO.
CUALQUIER EXPOSICIÓN POR ENCIMA DE LOS LIMITES MENCIONADOS
PUEDEN PROVOCAR PERDIDAS AUDITIVAS.
LOS TAPONES PROTECTORES DEBEN DE SER UTILIZADOS CUANDO SE OPERE
ESTE SISTEMA DE AMPLIFICACIÓN PARA PREVENIR DE UNA PERMANENTE
PERDIDA DE OIDO SI LA EXPOSICIÓN ES EXCESIVA O ESTÁ POR ENCIMA DE
LOS LIMITES DESCRITOS ARRIBA. PARA PREVENIR CONTRA UNA EXPOSICIÓN
PELIGROSA A ALTOS NIVELES DE SONIDO SE RECOMIENDA A TODAS LAS
PERSONAS QUE PUEDAN ESTAR EXPUESTAS A NIVELES PRODUCIDOS POR
UN SISTEMA DE AMPLIFICACIÓN COMO ESTE QUE PROTEJAN SUS OIDOS
MIENTRAS LA UNIDAD ESTÁ EN FUNCIONAMIENTO.
Todos los aparatos eléctricos o electrónicos se deben desechar de
forma distinta del servicio municipal de recogida de basura, a través
de puntos de recogida designados por el gobierno o las autoridades
locales.
DURACIÓN POR DIA Y HORAS NIVEL DE SONIDO DBA BAJA RESPUESTA
8 90
6 92
4 95
3 97
2 100
1
1
/
2
102
1 105
1
/
2
110
1
/
4
or less
115

4544
Introducción
Gracias por comprar este amplicador Blackstar HT Venue MkII. Como todos
nuestros productos, este amplicador es el resultado de incontables horas de
meticulosa Investigación y Desarrollo por parte de nuestro prestigioso equipo de
diseño. Con base en Northampton (Reino Unido), el equipo de Blackstar está
formado por músicos experimentados y el único objetivo del proceso de desarrollo
es el de proporcionar a los guitarristas con productos que sean las herramientas de
autoexpresión denitivas.
Todos los productos Blackstar son sometidos a intensivas pruebas de laboratorio y
de rodaje para asegurar que están fuera de compromiso en términos de abilidad,
calidad y, sobretodo, TONO.
El diseño exible de dos canales del HT Club MkII cuenta con el exclusivo control
patentado ISF (Innite Shape Feature) y aunque tiene un conjunto de control integral,
sigue siendo sencillo e intuitivo de usar. Por favor lee este manual detenidamente
para asegurarte de que obtienes el máximo rendimiento de tu producto Blackstar.
Si te gusta lo que oyes y quieres averiguar mas acerca de la línea de productos
Blackstar, por favor visita nuestro sitio web en www.blackstaramps.com.
¡Gracias!
El Equipo Blackstar
Características
El HT Venue MkII es un amplicador muy versátil y adecuado para una amplia gama
de estilos y situaciones.
El Clean Channel tiene dos voces; uno basado en un clásico circuito estadounidense
y el otro basado en un clásico tono británico. El botón Voice recongura el
preamplicador de sonido, EQ y la ganancia de la estructura de la válvula, así
como también la potencia de la amortiguación del amplicador. Esto produce una
respuesta de graves limpia, brillante y apretada pero sólida para el tono americano
y un „toque“ altamente sensible con la parte inferior más oja para el tono británico
que se puede empujar en una sobremarcha de gama media cuando se conduce
con fuerza. El ajuste de voz también se puede seleccionar a través del pedal.
El HT Stage MkII tiene dos voces en el canal Overdrive que comparten una sección
de EQ común Estas dos voces proporcionan una amplia gama de tonos saturados.
Como con el Clean Channel, cada una de estas voces también se puede seleccionar
por el pedal o footcontroller. Al cambiar entre los canales, el amplicador llamará a
la conguración especíca de voz que se usó por última vez en ese canal.
Los canales Overdrive se caracterizan por un tono que es alto en Gain, pero evita
cualquiera de la parte superior de la parte superior ‚zz‘ que a menudo se encuentran
en otros diseños. Este es el resultado de técnicas únicas del preamplicador y
amplicador de potencia, que también benecian al músico en la forma en que
los overdrives se limpian maravillosamente a medida que se reduce el volumen de
la guitarra. Incluso en los ajustes más extremos, los canales Overdrive suenan de
forma natural.
El control patentado ISF (Innite Shape Feature) es exclusivo de Blackstar
Amplication y representa un gran paso adelante en la exibilidad del modelado de
tonos. El control ISF desplaza la respuesta del conjunto de tres tonos de control
entre, por un lado una respuesta de tipo US y por el otro, una respuesta de tipo
UK. Es importante destacar que entre los dos extremos se encuentra un número
innito de opciones de tonos alternativos que de otro modo no estarían disponibles.
El amplicador ofrece un reverb digital que puede ser ajustado a través del
control de reverb en el panel frontal o encender y apagarlo a través del pedal de 5
posiciones opcional. Un interruptor en el panel posterior selecciona entre ‚Dark‘ y
‚Light‘. El ajuste Dark se basa en un reverb de habitación y el ajuste Light se basa
en un reverb de lámina.
En el panel frontal hay un interruptor de encendido para cambiar el amplicador
entre una potencia máxima y una del 10%. Esto signica que la profundidad
tonal total de la etapa de potencia EL34 se puede disfrutar en cualquier volumen,
manteniendo el sonido distintivo de las válvulas de potencia trabajando duro.
Un conector USB permite enviar hasta 4 canales de la señal de la guitarra (seco,
preamplicador y emulado estéreo) en un ordenador para nes de grabación.
Dos salidas adicionales en la parte trasera, una toma de jack estéreo y un XLR
balanceado, también permiten que la señal de emulación del altavoz se conecte a
dispositivos externos para practicar, grabar o usar en vivo.
Español
Español

4746
Panel Frontal
1. Input
Conecta tu guitarra aquí. Usa siempre un cable apantallado de calidad.
Clean Channel
2. Clean Volume
Controla el volumen del Clean Channel. Girándolo en el sentido de las agujas del reloj
aumenta el volumen. En los ajustes extremos en el sentido de las agujas del reloj,
el preamplicador empezará a overdrive, particularmente en el modo „británico“.
3. Clean Voice
Este es un interruptor momentáneo que selecciona entre dos voces limpias. El
ajuste „American“ es muy limpio y luminoso, pero con un sólido y estrecho bajo nal;
Esta voz se selecciona cuando el LED de voz está apagado. El ajuste „británico“
tiene una respuesta de graves más baja con una gama media más cálida y es
muy sensible al nivel de salida de la guitarra y la dinámica del músico; Esta Voz se
selecciona cuando el LED de Voz está encendido. La válvula de gain y el sonido EQ
se recongura completamente entre cada voz.
4. Bass
El control Bass ajusta la cantidad de frecuencias graves en su tono. En sentido
contrario a las agujas del reloj el sonido será más estrecho en carácter. Al girar el
control en el sentido de las agujas del reloj aumentará progresivamente la respuesta
de graves del canal.
5. Treble
El control Treble permite ajustar las frecuencias agudas dentro del sonido. En los
ajustes más bajos (en sentido contrario a las agujas del reloj) el sonido será cálido
y de carácter más oscuro. A medida que se gira en sentido de las agujas del reloj
el sonido será más vivo.
Canal OD (Overdrive)
6. OD
Pulse este botón para seleccionar el canal OD. El canal OD está seleccionado
cuando el LED amarillo está encendido. Cuando el LED amarillo esta apagado, el
Clean Channel está seleccionado.
7. OD Gain
El control OD Gain ajusta la cantidad de overdrive o distorsión del canal OD. Los
ajustes bajos (en sentido contrario a las agujas del reloj) proporcionan un sonido
limpio a punto de romper. A medida que se incrementa en el sentido de las agujas del
reloj, el sonido se vuelve más distorsionado, moviéndose a través de los tonos crunch
hasta que, en su posición máxima, se alcanza un tono completamente distorsionado.
Español
Español
8. OD 1 Voice
Este es un interruptor momentáneo que selecciona entre las dos voces del canal OD.
Cuando el LED rojo pequeño está apagado, este canal tiene unoverdrive ‚clásico‘
pero ‚hot-rodded‘, con una amortiguación de potencia media del amplicador. Con el
LED rojo iluminado, el sonido de overdrive tiene un sonido más „moderno“ que incluye
un potente pre-overdrive impulso enfatizado a medias, así como un sonido más ojo y
agresivo debido a la amortiguación del amplicador de potencia reducida.
9. OD Volume
Este control ajusta el volumen total del canal OD. Aumenta el volumen girándolo en
el sentido de las agujas del reloj.
10. Bass
El control Bass ajusta la cantidad de frecuencias bajas en su tono. Este amplicador
tiene un avanzado circuito tonal ajustable que permite variar el tono, en sentido
contrario a las agujas del reloj un tono más apretado y cortante, girado totalmente
en sentido horario para un tono más cálido y fuerte.
11. Middle
El control Middle ajusta la cantidad de frecuencias medias en su tono. Las
frecuencias medias son particularmente importantes para establecer la cantidad de
„cuerpo“ que tiene su tono. Con el control Middle ajustado en su posición mínima
(totalmente a la izquierda), el sonido será agresivo y con un toque ideal para un
ritmo agresivo. A medida que se incrementa el control (en el sentido horario), la
cantidad de „cuerpo“ se incrementa, lo que es más adecuado para los tonos de
plomo sostenido de guitarra.
12. Treble
El control Treble permite un ajuste exacto de las frecuencias agudas dentro del
sonido. En los ajustes bajos (en sentido contrario a las agujas del reloj) el sonido
será cálido y de carácter más oscuro. A medida que aumenta (sentido horario), el
sonido se iluminará. En su máximo, el sonido será agresivo y cortante.
13. ISF (Infinite Shape Feature)
El control patentado ISF funciona junto con los
controles Bass, Middle y Treble. Te permite
elegir el tono exactao que preera. Completamente
en sentido contrario a las agujas del reloj tiene una
característica más ‘American’ con un apretado nal y
medio más agresivo, girando totalmente a la derecha
tiene una característica británica que es más „leñosa“
y menos agresiva.
A diferencia de los controles convencionales de “contorno”, los controles Bass,
Middle y Treble permanecen interactivos entre sí, igual que en una pila de tonos de un
amplicador de guitarra tradicional. Esto conduce a una respuesta musical muy familiar.
US
AU
K

4948
Master
14. Reverb
El control Reverb ja el nivel general del efecto reverb. Con el control completamente
a la izquierda no habrá reverb. Al girar el control en sentido horario se aumenta la
cantidad de reverb.
15. Volume
Esto controla el volumen total de su amplicador. Se aumenta el volumen girándolo
en sentido de las agujas del reloj.
16. Interruptor de encendido
Este interruptor permite la reducción salida desde la potencia máxima hasta un
10% de potencia. Esto signica que la profundidad tonal total del amplicador
de potencia EL34 se puede disfrutar a volúmenes más bajos, por lo que el HT
Venue MkII es ideal para grabar, para conciertos más pequeños e incluso para uso
práctico en casa. Trabajando junto con las tensiones del amplicador de potencia,
este método de reducción de potencia no supone ninguna pérdida de tono de otros
sistemas de reducción de potencia.
17. Indicador de encendido
El indicador de encendido se encenderá cuando el amplicador esté encendido.
18. Standby
Este interruptor habilita la etapa de salida. Siempre encienda este interruptor al
menos 30 segundos después del interruptor de alimentación (19) y, preferiblemente,
apagar el interruptor de alimentación después de cambiar a Standby. Durante
las pausas cortas use sólo este interruptor para encender o apagar la salida del
amplicador. Para evitar cualquier ruido no deseado que se envía al altavoz se
recomienda ponerlo en stanby durante unos segundos antes de poner el interruptor
principal a la posición OFF.
19. Encendido
Este interruptor se utiliza para encender y apagar el amplicador. Siempre debe
encender este interruptor antes de encender el interruptor Standby (18).
Panel trasero
1. Fusible de red
El valor del fusible principal se especica en el panel trasero. Nunca utilice un fusible
del valor incorrecto o intente omitirlo..
2. Entrada de red
Aquí se conecta el cable de alimentación desmontable suministrado. El cable sólo
debe conectarse a una toma de corriente que sea compatible con los requisitos
de voltaje, potencia y frecuencia indicados en el panel posterior. En caso de duda,
obtenga asesoramiento de un técnico calicado.
Español
Español
3. Fusible H.T.
El valor del fusible H.T. se especica en el panel trasero. Nunca utilice un fusible del
valor incorrecto o intente omitirlo.
4. Salidas del altavoz
La salida marcada ‚1x16 Ohm‘ es para la conexión de un único altavoz de extensión
de 16 Ohm.
Las salidas marcadas ‘1x8 o 2x16 Ohm’ son para la conexión de un único altavoz
de extensión de 8 Ohm o dos de 16 Ohm.
1x16 Ohm output 1x8 Ohm o 2x16 Ohm’ outputs
Altavoz interno 16 Ohm combo ✓ X X
Altavoz interno 16 Ohm combo X ✓ ✓
más una extensión de 16 Ohm
Un gabinete de extensión de 16 Ohm ✓ X X
Dos gabinetes de extensión de 16 Ohm X ✓ ✓
Único gabinete extensión de 8 Ohm X ✓ X
ADVERTENCIA: La salida marcada ‚1x16 Ohm‘ nunca debe ser utilizada al mismo
tiempo que cualquiera de las salidas marcadas ‚1x8 Ohm o 2x16 Ohm’. Si no se
ajusta correctamente la impedancia del amplicador y de los altavoces, se dañará
el amplicador.
5. Enchufe de Salida emulada mono balanceada XLR
Esta salida emula las características tonales de un gabinete de altavoz de guitarra
y proporciona un tono de saturación de válvula natural para la conexión a un
dispositivo de grabación o mesa de mezclas. Utilizando un cable blindado de
buena calidad, la conexión XLR balanceada proporciona una señal de alta calidad
sin ruido.
6. Enchufe de salida estéreo emulada
Esta salida emula las características tonales de un gabinete de altavoz de guitarra
y proporciona un tono de saturación de válvula natural para la conexión a un
dispositivo de grabación o mesa de mezclas. Siempre use un plomo de buena
calidad. El enchufe estéreo acomoda la conexión de auriculares a esta salida,
permitiéndole practicar silenciosamente.
NOTA: Las salidas XLR y Stereo Emulated permanecen activas incluso en modo
de espera. Esto permite la grabación silenciosa o la práctica cuando el amplicador
está en modo de espera, independientemente de cualquier altavoz conectado.
7. Botón de salida emulada del gabinete
El botón le permite seleccionar una emulación de 4x12 cerrada o 1x12 abierta para
la emulación de altavoz. Esto se aplicará tanto a las salidas XLR balanceadas como
a las salidas estéreo.

5150
8. Reverb Dark/Light
Con el interruptor en la posición „out“ (oscuro), el reverb se expresa para tener una
calidad de „room“ cálida. Si ajusta a la posición ‚in‘ (luz), el reverb se expresa para
tener una calidad brillante, aireado, típico de un reverb del estilo ‘plate’. El ajuste
elegido se aplicará a todos los canales y voces.
9. Efectos Loop Level
El interruptor de Efectos Loop Level ajusta el bucle de ecualización a +4dBV /
-10dBV, lo que le permite utilizarlo con equipos profesionales (ajuste de +4dBV) o
con niveles de guitarra como los pedales de ecualización (ajuste de -10dBV).
10. Efectos Loop Return
Conecte aquí la salida (mono) de una unidad de ecualización externa.
11. Efectos Loop Send
Conecte aquí la entrada (mono) de una unidad de ecualización externa.
12. Enchufe 5-way footcontroller
El footcontroller o pedal opcional FS-14 de 5 vías (no suministrado), se conecta
aquí. Este pedal permite el acceso instantáneo a todos los canales y voces, además
de la función de impulso global y reverb. Este debe ser conectado a su amplicador
usando el cable suministrado con el FS-14. Alternativamente, se puede usar un
cable blindado de guitarra de buena calidad.
Al presionar el interruptor Clean en el pedal, se seleccionará Clean Channel. Al
presionar el interruptor Clean mientras el Clean Channel ya esté seleccionado
cambiará el Clean Voice. La voz previamente seleccionada se mantendrá al cambiar
al Clean Channel.
Al presionar el interruptor OD1 se seleccionará el canal de overdrive, Voz 1. Del
mismo modo, presionando el interruptor de OD 2 se seleccionará el canal de
overdrive, voz 2. Pulsando OD1 o OD2 cambia en el FS-14 mientras que la voz
está seleccionada no tendrá efecto.
13. Enchufe 2-way footswitch
El footswitch o interruptor de pie de 2 vías suministrado se conecta aquí. El pedal
FS-15 permite seleccionar las dos voces del Clean Channel y una voz elegida de
cada canal de Overdrive.
Al presionar cualquier canal en el FS-15 se alternará entre el Clean Channel y
un canal de Overdrive. Cuando se selecciona Clean Channel, al presionar el
conmutador de voz en el FS-15 se alternará entre las dos voces Clean.
Si el footswitch FS-15 suministrado no está disponible, se puede utilizar un pedal
genérico de enganche de 2 vías con conexión de jack TRS.
MODO ALTERNATIVO: Este modo está destinado a personas que desean
controlar las mismas características principales del amplicador mediante un
dispositivo de conmutación externo que se conecta a través de la conexión TRS.
Español
Español
Para cambiar al modo alternativo: simplemente presione y mantenga presionados
los botones Clean Select y Clean Voice durante 5 segundos. Los LED verdes
parpadearán entonces para indicar el cambio de modo. El amplicador mantendrá
este modo, incluso cuando se cambie o, hasta que cambie de nuevo al modo
normal/pedal.
Una vez en modo alternativo, se aplicarán los siguientes ajustes cuando se realice
una conexión TRS adecuada:
TIP RING CHANNEL VOICE
Cerrado Cerrado Clean Voice 1
Cerrado Abierto Clean Voice 2
Abierto Cerrado Overdrive Voice 1
Abierto Abierto Overdrive Voice 2
NOTA: Si ambos footcontrollers están conectados al mismo tiempo, cualquier
entrada de 2 vias será ignorada por el amplicador ya que el de 5 vias se comporta
como el controlador maestro.
14. Enchufe de salida emulada USB
La entrada de USB de tipo B es para la conexión a un ordenador mediante un cable
adecuado (no suministrado). Es capaz de múltiples entradas y salidas simultáneas.
Los controladores de dispositivo estándar se utilizan para conectar el amplicar a
un PC o Mac, así pues ningún dispositivo adicional es necesario. Para una guía en
latencia baja visite:
www.blackstaramps.com/usbrecording
NOTA: Siempre conecte el amplicador a través del puerto USB principal,
normalmente se encuentra en la parte trasera del ordenador.
El amplicador aparecerá como un dispositivo de audio.
La salida de audio de su amplicador al ordenador via USB se hace a través de
cuatro canales simultáneos e independientes:
Canal 1: Emulación de Estéreo, canal izquierdo — El sonido de guitarra
completamente procesado, con emulación de gabinete de altavoz. Este contiene el
canal izquierdo del reverb estéreo interno.
Canal 2: Emulación de Estéreo, canal derecho — El sonido de guitarra
completamente procesado, con emulación de gabinete de altavoz. Este contiene el
canal derecho del reverb estéreo interno.
Canal 3: Salida del Preamplicador — El sonido del preamplicador de la etapa de
voz (Voice) y EQ, tomado antes de los efectos, y sin ninguna emulación del gabinete
del altavoz. Ideal para usar con sus propios efectos y plugins de emulación de su
software de grabación / DAW.

5352
Canal 4: Señal de guitarra sin procesar — La señal tal y como sale de la guitarra.
Estas secuencias de audio pueden grabarse simultáneamente a través del
software de grabación elegido/DAW.t.
CONSEJO: Para grabar un sonido reverb con efecto estéreo, ponga el canal
emulado izquierdo estéreo 100% a la izquierda en la mezcla, y el canal derecho
100% a la derecha.
El HT Stage MkII también puede recibir, desde su ordenador, la entrada de audio.
Canal 1: Entrada de línea, canal izquierdo - Se utiliza para la supervisión de audio
o la reproducción de pistas de acompañamiento a través de la salida emulada.
Canal 2: Entrada de línea, canal derecho - Se utiliza para la supervisión de audio o
la reproducción de pistas de acompañamiento a través de la salida emulada.
15. Kensington Lock
También conocido como Kensington Security Slot o K-Slot, este es un oricio de
tamaño especíco para conectar un bloqueo Kensington compatible para jar el
amplicador. Para obtener más información, consulte www.kensington.com
Español
Español
Especificaciones Técnicas
HT CLUB 40 MkII
Potencia (RMS): 40 Watios
Válvulas: 2 x EL34, 2 x ECC83
Peso (kg): 24
Dimensiones (mm): 588 x 480 x 260
Footcontroller: El FS-15 está incluido y es opcional, para el control de canales,
voces, ‘boost’ y reverb el FS-14.
HT CLUB 50 MkII
Potencia (RMS): 50 Watios
Válvulas: 2 x EL34, 2 x ECC83
Peso (kg): 14,6
Dimensiones (mm): 558 x 220 x 245
Footcontroller: El FS-15 está incluido y es opcional, para el control de canales,
voces, ‘boost’ y reverb el FS-14.

5554
Japanese
Japanese

5756
はじめに
この度はBlackstar HT MkIIアンプをお買い上げいただき、誠にありがとうござ
います。他のBlackstar製品と同様、本機もワールドクラスの開発チームにより
膨大な時間をかけて研究開発した成果です。イギリス・ノーザンプトンを拠点
とするBlackstarは、すべてのスタッフが現役ミュージシャンであり、各製品の
開発プロセスは、ミュージシャンが自分の音を表現することができるための究
極のツールづくりをゴールとしています。
すべてのBlackstar製品は実験室、そして現場での過酷なテストを受け、信頼性
や品質面、そして何よりそのサウンドが確かなものである点で一切の妥協をし
ておりません。
本マニュアルでは次の機種をカバーしています:
• HT-5R MkII
• HT-5RH MkII
• HT-20R MkII
• HT-20RH MkII
HT MkIIシリーズはサウンドメイキングの自由度が高い2チャンネル構成のアン
プで、Blackstar独自のISF(インフィニット・シェイプ・フィーチャー:特許
取得済)が大きな特長です。このISFはトーンに関わる各種要素を広範囲にわ
たってコントロールする技術ですが、使い方は極めてシンプルです。このハン
ドブックをよくお読みになり、Blackstar製品から最高のサウンドを引き出して
ください。
本機を気に入ってくださり、さらに他のBlackstar製品にご興味がありました
ら、ぜひBlackstarウェブサイト(www.blacktaramps.com)にアクセスしてみ
てください。
重ねて、この度はBlackstar製品をお買い上げいただき、誠にありがとうござい
ました。
Blackstarチーム
主な特長
HT-5R MkIIとHT-20R MkIIは、様々なプレイスタイルやシチュエーションに適
した守備範囲の広いアンプで、定評のあるHT Venue MkIIシリーズから極上の
トーンと革新的な機能を受け継いでいます。
クリーン・チャンネルには2種類のボイス(サウンド)があります。1つはア
メリカン・サウンド、もう1つはブリティッシュ・トーンの定番サウンドで
す。Voiceスイッチを切り替えることで、プリアンプのボイシング、EQと真空
管のゲイン構成、そしてパワーアンプのダンピングが変化します。これによ
り、クリーンでブライト、タイトながらも芯のあるボトムエンドが特徴のアメ
リカン・トーンや、ゲインを上げるとミッドレンジから歪んでくる、きらめく
ようなトップエンドにやや控えめなボトムエンドのブリティッシュ・トーンが
得られます。Voiceスイッチの切り替えはフットスイッチでも行えます。
オーバードライブ・チャンネルにも2種類のボイスがあり、こちらではEQセク
ションは共通になります。2種類のボイスを切り替えることで、幅広いオーバ
ードライブ・トーンを作り出せます。
こちらもクリーン・チャンネルと同様、フットスイッチでボイスの切り替えが
できます。
オーバードライブのボイスはゲインが高い状態でのトーンとしてボイシングさ
れていますが、他のアンプで見られるような耳障りなトップエンドが出ないよ
うに調整されています。これはプリアンプとパワーアンプに独自の設計テクニ
ックを使用しているためで、これによりオーバードライブ時でもギター側の
ボリュームを絞ることで美しいクリーントーンになるというメリットがありま
す。また、かなり極端なセッティングにしても、ナチュラルな質感を残したオ
ーバードライブ・サウンドになります。
特許取得済のISF(インフィニット・シェイプ・フィーチャー)コントロー
ルは、ギタートーンづくりの自由度を別次元に高めるBlackstar独自の技術で
す。ISFを操作すると、3つのトーンスタックの特性が変化して、アメリカン・
タイプのレスポンスからブリティッシュ・タイプのレスポンス、あるいはその
中間を自在に調節できます。ここで重要なのは、アメリカンとブリティッシュ
の中間的サウンドを無段階で調節できることです。これは他のアンプでは得ら
れないポイントです。
リバーブは、ナチュラルな質感のデジタル・リバーブを搭載し、フロントパネ
ルにあるReverbノブで深さを調節できます。
電源スイッチはフロントパネルにあり、フルパワーと10%パワーに切り替える
ことができます。これにより、どんな音量でもフルパワー時の豊かなサウンド
を引き出すことができます。
USBポートからはスピーカー・エミュレーションがかかったオーディオを出力
でき、パソコンでのレコーディングにも最適です。
他にもステレオ・ジャックとバランス出力のXLRアウトがあり、このそれぞれ
にもスピーカー・エミュレーションがかかったサウンドを出力でき、練習時や
レコーディング、ライブなどで外部機器に接続する時に便利です。
Japanese
Japanese

5958
フロントパネル
1. Input
ギターからの信号をここに接続します。ケーブルは、高品質の楽器用ケーブル
(シールド)をご使用ください。
クリーン・チャンネル
2.Clean Volume
クリーン・チャンネルの音量を調節します。ノブを時計回りに回すと音量が
上がります。最大にするとプリアンプで歪みが出始めます。特にブリティッシ
ュ・モード時で歪みやすくなります。
3. Clean Voice スイッチ
これは、二つのきれいな声の間を選択モーメンタリスイッチです。 「アメリカ
の」の設定は非常に清潔で明るいが、固体とタイトなローエンドです。 この音
声は、音声LEDが消灯しているときに選択されます。 「英国の」の設定は暖か
いミッドレンジとの緩い低音レスポンスを持ち、ギターとプレイヤーのダイナ
ミクスの出力レベルに非常に敏感です。 この音声LEDが点灯しているとき、音
声が選択されています EQの発声とバルブ利得構造は、完全に各ボイス間再構成
され.
4.Tone
クリーン・チャンネルのトーン(ベースとトレブル)を同時に調節します。ノ
ブが反時計回りいっぱいのポジションではダークで低域が調教されたキャラク
ターに、そこから時計回りに上げていくと徐々に明るいトーンになっていき、
それにつれて低域が抑えられていきます。
OD(オーバードライブ)チャンネル
5. OD Selectスイッチ
このスイッチを押すとODチャンネルに切り替わります。この時、黄色のLEDが
点灯します。このLEDが消えている場合は、クリーン・チャンネルが選択され
た状態になります。
6. OD Gain
ODチャンネルのオーバードライブ/ディストーションの深さを調節します。反
時計回りのセッティングではクリーントーンから歪みが生じ始めるギリギリの
サウンドになります。ノブを時計回りに上げていくと歪みが徐々に深くなり、
クランチトーンを経てノブが最大になると完全に歪んだサウンドになります。
7. OD Voiceスイッチ
ODチャンネルの2つのボイスを切り替えます。赤LEDが控えめに点灯している場
合、クラシックながらもややホットな(ホットロッド)オーバードライブになり
ます。この状態では、パワーアンプのダンピングは中間程度です。赤LEDが明る
く点灯している場合、オーバードライブ・サウンドはよりモダンなボイシングと
なり、ミッドレンジが大幅に強調され、パワーアンプのダンピングが抑えられて
よりダーティでアグレッシブなサウンドになります。
8. OD Volume
ODチャンネルのボリュームを調節します。ノブを時計回りに上げていくと音
量が上がります。
9. Bass
ローエンドのトーンを調節します。本機は独自のトーン回路を搭載していま
すので、ノブが反時計回りのセッティングではタイトに抑えられたローエンド
に、時計回りいっぱいのセッティングにするとウォームで重厚なローエンドに
なります。
10. Middle
ミッドレンジのトーンを調節します。ミッドレンジはギター・サウンドのボデ
ィとなるため、特に重要な帯域です。最小値(反時計回りいっぱいの状態)で
はミッドを激しくえぐり取ったミッド・スクープになり、アグレッシブなバッ
キングに適したトーンになります。ノブが中間の位置になってくるとギタート
ーンのボディが出始めてリード向きのトーンになっていきます。
11. Treble
トレブルのトーンを調節します。反時計回りの控えめなセッティングではウォ
ームでダークなトーンになります。ノブを時計回りに上げていくとサウンドが
徐々にブライトになっていきます。最大時ではアグレッシブでヌケが強烈な(
他のパートに埋もれない)トーンになります。
12. ISF(インフィニット・シェイプ・フィーチャー)
ISF(特許取得済)コントロールはトーン・コントロール(ベース、ミッド、
トレブル)と併せて動作します。ISFを調節することで、最終的なトーンが決
まります。反時計回りいっぱいのセッティングにするとタイトなボトムエン
ド、アグレッシブなミッドレンジのアメリカン・キャラクターになり、時計回
りいっぱいの状態では、アグレッシブさはやや控えめになりつつ、より「ウッ
ディ」な質感のブリティッシュ・キャラクターになります。
一般的な「コンター(Contour)」やパラメトリックEQとは異なり、トーン・
コントロール(ベース、ミッド、トレブル)はトラディショナルなトーンスタ
ックと同様の動作のままとなりますので、より分かりやすく、音楽的な音作り
ができます。
Master
13. Reverb
リバーブの音量を調節します。ノブが反時計回りいっぱいの状態でリバーブが
オフになります。その状態からノブを時計回りに上げていくとリバーブ量が大
きくなっていきます。
14. Volume(HT-20R/RH MkIIのみ)
アンプ全体の音量を調節します。ノブを時計回りに回すと音量が上がります。
15. パワー・スイッチ
このスイッチは出力段のパワーをフルと10%の2段階で切り替えることができ
Japanese
Japanese

6160
ます。これにより、真空管アンプを豊かなサウンドを小さな音量でも得ること
ができ、レコーディングや小規模会場でのライブ、自宅でのトレーニングに最
適です。この減力システムはパワーアンプの電圧と併せて動作し、他のシステ
ムにありがちなトーンを犠牲にすることなく、音量のみを小さくすることがで
きます。
16. パワー・インジケーター
アンプの電源がオンになると点灯します。
17. 電源スイッチ
アンプの電源オン/オフ・スイッチです。
注意:本機にはスタンバイ・スイッチはありません。電源オン時は通常動作と
同様に真空管はウォームアップされた状態のままとなり、インプットやスピー
カー・アウト端子に何も接続されていない場合に自動的にスタンバイ・モード
になります。
リアパネル
1. 電源フューズ
電源フューズの値(規格)はリアパネルにプリントされています。規格外のもの
を使用したり、フューズを取り外した状態では絶対に本機を使用しないでくださ
い。
2. 電源コード・コネクター
付属の電源コードをここに接続します。リアパネルに記載されている電源電圧
と周波数に合った電源に接続してください。
3. H.T.フューズ
H.T.フューズの値(規格)はリアパネルにプリントされています。規格外のも
のを使用したり、フューズを取り外した状態では絶対に本機を使用しないでく
ださい。
4. スピーカー・アウト
「1×16オーム」と記された出力は、単一の16オー
ムの拡張スピーカーキャビネットを接続するためで
す。
「1X8オームまたは2×16オーム」と記された出力
は、単一の8オーム拡張キャビネットまたは2つの16
オームキャビネットのいずれかの接続のためのもの
です.
‘1x16オーム」出力 ‘ 1x8オームまたは2×16オーム」を出力Ohm»
内部16オームコンボスピーカー ✓ X X
内部16オームコンボスピーカープラス X ✓ ✓
ワン16オームの拡張キャブ
1つの16オームの拡張キャビネット ✓ X X
2つの16オームの拡張キャビネット X ✓ ✓
シングル8オーム拡張キャビネット X ✓X
警告:「1x16 Ohm」の表示があるスピーカー・アウトは、「1x8 Ohm or 2x16
Ohm」の表示のスピーカー・アウトと絶対に同時使用しないでください。アン
プとスピーカーのインピーダンスが一致していないと、アンプが破損する恐れ
があります。
5. エミュレーション・アウト(XLR:モノ)
本機のナチュラルな真空管サウンドに、スピーカー・キャビネットのエミュレ
ーションがかかったオーディオ・アウトです。レコーディング機器やミキサー
にダイレクトに接続する場合に便利です。接続にはノイズのない高品質のXLR
ケーブルをご使用ください。
6. エミュレーション・アウト(TRS:ステレオ)
本機のナチュラルな真空管サウンドに、スピーカー・キャビネットのエミュレ
ーションがかかったオーディオ・アウトです。レコーディング機器やミキサー
にダイレクトに接続する場合に便利です。接続にはノイズのない高品質のケー
ブルをご使用ください。このジャックはステレオ・ジャックで、ヘッドフォン
も接続でき、アンプから音を出さずに練習したい場合などに便利です。
7. エミュレーション・アウト・キャビネット・スイッチ
このスイッチでエミュレーション・アウトにかかるキャビネットのキャラクタ
ーを切り替えます。キャラクターは、4x12密閉型と1x12オープンバックの2タ
イプです。このスイッチでの設定は、XLRとステレオ・ジャックの両方で共通
となります。
8. MP3/Lineイン
ステレオ・ミニジャックのライン入力です。MP3プレイヤーなどのオーディオ
機器からの信号を接続でき、音楽に合わせてギターを演奏することができます。
注意:このインプットに入ったステレオ信号は、エミュレーション・アウト(
ステレオ・ジャック)からステレオのまま出力されます。その他のアウト端子
からは、ステレオからモノに変換されて出力されます。
9. エフェクトループ・レベル・スイッチ
このスイッチでエフェクトループのレベルを+4dBVまたは-10dBVのいずれか
に切り替えます。レコーディング・スタジオ等で使用する業務用エフェクト機
器を接続する場合は+4dBVに、ギターレベルのエフェクターを接続する場合
は-10dBVにセットします。
10. エフェクトループ・リターン
外部エフェクトのアウト(モノ)をこのジャックに接続します。
11. エフェクトループ・センド
外部エフェクトのインプットに信号(モノ)を送る時に、このジャックに接続
します。
US
AU
K
Japanese
Japanese

6362
12. フットスイッチ
2ウェイ・フットスイッチ(スイッチが2つあるタイプ)を接続できます。フッ
トスイッチを接続すると、クリーンとODチャンネルの切り替えと、それぞれ
のチャンネルでのボイス切り替えができます。
注意:フットスイッチ接続時は、フロントパネルでのチャンネルとボイス切り
替え操作ができなくなりますので、その両方がコントロールできるフットスイ
ッチをご使用ください。
外部機器を使ったスイッチ操作:TRSケーブルを使用した外部スイッチで本機
のチャンネルとボイスの切り替えができます。
以下は、TRSの各端子とチャンネル、ボイスの切り替え動作をまとめたもので
す:
チップ リング チャンネル ボイス
クローズ クローズ クリーン ボイス1
クローズ オープン クリーン ボイス2
オープン クローズ OD ボイス1
オープン オープン OD ボイス2
13. エミュレーション・アウトUSBポート
タイプBコネクターのUSBケーブル(市販品をご使用ください)で、スピーカ
ー・キャビネット・エミュレーションとリバーブがかかったオーディオ信号を
ステレオでパソコンに出力できます。
PC/Mac、その他のレコーディング・ソフトで使用されている一般的なオーデ
ィオ・ドライバーに対応していますので、専用ドライバーは不要です。
USBを使用した低レイテンシーでのレコーディング・ガイドはこちらをご参照
ください:
www.blackstaramps.com/usbrecording
注意:パソコン側のUSBポートは、ハブを使用せずパソコン本体のUSBポート
に接続してください。パソコンのレコーディング・ソフト側では、本機はオー
ディオ・キャプチャー・デバイスとして表示されます。
14. ケンジントンロック
ケンジントン・セキュリティ・スロットまたはK-スロットとも呼ばれます。
本機を定位置に設置して盗難等を防ぐ際にご使用ください。詳しくは www.
kensinton.com をご覧ください。
Japanese
Japanese
仕様
HT-5R MkII
出力 (RMS):5W
真空管:12BH7 x 1、ECC83 x 1
重量 (kg):TBC
外形寸法 (mm):443 x 405 x 252
フットスイッチ:FS-16(付属)
スピーカー:カスタム・デザイン12インチ
HT-5RH MkII
出力 (RMS):5W
真空管:12BH7 x 1、ECC83 x 1
重量 (kg):TBC
外形寸法 (mm):398 x 213 x 222
フットスイッチ:FS-16(付属
HT-20R MkII
出力 (RMS):20W
真空管:EL84 x 2、ECC83 x 2
重量 (kg):TBC
外形寸法 (mm):503 x 455 x 271
フットスイッチ:FS-16(付属
スピーカー:カスタム・デザイン12インチ
HT-20RH MkII
出力 (RMS):20W
真空管:EL84 x 2、ECC83 x 2
重量 (kg):TBC
外形寸法 (mm):468 x 245 x 222
フットスイッチ:FS-16(付属

6564
34
ݎꞿ
ԳϵԦҫҞ֥
௩࢛༊ࢴкЎҞ֥Ɬخࡖӛϩ܋ܾкపԗϱ܁ߏꞭ
ᗇိݘԘϼϡӛϩܾф܋ܾࡣ
জꞿҙֵח֞ӑӉय़Ɬ
Տ༅Ӌэޖީ֕ᅃꞭޖީֵחЬϩѓݑНۅ࢘ϡחխꞭӛϩۅ࢘
ۥׁ۴ϡۅ࢘Ϫ௬ҲꞭ
ђѓݾ֜ೕꞭ
ԗۋӵॆԫຘߤϡࢲ॒Ѕ҄ϻޠϡ֧ঞꟀۋӵॆֵחНЍЀу
Тߤ፝ꞭӋэဠॆӓꟀࠄ৷ԗဠॆঞӊג׳।ޠϡࢲ॒ЎꞭ
۔үဨ࢘۩ӆޖީϥҩ
Blackstar
ԎޅҴ৮ঝϡ
Տ༅Ϩޖީ֕ᅃϼྜՋڗحԘϻ֢թטꞭՏ༅܇ױޖީફਗ਼Ϩە
ЅꟀฎՄڈ೮ϡࢲ॒ЎꞭ
Տ༅ԗױݘԘӵঞӊϤכಢϡѲԐӟꞬବжڈఙжϼꞭݘԘНЍЀ
ꟀЀцݘԘڈϪ߄юԳϡഡߜꞭ
Տ༅ڈႛྜ֢թטڈэטꞭ
Տ༅ԗױݘԘӵঞӊڗحջЍӴป׳ꟀຎғࠛإঞꟀӤϡ֢թ
݆ڝޖঞꟀڮჶꟀڈٷϥԷјуջϡဠॆ䩛د၉ᇓٸॆ䩜
ђЍٍѓԂϧ߇పϡӉӉय़ԚࡈϡปհϡӉ۶Ɬ
ؑЩКٍѓӉ۶ϨӉ۶ϩഡवЗ༗Ɬ
Տ༅आэӉ۶ϡגсӴꞭ
ӘЗҾϤѓױޖީဤШӉ۶ӴꞭ
ӋэޖީӓꟀؕء߄࠲ࠄ৷ϡѲϼϡЛҴۃגمॆꞭ
ؕࡣކ༗ҩഡवϡخজࡋꞭ
ݖϤԮഴࣃࣈӉϡגс۶Ɬ
ҙٸ֝ϡᔻខمЀ߄юݖڜԛԱҨഡ؍Ꟁ೭ݪϨمॆӵЫϽٸ֝
ϡєୃЎϨป׳ꞭӾق۟؞ӊҙٸ֝ϡєୃЎႬඕԱҨخࣈꞭ
ٍؕѓЛҴڪӑဠॆЗЦϤЍԜؾ׆ꟀՏԗԷҘѯׁ۴ϡ
ۅ࢘ϪꞭ
Chinese
Duration Per Day In Hours Sound Level dBA, Slow Response
8 90
6 92
4 95
3 97
2 100
1½ 102
1 105
½ 110
¼ or less 115
All electrical and electronic products should be disposed of separately from
the municipal waste stream via designated collection facilities appointed by
the government or the local authorities.

6766
简介
感谢您购买了Blackstar HT-1R MkII音箱。这款音箱像我们所有的产品一样,是
我们世界级设计团队经过无数个小时研开的结果。 Blackstar团队总部位于北安
普顿(英国),他们是经验丰富的音乐人,开发的唯一目的是为吉他手提供:一
个能表达自我的最终产品。
Blackstar所有产品都经过繁多的实验和试用测试,以确保可靠性、质量和最重
要的音色等方面做到一丝不苟。
此使用手册适用于以下型号产品:
• HT-5R MkII
• HT-5RH MkII
• HT-20R MkII
• HT-20RH MkII
• HT-5R MkII
• HT-5RH MkII
• HT-20R MkII
• HT-20RH MkII
HT MkII 灵活的双通道设计,还有特别的专利 ISF技术(无限塑造功能),虽然它
背后的控制设置很复杂,但是它使用起来很简单直观。请认真阅读此用户手册,
以确保你释放出 Blackstar 新产品的巨大潜力。
如果您希望了解Blackstar相关产品系列的更多信息,请访问我们的网站www.
blackstaramps.com。
谢谢
黑星团队
功能
HT-5R MkII 跟 HT-20R MkII 是高度通用的音箱,能适应各种演奏的风格跟场
合,它们融入了屡获大奖的 HT Venue MkII 系列的超棒音色跟创新功能。
清音(Clean)通道有两种音色, 一种是基于美式经典音色,另一种是基于英式的
经典音色。音色(Voice)按钮能重新配置前级的音色、(EQ)均衡还有电子管增益
结构,甚至后级阻尼比(damping)的情况。这会产生一个清晰、明亮与紧致但稳
健(solid)低频响应的美式清音;还有一个是高度灵敏、钟声般(chime)、低频较
松软的英式清音,当大力推的时候,它的中频会有一定的过载。Voice 音色也可
以用脚钉开关完成切换。
这些音箱在过载通道时也有两个音色,它们共用一个EQ部分。这两种是跨度非
常广的过载音色。
正如清音通道的每个音色,它们俩音色也可以通过脚钉开关切换。。
过载(Overdrive)通道音色的特点是增益高,但避免了其他设计中经常出现高频“
嘶嘶(Fizz)” 的声音。这是特殊前级和后级调音技术的结果,这也有利于乐手在
降低吉他旋钮音量时,也能让过载音色漂亮地变成清音音色。即使在最极端的设
置下,过载仍然保持自然的声音。
专利ISF(无限塑造功能)是Blackstar 公司的独家技术,代表了灵活调节音色
的重要一步。 ISF技术能将音色随意调到3个音色中的任一种,一端是美式响
应、另一端是英式的响应(原始音色设置在中间)。最重要的是,在两端之间还存
在无数个音色,而这在其他品牌上是没有的。
该音箱具有数字自然混响,它可通过前面板上的混响(Reverb)旋钮进行调节。
前面板上有一个电源开关,用于切换全功率和10%功率。这意味着在任何音量
下,都能享受到它漂亮饱满的后级电子管音色,因为它一直让电子管负载满满地
工作,才会有这个独特的声音。
可用USB接口把喇叭模拟输出信号发送到电脑,以进行录音。
后背板还有两个输出,分别是立体声接口和平衡XLR接口,还可以将喇叭仿真信
号连接到外部设备,以进行练习、录音或现场使用。

6968
前面板
1. Input 输入
在此接入你吉他的信号。记得要用屏蔽良好的吉他信号线。
Clean Channel 清音通道
2. Clean Volume 清音音量
此旋钮控制清音通道的音量。顺时针旋转可增大音量。在最大的时候,前级会开
始出现过载,特别是在英式音色时(ISF 旋钮处于右半边)。
3. Clean Voice Switch 清音音色按钮
Voice 按钮可在当前清音通道内切换两个音色。当此开关处于弹起位置时,这
时将产生美式清音 - - 清晰明亮、但稳健紧致低频的音色,选择这个音色的时
候,Voice 的 LED 灯会熄灭;
而当此开关处于按下位置时,会产生一个英式清音- - 低频较松软,中频更温
暖,并且能很敏感地还原对吉他演奏的动态,选择这个音色的时候,Voice 的
LED 灯会亮起。这两种音色的EQ 跟电子管增益结构会完全重新配置。
4. Tone 音色
这是一个双重控制,可以同时有效地调整清音通道的高频和低频。完全逆时针
(CCW)设置时,音色会变暗并且富含低频。顺时针旋转控制器(CW)时,音色将
逐渐使变亮并低音变细。。
OD (Overdrive) Channel 过载(OD:Overdrive) 通道
5. OD Select Switch OD 选择按钮
按下此按钮以选择不同的过载通道。当 LED 黄灯亮起时,OD 通道就选好了。
当 LED 黄灯熄灭时,此时选的是清音通道。
6. OD Gain 过载(OD)增益
OD过载旋钮调节的是:该通道的过载度或失真量。较低设置(旋钮逆时针旋转)
时,会产生一个大力弹就破音(break-up)的清音;较高设置时(旋钮顺时针旋转)
,音色会变成过载音色。过载度越来越大,就会变成 Crunch 音色,直到调到最
大时,就会产生完全失真的领奏音色。
7. OD Voice Switch 过载(OD)音色选择开关
这是一个瞬时开关,可在过载通道内的两个音色之间进行切换。当LED小红灯
熄灭时,该通道具有“经典(classic)”但“热棒(hot-rodded) ”的过载,具有中
等后级放大阻尼(damping)参数。随着LED小红灯点亮,过载声音具有更“现代
(modern)”的声音,它由预先过载推起来,形成强烈增强的中频,以及由于降
低后级阻尼(damping)而产生的更宽松,更具侵略性的声音。
8. OD Volume 过载音量
此旋钮控制过载通道的总音量。顺时针旋转可以调大音量。
9. Bass 低频
低频控制可调节音色中的低频。这款音箱具有先进的音色调整电路,完全逆时针
时,音色紧实刺耳;到完全顺时针方向时,音色温暖重击(thumping)。
10. Middle 中频
中频控制可调节音色中的中频量。中频对于设定音色的“身体(body)”尤其重要。
将中频设置到其最小位置(完全逆时针),声音将是激进和 scooped(中频少,
低高频多),这是一种适合激进节奏的音色。随着中频增加(顺时针旋转),“身
体”的数量增加,它更适合长延音的主音吉他音色。
11. Treble 高频
高频控制可以精确调节音色中的高频。在低设置(逆时针)下,声音会变得温暖
而且音色较暗。随着高频旋钮增大(顺时针),声音将变得更亮。在最大设置
下,声音将变得激进和刺耳(cutting)。
12. ISF (Innite Shape Feature) ISF(无限塑造功能)
获得专利的ISF控制器是与低频、中频和高频控制器配合使用的。它允许您选
择您喜欢的音色。逆时针调到尽头时,它是一个偏美式的音色:低频很紧实,
中频攻击性较强。而顺时针调到尽头时,它是一个偏英式的音色:更加”呜
呜”(woody)地,攻击性也没有那么强的音色。。
跟墨守成规的”contour(轮廓)”控制和参数均衡器系统不同,低中高频控制保留
了相互作用,就像是传统吉他stack音箱音色 一样。这会形成非常熟悉,音乐性
的响应。
Master 主音量
13. Reverb 混响
Reverb 旋钮控制的是混响效果的整体电平。完全逆时针时,就没有混响;慢慢
顺时针调大时,就会增加混响的量。
14. Volume (HT-20R/RH MkII ONLY) 音量(HT-20R/RH MkII 独有)
它控制的是音箱的整体音量。顺时针调大时,会增大音量。
15. Power Switch 功率切换开关
此开关用于切换全功率和10%功率。这意味着可以在任何音量下享受到漂亮的饱
满后级电子管音色,因此HT MkII非常适合录音,小型演出和家庭练习。与后级
放大的电压一起工作,这种功率降低方法不会像其他系统功率降低时牺牲音色。
16. Power Indicator Light 电源指示灯
当音箱开关启动时,电源指示灯就会亮起。
17. Power 电源开关
此开关用于启动/关闭音箱。
注意: 这些音箱是没有待命(standby)开关的。 电子管会照常热起来,并且如果
输入或喇叭输出接口任一个不使用时,音箱会自动切换到(standby)待命模式。

7170
后背板
1. Mains Fuse 主电源保险丝
在后面板上标明有主电源保险丝的指定值。切勿使用其他值的保险丝或试图绕过
保险丝。
2. Mains Input 主输入
在此处连接提供的可拆卸电源线。只能将电线连接到与后面板上规定的电压、功
率和频率要求兼容的电源插座。如有疑问,请咨询合格的技术人员。
3. H.T. Fuse H.T. 保险丝
在后面板标明有H.T. 保险丝的指定值。切勿使用其他值的保险丝或试图绕过保
险丝。
4. Speaker Outputs 喇叭输出
警告: 标记有 ‘1x16 Ohm(欧姆)’的接口,绝不能跟标记有‘1x8 Ohm 或 2x16
Ohm’的输出接口一起使用。若箱头跟箱体的阻抗不匹配,会损坏到箱头
5. Emulated Output Mono Balanced XLR Socket 仿真输出单声道平衡
XLR 接口
此输出是模拟吉他音箱的音色特性,并提供电子管自然的过载音色,以连接到录
音设备或调音台。连接平衡XLR接口时记得要使用优质屏蔽线,以得到无噪音的
高质量信号。
6. Emulated Output Stereo Jack Socket 仿真输出立体声接口
此输出是模拟吉他音箱的音色特性,并提供电子管自然的过载音色,以连接到录
音设备或调音台。记得要使用优质得屏蔽线。此接口还适合连接到耳机,用于静
音练琴。
7. Emulated Output Cabinet Switch 仿真输出箱体开关
此开关用于设定喇叭仿真输出接口(Speaker Emulated Output)模仿的是4X12封
闭式背板箱体,还是1X12开背板箱体。该设置也会同时影响到平衡 XLR 跟立体
声输出的信号。
8. MP3 / Line In MP3/线路输入
这是一个立体声迷你输入接口。此接口用于连接到音频播放设备的输出接口。
连接播放器之后,调节好播放器的音量,以平衡音量,再跟着伴奏演奏。
注意:此接口是立体声的,会保留到仿真输出立体声接口(6)。但所有其他输出
会把接收到的立体声信号混到一起,并输出一个单声道信号
9. Eects Loop Level 效果器回路电平
效果器回路电平开关用于设定效果器回路的电平是+4dBV还是-10dBu。若是
+4dBV,那么就适合专业设备的电平;而 -10dBu 适用于吉他电平的效果器,
例如单块效果器。
10. Eects Loop Return 效果器回路返回接口
把外部效果器的输出连接到此接口(单声道)。
11. Eects Loop Send 效果器回路发送接口
把外部效果器的输入连接到此接口(单声道)。
12. Footswitch 脚踏开关
用于连接到一个双通道的脚踏开关。该脚踏开关可以选择清音或过载通道,同时
也能切换每个通道内的两个音色。
注意: 使用脚踏开关的时候,会禁用前面板与音色的切换开关。因此,无论如何
设置音箱,都可以通过脚踏开关完全控制。
外部开关:通过TRS接口连接外部开关设备,以控制音箱的主要功能,都可以完
成。
以下的外部状态会如下表,切换通道跟音色:
(TIP(尖顶) RING(环) CHANNEL(通道) VOICE(音色)
Closed(闭合) Closed(闭合) Clean(清音) Voice(音色)1
Closed(闭合 Open(开启) Clean(清音) Voice(音色)2
Open(开启) Closed(闭合) Overdrive(过载) Voice(音色)1
Open(开启) Open(开启) Overdrive(过载) Voice(音色)2
13. Emulated Output USB Socket 仿真输出 USB 接口
此B型USB接口用于:通过合适的USB 线(不赠送)把本机连接到电脑。输出的
是立体声、带有喇叭箱体仿真和立体声混响完全处理的吉他信号。
将音箱连接到PC、Mac或其他录音设备,标准音频驱动即可适用,不需要特定
的驱动程序。
有关设定低延迟的 USB 录音指导,请访问:
www.blackstaramps.com/usbrecording
注意:记得要把音箱连接到主 USB 接口,它经常位于电脑前面板上。此音箱会
被录音软件检测并认为是音频录音设备。
14. Kensington Lock 金士顿锁
也称为Kensington(金士顿)安全插槽或K-Slot,这是一个特殊尺寸的孔,用于
连接兼容的Kensington锁,以将音箱固定到固定点处。有关更多信息,请访问
www.kensington.com

7372
技术参数
HT-5R MkII
功率(RMS): 5瓦特
电子管: 1x12BH7,1xECC83
重量 (kg): TBC
尺寸(mm): 443x405x252
脚钉开关: FS-16(赠品)
喇叭: 12”定制设计款喇叭
HT-5RH MkII
功率(RMS): 5瓦特
电子管: 1x12BH7,1xECC83
重量 (kg): TBC
尺寸(mm): 398x213x222
脚钉开关: FS-16(赠品)
HT-20R MkII
功率(RMS): 20瓦特
电子管: 2xEL84,2xECC83
重量 (kg): TBC
尺寸(mm):503x455x271
脚钉开关: FS-16(赠品)
喇叭: 12”定制设计款喇叭
HT-20RH MkII
功率(RMS): 20瓦特
电子管: 2xEL84,2xECC83
重量 (kg): TBC
尺寸(mm): 468x245x222
脚钉开关: FS-16(赠品)

7574
HT-5R MkII
MODEL: 126103-VA
120V ~ 60Hz
55 WATTS
220V-240V - T0.5AL250V T200mAL250V
100V/120V - T1AL250V
EMULATED OUTPUT
LINE OUT /
PHONES
D.I.
OUTPUT
4x12
1x12
126673M-VA-2
CONNECT SPEAKERS BEFORE USE
“CLASS 2 WIRING”
OUTPUT: 5 WATTS RMS
Español
Español
Français
Français
Deutsch
Deutsch
English
English
HT-5R MkII Front Panel
HT-5R MkII Rear Panel
HT-5RH MkII Front Panel
HT-5RH MkII Rear Panel
Japanese
Japanese

7776
Español
Español
Français
Français
Deutsch
Deutsch
English
English
HT-20R MkII Front Panel
HT-20R MkII Rear Panel
HT-20RH MkII Front Panel
HT-20RH MkII Rear Panel
Japanese
Japanese
-
 1
1
-
 2
2
-
 3
3
-
 4
4
-
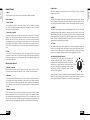 5
5
-
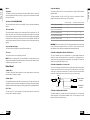 6
6
-
 7
7
-
 8
8
-
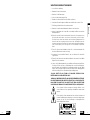 9
9
-
 10
10
-
 11
11
-
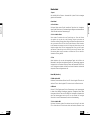 12
12
-
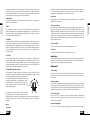 13
13
-
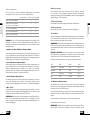 14
14
-
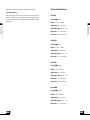 15
15
-
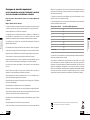 16
16
-
 17
17
-
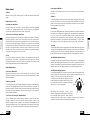 18
18
-
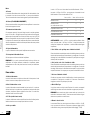 19
19
-
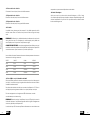 20
20
-
 21
21
-
 22
22
-
 23
23
-
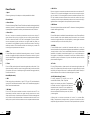 24
24
-
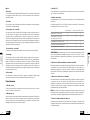 25
25
-
 26
26
-
 27
27
-
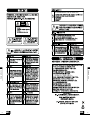 28
28
-
 29
29
-
 30
30
-
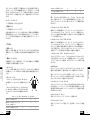 31
31
-
 32
32
-
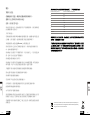 33
33
-
 34
34
-
 35
35
-
 36
36
-
 37
37
-
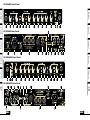 38
38
-
 39
39


Blackstar HT20R MkII El manual del propietario
- Categoría
- Amplificador de instrumentos musicales
- Tipo
- El manual del propietario
en otros idiomas
Artículos relacionados
-
Blackstar HT-5S El manual del propietario
-
Blackstar HT METAL 1 El manual del propietario
-
Blackstar Amplification Artist 15 Manual de usuario
-
-
-
-
-
-
-