
»
XS-3
Professional DJ Mixer
OWNER’S MANUAL/ MODE D’EMPLOI / BEDIENUNGSANLEITUNG /
MANUALE D'ISTRUZIONI / Mezclador de DJ profesional
D00675100B

English Important Safety Precautions
2 TASCAM XS-3
TO THE USER
This equipment has been tested and found to
comply with the limits for a Class B digital
device, pursuant to Part 15 of the FCC Rules.
These limits are designed to provide reasonable
protection against harmful interference in a resi-
dential installation. This equipment generates,
uses, and can radiate radio frequency energy
and, if not installed and used in accordance with
the instructions, may cause harmful interference
to radio communications.
However, there is no guarantee that interference
will not occur in a particular installation. If this
equipment does cause harmful interference to
radio or television reception, which can be deter-
mined by turning the equipment off and on, the
user is encouraged to try to correct the interfer-
ence by one or more of the following measures.
a) Reorient or relocate the receiving antenna.
b) Increase the separation between the equip-
ment and receiver.
c) Connect the equipment into an outlet on a
circuit different from that to which the
receiver is connected.
d) Consult the dealer or an experienced
radio/TV technician for help.
CAUTION
Changes or modifications to this equipment not
expressly approved by TEAC CORPORATION
for compliance could void the user's authority to
operate this equipment.
For U.S.A
IMPORTANT (for U.K. Customers)
DO NOT cut off the mains plug from this
equipment. If the plug fitted is not suitable for the power
points in your home or the cable is too short to reach a power
point, then obtain an appropriate safety approved extension
lead or consult your dealer.
If nonetheless the mains plug is cut off, remove
the fuse and dispose of the plug immediately,
to avoid a possible shock hazard by inadvertent connection
to the mains supply.
If this product is not provided with a mains plug, or one has
to be fitted, then follow the instructions given below:
IMPORTANT. DO NOT make any connection to the larger
terminal which is marked with the letter E or by the safety
earth symbol ç or coloured GREEN or GREEN-and-YEL-
LOW.
The wires in the mains lead on this product are coloured in
accordance with the following code:
BLUE : NEUTRAL
BROWN : LIVE
As these colours may not correspond with the coloured
markings identifying the terminals in your plug proceed as
follows:
The wire which is coloured BLUE must be connected to the
terminal which is marked with the letter N or coloured
BLACK.
The wire which is coloured BROWN must be connected to
the terminal which is marked with the letter L or coloured
RED.
When replacing the fuse only a correctly rated approved type
should be used and be sure to re-fit the fuse cover.
IF IN DOUBT — CONSULT A COMPETENT ELECTRI-
CIAN.

IMPORTANT SAFETY INSTRUCTIONS English
TASCAM XS-3 3
CAUTION:
≠ Read all of these Instructions.
≠ Save these Instructions for later use.
≠ Follow all Warnings and Instructions marked on the
audio equipment.
1) Read instructions — All the safety and operating instructions
should be read before the product is operated.
2) Retain instructions — The safety and operating instructions
should be retained for future reference.
3) Heed Warnings — All warnings on the product and in the
operating instructions should be adhered to.
4) Follow instructions — All operating and use instructions
should be followed.
5) Cleaning — Unplug this product from the wall outlet before
cleaning. Do not use liquid cleaners or aerosol cleaners. Use a damp
cloth for cleaning.
6) Attachments — Do not use attachments not recommended by
the product manufacturer as they may cause hazards.
7) Water and Moisture — Do not use this product near water
_
for example, near a bath tub, wash bowl, kitchen sink, or laundry
tub; in a wet basement; or near a swimming pool; and the like.
8) Accessories — Do not place this product on an unstable cart,
stand, tripod, bracket, or table. The product may fall, causing serious
injury to a child or adult, and serious damage to the product. Use
only with a cart, stand, tripod, bracket, or table recommended by the
manufacturer, or sold with the product. Any mounting of the product
should follow the manufacturer’s instructions, and should use a
mounting accessory recommended by the manufacturer.
9) A product and cart combination should be moved with care.
Quick stops, excessive force, and uneven surfaces may cause the
product and cart combination to overturn.
10) Ventilation — Slots and openings in the cabinet are provided
for ventilation and to ensure reliable operation of the product and to
protect it from overheating, and these openings must not be blocked
or covered. The openings should never be blocked by placing the
product on a bed, sofa, rug, or other similar surface. This product
should not be placed in a built-in installation such as a bookcase or
rack unless proper ventilation is provided or the manufacturer’s
instructions have been adhered to.
11) Power Sources — This product should be operated only from
the type of power source indicated on the marking label. If you are
not sure of the type of power supply to your home, consult your
product dealer or local power company. For products intended to
operate from battery power, or other sources, refer to the operating
instructions.
12) Grounding or Polarization — This product may be
equipped with a polarized alternating-current line plug (a plug hav-
ing one blade wider than the other). This plug will fit into the power
outlet only one way. This is a safety feature. If you are unable to
insert the plug fully into the outlet, try reversing the plug. If the plug
should still fail to fit, contact your electrician to replace your obso-
lete outlet. Do not defeat the safety purpose of the polarized plug.
13) Power-Cord Protection — Power-supply cords should be
routed so that they are not likely to be walked on or pinched by
items placed upon or against them, paying particular attention to
cords at plugs, convenience receptacles, and the point where they
exit from the product.
14) Outdoor Antenna Grounding — If an outside antenna or
cable system is connected to the product, be sure the antenna or
cable system is grounded so as to provide some protection against
voltage surges and built-up static charges. Article 810 of the
National Electrical Code, ANSI/NFPA 70, provides information
with regard to proper grounding of the mast and supporting struc-
ture, grounding of the lead-in wire to an antenna discharge unit, size
of grounding conductors, location of antenna-discharge unit, connec-
tion to grounding electrodes, and requirements for the grounding
electrode.
"Note to CATV system installer:
This reminder is provided to call the CATV system installer’s atten-
tion to Section 820-40 of the NEC which provides guidelines for
proper grounding and, in particular, specifies that the cable ground
shall be connected to the grounding system of the building, as close
to the point of cable entry as practical.
15) Lightning — For added protection for this product during a
lightning storm, or when it is left unattended and unused for long
periods of time, unplug it from the wall outlet and disconnect the
antenna or cable system. This will prevent damage to the product
due to lightning and power-line surges.
16) Power Lines — An outside antenna system should not be
located in the vicinity of overhead power lines or other electric light
or power circuits, or where it can fall into such power lines or cir-
cuits. When installing an outside antenna system, extreme care
should be taken to keep from touching such power lines or circuits
as contact with them might be fatal.
17) Overloading — Do not overload wall outlets, extension cords,
or integral convenience receptacles as this can result in risk of fire or
electric shock.
18) Object and Liquid Entry — Never push objects of any kind
into this product through openings as they may touch dangerous
voltage points or short-out parts that could result in a fire or electric
shock. Never spill liquid of any kind on the product.
19) Servicing — Do not attempt to service this product yourself as
opening or removing covers may expose you to dangerous voltage
or other hazards. Refer all servicing to qualified service personnel.
20) Damage Requiring Service — Unplug this product from the
wall outlet and refer servicing to qualified service personnel under
the following conditions:
a) when the power-supply cord or plug is damaged.
b) if liquid has been spilled, or objects have fallen into the product.
c) if the product has been exposed to rain or water.
d) if the product does not operate normally by following the operat-
ing instructions. Adjust only those controls that are covered by the
operating instructions as an improper adjustment of other controls
may result in damage and will often require extensive work by a
qualified technician to restore the product to its normal operation.
e) if the product has been dropped or damaged in any way.
f ) when the product exhibits a distinct change in performance
_
this
indicates a need for service.
21) Replacement Parts — When replacement parts are required,
be sure the service technician has used replacement parts specified
by the manufacturer or have the same characteristics as the original
part. Unauthorized substitutions may result in fire, electric shock, or
other hazards.
22) Safety Check — Upon completion of any service or repairs to
this product, ask the service technician to perform safety checks to
determine that the product is in proper operating condition.
23) Wall or Ceiling Mounting — The product should be mount-
ed to a wall or ceiling only as recommended by the manufacturer.
24) Heat — The product should be situated away from heat sources
such as radiators, heat registers, stoves, or other products (including
amplifiers) that produce heat.

English 1. Introduction
4 TASCAM XS-3
Table of contents
1. Introduction......................................................... 4
1.1. Some notes and precautions....................... 4
1.2. Serial number, etc. ..................................... 4
2. Features and controls .......................................... 5
2.1. Top panel.................................................... 6
2.2. How to replace the fader ............................ 6
2.3. Rear panel .................................................. 6
2.4. Front panel ................................................. 7
3. Specifications...................................................... 8
4. Block diagram................................................... 31
1. Introduction
The XS-3 is a sophisticated 2 channel DJ mixer which
allows the connection of many devices, and allows you
to mix in a creative way.
Following the sophisticated layout design, the XS-3
combines easy operation with a wide range of func-
tions.
It is VERY IMPORTANT that you read this manual
before connecting the mixer in order to obtain its max-
imum performance.
We recommend our authorised Technical Services
whenever any maintenance task should be needed so
that optimum operation shall be achieved.
1.1. Some notes and precautions
Treat the XS-3 as you would any other piece of preci-
sion equipment.
Avoid exposing it to extremes of temperature and
humidity and avoid mechanical shocks and vibration.
Keep the unit away from strong magnetic fields (TV
sets, computer monitors, large electric motors, etc.).
Environmental considerations
The XS-3 may be used in most areas, but to maintain
top performance, and prolong operating life, observe
the following environmental conditions:
The nominal temperature should be between 5°C and
35°C (41°F and 95°F).
Relative humidity should be 30 to 90 degrees non-con-
densing.
As the unit may become hot during operation, always
leave sufficient space above and around the unit for
ventilation.
Do not install this equipment in a confined space such
as a bookcase or similar unit.
You should not place the unit on a piece of equipment
generating heat, e.g. an amplifier, to avoid possible
problems with overheating.
XS-3 operates under 120, 50 Hz. Make sure that the
power cable is far away from the signal cables in order
to avoid any possible audio hum.
When transporting the unit, always use the origi-
nal packing materials or a properly-designed
equipment case. For this reason, we strongly rec-
ommend that you save all the packing materials
that came with the XS-3, in case you need to
transport it in the future.
Connections to other equipment
It is extremely important that the power is turned off
on all units when making or breaking connections to or
from the XS-3.
When turning power on, it is usually a good idea to
start with the source (turntables, CD players, etc.), then
the XS-3 and finish with the amplifier system.
Turning power off should be done in the other direc-
tion (amplifiers first, then other equipment).
When turning the unit on again, wait for three seconds
or more after turning it off.
1.2. Serial number, etc.
The serial number of the XS-3 is located on a sticker at
the front of the unit on the bottom panel. Make a note
of this for future reference (warranty, etc.).
NOTE

2. Features and controls English
TASCAM XS-3 5
2. Features and controls

English 2. Features and controls
6 TASCAM XS-3
2.1. Top Panel
1 MIC LEVEL
Adjusts the MIC input signal level.
2 MIC EQ
2-band EQ for microphone input signal.
3 TRIM
Adjusts the input signal level of each PGM.
All input sensitivity adjustment must be done by
very carefully using level meter and/or head-
phones as a reference and avoiding that all the
red LEDs of the level meter light up, otherwise
input could be clipped (overload).
4 PGM EQ
3-band EQ for each PGM signal.
When all EQ are set to -26 dB, the sound will be cut
fully.
5 C.F REVERSE
Sets the direction of CROSS FADER operation.
OFF: Moving the CROSS FADER toward
A makes A signal louder and moving
the CROSS FADER toward B makes
B signal louder.
REVERSE: Moving the CROSS FADER toward
A makes B signal louder and moving
the CROSS FADER toward B makes
A signal louder.
6 C.F CURVE
Allows you to adjust the PGM 2 FADER response
curve from soft (counter-clockwise) to hard (clock-
wise).
7 PHONO/LINE
Selects the input signal (PHONO or LINE) of each
PGM.
8 PGM FADER
Adjusts the PGM level.
9 MASTER LEVEL
Adjusts MASTER OUT 1 (balanced TRS and unbal-
anced RCA connectors) output level.
0 EFFECT switch and LED
Activates the external effect path of MASTER when
EFFECT switch is turned on. When effect path is acti-
vated, LED will light up.
NOTE
q MONITOR MASTER/CUE
Selects the way of monitoring in the headphones.
CUE: This way allows you to monitor the
PGM signals adjusted by cue balance
fader.
MASTER: This way allows you to monitor the
pre MASTER volume signal.
w LEVEL
Adjusts the headphone output level.
e CUE BALANCE
Adjusts the balance between PGM 1 and PGM 2 signal
in the headphones.
r CROSS FADER
Mixes the PGM 1 and PGM 2 signals.
CROSS FADER is user replaceable. It is possible to
set the CROSS FADER curve and reversal.
t INPUT LEVEL METER
Indicates the signal level of each PGM.
LEVEL METER indicates the post PGM FADER
signals.
2.2. How to replace the fader
1. Remove the two screws from the fader panel sur-
face.
2. Remove the fader.
3. Unplug the multi-cable connector that connected to
the fader.
4. Plug in the multi-cable connector to a new fader.
5. Replace the fader with the screws.
2.3. Rear Panel
y EFFECT (unbalanced TRS jack)
Inserts the external effect in STEREO OUTPUT signal
path. Connect the external effector to this jack.
Connections are follows:
SEND: Tip
RETURN: Ring
GND: Sleeve
NOTE

2. Features and controls English
TASCAM XS-3 7
u MIC INPUT (balanced TRS connector)
Connect the microphone to this connector.
Connections are as follows:
HOT: Tip
COLD: Ring
GND: Sleeve
If you connect the unbalanced microphone to
this connector, we recommend that cold (Ring)
short-circuited to GND (Sleeve).
i PHONO INPUTS (unbalanced RCA jacks)
Connect the turntables equipped with the MM car-
tridge.
Never connect any other type of equipment to
the PHONO connectors.
o LINE INPUTS (unbalanced RCA jacks)
Connect the line level equipment, such as CD players,
cassette decks, DAT, MD, etc.
p GND terminal
If the turntables are fitted with grounding wires, con-
nect these to this GND terminal to reduce noise and
hum.
a REC OUTPUT (unbalanced RCA jacks)
Outputs the pre MASTER 1/2 signal.
For example, to connect the recorder to these jacks,
you can record your live performance without MAS-
TER LEVEL control.
s MASTER OUTPUT (unbalanced RCA
jacks)
Outputs the master output signal adjusted by MAS-
TER control.
d MASTER OUTPUT (balanced TRS connec-
tor)
Outputs the master output signal adjusted by MAS-
TER control.
Connections are as follows:
HOT: Tip
COLD: Ring
GND: Sleeve
WARNING
NOTE
f C.F START
Connect a device which supports fader start operation.
Crossfader start function can be set to enable or dis-
able on either side independently.
Moving the cross-fader to start and/or stop (back cue)
the PGM A or B source automatically.
When you use this function, make sure to con-
nect audio signal and fader start signal to the
same XS-3.
Fader start signal is output from Tip terminal.
Fader stop (back cue) signal is output from sleeve
terminal.
g POWER switch
h AC Adaptor in
Use this jack to connect the PS-P3X AC adaptor which
comes with your XS-3.
When inserting the AC adaptor into the unit, please
make sure to align the arrow mark of the AC adaptor
plug to the white dot mark on the rear panel.
DO NOT use any adaptors with the XS-3 except
the PS-P3X adaptor which comes with the XS-3.
2.4. Front Panel
j PHONES
Connect your headphone to this jack.
k C.F START B
Sets the crossfader start B on/off.
l C.F START A
Sets the crossfader start A on/off.
If C.F REVERSE switch is set to ON, crossfader
start operation is set to reversal.
NOTE
WARNING
NOTE

English 3. Specifications
8 TASCAM XS-3
3. Specifications
LINE INPUT (PGM1-2): RCA, unbalanced
Input Level: -10 dBV
Input impedance: 10k ohm
PHONO INPUT (PGM1-2) RCA, unbalanced
Input Level: -54 dBV
Input impedance: 47k ohm
MIC INPUT: TRS, balanced
Input Level: -50 dBV
Input impedance: 2.8k ohm
MASTER OUTPUTS (balanced):
TRS, balanced
Nominal Output Level: +4 dBu
Output impedance: 75 ohm
MASTER OUTPUTS (unbalanced):
RCA, unbalanced
Nominal Output Level: 0 dBV
Output Impedance: 100 ohm
REC OUTPUT: RCA, unbalanced
Nominal Output Level: -10 dBV
Output Impedance: 1k ohm
EFFECT (send): TRS, unbalanced
Nominal Output Level: -4 dBV
Output Impedance: 100 ohm
EFFECT (return): TRS, unbalanced
Input Level: -4 dBV
Input Impedance: 10k ohm
PHONES:
100mW+100mW, (at 33ohm)
Frequency Response:
LINE IN: 20 Hz to 20KHz, +/-1.0 dB
PHONO IN: 30 Hz to 15KHz, +/-2.0 dB
(RIAA)
MIC IN: 30 Hz to 18KHz, +/-3.0 dB
Signal to Ratio:
LINE IN: 78 dB (IHF A WTD)
PHONO IN: 70 dB (IHF A WTD)
MIC IN: 60 dB (IHF A WTD)
Total Harmonic Distortion:
LINE IN: <0.1 %
PHONO IN: <0.2 %
MIC IN: <0.2 %
Crosstalk: >60 dB (@1KHz)
PGM EQ
HIGH: +12 dB ~ -26 dB
MID: +12 dB ~ -26 dB
LOW: +12 dB ~ -26 dB
Filter
(Cut Frequency at -6dB, slope 12dB/oct in all the
cases)
HIGH: 6 kHz
MID: 6 kHz & 200 Hz
LOW: 200 Hz
MIC EQ
HIGH: 5.5 kHz, +12 dB ~ -12 dB
LOW: 125 Hz, +12 dB ~ -12 dB
Power Requirement: 120 V (60Hz)
230 V (50Hz)
Power Consumption: 13 W
Dimension (mm): 228(W)x106(H)x267(D)
Weight: 2.6 kg (main unit)
0.6 kg (AC Adaptor)
Applicable electromagnetic environment:
E4
Peak inrush current: 5 A
All specifications subject to change without notice.
(10)
267
19138
228
211
(20)76
198
260
5 8
2
5

1. Introduction Français
TASCAM XS-3 9
Sommaire
1. Introduction................................................. 9
1.1. Remarques et précautions ................... 9
1.2. Numéro de série, etc. .......................... 9
2. Fonctionnalités et contrôles ...................... 10
2.1. Face supérieure ................................. 11
2.2. Remplacement d’un fader ................. 11
2.3. Face arrière........................................ 11
2.4. Face avant ......................................... 12
3. Caractéristques.......................................... 13
4. Schéma synoptique ................................... 31
1. Introduction
La XS-3 est une console DJ 2 voies permettant de
brancher de nombreux appareils et de réaliser des mix-
ages créatifs. Son ergonomie très étudiée lui permet de
combiner un accès très simple à des fonctionnalités
étendue.
Il est TRÈS IMPORTANT de lire ce manuel en totalité
et attentivement avant tout branchement pour en
exploiter au mieux les possibilités.
Nous conseillons vivement de faire réaliser les
opérations de maintenance exclusivement par des tech-
niciens agréés TASCAM.
1.1. Remarques et précautions
Traitez votre XS-3 avec tout le soin que vous accordez
normalement à un outil de précision.
Évitez de l’exposer à des conditions extrêmes de
température ou d’humidité et évitez de la soumettre à
des chocs ou à des vibrations.
Gardez-la à l’écart des champs magnétiques intenses
(récepteurs TV, moniteurs, moteurs électriques puis-
sants etc.).
Considérations environementales
La XS-3 peut être utilisée à peu près partout, mais
pour lui assurer des performances et une durée de vie
maximum nous vous conseillons de veiller aux points
suivants :
Sa température de fonctionnement doit rester comprise
entre 5°C et 35°C, avec une humidité relative située
entre 30 et 90 degrés sans condensation.
Une chauffe modérée intervenant normalement pen-
dant son fonctionnement, nous vous conseillons de
ménager un espace suffisant au dessus et sur les côtés
de l’appareil pour permettre sa ventilation. Ne l’in-
stallez pas dans un espace confiné, dans une biblio-
thèque ou un mobilier équivalent.
Pour éviter toute surchauffe , ne la placez pas au-
dessus de sources de chaleur importantes (amplifica-
teurs ou autres).
La XS-3 fonctionne sur un courant secteur de 100 à
240V, à 50 ou 60Hz. Vérifiez que le câble secteur
chemine à distance des câbles audio pour éviter toute
induction de ronflement ou de souffle.
Veillez à ne transporter cet appareil que dans un
conditionnement approprié ou dans son embal-
lage d’origine. Nous vous conseillons donc de
conserver celui-ci en lieu sûr à toutes fins utiles.
Connexions aux autres appareils
Il est extrêmement important que l’appareil et toutes
les unités qui lui sont reliées soient bien hors tension
avant d’effectuer quelque modification de branche-
ment que ce soit sur la XS-3.
Lors de la mise sous tension du système, il est
habituellement préférable de commencer par les
appareils sources (platines disques, lecteurs CD etc.)
puis d’allumer la XS-3 et de finir par le système d’am-
plification.
La mise hors tension doit se faire dans l’ordre inverse
(amplificateur d’abord, puis autres appareils).
Après avoir éteint l’appareil, attendez toujours au
moins 3 secondes avant de le remettre éventuellement
sous tension.
1.2. Numéro de série, etc.
Le numéro de ssérie de la XS-3 se trouve sur une
étiquette placée vers l’avant à la face inférieure de
l’appareil. Notez-le à toutes fins utiles (mise en œuvre
de la garantie, etc.). Après avoir éteint l’appareil,
attendez toujours au moins 3 secondes avant de le
remettre éventuellement sous tension.
REMARQUE
Numéro de série
Face arrière

Français 2. Fonctionnalités et contrôles
10 TASCAM XS-3
2. Fonctionnalités et contrôles

2. Fonctionnalités et contrôles Français
TASCAM XS-3 11
2.1 Face supérieure
1 Niveau micro (MIC LEVEL)
Réglage du niveau d’entrée du micro (MIC)
2 Égaliseur micro (MIC EQ)
Égaliseur 2 bandes destiné au signal micro.
3 Contrôle TRIM
Réglage du gain pour chaque PGM.
Tous les réglages de sensibilité d’entrée doivent
être effectués avec prudence, en utilisant les bar-
graphes et/ou l’écoute au casque pour éviter
toute saturation ou écrêtage.
4 Égaliseur PGM
Égaliseur 3 bandes affecté à chaque signal PGM.
5 Sélecteur C.F REVERSE
Détermine le sens d’action du CROSS FADER
OFF : le déplacement du CROSS FADER vers A aug-
mente le signal A et réduit le signal B.
ON : le déplacement du CROSS FADER vers A aug-
mente le signal B et réduit le signal A.
6 Sélecteur rotatif C.F CURVE
Permet de choisir la courbe de réponse du CROSS
FADER de « douce » (sens antihoraire) à « réactive »
(sens horaire).
7 Sélecteur PHONO/LINE
Détermine le signal d’entrée (PHONO ou LINE) pour
chaque PGM.
8 Faders PGM
Règlent le niveau des signaux PGM.
9 Contrôle MASTER LEVEL
Règle le niveau de la sortie MASTER OUT (con-
necteurs Jacks TRS symétriques et RCA non
symétriques).
0 Sélecteur EFFECT et témoin associé
Active le circuit d’effet externe de chaque canal. Le
témoin est allumé quand l’effet est actif.
REMARQUE
q Sélecteur MONITOR MASTER/CUE
Détermine la source de la pré-écoute casque (monitor-
ing).
CUE : Permet d’écouter les signaux PGM
réglés par le fader de balance du circuit
de CUE (CUE BALANCE).
MASTER : Permet d’écouter le signal MASTER
avant atténuation.
w Contrôle LEVEL
Règle le niveau de la sortie casque.
e Fader CUE BALANCE
Détermine la balance au casque entre les signaux PGM
1 et PGM 2.
r CROSS FADER
Assure le mélange (ou la transition) entre les signaux
PGM 1 et PGM 2.
Le CROSS FADER est amovible et remplaçable en
cas de besoin. Sa sensibilité (courbe de réponse) et son
sens d’action sont également modifiables.
t Bargraphe de niveau (LEVEL METER)
Indique le niveau du signal de chaque PGM.
Le bargraphe LEVEL METER indique le niveau du
signal après atténuation par les faders PGM.
2.2 Remplacement d’un fader
1. Retirez les deux vis de fixation du fader
2. Retirez-le de son logement
3. Débranchez la nappe qui lui est attachée
4. Branchez-la sur le nouveau fader
5. Remettez en place le nouveau fader et vissez-le.
2.3 Face arrière
y Connecteur EFFECT (jack TRS non
symétrique)
Permet l’insertion du signal d’un effet externe dans le
bus de sortie stéréo (STEREO OUTPUT).
Le brochage se présente comme suit :
SEND (départ) : extrémité
RETURN (retour) : anneau
GND (masse) : corps
REMARQUE

Français 2. Fonctionnalités et contrôles
12 TASCAM XS-3
u Entrée MIC INPUT (jack TRS symétrique)
Permet le branchement du micro.
Le brochage se présente comme suit :
Point chaud : extrémité
Point froid : anneau
Masse : corps
Si vous branchez ici un micro non symétrique,
nous vous conseillons de relier le point froid
(anneau) à la masse (corps).
i Entrées PHONO (connecteurs RCA non
symétriques)
Permettent le branchement de platines disques
équipées d’une cellule magnétique (MM).
AVERTISSEMENT :
Ne branchez aucun autre type d’appareil sur ce con-
necteur PHONO.
o Entrées LINE INPUTS (connecteurs RCA
non symétriques)
Permettent le branchement de sources à niveau ligne
comme lecteurs CD, platines cassettes, DAT, MD, etc.
p Bornier de masse GND
Si vos platines-disques disposent d’un branchement à
la masse, reliez-le à ce terminal pour réduire les ronfle-
ments ou le souffle.
a Sorties REC OUTPUT (connecteurs RCA
non symétriques)
Donnent accès au signal pré-MASTER.
Elles permettent le branchement d’un magnétophone
pour enregistrer, par exemple, votre prestation avant la
modification du gain par le contrôle MASTER
LEVEL.
s Sorties générales MASTER OUTPUT (con-
necteur RCA non symétrique)
Donnent accès au signal de sortie réglé par le contrôle
MASTER.
d Sorties générales MASTER OUTPUT (jack
TRS symétrique)
Donnent accès au signal de sortie réglé par le contrôle
MASTER.
Le brochage se présente comme suit :
Point chaud : extrémité
Point froid : anneau
Masse : corps
REMARQUE
f Connecteur C.F START
Permet le branchement d’appareils compatibles avec la
fonction Fader Start.
La fonction C.F. Start peut être activée/désactivée
indépendamment pour chaque section. Le déplacement
du cross-fader permet alors de démarrer et/ou d’arrêter
automatiquement (pour la source opposée) les
appareils reliés aux sources PGM A ou B.
Si vous utilisez cette fonction, veillez à bien
branchez le signal audio et la fonction fader-start
du même côté de la XS-3.
Le signal de départ (start) est émis par l’extrémité
du connecteur.
Le signal d’arrêt (stop) (pour la source opposée)
est émis par le corps du connecteur.
g Interrupteur général POWER
h Connecteur d’alimentation
Branchez ici l’adaptateur secteur PS-P3X fourni avec
l’appareil. Lors du branchement, veillez à bien aligner
la flèche présente sur le connecteur de l’adaptateur
avec le point blanc sérigraphié sur la face arrière.
N’utilisez aucun autre adaptateur secteur que le
modèle PS-P3X fourni avec la XS-3.
2.4 Face avant
j Prise casque (PHONES)
Branchez ici votre casque d’écoute.
k Sélecteur C.F START B
Permet d’activer/désactiver la fonction crossfader-start
pour le canal B.
l Sélecteur C.F START A
Permet d’activer/désactiver la fonction crossfader-start
pour le canal A.
Si le sélecteur C.F REVERSE est en position ON
(activé), la fonction crossfader-start est inversée.
REMARQUE
AVERTISSEMENT
REMARQUE

3. Caractéristques Français
TASCAM XS-3 13
3. Caractéristiques
Entrées LINE INPUT (PGM 1-2) :
RCA, non symétrique
Niveau d’entrée : - 10 dBV
Impédance d’entrée : 10 kOhms
Entrées PHONO INPUT (PGM 1-2) :
RCA, non symétrique
Niveau d’entrée : - 54 dBV
Impédance d’entrée : 47 kOhms
Entrée MIC INPUT :
Jack TRS, non nsymétrique
Niveau d’entrée : - 50 dBV
Impédance d’entrée : 2,8 kOhms
Sorties MASTER OUTPUTS (symétriques) :
Jack TRS, symétrique
Niveau de sortie nominal : + 4 dBu
Impédance de sortie : 75 Ohms
Sorties MASTER OUTPUTS (non symétriques) :
Jack TRS, non nsymétrique
Niveau de sortie nominal : 0 dBV
Impédance de sortie : 100 Ohms
Sorties REC OUTPUTS (symétriques) :
RCA, non symétrique
Niveau de sortie nominal : - 10 dBV
Impédance de sortie : 1 kOhms
Départ EFFECT (send) :
Jack TRS, non nsymétrique
Niveau de sortie nominal : - 4 dBV
Impédance de sortie : 100 Ohms
Retour EFFECT (return) :
Jack TRS, non nsymétrique
Niveau d’entrée : - 4 dBV
Impédance d’entrée : 10 kOhms
Prise casque PHONES : 100 mW + 100 mW
(à 33 Ohms)
Bande passante :
LINE IN : 20 Hz à 20 kHz +/- 1 dB
PHONO IN : 30 Hz à 15 kHz +/- 2 dB
(RIAA)
MIC IN : 30 Hz à 18 kHz +/- 3 dB
Rapport signal-bruit :
LINE IN : 78 dB (pondération A)
PHONO IN : 70 dB (pondération A)
MIC IN : 60 dB (pondération A)
Distorsion harmonique totale :
LINE IN : < 0,1 %
PHONO IN : < 0,2 %
MIC IN : < 0,2 %
Diaphonie : > 60 dB (à 1 kHz)
Aigus (HIGH) : + 12 dB ~ - 26 dB
Mediums (MID) : + 12 dB ~ - 26 dB
Graves (LOW) : + 12 dB ~ - 26 dB
Filtre
(Fréquence de coupure à –6 dB, 12 dB/oct dans tous les cas)
Aigus (HIGH) : 6 kHz
Mediums (MID) : 6 kHz & 200 Hz
Graves (LOW) : 200 Hz
Égalisation micro (MIC EQ)
Aigus (HIGH) : 5,5 kHz + 12 dB ~ -12 dB
Graves (LOW) : 125 Hz + 12 dB ~ -12 dB
Alimentation : 120 V (60 Hz)
230 V (50 Hz)
Consommation : 13 W
Dimensions : 228 mm (L) x 106 mm (H) x 267 mm (P)
Poids : 2,6 kg (console)
0,6 kg (adaptateur secteur)
Applicable dans l'environement électromagnétique :
E4
Surcharge de courant à l'allumage :
5 A
Toutes spécifications sujettes à modification sans
préavis.
(10)
267
19138
228
211
(20)76
198
260
5 8
2
5

Deutsch 1. Einführung
14 TASCAM XS-3
Inhaltsverzeichnis
1. Einführung ........................................................ 14
1.1. Einige Hinweise und
Vorsichtsmaßnahmen............................... 14
1.2. Seriennummer .......................................... 15
2. Funktionen und Bedienelemente ...................... 16
2.1. Geräteoberseite......................................... 17
2.2. Einen Fader austauschen.......................... 17
2.3. Geräterückseite......................................... 18
2.4. Frontplatte ................................................ 18
3. Technische Daten.............................................. 19
4. Blockschaltbild ................................................. 31
1. Einführung
Das XS-3 ist ein hochentwickeltes 2-Kanal-DJ-
Mischpult, an das Sie ein Vielzahl von Geräten
anschließen und so verschiedene Signale auf kreative
Weise mischen können. Wie von einem modernen
Mischpult zu erwarten, verbindet das XS-3 einfache
Bedienung mit einer Vielzahl von Funktionen.
Bitte lesen Sie sich dieses Handbuch unbedingt durch,
bevor Sie das Mischpult mit anderen Geräten
verbinden. Nur so ist gewährleistet, dass Sie
bestmöglichen Nutzen aus dem Gerät ziehen.
Sollten einmal Reparaturen an Ihrem Mischpult
notwendig werden, wenden Sie sich bitte an eine von
uns autorisierte Kundendienstwerkstätte, um den ein-
wandfreien Betrieb sicherzustellen.
1.1. Einige Hinweise und Vorsichtsmaßnah-
men
Behandeln Sie das XS-3 wie jedes andere elektronis-
che Gerät mit der notwendigen Sorgfalt.
Setzen Sie es möglichst nicht extremen Temperaturen
oder hoher Luftfeuchtigkeit aus, und vermeiden Sie
Stöße und Vibrationen.
Halten Sie das Gerät von starken Magnetfeldern fern
(Fernsehgeräten, Computermonitoren, größeren
Elektromotoren usw.).
Umgebungsbedingungen
Das XS-3 kann in den meisten Umgebungen betrieben
werden. Um eine größtmögliche Lebensdauer und ein-
wandfreien Betrieb zu gewährleisten, sollten Sie
jedoch auf folgende Umgebungsbedingungen achten:
• Umgebungstemperatur zwischen 5 °C und 35 °C
• Relative Luftfeuchte zwischen 30% und 90%, nicht
kondensierend.
Das Gerät kann während des Betriebs heiß werden;
lassen Sie deshalb für die Belüftung immer ausre-
ichend Raum um das Gerät herum frei.
Installieren Sie das Gerät nicht an einem räumlich
beengten Ort wie in einem Bücherregal oder
Ähnlichem.

1. Einführung Deutsch
TASCAM XS-3 15
Stellen Sie das Gerät niemals direkt auf ein Gerät, das
Hitze entwickelt (Verstärker usw.), um ein Überhitzen
zu vermeiden.
Das XS-3 kann mit einer Netzspannung von 100 bis
240 V betrieben werden. Um Störgeräusche in Ihrem
Audiosignal zu vermeiden, achten Sie darauf, das
Netzkabel möglichst weit von den Signalkabeln entfer-
nt zu legen.
Wenn Sie das Gerät transportieren: Verwenden
Sie immer die Originalverpackung oder besser
einen speziellen Transportkoffer. Wir empfehlen
deshalb nachdrücklich, alle
Verpackungsmaterialien des XS-3 aufzube-
wahren.
Um das Gerät vor einer eventuellen elektrischen
Überlastung zu schützen, ist es mit einer 250-mA-
Schmelzsicherung versehen. Sollte die Sicherung
jemals durchbrennen, trennen Sie das Gerät vom Netz,
und ersetzen Sie sie durch eine identische Sicherung.
Falls die neue Sicherung auch durchbrennt, wenden
Sie sich bitte unverzüglich an eine von uns autorisierte
Kundendienstwerkstatt.
ERSETZEN SIE DIE SICHERUNG UNTER
KEINEN UMSTÄNDEN DURCH EINEN DRAHT,
ALUFOLIE ODER ÄHNLICHES, UND VERWEN-
DEN SIE KEINE SICHERUNG MIT HÖHERER
AMPEREZAHL.
Andere Geräte anschließen
Es ist äußerst wichtig, dass Sie immer zuerst alle
Geräte ausschalten, bevor Sie Kabelverbindungen mit
dem XS-3 herstellen oder trennen.
Beim Einschalten ist es ratsam, mit den Quellen zu
beginnen (Plattenspieler, CD-Player usw.), dann das
XS-3 und erst zum Schluss die Verstärkeranlage
einzuschalten.
Beim Ausschalten verfahren Sie in umgekehrter
Reihenfolge (erst die Verstärker, dann die anderen
Geräte).
Warten Sie drei Sekunden oder länger, wenn Sie das
Gerät nach dem Ausschalten wieder einschalten
wollen.
VORSICHT
WICHTIG
1.2. Seriennummer
Die Seriennummer des XS-3 befindet sich auf einem
Aufkleber vorn auf der Unterseite. Notieren Sie sich
diese Seriennummer (für Serviceanfragen, Garantie
usw.).
Seriennummer
Rückseite

Deutsch 2. Funktionen und Bedienelemente
16 TASCAM XS-3
2. Funktionen und Bedienelemente

2. Funktionen und Bedienelemente Deutsch
TASCAM XS-3 17
2.1. Oberseite
1 MIC LEVEL
Regelt den Mikrofon-Eingangspegel.
2 MIC EQ
2-Band-EQ (Klangregelung) für das Mikrofon-
Eingangssignal.
3 TRIM
Regelt den Eingangspegel der beiden PGMs.
Änderungen an den Eingangspegeln sollten Sie
sehr vorsichtig vornehmen und dazu die
Pegelanzeige und/oder den Kopfhörer benutzen.
Um ein Übersteuern des Eingangssignals zu ver-
meiden, achten Sie darauf, dass niemals alle
roten LEDs der Pegelanzeige aufleuchten.
4 PGM EQ
3-Band-Klangregelung für die beiden PGM-Signale.
Wenn alle EQ-Bänder auf –26 dB eingestellt sind,
wird das Signal vollständig stummgeschaltet.
5 C.F REVERSE
Dient zum Einstellen der Bewegungsrichtung des
Cross-Faders.
OFF (Aus): Wenn Sie den Cross-Fader in Richtung
A bewegen, wird die Lautstärke von
Signal A angehoben. Wenn Sie ihn in
Richtung B bewegen, wird die
Lautstärke von Signal B angehoben.
ON (Ein): Wenn Sie den Cross-Fader in Richtung
A bewegen, wird die Lautstärke von
Signal B angehoben. Wenn Sie ihn in
Richtung B bewegen, wird die
Lautstärke von Signal A angehoben.
6 C.F CURVE
Ermöglicht Ihnen, die Lautstärkekurve des Cross-
Faders von weich (Drehen gegen den Uhrzeigersinn)
bis hart (Drehen im Uhrzeigersinn) einzustellen.
7 PHONO/LINE
Legt die Art des Eingangssignals für das jeweilige
PGM fest (PHONO oder LINE).
8 PGM-Fader
Regelt den Pegel des PGMs.
WICHTIG
9 MASTER LEVEL
Beeinflusst den Pegel am MASTER OUT-Ausgang
(symmetrische Klinkenanschlüsse und unsym-
metrische Cinch-Anschlüsse).
0 EFFECT-Taste mit LED
Wenn Sie die EFFECT-Taste drücken (so dass die
LED leuchtet), wird das Ausgangssignal am Anschluss
EFFECT (16) ausgegeben. Erneutes Drücken der Taste
schaltet die Funktion wieder aus.
q MONITOR MASTER/CUE
Legt fest, welche Signale Sie über den Kopfhörer
abhören.
CUE: Sie hören die mit dem Cue-Balance-
Fader eingestellten PGM-Signale ab.
MASTER: Sie hören das MASTER-Signal ab.
w LEVEL
Dient zum Anpassen des Kopfhörer-Ausgangspegels.
e CUE BALANCE
Regelt die Balance zwischen den Signalen PGM 1 und
PGM 2 am Kopfhörerausgang.
r Cross-Fader
Regelt das Mischverhältnis von PGM 1 und PGM 2.
Den Cross-Fader können Sie selbst austauschen.
Darüber hinaus können Sie die Lautstärkekurve und
Bewegungsrichtung des Cross-Faders einstellen.
t Eingangspegelanzeige
Zeigt die Eingangspegel der PGMs an.
Die Signale für die Pegelanzeige werden nach
dem PGM-Fader abgegriffen. Änderungen am
PGM-Fader sind also auf der Pegelanzeige sicht-
bar.
2.2. Den Fader austauschen
1. Lösen Sie die zwei Schrauben der Abdeckplatte des
Faderbereichs.
2. Entfernen Sie den Fader.
3. Lösen Sie den Kabelsteckverbinder des Faders.
4. Verbinden Sie den Kabelsteckverbinder mit dem
neuen Fader.
5. Befestigen Sie den Fader mithilfe der Schrauben.
WICHTIG

Deutsch 2. Funktionen und Bedienelemente
18 TASCAM XS-3
2.3. Rückseite
y EFFECT (unsymmetrische Klinkenbuchse)
Dient zum Einschleifen eines externen Effektgeräts in
den Signalweg des Stereoausgangs.
Schließen Sie das Effektgerät an diese Buchse an.
Die Belegung ist wie folgt:
SEND: Spitze
RETURN: Ring
MASSE: Hülse
u MIC INPUT
(symmetrische Klinkenbuchse)
Schließen Sie an diese Buchse Ihr Mikrofon an.
Die Belegung ist wie folgt:
HEISS (+): Spitze
KALT (–): Ring
MASSE: Hülse
Wenn Sie an dieser Buchse ein unsymmetrisches
Mikrofon anschließen, empfehlen wir, KALT
(Ring) mit MASSE (Hülse) zu verbinden.
i PHONO INPUTS (unsymmetrische Cinch-
Anschlüsse)
Anschluss für einen Plattenspieler mit MM-
Tonabnehmer (Moving Magnet).
VORSICHT
Schließen Sie außerdem niemals irgend ein anderes
Gerät an einen der PHONO-Anschlüsse an.
o LINE INPUTS (unsymmetrische Cinch-
Anschlüsse)
Schließen Sie hier Geräte mit Linepegel, wie CD-
Player, Kassettendecks, DAT- und MD-Player an.
p GND-Erdungsklemme
Wenn Ihre Plattenspieler über Erdungskabel verfügen,
schließen Sie diese zur Vermeidung von Stör- und
Brummgeräuschen an diese Erdungsklemme an.
a REC OUTPUT (unsymmetrische Cinch-
Anschlüsse)
Über diese Buchsen wird die Stereosumme vor dem
MASTER-Pegelregler ausgegeben.
Wenn Sie an diese Buchsen einen Recorder
anschließen, können Sie Ihre Mischung unbeeinflusst
von der MASTER LEVEL-Einstellung aufzeichnen.
s MASTER OUTPUT (unsymmetrische
Cinch-Anschlüsse)
An diesen Buchsen wird die mit dem MASTER-
Pegelregler eingestellte Stereosumme ausgegeben.
WICHTIG
d MASTER OUTPUT (symmetrische
Klinkenbuchsen)
An diesen Buchsen wird die mit dem MASTER-
Pegelregler eingestellte Stereosumme ausgegeben.
Die Belegung ist wie folgt:
HEISS (+): Spitze
KALT (–): Ring
MASSE: Hülse
f C.F START
Schließen Sie hier ein Gerät an, das Faderstart-fähig ist.
Der Cross-Faderstart kann für beide Seiten des Cross-
Faders unabhängig voneinander aktiviert und deak-
tiviert werden.
Wenn Sie den Cross-Fader bewegen, wird das Gerät
an PGM A beziehungsweise B automatisch gestartet
und gestoppt.
Wenn Sie diese Funktion nutzen, stellen Sie sich-
er, dass Audiosignal und Faderstartsignal mit
demselben PGM des XS-3 verbunden sind.
Das Faderstartsignal wird an der Spitze des
Anschlusses ausgegeben.
Das Faderstoppsignal wird an der Hülse des
Anschlusses ausgegeben.
g POWER (Netzschalter)
h Anschluss für Wechselstromadapter
Schließen Sie hier den mit dem XS-3 gelieferten
Wechselstromadapter PS-P3X an.
Achten Sie darauf, dass der Pfeil auf dem Stecker des
Adapters auf den weißen Punkt auf der Rückseite des
XS-3 ausgerichtet ist.
Um Schäden zu vermeiden, verwenden Sie KEINES-
FALLS einen anderen Wechselstromadapter mit
dem XS-3 als den mitgelieferten PS-P3X.
2.4. Vorderseite
j PHONES
Schließen Sie hier Ihren Kopfhörer an.
k C.F START B
Hier aktivieren/deaktivieren Sie den Crossfaderstart B.
l C.F START A
Hier aktivieren/deaktivieren Sie den Crossfaderstart A.
Wenn der C.F REVERSE-Schalter auf ON gestellt
ist, arbeitet auch der Crossfaderstart umgekehrt.
WICHTIG
VORSICHT
WICHTIG

3. Technische Daten Deutsch
TASCAM XS-3 19
3. Technische Daten
Lineeingang (PGM1-2) Cinch, unsymmetrisch
Eingangspegel –10 dBV
Eingangsimpedanz 10 kOhm
Phonoeingang (PGM 1–2) Cinch, unsymmetrisch
Eingangspegel –54 dBV
Eingangsimpedanz 47 kOhm
Mikrofoneingang Klinke, symmetrisch
Eingangspegel –50 dBV
Eingangsimpedanz 2,8 kOhm
Summenausgang (symmetrisch) Klinke, symmetrisch
Nominaler Ausgangspegel
+4 dBu
Ausgangsimpedanz 75 Ohm
Summenausgang (unsymmetrisch)
Cinch, unsymmetrisch
Nominaler Ausgangspegel
0 dBV
Ausgangsimpedanz 100 Ohm
Aufnahmeausgang Cinch, unsymmetrisch
Nominaler Ausgangspegel
–10 dBV
Ausgangsimpedanz 1 kOhm
Effekt-Send Klinke, unsymmetrisch
Nominaler Ausgangspegel
–4 dBV
Ausgangsimpedanz 100 Ohm
Effekt-Return Klinke, unsymmetrisch
Eingangspegel –4 dBV
Eingangsimpedanz 10 kOhm
Kopfhörerausgang 100 mW + 100 mW
(an 33 Ohm)
Frequenzbereich
Lineeingang 20 Hz bis 20 kHz, ±1,0 dB
Phonoeingang 30 Hz bis 15 kHz, ±2,0 dB
(RIAA)
Mikrofoneingang 30 Hz bis 18 kHz, ±3,0 dB
Fremdspannungsabstand
Lineeingang 78 dB (IHF-A-bewertet)
Phonoeingang 70 dB (IHF-A-bewertet)
Mikrofoneingang 60 dB (IHF-A-bewertet)
Verzerrung (THD)
Lineeingang <0,1%
Phonoeingang <0,2%
Mikrofoneingang <0,2%
Übersprechdämpfung >60 dB (bei 1 kHz)
PGM EQ
Höhen (HIGH) +12dB/ –26dB
Mitten (MID) +12dB/ –26dB
Tiefen (LOW) +12dB/ –26dB
Filter
(Trennfrequenz bei –6 dB, Flankensteilheit 12 dB/Oktave)
Höhen (HIGH) 6 kHz
Mitten (MID) 6 kHz und 200 Hz
Tiefen (LOW) 200 Hz
MIC EQ
Höhen (HIGH) 5,5 kHz, +12 dB bis –12 dB
Tiefen (LOW) 125 Hz, +12 dB bis –12 dB
Netzspannung 120 V AC (60 Hz)
230 V AC (50 Hz)
Leistungsaufnahme 13 W
Abmessungen (B x H x T)
228 mm x 106 mm x 267 mm
Gewicht 2,6 kg (Hauptgerät)
0,6 kg
(Wechselstromadapter)
Elektromagnetische Umgebung:
E4
Imulsfestigkeit: 5 A
Änderungen an Konstruktion und technischen Daten
vorbehalten.
(10)
267
19138
228
211
(20)76
198
260
5 8
2
5

Italiano 1. Introduzione
20 TASCAM XS-3
Indice
1. Introduzione...................................................... 20
1.1 Osservazioni ed avvertenze....................... 20
1.2 Numero di serie, ed altro........................... 21
2. Funzioni e controlli........................................... 22
2.1 Pannello superiore..................................... 23
2.2 Sostituzione dei fader................................ 23
2.3 Pannello posteriore.................................... 23
2.4 Pannello anteriore ..................................... 24
3. Caratteristiche tecniche..................................... 25
4. Schema a blocchi .............................................. 31
1. Introduzione
Il TASCAM XS-3 è un sofisticato mixer a 2 canali per
DJ che permette di collegare molti dispositivi, lascian-
do così spazio alla libera creatività dell’operatore.
Grazie alla sua accurata progettazione, l’XS-3 non pre-
senta nessuna difficoltà di azionamento, pur offrendo
un’ampia gamma di funzioni.
ATTENZIONE: per ottenere le massime prestazioni,
prima di mettere in funzione l’apparecchio con-
sigliamo vivamente di leggere questo Manuale
d’Istruzioni.
Per conservare nel tempo le condizioni ottimali di fun-
zionamento dell’XS-3 raccomandiamo inoltre di rivol-
gersi ai nostri Servizi tecnici autorizzati per qualsiasi
intervento di assistenza o manutenzione.
1.1 Osservazioni ed avvertenze
L’XS-3 va maneggiato ed utilizzato con tutta l’atten-
zione dovuta ad un apparecchio di alta precisione.
Evitare di esporlo a condizioni estreme di temperatura
ed umidità, e di sottoporlo ad urti meccanici e
vibrazioni.
Tenerlo inoltre lontano da apparecchiature in grado di
generare forti campi magnetici (come televisori, moni-
tor di computer, grandi motori elettrici, e così via).
Considerazioni ambientali
L’XS-3 può funzionare praticamente in qualsiasi ambi-
ente. Per conservare l’alto livello delle sue prestazioni
e prolungare nel tempo il suo utilizzo, consigliamo
comunque di rispettare le seguenti condizioni ambien-
tali:
Temperatura ambiente: compresa tra 5°C e 35°C.
Umidità relativa: compresa tra 30 e 90 gradi, senza
manifestazioni di condensa
Dato che l’apparecchio può scaldarsi durante il fun-
zionamento, raccomandiamo di prevedere lo spazio
sufficiente per l’adeguata ventilazione.
Evitare quindi di collocarlo in uno spazio ristretto,
come potrebbe essere il ripiano di una libreria.

1. Introduzione Italiano
TASCAM XS-3 21
Per evitare eventuali problemi di surriscaldamento,
non appoggiare l’XS-3 sopra nessun dispositivo che
possa generare calore, come per esempio un amplifica-
tore.
L’XS-3 può funzionare a 100-240 V, 50-60 Hz. Per
evitare l’eventuale comparsa di ronzio, accertarsi che
ci sia la dovuta distanza tra il cavo d’alimentazione e
quelli dei segnali audio
Per trasportare l’XS-3 bisogna sempre rimetterlo
nell’imballo originale. Nell’eventualità di dover
trasportare l’apparecchio in un secondo tempo,
raccomandiamo pertanto vivamente di conser-
vare la scatola e tutto il materiale d’imballaggio,.
A titolo di protezione contro eventuali sovraccarichi
elettrici, sull’apparecchio è montato un fusibile da 250
mA. Se tale fusibile dovesse bruciare, togliere l’ali-
mentazione e sostituirlo con un elemento dello stesso
tipo. Se anche quest’ultimo dovesse bruciare, chiedere
subito l’intervento del nostro servizio Assistenza.
NON CORTOCIRCUITARE MAI I CONTATTI DI
UN FUSIBILE INTERROTTO NÉ UTILIZZARE UN
FUSIBILE DI VALORE PIÙ ALTO.
Sarebbe comunque consigliabile che anche la
sostituzione del fusibile fosse effettuata da un
tecnico qualificato.
Collegamento di altri apparecchi
Quando si effettuano o interrompono collegamenti
all’XS-3 è indispensabile staccare prima l’alimen-
tazione da tutti gli apparecchi interessati.
Al termine del collegamento, consigliamo di ridare
tensione prima alla sorgente (giradischi, lettore di CD,
eccetera), poi all’XS-3 ed infine al sistema d’amplifi-
cazione.
Per spegnere il sistema procedere invece in senso
inverso: prima gli amplificatori e poi le altre apparec-
chiature.
Attenzione: non accendere di nuovo il sistema prima
che siano trascorsi almeno tre secondi dallo spegni-
mento
AVVERTENZA
NOTA
1.2 Numero di serie, ed altro
Il numero di serie dell’XS-3 è stampato su un’etichet-
ta, situata sul pannello posteriore dell’apparecchio. È
consigliabile prendere nota del numero di serie, che
può essere richiesto in molte occasioni (assistenza,
garanzia, eccetera).
Numero di serie
Pannello posteriore

Italiano 2. Funzioni e controlli
22 TASCAM XS-3
2. Funzioni e controlli

2. Funzioni e controlli Italiano
TASCAM XS-3 23
2.1 Pannello superiore
1 MIC LEVEL
Regola il livello del segnale d’ingresso MIC.
2 MIC EQ
EQ a 2 bande per il segnale d’ingresso MIC.
3 TRIM
Regola il livello del segnale d’ingresso di ciascun
PGM.
La regolazione della sensibilità di ogni ingresso
deve essere effettuata con molta attenzione
facendo riferimento al meter e/o alla cuffia e
senza far accendere tutti i LED rossi dello stru-
mento, per evitare la saturazione del segnale.
4 PGM EQ
EQ a 3 bande per ciascun segnale PGM.
Quando tutti gli equalizzatori sono regolati a –26 dB, il
suono verrà completamente eliminato
5 C.F. REVERSE
Determina la direzione di funzionamento del CROSS
FABER.
OFF spostando il CROSS FADER verso A
diventa più forte il segnale A, spostando il
CROSS FADER verso B diventa più forte il
segnale B
ON spostando il CROSS FADER verso A
diventa più forte il segnale B, spostando il
CROSS FADER verso B diventa più forte il
segnale A.
6 C.F. CURVE
Regola la curva di risposta del CROSS FADER da
“lenta” (rotazione in senso antiorario) a “rapida”
(rotazione in senso orario).
7 PHONO/LINE
Seleziona come ingresso per ciascun PGM il segnale
PHONO oppure LINE.
8 PGM FADER
Regola il livello PGM.
9 MASTER LEVEL
Regola il livello dell’uscita MASTER OUT (connettori
TRS bilanciati e RCA sbilanciati).
NOTA
0 LED e interruttore EFFECT
Quando si preme quest’interruttore, diventa attiva la
mandata all’effetto esterno del MASTER, e si accende
il LED.
q MONITOR MASTER CUE
Seleziona la modalità dell’ascolto monitor in cuffia.
CUE per ascoltare i segnali PGM regolati dal
fader Cue Balance
MASTER per ascoltare il segnale pre MASTER
w LEVEL
Regola il livello dell’uscita in cuffia.
e CUE BALANCE
Regola il bilanciamento in cuffia tra i segnali PGM 1 e
PGM 2.
r CROSS FADER
Miscela i segnali PGM 1 e PGM 2.
L’utente ha la possibilità di sostituire il Cross-fader e
di regolarne la curva e la funzione Reverse.
t INPUT LEVEL METER
Indica il livello del segnale di ciascun PGM.
LEVEL METER indica i segnali post PGM FADER.
2.2 Sostituzione dei fader
1. Togliere le due viti del pannello.
2. Togliere il fader.
3. Staccare il suo connettore.
4. Inserire il connettore nel nuovo fader.
5. Posizionare il nuovo fader e fissarlo con le viti.
2.3 Pannello posteriore
y EFFECT (jack TRS sbilanciato)
Inserisce l’effetto esterno nel percorso del segnale
STEREO OUTPUT.
Collegare qui il generatore d’effetto esterno.
I collegamenti sono:
MANDATA Punta
RITORNO Anello
MASSA Calza
NOTA

Italiano 2. Funzioni e controlli
24 TASCAM XS-3
u MIC INPUT (connettore TRS bilanciato)
Inserire il microfono in questo connettore.
I collegamenti sono:
CALDO: Punta
FREDDO: Anello
MASSA: Calza
Se è collegato un microfono sbilanciato, racco-
mandiamo di cortocircuitare il terminale FREDDO
(Anello) alla MASSA (Calza).
i PHONO INPUTS (jack RCA sbilanciati)
Collegare qui i giradischi muniti di cartuccia MM.
ATTENZIONE
Ai connettori PHONO non si devono mai collegare
apparecchi di altro tipo.
o LINE INPUTS (jack RCA sbilanciati)
Collegare qui apparecchiature a livello di linea, come
lettori di CD, registratori a cassetta, DAT, MD, ecc.
p Terminale GND
Inserire in questo terminale gli eventuali cavi di terra
dei giradischi, in modo da ridurre l’immissione di dis-
turbi audio e ronzii.
a REC OUTPUT (jack RCA sbilanciati)
Da questi connettori esce il segnale pre MASTER.
Per collegare qui il registratore, ad esempio, si può
registrare la propria prestazione dal vivo escludendo il
controllo MASTER LEVEL.
s MASTER OUTPUT (connettore RCA sbi-
lanciato)
Da questo connettore esce il segnale d’uscita master
regolato dal controllo MASTER.
d MASTER OUTPUT (connettore TRS bilan-
ciato)
Da questo connettore esce il segnale d’uscita master
regolato dal controllo MASTER.
I collegamenti sono:
CALDO Punta
FREDDO Anello
MASSA Calza
NOTA
f C.F. START
Collegare qui un dispositivo che accetta l’operazione
Fader Start.
Questo controllo permette di attivare o disattivare le
due sorgenti di segnale in modo indipendente.
Quando la funzione è attiva, spostando il cross-fader la
sorgente di programma A o B si avvia
e/o si ferma automaticamente.
Quando si utilizza questa funzione, accertarsi di
collegare il segnale audio e il segnale Fader Start
allo stesso XS-3.
Il segnale Fader Start viene emesso dalla Punta
del connettore.
Il segnale Fader Stop (back cue) viene emesso
dalla Calza del connettore.
g Interruttore POWER
h Ingresso adattatore c.a.
Collegare qui l’adattatore PS-P3X, compreso nella for-
nitura dell’XS-3.
Al momento d’inserire l’adattatore, verificare che la
freccia contrassegnata su di esso
sia allineata al punto bianco sul pannello posteriore
dell’apparecchio.
NON usare MAI adattatori di altro tipo: l’XS-3 accetta
soltanto l’adattatore PS-P3X, compreso nella fornitura.
2.4. Pannello anteriore
j PHONES
Collegare qui una normale cuffia.
k C.F.START B
Attiva/disattiva la funzione Cross-fader Start per la
sorgente B.
l C.F.START A
Attiva/disattiva la funzione Cross-fader Start per la
sorgente A.
Se l’interruttore C.F.REVERSE è in posizione ON,
risulta invertita anche la funzione Cross-fader
Start.
NOTA
ATTENZIONE
NOTA

3. Caratteristiche tecniche Italiano
TASCAM XS-3 25
3. Caratteristiche tecniche
LINE INPUT (PGM1-2)
RCA, sbilanciati
Livello ingresso -10 dBV
Impedenza ingresso 10 kohm
PHONO INPUT (PGM1-2)
RCA, sbilanciati
Livello ingresso -54 dBV
Impedenza ingresso 47 kohm
MIC INPUT
TRS, bilanciato
Livello ingresso -50 dBV
Impedenza ingresso 2,8 kohm
MASTER OUTPUTS (bilanciati)
TRS, bilanciati
Livello uscita nominale +4 dBu
Impedenza uscita 75 ohm
MASTER OUTPUTS (sbilanciati)
RCA, sbilanciati
Livello uscita nominale 0 dBV
Impedenza uscita 100 ohm
REC OUTPUT RCA, sbilanciati
Livello uscita nominale -10 dBV
Impedenza uscita 1 kohm
EFECT (send) TRS, sbilanciati
Livello uscita nominale -4 dBV
Impedenza uscita 100 ohm
EFECT (return) TRS, sbilanciati
Livello ingresso -4 dBV
Impedenza ingresso 10 kohm
PHONES 100 mW + 100 mW,
(a 33 ohm)
Risposta in frequenza
LINE IN 20 Hz æ 20 kHz, ±1,0 dB
PHONO IN 30 Hz æ 15 kHz, ± 2,0 dB
(RIAA)
MIC IN 30 Hz æ 18 kHz, ± 3,0 dB
Rapporto segnale/rumore
LINE IN 78 dB (IHF A WTD)
PHONO IN 70 dB (IHF A WTD)
MIC IN 60 dB (IHF A WTD)
Distorsione armonica totale
LINE IN < 0,1 %
PHONO IN < 0,2 %
MIC IN < 0,2 %
Diafonia > 60 dB (a 1 kHz)
HIGH +12 dB ~ -26 dB
MID +12 dB ~ -26 dB
LOW +12 dB ~ -26 dB
Filtro (frequenza di taglio a –6 dB, inclinazione 12
dB/ottava in tutti i casi)
HIGH 6 kHz
MID 6 kHz & 200 Hz
LOW 200 Hz
MIC EQ
HIGH 5,5 kHz, +12 dB ~ - 12 dB
LOW 125 Hz, +12 dB ~ - 12 dB
Alimentazione 120 V (60 Hz)
230 V (50 Hz)
Assorbimento 13 W
Dimensioni (mm) 265 (L) x 106 (A) x 267
(P)
Peso 2,6 kg (apparecchio)
0,6 kg (adattatore c.a.)
Compatibilita' elettromagnetica ambientale:
E4
b) Corrente di picco all'accensione:
5 A
Tutte le caratteristiche tecniche sono soggette a cambi-
amenti, senza preavviso
(10)
267
19138
228
211
(20)76
198
260
5 8
2
5

Español 1. Introducción
26 TASCAM XS-3
Indice
1. Introducción...................................................... 26
1.1. Algunas notas y precauciones.................. 26
1.2. Número de serie, etc................................. 26
2. Funciones y controles ....................................... 27
2.1. Panel superior........................................... 28
2.2. Cómo sustituir el fader............................. 28
2.3. Panel trasero............................................. 28
2.4. Panel frontal ............................................. 29
3. Especificaciones técnicas.................................. 30
4. Diagrama de bloques ........................................ 31
1. Introducción
El XS-3 es una sofisticada mesa de mezclas de 2
canales para DJ que permite la conexión de diversas
unidades, y con la que puede producir mezclas de una
forma creativa. Con su sofisticado diseño, el XS-3
combina un funcionamiento muy sencillo con una
amplia gama de funciones.
Es MUY IMPORTANTE que lea este manual antes de
conectar esta unidad para poder sacar el máximo par-
tido de la misma.
Para cualquier tipo de mantenimiento de esta unidad le
recomendamos que se ponga en contacto con uno de
nuestros servicios técnicos oficinales de cara a con-
seguir en todo momento un funcionamiento óptimo.
1.1. Algunas notas y precauciones
Trate el XS-3 como haría con cualquier otro aparato
electrónico de alta precisión.
Evite exponerlo a grados de temperatura y humedad
extremados y evite los golpes y vibraciones mecánicas.
Mantenga esta unidad lejos de los campos magnéticos
potentes (grandes TV, monitores, grandes motores
eléctricos, etc.).
Consideraciones medioambientales
Puede usar el XS-3 prácticamente en cualquier lugar,
pero para mantener el máximo rendimiento y alargar
su vida operativa, tenga en cuenta las siguientes condi-
ciones en cuanto al entorno:
La temperatura nominal debería estar entre los 5°C y
35°C (41°F y 95°F).
La humedad relativa del ambiente debería estar entre
el 30 y el 90 por ciento, sin condensación.
Dado que este aparato puede calentarse bastante
durante su funcionamiento, deje siempre un espacio
suficiente encima y alrededor del aparato para su cor-
recta ventilación.
No instale este aparato en un espacio muy limitado
como puede ser encastrado en una estantería o similar.
Nunca coloque este aparato sobre una unidad que
genere calor, p.e. un amplificador, para evitar posibles
problemas de recalentamiento.
El XS-3 funciona de 100 a 240V, 50-60Hz. Asegúrese
que el cable de corriente esté alejado de los cables de
señal para evitar posibles zumbidos audio.
Cuando transporte la unidad de un lugar a otro,
use siempre el embalaje original o una maleta
diseñada especialmente para ella. Por esta razón,
recomendamos que conserve el embalaje y las
protecciones que vienen con el XS-3, por si lo ha
de transportar en el futuro.
Conexiones a otros aparatos
Es muy importante que apague todas las unidades
cuando esté realizando o modificando las conexiones
de o hacia el XS-3.
Cuando encienda las unidades, suele ser una buena
idea comenzar primero con las fuentes (tocadiscos,
reproductores de CD, etc.), después encender el XS-3
y terminar encendiendo el sistema de amplificación.
Para apagar las unidades haga lo mismo pero al revés (los
amplificadores lo primero y después el resto del equipo).
Cuando vuelva a encender de nuevo la unidad, espere
durante unos tres segundos o más antes de volverla a apa-
gar.
1.2. Número de serie, etc.
El número de serie del XS-3 está situado en una eti-
queta colocada en la parte frontal de la unidad en el
panel inferior. Anótese este número para cualquier ref-
erencia a él en el futuro (garantía, etc.).
NOTA
Número de serie
Panel trasero

2. Funciones y controles Español
TASCAM XS-3 27
2. Funciones y controles

Español 2. Funciones y controles
28 TASCAM XS-3
2.1 Panel superior
1 MIC LEVEL
Ajusta el nivel de señal de la entrada MIC.
2 MIC EQ
Ecualizador de 2 bandas para la señal de entrada del
micrófono.
3 TRIM
Ajusta el nivel de señal de entrada de cada PGM.
Debe realizar todos los ajustes de sensibilidad de
entrada con mucho cuidado usando el medidor
de nivel y/o auriculares como referencia y evitan-
do que se iluminen los pilotos rojos del medidor
de nivel, ya que en caso contrario se podría satu-
rar la entrada (sobrecarga).
4 PGM EQ
Ecualizador de 3 bandas para cada señal PGM
Cuando todos los mandos del EQ estén ajustados a –26
dB, el sonido estará completamente cortado o anulado.
5C.F. REVERSE
Ajusta la dirección del funcionamiento del CROSS
FADER
OFF: el desplazamiento del CROSS FADER
hacia A hace que la señal A sea más fuerte,
mientras que el desplazamiento hacia B
hace que dicha señal B sea más fuerte.
ON: el desplazamiento del CROSS FADER
hacia A hace que la señal B sea más fuerte y
a la inversa.
6 C.F. CURVE
Le permite ajustar la curva de respuesta del CROSS
FADER desde muy suave (giro a la izquierda) a dura
(derecha).
7 PHONO/LINE
Elige la señal de entrada (PHONO o LINE) de cada
PGM.
8 FADER PGM
Ajusta el nivel de PGM.
9 MASTER LEVEL
Ajusta el nivel de salida de MASTER OUT (conec-
tores TRS balanceado y RCA no balanceado).
0 Interruptor y piloto EFFECT
Activa la ruta de efectos externa del MASTER cuando
el interruptor EFFECT está activado. Cuando dicha
ruta está activada, el piloto está encendido.
NOTA
q MONITOR MASTER/CUE
Elige la forma de monitorización a través de los auric-
ulares.
CUE: Esta forma le permite monitorizar las
señales PGM que estén ajustadas por el
fader de balance de escucha o cue.
MASTER: Esta forma le permite monitorizar la
señal previa al volumen MASTER.
w LEVEL
Ajusta el nivel de salida de los auriculares.
e CUE BALANCE
Ajusta el balance entre la señal PGM 1 y PGM 2 en los
auriculares.
r CROSS FADER
Mezcla las señales PGM 1 y PGM 2.
Este CROSS FADER es sustituible por el usuario. Es
posible también ajustar la curva e inversión del
CROSS FADER.
t MEDIDOR DE NIVEL DE ENTRADA
Indica el nivel de señal de cada PGM.
El MEDIDOR DE NIVEL indica las señales
después del FADER PGM.
2.2 Cómo sustituir el fader
1. Quite los dos tornillos de la superficie del panel del
fader.
2. Extraiga el fader.
3. Desconecte la clavija multicable que está conectada
al fader.
4. Vuelva a conectar la clavija multicable al nuevo
fader.
5. Sustituya el nuevo fader en su posición con los
tornillos.
2.3 Panel trasero
y EFFECT (conector TRS no balanceado)
Introduce un efecto exterior en la ruta de señal
STEREO OUTPUT.
Conecte la unidad de efectos exterior a esta entrada.
Las conexiones son de la siguiente forma:
ENVIO: Punta
RETORNO: Anillo
MASA: Lateral
NOTA

2. Funciones y controles Español
TASCAM XS-3 29
u ENTRADA MIC
(conector TRS balanceado)
Conecte a esta entrada el micrófono.
Las conexiones son de la siguiente forma:
ACTIVO: Punta
PASIVO: Anillo
MASA: Lateral
Si conecta esta entrada un micrófono no bal-
anceado, le recomendamos que cortocircuite la
señal pasiva (anillo) con la masa (lateral).
i ENTRADAS PHONO (clavijas RCA no bal-
anceadas)
Conecte aquí los giradiscos equipados con el cartucho
MM.
Nunca conecte ningún otro tipo de aparatos a las clavi-
jas PHONO.
o ENTRADAS LINE (conectores RCA no bal-
anceados)
Conecte a estas entradas aparatos con nivel de línea
como reproductores CD, pletinas de casette, DAT,
MD, etc.
p Terminal GND
Si sus giradiscos disponen de cables de antena o toma
de tierra, conecte estos cables a este terminal GND
para reducir los ruidos y zumbidos.
a
SALIDA REC (conectores RCA no balanceados)
Dan salida a la señal pre MASTER.
Por ejemplo, estas salidas sirven para conectar una
grabadora con la que pueda grabar su actuación en
directo sin el control MASTER LEVEL.
s SALIDA MASTER (conector RCA no bal-
anceado)
Da salida a la señal de salida master ajustada por el
control MASTER.
d
SALIDA MASTER (conector TRS balanceado)
Da salida a la señal de salida master ajustada por el
control MASTER.
Las conexiones están realizadas de la siguiente forma:
ACTIVO: Punta
PASIVO: Anillo
MASA: Lateral
PRECAUCION
NOTA
f C.F. START
Conecte a esta salida una unidad que acepte el disparo
por fader.
Puede ajustar la función de disparo o arranque por
crossfader para activar o desactivar cada lado de forma
independiente.
Mueva el crossfader para hacer que arranque y/o
detener (escucha inversa) la fuente del PGM A o B de
forma automática.
Cuando use esta función, asegúrese de conectar
la señal audio y la señal de disparo fader al
mismo XS-3.
La señal de disparo por fader es emitida desde la
punta.
La señal de parada por fader (escucha inversa) es
emitida por el lateral.
g Interruptor POWER.
h Entrada de adaptador AC
Utilice esta entrada para conectar el adaptador de cor-
riente PS-P3X que viene de fábrica con su XS-3.
Cuando conecte el adaptador de AC en la unidad,
asegúrese de alinear la marca de flecha del enchufe del
adaptador con el punto blanco del panel trasero.
NO USE ningún otro adaptador con el XS-3 que
no sea el PS-P3X que viene con la propia unidad.
2.4 Panel frontal
j PHONES
Conecte aquí sus auriculares.
k C.F. START B
Ajusta el punto on/off de disparo por crossfader de la
fuente B.
l C.F. START A
Ajusta el punto on/off de disparo por crossfader de la
fuente A.
Si el interruptor C.F. REVERSE está activado, el
funcionamiento de este disparo por crossfader
estará también al revés.
NOTA
PRECAUCION
NOTA

Español 3. Especificaciones técnicas
30 TASCAM XS-3
3. Especificaciones técnicas
ENTRADA LINE (PGM1-2) RCA, no balanceado
Nivel de entrada: -10 dBV
Impedancia de entrada: 10 kohmios
ENTRADA PHONO (PGM1-2) RCA, no balanceado
Nivel de entrada: -54 dBV
Impedancia de entrada: 47 kohmios
ENTRADA MIC: TRS, balanceado
Nivel de entrada: -50 dBV
Impedancia de entrada: 2.8 kohmios
SALIDAS MASTER (balanceadas) TRS, balanceado
Nivel de salida nominal: +4 dBu
Impedancia de salida: 75 ohmios
SALIDAS MASTER (no balanceadas)
RCA, no balanceado
Nivel de salida nominal: 0 dBV
Impedancia de salida: 100 ohmios
SALIDA REC: RCA, no balanceado
Nivel de salida nominal: -10 dBV
Impedancia de salida: 1 kohmio
EFFECT (envío) TRS, no balanceado
Nivel de salida nominal: -4 dBV
Impedancia de salida: 100 ohmios
EFFECT (retorno) TRS, no balanceado
Nivel de entrada: -4 dBV
Impedancia de entrada: 10 kohmios
PHONES: 100 mW + 100 mW
(a 33 ohmios)
Respuesta de frecuencia:
ENTRADA LINE: 20 Hz a 20 kHz, +/-1.0 dB
ENTRADA PHONO: 30 Hz a 15 kHz, +/-2.0 dB
(RIAA)
ENTRADA MIC: 30 Hz a 18 kHz, +/-3.0 dB
Relación señal-ruido:
ENTRADA LINE: 78 dB (
IHF MEDICION A
)
ENTRADA PHONO: 70 dB (
IHF MEDICION A
)
ENTRADA MIC: 60 dB (
IHF MEDICION A
)
Distorsión armónica total:
ENTRADA LINE: <0.1%
ENTRADA PHONO: <0.2%
ENTRADA MIC: <0.2%
Cruce de señal: >60 dB (@ 1 kHz)
PGM EQ
HIGH (agudos): +12 dB ~ -26 dB
MID (medios): +12 dB ~ -26 dB
LOW (graves): +12 dB ~ -26 dB
Filtro (frecuencia de corte a –6 dB, pendiente 12 dB/
octava en todos los casos)
HIGH (agudos): 6 kHz
MID (medios): 6 kHz y 200 Hz
LOW (graves): 200 Hz
MIC EQ
HIGH (agudos): 5.5 kHz, +12 dB ~ -12 dB
LOW (graves): 125 Hz, +12 dB ~ -12 dB
Alimentación: 120 V (60 Hz)
230 V (50 Hz)
Consumo: 13 W
Dimensiones (mm): 228 (L) x 106 (A) x 267
(P)
Peso: 2.6 kg (unidad principal)
0.6 kg (adaptador AC)
Entomo Electromagnético aplicable:
E4
Pico de flujo de corriente: 5 A
Todas las especificaciones están sujetas a cambios sin
previo aviso.
(10)
267
19138
228
211
(20)76
198
260
5 8
2
5

2. Features and controlsX English
TASCAM XS-3 31
4. Block diagram / Schéma synoptique / Blockschaltbild / Schema a blocchi / Diagrama de bloques
4. Block diagram / Schéma synoptique / Blockschaltbild /
Schema a blocchi / Diagrama de bloques
A
R
2 BAND TONE
PGM1_R
PGM1
B
PGM2
R
L
A
METER
OFF
A
L
METER L (PGM2)
ON
PGM1
PGM2_L
ON
PGM1_L
METER R (PGM2)
ON
EQ
L
PGM2
SEND
OFF
PGM2_R
CROSSFADER
50ms
PGM2
SEND
RCV
MAX
B
OFF
+12
- 26
MASTER
R
RCV
CUE
PGM1
L
R
R
50ms
MONI
CROSSF ADER
3 BAND
TONE
PGM1_R
PGM2_L
EFFECT
(BAL TYPE)
ON
R
PGM1_L
PGM2_R
B
L
OFF
PGM2
PGM1
L
LEVEL
METER R (PGM1)
EQ +12
- 26
3 BAND
TONE
EQ
3 BAND
TONE
EQ
+12
- 26
3 BAND
TONE
MAX
+12
- 26
+12
- 12
ON
OFF
OFF
ON
METER L (PGM1)
MAX
MAX
MAX
MAX
MAX
LED DR IVER
C.F
CUE
MASTER
C.F
MASTER
OUTPUT
OUTPUT
+
+
+
+
++
++
+
++
++
-
-
-
-
-
-
-
-
-
-
-
-
-
-
--
-
-
-
-
-
--
-
-
-
-
-
-
-
-
-
-
-
-
-
-
-
-
-
50ms
+
+
+
PAD
PAD
50ms
U1
MASTER
VCC
PHONO 2
+10dB
+7dB
+4dB
+2dB
0dB
-2dB
-10dB
-4dB
-7dB
-20dB
-30dB
-40dB
PHONO 1
PHONO 1
HI
REVERSE
UNBAL OUT
MASTER
LINE 1/PHONO 1
MONITOR
VCA BLOCK
RIAA
MIC LEVEL
VCA BLOCK
HI
LO
GAIN TRIM
LINE 1
GAIN TRIM
1
2
3
4
LO
MID
LINE 1
LO
PGM 1
FADER
LINE 2
HEAD PHONE
MID
PGM 2
FADER
MIC AMP
HI
LINE 2/PHONO 2
BAL OUT
2
3
1
VCA BLOCK
REVERSE
C/F START
PGM 1
FADER
EFFECT S
C/F START
1
2
3
4
C/F START
HI
HEAD PHONE
2
3
1
C/F CURVE
LINE 2
LO
LO
MID
VCA BLOCK
RIAA
RIAA
LEVEL
REC OUT
EQ
PGM 2
FADER
HI
MID
MIC INPUT
RIAA
2
3
1
PHONO 2
LED
POWER MUTE

TEAC CORPORATION
Phone: (0422) 52-5082 3-7-3, Nakacho, Musashino-shi, Tokyo 180-8550, Japan
TEAC AMERICA, INC.
Phone: (323) 726-0303 7733 Telegraph Road, Montebello, California 90640
TEAC CANADA LTD.
Phone: 905-890-8008 Facsimile: 905-890-9888 5939 Wallace Street, Mississauga, Ontario L4Z 1Z8, Canada
TEAC MEXICO, S.A. de C.V.
Phone: (525) 581-5500 Facsimile: (525) 581-5111 Campesinos 184. Col. Granjas Esmeralda. 09810.Mexico D.F.
TEAC UK LIMITED
Phone: 01923-819699 5 Marlin House, Croxley Business Park, Watford, Hertfordshire, WD18 8TE U.K.
TEAC DEUTSCHLAND GmbH
Phone: 0611-71580 Bahnstrasse 12, 65205 Wiesbaden-Erbenheim, Germany
TEAC FRANCE S. A.
Phone: 01.42.37.01.02 17 Rue Alexis-de-Tocqueville, CE 005 92182 Antony Cedex, France
TEAC BELGIUM NV/SA
Phone: 0162-510860 Oeverkruid 15, NL-4941 VV Raamsdonksveer, Netherlands
TEAC NEDERLAND BV
Phone: 0162-510210 Oeverkruid 15, NL-4941 VV Raamsdonksveer, Netherlands
TEAC AUSTRALIA PTY.,LTD. A.C.N. 005 408 462
Phone: (03) 9644-2442 106 Bay Street, Port Melbourne, Victoria 3207, Australia
TEAC ITALIANA S.p.A.
Phone: 02-66010500 Via C. Cantù 11, 20092 Cinisello Balsamo, Milano, Italy
Printed in China MA-0674
»
XS-3
Transcripción de documentos
XS3 02.6.12 1:56 PM ページ1 » XS-3 Professional DJ Mixer OWNER’S MANUAL/ MODE D’EMPLOI / BEDIENUNGSANLEITUNG / MANUALE D'ISTRUZIONI / Mezclador de DJ profesional D00675100B Important Safety Precautions English IMPORTANT (for U.K. Customers) For U.S.A TO THE USER DO NOT cut off the mains plug from this equipment. If the plug fitted is not suitable for the power points in your home or the cable is too short to reach a power point, then obtain an appropriate safety approved extension lead or consult your dealer. If nonetheless the mains plug is cut off, remove the fuse and dispose of the plug immediately, to avoid a possible shock hazard by inadvertent connection to the mains supply. If this product is not provided with a mains plug, or one has to be fitted, then follow the instructions given below: IMPORTANT. DO NOT make any connection to the larger terminal which is marked with the letter E or by the safety earth symbol ç or coloured GREEN or GREEN-and-YELLOW. The wires in the mains lead on this product are coloured in accordance with the following code: BLUE BROWN : NEUTRAL : LIVE As these colours may not correspond with the coloured markings identifying the terminals in your plug proceed as follows: The wire which is coloured BLUE must be connected to the terminal which is marked with the letter N or coloured BLACK. The wire which is coloured BROWN must be connected to the terminal which is marked with the letter L or coloured RED. When replacing the fuse only a correctly rated approved type should be used and be sure to re-fit the fuse cover. IF IN DOUBT — CONSULT A COMPETENT ELECTRICIAN. 2 TASCAM XS-3 This equipment has been tested and found to comply with the limits for a Class B digital device, pursuant to Part 15 of the FCC Rules. These limits are designed to provide reasonable protection against harmful interference in a residential installation. This equipment generates, uses, and can radiate radio frequency energy and, if not installed and used in accordance with the instructions, may cause harmful interference to radio communications. However, there is no guarantee that interference will not occur in a particular installation. If this equipment does cause harmful interference to radio or television reception, which can be determined by turning the equipment off and on, the user is encouraged to try to correct the interference by one or more of the following measures. a) Reorient or relocate the receiving antenna. b) Increase the separation between the equipment and receiver. c) Connect the equipment into an outlet on a circuit different from that to which the receiver is connected. d) Consult the dealer or an experienced radio/TV technician for help. CAUTION Changes or modifications to this equipment not expressly approved by TEAC CORPORATION for compliance could void the user's authority to operate this equipment. XS3 02.6.12 1:56 PM ページ3 IMPORTANT SAFETY INSTRUCTIONS CAUTION: ≠ Read all of these Instructions. ≠ Save these Instructions for later use. ≠ Follow all Warnings and Instructions marked on the audio equipment. 1) Read instructions — All the safety and operating instructions should be read before the product is operated. 2) Retain instructions — The safety and operating instructions should be retained for future reference. 3) Heed Warnings — All warnings on the product and in the operating instructions should be adhered to. 4) Follow instructions — All operating and use instructions should be followed. 5) Cleaning — Unplug this product from the wall outlet before cleaning. Do not use liquid cleaners or aerosol cleaners. Use a damp cloth for cleaning. 6) Attachments — Do not use attachments not recommended by the product manufacturer as they may cause hazards. 7) Water and Moisture — Do not use this product near water _ for example, near a bath tub, wash bowl, kitchen sink, or laundry tub; in a wet basement; or near a swimming pool; and the like. 8) Accessories — Do not place this product on an unstable cart, stand, tripod, bracket, or table. The product may fall, causing serious injury to a child or adult, and serious damage to the product. Use only with a cart, stand, tripod, bracket, or table recommended by the manufacturer, or sold with the product. Any mounting of the product should follow the manufacturer’s instructions, and should use a mounting accessory recommended by the manufacturer. 9) A product and cart combination should be moved with care. Quick stops, excessive force, and uneven surfaces may cause the product and cart combination to overturn. 10) Ventilation — Slots and openings in the cabinet are provided for ventilation and to ensure reliable operation of the product and to protect it from overheating, and these openings must not be blocked or covered. The openings should never be blocked by placing the product on a bed, sofa, rug, or other similar surface. This product should not be placed in a built-in installation such as a bookcase or rack unless proper ventilation is provided or the manufacturer’s instructions have been adhered to. 11) Power Sources — This product should be operated only from the type of power source indicated on the marking label. If you are not sure of the type of power supply to your home, consult your product dealer or local power company. For products intended to operate from battery power, or other sources, refer to the operating instructions. 12) Grounding or Polarization — This product may be equipped with a polarized alternating-current line plug (a plug having one blade wider than the other). This plug will fit into the power outlet only one way. This is a safety feature. If you are unable to insert the plug fully into the outlet, try reversing the plug. If the plug should still fail to fit, contact your electrician to replace your obsolete outlet. Do not defeat the safety purpose of the polarized plug. 13) Power-Cord Protection — Power-supply cords should be routed so that they are not likely to be walked on or pinched by items placed upon or against them, paying particular attention to cords at plugs, convenience receptacles, and the point where they exit from the product. 14) Outdoor Antenna Grounding — If an outside antenna or cable system is connected to the product, be sure the antenna or cable system is grounded so as to provide some protection against voltage surges and built-up static charges. Article 810 of the National Electrical Code, ANSI/NFPA 70, provides information with regard to proper grounding of the mast and supporting structure, grounding of the lead-in wire to an antenna discharge unit, size of grounding conductors, location of antenna-discharge unit, connection to grounding electrodes, and requirements for the grounding electrode. English "Note to CATV system installer: This reminder is provided to call the CATV system installer’s attention to Section 820-40 of the NEC which provides guidelines for proper grounding and, in particular, specifies that the cable ground shall be connected to the grounding system of the building, as close to the point of cable entry as practical. 15) Lightning — For added protection for this product during a lightning storm, or when it is left unattended and unused for long periods of time, unplug it from the wall outlet and disconnect the antenna or cable system. This will prevent damage to the product due to lightning and power-line surges. 16) Power Lines — An outside antenna system should not be located in the vicinity of overhead power lines or other electric light or power circuits, or where it can fall into such power lines or circuits. When installing an outside antenna system, extreme care should be taken to keep from touching such power lines or circuits as contact with them might be fatal. 17) Overloading — Do not overload wall outlets, extension cords, or integral convenience receptacles as this can result in risk of fire or electric shock. 18) Object and Liquid Entry — Never push objects of any kind into this product through openings as they may touch dangerous voltage points or short-out parts that could result in a fire or electric shock. Never spill liquid of any kind on the product. 19) Servicing — Do not attempt to service this product yourself as opening or removing covers may expose you to dangerous voltage or other hazards. Refer all servicing to qualified service personnel. 20) Damage Requiring Service — Unplug this product from the wall outlet and refer servicing to qualified service personnel under the following conditions: a) when the power-supply cord or plug is damaged. b) if liquid has been spilled, or objects have fallen into the product. c) if the product has been exposed to rain or water. d) if the product does not operate normally by following the operating instructions. Adjust only those controls that are covered by the operating instructions as an improper adjustment of other controls may result in damage and will often require extensive work by a qualified technician to restore the product to its normal operation. e) if the product has been dropped or damaged in any way. f ) when the product exhibits a distinct change in performance _ this indicates a need for service. 21) Replacement Parts — When replacement parts are required, be sure the service technician has used replacement parts specified by the manufacturer or have the same characteristics as the original part. Unauthorized substitutions may result in fire, electric shock, or other hazards. 22) Safety Check — Upon completion of any service or repairs to this product, ask the service technician to perform safety checks to determine that the product is in proper operating condition. 23) Wall or Ceiling Mounting — The product should be mounted to a wall or ceiling only as recommended by the manufacturer. 24) Heat — The product should be situated away from heat sources such as radiators, heat registers, stoves, or other products (including amplifiers) that produce heat. TASCAM XS-3 3 XS3 02.6.12 1:56 PM ページ4 English Table of contents 1. Introduction......................................................... 4 1.1. Some notes and precautions....................... 4 1.2. Serial number, etc. ..................................... 4 2. Features and controls .......................................... 5 2.1. Top panel.................................................... 6 2.2. How to replace the fader ............................ 6 2.3. Rear panel .................................................. 6 2.4. Front panel ................................................. 7 3. Specifications...................................................... 8 4. Block diagram................................................... 31 1. Introduction As the unit may become hot during operation, always leave sufficient space above and around the unit for ventilation. Do not install this equipment in a confined space such as a bookcase or similar unit. You should not place the unit on a piece of equipment generating heat, e.g. an amplifier, to avoid possible problems with overheating. XS-3 operates under 120, 50 Hz. Make sure that the power cable is far away from the signal cables in order to avoid any possible audio hum. NOTE 1. Introduction The XS-3 is a sophisticated 2 channel DJ mixer which allows the connection of many devices, and allows you to mix in a creative way. Following the sophisticated layout design, the XS-3 combines easy operation with a wide range of functions. It is VERY IMPORTANT that you read this manual before connecting the mixer in order to obtain its maximum performance. We recommend our authorised Technical Services whenever any maintenance task should be needed so that optimum operation shall be achieved. 1.1. Some notes and precautions Treat the XS-3 as you would any other piece of precision equipment. Avoid exposing it to extremes of temperature and humidity and avoid mechanical shocks and vibration. Keep the unit away from strong magnetic fields (TV sets, computer monitors, large electric motors, etc.). Environmental considerations The XS-3 may be used in most areas, but to maintain top performance, and prolong operating life, observe the following environmental conditions: The nominal temperature should be between 5°C and 35°C (41°F and 95°F). Relative humidity should be 30 to 90 degrees non-condensing. 4 TASCAM XS-3 When transporting the unit, always use the original packing materials or a properly-designed equipment case. For this reason, we strongly recommend that you save all the packing materials that came with the XS-3, in case you need to transport it in the future. Connections to other equipment It is extremely important that the power is turned off on all units when making or breaking connections to or from the XS-3. When turning power on, it is usually a good idea to start with the source (turntables, CD players, etc.), then the XS-3 and finish with the amplifier system. Turning power off should be done in the other direction (amplifiers first, then other equipment). When turning the unit on again, wait for three seconds or more after turning it off. 1.2. Serial number, etc. The serial number of the XS-3 is located on a sticker at the front of the unit on the bottom panel. Make a note of this for future reference (warranty, etc.). XS3 02.6.12 1:56 PM ページ5 2. Features and controls English 2. Features and controls TASCAM XS-3 5 XS3 02.6.12 1:56 PM ページ6 English 2.1. Top Panel 2. Features and controls q MONITOR MASTER/CUE 2-band EQ for microphone input signal. Selects the way of monitoring in the headphones. CUE: This way allows you to monitor the PGM signals adjusted by cue balance fader. MASTER: This way allows you to monitor the pre MASTER volume signal. 3 TRIM w LEVEL Adjusts the input signal level of each PGM. Adjusts the headphone output level. NOTE All input sensitivity adjustment must be done by very carefully using level meter and/or headphones as a reference and avoiding that all the red LEDs of the level meter light up, otherwise input could be clipped (overload). e CUE BALANCE 1 MIC LEVEL Adjusts the MIC input signal level. 2 MIC EQ 4 PGM EQ 3-band EQ for each PGM signal. When all EQ are set to -26 dB, the sound will be cut fully. 5 C.F REVERSE Sets the direction of CROSS FADER operation. OFF: Moving the CROSS FADER toward A makes A signal louder and moving the CROSS FADER toward B makes B signal louder. REVERSE: Moving the CROSS FADER toward A makes B signal louder and moving the CROSS FADER toward B makes A signal louder. 6 C.F CURVE Allows you to adjust the PGM 2 FADER response curve from soft (counter-clockwise) to hard (clockwise). Adjusts the balance between PGM 1 and PGM 2 signal in the headphones. r CROSS FADER Mixes the PGM 1 and PGM 2 signals. CROSS FADER is user replaceable. It is possible to set the CROSS FADER curve and reversal. t INPUT LEVEL METER Indicates the signal level of each PGM. NOTE LEVEL METER indicates the post PGM FADER signals. 2.2. How to replace the fader 1. Remove the two screws from the fader panel surface. 2. Remove the fader. 3. Unplug the multi-cable connector that connected to the fader. 4. Plug in the multi-cable connector to a new fader. 5. Replace the fader with the screws. 7 PHONO/LINE 2.3. Rear Panel Selects the input signal (PHONO or LINE) of each PGM. y EFFECT (unbalanced TRS jack) 8 PGM FADER Adjusts the PGM level. 9 MASTER LEVEL Adjusts MASTER OUT 1 (balanced TRS and unbalanced RCA connectors) output level. 0 EFFECT switch and LED Activates the external effect path of MASTER when EFFECT switch is turned on. When effect path is activated, LED will light up. 6 TASCAM XS-3 Inserts the external effect in STEREO OUTPUT signal path. Connect the external effector to this jack. Connections are follows: SEND: Tip RETURN: Ring GND: Sleeve XS3 02.6.12 1:56 PM ページ7 2. Features and controls English u MIC INPUT (balanced TRS connector) f C.F START Connect the microphone to this connector. Connections are as follows: HOT: Tip COLD: Ring GND: Sleeve Connect a device which supports fader start operation. Crossfader start function can be set to enable or disable on either side independently. Moving the cross-fader to start and/or stop (back cue) the PGM A or B source automatically. NOTE If you connect the unbalanced microphone to this connector, we recommend that cold (Ring) short-circuited to GND (Sleeve). NOTE When you use this function, make sure to connect audio signal and fader start signal to the same XS-3. Fader start signal is output from Tip terminal. Fader stop (back cue) signal is output from sleeve terminal. i PHONO INPUTS (unbalanced RCA jacks) Connect the turntables equipped with the MM cartridge. g POWER switch WARNING Never connect any other type of equipment to the PHONO connectors. o LINE INPUTS (unbalanced RCA jacks) Connect the line level equipment, such as CD players, cassette decks, DAT, MD, etc. p GND terminal If the turntables are fitted with grounding wires, connect these to this GND terminal to reduce noise and hum. a REC OUTPUT (unbalanced RCA jacks) Outputs the pre MASTER 1/2 signal. For example, to connect the recorder to these jacks, you can record your live performance without MASTER LEVEL control. h AC Adaptor in Use this jack to connect the PS-P3X AC adaptor which comes with your XS-3. When inserting the AC adaptor into the unit, please make sure to align the arrow mark of the AC adaptor plug to the white dot mark on the rear panel. WARNING DO NOT use any adaptors with the XS-3 except the PS-P3X adaptor which comes with the XS-3. 2.4. Front Panel j PHONES Connect your headphone to this jack. s MASTER OUTPUT (unbalanced RCA jacks) k C.F START B Outputs the master output signal adjusted by MASTER control. l C.F START A d MASTER OUTPUT (balanced TRS connector) Outputs the master output signal adjusted by MASTER control. Connections are as follows: HOT: Tip COLD: Ring GND: Sleeve Sets the crossfader start B on/off. Sets the crossfader start A on/off. NOTE If C.F REVERSE switch is set to ON, crossfader start operation is set to reversal. TASCAM XS-3 7 XS3 02.6.12 1:56 PM ページ8 English 8 TASCAM XS-3 slope 12dB/oct in all the 6 kHz 6 kHz & 200 Hz 200 Hz 5.5 kHz, +12 dB ~ -12 dB 125 Hz, +12 dB ~ -12 dB 120 V (60Hz) 230 V (50Hz) Power Consumption: 13 W Dimension (mm): 228(W)x106(H)x267(D) Weight: 2.6 kg (main unit) 0.6 kg (AC Adaptor) Applicable electromagnetic environment: E4 Peak inrush current: 5A All specifications subject to change without notice. 2 260 191 (20) 5 5 38 267 8 228 211 (10) LINE INPUT (PGM1-2): RCA, unbalanced Input Level: -10 dBV Input impedance: 10k ohm PHONO INPUT (PGM1-2) RCA, unbalanced Input Level: -54 dBV Input impedance: 47k ohm MIC INPUT: TRS, balanced Input Level: -50 dBV Input impedance: 2.8k ohm MASTER OUTPUTS (balanced): TRS, balanced Nominal Output Level: +4 dBu Output impedance: 75 ohm MASTER OUTPUTS (unbalanced): RCA, unbalanced Nominal Output Level: 0 dBV Output Impedance: 100 ohm REC OUTPUT: RCA, unbalanced Nominal Output Level: -10 dBV Output Impedance: 1k ohm EFFECT (send): TRS, unbalanced Nominal Output Level: -4 dBV Output Impedance: 100 ohm EFFECT (return): TRS, unbalanced Input Level: -4 dBV Input Impedance: 10k ohm PHONES: 100mW+100mW, (at 33ohm) Frequency Response: LINE IN: 20 Hz to 20KHz, +/-1.0 dB PHONO IN: 30 Hz to 15KHz, +/-2.0 dB (RIAA) MIC IN: 30 Hz to 18KHz, +/-3.0 dB Signal to Ratio: LINE IN: 78 dB (IHF A WTD) PHONO IN: 70 dB (IHF A WTD) MIC IN: 60 dB (IHF A WTD) Total Harmonic Distortion: LINE IN: <0.1 % PHONO IN: <0.2 % MIC IN: <0.2 % Crosstalk: >60 dB (@1KHz) PGM EQ HIGH: +12 dB ~ -26 dB MID: +12 dB ~ -26 dB LOW: +12 dB ~ -26 dB Filter (Cut Frequency at -6dB, cases) HIGH: MID: LOW: MIC EQ HIGH: LOW: Power Requirement: 76 3. Specifications 3. Specifications 198 XS3 02.6.12 1:56 PM ページ9 1. Introduction Sommaire 1. Introduction ................................................. 9 1.1. Remarques et précautions ................... 9 1.2. Numéro de série, etc. .......................... 9 2. Fonctionnalités et contrôles ...................... 10 2.1. Face supérieure ................................. 11 2.2. Remplacement d’un fader ................. 11 2.3. Face arrière........................................ 11 2.4. Face avant ......................................... 12 3. Caractéristques .......................................... 13 4. Schéma synoptique ................................... 31 1. Introduction La XS-3 est une console DJ 2 voies permettant de brancher de nombreux appareils et de réaliser des mixages créatifs. Son ergonomie très étudiée lui permet de combiner un accès très simple à des fonctionnalités étendue. Il est TRÈS IMPORTANT de lire ce manuel en totalité et attentivement avant tout branchement pour en exploiter au mieux les possibilités. Nous conseillons vivement de faire réaliser les opérations de maintenance exclusivement par des techniciens agréés TASCAM. 1.1. Remarques et précautions Traitez votre XS-3 avec tout le soin que vous accordez normalement à un outil de précision. Évitez de l’exposer à des conditions extrêmes de température ou d’humidité et évitez de la soumettre à des chocs ou à des vibrations. Gardez-la à l’écart des champs magnétiques intenses (récepteurs TV, moniteurs, moteurs électriques puissants etc.). Considérations environementales La XS-3 peut être utilisée à peu près partout, mais pour lui assurer des performances et une durée de vie maximum nous vous conseillons de veiller aux points suivants : Sa température de fonctionnement doit rester comprise entre 5°C et 35°C, avec une humidité relative située entre 30 et 90 degrés sans condensation. Français ménager un espace suffisant au dessus et sur les côtés de l’appareil pour permettre sa ventilation. Ne l’installez pas dans un espace confiné, dans une bibliothèque ou un mobilier équivalent. Pour éviter toute surchauffe , ne la placez pas audessus de sources de chaleur importantes (amplificateurs ou autres). La XS-3 fonctionne sur un courant secteur de 100 à 240V, à 50 ou 60Hz. Vérifiez que le câble secteur chemine à distance des câbles audio pour éviter toute induction de ronflement ou de souffle. REMARQUE Veillez à ne transporter cet appareil que dans un conditionnement approprié ou dans son emballage d’origine. Nous vous conseillons donc de conserver celui-ci en lieu sûr à toutes fins utiles. Connexions aux autres appareils Il est extrêmement important que l’appareil et toutes les unités qui lui sont reliées soient bien hors tension avant d’effectuer quelque modification de branchement que ce soit sur la XS-3. Lors de la mise sous tension du système, il est habituellement préférable de commencer par les appareils sources (platines disques, lecteurs CD etc.) puis d’allumer la XS-3 et de finir par le système d’amplification. La mise hors tension doit se faire dans l’ordre inverse (amplificateur d’abord, puis autres appareils). Après avoir éteint l’appareil, attendez toujours au moins 3 secondes avant de le remettre éventuellement sous tension. 1.2. Numéro de série, etc. Le numéro de ssérie de la XS-3 se trouve sur une étiquette placée vers l’avant à la face inférieure de l’appareil. Notez-le à toutes fins utiles (mise en œuvre de la garantie, etc.). Après avoir éteint l’appareil, attendez toujours au moins 3 secondes avant de le remettre éventuellement sous tension. Face arrière Numéro de série Une chauffe modérée intervenant normalement pendant son fonctionnement, nous vous conseillons de TASCAM XS-3 9 XS3 02.6.12 1:56 PM ページ10 Français 2. Fonctionnalités et contrôles 10 TASCAM XS-3 2. Fonctionnalités et contrôles XS3 02.6.12 1:56 PM ページ11 2. Fonctionnalités et contrôles 2.1 Face supérieure 1 Niveau micro (MIC LEVEL) Réglage du niveau d’entrée du micro (MIC) 2 Égaliseur micro (MIC EQ) Égaliseur 2 bandes destiné au signal micro. 3 Contrôle TRIM Réglage du gain pour chaque PGM. REMARQUE Tous les réglages de sensibilité d’entrée doivent être effectués avec prudence, en utilisant les bargraphes et/ou l’écoute au casque pour éviter toute saturation ou écrêtage. 4 Égaliseur PGM Égaliseur 3 bandes affecté à chaque signal PGM. 5 Sélecteur C.F REVERSE Détermine le sens d’action du CROSS FADER OFF : le déplacement du CROSS FADER vers A augmente le signal A et réduit le signal B. ON : le déplacement du CROSS FADER vers A augmente le signal B et réduit le signal A. 6 Sélecteur rotatif C.F CURVE Permet de choisir la courbe de réponse du CROSS FADER de « douce » (sens antihoraire) à « réactive » (sens horaire). 7 Sélecteur PHONO/LINE Détermine le signal d’entrée (PHONO ou LINE) pour chaque PGM. 8 Faders PGM Règlent le niveau des signaux PGM. Français q Sélecteur MONITOR MASTER/CUE Détermine la source de la pré-écoute casque (monitoring). CUE : Permet d’écouter les signaux PGM réglés par le fader de balance du circuit de CUE (CUE BALANCE). MASTER : Permet d’écouter le signal MASTER avant atténuation. w Contrôle LEVEL Règle le niveau de la sortie casque. e Fader CUE BALANCE Détermine la balance au casque entre les signaux PGM 1 et PGM 2. r CROSS FADER Assure le mélange (ou la transition) entre les signaux PGM 1 et PGM 2. Le CROSS FADER est amovible et remplaçable en cas de besoin. Sa sensibilité (courbe de réponse) et son sens d’action sont également modifiables. t Bargraphe de niveau (LEVEL METER) Indique le niveau du signal de chaque PGM. REMARQUE Le bargraphe LEVEL METER indique le niveau du signal après atténuation par les faders PGM. 2.2 Remplacement d’un fader 1. Retirez les deux vis de fixation du fader 2. Retirez-le de son logement 3. Débranchez la nappe qui lui est attachée 4. Branchez-la sur le nouveau fader 5. Remettez en place le nouveau fader et vissez-le. 9 Contrôle MASTER LEVEL 2.3 Face arrière Règle le niveau de la sortie MASTER OUT (connecteurs Jacks TRS symétriques et RCA non symétriques). y Connecteur EFFECT (jack TRS non symétrique) 0 Sélecteur EFFECT et témoin associé Active le circuit d’effet externe de chaque canal. Le témoin est allumé quand l’effet est actif. Permet l’insertion du signal d’un effet externe dans le bus de sortie stéréo (STEREO OUTPUT). Le brochage se présente comme suit : SEND (départ) : extrémité RETURN (retour) : anneau GND (masse) : corps TASCAM XS-3 11 XS3 02.6.12 1:56 PM ページ12 Français 2. Fonctionnalités et contrôles u Entrée MIC INPUT (jack TRS symétrique) f Connecteur C.F START Permet le branchement du micro. Le brochage se présente comme suit : Point chaud : extrémité Point froid : anneau Masse : corps Permet le branchement d’appareils compatibles avec la fonction Fader Start. La fonction C.F. Start peut être activée/désactivée indépendamment pour chaque section. Le déplacement du cross-fader permet alors de démarrer et/ou d’arrêter automatiquement (pour la source opposée) les appareils reliés aux sources PGM A ou B. REMARQUE Si vous branchez ici un micro non symétrique, nous vous conseillons de relier le point froid (anneau) à la masse (corps). i Entrées PHONO (connecteurs RCA non symétriques) Permettent le branchement de platines disques équipées d’une cellule magnétique (MM). AVERTISSEMENT : Ne branchez aucun autre type d’appareil sur ce connecteur PHONO. o Entrées LINE INPUTS (connecteurs RCA non symétriques) Permettent le branchement de sources à niveau ligne comme lecteurs CD, platines cassettes, DAT, MD, etc. p Bornier de masse GND REMARQUE Si vous utilisez cette fonction, veillez à bien branchez le signal audio et la fonction fader-start du même côté de la XS-3. Le signal de départ (start) est émis par l’extrémité du connecteur. Le signal d’arrêt (stop) (pour la source opposée) est émis par le corps du connecteur. g Interrupteur général POWER h Connecteur d’alimentation Branchez ici l’adaptateur secteur PS-P3X fourni avec l’appareil. Lors du branchement, veillez à bien aligner la flèche présente sur le connecteur de l’adaptateur avec le point blanc sérigraphié sur la face arrière. Si vos platines-disques disposent d’un branchement à la masse, reliez-le à ce terminal pour réduire les ronflements ou le souffle. AVERTISSEMENT N’utilisez aucun autre adaptateur secteur que le modèle PS-P3X fourni avec la XS-3. a Sorties REC OUTPUT (connecteurs RCA non symétriques) 2.4 Face avant Donnent accès au signal pré-MASTER. Elles permettent le branchement d’un magnétophone pour enregistrer, par exemple, votre prestation avant la modification du gain par le contrôle MASTER LEVEL. s Sorties générales MASTER OUTPUT (connecteur RCA non symétrique) Donnent accès au signal de sortie réglé par le contrôle MASTER. d Sorties générales MASTER OUTPUT (jack TRS symétrique) Donnent accès au signal de sortie réglé par le contrôle MASTER. Le brochage se présente comme suit : Point chaud : extrémité Point froid : anneau Masse : corps 12 TASCAM XS-3 j Prise casque (PHONES) Branchez ici votre casque d’écoute. k Sélecteur C.F START B Permet d’activer/désactiver la fonction crossfader-start pour le canal B. l Sélecteur C.F START A Permet d’activer/désactiver la fonction crossfader-start pour le canal A. REMARQUE Si le sélecteur C.F REVERSE est en position ON (activé), la fonction crossfader-start est inversée. XS3 02.6.12 1:56 PM ページ13 3. Caractéristques Toutes spécifications sujettes à modification sans préavis. 2 260 191 (20) 5 5 38 267 8 228 211 76 Entrées LINE INPUT (PGM 1-2) : RCA, non symétrique Niveau d’entrée : - 10 dBV Impédance d’entrée : 10 kOhms Entrées PHONO INPUT (PGM 1-2) : RCA, non symétrique Niveau d’entrée : - 54 dBV Impédance d’entrée : 47 kOhms Jack TRS, non nsymétrique Entrée MIC INPUT : Niveau d’entrée : - 50 dBV Impédance d’entrée : 2,8 kOhms Sorties MASTER OUTPUTS (symétriques) : Jack TRS, symétrique Niveau de sortie nominal : + 4 dBu Impédance de sortie : 75 Ohms Sorties MASTER OUTPUTS (non symétriques) : Jack TRS, non nsymétrique Niveau de sortie nominal : 0 dBV Impédance de sortie : 100 Ohms Sorties REC OUTPUTS (symétriques) : RCA, non symétrique Niveau de sortie nominal : - 10 dBV Impédance de sortie : 1 kOhms Départ EFFECT (send) : Jack TRS, non nsymétrique Niveau de sortie nominal : - 4 dBV Impédance de sortie : 100 Ohms Retour EFFECT (return) : Jack TRS, non nsymétrique Niveau d’entrée : - 4 dBV Impédance d’entrée : 10 kOhms Prise casque PHONES : 100 mW + 100 mW (à 33 Ohms) Bande passante : LINE IN : 20 Hz à 20 kHz +/- 1 dB PHONO IN : 30 Hz à 15 kHz +/- 2 dB (RIAA) MIC IN : 30 Hz à 18 kHz +/- 3 dB Rapport signal-bruit : LINE IN : 78 dB (pondération A) PHONO IN : 70 dB (pondération A) MIC IN : 60 dB (pondération A) Distorsion harmonique totale : LINE IN : < 0,1 % PHONO IN : < 0,2 % MIC IN : < 0,2 % Diaphonie : > 60 dB (à 1 kHz) Aigus (HIGH) : + 12 dB ~ - 26 dB Mediums (MID) : + 12 dB ~ - 26 dB Graves (LOW) : + 12 dB ~ - 26 dB Filtre (Fréquence de coupure à –6 dB, 12 dB/oct dans tous les cas) Aigus (HIGH) : 6 kHz Mediums (MID) : 6 kHz & 200 Hz Graves (LOW) : 200 Hz Égalisation micro (MIC EQ) Aigus (HIGH) : 5,5 kHz + 12 dB ~ -12 dB Graves (LOW) : 125 Hz + 12 dB ~ -12 dB Alimentation : 120 V (60 Hz) 230 V (50 Hz) Consommation : 13 W Dimensions : 228 mm (L) x 106 mm (H) x 267 mm (P) Poids : 2,6 kg (console) 0,6 kg (adaptateur secteur) Applicable dans l'environement électromagnétique : E4 Surcharge de courant à l'allumage : 5A (10) 3. Caractéristiques Français 198 TASCAM XS-3 13 XS3 02.6.12 1:56 PM ページ14 Deutsch Inhaltsverzeichnis 1. Einführung ........................................................ 14 1.1. Einige Hinweise und Vorsichtsmaßnahmen............................... 14 1.2. Seriennummer .......................................... 15 2. Funktionen und Bedienelemente ...................... 16 2.1. Geräteoberseite......................................... 17 2.2. Einen Fader austauschen.......................... 17 2.3. Geräterückseite......................................... 18 2.4. Frontplatte ................................................ 18 3. Technische Daten.............................................. 19 4. Blockschaltbild ................................................. 31 1. Einführung 1. Einführung Das XS-3 ist ein hochentwickeltes 2-Kanal-DJMischpult, an das Sie ein Vielzahl von Geräten anschließen und so verschiedene Signale auf kreative Weise mischen können. Wie von einem modernen Mischpult zu erwarten, verbindet das XS-3 einfache Bedienung mit einer Vielzahl von Funktionen. Bitte lesen Sie sich dieses Handbuch unbedingt durch, bevor Sie das Mischpult mit anderen Geräten verbinden. Nur so ist gewährleistet, dass Sie bestmöglichen Nutzen aus dem Gerät ziehen. Sollten einmal Reparaturen an Ihrem Mischpult notwendig werden, wenden Sie sich bitte an eine von uns autorisierte Kundendienstwerkstätte, um den einwandfreien Betrieb sicherzustellen. 1.1. Einige Hinweise und Vorsichtsmaßnahmen Behandeln Sie das XS-3 wie jedes andere elektronische Gerät mit der notwendigen Sorgfalt. Setzen Sie es möglichst nicht extremen Temperaturen oder hoher Luftfeuchtigkeit aus, und vermeiden Sie Stöße und Vibrationen. Halten Sie das Gerät von starken Magnetfeldern fern (Fernsehgeräten, Computermonitoren, größeren Elektromotoren usw.). Umgebungsbedingungen Das XS-3 kann in den meisten Umgebungen betrieben werden. Um eine größtmögliche Lebensdauer und einwandfreien Betrieb zu gewährleisten, sollten Sie jedoch auf folgende Umgebungsbedingungen achten: • Umgebungstemperatur zwischen 5 °C und 35 °C • Relative Luftfeuchte zwischen 30% und 90%, nicht kondensierend. Das Gerät kann während des Betriebs heiß werden; lassen Sie deshalb für die Belüftung immer ausreichend Raum um das Gerät herum frei. Installieren Sie das Gerät nicht an einem räumlich beengten Ort wie in einem Bücherregal oder Ähnlichem. 14 TASCAM XS-3 XS3 02.6.12 1:56 PM ページ15 1. Einführung Stellen Sie das Gerät niemals direkt auf ein Gerät, das Hitze entwickelt (Verstärker usw.), um ein Überhitzen zu vermeiden. Das XS-3 kann mit einer Netzspannung von 100 bis 240 V betrieben werden. Um Störgeräusche in Ihrem Audiosignal zu vermeiden, achten Sie darauf, das Netzkabel möglichst weit von den Signalkabeln entfernt zu legen. WICHTIG Wenn Sie das Gerät transportieren: Verwenden Sie immer die Originalverpackung oder besser einen speziellen Transportkoffer. Wir empfehlen deshalb nachdrücklich, alle Verpackungsmaterialien des XS-3 aufzubewahren. Deutsch 1.2. Seriennummer Die Seriennummer des XS-3 befindet sich auf einem Aufkleber vorn auf der Unterseite. Notieren Sie sich diese Seriennummer (für Serviceanfragen, Garantie usw.). Rückseite Seriennummer Um das Gerät vor einer eventuellen elektrischen Überlastung zu schützen, ist es mit einer 250-mASchmelzsicherung versehen. Sollte die Sicherung jemals durchbrennen, trennen Sie das Gerät vom Netz, und ersetzen Sie sie durch eine identische Sicherung. Falls die neue Sicherung auch durchbrennt, wenden Sie sich bitte unverzüglich an eine von uns autorisierte Kundendienstwerkstatt. VORSICHT ERSETZEN SIE DIE SICHERUNG UNTER KEINEN UMSTÄNDEN DURCH EINEN DRAHT, ALUFOLIE ODER ÄHNLICHES, UND VERWENDEN SIE KEINE SICHERUNG MIT HÖHERER AMPEREZAHL. Andere Geräte anschließen Es ist äußerst wichtig, dass Sie immer zuerst alle Geräte ausschalten, bevor Sie Kabelverbindungen mit dem XS-3 herstellen oder trennen. Beim Einschalten ist es ratsam, mit den Quellen zu beginnen (Plattenspieler, CD-Player usw.), dann das XS-3 und erst zum Schluss die Verstärkeranlage einzuschalten. Beim Ausschalten verfahren Sie in umgekehrter Reihenfolge (erst die Verstärker, dann die anderen Geräte). Warten Sie drei Sekunden oder länger, wenn Sie das Gerät nach dem Ausschalten wieder einschalten wollen. TASCAM XS-3 15 XS3 02.6.12 1:56 PM ページ16 Deutsch 2. Funktionen und Bedienelemente 16 TASCAM XS-3 2. Funktionen und Bedienelemente XS3 02.6.12 1:56 PM ページ17 2. Funktionen und Bedienelemente 2.1. Oberseite Deutsch 9 MASTER LEVEL Regelt den Mikrofon-Eingangspegel. Beeinflusst den Pegel am MASTER OUT-Ausgang (symmetrische Klinkenanschlüsse und unsymmetrische Cinch-Anschlüsse). 2 MIC EQ 0 EFFECT-Taste mit LED 1 MIC LEVEL 2-Band-EQ (Klangregelung) für das MikrofonEingangssignal. 3 TRIM Regelt den Eingangspegel der beiden PGMs. WICHTIG Änderungen an den Eingangspegeln sollten Sie sehr vorsichtig vornehmen und dazu die Pegelanzeige und/oder den Kopfhörer benutzen. Um ein Übersteuern des Eingangssignals zu vermeiden, achten Sie darauf, dass niemals alle roten LEDs der Pegelanzeige aufleuchten. 4 PGM EQ 3-Band-Klangregelung für die beiden PGM-Signale. Wenn alle EQ-Bänder auf –26 dB eingestellt sind, wird das Signal vollständig stummgeschaltet. 5 C.F REVERSE Dient zum Einstellen der Bewegungsrichtung des Cross-Faders. OFF (Aus): Wenn Sie den Cross-Fader in Richtung A bewegen, wird die Lautstärke von Signal A angehoben. Wenn Sie ihn in Richtung B bewegen, wird die Lautstärke von Signal B angehoben. ON (Ein): Wenn Sie den Cross-Fader in Richtung A bewegen, wird die Lautstärke von Signal B angehoben. Wenn Sie ihn in Richtung B bewegen, wird die Lautstärke von Signal A angehoben. Wenn Sie die EFFECT-Taste drücken (so dass die LED leuchtet), wird das Ausgangssignal am Anschluss EFFECT (16) ausgegeben. Erneutes Drücken der Taste schaltet die Funktion wieder aus. q MONITOR MASTER/CUE Legt fest, welche Signale Sie über den Kopfhörer abhören. CUE: Sie hören die mit dem Cue-BalanceFader eingestellten PGM-Signale ab. MASTER: Sie hören das MASTER-Signal ab. w LEVEL Dient zum Anpassen des Kopfhörer-Ausgangspegels. e CUE BALANCE Regelt die Balance zwischen den Signalen PGM 1 und PGM 2 am Kopfhörerausgang. r Cross-Fader Regelt das Mischverhältnis von PGM 1 und PGM 2. Den Cross-Fader können Sie selbst austauschen. Darüber hinaus können Sie die Lautstärkekurve und Bewegungsrichtung des Cross-Faders einstellen. t Eingangspegelanzeige Zeigt die Eingangspegel der PGMs an. WICHTIG Die Signale für die Pegelanzeige werden nach dem PGM-Fader abgegriffen. Änderungen am PGM-Fader sind also auf der Pegelanzeige sichtbar. 6 C.F CURVE Ermöglicht Ihnen, die Lautstärkekurve des CrossFaders von weich (Drehen gegen den Uhrzeigersinn) bis hart (Drehen im Uhrzeigersinn) einzustellen. 7 PHONO/LINE Legt die Art des Eingangssignals für das jeweilige PGM fest (PHONO oder LINE). 8 PGM-Fader Regelt den Pegel des PGMs. 2.2. Den Fader austauschen 1. Lösen Sie die zwei Schrauben der Abdeckplatte des Faderbereichs. 2. Entfernen Sie den Fader. 3. Lösen Sie den Kabelsteckverbinder des Faders. 4. Verbinden Sie den Kabelsteckverbinder mit dem neuen Fader. 5. Befestigen Sie den Fader mithilfe der Schrauben. TASCAM XS-3 17 XS3 02.6.12 1:56 PM ページ18 Deutsch 2. Funktionen und Bedienelemente 2.3. Rückseite d MASTER OUTPUT (symmetrische Klinkenbuchsen) y EFFECT (unsymmetrische Klinkenbuchse) An diesen Buchsen wird die mit dem MASTERPegelregler eingestellte Stereosumme ausgegeben. Die Belegung ist wie folgt: HEISS (+): Spitze KALT (–): Ring MASSE: Hülse Dient zum Einschleifen eines externen Effektgeräts in den Signalweg des Stereoausgangs. Schließen Sie das Effektgerät an diese Buchse an. Die Belegung ist wie folgt: SEND: Spitze RETURN: Ring MASSE: Hülse u MIC INPUT (symmetrische Klinkenbuchse) Schließen Sie an diese Buchse Ihr Mikrofon an. Die Belegung ist wie folgt: HEISS (+): Spitze KALT (–): Ring MASSE: Hülse WICHTIG Wenn Sie an dieser Buchse ein unsymmetrisches Mikrofon anschließen, empfehlen wir, KALT (Ring) mit MASSE (Hülse) zu verbinden. i PHONO INPUTS (unsymmetrische CinchAnschlüsse) Anschluss für einen Plattenspieler mit MMTonabnehmer (Moving Magnet). VORSICHT Schließen Sie außerdem niemals irgend ein anderes Gerät an einen der PHONO-Anschlüsse an. o LINE INPUTS (unsymmetrische CinchAnschlüsse) Schließen Sie hier Geräte mit Linepegel, wie CDPlayer, Kassettendecks, DAT- und MD-Player an. f C.F START Schließen Sie hier ein Gerät an, das Faderstart-fähig ist. Der Cross-Faderstart kann für beide Seiten des CrossFaders unabhängig voneinander aktiviert und deaktiviert werden. Wenn Sie den Cross-Fader bewegen, wird das Gerät an PGM A beziehungsweise B automatisch gestartet und gestoppt. WICHTIG Wenn Sie diese Funktion nutzen, stellen Sie sicher, dass Audiosignal und Faderstartsignal mit demselben PGM des XS-3 verbunden sind. Das Faderstartsignal wird an der Spitze des Anschlusses ausgegeben. Das Faderstoppsignal wird an der Hülse des Anschlusses ausgegeben. g POWER (Netzschalter) h Anschluss für Wechselstromadapter Schließen Sie hier den mit dem XS-3 gelieferten Wechselstromadapter PS-P3X an. Achten Sie darauf, dass der Pfeil auf dem Stecker des Adapters auf den weißen Punkt auf der Rückseite des XS-3 ausgerichtet ist. Wenn Ihre Plattenspieler über Erdungskabel verfügen, schließen Sie diese zur Vermeidung von Stör- und Brummgeräuschen an diese Erdungsklemme an. VORSICHT Um Schäden zu vermeiden, verwenden Sie KEINESFALLS einen anderen Wechselstromadapter mit dem XS-3 als den mitgelieferten PS-P3X. a REC OUTPUT (unsymmetrische CinchAnschlüsse) 2.4. Vorderseite p GND-Erdungsklemme Über diese Buchsen wird die Stereosumme vor dem MASTER-Pegelregler ausgegeben. Wenn Sie an diese Buchsen einen Recorder anschließen, können Sie Ihre Mischung unbeeinflusst von der MASTER LEVEL-Einstellung aufzeichnen. s MASTER OUTPUT (unsymmetrische Cinch-Anschlüsse) An diesen Buchsen wird die mit dem MASTERPegelregler eingestellte Stereosumme ausgegeben. 18 TASCAM XS-3 j PHONES Schließen Sie hier Ihren Kopfhörer an. k C.F START B Hier aktivieren/deaktivieren Sie den Crossfaderstart B. l C.F START A Hier aktivieren/deaktivieren Sie den Crossfaderstart A. WICHTIG Wenn der C.F REVERSE-Schalter auf ON gestellt ist, arbeitet auch der Crossfaderstart umgekehrt. XS3 02.6.12 1:56 PM ページ19 3. Technische Daten Änderungen an Konstruktion und technischen Daten vorbehalten. 2 260 191 (20) 5 5 38 267 8 228 211 76 Lineeingang (PGM1-2) Cinch, unsymmetrisch Eingangspegel –10 dBV Eingangsimpedanz 10 kOhm Phonoeingang (PGM 1–2) Cinch, unsymmetrisch Eingangspegel –54 dBV Eingangsimpedanz 47 kOhm Mikrofoneingang Klinke, symmetrisch Eingangspegel –50 dBV Eingangsimpedanz 2,8 kOhm Summenausgang (symmetrisch) Klinke, symmetrisch Nominaler Ausgangspegel +4 dBu Ausgangsimpedanz 75 Ohm Summenausgang (unsymmetrisch) Cinch, unsymmetrisch Nominaler Ausgangspegel 0 dBV Ausgangsimpedanz 100 Ohm Aufnahmeausgang Cinch, unsymmetrisch Nominaler Ausgangspegel –10 dBV Ausgangsimpedanz 1 kOhm Effekt-Send Klinke, unsymmetrisch Nominaler Ausgangspegel –4 dBV Ausgangsimpedanz 100 Ohm Effekt-Return Klinke, unsymmetrisch Eingangspegel –4 dBV Eingangsimpedanz 10 kOhm Kopfhörerausgang 100 mW + 100 mW (an 33 Ohm) Frequenzbereich Lineeingang 20 Hz bis 20 kHz, ±1,0 dB Phonoeingang 30 Hz bis 15 kHz, ±2,0 dB (RIAA) Mikrofoneingang 30 Hz bis 18 kHz, ±3,0 dB Fremdspannungsabstand Lineeingang 78 dB (IHF-A-bewertet) Phonoeingang 70 dB (IHF-A-bewertet) Mikrofoneingang 60 dB (IHF-A-bewertet) Verzerrung (THD) Lineeingang <0,1% Phonoeingang <0,2% Mikrofoneingang <0,2% Übersprechdämpfung >60 dB (bei 1 kHz) PGM EQ Höhen (HIGH) +12dB/ –26dB Mitten (MID) +12dB/ –26dB Tiefen (LOW) +12dB/ –26dB Filter (Trennfrequenz bei –6 dB, Flankensteilheit 12 dB/Oktave) Höhen (HIGH) 6 kHz Mitten (MID) 6 kHz und 200 Hz Tiefen (LOW) 200 Hz MIC EQ Höhen (HIGH) 5,5 kHz, +12 dB bis –12 dB Tiefen (LOW) 125 Hz, +12 dB bis –12 dB Netzspannung 120 V AC (60 Hz) 230 V AC (50 Hz) Leistungsaufnahme 13 W Abmessungen (B x H x T) 228 mm x 106 mm x 267 mm Gewicht 2,6 kg (Hauptgerät) 0,6 kg (Wechselstromadapter) Elektromagnetische Umgebung: E4 Imulsfestigkeit: 5A (10) 3. Technische Daten Deutsch 198 TASCAM XS-3 19 XS3 02.6.12 1:56 PM ページ20 Italiano Indice 1. Introduzione...................................................... 20 1.1 Osservazioni ed avvertenze....................... 20 1.2 Numero di serie, ed altro........................... 21 2. Funzioni e controlli........................................... 22 2.1 Pannello superiore..................................... 23 2.2 Sostituzione dei fader................................ 23 2.3 Pannello posteriore.................................... 23 2.4 Pannello anteriore ..................................... 24 3. Caratteristiche tecniche..................................... 25 4. Schema a blocchi .............................................. 31 1. Introduzione 1. Introduzione Il TASCAM XS-3 è un sofisticato mixer a 2 canali per DJ che permette di collegare molti dispositivi, lasciando così spazio alla libera creatività dell’operatore. Grazie alla sua accurata progettazione, l’XS-3 non presenta nessuna difficoltà di azionamento, pur offrendo un’ampia gamma di funzioni. ATTENZIONE: per ottenere le massime prestazioni, prima di mettere in funzione l’apparecchio consigliamo vivamente di leggere questo Manuale d’Istruzioni. Per conservare nel tempo le condizioni ottimali di funzionamento dell’XS-3 raccomandiamo inoltre di rivolgersi ai nostri Servizi tecnici autorizzati per qualsiasi intervento di assistenza o manutenzione. 1.1 Osservazioni ed avvertenze L’XS-3 va maneggiato ed utilizzato con tutta l’attenzione dovuta ad un apparecchio di alta precisione. Evitare di esporlo a condizioni estreme di temperatura ed umidità, e di sottoporlo ad urti meccanici e vibrazioni. Tenerlo inoltre lontano da apparecchiature in grado di generare forti campi magnetici (come televisori, monitor di computer, grandi motori elettrici, e così via). Considerazioni ambientali L’XS-3 può funzionare praticamente in qualsiasi ambiente. Per conservare l’alto livello delle sue prestazioni e prolungare nel tempo il suo utilizzo, consigliamo comunque di rispettare le seguenti condizioni ambientali: Temperatura ambiente: compresa tra 5°C e 35°C. Umidità relativa: compresa tra 30 e 90 gradi, senza manifestazioni di condensa Dato che l’apparecchio può scaldarsi durante il funzionamento, raccomandiamo di prevedere lo spazio sufficiente per l’adeguata ventilazione. Evitare quindi di collocarlo in uno spazio ristretto, come potrebbe essere il ripiano di una libreria. 20 TASCAM XS-3 XS3 02.6.12 1:56 PM ページ21 1. Introduzione Per evitare eventuali problemi di surriscaldamento, non appoggiare l’XS-3 sopra nessun dispositivo che possa generare calore, come per esempio un amplificatore. L’XS-3 può funzionare a 100-240 V, 50-60 Hz. Per evitare l’eventuale comparsa di ronzio, accertarsi che ci sia la dovuta distanza tra il cavo d’alimentazione e quelli dei segnali audio NOTA Per trasportare l’XS-3 bisogna sempre rimetterlo nell’imballo originale. Nell’eventualità di dover trasportare l’apparecchio in un secondo tempo, raccomandiamo pertanto vivamente di conservare la scatola e tutto il materiale d’imballaggio,. Italiano 1.2 Numero di serie, ed altro Il numero di serie dell’XS-3 è stampato su un’etichetta, situata sul pannello posteriore dell’apparecchio. È consigliabile prendere nota del numero di serie, che può essere richiesto in molte occasioni (assistenza, garanzia, eccetera). Pannello posteriore Numero di serie A titolo di protezione contro eventuali sovraccarichi elettrici, sull’apparecchio è montato un fusibile da 250 mA. Se tale fusibile dovesse bruciare, togliere l’alimentazione e sostituirlo con un elemento dello stesso tipo. Se anche quest’ultimo dovesse bruciare, chiedere subito l’intervento del nostro servizio Assistenza. AVVERTENZA NON CORTOCIRCUITARE MAI I CONTATTI DI UN FUSIBILE INTERROTTO NÉ UTILIZZARE UN FUSIBILE DI VALORE PIÙ ALTO. Sarebbe comunque consigliabile che anche la sostituzione del fusibile fosse effettuata da un tecnico qualificato. Collegamento di altri apparecchi Quando si effettuano o interrompono collegamenti all’XS-3 è indispensabile staccare prima l’alimentazione da tutti gli apparecchi interessati. Al termine del collegamento, consigliamo di ridare tensione prima alla sorgente (giradischi, lettore di CD, eccetera), poi all’XS-3 ed infine al sistema d’amplificazione. Per spegnere il sistema procedere invece in senso inverso: prima gli amplificatori e poi le altre apparecchiature. Attenzione: non accendere di nuovo il sistema prima che siano trascorsi almeno tre secondi dallo spegnimento TASCAM XS-3 21 XS3 02.6.12 1:56 PM ページ22 Italiano 2. Funzioni e controlli 22 TASCAM XS-3 2. Funzioni e controlli XS3 02.6.12 1:56 PM ページ23 2. Funzioni e controlli 2.1 Pannello superiore 1 MIC LEVEL Italiano 0 LED e interruttore EFFECT Quando si preme quest’interruttore, diventa attiva la mandata all’effetto esterno del MASTER, e si accende il LED. Regola il livello del segnale d’ingresso MIC. 2 MIC EQ EQ a 2 bande per il segnale d’ingresso MIC. 3 TRIM Regola il livello del segnale d’ingresso di ciascun PGM. NOTA La regolazione della sensibilità di ogni ingresso deve essere effettuata con molta attenzione facendo riferimento al meter e/o alla cuffia e senza far accendere tutti i LED rossi dello strumento, per evitare la saturazione del segnale. 4 PGM EQ EQ a 3 bande per ciascun segnale PGM. Quando tutti gli equalizzatori sono regolati a –26 dB, il suono verrà completamente eliminato 5 C.F. REVERSE Determina la direzione di funzionamento del CROSS FABER. OFF spostando il CROSS FADER verso A diventa più forte il segnale A, spostando il CROSS FADER verso B diventa più forte il segnale B ON spostando il CROSS FADER verso A diventa più forte il segnale B, spostando il CROSS FADER verso B diventa più forte il segnale A. q MONITOR MASTER CUE Seleziona la modalità dell’ascolto monitor in cuffia. CUE per ascoltare i segnali PGM regolati dal fader Cue Balance MASTER per ascoltare il segnale pre MASTER w LEVEL Regola il livello dell’uscita in cuffia. e CUE BALANCE Regola il bilanciamento in cuffia tra i segnali PGM 1 e PGM 2. r CROSS FADER Miscela i segnali PGM 1 e PGM 2. L’utente ha la possibilità di sostituire il Cross-fader e di regolarne la curva e la funzione Reverse. t INPUT LEVEL METER Indica il livello del segnale di ciascun PGM. NOTA LEVEL METER indica i segnali post PGM FADER. 2.2 Sostituzione dei fader 1. 2. 3. 4. 5. Togliere le due viti del pannello. Togliere il fader. Staccare il suo connettore. Inserire il connettore nel nuovo fader. Posizionare il nuovo fader e fissarlo con le viti. 6 C.F. CURVE Regola la curva di risposta del CROSS FADER da “lenta” (rotazione in senso antiorario) a “rapida” (rotazione in senso orario). 2.3 Pannello posteriore 7 PHONO/LINE y EFFECT (jack TRS sbilanciato) Seleziona come ingresso per ciascun PGM il segnale PHONO oppure LINE. 8 PGM FADER Regola il livello PGM. 9 MASTER LEVEL Inserisce l’effetto esterno nel percorso del segnale STEREO OUTPUT. Collegare qui il generatore d’effetto esterno. I collegamenti sono: MANDATA Punta RITORNO Anello MASSA Calza Regola il livello dell’uscita MASTER OUT (connettori TRS bilanciati e RCA sbilanciati). TASCAM XS-3 23 XS3 02.6.12 1:56 PM ページ24 Italiano 2. Funzioni e controlli u MIC INPUT (connettore TRS bilanciato) f C.F. START Inserire il microfono in questo connettore. I collegamenti sono: CALDO: Punta FREDDO: Anello MASSA: Calza Collegare qui un dispositivo che accetta l’operazione Fader Start. Questo controllo permette di attivare o disattivare le due sorgenti di segnale in modo indipendente. Quando la funzione è attiva, spostando il cross-fader la sorgente di programma A o B si avvia e/o si ferma automaticamente. NOTA Se è collegato un microfono sbilanciato, raccomandiamo di cortocircuitare il terminale FREDDO (Anello) alla MASSA (Calza). Collegare qui i giradischi muniti di cartuccia MM. ATTENZIONE Ai connettori PHONO non si devono mai collegare apparecchi di altro tipo. NOTA Quando si utilizza questa funzione, accertarsi di collegare il segnale audio e il segnale Fader Start allo stesso XS-3. Il segnale Fader Start viene emesso dalla Punta del connettore. Il segnale Fader Stop (back cue) viene emesso dalla Calza del connettore. o LINE INPUTS (jack RCA sbilanciati) g Interruttore POWER Collegare qui apparecchiature a livello di linea, come lettori di CD, registratori a cassetta, DAT, MD, ecc. h Ingresso adattatore c.a. i PHONO INPUTS (jack RCA sbilanciati) p Terminale GND Inserire in questo terminale gli eventuali cavi di terra dei giradischi, in modo da ridurre l’immissione di disturbi audio e ronzii. a REC OUTPUT (jack RCA sbilanciati) Collegare qui l’adattatore PS-P3X, compreso nella fornitura dell’XS-3. Al momento d’inserire l’adattatore, verificare che la freccia contrassegnata su di esso sia allineata al punto bianco sul pannello posteriore dell’apparecchio. Da questi connettori esce il segnale pre MASTER. Per collegare qui il registratore, ad esempio, si può registrare la propria prestazione dal vivo escludendo il controllo MASTER LEVEL. ATTENZIONE NON usare MAI adattatori di altro tipo: l’XS-3 accetta soltanto l’adattatore PS-P3X, compreso nella fornitura. s MASTER OUTPUT (connettore RCA sbilanciato) 2.4. Pannello anteriore Da questo connettore esce il segnale d’uscita master regolato dal controllo MASTER. j PHONES d MASTER OUTPUT (connettore TRS bilanciato) k C.F.START B Da questo connettore esce il segnale d’uscita master regolato dal controllo MASTER. I collegamenti sono: CALDO Punta FREDDO Anello MASSA Calza l C.F.START A Collegare qui una normale cuffia. Attiva/disattiva la funzione Cross-fader Start per la sorgente B. Attiva/disattiva la funzione Cross-fader Start per la sorgente A. NOTA Se l’interruttore C.F.REVERSE è in posizione ON, risulta invertita anche la funzione Cross-fader Start. 24 TASCAM XS-3 XS3 02.6.12 1:56 PM ページ25 3. Caratteristiche tecniche Tutte le caratteristiche tecniche sono soggette a cambiamenti, senza preavviso 2 260 191 (20) 5 5 38 267 8 228 211 76 LINE INPUT (PGM1-2) RCA, sbilanciati Livello ingresso -10 dBV Impedenza ingresso 10 kohm PHONO INPUT (PGM1-2) RCA, sbilanciati Livello ingresso -54 dBV Impedenza ingresso 47 kohm MIC INPUT TRS, bilanciato Livello ingresso -50 dBV Impedenza ingresso 2,8 kohm MASTER OUTPUTS (bilanciati) TRS, bilanciati Livello uscita nominale +4 dBu Impedenza uscita 75 ohm MASTER OUTPUTS (sbilanciati) RCA, sbilanciati Livello uscita nominale 0 dBV Impedenza uscita 100 ohm REC OUTPUT RCA, sbilanciati Livello uscita nominale -10 dBV Impedenza uscita 1 kohm EFECT (send) TRS, sbilanciati Livello uscita nominale -4 dBV Impedenza uscita 100 ohm EFECT (return) TRS, sbilanciati Livello ingresso -4 dBV Impedenza ingresso 10 kohm PHONES 100 mW + 100 mW, (a 33 ohm) Risposta in frequenza LINE IN 20 Hz æ 20 kHz, ±1,0 dB PHONO IN 30 Hz æ 15 kHz, ± 2,0 dB (RIAA) MIC IN 30 Hz æ 18 kHz, ± 3,0 dB Rapporto segnale/rumore LINE IN 78 dB (IHF A WTD) PHONO IN 70 dB (IHF A WTD) MIC IN 60 dB (IHF A WTD) Distorsione armonica totale LINE IN < 0,1 % PHONO IN < 0,2 % MIC IN < 0,2 % Diafonia > 60 dB (a 1 kHz) HIGH +12 dB ~ -26 dB MID +12 dB ~ -26 dB LOW +12 dB ~ -26 dB Filtro (frequenza di taglio a –6 dB, inclinazione 12 dB/ottava in tutti i casi) HIGH 6 kHz MID 6 kHz & 200 Hz LOW 200 Hz MIC EQ HIGH 5,5 kHz, +12 dB ~ - 12 dB LOW 125 Hz, +12 dB ~ - 12 dB Alimentazione 120 V (60 Hz) 230 V (50 Hz) Assorbimento 13 W Dimensioni (mm) 265 (L) x 106 (A) x 267 (P) Peso 2,6 kg (apparecchio) 0,6 kg (adattatore c.a.) Compatibilita' elettromagnetica ambientale: E4 b) Corrente di picco all'accensione: 5A (10) 3. Caratteristiche tecniche Italiano 198 TASCAM XS-3 25 XS3 02.6.12 1:56 PM ページ26 Español Indice 1. Introducción...................................................... 26 1.1. Algunas notas y precauciones .................. 26 1.2. Número de serie, etc................................. 26 2. Funciones y controles ....................................... 27 2.1. Panel superior........................................... 28 2.2. Cómo sustituir el fader............................. 28 2.3. Panel trasero............................................. 28 2.4. Panel frontal ............................................. 29 3. Especificaciones técnicas.................................. 30 4. Diagrama de bloques ........................................ 31 1. Introducción El XS-3 es una sofisticada mesa de mezclas de 2 canales para DJ que permite la conexión de diversas unidades, y con la que puede producir mezclas de una forma creativa. Con su sofisticado diseño, el XS-3 combina un funcionamiento muy sencillo con una amplia gama de funciones. Es MUY IMPORTANTE que lea este manual antes de conectar esta unidad para poder sacar el máximo partido de la misma. Para cualquier tipo de mantenimiento de esta unidad le recomendamos que se ponga en contacto con uno de nuestros servicios técnicos oficinales de cara a conseguir en todo momento un funcionamiento óptimo. 1. Introducción Nunca coloque este aparato sobre una unidad que genere calor, p.e. un amplificador, para evitar posibles problemas de recalentamiento. El XS-3 funciona de 100 a 240V, 50-60Hz. Asegúrese que el cable de corriente esté alejado de los cables de señal para evitar posibles zumbidos audio. NOTA Cuando transporte la unidad de un lugar a otro, use siempre el embalaje original o una maleta diseñada especialmente para ella. Por esta razón, recomendamos que conserve el embalaje y las protecciones que vienen con el XS-3, por si lo ha de transportar en el futuro. Conexiones a otros aparatos Es muy importante que apague todas las unidades cuando esté realizando o modificando las conexiones de o hacia el XS-3. Cuando encienda las unidades, suele ser una buena idea comenzar primero con las fuentes (tocadiscos, reproductores de CD, etc.), después encender el XS-3 y terminar encendiendo el sistema de amplificación. Para apagar las unidades haga lo mismo pero al revés (los amplificadores lo primero y después el resto del equipo). Cuando vuelva a encender de nuevo la unidad, espere durante unos tres segundos o más antes de volverla a apagar. 1.2. Número de serie, etc. 1.1. Algunas notas y precauciones Trate el XS-3 como haría con cualquier otro aparato electrónico de alta precisión. Evite exponerlo a grados de temperatura y humedad extremados y evite los golpes y vibraciones mecánicas. Mantenga esta unidad lejos de los campos magnéticos potentes (grandes TV, monitores, grandes motores eléctricos, etc.). El número de serie del XS-3 está situado en una etiqueta colocada en la parte frontal de la unidad en el panel inferior. Anótese este número para cualquier referencia a él en el futuro (garantía, etc.). Panel trasero Número de serie Consideraciones medioambientales Puede usar el XS-3 prácticamente en cualquier lugar, pero para mantener el máximo rendimiento y alargar su vida operativa, tenga en cuenta las siguientes condiciones en cuanto al entorno: La temperatura nominal debería estar entre los 5°C y 35°C (41°F y 95°F). La humedad relativa del ambiente debería estar entre el 30 y el 90 por ciento, sin condensación. Dado que este aparato puede calentarse bastante durante su funcionamiento, deje siempre un espacio suficiente encima y alrededor del aparato para su correcta ventilación. No instale este aparato en un espacio muy limitado como puede ser encastrado en una estantería o similar. 26 TASCAM XS-3 XS3 02.6.12 1:56 PM ページ27 2. Funciones y controles Español 2. Funciones y controles TASCAM XS-3 27 XS3 02.6.12 1:56 PM ページ28 Español 2.1 Panel superior 2. Funciones y controles q MONITOR MASTER/CUE Ecualizador de 2 bandas para la señal de entrada del micrófono. Elige la forma de monitorización a través de los auriculares. CUE: Esta forma le permite monitorizar las señales PGM que estén ajustadas por el fader de balance de escucha o cue. MASTER: Esta forma le permite monitorizar la señal previa al volumen MASTER. 3 TRIM w LEVEL 1 MIC LEVEL Ajusta el nivel de señal de la entrada MIC. 2 MIC EQ Ajusta el nivel de señal de entrada de cada PGM. NOTA Debe realizar todos los ajustes de sensibilidad de entrada con mucho cuidado usando el medidor de nivel y/o auriculares como referencia y evitando que se iluminen los pilotos rojos del medidor de nivel, ya que en caso contrario se podría saturar la entrada (sobrecarga). 4 PGM EQ Ecualizador de 3 bandas para cada señal PGM Cuando todos los mandos del EQ estén ajustados a –26 dB, el sonido estará completamente cortado o anulado. 5C.F. REVERSE Ajusta la dirección del funcionamiento del CROSS FADER OFF: el desplazamiento del CROSS FADER hacia A hace que la señal A sea más fuerte, mientras que el desplazamiento hacia B hace que dicha señal B sea más fuerte. ON: el desplazamiento del CROSS FADER hacia A hace que la señal B sea más fuerte y a la inversa. 6 C.F. CURVE Le permite ajustar la curva de respuesta del CROSS FADER desde muy suave (giro a la izquierda) a dura (derecha). Ajusta el nivel de salida de los auriculares. e CUE BALANCE Ajusta el balance entre la señal PGM 1 y PGM 2 en los auriculares. r CROSS FADER Mezcla las señales PGM 1 y PGM 2. Este CROSS FADER es sustituible por el usuario. Es posible también ajustar la curva e inversión del CROSS FADER. t MEDIDOR DE NIVEL DE ENTRADA Indica el nivel de señal de cada PGM. NOTA El MEDIDOR DE NIVEL indica las señales después del FADER PGM. 2.2 Cómo sustituir el fader 1. Quite los dos tornillos de la superficie del panel del fader. 2. Extraiga el fader. 3. Desconecte la clavija multicable que está conectada al fader. 4. Vuelva a conectar la clavija multicable al nuevo fader. 5. Sustituya el nuevo fader en su posición con los tornillos. 7 PHONO/LINE Elige la señal de entrada (PHONO o LINE) de cada PGM. 2.3 Panel trasero 8 FADER PGM y EFFECT (conector TRS no balanceado) Ajusta el nivel de PGM. 9 MASTER LEVEL Ajusta el nivel de salida de MASTER OUT (conectores TRS balanceado y RCA no balanceado). 0 Interruptor y piloto EFFECT Activa la ruta de efectos externa del MASTER cuando el interruptor EFFECT está activado. Cuando dicha ruta está activada, el piloto está encendido. 28 TASCAM XS-3 Introduce un efecto exterior en la ruta de señal STEREO OUTPUT. Conecte la unidad de efectos exterior a esta entrada. Las conexiones son de la siguiente forma: ENVIO: Punta RETORNO: Anillo MASA: Lateral XS3 02.6.12 1:56 PM ページ29 2. Funciones y controles Español u ENTRADA MIC (conector TRS balanceado) f C.F. START Conecte a esta entrada el micrófono. Las conexiones son de la siguiente forma: ACTIVO: Punta PASIVO: Anillo MASA: Lateral Conecte a esta salida una unidad que acepte el disparo por fader. Puede ajustar la función de disparo o arranque por crossfader para activar o desactivar cada lado de forma independiente. Mueva el crossfader para hacer que arranque y/o detener (escucha inversa) la fuente del PGM A o B de forma automática. NOTA Si conecta esta entrada un micrófono no balanceado, le recomendamos que cortocircuite la señal pasiva (anillo) con la masa (lateral). i ENTRADAS PHONO (clavijas RCA no balanceadas) Conecte aquí los giradiscos equipados con el cartucho MM. PRECAUCION Nunca conecte ningún otro tipo de aparatos a las clavijas PHONO. o ENTRADAS LINE (conectores RCA no balanceados) Conecte a estas entradas aparatos con nivel de línea como reproductores CD, pletinas de casette, DAT, MD, etc. NOTA Cuando use esta función, asegúrese de conectar la señal audio y la señal de disparo fader al mismo XS-3. La señal de disparo por fader es emitida desde la punta. La señal de parada por fader (escucha inversa) es emitida por el lateral. g Interruptor POWER. h Entrada de adaptador AC Utilice esta entrada para conectar el adaptador de corriente PS-P3X que viene de fábrica con su XS-3. Cuando conecte el adaptador de AC en la unidad, asegúrese de alinear la marca de flecha del enchufe del adaptador con el punto blanco del panel trasero. p Terminal GND Si sus giradiscos disponen de cables de antena o toma de tierra, conecte estos cables a este terminal GND para reducir los ruidos y zumbidos. PRECAUCION NO USE ningún otro adaptador con el XS-3 que no sea el PS-P3X que viene con la propia unidad. a SALIDA REC (conectores RCA no balanceados) Dan salida a la señal pre MASTER. Por ejemplo, estas salidas sirven para conectar una grabadora con la que pueda grabar su actuación en directo sin el control MASTER LEVEL. 2.4 Panel frontal s SALIDA MASTER (conector RCA no balanceado) k C.F. START B Da salida a la señal de salida master ajustada por el control MASTER. d SALIDA MASTER (conector TRS balanceado) Da salida a la señal de salida master ajustada por el control MASTER. Las conexiones están realizadas de la siguiente forma: ACTIVO: Punta PASIVO: Anillo MASA: Lateral j PHONES Conecte aquí sus auriculares. Ajusta el punto on/off de disparo por crossfader de la fuente B. l C.F. START A Ajusta el punto on/off de disparo por crossfader de la fuente A. NOTA Si el interruptor C.F. REVERSE está activado, el funcionamiento de este disparo por crossfader estará también al revés. TASCAM XS-3 29 XS3 02.6.12 1:56 PM ページ30 Español 30 TASCAM XS-3 Consumo: Dimensiones (mm): (P) Peso: 6 kHz 6 kHz y 200 Hz 200 Hz 5.5 kHz, +12 dB ~ -12 dB 125 Hz, +12 dB ~ -12 dB 120 V (60 Hz) 230 V (50 Hz) 13 W 228 (L) x 106 (A) x 267 2.6 kg (unidad principal) 0.6 kg (adaptador AC) Entomo Electromagnético aplicable: E4 Pico de flujo de corriente: 5 A Todas las especificaciones están sujetas a cambios sin previo aviso. 2 260 191 (20) 5 5 38 267 8 228 211 76 ENTRADA LINE (PGM1-2) RCA, no balanceado Nivel de entrada: -10 dBV Impedancia de entrada: 10 kohmios ENTRADA PHONO (PGM1-2) RCA, no balanceado Nivel de entrada: -54 dBV Impedancia de entrada: 47 kohmios ENTRADA MIC: TRS, balanceado Nivel de entrada: -50 dBV Impedancia de entrada: 2.8 kohmios SALIDAS MASTER (balanceadas) TRS, balanceado Nivel de salida nominal: +4 dBu Impedancia de salida: 75 ohmios SALIDAS MASTER (no balanceadas) RCA, no balanceado Nivel de salida nominal: 0 dBV Impedancia de salida: 100 ohmios SALIDA REC: RCA, no balanceado Nivel de salida nominal: -10 dBV Impedancia de salida: 1 kohmio EFFECT (envío) TRS, no balanceado Nivel de salida nominal: -4 dBV Impedancia de salida: 100 ohmios EFFECT (retorno) TRS, no balanceado Nivel de entrada: -4 dBV Impedancia de entrada: 10 kohmios PHONES: 100 mW + 100 mW (a 33 ohmios) Respuesta de frecuencia: ENTRADA LINE: 20 Hz a 20 kHz, +/-1.0 dB ENTRADA PHONO: 30 Hz a 15 kHz, +/-2.0 dB (RIAA) ENTRADA MIC: 30 Hz a 18 kHz, +/-3.0 dB Relación señal-ruido: ENTRADA LINE: 78 dB (IHF MEDICION A) ENTRADA PHONO: 70 dB (IHF MEDICION A) ENTRADA MIC: 60 dB (IHF MEDICION A) Distorsión armónica total: ENTRADA LINE: <0.1% ENTRADA PHONO: <0.2% ENTRADA MIC: <0.2% Cruce de señal: >60 dB (@ 1 kHz) PGM EQ HIGH (agudos): +12 dB ~ -26 dB MID (medios): +12 dB ~ -26 dB LOW (graves): +12 dB ~ -26 dB Filtro (frecuencia de corte a –6 dB, pendiente 12 dB/ octava en todos los casos) HIGH (agudos): MID (medios): LOW (graves): MIC EQ HIGH (agudos): LOW (graves): Alimentación: (10) 3. Especificaciones técnicas 3. Especificaciones técnicas 198 PHONO 2 (BAL TYPE) MIC INPUT R LINE 2 PHONO 2 LINE 2 PHONO 1 PGM2 L R LINE 1 PHONO 1 PGM1 L LINE 1 + RIAA + RIAA + RIAA + RIAA + MIC AMP - LINE 2/PHONO 2 LINE 1/PHONO 1 MIC LEVEL MAX MAX MAX MAX MAX - GAIN TRIM - - GAIN TRIM - - + - + - - + - - + - - + - + +12 - 26 + +12 - 26 + +12 - 26 LO MID HI LO MID HI LO MID HI LO MID HI HI 2 BAND TONE EQ 3 BAND TONE + +12 - 26 3 BAND TONE EQ EQ 3 BAND TONE EQ 3 BAND TONE LO EQ +12 - 12 - - - - FADER PGM 2 FADER PGM 2 FADER PGM 1 FADER PGM 1 MAX MAX - - - - METER R (PGM1) METER L (PGM1) METER R (PGM2) METER L (PGM2) C/F CURVE C.F REVERSE CROSSFADER - B A PGM1 PGM2 PGM1 METER -40dB -30dB -20dB -10dB -7dB -4dB -2dB 0dB +2dB +4dB +7dB +10dB LED DR IVER - PGM2_R PGM2_L PGM1_R PGM1_L PGM2 VCA BLOCK VCA BLOCK VCA BLOCK VCA BLOCK - - ON OFF ON OFF C.F REVERSE LED EFFECT S PGM1_L C/F START VCC ON OFF ON OFF B A PGM2_R PGM1_R PGM2_L MONI CROSSF ADER ON OFF ON OFF PGM1 PGM2 - - - - LEVEL MASTER MASTER CUE MASTER CUE MONITOR POWER MUTE + + - - - - - - LEVEL U1 HEAD PHONE - 50ms 50ms 50ms 50ms PAD PAD - - - 2 4 3 1 2 4 3 1 3 1 2 3 1 2 3 1 2 RCV SEND A C/F START B C/F START R UNBAL OUT MASTER OUTPUT L R BAL OUT MASTER OUTPUT L R REC OUT L RCV SEND R EFFECT L HEAD PHONE XS3 02.6.12 1:56 PM ページ31 4.2.Block Features diagram and / Schéma controlsX synoptique / Blockschaltbild / Schema a blocchi / Diagrama de bloques English 4. Block diagram / Schéma synoptique / Blockschaltbild / Schema a blocchi / Diagrama de bloques TASCAM XS-3 31 XS3 02.6.12 1:56 PM ページ32 » XS-3 TEAC CORPORATION Phone: (0422) 52-5082 3-7-3, Nakacho, Musashino-shi, Tokyo 180-8550, Japan TEAC AMERICA, INC. Phone: (323) 726-0303 7733 Telegraph Road, Montebello, California 90640 TEAC CANADA LTD. Phone: 905-890-8008 Facsimile: 905-890-9888 5939 Wallace Street, Mississauga, Ontario L4Z 1Z8, Canada TEAC MEXICO, S.A. de C.V. Phone: (525) 581-5500 Facsimile: (525) 581-5111 Campesinos 184. Col. Granjas Esmeralda. 09810.Mexico D.F. TEAC UK LIMITED Phone: 01923-819699 5 Marlin House, Croxley Business Park, Watford, Hertfordshire, WD18 8TE U.K. TEAC DEUTSCHLAND GmbH Phone: 0611-71580 Bahnstrasse 12, 65205 Wiesbaden-Erbenheim, Germany TEAC FRANCE S. A. Phone: 01.42.37.01.02 17 Rue Alexis-de-Tocqueville, CE 005 92182 Antony Cedex, France TEAC BELGIUM NV/SA Phone: 0162-510860 Oeverkruid 15, NL-4941 VV Raamsdonksveer, Netherlands TEAC NEDERLAND BV Phone: 0162-510210 Oeverkruid 15, NL-4941 VV Raamsdonksveer, Netherlands TEAC AUSTRALIA PTY.,LTD. A.C.N. 005 408 462 Phone: (03) 9644-2442 106 Bay Street, Port Melbourne, Victoria 3207, Australia TEAC ITALIANA S.p.A. Phone: 02-66010500 Via C. Cantù 11, 20092 Cinisello Balsamo, Milano, Italy Printed in China MA-0674-
 1
1
-
 2
2
-
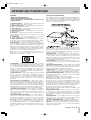 3
3
-
 4
4
-
 5
5
-
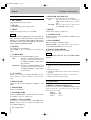 6
6
-
 7
7
-
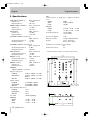 8
8
-
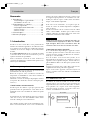 9
9
-
 10
10
-
 11
11
-
 12
12
-
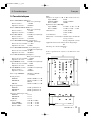 13
13
-
 14
14
-
 15
15
-
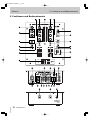 16
16
-
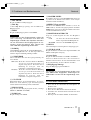 17
17
-
 18
18
-
 19
19
-
 20
20
-
 21
21
-
 22
22
-
 23
23
-
 24
24
-
 25
25
-
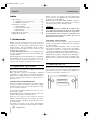 26
26
-
 27
27
-
 28
28
-
 29
29
-
 30
30
-
 31
31
-
 32
32


En otros idiomas
- français: Tascam XS-3 Le manuel du propriétaire
- italiano: Tascam XS-3 Manuale del proprietario
- English: Tascam XS-3 Owner's manual
- Deutsch: Tascam XS-3 Bedienungsanleitung
Documentos relacionados
Otros documentos
-
Akiyama MX-2 Manual de usuario
-
Denon DN-X300 Manual de usuario
-
Denon DN-X500 El manual del propietario
-
-
-
Gemini 19” 4 Channel MM-1800 Manual de usuario
-
-
Yamaha PGX1 Manual de usuario
-
Pulsar AWZ515 Instrucciones de operación