Maytag MGR5875QDW - 30 Inch Gas Range Guía del usuario
- Tipo
- Guía del usuario

M_A AG
®
Gas - Precision Touch
Control 800
Form No, B/09/04
Table of Contents
Umportant Safety
Unstructions ............................... 1-4
Surface Cooking ...................... 5-7
ControHs
Sealed Gas Burners
Oven Cooking ......................... 8=17
Bakhg
Cook & HoM
DeHay
Broiling
Keep Warm
Oven Racks
PaR No. 8113P458 60
Care & Cleaning ................... 18-21
Self-Clean Oven
Cleaning Procedures
Maintenaace ......................... 22-23
Oven Whldow & Light
Removal ot Gas Appliance
Troubleshooting ................... 24=25
Warranty & Service .................... 27
Guide d'ntilisation
et d'entretien ............................... 28
Guia de Use y Cnidado ............. 56
(_P2004 Mavtag Appliances Sales Co. Litho U.S.A.

Consumer: R[ease read and keep this manua! foe future
Model Number
Seria! Number
Date of Purchase
technician. Do not attempt to adjust, repair, service, or
replace any part of your appliance unless it is specifV
cally recommended in this guide. All other servicing
should be referred to a qualified servicer. Have the
installer show you the location of the gas shut off valve
and how to shut it off in an emergency.
Always disconnect power to appliance before servicing.
1_800-688:2080 [ U,S._ for headng or speech impaired}
(Mon._FrL,8 arn:8 pm Eastern Time}
!ntemet; http:/ivwvw.maytag.com
!n our conti nuingeffortto improvethequa!ityaud performance
ol:0ur cooking products, it maybe necessaryto make changes
to the appliance without revis!ng this gu!de.
Fer setvice #nfermatien_ seepage
Warning and Important Safety Instructions appearing in
thisguideare not meant to coverallpossibleconditions
and situations that may occur. Common sense, caution,
and care must be exercised when installing, maintain-
ing, or operating the appliance.
Always contact your dealer, distributor, service agent, or
manufacturer about problems or conditions you do not
understand.
Recognize Safety Symbols, Words, Labels
COULD result in severe personal injury or death.
WARNING - Hazards or unsafe practices which
CAUTION _ Hazards or unsafe practices Which
COULD result in minor personal injury.
Read and follow all instroctions before using this
appliance to prevent the potential risk of fire, electric
shock, personal injury or damage to the appliance as a
result of improper usage of the appliance. Use appliance
only for its intended purpose as described in this guide.
To ensure proper and safe operation: Appliance
must be properly installed and grounded by a qualified
if the information in this _anuam is not followed
e×actly, a fire or e×piosion may result causing
property damage, personal injury or death.
.............. use gasoline or other fla_-
m able vapors and liquids in the vicinity of this
or any appliance.
- IFYOU SNIELL GAS:
- Do not try to _ight any appliance.
- Do not touch any electricam switch.
o Do not use any phone in your building.
o I_mediately call your gas supplier from a
neighbor's phone. Follow the gas supplier's
instroctionso
o if you cannot reach your gas supplier, call
the fire department.
lnstaUation and service must be performed by
a quahfied installer, service agency or the gas
su ppiier.
dangerous situation. Gas leaks may not be detected
by smelt alonel Gas suppliers recommend you pur_
chase and instal! an UL approved gas detector, Instal!
and use in accordance with the manufacturer's
instructions.
Geneta instructions
* ALL P,ANGES CAN TIP AND

Tocheckif deviceisproperlyinstalled,lookunderneath
rangewithaflashlightto makesureoneoftherear
levelinglegsisproperlyengagedinthebracketslot.The
anti-tipdevicesecurestherearlevelinglegtothefloor
whenproperlyengaged.Youshouldcheckthisanytime
therangehasbeenmoved.
Donotusewaterongreasefires.Usebakingsoda,a
drychemicalorfoam-typeextinguishertosmotherfire
orflame.
Child Safety
Te Prevent Fire or Smoke
Be sure all packing materials are removed from the
appliance before operating it.
Keep area around appliance clear and free from com-
bustible materials, gasoline, and other flammable vapors
and materials.
If appliance is installed near a window, proper precau-
tions should be taken to prevent curtains from blowing
over burners.
NEVER leave any items on the cooktop. The hot air from
the vent may ignite flammable items and may increase
pressure in closed containers which may cause them to
burst.
Many aerosokype spray cans are EXPLOSIVE when
exposed to heat and may be highly flammable. Avoid
their use or storage near an appliance.
Many plastics are vulnerable to heal Keep plastics away
from parts of the appliance that may become warm or
hoL Do not leave plastic items on the cooktop as they
may melt or soften if left too close to the vent or a lighted
surface burner.
To eliminate the hazard of reaching over hot surface
burners, cabinet storage should not be provided directly
above a uniL If storage is provided, it should be limited to
items which are used infrequently and which are safely
stored in an area subjected to heat from an appliance.
Temperatures may be unsafe for some items, such as
volatile liquids, cleaners or aerosol sprays.
In Case of Fire
Turn off appliance and ventilating hood to avoid spread-
ing the flame. Extinguish flame then turn on hood to
remove smoke and odor.
, Cooktop: Smother fire or flame in a pan with a lid or
cookie sheet.
NEVER pick up or move a flaming pan.
. Ovens Smother fire or flame by closing the oven door.
above an appliance or on backguard of a range. Chil-
dren climbing on the appliance door to reach items
could be seriously injured.
NEVER leave children alone or unsupervised near the
appliance when it is in use or is still hot.
NEVER allow children to sit or stand on any part of the
appliance as they could be injured or burned.
Children must be taught that the appliance and utensils
in it can be hot. Let hot utensils cool in a safe place, out
of reach of small children. Children should be taught
that an appliance is not a toy. Children should not be
allowed to play with controls or other pars of the unit.
About Your Appliance
NEVER use appliance door as a step stool or seat as this
may result in possibietipping of the appliance and serious
injuries.
NEVER use this appliance as a space heater to heat ol
warm a room. Doing so may resuit in carbon monox-
ide poisoning and overheating of the oven.
NEVER cover any slots, hotes or passages in the oven
bottom or cover the entire rack with materials such as
aluminum foil. Doing so blocks air flow through the
oven and may cause carbon monoxide poisoning,
Aluminum foil may also trap heat causing a fire
hazard.
NEVER obstruct the flow of combustion and ventilation
air b\, blocking the oven vent or air intakes. Doing so
restricts air to the burners and may result in carbon
monoxide poisoning.
The oven vent is located at the base of the backguard.
Avoid touching oven vent area while oven is on and for
several minutes after oven is turned ofL Some parts of

theventandsurroundingareabecomehotenoughto
causeburns.Afterovenisturnedoff,donottouchthe
ovenventorsurroundingareasuntiltheyhavehad
sufficienttimetocool.
Otherpotentiallyhotsurfacesincludecooktop,areas
facingthecooktop,ovenvent,surfacenearthevent
opening,ovendoor,areaaroundtheovendoorand
ovenwindow.
Do not touch a hot oven light bulb with a damp cloth as
the bulb could break. Should the bulb break, disconnect
power to the appliance before removing bulb to avoid
electrical shock.
Cooking Safety
Always place a pan on a surface burner before turning it
on. Be sure you know which knob controls which
surface burner. Make sure the correct burner is turned
on and that the burner has ignited. When cooking is
completed, turn burner off before removing pan to
prevent exposure to burner flame.
Always adjust surface burner flame so that it does not
extend beyond the bottom edge of the pan. An excessive
flame is hazardous, wastes energy and may damage the
appliance, pan or cabinets above the appliance.
NEVER leave a surface cooking operation unattended
especially when using a high heat setting or when deep
fat frying. Boiiovers cause smoking and greasy spiiiovers
may ignite. Clean up greasy spills as soon as possible.
Do not use high heat for extended cooking operations.
NEVER heat an unopened container on the surface
burner or in the oven. Pressure build-up may cause
container to burst resulting in serious personal injury or
damage to the appliance.
Use dry, sturdy potholders. Damp potholders may cause
burns from steam. Dish towels or other substitutes
should never be used as potholders because they can
trail across hot surface burners and ignite or get caught
on appliance parts.
Always let quantities of hot fat used for deep fat frying
cool before attempting to move or handle.
Do not let cooking grease or other flammable materials
accumulate in or near the appliance, hood or vent fan.
Clean hood frequently to prevent grease from accumu-
lating on hood or filter. When flaming foods under the
hood turn the fan on.
NEVER wear garments made of flammable material or
loose fitting or long-sleeved apparel while cooking.
Clothing may ignite or catch utensil handles.
Always place oven racks in the desired positions while
oven is cool. Slide oven rack out to add or remove food,
using dry, sturdy potholders. Always avoid reaching into
the oven to add or remove food. If a rack must be moved
while hot, use a dry pothoIder. Always turn the oven off
at the end of cooking.
Use care when opening the oven door. Let hot air or
steam escape before moving or replacing food.
PREPARED FOOD WARNUNG: Follow food
manufacturer's instructions, if a plastic frozen food
container and/or its cover distorts, warps, or is otherwise
damaged during cooking, immediately discard the food
and its container. The food could be contaminated.
NEVER use aluminum foil to cover oven racks or oven
bottom. This could result in risk of electric shock, fire, or
damage to the appliance. Use foil only as directed in this
guide.
Utensil Safety
Use pans with flat bottoms and handles that are easily
grasped and stay cool. Avoid using unstable, warped,
easily tipped or loose-handled pans. Also avoid using
pans, especially small pans, with heavy handles as they
could be unstable and easily tip. Pans that are heavy to
move when filled with food may also be hazardous.
Be sure utensil is large enough to properly contain food
and avoid bollovers. Pan size is particularly important in
deep fat frying. Be sure pan will accommodate the
volume of food that is to be added as well as the bubble
action of fat.
To minimize burns, ignition of flammable materials and
spillage due to unintentional contact with the utensil do
not extend handles over adjacent surface burners.
Always turn pan handles toward the side or back of the
appliance, not out into the room where they are easily hit
or reached by small children.
Never let a pan boll dry as this could damage the utensil
and the appliance.
Follow the manufacturer's directions when using oven
cooking bags.
3

Only certain types of glass, glass!ceramic, ceramic or
glazed utensils are suitable for cooktop or oven usage
without breaking due to the sudden change in tempera-
ture. Follow manufacturer's instructions when using glass.
This appliance has been tested for safe performance
using conventional cookware. Do not use any devices or
accessories that are not specifically recommended in this
guide. Do not use eyelid covers for the surface units,
stovetop grills, or add-on oven convection systems. The
use of devices or accessories that are not expressly
recommended in this manual can create serious safety
hazards, result in performance problems, and reduce the
life of the components of the appliance.
Cmeaning Safety
Turn off all controls and wait for appliance parts to cool
before touching or cleaning them. Do not touch the
burner grates or surrounding areas until they have had
sufficient time to cool.
Clean appliance with caution. Use care to avoid steam
burns if a wet sponge or cloth is used to wipe spills on a
hot surface. Some cleaners can produce noxious fumes if
applied to a hot surface.
Self-Clean Oven
Do not leave food or cooking utensils, etc. in the oven
Clean only parts listed in this guide. Do not clean door
gaskeL The door gasket is essential for a good seal
Care should be taken not to rub, damage, or move the
gaskeL Do not use oven cleaners of any kind in or
around any part of the self-clean oven.
Before self-cleaning the oven, remove broiler pan, oven
racks and other utensils and wipe up excessive
spfllovers to prevent excessive smoke, flare-ups or
flaming.
It is normal for the cooktop of the range to become hot
during a self-clean cycle. Therefore, touching the
cooktop during a clean cycle should be avoided.
important Safety Notice and
The California Safe Drinking Water and Toxic Enforce-
ment Act of 1986 (Proposition 65} requires the Governor
of California to publish a list of substances known to the
State of California to cause cancer or reproductive harm,
and requires businesses to warn customers of potential
exposures to such substances.
Users of this appliance are hereby warned that the
burning of gas can result in low-level exposure to some
of the listed substances, including benzene, formalde-
hyde and soot, due primarily to the incomplete combus-
tion of natural gas or liquid petroleum (LP} fuels. Prop-
edy adjusted burners will minimize incomplete combus-
tion. Exposure to these substances can also be mini-
mized by properly venting the burners to the outdoors.
Users of this appliance are hereby warned that when
the oven is engaged in the self-clean cycle, there may
be some low-level exposure to some of the listed
substances, including carbon monoxide. Exposure to
these substances can be minimized by properly venting
the oven to the outdoors by opening the windows and/
or door in the room where the appliance is located
during the self-clean cycle.
UMPORTANT NOTUCE REGARDUNG PET BURDS:
Never keep pet birds in the kitchen or in rooms where
the fumes from the kitchen could reach. Birds have a
very sensitive respiratory system. Fumes released during
an oven self-cleaning cycle may be harmful or fatal to
birds. Fumes released due to overheated cooking oil, fat,
margarine and overheated non-stick cookware may be
equally harmful
Save These instructions for Future Reference
4

LO: Use to simmer foods, keep foods
warm and me,it chocoiate or butter. Some
cooking may take princeon the LO setting
if the pan is covered. It is possiMe to
reduce the heat by rotating the knob
toward OFF. Be sure flame is staMe.
Hi: Use to bring iiquid to a boii, or reach
pressure in a pressure cooker. Aiways
reduce setting to a bwer heat when iiquids
begin to boii or foods begin to cook.
An intermediate flame size is used to
continue cooking. Food wiii not cook any
faster when a higher flame setting is used
than needed to maintain a gentle boil.
Water boils at the same temperature
whether boiling gently or vigorously.
Surface Controls
° If flame should go out during a cooking operation, turn
the burner off. If a strong gas odor is detected, open a
window and wait five minutes before relighting the
burner.
o Be sure all surface controls are set in the OFF position
prior to su ppiying gas to the range.
• NEVER touch cooktop until it has cooled. Expect some
parts of the cooktop, especially around the burners, to
become warm or hot during cooking. Use potholders to
protect hands.
Pimot ess ignition
Pilotless ignition eliminates the
need for a constant standing
pilot light, Eachsurface burner
has a spark ignitor. Use care
when cleaning around the
surface burner.
If the surface burner does
not light, check if ignitor is
broken, soiled or wet.
BURNER CAP
Ports
gnitor
BURNER BASE
Surface Control Knobs
Use to turn on the surface burners. An infinite choice of heat
settings is available from LO to Hi. At the Hi setting a detent
or notch may be felt. The knobs can be set on or between any
of the settings.
Graphics next to the knob identify which burner the
Oo O knob controls. For example, the graphic at left
O shows the left front burner location.
Setting the controJs:
The size and type of cookware wiii affect the heat setting. For
information on cookware and other factors affecting heat
settings, refer to "Cooking Made Simple" booklet.
1. Placea pan on the burner grate.
o The burner flame may lift off or appear separated from
the port if a pan is not placed on the grate.
2. Push in and turn the knob counterclockwise to the MTE
setting.
" A clicking (spark} sound wiii be heard and tile burner
wiii light. {Aii five ignitors wiii spark when any surface
burner knob is turned to the LmTEposition.}
3. After the burner lights, turn knob to desired flame size.
" The ignitor wiii continue to spark until the knob is
turned past the LmTEposition.
Operating During a
Power Faimure
controls are in the OFF position, Strike the match first and
hold it in position before turning the knob to UTE,
1. Hold a lighted match to the desired surface burner head.
2. Push in and turn the control knob slowly to MTE
3. Adjust the flame to the desired level.
5

Cooktop
To prevent the cooktop from discoloring or
staining:
"Cban cooktop after each use.
Wipe acidic or sugar}, spflb as soon as the cooktop has
coobd as these spflb may discobr the_-_porceiain.
Unlike a range with standard gas burners,
this cooktop does not lift-up nor is it
removable. Do t_ot attempt to lift @e
cooktop for any reason.
Burner Grates
The grates must be properly positioned before cooking.
When installing the grates, place the tab ends toward the
center, matching the straight bars.
Improper installation of the grates may result in chipping of
the cooktop.
Seamed Burners
The sealed burners of your range are secured to the cooktop
and are not designed to be removed. Since the burners are
sealed into the cooktop, boilovers or spills will not seep
underneath the cooktop.
However, the burner should be cleaned after each use. The
head portion of the burner is easily removed for cleaning.
(See page 20 for cleaning directions.}
The burner heads must be correctly placed on the burner
base for proper operation of the burner.
Do not operate the burners without a pan on the grate.
The grate's porcelain finish may chip without a pan to
absorb the heat from the burner flame.
Use care when stirring food in a pot/pan sitting on the burner
grate. The grates have a smooth finish for ease of cleaning.
The pot/pan will slide if the handle is not held. This may result
in spilling of hot food items and may be a burn hazard.
Although the burner grates are durable, they will gradually
lose their shine and/or discolor, due to the high temperatures
of the gas flame.
High Performance Burners
There isone 16,000BTU* high speed burner on your range,
located in the right front position. There is a 12,000 BTU*
burner located in the left front position. These burners offer
higher speed cooking that can be used to quickly bring water
to a boii and for large-quantity cooking.
Simmer Burner
This burner is located in tile center position. Tile
simmer burner offers a lower BTU* flame for delicate
sauces or melting chocolate.
BTU ratings will vary when using LP gas.
" A properly adjusted burner with clean ports wiii light
within a few seconds. If using natural gas, the flame
wiii be blue with a deeper blue inner cone.
If the burner flame isyellow or is noisy, the air/gas
mixture may be incorrect. Contact a service technician
to adjust. (Adjustments are not covered by the war-
ranty.}
With LP gas, slight yellow tips on the flames are
acceptable. This is normal and adjustment is not
necessary.
" With some types of gas, you may hear a "popping"
sound when the surface burner is turned off. This is a
normal operating sound of the burner.
" If the control knob is turned very quickly from Hi to
LO, the flame may go out, particularly if the burner is
cold. If this occurs, turn the knob to the OFF position,
wait several seconds and relight the burner.
" The flame should be adjusted so it does not extend
beyond the edge of the pan.
6

D E F G
H j J K LM N 0
The control panel isdesigned for easehi programmhg, Thedisplaywhldow on thecontrol shows thlle ofday, thYlerand ovenfunctions.
Control panel shown includes Convect and other model specific features. [Styling may vary depending on moddj
C
D
E
H
J
L
M
n
m
Bake
Broil
Clean
ConvectRoast
Delay
Number Pads
Autoset
Keep Warm
Convect Bake
Cook & Hold
Favorite
Timer
Clock
OvenLight
CANCEL
Usefor bakingand roasting.
Usefor broilingand top browning.
Useto set self-cleancycle.
Usefor convectionroasting.
Programsthe ovento start bakingat
a latertime.
Useto set time and temperature.
Useto quickly set temperatures.
Useto keepcooked foodwarm in oven.
Usefor convectionbaking.
Bakesfor a presettime.then holdsfood
warm for 1hour.
Useto savea specific Cook& Hold
procedure.
SetsTimer.
Useto set time-of-day clock.
Useto turn the ovenlight on or off.
Cancelsall operationsexceptTimer
and Clock.
Using the Touchpads
" Pressthe desired pad=
" Pressthe number pads to enter time or temperature.
° Press the Autoset 0 pad to enter temperature.
" A beep will sound when any pad is touched.
" A double beep will sound if a programming error occurs.
Note: Fourseconds after pressing the number pads or
the Autoset 0 pad, the time or temperature will automati-
cally be entered. If more than 30 seconds elapse between
touching a function pad and the number pads or the
Autoset 0 pad, the function will be canceled and the
display will return to the previous display.
The clock can be set to display time in a 12-hour or 24-hour
format. The clock is set at the factory for the 12-hour format.
To change the clock to 24-hour format:
1. Pressand hold the CANCEL and
Favorite pads for three seconds.
° 12 Hr flashes in the display.
2. Pressthe Autoset 0 pad to select 24 Hr;
press again to select 12 Hr.
3. Set the time of day following the
directions in the To set the Clock
section.
0
Autoset
7

To set the C_ock:
1. Press the CHockpad.
, The time of day flashes in the dispiay.
2. Press the appropriate number pads to set the time of day.
, Cobn flashes in the dispiay.
3. Press the CHockpad again or wait four seconds.
, The cobn will remain on.
When ebctrbd power is suppibd or after a power interrup-
tion, the Hastchocktime before power was interrupted will
flash.
To recall the time of day when another time function is
showing, press the CHockpad.
CHocktime cannot be changed when the oven has been
programmed for Dday cook or dean or Cook &Hoid.
To cancem the Clock display:
If you do not want the time of day to dispiay:
Press and hoM the CANCEL and CHock
pads for three seconds. The time of day
will disappear from the display.
When the clock display is canceled, press
the Clock pad to briefly display the time of
day.
When the clock display is canceled, after 15 minutes, the oven
control will go into Standby Mode to save energy. The display
will be blank and the oven light will not operate. To "wake up"
the control from Standby Mode, press any touchpad. A double
beep will sound.
To restore the Clock display:
Press and hold the CANCEL and Clock pads for three sec-
onds. The time of day will reappear in the display.
The timer can be set from one minute (0:01} up to 99 hours
and 59 minutes (99:59}.
The timer can be used independently of any other oven
activity. It can also be set while another oven function is
operating.
The Timer does not control the oven. It only controls a
beeper.
To set the Timer:
1. Press the Timer pad.
° 0:00and TIMER flash in the display.
2. Press the appropriate number pads until the correct time
appears in the display.
° The colon and TIMER will continue to flash.
3. PressTimer pad again or wait four seconds.
° The colon stops flashing and the time begins counting
down.
, The last minute of the timer countdown will be displayed
in seconds.
4. At the end of the set time, one long beep will sound and
"End" will be displayed.
5. Pressthe Timer pad to clear the display.
To cancel the Timer:
1. Pressand hold the Timer pad for three seconds.
OR
2. Pressthe Timer pad and press '0'
using the number pads.
--0
Autoset
Locking the Contro
and Oven Door
The touchpad and oven door carl be locked for safety,
cleaning, or to prevent unwanted use. The touchpads will not
function when locked.
If the oven is currently in use, the touchpads and door cannot
be locked.
The current time of day wiii remain in the display when the
touchpads and door are locked.
To lock:
Press and hold the CANCEL and Cook &
Hold pads for three seconds. (Press the
CANCEL pad first.}
° OFFappears in the display
° LOCKflashes while the door is
locking.
To unlock:
Press and hold the CANCEL and Cook & Hold pads for three
seconds. (Press the CANCEL pad first.} OFFdisappears from
the display.
_ Note: The touchpads and oven door cannot be locked if
the oven temperature is 400° For above.
Faumt Codes
BAKE or LOCK may flash rapidly in the display to alert you if
there is an error or a probbm. If BAKE or LOCKflash in the
display, press the CANCEL pad. If BAKE or LOCKcontinue to
flash, disconnect power to the appliance. Wait a few minutes,
and then reconnect power. If the flashing still continues,
disconnect power to the appliance and call an authorized
servicer.

Q
To set Bake:
1. Press the Bake pad.
, BAKEwi[[ flash.
Bake
° 000 wi[[ flash in the display, l'_
U
2. Select the oven temperature. Pressthe Autoset 0
pad for 350° For the appropriate number pads. ,_uloset
, Each additional press of the Autoset 0 pad wi[[ increase
the temperature by 25°.
, The oven temperature can be set from 170° to 550°.
3. Press Bake pad again or wait four seconds.
, BAKEwi[[ stop flashing and light in the display.
Baking Differences Between Your Old
and New Oven
It is normal to notice some baking time differences between a
new ovenand an oldone. See"Adjusting the OvenTemperature"
on page 15.
Baking with Convection
(select models)
When convection baking, enter year normal baking
temperatare. The control wi[[ automatically reduce the set
oven temperature by 25°. The entered temperature wi[[ be
displayed. The convection fan will start after the oven has
been on for five minateso
TO set Conveet Bake:
1. Pressthe Convect Bake pad.
Bake
, BAKE and the FAN icon wi[[ flash ..............................
, 100° or the actual oven temperature if over 100° Fwill
display. It wi[[ rise in 5° increments until the preset
temperature is reached. °
4. Allow the oven to preheat for 8-15 minutes.
° When the set oven temperature is reached, one long 3.
beep wiil sound.
° The set temperature wiil display.
° To recall set temperature during preheat, press Bake pad.
5. Place food in the oven.
6. Check cooking progress at the minimum cooking time.
Cook longer if needed, 4,
7, When cooking is finished, press CANCEL pad,
8, Remove food from the oven,
Baking Notes:
° To change the oven temperatare daring cooking, press
Bake, then press the Autoset 0 pad or appropriate number
pads until the desired temperature is displayed.
, To change the oven temperatare daring preheat, press
the Bakepad twice, then press the Autoset 0 pad or
appropriate number pads until the desired temperature is
displayed.
° If you forget to turn off the oven, it wi[[ automatically turn
off at the end of 12 hours. If you wish to deactivate this
feature, see page 14.
° Foradditional baking and roasting tips, see "Cooking Made
Simple" book[eL
° 000 wi[[ flash in the display.
1/
Select the oven temperature. Pressthe Autoset 0 U
pad for 350° For the appropriate number pads. Au/osel
Eachadditiona[ press of the Autoset 0 pad wi[[ increase
the temperature by 25 degrees. The oven temperature
can be set from 170° to 550°.
Press Convect Bake pad again or wait four seconds.
° BAKE will stop flashing.
, 100° or the actual oven temperature if over 100° Fwill
display, it will rise in 5° increments until the preset
temperature is reached.
, The FAN icon will start to rotate.
Allow the oven to preheat for 8-15 minutes.
° When the set oven temperature is reached, one long
beep will sound.
° The set temperature will display.
° To recall the set temperature during preheat, press the
Convect Bake pad.
5, Place food in the oven,
0. Check cooking progress at the minimum cooking time.
Cook longer if needed.
7. When cooking is finished, press
CANCEL pad.
8. Remove food from the oven.
9

Roasting With Convection
(select models)
When convection roasting, enter your normaJ roasting
time and temperature. The control will automatically
prompt you to check the food for aloneness at 75% of the set
time. The convection fan will start after the even has
been on for five minutes.
Press Convect Roast pad again or wait four seconds.
° ROASTwill stop flashing and light in the display.
, 100° or the actual oven temperature will display. It will
rise in 5° increments until the preset temperature is
reached.
° The FAN icon will start to rotate.
Roasting Notes:
° When convection roasting, the cooking time must be set
before setting the temperature.
° If your recipe requires a preheated oven, add 15 minutes
to the cooking time programmed.
, Roasting times can vary with different cuts of meat.
, It is not necessary' to preheat when convect roasting
large cuts of meat.
° Refer to "Cooking Made Simple" booklet for suggested
roasting temperatures and times.
To set Convect Roast:
1. Press the Convect Roast pad.
Roast
° ROASTand the FAN icon will flash. .........
° 00:00will flash in the display.
° 000 lights in the display.
2. Enter the roasting time using the number pads.
° Time can be set from 10 minutes (00:10} to 11 hours,
59 minutes {11:59}.
° Press Convect Roast pad again or wait 4 seconds.
° ROASTand the FAN icon flash in the display.
° 000 will flash in the display.
3. Select the oven temperature. Pressthe N
Autoset 0 pad for 325° F or the appropriate AutoseL'J
number pads.
° Each additional press of the Autoset 0 pad will increase
the temperature by 25°.
° The oven temperature can be set from 170° to 550°.
_otes:
, [f a preheat is required, allow the oven to preheat for 8-15
minutes.
° When the set oven temperature is reached, one long beep
will sound.
5. Place food in the oven.
° Time will start counting down once oven starts heating
up.
° To recall the set temperature during preheat, press the
Convect Roast pad.
8. When 75% of the set cooking time has elapsed, the oven
light will turn on and FOODwill flash in the display. Check
the cooking progress at this time. Cook longer if needed.
° The oven light will remain on until the Oven Light pad is
pressed.
° Press any pad to recall the cook time remaining.
7. When cooking is finished, press CANCEL pad.
8. Remove food from the oven.
10

Q
Cook & Herod
When ushg the Cook & Hemaloptk)n, the oven beghs to heat
immediateHyafter the controHhas been set=Then, the oven
cooks for a specified Hengthof time. When that time has
eHapsed,the oven wiHHkeep the food warm for up to an hour
then automaticaHHyturn off=
TO set Cook & Herod:
1= Press the Cook & HoHdpad=
° HOLD wiHHflash to indicate that you are in Cook &
HoHdprogramming.
° 00:00wiHHflash in the dispHay=
2. SeHectthe amount of time you want to cook by using the
number pads.
° HOLD continues to flash.
° The time will] Hightin the dispHay.
° Time can be set from ten minutes (00:10) to 11 hours,
59 minutes (11:59].
3. WhiHeHOLD is still]flashing, press Bake,
Convect Bake or Convect Roast (seHect
modeHs)and seHectthe oven temperature.
Press the Autoset 0 pad for 350° For the
appropriate number pads.
° The desired function word will] flash.
Bake .....
0
Autosd
. The oven temperature can be set from
170° F to 550 ° F.
4. Press the desired function pad again OR
wait four seconds.
, The desired function word will remain Nit.
, The cooking time will show in the display.
, The actuaHoven temperature wiHHbe dispHayed
during preheat.
, The set temperature wiHHdispHaywhen the oven is
preheated.
When the cooking time has elapsed:
° Four beeps wiHHsound.
° HOLD and WARM wiHHHight.
° 170°and the time of daywiHHdispHay.
After one hour in HOLD WARM:
, The oven turns off automaticaHHy.
° HOLD and WARM go off.
, Remove food from oven.
To cancel Cook & Hold at any time:
Press the CANCEL pad. Remove food from oven.
Delay Cook & Hold
Do not use deHayedbaking for h!ghUYperishable foods such
as dairy products, pork, pouHtry,or seafood.
When using Demay, the oven begins to cook later in the day.
Set the amount of time that you want to delay before the oven
turns on and how long you want to cook. The oven begins to
heat at the selected time and cooks for the specified length of
time.
Delay time can be set from 10 minutes (00:10} to 11 hours, 59
minutes (11:59).
To set a Delayed Cook & Hold eyrie:
1. Pressthe 1 DeHaypad. 1
1
° DELAY flashes in the dispHay.
Delay
° 00:00 flashes in the display=
2. Using the appropriate number pads, enter the amount of
time yea want te delay the start of the Cook & HoHdcycHe.
3. Pressthe Cook & HoHdpad.
° HOLD and DELAY flash in the dispHay.
° 00:00 flashes in the dispHay.
4. Enter the ameant of time you want to cook using the
number pads.
5. Press Bake, Convect Bake or Convect
Roastpad (select models). ...............................
0. Set the oven temperature desired by pressing the
Autoset 0 pad or the appropriate number pads.
U
° 350° will[ Hightwhen Autoset 0 pad is pressed.
;\utoset
, After four seconds, the entered delay'time
will[ appear in the dispHay.
° HOLD turns off.
, BAKE and DELAY remain Nitto remind you that
a delayed Cook & Hold cycHehas been programmed.
_otes:
, Do not use Delayed Cook & Hold for items that require a
preheated oven, such as cakes, cookies, and breads.
° Do not use DeHayedCook & HoHdif oven is aHreadyhot.
11

Q
To set Broit:
1. Press the Broii pad.
, BROIL and SETflash in the dispiay. ..............
2. Press the Autoset 0 pad once to set HI broii or
twbe to set LO broil
, HI or LO wiii be dispiayed.
, Select HI broil (550° F}for normal broiling.
Seiect LO broi[ (450° F}for How-temperature
broiiing of [onger cooking foods such as pouitry.
3. After four seconds, the oven will[ start.
, BROIL will[ remain Hit.
, HI or LO wiil remain lit.
0
Autoset
4. For optimum browning, preheat 2-3 minutes before adding
food.
5. Place food in the oven. Close the oven door.
6. Turn meat once about halfway through cooking.
7. When food is cooked, press the CANCEL pad.
Removefood and broiler pan from the oven.
+ The time of day wiii reappear in the display.
Broil Notes:
, For best results when broiling, use a pan designed for
broiling.
, HI is used for most broiling. Use LO broil when broiling
longer cooking foods. The lower temperature allows
food to cook to the well done stage without excessive
browning.
, Broil times may be longer when the lower broiling
temperature is selected.
, Most foods should be turned halfway through broiling
time.
, For additional broiling tips and temperatures, refer to the
"Cooking Made Simple" booklet.
Broiling Chart
Preheat oven for 2-3 minutes.
FOOD POSITION DONENESS
Beef 5 Medium 15 - 20 min.
5 Well Done 18 - 24 min.
5 or 6 Well Done 13 - 18 min.
Pork 5 Well Done 6 - 10 min.
5 Warm 8 - 12 rain.
5 Weii Done 22 - 26 rain.
4 Well Done 30 - 45 min. (Lo Broil}
Seafood
Steaks, 1"thick
Hamburger Patties, 3/4" thick
Bacon
Ham, precooked 1/2" slice
Chops, 1" thick
Chicken Breasts, bone-in
Fish filets
Fish steaks, 1" thick
Lobster tails, 3-4 oz. each
5
5
5
Flaky
Flaky
Done
8 - 12 rain.
10 - 15 min.
7 - 10 min.
Fora browned/seared exterior and rare interior, it may be necessary to decrease cook time on side one and decrease the distance
between the meat and heat source.
Note: This chart is a suggested guide. The times may vary with the food being cooked.
12

Q
Keep War
For safeHykeeping hot foods warm or for warming breads and
pHates.
To set Keep Warm:
1. Press the Keep Warm pad.
, WARM flashes in the dispHay.
, 000 flashes in the dispHay.
warm .....
2. SeHectthe Keep Warm temperature. Pressthe U
Autoset 0 pad or the appropriate number pads. Autoset
, 170°wiHHHightwhen the Autoset 0 pad is pressed.
, Each press of the Autoset 0 padwiHHincrease the
temperature by 5°.
The Keep Warm temperature can be set from 145°to 190°,
WARM and the temperature wiHHbe dispHayedwhiHethe
function is active.
To cancem Keep Warm:
1. Press the CANCEL pad.
2. Remove food from the oven.
Keep Warm Notes:
, ForoptimaHfood quality, oven cooked foods shouHdbe
kept warm for no Hongerthan 1to 2 hours.
, To keep foods from drying, cover HooseHywith foiHor a Hid.
. To warm dinner rolls:
- cover roHHsHooseHywith foiHand pHacein oven.
- press Keep Warm and Autoset 0 pads.
- warm for 12-15 minutes.
, To warm plates:
- pHace2 stacks of up to four pHateseach in the oven.
- press Keep Warm and Autoset 0 pads.
- warm for five minutes, turn off the oven and Heave
pHatesin the oven for 15 minutes more.
- use onHyoven-safe pHates,check with the
manufacturer.
- do not set warm dishes on a coHdsurface as rapid
temperature changes couHdcause crazing or
breakage.
13

Automatic Shut-Off/Sabbath
Mode
The oven will automatically turn off after 12 hours if you
accidentally Heaveit on. This safety'feature can be turned off.
To cancel the 12-hour shut-off and run the
oven continuously for 72 hours:
1= Press and hoid the CHockpad for five
seconds
, SAb will be dispiayed and flash for five seconds.
, SAb will then be dispiayed condnuousiy und] turned
off or und] the 72-hour time limit is reached.
, BAKE will also be displayed if a bake cycle is in
use while the oven is in Sabbath Mode.
, All functions EXCEPTBAKE Crimer, Keep Warm,
Clean, etc.} are locked out during the Sabbath Mode.
° A Cook & Hold can be programmed during the Sabbath
Mode, however a Delay Cook & Hold is not allowed.
To cancel the Sabbath Mode:
1. Press the CLOCK pad for five seconds.
, SAb will flash for five seconds.
, The time of day will return to the display.
OR
2. After 72 hours, the Sabbath Mode will end.
, SAb will flash for five seconds.
, The time of day will return to the display.
Sabbath Mode Notes:
, Sabbath Mode can be turned on at any time with or
without the oven on.
° Sabbath Mode cannot be turned on if the touchpads are
locked out or when the door is locked.
, Most prompts and messages and all beeps are
deactivated when Sabbath Mode is active.
, If the oven is baking when Sabbath Mode is set, BAKE
will go out when Bake is canceled. There will be no
audible beeps.
, The oven light will not automatically come on when the
oven door is opened while the oven is in Sabbath Mode.
If the oven light is desired while in Sabbath Mode, it
must be turned on before the Sabbath Mode is started.
, When the Sabbath Mode is started, the temperature
display will immediately show the set temperature, rather
than the actual oven cavity'temperature. No preheat
beep will sound.
, The self-dean cycb and automatic door lock do not
operate during the Sabbath Mode.
, Pressing CANCEL pad will cancel a bake cycle, however
the control will stay in the Sabbath Mode.
, If power fails, the oven will power up in Sabbath Mode
with 72 hours remaining and no cycle active.
14

Adjusting the Oven Temperature
Oven temperatures are carefully tested for accuracy at the
factory. It is normal to notice some baking or browning
differences between a new oven and an old one. As ovens
get older, the oven temperature can shift.
You may adjust the oven temperature if you think the oven is
not baking or browning correctly. To decide how much to
change the temperature, set the temperature 25 degrees
higher or lower than your recipe recommends, then bake.
The results of the "test" should give you an idea of how much
to adjust the temperature.
To adjust the oven temperature:
1. Press the Bake pad. ....
2. Enter 550° by pressing the appropriate number pads.
3. Press and hold the Bake pad for several seconds or until
00° appears in the display.
If the oven temperature was previously adjusted, the
change wi[[ be displayed. Forexample, if the oven tem-
perature was reduced by 15°the display wi[[ show "-15°",
4. Press the Autoset 0 pad to adjust the temperature.
Each time the Autoset pad 0 is pressed, the temperature
changes by 5°, The oven temperature can be increased or
decreased by 5° to 35°.
Pressing the Autoset 0 pad wi[[ first cycle through increas-
ing the oven temperature (5, 10.... 35_.Continuing to
press the Autoset 0 pad wi[[ then cycle through decreasing
the oven temperature (-35, -30.... -5_.
5. The time of day wi[[ automatically reappear in the display.
You do not need to readjust the oven temperature if there is a
power failure or interruption. Temperature adjustment applies
to Bake, Convect Bake and Convect Roast (select mode[s_
only. Broiling and cleaning temperatures cannot be adjusted.
Changing Temp °F/°C
1. The factory default setting for temperature is Fahrenheit=
2= Tochange the setting, press and hold the CANCELand Bake
pads at the same time for three seconds.
3= A single beep wi[[ sound and the current setting wi[[ be
displayed (°F or °C_.(If no change is made, the range wi[[
return to the existing setting after 30 seconds=_
4= To change the setting, press the Autoset 0 pad=Press again
to return to existing setting. Wait five seconds and the setting
wi[[ be complete=
The Favorite pad allows you to save the time and temperature
from a Cook & Hold function.
To set a Favorite cycle, Cook & Hold must be either active or
just programmed.
To set a new Favorite cycle or to save a cur-
rently running Cook & Hold as a Favorite:
1. Program a Cook & Hold cycle as described in the Cook &
Hold section on page 11.
2. Press and hold the Favorite pad for three
seconds.
° The newly set or currently running Cook & Hold cycle
wi[[ be saved.
, A beep wi[[ sound to indicate that the control has
accepted the Favorite setting.
To start a cycle programmed into Favorite:
1. Press the Favorite pad.
, Time and temperature for the set Cook & Hold cycle wi[[
be displayed. (If no Cook & Hold cycle has been pro-
grammed, "nonE" is displayed.)
2. Press the Bake, Convect Bake or Convect Roast (select
models) pad.
, The Favorite cycle wi[[ begin immediately.
, The selected cycle word wi[[ light in the display
, The cooking time wi[[ light in the display
When the cooking time has elapsed:
° The selected cycle word wi[[ turn off.
° HOLD and WARM wi[[ light.
° 170°will display.
To cancel a Favorite cycle in progress:
1. Press the CANCEL pad. ('CANCE_
° The stored Favorite cycle wi[[ not
be affected.
2. Remove food from the oven.
15

Pilotless ignition
Your range is equipped with pibtbss ignition. With this type of
ignition system, the gas automatically shuts off and the oven
will #or operate during a power failure.
A lighted match will not light the oven burner. No attempt
should be made to operatethe oven daring a power failure.
Oven Fan
A convection fan is used to circulate hot air in the oven when
the convection feature is sebcted. It automatically turns on 5
minutes after the Convect pad is pressed and will turn off
when Convect is canceled.
Note: The convection fan will automatically stop when the
oven door is opened.
Oven Vent
When the oven is in use the area near the vent may become
hot enough to cause bums. Never block the vent opening.
The oven vent is located below the backgaard vent
OVEN VENT
LOCATION
shield on your range.
Do not place
plastics near the
vent opening as
heat front the vent
could distort or
melt the plastic.
Oven Light
The oven light automatically comes on when
the door is opened. When the door isclosed,
press the oven light pad to turn the oven light
on and off. A beep will sound every time the
oven light pad is pressed.
Oven Bottom
Protect oven bottom against spillovers, especially acidic or
sugary spills, as they may discolor the porcelain enamel. Use
the correct pan size to avoid spillovers and boilovers. Do not
place utensils or aluminum foil directly on the oven
bottom.
Oven Racks
, Do not attempt to change the rack positi°n when the oven
is hot.
Do not use the oven for storing food Orcookware.
The oven has two racks (three if convection). All racks are
designed with a lock-stop edge.
To remove:
1. Pull rack straight out until it
stops at the lock-stop
position.
2. Lift up on the front of the
rack and pui[ out.
To replace:
1. Place rack on the rack support in the oven.
2. Tilt the front end up slightly. Slide rack back until it clears
the lock-stop position.
3. Lower front and slide back into the oven.
Do not cover an entire rack with aluminum foil or place
foil on the oven bottom. Raking results will be affected
and damage may occur to the oven bottom.
Rack Positions
RACK 7 (highest
position[): Forsome Ii _ _ 7
single rack baking on _ ..... 6
cookie sheets and _ 5
broiling. _ 43
RACK 6: Used for some _
single rack baking on
cookie sheets and Three Rack Bottom
broiling. Used for Convection Baking
(select modeJs)
RACK 5: For single rack baking on cookie sheets and broiling.
RACK 4: Used for single rack baking on cookie sheets, sheet
cakes, casseroles and broiling. Used for multiple rack baking.
RACK 3: For single rack baking on cookie sheets, casseroles,
layer cakes, loaves of bread and sheet cakes. Used for
multiple rack baking.
16

RACK 2: Used for some singHerack baking on cookie sheets
and roasting small cuts of meat. Use for muHtipHerack baking.
RACK 1: Use for roasting Harge
cuts of meat and poultry.
Oven Rettem: Place oven rack on
raised sides of oven bottom. Use
for additional space when cooking
large oven meals.
MULTIPLE RACK COOKING:
Two rack: Use rack positions 3 and 6,or 2 and 4.
Three rack: (convection onH}OUse rack positions 1,3 and 6.
Nete: When convect baking [sdect modds:) on two or three
racks, check foods at the minimum suggested time to avoid
over-browning or over-cooking.
Baking Layer Cakes on Two Racks
Forbest results when baking cakeson two racks,use racks 2and
4 for regular baking and racks 3 and 6 for convection baking
(select models:).
Hace the cakes on the rack as shown.
Create-A-Space TMHalf Rack
SeHectrange models are
equipped with a convertible
half rack. The left side of
the rack can be removed
to accommodate a large
roaster on the lower
rack. The right side of
the rack is still avail-
able to hold a casse-
role dish.
//
° The removable section of the rack can be used as a
roasting rack in the broiling pan. Do not use the top
insert when using the rack in the broiling pan.
° The removable section of the rack can be used as a
cooling rack or trivet.
° Make sure oven is cool before removing or reinstalling
the half rack.
° Do not use cookware that extends beyond edge of rack.
° For best results, allow two inches between the pan
placed on the rack and the oven side wall.
° Use caution when removing items from the half rack to
avoid burns.
Carefully remove items from the lower rack to avoid
disturbing the half rack.
17

Serf-Clean Oven
- it is normal for parts of the oven to become hot during a
- To prevent damage to oven door do not attempt to open
the door when LOCK is displayed.
• Avoid touching door, window or oven vent area during a
clean cycle.
, Do not use commercial oven cleaners on the oven finish
or around any part of the oven. They will damage the
finish o_ parts.
The self-clean cycle uses above-normal cooking temperatures
to automatically clean the oven interior.
It is normal for flare-ups, smoking, or flaming to occur during
cleaning if the oven is heavily soiled. It is better to clean the
oven regularly rather than to wait until there is a heavy build-
up of soil in the oven.
During the cleaning process, the kitchen should be well
ventilated to get rid of normal odors associated with cleaning.
Before Se f-Cleaning
1. Turn off the oven light before cleaning. The oven light may
burn out during the clean cycle.
2. Remove broiler pan, all pans, and oven racks from the
oven. The oven racks will discolor and may not slide easily
after a self-clean cycle if they are not removed.
3. Clean oven frame, door frame, area outside of gasket, and
around the opening in the door gasket with a nonabrasive
cleaner such as Bon Ami* or detergent and water. The
self-cleaning process does not clean these areas. They
should be cleaned to prevent soil from baking on during
the clean cycle. (The gasket is the seal around the oven
door and window.}
4. To preventda,eage, d onotclean or ,_ _'___
rub the gasket around the oven
door. The gasket is designed to __t_
seal in heat during the clean cycle.
5. Wipe up excess grease or spill-
overs from the oven bottom. This
prevents excessive smoking, flare-ups or flaming during
the clean cycle.
6. Wipe up sugary and acidic spillovers such as sweet
potatoes, tomato, or milk-based sauces. Porcelain enamel
is acid-resistant, not acid-proof. The porcelain finish may
discoior if acidic or sugary spiiis are not wiped up before a
self-clean cycle.
To set Self-Clean:
1.
2.
Note: Oven temperature must be below 400° Fto
program a clean cycle.
Close the oven door.
Pressthe Clean pad.
° CLEAN flashes.
° SETflashes in the display. (}
Pressthe Autoset 0 pad. Autoset
° MEd (Medium Soil, 3 hours} is displayed.
Press the Autoset 0 pad to scroll through the self-cleaning
settings.
HVy (Heavy'Soil, 4 hours}
MEd (Medium soil, 3 hours}
LITE( Light Soil, 2 hours}
Choosing the soil level of the oven automatically programs
the self-cleaning time.
After four seconds, the oven wiii start cleaning.
° If the door is not closed, beeps wiii sound and "door" wiii
display. If the door is not closed within 30 seconds, the
self-cleaning operation wiii be canceled and the display
will return to the time of day.
° CLEAN wiii appear in the display.
° LOCKwiii flash in the display. Once the door iocks, the
word wiii remain steady.
° The cleaning time wiii start counting down in the display.
To Delay a Semf-Olean Cycle:
1. Pressthe Delay 1 pad. 1
/
° DELAY flashes.
Delay
2.
3.
, 00:00wiii flash in the display.
Entertheamount oftime youwant to delay thecycle using the
appropriate number pads.
Pressthe Clean pad.
° SETflashes in the display.
Pressthe Autoset 0 pad.
° LITE(Light soii ievei} is displayed.
dean
0
_\utoset
* Brand names for cleaning products are registered trademarks of the respective manufacturers.
18

5. Press the Autoset 0 pad to scroll through (_
the sdf-cHeaning settings. U
HVy (Heavy Soil 4 hours) ,\utoset
MEd (Medium Soil 3 hours)
LITE (Light Soil 2 hours)
Choosing the soiHHeveHof the oven automatically programs
the seHf-cHeaningtime.
6. After four seconds, CLEAN and DELAYwill Hightand LOCK
will flash in the dispHay. When the oven door Hatches,
LOCKwill stop flashing and HightcontinuousHyto show that
the oven is set for a deHayeddean operation. The deHay
time will dispHay.
During the Serf-Clean Cycle
When LOCK shows in the display, the door cannot be opened,
To prevent damage to the door, do not force the door open
when LOCK is displayed,
Smoke and Smells
You may see some smoke and smell an odor the first few
times the oven is cleaned. This is normal and will lessen in
time.
Smoke may also occur if the oven is heavily soiled or if a
broiler pan was left in the oven.
Sounds
As the oven heats, you may hear sounds of metal parts
expanding and contracting. This is normal and wi]] not
damage the oven.
After Seff-C eaning
About one hour after the end of the self-clean cycle, LOCK
will turn off. The door can then be opened.
Some soil may leave a light gray, powdery ash. Remove
it with a damp cloth. If soil remains after wiping, that means
the clean cycle was not long enough. The soil will be re-
moved during the next clean cycle.
if oven racks were left in the oven and do not slide
smoothly after a clean cycle, wipe racks and rack supports
with a small amount of vegetable oil to make them easier to
move.
Fine lines may appear in the porcelain because it went
through heating and cooling. This is normal and will not
affect performance.
A white discoloration may appear after cleaning if acidic
or sugary foods were not wiped up before the self-clean
cycle. This discoloration is normal and will not affect perfor-
mance.
, If the oven door is left open, "door" will flash in the
display and a signal will beep until the door is closed
and the Clean pad is pressed again.
° If more than five seconds elapse between pressing the
Clean pad and the Autoset 0 pad, the program will
automatically return to the previous display.
, The oven door will be damaged if the oven door is
forced to open when LOCK is still displayed.
19

Cleaning Procedures
or cleaning. This is te avoid damage andpossib!e burns.
* Brand names are registered trademarks of the
, To Prevent staining or discoloration, dean appliance afro( each use, respective manufacturers.
!f a part !Sremoved, be sure !t is correct!y replaced. ** To order call 1-877-232-0771 USAor
1-800-088-8408 Canada.
PART PROCEDURE
BroimerPan Never cover insert with aluminum foil as this prevents the fat from drainh_g to the pan below.
and insert , Place soapy cloth over insert and pan; let soak to loosen soil=
, Wash in warm soapy water. Use scouring pad to remove stubborn soil.
, Broiler pan and insert can be cleaned in dishwasher.
Removable Burner Heads
Sealed Gas , Allow burner to cool. Remove burner cap and wash in soapy water with a plastic scouring pad=For
Burners stubborn soils, clean with a soap-filled, nonabrasive pad or Cooktop Cleaning Creme*
(Part #20000001:]** and a sponge.
, Do not clean in the dishwasher or self-cleaning oven.
Sealed Gas Burners
° Clean frequently= Allow burner to cool=Clean with soap and plastic scouring pad=Forstubborn soils,
clean with a soap-filled, nonabrasive pad. Do not enlarge or distort holes.
° Be careful not to get water into burner ports.
° Use care when cleaning the ignitor= If the ignitor iswet or damaged the surface burner will not light=
Burner Grates - ° Wash with warm, soapy water and a nonabrasive, plastic, scrubbing pad= For stubborn soils,
Porcelain on clean with a soap-filled, nonabrasive, plastic pad or Cooktop Cleaning Creme* (Part _20000001:}**
Cast iron and a sponge. If soil remains, reapply Cooktop Cleaning Creme,cover with a damp paper towel and
soak for 30 minutes=Scrub again, rinse and dry=
° Do not clean in the dishwasher or self-cleaning oven.
Clock and ° To activate "Control Lock" for cleaning, see page 8=
Control Pad ° Wash, rinse and dry. Do not use abrasive cleaning agents as they may scratch the finish.
Area ° Glass cleaners may be used if sprayed on a cloth first= DO NOTspray directly on controlpad and
display area.
Control Knobs , Remove knobs in the OFFposition by pulling forward.
° Wash, rinse and dry. Do not use abrasive cleaning agents as they may scratch the finish.
° Turn on each burner to be sure the knobs have been correctly replaced.
Ceoktop and Porcelain enamel isglassfused on metal and may crack or chip with misuse, kis acid resistant, notacid proof.
Control Panel = All spillovers, especially acidic or sugary spillovers, should be wiped up immediately with a dry cloth.
Porcelain Enamel ° When cool, wash with soapy water, rinse and dry.
, Never wipe off a warm or hot surface with a damp cloth. This may cause cracking or chipping.
° Never use oven cleaners, abrasive or caustic cleaning agents on exterior finish of range.
° When cool, wash with warm soapy water, rinse and dry. Never wipe a warm or hot surface with a damp
Storage Drawer cloth as this may damage the surface and may cause a steam burn.
and Door , Forstubborn soil, use mildly abrasive cleaning agents such as baking soda paste or Bon Ami*. Do not use
Handles = abrasive cleaners such assteel wool pads or oven cleaners. These products will scratch or permanently
Painted Enamel damage the surface.
Note: Use a dry towel or cloth to wipe up spills, especially acidic or su_#aryspills. Surface may
discolor or dutl if soil is not immediately removed. This is especially important for white surfaces.
2O

Oven Window
and Door - Glass
, Avoid using excessive amounts of water which may seep under or behind glass causing staining.
, Wash with soapand water. Rinse with dear water and dry'. GHasscleaner can be used if sprayed on acloth
first.
, Do not use abrasive materials such asscouring pads, steal wooHor powdered cleaners astheywiH scratch
gHass.
Oven interior , Follow instructions on page 18-19 to set a sdf-dean cycle.
Oven Racks
Stainless Steel
(sdect modds_)
®
®
®
CHeanwith soapy water.
Remove stubborn soiHwith cleansing powder or soap-filled scouring pad. Rinse and dry'.
Racks will permanentHydiscoHorand may not slide out smoothly if left in the oven during a self-clean
operation. Ifthis occurs, wipe the rack and embossed rack supports with a small amount of vegetable oil
to restore ease of movement, then wipe off excess oil.
* DO NOT USEANY CLEANING PRODUCT CONTAINING CHLORINE BLEACH.
* DO NOT USEABRAStVE OR ORANGE CLEANERS.
* ALWAYS WiPE WiTH THE GRAIN WHEN CLEANING.
* DaiJy CJeaning/Light SoiJ-- Wipe with one ofthe following - soapy water, white vinegar/water sohJtion,
Formula 409 Glass and Surface Cleaner_ or a similar glass cleaner - using a sponge or soft cloth.
Rinse and dry. To polish and help prevent fingerprints, follow with Stainless Steel Magic Spray_
(Part No. 2000000d)_,
* Moderate/Heavy Soil -- Wipe with one of the following - Bon Ami, Smart Cleanser, or Soft Scrub_-
using a damp sponge or soft cloth. Rinse and dry. Stubborn soils may be removed with a damp multi-
purpose Scotch-Brite _pad; rub evenly with the grain. Rinse and dry. To restore luster and remove streaks,
follow with Stainless Steel Magic Spray_,
* Discoloration -- Using a damp sponge or soft cloth, wipe with Cameo Stainless Steel Cleaner_,Rinse
immediately and dry. To remove streaks and restore luster, follow with Stainless Steel Magic Spray_,
Brand names are registered trademarks of the respective manufacturers.
_ To order call 1-877-232-0771 USAor 1-800-088-8408 Canada.
21

Oven Door
Do not place excessive weight on or stand on an open
oven door. This could cause the range to tip over, break
the d00r, 0r !r_jurethe user,
Note: The oven door on a new range may feel "spongy"
when it is closed. This is normal and will decrease with use.
Oven Window
To protect the oven door window:
1. Do not use abrasive cleaning agents such as steel wool
scouring pads or powdered cleansers as they may scratch
the glass.
2. Do not hit the glass with pots, pans, furniture, toys, or other
objects.
3. Do not close the oven door until the oven racks are in
place.
Scratching, hitting, jarring or stressing the glass may weaken
its structure causing an increased risk of breakage at a later
date.
Leve ing Legs
Be sure the anti-t p bracket secures one of the rear
from accidentally tipping.
Electrical Connection
Appliances which require electrical power
are equipped with a three-prong
grounding plug which must be plugged
directly into a properly grounded three-
hole 120 volt electrical outlet.
Always disconnect power to appiiance before servicing,
The three-prong grounding plug offers protection against
shock hazards. DO NOT CUT OR REMOVE THE THIRD
GROUNDING PRONG FROM THE POWER CORD PLUG.
If an ungrounded, two-hole or other type electrical outlet is
encountered, it is the personal responsibility of the
appliance owner to have the outlet replaced with a
properly grounded three=home electrical oatmet.
Oven Light
• Disconnect power to range before replacing light bulb.
, Make sure bulb cover and bulb are cool before touching,
To replace oven light bulb:
1. When oven iscool, hold bulb cover BuLBoovE_
in place, then slide wire retainer
off cover. NOTE: Bulb cover
will fall if not held in place
while removing wire retainer.
2. Removebulb cover and light
RETAINER
bulb.
3. Replace with a 40-watt appliance bulb.
4. Replace bulb cover and secure with wire retainer.
5. Reconnect power to range. Reset clock.
22

Remova of Gas Appmiance
GasappHianceconnectors used to connect this appHianceto
the gas suppHyare not designed for continuous movement.
Once instaHHed,DO NOT repeatedHymove this gas appHiance
for cHeaningor to reHocate.If this appHiancehas to be moved
and/or removed for servicing, foHHowthe procedure described
in the instaHHationinstructions. Forinformation, contact
Maytag Customer Assistance at 1-800-688-9900 U.S.A.or
1-800-688-2002 Canada.
To prevent range from accidentally tipping, range must be
secured to the floor by sliding rear leveling leg into the anti-
tip bracket.
Oven Bottom
Protect oven bottom agahst spiHHovers,especiaHHyacidic or
sugary spills, as they may discolor the porcelain enamel. Use
the correct pan size to avoid spiiiovers and boiiovers.
The oven bottom may be removed for easier cleaning.
To remove:
Storage [}rawer
Do not store pHastic,paper products, food or fiammabHe
materials in this drawer. The drawer may become too warm
for these items when the oven is in use.
The storage drawer can be removed to allow you to clean
"[0 remove:
1. Empty drawer and pull out to the first stop position.
2. Lift up the front of the drawer.
3. Puil out to the second stop position.
4. Grasp sides and lift drawer up and out.
To replace:
1. Fit the ends of the drawer gHidesinto the raiHsin the range.
2. Lift up the front of the drawer and gentHypush in to the
first stop position.
3. Lift drawer up again and push untiHdrawer is dosed.
from oven.
To replace:
Fit the front edge of the oven bottom into the oven front
frame. Lower the rear of the oven bottom and sHidethe two
catches back to Hockthe oven bottom in pHace.
23

PROBLEM SOLUTION
For most concerns, try these first. , Check if oven controHshave been properly set.
, Check to be sure pHugis secureHyinserted into receptacle.
, Check or re-set circuit breaker. Check or repHacefuse.
, Check power suppHy.
Surface burner fails to light. , Check to be sure unit is propedy connected to power suppHy.
, Check for a Mown circuit fuse or a tripped main circuit breaker.
, Check to be sure ignitor isdry and cHicking.Burner will not Hightif ignitor isdamaged.
soiHedor wet. If ignitor doesn't chick,turn controHknob OFF.
The flame is uneven. , Burner ports may be dogged.
Sarface burner flame lifts , Check to be sure a pan issitting on the grate above.
off ports.
Baking resumts are not as , Check the oven temperature selected. Make sure oven is preheated when recipe
expected or differ from or directions recommend preheat.
previous oven. , Make sure the oven vent has not been blocked. See page 16 for location.
, Check to make sure range is level.
, Temperatures often vary between a new oven and an old one.As ovens age.the oven
temperature often "drifts" and may become hotter or cooler. See page 16 for
instructions on adjusting the oven temperature. NOT£: It is not recommended to
adjust the temperature if only one or two recipes are in question.
, Use correct pan. Dark pans produce dark browning. Shiny pans produce light
browning. See "Cooking Made Simple" booklet for more information on bakeware.
, Check rack positions and pan placement. Stagger panswhen using two racks. Allow
1-2 inches between pans and oven wall.
, Check the use of foil in the oven. Never use foil to cover an entire oven rack. Place
a small piece of foil on the rack below the pan to catch spillovers.
Food is not broiling properly or , Check oven rack positions. Food may be too close to flame.
smokes excessively. , Aluminum foil was incorrectly used. Never line the broiler insert with foil.
, Trim excess fat from meat before broiling.
, A soiled broiler pan was used.
, Preheat oven for 2-3 minutes before placing food in the oven.
, Broil with the oven door closed.
Oven will not self-clean. , Check to make sure the cycle is not set for a delayed start. See pages 18-19.
, Check if door is closed.
, Check if control is in Sabbath Mode. See page 14.
, Oven may be over 400° F.Oven temperature must be below 400° Fto program a
clean cycle.
24

i i _ i i i
PROBLEM $OLUTmON
Oven did not dean propermy. ° Longer deanhg thne may be needed_
, Excessivespillovers, especially sugary andlor acidic foeds, were [lot removed prior
to the self-clean cycle.
Oven door will not unlock after , Oven interior is still hot. Allow about one hour for the oven to cool after the
self:clean cycle, completion of a self-clean cycle. The door can be opened when the LOCK indicator
word is not displayed.
, The control and door may be locked. See page 8.
Moisture collects on oven , This is normal when cooking foods high in moisture.
window or steam comes from , Excessive moisture was used when cleaning the window.
oven vent.
There is a strong odor or light , This is normal for a new range and will disappear after a few uses. Initiating a clean
smoke when oven is turned on. cycle will "burn off" the odors more quickly.
, Turning on a ventilation fan will help remove the smoke and/or odor.
, Excessivefood soils on the oven bottom. Use a self-clean cycle.
Fault Codes , BAKE or LOCK may flash rapidly in the display to alert you if there is an error
or a problem. If BAKEor LOCK appear in the display, press the CANCEL pad.
If BAKE or LOCK continue to flash, disconnect power to the appliance.
Wait a few minutes, and then reconnect power. If the flashing still continues,
disconnect power to the appliance and call an authorized servicer.
° If the oven is heavily soiled, excessive flareups may result in a fault code during
cleaning. Press the CANCEL pad and allow the oven to cool completely, wipe out
excess soil, then reset the clean cycle. If the fault code reappears, contact an
authorized servicer.
Noises may be heard. ° Theoven makes several low level noises. You may hear the oven relays asthey go on
and off. This is normal.
° As the oven heats and cools, you may hear sounds of metal parts expanding and
contracting. This is normal and will not damage your appliance.
There are no beeps and ° Oven may be in Sabbath Mode. See page 14.
"SAb" flashing and then ° Oven is in Sabbath Mode. To cancel, press and hold the Clock pad for five
seconds.
25

26

Full One Year Warranty =
Parts and Labor
Forone (1} year from the odg_naI retail
purchase date. any part which fails in
normal home use will be repaired or
replaced free of charge ....
Canadian Residents
The above warranties only cover al
appliance installed in Canada that has
been certified or listed by appropriate
test agencies for compliance to a
National Standard of Canada unless the
appliance was brought into Canada due
to transfer of residence from the United
States to Canada.
Limited Warranty Outside the
United States and Canada -
Parts Only
For one (1} year from the date of
original retail purchase, any part which
fails in normal home use will be re-
paired or replaced free of charge for the
part itself, with the owne[ paying aii
other costs, includi ng labor, mileage
and transportation, t[p charge and
diagnostic charge, if required.
The specific warranties expressed above
are the ONLY wan'antie5 provided by the
manufacturer, These wa/Tantles give you
specific lega/ rights, and you may also
have other ndhts w,_ich vary from state
to state,
What is Not Covered By These
1. Conditions and damages resulting from any of the following:
a. Improper installation, delivery, or maintenance.
b. Any repair, modification, alteration, or adjustment not authorized by
the manufacturer or an authorized servicer.
c. Misuse, abuse, accidents, or unreasonable use.
d. Incorrect electric current, voltage, or supply.
e. Improper setting of any control
2. Warranties are void if the original serial numbers have been removed,
altered, or cannot be readily determined.
3. Light bulbs.
4. Products purchased for commercial or industrial use.
5. The cost of service or service caii to:
a. Correct installation errors.
b. Instruct the user on the proper use of the product.
c. Transport the appliance to the servicer.
6. Consequential or incidental damages sustained by any person as a result of
any breach of these warranties. Some states do not allow the exclusion or
limitation of consequential or incidental damages, so the above exclusion
may not apply.
If You Need Service
® Cail the dealer from whom your appliance was purchased or cai[ May'tag
Services sM,Maytag Customer Assistance at 1-800-688-9900 U.S.A. or
1-800-688-2002 Canada to locate an authorized servicer.
" Be sure to retain proof of purchase to verify warranty' status. Refer to
WARRANTY for further information on owner's responsibilities for warranty
service.
o If the dealer or service company cannot resolve the problem, write to Maytag
Services'sM,Attn: CAIR_Center, P.O.Box 2370,Cleveland, TN 37320-2370, or
call 1-800-688-9900 UoSoAoor 1-800-688-2002 Canada.
U.S.customers using TTY for deaf, hearing impaired or speech impaired, call
1-800-688-2080.
User's guides, service manuals and parts information are available from
Maytag ServicessM,Maytag Customer Assistance.
When writing or calling about a service problem, please include the following
information:
a. Your name, address and telephone number;
b. Model number and serial number;
c. Name and address of your dealer or servicer;
d. A clear description of the problem you are having;
e. Proof of purchase (sales receipt}.
27

B/IA AI3
®
gaz _ touches
de pr6cision 800
m m m
//|S|//|e
Table des
instructions de s6curit_
importantes ................................ 29-33
Cuisson sur masurface ............. 34-35
Commandes de la surtace de cuisson
Br0Heursscell6s
Cuissen darts le four ................ 36=46
CUiSSOH1courante
Cuisson et maintien
Cuisson et maintien diff6r6s
Maintien au chaud
Cuisson au gril
Grilles du four
Netteyage ...................................47-50
Four autonettoyant
M6thodes de nettoyage
Entretien ...................................... 51-52
Hublot et lain pe du tour
D6placement d'un appareil a gaz
Recherche des pannes ............53=54
Garantieet serviceapres-vente ....55
Guia de Use y Cuidade .................... 56

Consommatear:Veuflbz !irale guideet !ec0nserverpour
consultationultddeure.Conserveziafactured'achat0u b Cheque
Numerode modeie
Dated'achat
Sivous avezdesquestionslveuillezn0usappeler:
Dens b Cadrede nospratiquesd'amdiiorationCOnStantede B
qualit6 et de la performancede !!osproduitsdiecuisson,des
modificationsde i appareilqui uesent pasraentionneesdansCe
Life toutes los instructions avant d'utiliser cot appareii;
observer toutes bs instructions pour eiiminer bs nsques
dlncendie= choc 6bctdque, dommages materiels et corporeb
que pourrait susciter une utflisation incorrecte de Fapparefl.
Utfliser I'apparefl uniquement pour bs fonctions prevues.
d@rites clans ce guide
Pour une utiiisation adequate et en securitY, fl faut que
Fapparefl soit convenabbment installe pa un technicien
qualifi& et relic 8 la terre. Ne pas regbr, reparer n remplacen
un composant, a morns que cela ne soit sp@ifiq uement
recommande darts ce guide. Toute autre reparation doit 6tre
effectuee pa un technicien qualifie Demander a Finstdlateun
de montren ou se trouve b robinet d'arret de gaz et comment
b former en cas d'urgence.
Toujours debrancher [a pparefl avant d'y faire de [entretien.
cencema#t le setdce apr#s?ve#teo
Les instructions de securitd importantes et bs paragraphes
<<avertissemenb>de ce guide ne sent pas destines a couvrir
toutes bs conditions et situations qui pourraient se presenter.
II faut faire preuve de ben seas,de prudence et de soin Iors de
Finstdlation, de Fentretien ou du fonctionnement de Fapparefl.
Toujours prendre contact avec b detafllant, b distributeur,
Fagent de service apres-vente ou b fabricant dens b cas de
proNemes ou de conditions qui ne seraient pas comprises.
Reconna tre Ues tiquettes, paragraphes et
symboUessar Uasecurit
Si ies directives donn_es dens b present guide ne
sent pas respect6es _ la lettre, il y a risque d'incendie
eli d'explosion pouvant causer des dommages, des
blessa res et meme la mo_
- Ne pas ranger ni utiliser d'essence ou autre vapeur
ou liquide inflaramable _ pro×imit_ de cet appareil
ou de tout autre appareiL
- QUE FAIRE S! L'ON SENT UNE ODEUR DE GAZ :
. Ne mettre aucun appareil en marche.
. Ne pas toucher _ un interrupteur 61ectrique,
o N'utiliser aucun t_mephene de I'iraraeuble.
- Se rendre chez un voJsinet tel@honer
imraediatement _ la compagnie de gaz. Suivre les
directives donn_es par le pr@os_ de la
eompagnie de gaz.
* S'il est impossible de joindre la compagnie de
gaz, t_l@honer au service des incendies.
o L'instaliatioe et les r_parations doivent _tre
confiees _ un installateur competent, _ une
entreprise de service ou _ ia compagnie de gaz.
AVERTISSEMENT _ Dangers oUpratiques dangereuses qui
POURRAtENTrdsulter en @graves b!essures 0u meme la
mort.
POURRAIENTresulter en des blessures mineures.
Une fuite de gaz pourmit su_venir darts b syst6me et
susciter une situation dangereuse: L'odorat pout nepas
(homologatio n UL}_ Installer et utiiiser le detecteur
conformement aux instructions du fabricant.
29

instructions generates
° TOUTE CUm$1NIEREPEUT BASCULER
ETPROVOQUER DES BLESSURES.
° INSTALLER LA BRIDE
ANTiBASCULEMENT FOURNIE AVEC
CE_q'ECUJSJNJERE.
° RESPECTERTOUTES LESmNSTRUC-
TmONSD'mNSTALLATBON.
AVERTISSEMENT: Pour reduire Be
risque de bascubment de I'appareil _ i'eccasien
d'uae utilisation anermale eu d'un chargement
e×cessif de maporte du four, il faut que la bride
aatibasculement seit cenvenablement install_e.
Utiliser une lampe torche pour determiner si la bride
antibascubment est convenabbment installee sous la
cuisiniere: L'un des pie@ arriere de reglage de Faplomb doit
etre convenabbment engage darts la fente de la bride,
Lorsque la cuisiniere est convenabbment calee, la bride
antibascubment immoNise b pied arriere contre b sol,
Verifier la parfaite immoNisation de la cuisiniere par la bride
apres chaqae @placement de la cuisiniere,
Pour viter ur| incendie ou des
dommages par la fum e
S'assurer que tous bs materiaux de conditionnement sont
retires de Fappareil avant de b mettre en marche,
Garder bs materiaux combustibles, Fessenceet autres
matieres et vapeurs inflammables bien eloignes de Fappare&
Si I'appareil est installe pres d'une fenetre, des precautions
appropriees doivent etre prises pour @iter que b vent entrdne
bs rideaux au-dessus des brQburs,
NE JAMAIS Nsser des articles sur la table de cuisson, L'air
chaud de Feventpeut bs enfiammer et mettre egabment sous
pression des contenants fermes qui pourraient dors exploser,
De nombreux flacons d'aerosol peuvent EXPLOSERIorsqu'on
bs expose a B chabur, et ib peuvent contenir un produit tres
inflammable, Eviter d'utiliser ou remiser un flacon d'aerosol
proximite de Fappareik
De nombreux articles en pBstique peuvent etre @teriores par
la chabur, Conserver bs articles en plastique a distance des
composants de ['apparei[ susceptibies de devenir tiedes ou
chauds, Ne pas laisser des articles en plastique sur la table
de cuisson; un article en plastique trop proche de I'event du
four ou d'un brQleur allume pourrait s'amollir ou fondre,
Pour eliminer le besoin d'atteindre quelque chose par-dessus
les brQleursde surface, il est preferable qu'il n'y air aucune
armoire de cuisine directement au-dessus de I'appareil, S'il y
a une armoire, on ne @wait y remiser que des articles peu
frequemment utilises et capables de resister a la chaleur
emise par I'appareil, La temperature pourrait etre excessive
pour certains articles, comme liquides volatils, produits de
nettoyage ou flacons d'aerosol,
En cas d'incendie
Interrompre b fonctionnement de Fappareil et de la hotte de
ventilation pour minimiser b risque d'extension des fiammes,
Eteindre bs fiammes, pub mettre la hotte en marche pour
@acuer la fumee et Fairvicie,
° Table de cuissen : Utiliser un couverde ou une plaque
biscuits pour etouffer bs fiammes d'un feu qui se declare
darts un ustensib de cuisine,
NEJAMAmS saisir ou d@Bcer un ustensib de cuisine
enfiamme,
, Four : Fermer la porte du four pour etouffer bs fiammes,
Ne pas projeter de Feausur un feu de graisse, Utiliser du
bicarbonate de sodium ou un extincteur a mousse ou produit
chimique sec pour eteindre bs fiammes,
S curit6 pour enfants
enfants peuvent s'intdresser, Un enfant tentant de gEimper
subir de graves bbssure&
NE JAMAIS iaisser des enfants seuis ou sans supervision
Iorsque I'appareil est en service ou encore chaud,
NE JAMAIS laisser un enfant s'asseoir ou se tenir sur une
partie quelconque de I'appareil, II pourrait se blesser ou se
brOler,
II est important d'enseigner aux enfants que la cuisiniere et les
ustensiles places dessus ou dedans peuvent etre chauds,
Laisser refroidir les ustensiles en un lieu sOr,hors d'atteinte
30

des enfants. II est important d'enseigner aux enfants qu'un
appareiI menager n'est pas un jouet, et qulb ne doivent
toucher aucune commande ou autre composant de rappare&
Familiarisation avee l'appareil
NEJAMAIS utHber la porte de four comme tabouret/siege/
escabeau: ceci pourrait faire bascubr I'appareiI et entrainer
doramages corporeb serbux.
NEJAMAmS utHiser la cubiniere comme source de chabur
pour le chauffage de mapiece.Sinon. un empoisonnement au
monoxyde de carbone pourrait s'ensuivre ainsuqu'une
surchauffe du four.
NE]AMAIS recouwer les fentes, ouvertures ou passages
de la sole de four ni la grille toute entiere avec un materiau
comme du papier d'aDminium. Sinon. la circulation de rair
dans le four sera entravee et donc entraine_ un
empoisonnement au monoxyde de carbone. Le papier
d'aluminium peut aussi emprisonner de la chaleur el
entrdner un risque d'incendie,
NEJAMAIS obstruer la circulation de I'air de combustion et
de ventilation au niveau de I'@ent de four ou desentrees
d'air. Sinon. Fairne parv_entpas correctement aux brOieurs
et donc cela peut poser un risque d'empolsonnement au
monoxyde de carbone
L'@ent de four est situe a la base du dosseret.
Evitezde toucher ie voisinage de i'event de four iorsque ie four
est utiiise et pendant piusieurs minutes apres i'arret du four.
Certains composants de I'@ent et la zone voisine peuvent
devenir suffisamment chauds pour provoquer des br0iures.
Apres i'arret du four, ne touchez pas i'event de four ou ia zone
voisine avant que ces composants aient pu se refroidir
suffisamment.
Autres surfaces potentiellement chaudes :table de cuisson,
zones faisant face a la table de cuisson, event de four, zone
voisine de i'event, porte de four et zone voisine de porte et de
hubiot.
Ne touchez pas I'ampoule chaude du four avec un linge
humide; le choc thermique pourrait la briser. Si tel est le cas,
d@ranchez I'appareil avant de retirer I'ampoule pour eviter
Cuisson et s6curit
Placer touJours un ustensiie sur un br0ieur de surface avant de
i'aiiumer. Veiiier a bien connatre ia correspondance entre ies
boutons de commande et ies br0ieurs. Veiiier a aiiumer ie
br0ieur correct et verifier que ie br0ieur s'aiiume
effectivement. A ia fin de ia periode de cuisson, eteindre ie
br0ieur avant de retirer i'ustensiie, pour eviter une exposition
aux fiammes du br0ieur.
Veiller a toujours ajuster correctement la taille des flammes
pour qu'elles ne d@assent pas sur la peripherie de I'ustensile.
Des flammes de trop grande taille sur un brOleur sont
dangereuses, elles entrdnent un gaspillage d'energie et elles
peuvent Dire subir des dommages a I'ustensile, a I'appareil ou
I'armoire situee au-dessus.
NE JAMAIS iaisser un brOieur de surface aiiume sans
surveillance, particulierement avec une puissance de
chauffage elevee ou Iors d'une operation de friture. Un
debordement pourrait provoquer la formation de fumee et des
produits gras pourraient s'enfiammer. Eiiminer des que
possible les produits gras renverses. Ne pas utiliser une
puissance de chauffage elevee pendant une periode
proiongee.
NE JAMAIS faire chauffer un recipient non ouvert dans ie
four ou sur un brQleur de surface; I'accumulation de pression
dans le recipient pourrait provoquer son eclatement et de
graves dommages materiels ou corporels.
Utiliser des maniques robustes et s@hes. Des maniques
humides peuvent provoquer la formation de vapeur brQlante.
Ne jamais utiliser un torchon a vaisselle ou autre article textile
la place de maniques; un tel article pourrait trainer sur un
brQleur et s'enflammer, ou accrocher un ustensile ou un
composant de I'appareil.
Laisser toujours refroidir un recipient d'huile de friture chaude
avant de tenter de le deplacer et le manipuler.
Ne pas laisser la graisse de cuisson ou autre materiau inflam-
mane s'accumuler dans ou pres de I'appareil, de la hotte ou
du ventilateur de I'@ent. Nettoyer frequemment la hotte pour
empecher toute accumulation sur la hotte elle-meme ou sur le
filtre. Lors du flambage d'aliments sous la hotte, mettre le
ventilateur en marche.
NE JAMAmS porter, Iors de I'utilisation de I'appareil, des
vetements faits d'un materiau inflammable, ou amples, ou
Iongues manches. De tels vetements peuvent s'enflammer ou
accrocher la poignee d'un ustensile.
31

Placertoujours[esgrillesa[apositionapproprieedarts[efour
Iorsquelefourestfroid.FairecoulisserlagrilleversI'exterieur
avantd'ajouterouenleverunplat;utiliserpourcelaune
maniquerobusteetseche.Eviterd'introduirelamaindartsle
fourpouryplacerouretirerunplat.S'ilestnecessairede
deplacerunegrilleIorsqu'elleestchaude,utiliserunemanique
seche.Veilleratoujoursarreterlefouralafind'uneperiode
decuisson.
Ouvrirtoujours[aportedufourtresprudemment.Laisser['air
chaudoulavapeurs'echapperavantderetirer/introduireun
plat.
AVERTmSSEMENT: B/Jetsprepares: Respecterlesinstruc-
tionsdufabricant.Silecontenantoulecouverdeenplastique
d'unmetssurgeleseddormeouestendommagedurantla
cuisson,jeterimmediatementlerecipientetsoncontenu.Les
alimentspourraientetrecontamines.
NEJAMAmSgarnirlasoleouunegrilledufouravecdela
feuflled'aluminium.Cecipourraitsusciterunrisquedechoc
electriqueoud'incendie,ouuneautredeteriorationde
Fapparefl.Utfliserdelafeuifled'duminiumuniquementselon
lesinstructionsdeceguide.
UstensiJes et s cutit8
Utiliser des ustensiles 8 fond plat comportant une poignee
qu'on peut facflement saisir et qui reste froide. Eviter d'utfliser
un ustensile instable ou ddorme, qui pourrait facilement
basculer, ou dont la poignee est md fixee. Eviter egdement
d'utiliser des ustensiles de petite taille comportant une
poignee Iourde; ces ustensiles sont generalement instables et
peuvent facflement basculer. Un ustensfle Iourd Iorsqu'fl est
rempli peut egalement etre dangereux Iors des manipulations.
Vefller a utfliser un ustensfle de taflle suffisante pour que le
contenu ne risque pas de deborder. Ceci est particulierement
important pour un ustensfle rempli d'hufle de friture. Verifier
que la taille de Fustensile est suffisante pour qu'il puisse
recevoir les produits dimentaires 8 cuire, et absorber
Faugmentation de volume suscitee par Febullition de la
graisse.
Pour minimiser les risques de br01ure,d'infiammation de
matieres et de renversement par contact non intentionnel avec
un ustensfle, ne pas orienter la poignee d'un ustensfle vers un
brQ[euradjacent; orienter toujours [a poignee d'un ustensi[e
vers le cote ou I'arriere de I'appareil; ne pas laisser non plus la
poignee d'un ustensile deborder a I'avant de I'appareil, ou:Jun
jeune enfant pourrait facilement la saisir.
Veiller a ne jamais laisser le contenu liquide d'un ustensile
s'evaporer completement; I'ustensile et I'appareil pourraient
subir des dommages.
Appliquer les instructions du fabricant Iors de I'emploi d'un
sachet pour cuisson au four.
Seuls certains materiaux en verre, vitroceramique, ceramique,
ou certains ustensiles vitri%s/emailles peuvent etre utilises sur
la table de cuisson ou darts le four sans risque de bris sous
I'effet du choc thermique. Observer les instructions du
fabricant Iors de I'utilisation d'un ustensile en verre.
La secur[te de fonctionnement de cet appareHa ete testee
Faided'ustensiles de cuisine conventionnels. Ne pas utiliser un
ustensile ou accessoire qui n'est pas specifiquement
recommande darts ce guide. Ne pas utfliser de couvre-brQleur,
grfl place sur la table de cuisson ou systeme de convection
additionnel. L'utilisation d'un dispositif ou accessoire qui n'est
pas expressement recommande darts ce guide peut degrader
[a securite de ['apparei[ ou sa performance, ou reduire [a
Iongevite des composants.
Nettoyage et s curit
Arreter routes les commandes et attendre le refroidissement
de tousles composants avant de les toucher ou d'entre-
prendre le nettoyage. Ne pas toucher la grille d'un brQleur ou
la zone voisine avant que ces composants aient pu suffisam-
merit refroidir.
Exercer une grande prudence [ors du nettoyage de Fapparefl.
Travafller prudemment pour eviter des brQlures par la vapeur
en cas d'utflisation d'un chiffon ou d'une eponge humide Iors
de Felimination d'un produit renverse sur une surface chaude.
Certains produits de nettoyage peuvent generer des vapeurs
nocives Iorsqu'on les applique sur une surface chaude.
32

Four autonettoyant
dangereuses pour Hesysteme reproducteur, et impose aux
entreprises commerddes H'obHigationde signaller a Heurs
cHientsHesrisques d'exposition a de teHHessubstances,
Les uti[isateurs de cet apparei[ peuvent etre exposes a une
faible concentration de certaines substances figurant darts la
dans Uefour Uorsd'une operation dlautonettoyage, liste mentionnee ci-dessus, dont benzene, formaldehyde et
suie, du fait de la combustion incomplete du gaz naturel ou du
Ne laisser aucune nourriture ni ustensile de cuisine, etc,
Nettoyer uniquement les pieces mentionnees dans ce guide,
Ne pas nettoyer le joint de porte; le joint joue un rOleessentiel
quanta I'etancheite, Ne pas frotter, endommager ou deplacer
ie joint, Ne pas utiiiser de produit de nettoyage du four darts
ie four autonettoyant ou sur ies zones voisines,
Avant d'executer une operation d'autonettoyage, retirer la
lechefrite, lesgrilles du four et lesautres ustensiles, et eliminer
par essuyage tout exces de residus renverses pour eviter ia
formation de fumee ou i'infiammation de ces residus,
II est normal que la surface de cuisson devienne chaude
durant une operation d'autonettoyage; par consequent, eviter
de toucher ia surface de cuisson durant i'autonettoyage,
Avertissement et avis
important pour la s eurit
La Ioi californienne _SafeDrinking Water and Toxic Enforce-
ment Acb>de 1986 (proposition 65} stipule la publication par le
gouvemeur de ia Caiifomie d'une iiste de substances que
i'etat de Caiifomie considere comme cancerigenes ou
gaz de petroie iiqudie, Pour minimiser ia combustion
incomplete, veiiier ace que ies bru3ieurssoient parfaitement
regies, Pour minimiser i'exposition aces substances, veiiier
bien evacuer ies gaz de combustion a i'exterieur,
Nous informons ies utiiisateurs de cet appareii que iors d'une
operation d'autonettoyage, iis peuvent etre exposes a une
faibie concentration de certaines substances figurant darts la
iiste mentionnee ci-dessus, dont ie monoxyde de carbone,
Pour minimiser i'exposition, veiiier ace que ia piece oQse
trouve ie four soit convenabiement aeree durant une operation
d'autonettoyage par i'ouverture d'une fenetre ou d'une porte,
AViS IMPORTANT - OISEAU× FAMILIERS : Lesoiseaux ont
un systeme respiratoire tres sensible, Ne pas garder un oiseau
famiHierdarts Hacuisine ou darts une piece ou3i] pourrait etre
expose aux fumees, Lesfumees emises durant une operation
d'autonettoyage peuvent etre dangereuses ou morteHHespour
un oiseau, de meme que ]es fumees emises ]ors du chauffage
excessif de graisse, huiHe,margarine, et du chauffage excessif
dans un ustensiHea revetement antiadhesif,
Conserver ces instructions pour consultation ulterieure
33

@
LO (BASSE) :S'utilisepour le mijotageou le
maintiende latemp6ratured'un mets,oupour
lafusion de chocoiatou beurre.Lorsquele plat
ou I'ustens+Ieest couvert,un d6butde cuisson
peutseproduireavecIapuissancede
chauffageLO. Pourr6duireIapuissancede
chauffage,tourner Iebouton8 IapositionOFF.
V6rifierIastabilit6desflammessurle brOleur.
Commandes de Ja
surface de euisson
+ Si un brO[eurs'6teintdurant uneop6rationde cu_ssonfermer
I'arriv_ede gazau brOleur.Si uneforte odeur degazest
perceptJbJe,ouvr++unefenetre et attendreclnq minutesavant
d'allume[de nouveauJebrCIJeur.
o Avant d'ouvrirI'arriveede gaza la cuisiniere,v6rifierque
cnaquebouton(_ecommandeest a Japosit_onOFFJ:ARRET}.
• NEJAMAm$toucher la surfacede cuissonavantqu'ellesesoit
comp_e_emen-crefroidie.Certaineszonesde Jasurface.
particulierementauvoismagedesbrOleurs,peuventdeven+r
tres chaudes_]uran[unecuisson.Utillserdesmaniques.
AlJumage sans flamme de
CHAPEAU DEBROLEUH
LedispositJfd'allumagenefait
interveniraucunefiammede veille.
ChaquebrOleurde latable decuisson
comporteun allumeurpar etincelle.
Travaillerprudemmenttorsdu
nettoyageautourdesbrOleursde /x_ (-(_ .:_"'_A,,
latablede cuisson. °"r+°'_!__a++
Si un brOleurde latable decuissonne _.__
s'allumepas,ddtermJnersi I'allupaeur
est bris6,saliou mouiJl& BaseuuBHOLEUR
Boutons de commande de la
surface de cuisson
On utilise cesboutonspourcommanderI'alIumagedesbrOleursde
surface.Onpeut reglerchaqueboutona toute positionentreIes
positionsextremesLO[BASSE) et HI (ELEVEE}.Onpeut percevoir
une d6tentede calage_ la position HI.On peutchoisirtoute position
de reglageentrelesdeuxpositionsextr6mes.
34
HI (ELEVEE): S'ut[lisepourporterun liquide
6bulIitionou atteindreIabonne pressiondansun
autocuiseur.Reduireensuite lapuissancede
chauffageapr6sle d6butde %bulIJtionou de la
cuissondesaliments.
Unepuissancede chauffageintermediaireest
utiliseepour Iapoursuitede la cuisson.Les
alimentsnecuisentpasplusrapidementsion
utilise une puissancedechauffageplus(!lev6eque
necessairepour le maintiend'unedouce_bullition.
L'eaubouttoujours _ la m6metemp6rature,que
1'6bullitionsoit tranquJlleouvJgoureuse.
O O Ungraphiquepresde chaqueboutonidentifie le brOJeur
_O O desurfacecommandopar cebouton. Parexemple,le
graphique_ gaucheidentifie JebrOleuravant/droJt.
R6glage des commandes:
La puissancede chauffage_ employerdependdu type etde la taille
de I'ustensileutilisS.Ontrouve dartsIabrochureLa cuissons+mplJ%e
de I%formationsur lesustensileset autresfacteursaffectantle
r6glagede la puissancede chauffage.
1. Placerun ustensilesur la grilledu brOleur.
o Si aucunustensilen'estplacesurla grille du brOleur,les
flamFnespeuventavoirtendance_seseparerdu br_Jleur.
2. Appuyerettourner le boutondartsle sensanti-horaire,jusqu'_ la
positionUTE (ALLU_AGE).
o Onpeut percevoirle cliquetiscorrespondant_ la production
des6tincetles,et IebrOleurs'alIume.[Lescinq alIumeurs
produisentdesetincellesIorsqu'onplaceIeboutonde Fundes
bCJleurs_ la position MTE.}
3. Apr6sJ'allumagedu br_ileur,reglerla tailledesfiammesselonJe
d8sJren tournant le boutondecommande.
o Uallumeurcontinue_ produJredesetincelJesaussiIongtemps
que le boutonest _ JapositionMTE.
Utilisation durant une panne
Avant d'allumerunbrOJeurdesurface,v_dfier quetous lesboutons
de comrnandes0nt _ !ap0sltion0FF (ARRET),Approcher
!'aJJumetteenflammeedu br¢JJeuravantde fairetourner le bouton
jusqu'_ la position
1. Appmcher unea%mette enflamm6edu brQleura utilisen
2. Enfonceret fairetournerlentementle boutonde commande
jusqu'aIapositionMT_:.
3. Ajuster lesflampaesa la tailledesJr6e.

@
Surface de cuisson
Pour 6vitet ia formation de taches ou un
changement de couieur de la surface de
cu[sson :
° NettoyerIasurfacede cuissonapr_schaqueutilisation,
• EnleverIesresid_Jsrenversesde produits acidesou sucresd_sque
lasurfacede cuissona refroidi;cesproduits renversespeuvent
Breleurs sceH s
LesbrQleursscetl6sde IacuisiniSresont fixessur Iasurfacede
cuisson;[Isnesont pascon_uspour etreenlev6s.CommeIes
br_Jleurssont scelles,un produitqui deborded'un ustensilene
s'infiltrerapassousIasurfacede cuisson.
OndevraitcependantnettoyerlesbrOleursapreschaqueutilisation.
Lat6te du brOleurs'enl6vefacilementpour6trenettoy6e.(Voir les
instructionsde nettoyage_ la page49._
PourIebon fonctionnementdu brOIeur,Iechapeaude brOleurdoit
etrecorrectementplac6sur la basedu brQleur.
BrQlew's de haute
Cettecuisini_reestdoteed'un brOleurde16000BTU_,_ haute
vitesse,plac6_ I'avantdroit. UnbrOleurde 12000BTU_est situ6
I'avantgauche.CesbrOleurspermettentunecuissonrapidequi peut
servir_faire bouillir rapidementde I'eauou _cuire unegrande
quantited'aliments.
BrQlew" de mijotage
CebrOleurestsitu6 _ la positioncentrale,lI offre uneplusfaible
puissancepour la cuissonde saucesd61icatesou lafusion O O
du chocolat. 0_0
*LapuissanceNermique(BTU)desbrdeurs estdiff_reate
totsdef'a_;Jmentationaugazdep6,trole/iqu_fi6,,
Grilles de br leur
Avantune op6rationde cuisson,v6rifierque la griIIeest
correctementplacee.Lotsde I'instalIationdesgrilIes,placer
I'extr6mit6avecpattesverslecentre,auniveaudesbarresdroites.
Unegrille de brOieurincorrectementinstall6epeut 6caiJlerI'6mailde
Jasurfacede cuisson.
Ne pas faire fonctienner an br_mearsa_s q_'_ uste_sile seit
plac_ s_r la grille, L'_mail de lagrille peat s'_cailler s'il _'y a
aaca_ aste_sile capable d'absorber machamear_mise par me
br_le_r.
TravaiIIerprudemmentIorsqu'ilfaut remuerdesalimentsdansun
ustensiIeplacesur la grille de br0Ieur.LesgrilIescomportentun fini
lissequi faciIite le nettoyage.L'ustensiIepeutglissersur IagrilIesion
netient pasrefinementla poignee;ceci pourraitprovoquerun
renversementd'aiimentschauds,et susciterun risquede br0Iure.
MSmes[ Iesgrillesde br0Ieursonttr_s durabIes,eIIesperdront
progressivementIeurIustreet changemntde couleur,du fait des
temperatureselev6esauxquelleslesbr01eumlesexposent.
_e_at_fJes:
• UnbrOIeurconvenabIementregiset dont lesorificessont
propress'aIlumeen quetquessecondes.Lotsde I'alimentation
au gaznaturellesflammessont bleues,avecun coneinterne
bleuintense.
Si Iesfiammesd'un br_leursontiaunesou si Iacombustion
est bruyante,Ieratioaidgaz peut8tre incorrect.Demander
un techniciend'effectuerle reglage.(Lagarantienecouvre
pasce reglage.)
Lorsde I'aiimentationau gazde pStroIeIiqudi6, iIest accept-
abIeque rextremit_desfiammessoit jaune.Ceciest normal;
aucunreglagen'estnScessaire.
• Aveccertainstypesde gaz,on peutpercevoirun petit bruit
d'explosionIorsde I'extinctiond'un br01eurde surface.Ceci
est normal
• Sion fait passerrapidementle boutondecommandede Ia
position HI (ELEVEE)_ laposition LO (BASSE),lesfiammes
peuvents'eteindre,particulierementsi Iebr01eurestfroid. Si
ceci sepmduit,placerle boutonde commande_ Iaposition
OFF(ARRET)et attendrequelquessecondesavantd'allumer
de nouveaule br01eur.
• Ajuster Iapuissancede chauffagedetelIe mani6reque les
flammesnedebordentpas_ la peripheriede I'ustensile.
35

Tableau de commande
A B C 0 E F G
H J J K LM N 0
Letabieaude commandoest conqupour faciliter laprogrammation.Lafen6tred'affichageindiqueI'heure,lesfonctionsavecminuterieet
fonctionsdu four. LetabIeaudecommanderepr6sent6comprendla convectionetd'autrescaract6rJstiquessp6cifiquesau modele.(Lestyle
poutvarJerselonle mod_le.]
B
C
G
i%
L
M
N ¸
m
Cuisson courante
Gril
Nettoyage
R6tissageavec
convection
D6marragediff6r6
Touches
num6riques
Programmation
automatique
Maintienau
chaud
Cuissonavec
convection
Cuissonet
maintien
Favori
Minuterie
Horloge
Lampedu four
ANNULER
S'utilisepour [acuJssoncourante et le
rOtissage.
S'utilise pour lacuisson au gril et le rissolage
sur pattiesup_rieure.
S'utilisepour programmerle cycle
d'autonettoyage.
S'utilisepour le r6tissageavecconvection.
Programmelefourpourddbuterunecuissonou
un nettoyageplustard.
S'utilisentpourprogrammertemp6ratureset
dur6es.
S'utilisepourprogrammerrapidementles
temp6ratures.
S'utilisepourrnaJntenirauchauddanslefour
lesalimentscuits.
S'utilisepourlacuissonavecconvection.
Pourcuirependantunedur6epre6tablie,avec
maintienauchaudpendantuneheure.
S'utilisepourprogrammeretsauvegarderune
m6thodeparticuli6redecuissonet maintien.
Programmelaminuterie.
S'utilisepourprogrammerI'heuredujour.
S'utilisepourallumerou6teindrelalumi_redu
four.
Annuletouteslesop6rationssaufminuterieet
horloge.
36
UtiJisation des touches
• Appuyersurla touched6sir6e.
• Appuyersurlestouchesnum6riquespour entrerla dureeou la
temp6rature.
• Appuyersurla toucheAutoset0 pour entrerlatemperature.
• Unbip retentit IorsqueI'onappuie surunetouche.
• Undouble hip retentiten cas d'erreurdeprogrammation.
Remarque:Quatresecondesaprasavoirentr6leschiffresou le
toucheAutoset0,la dur6eou la temp6ratureserontautomati-
quementenregistr6es.Si plusde 30secondess'6coulententrela
pressionsur unetouche defonction etcellesur lostouches
numeriquesou latoucheAutoset0 (Programmationautomatique),
lafonctionest annuI6eet I'afficheurrevient_ I'affichagepr6c6dent.
L'horlogepeut 6trepmgramm6epour afficherIadur6edansun
format de 12ou 24 heures.L'horlogeest programm6een usinepour
un formatde 12heures.
Changement de l'horloge _ un format de 24 heures:
1. Appuyersur lestouchesCANCEL
{ANNULER]et Favorite(Favori]etmaintenir
la pressionpendanttroissecondes.
• 12Hrclignote _ I'afficheur.
2. Appuyersur Iatouche Autoset0 pour
setectionner24Hr;appuyerde nouveaupour
choisir 12Hr.
3. ProgrammerI'heureen suivantlesinstruc-
tions donn6esdansla sectionR6glagede ,_,utoset
I'horloge.

R6gmagede m'hormoge
1. AppuyersurIatoucheCIock [Hodoge}.
• L'heurecNgnote_ I'afficheur.
2. Appuyersurbs touchesnumeriquesapproprieespour program-
merPheuredujour.
• Deuxpoints clignotent_ I'afficheur.
3. Appuyer_ nouveausur B touche Clockou attendrequatre
secondes.
•Les deuxpointsrestent.
LorsqueIecourant6bctrique arriveou apresune interruptionde
courant,la derniereheureavantI'interruptiondecourantvacNgnoter.
PourrappelerI'heuredujour Iorsqu'uneautrefonctionde duree
s'affiche,appuyersur Iatouche Clock.
L'heurede I'horlogenepeut6trechangeeIorsquele foura 6t6
programmepour une cuissonou un nettoyagediffer6 ou pour la
fonctionde cuissonet maintien.
Annumation de m'affichage de m'heure:
Si I'onnedesirepasI'affbhagedeI'heuredu
jour: __@
Appuyersur IestouchesCANCEL{ANNULER}
et Clock{Horloge}et losmaintenirainsi
pendanttrois secondes.L'heuredu jour
disparaKde I'afficheur.
LorsqueI'affichagede I'heureest annule,
appuyersurla toucheClockpour afficherbri@ementI'heuredujour.
LorsqueI'affichagede I'heureest annul6,apres15minutes,lefour
passeen mode Attente pour @onomiserde I'@ergie.L'afficheur
seraviergeetl'eclairagedu four nefonctionnerapas.Pour_reveiller;>
bs commandesb partir du modeattente,appuyersur n'importe
queNetouche.Undoubb hip retentira.
tleaffichage de l'heure :
Appuyersur IestouchesCANCELet Clocket lesmaintenirainsi
pendanttrois secondes.L'heuredu jour reapparatt8 I'afficheur.
La minuteriepeut#treprogramme de uneminute (0:01}jusqu'_
99 heureset59 minutes(99:59}.
La minuteriepeut6treutiliseeind@endammentdetoute autre
activit6du four. Ellepeut6treaussiprogrammeealorsqu'uneautre
fonctiondu four esten cours d'utilisation.
La minuterienecommandopasle four.Ellenesert qu'8 6mettredes
bips.
Programmation de la minutetie :
1. AppuyersurIatoucheTimer {Mhluterie].
• 0:00et le mot TIMER[MINUTERIE}
clignotent_ I'afficheur.
5.
Annulation de la minutetie :
1. Appuyersurla toucheTimeret la maintenir
ainsipendanttrois secondes.
OU
2. Appuyersurla toucheTimeretsur latouche
numerique<<0 _>.
2. Appuyersurlostouchesnumeriquesapproprieesjusqu'_ceque
I'heurejusteparaisse_I'afficheur.
• Losdeuxpointset le motTIMERcontinuent_ clignoter.
3. Appuyer_ nouveausur latouche TIMERou attendrequatre
secondes.
• Losdeuxpointss'arretentde clignoteret le decomptede la
dur@ commence.
• Laderniereminutedu decompteseraaffich@sousformede
secondes.
4. A lafin de laduree programmee,un bip long retentitetle mot
End(Fin}seraaffiche.
AppuyersurlatoucheTIMERpoureffacerI'afficheur.
--0
A<utoset
Vettouillage des commar|des
et de la porte du four
La portedu fouret Iestouchespeuvent6treverrouilI@spourdes
raisonsde securite,nettoyageou pour emp@hertoute utilisation
non souhait@.Lestouchesnefonctionnerontpassiellessont
verrouillees.
Sile four esten cours d'utilisation,lostoucheset la portene peuvent
etreverrouillees.
L'heureactueiledujour restera_ I'afficheurIorsquelestouchesetla
porteserontverrouillees.
Verrouillage :
Appuyersur lostouchesCANCELet Cook&
Hold [Cuissonet maintien}et lesmaintenir
ainsipendanttrois secondes.{Appuyerd'abord
sur latouche CANCEL.}
• OFF{ARRt_T}parait_ I'afficheur.
• Lemot LOCKOdERROUiLLAGE}clignote
Iorsquela porteesten coursde verrouillage.
D6verrouillage :
Appuyersur lestouchesCANCELet Cook& Holdet Iesmaintenir
ainsipendanttrois secondes.(Appuyerd'abordsur latouche
CANCEL.}Le mot OFF(ARRt_T}disparaitde I'afficheur.
llemarque : Laportedu four et lestouchesne peuvent6tre
verrouilleessi latemperaturedu four estde 205°C [400°F}ou
plus.
37

@
Codes d'anoma ie
Les roots BAKE {CUiSSON COURANTE) ou LOCK 07ERROUiLLAGE}
peuvent c@noter rapidement b rafficheur pour pr@enir en cas
d'erreur ou de probl@Tle.Si tei est b cas, appuyer sur Iatouche
CANCEL. Si bs roots BAKE ou LOCK continuent b c@noter,
debrancher I'appare+LAttendre queIques minutes, puis rebrancher
I'appareiL Si un des roots continue b clignoter, @brancher I'appareil
et prendre contact avec un r@arateur autoris6.
Cuisson COUtante,
Programmation de macuisson courante :
1. AppuyersurIatouche Bake[Cuissoncourante}. .............
Lemot BAKE(CUISSONCOURANTE}clignote. Bake
+ 000ciignote b I'afficheur.
2. S6Iectionnerlatemp@aturedu four.Appuyersur U
latoucheAutoset0 [Pregrammationautomatique}pour ,',utoset
175°C[350°F}ou sur lestouchesnum6riquesappropri@s.
+ Chaquepressionadditionnelb de IatoucheAutoset0
augmentelatemp6raturede 15°C(25°F}.
+ Latemp6raturepeut6treprogramm@de75 _ 285°C
[170_ 550°F}.
3. Appuyerde nouveausur latouche Bakeou attendrequatre
secondes.
• Lemot BAKEs'arr6tede clignoteret s'allumeb I'afficheur.
+ 38° 000°}ou Iatemp6raturer@lle du four,si ia temperatureest
deplusde 38 °C [100°F},seraaffich@.Elleaugmenterapar
intervalIede 3 °C {5°F}jusqu'_ceque la temp6rature
pr@rogramm6esoitatteinte.
4. LaisserIefour pr@hauffer pendant8 _ 15minutes.
+ LorsqueIatemperatureprogrampa@pour lefour est atteinte,
un bip long retentit.
+ Latemp6ratureprogramm6es'affiche.
+ PourrappelerB temp6ratureprogramm@pendantle
pr@hauffage,appuyersurla touche Bake.
5. Placerlanourrituredartsle four.
6. V6rifierravancementde la cuisson_ Iadur6eminimab de
cuisson.CuireplusIongtempsau besoin.
7. LorsqueIacuissonest terrain@,appuyersurla
touche CANCEL(ANNULER}.
8. Retirerla nourrituredu four.
Remarques sur Uacuisson courante au
four :
+ Pour changer matemperature du feet pendant macu+sson,
appuyer sur Bake, puis sur la touche Autoset 0 ou Ies touches
num6riques appropri@s jusqu'_ ce que la temp6rature d6sir6e
soit affich@.
+ Pour changer matempSrature du four mot+du
prSchaufiage, appuyer de_× lois sur Ia touche Bake, puis sur
la touche Autoset 0 ou sur Ies touches num6riques appropri6es
jusqu'ace que la temperature d@ir@ soit affich6e.
+ Si I'on oub+ied'arr6ter le four, il s'arretera automatiquement
apres 12 heures. Si I'on d6sire d6sactiver cette fonction, voir
page 43.
+ Pourdes conseib supp!6mentaires sur la cuisson courante et le
rOtissage,voir la brochure La cuisson simplifi@.
Differences c isso e tre 'a cie fo r et
_e nouvea_
ii est normalde remarquerquelquesdiff6rencesdansladur@ de
cuissonentreun four neufet un four ancbn. VoirAjustementde la
temp6raturedu foura lapage44.
C isso avec co vectio
(certains modeles}
Po_r ia c_isso_ avec eo_vectio_, e_trer ia temperature 8e
eaisse_ _ormaleo Lacommander6duitautomat+quementla
tempSratureprogramm6ede 15°C(25°F}.Latemperatureentr@
seraaffich@. Le ve_tilatear de eo_veetio_ se met e_ marehe
_e lois q_e mefour a fo_etio_ pendant 5 minutes°
Programmatio_ de la cuisso_ avec co_vectio_ :
1. Appuyersurla toucheConvectBake[Cuisson
avecconvection}+
+ Lemot BAKEet I'icOneVENTILATEURc@notent.
+000clignote _ rafficheur.
U
2. S6bctionner Iatemp6raturedu four. Appuyersur
latoucheAutoset0 pour 175°C [350 °F}ou sur les :\utoset
touchesnum6riquesappropd@s.
+Chaquepressionadditionnetb sur IatoucheAutoset0
augmentelatemperaturede 15°C(25°F}.Latemp6raturedu
four peut6treprogrampa@de 75_ 285°C 070 _ 550°F}.
.... Bake ......
s_ite ooo
38

3. Appuyer_ nouveausur [atouche ConvectBakeou attendre
quatresecondes+
• Lemot BAKE[CUISSONCOURANTE]s'arr6tede ciignoter+
• 38° (100°] ou [atemp6raturer6elIedu four,si [atemp6rature
est de plusde38 °C [100°F],seraaffich6e+ElIeaugmenterapar
intervallede3 °C[5 °F)jusqu'8ceque [atemp6rature
pr6programm6esoit atteinte+
• L'icOneVENTILATEURsemet _ tourner+
4+ LaisserIefour prechaufferpendant8 _ 15minutes.
• LorsqueIatemperatureprogrammeepourle four est atteinte,
un hip long retentit+
• Latemperatureprogrammees'affiche+
• PourrappeterIatemperatureprogrammeependantIe
prechauffage,appuyersur [atoucheConvectBake.
5+ Placer[anourrituredansJefour.
6+ Verifier['avancementde [acuisson_ Iadureeminimalede
cuisson+Cuireplus Iongtempsau besoin+
7+ LorsqueIacuissonest terminee,appuyersur
latouche CANCEL(ANNULER]+
8+ Retirerla nourrituredu four.
R6tissage avec convection
(certains modeles )
Pourle rStissage ave€ convection, entrer la temp6rature et la
dur6e de r6tissage normales. Leprogrammateurindique
automatiquementdeverifier Iacuissonde Ianourdture_ 75%de la
dureeprogrammee.Le ventimateurde convection se met en
marche une lois que mefour a +oncSionn_pendant 5 minutes,
Remarques sur RerStissage :
+ Lorsdu rOtissageavecconvection,[adureede cuissondoit
6tre programmeeavantIatemperature+
+ S'i[ faut,d'apreslarecette,prechaufferIefour, ajouter
15minutes_ la duree decuissonprogrammee+
• Lesdureesde r0tissagepeuventvarierselonlescoupesde
viande+
• I1n+estpasnecessairede prechaufferIorsdu rOtissageavec
convectiondegros morceauxdeviande.
+ Se reporter_ IabrochureLacuissonsimpIifieepour connaitre
[esdureeset temperaturesde r6tissagesuggerees+
Programmation du rStissage avec convection :
1+Appuyersur[atoucheConvect
Roast[ROtissageavecconvection)+ _ast
• Lemot ROAST[ROTISSAGE_et I'icOne ...............................
VENTILATEURclignotent.
• 00:00ciJgnote_ J'afficheur+
+ 000s'aJhmea I'afficheur+
2+ EntrerIaduree de rOtissagea I'aidedestouchesnumerJques+
+ Ladureepeut 6treregJeede 10minutes(00:+0}
11heureset 59minutes[11:59}+
• Appuyera nouveausur ConvectRoastou attendre
4 secondes+
• Lemot ROASTet J'icOneVENTILATEURcJignotent
J'afficheur+
+ 000cJignote_ I'afficheur+
3. SelectionnerIatemperaturedu four. Appuyersur
latoucheAutoset0 (Programmationautomatique} U
pour 165°C{325°F}ousur lestouches ,\u/oscl
numeriquesappropriees.
• Chaquepressionadditionneliesur latouche Autoset0
augmenteIatemperaturede 15°C(25°F}.
• Latemperaturedu fourpeut 6treprogrammeede 75 _ 285°C
070 _ 550 OF}.
4. Appuyer_ nouveausur latouche ConvectRoastou attendre
quatresecondes.
• Lemot ROASTs'arretede c%noter ets'allume
I'afficheur.
• 38° (100°)ou la temperaturereeliedu four,si Iatemperature
est de plusde 38°C (100°F),seraaffichee.Eileaugmentera
par intervalIede3 °C[5 °F)jusqu'_ceque la temperature
preprogrammeesoit atteinte.
• L'icOneVENTILATEURse met_ tourner.
+S'ilfaut un prechauffage,[aisserlefour prechaufferpendant8
15minutes.
• Lorsquela temperatureprogrammeepour lefour estatteinte,un
hip Iongretentit+
39

5. Phcer [anourrituredartsle four.
• Ladureecommence[ecompte_ reboursdSsquele four semet
chauffer.
• Pourrappeterlatemperatureprogramm6ependant[e
pr_chauffage,appuyersur [atoucheConvectRoast.
6. Lorsquelostrois quartsde [adur6ede cuissonprogramm6ese
sont 6cou[6s,[efour semeten marcheet [emot FOOD
[NOURRHTURE]clignote _ ['afficheur.V6rifier['avancementde[a
cuisson_ cemoment.Cuireplus[ongtempsau besoin.
+La[ampedu four resteaIlum6ejusqu'_ceque ['onappuiesur [a
touche OvenLight (Lampedu fou0.
+Appuyerstir n'importequelletouchepour rappeler[adur6ede
cuissonrestante.
7. Lorsque[acuissonest termin6e,appuyersur[a
touche CANCEL(ANNULER).
8. Retirer[anourrituredu four.
4. Appuyer_ nouveausur latouche defonction d6sir6eOU
attendrequatresecondes.
• Lemot correspondant_ la fonctiond6sir6erestealhm6.
• Ladur6ede cuissonparait_ I'afficheur.
• Latemperaturer6eIIedu fourseraaffich#ependantle
pr6chauffage.
• Latemperatureprogramm#es'afficheIorsquelefour est
pr6chauff&
Lorsque [a dur6e de cuissou s'est 6coulee :
+ Quatrebipsretent[ssent.
• LosrootsHOLD(MAINTIEN]etWARM(CHAUD]s'alhment.
• 75° (170°] parait_ I'afficheur.
• L'heuredu jour parait_ I'afficheur.
Cuisson et maintien
Lorsde ['utilisationde ['optionCook & Hold (Cuisson et maintien),
[efourse met_ chaufferimm6diatementunefois que [acommandea
6t6programm6e.Puis,[efour cuit pendant[adur6esp6cifi6e.Lorsque
cettedur6es'est6coui6e,[efour maintient[anourrJtureauchaud
pendantuneheureau maximum,puiss'6teint automati(uement.
Programmatiou de Cuissou et maiutieu :
1. Appuyersur[atoucheCook& HokJ(Cuisson
etmaintien).
+ Lemot HOLD(MAINTIEN)cIignotepour indiquerque [a
programmationde cuissonet maintienesten cours.
+ 00:00cIignote_ rafficheur.
2. %[ectionner [adureed6sir6ede cuissonen utiIisant[estouches
numeriques.
• Lemot HOLDcontinue _ cIignoter.
+ Ladur6es'aIiume_ ['afficheur.
+ Ladur6e peut6trer6gi6ede 10minutes[00:10]_ 11heures
et59 minutes01:59).
3. AIorsque [emot HOLDciignote,appuyersur[a
touche Bake(Cuissoncourante),ConvectBake
[Cuissonavecconvection)ou ConvectRoast
[ROtissageavecconvection)[certainsmodules) ................................
etseiectionner[atemperaturedu four.Appuyer N
sur [atouche Autoset0 (Programmation /\utosetV
automatique}pour !75 °C (350°F}ou sur[es
touchesnum6riquesappropri6es.
• Lemot correspondant_ [afonctiond6sir6eclignote.
• Latemperaturedu four peut6treprogramm6ede 75 a 285°C
[170_ 550°F}.
AprSs uue heure de MNNT_EN AU CHAUD :
+ Lefours'Steintautomatiquement.
+ LesrootsHOLDetWARMs'_teignent.
o Retirer[anourrituredu four.
Auuulatiou de Cook & Hold _ tout momeut : f+-_
Appuyerstir latouche CANCEL[ANNULER}.Retirer[a
nourrituredu four.
CuissoB et maiBtieB diff r s
Nepasutiliserla cu!ssondiff6rdepour desdenr_estr6s p6rissabies
commeiespmduitsiaitiers;ie porc, iavolaifleouJesfruits de me[.
Avec[afonctiondiff6r6e, [efour set met_ cuireplustard dans[a
journ6e.Programmerla dur6ed'attentedesir6eavantque le four ne
semetteen marcheet la durdede cuissond6sir6e.Lefour com-
mence_ chauffer_ I'heureselectionneeet cuit pour la duree
sp6cifi6e.
La dur6ed'attentepout 8treprogrammeede 10minutes(00:10}
11heureset59 minutes(11:59}.
Programmatiou d'uu cycle de cuissou et maiutieu
diff_r_s :
1. Appuyerstir [atouche 1Delay. 1
• Lemot DELAY[ATTENTE}ciignotea I'afficheur. Delay
• 00:00ciignote_ I'afficheur.
2. A raide destouchesnumerJquesappropri6es,e_trer la durSe
d'atte_te avast que ne dSbute le cycledecuissonetmaintien.
40

3. Appuyersur[atoucheCook& Hold.
• LesrootsHOLDet DELAYc[ignotent
Fafficheur.
• 00:00c%note _ rafficheur.
4. Entmrla durSed_sir_ede¢uis+on_raide destouches
numeriques.
5. AppuyersurIatouche Bake[CuissoncouranteD,
ConvectBake(CuissonavecconvectionDou
ConvectRoast(R0tissageavecconvection) .....
[certainsmodeles).
6. Programmer la temperature du four desiree N
enappuyantsurIatoucheAutoset0 (Program- ,\u[osetv
mat+onautomatique)ousur lestouches
numeriquesappropriees.
+ 175° (350°) s'allumeIorsqueron appuiesur latouche
Autoset0.
+ Apr_squatresecondes,la dureed'attenteentreeparait
rafficheur.
+ Lemot HOLDs'eteint.
+ LesrootsBAKE[CUISSONCOURANTE)et DELAY[ATTENTE)
restentallumespour rappelerqu'un cyclede cuissonet
maintiendifferesa 6teprogramme.
_GmaFques :
+Ne pasutiliser Iecyclede cuissonet maintiendifferespour des
articlesqui n6cessitentque Iefour soit prechauffe,commeles
g_teaux,Iespetitsbiscuitset lespains.
+Ne pasutil+serIecyclede cuissonet maintiendifferessi le four
est dej8chaud.
Maintien at+ chaud
Pourmaintenirau chauddartsle four desalimentscuitsetchauds
ou pour rechaufferpainsetassiettes.
Programmation du Maintien au chaud :
1. AppuyersurIatouche KeepWarm .....................
Keep
(Maintienau chaud), warm
+ Lemot WARM(CHAUD)ciignote _ ['afficheur.
+ 000ciignote _ I'afficheur.
2. %tectionner latemperaturede maintienau chaud. U
Appuyersur[atoucheAutoset0 (Programmationauto- _\u[oset
matique)ousur lestouchesnumeriquesappropdees.
+ 75° (170°)s'a[[umeIorsqueI'onappuiesur[atouche
Autoset0.
+ Chaquepressionsur la toucheAutoset0 augmentela
temperaturede 3 °C(5 °F).
Latemperaturede maintienauchaudpeut 6tre
programmeede 63_ 90 °C [145_ 190°F).
Lemot WARM(CHAUD)et latemperaturesemntaffiches
pendantque lafonction estactive.
Annuiation du maintien au chaud :
1. Appuyersurla toucheCANCEL(ANNULER).
2. Retirerla nourrituredu four.
Remarques sur fonction de
maintien au chaud :
+ Pourobtenirdesqualitesaiimentaireset nutdtivesoptimales,
lesailmentsne doiventpas6tregardesauchaudplusde 1
2 heures.
, Pouremp6cherlesalimentsdedessecher,lesrecouvrirde
papieraluminium,sansserrer,ou d'un couvercle.
* Pour r6chauffer des petits pains :
- recouvrirlespetitspainsde papieraluminiumsans
setter et lesplacerau four.
- appuyersurlestouchesKeepWarmetAutoset0.
- rechaufferpendant12h 15minutes.
, Pourr6chauffe_ des assiettes :
- placerdeuxpilesde quatreassiettesmaximumdans
lefour.
- appuyersurlestouchesKeepWarmetAutoset0.
- rechaufferpendant5 minutes,arr_terlefour et Iaisser
lesassiettesaufour pendantencore15minutes.
- n'utiliserque desassiettespouvantaller aufour,
verifier aveclefabricant.
- ne pasposerdesassiettestiedessur unesurface
froide, leschangementsrapidesde temperature
pouvantcasserI'assietteou lafendiller.
41

Cuisson au gril
Programmation de la cuisson au gril :
1. Appuyersur Iatouche Broil (Gril}.
+ LesrootsBROIL(GRiL)et SET Broil ....
(VALiDER}clignotent_ I'afficheur. ............
tJ
2. Appuyersur IatoucheAutoset0 (Programmat[on
automatique}unefois pour programmerun gril Autoset
temp6rature6tev6eou deuxfois pour programmerun gril
temperaturebasse.
+ LesrootsHi (ELEVEE}ou LO (BASSE}serontaffiches.
+ %lectionner Hi broil (Gril_ temperature6Iev6e}(285°C
[550°F]) pour un griI normal %lectionner LObroil (Gril
temp6raturebasse}(230° C[450°F]} pour un gril _ tempera-
ture inf6rieured'aiiments_cuissonplusIonguecommela
vo[ai[le.
3. Apr@squatresecondes,le four semeten marche.
+ Le mot BROILrestealJum6.
LesmotsHi ou LOresentai[um6.
4. Pourun rissolagemaximum,pr6chauffer[efour pendant2 ou3
minutesavantd'ajouterIanourriture.
5. Placerla nourritureclansIefour. FermerIaportedu four.
6. RetournerIaviandeune fois a lamoiti6de Iadur6ede cuisson.
7. LorsqueI'alimentest cult,appuyersurla touche
CANCEL(ANNULER}.Retirerla nourrJtureetla
16chefritedufour.
o L'heuredu jour reapparait_ I'afficheur.
Remarques sur [a cuisson au gri[ :
o Pourde meilieursr6suitats[orsdu griI,seserv[rd'un ustensiie
pr6vupour cetypedecuisson.
o LegriI au regiageHi[Elev6}est utilis6pour [amajorit6des
op6rationsde cuissonaugriL UtiliserIegriIau r6giageLO
(Bas}pour [acuissonde metsdevantcuireplus Iongtemps,
afin de [eurpermettred'6tre biencults sansrissoiageexcessif.
o Lesdur6esde cuissonau gri[ peuvent6treplus [onguesavec
unetemperaturede gri[inf6rieure.
o RetournerIapiupartdesailmentsIorsque[amoitiede [adur6e
pr6vuepour [acuissonaugri[ s'est6coui6e.
• Pourdestemp6raturesetdesconseiissuppi6mentairessur la
cuissonau griI,sereportera [a brochureLacuissonsimpiifiee.
Tableau de cuisson au gri[
Pr6chauffer[efour pendant2-3 minutes+
AUNENTS I GRILLES
Boeuf
PoFc
Bifteck, 2,5 cm (1 po) d'6paisseur
Hamburger, 2 cm (3/4 po} d'6paisseur
Bacon
Tranche de jambon pr6cuit,
1,3 cm [1/2 po} d'6paisseur
COtelette, 2,5cm (1 po} d'6paisseur
Blancs, avec os
5
5
5ou6
5
5
CUISSON
DEGRADE i TEmPSDE
CmSSON OTAL
A point
Bien cult
Bien cuit
Bien cult
Chaud
15 - 20 min.
18 - 24 min.
13 - 18 min.
6 - 10 min.
8 - 12 min.
5 Biencult 22- 26min.
vomaimme 4 BiencuJt (GriI _ temperaturebasse}
30 - 45min.
Fruits de met
5
5
5
FiIetde poisson
Damede poisson,2,5cm (1 po}d'epaisseur
Queuede homard,85 _ 115g [3_ 4 onces}
Emiettement
Emiettement
Bien cult
8 - 12 min.
10 - 15 min.
7 - 10 min.
Fourobtenirunesurfaceexterieuresaisie/brunieetunint6rieursaignant,il peut@tren@cessaireder6duireletempsdecuissonsur[apremiereface,
et de r6duireia distanceentre laviandeetla sourcede chaieur.
Remarq_e : Cetableaun'estqu'un guidedesuggestions.Lesdur6espeuventvarJerselonI'aliment_ cuire.
_2

Arr t autornatique/Mode
Lefour s'arr6teautomatiquementapr_s12heuress'il a 6t6
accidentellementlaissden marche.Cettecaract6ristiquede s6curit6
peut6trearr6t6e.
Pour annuler l'arr_t 12 heures et faire fonctionner le
four en continu pendant 72 heures :
1. AppuyersurlatoucheClock (Hodoge:)et la
maintenirainsipendantcinqsecondes.
• SAbseraafficheetclignotera pendantcinqsecondes.
• SAbseraensuiteaffich6en continujusqu'_ cequ'on I'arr6te
oujusqu'_ceque la dur6elimite de 72heuressoit atteinte.
• Lemot BAKE(CUISSONCOURANTE_seraaussiaffich6si un
cyclede cuissoncouranteesten coursalorsque lefour est en
modesabbat.
• ToutesIesautresfonctions(MINUTERIE,MAINTIENAU
CHAUD,NETTOYAGE,etc._sontverrouiil6es,SAUFBAKE,
pendantie modesabbat.
• Uncyclede cuissonet maint[enpeut6treprogramm6durant
le modesabbat.Cependant,un cyclede cuissonet maintien
diff6r6sn'estpaspossible.
Annuiation du mode sabbat :
1. AppuyersurlatoucheClockpendantcinq
secondes.
• SAbciignote pendantcinq secondes.
• L'heuredu jour revient_ I'afficheur.
OU
2. Apres72 heures,le modesabbatsetermine.
• SAbclignote pendant5secondes.
• L'heuredu iour revient_ I'afficheur.
Remarques sur Uemode sabbat :
• Le modesabbatpeut6tremis en marche_ tout moment,que
le foursoit en marcheou non.
• Le modesabbatne peutpas6tremisen marchesi lestouches
sontverrouilI6esou Iaporteverrouillee.
• La maiorit6des messagesettous leshipssont d6sactiv6s
IorsqueIe modesabbatestactiE
• SiIefour esten modecuissonIorsquele modesabbatest
programm&le mot BAKE(CUISSONCOURANTE)s'6teint
IorsqueIacuissoncouranteest annuI6e.II n'yauraaucun
signalsonoreaudible.
• La Iampedu four nes'alIumepasautomatiquement
I'ouverturedeIaporteIorsquelefour est en modesabbat.Si
1'6clairagedu fourest souhaitependantIemodesabbat,la
lampedevra6treaihmee avantqueIemodesabbatne d6bute.
• Lorsquele modesabbata d6marr&I'afficheurindique
imm6diatementla temperatureprogramm6eplut6t que la
temperaturer6elIede lacavit6du four.Aucun hip de
prechauffageneretentit.
• Lecycled'autonettoyageet Ieverrouillageautomatiquede la
portene fonctionnentpaspendantle modesabbat.
• SiI'on appuiesur latouche CANCEL,un cyclede cuisson
couranteaufour seraannul6.Cependant,le programmateur
resteraen modesabbat.
• Apr_sunepannede courant,le four revienten modesabbat
avec72 heuresrestanteset aucuncycleactiE
43

Ajustement de la temp6rature
du four
La precisiondestemperaturesdu foura 6t6soigneusementverifiee
rusine+Hiest normalde remarquerquetquesdifferencesdansla
cuissonou ia couleurdu rissohge obtenuentreun four neufet un
four ancien+Au fur et _ mesureque le fourest moinsneuf,sa
temperaturepoutvader+
II estpossibied'ajusterla temperaturedu foursi ton penseque ie
four necuit pasou ne rissolepascorrectement+Pourdeciderde
I'ajustement_apporter,regierlefour _unetemperaturede 15°C
(25°FDplus 6leveeou piusbasseque ia temperatureindiqueedans
la recette,puisfaire cuireia preparation+Lesr6su+tatsde<i+essai>>de
cuissondoiventdonnerune id6edu hombrede degresduquel la
temperaturedolt 6treajustee+
Ajustement de la temperature du four :
1+Appuyersurla touche Bake(CuissoncouranteD+
2+ Entrer285°C[550°F]en appuyantsuries
touchesnum_riquesappropdees.
3. AppuyersurIatouche Bakeet tamaintenirains[pendant
plusieurssecondesoujusqu'a ceque 00°paraisse_ I'afficheur.
Si Iatemperaturedu foura 6t6precedemmentajustee,Ie
changementseraaffich6. Parexemple,si latemperaturedu four
a 6t6reduitede 8°C05 °F},I'afficheurindiquera -8° (-15°}.
4+ Appuyersuria toucheAutoset0 (Programmationautoma%ue)
pourajuster latemperature+
A chaquefois quei'on appuiesurla toucheAutoset0,ia
temperaturechangede3 °C[5 °F)+Latemperaturedu four peut
6treaugmenteeou diminueede3 _ 20 °C(5 _ 35°F]+
AppuyersuriatoucheAutoset0 pour augmenterla temperature
dufour (5,10+++35)+Continuerd'appuyersur iatoucheAutoset
0 pourdiminuerla temperaturedu four (-35,-%... -5).
5. L'heuredu jour reapparattautomatiquement_ rafficheur.
II n'estpasnecessairede reajusterla temperaturedufour en cas
depanneou d'interruption decourant.L'ajustementde la
temperatures'appliqueseu+ementauxfonctionsde cuisson
courante,cuissonavecconvectionet rOtissageavecconvection
(certainsmodStesD.Lestemperaturesde grii et de nettoyagene
peuvent6treajustees.
Changement de ma
temperature °F/°C
1. Lereglagepar ddaut de I'usJnepour Jatemperatureesten
Fahrenheit.
2. Pourmodifiercereglage,appuyersur lestouchesCANCELet
Bakesimultan6mentet maintener-lesenfonceespendanttrois
secondes.
3. Unbip retentitet Ier6glagecourant (°Fou °C)parait_ I'afficheur.
(Sivous nefaitespasde changement,la cuisiniSreretourneau
reglageexistantaprSs30secondesy
4+ Pourmodifierle reglage,appuyersur Iatouche Autoset0+
Appuyer_ nouveausur iatouche pour retournerau reglage
existant+Attendercinqsecondesetle regiageseraeffectue+
Latouche Favorite(favor[]permetde sauvegarderla dureeet la
temperatured'unefonct[onde cuissonet maintien.
Pourprogrammerun cycleFavori,unefonctionde cuissonet
maintiendolt 6treactiveou tout juste programmee.
Programmation d'un nouveau cycle favori ou
sauvegarde d'un cycle en cours de cuisson et
maintien comme favori :
1= Programmerun cyclede cuissonet maintiencommeil est decrit
lasectionCuissonet maintien_ Iapage40
2= AppuyersurIatoucheFavoriteet la maintenir
ainsJpendanttrois secondes.
+ Lecyclecuissonet maintiennouvellementprogrammeou en
cours defonctionnementserasauvegarde.
+ Unhip sonoreretentit pourindiquer que lescommandesont
accept6JereglagefavorL
Demarrage d'un cycle programme darts favori :
1+Appuyersurla toucheFaw_rite+
+ Ladureeet latemperaturedu cycleprogrammede cuissonet
maint[enserontaffichees (siaucuncycledecuissonet
maint[enn'a6t6programme,<_nonE>7seraaffiche).
2. AppuyersurIatoucheBake,ConvectBakeou ConvectRoast
(certainsmod@les).
+ Lecyclefavori commenceimmediatement.
+ Lemot correspondantau cycleselect[onn6s'alJume
J'afficheur.
+ Ladureede cuJssons'allume8 I'afficheur.
Lorsque la duree de cuisson s'est ecoulee :
+ Lemot correspondantau cycIeselectionn_s'_teint+
+ LesrootsHOLD(MAINTIENDetWARM(CHAUDDs'alhment+
+ 75° (170°)parait_ I'afficheur.
Annulation d'un cycle favori en oours :
1+ApptJyersurla toucheCANCEL(ANNULER]+
+ Lecyclefavori sauvegard6neserapasaffecte+
2+ Retirerla nourrituredu four.
44

AJJumage sans fJamme de
Grilles du four
La cuisiniSre est dot6e d'un systSme d'aIIumage sans flamme de
veille. Ce systeme ferme automatiquement Farriv6e de gaz et
emp_che tout fonctiormeme#t du four fors d'une #_terrupdo#
de I'alimerltador_ 61ectrique.
li #e sere pas possible d'agumer le brgleur du four avec une
a#umette. Ne pas tei_ter de faire foncdom_er /e four lets d'une
#tterrupdon de Fafimentaden 61ectrique.
VentiJateut du four
Unventiiateurde convectionsort _ fake circuIerFairchauddansle
four Iorsqueia caract6dstiquede convectionest selectionn6e.La
fonctionsemetautomatiquementen marche5 minutesapr6savoir
appuy6surla touche Conveet, ets'6teint Iorsquelafonction
Convectestannul6e,
Remarqae : IIs'arr6teautomatiquementIorsqueI'on ouvrela
porte.
1
Event du four
LorsqueIefour fonctionne,lossur[acesvoisinesde I'6ventpeuvent
devenirassezchaudespour entratnerdesbrOlures.Neiamais
bloquer1'6vent.
U_vent est sita_ seas meprotectear d'_vent du dosseret, sur ma
eaisini_reo EVENT
DU FOUR
Nepasmettrede
plastiquespr6sde
1'6vent,la chaleur
pouvantlesddormer
ou losfake fondre.
EcJairage du four
La lampedu four s'allumeautomatiquement
I'ouverturedelaporte.Lorsquela porteest ferm6e,
appuyersurOvenLight [Lampedu fou0 pour
aiIumerou6teindreIalampe.Le four preduitun
signalsonorechaquefois que I'on appuiesurOvenLight.
Somedu four
Prot6gerIasoIedesproduitsrenvers6s,enparticulier acidesou
sucr6s,ceux-cipouvantd6colorer1'6mailvitri% Utiliserdes
ustensilesde Iabonnedimensionpour 6viterque losproduitsnese
renversentou passentpar-dessusI'ustensileen bouiIiant.Ne pas
placerd'ustensiles oa de feuiiie d'alami_iam directeme_t s_r
masoled_ fo_r.
, NePaSrangerde nourdtu[eou d'usteus!!edanslefour.
Lefour comportedeuxgrilles [troiss'ilya convection)avec,pour
chacune,un dispositifde calage.
E×tractio_ :
1. Tirerla grille en Iignedroite
jusqu'acequ'elles'arr6tea la
positiondecalage.
2. SouIeverIagrilIe_ I'avantpour
pouvoirI'extraire.
_i_staHatio_ :
1. Placerlagrille sur lessupportsclansle four.
2. SouleverIdgerementI'avant.Faireglisserla grille versI'arri6re
au-del_ de Iapositionde calage.
3. Abaisserlagrille et la faireglisserclanslefour.
Ne pas co_vrir matotalit_ d'a_e grille de papier d'am_mi_iam_i
mettre d'am_mi_i_ms_r masomed_fo_r, Coma_e donnerait pas
de boris r_s_mtatsdarts macaisson de g_tea_× et masome
Positions des gri es
POSiTiON 7 (_Dositionla
plushaute): Pourla
cuissonau gril et lacuisson
au foursur uneseulegdlle
avecunetOle_ biscuits.
POS_TION6 :S'utilisepour
Iacuissonau gril et la
CUiSSOn au four sur une
seulegriIIeavecunetOie
biscuits.S'utilisepour une
cuissonsurplusieursgriIIes.
So_e du
fo_._r
C_isSOn 8VeC ¢O_VeOtio_
sur trois grilles
(certains modeles)
POSiTiON5 : PourIacuissonau gril etla cuissonau four surune
seulegriIleavecunetOIe_ biscuits.
POSiTiON_ :S'utilisepour Iacuissonaufour de g_teauxet de mets
en sauce,sur uneseulegriIleavecunet0Ie _ biscuits,et la cuisson
au griL S'utilisepour unecuissonsur plusieursgrilIes.
POSIT_ON3 : PourIacuissonau four de metsen sauce,de g_teaux
_tages,de michesde pain,suruneseulegriIleavecunetOle
biscuits.S'utilisepour une cuissonsurplusieursgriIles.
POS_T_ON2 :S'utilisepour Iacuissonaufour de gSteauxsur une
seuIegriIleavecunetOle_ biscuits,et pourIe r6tissagede petites
piecesdeviande.S'utilisepour unecuissonsur plusieursgrilles.
45

Q
POSMON 1 :S'utilisepour le rOtissaged'unevohille ou de grosses
piscesdeviande+
Sole du four : PlacerIagrille sur les
cOt6srelev6sde la sole.Donneune
placesuppl6mentairepourJacuisson
de grandesquantit6s+
CU_SSONSUR PLUSIEURS
GRILLES:
Deu× grilles : UtiIiserlospositions
3 et6,ou 2 et 4+
Trois grilles (convectionseulement): UtiliserJespositions
1,3et6+
I Remarque: Pourlacuissonavecconvection(certainsmodSles)
sur deuxou trois grilles,v6rifierlesaliments_ Iadur6e minimale
sugg6r6epour 6viterun exc@sde cuissonou de coJolation.
Cuisson de g_teau× _ etages sur deu× grilles
Pourde me+IIeursrSsultatspour Iacuissonde g_teauxsurdeux
grilles,utiliser Iespositions2 et4 pour une cuissontraditionnelle et
lospositions3 et 6 pour une cuissonavecconvection(certains
mod_Ies).
Placerlesg_teauxsur lagrille,commeil estindiquS.
Oemi+gtiJJe
CertaJnsmodTJesdecuisini_res
sent dotSsd'unedemi-grille//_
convertible.LecOt8gauchede_
la grille pout8treentev6pour
Iogerunegrossemarmitesur
Jagrille infTrieure.Le cOt6
droit de lagrille est
toujoursIibrepour Joger
une cocotte.
Cteate-A+Space TM
//
Remarques :
o Lapattie amoviblede la grille pout6tre utilisSecommegrille de
rOt+ssageclansla I@chefrite.Nepasutiliser la pattiesup6rieure
si la grille du four estplac6edartsJaJ_chefrite.
o Lasectionamovibiede lagrille peut 6treutiJisSecomme
support ou grille de refroidissement.
o S'assurerque Iefour a refroidiavantde retirerou de rSinstaller
Jademi-grille.
o Nepasutiliserun ustensilequi dSpasseraitdu bord de Iagriile.
o Pourobtenir IesmeilleursrSsultats,hisser un espaceIibrede
5 cm (2po} entreI'ustensiieplac6sur la grille et la paroidu
four.
o Agir prudemmentpour retirerunarticle plac6sur la demi-grilie,
afin d'SviterdesbrQlures.
o Enleverpmdemmentlesarticlesplac6ssur lagrille infSrieure,
pourne pasperturberlademi-grille.
46

Four autonetteyant
o IJestnormalquecertainespiecesae a cu_smieredevbnnent
tres cnaudeslots d'un cycb de nettoyage.
o Pour6viterque la portedu four ne sublssedesdommages,ne
pastenter de I'ouvrirIorsquele tool LOCK(VERROUILLAGE}est
visiblesurI'afficheur.
o Evlterde toucher laporte, le hublotet lazonede I'eventdufoul
Iorsd'un cycled'autonettoyage.
o Nepasutiliserde nettoyantpour fourdu commercesurle fini
du four ou surtout autrecomposantdu four. Celaabimeraitle
fini ou lescomposantsdu four.
Le cycled'autonettoyageutilise destemp6raturessuperieuresb la
normalepour assurerIe nettoyageautomatiquede latotalit6du four.
Si lefour esttr6s sale,il estnormalqu'on observeB formationde
rum@ou de flammesdurant Ienettoyage.Nettoyerlefour
intervalbs reguliersphtOt qued'attendreune accumulation
importantede r@idus.
Durant le processusd'autonettoyage,il convientde biena@erla
cuisinepour eliminerlesodeursnormalement6raisesdurant le
nettoyage.
Avant J'autonettoyage
1. EteindreIalampedu fouravant lenettoya% EilerJsqueraitsinon,
degrilIer.
2. Enbverla I@hefrite,tous Iesplatset Iesgrillesdu four. Lesgrilles
risquentdese@coloreret de ne plusglisserausslbienaprSsun
cycled'autonettoyagesion ne IesenlSvepas.
3. Nettoyerle cadredu four, Iecadrede la porte,Iazone_ I'ext6rieur
dujoint et autourde I'ouvertureclanslejoint de Iaporte,_ I'aide
d'un produitde nettoyagenonabrasifcommeBonAmi_ou d'eau
additionn@de detergent.Le pmcessusd'autonettoyagene
nettob pasceszones.Ellesdoiventetre nettoy@spour emp@her
lasalet6de s'incmsterpendantle cyclede nettoyage.(Lejoint
assure1'6tanch6it6autour de laporteet du hublot du four.[
4. Pouremp6chertout dommage,ne pasnettoyerni frotter lejoint
qui setrouve autourde Iaportedu four.
Cejoint estco%u pour 6viterlespertes
dechaleurpendantlecycle
d'autonettoyage.
5. EIiminerIesr@ldusde graisseou de
produitsrenver@ssur lasoleavant le
nettoyage.Ceciemp@heIaformation
defiammesoude rum@ durantle nettoyage.
6. EssuyerIesr@idussucr@et acides,commeIespatatesdouces,
Iatomateou Iessauces_}_basede Bit. Laporcelainevitrifi@
pos@deunecertainer@istanceauxcompos@acides,maisqui
n'estpaslimit@.EIIepeutsed@olorersi lesr@idusacidesou
sucresnesont pasenlev@avantde commencerI'autonettoyage.
Programmation de l'autonettoyage :
[ Remarque : Latemperaturedu four dolt 6tresitu6een dessous
de 205°C(400°F}pour programmerun cycled'autonettoyage.
1. Fermerla portedu four.
2. Appuyersurla toucheCban (Nettoyage}.
Lemot CLEAN(NETTOYAGE}clignote. ........
• Lemot SET6/ALIDER}clignote _ I'affJcheur. f_
U
3. AppuyersurIatoucheAutoset0 (Programmation
automatique}. _utoset
• MEd(Moyen}(Saletdmoyenne,3 heures}estaffich&
4. Appuyersurla toucheAutoset0 pourvoir defilerlesdifferents
reglagesde I'autonettoyage:
HVy(Tressale}(Saiet6@aisse,4 heures}
MEd (Moyen}(Salet6moyenne,3 heures}
LITE(L6ge0 (SaleteI6gere,2 heures}
Lechoixdu niveaudesabt6 du four programmeautoma-
tiquementla dur@ducycled'autonettoyage.
5. Apresquatresecondes,le fourcommencelenettoyage.
• Si la porten'estpasfens@,des hipsretentissentet Iemot
<{door _(porte}paratt_ I'afficheur.SiIaporten'estpas
ferm@dartsIes30secondes,roperationd'autonettoyageest
annul@et I'afficheurrevientb rheuredu lout.
• Lemot CLEANparait_ I'afficheur.
• Lemot LOCK07ERROUILLAGE}clignote_ I'afficheur.Unelois
la porteverrouill6e,Iemot restestable.
• Ladur6ede nettoyagecommencele d@omptea I'afficheur.
D6marrage differ_ d'un cycle d'auto_ettoyage :
1. AppuyersurJatouche 1Delay. 1
!
• Lemot DELAY(ATTENTE}clignote.
• 00:00clignote_ I'affbhage. Delay
2. EntrerIadur6e d'attente@sir@ pour le @managedu cycle
raide destouchesnumdriquesapproprJ@s.
3. AppuyersurIatoucheCban.
• Lemot SETclignote a I'afficheur.
4. Appuyersurla toucheAutoset0.
• Lemot LITE(saleteleg6re}estaffich&
Clean
0
i\utoset
*Lesnomsde marquedesproduitsde nettoyagesont desmarquesd@os6esdesdiff6rentsfabricants.
_7

5+ AppuyersurIatoucheAutoset0 (Programmation
automatique)pour voirddiIer Iesdiff6rents
U
r6gIagesde Fautonettoyage: Autosd
HVy(Tr_ssale}(Salet66paisse,4 heures]
MEd(Moyen)[Salet6moyenne,3 heures)
UTE(L6ge0 (Salet6I_g_re,2 heures]
Lechoixdu niveaude salet6du four programmeautoma-
tiquementIadur6edu cycled'autonettoyage.
6. Apresquatresecondes,lesrootsCLEAN(NETTOYAGE}et
DELAY(ATFENTE]s'aliumerontet Iemot LOCK
(VERROUILLAQE}clignotera_ I'aff+cheur.Lorsquela portedu
four severrouilie,le mot LOCKs'arr6tedeclignoter et reste
alhm6 en continu pour indiquerque lefour est programm6pour
uneop6rationde nettoyagediff6rQ.Led61aid'attentesera
affich_.
Aprbs le cycle d'autonettoyage
Environuneheureapr_s[afin du cycle,[emotLOCKs'#teint+Ace
moment,laportepeut 6treouverte.
Lasalet6 peut avoir laiss_ un r6sidu gris poudreu×.L'enIever
avecun linge humide.S'ii restedelasalet6,celaindiqueque le cycle
de nettoyagen'apas6t8assezlong.Cettesalet6restantesera
enlev6eau prochaincycled'autonettoyage.
Si les grilles ont _t_ laiss6es _ l'int6rieur du four pendant le
cycled'uutonettoyuge et qu'elles gmissentreal surleurssup-
ports,lesenduire,ainsique lessupports,d'unefine couched'huile
v6g_tale+
De fines lignespeuvent apparaitre duns la percelaine purce
qu'elle a subi chaleur et refroidissement. Ceciest normalet
n'affecterapasIaperformance.
Une d_comerationblanche peut apparaitre upr_s menettoyuge
si des aliments acides ou sucrSs n'ont pus_t_ enleves avunt
que ne commence l'autonettoyageo Lad6colorationestnormale
et n'affecterapasla performancedu four.
Pendant le cycle d'autonettoyage
LorsqueIemot LOCKparait_ I'afficheur,la portene peut6tre
ouverte+Pour6viterd'endommagerla porte,nepasforcer la porte
pour I'ouvrirIorsqueLOCKestaffich6+
Fum6e et odeurs
La premiSrefois o_ Iefour est nettoye,il peuty avoirproduction
d'odeuret defum(!e+Ceciest normalet disparaitra_ I'usage+
Si lefour esttrSssaleou si IaIechefritea 6telaissSedartsle four, il
peuty avoirproduction defumSe+
Pendantque Iefour chauffe,il peutseproduire desbruits de m6taI
en dilatationou en contraction.Ceciestnormalet n'indiquepasque
le fours'abime.
Remarque5:
+ si la portedu four n'estpasferm6e,Iemot<<door >)(porte}
clignote_ I'afficheuret lefour 6metdesbipsjusqu'_ ceque la
portesoitfermeeet que I'onappuiea nouveausur Clean
(Nettoyage}.
• S'iI s'6couleplusdecinqsecondesentreIemomentoQI'on
appuiesurCleanet celuio8 I'onappuiesurIatouche
Autoset0 (Programmationautomatique},I'afficheurretourne
automatiquement_ I'affichagepr6c6dent.
• Laportedu four setrouveraendommag6esiI'on forceson
ouverturealorsque le mot LOCK(VERROUiLLAGE}est encore
affich6.
48

M6thodes de nettoyage
et que _ousruescompesantssont froids, afin d'_viter des dommages eu des br_lureSo *Lesnomsde marquesontdesmarques
i Pour e_iterlaio[matiQnde tachesOuun changementde Couleur,n_ttoYerIappareflapr_s deposeesdesdifferentsfabricants=
chaqueutflisation, *_Pourcommanderdirectement,
o Apr_stout demontagede composants,vei!ler_ effectuerun remontagecorrect, composerIe 1-877-232-6771E=-U=ou
1-800-688-8408Canada.
_E
NE_OYAGE
E_chefriteet Nejamais couvrir tagrille depapier d'aluminium;cela emp_che la gmisse de ceuler dai_sle I_eheMte.
sa grille o RecouvrirIalechefriteetsagriIIed'un lingesavonneux;laisseragirpourdetacherlesresidus=
o Laveravecde I'eausavonneusetilde= UtiIiserun tampon _ recurerpour eliminerlessouillurestenaces=
o Onpeut placerlesdeuxcomposantsde la lechefritedartsun lave-vaissetle=
surfente
Zone de la
console de
cemmande et
TaMe de euisson
et tabmeaude
eemmande -
dmaii vitrifid
TStesde bremeuramovibles
o LaisserIebrOleurrefmidir=EnteverIechapeaude br_Jleurpour le laverdartsde I'eausavonneuseavecun tampon
recureren plastique=Pourlessouillurestenaces,nettoyeravecuntampon non abrasif,savonneux,ou avecune
epongeet lacr_mede nettoyagepourtablede cuissonCooktopCleaningCreme*(produitn° 20000001)_*=
o Nepaseffectuerle nettoyageau lave-vaisselleou danslefour autonettoyant=
gr_leurs _ gaz seell_s
o Nettoyer%quemment=Laisserle brOleurrefmidir= Nettoyeravecdu savonetun tampon_ recureren plastique=Pour
lessouillurestenaces,nettoyeravecuntampon savonneuxet nonabrasif=Ne pasagrandir ouddormer lestmus=
o Veiller_ ne pasintroduired'eaudartsIesorificesdu brOleur=
o TravaillerprudemmentIorsdu nettoyagede ralhmeur. Si rallumeurestendommageou mouilI& lesbrOleursde la
tablede cuissonne pourrontpass'aliumer.
o LaverlesgrilIesavecde I'eausavonneusetiede etun tampon _ recureren plastiquenonabrasif=Pourlessouillures
tenaces,nettoyeravecun tampon en plastiquenon abrasif,savonneux,ou avecune epongeet ia cremede nettoyage
pour tablede cuissonCooktopCleaningCreme*(produitn° 20000001]*t S'il restedessouiliures,appliquerde
nouveauIacreme pourtablede cuisson,recouvriravecun essuie-touthumide,et laissertremperpendant30 minutes.
Frotterde nouveau,rinceretfairesecher=
o Nepaseffectuerle nettoyageau lave-vaisselleou clanslefour autonettoyant=
o Pourutiliser[afonctionVerrouiHagedescommandespour le nettoyage,voirpage37.
o Laver,rinceretfairesecher.Ne pasutfliserun agentde nettoyageabrasifsusceptiblede rayerlafinition.
o Onpeut utiliserun produitde nettoyagedu verre,pulverised'abordsurun chiffon. NEPASprejeterlepred_lt
directement s_r les te_ches de cemma_de e_ s_r Fa_ficfle_ro
o Placerchaquebouton_ la positiond'ARRET,et retirerchaqueboutonen le tirant=
o Laver,rinceretfairesecher=Ne pasutiliser un agentde nettoyageabrasifsusceptiblede rayerlafinition=
o FairefonctionnerbrievementchaquebrOleurpourverifier que le boutonaete correctementreinstalle=
L'emaiIvitrifie estdu verrelie au metalparfusion.II peutsefissurerou s'ecailleren casde mauvaiseutilisation=II est
resistantauxacides,maispastotalement inattaquablepar lesacides=Tousles produits renverses,enparticulieracides
ou sucres,doivent_treessuyesimmediatementavecun Iingesec=
o Unelois refroidi,laveravecde reausavonneuse,rinceretsecher=
o Neiamaisessuyerunesurfacetiede ou chaudeavecun Iingehumide=Cecipourraitlafissurerou I'ecailler=
o Neiamaisutiliserde nettoyantspourfour, d'agentsde nettoyagecaustiquesou abrasifssurle fini exterieurde la
cuisiniere=
49

NETTOYAGE
Panneaux
mat6raux,tiroir
de remisage
et poign_es
de porte -
_U _OUr en verre
, Unefois lespiscesrefroidies,leslaver_ I'eausavonneusetiSde,rinceret s6cher.Nejamaisessuyerune surface
tiedeou chaudeavecun Iingehumide,ceci pouvantendommagerIasurfaceet entrainerune brOIurepar Iavapeur.
, PourIestachesrebelles,utiiiserdesagentsde nettoyageI6g6rementabrasifscommela pQteau bicarbonatede
soudeou BonAmR Nepasutiliser de nettoyantsabrasifs,caustiquesou 6nergiquescommelesnettoyantspour
four ou Iestamponsen Iained'acier.Cesproduitsraieraientou endommageraientde fagonpermanentelasurface.
Remarque : Utiiiserun linge ou un terchensec pour essuyer lespreduits renvers6s, surtout s'ils sellt acides
eu sucres. Lasurface peurrait se d_colerer eu se ternirsi la saiet6 n'_tait pas imm6diatemerst enlev_e. Ceci
est particuli_remellt important dartsle cas de surfaces blancheso
, Eviterd'utilisertrop d'eau,qui risqueraitde s'infiltrersousouderriSreleverreet detacher.
, Laver_ I'eauet au savon.Rinceravecde I'eaupropre ets6cher.Unproduitde nettoyagedu verrepeut6treutilis6en
levaporisantd'abordsur un linge.
, Nepasutiliser de produitsabrasifscommetampons_ r6curer,lained'acierou produitde nettoyageen poudrequi
risqueraientde rayerleverre.
_nt6rieur du four , Ex6cuter les instructionspr6sent6es aux pages 47-48 pour I'autonettoyagedu four,
Grilles du four
(certains modSles)
, Nettoyeravecde I'eausavonneuse.
, Eliminerlessouillurestenacesavecune poudrede nettoyageou un tampon_ r6curersavonneux.Rinceretfaire
s6cher.
, Si lesgrillessont laisseesdartsIefour pendantIecycled'autonettoyage,eilessed_colorentet peuventne plustr6s
bien glisser.Si ceciseproduit, appliquerpar essuyageun peu d'huilevSg_talesur la grille etsessupportsen relief
pour faciliterlemouvement,etenleverrexcSsd'huile.
, NEPAS UT_USERDEPRODUITSDE NETTOYAGECONTENANTDUJAVELLISANT.
"NEPASUT_USERDENETTOYANTS. ORANGE_ OUAR_AS_fSo
" TOUJOURSESSUYERDANS LESENSDE LA TEXTUREDEL'ACIERLORSDU NETTOYAGE.
, Nettoyage jo_maliedsalet_ 16g_re- EssuyeravecI'_mdesproduitssuivants:eausavonneuse,vinaigreblanc/eau,
produit de nettoyagepourverreet surfaceFormula409_ou un produitsemblablepourverre- avecun lingesoupIe
et une_ponge.Rinceret secher.PourpoIiretenleverlesmarquesde doigts,fairesuivrepar unevaporisationde
Magic Spray_pour acierinoxydabte[produit n°20000008]**.
, Salet_ mod_r_e/_paisse - EssuyeravecI'undesproduitssuivants:BonAmi",Smart Cleanse€ou SoftScrub"-
I'aided'un lingesoupleou d'uneepongehumide.Rincerets_cher.LestachesrebelIespeuvent_treenlevSesavec
un tampon multi-usagesScotch-Brite*humidi% Frotteruniformementdansle sensdu m_taLRinceret s_cher.
Pourredonnerdu hstre et retirerlesrayures,fairesuivrepar unevaporisationde MagicSpray_pouracier
inoxydable.
, D_eoloratio_ - A I'aided'une _pongehumidifi_eou d'un lingesouple,essuyerb raide du nettoyantCameo*pour
acierinoxydable.Rincerimm_diatementets6cher.Pourenleverlesmarqueset redonnerdu hstre,faire suivrepar
unevaporisationde Magic Spray_pouracier inoxydable.
* Lesnomsde marquesont desmarquesd_posSesdesdifferentsfabricants.
** Pourcommanderdirectement,composerle 1-877-232-6771E.-U.ou 1-800-688-8408Canada.
50

Porte du four
Ne Pasgrimpe[ sur!aportedu four ouverte,ou Juiimposer une
charge excessive.Cecip0ur[ait provoquerun basculementde !a
CUiSini6re,le brisde Japorteou desblessurespour la personne
concern6e.
Remarque : Onpout percevoirune certaine<<61asticit6>)Iorsde la
fermeturede Iaportedu four d'unecuisini_reneuve:ceciest
normal:cet effetdisparaftprogressivement.
Hublot du four
Pour proteger mehubmotde maporte du four :
1. NepasutiIiserde produits nettoyantsabrasifscommedes
tampons_ r6cureren lained'acier ou desproduitsde nettoyage
en poudrequi risqueraientde rayerleverre.
2. Nepasheurterle hublotenverreavecun ustensile,un articlede
mobilier,un iouet,etc.
3. Nepasformerla portedu four avantque lesgrillesne soienten
piacedartsle four.
Touted6gradationdu hublotde verre- rayure,choc,tension,etc.-
peutaffaiblir sastructureet augmenterle risquede bris_ une date
ult6rieure.
Pieds de r6glage de l'aplo b
V6rifier que la brideantibascu!ementagrippeconvenablement
I'undespiedsarri6rede r6glagede I'aplomb pour que la
Cu!s!nierene puissehasculeracc!dentel!ernent.
Lacuisini6redoit 6tred'aplombunefois install6e.Si #_
elle ne I'estpas,tournerIespiedsde r6glagede I _
I'aplomben plastique,_ chacun desanglesde Ia
cuisini_re,iusqu'_ce quecelle-ci soit d'aplomb. _,,JJ
PIED DE REGLAGE
DE L'APLOMB
Raccorde ent lectrique
Losappareils n_eessitant une amimentation
_mectriquecompoltent une fiche _ trois
5roehes raise_ la terrequi doit 6tre branchee
directementdansune prisede 120volts_ trois
cavit6set correctementraise_ laterre,
Toujoursd4brancherf'appardl avantd'yfa#ede
l'entretien.
La fiche _trois brochesraise_ la terrefournit une protectioncontre
lesd6charges61ectriques.NEPASCOUPERNI ENEEVER[A
BROCNE DE TERRE DU CORDON D'AUMENTATION.
Si la prisenecomporteque deuxcavit6s,n'estpasraise_ ia terreou
n'est pasappropri6e,mepropri_taire de m'appareiiamaresponsao
himit6de faire rempmacermaprisepar une prise _ trois cavit_s
correcteme_t raise _ materre,
Lampe four
' D6brancherJacuisiniSreavantde rempiacer['ampouJe.
; haiSserlefour refr0idiravantde rernplacerI'ampouJel
Sassurerque le CabochonetI ampoulesent fro!dsavantde los
touche_.
Pour remp_acer _'ampou_e du four :
I, AprSsIerefroidissementdu four, CABOCHON
maintenirIecabochontout en
enlevantia piScem6tailique
qui la maintienten place.
RE_ARQUE : Le cabochon
tomberasion neIemaintient
pasen place.
2. EnteverIecabochonet
[ampoule.
3. installer uneampoulede 40watts pour appareilm6nager.
4. R6instaIlerle cabochonet lefil m6tal%uede retenue.
5. R6tablirI'alimentationde lacuisini6re.R6glerde nouveau
I'horloge.
51

O placement d'un appareil
Lesraccordsdesappareils_ gazservant_ branchercet appare+[
Falimentationde gaznesont paspr6vuspour 6tred6plac6s
continuellement.Unefois I'appareiIinstall6,NF:PAS Ied6placerde
fa_onr6p6t6epour Ienettoyerou le changerde place.Si cet
appareildoit 6tred6menag_et/ou enlev6pour 6trer6par6,suivre la
m6thoded6critedartsIesinstructionsd'instailation.Pourtoute
information,prendrecontactavecleservice_ Iaclient6lede Maytag
au 1-800-688-9900E.-U.ou 1-800-688-2002au Canada.
IIfaut que Iepiedarri_rede IacuisiniSresoitengag6dansla bride
antibasculementpour que lacuisinierene puissebasculer
accidenteIIement.
Tiroir de remisage
Ne pasrangerdartscet[mir desart!clesde plastiqueou de
papier, desproduits inflammablesou desproduitsa!irnentaites.
Durant ]efonctionnementdu four, unetemp6mtureexcessive
pour cesarticlespeuts!6tabiirdans[etiro+r.
Sole du four
Prot6gerIasoledu four contre Iesrenversements(o[)articuli6rement
pour Iesproduitsacidesou sucrQs},quipeuventsusciterun
changementdecouleurde I'6mailvitrifi6. Utiliserun ustensilede la
tailIeappropri6epour 6vitertout renversementou d6bordement.
La soledu four peut 6treenlev6epour permettreun nettoyageplus
facile.
Depose :
Apr_sle refroidissementdu four,retirerIes
grillesdu four. Fairecoulisservers]'avantdu
four lesdeuxpitonssitu6sdanslesangles
arriSrede Iasoledu four.
SouleverIebord arrierede Iasoledu four,
puis lafaireglisserversI'arrierepour
d6gagerle bordavant de lapattie frontale
du chSssis.Retirerla soledu four.
Reinstallation :
Engagerle bord avantde Iasoledu four clansla pattiefrontale du
chassisdu four. AbaisserI'arriSredelasoleet fairecouHsserles
deuxpitonsversI'arriSrepourimmobiliserla soleen place.
Letiroir de rein[sagepeut6treenJev6pour vouspermettrede
nettoyersousla cuisini6re.
Depose :
1=Vider[etiroir et[etirerjusqu'_ [apositionde [apremierebut6e+
2. SouleverI'avant.
3. Tirerjusqu'a [aposition de lasecondebut6e.
4. SaJsirletiroir par lescOt6setsoulever/tirerpour ['extraire.
Reinsta[[ation :
1. InsSrerIesextr6mit6sdesgiissiSresdu tiroir danslesrailsde la
cuisiniere.
2. SouleverI'avantdu tiroir et pousserdoucementjusqu'_ la
positionde la premiSrebut6e.
3. Souleverde nouveauletiroir et lepousserpour lefermer.
52

PROBL_ME SOLUTION
Pourla plupart des probl_mes , Verifierque Iescommandesdu four sont correctementreglees.
observes, essayer d'abord lea , Verifiersi lefour est biersraccord6au circuit 61ectrique.
sore,lionspossibmes,_ droite. , Inspecter/r_armerle dis]oncteur.InspectedremplacerJesfusibles.
, ContrOlerIasourced'alimentation6Iectrique.
Un bremearde surface ne s'ammume , Verifierque I'appareiIestcorrectementraccord6_ lasourced'61ectricite.
paso , Determinersi I'alimentation6tectriqueest interrompue(fusiblegrilIe/disjoncteurouvert}.
° Verifierque I'allumeurestsec et qu'iI 6metdes6tJncelles.LebrOleurne peuts'allumersi
I'allumeurestendommage,souill6oumouille.SiI'allumeurnegenerepasd'etincelles,ramener
le boutonde commande_ la position OFF(ARRET}.
Flammes hen unifermeso , Orificesdu brOleurobstrues.
Separation entre les flammes et , VeilIera placercorrectementrustensilesur Iagrille du brOleur.
le breleuro
Resaltats de caisson aa four , Verifierque Iatemperatureselectionneeest correcte. VeiJler_ prechaufferJefour si
differents des attentes ou de eeu× ceciest demand6danslarecette.
produits par le four anterieur. , D_terminersi I'eventdu four estobstrue.Voirsonemplacementpage45.
• S'assurerque tacuisiniereest d'aplomb.
, Lesreglagesde temperaturevarientsouvententreun four neufet Iefour qu'iIremplace.
Onobservesouventune delivedu reglagede temperatured'un four a mesurequ'iIvieillit:
il peutdevenirpluschaudou moinschaud.Voir page44 Iesinstructionsd'aiustementde
latemperaturedu four.REMA_QUE: IIn'estpasutilede modifierlereglagedetemperature
si lavariationn'affectequ'uneou deuxrecettes.
, UtiliserIesborisustensiles.Lesustensilesfoncesdonnentun brunissementdecouleurfoncee,
lesustensilesbrillants,un brunissementplusclair.Pourd'autresinformationsau sujetde la
cuissonau four,voir Iab_ochureLa cuissonsimplifiee.
, Verifierla positiondesgrillesetdesustensiJes.Lorsde larepartitionsurdeuxgrilles,ne pas
superposerIesplats. Veillera laisserunespacede 2,5a 5cm (1 _2 po} entrelesplatset les
paroisdu four.
, ContrOlerI'utilisationde feuJlIed'aluminiumdansIefour. Nejamais recouvrircompletement
unegrilledufouravecdelafeuilled'aluminJum.Placerun petitmorceaudefeuilled'aluminium
surla grille sousle plat pourrecupererlesmatieresrenversees.
R_sultats ineorreets lots de la , Determinerla positiondesgrilles.Lesalimentspeuvent6tretrap presdesflammes.
caisson au gril, ou 6mission , Utilisationincorrectede feuilled'aluminium.Nejamais garnir lagriJlede lechefriteavec
e×eessive de fum_e, de Iafeuille d'aluminium.
° EnleverI'excesde graissesur Iapiecede viandeavantla cuissonau gril.
UtiIisationd'uneIechefritesouillee.
PrechaufferIefour pendanttrois minutesavantde placerle platdansle four.
Portedu four fermeedurant la cuissonau gril.
53

mposs b m t d'autoaettoyage
du four.
Le four ne se nettoie pus
correctement.
Lu po_e du four ne se d6verrouiHe
pus apr_s m'autonettoyage.
Accumumationd'humidit_ sur me
hubmotou vapeur so,ant de m'_vent.
Emission d'une forte odeur oude
fum emorsdemum seenmarche
du four.
Codes d'anomamie,
Des bruits se font entendre.
Determinerque rappareiln'a pas6t6programmepour un autonettoyagediff6r6.Voir
pages47-88.
Verifierque Iaporteest ferm6e.
Verifiersi la commandeest en modesabbat.Voirpage43.
Le fourest peutetre_ une temperaturesup6rieure_ 205°C [400°F).Latemperaturedu
fourdoitetreinf6rieure_205°C[400°F[}pourpouvoirprogrammerun cycled'autonettoya%
° Untempsde nettoyagepIus long peut6tren6cessaire.
° Onn'apas61imin6avantI'op6rationd'autonettoyageIesaccumulationsexcessivesder6sidus,
particulierementlesr6sidusd'alimentsacidesousucres.
° L'interieur du fourest encorechaud.Attendreenvironune heureapresI'achevementdeIa
p6rioded'autonettoyage.IIestpossibled'ouvrirlaporteapresladisparit[ondu messageLOCK
(VERROUILLAGE:}sur I'afficheur.
, Lescommandeset la portesontpeut-etreverrouill6es.Voir page37.
° Ceciest normaldurant lacuissond'alimentscontenantbeaucoupd'eau.
UtiJisat[onexcessived'humidit6Jorsdu nettoyagedu hublot.
Ceciest normalpour un four neufet disparaitaprasquetquesutitisations.
Uncycled'autonettoyage_<brCJIera_plusrapidementlesodeurs.
La miseen marched'un ventiIateuraidea retirerfumee etodeurs.
Presencede salet6ssur lasole.Proc6dera un autonettoyage.
LesrootsBAKEouLOCKpeuventclignoterrapidement_['afficheurpourpr6venird'uneerreur
oud'unprobleme.SilemotBAKEouLOCKparatt_I'afficheur,appuyersurIatoucheCANCEL.
Si le mot BAKEou LOCKcontinue_ clignoter,d6brancherrappareiLAttendre quelques
minutes,puisrebrancherI'appareiLSilemotcontinue_clignoter,d6brancherI'appareilet
prendrecontactavecun reparateurautorise.
SiIefouresttressale,lesflammechespeuventproduireuncoded'anomalieaucoursducycle
d'autonettoyage.Appuyersur Iatouche CANCELet IaisserIefour refroidircompietement,
essuyerlasalet6enexcespuisreprogrammerI'autonettoya%Silecoded'anomalier6apparait,
prendrecontactavecun r6parateurautoris6.
Lefourfair phsieurs bruits faib[es,lI estpossibled'entendre[esre[aisdufour quisemettent
en marcheets'arretenLCeciest normal
AIorsqueIefourser6chauffeetserefroidit,iIestpossibled'entendredesbruitscorrespondant
ladiIatationet_ lacontractiondespiecesm6tailiques.Ceciest normalet n'endommagepas
I'appareiL
_mn'ya n_hip ill affinhage. Le four est peut-etre en mode sabbat. Voir page 43.
_ SAb _ cmignolepuis
reste ammum_.
Le fourest en modesabbat.Pourannuler,appuyersurla toucheClocket maintener-la
enfonc6ependantcinqsecondes.
54

Garantie complbte d'une annbe _Pieces
et main=d'_uvre
Durant unep6fioded'un (1} an _compterde la date
de ['achatinitial aud6ta[LtoutepLecequl serdv6ie_aff
ddectueuse aansdesconditionsnormalesd'usage
menagersets repareeou remp[ac6egra[uitemem.
Residents canadiens
Lesgarantiesc[-dessuscouvrentun apparellinstalld
au Canada,seuements'il a 6t6ag[_6par lesagences
detest habilitees(v_rificationde la conformit6_ une
normenationaledu Canada),saufsi I'appareila ete
introduit au Canada_ I'occas_ond'un changementde
rSs_dencedesEtats-Un[sve[sle Canada.
Garantie limit6e hers des Etats-Unis et
du Canada = PiSces seulement
Pendan-_unepefioded'un (1} an _compterde la
oa[ede [achat m_tlalaud6tal[,toute piecequl se
r6v6ieraitddectueuse dansdesconditionsnormales
d'usagem6nagerserarepareeou remplac6e
gratultement(pieceseulement);le propfi_tairedevra
assumertousies autresfrais ycomprisfra[s de main-
d'ceuvre,deaep_acement,detransporLue
HIom6trageel de d agnostic,lecas ecn6ant.
Lesgarantiessp_cifiquesfom_ut_es¢i-dessussentles
SEULESquele fabricantaccorde.Cesgarantiesvous
cont_rentdesdroitsjuridiquessp_cffiqueset vous
pouvezegalementjouird'autresdro/[s,vanablesd'un
dtat b/'autre,d'unepmwncea uneautre.
Ne sent pas couverts par ces
garanties ."
1= Lesdommagesou d_rangementsdus_:
a=Miseen service,Iivraisonou entretieneffectu_sincorrectement=
b=Toutereparation,modification,aItdrationettout r_glagenonautorisSspar
Iefabricantou parun prestatairedeserviceapr_s-venteagrSe=
c=Accidents,mauvaiseutiIisationou usageabusifou ddraisonnable=
d=Aiimentat[on8tectrique[tension,intensite)incorrecte=
e=Rdglageincorrectd'unecommande=
2= Lesgarantiesnepeuvent6trehonorSess[ iesnum6rosde s_ried'origine ont
_t8enlevds,modifiesoune sent pasfacilementlisibles=
3, Ampoules,
4. Appareilsachet_sauxfins d'usagecommercialou industdeL
5. Lesfrais devisited'un prestatairedeserviceou de serviceapres-vente
encouruspour lesraisonssu[vantes:
a.Correctiond'erreursde raiseen service.
b.Initiationde rutilisateur_ I'emploide I'appareil.
c.Transportde I'appareiIauxIocauxdu prestatairede service.
6. Dommagessecondairesou indirectssubispar toute personnesuite au non-
respectde cesgarant[es.Certains8tatsou provincesne permettentpas
I'exclusionou la limitationdesdommagessecondairesou indirects;par
consSquentIeslimitationsou exclusionsci-dessuspeuventne pas
s'appliquer_votrecas.
Si l'i terve tio r parate r est
• Contacterle detaillantchezqui rappareila et_achetd,ou contacter
MaytagSewicesS_/service_ la clientelede Maytagau 1-800-688-9900[.-U.
ou 1-800-688-2002au Canada,pourobtenir lescoordonneesd'uneagencede
serviceagrede.
• Veiller_ conserverla factured'achatpouriustifier de la validit8de la garantie.
Pourd'autresinformationsen cequi concemelesresponsabilitdsdu
propri_taire_ 1'Sgarddu servicesousgarantie,voir Ietextede IaGARANTIE
• Si IedStailIantou I'agencede serviceaprSs-ventene peut resoudreIe
problSme,dcdre_ MaytagServicess_,attentionCAR Center,P.O.Box
2370,Cleveland,TN 37320-2370outdlSphonerau 1_800_688_9900 Eo_Uoo_
1_800_688_2_02 a_ Canada.
• Lesguidesd'utiIisation,Iesmanueisdeserviceet tesrenseignementssur Ies
piecessent disponiblesauprSsde MaytagServicess_,service_ la clientSlede
Maytag=
Re_atq_es :
Lorsdetout contacteoncemantun probl_me,fournir I'informationsuivante:
a. Nora,adresseet num_rode t_I_phonedu client;
b=Num_rode modSIeet num_rode sSriede I'appareii;
c=Noraetadressedu ddtaillantou de ragencede service;
d=DescriptioncIairedu prob!6meobserve;
e=Preuved'achat (facturedevented=
55

®
Estufa a Gas con Controma
Precisi6n Sensible al Tacto 800
Tabla de lVlaterias
lnstrucciones lmportantes
sobre Seguridad ........................57-61
Cocinando en la Estufa ............ 62-83
Controles
Quemadores de GasSellados
Cocinando en el Homo ............64=74
Horneado
'Cook & Hold'
'Cook & Hold' Diferido
Asar a la Parrilla
Mantener Caliente
Parrillas del Homo
Cuidado y Limpieza .................. 75-78
Homo Autoiimpiante
Procedimientos de Lirapieza
tVlantenimiento ..........................79-80
Luz _ Ventana del Horno
Retiro de UaEstufa a Gas
Localizaci6n y Soluci6n
de Avedas ...................................81 =82
Garantia y Servicio ..........................83

Censumido[: POtfavorleay conserveestagu[apara[derencia
futura. Conserveeltecibo de compraY!Oel chequecaneelado
ComoComprobante de £ompra.
N0merode Modelo
NSmeEode Serie
FechadeCompra
1-800_688-9900 EE,UU.
Intemet:httpJ!wvcw,rnaYtag_com
Ennuestrecontinuo dan de mejo[arla calidady rendimientode
nuestros electrodorn6stic0s,puede que seanecesariomodi[icar
e!ectrodom6stieoSinaetua!izarestagu[a.
Para in[ermacifin seflre servide, ver p#g#la 83.
Lea y siga todas las instrucciones antes de usar este
electrodom_stico para evitar el riesgo potencial de incendio,
choque el6ctrico, lesi6n personal o da_ioal electrodom6stico
como resultado de su uso inapropiado, Utilice este
electrodomestico solamente para el prop6sito que ha sido
destinado segQnse describe en esta guia,
Para asegurar funcionamiento correcto y seguro: El
electrodom6stico debe ser instdado debidamente y puesto a
tierra por un t6cnico calificado, No intente ajustar, reparar,
prestar servicio o reemplazar ninguna pieza de este
electrodom6stico a menos que sea espedficamente
recomendado en esta guia, Todas las reparaciones deben ser
realizadas por un t6cnico calificado, Pida al instalador que le
indique la ubicaci6n de la v_lvula de cierre del gas y como
oerrarla en oasode una emergencia,
Siempre desenchufe el electrodom6stico antes de efectuar
alguna reparaci6n,
= No almacene ni use gase!iaa n! etres vaperes y
liquides iaflamab!es ea la veCindad de este
-QUE HACERS_ PERCIBEOLORAGAS:
Las advertencias e instrucciones importantes sobre seguridad
que aparecen en esta guia no est_indestinadas a cubrir todas
las posiNes circunstancias y situaciones que puedan ocurrir,
Se debe ejercer sentido comuJn,precauci6n y cuidado cuando
instale, redice mantenimiento o haga funcionar el artefacto,
Siempre p6ngase en contacto con su distribuidor, agente de
servicio o fabricante si surgen proNemas o situaciones que
usted no comprenda,
Reconozca los simbolos, advertencias,
etiquetas de seguridad
, Llame inmediatamente a SU preveeder de gas
desde el te!_fene _e un veciao0 S!ga las
iastruccienes prepercienadas per el preveeder
ae gas,
o Si nO #_e_e lecalizar asa prevee_er _e gas,
Ilame a! c_erpe _e be_r_beros.
La instalaci_a y repa[acieaes _eben set efectua_as
per aa t_caice cal!fica_e, _aa ageacia de
reparacienes e el prevee_er _e gas.
ADVERTENClA _ Pe!ig[oo pr_cticas nOseguras que
PODRIAN causar lesidn personal menos grave,
detectados pot ei olor sohmente. Los proveedores de gas
rec0miendan que comp[e e instaie un detector de gas
acuerdo con lasinst[ucciones del [abdcante.
57

lnstruccienes Generates
Para vefificar si eI disposidvo est,1debidamente instaiado, mire
debajo de la estufa con una linterna para asegurarse de que
uno de los torniiios nivehdores traseros este debidamente
enganchado en Uaranura del soporte, EUdispositivo antivuebo
asegura el tornillo niveBdor trasero al piso cuando est,1
debidamente enganchado, Esto debe verificarse carla vez
que la estufa sea movida,
Pata Evitat tin lncendie e
Da e Causade per emHume
Asegurese de que se hayan retirado todos los materiabs de
empaque del ebctrodomestico antes de su use,
Mantenga el _rea drededor del ebctrodom_stico libre y
exenta de materiabs combustibles, gasolina u otros vapores y
materiabs infiamabbs,
Si el ebctrodom6stico es instalado cerca de una ventana, se
debe tener cuidado para evitar que las cortinas pasen sobre
los quemadores,
NUNCA deje articulos sobre la cubierta de la estufa, Elaire
cdiente del respiradero puede encender los articulos
infiamabbs y aumentar la presi6n en los envases cerrados
hasta haceflos reventar,
Muchos envases de %0 aerosol son EXPLOSIVOScuando son
expuestos al calory pueden ser dtamente infiamabbs, Evite
su use o su almacenamiento cerca del ebctrodom6stico,
Muchos pl4sticos son vulnerabbs al caior, Mantenga los
plasticos abjados de Bs piezas de la estufa que puedan estar
tibias o cdientes, No deje articulos de pl4stico sobre la
cubierta de la estufa pues se pueden derretir o ablandar si
est4n demasiado cerca del respiradero o de un quemador
Para eiiminar ei riesgo de pasar sobre los quemadores
superiores calientes, no se deben guardar articulos en los
armarios que est_indirectamente sobre la estufa, Si tabs
armarios son usados para almacenamiento, debe limitarse a
colocar art[culos de use poco frecuente y que pueden
guardarse en forma segura en una _rea que est,1sujeta ai
calor proveniente de la estufa, Lastemperaturas pueden no
ser apropiadas para algunos articulos, tal come liquidos
volatiles, limpiadores o sprays en aerosol,
En Case de lncendie
Apague el ebctrodomestico y la campana de ventiBci6n para
evitar que las llamas se dispersen, Extinga las llamas luego
encienda la campana para expubar el humo y el olor,
, En la cubierta: Apague el fuego o la llama en una sarten
con una tapa o una bandeja de hornear,
NUNCA levante o mueva una sarten en llamas,
, Fn el homo: Apague el fuego o la llama cerrando la puerta
dei homo,
No use agua en los incendios de grasa, Use bicarbonate, un
producto quimico seco o un extinguidor del %o con espuma
para apagar un incendio o ia llama,
Seguridad para Ni es
seriamente,
NUNCA deje a los nixies solos o sin supervisi6n cuando el
electrodom6stico est6 en use o este caliente,
NUNCA permita que los nixies se sienten o se paren en
ninguna parte del electrodom6stico pues se pueden lesionar o
quemar,
58

Se bs debe ensehar a los ni_iosque eI ebctrodom_stbo y
los utensiiios que est_in en eIo sobre 61pueden estar
calbntes, Deje enfnar los utensiiios calbntes en un lugar
seguro, fuera deI abance de los ni_iospeque_ios, Se bs
debe ensdiar a los ni_iosque un ebctrodomOstbo no es un
juguete, No se debe permitir que los ni_iosjueguen con los
controbs u otras pbzas de la estufa,
NUNCA usela puerta de este eiectrodomOsticocomo peldaho
o asiento ya que el electrodomOsticose puede volcar,y causar
lesiones graves.
NUNCA use este electrodomOstico como caiefactor de area
o para elevar la temperatura de la habitaci0n. Esto puede
causar envenenamiento por monOxido de carbono } el
sobrecalentamiento del homo,
NUNCA cubra ninguna rendija, agujero o canal en la parte
inferior dei homo o cubra la rejiiia completa con materiabs
tales como ei papei de aluminio. Esto evita que ei aire fiuya
a traves del homo y puede causar envenenamiento pot
monOxido de carbono. El papel de aiuminio tambien puede
contener el caiory producir un riesgo de incendio,
NUNC#, obstruya elflujo dei aire de combustion _ de
ventilaciOncubriendo lasentradas o saiidas de aire dei homo,
Esto puede restdngir el acceso dei aire a losquemadores
causar envenenamiento pot mon0xido de carbono,
Ei respiradero dei homo se encuentra debajo dei protector
trasero,
Evite tocar el area del respiradero mientras el homo est6
encendido y durante varios minutos despues de haberlo
apagado, Aigunas partes dei respiradero y dei area que io
rodea se calientan Io suficiente como para causar
quemaduras, DespuOsde apagar ei homo, no toque ei
respiradero o el area que Io rodea hasta que haya tenido
suficiente tiempo para enfriarse,
Qtras superficies que pueden estar calientes incluyen la
cubierta, las superficies que est_n dirigidas hacia la cubierta,
el respiradero del homo, la superficie cercana a la abertura del
respiradero, ia puerta dei homo y ia area que ia rodea, y ia
ventanilla del homo,
Seguridad Para Coeinar
Siempre coioque un utensiiio en un quemador superior antes
de encenderio, AsegSrese de usar ia periiia correcta que
controia cada quemador superior, AsegSrese de encender ei
quemador correcto y comprobar de queen efecto ei
quemador haya sido encendido, Cuando haya terminado de
cocinar, apague ei quemador antes de retirar ei utensiiio para
evitar exposiciOn a la llama del quemador,
Siempre ajuste ia llama dei quemador superior de modo que
no se extienda mas alia dei borde inferior dei utensiiio, Una
llama excesiva es peiigrosa, desperdicia energia y puede
da_iar ia estufa, ei utensiiio o los armarios que est_insobre ia
estufa,
NUNCA deje sin supervision ia cubierta de ia estufa cuando
este cocinando, especiaimente cuando usa un ajuste de caior
alto o cuando est6 usando una freidora, Los reboses pueden
producir humo y los derrames de grasa pueden infiamarse,
Limpie los derrames grasosos tan pronto como sea posibie,
No use caior alto durante periodos de cocciOn proiongados,
NUNCA caiiente un envase cerrado en ei quemador superior
o en el homo, La acumulaciOn de presiOn puede hacer
explotar el envase causando una lesiOnpersonal grave o daho
a la estufa,
Use tomaollas secos y gruesos, Los tomaollas humedos
pueden causar quemaduras a causa dei vapor, Lastoaiias u
otros sustitutos no deben ser usados como tomaollas porque
eiios pueden quedar coigando a traves de los quemadores
superiores y encenderse o enredarse en ias piezas de ia
estufa,
Siempre deje enfriar ia grasa caiiente que se ha usado en ia
freidora antes de intentar mover o manipuiaria,
No permita que se acumule grasa u otros materiales
inflamables en la estufa o cerca de ella, en la campana o en el
ventiiador aspirador, Limpie iacampana extractora con
frecuencia para evitar que ia grasa u otros materiaies
inflamables se acumulen en la campana o en el filtro,
Encienda el ventilador cuando cocine alimentos flameados
debajo la campana,
NUNCA use vestimentas de materiales inflamables, ropa
suelta o de mangas largas cuando est6 cocinando, La
vestimenta se puede encender o enganchar en los mangos de
los utensilios,
No toque un foco de homo caliente con un paHiohumedo ya
que se puede romper, Si ei foco se rompe, desconecte ei
suministro eidctrico ai eiectrodom6stico antes de retirar ei foco
para evitar un choque eiOctrico,
59

Sbmpre coIoque Bs parriiias deI homo en la posid6n deseada
cuando eI homo est6 frio. Desibe la parriih deI homo hacia
afuera para agregar o retirar aiimento, usando tomaoiBs secos
y resbtentes. Siempre evite abanzar dentro deI homo para
agregar o retirar aiimentos. Si una parriiia debe ser sacada
cuando est,1todavia caibnte, use un tomaoiias seco. Siempre
@ague eI homo despu_s de haber terminado de cocinar.
Tenga cuidado cuando abra la puerta deI homo. Deje que
escape eI aire o eIvapor caiiente antes de sacar o voiver
coIocar eI aiimento.
ADVERTENCmASOBRE LOS ALIMENTOS PREPARADOS:
Siga Bs instrucciones del fabricante de los alimentos. Si un
envase de pldstico de alimento congeBdo y/o su tapa se
deforma, se comba o se da_iade alguna otra manera durante
la cocci6n, descarte inmediatamente el alimento y su envase.
Elalimento puede estar contaminado.
NUNCA use papel de duminio para cubrir una parrilh del
homo o la parte inferior del homo. El uso incorrecto puede
resultar en un riesgo de choque el6ctrico, incendio o da_o al
ebctrodomestico. Use papel de duminio soBmente como se
indica en esta guia.
Utensilios Apropiados
Use sartenes con rondos pBnos y mangos que sean fdcibs de
tomar y que permanezcan frios. Evite usar sartenes u ollas
inestabbs, combadas que se pueden vobar fdcilmente u olBs
cuyos mangos esten sueltos. Ademas evite usar utensilios
especidmente pequeSos o sartenes con mangos pesados
pues ellos pueden ser inestabbs y vobarse fdcilmente. Los
utensilios que son pesados de mover cuando est_inIbnos con
alimento pueden tambien ser un peligro.
Asegurese de que el utensilio sea Io suficientemente grande
como para contener en forma debida los alimentos y evitar
derrames. El tamaSo es particuhrmente importante cuando
se utilizan freidoras. AseguJresede que el utensilio tiene
capacidad para ei voiumen de aiimentos que seva a agregar
ai iguai que para ia formaci6n de burbujas de ia grasa.
Para reducir a un minimo las quemaduras y que los materiales
inflamables y los derrames se enciendan debidos a contacto
no intencional con el utensilio, los mangos no deben
extenderse sobre el quemador superior adyacente. Siempre
gire los mangos de los utensilios hacia el lado o hacia la parte
trasera de la estufa, no hacia la habitaci6n donde puede ser
f_cilmente golpeados o alcanzados por los ni_os peque_os.
Nunca deje que un utensilio hierva hasta quedar seco pues
esto puede da_iar el utensilio y la estufa.
Siga las instrucciones del fabricante cuando use bolsas para
cocinar en el homo.
Solamente ciertos tipos de utensilios de vidrio cer_mico, de
ceramica o glaseados son convenientes para uso en la
cubierta de la estufa o en el homo sin quebrarse debido al
cambio repentino de temperatura. Siga las instrucciones del
fabricante cuando use utensilios de vidrio.
Esteelectrodomestico ha sido probado respecto a su
rendimiento seguro usando utensilios de cocina
convencionales. No use ningun dispositivo o accesorio que no
haya sido espedficamente recomendado en esta guia. No use
tapas para cubrir los quemadores superiores, rejiiias para ia
cubierta de la estufa ni agregue sistemas de convecci6n para
hornos. El uso de dispositivos o accesorios que no son
expresamente recomendados en esta guia, puede crear serios
peligros de seguridad, resultar en problemas de rendimiento y
reducir la vida utii de los componentes de la estufa.
Seguridad de la Limpieza
Apague todos los controles y espere que se enfrien las piezas
de la estufa antes de tocarlas o limpiarlas. No toque las
rejillas de los quemadores o las _reas circundantes hasta que
elias no hayan tenido tiempo suficiente de enfriarse.
Limpie la estufa con cuidado. Tenga cuidado para evitar
quemaduras de vapor si se usa una esponja o un patio mojado
para limpiar los derrames en una superficie caliente. AIgunos
iimpiadores pueden producir vapores nocivos cuando se
aplican a una superficie caliente.
Homo Automimpiante
No deje a!imento ni utensilios de c0cina, etc. en e! homo
durante el cicio de autolimpieza_
Limpie solamente las piezas que se indican en esta guia. No
iimpie ia junta de ia puerta. La junta es esenciai para un
sellado herm6tico. No restriegue, ddie, ni mueva la junta de
la puerta. No use limpiadores de homo de ninguna clase en el
homo ni alrededor de cualquier parte del homo autolimpiante.
6O

Antes de la autolimpieza del homo, saque la asadera, las
parrillas del homo y otros utensilios y limpie los derrames
excesivos para evitar que se produzca demasiado humo,
Ilamaradas o llamas.
Esnormal que la cubierta de la estufa se cdiente durante el
ciclo de autolimpieza, Pot Io tanto, se debe evitar tocar la
cubierta durante un ciclo de autolimpieza,
Aviso y Advertencia
lmportante Sobre Seguridad
La Propuesta 65 de la Ley de 1986 del Estado de California
Sobre Seguridad y Contaminad6n del Agua Potable (California
Safe Drinking Water and Toxic Enforcement Act of 1986_}exige
que el Gobernador de California publique una lista de las
sustancias que segun el estado de California causan c_incer o
ddio al sistema reproductivo y exige que lasempresas
adviertan a sus dientes sobre la exposici6n potencid a tales
sustancias.
Se advierte a los usuarios de esta estufa que la combusti6n
del gas puede resultar en exposici6n de bajo nivel a algunas
de las sustancias publicadas en la lista, induyendo benceno,
formddeh[do y hollin, debido principalmente a la combusti6n
incompleta del gas natural o de los combustibles de petr61eo
licuado. Los quemadores ajustados en forma debida
reducir_n la combusti6n incompleta. La exposici6n a estas
sustancias puede tambi6n set reducida a un minimo
ventilando los quemadores al exterior en forma adecuada.
Se advierte a los usuarios de este electrodom_stico que
cuando el homo est,1funcionando en el cido de autolimpieza,
puede haber exposici6n de bajo nivel a dgunas de las
sustancias indicadas en la lista, induyendo mon6xido de
carbono. La exposici6n aestas sustancias puede set reducida
a un minimo ventilando el homo al exterior en forma
adecuada, abriendo las ventanas y/o la puerta en la habitaci6n
en donde est,1ubicado el electrodom_stico durante el cido de
AVISO IMPORTANTE RESPECTOA LOS PAJAROS
DOMESTmCOS:
Nunca mantenga los p_ijarosen [a cocina o en [as
habitaciones donde puedan [[egar los humos de [a cocina. Los
p_jaros tienen un sistema respiratorio muy sensitivo. Los
humos producidos durante el cido de autolimpieza del homo
pueden set perjudiciales o mortales para los p_ijaros. Los
humos que despide el aceite de cocina recalentado, la grasa,
margarina y los utensilios antiadherentes recalentados pueden
tambi6n set perjudicides.
Conserve estas lnstrucciones para Referencia Futura
61

%0' (Bajo}:Seusaparacalentaralimentosa
fuegobnto, mantenerlosalimentoscalientesy
derretirchocolateo mantequilla. Sepuede
cocinaren el ajuste'LO' siemprequeel
utensilioest6tapado. Esposibb reducirel ca!or
girando laper[!laa la posiciOn'OFF'CApagado}.
Asegt_resede que la llamaseaestable.
Controies Superiores
o Si Jallamaseapagacuandoest6codnando, apagueel
quemador. SJsede_ectaun oJorfuerte a gas.aura unaven[ana
y espereclnco mlnu[osan[esde volvera encenderel quemador.
- Aseg0resedequetodos JoscontroJessuper!oreses_6nen Ja
pos+ciOn+OFF'[Apagadoflamesde summlstrargasa Jaestufa.
, NUNCA toque [asupefficiede Jaestufahastaque nose Iaya
enfl ado. S_esperadeque algunasde laspJezasdeJa
superfJcie,especiah_/enteaJrededorde loseJementos+se
entlbieno calientenmiem+asest4coclnando. UsetomaolJas
paraprotegersusmanos.
Eneendide Sin Pi[oto
ElencendidosinpiIoto eliminala +APADELQUEMAUOR
necesidaddeuna [uzpiloto
constantepermanente.Cada {
unode losquemadores
super!orestiene un encendedorde
chispa.Tengacuidadocuando
limpiealrededordel quemador
auperior,
Si el quemadorsuperior O"B_/'f__._j_/\\
no enciende,vedfiquesi el "__e,,_+nd_,+o_
encendedorest4roto,sucio o ___
mojado.
BASE DEL QUEMADOR
PeriJlas de Contro[ de los
Elementos Superiores
Seutilizanparaencenderlosquemadoressupedores.Sedisponede
una seiecci6ninfinita deajustesde caJordesde'LO' a 'Hi' (Bajoa
Alto)=EneJajuste'H_'sepuedesentirun tope o una muesca. Las
perillaspuedenserajustadasexactamenteen Josajustes
correspondbnteso entrecualqubra de eJJos.
'Hi' (AJto):Seusaparahauerhervirun Iiquidoo
a[canzar[apresi6nadecuadaen una o[[aa J
presi6n. Siemprereduzuae[ajustea un calor 1
rodsbajocuandolos[iquidoscomiencena hervir
o cuandolosaiimentoscomiencena cocinarse.
Seusauna llamade tamafiointermediopara
continuarcocinando. Elalimentono secocinar_
m4sr4pidocuandoseusaun ajustede [Jama
m4salto que e[necesariopara mantenerun
hervorsuave. EIaguahiervea la misma
temperaturasi est_hiwiendosuaveo
vigorosamente.
O O LasiJustracionescercade Japerilia identificancuaiesel
_O O quemadorquecontroia esaperiila. Porejemplo,la
iJustraci6na izquierdamuestra[aubicaci6ndel quemador
deJanteroizquierdo.
Programaci6n de los Controles:
E[tamafioye[tipo de utensiJioafectar4nel ajustede caJor.Para
informaci6nsobre[osutensiJiosyotrasfactoresque afectan[os
ajustesde calor,consuJtee[foJJeto"La CocinaF4ci[".
1. Co[oqueun utensiJiosobre[arejiJlade[quemador.
• La [lamade[quemadorpuedeievantarseo parecerseparada
de[orificio si no seco[ocaun utensiJioen [arejiJJa.
2. Oprimay gire [aperiJlaa [aizquierdaa[ajuste'LiTE' (Encendido}.
, Seoir4 un chasquido(chispa}y e[quemadorseencender4.
(Loscinco quemadoresproducir4nchispacuandoseco[oca[a
periJJade cualquierade [osquemadoresen [aposici6n'UTE'.}
3. Despu6squeel quemadorseha encendido,gire [aperiJJaa[
tamaiio de [[amadeseado.
, E[encendedorcontinuar4produciendochispashastaque [a
perJJJaseagirada m4saJ[_de [aposiciOn'LITE'.
Funcionamiento durante una
[nterrupci6n de [a Energia
Cuandose enciendenlosquemadoressuper!ores,aseg0resede}
que todas [asperi!jasde contro!est_nen [aP0s!ciOn'OFF!
Pr+meroenciendaelf6sforoy mant6ngaJ0en posiciOnantesde
girar [aperi!laa!ajuste+L[TE':
1. Acerqueun f6sfom encendidoa [acabezade[quemador
superiordeseado.
2. Optimay gire [aperiJJade control Jentamentea Japosbi6n 'L[TE'.
3. Ajuste [a[lamaaJniveJdeseado.
62

Para evitar que [a cubierta se descomore o se
• Limpielacubierta de laestufadespu6sdecadauso+
• Limpielosderrames_cidoso azucaradostan prontocomo la
cubiertasehayaenfriadopuesestosderrames
puedendescolorarla porcetana+
A diferenciade unaestufaconquemadoresde
gasest_ndar,estacubiertano selevantanl
tampocoesremovible+Ne iiitente/evalltaHa
cubierta per ning_n metive.
Quemadores Seminaries
LosquemadoresseIIadosdesu estufaest_naseguradosa [a
cubiertay no harts[dodisefiadosparasersacados+Debidoa que
losquemadoresest_nseiiadosen [acubierta,[osderrameso
rebosesnoseescurrirSndebajode [acubierta de laestufa+
Sin embargo,losquemadorespuedenserI[mpiadosdespuesde
cadauso+Lapartede [acabezade[quemadorpuedeset faciImente
sacadaparasu limpieza+[Veren la p_gina77 lasinstruccionessobre
[a[impieza,)
Lascabezasde Josquemadoresdebenestarcorrectamente
coJocadasen JabasedeJquemadorafin deque 6stefuncionede
maneraapmpJada.
Quemadores de Alto
Existeun quemadorde altorendimiento06.000 BTU*}en suestufa,
situado en Japosici6nderechadeJantera.Hayun quemadorde
12.000BTU*situadoen JaposiciOndelanteraizquierda.Estos
quemadoresofrecencocci6nm4sr_piday puedenserusadospara
herviragua conrapJdezo paracocinargrandescantidadesde
aJJmento.
Quemador para Cocinar a
Fuego Lento
Estequemadorseencuentraen [aposici6ncentral. E[
quemadorparacocinara fuegolentoofreceuna llamade
menorintensidad(BTU*inferio0 paraca[entarsalsas
deiicadaso derretirchocolate.
O O
_' r6,gimennominaldeBTUvariardcuandoseusagas_;_cuado,
Rejimmasde ruesQuemadores
Lasreji[lasdebenestardebidamenteco[ocadasantesdecomenzara
cocinar.Cuandoinstaie[asrejiIIas,co[oquelosextremosde [as
[eng0etashaciae[centro,de maneraque coincidancon [asbarras
derechas.
La instalaci(_nincorrectade [asreji[iaspuederesuitaren picaduras
de [acubierta.
Nousemosquemadoressin tenet unmensimioenmamjimmmEm
acabadodepomemanademasrej+mmaspue,_p+_ses+_o_×+s_
Tengacuidadoal revolvere[alimentode una o[[ao sart_ncolocado
sobre[areji[iade[quemador.Lasrejillastienenun acabadosuave
parafaciiitarsu [impieza.La oiiao sarten puedenresbalarsi nose
sujetanpor el mango.Estopuedeprovocarderramede aiimentos
calientesyconstituir un riesgode sufrir una quemadura.
Aunque[asrejiilasde losquemadoressondurables,graduaimente
perderdnsu bri[Ioy/o sedescoiorar_n,debido a [asaitas
temperaturasde [a[lamade[gas.
Unquemadorajustadode maneracorrectaconorificios
limpiosseencender_dentrode unospocossegundos. Si
est_usandogasnaturalla llamaser_azulconun cono
interiorazulprofundo.
Si [allamade[quemadoresamariIIao esruidosa,[a mezcla
de aire/gaspuedeserincorrecta. POngaseencontactocon
un t_cnicode servicioparaajustarla. (Losajustesno est_n
cubiertospor [agarant[a.)
Congas[icuadosonaceptabiesaIgunaspuntasamariIIasen
lallama. Estoes normaly no esnecesar[ohacerning0n
ajuste.
Conaigunostipos degas,usted puedeoff un "chasquido"
cuandoe!quemadorsuperiorseapaga. Esteesun sonido
normaldel funcionamientodelquemador.
Si [aperiiIade controlsegira muyr_pidamentede'HI' a 'LO',
lallamapuedeapagarse,particuIarmentesiel quemadorest_
if[o. Si estoocurre,gire la periilaa la posici6n'OFF'
(Apagado),espereaIgunossegundosy vueIvaencenderel
quemador.
Lallamadebesetajustadade modoque no seextiendam_s
a[[_de[bordede[utensiiio.
63

Panel de Control
A B C D G
Clean
Broil
P,_ast
Bake
Keep
Bake
2}
4560
Autoset
789
H [ J K LM N O
Elpanelde control haside diseffadoparasu f_ici[programaciOn.Elindicadorvisualen el panelde control muest+a[ahera de[d[a,el
temporizadory [asfuncionesdeIborne.Elpanelde control mostradoarribaincluye[ascaracteristicasde convecci@y adem4s[as
caracteffsticasespecificasdeotros modeIos. (Elesti[ode[panelde controlvariasegt_ne[ modeb.}
B
i_ iii
C
D ¸
G
H
Z
i i
I
J
[.
{M
N
m
'Bake'[Homea0
'Broil'(Asara
laParr+lla}
'Clean'
(Limpieza}
'ConvectRoast'0_,sado
perConvecci6n}
'Delay'(Diferido}
TeclasNumerbas
'Autosd (Pmgramaci6n
Autom_tica}
'KeepWarm'
(MantenerCa[bnte}
'Convec.tBake'(Horneado
perConvecci6n}
'Cook& Hold'(Cocci@
y MantenerCaIiente]
'Favorite'[Favorito}
%liner'_emporizado0
'Clock'(Reloj}
'OvenLight'
(LuzdelHorno}
'CANCEL'(CanceIaO
Seusa parahorneary asar.
Seusa paraasara laparriIIay dorar los
aIimentos
Seusa paraprogramaruncido de
autolimpieza
Seusa paraasarper convecciOn,
Pmgramaelhornoparacomenzara
hornearo [impiarsea unaheraposterbr.
Seusaparaprogramarlostiemposy
temperaturas.
Seusaparsprogramartemperaturas
conrapidez.
Seusaparamantenercalienteenel
borneel alimentococinado.
Seusaparahornearperconvecci6n.
Seusaparahornearduranteuntiempo
seleccionado,luegomantieneel a[imento
calienteduranteunahera.
Seusaparaguardarunprocedimiento
especificode'Cook& Hold'.
Programaa[temporizador.
Seusaparaprogramar[aherade[dia.
Seusaparaencenderoapagarlaluzde!
homo.
CancelartodaslasfuncionesaexcepciOn
deltemporizadorye[reIoj.
Use de [as Teeias
o Oprima[atecla @sea@.
o Oprima[astecIasnum6rbaspara programare[tbmpo o [a
temperatura.
o Oprima[atecia 'Autoset0' paraprogramar[atemperatura.
o Seescuchar_unaseiia[ sonoracarlavezque optima unatec[a.
o Seescuchar4ndosseffaIessonorassiocurreun error en [a
programaciOn.
Nora: Cuatmsegundosdespu@de haberoprimido[astecias
num6rbaso [atec[aAutoset0,seprogramar4autom4ticamente
el tbmpo o [atemperatura.Sitranscurrenm4sde 30segundos
despu6sde haberoprimidounatecIadefunci6n y antesde
oprimir[astecIasnum6ricaso [ateciaAutoset0,[afunciOnser_
canceIadayel indicadorvisualvelvet4a[ despIiegueanterior.
'CJock' (Reloj}
Elreloj puedeset ajustadopara despIegar[aherayaseaen formate
de 12betas o 24 horas.E[reIojhasideprogramadoen la f4brJca
parael formatede 12horas.
Para cambiar el re[oj a formate de 24 horas:
1. Oprimay mantengaoprimidas[astecIas'CANCEL'y 'Favorite'
durantetressegundos.
+ '12Hr'destelBen [apantalB.
2. OprimalatecIa'Autoset0' paraseIeccionar
24 horas;opffmalanuevamentepara
seleccionar'12Hr'.
3. Programela heradel d[asiguiendolas
instruccionesindicadasen la secci6n
ProgramaciOndel reIoj.
64

Programaci6n demRemoj:
1. Opr[ma[atecla 'Clock'.
+ Ene[ indicadordestettatahorade[alia+
2+ Optima[astectasnum6ricasapropiadasparaprogramartahora
deId[a.
+ Losdospuntosdestellanen etindicador.
3. OprimaIatecla 'Clock' nuevamenteo esperecuatmsegundos.
+ Losdospuntos permanecerSniluminados.
Cuandoseconectaenerg[aeI6ctricaal hornoo despuesdeuna
hlterrupci6nde la energ[aeI6ctrica,Ia_ltima horadel reloj previaa la
hlterrupci6ndestellar8en el indicador.
Paradesplegarla horadeIdia cuandoetindicadorest6 mostrando
otrafunci6n detiempo,oprimalatecla 'Clock'.
La horadel reloj no puedesercambiadacuandoel hornoha sido
programaticpara'DelayCook','Clean'o 'Cook& Hold'.
Para canceiar el despiiegue dei reioj:
Si nodeseaque ei indicadorvisualmuestrelahora del dia:
Oprimay mantengaoprimida[asteclas _-_
'CANCEL'y'Clock' durantetres segundos.La
horadel dia desaparecer_del indicador.
Cuandosecancelael desplieguedeIreloj,
optima latecla 'C+ock'paradesplegar
blevementeIahoradel dia.
Cuandosecancelael desplieguedel reloj,despu6sde 15minutos,el
control de!hornopasar_a Mode de Reserva paraahorrarenerg[a.
Elindicadorvisual estar_en blancoy la Iuzdel horno nofuncionar&
Paraactivarel controlysacarlodeImodode reserva,oprimacualquier
tecla.Seescuchar_ndossefialessonoras.
Para restaurar el despliegue del reloj:
Opnmay mantengaoprimidaIasteclas'CANCEL'y 'Clock'durante
tres segundos.Lahoradel dFareaparecer_del indicador.
'Timer' (Temporizador)
Eltemporizadolpuedeset programaticde un minuto (0:01)hasta99
horasy 59 minutos[99:59).
Eltemporizadorpuedeset usadoindependientementedecualquier
otraactividaddel homo.Adem_spuedeserprogramadocuandootra
funciOndel homoest6en funcionamiento.
Eltemporizadorno controlael horno.Solamentecontrolauna sefia!
sonora,
Para programar el temporizador:
1. Oprimalatecla 'Timer'.
+ Enel indicadorvisualdeste!Iar_'0:00'y 'TIMER'.
2. OptimaIasteclasnum6ricasapropiadashastaqueel tiempo
correctoaparezcaen el indicadorvisual
+ Losdospuntosy 'TIMER'continuar_ndestellando.
3. Optimanuevamentelatecla 'Timer'o esperecuatmsegundos.
+ Losdospuntosdejan de destellaryel tiempo comienzala
cuentaregresiva.
+ El01timominutode la cuentaregresivadeltemporizadorse
desplegar_en segundos.
4. Atfinal del tiempo programatic,seescuchar_unaserialsonora
largay 'End'(Fin)sedesplegar_en el indicadorvisual.
5. Optima latecla 'Timer'para despejarel indicadorvisual
Para cancemaremtemporizador:
1. Oprimay mantengaoprimJdala tecia'Timer'
durantetressegundos.
U
2. Optima latecla 'Timer'y optima'0' usando N
lasteclasnum_ricas.
,_,uloset
Bloqueo de ruesContromes y de
la Puetta dem Homo
Eltecladoy la puertadeIhomo puedenset bloqueadospara
seguridad,Iimpiezao evitarel uso noautorizado.Lasteclasno
funcionancuandoest_nbloqueadas.
Siel hornoest_enfuncionamiento,lasteclasni lapuertapuedeser
bloqueada.
La horaactualdel dia permanecer_en el indicadorcuandolasteclas
yla pue_a est_bloqueada.
Para bmoquear: __@
Optimay mantengaoprimidaslasteclas
'CANCEL'y'Cook& HoWdurantetres
segundos.(OprimaprimeroIatecla 'CANCEL').
+ Enet indicadorvisualaparece'OFF'.
+ 'LOCK'destellacuandola puertaseest_
bloqueando.
Para desbloquear:
Oprimay mantengaopdmidaslasteclas'CANCEL'y 'Cook& Hold'
durantetres segundos.(Optimaprimem la tecla'CANCEL').'OFF'
desaparecedel indicadorvisual
Nora: Lasteclasy Iapuertadei homo no puedebloquearsesi la 1
ltemperatura del hornoes205 C(400 F)o superior. |
o
!
C6digos de Ettotes
'BAKE'o 'LOCK'puedendestellarr_pidamenteparaadvertirleque
hayun error o un problema.Si'BAKE'o 'LOCK'desteilanen el
Jndicadorvisual,optima le tecla 'Cancel'. Si'BAKE'o 'LOCK'
contimiandestellando,desconectelacorrienteel6ctricahaciael
artefacto.Espereunospocosminutosyvuelvaa conectarla
corrienteel6ctrica.Si Iaspalabrasa0n contin0andesteJJando,
desconectela corrienteeJ6ctricahaciaeJartefactoy Jlamea un
t6cnicodeservicioautorizado.
65

Para programar +Bake' (HorneaO:
1. Oprimalatecla 'Bake'.
• 'BAKE'y '0%' deste%r_en el indicadorvisual. " .......................................
2. SeleccioneIatemperaturadel horno.OprimaIatecla ('_
'Autoset0' para 175° C (350°F}o lasteclasnum6ricas
U
apropiadas. ,\u[osel
+ Cadavezque oprimaIatecla 'Autoset0' la temperaturase
aumentar_en 15° C(25° F}.
+ LatemperaturadeIhornopuedeserpregramadade 75° a
285° C070° a 550° F}.
3. OprhTlalatecla'Bake' nuevarnenteo esperecuatrosegundos.
• 'BAKE'dejar8de destetlary seihminar_en el indicadorvisual.
+ Enel indicadorvisualsedesplegar_38° 000°}o Iatemperatura
realdel hornos+esque essuperiora 38°C 0O0° F}.La
temperaturaaumentar_en incrementosde3° C(5° F}hasta
Ilegara latemperaturaprogramada.
4. Espereaque el homo seprecalientedurante8-15minutos.
• Cuandoel hornoIlegaa Iatemperaturaprogramadase
escuchar_unaserialsonoraIarga.
+ Latemperaturapregramadasedesplegar_en el indicador
visual
+ ParaverificarIatemperaturaprogramadaduranteel
precalentamientodel horno,optima latecla 'Bake'.
5. Coloqueetalimentoen el homo.
6. Venfiqueel progresode IacocciOncuandohayatranscurridoel
tiempo minimorecomendado.Contintiela cocci6nsiesnecesario.
7. AIt6rmino de IacocciOn,optima latecla 'CANCEL'.
8. Retireel alimentodel homo.
Notas sobre Norneado:
, Para cambiar la temperatara del homo darante el proceso
de cocci6n, oprimaIatecla'Bake',luegooptima 'AutosetO'o
lasteclasnum6dcasapropiadashastaquesedesplieguela
temperaturadeseada.
, Paracambiar matemperatura demhomo darante 'Preheat',
oprimados veces Iatecia 'Bake',Iuegooprima'Autoset0' o las
teclasnum6ricasapropiadashastaquesedesplieguela
temperaturadeseada.
, Si olvidaapagarel homo, seapagar_autom_ticamentedespu6s
detranscurrir 12horas.Si deseadesactivarestacaracteffstica,
veala paigina71,
, Parasugerenciasadicionalessobrehorneadoy asado,consulte
elfolIeto"LaCocinaF_cil".
66
Diferenc+as tier homeado entre su homo
antiguo y su homo nuevo
Esnormalobservaralgunasdiferenciasen el tiempode horneadode
suhorno antiguoy su homonuevo+Vea"Ajustede laTemperatura
del Horno"en la p_gina72+
Homeado per Convecci6n
(modelos selectos)
Cuando homee per convecci6n, programe matemperatura
normal de homeado, Elcontroi reducir_autom_ticamenteIa
temperaturaprogramadaen 15°C (25°F).Enel indicadorvisualse
despiegar_la temperaturaprogramada+Elventimadorde
convecci6n comenzar_ a funcionar despa_s de qae el homo
haya estado encendido durante cinco minutos.
Para programar 'Coavect Bake' (Horneado pot
ConvecciOn):
1+Optimalatecla'ConvectBake'.
• 'BAKE'yel [conodel ventiladordestellar_n+
+ 'O00'desteIlar_en el indicadorvisual+
2. Seleccionelatemperaturadel horno.OprimaIatecla U
'Autoset0' para 175°C (350° F}o lasteclasnum6ricas ,\ulosd
apropiadas.
+Cada vezque oprimalatecla 'Autoset0' la temperaturase
aurnentara4en 15° C(25° F}.Latemperaturadel horno puede
set programadade75°a 285°C 070°a 550° F}.
3. Opnmalatecla 'ConvectBake'nuevamenteo esperecuatm
segundos.
+ 'BAKE'dejar_de destellar.
+ Enel indicadorvisualsedesplegar_38° (100°) o Ia
temperaturareaidel hornosiesque essuperiora 38° C
(100° F}.Laternperaturaaumentar_en incrementosde 3°C
(5° F}hastaIlegara latemperaturaprogramada.
+ El[conodelventiladorcomenzar_a girar.
4. Esperea que el homose precalientedurante8-15 minutos.
• Cuandoe!homo Ilegaa Iatemperaturaprogramadase
escuchar_unaserialsonoraIarga.
+ SedesplegaraiIatemperaturaprogramada.
+ Paraverificarla temperaturaprogramadaduranteel
precalentamientodei horno,oprimaIatecla 'ConvectBake'.
Bake
5. Coloqueel alimentoen el homo.
6. Verifiqueel pmgmsode IacocciOncuandohayatranscurridoel
tiempo m[nimorecomendado.Contin0eIacocci6nsies necesado.
7. Ai tdrminode lacoccidn,oprimalatecia 'CANCEL'.
8. Retireel alimentodel homo.

Q
Asado pot Conveeci6n
(modelos seiectos)
Guando est_ asando pot convecci6n, programe emtiempo y
temperatura de asar normal Elcontrol le advertir_
autom4ticamentecuandohayatranscurrido75%del tiempo deasado
programaticparaqueverifiqueel grado de cocci@de losaJimentos.
Emventimadorde eenvecci6n comenzar4 a funcionar despuSs de
que emhomo hayaestado eneendido durante eineominutoso
Notas sobre gsado:
• Cuandoasapot convecciTn,el tiempode cocci@ debeser
programaticantesque Iatemperatura.
• Sisu recetarequiereun homoprecalentado,agregue15
minutosai tiempodecocci@ programatic.
• Lostiemposde asadopuedenvariercon losdiferentescortes
de came.
• Noes necesarioprecatentarel hornocuandoseasanpor
convecciOncortesde carnegrandes.
• Consultelastemperaturasytiemposde asadosugeridosen el
folleto "LaCocinaF4ciJ".
Para programar 'Ceavect Roast' (Asado por
ConvecciOn): .............................
1. OptimaIatecJa'ConvectRoast'. Roast
• 'ROAST'yet [conodeIventiIadordesteIlar_n= ...........................
• '00:00'destelIar4enel indicadorvisual.
• '000'seiluminaen el indicadorvisual.
2= SeIeccioneIatemperaturade asarusandolasteclasnum6ricas
apropiadas.
• Eltiempo puedeserprogramadode 10minutos(00:10)a 11
horas,59minutos (11:59).
• Optimalatecla 'ConvectRoast'nuevamenteo espere4
segundos.
• 'ROAST'y el iconodelventiladordestelIar@en el indicador
visual
• '000'destelIar_en eIindicadorvisual
3. SeleccioneIatemperaturadel horno.OprimaIatecla U
'Autoset0' para 185° C (325°F}o [asteclasnum@icas ,\utoset
apropiadas.
• Cadavezque oprimaIatecla 'Autoset0' la temperaturase
aumentar_en 15° C(25° F}.
• LatemperaturadeIhornopuedeserprogramadade 75° a
285° C(170° a550° F}.
Optima latecla 'ConvectRoast'nuevamenteo esperecuatro
segundos.
• 'ROAST'dejar_de destellary seihminar4 en el indicador
visual
• Enel indicadorvisualsedespJegar438° (100°] o Ia
temperaturarealdeJhomo.Aumentarden incrementosde3° C
(5° F]hastaIlegara latemperaturaprogramada=
° El[conodelventiladorcomenzar4a girar.
_OtaS:
• Siesnecesarioprecalentamiento,espereaque el hornose
precalientedurante8-15minutos.
° Cuandoe!homoIlegaa Iatemperaturaprogramadase
escuchar4una sepalsonoralarga.
5. Coloqueel alimentoen ethomo.
o Lacuenta regresivadel tiempocomenzar4cuandoel homo
comJencea calentarse.
o ParaverificarIatemperaturaprogramadaduranteel
precalentamientodeIhomo,oprimaIatecla'ConvectRoast'.
6. Cuandohayatranscurrido75%deItiempo decocci@, la IuzdeI
hornoseencender4y 'FOOD'desteJlar_ien el indicadorvisuakEn
estemomentovedfiqueel progresode Jacocci6n.Cocinepot
m4stiemposies necesario.
o La luzdel hornopermanecer_encendidahastaqueseoprima
JatecJa'OvenLight'.
o OprimacualquiertecJaparaverJficareltiempo de cocci6n
restante.
7. A[t6rminode lacocci@,oprJma[atecla ri_AM_
'CANCEL'.
8. Retireel aJJmentodel homo.
'Cook & He d'
Cuandoseusala opciOn'Gook & Hold',el horno comienzaa
calentarinmediatamentedespu6sde queeIcontrol ha sido
programatic. Luego,eIhomococina duranteun per[odode tiempo
especificado.Cuandoesetiempoexpira,eIhomomantendr_iet
alimentocalientehastaduranteuna horay hego seapagar_
autom4ticamente.
Para programar 'Cook & HoJd':
1. Optima latecla 'Cook& HoJd'.
• 'HOLD'destellar4paraindicarlequeusted
est4programando'Cook& HoW.
• 'O0:O0'destellar_enel indicadorvisual
67

2. Seleccione[acantidaddetiempo que usteddeseacocinar
usandolasteclasnum6ricas.
+ 'HOLD'contintiadestellando.
+ Eltiempo seiluminar_en el indicadorvisual.
+ Eltiempo puedeprogramarsede 10minutos[00:10)a
11horas,59 minutos(11:59D.
3. CuandoHOLDest6desteiiando,oprima'Rake',
'ConvectRake'o 'ConvectRoast'[modelos
selectos)y seleccione[atemperaturade[homo.
Oprima[atecla 'Autoset O'para175° C(350° F)
f_
o lastedas num6ricasapropiadas. U
+ Enel indicadorvisualdesteilar_el hombre Autoset
de[ciclo deseado.
+ LatemperaturadeIhornopuedeserprogramadade 75° a
285° C(170° a550° F).
4. OprimanuevamentelatecIadel ciclo deseado0 esperecuatro
segundos.
• Elhombredel ciclo deseadopermanecer_iIuminado.
• Enel indicadorvisualsedesplegar_el tiempode cocciOn.
• Latemperaturarealdel homosedesplegar_duranteel
precaientamiento.
• LatemperaturaprogramadasedespIegar_cuandoel homose
hayaprecaIentado.
Cuando haya e×pirado e[ tiempo de cocci6m
+ SeescucharSncuatro seSaIessonoras.
• 'HOLD'y 'WARM'seiiuminar_n.
• Enel indicadorsedespiegar_75° 070°)y [ahora deld[a.
Despues de una hera en 'HOLD WARM' (Mantener
Caliente):
+ Elhornoseapagaautom_ticamente.
+ 'HOLD'y 'WARM'seapagan.
+ Retireel aIimentodel horno.
Para cancelar 'Cook & Hold' en cualquier memento:
Oprimala tecla'CANCEL'+Retireel aIimento
del horno.
'Delay Cook & Hold'
('Cook & Hold' Difeddo)
Nousehorn_adodiferidOpara a!kr/entosde #Ortadurac!6ntales
comop[oductos !_cteos,cerdo,came deaveomariscos,
Cuandousa'Belay', el homocomienzaa cocinar m_starde ene!
dfa.Programelacantidadde tiempo que usteddeseadiferir antesde
queseenciendae!hornoy cuantotiempo deseacocinar el aIimento.
EIhornocomienzaa caientaren lahoraseleccionaday cocina
duranteettiempo especificado.
EItiempodiferido puedeprogramarsede 10minutos[O0:IODhasta
11horas,59 minutos(11:59).
Para programar un cido de 'Cook & Hold' diferido:
1+ Optima latecIa'1 Delay'+
1
+ 'DELAY'sedesteiiaenel indicador. |
• 'O0:O0'destellaen el indicador. Delay
2. Usando[astec[asnum6r[casaprop[adas,programe [acantidad
de tiempo que asted desea diferir el comienzode[ cic[o'Cook
& Hold'.
3. Optima latecia 'Cook& Hold'.
• 'HOLD'y 'DELAY'destellanen el indicador
visual.
+ '00:00'destellaen el indicadorvisual
4. Pregrame la eantidad de tiempo que usteddeseacocinar
usando[asteclasnumSricas.
5. Oprima'Rake','ConvectRake'o 'ConvectRoast'
[modeIosseIectos).
6. Programe matemperatara demhomo deseada ......................................
oprimiendo[atecIa'AutosetO'o [astecIas
numericasapropiadas. 0
• '175°' ('350°') seiluminar_cuandoseoprime Autoset
'Autoset0'.
• Despu6sde cuatro segundos,e[tiempo diferidoprogramado
aparecer_en el indicadorvisual
• 'HOLD'seapaga.
• LaspaIabras'RAKE'y 'DELAY'permaneceniIuminadaspara
recordarIequese ha programadoun cic[ode 'Cook& Hold'
diferido.
_otas:
• Nouse'Cook& Hold' diferidoparaart[culosque requierenun
homopreca[entado,tales comopaste[es,ga[[etasy panes.
• Nouse'Cook& Hold' diferidosiel hornoya est_ca[iente.
68

Q
'Broiling' (Asar a [a Pardi[a] ..........................
Para pregramar 'Broil':
Broil
Oprima[atecia 'Broil'+ ..... .......
o 'BROIL'y 'SET'[Va[idar)deste[[anenel [nd[cadorvisual
2+ Oprima[atecia 'Autoset0' unavezpara'Hi broil' (Asara [a
pard[[acontemperaturaa[ta)o dosvecespara'LO broil'
kJ
(230° C [450°F]] (Asara [aparr[Hacontemperaturabaja)+ _,utoset
o Enel indicadorvisualsedesplegar_'Hi' o 'LO'.
o Selecciones'Hi broil' (285° C[550° F]] paraasadoa [aparrilla
normal Se[eccione'LObroil' [230°C [450° F]]para asara [a
parri[iacontemperaturabaja aiimentosque debenser
cocinadospor m_stiempo,ta[ como [acarnede ave.
3. Despu6sde cuatrosegundos,el horno comenzar_a funcionar.
o 'BROIL'continuar_iluminado.
o 'Hi' o 'LO'permanecer_ni[uminados.
4. Paraun dorado6ptimo,precaHenteel homodurante2 a 3 minutos
antesde co[ocare[aIimento.
5+ Co[oqueel a[imentoen e[homo+Cierre[apuertade[homo+
6. D6vue[taa [acame unavezaproximadamentea mitadde [a
cocci6n+
7+ Cuandoe[alimentoest6cocinado,optima [atecia _&iklC'_
'CANCEL'.Retireel aiimentoy [aasaderade[homo+
• Lahorade[d[avoIver_a despIegarseen e[
ind+cadorvisual
Notas Sobre Asade a [a Parri[[a:
+ Paramejoresresuitadoscuandoasea [aparrii[a,useuna
asaderadiseffadaparaasara [aparriIIa+
+ 'Hi' seusapara[amayoffade [osasadosa [aparriIIa+Use'LO
broir cuandoasea [aparriliaaiimentosque necesitancocciOn
proiongada+Latemperaturainferiorpermiteque e[aIimento
se cocinehastaquedar bien asadosin dorarsedemasiado+
+ Lostiemposde asadoa [aparriiia puedenserm_s[argos
cuandoseselecciona[atemperaturam_sbajade asara [a
parrilla.
• Elmayorde losa[imentosdebeserdadovue[tacuandoest_a
mKadde[tiempode asar+
• Parasugerenc[asytemperaturasad[ciona[essobreasara [a
parri[[a,consuiteel fo[[eto"La Coc[naF_c[["+
Tab[a de Asar a [a Parr+Ha
Preca[ienteel homo durante2-3 minutos+
[ POS[CiON DE GRADO DE i T[£MPO DE
ALiMENTGS . LAPARRILLA COCCJON TOTAL
Came de Res Biftec, 2,5 cm (1"]
Hamburguesas, 1,9cm (3/4"] de grosor
Came de Cerdo Tocino
Jam6n, precocido, rebanada de
1,3 cm (!/2 '+)
Chuietas, 2,5 cm [1")
Came de Ave Pechugasde Polio,conhueso Broil')
Mariscos
Filetesde pescado
Tajadasde pescado,
2,5cm 0'+] degrosor
Colasde [angosta,85-115g
[3-4 onzas]carlauna
5
5
506
5
5
5
4
5
5
5
A medioasar
Bienasado
Bienasado
Bienasado
Tibio
Bienasado
Bienasado
HojaIdrado
HojaIdrado
Biencocidas
15 - 20 minutos
18 - 24 minutos
13 - 18 minutos
6 - 10 minutos
8 - 12 minutos
22 - 26 minutos
30 - 45 minutos ['Lo
8 - 12 minutos
10 - 15 minutos
7 - 10 minutos
Paraun exteriorm_sdoradoy m_isasadoy un interiora mediococer,puedeser necesariodisminuir eltiempo de cocciOnen el primer ladoy
acercarm_s[acarnea [afuente de ca[or.
Nora: Estatab[aess0lounaguia. Lostiempospuedenvariarcone[tipo de a[imentoque seest_cocinando.
69

'Keep Warm' (Mantener Caliente)
Paramantenercalientesen forma seguraalimentoscalienteso para
cabntar panesyphtos.
Paraprogramar 'Keep Warm': ..........
1. OprimaIatecia 'KeepWarm'en el indicador Keep
visual.
+ 'WARM'deste!Iaen el indicadorvisual.
+ '000'destetlaen el indicadorvisual.
2. Sebccione [atemperaturade 'KeepWarm'. U
Oprima[atecia 'Autoset0' o lasteclas ,\utoset
numericasapropiadas.
+ 75° 070°)seiluminar_cuandoseoprimalatecla 'Autoset0'.
+ Cadavezque oprimalatecla 'Autoset0',la temperatura
aumentar_en 3°C {5° F}.
La temperatura de 'Keep Warm' puede ser pmgramada de 63° a
90° C 045 ° a 190°F).
'WARM' y la temperatura se desplegar_n en el indicador cuando
la funciOn est6 activa.
Notas sobre 'Keep Warm':
o ParacalidadOptimade losalimentos,losalimentoscocinados
en e!horno @bensermantenidoscalientespor no m_sde 1a
2 horas.
+ Paraevitarque losalimentossesequen,ctibraloslevemente
con pape[de aluminioouna tapa.
o Para camentarpaneciiios:
- cubra bvementelospanecillosconpapelde ahminio y
colOquelosenei homo+
- opnmalasteclas'KeepWarm'y 'Autoset0'.
- calbnte durante 12a 15minutos.
o Para caiemar piatos:
- coloque2 filasde cuatro platoscadauna en el homo.
- opnmalasteclas'KeepWarm'y 'Autoset0'.
- caibnte losptatosdurantecinco minutos,@ague el homoy
deje lospiatosen ei hornodurante 15minutosm_s.
- usesoiamenteplatos resistentesal horno,verifique conel
fabricante.
- nocoloqueiosplatoscalbntes sobreuna superficiefria
puesei cambior@ido de temperaturapuedecausarfisuras
superficiabs o rotura.
Para cancemar'Keep Warm':
1. Oprimalatecla 'CANCEL'. _CANICFI_
2. Retireel alimentodel homo.
7O

Cierte Autom tico/Modo
Elhomoseapagar_autom_ticamentedespu#sde 12horassi usted
Iodeiaaccidentalmenteencendido. EstacaracterFsticade seguridad
puedeset desactivada.
Para cancelar el cierre autom_tico de 12 horas y
dejar que el homo funcione continuamente durante
72 horas:
1. Optimay mantengaoprimidalatecla 'Clock'
durantecinco segundos.
• 'SAb'sedespiegar_ydestellar_idurantecinco segundos.
• 'SAb'sedesptegar_continuamentehastaquese desactiveo
hastaque transcurrael I[mitede 72horas.
• 'BAKE'tambi6nsedesplegar_siseest_usandoun ciclo de
horneadocuandoel hornoest_en modosab_tico.
• TodasIasotrasfuncionesEXCEPTO'BAKE'['Timer','Keep
Warm','Clean',etc.]est_nbloqueadasduranteel Modo
SabStico.
• Sepuede programar'Cook& Hold'duranteei Modo Sab_tico,
sin embargono sepuedeprogramar'DelayCook& Hold'.
Para cancelar el Modo Sab_tico:
I. OptimaJatecia 'CLOCK'durantecJncosegundos.
• 'SAb'desteJlar4durantechlcosegundos.
• Lahora delaliareaparecer4en el hldicadorvisual
O
2. Despuesde 72horas,el modosab4ticoterminar4.
• 'SAb'destellar4durantechlcosegundos.
• Lahora delaliareaparecer_en el hldicadorvisual.
Notas Sebre eUMode Sab tico:
• ElModo Sab_ticopuedeset activadoen cualquiermomento,
est6o no el homoencendido.
• ElModo Sab_ticonosepuedeactivarsi lasteciasest_n
bloqueadaso cuandola puertaest_ bloqueada.
• La mayor[ade [asadvertenciasy mensajesytodas lasseiiales
sonorasest_ndesactivadascuandoel ModoSab_ticoest_
activo.
• Siel hornoest_horneandocuandoel ModoSab_ticoes
programado,'BAKE'seapagar_icuandosecanceleel
horneado. NoseemitirSnseriaiessonoras.
• Mientrasel hornoesteen ModoSabSticola [uzde[homose
encender_autom_ticamentecuandose abrala puerta. Sise
deseala [uzde!homoduranteel ModoSab_tico,6stadebeser
encendidaantesdeque comienceel ModoSab_tico.
• Cuandocomienzael Modo Sab_tico,latemperaturaquese
despliegaser_latemperaturaprogramadaenvezde la
temperaturarealde la cavidaddethorno. Noseemitir_ la
se_alsonorade precalentamiento.
• Elcic[ode autolimpiezayb[oqueoautom_ticode la puertano
funcionar_duranteetModo Sab_tico.
• Sioprime[atec[a 'CANCEL'secancelar__mcic[o'bake',sin
embargoel control permanecer_enModo Sab_tico.
• Sifaiia lacorrienteel6ctrica,cuandovue[valaenergiaethomo
seactivar_en ModoSab_ticocon72 horasrestantesy ning_in
cic[oactivo.
71

Ajuste de [a temperatura de[
La exactitudde [astemperaturasde[homoescuidadosamente
probadaen [afSbrica. Esnormalnotaralgunadiferenciaentre[a
temperaturade horneadoo en el dorado,entreun homo nuevoy un
homo antiguo. A med+daque el homose usa,[atemperaturadel
homo puedecambiar.
Ustedpuedeajustar [atemperaturade[homo,si consideraquesu
homo noest_ horneandoo dorandoenforma correcta. Paradecidir
cuantodebecambiar[atemperatura,programe[atemperaturadel
homo a 15°C (25° F)m_isaItaom_sbajaque [atemperatura
indicadaen sus recetas,luegoborneo. LosresuItadosde [a
"prueba"puedendarIeuna idea decuanto debeajustarla
temperatura.
Para ajustar [a temperatura de[ homo:
1. Oprima[atecia 'Bake'. +................................
2. Programe285° C(550° F)oprimiendolasteciasnumSricas
apmpiadas.
3. Optimay rnantengaoprimida[atecla 'Bake'durantevar[os
segundoso hastaque O0° aparezcaenelindicadorvisual
Si [atemperaturadel borneha sidepreviamenteajustada,el
cambioaparecer_enel indicadorvisual+Perejempio,s[ la
temperaturade[hornofue reducidaen 8°C 05° F)e[indicador
mostrar_"- 8°" C-15°').
4. Optima[atecia 'AutosetO'paraajustar[atemperatura.
Cadavezque seoptima latecIa'Autoset0',[atemperatura
cambiaen 3°C [5° F}. Latemperaturadel bornepuedeser
aumentadao disminuidaen 3° a 20° C[5° a35° F}.
Si oprimelatecIa'AutosetO'(Autoajuste0),la temperaturade[
bornepasar8per un ciclo de aumentode temperatura(5,10...
35}.SicontinOaoprimiendo[atecia 'AutosetO'{Autoajuste0},la
temperaturade[borne pasar_perun ciclo de descensode
temperatura(-35,-30...-5}.
5. Lahera del d[areaparecer_autom_ticamenteen el indicador
visual
Nonecesitareajustar[atemperaturade[homos[ hayuna fa[[ao
[nterrupciOndeenerg[ae[6ctdca. Elajustede [atemperaturaes
vS[idopara'Bake','ConvectBake'y 'ConvectRoast'(mode[os
se[ectos)soJamente.Lastemperaturasde asara [aparri[[ay de
[impiezano puedenserajustadas.
Cambio de [a temperatura de
],
2.
Elajustedef_brica de la medidadetemperaturaes Fahrenheit.
Paracambiarel ajuste,optima y mantengaoprimidas[asteclas
'CANCEL'(Anula0 y 'Bake'(Hornea0a[ mismotiempo durante
tres segundos.
3. Escuchar_unaserialsonoraye[ajusteactual (°Fo °C)se
despiegar_en [apantaila.(Sino sereaiizaning0ncambio,[a
estufaregresar_a[ajusteactualdespuesde 30segundos).
4. Paracambiare[ajuste,optima [atecia 'AutosetO'[Autoajuste0).
Oprimaianuevamentepararegresara[ajusteanterior.Espere
cinco segundosye[ajusteseguardar_.
'Favorite' (Favorite)
Latecia 'Favorite'[epermiteguardaren memoriae[tiempoy [a
temperaturadeun cicio 'Cook& HoW.
Paraprogramarun cic[ofavorite,debeestaractivao recientemente
programadaunafunciOnde 'Cook& HoW.
Para programar un nuevo cicio Favorite o para
guardar come Favorite un cic[o 'Cook & Hold' que
est+ en progreso:
1. Programeun cic[ode'Cook& Hold'comesedescribeen [a
seccidn'Cook& Hoid'en [apdgina72.
2. Optimay mantengaopdpaida[atecia'Favorite'
durantetressegundos.
+ Elcicio'Cook&Hoid' recientementeprogramatico en
pmgresoser_guardadoen memoria.
+ Seoir_ una serialsonorapara indicarque el control ha
aceptadoe[ajuste'Favorite'+
Para comenzar un cicio programatic come Favorite:
1. Optima [atecIa'Favorite'+
+ Sedesp[egar_e[tiempoy [atemperaturaparael cic[o'Cook&
Hold'programatic(si nohaycicio 'Cook& HoW programatic,
en e[indicadorvisualse despIegar_'nonE'.)
2. Optima [atecIa'Bake','ConvectBake'o'ConvectRoast'(modeIos
se[ectos).
• Elcic[oFavoritecomenzar_inmediatamente.
+ Elnombrede[cic[oseIeccionadosese iIuminar_en e[
indicadorvisual.
• Eltiempo de cocciOnsei[uminar_ene[ indicadorvisual
Cuando ha expirado e[ tiempo de cocci6m
• Elnombrede[cic[ose[eccionadoseseapagar&
+ Sei[uminar_n'HOLD'y'WARM'.
+ Enel indicadorsedespIegar_'75°' ('170°').
Para canceiar un cic[o favorite en progreso:
1. OprimalatecIa'CANCEL',
• Elcic[ofavoriteguardadoen memoriano
ser_afectado.
2. Retiree[alimentode[borne.
72

Encendido sin Pimoto
Suestufaest_equipadacon un sistemade encendidosinpiioto.
Conestetipo de encendido,e!gasseapagaautomSticamentey el
homo no opemr_ duranteuna i_tterrupddn de/a corriente
electric&
Un f6sforo encendido no encender_ el quemador dei homo°
No se debe intenturennender el homodurunte una
interrupci6nde iu corriente eiSctrica,
VentiJador deJ homo
Seusaunventiladorde convecci6nparacircular el airecalienteen
eIhornocuandoseseieccionaIaopciOnde convecci6n=Seactiva
autom_ticamente5 minutosdespu6sde que seopdmelatecla
'Convect' yseapagar8cuandosecancele'Convect'o
Nora: EtventiJadorde convecciOnseapagar_autom_ticamente
cadavezque seabla la puertadel homo=
Respiradero deJ Homo
Cuandoe!homoest_ enuso,eI_reacercadeIrespiraderopuede
calentarseIosuficientecomo paracausarquemaduras.Nunca
bloqueela aberturadel respiradero.
Elrespiradero dei homo se encuentra debajo dei respuido
protectorde su estufuo
RESPIRADERO
DEL HORNO
No coloquepl_sticos
cercade Iaabertura
del respiraderopues
el calorque sale
puededeformaro
derretirel pl_stico=
'Oven Light' (Luz del Homo)
Laiuzdethornoseenciendeautom_ticamente
siemprequeseabre ia puertadet homo=Cuandose
cierraia puerta,optima latecla 'OvenLight'para
encendero apagarla luzdethomo=Seescuchar_
una seSalsonoracadavezqueseoptimalatecla'OvenLight'=
Paneminferior demHomo
Protejael panelinferiordeI hornoeontraderrames,especialmente
azucaradoso addicos,puespuedendescolorarlaporcelana
esmaltada.Useel utensiiiode tama_ocorrectoa fin de evitar
derrames=No comoqueutensimiosni pupei de amuminio
directamente en maparte inferiordemhomo,
Parrillas del Homo
, Nointentecarr!biarlaP0Sici6nde lasparril!ascuandoel homo
est6Caliente.
, N0useeJhomoparaguardara!imentosni utensiJios_
Elhornotiene dosparriIIas(tressi eshornode convecciOn)=Todas
lasparrillastienenun hordecontopede enganche=
Para retirar maparrimma:
1=Tirede la parriIIaderechohacia
afuerahastaquesedetengaen
la posiciOndel topede
enganche=
2= LevanteeIfrente de Iaparrillay
tire de Iaparrilla haciaafuera=
Para reinstamar maparriHa:
1= ColoquelaparrilIaen etsoportede la parrilla enel homo=
2= InclineIevementehaciaarribael extremodelantero;desliceIa
parrillahaciaatr_shastaque pasesobrelostopesde enganche=
3= Bajeel frente de la parrillay desl(celahaciaadentrodel homo=
No cubru una parrimmacompmetacon papei de umuminioni
comoquepupemde amuminioen el puneminferiordemhomo° Se
afectar_in mosresumtadosdemhomeado y se puededai'iur em
paneminferior dei homo°
Posiciones de ParriHa
PARRJLLA7 (posiciOnm_s
altal):Parahornearconuna
solapardllaen bandejasde
horneargalletasy paraasar
a Iaparrilla=
PARRJLLA6: Seusapara
hornearconuna sola
parri[[aen bandejasde
horneargailetas,para asar
a [aparriliay parahorneado
convariasparrilias=
Panel
hlferior
Horneado por Convecci6n d_U
con Tres Parritlas Homo
(modeJos selectos)
PARRmLLA5: Parahornearcon unasoiaparriliaen bandejasde
horneargalletasy paraasara [aparriiia=
PARRJLLA4: Seusaparahornearconuna solaparrillaen bandejas
de horneargailetas,paste[esde una cap&cacerolas,asara la parrilla
ypara horneadoconvariasparrillas=
PARRJLLA3: Parahornearcon unasoiaparriliaenbandejasde
horneargalletas,cacerolas,pasteiesdevadascapas,barrasde pan,
paste[esde una capay parahorneadocon vadasparri[[as=
PARRJLLA2: Seusaparahornearconuna so[aparrillaen bandejas
de horneargailetas,paraasarcortesde came peque_osy para
horneadoconvariasparri[las=
73

PARRIEEA1:Seusaparaasarcortesde camegrandesy camede
ave.
Panel Inferior del Homo:Cobque la
parrilladel hornoen bs soportesen
reIievedel pane!inferiordethorno.
Useparadisponerde espacio
adicionalcuandococinecomidas
grandesen el homo.
HORNEADOCON PARRmLLASMULTIPLES:
Dos parrillas:UseIaposici6n3 y 6o 2y 4.
Tres parillas (convecci6nsolamente):UseBs posiciones1,3 y6.
Nora: Cuandose horneapor convecci6n0Tlodelossebctos} con
dos otres parrillas,reviseIosalimentosen eitiempo m[nimo
sugeridoparaevitarque quedendemasiadodoradoso
demasiadococinados.
Media ParriJJa
Losmode!osde estufaselectos
est_nequipadoscon una media
parrillaconvertible. ElIado
izquierdode la pardllapuede
serretiradoparaacomodar
una asaderam_sgrande
en Iaparrillainferior. El
lado derechode Ia
pardllatodav[asepuede _
@jarparacolocaruna
oaoerol8.
//
Horneado de PasteJes de Capas en Dos
PattHJas
ParaobtenermeioresresultadoscuandohorneapasteIesen dos
parriIIas,useIaposici6n2 y 4 parahorneadoreguiary la posbiOn3y
6 para horneadopor convecci@(modelossetectos}.
Coloquelospastebsen lasparrillascomosemuestra.
Notas:
o Laporci6nremoviblepuedeserusadacomouna parriIIade
asaren laasaderadeasara Iapardlia.Nouseel inserto
superiorde IaasaderacuandouseIaporcidnremovibb de la
parrillaen Iaasadera.
o Laporci6nremovibb de Iaparrilla puedeset usadacomo una
pardllade enfriamientoo comoun salvamanteles.
o Aseg0resedeque el hornoest6fr[o antesde retirar o reinstalar
lamediaparrilla.
o Nouseutensiliosqueseextiendanpa_salI_del bordede la
parrilla.
o Parame}oresresultados,dejedos pulgadasentreel utensilio
colocadoen IaparriJlay la paredlateraidel homo.
o Tengacuidadocuandoretirearticulosque est6nen lamedia
parrillaparaevitarquemaduras.
o Saquecon cuidadolosalimentosde la parrilIainferiorpara
evitar moverlamediaparrilIa.
74

Homo Auto[impiante
, Esnormalquelasp+ezasdel homo secal[entenduranteel c+cio
de autolimp+eza,
, Paraevitarda_ioa [apuerta,no mtenteabrirlacuandola aaBbra
'LOCK'est6desplegadaen el indicadorvisual.
, Evitetocar la puerta,laventanao el areadel respiraderouel
hornoduranteun cic[ode limp+eza.
, No uselimpiadoresde hornoscomerc+alesen el acabadode+
homo ni atrededorde ninguna plezade[homo puespuede
daSarel acabadoo lasDezas
Elciclo de autoiimpiezausatemperaturasde cocciOnsupenoresa [as
normabs para Iimpiarautomdticamentetodo el interiordel homo.
EsnormalqueocurranIlamaradas,humoo llamasdurantela limpbza
siei homoestddemasiadosucio.Esmejorlimpiarel horno
reguiarmenteenvezde esperarhastaquese hayaacumuiado
demasiadasuciedad.
Duranteel procesode limpieza,Iacocinadebeestarbienventilada
paraeliminarlosoloresnormalesasociadoscon la limpieza.
Antes de [a Auto[+mpieza
1. Apague la luzdel hornoantesde la iimpieza.La hz de[horno
puedefundirseduranteei ciclode limpieza.
2. Retirela asadera,todos iosutensiiiosy iasparrillasdei homo+Las
parriiiasde[hornosedescolorar_ny no sedesiizardnf_cilmente
despu6sde un ciclo de autolimpbzasi noson retiradasdel homo+
3. Limpieel marcodei homo, el marcode ia puerta,el areafuerade
lajunta de la puertay alrededorde la aberturaen la junta de la
puerta,con un agentede limpiezano abrasivotal como'Bon
AmP o condetergentey agua.Elprocesode autoiimpiezano
limpiaestasareas+Eliasdebenset iimpiadasparaevitarque la
sucbdad sehomeeduranteel cicio deautolimpieza.(Lajunta es
elselioalrededorde lapuertayventanadel homo+)
4. Paraevitardaffo no limpieni frote Ia _=_Z_ 7-=77_Fq
junta situadaa[rededorde [apuertadel
homo+Lajunta est_diseriadapara
sellarherm6ticamenteel ca[ordurante __4_
el ciclode limpieza.
5. Limpieel excesode grasao derrames
de laparte inferiorde[homo+Esto
evitahumoexcesivoo ilamaradasduranteel ciclo de limpbza.
6. Limpielosderramesazucaradoso dcidostales comopapaduice
[camot@,tomateso sa[sasa basede leche.La porcelana
esmaitadaes resistenteal dcidoperu no a pruebadedcidos. El
acabadode porceianapuededescoiorarsesi losderrames_cidos
o azucaradosno sonlimpiadosantesde un ciclo de autolimpieza.
Para programar 'Self-Clean' (Auto[impbza):
Nota: Latemperaturadel hornodebeset inferiora 205° C
(400 F) para programar un cic[o de [impieza,
1.
2.
3.
Cierrela puertadel horno.
Oprimalatecla 'Clean'. Clean
• 'CLEAN'destetlaen e!indicadorvisual ............
o 'SET'destellaenel indicadorvisual. N
Oprimalatecla 'Autoset0'. Autoset
o 'MEd' (Suciedadmediana,3 horas}sedespliegaen el
indicador.
4. Oprimalatecla 'Autoset0' paradespbgar losajustesde
autolimpieza.
'HVy'(Suciedadintensa,4 horas)
'MEd' (Suciedadmedian&3 horas}
'LifE' (SucbdadIeve,2 horas)
AIsebccionar el niveJde suciedaddel homoseprograma
autom4ticamenteeJtiempode Iimpieza.
5. Despu6sde cuatro segundos,el homocomenzar4a Iimpiar.
o Si lapuertano secierra,se oir4una seriaIsonoray la palabra
'door'sedesplegar4en el indicadorvisual Si lapuertano es
cerradadentrode 30segundos,la operaci6nde autolimpieza
set4canceladayel indbador volver4a desplegarla horadeJ
dia.
o 'CLEAN'aparecer_en el indicadorvisual
+'LOCK'desteIBr_en ei indicadorvisual Unavezque la puerta
sebloquea,lapalabra'LOCK'permanecer_ihminada sin
@stellar.
+Eltiempode limpiezacomenzar_la cuenta regresivaen el
indicador.
Para diferir un tide de autoiimpieza:
1. Oprimalatecla 'Delay1'. 1
!
o 'DELAY'destella.
Delay
+'00:00+deste[[ar_en e[[ndbadorvbuaL
Programe[acantidadde tbmpo que usteddesead[fer[re[c[c[o
2.
usando[astec[asnum_ricasapropiadas.
3. Optima [atec[a'Ciean'.
o 'SET'destellaenel indicadorvisual. .............
4. Oprima[atec[a'Autoset0'.
tJ
o Sedesplbga'LifE' {nivelde suciedadleve}.
_,utoset
*Losnombresde losproductosson marcasregistradasde sus respectivosfabricantes.
75

5+ Oprima[atecla 'AutosetO'paradesp[egar[os
ajustesde autotimpieza+
k3
/\utoset
'HVy'(Suciedadintensa,4 horas)
'MEd' (Suciedadmediana,3 horas)
'LHTE'(Suciedadteve,2 horas)
At seteccionaretnivetde suciedadde!homose programa
autom_ticamenteettiempo de timpieza.
6. Despu6sde cuatrosegundos,taspalabras'CLEAN'y'DELAY'se
ituminar_ny'LOCK'desteltar_en etindicadorvisual. Cuando[a
pue+tade[horno secierra,'LOCK'dejar8de destellary se
iluminar_permanenteparamostrarqueel homo est_
programadopara unaoperaci6nde limpiezadiferida. Enel
indicadoraparecer_el tiempo diferido.
Durante emc+cmode auto[impieza
Cuandoaparece'LOCK'enel ind+cador,la puertano sepuedeabrir+
Paraevitardafio a la puerta,nofuerce la puertapara abrirlacuando
[apa[abra'LOCK'est_desplegadaenel indicadorvisual
Ustedpuedever humoy sentirolor lasprimemsvecesque el homo
esIimpiado. Estoesnormaly disminuir_conel tiempo.
Tambi6npuedeocurrirhumosi e!homoestddemasiadosucio o si
seha dejadounaasaderaen el homo.
Sonidos
A medidaquee+homosecalienta,ustedpuedeoff sonidosde
piezasmet_Iicasque seexpandenycontraen. Estoesnormaly no
dafiar_el homo.
Despu6s cido de auto imp+eza
Aproxirnadamenteunahora despu6sdelfin detciclo de limpieza,
'LOCK'desaparecer& Lapuertaahorapuedeserabierta.
Alguna saciedad paede quedar como una [eve ceniza gris ripe
polvo. Retffelaconun patio h_medo. Si Iasuciedadpermanece
despuesde [impiarla,significaque el cic[ode [impiezano rue1o
suficientementelargo. Lasuciedadser_eiiminadaduranteel
proximocic[ode [[mpieza.
Si masparrimmasdemhomo fueron dejadas en el homo y no se
desiizan saavemente despa_s de un cicio de iimpieza,Iimpie
[asparrillasy lossoportesde [asparri[lasconuna pequefiacantidad
de acekevegeta[para hacerlasdeslizarconm_sfacilidad=
Puedenaparecer m+neasdemgadasen maporcemammampasar pot
c+cmosde camentamientoy enfriamiento. Estoesnormaly no
afectar_el rendimiento+
Una descomoradSnblanca paede aparecer despuSs demc+do
de mimpiezasi mosamimentos_icidos o azucarados no faeron
limpiados antes dem¢i¢mode aatomimpieza°EstadescoloraciOnes
normaly no afectar_el rendimiento+
Notas:
• Si sedejaabiertala puertadel horno,Iapalabra'door'
destellar_enel indicadorvisualyseescucharauna serial
sonorahastaque la puertaseacerraday la tecla'Clean'sea
oprimidanuevamente.
+ Si transcurrenm_sde cincosegundosdespu6sde oprimir [a
tecia 'Clean'y antesde oprimir[atecia 'Autoset0',el pmgrama
volver_autom_t[camentea[ despliegueprevio.
• Lapuertadel homosedafiar_sisefuerzaparaabrir[acuando
la palabra'LOCK'continOadesp[egadaen el indicador.
?6

Procedi ientos de Li pieza
fr_as antes de tecario e iimpiarie. De este medOseevitar_ daSey
pesiblesquemaduras. %asnombresde Iosproductossonmarcasregistradas
de susrespectivosfabricantes=
, Paraevitarmanchaso decoloraci6nlimpieel homo despu6sdecarlausa.
_ Parahacerpedidos,Ilarneal 1-877-232-6771EEUU=o
' Siseretiraalgunapieza,aseg6resede que Seareinstaladaen formacorrecta. 1-800-688-8408Canadi
PmEZA' PROOEDIMIENTO DE LmMI_EZA
Asadera e Nunca cubra d inserte con papel dealumilde pues este evita que la gmsa se escurra a ta bandeja i_tferier.
Inserto , Coloqueun pasoenjabonadosabreel inse_oy Iabandeja;dejeremoiarparasoltarIasuciedad=
, Laveen aguajabonosatibia=Useuna esponjadefregarparaquitar la suciedadpersistente=
, La bandejade asary el insertopuedenset lavadosenel lavavajillas=
Tapasde
Quemadores y
Quemadoresde
Gassemmados
Rejimmasdemos
Quemadores =
poreelanasabre
Area del Reloj y
tie lasTeelas
de Control
Cubiertay Panel
de Control=
Esmalte de
Porenlana
Cabezasde Quemadores Removibles
* Dejeenfriarelquemador.RetirelatapayI_velaenaguajabonosaconunaesponjaderestregardepI_stico.Parasuciedad
dificil,IimpieconunaesponianoabrasivarellenaconjabOno concremaparalimpiezadecubiertas'CooktopCleaning
Creme'_(Pieza#20000001)*_y unaesponia.
* No laslaveeneI lavavajillasni en un hornoautolimpiante.
Quemadores tie Gas Sellados
, L[mpieloscon frecuencia=DejeenfriareIquemador=Limpieconjab6n y una esponjade restregardepl_stico=Para
suciedaddificil, limpieconuna esponjano abrasivarellenaconjabOn=Noagrandeni modifiquelosagujeros=
, Tengacuidadode que no entreagua en Iosorificiosde Iosquemadores=
, Tengacuidadocuandolimpieel encendedor=Si elencendedorest_h0medoodaSado,el quemadorsuperiorno
encender&
, L_vetasconaguatibiajabonosayunaesponjadepI_sticonoabrasiva.Paramanchasrebeldes,limpieconunaesponja
depi_sticorellenaconjabOn,noabrasivao con'CooktopCleaningCreme'*(CremaparaLimpiezadeCubiertas)(Pieza
20000001)**ytma esponja.Silasuciedadpersiste,wJeivaa aplicar'CooktopCleaningCreme',cubracon unatoallade
pape!hlimeday dejeremojardurante30 minutos.Restrieguenuevamente,enjuagueyseque.
, No laslaveenel lavavajillasni en un hornoautolimpiante.
, Paraactivar'ControlLock'[Bioqueode loscontroles]parala Iimpieza,verp_gina65.
, Lave,eniuagueyseque. No useagentesde Iimpiezaabrasivospunspueden rayarel acabado.
, Sepuedeusarlimpiaviddossise rocianen el paso primero. NO rec(e directamente en elpaneL
, RetireIasperillascuandoest6nen Iaposici6n'OFF'tir_ndohs haciaadelante.
, Lave,eni_Jagueyseque. No useagentesde limpiezaabrasivospunspueden rayarel acabado.
, Enciendacadaquemadorparaasegurarsede que lasperillashartsidocorrectamentereinstaladas.
Laporcelanaesmaltadaesvidriofundidoen metalypuedeagrietarseo picarsesinoseusacorrectamente.Esresistente
a Ios_cidos,no a pruebadeacidos.TodosIosderrames,especialmentelosderramesazucaradosoacidicosdebenset
limpiadosinmediatamenteconun paso seco.
, Cuandoseenfr[e,Iaveconaguajabonosa,enjuaguey seque.
, NuncaIimpie unasupefficietibia o calienteconun pasoh0medo.Estopuedecausaragrietamientoo picaduras.
, Nuncauselimpiadoresde homo,agentesde limpiezaabrasivoso c_usticosenel acabadoexteriorde la estufa.
77

PJEZA PROCEDmM_ENTO DE UMP_EZA
Paneies Lateraies
Gaveta de
Almacenamiento
y Manijas de las
Puertas + Esmalte
Pintado
Ventana y Puerta
del Homo +Vidrio
+ Cuandoest6fda, Iaveconaguatibiajabonosa,enjuaguey seque.Nunca Iimpieunasuper[icietibia o caliente
conun patio h0medopuesestopuededafiarla superficley causaruna quemaduraa causadetvapor.
+Paramanchasrebeldes,useagentesde IimpiezaIevementeabraslvosta! comopastade bicarbonatoo 'BonArni'*.
NouseIimpiadoresabraslvos,c_usticoso _sperostal comoesponjasde lanadeaceraoIimpiadoresde hornos.Estos
productospuedenrayaro dafiar permanentementeIasuperficie.
Nora: Use una tealla e un pa#e sece para I]mpiztr los derrames, especiaImente tes dert_mes ac[dices n
azucaradnsoLa superficie se puede desce!erar o perder el brJllesi el dermme #e se #mpia #lmediatamente.
Esto es especialmerlte #npertante en lassuperficies bfancas.
+ Eviteusarcantidadesexcesivasde aguapuespuedeescurrirsedebajoo detr_isdeIvidriocausandomanchas.
+Laveconaguayjab6n. Enjuaguecon aguaIimpiay seque. Ellimpiadordeviddopuede usarsesi seroda en un
patioprimera.
+Nousematedalesabrasivostalescomoesponjasde restregar,limpiadoresenpolvoo esponjasde lanade acera
puespuedenrayarelvidrio.
+nterior del Homo +Sigalasinstruccionesen lasp_ginas75-76paraprogramarun ciclode autolimpieza.
Acero lno×idable
(modelosselectos}
+Limpiarcon aguaconjab6n.
+Sacarlasmanchasdificilesconpolvode Iimpiezao una esponjaIlenaconjabSn. Enjuagueyseque.
+LasparrillassedescoIorar_npermanentementeypuedennodestizarseconsuavidadsisondejadasenelhornodurante
unciclo deauto+impieza.Siestosucede,IimpieIaparrillay Iossoportesenrelieveconunapequetiacantidaddeaceite
vegetalpara restaurarla facilidadde movim+ento,luego limpieelexcesode aceite.
* NO USENINGUN PRODUCTODELIMPIEZA QUECONTENGABLANQUEADORA BASEDE CLORO.
, NO USELIMPIADORES "ORANGE"NI LIMPIADORESABRASIVOS.
+SIEMPRELIMPIE LAS SUPERFICIESDEACEROA FAVORDELGRANO.
+ Limpieza[}iaria/Suciedad Leve+Limpieconuno de lossiguientes- aguaconjabOn,una soluci6nde vinagre
blancocon agua,limpiadorparasuperficiesyviddo 'Formula409'+o un limpiavidriossimiJar- usandounaesponja
o un patiosuave. Enjuaguey seque. Parapuiir yevitar marcasde Josdedos,useel praducto 'StainlessSteel
Magic Spray'+[PJezaNo.20000008)++.
+Saciedad Moderada/lntensa +Limpiecon unode Iossigu+entes- 'BanAmi'+,'SmartCleanser'+o 'SoftScrub'+-
usandounaesponjah0medao un patiosuave. Enjuaguey seque. LasmanchasdificJlespuedenset quitadascon
una esponjamulti-usa'Scotch-Brite'+h0meda;frote a favordeJgrano. Enjuaguey seque. Pararestaurarel
lustreysacar lasvetas,aplique'StainlessSteelMagic Spray'++
, Descoioraci6n - Useuna esponjamajadao unpa_osuave,limpieconlimpiadorde acera'CameoStainlessSteeJ
Cleaner'+.Enjuagueinmediatamenteyseque.Paraeliminarlasestr[asy restaurarel lustre,usedespu6srociador
paraacerainoxidable'StainlessSteelMagic Spray'+.
*Losnombresde Iosproductosson marcasregistradasde sus respectivosfabricantes.
** Parahacerpedidos,Ilameal 1-877-232-6771EE.UU.o 1-800-688-8408Canad&
?8

Puerta del Homo
No coloque_esoexeesivonisepare_nl@puerta delhomoL Esto
podda haeervo!eaFlaestufa,quebrar!apuertao lesionaral
usuaFio.
Nora: Lapuertadel hornoen una estufanuevapuedesentirse
"esponjosa"cuandosecierra=Estoesnormaly disminuir_conet
USO.
Ventana dem Homo
Para proteger maventana de mapuerta demhomo:
1= Nouseagentesde IimpiezaabrasivostaIescomoesponjasde
restregarde lanade aceroo limpiadoresenpolvopueselIos
puedenrayarelviddo=
2= Nogolpeeel vidrioconollas,sartenes,muebles,juguetes u otros
obietos=
3= NocierreIapuertadeI hornohastaque lasparrillasdel homo no
est6nen su lugar=
AIgolpear,rayar,hacervibraro esforzarel vidrio puededebilitarsu
estructuracausandoun mayorriesgode roturaen unafecha
posterior=
Cone×i6n El ctrica
Losemectrodom6sticosque requieren energia
el6ctrica est_n equipados con un enchufe de
ires clavijas con cone×i6n a tierra, el cual
debeserenchufadodirectamenteen un
tomacorrienteelectricodetres aguieros,para
120voltiosdebidamenteconectadoa tierra=
Sie_r_redesenchufeel ebctrodom_stieoantesdeefectuar
reparaciones.
Elenchufe detres ciaviiasconconexiOna tierra ofrecepmtecciOn
contrape@rosde choqueset6ctdcos=NO CORTENI EUMINE [A
TERCERACLAVUA DECONE×IONATtERRADE[ ENCNUFE
DEECORDONELECTRICO.
Si soIamentesedisponede un tomacorrientesinconexi6na tierra,
dedosagujerosu otto tipo detomacorrienteetdctrico,el
propietariodememectrodomSsticoes pnrsonammente
responsaMede reemplazarel tomacorriente con un
tomacorriente el6ntrico de tres agujeros debidamente puesto
a tierra.
Luz del Homo
Ternillos Niveladores
Veri%ue si el soporteantivueicoestdasegurandoal pisouno de
!OStornil!osniveladorestraseros. Estesoporteevitaque la estufa
se vue!que accidenta!mente .
Laestufadebesernivetadacuandoseinstala=SiIa
estufano est_nivelada,gire lostornillos niveladores
de pI_sticoubicadosencadaesquinade la estufa
hastaquequedenivelada= ,jj
TORNILLO NIVELADOR
• AsegSresede que lacubierta delfoco yel foco est6nfrios
antesde tocarlos.
Para reemplazar el foco del homo:
1=Cuandoel homoest6frio,sujetelatapade labombillaen sulugar,
luegodesliceel ret6nde alambrefuerade Iacubierta=NOTA: La
cubiertade la bombiliasecaer8sino essuietaensu lugarcuando
est8sacandoeIret6nde alambre=
2= Saquelacubiertadetfoco y elfoco= CABOCHON
3. Coloqueun foco de40 wattspara
electrodom6sticos=
4= Vuelvaa colocarlacubiertade
la bombiIIay aseg_irelacon el
ret6nde alambre. _ RESSORTDERETENUE
5. Vuelva a enchufar la estufa. (fiTm6ta#ique)
Vuelva a colocar la hora
correcta=
79

Retiro de la Estufa a Gas
Losconectoresde [aestufaa gasusadosparaconectareste
artefactoal suministrode gasno estdndise_adosparamovimiento
continuo. UnavezinstaDdos,NOmuevarepetidamenteeste
artefactoa gasparasuHmpiezao paraubicadoen otto Iugar. Si
esteartefactotiene quesermovidoy/o retiradopara reparaci6n,
sigae[procedimientodescritoen [asinstruccionesde instaiacidn.
ParainformaciOn,p6ngaseen contactoconel Sewicioa losCIientes
MaytagIIamandoal 1-800-688-9900EE.UU.o al 1-800-688-2002
Canad&
Paraevitarque la estufasevuelqueaccidentaImente,sedebe
aseguraral pisocoIocandoel tornilio niveladoltraserodentrodel
soporteantivuelco.
Gaveta de Almacenamiento
NOguardeproductosde papel0de pidstico,aiimentosni
materialesinfiamabtesenestagaveta.Lagavetapuede
calenta[sedemasiadoparaestosarticu[oscuandoseest,1usando
e!homo.
Panel inferior del Home
ProtejaeIpanetinferiordel horno contraderrames,especiaImentede
tipo addico o azucarado,puespuedendescoIorarla porcelana
esmaltada.UseeIutensiliodetama_ocorrectoa fin de evitar
derramesyreboses.
Elpane!inferiorde[ hornopuedesersacadoparasu [[mpieza.
Para sacar:
Cuandoseenfr[e,saque[asparrillasde[homo. Des[ice _X_
losdosretenes,ubicadosen cadaesquina
de[paneiinferiorde[homo haciala parte
delanterade[homo.
Levantee[bordetraserodel paneiinferior
del horno ligerarnentey Iuegodeslicelo
haciaatr_shastaque el bordede[anterode[ t s
horno pasapotsobreel marcodelantero.
Saqueel panel inferioldel homo.
Para vomvera comocar:
CoDqueei bordedeDnterodei pane[inferiorde[ homoen e!marco
delanterode[homo+Bajela partetraseradel panel inferiordei
homoy deslice[osdosreteneshaciaatrdsparabioqueare[pane[
inferiorde[homo ensu [ugar.
La gavetade almacenamientopuedeset retiradaparaque usted
puedalimpiardebajode la estufa.
Para sacar :
1, Vade la gavetaydeslicelahaciaafuerahastala primeraposici6n
tope,
2. Levantela partedelanterade la gaveta.
3. Tired hastaIasegundaposici6nde tope.
4. Sujetelosladosy levanteIagavetapara retirarla.
Para velvet a coiocar:
I. hmerteIosextremosde lascorrederasde la gavetaen losrieles
de laestufa.
2. Levantela partedelanterade la gavetay suavementeempOjeDa
la primeraposiciOndetope.
3. Levantelagavetanuevamentey empt_jelahastaquequede
comp[etamentecerrada.
80

PROBLEMA SOLUCION
Paramamayor_ade mosprobmemas, ° RevisesJIoscontrobs deIhornoest4ndebJdamenteaiustados.
verifiqueprimeromesiguiente, , Verifiquesiel enchufeest4firmementeinsertadoen ettomacorriente.
• Verifiqueovuelvaa reponerel disyuntor. VerJfiqueo reempBceel fusible.
• VerJfiqueelsuministrode energ[ael6ctrica.
Emquemador superier no se , Verifiquesilaestufaest4 debidamenteconectadaa Iafuentede alimentaciOn.
enciendeo ° Verifiquesiest4fundidoun fusibledel circuitoo si sedispar6el disyuntorprincipal.
• Verifiqueparaasegurarsede queel encendedorest6secoyque emitachasquidos. El
quemadorno seencender_sietencendedorest4dafiado,sucioo moiado. Siel encendedor
no produceun chasquido,gire la perillade control a la posici6n'Off'.
Lallama es disparejao , LosorJficiosdel quemadorpuedenestarobstruidos.
Lallama del quemador superior se ° VerJfiqueparaasegurarsede queel utensilioest4asentadoen [aparrillasoble elquemador.
levanta del orifieioo
Losresultados del homeado no son ° VerifiqueIatemperaturadel homoseleccionada.Aseg0resede que el horno est6
come se esperaban o son precalentadocuandola recetao instruccionesrecombndanprecalentamientodeIhorno.
diferentes a los del homo anterior° ° Aseg0resedequeelresplraderodeIhomonoest_bloqueado.Vetp%ina 80paraJaubicaci6n.
• Verifiqueparaasegurarsede que taestufaest_nivetada.
• Lastemperaturasa menudovar[anentreun horno nuevoyuno antiguo. A medidaque pasa
eltiempo,latemperaturadeIhomo cambiay puedehacersem4scalienteo m4sfr[a. Ver
p_g.72 paralasinstruccionescomo a}ustarlatemperaturadeÁhomo. NOTA:Nose
recombnda ajustarlatemperaturasi hatenidoproblemasconsolouna o dosrecetas.
• Useel utensiliocorrecto.Losutensiliososcurosproducendoradooscuro.Losutensilios
brilIantesproducendoradoclaro.Consulteelfofleto"LaCocinaF_cil"paramayorinformaciOn
sobrelosutensiliosde hornear.
• VerifiquelasposbionesdeIasparrilIasy IacolocaciOndelosutensilios.AIternelosutensilios
cuandousedosparrJllas.Deie2,5-5cm (1-2pulgadas}entrelosutensiliosy lasparedesdel
homo.
• VerifiqueeIusodepapeIde aluminioen el homo. Nuncausepapelde aluminioparacubrir
unaparrillacompletadelhomo.ColoqueunpedazopequefiodepapeldealuminioenlaparrilIa
queest4debajodel utensiliopara recibirlosderrames.
Losalimentos no se asan a la , VerifiqueIasposicionesde Bs parrillasdel homo. Elalimentopuedeestarmuycercade
parrillaen forma debida o salen la llama.
demasiado humoo ° Elpapetde aluminioseus0demaneraincorrecta. Nuncaforreel insertodeJasadorconpapel
dealuminio.
• Recorteel excesode grasade la came antesde ponerlaaasara la parrJlla.
• Seus0una asaderasucia.
• Precalienteel hornodurantedosatres minutosantesde colocarel alimentoenel horno.
• Asea la parrJllaconla puertadel hornocerrada.
81

PROBLErVlA SOLUC_ON
Emhomo no se automimpiao ° Vedfiqueparaasegurarsede queel cJclonoest6ajustadoparaun comienzodiferJdo.Ver
p4ginas75-76.
o Verifiquesi ia puertaest_cerrada.
o Verifiquesi el controIest4en ModoSab_itico.Vetp4g.71.
o E!homopuedeestara m4sde 205°C (400°F). Latemperaturadel hornodebeser inferiora
205° C(400° F)paraprogramarun cido de limpieza.
Emhomo no se mimpi6en , Puedeque seanecesarioun tiempo de limpiezarn4slargo.
forma debidao ° Losderramesexcesivos,especialmentede alimentosazucaradosy/o 4cidosno fueron
limpiadosantesdel ciclo deautolimpieza.
Lapuerta demhomono se ° ElinteriordeIhornotodavFaest_caliente. Dejeque paseaproximadamenteuna hora
desbloquea despuSs del ciclo paraqueel homoseenfrFeantesdeque secompleteun ciclo de autolimpieza. Lapuerta
puedeset abiertacuandodesaparezcala palabra'LOCK'del indicadorvisual
o Elcontro[y la puertapuedeestarbloqueada.Vetp%. 65.
$e junta humedad en la ventana ° Estoesnormalcuandosecocinanalimentoscon altocontenidode humedad.
del homoo sale vapor pot ° Seus0humedadexcesJvacuando[impi6[aventana.
emrespiraderodemhomo°
Hayun omorfuerte o humo mere ° Estoesnormalen una estufanuevay desaparecer_despu6sde unospocosusos.
cuando se enciende el homo, AI inJciarun cicio de autolimpiezase"quemar_n"loso[oresm4sr4pidamente.
o Sise enciendeetventiladorayudar_a eliminarel humoy/o el clot.
o Suciedadexcesivade alimentosen el panelinferiordel homo. Useun ciclo deautolimpieza.
C6digosde Errores ° 'BAKE'o 'LOCK'puedendestellarr_pidamenteen el indicadorparaavisarleque hayun error
o un problema.Si 'BAKE'o 'LOCK'aparecenen elindicadorvisual,oprimaIatecla'CANCEL'.
Si'BAKE'o'LOCK'continOandestellando,desconecteiaenerg[ael6ctricaalelectrodom6stico.
EspereunospocosminutosyvuelvaareconectarlaenergFael6ctrica.Sicontin8andestellando,
desconectelaenergFael6ctricadotelectrodom6sticoyflamealt6cnicode servicioautodzado.
o Siel homo est4demasiadosucio,puedenoculrir demasiadasIlamaradasIocual resultar_en
uncOdigode errorduranteIaIimpJeza.Oprimalatecla 'CANCEL'y dejequeel hornoseenfrie
completamente,Iimpieel excesodesuciedady luegovuetvaa programarel ciclo delimpieza.
Si el c6digodeerror reaparece,Ilamea un t6cnicoautorizado.
Se eseuchan ruidoso , Elhornoemitevariossonidosbajos.Ustedpuedeoir losrel6sdelholno cuandoseencienden
y seapagan.Estoesnormal.
o A medidaqueelhomosecalientayse enfr[a,ustedpuededr sonidosdepiezasmet41icasque
seexpandeny contraen. Estoes normaly noda_ar4suelectrodomestico.
Nose eseuchan se_ules sonoras , Elhornopuedeestaren ModoSab_tico. (Verp%. 71).
y el indicadorvisual no se activao
'SAb' destella y luego se o Elhomoest_en modosab4tico.Paraanularel modosab_tico,optimay mantengaoprJmida[a
tecla 'Clock' (Reloj)durantecinco segundos.
82

Garantia Completa de Un A_o - Piezas
y Mano de Obra
Duranteun (1) a_o desdeJafechaoriginal de
cornpraal pormenor:ser_pararao reempiazard
gratLHtamentecuaLqu_erp_ezaque falleduranteuso
normalen eihogar.
Residentes Canadienses
Lasgarantiasameriorescubrensolamenteaquellos
eJectrodom6sticosinstaJadosen Canadaque ban
sldocer[ihcadoso aprobadospor hs agenclasue
pruebascorrespondientesparacumpl_mientocon _a
NormaNacionalde Ca-_ad_ia menosque e!
eJectrodom6sticohayasidotra[do a Canadades@
_osEE.UU.debido a un cambiode residencia.
Garantia Limitada Fuera de los Estados
Unities y Oanad_ = Piezas Somamente
Durante ae (1) a_o des@lafecha de compra
originalal por menoncualqulerpJezaque falle
duran[eusonormalen el hogarser_reemplazadao
repara(lagratutamente en Ioque respectaa la ple,za
yel propietariodeber_ipagartodos Iosotroscostos
mcluyendomanode obra.kilometrajeimillaje.
[ranspor[e.costoae_vlajey costodel diagnostic3,si
hJesenecesario.
Lasgarantiasespecfficasexpresadasanter/ormente
son/asUMCAS gatantfasprovistaspot e!fabrican[e.
Fstasgarantiasle oto_ganderechos/ega/es
especfficosy ustedpuede tenetadembso[ro_
derechosque vat/andeun estadoa otto.
Lo que No Cubren Estas Garantias:
1=Situacionesy da_osresuitantesde cualquierade lassiguientes
eventuaIidades:
a=hlstaiaci6n,entregao mantenimientoinapropiados=
b=Cuaiquierreparaci6n,modificaciOn,alteraciOno aiuste noautorizadopor
el fabricanteo pot uncentro de servicioautorizado=
c=Mal uso,abuso,accidenteso usoirrazonable=
d=Corrienteei6ctrica,voltaieo suministroincorrecto=
e=Programaci6nincorrectade cualquierade loscontroles=
2= Lasgarant[asquedan hulassi losn0merosde serieoriginaleshartsido
retirados,alteradoso nosonf_cilmentelegibles=
3= Focos=
4= ProductoscompradosparausocomerciaIo industrial
5= Elcostodel servicioo Ilamadade serviciopara:
a=Corregirerroresde instalaci6n=
b=hlstruir aiusuariosobreel usocorrectodel artefacto=
c=Transportedel artefactoaIestableci@entode servicio=
6= Losddios consecuenteso incidentaiessufridospot cuaIquierpersonacomo
resuItadode cualquierincumplimientode estasgarant[as=EnaIgunos
estadosno sepermitela excIusi6no IimitaciOnde Iosdat_osconsecuenteso
incidentales,por Iotanto la exclusiOnanteriorpuedeque no seapliqueen su
08SO=
Si Necesita Servicio
• Llameal distribuidor dondecomprOsuelectrodom6sticoo Ilamea Maytag
ServicessM,ServicioaIosCIientesMaytagIlamandoal 1-800-688-9900EE=UU=
o al 1-800-688-2002Canad¶ ubicaraun t6cnicoautorizado=
o Aseg[iresede conservareIcomprobantede compraparaverificarel estadode
la garant[a. ConsulteIasecciOnsobrela GARANTIAparamayorinformaci6n
sobrelasresponsabilidadesdel propietarioparaserviciobaiola garantia.
o Si eldistribuidor o Iacompai_[ade serviciono puedenresolverel probIema,
escribaa MaytagServicessM,Attn: CAIR_;Center,P.O.Box2370,Cleveland,TN
37320-2370o Ilameal 1-800-688-9900 EE.UU.o ai 1-800-688-2002
Canad&
o Lasgalasdel usuario,manualesde servicioe informaciOnsobrelaspiezaz
puedensolicitarsea MaytagSewicessM,Servicioa losClientesMaytag=
CuandoIlameo escribaacercade un probiemade servJcio,pot favor
incluyaJasiguienteinformaci6n=
a=Su hombre,direcci6ny n@lerodeteJdono;
b=NQmerode modeloy n[imerode serJe;
c=Nombrey direcci6ndesu distribuidoro t@nico de servicio;
d=Unadescripci6nclaradel problemaque est4experimentando;
e=Comprobantede compra(recibodecompra)=
Form No. B/09/04 Part No. 8113P458 60 ¢')2004 Maytag Appliances Sales Co. Litho U.S.A.
Transcripción de documentos
Gas - Precision Touch Control 800 M_A AG ® Table of Contents Umportant Safety Unstructions ............................... Care & Cleaning 1-4 Self-Clean ................... 18-21 Oven Cleaning Procedures Surface Cooking ...................... ControHs Sealed Gas Burners Oven Cooking Bakhg Cook & HoM ......................... No, B/09/04 PaR No. 8113P458 Maintenaace ......................... 8=17 Warranty 60 22-23 Oven Whldow & Light Removal ot Gas Appliance Troubleshooting DeHay Broiling Keep Warm Oven Racks Form 5-7 ................... & Service 24=25 .................... 27 Guide d'ntilisation et d'entretien ............................... 28 Guia 56 de Use (_P2004 Mavtag y Cnidado Appliances Sales Co. ............. Litho U.S.A. Consumer: R[ease read and keep this manua! foe future Model Number Seria! Number technician. Do not attempt to adjust, repair, service, or replace any part of your appliance unless it is specifV cally recommended in this guide. All other servicing should be referred to a qualified servicer. Have the installer show you the location of the gas shut off valve and how to shut it off in an emergency. Always disconnect Date of Purchase 1_800-688:2080 [ U,S._ for headng or speech impaired} (Mon._FrL,8 arn:8 pm Eastern Time} !ntemet; http:/ivwvw.maytag.com !n our conti nui ng effortto improve the q ua!ity aud performance ol:0ur cooking products, it may be necessary to make changes to the appliance without revis!ng this gu!de. if the information in this _anuam is not followed e×actly, a fire or e×piosion may result causing property damage, personal injury or death. .............. use gasoline or other fla_m able vapors and liquids in the vicinity of this or any appliance. - Fer setvice #nfermatien_ seepage IFYOU SNIELL GAS: - Do not try to _ight any appliance. - Do not touch any electricam switch. o Do not use any phone in your building. o I_mediately call your gas supplier from a neighbor's phone. Follow the gas supplier's instroctionso o if you cannot reach your gas supplier, call the fire department. lnstaUation a quahfied su ppiier. Warning and Important Safety Instructions appearing in thisguide are not meant to cover allpossibleconditions and situations that may occur. Common sense, caution, and care must be exercised when installing, maintaining, or operating the appliance. Always contact your dealer, distributor, service agent, or manufacturer about problems or conditions you do not understand. Recognize Safety Symbols, Words, power to a ppliance before servicing. and service must be performed by installer, service agency or the gas dangerous situation. Gas leaks may not be detected by smelt alonel Gas suppliers recommend you pur_ chase and instal! an UL approved gas detector, Instal! and use in accordance with the manufacturer's instructions. Labels Geneta instructions WARNING - Hazards or unsafe practices which COULD result in severe personal injury or death. * CAUTION _ Hazards or unsafe practices Which COULD result in minor personal injury. Read and follow all instroctions before using this appliance to prevent the potential risk of fire, electric shock, personal injury or damage to the appliance as a result of improper usage of the appliance. Use appliance only for its intended purpose as described in this guide. To ensure proper and safe operation: must be properly installed and grounded Appliance by a qualified ALL P,ANGES CAN TIP AND Tocheckif deviceis properlyinstalled,lookunderneath rangewith a flashlightto makesureoneofthe rear levelinglegsis properlyengagedinthe bracketslot.The anti-tipdevicesecuresthe rearlevelinglegto the floor when properlyengaged.Youshouldcheckthis anytime the rangehasbeenmoved. Donot usewateron greasefires.Usebakingsoda,a dry chemicalor foam-typeextinguisherto smotherfire or flame. Child Safety Te Prevent Fire or Smoke Be sure all packing materials are removed from the appliance before operating it. Keep area around appliance clear and free from combustible materials, gasoline, and other flammable vapors and materials. If appliance is installed near a window, proper precautions should be taken to prevent curtains from blowing over burners. NEVER leave any items on the cooktop. The hot air from the vent may ignite flammable items and may increase pressure in closed containers which may cause them to burst. Many aerosokype spray cans are EXPLOSIVE when exposed to heat and may be highly flammable. Avoid their use or storage near an appliance. Many plastics are vulnerable to heal Keep plastics away from parts of the appliance that may become warm or hoL Do not leave plastic items on the cooktop as they may melt or soften if left too close to the vent or a lighted surface burner. To eliminate the hazard of reaching over hot surface burners, cabinet storage should not be provided directly above a uniL If storage is provided, it should be limited to items which are used infrequently and which are safely stored in an area subjected to heat from an appliance. Temperatures may be unsafe for some items, such as volatile liquids, cleaners or aerosol sprays. above an appliance or on backguard of a range. Children climbing on the appliance door to reach items could be seriously injured. NEVER leave children alone or unsupervised near the appliance when it is in use or is still hot. NEVER allow children to sit or stand on any part of the appliance as they could be injured or burned. Children must be taught that the appliance and utensils in it can be hot. Let hot utensils cool in a safe place, out of reach of small children. Children should be taught that an appliance is not a toy. Children should not be allowed to play with controls or other pars of the unit. About Your Appliance NEVER use appliance door as a step stool or seat as this may result in possibietipping of the appliance and serious injuries. NEVER use this appliance as a space heater to heat ol warm a room. Doing so may resuit in carbon monoxide poisoning and overheating of the oven. NEVER cover any slots, hotes or passages in the oven bottom or cover the entire rack with materials such as aluminum foil. Doing so blocks air flow through the oven and may cause carbon monoxide poisoning, Aluminum hazard. foil may also trap heat causing a fire In Case of Fire NEVER obstruct the flow of combustion and ventilation Turn off appliance and ventilating hood to avoid spreading the flame. Extinguish flame then turn on hood to remove smoke and odor. air b\, blocking the oven vent or air intakes. Doing so restricts air to the burners and may result in carbon monoxide poisoning. , Cooktop: Smother fire or flame in a pan with a lid or cookie sheet. The oven vent is located at the base of the backguard. NEVER pick up or move a flaming pan. . Ovens Smother fire or flame by closing the oven door. Avoid touching oven vent area while oven is on and for several minutes after oven is turned ofL Some parts of the ventandsurroundingareabecomehot enoughto causeburns.Afterovenisturnedoff,do nottouchthe ovenventor surroundingareasuntiltheyhavehad sufficienttimeto cool. NEVER wear garments made of flammable material or loose fitting or long-sleeved apparel while cooking. Clothing may ignite or catch utensil handles. Always place oven racks in the desired positions while oven is cool. Slide oven rack out to add or remove food, using dry, sturdy potholders. Always avoid reaching into the oven to add or remove food. If a rack must be moved Otherpotentiallyhotsurfacesincludecooktop,areas facingthe cooktop,ovenvent,surfacenearthe vent opening,ovendoor,areaaroundthe ovendoorand ovenwindow. while hot, use a dry pothoIder. Always turn the oven off at the end of cooking. Do not touch a hot oven light bulb with a damp cloth as the bulb could break. Should the bulb break, disconnect power to the appliance before removing bulb to avoid electrical shock. Cooking Use care when opening the oven door. Let hot air or steam escape before moving or replacing food. PREPARED FOOD WARNUNG: Follow food manufacturer's instructions, if a plastic frozen food container and/or its cover distorts, warps, or is otherwise damaged during cooking, immediately discard the food and its container. The food could be contaminated. Safety Always place a pan on a surface burner before turning it on. Be sure you know which knob controls which surface burner. Make sure the correct burner is turned NEVER use aluminum foil to cover oven racks or oven on and that the burner has ignited. When cooking is completed, turn burner off before removing pan to prevent exposure to burner flame. bottom. This could result in risk of electric shock, fire, or damage to the appliance. Use foil only as directed in this guide. Always adjust surface burner flame so that it does not extend beyond the bottom edge of the pan. An excessive flame is hazardous, wastes energy and may damage the appliance, pan or cabinets above the appliance. Utensil Use pans with flat bottoms and handles that are easily grasped and stay cool. Avoid using unstable, warped, easily tipped or loose-handled pans. Also avoid using pans, especially small pans, with heavy handles as they could be unstable and easily tip. Pans that are heavy to move when filled with food may also be hazardous. NEVER leave a surface cooking operation unattended especially when using a high heat setting or when deep fat frying. Boiiovers cause smoking and greasy spiiiovers may ignite. Clean up greasy spills as soon as possible. Do not use high heat for extended cooking operations. Be sure utensil is large enough to properly contain food and avoid bollovers. Pan size is particularly important in deep fat frying. Be sure pan will accommodate the volume of food that is to be added as well as the bubble action of fat. NEVER heat an unopened container on the surface burner or in the oven. Pressure build-up may cause container to burst resulting in serious personal injury or damage to the appliance. Use dry, sturdy potholders. Damp potholders may cause burns from steam. Dish towels or other substitutes should never be used as potholders To minimize burns, ignition of flammable materials and spillage due to unintentional contact with the utensil do not extend handles over adjacent surface burners. Always turn pan handles toward the side or back of the appliance, not out into the room where they are easily hit or reached by small children. because they can trail across hot surface burners and ignite or get caught on appliance parts. Always let quantities of hot fat used for deep fat frying cool before attempting to move or handle. Do not let cooking grease or other flammable Safety Never let a pan boll dry as this could damage the utensil and the appliance. materials accumulate in or near the appliance, hood or vent fan. Clean hood frequently to prevent grease from accumulating on hood or filter. When flaming foods under the hood turn the fan on. Follow the manufacturer's cooking bags. 3 directions when using oven Only certain types of glass, glass!ceramic, ceramic or glazed utensils are suitable for cooktop or oven usage without breaking due to the sudden change in temperature. Follow manufacturer's instructions when using glass. It is normal for the cooktop of the range to become hot during a self-clean cycle. Therefore, touching the cooktop during a clean cycle should be avoided. This appliance has been tested for safe performance using conventional cookware. Do not use any devices or accessories that are not specifically recommended in this guide. Do not use eyelid covers for the surface units, stovetop grills, or add-on oven convection systems. The use of devices or accessories that are not expressly important and Users of this appliance are hereby warned that the burning of gas can result in low-level exposure to some of the listed substances, including benzene, formaldehyde and soot, due primarily to the incomplete combustion of natural gas or liquid petroleum (LP} fuels. Propedy adjusted burners will minimize incomplete combustion. Exposure to these substances can also be minimized by properly venting the burners to the outdoors. Cmeaning Safety Turn off all controls and wait for appliance parts to cool before touching or cleaning them. Do not touch the areas until they have had Clean appliance with caution. Use care to avoid steam burns if a wet sponge or cloth is used to wipe spills on a hot surface. Some cleaners can produce noxious fumes if applied to a hot surface. Self-Clean Notice The California Safe Drinking Water and Toxic Enforcement Act of 1986 (Proposition 65} requires the Governor of California to publish a list of substances known to the State of California to cause cancer or reproductive harm, and requires businesses to warn customers of potential exposures to such substances. recommended in this manual can create serious safety hazards, result in performance problems, and reduce the life of the components of the appliance. burner grates or surrounding sufficient time to cool. Safety Users of this appliance are hereby warned that when the oven is engaged in the self-clean cycle, there may be some low-level exposure to some of the listed substances, including carbon monoxide. Exposure to these substances can be minimized by properly venting the oven to the outdoors by opening the windows and/ or door in the room where the appliance is located Oven during the self-clean Do not leave food or cooking utensils, etc. in the oven UMPORTANT cycle. NOTUCE REGARDUNG PET BURDS: Never keep pet birds in the kitchen or in rooms where the fumes from the kitchen could reach. Birds have a Clean only parts listed in this guide. Do not clean door gaskeL The door gasket is essential for a good seal Care should be taken not to rub, damage, or move the gaskeL Do not use oven cleaners of any kind in or around any part of the self-clean oven. very sensitive respiratory system. Fumes released during an oven self-cleaning cycle may be harmful or fatal to birds. Fumes released due to overheated cooking oil, fat, margarine and overheated non-stick cookware may be equally harmful Before self-cleaning the oven, remove broiler pan, oven racks and other utensils and wipe up excessive spfllovers to prevent excessive smoke, flare-ups or flaming. Save These instructions for Future 4 Reference Hi: Use to bring iiquid to a boii, or reach pressure in a pressure cooker. Aiways reduce setting to a bwer heat when iiquids begin to boii or foods begin to cook. LO: Use to simmer foods, keep foods warm and me,it chocoiate or butter. Some cooking may take princeon the LO setting if the pan is covered. It is possiMe to reduce the heat by rotating the knob toward OFF. Be sure flame is staMe. An intermediate flame size is used to continue cooking. Food wiii not cook any faster when a higher flame setting is used than needed to maintain a gentle boil. Water boils at the same temperature whether boiling gently or vigorously. Surface Controls Setting the controJs: The size and type of cookware wiii affect the heat setting. For information on cookware and other factors affecting heat settings, refer to "Cooking Made Simple" booklet. ° If flame should go out during a cooking operation, turn the burner off. If a strong gas odor is detected, open a window and wait five minutes before relighting the burner. 1. Place a pan on the burner grate. o The burner flame may lift off or appear separated from the port if a pan is not placed on the grate. 2. Push in and turn the knob counterclockwise to the MTE setting. o Be sure all surface controls are set in the OFF position prior to su ppiying gas to the range. " A clicking (spark} sound wiii be heard and tile burner wiii light. {Aii five ignitors wiii spark when any surface burner knob is turned to the LmTEposition.} • NEVER touch cooktop until it has cooled. Expect some parts of the cooktop, especially around the burners, to become warm or hot during cooking. Use potholders to protect hands. 3. After the burner lights, turn knob to desired flame size. " The ignitor wiii continue to spark until the knob is turned past the LmTEposition. Pimot ess ignition Pilotless ignition eliminates the need for a constant standing pilot light, Each surface burner has a spark ignitor. Use care when cleaning around the surface burner. If the surface burner does not light, check if ignitor is broken, soiled or wet. BURNER CAP Operating During Power Faimure a controls are in the OFF position, Strike the match first and hold it in position before turning the knob to UTE, Ports gnitor 1. Hold a lighted match to the desired surface burner head. BURNER Surface BASE 2. Push in and turn the control knob slowly to MTE 3. Adjust the flame to the desired level. Control Knobs Use to turn on the surface burners. An infinite choice of heat settings is available from LO to Hi. At the Hi setting a detent or notch may be felt. The knobs can be set on or between any of the settings. Graphics next to the knob identify which burner the Oo O O knob controls. For example, the graphic at left shows the left front burner location. 5 Burner Cooktop To prevent staining: "Cban the cooktop from discoloring Grates The grates must be properly positioned before cooking. When installing the grates, place the tab ends toward the center, matching the straight bars. or cooktop after each use. Improper installation of the grates may result in chipping of the cooktop. Wipe acidic or sugar}, spflb as soon as the cooktop has Unlike a range with standard gas burners, this cooktop does not lift-up nor is it removable. Dospflb t_ot attempt to lift _-_porceiain. coobd as these may discobr the@e cooktop for any reason. Seamed Burners Do not operate the burners without a pan on the grate. The grate's porcelain finish may chip without a pan to absorb the heat from the burner flame. The sealed burners of your range are secured to the cooktop and are not designed to be removed. Since the burners are sealed into the cooktop, boilovers or spills will not seep underneath the cooktop. Use care when stirring food in a pot/pan sitting on the burner grate. The grates have a smooth finish for ease of cleaning. The pot/pan will slide if the handle is not held. This may result in spilling of hot food items and may be a burn hazard. However, the burner should be cleaned after each use. The head portion of the burner is easily removed for cleaning. (See page 20 for cleaning directions.} Although the burner grates are durable, they will gradually lose their shine and/or discolor, due to the high temperatures of the gas flame. The burner heads must be correctly placed on the burner base for proper operation of the burner. High Performance Burners There is one 16,000 BTU* high speed burner on your range, located in the right front position. There is a 12,000 BTU* burner located in the left front position. These burners offer higher speed cooking that can be used to quickly bring water to a boii and for large-quantity cooking. Simmer " A properly adjusted burner with clean ports wiii light within a few seconds. If using natural gas, the flame wiii be blue with a deeper blue inner cone. If the burner flame is yellow or is noisy, the air/gas mixture may be incorrect. Contact a service technician to adjust. (Adjustments are not covered by the warranty.} Burner This burner is located in tile center position. Tile simmer burner offers a lower BTU* flame for delicate sauces or melting chocolate. With LP gas, slight yellow tips on the flames are acceptable. This is normal and adjustment is not necessary. BTU ratings will vary when using LP gas. " With some types of gas, you may hear a "popping" sound when the surface burner is turned off. This is a normal operating sound of the burner. " If the control knob is turned very quickly from Hi to LO, the flame may go out, particularly if the burner is cold. If this occurs, turn the knob to the OFF position, wait several seconds and relight the burner. " The flame should be adjusted so it does not extend beyond the edge of the pan. 6 D H j E J K LM N F G 0 The control panel is designed for ease hi programmhg, The displaywhldow on the control shows thlle of day, thYlerand oven functions. Control panel shown includes Convect and other model specific features. [Styling may vary depending on moddj Bake Use for baking and roasting. Broil Use for broiling and top browning. C Clean Use to set self-clean cycle. D Convect Roast Use for convection roasting. E Delay Programsthe ovento start baking at a later time. Number Pads Use to set time and temperature. Autoset Use to quickly set temperatures. Keep Warm Use to keepcooked food warm in oven. Convect Bake Use for convection baking. Cook & Hold Bakes for a preset time. then holds food warm for 1 hour. Favorite Use to save a specific Cook & Hold procedure. L Timer Sets Timer. M Clock Use to set time-of-day clock. n OvenLight CANCEL Use to turn the oven light on or off. H J Using the Touchpads " Press the desired pad= " Press the number pads to enter time or temperature. ° Press the Autoset 0 pad to enter temperature. " A beep will sound when any pad is touched. " A double beep will sound if a programming error occurs. Note: Four seconds after pressing the number pads or the Autoset 0 pad, the time or temperature will automatically be entered. If more than 30 seconds elapse between touching a function pad and the number pads or the Autoset 0 pad, the function will be canceled and the display will return to the previous display. The clock can be set to display time in a 12-hour or 24-hour format. The clock is set at the factory for the 12-hour format. Cancelsall operations except Timer and Clock. To change the clock to 24-hour 1. Press and hold the CANCEL and Favorite pads for three seconds. m format: ° 12 Hr flashes in the display. 2. Press the Autoset 0 pad to select 24 Hr; press again to select 12 Hr. 3. Set the time of day following the directions in the To set the Clock section. 0 Autoset 7 To set the C_ock: 3. Press Timer pad again or wait four seconds. 1. Press the CHockpad. , The time of day flashes in the dispiay. 2. Press the appropriate number pads to set the time of day. ° The colon stops flashing and the time begins counting down. , The last minute of the timer countdown will be displayed in seconds. , Cobn flashes in the dispiay. 3. Press the CHockpad again or wait four seconds. , The cobn will remain on. When ebctrbd power is suppibd or after a power interruption, the Hastchock time before power was interrupted will flash. To recall the time of day when another time function is showing, press the CHockpad. CHocktime cannot be changed when the oven has been programmed for Dday cook or dean or Cook &Hoid. To cancem the Clock display: If you do not want the time of day to dispiay: Press and hoM the CANCEL and CHock pads for three seconds. The time of day will disappear from the display. When the clock display is canceled, press the Clock pad to briefly display the time of day. When the clock display is canceled, after 15 minutes, the oven control will go into Standby Mode to save energy. The display will be blank and the oven light will not operate. To "wake up" the control from Standby Mode, press any touchpad. A double beep will sound. To restore the Clock display: Press and hold the CANCEL and Clock pads for three seconds. The time of day will reappear in the display. 4. At the end of the set time, one long beep will sound and "End" will be displayed. 5. Press the Timer pad to clear the display. To cancel the Timer: 1. Press and hold the Timer pad for three seconds. OR 2. Press the Timer pad and press '0' using the number pads. Locking the Contro --0 Autoset and Oven Door The touchpad and oven door carl be locked for safety, cleaning, or to prevent unwanted use. The touchpads will not function when locked. If the oven is currently in use, the touchpads and door cannot be locked. The current time of day wiii remain in the display when the touchpads and door are locked. To lock: Press and hold the CANCEL and Cook & Hold pads for three seconds. (Press the CANCEL pad first.} ° OFFappears in the display ° LOCK flashes while the door is locking. To unlock: The timer can be set from one minute (0:01} up to 99 hours and 59 minutes (99:59}. The timer can be used independently of any other oven activity. It can also be set while another oven function is operating. Press and hold the CANCEL and Cook & Hold pads for three seconds. (Press the CANCEL pad first.} OFF disappears from the display. oven is 400° F or above. _ the Note: Thetemperature touchpads and oven door cannot be locked if The Timer does not control the oven. It only controls a beeper. To set the Timer: 1. Press the Timer pad. ° 0:00 and TIMER flash in the display. 2. Press the appropriate number pads until the correct time appears in the display. ° The colon and TIMER will continue to flash. Faumt Codes BAKE or LOCK may flash rapidly in the display to alert you if there is an error or a probbm. If BAKE or LOCK flash in the display, press the CANCEL pad. If BAKE or LOCK continue to flash, disconnect power to the appliance. Wait a few minutes, and then reconnect power. If the flashing still continues, disconnect power to the appliance and call an authorized servicer. Q Baking 1. Press the Bake pad. Differences Between Your Old and New Oven To set Bake: It is normal to notice some baking time differences between a new oven and an old one. See "Adjusting the OvenTemperature" on page 15. Bake , BAKE wi[[ flash. ° 000 wi[[ flash in the display, 2. Select the oven temperature. Press the Autoset 0 pad for 350° F or the appropriate number pads. l'_ U Baking ,_uloset with Convection (select models) , Each additional press of the Autoset 0 pad wi[[ increase the temperature by 25°. When convection baking, enter year normal baking temperatare. The control wi[[ automatically reduce the set oven temperature by 25°. The entered temperature wi[[ be displayed. The convection fan will start after the oven has been on for five minateso , The oven temperature can be set from 170° to 550°. 3. Press Bake pad again or wait four seconds. , BAKE wi[[ stop flashing and light in the display. TO set Conveet Bake: 1. Press the Convect Bake pad. , BAKE and the FAN icon wi[[ flash Bake ........................... ° 000 wi[[ flash in the display. 1/ Select the oven temperature. Press the Autoset 0 U pad for 350° F or the appropriate number pads. Au/osel , 100° or the actual oven temperature if over 100° F will display. It wi[[ rise in 5° increments until the preset temperature is reached. ° Each additiona[ press of the Autoset 0 pad wi[[ increase the temperature by 25 degrees. The oven temperature can be set from 170° to 550°. 4. Allow the oven to preheat for 8-15 minutes. ° When the set oven temperature is reached, one long beep wiil sound. 3. Press Convect Bake pad again or wait four seconds. ° BAKE will stop flashing. ° The set temperature wiil display. , 100° or the actual oven temperature if over 100° F will display, it will rise in 5° increments until the preset temperature is reached. ° To recall set temperature during preheat, press Bake pad. 5. Place food in the oven. , The FAN icon will start to rotate. 6. Check cooking progress at the minimum cooking time. Cook longer if needed, 4, Allow the oven to preheat for 8-15 minutes. 7, When cooking is finished, press CANCEL pad, ° When the set oven temperature is reached, one long beep will sound. 8, Remove food from the oven, ° The set temperature will display. Baking ° To recall the set temperature during preheat, press the Convect Bake pad. Notes: ° To change the oven temperatare daring cooking, press Bake, then press the Autoset 0 pad or appropriate number pads until the desired temperature is displayed. , To change the oven temperatare daring preheat, press the Bake pad twice, then press the Autoset 0 pad or appropriate number pads until the desired temperature is displayed. 5, Place food in the oven, 0. Check cooking progress at the minimum cooking time. Cook longer if needed. ° If you forget to turn off the oven, it wi[[ automatically turn off at the end of 12 hours. If you wish to deactivate this feature, see page 14. 7. When cooking is finished, press CANCEL pad. ° For additional baking and roasting tips, see "Cooking Made Simple" book[eL 8. Remove food from the oven. 9 Roasting (select With Convection Press Convect Roast pad again or wait four seconds. ° ROAST will stop flashing and light in the display. models) , 100° or the actual oven temperature will display. It will rise in 5° increments until the preset temperature is reached. When convection roasting, enter your normaJ roasting time and temperature. The control will automatically prompt you to check the food for aloneness at 75% of the set time. The convection fan will start after the even has been on for five minutes. Roasting ° The FAN icon will start to rotate. Notes: ° When convection roasting, the cooking time must be set before setting the temperature. ° If your recipe requires a preheated oven, add 15 minutes to the cooking time programmed. _otes: , Roasting times can vary with different cuts of meat. , [f a preheat is required, allow the oven to preheat for 8-15 minutes. , It is not necessary' to preheat when convect roasting large cuts of meat. ° When the set oven temperature is reached, one long beep will sound. ° Refer to "Cooking Made Simple" booklet for suggested roasting temperatures and times. 5. Place food in the oven. ° Time will start counting down once oven starts heating To set Convect up. Roast: 1. Press the Convect Roast pad. ° ROAST and the FAN icon will flash. ° To recall the set temperature during preheat, press the Convect Roast pad. Roast ......... 8. When 75% of the set cooking time has elapsed, the oven light will turn on and FOOD will flash in the display. Check the cooking progress at this time. Cook longer if needed. ° 00:00 will flash in the display. ° 000 lights in the display. ° The oven light will remain on until the Oven Light pad is pressed. 2. Enter the roasting time using the number pads. ° Time can be set from 10 minutes (00:10} to 11 hours, 59 minutes {11:59}. ° Press any pad to recall the cook time remaining. 7. When cooking is finished, press CANCEL pad. ° Press Convect Roast pad again or wait 4 seconds. 8. Remove food from the oven. ° ROAST and the FAN icon flash in the display. ° 000 will flash in the display. 3. Select the oven temperature. Press the Autoset 0 pad for 325° F or the appropriate number pads. N AutoseL'J ° Each additional press of the Autoset 0 pad will increase the temperature by 25°. ° The oven temperature can be set from 170° to 550°. 10 Q Cook & Herod To cancel Cook & Hold at any time: When ushg the Cook & Hemaloptk)n, the oven beghs to heat immediateHyafter the controHhas been set= Then, the oven cooks for a specified Hengthof time. When that time has eHapsed,the oven wiHHkeep the food warm for up to an hour then automaticaHHyturn off= Press the CANCEL pad. Remove food from oven. TO set Cook Delay Cook & Hold & Herod: 1= Press the Cook & HoHdpad= Do not use deHayedbaking for h!ghUYperishable foods such as dairy products, pork, pouHtry,or seafood. ° HOLD wiHHflash to indicate that you are in Cook & HoHdprogramming. ° 00:00 wiHHflash in the dispHay= When using Demay, the oven begins to cook later in the day. Set the amount of time that you want to delay before the oven turns on and how long you want to cook. The oven begins to heat at the selected time and cooks for the specified length of time. 2. SeHectthe amount of time you want to cook by using the number pads. ° HOLD continues to flash. ° The time will] Hightin the dispHay. Delay time can be set from 10 minutes (00:10} to 11 hours, 59 minutes (11:59). ° Time can be set from ten minutes (00:10) to 11 hours, 59 minutes (11:59]. 3. WhiHeHOLD is still] flashing, press Bake, Convect Bake or Convect Roast (seHect modeHs)and seHectthe oven temperature. Press the Autoset 0 pad for 350° F or the appropriate number pads. To set a Delayed ° DELAY flashes in the dispHay. 0 2. Using the appropriate number pads, enter the amount of time yea want te delay the start of the Cook & HoHdcycHe. Autosd 3. Press the Cook & HoHdpad. can be set from ° HOLD and DELAY flash in the dispHay. ° 00:00 flashes in the dispHay. 4. Enter the ameant of time you want to cook using the number pads. , The desired function word will remain Nit. , The cooking time will show in the display. 5. Press Bake, Convect Bake or Convect Roast pad (select models). , The actuaHoven temperature wiHHbe dispHayed during preheat. 0. Set the oven temperature , The set temperature wiHHdispHaywhen the oven is preheated. time 1 Delay ° 00:00 flashes in the display= 4. Press the desired function pad again OR wait four seconds. When the cooking 1 Bake ..... 1. Press the 1 DeHaypad. ° The desired function word will] flash. . The oven temperature 170 ° F to 550 ° F. Cook & Hold eyrie: .............................. desired by pressing the Autoset 0 pad or the appropriate number pads. ° 350° will[ Hightwhen Autoset 0 pad is pressed. has elapsed: U ;\utoset ° Four beeps wiHHsound. , After four seconds, the entered delay' time will[ appear in the dispHay. ° HOLD and WARM wiHHHight. ° HOLD turns off. ° 170°and the time of daywiHHdispHay. , BAKE and DELAY remain Nitto remind you that a delayed Cook & Hold cycHehas been programmed. _otes: , Do not use Delayed Cook & Hold for items that require a preheated oven, such as cakes, cookies, and breads. After one hour in HOLD ° Do not use DeHayedCook & HoHdif oven is aHreadyhot. WARM: , The oven turns off automaticaHHy. ° HOLD and WARM go off. , Remove food from oven. 11 Q 6. Turn meat once about halfway through cooking. 7. When food is cooked, press the CANCEL pad. Remove food and broiler pan from the oven. To set Broit: 1. Press the Broii pad. , BROIL and SETflash in the dispiay. .............. 2. Press the Autoset 0 pad once to set HI broii or twbe to set LO broil + The time of day wiii reappear in the display. 0 Autoset Broil Notes: , For best results when broiling, use a pan designed for broiling. , HI or LO wiii be dispiayed. , Select HI broil (550 ° F} for normal broiling. Seiect LO broi[ (450° F} for How-temperature broiiing of [onger cooking foods such as pouitry. , HI is used for most broiling. Use LO broil when broiling longer cooking foods. The lower temperature allows food to cook to the well done stage without excessive browning. 3. After four seconds, the oven will[ start. , BROIL will[ remain Hit. , Broil times may be longer when the lower broiling temperature is selected. , HI or LO wiil remain lit. , Most foods should be turned halfway through broiling time. , For additional broiling tips and temperatures, refer to the "Cooking Made Simple" booklet. 4. For optimum browning, preheat 2-3 minutes before adding food. 5. Place food in the oven. Close the oven door. Broiling Chart Preheat oven for 2-3 minutes. FOOD Beef Seafood DONENESS 5 5 Medium Well Done 15 - 20 min. 18 - 24 min. 5 or 6 Well Done 13 - 18 min. Bacon Ham, precooked 1/2" slice Chops, 1" thick 5 5 5 Well Done Warm Weii Done 6 - 10 min. 8 - 12 rain. 22 - 26 rain. Chicken Breasts, bone-in 4 Well Done 30 - 45 min. (Lo Broil} Fish filets Fish steaks, 1" thick Lobster tails, 3-4 oz. each 5 5 5 Flaky Flaky Done 8 - 12 rain. 10 - 15 min. 7 - 10 min. Steaks, 1" thick Hamburger Patties, 3/4" thick Pork POSITION For a browned/seared exterior and rare interior, it may be necessary to decrease cook time on side one and decrease the distance between the meat and heat source. Note: This chart is a suggested guide. The times may vary with the food being cooked. 12 Q Keep War Keep Warm For safeHykeeping hot foods warm or for warming breads and pHates. Notes: , For optimaHfood quality, oven cooked foods shouHdbe kept warm for no Hongerthan 1 to 2 hours. To set Keep Warm: , To keep foods from drying, cover HooseHy with foiHor a Hid. 1. Press the Keep Warm pad. warm . To warm dinner rolls: ..... , WARM flashes in the dispHay. - cover roHHs HooseHy with foiHand pHacein oven. , 000 flashes in the dispHay. 2. SeHectthe Keep Warm temperature. Press the Autoset 0 pad or the appropriate number pads. - press Keep Warm and Autoset 0 pads. U Autoset - warm for 12-15 minutes. , 170° wiHHHightwhen the Autoset 0 pad is pressed. , To warm plates: , Each press of the Autoset 0 pad wiHHincrease the temperature by 5°. - pHace2 stacks of up to four pHateseach in the oven. The Keep Warm temperature can be set from 145° to 190°, - warm for five minutes, turn off the oven and Heave pHatesin the oven for 15 minutes more. - press Keep Warm and Autoset 0 pads. WARM and the temperature wiHHbe dispHayedwhiHethe function is active. - use onHyoven-safe pHates,check with the manufacturer. - do not set warm dishes on a coHdsurface as rapid temperature changes couHdcause crazing or breakage. To cancem Keep Warm: 1. Press the CANCEL pad. 2. Remove food from the oven. 13 Automatic Shut-Off/Sabbath Sabbath Mode oven the 12-hour continuously shut-off ° Sabbath Mode cannot be turned on if the touchpads are locked out or when the door is locked. and run the for 72 hours: , Most prompts and messages and all beeps are deactivated when Sabbath Mode is active. 1= Press and hoid the CHockpad for five seconds , If the oven is baking when Sabbath Mode is set, BAKE will go out when Bake is canceled. There will be no audible beeps. , SAb will be dispiayed and flash for five seconds. , SAb will then be dispiayed condnuousiy und] turned off or und] the 72-hour time limit is reached. , The oven light will not automatically come on when the oven door is opened while the oven is in Sabbath Mode. If the oven light is desired while in Sabbath Mode, it must be turned on before the Sabbath Mode is started. , BAKE will also be displayed if a bake cycle is in use while the oven is in Sabbath Mode. , All functions EXCEPTBAKE Crimer, Keep Warm, Clean, etc.} are locked out during the Sabbath Mode. , When the Sabbath Mode is started, the temperature display will immediately show the set temperature, rather than the actual oven cavity' temperature. No preheat beep will sound. ° A Cook & Hold can be programmed during the Sabbath Mode, however a Delay Cook & Hold is not allowed. To cancel the Sabbath Notes: , Sabbath Mode can be turned on at any time with or without the oven on. The oven will automatically turn off after 12 hours if you accidentally Heaveit on. This safety' feature can be turned off. To cancel Mode Mode: , The self-dean cycb and automatic door lock do not operate during the Sabbath Mode. 1. Press the CLOCK pad for five seconds. , SAb will flash for five seconds. , Pressing CANCEL pad will cancel a bake cycle, however the control will stay in the Sabbath Mode. , The time of day will return to the display. , If power fails, the oven will power up in Sabbath Mode with 72 hours remaining and no cycle active. OR 2. After 72 hours, the Sabbath Mode will end. , SAb will flash for five seconds. , The time of day will return to the display. 14 Adjusting the Oven Temperature Oven temperatures are carefully tested for accuracy at the factory. It is normal to notice some baking or browning differences between a new oven and an old one. As ovens get older, the oven temperature can shift. The Favorite pad allows you to save the time and temperature from a Cook & Hold function. To set a Favorite cycle, Cook & Hold must be either active or just programmed. You may adjust the oven temperature if you think the oven is not baking or browning correctly. To decide how much to change the temperature, set the temperature 25 degrees higher or lower than your recipe recommends, then bake. The results of the "test" should give you an idea of how much to adjust the temperature. To adjust To set a new Favorite rently running Cook & Hold as a Favorite: 1. Program a Cook & Hold cycle as described in the Cook & Hold section on page 11. 2. Press and hold the Favorite pad for three seconds. the oven temperature: 1. Press the Bake pad. .... ° The newly set or currently running Cook & Hold cycle wi[[ be saved. 2. Enter 550° by pressing the appropriate number pads. , A beep wi[[ sound to indicate that the control has accepted the Favorite setting. 3. Press and hold the Bake pad for several seconds or until 00° appears in the display. To start If the oven temperature was previously adjusted, the change wi[[ be displayed. For example, if the oven temperature was reduced by 15° the display wi[[ show "-15 °", a cycle programmed into Favorite: 1. Press the Favorite pad. , Time and temperature for the set Cook & Hold cycle wi[[ be displayed. (If no Cook & Hold cycle has been programmed, "nonE" is displayed.) 4. Press the Autoset 0 pad to adjust the temperature. Each time the Autoset pad 0 is pressed, the temperature changes by 5°, The oven temperature can be increased or decreased by 5° to 35°. 2. Press the Bake, Convect Bake or Convect Roast (select models) pad. Pressing the Autoset 0 pad wi[[ first cycle through increasing the oven temperature (5, 10.... 35_. Continuing to press the Autoset 0 pad wi[[ then cycle through decreasing the oven temperature (-35, -30.... -5_. , The Favorite cycle wi[[ begin immediately. , The selected cycle word wi[[ light in the display , The cooking time wi[[ light in the display 5. The time of day wi[[ automatically reappear in the display. When the cooking time has elapsed: ° The selected cycle word wi[[ turn off. You do not need to readjust the oven temperature if there is a power failure or interruption. Temperature adjustment applies to Bake, Convect Bake and Convect Roast (select mode[s_ only. Broiling and cleaning temperatures cannot be adjusted. ° HOLD and WARM wi[[ light. ° 170°will display. To cancel Changing cycle or to save a cur- a Favorite cycle in progress: 1. Press the CANCEL pad. ° The stored Favorite cycle wi[[ not be affected. Temp °F/°C 1. The factory default setting for temperature is Fahrenheit= 2. Remove food from the oven. 2= To change the setting, press and hold the CANCEL and Bake pads at the same time for three seconds. 3= A single beep wi[[ sound and the current setting wi[[ be displayed (°F or °C_. (If no change is made, the range wi[[ return to the existing setting after 30 seconds=_ 4= To change the setting, press the Autoset 0 pad=Press again to return to existing setting. Wait five seconds and the setting wi[[ be complete= 15 ('CANCE_ Pilotless Oven Racks ignition Your range is equipped with pibtbss ignition. With this type of ignition system, the gas automatically shuts off and the oven will #or operate during a power failure. , Do not attempt to change the rack positi°n when the oven is hot. A lighted match will not light the oven burner. No attempt should be made to operatethe oven daring a power failure. Do not use the oven for storing food Or cookware. Oven Fan The oven has two racks (three if convection). All racks are designed with a lock-stop edge. A convection fan is used to circulate hot air in the oven when the convection feature is sebcted. It automatically turns on 5 minutes after the Convect pad is pressed and will turn off when Convect is canceled. To remove: 1. Pull rack straight out until it stops at the lock-stop position. Note: The convection fan will automatically stop when the oven door is opened. 2. Lift up on the front of the rack and pui[ out. To replace: Oven Vent 1. Place rack on the rack support in the oven. When the oven is in use the area near the vent may become hot enough to cause bums. Never block the vent opening. 2. Tilt the front end up slightly. Slide rack back until it clears the lock-stop position. The oven vent is located below the backgaard vent shield on your range. OVEN VENT LOCATION 3. Lower front and slide back into the oven. Do not place plastics near the vent opening as heat front the vent could distort or melt the plastic. Do not cover an entire rack with aluminum foil or place foil on the oven bottom. Raking results will be affected and damage may occur to the oven bottom. Rack Positions RACK 7 (highest single rack baking on cookie sheets and Oven Light The oven light automatically comes the door is opened. When the door press the oven light pad to turn the on and off. A beep will sound every oven light pad is pressed. broiling. position[): some RACK 6: For Used for some single rack baking on cookie sheets and broiling. Used for on when is closed, oven light time the _ Ii ..... _ _ Three Rack _ 6 5 _ _ 43 7 Bottom Convection Baking (select modeJs) RACK 5: For single rack baking on cookie sheets and broiling. Oven RACK 4: Used for single rack baking on cookie sheets, sheet cakes, casseroles and broiling. Used for multiple rack baking. Bottom Protect oven bottom against spillovers, especially acidic or sugary spills, as they may discolor the porcelain enamel. Use the correct pan size to avoid spillovers and boilovers. Do not place utensils or aluminum foil directly on the oven bottom. RACK 3: For single rack baking on cookie sheets, casseroles, layer cakes, loaves of bread and sheet cakes. Used for multiple rack baking. 16 RACK 2: Used for some singHerack baking on cookie sheets and roasting small cuts of meat. Use for muHtipHerack baking. Create-A-Space RACK 1: Use for roasting Harge cuts of meat and poultry. SeHectrange models are equipped with a convertible half rack. The left side of the rack can be removed to accommodate a large roaster on the lower rack. The right side of the rack is still available to hold a casserole dish. Oven Rettem: Place oven rack on raised sides of oven bottom. Use for additional space when cooking large oven meals. MULTIPLE RACK COOKING: Two rack: Use rack positions 3 and 6, or 2 and 4. Three rack: (convection onH}OUse rack positions 1,3 and 6. TMHalf Rack // racks, check foods at the minimum suggested time to avoid Nete: When convect baking [sdect modds:) on two or three over-browning or over-cooking. Baking Layer Cakes on Two Racks Forbest results when baking cakes on two racks, use racks 2 and 4 for regular baking and racks 3 and 6 for convection baking (select models:). Hace the cakes on the rack as shown. ° The removable section of the rack can be used as a roasting rack in the broiling pan. Do not use the top insert when using the rack in the broiling pan. ° The removable section of the rack can be used as a cooling rack or trivet. ° Make sure oven is cool before removing or reinstalling the half rack. ° Do not use cookware that extends beyond edge of rack. ° For best results, allow two inches between the pan placed on the rack and the oven side wall. ° Use caution when removing items from the half rack to avoid burns. Carefully remove items from the lower rack to avoid disturbing the half rack. 17 Serf-Clean Oven To set Self-Clean: Note: Oven temperature must be below 400° F to program a clean cycle. - it is normal for parts of the oven to become hot during a 1. Close the oven door. 2. Press the Clean pad. - To prevent damage to oven door do not attempt to open the door when LOCK is displayed. ° CLEAN flashes. • Avoid touching door, window or oven vent area during a clean cycle. ° SET flashes in the display. Press the Autoset 0 pad. , Do not use commercial oven cleaners on the oven finish or around any part of the oven. They will damage the finish o_ parts. Press the Autoset 0 pad to scroll through the self-cleaning settings. HVy (Heavy'Soil, 4 hours} MEd (Medium soil, 3 hours} It is normal for flare-ups, smoking, or flaming to occur during cleaning if the oven is heavily soiled. It is better to clean the oven regularly rather than to wait until there is a heavy buildup of soil in the oven. LITE ( Light Soil, 2 hours} Choosing the soil level of the oven automatically programs the self-cleaning time. During the cleaning process, the kitchen should be well ventilated to get rid of normal odors associated with cleaning. After four seconds, the oven wiii start cleaning. ° If the door is not closed, beeps wiii sound and "door" wiii display. If the door is not closed within 30 seconds, the self-cleaning operation wiii be canceled and the display will return to the time of day. Se f-Cleaning 1. Turn off the oven light before cleaning. The oven light may burn out during the clean cycle. ° CLEAN wiii appear in the display. 2. Remove broiler pan, all pans, and oven racks from the oven. The oven racks will discolor and may not slide easily after a self-clean cycle if they are not removed. ° LOCK wiii flash in the display. Once the door iocks, the word wiii remain steady. ° The cleaning time wiii start counting down in the display. 3. Clean oven frame, door frame, area outside of gasket, and around the opening in the door gasket with a nonabrasive cleaner such as Bon Ami* or detergent and water. The self-cleaning process does not clean these areas. They should be cleaned to prevent soil from baking on during the clean cycle. (The gasket is the seal around the oven door and window.} 4. To preventda,eage, d onotclean or rub the gasket around the oven door. The gasket is designed to seal in heat during the clean cycle. ,_ Autoset ° MEd (Medium Soil, 3 hours} is displayed. The self-clean cycle uses above-normal cooking temperatures to automatically clean the oven interior. Before (} To Delay a Semf-Olean Cycle: 1. Press the Delay 1 pad. ° DELAY flashes. 1 / Delay , 00:00 wiii flash in the display. 2. _'___ Enter the amount of time you want to delay the cycle using the appropriate number pads. 3. Press the Clean pad. __t_ dean ° SET flashes in the display. Press the Autoset 0 pad. 5. Wipe up excess grease or spillovers from the oven bottom. This prevents excessive smoking, flare-ups or flaming during the clean cycle. ° LITE (Light soii ievei} is displayed. 0 _\utoset 6. Wipe up sugary and acidic spillovers such as sweet potatoes, tomato, or milk-based sauces. Porcelain enamel is acid-resistant, not acid-proof. The porcelain finish may discoior if acidic or sugary spiiis are not wiped up before a self-clean cycle. * Brand names for cleaning products are registered trademarks of the respective manufacturers. 18 5. Press the Autoset 0 pad to scroll through the sdf-cHeaning settings. HVy (Heavy Soil 4 hours) After (_ U Seff-C eaning About one hour after the end of the self-clean cycle, LOCK will turn off. The door can then be opened. ,\utoset Some soil may leave a light gray, powdery ash. Remove it with a damp cloth. If soil remains after wiping, that means the clean cycle was not long enough. The soil will be removed during the next clean cycle. MEd (Medium Soil 3 hours) LITE (Light Soil 2 hours) Choosing the soiHHeveH of the oven automatically programs the seHf-cHeaningtime. if oven racks were left in the oven and do not slide smoothly after a clean cycle, wipe racks and rack supports with a small amount of vegetable oil to make them easier to move. 6. After four seconds, CLEAN and DELAY will Hightand LOCK will flash in the dispHay. When the oven door Hatches, LOCK will stop flashing and HightcontinuousHy to show that the oven is set for a deHayeddean operation. The deHay time will dispHay. Fine lines may appear in the porcelain because it went through heating and cooling. This is normal and will not affect performance. A white discoloration may appear after cleaning if acidic or sugary foods were not wiped up before the self-clean cycle. This discoloration is normal and will not affect performance. During the Serf-Clean Cycle When LOCK shows in the display, the door cannot be opened, To prevent damage to the door, do not force the door open when LOCK is displayed, Smoke , If the oven door is left open, "door" will flash in the display and a signal will beep until the door is closed and the Clean pad is pressed again. and Smells You may see some smoke and smell an odor the first few times the oven is cleaned. This is normal and will lessen in time. ° If more than five seconds elapse between pressing the Clean pad and the Autoset 0 pad, the program will automatically return to the previous display. Smoke may also occur if the oven is heavily soiled or if a broiler pan was left in the oven. , The oven door will be damaged if the oven door is forced to open when LOCK is still displayed. Sounds As the oven heats, you may hear sounds of metal parts expanding and contracting. This is normal and wi]] not damage the oven. 19 Cleaning Procedures or cleaning. This is te avoid damage andpossib!e burns. , To Prevent staining or discoloration, dean appliance afro( each use, !f a part !Sremoved, be sure !t is correct!y replaced . * Brand names are registered trademarks of the respective manufacturers. ** To order call 1-877-232-0771 USA or 1-800-088-8408 Canada. PART PROCEDURE Broimer Pan and insert Never cover insert with aluminum foil as this prevents the fat from drainh_g to the pan below. , Place soapy cloth over insert and pan; let soak to loosen soil= , Wash in warm soapy water. Use scouring pad to remove stubborn soil. , Broiler pan and insert can be cleaned in dishwasher. Sealed Gas Burners Removable Burner Heads , Allow burner to cool. Remove burner cap and wash in soapy water with a plastic scouring pad=For stubborn soils, clean with a soap-filled, nonabrasive pad or Cooktop Cleaning Creme* (Part #20000001:]** and a sponge. , Do not clean in the dishwasher or self-cleaning oven. Sealed Gas Burners ° Clean frequently= Allow burner to cool= Clean with soap and plastic scouring pad=For stubborn soils, clean with a soap-filled, nonabrasive pad. Do not enlarge or distort holes. ° Be careful not to get water into burner ports. ° Use care when cleaning the ignitor= If the ignitor is wet or damaged the surface burner will not light= Burner Grates Porcelain on Cast iron ° Wash with warm, soapy water and a nonabrasive, plastic, scrubbing pad= For stubborn soils, clean with a soap-filled, nonabrasive, plastic pad or Cooktop Cleaning Creme* (Part _20000001:}** and a sponge. If soil remains, reapply Cooktop Cleaning Creme, cover with a damp paper towel and soak for 30 minutes= Scrub again, rinse and dry= ° Do not clean in the dishwasher or self-cleaning oven. Clock and Control Pad Area ° To activate "Control Lock" for cleaning, see page 8= ° Wash, rinse and dry. Do not use abrasive cleaning agents as they may scratch the finish. ° Glass cleaners may be used if sprayed on a cloth first= DO NOTspray directly on controlpad display area. Control Knobs , Remove knobs in the OFF position by pulling forward. ° Wash, rinse and dry. Do not use abrasive cleaning agents as they may scratch the finish. ° Turn on each burner to be sure the knobs have been correctly replaced. Ceoktop and Control Panel = Porcelain Enamel Porcelain enamel is glass fused on metal and may crack or chip with misuse, kis acid resistant, not acid proof. All spillovers, especially acidic or sugary spillovers, should be wiped up immediately with a dry cloth. ° When cool, wash with soapy water, rinse and dry. , Never wipe off a warm or hot surface with a damp cloth. This may cause cracking or chipping. ° Never use oven cleaners, abrasive or caustic cleaning agents on exterior finish of range. Storage Drawer and Door Handles = Painted Enamel and ° When cool, wash with warm soapy water, rinse and dry. Never wipe a warm or hot surface with a damp cloth as this may damage the surface and may cause a steam burn. , Forstubborn soil, use mildly abrasive cleaning agents such as baking soda paste or Bon Ami*. Do not use abrasive cleaners such as steel wool pads or oven cleaners. These products will scratch or permanently damage the surface. Note: Use a dry towel or cloth to wipe up spills, especially acidic or su_#ary spills. Surface may discolor or dutl if soil is not immediately removed. This is especially important for white surfaces. 2O Oven Window and Door - Glass , Avoid using excessive amounts of water which may seep under or behind glass causing staining. , Wash with soap and water. Rinse with dear water and dry'. GHasscleaner can be used if sprayed on a cloth first. , Do not use abrasive materials such as scouring pads, steal wooHor powdered cleaners as theywiH scratch gHass. Oven interior , Follow instructions on page 18-19 to set a sdf-dean cycle. Oven Racks ® ® ® Stainless Steel (sdect modds_) CHeanwith soapy water. Remove stubborn soiHwith cleansing powder or soap-filled scouring pad. Rinse and dry'. Racks will permanentHydiscoHorand may not slide out smoothly if left in the oven during a self-clean operation. If this occurs, wipe the rack and embossed rack supports with a small amount of vegetable oil to restore ease of movement, then wipe off excess oil. * * * * DO NOT USE ANY CLEANING PRODUCT CONTAINING CHLORINE BLEACH. DO NOT USEABRAStVE OR ORANGE CLEANERS. ALWAYS WiPE WiTH THE GRAIN WHEN CLEANING. DaiJy CJeaning/Light SoiJ -- Wipe with one of the following - soapy water, white vinegar/water sohJtion, Formula 409 Glass and Surface Cleaner_ or a similar glass cleaner - using a sponge or soft cloth. Rinse and dry. To polish and help prevent fingerprints, follow with Stainless Steel Magic Spray_ (Part No. 2000000d)_, * Moderate/Heavy Soil -- Wipe with one of the following - Bon Ami, Smart Cleanser, or Soft Scrub _ using a damp sponge or soft cloth. Rinse and dry. Stubborn soils may be removed with a damp multipurpose Scotch-Brite _ pad; rub evenly with the grain. Rinse and dry. To restore luster and remove streaks, follow with Stainless Steel Magic Spray_, * Discoloration -- Using a damp sponge or soft cloth, wipe with Cameo Stainless Steel Cleaner_, Rinse immediately and dry. To remove streaks and restore luster, follow with Stainless Steel Magic Spray_, Brand names are registered trademarks of the respective manufacturers. _ To order call 1-877-232-0771 USA or 1-800-088-8408 Canada. 21 Oven Door Electrical Appliances which require electrical power are equipped with a three-prong grounding plug which must be plugged directly into a properly grounded threehole 120 volt electrical outlet. Do not place excessive weight on or stand on an open oven door. This could cause the range to tip over, break the d00r, 0r !r_jurethe user, Always disconnect power to appiiance before servicing, The three-prong grounding plug offers protection against shock hazards. DO NOT CUT OR REMOVE THE THIRD GROUNDING PRONG FROM THE POWER CORD PLUG. Note: The oven door on a new range may feel "spongy" when it is closed. This is normal and will decrease with use. If an ungrounded, two-hole or other type electrical outlet is encountered, it is the personal responsibility of the appliance owner to have the outlet replaced with a properly grounded three=home electrical oatmet. Oven Window To protect the oven Connection door window: Oven Light 1. Do not use abrasive cleaning agents such as steel wool scouring pads or powdered cleansers as they may scratch the glass. 2. Do not hit the glass with pots, pans, furniture, toys, or other objects. • Disconnect power to range before replacing light bulb. 3. Do not close the oven door until the oven racks are in place. , Make sure bulb cover and bulb are cool before touching, Scratching, hitting, jarring or stressing the glass may weaken its structure causing an increased risk of breakage at a later date. Leve ing To replace oven light bulb: 1. When oven is cool, hold bulb cover in place, then slide wire retainer off cover. NOTE: Bulb cover will fall if not held in place while removing wire retainer. Legs BuLB oovE_ 2. Remove bulb cover and light bulb. 3. Replace with a 40-watt appliance Be sure the anti-t p bracket secures one of the rear RETAINER bulb. 4. Replace bulb cover and secure with wire retainer. from accidentally tipping. 5. Reconnect 22 power to range. Reset clock. Remova Oven of Gas Appmiance Gas appHiance connectors used to connect this appHianceto the gas suppHyare not designed for continuous movement. Once instaHHed, DO NOT repeatedHymove this gas appHiance for cHeaningor to reHocate.If this appHiancehas to be moved and/or removed for servicing, foHHow the procedure described in the instaHHationinstructions. For information, contact Maytag Customer Assistance at 1-800-688-9900 U.S.A.or 1-800-688-2002 Canada. Bottom Protect oven bottom agahst spiHHovers, especiaHHy acidic or sugary spills, as they may discolor the porcelain enamel. Use the correct pan size to avoid spiiiovers and boiiovers. The oven bottom may be removed for easier cleaning. To remove: To prevent range from accidentally tipping, range must be secured to the floor by sliding rear leveling leg into the antitip bracket. Storage [}rawer from oven. To replace: Fit the front edge of the oven bottom into the oven front frame. Lower the rear of the oven bottom and sHidethe two catches back to Hockthe oven bottom in pHace. Do not store pHastic,paper products, food or fiammabHe materials in this drawer. The drawer may become too warm for these items when the oven is in use. The storage drawer can be removed to allow you to clean "[0 remove: 1. Empty drawer and pull out to the first stop position. 2. Lift up the front of the drawer. 3. Puil out to the second stop position. 4. Grasp sides and lift drawer up and out. To replace: 1. Fit the ends of the drawer gHidesinto the raiHsin the range. 2. Lift up the front of the drawer and gentHypush in to the first stop position. 3. Lift drawer up again and push untiHdrawer is dosed. 23 PROBLEM SOLUTION For most concerns, try these first. , , , , Check Check Check Check if oven controHshave been properly set. to be sure pHugis secureHyinserted into receptacle. or re-set circuit breaker. Check or repHacefuse. power suppHy. Surface burner fails to light. , Check to be sure unit is propedy connected to power suppHy. , Check for a Mown circuit fuse or a tripped main circuit breaker. , Check to be sure ignitor is dry and cHicking.Burner will not Hightif ignitor is damaged. soiHedor wet. If ignitor doesn't chick, turn controHknob OFF. The flame is uneven. , Sarface burner flame lifts off ports. , Check to be sure a pan is sitting on the grate above. Baking resumts are not as expected or differ from previous oven. , Check the oven temperature selected. Make sure oven is preheated when recipe or directions recommend preheat. , Make sure the oven vent has not been blocked. See page 16 for location. , Check to make sure range is level. , Temperatures often vary between a new oven and an old one. As ovens age. the oven temperature often "drifts" and may become hotter or cooler. See page 16 for instructions on adjusting the oven temperature. NOT£: It is not recommended to adjust the temperature if only one or two recipes are in question. , Use correct pan. Dark pans produce dark browning. Shiny pans produce light browning. See "Cooking Made Simple" booklet for more information on bakeware. , Check rack positions and pan placement. Stagger pans when using two racks. Allow 1-2 inches between pans and oven wall. , Check the use of foil in the oven. Never use foil to cover an entire oven rack. Place a small piece of foil on the rack below the pan to catch spillovers. Food is not broiling properly or smokes excessively. , , , , , , Check oven rack positions. Food may be too close to flame. Aluminum foil was incorrectly used. Never line the broiler insert with foil. Trim excess fat from meat before broiling. A soiled broiler pan was used. Preheat oven for 2-3 minutes before placing food in the oven. Broil with the oven door closed. Oven will not self-clean. , , , , Check to make sure the cycle is not set for a delayed start. See pages 18-19. Check if door is closed. Check if control is in Sabbath Mode. See page 14. Oven may be over 400° F. Oven temperature must be below 400° F to program a clean cycle. Burner ports may be dogged. 24 i PROBLEM i _ i i i $OLUTmON Oven did not dean propermy. ° Longer deanhg thne may be needed_ , Excessive spillovers, especially sugary andlor acidic foeds, were [lot removed prior to the self-clean cycle. Oven door will not unlock after self:clean cycle, , Oven interior is still hot. Allow about one hour for the oven to cool after the completion of a self-clean cycle. The door can be opened when the LOCK indicator word is not displayed. , The control and door may be locked. See page 8. Moisture collects on oven window or steam comes from oven vent. , This is normal when cooking foods high in moisture. , Excessive moisture was used when cleaning the window. There is a strong odor or light smoke when oven is turned on. , This is normal for a new range and will disappear after a few uses. Initiating a clean cycle will "burn off" the odors more quickly. , Turning on a ventilation fan will help remove the smoke and/or odor. , Excessive food soils on the oven bottom. Use a self-clean cycle. Fault Codes , BAKE or LOCK may flash rapidly in the display to alert you if there is an error or a problem. If BAKE or LOCK appear in the display, press the CANCEL pad. If BAKE or LOCK continue to flash, disconnect power to the appliance. Wait a few minutes, and then reconnect power. If the flashing still continues, disconnect power to the appliance and call an authorized servicer. ° If the oven is heavily soiled, excessive flareups may result in a fault code during cleaning. Press the CANCEL pad and allow the oven to cool completely, wipe out excess soil, then reset the clean cycle. If the fault code reappears, contact an authorized servicer. Noises may be heard. ° The oven makes several low level noises. You may hear the oven relays as they go on and off. This is normal. ° As the oven heats and cools, you may hear sounds of metal parts expanding and contracting. This is normal and will not damage your appliance. There are no beeps and ° Oven may be in Sabbath Mode. See page 14. "SAb" flashing and then ° Oven is in Sabbath Mode. To cancel, press and hold the Clock pad for five seconds. 25 26 Full One Year Warranty Parts and Labor What is Not Covered = For one (1} year from the odg_naI retail purchase date. any part which fails in normal home use will be repaired or replaced free of charge .... Canadian 1. Conditions and damages resulting from any of the following: a. Improper installation, delivery, or maintenance. b. Any repair, modification, alteration, or adjustment not authorized the manufacturer or an authorized servicer. Residents Warranty Outside the United States and Canada Parts Only For one (1} year from the date of original retail purchase, any part which fails in normal home use will be repaired or replaced part itself, with the other costs, includi and transportation, diagnostic charge, by c. Misuse, abuse, accidents, or unreasonable use. d. Incorrect electric current, voltage, or supply. e. Improper setting of any control The above warranties only cover al appliance installed in Canada that has been certified or listed by appropriate test agencies for compliance to a National Standard of Canada unless the appliance was brought into Canada due to transfer of residence from the United States to Canada. Limited By These free of charge for the owne[ paying aii ng labor, mileage t[p charge and if required. The specific warranties expressed above are the ONLY wan'antie5 provided by the manufacturer, These wa/Tantles give you specific lega/ rights, and you may also have other ndhts w,_ich vary from state to state, 2. Warranties are void if the original serial numbers have been removed, altered, or cannot be readily determined. 3. Light bulbs. 4. Products purchased for commercial or industrial use. 5. The cost of service or service caii to: a. Correct installation errors. b. Instruct the user on the proper use of the product. c. Transport the appliance to the servicer. 6. Consequential or incidental damages sustained by any person as a result of any breach of these warranties. Some states do not allow the exclusion or limitation of consequential or incidental damages, so the above exclusion may not apply. If You Need Service ® Cail the dealer from whom your appliance was purchased or cai[ May'tag Services sM, Maytag Customer Assistance at 1-800-688-9900 U.S.A. or 1-800-688-2002 Canada to locate an authorized servicer. " Be sure to retain proof of purchase WARRANTY for further information service. to verify warranty' status. Refer to on owner's responsibilities for warranty o If the dealer or service company cannot resolve the problem, write to Maytag Services'sM,Attn: CAIR _ Center, P.O. Box 2370, Cleveland, TN 37320-2370, or call 1-800-688-9900 UoSoAoor 1-800-688-2002 Canada. U.S. customers using TTY for deaf, hearing impaired or speech impaired, call 1-800-688-2080. User's guides, service manuals and parts information are available from Maytag ServicessM,Maytag Customer Assistance. When writing information: or calling about a service problem, please include the following a. Your name, address and telephone number; b. Model number and serial number; c. Name and address of your dealer or servicer; d. A clear description of the problem you are having; e. Proof of purchase (sales receipt}. 27 gaz _ touches de pr6cision 800 B/IA AI3 ® m m //|S|//|e m Table des instructions de s6curit_ importantes ................................ 29-33 Cuisson sur masurface ............. 34-35 Commandes de la surtace de cuisson Br0Heursscell6s Netteyage ...................................47-50 Four autonettoyant M6thodes de nettoyage Entretien ...................................... 51-52 Hublot et lain pe du tour D6placement d'un appareil a gaz Cuissen darts le four ................ 36=46 CUiSSOH1 courante Cuisson et maintien Cuisson et maintien diff6r6s Maintien au chaud Cuisson au gril Grilles du four Recherche des pannes ............ 53=54 Garantieet serviceapres-vente Guia de Use y Cuidade .... 55 .................... 56 Life toutes los instructions avant d'utiliser cot appareii; observer toutes bs instructions pour eiiminer bs nsques dlncendie= choc 6bctdque, dommages materiels et corporeb que pourrait susciter une utflisation incorrecte de Fapparefl. Utfliser I'apparefl uniquement pour bs fonctions prevues. d@rites clans ce guide Consommatear:Veuflbz !ira le guide et !e c0nserverpour consultation ultddeure.Conservezia facture d'achat 0u b Cheque Numero de modeie Pour une utiiisation Date d'achat adequate et en securitY, fl faut que Fapparefl soit convenabbment installe pa un technicien qualifi& et relic 8 la terre. Ne pas regbr, reparer n remplacen un composant, a morns que cela ne soit sp@ifiq uement recommande darts ce guide. Toute autre reparation doit 6tre effectuee pa un technicien qualifie Demander a Finstdlateun de montren ou se trouve b robinet d'arret de gaz et comment b former en cas d'urgence. Si vous avezdesquestionslveuillezn0us appeler : Dens b Cadrede nospratiques d'amdiiorationCOnStante de B qualit6 et de la performancede !!os produits diecuisson,des modificationsde i appareilqui ue sent pas raentionneesdans Ce Toujours debrancher [a pparefl avant d'y faire de [entretien. Si ies directives donn_es dens b present guide ne sent pas respect6es _ la lettre, il y a risque d'incendie eli d'explosion pouvant causer des dommages, des blessa res et meme la mo_ cencema#t le setdce apr#s?ve#teo - Ne pas ranger ni utiliser d'essence ou autre vapeur ou liquide inflaramable _ pro×imit_ de cet appareil ou de tout autre appareiL - QUE FAIRE S! L'ON SENT UNE ODEUR DE GAZ : . . o - Ne mettre aucun appareil en marche. Ne pas toucher _ un interrupteur 61ectrique, N'utiliser aucun t_mephene de I'iraraeuble. Se rendre chez un voJsin et tel@honer imraediatement _ la compagnie de gaz. Suivre les directives donn_es par le pr@os_ de la eompagnie de gaz. * S'il est impossible de joindre la compagnie de gaz, t_l@honer au service des incendies. Les instructions de securitd importantes et bs paragraphes <<avertissemenb> de ce guide ne sent pas destines a couvrir toutes bs conditions et situations qui pourraient se presenter. II faut faire preuve de ben seas, de prudence et de soin Iors de Finstdlation, de Fentretien ou du fonctionnement de Fapparefl. Toujours prendre contact avec b detafllant, b distributeur, Fagent de service apres-vente ou b fabricant dens b cas de proNemes ou de conditions qui ne seraient pas comprises. Reconna tre Ues tiquettes, symboUes sar Uasecurit o L'instaliatioe et les r_parations doivent _tre confiees _ un installateur competent, _ une paragraphes et entreprise de service ou _ ia compagnie AVERTISSEMENT _ Dangers oU pratiques dangereuses qui POURRAtENTrdsulter en @graves b!essures 0u meme la mort. de gaz. Une fuite de gaz pourmit su_venir darts b syst6me et susciter une situation dangereuse: L'odorat pout nepas (homologatio n UL}_ Installer et utiiiser le detecteur conformement aux instructions du fabricant. POURRAIENTresulter en des blessures mineures. 29 instructions composants de ['apparei[ susceptibies de devenir tiedes ou chauds, Ne pas laisser des articles en plastique sur la table de cuisson; un article en plastique trop proche de I'event du four ou d'un brQleur allume pourrait s'amollir ou fondre, generates ° TOUTE CUm$1NIEREPEUT BASCULER ET PROVOQUER DES BLESSURES. Pour eliminer le besoin d'atteindre quelque chose par-dessus les brQleurs de surface, il est preferable qu'il n'y air aucune armoire de cuisine directement au-dessus de I'appareil, S'il y a une armoire, on ne @wait y remiser que des articles peu frequemment utilises et capables de resister a la chaleur emise par I'appareil, La temperature pourrait etre excessive pour certains articles, comme liquides volatils, produits de nettoyage ou flacons d'aerosol, ° INSTALLER LA BRIDE ANTiBASCULEMENT FOURNIE AVEC CE_q'ECUJSJNJERE. ° RESPECTERTOUTES LES mNSTRUCTmONSD'mNSTALLATBON. AVERTISSEMENT: Pour reduire Be risque de bascubment de I'appareil _ i'eccasien d'uae utilisation anermale eu d'un chargement e×cessif de maporte du four, il faut que la bride aatibasculement seit cenvenablement install_e. En cas d'incendie Interrompre b fonctionnement de Fappareil et de la hotte de ventilation pour minimiser b risque d'extension des fiammes, Eteindre bs fiammes, pub mettre la hotte en marche pour @acuer la fumee et Fair vicie, Utiliser une lampe torche pour determiner si la bride antibascubment est convenabbment installee sous la ° Table de cuissen : Utiliser un couverde ou une plaque biscuits pour etouffer bs fiammes d'un feu qui se declare darts un ustensib de cuisine, cuisiniere: L'un des pie@ arriere de reglage de Faplomb doit etre convenabbment engage darts la fente de la bride, Lorsque la cuisiniere est convenabbment calee, la bride antibascubment immoNise b pied arriere contre b sol, Verifier la parfaite immoNisation de la cuisiniere par la bride apres chaqae @placement de la cuisiniere, Pour viter dommages NE JAMAmS saisir ou d@Bcer un ustensib de cuisine enfiamme, , Four : Fermer la porte du four pour etouffer bs fiammes, Ne pas projeter de Feau sur un feu de graisse, Utiliser du bicarbonate de sodium ou un extincteur a mousse ou produit chimique sec pour eteindre bs fiammes, ur| incendie ou des par la fum e S'assurer que tous bs materiaux de conditionnement sont retires de Fappareil avant de b mettre en marche, S curit6 pour enfants Garder bs materiaux combustibles, Fessence et autres matieres et vapeurs inflammables bien eloignes de Fappare& Si I'appareil est installe pres d'une fenetre, des precautions appropriees doivent etre prises pour @iter que b vent entrdne bs rideaux au-dessus des brQburs, enfants peuvent s'intdresser, Un enfant tentant de gEimper NE JAMAIS Nsser des articles sur la table de cuisson, L'air subir de graves bbssure& chaud de Fevent peut bs enfiammer et mettre egabment sous pression des contenants fermes qui pourraient dors exploser, NE JAMAIS iaisser des enfants seuis ou sans supervision Iorsque I'appareil est en service ou encore chaud, De nombreux flacons d'aerosol peuvent EXPLOSERIorsqu'on bs expose a B chabur, et ib peuvent contenir un produit tres inflammable, Eviter d'utiliser ou remiser un flacon d'aerosol NE JAMAIS laisser un enfant s'asseoir ou se tenir sur une partie quelconque de I'appareil, II pourrait se blesser ou se brOler, proximite de Fappareik De nombreux articles en pBstique peuvent etre @teriores par la chabur, Conserver bs articles en plastique a distance des II est important d'enseigner aux enfants que la cuisiniere et les ustensiles places dessus ou dedans peuvent etre chauds, Laisser refroidir les ustensiles en un lieu sOr, hors d'atteinte 30 des enfants. II est important d'enseigner aux enfants qu'un appareiI menager n'est pas un jouet, et qulb ne doivent toucher aucune commande ou autre composant de rappare& Cuisson et s6curit Familiarisation br0ieur correct et verifier que ie br0ieur s'aiiume effectivement. A ia fin de ia periode de cuisson, eteindre ie br0ieur avant de retirer i'ustensiie, pour eviter une exposition aux fiammes du br0ieur. Placer touJours un ustensiie sur un br0ieur de surface avant de i'aiiumer. Veiiier a bien connatre ia correspondance entre ies boutons de commande et ies br0ieurs. Veiiier a aiiumer ie avee l'appareil NE JAMAIS utHber la porte de four comme tabouret/siege/ escabeau: ceci pourrait faire bascubr I'appareiI et entrainer dora mages corporeb serbux. Veiller a toujours ajuster correctement la taille des flammes pour qu'elles ne d@assent pas sur la peripherie de I'ustensile. Des flammes de trop grande taille sur un brOleur sont dangereuses, elles entrdnent un gaspillage d'energie et elles peuvent Dire subir des dommages a I'ustensile, a I'appareil ou I'armoire situee au-dessus. NE JAMAmS utHiser la cubiniere comme source de chabur pour le chauffage de mapiece. Sinon. un empoisonnement au monoxyde de carbone pourrait s'ensuivre ainsuqu'une surchauffe du four. NE JAMAIS iaisser un brOieur de surface aiiume sans NE ]AMAIS recouwer les fentes, ouvertures o u passages de la sole de four ni la grille toute entiere avec un materiau comme du papier d'aDminium. Sinon. la circulation de rair dans le four sera entravee et donc entraine_ un empoisonnement au monoxyde de carbone. Le papier d'aluminium peut aussi emprisonner de la chaleur el entrdner un risque d'incendie, surveillance, particulierement avec une puissance de chauffage elevee ou Iors d'une operation de friture. Un debordement pourrait provoquer la formation de fumee et des produits gras pourraient s'enfiammer. Eiiminer des que possible les produits gras renverses. Ne pas utiliser une puissance de chauffage elevee pendant une periode proiongee. NE JAMAIS obstruer la circulation de I'air de combustion et de ventilation au niveau de I'@ent de four ou des entrees d'air. Sinon. Fair ne parv_ent pas correctement aux brOieurs et donc cela peut poser un risque d'empolsonnement au monoxyde de carbone NE JAMAIS faire chauffer un recipient non ouvert dans ie four ou sur un brQleur de surface; I'accumulation de pression dans le recipient pourrait provoquer son eclatement et de graves dommages materiels ou corporels. Utiliser des maniques robustes et s@hes. Des maniques humides peuvent provoquer la formation de vapeur brQlante. Ne jamais utiliser un torchon a vaisselle ou autre article textile la place de maniques; un tel article pourrait trainer sur un brQleur et s'enflammer, ou accrocher un ustensile ou un composant de I'appareil. L'@ent de four est situe a la base du dosseret. Evitez de toucher ie voisinage de i'event de four iorsque ie four est utiiise et pendant piusieurs minutes apres i'arret du four. Certains composants de I'@ent et la zone voisine peuvent devenir suffisamment chauds pour provoquer des br0iures. Apres i'arret du four, ne touchez pas i'event de four ou ia zone voisine avant que ces composants aient pu se refroidir suffisamment. Laisser toujours refroidir un recipient d'huile de friture chaude avant de tenter de le deplacer et le manipuler. Autres surfaces potentiellement chaudes : table de cuisson, zones faisant face a la table de cuisson, event de four, zone voisine de i'event, porte de four et zone voisine de porte et de hubiot. Ne pas laisser la graisse de cuisson ou autre materiau inflammane s'accumuler dans ou pres de I'appareil, de la hotte ou du ventilateur de I'@ent. Nettoyer frequemment la hotte pour empecher toute accumulation sur la hotte elle-meme ou sur le filtre. Lors du flambage d'aliments sous la hotte, mettre le ventilateur en marche. Ne touchez pas I'ampoule chaude du four avec un linge humide; le choc thermique pourrait la briser. Si tel est le cas, d@ranchez I'appareil avant de retirer I'ampoule pour eviter NE JAMAmS porter, Iors de I'utilisation de I'appareil, des vetements faits d'un materiau inflammable, ou amples, ou Iongues manches. De tels vetements peuvent s'enflammer ou accrocher la poignee d'un ustensile. 31 Placer toujours[esgrillesa [aposition appropriee darts[efour Iorsque lefourestfroid.Fairecoulisser lagrilleversI'exterieur avantd'ajouter ouenlever unplat;utiliserpourcelaune manique robuste etseche.Eviterd'introduire lamaindartsle fourpoury placerouretirerunplat.S'ilestnecessaire de deplacer unegrilleIorsqu'elle estchaude, utiliserunemanique seche. Veillera toujours arreterlefoura lafind'uneperiode decuisson. Ouvrirtoujours[aportedufourtresprudemment. Laisser ['air chaudoulavapeurs'echapper avantderetirer/introduire un plat. AVERTmSSEMENT : B/Jets prepares: Respecter lesinstructionsdufabricant. Silecontenant oulecouverde enplastique d'unmetssurgeleseddormeouestendommage durantla cuisson, jeterimmediatement lerecipient etsoncontenu. Les aliments pourraient etrecontamines. NEJAMAmS garnirlasoleouunegrilledufouravecdela feuflled'aluminium. Cecipourraitsusciter unrisquedechoc electrique oud'incendie, ouuneautredeterioration de Fapparefl. Utfliser delafeuifled'duminium uniquement selon lesinstructions deceguide. UstensiJes et s cutit8 Utiliser des ustensiles 8 fond plat comportant une poignee qu'on peut facflement saisir et qui reste froide. Eviter d'utfliser brQ[eur adjacent; orienter toujours [a poignee d'un ustensi[e vers le cote ou I'arriere de I'appareil; ne pas laisser non plus la poignee d'un ustensile deborder a I'avant de I'appareil, ou:Jun jeune enfant pourrait facilement la saisir. Veiller a ne jamais laisser le contenu liquide d'un ustensile s'evaporer completement; I'ustensile et I'appareil pourraient subir des dommages. Appliquer les instructions du fabricant Iors de I'emploi d'un sachet pour cuisson au four. Seuls certains materiaux en verre, vitroceramique, ceramique, ou certains ustensiles vitri%s/emailles peuvent etre utilises sur la table de cuisson ou darts le four sans risque de bris sous I'effet du choc thermique. Observer les instructions du fabricant Iors de I'utilisation d'un ustensile en verre. La secur[te de fonctionnement de cet appareH a ete testee Faide d'ustensiles de cuisine conventionnels. Ne pas utiliser un ustensile ou accessoire qui n'est pas specifiquement recommande darts ce guide. Ne pas utfliser de couvre-brQleur, grfl place sur la table de cuisson ou systeme de convection additionnel. L'utilisation d'un dispositif ou accessoire qui n'est pas expressement recommande darts ce guide peut degrader [a securite de ['apparei[ ou sa performance, ou reduire [a Iongevite des composants. Nettoyage un ustensile instable ou ddorme, qui pourrait facilement basculer, ou dont la poignee est md fixee. Eviter egdement et s curit Arreter routes les commandes et attendre le refroidissement de tousles composants avant de les toucher ou d'entreprendre le nettoyage. Ne pas toucher la grille d'un brQleur ou la zone voisine avant que ces composants aient pu suffisammerit refroidir. d'utiliser des ustensiles de petite taille comportant une poignee Iourde; ces ustensiles sont generalement instables et peuvent facflement basculer. Un ustensfle Iourd Iorsqu'fl est rempli peut egalement etre dangereux Iors des manipulations. Exercer une grande prudence [ors du nettoyage de Fapparefl. Travafller prudemment pour eviter des brQlures par la vapeur en cas d'utflisation d'un chiffon ou d'une eponge humide Iors de Felimination d'un produit renverse sur une surface chaude. Certains produits de nettoyage peuvent generer des vapeurs nocives Iorsqu'on les applique sur une surface chaude. Vefller a utfliser un ustensfle de taflle suffisante pour que le contenu ne risque pas de deborder. Ceci est particulierement important pour un ustensfle rempli d'hufle de friture. Verifier que la taille de Fustensile est suffisante pour qu'il puisse recevoir les produits dimentaires 8 cuire, et absorber Faugmentation de volume suscitee par Febullition de la graisse. Pour minimiser les risques de br01ure,d'infiammation de matieres et de renversement par contact non intentionnel avec un ustensfle, ne pas orienter la poignee d'un ustensfle vers un 32 Four autonettoyant dangereuses pour Hesysteme reproducteur, et impose aux entreprises commerddes H'obHigationde signaller a Heurs cHientsHesrisques d'exposition a de teHHes substances, Les uti[isateurs de cet apparei[ peuvent etre exposes a une faible concentration de certaines substances figurant darts la liste mentionnee ci-dessus, dont benzene, formaldehyde et Ne laisser aucune nourriture ni ustensile de cuisine, etc, dans Uefour Uorsd'une operation dlautonettoyage, suie, du fait de la combustion incomplete du gaz naturel ou du gaz de petroie iiqudie, Pour minimiser ia combustion incomplete, veiiier ace que ies bru3ieurssoient parfaitement regies, Pour minimiser i'exposition aces substances, veiiier Nettoyer uniquement les pieces mentionnees dans ce guide, Ne pas nettoyer le joint de porte; le joint joue un rOle essentiel quanta I'etancheite, Ne pas frotter, endommager ou deplacer ie joint, Ne pas utiiiser de produit de nettoyage du four darts ie four autonettoyant ou sur ies zones voisines, bien evacuer ies gaz de combustion a i'exterieur, Nous informons ies utiiisateurs de cet appareii que iors d'une operation d'autonettoyage, iis peuvent etre exposes a une Avant d'executer une operation d'autonettoyage, retirer la lechefrite, les grilles du four et les autres ustensiles, et eliminer par essuyage tout exces de residus renverses pour eviter ia formation de fumee ou i'infiammation de ces residus, faibie concentration de certaines substances figurant darts la iiste mentionnee ci-dessus, dont ie monoxyde de carbone, Pour minimiser i'exposition, veiiier ace que ia piece oQ se trouve ie four soit convenabiement aeree durant une operation d'autonettoyage par i'ouverture d'une fenetre ou d'une porte, II est normal que la surface de cuisson devienne chaude durant une operation d'autonettoyage; par consequent, eviter de toucher ia surface de cuisson durant i'autonettoyage, Avertissement important AViS IMPORTANT un systeme respiratoire tres sensible, Ne pas garder un oiseau famiHierdarts Hacuisine ou darts une piece ou3i] pourrait etre expose aux fumees, Les fumees emises durant une operation d'autonettoyage peuvent etre dangereuses ou morteHHes pour un oiseau, de meme que ]es fumees emises ]ors du chauffage excessif de graisse, huiHe,margarine, et du chauffage excessif dans un ustensiHea revetement antiadhesif, et avis pour la s eurit La Ioi californienne _Safe Drinking Water and Toxic Enforcement Acb>de 1986 (proposition 65} stipule la publication par le gouvemeur de ia Caiifomie d'une iiste de substances que i'etat de Caiifomie considere comme cancerigenes ou Conserver ces instructions - OISEAU× FAMILIERS : Les oiseaux ont pour consultation 33 ulterieure @ HI (ELEVEE): S'ut[lisepour porter un liquide 6bulIition ou atteindre Ia bonne pressiondans un autocuiseur.Reduireensuite la puissancede chauffageapr6s le d6but de %bulIJtionou de la cuissondes aliments. LO (BASSE) : S'utilise pour le mijotage ou le maintien de la temp6ratured'un mets, ou pour la fusion de chocoiatou beurre.Lorsquele plat ou I'ustens+Ieest couvert,un d6but de cuisson peut se produire avec Ia puissancede chauffageLO. Pour r6duire Ia puissancede chauffage,tourner Ie bouton 8 Ia position OFF. V6rifier Ia stabilit6 desflammes sur le brOleur. Une puissancede chauffageintermediaireest utilisee pour Ia poursuite de la cuisson.Les aliments ne cuisent pas plus rapidementsi on utilise une puissancede chauffage plus (!lev6eque necessairepour le maintien d'une douce _bullition. L'eau bout toujours _ la m6metemp6rature,que 1'6bullitionsoit tranquJlleou vJgoureuse. Commandes de Ja surface de euisson O _O + Si un brO[eurs'6teintdurant une op6rationde cu_ssonfermer I'arriv_ede gaz au brOleur.Si une forte odeur de gaz est perceptJbJe, ouvr++une fenetre et attendreclnq minutesavant d'allume[ de nouveauJebrCIJeur. R6glage des commandes: 1. Placerun ustensilesur la grille du brOleur. • NEJAMAm$toucher la surfacede cuissonavant qu'elle se soit comp_e_emen-c refroidie. Certaineszones de Jasurface. particulierementau voismagedes brOleurs,peuvent deven+r tres chaudes_]uran[une cuisson. Utillserdes maniques. sans flamme Un graphique pres de chaquebouton identifie le brOJeur de surface commandopar ce bouton. Parexemple,le graphique _ gaucheidentifie JebrOleuravant/droJt. La puissancede chauffage_ employerdepend du type et de la taille de I'ustensileutilisS.On trouve darts Iabrochure La cuissons+mplJ%e de I%formation sur les ustensileset autres facteurs affectantle r6glage de la puissancede chauffage. o Avant d'ouvrir I'arriveede gaz a la cuisiniere,v6rifier que cnaquebouton (_ecommandeest a Japosit_onOFFJ:ARRET}. AlJumage O O o Si aucun ustensilen'est place sur la grille du brOleur,les flamFnespeuvent avoirtendance _ se separerdu br_Jleur. 2. Appuyeret tourner le bouton dartsle sens anti-horaire,jusqu'_ la position UTE (ALLU_AGE). o On peut percevoirle cliquetiscorrespondant_ la production des 6tincetles,et Ie brOleurs'alIume.[Les cinq alIumeurs produisentdes etincellesIorsqu'onplace Ie bouton de Fundes bCJleurs_ la position MTE.} de CHAPEAU DE BROLEUH Le dispositJfd'allumagene fait interveniraucunefiamme de veille. ChaquebrOleurde la table de cuisson comporte un allumeurpar etincelle. 3. Apr6sJ'allumagedu br_ileur,regler la taille des fiammesselon Je d8sJren tournant le bouton de commande. o Uallumeur continue _ produJredes etincelJesaussi Iongtemps que le bouton est _ Japosition MTE. Travaillerprudemmenttors du nettoyageautour des brOleursde /x_ (-(_ .:_"'_A,, la table de cuisson. °"r+°'_!__a++ Utilisation durant une panne Si un brOleurde la table de cuisson ne _.__ s'allume pas,ddtermJnersi I'allupaeur est bris6,sali ou mouiJl& Base uuBHOLEUR Boutons de commande surface de cuisson de la Avant d'allumerun brOJeurde surface,v_dfier que tous les boutons de comrnandes0nt _ !a p0sltion 0FF (ARRET),Approcher !'aJJumetteenflammeedu br¢JJeur avantde faire tourner le bouton jusqu'_ la position On utilise ces boutons pour commanderI'alIumagedes brOleursde surface. On peut regler chaquebouton a toute position entre Ies positionsextremesLO [BASSE) et HI (ELEVEE}.On peut percevoir une d6tente de calage_ la position HI. On peut choisir toute position de reglageentre les deux positionsextr6mes. 1. Appmcher une a%mette enflamm6edu brQleura utilisen 2. Enfonceret faire tourner lentementle bouton de commande jusqu'a Ia position MT_:. 3. Ajuster lesflampaesa la taille desJr6e. 34 @ Surface de cuisson Pour 6vitet ia formation changement cu[sson de couieur de taches Une grille de brOieurincorrectementinstall6epeut 6caiJlerI'6mailde Jasurfacede cuisson. ou un de la surface de : ° NettoyerIa surfacede cuissonapr_schaque utilisation, • EnleverIesresid_Jsrenversesde produits acidesou sucresd_s que la surfacede cuissona refroidi; ces produits renversespeuvent Ne pas faire fonctienner an br_mearsa_s q_'_ uste_sile seit plac_ s_r la grille, L'_mail de la grille peat s'_cailler s'il _'y a aaca_ aste_sile capable d'absorber machamear_mise par me br_le_r. Breleurs TravaiIIerprudemmentIorsqu'ilfaut remuerdesaliments dansun ustensiIeplacesur la grille de br0Ieur.LesgrilIes comportent un fini lisse qui faciIite le nettoyage. L'ustensiIepeut glissersur Ia grilIe si on ne tient pas refinementla poignee;ceci pourrait provoquerun renversementd'aiimentschauds,et susciter un risquede br0Iure. sceH s LesbrQleursscetl6sde Ia cuisiniSresont fixessur Iasurface de cuisson;[Is ne sont pas con_uspour etre enlev6s.CommeIes br_Jleurssont scelles,un produit qui deborde d'un ustensilene s'infiltrera passous Ia surfacede cuisson. MSmes[ Ies grilles de br0Ieursont tr_s durabIes,eIIesperdront progressivementIeur Iustreet changemntde couleur, du fait des temperatureselev6esauxquellesles br01eumles exposent. On devrait cependant nettoyerles brOleursapres chaqueutilisation. La t6te du brOleurs'enl6vefacilementpour 6tre nettoy6e.(Voir les instructionsde nettoyage_ la page 49._ _e_at_fJes: Pour Ie bon fonctionnementdu brOIeur,Ie chapeaude brOleurdoit etre correctementplac6sur la basedu brQleur. BrQlew's • Un brOIeurconvenabIementregis et dont lesorifices sont propress'aIlumeen quetquessecondes.Lots de I'alimentation au gaz naturel lesflammes sont bleues,avec un cone interne bleu intense. de haute Si Iesfiammes d'un br_leur sont iaunesou si Ia combustion est bruyante,Ieratio aidgaz peut 8tre incorrect.Demander un technicien d'effectuer le reglage.(La garantie ne couvre pas ce reglage.) Cettecuisini_re est dotee d'un brOleurde 16 000 BTU_,_ haute vitesse,plac6_ I'avantdroit. Un brOleurde 12 000 BTU_est situ6 I'avantgauche.Ces brOleurspermettent une cuisson rapide qui peut servir _ faire bouillir rapidementde I'eauou _ cuire une grande quantite d'aliments. BrQlew" Lorsde I'aiimentationau gazde pStroIeIiqudi6, iI est acceptabIe que rextremit_ desfiammessoit jaune. Ceciest normal; aucun reglage n'est nScessaire. • Avec certainstypes de gaz,on peut percevoir un petit bruit d'explosionIors de I'extinctiond'un br01eurde surface. Ceci est normal de mijotage Ce brOleurest situ6 _ la position centrale,lI offre une plus faible puissancepour la cuissonde saucesd61icatesou la fusion O • Si on fait passerrapidement le bouton de commandede Ia position HI (ELEVEE)_ la position LO (BASSE), lesfiammes peuvent s'eteindre,particulierementsi Ie br01eurest froid. Si ceci se pmduit, placer le bouton de commande_ Ia position OFF (ARRET)et attendre quelquessecondesavant d'allumer de nouveaule br01eur. O du chocolat. 0_0 * LapuissanceNermique (BTU) desbrdeurs est diff_reate tots de f'a_;Jmentation au gaz de p6,trole/iqu_fi6,, Grilles de br leur • Ajuster Ia puissancede chauffagede telIe mani6reque les flammes ne debordent pas_ la peripheriede I'ustensile. Avant une op6rationde cuisson,v6rifier que la griIIe est correctementplacee. Lots de I'instalIationdes grilIes,placer I'extr6mit6avec pattesvers le centre,au niveaudes barresdroites. 35 Tableau de commande A B C H 0 J E J K LM N F G 0 Le tabieau de commandoest conqupour faciliter la programmation.La fen6tre d'affichage indique I'heure,les fonctions avec minuterie et fonctions du four. Le tabIeau de commanderepr6sent6comprend la convectionet d'autres caract6rJstiquessp6cifiquesau modele. (Lestyle pout varJerselon le mod_le.] Cuisson courante S'utilise pour [a cuJssoncourante et le rOtissage. B Gril S'utilise pour la cuisson au gril et le rissolage sur pattie sup_rieure. C Nettoyage S'utilise pour programmer le cycle d'autonettoyage. R6tissageavec convection S'utilise pour le r6tissageavec convection. D6marrage diff6r6 Programme lefourpourddbuterunecuissonou un nettoyageplustard. G i% des touches • Appuyer sur la touche d6sir6e. • Appuyer sur les touchesnum6riquespour entrer la duree ou la temp6rature. • Appuyer sur la touche Autoset 0 pour entrer la temperature. • Un bip retentit IorsqueI'onappuie sur une touche. • Undouble hip retentit en cas d'erreur de programmation. Touches num6riques S'utilisentpourprogrammertemp6ratures et dur6es. Programmation automatique S'utilisepourprogrammerrapidementles temp6ratures. Maintienau S'utilisepourrnaJntenir au chauddansle four lesalimentscuits. chaud UtiJisation Remarque:Quatresecondesaprasavoir entr6 les chiffres ou le touche Autoset 0, la dur6e ou la temp6ratureseront automatiquement enregistr6es.Si plus de 30 secondess'6coulententre la pressionsur une touche de fonction et celle sur lostouches numeriquesou la touche Autoset 0 (Programmationautomatique), la fonction est annuI6eet I'afficheur revient _ I'affichagepr6c6dent. Cuissonavec convection S'utilisepourla cuissonavecconvection. Cuissonet maintien Pourcuirependantune dur6epre6tablie,avec maintienau chaudpendantuneheure. L'horlogepeut 6tre pmgramm6epour afficher Ia dur6e dans un format de 12 ou 24 heures.L'horlogeest programm6een usine pour un format de 12 heures. Favori S'utilisepourprogrammeret sauvegarder une m6thodeparticuli6rede cuissonet maintien. Changement L Minuterie Programmela minuterie. M Horloge S'utilisepourprogrammerI'heuredu jour. N ¸ Lampedu four S'utilisepourallumerou6teindrela lumi_redu four. ANNULER Annuletouteslesop6rationssaufminuterieet horloge. de l'horloge _ un format de 24 heures: 1. Appuyersur lestouches CANCEL {ANNULER]et Favorite(Favori]et maintenir la pression pendanttrois secondes. • 12 Hr clignote _ I'afficheur. 2. Appuyersur Iatouche Autoset0 pour setectionner24 Hr; appuyerde nouveaupour choisir 12 Hr. m 3. ProgrammerI'heureen suivant lesinstructions donn6esdans la section R6glagede I'horloge. 36 ,_,utoset R6gmagede m'hormoge 2. Appuyer sur lostouches numeriquesapproprieesjusqu'_ ce que I'heurejuste paraisse_ I'afficheur. 1. Appuyer sur Ia touche CIock [Hodoge}. • Losdeux points et le mot TIMERcontinuent_ clignoter. • L'heurecNgnote_ I'afficheur. 3. Appuyer _ nouveausur la touche TIMERou attendre quatre secondes. 2. Appuyer sur bs touchesnumeriquesapproprieespour programmer Pheuredu jour. • Losdeux points s'arretentde clignoter et le decomptede la dur@ commence. • Deuxpoints clignotent _ I'afficheur. 3. Appuyer _ nouveausur B touche Clock ou attendre quatre secondes. • La derniere minute du decomptesera affich@ sous forme de secondes. •Les deux points restent. LorsqueIe courant 6bctrique arriveou apres une interruption de courant,la derniere heure avant I'interruptionde courant va cNgnoter. 4. A la fin de la duree programmee,un bip long retentit et le mot End (Fin}seraaffiche. 5. Pour rappeler I'heuredu jour Iorsqu'uneautre fonction de duree s'affiche,appuyersur Iatouche Clock. Appuyer sur la touche TIMERpour effacer I'afficheur. Annulation de la minutetie : L'heure de I'horlogene peut 6tre changeeIorsquele four a 6t6 programmepour une cuissonou un nettoyagediffer6 ou pour la fonction de cuissonet maintien. 1. Appuyer sur la touche Timer et la maintenir ainsi pendanttrois secondes. Annumation de m'affichage de m'heure : 2. Appuyer sur la touche Timer et sur la touche numerique<< 0 _>. OU Si I'onne desire pasI'affbhage de I'heuredu jour: Appuyersur Iestouches CANCEL{ANNULER} et Clock {Horloge}et los maintenir ainsi pendanttrois secondes.L'heuredu jour disparaKde I'afficheur. A<utoset __@ Vettouillage des commar|des et de la porte du four LorsqueI'affichagede I'heureest annule, appuyersur la touche Clockpour afficher bri@ementI'heuredu jour. LorsqueI'affichagede I'heureest annul6,apres15 minutes, le four passeen mode Attente pour @onomiserde I'@ergie.L'afficheur seravierge et l'eclairagedu four ne fonctionnera pas.Pour _ reveiller;> bs commandesb partir du modeattente, appuyersur n'importe queNetouche. Un doubb hip retentira. tleaffichage --0 de l'heure : La porte du four et Ies touchespeuvent 6tre verrouilI@spour des raisonsde securite, nettoyageou pour emp@hertoute utilisation non [email protected] ne fonctionneront pas si elles sont verrouillees. Sile four est en cours d'utilisation,lostouches et la porte ne peuvent etre verrouillees. L'heure actueile du jour restera_ I'afficheur Iorsque lestouches et la porte seront verrouillees. Verrouillage : Appuyersur Iestouches CANCELet Clocket les maintenir ainsi pendanttrois secondes.L'heuredu jour reapparatt8 I'afficheur. Appuyersur lostouches CANCELet Cook& Hold [Cuissonet maintien} et les maintenir ainsi pendanttrois secondes.{Appuyerd'abord sur la touche CANCEL.} • OFF{ARRt_T}parait _ I'afficheur. La minuterie peut #tre programme de une minute (0:01}jusqu'_ 99 heureset 59 minutes(99:59}. • Le mot LOCKOdERROUiLLAGE} clignote Iorsquela porte est en cours de verrouillage. La minuterie peut 6tre utilisee ind@endammentde toute autre activit6 du four. Elle peut 6tre aussi programmeealors qu'une autre fonction du four est en cours d'utilisation. D6verrouillage : Appuyersur lestouches CANCELet Cook& Hold et Ies maintenir ainsi pendanttrois secondes.(Appuyerd'abord sur la touche CANCEL.}Le mot OFF(ARRt_T}disparait de I'afficheur. La minuterie ne commandopas le four. Elle ne sert qu'8 6mettredes bips. Programmation de la minutetie : 1. Appuyer sur Ia touche Timer {Mhluterie]. verrouilleessi la temperaturedu four est de 205 °C [400 °F}ou llemarque : La porte du four et lestouches ne peuvent6tre plus. • 0:00et le mot TIMER[MINUTERIE} clignotent_ I'afficheur. 37 @ Codes d'anoma ie Remarques four : Les roots BAKE {CUiSSON COURANTE) ou LOCK 07ERROUiLLAGE} peuvent c@noter rapidement b rafficheur pour pr@enir en cas d'erreur ou de [email protected] tei est b cas, appuyer sur Ia touche CANCEL. Si bs roots BAKE ou LOCK continuent b c@noter, debrancher I'appare+LAttendre queIques minutes, puis rebrancher I'appareiL Si un des roots continue b clignoter, @brancher I'appareil et prendre contact avec un r@arateur autoris6. Cuisson Programmation courante + Pour changer matempSrature du four mot+du prSchaufiage, appuyer de_× lois sur Ia touche Bake, puis sur la touche Autoset 0 ou sur Ies touches num6riques appropri6es jusqu'a ce que la temperature d@ir@ soit affich6e. + Si I'on oub+ied'arr6ter le four, il s'arretera automatiquement apres 12 heures. Si I'on d6sire d6sactiver cette fonction, voir page 43. : 1. Appuyer sur Ia touche Bake[Cuissoncourante}. Le mot BAKE(CUISSONCOURANTE}clignote. au + Pour changer matemperature du feet pendant macu+sson, appuyer sur Bake, puis sur la touche Autoset 0 ou Ies touches num6riques appropri@s jusqu'_ ce que la temp6rature d6sir6e soit affich@. COUtante, de macuisson sur Uacuisson courante ............. Bake + Pourdes conseib supp!6mentaires sur la cuisson courante et le rOtissage, voir la brochure La cuisson simplifi@. + 000ciignote b I'afficheur. 2. S6Iectionnerla temp@aturedu four. Appuyersur U la touche Autoset 0 [Pregrammationautomatique}pour ,',utoset 175°C [350 °F}ou sur lestouches num6riquesappropri@s. + Chaquepressionadditionnelb de Iatouche Autoset 0 augmentela temp6raturede 15 °C (25 °F}. Differences c isso e tre 'a cie fo r et _e nouvea_ ii est normalde remarquerquelques diff6rencesdans la dur@ de cuissonentre un four neuf et un four ancbn. Voir Ajustement de la temp6raturedu four a la page 44. + La temp6raturepeut 6tre programm@de 75 _ 285 °C [170 _ 550 °F}. 3. Appuyer de nouveausur la touche Bakeou attendre quatre secondes. C isso (certains • Le mot BAKEs'arr6tede clignoter et s'allumeb I'afficheur. avec co vectio modeles} Po_r ia c_isso_ avec eo_vectio_, e_trer ia temperature 8e eaisse_ _ormaleo La commander6duit automat+quementla tempSratureprogramm6ede 15 °C (25 °F}.La temperatureentr@ seraaffich@. Le ve_tilatear de eo_veetio_ se met e_ marehe _e lois q_e mefour a fo_etio_ pendant 5 minutes° + 38° 000 °} ou Ia temp6raturer@lle du four, si ia temperatureest de plus de 38 °C [100°F},sera [email protected] augmenterapar intervalIede 3 °C {5 °F}jusqu'_ ce que la temp6rature pr@rogramm6esoit atteinte. 4. LaisserIefour pr@hauffer pendant8 _ 15 minutes. Programmatio_ de la cuisso_ avec co_vectio_ 1. Appuyer sur la touche Convect Bake[Cuisson avec convection}+ + La temp6ratureprogramm6es'affiche. + Pour rappelerB temp6ratureprogramm@pendant le pr@hauffage,appuyersur la touche Bake. 5. Placerla nourriture darts le four. .... Bake ...... + Le mot BAKEet I'icOneVENTILATEUR c@notent. + 000 clignote _ rafficheur. 2. S6bctionner Iatemp6raturedu four. Appuyersur la touche Autoset 0 pour 175°C [350 °F}ou sur les touches num6riquesappropd@s. + LorsqueIatemperatureprogrampa@pour le four est atteinte, un bip long retentit. : U :\utoset + Chaquepressionadditionnetb sur Iatouche Autoset 0 augmente la temperaturede 15 °C (25 °F}.La temp6raturedu four peut 6tre programpa@de 75 _ 285 °C 070 _ 550 °F}. 6. V6rifier ravancementde la cuisson_ Ia dur6e minimab de cuisson.Cuireplus Iongtempsau besoin. s_ite 7. LorsqueIacuissonest terrain@,appuyer sur la touche CANCEL(ANNULER}. 8. Retirerla nourriture du four. 38 ooo 3. Appuyer _ nouveausur [atouche ConvectBakeou attendre quatresecondes+ Programmation du rStissage avec convection : 1+ Appuyer sur [a touche Convect • Le mot BAKE[CUISSONCOURANTE]s'arr6tede ciignoter+ Roast[ROtissageavec convection)+ • Le mot ROAST[ROTISSAGE_ et I'icOne VENTILATEUR clignotent. • 38° (100°] ou [a temp6raturer6elIedu four, si [atemp6rature est de plus de 38 °C [100°F],seraaffich6e+ElIeaugmenterapar intervallede 3 °C [5 °F)jusqu'8 ce que [a temp6rature pr6programm6esoit atteinte+ • L'icOneVENTILATEUR se met _ tourner+ _ast ............................... • 00:00ciJgnote_ J'afficheur+ + 000 s'aJhmea I'afficheur+ 2+ EntrerIaduree de rOtissagea I'aidedes touchesnumerJques+ 4+ LaisserIefour prechauffer pendant8 _ 15 minutes. + La duree peut 6tre regJeede 10 minutes (00:+0} 11 heureset 59 minutes [11:59}+ • LorsqueIa temperatureprogrammeepour le four est atteinte, un hip long retentit+ • Latemperatureprogrammees'affiche+ • Appuyer a nouveausur ConvectRoastou attendre 4 secondes+ • PourrappeterIatemperatureprogrammeependant Ie prechauffage,appuyersur [a touche ConvectBake. • Le mot ROASTet J'icOneVENTILATEUR cJignotent J'afficheur+ + 000 cJignote_ I'afficheur+ 3. SelectionnerIatemperaturedu four. Appuyersur la touche Autoset 0 (Programmationautomatique} pour 165°C {325 °F}ou sur lestouches numeriquesappropriees. 5+ Placer[anourriture dans Jefour. • Chaquepressionadditionneliesur la touche Autoset0 augmente Iatemperaturede 15 °C (25 °F}. 6+ Verifier ['avancementde [a cuisson_ Ia duree minimale de cuisson+Cuireplus Iongtempsau besoin+ • La temperaturedu four peut 6tre programmeede 75 _ 285 °C 070 _ 550 OF}. 7+ LorsqueIacuissonest terminee,appuyer sur la touche CANCEL(ANNULER]+ 8+ Retirerla nourriture du four. R6tissage 4. Appuyer _ nouveausur la touche ConvectRoastou attendre quatre secondes. • Le mot ROASTs'arretede c%noter et s'allume I'afficheur. avec convection • 38° (100°) ou la temperaturereelie du four, si Iatemperature est de plus de 38 °C (100°F),seraaffichee. Eile augmentera par intervalIede 3 °C [5 °F)jusqu'_ ce que la temperature preprogrammeesoit atteinte. • L'icOneVENTILATEUR se met _ tourner. (certains modeles ) Pour le rStissage ave€ convection, entrer la temp6rature et la dur6e de r6tissage normales. Le programmateurindique automatiquementde verifier Ia cuissonde Ia nourdture_ 75 % de la duree programmee.Le ventimateurde convection se met en marche une lois que mefour a +oncSionn_pendant 5 minutes, Remarques sur RerStissage U ,\u/oscl : + Lorsdu rOtissageavec convection,[a duree de cuissondoit 6tre programmeeavant Ia temperature+ + S'i[ faut, d'apresla recette,prechauffer Iefour, ajouter 15 minutes_ la duree de cuissonprogrammee+ + S'il faut un prechauffage,[aisserle four prechaufferpendant 8 15 minutes. • Lesdureesde r0tissagepeuventvarier selonles coupes de viande+ • Lorsquela temperatureprogrammeepour le four est atteinte, un hip Iong retentit+ • I1n+estpasnecessairede prechaufferIors du rOtissageavec convection de gros morceauxde viande. + Se reporter_ Ia brochure La cuissonsimpIifieepour connaitre [esdureeset temperaturesde r6tissagesuggerees+ 39 5. Phcer [anourriture darts le four. • La duree commence[e compte_ reboursdSsque le four se met chauffer. • Pourrappeterla temperatureprogramm6ependant [e pr_chauffage,appuyersur [a touche ConvectRoast. 4. Appuyer _ nouveausur la touche de fonction d6sir6eOU attendre quatre secondes. • Le mot correspondant_ la fonction d6sir6ereste alhm6. • La dur6e de cuissonparait _ I'afficheur. • La temperaturer6eIIedu four sera affich#ependant le pr6chauffage. 6. Lorsquelostrois quarts de [a dur6e de cuissonprogramm6ese sont 6cou[6s,[e four se met en marche et [e mot FOOD [NOURRHTURE] clignote _ ['afficheur.V6rifier ['avancementde [a cuisson_ ce moment.Cuire plus [ongtempsau besoin. • La temperatureprogramm#es'affiche Iorsque le four est pr6chauff& + La [ampedu four reste aIlum6ejusqu'_ ce que ['onappuie sur [a touche OvenLight (Lampedu fou0. Lorsque [a dur6e de cuissou s'est 6coulee : + Quatrebips retent[ssent. • Losroots HOLD (MAINTIEN]et WARM (CHAUD]s'alhment. +Appuyerstir n'importe quelle touche pour rappeler[a dur6e de cuisson restante. • 75° (170°] parait _ I'afficheur. 7. Lorsque[acuissonest termin6e,appuyer sur [a touche CANCEL(ANNULER). • L'heuredu jour parait _ I'afficheur. 8. Retirer[a nourriture du four. Cuisson et maintien Lors de ['utilisationde ['option Cook & Hold (Cuisson et maintien), [e four se met _ chauffer imm6diatementune fois que [a commandea 6t6 programm6e.Puis,[efour cuit pendant[a dur6e sp6cifi6e.Lorsque cette dur6e s'est6coui6e, [efour maintient [a nourrJtureau chaud pendant une heure au maximum,puis s'6teint automati(uement. AprSs uue heure de MNNT_EN AU CHAUD : Programmatiou de Cuissou et maiutieu : Auuulatiou de Cook & Hold _ tout momeut : f+-_ Appuyerstir la touche CANCEL[ANNULER}.Retirer [a nourriture du four. 1. Appuyer sur [a touche Cook & HokJ(Cuisson et maintien). + Le mot HOLD (MAINTIEN)cIignote pour indiquer que [a programmationde cuissonet maintien est en cours. + Le four s'Steintautomatiquement. + Lesroots HOLDet WARM s'_teignent. o Retirer[a nourriture du four. CuissoB et maiBtieB diff r s + 00:00cIignote _ rafficheur. 2. %[ectionner [a duree d6sir6ede cuissonen utiIisant [estouches numeriques. Ne pas utiliser la cu!ssondiff6rde pour desdenr_estr6s p6rissabies commeies pmduits iaitiers;ie porc, ia volaifle ou Jesfruits de me[. • Le mot HOLDcontinue _ cIignoter. + La dur6e s'aIiume_ ['afficheur. + La dur6e peut 6tre r6gi6ede 10 minutes [00:10]_ 11 heures et 59 minutes01:59). 3. AIors que [e mot HOLDciignote, appuyersur [a touche Bake (Cuissoncourante),Convect Bake [Cuissonavec convection)ou ConvectRoast [ROtissageavec convection) [certains modules) et seiectionner[atemperaturedu four. Appuyer sur [atouche Autoset 0 (Programmation automatique}pour !75 °C (350 °F}ou sur [es touches num6riquesappropri6es. Avec [a fonction diff6r6e, [e four set met _ cuire plus tard dans [a journ6e. Programmerla dur6e d'attentedesir6eavant que le four ne se mette en marcheet la durde de cuissond6sir6e.Le four commence _ chauffer_ I'heureselectionneeet cuit pour la duree sp6cifi6e. ................................ La dur6e d'attentepout 8tre programmeede 10 minutes(00:10} 11 heureset 59 minutes(11:59}. N /\utosetV Programmatiou d'uu cycle de cuissou et maiutieu diff_r_s • Le mot correspondant_ [a fonction d6sir6eclignote. : 1. Appuyer stir [a touche 1 Delay. • La temperaturedu four peut 6tre programm6ede 75 a 285 °C [170 _ 550 °F}. • Le mot DELAY[ATTENTE}ciignote a I'afficheur. 1 Delay • 00:00ciignote _ I'afficheur. 2. A raide destouches numerJquesappropri6es,e_trer la durSe d'atte_te avast que ne dSbute le cycle de cuisson et maintien. 40 3. Appuyer sur [a touche Cook & Hold. La temperaturede maintien au chaud peut 6tre programmeede 63 _ 90 °C [145_ 190°F). • Lesroots HOLDet DELAYc[ignotent Fafficheur. Le mot WARM (CHAUD)et la temperaturesemnt affiches pendant que la fonction est active. • 00:00c%note _ rafficheur. 4. Entmrla durSed_sir_ede ¢uis+on_ raide destouches numeriques. 5. Appuyer sur Ia touche Bake[CuissoncouranteD, ConvectBake(Cuissonavec convectionDou ConvectRoast(R0tissageavec convection) [certains modeles). ..... Annuiation 6. Programmer la temperature du four desiree N en appuyant sur Ia touche Autoset 0 (Programmat+onautomatique)ou sur lestouches numeriquesappropriees. du maintien au chaud : 1. Appuyer sur la touche CANCEL(ANNULER). 2. Retirerla nourriture du four. ,\u[osetv + 175° (350°) s'allumeIorsque ron appuie sur la touche Autoset 0. Remarques sur fonction maintien au chaud : + Apr_s quatre secondes,la duree d'attenteentree parait rafficheur. + Pour obtenir desqualites aiimentaireset nutdtives optimales, les ailmentsne doivent pas6tre gardes au chaud plus de 1 2 heures. + Le mot HOLDs'eteint. , Pour emp6cherles alimentsde dessecher,les recouvrirde papier aluminium,sansserrer, ou d'un couvercle. + Lesroots BAKE[CUISSONCOURANTE)et DELAY[ATTENTE) restentallumes pour rappelerqu'un cyclede cuissonet maintien differesa 6te programme. _GmaFques de * Pour r6chauffer des petits pains : - recouvrir les petits painsde papier aluminium sans setter et les placerau four. : + Ne pasutiliser Ie cyclede cuissonet maintien differespour des articlesqui n6cessitentque Iefour soit prechauffe,comme les g_teaux,Ies petits biscuits et les pains. - appuyersur les touchesKeep Warm et Autoset 0. - rechaufferpendant 12 h 15 minutes. , Pour r6chauffe_ des assiettes : + Ne pasutil+serIe cyclede cuissonet maintien differessi le four est dej8 chaud. - placerdeux piles de quatre assiettesmaximumdans le four. - appuyersur les touchesKeep Warm et Autoset 0. Maintien at+ chaud - rechaufferpendant 5 minutes,arr_ter le four et Iaisser les assiettesau four pendant encore 15 minutes. Pour maintenir au chaud dartsle four desaliments cuits et chauds ou pour rechaufferpains et assiettes. Programmation du Maintien 1. Appuyer sur Ia touche KeepWarm (Maintien au chaud), au chaud - n'utiliser que des assiettespouvantaller au four, verifier avec le fabricant. : - ne pasposer des assiettestiedes sur une surface froide, les changementsrapidesde temperature pouvant casserI'assietteou la fendiller. ...... ............... Keep warm + Lemot WARM (CHAUD)ciignote _ ['afficheur. + 000ciignote _ I'afficheur. 2. %tectionner la temperaturede maintienau chaud. Appuyer sur [a touche Autoset 0 (Programmationautomatique) ou sur lestouches numeriquesappropdees. U _\u[oset + 75° (170°) s'a[[umeIorsqueI'on appuie sur [a touche Autoset 0. + Chaquepressionsur la touche Autoset0 augmentela temperaturede 3 °C (5 °F). 41 Cuisson au gril 4. Pour un rissolagemaximum,pr6chauffer[e four pendant2 ou 3 minutes avantd'ajouter Ia nourriture. Programmation de la cuisson au gril : 5. Placerla nourriture clansIefour. FermerIa porte du four. 1. Appuyersur Iatouche Broil (Gril}. + Les rootsBROIL(GRiL)et SET (VALiDER}clignotent _ I'afficheur. 6. RetournerIa viandeune fois a la moiti6 de Ia dur6e de cuisson. Broil .... ............ tJ 2. Appuyersur Iatouche Autoset 0 (Programmat[on automatique}une fois pour programmerun gril Autoset temp6rature6tev6eou deuxfois pour programmerun gril temperaturebasse. + Les rootsHi (ELEVEE}ou LO (BASSE}seront affiches. + %lectionner Hi broil (Gril_ temperature6Iev6e}(285°C [550°F]) pour un griI normal %lectionner LO broil (Gril temp6raturebasse}(230° C [450° F]} pour un gril _ temperature inf6rieured'aiiments_ cuisson plus Ionguecommela vo[ai[le. 3. Apr@squatre secondes,le four se met en marche. 7. LorsqueI'alimentest cult, appuyersur la touche CANCEL(ANNULER}.Retirer la nourrJtureet la 16chefritedu four. o L'heure du jour reapparait_ I'afficheur. Remarques sur [a cuisson au gri[ : o Pourde meilieurs r6suitats [orsdu griI, se serv[rd'un ustensiie pr6vupour ce type de cuisson. o Le griI au regiage Hi [Elev6}est utilis6 pour [a majorit6 des op6rations de cuissonau griL Utiliser Ie griI au r6giage LO (Bas}pour [a cuissonde metsdevant cuire plus Iongtemps, afin de [eur permettred'6tre bien cults sans rissoiageexcessif. o Lesdur6esde cuissonau gri[ peuvent6tre plus [onguesavec une temperaturede gri[ inf6rieure. + Le mot BROILreste alJum6. Les motsHi ou LO resent ai[um6. o RetournerIa piupart des ailmentsIorsque[a moitie de [a dur6e pr6vuepour [acuisson au gri[ s'est6coui6e. • Pourdes temp6ratureset des conseiissuppi6mentairessur la cuisson au griI, se reportera [a brochureLa cuisson simpiifiee. Tableau de cuisson au gri[ Pr6chauffer[e four pendant2-3 minutes+ DEGRADE AUNENTS Boeuf Bifteck, 2,5 cm (1 po) d'6paisseur Hamburger, 2 cm (3/4 po} d'6paisseur PoFc Bacon Tranche de jambon pr6cuit, 1,3 cm [1/2 po} d'6paisseur COtelette, 2,5 cm (1 po} d'6paisseur I GRILLES 5 5 5ou6 CUISSON i TEmPSDE CmSSON OTAL A point Bien cult 15 - 20 min. 18 - 24 min. Bien cuit 13 - 18 min. 5 5 Bien cult Chaud 6 - 10 min. 8 - 12 min. 5 Bien cult 22 - 26 min. (GriI _ temperaturebasse} 30 - 45 min. vomaimme Blancs, avec os 4 Bien cuJt Fruits de met FiIetde poisson Dame de poisson,2,5 cm (1 po} d'epaisseur Queuede homard,85 _ 115g [3 _ 4 onces} 5 5 5 Emiettement Emiettement Bien cult 8 - 12 min. 10 - 15 min. 7 - 10 min. Fourobtenir unesurfaceexterieure saisie/brunieet un int6rieursaignant,il peut@tren@cessaire de r6duirele tempsde cuissonsur [apremiereface, et de r6duire ia distanceentre la viande et la source de chaieur. Remarq_e : Cetableau n'est qu'un guide de suggestions.Lesdur6es peuventvarJerselon I'aliment_ cuire. _2 Arr t autornatique/Mode Remarques • Le modesabbat peut 6tre mis en marche_ tout moment,que le four soit en marche ou non. Le four s'arr6teautomatiquementapr_s12 heuress'il a 6t6 accidentellementlaissden marche.Cettecaract6ristiquede s6curit6 peut 6tre arr6t6e. Pour annuler l'arr_t 12 heures et faire fonctionner four en continu pendant 72 heures : sur Uemode sabbat : • Le modesabbat ne peut pas 6tre mis en marche si lestouches sont verrouilI6esou Ia porte verrouillee. le • La maiorit6des messageset tous leships sont d6sactiv6s IorsqueIe modesabbat est actiE 1. Appuyer sur la touche Clock (Hodoge:)et la maintenir ainsipendant cinq secondes. • Si Ie four est en mode cuissonIorsquele modesabbat est programm& le mot BAKE(CUISSONCOURANTE)s'6teint IorsqueIa cuissoncourante est annuI6e.II n'y aura aucun signalsonore audible. • SAb sera affiche et clignotera pendantcinq secondes. • SAb sera ensuite affich6 en continujusqu'_ ce qu'on I'arr6te ou jusqu'_ ce que la dur6e limite de 72 heuressoit atteinte. • La Iampedu four ne s'alIumepas automatiquement I'ouverturede Ia porte Iorsque le four est en modesabbat.Si 1'6clairagedu four est souhaitependant Ie modesabbat,la lampedevra 6treaihmee avant que Ie mode sabbat ne d6bute. • Le mot BAKE(CUISSONCOURANTE_ sera aussi affich6si un cyclede cuissoncourante est en cours alors que lefour est en modesabbat. • Lorsquele modesabbat a d6marr& I'afficheur indique imm6diatementla temperatureprogramm6eplut6t que la temperaturer6elIede la cavit6 du four. Aucun hip de prechauffagene retentit. • ToutesIes autres fonctions (MINUTERIE,MAINTIENAU CHAUD,NETTOYAGE, etc._sont verrouiil6es,SAUFBAKE, pendantie modesabbat. • Un cyclede cuissonet maint[enpeut 6tre programm6durant le modesabbat.Cependant,un cyclede cuissonet maintien diff6r6sn'est pas possible. Annuiation du mode sabbat : • Le cycle d'autonettoyageet Ieverrouillageautomatiquede la porte ne fonctionnent pas pendantle mode sabbat. • Si I'on appuie sur la touche CANCEL,un cycle de cuisson courante au four seraannul6. Cependant,le programmateur resteraen modesabbat. 1. Appuyer sur la touche Clock pendantcinq secondes. • Apr_s une panne de courant,le four revient en modesabbat avec72 heuresrestanteset aucuncycle actiE • SAb ciignote pendantcinq secondes. • L'heuredu jour revient_ I'afficheur. OU 2. Apres 72 heures,le modesabbat setermine. • SAb clignote pendant 5 secondes. • L'heuredu iour revient_ I'afficheur. 43 du four 4+ Pour modifier le reglage,appuyersur Iatouche Autoset0+ Appuyer _ nouveausur ia touche pour retournerau reglage existant+Attender cinq secondeset le regiage seraeffectue+ La precisiondes temperaturesdu four a 6t6 soigneusementverifiee rusine+Hiest normalde remarquerquetquesdifferencesdans la cuissonou ia couleur du rissohge obtenu entre un four neuf et un four ancien+Au fur et _ mesureque le four est moins neuf, sa temperature poutvader+ La touche Favorite(favor[] permet de sauvegarderla duree et la temperatured'une fonct[on de cuissonet maintien. Ajustement de la temp6rature II est possibie d'ajusterla temperaturedu four si ton penseque ie four ne cuit pasou ne rissolepas correctement+Pour deciderde I'ajustement_ apporter, regier le four _ une temperaturede 15 °C (25 °FDplus 6leveeou pius basseque ia temperatureindiquee dans la recette, puisfaire cuire ia preparation+Les r6su+tatsde <i+essai>> de cuissondoivent donner une id6e du hombrede degresduquel la temperaturedolt 6tre ajustee+ Ajustement de la temperature Pour programmerun cycle Favori,une fonction de cuissonet maintien dolt 6tre activeou tout juste programmee. Programmation d'un nouveau cycle favori ou sauvegarde d'un cycle en cours de cuisson et maintien comme favori : 1= Programmerun cyclede cuissonet maintien commeil est decrit la section Cuissonet maintien _ Ia page 40 du four : 2= Appuyer sur Ia touche Favoriteet la maintenir ainsJpendanttrois secondes. 1+ Appuyer sur la touche Bake(CuissoncouranteD+ 2+ Entrer285 °C [550 °F] en appuyantsur ies touches num_riquesappropdees. + Le cyclecuisson et maintiennouvellementprogramme ou en cours de fonctionnementserasauvegarde. 3. Appuyer sur Ia touche Bakeet tamaintenir ains[ pendant plusieurssecondesou jusqu'a ce que 00° paraisse_ I'afficheur. + Un hip sonoreretentit pour indiquer que lescommandesont accept6 JereglagefavorL Si Iatemperaturedu four a 6t6 precedemmentajustee,Ie changementseraaffich6. Parexemple,si la temperaturedu four a 6t6 reduitede 8 °C 05 °F},I'afficheurindiquera -8° (-15°}. Demarrage d'un cycle programme darts favori : 1+ Appuyer sur la touche Faw_rite+ + La duree et la temperaturedu cycleprogrammede cuissonet maint[enseront affichees (siaucun cycle de cuisson et maint[enn'a 6t6 programme,<_nonE>7sera affiche). 4+ Appuyer sur ia touche Autoset 0 (Programmationautoma%ue) pour ajuster la temperature+ A chaquefois que i'on appuie sur la touche Autoset 0, ia temperaturechange de 3 °C [5 °F)+Latemperaturedu four peut 6tre augmenteeou diminuee de 3 _ 20 °C (5 _ 35 °F]+ 2. Appuyer sur Ia touche Bake, ConvectBakeou ConvectRoast (certainsmod@les). + Le cyclefavori commenceimmediatement. Appuyer sur ia touche Autoset 0 pour augmenterla temperature du four (5, 10+++35)+Continuerd'appuyersur ia touche Autoset 0 pour diminuer la temperaturedu four (-35, -%... -5). + Le mot correspondantau cycleselect[onn6s'alJume J'afficheur. 5. L'heuredu jour reapparattautomatiquement_ rafficheur. + La duree de cuJssons'allume8 I'afficheur. II n'est pas necessairede reajusterla temperaturedu four en cas de panne ou d'interruption de courant.L'ajustementde la temperatures'appliqueseu+ementaux fonctions de cuisson courante,cuissonavec convectionet rOtissageavec convection (certainsmodStesD. Lestemperaturesde grii et de nettoyagene peuvent6tre ajustees. Lorsque la duree de cuisson s'est ecoulee : + Le mot correspondantau cycIeselectionn_s'_teint+ + Lesroots HOLD (MAINTIENDet WARM (CHAUDDs'alhment+ + 75° (170°) parait _ I'afficheur. Annulation d'un cycle favori en oours : 1+ ApptJyersur la touche CANCEL(ANNULER]+ Changement temperature de ma °F/°C + Le cyclefavori sauvegard6ne sera pas affecte+ 2+ Retirerla nourriture du four. 1. Le reglage par ddaut de I'usJnepour Jatemperatureest en Fahrenheit. 2. Pour modifier ce reglage,appuyersur les touchesCANCELet Bakesimultan6mentet maintener-lesenfonceespendant trois secondes. 3. Un bip retentit et Ie r6glage courant (°Fou °C) parait _ I'afficheur. (Sivous ne faites pas de changement,la cuisiniSreretourneau reglageexistant aprSs30 secondesy 44 AJJumage sans fJamme Grilles du four de La cuisiniSre est dot6e d'un systSme d'aIIumage sans flamme de veille. Ce systeme ferme automatiquement Farriv6e de gaz et emp_che tout fonctiormeme#t du four fors d'une #_terrupdo# de I'alimerltador_ 61ectrique. , Ne PaSranger de nourdtu[e ou d'usteus!!edans le four. li #e sere pas possible d'agumer le brgleur du four avec une a#umette. Ne pas tei_ter de faire foncdom_er /e four lets d'une #tterrupdon de Fafimentaden 61ectrique. VentiJateut Le four comporte deuxgrilles [trois s'il y a convection) avec,pour chacune,un dispositif de calage. E×tractio_ : du four 1. Tirer la grille en Iignedroite jusqu'a ce qu'elle s'arr6te a la position de calage. Un ventiiateurde convectionsort _ fake circuIer Fairchaud dans le four Iorsqueia caract6dstiquede convectionest selectionn6e.La fonction se met automatiquementen marche 5 minutesapr6s avoir appuy6sur la touche Conveet, et s'6teint Iorsque la fonction Convect est annul6e, 2. SouIeverIagrilIe _ I'avantpour pouvoirI'extraire. _i_staHatio_ : Remarqae : II s'arr6teautomatiquementIorsque I'on ouvrela porte. 1. Placerla grille sur lessupportsclansle four. 2. SouleverIdgerementI'avant.Faireglisser la grille vers I'arri6re au-del_ de Ia position de calage. 3. Abaisser la grille et la faire glisser clansle four. 1 Event du four Ne pas co_vrir matotalit_ d'a_e grille de papier d'am_mi_iam_i mettre d'am_mi_i_ms_r masomed_ fo_r, Coma_e donnerait pas de boris r_s_mtats darts macaisson de g_tea_× et masome LorsqueIe four fonctionne,los sur[acesvoisinesde I'6ventpeuvent devenirassezchaudes pour entratnerdes brOlures.Ne iamais bloquer 1'6vent. U_vent est sita_ seas meprotectear d'_vent du dosseret, sur ma eaisini_reo EVENT DU FOUR Ne pas mettre de plastiquespr6sde 1'6vent,la chaleur pouvant les ddormer ou los fake fondre. Positions des gri es POSiTiON 7 (_Dosition la plus haute) : Pour la cuissonau gril et la cuisson au four sur une seulegdlle avec une tOle_ biscuits. POS_TION6 : S'utilise pour Ia cuissonau gril et la CUiSSOn au four EcJairage sur seulegriIIe avec une tOie biscuits.S'utilisepour une cuissonsur plusieurs griIIes. du four La lampedu four s'allumeautomatiquement I'ouverturede la porte. Lorsquela porte est ferm6e, appuyersur OvenLight [Lampe du fou0 pour aiIumer ou 6teindre Ia lampe.Le four preduit un signal sonorechaquefois que I'on appuie sur OvenLight. So_e du fo_._r une C_isSOn 8VeC ¢O_VeOtio_ sur trois grilles (certains modeles) POSiTiON 5 : PourIa cuissonau gril et la cuissonau four sur une seulegriIle avec une tOIe_ biscuits. POSiTiON _ : S'utilise pour Iacuisson au four de g_teauxet de mets en sauce,sur une seulegriIle avec une t0Ie _ biscuits,et la cuisson au griL S'utilise pour une cuissonsur plusieursgrilIes. Somedu four POSIT_ON3 : PourIa cuissonau four de metsen sauce,de g_teaux _tages,de michesde pain, sur une seule griIle avec une tOle biscuits.S'utilisepour une cuissonsur plusieurs griIles. Prot6gerIasoIe des produits renvers6s,en particulier acidesou sucr6s,ceux-ci pouvant d6colorer1'6mailvitri% Utiliserdes ustensilesde Ia bonne dimensionpour 6viter que los produits nese renversentou passentpar-dessusI'ustensileen bouiIiant.Ne pas placer d'ustensiles oa de feuiiie d'alami_iam directeme_t s_r POS_T_ON2 : S'utilise pour Iacuisson au four de gSteauxsur une seuIegriIle avec une tOle_ biscuits,et pour Ie r6tissagede petites pieces de viande.S'utilise pour une cuissonsur plusieursgrilles. masoled_ fo_r. 45 Q Oemi+gtiJJe POSMON 1 : S'utilise pour le rOtissaged'une vohille ou de grosses pisces de viande+ Cteate-A+Space TM CertaJnsmodTJesde cuisini_res Sole du four : PlacerIagrille sur les cOt6srelev6sde la sole. Donneune place suppl6mentairepour Jacuisson de grandesquantit6s+ sent dotSsd'une demi-grille//_ la grille pout 8tre entev6pour Ioger une grosse marmitesur Jagrille infTrieure.Le cOt6 droit de la grille est toujours Iibre pour Joger convertible.Le cOt8gauchede_ CU_SSONSUR PLUSIEURS GRILLES: Deu× grilles : UtiIiser lospositions 3 et 6, ou 2 et 4+ une cocotte. Trois grilles (convectionseulement): UtiliserJespositions 1,3et6+ // sur deuxou trois grilles, v6rifier les aliments_ Ia dur6e minimale I sugg6r6epour Remarque: Pour la cuissonavec (certainsmodSles) 6viter un exc@sde convection cuissonou de coJolation. Cuisson de g_teau× _ etages sur deu× grilles Pourde me+IIeursrSsultatspour Ia cuissonde g_teauxsur deux grilles, utiliser Ies positions2 et 4 pour une cuissontraditionnelle et lospositions3 et 6 pour une cuissonavecconvection (certains mod_Ies). Placerles g_teauxsur la grille, comme il est indiquS. Remarques : o La pattie amoviblede la grille pout 6tre utilisSecomme grille de rOt+ssage clansla I@chefrite. Ne pas utiliser la pattie sup6rieure si la grille du four est plac6edarts JaJ_chefrite. o La sectionamovibie de la grille peut 6tre utiJisSecomme support ou grille de refroidissement. o S'assurerque Ie four a refroidi avant de retirer ou de rSinstaller Jademi-grille. o Ne pas utiliser un ustensilequi dSpasseraitdu bord de Ia griile. o Pourobtenir Iesmeilleurs rSsultats,hisser un espaceIibre de 5 cm (2 po} entre I'ustensiieplac6sur la grille et la paroi du four. o Agir prudemmentpour retirer un article plac6sur la demi-grilie, afin d'Sviterdes brQlures. o Enleverpmdemmentles articles plac6ssur la grille infSrieure, pour ne pas perturber la demi-grille. 46 Four autonetteyant 6. EssuyerIes r@idussucr@et acides,commeIes patatesdouces, Iatomate ou Ies sauces_}_ basede Bit. La porcelainevitrifi@ pos@deune certaine r@istanceauxcompos@acides,maisqui n'est pas limit@. EIIepeut se d@olorersi les r@idusacidesou sucresne sont pas enlev@avant de commencerI'autonettoyage. o IJest normal que certaines piecesae a cu_smieredevbnnent tres cnaudes lots d'un cycb de nettoyage. Programmation o Pour 6viter que la porte du four ne sublssedes dommages,ne pastenter de I'ouvrir Iorsque le tool LOCK(VERROUILLAGE} est visible sur I'afficheur. : 205 °C (400 programmerun [ de Remarque : La°F}pour temperaturedu four doltcycled'autonettoyage. 6tre situ6e en dessous o Evlterde toucher la porte, le hublot et la zonede I'eventdu foul Iorsd'un cycled'autonettoyage. 1. Fermerla porte du four. o Ne pas utiliser de nettoyantpour four du commercesur le fini du four ou sur tout autre composantdu four. Celaabimerait le fini ou les composantsdu four. 2. Appuyer sur la touche Cban (Nettoyage}. Le mot CLEAN(NETTOYAGE} clignote. ........ • Le mot SET6/ALIDER}clignote _ I'affJcheur. 3. Appuyer sur Ia touche Autoset 0 (Programmation automatique}. Le cycled'autonettoyageutilise destemp6raturessuperieuresb la normalepour assurerIe nettoyageautomatiquede la totalit6 du four. Si le four est tr6s sale, il est normal qu'on observeB formation de rum@ ou de flammesdurant Ie nettoyage.Nettoyer le four intervalbs reguliersphtOt que d'attendre une accumulation importantede r@idus. f_ U _utoset • MEd (Moyen} (Saletdmoyenne,3 heures}est affich& 4. Appuyer sur la touche Autoset 0 pour voir defiler les differents reglagesde I'autonettoyage: HVy (Tressale} (Saiet6@aisse,4 heures} Durant le processusd'autonettoyage,il convient de bien a@erla cuisine pour eliminer les odeursnormalement6raisesdurant le nettoyage. Avant de l'autonettoyage MEd (Moyen} (Salet6moyenne,3 heures} LITE(L6ge0 (SaleteI6gere,2 heures} Le choix du niveaude sabt6 du four programmeautomatiquement la dur@ du cycle d'autonettoyage. J'autonettoyage 1. EteindreIa lampe du four avant le nettoya% Eile rJsqueraitsinon, de grilIer. 2. Enbver la I@hefrite,tous Ies plats et Iesgrilles du four. Les grilles risquent de se @colorer et de ne plus glisser aussl bien aprSsun cycled'autonettoyagesi on ne IesenlSvepas. 3. Nettoyerle cadre du four, Ie cadrede la porte, Iazone _ I'ext6rieur du joint et autour de I'ouvertureclansle joint de Ia porte,_ I'aide d'un produit de nettoyagenon abrasif commeBon Ami_ou d'eau additionn@de detergent.Le pmcessusd'autonettoyagene nettob pas ceszones.Ellesdoivent etre nettoy@spour emp@her la salet6 de s'incmsterpendant le cycle de nettoyage.(Le joint assure1'6tanch6it6autour de la porte et du hublot du four.[ 4. Pouremp6chertout dommage,ne pasnettoyer ni frotter le joint qui setrouve autour de Ia porte du four. Cejoint est co%u pour 6viter les pertes de chaleur pendant le cycle d'autonettoyage. 5. Apres quatre secondes,le four commence le nettoyage. • Si la porte n'est pas fens@, des hips retentissentet Ie mot <{door _ (porte} paratt _ I'afficheur.Si Ia porte n'est pas ferm@ darts Ies 30 secondes,roperation d'autonettoyageest annul@ et I'afficheur revientb rheure du lout. • Le mot CLEANparait _ I'afficheur. • Le mot LOCK07ERROUILLAGE} clignote _ I'afficheur.Unelois la porteverrouill6e,Ie mot reste stable. • La dur6e de nettoyagecommencele d@omptea I'afficheur. D6marrage differ_ d'un cycle d'auto_ettoyage 1. Appuyer sur Jatouche 1 Delay. • Le mot DELAY(ATTENTE}clignote. • 00:00clignote _ I'affbhage. : 1 ! Delay 2. EntrerIadur6e d'attente@sir@ pour le @manage du cycle raide destouches numdriquesapproprJ@s. 3. Appuyer sur Ia touche Cban. 5. EIiminerIes r@ldus de graisseou de produits renver@ssur la soleavant le nettoyage.Ceci emp@heIa formation de fiammes ou de rum@ durant le nettoyage. Clean • Le mot SETclignote a I'afficheur. 4. Appuyer sur la touche Autoset 0. • Le mot LITE(saleteleg6re} est affich& 0 i\utoset *Les noms de marquedes produits de nettoyagesont des marquesd@os6esdes diff6rents fabricants. _7 5+ Appuyer sur Ia touche Autoset 0 (Programmation automatique)pour voir ddiIer Iesdiff6rents r6gIagesde Fautonettoyage: Aprbs U le cycle d'autonettoyage Environune heure apr_s [a fin du cycle, [e mot LOCKs'#teint+Ace moment, la porte peut 6tre ouverte. Autosd HVy (Tr_ssale} (Salet66paisse,4 heures] La salet6 peut avoir laiss_ un r6sidu gris poudreu×.L'enIever avec un linge humide.S'ii reste de la salet6,cela indique que le cycle de nettoyagen'a pas 6t8 assezlong. Cettesalet6 restantesera enlev6eau prochain cycled'autonettoyage. MEd (Moyen) [Salet6 moyenne,3 heures) UTE (L6ge0 (Salet6I_g_re,2 heures] Le choix du niveaude salet6du four programmeautomatiquement Ia dur6e du cycle d'autonettoyage. Si les grilles ont _t_ laiss6es _ l'int6rieur du four pendant le cycle d'uutonettoyuge et qu'elles gmissentreal sur leurs supports, lesenduire,ainsi que lessupports, d'une fine couche d'huile v6g_tale+ 6. Apres quatre secondes,les roots CLEAN(NETTOYAGE} et DELAY(ATFENTE]s'aliumerontet Ie mot LOCK (VERROUILLAQE} clignotera _ I'aff+cheur.Lorsquela porte du four se verrouilie,le mot LOCKs'arr6te de clignoter et reste alhm6 en continu pour indiquer que le four est programm6pour une op6rationde nettoyagediff6rQ.Le d61aid'attente sera affich_. De fines lignes peuvent apparaitre duns la percelaine purce qu'elle a subi chaleur et refroidissement. Ceciest normal et n'affecterapas Ia performance. Une d_comerationblanche peut apparaitre upr_s menettoyuge si des aliments acides ou sucrSs n'ont pus _t_ enleves avunt que ne commence l'autonettoyageo La d6coloration est normale et n'affecterapas la performancedu four. Remarque5: Pendant le cycle d'autonettoyage + si la porte du four n'est pas ferm6e,Ie mot << door >)(porte} clignote _ I'afficheur et le four 6met des bips jusqu'_ ce que la porte soit fermee et que I'onappuie a nouveausur Clean (Nettoyage}. LorsqueIe mot LOCKparait _ I'afficheur,la porte ne peut 6tre ouverte+Pour6viter d'endommagerla porte, ne pas forcer la porte pour I'ouvrir IorsqueLOCKest affich6+ Fum6e et odeurs • S'iI s'6couleplus de cinq secondesentre Ie momentoQI'on appuie sur Cleanet celui o8 I'on appuie sur Ia touche Autoset 0 (Programmationautomatique},I'afficheur retourne automatiquement_ I'affichagepr6c6dent. La premiSrefois o_ Iefour est nettoye,il peut y avoir production d'odeur et de fum(!e+Ceci est normalet disparaitra_ I'usage+ Si le four est trSs saleou si Ia Iechefritea 6te laissSedarts le four, il peut y avoirproduction de fumSe+ • La porte du four se trouvera endommag6esi I'on force son ouverturealors que le mot LOCK(VERROUiLLAGE} est encore affich6. Pendantque Ie four chauffe, il peut se produire desbruits de m6taI en dilatation ou en contraction.Ceci est normal et n'indique pasque le four s'abime. 48 M6thodes de nettoyage et que _ous ruescompesantssont froids, afin d'_viter des dommages eu des br_lureSo *Les noms de marquesont des marques i Pour e_iter la io[matiQnde taches Ouun changementde Couleur,n_ttoYerIappareflapr_s deposeesdes differents fabricants= chaque utflisation, *_Pour commanderdirectement, o Apr_stout demontagede composants,vei!ler _ effectuer un remontagecorrect, composerIe 1-877-232-6771E=-U= ou 1-800-688-8408Canada. _E NE_OYAGE E_chefrite et sa grille Ne jamais couvrir ta grille de papier d'aluminium;cela emp_che la gmisse de ceuler dai_sle I_eheMte. o RecouvrirIa lechefrite et sa griIIe d'un linge savonneux;laisseragir pour detacher lesresidus= o Laveravec de I'eausavonneusetilde= UtiIiserun tampon _ recurerpour eliminer lessouillures tenaces= o On peut placer lesdeux composantsde la lechefritedarts un lave-vaissetle= TStesde bremeuramovibles o LaisserIe brOleurrefmidir=EnteverIechapeau de br_Jleurpour le laverdarts de I'eausavonneuseavec un tampon recureren plastique=Pour les souillurestenaces,nettoyeravec un tampon non abrasif,savonneux,ou avec une epongeet la cr_me de nettoyagepour table de cuissonCooktopCleaningCreme*(produit n° 20000001)_*= o Ne pas effectuer le nettoyageau lave-vaisselleou dans le four autonettoyant= gr_leurs _ gaz seell_s o Nettoyer%quemment=Laisserle brOleurrefmidir= Nettoyeravec du savon et un tampon _ recureren plastique=Pour les souillurestenaces,nettoyeravec un tampon savonneuxet non abrasif=Ne pasagrandir ou ddormer les tmus= o Veiller _ ne pasintroduire d'eau darts Ies orificesdu brOleur= o TravaillerprudemmentIors du nettoyagede ralhmeur. Si rallumeur est endommageou mouilI& les brOleursde la table de cuissonne pourront pass'aliumer. surfente Zone de la console de cemmande et o Laverles grilIes avecde I'eausavonneusetiede et un tampon _ recureren plastique non abrasif=Pour lessouillures tenaces,nettoyeravec un tampon en plastiquenon abrasif,savonneux,ou avec une epongeet ia creme de nettoyage pour table de cuissonCooktopCleaningCreme*(produit n° 20000001]*t S'il restedes souiliures,appliquer de nouveauIacreme pour table de cuisson,recouvrir avec un essuie-tout humide,et laissertremper pendant30 minutes. Frotterde nouveau,rincer et faire secher= o Ne pas effectuer le nettoyageau lave-vaisselleou clansle four autonettoyant= o Pour utiliser [a fonction VerrouiHagedes commandespour le nettoyage,voir page 37. o Laver,rincer et faire secher.Ne pasutfliser un agent de nettoyageabrasif susceptiblede rayer la finition. o On peut utiliser un produit de nettoyagedu verre, pulverised'abord sur un chiffon. NEPASprejeterlepred_lt directement s_r les te_ches de cemma_de e_ s_r Fa_ficfle_ro o Placerchaquebouton _ la position d'ARRET,et retirer chaque boutonen le tirant= o Laver,rincer et faire secher=Ne pasutiliser un agent de nettoyageabrasif susceptiblede rayer la finition= o Fairefonctionner brievementchaquebrOleurpour verifier que le bouton a ete correctementreinstalle= TaMe de euisson et tabmeaude eemmande dmaii vitrifid L'emaiIvitrifie est du verre lie au metal par fusion. II peut se fissurerou s'ecailler en cas de mauvaiseutilisation=II est resistant auxacides,mais pastotalement inattaquablepar lesacides=Tousles produits renverses,en particulier acides ou sucres,doivent _tre essuyesimmediatementavec un Iinge sec= o Une lois refroidi, laveravec de reau savonneuse,rincer et secher= o Ne iamais essuyerune surfacetiede ou chaudeavec un Iinge humide=Ceci pourrait la fissurer ou I'ecailler= o Ne iamais utiliser de nettoyantspour four, d'agents de nettoyagecaustiquesou abrasifssur le fini exterieur de la cuisiniere= 49 NETTOYAGE Panneaux mat6raux, tiroir de remisage et poign_es de porte - _U _OUr en verre , Une fois les piscesrefroidies,les laver_ I'eausavonneusetiSde, rinceret s6cher.Nejamais essuyerune surface tiede ou chaude avecun Iinge humide,ceci pouvantendommagerIa surfaceet entrainerune brOIurepar Ia vapeur. , Pour Iestaches rebelles,utiiiser des agents de nettoyageI6g6rementabrasifscomme la pQteau bicarbonatede soudeou Bon AmR Ne pasutiliser de nettoyantsabrasifs,caustiquesou 6nergiquescomme les nettoyantspour four ou Iestampons en Iained'acier. Cesproduits raieraientou endommageraientde fagon permanentela surface. Remarque : Utiiiser un linge ou un terchen sec pour essuyer les preduits renvers6s, surtout s'ils sellt acides eu sucres. La surface peurrait se d_colerer eu se ternir si la saiet6 n'_tait pas imm6diatemerst enlev_e. Ceci est particuli_remellt important darts le cas de surfaces blancheso , Eviterd'utiliser trop d'eau,qui risqueraitde s'infiltrer sous ou derriSrele verreet de tacher. , Laver_ I'eauet au savon.Rincer avecde I'eaupropre et s6cher.Un produit de nettoyagedu verre peut 6tre utilis6 en le vaporisantd'abordsur un linge. , Ne pas utiliser de produits abrasifscommetampons_ r6curer, laine d'acierou produit de nettoyageen poudre qui risqueraientde rayerle verre. _nt6rieur du four , Ex6cuter les instructionspr6sent6es aux pages 47-48 pour I'autonettoyage du four, Grilles du four , Nettoyer avecde I'eausavonneuse. , Eliminerlessouillurestenacesavec une poudre de nettoyageou un tampon _ r6curer savonneux.Rinceret faire s6cher. , Si lesgrilles sont laisseesdarts Iefour pendant Iecycle d'autonettoyage,eilesse d_colorent et peuventne plus tr6s bien glisser.Si ceci se produit, appliquer par essuyageun peu d'huile vSg_talesur la grille et ses supportsen relief pour faciliter le mouvement,et enleverrexcSsd'huile. (certains modSles) , NE PAS UT_USERDE PRODUITSDE NETTOYAGECONTENANTDU JAVELLISANT. " NE PAS UT_USERDE NETTOYANTS. ORANGE_ OU AR_AS_fSo " TOUJOURSESSUYERDANS LE SENSDE LA TEXTUREDE L'ACIERLORSDU NETTOYAGE. , Nettoyage jo_maliedsalet_ 16g_re- Essuyeravec I'_mdes produits suivants:eau savonneuse,vinaigre blanc/eau, produit de nettoyagepour verre et surfaceFormula409_ ou un produit semblable pour verre - avecun lingesoupIe et une _ponge.Rinceret secher.Pour poIir et enleverles marquesde doigts,faire suivre par une vaporisationde Magic Spray_ pour acier inoxydabte[produit n° 20000008]**. , Salet_ mod_r_e/_paisse - Essuyeravec I'undes produits suivants:Bon Ami", Smart Cleanse€ou Soft Scrub" I'aided'un linge soupleou d'une eponge humide. Rinceret s_cher.Lestaches rebelIespeuvent_tre enlevSesavec un tampon multi-usagesScotch-Brite*humidi% Frotteruniformementdans le sensdu m_taLRinceret s_cher. Pour redonner du hstre et retirer lesrayures,faire suivre par une vaporisationde Magic Spray_ pour acier inoxydable. , D_eoloratio_ - A I'aided'une _ponge humidifi_eou d'un linge souple,essuyerb raide du nettoyant Cameo*pour acier inoxydable.Rincerimm_diatementet s6cher.Pour enleverles marqueset redonnerdu hstre, faire suivre par une vaporisationde Magic Spray_ pour acier inoxydable. * Lesnoms de marquesont des marquesd_posSesdes differents fabricants. ** Pour commanderdirectement,composerle 1-877-232-6771E.-U.ou 1-800-688-8408Canada. 50 Porte du four Raccorde ent Los appareils n_eessitant une amimentation _mectriquecompoltent une fiche _ trois 5roehes raise_ la terre qui doit 6tre branchee directement dansune prise de 120volts _ trois cavit6set correctementraise_ la terre, Ne Pas grimpe[ sur !a porte du four ouverte,ou Juiimposer une charge excessive.Cecip0ur[ait provoquerun basculementde !a CUiSini6re, le brisde Japorte ou des blessurespour la personne Toujoursd4brancherf'appardl avantd'y fa#ede l'entretien. concern6e. La fiche _ trois brochesraise_ la terre fournit une protectioncontre les d6charges61ectriques.NEPAS COUPERNI ENEEVER[A BROCNE DE TERRE DU CORDON D'AUMENTATION. fermeturede Ia porte du four d'une cuisini_re neuve:ceciest Remarque : On pout percevoirune certaine<< 61asticit6>)Iors de la normal:cet effet disparaft progressivement. Hublot lectrique Si la prise ne comporteque deux cavit6s,n'est pas raise_ ia terre ou n'est pasappropri6e,mepropri_taire de m'appareiiamaresponsao himit6de faire rempmacermaprise par une prise _ trois cavit_s correcteme_t raise _ materre, du four Pour proteger mehubmotde maporte du four : Lampe 1. Ne pas utiIiserde produits nettoyantsabrasifscommedes tampons _ r6cureren laine d'acier ou des produits de nettoyage en poudre qui risqueraientde rayer le verre. 2. Ne pas heurter le hublot en verre avec un ustensile,un article de mobilier,un iouet, etc. ' D6brancherJacuisiniSreavant de rempiacer['ampouJe. 3. Ne pas former la porte du four avant que lesgrilles ne soient en piacedarts le four. ; haiSserle four refr0idir avant de rernplacerI'ampouJel Sassurer que le Cabochonet I ampoulesent fro!ds avant de los touche_. Toute d6gradationdu hublot de verre - rayure,choc, tension,etc. peut affaiblir sa structure et augmenterle risque de bris _ une date ult6rieure. Pieds de r6glage Pour remp_acer _'ampou_e du four : I, AprSsIe refroidissementdu four, maintenir Ie cabochontout en enlevant ia piScem6tailique qui la maintienten place. RE_ARQUE : Le cabochon tombera si on ne Ie maintient pas en place. de l'aplo b V6rifier que la bride antibascu!ementagrippe convenablement I'undes pieds arri6re de r6glagede I'aplomb pour que la Cu!s!nierene puisse hasculeracc!dentel!ernent. La cuisini6re doit 6tre d'aplombune fois install6e.Si elle ne I'estpas, tourner Ies pieds de r6glagede I'aplomben plastique,_ chacun desangles de Ia #_ I _ cuisini_re,iusqu'_ce que celle-ci soit d'aplomb. _,,JJ four CABOCHON 2. EnteverIe cabochon et [ampoule. 3. installer une ampoulede 40 watts pour appareil m6nager. 4. R6instaIlerle cabochon et le fil m6tal%ue de retenue. 5. R6tablir I'alimentationde la cuisini6re.R6glerde nouveau I'horloge. PIED DE REGLAGE DE L'APLOMB 51 O placement Sole du four d'un appareil Prot6gerIasole du four contre Ies renversements(o[)articuli6rement pour Ies produits acides ou sucrQs},qui peuventsusciter un changementde couleur de I'6mailvitrifi6. Utiliser un ustensilede la tailIe appropri6e pour 6vitertout renversementou d6bordement. Lesraccordsdesappareils_ gazservant_ branchercet appare+[ Falimentationde gaz ne sont pas pr6vuspour 6tre d6plac6s continuellement.Une fois I'appareiIinstall6,NF:PAS Ie d6placerde fa_on r6p6t6epour Ie nettoyerou le changerde place.Si cet appareil doit 6tre d6menag_et/ou enlev6pour 6tre r6par6,suivre la m6thoded6crite darts Ies instructionsd'instailation.Pourtoute information,prendre contact avec le service_ Ia client6le de Maytag au 1-800-688-9900E.-U.ou 1-800-688-2002au Canada. La soledu four peut 6tre enlev6epour permettreun nettoyageplus facile. Depose : Apr_s le refroidissementdu four, retirer Ies grilles du four. Fairecoulisservers ]'avantdu four les deux pitons situ6sdans les angles arriSrede Ia soledu four. II faut que Ie pied arri_re de Ia cuisiniSresoit engag6 dans la bride antibasculementpour que la cuisiniere ne puisse basculer accidenteIIement. SouleverIe bord arriere de Iasole du four, puis la faire glisser vers I'arrierepour d6gager le bord avant de la pattie frontale du chSssis.Retirer la soledu four. Tiroir de remisage Reinstallation Engagerle bord avant de Iasole du four clansla pattie frontale du chassisdu four. AbaisserI'arriSrede la sole et faire couHsserles deux pitons vers I'arriSrepour immobiliserla soleen place. Ne pasranger darts ce t[mir des art!clesde plastique ou de papier, des produits inflammablesou des produits a!irnentaites. Durant ]efonctionnementdu four, une temp6mture excessive pour ces articles peut s!6tabiirdans [etiro+r. Le tiroir de rein[sagepeut 6tre enJev6pour vous permettrede nettoyersous la cuisini6re. Depose : 1= Vider [etiroir et [e tirer jusqu'_ [a position de [apremierebut6e+ 2. SouleverI'avant. 3. Tirerjusqu'a [aposition de la seconde but6e. 4. SaJsirle tiroir par les cOt6set soulever/tirerpour ['extraire. Reinsta[[ation : : 1. InsSrerIes extr6mit6sdes giissiSresdu tiroir dans les rails de la cuisiniere. 2. SouleverI'avantdu tiroir et pousserdoucementjusqu'_ la position de la premiSrebut6e. 3. Souleverde nouveaule tiroir et le pousser pour le fermer. 52 PROBL_ME SOLUTION Pour la plupart des probl_mes observes, essayer d'abord lea sore,lions possibmes,_ droite. , , , , Verifier que Ies commandesdu four sont correctementreglees. Verifier si le four est biersraccord6au circuit 61ectrique. Inspecter/r_armerle dis]oncteur.InspectedremplacerJesfusibles. ContrOlerIa source d'alimentation6Iectrique. Un bremearde surface ne s'ammume paso , Verifier que I'appareiIest correctementraccord6_ la source d'61ectricite. , Determinersi I'alimentation6tectriqueest interrompue(fusible grilIe/disjoncteurouvert}. ° Verifier que I'allumeurest sec et qu'iI 6met des 6tJncelles.Le brOleurne peut s'allumersi I'allumeurestendommage,souill6ou mouille.SiI'allumeurnegenerepasd'etincelles,ramener le bouton de commande_ la position OFF(ARRET}. Flammes hen unifermeso , Orificesdu brOleurobstrues. Separation entre les flammes et le breleuro , VeilIer a placercorrectementrustensilesur Ia grille du brOleur. Resaltats de caisson aa four differents des attentes ou de eeu× produits par le four anterieur. , Verifier que Ia temperatureselectionneeest correcte. VeiJler_ prechaufferJefour si ceci est demand6dans la recette. , D_terminersi I'eventdu four est obstrue.Voir son emplacementpage 45. • S'assurerque tacuisiniere est d'aplomb. , Les reglagesde temperaturevarient souvententre un four neuf et Ie four qu'iI remplace. On observesouventune delive du reglagede temperatured'un four a mesurequ'iI vieillit: il peut devenirplus chaud ou moins chaud.Voir page 44 Ies instructionsd'aiustementde la temperaturedu four. REMA_QUE: II n'est pasutile de modifier le reglage detemperature si la variation n'affecte qu'une ou deux recettes. , UtiliserIesborisustensiles.Lesustensilesfoncesdonnentun brunissementde couleurfoncee, les ustensilesbrillants,un brunissementplus clair. Pour d'autres informationsau sujet de la cuissonau four, voir Ia b_ochureLa cuissonsimplifiee. , Verifier la position desgrilles et des ustensiJes.Lorsde la repartition sur deux grilles,ne pas superposerIes plats. Veiller a laisserun espacede 2,5a 5 cm (1 _ 2 po} entre lesplats et les paroisdu four. , ContrOlerI'utilisationde feuJlIed'aluminiumdans Ie four. Nejamais recouvrircompletement une grilledu four avecde la feuilled'aluminJum.Placerun petit morceaudefeuille d'aluminium sur la grille sous le plat pour recuperer les matieresrenversees. R_sultats ineorreets lots de la caisson au gril, ou 6mission e×eessive de fum_e, , Determinerla position des grilles. Lesalimentspeuvent 6tre trap presdes flammes. , Utilisation incorrectede feuille d'aluminium.Nejamais garnir la griJlede lechefrite avec de Iafeuille d'aluminium. ° EnleverI'excesde graissesur Ia piecede viandeavant la cuissonau gril. UtiIisationd'une Iechefrite souillee. PrechaufferIe four pendanttrois minutesavant de placer le plat dans le four. Portedu four fermeedurant la cuissonau gril. 53 mposs b md'autoaettoyage t du four. Determinerque rappareil n'a pas 6t6 programmepour un autonettoyagediff6r6.Voir pages47-88. Verifierque Ia porte est ferm6e. Verifiersi la commandeest en modesabbat.Voir page 43. Le four est peut etre _ une temperaturesup6rieure_ 205 °C [400°F).La temperaturedu four doit etre inf6rieure_ 205 °C [400°F[}pour pouvoir programmerun cycled'autonettoya% Le four ne se nettoie pus correctement. ° Un temps de nettoyagepIus long peut 6tre n6cessaire. ° On n'a pas61imin6avant I'op6rationd'autonettoyageIesaccumulationsexcessivesde r6sidus, particulierementles r6sidus d'alimentsacides ou sucres. Lu po_e du four ne se d6verrouiHe pus apr_s m'autonettoyage. ° L'interieur du four est encorechaud. Attendre environ une heure apresI'achevementde Ia p6rioded'autonettoyage.II est possibled'ouvrirla porteapresla disparit[ondu messageLOCK (VERROUILLAGE:} sur I'afficheur. , Les commandeset la porte sont peut-etre verrouill6es.Voir page 37. Accumumationd'humidit_ sur me hubmotou vapeur so,ant de m'_vent. ° Ceci est normaldurant la cuissond'alimentscontenant beaucoupd'eau. UtiJisat[onexcessived'humidit6 Jorsdu nettoyagedu hublot. Emission d'une forte odeur ou de fum emors demu m seenmarche du four. Ceci est normalpour un four neuf et disparait aprasquetquesutitisations. Un cycle d'autonettoyage_<brCJIera _ plus rapidement lesodeurs. La mise en marched'un ventiIateuraide a retirerfumee et odeurs. Presencede salet6ssur la sole. Proc6dera un autonettoyage. Codes d'anomamie, LesrootsBAKEou LOCKpeuventclignoter rapidement_ ['afficheurpour pr6venird'uneerreur ou d'un probleme.Si le mot BAKEou LOCKparatt_ I'afficheur,appuyersur Iatouche CANCEL. Si le mot BAKEou LOCKcontinue _ clignoter,d6brancherrappareiLAttendre quelques minutes, puis rebrancherI'appareiLSi le mot continue _ clignoter,d6brancherI'appareilet prendre contact avec un reparateurautorise. Si Iefour esttres sale,lesflammechespeuventproduire un coded'anomalieau cours du cycle d'autonettoyage.Appuyersur Iatouche CANCELet IaisserIe four refroidir compietement, essuyerlasalet6enexcespuisreprogrammerI'autonettoya%Si lecoded'anomalier6apparait, prendre contact avec un r6parateurautoris6. Des bruits se font entendre. Le four fair phsieurs bruits faib[es,lI est possibled'entendre[esre[aisdu four qui se mettent en marche et s'arretenLCeci est normal AIorsque Iefourser6chauffeet serefroidit,iIest possibled'entendre desbruitscorrespondant la diIatationet _ la contractiondespieces m6tailiques.Ceciest normalet n'endommagepas I'appareiL _mn'ya n_ hip ill affinhage. Le four est peut-etre en mode sabbat. Voir page 43. _ SAb _ cmignole puis reste ammum_. Le four est en modesabbat.Pour annuler,appuyersur la touche Clock et maintener-la enfonc6ependant cinq secondes. 54 Garantie complbte d'une annbe _ Pieces et main=d'_uvre Durant une p6fiode d'un (1} an _ compter de la date de ['achatinitial au d6ta[Ltoute pLecequl se rdv6ie_aff ddectueuse aansdes conditions normalesd'usage menagersets repareeou remp[ac6egra[uitemem. Residents canadiens Les garantiesc[-dessuscouvrent un apparell installd au Canada,seuement s'il a 6t6 ag[_6 par lesagences de test habilitees (v_rificationde la conformit6 _ une norme nationaledu Canada),sauf si I'appareila ete introduit au Canada_ I'occas_ond'un changementde rSs_dencedes Etats-Un[sve[s le Canada. Garantie limit6e hers des Etats-Unis et du Canada = PiSces seulement Pendan-_ une pefiode d'un (1} an _ compter de la oa[e de [achat m_tlalau d6tal[,toute piece qul se r6v6ieraitddectueuse dansdes conditions normales d'usagem6nagerserarepareeou remplac6e gratultement (pieceseulement);le propfi_taire devra assumertousies autres frais y comprisfra[s de maind'ceuvre,de aep_acement,de transporL ue HIom6trageel de d agnostic,le cas ecn6ant. Lesgarantiessp_cifiquesfom_ut_es¢i-dessussent les SEULESque le fabricantaccorde.Cesgarantiesvous cont_rentdesdroitsjuridiques sp_cffiqueset vous pouvezegalementjouird'autresdro/[s,vanablesd'un dtat b/'autre, d'unepmwnce a une autre. Ne sent pas couverts garanties ." par ces 1= Lesdommagesou d_rangementsdus _: a=Mise en service,Iivraisonou entretien effectu_s incorrectement= b=Toute reparation,modification,aItdrationet tout r_glage non autorisSspar Iefabricant ou par un prestatairede service apr_s-venteagrSe= c=Accidents, mauvaiseutiIisation ou usageabusif ou ddraisonnable= d=Aiimentat[on8tectrique[tension, intensite)incorrecte= e=Rdglageincorrect d'une commande= 2= Lesgaranties ne peuvent 6tre honorSess[ ies num6rosde s_ried'origine ont _t8 enlevds,modifiesoune sent pasfacilement lisibles= 3, Ampoules, 4. Appareils achet_saux fins d'usagecommercialou industdeL 5. Lesfrais de visite d'un prestatairede serviceou de serviceapres-vente encouruspour les raisonssu[vantes: a. Correctiond'erreursde raiseen service. b. Initiation de rutilisateur _ I'emploi de I'appareil. c. Transportde I'appareiIaux Iocauxdu prestatairede service. 6. Dommagessecondairesou indirectssubis par toute personnesuite au nonrespectde ces garant[es.Certains8tats ou provincesne permettent pas I'exclusionou la limitation des dommagessecondairesou indirects; par consSquentIes limitations ou exclusionsci-dessuspeuvent ne pas s'appliquer_ votre cas. Si l'i terve tio r parate r est • Contacterle detaillant chez qui rappareil a et_ achetd,ou contacter Maytag SewicesS_/service_ la clientelede Maytag au 1-800-688-9900[.-U. ou 1-800-688-2002au Canada,pour obtenir lescoordonneesd'une agencede serviceagrede. • Veiller _ conserverla facture d'achat pouriustifier de la validit8 de la garantie. Pour d'autres informationsen ce qui conceme les responsabilitdsdu propri_taire_ 1'Sgarddu servicesous garantie,voir Ietexte de Ia GARANTIE • Si IedStailIantou I'agencede serviceaprSs-ventene peut resoudreIe problSme,dcdre _ MaytagServicess_,attention CAR Center,P.O.Box 2370,Cleveland,TN 37320-2370ou tdlSphonerau 1_800_688_9900 Eo_Uo o_ 1_800_688_2_02 a_ Canada. • Les guidesd'utiIisation,Ies manueisde serviceet tes renseignementssur Ies piecessent disponiblesauprSsde Maytag Servicess_,service_ la clientSlede Maytag= Re_atq_es : Lors de tout contact eoncemantun probl_me,fournir I'informationsuivante: a. Nora, adresseet num_rode t_I_phonedu client; b=Num_ro de modSIeet num_rode sSriede I'appareii; c= Nora et adressedu ddtaillant ou de ragence de service; d=Description cIaire du prob!6meobserve; e=Preuved'achat (facturede vented= 55 Estufa a Gas con Controm a Precisi6n Sensible al Tacto 800 ® Tabla de lVlaterias lnstrucciones lmportantes sobre Seguridad ........................ 57-61 Cocinando en la Estufa ............ 62-83 Controles Quemadores de Gas Sellados Cuidado y Limpieza .................. 75-78 Homo Autoiimpiante Procedimientos de Lirapieza tVlantenimiento ..........................79-80 Luz _ Ventana del Horno Retiro de UaEstufa a Gas Cocinando en el Homo ............ 64=74 Horneado 'Cook & Hold' 'Cook & Hold' Diferido Asar a la Parrilla Mantener Caliente Parrillas del Homo Localizaci6n y Soluci6n de Avedas ...................................81 =82 Garantia y Servicio .......................... 83 Lea y siga todas las instrucciones antes de usar este electrodom_stico para evitar el riesgo potencial de incendio, choque el6ctrico, lesi6n personal o da_io al electrodom6stico como resultado de su uso inapropiado, Utilice este electrodomestico solamente para el prop6sito que ha sido destinado segQn se describe en esta guia, Censumido[: POtfavor lea y conserveesta gu[a para [derencia futura. Conserveel tecibo de compra Y!Oel chequecaneelado ComoComprobant e de £ompra. N0merode Modelo Para asegurar funcionamiento correcto y seguro: El electrodom6stico debe ser instdado debidamente y puesto a tierra por un t6cnico calificado, No intente ajustar, reparar, prestar servicio o reemplazar ninguna pieza de este electrodom6stico a menos que sea espedficamente recomendado en esta guia, Todas las reparaciones deben ser realizadas por un t6cnico calificado, Pida al instalador que le indique la ubicaci6n de la v_lvula de cierre del gas y como oerrarla en oaso de una emergencia, NSmeEode Serie Fechade Compra 1-800_688-9900 EE, UU. Intemet: httpJ!wvcw,rnaYtag_com En nuestrecontinuo dan de mejo[ar la calidady rendimiento de nuestros electrodorn6stic0s,puede que seanecesariomodi[icar e!ectrodom6stieoSin aetua!izaresta gu[a. Siempre desenchufe el electrodom6stico antes de efectuar alguna reparaci6n, Para in[ermacifin seflre servide, ver p#g#la 83. = No almacene ni use gase!iaa n! etres vaperes y liquides iaflamab!es ea la veCindad de este -QUE Las advertencias e instrucciones importantes sobre seguridad que aparecen en esta guia no est_in destinadas a cubrir todas las posiNes circunstancias y situaciones que puedan ocurrir, Se debe ejercer sentido comuJn,precauci6n y cuidado cuando instale, redice mantenimiento o haga funcionar el artefacto, , Llame inmediatamente a SU preveeder de gas desde el te!_fene _e un veciao0 S!ga las iastruccienes prepercienadas per el preveeder ae gas, o Si nO #_e_e lecalizar asa prevee_er _e gas, Ilame a! c_erpe _e be_r_beros. Siempre p6ngase en contacto con su distribuidor, agente de servicio o fabricante si surgen proNemas o situaciones que usted no comprenda, Reconozca los simbolos, etiquetas de seguridad HACERS_ PERCIBEOLORAGAS: La instalaci_a y repa[acieaes _eben set efectua_as pe r aa t_caice cal!fica_e, _aa ageacia de reparacienes e el prevee_er _e gas. advertencias, ADVERTENClA _ Pe!ig[o o pr_cticas nOseguras que detectados pot ei olor sohmente. Los proveedores de gas rec0miendan que comp[e e instaie un detector de gas acuerdo con las inst[ucciones del [abdcante. PODRIAN causar lesidn personal menos grave, 57 lnstruccienes Generates Muchos pl4sticos son vulnerabbs al caior, Mantenga los plasticos abjados de Bs piezas de la estufa que puedan estar tibias o cdientes, No deje articulos de pl4stico sobre la cubierta de la estufa pues se pueden derretir o ablandar si est4n demasiado cerca del respiradero o de un quemador Para eiiminar ei riesgo de pasar sobre los quemadores superiores calientes, no se deben guardar articulos en los armarios que est_in directamente sobre la estufa, Si tabs armarios son usados para almacenamiento, debe limitarse a colocar art[culos de use poco frecuente y que pueden guardarse en forma segura en una _rea que est,1sujeta ai calor proveniente de la estufa, Las temperaturas pueden no ser apropiadas para algunos articulos, tal come liquidos volatiles, limpiadores o sprays en aerosol, En Case de lncendie Apague el ebctrodomestico y la campana de ventiBci6n para evitar que las llamas se dispersen, Extinga las llamas luego encienda la campana para expubar el humo y el olor, Para vefificar si eI disposidvo est,1debidamente instaiado, mire debajo de la estufa con una linterna para asegurarse de que uno de los torniiios nivehdores traseros este debidamente , En la cubierta: Apague el fuego o la llama en una sarten con una tapa o una bandeja de hornear, enganchado en Uaranura del soporte, EUdispositivo antivuebo asegura el tornillo niveBdor trasero al piso cuando est,1 debidamente enganchado, Esto debe verificarse carla vez NUNCA levante o mueva una sarten en llamas, , Fn el homo: Apague el fuego o la llama cerrando la puerta dei homo, que la estufa sea movida, Pata Evitat Da e tin lncendie Causade No use agua en los incendios de grasa, Use bicarbonate, un producto quimico seco o un extinguidor del %o con espuma para apagar un incendio o ia llama, e per emHume Asegurese de que se hayan retirado todos los materiabs de empaque del ebctrodomestico antes de su use, Seguridad para Ni es Mantenga el _rea drededor del ebctrodom_stico libre y exenta de materiabs combustibles, gasolina u otros vapores y materiabs infiamabbs, Si el ebctrodom6stico es instalado cerca de una ventana, se debe tener cuidado para evitar que las cortinas pasen sobre los quemadores, NUNCA deje articulos sobre la cubierta de la estufa, El aire cdiente del respiradero puede encender los articulos infiamabbs y aumentar la presi6n en los envases cerrados hasta haceflos reventar, seriamente, NUNCA deje a los nixies solos o sin supervisi6n cuando el electrodom6stico est6 en use o este caliente, Muchos envases de %0 aerosol son EXPLOSIVOScuando son expuestos al calory pueden ser dtamente infiamabbs, Evite su use o su almacenamiento cerca del ebctrodom6stico, NUNCA permita que los nixies se sienten o se paren en ninguna parte del electrodom6stico pues se pueden lesionar o quemar, 58 Seguridad Se bs debe ensehar a los ni_iosque eI ebctrodom_stbo y los utensiiios que est_in en eI o sobre 61 pueden estar calbntes, Deje enfnar los utensiiios calbntes en un lugar seguro, fuera deI abance de los ni_ios peque_ios, Se bs debe ensdiar a los ni_ios que un ebctrodomOstbo no es un juguete, No se debe permitir que los ni_iosjueguen con los controbs u otras pbzas de la estufa, Para Coeinar Siempre coioque un utensiiio en un quemador superior antes de encenderio, AsegSrese de usar ia periiia correcta que controia cada quemador superior, AsegSrese de encender ei quemador correcto y comprobar de queen efecto ei quemador haya sido encendido, Cuando haya terminado de cocinar, apague ei quemador antes de retirar ei utensiiio para evitar exposiciOn a la llama del quemador, Siempre ajuste ia llama dei quemador superior de modo que no se extienda mas alia dei borde inferior dei utensiiio, Una llama excesiva es peiigrosa, desperdicia energia y puede da_iar ia estufa, ei utensiiio o los armarios que est_in sobre ia estufa, NUNCA use la puerta de este eiectrodomOstico como peldaho o asiento ya que el electrodomOstico se puede volcar, y causar lesiones g raves. NUNCA deje sin supervision ia cubierta de ia estufa cuando este cocinando, especiaimente cuando usa un ajuste de caior alto o cuando est6 usando una freidora, Los reboses pueden producir humo y los derrames de grasa pueden infiamarse, Limpie los derrames grasosos tan pronto como sea posibie, No use caior alto durante periodos de cocciOn proiongados, NUNCA use este electrodomOstico como caiefactor de area o para elevar la temperatura de la habitaci0n. Esto puede causar envenenamiento por monOxido de carbono } el sobrecalentamiento del homo, NUNCA cubra ninguna rendija, agujero o canal en la parte inferior dei homo o cubra la rejiiia completa con materiabs tales como ei papei de aluminio. Esto evita que ei aire fiuya a traves del homo y puede causar envenenamiento pot monOxido de carbono. El papel de aiuminio tambien puede contener el caiory producir un riesgo de incendio, NUNCA caiiente un envase cerrado en ei quemador superior o en el homo, La acumulaciOn de presiOn puede hacer explotar el envase causando una lesiOn personal grave o daho a la estufa, Use tomaollas secos y gruesos, Los tomaollas humedos pueden causar quemaduras a causa dei vapor, Las toaiias u otros sustitutos no deben ser usados como tomaollas porque eiios pueden quedar coigando a traves de los quemadores superiores y encenderse o enredarse en ias piezas de ia estufa, NUNC#, obstruya el flujo dei aire de combustion _ de ventilaciOncubriendo las entradas o saiidas de aire dei homo, Esto puede restdngir el acceso dei aire a los quemadores causar envenenamiento pot mon0xido de carbono, Siempre deje enfriar ia grasa caiiente que se ha usado en ia Ei respiradero dei homo se encuentra debajo dei protector trasero, freidora antes de intentar mover o manipuiaria, No permita que se acumule grasa u otros materiales inflamables en la estufa o cerca de ella, en la campana o en el ventiiador aspirador, Limpie ia campana extractora con frecuencia para evitar que ia grasa u otros materiaies inflamables se acumulen en la campana o en el filtro, Encienda el ventilador cuando cocine alimentos flameados Evite tocar el area del respiradero mientras el homo est6 encendido y durante varios minutos despues de haberlo apagado, Aigunas partes dei respiradero y dei area que io rodea se calientan Io suficiente como para causar quemaduras, DespuOsde apagar ei homo, no toque ei respiradero o el area que Io rodea hasta que haya tenido suficiente tiempo para enfriarse, debajo la campana, NUNCA use vestimentas de materiales inflamables, ropa Qtras superficies que pueden estar calientes incluyen la suelta o de mangas largas cuando est6 cocinando, La vestimenta se puede encender o enganchar en los mangos de los utensilios, cubierta, las superficies que est_n dirigidas hacia la cubierta, el respiradero del homo, la superficie cercana a la abertura del respiradero, ia puerta dei homo y ia area que ia rodea, y ia ventanilla del homo, No toque un foco de homo caliente con un paHiohumedo ya que se puede romper, Si ei foco se rompe, desconecte ei suministro eidctrico ai eiectrodom6stico antes de retirar ei foco para evitar un choque eiOctrico, 59 Sbmpre coIoque Bs parriiias deI homo en la posid6n deseada cuando eI homo est6 frio. Desibe la parriih deI homo hacia afuera para agregar o retirar aiimento, usando tomaoiBs secos y resbtentes. Siempre evite abanzar dentro deI homo para agregar o retirar aiimentos. Si una parriiia debe ser sacada cuando est,1todavia caibnte, use un tomaoiias seco. Siempre @ague eI homo despu_s de haber terminado de cocinar. Nunca deje que un utensilio hierva hasta quedar seco pues esto puede da_iar el utensilio y la estufa. Siga las instrucciones del fabricante cuando use bolsas para cocinar en el homo. Solamente ciertos tipos de utensilios de vidrio cer_mico, de ceramica o glaseados son convenientes para uso en la cubierta de la estufa o en el homo sin quebrarse debido al cambio repentino de temperatura. Siga las instrucciones del fabricante cuando use utensilios de vidrio. Tenga cuidado cuando abra la puerta deI homo. Deje que escape eI aire o eI vapor caiiente antes de sacar o voiver coIocar eI aiimento. Este electrodomestico ha sido probado respecto a su rendimiento seguro usando utensilios de cocina convencionales. No use ningun dispositivo o accesorio que no haya sido espedficamente recomendado en esta guia. No use tapas para cubrir los quemadores superiores, rejiiias para ia cubierta de la estufa ni agregue sistemas de convecci6n para hornos. El uso de dispositivos o accesorios que no son expresamente recomendados en esta guia, puede crear serios peligros de seguridad, resultar en problemas de rendimiento y reducir la vida utii de los componentes de la estufa. ADVERTENCmA SOBRE LOS ALIMENTOS PREPARADOS: Siga Bs instrucciones del fabricante de los alimentos. Si un envase de pldstico de alimento congeBdo y/o su tapa se deforma, se comba o se da_ia de alguna otra manera durante la cocci6n, descarte inmediatamente el alimento y su envase. El alimento puede estar contaminado. NUNCA use papel de duminio para cubrir una parrilh del homo o la parte inferior del homo. El uso incorrecto puede resultar en un riesgo de choque el6ctrico, incendio o da_o al ebctrodomestico. Use papel de duminio soBmente como se indica en esta guia. Utensilios Seguridad de la Limpieza Apague todos los controles y espere que se enfrien las piezas de la estufa antes de tocarlas o limpiarlas. No toque las rejillas de los quemadores o las _reas circundantes hasta que elias no hayan tenido tiempo suficiente de enfriarse. Apropiados Use sartenes con rondos pBnos y mangos que sean fdcibs de tomar y que permanezcan frios. Evite usar sartenes u ollas inestabbs, combadas que se pueden vobar fdcilmente u olBs cuyos mangos esten sueltos. Ademas evite usar utensilios especidmente pequeSos o sartenes con mangos pesados pues ellos pueden ser inestabbs y vobarse fdcilmente. Los utensilios que son pesados de mover cuando est_in Ibnos con Limpie la estufa con cuidado. Tenga cuidado para evitar quemaduras de vapor si se usa una esponja o un patio mojado para limpiar los derrames en una superficie caliente. AIgunos iimpiadores pueden producir vapores nocivos cuando se aplican a una superficie caliente. alimento pueden tambien ser un peligro. Asegurese de que el utensilio sea Io suficientemente grande como para contener en forma debida los alimentos y evitar derrames. El tamaSo es particuhrmente importante cuando se utilizan freidoras. AseguJresede que el utensilio tiene capacidad para ei voiumen de aiimentos que se va a agregar ai iguai que para ia formaci6n de burbujas de ia grasa. Homo Automimpiante No deje a!imento ni utensilios de c0cina, etc. en e! homo durante el cicio de autolimpieza_ Para reducir a un minimo las quemaduras y que los materiales inflamables y los derrames se enciendan debidos a contacto no intencional con el utensilio, los mangos no deben extenderse sobre el quemador superior adyacente. Siempre gire los mangos de los utensilios hacia el lado o hacia la parte trasera de la estufa, no hacia la habitaci6n donde puede ser f_cilmente golpeados o alcanzados por los ni_os peque_os. Limpie solamente las piezas que se indican en esta guia. No iimpie ia junta de ia puerta. La junta es esenciai para un sellado herm6tico. No restriegue, ddie, ni mueva la junta de la puerta. No use limpiadores de homo de ninguna clase en el homo ni alrededor de cualquier parte del homo autolimpiante. 6O Antes de la autolimpieza del homo, saque la asadera, las parrillas del homo y otros utensilios y limpie los derrames excesivos para evitar que se produzca demasiado humo, Ilamaradas o llamas. reducir_n la combusti6n incompleta. La exposici6n a estas sustancias puede tambi6n set reducida a un minimo ventilando los quemadores al exterior en forma adecuada. Se advierte a los usuarios de este electrodom_stico que cuando el homo est,1funcionando en el cido de autolimpieza, puede haber exposici6n de bajo nivel a dgunas de las sustancias indicadas en la lista, induyendo mon6xido de carbono. La exposici6n a estas sustancias puede set reducida a un minimo ventilando el homo al exterior en forma Es normal que la cubierta de la estufa se cdiente durante el ciclo de autolimpieza, Pot Io tanto, se debe evitar tocar la cubierta durante un ciclo de autolimpieza, Aviso y Advertencia lmportante adecuada, abriendo las ventanas y/o la puerta en la habitaci6n en donde est,1ubicado el electrodom_stico durante el cido de Sobre Seguridad La Propuesta 65 de la Ley de 1986 del Estado de California Sobre Seguridad y Contaminad6n del Agua Potable (California Safe Drinking Water and Toxic Enforcement Act of 1986_}exige que el Gobernador de California publique una lista de las sustancias que segun el estado de California causan c_incer o AVISO IMPORTANTE RESPECTO A LOS PAJAROS DOMESTmCOS: Nunca mantenga los p_ijaros en [a cocina o en [as habitaciones donde puedan [[egar los humos de [a cocina. Los p_jaros tienen un sistema respiratorio muy sensitivo. Los humos producidos durante el cido de autolimpieza del homo pueden set perjudiciales o mortales para los p_ijaros. Los humos que despide el aceite de cocina recalentado, la grasa, ddio al sistema reproductivo y exige que las empresas adviertan a sus dientes sobre la exposici6n potencid a tales sustancias. Se advierte a los usuarios de esta estufa que la combusti6n del gas puede resultar en exposici6n de bajo nivel a algunas de las sustancias publicadas en la lista, induyendo benceno, formddeh[do y hollin, debido principalmente a la combusti6n incompleta del gas natural o de los combustibles de petr61eo licuado. Los quemadores ajustados en forma debida Conserve estas margarina y los utensilios antiadherentes recalentados pueden tambi6n set perjudicides. lnstrucciones 61 para Referencia Futura 'Hi' (AJto): Se usa para hauer hervir un Iiquido o a[canzar[a presi6nadecuadaen una o[[aa J presi6n. Siemprereduzuae[ ajuste a un calor 1 rodsbajo cuando los [iquidoscomiencena hervir %0' (Bajo}:Se usa para calentar alimentosa fuego bnto, mantener los alimentoscalientesy derretir chocolateo mantequilla. Se puede cocinar en el ajuste 'LO' siempre que el utensilio est6 tapado. Esposibb reducirel ca!or girando la per[!la a la posiciOn'OFF' CApagado}. Asegt_resede que la llamasea estable. Controies o cuandolos aiimentoscomiencena cocinarse. Se usa una llamade tamafio intermedio para continuar cocinando. El alimento no secocinar_ m4s r4pido cuandose usa un ajuste de [Jama m4salto que e[ necesariopara mantenerun hervorsuave. EIagua hiervea la misma temperaturasi est_ hiwiendo suaveo vigorosamente. Superiores O _O o Si Jallamase apaga cuandoest6 codnando, apagueel quemador. SJsede_ectaun oJorfuerte a gas.aura una ven[ana y espereclnco mlnu[osan[es de volver a encenderel quemador. E[tamafio y e[ tipo de utensiJioafectar4nel ajuste de caJor.Para informaci6nsobre [os utensiJiosy otras factores que afectan [os ajustesde calor, consuJtee[ foJJeto"La Cocina F4ci[". , NUNCA toque [asupefficie de Jaestufa hasta que no se I aya enfl ado. S_ esperade que algunasde las pJezasde Ja superfJcie,especiah_/enteaJrededorde los eJementos+ se entlbien o calienten miem+asest4coclnando. UsetomaolJas para proteger sus manos. 1. Co[oqueun utensiJiosobre[a rejiJlade[ quemador. • La [lamade[ quemadorpuede ievantarseo parecerseparada de[ orificio si no se co[ocaun utensiJioen [a rejiJJa. 2. Oprimay gire [a periJlaa [a izquierdaa[ ajuste 'LiTE' (Encendido}. , Se oir4 un chasquido (chispa}y e[ quemadorse encender4. (Loscinco quemadoresproducir4n chispa cuandose co[oca [a periJJade cualquierade [os quemadoresen [a posici6n 'UTE'.} Sin Pi[oto El encendidosin piIoto elimina la necesidadde una [uz piloto constantepermanente.Cada { uno de los quemadores super!orestiene un encendedorde chispa.Tengacuidado cuando Las iJustracionescerca de Japerilia identificancuai es el quemadorque controia esaperiila. Por ejemplo,la iJustraci6n a izquierda muestra[a ubicaci6n del quemador deJanteroizquierdo. Programaci6n de los Controles: - Aseg0resede que todos JoscontroJessuper!oreses_6nen Ja pos+ciOn+OFF'[Apagadoflames de summlstrargas a Jaestufa. Eneendide O O 3. Despu6sque el quemadorse ha encendido,gire [a periJJaa[ tamaiio de [[amadeseado. +APA DEL QUEMAUOR , E[encendedorcontinuar4 produciendochispashasta que [a perJJJa seagirada m4s aJ[_de [a posiciOn'LITE'. Funcionamiento limpie alrededordel quemador auperior, [nterrupci6n Si el quemadorsuperior O"B_/'f__._j_/\\ no enciende,vedfique si el "__e,,_+nd_,+o_ encendedorest4 roto, sucio o ___ mojado. durante una de [a Energia BASE DEL QUEMADOR Cuandose enciendenlos quemadoressuper!ores,aseg0resede } que todas [as peri!jasde contro! est_nen [a P0s!ciOn'OFF! Pr+meroenciendael f6sforo y mant6ngaJ 0 en posiciOnantes de girar [a peri!la a! ajuste+L[TE': PeriJlas de Contro[ de los Elementos Superiores Se utilizan para encenderlos quemadoressupedores. Sedispone de una seiecci6ninfinita de ajustesde caJordesde'LO' a 'Hi' (Bajo a Alto)= En eJajuste 'H_' se puede sentir un tope o una muesca. Las perillas puedenser ajustadasexactamenteen Josajustes correspondbntes o entre cualqubra de eJJos. 1. Acerque un f6sfom encendidoa [acabezade[ quemador superior deseado. 2. Optima y gire [a periJJade control Jentamentea Japosbi6n 'L[TE'. 3. Ajuste [a [lamaaJniveJdeseado. 62 La instalaci(_nincorrectade [as reji[iaspuede resuitar en picaduras de [a cubierta. Para evitar que [a cubierta se descomore o se • Limpie la cubierta de la estufa despu6sde cada uso+ • Limpie losderrames_cidos o azucaradostan pronto como la cubierta se hayaenfriado puesestos derrames puedendescolorar la porcetana+ A diferencia de una estufa con quemadoresde gas est_ndar,esta cubierta no se levanta nl tampocoes removible+Ne iiitente/evalltaHa cubierta per ning_n metive. Quemadores Nousemos quemadoressin tenet un mensimioen mamjimmm Em acabado depomemana demas rej+mmas pue,_p+_ses+_o_×+s_ Tengacuidado al revolvere[ alimento de una o[[ao sart_ncolocado sobre [a reji[iade[ quemador.Lasrejillas tienen un acabadosuave para faciiitar su [impieza.La oiia o sarten pueden resbalarsi no se sujetan por el mango. Estopuede provocarderramede aiimentos calientesy constituir un riesgode sufrir una quemadura. Seminaries LosquemadoresseIIadosde su estufaest_n aseguradosa [a cubiertay no hart s[do disefiadospara sersacados+Debido a que los quemadoresest_n seiiadosen [a cubierta,[os derrameso rebosesno se escurrirSndebajo de [acubierta de la estufa+ Aunque [as rejiilas de los quemadoresson durables,graduaimente perderdnsu bri[Io y/o se descoiorar_n,debido a [asaitas temperaturasde [a [lamade[ gas. Sin embargo,los quemadorespueden ser I[mpiadosdespuesde cadauso+ La parte de [a cabezade[ quemadorpuede set faciImente sacada para su limpieza+[Ver en la p_gina77 las instruccionessobre [a [impieza,) Lascabezasde Josquemadoresdeben estar correctamente coJocadasen JabasedeJquemadora fin de que 6ste funcione de maneraapmpJada. Quemadores Un quemadorajustado de maneracorrectacon orificios limpiosse encender_dentro de unos pocossegundos. Si est_ usandogas natural la llamaser_ azul con un cono interiorazul profundo. de Alto Si [a llamade[ quemadores amariIIao es ruidosa,[a mezcla de aire/gas puede ser incorrecta. POngaseen contacto con un t_cnico de serviciopara ajustarla. (Losajustesno est_n cubiertos por [agarant[a.) Existeun quemadorde alto rendimiento 06.000 BTU*}en su estufa, situado en Japosici6n derechadeJantera.Hayun quemadorde 12.000BTU*situado en JaposiciOndelanteraizquierda.Estos quemadoresofrecen cocci6n m4s r_piday pueden ser usadospara herviragua con rapJdezo para cocinar grandescantidadesde aJJmento. Quemador Con gas [icuadoson aceptabiesaIgunas puntas amariIIasen la llama. Estoes normaly no es necesar[ohacer ning0n ajuste. Con aigunostipos de gas, usted puedeoff un "chasquido" cuando e! quemadorsuperior se apaga. Estees un sonido normaldel funcionamientodel quemador. para Cocinar a Fuego Lento Estequemadorse encuentra en [a posici6n central. E[ quemadorpara cocinar a fuego lento ofrece una llama de menorintensidad (BTU*inferio0 para ca[entarsalsas deiicadaso derretir chocolate. O Si [a periiIade control se gira muy r_pidamentede 'HI' a 'LO', la llama puede apagarse,particuIarmentesi el quemadorest_ if[o. Si esto ocurre,gire la periila a la posici6n 'OFF' (Apagado),espereaIgunos segundosy vueIvaencenderel quemador. O La llama debe set ajustada de modoque no se extienda m_s a[[_ de[ borde de[ utensiiio. _' r6,gimennominalde BTU variardcuandoseusagas _;_cuado, Rejimmasde ruesQuemadores Lasreji[las deben estar debidamenteco[ocadasantes de comenzara cocinar.Cuandoinstaie [as rejiIIas,co[oque losextremosde [as [eng0etashaciae[ centro, de maneraque coincidan con [as barras derechas. 63 Panel de Control A B C D G Clean 2} Broil 4560 P,_ast Autoset Bake Keep 789 Bake H [ J K LM N O El panel de control ha side diseffadopara su f_ici[programaciOn.El indicador visualen el panel de control muest+a[a hera de[ d[a,el temporizadory [asfunciones deI borne.El panel de control mostradoarriba incluye [as caracteristicasde convecci@y adem4s[as caracteffsticasespecificasde otros modeIos. (El esti[ode[ panel de control varia segt_ne[ modeb.} B i_ iii C 'Bake'[Homea0 Se usa para horneary asar. 'Broil'(Asara la Parr+lla} Se usa paraasar a la parriIIay dorar los aIimentos 'Clean' (Limpieza} Se usa para programar un cido de autolimpieza D ¸ 'ConvectRoast'0_,sado per Convecci6n} G o Oprima[as tecIas num6rbas para programare[ tbmpo o [a temperatura. o Oprima[a tecia 'Autoset0' para programar[a temperatura. Se usa para asarper convecciOn, 'Delay'(Diferido} Pmgramael hornoparacomenzara hornearo [impiarse a unaheraposterbr. TeclasNumerbas Seusaparaprogramarlostiemposy temperaturas. i 'KeepWarm' (MantenerCa[bnte} o Se escuchar_una seiia[ sonoracarlavez que optima una tec[a. o Se escuchar4ndosseffaIessonoras si ocurre un error en [a programaciOn. Nora: Cuatmsegundosdespu@de haber oprimido [as tecias num6rbas o [atec[a Autoset 0,se programar4autom4ticamente el tbmpo o [atemperatura.Si transcurrenm4s de 30 segundos despu6sde haber oprimido una tecIa de funci6n y antesde oprimir [as tecIas num6ricaso [a tecia Autoset 0, [a funciOnser_ canceIaday el indicador visualvelvet4a[ despIiegueanterior. Seusaparamantenercalienteenel borneel alimentococinado. I 'Convec.t Bake'(Horneado Seusaparahornearperconvecci6n. per Convecci6n} J 'Cook& Hold'(Cocci@ y MantenerCaIiente] Seusaparahornearduranteuntiempo seleccionado, luegomantieneel a[imento calienteduranteuna hera. 'Favorite'[Favorito} Seusaparaguardarun procedimiento especificode 'Cook& Hold'. %liner'_emporizado0 Programaa[temporizador. [. o Oprima[a tecla @sea@. 'Autosd (Pmgramaci6n Seusaparsprogramartemperaturas Autom_tica} con rapidez. H Z i Use de [as Teeias 'CJock' (Reloj} El reloj puede set ajustadopara despIegar[a hera ya sea en formate de 12betas o 24 horas.E[reIoj ha side programadoen la f4brJca para el formate de 12 horas. Para cambiar el re[oj a formate de 24 horas: 1. Oprimay mantengaoprimidas [astecIas 'CANCEL'y 'Favorite' durante tres segundos. {M 'Clock'(Reloj} Seusaparaprogramar[aherade[dia. N 'OvenLight' (LuzdelHorno} Seusaparaencendero apagarla luzde! homo. 'CANCEL' (CanceIaO Cancelartodaslasfuncionesa excepciOn del temporizador y e[ reIoj. + '12 Hr' destelB en [a pantalB. m 2. Oprima la tecIa 'Autoset0' para seIeccionar 24 horas;opffmala nuevamentepara seleccionar'12 Hr'. 3. Programela hera del d[asiguiendo las instruccionesindicadasen la secci6n ProgramaciOndel reIoj. 64 Programaci6n + El 01timominuto de la cuenta regresivadel temporizadorse desplegar_en segundos. demRemoj: 1. Opr[ma[atecla 'Clock'. 4. At final del tiempo programatic,se escuchar_una serial sonora largay 'End' (Fin)se desplegar_en el indicador visual. + Ene[ indicadordestettata hora de[ alia+ 2+ Optima [astectas num6ricasapropiadaspara programarta hora deId[a. 5. Optima la tecla 'Timer'para despejarel indicadorvisual Para cancemar emtemporizador: + Losdos puntos destellan en et indicador. 1. Oprimay mantengaoprimJdala tecia 'Timer' durante tres segundos. 3. OprimaIatecla 'Clock' nuevamenteo esperecuatm segundos. + Losdos puntos permanecerSniluminados. U Cuandose conectaenerg[aeI6ctricaal horno o despuesde una hlterrupci6n de la energ[aeI6ctrica,Ia _ltima hora del reloj previaa la hlterrupci6n destellar8en el indicador. 2. Optima la tecla 'Timer'y optima '0' usando lasteclas num_ricas. N ,_,uloset Paradesplegarla hora deI dia cuando et indicadorest6 mostrando otra funci6n de tiempo, oprima la tecla 'Clock'. Bloqueo de ruesContromes y de La hora del reloj no puede ser cambiadacuandoel horno ha sido programatic para 'DelayCook','Clean' o 'Cook& Hold'. la Puetta Para canceiar el despiiegue dei reioj: El teclado y la puertadeI homo puedenset bloqueadospara seguridad,Iimpiezao evitar el uso no autorizado.Lasteclas no funcionan cuando est_n bloqueadas. Si no deseaque ei indicadorvisual muestre la hora del dia: Oprimay mantengaoprimida [asteclas 'CANCEL'y 'Clock' durantetres segundos.La hora del dia desaparecer_del indicador. Si el horno est_ en funcionamiento,lasteclas ni la puerta puede ser bloqueada. _-_ La hora actual del dia permanecer_en el indicador cuando lasteclas y la pue_a est_ bloqueada. Cuandose cancelael desplieguedeI reloj, optima la tecla 'C+ock'para desplegar blevementeIa hora del dia. Cuandose cancelael desplieguedel reloj,despu6sde 15 minutos,el control de! horno pasar_a Mode de Reserva para ahorrar energ[a. El indicadorvisual estar_en blancoy la Iuz del horno no funcionar& Paraactivar el control y sacarlo deI modo de reserva,oprima cualquier tecla. Se escuchar_ndos sefialessonoras. Para restaurar el despliegue del reloj: (Temporizador) + Enet indicadorvisual aparece'OFF'. + 'LOCK'destellacuando la puertase est_ bloqueando. Nora: Lasteclasy Ia puertadei homo no puede bloquearsesi la o ltemperatura del horno es 205 C (400 F) o superior. El temporizadorpuede set usado independientementede cualquier otra actividaddel homo. Adem_s puede ser programadocuando otra funciOndel homo est6 en funcionamiento. C6digos El temporizadorno controla el horno.Solamentecontrola una sefia! de Ettotes 'BAKE'o 'LOCK'pueden destellarr_pidamentepara advertirle que hay un error o un problema.Si 'BAKE'o 'LOCK'desteilanen el Jndicadorvisual,optima le tecla 'Cancel'. Si 'BAKE'o 'LOCK' contimian destellando,desconectela corriente el6ctrica haciael artefacto.Espereunos pocos minutosy vuelvaa conectarla corriente el6ctrica.Si Ias palabrasa0n contin0an desteJJando, desconectela corriente eJ6ctricahacia eJartefactoy Jlamea un t6cnico de servicioautorizado. sonora, el temporizador: 1. Oprimala tecla 'Timer'. + Enel indicadorvisual deste!Iar_'0:00'y 'TIMER'. 2. Optima Iasteclas num6ricasapropiadashasta que el tiempo correctoaparezcaen el indicadorvisual + Losdos puntos y 'TIMER'continuar_ndestellando. 3. Optima nuevamentela tecla 'Timer'o esperecuatm segundos. + Losdos puntos dejan de destellary el tiempo comienzala cuenta regresiva. __@ Oprimay mantengaopdmidas lasteclas 'CANCEL'y 'Cook & Hold' durantetres segundos.(Optima primem la tecla 'CANCEL').'OFF' desaparecedel indicadorvisual El temporizadolpuede set programatic de un minuto (0:01)hasta99 horasy 59 minutos[99:59). Para programar Optimabmoquear: y mantengaoprimidas lasteclas Para 'CANCEL'y 'Cook & HoW durante tres segundos.(Oprimaprimero Iatecla 'CANCEL'). Para desbloquear: Opnmay mantengaoprimida Iasteclas 'CANCEL'y 'Clock' durante tres segundos.La hora del dFareaparecer_del indicador. 'Timer' dem Homo 65 1 !| Diferenc+as tier homeado antiguo y su homo nuevo Para programar +Bake' (HorneaO: entre su homo Esnormal observaralgunas diferenciasen el tiempo de horneadode su horno antiguoy su homo nuevo+Vea "Ajustede la Temperatura • 'BAKE'y '0%' deste%r_ en el indicadorvisual. " ....................................... del Horno" en la p_gina 72+ 2. SeleccioneIatemperaturadel horno. OprimaIatecla ('_ U 'Autoset0' para 175° C (350° F} o las teclas num6ricas apropiadas. ,\u[osel 1. Oprima la tecla 'Bake'. Homeado + Cadavez que oprima Iatecla 'Autoset0' la temperaturase aumentar_en 15° C (25° F}. per Convecci6n (modelos selectos) Cuando homee per convecci6n, programe matemperatura normal de homeado, El controi reducir_autom_ticamenteIa temperaturaprogramadaen 15° C (25° F). En el indicadorvisual se despiegar_la temperaturaprogramada+El ventimadorde convecci6n comenzar_ a funcionar despa_s de qae el homo haya estado encendido durante cinco minutos. + La temperaturadeI horno puede ser pregramadade 75° a 285° C 070 ° a 550° F}. 3. OprhTlala tecla 'Bake' nuevarnenteo esperecuatro segundos. • 'BAKE'dejar8 de destetlary se ihminar_en el indicadorvisual. Para programar 'Coavect Bake' (Horneado pot ConvecciOn): 1+ Optima la tecla 'ConvectBake'. • 'BAKE'y el [conodel ventilador destellar_n+ + Enel indicadorvisual se desplegar_38° 000 °} o Iatemperatura real del horno s+es que essuperior a 38° C 0O0° F}.La temperaturaaumentar_en incrementosde 3° C (5° F} hasta Ilegara la temperaturaprogramada. 4. Esperea que el homo se precalientedurante 8-15 minutos. Bake + 'O00'desteIlar_en el indicadorvisual+ 2. Seleccionela temperaturadel horno.Oprima Iatecla U 'Autoset 0' para 175° C (350° F}o las teclas num6ricas ,\ulosd apropiadas. +Cada vez que oprima la tecla 'Autoset0' la temperaturase aurnentara4 en 15° C (25° F}.La temperaturadel horno puede set programadade 75° a 285° C 070 ° a 550° F}. • Cuandoel horno Ilegaa Iatemperaturaprogramadase escuchar_una serial sonoraIarga. + La temperaturapregramadase desplegar_en el indicador visual 3. Opnma la tecla 'ConvectBake'nuevamenteo esperecuatm segundos. + ParaverificarIa temperaturaprogramadadurante el precalentamientodel horno,optima la tecla 'Bake'. + 'BAKE'dejar_ de destellar. 5. Coloqueet alimento en el homo. 6. Venfique el progresode Ia cocciOncuando hayatranscurridoel tiempo minimo recomendado.Contintiela cocci6n si es necesario. + Enel indicadorvisual se desplegar_38° (100°) o Ia temperaturareai del horno si es que es superiora 38° C (100° F}. La ternperaturaaumentar_en incrementosde 3° C (5° F} hastaIlegar a la temperaturaprogramada. + El [cono del ventilador comenzar_a girar. 7. AI t6rmino de Ia cocciOn,optima la tecla 'CANCEL'. 8. Retireel alimento del homo. 4. Esperea que el homo se precalientedurante8-15 minutos. • Cuandoe! homo Ilegaa Ia temperaturaprogramadase escuchar_una serialsonora Iarga. Notas sobre Norneado: + Se desplegaraiIa temperaturaprogramada. , Para cambiar la temperatara del homo darante el proceso de cocci6n, oprima Ia tecla 'Bake',luego optima 'AutosetO'o lasteclas num6dcasapropiadashasta que se desplieguela temperaturadeseada. + Paraverificar la temperaturaprogramadadurante el precalentamientodei horno,oprima Iatecla 'ConvectBake'. , Para cambiar matemperatura demhomo darante 'Preheat', oprimados veces Ia tecia 'Bake',Iuegooprima 'Autoset0' o las teclas num6ricasapropiadashasta que se desplieguela temperaturadeseada. 5. Coloqueel alimentoen el homo. , Si olvidaapagar el homo, seapagar_ autom_ticamentedespu6s de transcurrir 12 horas.Si deseadesactivaresta caracteffstica, vea la paigina71, 6. Verifique el pmgmso de Ia cocciOncuando hayatranscurridoel tiempo m[nimo recomendado.Contin0eIa cocci6n si es necesado. 7. Ai tdrmino de la coccidn, oprima la tecia 'CANCEL'. , Parasugerenciasadicionalessobre horneadoy asado,consulte el folIeto "La Cocina F_cil". 8. Retireel alimento del homo. 66 Q Asado pot Conveeci6n Optima la tecla 'ConvectRoast'nuevamenteo esperecuatro segundos. (modelos seiectos) Guando est_ asando pot convecci6n, programe emtiempo y temperatura de asar normal El control le advertir_ autom4ticamentecuando hayatranscurrido 75%del tiempo de asado programatic para que verifique el grado de cocci@ de los aJimentos. Em ventimadorde eenvecci6n comenzar4 a funcionar despuSs de que emhomo haya estado eneendido durante eineo minutoso Notas sobre • 'ROAST'dejar_ de destellary se ihminar4 en el indicador visual • Enel indicadorvisual se despJegar438° (100°] o Ia temperaturareal deJhomo.Aumentard en incrementosde 3° C (5° F] hastaIlegar a la temperaturaprogramada= ° El [cono del ventilador comenzar4a girar. gsado: • Cuandoasapot convecciTn,el tiempo de cocci@ debe ser programaticantes que Ia temperatura. • Si su receta requiereun homo precalentado,agregue 15 minutosai tiempo de cocci@ programatic. _OtaS: • Lostiempos de asadopuedenvarier con los diferentescortes de came. • Si es necesarioprecalentamiento,esperea que el horno se precalientedurante 8-15 minutos. • No es necesarioprecatentarel horno cuandose asan por convecciOncortesde carne grandes. ° Cuandoe! homo Ilega a Iatemperaturaprogramadase escuchar4una sepalsonoralarga. • Consultelastemperaturasy tiemposde asadosugeridosen el folleto "La CocinaF4ciJ". 5. Coloqueel alimentoen et homo. o La cuenta regresivadel tiempo comenzar4cuando el homo comJencea calentarse. Para programar 'Ceavect Roast' (Asado por ConvecciOn): ............................. o Paraverificar Iatemperaturaprogramadadurante el precalentamientodeI homo, oprima Ia tecla 'ConvectRoast'. 1. Optima IatecJa'ConvectRoast'. Roast • 'ROAST'yet [cono deIventiIadordesteIlar_n= ........................... 6. Cuandohayatranscurrido75% deItiempo de cocci@, la Iuz deI horno se encender4y 'FOOD'desteJlar_i en el indicadorvisuakEn • '00:00'destelIar4en el indicadorvisual. este momentovedfique el progresode Jacocci6n. Cocine pot • '000'se ilumina en el indicadorvisual. m4s tiempo si es necesario. 2= SeIeccioneIatemperaturade asar usandolasteclas num6ricas o La luzdel horno permanecer_encendidahasta que se oprima apropiadas. JatecJa'OvenLight'. • Eltiempo puede ser programadode 10 minutos (00:10)a 11 horas,59 minutos (11:59). o OprimacualquiertecJapara verJficarel tiempo de cocci6n restante. • Optima la tecla 'ConvectRoast'nuevamenteo espere4 segundos. 7. A[ t6rmino de la cocci@, oprJma[atecla 'CANCEL'. • 'ROAST'y el icono del ventilador destelIar@en el indicador visual 8. Retireel aJJmentodel homo. • '000'destelIar_en eI indicadorvisual 3. SeleccioneIatemperaturadel horno. OprimaIatecla 'Autoset0' para 185° C (325° F} o [as teclas num@icas apropiadas. U ,\utoset • Cadavez que oprima Iatecla 'Autoset0' la temperaturase aumentar_en 15° C (25° F}. • La temperaturadeI horno puede ser programadade 75° a 285° C (170° a 550° F}. 'Cook & He d' Cuandose usa la opciOn'Gook & Hold',el horno comienzaa calentar inmediatamentedespu6sde que eI control ha sido programatic. Luego,eI homo cocina duranteun per[odode tiempo especificado. Cuandoesetiempo expira, eI homo mantendr_iet alimento caliente hastadurante una hora y hego se apagar_ autom4ticamente. Para programar 'Cook & HoJd': 1. Optima la tecla 'Cook & HoJd'. • 'HOLD'destellar4para indicarle que usted est4 programando'Cook& HoW. • 'O0:O0'destellar_en el indicadorvisual 67 ri_AM_ 'Delay 2. Seleccione[a cantidad de tiempo que usted deseacocinar usandolasteclas num6ricas. Cook & Hold' ('Cook & Hold' Difeddo) + 'HOLD'contintia destellando. + Eltiempo se iluminar_en el indicador visual. + Eltiempo puede programarsede 10 minutos [00:10)a 11 horas,59 minutos (11:59D. 3. CuandoHOLDest6 desteiiando,oprima'Rake', 'ConvectRake'o 'ConvectRoast'[modelos selectos)y seleccione[a temperaturade[ homo. Oprima[atecla 'Autoset O'para 175° C (350° F) o lastedas num6ricasapropiadas. + Enel indicadorvisual desteilar_el hombre de[ciclo deseado. No use horn_adodiferidOpara a!kr/entosde #Ortadurac!6ntales como p[oductos !_cteos,cerdo, came de ave o mariscos, Cuandousa 'Belay', el homo comienzaa cocinar m_starde en e! dfa. Programela cantidad de tiempo que usted deseadiferir antes de que se enciendae! horno y cuanto tiempo deseacocinar el aIimento. EIhorno comienzaa caientaren la hora seleccionaday cocina duranteet tiempo especificado. f_ U Autoset EItiempo diferido puedeprogramarsede 10 minutos [O0:IODhasta 11 horas,59 minutos (11:59). + La temperaturadeI horno puede ser programadade 75° a 285° C (170° a 550° F). Para programar un cido de 'Cook & Hold' diferido: 4. Oprimanuevamentela tecIa del ciclo deseado0 esperecuatro segundos. 1+ Optima la tecIa '1 Delay'+ • El hombredel ciclo deseadopermanecer_iIuminado. + 'DELAY'se desteiia en el indicador. • Enel indicadorvisual se desplegar_el tiempo de cocciOn. • 'O0:O0'destella en el indicador. • La temperaturareal del homo se desplegar_durante el precaientamiento. • La temperaturaprogramadase despIegar_cuando el homo se hayaprecaIentado. Cuando haya e×pirado e[ tiempo de cocci6m + Se escucharSncuatro seSaIessonoras. 1 | Delay 2. Usando[astec[as num6r[casaprop[adas,programe [a cantidad de tiempo que asted desea diferir el comienzode[ cic[o'Cook & Hold'. 3. Optima la tecia 'Cook& Hold'. • 'HOLD'y 'DELAY'destellanen el indicador visual. + '00:00'destella en el indicadorvisual • 'HOLD'y 'WARM' se iiuminar_n. 4. Pregrame la eantidad de tiempo que usted deseacocinar usando [asteclas numSricas. • Enel indicadorse despiegar_75° 070 °) y [a hora del d[a. 5. Oprima'Rake', 'ConvectRake'o 'ConvectRoast' [modeIosseIectos). 6. Programe matemperatara demhomo deseada oprimiendo [atecIa 'AutosetO'o [as tecIas numericasapropiadas. • '175°' ('350°') se iluminar_cuando se oprime 'Autoset 0'. Despues de una hera en 'HOLD WARM' (Mantener Caliente): + El horno se apaga autom_ticamente. ............................... 0 Autoset • Despu6sde cuatro segundos,e[tiempo diferido programado aparecer_en el indicadorvisual + 'HOLD'y 'WARM' se apagan. + Retireel aIimentodel horno. • 'HOLD'se apaga. Para cancelar 'Cook & Hold' en cualquier memento: • Las paIabras'RAKE'y 'DELAY'permaneceniIuminadaspara recordarIeque se ha programadoun cic[o de 'Cook & Hold' diferido. Oprimala tecla 'CANCEL'+Retireel aIimento del horno. _otas: • No use 'Cook& Hold' diferido para art[culos que requierenun homo preca[entado,tales como paste[es,ga[[etasy panes. • No use 'Cook& Hold' diferido si el hornoya est_ ca[iente. 68 Q 'Broiling' (Asar a [a Pardi[a] Para pregramar 'Broil': 6. .......................... Broil Oprima[atecia 'Broil'+ ..... D6vue[taa [acame una vez aproximadamentea mitad de [a cocci6n+ 7+ Cuandoe[ alimento est6 cocinado,optima [atecia _&iklC'_ 'CANCEL'. Retireel aiimento y [aasaderade[ homo+ ....... o 'BROIL'y 'SET'[Va[idar)deste[[anen el [nd[cadorvisual • La hora de[ d[a voIver_a despIegarseen e[ ind+cadorvisual 2+ Oprima[atecia 'Autoset 0' una vez para 'Hi broil' (Asara [a kJ pard[[acon temperaturaa[ta) o dos vecespara 'LO broil' (230° C [450° F]] (Asara [a parr[Hacon temperaturabaja)+ _,utoset Notas Sobre Asade a [a Parri[[a: o En el indicadorvisual se desplegar_'Hi' o 'LO'. + Paramejores resuitadoscuandoase a [a parrii[a,use una asaderadiseffadapara asara [a parriIIa+ o Selecciones'Hi broil' (285° C [550° F]] para asadoa [a parrilla normal Se[eccione'LO broil' [230° C [450° F]] para asara [a parri[iacon temperaturabaja aiimentosque deben ser cocinadospor m_stiempo,ta[ como [a carnede ave. + 'Hi' se usa para [a mayoffade [os asadosa [a parriIIa+Use 'LO broir cuandoase a [a parrilia aiimentosque necesitancocciOn proiongada+La temperaturainferior permite que e[ aIimento se cocine hastaquedar bien asadosin dorarsedemasiado+ 3. Despu6sde cuatro segundos,el horno comenzar_a funcionar. o 'BROIL'continuar_ iluminado. + Lostiempos de asadoa [aparriiia pueden ser m_s [argos cuandose selecciona[atemperaturam_s baja de asara [a parrilla. o 'Hi' o 'LO' permanecer_ni[uminados. • El mayor de los a[imentosdebe ser dado vue[ta cuandoest_ a mKadde[ tiempo de asar+ • Parasugerenc[asy temperaturasad[ciona[essobre asara [a parri[[a,consuiteel fo[[eto "La Coc[naF_c[["+ 4. Para un dorado 6ptimo,precaHenteel homo durante2 a 3 minutos antes de co[ocare[ aIimento. 5+ Co[oqueel a[imentoen e[ homo+Cierre[a puerta de[ homo+ Tab[a de Asar a [a Parr+Ha Preca[ienteel homo durante 2-3 minutos+ [ ALiMENTGS Came de Res Biftec, 2,5 cm (1"] Hamburguesas, 1,9 cm (3/4"] de grosor POS[CiON DE . GRADO DE LAPARRILLA 5 5 506 i T[£MPO DE COCCJON TOTAL A medioasar Bien asado Bien asado 15 - 20 minutos 18 - 24 minutos 13 - 18 minutos Tocino Jam6n, precocido, rebanada de 1,3 cm (!/2 '+) Chuietas, 2,5 cm [1") 5 Bien asado 6 - 10 minutos 5 5 Tibio Bien asado 8 - 12 minutos 22 - 26 minutos Came de Ave Pechugasde Polio,con hueso 4 Bien asado Mariscos Filetesde pescado Tajadasde pescado, 2,5cm 0'+] de grosor Colasde [angosta,85-115 g [3-4 onzas]carla una 5 HojaIdrado 8 - 12 minutos 5 5 HojaIdrado Bien cocidas 10 - 15 minutos 7 - 10 minutos Came de Cerdo 30 - 45 minutos ['Lo Broil') Paraun exterior m_sdorado y m_isasadoy un interior a mediococer, puedeser necesariodisminuir el tiempo de cocciOnen el primer ladoy acercar m_s [a carne a [afuente de ca[or. Nora: Estatab[a es s0lo una guia. Los tiempospueden variar con e[ tipo de a[imentoque se est_ cocinando. 69 'Keep Warm' (Mantener Caliente) Notas sobre 'Keep Warm': Paramantener calientesen forma seguraalimentoscalienteso para cabntar panesy phtos. Para programar 'Keep Warm': o ParacalidadOptimade los alimentos,losalimentoscocinados en e! horno @ben ser mantenidoscalientespor no m_s de 1 a 2 horas. .......... 1. OprimaIatecia 'Keep Warm'en el indicador visual. Keep + Paraevitar que losalimentosse sequen,ctibralos levemente con pape[de aluminioouna tapa. + 'WARM'deste!Iaen el indicadorvisual. o Para camentarpaneciiios: + '000'destetlaen el indicadorvisual. 2. Sebccione [atemperaturade 'KeepWarm'. Oprima[atecia 'Autoset0' o lasteclas numericasapropiadas. - cubra bvemente los panecilloscon papel de ahminio y colOquelosen ei homo+ U ,\utoset - opnma las teclas'Keep Warm'y 'Autoset0'. - calbnte durante 12a 15 minutos. + 75° 070 °) se iluminar_cuando se oprima la tecla 'Autoset0'. o Para caiemar piatos: + Cadavez que oprima la tecla 'Autoset0', la temperatura aumentar_en 3° C {5° F}. - coloque 2 filas de cuatro platos cadauna en el homo. - opnma las teclas'Keep Warm'y 'Autoset0'. La temperatura de 'Keep Warm' puede ser pmgramada de 63° a 90 ° C 045 ° a 190° F). - caibnte los ptatosdurante cinco minutos,@ague el homo y deje los piatos en ei horno durante 15 minutosm_s. 'WARM' y la temperatura se desplegar_n en el indicador cuando la funciOn est6 activa. - use soiamenteplatos resistentesal horno,verifique con el fabricante. - no coloque ios platos calbntes sobreuna superficiefria pues ei cambio r@ido de temperaturapuede causarfisuras superficiabs o rotura. Para cancemar 'Keep Warm': 1. Oprimala tecla 'CANCEL'. 2. Retireel alimento del homo. _CANICFI_ 7O Cierte Autom tico/Modo Notas Sebre eUMode Sab tico: • El Modo Sab_ticopuedeset activadoen cualquier momento, est6 o no el homo encendido. El homo se apagar_ autom_ticamentedespu#sde 12 horassi usted Io deia accidentalmenteencendido. EstacaracterFstica de seguridad puede set desactivada. • El Modo Sab_ticono se puede activar si lasteciasest_n bloqueadaso cuando la puertaest_ bloqueada. Para cancelar el cierre autom_tico de 12 horas y dejar que el homo funcione continuamente durante 72 horas: • La mayor[ade [asadvertenciasy mensajesy todas lasseiiales sonorasest_n desactivadascuandoel Modo Sab_ticoest_ activo. 1. Optimay mantengaoprimida la tecla 'Clock' durantecinco segundos. • Si el horno est_ horneandocuando el Modo Sab_ticoes programado,'BAKE'se apagar_icuandose cancele el horneado. No se emitirSnseriaiessonoras. • 'SAb'se despiegar_y destellar_idurantecinco segundos. • Mientras el horno este en Modo SabSticola [uz de[ homo se encender_autom_ticamentecuandose abra la puerta. Si se deseala [uz de! homo durante el Modo Sab_tico,6sta debe ser encendidaantes de que comienceel Modo Sab_tico. • 'SAb'se desptegar_continuamentehasta que se desactiveo hastaque transcurrael I[mite de 72 horas. • 'BAKE'tambi6n se desplegar_si se est_ usando un ciclo de horneadocuandoel horno est_ en modo sab_tico. • Todas Iasotras funciones EXCEPTO 'BAKE'['Timer','Keep Warm','Clean',etc.] est_n bloqueadasdurante el Modo SabStico. • Cuandocomienzael Modo Sab_tico,la temperaturaque se despliegaser_ la temperaturaprogramadaen vez de la temperaturareal de la cavidaddet horno. No se emitir_ la se_alsonorade precalentamiento. • Se puede programar'Cook& Hold'durante ei Modo Sab_tico, sin embargono se puede programar'DelayCook & Hold'. • El cic[o de autolimpiezay b[oqueoautom_tico de la puertano funcionar_durante et Modo Sab_tico. Para cancelar el Modo Sab_tico: • Si oprime [atec[a 'CANCEL'se cancelar__mcic[o 'bake', sin embargoel control permanecer_en Modo Sab_tico. I. Optima Jatecia 'CLOCK'durante cJncosegundos. • 'SAb'desteJlar4durante chlco segundos. • Si faiia la corriente el6ctrica, cuandovue[vala energia et homo se activar_en Modo Sab_ticocon 72 horasrestantesy ning_in cic[o activo. • La hora del alia reaparecer4en el hldicadorvisual O 2. Despuesde 72 horas,el modosab4ticoterminar4. • 'SAb'destellar4durante chlco segundos. • La hora del alia reaparecer_en el hldicadorvisual. 71 Ajuste de [a temperatura 3. Escuchar_una serial sonoray e[ ajuste actual (°F o °C) se despiegar_en [apantaila. (Si no se reaiizaning0n cambio, [a estufa regresar_a[ ajuste actual despuesde 30 segundos). de[ La exactitudde [as temperaturasde[ homo es cuidadosamente probada en [afSbrica. Es normalnotar alguna diferencia entre [a temperaturade horneadoo en el dorado,entre un homo nuevoy un homo antiguo. A med+daque el homo se usa,[a temperaturadel homo puedecambiar. 4. Paracambiar e[ajuste,optima [a tecia 'AutosetO'[Autoajuste 0). Oprimaianuevamentepara regresara[ ajuste anterior. Espere cinco segundosy e[ ajuste se guardar_. 'Favorite' Usted puedeajustar [atemperaturade[ homo, si consideraque su homo no est_ horneandoo dorando en forma correcta. Paradecidir cuanto debe cambiar [a temperatura,programe[atemperaturadel homo a 15° C (25° F) m_isaIta o m_s baja que [atemperatura indicadaen sus recetas,luego borneo. Los resuItadosde [a "prueba" pueden darIeuna idea de cuanto debe ajustar la temperatura. Para ajustar [a temperatura Paraprogramarun cic[o favorite, debe estar activao recientemente programadauna funciOnde 'Cook& HoW. Para programar un nuevo cicio Favorite o para guardar come Favorite un cic[o 'Cook & Hold' que est+ en progreso: de[ homo: 1. Oprima[atecia 'Bake'. (Favorite) La tecia 'Favorite'[e permite guardar en memoriae[ tiempo y [a temperaturade un cicio 'Cook& HoW. + ................................ 1. Programeun cic[o de 'Cook & Hold'come se describe en [a seccidn'Cook & Hoid'en [apdgina 72. 2. Programe285° C (550° F) oprimiendolastecias numSricas apmpiadas. 2. Optima y mantengaopdpaida[a tecia 'Favorite' durante tres segundos. 3. Optimay rnantengaoprimida [a tecla 'Bake' durantevar[os segundoso hastaque O0° aparezcaen el indicadorvisual + El cicio 'Cook &Hoid' recientementeprogramatico en pmgresoser_ guardadoen memoria. Si [atemperaturadel borne ha side previamenteajustada,el cambio aparecer_en el indicadorvisual+Perejempio,s[ la temperaturade[ horno fue reducidaen 8° C 05 ° F) e[ indicador mostrar_"- 8°" C-15°'). + Se oir_ una serialsonorapara indicarque el control ha aceptado e[ ajuste 'Favorite'+ Para comenzar un cicio programatic come Favorite: 4. Optima [atecia 'AutosetO' para ajustar [atemperatura. 1. Optima [atecIa 'Favorite'+ Cadavez que se optima la tecIa 'Autoset0', [atemperatura cambiaen 3° C [5° F}. La temperaturadel borne puede ser aumentadao disminuida en 3° a 20° C [5° a 35° F}. + Se desp[egar_e[ tiempo y [a temperaturapara el cic[o 'Cook& Hold'programatic (si no hay cicio 'Cook & HoW programatic, en e[ indicadorvisual se despIegar_'nonE'.) Si oprime la tecIa 'AutosetO' (Autoajuste0), la temperaturade[ borne pasar8per un ciclo de aumentode temperatura(5, 10... 35}. Si continOaoprimiendo [atecia 'AutosetO' {Autoajuste0}, la temperaturade[ borne pasar_per un ciclo de descensode temperatura (-35,-30...-5}. 2. Optima [atecIa 'Bake','ConvectBake'o 'ConvectRoast'(modeIos se[ectos). • El cic[o Favoritecomenzar_inmediatamente. + El nombrede[ cic[o seIeccionadose se iIuminar_en e[ indicadorvisual. 5. La hera del d[a reaparecer_autom_ticamenteen el indicador visual • Eltiempo de cocciOnse i[uminar_ en e[ indicadorvisual No necesitareajustar [atemperaturade[ homo s[ hayuna fa[[ao [nterrupciOnde energ[ae[6ctdca. El ajuste de [a temperaturaes vS[idopara 'Bake','Convect Bake'y 'ConvectRoast'(mode[os se[ectos)soJamente.Lastemperaturasde asara [a parri[[ay de [impiezano pueden ser ajustadas. Cuando ha expirado e[ tiempo de cocci6m • El nombrede[ cic[o se[eccionadose se apagar& + Se i[uminar_n 'HOLD'y 'WARM'. + Enel indicadorse despIegar_'75°' ('170°'). Para canceiar un cic[o favorite en progreso: Cambio de [a temperatura ], de 1. Oprima la tecIa 'CANCEL', • El cic[ofavorite guardado en memoriano ser_ afectado. El ajuste de f_brica de la medidade temperaturaes Fahrenheit. 2. Retiree[ alimento de[ borne. 2. Paracambiar el ajuste,optima y mantengaoprimidas [asteclas 'CANCEL'(Anula0 y 'Bake' (Hornea0a[ mismotiempo durante tres segundos. 72 Parrillas Encendido sin Pimoto Su estufa est_ equipadacon un sistemade encendidosin piioto. Con estetipo de encendido,e! gas seapaga automSticamentey el homo no opemr_ durante una i_tterrupddn de/a corriente electric& , No intente carr!biar la P0Sici6nde las parril!ascuando el homo est6 Caliente. Un f6sforo encendido no encender_ el quemador dei homo° No se debe intentur ennender el homo durunte una interrupci6n de iu corriente eiSctrica, VentiJador del Homo , N0 useeJhomo para guardar a!imentos ni utensiJios_ El horno tiene dos parriIIas(tressi es horno de convecciOn)=Todas las parrillastienen un horde con tope de enganche= deJ homo Para retirar maparrimma: Se usa un ventilador de convecci6npara circular el aire caliente en eI horno cuando se seieccionaIa opciOnde convecci6n=Se activa autom_ticamente5 minutosdespu6sde que se opdme la tecla 'Convect' y se apagar8cuando se cancele 'Convect'o 1= Tire de la parriIIaderecho hacia afuera hasta que se detengaen la posiciOndel tope de enganche= Nora: EtventiJadorde convecciOnse apagar_autom_ticamente cadavez que seabla la puertadel homo= 2= LevanteeIfrente de Ia parrilla y tire de Ia parrilla haciaafuera= Para reinstamar maparriHa: 1= Coloquela parrilIa en etsoporte de la parrilla en el homo= Respiradero deJ Homo 2= Incline Ievementehacia arriba el extremodelantero;deslice Ia parrilla hacia atr_s hastaque pasesobre los topes de enganche= Cuandoe! homo est_ en uso, eI _rea cerca deI respiraderopuede calentarseIosuficiente como para causarquemaduras.Nunca bloquee la aberturadel respiradero. 3= Bajeel frente de la parrilla y desl(celahacia adentrodel homo= No cubru una parrimma compmetacon papei de umuminioni comoquepupemde amuminioen el puneminferior demhomo° Se afectar_in mosresumtadosdemhomeado y se puede dai'iur em paneminferior dei homo° El respiradero dei homo se encuentra debajo dei respuido protector de su estufuo RESPIRADERO DEL HORNO No coloquepl_sticos cerca de Ia abertura del respiraderopues el calor que sale puede deformar o derretir el pl_stico= de La iuz det horno se enciendeautom_ticamente siempre que se abre ia puertadet homo=Cuandose cierra ia puerta, optima la tecla 'OvenLight' para encendero apagar la luz det homo= Se escuchar_ una seSalsonoracada vez que se optima la tecla 'OvenLight'= ParriHa PARRJLLA7 (posiciOnm_s altal):Parahornear con una sola pardlla en bandejasde hornear galletasy para asar a Ia parrilla= PARRJLLA6: Se usa para hornear con una sola parri[[aen bandejasde hornear gailetas,para asar a [a parrilia y para horneado con varias parrilias= 'Oven Light' (Luz del Homo) Panem inferior Posiciones Panel hlferior Horneado por Convecci6n con Tres Parritlas (modeJos selectos) d_U Homo PARRmLLA5: Para hornearcon una soia parrilia en bandejasde hornear galletasy para asara [a parriiia= PARRJLLA4: Se usa para hornear con una sola parrilla en bandejas de hornear gailetas,paste[esde una cap& cacerolas,asar a la parrilla y para horneadocon varias parrillas= dem Homo Protejael panel inferior deI horno eontraderrames,especialmente azucaradoso addicos, pues puedendescolorar la porcelana esmaltada.Useel utensiiio de tama_o correctoa fin de evitar derrames=No comoqueutensimiosni pupei de amuminio directamente en maparte inferior demhomo, PARRJLLA3: Para hornearcon una soia parrilia en bandejasde hornear galletas,cacerolas,pasteiesde vadas capas,barrasde pan, paste[esde una capay para horneadocon vadasparri[[as= PARRJLLA2: Se usa para hornear con una so[a parrilla en bandejas de hornear gailetas,para asar cortesde came peque_osy para horneadocon varias parri[las= 73 Media PARRIEEA1: Se usa para asarcortes de came grandesy came de ParriJJa ave. Panel Inferior del Homo: Cobque la parrilla del horno en bs soportesen reIievedel pane!inferior det horno. Use para disponerde espacio adicionalcuando cocine comidas grandesen el homo. Los mode!osde estufaselectos est_n equipadoscon una media parrilla convertible. El Iado izquierdode la pardlla puede ser retirado para acomodar una asaderam_s grande en Ia parrilla inferior. El lado derechode Ia pardlla todav[ase puede @jar para colocar una HORNEADOCON PARRmLLAS MULTIPLES: Dos parrillas: Use Ia posici6n3 y 6 o 2 y 4. Tres parillas (convecci6nsolamente):Use Bs posiciones1,3 y 6. de PasteJes de Capas // oaoerol8. Nora: Cuandose horneapor convecci6n 0Tlodelossebctos} con dos o tres parrillas, reviseIos alimentosen ei tiempo m[nimo sugerido para evitar que queden demasiadodoradoso demasiadococinados. Horneado PattHJas _ en Dos Paraobtenermeiores resultadoscuando horneapasteIesen dos parriIIas,useIa posici6n 2 y 4 para horneadoreguiar y la posbiOn3 y 6 para horneadopor convecci@ (modelossetectos}. Coloquelos pastebs en lasparrillas como se muestra. Notas: o La porci6n removiblepuede ser usadacomo una parriIIa de asar en la asaderade asar a Ia pardlia. No useel inserto superior de Iaasaderacuandouse Ia porcidn removibb de la parrilla en Ia asadera. o La porci6n removibb de Ia parrilla puedeset usadacomo una pardlla de enfriamientoo como un salvamanteles. o Aseg0resede que el horno est6 fr[o antesde retirar o reinstalar la media parrilla. o No use utensiliosque se extiendan pa_salI_ del borde de la parrilla. o Parame}oresresultados,deje dos pulgadasentre el utensilio colocado en Ia parriJlay la pared lateraidel homo. o Tengacuidado cuando retirearticulos que est6nen la media parrilla para evitar quemaduras. o Saquecon cuidado losalimentosde la parrilIa inferior para evitar mover la media parrilIa. 74 Homo Auto[impiante Para programar 'Self-Clean' (Auto[impbza): Nota: La temperaturadel horno debe set inferiora 205° C (400 F) para programar un cic[o de [impieza, , Esnormal que las p+ezasdel homo se cal[entendurante el c+cio de autolimp+eza, 1. Cierrela puerta del horno. 2. Oprima la tecla 'Clean'. , Paraevitar da_ioa [a puerta, no mtenteabrirla cuando la aaBbra 'LOCK'est6 desplegadaen el indicadorvisual. • 'CLEAN'destetlaen e! indicadorvisual , Evitetocar la puerta, la ventana o el area del respiraderouel horno durante un cic[o de limp+eza. o 'SET'destella en el indicadorvisual. 3. , No uselimpiadoresde hornos comerc+alesen el acabadode+ homo ni atrededorde ninguna plezade[ homo puespuede daSarel acabadoo las Dezas Durante el procesode limpieza,Ia cocina debe estar bien ventilada para eliminar los oloresnormalesasociadoscon la limpieza. 'HVy' (Suciedadintensa,4 horas) 'MEd' (Suciedadmedian& 3 horas} 'LifE' (Sucbdad Ieve,2 horas) AI sebccionar el niveJde suciedad del homo se programa autom4ticamenteeJtiempo de Iimpieza. 5. Despu6sde cuatro segundos,el homo comenzar4a Iimpiar. o Si la puerta no se cierra,se oir4 una seriaIsonoray la palabra 'door' se desplegar4en el indicadorvisual Si la puerta no es cerradadentro de 30 segundos,la operaci6nde autolimpieza set4 canceladay el indbador volver4a desplegarla hora deJ dia. de [a Auto[+mpieza 1. Apague la luzdel horno antes de la iimpieza.La hz de[ horno puede fundirse duranteei ciclo de limpieza. o 'CLEAN'aparecer_en el indicador visual 2. Retirela asadera,todos ios utensiiiosy ias parrillasdei homo+Las parriiiasde[ horno se descolorar_ny no se desiizardnf_cilmente despu6sde un ciclo de autolimpbza si no son retiradasdel homo+ 3. Limpieel marco dei homo, el marco de ia puerta,el area fuera de la junta de la puertay alrededorde la aberturaen la junta de la puerta,con un agentede limpiezano abrasivotal como 'Bon AmP o con detergentey agua. Elproceso de autoiimpiezano limpia estasareas+Eliasdeben set iimpiadaspara evitar que la sucbdad se homee duranteel cicio de autolimpieza. (Lajunta es el selio alrededor de la puerta y ventana del homo+) _=_Z_ Autoset 4. Oprima la tecla 'Autoset0' para despbgar los ajustesde autolimpieza. Esnormal que ocurran Ilamaradas,humoo llamasdurante la limpbza si ei homo estd demasiadosucio. Esmejor limpiar el horno reguiarmenteen vez de esperarhasta que se hayaacumuiado demasiadasuciedad. 4. Paraevitar daffo no limpie ni frote Ia junta situada a[rededorde [a puerta del homo+La junta est_ diseriadapara sellar herm6ticamenteel ca[or durante el ciclo de limpieza. Oprima la tecla 'Autoset0'. N o 'MEd' (Suciedadmediana,3 horas}se despliegaen el indicador. El ciclo de autoiimpiezausatemperaturasde cocciOnsupenoresa [as normabs para Iimpiarautomdticamentetodo el interior del homo. Antes Clean ............ + 'LOCK'desteIBr_en ei indicadorvisual Unavez que la puerta se bloquea,la palabra 'LOCK'permanecer_ihminada sin @stellar. + El tiempo de limpiezacomenzar_la cuenta regresivaen el indicador. Para diferir un tide de autoiimpieza: 1. Oprima la tecla 'Delay 1'. o 'DELAY'destella. + '00:00+deste[[ar_en e[ [ndbador vbuaL 7-=77_Fq 2. __4_ 1 ! Delay Programe[a cantidad de tbmpo que usted desead[fer[r e[ c[c[o usando [astec[as num_ricasapropiadas. 3. Optima [atec[a 'Ciean'. o 'SET'destella en el indicadorvisual. 5. Limpieel excesode grasa o derrames de la parte inferior de[ homo+ Esto evita humo excesivoo ilamaradasdurante el ciclo de limpbza. 4. Oprima [atec[a 'Autoset0'. o Se desplbga 'LifE' {nivelde suciedad leve}. 6. Limpie losderramesazucaradoso dcidostales como papa duice [camot@,tomates o sa[sasa basede leche.La porcelana esmaitadaes resistenteal dcidoperu no a prueba de dcidos. El acabadode porceianapuede descoiorarsesi los derrames_cidos o azucaradosno son limpiados antesde un ciclo de autolimpieza. *Los nombresde los productosson marcasregistradasde sus respectivosfabricantes. 75 ............. tJ _,utoset 5+ Oprima[atecla 'AutosetO' para desp[egar[os ajustesde autotimpieza+ Despu6s k3 /\utoset cido de auto imp+eza Aproxirnadamenteuna hora despu6sdel fin det ciclo de limpieza, 'LOCK'desaparecer& La puerta ahora puede ser abierta. 'HVy'(Suciedadintensa,4 horas) Alguna saciedad paede quedar como una [eve ceniza gris ripe polvo. Retffelacon un patio h_medo. Si Ia suciedadpermanece despuesde [impiarla,significa que el cic[ode [impiezano rue 1o suficientementelargo. La suciedadser_eiiminada duranteel proximo cic[o de [[mpieza. 'MEd' (Suciedadmediana,3 horas) 'LHTE'(Suciedadteve,2 horas) At seteccionaret nivet de suciedadde! homo se programa autom_ticamenteet tiempo de timpieza. 6. Despu6sde cuatro segundos,tas palabras'CLEAN'y 'DELAY'se ituminar_ny 'LOCK'desteltar_en et indicador visual. Cuando[a pue+tade[ horno se cierra, 'LOCK'dejar8 de destellary se iluminar_permanentepara mostrar que el homo est_ programadopara una operaci6nde limpiezadiferida. Enel indicadoraparecer_el tiempo diferido. Si masparrimmas demhomo fueron dejadas en el homo y no se desiizan saavemente despa_s de un cicio de iimpieza, Iimpie [as parrillasy los soportesde [asparri[las con una pequefiacantidad de aceke vegeta[para hacerlasdeslizarcon m_s facilidad= Pueden aparecer m+neas demgadasen maporcemamm ampasar pot c+cmosde camentamientoy enfriamiento. Estoes normaly no afectar_el rendimiento+ Una descomoradSnblanca paede aparecer despuSs demc+do de mimpiezasi mosamimentos_icidos o azucarados no faeron limpiados antes dem¢i¢mode aatomimpieza° EstadescoloraciOnes normaly no afectar_el rendimiento+ Durante emc+cmo de auto[impieza Notas: Cuandoaparece'LOCK'en el ind+cador,la puerta no se puede abrir+ Paraevitar dafio a la puerta, no fuerce la puertapara abrirla cuando [a pa[abra'LOCK'est_ desplegadaen el indicadorvisual • Si se deja abierta la puertadel horno,Ia palabra 'door' destellar_en el indicadorvisual y se escucharauna serial sonora hasta que la puertasea cerraday la tecla 'Clean' sea oprimidanuevamente. Usted puedever humoy sentir olor las primemsvecesque el homo es Iimpiado. Estoes normaly disminuir_ con el tiempo. + Si transcurrenm_s de cinco segundos despu6sde oprimir [a tecia 'Clean'y antes de oprimir [a tecia 'Autoset0', el pmgrama volver_ autom_t[camentea[ despliegueprevio. Tambi6n puede ocurrir humo si e! homo estd demasiadosucio o si se ha dejado una asaderaen el homo. • La puerta del homo se dafiar_ si se fuerza para abrir[a cuando la palabra'LOCK' continOadesp[egadaen el indicador. Sonidos A medida que e+homo se calienta,usted puede off sonidosde piezasmet_Iicasque se expandeny contraen. Estoes normaly no dafiar_ el homo. ?6 Procedi ientos de Li pieza fr_as antes de tecario e iimpiarie. De este medO se evitar_ daSe y pesibles quemaduras. , Paraevitar manchaso decoloraci6nlimpie el homo despu6sde carla usa. ' Si se retira alguna pieza,aseg6resede que Seareinstaladaen forma correcta. %as nombres de Ios productosson marcasregistradas de sus respectivosfabricantes= _ Para hacerpedidos, Ilarneal 1-877-232-6771EEUU=o 1-800-688-8408Canadi PmEZA' PROOEDIMIENTO DE LmMI_EZA Asadera e Inserto Nunca cubra d inserte con papel de alumilde pues este evita que la gmsa se escurra a ta bandeja i_tferier. , Coloqueun paso enjabonadosabreel inse_oy Ia bandeja;deje remoiar para soltar Ia suciedad= , Laveen aguajabonosatibia=Use una esponjade fregar para quitar la suciedadpersistente= , La bandejade asary el inserto pueden set lavadosen el lavavajillas= Tapas de Quemadores y Quemadores de Gas semmados Cabezas de Quemadores Removibles * Dejeenfriarel quemador.RetirelatapayI_velaen aguajabonosaconuna esponjade restregarde pI_stico.Parasuciedad dificil, Iimpie conuna esponiano abrasivarellenaconjabOno concrema para limpiezade cubiertas'CooktopCleaning Creme'_ (Pieza#20000001)*_y una esponia. * No las laveen eI lavavajillasni en un horno autolimpiante. Quemadores tie Gas Sellados , L[mpieloscon frecuencia=Dejeenfriar eI quemador=Limpie conjab6n y una esponjade restregarde pl_stico=Para suciedaddificil, limpie con una esponjano abrasivarellenacon jabOn=No agrande ni modifique los agujeros= , Tengacuidado de que no entreagua en Ios orificios de Ios quemadores= , Tengacuidado cuando limpie el encendedor=Si el encendedorest_ h0medo o daSado,el quemadorsuperior no encender& Rejimmas de mos Quemadores = poreelana sabre Area del Reloj y tie las Teelas de Control , L_vetascon aguatibiajabonosay una esponjade pI_stico noabrasiva. Paramanchasrebeldes,limpie conuna esponja de pi_sticorellena conjabOn,no abrasivao con 'CooktopCleaningCreme'*(Cremapara Limpiezade Cubiertas)(Pieza 20000001)**y tma esponja.Si la suciedad persiste,wJeivaa aplicar'CooktopCleaningCreme',cubracon unatoalla de pape!hlimeda y deje remojardurante 30 minutos.Restrieguenuevamente,enjuaguey seque. , No las laveen el lavavajillasni en un horno autolimpiante. , Paraactivar 'Control Lock' [Bioqueode los controles] para la Iimpieza,ver p_gina 65. , Lave,eniuaguey seque. No useagentes de Iimpiezaabrasivospunspueden rayarel acabado. , Se puede usar limpiaviddossi se rocianen el paso primero. NO rec(e directamente en elpaneL , Retire Ias perillascuandoest6n en Ia posici6n 'OFF'tir_ndohs haciaadelante. , Lave,eni_Jague y seque. No useagentes de limpiezaabrasivospunspueden rayarel acabado. , Enciendacada quemadorpara asegurarsede que lasperillas hartsido correctamentereinstaladas. Cubierta y Panel de Control = Esmalte de Porenlana La porcelanaesmaltadaesvidrio fundido en metaly puede agrietarseo picarsesi no se usacorrectamente.Esresistente a Ios _cidos,no a prueba de acidos.Todos Ios derrames,especialmentelos derramesazucaradoso acidicos deben set limpiados inmediatamentecon un paso seco. , Cuandose enfr[e,Iavecon agua jabonosa,enjuaguey seque. , Nunca Iimpie una supefficie tibia o caliente con un paso h0medo.Estopuede causar agrietamientoo picaduras. , Nunca use limpiadoresde homo, agentes de limpiezaabrasivoso c_usticosen el acabadoexterior de la estufa. 77 PJEZA PROCEDmM_ENTO Paneies Lateraies Gaveta de Almacenamiento + Cuandoest6fda, Iave con agua tibia jabonosa,enjuaguey seque.Nunca Iimpie una super[icietibia o caliente con un patio h0medopues esto puede dafiar la superficley causaruna quemaduraa causadet vapor. + Paramanchasrebeldes,use agentesde IimpiezaIevementeabraslvosta! como pasta de bicarbonatoo 'BonArni'*. No useIimpiadoresabraslvos,c_usticoso _sperostal comoesponjasde lanade acera o Iimpiadoresde hornos.Estos productospueden rayaro dafiar permanentementeIa superficie. Nora: Use una tealla e un pa#e sece para I]mpiztr los derrames, especiaImente tes dert_mes ac[dices n azucaradnsoLa superficie se puede desce!erar o perder el brJlle si el dermme #e se #mpia #lmediatamente. Esto es especialmerlte #npertante en las superficies bfancas. y Manijas de las Puertas + Esmalte Pintado DE UMP_EZA Ventana y Puerta + Eviteusar cantidadesexcesivasde agua pues puede escurrirsedebajo o detr_isdeI vidrio causando manchas. del Homo +Vidrio + Lavecon agua y jab6n. Enjuaguecon agua Iimpiay seque. El limpiador de viddo puede usarsesi se roda en un patio primera. + No use matedalesabrasivostales como esponjasde restregar,limpiadores en polvo o esponjasde lana de acera pues pueden rayarel vidrio. +nterior del Homo + Siga las instruccionesen las p_ginas75-76 para programarun ciclo de autolimpieza. + Limpiarcon agua con jab6n. + Sacarlas manchasdificiles con polvo de Iimpiezao una esponjaIlenacon jabSn. Enjuaguey seque. + LasparrillassedescoIorar_npermanentementey puedennodestizarseconsuavidadsisondejadasen el hornodurante un ciclo de auto+impieza. Si estosucede,Iimpie Iaparrillay Iossoportesen relievecon una pequetiacantidad de aceite vegetalpara restaurarla facilidad de movim+ento,luego limpie el excesode aceite. Acero lno×idable (modelosselectos} * NO USENINGUN PRODUCTODE LIMPIEZA QUECONTENGABLANQUEADORA BASE DE CLORO. , NO USELIMPIADORES "ORANGE" NI LIMPIADORESABRASIVOS. + SIEMPRELIMPIE LAS SUPERFICIESDE ACEROA FAVORDEL GRANO. + Limpieza [}iaria/Suciedad Leve+ Limpie con uno de los siguientes- agua conjabOn,una soluci6n de vinagre blancocon agua,limpiador para superficiesy viddo 'Formula409'+o un limpiavidriossimiJar- usandouna esponja o un patio suave. Enjuaguey seque. Parapuiir y evitar marcasde Josdedos,use el praducto 'StainlessSteel Magic Spray'+ [PJezaNo. 20000008)++. + Saciedad Moderada/lntensa + Limpiecon uno de Iossigu+entes- 'Ban Ami'+,'SmartCleanser'+ o 'Soft Scrub'+ usandouna esponja h0medao un patio suave. Enjuaguey seque. LasmanchasdificJlespuedenset quitadas con una esponjamulti-usa 'Scotch-Brite'+ h0meda;frote a favor deJgrano. Enjuaguey seque. Pararestaurarel lustre y sacar lasvetas,aplique 'StainlessSteelMagic Spray'++ , Descoioraci6n - Useuna esponjamajadao un pa_o suave,limpie con limpiador de acera'CameoStainlessSteeJ Cleaner'+.Enjuagueinmediatamentey seque. Paraeliminar lasestr[asy restaurarel lustre,use despu6srociador para acera inoxidable'StainlessSteelMagic Spray'+. *Los nombresde Ios productosson marcasregistradasde sus respectivosfabricantes. ** Parahacer pedidos,Ilameal 1-877-232-6771EE.UU.o 1-800-688-8408Canad& ?8 Puerta del Homo Cone×i6n El ctrica Los emectrodom6sticos que requieren energia el6ctrica est_n equipados con un enchufe de ires clavijas con cone×i6n a tierra, el cual debe serenchufado directamenteen un tomacorrienteelectrico de tres aguieros,para 120voltios debidamenteconectadoa tierra= No coloque _esoexeesivo nisepare_n l@puert a delhomoL Esto podda haeervo!eaFla estufa, quebrar !a puertao lesionaral usuaFio. Sie_r_redesenchufeel ebctrodom_stieoantes de efectuar reparaciones. Elenchufe de tres ciaviiascon conexiOna tierra ofrece pmtecciOn contra pe@rosde choques et6ctdcos=NO CORTENI EUMINE [A TERCERACLAVUA DECONE×ION A TtERRA DE[ ENCNUFE DEECORDON ELECTRICO. "esponjosa"cuando se cierra=Estoes normaly disminuir_ con et Nora: La puerta del horno en una estufanuevapuede sentirse USO. Ventana Si soIamentese disponede un tomacorrientesin conexi6n a tierra, de dos agujerosu otto tipo de tomacorrienteetdctrico,el propietario dememectrodomSsticoes pnrsonammente responsaMede reemplazar el tomacorriente con un tomacorriente el6ntrico de tres agujeros debidamente puesto a tierra. dem Homo Para proteger maventana de mapuerta demhomo: 1= No use agentesde IimpiezaabrasivostaIescomo esponjasde restregarde lana de aceroo limpiadoresen polvo pues elIos pueden rayarel viddo= 2= No golpee el vidrio con ollas, sartenes,muebles,juguetes u otros obietos= Luz del Homo 3= No cierre Ia puertadeI horno hasta que lasparrillasdel homo no est6nen su lugar= AI golpear,rayar, hacervibrar o esforzarel vidrio puededebilitar su estructura causandoun mayor riesgode rotura en una fecha posterior= Ternillos Niveladores • AsegSrese de que la cubierta del foco y el foco est6n frios antesde tocarlos. Para reemplazar el foco del homo: 1= Cuandoel homo est6frio, sujete la tapa de la bombillaen su lugar, luego deslice el ret6n de alambrefuera de Ia cubierta=NOTA: La cubierta de la bombiliasecaer8si no essuieta en su lugarcuando est8 sacando eI ret6nde alambre= Veri%ue si el soporte antivueicoestd asegurandoal piso uno de !OStornil!os niveladorestraseros. Estesoporte evita que la estufa se vue!que accidenta!mente . 2= Saque la cubierta detfoco y el foco= 3. Coloqueun foco de 40 watts para electrodom6sticos= La estufa debe ser nivetadacuando se instala=Si Ia estufa no est_ nivelada,gire lostornillos niveladores de pI_sticoubicados en cada esquinade la estufa 4= Vuelvaa colocar la cubierta de la bombiIIay aseg_irelacon el ret6nde alambre. _ 5. Vuelva a enchufar la estufa. Vuelva a colocar la hora correcta= ,jj hasta quequedenivelada= TORNILLO NIVELADOR 79 CABOCHON RESSORTDERETENUE (fiTm6ta#ique) Retiro de la Estufa a Gas Panel inferior Los conectoresde [aestufa a gas usadospara conectareste artefacto al suministrode gas no estdn dise_adospara movimiento continuo. Unavez instaDdos,NO mueva repetidamenteeste artefacto a gas para su Hmpiezao para ubicadoen otto Iugar. Si este artefactotiene que ser movido y/o retiradopara reparaci6n, siga e[ procedimientodescrito en [as instruccionesde instaiacidn. ParainformaciOn,p6ngaseen contacto con el Sewicio a los CIientes Maytag IIamandoal 1-800-688-9900EE.UU.o al 1-800-688-2002 Canad& ProtejaeI panetinferior del horno contra derrames,especiaImentede tipo addico o azucarado,pues pueden descoIorarla porcelana esmaltada.Use eI utensilio de tama_o correcto a fin de evitar derramesy reboses. El pane! inferiorde[ horno puede ser sacadopara su [[mpieza. Para sacar: Cuandose enfr[e,saque [as parrillasde[ homo. Des[ice los dos retenes,ubicados en cadaesquina de[ panei inferior de[ homo hacia la parte delanterade[ homo. Paraevitar que la estufase vuelqueaccidentaImente,se debe aseguraral piso coIocandoel tornilio niveladoltrasero dentro del soporte antivuelco. Gaveta del Home Levantee[ borde trasero del panei inferior del horno ligerarnentey Iuegodeslicelo hacia atr_s hastaque el bordede[anterode[ horno pasapot sobre el marcodelantero. Saqueel panel inferiol del homo. de Almacenamiento _X_ t s Para vomvera comocar: CoDque ei borde deDntero dei pane[inferior de[ homo en e! marco delanterode[ homo+ Baje la partetrasera del panel inferior dei homo y deslice [os dos reteneshacia atrds para bioquear e[ pane[ inferior de[ homo en su [ugar. NOguarde productos de papel 0 de pidstico,aiimentosni materiales infiamabtesen esta gaveta.La gaveta puede calenta[sedemasiadopara estosarticu[oscuando se est,1usando e! homo. La gavetade almacenamientopuedeset retiradapara que usted pueda limpiar debajo de la estufa. Para sacar : 1, Vade la gavetay deslicela haciaafuera hasta la primeraposici6n tope, 2. Levantela partedelanterade la gaveta. 3. Tired hasta Iasegundaposici6n de tope. 4. Sujete los ladosy levanteIa gavetapara retirarla. Para velvet a coiocar: I. hmerteIos extremosde las correderasde la gavetaen los rieles de la estufa. 2. Levantela partedelanterade la gavetay suavementeempOjeDa la primeraposiciOnde tope. 3. Levantela gaveta nuevamentey empt_jelahasta que quede comp[etamentecerrada. 80 PROBLEMA SOLUCION Para mamayor_a de mosprobmemas, verifique primero mesiguiente, ° , • • RevisesJIos controbs deI horno est4n debJdamenteaiustados. Verifique si el enchufe est4 firmemente insertadoen ettomacorriente. Verifique o vuelva a reponer el disyuntor. VerJfiqueo reempBceel fusible. VerJfiqueel suministro de energ[ael6ctrica. Em quemador superier no se enciendeo , Verifique si la estufaest4 debidamenteconectadaa Ia fuente de alimentaciOn. ° Verifique si est4 fundido un fusible del circuito o si se dispar6el disyuntor principal. • Verifique para asegurarsede que el encendedorest6 seco y que emita chasquidos. El quemadorno seencender_si et encendedorest4 dafiado,sucio o moiado. Si el encendedor no produceun chasquido,gire la perilla de control a la posici6n'Off'. La llama es disparejao , La llama del quemador superior se levanta del orifieioo ° VerJfiqueparaasegurarsede que el utensilio est4asentadoen [aparrilla soble el quemador. Los resultados del homeado no son come se esperaban o son diferentes a los del homo anterior° ° Verifique Iatemperaturadel homo seleccionada.Aseg0resede que el horno est6 precalentadocuando la receta o instruccionesrecombndan precalentamientodeI horno. ° Aseg0resedeque el resplraderodeIhomo noest_ bloqueado.Vet p%ina 80para Jaubicaci6n. • Verifique para asegurarsede que ta estufaest_ nivetada. • Lastemperaturasa menudovar[anentre un horno nuevoy uno antiguo. A medidaque pasa el tiempo, la temperaturadeI homo cambiay puede hacersem4s caliente o m4s fr[a. Ver p_g.72 para las instruccionescomo a}ustarla temperaturadeÁhomo. NOTA:No se recombnda ajustar la temperaturasi ha tenido problemascon solo una o dos recetas. • Useel utensilio correcto. Los utensiliososcurosproducendorado oscuro.Los utensilios brilIantesproducendorado claro.Consulteel fofleto "LaCocinaF_cil"paramayorinformaciOn sobre los utensiliosde hornear. • Verifique lasposbiones de Ias parrilIasy IacolocaciOnde los utensilios.AIterne losutensilios cuandouse dosparrJllas.Deie2,5-5cm (1-2 pulgadas}entre los utensiliosy las paredesdel homo. • Verifique eI uso de papeI de aluminioen el homo. Nunca use papel de aluminio para cubrir unaparrillacompletadel homo.Coloqueun pedazopequefiode papelde aluminioen la parrilIa que est4 debajo del utensilio para recibir los derrames. Los alimentos no se asan a la parrilla en forma debida o salen demasiado humoo , Verifique Ias posicionesde Bs parrillasdel homo. El alimento puede estar muy cerca de la llama. ° Elpapetde aluminiose us0de maneraincorrecta. Nuncaforreel insertodeJasadorcon papel de aluminio. • Recorteel excesode grasade la came antes de ponerla a asar a la parrJlla. • Se us0 una asaderasucia. • Precalienteel horno durante dos a tres minutosantes de colocar el alimento en el horno. • Ase a la parrJllacon la puerta del horno cerrada. LosorJficiosdel quemadorpueden estar obstruidos. 81 PROBLErVlA SOLUC_ON Em homo no se automimpiao ° Vedfique para asegurarsede que el cJclono est6 ajustado para un comienzodiferJdo.Ver p4ginas75-76. o Verifiquesi ia puerta est_ cerrada. o Verifiquesi el controI est4 en Modo Sab_itico.Vet p4g. 71. o E!homo puede estar a m4sde 205° C (400° F). La temperaturadel horno debe ser inferiora 205° C (400° F) para programarun cido de limpieza. Em homo no se mimpi6en forma debidao , Puedeque sea necesarioun tiempo de limpiezarn4slargo. ° Losderramesexcesivos,especialmentede alimentosazucaradosy/o 4cidos no fueron limpiadosantes del ciclo de autolimpieza. La puerta demhomo no se desbloquea despuSs del ciclo ° El interior deI horno todavFaest_ caliente. Deje que paseaproximadamenteuna hora para que el homo se enfrFeantes de que se completeun ciclo de autolimpieza. La puerta puedeset abierta cuandodesaparezcala palabra 'LOCK'del indicadorvisual o Elcontro[ y la puerta puede estar bloqueada. Vet p%. 65. $e junta humedad en la ventana del homo o sale vapor pot ° Estoes normalcuando se cocinan alimentoscon alto contenido de humedad. ° Se us0 humedadexcesJvacuando [impi6 [a ventana. emrespiraderodemhomo° Hay un omorfuerte o humo mere cuando se enciende el homo, ° Estoes normalen una estufa nuevay desaparecer_despu6sde unos pocos usos. AI inJciarun cicio de autolimpiezase "quemar_n" loso[ores m4s r4pidamente. o Si se enciendeetventilador ayudar_a eliminarel humo y/o el clot. o Suciedadexcesivade alimentosen el panel inferior del homo. Use un ciclo de autolimpieza. C6digos de Errores ° 'BAKE'o 'LOCK'pueden destellar r_pidamenteen el indicadorpara avisarleque hayun error o un problema. Si 'BAKE'o 'LOCK'aparecenen el indicadorvisual,oprima Iatecla 'CANCEL'. Si 'BAKE'o 'LOCK'continOandestellando,desconecteia energ[ael6ctricaal electrodom6stico. Espereunospocosminutosyvuelvaa reconectarlaenergFael6ctrica.Sicontin8an destellando, desconectela energFael6ctricadotelectrodom6sticoy flameal t6cnicode servicioautodzado. o Si el homo est4demasiadosucio, puedenoculrir demasiadasIlamaradasIocual resultar_en un cOdigode error duranteIaIimpJeza.Oprimalatecla 'CANCEL'y dejeque el horno seenfrie completamente,Iimpieel excesode suciedady luegovuetvaa programarel ciclo de limpieza. Si el c6digo de error reaparece,Ilamea un t6cnico autorizado. Se eseuchan ruidoso , No se eseuchan se_ules sonoras y el indicadorvisual no se activao , 'SAb' destella y luego se o Elhomo est_en modosab4tico.Paraanularel modosab_tico,optimay mantengaoprJmida[a tecla 'Clock' (Reloj)durante cinco segundos. Elhorno emitevariossonidos bajos. Ustedpuede oir losrel6sdel holno cuandose encienden y se apagan.Esto esnormal. o A medidaque el homo secalientayse enfr[a,usted puededr sonidosde piezasmet41icasque se expandeny contraen. Estoes normaly no da_ar4 su electrodomestico. El horno puede estar en Modo Sab_tico. (Ver p%. 71). 82 Garantia Completa de Un A_o - Piezas y Mano de Obra Durante un (1) a_o desdeJafecha original de cornpraal por menor:se r_pararao reempiazard gratLHtamente cuaLqu_er p_ezaque falle durante uso normalen ei hogar. Lo que No Cubren Estas Garantias: 1= Situacionesy da_osresuitantesde cualquierade lassiguientes eventuaIidades: a=hlstaiaci6n,entregao mantenimientoinapropiados= b=Cuaiquierreparaci6n,modificaciOn,alteraciOno aiuste no autorizado por el fabricanteo pot un centro de servicioautorizado= c= Mal uso,abuso, accidenteso uso irrazonable= Residentes Canadienses d=Corrienteei6ctrica,voltaie o suministro incorrecto= Lasgarantias ameriorescubrensolamenteaquellos eJectrodom6sticosinstaJadosen Canadaque ban sldo cer[ihcadoso aprobadospor hs agenclasue pruebascorrespondientesparacumpl_mientocon _a Norma Nacionalde Ca-_ad_i a menosque e! eJectrodom6sticohayasidotra[do a Canadades@ _osEE.UU.debido a un cambio de residencia. e=Programaci6nincorrectade cualquierade los controles= 2= Lasgarant[asquedan hulassi los n0merosde serieoriginales hartsido retirados,alteradoso no son f_cilmente legibles= 3= Focos= 4= Productoscompradospara usocomerciaI o industrial 5= El costodel servicioo Ilamadade serviciopara: Garantia Unities Limitada Fuera de los Estados y Oanad_ = Piezas Somamente Durante ae (1) a_o des@ lafecha de compra original al por menoncualquler pJezaque falle duran[e uso normalen el hogar ser_ reemplazadao repara(lagratutamente en Io que respectaa la ple, za y el propietariodeber_ipagar todos Ios otros costos mcluyendomanode obra.kilometrajeimillaje. [ranspor[e.costoae_vlajey costo del diagnostic3,si hJesenecesario. Lasgarantiasespecfficasexpresadasanter/ormente son/as UMCAS gatantfasprovistaspot e! fabrican[e. Fstasgarantiasle oto_ganderechos/ega/es especfficosy ustedpuede tenet adembso[ro_ derechosque vat/ande un estadoa otto. a=Corregirerroresde instalaci6n= b=hlstruir ai usuariosobre el usocorrecto del artefacto= c= Transportedel artefacto aIestableci@entode servicio= 6= Losddios consecuenteso incidentaiessufridospot cuaIquier personacomo resuItadode cualquier incumplimientode estasgarant[as=En aIgunos estadosno se permite la excIusi6no IimitaciOnde Ios dat_osconsecuenteso incidentales,por Io tanto la exclusiOnanterior puedeque no se aplique en su 08SO= Si Necesita Servicio • Llameal distribuidor donde comprOsu electrodom6sticoo Ilamea Maytag ServicessM,Servicioa Ios CIientesMaytagIlamandoal 1-800-688-9900EE=UU= o al 1-800-688-2002Canad¶ ubicar a un t6cnico autorizado= o Aseg[iresede conservareI comprobantede compra para verificarel estadode la garant[a. ConsulteIasecciOnsobre la GARANTIApara mayor informaci6n sobre las responsabilidadesdel propietariopara servicio baio la garantia. o Si el distribuidor o Ia compai_[ade serviciono pueden resolverel probIema, escriba a MaytagServicessM,Attn: CAIR_;Center,P.O.Box2370,Cleveland,TN 37320-2370o Ilameal 1-800-688-9900 EE.UU.o ai 1-800-688-2002 Canad& o Las galasdel usuario, manualesde servicioe informaciOnsobre las piezaz pueden solicitarsea Maytag SewicessM,Servicioa los ClientesMaytag= CuandoIlame o escriba acercade un probiemade servJcio,pot favor incluya Jasiguiente informaci6n= a=Su hombre,direcci6n y n@lero de teJdono; b=NQmerode modeloy n[imero de serJe; c=Nombrey direcci6n de su distribuidor o t@nico de servicio; d=Unadescripci6nclara del problemaque est4experimentando; e=Comprobantede compra (recibo de compra)= Form No. B/09/04 Part No. 8113P458 60 ¢')2004 Maytag Appliances Sales Co. Litho U.S.A.-
 1
1
-
 2
2
-
 3
3
-
 4
4
-
 5
5
-
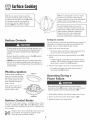 6
6
-
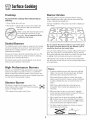 7
7
-
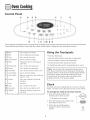 8
8
-
 9
9
-
 10
10
-
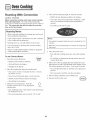 11
11
-
 12
12
-
 13
13
-
 14
14
-
 15
15
-
 16
16
-
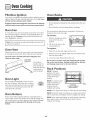 17
17
-
 18
18
-
 19
19
-
 20
20
-
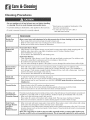 21
21
-
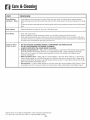 22
22
-
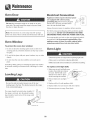 23
23
-
 24
24
-
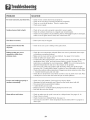 25
25
-
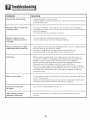 26
26
-
 27
27
-
 28
28
-
 29
29
-
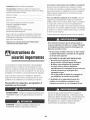 30
30
-
 31
31
-
 32
32
-
 33
33
-
 34
34
-
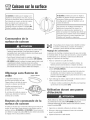 35
35
-
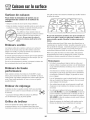 36
36
-
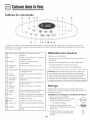 37
37
-
 38
38
-
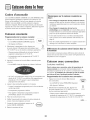 39
39
-
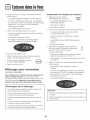 40
40
-
 41
41
-
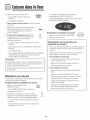 42
42
-
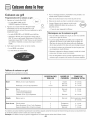 43
43
-
 44
44
-
 45
45
-
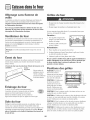 46
46
-
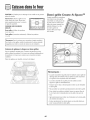 47
47
-
 48
48
-
 49
49
-
 50
50
-
 51
51
-
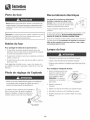 52
52
-
 53
53
-
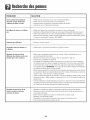 54
54
-
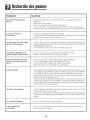 55
55
-
 56
56
-
 57
57
-
 58
58
-
 59
59
-
 60
60
-
 61
61
-
 62
62
-
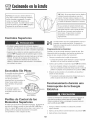 63
63
-
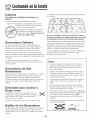 64
64
-
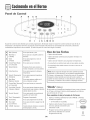 65
65
-
 66
66
-
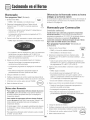 67
67
-
 68
68
-
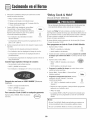 69
69
-
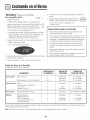 70
70
-
 71
71
-
 72
72
-
 73
73
-
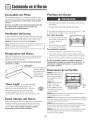 74
74
-
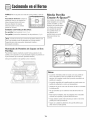 75
75
-
 76
76
-
 77
77
-
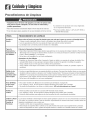 78
78
-
 79
79
-
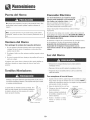 80
80
-
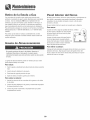 81
81
-
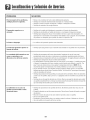 82
82
-
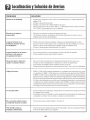 83
83
-
 84
84


Maytag MGR5875QDW - 30 Inch Gas Range Guía del usuario
- Tipo
- Guía del usuario
En otros idiomas
Documentos relacionados
-
Maytag MGRH865QDB0 Guía del usuario
-
-
Magic Chef MLR1415AJW User's guide El manual del propietario
-
Maytag MGRL752BDQ El manual del propietario
-
-
-
Maytag MEW6530DDS El manual del propietario
-
-
Amana AGR5715QDS El manual del propietario
-
Maytag MGRH865QDW1 El manual del propietario