
MAYI'AI3
Gas - Precision Touch
Contro_ 500
Form No. B/09/04
Umportant Safety
Unstructions ............................... 1-4
Surface Cooking ...................... 5-6
ControHs
SeaHedGas Burners
Oven Cooking ......................... 7=14
Baling
Cook & HoM
Dday
Keep Warm
BroiHing
Oven Racks
Part No 8113P456-60
Care & Cleaning ................... 15-18
SeUf-Clean Oven
Cleaning Procedures
Maintenance ......................... 19-20
Oven Whldow & Light
Removal ot Gas Appliance
Troubleshooting ................... 21 =22
Warranty & Service .................... 23
Guide d'utilisation et
d'entretien ................................... 28
Guia de Use y Cuidado ............. 52
_2004 Maytag Appliances Sales Co. Litho U.S.A.

Wi : : : ira: ¸¸: L
Installer: PUeaseReavethis manua! with this apP!!ance
Consumer: Please read and keep this manua! for future
Serial Number
Date of Purchase
Jfyou have questions, call:
Maytag CustomerAssistance
i L800-688-9900 USA
1:800T688_2002 Canada
]_800:688:2080 (U.S. TTYfor hearing orspeech !mpaired_
of ourcooking products, it may benecessaryto make changes
For seJldce i#femladen, see page 23.
Warning and Important Safety Instructions appearing in
this guide are not meant to cover all possible conditions
and situations that may occur. Common sense, caution,
and care must be exercised when installing, maintaining,
or operating the appliance.
Always contact your dealer, distributor, service agent, or
manufacturer about problems or conditions you do not
understand.
Recognize Safety Symbems, Words, LabeJs
cian. Do not attempt to adjust, repair, service, or replace
any part of your appliance unless it is specifically recom-
mended in this guide. All other servicmng should be
referred to a qualified servicer. Have the installer show
}ou the location of the gas shut off valve and howto
shut it off in an emergency.
Always disconnect power to appliance before servicing.
if the information in this guide is not followed
exactly, a fire or explosion may resuJt caosing
property damage, personal injury or death.
Do uot store or use gasohne or other flam-
mabJe vapors and Jiquids in the vicinity of this
or any appliance.
UFYOU SMELL GAS:
o Do not try to Jight any appliance.
o Do not touch any eJectricaJ switch.
o Do not use any phone in yoor buildingo
o immediately call your gas supplier from a
neighbor's phone. FoJlow the gas supplier's
iustructions.
* If you cannot reach your gas sopplier, call
the fire department.
JnstaJlation and service must be performed by
a quaJified instaJler, service agency or the gas
sa pplier.
dangerous situation. Gas leaks may not be detected
and use in accordance with the manufacturer's
instructions.
GeneraJ instructions
COULD resuit in severe persona! injury or death.
CAUTION _ Hazards or unsafe practices which
COULD result in minor pe_s0nal inju_.
Read and follow alJ instructions before using this
appliance to prevent the potential risk of fire, electric
shock, personal injunj or damage to the appliance as a
result of improper usage of the appliance. Use appliance
only for its intended purpose as described in this guide.
To ensure proper and safe operation: Appliance must
be properly installed and grounded by a qualified techni-
abnormal usage or by excessive Joading of the
oven door, the appliance must be secured by a
properly

To check if device is properly installed, look underneath
range with a flashlight to make sure one of the rear
leveling legs is properly engaged in the bracket slot. The
antPdp device secures the rear leveling leg to the floor
when properly engaged. You should check this anytime
the range has been moved.
Do not use water on grease fires. Use baking soda, a
dry chemical or foam-type extinguisher to smother fire
or flame.
Child Safety
Te Prevent Fire er Smoke
Be sure all packing materials are removed from the
appliance before operating it.
Keep area around appliance clear and free from com-
busdbb materials, gasoline, and other flammable vapors
and matedab.
If appliance is installed near a window, proper precau-
tions should be taken to prevent curtains from blowing
over burners.
NEVER leave any items on the cooktop. The hot air from
the vent may ignite flammabb items and may increase
pressure in dosed containers which may cause them to
burst.
Many aerosoPtype spray cans are EXPLOSIVE when
exposed to heat and may be highly flammabb. Avoid
their use or storage near an appliance.
Many plastics are vulnerabb to heal Keep plastics away
from parts of the appliance that may become warm or
hoL Do not leave plastic items on the cooktop as they
may melt or soften if left too close to the vent or a
lighted surface burner.
To eliminate the hazard of reaching over hot surface
burners, cabinet storage should not be provided directly
above a unit. If storage is provided, it should be limited
to items which are used infrequently and which are
safely stored in an area subjected to heat from an
appliance. Temperatures may be unsafe for some items,
such as volatile liquids, cleaners or aerosol sprays.
In Case of Fire
Turn off appliance and ventilating hood to avoid spread-
ing the flame. Extinguish flame then turn on hood to
remove smoke and odor.
, Gooktop: Smother fire or flame in a pan with a lid or
cookie sheeL
NEVER pick up or move a flaming pan.
, Ovens Smother fire or flame by closing the oven door.
above an appliance or on backguard of a range,
items could be seriously injured.
NEVER leave children alone or unsupervised near the
appliance when it is in use or is still hot.
NEVER allow children to sit or stand on any part of the
appliance as they could be injured or burned.
Children must be taught that the appliance and utensils
in it can be hot. Let hot utensils cool in a safe place, out
of reach of small children. Children should be taught
that an appliance is not a toy. Children should not be
allowed to play with controls or other parts of the unit.
About Your Appliance
2
NEVER use appliance door as a step stool or seat as this
may result in possibte tipping d the appliance and serious
injuries.
NEVER use this appliance as a space heater to heat of
warm a room. Doing so may result in carbon monox-
ide poisoning and overheating of the oven.
NEVER cover any slots, holes or passages in the oven
bottom or cover the entire rackwith materials such as
aluminum foil. Doing so blocks air flow through the
oven and may cause carbon monoxide poisoning.
Aluminum foil may also trap heat causing a fire
hazard.
NEVER obstruct the flow of combustion and ventiJatJon
air by blocking the oven vent or air intakes. Doing so
restricts air to the burners and may result in carbon
monoxide poisoning.
The oven vent is located at the base of the backguard.
Avoid touching oven vent area while oven is on and for
several minutes after oven is turned ofL Some parts of
the vent and surrounding area become hot enough to

causeburns.Afterovenisturnedoff,donottouchthe
ovenventorsurroundingareasuntiltheyhavehad
sufficienttimetocool.
Otherpotentiallyhotsurfacesincludecooktop,areas
facingthecooktop,ovenvent,surfacenearthevent
opening,ovendoor,areaaroundtheovendoorand
ovenwindow.
Do not touch a hot oven light bulb with a damp cloth as
the bulb could break. Should the bulb break, disconnect
power to the appliance before removing bulb to avoid
ebctdcal shock.
Do not use the cooktop or oven as a storage area for
food or cooking utensib.
Cooking Safety
Always place a pan on a surface burner before turning it
on. Be sure you know which knob controls which
surface burner. Make sure the correct burner isturned
on and that the burner has ignited. When cooking is
completed, turn burner off before removing pan to
prevent exposure to burner flame.
Always adjust surface burner flame so that it does not
extend beyond the bottom edge of the pan. An exces-
sive flame is hazardous, wastes energy and may damage
the appliance, pan or cabinets above the appliance.
NEVER leave a surface cooking operation unattended
especially when using a high heat setting or when deep
fat frying. Boilovers cause smoking and greasy spillovers
may ignite. Clean up greasy spills as soon as possible.
Do not use high heat for extended cooking operations.
NEVER heat an unopened container on the surface
burner or in the oven. Pressure build-up may cause
container to burst resulting in serious personal injury or
damage to the appliance.
Use dry, sturdy potholders. Damp potholders may cause
burns from steam. Dish towels or other substitutes
should never be used as potholders because they can
trail across hot surface burners and ignite or get caught
on appliance parts.
Always let quantities of hot fat used for deep fat frying
cool before attempting to move or handle.
Do not let cooking grease or other flammabb materials
accumulate in or near the appliance, hood or vent fan.
Clean hood frequently to prevent grease from accumu-
lating on hood or filter. When flaming foods under the
hood turn the fan on.
NEVER wear garments made of fiammabb material or
loose fitting or Iong-sbeved apparel while cooking.
Clothing may ignite or catch utensil handles.
Always place oven racks in the desired positions while
oven is cook Slide oven rack out to add or remove food,
using dry, sturdy potholders. Always avoid reaching into
the oven to add or remove food. If a rack must be
moved while hot, use a dry potholder. Always turn the
oven off at the end of cooking.
Use care when opening the oven door. Let hot air or
steam escape before moving or replacing food.
PREPARED FOOD WARNUNG: Follow food
manufacturer's instructions, if a plastic frozen food
container and/or its cover distorts, warps, or is otherwise
damaged during cooking, immediately discard the food
and its container. The food could be contaminated.
NEVER use aluminum foil to cover oven racks or oven
bottom. This could result in risk of electric shock, fire, or
damage to the appliance. Use foil only as directed in this
guide.
Utensim Safety
Use pans with flat bottoms and handles that are easily
grasped and stay cool. Avoid using unstable, warped,
easily tipped or Ioose-handbd pans. Also avoid using
pans, especially small pans, with heavy handles as they
could be unstable and easily tip. Pans that are heavy to
move when filled with food may also be hazardous.
Be sure utensil is large enough to properly contain food
and avoid boilovers. Pan size is particuhrly important in
deep fat frying. Be sure pan will accommodate the
volume of food that is to be added as well as the bubble
action of fat.
To minimize burns, ignition of flammabb materials and
spillage due to unintentional contact with the utensil, do
not extend handles over adjacent surface burners.
Always turn pan handles toward the side or back of the
appliance, not out into the room where they are easily
hit or reached by small children.
Never let a pan boil dry as this could damage the utensil
and the appliance.
Follow the manufacturer's directions when using oven
cooking bags.
3

Only certain types of glass, ghss/ceramb, ceramic or
glazed utensils are suitable for cooktop or oven usage
without breaking due to the sudden change in tempera-
ture. Follow manufacturer's instructions when using
glass.
This appliance has been tested for safe performance
using conventional cookware. Do not use any devices or
accessories that are not specifically recommended in
this guide. Do not use eyelid covers for the surface
units, stovetop grills, or add-on oven convection sys-
tems. The use of devices or accessories that are not
expressly recommended in this manual can create
serious safety hazards, result in performance problems,
and reduce the life of the components of the appliance.
Cmeaning Safety
Turn off all controls and wait for appliance parts to cool
before touching or cleaning them. Do not touch the
burner grates or surrounding areas until they have had
sufficient time to cool.
Clean appliance with caution. Use care to avoid steam
burns if a wet sponge or cloth is used to wipe spills on a
hot surface. Some cleaners can produce noxious fumes
if applied to a hot surface.
Self-Clean Oven
It is normal for the cooktop of the range to become hot
during a self-clean cycle. Therefore, touching the
cooktop during a clean cycle should be avoided.
important Safety Notice and
The California Safe Drinking Water and Toxic Enforce-
ment Act of 1986 (Proposition 65} requires the Governor
of California to publish a list of substances known to the
State of California to cause cancer or reproductive harm,
and requires businesses to warn customers of potential
exposures to such substances.
Users of this appliance are hereby warned that the
burning of gas can result in Iow-bvel exposure to some
of the listed substances, including benzene, formalde-
hyde and soot, due primarily to the incomplete combus-
tion of natural gas or liquid petroleum (LP} fuels. Prop-
erly adjusted burners will minimize incomplete combus-
tion. Exposure to these substances can also be mini-
mized by properly venting the burners to the outdoors.
Users of this appliance are hereby warned that when
the oven is engaged in the self-clean cycle, there may
be some low-level exposure to some of the listed
substances, including carbon monoxide. Exposure to
these substances can be minimized by properly venting
the oven to the outdoors by opening the windows and/
or door in the room where the appliance is located
during the self-clean cycle.
UMPORTANT NOTUCE REGARDUNG PET BURDS:
Never keep pet birds in the kitchen or in rooms where
oven during the seff_c!ean cycb. the fumes from the kitchen could reach. Birds have a
Clean only parts listed in this guide. Do not clean door
gaskeL The door gasket is essential for a good seaL
Care should be taken not to rub, damage, or move the
gaskeL Do not use oven cleaners of any kind in or
around any part of the self-clean oven.
very sensitive respiratory system. Fumes released during
an oven self-cleaning cycle may be harmful or fatal to
birds. Fumes released due to overheated cooking oil, fat,
margarine and overheated non-stick cookware may be
equally harmful.
Before self-cleaning the oven, remove broiler pan, oven
racks and other utensils and wipe up excessive
spillovers to prevent excessive smoke, flare-ups or
flaming.
Save These instructions for Future Reference
4

LO: Use to simmer foods, keep foods
warm and melt chocolate or butter. Some
cooking may take place on the LO setting
if the pan is covered. It is possible to
reduce the heat by rotating the knob
toward OFF. Be sure flame is stable.
Hi: Use to bring liquid to a boil, or reach
pressure in a pressure cooker. Always
reduce setting to a lower heat when liquids
begin to boil or foods begin to cook.
An intermediate flame size is used to
continue cooking. Food will not cook any
faster when a higher flame setting is used
than needed to maintain a gentle boil.
Water boils at the same temperature
whether boiling gently or vigorously.
Surface Controls
- if flame should go out during a cooking operation, turn
Lheburner off. If a strong gas odor is detected, open a
window and wait five minutes before relighting the
burnel
o Be sure all surface controls are set in the OFF position
before supplying gas to the range.
- NEVERtouch cooktop until it has cooled, Expect some
parts of the cooktop, especiaii} around the burners, to
become warm or hot during cooking, Use potholders to
Pimot ess ignition
Pilotless ignition eliminates the
need for a constant standing
pilot light, Each surface burner
has a spark ignitor, Use care
when cleaning around the
surface burner.
If the surface burner does
not light, check if ignitor is
broken, soiled or wet.
BURNER CAP
Ports
gnitor
BURNER BASE
Surface Contro Knobs
Use to turn on the surface burners. An infinite choice of heat
settings usavailable from LO to Hm.At the Hmsetting a detent
or notch may be felt. The knobs can be set on or between any
of the settings.
Graphics next to the knob identify which burner the O O
knob controls. Forexample, the graphic at right O O
shows the left front burner location.
Setting the controls:
The size and type of cookware wiii affect the heat setting. For
information on cookware and other factors affecting heat
settings, refer to "Cooking Made Simple" booklet.
1. Place a pan on the burner grate.
o The burner flame may lift off or appear separated from
the port if a pan is not placed on the grate.
2. Push in and turn the knob counterclockwise to the LiTF
setting.
o A clicking (spark} sound will be heard and tile burner
will light. {All four ignitors will spark when any surface
burner knob is turned to the LiTF position.}
3. After the burner lights, turn knob to desired flame size.
* The ignitor will continue to spark until the knob is
turned past the LiTE position.
Operating During a
Power Failure
When lighting the Surfaceburners, be sure all of the
hold it in position before turning the knob to MTE,
1. Hold a lighted match to the desired surface burner head.
2. Push in and turn the control knob slowly to LmTF.
3. Adjust the flame to the desired level.
5

Cooktop
To prevent the cooktop from discoloring or
staining:
" Qean cooktop after each use.
Wipe acidic or sugary' spins as soon as the cooktop has
_ cooHedas these spins may discoHorthe
__ UnHikea range with standard gas burners,
this cooktop does not Hilt-up nor is it
removaMe. Do t_ot attempt to lift the
%®_,' cooktop for any reason°
Burner Grates
The grates must be properly positioned before cooking.
When installing the grates, place the tab ends toward the
center, matching the straight bars.
hlproper installation of the grates may result ill chipping of
the cooktop.
Sealed Burners
The sealed burners of your range are secured to the cooktop
and are not designed to be removed. Since the burners are
sealed into the cooktop, boilovers or spills will not seep
underneath the cooktop.
However, the burner should be cleaned after each use. The
head portion of the burner is easily removed for cleaning.
(See page 17 for cleaning directions._)
The burner heads must be correctly placed on the burner
base for proper operation of the burner.
Do not operate the burners without a pan on the grate.
The grate's porcelain finish may chip without a pan to
absorb the heat from the burner flame.
Use care when stirring food in a pot/pan sitting on the burner
grate. The grates have a smooth finish for ease of cleaning.
The pot/pan will slide if the handle is not held. This may result
in spilling of hot food items and may be a burn hazard.
Although the burner grates are durable, they will gradually
lose their shine and/or discolor, due to the high temperatures
of the gas flame.
Nigh Performance Burners*
There isone high speed burner located ill the right front position
on your range. Select models also have a second high speed
burner located ill the left front position. These burners offer
higher speed cooking that call be used to quickly bring water to
a boil and for large-quantity cooking.
Si[n[ner Burlier* (select models)
This burner is located in the left rear or right rear position. The
simmer burner offers a lower BTU flame for delicate sauces or
melting chocolate.
BTUratings wfll vary when using LP gas.
" A properly adjusted burner with clean ports will light
within a few seconds. If using natural gas, the flame
will be blue with a deeper blue inner cone.
If the burner flame is yellow or is noisy, the air/gas
mixture may be incorrect. Contact a service technician
to adjust. (Adjustments are not covered by the war-
ranty._)
With LPgas, slight yellow tips on the flames are
acceptable. This is normal and adjustment is not
necessary.
" With some types of gas, you may hear a "popping"
sound when the surface burner is turned off. This is a
normal operating sound of the burner.
" If the control knob is turned very quickly from Hi to
LO, the flame may go out, particularly if the burner is
cold. If this occurs, turn the knob to the OFF position,
wait several seconds and rdight the burner.
" The flame should be adjusted so it does not extend
beyond the edge of the pan.
6

@
Control Panel
A B
C D
......................Th]e
Less- ............
G H 1 J
The control panel isdesigned for easein programming. Thedispiaywindow on thecontrol shows time ofday, timer and ovenfunctions.
Control panel shown includes model specific features. (Styling may vary depending on modeL}
A
B
C
D
Ft
G!
H
!!4
Broil
Bake
More+ or
Less-
Timer
Cook & Hold
Clean
Delay
Clock
Keep Warm
CANCEL
Use for broiling and top browning.
Use for baking and roasting.
Enters or changes time, oven
temperature. Sets HI or LO broil
Sets Timer.
Bakes for a preset time, then holds food
warm for 1 hour.
Use to set self-clean cycle.
Programs the oven to start baking at
a later time.
Use to set time-of-day clock.
Use to keep cooked food warm in oven.
Cancels all operations except Timer
and Clock.
Using the Touchpads
Pressthe desired pad.
Pressthe More+ or Less- pad to enter time or temperature.
° A beep wiii sound when any pad is touched.
° A double beep wiii sound if a programming error occurs.
Note: Four seconds after pressing the More+ or Less-
pad, the time or temperature will automatically be entered.
If more than 30 seconds elapse between touching a
function pad and the More+ or Less- pad, the function will
be canceled and the display will return to the previous
display.
The clock can be set to display time in a 12-hour or 2a-hour
format. The clock is set at the factory for the 12-hour format.
To change the clock to 24-hour format:
1. Pressand hold the CANCEL and Delay
pads for three seconds.
2. Pressthe More+ or Less - pad to select
12 or 24 hour.
3. Set the time of day following the
directions below.
To set the Clock:
1. Pressthe Clock pad.
° The colon flashes in the display.
2. Pressthe More+ or Less- pad to set the
time of day.
° Colon continues flashing. ...........................................
3. Pressthe CHockpad again or wait four { Less-
seconds, The colon stops flashing,
When electrical power is supplied or after a power interrup-
tion, the last clock time before power was interrupted will
flash.
To recall the time of day when another time function is
showing, press the Clock pad.
Clock time cannot be changed when the oven has been
programmed for cook or clean Delay or Cook & Hold.

@
To cancem the Clock display:
[f you do not want the time of day to dispiay:
Press and hoM the CANCEL and CHock
pads for three seconds. The time of day
will disappear from the dispiay
When the chockdispiay is cancebd, press
the CHockpad to brbfiy dispiay the time
of day.
To restore the Clock display:
Press and hoid the CANCEL and CHockpads for three sec-
onds. The time of day will reappear in the dispiay.
The timer can be set from one minute (0:01} up to 99 hours
and 59 minutes (:99:59}+
The timer can be used independendy of any other oven
activity. It can abo be set while another oven function is
operating+
The Timer does not control the oven. It only controls a
beeper.
To set the Timer:
1. Press the Timer pad. T+mer ,
+0:00lights in the display.
+The colon flashes in the display. ............................
2. Press the More+ or Less- pad untii the Less- }
correct time appears in the display. ...................................
+The colon will continue to flash.
3. PressTimer pad again or wait four seconds.
+The colon continues flashing and the time begins
counting down.
+The last minute of the timer countdown wiii be displayed
as seconds.
4. At the end of the set time, one long beep wiii sound.
To cancem the Timer:
1. Press and hold the Timer pad for three seconds.
OR
2. Press the Timer pad and set the time to 0:00.
Locking the Contro
and Oven Door
The touchpad controls and oven door call be locked for
safety, cleaning, or to prevent unwanted use. They will not
function when locked.
If the oven is currently in use, the controls and door cannot be
locked.
The current time of day wiii remain in the display when the
controls are locked.
To mock:
Press and hold the CANCEL and Cook &
Hold pads for three seconds. (Press
CANCEL pad first.}
LOCKflashes in the display.
To un+ock:
Press and hold the CANCEL and Cook & Hold pads for three
seconds. (Press CANCEL pad first.}
LOCKdisappears from the display.
Fault Codes
BAKE or LOCK may flash rapidly ill the display to alert you if
there is an error or a problem. If BAKE or LOCKflash in the
display, press CANCEL pad. If BAKE or LOCK continue to
flash, disconnect power to the appliance. Wait a few minutes,
and then reconnect power. If the flashing still continues,
disconnect power to the appliance and call an authorized
servicer.
8

To set Bake:
1. Press the Bake pad.
, BAKEwill flash.
, 000 wifl Hightin the dispiay. .............................
2. Sebct the oven temperature. The oven tempera- More÷
ture can be set from 170° to 550°. Pressor press .............................
and hoM the More+ or Less- pads.
° 350°will Hightwhen either pad is first pressed.
Less-
j_
, Press the More+ pad to increase the temperature.
° Press the Less- pad to decrease the temperature.
3. Press Bake pad again or wait four seconds.
° BAKEwifl stop flashing and Hightin the dispiay.
° 100° or the actuai oven temperature will dispiay. The
temperature will rise in 5° increments untii the preset
temperature is reached.
4. AHow the oven to preheat for 8-15 minutes.
° When the set oven temperature is reached, one long
beep will sound.
° To recall the set temperature during preheat, press the
Bake pad.
5. Place food in the oven.
8. Check cooking progress. Cook longer if needed.
7. When cooking is finished, press CANCEL. SA_ F-_
8. Remove food from the oven.
Baking Notes:
, To change the oven temperatare daring cooking,
press the Bake pad, then the More+ or Less- pad until
you reach the desired temperature.
To change the oven temperatare daring preheat,
press the Bake pad twice, then press the More+ or Less-
pads until the desired temperature is displayed.
° If you forget to turn off the oven, it will automatically turn
off at the end of 12 hours. If you wish to deactivate this
feature, see page 12.
° Foradditional baking and roasting tips, see "Cooking
Made Simple" booklet.
Baking Differences Between Your OJd
and New Oven
It is normal to notice some baking time differences between a
new ovenand an old one. See"Adjusting the OvenTemperature"
on page 12.
Cook & Hold
Cook & Hold allows you to bake for a preset amount of time,
followed by a one-hour Keep Warm cycle.
To set Cook & HoJd:
1. Pressthe Cook & Hold pad.
° BAKE and HOLD flash.
° 000 lights in the display.
2. Select the oven temperature. The oven tempera-
%.................................../
ture can be set from 170° to 550°. Pressor press .................................
and hold the More+ or Less- pad. Less- :
, Pressthe More+ pad to increase the temperature.
, Pressthe Less- pad to decrease the temperature.
3. Press Cook & Hold again ORwait four seconds.
, HOLD flashes.
, 00:00flashes in the display.
4. Enter the amount of time you want to bake by pressing the
More+ or Less- pad. Bake time can be set from ten
minutes (00:1O}to 11 hours, 59 minutes (11:59}.
, BAKE and HOLD light in the display.
, The baking time will light in the display.
, The baking time will start counting down.
When the cooking time has eJapsed:
° Four beeps will sound.
° BAKE will turn off.
° HOLD and WARM will light.
, 170°will display.
After one hour in HOLD WARM:
° "End" will display=
° The time of day reappears in the display.
To cancel Cook & Hold at any time: (CANCFI ")
Press the CANCEL pad. Remove food from oven.
9

@
De ay Bake
as dairy products, pork; poultry, or seafood.
When using Delay, the oven begins to cook later in the day.
Set the amount of time that you want to delay before the oven
turns on and how long you want to cook. The oven begins to
heat at the selected time and cooks for the specified length of
time, then keeps food warm for up to one hour.
Delay time can be set from 10 minutes (00:10} to 11 hours, 59
minutes (11:59}.
To set a Delayed Baking eyrie:
1. Press the Delay pad.
° DELAY flashes.
° 00:00 flashes in the display.
2. Press the More+ or Less- pad to set the
delay time.
While DELAY is still flashing:
3. Press the Cook & Hold pad.
° 000 lights in the display.
° BAKE and HOLD flash.
4.
Less-i
Press More+ pad to set the baking temperature.
° 00:00 and HOLD flash.
° BAKE stays lit.
Press More+ pad to set the baking time.
° The Delay time, DELAY, BAKE and HOLD light in
the display.
When the Delay time has expired:
° DELAYwill turn off.
° Baking time is displayed.
° BAKE and HOLD are displayed.
To set a Delay when Cook & Hold has already
been programmed:
1. Pressthe Delay pad.
° DELAY flashes.
° 00:00 appears in the display.
2. Pressthe More+ or Less- pad to set the
delay time.
° After four seconds, DELAY wiii { Less-
stay lit to remind you that a delayed
cooking cycle has been set.
When the Delay time has expired and the oven
starts:
° The baking time wiii be displayed.
° DELAYwiii turn off.
° BAKE and HOLD wiii remain iiL
To cancel:
Press the CANCEL pad.
° Ail timed and untimed cooking functions wiil be
canceled.
° The time of day wiii reappear in the display.
_otes:
Do not use delayed baking for items that require a
preheated oven, such as cakes, cookies, and breads.
Do not use delayed baking if oven is already hot.
10

Keep War
For safely keeping foods warm or for warming breads and
pHates.
Te set Keep Warm:
1. Pressthe Keep Warm pad.
° WARM flashes.
,000 appears in the dispHay. , ....................................
2. SeHectthe Keep Warm temperature. The Keep More+
Warm temperature can be set from 145° to
190°. Pressor press and hoHdthe More+ or
Less- pad. ,:,Less-
...........................
_ 170° wiHHHightwhen either pad is first pressed.
° Press the More+ pad to increase the temperature.
° Press the Less- pad to decrease the temperature.
WARM and the temperature wiHHbe dispHayedwhiHeKeep
Warm is active.
Keep Warm Notes:
° Foroptimal food quality, oven cooked foods shouHdbe kept
warm for no Hongerthan 1 to 2 hours.
° To keep foods from drying, cover HooseHywith foiHor a Hid.
, To warm dinner rolls:
- cover roHHsHooseHywith foiHand pHacein oven.
- press Keep Warm and More+ pads to set 170° F.
- warm for 12-15 minutes.
, To warm plates:
- pHace2 stacks of up to four pHateseach in the oven.
- press Keep Warm and More+ pads to set 170° F.
- warm for five minutes, turn off the oven and HeavepHates
in the oven for 15 minutes more.
- use onHyoven-safe pHates,check with the manufacturer.
- do not set warm dishes on a coHdsurface as rapid
temperature changes couHdcause crazing or breakage.
To cancel Keep Warm:
1. Press the CANCEL pad.
2. Removefood from the oven.
Changing Temp °F/°C
1. The factory default setting for temperature is Fahrenheit.
2. Tochange the setting, press and hoHdthe CANCELand Bake
pads at the same time for three seconds.
3. A singHebeep wiHHsound and the current setting wiHHbe
dispHayed(°F or °C:).(If no change is made, the range wiHH
return to the existing setting after 30 seconds.:)
4. To change the setting, press the More+ or Less- pad. Press
again to return to existing setting. Wait five seconds and the
setting wiHHbe compHete.
11

Automatic Shut-Off/Sabbath
Mode
The oven will automatically turn off after 12 hours if you
accidentally Heaveit on. This safety' feature can be turned off.
TO cancel the 12-hour shut-off and run the
oven continuously for 72 hours:
1. Set the oven to bake (see page 9].
2. Press and hoHdthe CHockpad for five seconds.
° SAb wifl be dispHayedand flash for five seconds.
, SAb wifl then be dispHayedcontinuousHyuntiHturned off
or untiHthe 72-hour time limit is reached.
° BAKEwill also be displayed if a bake cycle is in use
while the oven is in Sabbath Mode.
All other functions EXCEPTBAKE {Timer, Keep Warm,
Clean, etc.:}are locked out during the Sabbath Mode=
To cancel Bake when in Sabbath Mode:
Press CANCEL.° BAKEwill turn off in the display.
° No beeps will sound.
To cancel the Sabbath Mode:
1. Press the Clock pad for five seconds.
OR
2. After 72 hours, the Sabbath Mode will end.
° SAb will flash for 5 seconds.
° The time of day will return to the display.
Adjusting the Oven Temperature
Oven temperatures are carefully tested for accuracy at the
factory. It is normal to notice some baking or browning
differences between a new oven and an old one. As ranges
get older, the oven temperature can shift.
You may adjust the oven temperature if you think the oven is
not baking or browning correctly. To decide how much to
change the temperature, set the temperature 25° higher or
lower than your recipe recommends, then bake. The results
of the "test" should give you an idea of how much to adjust
the temperature.
TO adjust the oven temperature:
1. Press Bake.
2. Enter 550° by pressing the More+ pad.
3. Pressand hold the Bake pad for several ,M,or(_;+i:
seconds or until 0° appears in the display.
If the oven temperature was previously adjusted, the
change will be displayed. Forexample, if the oven tem-
perature was reduced by 15° the display will show "-15°''.
4. Pressthe More+ or Less- pad to adjust the temperature.
Eachtime a pad is pressed, the temperature changes by
5°. The oven temperature can be increased or decreased
by 5° to 35°.
5. The time of day will automatically reappear in the display.
You do not need to readjust the oven temperature if there
is a power failure or interruption. Broiling and cleaning
temperatures cannot be adjusted.
Sabbath Mode Notes:
, Sabbath Mode can be turned on at any time with or
without the oven on.
° Sabbath Mode cannot be turned on if the touchpads are
locked out or when the door is locked.
, If the oven is baking when Sabbath Mode is set, BAKE
will go out at the end of the baking cycle. There will be
no audible beeps.
° If the oven light is desired while in Sabbath Mode, it
must be turned on before the Sabbath Mode is started.
, When the Sabbath Mode is started, no preheat beep will
sound.
, All prompts, messages and beeps are deactivated when
Sabbath Mode is active.
, The automatic door lock does not operate during the
Sabbath Mode.
, Pressing CANCELwill cancel a Bake cycle, however the
control will stay in the Sabbath Mode.
° If power fails, the oven will power up in Sabbath Mode with
72 hours remaining and no cycle active.
12

Q
To set Broim:
1. Press the Broii pad.
, BROIL flashes.
, SEtis dispiayed.
2. Press the More+ pad to set HI broi] or press the Less- pad
to set LO bro&
, HI or LO will be dispiayed.
, Sebct HI broi] (550° F}for norma] broiiing. Sebct
LO broi] (450° F}for bw-temperature broiiing of bnger
cooking foods such as pouitry.
3. After four seconds, the oven will start.
, BROIL will remain Hit.
5.
8.
7.
4. Foroptimum browning, preheat for 2-3 minutes before
adding food.
Placefood in the oven. Close oven door.
Turn meat once about halfway through cooking.
When food is cooked, press the CANCEL
pad. Remove food and broiler pan from the
ove n.
, The timeofdaywillreappearinthe
display,
BroiJ Notes:
, For best results when broiling, use a pan designed for
broiling.
, HI is used for most broiling. Use LO broil when broiling
longer cooking foods. The lower temperature allows
food to cook to the well done stage without excessive
browning.
. To change the oven temperatare daring broiling,
press the Broil pad and then press the More+ or Less-
pad to switch between LO and HI broil.
, Broil times may be longer when the lower broiling
temperature is selected.
, Most foods should be turned halfway through broiling
time.
Foradditional broiling tips and temperatures, refer to the
"Cooking Made Simple" bookleL
Broiling Chart
Preheat oven for 2-3 minutes.
I I i
Beef
Pork
Steaks, 1" thick
Hamburger Patties, 3/4" thick
Bacon
Ham, precooked 1/2" slice
Chops, 1" thick
Chicken Breasts, bone-in
Seafood Fish filets
Fish steaks, 1" thick
Lobster tails, 3-4 oz. each
5
5
5or8
Medium
Weii Done
Weii Done
15-20 min.
18-24 min.
13-18 min.
Weil Done 8-10 rain.
Warm 8-12 min.
Weil Done 22-28 min.
5
5
5
5
5
Weii Done
Flaky
Flaky
Done
30-45 rain. (Lo Broil)
8-12 min.
10-15 min.
7-10 min.
For a browned/seared exterior and rare interior, it may be necessary to decrease cook time on side one and decrease the distance
between the meat and heat source.
Note: This chart is a suggested guide. The times may vary with the food being cooked.
13

@
Pilotless ignition
Your range is equipped with pflotHessignition. With this type of
ignition system, the gas automatically shuts off and the eve#
will not operate during a power failureo
A lighted match will not light the oven burner. No attempt
should be made to operate the oven daring a power
failure.
Oven Vent
When the oven is in use the area near the vent may become
hot enough to cause burns. Never block the vent opening.
The oven vent is located below the backgaard vent shield
OVEN VENT
LOCATION
on yoarrange.
Do not place
plastics near the
vent opening as
heat from the vent
could distort or
melt the plastic.
Oven Light
Pressthe oven light switch to turn the oven light
on and off=The oven light is only activated by
this switch.
Oven Bottom
Oven
Light
Protect oven bottom against spillovers, especially acidic or
sugary spills, as they may discolor the porcelain enamel, Use
the correct pan size to avoid spfllovers and boflovers, Do not
place atensils or alaminam foil directly on the oven
bottom.
Oven Racks
2. Lift up on the front of the rack and pull out.
To replace:
1= Place rack on the rack support in the oven.
2= Tilt the front end up slightly. Slide rack back until it clears
the lock-stop position.
3= Lower front and slide back into the oven.
Do not cover an entire rack with alaminam foil or place
foil on the oven bottom. Baking resalts will be affected
and damage may occar to the oven bottom.
Rack Positions
RACK 7 (highest
baking on cookie sheets 6
and broiling. ;z;z;_z_=p_;:_;_ 4
RACK 6: Used for single
3
rack baking on cookie
sheets and broiling. Used o_,
Bottom
for multiple rack baking. Two Rack Baking
RACK 5: For single rack baking on cookie sheets and
broiling.
RACK 4: Used for single rack baking on cookie sheets, sheet
cakes, casseroles and broiling. Used for multiple rack baking.
RACK 3: For single rack baking on cookie sheets, casseroles,
layer cakes, loaves of bread and sheet cakes. Used for
RACK 2: Used for single rack baking on cookie sheets and
roasting small cuts of meat. Used for multiple rack baking.
RACK 1: Use for roasting large cuts of meat and poultry.
Oven Bottom: Place oven rack
on raised sides of oven bottom.
Use for additional space when
cooking large oven meals.
MULTIPLE RACK COOKING:
Two rack: Use rack positions 3
and 6,or 2 and 4.
Bakiag Layer Cakes on Two Racks
, Do not usethe oven for storing food or cookwarel
The oven has two racks. All racks
are designed with a lock-stop
edge.
To remove:
1. Pull rack straight out until it
stops at the lock-stop position.
14

Seff-C ean Oven
• it is normal for parts of the range to become hot during a
To set Semf-Clean:
Note: Oven temperature must be below 400° Fto program
a clean cycle.
• To prevent damage to oven door. do not attempt to open
the door when "LOCK" is displayed
, Avoid touching cooktop, door, window or oven vent area
during a clean cycle.
° Do not use commercial even cleaners on the oven finish
or around any part of the oven. The} will damage the
finish o_ parts.
The self-clean cycle uses above-normal cooking temperatures
to automatically clean the oven interior.
It is normal for flare-ups, smoking, or flaming to occur during
cleaning if the oven is heavily soiled. It is better to clean the
oven regularly rather than to wait until there is a heavy build-
up of soil in the oven.
During the cleaning process, the kitchen should be well
ventilated to get rid of normal odors associated with cleaning.
Before Self-C eaning
1. Turn off the oven light before cleaning. The light may burn
out during the clean cycle.
2. Remove broiler pan, all pans, and oven racks from the
oven. The oven racks will discolor and may not slide easily
after a self-clean cycle if they are not removed.
3. Clean oven frame, door frame, area outside of gasket, and
around the opening in the door gasket with a nonabrasive
cleaner such as Bon Ami* or detergent and water. The
self-cleaning process does not clean these areas. They
should be cleaned to prevent soil from baking on during
the clean cycle. (The gasket is the
seal around the oven door and
window.}
4. To prevent damage, do not clean or
rub the gasket around the oven
door. The gasket is designed to
seal in heat during the clean cycle.
5. Wipe up excess grease or spillovers from the oven bottom.
This prevents excessive smoking, flare-ups or flaming
during the clean cycle.
6. Wipe up sugary and acidic spillovers such as sweet
potatoes, tomato, or milk-based sauces. Porcelain enamel
is acid-resistant, not acid-proof. The porcelain finish may
discolor if acidic spills are not wiped up before a self-clean
cycle.
1. Close the oven door.
2. Press the Clean pad.
, CLEAN flashes in the display.
3. Press the More+ or Less- pad.
, CL-M (Medium Soil, 3 hours[)is displayed. ...................................
If the door is not closed, beeps will sound and ...............................
"door" will display. If the door is not closed .....Less-
within 45 seconds, the self-cleaning operation
will be canceled and the display will return to the time of
day.
4. Press the More+ or Less- pad to scroll through the self-
cleaning settings.
CL-H (Heavy Soil, 4 hours}
CL-M (Medium soil, 3 hours}
CL-L (Light Soil, 2 hours}
Choosing the soil level of the oven automatically programs
the self-cleaning time.
5. After four seconds, the oven will start cleaning.
° The cleaning time will start counting down in the display.
° LOCK will appear in the display.
° CLEAN will appear in the display.
To Demay a Self-Omean Cycle:
1. Press the Delay pad.
° DELAY flashes.
, 00:00 wiil appear in the display. ..............................
2. Press the More+ or Less- pad to set the
amount of time you want to delay the cycle.
Delay time can be set from ten minutes
(00:10} to 11 hours, 59 minutes (11:59}.
3. While DELAY is flashing, press the
Clean pad.
, CLEAN wiil flash.
4. Press the More+ or Less- pad.
. CL-M (Medium Soil, 3 hours} is displayed.
eonto
Brand names for cleaning products are registered trademarks ofthe respective manufacturers.
15

5. Press the More+ or Less- pad to scroll through the sdf-
cieaning settings.
CL-H (Heavy Soft,4 hours:}
CL-M (Medium soft, 3 hours:}
CL-L (Light Soft,2 hours:}
Choosing the soft bvd of the oven automatically programs
the sdf-cbaning time.
6. After four seconds, CLEAN, DELAY and LOCK wfli appear
in the dispiay to show that the oven is set for a ddayed
dean operation. The dday time is dispiayed.
During the Se_f-Clean Cycle
When LOCK shows in the dispiay, the door cannot be opened.
To prevent damage to the door, do not force the door open
when LOCK is dispiayed.
Smoke and Sin!!ms
You may see some smoke and smell an odor the first few
times the oven is cleaned. This is normal and will lessen in
time,
Smoke may also occur if the oven is heavily soiled or if a
broiler pan was left in the oven.
Sounds
As the oven heats,you may hear sounds of metal parts
expanding and contracting. This is normal and will not
damage the oven.
Jf the oven has already been set for a clean
cycle and you wish to set a delay:
1. Press the Delay pad.
° DELAY flashes.
° 00:00will appear in the display.
2. Press the More+ or Less- pad to set the More+
amount of time you want to delay the cycb.
After four seconds, CLEAN, DELAY and LOCK Less-
will appear in the display to show that the ................................
oven is set for a delayed clean operation. The
delay time is displayed.
When the Self-Clean cycle starts:
° DELAYwill turn off.
° The clean time will appear in the display.
To canoe! the Serf-Clean cycle:
Press the CANCEL pad.
° All words disappear from the display.
° All functions are canceled.
° The time of day appears in the display.
After Seff-C_eaning
About one hour after the end of the self-dean cycle, LOCK
will turn off. The door can then be opened.
Some soil may leave a light gray, powdery ash. Remove
it with a damp cloth. If soil remains after wiping, that means
the clean cycle was not long enough. The soil will be re-
moved during the next clean cycb.
if oven racks were left in the oven and do not slide
smoothly after a clean cycle, wipe racks and rack supports
with a small amount of vegetable oil to make them easier to
move.
Fine lines may appear in the porcelain becaase it went
throagh heating and cooling, This is normal and will not
affect performance.
A white discoloration may appear after cleaning if acidic
or sugary foods were not wiped up before the self=clean
cycle. This discoloration is normal and will not affect perfor-
mance.
If the oven door is left open, "door" wiii flash in the
display and a signal will beep until the door is closed
and the Clean pad is pressed again.
If more than five seconds elapse between pressing the
Clean pad and the More+ or Less- pad, the program will
automatically return to the previous display.
The oven door will be damaged if the oven door is
forced to open when LOCK is still displayed.
16

Cleaning Procedures
or cleaning. This is to avoid damage andpossib!e burns.
Brand names are registered trademarks of the
, re Prevent staining or discobrati0n, clean appliance after each use, respective manufacturers=
!1:a Part !s removed, be sure !t is correct!y replaced. _*To order call 1-877-232-8771 USA or
1-800-888-8408 Canada.
PART PROCEDURE
BroimerPan Never cover insert with aluminum foil as this prevents the fat from drahting to the pan below.
and insert , Place soapy cloth over insert and pan; let soak to loosen soil=
, Wash in warm soapy water. Use scouring pad to remove stubborn soil.
, Broiler pan and insert can be cleaned in dishwasher.
Seamed Gas
Burners
Burner Grates -
Porcemain on
Cast iron
cmock and
Control Pad
Area
Control Knobs
Cooktop and
Control Panem-
Porcemain Enamel
Side Panems,
Storage Drawer
and Door
Handmes-
Painted Enamel
Removabme Burner Heads
° Allow burner to cool. Remove burner cap and wash in soapy water with a plastic scouring pad. For
stubborn soils, clean with a soap-filled, nonabrasive pad or Cooktop Cleaning Creme_
(Part #20000001} _*and a sponge.
° Do not clean in the dishwasher or self-cleaning oven.
SeamedGas Burners
° Clean frequently= Allow burner to cool=Clean with soap and plastic scouring pad. Forstubborn soils,
clean with a soap-filled, nonabrasive pad. Do not enlarge or distort holes.
° Be careful not to get water into burner ports.
° Use care when cleaning the ignitor= If the ignitor iswet or damaged the surface burner will not light=
° Wash with warm, soapy water and a nonabrasive, plastic, scrubbing pad. For stubborn soils,
clean with a soap-filled, nonabrasive, plastic pad or Cooktop Cleaning Creme_ (Part #20000001} _*
and a sponge. If soil remains, reapply Cooktop Cleaning Creme,cover with a damp paper towel
and soak for 30 minutes. Scrub again, rinse and dry.
° Do not clean in the dishwasher or self-cleaning oven.
° To activate "Control Lock" for cleaning, see page 8.
° Wipe with a damp cloth and dry. Do not use abrasive cleaning agents as they may scratch the finish.
° Glass cleaners may be used if sprayed on a cloth first. DO NOTspray directly on controlpad and
display area.
° Remove knobs in the OFFposition by pulling forward.
, Wash, rinse and dry. Do not use abrasive cleaning agents as they may scratch the finish.
° Turn on each burner to be sure the knobs have been correctly replaced.
Porcelain enamel isglassfused on metal and may crack or chip with misuse. Itisacid resistant, notacid proof.
All spillovers, especially acidic or sugary spillovers, should be wiped up immediately with a dry cloth.
° When cool, wash with soapy water, rinse and dry.
, Never wipe off a warm or hot surface with a damp cloth. This may cause cracking or chipping.
, Never use oven cleaners, abrasive or caustic cleaning agents on exterior finish of range.
° When cool, wash with warm soapy water, rinse and dry. Never wipe a warm or hot surface with a damp
cloth as this may damage the surface and may cause a steam burn.
° Forstubborn soil, use mildly abrasive cleaning agents such as baking soda paste or Bon Ami*. Do not use
abrasive cleaners such assteel wool pads or oven cleaners. These products will scratch or permanently
damage the surface.
Note: Use a dry towel or cloth to wipe up spills, especially acidic or sugary spills. Surface may
discolor or dutl if soil is not immediately removed. This is especially important for white surfaces.
17

i
Oven Window
and Door - Glass
+ Avoid using excessive amounts of water which may seep under or behind gHasscausing staining.
+ Wash with soapand water. Rinsewith dear water and dry. GHasscHeanercan be used if sprayed on acHoth
first.
+ Do not useabrasive materiaHssuch asscouring pads,steeHwooHor powdered cHeanersastheywiHHscratch
gHass.
Oven interior + FoHHowinstructions on pages 15-18 to set a seHf-cHeancycHe.
Oven Racks
Stainmess Steel
(seHect modems:)
®
®
®
CHeanwith soapy water.
Removestubborn soiHwith cHeansingpowder or soap-fiHHedscouring pad. Rinse and dry.
Racks wiHHpermanently discoHorand may not sHideout smoothHyif Heftin the oven during a seHf-cHean
operation. If this occurs, wipe the rack and embossed rack supports with a smaHHamount ofvegetabHeoiH
to restore ease of movement, then wipe off excess oil
* DO NOT USEANY CLEANING PRODUCT CONTAINING CHLORINE BLEACH.
* DO NOT USEABRASIVE OR ORANGE CLEANERS.
* ALWAYS WIPE WITH THE GRAIN WHEN CLEANING.
* Daily Cleaning/Light Soil -- Wipe with one ofthe following - soapywater, white vinegar/water solution,
Formula 409 GHassand Surface CHeaner+or a similar gHasscHeaner- using a sponge or soft cHoth.
Rinse and dry. To poHishand heHpprevent fingerprints, foHHowwith StainHessSteeHMagic Spray+
(Part No. 20000008:)+*-
, Moderate/Heavy Soil -- Wipe with one of the foHHowing- Bon Ami, Smart CHeanser,or Soft Scrub* -
using a damp sponge or soft cHoth.Rinse and dry. Stubborn soiHsmay be removed with a damp muHti-
purpose Scotch-Brite +pad; rub evenHywith the grain. Rinse and dry.To restore Husterand remove streaks,
foHHowwith StainHessSteeHMagic Spray*.
, Discoloration -- Using a damp sponge or soft cHoth,wipe with Cameo StainHessSteeHCHeaner+-Rinse
immediateHyand dry. To remove streaks and restore Huster,foHHowwith StainHessSteeHMagic Spray*.
+Brand names for cHeaning products are registered trademarks of the respective manufacturers.
+*To ou+deu+direct, caHH1-877-232-8771 USA or 1-800-888-8408 Canada,
18

Oven Door
oven door, This couUdcause the range to tip over, break
the d00r, 0r injure the user.
Note: The oven door on a new range may feel "spongy"
when it is closed. This is normal and will decrease with use.
Oven Window
To protect the oven door window:
1. Do not use abrasive cleaning agents such as steel wool
scouring pads or powdered cleansers as they may scratch
the glass=
2. Do not hit the glass with pots, pans, furniture, toys, or other
objects.
3. Do not close the oven door until the oven racks are in
place.
Scratching, hitting, jarring or stressing the glass may weaken
its structure causing an increased risk of breakage at a later
date.
Leveling Legs
!eye!!ng !egs to the f!OOr.This bracket prevents the range
from accidentally tipping.
Emectrical Connection
Appliances which require electrical
power are equipped with a three=
prong grounding plug which must be
plugged directly into a properly grounded
three-hole 120 volt electrical outlet.
A/w<vs chsconnectpower to appliance before servicing,
The three-prong grounding plug offers protection against
shock hazards. DO NOT CUT OR REMOVE THE THIRD
GROUNDING PRONG FROM THE POWER CORD PLUG.
If an ungrounded, two-hole or other type electrical outlet is
encountered, it is the personal responsibility of the
appliance owner to have the outlet replaced with a
properly grounded three-hole electrical outlet.
Oven Light
Make sure bulb cover and bulb are Cool before touching.
To replace oven light bulb:
1. When oven iscoo[, hold bulb cover BULBOOVER
in place, then slide wire retainer
off cover. NOTE: Bulb cover
will fall if not held in place
while removing wire retainer=
2. Removebulb cover and light
RETAINER
bulb=
3. Replace with a 40-watt appliance bulb.
4. Replace bulb cover and secure with wire retainer.
5. Reconnect power to range. Reset clock.
19

Remova of Gas Appmiance
Gasappiiance connectors used to connect this appiiance to
the gas suppiy are not designed for continuous movement.
Once installed, DO NOT repeatediy move this gas appiiance
for cbaning or to rebcate. If this appiiance has to be moved
and/or removed for servicing, follow the procedure described
in the installation instructions. Forinformation, contact
Maytag Customer Assistance at 1-800-688-9900 USAor
1-800-688-2002 Canada.
To prevent range from accidentally tipping, range must be
secured to the floor by sliding rear leveling leg into the anti-
tip bracket.
Storage [}rawer
Do not store plastic, paper products, food or flammable
for these items when the oven is in use.
The storage drawer can be removed to allow you to clean
To remove:
1. Empty drawer and pull out to the first stop position.
2. Lift up the front of the drawer.
3. Pull out to the second stop position.
4. Grasp sides and lift drawer up and out.
To replace:
1. Fit the ends of the drawer glides into the rails in the range.
2. Lift up the front of the drawer and gently push in to the
first stop position.
3. Lift drawer up again and push until drawer is closed.
Oven Bottom
Protect oven bottom against spillovers, especially acidic or
sugary spills, as they may discolor the porcelain enamel. Use
the correct pan size to avoid spillovers and boilovers.
The oven bottom may be removed for easier cleaning.
To remove:
from oven.
To replace:
Fit the front edge of the oven bottom into the oven front
frame. Lower the rear of the oven bottom and slide the two
catches back to lock the oven bottom in place.
20

PROBLEM SOLUTION
For most concerns, try these first. ° Check if oven controHshave been propedy set.
° Check to be sure pHugis secureHyinserted into receptacle.
° Check or re-set circuit breaker. Check or repHacefuse.
° Check power suppHy.
Surface burner fails to light. , Check to be sure unit is propedy connected to power suppHy.
° Check for a Mown circuit fuse or a tripped main circuit breaker.
° Check to be sure ignitor isdry and cHicHng.Burner will not Hightif ignitor isdamaged.
soiHedor wet. If ignitor doesn't chick,turn controHknob OFF.
The flame is uneven. ° Burner ports may be clogged.
Sarface burner flame lifts ° Check to be sure a pan issitting on the grate above.
off ports.
Baking resumts are not as ° Check the oven temperature selected. Make sure oven is preheated when recipe
expected or differ from or directions recommend preheat.
previous oven. , Make sure the oven vent has not been blocked. See page 14 for location.
° Check to make sure range is level.
, Temperatures often vary between a new oven and an old one.As ovens age,the oven
temperature often "drifts" and may become hotter or cooler. See page 12 for
instructions on adjusting the oven temperature. Note: It is not recommended to
adjust the temperature if only one or two recipes are in question.
° Use correct pan. Dark pans produce dark browning. Shiny pans produce light
browning. See "Cooking Made Simple" booklet for more information on bakeware.
° Check rack positions and pan placement. Stagger panswhen using two racks. Allow
1-2 inches between pans and oven wall.
° Check the use of foil in the oven. Never use foil to cover an entire oven rack. Place
a small piece of foil on the rack below the pan to catch spillovers.
Food is not broiling properly or , Check oven rack positions. Food may be too close to flame.
smokes excessively. , Aluminum foil was incorrectly used. Never line the broiler insert with foil.
, Trim excess fat from meat before broiling.
, A soiled broiler pan was used.
, Preheat oven for 2-3 minutes before placing food in the oven.
, Broil with the oven door closed.
Oven will not self-clean. ° Check to make sure the cycle is not set for a delayed start. See pages 15-16.
, Check if door is closed.
, Check if control is in Sabbath Mode. See page 12.
, Oven may be over 400° F.Oven temperature must be below 400° Fto program a
clean cycle.
21

PROBLEM $OLUTmDN
Oven did not clean properly. ° Longer cleaning time may be needed.
, Excessivespillovers, especially sugary and/or aekJiefoods, were not removed prior
to the self-clean cycle=
Oven door will not unlock after
self-clean cycle.
Moisture collects on oven
window or steam comes from
oven vent.
There is a strong odor or light
smoke when oven isturned on.
Fault Codes
Noises may be heard.
There are no beeps and
"SAb" flashing and then
Oven interior is still hot. Allow about one hour for the oven to cool after the
completion of a self-clean cycle. The door can be opened when "LOCK" is
not dispDyed.
The control and door may be locked. See page 8.
° This is normal when cooking foods high in moisture.
° Excessive moisture was used when cleaning the window.
. This is normal for a new range and will disappear after a few uses. Initiating a clean
cycle will "burn off" the odors more quickly.
, Turning on a ventilation fan will help remove the smoke and/or odor.
, Excessivefood sells on the oven bottom. Use a self-clean cycle.
, BAKE or LOCK may flash rapidly in the dispDy to alert you if there is an error
or a problem. If BAKEor LOCK appear in the display, press the CANCEL pad.
If BAKE or LOCK continue to flash, disconnect power to the appliance.
Wait a few minutes, and then reconnect power. If the flashing still continues,
disconnect power to the appliance and call an authorized servicer.
° If the oven is heavily soiled, excessive flareups may result in a fault code during
cleaning. Press the CANCEL pad and allow the oven to cool completely, wipe out
excess sell, then reset the clean cycle. If the fault code reappears, contact an
authorized servicer.
, Theoven makes several low level noises. You may hear the oven relaysasthey go on
and off. This is normal.
° As the oven heats and cools, you may hear sounds of metal parts expanding and
contracting. This is normal and will not damage your appliance.
° Oven may be in Sabbath Mode. See page 12.
° Oven is in Sabbath Mode. To cancel, press and hold the Clock pad for five
seconds.
22

Fuji One Year Warranty -
Parts and Labor
For erie (1} year from the ollginai retail
purchase date. any part which fails in
normal home use wiii be repaired or
replaced free of charge.
Canadian Residents
The auove warranties only cover an
appliance installed in Canada that has
been certified or listed b} appropriate test
agencies for corrlpliance to a National
Standard of Canada unless the appliance
was brought into Canada due to transfer
of residence from the United States to
Canada
Limited Warranty Outside the
United States and Canada -
Parts Only
For one {1} year from the date of original
retail purchase, any part which fails in
normal home use will be repaired or
_eplaced free of charge for the part itself.
with the owner paying all other costs.
including labor, mileage and transporta-
tion. trip charge and diagnostic charge, it
required.
The specific warTant/es expressed above
are tbe ON£ Y warTanties provided by the
manufacturel: These warrant,,es g,,veyou
specific legal rights, and you may also have
other r79hts which valN hem state to state.
What is Not Covered By These
1. Conditions and damages resulting from any of the following:
a. Improper installation, delivery, or maintenance.
b. Any repair, modification, alteration, or adjustment not authorized by
the manufacturer or an authorized servicer.
c. Misuse, abuse, accidents, or unreasonable use.
d. Incorrect electric current, voltage, or supply.
e. Improper setting of any control
2. Warranties are void if the original serial numbers have been removed, altered,
or cannot be readily determined.
3. Light bulbs.
4. Products purchased for commercial or industrial use.
5. The cost of service or service caii to:
a. Correct installation errors.
b. Instruct the user on the proper use of the product.
c. Transport the appliance to the servicer.
6. Consequential or incidental damages sustained by any person as a result of
any breach of these warranties. Some states do not allow the exclusion or
limitation of consequential or incidental damages, so the above exclusion may
not apply.
If You Need Service
" Call the dealer from whom your appliance was purchased or carl May'tag
Services sM,Maytag Customer Assistance at 1-800-688-9900 U.S.A. or
1-800-888-2002 Canada to locate an authorized servicer.
Be sure to retain proof of purchase to verify warranty status. Refer to
WARRANTY for further information on owner's responsibilities for warranty'
service.
o If the dealer or service company cannot resolve the problem, write to Maytag
Services sM,Attn: CAIR _ Center, P.O. Box 2370, Cleveland, TN 37320-2370, or
call 1-800-688=9900 UoSoAoor 1-800-688-2002 Canada.
U.S.customers using TTY for deaf, hearing impaired or speech impaired, call
1-800-888-2080.
User's guides, service manuals and parts information are available from
Maytag ServicessM,Maytag Customer Assistance.
When writing or calling about a service problem, please include:
a. Your name, address and telephone number;
b. Model number and serial number;
c. Name and address of your dealer or servicer;
d. A clear description of the problem you are having;
e. Proof of purchase (sales receipt}.
23

I _&YI'AI3
®
gaz _ touches
de pr6cision 500
m m m "IL
U|S|R|e
instructions de s6curit_
importantes ......................... 25-29
Cuissou sur masurface ............. 30-31
Commandes de la surtace de cuisson
BrOleurs scell6s
Cuissou claus mefour ................ 32=41
Cubson courante
Cubson et mamtbn
Cuisson courante diff6r6e
Maintien au chaud
Cuisson au gril
Grilles du four
Nettoyage ................................... 42-45
Four autonettoyant
M6thodes de nettoyage
Eutretieu ......................................46-47
Hublot et lampe du four
D6placement d'un appareil a gaz
Recherche des 9auues .............b,8=49
Garantieet serviceapres=vente ....51
Guia de Use y Cuidado ....................52

lnstaUatear : Laissezceguide avecI'appareil.
Consommateur: VeuHbzIirele guideet le conselvetpaul
consur[ationuiterbure. Conservezlafactured'achatou iecheque
encalssecommepreuvede I'achat.
Numerode mod_Je
Numerode serie
Dated'achat
Sivousavezdesquestions,veuifleznousappeier:
Servicea laclientelede May[ag
1-800-688-9900 E.-U.
1-800-688-2002 Canada
(lundiau vendredi,8 h _20 h,heurede rest}
Internet:http:iiwww.maytag.com
Dartsle cadrede nospratiquesd'ameliorationconstantede la
qualit6et de la pedormancede nosproduitsde cuisson,ues
modificationsde ['appareilqui ne sont pasmentionndesdansce
guide pourront6treintroduites.
Repertez=veus _ la page 51 pour plusd'iiffermatiens
cencemant le se_lviceapr_s-vellteo
Life toutes lea instructions avant d'utiliser cet appareii;
observer toutes bs instructions pour eliminer bs risques
d'incendie, choc ebctrique, dommages materiels et corporeb
que pourrait susciter une utflisation incorrecte de rapparefl,
Utfliser rapparefl uniquement pour bs fonctions prevues,
decrites darts ce guide,
Pour une utilisation adequate et en s_eurite, fl faut que
rapparefl soit convenabbment installe par un technicien
qudifie, et relic 8 la terre, Ne pas regbr, rearer ni remplacer
un composant, 8 moins que ceB ne soit sp@ifiquement
recommand6 darts ce guide, Toute autre reparation doit 6tre
effectuee par un technicien qualifie, Demander a rinstallateur
de montrer o8 setrouve b robinet d'arret de gaz et comment
b fermer en cas d'urgence,
Toujours debrancher rapparefl avant d'y faire de rentretien,
sent pas tespectdes _ la iettre, il y a risque d'!ncendie
Lesinstructions de securite importantes et bs paragraphes
_mvertissemenb_de ce guide ne sont pas destines a couvriH
toutes bs conditions et situations qui pourraient se presenter.
IIfaut faire preuve de bon sens. de prudence et de soin Iors de
rinstallation de rentretien ou du fonctionnement de Fappareil
Toujours prendre contact avec b detafllant, le distributeur.
ragent de seMce apres-vente ou b fabricant dans b cas de
problemes ou de conditions qui ne seraent pas comprises.
Reconna tre les 6tiquettes, paragraphes et
symboUessur Uas curit
-Ne pas ranger ni utiliser d'essence eu autre vapeur
eu liquide inflammable _ pre×imit_ de cet appareil
e_ de teat a_tre appareiL
Z QUE FAIRE SI L'ON SENT UNE ODEUR DE GAZ :
, N'uti!ise_ a_cun telephone de I'imme_bleo
o Se te_dre ehez _ veisin et t_l_phe_er
i_mddiatement _ la eempag_ie de gaz, S_ivre lea
direetives de_es par ie pr_pes_ de la
ee_pag_ie de gaz,
, S'il est impossible de jeindre ia ee_pag_ie de
gaz, tdldphe_e_ a_ se_iee des i_ee_dies.
L'i_stal!atie_ et lea r_paratie_s deivent etre
entrepr sedeservicee, laco pag.b degaz,
AVERTISSEMENT _ Dangers ou pratiques dangereuses qui
POURRA!ENT resu!ter en de groves biessures ou meme la
mort.
Une fuite de gaz pouNait surven!r dans le SystSmeet
susciter une situation dangereuse, L'odorat peut ne pas
suffire pour detecter une fuite de gaz, Les foumisseurs de
A_ENTION, Dangers ou pratiques dangereuses qui
POURRAIENTresulter en des blessures mineures,
conformement aux instructions du fabricant.
25

,u
instructions gen raJes
o TOUTE CUm$1NIEREPEUT BASCULER
ET PROVOQUER DES BLESSURES°
o mNSTALLERLA BRIDE
ANTIBASCULEMENT FOURNIE AVEC
CETTECUISINIERE.
o RESPECTERTOUTES LES iNSTRUC-
TiONS D'INSTALLATION°
AVERTJSSEMENT: Pour r_duire Je
risque de basculement de I'appareil _ re'occasion
d'une utiHsation anormaie ou d'un chargement
e×eessif de Japorte du four, il faut que Jabride
antibaseuiement soit convenabiement instaii_e,
Utiliser une Bmpe torche pour determiner si la bride
antibascubment est convenabbment instaflee sous la
cuisiniere, L'un des pieds arriere de reghge de I'aplomb doit
etre convenabbment engage darts la lento de la bride,
Lorsque la cuisiniere est convenabbment calee, la bride
antibascubment immoNise b pied arriere contre b sol,
Verifier la parfaite immobflisation de la cuisiniere par la bride
apres chaque @placement de la cuisiniere,
Pour viter un incendie ou des
dommages par la fum e
S'assurer que tous bs materiaux de conditionnement sont
retires de Fappareil avant de b mettre en marche,
Garder bs materiaux combustibles, [essence et autres
matieres et vapeurs inflammables bien 61oignesde Fappare&
Si I'appareil est installe pros d'une fenetre, des precautions
appropriees doivent etre prises pour @iter que b vent entrdne
bs rideaux au-dessus des bn]burs,
NEJAMAIS Bisser des articles sur la table de cuisson, L'air
chaud de Fevent peut bs enfiammer et mettre egabment sous
pression des contenants fermes qui pourraient alors exploser,
De nombreux flacons d'aerosol peuvent EXPLOSERIorsqu'on
bs expose a la chabur, et ib peuvent contenir un produit tres
inflammable, Eviter d'utifiser ou remiser un flacon d'aerosol
proximite de [@pare&
De nombreux articles en plastique peuvent etre deteriores par
la chabur, Conserver bs articles en plastique a distance des
composants de ['apparei[ susceptibies de devenir tiedes ou
chauds, Ne pas laisser des articles en plastique sur la table
de cuisson; un article en plastique trop proche de I'event du
four ou d'un bn]bur allume pourrait s'amollir ou fondre,
Pour eliminer le besoin d'atteindre quelque chose par-dessus
les brQburs de surface, il est preferable qu'il n'y ait aucune
armoire de cuisine directement au-dessus de I'appareil, S'il y
a une armoire, on ne @wait y remiser que des articles peu
frequemment utilises et capables de resister a la chaleur
emise par I'appareil, La temperature pourrait etre excessive
pour certains articles, comme liquides volatils, produits de
nettoyage ou flacons d'aerosol,
En cas d'incendie
Interrompre b fonctionnement de Fappareil et de la hotte de
ventilation pour minimiser b risque d'extension des fiammes,
Eteindre bs fiammes, pub mettre la hotte en marche pour
evacuer la fumee et Fairvicie,
° Table de euisson : Utfliser un couverde ou une plaque
biscuits pour etouffer bs fiammes d'un feu qui se declare
darts un ustensib de cuisine,
NE JAMAJS saisir ou d@Bcer un ustensib de cuisine
oriflamme,
. Four : Fermer la porte du four pour etouffer bs fiammes,
Ne pas projeter de [eau sur un feu de graisse, Utiliser du
bicarbonate de sodium ou un extincteur a mousse ou produit
chimique sec pour eteindre bs fiammes,
S6curit pour Jes enfants
enfants Peuvents'int_[esser, Un enfant tentant de grimper
subiEde graves bbssures.
NEJAMAIS iaisser des enfants seuis ou sans supervision
Iorsque I'appareil est en service ou encore chaud,
NEJAMAIS laisser un enfant s'asseoir ou se tenir sur une
partie quelconque de I'appareil, II pourrait se blesser ou se
brOler,
II est important d'enseigner aux enfants que la cuisiniere et les
ustensiles places dessus ou dedans peuvent etre chauds,
Laisser refroidir les ustensiles en un lieu sOr,hors d'atteinte
26

des enfants. II est important d'enseigner aux enfants qu'un
appareil menager n'est pas un jouet, et qu'ils ne doivent
toucher aucune commande ou autre composant de I'appareil.
Familiarisation avee l'appareil
NEJANIAIS utiHserla porte de four comme tabouret/siege/
escabeau: ceci pourrait faire basculer I'appareil et entraner
dommages corporals serieux.
NEJAMAIS utiHserla cuisJnierecomme source de chaUeuH
pour le chauffage de Japiece. Sinon. un empoisonnement au
monoxyde de carbone pourrait s'ensuivre ainsi qu'une
surchauffe du four.
NEJAMAIS recouvrer lesfentes, ouvertures ou passages
de la sole de four ni la grille toute entiere avec un materiau
comme du papuerd'aluminium. Sinon. la circulation de I'aur
darts le fouu sera entravee et doric entraner un
empousonnement au monoxyde de sarbone. Le papier
d'alumnium peut aussi empnsonner ue la chaleur et
entrdner un risque d'incendie.
NEJANIAIS obstruer la circulation de I'airde combustion et
de ventilation au niveau de revent de four ou des entrees
d'air. Sinon. I'air ne parvient pas correctement aux brOleurs
et doric cda peut poser un risque d'empoisonnement au
monoxyde de carbone.
L'event de four est situe a [a base du dosseret.
Evitezde toucher le voisinage de I'event de four Iorsque le four
est utilise et pendant plusieurs minutes apres I'arret du four.
Certains composants de I'event et la zone voisine peuvent
devenir suffisamment chauds pour provoquer des brOlures.
Apres I'arret du four, ne touchez pas revent de four ou la zone
voisine avant que ces composants aient pu se refroidir
suffisamment.
Autres surfaces potentiellement chaudes :table de cuisson,
zones faisant face a la table de cuisson, event de four, zone
voisine de I'event, porte de four et zone voisine de porte et
de hublot.
Ne touchez pas Fampoule chaude du four avec un linge
humide; le choc thermique pourrait la briser. Si tel est le cas,
debranchez I'appareil avant de retirer I'ampoule pour eviter
une decharge electrique.
Ne remisezpas des aliments ou ustensiles de cuisine sur la
table de cuisson ou darts le four.
Cuisson et s eurit6
Placer toujours un ustensile sur un brOleur de surface avant de
I'dlumer. Veiller 8 bien conndtre la correspondance entre les
boutons de commande et les brOleurs.Veiller a allumer le
brOleur correct et verifier que le bru2leurs'dlume
effectivement. A la fin de la periode de cuisson, eteindre le
brQleur avant de retirer rustensile, pour eviter une exposition
aux fiammes du brQleur.
Veiller a toujours ajuster correctement la taille des flammes
pour qu'elles ne depassent pas sur la peripherie de I'ustensile.
Des flammes de trop grande taille sur un brflleur sont
dangereuses, elles entrainent un gaspillage d'energie et elles
peuvent faire subir des dommages a rustensile, a I'appareil ou
I'armoire situee au-dessus.
NE JAIVIAIS laisser un brQleur de surface allume sans
surveillance, particulierement avec une puissance de
chauffage elevee ou Iors d'une operation de friture. Un
debordement pourrait provoquer la formation de fumee et des
produits gras pourraient s'enfiammer. Eliminer des que
possible les produits gras renverses. Ne pas utiliser une
puissance de chauffage elevee pendant une periode
prolongee.
NE JAMAIS faire chauffer un recipient non ouvert darts le
four ou sur un bru3leurde surface; [accumulation de pression
darts le recipient pourrait provoquer son edatement et de
graves dommages materiels ou corporels.
Utiliser des maniques robustes et seches. Des maniques
humides peuvent provoquer la formation de vapeur bru3lante.
Ne jamais utiliser un torchon a vaisselle ou autre article textile
la place de maniques; un tel article pourrait trainer sur un
brQleur et s'enfiammer, ou accrocher un ustensile ou un
composant de I'appareil.
Laisser toujours refroidir un recipient d'huile de friture chaude
avant de tenter de le deplacer et le manipuler.
Ne pas laisser la graisse de cuisson ou autre materiau inflam-
mable s'accumuler darts ou pres de I'appareil, de la hotte ou
du ventilateur de Fevent. Nettoyer frequemment la hotte pour
empecher route accumulation sur la hotte elle-meme ou sur le
filtre. Lors du flambage d'diments sous la hotte, mettre le
ventilateur en marche.
NE JAIVIAIS porter, Iors de I'utilisation de I'appareil, des
vetements fairs d'un materiau inflammable, ou amples, ou
Iongues manches. De tels vetements peuvent s'enflammer ou
accrocher la poignee d'un ustensile.
27

Placertoujours[esgrillesa[apositionapproprieedans[efour
[orsque[efourestfroid.Fairecouiisser[agrillevers['exterieur
avantd'ajouterouenbverunplat;utiiiserpourceiaune
maniquerobusteetseche.Eviterd'introduire[amaindarts[e
fourpouryplacerouretirerunplat.S'i[estn@essairede
d@iacerunegrille[orsqu'eiieestchaude,utiiiserunemanique
seche.Veiiieratoujoursarreter[efoura[afind'uneperiode
decuisson.
Ouvrirtoujourslaportedufourtresprudemment.LaisserFair
chaudoulavapeurs'@happeravantderetirer/introduireun
plat.
AVERTmSSEMENT: Metsprepares:Respecterbsinstruc-
tionsdufabricant.Sibcontenantoub couverdeenplastique
d'unmetssurgeleseddormeouestendommagedurantla
cuisson,jeterimmediatementb recipientetsoncontenu.Les
alimentspourraientetrecontamines.
NFJ/_MAmSgarnirlasoleouunegrilledufouravecdela
feuflbd'duminium.Cecipourraitsusciterunrisquedechoc
ebctriqueoud'incendie,ouuneautredeteriorationde
Fapparefl.Utfliserdelafeuflbd'duminiumuniquementselon
bsinstructionsdeceguide.
Ustensimes et s cutit6
Utiliser des ustensibs a fond plat comportant une poignee
qu'on peut facflement saisir et qui reste froide. Eviter d'utfliser
un ustensib instabb ou ddorme, qui pourrait facibment
bascubr, ou dont la poignee est md fixee. Eviter egabment
d'utiliser des ustensibs de petite tailb comportant une
poignee Iourde; ces ustensibs sont generabment instabbs et
peuvent facibment bascubr. Un ustensfle Iourd Iorsqu'fl est
rempli peut egabment 6tre dangereux Iors des manipulations.
Veflbr a utfliser un ustensfle de taifle suffisante pour que b
contenu ne risque pas de @border. Ceci est particulierement
important pour un ustensib rempli d'huib de friture. Verifier
que la taifle de Fustensib est suffisante pour qu'il puisse
recevoir bs produits alimentaires a cuire, et absorber
Faugmentation de volume suscitee par Febullition de la
graisse.
Pour minimiser bs risques de br01ure,d'infiammation de
matieres et de renversement par contact non intentionnel avec
un ustensib, ne pas orienter la poignee d'un ustensib vers un
br0bur adjacent; orienter toujours la poignee d'un ustensib
vers b cOte ou Farriere de Fapparefl; ne pas Bisser non plus la
poignee d'un ustensib deborder a Favantde Fapparefl,o0 un
jeune enfant pourrait facibment la saisir.
Veflbr a ne jamais laisser b contenu liquide d'un ustensfle
s'evaporer completement; Fustensib et Fappareil pourraient
subir des dommages.
Appliquer bs instructions du fabricant Iors de Femploi d'un
sachet pour cuisson au four.
Seub certains materiaux en verre, vitroceramique, @ramique,
ou certains ustensibs vitrifies/emailles peuvent etre utilises sur
la table de cuisson ou darts b four sans risque de bris sous
Feffet du choc thermique. Observer bs instructions du
fabricant Iors de Futflisation d'un ustensib en verre.
La s@urite de fonctionnement de cet apparei[ a 6te testee
I'aide d'ustensiles de cuisine conventionnels. Ne pas utiliser un
ustensib ou accessoire qui n'est pas sp@ifiquement
recommande darts ce guide. Ne pas utiliser de couvre-br01eur,
gril place sur la table de cuisson ou systeme de convection
additionnek L'utilisation d'un dispositif ou accessoire qui n'est
pas expressement recommande dans ce guide peut degrader
la securite de I'appareil ou sa performance, ou reduire la
Iongevite des composants.
Nettoyage et s curit
Arreter routes bs commandes et attendre b refroidissement
de tous bs composants avant de bs toucher ou d'entre-
prendre b nettoyage. Ne pas toucher la grille d'un br0bur ou
la zone voisine avant que ces composants aient pu suffisam-
merit refroidir.
Exercer une grande prudence Iors du nettoyage de Fappareik
Travaifler prudemment pour eviter des br01urespar la vapeur
en cas d'utflisation d'un chiffon ou d'une @onge humide Iors
de Felimination d'un produit renverse sur une surface chaude.
Certains produits de nettoyage peuvent generer des vapeurs
nocives Iorsqu'on bs applique sur une surface chaude.
Four autor|ettoyar|t
Ne laisser aucune nourriture ni ustensile de cuisine, etc,
dams le fo0r !ors d 0he operat!on d autonettoyage,
Nettoyer uniquement les pieces mentionnees dans ce guide,
Ne pas nettoyer le joint de portel le joint joue un rob essentiel
quanta I'etancheite, Ne pasfrotter, endommager ou deplacer
le joint, Ne pas utiliser de produit de nettoyage du four dans
le four autonettoyant ou sur les zones voisines,
Avant d'executer une operation d'autonettoyage, retirer la
lechefrite, les grilles du four et les autres ustensiles, et eliminer
par essuyage tout exces de residus renverses pour eviter la
formation de fumee ou I'inflammation de ces residus,
28

II est normal que la surface de cuisson devienne chaude
durant une operation d'autonettoyage; par consequent, dviter
de toucher la surface de cuisson durant Fautonettoyage,
Avertissement et avis
important pour la s curit6
La Ioi cdifornienne _Safe Drinking Water and Toxic Enforce-
ment Act >>de 1986 Cproposition65Dstipule la publication par
le gouverneur de la Cdifornie d'une liste de substances que
I'etat de Californie considere comme cancerigenes ou
dangereuses pour le systeme reproducteur, et impose aux
entreprises commerdales [obligation de signaler a leurs
clients les risques d'exposition a de telles substances,
Les utilisateurs de cet appareil peuvent etre exposes a une
faible concentration de certaines substances figurant darts la
liste mentionnee ci-dessus, dont benzene, formaldehyde et
suie, du fait de la combustion incomplete du gaz naturel ou du
gaz de petrole liquefie, Pour minimiser la combustion
incomplete, veiller ace que les braleurs soient parfaitement
regles, Pour minimiser Fexposition aces substances, veiller
bien evacuer les gaz de combustion a I'exterieur,
Nous informons les utilisateurs de cet appareil que Iors d'une
operation d'autonettoyage, ils peuvent etre exposes a une
faible concentration de certaines substances figurant darts la
liste mentionnee ci-dessus, dont le monoxyde de carbone,
Pour minimiser [exposition, veiller a ce que la piece oQse
trouve le four soit convenablement aeree durant une operation
d'autonettoyage par I'ouverture d'une fenetre ou d'une porte,
AViS iMPORTANT - OISEAUX FAMILIERS : Lesoiseaux ont
un systeme respiratoire tres sensible, Ne pas garder un oiseau
familier darts la cuisine ou darts une piece oQil pourrait etre
expose aux fumees, Lesfumees emises durant une operation
d'autonettoyage peuvent etre dangereuses ou mortelles pour
un oiseau, de meme que les fumees emises Iors du chauffage
excessif de graisse, huile, margarine, et du chauffage excessif
darts un ustensile a revetement antiadhesif,
Conserver ces instructions pout consultation ult6tieute
29

LO(Basse): S'utilisepourle mijotageou Ie
maintiende Iatemperatured'un mets,oupour
lafusion de chocotatou beurre+LorsqueIeplat
ou %stensiteest couvert,un debutde cuisson
peutseproduireavectapuissancede
chauffageLO+Pourreduiretapuissancede
chauffage,tourner Iebouton_ tapositionOFF+
VerifierIastabilit6desfiammessur IebrOleur+
Commandes de ma
surface de cuissor|
+
Siun brQleurs'eteintduran[une operationde culsson,fermer
I'arr+veedegazau brFJleur.Si uneforte odeurde gazes[
perceptible,ouvrirune fenetreeta[[endrecmq minutesavan[
d'allumerae nouveaule brtileur.
A_ant d'ouvrirI'arriveede gaza la cuislniere+ver+fierque
cnaqueboutortde commandeest _ la positionOFF(Arre0+
NEJAMAI$ toucher la surfacede cu_ssonavan[qu'elleseso+t
completementrefroidle.Certaineszonesae lasurface
DarticulierementauvoEsmagedesbr_leu[s peuventdeveni+
Ireschaudesdurant unecuisson.Utlliserdesmaniq4es.
AHumage sans f amme de
veiHe +++°,.°,+°
Ledispositifd'allumagene fait
interveniraucunefiammede veilIe.
Chaquebr_JleurdeIatable de cuisson
comporteun alIumeurpar etincelle.
Travaillerprudemmentlots du
nettoyageautourdesbt_Jleursde .4_ _-_ ._-"_
latable decuisson. °'+++_._A,,
Si un brOleurde Iatablede cu+ssonne _...__
s'alIumepas,determinersi I'alhmeur
est brise,saliou paouill& BASEUUBROLEUR
Boutor|s de commande de
surface de cuissor|
Onutilise cesboutonspour commanderI'allumagedesbrOleursde
surface.Onpeut reglerchaquebouton_ toute positionentreles
positionsextremesLO (Basse}etHm(Ele%e}.Onpeut percew_irune
detentede calage_ Iaposition Hi. On peutchoisirtoute positionde
reglageentrelesdeuxpositionsextremes.
30
NJ(Elevee}:S'ut+Iisepourporterun Iiquide
ebullitionou atteindreIa bonnepressiondartsun
autocuiseur.Reduireensuitela puissancede
chauffageapresledebut de %bullition ou de la
cuissondesaliments.
Unepuissancede chauffageintermediaireest
utiliseepour Iapoursuitede Iacuisson+Les
ailmentsne cuisentpasplusrapidementsion
utilise unepuissancede chauffagepluseleveeque
necessairepour Iemaint+end'une douceebuIlit+on+
L'eaubouttoujours _ la memetemperature,que
1'ebullitionsoit tranquilleouvigoureuse+
O O UngraphiqueprSsde chaqueboutonidentifie IebrCJleurde
O surfacecommandeparce bouton.Parexemple,Ie
graphique_ gaucheidentifie le brCJleuravandgauche.
R6giage des commandes :
La puissancede chauffage_ employerdependdu type etde Iataille
de I'ustensileutilis& Ontrouve dansIa brochureLacuissonsimpli%e
de rinformationsur lesustensileset autresfacteurs affectantle
reglagede la puissancede chauffage.
1. Placerun ustensilesur lagrille du brOleur.
, Si aucunustensilen'estplacesur la grille du brOleur,les
fiammespeuventavoirtendance_seseparerdu brOleur.
2. Appuyerettourner le boutonclansle sensanti-horaire,jusqu'_la
positionUTE [A+Iumage].
, Onpeutpercevoirle cliquetiscorrespondant_ Iaproduction
desetincelles,et IebrOleurs'allume.[LescuatrealIumeurs
produisentdesetincellesIorsqu'onplacele boutonde Fundes
br[ileum_ la positionUTE.]
3. ApresI'allumagedu brOleur,reglerla tailledesflapapaesselonle
desiren tournant Ieboutonde commande.
, Uallumeurcontinue _ produ+redesetince%saussiIongtemps
quele boutonest _ la positionUTE.
[Jti isation durar|t ur|e parme
Avantd'aIlumerun brOieurdesurface,v#rifier quetousles boutons
de commandeSont_ la positionOFF(Arret),ApproeherI'ailurnette
eufiamm_edu br0!euravantde fa!retournerle b0utonJusqu_ la
posit+onUTE
1. Approcherune alIumetteenflammeedu brOleura utiliser.
2. EnfonceretfairetournerIentementle boutonde commande
jusqu'_la positionL_TE.
3. Ajuster lesflapapaes_lataille desiree.

@
Surface de cuisson
Pour 6viter Ja formation de taches ou un
changement de couleur de la surface de
cuisson :
° Nettoyer ]a surface de cuissen apr_s chaque uti]isation.
, EnHeverHesrdsidus renvers6s de produits acides ou sucr6s
d6s que Hasurface de cuisson a refroidi; ces produits
renversds peuvent faire changer la couleur de
['6mail
qu'en seit la raisono
E}r@ euts
Les br_Jleursscell6s de la cuisini_re sont fix6s sur la surface de
cuisson; ils ne sont pas con_us pour 6tre enlev6s. Comme les
br_Jleurssont scell6s, un produit qui d6borde d'un ustensile ne
s'infiltrera pas sous la surface de cuisson.
On devrait cependant nettoyer les br_Jleursapr6s chaque
uti[isation. La t6te du br_J[eurs'en[_ve faci[ement pour 6tre
nettoy6e. (Voir les instructions de nettoyage 8 la page 44.)
Pour le bon fonctionnement du brQleur, le chapeau de brCJleur
doit 6tre correctement plac6 sur la base du brCJleur.
Br@ eurs de haute
Cette cuisini6re est dot6e d'un br_Jleur8 haute vitesse, plac6
I'avant droit. Certains modules ont un deuxi6me br_Jleur8 haute
vitesse situ6 8 gauche, b I'avant. Ces brQleurs permettent une
cuisson rapide qui peut servir b faire bouillir rapidement de
I'eau ou b cuire une grande quantit6 d'aliments.
Br@Je r de mijotage
(certains modeJes)
Ce br_leur est situ6 _ la position arri6re droit ou arri6re gauche.
II offre une plus faible puissance_ pour la cuisson de sauces
d61icatesou la fusion du chocolat.
La puissance thermique (BTU) des brOieursest diff4rente /ors
de I'alimentation au gaz de p4trole Iiqu4fi4.
Grilles de br@ e r
Avant une operation de cuisson, v6rifier que la grille est
correctement plac_e. Lors de I'installation des grilles, placer
I'extr6mit6 avec pattes vers le centre, au niveau des barres
droites.
31
Une grille de brQleur incorrectement install6e peut 6cailler
F6mail de la surface de cuisson.
Ne pas faire fonctionner _ br_me_r sans qa'_n _ste_sile
soit plac_ s_r la grille. L'_mail de la grille peat s'_cailler
s'ii _'y a aac_n aste_siie capable d'absorber ia chaie_r
_ise par le breme_r.
Travailler prudemment Iorsqu'il faut remuer des aliments dans
un ustensile plac6 sur la grille de br_leur. Les grilles
comportent un fini lisse qui facilite le nettoyage. L'ustensile
peut glisser sur la grille si on ne tient pas fermement la
poign6e; ceci pourrait provoquer un renversement d'aliments
chauds, et susciter un risque de br_lure.
M6me si les grilles de br¢leur sont tr6s durables, elles perdront
progressivement leur lustre et changeront de couleur, du fait
des temperatures 61ev6esauxqudles les br_leurs les exposent.
_emarqBes :
° Un brCJleurconvenablement r_gl_ et dont les orifices
sent propres s'dhme en qudques secondes. Lors de
I'dimentation au gaz natural les fiammes sont bleues,
avec un cone interne bleu intense.
Si les fiammes d'un br_leur sontjaunes ou si la com-
bustion est bruyante, le ratio air/gaz peut 6tre incorrect.
Demander bun technicien d'effectuer le r6glage. [La
garantie ne couvre pas ce r_glage.)
Lors de Fdimentation au gaz de petrole liqu6fi6, il est
acceptable que I'extremit_ des fiammes soit ]aune. Ceci
est normal; aucun r6glage n'est n6cessaire.
° Avec certains types de gaz, on peut percevoir un petit
bruit d'explosion Iors de I'extinction d'un br_Jleurde
surface. Ceci est normal.
° Si on fait passer rapidement le bouton de commande de
la position Hi [Elev_e) _ la position LO [Basse), les
fiammes peuvent s'6teindre, particuli6rement si le
br_leur est froid. Si ceci se produit, placer le bouton de
commande b la position OFF [Arr6t) et attendre
qudques secondes avant d'allumer de nouveau le
br_leur.
, Ajuster la puissance de ohauffage de telle mani6re que
les fiammes ne d6bordent pas b la p6riph6rie de
I'ustensile.

Tableau de commande
A B C 0
E F G
Timer
Less+ ..... ......
H J J
Letableaude commandeestcon_upourfaciliter la programmation.Lafen6tre d'affichageindique I'heure,lesfonctions avecminuterieet
fonctions du four.Letableaude commandorepr6sent6comprendcaract6ristiquessp6cifiquesau modSle.(Lestylepeutvarlet selonJe
mod_te.]
G
H
/
m
Gril
Cuissoncourante
Plus+/moins-
Minuterie
Cuissonet
maintien
Nettoyage
D6marrage
diff6r6
Horloge
MaJntienau
chaud
ANNULER
S'utilisepourlacuissonaugriletlerissolage
surpattiesup@ieure.
S'utilisepourlacuissoncouranteetle
rOtissage.
S'utilisepourentrerouchangerladur6e,la
tetr_p@aturedufour.Etablitle gril
tetr}p6ratureELEVEEouBASSE.
Programmelaminuterie.
Pourcuirependantunedur#epr66tablie,avec
maintienauchaudpendantuneheure.
S'utilisepourprogrammerlecycle
d'autonettoyage.
Programmelefourpourdabuterunecuisson
plustard.
S'utilisepourprogrammerI'heuredujour.
S'utilisepourmaintenirauchauddansle four
lesalimentscuits.
Annuletouteslosop6rationssaufminuterieet
horloge.
Utilisation des touches
o Appuyersur latouche d6sir6e.
o Appuyersur More+ (Plus+)ou Less-(Moins-] pour entrerla dur6e
ou la temperature.
o Un hip retentitIorsqueI'onappuiesurune touche.
o Undouble hip retentiten casd'erreurde programmation.
Remarque: Quatresecondesapresavoirappuy_sur Ies
touchesMore+ ou Less-,ladur6e ou latemp6raturesera
automatiquemententr6e.Siplusde 30secondess'_coulententre
la pressionetsur unetouche defonction surlostouchesMore+
ou Less-,la fonctionseraannul6eet I'afficheurreviendra
I'affichagepr6c6dent.
L'horJogepeut6treprogramm6epour afficher[adur6edansun
formatde 12ou 24 heures.L'hollogeest programm6een usinepour
un formatde 12heures.
Changement de J'horJoge _ un format de 24 he_res :
1. AppuyersurlestouchesCANCEL(ANNULER]
etDelay(Demarragediff6r6] et maintenirla
pressJonpendanttroissecondes.
2. AppuyersurMore+ ou Less-pour pro-
grammerun formatde 12ou 24heures.
3. ProgrammerI'heureen suivantlesinstructions
donn_esci-dessous.
_eglage de l'horloge :
1. Appuyersurla touche Clock(Horloge].
o Lesdeuxpointsclignotent_ I'afficheur.
2. AppuyersurMore+ ou Less-pour programmer ; More+
J'heuredujour. ".........................
o Lesdeuxpointscontinuent_ clignoter.
Less-
Appuyer_ nouveausur Iatouche Clockou attendre .......................................'
quatresecondes.Lesdeuxpoh]tss'arrStentde clignoter.
s_ite,,,
32

LorsqueIecourant61ectriquearriveou apr_sune interruptionde
courant,tademBre heureavantrinterruption de courantva
clignoter.
Pourrappelert'heuredujour torsqu'uneautrefonctionde dur6e
s'aff+che,appuyersur latouche Clock.
L'heurede I'hortogene peut6trechangeeIorsquetefoura 6te
programmepour une cuissonou un nettoyagediff6r6 ou pour la
fonctionde cuissonet maintien.
Annumation de Paffichage de m'heure:
Si I'onne desirepasI'aff+chagede I'heuredu jour :
Appuyersur lestouchesCANCEL(ANNULER)
et Clock(Horloge)et lesmaintenirainsi
pendanttrois secondes.L'heuredu jour
d+sparaitde I'afficheur.
LorsqueI'affichagede I'heureest annuB,
appuyersurIatouche Clockpour afficher
brBvementI'heuredujour.
Reaffichage de Pheure :
Appuyersur IestouchesCANCELet CIocket lesmaintenirains+
pendanttrois secondes.L'heuredu jour reapparatt_ I'afficheur.
La minuterie peut etre programmee de une minute (0:01)jusqu'_
99 heures et 59 minutes (99:59)+
La minuterie peut 6tre utilisee independamment de toute autre
activite du four, Elle peut 6tre aussi programmee alors qu'une autre
fonction du four est en cours d'utilisation.
La minuterienecommandepasle four.Ellenesert qu'_ 6mettredes
bips.
Programmation de maminuterie :
1. Appuyersurla toucheTimer(Minuterie). ..............................................
0:00s'alhme _ I'afficheur.
+ ......................................
• Lesdeuxpointsclignotent.
2. AppuyersurIatoucheMore+ ou Less- jusqu'_ce More+ ;
queI'heurejuste paraisse_ I'afficheuL ...............................
• Lesdeuxpointscontinuent_ clignoter. Less- ,
3. Appuyer_ nouveausur latouche Timerou attendre .....................................
quatresecondes.
• Lesdeuxpointscontinuent_ clignoteret le decomptede la
dureecommence+
• LadernBre minutedu decompteseraafficheesousformede
secondes.
4. A la fin de laduree programmee,un bip long retentiL
Annumation de maminuterie :
1. Appuyersurla toucheTimeret la maintenirainsipendanttrois
secondes.
OU
2. Appuyersurla toucheTimeret reglerI'heure_ 0:00.
Verroui age des commandes
et de maporte du four
Lestouchespeuvent6treverrouiIBespour desraisonsde securite,
nettoyageou pourempechertoute utiIisationnon souhaitee.Ellesne
pourrontetreutiIiseessiellessentverrouiIBes.
Si lefour esten cours d'utilisation,lescommandesne peuventetre
verrouJlBes.
L'heureactuelledujour restera_ I'afficheurIorsquelescommandes
serontverrouiIBes.
Appuyersur lestouchesCANCELet Cook&
Hold (Cuissonet maintien)et lesmaintenir
ainsipendanttrois secondes.(Appuyer
d'abordsur latouche CANCEL.)
• Le mot LOCK(VERROUILLAGE)clignote _ .....
J'afficheur.
D_verreuimmage:
Appuyersur lestouchesCANCELet Cook& Holdet Iesmaintenir
ainsipendanttrois secondes.(Appuyerd'abordsur latouche
CANCEL.)
o Le mot LOCKdisparaitde I'afficheuL
Codes d'anomamie
LesrootsBAKE(CUISSONCOURANTE)ou LOCK(VERROUILLAGE)
peuventclignoter rapidement_ I'afficheurpour preveniren cas
d'erreurou de probBme.Si te! est lecas,appuyersur Iatouche
CANCEL.Si lesrootsBAKEou LOCKcontinuent_ ciignoter,
debrancherI'appareiL#_ttendrequelquesminutes,puisrebrancher
I'appareiI.Si fun desrootscontinue_ clignoter,debrancherI'appareil
et prendrecontactavecun reparateurautorise.
33

Cuisson courant@
Programmatio_ de u_e cuisso_ coura_te :
1. Appuyersurlatouche Bake(Cuissoncourant@.
• Lemot BAKE(CUISSONCOURANTE)c@note.
Diff@ences de cuisson entre I'ancien
four et le nouveau
II est normalde remarquerquelquesdiff@encesclansladur@ de
cuissonentreun four neufet un four ancien.VoirAjustementde la
temp@aturedufour_ lapage38.
• 000clignote _ I'afficheur.
2. %bctionner latemperaturedu four.Latemperature
peutetreprogramm@de75 _ 290°C(1708 550°F}.
Appuyerunefois sur latouche More+ (PkJs+}ou
Less-(Moins-),ou appuyersurla touche More+ ou
Less- et la maintenirainsi.
More+
Less-
• 175° (350°} s'aliumeIorsqueI'on@pub la premierefois sur
I'unedestouches.
• AppuyersurJatoucheMore+ pour augmenterla temperature.
• AppuyersurIatouche Less- pour diminuerlatemperature.
3. Appuyer_ nouveausur latouche Bakeou attendrequatresecondes.
Cuisson et maintien
Lafonction cuissonet maintienpermetdecuire pendantune dur@
pre@terminee,suivb parun cyclede maintienau chaudd'une
heure.
Programmation de Ja fonction cuisson et maintien :
1. Appuyersurla toucheCook& Hold(Cuissonet
maintien).
• LesrootsBAKE(CUBSON)et HOLD
(MAINTIEN)clignotent.
• 000s'alhme _ I'afficheur.
More+
• Lemot BAKEs'arretede clignoteret s'aliumea I'afficheur.
2. Selectionnerlatemperaturedu four. Latemperature
peut etreprogramm@de75 _ 290°C(170_ 550°F}. Less-
Appuyerunefob sur Iatouche Mole+ ou Less- ou
appuyersur latouche More+ ou Less- et la maintenirainsi.
• Appuyer sur la touche More+ pour augmenter la temp@ature.
• 38° 000°}ou Iatemperaturer@lb du fourseraaffich@.La
temperatureaugmenterapar intervalb de 3 °C {5°F)jusqu'a
ceque latemp@aturepr@rogramm@soJtatteinte.
4. LaisserIefour pr@hauffer pendant8 _ 15minutes.
• LorsqueIatemp@atureprogramm@pour lefour est atteinte,
un hip long retentit.
• Pourrappelerla temperatureprogramm@pendantle
pr@hauffage,appuyersurla touche Bake.
5. Placerlanourrituredansle four.
• Appuyersurla toucheLess- pour diminuerlatemperature.
3. Appuyer_ nouveausur Jatouche Cook& HoldOUattendre
quatresecondes.
• Lemot HOLDclignote.
• 00:00ciignote_ I'afficheur.
4. EntrerIaduree pendantlaqueileI'ondesireque la cuissonait
lieuen appuyantsur lestouchesMore+ ou Less-. La dur@
de cuissonpeut 6treprogramm@de dix minutes(00:10)
11heures,59minutes(11:59}.
6. VerifierI'avancementde la cuisson_ Iadureeminimab de
cuisson.CuireplusIongtempsau besoin.
7. LorsqueIacuissonest terrain@,appuyersur __
latouche CANCEL(ANNULER).
8. Retirerla nourrituredu four.
Remarques sur Ja cuisson courante
au four :
o Pourchanger la temp@ature du four pendant la ciiisson,
appuyersur latouche Bake,puissur Iatouche More+ ou Less-
jusqu'_ceque I'onobtiennelatemperature@siree.
o Pourchanger la temp@ature du four morsdu prechauffage,
appuyerdeu× lois sur Iatouche Bake,puissur latouche More+
ou Less-jusqu'a ceque latemperatured@ir@ soit affich@.
o Si I'on ouNied'arreterIefour, iIs'arreteraautomatiquement
apres12heures.Si I'ondesiredesactivercettefonction,voir
page37.
o PourdesconseiBsupplementairessur Iacuissoncouranteet le
rOtissage,voirla brochureLacuissonsimplifiee.
• LesmotsBAKEet HOLDs'allument _ Fafficheur.
• Ladureede cuissons'alIumea I'afficheur.
• Ladureede cuissoncommencele comptea rebours.
Lorsque la dur6e de cuisson s'est _coul6e :
• Quatrebipsretentissent,
• Lemot BAKEs'eteint.
• LesrootsHOLDetWARM (CHAUD}s'allument.
• 75° (170°)parait_ I'afficheur.
Apres _e he,re de _AiNTIEN AU CHAUD :
• Lemot End(Fin)s'affiche.
• L'heuredu jour reapparait_ I'afficheur.
34

Auuulatiou de la fouctiou cuissou et maiutieu _ tout
momeut :
Appuyersur Iatouche CANCEL{ANNULER).Retirer ({-ANCH _
la nourrituredu four.
Cuisson courante diff r e
Nep@suti!iser!acaissondiffdr_e pourdesdenr6estrSs
p@issablescomme!esproduitslaitiers,ie pore,ia voiai!!eou les
fruits de mer.
AvecJafonctiondiffSrde, Iefour semet _cuire plustard clansla
journ6e.Programmerla dur6ed'attented6sir6eavantque Iefour ne
semottoen marcheet la dur@de cuissond6sir6e.Lefour com-
mence_ chauffer_ J'heures61ectionneeet cur pour Jadur6e
sp6cifiee.
La dur6ed'attentepeut6tre programm6ede 10minutes{00:10]
11heures,59 minutes[11:59].
Programmatiou d'uu cycle de cuissou couraute
differ6e :
I. Appuyersurla touche Delay[D6marragediff6r_).
• Lemot DELAY(ATTENTE]cJignote.
• 00:00c@note _ Fafficheur.
: More+
2. AppuyersurIatoucheMore + {Pius+]ou Less-
............................................
_M_ins-] poar programmermadarSe d'attenteo
AIorsque le mot DELAYciignotetoujours Less-
3. Appuyersurla toucheCook& Hold{Cuissonet ......................................
maintien].
• 000s'aliume_ I'afficheur.
• LosrootsBAKE[CUISSONCOURANTE)et HOLD
[MAINTIEN]c@notent.
4. AppuyersurMore+ pourprogrammermatemp@ature de
cuissorL
• 00:00et le mot HOLDclignotent.
• Lemot BAKEresteallure&
5. AppuyersurMore+ pourprogrammeria dur_e de euisson.
• Ladur6ed'attente,lesrootsDELAY,BAKEet HOLDs'allument
I'afficheur.
Lorsque la duroc d'atteute s'est 6coulee :
• Le mot DELAYs'6teint.
Laduree decuissonestaffich6e.
• LosrootsBAKEet HOLDsont affiches.
Pour programmer uu temps d'atteute lorsque la
fouctiou cuissou et maiutieu a d_j_ 6t6
programm6e :
1. Appuyersur latouche Delay{D6marragediff@_].
• Le mot DELAY(ATTENTE]clignote.
• 00:00parait_ Fafficheur.
2. Appuyersur latouche More+ ouLess- pour
programmerIadur6ed'attente.
Apr_squatresecondes,le mot DELAYreste { less-
allum_pour rappelerqu'un cyclede cuisson .....................................
diff@_ea6t6programm6.
Lorsque la duroc d'atteute s'est _coul_e et que le
four se met eu marche :
Ladur@edecuissonseraaffich@e.
• Le mot DELAYs'_teint.
• LosrootsBAKEet HOLDrestentaflum@s.
AuuuJatiou :
Appuyersur Iatouche CANCEL(ANNULER].
• ToutesIesfonctionsde cuissonminuteeet
non minut_eserontannul_es.
L'heureduiour r6apparait_ ['afficheur.
NepasutiliserIacuissondiff6rSepour desarticlesqui
n_cessitentqueJefour soit pr_chauff&commelesg_teaux,
Jespetitsbiscuitset lespains.
NepasutiliserIecycledecuissonet maintiendiff@Sssile
four estd@j_chaud.
35

Maintien au chaud
Pourmaintenirau chauddans[efourdesalimentscuks etchauds
ou pour r6chaufferpainset assiettes.
Programmation du maintien au chaud :
1. Appuyersur latouche KeepWarm
[Maintienau chaud).
• Le motWARM[CHAUD)c@note.
• 000paratt_ I'afficheur.
2. %tectionner IatempSraturede maintienau chaud.
Celle-cipeut6tre r_gI6ede 63 _90 °C045 _ .........................
190°F).Appuyerune foissur latouche More+ ...................................
nus÷)ouLessCMo ns)ouappuyersurta ;::Loss :
touche More+ ouLess- et lamaintenirainsL
• 75° (170°) s'allumeIorsqueI'onappuie la premiSrefois sur
I'unedestouches.
• Appuyersur latouche More÷ pouraugmenterlatemperature.
• Appuyersur latouche Less- pour diminuerlatemp6rature.
Le motWARM[CHAUD)et Iatemp6ratureseront affich6spendant
que lafonction maintienau chaudest active.
Annumation du maintien au chaud :
1.Appuyersur latouche CANCEL[ANNULER).
2.Retirerla nourrituredu four.
Remarques sur Rafonction maintien
au chaud :
o Pourobtenirdesqua[it6sa[[mentairesetnutdt[vesoptimales,
[esalimentscuitsau four nedoivent pas6tregardesau chaud
plusde 1_ 2 heures.
o Pouremp6cherlesalimentsde dess6cher,lesrecouvrirde
papieraiuminium,sansserrer,ou d'un couvercle.
o Pourr_chau_er des petits pains :
- recouvrirlespetitspainsdepapier aluminiumsansserreret
lesplaceraufour.
- appuyersur lestouchesKeepWarmet More+ pour
programmer75 °C070 °F].
- r6chaufferpendant 12_ 15minutes.
o Pourr_chau_er des assiettes :
- placerdeuxpilesde quatreassiettesmaximumdansle four.
- appuyersur lestouchesKeepWarmet More+ pour
programmer75 °C070 °F).
- r6chaufferpendant5 minutes,arr6terIefour et laisserles
assiettesau four pendantencore15minutes.
- n'utiJiserque desassiettespouvantallerau four,_ v6rJfier
avecle fabricant.
- ne pasposerdesassiettesti@dessur une surfacefroide,Jes
changementsrapidesdetemp6raturepouvantcasser
I'assietteoula fendilier.
36

Arr6t autornatique/Mode
Lefour s'arr6teautomatiquementapr_s12heuress'il a 6t6
accidentelbmentlaiss_en mar@e.Cettecaract6rbtiquede @curit6
peut6trearr6t@.
Pour auuuler l'arr_t 12 heures et faire fouctiouuer me
four eu coutiuu pendant 72 heures :
1. Programmerlefour pour une cuissoncourante[voir page34}.
2. AppuyersurIatoucheClock (Horloge}et la
maintenirainsipendant5 secondes.
• SAbseraafficheetclignoterapendant
5secondes.
• SAbseraensuiteaffich6en continujusqu'_ cequ'on I'arr6te
oujusqu'_ceque la dur@limite de 72heuressoit atteinte.
• Lemot BAKE(CUISSONCOURANTE}seraaussiaffich6si un
cyclede cuissoncouranteesten coursalorsque lefour est en
modesabbat.
ToutesIesautresfonctions (Minuterie,Maintien au chaud,
Nettoyage,etc.}sont verrouill@s,SAUFBAKE,pendantle mode
sabbat.
Auuulatiou de la euissou couraute alors que le four
est en mode sabbat :
Appuyersur CANCEL(ANNULER}.
• Lemot BAKEs'6teint_ I'afficheur.
• Aucun hip sonorene retentit.
Auuulatiou du mode sabbat :
1. Appuyersurla toucheClockpendant5 secondes.
OU
2. Apr_s72 heures,le modesabbatsetermine.
• SAbclignote pendant5secondes.
• L'heuredu jour revbnt _ I'afficheur.
Remarques sur Je mode sabbat :
• Le mode sabbat peut 6tre mis en marche _ tout moment, que
le four soit en marche ou non.
, Le modesabbatne poutpas6tremisen marchesi los
commandossontverrouilI@sou Japorteverrouill@.
• SiIefour esten modecuissonIorsquele modesabbatest
programm6,le mot BAKE(CUISSONCOURANTE}s'6teint _ la
fin du cycb decuisson.IIn'y auraaucunsignalsonoreaudibb.
• SiI'@lairagedu four estsouhait6pendantle modesabbat,la
lampedevra6treallum@ avantqueIemodesabbatne d6bute.
• Lorsquele modesabbata d@marr@,aucunbJpde pr@hauffage
ne retentit.
• Tousles messageset lesbipssontd6sactiv6sIolsquele mode
sabbatest actif.
• LeverrouiHageautomatiquede Japortenefonctionnepas
pendantle modesabbat.
° SiI'on@pub sur latouche CANCEL,un cycIedecuisson
couranteaufour seraannul6.Cependant,le programmateur
resteraen modesabbat.
• Apr6sunepannede courant,le four revienten modesabbat
avec72 heuresrestanteset aucuncycleactiE
37

@
Ajustement de Jatemp6rature
du four
Laprecisiondestemperaturesdu four aete soigneusementverifiee
I'usine=lIest normalde remarquerqueIquesdifferencesdartsIa
cuissonentreun four neufet un four ancien=Au fur et _ mesureque
lescuisinieressont moinsneuves,Iatemperaturedu four peutvarlet=
lIestpossibled'ajusterIatemperaturedu four si I'onpenseque Ie
four ne cuit pasou ne rissoIepascorrectement=Pourdeciderde
I'ajustement_ apporter+reglerIefour_ une temperaturede 15°C
{25°F}pius61eveeou plusbasseque la temperatureindiqueedarts
larecette,puisfairecuireIapreparation.Lesresultatsdu _test>7de
cuissondoiventdonner uneideedu nombrede degresduquel la
temperaturedoJt6tre ajustee.
Ajustement de la temperature du four :
1. Appuyersurla touche Bake(Cuissoncourante}.
2. Entrer285°C{550°F}enappuyantsurla touche
More+ {Plus+}.
3. Appuyersurla touche Bakeet la maintenirainsi
pendantplusieurssecondesoujusqu'_ ceque 0°
paraissea I'afficheur.
Si la temperaturedu foura 6te precedemmentajustee,le
changementseraaffiche. Parexemple,si latemperaturedu four
a 6te reduitede 8 °C05 °F},I'afficheurindiquera-8 615}+
4. Appuyersurla touche More+ {Plus+}ou Less-{Moins-} pour
ajuster Iatemperature.
,_,chaquelois que I'onappuie surunetouche,Iatemperature
changede 3 °C {5°F}.Latemperaturedu four peutetre
augmenteeou dimJnueede3 a 20 °C (5_ 35 °F}.
5. Uheuredu jour reapparaitautomatiquement_ I'afficheur.
II n'estpasnecessairede reajusterIatemperaturedu fouren cas
de panneou d'interruptionde courant.Lestemperaturesde
cuissonaugril et de nettoyagene peuvent6treajustees.
Changement de Ja
temp6tatute °F/°C
1= LeregIageparddaut de I'usinepour latemperatureest en
Fahrenheit.
2. Pour modifier ce reglage, appuyer sur Iestouches CANCEL et
Bake simultanement et maintener-les enfoncees pendant trois
secondes.
3= Unhip retentitet Iereglagecourant (°Fou %} parak_ rafficheur.
{Sivous nefaitespasde changement,la cuisiniereretourneau
r@glageexistantapres30secondes.}
/t. Pourmodifierle reglage,appuyersur Jatouche More+ ouLess-.
Appuyer_ nouveausur Iatouche pour retoumerau reglage
existant.Attendercinqsecondesetle regJageseraeffectue.
38

Cuisson au gril
Programmation de la cuisson au gril :
1. Appuyersur latouche Broil (GriID.
o Le mot BROIL(GRILDclignote.
o Le motSEt(VALIDERDestaffich6.
2. Appuyersur Iatouche More+ (Plus¢Dpour programmerun gril
temp6rature6leveeou surD touche Less-(Moins-Dpour
programmerun gril _ temperaturebasse.
o LesrootsHI [ELEVEEDou LO (BASSEDserontaffiches.
o %tectionnerHI broil (GriI_ temperatureeteveeD[290°C
[550°F]}pour un gril normal.SelectionnerLO broil (GriI
temperaturebasseD[230°C[450°F]Dpour un gril _ tempera-
tureinferieured'aliments_cuissonplusIonguecommela
volaille.
3. AprSsquatresecondes,le fourse meten marche.
o Le mot BROILresteallum&
5.
6.
7.
Pourun rissolagemaxh_um,pr6chaufferl'el6mentde gril
pendant2 ou3 minutesavantd'ajouterla nourriture.
Placerla nourrituredanslefour. FermerIaportedu four.
Retournerla viandeune fois _ la moitidde Iadur6ede cuisson.
LorsqueI'alimentest cult,appuyersurla touche
CANCEL[ANNULERD.Retirerla nourritureetla
Dchefrite dufour.
o L'heuredu jour reapparait_ I'afficheur.
Remarques sur Uacuissen au grH :
• Pourde meilleursr6sultatslots du gril,sesewir d'un ustensile
pr6vupour cetypede cuisson.
• LegriIau reglageHI [Etev6Destutilise pour Iamajoritedes
op6rationsdecuissonau griL UtiliserIegril au r6glageLO
(BasDpour la cuissonde metsdevantcuireplus Iongtemps,
afin de leur permettred'6trebiencuitssans rissolageexcessif.
+ Pour changer matemperature du four pendant macuisson
au grim,appuyersurIatouche Broil,puissur Iatouche More¢
ou Less-pour changerentreIacuissonaugril _ temperature
elevee[HIDet Iacuissonau gril _ temperaturebasse(LOD.
+ Lesdureesde cuissonau griIpeuventetreplusIonguesavec
unetempSraturedegril inferieure.
+ RetournerlaIaplupart desalimentsIorsquela moitiede la
duree prevuepour lacuissonaugril s'estecoulee.
• Pourdestemperatureset desconseilssuppI_mentairessur Ia
TabUeau _e cui85ol1 au _rH cuissonau gall,se reporter_ IaDochure Lacuissonsimpiifi6e.
Prechaufferlefour pendant2-3 minutes.
POSITmON DES DEGP_E DE TEMPS DE
ALIMENTS GP,ILLES' CUISSON
Boeuf
Pore
Bifteck,2,5cm 0 podd'_paisseur
Hamburger,2 cm (3/4 podd'epaisseur
Bacon
Tranchedejambon precuit,
1,3cm [1/2 podd'_paisseur
COteJette,2,5cm (1podd'epaisseur
Blancs,avecos
5
5
5ou6
5
5
A point
Bien cuit
Bien cuit
Biencuit
Chaud
CUISSON TOTAL
15 - 20 min
18 - 24 min
13 - 18 min
6 - 10 mJn
8 - 12 mJn
5 Bien cuit 22 - 26 min
Voiaiiie 4 Bien cuit 30-45 min
(GriI _ temperature basseD
Fruits de mer
Filetde poisson
Dame de poisson,2,5cm 0 podd'epaisseur
Queuede homard,85_ 115g (3_ 4 onces)
5
5
5
Emiettement
Emiettement
Bien cuit
8 - 12 rain
10- 15rain
7 - 10 rain
Fourobtenirunesurfaceexterieuresaisie/brunieetun interieursaignant,il peut8trenScessairede reduireletempsdecuissonsurlapremiSreface,
et de reduireIadistanceentreIaviandeet lasourcede chaleur.
Remarq_e :Cetableaun'estqu'un guidede suggestions.LesdureespeuventvarierselonI'alimenth cuire.
39

Allumage sans flamme de
veiHe
Laculsini_reestdot6ed'un syst_med'allumagesansfiammede
veille.Cesyst_meferme automatiquementI'ardv6ede gazet
emff_che tout fonctionnemellt du four/ors d'une interruption
de/'a/imentadon _iectrique.
+mneserapaspossibme#ammamermebr_meurdu+ouravecune
ammumette.Ne pus tenter de faire fonctionner mefour morsd'une
interruption de m'amimentation_mectriqueo
1
Event du four
LorsqueIefourfonctionne,Iessurfacesvoisinesde 1'6ventpeuvent
devenirassezchaudespour entrainerdes bKJlures.Nejamais
bloquer1'6vent.
USvent est situ_ sous meprotecteur d'_vent du dosseret, sur la
EcJairage du four
Appuyersur le commutateurd'6clairagedufour pour
allumerou 6te+ndrelalampedu four. Lalampede
four estactiv6epar I'hlterrupteurseulement.
Sole du four
Nepasmettrede
plastiquesprosde
r6vent,Iachaleur
pouvantIesddormer
ou losfairefondre.
Oven
Light
Prot6gerlasoledesproduits renverses,en particulieracidesou
sucr6s,ceux-cipouvantd6colorerI'6maiIvitrifi& Utiliserdes
ustensilesde la bonnedimensionpour6viterque Iesproduits nese
renversentou passentpar-dessusJ'ustensileen bouillant.Ne pus
placer d'ustensiles ou defeuille d'aluminium directement sur
la somedu four°
Grilles du four
+ Nepasrangerde nou[dtureou dlustensi!edansle[out:
Lefour comportedeuxgrillesavec,pourchacune,un dispositifde
calage.
E×traction :
1. Tirerla griIleen lignedroitejusqu'_
ce qu'elles'arr6te_la positionde
calage.
2. Souleverlagrille _ I'avantpour
pouvoirI'extraire.
ReinstaHation :
1. PlacerIagrille sur lessupportsdartsle four.
2. Soulever16g6rementI'avant.Faireglisserlagrille vers I'arrJ_re
au-deI8de la positionde calage.
3. Abaisserlagrille et la faireglisserdartslefour.
Ne pus couvrir lutotalit6 d'une grille de papier d'aluminium ni
mettre d'aluminium sur masomedu +our°Comane donnerait pas
de bona r_sultats darts la cuisson de g_teau× et la some
Positions des grilles
POSMON 7 (positionla plus
haute): PourIacuissonau griI
et la cuissonaufour surune
seulegrille avecunet61e
biscuits.
POSMON 6 :S'utilisepour la
cuissonau gril et la cuisson
au foursur uneseulegrille
avecunetOle_ biscuits.
fou_
Ouisson sur deu× grilles
S'utilisepourune cuissonsurplusieursgrilles.
POSMON 5 : PourIacuissonau gril etla cuissonau four surune
seulegrille avecunet6Ie _ biscuits.
POSITION8 :S'utilisepour lacuissonaufour de g_teauxet de mets
en sauce,sur uneseulegrille avecunet0Ie _ biscuits,et la cuisson
au gril. S'utilisepour unecuissonsur plusieursgrilles.
POSITION3 : PourIacuissonau four de metsen sauce,de g_teaux
etages,de michesde pain,suruneseulegrille avecunet61e
biscuits.S'utilisepour une cuissonsurplusieursgrilles.
suite...
4O

@
POSITION2 :S'utiNsepour Iacuissonaufour de g_teauxsur une
seutegrilteavecunetote _ biscuits,et pour ter6tissagede petites
piscesdeviande.S'utiIisepour unecuissonsur ptusieursgriltes.
POSITION1 :S'utitisepour le rOtissaged'unevohitte ou de grosses
pi6cesdeviande.
Sole du four : Phcer Iagrittesur tes
cOt6sretev6sde la soIe.Donneune
pIacesuppl6mentairepourla cuisson
de grandesquantit6s.
CU_SSONSUR PLUSIEURS
GRILLES:
Deux grilles : UtiHserJesposkions3 et 6,ou 2 et4.
Cuisson de g_teau× _ 6rages sur deu× grimmes
Pourde meilleursr6sultatspour lacuissondeg_teauxsurdeux
grilles,utiIiserlespositions2 et 4.
Placerlesg_teauxsurla grille,commeil estindiqu6.
41

Four autonettoyant
, flest norma_quecerta_nespiecesde lacuisinieredewennent
tres chaudesIorsd'un cyclede nettoyage.
, Pour6viter quela portedu tour ne subissedeseommages,ne
pastenter de I'ouvrirIorsqueie mot LOCKNERROUILLAGE)est
visible surI'affbheur.
, Eviterde toucherJaporte.[ehublotet la zonede I'eventdu fou_
/orsd'uncycled'autonettoyage.
o Nepasutiliserde neTzoyan[pourfour du commercesur lefini
du [ourou surtou! au[recomposantdu four.ColaaNmeraitle
fini ou lescomposantsdufour.
LecycIed'autonettoyageutilisedestemp6raturessuperJeures_ Ia
normalepour assurerle nettoyageautomatiquede la totaiit6du four.
Si Iefour esttr6ssale,il estnormaiqu'onobservela formationde
fumee ou deflammesdurantie nettoyage.Nettoyerle four
intervaiIesr6guiiersplut6t que d'attendreune accumulation
importantede residus=
Durantle processusd'autonettoyage,il convientde bien aererla
cuisinepoureliminerlesodeursnormalement6raisesdurant le
nettoyage=
Avant J'autonettoyage
1= EteindreIalampedu four avantle nettoyage=EilerJsqueraitsinon,
de griIIer=
2= Enleverla Iechefrite,tous Iesplatset Iesgrillesdu four. Lesgrifles
risquentde sed6coloreret de nepiusglisseraussJbien aprSsun
cycled'autonettoyagesion ne Iesenbve pas=
3= NettoyerIecadredu four, Iecadrede la porte,Iazone_ I'exterieur
du ioint etautour de I'ouverturedonslejoint de ia porte,_ I'aide
d'un produit denettoyagenon abrasifcommeBenAmi_ou d'eau
additionn6ede detergent=Leprocessusd'autonettoyagene
nettoiepascoszones=EIIesdoiventetre nettoyeespour empecher
la saletedes'incrusterpendantlecyclede nettoyage=(Lejoint
assure1'6tanch6it6autourde la porteet du hubIotdu four=]
4. Pouremp6chertout dommage,negasnettoyerni frotter leioint
qui setrouveautourde Iaportedu four.
Cejoint est congupour 6viter lespertes
de chaJeurpendantle cycle
d'autonettoyage.
5. Eliminerlesr6sidusde graisseou de
produits renvers6ssur Iasoleavantb
nettoyage.Ceciemp6cheJaformation
de flammesou de fumeedurantle nettoyage.
6. EssuyerJesresidussucr6set acides,commelospatatesdeuces,
Iatomateou Iessauces_ basede hit. La porceJainevitrifi4e
poss6deune certainer6sistanceauxcomposesacides,maisqui
n'est pasIimit6e.EIIepeutse d6colorersi Iesresidusacidesou
sucresne sent pasenlevesavantde commencerJ'autonettoyage.
Programmation de l'autonettoyage :
Remarque : Latemp6raturedu four doit6tresJtu6een dessous
de 205°C (400°F]pour programmerun cycled'autonettoyage.
]
1. FermerIaportedu four.
2. Appuyersur latouche CleanCNettoyage].
• Le mot CLEAN(NETTOYAGE:)clignote_ I'afficheur.
3. Appuyersur latouche Mole + (Plus+)ou Less-
(Moins-).
• CL-M (Nettoyage- sabte moyenne)estaffich& Less-
.....
Sila porte n'estpasfermee,desbipsretentissentet
le mot 'door' (PORTE:)parait_ I'afficheur.Si Iaporte n'estpas
fermSedonsIes45secondes,I'operatJond'autonettoyageest
annuI6eetI'afficheurrevient_ I'heuredu iour.
4. Appuyersur latouche More+ ou Less- pour voirdefiler los
differentsrSglagesde I'autonettoyage.
CL-H (Nettoyage- sa[eteimportante,4 heures]
CL-M (Nettoyage- salet6moyenne,3 heures)
CL-L (Nettoyage- saiet6Ieg6re,2 heures]
Lechoix du niveaude salet6du four programme
automatiquementla dureedu cycled'autonettoyage.
5. AprSsquatresecondes,lefour commencele nettoyage.
• La dur6ede nettoyagecommenceJed6compte&I'afficheur.
• Le mot LOCKGiERROUILLAGE)parait_ I'affJcheur.
o Le mot CLEANparait_ I'affbheur.
D_marrage diff6r6 d'un cycle d'a_to_ettoyage :
1. Appuyersur latouche Delay(DemarragediffSrS).
• Le mot DELAY(ATTENTE}clignote.
00:00parait_ I'afficheur. ..................................
2. Appuyersur latouche More+ ou Less- pour
programmerla dureed'attente avantque ne
commenceIecycle.Ladur_ed'attentepeutetre ......................................
reglee,dedix minutes(00:10)_ onzeheures, Less-
cinquante-neufminutes(11:59).
3. Alorsque Iemot DELAYclignote,appuyersur
la toucheClean(Nettoyage).
• Le mot CLEAN(NETTOYAGE]vaciignoter.
saite, oo
_Lesnomsde marquedesproduitsde nettoyagesent desmarquesd@os6esdesdifferentsfabricants.
42

4+ Appuyersurla toucheMore + [Plus+)ou Less..................................
[Moins-).
• CL-M (Nettoyage- salet6moyenne)est affiche.
5. AppuyersurIatoucheMore + ou Less- pourvoir defilerles
differentsreghgesde I'autonettoyage.
CL-H[Nettoyage- saleteimportante,4 heures)
CL-M (Nettoyage- saletemoyenne,3 heures)
CL-L(Nettoyage- salete legere,2 heures)
Lechoixdu niveaude saletedu four programme
automatiquementladuree du cycled'autonettoyage.
6. Apresquatresecondes,lesmotsCLEAN(NETTOYAGE),DELAY
[ATTENTE)et LOCK(VERROUILLAGE)paraissent_ I'afficheur
pour indiquerque le fourest programmepour une operationde
nettoyagediffere.Letempsd'attenteparait_ I'afficheur.
S[ mefour a dej_ ete programme pour uu cycle de
uettoyage et que m'oudesire 8tabmiruu dema[:
1. Appuyersur latouche Delay(Demarragediffere).
+ Le mot DELAY[ATTENTE)clignote.
+ 00:00parait_ I'afficheur.
2. Appuyersur Iatouche More+ ou Less-pour ............................
programmerJadureedesireede J'attenteavantque ..................................
/ ....
ne debuteJecycle. Less-
Apresquatresecondes,lesrootsCLEAN,DELAYet ..............................
LOCKparaissent_ I'afficheurpour indiquerque Iefour est
programmepour une operationde nettoyaged+ffere.Letemps
d'attenteparait_ I'afficheur.
Lorsque le cycle d'autouettoyage debute :
• Le mot DELAYs'eteint+
• Laduree de nettoyageparak_ I'afficheur.
Auuulatiou du cycle d'autouettoyage :
Appuyersurla toucheCANCEL(ANNULER).
• Touslesrootsdisparaissentde I'afficheur.
+ Touteslesfonctionssont annulees.
L'heuredujour parait_ I'afficheur.
Pendant le cycle d'autonettoyage
Lorsquele mot LOCKparait_ I'afficheur,la portene peutetre
ouverte.Poureviterd'endommagerla porte,ne pasforcer la porte
pour I'ouvrirIorsqueLOCKest affiche.
Fumee et odeurs
La premierefois o_ lefour est nettoye,il peuty avoirproduction
d'odeuretde fumee.Ceciest normaletdisparaitra_ I'usage.
Si lefour esttres saleou si la Iechefritea etelaisseedansle four, il
peutyavoirproductionde fumee.
Pendantque lefour chauffe,il peutseproduiredes bruitsde metal
en dilatationou en contraction.Ceciestnormalet n'indiquepasque
le fours'abime.
Aprbs le cycle d'autonettoyage
Environuneheureapresla fin du cycle,le motLOCKs'eteint.Ace
moment,laportepeut 6treouverte.
Lasamet_peut avoir maiss@un residu gris poudreu×.L'enlever
avecun linge humide.S'iJrestede lasalete+ceJaindiqueque le cycle
de nettoyagen'apaseteassezlong.Cettesaleterestantesera
enleveeau prochaincycled'autonettoyage.
S+mesgrilles om_t_t_ maiss_es_ m'intSrieurdu four pendant me
cyemed'autonettoyage et qu'emmesglissent roamsurleurssup-
ports,lesenduire,ainsique lessupports,d'unefine couched'huile
vegetale+
De fines lignespeuventapparaitre darts la porcelaineparee
qu'elle a subi chaleur et refroidissement. Ceciest normalet
n'affecterapasla performance.
Une decomoratiom_Manche peut apparaitre apr_s me_ettoyage
si des aliments acides o_ s_cr_s _'ent pas_t_ enmev_.savast
q_e _e eomme_ee m'a_tonettoyage.Ladecolorationestnormale
et n'affecterapasla performancedu four+
_emarques:
+ si la portedu four n'estpasfermee,Iemot_door >>[porte)
clignote8 I'afficheuret lefour emetdeshipsjusqu'_ceque la
portesoitfermeeet que I'onappuie8 nouveausur Clean+
+ S'il s'ecouleplusde cinqsecondesentreIemomento_'JI'on
appuiesurCleanet cehi o_ I'onappuiesurla touche
More+ ou Less-, I'afficheurretourneautomatiquement
I'affichageprecedent.
+ Laportedu four setrouveraendommageesiI'on forceson
ouverturealorsque le mot LOCKestencoreaffiche+
43

M6thodes de nettoyage
, Avant route manipulatien ea op6ratien de nettoyage, v_rifier que I'appareil eat arr_t_
et que teas leacempesants sent freids, afin d,_viter des demmages eu des br_lures. " Lesnomsde marquesent desmarques
' Pour6viterla formationde tachesou un chart ementde Couleur,netto er Ia areil a r_s d6poseesdesdifferentsfabricants=
g Y PP P
chaqueutilisation. _*Pourcommanderdirectement,
composerle 1-877-232-6771 E=-U=ou
oApr_s tout demontagede composants,veiller_ effectuerun remontagecorrect. 1-800-088-8408 Canada.
PIECE NE_OYAGE
L_chefrite et Nejamais ceuvrir la grille depapier d'atumhdum; cela emp_che la gmisse deceuler dai_sla I_ehefrite.
sa grille , RecouvrirIaI_chefriteet sagriIled'un lingesavonneux;laisseragir pourdetacherlesresidus=
, Laveravecde I'eausavonneusetilde=UtiIiserun tampon_ recurerpour eliminerlessouillurestenaces=
, Onpeutplacerlesdeuxcomposantsde Is 18chefritedartsun lave-vaisselle=
Chapeaa× de
br_meur et
br_meura_gaz
sur fonte
Zone de la
console de
cemmunde et
Tablede caisson
et tableau de
eommande -
_maii vitrifi_
Tetes de br_leur amovibles
, Laisserle br0Ieurrefroidir=EnleverIechapeaude brMeurpour le laverdartsde reausavonneuseavecun tampon
recureren plastique=Pourlessouillurestenaces,nettoyeravecun tampon nonabrasif,savonneux,ou avecune
epongeet la cremede nettoyagepour tablede cuissonCooktopCleaningCreme*[produit n°20000001)*(
* Nepaseffectuerle nettoyageau lave-vaisselleou dansle four autonettoyant=
Br_leurs _ gaz seell6s
, Nettoyer%quemment=LaisserlebrMeurrefroidir=Nettoyeravecdu savonet un tampon_ recureren plastique=Pour
lessouillurestenaces,nettoyeravecun tamponsavonneuxet nonabrasif=Nepasagrandirou ddormer lestmus=
, Veiller_ nepasintroduired'eaudartslesorificesdu bMleur=
, TravaillerprudemmentIotadu nettoyagede I'alhmeur. Si rallumeurest endommag_ou mouille,lesbr01eursde la
table decuissonnepourrontpass'allumer=
, LaverlesgrilIesavecde I'eausavonneusetiedeet un tampon_ recurerenplastique nonabrasif=Pourlessouillures
tenaces,nettoyeravecun tamponen plastiquenon abrasif,savonneux,ou avecuneepongeet Iacr6mede nettoyage
pourtabiede cuissonCooktopCleaningCreme*(produitn°20000001)*( S'ilrestedessouilIures,appiiquerde
nouveauIs cr6mepourtable de cuisson,recouvriravecun essuie-touthumide,ethisser tremper pendant30 minutes.
Frotterde nouveau,rinceret fairesecher=
* Nepaseffectuerle nettoyageau lave-vaisselleou clansle four autonettoyant=
, Pourutiliser IafonctJonVerrouilJagedescommandespour le nettoyage,voir page33=
, Laver,rinceret fairesecher=Nepasutiliserun agentde nettoyageabrasifsusceptiblede rayerla finition=
, Onpeututiliser un produitde nettoyagedu verre,puJverised'abord surun chiffon.NEPASprejeterlepreduit
directement sur les teaches de cemmande eu sur Fa_fiche_ro
, Placerchaquebouton_ Iapositiond'ARRET,et retirerchaqueboutonen letirant=
, Laver,rinceret fairesecher=Nepasutiliserun agentde nettoyageabrasifsusceptiblede rayerla finition=
, FairefonctionnerbriTvementchaquebrOleurpour verifierque le boutona etecorrectementreinstalle=
L'emaiIvitrifieest du verrelieau metalparfusion.II peutsefissurerou s'ecailieren casde mauvaiseutilisation.IIest
resistantauxacides,maispastotalementinattaquablepar lesacides.Tousles produitsrenverses,enparticulier acides
ou sucres,doiventetre essuyesimmediatementavecun Iingesec.
, Unefois refroidi,laveravecde reau savonneuse,rinceret secher.
, Neiamaisessuyerunesurfacetiedeou chaudeavecun linge humide.Cecipourraitla fissurerou I'ecailler.
, Neiamais utiliserde nettoyantspour four, d'agentsdenettoyagecaustiquesouabrasifssur lefini exterieurde la
cuisini_re.
suite° o.
44

NETTOYAGE
Panneaux
et poign_es
de porte -
_mail peint
Habmotet po_e
da roaren verre
* Unefois Iespiecesrefroidies,leslaver_ I'eausavonneuseti6de,rincerets6cher.Nejamaisessuyerunesurface
tilde ouchaudeavecun Iingehurnide,ceci pouvantendommagerlasurfaceet entrainerune brOIurepar Iavapeur.
, Pourbs tachesrebelbs,utiliser desagentsde nettoyageI6g_rementabrasifscommeIap_teau bicarbonatede
soudeou BonAmi*.Nepasutiliserde nettoyantsabrasifs,caustiquesou @lergiquescommeIesnettoyantspour
four ou lestamponsen Iained'acier.Cesproduits raieraientou endommageraientdefa_onperrnanentela surface.
Remarque : Udliserun liade eu un terchensec pour essuyer les preduits reayers6s, surtout s'ils seat acides
eu sucres° Lasurface peurrait se ddcelerer eu se terair si ]asaletd a'6tait pas imm6diatemeat ealey_e. Ceci
est pardcuH_rement important darts le cas de surfaces bialtches.
* Eviterd'utflisertrop d'eau,qui risqueraitdes'infikrer sousouderrierele verreetde tacher.
, Laver_ I'eauetau savon.Rinceravecde I'eaupropreets6cher.Un produitde nettoyagedu verrepeut6treutilise en
levaporisantd'abordsurun linge.
, Nepasutiliserde produitsabrasifscommetampons_ r6curer,lained'acierou produitde nettoyageenpoudre qui
risqueraientde rayerleverre.
Int_rieur da roar • Ex6cuter les instructions pr6sent6es aux pages 42-43 pour rautonettoyage du four,
Grilles da four
(certainsmodSbs]
* Nettoyer avec de I'eau savonneuse.
* Eliminer les souillures tenaces avec une poudre de nettoyage ou un tampon _ r#curer savonneux. Rhlcer et faire
s_cher.
, Si Ies grilles sont taiss6es dans Ie four pendant te cycle d'autonettoyage, e!ies se d6colorent et peuvent ne plus tr_s
bien glisser. Si ceci se produit, appliquer par essuyage un peu d'huile v6g6tale sur la grille et ses supports en relief
pour faciliter le mouvement, et enIever I'exc6s d'huile.
* NEPASUT]USERDEPRODUITSDENETTOYAGECONTENANTDUJAVELUSANT.
, NEPAS UTIUSERDENETTOYANTS_ ORANGE_ OUABRASIfSo
, TOUJOURSESSUYERDANS LESENSDELA TEXTUREDEL'ACIERLORSDU NETTOYAGE.
* Netteyage jeumamier/saJet_l_g_re - EssuyeravecI'un desproduitssuivants:eau savonneuse,vinaigreblanc/eau,
produitde nettoyagepour verreetsurfaceFormula409*ou un produitsembiabiepour verre- avecun linge soupie
etune 6ponge.Rincerets6cher.PourpoIiret enteverIesmarquesdedoigts,fairesuivrepar unevaporisationde
MagicSpray_pouracierinoxydabie(produit n° 20000008)_.
, Salet_.modSrSe/_.paisse- EssuyeravecI'un desproduits suivants:BonAmi_,SmartCleanser_ou SoftScrub_-
I'aided'un lingesoupleou d'une_pongehumide.Rinceret s_cher.LestachesrebeIbs peuvent_treenievSesavec
untampon multi-usages Scotch-Brite_humidifie.FrotteruniformementdansIesensdu metai.Rinceret s6cher.
Pourredonnerdu lustreetretirer lesrayures,fairesuivrepar unevaporisationde Magic Spray_pouracier
inoxydabie.
, D_celeratie_ - A Vaided'une6pongehumidifiSeou d'un linge soupie,essuyer_ I'aidedu nettoyantCameo*pour
acierinoxydable.Rincerimm6diatementet s6cher.Pourenieverlesmarqueset redonnerdu lustre,fairesuivrepar
unevaporisationde Magic Spray*pour acierinoxydabIe.
* Lesnomsde marquesontdesmarquesd6poseesdesdiff6rentsfabricants.
** Pourcommanderdirectement,composerle 1-877-232-6771 E.-U.ou 1-800-688-8408 Canada.
45

Porte du four
Nepas grimpersur[aporte dufour Ouverte,og[uiimposer Une
charge excessive.Cecipour[airprovoquerun basculementde [a
cuisiniSre,le brisde la porteoudes Nessurespour la personne
conoern6e.
Remarqee : Onpeut percevoirune certaine<<6[asticit_>_Iorsde la
fermeturede [aportedu four d'unecuisiniereneuve;ceciest
normal cet effetdisparait progressivement.
Hub[or du four
Pour proteger mehublot de [a porte du four :
1. Nepasutiliserde produits nettoyantsabrasifscommedes
tampons_ recureren lained'acier ou desproduksde nettoyage
en poudrequi risqueraientde rayerleverre.
2. Nepasheurterle hubIotenverreavecun ustensiIe,un articlede
mobilier,un iouet,etc.
3. Nepasfermerla portedu four avantque lesgrillesne soienten
placedansle four.
Touted6gradationdu hubIotde verre- rayure,choc,tension,etc.-
peutaffaibiir sastructureet augmenterle risquede bris_ une date
ult6rieure.
Pieds de r6g[age de ['aplomb
V_df[erque [abrideantibaseu!ernentagdppeconvenab[ement
I'undespiedsarriere de r6g[agede ['aplomb,pour que [a
cuisiniem ne PUiSSebasculeraccidenteHement.
LacuisiniSredoit 6tred'ap[ombunefois insta[[6e.Si
e[[ene Vestpas,tourner[espiedsde reg[agede I _
['aplombenp[astique,_ chacun desanglesde [a
cuisiniere,iusqu'_ce quece[[e-cisoit d'ap[omb. ,jj
PIED DE REGLAGE
DE L 'APL OMB
Raccorde ent [ectrique
Lesappareiis n_cessitant une amimentation
8mectriquecomportent une fiche _ trois hroches
mise_ la terrequi dolt etrebranch6edirectement
dansune prisede 120volts_trois caviteset
correctementmise_ [aterre.
Toujoursd_brancherf'appardlavantd'yfaillede
l'entretien,
La fiche _trois brochesraise_ [aterrefournit une protectioncontre
[esd6chargeselectriques.NEPAS COUPERN[ ENEEVEREA
BROONEDETERREDU CORDOND'AUIVIENTATION.
Si la prisenecomporteque deuxcavites,n'estpasraise_ Iaterreou
n'est pasappropri6e,mepropri_taire de m'appareima maresponsao
bimit8de faire rempiacer maprise par u_e prise _ trois cavit_s
correcteme_t raise _ ia terre.
La pe du four
. D_brancheria cuisiniereavantde remp[acerI'ampouie.
, Laisserlefour refroidiravantde rempiaeeriampoule.
' S'aSsurerque le Cabochonet ['am oulesont froids avantde les
toucher:
Pour rempiacer ['ampoule du four :
1. Apres[erefroidissementdu four, CASOCHON
maintenir[ecabochontout en
enlevant[apiecem_taiiique
qui [amaintienten pJace.
REiVIARQUE: Lecabochon
tomberasion ne le maintient
pasen place.
2. Eniever[ecabochonet
['ampoule.
3. Installeruneampoulede 40watts pour apparei[m@nager.
4. RSinstaJier[ecabochonet [efii metaJJiquede retenue.
5. R_tabiir['aJimentationde [acuisiniere.R6gierde nouveau
['horJoge.
RESSORTDE RETENUL
(fLIm_taHique)
46

O placement d'un appareil
Lesraccordsdesappareils_ gazsewant8 branchercet appareH
ralimentationde gaznesont paspr6vuspour 6tred_plac6s
continuellement.Unefois I'appareiIinstall6,NF:PAS Ied6placerde
fa£onr6p6t_epour Ienettoyerou le changerde place.Si cet
appareildoit 6tred_menag_et!ou enlev6pour 6trer6par6,suivre la
methoded_critedartsIesinstructionsd'instaIIation.Pourtoute
information,prendrecontactavecleservice_ Iaclient61ede Maytag
au 1-800-688-9900E.-U.ou 1-800-688-2002au Canada.
IIfaut que Iepiedarri_rede Iacuisini_resoitengagedartsla bride
antibasculementpour que lacuisini_rene puissebascuIer
accidentellement.
Tiroir de remisage
papier, despFoduitsif!flammablesou desproduitsa!imentaires.
Durant lefonctionnementdu four, uneternp6ratureexcessive
pour cesarticlespeuts'6tablirdansletiroir.
Sole du four
Prot_gerIasoledu four contre Iesrenversernents(o_)articu%rement
pour Iesproduitsacidesou sucres),qui peuventsusciterun
changementdecouleurde I'6mailvitrifi6. Utiliserun ustens+Iede la
tailleapproprJ6epour 6vitertout renversementou d6bordement.
La soledu four peut 6treenlev6epour permettreun nettoyageplus
facile.
Depose :
Apr_sle refroidissementdu four.retirerles
grillesdu foun Fairecou+isservers]'avantdu
four lesdeuxpitonssitu6sclanslesangles
arriSrede Iasoledu four.
SouleverIebord arrierede Iasoledu four,
puis lafaireglisserversI'arrierepour
d6gagerle bordavant de lapattie frontale
du chassis.Retirerla soledu four.
R_installation :
Engagerle bord avantde Iasoledu four dansla partiefrontale du
ch_ss+sdu four. AbaisserI'arrJSrede lasoleet fairecoulisserles
deuxpitonsversI'arriSrepourimmobiliserla soleen place.
Letiroir de remisagepeut6treenlev6pour vouspermettrede
nettoyersousla cuisini_re.
D6pose :
I+ Vider letiroir etle tirerjusqu'_ la positionde lapremiSrebut6e+
2+ SotJlever ravant+
3, Tirerjusqu'_ laposition de lasecondebut6e,
4+ Saisirletiroir par lescotesetsoulever/tirerpour I'extraire+
R6installation :
1. InsUrerIesextremit6sdesgiissiSresdu tiroir clanslesrailsde la
cuisJni_re.
2. Souleverravantdu tiroir et pousserdoucementjusqu'_ la
positionde la premJSrebutte.
3. Souleverde nouveauletiroir et lepousserpour lefermer.
47

PROBLEME SOLUTION
Pourmapmupartdes probm mes
obse_6s, essayer d'aberd mes
somutionspossibmes,_ dreite.
Un br_meurde sudace nes'ammume
pas.
, V6rifierque lescommandesdufour sent correctementr6glees.
, Wrifier si la fiche estbien ins6r6edanslaprise.
, Inspectedr6armerle disioncteur.Inspectedremplacerlesfusibles.
, ContrOlerlasourced'alimentation6Iectdque.
V6rifierque rappareilestcorrectementraccord6a Iasourced'61ectricit&
D6terminersiI'alimentation61ectriqueest interrompue(fusiblegrilIddisjoncteur ouvert).
Wrifier que rallumeurest secet qu'il 6metdes6tincelles.Le brOleurne peuts'alkmlersi
I'allumeurestendommag&souili6ou mouill&SiI'allumeurneg6n_repasd'6tincelles,ramener
Ieboutonde commande_ Iaposition OFF(ARRET}.
Flammes non aniformes. , Orificesdu brOleurobstrues.
Separation entre les flammes et , Veiller_ piacercorrectementI'ustensilesur Iagr[iledu brOleur.
mebreiear.
RSsaitats de caissonaa fear
differents des attentes ea de neax
predaitsparmefear ant&riear.
R_samtatsinnerrects morsde ma
caissonaa grim,oa emission
excessive de famSe.
V_rifierque latemperatureselectionn6eestcorrecte. Veiller a pr6chaufferlefour si
ceci estdemand6clansla recette.
, D6terminersiI'6ventdu four estobstru& Voir sonemplacementpage40.
, S'assurerquela cuisini6reest d'aplomb.
, Lesr6giagesde temp6raturevarientsoavententre unfour neufet ie four qu'iIremplace.
Onobservesouventune d6rivedu reglagede temperatured'un four {_mesurequ'iI vieillit;
il peutdevenirpIuschaudou moinschaud.Voir page38 Iesinstructionsd'ajustementde
latemp6raturedufour. REMARQUE:IIn'estpasutilede modifierler6glagedetemp6rature
si lavariationn'affectequ'uneou deuxrecettes.
, Utiliserlesbonsustensiles.LesustensiIesfencesdonnentunbrunissementdecouIeurfonc6e,
lesustensiIesbrillants,un brunissementplusclair.Pourd'autresinformationsau sujet de la
cuissonau four,voir la brochureLa cuissonsimpIifi6e.
, Wrifier lapositiondesgrillesetdesustensiIes.Lotsde la r6partitionsurdeuxgrilles,nepas
superposerIesplats. Veiller_ hisser un espacede 2,5_ 5cm (1_2 po} entrelesplatset les
paroisdu four.
, ContrOlerrutilisationdefeuilled'atuminiumdansle four. Nejamaisrecouvdrcompl6tement
unegrilledufouravecdelafeuilled'aluminium.Placerunpetitmorceaudefeuilled'aluminium
sur lagrille sousIeplat pour recup6rerlesmati6resrenvers6es.
, D6terrninerla positiondesgrilles.Lesalimentspeuvent6tretrop prosdesflampaes.
, Utilisationincorrectede feuilled'aluminium.Nejamais garnir lagrille de lechefriteavec
de Iafeuilled'aluminium.
. EnleverI'excasdegraissesur Iapiecede viandeavantlacuissonau gril.
• Utilisationd'une 16chefritesouillee.
o Pr6chaufferlefour pendantdeuxa 2 _ 3 minutesavantde placerle platdartsle four.
• Portedu four ferm6edurant la cuissonau griL
saite,..
48

PP,OBLEME SOLUTION
mposs b m t d autonettoyage
du four.
Le four ne se nettoie pas
correetemento
Laportedu four ne se d_verrouimme
Aecumumat_ond'humidit_ sur me
hubmotou wpeur so,am de m'6vemo
(:mission d'une forte odeur ou de
fum6emorsdemam seenmarche
du four.
Codesd'anomam e.
Des bruits se font entendre.
o Determinerque I'appareiln'a paseteprogrammepour un autonettoyagediffer& Voir
pages42-43.
, Verifierque Iaporteestfermee.
, Verifiersi lacommandeesten modesabbat.Voir page37.
o Lefour estpeutetreb unetemperaturesuperieureb 205°C (400°F).Latemperaturedu
four doitetreinferieure_205°C(400°FDpour pouvoirprogrammeruncycled'autonettoyage.
, Untempsde nettoyagepluslong peutetrenecessaire.
, Onn'apaselimineavantI'operationd'autonettoyagelesaccumulationsexcessivesderesidus,
particulierementIesresidusd'alimentsacidesou sucres.
, L'interieurdu four estencorechaud.Attendreenvironune heureapresrachevementde la
perioded'autonettoyage.IIestpossibled'ouvrirlaporteapresladisparitiondu messageLOCK
(VERROUILLAGE)surI'afficheur.
, Lescommandeset la portesont peut-6treverrouili6es.Voir page33.
° Ceciest normaldurantla cuissond'alimentscontenantbeaucoupd'eau.
° Utiiisationexcessived'humidite [orsdu nettoyagedu hub[ot.
o Ceciest normalpourune cuisiniereneuveetdisparaitapresquelquesuti[[sations.
Uncycied'autonettoyage_<bKJ[era7>pius rapidement[esodeurs.
o Laraiseen marched'unventi[ateuraide_ ret[rerfumeeet odeurs.
o Presencede sa[etessur [asoie.Proceder_ un autonettoyage.
o LesrootsBAKEouLOCKpeuventclignoterrapidementbI'afficheurpourpr6venird'uneerreur
ou d'unprobleme.Sile motBAKEou LOCKparaitbI'afficheur,appuyersurlatoucheCANCEL.
Si le mot BAKEou LOCKcontinueb clignoter,debrancherI'appareiLAttendre quelques
minutes,puisrebrancherI'appareiLSi le mot continue_ clignoter,debrancherrappareil et
prendrecontactavecun r6parateurautoris&
o SiIefouresttressale,lesfiammechespeuventproduireun coded'anomalieaucoursducycle
d'autonettoyage.Appuyersur IatoucheCANCELet hisser Iefour refroidircompletement,
essuyerlasaleteenexecspuisreprograminer!'autonettoyage.Silecoded'anomalier6apparait,
prendrecontactavecun r6parateurautoris&
®
Lefourfait plusieursbruitsfaibles.IIestpossibled'entendrelesrelaisdu fourqui semettent
en marcheets'arretent.Ceciest normal.
AIorsqueIefourserechauffeetserefroidit,iIestpossibled'entendredesbruitscorrespondant
Iadilatationet_lacontractiondespi_cesmetalliques.Ceciestnormaletn'endommagepas
I'appareiL
_mn'ya ni hip_i affichageo o Lefour estpeut-etre en modesabbat.Voir page37.
_ SAb _ emig_otep_is
reste amm_m_.
• Lefour esten modesabbat.Pourannulet,appuyersurla touche Clocket maintener-la
enfonceependantcinq secondes.
49

50

Garantie template d'une annee = Pi_ces
et main-d'(_uvre
Durantune perioded'un (1} an _ tempter de[adate
oe I'achatinitialau @tail toute piecequise revelera_t
defectueusedartsdesconditionsnorma[esd'usage
menagerserar@areeou rempiaceegra[u_tement.
Residents canadiens
Les_'arant_esc[-uessuscouvren_un apparel[ins[aile
au Canada.seu_ements'[la 6t8agreepar [esagences
detest habilitees[verificationde [aconformiteaune
normenationaiedu Canada),saufsi I'appare[_a ete
introduit au Ca[lada_ ['occasiond'un changemem(_e
residencedesEtats-Umsversle Canada.
Garantie limitee hers des Etats=Unis et
du CaNada - PiSces seuiement
Pendantune perioded'un {1} an a compeerde la
datede ['achatinitialau detail,toute piecequl se
reveleraitddectueuse dartsdesconditionsnorrnaIes
d'usagemenagerserarepareeou rempiac@
gratultement[pieceseubmen0; [epropdetairedevra
assumertous bs aJtrestrais,y compnsfrais de main-
d'ceuvremed@lacement,de[ransporLme
kilometrageetde diagnostic,le cas@hean[
Lesga,rantiessp_cffiquesformut@sc/-dessusso_t/es
SEULESquele fabricantaccorde.Cesgarantiesvous
conf_rentdesdroitsjuridiquessp@ifiquese[wous
pouvezegalementjouir d?lutresdroits,variab/esd'un
dtat_ /'auLt_.d'uneprovincebuneau[re.
Ne sent pas couverts pat ces
garanties ."
1. Leadommagesou derangementsdus 8:
a.Mise en service,livraisonou entretieneffectuesincorrectemenL
b.Touter@aration,modification,alterationet tout reglagenon autorisespar
lefabricantdUpar un prestatairedeserviceapr@-venteagr@.
c. Accidents,mauvaiseutiiisationou usageabusifou deraisonnabb.
d.AlimentationeIectrique(tension,intensit@incorrecte.
e. Regiageincorrectd'une commande.
2. Lesgarantiesne peuventetre honor@ssi Iesnumerosde seried'origineont
eteenbv@,modifiesou nesent pasfaciIementlisibIes.
3. AmpouIes.
4. Appareilsachetesauxfins d'usagecommercialou industrieL
5. Lesfraisde visited'un prestatairede serviceou deserviceapr@-vente
encouruspour lesraisonssuivantes:
a.Correctiond'erreursde raiseenservice.
b.initiationde I'utilisateur_ remploide I'appareiL
c. Transportde I'appareiIauxIocauxdu prestatairedeservice.
6. Dommagessecondairesou indirectssubispar toute personnesuite au non-
respectdecesgaranties.Certainsetatsou provincesnepermettentpas
I'excIusionou Ialimitationdesdommagessecondairesou indirects;par
consequentIeslimitationsou exclusionsci-dessuspeuventnepas
s'appIiqueravotrecas.
Si ['intervention d'un r parateur est
• Contacter[edetai[iantchezqui ['apparei[aeteachete,ou contacter
MaytagServicesSM/service_ [aciientelede Maytagau 1-800-688-9900E.-U.
ou 1-800-688-2002au Canada,pourobtenir[escoordonn@sd'uneagencede
serviceagreee.
• Veiiier _ conserver[afactured'achatpouriustifier de [avalidite de [agarantie.
Pourd'autresinformationsence qui concerne[esresponsabiiit@du
prdprietaire_ ['egarddu servicesousgarantb, voir[etextede [aGARANTiE.
° Si[e detail[antou ['agencedeserviceapres-ventene peutr@oudre[e
probIeme,ecrire_ MaytagServicessM,attention:CAiR:_Center,P.O.Box
2370,Cleveland,TN37320-2370ou tel@honerau 1°800°688°9900 Eo_Uoeu
1o800o688o2002au Canada.
• Lesguidesd'utiiisation,lesmanueisdeserviceet iesrenseignementssur [es
piecessent disponibIesaupresde Ma}¢agServicessM,service_ laclientelede
Maytag.
Remarques :
Lorsdetout contactconcernantun prob[@Tle,fournir ['inforpaationsuivante:
a. Nora,adresseet numerode tel@honedu client;
b. Numerode mo@b et numerode seriede I'appareil;
c. Noraetadressedu detaillantou de ['agencedeservice;
d. Descriptionclairedu probiemeobserve;
e. Preuved'achat (facturede vent@.
51

®
Estufa a Gas con Controm a
Precisi6n Sensible a_Tacto 500
Tabla de Matetias
lnstrucciones Importantes
sobre Seguridad ........................53-57
Cocinando en la Estufa ............ 58-59
Controles
Quemadores de GasSeflados
Cocinando en ei Homo ............60=69
Homeado
'Cook & HoW
'Cook & HoW Diferido
Mantener CaHiente
Asar a HaParriHa
ParriHasdellHomo
Cuidado y Limpieza ..................70-23
Homo AutoHmDiante
Procedimientos de Limpieza
Mantenimiento .......................... 24-25
Ventana y Luz del Homo
Retiro de la Estufa a Gas
Locamizaci(_ny Soluci6n
de Aver_as...................................26-27
Garant_a y Servicio ..........................79

[nstalador: Potfavor dejeestagu[ajunte COne[
Censumidor: Potfavor leayconserveesta guiapara rderencia
NOmerode Modelo
N_merodeSerie
Fecha de Cornpra
(Lunesa Viernes,8100a.m.a 8;00p.m.Hornde[Este}
Ennuestrocontinuoaf_nde mejorar!aCa!idady[endimientode
nuestrosebc_rodorn6sticos,puede queseanecesariomodificar
Para i#fermacifi# seflre servicie, ver pbg#la 79.
Lea y siga todas las instrucciones antes de usar este
eiectrodom_stico para evitar eI fiesgo potential de incendio.
choque ei@tfico, lesi6n personal o daSo aI ebctrodom6stico
como resultado de su uso inapropiado. Utilice este
ebctrodomestico soBmente para el prop6sito que ha sido
destinado segQnse describe en esta guia.
Para asegurar funcionamiento correcto y seguro: El
ebctrodom6stico debe sell instdado debidamente y puesto a
tierra poll un tecnico calificado. No intente ajustar, reparal
presta servicio o reemplazar nmguna pieza de este ebctro-
dom6stico a menos que sea especdicamente recomendado en
esta guia. Todas las reparaciones deben ser reaiizadas por un
tecnico cafificado. Pida al instahdor que b indique la
ubicaciOn de la v_ilvulade cierre del gas y como cerrafla en
caso de una emergencia.
Siempre desenchufe el ebctrodom6stico antes de efectua
alguna reparaciOn.
Lasadvertencias e instrucciones importantes sobre seguridad
que aparecen en esta guia no est_in destinadas a cubrir todas
Ins posibbs circunstancias y situaciones que puedan ocurrir,
Se debe ejercer sentido comLin,precauci6n y cuidado cuando
instab, redice mantenimiento o haga funcionar el artefacto,
Siempre p6ngase en contacto con su distribuidor, agente de
servicio o fabricante si surgen probbmas o situaciones que
usted no comprenda,
Reconozca _os simbo_os, advertencias,
etiquetas de seguridad
Si no se sigue estrictamente la infermaci6n
prepercienada en esta gu_a, se puede preducir Ltn
incendie e una e×plesi6n, causande da_os materiaies,
lesienes persenaies e mertales,
No almacene ni ase gaselina ni etres vaperes y
liquides inflamables en la vecindad de este
electrodom_stico o de cualquier otroo
O.UEHACER SmPERCIBE OLOR A GAS:
o No trate de enceader ning_n artefacte,
, No toque ning_n interrupter el#ctriceo
• No use ning_n tel6fone eu su edificie,
• Llarae inmediatamente a su preveeder de gas
desde el tel_fene de a a vecineo Si _a ins
instruccienes preporcionadas per el preveeder
_e gas.
o Si no p_e_e lecalizar a su preveeder _e gas,
llame al cuerpe _e bembereso
- La instalaciSa y reparacienes _eben set efectua_as
per un t_cnico califica_e, aria ag_ncia _e
reparacienes e el prevee_er _e gas,
PODRIAN Causar lesi6n personal grave o mor£ai.
una s!tuaci6n peligrosa, Los escapes de gas no Pueden ser
PODRIAN causar lesi6n personal menos grave.
acuerdo con bs inst[ucciones del [abdcante.
53

lnstrucciones Generates
o TODAS LAS ESTUFAS SE PUEDEN
VOLCAR Y CAUSAR LESIONES
PERSONALES
• INSTALE EL DiSPOSiTiVO
ANTIVUELCO mNCLUmDOCON LA
ESTUFA
o SIGA TODAS LAS mNSTRUCCIONES
DE INSTALACmON
ADVERTENCIA: Para reducir el riesgo de vueico den
ebctrodom6stico a eausa de use anormal o debido a
peso e×eesivo en [a puer_ dei homo, es neoesario
asegurarlo mediante un dispositivo antivuelco
debidamente instalado=
Paravedficar si eI disposidvo est,1debidamente instaBdo, mire
debajo de la estufa con una linterna para asegurarse de que
uno de los tornillos niveladores traseros este debidamente
enganchado en la ranura del soporte, Eldispositivo antivuebo
asegura el tornillo niveBdor trasero al piso cuando estd
debidamente enganchado, Estodebe verificarse carla vez
que la estufa seamovida,
Pa|'a Evita|" un lncendie e
Da e Causado per el Hume
Asegurese de que se hayan retirado todos los materiabs de
empaque del ebctrodomestico antes de su use,
Mantenga el drea alrededor del ebctrodomestico libre y
exenta de materiabs combustibles, gasolina u otros vapores y
materiabs infiamabbs,
Si el ebctrodomestico es instalado cerca de una ventana, se
debe tener cuidado para evitar que lascortinas pasen sobre
los quemadores,
NUNCA deje articulos sobre la cubierta de la estufa, Elaire
caliente del respiradero puede encender los articulos
infiamabbs y aumentar la presi6n en los envases cerrados
hasta hacedos reventar,
Muchos envases de tipo aerosol son EXPLOSIVOScuando son
expuestos al crier y pueden ser altamente infiamabbs, Evite
su use o su almacenamiento cerca del ebctrodom6stico,
Muchos pl_sticos son vulnerables al calor, Mantenga los
pl_sticos alejados de las piezas de la estufa que puedan estar
tibias o calientes, No deje articulos de pl_isticosobre la
cubierta de la estufa pues se pueden derretir o ablandar si
est_indemasiado cerca del respiradero o de un quemador
superior encendido,
Paraeiiminar ei riesgo de pasar sobre los quemadores
superiores calientes, no se deben guardar art[culos en los
armarios que est_n directamente sobre la estufa, Si tabs
armarios son usados para almacenamiento, debe limitarse a
colocar art[culos de use poco frecuente y que pueden
guardarse en forma segura en una _rea que est,1sujeta ai
calor proveniente de la estufa, Las temperaturas pueden no
set apropiadas para algunos art[culos, tal come liquidos
vol_itiles,limpiadores o sprays en aerosol,
En Case de lncendie
Apague ei eiectrodomestico y ia campana de ventiiaci6n para
evitar que las llamas se dispersen, Extinga las llamas luego
encienda ia campana para expuisar ei humo y ei oior,
• En la cubierta: Apague ei fuego o ia llama en una sart6n
con una tapa o una bandeja de hornear,
NUNCA levante o mueva una sarten en llamas,
• En el homo: Apague ei fuego o ia llama cerrando ia puerta
dei homo,
No use agua en los incendios de grasa, Use bicarbonate, un
producto quimico seco o un extinguidor del tipo con espuma
para apagar un incendio o ia llama,
Segutidad para Ni es
armar!os que estjn s0bre !aestufa o en el protector trase_o
estda para alcanzar tales articu!os pueden lesionarse
seriamente,
NUNCA deje a los niSos solos o sin supervisi6n cuando el
electrodomestico est6 en use o este caliente,
NUNCA permita que los nixies se sienten o se paren en
ninguna parte del electrodom6stico pues se pueden lesionar o
quemar,
54

Sebsdebeense_aralosni_iosqueeI ebctrodomestbo y
los utensiiios que est4n en _Io sobre 61pueden estar
cdientes, Deje enfriar los utensiiios cdientes en un lugar
seguro, fuera deI aicance de los ni_iospequdios, Se bs
debe ense_iara los ni_iosque un ebctrodom6stbo no es un
juguete, No se debe permitir que los ni_iosjueguen con los
controbs u otras piezas de la estufa,
NUNCA uselapuertadeesteelectmdomestJcocomo pelda_o
o asbnto ya que el ebctrodom6stico se puede volcar,y causar
lesiones graves.
NUNCA use este eledrodom6stico como cabfactor de area
o para elevar la temperatura de la habitaciOn.Esto puede
causar envenenamiento por monOxido de carbono y el
sobr_cabntamiento dd homo
NUNCA cubra ninguna rendija, agujero o canal en la parte
inferior dd homo o cubra la rejilB completa con materiabs
tales como el papel de aiuminio. Esto evita que el aire fluya
a trav6s del norno y puede causar envenenamiento por
mon6xido de carbono. El papel de aluminio tambiSn puede
contener el calory producir un riesgo de incendio,
NUNOA obstruya el flujo del aire de combusti6n y de
ventiBciOncubriendo lasentradas o saiidas de aire del homo,
Esto puede restringir el acceso del aire a losquemadores _,
causar envenenamiento por monOxidode carbono,
El respiradero del homo se encuentra debajo del protector
trasero.
Evite tocar el 4rea del respiradero mientras el homo est6
encendido y durante varios minutos despues de haberlo
apagado, Algunas partes del respiradero y del area que Io
rodea se calientan Io suficiente como para causar
quemaduras, Despues de apagar el homo, no toque el
respiradero o el area que Io rodea hasta que haya tenido
suficiente tiempo para enfriarse,
Otras superficies que pueden estar calientes induyen la
cubierta, Bs superficies que est4n dirigidas hacia la cubierta,
el respiradero del homo, la superficie cercana a la abertura
del respiradero, la puerta del homo y la area que la rodea,
y la ventanilh del homo,
No toque un foco de homo caliente con un patio huJmedoya
que se puede romper, Si el foco se rompe, desconecte el
suministro el@trico al ebctrodom@tico antes de retirar el foco
para evitar un choque el@trico,
No utilice la cubierta o los hornos como 4reas de
almacenamiento para alimentos o utensilios de cocina,
Seguridad Para Coeinar
Siempre coioque un utensiiio en un quemador superior antes
de encenderio, Asegurese de usar ia periiia correcta que
controia cada quemador superior, AsegSrese de encender ei
quemador correcto y comprobar de queen efecto ei
quemador haya sido encendido, Cuando haya terminado de
cocinar, apague ei quemador antes de retirar ei utensiiio para
evitar exposici6n a la llama del quemador,
Siempre ajuste ia llama dei quemador superior de modo que
no se extienda mas alia del borde inferior del utensilio, Una
llama excesiva es peiigrosa, desperdicia energia y puede
da_iar la estufa, el utensilio o los armarios que est4n sobre la
estufa,
NUNCA deje sin supervisi6n ia cubierta de ia estufa cuando
est6 cocinando, especialmente cuando usa un ajuste de calor
alto o cuando est6 usando una freidora, Los reboses pueden
producir humo y los derrames de grasa pueden infiamarse,
Limpie los derrames grasosos tan pronto como sea posible,
No use calor alto durante periodos de cocci6n prolongados,
NUN6SAcaiiente un envase cerrado en ei quemador superior
o en el homo, La acumulaci6n de presi6n puede hacer
explotar el envase causando una lesi6n personal grave o da_io
a la estufa,
Use tomaollas secos y gruesos, Los tomaollas hOmedos
pueden causar quemaduras a causa dei vapor, Lastoaiias u
otros sustitutos no deben ser usados como tomaollas porque
eiios pueden quedar coigando a trav6s de los quemadores
superiores y encenderse o enredarse en ias piezas de ia
estufa,
Siempre deje enfriar la grasa caliente que se ha usado en la
freidora antes de intentar mover o manipularla,
No permita que se acumule grasa u otros materiales
inflamables en la estufa o cerca de ella, en la campana o en el
ventilador aspirador, Limpie la campana extractora con
frecuencia para evitar que la grasa u otros materiales
inflamables se acumulen en la campana o en el filtro,
Encienda el ventilador cuando cocine alimentos flameados
debajo ia campana,
NUNCA use vestimentas de materiales inflamables, ropa
suelta o de mangas largas cuando est6 cocinando, La
vestimenta se puede encender o enganchar en los mangos de
los utensilios,
55

SbmprecoIoqueBsparriiiasdeIhomoenlaposid6ndeseada
cuandoeIhomoest6frio.DesibelaparriihdeIhomohacia
afueraparaagregaroretiraraiimento,usandotomaoiBssecos
yresbtentes.SiempreeviteabanzardentrodeIhomopara
agregaroretiraraiimentos.Siunaparriiiadebesersacada
cuandoest,1todaviacaibnte,useuntomaoiiasseco.Siempre
@agueeIhomodespu_sdehaberterminadodecocinar.
TengacuidadocuandoabralapuertadeIhomo.Dejeque
escapeeIaireoeIvaporcaiienteantesdesacarovoiver
coIocareIaiimento.
ADVERTENCmASOBRELOSALIMENTOSPREPARADOS:
SigaBsinstruccionesdelfabricantedelosalimentos.Siun
envasedepldsticodealimentocongeBdoy/osutapase
deforma,secombaoseda_iadealgunaotramaneradurante
lacocci6n,descarteinmediatamenteelalimentoysuenvase.
Elalimentopuedeestarcontaminado.
NUNCAusepapeldeduminioparacubrirunaparrilhdel
homoolaparteinferiordelhomo.Elusoincorrectopuede
resultarenunriesgodechoqueel6ctrico,incendiooda_oal
ebctrodomestico.UsepapeldeduminiosoBmentecomose
indicaenestaguia.
Utensilios Apropiados
Use sartenes con rondos pBnos y mangos que sean fdcibs de
tomar y que permanezcan frios. Evite usar sartenes u ollas
inestabbs, combadas que se pueden vobar fdcilmente u olBs
cuyos mangos esten sueltos. Ademas evite usar utensilios
especidmente pequeSos o sartenes con mangos pesados
pues ellos pueden ser inestabbs y vobarse fdcilmente. Los
utensilios que son pesados de mover cuando est_inIbnos con
alimento pueden tambien ser un peligro.
Asegurese de que el utensilio sea Io suficientemente grande
como para contener en forma debida los alimentos y evitar
derrames. El tamaSo es particuhrmente importante cuando
se utilizan freidoras. AseguJresede que el utensilio tiene
capacidad para ei voiumen de aiimentos que seva a agregar
ai iguai que para ia formaci6n de burbujas de ia grasa.
Para reducir a un minimo las quemaduras y que los materiales
inflamables y los derrames se enciendan debidos a contacto
no intencional con el utensilio, los mangos no deben
extenderse sobre el quemador superior adyacente. Siempre
gire los mangos de los utensilios hacia el lado o hacia la parte
trasera de la estufa, no hacia la habitaci6n donde puede ser
f_cilmente golpeados o alcanzados por los ni_os peque_os.
Nunca deje que un utensilio hierva hasta quedar seco pues
esto puede da_iar el utensilio y la estufa.
Siga las instrucciones del fabricante cuando use bolsas para
cocinar en el homo.
Solamente ciertos tipos de utensilios de vidrio cer_mico, de
ceramica o glaseados son convenientes para uso en la
cubierta de la estufa o en el homo sin quebrarse debido al
cambio repentino de temperatura. Siga las instrucciones del
fabricante cuando use utensilios de vidrio.
Esteelectrodomestico ha sido probado respecto a su
rendimiento seguro usando utensilios de cocina
convencionales. No use ningun dispositivo o accesorio que no
haya sido espedficamente recomendado en esta guia. No use
tapas para cubrir los quemadores superiores, rejiiias para ia
cubierta de la estufa ni agregue sistemas de convecci6n para
hornos. El uso de dispositivos o accesorios que no son
expresamente recomendados en esta guia, puede crear serios
peligros de seguridad, resultar en problemas de rendimiento y
reducir la vida utii de los componentes de la estufa.
Seguridad de la Limpieza
Apague todos los controles y espere que se enfrien las piezas
de la estufa antes de tocarlas o limpiarlas. No toque las
rejillas de los quemadores o las _reas circundantes hasta que
elias no hayan tenido tiempo suficiente de enfriarse.
Limpie la estufa con cuidado. Tenga cuidado para evitar
quemaduras de vapor si se usa una esponja o un patio mojado
para limpiar los derrames en una superficie caliente. AIgunos
iimpiadores pueden producir vapores nocivos cuando se
aplican a una superficie caliente.
Homo Auto impiarmte
No deje a!imento ni utensilios de cocina, etc. en e! homo
durante el cicio de autolimpieza_
Limpie solamente las piezas que se indican en esta guia. No
iimpie ia junta de ia puerta. La junta es esenciai para un
sellado herm6tico. No restriegue, ddie, ni mueva la junta de
la puerta. No use limpiadores de homo de ninguna clase en el
homo ni alrededor de cualquier parte del homo autolimpiante.
56

Antes de la autolimpieza del homo, saque la asadera, las
parrillas del homo y otros utensilios y limpie los derrames
excesivos para evitar que se produzca demasiado humo,
Ilamaradas o llamas.
Esnormal que la cubierta de la estufa se cdiente durante el
ciclo de autolimpieza, Pot Io tanto, se debe evitar tocar la
cubierta durante un ciclo de autolimpieza,
Aviso y Advertencia
lmportante Sobre Seguridad
La Propuesta 65 de la Leyde 1986 del Estado de California
Sobre Seguridad y Contaminad6n del Agua Potable (California
Safe Drinking Water and Toxic Enforcement Act of 1986_}exige
que el Gobemador de California publique una lista de las
sustancias que segun el estado de California causan c_incer o
ddio al sistema reproductivo y exige que las empresas
adviertan a sus dientes sobre la exposici6n potencid a tales
sustancias.
Se advierte a los usuarios de esta estufa que la combusti6n
del gas puede resultar en exposici6n de bajo nivel a dgunas
de las sustancias publicadas en la lista, induyendo benceno,
formddeh{do y hollin, debido principalmente a la combusti6n
incompleta del gas natural o de los combustibles de petr61eo
licuado. Losquemadores ajustados en forma debida
reducir_n la combusti6n incompleta. La exposici6n a estas
sustancias puede tambi6n set reducida a un minimo
ventilando los quemadores al exterior en forma adecuada.
Se advierte a los usuarios de este electrodom_stico que
cuando el homo est,1funcionando en el cido de autolimpieza,
puede haber exposici6n de bajo nivel a dgunas de las
sustancias indicadas en la lista, induyendo mon6xido de
carbono. La exposici6n a estas sustancias puede set reducida
a un minimo ventilando el homo al exterior en forma
adecuada, abriendo las ventanas y/o la puerta en la habitaci6n
en donde est,1ubicado el electrodom_stico durante el cido de
AVISO IMPORTANTE RESPECTOA LOS PAJAROS
DOMESTmCOS:
Nunca mantenga los p_ijarosen [a cocina o en [as
habitaciones donde puedan [[egar los humos de [acocina. Los
p_jaros tienen un sistema respiratorio muy sensitivo. Los
humos producidos durante el cido de autolimpieza del homo
pueden set perjudiciales o mortales para los p_ijaros. Los
humos que despide el aceite de cocina recalentado, la grasa,
margarina y los utensilios antiadherentes recalentados pueden
tambi6n set perjudicides.
Conserve estas lnstrucciones para Referencia Futura
57

@
'LO' (Bajo):Seusaparacalentaralimentosa
fuegolento,mantenerIosalimentoscaiientesy
derretirchocolateo mantequilla. Sepuede
cocinaren el ajuste'LO' siemprequeel
utensilioest6tapado. Esposiblereducirel calor
girando Iaper[!laa IaposiciOn'OFF'(Apagado).
Asegt_resede que la llamaseaestabte.
Controles Superiores
• S[[a[mmaseapagacuandoest6coc[nando,apaguee(
quemador. S[sedetectaun o[orfue+teagas.aura unaventana
y esperec+ncomlnutosantesde vo[ve+a eneenderelquemador.
- Aseg0resedequetodos loscontro[essuperioresest6nen [a
pos+ciOn+OFF'(Apagado)antesde summLstrargasa [aestufa.
• NUHCA toque [asuperficiede [aestufahastaque nose haya
enfriado. Seesperade que algunasde [aspiezasde [a
superf+cie,especiatmentealrededorde loseiementos+se
ent[bieno ca(lentenm[em+asest_coc[nando. Usetomaol[as
paraprotegersusmanos.
Eneendido Sin Piloto
Elencendidosinpiloto eliminala +APAUELQUEMADOR
necesidaddeuna luzpiloto
constantepermanente.Cada
unode losquemadores
superiorestiene un encendedorde
chispa.Tengacuidadocuando
limpiealrededordel quemador
superior+
Si el quemadorsuperior O"B_n_.fl_#__/_
no enciende,verifiquesi el _.._E,,_,,++_,_,
encendedorest_roto,sucio o ___
mojado.
BASEDEL QUEMADOR
Perillas de Control de los
Elementos Superiores
Seutilizanparaeneenderlosquemadoressupedores+Sedisponede
una selecci6ninfinita deajustesde calordesde'LO' a 'HI' (Bajoa
Alto). Ene+ajuste'H+'sepuedesentirun tope o una muesca. Las
perillaspuedenserajustadasexactamenteen losajustes
correspondienteso entrecualquierade ellos.
'HI' (Alto): Seusaparahacerhervirun I[quidoo
alcanzarla presi6nadecuadaen una ollaa [
presidn. Siemprereduzcael ajustea un calor [
rodsbajocuandolos[iquidoscomieneena hervir
o cuandolosalimentoscomiencena cocinarse.
Seusauna llamade tamafiointermediopara
continuarcocinando. Etalimentono secocinar_
m_sr_pidocuandoseusaun ajustede llama
m_salto que el necesariopara mantenerun
hervorsuave. Elaguahiervea [amisma
temperaturasi est_hiwlendosuaveo
v[gorosamente.
O O Lasilustracionescercade la peri[iaidentificancua[ esel
quemadorquecontrola esaperil(a+Porejempio,la
O i[ustraci6na izquierdamuestrala ubicaciOndel quemador
de[anteroizquierdo+
Programaci6n de los Contro[es:
Eltamafioyel tipo de utens[[ioafectar_inel ajustede calor.Para
informaciOnsobrelosutensi[iosyotrasfactoresque afectanlos
ajustesde caior,consulteel folleto "LaCocinaF_ci['+
1+ Coloqueun utensiiiosobre[arejilia del quemador+
+ La llamadel quemadorpuede[evantarseo parecerseparada
del orificio si no seco[ocaun utensilioen la reji[la+
2+ Oprimay gire la peri[iaa [aizquierdaa[ajuste'UTE' (Encendido)+
o Seoir_ un chasquido(chispa)y el quemadorseencender&
(Loscuatro quemadoresproducir_nchispacuandoseco[ocala
peri[lade cualquierade losquemadoresen la posiciOn'UTE'y
3+ Despu6squeel quemadorseha encendido,gire [aperillaal
tamaffode llamadeseado+
o Elencendedorcontinuar_produciendochispashastaque [a
peri[laseagirada m_sa[l_de la posiciOnffLITE'+
Furmciormamiento durante una
[nterrupci6n de la Energia
Cuandoseencienden10Squemadoressuperiores,aseg_iresede
que todas [asperiliasde control est6nen la position 'O[:F+
Pr+meroenclendae[fOsforoy mant6nga[0 en P0SidOnantesde
girar [a pe[i[la a!ajuste!UTE';
1. Acerqueun f6sforoencendidoa [acabezadelquemador
superiordeseado.
2. Oprimay gire la perilla decontrol lentamentea [aposlci6ni[TE'.
3. Ajuste [allamaa[ nive[deseado.
58

Para evitar que ia cubierta se descoiore o se
• Limpielacubierta de laestufadespu6sdecadauso.
• Limpielosderrames_icidoso azucaradostan prontocomo la
cubiertasehayaenfriadopuesestosderrames
puedendescolorarla porcetana.
A diferenciade unaestufaconquemadoresde
gasestSndar,estacubiertano se[evantani
tampocoesremovible.No h_tente/evantarla
cubietta per ning_n motive.
Quemadores Seminaries
LosquemadoresseIIadosdesu estufaest_naseguradosa [a
cubiertay no hartsidodisefiadosparasersacados+Debidoa que
losquemadoresest_nseiiadosen [acubierta,[osderrameso
rebosesnoseescurrir_ndebajode [acubierta de [aestufa+
Sin embargo,losquemadorespuedenser[[mpiadosdespuesde
cadauso+Lapartede [acabezadetquemadorpuedeset faciimente
sacadaparasu [impieza+[Veten [ap_gina77 [asinstruccionessobre
[a[impieza,)
Lascabezasde Josquemadoresdebenestarcorrectamente
coJocadasen JabasedeJquemadorafin deque 6stefuncionede
maneraapmpJada.
Quemadores de Alto
Existeun quemadorde altorendimientoensu estufa,situadoen [a
posiciOnderechadeIantera.AIgunosmodeIosselectostambi6n
tienen unsegundoquemadorde alto rendimientosituadoen
posiciOndeIanteraizquierda.Estosquemadoresofrecencocci6nm_s
r_pidaypuedenserusadospara herviraguacon rapidezo para
cocinargrandescantidadesde aIimento.
Quemador para Cocinar a
Fuego Lento (mode[osselectos)
Estequemadorseencuentraen [aposiciOndeIanteraizquierdao
derecho. Elquemadorparacocinara fuego lentoofreceuna llama
de menorintensidad(BTU*infer[o0 para ca[entarsalsasdelicadaso
derretirchocolate.
_' r6gimennomina,;deBTUvariar_cuandoseusagas_;ieuado.
Rejimmasde ruesQuemadores
Lasreji[lasdebenestardebidamenteco[ocadasantesdecomenzara
cocinar.Cuandoinstaie[asrejiIIas,co[oquelosextremosde [as
[eng0etashaciae[centro,de maneraque coincidancon [asbarras
derechas.
La instahciOnincorrectade tasreji[hs puederesultaren picaduras
de la cubierta.
No use mosquemadores sin tenet un utensimioen mamjmaoEm
acabado de porceJanade [as rejiJJaspaede picarsesi no existe
anatensimioqae absorba el camordemallamadamquemador.
Tengacuidadoa[ revolvere[aiimentode una oIiao sart6ncoiocado
sobre[arejiliade[quemador.Lasreji[[astienenun acabadosuave
parafaciiitarsu [impieza.La oiiao sart6n puedenresbaIars[ nose
sujetanpor el mango.Estopuedeprovocarderramede aiimentos
caIientesyconstituir un riesgode sufrir una quemadura.
Aunque[asrejiiIasde losquemadoressondurables,graduaImente
perder_nsu bd[[oy/o sedescoiorar_n,debido a [asaItas
temperaturasde [a[lamade[gas.
Unquemadorajustadode maneracorrectaconorificios
[impiosseencender_dentrode unospocossegundos. Si
est_usandogasnatural[allamaser_azulconun cono
interiorazu[profundo.
Si [allamade[quemadoresamariIIao esruidosa,[a mezcla
de aire/gaspuedeserincorrecta. POngaseen contactocon
un t6cnicode servicioparaajustarla. [Losajustesno est_n
cubiertospar [agarant[ay
Congas[icuadosonaceptablesaIgunaspuntasamariIIasen
[a[lama. Estoes normaly no esnecesar[ohacerning0n
ajuste.
Conalgunostipos degas,usted puedeoff un "chasquido"
cuandoel quemadorsuperiorseapaga. Esteesun sonido
normalde[funcionamientodel quemador.
Si [aperilIade controlsegira muyr_ipidamentede'HI' a 'LO',
[a[lamapuedeapagarse,particu[armentes[el quemadorest8
if[o. Si estoocurre,gire [aperillaa [aposici6n'OFF'
[Apagado),espereaIgunossegundosy vue[vaencendere[
quemador.
La[]areadebesetajustadade modoque no seextiendam_s
a[[_de[bordede[utensiiio.
ZLf
59

Panel de Control
A B C D
E
Elpanelde control haside diseriadoparasu f4cil programaci6n.Elindicadorvisualen el panelde control muestrala hera deJd[a,el
tempodzadory lasfuncionesdel borne.Elpanelde control mostradoarribaincJuyelascaracter[sticasespedficasdel modelo. [Elestilo del
panelde controlvar[asegOnel modelo0
B
C
E
H
J
illi
'Broil'(Asara
laParrilla)
'Bake'(Homear}
'More+/Less-'
(M_s+/Menos-}
'Tirner'_empofizador)
'Cook&Hold'(CocciOn
y MantenerCaliente)
'Clean'[Limpieza]
'Delay'(Diferido}
'Clock'(Re!el)
'KeepWarm'
(MantenerCaliente]
'CANCEL'(CANCELAR]
Seusaparaasarala parfillay dorarlos
alJmentos.
Seusaparahomearyasar.
Programaocambialahera,la
teraperaturadelhomo.Programaasara
laparrilla'HI'o 'LO'.
Programaaltemporizador.
Seusaparahorneardurm_teuntiempo
seleccionado,luegomantieneel alimento
calienteduranteunahera.
Seusaparaprogramarunciclode
autolimpieza.
Programaelborneparacomenzara
homearo limpiarsea unaheraposterior.
Seusaparaprogramarlaheradeldia.
Seusaparamantenercalienteenet
homoel alimentococinado.
Cancelatodaslasfuncionesa excepciOn
deltemporizadoryel reloj.
Use de Jas Teclas
, Oprimalatecla deseada.
, Optima'More+' o 'Less-'para programareltiempo o la
temperatura.
, Seescuchar_unaseSalsonoracadavezque oprimaunatecla.
, Seescuchar_ndosserialessonorassiocurreun error en la
programaciOn.
Nota: Cuatrosegundosdespu(!sde haberoprimidoIatecla
'More+' o 'Less-'el tiempo o Iatemperaturaset4 autom4tica-
menteprogramada.Si transcurrenm4sde30 segundosdespu@s
de haberoprimidouna tecJade funci6ny antesde oprimir las
teclas'More+' o'Less-',Jafunci6nser4canceladay el Jndicador
visualvolver_aJdespJiegueanterior.
'Clock' (Reloj)
Elreloj puedeset ajustadopara desplegarla herayaseaen formate
de 12betas o 24 horas.Elreloj hasideprogramadoen la f_brJca
parael formatede 12betas.
Para cambiar eJ reJej a formate de
24 betas:
1. Optimay mantengaoprimidasIasteclas
'CANCEL'y 'Delay'durantetres segundos.
2. Optima 'More+' o'Less-'paraprogramarel
formatede 12 horaso 24horas.
3.
abajo.
Programaci6n de[ Reiej:
1. Optima latecla 'Clock'.
+ Losdospuntosdesteilanen e[ indicador.
2. Oprima'More+' o 'Less-'paraprogramarla
heradel d[a.
Programe[aherade[d/asiguiendo[ashlstruccionesindicadas
+ Losdospuntoscontintian destellando. Less-
3. Optima latecla 'Clock' nuevamenteoesperecuatro ......................................
segundos.Losdospuntosdejar4nde destelJar.
cento
6O

@
Cuandoseconectaenergiaei@tdcaaIhornoo despu@deuna
interrupci6nde taenergfaeI6ctrica,Ia(fltimahoradel rebj previaa
la interrupcidndestetlar_en ei indicador.
Paradespbgar tahoradeIaliacuandoeIindicadorest6 mostrando
otrafuncidn detiempo,optima tatecta'Cbck'.
La horadeIreloj no puedesercambiadacuandoel hornoha sido
programaticpara'DelayCook','Clean'o 'Cook& Hold'.
Para cancelar el despliegue del reloj:
Si no@seaque eIindicadorvisualmuestrelahora del alia:
Oprimay mantengaoprimidalasteclas
'CANCEL'y'Clock' durantetres segundos.La
horadel d[adesaparecer_del indicador.
Cuandosecancelael desplieguedeIreloj,
oprimaIatecla 'Clock' paradesplegar
brevementela horadel d[a.
Para restaurar el despliegue del reloj:
Oprimay mantengaoprimkla iasteclas'CANCEL'y 'Ciock'durante
tres segundos.Lahoradel d[areaparecer8en el indicador.
'Timer' (Temporizador)
Eltemporizadorpuedeset programaticde un minuto [0:01}hasta99
horasy 59 minutos[99:59}.
Eltemporizadorpuedeset usadoindependientementedecualquier
otraactividaddel homo.Adem_spuedeserprogramadocuandootra
funci@ delhomoest6en funcionamiento.
Eltemporizadorno controlael horno.Solamentecontrolauna sepal
SO[iCES.
Para programar ei temporizador:
1. Optimaiatecia 'Timer'{Temporizador}. .....
Timer
• '0:00'seiluminaen el indicadorvisual.
• Losdospuntosdesteilar_n. .............................
2. OprimaIatecla 'More+' o 'Less-'hastaque el ..........................................
tbmpo corre(',toaparezcaen eIindicadorvbuaL
• LosdospuntoscontinOandesteilando. Less-
3. Optimanuevamentelatecla 'Timer'o esperecuatro
segundos.
• LosdospuntoscontinOandestellandoy comienzala cuenta
regresivadel tbmpo.
• Elqtimo minutode Iacuentaregresivadel temporizadorse
desplegar_ensegundos.
4. A! finaldel tiempo programado,seescuchar_una s@alsonora
larga.
Para canceiar ei temporizador:
1. Opnmay mantengaoprimidala tecia'Timer'durantetres
segundos.
U
2. Optima latecla 'Timer'y coioquelahora a 0:00.
Bloqueo de los Controles y de
la Puerta dem Homo
EItecladoy ia puertadei horno puedenser bloqueadospara
seguridad,iimpiezao evitarel uso noautorizado.Nofuncionar_n
cuandoest6n bloqueados.
Siel homoest_en uso,loscontroiesni la puertapuedenbioquearse.
La horaactualdel d[apermanecer_en el indicadorcuandolos
controiesest6nbioqueados.
Para bioquear:
Oprimay mantengaoprimidaslastecias
'CANCEL'y'Cook& HoWdurantetres
segundos.((}primaprimerolatecla 'CAN-
CEL'}.
'LOCK'desteIIaenelindieadorvisual
Para desbioquear:
Oprimay mantengaopdmidaslasteclas'CANCEL'y 'Cook& Hold'
durantetres segundos.(Opdmaprimerola tecla'CANCEL'}.
' LOCK'desaparecedel indicadorvbuaL
C6digos de Errores
'BAKE'o 'LOCK'puedendeste[[arr@idamenteparaadvertirb que
hayun error o un probiema.Si'BAKE'o 'LOCK'deste!lanen eI
indicadorvisual,optima le tecla 'CANCEL'.Si'BAKE'o 'LOCK'
contin_andestellando,desconectelacorrienteel6ctricahaciael
artefacto.Espereunospocosminutosyvuelvaa conectarla
corrienteel6ctrica.Si IaspalabrasaOncontinOandesteilando,
desconecteIacornenteel@tdcahaciael artefactoy Ilamea un
t@nicodeservbio autorizado.
61

'Bake' (Horneado])
Para pregramar 'Bake' (Hemeade):
1+ OprJma[atecia 'Bake'.
+ 'BAKE'desteitar_+
• '000'deste+iar8en e[indicadorvisual
2+ Seieccione[atemperaturade[homo+Latemperatura
detbornepuedeset programadade 75° a285° C .............................
070°a 550° F}.Optimau oprimay mantenga
oprJmida[atecia 'More+' o 'Less-'. \ Less- +
+ Cuandocualquierade estasdostectasseoprimeper
prJmeravez,175° (350°}se ituminar_.
+ Optimatatecta'More+' para aumentar[atemperatura.
+ Optimatatecta'Less-'paradisminuir tatemperatura.
3. Optima[atecia 'Bake' nuevamenteo esperecuatrosegundos.
+ 'BAKE'dejar4de destelJary seiiuminar4en el indicadorvisual.
+ 38° (100°:)o la temperatura actual del hornosedesplegar&
Latemperaturase elevar_en incrementosde 5° hastaquese
aicance[atemperaturaprogramada.
4. Espereaque el homo seprecaJientedurante8-15minutes.
+ Cuandoel homo[[egaa [atemperaturaprogramadase
escuchar_unaseffalsonora[arga.
+ Paraverificar[atemperaturaprogramadadurantee[
precaJentamientodel borne,optimalatecla 'Bake'.
5. Coloquee!alimentoen el homo.
6. Vedfiqueel progresode [acocciOncuandohayatranscurridoe[
tiempo minimorecomendado.Contint_ela cocci6nsiesnecesario.
7. AIt@minode [acocci6n,optima[atecJa'CANCEL'._",S
8. Retireel alimentodel borne.
Notas sobre Horneado:
, Paracamhiar matemperatara demhomo darame em
hemeado,optima la tecla 'Bake',[uegooprima[atecJa'More+'
o 'Less-'hastaque Ileguea latemperaturadeseada+
+ Para¢amhiar ia temperatara dei homo darante 'Preheat',
oprJmadosveces[atecJa'Bake',[uegooptima[atecia 'More+'
o 'Less-'hastaque sedesplieguelatemperaturadeseada+
, Si oividaapagarel homo, seapagar_autom4ticamentedespuSs
detranscurrir 12horas+SideseadesactivarestacaracterBtica,
yeala p%ina 65+
, Parasugerenciasadicionaiessobrehomeadoy asado,consuite
e[foJleto"LaCocinaF_cil"+
Diferencias de[ homeado entre su homo
antiguo y su homo nuevo
Esnormalobsewaralgunasdiferenciasen el tiempode horneadode
suborne antiguoy su homonuevo+Vea"Ajustede laTemperatura
del Horno"en [ap%ina 66+
'Ceek & Hemal'(Cocciony
Mantener CaJiente}
'Cook& HoWle permitehornearduranteunacantidad determinada
detiempo,seguidode un ciclo 'KeepWarm'de una hera.
Para pregramar 'Cook & HoJd':
1+Optima latecla 'Cook&Hoid'+
+ 'BAKE'y'HOLD' destellan+
+ '000'seiiuminaen el indicadorvisual+
2.
Seieccionelatemperaturadel homo.La temperatura
de[homo puedeserprogramadade 75° a 285° C
070° a550° F}.Optima u oprimay mantenga
oprimidala tecla'More+' o 'Less-'.
+ Oprimalatecla 'Mole+' paraaumentarla
temperatura.
+ Optimalatecla 'Less-'paradisminui+latemperatuia.
3. Optima latecla 'Cook& Hold' nuevamenteOesperecuatro
segundos.
+ 'HOLD'desteJla.
+ '00:00'desteliaen e[indicadorvisual
4. Programe[acantidadde tiempo durantelacual usteddesea
hornearoprimiendo[atecJa'More+' o'Less-',Eltiempode
homeadopuedeprogramarsedesde10minutes(00:10}hasta
11horas,59 minutes[11:59}.
+ 'BAKE'y'HOLD'se iJuminanen el indicadorvisual
+ Eltiempo de horneadoseiluminar_ene[ indicadorvisual.
+ Comenzar4[acuenta regresivadel tiempode horneado.
Cuande haya expirade eJtiempe de cecci6m
• Seescuchar4ncuatm seffalessonoras+
• 'BAKE'seapagar_+
+ 'HOLD'y 'WARM'se[[uminar4n+
• Ene[ [ndicadorsedesplegar_75° [170_]+
Less- +
62

@
Despu6s de una hora en 'HOLD WARM' (Mantener
Caliente):
. 'End'sedesplegar&
. Lahoradel d{avolver_a desplegarseen el indicadorvisual.
Para cancemar 'Cook & Homd'en cuamquier momento:
Optimala tecB 'CANCEL'.Retireel alimentodel homo.
CANCEL
'Delay Bake' (HorneadoDifeddo)
NeUseh0rneadodifeddopara alimentosde CoAadurac!6ntabs
como productosI@teos,cerdo,camede aveo marbcos.
Cuandousa'Delay', el horno comienzaa cocinarm_star@ en el
dia.Programela cantidaddetbmpo que usted@seadiferirantes
de queseencbnda et hornoycuantotiempo deseacocinarel
alimento.Elhornocomienzaa calentaren la hora seleccionaday
cocinaduranteeltiempo especificado.
Eltiempo diferidopuedeprogramarsede 10minutos(00:10}hasta
11horas,59minutos(11:59}.
Para programar un ciclo de homeado diferido:
1. OprJmaJatecia 'Delay'.
• 'DELAY'destella.
• '00:00'destellaen el indicadorvisual.
2. OptimaIatecla 'More+' o 'Less-'para
programar el tiempo diferido,
Cuando'DELAY'estetodav[adestellando:
3. OptimaIatecla 'Cook& Hold'.
• '000'seiluminaen el indicadorvisual.
• 'BAKE'y 'HOLDdestellan.
4. Oprima'More+' para programar matemperatara tie
horneado,
• 00:00y'HOLD' destellan.
• 'BAKE'permaneceihminado.
5, Oprima'More+' parapregramarel tiempo tie homeado.
• Enet indicadorvisualseiiuminan'DELAY','BAKE',y
'HOLD'.
More+
Less-}
Cuando emtiempo diferido ha expirado:
• 'DELAY'seapagar&
• Sedespliegael tiempoy latemperaturade horneado.
• Sedespliega'BAKE'y 'HOLD'.
Para programar un tiempo diferido cuando ya se ha
£rogramado 'Cook & Homd':
1. Oprimalateela'Delay'.
• 'DELAY'destella.
• '00:00'sedespliegaen el indicadorvisual.
2. Optima latecla 'More+' o 'Less-'para programar ................................................
el tiempo diferido........................................
Despu6sde cuatrosegundos,'DELAY' Less-
permanecer_iluminadopara recordadeque se
haprogramadoun ciclo de horneadodiferido.
CuaBdo ha expirado el tiempo diferido y el homo
comieaza a fuacioaar:
• Sedespbgar_el tiempoy la temperaturade horneado.
• 'DELAY'seapagar&
• 'BAKE'y'HOLD'permanecer_niluminados.
Para cancemar:
OprimaIatecla 'CANCEL'.
• Todaslasfuncionesde horneadocontroladaso no pol el
temporizadorser_ncanceladas.
• Lahoradel dia volver_a desplegarseen el indicadorvisual.
_ota_a
o Nousehorneadodiferidopara losart[culosque necesitan
precalentambntodel horno,talcomo pasteles,galIetasy panes.
o Nousehorneadodiferidosi el hornoyaest_caliente.
63

'Keep Warm' (Mantener Caliente)
Paramantenerca[ientesen forma seguraalimentoscaiienteso para
calentarpanesyphtos+
Para pregramar 'Keep Warm':
1+ Optimalatecla 'KeepWarm'+
+ 'WARM'destella.
+ '000'sedespiiegaenet indicadorvisual.
2. SeleccioneIatemperaturade 'KeepWarm'.La
temperaturapara 'KeepWarn/puede ser
programadade 63°a 90° C(145°a 190° F).Optima ..................................
u oprimay mantengaoprimidalatecla'More+' o Less- +
'Less-'. *...........................................
+ CuandocuaJquierade estasdosteclasseoprime
per primeravez,75° (170°}seiJuminar&
+ Optimalatecla 'More+' paraaumentaria temperatura.
+ Oprimalatecla 'Less-'paradisminuir latemperatura.
'WARM'y iatemperaturasedesplegar4nen eJindicadorcuando
eJciclo'KeepWarm'est6active.
Para ca_oeJar 'Keep Warm':
1. Optimalatecla 'CANCEL'.
2. Retireel alimentodel homo.
Notas sebre 'Keep Warm':
, ParacaIidad6pthnade losalimentos,losalimentoscocinados
en el homo debensermantenidoscalientesper no rossde 1a
2 horas.
, Paraevitarque losalimentossesequen,cObraloslevemente
con papelde aluminioo unatapa.
, Para camentarpanecimmes:
- cubra ievementelospanecillosconpapelde ahminio y
col6quelosenei homo+
- oprimaiastecias'KeepWarm'y 'More+' paraprogramar
75°C (175° F].
- calientedurante 12a 15minutes+
, Para camemarplates:
- coloque2 pilasdecuatro platescadaunaen el homo+
- oprimaiastecias'KeepWarm'y 'More+' parapmgramar
75°C (175° F].
- caiiente losp+atosdurantecinco minutes,apagueel homoy
deje lospiatosen e!bornedurante 15minutesm_s+
- usesolamenteplates resistentesal homo,verifique conel
fabricante+
- nocoloquelosplatescalientessobreuna superficiefrfa
puesetcambior_pidode temperaturapuedecausarfisuras
superficialeso rotura+
64

@
Cierte Auto tico/Modo
Elhomoseapagar_autom4tJcamentedespu6sde 12betassi usted
Jodeiaaccidentalmenteencendido. EstacaracterFsticadeseguridad
puedeset desactivada.
Para caneelar el eierre autem_tiee de 12 heras y
dejar que el home funciene centinuamente durante
72 heras:
1. Programeel bornepara homear(verp4gina62).
2. Optimay mantengaoprimidaJatecla 'Clock'
durantecinco segundos.
• 'SAb'sedesplegar_ydesteJlar4durantecinco segundos.
• 'SAb'sedesplegar_continuamentehastaquese desactiveo
hastaque transcurraei I[mitede 72betas.
• 'BAKE'tambi6nsedesplegar_sJseest4usandoun ciclo de
horneadocuandoet hornoest4en ModeSab4tico.
TodasIasotrasfuncionesEXCEPTO'BAKE'['Timer','KeepWarm',
'Clean',etc.] est_nbloqueadasduranteel ModeSab4tJco.
Para caacelar 'Bake' cuaade el Mode Sab_tice est_
active:
Optima'CANCEL'.
• 'BAKE'seapagar4en etindicadorvisual
• Noseoir4 nlngunase_alsonora.
Para cancelar el Mode Sab_tico:
1. OprJmaJatecla 'Clock' durantecinco segundos.
O
2. Despu6sde 72horas,ei modesab4ticoterminar&
• 'SAb'destellar_durante5 segundos=
• Lahera deldia reaparecer4en el indicadorvisual.
Notas Sobre eUMode Sab tico:
• ElMode Sab_ticopuedeset activadoen cualquiermemento,
est6o no el borneencendido.
• ElMode Sab_ticonosepuedeactivarsi lasteciasest4n
bloqueadaso cuandola puertaest_ bloqueada.
• Sie! hornoest4horneandocuandoel ModeSab_iticoes
programado,'BAKE'seapagar_cuandosecanceleel
horneado. Noseemitir4nse_aiessonoras.
• Sisedesea[a[uzdel borne durantee[Mode Sab_tico,6sta
debeserencendidaantesde que comienceel ModeSab4tico.
• Cuandocomienzael modesab_tico,noseemitira la se_al
sonorade precaJentamiento.
• La mayor[ade [asadvertenciasy mensajesytodas lasseiiales
sonorasest_ndesactivadascuandoel ModeSab_ticoest4
active.
• Elcic[ode autolimpiezayb[oqueoautom4ticode la puertano
funcionar_duranteel Mode Sab4tico.
• Sioprime[atecia 'CANCEL'secancelar_un cic[o'Bake',sin
embargoel control permanecer_enMode Sab_tico.
• Sifaiia lacorrienteel6ctrica,cuandovue[valaenergiae[borne
seactivar4en ModeSab4ticocon72 betasrestantesy ning_in
cic[oactive.
65

Ajuste de [a temperatura de[
La exactitudde [astemperaturasde!hornoescuidadosamente
probadaen [af4brica. Esnormalnotaralgunadiferenciaentre[a
temperaturade horneado,entreun homo nuevoy un hornoantiguo.
Cone[correrde[tiempo,[atemperaturadeIhorno puedecambiar.
Ustedpuedeajustar [atemperaturadeJhorno,si consideraquesu
homo noest4 horneandoo dorandoenforma correcta. Paradec+dir
cuantodebecambiar[atemperatura,programe[atemperaturadel
homo a 15°C [25° F[ m4saIta o m4sbajaque [atemperatura
indicadaen sus recetas,luego hornee. LosresuItadosde [a
"prueba"puedendarleuna ideade cuantoajustar latemperatura.
Ajuste de [a temperatura de[ heine:
1. OprJmalatecla 'Bake'.
2. Programe280° (550°[oprimiendola tecla
'More+'.
3. Optimay mantengaoprimida[atecia 'Bake'
durantevariossegundoso hastaque0° aparezca
enel indicadorvisual
More+
Si latemperaturadel homoha sidopreviamenteajustada,el
cambioaparecer_enel indicadorvisual. Potejempio,si la
temperaturadel hornofue reducidaen 8°C 05° F)el indicador
mostrar4'- 8°'('-15°'].
4. Oprimalatecla 'More+' o 'Less-'paraajustar [atemperatura.
Cadavezque seoprimeuna tecla,latemperaturacambiaen3° C
[5° F). Latemperaturade[homopuedeseraumentadao
disminuidaen 3° a 20° C(5° a 35°F).
5. Lahora de[d[areaparecer4autom4ticamenteen el indicadol
visual
Nonecesitareajustarlatemperaturadel hornosi hayuna fallao
interrupci6ndeenerg[aeJ6ctrica.Lastemperaturasde asara [a
parriJJay [impiezano puedenser ajustadas.
Cambio de [a temperatura
de °F/°C
1. Elajustede f_brica de [amedidadetemperaturaesFahrenheit.
2. Paracambiarelajuste,oprimay mantengaoprimidas[astecIas
'CANCEL'(AnuIa0y'Bake' (Hornea0a[ mismotiempodurante
tres segundos.
3. Escuchar_unaseffa[sonoraye[ajusteactual [°Fo °C[se
despiegar_en [apantaiIa.(Sino sereaiizaning@lcamb[o,[a
estufaregresar4a[ajusteactualdespuesde 30segundos[.
4. Paracambiare[ajuste,optima [atecIa'More+' o 'Less-'.
Oprimaianuevamentepararegresara[ajusteanterior.Espere
cinco segundosye[ajusteseguardar_.
66

'Broiming' (Asar a [a Pardiia)
1. Oprima[atecia 'BroiF.
• 'BROHL'desteHa.
• 'SEt'sedespiiegaen el indicador.
2. Oprima[atecia 'More+' paraprogramarasara [aparriHa'Hi' u
oprimalatecla 'Less-'paraprogramarasarla parriHa'LO'.
• Ene]indicadorvisua[sedesplegar_'Hi' o 'LO'.
• Selecciones'Hi broiF285° C(550° F}paraasadoa HaparriHa
normal SeHeccione'LO broiF230° C(450° F}para asara la
parriiiacontemperaturabajaaiimentosquedebenser
cocinadospot m_stiempo,talcomo la camede ave.
3. Despu6sde cuatrosegundos,el hornocomenzar_afuncionar.
• 'BROHL'continuar_iluminado.
G.
7.
4. Para un dorado 6ptimo, precaliente el eIemento de asar a la
parrilla durante 2 a3 minutos antes de colocar el aIimento.
5. Co[oque el aIimento en el homo. Cierre la puerta del homo.
D6vueita a la cameuna vezaproximadamentea mitadde la
cocci6n.
CuandoelaHmentoest6cocinado,oprima[a
tecJa'CANCEL'.Retiree[afimentoy Haasadera
deJhomo.
o La horadel d[avolver_adesp[egarseen el
indicadorvisual.
Notas Sebre Asado a [a ParriHa:
• ParamejoresresuItadoscuandoasea [aparriila,useuna
asaderadisefiadaparaasara la parriiIa.
• 'Hi' seusaparala mayoffade losasadosa la parriIIa. Use'LO
broil' cuandoasea [aparriliaaiimentosque necesitancocciOn
proiongada. Latemperaturainferiorpermiteque el aIimento
se cocinehastaquedar bienasadosin dorarsedemasiado.
• Paracambiar matemperatura demhomo durante maasar a
maparrimma,oprima[atecIa'Broi[',hego oprima[atecla
'More+' o 'Less-'paracambiare[ajustede asadoentre'LO'
{Baio}y 'Hi' (Alto}.
• Lostiemposde asadoa [apardIiapuedenserm_slargos
cuandoseseIeccionala temperaturam_sbajade asara la
parrilla.
• Lamayoffadesalimentosdebeset dadovueItacuandoest_a
mitadde[tiempode asar.
• Parasugerenciasy temperaturasadicionaIessobreasara la
parrifla,consuIteel fofleto"La CocinaF_cil'.
Tab[a de Asar a [a ParriHa
Precafienteel homo durante2-3 minutos.
POSiCmONuE eRADOUE
ALiMENTOS . LA PARRILLA
Came de Res Biftec, 2,5 cm (1"}
Hamburguesas, 1,9cm (3/4"} de grosor
Came de Cerde Tocino
Jam6n, precocido, rebanada de
1,3 cm 0/2"}
Chuletas, 2,5 cm {1"}
Came de Ave Peehugas de Poflo,con hueso
Mariseos
Filetesde pescado
Tajadasde pescado,
2,5cm 0'} degrosor
Colasde langosta,85-115g
(3-4 onzas}cadauna
5
5
506
5
5
5
4
5
5
5
A medioasar
Bienasado
Bienasado
Bienasado
Tibio
Bienasado
Bienasado
Hoja[drado
Hoja[drado
BHencocidas
COCC[ON TOTAL
15- 20 minutos
18- 24 minutos
13- 18minutos
6 - 10minutos
8 - 12minutos
22- 28 minutos
30- 45 minutos{'LoBroil'}
8 - 12minutos
10- 15minutos
7 - 10minutos
Paraun exteriorm_sdoradoym_sasadoy un interiora mediococer,puedeset necesariodismhluir eltiempo de cocciOnen e[primer [adoy
acercarm_sla carnea [afuente de caIor.
Nora: Estatablaessolounaguia. Lostiempospuedenvariarconel %0 de alimentoque seest_cocHnando.
67

O
Encendido sin PiJoto
Suestufaest_equipadacon an sistemade encendidosinpiioto.
Conestetipo de encendido,e[gasseapagaautomSticamentey el
homo no ope_r_ duranteuna i_tterrupddn de/a corriente
e/_ctrica.
Un f6sforo encendido no encender_ el qaemador del homo°
No se debe intentar eneender el homodarante aria
interrapei6nde la eorriente elSetriea,
Respiradero del Homo
Cuandoel borneest_en use,el _reacercadel respiraderopuede
caientarseIosuficiente comeparacaasarquemaduras=Nunca
bIoqueela aberturadel respiradero=
Elrespiradero demhomo se encaentra debajo demrespamdo
protectorde sa estafao
RESPIRADERO
ORNO NO Coloque plastioos
cercade laabertura
dei respiraderopues
el calorqae sale
puededeformaro
derretirel pI_stico=
'Oven Light' (Luz del Horno )
Oprima[atecla'OvenLight' para encendero apagar
la lazde[homo=Lalazdel bornes6Iosepuede
encenderusandoel interrupter=
Pane[ inferior de[ Homo
S
Oven
Light
Protejael pane!inferiorde!homocontra derrames,especialmente
azacaradoso addicos,puespaedendescolorarla porcelana
esmaltada.Useel utensiliode tamaffocorrectoa fin de evitar
derrames=No eomoqaeatensilies ni papel de amaminio
direetamente en ia pare inferiordei homo°
Parriiias del Homo
• No intente ca_!biar [apos!ci6n de [as parriJJascuando e[ homo
est6caliente.
, NO useeJhomeparaguardaralimentosni utensili0s_
Elbornetiene dosparrillas. Todaslasparrillastienen an hordecon
topede enganche.
Para retirar [a parrimma:
1=Tirede la parrilladerechohacia
afaerahastaquesedetengaen la
posici6ndel topede enganche=
2= Levanteelfrente de [aparrillay tire
de [aparrilla haciaafuera=
Para reinstalar [a parriHa:
1= Coloquelaparrilla en elsoportede la parrilIaenel homo=
2= Incline[evementehaciaarribael extremedeiantero;desIice[a
parriIIahaciaatr_shastaque pasesobrelostopesde enganche=
3= Bajeel frente de la parrilIay desl(ceIahaciaadentrodel homo=
No eabra aria parrimmaeompmetacon papei de amaminioni
cemoqaepapei de aiaminio en el panel inferiordemhome° Se
afeetar_in mosresamtadosdemhomeado y se paede da_ar em
paneminferior dei homo°
Posiciones de la ParriJJa
PARRILLA7 (posiciOnm_s
aIta}:Parahornearconuna
soiapardIiaen bandejasde
horneargalIetasy paraasara
[aparri[ia=
PARR[LLA6: Seusapara
hornearconuna soiaparrilla
en bandejasde hornear
gaIIetas,paraasara la parriIIa
hlferior
Homeado per Dos del
ParriHas Homo
ypara horneadoconvariasparri[[as=
PARRILLA5: Parahornearcon unasoiaparri[iaen bandejasde
horneargalIetasy paraasara [aparriiia=
Pg,RRIL[._,4: Seusaparahornearconuna soIaparriIIaen bandejas
de horneargaiIetas,paste[esde una capa,caceroIas,asara [aparriIIa
ypara horneadoconvariasparriIIas=
PARRILLA3: Parahornearcon anasoiaparriIiaen bandejasde
horneargalIetas,caceroIas,pastelesdevariascapas,barrasde pan,
paste[esde aria capay parahorneadocon variasparri[[as=
68

PAflfl[[.LA2: Seusaparahornearconuna solapard[laen bandejas
de homeargattetas,paraasarcortesde came peque_osy para
horneadoconvariasparrittas.
PAflfl[ULA1:Seusaparaasarcortesde camegrandesy camede
8ve.
Panel _nferior dei Homo:Cotoquela
pard[iadet homoen tossoportesen
relievedetpanetinferiorde[homo. Use
paradisponerde espacioadiciona[
cuandococinecomidasgrandesen el
homo.
HOflNEADOCON PARRILLAS r_ULTIPLES:
Dos parrillas: Usela posici6n 3 y 6o 2 y 4.
Homeado de PasteJes de Capas en Dos
ParriJ[as
Paraobtenermejoresresu[tadoscuandohomeapastelesen dos
parrillas,usela posici6n2y 4.
Coloquelospastelesen lasparrii[ascomo semuestra.
69

Homo Autolimpiante
, Esnormalque[aspiezasde[homo seca[lentenduranteel cic[o
de autoiimpieza,
+ Paraevitardaffo a [apuerta,no intenteabrir+acuandola paiabra
LOCK'est6desplegadaen el indicadorvisual.
• Evitetocar [apuerto.[aventanao e[_reade[respJraderodel
homo duranteun ciclo de [imp+eza.
o No uselimpiadoresde hornoscomercialesen el acabadodel
homo nialrededorde ninguna plezadel homopuespuede
da_arei acabadoo lasprezas
Elciclo de autoiimpiezausatemperaturasde cocci6nsuperioresalas
normaiespara Iimpiarautomdticamentetodo el interiordel homo.
EsnormalqueocurranIhmaradas,humoo llamasdurantela limpieza
siei homoestddemasiadosucio.Esmejorlimpiarel horno
reguiarmenteenvezde esperarhastaquese hayaacumuiado
demasiadasuciedad.
Duranteel procesode limpieza,Iacocinadebeestarbienventilada
paraeliminarlosoloresnormalesasociadoscon la limpieza.
Antes de NaAutoN+mpieza
1. Apague la luzdel hornoantesde la iimpieza.La hz del horno
puedefundirseduranteei ciclode limpieza.
2. Retirela asadera,todos iosutensiiiosy iasparrillasdei homo+Las
parriiiasde!hornosedescolorar_ny no sedesiizardnf_cilmente
despu6sde un ciclo de autolimpiezasi noson retiradasdel homo+
3. Limpieel marcodethomo, el marcode ia puerta,el _reafuerade
lajunta de la puertay alrededorde la aberturaen la junta de la
puerta,con un agentede limpiezano abrasivotal como'Bon
Ami'+o condetergentey agua.Elprocesode autoiimpiezano
limpiaestas_reas. Eliasdebenser iimpiadasparaevitarque la
suciedadsehomeeduranteel ciclo de autoiimpieza. (Lajunta es
elselloalrededorde lapuertayventanadel hornoY
4. ParaevitardaSono limpieni frote lajunta situadaalrededorde la
puertadethomo. Lajunta est_ _ _
diseriadaparasellarherm6ticamenteel " "
calorduranteel ciclo de limpieza+
5+ Limpieel excesode grasao derrames
de laparte inferiordei homo+Esto
evitahumoexcesivoo llamaradas
durantee!ciclo de limpieza+
6+ Limpielosderramesazucaradoso _cidostales comopapadulce
[camote],tomateso saisasa basede leche+La porceiana
esmaltadaes resistenteal _cidopero no a pruebade_cidos+El
acabadode porcelanapuededescolorarses[ losderrames_cidos
o azucaradosno sonlimpiadosantesde un ciclo de autolimpieza.
Para programar 'Semf-Cmean' (Autolimpieza):
Nora: Latemperaturadel hornodebeset inferiora 205° C[400° F]paraprogramarun ciclo de limpieza+
1+
2.
Cierre[apuertade[homo.
Optima latecla 'CJean'.
o 'CLEAN'destetlaen el indicadorvisual
3. Oprimalatecla 'More+' o 'Less-'. _.......................................
o Sedespliega'CL-M (SuciedadModerada, ...........................
3 horas].
Si [apuertanosecierra,seoir_ unaserialsonoray [a Less- )
palabra'door'sedespiegar_en el indicadorvisual Si .........................
[apuertano escerradadentrode 45segundos,la operaciOnde
autolimpiezaser_canceladay el indicadorvolver_a desplegar[a
hora del d[a.
4. Oprimalatecla 'More+' o 'Less-'paradespiazarlosajustesde
autolimpieza.
'CL-H' (SuciedadIntensa,4 horas]
'CL-M' (SuciedadModerada,3 horas)
'CL- L' (Suciedad[eve,2horas)
Atseleccionarel nivelde suciedaddel homoseprograma
autom_ticamenteel tiempode limpieza.
5. Despu6sde cuatro segundos,el homocomenzar_a [impiar.
o Eltiempode limpiezacomenzar8[acuenta regresivaen e[
indicador.
o 'LOCK'sedesplegar_en el indicadorvisual
o 'CLEAN'sedesplegar_en el indicadorvisual
Para diferir un cicmo de automimpieza:
1+ Optima latecla 'Delay'+
o 'DELAY'destella+
o '00:00'sedesplegar_en el indicadorvisual
2+ Optima latecla 'More+' o 'Less-'paraprogramarla
3.
4.
cantidadde tiempoque usteddeseadiferir elciclo+El
tiempodiferido puedeset programadode 10minutos , Loss-
(00:10_a 11horas,59 minutos[11:59_).
CuandoDELAYest6destellando,optima la tecla
'Clean'.
o "CLEAN"destellar4+
Oprimalatecla 'More+' o 'Less-'.
o 'CL-M' (SuciedadModerada,3 horas]se
despliegaenel indicador.
conto
*Losnombresde losproductosson marcasregistradasde sus respectivosfabticantes.
70

5, Optima Iatecia 'More+' o 'Less-' para desptazar tos ajustes de
autoiimpieza.
'CL-H' [Suciedad Hntensa,4 horas)
'CL-M' [Suciedad Moderada, 3 horas)
'CL-L' CSuciedadIeve, 2 horas)
At seteccionar et nivet de suciedad de! homo se programa
autom_ticamente et tiempo de timpieza.
6. Despu6s de cuatro segundos, 'CLEAN', 'DELAY' y 'LOCK' se
desptegarSn en ei indicador visuat para indicar queet horno esta
programado para un cicto de timpieza diferido. El tiempo diferido
tambi_n se despliega en el indieador visual.
Durante e_ cic_o de autolimpieza
Cuandoaparece'LOCK'eneI indicador,Iapuertano sepuedeabrir.
Paraevitarda_o a la puerta,nofuerce Iapuertapara abrirlacuando
la palabra'LOCK'est_desplegadaen el indicadorvisual.
HUmO y OIores
Ustedpuedever humoy sentirolor lasprimerasvecesque el horno
eslimpiado. Estoesnormalydisminuirdconel tiempo.
Tambienpuedeocurdr humosi eIborneest_demasiadosucioo si
seha dejadounaasaderaen el heine.
Sonidos
A medidaque el homosecaIienta,usted puedeoir sonidosde
piezasmet_licasquese expandenycontraen, Estoesnormaly no
da_ar8el homo,
Si el home ya ha side programado para un cicle de
limpieza y usted desea pregramar un tiempe
diferide:
1. Oprimalatecia 'Delay'.
• 'DELAY'destella.
• '00:00'se desplegar_en el indicadorvisual.
2. OprimaIatecia 'More+' o 'Less-'para programarIa More+
cantidadde tiempo queusted deseadiferir el ciclo. '.....................
Despu6sde cuatrosegundos,'CLEAN','DELAY'y
'LOCK'sedesplegar_nen el indicadorvisuaipara
indicarqueel horno estdprogramadopara una .............................
ciclode limpiezadifeddo. Eltiempo diferidotambiensedespliega
enel indicadorvisual
Cuande eemienza el cicle de autelimpieza:
• 'DELAY'seapagar&
• EItiempo de limpiezasedesplegar_en eIindicadorvisual.
Para eanceiar el cicle de auteiimpieza:
OprimaJatecia 'CANCEL'. [fCANCfiI"_
• Elhldicadorvisualquedaen blanco.
• TodasJasfuncionesson canceladas.
• Lahera deldia sedesplJegaen el indicadorvisual.
Despu s del ciclo de
autolimpieza
Aproximadamenteunahera despuesdeIfin detciclo de limpieza,
'LOCK'desaparecer& Lapuertaahorapuedeserabierta.
Aigima suciedad puedequedar come una ieveceniza gris ripe
polvo. Retirelaconun pai_ohoTledo. Si Iasuciedadpermanece
despudsde limpiarla,significaque el ciclode limpiezano rueIo
suficientementeIargo. Lasuciedadser_eliminadaduranteel
proximociclo de [impieza.
$i masparrimmasdemhomo fueron dejadas en emhomo y no se
desiizan suavemente despuds de un cicio de iimpieza, Iimpie
lasparrillasy lossoportesde [asparrillasconuna peque_acantidad
de aceitevegetaIpara hacerlasdeslizarconm_sfacilidad=
Pueden aparecer mineasdemgadasen maporcemanaampasar per
cicmosde camentamientoy enfHamiento. Estoesnormaly no
afectardei rendimiento.
Una descomoraci6nbmancapuede aparecer despuSs demcicmo
de mimpiezasi mosamimentosdcidos o azucarados no fueron
iimpiados antes demcicio de autoiimpieza. EstadescoloraciOnes
normaly no afectar_el rendimiento.
Notas:
• Si sedeiaabiertala puertadel homo,IapaIabra'door'
destellar8enel indicadorvisuaIyseescucharduna seSal
sonorahastaque la puertaseacerraday la tecla'Clean'sea
oprimidanuevamente.
• Si transcurrenm_sde cincosegundosdespudsde oprimir Ia
tecia 'Clean'y antesde oprimirIasteclas'More+' o 'Less-',el
programavoIverdautomdticamenteaIdespiiegueprevio.
• Lapuertade[homosedaffardsisefuerzaparaabrir[acuando
la palabra'LOCK'contin0adespiegadaen el [ndicador.
71

Procedi ientos de Limpieza
fr[asantes de tecarJo e mimpiarmo.De este mode se evitar_ da_o y
posibiesqaemadaras. * Losnombresde Iosproductossonmarcasregistradas
Paraevita[rnanchaso deco!o[aciSulimpiee!homo desPU6Sdecarlauso. de susrespectivosfabricantes=
_ Parahacerpedidos,Ilameal 1-877-232-6771EEUU=o
, Siseretiraalgunapieza,asegOresede que seareinsta[adaenforma correcta, al 1-800-688-8808Canada=
P EZA PROCED M ENTODEUMP EZA
Asadera e Nunca cubra d inserte con papel de alum_ldepues este evita que la gmsa se escurra a ta bandeja i_tferier.
Inserto , Co[oqueun pasoenjabonadosobree[ inse_oy Iabandeja;dejeremoiarparasoitarIasuciedad=
, Laveen aguajabonosatibia. Useuna esponjadefregarparaquitar la suciedadpersistente=
, La bandeiade asary el insertopuedenset lavadosenel lavavajillas=
Tapasde
Quemadoresy
Quemadoresde
GasSeHados
Rejiiiasdemos
Quemadores -
porcelanasobre
Area del Reloj y
tie lasTeelas
de Control
Cubierta y Panel
de Control -
Esmalte de
Poreelana
Cabezas de Quemadores Remevibles
* Dejeenfriarelquemador.RetirelatapayI_ve]aenaguajabonosaconunaesponjaderestregardepI_stico.Parasuciedad
dificil,Iimpieconunaesponianoabrasivarellenaconjab6n o concremapareIimpiezadecubiertas'CooktopCleaning
Creme'* (Pieza#20000001}**y unaesponia.
, No laslaveenel lavavajillasni en un hornoautolimpiante.
Quemadores tie Gas Sellados
, L[mpieloscon frecuencia=DejeenfriareIquemador=Limpieconjab6n y una esponjade restregardepl_stico=Para
suciedaddificil, limpieconuna esponjano abrasivarellenaconjabOn=Noagrandeni modifiquelosagujeros=
, Tengacuidadode que no entreagua en Iosorificiosde Iosquemadores=
, Tengacuidadocuandolimpieel encendedor=Si elencendedorest_h0medoodaSado,el quemadorsuperiorno
encender&
, L_velasconaguatibiajabonosayunaesponjadepI_sticonoabrasiva=Paramanchasrebeldes,limpieconunaesponja
depldsticoreilenaconiabOn,noabrasivao con'CooktopCleaningCreme'_(CremaparaLimpiezadeCubiertas)CPieza
20000001)*_yuna esponja=Silasuciedadpersiste,vueivaa apIicar'CooktopCleaningCreme',cubracon unatoallade
pape]hOmeday dejeremojardurante30 minutos=Restrieguenuevamente,enjuagueyseque=
, No laslaveenel lavavajillasni en un hornoautolimpiante=
, Paraactivar'ControlLock'[Bioqueode loscontroles]parala Iimpieza,verp_gina61.
, Lave,eniuagueyseque. No useagentesde Iimpiezaabrasivospunspueden rayarel acabado.
, Sepuedeusarlimpiaviddossise rocianen el paso primero. NO retie directamente en elpaneL
, RetireIasperillascuandoest6nen IaposiciOn'OFF'tir_ndohs haciaadehnte=
, Lave,eniuagueyseque=No useagentesde limpiezaabrasivospunspueden rayarel acabado=
, Enciendacadaquemadorparaasegurarsede que lasperillashartsidocorrectamentereinstaladas=
Laporcetanaesmaltadaesvidriofundidoen metalypuedeagrietarseo picarsesinoseusacorrectamente.Esresistente
a Ios_cidos,no a pruebade_icidos.Todoslosderrames,especialmentelosderramesazucaradosoacidicosdebenset
limpiadosinmediatamenteconun pai_oseco.
, Cuandoseenfr[e,Iaveconaguajabonosa,enjuaguey seque.
, NuncaIimpie unasupefficietibia o calienteconun pasoh0medo.Estopuedecausaragrietamientoo picaduras.
, Nuncauselimpiadoresde homo,agentesde limpiezaablasivoso c_usticosenel acabadoexteriorde la estufa.
72

PmEZA PROCEDIM_ENTO DE LIMPIEZA
PaneJes LateraJes
Gaveta de
AJmacenamiento
y Manijas de las
Puertas + EsmaJte
Pintado
Ventana y Puerta
demHomo- Vidrio
+ Cuandoest6fr[a,Iaveconaguatibiajabonosa,enjuaguey seque.Nunca Iimpleunasuperficietibia o caliente
conun pai_oh0medopuesestopuededa_arIasuperficiey causaruna quemaduraa causadeIvapor.
+Paramanchasrebeldes,useagentesde IimpiezaIevementeabraslvostal comopastade bicarbonatoo 'BonAmi'+-
NouseIimpiadoresabrasivos,c_usticoso _sperostal comoesponjasde lanadeacerooIimpiadoresde hornos.Estos
productospuedenrayaro da_ar permanentementeIasuperficie.
Nora: Useui_atoa//a e uit paso seco para /impiarlos derrames, especia/mente los derrames addices e
azucaradesoLa superficie se puede descolorar e perder e! bril/e si e! derrame i_ese #mpia imnediatamellte.
Esto es especiafmente importante en tassuperficies blancas.
+ Eviteusarcantidadesexcesivasde aguapuespuedeescurrirsedebajoo detrSsdel vidriocausandomanchas.
+Laveconaguayjab6n. Enjuaguecon agualimpiay seque. Ellimpiadordeviddopuede usarsesi seroda en un
pai_oprimero.
+Nousematerialesabrasivostalescomoesponjasde restregar,limpiadoresenpolvoo esponjasde lanade acero
puespuedenrayarelvidrio.
Interior +']elHomo + Siga las instrucciones en las p_ginas 70-71 para programar un ciclo de autolimpieza.
Acero Ino×idabJe
(modelosselectos}
+Limpiarcon aguaconjabOn.
+Sacarlasmanchasdificiiesconpolvode limpiezao una esponjaIlenaconjab6n. Enjuagueyseque.
+Lasparr+llassedescolorar_npermanentementeypuedennodestizarseconsuavidadsisondejadasene!hornodurante
unciclo deautoiimpieza.Siestosucede,iimpieiaparrillay iossoportesenrelieveconunapeque_acantidaddeaceite
vegetalpara restaurarla facilidadde movimiento,hego limpieelexcesode aceite.
+NO USEMNGUN PBODUCTODEUMPIEZA QUECONTENGABLANQUEADOBA BASEDE CLOBO.
+NO USELIMP/ADOBES "ORANGE"Nt UMPIADOBESABRASIVOS.
• SIEMPBELIMP/E LAS SUPEBFICtESDEACEBOA FAVORDELGRANO,
+EimpiezaDiaria/Suciedad Leve+ Limpieconuno de lossiguientes- aguaconjabOn,una soluci0nde vinagre
blancocon agua,limpiadorparasuperficiesyvidrio 'Formula409'*o un limpiaviddossimilar - usandounaesponja
o un pai_osuave. Enjuaguey seque. Parapu+iryevitar marcasde losdedos,useel producto 'StainlessSteel
Magic Spray'*[PiezaNo.20000008}++.
+Suciedad Moderada/Jntensa + Limpiecon unode iossigu+entes- 'BonAmi'*, 'SmartCleanser'*o'SoftScrub'+-
usandounaesponjah0medao un pasosuave. Enjuaguey seque. Lasmanchasdific+lespuedenset quitadascon
una esponjamuiti-uso'Scotch-Bdte'+hOmeda;frote a favordel grano. Enjuaguey seque. Pararestaurarel
lustreysacar lasvetas,apiique'StainlessSteelMagicSpray'+.
+DescoioraciSn - Useuna esponjamojadao un patiosuave,limpieconlimpiadorde acero'CameoStainlessSteel
Cleaner'*.Enjuagueinmediatamenteyseque.Paraeliminarlasestr+asy restaurarel lustre,usedespu6srociador
paraaceroinoxidable'StainlessSteelMagic Spray'+-
*Losnombresde Iosproductosson marcasregistradasde sus respectivosfabdcantes+
** Parahacerpedidos,Ilapaeal 1-877-232-6771EE+UU+o al 1-800-688-8408Canadi
73

Puerta del Homo
NO Co!oquepesoexcesivoni separeen la puertadel homo. Esto
podr[a bacervo!carlaestufa,quebrar!apuertao lesionaral
/Jsuario.
Nora: Lapuertadethorriden una estufanuevapuedesentirse
"esponjosa"cuandosecierra. Estoesnormaly disminuir_conet
USO.
Ventana del Homo
Para proteger maventana de mapuerta demhomo:
1. Nouseagentesde Iimpiezaabrasivostabs coredesponjasde
restregarde hna de aceroo limpiadoresenpolvopuesellos
puedenrayarelviddo.
2. Nogolpeeel vidrioconollas,sartenes,muebbs,juguetes u otros
obietos.
3. NocierreIapuertadeI homohastaque lasparrillasdel homo no
est@len su lugar.
Ai golpear,rayar,hacervibraro esforzarel vidrio puededebilitarsu
estructuracausandoun mayorrbsgo de roturaen unafecha
posterior.
Tornillos Niveladores
VeFifiquesiel soporteantivuelcoest,1aseguEandoalPiS0un0 de
10St0milbs niveladorestraseros.EsteSoporteevitaque la estufa
sevueklueaccidenta!rnente.
Laestufadebesernivetadacuandoseinstal& Si Ia
estufano est_niveBda,gire lostornillos niveladores
de pI_sticoubicadosencadaesquinade la estufa
hastaquequedenivelad& ,jj
TORNILLO NIVELADOR
Cone×i6n El ctrica
Loselectrodom6sticos que requieren energia
ei6ctrica est_n equipados con un enchufe de
ires clavijas con cone×i6n a tierra, el cual
debeserenchufadodirectamenteen un
tomacorrbnte el@trico detres aguieros,para
120voltiosdebidamenteconectadoa tierra.
Sie_r_redesenchufeel ebctrodom#stieoantesdeefectuar
reparaciones.
Elenchufe detres ciaviiasconconexiOna tierra ofrecepmtecciOn
contrape@rosde choqueset@tricos.NO CORTENl FMMINF LA
TERCERACLAVUA DECONE×IONA TtERRADE[ ENCNUFE
DELCORDONELECTRICO.
Si soIamentesedisponede un tomacorrientesinconexi6na tierra,
dedosagujerosu otto %o detomacorrientee!@trice,el
propietariodememectrodomSsticoes personammente
responsablede reemplazarel tomacorriente con un
tomacorriente el6ctrico de tres agujeros debidamente puesto
a tierra.
Luz del Homo
" Dejeque el homoseenfrieantesde reemp!azar el f0co.
o Aseg_resede que !acubie¢[adelfoco y elfoco est_nfr[os
antesde tocarlos.
Para reem_azar e_ foco de_ homo:
1. Cuandoe! horridest_fr[o,sujete Iatapade Iabombillaensu
lugar,luego@slice etret@_de alambrefuerade lacubbrta.
NOTA: Lacubiertade la bombilIase
caer_si no essuietaensu lugar CUBIERTADE
LA BOMBILLA
cuandoest_sacandoel ret@ de
alambre.
2. SaqueIacubiertadelfoco y el
foco.
3. Coloqueun foco de 40watts
RE7EN F)E ALAMBRE
para electrodom@ticos.
4. Vuelvaa colocarla cubiertade
la bombiIIayasegOrelaconetret6nde alamble.
5. Vuelvaa enchufarla estufa.Vuelvaa colocarla horacorrect&
74

Retire de la Estufa a Gas
Losconectoresde taestufaa gasusadosparaconectareste
artefactoatsuministrode gasno estSndise_adospara movimiento
continuo. Unavezinstatados,NOmuevarepetidamenteeste
artefactoa gasparasu Nmpiezao paraubicadoenotro Iugar. Si
esteartefactotieneque ser movidoy/o retiradopara reparaci6n,
sigaeIprocedimientodescritoen Iasinstruccionesde instalaciOn.
ParainformaciOn,pdngaseen contactoconel Servicioa IosCiientes
MaytagIlamandoal 1-800-688-9900EE.UU.o al 1-800-688-2002
Canad&
Paraevitarque la estufasevuelqueaccidentalmente,sedebe
aseguraral pisocoiocandoel tornillo niveladortraserodentrodel
soporteantivuelco.
Gaveta de Almacenamiento
No guardeproductosde pape+o de p!_stice,a!imentosni
mat_riatesinfiamablesen estagaveta.LagavetaPUede
calenta[sedemas+adopara estosart[culoscuandoseestdusando
ei homo,
Panel inferior del Home
Protejael panetinferiordeIhomocontra derrames,especialmentede
%0 addico o azucarado,puespuedendescolorarla porcelana
esmattada.Useel utensiliodetamariocorrectoa fin de evitar
derramesy reboses.
ElpaneIinferiordeIhomopuedesersacadoparasu limpieza.
f
CuandoseenfrFe,saque[asparril[asde[homo. Des[ice
losdosretenes,ubicadosencadaesquina _
de[panelinferiorde[homo hacia[aparte
de[anteradel holno. _,_ 2T -_,
Levantee!bordetraserodel panelinferior _._f_
del horno Iigeramentey IuegodesI[celo _ _/
haciaatr_s hastaqueeIhorde deianterodel H_L. t3
homopasapor sobreei marcodelantero+
Saqueel panelinferior dei homo+
Para vomvera comocar:
Cotoqueel hordedetanterodei pane+inferiordel homo en e!marco
delanterodel homo+Bajela partetraseradel panelinferiordet
homoy desIiceIosdosreteneshaciaatr_sparabloquearel panel
inferiordel horno ensu lugar+
Lagavetade almacenamientopuedeserretiradaparaque usted
puedaIimpiardebajode la estufa.
Para sacar :
1. Vade Iagavetay deslicelahaciaafuerahastalaprimeraposiciOn
tope.
2. Levantelapartedelanterade la gaveta.
3. Tirelahasta lasegundaposicidnde tope.
4. Sujetelos ladosy levanteIagavetapara retirarla.
Para velvet a coiocar:
1. InserteIosextremesde lascorrederasde la gavetaen losrieles
de Iaestufa.
2. Levantelapartedelanterade la gavetay suavementeempOjelaa
la primeraposiciOndetope.
3. Levantelagavetanuevamentey empSjelahastaquequede
completamentecerrada.
75

PROBLEMA
Paramamayor_ade mosprobmemas, Revisesi Ioscontrolesde!horno est_ndebidamenteajustados.
verifiqueprimeromosigaiente. , Verifiquesiel enchufeest_firmementeinseltadoen el tomacorriente.
• Verifiqueo vuelvaa reponerel disyuntor. Verifiqueo reemphce el fusible.
• Verifiqueel suministrode energ[ael6ctrica.
Emqaemador saperior no se , Verifiquesi laestufaest_debidamenteconectadaa Iafuente dealimentaciOn.
enciende. ° Verifiquesiest_fundido un fusibledel circuitoo si sedispar6el disyuntorprincipal.
• Verifiqueparaasegurarsede que e!encendedorest6secoyque emitachasquidos. El
quemadornoseencender_si elencendedorest_dafiado,sucioo mojado. Siel encendedor
no produceun chasquido,gire la perillade control a la posiciOn'OFF'.
Lallama es dispareja. Losorificiosdel quemadolpuedenestarobstruidos.
La mmamademqaemador saperior se , Verifiqueparaasegurarsede queel utensilioestdasentadoen la parrillasobreel quemador.
levanta del orifieio.
Los resamtadosdemhomeado no son ° VerifiqueIatemperaturadel hornoseleccionada.Aseg(Jresede quee! hornoest6
como se esperaban o sen precalentadocuandola recetao instruccionesrecomiendanprecalentamientodel horno.
diferentes a los del heine anterior° ° Aseg0resedequeelrespiraderodelhomonoest6bloqueado.Vetp_gina68paralaubicaci6n.
• Verifiqueparaasegurarsede que la estufaest_ nivetada.
Lastemperaturasa menudovar[anentreun hornonuevoy unoantiguo. A medidaquepasa
eltiempo,la temperaturadet homocambiay puede hacersem_scalienteo m_sfr[a. Ver
p_g.66 paraIasinstmccionescomo ajustarIatemperaturadeÁhomo. NOTA:Nose
recomiendaajustarlatemperaturasi hatenido problemasconsolo unao dos recetas.
Useel utensiliocorrecto.Losutensiliososcurosproducendoradooscuro.Losutensilios
brilIantesproducendoradoclaro.Consulteelfolleto "LaCocinaF_cil"paramayorhfformaci6n
sobrelosutensiliosde hornear.
° VerifiquelasposicionesdeIasparrilIasy Iacolocaci6ndelosutensilios.Alternelosutensilios
cuandousedosparrillas.Deje2,5-5cm (1-2pulgadas)entrelosutensiliosy lasparedesdel
homo.
° Verifiqueel usode papeIde aluminioen el homo. Nuncausepapetde aluminioparacubrir
unaparrillacompletadelhorno.Coloqueunpedazopeque_odepapeldealuminioenlaparrilla
queest_debajodel utensilio pararecibirlosderrames.
Losalimentos no se asan a la , Verifique[asposicionesde [asparrillasde[horno.Ela[imentopuedeestarmuycercade
parrillaen forma debida o sale la llama.
demasiadohamoo ElpapeIdealuminioseus0demaneraincorrecta.Nuncaforreelinsertodelasadorconpapel
de aluminio.
Recorteel excesodegrasade lacame antesde ponerlaa asara la parrilla.
, Se us6unaasaderasucia.
Precalienteel hornodurante2 a 3 minutosantesde colocarel alimentoen el homo.
• Asea la parrillaconla puertadel hornocerrada.
76

PROBLEMA SOLUCION
Emhomo no se automimpia. ° Verifiqueparaasegurarsede queel ciclo noest6ajustadoparaun comienzodiferido.Ver
pSginas70-71.
o Verifiquesi ia puertaest_cerrada.
o Verifiquesi el controIest_en ModeSab_tico.Vetp%. 65.
o Elhomopuedeestara m_sde 205°C [400°F). Latemperaturadel bornedebeser inferiora
205° C[400° F[}paraprogramarun ciclo de limpieza.
Emhomo no se mimpi6en ° Puedeque seanecesarioun tiempo de limpiezarosslargo.
ferma debida° , Losderramesexcesivos,especialmentede alimentosazucaradosy/o 4cidosno fueron
limpiadosantesdel ciclo deautolimpieza.
Lapuerta del homono se , Elinteriorde!hornotodav[aest_caliente. Dejeque paseaproximadamenteuna hera
desblequea despu6s del cicle paraqueel homoseenfr[eantesdeque secompleteun cic[ode autoiimpieza. Lapuerta
puedeserabiertacuandodesaparezcala palabra'LOCK'delindicadorvisual
o ElcontroJy la puertapuedeestarbloqueada.Verp%. 61.
Se junta humedaden maventana , Estoesnormalcuandosecocinanalimentoscon altocontenidode humedad.
del homoo sale vaper per , Seus0humedadexcesivacuandolimpi6laventana.
el respiradero del home.
Hayun emerfuerte o humomere , Estoesnormalen una estufanuevay desaparecer_despu6sde unospocosuses.
cuando se enciende emberne° At iniciarun ciclo de autoJimpiezase"quemar_n"losoloresm4sr4pidamente.
o Sise enciendee!ventihdor ayudar_a eliminarel humoy/o el olor.
o Suciedadexcesivade alimentosen el panelinferiordel homo. Useun ciclo deautolimpieza.
C6digos de Errores , 'BAKE'o 'LOCK'puedendestellarr4pidamenteen el indicadorparaavisarleque hayun error
o un problema.Si 'BAKE'o'LOCK'aparecenen el indicadorvisual,oprimaIatecla'CANCEL'.
Si'BAKE'o'LOCK'continOandestellando,desconecteJaenerg[ael6ctricaalelectrodom6stico.
Espereunospocosminutesyvuelvaareconectarlaenerg[ael6ctrica.Sicontimiandestellando,
desconectelaenerg[ael6ctricadeJelectrodom6sticoyIlamealt6cnicode servicioautodzado.
o Siel homo est4demasiadosucio,puedenocurrirdemasiadasIlamaradasIocual resuJtar4en
unc6digode errorduranteIaIimpieza.Oprimalatecla 'CANCEL'y dejequeel borneseenfrie
completamente,IimpieeJexcesodesuciedady luegovueJvaa programarel ciclo deJimpieza.
Si eJc6digodeerror reaparece,Ilamea un t6cnicoautorizado.
Se escuchan ruideso ° Elhornoemitevariessonidosbajos.Ustedpuedeoir Josrel6sdelheine cuandoseencienden
y seapagan.Estoesnormal.
o A medidaqueelhomosecalientayse enfr[a,ustedpuededr sonidosdepiezasmet_licasque
seexpandeny contraen. Estoes normaly nodariar_suelectrodomestico.
Nose escunhan sesamessenoras ° Elhornopuedeestaren ModeSab_tico.Vet p%. 65.
y el indicadorvisuamno se activa.
'SAb' destemmay muegose o Elborneest4en modesab4tico.Paraanu[are[modesab_tico,optimay mantengaoprJmida[a
tecla 'Clock' (Relo}}durantecinco segundos.
77

78

Garantia Compmeta de Un A_o = Piezas
y Mano de Obra
Duranteun (t) a_o desdela fechaoriginal de
compraal pot rnenor,serepararao reemplazard
gratutamente cualquierpiezaque falledu[ante uso
normalen e_hogar.
Residentes Canadienses
Lasgarandasanteriorescubrenso[amenteaqueflos
electmdom6sticos[nstaiadosen CanaddqLe han
sldo certificadoso aprobadospot iasagenciasde
pruebascorrespondientesparacumpl_m_entocon la
NormaNacionalde Caladd a menosque e!
eiectmdom6sticohayas_dotraido a Canad_desd÷
losEstadosUn[dos.debido a un cambiode
residencla.
Garantia Limitada Fuera de ruesEstades
Unities y Canad_ - Piezas Soiamente
Durame _n (1} a_o desdeia fechade compra
originalal por menoncuakluler plezaque falie
duranceusonormalen el hogarserareemp_azadao
reparadagratuitamenteen Ioque respec[aa la Heza
y el propietafiodeberapagartodos !oso[roscostos
mcluyendomanode obra.kilometraje/miHaje.
_ransporte.costode[viajey costode[diagnOstico,si
fuese necesar[o,
Lasgarantiase.specfficaseAyesadasantefiormente
son!asUNICASgarantiasprovistaspor el fabrican[e.
Estas_erantiasle otorganderechosledales
especfficosy ustedpuede tenerademasotros
derechosque vaffandeun estadoa otto.
Lo que No Cubren EEstasGarantias:
1=Situacionesy da_osresuitantesde cualquierade lassiguientes
eventualidades:
a=hlstaIaciOn,entregao mantenimientoinapropiados=
b=CualquierreparaciOn,modificaciOn,alteraciOno aiuste noautorizadopor
el fabricanteo por uncentro de servicioautorizado=
c=Mal uso,abuso,accidenteso usoirrazonabie=
d=Corrienteei6ctrica,voitaieo suministroincorrect&
e=ProgramaciOnincorrectade cuaIquierade loscontroles=
2. Lasgarant[asquedan nuhs si losn0merosde serieoriginaleshartsido
retirados,alteradoso nosonfdcilmentelegibles.
3. Focos.
4. Productoscompradosparausocomerciaio industrial
5. EIcostodeIservicioo Ilamadade serviciopara:
a. Corregirerroresde instalacidn.
b. hlstruir aIusuadosobreel usocorrectodel artefacto.
c. Transportedel artefactoaiestablecimientode servicio.
6. Losda_osconsecuenteso incidentaiessufridospot cualquierpersonacomo
resultadode cualquierincumplimientode estasgarantias.Enaigunos
estadosno sepermitela exclusi6no iimitaciOnde losdatiosconsecuenteso
incidentales,por Iotanto la exclusiOnanteriorpuedeque no seapliqueen su
08SO,
Si Necesita Servicio
° Llameal distdbuidor dondecompr6suelectrodom6sticoo Ilamea Maytag
ServicessM,Servicioa IosClientesMaytagIlamandoal 1-800-688-9900EE.UU.
o al 1-800-688-2002Canad¶ ubicaraun t6cnicoautor[zado.
o AsegOresede conservarei comprobantede compraparaverificarel estadode
la garant[a. ConsulteiasecciOnsobrela GARANTIAparamayorinformaciOn
sobrelasresponsabilidadesdel propietarioparaservicioba]ola garant[a.
o Si eldistribuidor o ia compatiiade serviciono puedenresolverel probiema,
escribaa MaytagServicessM,Attn: CAIR:_Center,P.O.Box2370,Cleveland,TN
37320-2370o Ilameal 1-800-688-9900 EE.UU.o al 1-800-688-2002
Canad&
o Lasgu[asdel usuario,manuaiesde servicioe hlformaciOnsobrelaspiezas
puedensolicitarsea MaytagServicessM,Ma}_agCustomerAssistance.
Cuandoflameo escribaacercade un proMemade servJcio,pot favor
incluyaJasiguienteinformaci6n.
a.Su hombre,direcci6ny n_imerodeteJdono;
b.N_merode modeloy nLimerode serJe;
c. Nombrey direcci6ndesu distribuidoro t6cnJcode servicio;
d. UnadescrJpcidnclaradel problemaque est4experimentando;
e.Comprobantede compra0ecibo decompra].
Form No. B/09/04 Part No 8113P456-60 _::2004 Maytag Appliances Sales Co. Lithe USA
-
 1
1
-
 2
2
-
 3
3
-
 4
4
-
 5
5
-
 6
6
-
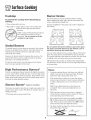 7
7
-
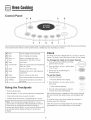 8
8
-
 9
9
-
 10
10
-
 11
11
-
 12
12
-
 13
13
-
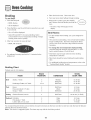 14
14
-
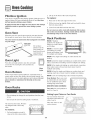 15
15
-
 16
16
-
 17
17
-
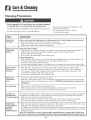 18
18
-
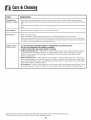 19
19
-
 20
20
-
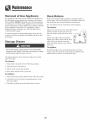 21
21
-
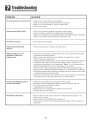 22
22
-
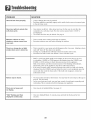 23
23
-
 24
24
-
 25
25
-
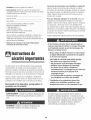 26
26
-
 27
27
-
 28
28
-
 29
29
-
 30
30
-
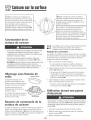 31
31
-
 32
32
-
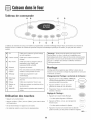 33
33
-
 34
34
-
 35
35
-
 36
36
-
 37
37
-
 38
38
-
 39
39
-
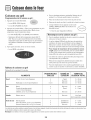 40
40
-
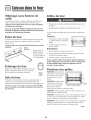 41
41
-
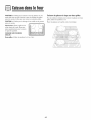 42
42
-
 43
43
-
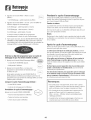 44
44
-
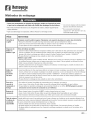 45
45
-
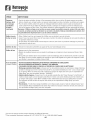 46
46
-
 47
47
-
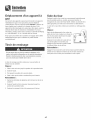 48
48
-
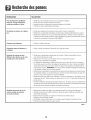 49
49
-
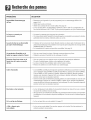 50
50
-
 51
51
-
 52
52
-
 53
53
-
 54
54
-
 55
55
-
 56
56
-
 57
57
-
 58
58
-
 59
59
-
 60
60
-
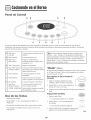 61
61
-
 62
62
-
 63
63
-
 64
64
-
 65
65
-
 66
66
-
 67
67
-
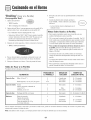 68
68
-
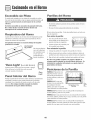 69
69
-
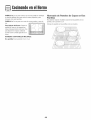 70
70
-
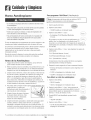 71
71
-
 72
72
-
 73
73
-
 74
74
-
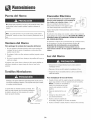 75
75
-
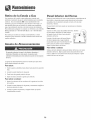 76
76
-
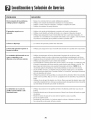 77
77
-
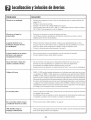 78
78
-
 79
79
-
 80
80


Maytag MGR5755QDW El manual del propietario
- Tipo
- El manual del propietario
- Este manual también es adecuado para
en otros idiomas
- français: Maytag MGR5755QDW Le manuel du propriétaire
- English: Maytag MGR5755QDW Owner's manual
Artículos relacionados
-
Maytag MGR5775QDW - 30 Inch Gas Range El manual del propietario
-
Amana AGR5715QDS El manual del propietario
-
Maytag MGRL752BDQ El manual del propietario
-
-
-
-
Magic Chef MLR1415AJW User's guide El manual del propietario
-
-
Magic Chef CG31600ADV Manual de usuario
-