
?vlA A(3
GaS - Precision Touch
Control 800
Table of
hnportant Safety
Instructions ............................... 1-4
Care & Cleaning ....................... 4=6
Self-Clean Oven
Cleaning Procedures
Maintenance ............................. 7=8
Oven Window & Light
Removal of Gas Appliance
Troubleshooting ....................... 8=9
Surface Cooking .................... 9-10
Surface Controls
Sealed Gas Burners
Oven Cooking ....................... 11=18
Baking
Cook & Hold
Delay Cook & Hold
Broiling
Keep Warm
Sabbath Mode
Oven Racks
Warranty & Service .................... 19
_ Guide d'utilisation
et d'entretien ............................... 20
Guia de uso y cuidado .............. 42
Form No. A!11/06 Part No. 8113P666 60 @2006 All rights reserved, Litho U.S.A.

technician. Do not attempt to adjust, repair, service,
or replace any part of your appliance unless it is
specifically recommended in this guide. All other
servicing should be referred to a qualified servicer. Have
the installer show you the location of the gas shut off
valve and how to shut it off in an emergency.
Always disconnect power to appliance before servicing.
Warning and important Safety instructions appearing in
this guide are not meant to cover all possible conditions
and situations that may occur. Common sense, caution,
and care must be exercised when installing,
maintaining, or operating the appliance.
Always contact the manufacturer about problems or
conditions you do not understand.
Recognize Safety Symbols, Words, Labels
General instructions
Read and follow aJl instructions before using this
appliance to prevent the potential risk of fire, electric
shock, personal injury or damage to the appliance as a
result of improper usage of the appliance. Use appliance
only for its intended purpose as described in this guide.
To ensure proper and safe operation: Appliance
must be properly installed and grounded by a qualified

Tocheckifdeviceisproperlyinstalled,lookunderneath
rangewithaflashlightto makesureoneoftherear
levelinglegsisproperlyengagedinthebracketslot.The
anti-tipdevicesecurestherearlevelinglegtothefloor
whenproperlyengaged.Youshouldcheckthisanytime
therangehasbeenmoved.
Child Safety
To Prevent Fire or
Smoke Damage
Be sure all packing materials are removed from the
appliance before operating it.
Keep area around appliance clear and free from
combustible materials, gasoline, and other flammable
vapors and materials.
If appliance is installed near a window, proper
precautions should be taken to prevent curtains from
blowing over burners.
NEVER leave any items on the cooktop. The hot air from
the vent may ignite flammable items and may increase
pressure in closed containers which may cause them
to burst.
Many aerosol-type spray cans are EXPLOSIVE when
exposed to heat and may be highly flammable. Avoid
their use or storage near an appliance.
Many plastics are vulnerable to heat. Keep plastics away
from parts of the appliance that may become warm or
hot. De not leave plastic items on the cooktop as they
may melt or soften if left too close to the vent or a lighted
surface burner.
To eliminate the hazard of reaching over hot surface
burners, cabinet storage should not be provided directly
above a unit. If storage is provided, it should be limited to
items which are used infrequently and which are safely
stored in an area subjected to heat from an appliance.
Temperatures may be unsafe for some items, such as
volatile liquids, cleaners or aerosol sprays.
In Case of Fire
Turn off appliance and ventilating hood to avoid
spreading the flame. Extinguish flame, then turn on hood
to remove smoke and odor.
• Cooktop: Smother fire or flame in a pan with a lid or
cookie sheet.
NEVER pick up or move a flaming pan.
• Oven: Smother fire or flame by closing the oven door.
Do not use water on grease fires. Use baking soda, a dry
chemical or foam-type extinguisher to smother fire
or flame.
NEVER leave children alone or unsupewised near the
appliance when it is in use or is still hot.
NEVER allow children to sit or stand on any part of the
appliance as they could be injured or burned.
Children must be taught that the appliance and utensils
in it can be hot. Let hot utensils cool in a safe place, out
of reach of small children. Children should be taught
that an appliance is not a toy. Children should not be
allowed to play with controls or other parts of the
appliance.
About Your Appliance
Do not use the oven as a storage area for food or
cooking utensils.
The oven vent is located at the base of the backguard.
Avoid touching oven vent area while oven is on and for
several minutes after oven is turned off. Some parts of
the vent and surrounding area become hot enough to
cause burns. After oven is turned off, do not touch the
oven vent or surrounding areas until they have had
sufficient time to cool.
Other potentially hot surfaces include cooktop, areas
facing the cooktop, oven vent, surface near the vent
opening, oven door, area around the oven door and oven
window.

Donot touch a hot oven light bulb with a damp cloth as
the bulb could break. Should the bulb break, disconnect
power to the appliance before removing bulb to avoid
electrical shock.
Cooking Safety
Always place a pan on a surface burner before turning it
on. Be sure you know which knob controls which
surface burner. Make sure the correct burner is turned
on and that the burner has ignited. When cooking is
completed, turn burner off before removing pan to
prevent exposure to burner flame.
Always adjust surface burner flame so that it does not
extend beyond the bottom edge of the pan. An excessive
flame is hazardous, wastes energy and may damage the
appliance, pan or cabinets above the appliance.
NEVER leave a surface cooking operation unattended,
especially when using a high heat setting or when deep
fat frying. Boilovers cause smoking and greasy spillovers
may ignite. Clean up greasy spills as soon as possible.
Do not use high heat for extended cooking operations.
NEVER heat an unopened container on the surface
burner or in the oven. Pressure build-up may cause
container to burst, resulting in serious personal injury or
damage to the appliance.
Use dry, sturdy potholders. Damp potholders may cause
burns from steam. Dish towels or other substitutes
should never be used as potholders because they can
trail across hot surface burners and ignite or get caught
on appliance parts.
Always let quantities of hot fat used for deep fat frying
cool before attempting to move or handle.
Do not let cooking grease or other flammable materials
accumulate in or near the appliance, hood or vent fan.
Clean hood frequently to prevent grease from
accumulating on hood or filter. When flaming foods
under the hood, turn the fan on.
NEVER wear garments made of flammable material or
loose fitting or long-sleeved apparel while cooking.
Clothing may ignite or catch utensil handles.
Always place oven racks in the desired positions while
oven is cool. Slide oven rack out to add or remove food,
using dry, sturdy potholders. Always avoid reaching into
the oven to add or remove food. If a rack must be moved
while hot, use a dry potholder. Always turn the oven off
at the end of cooking.
Use care when opening the oven door. Let hot air or
steam escape before moving or replacing food.
PREPARED FOOD WARNING: Follow food
manufacturer's instructions. If a plastic frozen food
container and/or its cover distorts, warps, or is otherwise
damaged during cooking, immediately discard the food
and its container. The food could be contaminated.
NEVER use aluminum foil to cover oven racks or oven
bottom. This could result in risk of electric shock, fire, or
damage to the appliance. Use foil only as directed in
this guide.
Utensil Safety
Use pans with flat bottoms and handles that are easily
grasped and stay cool. Avoid using unstable, warped,
easily tipped or loose-handled pans. Also avoid using
pans, especially small pans, with heavy handles as they
could be unstable and easily tip. Pans that are heavy to
move when filled with food may also be hazardous.
Be sure utensil is large enough to properly contain food
and avoid boilovers. Pan size is particularly important in
deep fat frying. Be sure pan will accommodate the
volume of food that is to be added as well as the bubble
action of fat.
To minimize burns, ignition of flammable materials and
spillage due to unintentional contact with the utensil, do
not extend handles over adjacent surface burners.
Always turn pan handles toward the side or back of the
appliance, not out into the room where they are easily hit
or reached by small children.
NEVER let a pan boil dry as this could damage the
utensil and the appliance.
Follow the manufacturer's directions when using oven
cooking bags.
Only certain types of glass, glass/ceramic, ceramic or
glazed utensils are suitable for cooktop or oven usage
without breaking due to the sudden change in tempera-
ture. Follow manufacturer's instructions when using glass.
This appliance has been tested for safe performance
using conventional cookware. Do not use any devices or
accessories that are not specifically recommended in
this guide. De not use element covers for the surface
units, stovetop grills, or add-on oven convection systems.
The use of devices or accessories that are not expressly
recommended in this manual can create serious safety
hazards, result in performance problems, and reduce the
life of the components of the appliance.
Cleaning Safety
Turn off all controls and wait for appliance parts to cool
before touching or cleaning them. Do not touch the
burner grates or surrounding areas until they have had
sufficient time to cool.
Clean appliance with caution. Use care to avoid steam
burns if a wet sponge or cloth is used to wipe spills on a
hot surface. Some cleaners can produce noxious fumes
if applied to a hot surface.

Self-Clean Oven
Clean only parts listed in this guide. Do not clean door
gasket. The door gasket is essential for a good seal.
Care should be taken not to rub, damage, or move the
gasket. Do not use oven cleaners of any kind in or
around any part of the self-clean oven.
It is normal for the cooktop of the range to become hot
during a self-clean cycle. Therefore, touching the
cooktop during a clean cycle should be avoided.
Important Safety Notice
and Warning
The California Safe Drinking Water and Toxic
Enforcement Act of 1986 (Proposition 65) requires the
Governor of California to publish a list of substances
known to the State of California to cause cancer or
reproductive harm, and requires businesses to warn
customers of potential exposures to such substances.
Users of this appliance are hereby warned that the
burning of gas can result in low-level exposure to
some of the listed substances, including benzene,
formaldehyde and soot, due primarily to the incomplete
combustion of natural gas or liquid petroleum (LP) fuels.
Properly adjusted burners will minimize incomplete
combustion. Exposure to these substances can also be
minimized by properly venting the burners to the out-
doors.
Users of this appliance are hereby warned that when
the oven is engaged in the self-clean cycle, there may
be some low-level exposure to some of the listed
substances, including carbon monoxide. Exposure to
these substances can be minimized by properly venting
the oven to the outdoors by opening the windows and/
or door in the room where the appliance is located
during the self-clean cycle.
IMPORTANT NOTICE REGARDING PET BIRDS:
Never keep pet birds in the kitchen or in rooms where
the fumes from the kitchen could reach. Birds have a
very sensitive respiratory system. Fumes released during
an oven self-cleaning cycle may be harmful or fatal to
birds. Fumes released due to overheated cooking oil, fat,
margarine and overheated non-stick cookware may be
equally harmful.
Save These instructions for Future Reference
Self-Clean Oven
The self-clean cycle uses above-normal cooking temperatures
to automatically clean the oven interior.
The oven should be cleaned regularly by wiping up spillovers
to prevent excessive smoke and flare-ups. Do not allow a
heavy build-up of soil to accumulate in the oven.
During the cleaning process, the kitchen should bewell
ventilated to get rid of normal odors associated with cleaning.
4
Before Self=Cleaning
1. Turn off the oven light before cleaning. The oven light may
burn out during the clean cycle.
2. Removeall pans, and oven racks from the oven. The oven
racks will discolor and may not slide easily after a self-
clean cycle ifthey are not removed.
3. Clean oven frame, door frame, area
outside of gasket, and around the
opening in the door gasket with a
nonabrasive cleaner such as Bon Ami*
or detergent and water. The self-
cleaning process does not clean these
areas. They should be cleaned to prevent soil from baking
on during the clean cycle. _Thegasket is the seal around
the oven door and window.]
* Brand names for cleaning products are registered trademarks
of the respective manufacturers.

4. Topreventdamage,donotcleanorrubthegasket
aroundtheovendoor.Thegasketisdesignedtosealin
heatduringthecleancycle.
5. Wipeupexcessgreaseorspill-oversfromtheoven
bottom.Thispreventsexcessivesmoking,flare-upsor
flamingduringthecleancycle.
6. Wipeupsugaryandacidicspilloverssuchassweet
potatoes,tomato,ormilk-basedsauces.Porcelainenamel
isacid-resistant,notacid-proof.Theporcelainfinishmay
discolorifacidicorsugaryspillsarenotwipedupbeforea
self-cleancycle.
To set Self=Clean:
I Note: Oven be below 400° F
|a clean cycle.
1. Close the oven door.
2. Pressthe Clean pad. Clear
• CLEAN flashes. ...................................................
• SETflashes in the display.
3. Pressthe Autaset 0 pad. U
Autose[
° MEd (Medium Soil, 3 hours} is displayed.
4. Pressthe Auteset 0 pad to scroll through the self-cleaning
settings.
HVy (Heavy Soil, 4 hours}
MEd (Medium soil, 3 hours}
LITE ( Light Soil, 2 hours}
Choosing the soil level of the oven automatically programs
the self-cleaning time.
5. After four seconds, the oven will start cleaning.
• If the door is not closed, beeps will sound and "door" will
display. If the door is not closed within 30 seconds, the
self-cleaning operation will be canceled and the display
will return to the time of day.
° CLEAN will appear in the display.
° LOCKwill flash in the display. Once the door locks, the
word will remain steady.
• The cleaning time will start counting down in the display.
To Delay a Self=Clean Cycle:
1. Pressthe Delay 1 pad.
° DELAY flashes.
• 00:00will flash in the display.
1
Delay
2. Entertheamount of timeyouwant to delay thecycle using the
appropriate number pads.
3. Pressthe Clean pad.
• SETflashes in the display.
4. Pressthe Autaset 0 pad.
• LITE (Light soil level} is displayed. U
5. Pressthe Autaset 0 pad to scroll through Autoset
the self-cleaning settings.
HVy (Heavy Soil, 4 hours}
MEd (Medium Soil, 3 hours}
LITE (Light Soil, 2 hours}
Choosing the soil level of the oven automatically programs
the self-cleaning time.
After four seconds, CLEAN and DELAY will light and LOCK
will flash in the display. When the oven door latches,
LOCKwill stop flashing and light continuously to show that
the oven is set for a delayed clean operation. The delay
time will display.
During the Self=Clean Cycle
When LOCKshows in the display, the door cannot be opened.
To prevent damage to the door, do not force the door open when
LOCKis displayed.
Smoke and Smells
You may see some smoke and smell an odor the first few thnes
the oven iscleaned. This isnormal and will lessen in time.
Smoke may also occur if the oven is heavily soiled or if a pan
was left in the oven.
Sounds
As tile ovenheats, you may hear sounds of metal parts
expanding and contracting. This is normal and will not
damage the oven.
After Self=Cleaning
About one hour after the end of the self-clean cycle, LOCK will
turn off. The door can then be opened.
Some soil may leave a light gray, powdery ash. Remove it
with a damp cloth. If soil remains after wiping, that means the
clean cycle was not long enough. The soil will be removed
during the next clean cycle.
If oven racks were left in the oven and do not slide smoothly
after a clean cycle, wipe racks and rack supports with a small
amount of vegetable oil to make them easier to move.
Fine lines may appear in the porcelain because it went
through heating and cooling. This is normal and will not
affect performance.
A white discoloration may appear after cleaning if acidic or
sugary foods were not wiped up before the self-clean cycle.
This discoloration is normal and will not affect performance.
Notes:
• If the oven door is left open, "door" will flash in the display
and a signal will beep until the door is closed and the
Clean pad is pressed again.
° If more than five seconds elapse between pressing the
Clean pad and the Autoset 0 pad, the program will
automatically return to the previous display.
• The oven door will be damaged if the oven door is forced
to open when LOCK isstill displayed.
5

Cleaning Procedures
Burner Caps and Sealed Gas Burners =
Removable Burner Caps
• Allow burner to cool. Remove burner cap and wash in soapy
water with a plastic scouring pad. Forstubborn soils, clean
with a soap-filled, nonabrasive pad or Cooktop Cleaning
Creme* (Part #20000001)** and a sponge.
• Do not clean in the dishwasher or self-cleaning oven.
Sealed Gas Burners
• Clean frequently. Allow burner to cool. Clean with soap and
plastic scouring pad. Forstubborn soils, clean with a soap-
filled, nonabrasive pad. Do not enlarge or distort holes.
• Be careful not to get water into burner ports.
• Use care when cleaning the ignitor. If the ignitor is wet or
damaged the surface burner will not light.
Burner Grates - Porcelain on Cast Iron
• Wash with warm, soapy water and a nonabrasive, plastic,
scrubbing pad. For stubborn soils, clean with a soap-filled,
nonabrasive, plastic pad or Cooktop Cleaning Creme* (Part
#20000001)** and a sponge. If soil remains, re@ply
Cooktop Cleaning Creme*, cover with a damp paper towel
and soak for 30 minutes. Scrub again, rinse and dry.
• Do not clean in the dishwasher or self-cleaning oven.
Clock and Control Pad Area
• To activate control lock for cleaning, see "Locking the
Control and Oven Door" page 12.
• Wipe with a damp cloth and dry. Do not use abrasive
cleaning agents as they may scratch the finish.
• Glass cleaners may be used if sprayed on a cloth first.
DO NOTspray directly on control pad and
display area.
Control Knobs
• Remove knobs in the OFFposition by pulling forward.
• Wipe with a damp cloth and dry. Do not use abrasive
cleaning agents as they may scratch the finish.
• Turn on each burner to be sure the knobs have been
correctly replaced.
Cooktop and Control Panel - Porcelain Enareel
Porcelain enamel isglass fused on metal and may crack or
chip with misuse. It is acid-resistant, not-acid proof. All
spillovers, especially acidic or sugary spillovers, should be
wiped up immediately with a dry cloth.
• When cool, wash with soapy water, rinse and dry.
• Never wipe off a warm or hot surface with a damp cloth.
This may cause cracking or chipping.
° Never use oven cleaners, abrasive or caustic cleaning
agents on exterior finish of range.
Side Panels, Storage Drawer and Door and Door
Handles = Painted Enamel
• When cool, wash with warm soapy water, rinse and dry.
Never wipe a warm or hot surface with a damp cloth as this
may damage the surface and may cause a steam burn.
° For stubborn soil, use mildly abrasive cleaning agents such
as baking soda paste or Bon Ami*. Do not use abrasive
cleaners such as steel wool pads or oven cleaners. These
products will scratch or permanently damage the surface.
Note: Use a dry towel or cloth to wipe up spills,
especially acidic or sugary spills. Surface may discolor
or dull if soft is not immediately removed. This is
especially important for white surfaces.
Oven Window and Door =Glass
• Avoid using excessive amounts of water which may seep
under or behind glass, causing staining.
• Wash with soap and water. Rinsewith clear water and dry.
Glass cleaner can be used if sprayed on a cloth first.
° Do not use abrasive materials such as scouring pads, steel
wool or powdered cleaners as they will scratch glass.
Oven Interior
° Follow instructions on pages 4% to set a self-clean cycle.
Oven Racks
• Clean with soapy water.
• Remove stubborn soil with cleansing powder or soap-filled
scouring pad. Rinse and dry.
• Racks will permanently discolor and may not slide out
smoothly if left in the oven during a self-clean
operation. If this occurs, wipe the rack and embossed rack
supports with a small amount of vegetable oil
to restore ease of movement, then wipe off excess oil.
Stainless Steel (select models)
• DO NOT USEANY CLEANING PRODUCT CONTAINING
CHLORINE BLEACH.
° DO NOTUSEABRASIVE OR ORANGE CLEANERS.
• ALWAYS WIPE WITH THE GRAIN WHEN CLEANING.
• Daily Cleaning/Light Soil -- Wipe with one of the
following - soapy water, white vinegar/water solution,
Formula 409 Glass and Surface Cleaner* or a similar glass
cleaner - using a sponge or soft cloth. Rinse and dry. To
polish and help prevent fingerprints, follow with Stainless
Steel Magic Spray* (Part No. 20000008)**.
• Moderate/Heavy Soil -- Wipe with one of the following -
Bon Ami, Smart Cleanser, or Soft Scrub* - using adamp
sponge or soft cloth. Rinse and dry. Stubborn soils may be
removed with a damp multi-purpose Scotch-Brite* pad; rub
evenly with the grain. Rinse and dry. To restore luster and
remove streaks, follow with Stainless Steel Magic Spray*.
• Discoloration -- Using a damp sponge or soft cloth, wipe
with Cameo Stainless Steel Cleaner*. Rinse immediately and
dry. To remove streaks and restore luster, follow with
Stainless Steel Magic Spray*.
* Brand names are registered trademarks of the respective manufacturers.
** To order call 1-877-232-6771 USAor 1-800-688-8408 Canada.

Oven Door
Leveling Legs
Note: The oven door on a new range may feel "spongy"
when it isclosed. This is normal and will decrease with use.
Oven Window
To protect the oven door window:
1. Do not use abrasive cleaning agents such as steel wool
scouring pads or powdered cleansers as they may scratch
the glass.
2. Do not hit the glass with pots, pans, furniture, toys, or
other objects.
3. Do not close the oven door until the oven racks are
in place.
Scratching, hitting, jarring or stressing the glass may weaken
itsstructure causing an increasedrisk of breakage at a
later date.
Oven Light
To replace oven light bulb:
Be sure the range is leveled when
installed. If the range is not level,
turn the leveling legs, located at
each corner of the range, until
range is level.
Electrical Connection
Appliances which require electrical power
are equipped with a three=prong
grounding plug which must be plugged
directly into a properly grounded three-
hole 120 volt electrical outlet.
Always disconnect power to appliance before servicing.
The three-prong grounding plug offers protection against
shock hazards. DO NOT CUT OR REMOVE THE THIRD
GROUNDING PRONG FROM THE POWER CORD PLUG.
If an ungrounded, two-hole or other type electrical outlet is
encountered, it isthe personal responsibility of the
appliance owner to have the outlet replaced with a
properly grounded three-hole electrical outlet.
Storage Drawer
1. When oven iscool, hold bulb cover BOLBOOVER
in place, then slide wire retainer
off cover. Note: Bulb cover
will fall if not held in place
while removing wire retainer.
2. Remove bulb cover and
RETAINER
light bulb.
3. Replace with a 40-watt appliance bulb.
4. Replace bulb cover and secure with wire retainer.
5. Reconnect power to range. Reset clock.
The storage drawer can be removed to allow you to clean
under the range.
To remove:
1. Empty drawer and pull out to tile first stop position.
2. Lift up the front of the drawer.
3. Pull out to the second stop position.
4. Grasp sides and lift drawer up and out.
To replace:
1. Fit tile ends of tile drawer glides into tile rails in tile range.
7

2. Lift up the front of the drawer and gently push in to
the first stop position.
3. Lift drawer up again and push until drawer is
closed.
Removal of Gas Appliance
Gas appliance connectors used to connect this appliance to
the gas supply are not designed for continuous movement.
Once installed, DO NOT repeatedly move this gas appliance
for cleaning or to relocate. If this appliance has to be moved
and/or removed for servicing, follow the procedure described
in the installation instructions. Forinformation, contact
Maytag Customer Assistance at 1-800-688-9900 U.S.A. or
1-800-688-2002 Canada.
To prevent range from accidentally tipping, range must be
secured to the floor by sliding rear leveling leg into the anti-
tip bracket.
froubleshootln9
For most concerns, try these first.
• Check if oven controls have been properly set.
• Check to be sure plug is securely inserted into receptacle.
° Check or re-set circuit breaker. Check or replace fuse.
° Check power supply.
Surface burner fails to light.
° Check to be sure unit is properly connected to
power supply.
• Check for a blown circuit fuse or a tripped main
circuit breaker.
• Check to be sure ignitor is dry and clicking. Burner will not
light if ignitor is damaged, soiled or wet. If ignitor doesn't
click, turn control knob OFF.
The flame is uneven.
• Burner ports may be clogged.
Surface burner flame lifts off ports.
• Check to be sure a pan is sitting on the grate above.
Baking results are not as expected or differ from
previous oven.
° Check tile oven temperature selected. Make sure oven is
preheated when recipe or directions recommend preheat.
° Make sure the oven vent has not been blocked. See page
17 for location.
° Check to make sure range is level.
• Temperatures often vary between a new oven and an old
one. As ovens age, the oven temperature often "drifts" and
may become hotter or cooler. See page 16 for instructions
on adjusting the oven temperature. Note: It is not
recommended to adjust the temperature if only one or
two recipes are in question.
• Use correct pan. Dark pans produce dark browning. Shiny
pans produce light browning.
• Check rack positions and pan placement. Stagger pans
when using two racks. Allow 1-2 inches between pans and
oven wall.
• Check the use of foil in the oven. Never use foil to cover an
entire oven rack. Place a small piece of foil on the rack
below the pan to catch spillovers.
Food is not broiling properly or smokes excessively.
° Check oven rack positions. Food may be too close to flame.
° Aluminum foil was incorrectly used. Never line the broiler
insert with foil.
• Trim excess fat from meat before broiling.
• A soiled broiler pan was used.
• Preheat oven for 2-3 minutes before placing food in the oven.
° Broil with the oven door closed.
Oven will not self=clean.
° Check to make sure the cycle is not set for a delayed start.
See pages 4-5.
• Check if door isclosed.
• Check if control isin Sabbath Mode. See page 16.
• Oven may be over 400° F. Oven temperature must be below
400° Fto program a clean cycle.
Oven did not clean properly.
• Longercleaning time may be needed.
° Excessivespillovers, especially sugary and/or acidic foods,
were not removed prior to the self-clean cycle.
Oven door will not unlock after self=clean cycle.
• Oven interior is still hot. Allow about one hour for tile oven to
cool after the completion of a self-clean cycle. The door can
be opened when the LOCK indicator word is not displayed.
• The control and door may be locked. See page 12.
Moisture collects on oven window or steam comes from
oven vent.
° This is normal when cooking foods high in moisture.
° Excessivemoisture was used when cleaning the window.
There is a strong odor or light smoke when oven is
turned on.
• This is normal for a new range and will disappear after a few
uses. Initiating a clean cycle will "burn off" the odors
more quickly.
° Turning on a ventilation fan will help remove the smoke and/
or odor.
° Excessivefood soils on the oven bottom. Use a
self-clean cycle.
Fault Codes
° BAKE or LOCK may flash rapidly in the display to alert you if
there is an error or a problem. If BAKE or LOCKappear in
the display, press the CANCEL pad. If BAKEor LOCK
continue to flash, disconnect power to the appliance. Wait a
few minutes, and then reconnect power. If the flashing still
continues, disconnect power to the appliance and call an
authorized servicer.
8

• If the oven is heavily soiled, excessive fiareups may result in
a fault code during cleaning. Pressthe CANCEL pad and
allow the oven to cool completely, wipe out excess soil, then
reset the clean cycle. If the fault code reappears, contact an
authorized servicer.
Noises may be heard.
• The oven makes several low level noises.You may hear the
oven relays as they go on and off. This isnormal.
• As the oven heats and cools, you may hear sounds of metal
parts expanding and contracting. This is normal and will not
damage your appliance.
There are no beeps and no display.
• Oven may be in Sabbath Mode. See page 16.
SAb flashing and then displayed continuously.
° Oven is in Sabbath Mode. To cancel, press and hold the
Clock pad for fiveseconds.
¢ookln
LO: Use to simmer foods, keep foods
warm and melt chocolate or butter. Some
cooking may take place on the LO setting
if the pan is covered. It is possible to
reduce the heat by rotating the knob
toward OFF. Be sure flame is stable.
HI: Use to bring liquid to a boil, or reach
pressure in a pressure cooker. Always
reduce setting to a lower heat when liquids
begin to boil or foods begin to cook.
An intermediateflame size isused to
continue cooking. Food will not cook any
faster when a higher flame setting is used
than needed to maintain a gentle boil,
Water boils at the same temperature
whether boiling gently or vigorously,
Surface Controls
Pilotless Ignition
Pilotless ignitioneliminates the
need for a constant standing
pilot light. Eachsurface burner
has a spark ignitor.Use care
when cleaning around the
surface burner.
If the surface burner does
not light, check if ignitor is
broken, soiled or wet.
BURNER CAP
Surface Control Knobs
Use to turn on the surface burners. An infinitechoice of heat
settings is available from LO to HI. At the HI setting a detent
or notch may be felt. The knobs can be set on or between any
of the settings.
Graphics next to the knob identify which burner the
knob controls. For example, the graphic at 00
right shows the left front burner location. Front _[_
Setting the controls:
The size and type of cookware will affect the heat setting.
1. Place a pan on the burner grate.
* The burner flame may lift off or appear separated from
the port if a pan is not placed on the grate.
2. Push in and turn the knob counterclockwise to the
LITE setting.
A clicking (spark) sound will be heard and the burner
will light. (All five ignitors will spark when any surface
burner knob is turned to the LITE position.)
3. After the burner lights, turn knob to desired flame size.
* The ignitor will continue to spark until the knob is
turned past the LITE position.
9

Operating During a
Power Failure
1. Hold a lighted match to the desired surface burner.
2. Push in and turn the control knob slowly to LITE.
3. Adjust the flame to the desired level.
Burner Grates
The grates must be properly positioned before cooking.
When installingthe grates, place the tab ends toward the
center, matching the straight bars.
Improper installationof the grates may result in chipping of
the cooktop.
Do not operate the burners without a pan on the grate.
The grate's porcelain finish may chip without a pan to
absorb the heat from the burner flame.
Cooktop
To prevent the cooktop from discoloring
or staining:
" Clean cooktop after each use.
" Wipe acidic or sugary spills as soon as the cooktop has
cooled as these spills may discolor
, _ -__the porcelain.
Unlike a range with standard gas burners,
this cooktop does not lift-up nor is it
removable. Do not attempt to lift the
cooktop for any reason.
Sealed Gas Burners
The sealed burners of your range are secured to the cooktop
and are not designed to be removed. Since the burners are
sealed into the cooktop, boilovers or spills will not seep
underneath the cooktop.
However, the burner should be cleaned after each use. The
head portion of the burner is easily removed for cleaning.
(See page 6 for cleaning directions.)
The burner heads must be correctly placed on the burner
base for proper operation of the burner.
Power Boost Burner*
There is one high speed burner on your range, located in the
right front position. This burner offers higher speed cooking
that can be used to quickly bring water _-_--___i°_ ca _,_;_
tOa boil and for large-quantity cooking, y_//fi_ _mF,ont
Simmer Burner* %
This burner is located in the left rear
position. The simmer burner
offers a lower flame for delicate R_,a,go ®
Simmer _o_
sauces or melting chocolate. /MettOO
BTU ratings will vary when using LP o =
gas.
Use care when stirring food in a pot/pan sitting on the burner
grate. The grates have a smooth finish for ease of cleaning.
The pot/pan will slide if the handle is not held. This may result
in spilling of hot food items and may be a burn hazard.
Although the burner grates are durable, they will gradually
lose their shine and/or discolor, due to the high temperatures
of the gas flame.
Notes:
, A properly adjusted burner with clean ports will light
within a few seconds. If using natural gas, the flame
will be blue with a deeper blue inner cone.
If the burner flame isyellow or isnoisy, the air/gas
mixture may be incorrect.Contact a service technician
to adjust. (Adjustments are not covered by
the warranty.)
With LP gas, slight yellow tips on the flames are
acceptable. This isnormal and adjustment is
not necessary.
• With some types of gas, you may hear a "popping"
sound when the surface burner isturned off. This isa
normal operating sound of the burner.
" If the control knob is turned very quickly from HI to LO,
the flame may go out, particularly if the burner iscold.
If this occurs, turn the knob to the OFF position, wait
several seconds and relight the burner.
• The flame should be adjusted so it does not extend
beyond the edge of the pan.
10

D E
/ •
Clean
: Broil
Convect
Bake
Keep
warm
1 2
Delay 3
4 5
8 9
G H I J K L NI N
Tile control panel isdesigned for easein programming. Thedisplaywindow on the control shows time ofday, timer andovenfunctions.
Control panel shown includes Convect and other model specific features. (Styling may vary depending on model.:)
Bake
Broil
Clean
Delay
Number Pads
Autoset
Keep Warm
Convect
Cook & Hold
Favorite
Timer
Clock
Oven Light
CANCEL
Use for baking and roasting.
Use for broiling and top browning.
Use to set self-clean cycle.
Programs the oven to start baking at
a later time.
Use to set time and temperature.
Use to quickly set temperatures.
Useto keep cooked food warm in oven.
Use for convection baking and
roasting.
Bakes for a preset time, then holds
food warm for 1 hour.
Use to set and save a specific
Cook & Hold procedure.
Sets Timer.
Use to set time of day clock.
Use to turn the oven light on or off.
Cancels all operations except Timer
and Clock.
Using the Touchpads
* Press the desired pad.
* Press the number pads to enter time or temperature.
* Press the Autoset 0 pad to enter temperature.
* A beep will sound when any pad is touched.
* A double beep will sound if a programming error occurs.
Note: Four seconds after pressing the number pads or
the Autoset 0 pad, the time or temperature will automati-
cally be entered. If more than 30 seconds elapse between
touching a function pad and the number pads or the
Autoset 0 pad, the function will be canceled and the
display will return to the previous display.
Clock
The clock can be set to display time in a 12-hour or 24-hour
format. The clock is set at the factory for the 12-hour format.
To change the clock to 24=hour format:
1. Pressand hold the CANCEL and Favorite pads_
for three seconds.
• 12 Hr flashes in the display.
2. Pressthe Autoset O pad to select 24 Hr;
press again to select 12 Hr.
3. Set the time of day following the directions in
the Toset the Clock section. A
tJ
To set the Clock: Autoset
1. Pressthe Clock pad.
° The time of day flashes in the display.
2. Pressthe appropriate number pads to set the
time of day.
• Colon flashes in the display.
3. Pressthe Clock pad again or wait four seconds.
° The colon will remain on.
When electrical power is supplied or after a power interruption,
the last clock time before power was interrupted will flash.
11

Torecallthetimeofdaywhenanothertimefunctionis
showing,presstheClockpad.
Clocktimecannotbechangedwhentheovenhasbeen
programmedforDelayCookorDelayCleanorCook&Hold.
To cancel the Clock display:
If you do not want the time of day to display:
Press and hold the CANCEL and Clock _"_
pads for three seconds. The time of day will
disappear from the display.
When the clock display is canceled, press the
Clock pad to briefly display the time of day.
When the clock display is canceled, after 15 minutes, the oven
control will go into Standby Mode to saveenergy. Thedisplaywill
be blank and the oven light will not operate. To "wake up" the
control from Standby Mode, press anytouchpad. A double beep
will sound.
To restore the Clock display:
Press and hold the CANCEL and Clock pads for three
seconds. The time of day will reappear in the display.
Timer
The timer can be set from one minute (0:01) up to 99 hours
and 59 minutes (99:59).
The timer can be used independently of any other oven
activity. It can also be set while another oven function
is operating.
The timer does not control the oven. It only controls a beeper.
To set the Timer:
1. Pressthe Timer pad.
• 0:00and TIMER flash in the display.
2. Pressthe appropriate number pads until the correct time
appears in the display.
° The colon and TIMER will continue to flash.
3. PressTimer pad again or wait four seconds.
• The colon stops flashing and the time begins
counting down.
• The last minute of the timer countdown will be displayed
in seconds.
4. At the end of the set time, one long beep will sound and
"End" will be displayed.
5. Pressthe Timer pad to clear the display.
To canoe[ the Timer:
1. Pressand hold the Timer pad for three seconds.
OR
2. Pressthe Timer pad and press '0' using
the number pads.
m0
Autoset
Locking the Control
and Oven Door
The touchpad and oven door can be locked for safety,
cleaning, or to prevent unwanted use. The touchpads will not
function when locked.
If the oven is currently in use, the touchpads and door cannot
be locked.
The current time of day will remain in the display when the
touchpads and door are locked.
To lock:
Press and hold the CANCEL and Cook &
Hold pads for three seconds. (Press the
CANCEL pad first.)
• OFFappears in the display
° LOCKflashes while the door is
locking.
To unlock:
Press and hold the CANCEL and Cook & Hold pads for three
seconds. (Press the CANCEL pad first.) OFFdisappears from
the display.
Note: The touchpads and oven door cannot be locked if the
oven temperature is 400° For above.
Fault Codes
BAKE or LOCKmay flash rapidly in the display to alert you if
there is an error or a problem. If BAKE or LOCKflash in the
display, press the CANCEL pad. If BAKE or LOCK continue
to flash, disconnect power to the appliance. Wait a few
minutes, and then reconnect power. If the flashing still
continues, disconnect power to the appliance and call an
authorized servicer.
Baking
To set Bake:
1. Pressthe Bake pad.
• BAKEwill flash.
\ S
° 000 will flash in the display.
2. Select the oven temperature. Press the Autoset 0 U
pad for 350° For the appropriate number pads. Autoset
• Eachadditional press of the Autoset 0 pad will increase
the temperature by 25°.
° The oven temperature can be set from 170° to 550°.
3. Press Bake pad again or wait four seconds.
° BAKEwill stop flashing and light in the display.
12

• 100° or the actual oven temperature if over 100° Fwill
display. It will rise in 5° increments until the preset
temperature is reached.
4. Allow the oven to preheat for 8-15 minutes.
° When the set oven temperature is reached, one long
beep will sound.
• The set temperature will display.
° To recall set temperature during preheat, press
Bake pad.
5. Placefood in the oven.
6. Check cooking progress at the minimum cooking time.
Cook longer if needed.
7. When cooking is finished, press CANCEL pad. (CANCEL_
8. Remove food from the oven.
Notes:
Tochange the oventemperature during cooking, press
Bake, then press the Autoset 0 pad or appropriate
number pads until the desired temperature is displayed.
Tochange the oventemperature during prehea_ press the
Bake pad twice, then press the Autoset 0 pad or
appropriate number pads until the desired temperature
isdisplayed.
If you forget to turn off the oven, it will automatically turn
off at the end of 12 hours. If you wish to deactivate this
feature, see page 16.
Baking Differences Between Your Old
and New Oven
It is normal to notice some baking time differences between a
new oven and an old one. See "Adjusting the OvenTemperature"
on page 16.
Baking and Roasting
with Convection
([select models)
When convection baking, enter your normal baking
temperature. The control will automatically reduce the set
oven temperature by 25°. The entered temperature will be
displayed. The convection fan will start after the oven has
been on for approximately five minutes.
To set Convect: Convect
1. Pressthe Convect pad.
• BAKE and the fan iconwill flash
Y_
• 000 will flash inthe display. U
i\u[oset
2. Select the oven temperature. Press the Autoset 0
pad for 350° For the appropriate number pads.
• Eachadditional press of the Autoset 0 pad will increase
the temperature by 25 degrees. The oven temperature
can be set from 170° to 550°.
3. Press Convect pad again or wait four seconds.
° BAKEwill stop flashing.
• 100°or the actual oven temperature if over 100° Fwill
display. It will rise in 5° increments until the preset
temperature is reached.
• The fan icon will start to rotate. (_:_)
4. Allow the oven to preheat for 8-15 minutes.
• When the set oven temperature is reached, one long
beep will sound.
• The set temperature will display.
° To recall the set temperature during preheat, press the
Convect pad.
5. Placefood in the oven.
6. Check cooking progress at the minimum cooking time.
Cook longer if needed.
7. When cooking is finished, press _,kl¢'l:l_
CANCEL pad.
8. Removefood from the oven.
Notes:
• Roasting times can vary with different cuts of meat.
° It isnot necessary to preheat when convect roasting
large cuts of meat.
Cook & Hold
When using the Cook & Hold option, the oven begins to heat
immediately after the control has been set. Then, the oven
cooks for a specified length of time. When that time has
elapsed, the oven will keep the food warm for up to an hour
then automatically turn off.
To set Cook & Hold:
1. Pressthe Cook & Hold pad.
° HOLD will flash to indicate that you are in
Cook & Hold programming.
• 00:00 will flash in the display.
2. Select the amount of time you want to cook by using the
number pads.
° HOLD continues to flash.
° The time will light in the display.
• Time can be set from ten minutes (00:10] to 11 hours,
59 minutes (11:59).
3. While HOLD is still flashing, press Bake or Bake
Convect pad and select the oven temperature .........................
Pressthe Autoset 0 pad for 350° For the
appropriate number pads. 0
Autoset
13

• The desired function word will flash.
• The oven temperature can be set from
170° Fto 550° F.
4. Pressthe desired function pad again OR
wait four seconds.
° The desired function word will remain lit.
• The cooking time will show in the display.
• The actual oven temperature will be displayed
during preheat.
• The set temperature will display when the oven is
preheated.
When the cooking time has elapsed:
° Four beeps will sound.
° HOLD and WARM will light.
• 170° and the time of day will display.
4,
5.
6.
Enter the amount of time you want to cook using
the number pads.
Press Bake or Convect pad.
Set the oven temperature desired by pressing the................................................
Autoset 0 pad or the appropriate number pads.
° 350° will light when Autoset 0pad is pressed. A
W
• After four seconds, the entered delay time
Autoset
will appear in the display.
• HOLD turns off.
BAKE and DELAY remain lit to remind you that
a delayed Cook & Hold cycle has been programmed.
Notes:
° Do not use Delayed Cook & Hold for items that require a
preheated oven, such as cakes, cookies, and breads.
• Do not use Delayed Cook & Hold if oven is already hot.
Broiling
After one hour in HOLD WARM:
• The oven turns off automatically.
• HOLD and WARM go off.
° Remove food from oven.
To cancel Cook & Hold at any time:
Press the CANCEL pad. Remove food from oven.
Delay Cook & Hold
When using Delay, the oven begins to cook later in the day.
Set the amount of time that you want to delay before the oven
turns on and how long you want to cook. The oven begins to
heat at the selected time and cooks for the specified length of
time.
Delay time can be set from 10 minutes (00:10] to 11 hours, 59
minutes (11:59D.
To set a Delayed Cook & Hold cycle:
1. Pressthe Delay 1 pad. 1
J
• DELAY flashes in the display. Delay
° 00:00flashes in the display.
2. Using the appropriate number pads, enterthe amountoftime
you want to delay the start of the Cook & Hold cycle.
3. Pressthe Cook & Hold pad.
• HOLD and DELAY flash in the display.
° 00:00flashes in the display.
To set Broih
1. Press the Broil pad. Broil ;
{
• BROIL and SETflash in the display.
U
2. Press the Autoset 0 pad once to set HI broil or
twice to set LO broil. Auloset
° HI or LOwill be displayed.
• Select HI broil (550° F) for normal broiling.
Select LO broil (450° F'Jfor low-temperature
broiling of longer cooking foods such as poultry.
3. After four seconds, the oven will start.
° BROIL will remain lit.
• HI or LOwill remain lit.
4. Foroptimum browning, preheat 2-3 minutes before
adding food.
5. Placefood in the oven. Close the oven door.
6. Turn meat once about halfway through cooking.
7. When food is cooked, press the CANCEL pad.
Removefood and broiler pan from the oven.
• The time of day will reappear in the display.
14

Notes:
• For best results when broiling, use a pan designed
for broiling.
° HI is used for most broiling. Use LO broil when broiling
longer cooking foods. The lower temperature allows
food to cook to the well done stage without
excessive browning.
• Tochange the oven temperature during broiling, press
the Broil pad, then the Autoset 0 pad to switch
between LO and HI broil
° Broil times may be longer when the lower broiling
temperature is selected.
° Most foods should be turned halfway through
broiling time.
Keep Warm
For safely keeping hot foods warm or for warming breads
and plates.
To set Keep Warm:
1. Pressthe Keep Warm pad.
• WARM flashes in the display.
warm
° 000 flashes in the display.
2. Select the Keep Warm temperature. Pressthe U
Autoset 0 pad or the appropriate number pads. Autoset
• 170°will light when the Autoset 0 pad is pressed.
° Each press of the Autoset 0 pad will increase the
temperature by 5°.
Broiling Chart
Preheat oven for 2-3 minutes.
The Keep Warm temperature can be set from 145° to 190°.
WARM and the temperature will be displayed while the
function is active.
To cancel Keep Warm:
1. Press the CANCEL pad.
2. Remove food from the oven.
NOteS:
° Foroptimal food quality, oven cooked foods should be
kept warm for no longer than 1to 2 hours.
° To keep foods from drying, cover loosely with foil or a lid.
• To warm dinner rolls:
- cover rolls loosely with foil and place in oven.
- press Keep Warm and Autoset 0 pads.
- warm for 12-15 minutes.
• To warm plates:
- place 2 stacks of up to four plates each in the oven.
- press Keep Warm and Autoset 0 pads.
- warm for five minutes, turn off the oven and leave
plates in the oven for 15 minutes more.
- use only oven-safe plates, check with
the manufacturer.
- do not set warm dishes on a cold surface as rapid
temperature changes could cause crazing
or breakage.
Beef 5
5
5or6
Steaks, 1" thick
Hamburger Patties, 314" thick
Bacon
Ham, precooked 1/2" slice
Chops, 1"thick
Chicken Breasts, bone-in
Fish filets
Fish steaks, 1" thick
Lobster tails, 3-4 oz. each
Medium
Well Done
Well Done
15 - 20 min.
18 - 24 min.
13 - 18 min.
Pork 5 Well Done 6 - 10 min.
5 Warm 8 - 12 min.
5 Well Done 22 - 26 min.
Poultry 4 Well Done 30 - 45 min. (Lo Broil)
Seafood
Flaky
Flaky
Done
5
5
5
8 - 12 min.
10 - 15 min.
7 - 10 min.
For a browned/seared exterior and rare interior, it may be necessary to decrease cook time on side one and decrease the distance
between the meat and heat source.
Note: This chart is a suggested guide. The times may vary with the food being cooked.
15

Automatic Shut-Off/
Sabbath Mode
The oven will automatically turn off after 12 hours if you
accidentally leave it on. This safety feature can be turned off.
To cancel the 12=hour shut=off and run the
oven continuously for 72 hours:
1. Pressand hold the Clock pad for five
seconds
• SAb will be displayed and flash for five seconds.
• SAb will then be displayed continuously until turned
off or until the 72-hour time limit is reached.
• BAKEwill also be displayed ifa bake cycle is in
use while the oven isin Sabbath Mode.
• BAKEis the only function that operates during the
Sabbath Mode. Aft other functions (Timer,Keep Warm,
Clean,etc.) are locked out during the Sabbath Mode.
° A Cook & Hold can be programmed during the Sabbath
Mode, however a Delay Cook & Hold isnot allowed.
To cancel the Sabbath Mode:
1. Pressthe Clock pad for five seconds.
° SAb will flash for five seconds.
• The time of day will return to the display.
OR
2. After 72 hours, the Sabbath Mode will end.
° SAb will flash for five seconds.
° The time of day will return to the display.
Notes:
° Sabbath Mode can be turned on at any time with or
without the oven on.
° Sabbath Mode cannot be turned on if the touchpads are
locked out or when the door is locked.
• Most prompts and messages and all beeps are
deactivated when Sabbath Mode is active.
° If the oven is baking when Sabbath Mode is set, BAKE
will go out when Bake iscanceled. There will be rio
audible beeps.
° The oven light will not automatically come on when the
oven door is opened while the oven is in Sabbath Mode.
If the oven light isdesired while in Sabbath Mode, it
must be turned on before the Sabbath Mode isstarted.
• When the Sabbath Mode is started, the temperature
display will immediately show the set temperature, rather
than the actual oven cavity temperature. No preheat
beep will sound.
° The self-clean cycle and automatic door lock do not
operate during the Sabbath Mode.
• Pressing CANCEL pad will cancel a bake cycle, however
the control will stay in the Sabbath Mode.
• If power fails, the oven will power up in Sabbath Mode
with 72 hours remaining and no cycle active.
Adjusting the Oven Temperature
Oven temperatures are carefully tested for accuracy at the
factory. Itis normal to notice some baking or browning
differences between a new oven and an old one. As ovens
get older, the oven temperature can shift.
You may adjust the oven temperature if you think the oven is
not baking or browning correctly. To decide how much to
change the temperature, set the temperature 25 degrees
higher or lower than your recipe recommends, then bake.
The results of the "test" should give you an idea of how much
to adjust the temperature.
To adjust the oven temperature: Bake
1. Press the Bake pad.........
2. Enter 550° by pressing the appropriate number pads.
3. Press and hold the Bake pad for several seconds or until
00° appears in the display.
If the oven temperature was previously adjusted, the
change will be displayed. Forexample, if the oven
temperature was reduced by 15° the display will
show "- 15°''.
4. Press the Aatoset 0 pad to adjust the temperature.
Each time the Autoset 0pad is pressed, the temperature
changes by 5°. The oven temperature can be increased or
decreased by 5° to 35°.
Pressing the Autoset 0 pad will first cycle through increas-
ing the oven temperature (5, 10.... 35). Continuing to
press the Autoset 0 pad will then cycle through decreasing
the oven temperature (-35, -30.... -5).
5. The time of day will automatically reappear in the display.
You do riot need to readjust the oven temperature if there is a
power failure or interruption. Temperature adjustment applies
to Bake, Convect Bake arid Convect Roast (select models)
only. Broiling arid cleaning temperatures cannot be adjusted.
Changing Temp °F/°C
1. The factory default setting for temperature is Fahrenheit.
2. Tochange the setting, press and hold the CANCEL and Bake
pads at the same time for three seconds.
3. A single beep will sound and the current setting will be
displayed (°F or °C). (If no change is made, the range will
return to the existing setting after 30 seconds.)
4. Tochange the setting, press the Aatoset Opad. Pressagain
to return to existing setting. Wait fiveseconds and the setting
will be complete.
16

Favorite
Tile Favorite pad allows you to save tile time and temperature
from a Cook & Hold function.
To set a Favorite cycle, Cook & Hold must be either active or
just programmed.
To set a new Favorite cycle or to save a
currently running Cook & Hold as a Favorite:
1. Program a Cook & Hold cycle as described in tile Cook &
Hold section on page 13.
2. Pressand hold the Favorite pad for
three seconds.
• The newly set or currently running Cook & Hold cycle
will be saved.
• A beep will sound to indicate that the control has
accepted the Favorite setting.
To start a cycle programmed into Favorite:
1. Pressthe Favorite pad.
• Time and temperature for the set Cook & Hold cycle will
be displayed. (If no Cook & Hold cycle has been
programmed, "nonE" isdisplayed.)
2. Pressthe Bake or Convect pad.
• The Favorite cycle will begin immediately.
• The selected cycle word will light in the display
• The cooking time will light in the display
When the cooking time has elapsed:
• Tile selected cycle word will turn off.
• HOLD and WARM will light.
• 170°will display.
To cancel a Favorite cycle in progress:
1. Presstile CANCEL pad.
• The stored Favorite cycle will not
be affected.
2. Removefood from the oven.
Pilotless ignition
Your range isequipped with pilotless ignition.With this type of
ignitionsystem, the gas automatically shuts off and the oven
will not operate during a power failure.
A lighted match will not light the oven burner. No attempt
should be made to operate the oven during a power failure.
Oven Fan
A convection fan isused to circulate hot air in the oven when
the convection feature isselected. It automatically turns on 5
minutes after the Convect pad is pressed and will turn off
when Convect is canceled.
Note: The convection fan will automatically stop when the |
oven door is opened.
l
Oven Vent
When tile over) is in use the area near tile vent may become
hot enough to cause burns. Never block the vent opening.
The oven vent is located below the backguard vent
OVEN VENT
LOCA T!ON
shield on your range.
Do not place
plastics near the
vent opening as
heat from the vent
could distort or
melt the plastic.
Oven Light
Tile oven light automatically comes on when
the door is opened. When the door is closed,
press the Oven Light pad to turn the oven
light on and off.
A beep will sound every time the Oven Light pad is pressed.
Oven Bottom
Protect oven bottom against spillovers, especially acidic or
sugary spills, as they may discolor the porcelain enamel. Use
the correct pan sizeto avoid spillovers and boilovers. Do not
place utensils or aluminum foil directly on the oven
bottom.
Oven Racks
The oven has two racks. All racks are designed with a
lock-stop edge.
To remove:
1. Pull rack straight out
until itstops at the
lock-stop position.
2. Lift up on the front of the
rack and pull out.
To replace:
1. Place rack on tile rack supports in tile oven.
2. Tilt the front end up slightly. Slide rack back until it clears
the lock-stop position.
3. Lower front and slide back into the oven.
Do not cover an entire rack with aluminum foil or place
foil on the oven bottom. Baking results will be affected
and damage may occur to the oven bottom.
17

Rack Positions
RACK 7 (highest
position): Forsome
single rack baking
on cookie sheets
and broiling.
RACK 6: Usedfor
some single rack
baking on cookie
sheets and broiling.
Used for multiple
rack baking.
!J _ LJ
_[ ' 43
2
Convection baking
on two racks
RACK 5: For single rack baking on cookie sheets
and broiling.
RACK 4: Used for single rack baking on cookie sheets, sheet
cakes, casseroles and broiling. Usedfor multiple rack baking.
RACK 3: For single rack baking on cookie sheets, casseroles,
layer cakes, loaves of bread and sheet cakes. Used for
multiple rack baking.
RACK 2: Used for some single rack baking on cookie sheets
and roasting small cuts of meat. Use for multiple rack baking.
RACK 1: Use for roasting large cuts of meat and poultry.
Oven Bottom: Place oven rack on
raised sides of oven bottom. Use
for additional space when cooking
large oven meals.
MULTIPLE RACK COOKING:
Use rack positions 3 and 6, or 2
and 4.
i ote: When convect baking on two racks, check foods at
the minimum suggested time to avoid over-browning or
over-cooking.
Baking Layer Cakes on Two Racks
Forbest results when baking cakeson two racks, use racks 2and
4 for regular baking and racks 3 and 6 for convection baking.
Place the cakes on the rack as shown.
18

Warrant
MAYTAG CORPORATION MAJOR APPLIANCE WARRANTY
ONE YEAR LiMiTED WARRANTY
For one year from the date of purchase, when this major appliance is operated and maintained according to instructions
attached to or furnished with the product, Maytag Corporation or Maytag Limited Olereafter "Maytag'] will pay for Factory
Specified Parts and repair labor to correct defects in materials or workmanship. Service must be provided by a Maytag
designated service company. This limited warranty applies only when the major appliance is used in the country in which it
was purchased.
ITEMS MAYTAG WiLL NOT PAY FOR:
1. Service calls to correct the installation of your major appliance, to instruct you how to use your major appliance, to
replace or repair house fuses or to correct house wiring or plumbing.
2. Service calls to repair or replace appliance light bulbs, air filters or water filters. Those consumable parts are excluded
from warranty coverage.
3. Repairs when your major appliance is used for other than normal, single-family household use.
4. Damage resulting from accident, alteration, misuse, abuse, fire, flood, acts of God, improper installation, installation not in
accordance with electrical or plumbing codes, or use of products not approved by Maytag.
5. Any food loss due to refrigerator or freezer product failures.
6. Replacement parts or repair labor costs for units operated outside the United States or Canada.
7. Pickup and delivery. This major appliance is designed to be repaired in the home.
8. Repairs to parts or systems resulting from unauthorized modifications made to the appliance.
9. Expensesfor travel and transportation for product service in remote locations.
10. The removal and reinstallation of your appliance if it is installed in an inaccessible location or is not installed in
accordance with published installation instructions.
11. Replacement parts or repair labor costs when the major appliance is used in a country other than the country in which it
was purchased.
DiSCLAiMER OF iMPLiED WARRANTIES; LiMiTATiON OF REMEDIES
CUSTOMER'SSOLEAND EXCLUSIVEREMEDY UNDER THIS LIMITED WARRANTY SHALL BE PRODUCTREPAIRAS PROVIDED
HEREIN.IMPLIED WARRANTIES, INCLUDING WARRANTIES OF MERCHANTABILITY OR FITNESSFORA PARTICULAR
PURPOSE,ARE LIMITED TO ONEYEAR ORTHE SHORTESTPERIODALLOWED BY LAW. MAYTAG SHALL NOT BE LIABLE FOR
INCIDENTAL OR CONSEQUENTIALDAMAGES. SOME STATESAND PROVINCESDO NOT ALLOW THE EXCLUSIONOR
LIMITATION OFINCIDENTAL ORCONSEQUENTIALDAMAGES, OR LIMITATIONS ON THE DURATION OFIMPLIED
WARRANTIESOF MERCHANTABILITY OR FITNESS,SO THESEEXCLUSIONSOR LIMITATIONS MAY NOT APPLY TO YOU. THIS
WARRANTY GIVESYOU SPECIFICLEGAL RIGHTSAND YOU MAY ALSO HAVE OTHERRIGHTS,WHICH VARY FROMSTATETO
STATEOR PROVINCETO PROVINCE.
Outside the 50 United States and Canada, this warranty does not apply. Contact your authorized Maytag dealer to determine if
another warranty applies.
If you need service, first see the "Troubleshooting" section of the Use & Care Guide. After checking "Troubleshooting, "additional
help can be found by checking the "Assistance or Service" section or by calling Maytag. In the U.S.A.,call 1=800-688-9900. In
Canada, call 1=800=688=2002.
19

MAYI'AG
Cuisinibre _ gaz & touches
de precision 800
/sln/e
Table dc
instructions de securit6
importantes ................................21 =24
Nettoyage ................................... 25=27
Four autonettoyant
M_thodes de nettoyage
IEntretien ...................................... 27-28
Hublot et lampe du four
D6placement d'un appareil a gaz
Recherche des pannes ...................29
Caisson sat la surface ............. 30=31
Commandes de la surface de cuisson
BrQleurs _ gaz scell6s
Caisson dans le four ................ 32=39
CuissoR courante
Cuisson et n-aintien
Cuisson et maintien diff6r6s
Maintien au chaud
Cuisson au gril
Arr6te automatique/Mode sabbat
Grilles du four
Garantieet serviceapres=vente ....41
Gain de aso y caidado .....................42

qualifie, et relic _ la terre. Ne pas regler, reparer ni remplacer un
composant, _ moins que cela ne soit specifiquement recommande
darts ce guide. Toute autre reparation dolt etre effectuee par un
technicien qualifie. Demander _ rinstallateur de montrer ou se
trouve le robinet d'arret de gaz et comment le former en
cas d'urgence.
Toujoursdebrancher rappareil avantd'y faire de rentretien.
Instructionsde
securltetmpomntes
Les instructions de securite importantes et lesparagraphes
_{avertissement >>de ceguide ne sont pas destines _ couvfir
toutes losconditions et situations qui pourraient se presenter. II
faut faire preuve de bon sens,de prudence et de soin Iorsde
rinstallation, de rentretien ou du fonctionnement de rappareil.
Toujours prendre contact avec le fabricant dans le cas de
problemes ou de conditions qui ne seraient pas comprises.
Reconnaitre los etiquettes, paragraphes et
symboles sur la s6curit6
Life routes les instructions avant d'utiliser cot appareil;
observer toutes les instructions pour eliminer losrisques
d'incendie, choc electfique, dommages materiels et corporels
que pourrait susciter une utilisation incorrecte de rappareil.
Utiliser rappareil uniquement pour lesfonctions prevues,
decrites darts ce guide.
Pour une utilisation adequate et en s_curit_, il faut que
rappareil soit convenablement installepar un technicien
21
instructions g6n rales

Utiliser une lampe torche pour determiner si la bride
antibasculement est convenabiement installee sous la cuisiniere:
L'un des pieds arriere de reglage de raplomb doit ¢tre
convenabiement engage dans la fente de la bride. Lorsque la
cuisiniere est convenablement calee, la bride antibasculement
immobiiise [e pied arriere contre le sol.Verifier [a parfaite
immobilisation de la cuisiniere par la bride apres chaque
deplacement de la cuisiniere.
Ne pas projeter de reau sur un feu de graisse. Utiliserdu bicar-
bonate de sodium ou un extincteur _ mousse ou produit chimique
sec pour eteindre lesflammes.
S6curit6 pour les en(ants
Pour 6viter un incendie ou des
dommages par la fum6e
S'assurerque tousles materiaux de conditionnement sont retires
de rapparei[ avantde le mettre en marche.
Garder lesmateriaux combustibles, ressence et autres matieres
et vapeurs inflammables bien eioignes de rappareil.
Si rappareil est installe pres d'une fenetre, des precautions
appropriees doivent etre prises pour eviter que le vent entraine
les rideaux au-dessus des brQleurs.
NEJAMAIS hisser des articles sur la table de cuisson. L'air
chaud de revent peut lesenflammer et mettre egalement sous
pression des contenants fermes qui pourraient alors exploser.
De nombreux flacons d'aerosol peuvent EXPLOSERIorsqu'on les
expose _ la chaleur, et ils peuvent contenir un produit tres
inflammable. Eviterd'utiliser ou remiser un flacon d'aerosol
proximite de rappareil.
De nombreux articles en piastique peuvent etre deteriores par la
chaleur. Conserverles articles en plastique _ distance des
composants de rappareil susceptibles de devenir tiedes ou
chauds. Ne pas hisser des articles en plastique sur la table de
cuisson; un article en plastique trop proche de revent du four ou
d'un brQleur allume pourrait s'amollir ou fondre.
Pour eliminer le besoin d'atteindre quelque chose par-dessus les
brQleursde surface, il est preferable qu'il n'y ait aucune armoire
de cuisine directement au-dessus de rappareil. S'i[y a une
armoire, on ne devrait y remiser que des articles peu
frequemment utilises et capables de resister _ [achaleur emise
par rappareil. La temperature pourrait etre excessivepour
certains articles, comme liquides volatils, produits de nettoyage
ou flacons d'aerosol.
En cas d'incendie
Interrompre [e fonctionnement de rapparei[ et de [a hotte de
ventilation pour minimiser le risque d'extension des flammes.
Eteindre les flammes, puis mettre la hotte en marche pour
evacuer la fumee et rair vicie.
• Table de cuisson : Utiiiser un couvercle ou une plaque
biscuits pour etouffer lesflammes d'un feu qui sedeclare
darts un ustensile de cuisine.
NE JAMAIS saisir ou deplacer un ustensiie de
cuisine enfiamme.
NE JAMAIS hisser des enfants seuls ou sans supervision Iorsque
rappareil est en service ou encore chaud.
NE JAMAIS laisser un enfant s'asseoir ou setenir sur une partie
quelconque de rappareil. I1pourrait se blesser ou se brOier.
II est important d'enseigner aux enfants que la cuisiniere et les
ustensiies places dessus ou dedans peuvent etre chauds. Laisser
refroidir les ustensiies en un lieu sOr,hors d'atteinte des enfants. II
est important d'enseigner aux enfants qu'un appareil menager
n'est pas un jouet, et qu'ils ne doivent toucher aucune commande
ou autre composant de rappareil.
Familiarisation avec ['apparei[
Ne pas utiliser le four pour ranger des aliments ou des
ustensiles de cuisine.
L'event de four est situe _ la base du dosseret.
suite
• Four : Fermer la porte du four pour etouffer lesfiammes.
22

Evitezde toucher le voisinage de revent de four Iorsque lefour
est utilise et pendant phsieurs minutes apres rarret du four.
Certains composants de revent et la zonevoisine peuvent
devenir suffisamment chauds pour provoquer des brOlures.
Apres rarret du four, ne touchez pas revent de four ou la zone
voisine avant que ces composants aient pu se
refroidir suffisamment.
Autres surfaces potentJellementchaudes :table de cuisson,
zones faisant face _ la table de cuisson, event de four, zone
voisine de revent, porte de four et zone voisine de porte et
de hublot.
Ne touchez pas rampoule chaude du four avec un linge
humide; le choc thermique pourrait la briser. Si tel est le cas,
debranchez rappareil avant de retirer rampoule pour eviter une
decharge electrique.
empecher toute accumulation sur la hotte elle-meme ou sur le
filtre. Lorsdu flambage d'aliments sous la hotte, mettre le
ventilateur en marche.
NE JAMAIS porter, Iorsde rutilisation de rappareil, des
vetements faits d'un materiau inflammable, ou amples, ou
Iongues manches. De tels vetements peuvent s'enflammer ou
accrocher la poignee d'un ustensile.
Placertoujours les grilles _ la position appropriee dans le four
Iorsque le four est froid. Fairecoulisser la grille vers rexterieur
avant d'ajouter ou enlever un plat; utiliser pour cela une manique
robuste et seche. Eviterd'introduire la main dans le four pour y
placer ou retirer un plat. S'il est necessairede deplacer une grille
Iorsqu'elle est chaude, utiliser une manique seche.Veiller
toujours arreter le four _ la fin d'une periode de cuisson.
Cuisson et s curit
Ouvrir toujours la porte du four tres prudemment. Laisser rair
chaud ou la vapeur s'echapper avantde retirer/introduire un plat.
Placertoujours un ustensile sur un brOleur de surface avantde
rallumer. Veiller _ bien connaitre la correspondance entre les
boutons de commande et les brOleurs.Veiller _ allumer le
brOleurcorrect etverifier que le brOleurs'allume effectivement.
A la fin de la periode de cuisson, eteindre le brOleur avantde
retirer rustensile, pour eviter une exposition aux flammes du
brOleur.
Veiller _ toujours ajuster correctement la taille des flammes
pour qu'elles ne depassent passur la peripherie de rustensile.
Des flammes de trop grande taille sur un brOleur sent
dangereuses, ellesentrainent un gaspillage d'energie et elles
peuvent faire subir des dommages _ rustensile, _ rappareil ou
rarmoire situee au-dessus.
NEJAMAIS hisser un brOleurde surface allume sans
surveillance, particulierement avec une puissance de chauffage
eleveeou Iors d'une operation de friture. Undebordement
pourrait provoquer la formation de fumee et des produits gras
pourraient s'enfiammer. Eliminer des que possible lesproduits
gras renverses. Ne pas utiliser une puissance de chauffage
eleveependant une periode prolongee.
NEJAMAIS faire chauffer un recipient non ouvert dans le four
ou sur un brOleur de surface; raccumulation de pression dans le
recipient pourrait provoquer son eclatement et de graves
dommages materiels ou corporels.
Utiliser des maniques robustes et seches. Desmaniques
humides peuvent provoquer la formation de vapeur brOlante.
Ne jamais utiliser un torchon _ vaisselleou autre article textile
la place de maniques; un tel article pourrait trainer sur un
brOleuret s'enflammer, ou accrocher un ustensile ou un
composant de rappareil.
Laisser toujours refroidir un recipient d'huile de friture chaude
avantde tenter de le deplacer et le manipuler.
Ne pas hisser la graisse de cuisson ou autre materiau
inflammable s'accumuler dans ou pres de rappareil, de lahotte
ou du ventilateur de revent. Nettoyer frequemment la hotte pour
AVERTISSEMENT : Mets prepares : Respecter les instructions
du fabricant. Si le contenant ou le couvercle en plastique d'un
mets surgele se ddorme ou est endommage durant lacuisson,
jeter immediatementle recipient et son contenu. Lesaliments
pourraient etre contamines.
NE JAMAIS garnir la sole ou une grille du four avec de la feuille
d'aluminium. Ceci pourrait susciter un risque de choc electrique
ou d'incendie, ou une autre deterioration de rappareil. Utiliser de
la feuille d'aluminium uniquement selon les instructions de ce
guide.
Ustensiles et s6curit6
Utiliser des ustensiles _ fond plat comportant une poignee qu'on
peut facilement saisir et qui reste fro[de. Eviterd'utiliser un
ustensile instable ou ddorm& qui pourrait facilement basculer,
ou dent la poignee est mal fixee. Eviter egalement d'utiliser des
ustensiles de petite taille comportant une poignee Iourde; ces
ustensiles sent generalement instables et peuvent facilement
basculer. Un ustensile Iourd Iorsqu'il est rempli peut egalement
etre dangereux Iors des manipulations.
Veiller _ utiliser un ustensile de taille suffisante pour que le
contenu ne risque pas de deborder. Ceci est particulierement
important pour un ustensile rempli d'huile defriture. Verifier que
la taille de rustensile est suffisante pour qu'il puisse recevoir les
produits alimentaires _ cuire, et absorber raugmentation de
volume suscitee par rebullition de lagraisse.
Pour minimiser lesrisques de brOlure,d'inflammation de
matieres et de renversement par contact non intentionnel avec
un ustensile, ne pas orienter la poignee d'un ustensile vers un
brOleur adjacent; orienter toujours la poignee d'un ustensile vers
le cote ou rarriere de rappareil; ne pas hisser non plus la
poignee d'un ustensile deborder _ ravant de rappareil, oO un
jeune enfant pourrait facilement la saisir.
Veiller _ NEJAMAIS hisser le contenu liquide d'un ustensile
s'evaporer compietement; rustensile et rappareil pourraient subir
des dommages.
23

Appliquer les instructions du fabricant Iors de remploi d'un
sachet pour cuisson au four.
Seulscertains materiaux en verre, vitroceramique, ceramique,
ou certains ustensiles vitrifies/emailles peuvent etre utilises sur
la table de cuisson ou dans le four sans risque de bris sous
reffet du choc thermique. Observer les instructions du fabricant
lots de rutilisation d'un ustensile enverre.
La securite de fonctionnement de cet appareil aete testee
raide d'ustensiles de cuisine conventionnels. Ne pas utiliser un
ustensile ou accessoire qui n'est passpecifiquement
recommande darts ce guide. Ne pas utiliser de couvre-brQleur,
gril place sur la table de cuisson ou systeme de convection
additionnel. L'utilisation d'un dispositif ou accessoirequi n'est
pas expressement recommande dans ce guide peut degrader la
securite de rappareil ousa performance, ou reduire la Iongevite
des composants.
Nettoyage et s curit
Arreter toutes lescommandes et attendre le refroidissement
de tous lescomposants avant de lestoucher ou d'entre-prendre
le nettoyage. Ne pas toucher la grille d'un brOleurou la
zonevoisine avant que ces composants aient pu
suffisamment refroidir.
Exercer une grande prudence Iors du nettoyage de rappareil.
Travailler prudemment pour eviter des br01urespar la vapeur en
cas d'utilisation d'un chiffon ou d'une @onge humide Iors de
relimination d'un produit renverse sur une surface chaude.
Certains produits de nettoyage peuvent generer des vapeurs
nocives Iorsqu'on les applique sur une surface chaude.
Four autonettoyant
Nettoyer uniquement les pieces mentJonneesdans ce guide. Ne
pas nettoyer le joint de porte; le joint joue un r01eessentiel
quant 8 retancheit8. Ne pas frotter, endommager ou deplacer
le joint. Ne pas utiliser de produit de nettoyage du four darts le
four autonettoyant ou sur leszones voisines.
II est normal que la surface de cuisson devienne chaude durant
une operation d'autonettoyage; par consequent, eviter de
toucher la surface de cuisson durant rautonettoyage.
Avertissement et avis
important pour la s curit
La Ioicalifornienne <<SafeDrinking Water and Toxic
Enforcement Act >>de ]986 (proposition 65_stipule lapublication
par le gouverneur de la Californie d'une liste de substances que
retat de Californie considere comme cancerigenes ou
dangereuses pour le systeme reproducteur, et impose aux
entreprises commerciales robligation de signaler _ burs clients
les risques d'exposition _ de telles substances.
Les utilisateurs de cet appareil peuvent etre exposes_ une
faible concentration de certaines substances figurant dans la
liste mentionnee ci-dessus, dont benzene,formaldehyde et suie,
du fait de la combustion incomplete du gaz naturel ou du gaz
de petrole liqudie. Pour minimiser la combustion incomplete,
veiller _ ce que les br01eurssoient parfaitement regles. Pour
minimiser rexposition _ ces substances, veiller 8 bien evacuer
les gazde combustion _ rexterieur.
Nous informons lesutilisateurs de cet appareil que Iors d'une
operation d'autonettoyage, ils peuvent etre exposes_ une faible
concentration de certaines substances figurant dans la liste
mentionnee ci-dessus, dont le monoxyde de carbone. Pour
minimiser rexposition, veiller _ ce que la piece ouse trouve le
four soit convenablement aeree durant une operation
d'autonettoyage par rouverture d'une fenetre ou d'une porte.
AVIS IMPORTANT - OISEAUX FAMILIERS : Lesoiseaux ont
un systeme respiratoire tres sensible. Ne pas garder un oiseau
familier dans la cuisine ou dans une piece ou il pourrait etre
expose aux fumees. Lesfumees emises durant une operation
d'autonettoyage peuvent etre dangereuses ou mortelles pour un
oiseau, de meme que les fumees emises lots du chauffage
excessifde graisse,huib, margarine, et du chauffage excessif
dans un ustensile _ revetement antiadhesif.
Conserver ces instructions pour consultation ult rieure
24

Four autonettoyant
Lecycled'autonettoyageutilisedestemp6raturessup6rieuresa la
normalepour assurerle nettoyageautomatiquede la totalit6dufour.
Lefour dolt 6trenettoy6rc!guliSrement.Lesc!claboussuresdoivent
6treessuy6espour@iter uneproductionexcessivedefum6eou
[apparition de flammes.Ne laissezpas de r_siduss'accumulerdans
le four.
Durant le processusd'autonettoyage,il convientde biena_rer la
cuisinepour c!liminerlesodeursnormalementc!misesdurant
le nettoyage.
Avant I'autonettoyage
1. Eteindrela lampedufour avantle nettoyage.Ellerisqueraitsinon,
de griller.
2. Enlevertousles platset lesgrillesdu four. Lesgrillesrisquentde
sed6coloreret de ne plusglisseraussibienapr_sun cycle
d'autonettoyagesi on ne lesenl_vepas.
3. Nettoyerle cadredufour, lecadredela
porte,lazone_ I'ext6rieurdujoint et \,
autourde I'ouverturedanslejoint de la
porte,a I'aided'un produitde nettoyage
nonabrasifcommeBonAmi* ou d'eau
additionn@de d6tergent.Leprocessus
d'autonettoyagenenettoie pasces
zones.Ellesdoivent6trenettoy6espouremp6cherla saletc!de
s'incrusterpendantlecyclede nettoyage.(Lejoint assure
1'6tanchc!it6autourde la porteet duhublotdufour.]
4. Pouremp6chertout dommage,ne pas nettoyernifrotter lejoint
qui setrouve autourde la portedu four.Cejoint estcon_upour
@iter lespertesde chaleurpendantlecycled'autonettoyage.
5. Eliminerlesr_sidusde graisseou de produitsrenvers6ssurla
soleavantle nettoyage.Ceciemp6chelaformationdeflammes
ou de fum6edurant le nettoyage.
6. Essuyerlesrc!sidussucreset acides,commelespatatesdouces,
latomateou lessaucesa basede lait.La porcelainevitrifi6e
pos@deune certainer6sistanceauxcomposc!sacides,maisqui
n'estpaslimit_e.Ellepeutsed6colorersilesr6sidusacidesou
sucr6snesont pasenlev_savantde commencerI'autonettoyage.
Programmation de I'autonetteyage :
l Remarque: Latemperaturedu four dolt 6tresituc!eell dessous
de 205° C(400° F)pourprogrammerun cycled'autonettoyage.
1
1. Fermerla portedu four.
2. Appuyersur latouche Clean [Nettoyage). Clean
• Lemot CLEANclignote.
• Lemot SETG/alider]clignote_ I'afficheur.
3. Appuyersur latouche Autoset 0 (Programmation [_
automatique). /\utosctV
• MEd [Moyen)[Salet6moyenne,3 heures)estaffich&
4. Appuyersur latouche Autoset 0 pourvoir driller lesdiff6rents
r6glagesde I'autonettoyage•
HVy 0-r_ssale)[Salet6@aisse,4 heures)
MEd (Salet6moyenne,3 heures)
LifE [L6ger)(Salet616g_re,2heures)
Le choixdu niveaudesaletc!du four programmeautoma-
tiquementla dur6edu cycled'autonettoyage.
5. Apr_squatresecondes,lefour commencele nettoyage.
• Si la porten'estpasferm6e,desbipsretentissentet le mot
{{door_ [porte) paraita I'afficheur.Sila porten'estpas
ferm6edansles30 secondes,I'op6rationd'autonettoyageest
annulc!eet I'afficheurrevient_ I'heuredu jour.
• Lemot CLEANparaita I'afficheur.
• Lemot LOCKclignote _ I'afficheur.Unelois la porte
verrouill_e,le mot restestable.
• Ladurocdenettoyagecommenceled_!comptea I'afficheur.
D_marrage diff_r_ d'u_ cycle d'aute_etteyage :
1. Appuyersur latouche Delay 1 (Diff@_e). 1
/
• Lemot DELAYclignote.
Delay
• 00:00clignotea I'affichage.
2. Entrerladur_e d'attented_!sir_epour le d6marragedu cycle
I'aidedestouchesnum@iquesappropri_es.
3. Appuyersur latouche Clean.
dean
Lemot SETclignote a I'afficheur.
4. Appuyersur latouche Autoset O.
° Lemot LifE (salet_I%_re) estaffich& U
5. Appuyersur latouche Autoset 0 (Programmation kutoset
automatique)pour voirdriller lesdiff,!rents
r_glagesde I'autonettoyage•
HVy 0-r_ssale)[Salet_@aisse,4 heures)
MEd (Salet_moyenne,3 heures)
LifE [L_ger)(Salet_I_!g_re,2heures)
*Lesnomsde marquedesproduitsde nettoyagesont desmarquesd@os_esdesdiff_rentsfabricants.
25

Lechoixdu niveaudesalet6du four programmeautoma-
tiquementla dur6edu cycled'autonettoyage.
6. Apr_squatresecondes,losmotsCLEAN(Nettoyage)et DELAY
(Diff6r_e)s'allumerontet lemot LOCK(Verrouillage)clignotera
I'afficheur.Lorsquela portedu four severrouille,le mot LOCK
s'arr6tede clignoteret resteallumc!en continu pour indiquerque
lefour est programm_pour uneop6rationde nettoyagediff6rc!.
Ledc!laid'attenteseraaffich&
M thodes de nettoyage
Pendant le cycle d'autonettoyage
Lorsquele mot LOCKparaitaI'afficheur,la portenepeut6tre
ouverte.Pour6viterd'endommagerlaporte,ne pas forcer la porte
pour I'ouvrirIorsqueLOCKest affich&
Fum_e et odeurs
Lapremierefois o_ lefour est nettoy6,il peuty avoirproduction
d'odeuretde fum6e.Ceciest normalet disparaitraa I'usage.
Sile four esttr_s saleou si uneustensilea €1t6laiss6edanale four, il
peutyavoirproductionde fumc!e.
Bruits
Pendantque le four chauffe,il peutseproduiredesbruitsde m_tal
en dilatationou en contraction.Ceciestnormalet n'indiquepasque
le fours'abime.
Apr s le cycle d'autonettoyage
Environuneheureapr_slafin du cycle,le mot LOCKs'c!teint.Ace
moment,laportepout 6treouverte.
Lasalet6 poutavoir laiss6un r6sidu gris poudreux.L'enlever
avecun lingo humide.S'il restede lasalet(!,celaindiqueque le cycle
de nettoyagen'apas6t(!assezlong.Cettesalet6restantesera
enlev6eau prochaincycled'autonettoyage.
Silos grillesont 6t6 laiss_es_ rint6rieur du four pendant le
cycled'autonettoyageet qu'elles glissent real surleurs
supports,losenduire,ainsique lossupports,d'une finecouche
d'huilev6gc!tale.
De fines lignespeuventapparaitre dansla porcelaine parce
qu'elle a subi chaleur et refroidissement.Ceciest normalet
n'affecterapasla performance.
Une d6coJorationblanche poutapparaitre apr_s lenettoyage
sides aliments acides ou sucr6sn'ont pas 6t6 enlev6s avant
que ne commenceI'autonettoyage. Ladc!colorationeatnormale
et n'affecterapasla performancedu four.
Remarques :
• Si la portedufour n'estpasferm6e,lemot_door_ (porte)
clignote_ I'afficheuret lefour c!metdesbipsjusqu'aceque la
portesoitferm(!eet que I'onappuie_ nouveausur
Clean(Nettoyage).
• S'il s'c!couleplusdecinqsecondesentrele momentoQI'on
appuiesurCleanetcelui oQI'on appuiesurla touche
AutosetO(Programmationautomatique),I'afficheurretourne
automatiquementa I'affichagepr6c6dent.
• Laportedu four setrouveraendommag6esi I'on forceson
ouverturealorsque le mot LOCKest encoreaffichc!.
Chapeauxde br_leur et brQleurs_ gaz =
Chapeaux de brSleur amovibles
• Laisserle brQleurrefroidir. Enleverlechapeaude brQleurpour le
laverclansde I'eausavonneuseavecun tampon _ r6cureren
plastique.Pourlossouillurestenaces,nettoyeravecun tamponnon
abrasif,savonneux,ou avecune @onge et lacr_mede nettoyage
pourtablede cuissonCooktopCleaningCreme*(produitn°
20000001)**.
• Ne pas effectuerle nettoyageau lave-vaisselleou dartslefour
autonettoyant.
Br_leurs_ gaz scell_s
• Nettoyerfr_quemment.Laisserle brOleurrefroidir. Nettoyeravec
du savonet un tampona r_curerenplastique.Pourlessouillures
tenaces,nettoyeravecun tamponsavonneuxet nonabrasif. Ne
pas agrandirou d(!formerlestrous.
• Veillera nepasintroduired'eaudanslesorificesdu brOleur.
• TravaillerprudemmentIorsdu nettoyagede I'allumeur.Si
I'allumeurestendommag_ou mouill_,losbr01eursde la tablede
cuissonne pourrontpass'allumer.
Grillesdesbr_leurs - porcelaine surlento
. Laverlesgrilles avecde I'eausavonneusetilde et un tampon
r_cureren plastiquenon abrasif.Pourlossouillurestenaces,
nettoyeravecun tampon en plastiquenonabrasif,savonneux,ou
avecune @ongeet lacr_mede nettoyagepourtablede cuisson
CooktopCleaningCreme*(produitn° 20000001)**.S'il restedes
souillures,appliquerde nouveaulacr_mepour tabledecuisson,
recouvriravecun essuie-touthumide,et hisser tremper pendant
30 minutes.Frotterde nouveau,rinceretfaire s6cher.
. Ne pas effectuerle nettoyageau lave-vaisselleou dartslefour
autonettoyant.
Zonede la consolede commandoet horloge
• Pourutiliserla fonction Verrouillagedescommandospour le
nettoyage,voirpage33.
• Essuyeravecun lingo humideet sdcher.Ne pas utiliserun agent
de nettoyageabrasifsusceptiblede rayerla finition.
. Onpout utiliserun produitde nettoyagedu verre,pulvdris_d'abord
sur un chiffon. NEPASprojeterle produit directementsur los
touchesde commandoeusur I'afficheur.
Boutons de commande
• Placerchaqueboutona la positiond'ARRET,et retirerchaque
boutonen letirant.
• Laver,rinceretfaires_cher.Ne pas utiliserun agentdenettoyage
abrasifsusceptiblede rayerlafinition.
*Les nomsde marquesont desmarquesd@os_!esdesdiff_rents
fabricants.
** Pourcommanderdirectement,composerle 1-877-232-6771E.-U.
ou 1-800-688-8408Canada.
26

• Fairefonctionnerbri_vementchaquebrQleurpourvc!rifierquele
boutona€!t6correctementrc!installc!.
Tablede cuissonet tableau de commande- 6mail vitrifi6
L'6mailvitrifi_ estdu verrelidau m6tal parfusion.IIpoutsefissurerou
s'_caillerencasde mauvaiseutilisation.IIest r6sistantauxacides,mais
pustotalement inattaquableparleaacides.Touslosproduitsrenvers6s,
en particulieracidesou sucrc!s,doivent 6treessuy6simm6diatement
avecun lingosec.
• Unefois refroidi,laveravecde I'eausavonneuse,rincerets6cher.
• Nejamais essuyerunesurfacetilde ou chaudeavecun linge
humide.Cecipourrait lafissurerou I'_cailler.
• Nejamais utiliser de nettoyantspour four, d'agentsde nettoyage
caustiquesou abrasifssur lefini ext6rieurde la cuisini_re.
Panneauxlat6raux,tiroir de remisageet poign6esde porte-
6mail point
• Unefois lespi_cesrefroidies,leslavera I'eausavonneusetilde,
rinceretsc!cher.Nejamais essuyerunesurfacetilde ou chaude
avecun lingehumide,ceci pouvantendommagerla surfaceet
entrainerune brQlurepar la vapeur.
• Pourlostachesrebelles,utiliser desagentsde nettoyage16g6rement
abrasifscommelap_teaubicarbonatedesoudeouBonAmi*.Be
pas utiliserde nettoyantsabrasifs,caustiquesou 6nergiquescomme
losnettoyantspour four ou lostamponsen lained'acier.Cesproduits
raieraientou endommageraientdefagonpermanentela surface.
Remarque : Udliserun lingoeu un torchonsec pour essuyer los
produits renvers_s,surtout s'ils sent acides eu sucr#s. La
surface peurrait se d#colererou se terairsi lasalet# n'#tait pus
imm#diatement enlev#e. Ceciest parUculi#rement important
clans/e casdesurfaces blanches.
Hublotet porte defour enverre
• Eviterd'utilisertrop d'eau,qui risqueraitde s'infiltrersous ouderriere
leverreetde tacher.
• Laver_ I'eauetausavon.Rinceravecde I'eaupropreet sc!cher.Un
produitde nettoyagedu verrepout6treutilisc!enlevaporisant
d'abord surun lingo.
• Ne pusutiliserde produits abrasifscommetampons_ r_curer,laine
d'acierou produit de nettoyageen poudrequi risqueraientderayer
leverre.
int6rieur de four
• Exc!cuterlesinstructionsprdsentc!esauxpages24-25pour
I'autonettoyagedu four.
Grillesdu four
• Nettoyeravecde I'eausavonneuse.
• Eliminerlossouillurestenacesavecune poudrede nettoyageou un
tampon _ r_curersavonneux.Rinceret faires(!cher.
• Si lesgrillessont laiss6esdunsle four pendantle cycle
d'autonettoyage,oliossed_colorentet peuventne plustr_s bien
glisser.Si ceciseproduit,appliquer paressuyageun peu d'huile
v6gc!talesur la grille etsossupportsen reliefpourfaciliter le
mouvement,et enleverI'exc_sd'huile.
Acier inoxydable(curtainsmod_les)
• NEPASUTILISERDE PROBUITSDENETTOYAGECONTENANT
DU JAVELLISANT.
• NEPASUTILISERDE NETTOYANT$_ ORANGE_ OUABRA$1F$.
• TOUJOURSESSUYERDAN$ LESEN$DELA TEXTUREDE
L'AClERLOBS#U NETTOYAGE.
• Nettoyagejournalier/salet6 16g_re- Essuyeravec I'undes
produitssuivants:eausavonneuse,vinaigreblanc/eau,produitde
nettoyagepour verreet surfaceFormula409*ou un produit
semblablepourverre- avecun lingesoupleetune @onge.Rinceret
s6cher.Pourpolir et enleverlosmarquesdedoigts,faire suivrepar
unevaporisationde Magic Spray*pour acierinoxydable(produitn°
2OOOOOO8]**.
" Salet6 mod6r6e/6paisse - EssuyeravecI'un desproduitssuivants:
BenAmi*,SmartCleanser*ouSoft Scrub*- _ I'aided'un lingesouple
ou d'une@onge humide.Rinceret s6cher.Leatachesrebelles
peuvent6treenlev_esavecun tampon multi-usagesScotch-Brite*
humidifi_!.Frotteruniform_mentdartsle sensdu m_tal.Rinceret
sScher.Pourredonnerdu lustreet retirerlesrayures,fairesuivrepar
unevaporisationde Magic Spray*pour acierinoxydable.
• D6coloration- A I'aided'une@onge humidifi_eou d'un lingo
souple,essuyera I'aidedu nettoyantCameo*pour acierinoxydable.
Rincerimm_!diatementet s_!cher.Pourenleverlosmarqueset
redonnerdu lustre,faire suivrepar unevaporisationde Magic Spray*
pouracierinoxydable.
*Les nomsde marquesont desmarquesd@os_esdescliff,rentslubricants.
** Pourcommanderdirectement,composerle 1-877-232-6771E.-U.ou 1-800-888-8408Canada.
Porte du four
Remarque : Onpeutpercevoirunecertaine{{_lasticit_>>Iorsde la
fermeturede laportedu fourd'une cuisini_reneuve;ceci est
[norma;coteffetdisparaitprogressivement.
Hublot du four
Pour proteger le hublot de la porte du four :
1. Ne pasutiliserde produits nettoyantsabrasifscommedestampons
r_cureren lained'acierou desproduitsde nettoyageen poudre
qui risqueraientde rayerle verre.
2. Ne pusheurterlehublotenverreavecun ustensile,un articlede
mobilier,unjouet, etc.
3. Ne pusfermerla portedufour avantque lesgrillesnesoient en
placedunsle four.
Touted_gradationdu hublotdeverre- rayure,choc,tension,etc.-
peutaffaiblir sastructureetaugmenterle risquede brisa unedate
ult_rieure.
27

Pieds de r glage de I'aplomb
PIED DE REGLAGE
DEL'APLOMB
D placement d'un appareil
gaz
Lesraccordsdesappareilsa gazservant_ branchercotappareil
I'alimentationdegazne sont paspr@uspour 6tred@lac6s
continuellement.Unelois I'appareilinstall6,NEPASle d@lacerde
fwon r@6t6epourle nettoyerou lechangerde place.Si cet
appareildoit6tre d_m_nag6et/ou enlev_pour 6trerc!parc!,suivre la
m_thodedc!critedartslosinstructionsd'installation.Pourtoute
information,prendrecontactavecleservice_ la clientelede Maytag
au 1-800-688-9900E.-U.ou 1-800-688-2002au Canada.
IIfaut que le piedarri_rede la cuisini_resoit engag6dansla bride
antibasculementpourque la cuisini_rene puissebasculer
accidentellement.
Lampe du four
Pour rempiacer I'ampoule du four :
1. Apr_sle refroidissementdu four, CABOCHON
maintenirle cabochontout en
enlevantla piScemc!tallique
qui la maintienten place.
Rernarque : Lecabochon
tomberasi on ne le maintient
pasen place.
2. Enleverlecabochon
et I'ampoule.
3. Installeruneampoulede/40watts pour appareilm6nager.
4. R6installerlecabochonet lefil m6talliquede retenue.
5. R6tablirI'alimentationdelacuisini_re.R_glerde
nouveauI'horloge.
"_ RESSORTDERETENUE
lfil m#tallique)
Raccordement lectrique
Losappareilsn_cessitantune alirnentation
_lectrique comportentunefiche _ trois
broches raise_ laterre qui doit _trebranch_e
directementdartsune prisede 120volts_ trois
cavit6set correctementraisea la terre.
Toujoursd4brancherI'appareilavantd'yfaire
de I'entretien.
Lafiche a trois brochesraisea laterrefournit une protectioncontre
losd_chargesc!lectriques.NEPASCOUPERNI ENLEVERLA
BROCHEDETERREDU CORDOND'ALIMENTATION.
Si laprisenecomporteque deuxcavitc!s,n'estpasmise_ laterre
ou n'estpasappropri_e,le propri_tairede rappareJl a la
responsa-bilit_defaire remplacer la prisepar ane prise
trois cavit_scorrecternentraise_ la torte.
Tiroir de remisage
Letiroir de remisagepeut6treenlevc!pour vouspermettrede
nettoyersousla cuisiniSre.
D_pose :
1. Vider letiroir et le tirerjusqu'_la positionde la premierebut6e.
2. SouleverI'avant.
3. Tirerjusqu'_ laposition de lasecondebutc!e.
4. Saisirle tiroir par lesc6t6set soulever/tirerpour I'extraire.
R_installation :
1. InsUrerlesextrc!mit6sdesglissi_resdu tiroir danslesrailsdela
cuisini_re.
2. SouleverI'avantdu tiroir et pousserdoucementjusqu'ala
positionde lapremi6rebutSe.
3. Souleverde nouveauletiroir et le pousserpour leformer.
28

Pourla plupartdes problbroesobservbs, essayerd'abord los
solutionspossibles,_ droite.
• V_rifierque loscommandosdufour sentcorrectementrdgldes.
• Vdrifiersile fourestbienraccord6au circuit61ectrique.
• Inspecter/rCarmerle disjoncteur.Inspecter/remplacerlosfusibles.
• ContrOlerlasourced'alimentation61ectrique.
Un br_leur de surfacenes'alluroepas.
° Vdrifierque I'appareilestcorrectementraccord6_ la
sourced'dlectricit&
° DCterminersi I'alimentation61ectriqueestinterrompue(fusiblegrilld
disjoncteurouvert).
° Vdrifierque I'allumeureatsecetqu'il dmetdes6tincelles.LebrQleur
nepouts'allumersi I'allumeurestendommagC,souill6ou mouill&Si
I'allumeurne gdn_repasd'dtincelles,ramenerleboutonde
commandoa la positionOFF(ArrCt].
Flaroroesnon uniforroes.
• Orificesdu brOleurobstruCs.
S_paration entrelos flaroroeset le brQleur.
° Veillera placercorrectementI'ustensilesur lagrilledu brQleur.
R_sultats decaissonau fourcliff, rents des attentes ou de ceux
produitspar lefourantbrieur.
• Vdrifierque latemperaturesClectionndeestcorrecte. Veiller
prdchaufferlefoursi ceciestdemandddansla recette.
• DCterminersi 1'Cventdufour estobstruC.Voir sonemplacement
page39.
° S'assurerque la cuisiniCreestd'aplomb.
° Losrdglagesdetempdraturevarientsouvententreun four neufet le
four qu'il remplace.Onobservesouventuned@ivedu r_glagede
tempCratured'unfour _ mesurequ'il vieillit;il poutdevenirpluschaud
ou moinschaud.Voirpage38losinstructionsd'ajustementde la
temperaturedu four.Reroarque:11n'estpusutiledemodifierle
r_glagedetemp@aturesi lavariationn'affectequ'uneou deux
recettes.
° Utiliserlosborisustensiles.LosustensilesfoncCsdonnentun
brunissementde couleurfoncde,leaustensilesbrillants,un
brunissementplusclair.
• Vdrifierlapositiondesgrillesetdesustensiles.Lorsde lar@artition
sur deuxgrilles,nepassuperposerlosplats.Veiller_ hisser un
espacede2,5_ 5 cm (1a 2 pc] entrelosplatset losparoisdu four.
• ContrClerI'utilisationdefeuilled'aluminiumdanslefour. Nejaroais
recouvrircompletementunegrilledu fouravecdela feuille
d'aluminium.Placerun petit morceaude feuilled'aluminiumsurla
grille sousleplatpourrdcupdrerlosmati_resrenversCes.
R_sultats incorrectslotsde lacaissonaugril, ou _roission
excessivedefurore.
° DCterminerlapositiondesgrilles.Losalimentspeuvent6tretroppros
desflammes.
° Utilisationincorrectedefeuilled'aluminium.Nejaroais garnirla grille
de I_chefriteavecde lafeuilled'aluminium.
° Enleverrex@sdegraissesurlapiecedeviandeavantlacuisson
au gril.
• Utilisationd'une I_chefritesouillde.
• Prdchaufferlefour pendanttrois minutesavantdeplacerle platduns
lefour.
• Portedu fourfermdedurantlacuissonau gril.
Iropossibilited'autonettoyagedefour.
, Ddterminerque rappareiln'apas6tc!programmdpour unautonettoyage
diffdrC.Voir page25.
• V_rifierque laporteestfermCe.
• Vdrifiersi lacommandoesten modesabbat.Voir page37.
, Lefourestpout6tre_ unetempCraturesup@ieurea 205°C (400°F].La
tempc!raturedu fourdolt 6treinfCrieure_ 205°C(400° F)pour pouvoir
programmerun cycled'autonettoyage.
Le four ne se nettoJepuscorrecteroent.
° Untempsdenettoyagepluslongpout6trendcessaire.
° Onn'apusdlimin_avantI'op_rationd'autonettoyagelosaccumulations
excessivesde rdsidus,particuli_rementlosr_sidusd'alimentsacides
OU sucres.
Laportedufournese deverrouillepusapr_s rautonettoyage.
• L'int@ieurdu fourestencorechaud.Attendreenvironune heureapr_s
I'ach_vementdela pdrioded'autonettoyage.IIestpossibled'ouvrirla
porteapr_sla disparitiondu messageLOCK[Verrouillage]surI'afficheur.
• Loscommandoset la portesentpeut-_treverrouilldes.
Voir page33.
Accumulation d'huroidit_sur le hublotou vapeursortant der_vent.
° Ceciest normaldurantlacuissond'alimentscontenantbeaucoupd'eau.
• Utilisationexcessived'humidit8Iorsdu nettoyagedu hublot.
Eroissiond'uneforte odeur ou de furore lots dela roise enroarcbe
du four.
• Ceciest normalpourun fourneufetdisparaitapr_squelques
utilisations.Uncycled'autonettoyage{{brOlera_plus rapidementles
odeurs.
• Laraiseen marched'un ventilateuraidea retirerfumdeet odeurs.
• Presencedesaletdssurla sole.Procdder_ un autonettoyage.
Codesd'anoroalie.
• LosmotsBAKE(Cuissoncourante)ou LOCKpeuventclignoter
rapidement_ I'afficheurpourprdvenird'uneerreurou d'unprobl_me.Si
le motBAKEou LOCKparaita I'afficheur,appuyersurlatouche
CANCEL(Annuler].Sile motBAKEou LOCKcontinueaclignoter,
d_brancherI'appareil.Attendrequelquesminutes,puisrebrancher
I'appareil.Sile mot continue_ clignoter,d_brancherI'appareiletprendre
contactavecun r@arateurautorisd.
• Sile four esttr_s sale,losflamm_chespeuventproduireun code
d'anomalieau coursdu cycled'autonettoyage.Appuyersur latouche
CANCELet laisserlefour refroidircomplStement,essuyerla salet_!en
ex@spuisreprogrammerI'autonettoyage.Sile coded'anomalie
rdapparait,prendrecontactavecun r@arateurautoris&
Des bruits se font entendre.
• Lefourfaitplusieursbruitsfaibles.IIest possibled'entendrelesrelaisdu
fourqui semettenten marcheets'arr_tent.Ceciestnormal.
• Alorsquelefourserdchauffeetse refroidit,il estpossibled'entendre
desbruitscorrespondant_ la dilatationet_ la contractiondespiCces
mStalliques.Cecieatnormaletn'endommagepasI'appareil.
II n'ya ni hip niaffichage.
• Lefour est peut-_treen modesabbat.Voir page37.
SAb clignote puisreste ailuro&
, Lefour est en modesabbat.Pourannuler,appuyersur latouche Clock
(Horloge)et maintener-laenfoncSependantcinqsecondes.
29

Culssonsurlesurfece
LO[Basse]: S'utilisepour lemijotageou le
maintiende latemp6ratured'un mets,ou pour
lafusion de chocolatou beurre.Lorsquele plat
ou I'ustensileest couvert,un d6butdecuisson
peutseproduireavecla puissancede
chauffageLO. Pour r6duirela puissancede
chauffage,tourner le bouton) la positionOFF
(Arr6t).V6rifierlastabilit6desflammessurle
br01eur.
Commandes de la
surface de cuisson
Allumage sans flamme
de veille BBAPEABOEBB0'E.B
Ledispositif d'allumagenefait
interveniraucuneflammedeveille.
ChaquebrOleurde la tablede cuisson
comporteun allumeurpar6tincelle.
TravaillerprudemmentIorsdu
nettoyageautourdesbrOleursde _(_z_,
latable de cuisson, o,nct_//_,P.LL.Z_/\\
Siun brOleurde latable de -_._v__..__A,,
cuissonne s'allumepas,d6terminersi
I'allumeurestbris&sailou mouill6. BASEDUBRI)LEUR
Boutons de cornmande de la
surface de cuisson
Onutilise cesboutonspour commanderI'allumagedesbr01eursde
surface.On peutr6glerchaqueboutonatoute positionentre les
positionsextr6mesLO et HI.Onpeut percevoiruneddtentede
calage_ la position HI.Onpeutchoisirtoute positionde rdglage
entrelesdeuxpositionsextr6mes.
141[Elev6e) :S'utilise pour porter un liquide
dbullition ou atteindre la bonne pression dans un
autocuiseur. R6duire ensuite la puissance de
chauffage apr6s le ddbut de I'dbullition ou de la
cuisson des aliments.
Unepuissancede chauffageintermc!diaireest
utilisc!epour la poursuitede la cuisson.Les
alimentsne cuisentpasplus rapidementsion
utilise une puissancedechauffageplus61ev6eque
n_cessairepour le maintiend'unedoucec!bullition.
L'eaubouttoujours _ la m6metemp(grature,que
I'c!bullitionsoit tranquilleouvigoureuse.
Ungraphiqueprosde chaqueboutonidentifiele brOleurde [_{_
surfacecommand_par ce bouton.Parexemple,le Front m[_
graphiquea droit identifiele br01euravant/gauche.
R_glage des commandes:
La puissancede chauffagea employerd6penddu typeet de lataille
de I'ustensileutilisd.
1. Placerun ustensilesur lagrille du brCfleur.
Si aucunustensilen'estplac6sur lagrille du brt'Jleur,les
flammespeuventavoirtendance_ ses_parerdu br01eur.
2. Appuyerettournerleboutonclanslesensanti-horaire,jusqu'_ la
position LITE[Allumage).
• On peutpercevoirle cliquetiscorrespondant_ la production
desdtincelles,et le br01eurs'allume.(Lescinqallumeurs
produisentdes6tincellesIorsqu'onplacele boutondeI'undes
brOleurs_ la positionUTE.]
3. Apr_sI'allumagedu br0leur,r6glerlataille desflammesselonle
ddsiren tournant le boutondecommande.
L'allumeurcontinue_ produiredes6tincellesaussiIongtemps
que le boutonest a la positionLITE.
UtUisation durant une panne
d'61ectricit6
1. Approcheruneallumetteenflamm_!edu brOleur_ utiliser.
2. Enfonceret fairetournerlentementle boutonde commande
jusqu'_la positionLITE.
3. Ajuster lesflammes_ lataille d6sir_e.
3O

Surface de cuisson
Pour _viter ia formation de taches ou un
changement de couleur de la surface de
cuisson :
• Nettoyerlasurfacede cuissonapr_schaqueutilisation.
, EnleverlesrOsidusrenversOsde produitsacides
ou sucrOsd_sque lasurfacede cuisson
_ refroidi;cesproduitsrenversOspeuvent_aire
_ changerla couleurde I'_mail.
_ A la diff@enced'unecuisini_redotOede
_J brQleursa gazstandard,la surfacede cuisson
_' de cettecuisini_ren'estpasamovibleou
relevable.Alepas tenter de releverla surface
de cuisson, quelle qu'en soit la raison.
Br leurs & 9az scell s
Lesbr01eursscellc!sde lacuisini_resontfixOssur lasurfacede
cuisson;ils nesont pasconguspour 6treenlevc!s.Commeles
brOleurssont scellOs,un produitquidOborded'un ustensilene
s'infiltrerapassousla surfacede cuisson.
OndevraitcependantnettoyerlesbrOleursapr_schaqueutilisation.
Latote du br01eurs'enl_vefacilementpour 6tre nettoyOe.(Voir les
instructionsde nettoyage_ la page260
Pourle bonfonctionnementdu brOleur,le chapeaude brCJleurdolt
6trecorrectementplacc!sur la basedu brOleur.
Br=31eurde haute performance
Power Boost*
Cettecuisini_reestdotOed'un br01eurde
hautevitesse,plac6_ I'avantdroit. Ce
brQleurpermet unecuissonrapidequi peut
servir_faire bouillir rapidementde I'eauou
cuireune grandequantitc!d'aliments.
• Powe_
O0 _oo_
O_ Fiont
gr leur de 0o ,o •
Cebr01eurestsituc!_ la positioncentrale. /'_ i!=',
J
II offre uneplusfaiblepuissancepour la \-_, ',il
cuissonde saucesddlicatesou la fusion _-_x
du chocolat. ""_
Lapuissancethermique(BTU)desbrOleursest diff4rente/orsde
I'alimentationaugazdep4troleliqu4fi4.
Grilles de br leur
Avantune opOrationde cuisson,v_rifierque la grille est
correctementplacOe.Lorsde [installation desgrilles,placer
I'extrc!mit6avecpattesversle centre,au niveaudesbarresdroites.
Unegrille de brCfleurincorrectementinstallOepeut 6caillerI'c!mailde
la surfacede cuisson.
Ne pasfake fonctionner un brSleursans qu'un ustensilesoit
plac_ sur la grille.L'Omailde la grille peut s'Ocailler s'il n'y a
aucun ustensilecapabled'absorberla chaleur 6rnise par le
br_leur.
TravaillerprudernmentIorsqu'ilfaut remuerdesalimentsdansun
ustensileplac6sur la grille de brCfleur.Lesgrillescomportentun fini
lissequi facilitele nettoyage.L'ustensilepeutglissersur lagrille si
on netient pasfermementla poignOe;cecipourrait provoquerun
renversementd'alimentschauds,et susciterun risquede brCflure.
MOmesi lesgrillesde brQleursonttr_s durables,ellesperdront
progressivementleur lustreetchangerontde couleur,du fait des
temp@aturesc!lev_!esauxquelleslesbrOleurslesexposent.
Reinarques :
* UnbrOleurconvenablementr_gk!et dont lesorificessont
propress'allumeen quelquessecondes.Lorsde I'alimentation
au gaznaturellesflammessontbleues,avecun coneinterne
bleuintense.
Si lesflammesd'un br01eursontjaunesou si la combustion
est bruyante,leratioaidgaz peut6tre incorrect.Demander
un techniciend'effectuerle r_glage.(Lagarantiene couvre
pasce r_glage.)
Lorsde I'alimentationaugazdep_!troleliqudi_!,il est
acceptableque I'extr_mit_desflammessoitjaune.Ceciest
normal;aucunr_glagen'estn_!cessaire.
o Aveccertainstypesdegaz,on peut percevoirun petit bruit
d'explosionIorsde [extinction d'un brQleurde surface.Ceci
est normal.
o Si onfait passerrapidementle boutonde commandede la
position HI (ElSv4e)_ la positionLO(Basse],lesflammes
peuvents'Bteindre,particuli@rementsi le br01eurestfroid. Si
ceci seproduit,placerle boutonde commande_ la position
OFF(Arr@t)et attendrequelquessecondesavantd'allumer de
nouveaule br_fleur.
o Ajuster la puissancedechauffagedetelle maniBreque les
flammesned_bordentpasa la p@iph_!riede I'ustensile.
31

@issondenslefour
Tableau de commande
A B C
Clean
D E F
4 s6oo,)
Letableaude commandeestcongupourfaciliterlaprogrammation.Lafen_tred'affichageindique I'heure,lesfonctions avecminuterieet
fonctions du four. Letableaude commandereprdsentdcomprend laconvectionet d'autrescaractdristiquessp6cifiquesau module.(Lestyle
peutvarierscion le module.)
iiiiiiiiiiiiiiiiiiiii
iCi!ii
ilFi
]
[Bake[Cuisson
courante)
Broil(Gril)
Clean(Nettoyage)
Delay(D6marrage
diff_re)
Touches
numeriques
Autoset
(Programmation
automatique]
KeepWarm
(Maintienauchaud)
'Convect
(Convection)
i
[Cook& Hold
[(Cuissonetmaintien
Favorite(Favori]
Timer(Minuterie]
Clock[Horloge]
OvenLight
(Lampedufou0
CANCEL[Annule0
S'utilisepourlacuissoncouranteetle
r6tissage.
S'utilisepourlacuissonaugriletlerissolage
surpartiesup6rieure.
S'utilisepourprogrammerlecycle
d'autonettoyage.
Programmelefourpourd6buterunecuisson
ouun nettoyageplustard.
S'utilisentpourprogrammertemperatureset
durees.
S'utilisepourprogrammerrapidementles
temp6ratures.
S'utilisepourmaintenirauchauddanslefour
lesalimentscults.
S'utilisepourlacuissonetlerOtissageavec
convection.
Pourcuirependantunedur6epr66tablie,avec
maintienauchaudpendantuneheur_.
S'utilisepourprogrammeretsauvegarderune
methodeparticulieredecuissonetmaintien.
Programmela minuterie.
S'utilisepourprogrammerI'heuredujour.
S'utilisepourallumerou6teindrela lumiere
dufour.
Annuletouteslesoperationssaufminuterie
ethorloge.
Utilisation des touches
• Appuyersur latouched_sir_e.
• Appuyersur lestouchesnum_!riquespour entrer ladur_!eou la
temp_!rature.
. Appuyersur latoucheAutoset 0 pour entrerlatemp6rature.
• Unbip retentitIorsqueron appuiesurunetouche.
• Undouble hip retentiten casd'erreurde programmation.
Remarque: Quatresecondesapr_savoirentr6 leschiffres ou
letoucheAutoset O,la dur_!eou latemp_!ratureseront
automati-quementenregistr6es.Si plusde 30secondess'_coulent
entre lapressionsur unetouche de fonctionetcellesur les
touchesnum(griquesou la toucheAutoset O,lafonctionest
annuE!eet rafficheur revient_ I'affichagepr6c_!dent.
Horloge
L'horiogepeut_treprogramm_epour afficherla durocdansun
formatde 12ou 24 heures.L'hoflogeest programm_eenusinepour
un formatde 12heures.
Changement de I'horloge _ un format de 24 heures :
1. AppuyersurlestouchesCANCEL
etFavorite et maintenirlapression
pendanttroissecondes.
. 12 Hrclignotea I'afficheur.
2. Appuyersurla toucheAutoset 0 pour
s(glectionner24Hr; appuyerde nouveaupour
choisir12Hr.
3. ProgrammerI'heureensuivantles
instructionsdonn6esdartsla section
R4glagede I'horloge.
0
,&utoset
32

R_glage de I'horloge
1. Appuyersurla toucheClock (Horloge).
• L'heureclignote a I'afficheur.
2. Appuyersurlostouchesnumc!riquesappropri6espour
programmerI'heuredujour.
• Deuxpoints clignotenta I'afficheur.
3. Appuyer) nouveausur latouche Clockou attendre
quatresecondes.
• Losdeuxpointsrestent.
Lorsquele courant61ectriquearriveou apr_suneinterruption de
courant,la derni6reheureavantI'interruptionde courantvaclignoter.
PourrappelerI'heuredujour Iorsqu'uneautrefonctionde durc!e
s'affiche,appuyersur latouche Clock.
L'heurede I'horlogenepout 6trechang6eIorsquelefour a_t6
programm6pour unecuissonou un nettoyagediffc!rc!ou pour la
fonctionde cuissonet maintien.
Annalation de I'affichage de I'heare :
Si I'onne d_sirepasI'affichagede I'heuredu jour :I_(_ANCFI"_,,_,-,--==,,
Appuyersur lostouchesCANCEL(Annuler)et |_
Clock et losmaintenirainsi pendanttrois |
secondes.L'heuredujour disparaitde I'afficheur. [
LorsqueI'affichagedeI'heureest annul& appuyer
surla toucheClock pourafficher bri_vementI'heuredu jour.
LorsqueI'affichagedeI'heureestannul& apr_s15minutes,lefour
passeen modeAttente pour6conomiserde I'dnergie.L'afficheursera
viergeet 1'6clairagedu four ne fonctionnerapas.Pour<{r6veiller_>los
commandos_ partir du modeattente,appuyersur n'importequelle
touche.Undoublehip retentira.
R_aflichage de I'heare :
Appuyersur lostouchesCANCELetClock etlosmaintenirainsi
pendanttroissecondes.L'heuredu jour rc!apparaita I'afficheur.
Nlinuterie
Laminuteriepeut6treprogrammc!edeune minute (0:01)jusqu'_
99 heureset 59 minutes[99:59).
La minuteriepout6treutilisdeind@endammentdetoute autre
activit6du four. Ellepout 6treaussiprogramm6ealorsqu'uneautre
fonctiondu four esten cours d'utilisation.
La minuterienecommandopaslefour. Ellenesort qu'_ dmettre
deships.
Programmation de la minaterie :
1. Appuyersurla toucheTimer (Minuterie).
• 0:00et le mot TIMERclignotent_ I'afficheur.
2. Appuyersurlostouchesnum6riquesappropri6esjusqu'_ceque
I'heurejusteparaissea I'afficheur.
• Losdeuxpointset le motTIMERcontinuentaclignoter.
3. Appuyer) nouveausur latouche Timer ou attendrequatre
secondes.
• Losdeuxpointss'arr6tentde clignoteret le d6comptede la
dur6ecommence.
• Laderni_reminutedu dc!compteseraaffich6esousforme
de secondes.
4. A lafin de ladur_e programmc!e,un bip longretentitet lemot
End (Fin)seraaffichc!.
5. Appuyersur latouche Timer pour effacerI'afficheur.
Annalation de la minaterie :
1. Appuyersur latouche Timeret lamaintenir
ainsipendanttroissecondes.
OU
2. Appuyersur latouche Timeret surla touche
numc!rique<_0 >>. Autoset
Verrouillage des commandos
et de la porte du four
La portedu four etlostouchespeuvent6treverrouillc!espourdes
raisonsde s_curit& nettoyageou pour emp6chertoute utilisation
non souhait_e.Lostouchesnefonctionnerontpassioliossont
verrouill6es.
Sile four esten coursd'utilisation,lostoucheset laportenepeuvent
6treverrouill6es.
L'heureactuelledu jour resteraa I'afficheurIorsquelostoucheset la
porteserontverrouill6es.
Verroaillage :
Appuyersur lostouchesCANCELetCook &
Hold (Cuissonet maintien)etlosmaintenir
ainsipendanttroissecondes.(Appuyerd'abord
surla toucheCANCEL.)
• OFF(Arr6t)paraita rafficheur.
• Lemot LOCK(Verrouillage)clignote
Iorsquela porteesten coursde verrouillage.
D6verroaillage :
Appuyersur lostouchesCANCELetCook & Holdet losmaintenir
ainsipendanttroissecondes.(Appuyerd'abordsurlatouche
CANCEL.)Le mot OFFdisparaitde I'afficheur.
Remarqae : Laportedufour et lestouchesnepeuvent6tre
[verrouillc!essi la temp_!raturedu four est de205° C(400° F)ouplus.
Codes d'anomalie
LosrootsBAKE(Cuissoncourante)ou LOCKpeuventclignoter
rapidement_ I'afficheurpour pr_veniren casd'erreurou de
probl_me.Sitel estle cas,appuyersur latouche CANCEL.Siles
rootsBAKEou LOCKcontinuentaelignoter,d_!brancherI'appareil.
Attendrequelquesminutes,puis rebrancherI'appareil.Siun des
rootscontinuea clignoter,d_!brancherI'appareiletprendrecontact
avecun r@arateurautoris&
Cuissor| courar|te
Programmation de la caisson courante :
1. Appuyersurla touche Bake.
• Lemot BAKEclignote.
• 000clignote _ I'afficheur.
2. %lectionner latempSraturedu four. Appuyersur
33
Bake
0
latoucheAutoset 0 (Programmationautomatique)pour Autoset
175° C(350° F)ou sur lostouchesnum_!riquesappropri_es.

• ChaquepressionadditionnelledelatoucheAutoset0
(Programmationautomatique}augmentelatempc!raturede
15°C(25°F}.
• Latemp6raturepeut6treprogramm6ede 75_ 285° C
(170_ 550°F}.
3. Appuyerdenouveausur latouche Bake [Cuissoncourante]ou
attendrequatresecondes.
• Lemot BAKEs'arrCtede clignoteret s'allumea I'afficheur.
• 38° [100°}ou la temperaturer@lle du four,si latempCratureest
de plusde 38 °C(100°F},seraaffich@.Elleaugmenterapar
intervallede 3 °C(5 °F}jusqu'aceque la tempc!rature
pr@rogrammc!esoit atteinte.
4. Laisserlefour pr@haufferpendant8 _ 15minutes.
• LorsquelatempCratureprogramm@pour lefour est atteinte,
un hip long retentit.
• Latempc!ratureprogrammCes'affiche.
• Pourrappelerla tempc!ratureprogramm@pendantle
pr@hauffage,appuyersurla toucheBake.
5. Placerla nourrituredansle four.
6. VCrifierI'avancementde la cuissona la durc!eminimalede
cuisson.CuireplusIongtempsau besoin.
7. Lorsquelacuissonest termin@,appuyersur la
touche CANCEl. (Annule0.
8. Retirerla nourrituredufour.
Differences de caisson entre I'ancien four et
le nouveau
ii estnormalde remarquerquelquesdiffCrencesdansladurCede
cuissonentreunfour neufet unfourancien.VoirAjustementdela
temperaturedu four_ la page38.
Remarques :
, Pourchangerla temperaturedu fourpendantlacuisson,appuyer
sur Bake, puissur latoucheAutoset Oou lestouches
numCriquesappropri@sjusqu'acequela tempCratured_sir@
soit affichCe.
, Pourchangerla temperaturedu fourIorsdupr_chauffage,
appuyerdeuxloissurla touche Bake, puissur latouche
Autoset 0 ou surlostouchesnumCriquesappropri@sjusqu'_
ceque la tempCratured@ir@soit affichc!e.
, Si I'onoublied'arrCterlefour, il s'arrCteraautomatiquement
apr_s12heures.Si I'ond@ired@activercettefonction,voir
page37.
Caisson et rStissage avec
convection (certains modeles)
Pourla caissonavec convection,entrer la temperature de
caissonnormale. LacommanderCduitautomatiquementla
tempc!ratureprogramm@de 15° C(25°F}.LatempCratureentr@
seraaffich@,l.e ventilateurde convectionse met en marche
unelois qae le four a fonctionn_ pendantenviron
cinqminutes.
Program[nation de la convection :
1. Appuyersur latouche Conveet [Convection}.
* Le mot BAKEet I'icOnedeventilateurclignotent.
* 000clignote_ I'afficheur.
F
Convect
0
Autoset
2. %lectionner latempCraturedu four. Appuyersur
la toucheAutoset 0 pour 175°C [350°F}ou surlos
touchesnumc!riquesappropri@s.
• Chaquepressionadditionnellesur latoucheAutoset0
augmentelatempCraturede 15° C[25°F}.Latempc!raturedu
four pout6treprogramm@de 75_ 285°C [170_ 550°F}.
3. Appuyeranouveausur latouche Conveetouattendre
quatresecondes.
• Le mot BAKE[Cuissoncourante}s'arrCtedeclignoter.
,38 ° [100°} ou latempCraturerc!elledu four,si latemperature
est de plusde38°C [100° F},seraaffich@.Elleaugmenterapar
intervallede3° C(5° F}jusqu'aceque la tempc!rature
pr@rogrammc!esoit atteinte.
• L'icOneventilateurse met_ tourner. (_)
4. Laisserle four pr@haufferpendant8a 15minutes.
, Lorsquela tempCratureprogramm@pour lefour estatteinte,
un hip long retentit.
, La tempc!ratureprogrammc!es'affiche.
• Pourrappelerla tempCratureprogramm_ependantle
pr@hauffage,appuyersur latouche Convect.
5. Placerla nourrituredanslefour.
6. VCrifierravancementde la cuissona la durCeminimalede
cuisson. CuireplusIongtempsau besoin.
7. Lorsquelacuissonest terminCe,appuyersur ,_
latouche CANCEL(Annuler}.
8. Rotiferla nourrituredufour.
Fleilrlarques :
•Les durc!esde rCtissagepeuvent varier selon les coupes de
viande.
• II n'est pas n@essairede pr@hauffer Iors du r0tissageavec
convectionde grosmorceauxde viande.
34

Caisson et maintien
Lorsde I'utilisationde I'optionCook& Hold(Cuissonet maintien),le
four semeta chaufferimrn6diatementune lois quala commandoa
_t6programrn6e.Puis,le fourcult pendantladurdespdcifide.Lorsque
cettedur6es'est 6coul6e,lefour maintientla nourritureauchaud
pendantune heureau maximum,puiss'dteintautomatiquement.
Programmation de Caisson et maintien :
1. Appuyersur latouche Cook& Hold.
• Le motHOLD(Maintien) clignotepour indiquerqua la
prograrnrnationde cuissonet maintienesten cours.
• 00:00clignote _ I'afficheur.
2. Sdlectionnerla dur_ed6sirdede cuissonen utilisantlos
touchesnum6riques.
• Le motHOLDcontinue_ clignoter.
• Ladur6es'allumeaI'afficheur.
• Ladurde pout6trerdgldede 10 minutes(00:10)_ 11heures
et59 minutes[11:59).
3. Alors que le mot HOLDclignote,appuyersur latouche Bake
(Caissoncourante)ou Convect (Convection)et
s61ectionnerla ternp6raturedu four.Appuyersur ......
latouche Autoset 0 [Prograrnmation Bake
autornatique)pour 175° C(350° F)ou sur los
touchesnum6riquesapproprides, r_
u
• Le motcorrespondanta lafonction
d6sir6eclignote. Autosd
• Latempdraturedu four peut6treprograrnrndede 75
285° C (170_550° F).
4. Appuyer_nouveausur la touchede fonctiondc!sir6eOUattendre
quatresecondes.
• Le motcorrespondanta lafonction ddsirc!eresteallurn&
• Ladur6e decaissonparait_ I'afficheur.
• Latempdraturer6elledu four seraaffich_ependant
le pr6chauffage.
• Latempdratureprograrnrnc!es'afficheIorsquele four
est pr6chauff&
Lorsqae la dar_e de caisson s'est _coal_e :
• Quatrebipsretentissent.
• LosrnotsHOLD(Maintien)et WARM(Chaud)s'allument.
• 75° (170°)parait_ I'afficheur.
• L'heuredu jour parait_I'afficheur.
Caisson et maintien diff r s
Avecla fonctiondiff6r_e,le four setmet _ cuireplustard dansla
journ_e.Programmerla dur6ed'attented6sir_eavantqua le four
nese matteen rnarcheet la dur6ede cuissond6sirc!e.Lefour
commence_ chauffer_ I'heures61ectionn6eet cult pour la
durdespdcifide.
Ladurde d'attentepout6tre prograrnm6ede 10minutes[00:10)
11 heureset 59 minutes[11:59).
Programmation d'an cycle de caisson et
maintien diff_res :
Appuyersur latouche Delay 1 (Diff6r6e). ]
1.
• Lemot DELAYclignotea I'afficheur. Delay
• 00:00clignotea I'afficheur.
2. A I'aidedestouchesnum6riquesappropri_!es,entrerla dur4e
d'attenteavantquane d4butele cycledecaissonet rnaintien.
3. Appuyersur latouche Cook& Hold.
• LesrnotsHOLD(Maintien)et DELAY
(Diff_!r6e)clignotenta I'afficheur.
• 00:00clignotea I'afficheur.
4. Entrerla dur4ed4sir4ede caissona I'aidedestouches
numdriques.
5. Appuyersur latouche Bake ou Convect............................................
6. Programmerla temp4raturedu fourddsirdeen Bake
appuyantsurla toucheAutoset Oou surles .......................................
touchesnurndriquesappropriSes.
• 175° (350°)s'allumeIorsqueI'onappuiesur la U
toucheAutoset0. Autosd
• Apr6squatresecondes,la dur_!ed'attente
entreeparaita I'afficheur.
, Lemot HOLDs'_teint.
, LesrnotsBAKEetDELAYrestentallumdspour rappelerqu'un
cyclede cuissonet rnaintiendiffdrdsa_t8programm&
Remarques :
• Ne pasutiliser{ecycledecuissonet rnaintiendiffdr_spourdes
articlesqui n_cessitentque le foursoitprdchauff_,comrneles
g_teaux,lespetits biscuitsetles pains.
• Ne pasutiliserle cycledecuissonet maintiendiff_r_!ssi le four
estd_!jachaud.
Apres ane heare de MAINTIEN AU CHAUD :
• Lefours'dteintautornatiquernent.
•Les rootsHOLDetWARMs'dteignent.
• Retirerla nourrituredu four.
Annalation de Cook & Hold _ tout moment :/._
Appuyersur latouche CANCEL.Retirerla nourriture
du four.
35

Maintien at=chat=d
Pourmaintenirau chaudclanslefour desalimentscultset chaudsou
pour r_chaufferpainset assiettes.
Programmation du Maintien au chaud :
1. Appuyersurla touche KeepWarm :Keep .............
[Maintienau chaud). \, warm
, Lemot WARM(Chaud)clignote_ I'afficheur.
° 000clignotea I'afficheur.
2. S_lectionnerla temp6raturede maintienauchaud. II
Appuyersurla toucheAutoset 0 (Programmation AuLoset
automatique)ou sur lostouchesnumc!riquesappropri6es.
° 75° (170°)s'allumeIorsqueI'on appuiesur latoucheAutoset0.
• ChaquepressionsurlatoucheAutoset0augmentela
temp6raturede 3°C (5° F).
Latemp6raturede maintienauchaud pout6tre
programm6ede 63_ 90°C (145a 190° F).
Le motWARMet la tempc!ratureseront affich6spendantque la
fonction estactive.
Annulation du rnaintien au chaud :
1. Appuyersur latouche CANCEL(Annule0.
2. Retirerla nourrituredufour.
Rellrlarqtles :
, Pourobtenirdesqualit6salimentaireset nutritivesoptimales,los
alimentsnedoiventpas6tregard6sau chaudplusde 1
2 heures.
, Pouremp6cherlosalimentsdedess6cher,losrecouvrirde
papieraluminium,sansserrer,ou d'un couvercle.
• Pourr_chauffer despetitspains :
- recouvrirlospetitspainsdepapieraluminiumsansserreret
losplacerau four.
- appuyersur lostouchesKeep Warm etAutoset O.
- r6chaufferpendant12a 15minutes.
• Pourr_chauf|er desassiettes :
- placerdeuxpilesde quatreassiettesmaximumdans lefour.
- appuyersur lostouchesKeep Warm etAutoset O.
- r_chaufferpendant5minutes,arr_terle four etlaisserlos
assiettesau four pendantencore15minutes.
- n'utiliserque desassiettespouvantallotat] four, _v6rifier
avecle fabricant.
- ne pas poserdesassiettestildes sur unesurfacefroide, los
changementsrapidesdetempc!raturepouvantcasser
I'assietteou lafendiller.
Ct=isson at= grii
Programmation de la caisson au gril :
1. Appuyersur latouche Broil (Gril).
Broil
° LesrootsBROILetSET
(Valide0clignotent_ I'afficheur.
2. Appuyersur latouche Autoset e unelois pour U
programmerun gril _temp6rature61evc!eou deux Autoset
fois pour programmerun gril atemp6raturebasse.
° LosrootsHI [EL6v6e)ou LO(Basso)serontaffichc!s.
• Sc!lectionnerHi broil (Grilatempc!rature6levee)[285° C
[550° F]) pourun gril normal.Sc!lectionnerLO broil (Gril
temp6raturebasso)(230° C [450°F]) pour un gril atemp(grature
inf6rieured'alimentsacuissonplusIonguecommela volaille.
3. Apr_squatresecondes,lefour semet en marche.
• LosmotsBROILet HIou LO resentallure&
4. Pourun rissolagemaximum,pr6chaufferle four pendant2 ou 3
minutesavantd'ajouterla nourriture.
5. Placerla nourrituredanslefour. Formerla portedufour.
6. Retournerla viandeune fois a la moiti6de la durc!ede cuisson.
7. Lorsqueraliment est cult,appuyersurlatouche
CANCEL.Retirerla nourritureet laDchefrite
du four.
° L'heuredujour rc!apparaita rafficheur.
Remarques :
• Pourde meilleursr_sultatslotsdu gril, seservird'un ustensile
prc!vupour cetype decuisson.
, Legril aurc!glageHI estutilis6 pour la majorit6desop6rations
de cuissonat] gril. Utiliserle gril aur6glageLOpour lacuisson
de metsdevantcuireplusIongtemps,afin de leurpermettre
d'6tre biencultssansrissolageexcessif.
, Pourchangerla temp4raturedu fourpendantla cuissonaugril,
appuyersur latouche Broil, puissur latoucheAutoset 0 pour
changerentrela cuissonau gril a tempc!raturec!levc!e(HI)et la
cuissonat]gril _temp6raturebasso(LO).
° Losdurc!esde cuissonau gril peuvent6treplus Ionguesavec
unetemp_!raturede gril inf_!rieure.
° Retournerla plupartdesalimentsIorsquela moiti_!de la dur6e
pr_M]epour lacuissonat]gril s'est_!couk!e.
36

Tableau de caisson au gril
Pr6chaufferlefour pendant2-3 minutes.
Boeul Bifteck,2,5cm[1pc) d'@aisseur 5 A point 15- 20 min.
5 Biencult 18- 24 rain.
Hamburger,2 cm [3/4 pc) d'@aisseur 5ou 6 Biencult 13- 18min.
Porc Bacon 5 Biencult 6 - 10rain.
Tranchedejambonpr6cuit, 5 Chaud 8 - 12min.
1,3cm (1/2 pc) d'@aisseur
C6telette,2,5cm (1pc) d'@aisseur 5 Biencult
Volaille Blancs,avecos 4 Biencult (Gril
Fruitsde met
Filetde poisson
Damede poisson,2,5cm (1 pc)d'@aisseur
Queuede homard,85 a ] 15g (3_ 4 onces)
5
5
5
Emiettement
Emiettement
Bien cult
22 - 26 min.
tempc!raturebasse)
30 - 45 rain.
8 - 12min.
10- 15min.
7 - 10min.
Fourobtenirunesurfaceext6rieuresaisie/brunieetun int6rieursaignant,i[peut6tren6cessaireder6duireletempsdecuissonsur[apremiereface,
etde r6duireladistanceentrelaviandeetla sourcede chaleur.
Remarque : Cetableaun'estqu'un guide desuggestions.Lesdurc!espeuventvarlet selonI'alimenta cuire.
Arret automatique/
Mode sabbat
Lefour s'arr6teautomatiquementapr_s12heuress'il a 6t6
accidentellementlaissc!en marche.Cettecaract6ristiquedes6curit6
peut6trearr6t6e.
Pour annulet I'arret 12 heures et fake fonctionner le
four en continu pendant 72 heures :
1. Appuyersurla toucheClock (Horloge)etla
maintenirainsipendantcinqsecondes.
• SAbseraaffich6etclignoterapendantcinqsecondes.
• SAbseraensuiteaffichc!en continujusqu'_ ce qu'on I'arr6te
ou jusqu'_cequela dur6elimite de 72heuressoit atteinte.
• Lemot BAKE(Cuissoncourante)seraaussiaffich_si un
cyclede cuissoncouranteesten coursalorsque le fourest en
modesabbat.
• LaCUISSONAUFOURestla seulefonctionqui est
op4rationnelleenmodesabbat.Touteslesautresfonctions
(Minuterie,Maintienau chaud,Nettoyage,etc.)sont verrouill4es
pendantlemodesabbat.
• Uncyclede cuissonet maintienpeut6treprogrammc!durant
le modesabbat.Cependant,un cyclede cuissonet maintien
diff6r6sn'estpaspossible.
Annuiation du mode sabbat :
1. Appuyersurla toucheClock pendantcinq
secondes.
• SAbclignote pendantcinq secondes.
• L'heuredu jour revienta I'afficheur.
OU
2. Apr_s72heures,le modesabbatsetermine.
• SAbclignote pendant5 secondes.
• L'heuredu jour revienta I'afficheur.
37
Remarques :
• Le modesabbatpeut(_tremis en marchea tout moment,que
lefour soit en marcheou non.
• Le modesabbatne peutpas6tremisen marchesi lestouches
sontverrouill6esou la porteverrouill6e.
• La majorit6desmessagesettousles bipssont dc!sacti%s
Iorsquele modesabbatestactif.
• Sile four esten modecuissonIorsquele modesabbatest
programm&le mot BAKEs'c!teintIorsquelacuissoncourante
estannul(!e.II n'yauraaucunsignalsonoreaudible.
• La lampedu four nes'allumepasautomatiquement
rouverturede la porteIorsquelefour est en modesabbat.Si
r_clairagedu fourest souhait6pendantle modesabbat,la
lampedevra6treallum6eavant que lemodesabbatnedc!bute.
• Lorsquele modesabbata d6marr&I'afficheurindique
immc!diatementlatemperatureprogramm(_eplutOtque la
tempc!raturer6ellede la cavit6du four.Aucun hip de
pr6chauffageneretentit.
• Lecycled'autonettoyageet leverrouillageautomatiquede la
portene fonctionnentpaspendantle modesabbat.
• SiI'on appuiesur latouche CANCEL(Annule0,un cyclede
cuissoncouranteaufour seraannul& Cependant,le
programmateurresteraen modesabbat.
• Apr_sune pannede courant,le four revienten modesabbat
avec72 heuresrestanteset aucuncycleactif.

Ajustement de la temperature
du four
La pr6cisiondesterapc!raturesdu foura _t6soigneusementv_rific!e
I'usine.IIest normalde remarquerquelquesdiff6rencesdabsla
cuissonou la couleurdurissolageobtenuentreun four neufet un
fourancien.Au fur et_ mesureque lefour est moinsneuf,sa
temp6raturepoutvarlet.
II estpossibled'ajusterla tempc!raturedu foursi I'onpenseque le
four necult pasou nerissolepascorrectement.Pourd6ciderde
I'ajustementaapporter,r6gler lefour _ unetemp6raturede 15° C
(25° F)plusc!lev_eou plusbassoquela temp6ratureindiqu6edabs
la recette,puisfairecuire la pr6paration.Losr6sultatsde{{I'essai>>
de cuissondoiventdonnerune idc!edu hombrededegrc!sduquella
temp6raturedolt 6treajust6e.
Ajustement de la temperature du four :
1. Appuyersurla toucheBake (Cuissoncourante).
2. Entrer285° C(550° F)en appuyantsurlos
touchesnum6riquesappropric!es.
3. Appuyersurla toucheBake et la maintenirainsipendant
plusieurssecondesoujusqu'_ce que00°paraisseaI'afficheur.
Si latempc!raturedu four a _tc!prc!cc!demmentajustc!e,le
changementseraaffich6.Parexemple,si latempc!raturedu four
a _tc!rc!duitede 8°C (15° F),I'afficheurindiquera-8° (-15°).
4. Appuyersurla toucheAutoset 0 (Programmationautomatique)
pourajusterla temp6rature.
A chaquefois que I'onappuiesur la toucheAutoset0, la
temp6raturechangede 3°C (5° F).Latempc!raturedu four pout
6treaugmentc!eou diminu_ede 3 _ 20° C(5 a 35° F).
Appuyersurla toucheAutoset0 pour augmenterla tempc!rature
du four (5,10... 35).Continuerd'appuyersur latouche
Autoset0 pour diminuerlatemp6raturedu four (-35,-30... -5).
5. L'heuredujour r6apparaitautomatiquement_ I'afficheur.
II n'estpas n6cessairede r6ajusterla tempc!raturedu four en cas
de panneou d'interruptionde courant.L'ajustementde la
temp6ratures'appliqueseulementauxfonctionsde cuisson
courante,cuissonavecconvectionet r6tissageavecconvection
(certainsmodules).Lostempc!raturesdegril et de nettoyagene
peuvent6treajustc!es.
Changement de la
temp6rature °F/°C
1. Lerc!glagepar ddaut de I'usinepour latemp6ratureesten
Fahrenheit.
2. Pourmodifier cer_glage,appuyersurlestouchesCANCEL
(Annulet)et Bakesimultan6mentet raaintener-lesenfonc6es
pendanttroissecondes.
3. Unbipretentitet lerc!glagecourant(°Fou °C)paraitaI'afficheur.
(Sivous nefaitespasde changement,la cuisini_reretourneau
r_glageexistantapr_s30secondes.)
4. Pourmodifier le r6glage,appuyersur latoucheAutoset O.
Appuyer_ nouveausur latouche pour retournerau r_glage
existant.Attender cinqsecondeset le r_!glageseraeffectu_.
Favori
Latouche Favorite(favori)permetde sauvegarderla dur_eet la
temp_!ratured'une fonctionde cuissonet maintien.
Pourprogrammerun cycleFavori,une fonctiondecuissonet
maintiendolt _treactiveou tout juste programm_!e.
ProgrammatioB d'un nouveau cycle favori ou
sauvegarde d'un cycle en coats de caisson et
maiBtien comme favori :
1. Programmeruncyclede cuissonet rnaintiencorameil est d_crit
lasectionCuissonet maintien_ la page35.
2. Appuyersur latouche Favorite et la maintenir
ainsipendanttroissecondes.
• Lecyclecuissonetmaintiennouvellementprogramm_!ouen
coursde fonctionnementserasauvegard&
• Unbipsonoreretentitpourindiquer que lescommandesont
accept_le r_glagefavori.
D_marrage d'uB cycle programm_ dabs favori :
1. Appuyersur latouche Favorite.
• Ladur_!eet latemp_!raturedu cycleprogramm_de cuissonet
maintienserontaffich_es(siaucuncyclede cuissonet
maintienn'a_!t_programme,_nonE_seraaffich_).
2. Appuyersur latouche Bake ou Convect(Convection].
, Lecyclefavori commenceimm_diatement.
, Lemot correspondantau cycles_lectionn_s'allume
I'afficheur.
, Ladur_!ede cuissons'allume_ I'afficheur.
Lorsque la duroc de cuisson s'est _coul_e :
° Lemot correspondantau cycles_lectionn_s'_teint.
° LosrootsHOLD(Maintien)etWARM(Chaud)s'allument.
• 75° (170°)parait_I'afficheur.
AnBulatioB d'uB cycle favori eB tours :
1. Appuyersur latouche CANCEL.
° Lecyclefavorisauvegard_!neserapasaffect_!.
2. Rotiferla nourrituredufour.
Allumage sans flamme
de veille
Lacuisini_reest dot_!ed'un syst_rned'alluraagesansflaramede
veille.Cesyst_mefermeautomatiquementI'arriv_!edegazet
emp_che tout fon_tionnement du four/ors d'uneinterruption
de I'alimentation _lectrique.
II ne aera paspossibled'allamer lebr_lear dufour avec une
ailumette. Ne pastenter defaire fonctionnerle four lotsd'une
interruptionde ralimentation 61eetriqae.
38

Ventilateur du four
Unventilateurde convectionsert afaire circuler I'airchauddansle
four Iorsquela caractGristiquede convectionest sGlectionnGe.La
fonctionsemet automatiquementen marche5 minutesapr_savoir
appuy6surlatouche Convect[Convection)ets'c!teintIorsquela
fonctionConvectest annulc!e.
Remarque :11s'arrGteautomatiquementIorsqueI'onouvre |
la porte.
1
Reinstallation :
1. Placerla grille surlossupportsdansle four.
2. Soulever16g_rementI'avant.Faireglisserlagrille vers I'arri_re
au-del_ de la positionde calage.
3. Abaisserlagrille et la faireglisserclanslefour.
Ne pascouvrir latotalit_ d'une grille de papier d'aluminiumni
mettre d'aluminiumsur la sole dufour. Colane donneraitpas
de hensr_sultatsdansla cuissondeg_teau× et la sole
pourraitse trouver abim_e.
f
Event du four
Lorsquele four fonctionne,lessurfacesvoisinesde 1'Gventpeuvent
devenirassezchaudespour entrainerdesbr01ures.Ne jamais
bloquerI'c!vent.
L'_vent estsitu_ sous leprotecteurd'_vent du dosseret, sur la
cuisini_re. EVENT
DU FOUR
Ne pasmettrede
plastiquesprosde
I'_vent,lachaleur
pouvantlosti!!former
ou losfairefondre.
i'clairage du four
Lalampedu four s'allumeautomatiquement
I'ouverturede laporte, Lorsquelaporte estfermc!e,
appuyersur letouche Oven Light [(--clairage)pour
allumerou c!teindrela lampe.Lefour produitunsignalsonore
chaquelois que I'onappuiesurOvenLight.
Sole du four
Prot(!gerla soledesproduitsrenversc!s,en particulieracidesou
sucre!s,ceux-cipouvantd_colorer1'Gmailvitrifi& Utiliserdes
ustensilesde la bonnedimensionpour_viterque losproduits nese
renversentou passentpar-dessusI'ustensileen bouillant.Ne pas
placer d'ustensilesoude feuille d'aluminiumdirectementsur
la sole dufour.
Grilles du four
Lefour comportedeuxgrillesavec,pourchacune,un dispositif
de calage.
Extraction : 44
1. Tirerlagrille en lignedroite
jusqu'_cequ'elles'arrGte_ la
positiondecalage.
2. Souleverla grille _ I'avantpour
pouvoirI'extraire.
Positions des grilles
POSITION7 [positionla
plushaute): Pourla
cuissonau gril et la
CUiSSOn au four sur une
seulegrille avecunetOle
biscuits.
POSITION6 :S'utilise
pour la cuissonau gril et
la cuissonat] foursur une
seulegrille avecunetOle
,4, _¢
11_,U., LU 7
6
' __ _ 2
CLiiSSOR avec CORVeCtiOR
sur deu× grilles
biscuits.S'utilisepourune cuissonsurplusieursgrilles.
POSITION5 : Pourla cuissonat] gril et la cuissonau foursur une
seulegrille avecunet01e_ biscuits.
POSITION4 :S'utilisepour lacuissonaufour de g_teauxet de mets
ensauce,sur uneseulegrille avecunetOle_ biscuits,et lacuisson
au gril. S'utilisepour unecuissonsur plusieursgrilles.
POSITION3 : Pourla cuissonat] four de metsen sauce,de g_teaux
6tages,de michesde pain,sur uneseulegrille avecune t61e
biscuits.S'utilisepourune cuissonsurplusieursgrilles.
POSITION2 :S'utilisepour lacuissonaufour de g_teauxsurune
seulegrille avecunetOle_ biscuits,et pourle rOtissagede petites
piscesde viande.S'utilisepour unecuissonsur plusieursgrilles.
POSITION 1 :S'utilisepour le r0tissaged'unevolailleoude grosses
piscesde viande.
Sole dufour : Placerla grille sur les
cOt_srelevc!sde la sole.Donneune
placesuppk!mentairepour lacuisson
de grandesquantitc!s.
CUISSONSUR PLUSIEURS
GRILLES: Utiliserlespositions
3 et6,ou 2 et 4.
Rernarque: Pourla cuissonavecconvectionsurdeuxgrilles,
vGrifierlesaliments_ ladur_e minimalesugg_r_epour @iterun
lexc_s de cuissonou de cooration.
Cuisson de g_teaux t_etages sur deux grilles
Pourde meilleursr_sultatspour _.._ -_
laouissondeg_teauxsurdeux/_(° ° }_}_//[////_\\\\\
grilles,utiliser lospositions2 //7_ -__o¢_t_-_=___\
et4 pourune cuisson ///_ H S(, " o _:\\
traditionnelleetlespositions /i=ii=i_i_L_/_-.._-°____:_\
3 et6 pour une cuissonavec _/// //#////////f/#l//#/llllJl)If/,1[II-b_mq:,,& \\ \_
convection.
Placerlesg_teauxsur la
grille,commeil est indiqu&
39

Bemerques
40

epres-vente
GARANTIE DES GROS APPAREILS MI;:NAGERS MAYTAG CORPORATION
GARANTIE LIMITI_E DE UN AN
Pendant un an _ corrupter de la date d'achat, Iorsquece gros appareil m6nager est utilis6 et entretenu conform6ment aux
instructions jointes _ ou fournies avec le produit, Maytag Corporation ou Maytag Limited (ci-apr(_s d6sign6es <<Maytag >>]paiera
pour les pi(_cessp6cifi6es par rusine et la main-d'oeuvre pour corriger lesvices de mat6riaux ou de fabrication. Le service dolt
6tre fourni par une compagnie de service d6sign6e par Maytag. Cette garantie limit6e s'applique exclusivement Iorsque rappareil
est utilis6 darts le pays ou il a 6t6 achet6.
MAYTAG NE PRENDRA PAS EN CHARGE
1. Lesvisites de service pour rectifier [installation du gros appareil m6nager, montrer _ rutilisateur comment utiliser
rappareil, remplacer ou r@arer des fusibles ou rectifier lec_blage ou la plomberie du domicile.
2. Lesvisites de service pour r@arer ou remplacer les ampoules 61ectriquesde rappareil, les filtres _ air ou les filtres _ eau.
Ces pi_ces consomptibles ne sont pas couvertes par la garantie.
3. Les r@arations Iorsque le gros appareil m6nager est utilis6 _ des fins autres que rusage unifamilial normal.
4. Lesdommages imputables _ : accident, modification, usage impropre ou abusif, incendie, inondation, actes de Dieu,
installation fautive ou installation non conforme aux codes d'61ectricit6 ou de plomberie, ou rutilisation de produits non
approuv6s par Maytag.
5. Toute perte d'aliments due _ une d6faillance du rdrig6rateur ou du cong61ateur.
6. Le coot des pi(_cesde rechange et de la main-d'ceuvre pour les appareils utilis6s hors des Etats-Unis ou du Canada.
7. Le ramassage et la livraison. Ce gros appareil m6nager est congu pour 6tre r6par6 _ domicile.
8. Les r@arations aux pi_ces ou systSmes r6sultant d'une modification non autoris6e faite _ rappareil.
9. Lesfrais de transport pour le service d'un produit dans les r6gions 61oign6es.
10.La d@ose et la r6installation de votre appareil si celui-ci est install6 darts un endroit inaccessible ou n'est pas install6
conform6ment aux instructions d'installation fournies.
11.Le coot des pi_ces de rechange et de la main-d'ceuvre Iorsque rappareil est utilis6 dans un pays autre que le pays o_Jil a
6t6 achet6.
CLAUSE D'EXONERATION DE RESPONSABILITE AU TITRE DES GARANTIES IMPLICITES ; LIMITATION DES RECOURS
LE SEUL ETEXCLUSIFRECOURSDU CLIENT DANS LE CADRE DE LA PRI_SENTEGARANTIE LIMITI_ECONSISTEEN LA
RI_PARATIONPRI_VUECI-DESSUS.LESGARANTIES IMPLIClTES,Y COMPRIS LESGARANTIESAPPLICABLES DEQUALITE
MARCHANDE ETD'APTITUDEA UN USAGEPARTICULIER,SONT LIMITEESA UN AN OUA LA PLUSCOURTEPI_RIODE
AUTORISI_EPAR LA LOI. MAYTAG N'ASSUME AUCUNE RESPONSABILITI_ POUR LESDOMMAGES FORTUITSOU INDIRECTS.
CERTAINESJURIDICTIONS NE PERME]q-ENTPAS L'EXCLUSION OU LA LIMITATION DESDOMMAGES FORTUITSOU
INDIRECTS,OU LES LIMITATIONS DE LA DURI_EDESGARANTIES IMPLIClTESDE QUALITEMARCHANDE OU D'APTITUDEA
UN USAGEPARTICULIER,DESORTEQUECESEXCLUSIONSOU LIMITATIONS PEUVENTNE PASS'APPLIQUERDANS VOTRE
CAS. CETTEGARANTIE VOUS CONFEREDES DROITSJURIDIQUESSPECIFIQUESETVOUS POUVEZ EGALEMENTJOUIR
D'AUTRES DROITSQUI PEUVENTVARIER D'UNE JURIDICTION A UNE AUTRE.
A rext_rieur du Canada et des 50 I_tatsdes Etats-Unis, cette garantie ne s'applique pas. Contacter votre marchand Maytag
autoris8 pour d_terminer si une autre garantie s'applique.
Si vous avez besoin de service, voir d'abord la section "D4pannage"du Guide d'utilisation et d'entretien. Apr_s avoir v_rifi6 la
section "D4pannage", de raide suppl_mentaire peut 6tre trouv_e en v_rifiant la section "Assistance ou service"ou en appelant
Maytag. Aux E.-U.,composer le 1-800-688-9900. Au Canada, composer le 1-800-688-2002.
41

MAY[AG
®
Estufa a gas con control a
precisi6n sensible al tacto 800
Tabla dq
instrucciones importantes
sobre seguridad ........................43-46
Cuidado y [impieza ...................47=49
Horno autolimpiante
ProcedJmientos de limpieza
IVlantenimiento ..........................49=50
Luz _ ventana del horno
Retiro de la estufa a gas
Localizaci6n y soluci6n
de averias ...................................51-52
Cocinando en la estufa ............52=53
Controles suDerlores
Quemadores de gas sellados
Cocinando en el homo ............54=61
Horneado
Cook & Hold'
'Cook & Hold' difeddo
Asar a la parrilla
Mantener caliente
Cierre autom4tico/Modo sab4tico
Parrillas del homo
Garantia y servicio .... P_gina _ltima

Lea y siga todas las instrucciones antes de usar este
electrodorn_stico para evitar el riesgo potencial de incendio,
choque electrico, lesi6n personal o da_o al electrodomestico
como resultado de su uso inapropiado. Utilice este
electrodomestico solamente para el prop6sito que ha sido
destinado segQnse describe en esta guia.
Para asegurar funcionarniento correcto y seguro: El
electrodom_stico debe set instalado debidamente y puesto a
tierra por un t6cnico calificado. No intenteajustar, reparar,
prestar servicio o reemplazar ninguna piezade este
electrodomestico a menos que seaespedficamente
recomendado en esta gufa. Todas las reparaciones deben ser
realizadas por un tScnico calificado. Pida al instaladorque le
indique la ubicaci6n de la v_lvula de cierre del gas y como
cerrarla en caso de una emergencia.
Siempredesenchufe el electrodomestico antes de efectuar
alguna reparaci6n.
Lasadvertencias e instrucciones importantes sobre seguridad
que aparecen en esta gufa no est_n destinadas a cubfir todas
las posibles circunstancias y situaciones que puedan ocurrir.
Sedebe ejercer sentido com_n, precauci6n y cuidado cuando
instale, realice mantenimiento o haga funcionar el artefacto.
Siempre p6ngase en contacto con el fabricante si surgen
problemas o situaciones que usted no comprenda.
Reconozca los simbolos, advertencias,
etiquetas de seguridad
43

Instrucciones generales
Paraverificar si el dispositivo est_ debidamente instalado, mire
debajo de la estufa con una linterna para asegurarse de que
uno de los tornillos niveladores traseros est6 debidamente
enganchado en la ranura del soporte. El dispositivo antivuelco
asegura el tornillo nivelador trasero al piso cuando est_
debidamente enganchado. Estodebe verificarse carla vez que
la estufa sea movida.
Para evitar un incendio o da o
causado per el humo
Aseg_rese de que se hayan retirado todos losmateriales de
empaque del electrodomestico antesde su uso.
Mantenga el _rea alrededor del electrodomestico libre y exenta
de materiales combustibles, gasolina u otros vapores y
materiales infiamables.
Si el electrodomestico es instalado cerca de una ventana, se
debe tenet cuidado para evitar que lascortinas pasensobre
los quemadores.
NUNCA deje articulos sobre la cubierta de la estufa. Elaire
caliente del respiradero puede encender losarticulos
inflamables y aumentar la presi6n en los envasescerrados
hasta hacedos reventar.
Muchos envasesde tipo aerosol son EXPLOSlVOScuando son
expuestos al calory pueden ser altamente infiamables. Evitesu
uso o su almacenamiento cerca del electrodomestico.
Muchos pl_sticos son vulnerables al calor. Mantenga los
pl_sticos alejados de las piezasde la estufa que puedan estar
tibias o calientes. No deje articulos de pl_stico sobre la cubierta
de la estufa puesse pueden derretir o ablandar si est_n
demasiado cerca del respiradero o de un quemador
superior encendido.
Para eliminar el riesgo de pasarsobre losquemadores
superiores calientes, no se deben guardar articulos en los
armarios que est_n directamente sobre la estufa. Si tales
armarios son usados para almacenamiento, debe limitarse a
colocar artfculos de uso poco frecuente y que pueden
guardarse en forma segura en una _rea que est_ sujeta al calor
proveniente de la estufa. Lastemperaturas pueden no ser
apropiadas para algunos articulos, tal como liquidos vol_tiles,
limpiadores o spraysen aerosol.
En case de incendio
Apague el electrodom_stico y lacampana de ventilaci6n para
evitar que las llamas sedispersen. Extinga lasllamas luego
encienda la campana para expulsar el humo y el olor.
• En la cubierta: Apague el fuego o la llama en una sart6n
con una tapa o una bandeja de hornear.
NUNOA levante o muevauna sartSn en llamas.
• En el borne: Apague el fuego o la llama cerrando la puerta
del horno.
No use agua en los incendios de grasa. Use bicarbonato, un
producto quimico secoo un extinguidor del tipo con espuma
para apagar un incendio o la llama.
Seguridad para los ni os
NUNCA deje a los ni_os solos o sin supervision cuando el
electrodomestico este en uso o est6 caliente.
NUNCA permita que los ni_os se sienten o se paren en
ninguna parte del electrodomestico pues se pueden lesionar
o quemar.
Se lesdebe ense_ar a los nii3osque el electrodomestico y los
utensilios que est_n en el o sobre el pueden estar calientes.
Deje enfriar los utensilios calientes en un lugar seguro, fuera del
alcance de los ni_os peque_os. Se les debe ense_ar a los ni_os
que un electrodomestico no es un juguete.No se debe permitir
que los ni_os jueguencon loscontroles u otras piezas de
la estufa.
44

Generalidades
No useel homo como un lugar para guardar alimentos o
utensilios de cocina.
El respiradero del homo se encuentra debajo del
protector trasero.
Evitetocar el _rea del respiradero mientras el homo este
encendido y durante varios minutos despues de haberlo
apagado. Algunas partes del respiradero y del _rea que Io rodea
secalientan Io suficiente como para causar quemaduras.
Despues de apagar el homo, no toque el respiradero o el _rea
que Io rodea hasta que haya tenido suficiente tiempo
para enfriarse.
Otras superficies que pueden estar calientes incluyen la
cubierta, lassuperficies que est_n dirigidas hacia la cubierta, el
respiradero del homo, la superficie cercana a la abertura del
respiradero, la puerta del homo y la _rea que la rodea,y la
ventanilla del horno.
No toque un foco de homo caliente con un paso hamedo ya
que se puede romper. Si el foco se rompe, desconecte el
suministro electrico al electrodomestico antes de retirar el foco
para evitar un choque electrico.
Seguridad para cocinar
Siempre coloque un utensilio en un quemador superior antes de
encenderlo. Aseg_rese de usar la perilla correcta que controla
cada quemador superior. AsegOresede encender el quemador
correcto y comprobar de queen efecto el quemador haya sido
encendido. Cuando haya terminado de cocinar, apague el
quemador antesde retirar el utensilio para evitar exposici6n a la
llama del quemador.
Siempre ajuste la llama del quemador superior de modo que no
seextienda m_s all_ del horde inferior del utensilio. Una llama
excesivaes peiigrosa, desperdicia energfa y puede daffar la
estufa, el utensilio o los armarios que est_n sobre la estufa.
NI.INGA deje sin supervisi6n la cubierta de la estufa cuando
este cocinando, especialmente cuando usa un ajuste de calor
alto o cuando est6 usando una freidora. Losreboses pueden
producir humo y los derrames de grasa pueden infiamarse.
Limpie los derrames grasosostan pronto como sea posible.
No use calor alto durante periodos de cocci6n prolongados.
NUNGA caliente un envase cerrado en el quemador superior o
en el horno. La acumulaci6n de presi6n puede hacer explotar
el envase causando una lesi6n personal grave o daffo a
la estufa.
Use tomaollas secos y gruesos. Los tomaolhs h_medos pueden
causar quemaduras a causa del vapor. Lastoallas u otros
sustitutos no deben set usados como tomaollas porque ellos
pueden quedar colgando a traves de losquemadores
superiores y encenderse o enredarse en las piezas de la estufa.
Siempre deje enfriar la grasa caliente que se ha usado en la
freidora antesde intentar mover o manipularla.
No permita que seacumule grasa u otros materiales
infiamables en la estufa o cerca de ella,en la campana o en el
ventilador aspirador. Limpie la campana extractora con
frecuencia para evitar que la grasa u otros materiales
infiamables seacumulen en la campana o en el filtro. Encienda
el ventilador cuando cocine alimentos fiameados debajo
la campana.
NUNCA usevestimentas de materiales inflamables, ropa suelta
o de mangas largas cuando est8 cocinando. La vestimenta se
puede encender o enganchar en los mangos de los utensilios.
Siempre coloque las parrillas del homo en la posici6n deseada
cuando el homo est8 fifo. Deslice la parrilla del horno hacia
afuera para agregar o retirar alimento, usando tomaollas secos
y resistentes. Siempre evite alcanzar dentro del homo para
agregar o retirar alimentos. Si una parrilla debe ser sacada
cuando est_ todavfa caliente, use un tomaolhs seco. Siempre
apague el homo despues de haber terminado de cocinar.
Tenga cuidado cuando abra la puerta del horno. Deje que
escape el aire o el vapor caliente antes de sacar o volver colocar
el alimento.
ADVERTENCIA SOl}RE LOSALIMENTOS PREPARADOS:
Siga las instrucciones del fabricante de los alimentos. Si un
envase de pl_stico de alimento congelado y/o su tapa se
deforma, se comba o se da_a de alguna otra manera durante la
cocci6n, descarte inmediatamente el alimento y su envase. El
alimento puede estar contaminado.
NUNGA use papel de ahminio para cubrir una parrilla del
homo o la parte inferior del homo. Eluso incorrecto puede
resultar en un riesgo de choque electrico, incendio o da_o al
electrodomestico. Use papel de aluminio solamente como se
indica en esta guia.
45

Utensilios apropiados
Usesartenes con fondos pianos y mangos que sean f_ciles de
tomar y que permanezcan frfos. Eviteusar sartenes u ollas
inestables, combadas que sepueden volcar f_cilmente u ollas
cuyos mangos est6n sueltos. Adem_s evite usar utensilios
especialmente peque_os o sartenes con mangos pesados pues
ellos pueden ser inestablesy volcarse f_cilmente. Losutensilios
que son pesados de mover cuando est_n Ilenoscon alimento
pueden tambi6n set un peligro.
AsegQresede que el utensilio sea Io suficientemente grande
como para contener en forma debida los alimentos y evitar
derrames. Eltama_o es particularmente importante cuando se
utilizan freidoras. AsegQresede que el utensilio tiene
capacidad para el volumen de alimentos que seva a agregar al
igual que para la formaci6n de burbujas de la grasa.
Parareducir a un mfnimo las quemaduras y que losmateriales
infiamables y los derrames seenciendan debidos a contacto no
intencional con el utensilio, los mangos no deben extenderse
sobre el quemador superior adyacente. Siempre gire los
mangos de los utensilios hacia el lado o hacia la parte trasera
de la estufa, no hacia la habitaci6n donde puede set f_cilmente
golpeados o alcanzados por los ni_os peque_os.
NUNCA deje que un utensilio hierva hasta quedar seco pues
esto puede da_ar el utensilio y la estufa.
Siga las instrucciones del fabricante cuando use bolsas para
cocinar en el horno.
Esteelectrodom6stico ha sido probado respecto a su
rendimiento seguro usando utensilios de cocina
convencionales. No use ningQn dispositivo o accesorio que no
haya sido espedficamente recomendado en esta gufa. No use
cubiertas de loselementos, rejillas superiores de la estufa o
sistemas de convecci6n para hornos. El uso de dispositivos o
accesorios que no son expresamente recomendados en esta
gufa, puede crear serios peligros de seguridad, resultar en
problemas de rendimiento y reducir la vida _til de los
componentes de la estufa.
Seguridad de la limpieza
Apague todos loscontroles y espere que seenfrfen las piezas
de la estufa antesde tocarlas o limpiarlas. No toque las rejillas
de los quemadores o las_reas circundantes hasta que elias no
hayan tenido tiempo suficiente de enfriarse.
Limpie la estufa con cuidado. Tenga cuidado para evitar
quemaduras de vapor si se usa una esponja o un paso mojado
para limpiar los derrames en una superficie caliente. Algunos
limpiadores pueden producir vapores nocivos cuando se
aplican a una superficie caliente.
Conserve estas instrucciones
para referencia futura
Homo autolirnpiante
Limpie solamente las piezas que se indican en esta gufa. No
limpie la junta de la puerta. La junta es esencial para un sellado
herm6tico. No restriegue, daffe, ni mueva lajunta de lapuerta.
No use limpiadores de homo de ninguna clase en el homo ni
alrededor de cualquier parte del homo autolimpiante.
Esnormal que la cubierta de la estufa se caliente durante el
ciclo de autolimpieza. PotIo tanto, se debe evitar tocar la
cubierta durante un ciclo de autolimpieza.
Aviso y advertencia irnportante
sobre seguridad
La Propuesta 65 de la Leyde 1986del Estadode California
Sobre Seguridad y Contaminaci6n del Agua Potable {California
Safe Drinking Water and Toxic Enforcement Act of 1986_exige
que el Gobernador de California publique una lista de las
sustancias que seg_n el estado de California causan c_ncer o
da_o al sistema reproductivo y exige que las empresas
adviertan a sus clientes sobre la exposici6n potencial a tales
sustancias.
Se advierte a los usuarios de esta estufa que la combusti6n del
gas puede resultar en exposici6n de bajo nivel a algunas de las
sustancias publicadas en la lista, inchyendo benceno,
formaldehfdo y hollfn, debido principalmente a la combusti6n
incompleta del gas natural o de loscombustibles de petr61eo
licuado. Losquemadores ajustados en forma debida reducir_n
la combusti($n incompleta. La exposici6n a estassustancias
puede tambi6n set reducida a un mfnimo ventilando los
quemadores al exterior en forma adecuada.
Se advierte a los usuarios de este electrodom6stico que cuando
el homo est_ funcionando en el ciclo de autolimpieza, puede
haber exposici6n de bajo nivel a algunas de las sustancias
indicadas en la lista,inchyendo mon6xido de carbono. La
exposici6n a estassustancias puede ser reducida a un mfnimo
ventilando el homo al exterior en forma adecuada, abriendo las
ventanasy/o la puerta en la habitaci6n en donde est_ ubicado
el electrodom6stico durante el ciclo de autolimpieza.
AVISO IMPORTANTE RESPECTOA LOS PAJAROS
DOMESTICOS: Nunca mantenga los p_jarosen la cocina o en
las habitaciones donde puedan Ilegar los humos de la cocina.
Los p_jaros tienen un sistema respiratorio muy sensitivo. Los
humos producidos durante el ciclo de autolimpieza del homo
pueden ser perjudiciales o mortales para los p_jaros. Los
humos que despide el aceite de cocina recalentado, la grasa,
margarina y los utensilios antiadherentes recalentados pueden
tambi6n ser perjudiciales.
46

Culdedolimpleze
Homo autolimpiante
Para programar 'Self=Clean' (Autolimpieza):
Nota: Latemperaturadel homodebeserinferior a205° C
(400° F)paraprogramarun ciclo de limpieza.
1. Cierrelapuertadelhomo.
2. Optima latecla 'Clean' (Limpieza).
• 'CLEAN'destellaenel indicadorvisual.
Clean
• 'SET'destellaen el indicadorvisual.
Oprimalatecla 'Autoset e' (ProgramaciOnAutom_tica).,Autct_se[
• 'MEd' (Suciedadmediana,3 horas)sedespliegaen el
indicador.
Elciclo de autolimpiezausatemperaturasde cocci6nsuperioresa las
normalespara limpiarautom_iticamentetodo el interiordelhomo.
Limpieel homoconfrecuenciaremoviendolosderramesparaevitar
humoexcesivoy Ilamaradas.No permitaque seacumuledemasiado
sucioen el homo.
Duranteel procesode limpieza,lacocinadebe estarbienventilada
paraeliminarlosoloresnormalesasociadoscon la limpieza.
Antes de la autolimpieza
1. Apague la luzdel hornoantesde la limpieza.La luzdelhorno
puedefundirse duranteel ciclo de limpieza.
2. Retiretodos losutensiliosy lasparrillasdel homo. Lasparrillas
del homosedescolorar_ny nosedeslizar_nf_cilmentedespuc!s
de un ciclo de autolimpiezasi no sonretiradasdelhomo.
3. Limpieel marcodelhomo, el marcode
la puerta,el _ireafueradelajunta de la \,
puertay alrededorde la aberturaen la
junta de la puerta,con un agentede
limpiezano abrasivotal como 'Bon
Ami'* ocondetergentey agua.El
procesode autolimpiezano limpia
estas_ireas.Eliasdebenser limpiadasparaevitarque la suciedad
se horneeduranteel ciclo de autolimpieza. (Lajunta esel sello
alrededorde la puertay ventanadel homo.)
4. Paraevitardaro no limpienifrote lajunta situadaalrededorde la
puertadel homo. Lajunta est_diseradaparasellar
herm6ticamenteel calorduranteel ciclo de limpieza.
5. Limpieel excesodegrasao derramesde la parteinferiordel
homo. Estoevitahumoexcesivoo Ilamaradasduranteel ciclo
de limpieza.
6. Limpielosderramesazucaradoso _cidostalescomo papadulce
(camote),tomateso salsasa basede leche.La porcelana
esmaltadaesresistenteal _cidopero no a pruebade _cidos. El
acabadode porcelanapuededescolorarsesi losderrames_icidos
o azucaradosno sonlimpiadosantesde un ciclo de autolimpieza.
4. Optima latecla 'Autoset O'paradesplegarlosajustesde
autolimpieza.
'HVy'(Suciedadintensa,4 horas)
'MEd' (Suciedadmediana,3 horas)
'LITE'(Suciedadleve,2 horas)
AIseleccionarel nivelde suciedaddel homoseprograma
autom_iticamenteel tiempode limpieza.
5. Despu6sde cuatrosegundos,el homocomenzar_a limpiar.
• Sila puertanosecierra,seoir_ una serialsonoray la palabra
'door'sedesplegar_en el indicadorvisual. Sila puertano es
cerradadentrode30segundos,la operaci6nde autolimpieza
ser_canceladay el indicadorvolver_ia desplegarla horadel
d[a.
• 'CLEAN'aparecer_en el indicadorvisual.
• 'LOCK'(Bloqueado)destellar_en el indicadorvisual. Unavez
que la puertase bloquea,la palabra'LOCK'permanecer_
iluminadasin destellar.
• Eltiempode limpiezacomenzar_lacuenta regresivaen el
indicador.
Para diferir un ciclo de autolimpieza:
1. Oprimalatecla 'Delay 1' (Diferido). 1
|
• 'DELAY'destella. Delay
• '00:00'destellar_en el indicadorvisual.
2. Programela cantidadde tiempoque usteddeseadiferir elciclo
usandolasteclasnumc!ricasapropiadas.
3. Optima latecla 'Clean'. Clean ii
• 'SET'destellaen el indicadorvisual. .................................
4. Optima latecla 'Aatoset 0'.
U
• Sedespliega'LITE'(nivelde suciedadleve).
Au_oset
5. Optima latecla 'Auteset O'(ProgramaciOn
Autom_tica)paradesplegarlosajustes
de autolimpieza.
'HVy'(Suciedadintensa,4 horas)
'MEd' (Suciedadmediana,3 horas)
'LITE'[Suciedadleve,2 horas)
*Losnombresde losproductossonmamasregistradasde sus respectivosfabricantes.
47

AIseleccionarel nivelde suciedaddel homoseprograma
autom_ticamenteel tiempo de limpieza.
6. Despu_sde cuatrosegundos,laspalabras'CLEAN'(Limpieza)y
'DELAY'(Diferido)seiluminar_iny 'LOCK'(Bloqueado)destellar_i
en el indicadorvisual. Cuandola puertadelhomosecierra,
'LOCK'dejar_de destellary seiluminar4permanentepara
mostrarqueel homoest_programadoparauna operaci6nde
limpiezadiferida. Enel indicadoraparecer_el tiempodiferido.
Procedimientos de
limpieza
Durante el title de autolimpieza
Cuandoaparece'LOCK'en el indicador,la puertanosepuedeabrir.
Paraevitardafioa lapuerta,no fuerce lapuertaparaabrirla cuando
la palabra'LOCK'est,1desplegadaen el indicadorvisual.
Humo y Olores
Ustedpuedeverhumoysentirclot lasprimerasvecesqueel borne
eslimpiado. Estoesnormaly disminuir_coneltiempo.
Tambic!npuedeocurrirhumosiel homoest_demasiadosucio o si
sehadejadoun utensilioenel homo.
Sonidos
A medidaque el bornesecalienta,ustedpuedeoff sonidosde
piezasmet_ilicasqueseexpandeny contraen. Estoesnormaly no
dafiar_el homo.
Despu6s dei title de autolimpieza
Aproximadamenteuna heradespu6sdel fin del ciclo de limpieza,
'LOCK'desaparecer& Lapuertaahorapuedeset abierta.
Algunasuciedad puedequedarcome una leve cenizagrisripe
polvo. Retffelaconun patio h_medo. Si lasuciedadpermanece
despu6sde limpiarla,significaqueel ciclo de limpiezanofue Io
suficientementelargo. Lasuciedadser_ieliminadaduranteel
pr6ximociclo de limpieza.
Silas parrillasdel homo fuerondejadasen el homo y no se
deslizansuavementedespu_sdeun ciclo de limpieza,limpie
lasparrillasy lossoportesde lasparrillascon unapequefiacantidad
deaceitevegetalparahacerlasdeslizarcon m_isfacilidad.
Puedenaparecer lineasdelgadasenla porcelanaal pasar per
ciclosde calentamientoyenfriamiento. Estoes normaly no
afectar_el rendimiento.
Una descoloraci6nblancapuede aparecer despu_sdel ciclo
delimpieza silos alimentos ;icidoso azucaradosno fueron
limpiadosantes del ciclo de autolimpieza. Estadescoloraci6nes
normaly no afectar4el rendimiento.
Notas:
• Si sedejaabiertalapuertadel borne,la palabra'door'
destellar_enel indicadorvisualyseescuchar_una serial
sonorahastaque lapuertaseacerraday la tecla'Clean'a
oprimidanuevamente.
• Si transcurrenm4sde cincosegundosdespu6sde oprimir la
tecla 'Clean'y antesde oprimirlatecla 'Autoset0',el programa
volver_iautom4ticamenteal despliegueprevio.
• Lapuertadel homosedafiar_sisefuerzaparaabrirla cuando
la palabra'LOCK'contint_adesplegadaenel indicador.
Tapasde quemadoresy quemadoresde gas sellados
Tapas de qaemadoresremovibles
, Dejeenfriarelquemador.Retirelatapay I_velaenaguajabonosa
con una esponjade restregardepl_stico.Parasuciedaddiffcil,
limpieconuna esponjanoabrasivarellenaconjab6no concrema
paralimpiezade cubiertas'CooktopCleaningCreme'*(Cremapara
Limpiezade Cubiertas)(Pieza#20000001)**y una esponja.
, No laslaveen el lavavajillasni en un homo autolimpiante.
Quemadoresde gas seilados
, Limpielosconfrecuencia.Dejeenfriarelquemador.Limpiecon
jab6n yuna esponjade restregarde pl_stico.Parasuciedaddiffcil,
limpieconuna esponjanoabrasivarellenaconjab6n.No agrande
ni modifiquelosagujeros.
, Tongacuidadodeque noentreaguaen losorificiosde los
quemadores.
, Tongacuidadocuandolimpieelencendedor.Siel encendedorest_
homerico dafiado,el quemadorsuperiornoencender&
Rejillasde losquemadores=porcelanasobrehierroforjado
• L_velasconaguatibia jabonosay una esponjade pl_sticono
abrasiva. Paramanchasrebeldes,limpiecon unaesponjade
pl4sticorellenaconjab6n,no abrasivao con'CooktopCleaning
Creme'*(Pieza20000001)**y una esponja.Si la suciedadpersiste,
wJelvaa aplicar'CooktopCleaningCreme',cubracon unatoallade
papelhOmedaydeje remojardurante30 minutes.Restriegue
nuevamente,enjuaguey seque.
• No laslaveen el lavavajillasni en un homo autolimpiante.
Area del reloj y de lasteclas decontrol
° Paraactivar'ControlLock'(Bloqueode loscontroles)para la
limpieza,verp_gina55.
° Limpiecon un pafiohOmedoyseque. No useagentesdelimpieza
abrasivespuespuedenrayarel acabado.
° Sepuedeusarlimpiavidriossiseroc[anen el patioprimero.
NO retie directamenteen el panel.
Perillasde control
, Retirelasperillascuandoest6nen la posici6n'OFF'(Apagado)
tir_ndolas haciaadelante.
• Lave,enjuagueyseque. No useagentesde limpiezaabrasives
puespuedenrayarel acabado.
• Enciendacadaquemadorpara asegurarsedeque lasperillashart
side correctamentereinstaladas.
* Loshombresde losproductossonmamasregistradasde sus
respectivosfabricantes.
** Parahacerpedidos,Ilameal 1-877-232-6771EE.UU.o
1-800-688-8408Canad&
48

Cubiertay panelde control=Esmaltede porcelana
Laporcelanaesmaltadaesvidriofundido en metaly puede
agrietarseo picarsesi no seusacorrectamente.Esresistentea los
_cidos,noa pruebade_icidos.Todoslosderrames,especialmente
losderramesazucaradoso acfdicosdebenserlimpiados
inmediatamentecon un pasoseco.
• Cuandoseenfr[e,laveconaguajabonosa,enjuagueyseque.
• Nunca limpieuna superficietibiao calienteconunpaso hOmedo.
Estopuedecausaragrietamientoo picaduras.
• Nunca uselimpiadoresde homo,agentesde limpiezaabrasivoso
c_iusticosen el acabadoexteriorde laestufa.
Paneles laterales,gavetade ahnacenamiento y manijasde las
puertas=Esmaltepintado
• Cuandoest6frfa,lavecon aguatibiajabonosa,enjuaguey seque.
Nunca limpieuna superficietibiao calienteconunpaso h0medo
puesesto puededa_ar la superficieycausarunaquemaduraa
causadel vapor.
• Paramanchasrebeldes,useagentesde limpiezalevemente
abrasivostal como pastade bicarbonatoo 'BonAmi'*.No use
limpiadoresabrasivos,c_usticoso _isperostal comoesponjasde
lanade aceroo limpiadoresde hornos.Estosproductospueden
rayaro da_arpermanentementelasuperficie.
Nora:Useuna toa/la oun patioseco para limpiar los
derrames, especialmente los derramesac[dicos o
azucarados. Lasuperficie sepuede descolorar o perder el
brillo si el derrame no se limpia inmediatamente.
Esto esespecialmente importante eftlas superficies blancas.
Ventanay puertadel homo =Vidrio
• Eviteusarcantidadesexcesivasde aguapuespuedeescurrirse
debajoo detr_sdel vidriocausandomanchas.
• Laveconaguayjab6n. Enjuagueconagualimpiay seque. El
limpiadorde vidriopuedeusarsesi seroc[aen un
pasoprimero.
• No usematerialesabrasivostalescomoesponjasde restregar,
limpiadoresen polvoo esponjasde lanade aceropuespueden
rayarel vidrio.
interior del homo
• Siga lasinstruccionesen la p_gina47para prograrnarun ciclo
de autolimpieza.
Parrillasdel homo
• Limpiarcon aguaconjabSn.
. Sacarlasmanchasdificilesconpolvode limpiezao una esponja
IlenaconjabOn.Enjuaguey seque.
. Lasparrillasse descolorar_npermanentementey puedenno
deslizarseconsuavidadsi sondejadasenel homoduranteun
ciclo de autolimpieza.Si estosucede,limpiela parrilla ylos
soportesen relievecon unapequeSacantidad deaceitevegetal
pararestaurarlafacilidad de movimiento,luegolimpieelexceso
de aceite.
Aceroinoxidable[modelosselectos)
• NO USENINGUN PROBUCTODELIMPIEZA QUE
CONTENGABLANQUEADORA BASEDECLORO.
• NO USELIMP/ADORES"ORANGE" N/
L/MPIADORESABRAS/VOS.
• $/EMPRELIMPIE LASSUPERFICIESDEACEROA FAVOR
DEL GRANO.
• limpieza diaria/Suciedad leve =Limpieconuno de los
siguientes- aguaconjab6n,una soluci6ndevinagreblancocon
agua,limpiadorparasuperficiesy vidrio'Formula409'*o un
limpiavidriossimilar - usandounaesponjaoun pasosuave.
Enjuaguey seque. Parapulir yevitarmarcasde losdodos,useel
producto'StainlessSteelMagicSpray'*(PiezaNo.20000008)**.
• Suciedad moderada/Intensa =Limpiecon uric de lossiguientes
- 'BonAmi'*,'SmartCleanser'*o 'SoftScrub'*- usandouna
esponjah0medao un pasosuave. Enjuaguey seque. Las
manchasdificilespuedenset quitadasconunaesponjamulti-uso
'Scotch-Brite'*hOmeda;frote a favordel grano. Enjuaguey seque.
Pararestaurarel kJstrey sacarlasvetas,aplique'StainlessSteel
MagicSpray'*.
. Descoloraci6n - Useuna esponjamojadao un pasosuave,
limpieconlimpiadordeacero'CameoStainlessSteelCleaner'*.
Enjuagueinmediatamentey seque.Paraeliminarlasestr[asy
restaurarel lustre,usedespuc!srociadorparaaceroinoxidable
'StainlessSteelMagic Spray'*.
Puerta del homo
Nora: Lapuertadel homo en unaestufanuevapuedesentirse
"esponjosa"cuandosecierra. Estoesnormaly disminuir_con
el uso.
Ventana del homo
Para proteger la ventana de la puerta del homo:
1. No useagentesde limpiezaabrasivostales comoesponjasde
restregarde lanade aceroo limpiadoresen polvopuesolios
pueden rayarelvidrio.
2. No golpeeel vidrio conollas,sartenes,muebles,juguetes u
otros objetos.
3. No cierrelapuertadel homo hastaque lasparrillasdel homono
est6nen sulugar.
AIgolpear,rayar,hacervibrar o esforzarel vidriopuededebilitarsu
estructuracausandoun mayorriesgode roturaen unafecha posterior.
49

Tornillos niveladores
Verifiquesi laestufaestaniveladacuandoseinstala.
Si laestufano est_nivelada,gire lostornillos I 4
niveladoresubicadosen cadaesquinade la estufa
hastaquequede nivelada. _,,/J
TORNILLO NIVELADOR
Gaveta de ahnacenamiento
Conexi6n el ctrica
Loselectrodom_sticos que requieren energia
el_ctrica est_n equipadosconun enchufe de
ires clavijascon cenexi6na tierra, el cual
debeserenchufadodirectamenteerrun
tomacorrienteeldctricode tres agujeros,para
120voltiosdebidamenteconectadoatierra.
Siempredesenchufeel electrodom#sticoantesde
efectuarreparaciones.
Elenchufedetres clavijasconconexi6natierra ofreceprotecciOn
contrapeligrosdechoqueseldctricos.NO CORTENI EUIVlINELA
TERCERACLAVIJADECONEXIONATIERRADELENCHUFE
DELCORDONELECTRICO.
Sisolamentesedisponede untomacorrientesin conexi6na tierra,
de dosagujerosu otrotipo detomacorrienteel_ctrico,el
propietariodel electrodom(_sticoes personalmente
responsablede reemplazarel tomacorriente con un
tomacerriente el_ctrico deires agujeros debidamente puesto
a tierra.
Luz del homo
Lagavetadealmacenamientopuedeserretiradaparaque usted
puedalimpiardebajode la estufa.
Para sacar :
1. Vac[elagavetaydeslfcelanaciaafueranastalaprimera
posici6ntope.
2. Levantela partedelanteradela gaveta.
3. TirelahastalasegundaposiciOnde tope.
4. Sujetelos ladosylevantelagavetapararetirarla.
Para velvet a colocar:
1. Insertelosextremosde lascorrederasde lagavetaen losrieles
de la estufa.
2. Levantela partedelanteradela gavetaysuavementeemp0jelaa
la primeraposici6ndetope.
3. Levantela gavetanuevamentey emp0jelahastaquequede
completamentecerrada.
Retiro de la estufa a gas
Losconectoresde la estufaagasusadosparaconectareste
artefactoalsuministrode gasnoestdndise_adosparamovimiento
continuo. Unavezinstalados,NO muevarepetidamenteeste
artefactoa gasparasulimpiezao paraubicarloenotro lugar. Si
esteartefactotiene queset movidoy/o retiradopara reparaci6n,
sigael procedimientodescritoenlasinstruccionesde instalaci6n.
Parainformaci6n,p6ngaseen contactoconel Servicioa losClientes
MaytagIlamandoal 1-800-688-9900EE.UU.o al 1-800-688-2002
Canada.
Paraevitarque la estufasevuelqueaccidentalmente,sedebe
aseguraral pisocolocandoeltornillo niveladortraserodentrodel
soporteantivuelco.
5O
Para reemplazar el foco del homo:
1. Cuandoel nornoestc!if[o, sujetela tapade la bombillaen su
lugar,luegodesliceel ret(!ndealambrefuerade la cubierta.
Nora: Lacubiertade la bombillasecaerdsi noessujetaen su
lugar cuandoest_sacandoel ret6nde alambre.
2. Saquela cubiertadel focoy el foco. CABOCHON
3. Coloqueun focode 40 watts
paraelectrodomdsticos.
4. Vuelvaa colocarla cubierta
de la bombillay asegOrela
conel ret(_nde alambre. \/ RESSORTDERETENUE
5. Vuelvaa enchufar laestufa. (fffm6tallique)
Vuelvaa colocar la
noracorrecta.

Parala mayoda de los problemas,verifiqueprimero
Io siguiente.
• Revisesi loscontrolesdelhorno est_indebidarnenteajustados.
• Verifiquesiel enchufeest_firrnernenteinsertadoen
el tomacorriente.
Verifiqueo vuelvaa reporterel disyuntor. Verifiqueo reernplace
el fusible.
Verifiqueel surninistrode energ[aelc!ctrica.
Elquemadorsuperiorno se enciende.
• Verifiquesila estufaest_debidarnenteconectadaa la fuentede
alimentaci6n.
• Verifiquesiest_fundido unfusible del circuitoosi sedispar6el
disyuntorprincipal.
• Verifiqueparaasegurarsede que el encendedorest6secoyque
ernitachasquidos. Elquemadornoseencender_isiel encendedor
est_ da_ado,sucio o rnojado.Siel encendedornoproduceun
chasquido,gire la perillade control a la posici6n'OFF'(Apagado).
Lallama es dispareja.
° Losorificiosdelquernadorpuedenestarobstruidos.
Lallama del quemadorsuperiorse levantadel orificio.
• Verifiqueparaasegurarsede que el utensilioest_asentadoen la
parrillasobreelquernador.
Losresultadosdel horneadono son comese esperaban o son
diferentesa losdel homoanterior.
• Verifiquelaternperaturadel horno seleccionada.Aseg_resedeque
el homoest6precalentadocuandola recetao instrucciones
recomiendanprecalentamientodel homo.
• AsegOresede que el respiraderodel homo noest6 bloqueado.Ver
p%ina 61para la ubicaci6n.
• Verifiqueparaasegurarsede que la estufaestdnivelada.
• Lastemperaturasa rnenudovat(anentreun homonuevoy uric
antiguo. A medidaque pasael tiernpo,laternperaturadel homo
cambiay puedehacersem_scalienteo m_sfrfa. Ver p%. 60 para
lasinstruccionescomeajustarla ternperaturadel homo. Nora: No
se recorniendaajustar laternperaturasihatenidoproblernascon
solo unao dosrecetas.
• Useel utensiliocorrecto.Losutensiliososcurosproducendorado
oscuro.Losutensiliosbrillantesproducendoradoclare.
• Verifiquelasposicionesde lasparrillasy la colocaci6nde los
utensilios.Alterne losutensilioscuandousedosparrillas.Deje
2,5-5cm (1-2 pulgadas)entrelosutensiliosylasparedesdel
homo.
• Verifiqueelusedepapeldealurninioen el homo.Nunca use
papelde alurniniopara cubriruna parrillacompletadel homo.
Coloqueun pedazopeque_ode papelde alurninioen la parrilla
que est_debajodel utensiliopara recibirlosderrarnes.
Losalimentos no se asan a la parrilla enforma debida o salen
demasiado humo.
• Verifiquelasposicionesde lasparrillasdel borne.Elalirnento
puedeestarmuycercade lallama.
• Elpapelde aluminiose us6de maneraincorrecta. Nunca forreel
insertodelasadorcon papelde ahrninio.
• Recorteel excesode grasade la came antesde ponerlaa asara
la parrilla.
• Se us6una asaderasucia.
, Precalienteel homodurantedosatres minutesantesde colocarel
alirnentoen el homo.
, Asea la parrilla conla puertadel homocerrada.
Eihomono se autolimpia.
• Verifiqueparaasegurarsede que el ciclo no estc!ajustadopara un
cornienzodiferido.Vetp%ina 47.
, Verifiquesi la puertaest_cerrada.
, Verifiquesi el control est,1en Modesab_itico.Vetp%. 59.
, Elhomopuedeestara m_sde205°C [400° F). Laternperaturadel
homodebeserinferiora 205° C(400° F)para programarun ciclo
de lirnpieza.
Eihomono se limpi6 en forma debida.
° Puedequeseanecesariountiernpodelirnpiezarn_slargo.
° Losderramesexcesivos,especialrnentede alimentosazucaradosy/
o _cidosnofueron limpiadosantesdel ciclo deautolimpieza.
Lapuerta del homo no se desbloqueadespu_sdel eiclo
de autolimpieza.
° Elinteriordel homotodav[aest,1caliente. Dejeque paso
aproxirnadarnenteuna herapara queel homoseenfr[eantesde
que secompleteun ciclo de autolirnpieza.Lapuertapuedeset
abiertacuandodesaparezcala palabra'LOCK'(Bloqueado)del
indicadorvisual.
, Elcontroly la puertapuedeestarbloqueada.Vetp%. 55.
Sejunta humedad en laventana del homo o salevaporper
el respiraderodel homo.
• Estoesnormalcuandosecocinanalirnentosconalto contenido
de hurnedad.
• Se us6hurnedadexcesivacuandolimpi6 laventana.
Hayun oJorfuerte o humoleveeuandose enciendeel homo.
° Estoesnormalen una estufanuevay desaparecer_despu6sde
unospocosuses.AI iniciarunciclo de autolirnpiezase"quernar_n"
losoloresrn_isr_pidarnente.
• Si seenciendeelventiladorayudar_a elirninarel hurnoy/o el clot.
• Suciedadexcesivade alirnentosenel panelinferiordelhomo. Use
un ciclode autolirnpieza.
C6digosde errores
• 'BAKE'(Horneado)o 'LOCK'puedendestellarr_ipidarnenteen el
indicadorparaavisarleque hayunerror o un problerna.Si'BAKE'
o 'LOCK'aparecenen el indicadorvisual,oprirna latecla
'CANCEL' (Cancela0.Si 'BAKE'o 'LOCK'contintian destellando,
desconectela energiael_ctricaal electrodorn6stico.Espereunos
pocosminutesyvuelvaa reconectarlaenerg[ael6ctrica. Si
continOandestellando,desconectela energ[ael6ctricadel
electrodorn_sticoy Ilarneal t6cnicode servicioautorizado.
• Si el homoest_dernasiadosucio,puedenocurrirdernasiadas
IlarnaradasIocual resultar_ien un c6digode errordurantela
lirnpieza. Oprirnalatecla 'CANCEL'y dejeque el homoseenfrfe
cornpletarnente,lirnpieel excesode suciedadyluegovuelvaa
programarelciclo de lirnpieza.Si el c6digode errorreaparece,
Ilamea un tc!cnicoautorizado.
Se escuchanruidos.
• Elhomoernitevariessonidosbajos. Ustedpuedeoft losrelc!sdel
homocuandoseenciendenapagan.Estoes normal.
51

• A medidaqueel homosecalientay seenfr[a,ustedpuedeoft
sonidosde piezasmet_licasque seexpandenycontraen. Estoes
normaly no dahar_su electrodom6stico.
No se escuchan se_ales sonorasy e( indicadorvisualno
se activa.
• Elhorno puedeestaren Modo sab_itico.(Verp%. 59).
'SAb' destellay luegese despliegacontinuamente.
. Elhomoest_en modosab_tico.Paraanularel modosab_tico,
optima y mantengaoprimidalatecla 'O(eck' [Reloj)durante
cincosegundos.
¢oclneMoenleestuf, e
'LO' [Bajo):Seusaparacalentaralimentosa
fuego lento,mantenerlosalimentoscalientesy
derretirchocolateo mantequilla.Sepuede
cocinar enel ajuste'LO'siemprequeel utensilio
est6tapado. Esposiblereducirelcalorgirando
la perillaa la posici6n'OFF'(Apagado).
AsegOresede que lallamaseaestable.
Controles superiores
Encendido sin piloto
Elencendidosin pilotoeliminala TAPADELQUEMADOR
necesidadde una luzpiloto
constantepermanente.Cada
uno de losquemadores
superiorestieneun encendedorde
chispa.Tengacuidadocuando
limpiealrededordel
quemadorsuperior.
Si el quemadorsuperior O,Bc
no enciende,verifiquesiel Encen(le(ler
encendedorest_roto,sucio
o mojado.
BASE DEL QUEMADOR
I
'H(' [Alto): Seusaparahacerhervirun I[quidoo I
alcanzarla presi6nadecuadaen unaolin a [
presi6n. Siemprereduzcael ajusteaun calor I
m_isbajo cuandolosI[quidoscomiencena hervirI
o cuandolosalimentoscomiencena cocinarse. I
Seusauna llamadetamaho intermediopara
continuarcocinando. Elalimento nosecocinard
rodsrdpido cuandoseusaun ajustede llama
rodsaltoqueel necesarioparamantenerun
hervorsuave. Elagua hiervea la misma
temperaturasi est_hirviendosuave
o vigorosamente.
Perillas de control de los
elementos superiores
Seutilizanparaencenderlosquemadoressuperiores. Sedisponede
unaselecciOninfinitade ajustesde calordesde'LO'a'HI'. Enel
ajuste'HI'sepuedesentir un topeouna muesca. Lasperillas
puedenserajustadasexactamenteen losajustescorrespondienteso
entrecualquierade ellos.
Lasilustracionescercade la perilla identificancual esel
quemadorquecontrola esaperilla. Potejemplo,la [_[_
ilustraciOna derechamuestrala ubicaci6ndel Front mO
quemadordelanteroizquierdo.
Programaci6n de los controles:
Eltamahoyeltipo de utensilioafectar_nel ajustedecalor.
1. Coloqueun utensiliosobrela rejilladel quemador.
• Lallamadelquemadorpuedelevantarseo parecerseparada
del orificio si nosecoloca un utensilioen la rejilla.
2. Optimay gire la perillaa la izquierdaal ajuste'LITE' (Encendido).
° Seoir_ un chasquido[chispa)y el quemadorse encender&
[Loscinco quemadoresproducir_nchispacuandosecolocala
perilla decualquierade losquemadoresen la posici6n'LITE'.)
3. Despu6squeel quemadorseha encendido,gire la perillaal
tamahode llamadeseado.
° Elencendedorcontinuar_produciendochispashastaque la
perilla seagirada m_sall_ de la posiciOn'LITE'.
52

Funcionamiento durante
una interrupci6n de la
energia el ctrica
1. Acerqueun f6sforoencendidoa latapadel quemador
superiordeseado.
2. Optimay gire la perillade control lentamentea la posici6n'LifE'.
3. Ajuste la llamaal niveldeseado.
Cubierta
Para evitar que la cubierta se descolore o
se manche:
o
o
Limpielacubiertade la estufadespuc!sdecadauso.
Limpielosderrames_cidoso azucaradostan prontocomola
cubiertasehayaenfriadopuesestosderrames
puedendescolorarlaporcelana.
A diferenciade unaestufaconquemadoresde
gasest_ndar,estacubiertano se[evantani
tampocoesremovible.No intentelevantarla
cubiertaper ning_nmotive.
Quemadores de gas sellados
Losquemadoresselladosdesu estufaest_naseguradosa la
cubiertay no han sidodiseiados paraset sacados. Debidoa que
losquemadoresest4nselladosen lacubierta,losderrameso
rebosesnoseescurrir_ndebajode lacubiertade la estufa.
Sin embargo,losquemadorespuedenserlimpiadosdespu6sde
cadauso. Lapartede la cabezadel quemadorpuedeset f4cilmente
sacadaparasulimpieza.07oren lap_gina/48lasinstruccionessobre
la limpieza.)
Lascabezasde losquemadoresdebenestarcorrectamente
colocadasen la basedel quemadorafin deque 6stefuncionede
maneraapropiada.
Quemador de alto
rendimiento 'Power Boost'*
Existeun quernadordealto rendimientoen •
suestufa,situadoenlaposiciOnderecha __ u,_Fro=,
delantera. EstoquemadorofrececocciOn __
m£sr£piday puedenserusadospara hervir
agua conrapidezo paracocinargrandes
cantidadesde alimento.
53
Quemador para cocinar a
Fuego Lento* ==,=o o
Simme O0 _I°TI
Estequemadorseencuentraenla posici6n /M_'_ ._j/l_,_,_
central. Elquemadorparacocinara fuego /// /
lentoofreceuna llamade menorintensidadpara (-°l[ i"_
calentarsalsasdelicadaso derretirchocolate. _.!
_EIr4dimennominaldeBTUvariar4cuandoseusa _::
gasIicuado.
Rejillas de los quemadores
Lasrejillasdebenestar f_
debidamentecolocadas //_ i J_-
a=esdecomenzara Jl
cocinar.Cuandoinstalelas
rejillas,coloquelos /_ u _
extremosde .as.engOetas//_-' /? '_,_
haca e centro,de manera
que coincidancon lasbarrasderechas.
La instalaci6nincorrectade lasrejillaspuederesultaren picaduras
de la cubierta.
No use los quemaderessintoner an utensiiioen [a rejila. El
acabadode porcelanade lasrejilas puede picarsesi no existe
un utensilioque abserba el taler de la llama del quemader.
Tongacuidadoal revolverel alimentode una ollao sartdncolocado
sobrela rejilla del quemador.Lasrejillastienen un acabadosuave
parafacilitarsu limpieza.La ollao sart6npuedenresbalarsi nose
sujetanpor el mango.Estopuedeprovocarderramede alimentos
calientesy constituir un riesgode sufrir una quemadura.
Aunquelasrejillasdelosquemadoressondurables,gradualmente
perder_nsu brilloy/o sedescolorardn,debido alas altas
temperaturasde la llamadelgas.
Notas:
• Unquemadorajustadodemaneracorrectacon orificios
limpiosseencender_dentrodeunospocossegundos. Si
est_ usandogasnaturallallamaser_azulconun cono interior
azulprofundo.
Si la llamadel quemadoresamarillao esruidosa,la mezclade
aire/gas puedeser incorrecta. P6ngaseen contactocon un
t6cnicode servicioparaajustarla. (Losajustesnoest_n
cubiertospot lagarantia.)
Congaslicuadosonaceptablesalgunaspuntasamarillasen la
llama. Estoesnormaly no esnecesariohacerningin ajuste.
• Conalgunostipos degas,usted puedeoir un "chasquido"
cuandoel quemadorsuperiorseapaga. Esteesunsonido
normaldel funcionamientodel quemador.
• Si la perillade control segira muyr_ipidamentede 'HI' (Alto)a
'LO' (Bajo),la llamapuedeapagarse,particularmentesi el
quemadorest£fifo. Si estoocurre,gire la perillaa la posici6n
'OFF',esperealgunossegundosyvuelvaencenderel
quemador.
• Lallamadebeserajustadademodoquenoseextiendam_s
all_ del hordedel utensilio.

Codnendoenelhomo
Panel de control
A B C
/
Clean
Broil
Conved
: Bake
Keep
warm
D E F
4 s6A)
8
G H I J K L IVl N
Elpanelde control hasidodisehadoparasu fdcil programaci6n.Elindicadorvisualen el panelde control muestrala horadel d[a,el
temporizadory lasfuncionesdel homo.Elpanelde control mostradoarriba incluyelascaracter[sticasde convecciOny adem_slas
caracteristicasespecfficasde otros modelos. (Elestilodel panelde controlvariaseg0nelmodel&)
iiiiiiiiii_
iiiiiiiiii_
iiiiiiiiii_
iiiiiiiiii_
iiiiiiiiii_
iiiiiiiiii_
iiiiiiiiii_
'Bake'[Horneado)
'Broil'[Asara
laparrilla)
'Clean'
(Limpieza]
'Delay'(Diferido]
TeclasNumericas
'Autoset'(Programaci6n
automdtica3
'KeepWarm'
[MantenerCaliente)
'Convect' (ConvecciOn]
'Cook& Hold'(Cocci6n
y mantenercaliente]
'Favorite'(Favorito)
Timer'O-emporizado0
'Clock'(Reloj}
'OvenLight'
[Luzdelhomo)
'CANCEL'(Cancela0
Seusaparahorneary asar.
Seusaparaasarala parrillay dorar
los alimentos.
Seusapara programarun eiclo
de autolimpieza.
Programael homo paracomenzara
hornearo limpiarsea una horaposterior.
Seusapara programarlos tiempos
y temperaturas.
Seusapara programartemperaturas
con rapidez.
Seusapara mantenercalienteen el
homo el alimentococinado.
Seusaparahornearo asado
por convecci6n.
Seusapara horneardurante untiempo
seleccionado,luego mantieneel alimento
calienteduranteuna hora.
Seusapara guardarun procedimiento
especificode 'Cook& Hold'.
Programaal temporizador.
Seusaparaprogramarla hora deldia.
Seusaparaencender oapagarla luz
del homo.
Cancelartodaslas funcionesa excepei6n
deltemporizadory el reloj.
54
Use de las teclas
• Oprimala tecladeseada.
• Optimalasteclasnumdricasparaprogramarel tiempo o
la temperatura.
• Optimala tecla 'Autoset O'para prograrnarlatemperatura.
• Seescuchardunasehalsonoracadavezque oprimaunatecla.
• Seescuchardndossefialessonorassi ocurreunerroren
la programaci6n.
Nora: Cuatrosegundosdespudsde haberoprimidolasteclas
num6ricaso latecla Autoset0,seprogramardautom_ticamente
eltiempo o la temperatura.Si transcurrenmdsde30 segundos
despu_sde haberoprimidouna tecla defuncidn y antesde
oprimirlasteclasnumdricaso la teclaAutoset0,la funci6nser_
canceladay el indicadorvisualvolverdal despliegueanterior.
'Clock' (Reloj)
Elreloj puedeserajustadoparadesplegarla horayaseaen formato
de 12horaso 24horas.Elreloj hasidoprogramadoen lafdbrica
parael formatode 12horas.
Para cambiar el reloj a formate de 24 betas:
1. Oprimay rnantengaoprirnidaslasteclas'CANCEL'y 'Favorite'
durantetressegundos.
• '12 Hr' destellaen la pantalla.
Oprimalatecla 'Autoset O'paraseleccionar
24 horas;oprimalanuevamentepara
seleccionar'12 Hr'.
Programela hora deldia siguiendolasinstrucciones
indicadasen lasecciOnProgramaci6ndelreloj.
0
Autoset

ProgramaciCn del Reloj:
1. Oprimalatecla 'Clock' (Reloj).
• Enel indicadordestellala horadel d[a.
2. OprimalasteclasnumCricasapropiadasparaprogramarla hora
del dfa.
• Losdospuntosdestellanen el indicador.
3. Oprimalatecla 'Clock' nuevamenteo esperecuatrosegundos.
• Losdospuntosperrnanecer_niluminados.
Cuandose conectaenergfaek!ctricaal homoo despuCsdeuna
interrupciCnde la energfaek!ctrica,la 01tirnahoradel reloj previaa la
interrupciCndestellar_en el indicador.
Paradesplegarla horadel d[acuandoel indicadorest6 mostrando
otrafunciCndetiempo,oprimalatecla 'Clock'.
La horadel reloj no puedeser cambiadacuandoel homo hasido
programadopara 'DelayCook' (CocciCnDiferido),'DelayClean'
(LirnpiezaDiferido]o 'Cook& Hold'(CocciOny MantenerCaliente
Diferido).
Para cancelar el despliegue del reloj:
Si nodeseaque el indicadorvisualmuestrela
horadel d[a: --_rAklrE_
Oprimay mantengaoprimidalasteclas
'CANCEL' (Cancelar]y 'Clock' duranteties
segundos.Lahora del dfadesaparecer_del
indicador.
Cuandose cancelael desplieguedel reloj,oprimala
tecla 'Clock' paradesplegarbrevementela horadel dfa.
Cuandose cancelael desplieguedel reloj,despuc!sde 15 minutos,el
control del homopasar_ia MododeReservapara ahorrarenerg[a.El
indicadorvisualestar_ien blancoy la luzdel homo nofuncionar& Para
activarel control ysacarlodel modode reserva,optima cualquiertecla.
Seescuchar_ndossefialessonoras.
Para restaurar el despliegue del reloj:
Oprimay mantengaoprimidalasteclas'CANCEL'y 'Clock' durante
tressegundos.La horadel dfareaparecer_del indicador.
'Timer' (Temporizador)
Elternporizadorpuedeserprogramaticde un minuto (0:01)hasta99
horasy 59minutos(99:59).
Eltemporizadorpuedeserusadoindependientementedecualquier
otraactividaddel homo.Adem_ispuedeserprogramaticcuandootra
funciOndel homoest6en funcionamiento.
Elternporizadorno controlael homo.Solamentecontrolauna serial
soilora.
Para programar el temporizador:
1. Oprimalatecla 'Timer'.
• Enel indicadorvisualdestellar_i'0:00'y 'TIMER',
2. Oprimalasteclasnum(!ricasapropiadashastaqueel tiempo
correctoaparezcaen el indicadorvisual,
• Losdospuntosy 'TIMER'continuar_ndestellando.
3. Oprimanuevamentelatecla 'Timer' oesperecuatrosegundos.
• Losdospuntosdejan de destellaryel tiempo comienzala
cuenta regresiva.
• El01timominutode la cuentaregresivadeltemporizadorse
desplegar_ien segundos.
4. AIfinal deltiempoprogramado,seescuchar_iunaserialsonora
largay 'End'(Fin)sedesplegar_en el indicadorvisual.
5. Oprimalatecla 'Timer' paradespejarel indicadorvisual.
Para cancelar el temporizador:
1. Oprimay mantengaoprimidalatecla 'Timer'
durantetressegundos.
U
2. Oprimalatecla 'Timer' y optima '0'usando A
lasteclasnumCricas.
AlJtese[
Bloqueo de los controles y de
la puerta del homo
Eltecladoy lapuertadelhomo puedenserbloqueadospara
seguridad,limpiezao evitarel usono autorizado.Lasteclasno
funcionan cuandoest_inbloqueadas.
Si el homoest_en funcionamiento,lasteclasnila puertapuedeset
bloqueada.
La horaactualdel dfaperrnanecer_en el indicadorcuandolasteclas
y la puertaestc!bloqueada.
Para bloquear:
Oprimay mantengaoprimidaslasteclas
'CANCEL'y 'Cook & Hold' (CocciOny Mantene0
durante tressegundos.(Oprimaprimerola
tecla 'CANCEL').
• Enel indicadorvisualaparece
'OFF'(Apagado].
• 'LOCK'(Bloqueado)destellacuandolapuerta
seest_ bloqueando.
Para desbloquear:
Oprimay mantengaoprimidaslasteclas'CANCEL'y 'Cook & Hold'
durante tressegundos.(Optimaprimerolatecla 'CANCEL').'OFF'
desaparecedel indicadorvisual.
Nota: Lasteclasyla puertadel homo no puedebloquearsesila
ltemperaturade homo es205° C[400° F] o superior.
CCdigos de errores
'BAKE'(Horneado]o 'LOCK'puedendestellarr_pidamentepara
advertirleque hayun error oun problem&Si'BAKE'o 'LOCK'
destellanen el indicadorvisual,oprimaletecla 'Cancel'. Si'BAKE'o
'LOCK'contint3andestellando,desconectelacorrienteel_ctrica
haciael artefacto.Espereunospocosminutosy vuelvaa conectarla
corrienteelCctrica.Si laspalabrasaOncontint3andestellando,
desconectelacorrienteelc!ctricahaciael artefactoy Ilamea un
tCcnicodeservicioautorizado.
55

Horneado
Para programar 'Bake' (Horneado):
1. Oprimalatecla 'Bake'.
• 'BAKE'y 'OOO'destellar_enel indicadorvisual.
2. Seleccionelatemperaturadel homo.Oprimalatecla
'Auteset O'(Programaci6nautomdtica}para 175° C
U
(350° F]o lasteclasnum6ricasapropiadas. /\utose[
• Cadavezque oprimalatecla 'Autoset0' la ternperaturase
aumentarden 15° C(25° F].
• Latemperaturadel homopuedeserprogramadade 75° a
285° C070°a 550° F].
3. Oprimalatecla 'Bake' nuevamenteo esperecuatrosegundos.
• 'BAKE'dejar_de @stellaryse iluminar_enel indicadorvisual.
Horneado o asado
per convecci6n
(modelos selectos)
Caande herneeper cenvecei6n,pregrame latemperatura
normal de herneade.Elcontrol reducir4autom_ticamentela
temperaturaprogramadaen 15°C (25° F}.Enel indicadorvisualse
desplegar_la temperaturaprogramada.Elventiladerde
cenvecci6ncemenzar_a funcienar despu_sde que el home
haya estade encendideduranteqapprex,cince minutes.
Para programar 'Convect' (ConvecciOn):
1. Oprimalatecla 'Cenvect'.
• 'BAKE'y el (conedel ventiladordestellar_n. ; Convect
• '000'destellar4enel indicadorvisual.
• Enel indicadorvisualsedesplegar_38° (100°}o latemperatura
realdel homosi esqueessuperiora38° C (100°F}.La
temperaturaaumentar4en incrementosde3° C(5° F}hasta
Ilegara latemperaturaprogramada.
4. Esperea que el homose precalientedurante8-15 minutes.
• Cuandoel homo Ilegaa latemperaturaprogramadase
escuchar_unasepalsonoralarga.
• Latemperaturaprogramadasedesplegar_ien el indicador
visual.
• Paraverificarlatemperaturaprogramadaduranteel
precalentamientodel homo,oprimalatecla 'Bake'.
5. Coloqueel alimentoen el homo.
6. Verifiqueelprogresode lacocci6ncuandohayatranscurridoel
tiempo mfnimorecomendado.Contin0ela cocci6nsi esnecesario.
7. AIt6rminode la cocciOn,oprimala tecla 'CANCEL'.
8. Retireel alimentodel homo.
Notas:
• Paracarobiarla teroperaturadel homoduranteelprocesode
cocci@,oprimala tecla 'Bake', luegooprima'Auteset e' o las
teclasnum_ricasapropiadashastaque sedesplieguela
temperaturadeseada.
Paracambiarla teroperaturadel homodurante'Preheat',
oprimadosvecesla tecla'Bake', luegooprima'Auteset e'
o Insteclasnum6ricasapropiadashastaquesedesplieguela
temperaturadeseada.
Si olvidaapagarel homo,seapagar_autom4ticamentedespu@
de transcurrir12horus.Si deseadesactivarestacaracterfstica,
yeala p_gina59.
Diferencias del horneado entre st= homo
antiguo y st= homo nuevo
Esnormalobservaralgunasdiferenciasen el tiempode horneadode
suhomo antiguoy suhomo nuevo.Vea "Ajustedela Teroperatura
delHoroo"en lap_gina60.
2. Seleccionelatemperaturadel homo. Oprimalatecla A
'Auteset 0' para175° C(350°F] o lasteclas
U
num_ricasapropiadas. Autoset
•Cada vezque oprima[atecla 'Autoset O'latemperaturase
aumentar_en 15° C(25° F}.Latemperaturadel homo puede
set programadade75°a 285° C (170°a 550° F].
3. Oprima[atecla 'Cenvect' nuevamenteo espere
cuatrosegundos.
• 'BAKE'dejar_idedestellar.
• Enel indicadorvisualsedesplegar_38° (100°}o [a
temperaturarealdel homosiesque essuperiora38° C
(100° F].La temperaturaaumentar_ien incrementosde 3° C
(5° F}hastaIlegara latemperaturaprogramada.
• El(conedelventiladorcomenzar_a girar.
/4. Esperea que el homoseprecalientedurante8-15 minutes.
° Cuandoel homoIlegaa la temperaturaprogramadase
escuehar_unasepalsonoralarga.
° Sedesplegar_la temperaturaprogramada.
• Paraverificarla temperaturaprogramadaduranteel
precalentamientodel homo, optima latecla 'Cenvect'.
5. Coloqueel alimentoen el homo.
6. Verifiqueel progresode la cocci6ncuandohayatranscurridoel
tiempo minimorecomendado.Contin0ela cocci6nsi
esnecesario.
7. AIt6rminode la cocciOn,oprimalatecla'CANCEL'. (CANCEl")
8. Retireel alimentodel homo.
Notas:
° Los tiemposde asadopueden variar con los diferentescortes
de came.
° Noesnecesarioprecalentarelbornecuandoseasanporconvecci@
cortesde camegrandes.
56

'Cook & Hold' (CocciOny
mantener caliente)
Cuando se usa laopci6n 'Cook & Hold', el homo comienza a calentar
inmediatamente despu_s de que el control ha sido programado.
Luego, el homo cocina durante un perfodo de tiempo especificado.
Cuando ese tiempo expira, el homo mantendr_ el alimento caliente
hasta durante una hora y luego se apagar_ automdticamente.
Para programar 'Cook & Hold':
1. Oprima la tecla 'Cook & Bold'.
• 'HOLD' destellar4 para indicarle que usted
est_ programando 'Cook & Hold'.
• '00:00' destellar_ en el indicador visual.
2. Seleccione la cantidad de tiempo que usted desea cocinar
usando las teclas num6ricas.
• 'HOLD' (Mantener) continOa destellando.
• Eltiempo se iluminar_ en el indicador visual.
• Eltiempo puede programarse de 10 minutos (00:10) a
11 horas, 59 minutos (11:59).
3. Cuando HOLD estd destellando, optima 'Bake'
(Horneado] o 'Convect' (ConvecciOn) y
seleccione la temperatura del homo. Oprima la
tecla 'Autoset O' (Programaci6n automdtica) para f-_
175° C (350° F)o las teclas num6ricas apropiadas. U
• Enel indicador visual destellard el nornbre Autoset
del ciclo deseado.
• La temperatura del homo puede ser programada de 75° a
285° C (170° a 550° F].
4. Oprima nuevamente la tecla del ciclo deseado O espere
cuatro segundos.
• El hombre del ciclo deseado permanecer_ iluminado.
• Enel indicador visual se desplegar_ el tiempo de cocci6n.
• La temperatura real del homo se desplegar_ durante
el precalentamiento.
• La temperatura programada se desplegard cuando el homo se
haya precalentado.
Caando haya expirado el tiempo de cocci6n:
• Se escuchar_n cuatro so,ales sonoras.
• 'HOLD' y 'WARM' (Caliente] se iluminar_n.
• Enel indicador se desplegar_ 75° (170°] y la hora del d[a.
Despues de aria hora en 'HOLD WARM'
(Mantener caliente):
• El homo se apaga autom_ticamente.
• 'HOLD' y 'WARM' se apagan.
• Retire el alimento del homo.
Para cancelar 'Cook & Hold' en cualquier momento:
Oprima la tecla 'CANCEL' (Cancelar]. Retire el alimento
del homo.
'Delay Cook & Hold'
(Cocci0n y mantener caliente diferido)
Cuando usa 'Delay' (Diferido], el homo comienza a cocinar mds
tarde en el d[a. Programe la cantidad de tiempo que usted desea
diferir antes de que se encienda el homo y cuanto tiempo desea
cocinar el alimento. El homo comienza a calentar en la hora
seleccionada y cocina durante el tiempo especificado.
Eltiempo diferido puede programarse de 10 minutos (00:10) hasta
11 horas, 59 minutos (11:59).
Para programar an ciclo de 'Cook & Hold' diferido:
1. Oprima la tecla 'Delay 1'.
"1
. 'DELAY' se destella en el indicador. |
, '00:00' destella en el indicador. Delay
2. Usando las teclas num6ricas apropiadas, pmgrame
la cantidad de tiempo que usted desea diferir el
comienzo del ciclo 'Cook & Hold'.
3. Optima la tecla 'Cook & Hold'.
• 'HOLD' y 'DELAY' destellan en el
indicador visual.
° '00:00' destella en el indicador visual.
4. Programe la cantidad de tiempo que usted desea
cocinar usando las teclas numdricas.
5. Oprima 'Bake' o 'Conveet'. Bake
6. Prodrame la temperatura del homo deseada ...........................................
oprimiendo la tecla 'Autoset O' o las teclas
numdricas apropiadas. 0
° '175°' ('350°'] se iluminard cuando se oprime Autoset
'Autoset O'.
° Despu6s de cuatro segundos, el tiempo diferido programado
aparecer4 en el indicador visual.
• 'HOLD' se apaga.
• Las palabras 'BAKE' y 'DELAY' permanecen ihminadas
para recordarle que se ha programado un ciclo de
'Cook & Hold' diferido.
Notas:
• No use 'Cook & Hold' diferido para articulos que requieren un
homo precalentado, tales como pasteles, galletas y panes.
° No use 'Cook & Hold' diferido si el homo ya est_ caliente.
57

'Broiling' (Asar a la parrilla)
Para programar 'Broil' (Asado):
1. Oprimalatecla 'Broil'.
• 'BROIL'y 'SET'07alidar)destellan.
2.
Oprimalatecla 'Autoset O' (ProgramaciOn
autom_tica)una vezpara'HI broil' (Asarala U
parrilla contemperaturaalta)o dosvecespara Autose[
'LO broil' (230° C[450° F]) (Asara la parrilla con
temperaturabaja).
• Enel indicadorvisualse desplegar_i'HI' (Alto)o 'LO' (Bajo).
• Selecciones'HI broil' (285° C [550° F]) paraasadoa la parrilla
normal. Seleccione'LO broil' (230°C [450°F])paraasarala
parrilla contemperaturabajaalimentosquedebenser
cocinadospor m_istiempo,tal comola came de ave.
DespuCsdecuatro segundos,el homocomenzar_a funcionar.
• 'BROIL'continuar_ iluminado.
'HI' o 'LO'permanecer_niluminados.
4. Paraun dorado6ptimo,precalienteel homodurante2 a 3
minutosantesde colocarel alimento.
5. Coloqueel alimentoen el homo.Cierrela puertadel homo.
Tabla de asar a la parrilla
Precalienteel horno durante2-3 minutos.
6. Dc!vuelta a la cameuna vezaproximadamentea mitadde
la cocciCn.
7. Cuandoel alimentoest6cocinado,oprimalatecla _Alkl¢'l:l_
'CANCEL'(Cancelar).Retireelalimentoy la
asaderadel homo.
• Lahora del dfavolver_a desplegarseen el indicadorvisual.
Notas:
• paramejoresresultadoseuandoasea laparrilla,useuna
asaderadise_adapara asara la parrilla.
° 'Hi' seusapara la mayor[ade losasadosa la parrilla. Use'LO
broil'cuandoasea laparrilla alimentosque necesitancocciCn
prolongada. Latemperaturainferiorpermitequeel alimento
secocine hastaquedar bienasadosindorarsedemasiado.
• Paracambiarla temperaturadelhomodurantela asara la
parrilla,oprimalatecla 'Broil', luegooprimala tecla 'Autoset
O'paracambiarel ajustede asadoentre'LO'y 'HI'.
• Lostiemposdeasadoa la parrilla puedenset m_slargos
cuandoseseleccionala temperaturam_isbajade asara
la parrilla.
° Elmayorde losalimentosdebeset dadovueltacuandoest_a
mitaddel tiempode asar.
'Keep War ' (Mantener caliente)
Paramantenercalientesen formaseguraalimentoscalienteso para
calentarpanesy platos.
Para programar 'Keep Warm':
1. Oprimalatecla 'Keep Warm'en el
indicadorvisual.
° 'WARM' (Caliente)destellaen el indicadorvisual.
Keep
wal'm
• 'OOO'destellaen el indicadorvisual.
2. Seleccionelatemperaturade 'KeepWarm'.
Oprimalatecla 'Autoset O'o lasteclas
numCricasapropiadas.
0
Autose[
Carnede res Biftec,2,5cm (1") 5 A medic asar 15- 20minutos
5 Bienasado 18- 24minutos
Hamburguesas,1,9cm (3/4")de grosor 5o 6 Bienasado 13- 18minutos
Came de cerdo Tocino 5 Bienasado 8- 10minutos
JamCn,precocido,rebanadade
1,3em(1/2") 5 8- 12minutos
Chuletas,2,5cm (1") 5 22- 26minutos
Carnede ave 4 30- 45minutos('Lo Broil')
Mariscos 5 8- 12minutos
Pechugasde polio,con hueso
Filetesde pescado
Tajadasde pescado,
2,5cm (1") de grosor
Colasde langosta,85-115g
(3-4onzas)cadauna
Tibio
Bienasado
Bienasado
Hojaldrado
Hojaldrado
Biencocidas
10 - 15 minutos
7- 10 minutos
Paraun exteriorm_sdoradoy m_sasadoy un interioramedic cocer,puedeset necesariodisminuirel tiempode cocciCnen el primerladoy
acercarm_slacame a la fuentede calor.
Nota: EstatablaessCIouna gu[a. Lostiempospuedenvariarconel tipo de alimentoqueseest_cocinando.
58

• 75° (170°) se iluminar_ cuando se optima la tecla 'Autoset 0'
(ProgramaciOn autom_tica].
• Cada vez que optima la tecla 'Autoset 0', la temperatura
aumentard en 3° C (5° F).
La temperatura de 'Keep Warm' puede ser programada de 63° a
90° C (145° a 190°F).
'WARM' y la temperatura se desplegardn en el indicador cuando
la funci6n est6 activa.
Para cancelar 'Keep Warm':
1. Optimalatecla 'CANCEL' [Cancela0.
2. Retireel alimentodel homo.
NotaS:
• ParacalidadOptimade losalimentos,losalimentoscocinados
en el homo debenser mantenidoscalientesper no rodsde 1 a
2 horas.
• Paraevitarqua losalimentossesequen,c0braloslevemente
con papalde aluminioo unatapa.
• Para caJentarpanecilles:
- cubralevementelospanecillosconpapelde aluminioy
colOquelosen el homo.
- optima lasteclas'Keep Warm' y 'Auteset 0'.
- calientedurante 12a 15minutes.
• Para calentar plates:
- coloque2filas de cuatro platescarlauna en el borne.
- optima lasteclas'Keep Warm' y 'Aateset 0'.
- calientelosplatesdurantecincominutes,apagueel homoy
deje losplatesen el homodurante 15minutesm_s.
- usesolamenteplates resistentesal homo,verifique con
el fabricante.
- no coloquelosplatescalientessobreuna superficiefr[a
puesel cambiordpidode temperaturapuedecausarfisuras
superficialeso rotura.
Cierre autom tico/
NIodo sab tico
Elhomoseapagardautom_ticamentedespuOsde 12horassi usted
Iodejaaccidentalmenteencendido. Estacaracteristicade seguridad
puedeserdesactivada.
Para caneelar el cierre autom_tico de 12 betas y
dejar que el homo funciene eontinuamente durante
72 betas:
1. Oprimay mantengaoprimidala tecla'Clock'
(Reloj]durantecincosegundos.
• 'SAb'sedesplegar_ydestellarddurantecinco segundos.
• 'SAb'sedesplegar_continuamentehastaquasedesactiveo
hastaqua transcurrael Ifmitede 72horas.
• 'BAKE'(Horneado)tambiOnsedesplegar_si seestdusando
un ciclo de horneadocuandoel homoest_en modesabdtico.
• Lafuncidn'BAKE'esla E_nicaquesepuedeutilizarconel mode
sab4tico.Lasdern4sfunciones(temporizador,mantener
caliente,autolimpieza,etc.)sebloquear4nduranteel
modesab4tico.
• Sepuedeprogramar'Cook& Hold' (Cocci6ny mantener
caliente]duranteel Modesab_tico,sin embargonose puede
programar'DelayCook& Hold'(CocciOnymantenercaliente
diferido).
Para cancelar el NIodo sab_tice:
1. Oprimalatecla 'Clock' durantecincosegundos.
• 'SAb'destellar_durantecincosegundos.
• Laheradel dfareaparecerden el indicadorvisual.
O
2. Despuc!sde72 horas,el modesab_ticoterminard.
• 'SAb'destellar_durantecincosegundos.
• Laheradel d[areaparecerden el indicadorvisual.
NotaS:
• ElModesabdticopuedeseractivadoen cualquiermemento,
est6o no el homoencendido.
• ElModesabdticonose puedeactivarsilasteclasest_n
bloqueadaso cuandolapuertaestd bloqueada.
• La mayor[ade lasadvertenciasy mensajesy todaslas
se_alessonorasest4ndesactivadascuandoel Mode
sab_ticoest_active.
• Siel homo est,1horneandocuandoelModesab_ticoes
programado,'BAKE'seapagardcuandosecanceleel
horneado. Noseemitir_nse_alessonoras.
• Mientrasel homoest_en Modesab_ticola luzdel homose
encender_autom4ticamentecuandoseabra la puerta. Sise
deseala luzdelhomoduranteel Modesab_tico,datadebeser
encendidaantesde qua comienceel Modesab_tico.
• Cuandocomienzael Modesab_tico,latemperaturaquase
despliegaserdlatemperaturaprogramadaenvezde la
temperaturarealde la cavidaddel homo. Noseemitird la
sepalsonorade precalentamiento.
• Elciclo de autolimpiezay bloqueoautom_ticode la puertano
funcionar_duranteel Mode sab_tico.
• Sioprimela tecla 'CANCEL'(Cancela0secancelar_unciclo
'bake',sin embargoel controlpermanecer_en Modesabdtico.
• Sifalla lacorrienteeldctrica,cuandowJelvala energiael homo
seactivar_en Modesab_ticocon72horasrestantesy ning0n
ciclo active.
CaBbie de la temperatura
de °F/°C
1. Elajustede fdbricade lamedidadetemperaturaesFahrenheit.
2. Paracambiarelajuste,optimay mantengaoprimidaslas
teclas'CANCEL'y 'Bake' (Horneado)al mismotiempo durante
tressegundos.
3. Escuchar4unasepalsonoray el ajusteactual (°Fo °C)se
desplegar4en lapantalla.[Sino serealizaningOncambio,la
estufaregresar_al ajusteactualdespuOsde 30segundos).
59

4. Paracambiarel ajuste,oprima latecla 'Autoset O'(Programaci6n
autom_tica).Oprimalanuevamentepararegresaral ajuste
anterior.Esperecincosegundosy el ajusteseguardar&
Ajuste de la temperatura
del homo
Laexactitudde lastemperaturasdel hornoescuidadosamente
probadaen laf_brica. Esnormalnotaralgunadiferenciaentrela
temperaturade horneadooen el dorado,entreun homo nuevoy un
homoantiguo. A medidaque el homose usa,la temperaturadel
homo puedecambiar.
Ustedpuedeajustarla temperaturadel homo,siconsideraquesu
homo noest,1horneandoo dorandoenforma correcta. Paradecidir
cuantodebecambiarla temperatura,programelatemperaturadel
homoa 15° C (25° F)m_salta o m_isbajaque latemperatura
indicadaen sus recetas,luego hornee. Losresultadosde la
"prueba"puedendarleuna ideade cuanto debeajustarla
temperatura.
Para ajustar la temperatura del homo:
1. Oprimalatecla 'Bake' (Horneado).
2. Programe285°C (550° F)oprimiendolasteclas
num6ricasapropiadas.
3. Oprimay mantengaoprimidalatecla'Bake' durantevaries
segundoso hastaque 00° aparezcaen el indicadorvisual.
Si latemperaturadel homoha sidepreviamenteajustada,el
cambioaparecer_enel indicadorvisual. Perejemplo,si la
temperaturadel homoruereducidaen 8°C (15° F)elindicador
mostrar_i"- 8°" ("-15°").
4. Oprimalatecla 'Autoset O'paraajustar latemperatura.
Cadavezque seoptimalatecla 'Autoset0', latemperatura
cambiaen 3°C (5°F). Latemperaturadel homopuedeser
aumentadao disminuidaen 3° a 20° C(5° a35° F).
Si oprimelatecla 'Autoset0',la temperaturadel homopasar_i
per un ciclo deaumentodetemperatura(5,10... 35).Si
contin0a oprimiendola tecla'Autoset0'),latemperaturadel
homopasar_per un ciclo dedescensodetemperatura(-35,
-30...-5).
5. Laheradel dfa reaparecer_autom_ticamenteen el
indicadorvisual.
Nonecesitareajustarla temperaturadel homosi hayunafallao
interrupci6nde energfael6ctrica. Elajustede latemperaturaes
v_lidopara'Bake'y 'Convect'(Convecci6n)solamente.Las
temperaturasde asara la parrillay de limpiezano puedenset
ajustadas.
'Favorite' (Favorite)
Latecla 'Favorite'le permiteguardaren memoriael tiempoy la
temperaturade un ciclo 'Cook& Hold' (CocciOny mantener
caliente).
Paraprogramarun ciclo favorite,debeestaractivao recientemente
programadauna funci6n de 'Cook& Hold'.
Para programar un nuevo ciclo Favorite o para
guardar come Favorite un ciclo 'Cook & Hold' que
este en progreso:
1. Programeun ciclo de 'Cook& Hold'comesedescribeen la
secci6n 'Cook& Hold'on la p%ina 57.
2. Oprimay mantengaoprimidalatecla 'Favorite'
durantetressegundos.
• Elciclo'Cook& Hold'recientementeprogramadoo en
progresoser_guardadoenmemoria.
• Seoir_ unasepalsonorapara indicarque el control ha
aceptadoel ajuste'Favorite'.
Para comenzar un title programado come Favorite:
1. Oprimalatecla 'Favorite'.
• Sedesplegar_el tiempoy la temperaturaparael ciclo 'Cook&
Hold'programado(sinohayciclo'Cook& Hold' programado,
en el indicadorvisualsedesplegar_i'nonE'.)
2. Oprimalatecla 'Bake' o 'Convect'.
• Elciclo Favoritecomenzar_inmediatamente.
• Elhombredel ciclo seleccionadosese iluminar_enel
indicadorvisual.
• Eltiempo de cocci6nseiluminar_enel indicadorvisual.
Cuando ha e×pirado el tiempo de cocci6n:
• Elnombredel ciclo seleccionadoseseapagar&
• Seiluminar_n'HOLD'(Mantener)y 'WARM'(Caliente).
• Enel indicadorsedesplegar_i'75°, ('170°').
Para cancelar un title favorite en progreso:
1. Oprimalatecla 'CANCEL'. _ANICFh
• Elciclofavoriteguardadoen memoriano
ser_afectado.
2. Retireel alimentodel homo.
Encendido sin piloto
Suestufaest,1equipadacon unsistemade encendidosin piloto.
Conestetipo de encendido,el gasse apagaautom_ticamentey
el homono operar# duranteunainterrupciSn de la
corriente eldctrica.
Un f6sforoencendido no encender_ el quemador del homo.
No se debe intentar encendereJhomo durante una
interrupci6nde la corrienteel_ctrica.
Ventilador del homo
Seusaunventiladorde convecciOnparacircular el airecalienteen
el homocuandoseseleccionala opciOnde convecci6n.Se activa
autom_ticamente5 minutesdespu6sde quese oprimelatecla
'Convect'y seapagar_cuandosecancele'Convect'.
Nora: Elventiladorde convecci6nseapagar_iautom_iticamente
cadavezqueseabra la puertadel homo.
6O

Respiradero del homo
Cuandoel hornoest_en uso,el dreacercadel respiraderopuede
calentarseIosuficientecomoparacausarquemaduras.Nunca
bloqueelaaberturadel respiradero.
El respiraderodel homose encuentradebajo del respaldo
RESPIRADERO
DELHORNO
protector de su estufa.
No coloque pl_sticos
cerca de la abertura
del respiradero pues
el calor que sale
puede deformar o
derretir el pldstico.
'Oven Light' (Luz del homo)
La luzdel homoseenciendeautomdticamente
siempreque seabrela puertadel homo. Cuandose
cierrala puerta,oprimala teclaOven Light (Luzdel
homo)para encendero apagarla luzdelhomo.Seescuchar_una
seSalsonoracadavezqueseoprimalatecla 'OvenLight'.
Panel inferior del homo
Protejael panelinferiordelhorno contraderrames,especiahnente
azucaradoso ac[dicos,puespuedendescolorarla porcelana
esmaltada.Useel utensiliodetama_ocorrectoafin de evitar
derrames.No coloqueutensiiiosni papel deaiuminio
directamente enla parte inferiordel homo.
Parrillas del homo
Posiciones de ia parrilla
PARRILLA7 [posici0n _! _.
m_salta): Parahornear #;_i _,. 7
conuna solaparrillaen I1-_, --_: 6
bandejasde hornear __f s
galletasy paraasara la _ 4
3
parrilla. 2
1
PARRILLA6: Seusapara Panel
inferior
hornearconuna sola del
parrillaen bandejasde Horneado porconvecci6n Homo
con dos parrillas
horneargalletas,paraasar
a la parrilla y para horneado con varias parrillas.
PARRiLLA 5: Para hornear con una sola parrilla en bandejas de
hornear galletas y para asar a la parrilla.
PARRiLLA 4: Se usa para hornear con una sola parrilla en bandejas
de hornear galletas, pasteles de una capa, cacerolas, asar a la
parrilla y para horneado con varias parrillas.
PARRiLLA 3: Para hornear con una sola parrilla en bandejas de
hornear galietas, cacerolas, pasteles de varias capas, barras de pan,
pasteles de una capa y para horneado con varias parrillas.
PARRiLLA 2: Se usa para hornear con una sola parrilla en bandejas
de hornear galletas, para asar cortes de came peque_os y para
horneado con varias parrilias.
PARRILLA1:Seusaparaasarcortesde camegrandesycame
de ave.
Panel inferior del Homo: Coloque la
parrilla del homo en los soportes en
relieve del panel inferior del homo.
Use para disponer de espacio
adicional cuando cocine comidas
grandes en el homo.
HORNEADOCON PARRILLASMULTIPLES:UseInsposiciones
3y6o2y4.
Nora: Cuandosehorneapor convecci0ncondosparrillas,revise
losalimentosen eltiempo m[nimosugeridoparaevitarque
Iquedendemasiadodoradoso demasiadococinados.
Elhomotiene dosparrillas. TodasInsparrillastienen un bordecon
topede enganche.
Para retirar la parrilla:
1. Tiredela parrilladerechohacia
afuerahastaquesedetengaen
la posici6ndel topede
enganche.
2. Levanteelfrente de la parrillay
tire de la parrilla haciaafuera.
Para reinstalar la parrilla:
1. Coloquela parrilla en lossoportesde la parrilla enel homo.
2. Inclinelevementehaciaarribael extremodelantero;deslicela
parrillahaciaatrdshastaque pasosobrelostopesde enganche.
3. Bajeel frente de la parrillay deslicelahaciaadentrodelhomo.
No cubra una parrillacompleta con papel de aluminio ni
coloquepapelde aluminio en el panelinferior del homo. Se
afectar_n los resultadosdel horneadoy se puededafiar el
panelinferior del homo.
Horneado de pasteles de capas en dos
parrillas
Paraobtenermejoresresultadoscuandohorneapastelesendos
parrillas,uselaposici6n2 y4 parahorneadoregulary la posiciOn3y
6 para horneadopor convecci0n(modelosselectos).
Coloquelospastelesen lasparrillascomosemuestra.
61

62

GARANT|A DE LOS ELECTRODOlVll STICOS
PRINCIPALES DE IViAYTAG CORPORATION
GA_NTJA LIMITADA DE UN Al_O
Duranteun ahoa partirde la fechade compra,siempreycuandosed6a esteelectrodomOsticoprincipalunusoy mantenimientode
conformidadcon lasinstruccionesadjuntaso provistascon el producto,MaytagCorporationoMaytagLimited[enIosucesivodenominado
"Maytag"]sehar_icargodel costodelaspiezasespecificadasde f4bricay deltrabajodereparaci6nparacorregirdefectosenlos materialeso
en la manode obra.Elserviciodeber_sersuministradopot unacompa_iade serviciodesignadapot Maytag.Estagarant[alimitadaseaplica
sOlocuandoel electrodomc!sticoprincipalseuseenel palsen dondesecompr6.
IVlAYTAG NO PAGARA POR LOS SIGUIENTES ARTJCULOS
1. Visitasde serviciotOcnicoparacorregirlainstalaci6ndesu electrodom_sticoprincipal,paraense_arlea usarsuelectrodomOstico
principal,paracambiaro repararfusiblesdomOsticoso paracorregirla instalaci6nelc!ctricao de la tuber[ade la casa.
2. Visitasde serviciotc!cnicopararepararo reemplazarfocosparaelectrodomc!sticos,filtros deaire ofiltros de agua.Esosinsumosest_n
excluidosde la coberturade la garantia.
3. Reparacionescuandosu electrodom(!sticoprincipalseusedeun mododiferenteal domOsticonormalde unafamilia.
4. Dahoscausadospot accidente,alteraci6n,usoindebido,abuso,incendio,inundaciOn,actosfortuitos,instalaci6nincorrecta,instalaci6n
que no est6de acuerdocon losc6digoselOctricoso de plomeria,o el empleode productosno aprobadospor Maytag.
5. Cualquierp(!rdidade comidadebidoa fallasdel refrigeradoro del congelador.
6. Piezasde repuestoo gastosde reparaci6nparaelectrodomc!sticosque seempleenfueradelosEstadosUnidoso Canad&
7. Recogiday entrega.Esteelectrodom(!sticoprincipalest_dise_adoparaserreparadoen el hogar.
8. Reparacionesde piezaso sistemascomoresultadode modificacionesno autorizadasque sehayanefectuadoen el electrodomOstico.
9. Gastosde viajey transporteparaobtenerserviciodelproductoen lugaresremotos.
10.LaremociOne instalaciOnde suelectrodomc!sticosi estuvierainstaladoen un lugar inaccesibleo si noestuvierainstaladode
conformidadcon lasinstruccionesde instalaci6npublicadas.
11.Piezasde repuestoo gastosde reparaci6ncuandoelelectrodomOsticoprincipalseuseen un paisdiferentedel paisen dondese
compr6.
EXCLUSION DE GARANTJAS llVlPLJCITAS
LIMITACIONDERECURSOSELONICOY EXCLUSIVORECURSODELCLIENTESEGONLOSTERMINOSDEESTAGARANTiALIMITADASERA
ELDEREPARARELPRODUCTOSEGONSEESTIPULAENLA PRESENTE.LASGARANTiASIMPLiClTAS,INCLUYENDOLASGARANTiASDE
COMERCIABILIDAD0 DECAPACIDADPARAUN PROPOSITOPARTICULAR,SERANLIMITADASA UNANO0 AL PERIODOMASCORTO
PERMITIDOPORLEY.MAYTAGNOSERESPONSABILIZARAPORDANOSINClDENTALES0 CONSECUENTES.ALGUNOSESTADOSY
PROVINClASNO PERMITENLASEXCLUSIONES0 LIMITACIONESPORDANOSINCIDENTALES0 CONSECUENTES,0 LIMITACIONES
ACERCADECUANTODEBEDURARUNAGARANTiAIMPLiCITADECOMERClABILIDAD0 CAPACIDAD,DEMODOQUELASLIMITAClONES
0 EXCLUSIONESARRIBAMENCIONADASPUEDENNOAPLICARSEENSUCASO.ESTAGARANTiALEOTORGADERECHOSLEGALES
ESPEClFICOSY ESPOSIBLEQUEUSTEDTENGATAMBIENOTROSDERECHOSQUEPUEDENVARIARDEUNESTADOA OTRO0 DEUNA
PROVlNCIAA OTRA.
Estagarant[anotienevigorfuerade loscincuentaEstadosUnidosy Canad&POngaseen contactocon el distribuidorautorizadode Maytag
paradeterminarsicorrespondeotragarant[a.
Si necesitaservicio,consulteprimerola secci6n"Solucidndepmblemas"del Manualde usoy cuidado.DespuOsde consultarla secciOn
"Solucidndeproblemas',puedeencontrarayudaadicionalen la secci6n"Ayudao serviciot4cnico",o Ilamandoa Maytag.EnEE.UU.,Ilameal
1=800=688=9900.EnCanad&Ilameal 1=800=688=2002.
®Registered Trademark/TM Trademark of Maytag Corporation or its related companies.
Part No, 8113P666 60 Used under license by Maytag Limited in Canada
© 2006 ®Marca registrada/Tr'4Marca de comercio de Maytag Corporation o sus compaiiias asociadas. 11/06
All rights reserved. Usada bajo licencia por Maytag Limited en Canada Printed in U.S.A.
Todos los derechos reservados. ®Marque depos_e/Tr'4Marque de commerce de Maytag Corporation ou de ses compagnies affili_es. Impreso en EE_UU.
Tous droits r_serv_s. Utilise sous licence par Maytag Limited au Canada Imprim_ aux E.-U.
Transcripción de documentos
GaS ?vlA A(3 - Precision Touch Control 800 Table of hnportant Safety Instructions ............................... Oven Cooking ....................... 11 =18 1-4 Baking Cook & Hold Care & Cleaning ....................... 4=6 Delay Cook & Hold Broiling Keep Warm Sabbath Mode Oven Racks Self-Clean Oven Cleaning Procedures Maintenance ............................. 7=8 Oven Window & Light Removal of Gas Appliance Troubleshooting ....................... 8=9 Surface Cooking .................... Surface Controls Sealed Gas Burners Form No. A!11/06 Part No. 8113P666 Warranty 60 _ & Service .................... 19 Guide d'utilisation et d'entretien ............................... 20 9-10 Guia de uso y cuidado @2006 All rights .............. 42 reserved, Litho U.S.A. technician. Do not attempt to adjust, repair, service, or replace any part of your appliance unless it is specifically recommended in this guide. All other servicing should be referred to a qualified servicer. Have the installer show you the location of the gas shut off valve and how to shut it off in an emergency. Always disconnect power to appliance Warning and important Safety instructions appearing in this guide are not meant to cover all possible conditions and situations that may occur. Common sense, caution, and care must be exercised when installing, maintaining, or operating the appliance. Always contact the manufacturer about problems or conditions you do not understand. Recognize Safety Symbols, Words, Labels General Read and follow aJl instructions before using this appliance to prevent the potential risk of fire, electric shock, personal injury or damage to the appliance as a result of improper usage of the appliance. Use appliance only for its intended purpose as described in this guide. To ensure proper and safe operation: Appliance must be properly installed and grounded by a qualified instructions before servicing. Tocheckif deviceis properlyinstalled,lookunderneath rangewith a flashlightto makesureoneofthe rear levelinglegsis properlyengagedinthe bracketslot.The anti-tipdevicesecuresthe rearlevelinglegto the floor whenproperlyengaged.Youshouldcheckthis anytime the rangehasbeenmoved. Child Safety To Prevent Fire or Smoke Damage Be sure all packing materials are removed from the appliance before operating it. Keep area around appliance clear and free from combustible materials, gasoline, and other flammable vapors and materials. If appliance precautions blowing is installed near a window, proper should be taken to prevent curtains from over burners. NEVER leave any items on the cooktop. The hot air from the vent may ignite flammable items and may increase pressure in closed containers which may cause them to burst. NEVER leave children alone or unsupewised appliance when it is in use or is still hot. near the NEVER allow children to sit or stand on any part of the appliance as they could be injured or burned. Children must be taught that the appliance and utensils in it can be hot. Let hot utensils cool in a safe place, out of reach of small children. Children should be taught that an appliance is not a toy. Children should not be allowed to play with controls or other parts of the appliance. About Your Appliance Many aerosol-type spray cans are EXPLOSIVE when exposed to heat and may be highly flammable. Avoid their use or storage near an appliance. Many plastics are vulnerable to heat. Keep plastics away from parts of the appliance that may become warm or hot. De not leave plastic items on the cooktop as they may melt or soften if left too close to the vent or a lighted surface burner. To eliminate the hazard of reaching over hot surface burners, cabinet storage should not be provided directly above a unit. If storage is provided, it should be limited to items which are used infrequently and which are safely stored in an area subjected to heat from an appliance. Temperatures may be unsafe for some items, such as volatile liquids, cleaners or aerosol sprays. In Case of Fire Turn off appliance and ventilating hood to avoid spreading the flame. Extinguish flame, then turn on hood to remove smoke and odor. • Cooktop: Smother fire or flame in a pan with a lid or cookie sheet. NEVER pick up or move a flaming pan. • Oven: Smother fire or flame by closing the oven door. Do not use water on grease fires. Use baking soda, a dry chemical or foam-type extinguisher to smother fire or flame. Do not use the oven as a storage area for food or cooking utensils. The oven vent is located at the base of the backguard. Avoid touching oven vent area while oven is on and for several minutes after oven is turned off. Some parts of the vent and surrounding area become hot enough to cause burns. After oven is turned off, do not touch the oven vent or surrounding sufficient time to cool. areas until they have had Other potentially hot surfaces include cooktop, areas facing the cooktop, oven vent, surface near the vent opening, oven door, area around the oven door and oven window. Do not touch a hot oven light bulb with a damp cloth as the bulb could break. Should the bulb break, disconnect and its container. The food could be contaminated. power to the appliance electrical shock. bottom. This could result in risk of electric shock, fire, or Cooking before removing bulb to avoid NEVER use aluminum foil to cover oven racks or oven damage to the appliance. Use foil only as directed in this guide. Safety Always place a pan on a surface burner before turning it on. Be sure you know which knob controls which surface burner. Make sure the correct burner is turned on and that the burner has ignited. When cooking is completed, turn burner off before removing pan to prevent exposure to burner flame. Always adjust surface burner flame so that it does not extend beyond the bottom edge of the pan. An excessive flame is hazardous, wastes energy and may damage the appliance, pan or cabinets above the appliance. NEVER leave a surface cooking operation unattended, especially when using a high heat setting or when deep fat frying. Boilovers cause smoking and greasy spillovers may ignite. Clean up greasy spills as soon as possible. Do not use high heat for extended cooking operations. NEVER heat an unopened container on the surface burner or in the oven. Pressure build-up may cause container to burst, resulting in serious personal injury or damage to the appliance. Utensil Safety Use pans with flat bottoms and handles that are easily grasped and stay cool. Avoid using unstable, warped, easily tipped or loose-handled pans. Also avoid using pans, especially small pans, with heavy handles as they could be unstable and easily tip. Pans that are heavy to move when filled with food may also be hazardous. Be sure utensil is large enough to properly contain food and avoid boilovers. Pan size is particularly important in deep fat frying. Be sure pan will accommodate the volume of food that is to be added as well as the bubble action of fat. To minimize burns, ignition of flammable materials and spillage due to unintentional contact with the utensil, do not extend handles over adjacent surface burners. Always turn pan handles toward the side or back of the appliance, not out into the room where they are easily hit or reached by small children. NEVER let a pan boil dry as this could damage the Use dry, sturdy potholders. Damp potholders may cause burns from steam. Dish towels or other substitutes should never be used as potholders because they can trail across hot surface burners and ignite or get caught on appliance parts. Always let quantities of hot fat used for deep fat frying cool before attempting to move or handle. Do not let cooking grease or other flammable materials accumulate in or near the appliance, hood or vent fan. Clean hood frequently to prevent grease from accumulating on hood or filter. When flaming foods under the hood, turn the fan on. NEVER wear garments made of flammable material or loose fitting or long-sleeved apparel while cooking. Clothing may ignite or catch utensil handles. Always place oven racks in the desired positions while oven is cool. Slide oven rack out to add or remove food, utensil and the appliance. Follow the manufacturer's cooking bags. directions when using oven Only certain types of glass, glass/ceramic, ceramic or glazed utensils are suitable for cooktop or oven usage without breaking due to the sudden change in temperature. Follow manufacturer's instructions when using glass. This appliance has been tested for safe performance using conventional cookware. Do not use any devices or accessories that are not specifically recommended in this guide. De not use element covers for the surface units, stovetop grills, or add-on oven convection systems. The use of devices or accessories that are not expressly recommended in this manual can create serious safety hazards, result in performance problems, and reduce the life of the components of the appliance. using dry, sturdy potholders. Always avoid reaching into the oven to add or remove food. If a rack must be moved Cleaning while hot, use a dry potholder. Always turn the oven off at the end of cooking. Turn off all controls and wait for appliance parts to cool before touching or cleaning them. Do not touch the Use care when opening the oven door. Let hot air or steam escape before moving or replacing food. PREPARED FOOD WARNING: Follow food manufacturer's instructions. If a plastic frozen food container and/or its cover distorts, warps, or is otherwise damaged during cooking, immediately discard the food Safety burner grates or surrounding sufficient time to cool. areas until they have had Clean appliance with caution. Use care to avoid steam burns if a wet sponge or cloth is used to wipe spills on a hot surface. Some cleaners can produce noxious fumes if applied to a hot surface. Self-Clean Oven Users of this appliance are hereby warned that the burning of gas can result in low-level exposure to some of the listed substances, including benzene, formaldehyde and soot, due primarily to the incomplete combustion of natural gas or liquid petroleum (LP) fuels. Properly adjusted burners will minimize incomplete combustion. Exposure to these substances can also be minimized doors. Clean only parts listed in this guide. Do not clean door gasket. The door gasket is essential for a good seal. Care should be taken not to rub, damage, or move the gasket. Do not use oven cleaners of any kind in or around any part of the self-clean oven. Users of this appliance are hereby warned that when the oven is engaged in the self-clean cycle, there may be some low-level exposure to some of the listed substances, including carbon monoxide. Exposure to these substances can be minimized by properly venting the oven to the outdoors by opening the windows and/ or door in the room where the appliance is located during the self-clean cycle. It is normal for the cooktop of the range to become hot during a self-clean cycle. Therefore, touching the cooktop during a clean cycle should be avoided. Important IMPORTANT Safety Notice NOTICE REGARDING PET BIRDS: Never keep pet birds in the kitchen or in rooms where the fumes from the kitchen could reach. Birds have a and Warning very sensitive respiratory system. Fumes released during an oven self-cleaning cycle may be harmful or fatal to birds. Fumes released due to overheated cooking oil, fat, margarine and overheated non-stick cookware may be equally harmful. The California Safe Drinking Water and Toxic Enforcement Act of 1986 (Proposition 65) requires the Governor of California to publish a list of substances known to the State of California to cause cancer or reproductive harm, and requires businesses to warn customers of potential exposures to such substances. Save These instructions Self-Clean by properly venting the burners to the out- Oven for Future Reference During the cleaning process, the kitchen should be well ventilated to get rid of normal odors associated with cleaning. Before Self=Cleaning 1. Turn off the oven light before cleaning. The oven light may burn out during the clean cycle. 2. Remove all pans, and oven racks from the oven. The oven racks will discolor and may not slide easily after a selfclean cycle if they are not removed. 3. Clean oven frame, door frame, area outside of gasket, and around the opening in the door gasket with a nonabrasive cleaner such as Bon Ami* or detergent and water. The selfcleaning process does not clean these areas. They should be cleaned to prevent soil from baking on during the clean cycle. _Thegasket is the seal around the oven door and window.] The self-clean cycle uses above-normal cooking temperatures to automatically clean the oven interior. The oven should be cleaned regularly by wiping up spillovers to prevent excessive smoke and flare-ups. Do not allow a heavy build-up of soil to accumulate in the oven. * Brand names for cleaning products are registered trademarks of the respective manufacturers. 4 4. Toprevent damage, donotcleanorrubthegasket aroundtheovendoor.Thegasketis designed tosealin heatduringthecleancycle. 5. Wipeupexcess greaseorspill-overs fromtheoven bottom.Thisprevents excessive smoking, flare-ups or flamingduringthecleancycle. 6. Wipeupsugaryandacidicspillovers suchassweet potatoes, tomato, or milk-based sauces. Porcelain enamel isacid-resistant, notacid-proof.Theporcelain finishmay discolorifacidicorsugaryspillsarenotwipedupbeforea self-clean cycle. To set Self=Clean: I Note: Oven |a clean cycle. MEd (Medium Soil, 3 hours} LITE (Light Soil, 2 hours} Choosing the soil level of the oven automatically programs the self-cleaning time. After four seconds, CLEAN and DELAY will light and LOCK will flash in the display. When the oven door latches, LOCK will stop flashing and light continuously to show that the oven is set for a delayed clean operation. The delay time will display. be below 400° F During 1. Close the oven door. the Self=Clean Cycle When LOCK shows in the display, the door cannot be opened. To prevent damage to the door, do not force the door open when Clear LOCK is displayed. ................................................... 2. Press the Clean pad. • CLEAN flashes. Smoke and Smells • SET flashes in the display. 3. Press the Autaset 0 pad. You may see some smoke and smell an odor the first few thnes the oven is cleaned. This is normal and will lessen in time. U Autose[ ° MEd (Medium Soil, 3 hours} is displayed. Smoke may also occur if the oven is heavily soiled or if a pan was left in the oven. 4. Press the Auteset 0 pad to scroll through the self-cleaning settings. Sounds HVy (Heavy Soil, 4 hours} As tile oven heats, you may hear sounds of metal parts expanding and contracting. This is normal and will not damage the oven. MEd (Medium soil, 3 hours} LITE ( Light Soil, 2 hours} Choosing the soil level of the oven automatically programs the self-cleaning time. After Self=Cleaning About one hour after the end of the self-clean cycle, LOCK will turn off. The door can then be opened. 5. After four seconds, the oven will start cleaning. • If the door is not closed, beeps will sound and "door" will display. If the door is not closed within 30 seconds, the self-cleaning operation will be canceled and the display will return to the time of day. Some soil may leave a light gray, powdery ash. Remove it with a damp cloth. If soil remains after wiping, that means the clean cycle was not long enough. The soil will be removed during the next clean cycle. ° CLEAN will appear in the display. If oven racks were left in the oven and do not slide smoothly after a clean cycle, wipe racks and rack supports with a small amount of vegetable oil to make them easier to move. ° LOCK will flash in the display. Once the door locks, the word will remain steady. Fine lines may appear in the porcelain because it went through heating and cooling. This is normal and will not affect performance. • The cleaning time will start counting down in the display. To Delay a Self=Clean Cycle: 1. Press the Delay 1 pad. ° DELAY flashes. • 00:00 will flash in the display. 1 A white discoloration may appear after cleaning if acidic or sugary foods were not wiped up before the self-clean cycle. This discoloration is normal and will not affect performance. Delay 2. Enter the a mount of time you want to delay the cycle using the appropriate number pads. Notes: 3. Press the Clean pad. • If the oven door is left open, "door" will flash in the display and a signal will beep until the door is closed and the Clean pad is pressed again. • SET flashes in the display. 4. Press the Autaset 0 pad. • LITE (Light soil level} is displayed. 5. Press the Autaset 0 pad to scroll through the self-cleaning settings. ° If more than five seconds elapse between pressing the Clean pad and the Autoset 0 pad, the program will automatically return to the previous display. U Autoset • The oven door will be damaged if the oven door is forced to open when LOCK is still displayed. HVy (Heavy Soil, 4 hours} 5 Cleaning Procedures Side Panels, Storage Drawer and Door and Door Handles = Painted Enamel • When cool, wash with warm soapy water, rinse and dry. Never wipe a warm or hot surface with a damp cloth as this may damage the surface and may cause a steam burn. ° For stubborn soil, use mildly abrasive cleaning agents such as baking soda paste or Bon Ami*. Do not use abrasive cleaners such as steel wool pads or oven cleaners. These products will scratch or permanently damage the surface. Note: Use a dry towel or cloth to wipe up spills, especially acidic or sugary spills. Surface may discolor or dull if soft is not immediately removed. This is especially important for white surfaces. Burner Caps and Sealed Gas Burners = Removable Burner Caps • Allow burner to cool. Remove burner cap and wash in soapy water with a plastic scouring pad. For stubborn soils, clean with a soap-filled, nonabrasive pad or Cooktop Cleaning Creme* (Part #20000001)** and a sponge. • Do not clean in the dishwasher or self-cleaning oven. Sealed Gas Burners • Clean frequently. Allow burner to cool. Clean with soap and plastic scouring pad. For stubborn soils, clean with a soapfilled, nonabrasive pad. Do not enlarge or distort holes. • Be careful not to get water into burner ports. • Use care when cleaning the ignitor. If the ignitor is wet or damaged the surface burner will not light. Oven Window and Door = Glass • Avoid using excessive amounts of water which may seep under or behind glass, causing staining. • Wash with soap and water. Rinse with clear water and dry. Glass cleaner can be used if sprayed on a cloth first. ° Do not use abrasive materials such as scouring pads, steel wool or powdered cleaners as they will scratch glass. Burner Grates - Porcelain on Cast Iron • Wash with warm, soapy water and a nonabrasive, plastic, scrubbing pad. For stubborn soils, clean with a soap-filled, nonabrasive, plastic pad or Cooktop Cleaning Creme* (Part #20000001)** and a sponge. If soil remains, re@ply Cooktop Cleaning Creme*, cover with a damp paper towel and soak for 30 minutes. Scrub again, rinse and dry. • Do not clean in the dishwasher or self-cleaning oven. Clock and Control Pad Area • To activate control lock for cleaning, see "Locking the Control and Oven Door" page 12. • Wipe with a damp cloth and dry. Do not use abrasive cleaning agents as they may scratch the finish. • Glass cleaners may be used if sprayed on a cloth first. DO NOTspray directly on control pad and display area. Control Knobs • Remove knobs in the OFF position by pulling forward. • Wipe with a damp cloth and dry. Do not use abrasive cleaning agents as they may scratch the finish. • Turn on each burner to be sure the knobs have been correctly replaced. Cooktop and Control Panel - Porcelain Enareel Porcelain enamel is glass fused on metal and may crack or chip with misuse. It is acid-resistant, not-acid proof. All spillovers, especially acidic or sugary spillovers, should be wiped up immediately with a dry cloth. • When cool, wash with soapy water, rinse and dry. • Never wipe off a warm or hot surface with a damp cloth. This may cause cracking or chipping. ° Never use oven cleaners, abrasive or caustic cleaning agents on exterior finish of range. Oven Interior ° Follow instructions on pages 4% to set a self-clean cycle. Oven Racks • Clean with soapy water. • Remove stubborn soil with cleansing powder or soap-filled scouring pad. Rinse and dry. • Racks will permanently discolor and may not slide out smoothly if left in the oven during a self-clean operation. If this occurs, wipe the rack and embossed rack supports with a small amount of vegetable oil to restore ease of movement, then wipe off excess oil. Stainless Steel (select models) • DO NOT USE ANY CLEANING PRODUCT CONTAINING CHLORINE BLEACH. ° DO NOTUSEABRASIVE OR ORANGE CLEANERS. • ALWAYS WIPE WITH THE GRAIN WHEN CLEANING. • Daily Cleaning/Light Soil -- Wipe with one of the following - soapy water, white vinegar/water solution, Formula 409 Glass and Surface Cleaner* or a similar glass cleaner - using a sponge or soft cloth. Rinse and dry. To polish and help prevent fingerprints, follow with Stainless Steel Magic Spray* (Part No. 20000008)**. • Moderate/Heavy Soil -- Wipe with one of the following Bon Ami, Smart Cleanser, or Soft Scrub* - using a damp sponge or soft cloth. Rinse and dry. Stubborn soils may be removed with a damp multi-purpose Scotch-Brite* pad; rub evenly with the grain. Rinse and dry. To restore luster and remove streaks, follow with Stainless Steel Magic Spray*. • Discoloration -- Using a damp sponge or soft cloth, wipe with Cameo Stainless Steel Cleaner*. Rinse immediately and dry. To remove streaks and restore luster, follow with Stainless Steel Magic Spray*. * Brand names are registered trademarks of the respective manufacturers. ** To order call 1-877-232-6771 USA or 1-800-688-8408 Canada. Oven Door Leveling Legs Note: The oven door on a new range may feel "spongy" when it is closed. This is normal and will decrease with use. installed. If the range is not level, Be sure the range is leveled when turn the leveling legs, located at each corner of the range, until range is level. Oven Window Electrical To protect the oven door window: Connection Appliances which require electrical power are equipped with a three=prong grounding plug which must be plugged directly into a properly grounded threehole 120 volt electrical outlet. 1. Do not use abrasive cleaning agents such as steel wool scouring pads or powdered cleansers as they may scratch the glass. 2. Do not hit the glass with pots, pans, furniture, toys, or other objects. Always disconnect power to appliance before servicing. 3. Do not close the oven door until the oven racks are The three-prong grounding plug offers protection against shock hazards. DO NOT CUT OR REMOVE THE THIRD GROUNDING PRONG FROM THE POWER CORD PLUG. in place. Scratching, hitting, jarring or stressing the glass may weaken its structure causing an increased risk of breakage at a later date. If an ungrounded, two-hole or other type electrical outlet is encountered, it is the personal responsibility of the appliance owner to have the outlet replaced with a properly grounded three-hole electrical outlet. Oven Light Storage Drawer To replace oven light bulb: 1. When oven is cool, hold bulb cover in place, then slide wire retainer off cover. Note: Bulb cover will fall if not held in place while removing wire retainer. 2. Remove bulb cover light bulb. The storage drawer can be removed to allow you to clean under the range. BOLBOOVER To remove: 1. Empty drawer and pull out to tile first stop position. 2. Lift up the front of the drawer. and RETAINER 3. Pull out to the second stop position. 3. Replace with a 40-watt appliance bulb. 4. Grasp sides and lift drawer up and out. 4. Replace bulb cover and secure with wire retainer. To replace: 5. Reconnect power to range. Reset clock. 1. Fit tile ends of tile drawer glides into tile rails in tile range. 7 2. Lift up the front of the drawer and gently push in to the first stop position. Once installed, DO NOT repeatedly move this gas appliance for cleaning or to relocate. If this appliance has to be moved and/or removed for servicing, follow the procedure described in the installation instructions. For information, contact Maytag Customer Assistance at 1-800-688-9900 U.S.A. or 1-800-688-2002 Canada. 3. Lift drawer up again and push until drawer is closed. Removal of Gas Appliance To prevent range from accidentally tipping, range must be secured to the floor by sliding rear leveling leg into the antitip bracket. Gas appliance connectors used to connect this appliance to the gas supply are not designed for continuous movement. froubleshootln9 For most concerns, try these first. • Check if oven controls have been properly set. • Check to be sure plug is securely inserted into receptacle. ° Check or re-set circuit breaker. Check or replace fuse. ° Check power supply. • Trim excess fat from meat before broiling. • A soiled broiler pan was used. • Preheat oven for 2-3 minutes before placing food in the oven. ° Broil with the oven door closed. Oven will not self=clean. ° Check to make sure the cycle is not set for a delayed start. See pages 4-5. • Check if door is closed. • Check if control is in Sabbath Mode. See page 16. • Oven may be over 400° F. Oven temperature must be below 400° F to program a clean cycle. Surface burner fails to light. ° Check to be sure unit is properly connected to power supply. • Check for a blown circuit fuse or a tripped main circuit breaker. • Check to be sure ignitor is dry and clicking. Burner will not light if ignitor is damaged, soiled or wet. If ignitor doesn't click, turn control knob OFF. Oven did not clean properly. • Longer cleaning time may be needed. ° Excessive spillovers, especially sugary and/or acidic foods, were not removed prior to the self-clean cycle. The flame is uneven. • Burner ports may be clogged. Surface burner flame lifts off ports. • Check to be sure a pan is sitting on the grate above. Oven door will not unlock after self=clean cycle. • Oven interior is still hot. Allow about one hour for tile oven to cool after the completion of a self-clean cycle. The door can be opened when the LOCK indicator word is not displayed. • The control and door may be locked. See page 12. Baking results are not as expected or differ from previous oven. ° Check tile oven temperature selected. Make sure oven is preheated when recipe or directions recommend preheat. ° Make sure the oven vent has not been blocked. See page 17 for location. ° Check to make sure range is level. • Temperatures often vary between a new oven and an old one. As ovens age, the oven temperature often "drifts" and may become hotter or cooler. See page 16 for instructions on adjusting the oven temperature. Note: It is not recommended to adjust the temperature if only one or two recipes are in question. • Use correct pan. Dark pans produce dark browning. Shiny pans produce light browning. • Check rack positions and pan placement. Stagger pans when using two racks. Allow 1-2 inches between pans and oven wall. • Check the use of foil in the oven. Never use foil to cover an entire oven rack. Place a small piece of foil on the rack below the pan to catch spillovers. Moisture collects on oven window or steam comes from oven vent. ° This is normal when cooking foods high in moisture. ° Excessive moisture was used when cleaning the window. There is a strong odor or light smoke when oven is turned on. • This is normal for a new range and will disappear after a few uses. Initiating a clean cycle will "burn off" the odors more quickly. ° Turning on a ventilation fan will help remove the smoke and/ or odor. ° Excessive food soils on the oven bottom. Use a self-clean cycle. Fault Codes ° BAKE or LOCK may flash rapidly in the display to alert you if there is an error or a problem. If BAKE or LOCK appear in the display, press the CANCEL pad. If BAKE or LOCK continue to flash, disconnect power to the appliance. Wait a few minutes, and then reconnect power. If the flashing still continues, disconnect power to the appliance and call an authorized servicer. Food is not broiling properly or smokes excessively. ° Check oven rack positions. Food may be too close to flame. ° Aluminum foil was incorrectly used. Never line the broiler insert with foil. 8 • If the oven is heavily soiled, excessive fiareups may result in a fault code during cleaning. Press the CANCEL pad and allow the oven to cool completely, wipe out excess soil, then reset the clean cycle. If the fault code reappears, contact an authorized servicer. • As the oven heats and cools, you may hear sounds of metal parts expanding and contracting. This is normal and will not damage your appliance. There are no beeps and no display. • Oven may be in Sabbath Mode. See page 16. Noises may be heard. • The oven makes several low level noises. You may hear the oven relays as they go on and off. This is normal. SAb flashing and then displayed continuously. ° Oven is in Sabbath Mode. To cancel, press and hold the Clock pad for five seconds. ¢ookln HI: Use to bring liquid to a boil, or reach pressure in a pressure cooker. Always reduce setting to a lower heat when liquids begin to boil or foods begin to cook. LO: Use to simmer foods, keep foods warm and melt chocolate or butter. Some cooking may take place on the LO setting if the pan is covered. It is possible to reduce the heat by rotating the knob toward OFF. Be sure flame is stable. Surface An intermediate flame size is used to continue cooking. Food will not cook any faster when a higher flame setting is used than needed to maintain a gentle boil, Water boils at the same temperature whether boiling gently or vigorously, Controls Surface Control Knobs Use to turn on the surface burners. An infinite choice of heat settings is available from LO to HI. At the HI setting a detent or notch may be felt. The knobs can be set on or between any of the settings. Graphics next to the knob identify which burner the knob controls. For example, the graphic at right shows the left front burner location. Front Setting 00 _[_ the controls: The size and type of cookware will affect the heat setting. 1. Place a pan on the burner grate. * The burner flame may lift off or appear separated from the port if a pan is not placed on the grate. Pilotless 2. Push in and turn the knob counterclockwise to the LITE setting. Ignition Pilotless ignition eliminates the need for a constant standing pilot light. Each surface burner has a spark ignitor. Use care when cleaning around the surface burner. BURNER CAP A clicking (spark) sound will be heard and the burner will light. (All five ignitors will spark when any surface burner knob is turned to the LITE position.) 3. After the burner lights, turn knob to desired flame size. * The ignitor will continue to spark until the knob is turned past the LITE position. If the surface burner does not light, check if ignitor is broken, soiled or wet. 9 Burner Grates Operating During a Power Failure The grates must be properly positioned before cooking. When installingthe grates, place the tab ends toward the center, matching the straight bars. Improper installationof the grates may result in chipping of the cooktop. Do not operate the burners without a pan on the grate. The grate's porcelain finish may chip without a pan to absorb the heat from the burner flame. 1. Hold a lighted match to the desired surface burner. 2. Push in and turn the control knob slowly to LITE. 3. Adjust the flame to the desired level. Cooktop To prevent the cooktop or staining: from discoloring " Clean cooktop after each use. Use care when stirring food in a pot/pan sitting on the burner grate. The grates have a smooth finish for ease of cleaning. The pot/pan will slide if the handle is not held. This may result in spilling of hot food items and may be a burn hazard. " Wipe acidic or sugary spills as soon as the cooktop has cooled as these spills may discolor porcelain. , _ -__the Although the burner grates are durable, they will gradually lose their shine and/or discolor, due to the high temperatures of the gas flame. this cooktop does not lift-up nor is it removable. Do not attempt to lift the Unlike a range with standard gas burners, cooktop for any reason. Notes: , A properly adjusted burner with clean ports will light within a few seconds. If using natural gas, the flame will be blue with a deeper blue inner cone. Sealed Gas Burners The sealed burners of your range are secured to the cooktop and are not designed to be removed. Since the burners are sealed into the cooktop, boilovers or spills will not seep underneath the cooktop. If the burner flame is yellow or is noisy, the air/gas mixture may be incorrect. Contact a service technician to adjust. (Adjustments are not covered by the warranty.) However, the burner should be cleaned after each use. The head portion of the burner is easily removed for cleaning. (See page 6 for cleaning directions.) With LP gas, slight yellow tips on the flames are acceptable. This is normal and adjustment is not necessary. The burner heads must be correctly placed on the burner base for proper operation of the burner. Power Boost • With some types of gas, you may hear a "popping" sound when the surface burner is turned off. This is a normal operating sound of the burner. Burner* There is one high speed burner on your range, located in the right front position. This burner offers higher speed cooking that can be used to quickly bring water _-_--___i° _ tO a boil and for large-quantity cooking, y_//fi_ Simmer Burner* ca _,_;_ _mF,ont % This burner is located in the left rear position. The simmer burner offers a lower flame for delicate R_,a, go sauces or melting chocolate. /MettOO BTU ratings will vary when using LP gas. Simmer ® o = _o_ 10 " If the control knob is turned very quickly from HI to LO, the flame may go out, particularly if the burner is cold. If this occurs, turn the knob to the OFF position, wait several seconds and relight the burner. • The flame should be adjusted so it does not extend beyond the edge of the pan. / • Clean D E 1 2 Delay : 3 Broil Convect Bake 4 Keep warm G H I J K L NI 5 8 9 N Tile control panel is designed for ease in programming. The displaywindow on the control shows time of day, timer and oven functions. Control panel shown includes Convect and other model specific features. (Styling may vary depending on model.:) Bake Use for baking and roasting. Broil Use for broiling and top browning. Clean Use to set self-clean cycle. Delay Programs the oven to start baking at a later time. Number Pads Use to set time and temperature. Autoset Use to quickly set temperatures. Keep Warm Use to keep cooked food warm in oven. Clock Convect Use for convection baking and roasting. The clock can be set to display time in a 12-hour or 24-hour format. The clock is set at the factory for the 12-hour format. Cook & Hold Bakes for a preset time, then holds food warm for 1 hour. To change Favorite Use to set and save a specific Cook & Hold procedure. Timer Sets Timer. Clock Use to set time of day clock. Oven Light Use to turn the oven light on or off. CANCEL Cancels all operations except Timer and Clock. Note: Four seconds after pressing the number pads or the Autoset 0 pad, the time or temperature will automatically be entered. If more than 30 seconds elapse between touching a function pad and the number pads or the Autoset 0 pad, the function will be canceled and the display will return to the previous display. the clock to 24=hour format: 1. for Press andseconds. hold the CANCEL and Favorite pads_ three • 12 Hr flashes in the display. 2. Press the Autoset O pad to select 24 Hr; press again to select 12 Hr. 3. Set the time of day following the directions in the To set the Clock section. To set the Clock: 1. Press the Clock pad. Using the Touchpads A tJ Autoset ° The time of day flashes in the display. * Press the desired pad. 2. Press the appropriate number pads to set the time of day. * Press the number pads to enter time or temperature. • Colon flashes in the display. * Press the Autoset 0 pad to enter temperature. * A beep will sound when any pad is touched. 3. Press the Clock pad again or wait four seconds. * A double beep will sound if a programming error occurs. ° The colon will remain on. When electrical power is supplied or after a power interruption, the last clock time before power was interrupted will flash. 11 Torecallthetimeofdaywhenanothertimefunctionis showing, presstheClockpad. Clocktimecannotbechanged whentheovenhasbeen programmed forDelayCookor DelayCleanor Cook& Hold. Locking the Control and Oven Door The touchpad and oven door can be locked for safety, cleaning, or to prevent unwanted use. The touchpads will not function when locked. To cancel the Clock display: If you do not want the time of day to display: Press and hold the CANCEL and Clock pads for three seconds. The time of day will disappear from the display. If the oven is currently in use, the touchpads and door cannot be locked. _"_ The current time of day will remain in the display when the touchpads and door are locked. When the clock display is canceled, press the Clock pad to briefly display the time of day. To lock: Press and hold the CANCEL and Cook & Hold pads for three seconds. (Press the CANCEL pad first.) When the clock display is canceled, after 15 minutes, the oven control will go into Standby Mode to save energy. The displaywill be blank and the oven light will not operate. To "wake up" the control from Standby Mode, press any touchpad. A double beep will sound. To restore • OFF appears in the display ° LOCK flashes while the door is locking. the Clock display: To unlock: Press and hold the CANCEL and Clock pads for three seconds. The time of day will reappear in the display. Press and hold the CANCEL and Cook & Hold pads for three seconds. (Press the CANCEL pad first.) OFF disappears from the display. Timer The timer can be set from one minute (0:01) up to 99 hours and 59 minutes (99:59). Note: The touchpads and Foven door cannot be locked if the oven temperature is 400° or above. The timer can be used independently of any other oven activity. It can also be set while another oven function is operating. Fault Codes BAKE or LOCK may flash rapidly in the display to alert you if there is an error or a problem. If BAKE or LOCK flash in the display, press the CANCEL pad. If BAKE or LOCK continue to flash, disconnect power to the appliance. Wait a few minutes, and then reconnect power. If the flashing still continues, disconnect power to the appliance and call an authorized servicer. The timer does not control the oven. It only controls a beeper. To set the Timer: 1. Press the Timer pad. • 0:00 and TIMER flash in the display. 2. Press the appropriate number pads until the correct time appears in the display. ° The colon and TIMER will continue to flash. Baking 3. Press Timer pad again or wait four seconds. To set Bake: • The colon stops flashing and the time begins counting down. 1. Press the Bake pad. \ S • BAKE will flash. • The last minute of the timer countdown will be displayed in seconds. ° 000 will flash in the display. 2. Select the oven temperature. Press the Autoset 0 U pad for 350° F or the appropriate number pads. Autoset 4. At the end of the set time, one long beep will sound and "End" will be displayed. • Each additional press of the Autoset 0 pad will increase the temperature by 25°. 5. Press the Timer pad to clear the display. To canoe[ the Timer: ° The oven temperature can be set from 170° to 550°. 1. Press and hold the Timer pad for three seconds. 3. Press Bake pad again or wait four seconds. OR ° BAKE will stop flashing and light in the display. 2. Press the Timer pad and press '0' using the number pads. m0 Autoset 12 • 100° or the actual oven temperature if over 100° Fwill display. It will rise in 5° increments until the preset temperature is reached. 2. Select the oven temperature. Press the Autoset 0 pad for 350° F or the appropriate number pads. • Each additional press of the Autoset 0 pad will increase the temperature by 25 degrees. The oven temperature can be set from 170° to 550°. 4. Allow the oven to preheat for 8-15 minutes. ° When the set oven temperature is reached, one long beep will sound. 3. Press Convect pad again or wait four seconds. • The set temperature will display. ° BAKE will stop flashing. ° To recall set temperature during preheat, press Bake pad. • 100° or the actual oven temperature if over 100° F will display. It will rise in 5° increments until the preset temperature is reached. 5. Place food in the oven. • The fan icon will start to rotate. 6. Check cooking progress at the minimum cooking time. Cook longer if needed. (_:_) 4. Allow the oven to preheat for 8-15 minutes. • When the set oven temperature is reached, one long beep will sound. 7. When cooking is finished, press CANCEL pad. (CANCEL_ 8. Remove food from the oven. • The set temperature will display. ° To recall the set temperature during preheat, press the Convect pad. Notes: To change the oven temperature during cooking, press Bake, then press the Autoset 0 pad or appropriate number pads until the desired temperature is displayed. 5. Place food in the oven. To change the oven temperature during prehea_ press the Bake pad twice, then press the Autoset 0 pad or appropriate number pads until the desired temperature is displayed. 7. When cooking is finished, press CANCEL pad. 6. Check cooking progress at the minimum cooking time. Cook longer if needed. _,kl¢'l:l_ 8. Remove food from the oven. If you forget to turn off the oven, it will automatically turn off at the end of 12 hours. If you wish to deactivate this feature, see page 16. Notes: • Roasting times can vary with different cuts of meat. Baking Differences Between ° It is not necessary to preheat when convect roasting large cuts of meat. Your Old and New Oven It is normal to notice some baking time differences between a new oven and an old one. See "Adjusting the Oven Temperature" on page 16. Cook & Hold When using the Cook & Hold option, the oven begins to heat immediately after the control has been set. Then, the oven cooks for a specified length of time. When that time has elapsed, the oven will keep the food warm for up to an hour then automatically turn off. Baking and Roasting with Convection To set Cook & Hold: 1. Press the Cook & Hold pad. ([select models) When convection baking, enter your normal baking temperature. The control will automatically reduce the set oven temperature by 25°. The entered temperature will be displayed. The convection fan will start after the oven has been on for approximately five minutes. To set Convect: ° HOLD will flash to indicate that you are in Cook & Hold programming. • 00:00 will flash in the display. 2. Select the amount of time you want to cook by using the number pads. Convect 1. Press the Convect pad. • BAKE and the fan icon will flash • 000 will flash in the display. ° HOLD continues to flash. Y_ U i\u[oset ° The time will light in the display. • Time can be set from ten minutes (00:10] to 11 hours, 59 minutes (11:59). 3. While HOLD is still flashing, press Bake or Bake Convect pad and select the oven temperature ..................... .... Press the Autoset 0 pad for 350 ° F or the appropriate number pads. 0 Autoset 13 • The desired function word will flash. 4, • The oven temperature can be set from 170° F to 550° F. 5. Press Bake or Convect pad. Enter the amount of time you want to cook using the number pads. 6. Set the oven temperature desired by pressing the................................ Autoset 0 pad or the appropriate number pads. 4. Press the desired function pad again OR wait four seconds. ° The desired function word will remain lit. ° 350° will light when Autoset 0 pad is pressed. • The cooking time will show in the display. • After four seconds, the entered delay time will appear in the display. • The actual oven temperature will be displayed during preheat. A W Autoset • HOLD turns off. • The set temperature will display when the oven is preheated. BAKE and DELAY remain lit to remind you that a delayed Cook & Hold cycle has been programmed. When the cooking time has elapsed: Notes: ° Four beeps will sound. ° HOLD and WARM will light. ° Do not use Delayed Cook & Hold for items that require a preheated oven, such as cakes, cookies, and breads. • 170° and the time of day will display. • Do not use Delayed Cook & Hold if oven is already hot. Broiling After one hour in HOLD WARM: • The oven turns off automatically. • HOLD and WARM go off. ° Remove food from oven. To cancel Cook & Hold at any time: Press the CANCEL pad. Remove food from oven. To set Broih 1. Press the Broil pad. Delay Cook & Hold Broil • BROIL and SETflash in the display. 2. Press the Autoset 0 pad once to set HI broil or twice to set LO broil. ° HI or LOwill be displayed. • Select HI broil (550° F) for normal broiling. Select LO broil (450° F'Jfor low-temperature broiling of longer cooking foods such as poultry. When using Delay, the oven begins to cook later in the day. Set the amount of time that you want to delay before the oven turns on and how long you want to cook. The oven begins to heat at the selected time and cooks for the specified length of time. 3. After four seconds, the oven will start. ° BROIL will remain lit. • HI or LO will remain lit. Delay time can be set from 10 minutes (00:10] to 11 hours, 59 minutes (11:59D. To set a Delayed Cook & Hold cycle: 1. Press the Delay 1 pad. 1 J • DELAY flashes in the display. ° 00:00 flashes in the display. Delay 4. For optimum browning, preheat 2-3 minutes before adding food. 5. Place food in the oven. Close the oven door. 2. Using the appropriate number pads, enterthe amountoftime you want to delay the start of the Cook & Hold cycle. 6. Turn meat once about halfway through cooking. 7. When food is cooked, press the CANCEL pad. Remove food and broiler pan from the oven. 3. Press the Cook & Hold pad. • HOLD and DELAY flash in the display. • The time of day will reappear in the display. ° 00:00 flashes in the display. 14 { ; U Auloset The Keep Warm temperature can be set from 145° to 190°. Notes: WARM and the temperature will be displayed while the function is active. • For best results when broiling, use a pan designed for broiling. ° HI is used for most broiling. Use LO broil when broiling longer cooking foods. The lower temperature allows food to cook to the well done stage without excessive browning. To cancel Keep Warm: • To change the oven temperature during broiling, press the Broil pad, then the Autoset 0 pad to switch between LO and HI broil 1. Press the CANCEL pad. 2. Remove food from the oven. ° Broil times may be longer when the lower broiling temperature is selected. NOteS: ° Most foods should be turned halfway through broiling time. ° For optimal food quality, oven cooked foods should be kept warm for no longer than 1 to 2 hours. ° To keep foods from drying, cover loosely with foil or a lid. Keep Warm • To warm dinner rolls: For safely keeping hot foods warm or for warming breads and plates. - cover rolls loosely with foil and place in oven. - press Keep Warm and Autoset 0 pads. To set Keep Warm: 1. Press the Keep Warm pad. - warm for 12-15 minutes. warm • To warm plates: • WARM flashes in the display. - place 2 stacks of up to four plates each in the oven. ° 000 flashes in the display. 2. Select the Keep Warm temperature. Press the Autoset 0 pad or the appropriate number pads. - press Keep Warm and Autoset 0 pads. U Autoset - warm for five minutes, turn off the oven and leave plates in the oven for 15 minutes more. • 170° will light when the Autoset 0 pad is pressed. - use only oven-safe plates, check with the manufacturer. ° Each press of the Autoset 0 pad will increase the temperature by 5°. - do not set warm dishes on a cold surface as rapid temperature changes could cause crazing or breakage. Broiling Chart Preheat oven for 2-3 minutes. Beef Steaks, 1" thick Hamburger Patties, 314" thick 5 5 5or6 Medium Well Done Well Done 15 - 20 min. 18 - 24 min. 13 - 18 min. Pork Bacon Ham, precooked 1/2" slice Chops, 1" thick 5 5 5 Well Done Warm Well Done 6 - 10 min. 8 - 12 min. 22 - 26 min. Poultry Chicken Breasts, bone-in 4 Well Done 30 - 45 min. (Lo Broil) Seafood Fish filets Fish steaks, 1" thick Lobster tails, 3-4 oz. each 5 5 5 Flaky Flaky Done 8 - 12 min. 10 - 15 min. 7 - 10 min. For a browned/seared exterior and rare interior, it may be necessary to decrease cook time on side one and decrease the distance between the meat and heat source. Note: This chart is a suggested guide. The times may vary with the food being cooked. 15 Automatic Shut-Off/ Sabbath Mode Adjusting The oven will automatically turn off after 12 hours if you accidentally leave it on. This safety feature can be turned off. To cancel the 12=hour oven continuously shut=off and the Oven Temperature Oven temperatures are carefully tested for accuracy at the factory. It is normal to notice some baking or browning differences between a new oven and an old one. As ovens get older, the oven temperature can shift. run the You may adjust the oven temperature if you think the oven is not baking or browning correctly. To decide how much to change the temperature, set the temperature 25 degrees higher or lower than your recipe recommends, then bake. The results of the "test" should give you an idea of how much to adjust the temperature. for 72 hours: 1. Press and hold the Clock pad for five seconds • SAb will be displayed and flash for five seconds. • SAb will then be displayed continuously until turned off or until the 72-hour time limit is reached. To adjust the oven temperature: 1. Press the Bake pad ......... • BAKE will also be displayed if a bake cycle is in use while the oven is in Sabbath Mode. 2. Enter 550° by pressing the appropriate number pads. 3. Press and hold the Bake pad for several seconds or until 00° appears in the display. • BAKEis the only function that operates during the Sabbath Mode. Aft other functions (Timer, Keep Warm, Clean, etc.) are locked out during the Sabbath Mode. If the oven temperature was previously adjusted, the change will be displayed. For example, if the oven temperature was reduced by 15° the display will show "- 15°''. ° A Cook & Hold can be programmed during the Sabbath Mode, however a Delay Cook & Hold is not allowed. To cancel the Sabbath Bake Mode: 4. Press the Aatoset 1. Press the Clock pad for five seconds. 0 pad to adjust the temperature. Each time the Autoset 0 pad is pressed, the temperature changes by 5°. The oven temperature can be increased or decreased by 5° to 35°. ° SAb will flash for five seconds. • The time of day will return to the display. OR Pressing the Autoset 0 pad will first cycle through increasing the oven temperature (5, 10.... 35). Continuing to press the Autoset 0 pad will then cycle through decreasing the oven temperature (-35, -30 .... -5). 2. After 72 hours, the Sabbath Mode will end. ° SAb will flash for five seconds. ° The time of day will return to the display. 5. The time of day will automatically reappear in the display. You do riot need to readjust the oven temperature if there is a power failure or interruption. Temperature adjustment applies to Bake, Convect Bake arid Convect Roast (select models) only. Broiling arid cleaning temperatures cannot be adjusted. Notes: ° Sabbath Mode can be turned on at any time with or without the oven on. ° Sabbath Mode cannot be turned on if the touchpads are locked out or when the door is locked. Changing Temp °F/°C • Most prompts and messages and all beeps are deactivated when Sabbath Mode is active. 1. The factory default setting for temperature is Fahrenheit. 2. To change the setting, press and hold the CANCEL and Bake pads at the same time for three seconds. ° If the oven is baking when Sabbath Mode is set, BAKE will go out when Bake is canceled. There will be rio audible beeps. 3. A single beep will sound and the current setting will be displayed (°F or °C). (If no change is made, the range will return to the existing setting after 30 seconds.) ° The oven light will not automatically come on when the oven door is opened while the oven is in Sabbath Mode. If the oven light is desired while in Sabbath Mode, it must be turned on before the Sabbath Mode is started. 4. To change the setting, press the Aatoset O pad. Press again to return to existing setting. Wait five seconds and the setting will be complete. • When the Sabbath Mode is started, the temperature display will immediately show the set temperature, rather than the actual oven cavity temperature. No preheat beep will sound. ° The self-clean cycle and automatic door lock do not operate during the Sabbath Mode. • Pressing CANCEL pad will cancel a bake cycle, however the control will stay in the Sabbath Mode. • If power fails, the oven will power up in Sabbath Mode with 72 hours remaining and no cycle active. 16 Favorite Oven Vent Tile Favorite pad allows you to save tile time and temperature from a Cook & Hold function. When tile over) is in use the area near tile vent may become hot enough to cause burns. Never block the vent opening. To set a Favorite cycle, Cook & Hold must be either active or just programmed. The oven vent is located below the backguard shield on your range. OVEN VENT L OCA T!ON To set a new Favorite cycle or to save a currently running Cook & Hold as a Favorite: Do not place plastics near the vent opening as heat from the vent could distort or melt the plastic. 1. Program a Cook & Hold cycle as described in tile Cook & Hold section on page 13. 2. Press and hold the Favorite pad for three seconds. • The newly set or currently running Cook & Hold cycle will be saved. Oven Light • A beep will sound to indicate that the control has accepted the Favorite setting. To start a cycle programmed vent Tile oven light automatically comes on when the door is opened. When the door is closed, press the Oven Light pad to turn the oven light on and off. into Favorite: 1. Press the Favorite pad. A beep will sound every time the Oven Light pad is pressed. • Time and temperature for the set Cook & Hold cycle will be displayed. (If no Cook & Hold cycle has been programmed, "nonE" is displayed.) Oven Bottom Protect oven bottom against spillovers, especially acidic or sugary spills, as they may discolor the porcelain enamel. Use the correct pan size to avoid spillovers and boilovers. Do not place utensils or aluminum foil directly on the oven bottom. 2. Press the Bake or Convect pad. • The Favorite cycle will begin immediately. • The selected cycle word will light in the display • The cooking time will light in the display When the cooking time has elapsed: Oven Racks • Tile selected cycle word will turn off. • HOLD and WARM will light. • 170°will display. To cancel a Favorite cycle in progress: 1. Press tile CANCEL pad. • The stored Favorite cycle will not be affected. The oven has two racks. All racks are designed with a lock-stop edge. 2. Remove food from the oven. To remove: Pilotless ignition 1. Pull rack straight out until it stops at the lock-stop position. Your range is equipped with pilotless ignition.With this type of ignition system, the gas automatically shuts off and the oven will not operate during a power failure. 2. Lift up on the front of the rack and pull out. A lighted match will not light the oven burner. No attempt should be made to operate the oven during a power failure. To replace: 1. Place rack on tile rack supports in tile oven. Oven Fan 2. Tilt the front end up slightly. Slide rack back until it clears the lock-stop position. A convection fan is used to circulate hot air in the oven when the convection feature is selected. It automatically turns on 5 minutes after the Convect pad is pressed and will turn off when Convect is canceled. 3. Lower front and slide back into the oven. Do not cover an entire rack with aluminum foil or place foil on the oven bottom. Baking results will be affected and damage may occur to the oven bottom. l oven opened. fan will automatically stop when the | Note:door The is convection 17 Rack Positions RACK 7 (highest position): For some single rack baking on cookie sheets and broiling. RACK 6: Used for some single rack baking on cookie sheets and broiling. Used for multiple rack baking. !J _ _[ Oven Bottom: Place oven rack on raised sides of oven bottom. Use for additional space when cooking large oven meals. LJ ' MULTIPLE RACK COOKING: Use rack positions 3 and 6, or 2 and 4. 43 2 the minimum suggested time to avoid over-browning or i over-cooking. ote: When convect baking on two racks, check foods at Convection baking on two racks Baking RACK 5: For single rack baking on cookie sheets and broiling. Layer Cakes on Two Racks For best results when baking cakes on two racks, use racks 2 and 4 for regular baking and racks 3 and 6 for convection baking. RACK 4: Used for single rack baking on cookie sheets, sheet cakes, casseroles and broiling. Used for multiple rack baking. Place the cakes on the rack as shown. RACK 3: For single rack baking on cookie sheets, casseroles, layer cakes, loaves of bread and sheet cakes. Used for multiple rack baking. RACK 2: Used for some single rack baking on cookie sheets and roasting small cuts of meat. Use for multiple rack baking. RACK 1 : Use for roasting large cuts of meat and poultry. 18 Warrant MAYTAG CORPORATION MAJOR APPLIANCE WARRANTY ONE YEAR LiMiTED WARRANTY For one year from the date of purchase, when this major appliance is operated and maintained according to instructions attached to or furnished with the product, Maytag Corporation or Maytag Limited Olereafter "Maytag'] will pay for Factory Specified Parts and repair labor to correct defects in materials or workmanship. Service must be provided by a Maytag designated service company. This limited warranty applies only when the major appliance is used in the country in which it was purchased. ITEMS MAYTAG WiLL NOT PAY FOR: 1. Service calls to correct the installation of your major appliance, to instruct you how to use your major appliance, to replace or repair house fuses or to correct house wiring or plumbing. 2. Service calls to repair or replace appliance light bulbs, air filters or water filters. Those consumable parts are excluded from warranty coverage. 3. Repairs when your major appliance is used for other than normal, single-family household use. 4. Damage resulting from accident, alteration, misuse, abuse, fire, flood, acts of God, improper installation, installation not in accordance with electrical or plumbing codes, or use of products not approved by Maytag. 5. Any food loss due to refrigerator or freezer product failures. 6. Replacement parts or repair labor costs for units operated outside the United States or Canada. 7. Pickup and delivery. This major appliance is designed to be repaired in the home. 8. Repairs to parts or systems resulting from unauthorized modifications made to the appliance. 9. Expenses for travel and transportation for product service in remote locations. 10. The removal and reinstallation of your appliance if it is installed in an inaccessible location or is not installed in accordance with published installation instructions. 11. Replacement parts or repair labor costs when the major appliance is used in a country other than the country in which it was purchased. DiSCLAiMER OF iMPLiED WARRANTIES; LiMiTATiON OF REMEDIES CUSTOMER'SSOLE AND EXCLUSIVEREMEDY UNDER THIS LIMITED WARRANTY SHALL BE PRODUCT REPAIRAS PROVIDED HEREIN. IMPLIED WARRANTIES, INCLUDING WARRANTIES OF MERCHANTABILITY OR FITNESS FORA PARTICULAR PURPOSE,ARE LIMITED TO ONE YEAR OR THE SHORTESTPERIODALLOWED BY LAW. MAYTAG SHALL NOT BE LIABLE FOR INCIDENTAL OR CONSEQUENTIAL DAMAGES. SOME STATESAND PROVINCES DO NOT ALLOW THE EXCLUSION OR LIMITATION OF INCIDENTAL OR CONSEQUENTIAL DAMAGES, OR LIMITATIONS ON THE DURATION OF IMPLIED WARRANTIES OF MERCHANTABILITY OR FITNESS,SO THESE EXCLUSIONS OR LIMITATIONS MAY NOT APPLY TO YOU. THIS WARRANTY GIVESYOU SPECIFICLEGAL RIGHTSAND YOU MAY ALSO HAVE OTHERRIGHTS,WHICH VARY FROM STATE TO STATE OR PROVINCETO PROVINCE. Outside the 50 United States and Canada, this warranty does not apply. Contact your authorized Maytag dealer to determine if another warranty applies. If you need service, first see the "Troubleshooting" section of the Use & Care Guide. After checking "Troubleshooting, "additional help can be found by checking the "Assistance or Service" section or by calling Maytag. In the U.S.A.,call 1=800-688-9900. In Canada, call 1 =800=688=2002. 19 Cuisinibre _ gaz & touches de precision 800 MAYI'AG /sln/e Table dc instructions de securit6 importantes ................................21 =24 Nettoyage ................................... Four autonettoyant M_thodes de nettoyage 25=27 IEntretien ...................................... 27-28 Hublot et lampe du four D6placement d'un appareil a gaz Recherche des pannes ................... 29 Caisson sat la surface ............. 30=31 Commandes de la surface de cuisson BrQleurs _ gaz scell6s Caisson dans le four ................ 32=39 CuissoR courante Cuisson et n-aintien Cuisson et maintien diff6r6s Maintien au chaud Cuisson au gril Arr6te automatique/Mode Grilles du four sabbat Garantieet serviceapres=vente ....41 Gain de aso y caidado .....................42 qualifie, et relic _ la terre. Ne pas regler, reparer ni remplacer un composant, _ moins que cela ne soit specifiquement recommande darts ce guide. Toute autre reparation dolt etre effectuee par un technicien qualifie. Demander _ rinstallateur de montrer ou se trouve le robinet d'arret de gaz et comment le former en cas d'urgence. Toujoursdebrancher rappareil avantd'y faire de rentretien. Instructions de securlte tmpomntes Les instructions de securite importantes et les paragraphes _{avertissement >>de ce guide ne sont pas destines _ couvfir toutes los conditions et situations qui pourraient se presenter. II faut faire preuve de bon sens, de prudence et de soin Iors de rinstallation, de rentretien ou du fonctionnement de rappareil. Toujours prendre contact avec le fabricant dans le cas de problemes ou de conditions qui ne seraient pas comprises. Reconnaitre los etiquettes, paragraphes et symboles sur la s6curit6 instructions Life routes les instructions avant d'utiliser cot appareil; observer toutes les instructions pour eliminer los risques d'incendie, choc electfique, dommages materiels et corporels que pourrait susciter une utilisation incorrecte de rappareil. Utiliser rappareil uniquement pour les fonctions prevues, decrites darts ce guide. Pour une utilisation adequate et en s_curit_, il faut que rappareil soit convenablement installepar un technicien 21 g6n rales Utiliser une lampe torche pour determiner si la bride antibasculement est convenabiement installee sous la cuisiniere: Ne pas projeter de reau sur un feu de graisse. Utiliser du bicarbonate de sodium ou un extincteur _ mousse ou produit chimique sec pour eteindre les flammes. L'un des pieds arriere de reglage de raplomb doit ¢tre convenabiement engage dans la fente de la bride. Lorsque la cuisiniere est convenablement calee, la bride antibasculement S6curit6 pour les en(ants immobiiise [e pied arriere contre le sol. Verifier [a parfaite immobilisation de la cuisiniere par la bride apres chaque deplacement de la cuisiniere. Pour 6viter un incendie ou des dommages par la fum6e S'assurer que tousles materiaux de conditionnement sont retires de rapparei[ avantde le mettre en marche. Garder les materiaux combustibles, ressence et autres matieres NE JAMAIS hisser des enfants seuls ou sans supervision Iorsque et vapeurs inflammables bien eioignes de rappareil. rappareil est en service ou encore chaud. Si rappareil est installe pres d'une fenetre, des precautions appropriees doivent etre prises pour eviter que le vent entraine les rideaux au-dessus des brQleurs. NE JAMAIS laisser un enfant s'asseoir ou se tenir sur une partie quelconque de rappareil. I1pourrait se blesser ou se brOier. II est important d'enseigner aux enfants que la cuisiniere et les ustensiies places dessus ou dedans peuvent etre chauds. Laisser refroidir les ustensiies en un lieu sOr, hors d'atteinte des enfants. II NE JAMAIS hisser des articles sur la table de cuisson. L'air chaud de revent peut les enflammer et mettre egalement sous pression des contenants fermes qui pourraient alors exploser. est important d'enseigner aux enfants qu'un appareil menager n'est pas un jouet, et qu'ils ne doivent toucher aucune commande ou autre composant de rappareil. De nombreux flacons d'aerosol peuvent EXPLOSERIorsqu'on les expose _ la chaleur, et ils peuvent contenir un produit tres inflammable. Eviter d'utiliser ou remiser un flacon d'aerosol Familiarisation proximite de rappareil. avec ['apparei[ De nombreux articles en piastique peuvent etre deteriores par la chaleur. Conserver les articles en plastique _ distance des composants de rappareil susceptibles de devenir tiedes ou chauds. Ne pas hisser des articles en plastique sur la table de cuisson; un article en plastique trop proche de revent du four ou d'un brQleur allume pourrait s'amollir ou fondre. Pour eliminer le besoin d'atteindre quelque chose par-dessus les brQleurs de surface, il est preferable qu'il n'y ait aucune armoire de cuisine directement au-dessus de rappareil. S'i[ y a une armoire, on ne devrait y remiser que des articles peu frequemment utilises et capables de resister _ [a chaleur emise par rappareil. La temperature pourrait etre excessive pour certains articles, comme liquides volatils, produits de nettoyage ou flacons d'aerosol. En cas d'incendie Interrompre [e fonctionnement de rapparei[ et de [a hotte de ventilation pour minimiser le risque d'extension des flammes. Eteindre les flammes, puis mettre la hotte en marche pour evacuer la fumee et rair vicie. • Table de cuisson : Utiiiser un couvercle ou une plaque biscuits pour etouffer les flammes d'un feu qui se declare darts un ustensile de cuisine. Ne pas utiliser le four pour ranger des aliments ou des ustensiles de cuisine. L'event de four est situe _ la base du dosseret. NE JAMAIS saisir ou deplacer un ustensiie de cuisine enfiamme. suite • Four : Fermer la porte du four pour etouffer les fiammes. 22 Evitezde toucher le voisinage de revent de four Iorsque le four est utilise et pendant phsieurs minutes apres rarret du four. Certains composants de revent et la zone voisine peuvent devenir suffisamment chauds pour provoquer des brOlures. Apres rarret du four, ne touchez pas revent de four ou la zone voisine avant que ces composants aient pu se refroidir suffisamment. empecher toute accumulation sur la hotte elle-meme ou sur le filtre. Lors du flambage d'aliments sous la hotte, mettre le ventilateur en marche. NE JAMAIS porter, Iors de rutilisation de rappareil, des vetements faits d'un materiau inflammable, ou amples, ou Iongues manches. De tels vetements peuvent s'enflammer ou accrocher la poignee d'un ustensile. Autres surfaces potentJellement chaudes : table de cuisson, zones faisant face _ la table de cuisson, event de four, zone voisine de revent, porte de four et zone voisine de porte et de hublot. Ne touchez pas rampoule chaude du four avec un linge humide; le choc thermique pourrait la briser. Si tel est le cas, debranchez rappareil avant de retirer rampoule pour eviter une decharge electrique. Placer toujours les grilles _ la position appropriee dans le four Iorsque le four est froid. Faire coulisser la grille vers rexterieur avant d'ajouter ou enlever un plat; utiliser pour cela une manique robuste et seche. Eviter d'introduire la main dans le four pour y placer ou retirer un plat. S'il est necessaire de deplacer une grille Iorsqu'elle est chaude, utiliser une manique seche. Veiller toujours arreter le four _ la fin d'une periode de cuisson. Cuisson et s curit Ouvrir toujours la porte du four tres prudemment. Laisser rair chaud ou la vapeur s'echapper avantde retirer/introduire un plat. Placer toujours un ustensile sur un brOleur de surface avantde rallumer. Veiller _ bien connaitre la correspondance entre les boutons de commande et les brOleurs. Veiller _ allumer le AVERTISSEMENT : Mets prepares : Respecter les instructions du fabricant. Si le contenant ou le couvercle en plastique d'un mets surgele se ddorme ou est endommage durant la cuisson, jeter immediatementle recipient et son contenu. Les aliments pourraient etre contamines. brOleur correct et verifier que le brOleur s'allume effectivement. A la fin de la periode de cuisson, eteindre le brOleur avantde retirer rustensile, pour eviter une exposition aux flammes du brOleur. NE JAMAIS garnir la sole ou une grille du four avec de la feuille d'aluminium. Ceci pourrait susciter un risque de choc electrique ou d'incendie, ou une autre deterioration de rappareil. Utiliser de la feuille d'aluminium uniquement selon les instructions de ce guide. Veiller _ toujours ajuster correctement la taille des flammes pour qu'elles ne depassent pas sur la peripherie de rustensile. Des flammes de trop grande taille sur un brOleur sent dangereuses, elles entrainent un gaspillage d'energie et elles peuvent faire subir des dommages _ rustensile, _ rappareil ou rarmoire situee au-dessus. Ustensiles et s6curit6 Utiliser des ustensiles _ fond plat comportant une poignee qu'on peut facilement saisir et qui reste fro[de. Eviter d'utiliser un NE JAMAIS hisser un brOleur de surface allume sans surveillance, particulierement avec une puissance de chauffage elevee ou Iors d'une operation de friture. Un debordement pourrait provoquer la formation de fumee et des produits gras pourraient s'enfiammer. Eliminer des que possible les produits ustensile instable ou ddorm& qui pourrait facilement basculer, ou dent la poignee est mal fixee. Eviter egalement d'utiliser des ustensiles de petite taille comportant une poignee Iourde; ces ustensiles sent generalement instables et peuvent facilement basculer. Un ustensile Iourd Iorsqu'il est rempli peut egalement etre dangereux Iors des manipulations. gras renverses. Ne pas utiliser une puissance de chauffage elevee pendant une periode prolongee. NE JAMAIS faire chauffer un recipient non ouvert dans le four ou sur un brOleur de surface; raccumulation de pression dans le recipient pourrait provoquer son eclatement et de graves dommages materiels ou corporels. Veiller _ utiliser un ustensile de taille suffisante pour que le contenu ne risque pas de deborder. Ceci est particulierement important pour un ustensile rempli d'huile de friture. Verifier que la taille de rustensile est suffisante pour qu'il puisse recevoir les produits alimentaires _ cuire, et absorber raugmentation de volume suscitee par rebullition de la graisse. Utiliser des maniques robustes et seches. Des maniques humides peuvent provoquer la formation de vapeur brOlante. Ne jamais utiliser un torchon _ vaisselle ou autre article textile la place de maniques; un tel article pourrait trainer sur un brOleur et s'enflammer, ou accrocher un ustensile ou un Pour minimiser les risques de brOlure,d'inflammation de matieres et de renversement par contact non intentionnel avec un ustensile, ne pas orienter la poignee d'un ustensile vers un brOleur adjacent; orienter toujours la poignee d'un ustensile vers le cote ou rarriere de rappareil; ne pas hisser non plus la poignee d'un ustensile deborder _ ravant de rappareil, oO un composant de rappareil. Laisser toujours refroidir un recipient d'huile de friture chaude avant de tenter de le deplacer et le manipuler. jeune enfant pourrait facilement la saisir. Ne pas hisser la graisse de cuisson ou autre materiau inflammable s'accumuler dans ou pres de rappareil, de la hotte ou du ventilateur de revent. Nettoyer frequemment la hotte pour Veiller _ NE JAMAIS hisser le contenu liquide d'un ustensile s'evaporer compietement; rustensile et rappareil pourraient subir des dommages. 23 Appliquer les instructions du fabricant Iors de remploi d'un sachet pour cuisson au four. le joint. Ne pas utiliser de produit de nettoyage du four darts le four autonettoyant ou sur les zones voisines. Seuls certains materiaux en verre, vitroceramique, ceramique, ou certains ustensiles vitrifies/emailles peuvent etre utilises sur la table de cuisson ou dans le four sans risque de bris sous reffet du choc thermique. Observer les instructions du fabricant lots de rutilisation d'un ustensile en verre. II est normal que la surface de cuisson devienne chaude durant une operation d'autonettoyage; par consequent, eviter de toucher la surface de cuisson durant rautonettoyage. La securite de fonctionnement de cet appareil a ete testee raide d'ustensiles de cuisine conventionnels. Ne pas utiliser un ustensile ou accessoire qui n'est pas specifiquement recommande darts ce guide. Ne pas utiliser de couvre-brQleur, gril place sur la table de cuisson ou systeme de convection additionnel. L'utilisation d'un dispositif ou accessoire qui n'est pas expressement recommande dans ce guide peut degrader la securite de rappareil ousa performance, ou reduire la Iongevite des composants. important pour la s curit Nettoyage Avertissement et avis La Ioi californienne <<Safe Drinking Water and Toxic Enforcement Act >> de ] 986 (proposition 65_stipule la publication par le gouverneur de la Californie d'une liste de substances que retat de Californie considere comme cancerigenes ou dangereuses pour le systeme reproducteur, et impose aux entreprises commerciales robligation de signaler _ burs clients les risques d'exposition _ de telles substances. Les utilisateurs de cet appareil peuvent etre exposes _ une faible concentration de certaines substances figurant dans la liste mentionnee ci-dessus, dont benzene, formaldehyde et suie, du fait de la combustion incomplete du gaz naturel ou du gaz de petrole liqudie. Pour minimiser la combustion incomplete, et s curit Arreter toutes les commandes et attendre le refroidissement de tous les composants avant de les toucher ou d'entre-prendre le nettoyage. Ne pas toucher la grille d'un brOleur ou la zone voisine avant que ces composants aient pu suffisamment refroidir. veiller _ ce que les br01eurssoient parfaitement regles. Pour minimiser rexposition _ ces substances, veiller 8 bien evacuer les gaz de combustion _ rexterieur. Exercer une grande prudence Iors du nettoyage de rappareil. Travailler prudemment pour eviter des br01urespar la vapeur en cas d'utilisation d'un chiffon ou d'une @onge humide Iors de relimination d'un produit renverse sur une surface chaude. Certains produits de nettoyage peuvent generer des vapeurs Nous informons les utilisateurs de cet appareil que Iors d'une operation d'autonettoyage, ils peuvent etre exposes _ une faible concentration de certaines substances figurant dans la liste mentionnee ci-dessus, dont le monoxyde de carbone. Pour minimiser rexposition, veiller _ ce que la piece ouse trouve le four soit convenablement aeree durant une operation d'autonettoyage par rouverture d'une fenetre ou d'une porte. nocives Iorsqu'on les applique sur une surface chaude. Four autonettoyant AVIS IMPORTANT - OISEAUX FAMILIERS : Les oiseaux ont un systeme respiratoire tres sensible. Ne pas garder un oiseau familier dans la cuisine ou dans une piece ou il pourrait etre expose aux fumees. Les fumees emises durant une operation d'autonettoyage peuvent etre dangereuses ou mortelles pour un oiseau, de meme que les fumees emises lots du chauffage excessif de graisse, huib, margarine, et du chauffage excessif dans un ustensile _ revetement antiadhesif. Nettoyer uniquement les pieces mentJonnees dans ce guide. Ne pas nettoyer le joint de porte; le joint joue un r01eessentiel quant 8 retancheit8. Ne pas frotter, endommager ou deplacer Conserver ces instructions pour consultation 24 ult rieure n'est pas limit_e.Elle peut se d6colorersi les r6sidus acidesou sucr6s ne sont pas enlev_savant de commencerI'autonettoyage. Four autonettoyant Programmation de I'autonetteyage : 205° C (400 ° F) pour programmerun l de Remarque : Latemperaturedu four doltcycled'autonettoyage. 6tre situc!eell dessous 1. Fermerla porte du four. 2. Appuyersur la touche Clean [Nettoyage). • Le mot CLEANclignote. Clean • Le mot SETG/alider]clignote _ I'afficheur. 3. Appuyersur la touche Autoset 0 (Programmation automatique). [_ /\utosctV • MEd [Moyen) [Salet6moyenne,3 heures)est affich& 4. Appuyersur la touche Autoset 0 pour voir driller les diff6rents r6glagesde I'autonettoyage• Le cycle d'autonettoyageutilise des temp6raturessup6rieuresa la normalepour assurerle nettoyageautomatiquede la totalit6 du four. HVy 0-r_ssale) [Salet6@aisse,4 heures) Le four dolt 6tre nettoy6rc!guliSrement.Lesc!claboussuresdoivent 6tre essuy6espour @iter une production excessivede fum6e ou [apparition de flammes.Ne laissezpas de r_siduss'accumulerdans le four. MEd (Salet6moyenne,3 heures) LifE [L6ger) (Salet616g_re,2 heures) Le choix du niveaude saletc!du four programmeautomatiquement la dur6e du cycle d'autonettoyage. Durant le processusd'autonettoyage,il convient de bien a_rer la cuisine pour c!liminerlesodeurs normalementc!misesdurant le nettoyage. 5. Apr_s quatresecondes,le four commencele nettoyage. • Si la porte n'est pas ferm6e,des bips retentissentet le mot {{door _ [porte) parait a I'afficheur.Si la porte n'est pas ferm6e dans les30 secondes,I'op6rationd'autonettoyageest annulc!eet I'afficheurrevient _ I'heuredu jour. Avant I'autonettoyage 1. Eteindrela lampe du four avantle nettoyage.Elle risqueraitsinon, de griller. • Le mot CLEANparait a I'afficheur. • Le mot LOCKclignote _ I'afficheur.Unelois la porte verrouill_e,le mot restestable. 2. Enlevertousles plats et les grilles du four. Lesgrilles risquent de se d6coloreret de ne plus glisser aussi bien apr_sun cycle d'autonettoyagesi on ne les enl_vepas. • La duroc de nettoyagecommencele d_!comptea I'afficheur. D_marrage diff_r_ d'u_ cycle d'aute_etteyage : 3. Nettoyerle cadre du four, le cadre de la 1. Appuyersur la touche Delay 1 (Diff@_e). • Le mot DELAYclignote. porte, la zone _ I'ext6rieurdu joint et \, autour de I'ouverturedans le joint de la porte, a I'aided'un produit de nettoyage non abrasif comme BonAmi* ou d'eau additionn@ de d6tergent.Le processus d'autonettoyagene nettoie pasces zones.Ellesdoivent 6tre nettoy6espour emp6cherla saletc!de s'incruster pendant le cycle de nettoyage.(Lejoint assure 1'6tanchc!it6 autour de la porte et du hublot du four.] • 00:00clignote a I'affichage. 1 / Delay 2. Entrerla dur_e d'attented_!sir_epour le d6marragedu cycle I'aide destouches num@iquesappropri_es. 3. Appuyersur la touche Clean. dean Le mot SETclignote a I'afficheur. 4. Appuyersur la touche Autoset O. 4. Pouremp6chertout dommage,ne pas nettoyerni frotter le joint qui se trouve autour de la porte du four. Cejoint est con_u pour @iter les pertesde chaleur pendant le cycle d'autonettoyage. ° Le mot LifE (salet_I%_re) est affich& 5. Appuyersur la touche Autoset 0 (Programmation automatique)pour voir driller les diff,!rents r_glagesde I'autonettoyage• 5. Eliminerles r_sidus de graisseou de produits renvers6ssur la sole avant le nettoyage.Ceci emp6che la formation de flammes ou de fum6e durant le nettoyage. HVy 0-r_ssale) [Salet_@aisse,4 heures) 6. Essuyerles rc!sidussucreset acides,comme les patatesdouces, la tomate ou les saucesa basede lait. La porcelainevitrifi6e pos@deune certaine r6sistanceaux composc!sacides,mais qui MEd (Salet_moyenne,3 heures) LifE [L_ger) (Salet_I_!g_re,2 heures) *Les noms de marquedes produits de nettoyagesont des marquesd@os_esdes diff_rents fabricants. 25 U kutoset 1 M thodes Le choix du niveaude salet6 du four programmeautomatiquement la dur6e du cycle d'autonettoyage. de nettoyage 6. Apr_s quatre secondes,los mots CLEAN(Nettoyage)et DELAY (Diff6r_e)s'allumerontet le mot LOCK(Verrouillage)clignotera I'afficheur.Lorsquela porte du four se verrouille,le mot LOCK s'arr6te de clignoter et reste allumc!en continu pour indiquer que le four est programm_pour une op6ration de nettoyagediff6rc!. Le dc!laid'attenteseraaffich& Pendant le cycle d'autonettoyage Chapeaux de br_leur et brQleurs _ gaz = Chapeaux de brSleur amovibles • Laisserle brQleurrefroidir. Enleverle chapeaude brQleurpour le laverclansde I'eausavonneuseavecun tampon _ r6cureren plastique.Pour los souillurestenaces,nettoyeravec un tampon non abrasif,savonneux,ou avecune @onge et la cr_me de nettoyage pour table de cuisson CooktopCleaningCreme*(produit n° 20000001)**. • Ne pas effectuer le nettoyageau lave-vaisselleou darts le four autonettoyant. Br_leurs_ gaz scell_s • Nettoyerfr_quemment.Laisserle brOleurrefroidir. Nettoyeravec du savonet un tampon a r_curer en plastique.Pour les souillures tenaces,nettoyeravec un tampon savonneuxet non abrasif. Ne pas agrandir ou d(!formerlestrous. • Veiller a ne pas introduire d'eau dans les orificesdu brOleur. • TravaillerprudemmentIors du nettoyagede I'allumeur.Si I'allumeurest endommag_ou mouill_, los br01eursde la table de cuisson ne pourront pass'allumer. Lorsquele mot LOCKparait a I'afficheur,la porte ne peut 6tre ouverte.Pour6viter d'endommagerla porte, ne pas forcer la porte pour I'ouvrir IorsqueLOCKest affich& Fum_e et odeurs La premierefois o_ le four est nettoy6,il peut y avoir production d'odeur et de fum6e.Ceci est normalet disparaitraa I'usage. Sile four est tr_s saleou si une ustensilea €1t6laiss6edana le four, il peut y avoir production de fumc!e. Bruits Pendantque le four chauffe, il peut se produire des bruits de m_tal en dilatation ou en contraction.Ceci est normal et n'indique pasque le four s'abime. Apr s le cycle d'autonettoyage Environune heure apr_s la fin du cycle,le mot LOCKs'c!teint.Ace moment, la porte pout 6tre ouverte. La salet6 pout avoir laiss6 un r6sidu gris poudreux.L'enlever avec un lingo humide.S'il reste de la salet(!,cela indique que le cycle de nettoyagen'a pas 6t(! assezlong. Cettesalet6 restantesera enlev6eau prochain cycled'autonettoyage. Grilles des br_leurs - porcelaine sur lento . Laverlesgrilles avecde I'eausavonneusetilde et un tampon r_cureren plastique non abrasif.Pour lossouillurestenaces, nettoyeravecun tampon en plastique non abrasif,savonneux,ou avec une @onge et la cr_me de nettoyagepour table de cuisson CooktopCleaningCreme*(produit n° 20000001)**.S'il restedes souillures,appliquer de nouveaula cr_me pour table de cuisson, recouvriravec un essuie-tout humide,et hisser tremper pendant 30 minutes. Frotterde nouveau,rincer et faire s6cher. . Ne pas effectuer le nettoyageau lave-vaisselleou darts le four autonettoyant. Si los grilles ont 6t6 laiss_es _ rint6rieur du four pendant le cycle d'autonettoyageet qu'elles glissent real sur leurs supports,los enduire,ainsi que lossupports,d'une fine couche d'huile v6gc!tale. De fines lignes peuventapparaitre dans la porcelaine parce qu'elle a subi chaleur et refroidissement.Ceci est normalet n'affecterapas la performance. Zone de la console de commando et horloge • Pour utiliser la fonction Verrouillagedescommandospour le nettoyage,voir page 33. • Essuyeravec un lingo humideet sdcher.Ne pas utiliser un agent de nettoyageabrasif susceptiblede rayerla finition. . On pout utiliser un produit de nettoyagedu verre,pulvdris_ d'abord sur un chiffon. NEPAS projeter le produit directement sur los touchesde commando eu sur I'afficheur. Une d6coJorationblanche pout apparaitre apr_s le nettoyage si des aliments acides ou sucr6s n'ont pas 6t6 enlev6s avant que ne commence I'autonettoyage. Ladc!colorationeat normale et n'affecterapas la performancedu four. Remarques : • Si la porte du four n'est pas ferm6e,le mot _ door _ (porte) clignote _ I'afficheur et le four c!metdes bips jusqu'aceque la porte soit ferm(!eet que I'onappuie _ nouveausur Clean(Nettoyage). Boutons de commande • Placerchaque bouton a la position d'ARRET,et retirer chaque bouton en le tirant. • Laver,rincer et faire s_cher.Ne pas utiliser un agent de nettoyage abrasif susceptiblede rayer la finition. • S'il s'c!couleplus de cinq secondesentre le momentoQI'on appuie sur Cleanet celui oQI'on appuie sur la touche Autoset O (Programmationautomatique),I'afficheur retourne automatiquementa I'affichagepr6c6dent. *Les noms de marquesont des marquesd@os_!esdes diff_rents fabricants. ** Pourcommanderdirectement,composerle 1-877-232-6771E.-U. ou 1-800-688-8408Canada. • La porte du four se trouvera endommag6esi I'on force son ouverturealors que le mot LOCKest encoreaffichc!. 26 • Faire fonctionner bri_vement chaque brQleur pourvc!rifier quele bouton a€!t6correctement rc!installc!. Table de cuissonet tableau de commande - 6mail vitrifi6 L'6mailvitrifi_ est du verre lid au m6tal par fusion. II pout sefissurer ou s'_cailleren cas de mauvaiseutilisation. II est r6sistantaux acides,mais pustotalement inattaquablepar lea acides.Tous los produits renvers6s, en particulier acides ou sucrc!s,doivent 6tre essuy6simm6diatement avec un lingo sec. • Unefois refroidi, laver avecde I'eausavonneuse,rincer et s6cher. • Ne jamais essuyerune surfacetilde ou chaude avecun linge humide.Ceci pourrait la fissurerou I'_cailler. • Ne jamais utiliser de nettoyantspour four, d'agentsde nettoyage caustiquesou abrasifssur le fini ext6rieurde la cuisini_re. Panneaux lat6raux,tiroir de remisage et poign6esde porte 6mail point • Unefois les pi_ces refroidies,les lavera I'eausavonneusetilde, rincer et sc!cher.Ne jamais essuyerune surfacetilde ou chaude avec un linge humide, ceci pouvantendommagerla surfaceet entrainer une brQlurepar la vapeur. • Pour lostaches rebelles,utiliser des agentsde nettoyage16g6rement abrasifscomme la p_te au bicarbonatede soude ou Bon Ami*. Be pas utiliser de nettoyantsabrasifs,caustiquesou 6nergiquescomme los nettoyantspour four ou lostamponsen laine d'acier.Ces produits raieraientou endommageraientde fagon permanentela surface. Remarque : Udliser un lingo eu un torchonsec pour essuyer los produits renvers_s,surtout s'ils sent acides eu sucr#s. La surface peurrait se d#colerer ou se terair si la salet# n'#tait pus imm#diatement enlev#e. Ceciest parUculi#rement important clans/e cas de surfaces blanches. Hublot et porte de four en verre • Eviterd'utiliser trop d'eau,qui risquerait de s'infiltrersous ou derriere le verre et de tacher. • Laver_ I'eauet au savon.Rinceravec de I'eaupropre et sc!cher.Un produit de nettoyagedu verre pout 6tre utilisc!en le vaporisant d'abord sur un lingo. • Ne pus utiliser de produits abrasifscommetampons _ r_curer, laine d'acier ou produit de nettoyageen poudre qui risqueraientde rayer le verre. int6rieur de four • Exc!cuterles instructionsprdsentc!esaux pages24-25 pour I'autonettoyagedu four. Grilles du four • Nettoyeravec de I'eausavonneuse. • Eliminerlossouillurestenacesavec une poudre de nettoyageou un tampon _ r_curersavonneux.Rinceret faire s(!cher. • Si les grilles sont laiss6esduns le four pendantle cycle d'autonettoyage,olios se d_colorentet peuvent ne plustr_s bien glisser.Si ceci se produit, appliquer par essuyageun peu d'huile v6gc!talesur la grille et sos supportsen relief pour faciliter le mouvement,et enleverI'exc_sd'huile. Acier inoxydable (curtainsmod_les) • NE PAS UTILISERDE PROBUITSDE NETTOYAGECONTENANT DU JA VELLISANT. • NE PAS UTILISERDE NETTOYANT$_ ORANGE_ OUABRA$1F$. • TOUJOURSESSUYERDAN$ LE SEN$ DE LA TEXTUREDE L'AClERLOBS#U NETTOYAGE. • Nettoyagejournalier/salet6 16g_re - Essuyeravec I'undes produits suivants:eau savonneuse,vinaigre blanc/eau, produit de nettoyagepour verreet surfaceFormula409*ou un produit semblable pour verre - avecun linge souple et une @onge. Rinceret s6cher.Pour polir et enleverlosmarques de doigts,faire suivre par une vaporisationde Magic Spray*pour acier inoxydable(produit n° 2OOOOOO8]**. " Salet6 mod6r6e/6paisse - Essuyeravec I'un des produits suivants: Ben Ami*,Smart Cleanser*ou Soft Scrub* - _ I'aided'un linge souple ou d'une @onge humide. Rinceret s6cher.Leataches rebelles peuvent6tre enlev_esavec un tampon multi-usagesScotch-Brite* humidifi_!.Frotteruniform_mentdarts le sens du m_tal.Rincer et sScher.Pour redonner du lustre et retirer les rayures,faire suivre par une vaporisationde Magic Spray*pour acier inoxydable. • D6coloration - A I'aided'une @onge humidifi_e ou d'un lingo souple, essuyera I'aidedu nettoyantCameo*pour acier inoxydable. Rincer imm_!diatementet s_!cher.Pour enleverlos marqueset redonnerdu lustre,faire suivre par une vaporisationde Magic Spray* pour acier inoxydable. *Les noms de marquesont des marquesd@os_esdes cliff, rents lubricants. ** Pour commanderdirectement,composerle 1-877-232-6771E.-U.ou 1-800-888-8408Canada. Porte du four Hublot du four Pour proteger le hublot de la porte du four : 1. Ne pas utiliser de produits nettoyantsabrasifscommedes tampons r_cureren laine d'acier ou des produits de nettoyageen poudre qui risqueraientde rayerle verre. 2. Ne pus heurter le hublot en verre avec un ustensile,un article de mobilier, un jouet, etc. Remarque : On peut percevoir une certaine {{_lasticit_>>Iorsde la fermeture de la porte du four d'une cuisini_re neuve;ceci est [norma; cot effet disparait progressivement. place duns le four. 3. Ne pus fermer la porte du four avant que lesgrilles nesoient en Touted_gradationdu hublot de verre - rayure,choc,tension, etc. peut affaiblir sa structure et augmenter le risquede bris a une date ult_rieure. 27 Pieds de r glage de I'aplomb Raccordement lectrique Los appareils n_cessitantune alirnentation _lectrique comportent une fiche _ trois broches raise_ la terre qui doit _tre branch_e directementdarts une prisede 120volts _ trois cavit6set correctementraisea la terre. Toujoursd4brancherI'appareilavantd'y faire de I'entretien. La fiche a trois broches raisea la terre fournit une protectioncontre los d_chargesc!lectriques.NE PAS COUPERNI ENLEVERLA BROCHEDE TERREDU CORDON D'ALIMENTATION. PIED DE REGLAGE DEL'APLOMB D placement d'un appareil Si la prise ne comporteque deuxcavitc!s,n'est pas mise _ la terre ou n'est pas appropri_e,le propri_taire de rappareJl a la responsa-bilit_ de faire remplacer la prise par ane prise trois cavit_s correcternentraise _ la torte. gaz Lesraccordsdes appareilsa gazservant_ branchercot appareil I'alimentationde gazne sont pas pr@uspour 6tre d@lac6s continuellement.Unelois I'appareilinstall6,NE PAS le d@lacer de fwon r@6t6e pour le nettoyerou le changer de place.Si cet appareil doit 6tre d_m_nag6et/ou enlev_pour 6tre rc!parc!, suivre la m_thode dc!critedarts los instructionsd'installation.Pourtoute information, prendre contact avec le service_ la clientele de Maytag au 1-800-688-9900E.-U.ou 1-800-688-2002au Canada. II faut que le pied arri_re de la cuisini_resoit engag6 dans la bride antibasculementpour que la cuisini_re ne puisse basculer accidentellement. Tiroir de remisage Le tiroir de remisagepeut 6tre enlevc!pour vous permettrede nettoyersous la cuisiniSre. D_pose : Lampe du four 1. Vider le tiroir et le tirer jusqu'_ la position de la premierebut6e. 2. SouleverI'avant. 3. Tirerjusqu'_ la position de la seconde butc!e. 4. Saisirle tiroir par les c6t6set soulever/tirerpour I'extraire. R_installation : 1. InsUrerles extrc!mit6sdes glissi_resdu tiroir dans les rails de la cuisini_re. Pour rempiacer I'ampoule du four : 1. Apr_s le refroidissementdu four, maintenir le cabochontout en enlevant la piScemc!tallique qui la maintienten place. Rernarque : Le cabochon tombera si on ne le maintient "_ pasen place. CABOCHON 2. SouleverI'avantdu tiroir et pousserdoucementjusqu'a la position de la premi6re butSe. 3. Souleverde nouveaule tiroir et le pousserpour le former. RESSORT DERETENUE lfil m#tallique) 2. Enleverle cabochon et I'ampoule. 3. Installerune ampoulede/40watts pour appareil m6nager. 4. R6installerle cabochon et le fil m6talliquede retenue. 5. R6tablirI'alimentationde la cuisini_re.R_glerde nouveauI'horloge. 28 Pourla plupartdes problbroesobservbs, essayerd'abord los solutionspossibles,_ droite. • V_rifierque loscommandosdu four sent correctementrdgldes. • Vdrifiersile four est bien raccord6au circuit 61ectrique. • Inspecter/rCarmer le disjoncteur.Inspecter/remplacerlosfusibles. • ContrOlerla sourced'alimentation61ectrique. Iropossibilited'autonettoyagede four. , Ddterminerque rappareil n'a pas6tc!programmdpour un autonettoyage diffdrC.Voir page25. • V_rifierque la porte est fermCe. • Vdrifiersi la commandoest en modesabbat.Voir page37. , Le four est pout 6tre _ une tempCraturesup@ieurea 205° C (400° F]. La tempc!raturedu four dolt 6treinfCrieure_ 205° C (400° F)pour pouvoir programmerun cycled'autonettoyage. Un br_leur de surface ne s'alluroepas. ° Vdrifierque I'appareilest correctementraccord6_ la source d'dlectricit& ° DCterminersi I'alimentation61ectriqueest interrompue(fusiblegrilld disjoncteurouvert). ° Vdrifierque I'allumeureatsec et qu'il dmetdes 6tincelles.Le brQleur ne pout s'allumersi I'allumeurest endommagC,souill6ou mouill& Si I'allumeurne gdn_repasd'dtincelles,ramenerle boutonde commandoa la positionOFF(ArrCt]. Le four ne se nettoJe pus correcteroent. ° Untemps de nettoyageplus long pout 6tre ndcessaire. ° On n'a pus dlimin_avant I'op_rationd'autonettoyagelosaccumulations excessivesde rdsidus,particuli_rementlosr_sidusd'alimentsacides OU sucres. La porte du four ne se deverrouillepus apr_s rautonettoyage. • L'int@ieurdu four est encorechaud.Attendre environune heureapr_s I'ach_vementde la pdrioded'autonettoyage.II est possibled'ouvrirla porteapr_sla disparitiondu messageLOCK[Verrouillage]sur I'afficheur. • Loscommandoset la portesent peut-_treverrouilldes. Voir page33. Flaroroesnon uniforroes. • Orificesdu brOleurobstruCs. S_paration entre los flaroroeset le brQleur. ° Veiller a placercorrectementI'ustensilesur la grille du brQleur. R_sultats de caissonau four cliff, rents des attentes ou de ceux produitspar le four antbrieur. • Vdrifierque la temperaturesClectionndeest correcte. Veiller prdchaufferle four si ceciest demandddansla recette. • DCterminersi 1'Cventdu four est obstruC.Voir sonemplacement page39. ° S'assurerque la cuisiniCreest d'aplomb. ° Losrdglagesde tempdraturevarient souvententreun four neufet le four qu'il remplace.On observesouventune d@ivedu r_glagede tempCratured'un four _ mesurequ'il vieillit;il pout devenirpluschaud ou moinschaud.Voir page 38 los instructionsd'ajustementde la temperaturedu four. Reroarque:11n'estpus utile de modifierle r_glagede temp@aturesi la variation n'affectequ'une ou deux recettes. ° Utiliserlosborisustensiles.LosustensilesfoncCsdonnent un brunissementde couleurfoncde,leaustensilesbrillants,un brunissementplus clair. • Vdrifier la positiondes grilleset des ustensiles.Lorsde la r@artition sur deuxgrilles,ne passuperposerlos plats. Veiller _ hisser un espacede 2,5_ 5 cm (1 a 2 pc] entre losplats et losparoisdu four. • ContrClerI'utilisationde feuilled'aluminiumdans le four. Ne jaroais recouvrircompletementune grille du four avec de la feuille d'aluminium.Placerun petit morceaude feuilled'aluminiumsur la grille sous le plat pour rdcupdrerlosmati_resrenversCes. R_sultats incorrectslots de la caissonau gril, ou _roission excessivede furore. ° DCterminerla position desgrilles.Losalimentspeuvent6tre trop pros des flammes. ° Utilisationincorrectede feuille d'aluminium.Ne jaroais garnir la grille de I_chefriteavecde la feuille d'aluminium. ° Enleverrex@sde graissesur la piece de viandeavantla cuisson au gril. • Utilisationd'une I_chefritesouillde. • Prdchaufferle four pendanttrois minutesavantde placerle plat duns le four. • Portedu four fermdedurant la cuissonau gril. 29 Accumulation d'huroidit_sur le hublotou vapeursortant de r_vent. ° Ceciest normaldurant la cuissond'alimentscontenantbeaucoupd'eau. • Utilisationexcessived'humidit8Iors du nettoyagedu hublot. Eroissiond'uneforte odeur ou de furore lots de la roise en roarcbe du four. • Ceciest normalpour un four neuf et disparaitapr_squelques utilisations.Un cycled'autonettoyage{{brOlera_plus rapidementles odeurs. • La raiseen marched'un ventilateuraide a retirerfumdeet odeurs. • Presencede saletdssur la sole.Procdder_ un autonettoyage. Codesd'anoroalie. • Losmots BAKE(Cuissoncourante)ou LOCKpeuventclignoter rapidement_ I'afficheurpour prdvenird'une erreur ou d'un probl_me.Si le mot BAKEou LOCKparaita I'afficheur,appuyersur la touche CANCEL(Annuler].Sile mot BAKEou LOCKcontinue a clignoter, d_brancherI'appareil.Attendre quelquesminutes,puis rebrancher I'appareil.Sile mot continue_ clignoter,d_brancherI'appareilet prendre contactavec un r@arateurautorisd. • Sile four esttr_s sale,losflamm_chespeuventproduire un code d'anomalieau coursdu cycled'autonettoyage.Appuyersur la touche CANCELet laisserle four refroidircomplStement,essuyerla salet_!en ex@spuis reprogrammerI'autonettoyage.Sile code d'anomalie rdapparait,prendre contactavec un r@arateurautoris& Des bruits se font entendre. • Le four fait plusieursbruits faibles.II est possibled'entendreles relaisdu four qui se mettenten marcheet s'arr_tent.Ceciest normal. • Alors que le four se rdchauffeet se refroidit,il est possibled'entendre desbruits correspondant_ la dilatationet _ la contractiondespiCces mStalliques.Cecieat normalet n'endommagepas I'appareil. II n'y a ni hip ni affichage. • Le four est peut-_tre en modesabbat.Voir page 37. SAb clignote puisreste ailuro& , Le four est en modesabbat.Pourannuler,appuyersur la touche Clock (Horloge)et maintener-laenfoncSependantcinq secondes. Culsson surlesurfece 141[Elev6e) : S'utilise pour porter un liquide dbullition ou atteindre la bonne pression dans un autocuiseur. R6duire ensuite la puissance de chauffage apr6s le ddbut de I'dbullition ou de la cuisson des aliments. LO [Basse]: S'utilisepour le mijotageou le maintien de la temp6ratured'un mets, ou pour la fusion de chocolatou beurre.Lorsquele plat ou I'ustensileest couvert,un d6but de cuisson peut se produire avec la puissancede chauffageLO. Pour r6duire la puissancede chauffage,tourner le bouton ) la position OFF (Arr6t). V6rifier la stabilit6 desflammes sur le br01eur. Une puissancede chauffageintermc!diaireest utilisc!epour la poursuite de la cuisson.Les alimentsne cuisent pasplus rapidementsi on utilise une puissancede chauffage plus 61ev6eque n_cessairepour le maintien d'une douce c!bullition. L'eau bout toujours _ la m6metemp(grature,que I'c!bullitionsoit tranquille ou vigoureuse. Commandes de la surface de cuisson Un graphique pros de chaquebouton identifie le brOleurde [_{_ surfacecommand_par ce bouton. Parexemple,le Front m[_ graphique a droit identifie le br01euravant/gauche. R_glage des commandes: La puissancede chauffagea employerd6pend du type et de la taille de I'ustensileutilisd. 1. Placerun ustensilesur la grille du brCfleur. Si aucun ustensilen'est plac6sur la grille du brt'Jleur,les flammes peuventavoir tendance_ se s_parerdu br01eur. 2. Appuyer et tourner le bouton clansle sensanti-horaire,jusqu'_ la position LITE[Allumage). • On peut percevoir le cliquetiscorrespondant_ la production des dtincelles,et le br01eurs'allume.(Lescinq allumeurs produisent des 6tincellesIorsqu'onplace le bouton de I'un des brOleurs_ la position UTE.] Allumage sans flamme 3. Apr_s I'allumagedu br0leur, r6gler la taille des flammesselon le de veille BBAPEABOEBB0'E.B ddsir en tournant le bouton de commande. Le dispositif d'allumagene fait intervenir aucuneflamme de veille. ChaquebrOleurde la table de cuisson comporteun allumeur par 6tincelle. TravaillerprudemmentIorsdu nettoyageautour des brOleursde _(_z_, la table de cuisson, o,nct_//_,P.LL.Z_/\\ Si un brOleurde la table de cuissonne s'allumepas, d6terminersi I'allumeurest bris& sail ou mouill6. L'allumeurcontinue _ produire des 6tincellesaussi Iongtemps que le bouton est a la position LITE. UtUisation durant une panne d'61ectricit6 -_._v__..__A,, BASE DUBRI)LEUR Boutons de cornmande de la surface de cuisson 1. Approcher une allumette enflamm_!edu brOleur_ utiliser. 2. Enfonceret faire tourner lentementle bouton de commande jusqu'_ la position LITE. On utilise ces boutons pour commanderI'allumagedes br01eursde surface.On peut r6gler chaque bouton a toute position entre les positionsextr6mesLO et HI. On peut percevoirune ddtente de calage_ la position HI.On peut choisir toute position de rdglage entre les deuxpositionsextr6mes. 3. Ajuster lesflammes _ la taille d6sir_e. 3O Surface de cuisson Grilles de br leur Pour _viter ia formation de taches ou un changement de couleur de la surface de Avant une opOrationde cuisson,v_rifier que la grille est correctementplacOe.Lorsde [installation des grilles, placer I'extrc!mit6avec pattesvers le centre,au niveaudes barresdroites. cuisson : • Nettoyer la surface de cuissonapr_schaqueutilisation. , _ Une grille de brCfleurincorrectementinstallOepeut 6caillerI'c!mailde la surfacede cuisson. Enleverles rOsidusrenversOsde produits acides refroidi; ces produits renversOspeuvent_aire _ _ _J _' changer la couleur de I'_mail. A la diff@enced'une cuisini_re dotOede ou brQleursa sucrOsd_s gazstandard,la que la surfacesurfacede de cuisson cuisson de cette cuisini_re n'est pasamovible ou relevable.Ale pas tenter de relever la surface de cuisson, quelle qu'en soit la raison. Br leurs Ne pas fake fonctionner un brSleursans qu'un ustensile soit plac_ sur la grille. L'Omailde la grille peut s'Ocailler s'il n'y a aucun ustensile capable d'absorberla chaleur 6rnise par le br_leur. & 9az scell s Lesbr01eursscellc!sde la cuisini_re sont fixOssur la surface de cuisson;ils ne sont pas conguspour 6tre enlevc!s.Commeles brOleurssont scellOs,un produit qui dOborded'un ustensilene s'infiltrera passous la surfacede cuisson. TravaillerprudernmentIorsqu'il faut remuerdes aliments dansun ustensileplac6sur la grille de brCfleur.Lesgrilles comportent un fini lisse qui facilite le nettoyage. L'ustensilepeut glissersur la grille si on ne tient pasfermement la poignOe;ceci pourrait provoquerun renversementd'alimentschauds,et susciterun risquede brCflure. On devrait cependant nettoyerles brOleursapr_s chaqueutilisation. La tote du br01eurs'enl_vefacilement pour 6tre nettoyOe.(Voir les instructionsde nettoyage_ la page 260 MOmesi les grillesde brQleursont tr_s durables,ellesperdront progressivementleur lustre et changeront de couleur, du fait des temp@aturesc!lev_!es auxquellesles brOleursles exposent. Pour le bon fonctionnementdu brOleur,le chapeaude brCJleur dolt 6tre correctementplacc!sur la basedu brOleur. Reinarques : * Un brOleurconvenablementr_gk! et dont lesorifices sont propress'allume en quelquessecondes.Lorsde I'alimentation au gaz naturel lesflammes sont bleues,avec un cone interne bleu intense. Br=31eurde haute performance Power Boost* Cettecuisini_re est dotOed'un br01eurde hautevitesse,plac6_ I'avantdroit. Ce brQleurpermet une cuisson rapide qui peut servir _ faire bouillir rapidementde I'eauou cuire une grande quantitc!d'aliments. • gr leur • de O_ 0o ,o Ce br01eurest situc!_ la position centrale. II offre une plus faible puissancepour la cuissonde saucesddlicatesou la fusion du chocolat. Powe_ O0 _oo_ Fiont Si lesflammes d'un br01eursont jaunes ou si la combustion est bruyante,le ratio aidgaz peut 6tre incorrect.Demander un technicien d'effectuer le r_glage.(La garantiene couvre pasce r_glage.) Lorsde I'alimentationau gaz de p_!troleliqudi_!, il est acceptableque I'extr_mit_desflammessoit jaune. Ceciest normal;aucun r_glage n'est n_!cessaire. o Avec certainstypes de gaz,on peut percevoirun petit bruit d'explosionIors de [extinction d'un brQleurde surface. Ceci est normal. /'_ i!=', J o Si on fait passerrapidement le boutonde commandede la position HI (ElSv4e)_ la position LO (Basse],lesflammes peuvent s'Bteindre,particuli@rementsi le br01eurest froid. Si ceci se produit, placer le bouton de commande_ la position OFF (Arr@t)et attendrequelquessecondesavant d'allumer de nouveaule br_fleur. \-_, ',il _-_x ""_ Lapuissancethermique(BTU) desbrOleursest diff4rente/orsde I'alimentationau gaz de p4troleliqu4fi4. o Ajuster la puissancede chauffage de telle maniBreque les flammes ne d_bordent pasa la p@iph_!riede I'ustensile. 31 @issondenslefour Tableau de commande A B D C E F Clean 4 s6oo,) Le tableaude commandeest congu pour faciliter la programmation.La fen_tre d'affichageindique I'heure,lesfonctions avecminuterie et fonctions du four. Le tableaude commandereprdsentdcomprend la convectionet d'autres caractdristiquessp6cifiquesau module.(Le style peut varierscion le module.) [Bake [Cuisson courante) Broil(Gril) Utilisation des touches S'utilisepourla cuissoncouranteet le r6tissage. • Appuyer sur la touche d_sir_e. S'utilisepourla cuissonau gril et le rissolage sur partiesup6rieure. • Appuyer sur lestouches num_!riquespour entrer la dur_!eou la temp_!rature. iiiiiiiiiiiiiiiiiiiii iCi!iiClean(Nettoyage) S'utilisepourprogrammerle cycle d'autonettoyage. . Appuyer sur la touche Autoset 0 pour entrer la temp6rature. • Un bip retentit Iorsqueron appuie sur une touche. Delay(D6marrage Programmele fourpour d6buterunecuisson diff_re) ou un nettoyageplustard. Touches numeriques ilFi Autoset (Programmation automatique] • Un double hip retentit en cas d'erreur de programmation. S'utilisentpourprogrammertemperatureset durees. Remarque: Quatresecondesapr_s avoirentr6 leschiffres ou le touche Autoset O,la dur_!eou la temp_!ratureseront automati-quementenregistr6es.Si plus de 30 secondess'_coulent entre la pressionsur une touche de fonction et celle sur les touches num(griquesou la touche Autoset O,la fonction est annuE!eet rafficheur revient_ I'affichagepr6c_!dent. S'utilisepour programmerrapidementles temp6ratures. KeepWarm S'utilisepourmaintenirau chauddansle four (Maintienau chaud) lesalimentscults. ' Convect (Convection) S'utilisepourla cuissonet le rOtissage avec convection. Horloge i ] [Cook& Hold Pourcuirependantune dur6epr66tablie,avec [ (Cuissonet maintien maintienauchaudpendantune heur_. Favorite(Favori] S'utilisepourprogrammeret sauvegarderune methodeparticulierede cuissonet maintien. Timer(Minuterie] Programmela minuterie. Clock[Horloge] S'utilisepourprogrammerI'heuredu jour. OvenLight (Lampedu fou0 S'utilisepourallumerou 6teindrela lumiere du four. CANCEL[Annule0 L'horioge peut _tre programm_epour afficher la duroc dans un format de 12 ou 24 heures.L'hoflogeest programm_een usine pour un format de 12 heures. Changement de I'horloge _ un format de 24 heures : 1. Appuyer sur les touchesCANCEL et Favorite et maintenir la pression pendant troissecondes. . 12 Hr clignote a I'afficheur. 2. Appuyer sur la touche Autoset 0 pour s(glectionner24 Hr; appuyerde nouveaupour choisir 12 Hr. Annuletouteslesoperationssaufminuterie et horloge. 3. ProgrammerI'heureen suivant les instructionsdonn6esdarts la section R4glagede I'horloge. 32 0 ,&utoset 4. A la fin de la dur_e programmc!e,un bip long retentit et le mot End (Fin)seraaffichc!. R_glage de I'horloge 1. Appuyer sur la touche Clock (Horloge). 5. Appuyersur la touche Timer pour effacer I'afficheur. • L'heureclignote a I'afficheur. Annalation de la minaterie : 2. Appuyer sur los touches numc!riquesappropri6espour programmerI'heuredu jour. 1. Appuyersur la touche Timer et la maintenir ainsi pendant trois secondes. • Deuxpoints clignotent a I'afficheur. OU 3. Appuyer ) nouveausur la touche Clock ou attendre quatresecondes. 2. Appuyersur la touche Timer et sur la touche numc!rique<_0 >>. • Losdeux points restent. Lorsquele courant 61ectriquearriveou apr_s une interruption de courant,la derni6re heure avant I'interruptionde courant va clignoter. Autoset Verrouillage des commandos Pour rappeler I'heuredu jour Iorsqu'uneautre fonction de durc!e s'affiche,appuyersur la touche Clock. et de la porte du four L'heure de I'horlogene pout 6tre chang6eIorsquele four a _t6 programm6pour une cuisson ou un nettoyagediffc!rc!ou pour la fonction de cuissonet maintien. La porte du four et los touchespeuvent 6treverrouillc!espour des raisonsde s_curit& nettoyageou pour emp6chertoute utilisation non souhait_e.Lostouches ne fonctionneront pas si oliossont verrouill6es. Annalation de I'affichage de I'heare : Si le four est en cours d'utilisation, lostouches et la porte ne peuvent 6tre verrouill6es. Si I'onne d_sirepas I'affichagede I'heuredu jour :I_(_ANCFI" _,,_,-, --==,, Appuyersur lostouchesCANCEL (Annuler) et |_ Clock et los maintenirainsi pendant trois | secondes.L'heure du jour disparait de I'afficheur. [ L'heure actuelledu jour resteraa I'afficheur Iorsquelos toucheset la porte seront verrouill6es. Verroaillage : LorsqueI'affichagede I'heureest annul& appuyer sur la touche Clock pour afficher bri_vementI'heuredu jour. Appuyersur lostouchesCANCELet Cook & Hold (Cuissonet maintien) et los maintenir ainsi pendant troissecondes.(Appuyerd'abord sur la touche CANCEL.) LorsqueI'affichagede I'heureest annul& apr_s 15minutes, le four passeen modeAttente pour 6conomiserde I'dnergie.L'afficheursera viergeet 1'6clairagedu four ne fonctionnerapas. Pour<{r6veiller_>los commandos_ partir du mode attente,appuyersur n'importequelle touche.Un double hip retentira. • OFF(Arr6t) parait a rafficheur. • Le mot LOCK(Verrouillage)clignote Iorsque la porte est en cours de verrouillage. R_aflichage de I'heare : D6verroaillage Appuyersur lostouchesCANCELet Clock et los maintenir ainsi pendant troissecondes.L'heuredu jour rc!apparaita I'afficheur. : Appuyersur lostouchesCANCELet Cook & Hold et los maintenir ainsi pendant troissecondes.(Appuyerd'abord sur la touche CANCEL.)Le mot OFFdisparait de I'afficheur. Nlinuterie Remarqae : La porte du four et lestouches ne peuvent6tre La minuterie peut 6tre programmc!ede une minute (0:01)jusqu'_ 99 heureset 59 minutes[99:59). [verrouillc!essi la temp_!raturedu four est de 205° C (400° F) ou plus. La minuterie pout 6tre utilisde ind@endammentde toute autre activit6 du four. Ellepout 6tre aussi programm6ealors qu'une autre fonction du four est en cours d'utilisation. Codes d'anomalie LosrootsBAKE (Cuissoncourante) ou LOCKpeuventclignoter rapidement_ I'afficheurpour pr_veniren cas d'erreur ou de probl_me.Si tel est le cas,appuyersur la touche CANCEL.Siles roots BAKEou LOCKcontinuent a elignoter,d_!brancherI'appareil. Attendre quelquesminutes,puis rebrancherI'appareil.Si un des roots continue a clignoter,d_!brancherI'appareilet prendre contact avec un r@arateur autoris& La minuterie ne commandopas le four. Elle ne sort qu'_ dmettre des hips. Programmation de la minaterie : 1. Appuyer sur la touche Timer (Minuterie). • 0:00et le mot TIMERclignotent _ I'afficheur. 2. Appuyer sur los touches num6riquesappropri6esjusqu'_ ceque I'heurejuste paraissea I'afficheur. Cuissor| • Losdeux points et le mot TIMERcontinuent a clignoter. Programmation 3. Appuyer ) nouveausur la touche Timer ou attendre quatre secondes. courar|te de la caisson courante : 1. Appuyer sur la touche Bake. • Losdeux points s'arr6tentde clignoter et le d6comptede la dur6e commence. • Le mot BAKEclignote. • 000 clignote _ I'afficheur. • La derni_re minute du dc!comptesera affich6esous forme de secondes. Bake 0 2. %lectionner la tempSraturedu four. Appuyersur la touche Autoset 0 (Programmationautomatique)pour Autoset 175° C (350° F)ou sur lostouches num_!riquesappropri_es. 33 • Chaque pression additionnelle delatouche Autoset0 (Programmation automatique} augmente latempc!rature de 15° C(25 ° F}. Caisson et rStissage avec convection (certains modeles) • La temp6raturepeut 6tre programm6ede 75 _ 285° C (170_ 550° F}. Pour la caissonavec convection, entrer la temperature de caissonnormale. La commanderCduitautomatiquementla tempc!ratureprogramm@de 15° C (25° F}. La tempCratureentr@ seraaffich@, l.e ventilateur de convectionse met en marche une lois qae le four a fonctionn_ pendant environ cinq minutes. 3. Appuyer de nouveausur la touche Bake [Cuissoncourante] ou attendre quatre secondes. • Le mot BAKEs'arrCtede clignoter et s'allumea I'afficheur. Program[nation de la convection : 1. Appuyersur la touche Conveet [Convection}. F Convect * Le mot BAKEet I'icOnede ventilateur clignotent. • 38° [100°} ou la temperaturer@lle du four, si la tempCratureest de plus de 38 °C (100 °F},sera [email protected] augmenterapar intervallede 3 °C (5 °F}jusqu'a ceque la tempc!rature pr@rogrammc!esoit atteinte. 0 * 000 clignote _ I'afficheur. Autoset 4. Laisserle four pr@haufferpendant 8 _ 15 minutes. • Lorsquela tempCratureprogramm@pour le four est atteinte, un hip long retentit. 2. %lectionner la tempCraturedu four. Appuyersur la touche Autoset 0 pour 175° C [350° F} ou sur los touches numc!riquesappropri@s. • La tempc!ratureprogrammCes'affiche. • Chaquepressionadditionnellesur la touche Autoset 0 augmente la tempCraturede 15° C [25° F}. La tempc!raturedu four pout 6tre programm@de 75 _ 285° C [170_ 550° F}. • Pourrappeler la tempc!ratureprogramm@pendant le pr@hauffage,appuyersur la touche Bake. 5. Placerla nourriture dans le four. 3. Appuyer a nouveausur la touche Conveet ou attendre quatresecondes. 6. VCrifierI'avancementde la cuissona la durc!eminimale de cuisson.Cuire plus Iongtempsau besoin. 7. Lorsquela cuissonest termin@,appuyersur la touche CANCEl. (Annule0. 8. Retirerla nourriture du four. • Le mot BAKE[Cuissoncourante}s'arrCtede clignoter. ,38 ° [100°} ou la tempCraturerc!elledu four, si la temperature est de plus de 38° C [100° F},seraaffich@. Elleaugmenterapar intervalle de 3° C (5° F}jusqu'a ceque la tempc!rature pr@rogrammc!esoit atteinte. Differences de caisson entre I'ancien four et • L'icOneventilateurse met _ tourner. le nouveau (_) 4. Laisserle four pr@haufferpendant 8 a 15 minutes. ii est normal de remarquerquelquesdiffCrencesdans la durCede cuissonentre un four neuf et un four ancien. Voir Ajustementde la temperaturedu four_ la page 38. , Lorsquela tempCratureprogramm@pour le four est atteinte, un hip long retentit. , La tempc!ratureprogrammc!es'affiche. • Pour rappeler la tempCratureprogramm_ependant le pr@hauffage,appuyersur la touche Convect. Remarques : , Pour changerla temperaturedu fourpendant la cuisson,appuyer sur Bake, puis sur la touche Autoset O ou les touches numCriquesappropri@sjusqu'a ce que la tempCratured_sir@ soit affichCe. 5. Placerla nourriture dans le four. 6. VCrifierravancementde la cuissona la durCeminimale de cuisson. Cuire plus Iongtempsau besoin. , Pour changerla temperaturedu fourIors du pr_chauffage, appuyer deuxlois sur la touche Bake, puis sur la touche Autoset 0 ou sur lostouches numCriquesappropri@sjusqu'_ ceque la tempCratured@ir@soit affichc!e. 7. Lorsquela cuissonest terminCe,appuyersur la touche CANCEL(Annuler}. ,_ 8. Rotiferla nourriture du four. , Si I'on oublie d'arrCterle four, il s'arrCteraautomatiquement apr_s 12 heures.Si I'ond@ire d@activercette fonction, voir page 37. Fleilrlarques : •Les durc!esde rCtissagepeuvent varier selon les coupes de viande. • II n'est pas n@essairede pr@hauffer Iors du r0tissage avec convectionde gros morceauxde viande. 34 Caisson et maintien Caisson et maintien diff r s Lorsde I'utilisation de I'option Cook& Hold (Cuissonet maintien),le four se met a chauffer imrn6diatementune lois qua la commandoa _t6 programrn6e.Puis,le four cult pendant la durde spdcifide. Lorsque cette dur6e s'est 6coul6e,le four maintient la nourriture au chaud pendant une heure au maximum,puis s'dteintautomatiquement. Programmation de Caisson et maintien : Avec la fonction diff6r_e,le four set met _ cuire plus tard dansla journ_e. Programmerla dur6e d'attented6sir_eavant qua le four ne se matteen rnarcheet la dur6e de cuissond6sirc!e.Le four commence_ chauffer_ I'heures61ectionn6eet cult pour la durde spdcifide. 1. Appuyer sur la touche Cook& Hold. • Le mot HOLD (Maintien) clignote pour indiquer qua la prograrnrnationde cuissonet maintien est en cours. • 00:00clignote _ I'afficheur. 2. Sdlectionnerla dur_e d6sirdede cuissonen utilisant los touches num6riques. La durde d'attentepout 6tre prograrnm6ede 10 minutes[00:10) 11 heureset 59 minutes[11:59). • Le mot HOLD continue _ clignoter. • La dur6e s'allume a I'afficheur. Programmation d'an cycle de caisson et maintien diff_res : • La durde pout 6tre rdglde de 10 minutes(00:10)_ 11 heures et 59 minutes [11:59). 1. Appuyersur la touche Delay 1 (Diff6r6e). • Le mot DELAYclignote a I'afficheur. 3. Alors que le mot HOLDclignote,appuyersur la touche Bake (Caissoncourante) ou Convect (Convection)et s61ectionnerla ternp6raturedu four. Appuyer sur ...... la touche Autoset 0 [Prograrnmation Bake autornatique)pour 175° C (350° F)ou sur los touches num6riquesapproprides, • Le mot correspondanta la fonction d6sir6eclignote. ] Delay • 00:00clignote a I'afficheur. 2. A I'aidedestouches num6riquesappropri_!es,entrerla dur4e d'attenteavantqua ne d4butele cycle de caissonet rnaintien. 3. Appuyersur la touche Cook & Hold. • Lesrnots HOLD (Maintien) et DELAY (Diff_!r6e)clignotent a I'afficheur. r_ u Autosd • 00:00clignote a I'afficheur. 4. Entrerla dur4ed4sir4ede caissona I'aidedestouches numdriques. • La tempdraturedu four peut 6tre prograrnrndede 75 285° C (170_ 550° F). 4. Appuyer _ nouveausur la touche de fonction dc!sir6eOU attendre quatresecondes. • Le mot correspondanta la fonction ddsirc!eresteallurn& • La dur6e de caisson parait_ I'afficheur. 5. Appuyersur la touche Bake ou Convect............................................ 6. Programmerla temp4raturedu four ddsirdeen appuyant sur la touche Autoset O ou sur les touches nurndriquesappropriSes. • La tempdraturer6elle du four seraaffich_e pendant le pr6chauffage. • 175° (350°) s'allume Iorsque I'onappuie sur la touche Autoset 0. • La tempdratureprograrnrnc!es'affiche Iorsquele four est pr6chauff& • Apr6s quatre secondes,la dur_!ed'attente entree parait a I'afficheur. Bake ................................ U Autosd , Le mot HOLDs'_teint. Lorsqae la dar_e de caisson s'est _coal_e : , Lesrnots BAKEet DELAYrestentallumdspour rappeler qu'un cycle de cuissonet rnaintiendiffdrds a _t8 programm& • Quatrebips retentissent. • Los rnots HOLD(Maintien) et WARM (Chaud)s'allument. • 75° (170°) parait _ I'afficheur. Remarques : • L'heuredu jour parait _ I'afficheur. • Ne pas utiliser {e cycle de cuissonet rnaintiendiffdr_s pour des articles qui n_cessitentque le four soit prdchauff_,comrneles g_teaux,lespetits biscuitsetles pains. • Ne pas utiliser le cycle de cuissonet maintien diff_r_!ssi le four est d_!jachaud. Apres ane heare de MAINTIEN AU CHAUD : • Le four s'dteint autornatiquernent. •Les roots HOLDet WARM s'dteignent. • Retirerla nourriture du four. Annalation de Cook & Hold _ tout moment :/._ Appuyersur la touche CANCEL.Retirer la nourriture du four. 35 Maintien at= chat=d Ct=isson at= grii Pourmaintenir au chaud clansle four des alimentscults et chauds ou pour r_chauffer painset assiettes. Programmation du Maintien au chaud : 1. Appuyer sur la touche Keep Warm [Maintien au chaud). , Le mot WARM (Chaud)clignote _ I'afficheur. :Keep ............. \, warm ° 000 clignote a I'afficheur. 2. S_lectionnerla temp6raturede maintien au chaud. II Appuyer sur la touche Autoset 0 (Programmation AuLoset automatique)ou sur lostouches numc!riquesappropri6es. • Chaquepression sur la touche Autoset 0 augmentela temp6raturede 3° C (5° F). 2. Appuyersur la touche Autoset e une lois pour programmerun gril _ temp6rature61evc!e ou deux fois pour programmerun gril a temp6raturebasse. La temp6raturede maintien au chaud pout 6tre programm6ede 63 _ 90° C (145a 190° F). au chaud Broil U Autoset ° Los roots HI [EL6v6e)ou LO (Basso)seront affichc!s. Le mot WARMet la tempc!ratureseront affich6s pendantque la fonction est active. du rnaintien 1. Appuyersur la touche Broil (Gril). ° Les roots BROILet SET (Valide0 clignotent _ I'afficheur. ° 75° (170°) s'allume IorsqueI'on appuie sur la touche Autoset 0. Annulation Programmation de la caisson au gril : • Sc!lectionnerHi broil (Gril a tempc!rature6levee)[285° C [550° F]) pour un gril normal.Sc!lectionnerLO broil (Gril temp6raturebasso)(230° C [450° F]) pour un gril a temp(grature inf6rieure d'alimentsa cuisson plus Ionguecommela volaille. 3. Apr_s quatresecondes,le four se met en marche. • Los mots BROILet HI ou LO resent allure& : 1. Appuyersur la touche CANCEL(Annule0. 2. Retirer la nourriture du four. Rellrlarqtles : , Pour obtenir des qualit6s alimentaireset nutritivesoptimales,los aliments ne doivent pas 6tre gard6sau chaud plus de 1 2 heures. 4. Pour un rissolagemaximum,pr6chaufferle four pendant2 ou 3 minutes avantd'ajouter la nourriture. , Pour emp6cherlos alimentsde dess6cher,los recouvrir de papier aluminium,sans serrer,ou d'un couvercle. 5. Placerla nourriture dans le four. Formerla porte du four. 6. Retournerla viandeune fois a la moiti6 de la durc!ede cuisson. • Pour r_chauffer des petits pains : - recouvrir los petits pains de papier aluminium sansserrer et los placer au four. - appuyersur lostouches Keep Warm et Autoset O. - r6chauffer pendant 12 a 15 minutes. 7. Lorsqueraliment est cult, appuyersur la touche CANCEL.Retirer la nourriture et la Dchefrite du four. ° L'heure du jour rc!apparaita rafficheur. • Pour r_chauf|er des assiettes : - placer deux pilesde quatre assiettesmaximumdans le four. - appuyersur lostouches Keep Warm et Autoset O. - r_chauffer pendant5 minutes,arr_ter le four et laisser los assiettesau four pendantencore 15 minutes. - n'utiliser que des assiettespouvant allot at] four, _ v6rifier avec le fabricant. - ne pas poser des assiettestildes sur une surfacefroide, los changementsrapidesde tempc!raturepouvant casser I'assietteou la fendiller. Remarques : • Pourde meilleurs r_sultats lots du gril, se servir d'un ustensile prc!vupour ce type de cuisson. , Le gril au rc!glageHI est utilis6 pour la majorit6 desop6rations de cuissonat] gril. Utiliserle gril au r6glage LO pour la cuisson de metsdevant cuire plus Iongtemps,afin de leur permettre d'6tre bien cults sans rissolageexcessif. , Pourchangerla temp4raturedu fourpendantla cuissonau gril, appuyersur la touche Broil, puis sur la touche Autoset 0 pour changer entre la cuissonau gril a tempc!raturec!levc!e(HI) et la cuisson at] gril _ temp6rature basso(LO). ° Losdurc!esde cuissonau gril peuvent 6tre plus Ionguesavec une temp_!raturede gril inf_!rieure. ° Retournerla plupart desaliments Iorsquela moiti_!de la dur6e pr_M]epour la cuisson at] gril s'est_!couk!e. 36 Tableau de caisson au gril Pr6chaufferle four pendant2-3 minutes. Boeul Bifteck,2,5 cm [1 pc) d'@aisseur 5 5 5 ou 6 A point Bien cult Bien cult 15 - 20 min. 18 - 24 rain. 13 - 18 min. Bacon Tranche de jambon pr6cuit, 1,3cm (1/2 pc) d'@aisseur C6telette,2,5cm (1 pc) d'@aisseur 5 5 Bien cult Chaud 6 - 10 rain. 8 - 12 min. 5 Bien cult 22 - 26 min. Volaille Blancs,avec os 4 Bien cult (Gril tempc!raturebasse) 30 - 45 rain. Fruits de met Filet de poisson Dame de poisson,2,5cm (1 pc) d'@aisseur Queuede homard,85 a ] 15 g (3 _ 4 onces) 5 5 5 Emiettement Emiettement Bien cult 8 - 12 min. 10 - 15 min. 7 - 10 min. Hamburger,2 cm [3/4 pc) d'@aisseur Porc Fourobtenirune surfaceext6rieuresaisie/brunieet un int6rieursaignant,i[ peut6tre n6cessairede r6duire letempsde cuissonsur [apremiereface, et de r6duire la distance entre la viande et la source de chaleur. Remarque : Cetableau n'est qu'un guide de suggestions.Les durc!espeuventvarlet selonI'alimenta cuire. Arret automatique/ Mode sabbat Remarques Le four s'arr6teautomatiquementapr_s 12 heuress'il a 6t6 accidentellementlaissc!en marche.Cettecaract6ristiquede s6curit6 peut 6tre arr6t6e. Pour annulet I'arret 12 heures et fake fonctionner four en continu pendant 72 heures : • Le modesabbat ne peut pas 6tre mis en marchesi lestouches sont verrouill6esou la porte verrouill6e. le • La majorit6des messageset tousles bips sont dc!sacti%s Iorsquele mode sabbat est actif. 1. Appuyersur la touche Clock (Horloge)et la maintenirainsi pendant cinq secondes. • Si le four est en mode cuissonIorsquele mode sabbat est programm& le mot BAKEs'c!teintIorsque la cuissoncourante est annul(!e.II n'y aura aucun signal sonoreaudible. • SAb sera affich6 et clignotera pendant cinqsecondes. • SAb sera ensuiteaffichc!en continu jusqu'_ ce qu'on I'arr6te ou jusqu'_ ce que la dur6e limite de 72 heuressoit atteinte. • La lampedu four ne s'allume pas automatiquement rouverture de la porte Iorsque le four est en modesabbat.Si r_clairagedu four est souhait6 pendantle modesabbat,la lampedevra 6tre allum6eavant que le mode sabbat ne dc!bute. • Le mot BAKE(Cuissoncourante) seraaussi affich_ si un cycle de cuissoncourante est en cours alors que le four est en modesabbat. • La CUISSONAUFOURest la seulefonctionqui est op4rationnelleen mode sabbat.Toutesles autresfonctions (Minuterie,Maintienau chaud,Nettoyage,etc.) sont verrouill4es pendantle mode sabbat. • Un cyclede cuissonet maintien peut 6tre programmc!durant le modesabbat.Cependant,un cycle de cuissonet maintien diff6r6s n'est pas possible. Annuiation : • Le modesabbat peut (_tremis en marchea tout moment,que le four soit en marche ou non. • Lorsquele modesabbat a d6marr& I'afficheur indique immc!diatementla temperature programm(_eplutOtque la tempc!raturer6ellede la cavit6du four. Aucun hip de pr6chauffagene retentit. • Le cycle d'autonettoyageet le verrouillageautomatiquede la porte ne fonctionnent pas pendantle modesabbat. • Si I'on appuie sur la touche CANCEL (Annule0,un cyclede cuissoncourante au four seraannul& Cependant,le programmateurresteraen modesabbat. du mode sabbat : 1. Appuyersur la touche Clock pendantcinq secondes. • Apr_sune panne de courant,le four revient en modesabbat avec72 heuresrestanteset aucuncycle actif. • SAb clignote pendantcinq secondes. • L'heuredu jour revienta I'afficheur. OU 2. Apr_s 72 heures,le modesabbatse termine. • SAb clignote pendant5 secondes. • L'heuredu jour revienta I'afficheur. 37 Favori Ajustement de la temperature du four Latouche Favorite(favori) permet de sauvegarderla dur_e et la temp_!ratured'une fonction de cuissonet maintien. La pr6cisiondes terapc!raturesdu four a _t6 soigneusementv_rific!e I'usine.II est normalde remarquerquelquesdiff6rencesdabs la cuissonou la couleur du rissolageobtenu entre un four neuf et un four ancien. Au fur et _ mesureque le four est moins neuf, sa temp6raturepout varlet. Pour programmerun cycle Favori,une fonction de cuissonet maintien dolt _tre activeou tout juste programm_!e. ProgrammatioB d'un nouveau cycle favori ou sauvegarde d'un cycle en coats de caisson et maiBtien comme favori : II est possibled'ajuster la tempc!raturedu four si I'on penseque le four ne cult pasou ne rissole pascorrectement.Pour d6ciderde I'ajustementa apporter,r6gler le four _ une temp6raturede 15° C (25° F)plus c!lev_eou plus bassoque la temp6ratureindiqu6e dabs la recette,puis faire cuire la pr6paration.Losr6sultats de {{I'essai>> de cuissondoivent donner une idc!edu hombrede degrc!sduquel la temp6raturedolt 6tre ajust6e. Ajustement de la temperature 1. Programmerun cycle de cuissonet rnaintiencorameil est d_crit la section Cuissonet maintien_ la page 35. 2. Appuyersur la touche Favorite et la maintenir ainsi pendant trois secondes. • Le cyclecuisson et maintien nouvellementprogramm_!ou en cours de fonctionnementserasauvegard& du four : • Un bip sonoreretentit pour indiquer que lescommandesont accept_ le r_glagefavori. 1. Appuyer sur la touche Bake (Cuissoncourante). 2. Entrer285° C (550° F)en appuyantsur los touches num6riquesappropric!es. D_marrage d'uB cycle programm_ dabs favori : 1. Appuyersur la touche Favorite. 3. Appuyer sur la touche Bake et la maintenirainsi pendant plusieurssecondesou jusqu'_ ce que 00° paraissea I'afficheur. • La dur_!eet la temp_!raturedu cycleprogramm_de cuissonet maintienseront affich_es (si aucun cycle de cuissonet maintien n'a _!t_programme,_ nonE _sera affich_). Si la tempc!raturedu four a _tc!prc!cc!demment ajustc!e,le changementseraaffich6. Par exemple,si la tempc!raturedu four a _tc!rc!duitede 8° C (15° F), I'afficheur indiquera -8° (-15°). 2. Appuyersur la touche Bake ou Convect (Convection]. , Le cyclefavori commenceimm_diatement. 4. Appuyer sur la touche Autoset 0 (Programmationautomatique) pour ajuster la temp6rature. , Le mot correspondantau cycles_lectionn_s'allume I'afficheur. A chaquefois que I'onappuie sur la touche Autoset0, la temp6raturechangede 3° C (5° F).La tempc!raturedu four pout 6tre augmentc!eou diminu_ede 3 _ 20° C (5 a 35° F). , La dur_!ede cuissons'allume_ I'afficheur. Lorsque la duroc de cuisson s'est _coul_e : Appuyer sur la touche Autoset 0 pour augmenterla tempc!rature du four (5, 10 ... 35). Continuerd'appuyersur la touche Autoset 0 pour diminuer la temp6raturedu four (-35,-30... -5). ° Lemot correspondantau cycles_lectionn_s'_teint. ° Losroots HOLD (Maintien) et WARM (Chaud)s'allument. • 75° (170°) parait _ I'afficheur. 5. L'heuredu jour r6apparaitautomatiquement_ I'afficheur. AnBulatioB d'uB cycle favori eB tours : II n'estpas n6cessairede r6ajusterla tempc!raturedu four en cas de panne ou d'interruption de courant. L'ajustementde la temp6ratures'appliqueseulementaux fonctions de cuisson courante,cuissonavec convectionet r6tissageavec convection (certainsmodules).Lostempc!raturesde gril et de nettoyagene peuvent6tre ajustc!es. Changement temp6rature 1. Appuyersur la touche CANCEL. ° Le cyclefavori sauvegard_!ne sera pas affect_!. 2. Rotiferla nourriture du four. Allumage de veille de la °F/°C sans flamme Lacuisini_re est dot_!ed'un syst_rned'alluraagesansflarame de veille.Ce syst_meferme automatiquementI'arriv_!ede gaz et emp_che tout fon_tionnement du four/ors d'une interruption de I'alimentation _lectrique. 1. Lerc!glagepar ddaut de I'usine pour la temp6ratureest en Fahrenheit. 2. Pourmodifier ce r_glage,appuyer sur lestouches CANCEL (Annulet) et Bake simultan6mentet raaintener-lesenfonc6es pendanttrois secondes. II ne aera pas possibled'allamer le br_lear du four avec une ailumette. Ne pas tenter de faire fonctionnerle four lots d'une interruptionde ralimentation 61eetriqae. 3. Un bip retentit et le rc!glagecourant (°F ou °C) parait a I'afficheur. (Sivous ne faites pas de changement,la cuisini_re retourneau r_glageexistant apr_s30 secondes.) 4. Pourmodifier le r6glage,appuyersur la touche Autoset O. Appuyer _ nouveausur la touche pour retournerau r_glage existant.Attender cinq secondeset le r_!glageseraeffectu_. 38 Ventilateur du four Reinstallation Un ventilateurde convectionsert a faire circuler I'airchaud dans le four Iorsquela caractGristiquede convectionest sGlectionnGe. La fonction se met automatiquementen marche 5 minutesapr_s avoir appuy6sur la touche Convect[Convection)et s'c!teintIorsque la fonction Convectest annulc!e. 1. Placerla grille sur los supportsdans le four. Remarque :11s'arrGteautomatiquementIorsqueI'on ouvre la porte. : 2. Soulever16g_rementI'avant.Faireglisser la grille vers I'arri_re au-del_ de la positionde calage. 3. Abaisser la grille et la faire glisser clansle four. 1 | Ne pas couvrir la totalit_ d'une grille de papier d'aluminium ni mettre d'aluminiumsur la sole du four. Cola ne donnerait pas de hens r_sultats dans la cuisson de g_teau× et la sole pourrait se trouver abim_e. Positions des grilles f Event du four POSITION 7 [position la plus haute) : Pour la cuissonau gril et la Lorsquele four fonctionne, lessurfacesvoisinesde 1'Gventpeuvent devenir assezchaudespour entrainerdes br01ures.Ne jamais bloquer I'c!vent. CUiSSOn au four L'_vent est situ_ sous le protecteur d'_vent du dosseret, sur la cuisini_re. EVENT DU FOUR sur _¢ LU 7 6 une seulegrille avec une tOle biscuits. Ne pas mettre de plastiquespros de I'_vent,la chaleur pouvant losti!!former ou los faire fondre. ,4, 11_,U., ' __ _ 2 POSITION 6 : S'utilise pour la cuissonau gril et la cuissonat] four sur une CLiiSSOR avec CORVeCtiOR sur deu× grilles seulegrille avec une tOle biscuits.S'utilisepour une cuissonsur plusieurs grilles. POSITION 5 : Pourla cuissonat] gril et la cuissonau four sur une seulegrille avec une t01e_ biscuits. i'clairage POSITION 4 : S'utilise pour la cuisson au four de g_teauxet de mets en sauce,sur une seulegrille avec une tOle_ biscuits,et la cuisson au gril. S'utilise pour une cuissonsur plusieursgrilles. du four La lampedu four s'allume automatiquement I'ouverturede la porte, Lorsquela porte est fermc!e, appuyersur le touche Oven Light [(--clairage)pour allumer ou c!teindrela lampe. Le four produit un signal sonore chaquelois que I'on appuie sur Oven Light. POSITION 3 : Pourla cuissonat] four de metsen sauce,de g_teaux 6tages,de michesde pain,sur une seule grille avecune t61e biscuits.S'utilisepour une cuissonsur plusieurs grilles. POSITION 2 : S'utilise pour la cuisson au four de g_teauxsur une seulegrille avec une tOle_ biscuits,et pour le rOtissagede petites piscesde viande.S'utilise pour une cuissonsur plusieursgrilles. Sole du four POSITION 1 : S'utilise pour le r0tissaged'une volaille ou de grosses piscesde viande. Prot(!gerla soledes produits renversc!s,en particulier acides ou sucre!s,ceux-ci pouvant d_colorer1'Gmailvitrifi& Utiliserdes ustensilesde la bonne dimension pour _viter que los produits nese renversentou passentpar-dessusI'ustensileen bouillant. Ne pas placer d'ustensilesou de feuille d'aluminium directement sur la sole du four. Sole du four : Placerla grille sur les cOt_srelevc!sde la sole. Donneune placesuppk!mentairepour la cuisson de grandesquantitc!s. CUISSON SUR PLUSIEURS GRILLES: Utiliser les positions 3 et 6, ou 2 et 4. Grilles du four Rernarque: Pour la cuissonavec convectionsur deux grilles, vGrifierlesaliments_ la dur_e minimalesugg_r_epour @iter un lexc_s de cuissonou de co oration. Cuisson de g_teaux t_etages sur deux grilles Pour de meilleursr_sultats pour -_ laouissondeg_teauxsurdeux /_(° ° }_}_//[////_\\\\\ grilles, utiliser lospositions2 //7_ -__o¢_t_-_=___\ et 4 pour une cuisson ///_ H S(, " o _:\\ traditionnelle et les positions /i=ii=i_i_L_/_-.._-°____:_\ 3 et 6 pour une cuissonavec _/// //#////////f/#l//#/llll Jl)If /,1[II-b_mq:,,& \\ \_ convection. Lefour comportedeux grilles avec,pour chacune,un dispositif de calage. Extraction : 44 1. Tirer la grille en ligne droite jusqu'_ ce qu'elle s'arrGte_ la position de calage. 2. Souleverla grille _ I'avantpour pouvoirI'extraire. _.._ Placerlesg_teauxsur la grille, commeil est indiqu& 39 Bemerques 40 epres-vente GARANTIE DES GROS APPAREILS MI;:NAGERS MAYTAG CORPORATION GARANTIE LIMITI_E DE UN AN Pendant un an _ corrupter de la date d'achat, Iorsquece gros appareil m6nager est utilis6 et entretenu conform6ment aux instructions jointes _ ou fournies avec le produit, Maytag Corporation ou Maytag Limited (ci-apr(_s d6sign6es << Maytag >>]paiera pour les pi(_ces sp6cifi6es par rusine et la main-d'oeuvre pour corriger les vices de mat6riaux ou de fabrication. Le service dolt 6tre fourni par une compagnie de service d6sign6e par Maytag. Cette garantie limit6e s'applique exclusivement Iorsque rappareil est utilis6 darts le pays ou il a 6t6 achet6. MAYTAG NE PRENDRA PAS EN CHARGE 1. Les visites de service pour rectifier [installation du gros appareil m6nager, montrer _ rutilisateur comment utiliser rappareil, remplacer ou r@arer des fusibles ou rectifier le c_blage ou la plomberie du domicile. 2. Les visites de service pour r@arer ou remplacer les ampoules 61ectriques de rappareil, les filtres _ air ou les filtres _ eau. Ces pi_ces consomptibles ne sont pas couvertes par la garantie. 3. Les r@arations Iorsque le gros appareil m6nager est utilis6 _ des fins autres que rusage unifamilial normal. 4. Les dommages imputables _ : accident, modification, usage impropre ou abusif, incendie, inondation, actes de Dieu, installation fautive ou installation non conforme aux codes d'61ectricit6 ou de plomberie, ou rutilisation de produits non approuv6s par Maytag. 5. Toute perte d'aliments due _ une d6faillance du rdrig6rateur ou du cong61ateur. 6. Le coot des pi(_cesde rechange et de la main-d'ceuvre pour les appareils utilis6s hors des Etats-Unis ou du Canada. 7. Le ramassage et la livraison. Ce gros appareil m6nager est congu pour 6tre r6par6 _ domicile. 8. Les r@arations aux pi_ces ou systSmes r6sultant d'une modification non autoris6e faite _ rappareil. 9. Les frais de transport pour le service d'un produit dans les r6gions 61oign6es. 10. La d@ose et la r6installation de votre appareil si celui-ci est install6 darts un endroit inaccessible ou n'est pas install6 conform6ment aux instructions d'installation fournies. 11. Le coot des pi_ces de rechange et de la main-d'ceuvre Iorsque rappareil est utilis6 dans un pays autre que le pays o_Jil a 6t6 achet6. CLAUSE D'EXONERATION DE RESPONSABILITE AU TITRE DES GARANTIES IMPLICITES ; LIMITATION DES RECOURS LE SEUL ET EXCLUSIFRECOURSDU CLIENT DANS LE CADRE DE LA PRI_SENTEGARANTIE LIMITI_ECONSISTE EN LA RI_PARATIONPRI_VUECI-DESSUS. LES GARANTIES IMPLIClTES, Y COMPRIS LES GARANTIES APPLICABLES DE QUALITE MARCHANDE ET D'APTITUDE A UN USAGE PARTICULIER,SONT LIMITEESA UN AN OU A LA PLUS COURTE PI_RIODE AUTORISI_EPAR LA LOI. MAYTAG N'ASSUME AUCUNE RESPONSABILITI_ POUR LES DOMMAGES FORTUITSOU INDIRECTS. CERTAINESJURIDICTIONS NE PERME]q-ENTPAS L'EXCLUSION OU LA LIMITATION DES DOMMAGES FORTUITSOU INDIRECTS, OU LES LIMITATIONS DE LA DURI_EDES GARANTIES IMPLIClTES DE QUALITE MARCHANDE OU D'APTITUDE A UN USAGE PARTICULIER,DE SORTE QUE CES EXCLUSIONS OU LIMITATIONS PEUVENTNE PAS S'APPLIQUER DANS VOTRE CAS. CETTEGARANTIE VOUS CONFEREDES DROITSJURIDIQUES SPECIFIQUESETVOUS POUVEZ EGALEMENTJOUIR D'AUTRES DROITS QUI PEUVENTVARIER D'UNE JURIDICTION A UNE AUTRE. A rext_rieur du Canada et des 50 I_tats des Etats-Unis, cette garantie ne s'applique pas. Contacter votre marchand Maytag autoris8 pour d_terminer si une autre garantie s'applique. Si vous avez besoin de service, voir d'abord la section "D4pannage"du Guide d'utilisation et d'entretien. Apr_s avoir v_rifi6 la section "D4pannage", de raide suppl_mentaire peut 6tre trouv_e en v_rifiant la section "Assistance ou service"ou en appelant Maytag. Aux E.-U., composer le 1-800-688-9900. Au Canada, composer le 1-800-688-2002. 41 MAY[AG Estufa a gas con control a precisi6n sensible al tacto 800 ® Tabla dq instrucciones importantes sobre seguridad ........................ 43-46 Cocinando en la estufa ............ 52=53 Controles suDerlores Quemadores de gas sellados Cuidado y [impieza ................... 47=49 Horno autolimpiante ProcedJmientos de limpieza IVlantenimiento ..........................49=50 Luz _ ventana del horno Retiro de la estufa a gas Localizaci6n y soluci6n de averias ...................................51-52 Cocinando en el homo ............ 54=61 Horneado Cook & Hold' 'Cook & Hold' difeddo Asar a la parrilla Mantener caliente Cierre autom4tico/Modo sab4tico Parrillas del homo Garantia y servicio .... P_gina _ltima Lea y siga todas las instrucciones antes de usar este electrodorn_stico para evitar el riesgo potencial de incendio, choque electrico, lesi6n personal o da_o al electrodomestico como resultado de su uso inapropiado. Utilice este electrodomestico solamente para el prop6sito que ha sido destinado segQnse describe en esta guia. Para asegurar funcionarniento correcto y seguro: El electrodom_stico debe set instalado debidamente y puesto a tierra por un t6cnico calificado. No intenteajustar, reparar, prestar servicio o reemplazar ninguna pieza de este electrodomestico a menos que sea espedficamente recomendado en esta gufa. Todas las reparaciones deben ser realizadas por un tScnico calificado. Pida al instaladorque le indique la ubicaci6n de la v_lvula de cierre del gas y como cerrarla en caso de una emergencia. Siempre desenchufe el electrodomestico antes de efectuar alguna reparaci6n. Las advertencias e instrucciones importantes sobre seguridad que aparecen en esta gufa no est_n destinadas a cubfir todas las posibles circunstancias y situaciones que puedan ocurrir. Se debe ejercer sentido com_n, precauci6n y cuidado cuando instale, realice mantenimiento o haga funcionar el artefacto. Siempre p6ngase en contacto con el fabricante si surgen problemas o situaciones que usted no comprenda. Reconozca los simbolos, etiquetas de seguridad advertencias, 43 Instrucciones generales Para eliminar el riesgo de pasar sobre los quemadores superiores calientes, no se deben guardar articulos en los armarios que est_n directamente sobre la estufa. Si tales armarios son usados para almacenamiento, debe limitarse a colocar artfculos de uso poco frecuente y que pueden guardarse en forma segura en una _rea que est_ sujeta al calor proveniente de la estufa. Las temperaturas pueden no ser apropiadas para algunos articulos, tal como liquidos vol_tiles, limpiadores o sprays en aerosol. En case de incendio Apague el electrodom_stico y la campana de ventilaci6n para evitar que las llamas se dispersen. Extinga las llamas luego encienda la campana para expulsar el humo y el olor. • En la cubierta: Apague el fuego o la llama en una sart6n con una tapa o una bandeja de hornear. NUNOA levante o mueva una sartSn en llamas. • En el borne: Apague el fuego o la llama cerrando la puerta del horno. Para verificar si el dispositivo est_ debidamente instalado, mire debajo de la estufa con una linterna para asegurarse de que uno de los tornillos niveladores traseros est6 debidamente No use agua en los incendios de grasa. Use bicarbonato, un producto quimico seco o un extinguidor del tipo con espuma para apagar un incendio o la llama. enganchado en la ranura del soporte. El dispositivo antivuelco asegura el tornillo nivelador trasero al piso cuando est_ debidamente enganchado. Esto debe verificarse carla vez que la estufa sea movida. Para evitar un incendio Seguridad para los ni os o da o causado per el humo Aseg_rese de que se hayan retirado todos los materiales de empaque del electrodomestico antes de su uso. Mantenga el _rea alrededor del electrodomestico libre y exenta de materiales combustibles, gasolina u otros vapores y materiales infiamables. NUNCA deje a los ni_os solos o sin supervision cuando el electrodomestico este en uso o est6 caliente. Si el electrodomestico es instalado cerca de una ventana, se debe tenet cuidado para evitar que las cortinas pasen sobre los quemadores. NUNCA permita que los ni_os se sienten o se paren en ninguna parte del electrodomestico pues se pueden lesionar o quemar. NUNCA deje articulos sobre la cubierta de la estufa. El aire caliente del respiradero puede encender los articulos inflamables y aumentar la presi6n en los envases cerrados hasta hacedos reventar. Se les debe ense_ar a los nii3osque el electrodomestico y los utensilios que est_n en el o sobre el pueden estar calientes. Deje enfriar los utensilios calientes en un lugar seguro, fuera del alcance de los ni_os peque_os. Se les debe ense_ar a los ni_os que un electrodomestico no es un juguete. No se debe permitir que los ni_os jueguen con los controles u otras piezas de la estufa. Muchos envases de tipo aerosol son EXPLOSlVOScuando son expuestos al calory pueden ser altamente infiamables. Evite su uso o su almacenamiento cerca del electrodomestico. Muchos pl_sticos son vulnerables al calor. Mantenga los pl_sticos alejados de las piezas de la estufa que puedan estar tibias o calientes. No deje articulos de pl_stico sobre la cubierta de la estufa pues se pueden derretir o ablandar si est_n demasiado cerca del respiradero o de un quemador superior encendido. 44 Generalidades Siempre ajuste la llama del quemador superior de modo que no se extienda m_s all_ del horde inferior del utensilio. Una llama excesiva es peiigrosa, desperdicia energfa y puede daffar la estufa, el utensilio o los armarios que est_n sobre la estufa. NI.INGA deje sin supervisi6n la cubierta de la estufa cuando este cocinando, especialmente cuando usa un ajuste de calor alto o cuando est6 usando una freidora. Los reboses pueden producir humo y los derrames de grasa pueden infiamarse. Limpie los derrames grasosos tan pronto como sea posible. No use calor alto durante periodos de cocci6n prolongados. NUNGA caliente un envase cerrado en el quemador superior o en el horno. La acumulaci6n de presi6n puede hacer explotar el envase causando una lesi6n personal grave o daffo a la estufa. Use tomaollas secos y gruesos. Los tomaolhs h_medos pueden causar quemaduras a causa del vapor. Las toallas u otros sustitutos no deben set usados como tomaollas porque ellos pueden quedar colgando a traves de los quemadores superiores y encenderse o enredarse en las piezas de la estufa. Siempre deje enfriar la grasa caliente que se ha usado en la freidora antes de intentar mover o manipularla. No permita que se acumule grasa u otros materiales infiamables en la estufa o cerca de ella, en la campana o en el ventilador aspirador. Limpie la campana extractora con frecuencia para evitar que la grasa u otros materiales infiamables se acumulen en la campana o en el filtro. Encienda el ventilador cuando cocine alimentos fiameados debajo la campana. No use el homo como un lugar para guardar alimentos o utensilios de cocina. El respiradero del homo se encuentra debajo del protector trasero. Evite tocar el _rea del respiradero mientras el homo este encendido y durante varios minutos despues de haberlo apagado. Algunas partes del respiradero y del _rea que Io rodea se calientan Io suficiente como para causar quemaduras. Despues de apagar el homo, no toque el respiradero o el _rea que Io rodea hasta que haya tenido suficiente tiempo para enfriarse. NUNCA use vestimentas de materiales inflamables, ropa suelta o de mangas largas cuando est8 cocinando. La vestimenta se puede encender o enganchar en los mangos de los utensilios. Siempre coloque las parrillas del homo en la posici6n deseada cuando el homo est8 fifo. Deslice la parrilla del horno hacia afuera para agregar o retirar alimento, usando tomaollas secos y resistentes. Siempre evite alcanzar dentro del homo para Otras superficies que pueden estar calientes incluyen la cubierta, las superficies que est_n dirigidas hacia la cubierta, el respiradero del homo, la superficie cercana a la abertura del respiradero, la puerta del homo y la _rea que la rodea, y la ventanilla del horno. agregar o retirar alimentos. Si una parrilla debe ser sacada cuando est_ todavfa caliente, use un tomaolhs seco. Siempre apague el homo despues de haber terminado de cocinar. No toque un foco de homo caliente con un paso hamedo ya que se puede romper. Si el foco se rompe, desconecte el suministro electrico al electrodomestico antes de retirar el foco Tenga cuidado cuando abra la puerta del horno. Deje que escape el aire o el vapor caliente antes de sacar o volver colocar el alimento. para evitar un choque electrico. Seguridad ADVERTENCIA SOl}RE LOS ALIMENTOS PREPARADOS: Siga las instrucciones del fabricante de los alimentos. Si un envase de pl_stico de alimento congelado y/o su tapa se deforma, se comba o se da_a de alguna otra manera durante la cocci6n, descarte inmediatamente el alimento y su envase. El alimento puede estar contaminado. para cocinar Siempre coloque un utensilio en un quemador superior antes de encenderlo. Aseg_rese de usar la perilla correcta que controla cada quemador superior. AsegOrese de encender el quemador correcto y comprobar de queen efecto el quemador haya sido encendido. Cuando haya terminado de cocinar, apague el quemador antes de retirar el utensilio para evitar exposici6n a la llama del quemador. NUNGA use papel de ahminio para cubrir una parrilla del homo o la parte inferior del homo. El uso incorrecto puede resultar en un riesgo de choque electrico, incendio o da_o al electrodomestico. Use papel de aluminio solamente como se indica en esta guia. 45 Utensilios apropiados Homo autolirnpiante Use sartenes con fondos pianos y mangos que sean f_ciles de tomar y que permanezcan frfos. Evite usar sartenes u ollas inestables, combadas que se pueden volcar f_cilmente u ollas cuyos mangos est6n sueltos. Adem_s evite usar utensilios especialmente peque_os o sartenes con mangos pesados pues ellos pueden ser inestables y volcarse f_cilmente. Los utensilios que son pesados de mover cuando est_n Ilenos con alimento pueden tambi6n set un peligro. Limpie solamente las piezas que se indican en esta gufa. No limpie la junta de la puerta. La junta es esencial para un sellado herm6tico. No restriegue, daffe, ni mueva la junta de la puerta. No use limpiadores de homo de ninguna clase en el homo ni alrededor de cualquier parte del homo autolimpiante. AsegQresede que el utensilio sea Io suficientemente grande como para contener en forma debida los alimentos y evitar derrames. El tama_o es particularmente importante cuando se utilizan freidoras. AsegQresede que el utensilio tiene capacidad para el volumen de alimentos que se va a agregar al igual que para la formaci6n de burbujas de la grasa. Es normal que la cubierta de la estufa se caliente durante el ciclo de autolimpieza. Pot Io tanto, se debe evitar tocar la cubierta durante un ciclo de autolimpieza. Para reducir a un mfnimo las quemaduras y que los materiales infiamables y los derrames se enciendan debidos a contacto no intencional con el utensilio, los mangos no deben extenderse sobre el quemador superior adyacente. Siempre gire los mangos de los utensilios hacia el lado o hacia la parte trasera de la estufa, no hacia la habitaci6n donde puede set f_cilmente Aviso y advertencia irnportante sobre seguridad La Propuesta 65 de la Ley de 1986 del Estado de California Sobre Seguridad y Contaminaci6n del Agua Potable {California Safe Drinking Water and Toxic Enforcement Act of 1986_exige que el Gobernador de California publique una lista de las sustancias que seg_n el estado de California causan c_ncer o da_o al sistema reproductivo y exige que las empresas adviertan a sus clientes sobre la exposici6n potencial a tales sustancias. golpeados o alcanzados por los ni_os peque_os. NUNCA deje que un utensilio hierva hasta quedar seco pues esto puede da_ar el utensilio y la estufa. Siga las instrucciones del fabricante cuando use bolsas para cocinar en el horno. Este electrodom6stico ha sido probado respecto a su rendimiento seguro usando utensilios de cocina convencionales. No use ningQn dispositivo o accesorio que no haya sido espedficamente recomendado en esta gufa. No use cubiertas de los elementos, rejillas superiores de la estufa o sistemas de convecci6n para hornos. El uso de dispositivos o accesorios que no son expresamente recomendados en esta gufa, puede crear serios peligros de seguridad, resultar en problemas de rendimiento y reducir la vida _til de los componentes de la estufa. Se advierte a los usuarios de esta estufa que la combusti6n del gas puede resultar en exposici6n de bajo nivel a algunas de las sustancias publicadas en la lista, inchyendo benceno, formaldehfdo y hollfn, debido principalmente a la combusti6n incompleta del gas natural o de los combustibles de petr61eo licuado. Los quemadores ajustados en forma debida reducir_n la combusti($n incompleta. La exposici6n a estas sustancias puede tambi6n set reducida a un mfnimo ventilando los quemadores al exterior en forma adecuada. Se advierte a los usuarios de este electrodom6stico que cuando el homo est_ funcionando en el ciclo de autolimpieza, puede haber exposici6n de bajo nivel a algunas de las sustancias indicadas en la lista, inchyendo mon6xido de carbono. La exposici6n a estas sustancias puede ser reducida a un mfnimo ventilando el homo al exterior en forma adecuada, abriendo las Seguridad de la limpieza Apague todos los controles y espere que se enfrfen las piezas de la estufa antes de tocarlas o limpiarlas. No toque las rejillas de los quemadores o las _reas circundantes hasta que elias no hayan tenido tiempo suficiente de enfriarse. ventanas y/o la puerta en la habitaci6n en donde est_ ubicado el electrodom6stico durante el ciclo de autolimpieza. Limpie la estufa con cuidado. Tenga cuidado para evitar quemaduras de vapor si se usa una esponja o un paso mojado para limpiar los derrames en una superficie caliente. Algunos limpiadores pueden producir vapores nocivos cuando se aplican a una superficie caliente. AVISO IMPORTANTE RESPECTOA LOS PAJAROS DOMESTICOS: Nunca mantenga los p_jaros en la cocina o en las habitaciones donde puedan Ilegar los humos de la cocina. Los p_jaros tienen un sistema respiratorio muy sensitivo. Los humos producidos durante el ciclo de autolimpieza del homo pueden ser perjudiciales o mortales para los p_jaros. Los humos que despide el aceite de cocina recalentado, la grasa, Conserve estas instrucciones para referencia futura margarina y los utensilios antiadherentes recalentados pueden tambi6n ser perjudiciales. 46 Culdedolimpleze Homo autolimpiante Para programar 'Self=Clean' (Autolimpieza): Nota: La temperaturadel homo debe ser inferior a 205° C (400° F) para programarun ciclo de limpieza. 1. Cierre la puerta del homo. 2. Optima la tecla 'Clean' (Limpieza). • 'CLEAN'destella en el indicadorvisual. Clean • 'SET'destellaen el indicadorvisual. Oprima la tecla 'Autoset e' (ProgramaciOnAutom_tica).,Autct_se[ • 'MEd' (Suciedadmediana,3 horas)se despliegaen el indicador. 4. Optima la tecla 'Autoset O'para desplegarlos ajustesde autolimpieza. El ciclo de autolimpiezausatemperaturasde cocci6nsuperioresa las normalespara limpiarautom_iticamentetodo el interior del homo. Limpie el homo con frecuencia removiendolos derramespara evitar humo excesivoy Ilamaradas.No permita que se acumule demasiado sucio en el homo. Durante el procesode limpieza,la cocina debe estar bien ventilada para eliminar los olores normalesasociadoscon la limpieza. Antes de la autolimpieza 1. Apague la luzdel horno antesde la limpieza.La luz del horno puede fundirse duranteel ciclo de limpieza. 2. Retiretodos los utensiliosy las parrillasdel homo. Lasparrillas del homo se descolorar_ny no se deslizar_nf_cilmentedespuc!s de un ciclo de autolimpiezasi no son retiradasdel homo. 3. Limpieel marcodel homo, el marco de la puerta,el _ireafuera de la junta de la \, puerta y alrededorde la aberturaen la junta de la puerta,con un agentede limpiezano abrasivotal como 'Bon Ami'* o con detergentey agua.El proceso de autolimpiezano limpia estas_ireas. Eliasdeben ser limpiadaspara evitar que la suciedad se horneedurante el ciclo de autolimpieza. (Lajunta es el sello alrededor de la puertay ventanadel homo.) 4. Paraevitar daro no limpie ni frote la junta situada alrededorde la puerta del homo. La junta est_ diserada para sellar herm6ticamenteel calor durante el ciclo de limpieza. 5. Limpieel excesode grasa o derramesde la parte inferior del homo. Estoevita humo excesivoo Ilamaradasduranteel ciclo de limpieza. 6. Limpielos derramesazucaradoso _cidostales como papa dulce (camote),tomates o salsasa base de leche.La porcelana esmaltadaes resistenteal _cido pero no a prueba de _cidos. El acabadode porcelanapuede descolorarsesi los derrames_icidos o azucaradosno son limpiadosantes de un ciclo de autolimpieza. 'HVy' (Suciedadintensa,4 horas) 'MEd' (Suciedadmediana,3 horas) 'LITE'(Suciedadleve,2 horas) AI seleccionarel nivelde suciedad del homo se programa autom_iticamenteel tiempo de limpieza. 5. Despu6sde cuatro segundos,el homo comenzar_a limpiar. • Si la puerta no se cierra,se oir_ una serialsonoray la palabra 'door' se desplegar_en el indicadorvisual. Si la puerta no es cerradadentro de 30 segundos,la operaci6nde autolimpieza ser_canceladay el indicadorvolver_ia desplegarla hora del d[a. • 'CLEAN'aparecer_en el indicadorvisual. • 'LOCK'(Bloqueado)destellar_en el indicadorvisual. Unavez que la puertase bloquea,la palabra 'LOCK'permanecer_ iluminadasin destellar. • El tiempo de limpieza comenzar_la cuenta regresivaen el indicador. Para diferir un ciclo de autolimpieza: 1. Oprima la tecla 'Delay 1' (Diferido). 1 | • 'DELAY'destella. • '00:00'destellar_en el indicadorvisual. Delay 2. Programela cantidad de tiempo que usted deseadiferir el ciclo usando lasteclas numc!ricasapropiadas. 3. Optima la tecla 'Clean'. • 'SET'destellaen el indicadorvisual. 4. Optima la tecla 'Aatoset 0'. • Se despliega'LITE'(nivelde suciedad leve). Clean ii ................................. U Au_oset 5. Optima la tecla 'Auteset O'(ProgramaciOn Autom_tica) para desplegarlos ajustes de autolimpieza. 'HVy' (Suciedadintensa,4 horas) 'MEd' (Suciedadmediana,3 horas) 'LITE'[Suciedadleve,2 horas) *Los nombresde los productosson mamasregistradasde sus respectivosfabricantes. 47 Procedimientos de limpieza AI seleccionarel nivel de suciedaddel homo se programa autom_ticamenteel tiempo de limpieza. 6. Despu_sde cuatro segundos,las palabras'CLEAN'(Limpieza)y 'DELAY'(Diferido) se iluminar_iny 'LOCK'(Bloqueado)destellar_i en el indicadorvisual. Cuandola puerta del homo se cierra, 'LOCK'dejar_de destellary se iluminar4 permanentepara mostrarque el homo est_ programadopara una operaci6nde limpiezadiferida. En el indicador aparecer_el tiempo diferido. Durante el title Tapas de quemadoresy quemadoresde gas sellados Tapas de qaemadores removibles , Dejeenfriar el quemador.Retire la tapa y I_velaen aguajabonosa con una esponjade restregarde pl_stico. Parasuciedaddiffcil, limpie con una esponjano abrasiva rellenacon jab6n o con crema para limpiezade cubiertas'CooktopCleaningCreme'*(Cremapara Limpiezade Cubiertas)(Pieza#20000001)**y una esponja. , No las laveen el lavavajillasni en un homo autolimpiante. Quemadores de gas seilados , Limpieloscon frecuencia. Dejeenfriar el quemador.Limpiecon jab6n y una esponjade restregarde pl_stico. Parasuciedad diffcil, limpie con una esponjano abrasiva rellenacon jab6n. No agrande ni modifique los agujeros. , Tongacuidado de que no entre agua en los orificiosde los quemadores. , Tongacuidado cuando limpie el encendedor.Si el encendedorest_ homeric o dafiado, el quemadorsuperior no encender& de autolimpieza Cuandoaparece'LOCK'en el indicador, la puerta no se puede abrir. Paraevitar dafio a la puerta, no fuerce la puerta para abrirla cuando la palabra 'LOCK'est,1desplegadaen el indicador visual. Humo y Olores Ustedpuede ver humo y sentir clot las primerasvecesque el borne es limpiado. Estoes normaly disminuir_ con el tiempo. Tambic!npuede ocurrir humo si el homo est_ demasiadosucio o si se ha dejado un utensilio en el homo. Sonidos A medidaque el borne se calienta,usted puede off sonidos de piezasmet_ilicasque se expandeny contraen. Esto es normaly no dafiar_el homo. Despu6s dei title de autolimpieza Rejillas de los quemadores= porcelana sobre hierro forjado • L_velascon agua tibia jabonosay una esponjade pl_sticono abrasiva. Paramanchasrebeldes,limpie con una esponjade pl4sticorellena con jab6n, no abrasivao con 'CooktopCleaning Creme'*(Pieza20000001)**y una esponja.Si la suciedadpersiste, wJelvaa aplicar 'CooktopCleaningCreme',cubra con una toalla de papel hOmeday deje remojardurante30 minutes.Restriegue nuevamente,enjuaguey seque. • No las laveen el lavavajillasni en un homo autolimpiante. Aproximadamenteuna hera despu6sdel fin del ciclo de limpieza, 'LOCK'desaparecer& La puerta ahora puede set abierta. Alguna suciedad puede quedar come una leve ceniza gris ripe polvo. Retffelacon un patio h_medo. Si la suciedad permanece despu6sde limpiarla,significa que el ciclo de limpieza no fue Io suficientementelargo. La suciedad ser_ieliminadadurante el pr6ximociclo de limpieza. Si las parrillas del homo fueron dejadas en el homo y no se deslizansuavemente despu_s de un ciclo de limpieza, limpie las parrillasy lossoportesde las parrillascon una pequefia cantidad de aceite vegetal para hacerlasdeslizarcon m_isfacilidad. Area del reloj y de las teclas de control ° Paraactivar 'ControlLock' (Bloqueode los controles)para la limpieza,ver p_gina 55. ° Limpiecon un pafiohOmedoy seque. No use agentesde limpieza abrasivespuespueden rayarel acabado. ° Se puede usar limpiavidriossi se roc[an en el patio primero. NO retie directamente en el panel. Puedenaparecer lineas delgadas en la porcelana al pasar per ciclosde calentamiento y enfriamiento. Estoes normaly no afectar_el rendimiento. Una descoloraci6nblanca puede aparecer despu_sdel ciclo de limpieza si los alimentos ;icidos o azucarados no fueron limpiadosantes del ciclo de autolimpieza. Estadescoloraci6nes normaly no afectar4el rendimiento. Perillas de control , Retirelas perillas cuandoest6n en la posici6n 'OFF'(Apagado) tir_ndolas haciaadelante. • Lave,enjuague y seque. No use agentesde limpiezaabrasives puespueden rayarel acabado. • Enciendacadaquemadorpara asegurarsede que las perillas hart side correctamentereinstaladas. Notas: • Si se deja abierta la puertadel borne,la palabra 'door' destellar_en el indicadorvisual y se escuchar_una serial sonora hasta que la puerta sea cerraday la tecla 'Clean' a oprimidanuevamente. • Si transcurrenm4s de cinco segundosdespu6sde oprimir la tecla 'Clean'y antes de oprimir la tecla 'Autoset0',el programa volver_iautom4ticamenteal despliegueprevio. * Loshombres de los productosson mamasregistradasde sus respectivosfabricantes. • La puerta del homo se dafiar_ si se fuerza para abrirla cuando la palabra'LOCK' contint_adesplegadaen el indicador. ** Parahacer pedidos,Ilameal 1-877-232-6771EE.UU.o 1-800-688-8408Canad& 48 Parrillasdel homo • Limpiarcon agua con jabSn. . Sacarlas manchasdificiles con polvo de limpiezao una esponja Ilenacon jabOn. Enjuaguey seque. . Lasparrillasse descolorar_npermanentementey pueden no deslizarsecon suavidadsi son dejadasen el homo durante un ciclo de autolimpieza.Si esto sucede,limpie la parrilla y los soportesen relievecon una pequeSacantidad de aceite vegetal para restaurar la facilidad de movimiento,luego limpie el exceso de aceite. Cubierta y panel de control =Esmaltede porcelana La porcelanaesmaltadaes vidrio fundido en metaly puede agrietarseo picarsesi no se usa correctamente.Esresistentea los _cidos,no a pruebade _icidos.Todoslos derrames,especialmente los derramesazucaradoso acfdicos deben ser limpiados inmediatamentecon un paso seco. • Cuandose enfr[e, lavecon agua jabonosa,enjuaguey seque. • Nunca limpie una superficietibia o caliente con un paso hOmedo. Estopuede causaragrietamientoo picaduras. • Nunca use limpiadoresde homo, agentesde limpiezaabrasivoso c_iusticosen el acabadoexterior de la estufa. Acero inoxidable [modelosselectos) • NO USENINGUN PROBUCTODE LIMPIEZA QUE CONTENGABLANQUEADORA BASE DE CLORO. • NO USELIMP/ADORES "ORANGE" N/ L/MPIADORES ABRAS/VOS. • $/EMPRE LIMPIE LAS SUPERFICIESDEACERO A FAVOR DEL GRANO. • limpieza diaria/Suciedad leve =Limpie con uno de los siguientes- agua con jab6n, una soluci6n de vinagre blancocon agua, limpiador para superficiesy vidrio 'Formula409'*o un limpiavidriossimilar - usando una esponjaoun paso suave. Enjuaguey seque. Para pulir y evitar marcasde los dodos,use el producto 'StainlessSteel Magic Spray'* (PiezaNo. 20000008)**. • Suciedad moderada/Intensa = Limpiecon uric de lossiguientes - 'Bon Ami'*,'Smart Cleanser'*o 'Soft Scrub'* - usandouna esponja h0medao un paso suave. Enjuaguey seque. Las manchasdificiles pueden set quitadas con una esponja multi-uso 'Scotch-Brite'*hOmeda;frote a favor del grano. Enjuaguey seque. Pararestaurarel kJstrey sacar lasvetas,aplique 'StainlessSteel Magic Spray'*. . Descoloraci6n - Use una esponjamojadao un paso suave, limpie con limpiador de acero 'CameoStainlessSteel Cleaner'*. Enjuagueinmediatamentey seque.Paraeliminar las estr[asy restaurarel lustre,use despuc!srociador para aceroinoxidable 'StainlessSteelMagic Spray'*. Paneles laterales, gaveta de ahnacenamiento y manijas de las puertas =Esmalte pintado • Cuandoest6 frfa, lavecon agua tibia jabonosa,enjuaguey seque. Nunca limpie una superficietibia o caliente con un paso h0medo puesesto puededa_ar la superficiey causar una quemaduraa causa del vapor. • Paramanchasrebeldes,use agentesde limpiezalevemente abrasivostal como pastade bicarbonatoo 'Bon Ami'*.No use limpiadoresabrasivos,c_usticoso _isperostal como esponjasde lana de aceroo limpiadores de hornos.Estosproductospueden rayaro da_ar permanentementela superficie. Nora: Use una toa/la oun patio seco para limpiar los derrames, especialmente los derramesac[dicos o azucarados. La superficie se puede descolorar o perder el brillo si el derrame no se limpia inmediatamente. Esto es especialmente importante eft las superficies blancas. Ventana y puerta del homo =Vidrio • Eviteusar cantidadesexcesivasde agua pues puede escurrirse debajo o detr_sdel vidrio causando manchas. • Lavecon agua y jab6n. Enjuaguecon agua limpiay seque. El limpiadorde vidrio puede usarsesi se roc[a en un paso primero. • No use materialesabrasivostales como esponjasde restregar, limpiadoresen polvoo esponjasde lana de acero puespueden rayarel vidrio. interior del homo • Siga lasinstruccionesen la p_gina 47 para prograrnarun ciclo de autolimpieza. Ventana Puerta del homo del homo Para proteger la ventana de la puerta del homo: 1. No useagentes de limpiezaabrasivostales como esponjasde restregar de lana de aceroo limpiadoresen polvo puesolios pueden rayarel vidrio. 2. No golpeeel vidrio con ollas,sartenes,muebles,juguetes u otros objetos. 3. No cierre la puertadel homo hastaque las parrillas del homo no est6n en su lugar. Nora: La puertadel homo en una estufa nuevapuede sentirse "esponjosa"cuandose cierra. Estoes normaly disminuir_ con el uso. AI golpear,rayar,hacervibrar o esforzarel vidrio puede debilitar su estructuracausando un mayor riesgode rotura en una fecha posterior. 49 Tornillos niveladores Conexi6n el ctrica Los electrodom_sticos que requieren energia el_ctrica est_n equipados con un enchufe de ires clavijas con cenexi6n a tierra, el cual debe ser enchufadodirectamenteerr un tomacorrienteeldctricode tres agujeros,para 120voltios debidamenteconectadoa tierra. Verifiquesi la estufa esta niveladacuandose instala. Si la estufa no est_ nivelada,gire lostornillos niveladoresubicados en cadaesquinade la estufa hasta que quede nivelada. TORNILLO Siempredesenchufeel electrodom#sticoantesde efectuarreparaciones. I 4 _,,/J NIVELADOR Gaveta de ahnacenamiento El enchufe de tres clavijascon conexi6n a tierra ofrece protecciOn contra peligros de choques eldctricos.NO CORTENI EUIVlINELA TERCERACLAVIJADE CONEXIONA TIERRADEL ENCHUFE DEL CORDONELECTRICO. Si solamentese disponede un tomacorrientesin conexi6na tierra, de dos agujerosu otro tipo de tomacorriente el_ctrico,el propietario del electrodom(_sticoes personalmente responsablede reemplazar el tomacorriente con un tomacerriente el_ctrico de ires agujeros debidamente puesto a tierra. Luz del homo La gaveta de almacenamientopuede ser retirada para que usted pueda limpiar debajo de la estufa. Para sacar : 1. Vac[e la gaveta y deslfcelanaciaafuera nasta la primera posici6n tope. 2. Levantela parte delanterade la gaveta. 3. Tirela hasta la segundaposiciOnde tope. 4. Sujetelos ladosy levante la gaveta para retirarla. Para velvet a colocar: 1. Inserte losextremosde las correderasde la gaveta en los rieles de la estufa. 2. Levantela parte delanterade la gavetay suavementeemp0jelaa la primera posici6n de tope. 3. Levantela gaveta nuevamentey emp0jelahasta que quede completamentecerrada. Retiro de la estufa Para reemplazar el foco del homo: 1. Cuandoel norno estc!if[o, sujete la tapa de la bombillaen su lugar, luego deslice el ret(!n de alambrefuera de la cubierta. Nora: La cubierta de la bombilla se caerdsi no es sujeta en su lugar cuandoest_ sacandoel ret6n de alambre. 2. Saquela cubierta del foco y el foco. 3. Coloqueun foco de 40 watts para electrodomdsticos. 4. Vuelvaa colocar la cubierta de la bombillay asegOrela con el ret(_nde alambre. \/ 5. Vuelvaa enchufar la estufa. Vuelvaa colocar la nora correcta. a gas Los conectoresde la estufa a gas usadospara conectareste artefacto al suministro de gas no estdn dise_adospara movimiento continuo. Unavez instalados,NO mueva repetidamenteeste artefacto a gas para su limpiezao para ubicarlo en otro lugar. Si este artefactotiene que set movido y/o retiradopara reparaci6n, siga el procedimientodescrito en las instruccionesde instalaci6n. Parainformaci6n,p6ngaseen contacto con el Servicioa los Clientes Maytag Ilamandoal 1-800-688-9900EE.UU.o al 1-800-688-2002 Canada. Paraevitar que la estufase vuelqueaccidentalmente,se debe aseguraral piso colocandoel tornillo niveladortrasero dentro del soporte antivuelco. 5O CABOCHON RESSORTDERETENUE (fffm6tallique) , Precalienteel homo durante dos a tres minutesantes de colocar el alirnentoen el homo. , Ase a la parrilla con la puerta del homo cerrada. Para la mayoda de los problemas, verifique primero Io siguiente. • Revisesi los controlesdel horno est_indebidarnenteajustados. • Verifique si el enchufe est_ firrnernenteinsertadoen el tomacorriente. Verifique o vuelvaa reporterel disyuntor. Verifique o reernplace el fusible. Verifique el surninistrode energ[aelc!ctrica. Ei homo no se autolimpia. • Verifique para asegurarsede que el ciclo no estc!ajustado para un cornienzodiferido. Vet p%ina 47. , Verifiquesi la puerta est_ cerrada. , Verifiquesi el control est,1en Mode sab_itico.Vet p%. 59. , El homo puede estar a m_sde 205° C [400° F). La ternperaturadel homo debe ser inferior a 205° C (400° F)para programarun ciclo de lirnpieza. El quemadorsuperior no se enciende. • Verifique si la estufa est_ debidarnenteconectadaa la fuente de alimentaci6n. • Verifique si est_ fundido un fusible del circuito o si se dispar6el disyuntor principal. • Verifique para asegurarsede que el encendedorest6 seco y que ernita chasquidos. El quemadorno se encender_isi el encendedor est_ da_ado,sucio o rnojado. Si el encendedorno produce un chasquido,gire la perilla de control a la posici6n 'OFF' (Apagado). Ei homo no se limpi6 en forma debida. ° Puedeque sea necesarioun tiernpo de lirnpiezarn_s largo. ° Losderramesexcesivos,especialrnentede alimentosazucaradosy/ o _cidos no fueron limpiadosantes del ciclo de autolimpieza. La puerta del homo no se desbloquea despu_s del eiclo de autolimpieza. ° El interior del homo todav[aest,1caliente. Deje que paso aproxirnadarnenteuna hera para que el homo se enfr[e antes de que se completeun ciclo de autolirnpieza. La puerta puede set abierta cuando desaparezcala palabra'LOCK' (Bloqueado)del indicadorvisual. , El control y la puerta puede estar bloqueada. Vet p%. 55. La llama es dispareja. ° Losorificios del quernadorpueden estar obstruidos. La llama del quemadorsuperior se levanta del orificio. • Verifique para asegurarsede que el utensilio est_ asentadoen la parrilla sobre el quernador. Los resultadosdel horneado no son come se esperaban o son diferentes a los del homo anterior. • Verifique la ternperaturadel horno seleccionada.Aseg_resede que el homo est6 precalentadocuando la recetao instrucciones recomiendanprecalentamientodel homo. • AsegOresede que el respiraderodel homo no est6 bloqueado. Ver p%ina 61 para la ubicaci6n. • Verifique para asegurarsede que la estufaestd nivelada. • Lastemperaturasa rnenudovat(anentre un homo nuevoy uric antiguo. A medidaque pasael tiernpo, la ternperaturadel homo cambia y puede hacersem_s caliente o m_s frfa. Ver p%. 60 para las instruccionescome ajustar la ternperaturadel homo. Nora: No se recorniendaajustar la ternperaturasi ha tenido problernascon solo una o dos recetas. • Useel utensilio correcto.Los utensiliososcurosproducendorado oscuro. Losutensilios brillantesproducendorado clare. • Verifique las posicionesde las parrillasy la colocaci6nde los utensilios.Alterne los utensilioscuando use dos parrillas.Deje 2,5-5 cm (1-2 pulgadas)entre los utensiliosy las paredesdel homo. • Verifique el use de papel de alurninio en el homo. Nunca use papel de alurniniopara cubrir una parrilla completa del homo. Coloqueun pedazopeque_o de papel de alurninioen la parrilla que est_ debajo del utensilio para recibir los derrarnes. Se junta humedad en la ventana del homo o sale vapor per el respiraderodel homo. • Estoes normalcuando se cocinan alirnentoscon alto contenido de hurnedad. • Se us6 hurnedadexcesivacuando limpi6 la ventana. Hay un oJorfuerte o humo leve euando se enciende el homo. ° Estoes normalen una estufa nuevay desaparecer_despu6sde unos pocos uses.AI iniciar un ciclo de autolirnpiezase "quernar_n" los oloresrn_isr_pidarnente. • Si se enciendeel ventilador ayudar_a elirninarel hurnoy/o el clot. • Suciedadexcesivade alirnentosen el panel inferior del homo. Use un ciclo de autolirnpieza. C6digosde errores • 'BAKE'(Horneado)o 'LOCK'pueden destellar r_ipidarnenteen el indicador para avisarleque hay un error o un problerna. Si 'BAKE' o 'LOCK'aparecenen el indicador visual,oprirna la tecla 'CANCEL' (Cancela0.Si 'BAKE'o 'LOCK'contintian destellando, desconectela energia el_ctricaal electrodorn6stico. Espereunos pocos minutesy vuelva a reconectarla energ[ael6ctrica. Si continOandestellando,desconectela energ[ael6ctricadel electrodorn_sticoy Ilarneal t6cnico de servicioautorizado. • Si el homo est_ dernasiadosucio,pueden ocurrir dernasiadas IlarnaradasIo cual resultar_ien un c6digo de error durante la lirnpieza. Oprirnala tecla 'CANCEL' y deje que el homo se enfrfe cornpletarnente,lirnpieel excesode suciedad y luego vuelva a programarel ciclo de lirnpieza.Si el c6digo de error reaparece, Ilamea un tc!cnicoautorizado. Los alimentos no se asan a la parrilla en forma debida o salen demasiado humo. • Verifique las posicionesde las parrillasdel borne. El alirnento puede estar muy cerca de la llama. • El papel de aluminiose us6de maneraincorrecta. Nunca forre el inserto del asadorcon papel de ahrninio. • Recorteel excesode grasade la came antes de ponerlaa asar a la parrilla. • Se us6una asaderasucia. Se escuchan ruidos. • El homo ernitevaries sonidos bajos. Ustedpuede oft los relc!sdel homo cuandose encienden apagan.Estoes normal. 51 • A medidaque el homo se calienta y se enfr[a,usted puede oft sonidos de piezasmet_licasque se expandeny contraen. Estoes normaly no dahar_su electrodom6stico. 'SAb' destella y luege se despliegacontinuamente. . El homo est_ en modo sab_tico.Paraanular el modo sab_tico, optima y mantengaoprimida la tecla 'O(eck' [Reloj) durante cincosegundos. No se escuchan se_ales sonorasy e( indicadorvisual no se activa. • El horno puede estaren Modo sab_itico. (Verp%. 59). estuf, ¢oclneMo enle e I 'H(' [Alto): Se usa para hacer hervirun I[quidoo I alcanzarla presi6nadecuadaen una olin a [ presi6n. Siemprereduzcael ajuste aun calor I m_isbajo cuandolos I[quidoscomiencena hervirI o cuando los alimentoscomiencena cocinarse. I 'LO' [Bajo): Se usa para calentar alimentosa fuego lento, mantenerlos alimentoscalientesy derretir chocolate o mantequilla. Se puede cocinar en el ajuste 'LO' siempre que el utensilio est6 tapado. Esposiblereducir el calor girando la perilla a la posici6n 'OFF' (Apagado). AsegOresede que la llama sea estable. Se usa una llamade tamaho intermedio para continuar cocinando. Elalimento no se cocinard rodsrdpido cuandose usa un ajuste de llama rodsalto que el necesariopara mantener un hervorsuave. El agua hiervea la misma temperaturasi est_ hirviendosuave o vigorosamente. Controles superiores Perillas de control de los elementos superiores Se utilizan para encenderlos quemadoressuperiores. Sedispone de una selecciOninfinita de ajustesde calor desde'LO' a 'HI'. En el ajuste 'HI' se puede sentir un tope o una muesca. Lasperillas pueden ser ajustadasexactamenteen los ajustescorrespondienteso entre cualquierade ellos. Las ilustracionescerca de la perilla identificancual esel quemadorque controla esaperilla. Pot ejemplo,la ilustraciOna derechamuestrala ubicaci6n del Front quemadordelanteroizquierdo. [_[_ mO Programaci6n de los controles: El tamaho y el tipo de utensilio afectar_nel ajuste de calor. 1. Coloqueun utensilio sobre la rejilla del quemador. Encendido sin piloto El encendidosin piloto elimina la necesidadde una luz piloto constante permanente.Cada uno de los quemadores superiorestiene un encendedorde chispa.Tengacuidadocuando • La llama del quemador puede levantarseo parecerseparada del orificio si no se coloca un utensilio en la rejilla. TAPA DELQUEMADOR 2. Optima y gire la perilla a la izquierdaal ajuste 'LITE' (Encendido). ° Se oir_ un chasquido [chispa)y el quemadorse encender& [Los cinco quemadoresproducir_n chispa cuandose coloca la perilla de cualquiera de los quemadoresen la posici6n 'LITE'.) 3. Despu6sque el quemadorse ha encendido,gire la perilla al tamaho de llamadeseado. quemadorsuperior. Si el quemadorsuperior O,Bc no enciende,verifique si el limpie alrededor del encendedorest_ roto, sucio o mojado. Encen(le(ler BASE DEL QUEMADOR 52 ° El encendedorcontinuar_ produciendochispashasta que la perilla seagirada m_sall_ de la posiciOn'LITE'. Funcionamiento durante una interrupci6n de la energia el ctrica Quemador para cocinar a Fuego Lento* ==,=o o Simme O0 _I°TI Estequemadorse encuentraen la posici6n /M_'_ ._j/l_,_,_ central. El quemadorpara cocinar a fuego /// / lento ofrece una llama de menorintensidad para (-°l[ i"_ calentarsalsasdelicadaso derretir chocolate. _.! _EIr4dimennominalde BTU variar4cuandose usa _:: gasIicuado. Rejillas de los quemadores Lasrejillasdeben estar debidamentecolocadas 1. Acerque un f6sforoencendido a la tapa del quemador superior deseado. f_ //_ i J_- a=es decomenzar a Jl 3. Ajuste la llamaal niveldeseado. cocinar.Cuandoinstale las rejillas,coloque los /_ u_ Cubierta extremosde .as.engOetas//_-' /? '_,_ hac a e centro,de manera que coincidancon las barrasderechas. 2. Optimay gire la perilla de control lentamentea la posici6n'LifE'. Para evitar que la cubierta se descolore o se manche: La instalaci6nincorrectade las rejillaspuede resultar en picaduras de la cubierta. o Limpiela cubierta de la estufa despuc!sde cada uso. o Limpie losderrames_cidos o azucaradostan pronto como la cubierta se hayaenfriado puesestos derrames puedendescolorar la porcelana. No use los quemaderes sin toner an utensiiio en [a rejila. El acabado de porcelana de las rejilas puede picarsesi no existe un utensilio que abserba el taler de la llama del quemader. Tongacuidado al revolverel alimento de una olla o sartdn colocado sobrela rejilla del quemador.Lasrejillastienen un acabadosuave para facilitar su limpieza.La olla o sart6n pueden resbalarsi no se sujetan por el mango.Esto puede provocarderramede alimentos calientesy constituir un riesgode sufrir una quemadura. A diferencia de una estufa con quemadoresde gasest_ndar,esta cubierta no se [evantani tampocoes removible. No intente levantarla cubierta per ning_nmotive. Aunque las rejillas de los quemadoresson durables,gradualmente perder_nsu brillo y/o se descolorardn,debido alas altas temperaturasde la llama del gas. Quemadores de gas sellados Losquemadoressellados de su estufaest_n aseguradosa la cubierta y no han sido diseiados para set sacados. Debido a que los quemadoresest4n selladosen la cubierta, los derrameso rebosesno se escurrir_n debajo de la cubierta de la estufa. Notas: • Un quemadorajustadode maneracorrectacon orificios limpios seencender_dentro de unos pocossegundos. Si est_ usandogas naturalla llama ser_azul con un cono interior azul profundo. Sin embargo,los quemadorespueden ser limpiados despu6sde cada uso. La parte de la cabezadel quemadorpuede set f4cilmente sacada para su limpieza.07oren la p_gina/48las instruccionessobre la limpieza.) Si la llamadel quemadores amarillao es ruidosa, la mezclade aire/gas puedeser incorrecta. P6ngaseen contacto con un t6cnico de serviciopara ajustarla. (Los ajustesno est_n cubiertos pot la garantia.) Lascabezasde los quemadoresdeben estar correctamente colocadasen la basedel quemadora fin de que 6ste funcione de maneraapropiada. Quemador de alto rendimiento 'Power Existeun quernadorde alto rendimiento en su estufa, situado en laposiciOn derecha Con gas licuadoson aceptablesalgunaspuntas amarillasen la llama. Esto es normaly no es necesariohacerningin ajuste. • Con algunostipos de gas, usted puede oir un "chasquido" cuando el quemadorsuperior se apaga. Estees un sonido normaldel funcionamientodel quemador. Boost'* • __ u,_ Fro=, m£s r£piday pueden ser usadospara hervir agua con rapidezo para cocinar grandes delantera. EstoquemadorofrececocciOn __ cantidadesde alimento. • Si la perilla de control segira muy r_ipidamentede 'HI' (Alto) a 'LO' (Bajo),la llama puede apagarse,particularmentesi el quemadorest£ fifo. Si esto ocurre, gire la perilla a la posici6n 'OFF', esperealgunossegundosy vuelva encenderel quemador. • La llama debe ser ajustadade modo que no se extienda m_s all_ del horde del utensilio. 53 homo Codnendo enel Panel de control A B C D E F / Clean Broil 4 s6A) Conved : Bake 8 Keep warm G H I J K L IVl N El panel de control ha sido disehadopara su fdcil programaci6n.El indicadorvisual en el panel de control muestrala hora del d[a, el temporizadory las funcionesdel homo. El panel de control mostradoarriba incluye las caracter[sticasde convecciOny adem_slas caracteristicasespecfficasde otros modelos. (El estilo del panel de control varia seg0nel model&) iiiiiiiiii_ iiiiiiiiii_ Use de las teclas 'Bake'[Horneado) Se usa para hornear y asar. 'Broil'[Asara la parrilla) Se usa para asar a la parrilla y dorar los alimentos. 'Clean' (Limpieza] Se usa para programarun eiclo de autolimpieza. 'Delay'(Diferido] Programael homo para comenzara hornear o limpiarsea una hora posterior. TeclasNumericas Se usa para programarlos tiempos y temperaturas. • Oprimala tecla deseada. • Optima las teclas numdricaspara programarel tiempo o la temperatura. • Optima la tecla 'Autoset O' para prograrnarla temperatura. 'Autoset'(Programaci6n Se usa para programartemperaturas automdtica3 con rapidez. 'KeepWarm' [MantenerCaliente) iiiiiiiiii_ iiiiiiiiii_ iiiiiiiiii_ iiiiiiiiii_ 'Convect' (ConvecciOn] Se usa para hornear o asado por convecci6n. 'Cook& Hold'(Cocci6n y mantenercaliente] iiiiiiiiii_ Se usa para mantenercalienteen el homo el alimentococinado. 'Favorite'(Favorito) Se usa para horneardurante un tiempo seleccionado,luego mantieneel alimento caliente durante una hora. Se usa para guardar un procedimiento especificode 'Cook& Hold'. • Seescucharduna sehal sonoracadavez que oprima una tecla. • Seescuchardndossefialessonorassi ocurre un error en la programaci6n. Nora: Cuatrosegundosdespudsde haber oprimido lasteclas num6ricaso la tecla Autoset0, se programardautom_ticamente el tiempo o la temperatura.Si transcurrenmds de 30 segundos despu_sde haberoprimido una tecla de funcidn y antesde oprimir las teclas numdricaso la tecla Autoset 0, la funci6n ser_ canceladay el indicadorvisual volverdal despliegueanterior. 'Clock' (Reloj) Timer'O-emporizado0 Programaal temporizador. El reloj puede ser ajustadopara desplegarla hora ya sea en formato de 12 horaso 24 horas. El reloj ha sido programadoen la fdbrica para el formato de 12 horas. 'Clock'(Reloj} Se usa para programar la hora del dia. Para cambiar el reloj a formate de 24 betas: 'OvenLight' [Luzdelhomo) Se usa para encender o apagar la luz del homo. 1. Oprimay rnantengaoprirnidaslasteclas 'CANCEL' y 'Favorite' durante tres segundos. 'CANCEL' (Cancela0 Cancelartodas las funcionesa excepei6n del temporizadory el reloj. • '12 Hr' destellaen la pantalla. Oprima la tecla 'Autoset O' para seleccionar 24 horas;oprimala nuevamentepara seleccionar'12 Hr'. Programela hora del dia siguiendo las instrucciones indicadasen la secciOnProgramaci6ndel reloj. 54 0 Autoset ProgramaciCn del Reloj: 4. AI final del tiempo programado,seescuchar_iuna serial sonora larga y 'End' (Fin)se desplegar_en el indicadorvisual. 1. Oprimala tecla 'Clock' (Reloj). • Enel indicadordestella la hora del d[a. 5. Oprima la tecla 'Timer' para despejarel indicadorvisual. Para cancelar el temporizador: 2. Oprimalasteclas numCricasapropiadaspara programarla hora del dfa. 1. Oprimay mantengaoprimida la tecla 'Timer' durante tres segundos. • Losdos puntos destellan en el indicador. U 3. Oprimala tecla 'Clock' nuevamenteo esperecuatrosegundos. 2. Oprima la tecla 'Timer' y optima '0' usando las teclas numCricas. • Losdos puntos perrnanecer_niluminados. Cuandose conectaenergfaek!ctrica al homo o despuCsde una interrupciCnde la energfaek!ctrica, la 01tirnahora del reloj previaa la interrupciCndestellar_en el indicador. AlJtese[ Bloqueo de los controles y de la puerta del homo Paradesplegarla hora del d[a cuando el indicadorest6 mostrando otra funciCnde tiempo, oprima la tecla 'Clock'. Elteclado y la puerta del homo puedenser bloqueadospara seguridad, limpiezao evitar el uso no autorizado.Lasteclas no funcionan cuandoest_inbloqueadas. La hora del reloj no puedeser cambiadacuandoel homo ha sido programadopara 'DelayCook' (CocciCnDiferido),'Delay Clean' (LirnpiezaDiferido] o 'Cook& Hold' (CocciOny Mantener Caliente Diferido). Si el homo est_ en funcionamiento,lasteclas ni la puerta puede set bloqueada. Para cancelar el despliegue del reloj: Si no deseaque el indicadorvisual muestre la hora del d[a: A La hora actual del dfa perrnanecer_en el indicadorcuando las teclas y la puerta estc!bloqueada. --_rAklrE_ Para bloquear: Oprimay mantengaoprimida lasteclas 'CANCEL' (Cancelar]y 'Clock' durante ties segundos.La hora del dfadesaparecer_del indicador. Oprimay mantengaoprimidas las teclas 'CANCEL'y 'Cook & Hold' (CocciOny Mantene0 durante tressegundos.(Oprimaprimero la tecla 'CANCEL'). Cuandose cancelael desplieguedel reloj,oprima la tecla 'Clock' para desplegarbrevementela hora del dfa. Cuandose cancelael desplieguedel reloj,despuc!sde 15 minutos,el control del homo pasar_ia Modo de Reservapara ahorrar energ[a.El indicadorvisual estar_ien blancoy la luz del homo no funcionar& Para activarel control y sacarlo del modode reserva,optima cualquiertecla. Se escuchar_ndos sefialessonoras. Para restaurar el despliegue del reloj: Oprimay mantengaoprimida lasteclas 'CANCEL'y 'Clock' durante tres segundos.La hora del dfa reaparecer_del indicador. • En el indicadorvisual aparece 'OFF'(Apagado]. • 'LOCK' (Bloqueado)destella cuando la puerta se est_ bloqueando. Para desbloquear: Oprimay mantengaoprimidas las teclas 'CANCEL'y 'Cook & Hold' durante tressegundos.(Optima primero la tecla 'CANCEL').'OFF' desaparecedel indicadorvisual. Nota: Lasteclas y la puerta del homo no puede bloquearsesi la 'Timer' ltemperaturade homo es205° C [400° F] o superior. (Temporizador) El ternporizadorpuede ser programatic de un minuto (0:01)hasta99 horasy 59 minutos (99:59). CCdigos de errores 'BAKE'(Horneado]o 'LOCK'pueden destellar r_pidamentepara advertirleque hay un error oun problem& Si 'BAKE'o 'LOCK' destellanen el indicadorvisual,oprima le tecla 'Cancel'. Si 'BAKE'o 'LOCK'contint3andestellando,desconectela corriente el_ctrica hacia el artefacto.Espereunos pocos minutosy vuelvaa conectar la corriente elCctrica.Si laspalabrasaOncontint3andestellando, desconectela corriente elc!ctricahaciael artefacto y Ilamea un tCcnicode servicioautorizado. El temporizadorpuede ser usado independientementede cualquier otra actividaddel homo. Adem_ispuede ser programaticcuando otra funciOndel homo est6 en funcionamiento. El ternporizadorno controla el homo. Solamentecontrola una serial soilora. Para programar el temporizador: 1. Oprimala tecla 'Timer'. • Enel indicadorvisual destellar_i'0:00'y 'TIMER', 2. Oprimalasteclas num(!ricasapropiadashasta que el tiempo correcto aparezcaen el indicadorvisual, • Losdos puntos y 'TIMER'continuar_ndestellando. 3. Oprimanuevamentela tecla 'Timer' o espere cuatrosegundos. • Losdos puntos dejan de destellary el tiempo comienzala cuenta regresiva. • El 01timominuto de la cuenta regresivadel temporizadorse desplegar_ien segundos. 55 Horneado Horneado o asado per convecci6n Para programar 'Bake' (Horneado): 1. Oprima la tecla 'Bake'. (modelos • 'BAKE'y 'OOO' destellar_en el indicadorvisual. 2. Seleccionela temperaturadel homo. Oprima la tecla 'Auteset O' (Programaci6nautomdtica}para 175° C (350° F] o lasteclas num6ricasapropiadas. U /\utose[ • Cadavez que oprima la tecla 'Autoset0' la ternperaturase aumentarden 15° C (25° F]. selectos) Caande hernee per cenvecei6n, pregrame la temperatura normal de herneade. El control reducir4autom_ticamentela temperaturaprogramadaen 15° C (25° F}. En el indicadorvisual se desplegar_la temperaturaprogramada.El ventilader de cenvecci6n cemenzar_ a funcienar despu_sde que el home haya estade encendide durante qapprex, cince minutes. Para programar 'Convect' (ConvecciOn): • La temperaturadel homo puede ser programadade 75° a 285° C 070 ° a 550° F]. 1. Oprima la tecla 'Cenvect'. 3. Oprimala tecla 'Bake' nuevamenteo esperecuatro segundos. • 'BAKE'y el (conedel ventilador destellar_n. • 'BAKE'dejar_ de @stellary se iluminar_en el indicadorvisual. ; Convect • '000' destellar4en el indicadorvisual. • Enel indicadorvisual se desplegar_38° (100°} o la temperatura real del homo si es que es superior a 38° C (100° F}. La temperaturaaumentar4en incrementosde 3° C (5° F} hasta Ilegara la temperaturaprogramada. 4. Esperea que el homo se precalientedurante8-15 minutes. • Cuandoel homo Ilegaa la temperaturaprogramadase escuchar_una sepal sonoralarga. 2. Seleccionela temperaturadel homo. Oprimala tecla 'Auteset 0' para 175° C (350° F] o lasteclas num_ricasapropiadas. A U Autoset •Cada vez que oprima[a tecla 'Autoset O' la temperaturase aumentar_en 15° C (25° F}.La temperaturadel homo puede set programadade 75° a 285° C (170° a 550° F]. 3. Oprima [atecla 'Cenvect' nuevamenteo espere cuatro segundos. • La temperaturaprogramadase desplegar_ien el indicador visual. • 'BAKE'dejar_ide destellar. • Paraverificar la temperaturaprogramadadurante el precalentamientodel homo, oprima la tecla 'Bake'. 5. Coloqueel alimento en el homo. • Enel indicadorvisual se desplegar_38° (100°} o [a temperaturareal del homo si es que essuperior a 38° C (100° F].La temperaturaaumentar_ien incrementosde 3° C 6. Verifique el progresode la cocci6n cuando hayatranscurridoel tiempo mfnimorecomendado.Contin0ela cocci6nsi es necesario. (5° F} hastaIlegara la temperaturaprogramada. • El (conedel ventilador comenzar_a girar. /4. Esperea que el homo se precaliente durante8-15 minutes. 7. AI t6rmino de la cocciOn,oprimala tecla 'CANCEL'. 8. Retireel alimento del homo. ° Cuandoel homo Ilegaa la temperaturaprogramadase escuehar_una sepalsonora larga. Notas: ° Se desplegar_la temperaturaprogramada. • Paracarobiarla teroperaturadel homo duranteel proceso de cocci@,oprima la tecla 'Bake', luego oprima 'Auteset e' o las teclas num_ricasapropiadashastaque se desplieguela temperaturadeseada. • Paraverificar la temperaturaprogramadadurante el precalentamientodel homo, optima la tecla 'Cenvect'. 5. Coloqueel alimento en el homo. 6. Verifiqueel progresode la cocci6n cuando hayatranscurrido el tiempo minimo recomendado.Contin0e la cocci6nsi es necesario. Paracambiarla teroperaturadel homo durante'Preheat', oprima dos vecesla tecla 'Bake', luego oprima 'Auteset e' o Insteclas num6ricasapropiadashasta que se desplieguela temperaturadeseada. 7. AI t6rmino de la cocciOn,oprima la tecla 'CANCEL'. (CANCEl") 8. Retireel alimento del homo. Si olvidaapagar el homo, se apagar_ autom4ticamentedespu@ de transcurrir 12 horus.Si deseadesactivaresta caracterfstica, yea la p_gina 59. Notas: ° Los tiempos de asado pueden variar con los diferentes cortes de came. Diferencias del horneado antiguo y st= homo nuevo entre st= homo ° Noesnecesarioprecalentarel bornecuandoseasanporconvecci@ cortes de came grandes. Esnormal observaralgunasdiferenciasen el tiempo de horneadode su homo antiguoy su homo nuevo.Vea "Ajustede la Teroperatura delHoroo"en la p_gina 60. 56 'Cook & Hold' (CocciOn y Para cancelar 'Cook & Hold' en cualquier momento: mantener Oprima la tecla 'CANCEL' (Cancelar]. Retire el alimento del homo. caliente) Cuando se usa la opci6n 'Cook & Hold', el homo comienza a calentar inmediatamente despu_s de que el control ha sido programado. Luego, el homo cocina durante un perfodo de tiempo especificado. Cuando ese tiempo expira, el homo mantendr_ el alimento caliente hasta durante una hora y luego se apagar_ automdticamente. 'Delay Cook & Hold' (Cocci0n y mantener caliente diferido) Para programar 'Cook & Hold': 1. Oprima la tecla 'Cook & Bold'. • 'HOLD' destellar4 para indicarle que usted est_ programando 'Cook & Hold'. • '00:00' destellar_ en el indicador visual. • 'HOLD' (Mantener) continOa destellando. Cuando usa 'Delay' (Diferido], el homo comienza a cocinar mds tarde en el d[a. Programe la cantidad de tiempo que usted desea diferir antes de que se encienda el homo y cuanto tiempo desea cocinar el alimento. El homo comienza a calentar en la hora • El tiempo se iluminar_ en el indicador visual. seleccionada y cocina durante el tiempo especificado. • El tiempo puede programarse de 10 minutos (00:10) a 11 horas, 59 minutos (11:59). El tiempo diferido puede programarse de 10 minutos (00:10) hasta 11 horas, 59 minutos (11:59). 2. Seleccione la cantidad de tiempo que usted desea cocinar usando las teclas num6ricas. Para programar an ciclo de 'Cook & Hold' diferido: 3. Cuando HOLD estd destellando, optima 'Bake' (Horneado] o 'Convect' (ConvecciOn) y seleccione la temperatura del homo. Oprima la 1. Oprima la tecla 'Delay 1'. tecla 'Autoset O' (Programaci6n automdtica) para 175° C (350° F) o las teclas num6ricas apropiadas. • En el indicador visual destellard el nornbre del ciclo deseado. "1 | . 'DELAY' se destella en el indicador. f-_ , '00:00' destella en el indicador. U Autoset Delay 2. Usando las teclas num6ricas apropiadas, pmgrame la cantidad de tiempo que usted desea diferir el comienzo del ciclo 'Cook & Hold'. • La temperatura del homo puede ser programada de 75° a 285° C (170° a 550° F]. 3. Optima la tecla 'Cook & Hold'. • 'HOLD' y 'DELAY' destellan en el indicador visual. 4. Oprima nuevamente la tecla del ciclo deseado O espere cuatro segundos. ° '00:00' destella en el indicador visual. • El hombre del ciclo deseado permanecer_ iluminado. 4. Programe la cantidad de tiempo que usted desea cocinar usando las teclas numdricas. • En el indicador visual se desplegar_ el tiempo de cocci6n. • La temperatura real del homo se desplegar_ durante el precalentamiento. 5. Oprima 'Bake' o 'Conveet'. 6. Prodrame la temperatura del homo deseada oprimiendo la tecla 'Autoset O' o las teclas • La temperatura programada se desplegard cuando el homo se haya precalentado. Bake ........................................ numdricas apropiadas. Caando haya expirado el tiempo de cocci6n: ° '175°' ('350°'] se iluminard cuando se oprime 'Autoset O'. • Se escuchar_n cuatro so,ales sonoras. • 'HOLD' y 'WARM' (Caliente] se iluminar_n. 0 Autoset ° Despu6s de cuatro segundos, el tiempo diferido programado aparecer4 en el indicador visual. • En el indicador se desplegar_ 75° (170°] y la hora del d[a. • 'HOLD' se apaga. • Las palabras 'BAKE' y 'DELAY' permanecen ihminadas para recordarle que se ha programado un ciclo de 'Cook & Hold' diferido. Despues de aria hora en 'HOLD WARM' (Mantener caliente): Notas: • No use 'Cook & Hold' diferido para articulos que requieren un homo precalentado, tales como pasteles, galletas y panes. • El homo se apaga autom_ticamente. • 'HOLD' y 'WARM' se apagan. ° No use 'Cook & Hold' diferido si el homo ya est_ caliente. • Retire el alimento del homo. 57 'Broiling' 6. Dc!vuelta a la came una vez aproximadamentea mitad de la cocciCn. (Asar a la parrilla) 7. Cuandoel alimentoest6 cocinado,oprima la tecla 'CANCEL' (Cancelar). Retireel alimento y la asaderadel homo. _Alkl¢'l:l_ • Lahora del dfavolver_a desplegarseen el indicador visual. Notas: • paramejoresresultadoseuando asea la parrilla, useuna asaderadise_adapara asara la parrilla. ° 'Hi' se usapara la mayor[ade los asadosa la parrilla. Use'LO broil' cuando asea la parrilla alimentosque necesitancocciCn prolongada. Latemperatura inferior permite que el alimento se cocine hastaquedar bien asadosin dorarsedemasiado. Para programar 'Broil' (Asado): 1. Oprima la tecla 'Broil'. • 'BROIL'y 'SET'07alidar)destellan. 2. Oprima la tecla 'Autoset O' (ProgramaciOn autom_tica)una vez para 'HI broil' (Asara la parrilla con temperaturaalta) o dos vecespara 'LO broil' (230° C [450° F]) (Asara la parrilla con temperaturabaja). • Paracambiarla temperaturadel homo durantela asara la parrilla,oprima la tecla 'Broil', luego oprima la tecla 'Autoset O' para cambiar el ajuste de asadoentre 'LO'y 'HI'. U Autose[ • Lostiempos de asadoa la parrilla pueden set m_s largos cuando se seleccionala temperaturam_isbaja de asara la parrilla. • En el indicador visualse desplegar_i'HI' (Alto) o 'LO' (Bajo). • Selecciones'HI broil' (285° C [550° F]) para asadoa la parrilla normal. Seleccione'LO broil' (230° C [450° F]) para asar a la parrilla con temperaturabaja alimentosque deben ser cocinadospor m_istiempo,tal como la came de ave. ° El mayorde los alimentosdebe set dado vuelta cuando est_ a mitad del tiempo de asar. 'Keep DespuCsde cuatro segundos,el homo comenzar_a funcionar. • 'BROIL'continuar_ iluminado. War ' (Mantener caliente) Paramantenercalientesen forma segura alimentoscalienteso para calentar panesy platos. 'HI' o 'LO' permanecer_niluminados. Para programar 'Keep Warm': 1. Oprima la tecla 'Keep Warm' en el indicador visual. Keep wal'm ° 'WARM' (Caliente)destella en el indicadorvisual. • 'OOO'destellaen el indicadorvisual. 4. Paraun dorado 6ptimo,precalienteel homo durante 2 a 3 minutosantes de colocar el alimento. 2. Seleccionela temperaturade 'KeepWarm'. Oprima la tecla 'Autoset O'o las teclas numCricasapropiadas. 5. Coloqueel alimento en el homo. Cierre la puertadel homo. 0 Autose[ Tabla de asar a la parrilla Precalienteel horno durante 2-3 minutos. Carne de res Biftec,2,5cm (1") 5 5 5o 6 A medic asar Bien asado Bien asado 15 - 20 minutos 18 - 24 minutos 13 - 18 minutos Came de cerdo Tocino JamCn,precocido,rebanadade 1,3em (1/2") Chuletas,2,5cm (1") 5 Bien asado 8 - 10 minutos 5 5 Tibio Bien asado 8 - 12 minutos 22 - 26 minutos Pechugasde polio,con hueso 4 Bien asado Filetesde pescado Tajadasde pescado, 2,5 cm (1") de grosor Colasde langosta,85-115g (3-4 onzas)cada una 5 Hojaldrado 8 - 12 minutos Hojaldrado Bien cocidas 10 - 15 minutos 7 - 10 minutos Hamburguesas,1,9cm (3/4") de grosor Carne de ave Mariscos 30 - 45 minutos('Lo Broil') Paraun exterior m_s dorado y m_sasadoy un interior a medic cocer,puede set necesariodisminuir el tiempo de cocciCnen el primer lado y acercar m_s la came a la fuente de calor. Nota: Estatabla es sCIouna gu[a. Lostiempos puedenvariar con el tipo de alimento que se est_ cocinando. 58 • La funcidn 'BAKE'esla E_nica que se puede utilizarcon el mode sab4tico.Lasdern4sfunciones(temporizador,mantener caliente,autolimpieza,etc.) se bloquear4nduranteel mode sab4tico. • 75° (170°) se iluminar_ cuando se optima la tecla 'Autoset 0' (ProgramaciOn autom_tica]. • Cada vez que optima la tecla 'Autoset 0', la temperatura aumentard en 3° C (5° F). • Se puede programar'Cook & Hold' (Cocci6ny mantener caliente] durante el Mode sab_tico,sin embargono se puede programar'Delay Cook & Hold' (CocciOny mantener caliente diferido). La temperatura de 'Keep Warm' puede ser programada de 63° a 90 ° C (145° a 190° F). 'WARM' y la temperatura se desplegardn en el indicador cuando la funci6n est6 activa. Para cancelar el NIodo sab_tice: 1. Oprima la tecla 'Clock' durante cinco segundos. • 'SAb' destellar_durante cinco segundos. • La hera del dfa reaparecerden el indicadorvisual. O Para cancelar 'Keep Warm': 2. Despuc!sde 72 horas,el mode sab_ticoterminard. 1. Optima la tecla 'CANCEL' [Cancela0. 2. Retireel alimento del homo. • 'SAb' destellar_durante cinco segundos. • La hera del d[a reaparecerden el indicadorvisual. NotaS: NotaS: • Para calidadOptimade losalimentos,los alimentoscocinados en el homo debenser mantenidoscalientesper no rodsde 1 a 2 horas. • El Mode sabdtico puedeser activadoen cualquier memento, est6 o no el homo encendido. • Para evitar qua losalimentosse sequen,c0bralos levemente con papal de aluminioo una tapa. • El Mode sabdtico no se puedeactivar si las teclasest_n bloqueadaso cuando la puertaestd bloqueada. • Para caJentarpanecilles: - cubra levementelos panecilloscon papel de aluminioy colOquelosen el homo. - optima lasteclas 'Keep Warm' y 'Auteset 0'. - caliente durante 12a 15 minutes. • La mayor[ade lasadvertenciasy mensajesy todas las se_alessonoras est4ndesactivadascuando el Mode sab_ticoest_ active. • Si el homo est,1horneandocuando el Mode sab_ticoes programado,'BAKE'se apagardcuandose cancele el horneado. No se emitir_n se_alessonoras. • Para calentar plates: - coloque 2 filas de cuatro plates carlauna en el borne. - optima lasteclas 'Keep Warm' y 'Aateset 0'. - caliente los plates durante cinco minutes,apague el homo y deje los plates en el homo durante 15 minutesm_s. - use solamenteplates resistentesal homo, verifique con el fabricante. - no coloque los plates calientessobreuna superficiefr[a pues el cambio rdpido de temperaturapuede causarfisuras superficialeso rotura. • Mientras el homo est_ en Mode sab_tico la luz del homo se encender_autom4ticamentecuandose abra la puerta. Si se deseala luz del homo durante el Mode sab_tico,datadebeser encendidaantesde qua comienceel Mode sab_tico. • Cuandocomienzael Mode sab_tico, la temperaturaqua se despliegaserd la temperaturaprogramadaen vez de la temperaturareal de la cavidaddel homo. No se emitird la sepalsonorade precalentamiento. • El ciclo de autolimpiezay bloqueo autom_ticode la puerta no funcionar_durante el Mode sab_tico. Cierre autom tico/ NIodo sab tico • Si oprime la tecla 'CANCEL' (Cancela0se cancelar_un ciclo 'bake',sin embargoel control permanecer_en Mode sabdtico. • Si falla la corriente eldctrica,cuando wJelvala energia el homo se activar_en Mode sab_ticocon 72 horasrestantesy ning0n ciclo active. El homo se apagard autom_ticamentedespuOsde 12 horassi usted Io deja accidentalmenteencendido. Estacaracteristicade seguridad puede ser desactivada. Para caneelar el cierre autom_tico de 12 betas y dejar que el homo funciene eontinuamente durante CaBbie de la temperatura 72 betas: de °F/°C 1. Oprimay mantengaoprimida la tecla 'Clock' (Reloj] durantecinco segundos. 1. Elajuste de fdbrica de la medidade temperaturaes Fahrenheit. 2. Paracambiar el ajuste,optima y mantengaoprimidaslas teclas 'CANCEL'y 'Bake' (Horneado)al mismotiempo durante tressegundos. • 'SAb'se desplegar_y destellarddurante cinco segundos. • 'SAb'se desplegar_continuamentehasta qua se desactiveo hastaqua transcurrael Ifmite de 72 horas. 3. Escuchar4una sepalsonoray el ajuste actual (°Fo °C) se desplegar4en la pantalla. [Si no se realizaningOncambio,la estufa regresar_al ajuste actual despuOsde 30 segundos). • 'BAKE'(Horneado)tambiOnse desplegar_si se estd usando un ciclo de horneadocuandoel homo est_ en modesabdtico. 59 4. Paracambiarel ajuste,oprima la tecla 'Autoset O' (Programaci6n autom_tica).Oprimalanuevamentepara regresaral ajuste anterior. Esperecinco segundosy el ajuste se guardar& 1. Programeun ciclo de 'Cook & Hold'come se describe en la secci6n 'Cook& Hold'on la p%ina 57. Ajuste de la temperatura del homo 2. Oprimay mantengaoprimida la tecla 'Favorite' durante tres segundos. Laexactitud de las temperaturasdel horno es cuidadosamente probadaen la f_brica. Esnormal notar alguna diferencia entre la temperaturade horneadoo en el dorado,entreun homo nuevoy un homo antiguo. A medidaque el homo se usa,la temperaturadel homo puedecambiar. • El ciclo 'Cook & Hold' recientementeprogramadoo en progresoser_ guardadoen memoria. • Se oir_ una sepal sonorapara indicarque el control ha aceptadoel ajuste 'Favorite'. Para comenzar un title programado come Favorite: Ustedpuede ajustar la temperaturadel homo, si considera que su homo no est,1horneandoo dorando en forma correcta. Paradecidir cuanto debe cambiar la temperatura,programela temperaturadel homo a 15° C (25° F) m_salta o m_isbaja que la temperatura indicadaen sus recetas,luego hornee. Los resultadosde la "prueba" pueden darle una idea de cuanto debe ajustar la temperatura. Para ajustar la temperatura 1. Oprima la tecla 'Favorite'. • Se desplegar_el tiempo y la temperaturapara el ciclo 'Cook& Hold'programado(si no hay ciclo 'Cook & Hold' programado, en el indicadorvisual se desplegar_i'nonE'.) 2. Oprima la tecla 'Bake' o 'Convect'. • El ciclo Favoritecomenzar_inmediatamente. del homo: • El hombredel ciclo seleccionadose se iluminar_en el indicadorvisual. 1. Oprimala tecla 'Bake' (Horneado). 2. Programe285° C (550° F)oprimiendo lasteclas num6ricasapropiadas. • Eltiempo de cocci6nse iluminar_ en el indicadorvisual. Cuando ha e×pirado el tiempo de cocci6n: 3. Oprimay mantengaoprimida la tecla 'Bake' durantevaries segundoso hastaque 00° aparezcaen el indicadorvisual. • El nombredel ciclo seleccionadose se apagar& Si la temperaturadel homo ha side previamenteajustada,el cambio aparecer_en el indicadorvisual. Per ejemplo,si la temperaturadel homo rue reducidaen 8° C (15° F) el indicador mostrar_i"- 8°" ("-15°"). • Se iluminar_n'HOLD' (Mantener)y 'WARM' (Caliente). • Enel indicadorse desplegar_i'75°, ('170°'). Para cancelar un title favorite en progreso: 1. Oprima la tecla 'CANCEL'. • El ciclo favorite guardado en memoriano ser_afectado. 4. Oprimala tecla 'Autoset O'para ajustar la temperatura. Cadavez que se optima la tecla 'Autoset0', la temperatura cambia en 3° C (5° F). La temperaturadel homo puede ser aumentadao disminuida en 3° a 20° C (5° a 35° F). _ANICFh 2. Retireel alimento del homo. Si oprime la tecla 'Autoset0', la temperaturadel homo pasar_i per un ciclo de aumento de temperatura (5, 10... 35). Si contin0a oprimiendola tecla 'Autoset 0'), la temperaturadel homo pasar_per un ciclo de descensode temperatura (-35, -30...-5). Encendido sin piloto Su estufa est,1equipada con un sistema de encendidosin piloto. Coneste tipo de encendido,el gasse apagaautom_ticamentey el homo no operar# durante una interrupciSn de la corriente eldctrica. 5. La hera del dfa reaparecer_autom_ticamenteen el indicadorvisual. Un f6sforo encendido no encender_ el quemador del homo. No se debe intentar encender eJ homo durante una interrupci6n de la corriente el_ctrica. No necesitareajustarla temperaturadel homo si hayuna falla o interrupci6n de energfael6ctrica. El ajuste de la temperaturaes v_lido para 'Bake' y 'Convect'(Convecci6n)solamente.Las temperaturasde asara la parrilla y de limpiezano pueden set ajustadas. 'Favorite' Para programar un nuevo ciclo Favorite o para guardar come Favorite un ciclo 'Cook & Hold' que este en progreso: Ventilador del homo Se usa un ventilador de convecciOnpara circular el aire caliente en el homo cuando se seleccionala opciOnde convecci6n.Se activa autom_ticamente5 minutesdespu6sde que se oprime la tecla 'Convect'y se apagar_cuandose cancele 'Convect'. (Favorite) La tecla 'Favorite'le permite guardar en memoriael tiempo y la temperaturade un ciclo 'Cook& Hold' (CocciOny mantener caliente). cada que se abra puerta del homo. Nora:vez Elventilador delaconvecci6nse apagar_iautom_iticamente Paraprogramarun ciclo favorite, debe estar activao recientemente programadauna funci6n de 'Cook& Hold'. 6O Respiradero del homo Posiciones de ia parrilla Cuandoel horno est_ en uso, el drea cerca del respiraderopuede calentarseIo suficiente como para causar quemaduras.Nunca bloquee la abertura del respiradero. PARRILLA7 [posici0n m_s alta): Parahornear con una sola parrilla en _! #;_i I1-_, _. _,. --_: 7 6 El respiraderodel homo se encuentra debajo del respaldo protector de su estufa. RESPIRADERO DELHORNO No coloque pl_sticos cerca de la abertura del respiradero pues el calor que sale puede deformar o derretir el pldstico. 'Oven Light' galletasy para asara la _ parrilla. bandejasde PARRILLA6:hornear Se usa para __f hornear con una sola parrilla en bandejasde Horneado porconvecci6n con dos parrillas hornear galletas,para asar 4 3 2 1 sPanel inferior del Homo a la parrilla y para horneado con varias parrillas. PARRiLLA 5: Para hornear con una sola parrilla en bandejas de hornear galletas y para asar a la parrilla. PARRiLLA 4: Se usa para hornear con una sola parrilla en bandejas de hornear galletas, pasteles de una capa, cacerolas, asar a la parrilla y para horneado con varias parrillas. (Luz del homo) La luz del homo se enciendeautomdticamente siempreque se abre la puerta del homo. Cuandose cierra la puerta,oprima la tecla Oven Light (Luzdel homo) para encendero apagar la luz del homo. Se escuchar_una seSalsonoracada vez que se oprima la tecla 'OvenLight'. PARRiLLA 3: Para hornear con una sola parrilla en bandejas de hornear galietas, cacerolas, pasteles de varias capas, barras de pan, pasteles de una capa y para horneado con varias parrillas. Panel inferior del homo PARRILLA1: Se usa para asarcortes de came grandesy came PARRiLLA 2: Se usa para hornear con una sola parrilla en bandejas de hornear galletas, para asar cortes de came peque_os y para horneado con varias parrilias. de ave. Protejael panel inferior del horno contra derrames,especiahnente azucaradoso ac[dicos,puespueden descolorarla porcelana esmaltada.Use el utensilio de tama_o correcto a fin de evitar derrames.No coloque utensiiiosni papel de aiuminio directamente en la parte inferior del homo. Panel inferior del Homo: Coloque la parrilla del homo en los soportes en relieve del panel inferior del homo. Use para disponer de espacio adicional cuando cocine comidas grandes en el homo. Parrillas del homo HORNEADOCON PARRILLASMULTIPLES: Use Ins posiciones 3y6o2y4. Nora: Cuandose hornea por convecci0ncon dos parrillas, revise los alimentosen el tiempo m[nimosugerido para evitar que I queden demasiadodoradoso demasiadococinados. Horneado de pasteles de capas en dos parrillas El homo tiene dos parrillas. Todas Insparrillastienen un borde con tope de enganche. Paraobtener mejoresresultadoscuando horneapastelesen dos parrillas, use la posici6n 2 y 4 para horneado regulary la posiciOn3 y 6 para horneadopor convecci0n(modelosselectos). Para retirar la parrilla: 1. Tire de la parrilla derecho hacia afuera hasta que se detengaen la posici6ndel tope de enganche. Coloquelos pastelesen lasparrillas como se muestra. 2. Levanteel frente de la parrilla y tire de la parrilla haciaafuera. Para reinstalar la parrilla: 1. Coloquela parrilla en los soportesde la parrilla en el homo. 2. Incline levementehacia arriba el extremodelantero;deslice la parrilla hacia atrds hastaque pasosobre los topes de enganche. 3. Bajeel frente de la parrilla y deslicelahaciaadentro del homo. No cubra una parrilla completa con papel de aluminio ni coloque papel de aluminio en el panel inferior del homo. Se afectar_n los resultadosdel horneado y se puede dafiar el panel inferior del homo. 61 62 GARANT|A DE LOS ELECTRODOlVll STICOS PRINCIPALES DE IViAYTAG CORPORATION GA_NTJA LIMITADA DE UN Al_O Durante un aho a partir de la fecha de compra,siempre y cuando se d6 a este electrodomOsticoprincipal un uso y mantenimientode conformidadcon las instruccionesadjuntaso provistascon el producto,Maytag Corporationo Maytag Limited [en Io sucesivodenominado "Maytag"] se har_icargodel costo de las piezasespecificadasde f4brica y del trabajo de reparaci6npara corregir defectosen los materialeso en la manode obra. Elservicio deber_ser suministradopot una compa_iade serviciodesignadapot Maytag.Estagarant[a limitada se aplica sOlocuandoel electrodomc!sticoprincipal se use en el palsen donde se compr6. IVlAYTAG NO PAGARA POR LOS SIGUIENTES ARTJCULOS 1. Visitasde serviciotOcnicopara corregir la instalaci6nde su electrodom_sticoprincipal, para ense_arlea usar su electrodomOstico principal, para cambiar o reparar fusiblesdomOsticoso para corregir la instalaci6nelc!ctricao de la tuber[a de la casa. 2. Visitasde serviciotc!cnicopara reparar o reemplazarfocos para electrodomc!sticos, filtros de aire o filtros de agua.Esosinsumosest_n excluidosde la coberturade la garantia. 3. Reparacionescuandosu electrodom(!sticoprincipal seuse de un modo diferente al domOsticonormalde una familia. 4. Dahoscausadospot accidente,alteraci6n,uso indebido,abuso, incendio,inundaciOn,actos fortuitos, instalaci6nincorrecta, instalaci6n que no est6 de acuerdocon losc6digos elOctricoso de plomeria,o el empleode productosno aprobadospor Maytag. 5. Cualquierp(!rdidade comida debido a fallas del refrigeradoro del congelador. 6. Piezasde repuestoo gastosde reparaci6npara electrodomc!sticosque se empleenfuera de los EstadosUnidoso Canad& 7. Recogiday entrega. Esteelectrodom(!sticoprincipal est_ dise_adopara ser reparadoen el hogar. 8. Reparacionesde piezaso sistemascomo resultado de modificacionesno autorizadasque se hayanefectuadoen el electrodomOstico. 9. Gastosde viajey transportepara obtenerservicio del producto en lugaresremotos. 10. La remociOne instalaciOnde su electrodomc!sticosi estuvierainstalado en un lugar inaccesibleo si no estuvierainstaladode conformidadcon las instruccionesde instalaci6npublicadas. 11. Piezasde repuestoo gastosde reparaci6ncuando el electrodomOsticoprincipal se useen un pais diferente del pais en donde se compr6. EXCLUSION DE GARANTJAS llVlPLJCITAS LIMITACIONDE RECURSOSEL ONICOY EXCLUSIVORECURSO DELCLIENTESEGONLOSTERMINOSDEESTAGARANTiALIMITADASERA EL DEREPARAREL PRODUCTOSEGONSE ESTIPULAENLA PRESENTE. LAS GARANTiASIMPLiClTAS,INCLUYENDOLASGARANTiASDE COMERCIABILIDAD 0 DECAPACIDADPARAUN PROPOSITO PARTICULAR, SERANLIMITADASA UN ANO 0 AL PERIODOMAS CORTO PERMITIDOPORLEY.MAYTAGNOSE RESPONSABILIZARA PORDANOSINClDENTALES0 CONSECUENTES. ALGUNOSESTADOSY PROVINClASNO PERMITENLASEXCLUSIONES 0 LIMITACIONESPORDANOSINCIDENTALES 0 CONSECUENTES, 0 LIMITACIONES ACERCADECUANTODEBEDURARUNA GARANTiAIMPLiCITADECOMERClABILIDAD0 CAPACIDAD,DEMODO QUELAS LIMITAClONES 0 EXCLUSIONES ARRIBAMENCIONADASPUEDENNO APLICARSEENSU CASO.ESTAGARANTiALE OTORGADERECHOSLEGALES ESPEClFICOS Y ESPOSIBLEQUEUSTEDTENGATAMBIENOTROSDERECHOS QUEPUEDENVARIARDE UN ESTADOA OTRO0 DEUNA PROVlNCIAA OTRA. Estagarant[a no tiene vigor fuera de los cincuenta EstadosUnidosy Canad&POngaseen contacto con el distribuidor autorizadode Maytag para determinar si correspondeotra garant[a. Si necesitaservicio,consulteprimero la secci6n "Solucidndepmblemas"del Manual de usoy cuidado. DespuOsde consultarla secciOn "Solucidndeproblemas',puede encontrar ayudaadicionalen la secci6n "Ayudao serviciot4cnico",o Ilamandoa Maytag. En EE.UU.,Ilame al 1=800=688=9900.En Canad&Ilameal 1=800=688=2002. ®Registered Part No, 8113P666 60 © 2006 All rights reserved. Todos los derechos reservados. Tous droits r_serv_s. Trademark/TM Trademark of Maytag Corporation or its related companies. Used under license by Maytag Limited in Canada ®Marca registrada/Tr'4Marca de comercio de Maytag Corporation o sus compaiiias asociadas. Usada bajo licencia por Maytag Limited en Canada ®Marque depos_e/Tr'4Marque de commerce de Maytag Corporation ou de ses compagnies affili_es. Utilise sous licence par Maytag Limited au Canada 11/06 Printed in U.S.A. Impreso en EE_UU. Imprim_ aux E.-U.-
 1
1
-
 2
2
-
 3
3
-
 4
4
-
 5
5
-
 6
6
-
 7
7
-
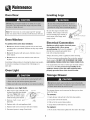 8
8
-
 9
9
-
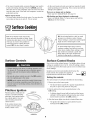 10
10
-
 11
11
-
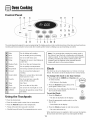 12
12
-
 13
13
-
 14
14
-
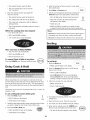 15
15
-
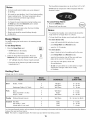 16
16
-
 17
17
-
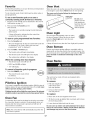 18
18
-
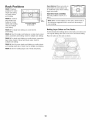 19
19
-
 20
20
-
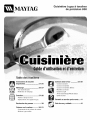 21
21
-
 22
22
-
 23
23
-
 24
24
-
 25
25
-
 26
26
-
 27
27
-
 28
28
-
 29
29
-
 30
30
-
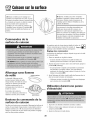 31
31
-
 32
32
-
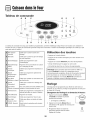 33
33
-
 34
34
-
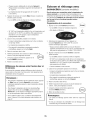 35
35
-
 36
36
-
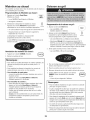 37
37
-
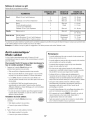 38
38
-
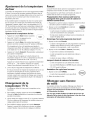 39
39
-
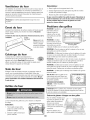 40
40
-
 41
41
-
 42
42
-
 43
43
-
 44
44
-
 45
45
-
 46
46
-
 47
47
-
 48
48
-
 49
49
-
 50
50
-
 51
51
-
 52
52
-
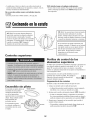 53
53
-
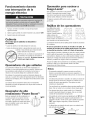 54
54
-
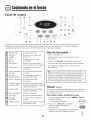 55
55
-
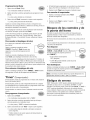 56
56
-
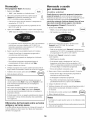 57
57
-
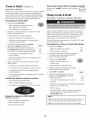 58
58
-
 59
59
-
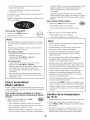 60
60
-
 61
61
-
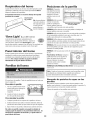 62
62
-
 63
63
-
 64
64


en otros idiomas
- français: Maytag 8113P666-60 Manuel utilisateur
- English: Maytag 8113P666-60 User manual
Artículos relacionados
-
Maytag MGR5765QDQ32 El manual del propietario
-
Maytag MGR5875QDW1 Manual de usuario
-
Maytag MGRH865QDW1 El manual del propietario
-
Magic Chef CG31600ADV Manual de usuario
-
-
-
-
-
Magic Chef MLR1415AJW User's guide El manual del propietario
-