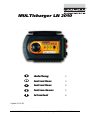
MULTIPLEX LN-2010 El manual del propietario
- Categoría
- Cargadores de bateria
- Tipo
- El manual del propietario
Este manual también es adecuado para

© MULTIPLEX Modellsport GmbH & Co. KG Neuer Weg 2 D-75223 Niefern GERMANY
MULTIcharger LN 2010
Anleitung 2
Instructions 3
Instructions 4
Instrucciones 5
Istruzioni 6
Update 31.05.05

Bedienungsanleitung MULTIcharger LN-2010
2523 MULTIcharger LN-2010 (04-01-21)
! Diese Bedienungsanleitung ist Bestandteil des Produktes. Sie
beinhaltet wichtige Informationen und Sicherheitshinweise. Sie
ist deshalb jederzeit griffbereit aufzubewahren und beim
Verkauf des Produktes an Dritte weiterzugeben.
1. TECHNISCHE DATEN
MULTIcharger LN-2010 Best.Nr. # 9 2523
Betriebsspannung 12 V DC (=) (11 ... 15 V)
Stromaufnahme max. 3 A
Ausgang
1 ... 4 Zellen Li-Ion/Polymer
1 ... 10 Zellen NiCd / NiMH
Ladestrom 200 mA ... 2 A einstellbar
1 ... 4 Zellen Li-Ion/Polymer 2A
Max. Ladestrom
1 ... 10 Zellen NiCd / NiMH 2A
Max. Ladeleistung 30 W
Abmessungen / Gewicht ca. 135 x 102 x 40 mm / ca. 250 g
2. CE-KONFORMITÄTSERKLÄRUNG
Die Firma MULTIPLEX Modellsport GmbH & Co.KG erklärt für das
Ladegerät MULTIcharger LN-2010 die Übereinstimmung mit
folgenden harmonisierten Richtlinien der EU:
EN 50081, EN 50082, EN 55014, EN 55022
3. BESONDERE EIGENSCHAFTEN
• Microcontroller gesteuertes 12 V Automatik-Schnellladegerät
für 1 ... 4 Zellen Li-Ion/Polymer, 1 ... 10 Zellen NiCd / NiMH
• Ladestrom von 200 mA — 2 A stufenlos einstellbar
• Geeignet für Akkupacks mit 1 ... 4 Lithium-Ion/-Polymer-
Zellen (automatische Zellenanzahl-Erkennung und Lade-
Abschaltung bei Voll-Erkennung)
• Automatische Abschaltung durch
− ∆V(Delta-Peak)-Abschaltung mit zusätzlichem
Sicherheitstimer bei NiCd / NiMH-Zellen
• Umschaltung auf Erhaltungsladung nach Ladeende
• LED-Monitor zur Betriebsanzeige und akustisches Signal
(Piepser) bei Ladeende und Fehlbedienung
• Kurzschluss- und Verpolschutz (Eingang und
Ausgang)
• Kompakte Abmessungen, geringes Gewicht
4. SICHERHEITSHINWEISE
! Vor Inbetriebnahme Anleitung lesen
! Gerät nicht öffnen, keine technischen Änderungen
vornehmen
! Ausschließlich schnellladefähige Li-Ion/Polymer, NiCd- oder
NiMH-Akkus laden
! Ladehinweise des Akkuherstellers beachten
(insbesondere bei Li-Ion/-Polymer-Akkus !)
! Nur Zellen gleichen Typs/Kapazität im Batterieverbund
(Akku-Pack) laden
! Nicht zwei Akku-Packs gleichzeitig laden
! Keine Akkus laden, die stark erwärmt sind,
zuerst auf Umgebungstemperatur abkühlen lassen
! Ladegerät und Akku nicht verpolt anschließen
! Ladegerät im Betrieb nicht unbeaufsichtigt lassen
! Ladegerät kann sehr warm werden. Vorsicht bei Berührung
⇒ Gerät nicht abdecken, für ausreichende Kühlung sorgen
⇒ Gerät nicht direkter Sonnenstrahlung aussetzen
! Ladegerät, Akku und Zuleitungen von brennbaren oder
temperaturempfindlichen Gegenständen fern halten
! Ladegerät vor Feuchtigkeit schützen
5. INBETRIEBNAHME
Das Ladegerät mit Krokodilklemmen an die Autobatterie anschließen:
rote Krokodilklemme → „+“-Pol
schwarze Krokodilklemme → „—“-Pol
Die rote LED „Laden/CHG“ leuchtet und signalisiert die
Betriebsbereitschaft des Ladegerätes.
6. LADEN
Akku anschließen
Den Akku an die entsprechenden „OUTPUT“ Buchsen für NiCd /
NiMH-Akkus oder Li-Ion/Polymer-Akkus anschließen (passende
Ladekabel mit Bananenstecker s. MULTIPLEX Hauptkatalog).
Mit dem „Batt.Type“-Taster den entsprechenden Akku-Typ
auswählen. Die rote LED „Li-Ion“ bzw. orange farbene LED „NiCd /
NiMH“ zeigt das entsprechende Ladeverfahren an.
! Kurzschlüsse des Akkus vermeiden. Auf korrekten Anschluss
achten, Akku nicht verpolt anschließen:
„+“-Pol des Akkus → rotes Kabel (+)
„—“-Pol des Akkus → schwarzes Kabel (—)
Ladestrom einstellen
Der Ladestrom ist stufenlos einstellbar von 0,2A — 2A
! Ladehinweise des Akkuherstellers beachten
Sind keine Angaben des Akkuherstellers vorhanden:
NiCd-Akku:
0,5 ... 2 C
NiMH-Akku:
0,5 ... 1 C
Li-Ion/Polymer:
0,5 ... 1 C
Bsp. Ladestrom für NiMH-Akku mit 600 mAh Kapazität:
600 mAh x 0,5 C ... 1 C = 300 mA ... 600 mA
! Hinweis: Keine tiefenentladene (<3V/Zelle) Li-Ion/Polymer
Akkus an das Ladegerät anschließen.
Der Schnellladevorgang
Mit dem Drücken der „START/STOP“—Taste beginnt der
Schnellladevorgang mit dem eingestellten Strom.
Während des Ladevorgangs leuchtet je nach eingestelltem Akku-Typ
bzw. Ladeverfahren die entsprechende LED.
Die Ladezeit ist aus Sicherheitsgründen auf 6 Stunden begrenzt
(Sicherheitstimer). Dann wird die Schnellladung unterbrochen und
der Lader geht auf Erhaltungsladung über.
Die Ladung kann jederzeit durch Drücken der „START/STOP“—Taste
unterbrochen werden.
Eine gewisse Erwärmung des Akkus beim Laden ist normal (bis ca.
50°C). Bei höheren Temperaturen den Akku vom Ladegerät trennen.
Eventuell ist der Akku nicht schnellladefähig oder der Ladestrom ist
zu hoch eingestellt. Ladevorgang nach Abkühlung des Akkus auf
Umgebungstemperatur mit kleinerem Ladestrom erneut starten.
Ladeende
Das Ende der Ladung wird durch kurzzeitiges Piepsen angezeigt. Die
„Voll“-LED leuchtet.
Erhaltungsladung
Nach Ladeende wechselt das Ladegerät automatisch auf
Erhaltungsladung.
7. ERROR MODE
Bei folgenden Fehlern geht der Lader in den Error-Mode (Fehler-
Anzeige: Alle drei LED´s blinken gleichzeitig plus Piepton):
1. Über- bzw. Unterschreitung des zulässigen Betriebsspannungs-
bereiches (11 ... 15 V)
2. Taste START/STOP drücken ohne angeschlossenen Akku
3. abtrennen des Akkus während des Ladevorgangs
4. Akku verpolt angeschlossen
5. Akku-Kurzschluss
6. Akkuspannung über 18 V (z.B. wenn Akkus mit sehr hohem
Innenwiderstand angeschlossen sind oder Defekt einer Akkuzelle
vorliegt)
MULTIPLEX Modellsport GmbH & Co.KG • Neuer Weg 2 • D-75223 Niefern-Öschelbronn • www.multiplex-rc.de
Anleitung # 9
Die Fehlerursache muss dann abgestellt werden. Durch
anschließendes Drücken der START/STOP—Taste geht der Lader
wieder in Betriebsbereitschaft.

MULTIcharger LN-2010 Operating Instructions
ULTIcharger LN-2010 instructions (04-01-21)
! These operating instructions are an integral part of this
product. They contain important information and safety notes,
and should therefore be kept in a safe place at all times. Be sure
to pass them on to the new owner if you ever dispose of the
product
1. SPECIFICATION
MULTIcharger LN-2010 Order No. # 9 2523
Operating voltage 12 V DC (=) (11 ... 15 V)
Max. current drain 3 A
Output
1 ... 4 Li-Ion / Li-Polymer cells
1 ... 10 NiCd / NiMH cells
Charge current 200 mA ... 2 A, variable
1 ... 4 Li-Ion / Li-Polymer cells 2A
Max. charge current
1 ... 10 NiCd / NiMH cells 2A
Max. charge power 30 W
Dimensions / weight approx. 135 x 102 x 40 mm / 250 g
2. CE CONFORMITY DECLARATION
MULTIPLEX Modellsport GmbH & Co. KG declares that the MULTI-
charger LN-2010 conforms with the following harmonised EU
directives:
EN 50081, EN 50082, EN 55014, EN 55022
3. SPECIAL FEATURES
• Micro-controller controlled 12 V automatic fast charger
for 1 ... 4 Li-Ion/Li-Polymer cells and 1 ... 10 NiCd / NiMH cells
• Charge current 200 mA — 2 A, infinitely variable
• Suitable for batteries consisting of 1 ... 4 Lithium-Ion /
Lithium-Polymer cells (automatic cell count detection and
charge termination when pack is full)
• Automatic charge termination for NiCd / NiMH cells using
− ∆V (Delta-Peak) method with additional safety timer
• Switches to trickle charge at termination of charge
• LED monitor indicates charger function, audible beeper
sounds at end of charge; also indicates operating errors
• Short-circuit and reverse polarity protection
(input and output)
• Compact dimensions, light weight
4. SAFETY NOTES
! Read the instructions before using the charger for the
first time
! Do not open the case, and do not modify the unit in any way
! Use the charger exclusively to recharge rapid-charge capable
Li-Ion / Li-Polymer, NiCd or NiMH batteries
! Observe the battery manufacturer’s charging instructions
(especially with Li-Ion and Li-Polymer batteries !)
! Use the charger only to recharge packs consisting of cells of
the same type and capacity
! Do not attempt to charge two battery packs simultaneously
! Do not recharge packs which are hot to the touch; allow them
to cool down to ambient temperature first
! Do not connect charger and battery with reverse polarity
! Do not leave the charger operating unsupervised
! The charger may become hot when operating - take care when
touching the unit
⇒ Do not cover the charger; provide adequate cooling
⇒ Do not subject the charger to direct sunshine
! Keep the charger, battery and cables well away from
flammable or temperature-sensitive objects
! Protect the charger from damp
5. USING THE CHARGER FOR THE FIRST TIME
Connect the charger to the car battery using the crocodile clips:
red crocodile clip → “+” terminal
black crocodile clip → “—” terminal
The red LED marked “Laden/CHG” lights up to indicate that the
charger is ready for use.
6. CHARGING
Connecting the battery
Connect the battery to the appropriate “OUTPUT” sockets for NiCd /
NiMH batteries or Li-Ion / Li-Polymer batteries (see main MULTIPLEX
catalogue for suitable charge leads terminating in banana plugs).
Select the appropriate battery type using the “Batt. Type” button. The
red LED marked “Li-Ion” or the orange LED marked “NiCd / NiMH”
glows to indicate the selected charge process.
! Avoid short-circuiting the battery. Take care to make all
connections correctly; avoid reversed polarity:
“+” battery terminal → red wire (+)
“—” battery terminal → black wire (—)
Set charge current
The charge current is infinitely variable within the range 0.2A - 2A.
! Observe the battery manufacturer’s charging instructions.
If the battery manufacturer’s information is not available:
NiCd battery:
0.5 ... 2 C
NiMH battery:
0.5 ... 1 C
Li-Ion / Li-Polymer:
0.5 ... 1 C
Example: charge current for NiMH battery of 600 mAh capacity:
600 mAh x 0.5 C ... 1 C = 300 mA ... 600 mA
! Note: do not connect Li-Ion / Li-Polymer batteries to the
charger if they are deeply discharged (<3V / cell).
Fast-charging
Press the START/STOP button to initiate the fast-charge process at the
set current.
During charging the appropriate LED glows to confirm the battery
type.
For safety reasons the charge period is limited to 6 hours (safety
timer). After this period the fast-charge process is interrupted and the
unit switches to a trickle charge current.
The charge process can be interrupted at any time by pressing the
START/STOP button.
It is normal for batteries to become quite warm (up to about 50°C)
during charging. If the pack gets hotter than this, disconnect it from
the charger immediately. It may be that the battery is not fast-charge
capable, or that an excessive charge current is set. Allow the pack to
cool down to ambient temperature and re-start the process at a lower
charge current.
Charge termination
The charger beeps briefly to indicate the end of the charge process.
The “Full” LED also lights up at this time.
Trickle charge
At the end of the charge process the unit automatically switches to a
trickle charge current.
7. ERROR MODE
If any of the following errors occurs, the charger switches to Error
Mode (error indicator: all three LEDs flash simultaneously, beeper
sounds):
1. Operating voltage above or below the permissible range
(11...15V)
2. START/STOP button pressed with no battery connected to output
3. Battery disconnected during charge process
4. Battery connected with reverse polarity
5. Battery short-circuit
MULTIPLEX Modellsport GmbH & Co.KG • Neuer Weg 2 • D-75223 Niefern-Öschelbronn • www.multiplex-rc.de
# 9 2523 M
6. Battery voltage above 18 V (e.g. if a pack with very high internal
resistance is connected, or if the pack is faulty or contains a bad
cell)
Establish the cause of the error before continuing. Press the START/
STOP button to restore the charger to Ready mode.

Instructions d’utilisations MULTIcharger LN-2010
s # 9 2523 MULTIcharger LN-2010 (04-01-21)
! Ces instructions font partie intégrante du produit. Celle-ci
contient des informations importantes ainsi que des consignes de
sécurités. Elle doit donc être consultable à tous moments et à joindre
lors d’une revente à tierce personne.
1. D
ONNEES TECHNIQUES
MULTIcharger LN-2010 Nr. Com. # 9 2523
Tension d’alimentation 12 V DC (=) (11 ... 15 V)
Consommation max. de
courant
3 A
Sortie
1 ... 4 éléments Li-Ion/Polymère
1 ... 10 éléments NiCd / NiMH
Courant de charge 200 mA ... 2 A réglable
1 ... 4 éléments Li-Ion/Polymère 2A
Courant max. de charge
1 ... 10 éléments NiCd / NiMH 2A
Puissance max. de charge 30 W
Dimensions / Poids env. 135 x 102 x 40 mm / env. 250 g
2. DECLARATION DE CONFORMITEE CE
La société MULTIPLEX Modellsport GmbH & Co.KG déclare par ce
document que le chargeur MULTIcharger LN-2010 est conforme et en
harmonie avec les directives de la communauté européenne:
EN 50081, EN 50082, EN 55014, EN 55022
3. PROPRIETES PARTICULIERES
• Chargeur automatique rapide 12 V piloté par microprocesseur
pour 1 ... 4 éléments Li-Ion/Polymère et
1 ... 10 éléments NiCd / NiMH
• Courant de charge de 200 mA à 2 A réglable linéairement
• Idéal pour des packs d’accus avec 1 ... 4 éléments Lithium-Ion/-
Polymère (reconnaissance automatique du nombre d’éléments et
coupure automatique de la charge par détection de pleine
charge)
• Coupure automatique de charge par détection de
− ∆V(Delta-Peak) avec chrono de sécurité supplémentaire pour
les éléments NiCd / NiMH
• Passage en mode charge de maintien en fin de charge
• Affichage des indications de fonctionnements par LED et signal
sonore (tweeter) pour indiquer la fin de charge ou les erreurs de
manipulations
• Protection contre les inversions de polarité (entrée et sortie) et
les courts-circuits
• Dimensions compactes, et faible poids
4.
CONSIGNES DE SECURITES
! Lire attentivement les instructions avant utilisation
! Ne pas ouvrir l’appareil, n’effectuer aucune modification
technique.
! Brancher uniquement des accus Li-Ion/Polymère, NiCd ou NiMH
supportant la charge rapide.
! Respecter les instructions de charge des fabricants d’accus
(surtout pour les accus Li-Ion/-Polymère !).
! Charger uniquement des éléments de même type/capacité
constituant le pack d’accu.
! Ne chargez pas deux packs d’accu en même temps.
! Ne chargez pas de packs d’accus chauds, Le laisser d’abord
revenir à température ambiante.
! N’inversez pas la polarité du pack d’accu ou du chargeur.
! Ne laissez pas le chargeur sans surveillance lors de son utilisation.
! Le chargeur peut chauffer beaucoup. Attention lors de sa
manipulation.
⇒ Ne jamais couvrir le chargeur, veillez à assurer une bonne
ventilation.
⇒ Ne jamais exposer l’appareil directement au soleil.
! Laissez le chargeur, les accus et les câbles à bonne distance de
produits inflammables ou sensibles à la température.
! Protégez le chargeur contre l’humidité.
5. M
ISE EN MARCHE
Branchez le chargeur sur la batterie du véhicule à l’aide des pinces
crocodiles:
Pince crocodile rouge → borne „+“
Pince crocodile noire → borne „—“
La LED rouge „charge/CHG“ éclaire et signal que l’appareil est près.
6. CHARGE
Branchez l’accu
Branchez l’accu aux prises de sorties „OUTPUT“ correspondants au type
d’accu NiCd / NiMH ou Ion/Polymère que vous voulez charger (voir le
catalogue principal MULTIPLEX pour le câble adapté avec prises bananes).
Sélectionnez le type d’accu à charger à l’aide de la touche „Batt.Type“. La
LED rouge pour „Li-Ion“ ou orange pour „NiCd / NiMH“ vous indique le
processus de charge sélectionné.
! Evitez tout court-circuit de l’accu, et vérifiez que celui-ci soit
correctement branché. Ne pas inverser la polarité de l’accu:
Pole „+“ de l’accu → câble rouge (+)
Pole „—“ de l’accu → câble noir (—)
Réglage du courant de charge
Le courant de charge est réglable linéairement de 0,2A à 2A
! Respectez les instructions de charge
Si vous ne possédez aucunes indications de charge du constructeur de
votre accu, respectez:
Accu NiCd:
0,5 ... 2 C
Accu NiMH:
0,5 ... 1 C
Li-Ion/Polymère:
0,5 ... 1 C
Par ex. : courant de charge pour un accu NiMH avec une capacité de 600
mAh:
600 mAh x 0,5 C ... 1 C = 300 mA ... 600 mA
! Remarque: ne branchez pas d’accus attestant une décharge sous
le seuil normal (<3V/élément) pour des éléments Li-Ion/Polymère.
Le processus de charge rapide
En appuyant sur la touche „START/STOP“, la charge rapide débutera avec
le courant programmé.
La LED correspondante au type d’accu ou de charge sélectionné éclairera
pendant le processus de charge.
Pour des raisons de sécurité, le temps maximal de charge est limité à 6
heures (chrono de sécurité). Après ce temps, la charge rapide est
interrompue et le chargeur passe en mode charge de maintien.
Vous pouvez interrompre à tout moment le processus de charge en
appuyant sur la touche „START/STOP“.
Un échauffement de l’accu lors de la charge est normal (jusqu’à env.
50°C). Pour des températures plus élevées il faut débrancher l’accu du
chargeur. Il est possible que l’accu ne support pas la charge rapide ou que
le courant de charge soit trop important. Réitérer la charge après que
l’accu ait repris une température normale mais en choisissant un courant
de charge inférieur.
Fin de charge
La fin de charge est signalée par un court signal sonore. La LED „Plein“
éclaire.
Charge de maintien
Après la fin de la charge, le chargeur passe automatiquement en mode
charge de maintien.
7. MODE ERREUR
Pour les erreurs suivants, le chargeur passe en mode erreur (Indication
d’erreur: les trois LED clignotent simultanément et un signal sonore se fait
entendre):
1. Tension d’alimentation de l’appareil supérieure ou inférieure à la
limite d’alimentation (11 ... 15 V)
2. Utilisation de la touche START/STOP sans accu de branché
3. Débranchement de l’accu lors du processus de charge
4. Accu branché avec inversion de polarité
5. Court-circuit de l’accu
6. Tension d’accu au-dessus de 18 V (par ex. : lorsque des accus avec des
éléments de très forte résistance interne ou défectueux sont
branchés)
MULTIPLEX Modellsport GmbH & Co.KG • Neuer Weg 2 • D-75223 Niefern-Öschelbronn • www.multiplex-rc.de
Instruction
Il faut tout d’abord éliminer la cause du défaut. En appuyant sur la touche
START/STOP l’appareil est à nouveau près à l’emploi.

Instrucciones MULTIcharger LN-2010
2523 MULTIcharger LN-2010 (04-01-21)
! Este manual de instrucciones es parte del producto. En él se
incluye información importante, así como consejos de seguridad.
Por este motivo se ha de tener en todo momento a mano e
incluirlo en caso de venta del producto a terceros.
1. DATOS TÉCNICOS
MULTIcharger LN-2010 Nº de pedido. # 9 2523
Tensión de funcionamiento 12 V DC (=) (11 ... 15 V)
Toma de corriente máx. 3 A
Salida
1 ... 4 células iones de polímeros de litio
1 ... 10 células NiCd / NiMH
Corriente de carga 200 mA ... 2 A ajustable
1 ... 4 células polímero de litio 2A
Corriente de carga máx.
1 ... 10 células NiCd / NiMH 2A
Capacidad de carga máx. 30 W
Medidas / Peso unos 135 x 102 x 40 mm / unos 250 g
2. DECLARACIÓN DE CONFORMIDAD DE LA CE
La empresa MULTIPLEX Modellsport GmbH & Co.KG declara para el
cargador MULTIcharger LN-2010 DC la coincidencia con las siguientes
y directrices armonizadas de la UE:
EN 50081, EN 50082, EN 55014, EN 55022
3. CARACTERÍSTICAS ESPECIALES
• Dispositivo automático de carga rápida de 12 V por un
microcontrolador para 1 ... 4 células iones de polímeros de
litio, 1 ... 10 células NiCd / NiMH
• Corriente de carga desde 200 mA — 2 A linealmente ajustable
• Indicado para paquetes de baterías con 1 ... 4 células de iones
de polímeros de litio (detección automática del número de
células y desconexión automática en caso completo)
• Desconexión automática mediante − ∆V desconexión
(Delta-Peak) con temporizador de seguridad adicional en
caso de células de NiCd / NiMH
• Inversión de polarización a conservación de carga al finalizar
• Monitor LED para la indicación de funcionamiento y señal
acústica (pitido) al finalizar la carga y error
• Protección de cortocircuito y error de polarización
(entrada y
salida)
• Medidas compactas, bajo peso
4. CONSEJOS DE SEGURIDAD
! Leer las instrucciones antes de la puesta en funcionamiento
! No abrir el dispositivo, no realizar modificaciones técnicas
! Cargar exclusivamente baterías de iones de polímeros de litio,
NiCd o NiMH de carga rápida
! Respetar los consejos del fabricante de las baterías
(¡especialmente los de las baterías de iones de polímeros de
litio!)
! Cargar solo células del mismo tipo/capacidad en conexión con
la batería (paquete de baterías)
! No cargar dos baterías al mismo tiempo
! No cargar baterías que estén muy calientes
Primero dejar enfriar hasta temperatura ambiente
! No conectar el cargador a la batería con la polaridad invertida
! Vigilar siempre el cargador durante su funcionamiento
! El cargador se puede calentar mucho. Cuidado al tocar
⇒ No cubrir el dispositivo, proporcionar suficiente ventilación
⇒ No exponer el dispositivo directamente al sol
! Mantener el cargador, la batería y los cables alejados de
material inflamable o sensibles a la temperatura
! Proteger el cargador de humedad
5. PUESTA EN FUNCIONAMIENTO
Conectar el cargador con pinzas de cocodrilo a la batería del coche:
Pinza de cocodrilo roja → polo “+“
Pinza de cocodrilo negra → polo “—“
Las LEDs roja y verde se iluminan intermitentemente y señalizan la
disponibilidad de funcionamiento del dispositivo
6. CARGA
Conectar la batería
Conectar la batería en el correspondiente casquillo „OUTPUT“ para
baterías e NiCd / NiMH o de iones de polímeros de litio (ver catálogo
principal de MULTIPLEX para cables de carga y conectores
adecuados).
Con la tecla „Batt.Type“ seleccionar el correspondiente tipo de
batería.. La LED roja „Li-Ion“, o bien, la LED color naranja „NiCd /
NiMH“ indica el correspondiente proceso de carga..
! Evitar cortocircuitos de la batería. Fijarse en la correcta
conexión, no conectar con la polaridad invertida:
Polo “+“ de la batería → cable rojo (+)
Polo “— “ de la batería → cable negro (—)
Ajustar la corriente de carga
La corriente de carga se puede ajustar de forma lineal desde 0,2A—2A
! Prestar atención a los consejos de carga del fabricante
En caso de que no haya indicaciones de carga del fabricante:
Batería NiCd:
0,5 ... 2 C
Batería NiMH:
0,5 ... 1 C
Ion-poli. de litio:
0,5 ... 1 C
Ej. Corriente de carga para baterías de NiMH con capacidad de 600
mAh: 600 mAh x 0,5 C ... 1 C = 300 mA ... 600 mA
! Advertencia: No conectar baterías de iones de polímeros de
litio de descarga máxima (<3V/célula) al cargador.
El proceso de carga rápida
Al pulsar la tecla de START/STOP comienza el proceso de carga rápida
con la corriente ajustada. Durante el proceso de carga se ilumina,
dependiendo del tipo de batería seleccionada, la LED verde (NiCd) o
la roja (NiMH). El tiempo de carga se ha limitado a 6 horas por
motivos de seguridad (temporizador de seguridad). La carga rápida
se interrumpirá y el cargador pasa a la carga de conservación. La
carga se puede interrumpir en cualquier momento pulsando la tecla
START/STOP. Es normal que se produzca un cierto calentamiento de
las baterías durante su carga (hasta unos 50°C). En caso de que se
detecten temperaturas más altas, retirar la batería del cargador.
Eventualmente, la batería puede no ser apta para una carga rápida o
la corriente de carga es demasiado alta. Renovar el proceso de carga
con corriente de carga más baja después de haber dejado enfriar la
batería hasta temperatura ambiente.
Final de la carga
El final de la carga se indica con un corto pitido. La LED „Llena“ se
ilumina.
Conservación de la carga
Una vez finalizada la carga, el dispositivo cambia automáticamente a
una carga de conservación.
7. MODO ERROR
En el caso de los siguientes errores, el cargador pasa al modo de error
(indicación de error: las tres LEDs parpadean simultáneamente y
emiten un pitido):
1. Sobrepasar o no llegar al umbral de corriente de funcionamiento
permitido (11 ... 15 V)
2. Pulsar la tecla START/STOP sin estar la batería conectada
3. Retirar la batería durante en proceso de carga
4. Conectar la batería con la polaridad invertida
5. Cortocircuito de la batería
MULTIPLEX Modellsport GmbH & Co.KG • Neuer Weg 2 • D-75223 Niefern-Öschelbronn • www.multiplex-rc.de
Anleitung # 9
6. Tensión de la batería por encima de los 18 V (ej.: cuando las
baterías están conectadas con una resistencia interior muy alta o
exista un defecto con una célula de la batería).
El motivo de error tiene que ser solventado. Al pulsar la tecla de
START/STOP, el cargador vuelve a estar listo para funcionar de nuevo.

Istruzioni d’uso MULTIcharger LN-2010
2523 MULTIcharger LN-2010 (04-01-21)
! Queste istruzioni sono parte integrante del prodotto e
contengono informazioni importanti. Per questo motivo è
indispensabile conservarle con cura e, in caso di vendita del
prodotto, di consegnarle all’acquirente.
1. DATI TECNICI
MULTIcharger LN-2010 Art.nr. # 9 2523
Tensione di funzionamento 12 V DC (=) (11 ... 15 V)
Consumo max. 3 A
Uscita
1 ... 4 elementi Li-Ion/Poli
1 ... 10 elementi NiCd / NiMh
Corrente di carica 200 mA ... 2 A regolabile
1 .. 4 elementi Li-Ion/Poli 2A
Corrente di carica max.
1 ... 10 elementi NiCd / NiMh 2A
Potenza di carica max. 30 W
Dimensioni / peso ca. 135 x 102 x 40 mm / ca. 250 g
2. DICHIARAZIONE DI CONFORMITÀ CE
La ditta MULTIPLEX Modellsport GmbH & Co. KG dichiara che il
caricabatterie MULTIcharger 5008 DC rispetta le seguenti normative
CEE:
EN 50081, EN 50082, EN 55014, EN 55022
3. CARATTERISTICHE PARTICOLARI
• Caricabatterie veloce, automatico, 12 V, controllato da
microprocessore, per 1 — 4 elementi Li-Ion/Poli,
1 ... 10 elementi NiCd / NiMh
• Corrente di carica regolabile da 200 mA a 2 A
• Adatto per la carica di pacchi batteria da 1 ... 4 Li-Ion/Poli
(riconoscimento automatico del numero di elementi ed
interruzione carica a fine carica)
• Fine carica automatico con disinserimento ∆V (Delta-Peak) e
con timer di sicurezza (con elementi NiCd / NiMh)
• Mantenimento carica automatico a fine carica
• Indicatore di stato a LED e segnale acustico a fine carica o in
caso di errore
• Protezione cortocircuito e inversione di polarità
(uscita e
entrata)
• Dimensioni compatte, peso ridotto
4. AVVERTENZE
! Prima di mettere in funzione, leggere le istruzioni
! Non aprire l’apparecchio e non apportare modifiche
! Caricare esclusivamente batterie al litio, NiCd o NiMh adatte
alla carica veloce
! Rispettare le avvertenze di carica allegate al pacco batteria (in
particolare con pacchi batteria al litio)
! Caricare solo elementi dello stesso tipo e capacità
(pacco batteria)
! Non caricare contemporaneamente due pacchi batteria
! Non caricare batterie surriscaldate; farle prima raffreddare a
temperatura ambiente
! Non collegare il caricabatteria e la batteria con polarità
invertita
! Non lasciare incustodito il caricabatterie durante il suo
funzionamento
! Attenzione: il caricabatterie può diventare molto caldo.
⇒ Non coprire l’apparecchio, non ostacolare il ricircolo d’aria
attorno all’apparecchio
⇒ Non posizionare l’apparecchio sotto il sole
! Non posizionare il caricabatterie, la batteria ed i cavi su o
vicino a superfici o oggetti facilmente infiammabili o sensibili
alle alte temperature
! Proteggere il caricabatterie dall’umidità
5. COLLEGAMENTO
Collegare il caricabatterie alla batteria dell’autovettura:
morsetto rosso → polo „+“
morsetto nero → polo „—“
Il LED rosso “Laden/CHG) si accende per indicare che l’apparecchio è
pronto per l’uso.
6. CARICA
Collegare il pacco batteria
Collegare il pacco batteria alle rispettive prese - NiCd / NiMh o litio
(cavi di carica adeguati vedi catalogo generale MULTIPLEX).
Con il tasto „Batt.Type“ scegliere il tipo di batteria da caricare. Il LED
rosso „Li-Ion“ o il LED di colore arancione „NiCd / NiMh“ indicano la
rispettiva procedura di carica.
! Evitare cortocircuiti del pacco batteria. Non collegare con
polarità invertita:
Polo „+“ della batteria → cavo rosso (+)
Polo „—“ della batteria → cavo nero (—)
Regolare la corrente di carica
La corrente di carica può essere regolata da 0,2 a 2 A.
! Rispettare le avvertenze di carica allegate al pacco batteria.
Se dovessero mancare le indicazioni riguardanti la carica:
pacco batteria NiCd:
0,5 ... 2 C
pacco batteria NiMH:
0,5 ... 1 C
Li-Ion/Poli:
0,5 ... 1 C
Esempio: Corrente di carica per un pacco batteria NiMh con una
capacità di 600 mAh:
600 mAh x 0,5 C ... 1 C = 300 mA ... 600 mA
! Avvertenza: non collegare al caricabatterie elementi Li-
Ion/Poli completamente scarichi (<3V/elemento).
Carica veloce
Con la pressione del tasto START/STOP il caricabatteria comincia a
caricare velocemente il pacco batteria con la corrente impostata.
Durante la fase di carica si accende il LED corrispondente al tipo di
pacco batteria impostato.
Per motivi di sicurezza, il tempo di carica è limitato a 6 ore (timer di
sicurezza), dopodiché la carica veloce viene terminata ed il
caricabatterie passa alla modalità di mantenimento della carica.
La procedura di carica può essere fermata in ogni momento con la
pressione del tasto START/STOP.
L’aumento di temperatura del pacco batteria durante la carica è
normale (fino a ca. 50°C). Se la temperatura dovesse superare i 50°C,
scollegare il pacco batteria. Questo può accadere p.es. se il pacco
batteria non è adatto per la carica veloce oppure con una corrente di
carica troppo elevata. Fare raffreddare il pacco batteria a temperatura
ambiente e caricarlo con una corrente minore.
Fine carica
A fine carica, il caricabatterie emette un segnale acustico ed il LED
“batteria carica” si accende.
Carica di mantenimento
A fine carica, il caricabatterie passa automaticamente alla carica di
mantenimento.
7. ERROR MODE
Con i seguenti errori, il caricabatterie passa in modalità errore
(indicazione d’errore: i tre LED lampeggiano contemporaneamente
ed il caricabatterie emette un segnale acustico):
1. Tensione di funzionamento troppo alta / bassa (11 ... 15 V)
2. Pressione del tasto START/STOP con pacco batteria non collegato.
3. Scollegando il pacco batteria durante la fase di carica
4. Pacco batteria collegato con polarità invertita
5. Cortocircuito del pacco batteria
6. Tensione pacco batteria oltre 18 V (p.es. pacchi batteria con alta
resistenza interna o con elemento difettoso)
MULTIPLEX Modellsport GmbH & Co.KG • Neuer Weg 2 • D-75223 Niefern-Öschelbronn • www.multiplex-rc.de
Anleitung # 9
Il motivo dell’errore deve essere prima escluso, premere poi il tasto
START/STOP.
-
 1
1
-
 2
2
-
 3
3
-
 4
4
-
 5
5
-
 6
6


MULTIPLEX LN-2010 El manual del propietario
- Categoría
- Cargadores de bateria
- Tipo
- El manual del propietario
- Este manual también es adecuado para
en otros idiomas
- français: MULTIPLEX LN-2010 Le manuel du propriétaire
- italiano: MULTIPLEX LN-2010 Manuale del proprietario
- Deutsch: MULTIPLEX LN-2010 Bedienungsanleitung
Artículos relacionados
-
MULTIPLEX Multicharger 4010 Dc El manual del propietario
-
-
-
MULTIPLEX Multicharger L 703 Equ El manual del propietario
-
-
-
-
-
-
MULTIPLEX kit FunJet El manual del propietario
