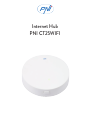
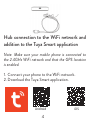
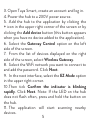
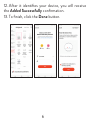
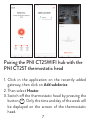
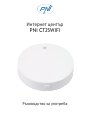
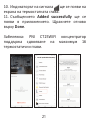
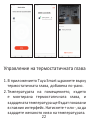
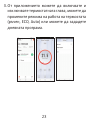
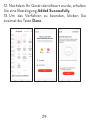
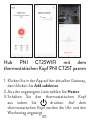
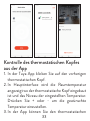
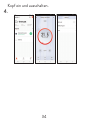
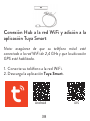
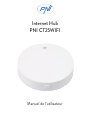
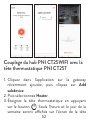
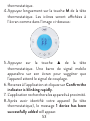
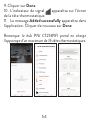
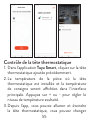
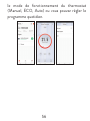
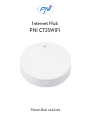
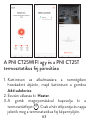
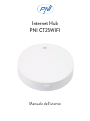
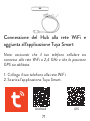
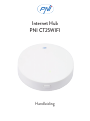
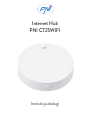
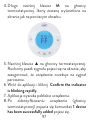
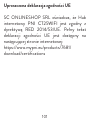
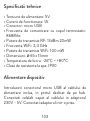
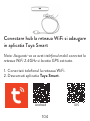
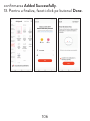
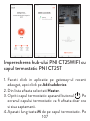
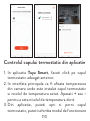
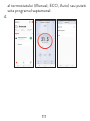
El PNI CT25WIFI es un hub Internet que te permite controlar la temperatura de tu hogar desde cualquier lugar con conexión a Internet. Es compatible con hasta 16 cabezales termostáticos PNI CT25T, que se venden por separado. Con el PNI CT25WIFI, puedes crear horarios personalizados para cada habitación de tu casa, para que siempre tengas la temperatura perfecta. También puedes controlar la temperatura de tu hogar con comandos de voz, usando Amazon Alexa o Google Assistant.
El PNI CT25WIFI es un hub Internet que te permite controlar la temperatura de tu hogar desde cualquier lugar con conexión a Internet. Es compatible con hasta 16 cabezales termostáticos PNI CT25T, que se venden por separado. Con el PNI CT25WIFI, puedes crear horarios personalizados para cada habitación de tu casa, para que siempre tengas la temperatura perfecta. También puedes controlar la temperatura de tu hogar con comandos de voz, usando Amazon Alexa o Google Assistant.


-
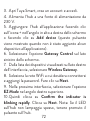
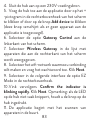
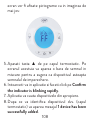
 1
1
-
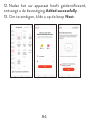
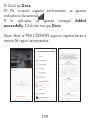
 2
2
-
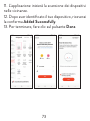
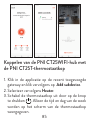
 3
3
-
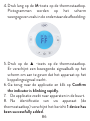
 4
4
-
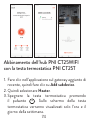
 5
5
-
 6
6
-
 7
7
-
 8
8
-
 9
9
-
 10
10
-
 11
11
-
 12
12
-
 13
13
-
 14
14
-
 15
15
-
 16
16
-
 17
17
-
 18
18
-
 19
19
-
 20
20
-
 21
21
-
 22
22
-
 23
23
-
 24
24
-
 25
25
-
 26
26
-
 27
27
-
 28
28
-
 29
29
-
 30
30
-
 31
31
-
 32
32
-
 33
33
-
 34
34
-
 35
35
-
 36
36
-
 37
37
-
 38
38
-
 39
39
-
 40
40
-
 41
41
-
 42
42
-
 43
43
-
 44
44
-
 45
45
-
 46
46
-
 47
47
-
 48
48
-
 49
49
-
 50
50
-
 51
51
-
 52
52
-
 53
53
-
 54
54
-
 55
55
-
 56
56
-
 57
57
-
 58
58
-
 59
59
-
 60
60
-
 61
61
-
 62
62
-
 63
63
-
 64
64
-
 65
65
-
 66
66
-
 67
67
-
 68
68
-
 69
69
-
 70
70
-
 71
71
-
 72
72
-
 73
73
-
 74
74
-
 75
75
-
 76
76
-
 77
77
-
 78
78
-
 79
79
-
 80
80
-
 81
81
-
 82
82
-
 83
83
-
 84
84
-
 85
85
-
 86
86
-
 87
87
-
 88
88
-
 89
89
-
 90
90
-
 91
91
-
 92
92
-
 93
93
-
 94
94
-
 95
95
-
 96
96
-
 97
97
-
 98
98
-
 99
99
-
 100
100
-
 101
101
-
 102
102
-
 103
103
-
 104
104
-
 105
105
-
 106
106
-
 107
107
-
 108
108
-
 109
109
-
 110
110
-
 111
111
-
 112
112
-
 113
113
-
 114
114


El PNI CT25WIFI es un hub Internet que te permite controlar la temperatura de tu hogar desde cualquier lugar con conexión a Internet. Es compatible con hasta 16 cabezales termostáticos PNI CT25T, que se venden por separado. Con el PNI CT25WIFI, puedes crear horarios personalizados para cada habitación de tu casa, para que siempre tengas la temperatura perfecta. También puedes controlar la temperatura de tu hogar con comandos de voz, usando Amazon Alexa o Google Assistant.
en otros idiomas
- français: PNI CT25WIFI Manuel utilisateur
- italiano: PNI CT25WIFI Manuale utente
- Deutsch: PNI CT25WIFI Benutzerhandbuch
- polski: PNI CT25WIFI Instrukcja obsługi
Artículos relacionados
-
PNI CT25PW Manual de usuario
-
PNI PT202L Manual de usuario
-
PNI SafeHome PT710B Manual de usuario
-
PNI IP649 Manual de usuario
-
PNI Safe House HS008 wireless outdoor siren Manual de usuario
-
PNI HS650 Manual de usuario
-
PNI SafeHome PTZ382 Manual de usuario
-
PNI CT60 Manual de usuario
-
PNI House WiFi550 Manual de usuario
-