Kenmore 91147722200 El manual del propietario
- Categoría
- Hornos
- Tipo
- El manual del propietario
Este manual también es adecuado para

Double 27" Built-In
Wall Oven
Use & C_re Guide
Homo de Pared
Empotrado Doble de 27"
Gu_a para el Uso y Cuidado
Models, Modelos 911.47722, 47724, 47729
It I J I•, .,
• I
i-
229C4020P306-2
(SR-10495-2)
Sears, Roebuck and Co.,
Hoffman Estates, IL 60179 U.S.A. www.sears.com
20P306-2ENv01 2/14_3,3:56PM

DOUBLEBUILT-INWALLOVEN
TableofContents
Oven Safety .......................... 3-4
Features of Your Oven .............. 5
Removal of Packaging Tape ... 5
Oven Control, Clock, Timer
(Upper Oven) ........................... 6
Control Display (Upper Oven) .. 7
Clock (Upper Oven) ................. 8
Kitchen Timer (Upper Oven) ._ 8
Control Lockout (Upper Oven).... 8
Tones (Upper Oven) ................. 9
F Codes (Upper Oven) ............. 9
Oven Cooking Tips ........... 10-12
Baking and Broiling
(Lower Oven) .......................... 12
Baking (Upper Oven) ............. 13
Broiling (Both Ovens) ............. 14
Setting Special Features
(Upper Oven) ................... 15-19
Self-Cleaning Cycle
(Upper Oven) ................... 20-21
Control Panel .......................... 22
Broiler Pan and Grid ............... 22
Oven Interior - Self-Cleaning
(Upper Oven) ......................... 22
Oven Interior - Conventional
(Lower Oven) .......................... 22
Oven Light Bulb ...................... 23
Oven Racks ............................ 23
Oven Door .............................. 24
Before Calling for
Service .............................. 25-26
TemperatureAdjustment..,,. 27-28
Warranty ................................. 30
Service Numbers .................... 64
For your convenience and future reference, please write down your model
and serial numbers in the space provided. They are located on the vertical
side trim, when the door is opened.
MODEL NUMBER: SERIAL NUMBER:
@Sears, Roebuck andCo.
2
20p3{}6-2 ENv01 ?J14_3, 3:56 PM

IMPORTANTSAFETYINSTRUCTIONS
SAVE THESE INSTRUCTIONS
Read aU Instructions before using this appliance. When using gas or
electrical appliances, basic safety precautions should be followed,
including the following:
To ensure safety for yourself, family
and home, please read your Use and
Care Guide carefully, Keep it handy
for reference. Pay close attention to
Safety Sections. BE SURE your
appliance is installed and grounded
by a qualified technician.
• DO NOT leave children alone or
unattended near an appliance ifl
use
• TEACH CHILDREN not to play
with controls or any part of the
appliance, and not to sit, climb or
stand on the door, or any part of
the appliance.
• CAUTION: NEVER STORE items
of interest to children incabinets
above the appliance Children
climbing on an appliance could
be seriously injured
• KEEP THIS book for later use
• NEVER TRY to repair or replace
any part of the appliance unless
instructions are given in this guide.
All other work should be done by a
qualified technician.
• NEVER USE your appliance for
warming or heating the room.
• ALWAYS KEEP combustible wall
coverings, curtains, dishcloths,
towels, pothotders and other linens
a safe distance from the appliance.
• NEVER USE a towel or other bulky
cloth as a potholder Make sure the
potholder is dry. Moist potholders
could cause steam burns. DO NOT
let petholders touch hot surfaces.
• ALWAYS KEEP the oven area free
from things that will burn. Food,
wooden utensils, grease buildup,
gasoline and other flammable
vapors or liquids could catch fire,
Plastic utensils could melt1and
eannod foods could explode. Your
appliance should never be used as
a storage area
• ALWAYS KEEP your appliance
clear of things that will burn
(gasoline and other flammable
vapors or liquids).
• NEVER HEAT unopened food
containers Pressure buildup can
cause the container to burst and
cause injury.
• NEVER LEAVE containers of fat or
drippings in your oven.
• NEVER TRY to clean a hot surface.
Some cleaners produce noxious
fumes, and wet cloths or sponges
could cause steam Burns.
• NEVER WEAR loose fitting ctothing
when using your appliance.
• RE SURE the oven is securely
installed in a cabinet that is firmly
attached to the house structure.
• LARGE SCRATCHES OR
IMPACTS to glass doors can lead
to broken or shattered glass.
20P306-2 EN'_I 2J14_33, 3.56 PM

IMPORTANTSAFETY
INSTRUCTIONS
• DOROTtouchheatingelements,surfaces
nearthemor interiorovensurfaces.These
maybe hotenoughto causeburnseven
thoughtheyaredarkin color.Duringand
afterusa,do nottouchortetclothingor
flammablematerialcontacttheelements
or hotsudacesuntiltheyhavehadtimeto
ooohOthersurfacesneartheovenvent
openings,ovendoorandwindowmayalso
behatenoughto causeburns,
• PLACE OVEN RACKS in thedesired
position while the oven is cool, If racks
must be moved while oven is hot, do not
let potholder contact the hot oven element
• AFTER BR_UNG, a_waystake the broi_er
pan and grid out ofthe oven and clean
them. Leftover grease in the broiler pan
could catch fire the next time you use your
over
• ALWAYS USE care when opening
the oven door. Let hot air and steam
escape before moving foods.
• NEVER USE aluminum foil to linethe oven
bottom Improper useof foil could start a
fire, or electrical shook could result
• NEVER BLOCK the oven vent opening.
• CLEANONLYthe partslistedinthis
manual.Followall cleaninginstructions.
• NEVERRUB,move,cleanor damagethe
doorgasketonse_f-cleanir,go',,ens._tis
essentialfor agoodseal.
• NEVERTRYtocleanutensils,cookware,
removablepartsor broilerpanandgridin
theself-cleancycle
• DONOTUSEovencleaners No
commercialovencleaneror protective
coatingof anykindshouldbeusedinor
aroundanypartoftheoven
• IFTHESELF-CLEANINGmode
malfunctions,turntheovenoffand
disconnectthepowersupply.Haveit
servicedby a qualifiedtechnician.
IMPORTANT SAFETY NOTICEI
"_neCatitomla Sate Drinking Water and
Toxic Enforcement Act requires the
governor of California to publish a
liM of substances known to the stale
to cause birth defects or other
reproductive harm and requires
businesses to warn their customers of
potential exposure to such substances,
The fiberglass ineutation in a
self-cleaning oven will give off a very
small amount of carbon monoxide during
the cleaning cycle. Exposure can be
mi_mlzed by ventlnojwith artopen door
or window or using a ventilation fan or
hood,
IMPORTANT: The health o1some
b|rde is extreme|¥ nensitwe tothe fames
given off during the self-cleaning cycle
of any oven, Move birds to another
well-ventilofod room.
READ AND UNDERSTAND
THIS INFORMATION NO_.
Besumeveryonein yourhomeknows
whattodoincaseoifire.Neverusewater
onagreasefire;it wlllonlyspreadthe
flames.
OVEN FIRE:
Do not try to move the pan!
1. Close the oven dcor and turn
controls off
2. Iffire continues, carefuny open the door,
throw baking soda on the fire,
or use a dry chemical, foam or halon
type extinguisher.
SAVE THESE INSTRUCTIONS
4
2(]p306-2 ENVOl 2/14/_D3,3:56 PM

OPERATION
FEATURESOFYOURWALLOVER
Self-Clean
Automatic
Broil Element
(both ovens) _
Broiler Pan
and Grid --
Model & Serial
Number Location-
Self-Cleaning
Door Gasket
(upper oven)
Oven VentJ
LocsUon _-
(behind grille,
both ovens)
Bake
(both ovens)
LowerOven UpperOvsn
Contml Contml
Automatic Oven
;witch
Oven Light
(upper
oven only)
Self-Cleaning
(upper oven)
Removable
(both ovens)
Oven Rack Guides
(both Ovens)
Removable Oven
Racks {both ovens)
To remove the adhesive leftfrom packaging tape, use household dishwashing
liquid, mineral oi! or cooking oil, With a soft cloth rub into the area and allow to
soak Rinse and dry well Repeat procedure using an appliance potish to ensure
no damage is done. This should be done before the oven is turned on the
the first time. The tape cannot be removed once the oven has heated.
Packaging tape may be found in the following areas: door handle, control panel
area, door trim and oven area
5
20P306-2 ENV01 2/14/03, 3:56 PM

OPERATION
OvenControl,ClockandTimer
(UpperOven)
@ ® ®® ®®@
Your new touch pad oven control will allow you to setvarious functions with ease.
Below are the different types of functions and a description of each.
automatically,at theend ofthe
cooking time.
BAKE- Cooksfoodsin thetraditional
ovenwitha temperaturerangeof 170°F
to550_F.
BROIL- Cooksfoods at550°F HIbroil
or 450°FLO broilfrom the direct heatof
the upperelement.Broilingshouldbe
donewith the door openedto thebroil
stop position.
SELECTCLEAN- Cleansthe inside area
ofthe ovenfor youat oneofthree levels:3
hours Lo,4 hoursStd and 5 hoursHL
Whenthecycle lsfinished,
the ovenwill turnoff automatically.
NOTE:The ovendoor will automatically
latch andwill onlyunlatchonce the oven
hascooled down.
Setthe amountof timeyou
wantfoodsto cook,or the
ovento clean.Theoven turns
offautomaticallyattheend of
thistime.
Setthe timeof day youwant
theoven to turnon. Theoven
will turnon automaticallyat
the timeyou haveset. When
DELAYSTARTTIME is used
wTthOVENCOOKINGTIME,
the ovenwill alsoturnoff
6
The HOUR/MIH UP and/or
DOWN arrow pads set the
time of day, length of cooking
time, length of cleaning time,
the delayed start time and the
time set on the Kitchen Timer.
(_ The TEMP UP and/or DOWN
•rein arrow pads set the tempera-
(_ ture used for cooking.
<_The START pad must be
pressed to activate any oven
function.
The CLEAR/OFF pad is used
to cancel any oven function
and the end of cycle tone. It
will not cancel the Clock or
Kitchen Timer.
The KITCHEN .tiMER pad ls
used to turn the Kltchen Tlmer
on or off. It will not control any
of the other
oven functions,
The CLOCK pad is used to set
the time of day.
Turns oven light on or off.
20P306-2 ENV'31 2/1_. 3:56 PM

OPERATION
ControlDisplay(UpperOven)
OvenTemperature
Indicator "On" Indlcator
Sat Indicator -- Timed Indicator
OvenFunction OvenFunction
Indicator Indicator
The Control Display is an easy
reference for using your even control.
Below are descriptions of how the
Control Display works.
OVENTEMPERATURE INDICATOR -
This indicator has a multiple purpose.
• Displays the temperature
• Displays error code "ERR" -
Ifthe oven temperature indicator
flashes "ERR", then you have set
an invalid time or temperature.
• Displays Oven Problems - Ifyour
control flashes "F" and a number
or letter, you have experienced an
oven problem. Please read the
section on F-CODES in your
manual.
"ON" INDICATOR - Will light when
the oven turns on
SET INDICATOR The set
indicator willflash in combination with
an oven function or timed function to
let you know you need to set a time
or temperature. Example: "SET" and
"BAKE" will flash to let you know you
need to set the bake temperature.
TIMED INDICATOR - Displays the
time of day, cooking time, delay start
time, cleaning time or the time set on
the Kitchen Timer
• Displays reminder code "PUSH
START" - Ifthe time indicator
flashes the word "PUSH STARTS'
then you need to press the START
pad to activate your setting.
OVEN FUNCTION INDICATORS -
Display which oven function has been
set, when the oven door locks and if
the function is delayed.
7
2(]p306-2 ENv01 2J14_3, 3:56 PM

OPERATION
ClockandTimer(UpperOven)
Theclock must be set for the correct
time of day before a delayed oven
function can work properly. The time of
day cannot be changed during a timed
even function, but can be changed
during a bake or broil function.
HOW TO SET THE CLOCK
® ®
1. Pressthe CLOCK pad.
2. Pressthe HOUR/MINUP and/or
DOWN arrow pads to setthe time.
3. Pressthe START pad.
RECALL THE CLOCK
While using your ovenfor cooking,
press the CLOCK pad ifyou wish to
check the time of day. The current time
of day will show in the disptay.
POWER FAILURE
Ifyou have experienced a power
failure, the time will flash in the display
and will be incorrect. Resetyour clock.
Any oven cooking function thatwas in
process will need to be reset.
The Kitchen Timer is used to time
cooking processes or other household
activities. It does not control the oven.
It can be set for up to 9 hours and 59
minutes. It will count down in minutes
until the LAST 60 SECONDS is
reached, then the control wilt beep
once. When the countdown reaches
ZERO, the control will beep 3 times
followed by one beep every 6
seconds until the KITCHENTIMER pad
is pressed. The 6-second beep can be
removed for future cycles if desired. For
directions on removing this continuous
beep, see Tones on the following page.
HOW TO SET THE TIMER
1. PresstheKITCHEN TIMER pad.
2. Pressthe HOUR/MIN UP and/or
DOWN arrow pads to settime.
3. Pressthe START pad.
4. When the countdown has reached
zero, press the KITCHEN TIMER
pad to turn off the beep.
Tocancel the timer during the
countdown, pressthe KITCHENTIMER
padTWICE.
Your control will allow you to lock the
touch pads so they cannot be activated
when pressed. Ifyou're worried about
leavingthe oven unsupervised, activate
this feature.
1. Press and hold, at the same time,
the HOUR/MIN DOWN arrow pads
for 3 seconds, until the display
shows "LOC ON."
2. To unlock the control, press
and hold, at the sametime, the
HOUR/MIN DOWN arrow pads
for 3seconds, untilthe display
shows "LOC OFF."
This feature can only be set when the
oven is not in use.
When this feature is on, no touch
pads will work. Thedisplay will show
"LOC ON" if a touch pad is pressed.
The adjustment will be retained in
memory after a power failure.
8
20P306-2 ENv 2/14_3, 3:56 PM

OPERATION
OvenControl, Clockand Timer
(Upper Oven)
Your new control has a series of
tones that will sound at different times.
These tones may sound while you set
the control for an oven function, or at
the end of the oven function Itwil_also
a_ertyou that there may be a problem
with the functions. Below are the types
of tones and a brief description of
each
TONES WHILE SETTING THE
CONTROL- When you press atouch
pad you willhear a beep. This beep
will let you know you have placed
enough pressure on the pad to
activate it (Thearrow pads do not
beep).
END OF TIMED CYCLE TONE -
At the end of a timed cooking function,
you will hear 3 short beeps followed
by 1 beep every 6 seconds. This
6-second beep will continue to sound
until the CLE/M_OFF pad ispressed
or you may select the special feature
to cancel this 6 second beep from
sounding at the end of future cycles.
TO CANCEL THE 6 SECOND BEEP
1. Press and hold the BAKE and
BROIL pads, at _e same time
for3 seconds, until the display
shows "SE"
2. Press the KITCHEN TIMER
pad. The display will show
"CON BEEP" (continuous beep).
3. Press the KITCHEN TIMER pad
again. The display will show
"BEEP" (heap canceled).
4. Press the START pad to cancel
the 6-second beep and leave the
special feature mode.
If you would like to return the 6-second
beep, repeat steps above until the
display shows your choice and press
the START pad
A'n'ENTION TONE - This tone wil!
sound if you make an error or an
oversight is made while setting an
oven function
Examples would be:
a. Setting a clean cycle and the oven
door is not properly closed.
b. Setting a function and not pressing
the START pad.
c. Pressingan additional function
pad without first setting a temperature
or time.
d.
ERR will flash if you set an invalid
temperature. Press the CLEAR/OFF
pad to clear the control and the oven
function
Any of these can be quickly identified
by watching the display
PREHEAT TONE- When you
select a cooking mode, set an oven
temperature and press the START
pad, the oven starts to heat. When the
temperature inside the oven reaches
the temperature you have set, a tone
will sound to let you know the oven is
ready for baking
Ifyou set an ovenfunctionand the
control beeps while the display is
flashing "F" and a number or letter
such as "F-.4" or "R," there may be
a problem with the control or oven.
Simply press the CLEAWOFF pad
and wait about an hour Try setting the
function again If the code repeats,
write down the flashing code and call
for service Tell the technician what
code was flashing.
9
20P306-2 ENv'_I 2/14/03, 3:56 PM

OPERATION
OvenCookingTips
it is normal to have some odor when
using your oven for the first time To
hetp eliminate this odor, ventilate the
room by opening a window or using
a vent hood
IMPORTANT: Never cover the oven
bottom or oven rack with aluminum
foil. Improper use can cause poor heat
flow, poor baking results and may
damage the oven finish. To prevent
staining from spillovers, you may
place a piece of aluminum foil or a
cookie sheet below foods which may
spill over.
Opening the door often to check foods
will cause heat loss and poor baking
results
Preheating is bringing the oven
temperature up to the temperature
you will be using during baking. Let
the oven preheat thoroughly when
recipes calt for preheating.
To prolong the life of your
oven light bulbs, follow this
helpful tip: Always turn the
lights off when the oven is
not in use or during a clean cycle.
If your oven lights are lefton for an
extended period of time, the oven will
be warm when the door isopened due
to the heat generated from the oven
light bulbs.
The oven vent is located under
the control panel. This area could
become hot during oven use It is
normal for steam to come out of
the vent and/or collect moisture
underneath when the over_is in use,
The vent is important for proper air
circulation. Never block this vent,
OvenVent
Inthe back of the oven you will notice
a small tube. This is a heat sensor that
maintains the temperature of the oven.
Never move or bend this tube
Ovell
10
2(}P3(}6-2 ENv01 2J14€03, 3:56 PM

OPERATION
OvenCookingTips
The low temperature zone of your oven
(between 170°Fand 2CO°F)isavailable
to keep hot cooked foods warm.
However, foods should not be kept at
these temperatures longer than 2 hours.
When using your convenient Delay
Start operation, foods such as dairy
products, fish, poultry, etc., should
never sit more than 1 hour before
cooking. Room temperature and
the heat from the oven light promote
bacterial growth.
Most recipes for baking have been
developed using high-fat products
such as butter or margarine (80% fat
by weight - the federal requirement tor
products labeled "margarine"). You will
get poor results if cakes, pies, pastries,
cookies or candies are made with
low-fat spreads Low-fat spreads
contain less fat and more water. The
high moisture content of these spreads
affects the texture and flavor of favorite
baked recipes. The lower the fat
content of a spread product, the more
noticeable these differences become.
To ensure best results, use marganne,
butter or stick spreads containing at
least 70% vegetable oil.
The Oven Temperature Sensor at the
back of the oven continuously senses
and controls the temperature inside
the oven. To keep a constant set
temperature, the elements will cycle
(turn on and off during cooking).
Baking results will be better if baking
pans are centered in the oven as
much as possible. If baking with more
than one pan, place the pans so each
has at least 1 to lY="of air space
around it. Place pans so one is not
directly above the other.
FLATCOOKIE SHEETS, without sides,
allow air to circulate all around the
cookies for even browning.
SHINY PANS reflect heat, and are
perfect for cakes and quick breads
thatneed a light brown crust.
GLASS, DARK NON-STICK OR
DARKENED BY AGE BAKEWARE
absorbs heat, and can be used for
yeast breads, pie crust or foods that
need abrown crust.The oven
temperature, when using these
pans, should be reduced by 25°F.
11
20P306-2 ENV01 2J14KI3, 3:56 PM

OPERATION
OvenCookingTips_aking
and Broiling(LowerOven)
The oven racks are designed with
stops, a convenience as well as a
safety precaution. The guides have a
bump to prevent the racks from tilting
when racks are pulled out of the oven.
This design allows the racks to be
inserted in only one way.
Your oven has four (4) rack positions.
The area above the top guide cannot
be used for a rack position.
Guide
4 ' 4
3 3
2 2
1 1
Always place oven racks in the
proper position while oven is cool.
You may feel that your new oven
cooks differently than the oven it
replaced. We recommend that you
use your new oven a few weeks
to become more famitiar with it,
following the times given in your
recipes as a guide Ifyou feel your
oven is too hot or too cool for your
cooking preference, see Do-it-
Yourself Temperature Adjustment in
the back of this guide to make the
adjustment.
12
°,,'f?h,
o©
1. Push in to turn
the OVEN
CONTROL
knob to the
desired
temperature,
2. When baking
is complete,
turn OVEN
CONTROL
knob to OFF.
1. Open lower
oven door to
the broil stop
position.
NOTE: Food
can be broiled
with the door
closed, but it
may not be as
brown because
the element will
cycle on and
Off.
2. Push in and
turn the OVEN
CONTROL
knob to BROIL,
3. When cooking
is complete,
turn the OVEN
CONTROL
knob to OFF
201=306-2 ENv01 2/14,'03, 3:56 PM

OPERATION
Baking& Roasting
(UpperOven)
(_ 1.Press the
BAKE pad.
(_ 2, Press the TEMP UP
and/or DOWN arrow
TEMP pads to set the oven
temperature you
prefer to use
<_ 3. Pressthe
START pad
To set the oven to cook for a specific
time and turn off automatically.
(_ 1. Press the
BAKE pad.
(_ 2. Press the TEMP UPand/or DOWN arrow
TEMP pads to set the oven
temperature you
prefer to use.
3. Press the OVEN
COOKING TIME
pad.
@ @ 4. Press the HOUR/
MIN UP and/or
arrow pads
DOWN
,_,_ to set the amount of
time you prefer your
foods to cook.
<_ 5. Press the
START pad
To set the oven to turn on at a
later time of day, cook for a
specific amount of time and turn
off automatically.
1. Press the BAKE pad
TEMP
®®4.
2. Press the TEMP UP
and/or DOWN arrow
pads to set the oven
temperature you
prefer to use.
Press the OVEN
COOKING TIME pad.
Press the HOUR/MIN
LIP and/or DOWN
arrow pads to sot
the amount of time
you prefer your foods
to cook
Press the DELAY
START TIME pad
5.
(_) (_ 6. Press the HOUR/MIN
UP and/or DOWN
to set the
arrow
pads
.,_,_ time of day you prefer
the oven to turn on
_) 7. Pressthe
START pad.
The oven will tum off at the end
of the cooking time unless the
cook and hold feature has bean
activated.
13
20P3(}6-2 ENv01 2J14/O3, 3;56 PM

OPERATION
Broiling(BothOvens)
Broiling is cooking by direct heat
from the upper element. The oven
door should remain open to the broil
stop position during broiling
Ij I.
It is not necessary to preheat the
oven when broiling. Use the broiler
pan and grid that came with your
oven. Both are designed for proper
drainage of fat and liquids
If foil is used it must be
molded tightly to the
grid and slits cut Into
the foil to match those
of the grid. This allows fats and
liquids to drain into the broiler
pan, preventing fire and
excessive smoke.
Always remove the pan and grid
from the oven,
Storing or forgetting _
a soiled broiler pan
in the oven is a
)otential smoke or
fire hazard.
The U.S. Department of Agriculture
recommends to cook meat and
poultry thoroughly--meat to at least
an INTERNAL temperature of !60°F
and poultry to at least an INTERNAL
temperature of 180°F, Cooking to
these temperatures usually protects
against food-borne illness.
The closer you place foods to the
broil element, the faster foods brown
on the outside yet remain red to pink
_nthe center
Moving meats away from the element
will allow the meat to cook to the
center while browning on the outside.
Cook side 1at least 2 minutes longer
than side 2. If your oven is connected
to 208 volts, you may want to use a
higher rack position and/or broil
foods longer.
The size, weight, thickness, starting
temperature and your preference of
the doneness of the meat will affect
broiling. This chart is based on meats
at refrigerator temperature,
FOOD RACK TOTAL
POSITION TIME (MIN.)
Steak 1" thick 3 9-11
Ground beef
patties
1" thick 3 16-18
Pork Chops -
I/'2" thick 3 27-29
F_h Ifillets) 3 11-13
Chicken (pieces] 2 45-55
la. Press the BROIL pad. (This will
automatically set HI Broil).
lb. While the sot indicator is flashing
in the display, press the BROIL
pad again if you prefer to use
Lo Broil. Use Lo Broil to cook
foods such as pouitry or thick
cuts of meat thoroughly without
over-browning them.
2. Press the START pad,
3, When broiling is finished, press
the CLEAR/OFF pad.
14
20p306-2 ENv01 2J14_3, 3:56 PM

OPERATION
Setting Special Features
(UpperOven)
Your new touch pad control has
additional features that you may
choose to use. After making your
selection, if you want to change the
setting, follow the steps until the
display shows your choice,
2.
3.
(a) Press the BROIL and OVEN
COOKING TIME pads at the
same time The control display
will show the degrees sign and
_,F-
(b) Press the BROIL and OVEN
COOKING TIME pads at the
same time again This will
change "F" (Fahrenheit) to "C"
(Celsius),
Press the START pad.
The control is automatically set to
turn off the oven after 12 hours
baking or 3 hours broiling should you
forget and leave the oven on. If you
want to remove this feature:
1. Press and hold, at the same
time, the BAKE and BROIL pads
for 3 seconds, until the display
shows "SF."
2. Press the DELAY STARTTIME
pad. The display shows
"12Shdn" (12 hour shut-off).
Press the DELAY START TIME
pad again, The display will show
"no shdn" (no shut off)
3. Press the START pad,
Your oven control is set for the
Fahrenheit temperature selections.
Most recipes are given using the
Fahrenheit scale. You can change
this to use the Celsius selection,
1. Press and hold, atthe same
time, the BAKE and BROIL pads
for 3 seconds, until the display
shows "SF"
Your control is set to use the 12 hour
clock If you prefer to use the 24 hour
Military Time clock or black out the
display:
1. Press and hold, at the same
time, the BAKE and BROIL pads
for 3 seconds, until the display
shows "BE"
2. (a) Press the CLOCK pad. The
display shows "12hr?' If this is
your choice, press the START
pad.
or
(b) Press the CLOCK pad again
The display will show "24hr."
Example: 5:00 on the 12 hour
clock will show 17:00 hours on the
military clock Ifthis is your
choice, press the START pad.
or
(c) Press the CLOCK pad again.
The display will show "OFF." If
this is your choice, press START
The display will not show time.
(The Delay Start Time feature will
not operate.)
15
20P306-2 ENv01 2]14/D3, 3:56 PM

OPERATION
Ov#ingSpecialFeatures
(UpperOven)
Your new control has a cook and
hold feature for timed cooking only
that will keep hot cooked foods warm
up to 3 hours after the timed cooking
is finished To activate this feature:
1. Press and hold, atthe same
time, the BAKE and BROIL pads
for 3 seconds, until the display
shows "SF."
2. (a) Press the OVEN COOKING
TIME pad. The display will show
"NLd OFF."
(b) Press the OVEN COOKING
TIME pad again to activate the
feature. The display will show
"HLd ON."
3. Press the START pad.
This special feature will allow you to
change the speed; #1 means speed
of change is slow up to #5 which
means speed of change is fast. To
set the speed you prefer, follow
these steps:
t. Press and hold, at the same
time, the BAKE and BROIL pads
for 3 seconds, until the display
shows "SF"
2. Press any UP arrow pad. The
display will show the current set
speed.
3, Press any UP arrow to increase
the speed up to the number 5
or
Press any DOWN arrow pad to
decrease the speed down to the
number 1.
4, Press the START pad
16
20P306-2 ENVOl 2J_4/03, 3:56 PM

OPERATION
Setting Special Features
(UpperOvea)
(Designed for use on the Jewish
Sabbath and Holidays.)
The Sabbath feature can be used
for bakingJroaeting only, It cannot
be used for broiling, self-cleaning
or Delay Start cooking
NOTE: The oven light comes on
automatically (on some models)
when the door is opened and goes
off when the door is closed. The bulb
may be removed. See the Oven Light
Replacement section. On models with
an OVEN LIGHT pad, the oven light
may be turned on and left on.
HOW TO SET FOR REGULAR
BAKING/ROASTING
NOTE: To understand how the oven
control works, practice using regular
baking (non-Sabbath) before entering
the Sabbath mode.
Make sure the clock shows the
correct time of day and the oven
is off.
1. Touch and hold both
the BAKE and BROIL
pads, at the same
time, until the display
shows "SF,"
Tap the DELAY START
TIME pad until "SAb
bAtH" appears in the
display
"[ouch the START pad
and _will appear inthe
display
(_4. Touch the BAKE pad.
No signal will be gtven.
(_) 5. The preset starting
temperature will
"[EMP automatically be set to
350°F. Tap the UP or
OOWN arrow pads to
increaee or decrease
the temperature in
5° increments The
temperature can be set
between 170°F and
550°F. No signal or
temperature will be given.
Touch the START pad
After a random delay
period of approximately
30 seconds to 1 minute,
c will appear in the
display indicating that the
oven is baking/roasting
If D c does not appear in
the display, start again at
Step 4,
To adjust the oven temperature,
touch the BAKE pad and tap the
UP or DOWN arrow pads to increase
or decrease the temperature in 5°
increments. Touch the START pad.
NOTES:
• When the display shows D the
oven is set in Sabbath, When the
display shows • • the oven is
baking/roasting
• The CLEAR/OFF and OVEN
COOKING TIME pads are active
during the Sabbath feature.
17
20P306-2 ENv01 2/14/03, 3:56 PM

OPERATION
Setting Special Features
(UpperOven)
HOW TO SET FOR TIMED BAKING/
ROASTING-IMMEDIATE START
AND AUTOMATIC STOP
NOTE: To understand how the oven
control works, practice using regular
(non-Sabbath) Immediate Start and
Automatic Stop before entering the
Sabbath mode
Make sure the clock shows the
correct time of day and the oven
is off
,:_3.
®®,.
1, Touch and held both
the BAKE and BROIL
pads, at the same
time, until the display
shows "SF "
Tap the DELAY START
TIME pad until "SAb
bAtH" appears in the
display,
Touch the START pad
and q will appear in the
display.
Touch the OVEN
COOKING TIME pad.
No signal will be given.
Touch the UP or DOWN
arrow pads to set the
desired length of
cooking time between
1 minute and 9 hours
and 59 minutes The
cooking time that
you entered will be
displayed.
Touch the START pad.
G
@
TEMP
7. Touch the BAKE pad.
No signal will be given.
8. The preset starting
temperature will
automatically be set to
350°F Tap the UP or
DOWN arrow pads to
increase or decrease
the temperature in 5°
increments The
temperature can be
set between 170°F
and 550°F. No signal
or temperature will be
given
Touch the START pad
After a random delay
period of approximately
30 seconds to 1 minute,
c will appear in the
display indicating that
the oven is baking/
roasting. If D • does not
appear in the display,
start again at Step 7.
To adjust the oven temperature,
touch the BAKE pad and tap the
UP or DOWN arrow pads to increase
or decrease the temperature in 5°
increments. Press the START pad
NOTES:
• When the display shows • the
oven is set in Sabbath. When the
display shows D c the oven is
baking/roasting.
• When cooking is finished, the
display will change from • C to •
and 0:00 will appear, indicating
that the oven has turned OFF but
isstill set in Sabbath. Remove the
cooked food
18
20P306 2 ENv01 2J14_]3, 3:56 PM

OPERATION
Setting SpecialFeatures
(UpperOven)
HOW TO EXIT THE SABBATH
FEATURE
®
®
1. Touch the CLEAR/OFF
pad.
2. If the oven is cooking,
wait for a random delay
period of approximately
30 seconds to 1minute,
until only m is in the
display.
3.Touch and hold both
the BAKE and BROIL
pads, at the same
time, until the display
shows "SF."
4. Tap the DELAY START
TIME pad until "12
Shdn" or "no shdn"
appears in the display.
"12 Shdn" indicates
that the oven will
automatically turn
off after 12 hours. "no
shdn" indicates that
the oven will not
automatically turn off.
5, Touch the START pad.
NOTE: If a power outage occurred
while the oven was in Sabbath mode,
the oven will automatically turn off and
the oven control must be reset.
19
20P306-2 ENvOl 2/14tO3, 3:57 PM

CARE AND CLEANING
Self-Cleaning Cycle
(UpperOven)
1. Remove the broiler pan and grid,
utensils and any foil that may be
in the oven.
2. If your oven is equipped
with nickel oven racks, they
should be removed. If your
oven is equipped with gray
porcelain-coated oven racks,
they may stay in the oven during
the self-clean cycle
3. Soil on the front frame and
outside the gasket of the door
liner will need to be cleaned
by hand
Front Frame
" DoorGasket "°_
ar
Cleantheseareaswith hot water,
soapfilled padsor cleansers suchasSoft
Scrub®to removeany soil Rinsewell with
clean waterand dry.
Donot useoven cleaners-no commercial
ovencleaneror protectivecoating ofany
kind shouldbe usedin oraroundany part
of the oven.
4. Wipe up anyheavy spilloverson the
ovenbottom.
5. Donot clean the doorgasket.The
fiberglass materTalofthe ovendoor
gasketcannot withstandabrasion.
Itisessentialfor thegasketto remain
intact. Ifyou noticeTtbecomingworn
or frayed,it shouldbe replaced.
The door gasket is designed to have
a 5'-6' gap at the bottom of the door.
This allows for proper air circulation.
OoorPanel Gasket
It is normal for your oven door to give
the appearance of not having a good
seal against the oven. This is due to
the gasket. The location of the gasket
on the door maintains a good seal and
prevents any heat loss.
_ tensils should never beTM
left in the oven during a
self-clean cycle.
Nickel oven racks may be
cleaned during the self-clean
cycle, but will lose their luster
and become hard to slide. It you
choose to leave them in during
the cycle, wiping the edges down
with vegetable oil after the cycle
will help them slide easier.
Gray porcelain-coated oven
racks may safely be cleaned in
the oven during a self-clean
cycle. It will be necessary to
grease the edges of the oven
rack with a light costing of
vegetable oil after a clean cycle.
This will help maintain the ease
of sliding the racks in and out of
the oven.
For the first clean cycle, vent the
room with an opened window or
hood vent. This will reduce the
odor when heating new parts.
2O
20P3C_-2 ENVOI 2/14/03, 3:57 PM

CAREANg CLEANING
Self-CleaningCycle
(UpperOven)
TheCleanCycle, includingcooldown
time,offerspreset optTonsof3, 4or 5
hours,but you may changethis toany
tTmebetween3and5 hours.
1. For3 hours:Pressthe
SELECTCLEANpad, 3
hoursand "Lo" will show
in the display. Thissetting
is recommendedfor
smallcontainedspills. Go
to step 3and pressthe
STARTpad.
For 4hours: Press
the SELECTCLEANpad
twotimes.4hours and
"Std" will shawin the
display. Thissetting is
recommended fora
normallysoiled oven.
Go tostep 3 and pressthe
STARTpad.
For 5hours:Press
theSELECTCLEANpad
three times. 5 hoursand
"HI" will show inthe
display. Thissetting is
recommendedforheavily
soiled ovens.Goto
step 3andpressthe
STAR1"pad.
(_) (_ 2. Ifyouwantto change the
lengthofclean time,press
the HOURiMINUP and/or
_.. DOWNarrowpads.
<_)3. PresstheSTARTpad.
Simply press the CLEAR/OFF pad. You
wil! need to watt for the oven temperature
to drop below the lock temperature
(approx. 1 hour) before attempting to
open the door.
After the cycle, you may notice some
white ash in the oven. Just wipe it up
with a damp cloth or sponge.
If white spots remain, scrub them
with a soap-filled steel wool pad. Be
sure to rinse thoroughly. These are
usually deposits of salt that cannot
be removed during the cycle.
Ifyour oven is equipped with porcelain
oven racks, it will be necessary to
grease the edges with a light coating
of vegetable oil after the clean cycle.
This wilt help maintain the ease of
sliding the racks in and out of the oven.
If for any reason you are not
satisfied with the cleaning results,
just repeat the cycle,
1. Pressthe SELECT
CLEANpad and choose
theclean levelofeither
Lo(3 hours),Std (4
hours)or Hi(5 hours).If
oneof theseisyour
choTce,go tostep 3and
setthe delaystarttime.
@ @ 2. Ifyouwantto ehangethe
lengthofclean time,
presstheHOUR/MINUP
_,,o.,,,._=, and/orDOWNarrow
pads.
3. Pressthe DELAY
STARTTIMEpad.
@ @ 4. Pressthe HOUR/MINUP
and/orDOWNarrow
padstosetthetimeyou
_.'_,,"_ preferthe cleancycle te
start.
<_5. PresstheSTARTpad.
21
20P306-2 ENv01 2/14_03, 3:57 PM

CAREANDCLEANING
b
CLEANING MATERIALS
• Dishwashing detergent
• Warm water
• Soft cloth
Oo not use abrasive cleaners,
Industrial cleaners or bleach.
SELF-CLEANING OVEN
(UPPER OVEN)
CLEANING MATERIALS
• Dishweshing detergent
• Soap-filled pad
• Scouring pad
• Warm water
TO CLEAN
Rinse thoroughly after cleaning.
Cleaning inside the oven need only
be done as atouch up between clean
cycles
Do not attempt to clean the oven
unless It is completely cool. Never
use oven cleaner In your oven.
CONVENTIONAL OVEN
(LOWER OVEN)
CLEANING MATERIALS
• Dishwashing detergent
• Oven cleaner
• Soap-filled steel wool pad
• Warm water
• Cleansing powder
TO CLEAN
Cleaning inside the oven after each
use will make clean-up easier. For
heavy soil, if a commercial oven
cleaner is used, follow the label
directions carefully Do not get any
cleaner on the temperature sensor
Rinse well after cleaning.
_Te mperaOt,_n Sensor
Do not attempt to clean the oven
unless It Is completely cool.
CLEANING MATERIALS
• Dishwashing detergent
• Warm water
• Soap-filled scouring pad
• Commercial oven cleaner
TO CLEAN
Allow the pan to soak. Sprinkle the
grid with dishwashing detergent and
cover with a damp cloth or paper
towel Scour as needed. Rinse and
dry well. You may also place both the
pan and grid in the dishwasher.
22
20P306 2 ENv01 2/14_3, 3:57 PM

CAREAND CLEANING
Cleaning/Removable Parts
_ CAUTION: You must
disconnect electdcal
power to the oven at
the main circuit
k)reakeror fuse box before
attempting to replace oven light
bulbs. Do not touch the light
bulbs with bare hands. The bulbs
get very hot very quickly. Wrap
foam rubber from bulb package
around bulb when installing.
When removing the bulb, wait
until the bulb has cooled and
use a dry cloth.
i, j
Togive youthe best lighting available,
your ovenhastwo halogenbulbs. Both
lightsareon the ceilingofthe oven cavity.
Receptacle Socket
Glass
TO REMOVE Cover
1. You must disconnect electrical power
to the oven at the main circuit breaker
or fuse box.
2. Turnthe glasscovercounterclockwise
V4turnuntilthe tabsof the glasscover
clearthe groovesof thesocket.
3. Pullstraight outtoremovethe bulb.
TO REPLACE
1. Wrapbulb withcotton clothor bulb
packagingmaterial.Don'ttouchbulb
withyourfingers.
2. Pushbulb straightintoreceptacle all
theway. Use onlya 120-volt,35-watt
halogenbulb.
3. Placethe tabsof the glasscoverTnto
thegrooves ofthe socket.
4. Turnthe glasscoverclockwise
V4turn.
5. Reconnectelectricalpowertothe
ovenat the maincircuit breakeror
fusebox.
CLEANINGMATERIALS
• Dishwashingdetergent
• Warmwater
• Scouringpad or soap-filledpad
Bump in
..o.Ou,°e
Bs,se.Bsc. IIll
TO REMOVE
1. Pullthe racks outto thestop lock
position.
2. Pullup the frontof _qerack and slide
underthe bumpof the rackguide.
TO CLEAN
Cleanwithwarmwateranddetergent. For
hard toremovestains,gently scrubwith a
scouring pad or asoap-filled pad. Rinse
well.
Grayporcelan-coated ovenracks may
alsobe cleaned intheoven during the
self-cleancycle. Itisnecessaryto wipe
the edgesof grayporcelain-coatedoven
racks witha Ifghtcoating ofvegetableoil
aftercleaning. Thiswill helpmaintaTnthe
easeof slidingthe racks in and out
ofthe oven.
TO REPLACE
1. PlacetheraTsedback ofthe rack onto
the rack guides.
2. Liftthe frontofthe rack untilthe rafsed
backslides underthebump of the
rack guides.
3. Slidethe rack all the wayback.
23
213p306-2 ENv01 2J14/O3, 3:57 PM

CAREMID CL£A#I#6
RemovableParts
The dooris very heavy.Be carefulwhen
removingandliftingthe door.Donot lift
the doorby the handle.
TO REMOVE
1. Fullyopenthe door.
2. Pul!the hingelocks
down towardthe
door frame,tothe
unlocked position.
Thismay require
aflat-blade
screwdriver.
Slot
geLock
Pullhingelocks
down tounlock
3. Firmlygrasp both
sides ofthe door at
the top.
4. Closedoor tothe
doorremovalposition,
which ishalfway
betweenthe broil
stop andfullyclosed.
5. Liftdoor up andout
untilthe hingearmis
clearof the slot.
Removal
Position
TO REPLACE
1. Firmlygrasp both Bottom
sidesofthe door Edgeof Hinge
atthe top. Slot Arm
2. Withthe door at \lFlIFr!
thesameangle
asthe removal
position,seatthe _F
indentationofthe
hingearminto
the bottomedge of
the hingeslot.The
notchin thehingearm Indentaiton
mustbefully seated
intothe bottomofthe
slot.
RemovableOven Door
(cont.)
3. Fullyopen thedoor.
Ifthedoor willnot fully
open,the indentation I
is notseatedcorrectly
in thebottomedge of
theslot.
Hinge Arm
4. Push the hinge locks
up against the front Hinge Lock
frame of the oven
cavity, tothe locked Push hinge locks
position, up to lock
5. Close the oven
door.
TO CLEAN OUTSIDE OF DOOR
• Use soap and water to thoroughly
clean the top, sides and front of the
oven door. Rinse well You may also
use aglass cleaner to clean the
glass on the outside of the door
Do not let water drip into the vent
openngs.
• Spillage of marinades, fruit
luices, tomato sauces and basting
materials containing acids may
cause discoloration and should
be wiped up immediately. When
surface is cool, clean and rinse.
• Do not use oven cleaners, cleaning
powders or harsh abrasives on the
outside of the door.
• If any stain on the door vent trim
is persistent, use a soft abrasive
cleaner and a sponge scrubber
for best results.
TO CLEAN INSIDE OF DOOR
• Because the area inside the gasket
is cleaned during the self-clean
cycle, you do not need to clean
this by hand.
• The area outside the gasket and
the door finer can be cleaned with
a soap-filled pad, hot water and
detergent. Rinse wel! with a vinegar
and water solution.
24
20P306 2 ENv01 ?J14/03, 3:57 PM

BEFORECALLINGFORSERVICE
To save you time and money, before making a service call check the list below
for any problem you may feel you have with the performance of your oven. If
the problem is something you cannot fix, use the Consumer Service Numbers
located at the back of this guide. When making any calls, have the Model
No., Serial No., Repair Parts List, Use and Care Guide and the Date of
Purchase available.
PROBLEM POSSIBLE CAUSE POSSIBLE SOLUTION
The display of your Oven malfunc',ion. Pressthe CLEARIOFFpad. Let
control Is flashing "F" the oven coolfor 1hourand enter
followed by a number an ovenor cleaning operation.If
or letter. (Upper Oven) code repeats, call forservice.
Oven and oven a. No powerto oven. a. Checkthe circuTtbreakeror
control will not work. fuse.Makesurethe power
cord Tsplugged in.
b. Theclock TsTnthe b. See the "SettingSpecial
black-out mode. Features"sectTonof this
manuaL.
Oven temperature Oven control calibration. Seethe temperatureadiustment
seems Inaccurate. instructfonsfollowlngthis sectfon.
Oven will not Cleancycle ls not Oven temperaturemustdrop
unlock. (Upper Oven) finished. Ovenis too hot. below the lock temperature before
the door will unlock.
Oven light will not a. Light switch in off a. Check ovenlight switch on the
work. position, control panel.
b. Oven light bulb loose b. Check theoven lightbulb.
or burned out.
Oven did not clean a. Controlswere not set a. Check the self-cleaningseetTon
or results were poor. properly, of this manual.
(Upper Oven) b. Ovenwas seTled b. Heavyspillovers shouldbe
heavily, removed beforethe cycle Ts
set. Usethe longestcycle, Hi,
forthe heavilysoiled oven.
c. Clean cycle was c. Thestandard cleancycle is 4
interrupted, hours, a Lo clean cycle is 3
hours and a Hiclean cycle is 5
hours.
Oven rack does not Rackswere leftinoven Wipe the rack edges with a small
slide ess|ly, during a self-cleancycle, amountof vegetableoil.
Fan noise. A cooling fan may This is normal.Thecoolingfan will
automaticallyturn on. turn on to cool internalparts. It
may run for up to 2hours a(terthe
ovenis turned OFF.
25
20 P3(_-2 ENv01 2/14/03, 3:57 PM

BEFORECALLINGFORSERVICE
PROBLEM POSSIBLE CAUSE
POSSIBLE SOLUTION
Oven smokes.
e. Dirty oven.
b. Improper use of
aluminum foil.
c. Broiler pan containing
grease left in the oven.
a. Check for heavy
spillover
b. Use of foil not
recommended.
c. Clean pan and grid
after each use.
Foods do not bake
properly.
Foods do not broil
properly.
a. Oven was not
preheated
b. Improper rack or pan
placement
c. Oven vent blocked c.
or covered,
d. Improper use of foil d.
e. Impropertemperature e.
setting for utensil
used.
f. Oven temperature
needs adjustment.
g. Oven and oven rack
not level.
h. Oven controls
improperly set.
s. Improper rack
position.
b. Oven preheated.
c. Improper use of foil.
d. Oven door closed
during broiling
e. Low voltage
(208 Volts).
f. Improper broiling
time.
g. Oven controls
improperly set
a. Be sure to preheat until
the tone sounds, when
the recipe calls for it.
b. Maintain unilorm a_r
space around pans and
utensils. See oven
cooking section.
Keep vent clear.
Racks should not be
covered during baking
Reduce temperature 25
degrees for glass or
dull/darkened pans,
f. Check the temperature
adjustment following
this section
g, Check the installation
instructions for leveling
h, See the baking section.
a. Check broil pan
placement; see broiling
section.
b. Do not preheat when
broiling.
¢. Check broiling section.
d. Open door to broil stop,
e. Use higher rack
position and/or longer
cooking time,
f. Check broiling chart in
broiling section
g. See the broiling
section.
26
2OP306-2 ENv01 2/14,'03, 3:57 PM

"170IT YOURSELF"
TEMPERATURE
ADJUSTMENT
You may feel that your new oven cooks
differently than the oven it replaced.
We recommend that you use your new
oven afew weeks to become more
familiar with it,following the times
given in your recipes asa guide,
Ifyou think your new oven is too hot
(burning foods) or not hot enough
(foods are undercooked), you can
adjust the temperature yourself, The
appearance and texture of foods is a
better indicator of oven accuracy than
an oven thermometer. These
thermometers can vary by 20-40
degrees from the true temperature of
the oven. In addition, the oven door
must be opened to read these
thermometers. Opening the door will
change the temperature of the oven.
To decide how much to change the
temperature, set the oven temperature
25 degrees higher (iffoods are
undercooked) or 25 degrees lower
(if foods are burning) than the
temperature in your recipe, then bake.
The results of this "test" should g_ve
you an idea of howmuch the
temperature should be changed,
Cooler Hotter
1. Turnthe OVEN COl_l'RO1 knob
to OFF and remove it by pulling
straight off.
2. Use a screwdriver to loosen the two
screws about 1 turn each.
3. Hold the knob handle, while
turning the knob disk in the
desired direction, As you turn you
should be able to hear clicks and
feet notches or teeth. Each click or
notch is 10° You can turn up to 5
clicks or notches in either
direction.
4.
When you reach the desired
adjustment, retighten both screws
Do not force the knob onto the
thermostat stem or you may
damage it.
27
20P3(_-2 ENv01 2/14_3, 3:57 PM

"DO IT YOURSELF"
TEMPERATURE
ADJUSTMENT
(_1. Press and hold down
both the BAKE and
BROIL pads, st
(_ the same time for
3 seconds, until the
display shows "BF."
(_2. Press the BAKE pad.
A factory set 2 digit
number will show in
the display, usually
"go"
Ifyou think the oven
is not hot enough,
(_) 3a. Press the TEMP UP
arrow pad to Increase
(+) the temperature up
TEMP to +_LS° F
@ or
If you think the oven
is too hot,
3b. Press the TEMP
DOWN arrow pad
to decrease (-) the
temperature down
to -35°F.
4. Press the START pad.
This increased or decreased
temporature setting will remain in
memory until the above steps are
repeated A power failure will not
affect this setting
The broil and self-clean temperatures
will not be affected
28
20P306-2 SHy01 2/14/03, 3:57 PM

NOTES
29
201::_30_2FJqvQ1 2/14_3, 3:57 PM

OUILT-IN
WALLOVENWARRANTY
fFULL ONE YEAR WARRANTY ON ALL PARTS
If,within one year from the date of installation, any part falls to function
properly due to a defect in material or workmanship, Sears will repair or
replace it. at our option, free of charge.
Ifthis product is subjected to other than private family use, the above
warranty is effective for only 90 days.
WARRANTY SERVICE IS AVAILABLE BY CALLING SEARS SERVICE AT
1-800-4-MY-HOME ®.
This warranty gives you specific legal rights, and you may also have other
rights which vary from state to state.
Sears Roebuck and Co Dept. 817 WA Hoffman Estates, IL 60179
J
MasterProtectionAgreements
Congratulationsonmaking asmart
purchase.YournewKenmero®appliance
isdesigned andmanufacturedfor yearsof
dependableoperation.But likeall
products, itmay requirepreventive
maintenanceor repairfromtimeto t'me.
That'swhen havingaMaster Protection
Agreementcan saveyou moneyand
aggravation.
Purchasea MasterProtection
Agreementnowandprotectyou#selffrom
unexpectedhassleandexpense.
TheMasterProtectionAgreement
alsohelps extendthe lifeofyournew
appliance. Here'swhat's included
in the Agreement:
V'Expertserviceby our 12,000
professionalrepair specfalists
v' Unlimitedserviceand no chargefor
parts and laboronall coveredrepairs
V'"No-lemon"guarantee- replacement
of yourcoveredproduct if morethan
three productfailuresoccurwithfn
twelvemonths
v' Product replacementif yourcovered
product can't be fixed
v' AnnualPreventiveMaintenance
Checkat yourrequest- noextra
charge
v' Fast help by phons - non-technical
and Tnstructional assistance on
products repaired in your home, plus
convenient repair scheduling
V Power surge protection against
eleetrical damage due to power
fluctuations
v' Rental reimbursementif repar ofyour
coveredproduct takeslonger than
promised
Onceyou purchasethe Agreement,a
simplephone call isall thatTttakesfor you
to schedule service.Youcan call anytime
day or nTght,or schedule aservice
appointmenton-line.
Searshasover 12,000professionalrepair
specialists,whohaveaccess to over4.b
millTonqualityparts and accessories.
That'sthekTndof professionalismyoucan
countonto help prolongthe lifeofyour
newpurchaseforyearstocome.
PurchaseyourMasterProtection
Agreementtoday!
SomeUmltatlonsand exclusionsapply.
Forpricesand additionalInformation,
call 1-800-827-6655.
Sears Installation Service
For Searsguaranteedprofessional
installationofhome appliancesand Ttems
like garagedoor openersand water
heaters,call 1-800-4-MY-HOME°.
3O
20P306-2 ENv01 2/14KI3, 3:57 PM

HORNODEPARED
EMPOTRADODOBLE
Indice
Seguridad en el use
del horno ................................. 32-33
Caracteristicas de su homo .......... 34
COmo sacar la ©nta
de empaque ................................. 34
Control de homo, re©j,
cron0metro (homo superior) ......... 35
Panel de control (homo superior) 36
Reloj (homo superior) ................... 37
CronOmetro de la cocina
(homo superior) ............................ 37
Tones (homo superior) ................. 38
COdigos F (homo superior) ........... 38
Consejos para co©nar en e!
homo ....................................... 39-41
Come hornear y
asar ala parilla (homo ]nferior) ,_ 41
Come hornear (homo superior) 42
Come asar a la parrilla
(ambos hornos) ............................. 43
COme seleccionar programes
espe©ales (homo superior) ....44-48
El©ale de autolimpieza
(homo superior) ...................... 49-50
Panel de control ............................ 51
CaoeroIa y parrilla para asar ala
pamlla ........................................... 51
Interior del homo con
autolimpieza (homo superior) ....... 51
tnterior del homo conven©onal
(homo inferior) .............................. 51
Foco de la luz del homo ............... 52
Parrillas Oel homo ......................... 52
Puerta del homo ........................... 53
Antes de Ilamar para un
servlcio .................................... 54-55
Ajustes ala temperatura ......... 56-57
Garantia ........................................ 58
NQmeros pare servicios ................ 60
Para su convenlencla y referencla future, por favor escriba el n0mero de
modelo en el espaclo que se provee. Estos est_n Iocalizados en el panel
lateral vertical, cuando la puerta es ablerta.
MODELNUMBER:
SERIAL NUMBER:
© Sears, Roebuck and CO.
31
20P306-2 SPy02 _J14_3, 3:59 PM

INSTRUCClONESDESEGURIDADIMPORTANTES
GUARDE ESTAS INSTRUCCIONES
Lea todas las instrucclones antes de usar este aparato. Cuando use
aparatos a gas o el_ctrlcos, se deberian seguir precauciones de seguridad,
incluyendo Io slgulente:
IMPORTANTE: Para garantizar su
seguridad, la de su familia y la de slu
hogar, por favor lea su Guia para el Uso y
Cu]dado cu]dadosamente Mant6ngalo a
la mano para referencias. Ponga mucha
atenci6n a las secciones de seguridad
ASEGtJRESE que su estufa sea instalada
por un tecnico especializado y due haga
tierra adecuadamente
• NO DEJE a los nirlos sin vigilancia cerca
de una estufa que se este usando.
• ENSEI_E A LOS NII_IOS A no jugar con
]as controles o cualquier parte de la
estufa, no sentarsel subirse o pararse
sobre la puerta del homo
• PRECAUCION: NUNCA GUARDE
articulos due sean de interes para
los niNos en el panel trasero o en los
gabinetes sobre la estufa. Los nitros
que se suban sobre la estufa podrian
resultar gravemente heridos.
• GUARDE ESTE libro para un uso
futuro.
• NUNCA TRATE de reparar o
reemplazar una parle de la estufa a
menos due las instrucciones se den en
este guia. Todo otro trabajo deberia ser
hecho por un tecnico especializado
• NUNCA USE su estufa para entibiar o
calentar una habitaci0n.
• SIEMPRE MANTENGA los
reveslimientos combustibles de las
paredes, cortinas y otros paSos a una
distancia prudente de la estufa.
• NUNCA USE una toalla u otro paRo
abultado como agarradera, Asegt]rese
que raagarradera est6 seea Las
agarraderas h6medas podrian causar
quemaduras por vapor. NO PERMITA
due las agarraderas toquen las
superficies para coeinar calientes
• SIEMPRE MANTENGA el _rea de la
estufa despejada de cosas que se
podrian quemar. Los alimentos, los
utensilios de madera, la acumulacion
de grasa, la gasolina y otros vapores
o ]iquidos inflamables se podrian
incendiar, Los utensilios de pl&stico se
podrian derretir y las comidas en
conservas podrian explotar. Su homo
nunca de deberia usar para almacenar
cosas,
• SIEMPRE MANTENGA la estufa
despejada de cosas due se poddan
quemar (gasolina yotros vapores o
liquidos inflamables).
• NUNCA CALIENTE contenedores de
alimentos cerrados. El aumento de la
presiOn puede causar que el
contenedor explote y cause heridas.
• NUNCA DEJE contenedores con grasa
o goteaduras dentro o cerca de la
estufa
• NUNCA TRATE de I]mpiar una cubierta
caliente. Algunos limpiadores producen
vapores t6xicos, y los patios o esponlas
mojadas podrian causar quemaduras
por vapor.
• NUNCA USF ropa sueRa cuando use er
estufa,
• ASEGORESE due el homo este
instalado flrmemente en un gab]note que
est_ bien pegado a la pared.
• RASGUI_IOS GRANDES O IMPACTOS
sobre las superficies de vidrio de las
puertas podrian romper o agrietar el
vidri.
32
20 P3(_-2 SPY02 2214_13,3:59 PM

INSTRUCCIONES
DESEGURIDAD
IMPORTANTES
• NO TOQUE las Buperficies para calentar,
las superficies cerca de elias o tas
superficies interiores. Estas podrlan estar
_ufielentemente cafientes para quemar
aunque se vean de color oscuro. Durante
y qespues del use, no toque o permita
qua la ropa o materiales inflamables hagan
contacto con las superficieB calientes hasta
qua hayan lenido fiempo de enfriarrse La,_
otras suprficies _erca de las ventanillas
de ventilacion del homo, puertas, ventana_ y
las superficies para cocinar tambi_n podrian
estar suficientemente cafientes para causar
Quemaduras
• COLOQUE _ PARRILLAS []EL HORNO en
la poelcion deseada mientras el homo este fr_
Si las parril_ se deben mover mientras el homo
esta cal_nte, no permita qua la agarradera haga
contacto co_ el quernador cWiente del homo¸
• DESPUES DEASARALAPARRILLA, siempre
saque la cacer_a y la parella para _sar del
homo y fimpielas. Los sebrados de grasa en la
cacerela para asar podrian incenelarse la
pr6xirr_ vez qua usied use el homo.
• SIEMPRE TENGA CUIDADO cuando abra la
puerta del homo, Deje qua el aire caliente y el
vapor escapen antes de mover los alimentos.
• NUNCA I_E papel de aluminlo para _rar el
rondodel horn(]¸ El use inadecuado del papal de
alumielo podrta resultar en un gelpe de cornente
(3en u[i JnoeNdio.
• NUNCA OBSTRUYA la aberlura de la
veniilac_n del homo¸
• LIMPIE SOLAMENTElaspartes que
._elistanen este manual Sigatodas ]as
instruccionespara la limpieza.
• NUNCAFRIEGUE,muew, limpie o daSeel
sefiode la puertaen loshornoscon
autolimpieza.Esesencial para unbuen
sellado.
• NUNCATRATF de limpiar losutenwlios,
elias, partesremovibleso la cacerola y la
parrillapara asaren el ciclo deauto$impieza.
• NO USE limpiaqorespara hornos- Nose
deberia usarningunaclase de limpiadorpara
homes dentroo alrededor decualquier parte
delhomo.
• SI LAFUNCIONDE AUTOLIMPIEZA
falla,apague el homoydesconectela
electricidad Hagaleun serviciDper un
tecnieocalificade.
IADVERTENClA DE
SEGURIDAD IMPORTANTEI
CaliforniaSafe DrinkingWater and
Toxic EnforcementActrequiare que el
gobernadorde California publiqueunalists
de substanclasqua eleetado sepa que
producendefectosde na©imientou otros
da_os reproductivosy requiemqua los
hombresde negociosadvlertanasue
clientes del contectopoilnclal a tales
substancias. El aislante de fibrede vialrioen
al homocon autollrnpieza ern#irduna moy
pequei_acantidadde rnon6xidode carbono
durantael ciclo deautollrnpieza. El centacre
se puada minimizerventilandocon uns
puerta o ventanaableril o usandoun
ventiladoro unacarnpanade ventllaci6n.
IMPOR'rAN'rE: La saludde algunos
p¢ijarosesextrernadarnentesensitivea los
vaporesproducidosperel ciclode
autolirnpieza de cuaiquierhorno.PongalOS
p_ljarosen otra habitaci6n qua est_ bien
ventilada.
ILEA Y COMPRENDA ESTA
INFORMACION AHORAI
Aseg@resequatodos ansu hogarsepanqu_
haceren casede incendio.Nuncauseague
sobre un Incendlode grass, estosolarnente
extenderdlas llamas.
FUEGOEN ELHORNO:
iNoIrate de moverlacacerola!
1. Cierrela puertadel homoy apague los
controles
2. Siel incenqiocontint_a,cuidadosamente
abra la puerta,arroiesoda para cocinar
sobre elfuego, e use unextintorde
quimlco seco,espumao "t_alon"
GUARDE ESTAS INSTRUCCIONES
33
20P306-2 SPy02 2/14'O3, 3:59 PM

OPERACIO#
CARACTERI$TICASDESUHORNOSDEPARED
Cerrojo de le
puerta pare
(homo
superior)
Elemento pare
aser e ie
(ambos hornos)
Cacerola y panilie
pBr8 8ser e
Ubicaci6n del
n,',mero de
modelo
Sello de le puerto
pare autollmpleza
(homo superior)
Control del Control del homo
homo inferior
Interruptor
automlitico de le
U bicacidn del
(homo superior
solamente)
Inferior del homo
,con autolimpieza
(homo superior)
Puerfe
removihle del
(ambos
hornos)
homo (detr_s de (embos homes)
le rejllla ambos
hornos) Parrillas de homo
Elemento
hornear (embos
homes)
(ambos homes)
Para sacar el residuo del adhesivo de la cinta de empaque, use un detergente riquido
normal para platos, aceite mineral o aceite para cocinar Con un patio suave fr6telos
sobre el area y permila que se remoje. Enjuague y seque bien. Esto se doben'a hacer
antes de encender el homo per primera vez. Le cinta no se puede sacar una vez que
el homo se haya c81entado. La cinta de empaque se puede encontrar en los siguientes
Areas: manilla de la puerto, area del pane4de control y moldura de la puerta.
34
20P306-2 ,SPv_32 2/14/03, 3"5g PM

OPERACION
ControlDel Homo,Reloj,
YCronGmetroDe LaCocina(HomoSuperior}
® ®® @@@
Sunuevo control de homo a botones le permitir_ programar las varias funciones con
facilidad. Mas abajo estan los diferentes tipos de func]ones y la descfipc]On de cada uno.
HORNEAR- Cocina losalimentosenel homo _) 1_
tradicionala tlnatemperaturaque varia de
170°Fa 550°F. _ ....
ASARA LA PARRILLA- Asa losalimentos
enALTOa 550°Foen BAJO a450°Fa calor
directo del elementosuperior, Elasado a la
parrillase debe hacercon tapuertaabierta
enla poalcion de tope para asara la parrilla,
SELECCl6NDELIMPIEZA(SELECTCLEAN)-
Limpiael area interiordel homopar usted a
unode losIres niveles:3horas Lo, 4horas Sld,
y 5 horas Hi.Cuando el title termala,el homo
se apagar_.automaticamente
NOTA:La puertadel homo se cerrar_ con
cerrojo automaticamentey etcerrojo Beabrira
solocuando el homose hayae_l[riado.
Programa la cantidad de tiempo en
que usted desea coalnar los
alimentos e en que el homo se
limpie, El homo se apaga
aulomalicamente al final de esta
cantidad de tiempo,
Selecalone la hera del dia en
la cual desea que el homo se
encienda El homo Be encendera
autamaticamente a la hera que
usted haya seleccionado. Cuande
se use la HORA DE COMIENZO
DEMORADO con el TIEMPO
PARA COClNAR EN EL HORNO,
el herrlo lambien se apagar_
automaticamente al final de la
cantidad de tiempo para cocmar
®
TEMp
(9
<8>
@
@
@
35
Los botones con las flechas
para SUBIR y/o BAJAR las
HORAS/MINUTOS programan
la hera del dia, la cantidad de
tiempo para coc]nar, la
cantidad de tiempo para
limpiar, la hera para un
comienzo demorado, y la hera
del cron0metro de la cocina,
Losbotonescon las flechas
paraSUBIRy/o BAJARla
TEMPERATURAseleccionan
la temperaturaparacocinar
El baton START debe
empujarse para aclivar
cualquier funoi0r]del homo.
El baton CLEAR/OFF se
usa para oancelar cualquler
funci0n del homo y el tone de
fin de ciclo. No cancelard el
Reloj o el Crondmetro de la
Cocina.
El botOn KITCHEN TIMER se
usa pare encender o apagsr el
Cron0metro de la Cocina No
conlrolara ninguna otra funci0n
del homo
El baton del RELOJ se usa
para porter la hera del dia
Enciende y apaga la luz del
homo.
20P306-2 SPy02 2J14/03, 3:59 PM

OPERAClON
Panel De Control
(HomoSuperior)
Indlcadordetemperature Indicadordeencendido
delhorno_
Indicadorde _, _ _ Indicadorde lahora
,.,.m. BBB BB-BB
Indicadordetunci6n Indicadordefunci6n
delhomo del homo
El Dial de Control es una referencia
f&cil para ut]lizar el control del homo.
Mas abajo est_n las descripciones para
indicar c6mo funciona el Dial de Control.
INDICADOR DE LA TEMPERATURA
DEL HORNO - Este indicador tiene un
proposito multiple
• Muestra la temperature
• Muestm un c6digo de error "ERR" -
Si el indicador de temperatura del homo
pestaSea "ERR'; entonces usted ha
programado un tiempo o una
temperatura incorrecta
• Uuestra problemas el homo- Si el
control pestaClea "F" y un n0moro o
letra, usted est& experimentando un
problema del homo. Por favor lea la
secci6n CODIGOS-F en su manual.
INDICADOR DE ENCENDIDO "ON"
Seencendera cuando se programe una
funci6n del homo
INDICADOR DE PROGRAMA - El
indicador de programa pestaneara en
combinaciOn con una funciOn del homo o
una funci6n automatica para avisarle que
necesita programar un tiempo o una
temperatura Eiemplo: "SET" y "BAKE"
pesta_ear_n para avisarle que necesita
programar la temperatura del homo.
INOICADOR DE LA HORA Muestra
I_ _lora de_ die I [a _antidad de ti_mp_
para cocinar, la hora para comenzar una
funci0n demorada para cocinarl limpiar,
o la hora programada en el cronometro
de la cooina
• Muestra un c6digo pare recorder
"PUSH START"-Si el indicador de la
hora del homo pesta_3ealos palabras
"PUSH START,"entonces usted tiene
clueempujar el botch START para
aclivar su programa.
IHDICADORES DE LAS FUNCIONES
OEL HORNO - MLJestranque funci6n ha
sido programada, cuando la puerto del
homo esta enganchada, y sila funci0n
es demorada
36
201:)306-2 SP_ 2/14_03, 3:5g PM

OPERACIO#
RelojYCroodmetroDeta
Cocino(HomoSuperior)
El relol debe ponerse a la correcta hora
del dia anles que una funci6n demorada
del horrid func]one correctamente. La hora
del alia no se puede cambiar durante una
funcidn automAtica del homo, pero se
puede cambiar durante una funci6n para
hornear o para asar a la parrilla
C(_MO PONER EL RELOJ
1. Empuje el bot6n CLOCK.
2. Empuje los botones con las flechas
para SUBIR y/o BAJAR las HORAS/
MINUTOS para poner ;a hora correcta
del dfa.
3. Empuje el bot6n START,
PARA VOLVER AL RELOJ
Mientras est6 usando el homo para
cocinar, empuje el boton CLOCK, sl
desea ver la hora del dia. La hora
presente del dia se ver_ en el dial.
CORTE DE CORRIENTE
Si ha ocurrido un torte de corrienle,
la hora pestafieara en eldial y estar&
incorrecta. Ponga nuevamente el reloj
a la hora
Cualquier func]6n para cocinar del horrid
que estaba en proceso tendr_ que ser
reprogramada.
El cronometro de la coc]na se usa para
medir el t]empo de los procesos para
cocinar u otras actividades del hogar. No
controla el homo. Se puede programar
basra 9 horas y 59 minutos. Contar_ hacia
arras en minutes hasta que Ilegue a los
UL'nMOS 60 SEGUNDOS, ontonces e!
Control sonar_ una vez. Cuando la cuenta
Ileg ue a CERO, el control sonara 3 vecos
seguido de un sonido cada 6 segundos
hasla que el boron KITCHEN TIMER
se empuje. El son]do de carla 6 segundos
se puede eliminar para ciclos futuros si se
desea. Para las instrucciones de cdmo
eliminar estos sonidos continuos, yea
TONOS en la p_gina siguiente.
COMO PROGRAMAR EL CRON(_METRO
1. Empuje el botdn KITCHEN TIMER.
2. Empuje los botones con las flechas
para SUBIR y/o BAJAR las HORAS/
MINUTOS para poner la hora
3, Empuje el bot6n START
4. Cuando lacuenta Ilegue a cord,
empuje el boron KITCHEN TIMER
para apagar el torlo.
Para cancelar el cron6metro durante la
cuenta, empuje el bot6n KITCHEN TIMER
DOS VECES.
El control le permitira cerrar los botones de
manera que no se puedan aotivar ouando
los empule. Si so proocupa de deiar el homo
sin supervision, active este programa
1. Toque y sostenga, al mismo tlempo, los
botones con las flechas para BAJAR las
HORAS/MINUTOS (HOUR/MIN) por tres
segundos, hasta que el dial muestre
"LOC ON" (bloquear)
2. Para desbloquear el control, toque y
sostenga, almismo tlem po, los botones
de las flechaspara BAJAR las NORA,S/
MINUTOS (HOUR/MIN) portros
segundos, hasta que el dia! muestre
"LOC OFF" (desbloquear).
EMe programa se puede seleccionar
solamente cuando el horno no est_
ell USO,
Cuando este programa est6 activado,
estos bolones no funcionar_n, Eldial
mostrara "LOC ON" si se empula un
bot6n. El ajuste sera retenido en la
memoria inclusivedespu_s de una
interrupci6n el servicio energetico
37
20P306-2 SPY02 2/14/1_, 3:59 PM

OPERAClON
ControlDelHomo,Reloj Y
Cronmetro(HorBoSuperior)
El nuevo control tiene una serie de tonos
que sonaran a tiempos diferentes Estos
tonos pueden sonar mientras usted
programa una funci6n del homo, o al final
de una funci6n del homo. Tambien re
avisar_ si existe un problema con una de
las funciones. Mas abajo estan los tipos
de tonos y una breve descnpci6n de
cada uno,
TONOS MIENTRAS PROGRAMA EL
CONTROL - Cuando empuje un bot6n
tJsfedeseuchar8 un fond Este fond le hara
saber que aplicO suficiente presi6n sobre
el boron para activarlo, (Los botches con
las flechas no suenan,)
TONO AL FINAL DE UN CICLO
AUTOMATICO - Despues de una funci6n
para cocinar automatica, usted escuchar_
tres tonos cortos seguidos por un tono
cada 6 segundos. El fond de cada 6
segundos seguira sonando hasta aue
empuje el bot6n CLEAR/OFF ousted
decida seleccionar el programa especial
para cancelar y evitar que el fond de 6
segundos suene al final de un ciclo futuro.
C(_MO CANCELAR EL TONO DE
6 SEOUNDOS
1. Empule y sujete los botones
BAKE y BROIL, a la misma vez
por 3 segundos, hasta que el dial
muestre "SF."
2. Empuje el bot6n KITCHEN TIMER.
El dial mostrara "CON BEEP" (tono
continuo).
3. Empuje el bot0n KITCHEN TIMER
nuevamente El dial mostrara "BEEP"
(fond canceFado).
4. Empuje el bot6n STAre', para
cancelar el tono y salir de este m6dulo
especial
Si desea regresar a los tonos de 6
segundos, repita los pasos de arriba hasta
due el dial muestre su selecci6n y empuje
el bot6n START (para eEcomienzo).
TONO DE ATENCION - Este tono sonar&
si hace un error u omite algo mienlras
programa una funci6n del homo
Unos ejemplos serian:
a. Programar un Gi61ode limpieza y la
puerta del homo no esta bien cerrada
b, Programar una funci6n y no empujar el
bot6n START
c, Empujar un bot6n para una funci6n
adicional sin programar primero la
temperatura o el tiempo.
d. ERR pestafleara si usted programa
una temperatura invAlida Empuje el
boron CLEAR/OFF para poner el dial
en blanco y reprogramar la funci6n (del
homo
Cualquiera de estos se puede identificar
r&pidamente con mirar e! dial.
TONO DE PRECALENTAMIERTO -
Cuando uste_ seleccione un modo de
cocinado, ajuste la temperatura del homo,
y presione el bot6n para el comienzo
(START) para que el homo comience a
calentar Cuando la temperatura dentro
del homo Ilega a la temperatura que usted
program0, sonar& un fond para avisarle
que el homo est_ listo para hornear.
Si usted programa una funci6n del homo
y el control suena mientras el dial hace
pestafiear una "F" y un nt3mero o letra tal
cored "F-4" o "FL" es posible que exista
un problema con el control o con el homo.
Simplemente empuje el bot6n CLEAR/
OFF y espere una hora Trate de
programar esa funci6n nuevamente. Si el
c0digo so repite, escriba el c6digo que
pesfar_ea y Ilame para un servicio Digale
al tecnico que c6digo estaba
peslar_eando
38
20P306-2 S.Pv02 2/14_3, 3:59 PM

OPERAClON
Consejo$Para Cocinar
En ElHomo
Si abre la pueda frecuentemente para mirar
losalimentos, causar_ una perdida de color
y males resultados cuando hornee
Es normal sentir un poca de olor cuando use
su homo per primera vez. Esto es causado
per el calentamiento de las pabes nuevas y
del aislante. Pare ayudar a eliminar este oler,
ventile la habilaci6n abriendo una ventana
o usando una camp_ma de ventilacl6n.
El precalentamiento es subir la temperalura
del homo a la temperature que va a user
cuando homee. Permita que el homo se
precalienle bien cuando las recetas
requleren preealentamiento,
IMPORTANTF: Nunca cubra el rondo del
homo o la parrilla del homo con papel de
aluminia. El use inadecuado puede causar
una male circulacidn del color1 pobres
resultados at hornear, y podria dafter el
acabado del homo. Pare prevenir manchas
debide a derrames, usted podria colocar
un pedazo de papel de aluminio o una
bandeja para galletas sobre la parrilla
debalO de ta comida que se podrla
derramar
1[: SJi
La ventilacion del homo est& ubicaaa
debajo del panel de control. Esta_rea se
podria calentar mucho durante el use del
homo. Es normal que salga vapor de la
ventilaci6n y/o que se produzca humedad
debalo cuando el homo no est_ en use La
ventilaoi6n es importante para la correcta
circulaci6n del aire. Nunca obstruy8 la
ventilaci6n
Ventilaci6n
del homo
(_ Para prolongar la vida del foco de las
luces del homo, siga estos censejos:
Siempre apague los luces cuando el
homo no este en uso 6 durante un
ciclo Oelimpieza. Si la luz del homo se dela
encendida per un largo pefiodo de tiempo, el
homo eslara tibio cuando abra I_ puerto
debido al cafor generade per el foco de las
_uoes del homo,
Enla parte trasera del homo usted notara un
pequefio tube. Estoes un sensor decalor
que mantiene la temperature del homo.
Nunca mueva o doble este tube.
Sensor de
temperatura
La zona de temperaturabaja de su homo
(entre 170°Fy 200°F) est,( disponible pare
mantener los alimentos tObiesSin embargo,
los alimentos na se deberian mantener
a estas bajas temperatures per m_s de
2 heros
39
20P306-2 SPvO2 2J14,'03, 3:59 PM

OPERACION
ConsejosPare Cocinar
EnE1Homo
Cuando use su conveniente operaci6n de
Comienzo Demorado, los allmentos tales
come productos I_tcteos, pescado, eves,
etc., nunca se deberian deJarexpuestos
per m_s de una hera antes de ser
¢ocinados La temperaturaambiente y el
ca_orde la luz del homo promueven el
crecimiento de bacterias.
Los resultados del horneado ser_ meier si
las cacerolas para hornear est_.ncentradas
en el home Iomas posible. Si est_
horneando con mas de unutensilio,
col6quelos de manera que cada unotenga
per Iomenos de 1"a 1V2"de espacio de aire
a su alrededor. Coloque los utensilios
de manera que n_ngunoquede directamente
encima de otre
I
La mayoria de las recetas para hornear ban
side desarrolladas utilizando productes con
un alto contenide de manleoa tales come
mantequilla y margarina (80% de manteca
per peso_el requerimiento federal pare los
productos marcados "margarina"). Usled
obtendra males resultados si los queques,
pasteles, tortas, gal_etas,o dulces son
hechos con mantequilla con baje eontenido
de manteca, I_asmantequillas y margarines
con bajo contenido de aceite contienen
menos manleca y m_s agua. El alto
contenido de agua de la mantequilla o
margarine afecta latextura y el saber de sus
recetas pare hornear favoritas. Mientras mas
bajo sea el conlenido de manteca de la
mantequilla o margarina, m_s se notaran
estas diferencias. Paraasegurar los mejores
resultados, use margarine, mantequilla u
olras barras de estos productos que
conlengan per Iomenos 70% de aceite
vegetal
El Sensor de Temperalura del Homo en la
parte trasera del homo mide y controla
eontinuamente la temperatura dentro del
homo. Pare manlener una temperatura
programada constante, los elementos haran
un title de encendido y apagado mientras
el homo cocina.
LAS BANDEJAS BAJAS PARA
GALLETAS, sin lades, permiten que el
aire circule alrededer de las galletas pare
que se doren en forma pareja
i
i
II
UTENSILIOS BRILLANTES1 reflejan el
calor, son perfectos para que los queques
y panecillos rtlpidos queden con una
codeza dorada clara.
UTENSILIOS DE VIDRIO, OSCUROS
CONTRA PEGADURAS, UOPACOS
PeR LA EDAD1absorben el calor, son
perfectos para panes con levadura,
cortezas para pasteles o alimentos que
tengan una corteza caf_ Cuando use estos
utensitios, la temperatura del homo se
deberia reducir en 25°F.
40
20P306-2 SPy02 2/14KI3, 3:59 PM

OPERACION
ConsejosParaCocinar
EnElIlomo/CGmoHornear
(HomoInferior)
Las parrillas del homo est_n diseSadas
con topes, una conveniencia y tambien
una precauci6n de segurBdad.Cuando los
parrillas estan colocadas correctamente
en el homo, las guias tienen un tope para
prevenir que los parrillas se den vuella
cuando se sacan del homo. Este diseNo
permite que los parrillas puedan set
inserladas de solo una manera.
Su homo tiene cuatro (4) posiciones La
posici6n de m_s arriba es solamente una
guia+La guia de arriba nose puede usar
para una posici6n de laparrill&
Guias
Siempre coloque las pard.as del homo
en la posici6n correcla cuando el homo
est_ fr(o,
Usted padria pensar que su homo
nuevo cocina diferentemente al homo que
reemplaz¢_Le recomendamas que use su
homo nuevo per varlas semanas para que
se famiJiarice mas con +1,siguiendo los
tiempos que se dan en la receta come una
guia. Si cree que su homo est_ funcionando
demasiado caJienteo frio para su
preferencia, yea Ajustes - H_galos Usted
Mismo en la porte de atras de este guia para
hacer +osajustes+
_£R o_m OFF _
,@ o 1. Empujey haga
I, '_ girar ponga la
_1 _ PERILLA DE
HORNO en la
temperatura de
la receta.
2. Cuando
termine de
hornear ponga
la pFRILLA
DE HORNO en
APAGADO
(OFF)
3.
Abra la puerta
del homo de
abalo en la
posicion de pare
para asar a la
parrilla (broil
stop).
NOTA: Los
alimentos pueden
ser asados con la
puerta cerrada,
pero es pasible
que no queden
tan dorados
porque el
elemento hara
oiclo entre
enoendido y
apagado.
Empule y haga
girar ponga la
PERILLA DE
HORNO a
BROIL (ASAR A
LA PARRILLA).
Cuando termine
de cocinar,
ponga la
PERILLA DE
HORNO en
APAGADO
(OFF)
41
20P306 2 SPY02 Z/14/03, 3:59 PM

OPERACION
CmoI mur Y (11 oSuper )
(_1. Empuje el bot6n BAKE.
(_ 2. Empuje los botonescon las flechas
TEMP SUBIR y/o BAJAR la
TEMPERATURA para
programar la temperatura
del homo que desea usar
3. Empuje el bot6n START.
Para programar que el homo cocine por
un tiempo determinado y se apague
automaticamente:
(_1, Empuje el boron BAKE.
(_ 2. Empuje los botones
oon las fiechas SUBIR
TEMP y/o BAJAIR la
TEMPERATURA para
seleccionar la temperatura
del homo que usted
de£e_ tJSRF
3. mpujeel bot6n OVEN
COOKING TIME.
(_) (_) 4. Empuie los botones con
las flechas SUBIR y/o
BAJAR las HORAS/
_,,_ =, MINUTOS para
seleccionar la cantidad
de tiempo en que
desea que los
al]mentos se cocinen
<_5. Empuje e] boron START,
Para programar que el homo se enc]enda
a una hora posterior del dia, coctne por
una cantidad de tiempo especi£ca y se
apague autom_ticamente.
TEMP
@
®®
®
®®
1. Empuje el bot6n BAKE.
2. Empuje los botones
con las flechas
BUBIR y/o BAdAR la
TEMPERATURA para
selecc]onar la
temperatura del homo
que prefiere usar
3. Empuje el bot6n OVEN
COOKING TIME.
4. Empuje los botones
con las flechas para
SUBIR y/o BAJAR las
HORAS/MIN UTOS
para seleccionar la
cant]dad de tiempo en
due desea cocinar los
alimentos.
5. Empuje el botdn
DELAY START TIME.
6. Empuje los botones
con las flechas para
SUBIR y/o BAJAR las
I'IORAS/MINUTOS
para seleccionar la
hora del dia en que
prefiere que eJhomo se
encienda.
7. Empuje el bot6n
START.
El homo se ap_gar_ al t_rmino del
tlempo pare cocinar a rnenos que el
programa pare mantencl6n de
temperature se haya activado.
42
20P306-2 SPY02 2/14/03, 4:00 PM

OPERACION
C6enoAsarALa Parrilla
(AmbosHornos)
Asar es cocinar al calor directo del
elemente superior. La puerta del horno
deberia permanecer abierta en la posici6n
de tope para asar cuando ase a la parrilla
No es necesario precalentar el homo
cuando ase a la parrilla, Use la cacerola
y la parrilla para asar que viene con su
homo. Ambas estan dJseSadas para
drenar adecuadamente la grasa y los
!iquidos
_ uando use papel de
alumlnlo, el papel de
aluminlo debe estar
moldeado firmemente a
la parrllla y los cortes en el papel
deben colncldlr con los cortes de
la parrllla. Esto permlte que la
grasa y los IJquIdoscaigan a la
cacerola, evitando que se
produzca un Incendlo y humo
excesivo.
Slempre saque la
cacerola y la
parrllla del homo.
Guardar y olvldar
una cacerola para asar
sucia en el homo es un peligro
para produclr un Incendlo o
humo.
El Oepartamento de Agricultura de los
Estados Unidos recomienda cocinar la
came y las ayes completamente--la came
a un calor INTERNO de per Io mends
160°F y las ayes a un ca!or INTERNO de
per Io mends 180°F. El cocinar a estas
temperaturas generalmente protege
contra enfermedades causadas per los
alimentos.
Mientras m_s cerca coloque los alimentos
del elemento para asar, m_s r&pido se
dorar_n per afuera, pero quedando rojo o
rosario en el centre.
Colocando las carnes lejos del elemento
permitir_ que las carries se cocinen en eL
centre mientras se doran per afuera.
Usando estas posiciones, cocine el lade 1
per Io mends 2 minutes m_s que el lade 2.
Si su homo est_ conectado a 208 voltios,
usted podria usar una posiciOn de parrilla
mas alta y/o cocinar los alimentos per mas
tiempo.
El tamafio, peso, grosor, temperatura
inicial ysu preferencia personal afectara el
asado a la parrilla Esta tabla est_ basada
en Games a la temperatura del
refrigerador.
AUMENTO
Blldlc 1" de gruuo
Tortem
do came rnollda -
1• de gr gibe
Chukmm de cenJo -
1/2" do grueso
Pesc_o(_es)
Polio(presas)
POSICION J TIEMPO TOTAL.
DE I (mlnut_)
PARRILLA I
I
16-18
I
27-29
I
11-13
I
la. Empuje el bot6n BROIL. (Esto
automdticamente progmma ASADO
en HI-ALTO.)
lb. Mientras el indicador de programa
pestafiea en el dial, empuje
nuevamente el bot0n BROIL si
prefiere asar en Bajo (Lo). Ase en Lo
(Bajo) para cocinar bien alimentos
tales come aves o cortes de came
gruesos sin que se doren demasiado.
2. Empuje el bot6n START.
3. Cuando termine de asar, empuje el
bot6n CLEAR/OFF
43
20P306-2 SPy02 2J14KI3, 4:00 PM

OPERACION
CGmoSele¢cionorProgramas
EspecialesDolCoMrol
(HomoSuperior)
El nuevo control a botones tiene
programas adicionales que usted ptJede
seleccionar, Despues de hacer su
selecciBn, si desea cambiar el programa,
siga los pasos hasta que el dial muestre
£u seleociBn,
2. (a) Empuje los botBns BROIL y OVEN
COOKING "riMEal mismo tiempo. El
dial del control mostrar& el signo para
grade y "F,"
(b) Empuie los botBns BROIL y OVEN
COOKING TIME al mismo tiempo
nuevamente. Esto cambiar_ F°
(Fahrenheit) a C° (Centigrade).
3. Empuje el botBn START.
El control se prograrna automaticamente
para apagarse despues de hornear por
12 horas o despues de asar a la parrilla
per 3 horas en case que se le olvide y
deje el homo encend]do. Si desea eliminar
este programa:
1, Empuje y sujete, 81mismo _empo, el
bolon BAKE y BROIL per 3 segundos,
hasta que el dial muestre "SF."
2, Empuje el botBn DELAY START
TIME. El dial muestra "12Shdn"
(apagado en 12 horas).
Empuje el botBn DELAY START TIME
nuevamenle. F_Idial mostrara "no
8hdn" (no apagado)
3. Empuje el 13ot0n START.
El control del homo esta programatic
para la selecciBn de temperaturas en
Fahrenheit. La mayoda de los recetas se
dan usando la escala Fahrenheit. Usted
puede cambiar esto y usar una selecciBn
en Cenh'grados.
1. Empuje y sujete, al mlsmo
tiempo, los botches BAKE y
BROIL per 3 segundos, hasta
que el dial muestre "SF."
Su control esta programatic para usar el
relol en 12 horas. Si usted prefiere usar
Hera Militar de 24 heros o poner el dial en
blanco, se hace asi:
1, Empuje y sulete, mla mlsma
VQZ1el botBn BAKE y BROIL per
3 segundos, hasta _ue el d]al
muestre "SF"
2. (a) Empuje el boton CLOCK. El dial
mostrara "12hr," Si _sta es su
seleecion, empuje el botBn
START.
0
(b) Empuje el boron CLOCK
nuevamente, El dial mostrar_
"24hr." Ejemplo: 5:00 en el reloj
de 12 horas leera 17:00 en el reloj
de 24 horas Empuje el botBn
START
O
(c) Empuje el botBn CLOCK
nuevamente. El dial ahora mostrara
"OFF." Siesta es su selecciBn,
empuje el botBn START. La hora
no se mostrara en el dial. (La
funciBn delay start no funcionara
44
20P306-2 SPv_ 2/14_)3, 4:00 PM

OPERAClON
CGmo$eleccionar Programas
Especiales(HomoSuperior)
Su nuevo control tiene una funciOnpara
cocinar y mantener la lemperatura para
cocinar automaticamente solamente que
manlendr_ !os alimentos tibios basra
3 horasdespues que e$cocinado
automatico haya terminado. Para activar
esta funcion:
1. Empuje y sujete, a la misma vez,
los botones BAKE y BROIL por
3 segundos, hasta que el dial
muestre "SF."
2. (e) Empuje el botBn OVEN COOKING
TIME. El dial mostrara "HLd OFF."
(b) Empuje el boron OVEN COOKING
TIME nuevamente para activar este
programa El dial mostrar_ "HLd ON."
3. Empuje el botBn STAre',
Este Programa Especial le permitir& cambiar
la velocidad; #1 signiflca que el cambio de
velocidad es lento basra #5 que significa
que el cambio de velocidad es r_pido Para
seleccionar la velocidad que prefiere, siga
estos pasos:
1. Empuje y suiete, a la misma
vez, los botones BAKE y BROIL
por 3 segundos, hasta que el dial
muestre "SF."
2. Empuje algon boron con la flecha
SUBIR. El dial le mostrara una posiciBn
de velocidad entre 1y 5.
3. Empu]e alguna flecha SUBIB
para aumentar la velocidad hasta el
nL_mero5.
Empuje algun botBn con la flecha
BAJAR para disminuir la velocidad
has_ael ndmero 1
4. Empuje el botBn START.
45
20P306-2 SPvC_ 2/14J_3, 4:00 PM

OPERAClO#
CGmoSeleccionarProgramas
Especiales(Homo_lperior)
(Dlse_ado para usar los S_b_dos
Judios y los dias festivos.)
La caracteristica de los S&bados puede
ser usada solamente para hornear/asar.
No pue0e ser usada para convecciGn,
asado a laparrilla, I]mp]eza automatica, o
coccidn de Inicio Retrasado.
NOTA: La luz del homo se enciende
automaticamente (en algunos modelos)
cuando la puerta es ablertay se apaga
cuando la puerta es cerrada La bombilla
puede ser removida Ver la Secci0n sobre
COmo cambiar la bombilla del homo, En
los modelos con el boron de OVEN LIGHT
la luz del homo podria encenderse y
dejarse encendida.
C(_MO AJUSTAR LA FUNCI(_N
REGULAR DE HORNEADO/ASADO
NOTA: Para entender cOmo trabaja el
control del homo, practique utilizando la
funciGn de horneado regular (no S_bado)
antes de usar la funci0n del Sabado.
Cerci6rese de que el reloj muestra la hora
eorrecta del dta y de que el homo esta
apagado.
®
@
G
1. Empuje y sostenga
empujados ambos
botones, BAKE
(Horneado) y BROIL
(Asado), al mismo tlempol
hasta que la pantalla
muestre "SF"
2. Toque el botSn de DELAY
START _ME hasta que
aparezca "SAb bAtH"
en la pantalla.
3. Empuje el botGn START
y • aparecera en la
pantalla.
4. Toque el botGn BAKE. NO
aparecera ninguna ser3al.
(_ 5. I_ temperatura ]nicialpreprogramada se
TIEIMP ajustar8 automaticamente
a 350°F. Toque los
botones UP o DOWN que
se serlalan con flechas
para aumentar o disminu]r
la temperatura en
incrementoss de 5°. La
temperatura se puede
ajustar entre 170°F y
550°F. No aparecerA
ninguna sepal o
temperatura
6, Empule el boton START
7. Despues de un pefiodo de
retraso al azar de
aproximadamente 30
segundos a 1 minuto, las
serlales ) C apareceran
en la pantalla ]ndicanc_o
due el homo ha side
atustado para hornead
asar. Si las senales
D • no aparecen en la
pantafla, comience desde
el Paso 4,
Para ajustar latemperatura del homo,
empuje el bot0n BAKE y toque los
botones UP o DOWN que se senaLancon
fiechas para aumentar o disminuir la
temperatura en incrementos de 5°, Empuje
e! botGn START.
NOTAS:
• Cuando la pantalla muestra _, la
funcion del S&bado esttl activada.
Cuando la pantalla muestra D C, el
homo est_ en la funciGn de hornea0o/
asaqo
• Los botones CLEAR/OFF y OVEN
COOKING TIME estAn activos durante
el uso de la funciGn del Sabado
46
20P306-2 SPy02 2/14_3, 4:00 pM

OPERACIO#
C no SeleccionarPrograms
EspeGiales(HomoSuperior)
C6MO SELECCIONAR EL
HORNEADOIASADO POR TIEMPO-
INIClO INMEDIATO Y PARADA
AUTOM_,TICA
NOTA: Para entender oPmo el contror del
homo trabala, practique util]zanqo las
funciPnes de In]cio Inmediato y Parada
Autorn_tica regulares (no S_bado) antes
de usar la func On dei S&bado.
Cercic_rese de que el roloj muestra la hora
correcta de101a y de que el homo esl&
apagado,
1. Empuie y sostenga
empujados arnbos
botor',es, BAKE
(Horneado) y BROIL
(Asado), al mismo tlempo,
hasta que la pantalla
muestre "SF."
Toque el batPn de DELAY
START _ME basra que
aparezca "SAb bAtH" on
la pantalla.
Empuje e! bot0n START
y • aparecera en la
pantalla.
Toque el botc_nOVEN
COOKING "riME No
aparecer_, n]nguna serial
(_ (_ 5. Empuje los botones UP
o DOWN que se sefialan
con flechas para entrar el
..._ tiempo de coccion deseado
entre 1 minuto
y 9 horas y 59 minutos.
F-/tempo de cocoi_Sn
seleccionado aparecer_
en La_ar_talLa.
6. Empuje el bot_,n START
7. Toque el boton BAKP. No
(_ aparecera ninguna sehaL
(_) 8. La temperatura initialpreprogramada se
"rEMP coloca_(:l
automatieamente en
350°F Toque los
botones UP o DOWN
que se sefialan con
fiechas para aumentar o
disminuir la temperatura
en ]ncrementos de 5_.
La temperatura se
puede atustar entre
170°F y 550°F. No
aparecer_ ninguna serial
o temperatura.
g. Empuje elboron START.
10. Despues de un pefioqo
de retraso al azar de
aprox_madamente 30
s_Ejul_dos_,1 il_ii_t_to,
las sefiales -_ ¢-
aparecer_n en la
pantalla ]ndicando que
el homo ha s]do
alustaqo para hornear/
asar. Si las sef_ales
c, • no aparecen en _a
pantalla, comienee
d_sqe el Paso 7
Para ajustar la temperatura del homo,
empuje el botPn BAKE y toque los
botones UP o DOWN que se sefialan
con flechas pata aumentar o disminuif
la tomperatura en incrementos de 5°.
Empule e! boron START.
NOt"AS:
• Cuando la pantal[amuestra -_ , la
funciSn qel Sabado esta activada.
Cuando la pantalla mueslra -_ •, el
homo estA en la funci0n de horneado/
asado,
• Cuando lacocciPn haya terminado, la
visuafizaci0n en la pantalla oambiara
de =) • a _ y"0:00" apareeer&,
indlcsndo que el homo se ha apagaqo
(OFF), peto que todavla est& en al
funciPn del SAbaqo. Remueva los
atimentos aocinados.
47
20P306-2 SPY02 2/14/O3, 4:00 PM

OPERACION
C no SeleccionarProgramas
Especiales(HomoSuperior)
COMO SALIR DE LA FUNCI(_N DEL
SABADO
Si el homo est& cocinando,
espere por un periodo de
tiempo 0e retraso al azar
de aproximadamente
30 segundos a 1 m!nuto,
hasta que las se_ales
• aparezcan en la
pantalla.
(_) 3, Empuje y sostenga
empujados 8mbo9
botones, BAKE
(Horneado) y BROIL, al
(_) mismo tiempo, hasta que
la pantalla muestre "SF."
Toque el bot6n de DELAY
START TIME hasta que
"12 Shdn" o "no Shdn"
aparezca en la pantalla,
"12 Shdn" ind]ca que e!
homo se apagar&
automaticamente despues
de 12 horas "no Shdn"
ind]c8 que el homo no se
apagar_ automaticamente.
Empuje el bot6n START
NOTA: Si ocurriera una interrupci6n
del suministro el_,ctrico mientras el homo
est_ en la funci6n del Sabado, el homo
se apagara automaticamente y
permanecera apagado cuando la
energia sea restablecida. El contro!
del homo deloe set reiniciado.
48
20P306-2 SPy02 2/14/03, 4:00 PM

CUIDADO Y LIMPIF.ZA
El CicloDe Autolimpiuza
(HomoSuperior)
El sello de la puerta est& disefiado para que
tenga un espac]o de 5"_" en el rondo del
homo. Esto permite la circulaci(_n adecuad8
del aire
1.
Saque la cacerola y la parrilla para
asar, utensilios, y cualquier papal de
aluminio que podda quedar en el
horno.
2, Si su horno esl& equipado con
parr]llas de niquel, los mismas
deben ser removidas. Si su homo esta
equipado con pardllas cubiertas de
poroelana gris, los mismas deben set
removidas durante er ciclo de I}mpieza
autom_tica
3, La suoiedad sobre el marco frontal
y 8fuer8 deJ seilo del revestimiento
de la puerto neaesitar_ ser Iimpiada
a mano.
Macro frontal
_-_ Revestlmerdo
de la puerta
Limpie estas _reas con agua caJiente, lanillas
can jabon o limpiadores como Soft Scrub _ para
sacar oualquier suciedad. Enjuague bien con
agua limpia y seque.
No use limpiadores de harnas--ningLin
limpiador de hornos para usos comerciales o
revestimiemo de protecci6n debeser usado en
el inleriar o alrededor del homo.
4, Limpiecualquier derrarnepesado del rondo
del homo.
5. No limpie el sello de la puertadel horno. EI
materialde fibra devidno de la puertadel
homo nosoporta laabrasi6n.Esesencial
qua el sello permanezca intacto.Si nora
quese estAgastandoo ttizando, deberia
ser reemplazado
Revestimento de la puerta
Es normal que su homo de la apar]encia de
no toner un buen sel]o sobre el horno Esto
se debe al sello. La ubicac]6n del sello
sobre la puerto mantiene [a puerta se[lada
y prev]ene cualquier p_rOiOa de color.
(_ Los utensllios nunca se
deberian dejar dentin del
homo dumnte un clclo
de autollmpleza.
I-as p_rrillas de niquel
del homo se podrian limplar durante
el ciclo de autollmpleza, pero
perder_n su brlllo y se pondrtn
dlflciles de deslizar. Si decide dejarlas
dentro dumnte al ciclo de Ilmpieza,
pase aceite vegetal a los extremos de
la perrllla pare que se dBslicen mlis
_cllmente.
Las parrlllas cublertaa de porcolana
gria pueden set limpiadaa con
seguddad en el interior del homo
durante el clclo de limpieza
autom_tica. Serei necesario pam
engraaar los extremoa de la parrilla
del homo con una capa ligera de
acelte vegetal despu_s de un ciclo de
Ilmpleza. Esto ayudar_ a qua se haga
f_cil dealizar los eetantea o rejillaa en
el homo.
Durante el primer ciclo de Ilmpleza,
ventile la habiteci6n con una ventans
elbierta o una campana de ventilacl6n.
Eeto evltar',i el olor fuerte producldo
por el calentemianto de lag pa_es
nuevaa.
49
20P306-2 SPV(]_ 2/14,'113,4:_ PM

CUIDADO Y UMPIEZA
E1CicloDe Autolimpieza
(HomoSuperior)
ElCiclodelimpieza,incluyendoel tiempode
enfriamiento,ofreceopcionespreseleccionadas
de3,4,65 horas,peroustedpuedecambiar
escogiendocualquiertlempoentre3y 5horas.
1. sm 3ho_ras:Empuieel boronde
SELECTCLEAN(SELECCIONDE
UMPIEZA).Mostrar_3 horasy
"Lo" enel dial.Eslafunciones
recomendadaparaderrames
pequenosconlenidos.Paseal
paso3 y presioneSTART,
Pare4horas:Presioneel bot6nde
SELECTCLEAN(SELECC_N DE
LIMPIEZA)dosveces,4horasy
"Std" aparecer&nen lapantalla.
Estafunci6nes recomendadapara
unhomo normalmentesucio.Pase
el paso3y presioneSTART
PRra5betas: Presioneel bot6nde
SELECTCLEAN(SELECCI_NDE
UMPIEZA)tresveces 5 horasy
"Hi" apareceranenla pantalla.
Estafunci6nes recornendadapara
hornosaltamentesuelos.Paseal
paso3y presioneSTART.
Empujelosbotonescon lasflechas
paraSUBIRy/o BAJARlas
HORAS/MINUTOSpara
selecc_)narlacantidaddetiempo
queusteddeseequedufeelciclo
Empuleel botonSTART,
Simplementeernpujeelbet6nCIEAWOFF Usted
necesitaraesperara quela temperaturadelhomo
bajernasque latemperaturadeenganche(aprox.
1hera)antesdetratardeabrir lapuerta.
Despu_sdelcicloustedpodrtanotar
unpo_odeceniz_sblancasenel homo.
Simplementelimpielascon unpar3oo esponja
hSmeda.
Sielgunasmanchasblancaspers_sten,fneguelas
con unalanilladeaceroconjab_n./_egQre_ede
enjuagarbien.Ealassongeneralmentedep6sitos
desalquenosepuedens_..arduranteelciclo.
Sisu homoestaequipadocon parrillasde
porcelana,seranecesariopareengr_ar los
extremescon unacapa ligeradeaceitevegetal
despuesdelcielo delimpiezaEstoayudaraa
quese hagaf_,cildeelizarlosestanteso rejillasen
el homo.
Sipornlgunaraz_ ustednoquedasstisfecho
conlos resultadosde Islimpleze,slmpten_nte
mpitnelciclo.
1. F'resionesel boronde
SELECTCLEAN
(SELECCI_NDE UMPIEZA),
y escojael elveldel limpieza
deseadeyasea Lo{3hems),
Std(4 horas},o Hi(5bolas).
Siunadeestases su opci6n,
paseal paso3y escoiael
tiempode ielciode demor_
@ @ 2. Siusteddeseacambelrla
cantidaddetiempopapa
limpiar,empujelosbotones
'_,_ con lasflech_sparaSUBIR
y/o BAJARlasHeRAld
MINUTOS.
3, rnpujeelI:x}t6nDELAY
STARTTIME
@ @ _" Empuj_iosbo_o_s_Onlas
fleohasparaSUBIRy/o
BAJARlasHORAS/
=,,._,_ MINUTESparaseleccionarla
heradel diaenque preflem
queel cialedelirnpieza
empiece
5, Empuieel bot_nSTART.
20P306-2 SPv02 2/14/03, 4:00 PM

CUIDADOYUMPIEZA
MA33£RIALES DE LIMPIFZA
• Detergente liquido para platos
• Agua [bia
• P_r_o suave
NO use Ilmp_ldores abrllsivos,
llmpiadoms industrlales, o
blanquedores (l:loro).
HORNO CON AUTOLIMPIFZA
(HORNO SUPERIOR)
MATERIALES OF LIMPIEZA
• Detergente para platos
• /anillas con jabdn
• Lanas para fregar
• Agua tibia
PARA LIMPIAR
Enjuague bien despuds de limpi_r. La
limpieza denlro de_homo se necesita
hacer sOlo como un retoque entre ciclos
de limpieza
No Irate de limplar el homo a menos
que est_ completamente frio. Nunca use
un Ilmpiador para homos en su homo.
HORNO CONYFNCIONAL
(HORNO INFERIOR)
MATERIALES DE LIMPIEZA
• Detergente Fiquido para platos
• Limpiador para hornos
• Lanillas de acero con jabdn
• Agua tibia
• Polvos para limpiar
POLVOS PARA LIMPIAR
El Iimpiar eqinterior del homo despu_s
de cada uso hara mas facil la limpieza.
Para suciedad pesada, si se usa un
_impiador para b_rnos come,ciaL siga
las instrucuiones de la etiqueta
cuidadosamente. No ponga nada
de limpiador sohre el sensor de la
temperatura. Enjuague bien despues
de limp_ar
_ Sensor de
" _ temperatura
II _ _"'_ del homo
LLI
No trate de limpiar el horno a menos
que estd completamente ftio.
MA33ERIALES DE LIMPIEZA
• Detergente liquido para platos
• Agua tibia
• Lanillas de acero con jab6n
• Limpiador comercial para hornos
C(_k_O UMPIAR
Permita que la cacerola se remoje. Ponga
detergente para platos sobre ;a parrilla y
cubTBcon _T_pa_o o una '_oal_a h_m_a
pot un rato Friegue a me(3ida que sea
n¢cesario Lave, enluague, y seque bien.
Usted tambidn podria poner la cacerola y
]a parrilla er] la lavadora de platos
51
201:;306-2 SPY02 2/14K]3, 4:00 PM

CUIDADOYLIMPIEZA
5, Reconecte laelectricidad haciael homo en
el interrupter detcircuito principal o la caja
delos fusibles.
_ RECAUCION: Usteddebe
desconectar el poder ehtctrico
hacla el homo en el intermptor
t_lnclpel del circulto o en la caJa
de los fuMMes antes de ttatar
de reemplazar los feces de [a luz del homo,
Notoque el foco de la I_ con las manes
peladas, El foco se calienta mucho
nipidemerdo. Envtmlva la gems de espuma
del paquete del foco slrededor del foco
pare la Instalackin. Cuando saque el foco,
espere haste que el foco se hays enfriado y
use url p_lo Seco.
k i
Pare darle la mejor luz posible, su homo tiene
dos luces de feces de hal6geno. Uno estd en la
esquina _zquierda de la pared trasera, el otro
esta en el teeho de la cavidad del homo,
Recopt_culo S_uete
Cubiorta
COM0 SACAR de vidrio
1, Usted debe desconectar el poder electrico
hacia el homo en el interrupter principal del
circuito 0 en la caja de los fusibles
2, Haga girar la cubierta de vidrio en
direccion centre el reloI V4de vueita hasta
que las alelillas de la cubierta de vidrio
salgan de las ranuras del soquete.
3. Tire derecho hacia afuera para saear
el foce.
COMO COLOCAR
1, Envuelva et foco con un pane seco o con el
material de empaque del foco. No toque el
foco con los dedos,
2. Empuje cempletamente el foco derecho
denise del receplaculo. Use solo feces de
halogeno de 120 voldes, 35 waits,
3. Coloque las aletillas de lacubierta de
vidrio en la,_ranuras del soquele
4, Haga girar la eubierta de vidrio en
direcci6n del relol V4de vuelta.
MATERIALES DE LIMPIEZA
• Detergente
• Ague tibia
• Lanes pare fregar o lanilla con jabOrl
Tope en
Parte trasera la guie
levantada de
lapardlla _
C(_MO SACAR
1. I-re las parrillas hasta la poslci6n de
tope.
2. Levante el frente de la parrilla y
deslfcela bajo el tope de la gu{a pare
las parrillas.
PARA LIMPIAR
Umpie con agua tibia y detergente. Pare
sacar manchas duras, _iegue levemente
con lane pare fregar o con una lanilla con
jabOn. Enjuague bien.
Las parrillas cubiertas de porcelana gris
pueden ser limpiadas con seguridad en
el interior del borne durante el ciclo de
limpieza automatica. Sere necesario para
engraaar los extremes de la parrilla del
homo con una capa ligera de aceite
vegetal despues de un ciclo de limpieza.
Esto ayudar& a que se haga f_cil deslizar
los estantes o rejiflas en er homo.
PARA COLOCAR NUEVAMENTE
1, Coloque la parte levantada de atr_s de
la parrilla sobre las gules
2. Levante el frente de la parrilla hasta
que la parie levantada de atr_s se
deslice per debajo del tope de las
gules
3, Deslice la parrilla hasta arras
52
20P3_ SP_ 2/14/03,4:00 PM

CUIDADO Y LIMPIEZA
Partes Removibles
Ls puerta es muypesacla.Tenga cuidado
cuandoremuevay levante lapuert8. No
levante la puertapor lamanlja.
C(_MOSACAR
1, Abralapuerta /_ I_ .
comptetamente.
2. Tire los topes de las
bisagras hacia abalo
hacia el marco de la
puerta, a la posicion de
abierto. Esto podda
requerir un destornillador Cerradurade
biiagra
de cabeza plana. Tire de IO_ clerru
de la biSagra hacla
abajo para abrlr
3. Tomefirmementelos
ladosde la puerta
dearriba.
4. Cierrela pueda a la
posicion desaque la
CUS.Ise ericuerltrs.
entrela poslcion
inte_mediay
totalmentecermda.
5. Levantela puertay
hagaun movimiento
de extracci6n hasta
Poslclbn
de saque
queel brazo de la bisagra Ssalga
de la fanura,
C0MO PONERLA
NUEVAMENTE
1. Tome firmemente
los dos lados de
_apuerta de amba.
2, Con la puerta en el
mlsmo anguto de
extracei6n, coloque la
hendidura del brazo de
la bisagra dentro del
borde del tondo de la / I
ranura de la bisag[a. Indencl6n
Ca muesca on el brazo
de la bisagra debe
e_tar totalmente
asentada en el rondo de
laranura.
Puerta removible del homo (cont.)
3. Abracompletamente Brazodefabisagra
lapuerta. Si la _1 _i
puerta no abre
eompletamente,
la hendidura no
est_ asentada
correctamente en el
extremo inferior de la
ranura
4. Empuje los topes de las Cerradura de
bisagras hacia arriba blsagm
contra el marco frontal Em_je de Ioi
de lacavidad del homo, clerresdela
biSagra hacia
a la posici6n de cierre, arriba para
5. Cierre la puerta cerrar
del horno.
C(_MO LIMPIAR AFUERA DE LA
PUERTA
• Use jab6n y agua para limpiar bien la
superficie, lados, y frente de la puerta
del homo Enjuague bien, Usted tambi6n
podria usar un limpiador de vidrio para
Iimpiar el vidrio exterior de la puerta No
permita que el agua gotee dentro de 1as
aberturas de laventilation.
• Los derrames de salsas para al]riar,
jugos de fruta, salsas de tomate, y
materiales para sasonar que contengan
acidos poddan causar una
descoloraci6n y se deberian limpiar
inmediatamente. Cuando la superficie se
enfrie, Iimpie y enjuague.
• No use limp]adores para hornos, polvos
para Iimpiar, o abrasfvos duros en la
parte exterior de la puerta.
• Si cualquier mancha sobre la moldura
de laventilacibn de la puerta persiste,
use un limpiador abrasivo suave y un
fregador de esponja para mejores
resultados.
C(_MO LIMPIAR ADENTRO DE LA
PUERTA
• Debido a que el Area Oentro del sello se
limpia durante el CicIo de autolimp_eza,
usted no necesita limpiar esto a mano,
• El Area afuera del sello y el revestimiento
de la puerta se pueden limpiar con una
lanilla Ilena con jab6n, agua calientel y
detergerde Enjuague bien con una
solu_;i6n de vinagre y agua.
53
2OP306_ GPvG2 2/14/03, 4:00 PM

ANTESDELLAMARPARAUNSERVlClO
Pare ahorrar tiempo y dinero, antes de Ilamar para un serv]cio, revise la I]sta de mas aba)o
para cualquier problema que usted crea que tiene con el funcionamiento de su homo. Si
el prohlema es algo que usled no puede reparar, use los Numeros de Servicio pare el
Consumidor qua se encuentran al fina! de este guia. Cuando haga un Ilamado, tonga
disponible el nL_merode modelo, n,',mero de aerie, Ilsta de patios pars reparaclones,
gu{a de use y cuidado y la techa de compre.
PROBLEMA POSIBLE CAUSA POSIBLE SOLUCION
El dial dal control pesta_ea Malfuncionamiento EmpujeelboronCLEAR/OFF
una "F" seguida per un del homo Permitaqua el hornose enfrieper
nt_meroo letra, una heray ponga nuevamenteel
(Homo Superior) hornoe_ funcionamiento.Siel
problema se repite,llarnepafa un
servic_o.
El homo y los controles 8, Nopasa a. Revise lacaia del circuito
del homo no funcionan, electricidad e losfusibles.Asegt_rese
al homo. queel cordon de la
corriente esteenchufado,
b, Elmlojesta b, Vea lasecciOnOe"COme
enla funciOn ProgrammerFunciones
enblanco. Especiales"enestemanual.
La temperature del homo Calibraci6n del Vealas instruccionesparaajustar la
perece ester Inexacte. control del homo. temperaturequesiguen esta secciOn,
La puerto del Elciclo de lirapiezanoha Latemperaturadel homodebe baiar
homo no se terminado. Elhomo esta a manesde la temperaturede
desengancha, demasiado caJiente engaache antesque lapuerta pueda
(Homo Superior) abrifse.
La luz del homo n, Interrupter dela luz en a. Revisela posicion del interrupter
no funciona, posiciOndeapagado, de la luz del home.
b. Foco de la luzest& b. Reviseel foco de la luz del homo.
sue_too quemado.
El homo no se e. Los controles nose a. Lea la seccion deautolirnpiezade
limpi6 o los pusieron bien este manual.
msultedoa h. Elhornoestaba b. Losderramesgrandesdebenser
fueron malos, demasiado sucio, removidos antesde que el ciclo
(Homo Superior) de limpiezainicie.Useel ciclo
ma.sprolongado, Hipara los
homes mas suoios
¢. El ciclo de lirnpiezarue c, El ciclo de limpiezaestandares 4
interrumpido, heros, unciclo de limpiezaLoes
de 3 heros y unciclo de limpleza
Hies 5 heros.
1.8perrllladel Lasparrillas |uemn dejadas Pasountrope mojadocon un
homo no se enel interior del homo poco de aceite vegetala los
desliza con duranteel proceso de extremesde la parrilla.
facilided, limpiezaau_ematica
Ruldo delventilador, Unventilador de Estoes normal. Elventiladorde
refrigeracionse podr[a refrigeracionse encendera pare
encender automaticamente,refrigerar lospartes internas.El
ventiladorpodria funcionarper 2
54 horasdespues de quael hornose
hayaapagado (OFF).
20P306-2 SPy02 2/14/03, 4_0 PM

ANTESDELLAMARPARAUN$ERVICIO
PROBLEMA POSIBLE CAUSA POSIBLE SOLUCION
El homo humea, a. Homo 8uc]o.
b. Mal uso de papel de
aluminio.
c. Se dejo la cacerola para
asar con grasa dentro del
homo.
a. Vea que no hayan derrames
grandes
b. Limpie el exceso de suciedad
antes de comenzar un ciclo de
autolimp]eza
6, Umpie la cacerola y la parrilla
despues de cada uso
Los allmentos a. El homo no se
no $e hom_n precalent6
8decuadamerlte.
b, PositiOn inoorrecta de
laparri!lao la
cacerola
c, La ventilar, idn del
homo estA obstruida
o cubierta
d. Uso incorreolo del
papel de alumin]o
e, Temperatura
incorrecta para el
utensmiNo usado
f. La temperatura del
homo necesita ajuste
g. El hornoo laparrilla
del homo no estAn
nieveladas
h. Controles del homo
real puestos
a. AsegQrese de precalentar
hasta que suene el tono,
cuando la receta Io requiera
b, Mantenga un espac]o de a]re
uniforme alrededor de las ollas
y utensilios Vea la secciOn
para cooinar en el Homo
c. Mantenga la ventilaci6n
despejada
d. No oubra las parrilias cuando
hornee
e. Reduzea la temperatura en 25
grados para utensilios de
v]drio, oscufos u opacos.
f, Revise la secci6n de ajustes a
la temperatura que sigue esta
secci6r_
g. Vea las inslrucciones de
instalacion para la nivelaci6n,
h. Vea la secci6n para hornear.
Los allmentos
no s8 aAsn
adecuadamente.
a. Posici6n incorreota 0e
la parrilla
b. El homo se
precaLent6.
c, Mal uso de papel de
aluminio.
d. La puerta del homo se
cerro durante el a£ado 8
la parrilla
e. Bajo voltage
(208 Voltios)
f, Cantidad de tiempo
incorrecta para asar
g. Controles del homo
real puestos
a. Revise la pos]ci6n de las
cacerolas; yea la secci6n oara
asar a laparrilla
b. No precaliente cuando ase a la
parrilla,
c. Lea la secci6n para asar a la
parrilla.
d, Abra la puedaa la posici6n de
tope paraasar.
e. Use una posici6n de parrilia
mas alta y/o ase por mas
tiempo.
f, Vea la tabla para asar en la
secci6n de c6mo asar a la
parrilla
g, Vea la secci6n para asar.
55
20P306-2 SPy02 2/14t03, 4:00 PM

AJUSTE$BE TEMPERATURA-
"llAGALOSliSTEDMISAfO"
Usted podda pensar que su nuevo homo
coolna diferentemente aLhomo due
reemplaz0. Recomendamos que use su
homo nuevo unas pocas semana£ para
que se fam]]iar]ce con el, sigu]endo los
t]empos que se dan en qasrecetas cored
una guia,
Si cree que su nuevo homo est&
funcionando demasiado caliente (quema
la comida) o no calienta Eosuficiente (la
comida no queda bien cocida) usted
mismo puede ajustar la temperatura. La
apar]enc_a y la textura de los alimentos
son mejores indicadores de la exactitud
de un homo que un termomeko. Estos
term0metros pueden variar entre 20-40
grados de la verdarer temperatura del
homo. AdemAs, la puerta se tiene que
abrir para leer estos termdmetros Abr]r la
puerta cambiar& la temperatura deLhomo.
Para decidir en euanto eambiar la
temperatura, suba la temperatura del
homo en 25 grades (si los alimentos
no quedan bien eocidos) o bale la
temperatura en 25 grados (s] la comida
se quema) de la temperatura de la receta,
luego hornee. Los resultados de esta
"prueba" le deberian dar una Ldeade
cu&nto se deberia cambiar la temperatura.
1,
2,
3,
4.
M_s frio M_s caliente
Haga girar la perilla OE HORNO la la
posicidn OFF (APAGADO) y saque {a
perilla de la temperatura tir&ndola
derecho hacia afuera
Use un destornillador para soltar los
dos tornillos aproximadamenle una
vuelta carla and.
Sujete la manilla de la peri]Lamientras
hace girar el disco de qaperilla en la
direccidn deseada. A medida que
hace girar usted deberia oir los clicks
o sentir los dientes, Cada click o
diente es 10° Usted puede hacer g_rar
hasta 5 clicks o dientes en cada
direccidn
Cuando Ilegue al ajuste necesario,
apr]ele nuevamente los dos tornillos.
No fuerce la perilla en el tallo del
termostato o Io podria dafiar.
56
20P30_2 8Pv02 2./14/03, 4:00 PM

AJUSTESDE TEMPEP,4TURA-
"IMGALOSlISTEDMISMO"
(_1. Empuje y sujete los
botones BAKE y BROIL,
al mismo tiempo par 3
segundos, hasta que e]
dial muestre "SF."
(_2. Empuje el baton BAKE.
Un nt3meropuesto en
f&brica de dos digitos
aparecera en el dial,
generalmente "OO."
SI plensa que el horno
no esta suflclentemente
c81iente,
Q 3a. Empuje el botOn con
la flecha SUBIR TEMP
TEMP para aumentar (+) la
temperatura hasta +35°F.
o
Si piense que el homo
estlt demasiado caliente,
3b. Empuje el botOn con la
flecha BAJAR TEMP para
bejar (-) la temperatura
hasta -35°F.
(_4. Empuie el baton START.
Este aumento o disminuciOn en la position
(3ela temperatura permanecer_ en la
memoria basra que los pasos de arr]ba
sean repetidos. Un carte de corriente no
afectar_ esta poslciOn,
Las temperaturas para asar a la parrilla o
para la autolimpieza no ser&n afectadas.
57
20P306-2 SP_32 2/14/03, 4:00 PM

GARANTIADEL#ORNODE
PAREDEMPOTRADO
f
UN AI_IOCOMPLETO DE GARANTIA PARA TODAS LAS PARTES
Si, dentro de un afio de la fecha de instalaci6n, cualquier parte deja de
funcionar adecuadamente debido a un defecto en el material o la obra de
mano, Sears la reparar_, o reempPazar_t,a nuestra opci6n, sin costo.
Si este produeto es someticlo a un uso que no sea el familiar privado, la
garantia de arriba es efeetiva por solamente 90 dias.
EL SERVlCIO DE GARANT[A EST/k DISPONIBLE AL LLAMAR A SEARS
SERVICE AL 1-800-4-MY-HOME _.
Esta garantia le brinda derechos legales especificos, y usted tambi6n
podria tener otros derechos que varian de estado a estado
Sears Roebuck and Co. Dept. 817 WA Hoffman Estates, IL 60179
J
58
20P306_2 SPy02 2/14/03, 4:00 PM

Contrato de proteccibn
maestra
Felicitaciones por su compra
inteligenle Su nuevo aparato
Kenmore®est,. diserlado y fabricado
para muchos afros de operaci6n
confiable. Sin embargo, al igual que
todos los productos, puede requerir
de mantenimiento o reparaci6n
preventives en cualquier momento. Es
ahi cuando el contrato de protecci6n
maestra le puede ahorrar dinero y
molestias.
Adquiera un Contrate de protecci6n
maestra ahora mismo y prot6jase
contfa inconvenientesy gastos
mesperados.
El Contrato de protecci6n maestra
tambien le ayuda a ampliar la vida de
su electrodom6stico, Lo siguiente es
Io que se incluye en el oontrato:
€ Serviclo experto per parte de
nuestros 12,000 especialistas
profesionales de reparaci6n
v'Servlclo ilimitado sin costo por
partes y mano de obra er_todas las
reparaciones cubiertas
V'Garantia total - reposici6n de su
producto cubierto si ocurren m&s
de tres fallas det producto dentro
de doce meses
v' Reposicibn del producto si el
producto cubierto no se puede
reparar
_/Revlsl6n anual de mantenlmlento
preventlvo a su solieitud- sin
cargo adicionat
v' Ayuda telef6nlca rdplda -
asistencia no t_cnica y de
instrucciones sobre los productos
reparados en su casa, adem_.s
de una conveniente programaci6n
de reperaciones
t/Protecci6n contra descargas
eldctrlcas pare dafios debido a
fluctuaciones el6ctricas
_/Reembolao por alquller si la
reparaci6n del producto cubierto
tome m_s tiempo del prometido
Una vez adquiera el contrato, solo
necesita una Ilamada telef6nica pare
programar el servicio, Puede tlamar a
cualquier hora del die o de la noche o
programar la cite del servicio por
Internet.
Sears euenta con m_.sde 12,000
especialistas profesionales de
reparaei6n, quienes tienen aoceso a
m_s de 45 railleries de partes y
accesorios de calidad Este es el ripe
de profesionalismo en el que puede
contra para ayudar a prolonger !a
vide de su nueva compra para tos
afios ver_ideros, iAdquiera el Contrato
de proteccidn maestra hey mismo!
Aplican clertas Ilmltacionea y
exclusiones.
Para precios e informaci6n
adlclonal, Ilame al 1-800-827-6655.
Servlclo de Instalaci6n de Sears
Para la instalaci6n profesional
garantizada de Sears de
electrodom6sticos y articulos pare ei
hogar como dispositivos para abrir
puertas de garaje y ealentadores de
ague, en los EE.UU. Ilame al
1-800-4-MY-HOME ®.
59
20p306-2 SPvO2 2/14/03, 4:00 PM

i iiiiiiiiii_iiiiiiiiiiiiiiii
Your Home
Forrepair-in your home-of all majorbrandappliances, _-.
lawnand gardenequipment,or heatingand coolingsystems
!_ no matter who made it, no matter who sold itt
_ Forthe replacementparts,accessories and
owner'smanualsthatyou needtodo-it-yourself.
ForSears professionalinstallationof homeappliances
and itemslike garagedooropenersand waterheaters.
1-800-4-MY-HOME _ (1.-800469-4863)
Call anytime, day or night (U,S.A. and Canada)
yr.qi_v,8_m rs.cot_ .Nww.soa rLca
O-rHome
Forrepairofcarry-initemslikevacuums,lawnequipment,
and electronics,callorgo on-linefor the locationofyournearest
Sears Parts & Repair Center.
1-800-488-1222
Call anytime, day or night (U.S.A. only) _
www.sears.com ;-;y/
purchasea protectionagreement U.S.A.) _
To
or maintenanceagreement(Canada) ona productservced by Sears
1-800-827-6655 (U.S.A.) 1-800-361-6665 (Canada) ::,,
Para pedir serwoo da reparacibn Au Canada pour service en fran_ais: _
a domicilio y para ordenar piezas-
, " 1-800-LE-FOYER"_ ;_"
1"888"SU-HOGAR_' (t-800-533-6937)
©s_ _and_
6O
20 p306-2 SFvO'2 2/14_3, 4:00 PM
-
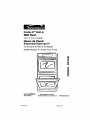 1
1
-
 2
2
-
 3
3
-
 4
4
-
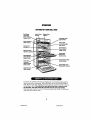 5
5
-
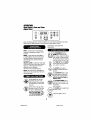 6
6
-
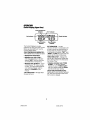 7
7
-
 8
8
-
 9
9
-
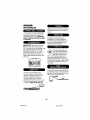 10
10
-
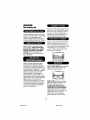 11
11
-
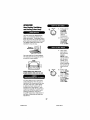 12
12
-
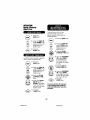 13
13
-
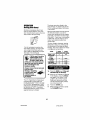 14
14
-
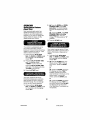 15
15
-
 16
16
-
 17
17
-
 18
18
-
 19
19
-
 20
20
-
 21
21
-
 22
22
-
 23
23
-
 24
24
-
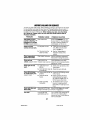 25
25
-
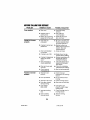 26
26
-
 27
27
-
 28
28
-
 29
29
-
 30
30
-
 31
31
-
 32
32
-
 33
33
-
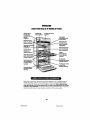 34
34
-
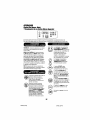 35
35
-
 36
36
-
 37
37
-
 38
38
-
 39
39
-
 40
40
-
 41
41
-
 42
42
-
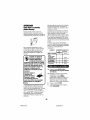 43
43
-
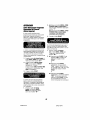 44
44
-
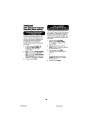 45
45
-
 46
46
-
 47
47
-
 48
48
-
 49
49
-
 50
50
-
 51
51
-
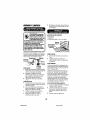 52
52
-
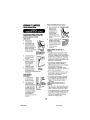 53
53
-
 54
54
-
 55
55
-
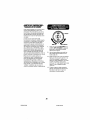 56
56
-
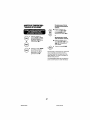 57
57
-
 58
58
-
 59
59
-
 60
60


Kenmore 91147722200 El manual del propietario
- Categoría
- Hornos
- Tipo
- El manual del propietario
- Este manual también es adecuado para
en otros idiomas
- English: Kenmore 91147722200 Owner's manual
Artículos relacionados
-
Kenmore 91147702201 El manual del propietario
-
Kenmore 91147812200 El manual del propietario
-
Kenmore 91148389890 El manual del propietario
-
-
-
-
Kenmore 911.47466 Manual de usuario
-
-
Kenmore 911.41885 Series El manual del propietario
-