Jensen JTA-460 Guía del usuario
- Categoría
- Equipo de música suplementario
- Tipo
- Guía del usuario

MODEL JTA-460
3-SPEED STEREO TURNTABLE WITH MP3 ENCODING
AND AM/FM STEREO RADIO
USER MANUAL
PLEASE READ THIS OPERATING MANUAL COMPLETELY
BEFORE OPERATING THIS UNIT AND RETAIN IT FOR FUTURE REFERENCE.

EN-1
IMPORTANT SAFETY INSTRUCTIONS
WARNING:
TO REDUCE THE RISK OF FIRE OR ELECTRIC SHOCK, DO NOT EXPOSE THIS
APPLIANCE TO RAIN OR MOISTURE. DANGEROUS HIGH VOLTAGES ARE
PRESENT INSIDE THE ENCLOSURE. DO NOT OPEN THE CABINET REFER
SERVICING TO QUALIFIED PERSONNEL ONLY.
CAUTION:
PLEASE READ AND OBSERVE ALL WARNINGS AND INSTRUCTIONS GIVEN IN THIS
OWNER’S MANUAL AND THOSE MARKED ON THE UNIT, KEEP THESE
INSTRUCTIONS. RETAIN THIS BOOKLET FOR FUTURE REFERENCE.
This set has been designed and manufactured to assure personal safety. Improper use can
result in electric shock or fire hazard. The safeguards incorporated in this unit will protect
you if you observe the following procedures for installation, use and servicing. This unit
does not contain any parts that can be repaired by the user.
The symbol for class II (Double insulation)
DO NOT REMOVE THE CABINET COVER, OR YOU MAY BE EXPOSED TO
DANGEROUS VOLTAGE. REFER SERVICING TO QUALIFIED SERVICE PERSONNEL
ONLY.
1. Read these Instructions.
2. Keep these Instructions.
3. Heed all Warnings.
4. Follow all instructions.
5. Do not use this apparatus near water.
6. Clean only with a dry cloth.

EN-2
7. Do not block any of the ventilation openings. Install in accordance with the
manufacturer’s instructions.
8. Do not install near any heat sources such as radiators, heat registers, stoves, or other
apparatus (including amplifiers) that produce heat.
9. Do not defeat the safety purpose of the polarized or grounding – type plug. A polarized
plug has two blades with one wider than the other. A grounding type plug has two
blades and a third grounding prong. The wide blade or the third prong is provided for
your safety. If the provided plug does not fit into your outlet, consult an electrician for
replacement of the obsolete outlet.
10. Protect the power cord from being walked on or pinched particularly at plugs,
convenience receptacles and the point where they exit from the apparatus.
11. Only use attachments/accessories specified by the manufacturer.
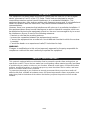
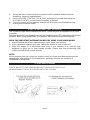
12. Use only with a cart, stand, tripod, bracket, or table specified by the
manufacturer, or sold with the apparatus. When a cart is used, use
caution when moving the cart/apparatus combination to avoid injury
from tip-over.
13. Unplug this apparatus during lightning storms or when unused for long
periods of time.
14. Refer all servicing to qualified service personnel. Servicing is required when the
apparatus has been damaged in anyway, such as power-supply cord or plug is
damaged, liquid has been spilled or objects have fallen into the apparatus, the
apparatus has been exposed to rain or moisture, does not operate normally, or has
been dropped.
15. The apparatus shall not be exposed to dripping or splashing and that no objects filled
with liquids, such as vases, shall be placed on apparatus.
16. Main plug is used as disconnect device and it should remain readily operable during
intended use. In order to disconnect the apparatus from the mains completely, the
mains plug should be disconnected form the mains socket outlet completely.
17. Battery shall not be exposed to excessive heat such as sunshine, fire or the like.
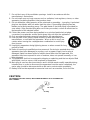
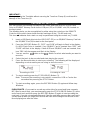
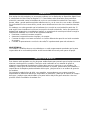
CAUTION:
TO PREVENT ELECTRIC SHOCK, MATCH WIDE BLADE OF PLUG TO WIDE SLOT.
FULLY INSERT.
AC Plug
A
COutlet

EN-3
FCC NOTICE:
This equipment has been tested and found to comply with the limits for a Class B digital
device, pursuant to Part 15 of the FCC Rules. These limits are designed to provide
reasonable protection against harmful interference in a residential installation. This
equipment generates, uses and can radiate radio frequency energy and, if not installed and
used in accordance with the instructions, may cause harmful interference to radio
communications.
However, there is no guarantee that interference will not occur in a particular installation. If
this equipment does cause harmful interference to radio or television reception, which can
be determined by turning the equipment off and on, the user is encouraged to try to correct
the interference by one or more of the following measures:
– Reorient or relocate the receiving antenna.
– Increase the separation between the equipment and receiver.
– Connect the equipment into an outlet on a circuit different from that to which the receiver
is needed.
– Consult the dealer or an experienced radio/TV technician for help.
WARNING:
Changes or modifications to this unit not expressly approved by the party responsible for
compliance could void the user's authority to operate the equipment.
PROTECT YOUR FURNITURE!!
This system is equipped with non-skid rubber ‘feet’ to prevent the product from moving when you
operate the controls. These ‘feet’ are made from non-migrating rubber material specially formulated
to avoid leaving any marks or stains on your furniture. However certain types of oil based furniture
polishes, wood preservatives, or cleaning sprays may cause the rubber ‘feet’ to soften, and leave
marks or a rubber residue on the furniture.
To prevent any damage to your furniture we strongly recommend that you purchase small self-
adhesive felt pads, available at hardware stores and home improvement centers everywhere, and
apply these pads to the bottom of the rubber ‘feet’ before you place the product on fine wooden
furniture.

EN-4
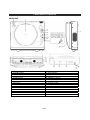
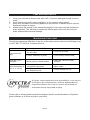
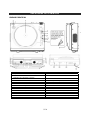
LOCATION OF CONTROLS
MAIN UNIT
1. Turntable 16. Play / Pause Button
2. 45 RPM Adaptor 17. Record Button
3. Cue-lever (use this lever to lift the tone arm). 18. Skip + Button
4. Tone Arm 19. Skip - Button
5. Speed Selector 20. SD/MMC Card Slot
6. Tone Arm Holder 21. Headphone Jack
7. Speaker 22. USB Port
8. Dust Cover 23. Volume Control
9. Display 24. IR Sensor
10. Tuning Control 25. Power Indicator
11. Band Selector 26. FM Antenna
12. Function Selector 27. Auto Stop (ON/OFF) Selector
13. Bass Boost Button 28. Audio LINE OUT Jacks
14. Mode Button 29. Internal Speaker (ON / OFF) Selector
15. Stop/USB/Card Button 30. AC Power Cord

EN-5
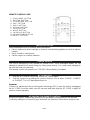
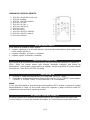
REMOTE CONTROL UNIT
1. PLAY/PAUSE BUTTON
2. RECORD BUTTON
3. STOP/USB/SD BUTTON
4. SKIP- BUTTON
5. SKIP+ BUTTON
6. DISPLAY BUTTON
7. PROG BUTTON
8. MODE BUTTON
9. FOLDER UP BUTTON
10. FOLDER DOWN BUTTON
11. DELETE BUTTON
IMPORTANT NOTES
Avoid installing the unit in locations described below:
Places exposed to direct sunlight or close to heat radiating appliances such as electric
heaters.
Dusty, humid or moist places.
Places subject to constant vibration.
POWER SOURCE
This Unit is designed to only operate on normal 120V~ 60Hz household power. Do not
attempt to operate the System using any other power source. You could cause damage to
the unit and void your warranty.
The remote control unit operates on 1 CR2025 Lithium battery (Included).
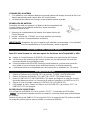
AC OPERATION
1. Plug the AC POWER CORD into a 120V AC ~ 60Hz outlet.
2. Turn the System on by sliding the Function Selector (12) to either “TUNER”, “USB/SD”
or “PHONO”. The LCD backlight will turn on.
Remarks:
If there is a malfunction due to electrostatic discharge (ESD), reset the unit by unplugging
the AC CORD from the outlet, wait 30 seconds and then plug the AC CORD in again to
reset to normal operation.
ACTIVATING THE REMOTE CONTROL
Remove the plastic insulator tag sticking out of the Battery Compartment of the Remote
Control by pulling on it. Once the tag is removed, the Remote Control will be ready for use.

EN-6
BATTERY CARE
i. If the unit is not to be used for an extended period of time, remove the battery. An old or
leaking battery can cause damage to the Remote Control.
ii. Do not dispose of batteries in fire, batteries may explode or leak.
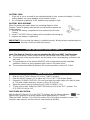
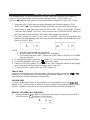
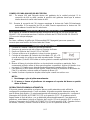
BATTERY REPLACEMENT
When the battery becomes weak, the operating distance of the
Remote Control is greatly reduced and you will need to replace the
Lithium battery.
1. Remove the battery compartment from bottom of the Remote
Control.
2. Install 1 “CR2025” Lithium battery with the positive side facing up.
3. Replace the battery compartment.
IMPORTANT
: Be sure that the battery is installed correctly. Wrong polarity may damage the
Remote Control and void the warranty.
USING THE REMOTE CONTROL CORRECTLY
Note: The Remote Control is only for operating the USB and MMC Card functions.
Point the Remote Control at the SENSOR (IR) located on the front of the System.
The functions of the remote buttons are the same as the corresponding controls on the
main unit.
The performance of the infrared SENSOR may be degraded causing unreliable
operation if there is a strong ambient light source in the same room.
The recommended effective distance for remote operation is about 10-15 feet.
RADIO OPERATION
1. Slide the FUNCTION Selector (12) to the “TUNER” position.
2. Slide the BAND Selector (11) to either AM, FM or FM ST (FM Stereo Mode).
3. Rotate the TUNING CONTROL (10) until you reach the radio station you wish to listen
to. The radio station frequency shows on the LCD DISPLAY.
4. Adjust the sound level by rotating the VOLUME CONTROL (23).
5. To turn off the radio, Slide the FUNCTION Selector (12) to the “OFF” position. The
LCD DISPLAY will go “off”.
FM STEREO RECEPTION
With the BAND Selector (11) in the “FM ST” position, the FM Stereo Indicator “
” will
light up when listening to a strong station that is broadcasting in “Stereo”.
Slide the BAND Selector (11) to the FM position if the FM stereo reception is weak. The
reception may improve, but the sound is now monaural (MONO).

EN-7
TIPS FOR BEST RECEPTION
AM – The AM antenna is located inside the cabinet of the main unit. If AM reception is
weak, change the position of cabinet until the internal antenna picks up the
strongest AM signal.
FM – During FM reception, always keep the FM Wire Antenna fully extended. If FM
reception is weak try repositioning the FM Wire Antenna until you find the strongest
FM signal.
BASS BOOST OPERATION
To enhance the low frequency sound, press the BASS BOOST BUTTON (13) once (button
in) to activate. Press the BASS BOOST Button (13) again (button out) to turn the Bass
Boost off.
Note :
Please refer to the ON/OFF graphic on the Front Panel for correct operation of the Bass
Boost function.
PLAYING PHONO RECORDS
1. Raise the Turntable Dust Cover.
2. Remove the stylus protector and release the Tone Arm Clamp (6).
3. Slide the Function Selector (12) to “PHONO”.
4. Place a record on the turntable, over the center spindle.
5. Set the Speed Selector Switch to 33, 45 or 78 rpm according to
the record you are playing. Place the included 45 RPM adaptor (2) over the center
spindle when playing 45 rpm records.
6. Move the Tone Arm to the beginning of the record or to the beginning of a particular
track. Gently lower the Tone Arm onto the record to start playing. Adjust the Volume if
needed. The Turntable will stop automatically when the record finishes.
7. To stop the record before it ends, lift the Tone Arm (4) using the Cue-lever (3) and
return it carefully onto the Tone Arm Clamp (6).
8. Replace the stylus protector on the stylus when not in use.
NOTE:
i. Do not stop or turn the platter manually.
ii. Moving or jarring the turntable without securing the Tone arm clamp could
result in damage to the Tone arm.
AUTO-STOP SWITCH OPERATION
The Auto-Stop area on some records may extend beyond the preset setting. As a result
the turntable could possibly stop before the last track finishes. If you experience this during
playback, set the AUTO-STOP Switch (27) to the “OFF” position. The turntable will now run
to the end of the record, but will no longer stop automatically. To stop the turntable you will
need to either set the Function Selector (12) to the OFF position or return the AUTO-STOP
Switch (27) to the “ON” position. After the record stops, lift and return the Tone Arm (4)
carefully back onto the Tone Arm Clamp (6).

EN-8
IMPORTANT:
Moving or jarring the Turntable without securing the Tone Arm Clamp (6) could result in
damage to the Tone Arm (4).
ENCODING RECORDS TO MP3
You can convert you favorite records into MP3 files and store then on a USB Flash
Drive or SD/MMC Memory Card via the USB port (22) or SD/MMC slot (20) located on
the front panel.
The following tasks can be accomplished by either using the controls on the REMOTE
Control or those which have similar function markings on the JTA-460 main unit.
This icon
indicates that a task can only be performed using the controls on JTA-460.
1.
Insert a USB flash drive into the USB PORT (22) or an SD/MMC Memory Card into
the SD/MMC Slot (20) located on the front panel.
2.
Press the RECORD Button (2), “REC” and “USB” will begin to flash in the display,
If a USB Flash Drive is inserted. If an SD/MMC Card is inserted then “REC” and
“CARD” will flash in the display.
If both USB and SD/MMC card are inserted, then
Icon “
SEL
” will also appear and flash in the Display.
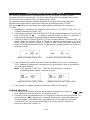
3. You can use the
Button or the Button to select what media you want to
record to.
4. Select the track to be encoded and start playing the record.
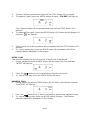
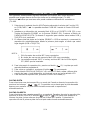
5. Press the Record button to start sync encoding. The following will be displayed
depending on what media you are using to store the music.
Encoding to USB Encoding to Card
6. To stop encoding press the STOP/USB/SD Button (3).
Note: To ensure the encoding is successful, remove the USB or Card a few
seconds after pressing the STOP Button.
7. To start recording again, press the RECORD Button (2) again and follow step
#2 above.
PLEASE NOTE : If you want to encode an entire side of a record and have seperate
MP3 files for each track, you must manually press the STOP/USB/SD Button (3) at the
end of each track and then press the RECORD Button (2) again to start recording the
next track. If you do not manually Stop and Start the recording process after each track,
you will end up with one large MP3 file that will have all the songs from the side of the
record playing one after the other.

EN-9
USB / CARD OPERATION
The following tasks can be accomplished by either using the controls on the REMOTE
Control or those which have similar function markings on the JTA-460 main unit.
This icon
indicates that a task can only be performed using the controls on JTA-460.
1.
Select the USB / CARD function mode by setting the Function selector (12) to
“USB/CARD”
.
The Display will show “USB NO” when the USB port is empty.
2.
Insert either a USB flash drive into the USB PORT (22) or an SD/MMC Memory
Card into the SD/MMC Slot (20). Press and hold the STOP/USB/CARD Button (3)
for 2 seconds to switch between USB and CARD modes if necessary.
3.
The total number of tracks on the USB or SD/MMC card will be displayed and
playback will automatically start from the first track depending which mode you have
chosen (USB or CARD).
NOTE:
i. Only MP3 file formats are supported.
ii. Not all brands of USB flash drives are supported.
iii. The Display will show "NOF" if there are no MP3 files on the USB or SD/MMC
card you inserted.
4. To interrupt playback, press the button (1). The track being played will flash.
5. To resume playback, press the Button (1) again.
6. Press the DISPLAY Button (6) once then the Title, Artist and Album of the playing
song if available will be displayed one by one on the LCD.
7. To stop playback, briefly press the STOP button (3).
TRACK SKIP
To select a particular track, in Stop mode or during playback, press the or
Buttons (4, 5) repeatedly until the desired track number appears on the display. The
selected track will start playback automatically.
FOLDER SKIP
To select a particular folder, in Stop mode or during playback, press the
/
Button (9,10), until the track number (first track number) of the Album appears in the
Display. Playback of the first track of the selected folder will start automatically.
REPEAT 1/FOLDER/ ALL PLAYBACK
1. During playback, if you want to repeat the same track, simply press the MODE
(8) Button once. ‘
‘ appears in the Display.

EN-10
2. The track will be repeated and stop until the STOP Button (3) is pressed.
3. To repeat a Folder, press the MODE button (8) twice. "FOLDER" will light up.
The selected Folder will be repeated and stop until the STOP Button (3) is
pressed.
4. To repeat all the tracks, press the MODE Button (8) 3 times and the Repeat All
Indicator "
" will light up.
5. All the tracks of the storing device will be repeated until the STOP Button (3) is
pressed.
6. To cancel repeat play, press the MODE button (8) repeatedly until all the
repeat indicator disappear in the Display.
INTRO PLAY
This function enables the first 10 seconds of each track to be played.
1. During playback press the MODE button (8) four times, the Intro Indicator
“INTRO” will light up.
2. Press the button once to start playback from the next track.
3. To cancel intro play, press the MODE Button (8) twice.
RANDOM PLAY
1. During palyback press the MODE button (8) five times, the Random Indicator
“RADDOM” will light up.
2. Press the button once. A track is selected at random and playback starts.
3. To cancel random play, press the MODE Button (8) again. The Random
Indicator ‘RANDOM’ disappears in the Display.

EN-11
PROGRAMMED PLAY
Programmed play can only be achieved in Stop mode.
1. In stop mode, briefly press the PROG button (7) on the unit. Program Channel
No. ‘P1’ will briefly appear. ‘P’ will then disappear leaving the Program
Indicator,‘PROG’ and ‘1’ flash in the Display to prompt for input.
2. Press the or Buttons (4, 5) to select your desired track to be stored in
the program. For example the first selection is track no.5.
3. Press the PROG button (7) to confirmed when track No.5 flashed in the Display.
The first program selection is now stored in the program memory.
The Program Channel No. ‘P 2’ will appear briefly. ‘P’ will disappear and 2 will
revert to 5, i.e. the first selected program and flash together with ‘PROG’ to
prompt for another input.
4. Repeat points 2 and 3 to enter the desired tracks up to max 32 selections.
5. Press the button (1) once to start playback in your programmed sequence.
6. To clear the program memory, while playing press the Stop button (3) 2 times or
select TUNER, PHONO function or turn the System off.
COPYING FILES BETWEEN USB AND CARD
The files stored on your USB flash drive or on the SD/MMC card can be copied to each
other. Please follow the instructions below to copy the files between the USB port and
the Card slot.
The following tasks can be accomplished by either using the controls on the REMOTE
Control or those which have similar function markings on the JTA-460 main unit.
This icon indicates that a task can only be performed using the controls on JTA-460.
1.
Insert your USB flash drive into the USB PORT (22) and the SD/MMC Memory Card
into the SD/MMC Slot (20).
2.
Select the USB / CARD function mode by setting the Function selector (12) to
“USB/CARD”.
.
The total number of tracks on the USB will be displayed and
playback will automatically start from the first track.
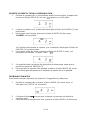
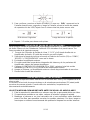
3.
Press the STOP/USB/SD Button (3) once to stop the playback. Copy of the USB
files to the Card is now ready to proceed any time. If you want to copy the files from
the Card to the USB, you need to enter the Card playback Stop mode first then
proceed to Step 4 below for copying.
USB Playback Stop Mode Card Playback Stop Mode

EN-12
4. To start copying briefly press the RECORD Button (2) once.
Flashing “CHE” will
appear briefly and disappear in the Display and copying will then start right away.
Note:
“CHE” means “CHECKING”. Every file to be copied will be checked before
copying starts.
Copying USB Files to Card Copying Card Files to USB
5. To stop copying, briefly press the STOP Button once.
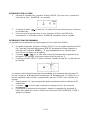
DELETING FILES
1. With the USB or Card in the playback stop mode, press or Buttons to
select the track to delete, for example track 5 is selected.
2. When the desired track appears in the Display press the DELETE Button(11) to
confirm. ‘DEL’ will flash few times and then disappear. The chosen track, ‘005’,
will appear and blink in the Display to prompt for confirmation. In case you want
to cancel the delete function just briefly press the STOP Button.
3. To confirm, briefly press the RECORD button (2) once. ‘DEL’ will appear steadily
in the Display for few seconds and then the Display will resume to USB/Card
playback stop mode with the total track number deducted by 1.
Original 38 Files After Deleting track 5
4. Repeat 1-3 above to delete more tracks as desired.
LINE OUT OPERATION (OPTIONAL)
For better playback sound, you can connect the JTA-460 to an external Audio Amplifier via
the RCA LINE OUT JACKS located at the back panel. Please proceed as following:
1. Connect the “L” & “R” LINE OUT Jacks and the AUX IN of your Audio Amplifier.
(Connection cable is not included).
2. Select the music source by setting the Function Selector (12) to “PHONO”, “USB/SD”
or “TUNER” as desired.
3. Turn on the external Amplifier.

EN-13
4. Sound will then come out from the system’s built-in speakers and the external
Amplifier’s speakers simultaneously.
5. Set the VOLUME CONTROL (23) to “MIN” and adjust the sound level using the
VOLUME CONTROL on the external Amplifier as desired.
6. Turn the System and the external Amplifier off when you have finished listening.
7. Unplug the connection cable.
USING HEADPHONES (NOT INCLUDED)
This System accepts stereo headphones with a 3.5mm plug and an impedance of 8 ohms
or greater.
Inserting the plug of your headphones into the Headphone jack (21) will enable you to listen
privately. When using headphones, the speakers will be disconnected automatically.
READ THIS IMPORTANT INFORMATION BEFORE USING YOUR HEADPHONES
1. Avoid extended play at very high volume as it may impair your hearing.
2. If you experience ringing in your ears, reduce the volume or shut off your unit.
3. Keep the volume at a reasonable level even if your headset is an open-air type
designed to allow you to hear outside sounds. Please note that excessively high
volume may still block outside sounds.
NOTE:
We recommend that you reduce the volume control to a lower level before putting on the
headphones. After putting on the headphones, gradually increase the volume to a
comfortable listening level.
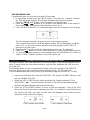
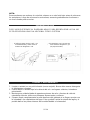
STYLUS REPLACEMENT
PLEASE REFER TO THE DIAGRAM BELOW TO REPLACE THE STYLUS.
NO ADDITIONAL STYLUS IS SUPPLIED WITH THE SYSTEM.

EN-14
CARE AND MAINTENANCE
1. Clean your unit with a damp (never wet) cloth. Solvent or detergent should never be
used.
2. Avoid leaving your unit in direct sunlight or in hot, humid or dusty places.
3. Keep your unit away from heating appliances and sources of electrical noise such as
fluorescent lamps or motors.
4. Always clean the outside of the cabinet thoroughly if it becomes wet with moisture or
water splashes. This will help to prevent the internal parts of the unit from entry of
water and possible moisture damage.
TROUBLESHOOTING GUIDE
Should you experience difficulties in the use of this player please refer to the following chart
or call 1-800-777-5331 for Customer Service.
PROBLEM POSSIBLE CAUSE REMEDY
The unit is disconnected from
the AC outlet
Connect to an outlet.
The unit will not
play
The AC outlet has no power Try the unit on another outlet
Poor AM or FM
reception
Weak signal on distant stations
Rotate the cabinet for better
reception
The volume Control has been
turned all the way down
Turn the Volume control to a
higher output
Unit ON but there is
low or no volume
Headphones are inserted into
the Headphone jack
Pull the headphones out
At Spectra, environmental and social responsibility is a core value of
our business. We are dedicated to continuous implementation of
responsible initiatives with an aim to conserve and maintain the
environment through responsible recycling.
Please visit us at http://www.spectraintl.com/green.htm for more information on Spectra’s
green initiatives or to find a recycler in your area.

EN-15
90 DAY LIMITED WARRANTY AND SERVICE
VALID IN THE U.S.A ONLY
SPECTRA MERCHANDISING INTERNATIONAL, INC. warrants this unit to be free from defective materials
or factory workmanship for a period of 90 days from the date of original customer purchase and provided the
product is utilized within the U.S.A. This warranty is not assignable or transferable. Our obligation under this
warranty is the repair or replacement of the defective unit or any part thereof, except batteries, when it is
returned to the SPECTRA Service Department, accompanied by proof of the date of original consumer
purchase, such as a duplicate copy of a sales receipt.
You must pay all shipping charges required to ship the product to SPECTRA for warranty service. If the
product is repaired or replaced under warranty, the return charges will be at SPECTRA’s expense. There are
no other express warranties other than those stated herein.
This warranty is valid only in accordance with the conditions set forth below:
1. The warranty applies to the SPECTRA product only while:
a. It remains in the possession of the original purchaser and proof of purchase is demonstrated.
b. It has not been subjected to accident, misuse, abuse, improper service, usage outside the descriptions
and warnings covered within the user manual or non-SPECTRA approved modifications.
c. Claims are made within the warranty period.
2. This warranty does not cover damage or equipment failure caused by electrical wiring not in compliance
with electrical codes or SPEC
TRA user manual specifications, or failure to provide reasonable care and
necessary maintenance as outlined in the user manual.
3. Warranty of all SPECTRA products applies to residential use only and is void when products are used in a
nonresidential environment or installed outside the United States.
This warranty gives you specific legal rights, and you may also have other rights which vary from state to
state. TO OBTAIN SERVICE please remove all batteries (if any) and pack the unit carefully and send
it freight
prepaid to SPECTRA at the address shown below. IF THE UNIT IS RETURNED WITHIN THE WARRANTY
PERIOD shown above, please include a proof of purchase (dated cash register receipt) so that we may
establish your eligibility for warranty service and repair of the unit without cost. Also include a note with a
description explaining how the unit is defective. A customer service representative may need to contact you
regarding the status of your repair, so please include your name, address, phone number a
nd email address
to expedite the process.
IF THE UNIT IS OUTSIDE THE WARRANTY PERIOD, please include a check for $50.00 to cover the cost of
repair, handling and return postage. All out of warranty returns must be sent prepaid.
It is recommended that you contact SPECTRA first at 1-800-777-5331 or by email at
[email protected] for updated information on the unit requiring service. In some cases the model you
have may be discontinued, and SPECTRA reserves the right to offer alternative options for repair
or
replacement.
SPECTRA MERCHANDISING INTERNATIONAL, INC.
4230 North Normandy Avenue,
Chicago, IL60634, USA.
1-800-777-5331
To register your product, visit the link on the website below to enter your information.
http://www.spectraintl.com/wform.htm
Printed in China
0712

MODELO JTA-460
GIRADISCOS ESTERÉO CON 3 VELOCIDADES CON CODIFICACIÓN A
MP3 Y RADIO ESTÉREO AM/FM
Manual del Usuario
Por favor lea y observe cuidadosamente este
Manual de Instrucciones cuidadosamente antes de
utilizar la unidad y reténgalo para futura referencia

SP-1
IMPORTANTES INSTRUCCIONES
DE SEGURIDAD
ADVERTENCIA:
PARA REDUCIR EL RIESGO DE INCENDIO O CHOQUE ELÉCTRICO, NO EXPONGA
ESTE EQUIPO A LA LLUVIA O HUMEDAD. EXISTE ALTO VOLTAJE PELIGROSO
PARA LA SALUD EN LA PARTE INTERIOR. NO ABRA EL GABINETE, REALICE EL
MANTENIMIENTO SOLAMENTE CON LA AYUDA DE PERSONAL CALIFICADO.
El destello de luz y diseño de
flecha con punta dentro de un
triángulo es una señal de
advertencia, alertando sobre
“voltaje peligroso” dentro del
producto
PRECAUCIÓN: PARA REDUCIR EL REISGO DE
CHOQUE ELÉCTRICO NO REMUEVA LA TAPA
O LA PARTE TRASERA – NO EXISTEN EN EL
INTERIOR PARTES ÚTILES PARA EL USUARIO.
REALICE EL SERVICIO CON PERSONAL DE
MANTENIMIENTO CALIFICADO
PRECAUCIÓN
RIESGO DE CHOQUE ELÉCTRICO
NO ABRIR
El signo de exclamación
dentro de un triángulo es
una señal de advertencia
alertando de importantes
instrucciones
acompañando este
producto
PRECAUCIÓN:
POR FAVOR LEA Y OBSERVE TODAS LAS ADVERTENCIAS E INSTRUCCIONES
DADAS EN ESTE MANUAL DEL PROPIETARIO Y AQUELLAS MARCADAS EN LA
UNIDAD, GUARDE ESTAS INSTRUCCIONES. RETENGA ESTE FOLLETO PARA
REFERENCIA FUTURA.
Este equipo ha sido diseñado y fabricado para garantizar la seguridad personal. El uso inadecuado
puede resultar en choque eléctrico o riesgo de incendio. La medidas de seguridad incorporadas en
esta unidad serán eficaces si usted observa los siguientes procedimientos de instalación, uso y
mantenimiento. Esta unidad no contiene ninguna parte que pueda ser reparada por el usuario.
El símbolo de clase II (Doble aislamiento)
NO RETIRE LA COBERTURA DEL GABINETE, QUE PODRÍA EXPONER SU PERSONA
A VOLTAJE PELIGROSO. REALICE EL MANTENIMIENTO SOLAMENTE A TRAVÉS
DE PERSONAL DE SERVICIO CALIFICADO.
1. Lea estas Instrucciones.
2. Guarde estas Instrucciones.
3. Preste atención a todas las Advertencias.
4. Observe todas las instrucciones.

SP-2
5. No use este aparato cerca del agua.
6. Limpie solamente con paño seco.
7. No bloquee ninguna de las aberturas de ventilación. Realice la instalación de acuerdo a
las instrucciones del fabricante.
8. No realice la instalación cerca de fuentes de calor tales como radiadores, registros de
calor, estufas u otros artefactos (incluyendo amplificadores) que produzcan calor.
9. No contradiga los propósitos de seguridad de la conexión a tierra o polaridad. Un
enchufe polarizado tiene dos elementos siendo uno más grueso que el otro. Un
enchufe de tipo de conexión a tierra tiene dos elementos y una tercera pata para la
conexión a tierra. El elemento más grueso o tercera pata se suministra para su
seguridad. Si el enchufe suministrado no encaja en su tomacorrientes, consulte a un
electricista para reemplazar el tomacorrientes obsoleto.
10. Proteja el cable eléctrico para que no sea pisado o pellizcado particularmente en los
enchufes, en los receptáculos utilitarios, y en el lugar donde los enchufes salen del
aparato.
11. Solamente utilice accesorios/conexiones especificadas por el fabricante.
12. Utilice el equipo solamente con soportes, trípodes, carros, abrazaderas
o mesa especificados por el fabricante, o vendidos junto con el aparato.
Cuando se utiliza un carro, tenga cuidado al mover el conjunto
carro/aparato para evitar lesiones provocadas por caídas o inclinación.
13. Desenchufe este aparato durante tormentas eléctricas o cuando no sea
utilizado por largos períodos de tiempo.
14. Realice todo el mantenimiento con personal de servicio calificado. Se requiere
mantenimiento cuando el aparato ha sido dañado en cualquier forma, como por
ejemplo daño de enchufes o del cable de electricidad, cuando se hayan derramado
líquidos u objetos hayan caído dentro del equipo, cuando el aparato haya sido
expuesto a la lluvia o humedad, cuando no funcione normalmente, o como resultado de
una caída.
15. Utilizar sólo con carrito, repisa, trípode, soporte o mesa especificada por el fabricante, o
vendida con el aparato. Si utiliza un carrito, tenga precaución al mover la combinación
de carrito/aparato para evitar lesiones debido a vuelcos.
16.
El enchufe de conexión a la red se utiliza para desconectar el dispositivo, el dispositivo
de desconexión se mantendrá listo para operación.
17. El paquete de batería o la batería instalada no podrá ser expuesta al calor excesivo
como la luz solar, fuego o similar.
PRECAUCIÓN:
PARA PREVENIR DESCARGA ELÉCTRICA, EMPAREJAR LA LÁMINA ANCHA DEL
ENCHUFE A LA RANURA ANCHA. INSERTAR COMPLETAMENTE EL ENCHUFE AL
ZÓCALO DE LA ALIMENTACIÓN PRINCIPAL.
Toma corrientes AC
Enchufe AC

SP-3
ANUNCIO FCC
Este equipo ha sido probado y se encuentra conforme con los límites de un dispositivo digital Clase
B, observando la Parte 15 de las Reglas FCC. Estos límites están diseñados para suministrar
protección razonable contra la interferencia nociva en una instalación residencial. Este equipo
genera, utiliza y puede emitir energía de radiofrecuencia, y en el caso de no ser usado e instalado
en conformidad con las instrucciones, puede causar interferencia nociva a las comunicaciones de
radio.
Sin embargo, no existe garantía que la interferencia no ocurrirá en una instalación particular. Si
este equipo causa interferencia nociva a la recepción de radio o televisión, hecho que puede ser
determinado apagando o encendiendo el equipo, se recomienda al usuario que intente corregir la
interferencia mediante una o más de las siguientes medidas:
Reorientar o reubicar la antena receptora.
Aumentar la separación entre el equipo y el receptor.
Conectar el equipo a un toma corriente o un circuito diferente de aquel al cual está conectado
el receptor.
Consulte al representante o un técnico de radio/TV experimentado para más asistencia.
ADVERTENCIA:
Los cambios o modificaciones a esta unidad que no estén expresamente aprobados por la parte
responsable de la conformidad podrían anular la autoridad del usuario para operar el equipo.
¡PROTEJA SUS MUEBLES!
Este sistema está equipado con pies de goma antideslizante para prevenir que el equipo se mueva
mientras usted opera los controles. Éstos pies están realizados en un material de goma no
migratorio especialmente formulado para evitar dejar marcas o manchas en sus muebles. Sin
embargo, ciertos tipos de barnices de muebles basados en aceites, preservativos de la madera, o
vaporizadores de limpieza pueden ablandar dichos pies, y dejar marcas o un residuo de goma en
los muebles.
Para prevenir cualquier tipo de daño a sus muebles, recomendamos que compre pequeñas
almohadillas de fieltro auto-adhesivas, disponibles en ferreterías y todo tipo de centros de compra
del hogar, y aplique estas almohadillas en la parte inferior del pie de goma antes de colocar el
producto sobre el mobiliario de madera fina.

SP-4
UBICACIÓN DE LOS CONTROLES
UNIDAD PRINCIPAL
1. Giradiscos 16. Botón Reproducir/Pausa
2. Adaptador RPM 45 17. Botón Grabar
3. Nivelador de Brazo Automático (utilice este
nivelador para levantar el brazo)
18. Botón Saltar +
4. Brazo automático 19. Botón Saltar -
5. Selector de Velocidad 20. Ranura para Tarjeta SD/MMC
6. Soporte de Brazo Automático 21. Entrada para auriculares
7. Parlante 22. Puerto USB
8. Cubierta contra el polvo 23. Control de Volumen
9. Pantalla 24. Sensor IR
10. Control de Sintonizador 25. Indicador de Encendido
11. Selector de Banda 26. Antena FM
12. Selector de Función 27. Selector Parada Automática (ENC/APAG)
13. Botón de Potenciador de Graves 28. Entrada de Audio LINEA AFUERA
14. Botón de Modo 29. Selector Parlante Interno (ENC/APAG)
15. Botón de Tarjeta/USB/Parada 30. Cable de Potencia CA

SP-5
UNIDAD DE CONTROL REMOTO
1. BOTÓN PAUSA/ REPRODUCIR
2. BOTÓN GRABAR
3. BOTÓN SD/USB/PARADA
4. BOTÓN SALTAR -
5. BOTÓN SALTAR +
6. BOTÓN PANTALLA
7. BOTÓN PROG
8. BOTÓN MODO
9. BOTÓN CARPETA ARRIBA
10. BOTÓN CARPETA ABAJO
11. BOTÓN BORRAR
NOTAS IMPORTANTES
Evite instalar la unidad en estos lugares:
Lugares expuestos a la luz solar directa o cerca de electrodomésticos que irradien calor
como estufas eléctricas.
Lugares húmedos, con polvo, o mojados.
Lugares sujetos a vibración constante.
FUENTE DE ALIMENTACIÓN
Esta unidad está diseñada para funcionar sólo con una fuente de alimentación casera de
120V~ 60Hz. No intente operar este sistema utilizando cualquier otra fuente de
alimentación. Usted puede causar daño a la unidad y anular la garantía. El control remoto
funciona con 1 pila de litio CR2025 (Incluida).
OPERACIÓN CA
1. Enchufe el cable de alimentación CA en una toma 120V CA ~ 60Hz
2. Encienda el sistema deslizando el Selector de Función (12) a “TUNER” (sintonizador),
“USB/SD” o “PHONO” (fono). La luz trasera de LCD se encenderá.
Notas:
Si hay una falla debido a una descarga electroestática (ESD) vuelva a reiniciar la unidad
desenchufando el cable CA de la toma, espera 30 segundos y luego enchufe el cable CA
nuevamente para reiniciar la operación normal.
ACTIVAR EL CONTROL REMOTO
Remueva jalando de la etiqueta del aislador plástico del Compartimiento de Batería del
Control Remoto. Una vez que removió la etiqueta, el Control Remoto estará listo para uso.

SP-6
CUIDADO DE LA BATERÍA
i. Si la unidad no va a utilizarse durante un periodo extenso de tiempo, remueva la pila. Una
batería que pierde puede causar daño al Control Remoto.
ii. No deseche las baterías en el fuego, ya que pueden explotar o perder.
REEMPLAZO DE BATERÍA
Cuando la pila está por gastarse, la distancia de funcionamiento del
Control Remoto se ve bastante reducida y usted necesitará
reemplazar la pila de litio.
1. Remueva el compartimiento de batería de la parte inferior del
Control Remoto.
2. Instale 1 pila de litio “CR2025” con el lado positivo hacia arriba.
3. Vuelva a colocar el compartimiento de batería.
IMPORTANTE
: Asegúrese de que la batería esté instalada correctamente. Una polaridad
incorrecta puede dañar el Control Remoto y anular la garantía.
USO CORRECTO DEL CONTROL REMOTO
Nota: El Control Remoto es sólo para operar las funciones de la Tarjeta MMC y USB.
Apunte el Control Remoto al SENSOR (IR) ubicado en la parte frontal del Sistema.
Las funciones de los botones del control remoto son las mismas que los controles
correspondientes de la unidad principal.
El funcionamiento del SENSOR infrarrojo puede empeorar y causar una operación
poco fiable si hay una fuente de luz ambiente fuerte en la misma habitación.
La distancia efectiva recomendable para una operación es alrededor de 3-4 metros.
OPERACIÓN DE RADIO
1. Deslice el Selector de FUNCIÓN (12) a la posición “TUNER” (SINTONIZADOR).
2. Deslice el Selector de BANDA (11) a AM, FM o FM ST (FM Modo Estéreo).
3. Rotar el CONTROL DE SINTONIZADOR (10) hasta que llegue a la estación de ratio
que usted desee escuchar. La frecuencia de radio se muestra en la PANTALLA LCD.
4. Ajustar el nivel de sonido rotando el CONTROL DE VOLUMEN (23).
5. Para apagar la radio, Deslice el Selector de FUNCIÓN (12) a la posición “OFF”. La
PANTALLA LCD se apagará.
RECEPCIÓN DE FM ESTÉREO
Con el Selector de BANDA (11) en la posición “FM ST”, el Indicador de FM Estéreo
“
” se encenderá cuando escuche una estación con señal fuerte que esté emitiendo
en “Estéreo”.
Deslice el Selector de BANDA (11) a la posición FM si la recepción de FM estéreo es débil.
La recepción podría mejorar, pero el sonido es monoaural (MONO).

SP-7
CONSEJOS PARA UNA MEJOR RECEPCIÓN
AM – La antena AM está ubicada dentro del gabinete de la unidad principal. Si la
recepción de AM es débil, cambie la posición del gabinete hasta que la antena
interna levante la señal más fuerte de AM.
FM – Durante la recepción de FM, siempre mantenga la Antena de Cable FM totalmente
extendida. Si la recepción de FM es débil, intente reposicionar la Antena de FM
hasta obtener la señal de FM más fuerte.
OPERACIÓN DE POTENCIADOR DE GRAVES
Para mejorar el sonido de frecuencia baja, presione el BOTÓN DE POTENCIADOR DE
GRAVES (13) una vez para activar. Presione el Botón de POTENCIADOR DE GRAVES
(13) una vez más para apagar.
Nota :
Por favor, refiérase al gráfico de ON(encendido)/OFF(apagado) para una operación
correcta para una función de Potenciador de Graves.
REPRODUCIR DISCOS FONO
1. Levante la Cubierta Contra el Polvo del Giradiscos.
2. Remueva el protector de púa y libere el Soporte de Brazo.
3. Deslice el Selector de Función (12) a “PHONO”.
4. Coloque el disco en el giradiscos, sobre el centro giratorio.
5. Coloque el Interruptor de Selector de Velocidad a 33, 45, o 78
rpm de acuerdo con el disco que esté reproduciendo. Coloque
el adaptador (2) de 45 RPM sobre el centro giratorio cuando reproduzca discos de 45
rpm.
6. Mueva el Brazo al principio del disco o al principio de una pista en particular. Baje
suavemente el Brazo sobre el disco para empezar a reproducir. Ajuste el Volumen si es
necesario. El Giradiscos se detendrá automáticamente cuando el disco finalice.
7. Para detener el disco antes de que finalice, sube el Brazo (4) utilizando el Nivelador de
Púa (3) y vuélvala a colocar sobre el Soporte de Brazo (6).
8. Vuelva a colocar el protector de púa sobre la púa cuando no está en uso.
NOTA:
i. No detenga o gire el plato manualmente.
ii. Si mueve o fuerza el giradiscos sin asegurar el soporte del brazo se podría
dañar el Brazo.
OPERACIÓN DE PARADA AUTOMÁTICA
El área de parada automática en algunos discos podría extenderse más allá de la
configuración predeterminada. Como resultado, el giradiscos podría detenerse antes de
que la última pista finalice. Si usted experimenta esto durante la reproducción, configure el
Interruptor de PARADA AUTOMÁTICA (27) en la posición “OFF”. El giradiscos ahora
llegará hasta el final del disco y no se detendrá más automáticamente. Para detener el
giradiscos, usted deberá colocar el Selector de Función (12) en la posición OFF o volver a
colocar el Interruptor de PARADA AUTOMÁTICA (12) en la posición “ON”. Cuando el disco
se detiene, levante y vuelva a colocar el Brazo (4) en el Soporte de Brazo (6).

SP-8
IMPORTANTE:
Si mueve o fuerza el giradiscos sin asegurar el soporte del brazo se podría dañar el Brazo.
CODIFICAR DISCOS MP3
Usted puede convertir sus discos favoritos en archivos MP3 y guardarlos en un
dispositivo de memoria flash USA o Tarjeta de Memoria SD/MMC vía el puerto USB (22)
o ranura SD/MMC (20) ubicado en el panel frontal.
Las siguientes tareas pueden lograrse utilizando los controles del Control Remoto o
aquellos que tengan marcas de función similar en la unidad principal JTA-460.
Este icono
indica que una tarea sólo puede realizarse utilizando los controles en
JTA-460.
1. Introduzca la memoria flash USB en el PUERYO USB (22) o la Tarjeta de
Memoria SD/MMC en la Ranura SD/MMC (20) ubicada en el panel frontal.
2. Presione el Botón GRABAR (2), “REC” y “USB” comenzarán a parpadear en la
pantalla, si se introduce un Dispositivo de Memoria Flash USB. Si se introduce
una Tarjeta
SD/MMC, “REC” y “CARD” parpadearán en pantalla. Si se introducen
la memoria USB y la Tarjeta SD/MMC, luego el ícono “
SEL
” también aparecerá y
parpadeará en la Pantalla.
3. Usted puede usar el Botón SALTAR +
(18) o SALTAR - (19) para
seleccionar q qué medio quiere grabar.
4. Seleccione la pista a ser codificada y comience a reproducir el disco.
5. Presione el botón Grabar para comenzar la codificación sincronizada. Se mostrará
lo siguiente en pantalla según el medio que está utilizando para guardar la música.
Codificar a USB Codificar a Tarjeta
6. Para detener la codificación, presione el Botón de PARADA/USB/SD (3).
Nota: Para asegurarse que la codificación fue exitosa, remueva el USB o
Tarjeta durante unos segundos después de presionar el Botón de
PARADA.
7. Para comenzar a grabar nuevamente, presione el Botón GRABAR (2)
nuevamente y siga el paso # 2 arriba.
POR FAVOR, TENGA EN CUENTA: Si usted quiere codificar un lado entero de un
disco y tener archivos MP3 por separado para cada pista, usted debe presionar
manualmente el botón PARADA/USB/SD (3) al final de cada pista y luego presionar el
botón de GRABAR (2) nuevamente para comenzar a grabar la próxima pista. Si no
detiene y comienza el proceso de grabación manualmente luego de cada pista, usted
terminará con un archivo MP3 grande que tendrá todas las canciones de un lado del
disco una después de la otra.

SP-9
OPERACIÓN USB / TARJETA
Las siguientes tareas pueden lograrse utilizando los controles del Control Remoto o
aquellos que tengan marcas de función similar en la unidad principal JTA-460.
Este icono
indica que una tarea sólo puede realizarse utilizando los controles en
JTA-460.
1.
Seleccione el modo de función USB/Tarjeta colocando el selector de Función (12)
en “USB/CARD”.
.
La pantalla mostrará “USB NO” cuando el Puerto USB esté
vacío.
2. Introduzca un dispositivo de memoria flash USB en el PUERTO USB (22) o una
Tarjeta de Memoria SD/MMC en la Ranura SD/MMC (20). Presione el Botón de
PARADA/USB/TARJETA (3) durante 2 segundos para cambiar entre modos USB y
TARJETA si es necesario.
3. El número total de pistas en la tarjeta SD/MMC o USB se mostrará y comenzará la
reproducción automáticamente desde la primera pista según el modo que usted
haya elegido (USB o TARJETA).
NOTA:
i. Sólo formatos de archivo MP3 son soportados.
ii. No todas las marcas de memoria flash USB son soportadas.
iii. La pantalla mostrará "NOF" si no hay archivos MP3 en la USB o tarjeta
SD / MMC que ha insertado.
4. Para interrumpir la reproducción, presione el botón (1). La pista que está
reproduciéndose parpadeará.
5. Para volver a reproducir, presione el botón (1) nuevamente.
6. Pulse el botón PANTALLA (DISPLAY) (6) una vez. El título, artista y álbum de la
canción de jugar, si está disponible, se mostrará uno a uno en la pantalla LCD.
7. Para detener la reproducción, presione el botón de Parada (3).
SALTAR PISTA
Para seleccionar una pista específica, en modo de Parada o durante la reproducción,
presione los botones o (4, 5) repetidas veces hasta que la pista deseada
aparezca en pantalla. La pista seleccionada comenzará a reproducirse
automáticamente.
SALTAR CARPETA
Para seleccionar una carpeta específica, en modo de Parada o durante la reproducción,
presione el Botón CARPETA ARRIBA
o ABAJO (9,10) hasta que aparezca el
número de pista (primer número de pista) del Álbum en Pantalla. Comenzará la
reproducción de la primera pista de la carpeta seleccionada automáticamente.

SP-10
REPETIR 1/CARPETA/ TODA LA REPRODUCCIÓN
1. Durante la reproducción, si usted desea repetir la misma pista, simplemente
presione el Botón MODO (8) una vez. ‘ ’ aparece en la Pantalla.
2. La pista se repetirá y no se detendrá hasta que el Botón de PARADA (3) sea
presionado.
3. Para repetir una Carpeta, presione el botón de MODO (8) dos veces.
"FOLDER" se encenderá.
La Carpeta seleccionada se repetirá y no se detendrá hasta que el Botón de
PARADA (3) sea presionado.
4. Para repetir todas las pistas, presione el Botón de MODO 3 veces y se
encenderá el Indicador « Repetir Todo » "
".
5. Se repetirán todas las pistas del dispositivo de almacenaje hasta que se
presione el botón de PARADA (3).
6. Para cancelar la reproducción repetida, presione el botón MODO (8) varias
veces hasta que desaparezca el indicador de repetición de la pantalla.
REPRODUCCIÓN INTRO
Esta función permite reproducir los primeros 10 segundos de cada pista.
1. Durante la reproducción, presione el botón MODO (8) cuatro veces, el
Indicador Intro “INTRO” se encenderá.
2. Presione el botón una vez para comenzar la reproducción desde la
siguiente pista.
3. Para cancelar la reproducción intro, presione el Botón MODO (8) dos veces.

SP-11
REPRODUCCIÓN AL AZAR
1. Durante la reproducción, presione el botón MODO (8) cinco veces, aparece el
Indicador al Azar “RANDOM” en pantalla.
2. Presione el botón (1) una vez. Se selecciona una pista al azar y comienza
la reproducción.
3. Para cancelar la reproducción al azar, presione el Botón de MODO (8)
nuevamente. El Indicador al Azar, ‘RANDOM’ desaparece de la Pantalla.
REPRODUCCIÓN PROGRAMADA
La reproducción programada se puede lograr sólo en modo de PARADA.
1. En modo de parada, presione el Botón PROG (7) en la unidad. Aparecerá el No.
De Canal de Programa brevemente ‘P1’. ‘P’ desaparecerá luego dejando el
Indicador de Programa,‘PROG’ y ‘1’ que parpadearán en la Pantalla para
solicitar que se ingrese el programa.
2. Presione o (4, 5) para seleccionar la pista que desea guardar en el
programa. Por ejemplo, la primera selección es la pista no. 5.
3. Presione el Botón PROG (7) para confirmar Cuando la pista No. 5 parpadea en
la Pantalla.
La primera selección del programa está guardada en la memoria del programa. El
No. de Programa ‘P 2’ aparecerá brevemente. ‘P’ desaparecerá y 2 volverá a 5, el
primer programa seleccionado, y parpadeará junto con “PROG” para solicitar otro
ingreso.
4. Repetir puntos 2 y 3 para ingresar las pistas que desea hasta un máximo de 32
selecciones.
5. Presione una vez para comenzar la reproducción en la secuencia
programada.
6. Para limpiar la memoria del programa, durante la reproducción presione el
botón de Parada dos veces o seleccione la función SINTONIZADOR, FONO o
apague el sistema.

SP-12
COPIAR ARCHIVOS ENTRE USB Y TARJETA
Los archivos guardados en su memoria flash USB o su tarjeta SD/MMC pueden
copiarse entre estos dispositivos. Por favor, siga las instrucciones debajo para copiar
los archivos entre el puerto USB y la ranura de la Tarjeta.
Las siguientes tareas pueden lograrse utilizando los controles del Control Remoto o
aquellos que tengan marcas de función similar en la unidad principal JTA-460.
Este icono
indica que una tarea sólo puede realizarse utilizando los controles en
JTA-460.
1. Introduzca su dispositivo de memoria flash USB en el PUERTO USB (22) y la
Tarjeta de Memoria SD/MMC (20).
2. Seleccione el modo de función USB/TARJETA colocando el selector de Función (12)
para USB/TARJETA
.
El número total de pistas en USB se mostrará y
comenzará la reproducción automáticamente desde la primera pista.
3.
Presione el Botón PARADA/USB/SD (3) una vez para detener la reproducción. Se
puede copiar los archivos USB a la Tarjeta en cualquier momento ahora. Si usted
desea copiar los archivos desde la Tarjeta a USB, usted necesitará ingresar al
modo de Parada de reproducción de Tarjeta primero y luego proceder con el Paso 4
abajo para copiar.
Modo de Parada de Rep. USB Modo de Parada de Rep.Tarjeta
4. Para comenzar el copiado, presione el botón GRABAR (2) una vez.
Intermitente
"CHE" aparecerá brevemente y desaparecen en la pantalla y copiar a continuación,
se iniciará de inmediato.
Nota:
"CHE" significa "CONTROL". Todos los archivos que se copian se
comprobará antes de que comience la copia.
Copiando Archivos USB a Tarjeta Copiando Archivos de Tarjeta a USB
5. Para detener el copiado, presione el botón de PARADA (3) una vez.
BORRAR ARCHIVOS
1. Con USB o la Tarjeta en el modo de parada de reproducción, presione o
para seleccionar la pista a borrar, por ejemplo pista 5.
2. Cuando la pista deseada aparece en la Pantalla, presione el Botón BORRAR (11)
para confirmar. “DEL” aparecerá en pantalla unas veces y luego desaparecerá.
La pista elegida, “005” aparecerá y parpadeará en la Pantalla para solicitarle
confirmación. En caso de que usted quiera cancelar, la función de borrar
presione el Botón de Parada (3).

SP-13
3. Para confirmar, presione el botón GRABAR (2) una vez. ‘DEL’ aparecerá en la
Pantalla durante unos segundos y luego la Pantalla volverá al modo de parada
de reproducción de USB/Tarjeta con el número total de pistas menos una.
38 Archivos Originales Luego de borrar la pista 5.
4. Repetir 1-3 arriba para borrar más pistas.
OPERACIÓN DE SALIDA DE LÍNEA (OPCIONAL)
Para un mejor sonido de reproducción, usted puede conectar el JTA-460 a un Amplificador
de Audio Externo vía las Entradas de Salida de RCA ubicadas en el panel trasero. Por
favor proceda de la siguiente manera:
1. Conecte las Enchufes de Salida de Línea “L” & “R” y la Entrada Auxiliar de su
Amplificador de Audio. (El cable de conexión no está incluido).
2. Seleccione la fuente de música colocando el Selector de Función (12) en “FONO”,
“USB/SD” o “SINTONIZADOR” como así lo desee.
3. Encienda el amplificador externo.
4. El sonido vendrá de los parlantes integrados del sistema y de los parlantes del
Amplificador externo de manera simultanea.
5. Coloque el CONTROL DE VOLUMEN (23) a “MIN” y ajuste el nivel de sonido
utilizando el CONTROL DE VOLUMEN del Amplificador externo.
6. Apague el Sistema y el Amplificador externo cuando haya terminado de escuchar.
7. Desenchufe el cable de conexión.
USO DE AURICULARES (NO INCLUIDOS)
Este Sistema acepta auriculares estéreo con un enchufe de 3.5mm y una impedancia de 8
ohms o más.
Al introducir el enchufe de sus auriculares en la entrada para auriculares (21) usted podrá
escuchar de manera privada. Cuando utilice los auriculares, los parlantes se
desconectarán automáticamente.
LEA ESTA INFORMACIÓN IMPORTANTE ANTES DE USAR LOS AURICULARES
1. Evite la reproducción extendida a un volumen muy alto ya que puede dañar sus oídos.
2. Si experimenta zumbido en sus oídos, reduzca el volumen o apague la unidad.
3. Mantenga el volumen a un nivel razonable aún si sus auriculares están diseñados
para el aire libre para permitirle escuchar los sonidos exteriores. Por favor, tenga en
cuenta que un volumen excesivamente alto podría aún bloquear los sonidos externos.

SP-14
NOTA:
Recomendamos que reduzca el control de volumen a un nivel más bajo antes de colocarse
los auriculares. Luego de colocarse los auriculares, aumente gradualmente el volumen a
un nivel cómodo para escuchar.
REEMPLAZO DE PUA
POR FAVOR REFIÉRASE AL DIAGRAMA ABAJO PARA REEMPLAZAR LA PUA. NO
SE PROPORCIONA UNA PUA ADICIONAL CON EL SISTEMA
CUIDADO Y MANTENIMIENTO
1. Limpie su unidad con un paño húmedo (nunca mojado). Nunca debe usarse detergente
ni substancias solventes.
2. Evite el dejar su unidad bajo la luz directa del sol o en lugares calientes, húmedos o
polvorientos.
3. Mantenga su unidad alejada de aparatos emisores de calor y fuentes de ruido de
naturaleza eléctrica, tales como lámparas fluorescentes o motores.
4. Siempre limpie completamente la parte de afuera del gabinete si se llegara a mojar con
la humedad o las salpicaduras de agua. Esto ayudará a evitar la entrada del agua y el
posible daño a las piezas internas de la unidad debido a la humedad.
(1) Afloje la parte roja de la púa con
un destornillador y retire como se
muestra en diagrama A Y B.
(2) Reemplace con la nueva pua
como muestra diagrama C y D
(no proporcionada).
Clavijas de
g
uía
(
adentro
)

SP-15
GUÍA DE SOLUCIÓN DE PROBLEMAS
Si usted experimente dificultades en el uso de esta Radio HD, por favor verifique lo siguiente o
llama al Servicio al Cliente al número 1-800-777-5331.
PROBLEMA POSIBLE CAUSA SOLUCIÓN
La unidad está desconectada de
la toma CA.
Conecte a una toma.
La unidad no
reproduce
La toma CA no tiene potencia. Pruebe la unidad en otra toma.
Recepción AM o
FM mala
Señal débil en estaciones
distantes.
Rote el gabinete para una mejor
recepción.
El Control de Volumen está al
mínimo.
Gire el control de volumen a un
nivel más alto.
La unidad está
encendida pero el
volumen está bajo
o no hay volumen.
Hay auriculares enchufados en
la toma para auriculares.
Quite los auriculares.
En Spectra, responsabilidad ambiental y social es un valor
fundamental de nuestro negocio. Estamos dedicados a la
aplicación continua de iniciativas responsables con el
objetivo de conservar y mantener el medio ambiente
mediante el reciclado responsable.
Por favor, visítenos en http://www.spectraintl.com/green.htm para obtener más información
sobre las iniciativas verdes de Spectra o para encontrar un centro de reciclaje en su área.

SP-16
GARANTÍA Y SERVICIOS DE COBERTURA LIMITADA POR 90 DÍAS
VÁLIDA EN LOS ESTADOS UNIDOS SOLAMENTE
SPECTRA MERCHANDISING INTERNATIONAL, INC. garantiza que esta unidad se encuentra libre de materiales o
mano de obra de fábrica defectuosos, por un período de 90 días, desde la fecha de la compra original por parte del
cliente, siempre que el producto sea utilizado dentro de los Estados Unidos. Esta garantía no es asignable o transferible.
Nuestra obligación de acuerdo a esta garantía es reparar o reemplazar la unidad con defectos o cualquier parte
correspondiente, con excepción de las baterías, cuando es devuelta al Departamento de Servicios de SPECTRA,
acompañada de la prueba de l
a fecha original de compra por parte de cliente, como por ejemplo una copia duplicado del
recibo de ventas.
Usted debe pagar todos los costos de envío requeridos para entregar el producto a SPECTRA para el servicio de
garantía. Si el producto es reparado o reemplazado de acuerdo a garantía, los gastos de retorno serán por cuenta de
SPECTRA. No existen otras garantías expresas diferentes de aquellas declaradas en el presente documento.
Esta garantía es válida solamente en el cumplimiento de las condiciones que se establecen a continuación:
1. La garantía se aplica solamente al pro
ducto de SPECTRA siempre que:
a. Permanezca en posesión del comprador original y se exhiba la prueba de compra.
b. Que no ha sido sometido a accidentes, mal uso, abuso, servicio inapropiado, uso fuera de las descripciones de
advertencia cubiertas dentro del manual del propietario, o modificaciones no aprobada por SPECTRA.
c. Los reclamos deben ser hechos dentro del período de garantía.
2. Esta garantía no cubre daños o fallas del equipamiento causados por conexiones eléctricas que no cumplen con los
códigos eléctricos, con las especificaciones del manual del propietario de SPECTRA, o la falta de cuidado razonable y
mantenimient
o necesario como se describe en el manual del propietario.
3. La garantía de todos los productos de SPECTRA se aplica solamente al uso residencial y es anulada cuando los
productos son utilizados en un ambiente no residencial, o instalados fuera de los Estados Unidos.
Esta garantía le da derechos legales específicos, y usted puede tener también otros derechos que varían de estado a
estado. Para OBTENER SERVICIO por favor remueva todas las baterías (de existir) y embale la unidad con cuidado
enviándola a SPECTRA, a la dirección que se menciona abajo. SI LA UNIDAD ES DEVUELTA DENTRO DEL PERÍODO
DE GARANTÍA EXHIBIDO arriba, por fa
vor incluya una prueba de compra (recibo de caja registradora con fecha), para
que podamos determinar su elegibilidad para el servicio de garantía y reparación de la unidad sin costo. También incluya
una nota con una descripción explicando en qué forma la unidad es defectuosa. Un representante de atención al cliente
tal vez deba contactarlo en relación al estado de su reparación, por lo tanto incluya su nombre, dirección, número de
teléfono y dirección de correo electrónico para acelerar el proceso por favor.
SI LA GARANTÍA SE ENCUENTRA FUERA DEL PERÍODO DE GARANTÍA, por favor incluy
a un cheque por $50.00
para cubrir el costo de reparación, manejo y correo de retorno. Todas las devoluciones cubiertas por la garantía deben
ser enviadas por correo prepago.
Se recomienda que primero entre en contacto con SPECTRA llamando al número 1-800-777-5331 o por correo
electrónico enviando un mensaje a [email protected] para obtener información actualizada sobre la unidad que
requiere servicio. En algunos casos el modelo puede haber sido discontinuado y SPECTRA se reserva el derecho de
ofrecer opciones alternativas de reparación o reemplazo.
SPECTRA MERCHANDISING INTERNATIO
NAL, INC.
4230 North Normandy Avenue,
Chicago, IL60634, USA.
1-800-777-5331
Para registrar su producto, siga el vínculo a continuación en el sitio web para ingresar su información.
http://www.spectraintl.com/wform.htm
Impreso en China
0712
-
 1
1
-
 2
2
-
 3
3
-
 4
4
-
 5
5
-
 6
6
-
 7
7
-
 8
8
-
 9
9
-
 10
10
-
 11
11
-
 12
12
-
 13
13
-
 14
14
-
 15
15
-
 16
16
-
 17
17
-
 18
18
-
 19
19
-
 20
20
-
 21
21
-
 22
22
-
 23
23
-
 24
24
-
 25
25
-
 26
26
-
 27
27
-
 28
28
-
 29
29
-
 30
30
-
 31
31
-
 32
32
-
 33
33


Jensen JTA-460 Guía del usuario
- Categoría
- Equipo de música suplementario
- Tipo
- Guía del usuario
en otros idiomas
- English: Jensen JTA-460 User guide
Artículos relacionados
Otros documentos
-
Akiyama Acorde Manual de usuario
-
Sunstech PXR3 Guía del usuario
-
Sytech SY8035A El manual del propietario
-
-
Roadstar HIF-8888TUMPN Manual de usuario
-
auna multimedia NR-620 El manual del propietario
-
-
JVC RD-F327B El manual del propietario
-
Silvercrest KH 2431 Instrucciones de operación
-
TEAC CEC6P10501531 Manual de usuario