NOTE
: Because of the soleplate design,
ordinary tap water may be used with this
iron. However, in very hard water areas,
we recommend using distilled or
demineralized water.
CAUTION: Never fill the iron with
fabric conditioner, starches or any
other liquid, as these will damage the
steam mechanism. Do not use
contaminated water.
1. Turn temperature dial to "Min" and
slide the variable steam control all
the way down.
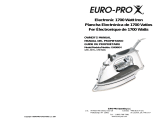
2. Holding the iron at a slight angle,
pour water slowly into the water
filling inlet. See figure 2. Fill tank to
desired level or to the "MAX" water
level marking using the water filling
flask. (When the iron is upright, the
blue, see-through water tank allows
you to gauge the amount of water.)
DO NOT
overfill the tank.
1. Turn temperature dial to "MIN" and
slide the variable steam control lever
all the way down to "0".
2. Plug the cord into a polarized, 120V
AC electrical outlet. The power "ON"
light will come on, indicating that the
iron is receiving power.
3. Turn the temperature dial to the
desired setting. (See "Ironing Guide"
for a guide to temperature selection.)
4. Place iron on its heel (on a stable,
protected surface) while iron is
warming to desired temperature.
STEAM IRONING
WARNING! DO NOT aim iron at
face, towards yourself, or anyone
else while using or adjusting
steam. Burns or serious injury may
occur.
WARNING! Before filling the iron
with water, be sure the iron is not
plugged into the electrical outlet. The
iron may be filled with water while it
is hot.
WARNING! TO PREVENT THE RISK
OF BURNS, use caution when filling
iron with water. Burns can occur
from touching hot metal parts, hot
water or steam.
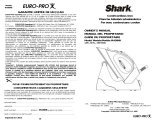
Fig. 1
For Dry Ironing:
INSTRUCCIONES DE MANTENIMIENTO POR PARTE
DEL USUARIO
ALMACENAMIENTO
1. Siempre gire el control de vapor
variable a “0” después de vaciar
el tanque de agua.
2. Deje que la plancha se enfríe.
3. Siempre guarde la plancha en
posición vertical para proteger la
base.
4. De vez en cuando, limpie el exterior
de la plancha con un paño húmedo
y seque.
5. Si utiliza almidón rociado, limpie la
base de vez en cuando con un paño
suave húmedo para evitar la
acumulación de depósitos.
6. Si la plancha no se ha utilizado
durante algunas semanas, sosténgala
horizontalmente y deje que salga
vapor durante 2 minutos antes de
planchar.
VACIADO DE LA PLANCHA
1. Siempre vacíe la plancha después
de cada uso.
2. Cuando termine de usar la plancha,
gire el control de vapor variable a “0”
y el regulador de temperatura a
“MIN”.
3. Desconecte la plancha del
tomacorriente eléctrico.
4. Ajuste el control de vapor variable
en “MAX”.
5. Invierta la plancha sobre el fregadero
con la punta hacia abajo y deje que
el agua fluya por la abertura.
6. Ajuste el control de vapor variable
en “0”.
7. Deje que la plancha se enfríe en
posición vertical antes de guardarla.
¡ADVERTENCIA! Tenga cuidado
al vaciar la plancha. Pueden ocurrir
quemaduras al contacto con
superficies metálicas calientes, agua
caliente o vapor.
• Llene la taza de llenado que viene con el
artefacto hasta la marca de llenado medio
y luego vierta el agua en el depósito.
• Ajuste el control de vapor variable en
la posición sin vapor.
• Inserte el enchufe en el tomacorriente.
• Ajuste el regulador de temperatura en
el máximo.
• Espere hasta que se apague la luz
del termostato y la plancha de vapor
alcance la temperatura preajustada.
• Saque el enchufe del tomacorriente.
• Sostenga la plancha de vapor
horizontalmente sobre un fregadero.
• Ajuste el control de vapor variable en
la posición “Self-Clean” (Autolimpieza).
Saldrá agua caliente y vapor de la base.
Balancee suavemente la plancha de
vapor de un lado a otro para que
salgan las partículas de cal y polvo.
• Cuando el depósito de agua esté vacío,
cambie el control de vapor variable de
la posición “Self-Clean” a “0”.
• Sostenga la plancha vertical e inserte
el enchufe en el tomacorriente para que
la plancha se caliente de nuevo.
• Mueva la plancha sobre un paño de
algodón limpio para limpiar la base y
permitir que se evapore el agua restante.
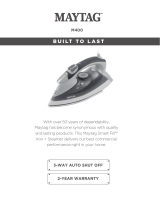
AUTOLIMPIEZA
NOTA: La función antigoteo reduce el
goteo de agua y las manchas. Si
presiona con mucha frecuencia el botón
de escape de vapor o si la temperatura
es demasiado baja, no se podrá evitar el
goteo de agua y las manchas. La
cantidad de gotas de agua a la larga
disminuirá, una vez que la plancha haya
utilizado2ó3tanques llenos para vapor
y planchado.
Fig. 9
Para eliminar el calcio y las partículas
acumuladas, el sistema de autolimpieza
debe hacerse funcionar por lo menos
una vez por mes. (Fig. 9)
OPERATING INSTRUCTIONS
This appliance is for HOUSEHOLD USE
ONLY and may be plugged into any
120V AC polarized electrical outlet. Do
not use any other type of outlet.
ANTI-DRIP FEATURE
DRY IRONING
Built-in Anti-Drip feature helps reduce
water spots by cutting of water flow
when the iron temperature is too low to
build sufficient steam. The anti drip
function reduces water dripping and
water stains. It does not prevent water
dripping and water stains if you press
the steam burst button too often or if the
temperature is too low. The amount of
water droplets will eventually decrease
after the iron is used for 2 to 3 tankfuls
of steaming and ironing.
All marked settings on the temperature
dial can be used for dry ironing. Slide
the variable steam control lever all the
down as shown in Figure 1. This will cut
off the steam flow if water is in the tank.
Fig. 2
3. Plug the cord into a polarized, 120V
AC electrical outlet.
17
4