La página se está cargando...

Gloves must be worn
at all times to reduce
risk of injury!
Owner’s Manual
& Assembly Guide
730080722
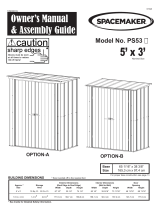
BUILDING DIMENSIONS
* See Inside for Detailed Safety Information.
Size rounded off to the nearest foot For proper base construction see page 12
†
Nominal Size
10’ x 8’
01HUc
†
Base
Size
121 1/8” x 97 1/8”
307,6 cm x 246,7 cm
Exterior Dimensions
(Roof Edge to Roof Edge)
Width Depth Height
Interior Dimensions
(Wall to Wall)
Width Depth Height
Door
Opening
Width Height
Approx.
Size
Storage
Area
10’ x 8’ 78 Sq. Ft. 526 Cu. Ft. 122 7/8” 96 11/16” 91 3/8” 118 3/8” 94 3/8” 90 1/8” 63 7/16” 69 3/4”
3,0 m x 2,4 m 7,2 m2 14,9 m3312,2 cm 245,6 cm 232,2 cm 300,6 cm 239,7 cm 229,0 cm 161,1 cm 177,2 cm
†
Model No.
EG108AN EG108BG
EG108CG EG108AB

02HUa
DIMENSIONS DU COFFRE
* Voir les informations de sécurité détaillées à l’intérieur.
Toujours porter des
gants pour réduire le
risque de blessure !
attention
bords coupants
Manuel de l’utilisateur et
guide d’assemblage
DIMENSIONES DE LA UNIDAD
* Consulte en el interior para obtener la seguridad de información detallada.
Se deben usar guantes
en todo momento para
reducir el riesgo de
lesiones.
precaución
bordes fi losos
Manual del propietario
e instrucciones de ensamblaje
Las medidas están redondeadas en pies
†
Dimension arrondie au pied le plus proche
†
Taille de
la base
Tamaño
básico
2
Dimensions extérieures
(de bordure de toit à bordure de toit)
Largeur Profondeur Hauteur
Dimensions intérieures
(de paroi à paroi)
Largeur Profondeur Hauteur
Ouverture
de porte
Largeur Hauteur
Taille
approx.
Zone
d’entreposage
10’ x 8’ 78 Sq. Ft. 526 Cu. Ft. 122 7/8” 96 11/16” 91 3/8” 118 3/8” 94 3/8” 90 1/8” 63 7/16” 69 3/4”
3,0 m x 2,4 m 7,2 m2 14,9 m3312,2 cm 245,6 cm 232,2 cm 300,6 cm 239,7 cm 229,0 cm 161,1 cm 177,2 cm
†
Dimensiones exteriores
(borde a borde del techo)
Ancho Profundidad Altura
Dimensiones interiores
(pared a pared)
Ancho Profundidad Altura
Abertura de
la puerta
Ancho Altura
Tamaño
aproximado
Área de
almacenaje
10’ x 8’ 78 Sq. Ft. 526 Cu. Ft. 122 7/8” 96 11/16” 91 3/8” 118 3/8” 94 3/8” 90 1/8” 63 7/16” 69 3/4”
3,0 m x 2,4 m 7,2 m2 14,9 m3312,2 cm 245,6 cm 232,2 cm 300,6 cm 239,7 cm 229,0 cm 161,1 cm 177,2 cm
†
Außenabmessungen
(Dachkante zu Dachkante)
Breite Tiefe Höhe
Innenabmessungen
(Wand zu Wand)
Breite Tiefe Höhe
Türöff nung
Breite Höhe
Ungefähre
Größe Lagerfl äche
10’ x 8’ 78 Sq. Ft. 526 Cu. Ft. 122 7/8” 96 11/16” 91 3/8” 118 3/8” 94 3/8” 90 1/8” 63 7/16” 69 3/4”
3,0 m x 2,4 m 7,2 m2 14,9 m3312,2 cm 245,6 cm 232,2 cm 300,6 cm 239,7 cm 229,0 cm 161,1 cm 177,2 cm
†
Pflege- &
Montageanleitung
Zur Verringerung der
Verletzungsgefahr
müssen stets Handschuhe
getragen werden!
Vorsicht
scharfe Kanten
Bodenabmessungen
ABMESSUNGEN Angaben auf ganze Fuß gerundet
†
* Detaillierte Sicherheitsinformationen im Inneren.
121 1/8” x 97 1/8”
307,6 cm x 246,7 cm
121 1/8” x 97 1/8”
307,6 cm x 246,7 cm
121 1/8” x 97 1/8”
307,6 cm x 246,7 cm

3
• Keep children and pets away from the worksite during construction and until the building is completely assembled. This will
help avoid distractions and any accidents which may occur.
EN,FR,SP,GE-04HN
• Care must be taken when handling various pieces of your building since many contain sharp edges.
CAUTION /
• Faire preuve de précaution pour manipuler les diff érentes pièces de l’abri car elles présentent de nombreux bords coupants.
ATTENTION / PRECAUCIONES/
• Tenga cuidado al manipular las diferentes piezas de la estructura ya que pueden tener bordes fi losos.
• Do NOT attempt to assemble your building before double checking that you have all the parts indicated in the parts lists.
Any building left partially assembled may be seriously damaged by even light winds.
• Ne PAS tenter d’assembler l’abri avant d’avoir vérifi é la présence de toutes les pièces fi gurant dans la liste des pièces. Tout
abri laissé partiellement assemblé peut être gravement endommagé par des vents même légers.
• NO trate de montar la estructura antes de verifi car que tenga todas las piezas indicadas en la lista de piezas. Cualquier
estructura sin terminar puede ser dañada seriamente incluso por vientos ligeros.
• Do NOT attempt to assemble your building on a windy day. The large panels can catch the wind like a “sail”, making
construction diffi cult and unsafe.
• Ne PAS tenter d’assembler l’abri en présence de vent. Les grands panneaux peuvent se comporter comme une voile et
« battre » au vent, rendant la construction diffi cile et dangereuse.
• NO trate de montar la estructura en un día ventoso. Los paneles grandes pueden atrapar el viento como una “vela”, lo que
hace que sean llevados por el viento, lo que, a su vez, hace que la construcción sea difícil e insegura.
• Tenir les enfants et les animaux domestiques à l’écart du chantier durant la construction et jusqu’à ce que l’abri soit
complètement assemblé. Cela évite les distractions et les accidents potentiels.
• No permita entrar a niños ni animales domésticos en el lugar de trabajo durante la construcción y hasta que la estructura
esté completamente montada. Esto ayudará a evitar distracciones y cualquier accidente que pueda producirse.
Your building MUST be anchored to prevent wind damage.
La estructura DEBE estar anclada para evitar daños por vientos.
• NEVER concentrate your weight on the roof of the building.
• NE JAMAIS concentrer son propre poids sur le toit de l’abri.
• NUNCA concentre su peso en el techo de la estructura.
• Before assembling any parts, your base should be constructed and an anchoring system should be ready to use.
• Avant de commencer à assembler des pièces, la base doit avoir été construite et le système d’ancrage doit être prêt à
l’emploi.
• Antes de montar cualquier pieza, debe estar construida la base y preparado el sistema de anclaje.
VORSICHT
• Verschiedene Teile Ihres Schuppens müssen vorsichtig gehandhabt werden, denn viele haben scharfe Kanten.
• Versuchen Sie NICHT, Ihren Schuppen an einem windigen Tag aufzustellen. Die großen, fl ächigen Bauteile könnten wie ein
Segel vom Wind erfasst und herumgeschleudert werden, was die Aufstellarbeiten erschwert und gefährlich macht.
• Versuchen Sie NICHT, Ihren Schuppen zu montieren, bevor Sie sich nochmals vergewissert haben, dass Sie alle in der
Teileliste. Ein nur teilweise montiert zurückgelassener Schuppen kann bereits durch leichten Wind schwer beschädigt werden.
• Halten Sie Kinder und Haustiere während der Montage und bis der Schuppen vollständig aufgestellt ist vom Aufstellplatz
fern. Dies hilft, Ablenkungen und damit einhergehende Unfälle zu verhindern.
• Belasten Sie das Dach des Schuppens NIEMALS punktuell mit Ihrem Gewicht.
L’abri doit IMPÉRATIVEMENT être ancré pour éviter les dommages par le vent.
Watch the Weather Closely
Suivre la météo avec attention
Observe el clima atentamente
• Das Fundament sollte vor dem Zusammenbau der Teile gebaut und das Verankerungssystem nutzungsbereit sein.
• hr Schuppen MUSS verankert werden, um Schäden durch Wind zu verhindern.

4
EN,FR,SP,GE-05HN
• The best location is a level area with good drainage.
ASSEMBLY /
ASSEMBLAGE /
ENSAMBLAR /
• Le meilleur emplacement sera une surface de niveau à bon drainage.
• El mejor lugar es un área nivelada con buen drenaje.
• Allow enough space outside the building to be able to access the roof with a ladder.
• Use Teamwork: Two or more people are required to assemble your building.
• Travailler en équipe: Deux personnes ou plus sont nécessaires pour assembler l’abri.
• Trabaje en equipo: Se necesitan dos o más personas para ensamblar su cobertizo.
• Laissez suffi samment d’espace à l’extérieur du bâtiment pour être en mesure d’accéder à la toiture avec une échelle.
• Deje sufi ciente espacio afuera del edifi cio para poder tener acceso al techo con una escalera.
CARE & MAINTENANCE / SOINS ET ENTRETIEN / PROTECCIÓN Y CONSERVACIÓN/
• DO NOT use power washing to clean your shed.
• NE PAS utiliser de jet sous haute pression pour nettoyer l’abri.
• NO utilice hidrolavadora para limpiar el cobertizo.
• Combustibles and corrosives must be stored in air tight containers designed for chemical and/or combustible storage.
Corrosive chemicals such as fertilizers, pesticides and herbicides should be cleaned off the interior and exterior surfaces
immediately. Rust caused by chemical damage is not covered by the warranty.
• Les matières combustibles et corrosives doivent être entreposées dans des contenants étanches à l’air conçus pour
l’entreposage de produits chimique et/ou combustibles. Les produits chimiques corrosifs tels que les engrais, pesticides et
herbicides doivent immédiatement être nettoyés des surfaces intérieures et extérieures. La rouille causée par des produits
chimiques n’est pas couverte par la garantie.
• Los combustibles y productos corrosivos deben guardarse en contenedores herméticos diseñados para almacenamiento
de químicos o combustibles. Se deben limpiar inmediatamente los químicos corrosivos, como fertilizantes, pesticidas y
herbicidas, de las superfi cies interiores y exteriores. El óxido causado por daños químicos no está cubierto por la garantía.
Rust protection precautions / Des mesures de protection contre la rouille /
Las precauciones de protección contra el óxido/
• Avoid nicking or scraping the coating surface, inside and out.
• Éviter d’entailler ou de rayer le revêtement de surface, à l’intérieur comme à l’extérieur.
• Evite dañar o raspar la capa protectora, por dentro y por fuera.
• Keep roof, base perimeter and door free of debris.
• Nettoyer le toit, le pourtour de la base et les rails de porte de tous débris.
• Mantenga el techo, el perímetro de la base y los rieles de la puerta sin desechos.
• Touch up scrapes or nicks and any area of visible rust as soon as possible.
• Retoucher les entailles et égratignures et toute surface de rouille visible dès que possible.
• Retoque las raspaduras o las muescas y cualquier área de todo óxido visible lo más pronto posible.
MONTAGE
• Der bestmögliche Bauplatz ist eben mit einer guten Drainage.
• Es muβ auβerdem genügend Platz auβehalb des Gerätehauses vorgesehen
werden, damit die Blechschrauben von auβen aus verschraubt werden können.
• Arbeiten Sie im Team: Mindestens zwei Personen werden für die Montage des Gerätehauses benötigt.
PFLEGE & INSTANDHALTUNG
• Reinigen Sie Ihren Schuppen NICHT mit dem Hochdruckreiniger.
• Brennbare und ätzende Stoff e müssen in luftdichten Behältern gelagert werden, die zur Lagerung von Chemikalien und/oder Brennstoff en
vorgesehen sind. Ätzende Chemikalien wie z. B. Dünger, Insektenvernichter und Unkrautvernichter sollten sofort von den Innen-
und Außenfl ächen abgewischt werden. Durch die Lagerung von Chemikalien entstandener Rost wird nicht von der Gewährleistung
abgedeckt.
Rostschutzmaßnahmen
• Vermeiden Sie es, die Oberfl ächenbeschichtung an der Innen- und Außenseite zu beschädigen oder zu verkratzen.
• Halten Sie das Dach, den Bodenbereich und die Türführungen stets frei von Verunreinigungen.
• Bessern Sie Kratzer oder Beschädigungen und alle Bereiche mit sichtbarem Rost so schnell wie möglich aus.

5
HARDWARE LIST 05HUb
The fasteners used in each step are shown actual size at the top of each page. If you are unsure which
fastener to use, hold it up to the picture and use the one that matches.
LISTE DE LA VISSERIE
LISTA DE PIEZAS
165103 Hex Nut (#8-32) / Écrou hexagonal (8-32) / Tuerca hexagonal (N.º 8-32)
/ Sechskantmutter (#8-32) 176
Key
No. Part No.
Part
Description
Qty. Part Views
Rep.
N.º de
refe-
rencia
Réf.
pièce
N.º de
pieza Description
de la pièce
Descripción
de la pieza
Qté
Cant.
Profi ls de pièces
Vistas desde
un extremo
265923 Small Bolt (#8-32 x 3/8) (10 mm) / Petit boulon (8-32 x 3/8) (10 mm) / Perno
pequeño color arena (N.º 8-32 x 3/8) (10 mm) / Kleine Maschinenschraube
(#8-32 x 3/8) (10 mm) 152
365004 Small Screw (#8AB x 5/16) (8 mm) / Petite vis (8AB x 5/16) (8 mm) / Tornillo
pequeño color arena (N.º 8AB x 5/16) (8 mm) / Kleine Blechschraube
(#8AB x 5/16) (8 mm) 403
Les éléments de visserie utilisés à chaque étape sont représentés en taille réelle en haut de chaque page. En
cas de doute sur le type de visserie à utiliser, les placer sur l’image et utiliser celui qui correspond.
Los tornillos y pernos que se utilizan en cada paso se muestran en el tamaño real en la parte superior
de cada página. Si no está seguro de qué tornillo o perno de usar, compárelo con la imagen y use el que
coincida con ella.
KLEINTEILELISTE
Lfd.
Nr. Art.-Nr. Menge
Vor-handen
Die in den jeweiligen Schritten verwendeten Verbindungselemente werden am oberen Seitenrand jeweils
in tatsächlicher Größe gezeigt. Falls Sie unsicher sind, welches Verbindungselement Sie verwenden
sollen, dann halten Sie es vor das Bild und verwenden Sie dasjenige, das passt.
Bezeichnung
466783
Flathead Bolt (#8-32 x 1/2) (13 mm) / Boulon à tête plate (#8-32 X 1/2) (13
mm) / Perno de cabeza chata (N.º 8-32 x 1/2) (13 mm) / Senkkopf-Maschinen-
schraube (#8-32 x 1/2) (13 mm)
24

6
HARDWARE LIST 06HUa
LISTE DE LA VISSERIE
LISTA DE PIEZAS
13 66847 Gable Vent / Grilles de ventilation / Rejillas de ventilación / Dachgi-
ebelentlüfter 4
14 67293 Weather Stripping / Ruban de calfeutrage / Burlete / Dichtungsband 1
15 30028 Nameplate / Plaque signalétique / Placa de identifi cación / Typenschild 1
12 30001 Left Handle / Poignée droite / Manija izquierda / Linker Griff 1
530000 Locking Handle Right / Poignée verrouillable droite / Manija de bloqueo
derecha / Verriegelungsgriff rechts 1
630040 Hinge / Charnière / Bisagra / Scharnier 4
760H Corner Cap / Coin bouchon / Tapa de esquina / Dachleisten-
Abschlusskappe 4
866646 Washer Sheet / Plaque de rondelles / Plancha de arandelas / Unterlegs-
cheiben 10
930026 Peak Cap / Embout de faîte / Tope del caballete / Firstkappe 2
10 66808 Latch Spring / Verrou à ressort / Resorte de aldaba inferior / Schnapprie-
gel unten 1
11 66684 Latch Spring / Verrou à ressort / Resorte de aldaba superior / Schnap-
priegel oben 1
KLEINTEILELISTE
Key
No. Part No.
Part
Description
Qty. Part Views
Rep.
N.º de
refe-
rencia
Réf.
pièce
N.º de
pieza Description
de la pièce
Descripción
de la pieza
Qté
Cant.
Profi ls de pièces
Vistas desde
un extremo
Lfd.
Nr. Art.-Nr. Menge Vor-handen
Bezeichnung

6
7
16 11362 Floor Frame / Cadre de plancher / Tirante del entramado del piso
/ Bodenrahmen 4
18 11363 Ramp / Seuil / Rampa / Türschwelle 1
19 11340 Rear Corner Panel / Panneau de coin arrière / Panel esquinero
trasero / Eckblech hinten 2
20 11391 Front Corner Panel / Panneau d’angle avant / Panel de la
delantero esquina / Eckblech vorne 2
21 11342 Side Corner Panel / Panneau de mur latéral / Panel esquinero
lateral / Eckblech Seiten 4
22 11343 Wall Panel / Panneau de mur / Panel de la pared / Wandblech 10
23 11381 Wall Channel / Longeron de mur / Canaleta de la pared / Wand
verstrebung 2
25 11382 Side Wall Angle /
Cornière de mur latéral
/ Ángulo de la pared
lateral / Seitenwandwinkel 4
26 11383 Rear Wall Angle / Cornière arrière / Ángulo de la pared trasera /
Rückwandwinkel 2
27 11365 Lintel / Linteau / Dintel / Sturz 1
29 11348 Door Jamb Right / Jambage de porte droit / Jamba de la puerta
derecha / Türpfosten rechts 1
17 11380 Front/Rear Floor Frame / Cadre de plancher avant/arrière / Tirante del
entramado delantero/trasero del piso / Bodenrahmen vorne/hinten 4
24 11370 4
28 11385 End Lintel / Linteau d’extrémité / Final del dintel / Ende des
Türsturzes 2
EN,FR,SP,GE-07HU
PARTS LIST LISTE DES PIÈCES
ARTÍCULOS DE FERRETERÍA
Key
No. Part No.
Part
Description
Qty. Part Views
Rep.
N.º de
refe-
rencia
Réf.
pièce
N.º de
pieza Description
de la pièce
Descripción
de la pieza
Qté
Cant.
Profi ls de pièces
Vistas desde
un extremo
Lfd.
Nr. Art.-Nr. Menge Vor-handen
Bezeichnung
TEILELISTE
Wall Channel / Longeron de mur / Canaleta de la pared / Wand
verstrebung

6
8
35 11386 Roof Beam / Poutre de toit / Viga del techo / Dachträger 8
37 11387 Right Roof Panel / Panneau de toit droit / Panel del techo derecho
/ Dachblech rechts 2
38 80215 Left Roof Panel / Panneau de toit gauche / Panel del techo
izquierdo / Dachblech links 2
39 11388 Roof Panel / Panneau de toit / Panel del techo / Dachblech 6
40 11352 Roof Trim / Garniture de toit / Contramarco del techo / Dachab-
schlussleiste 2
41 11390 Ridge Cap /
Faîtage
/ Tope del caballete / Firstabdeckung 1
42 11371 Door Panel Hinge Side / Coté charnière du panneau de porte /
Panel de puerta lateral de bisagra / Türverkleidung Bandseite 1
43 11372 Door Panel / Panneau porte / Panel puerta / Tür 2
31 9009 Gable Brace /
Renfort de pignon
/ Abrazadera del gablete / Gie-
belverstärkung 2
33 11398 Right Gable / Pignon droit / Gablete derecho / Giebel rechts 2
34 80221 Left Gable / Pignon gauche / Gablete izquierdo / Giebel links 2
32 6635 4
36 9204 Roof Beam Brace / Contrefi che de poutre de toit / Abrazadera de
la viga del techo / Dachträger verstärkung 2
EN,FR,SP,GE-08HU
30 80209 Door Jamb Left / Jambage de porte gauche / Jamba de la puerta
izquierda / Türpfosten links 1
PARTS LIST LISTE DES PIÈCES
ARTÍCULOS DE FERRETERÍA TEILELISTE
Key
No. Part No.
Part
Description
Qty. Part Views
Rep.
N.º de
refe-
rencia
Réf.
pièce
N.º de
pieza Description
de la pièce
Descripción
de la pieza
Qté
Cant.
Profi ls de pièces
Vistas desde
un extremo
Lfd.
Nr. Art.-Nr. Menge Vor-handen
Bezeichnung
Gable Brace /
Renfort de pignon
/ Abrazadera del gablete / Gie-
belverstärkung

6
9
EN,FR,SP,GE-09HU
46 11375 Horizontal Door Channel / Canal d’ouverture horizontale de la
porte / Canal de puerta horizontal / Horizontale Türschiene 4
47 11376 Diagonal Door Brace / Renfort diagonal de porte / Abrazadera
diagonal de la puerta / Diagonale Türversteifung 4
48 11377 Door Handle Brace / Renfort de poignée de porte / Abrazadera de
la manija de la puerta gablete / Türgriff versteifung 2
49 11378 Door Trim / Garniture de porte / Moldura de la puerta / Türverkle-
idung 2
50 11379 Astragal / Astragale de porte / Astrágalo de puerta / Türfugenprofi l 1
45 11374 Vertical Door Channel / Canal d’ouverture verticale de la porte /
Canal de puerta vertical / Vertikale Türschiene 4
44 11373 Door Edge / Bord de porte / Borde de la puerta / Türkante 2
PARTS LIST LISTE DES PIÈCES
ARTÍCULOS DE FERRETERÍA
51 80229 1
Door Panel Hinge Side / Coté charnière du panneau de porte /
Panel de puerta lateral de bisagra / Türverkleidung Bandseite
TEILELISTE
Key
No. Part No.
Part
Description
Qty. Part Views
Rep.
N.º de
refe-
rencia
Réf.
pièce
N.º de
pieza Description
de la pièce
Descripción
de la pieza
Qté
Cant.
Profi ls de pièces
Vistas desde
un extremo
Lfd.
Nr. Art.-Nr. Menge Vor-handen
Bezeichnung
52 11384 2
Wall Channel Front / Canal mur avant / Canal frontal de pared /
Vorderseite Kanalwand
53 11392 2
Front Wall Panel / Panneau de mur avant / Panel de la
delantero pared / Wandblech vorne
54 11389 Roof Trim / Garniture de toit / Contramarco del techo / Dachab-
schlussleiste 2
55 11399 Ridge Cap /
Faîtage
/ Tope del caballete / Firstabdeckung 1
56 69835 Edge Trim(Green) / Garniture de bordure (verte) / Contramarco
del gablete de (verde) / Kantenschutz (Grün) 4

6
10
10HU
ASSEMBLY BY KEY NO. PIÈCES PAR N° DE REPÈRE
MONTAJE POR N.º DE REFERENCIA
16
16
16
16
17
17
17
17
18
19
19
20
20
21
21
21
21
22
22
22
22
22
22 22
22
22
22
23
23
24
24
24
24
25
25
25
25
26
26
27
28
28
29
30
53
53
52
52
MONTAGE NACH LFD. NR.

6
11
11HUa
ASSEMBLY BY KEY NO. PIÈCES PAR N° DE REPÈRE
MONTAJE POR N.º DE REFERENCIA
MONTAGE NACH LFD. NR.
31
31
32
32
32
32
33
33
34
34
35
35
35
35
35
35
35
35
36
36
37
37
38
38
39
39
39
39
39
39
40
40
41
42 43
43
54
54
55
44 44
45
45 45
45
46
46
46
46
47
47
47
47
48
48
49
49
50
51
56
56
56
56

6
12
EN,FR-12HUa
CONSTRUCTING A FOUNDATION CONSTRUIRE UNE FONDATION
Wood Platform / Plateforme en bois Concrete Slab / Dalle en béton
16"/24"
40,6 cm/61,0 cm
121 1/8”
307,6 cm
97 1/8"
246,7 cm
121 1/8"
307,6 cm
97 1/8"
246,7 cm
* IMPORTANT *
The base MUST be fl at and level to provide adequate support for your building, otherwise the PRE-DRILLED HOLES WILL
NOT ALIGN AND IT CANNOT BE ASSEMBLED. No matter which of the options below you choose for a base, an ARROW
ANCHORING KIT is recommended as an eff ective method of properly securing your building after assembly is complete.
OPTION 1: Build directly on the ground
OPTION 2: Wood Platform
NOTE: Pressure Treated Lumber must NOT be used where it will make contact with your storage building. The properties of Pressure
Treated Lumber will cause accelerated corrosion. If Pressure Treated Lumber comes in contact with your storage building your
warranty will be voided. The platform should be level and fl at (free of bumps, ridges, etc.) to provide good support for the building.
The necessary materials may be obtained from your local lumber yard.
OPTION 3: Concrete Slab
The slab should be at least 4" (10,2 cm) thick.
* IMPORTANT *
La base DOIT être plate et de niveau pour fournir un support adéquat à votre bâtiment, sinon les trous PRÉ-PERCÉS
NE S'ALIGNERONT PAS ET ILS NE POURRONT PAS ÊTRE ASSEMBLÉS. Quelque que soit l’option ci-dessous
choisie pour la base, un NÉCESSAIRE D’ANCRAGE ARROW est recommandé pour amarrer solidement l’abri une fois
que le montage est terminé.
OPTION 1 : Construire à même le sol
OPTION 2 : Plateforme en bois
REMARQUE : Ne PAS utiliser de bois traité sous pression aux points de contact avec l’abri. Le bois traité sous pression contribue
à accélérer la corrosion. Le contact de bois traité sous pression avec l’abri aura pour eff et d’annuIer la garantie. La plateforme
doit être plate et de niveau (sans bosses, arêtes, etc.) afi n d’off rir un bon support à l’abri. Les matériaux nécessaires peuvent s’obtenir
auprès d’un fournisseur de bois d’oeuvre local.
OPTION 3 : Dalle en béton
La dalle doit avoir au moins 4 "(10,2 cm) d'épaisseur.

6
13
SP,GE-13HUa
Plataforma de Madera /
Plattform aus Holz
Losa de Hormigón /
Bodenplatte aus Beton
16"/24"
40,6 cm/61,0 cm
* IMPORTANTE *
La base DEBE ser plana y nivelada para proporcionar el soporte adecuado para su edifi cio; de lo contrario, los AGUJEROS
PRETALADRADOS NO SE ALINEARÁN Y NO SE PUEDEN MONTAR. Independientemente de las siguientes opciones
que elija como base, se recomienda un KIT DE SUJECIÓN ARROW como método efi caz para sujetar adecuadamente su
cobertizo después de terminar el ensamblaje.
OPCIÓN 1: Construir directamente en el suelo
OPCIÓN 2: Plataforma de madera
NOTA: La madera tratada a presión NO debe usarse donde haga contacto con su edifi cio de almacenamiento. Las propiedades de
la madera tratada a presión causarán corrosión acelerada. Si la madera tratada a presión entra en contacto con su edifi cio de
almacenamiento, su garantía quedará anulada. La plataforma debe estar nivelada y plana (libre de golpes, crestas, etc.) para
proporcionar un buen soporte para el edifi cio. Los materiales necesarios se pueden obtener de su aserradero local.
OPCIÓN 3: Losa de hormigón
La losa debe tener al menos 4 “(10,2 cm) de espesor.
CONSTRUYENDO UNA FUNDACIÓN BAU EINER BODENPLATTE
Der Sockel MUSS fl ach und eben sein, um eine angemessene Unterstützung für Ihr Gebäude zu gewährleisten. Andernfalls
werden die VORGEBOHRTEN LÖCHER NICHT AUSGERICHTET UND ES KANN NICHT ZUSAMMENGEBAUT WERDEN.
Unabhängig davon, für welche der nachfolgend genannten Möglichkeiten Sie sich als Fundament entscheiden, empfi ehlt
sich ein ARROW-VERANKERUNGSKIT als wirkungsvolle Methode zur ordnungsgemäßen Sicherung Ihres Bauwerks nach
Abschluss der Montagearbeiten.
MÖGLICHKEIT 1: Direkt auf dem Untergrund (Erde)
MÖGLICHKEIT 2: Plattform aus Holz
HINWEIS: An Stellen, an denen es mit Ihrem Geräteschuppen in Kontakt kommen würde, darf kein kesseldruckimprägniertes
Holz verwendet werden. Kesseldruckimprägniertes Holz hat Eigenschaften, die zu beschleunigter Korrosion führen. Wenn
kesseldruckimprägniertes Holz mit Ihrem Geräteschuppen in Kontakt kommt, wird Ihre Garantie ungültig.
MÖGLICHKEIT 3: Bodenplatte aus Beton
Die Bodenplatte sollte wenigstens 10,2 cm stark sein.
*WICHTIG*
121 1/8”
307,6 cm
97 1/8"
246,7 cm
121 1/8"
307,6 cm
97 1/8"
246,7 cm

14
11380
119 1/2” 303,5 cm
11 7/8” 30,2 cm
14HU
1: FLOOR FRAME
Overlap Length
Longueur de
chevauchement
Longitud de
superposición
Finished Length
Longueur fi nie
Longitud terminada
11380 4
11380
X2
11363
11363
Side View Vue latérale Vista lateral
CADRE DE PLANCHER
MARCO DE PISO
11363 1
65923 65103 8 65004 4
65923 65103
65004
65923
65103
BODENRAHMEN
Länge nach Montage
Überlappung
Seitenansicht

15
11362
95 1/2” 242,6 cm
11 7/8” 30,2 cm
15HU
1: FLOOR FRAME
Overlap Length
Longueur de
chevauchement
Longitud de
superposición
Finished Length
Longueur fi nie
Longitud terminada
11362 4
11362
X2
CADRE DE PLANCHER
MARCO DE PISO
65923 65103 8
65923 65103
65923
65103
BODENRAHMEN
Länge nach Montage
Überlappung

12
16HU
11362
16
11362
1: FLOOR FRAME CADRE DE PLANCHER
MARCO DE PISO
65004 811380+11380 1(2)11380+11363 1
11362
11380
11380
11380
11380
11380
11363
NOTES:
Do NOT fasten your Floor Frames to your
Base at this time. You will anchor your
building after it is erected.
The Floor Frame must be BOTH square AND
level or the holes will not line up properly.
Measure diagonally from corner to corner.
When diagonal measurements are equal,
the Frame is square.
REMARQUES:
Ne PAS attacher les éléments de cadre de
plancher à la base à ce stade. L’abri sera
ancré une fois qu’il est assemblé.
Le cadre de plancher doit être À LA FOIS
d’équerre et de niveau pour que les trous
s’alignent correctement.
NOTAS:
NO fi je los tirantes del piso a la base en este
momento. Anclará la estructura después de
que esté erguida.
El tirante del piso debe estar TANTO
cuadrado COMO nivelado o los orifi cios
no se alinearán correctamente. X4
65004
Mesurer en diagonale d'un coin à l'autre.
Lorsqu’elles sont égales, le cadre de
plancher est d’équerre.
Mida diagonalmente de esquina a esquina.
Cuando las medidas diagonales son iguales,
el tirante está cuadrado.
BODENRAHMEN
HINWEIS:
Befestigen Sie Ihre Bodenrah-
men noch NICHT am Fundament.
Sie verankern Ihr Bauwerk erst,
nachdem es fertig aufgebaut ist.
Der Bodenrahmen muss SOWOHL rechtwinklig
ALS AUCH waagerecht sein. Andernfalls
fl uchten die Löcher nicht richtig.
Messen Sie diagonal von Ecke zu Ecke. Wenn
die diagonalen Abmessungen gleich sind, ist
der Rahmen rechtwinklig.
11362+11362 2
11362
11362

17
17HU
11383
117” (297,2 cm)
Finished Length
Longueur fi nie
Longitud terminada
11383
2: PRE-ASSEMBLY PRÉ-ASSEMBLAGE
PRE-ENSAMBLE
65923 65103 6 11383 2 11382 4
65923
65103
VORMONTAGE
Länge nach Montage
11382
92 3/4” (235,6 cm)
Finished Length
Longueur fi nie
Longitud terminada
11382
65923
65103
Länge nach Montage
X2

18
18HU
11386
11386
END VIEW
Vista desde un
extremo
Vue d’extrémité
2: PRE-ASSEMBLY PRÉ-ASSEMBLAGE
PRE-ENSAMBLE
65923 65103 30
VORMONTAGE
Endansicht
X4
11386 8
65923
65103
11386
11386
65923
65103
X2
11386
11386
11386
11386
11386 11386 65923
65103
Finished Length
96 1/4” 244,5 cm

19
19HU
11385
118 1/4” (300,4 cm)
11385
11365
11381
11381
Finished Length
Longueur fi nie
Longitud terminada
118 1/4” (300,4 cm)
Finished Length
Longueur fi nie
Longitud terminada
2: PRE-ASSEMBLY PRÉ-ASSEMBLAGE
PRE-ENSAMBLE
65923 65103 6
65923 66646 65103 4 11365 1 11385 2 11381 2
65923
65103
66646
66646
65923
65103
66646
66646
65923
65103
VORMONTAGE
Länge nach Montage
Länge nach Montage
11370 4
11370
11370
94 1/4” (239,4 cm)
Finished Length
Longueur fi nie
Longitud terminada
65923
65103
Länge nach Montage
X2

20
20HU
11340
11342
X2
11391 11342
X2
3: CORNER PANELS PANNEAUX D’ANGLE
PANELES DE ESQUINA
65923 66646 65103 16 11340 2 11342 4 11391 2
11342
11340
11391
11342
65923 65103
66646
65923
65103
66646
ECKPLATTEN

21
21HU
3: CORNER PANELS PANNEAUX D’ANGLE
PANELES DE ESQUINA
65004 66646 10 11391+11342 211340+11342 2
65004
66646
1
11391
11342
11391 11342
11342
11342 11340
11340
Front
Avant
Frente
ECKPLATTEN
Vorne

22
22HU
11382
11382
4: WALL ANGLE
CORNIÈRE DE MUR
ÁNGULO DE LA PARED
65004 66646 611383+11383 1
11383+11383
65004
66646
Front
Avant
Frente
WANDWINKEL
Vorne
11382+11382 2
11382+11382
11382+11382
11383

12
23HU
23
5: LINTEL LINTEAU
DINTEL
65004 66646 4(2)11385+11365 1
(2)11385+11365
65004
66646
Front
Avant
Frente
STURZ
Vorne

12
24HU
24
Rear
Arrière
Atrás
6: WALL CHANNEL LONGERON DE MUR
CANALETA DE LA PARED
65004 66646 211381+11381 1
11381+11381
65004
66646
Rear
Arrière
Atrás
WAND VERSTREBUNG
Hinten
Hinten

12
25HU
25
11370
6: WALL CHANNEL LONGERON DE MUR
CANALETA DE LA PARED
65004 66646 465923 65103 2
65923
65103
65004
66646
Front
Avant
Frente
WAND VERSTREBUNG
Vorne
11381
11381+11381
11370+11370
11370+11370
11370+11370 2

12
26HU
26
11343
7: WALL PANELS PANNEAUX DE MUR
PANELES DE LA PARED
65004 66646 30 11343 3
Front
Avant
Frente
11343
1
11343
2
1
11342
11343
1
11343
2
11343
3
11342
65004
66646
ALWAYS COVER THE ARROW
NOTE:
REMARQUE: TOUJOURS COUVRIR LA FLÈCHE
DEBE CUBRIRSE SIEMPRE LA FLECHA
NOTA:
11342
11342
WANDBLECHE
HINWEIS: IMMER DEN PFEIL ABDECKEN
Vorne
11343
3

12
27HU
27
11343
11343
11343
1
2
4
7: WALL PANELS PANNEAUX DE MUR
PANELES DE LA PARED
65004 66646 39 11343 4
11343
1
11340
11343
1
11343
2
11343
4
11340
65004
66646
Rear
Arrière
Atrás
11340
11340
WANDBLECHE
Hinten
11343
3

12
28HU
28
11343
11343
1
2
7: WALL PANELS PANNEAUX DE MUR
PANELES DE LA PARED
65004 66646 30 11343 3
11343
1
11342
11343
3
11342
Front
Avant
Frente
65004
66646
11342
11342
WANDBLECHE
Vorne
11343
3
11343
1
11343
2

12
29HUa
29
80209
11348
8: DOOR JAMB JAMBAGE DE PORTE
JAMBA DE LA PUERTA
65004 66646 20 65923 66646 65103 6 80209 1 11348 1
Front
Avant
Frente
65004 66646
65923
66646
65103
TÜRPFOSTEN
Vorne
11392 2
11392
1
11392
1
11391
11391
11392
80209
11392
11391
11391
11392
11392
11348
1
1
1
1

12
30HU
30
9: WALL CHANNEL FRONT CANAL MUR AVANT
CANAL FRONTAL DE PARED
65004 66646 14 65923 65103 2 11384 2
65004
66646
VORDERSEITE KANALWAND
65923
65103
11384
11370
Front
Avant
Frente
Vorne
11384
11384
Front
Avant
Frente
Vorne

12
31HU
31
6635
11398
80221
6635
10: GABLES PIGNON
GABLETE
11398 2 80221 2 6635 4
65923 66646 65103 8
65923
66646
65103
GIEBEL
69835 4
69835
69835
6635
11398
69835
69835
80221
6635
To avoid mishap on the sharp edge the
edge trim must remain in place on the
top edge of the gable until right and left
roof panels are in place.
CAUTION:
PRUDENCE:
Pour éviter les accidents sur l’arête
coupante de la garniture de bord,
cette garniture doit rester en place sur
le bord supérieur du pignon jusqu’à
ce que les panneaux de toit droit et
gauche soient en place.
Para evitar un accidente en el borde
fi loso, el recuadro del borde debe
quedar en su lugar en el borde superior
del frontón hasta que los paneles
izquierdo y derecho están colocados.
ADVERTENCIA:
VORSICHT:
Um Unfälle zu vermeiden, sollte die
scharfe Kante der Randleiste auf der
oberen Kante des Giebels verbleiben,
bis die rechten und linken Dachpaneelen
angebracht sind.

12
32HU
32
9009
10: GABLES PIGNON
GABLETE
65004 18 65923 65103 111398+6635 180221+6635 1 9009 1
Rear
Arrière
Atrás
65923
65103
65004 11398+6635
80221+6635
Rear
Arrière
Atrás
GIEBEL
Hinten
Hinten

12
33HU
33
9009
10: GABLES PIGNON
GABLETE
65004 18 65923 65103 111398+6635 180221+6635 1 9009 1
65923
65103
65004 11398+6635
80221+6635
GIEBEL
Front
Avant
Frente
Vorne
Front
Avant
Frente
Vorne

6
34
34HU
Tape BOTH Gable joints before installing Roof Beams.
Couvrir de ruban le raccord des DEUX pignons
avant de poser les poutres du toit.
Coloque cinta adhesiva en AMBAS juntas del
gablete antes de instalar las vigas del techo.
11386
11386
11: ROOF BEAMS POUTRE DE TOIT
VIGA DEL TECHO
65923 65103 4(2)11386+(2)11386 1 67293
67293
Top View of Gables
Vue de dessus du pignon
Vista superior de gabletes
67293
65923
65103
9009
DACHTRÄGER
Draufsicht auf die Giebel
Kleben Sie BEIDE Giebelverbindungen zusammen,
bevor Sie die Dachbalken montieren.

6
35
35HU
11386
11386
11386
11: ROOF BEAMS POUTRE DE TOIT
VIGA DEL TECHO
65923 65103 8
65103
65923
65923
65103
DACHTRÄGER
(2)11386 2
11386
11386
11386

36
36HU
9204
9204
9204
12: ROOF BEAM BRACE CONTREFICHE DE POUTRE DE TOIT
ABRAZADERA DE LA VIGA DEL TECHO
65923 65103 4 9204 2
65923
65103
9204
65923
65103
1
2
X2
X2
DACHTRÄGER VERSTÄRKUNG

12
37HU
37
11388
11387
11388
11388
11387
Gable
Pignon
Gablete
11387
2
3
2
3
1
4
5
6
7
8
13: ROOF PANELS PANNEAU DE TOIT
PANEL DEL TECHO
65004 66646 30 11387 1 11388 3
Front
Avant
Frente
Front
Avant
Frente
65004
66646
66646 65004
DACHBLECH
Giebel
Vorne
Vorne
65923 66646 65103 6
65923
66646
65103
9
10
11388
1
1

12
38HU
38
80215
11387
2
3
1
4
5
6
7
8
9
10 11
1
3
4
5
6
7
8
13: ROOF PANELS PANNEAU DE TOIT
PANEL DEL TECHO
80215 1
Front
Avant
Frente
Front
Avant
Frente
65004
66646
65004
66646
DACHBLECH
Vorne
Vorne
12 13
11387 1
2
9
10
80215
66646
65923
Gable
Pignon
Gablete
Giebel
65103
11387
66646
65923
Gable
Pignon
Gablete
Giebel
65103
65004 66646 9
65923 66646 65103 12

12
39HU
39
11388
11388
11387
11388
13: ROOF PANELS PANNEAU DE TOIT
PANEL DEL TECHO
11388 2
65004
66646
Front
Avant
Frente
Front
Avant
Frente
DACHBLECH
Vorne
Vorne
11387
1
2
1
65004 66646 18
65923 66646 65103 6 11390 1
11399 1
11390
11399
65923
66646
30026 1
11390
11399
65923
66646
65923
65103
65103 65103
65923 65103 2
30026

12
40HU
40
11388
13: ROOF PANELS PANNEAU DE TOIT
PANEL DEL TECHO
11388 1
65004
66646
Front
Avant
Frente
Front
Avant
Frente
DACHBLECH
Vorne
Vorne
1
65004 66646 15
65923 66646 65103 8
30026 1
65923
66646
65103
65923 65103 2
30026
65004 66646
65923
65103
65923
11388
80215
1
65103
80215 1
1
2
3
4
5
6
7
8
9
10
11
12
13
14 15
16 17
80215
1

12
41HU
41
14: ROOF TRIM GARNITURE DE TOIT
CONTRAMARCO DEL TECHO
Front
Avant
Frente
DACHABSCHLUSSLEISTE
Vorne
65004 66646 6
65923 66646 65103 2 11352 2
11352
11389
65923
66646
11389
66847
66646
65004
65103
11389 2
X2
65004
11352
66847 4
60H 4
65004 12
11352
11389
65004
66847
60H
60H
60H
60H

6
42
42HU
11375
11374
11374
11376
11377
11376
11374
123
11375
11375
11374
15: DOOR ASSEMBLY PORTE ASSEMBLÉE
ENSAMBLAJE DE LA PUERTA
65004 4 11374 2 11375 1 11376 2 11377 1
Front
Avant
Frente
Front
Avant
Frente
Front
Avant
Frente
Rear
Arrière
Atrás
65004
11374
11376
11374
11376
11376
11377
MONTAGE DER TÜRE
Vorne
Vorne
Vorne
Hinten

6
43
43HU
11375
11374
11375
11375
11374
65004 16 11375 1
Rear
Arrière
Atrás
Rear
Arrière
Atrás
Rear
Arrière
Atrás Rear
Arrière
Atrás
65004 65004
15: DOOR ASSEMBLY PORTE ASSEMBLÉE
ENSAMBLAJE DE LA PUERTA MONTAGE DER TÜRE
Hinten
Hinten
Hinten
Hinten

44
44HU
11371
11372 11373
11373
11372
65004 66646 18 11371 1 11372 1 11373 1
Front
Avant
Frente
65004
66646
65004
66646
11372 11371
Front
Avant
Frente
15: DOOR ASSEMBLY PORTE ASSEMBLÉE
ENSAMBLAJE DE LA PUERTA MONTAGE DER TÜRE
Vorne Vorne

45
45HUb
11378
30040
30040
Ensamblaje de la puerta derecha
Right Door Assembly
Ensemble de porte droite
65004 66646 13 11378 1 30040 2
65004
66646
65004
66646
66783
65103
Front
Avant
Frente
15: DOOR ASSEMBLY PORTE ASSEMBLÉE
ENSAMBLAJE DE LA PUERTA MONTAGE DER TÜRE
Montage der rechten Tür
Vorne
66783 65103 6

46
46HU
11375
11374
11374
11376
11377
11376
66808
11375
11374
11374
11375
1
2
3
65004 6 11374 2 11375 1 11376 2 11377 1 66808 1
Front
Avant
Frente
Front
Avant
Frente
Front
Avant
Frente
Rear
Arrière
Atrás
65004
11376
11374
11374
11376
11376
11377
15: DOOR ASSEMBLY PORTE ASSEMBLÉE
ENSAMBLAJE DE LA PUERTA MONTAGE DER TÜRE
Vorne
Vorne
Vorne Hinten

6
47
47HU
11375
66684
11375
11374
65004 18 11375 1 66684 1
Rear
Arrière
Atrás
Rear
Arrière
Atrás
Rear
Arrière
Atrás Rear
Arrière
Atrás
65004
65004
11374
11375
15: DOOR ASSEMBLY PORTE ASSEMBLÉE
ENSAMBLAJE DE LA PUERTA MONTAGE DER TÜRE
Hinten
Hinten
Hinten
Hinten

48
48HUa
1137280229
80229
11373
11373
11372
11372
30028 1
30028
2 2
65004 66646 27 80229 1 11372 1 11373 1
Front
Avant
Frente
65004
66646
65004
66646
80229
15: DOOR ASSEMBLY PORTE ASSEMBLÉE
ENSAMBLAJE DE LA PUERTA MONTAGE DER TÜRE
Vorne
11379 1
11379
65004
66646

49
49HUb
11378
30040
30040
Ensamblaje de la puerta izquierdo
Left Door Assembly
Ensemble de porte gauche
30001
B
E
F
B
E
E
F
F
2
2
65004 66646 4 11378 1 30040 2
65004
66646
66783
65103
Front
Avant
Frente
15: DOOR ASSEMBLY PORTE ASSEMBLÉE
ENSAMBLAJE DE LA PUERTA MONTAGE DER TÜRE
Montage der linken Tür
Vorne
66783 65103 6
66646 2
66646
66646
Washer 66646 NOT supplied with
30001 handle kit.
Rondelle 66646 NON fournie avec
le kit de poignée 30001.
Arandela 66646 NO suministrada con
el kit de mango 30001.
Unterlegscheibe 66646 NICHT im
Lieferumfang des Griff satzes 30001
enthalten.

6
50
50HUb
1 1
Ensamblaje de la puerta izquierdo
Left Door Assembly
Ensemble de porte gauche
Ensamblaje de la puerta derecha
Right Door Assembly
Ensemble de porte droite
15: DOOR ASSEMBLY PORTE ASSEMBLÉE
ENSAMBLAJE DE LA PUERTA MONTAGE DER TÜRE
Montage der linken Tür
Montage der rechten Tür
66783 65103 12
Jamba de la
puerta
Door
Porte
Puerta
Door Jamb
Jambage de porte
Door Jamb
Jambage de porte
Jamba de la
puerta
Door
Porte
Puerta
30040
30040 Door
Porte
Puerta
Tür
Türpfosten
Tür
Tür
Türpfosten
Door
Porte
Puerta
Tür
65103 66783
65103
66783

51
51HUa
Ensamblaje de la puerta derecha
Right Door Assembly
Ensemble de porte droite
Set Screw
Vis d’arrêt
Tornillo de
fi jación
Close doors. Adjust so that latch engages behind door
jamb, then tighten set screw. The unit is locked. Turn key
and remove.
Ajuster de manière à ce que le loquet s’enclenche derrière
la Jambage porte puis serrer la vis d’arrêt.
Cierre la puerta. Ajuste de manera que el cerrojo se
enganche detrás de la Jamb de la puerta, luego apriete
el juego de tornillos. La unidad está trancada. Voltee
la llave y la retira.
30000
A
C
D
E
F
2
2
15: DOOR ASSEMBLY PORTE ASSEMBLÉE
ENSAMBLAJE DE LA PUERTA MONTAGE DER TÜRE
Montage der rechten Tür
Stellschraube
Schließen Sie die Türen. Nehmen Sie Anpassungen vor,
sodass die Verriegelung hinter der linken Tür einrastet,
dann ziehen Sie die Stellschraube fest. Die Einheit ist
abgeschlossen. Drehen Sie den Schlüssel um und ziehen
Sie ihn heraus.
66646 2
Washer 66646 NOT supplied with 30000 handle kit.
Rondelle 66646 NON fournie avec le kit de poignée 30000.
Arandela 66646 NO suministrada con el kit de mango 30000.
Unterlegscheibe 66646 NICHT im Lieferumfang des Griff satzes 30000 enthalten.
A
C
E
FE
F
D
G
66646
66646

ANCHORING OPTIONS EN,FR,SP,GE-48HK
• If you have swing doors, they must hang and swing level before anchoring building.
• Anchor your building at this time. Use approprate 1/4”
(6mm) X minimum 1 1/2” (38,1mmm) length hardware.
• Please take a moment to ensure that the building is installed in accordance
with these instructions and with all applicable regulations.
• The entire fl oor frame MUST be securely anchored once the building is erected.
32
52
OPTIONS D’ANCRAGE
* IMPORTANT *
* IMPORTANT *
• Si l’abri comporte des portes battantes, vérifi er qu’elles sont accrochées de niveau et pivotent
librement avant d’ancrer l’ouvrage.
• Ancrez votre bâtiment en ce moment. Utilisez une longueur appropriée de 1/4 po (6 mm) X 1
1/2 po (38,1 mm) Matériel.
• Veiller à bien s’assurer que l’abri est installé conformément aux présentes instructions et à
toute la réglementation en vigueur.
• Le cadre de plancher entier doit IMPÉRATIVEMENT être solidement ancré une fois que l’abri
est assemblé.
OPCIONES DE ANCLAJE
• Si tiene puertas vaivén, estas deben colgar y moverse en forma pareja antes de sujetar el
cobertizo.
• Ancle su edifi cio en este momento. Use una herramienta apropiada de 1/4 “(6 mm) X 1 1/2”
(38,1 mm) de longitud.
• Dedique unos minutos a asegurarse de que la estructura está instalada de acuerdo con estas
instrucciones y con las reglamentaciones vigentes.
• Se DEBE anclar todo el tirante del piso cuando la estructura está erguida.
* IMPORTANTE *
• Anchor your building at this time. Use appropriate 1/4”(6mm) X 1 1/2”(38,1mm) length
hardware.
VERANKERUNGSMÖGLICHKEITEN
• Wenn Sie Schwingtüren haben, müssen diese sauber hängen und schwingen, bevor der
Schuppen verankert wird.
• Verankern Sie Ihr Gebäude zu diesem Zeitpunkt. Verwenden Sie angemessene Teile der Länge
1/4”(6mm) X 1 1/2” (38,1mm).
• Bitte überprüfen Sie noch einmal, ob der Schuppen im Einklang mit dieser Anleitung und mit
allen geltenden Vorschriften aufgestellt wurde.
• Nach Aufstellung des Geräteschuppens MUSS der gesamte Bodenrahmen sicher verankert
werden.
*WICHTIG*
1/52