Kenmore 91149052200 El manual del propietario
- Categoría
- Hornos
- Tipo
- El manual del propietario
Este manual también es adecuado para

E L I T E
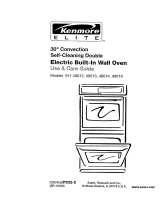
30" Convection Self-Cleaning Double
Electric Built-In Wall Oven
U_-_e& Care G_ide
Horno de Pared Empotrado El_ctrico
Doble de 30" a Convecci6n con Autolimpieza
Man_a_ del consumidor
Models 911.49052, 49053, 49054, 49059
÷
÷
229C4020P31 0-3 Sears, Roebuck and Co.,
(SR-10499-3) 01_)3JR HoffITl_nEstates, IL 60179 U.SJ_. www.sears.com
20P310-3 ENvO'2 1 -_ 2J14_3, 2:12 PM

SELF-CLEANING
DOUBLECONVECTIONOVEN
TABLEOFCONTENTS
÷
Oven Safety .......................... 3-4
Features of Your Oven ............. 5
Removal of Packaging Tape .. 5
Oven Control, Clock,
and Timer ............................. 6-7
Control Display ......................... 8
Clock ........................................ 9
Kitchen Timer ........................... 9
Control Lockout ........................ 9
Tones ...................................... 10
Tone Volume .......................... ! 1
F Code .................................... 11
Oven Cooking Tips .......... 12-!4
Baking With Margarine .......... 13
Baking .............................. 14-15
Serve Warm ............................ 15
Convection Baking Tips ......... 16
Dehydration Tips .................... 17
Convection RoastingTips .. 17-18
Convection Modes ................. 19
Recipe Recall ................... 20-21
Multi-Stage Cooking .............. 22
Broiling ............................. 23-24
Setting Special Features. 25-29
Self-Cleaning Cycle .......... 30-32
Control Panel .......................... 33
Broiler Pan and Grid ............... 33
Self-Clean Oven interior ......... 33
Oven Door Glass .................... 33
Door Vent Trim ........................ 33
Stainless Steel ........................ 33
Oven Light Bulbs .................... 34
Oven Backs ............................ 34
Oven Door .............................. 35
Before Calling for
Service .............................. 36_38
Temperature Adjustment ........ 39
Warranty ................................. 42
Service Numbers .................... 84
÷
For your convenience and future reference, please wrlt_ down your model
and serial numbers in the space provided. They are located on the front
frame behind the oven door.
MODEL NUMBER: SERIAL NUMBER:
© Sears, Roebuck and Co.
2
20P310-3 ENv02 2 ÷ 2/14/03, 2:12 PM

÷
IMPORTANT
SAFETYINSTRUCTIONS
SAVE THESE INSTRUCTIONS
Read all instructions before using this appliance. When using gas or
electrical appliances, basic safety precautions should be followed,
including the following:
IMPORTANT: To ensuresafetyfor
yourself,familyandhome,pleasereadyour
Useand CareGuidecarefully. Keepit
handyfor reference.PaycloseattentTonto
SafetySections.RESUREyour appliance
isTnstalledand grounded by a qualified
technician.
• DO NOT leave children alone or
unattended near an appliance in use.
• TEACH CHILDREN not to play with
controls or any part of the appliance, and
not to sit, climb or stand on the door or
any other part of the appliance.
• CAUTION: NEVER STORE items
of interest to children in cabinets above
the appliance. Children c!imbing on the
appliance could be seriously injured.
• KEEP THIS book for later use.
• NEVER USEyourappliance for
warmingor heatingtheroom.
• NEVERTRY torepairor replace
anypart of theappliance unless
instructionsaregiven inthismanual.
Allother workshouJdbe done bya
qualifiedtechnician.
• ALWAYSKEEPcombustiblewall
coverings,curta'ns,dish cloths,towels,
pot holders and other linensa safe
distancefromthe appliance.
• NEVER HEATunopenedfood
containers.Pressurebuildup can cause
thecontainer toburst andcauseinjury.
• NEVER LEAVEcontainersof fat or
drippings inyouroven.
• ALWAYSKEEPthe ovenareafree
from thingsthatwill burn. Food,wooden
utensilsand greasebuildupcould catch
fire.P]asticutensilscould meltand
canned foods could explode.Your
appliance should neverbe used as a
storagearea.
• ALWAYSKEEPyourapplianceclear of
thingsthatwill burn (gasolineand other
flammablevapors or liquids).
• NEVERTRY to cleana hotsurface.
Somecleaners producenoxiousfumes,
andwetclothsor sponges could cause
steamburns.
NEVERWEARloose-fittingclothing
whenusing yourappliance.
NEVERUSE a towelor otherbulkycloth
asapot holder.Makesurethe potholder
is dry.Meistpot holdersand wetcloths
or spongeseould causesteamburns.
DONOT letpot holderstouchhot
surfaces.
BESURE theovenlssecurelyinstalled
in a cabinetthatisfirmlyattachedto the
housestructure.
LARGESCRATCHESOR IMPACTS
toglass doors can eeadto brokenor
shatteredglass.
DO NOTtouch hotheatingelements,
surfacesnearthemor interioroven
surfaces.Thesemay be hotenoughto
causeburnseventhoughtheyaredark
in color.Duringandafteruse, do not
touchor let clothingor flammal_le
mater'alcontact theelementsor hot
surfacesuntilthey havehad time to
cool.Othersurfacesnearthe ovenvent
openings,ovendoor andwindowmay
alsobe hotenoughto cause burns.
3
÷
20P31(]-3 ENvQ2 3 ÷ 2/14_3, 2:12 PM

÷
IMPORTANTSAFETY
INSTRUCTIONS
• PLACE OVEN RACKS in the
desired position while the oven is
cool If racks must be moved while
oven is hot, do not let pot holder
contact the hot oven element.
• AFTER BROILING, always take the
broiler pan and grid out of the oven
and clean them Leftover grease in
the broiler pan could catch fire the
next time you use your oven
• ALWAYS USE care when opening
the oven door. Let hot air and steam
escape before moving foods.
• NEVER USE aluminum foil to line
the oven bottom. Improper use of
foil could start a fire, or electrical
shock could result
• NEVER BLOCK the oven vent
opening.
• CLEAN ONLY the parts listed
in this manual. Follow all cleaning
instructions Be sure to remove
broiler pan and grid before the
self-clean cycle.
• NEVER RUB, move, clean or
damage the door gasket on
self-cleaning ovens. It is essential
for a good seal.
• NEVER TRY to clean utensils,
cookware, removable parts or
broiler pan and grid in the self-clean
cycle
• DO NOT USE oven cleaners-
No commercial oven cleaner or
protective coating of any kind
should be used ;n or around any
part of the oven.
• IF THE SELF-CLEANING mode
malfunctions, turn the oven off and
disconnect the power supply. Have
it serviced by a qualified technician.
IMPORTANT SAFETY NOTICE[
The Canfomla Safe Drinking Water
and Toxic Enforcement Act
requires the governor of California
to publish a list of substances
known to the state to cause birth
defects or other reproductive harm
and requires businesses to warn
their customers of potential
ex])osure to such substances.
The fiberglass insulation in a
self-cleaning oven will give off a
very small amount of carbon
monoxide during the cleaning
cycle, Exposure can be minimized
by venting with an open door or
window or using a ventilation fan
or hood.
IMPORTANT: The health of
some birds is extremely sensitive
to the fumes given off during
the sefl-cleaning cycle of any
oven. Move birds to another
well-vectilafed room.
READ AND UNDERSTAND
THIS INFORMATION NOW!
Be sure everyone In your home
knows what to do In case of fire.
Never use water on a grease fire;
it will only spread the flames.
OVEN FIRE:
Do not try to move the pan!
1. Close the oven door and turn
contro{s off.
2. If fire continues, carefully open
the door, throw baking soda on
the fire or use a dry chemical,
foam or halon type extinguisher.
SAVE THESE INSTRUCTIONS
÷
4
20P31(_3 ENv02 4 ÷ 2J14/03, 2:12 PM

OPERATION
FEATURESOFYOUROVEN
Oven Vent Oven ConVol
Self-Clean
AutomaUc Door
both ovens)
Oven Llgl (both ovens)
(both ovens) Oven Light
(both ovens)
Broiler Pan Element
and i (both ovens)
Convection Bake
Modeland Sedal
NumberLocotion
(behind upper
door)
Hidden Bake
Element
(under oven floor)
(both ovens)
Door Gasket
(both ovens)
Oven Rack
Guides (both
ovens)
Self-Cleaning
(both ovens)
Removable
(both ovens)
Removable
Racks
{3 in upper oven,
2 in lower oven)
To remove the adhesive residue left from packaging tape, use household
dishwashing liquid, mineral oil or cooking oil. With a soft cloth rub into the
area and allow to soak, Rinse and dry well. Repeat procedure using an
appliance polish to ensure no damage is done to the oven. This should be
done before the oven is turned on for the first time. The tape cannot be
removed once the oven has heated. Packaging tape may be found in the
following areas: Control Panel Area, Door Handle, Door Trim and Oven Area.
5
20P310-3 ENvQ2 5 _ 2J14_3, 2:12 PM

÷
OPERATION
OvenControl,ClockandTimer
Your new touch pad oven control will allow you to set various functions with
ease. Below are the different types of functions and a description of each.
BAKE - Cooks foods in the traditional
oven with a temperature range of
170°F to 550°F.
RECIPE RECALL (upper oven) - Lets
you preset up to five temperature/
cooking time combinations. With this
function you can bake or convection
bake/roast any one of five of your
favorite recipes without choosing
settings each time.
MULTI-STAGE (upper oven) - Lets
you set the oven to cook your recipes
that require two temperature/time
settings.
BROIL - Cooks foods at 550°F HI
broil or 450° LO broil from the direct
heat of the upper element. Broiling
should be done with the door opened
to the broil stop position.
SELF-CLEAN (upper oven) - Cleans
the inside of the oven for you There
are two self-clean options. The Sens-
A-Clean option senses the dirtiness of
the oven and cleans it for the appro-
priate length of time. The timed option
allows you to select the length of the
self-cleaning time When either cycle
is finished, the oven will turn off
automatically.
SELECT CLEAN (loweroven) -
Cleans the inside area of the oven for
you at one of three levels: 3 hours Lo,
4 hours Std and 5 hours Hi When the
cycle is finished, the oven wilI turn off
automatically.
NOTE: During the clean cycles, the
oven door will automatically latch and
will only unlatch once the oven has
cooled down
Cooks food with hot air circulated
over and around foods by a
convection fan, located at the
back of the oven.
CONVECTION BAKE 1 RACK- Idea_
for baked foods on a single sheff.
Good for a large variety of foods.
CONVECTION BAKE MULTI - ideal
for baked foods cooked on multiple
shelves. Good for a large quantity
of foods
CONVECTION ROAST- Good for
large tender cuts of meat, uncovered.
DEHYDRATE Designed for
dehydrating a variety of foods such as
herbs, vegetabtes, fruits and meats
6
÷
20P310-3 ENve_ 6 _ 2/14_03, 2:_2 PM

- 5 ;?;Ii ii i ii:i il! 4} iiiiiiiiiiiD|iiiiii
÷
OPERATION
OvenControl, Clockand Timer
(cent.)
Set the amount of time you
want foods to cook The
oven turns off automatically
at the end of this time.
Set the time of day you
want the oven toturn on,
The oven will turn on
automatically at the time
you have set When
DELAY START TIME is
used with OVEN COOKING
TIME, RECIPE RECALL,
MULTI STAGE
SENS-A-CLEAN or
SELECT CLEAN,
the oven will also turn off
automatically, at the end of
the cooking or clean cycle
The TEMP UP and DOWN
arrow pads set the oven
temperature
TEMP
QO TheHOUR/MIN UPand
DOWN arrow pads set the
time of day, length of
cooking time, length of
cleaning time, the delayed
start time and the time set
on the Kitchen Timer.
<_The START pad must be
touched to activate any
oven function.
The CLEAR/OFF pad
is used to cancel any
oven function and the
end-of-cycle tone. It will
not cancel the Clock or
Kitchen TImer.
The KITCHEN TIMER pad
is used to turn the Kitchen
Timer on or off. It witl not
control any other functions.
(_) The CLOCK pad is used to
set the time of day
(_ The LIGHT pad turns the
lights inside the oven on
or off.
÷
7
20P310 3 ENv02 7 _ 2J14/O3, 2:12 PM

÷
OPERATION
ControlDisplay
Oven Temperature
Set Indicators
In n
Indicator Funetlon Function Indicators
Indicators Indicators
The Control Display is an easy
reference for using your oven control.
Below are descriptions of how the
Control Display works,
OVEN TEMPERATURE
INDICATOR - This indicator has a
multiple purpose.
• Displays the temperature
• Displays oven problems -
Ifyour control flashes "F" and
a number or letter, you have
experienced an oven problem.
Please read the section on
F-CODES in your manual.
"ON" INDICATOR - Will light when
the oven turns on.
SET INDICATORS - The set indicator
will flash in combination with an oven
function or timed function to let you
know you need to set a time or
temperature. Example: "SET" and
"BAKE" will Flash to tat you know
you need to set the bake temperature,
TIMED FUNCTION
INDICATORS - Displays the time of
day, cooking time, delay start time,
cleaning time or the time set on the
kitchen timer and which time function
has been set.
• Displays reminder code "PUSH
START" - If the time indicator
flashes the word "PUSH START,"
then you need to press the START
pad to activate your setting.
OVEN FUNCTION INDICATORS -
Display which oven function has
been set, when the oven door locks,
if the function is delayed or which
elements are used.
÷
8
2(IP310-3 EN',K]2 8 ÷ 2/14_3, 2:12 PM

÷
OPERATION
OvenControl,Clockand Timer
Theclock mustbe setfor thecorrect time
of day beforea delayed ovenfunctioncan
work properly.Thetime ofday cannotbe
changedduring a timedovenfunction,
butcan be changed during abakeor
broil function.
HOW TO SET THE CLOCK
1. Touch theCLOCKpad.
2. Touch the HOUR/MINUP and/or
DOWNarrowpadsto setthe time.
8. Touch theSTARTpad.
RECALLTHE CLOCK
Whileusingyourovenfor cooking,touch
theCLOCKpad if youwish tocheck the
timeof day.The currenttimeof day will
showinthe display.
POWERFAILURE
Your oven has a feature which continues
to update the oven clock time for 3
minutes or longer when you experience
a power failure. In this case, the time will
not flash when the power returns to the
oven, and there isno need to reset your
clock.
Ifyou haveexperienceda powerfailure
andthe timeis flashinginthe display,it is
incorrect. Resetyourclock.
Anyoven cookingfunctionthatwas in
processwhen the powerfailureoccurred
will needtobe reset.
h
The Kitchen Timer is used to time cooking
processes or other household activities. It
does not control the oven. It can be set for
up to 9 hours and 59 minutes. It will count
down in minutes until the LAST 60
SECONDSTsreached; thenthe control
willbeep once.Whenthe countdown
reachesZERO,the controlwillbeep 3
times,followedbyone beep every6
secondsuntilthe KITCHENTIMERpad is
touched.The6-seeandbeep can be
removedfor futurecycles if desired.For
directionson removingthiscontinuous
beep, see "Tones"onthe following page.
HOW TO SET THE TIMER
1. Touchthe KITCHENTIMERpad.
2. TouchHOUR/MINUPand/or DOWN
arrowpadsto settime.
3. Touchthe STARTpad.
4. Whenthe countdownhasreached
zero,touchthe KITCHENTIMER pad
to turnoffthe beep.
Tocancelthe timerduringthe countdown,
touch theKITCHENTIMERpad TWICE
Yourcontrolwill allowyou tolock the
touchpads sothey cannotbe activated
when touched.Ifyou'reworriedabout
leavingtheoven unsupervised,activate
thisfeature.
(_ (_1. Touchand hold, atthe
sametime,theHOUR/MIN
DOWN arrowpadsfor 3
_'=" seconds, untilthe display
shows"LOC ON."
2. To unlock thecontrol, touch
and hold,at the sametime,
the HOUR/MINDOWNarrow
padsfor 3seconds,untilthe
display shows"LOC OFF."
Thisfeaturecanonly beset when the
ovenis net in use.
When this feature is on, no touch pads
will work. The dTsplay willshow "LOC ON"
if a touch pad ispressed. The adjustment
will be retaTned in memory after a power
failure.
9
÷
20P310 3 ENvO2 9 . 2/14KI3, 2:12 PM

.... iiiiliiiiiiiiili ÷ l iiiiii!iiiiii
÷
OPERATION
OvenControl,ClockandTimer
(cent.)
Your new control has a series of
tones that will sound at different times.
These tones may sound while you set
the control for an oven function or at
the end of the oven function. It will
also alert you that there may be a
problem with the functions. Below
are the types of tones and a bdef
description of each.
TONES WHILE SE'n'ING THE
CONTROL -When you touch a pad,
you will hear a beep. This beep will let
you know that the pad has been
activated, (The arrow pads de not
beep.)
END OF TIMED CYCLE TONE - At
the end of a timed cooking function,
you will hear 3 short beeps followed
by 1 beep every 6 seconds. This
beep will continue to sound every 6
seconds until the CLEAR/OFF pad is
touched or you may select the special
feature to cancel this 6-second beep
from sounding at the end of future
cycles
TO CANCEL THE G-SECOND BEEP
1. Touch and hold the BAKE and
BROIL pads, at the same time
for 3 seconds, until the display
shows "SF"
2, Touch the KITCHEN TIMER pad.
The display willshow "CON
BEEP" (continuous beep).
3. Touch the KITCHEN TIMER
pad again. The display will show
"BEEP" (continuous beep
canceled).
4. Touch the START pad to canceI
the 6-second beep and leave the
special feature mode.
If you would like to return the
6-second beep, repeat steps above
until the display shows your choice
and touch the START pad.
A'B'ENTIOH TONE This tone will
sound if you make an error or an
oversight is made while setting an
oven function.
Examples would be:
a. Setting a clean cycle and the oven
door is not properly closed.
b. Setting function and not touching
the START pad.
c, Touching an additional function
pad without first setting a
temperature or time.
Any of these can be quickly identified
by watching the display.
PREHEAT TONE - When you
select a cooking mode, set an oven
temperature and press the START
pad, the oven starts to heat. When the
temperature inside the oven reaches
the temperature you have set, a tone
wilt sound to let you know the oven is
ready for baking.
÷
10
20P310-3 ENv02 10 ÷ 2/14_3, 2:12 PM

÷
OPERATION
OvenControl,Clockand Timer
(cont.)
This feature allows you to adjust the
tone volumes to a more acceptable
volume. There are three possible
volume levels.
1. ouch the BAKE and
BROIL pads at the same
time for 3 seconds, until
the display shows "SF"
Touch the LIGHT pad
The display will show
"2 BEEP" This is the
middle volume level
Touch the LIGHT pad
again. The display will
show "3 BEEP." This is
the loudest volume level
Touch the LIGHT pad
again, The display will
show "1 BEEP." This is
the quietest volume level.
For each time the level
is changed, a tone will
sound to provide an
indication of the
volume level,
3. Touch the START pad to
activate the level shown.
If the control beeps while the display
is showing "F" and a number or letter
such as "F4" or "Fd," there may be
a problem with the control or oven.
Touch the CLEAR/OFF pad. Ifthe
function code repeats, disconnect
all power to the oven for at least 30
seconds and then reconnect the
power, Try setting the function again.
Ifthe code repeats again, write down
the flashing code and call for service.
Tell the technician what code was
flashing
÷
11
20P310-3 ENv02 11 ÷ 2J1,4_, 2:12 PM

Jill
÷
OPERATION
OvenCookingTips
It is normal to have some odor when
using your oven for the first time. To
help eliminate this odor, ventilate the
room by opening a window or
using a vent hood.
IMPORTANT: Never cover the oven
bottom or oven rack with aluminum
foil, Improper use can cause poor
heat flow, poor baking results and
may damage the oven finish. To
prevent staining from spillovers, you
may place a piece of aluminum foi! or
a cookie sheet on a rack below the
food which may spill over.
The oven vent is located just above
the door. This area could become hot
during oven use It is normal for steam
to come out of the vent and/or collect
moisture underneath when the oven
is in use. The vent is important for
proper air circulation. Never block
this vent.
OvenVent
i,
Opening the door often to check
foods wailcause heat loss and poor
baking results.
Preheating is bringing the oven
temperature up to the temperature
you will be using during baking. Let
the oven preheat when recipes call
for preheating.
The low temperature zone of your
oven (between 170°F and 200<>F)is
available to keep hot cooked foods
warm However, foods should not be
kept at these temperatures longer
than 2 hours
When using your convenient Delay
Start operation, foods such as dairy
products, fish, poultry, etc., should
never sit more than 1 hour before
cooking. Room temperature and the
heat from the oven light promote
bacterial growth.
To prolong the life of your
oven light bulbs, follow
this hetpful tip: Always
turn the lights off when the oven is not
in use or during a clean cycle. Ifyour
oven lights are lefton for an extended
period of time, the oven will be warm
when the door is opened due to the
heat generated from the oven light
bulbs
÷
12
20P310-3 ENvO2 12 . 2J14KI3, 2:12 PM

I iiiiiiiiiiii iiii
÷
OPERATION
OvenCookingTips(conL)
Most recipes for baking have been
developed using high fat products
such as butter or margarine (80% fat
by weight--the federal requirement
for products labeled "margarine").
You will get poor results if cakes, pies,
pastries, cookies or candies are made
with few-fat spreads. Low-fat spreads
contain less fat and more water. The
high moisture content of these
spreads affects the texture and flavor
of favorite baked recipes. The lower
the fat content of a spread product,
the more noticeable these differences
become. To ensure best results, use
margarine, butter or stick spreads
containing at least 70% vegetable oil
The bake element is under the oven
floor. Do not place food on the oven
bottom for cooking.
The Oven Temperature Sensor at the
back of the oven continuously senses
and controls the temperature inside
the oven. To keep a constant set
temperature, the elements wil_cycle
(turn on and off during cooking)
Baking results will be better if baking
pans are centered in the oven as
much as possible. If baking with more
than one pan, place the pans so each
has at least 1' to 1V2"of air space
around it. If baking four cake layers at
the same time, place two layers on
rack 2 and two layers on rack 4
Stagger pans on the rack so one is
not directly above the other.
FLAT COOKIE SHEETS, without
sides, allow air to circulate all around
the cookies for even browning,
SHINY PANS reflect heat and are
perfect for cakes and quick breads
that need a golden brown crust.
GLASS, DARK NON-STICK OR
DARKENED-BY-AGE BAKEWARE
absorbs heat and can be used for
yeast breads, pie crust or foods
that need a brown crust. The oven
temperature, when using these pans,
should be reduced by 25°F.
÷
13
20P31_3 ENvQ2 13 ÷ 2/14_3. 2:12 PM

i Eli iJ i iJ i !Miiiiiili
÷
OPERATION
OvenCookingTips(coot.)/
Baking& Roasting
The oven racks are designed with
stops, a convenience as well as a
safety precaution. The guides have a
bump to prevent the racks from tilting
when racks are pulled out of the oven.
This design allows the racks to be
inserted in only one way.
Your oven has seven (7) rack
positions in the upper oven (the lower
oven has six (6) positions) The top
position is only a guide. It cannot be
used as a rack position
Guide
Always place oven racks In the
proper position while oven is cool.
CAUTION: When you are using the
rack in the lowest position (!)1 you will
need to use caution when pulling the
rack out. We recommend that you pull
the rack out several inches and then,
using two pot holders, pull the rack
out by holding the sides of it. The rack
is low and you could be burned if you
place your hand in the middle of the
rack and Dull all the way out. Be very
careful not to burn your hand on the
door when using a rack in the lowest
position (1)
You may feel that your new oven
cooks differently than the oven it
replaced We recommend that you
use your new oven a few weeks to
become more familiar with it, following
the times g_ven in your recipes as
aguide. If you feel your oven is
too hot or too cool for your cooking
preference, see Do-tt-Yourself
Tomporature Adjustment in tho
back of this manual to make tho
adjustment.
(_ 1. Touch the BAKE pad
(_ 2. Touch the TEMP UP or
DOWN arrow pads to set
(_ the oven temperature
you prefer to use.
I]EMp
3. Touch the START pad.
4. hen baking is
finished, touch the
CLEAR/OFF pad.
BAKING SHELF POSITION CHART
TYPE OF FOOD SHELF POSITION
Frozen pies (on cookie 3 or 4
sheet)
Angel food cake 1
Bundt or pound cakes 2
Biscuits, muffins, 3 or 4
brownies,cookies,
cupcakes, layer
cakes, pies
Casseroles 3 or 4
Turkey or roast 1
÷
14
2(]P310 3 ENv02 14 ÷ 2J14KI3, 2:12 PM

i liiii iiiii:-- :: iiiiiiiiiilMiiiiiiiiiii
÷
OPERATION
Baking& Roasting(cont.)
Youcan setthe ovento cookfor a specific
timeand turnoff automatically,
(_1. Touch the BAKEpad.
2, TouchtheTEMP UPor
DOWNarrow pads toset
(_) the oven temperatureyou
_',, prefer touse.
3. Touch the OVEN
COOKINGTIME pad.
(_ (_ 4. Touch the HOUR/MINUP
and/or DOWNarrow pads
to set the amountof
_ cooking time.
5. Touch the STARTpad.
You can set theoven to turn on at a later time
of day, cook for a specific amount of time
and turn off automatically. Make sure the
clock Tsset correctly.
Q 2.
(2)
T_
3.
QQ4.
Touchthe BAKEpad.
Touchthe'[1EMPUP or
DOWNarrowpadstoset
the oventemperatureyou
preferto use.
Touchthe OVEN
COOKING"RMEpad.
Touchthe HOUR/MINUP
and/orDOWNarrowpadsto
setthe amountof timeyou
preferyourfoodsto cock.
Touchthe DELAYSTART
TIMEpad
15
(_ (_ 6. Touchthe HOUR/MINUP
and/orOOWNarrowpadsto
(_)°(_ setthe timeof day you
'_- prefertheoventoturnon
7. TouchtheSTARTpad.
The oven will turn off at the end of the
cooking time unless the Serve Warm
feature has been activated.
TheServeWarmfeaturekeepscod_edfoods
warmforupto3hoursafterthecookingfunction
isfinished,or itcanbeactivatedindependently
tokeepalreadycookedfeedswarm.
TOusethisfeatureindependently,touchthe
SERVEWARMpadandthentheSTARTpad
Toactivatethisfeatureforuseafteratimed
cookingfunction,touchtheSERVEWARM
padwhileprogrammingtheovenandbefore
touchingtheSTARTpad.
IMPORTANTNOTES:
• Foodshouldbekepthotinitscooking
containerortransferredtoa healsafe
servingdish
• Formoistfoods,coverthemwithan
oven-safelidoraluminumfoil,
• Repeatedopeningofthedeerallowsthehot
airtoescapeandthefoodtoecol.
• Allowextratimeforthetemperatureinside
theoventostabilizeafteraddingitems
• Withlargeloadsit maybenecessaryto
coversomeofthecookedfooditems.
• Removeservingspoons,etc.,
beforeplacingcontainersintheoven.
• Donotuseplasticcontainers,lidsorplastic
wrap.
CAUTION:Plasticcontainers,lidsorplastic
wrapwill meltif placedintheoven.Melted
plasticmaynotbe removableandisnot
coveredunderyourwarranty.
÷
2OP310-3 ENvl]r2 15 ÷ 2J14/03, 2:13 PM

1 ÷ !i:ii iii!; iiii!;!ii iiii}
OPERATION
ConvectionBakingTips
(UpperOven)
Whenusing 2racks,place the tworacks
Tnpositions2 and 4anduse Convection
BakeMulti.
÷
ConvectionBakTngusesheatedairthat Ts
circulated overand around foodsbythe
convectTonfan locatedTntheback ofthe
oven.
NOTE:Youwill hearafan whTlecooking
with convectTon.Thefan will stopwhen the
door is opened, butthe heatTngelements
will not turnoff.
Becauseheatedair is cTrculatedevenly
throughoutthe oven,foodscan be baked
with excellentresultsusing multipleracks.
Multi-rackbaking mayincreasecook
times slightlyfor somefoodsbut the
overallresultistime saved.CookTes,
muffTns,bTscuitsandother quickbreads
gTvevery good resultswith multi-rack
baking.
• Forcookingfoodson multiplerack
positions.
• Forlarge quantitTesof cooking.
• GreatforcookTngbTscuits,brownies,
angelfood cakeand bread.
Whenusing 3racks,place the racksin
posTtions2,4 and 6 and use Convection
BakeMulti,
Whenconvectionbaking,cooking
temperatures usedin recipes shouldbe
reduced 25°EtheConvectionCooversTon
featureautomaticallyconvertsentered
regular bakTngtemperaturestoconvection
baking temperatures.
Oncethe featureisactivated,the dTsplay
will showthe actualconverted (reduced)
temperature.Forexample,ifyouenter a
regular recipetemperatureof 350°Fand
pressthe STARTpad, the dTsplay
will brieflyshow"CON" and thenthe
converted temperatureof 325"E
NOTE:Thisfeaturedoesnotconvert
convection bake cookingtimes,only
temperatures.This featuredoesnot
convert convectionroastcookingtimes or
temperatures.
See ConvectionConversionunderthe
SettTngSpecialFeaturessection formore
informatTon.
METAL OR GLASS
WhenconvectTonbakingwith only
onerack, followthe rackpositTons
recommendedin the"HowtoSet Bake"
sectionand useConvectionBake 1-rack.
Single-rackbakingTsidealforcooking
largefood itemson 1rack.Cooktimes
may decrease,so foodshouldbe
checkedearlier thanpackage instructions
Any type cookwarewill workin the
convection oven.However,metalpans
heatfaster andare recommended.Glass
panscookmoreslowly,
PAPEROR PLASTIC
Heat-resistantpaperand plasticthatis
recommendedforregularovensmay be
usedinyourconvection oven.
indicateto makesureit is notovercooked. 16
÷
20P310-3 ENV02 16 ÷ 2/14,_3, 2:13 PM

i ÷ [iiiiiiiiiiiiii i iiiii iii iWiiiill¸
÷
OPERATION
DehydrationTips/Convection
Tips(UpperOven)
Dehydration(Drying)isamethodofpreserving
fruits,vegetables,herbs,andmeatsby
removingmoisturesobacteria,yeast,andmo4d
cannotgrowandspoilthefood.Yourovenuses
aconvectionfantoassisttheheatingelement
inremovingthereoistarefromthefoodstodry
andpreservethem.Notethatover12hours
mayberequiredtodrysomefoods
Accurateandcompleteinforma_Jouonbasic
fooddryingisavailablefromyourlocal
cooperativeextensionserviceofficeTolocate
thisofficeinyourarea,lookinyourtelephone
directoryforthecountygovernmentlistings
underyourcountyname.Yoocanalsogoto
theirwebeiteatwww,esusdagov.
Duringdehydralien,yourovendoormust
remainpartiallyopentoallowforaircirculation
andmoistureremovalUsethedehydration
doorstop,whichisincludedwithyouroven,to
holdthedouropenfordehydration,
1. Opentheovendoor.
2. Lenafetbeovenlightplungerswitchonthe
upperrightcorneroftheovenframe.
3. I=lacethemagneticendofthedoorstop
overtheovenlightplungerswitch
4. Clesetheovendoar,allowingtbedourto
restagainstthedoorstop.
Placethe magneticendovertheoven
lightplungerswitch.Closethedoor
againstthe doorstop.
NOTES:
• Use onlythedoorstop providedwith your
oven and onlyuse the doorstopwhile
dehydrating.
• De notstorethe doorstop in theoven.
• See thesection on Howto SetConvection
Modes to select thisfeature.
• Remomberthatthe proper preparation,
treatment,andstorageoffoodareessential
forthequalityandsafetyofdriedfood.
DehydratingHelpflJl"13ps:
• Multipleracksoffoodcanbedriedatone
time.
• Dryingtimewillvarydependingonseveral
factors:
• numberofracksoflead
• amountoffoodoneachrack
• size,shape,andthicknessoffood
• typeofdryingfraysused
• Usefoodpreservationresources,suchas
yourlocalcooperativeextensionservice,asa
guideforselectingfoodsafedryingtrays,
DuringConvectionRoasting,heatcomesfrom
thetopelement.Thecenvec'fionfancirculates
theheatevenlyaroundthefood.
Meatscookedinaconvectionovenaredark
brownontheoJtsibeandtenderandjuicyon
theinside.Inmostcasescookingtimowillbe
lesswhenusingtheConvectionRoastfeature,
Use therecommendedroastingtemperature.
Preheatingis not necessary Check foods at
theend ofsuggested time.Youmay chooseto
couklonger.
WhenyouareConvectionRoasting,youshould
usethebroilerpanandgridthatcamewith
yournewoven,Thepanisusedtocatch
greasespillsandthegridisusedtoprevent
greasesplatters
TousethePan_d Grid
a. Piacetheovenrackinthelowestrack
position.
b. Racethemeatonthebroilerpan
andgrid.
,;,
÷
20P310-3 EN',_32 !7 ÷ 2/14/03, 2:13 PM

1 ÷ iiiiiiiii...... iiiiiiiiiiiiiMiiiiiiiiill
OPERATION
ConvectionRoastingTips(UpperOven)(cont.)
MEATS
Beef
CONVECTION ROASTING GUIDE
Pork
Ham
Lamb
MINJLB. , OVENTEMP. {'F
Rib (3to 5Ibs.)
Rare*
Medium
Well
Boneless Rib, Top Sirloin
Rare*
Medium
Well
Beef Tenderloin
Rare*
Medium
Pot Boast (2½ to 3 Ibs.)
Chuck,Rump
Bone-in (3to 5 Ibs.)
Boneless(3 to5 Ibs.)
Pork Chops (½ to 1-inchthick
2 chops
4 chops
6 chops
Canned(3 Ibs. fu{tycooked)
Butt(5 Ibs. fully cooked)
Shank (5 Ibs.fully cooked)
Bone-in (3 to 5 Ibs.)
Medium
Well
Boneless(3 to 5 Ibs.)
Medium
Well
Fish, whole(3 to 5 Ibs.)
LobsterTails(6to 8 oz.eact
WholeChicken
(2½to3½ Ibs.)
Cornish Hens
Unstuffed(1 to 1V2Ibs.)
Stuffed (1 to 1V2Ibs.)
Duckling (4to 5 Ibs.)
Turkey, wholet
Unstuffed(10 to 16 Ibs.)
Unstuifed(18 to 24 Ibs.)
Turkey Breast (4 to 6 Ibs.)
20tO24
24to 28
28to 32
20to24
24to28
28t032
1Oto 14
14t0 18
35 to45
23 to27
23 to27
30 to35 total
35 to40 total
40 to45 total
14to 18
14to 18
14t0 18
325°
325°
325°
325°
325°
325°
325°
325°
300°
325°
325°
325°
325°
325°
325°
325°
325°
17to 20 325°
20to 24 325°
17to 20 325°
20to 24 325°
Seafood 30to 40total 400°
20to 25total 350°
Poultry 24to 26 350°
50to 55total
55to 60total
24to 26
8toll
7t010
16to 19
350°
350°
325°
325°
325°
325°
*The U.S.
Department
ofAgriculture
recommends
to cook meat
and poultry
thoroughly--
meat to at least
an INTERNAL
temperature of
160°F and
poultry to at least
an INTERNAL
temperature
of 180°F.
Cooking
to these
temperatures
usually protects
against
foodborne
illness.
_Stuffed birds
generally require
30-45 minutes
additional
roasting time.
Shield legs
and breast with
foil to prevent
overbrowning
and drying of
skin.
÷
18
2OP31(]-3 ENv02 18 . 2J14/03, 2:13 PM

...., liiiii i ] i ÷ {IFUililil iiiiiiiiiiii! i
÷
OPERATION
ConvectionModes
(UpperOven)
1. ouchtheCONV_"I1ONSELECT
padtoselectConvectionBake1
Rack,ConvectionBakeMulti,
ConvectionRoast,orDehydrate
IfyouselectDehydrate,itis
necessarytoinstallthedehydration
doorstopbetweentheupperright
corneroftheovenframeandthe
door SeetheDehydratingsection
forproperinstallation.
@ 2. Teeehthe"l_MPUPorDOWNarrow
padtosettheoventemperatureyou
preferteuse.
,,_3. TouchtheSTARTpad.
_4. Whenbakingisfinished,touchthe
CI.F.M_iOFFpad.
Youcansettheoventocookfora specifictime
andturnoffautomaticaLLy.
1. TouchtheCONVEC1"IONSEIJECT
padtoselectConvectionBake1
Rack,ConvectionBakeMulti,
ConvectionRoast,or Dehydrate.
IfyouselectDehydrate,it
isnecessarytoinstallthe
dehydrationdoorstopbetween
theupperrightcorneroftheoven
frameandthedeer.Seethe
Dehydratingse,cf_ forproper
installation,
(_ 2. Touchthe'l_MPUPorDOWH
arrowpadtosettheoven
temperatureyouprefertouse.
@3. TouchtheOVENI_OKING
"flMEpad.
QG
4. Touch theHOUR/MINUPand/
or DOWN ,_TOWpads to setthe
amount ofcocking lime. ]_e
cooking time youenterdoes not
include thepreheattime.
5, Touch the START pad.
19
Youcansettheoventoturnonatalatertimeof
day,cookforaspecificamountoftimeandturn
offautomaticallyMakesuretheclockisset
correctly
_1. TouchtheCONVL_'13ON_.,,c-_. SELEC'Fpadtoselect
ConvectionBake1Back,
ConvectionBakeMulti,
ConvectionRoast,orDehydrate,
IfyouselectDehydrate,it
isnecessarytoinstallthe
dehydrationdoorstopbetween
theupperrightcorneroftheoven
frameandthedoor.Seethe
Dehydratingsectionforproper
installation
(_ 2. ToechtheTEMPUPerDOWH
arrowpadtosettheoven
([_ temperatureyouprefertouse.
raM,
_3. TouchtheOVENCOOKING"tiMEpad.
05,
C) Qo.
TouchtheHOUR_AINUPand/or
DOWNarrowpadstosetthe
amountoftimeyoupreferyour
feedstocook.]Tiecookingtime
youenterdoesnotincludethe
preheattime.
TouchtheDELAYS'rART
"riMEpad.
Touch theHOUR/kilN UPand/
or DOWNarrowpads toset the
time of day you prefer theoven
toturnon.
7. Touch theSTARTpad Theovenwill tum offattheend of
thecooking t',reeeeLesst_
ServeWarmfeaturehas been
activated
÷
20P310-3 ENV02 r9 . 2/14_03, 2:13 PM

7" 4iiiiiiiiiiiiiili ÷ iiiiiii iiiii i
÷
OPERATION
CookingTimeSavors
(UpperOven)
You can preset up tofivetemperature/
cooking time combinations with this
function You can then bake or
convection bake/roast any one of five
of your favorite recipes without
choosing settings each time.
NOTES:
•You can not use Recipe Recall with
Broil, Dehydrate, Serve Warm or the
Self-Cleaning cycle.
• Your oven will remember Recipe
Recall presettings even after a power
outage
• The cooldngtime you enter does not
include preheat time.At the preheat
tone, put your food in the oven.
To save a recipe:
1. ouch the RECIPE
RECALL pad one to five
times to find a blank space
for a recipe.
2. Touch the BAKEor
CONVEC'RONSELECT
pad.
(_) 3. Touch theTEMP UPor
DOWN arrow pad to set
(_ the cooking temperature.
(If you do not set a
T_., temperature,the oven will
cook at the temperature
displayed on the control)
Each time you touch an
arrow pad, the temperature
will increase/decrease by 5°,
4. Touch the OVEN
COOKING TIME pad
(_ (_) 5. Touch the HOUR/MIN UP
1_ or DOWN arrow pads to
.,_ _ , set the cook time.
@
6. Touch the RECIPE
RECALL pad The
display shows "Save,"
Touch the RECIPE
RECALL pad again and
the new recipe is saved.
7. Touch the START pad if
you want to start cooking
the recipe which you
havejust saved.
OR
Touch the CLEAR/OFF
pad to clear the display
To use a recipe:
1. Touch the RECIPE
RECALL pad one to five
times to find the recipe
you want to cook
2. When you have chosen
the recipe that you want
to use, touch the START
pad
NOTE: You can set Recipe Recall to
start at a latertime by touching the
DELAY START TIME pad and the
HOUR/MIN UP and/or DOWN arrow
pads (see "How to Set Delayed Start
Time with Timed Bake" in the baking
section). You can setthe delayed start
time before or after you choose the
recipe you want You can even set
a delay start alter you touch the
START pad.
÷
20
20P310-3 EN vl]_ 20 . 2214_J3, 2:13 PM

÷
OPERATION
Cooking Time Savors
(UpperOven)(cont.)
To change or replace a recipe:
1. Touch the RECIPE
RECALL pad one to five
times to find the recipe
that you want to change
or reptace.
2. Touch the BAKEor
CONVECTIONSELECT
pad.
(_ 3. Touch the TEMP UP or
DOWN arrow pad to set
(_ the cooking temperature.
(If you do not set a
TE., temperature, the
oven will cook at the
temperature displayed
on the control.) Each time
you touch an arrow pad,
the temperature will
increase/decrease by 5°.
4. Touch the OVENCOOKING TIME pad.
(_ (_ 5. Touch the HOURiMIN UP
or DOWN arrow pads to
....._,,.. set the cook time.
Touch the RECIPE
RECALL pad twice to
save the changes you
have made,
If you do not want to start
the recipe now, touch the
CLEAR/OFF pad once.
To delete a recipe:
1. ouch the RECIPE
RECALL pad one to five
times to find the recipe
that you want to delete
2. Touch the CLEAR/OFF
pad. "DEL" will show in
the display
3. Touch the RECIPE
RECALL pad to delete
the recipe.
4. ouch the CLEAR/OFF
pad to exit from the
Recipe Recall feature.
÷
21
20P310-3 EN',K}2 21 ÷ 2/14/_3, 2:13 PM

÷
OPERATION
CookingTimeSavers
(UpperOven)(cent.)
Youcan sotthe oventocook
yourrecipesthat requiretwo-stage
cooking. Inotherwords, ifyour recipe
calls fortwotemperaturesettings,
the control can beprogrammedto
automatica]lychangefrom thefirst
temperature/timesettingto the second.
Youwill nothave toreturnto the ovento
program the secondtemperatureand
time.Thecontroldoes this foryou.
NOTE:Ifthere isa poweroutage,youwill
haveto resetmulti-stagecooking.
To setmulti(two) stagecooking:
1. TouchtheBAKEor
CONVECTIONSELECT
pad.
(_ 2. Touch theTEMPUP or
DOWNarrow pad toset
(_) the oventemperature you
preferto use.
_MP
3. Touchthe OVEN
COOKINGTIME pad.
(_) (_ 4. Touch the HOUR/MINUP
or BOWNarrow pads to
setthe amountof time
'_'_" youprefer your foodsto
cook.
Touch the
MULTISTAGE pad.
5,
6. Touch the BAKE or
CONVECTION SELECT
pad for the second stage
of your recTpe.
7. Touch the TEMP UP
or BOWN arrow pad
to set the oven
temperature you
1_P prefer to use.
Touch the OVEN
COOKING TIME pad.
8.
(_) (_) 9. Touchthe HOUR/MIN
UP or DOWNarrow
padsto setthe amount
_ oftimeyouprefer your
foodstocook during this
second stageofthe
recipe.
10. TouchtheSTAIT]"pad.
Multi-stagecoekTngis
cancelled if youdo not
touchthe STARTpad.
Thecontrolwill beep
when ftchangesfrom
the firststage ofthe
recipetothe second
stage.
tl. Whenthe controlbeeps
atthe endofthe second
cookingtTme,touchthe
CLEAR/OFFpad.
NOTES:
• The cooldngtimeyou enter does
notInclude preheattime. Atthe
preheattone,put yourfood inthe
oven.Whenthe firstcookfngstage is
complete,the controlwill displaythe
second temperatureandcooking time
thatyouhave chosen.Theovenwill shut
off whenthe secondstageof cookingis
complete,but the beep willcontfnueuntfl
youtouch theCLE/_R/OFFpad.
• Touchand holdthe MULTISTAGEpad
during the firstcookingstageto recall
the temperature/timeofthe second
stageof yourrecipe.
• Ifyou decidethatyou do notwant to
cookthe recipeusingthe multistage
settings,touchthe OLE/_/OFF pad
and itwill be cancelled.
• For multi-stagecooking,you canuse
asavedrecipe recallfor oneor both
stagesofcooking.
÷
22
20P310 3 ENv02 22 ÷ 2J14_3, 2:13 PM

÷
÷
OPERATION
Broiling
Broiting is cooking by direct heat
from the upper element The oven
door should remain open to the broil
stop position during broiling.
/
"S
It is not necessary to preheat the
oven when broiling, Use the broiler
pan and grid that came with your
oven, Both are designed for proper
drainage of fat and liquids.
If foil is used it must be
molded tightly to the
grid and slits cut into
the foil to match those
of the grid. This allows fats and
liquids to drain into the broiler
pan, preventing fire and
excessive smoke.
Always remove the pan and grid
from the oven. Storing
or forgetting a soiled
broiler pan in the oven
The closer you place foods to the
broil element, the faster foods brown
on the outside yet remain red to pink
in the center,
Moving meats away from the element
will allow the meat to cook to the
center while browning on the outside.
Cook side 1 at least 2 minutes longer
than side 2. If your oven is connected
to 208 volts, you may want to use a
higher rack position and/or broil foods
longer
The size, weight, thickness, starting
temperature and your preference of
the doneness of the meat will affect
broiling. The chart below is based on
meats at refrigerator temperature
FOOD
Steak 1" thick
Ground beef
patties -
1" thick
Pork Chops -
1/2" thick
Fish (fillets)
Chicken
(pieces)
RACK
POSITION
3
3
3
3
2
TOTAL
TIMEIMIN.)
9-11
16-18
27-29
11-13
46-55
÷
The U.S. Department of Agriculture
recommends to cook meat and
poultry thoroughly--meat to at least
an INTERNAL temperature of 160°F
and poultry to at teast an INTERNAL
temperature of 180°F Cooking to
these temperatures usually protects
against foodborne illness
23
20P310-3 ENV02 23 ÷ 2/14/03, 2:13 PM

OPERATION
Broiling onL)
÷
la. Touch the BROIL
pad. (This will
automatically set HI
BROIL,)
lb, While the set
indicator is flashing
in the display, touch
the BROIL pad again
if you prefer to use
Lo Broil. Use Lo Broil
to cook foods such
as poultry or thick
cuts of meat
thoroughly without
overbrowning them
2, Touch the
START pad.
3. When broiling is
finished, touch the
CLEAR/OFF pad.
÷
24
20P310-3 ENV32 24 ÷ 2/14/03, 2:13 PM

T4+i+i+++i;+li ÷ t+i+i+i+i+iii
OPERATION
SettingSpecialFeatures
Your new touch pad control has
additional features that you may
choose to use. After making your
selection, if you want to change that
setting, follow the steps until the
display shows your choice.
2. (a) Touch the BROIL and OVEN
COOKING TIME pads st the
same time The control display
will show the degrees sign and
i+F_5
(b) Touch the BROIL and OVEN
COOKING TIME pads at the
same time again. This will
change "F" (Fahrenheit) to "C"
(Celsius),
3. Touch the START pad.
÷
The control is set to automatically turn
off the oven after 12 hours baking or 3
hours broiling should you forget and
leave the oven on Ifyou want to
remove this feature:
1.
Touch and hold, st the same
time, the BAKE and BROIL pads
for 3 seconds, until the display
shows "SF "
2. Touch the DELAY STARTTIME
pad. The display shows "12Shdn"
(12-hour shutoff),
Touch the DELAY START TIME
pad again The display will show
"no Shdn" (no shutoff)
3. Touch the START pad.
Your oven control is set for Fahrenheit
temperature selections. Most recipes
are given using Fahrenheit scale. You
can change this to use Celsius
selections.
1. Touch and hold, atthe same
time, the BAKE and BROIL pads
for 3 seconds, until the display
shows "SF"
Your control is set to use the 12-hour
clock. If you prefer to use the 24-hour
Military Time clock or black out the
display:
1. Touch and hold, atthe same
time, the BAKE and BROIL pads
for3 seconds, untilthe display
shows "SF."
2. (a) Touch the CLOCK pad.
The display shows "12hr."
If this is your choice, touch the
START pad.
or
(b) Touch the CLOCK pad again
The display will show "24hr"
Example: 5:00 on the 12-hour
clock will show 17:00 hours on
the military clock, Ifthis ts your
choice, touch the START pad,
or
(c) Touch the CLOCK pad again.
The display will show "OFF." If
this +syour choice, touch START
The display will not show time
(The Delay Start Time feature will
not operate.)
÷
25
20P310-3 ENV02 25 + 2/14_3, 2:13 PM

]liii]iiiiiii!iiii]i ! ': Miii iii iii1111'111
÷
OPERATION
Setting Special Features
(cont.)
This special feature will allow you to
change the speed: #1 means speed
of change is slow, up to #5 which
means speed of change is fast. To
set the speed you prefer, follow
these steps:
1. Touch and hold, at the same time,
the BAKE and BROIL pads for 3
seconds, until the display shows
"SF"
2, Touch any UP arrow pad. The
display will show the current set
speed.
3, Touch any UP arrow pad
to increase the speed up to the
number 5.
or
Touch any DOWN arrow pad to
decrease the speed down to the
number 1.
4, Touch the START pad
When using convection bake, the
Convection Conversion feature will
automatically convert entered regular
baking temperatures to convection
baking temperatures,
Once the feature is activated,
the display will show the actual
converted (reduced) temperature.
For example, if you enter a regular
recipe temperature of 350°F and
press the START pad, the display
will show "CON" and the converted
temperature of 325°E
NOTE: This feature does not convert
convection bake cooking times, only
temperatures. This feature does not
convert convection roast cooking
times or temperatures.
1. Touch the BAKE and BROIL pads
at the same time for 3 seconds,
until the display shows "SF"
2. Touch the CONVECTION SELECT
pad The display will show "CON
ON" If the display shows "CON
OFF," touch the CONVECTION
SELECT pad again and the
display will show "CON ON."
3. Touch theSTARTpad.
Todeactivate the feature, repeat
steps 1-3 above but touch the
START pad when "CON OFF"
is in the display.
÷
26
20P310-3 ENv02 26 _ ?J14_, 2:13 PM

÷
OPERATION
Setting Special Features
(cont.)
(Designed for use on the Jewish
Sabbath and Holidays.)
The Sabbath feature can be used
for baking/roasting only. It cannot
be used for broiling, selFcleaning
or Delay Start cooking.
NOTE: The oven light comes on
automatically (on some models)
when the door is opened and goes
off when the door is closed. The bulb
may be removed, Seethe Oven Light
Replacement section On models with
a LIGHT pad, the oven light may be
turned on and left on.
HOW TO SET FOR REGULAR
BAKING/ROASTING
NOTE: To understand how the oven
control works, practice using regular
baking (non-Sabbath) before entering
the Sabbath mode
Make sure the clock shows the
correct time of day and the oven
isoff.
(_ 1. Touch and hold both
the BAKE and BROIL
pads, at the same
time, until the display
shows "S F,"
2. Tap the DELAYSTART TIME pad until
"SAb bAtH" appears
in the display.
3. Touch the START pad
and _) will appear in
the display
4. Touch the BAKE pad.
No signal will be given.
27
Q
G
TEMP
5. The preset starting
temperature will
automatically be set to
350°F. Tap the UP or
DOWN arrow pads to
increase or decrease
the temperature bn
5° increments. The
temperature can be set
between 170°F and
550°F. No signal or
temperature will be given.
6. Touch the START pad.
7. After a random delay
period of approximately
30 seconds to 1 minute,
__c will appear inthe
display indicating that
the oven is baking/
roasting, If _ c does
not appear in the display,
start again at Step 4,
To adjust the oven temperature,
touch the BAKE pad and tap the UP
or DOWN arrow pads to increase or
decrease the temperature in 5°
increments. Touch the START pad.
NOTES:
• When the display shows D the
oven is set in Sabbath, When the
display shows • • the oven is
baking/roasting
• The CLEAR/OFF and OVEN
COOKING TIME pads are active
during the Sabbath feature.
÷
20P310-3 ENv02 27 . 2/14_3, 2:14 PM

iii iiiiiiiMiiiiiiiii
÷
OPERATION
Setting Special Features
(cont.)
HOW TO SET FOR TIMED BAKING/
ROASTING - IMMEDIATE START
AND AUTOMATIC STOP
NOTE: To understand how the oven
control works, practice using regular
(non-Sabbath) immediate Start and
Automatic Stop before entering the
Sabbath mode.
Make sure the clock shows the
correct time of day and the oven
is off
(_1.
G
<_3.
Touch and hold both the
BAKE and BROIL pads,
at the same time, until
the display shows "SF"
Tap the DELAY START
TIME pad until "SAb
bAtH" appears in the
display.
Touch the START pad
and D will appear in the
display.
Touch the OVEN
COOKING TIME pad.
No signat will be given.
QQ_.
Touch the UP or DOWN
arrow pads to set the
desired length of cooking
time between 1 minute
and 9 hours and 59
minutes, The cooking
time that you entered
will be displayed
Touch the START pad
(_7.
G
TEMP
Touch the BAKE pad.
No signal will be given,
The preset starting
temperature will
automatically be set to
350°F Tap the UP or
DOWN arrow pads to
increase or decrease
the temperature in
5° increments The
temperature can be
set between 170°F
and 550°F. No signal
or temperature will
be given.
Touch the START pad.
After a random delay
period of approximately
30 seconds to I minute,
D C will appear in the
display indicating thatthe
oven is baking/roasting. If
D C does not appear in
the display, startagain at
Step 7.
Toadjust the oven temperature,
touch the BAKE pad and tap the
UP or DOWN arrow pads to increase
or decrease the temperature in 5°
increments. Touch the START pad.
NOTES:
• When the display shows • the
oven is set in Sabbath. When the
display shows • • the oven is
baking/roasting
• When cooking is finished, the
display will change from • c to D
and "0:00" will appear, indicating
that the oven has turned OFF but
is still set in Sabbath. Remove the
cooked food
÷
28
20P310_3 ENv02 28 . 2/14'03, 2:14 PM

OPERATION
Setting Special Features
(co.t.)
÷
HOW TO EXIT THE SABBATH
FEATURE
1. Touch the CLEAR/OFF
pad.
2. Ifthe oven is cooking,
wait for a random delay
period of approximately
30 seconds to 1 minute,
until only _ is in the
display
(_ 3, Touch and hold both
the BAKE and BROIL
pads, at the same
time, until the display
shows "SF."
4. Tap the DELAY START
TIME pad until "12
shdn" or "no shdn"
appears in the display
"12 shdn" indicates
that the oven will
automatically turn
off after 12 hours. "no
shdn" indicates that
the oven will not
automatically turn off
5. Touch the START pad.
NOTE: if a power outage occurred
while the oven was in Sabbath mode,
the oven will automatically turn off and
the oven control must be reset.
÷
29
201=310 3 ENV02 29 _ 2/14/03, 2:14 PM

÷
CAREANDCLEANING
Self-CleaningCycle
1. Removethe broilerpan and grid,
utensilsandany feilthat maybe inthe
oven.
2. The gray porcelain-coated oven
racks may stay in the oven during
the self-clean cycle.
3. Sellonthe frant frameand outsidethe
gasketonthe door Ilnerwfllneedto
be cleaned byhand.
Cleantheseareaswith hot water,
soapfilled pads or cleansers suchasSoft
Scrube to removeany soil. Rinsewellwith
clean wateranddry.
Donot useoven cleaners--no
cornrnercialoven cleaner or protective
coating ofany klnd shouldbe usedin or
around anypart ofthe oven.
F_ntFmme
/
4. Wipeup any heavyspillovers onthe
ovenbottom.
5. Donot cleanthe gasket.The
fiberglass materialofthe oven door
gasketcannotwithstandabrasion.
It isessentialforthe gasketto remain
intact.Ifyou noticeit becomlngworn
or frayed,it shouldbe replaced.
\
The gasket is designed to have a
_0" gap at the bottom of the door.
This allows for proper air circulation.
DoorPanel Gasket
Door Liner
It is normal for your oven door to give
the appearance of not having agood
seal against the oven. This is due to
the gasket. The location of the gasket
on the door maintains a good seal
and prevents any heat _oss.
_f_ tensils should never
be left in the oven
during a clean cycle.
Gray porcelain-coated
oven racks may safely be
cleaned in the oven during
a self-clean cycle. It will be
necessary to grease the edges of
the oven rack with a light coating
of vegetable oll after a clean
cycle. This will help malntein the
ease of sliding the racks in and
out of the oven.
For the first clean cycle, vent the
room with an opened window or
hood vent. This will reduce the
odor produced when hoaUng
_new parts.
÷
30
20P310-3 ENVY2 30 ÷ 2/14/Q3, 2:14 PM

÷
CAREANDCLEANING
Self-CleaningCycle(cont.)
For upper oven: With Sens-a-Clean,
the oven control determines the
amount of soil in the oven for you and
then determines the amount of time
required to clean the oven, The
standard 4-hour clean is also
available. This allows you to set a
clean time from 3 hours, if the oven is
lightly soiled, up to 5 hours if the oven
is heavily soiled.
1. ouch the SENS-A-
CLEAN pad. "Sen" will
show in the display. If
this is your desired
selection, go to step 3.
OR
Touch the SENS-A-
CLEAN pad again. Four
hours will show in the
display. If this is your
desired selection, go to
step 3. Otherwise, go to
step 2.
If you want to change
the length of the
standard clean time,
touch the HOUR/MIN
UP and/or DOWN arrow
pads
3. Touch the START pad.
For lower oven: The Clean Cycle,
including cooldown time, offers preset
options of 3, 4 or 5 hours, but you
may change this to any time between
3 and 5 hours.
@
1. For 3 hours: Touch the
SELECT CLEAN pad.
3 hours and "Lo" will
show in the display. This
setting is recommended
for small contained
31
spills. Go to step 3 and
touch the START pad
For 4houm: Touch the
SELECT CLEAN pad
twice 4 hours and
"Std" will show in the
display. This setting is
recommended for a
normally soited oven
Go to step 3 and touch
the START pad
For 5 hours: Touch the
SELECT CLEAN pad
three times 5 hours and
"Hi" wilt show in the
dispiay. This setting is
recommended for
heavily soiled ovens,
Go to step 3 and touch
the START pad
(_ (_ 2. If you want to change
the length of clean time,
touch the HOUR/MIN UP
_"_ and/or DOWN arrow
pads.
<_3. Touch the START pad.
The door locks automatically. The
display will show the clean time
remaining, It will not be possible to
open the oven door until the
temperature drops below the lock
temperature and the LOCKED light
goes off.
When the LOCKED light is off, open
the door.
The LOCKED light will flash, "door"
will appear in the time display, and
the oven control will signal if you set
the clean cycle and forget to close
the oven door
÷
20P310-3 ENv02 31 ÷ 2J14/O3, 2:14 PM

'II[ ÷
÷
CAREANDCLEANING G G
Self-CleaningCycle(cont.)
Touch the CLEAR/OFF pad You will (" £e_ ",_
need to wait for the oven temperature
to drop below the lock temperature
(approx. 1 hour) before attempting to
open the door,
After the cycle, you may notice some
white ash in the oven. Just wipe it up
with a damp cloth or sponge.
Ifwhite spots remain, scrub them
with a soap-filled steel-wool pad. Be
sure to rinse thoroughly. These are
usually deposits of salt that cannot
be removed during the cycle.
Ifyour oven is equipped with
porcelain oven racks, it will be
necessary to grease the edges with a
light coating of vegetable oil after the
clean cycle This wilthelp maintain
the ease of stiding the racks in and
out of the oven
If for any reason you are not
satisfied with the cleaning results,
just repeat the cycle.
Make sure the clock is set correctly.
For upper oven:
1. Touchthe SENS-A-
CLEAN pad.
2. For astandard
self-clean, touch the
SENS-A-CLEAN pad
again Ifthis is your
desired selection,
go to step 4
3. If youwantto change
the length of clean
time, touch the HOUR/
MiN UP and/or DOWN
arrow pads.
4. Touch the DELAY
START TIME pad.
®(2b
5. Touch the HOUR/MIN
UP or DOWN arrow
pads to set the time
you prefer the clean
cycle to start.
6. Touch the START pad.
For lower oven:
@
QQ
1. Touch the SELECT
CLEAN pad and
choose the clean level
of either Lo (3 hours),
Std (4 hours) or Hi (5
hours) Ifone of these
is your choice, go to
step 3 and set the
delay start time.
2. Ifyou want to change
the length of clean
time, touch the HOUR/
MiN UP and/or DOWN
arrow pads.
3. Touch the DELAY
START TiME pad.
(S)®
4. Touch the HOUR/MIN
UP and/or DOWN
arrow pads to set the
time you prefer the
clean cycle to start.
5. Touch the START pad.
÷
32
2QP310-3 F-Nv02 3Z . 2/14_3, 2:14 PM

÷
CAREARDCLEANING
Cleaning
CLEANING MATERIALS
• Dishwashing detergent
• Warm water
• Soft cloth
Do not use abraslve cleaners,
industrial cleaners or bleach.
_:lt, t_lllll.:lgtl'.i_,l_,"il:lAVlmlla:llmm
CLEANING MATERIALS
• Dishwashing detergent
• Warm water
• Soap-filled scouring pad
• Commercial oven cleaner
TO CLEAN
Allow the pan to soak Sprinkle the
grid with dishwashing detergent and
cover with a damp cloth or paper
towel Scour as needed Rinse and
dry well You may also place both the
pan and grid in the dishwasher.
Clean only as touch-up between
clean cycles Use dishwashing
liquid, warm water or a soap-filled
pad Rinse well after cleaning
and dry
NEVER USE OVEN CLEANERS IN
OR AROUND ANY PART OF "filE
OVEN,
When cleaning, be sure not to bend
or displace the temperature sensor
located on the back wail of the oven.
Oven
Temperature
Ill s0°.,
TO CLEAN
For everyday cleaning, use glass
cleaner and a paper towel For
stubborn soil, use paste of baking
soda and water Rinse thoroughly
CLEANING MATERIALS
• Soft abrasive cleaner
• Sponge-scrubber
Do not use hard abraslve
cleaners, Industrlal cleaners
or bleach.
Clean with warm sudsy water,
a stainless-steel cleaner or an
all-purpose liquid or spray cleaner
Always scrub in the direction of
the grain. Rinse thoroughly with a
sponge or cloth and clean water.
Dry with a soft, clean cloth.
Do not use a soap-filled,
steel-wool pad; It will scratch the
surface.
÷
33
20P310-3 ENVY2 33 _ 2/14_3, 2:14 PM

E i iiiii iii i i i imiiiii¸¸
÷
CAREANDCLEANING
RemovableParts
_ CAUTION: YOU
must disconnect
electrical power
to the oven at the main
circuit breaker or fuse box before
attempUng to replace oven light
bulbs. Do not touch the light
bulbs with bare hands. The bulbs
get very hot very quickly. Wrap
cotton cloth or foam rubber from
bulb package around bulb when
installing. When removing the
bulb, wait until the bulb has
cooled and use s dry cloth.
To giveyouthe best lighting available,
your ovenhastwo halogenbulbs. Both
lightsareon the ceilingofthe oven cavTty.
Receptacle Socket
Glass
Cover
TO REMOVE
1. You must disconnectelectricalpower
to theovenat the maTncircuit breaker
or fusebox.
2. Turnthe glasscover
counterclockwise_/_turnuntilthe tabs
of the glasscoverclear the groovesof
the socket.
3. Pull straight out to remove the bulb.
TO REPLACE
1. Wrap bulb with cotton cloth or bulb
packaging material. Don't touch bulb
with your fingers.
2, Pushbulb straightintoreceptacle all
theway. Useonlya 120-volt,35-watt
halogenbulb.
3. Placethetabs ofthe glasscover into
the groovesof the socket.
4. Turnthe glasscover clockwise
V4turn.
5. Reconnectelectricalpowerto the
ovenatthe main circuit breakeror
fuse box.
CLEANINGMATERIALS
• Dfshwashingdetergent
• Warmwater
• ScourTngpad or soap-filledpad
TO REMOVE
1. Pulltheracksoutto the stop position.
2. Pullupthe frontof the rackand slide
underthe bump ofthe rack guide.
TO CLEAN
Cleanwith warmwaterand detergent.
Forhard-to-removestains,gently scrub
with a scouringpad or asoap4illed pad.
Rinsewell.
Grayporcelaincoated ovenracks may
alsobe cleaned inthe ovenduring the
self-clean cycle. It isnecessaryto wipe
the edges ofgray porcelain-coatedoven
rackswith aI;ghtcoatingofvegetableoil
after cleaning.Thiswill help maintaTnthe
easeofsliding the racks ;nand outof
the oven.
TO REPLACE
1, Placetheraisedback oftherack onto
the rack guides.
2. Liftthe frontof the rack untilthe raised
back slidesunderthe bump ofthe
rack guides.
3. Slidethe rackall Iheway back.
34
÷
20P310-3 ENv02 34 ÷ 2J14_3, 2:14 PM

÷
CAREANDCLEANING
RemovableParts(cont.)
The door is very heavy. Be careful when
removing and lifting the door. Do not lift
the door by the handle.
TO REMOVE
1. Fuliyopen the door.
2. Pullthehinge locks
down towardthe
door frame,to the
unlocked position.
This mayrequire
a flat-blade
screwdriver.
Slot
_=Lock
Pull hinge locks
down to unlock
3.
4.
5,
TO
1.
2.
Firmlygraspboth __
sides ofthe door at
the top.
Closedoorto the
door removalposition,
which ishalfway
betweenthe broTI _./_
stop andfullyclosed. Ramoval
Liftdoor up andout Position
untilthe hingearm(e
clearof theslot.
REPLACE
Firmly grasp both Bottom
sides of the door Edge of Hinge
at the top. Slot Arm
With the door at
the same angle
as the remova_
positfon, seat the
indentaffon of the
hinge arm into
the bottom edge of
the hTngeslot. The
notch in the hinge arm Indentation
must be fully seated
into the bottom of the
slot.
RemovableOvenDoor
(cont.)
3. Fullyopen thedoor. Hinge Arm
Ifthe door willnot fully_ _M
the indentation /111
open,
is notseated correctly/I I.'_l_'-
in the bottomedge of /_L'_/_ --_
thes,e,
4. Pushthe hTngelocks _t'/4
upo ,nstthefrontH,'-o"----
frameofthe oven
cavity, tothe Jocked Pushhinge locks
position, up to lOck
5. Closethe oven
door.
TO CLEANOUTSIDEOF DOOR
• Usesoapandwatertothoroughly clean
the top, sdes andfront ofthe ovendoor.
Rinsewell Youmayalsousea glass
cleanerto cleanthe glasson the outside
ofthe door.Do not letwaterdrip intothe
ventopenings.
• Spillageof marinades,fruit
juices,tomato sauces andbasting
materialscontainingacids maycause
discolorationandshouldbe wiped up
immediately.Whensurface is cool,
clean and rinse.
• Oonot useoven cleaners,cleaning
powdersor harsh abrasiveson the
outsideofthe door.
• if any stainonthedoor venttrimis
persistent,use asoft abrasivecleaner
anda sponge-scrubberforbest results.
TO CLEANINSIDEOF DOOR
• Becausethe area insidethe gasketTs
cleaned duringthe self-c_eancycle,you
do notneedto clean thisbyhand.
• TheareaoutSidethe gasketand
the door linercanbe cleaned with
a seap-filledpad, hotwaterand
detergent.Rfnsewellwftha vinegar
andwatersolot'on.
÷
35
20P310-3 ENvO_ 35 . 2/14/03, 2:14 PM

÷
BEFORECALUNBFORSERVICE
To save you time and money, before making a service call check the list below
for any problem you may feel you have with the performance of your oven. If
the problem is something you cannot fix, use the Service Numbers located at
the back of this manual. When making any calls, have the Model No., Serial
No., Repair Parts List and Use and Care Guide available.
PROBLEM POSSIBLE CAUSE POSSIBLE SOLUTION
The display of your You havea function Pressthe CLEAR/OFFpad.
=ontrol is flashing error code. Let the ovencool for 1
"F" totlowed by a hour andsnter an ovaner
number or letter, cleanTngoperation. Ifcode
repeats, call for service.
Oven and oven a, No power to oven, a. Check thecircuit breaker or
control will not fuse.Makesurethe power
work. cord isplugged in.
b. Theclock isin the b. See the"Settng Special
black-out mode. Features"sectionof this
manual.
Oven temperature Ovencontrol calibratTon. Seethe temperatureadjustment
seems inaccurate, instructionsfoflowTngthissection.
Oven will not Cleancycle isnot Oventemperature mustdrop
unlock, finished. Oven is below thelock temperature before
too hot. the door will unlock.
Oven light does a. Light swi|ch in off a. Check oven light switch on the
not work, position, control panel
b. Oven lightbulb loose b. Check the oven
or burned out. light bulb.
Oven did not clean a. Controlswere not a, Checkthe self-cleaning
or results were poor. set properly, sectionofthis manual.
b. Ovenwas soiled
heavily.
Fan noise.
c. Cleancycle was
interrupted.
Acooling fan or
aconvection fan
(depending on the
function you areusing)
may automatically
turn on.
36
b. Heavy spilloversshould be
removed beforethe cycle is
set. Usethe longestcycle, HT,
forthe heavilysoiled oven.
c. The standard cleancycle is4
hours, a Loclean cycle is 3
hours anda Hiclean cycle is 5
hours.
This is normal. The cooling fan will
turn on to cool [ntema[ parts. It
may run for up to 1 !/2 hours after
the oven is turned OFF. The
convection fan will run until the
function is over or the door is
opened.
÷
20P310-3 ENv02 3_ ÷ 2a 4/03, 2:14 PM

I ÷ [
I
÷
BEFORECALLINBFORSERVICE
PROBLEM POSSIBLE CAUSE POSSIBLE SOLUTION
Oven reck does not Rackswere left in the Wipe the rack edges
slide easily, oven dudng a selfclean with a small amount of
cycle, vegetable oil.
Oven smokes, a. Dirty oven a. Check for heavy
spil_ever.
b, Improper use of b, Use of foi_not
aluminum foil. recommended
c. Broiler pan c. Clean pan and grid
containing grease after each use.
left in the oven.
Oven emits odor. a. Oven insulation may
emit odor during the
first few usages
b. Failure to wipe out
excess sail,
a. Put oven through
self-clean cycle to
speed up process of
odor "wearing off"
b. Wipe excess soil
off before using oven,
Foods do not bake
properly.
a. Oven was not s.
preheated long
enough
b. Improper rack or pan b,
placement.
c. Oven vent blocked or c.
covered.
d, Improper use of foil. d,
e. Improper e.
temperature setting
for utensil used.
f. Oven temperature f.
needs adjustment.
g. Oven and oven rack g-
not level
h. Oven controls h.
improperly set.
Be sure to preheat
when recipe calls for it.
Maintain uniform air
space around pans
and utensils; see oven
cooking tips section.
Keep vent clear.
Use of foil not
recommended on
racks or oven bottom,
Reduce temperature
25 degrees for glass
or dull/darkened pans.
Check oven
temperature
adjustment section,
Check the installation
instructions for leveling
See the baking section.
÷
37
'20P310_3 ENv02 37 ÷ 2/14/03, 2:14 PM

I ............. ,._--_3_iiiiiiiiiiiiiili ÷ ii!iiiiiT!lUTiii
÷
BEFORECALLINGFORSERVICE
PROBLEM POSSIBLE CAUSE
Foods do not broil a. Improper rack
properly, position
POSSIBLE SOLUTION
a. Check broil pan
placement; see
broiling section.
b. Oven preheated b, Do not preheat when
broiling.
c, Improper use of foil c. Do not let foil cover
slits in the grid; this
will prevent grease
drainage
d. Oven door closed d, Open door to broil
during broiling, stop.
e, Low voltage (208) e. Use higher rack
position
f. Improper f, Check broiling chart in
broiling time. broiling section
g, Oven controls g, See the broil section.
improperly set,
÷
38
20P310-3 ENV32 38 ÷ 2/14/03.2:14 PM

÷
"DO-IFYOURSELF"
TEMPERATURE
ADJUSTMENT
You may feel that your new oven v
cooks differently than the even it -I-
replaced We recommend that you _.
use your new oven a few weeks to
become more familiar with it.
following the times gwen in your
recipes as a guide. ("RA_J:'_
If you think your new oven is too hot
(burning foods) or not hot enough
(foods are undereooked), you can
adjust the temperature yourself. The
appearance and texture of foods is a
better indicator of oven accuracy than
oven thermometers. These
thermometers can vary by
20-40 degrees from the true
temperature of the oven. In addition.
the oven door must be opened to
read these thermometers. Opening _,_,
the door will change the temperature
of the oven.
To decide how much to change
the temperature, set the oven
temperature 25 degrees higher
(if foods are undercooked) or _L,,
25 degrees lower (if foods are
burning) than the temperature in your
recipe, then bake The results of this
"test" should give you an idea of how
much the temperature should be
changed
1. Touch and hold down
both the BAKE and
BROIL pads for 3
seconds, until the
display shows "SF"
2. Touch the BAKE
pad for the oven to
adjust. A factory set
2-digit number wilt
show in the display.
usually "00"
If you think the oven
is not hot enough,
3a. Touch the TEMP UP
arrow pad to increase
(+) the temperature up
to +35°F.
If you think the oven
is too hot,
3b. Touch the TEMP
DOWN arrow pad
to decrease (-) the
temperature down
to -35°F
4. Touch the
START pad.
This adjustment will remain in
memory untit the above steps are
repeated. A power failure will not
affect this setting.
The broil and self-clean temperatures
will not be affected.
Each oven will need to be adjusted
separately.
÷
39
20P310-3 ENv02 39 ÷ 2/14_03, 2:14 PM

NOTES
÷ ÷
40
20P310-3 ENv02 40 ÷ 2/14_3, 2:14 PM

_,,iJiiiiiiili _ liiiiiiii:i:i_il iiiiiiiiii_i_i:
NOTES
÷ ÷
41
20P310-3 ENv02 41 ÷ 2/14KI3, 2:14 PM

iiiiiiiiiiiii|I ÷ iiiiiiiiiW ill
÷
E L I T E
BUILT-IN
WALLOVENWARRANTY
fFULL ONE-YEAR WARRANTY ON ALL PARTS
If, withinone year fromthe date ofinstallation,any part fails to function
properlydue to a defect in material or workmanship,Sears will repairor
replace it, at our option,free of charge.
Ifthis productissub ected toother than privaLefamily use, the above warranty
is effectivefor only 90 days.
WARRANTY SERVICE IS AVAILABLE BY CALLING SEARS SERVICE AT
1-SO0-4-MY-HOME°.
Thiswarranty gives you specificlegal rights,and you may also have other
rightswhichvaryfrom stats to state.
_, Sears Roebuckand Co. Dept. 817 WA Hoffman Estates, IL 60179
MasterProtectionAgreements
Congratulationsonmakinga smart
purchase.Yournew Kenmoreeappliance
isdesignedand manufacturedfor yearsof
dependableoperation.But ITkeall
products,it may requirepreventive
maintenanceor repairfrom timeto time.
That'swhenhavTngaMasterProtectfon
Agreementcan saveyou moneyand
aggravation.
Purchasea Master Protection
Agreementnow and protect yourselffrom
unexpectedhassleandexpense.
TheMasterProtectfonAgreement
also helpsextend the lifeof yournew
appIfance.Here'swhat'sincluded
fnthe Agreement:
V' Expertservicebyour 12,000
professionalrepairspecialists
v' Unlimitedserviceand nochargefor
partsand laboronall coveredrepairs
v' "No-lemon" guarantee replacement
ofyourcoveredproduct if morethan
threeproduct failuresoccur within
twelvemonths
V' Product replacement if your covered
product can't be fixed
V' Annual Preventive Maintenance
Check at your request - no extra
charge
V' Fast helpby phone- non-technical
and instructionalassistanceon
products repairedin yourhome,plus
convenientrepairscheduling
v' Powersurgeprotectionagainst
eleetr'caldamage duetopower
fluctuations
v" Rentalreimbursement ifrepair ofyour
coveredproducttakes longerthan
promised
Once youpurchasethe Agreement,a
sfmplephonecall fsalJthatittakesfor you
toschedule service.Youcan call anytime
day or night,or schedulea service
appointmenton-Ifne.
Searshasover 12,000professionalrepair
specialfsts,who haveaccess toover4.5
millfonqualityparts andaccessories.
That'sthe kfndof professionalismyoucan
counton tohelp prolong thelife ofyour
newpurchase_oryearstocome.
PurchaseyourMasterProtection
Agreementtoday!
Somelimitationsandexclusionsapply.
Forprisesand additionalinformation,
call 1-800-827-6655.
Sears Installation Service
ForSearsguaranteedprofessional
installationof homeappliancesand items
likegarage dooropeners andwater
heaters,call 1-600-4.-M¥...ROME®.
42
÷
20P310-3 ENv0_ 42 ÷ 2J14/_3, 2:14 PM

HOR#OACO#VECClO#
DOBLECONAUTOLIMPIEZA
INDICE
÷
Seguridad en el uso del
horno ................................... 44-45
Caracteristicas de su homo ........... 46
C6mo sacar la cinta de
empaque ........................................ 46
Controldel homo, reloj,
cron6metro ................................ 47-48
Panel de control ............................. 49
Reloj ............................................... 50
Cron6metro de la cocina ............... 50
Control de cierre ............................ 50
Tonos ............................................. 51
Volumen del tono ........................... 52
Cddigo F ........................................ 52
Consejos para cocinar
en el homo ............................... 53_55
Horneado con margarina ............... 54
C6mo programar para hornear ..,.. 56
Consejos para homear a
convecci6n .................................. 57
Consejos para deshidratar ............ 58
Consejos para asar a
convecci6n .............................. 58_59
C6mo programar para hornear
o asar a convecci6n ................ 6041
Recordars recetas ................... 6142
Niveles mQItiples ............................ 63
C6mo asar a laparrilra ............. 64-65
C6mo seleccionar programas
especiales del control .............. 66-70
El cicIo de autolimpieza ........... 71-73
Panel de control ............................. 74
Cacerola y parrilla para asar
a laoarrilla ..................................... 74
Interior del homo con
autolimpieza ................................... 74
Vidrio de la puerta del homo ......... 74
Moldura de la ventilaci6n
de la puerta ................ 74
Acero inoxidable ............................ 74
C6mo reemplazar el foco de
la luz del horno ................ 75
Parrillas removibles del homo ....... 75
Puerta removible del homo ............ 76
Antes de _lamar para un
servicio .................................... 7_79
Ajustes de lemperatura ................. 80
Garant{a ................. B243
NLimeros para servicqos ................. 84
÷
Para su conveniencia y referencla future, por favor escrlba el n_mero de modalo
y de serle an el aspacio qua sa provee. Est_n ubicados en el marco frontal detr_s
de la puarta.
NUMERO DE MODELO: NUMERO DE SERE:
© Sears, Roebuck and Co.
43

÷
INSTRUCCIONESDE
SEGURIDADIMPORTANTES
GUARDE ESTAS INSTRUCClONES
Lea todas las Instrucciones antes de usar esta estufa. Cuando use un aparato a
gas o el6ctrico, se debe segult Instrucciones de segurldad baaicaa, incluyendo
Io siguiente:
IMPORTANTE:Para garantizarsuseguridad,
la desu familia y la de su hogar, per favorlea
su Manualdel Consurnidorcuidadosarnenle.
Mantengaloa la mane para referencias,Ponga
rnucha atencisn a la_secciones de seguridad.
ASEGURESEquesu home sea instaladaper
untecnico especializado yque haga tierra
adecuadamer]te.
• NO DEJEa losniSossinvigilancia cerca de
un homo due se esl_ usando.
• ENSENEA LOS NINOSA nolugarcon los
controteso cualquier parte de la homoya no
sentarse,subirse o pararsesobre la puerta
• iPRECAUCION!NUNCAGUARDEcosas de
interes para losnifios sobre el respaldo del
homo oen losgabinetes quequedan per
sobre el homo. Losni_osdUese subansobre
el homo podrlan resultargravementeheridos.
• GUARDE ESTE libro paraun use future.
• NUNCA USE suhomopara entibiaro
calentar unahabitacion.
• NUNCATRATE de reparar o reemplazar
unaparte del homo amenos quelas
instrucciones se deneneste manual.Todo
otrotrabajo debefia ser hechoper untecnico
especializado.
• SIEMPRE MANTENGAlosrevestimientos
combustibles de lasparedes, cortinasy otros
paSosa una distanciaprudente del homo.
• NUNCA CALIENTEcontenedores de
alimentosce_rados.El aumentode tapresi6n
podria causar que el contenedor explotey
cause heridas.
• NUNCA deje contenedores de grasa o
goteaduras sobre o cerca del homo
• SIEMPRE MANTENGA la area del homo
despejada de cosas due se poddan quernar.
Laacurnutacibndecomida y grasa y los
utensifiosde maderase podrian incendiar.
Los utensitiosde pl&sticose podrian
explotar.Suhomonuncase deberia usar
para alrrlacenarCosa$.
• SIEMPREMANTENGAsu homo ctespejada
decosas quese podrian quemar (gasolinay
otrosvaporeso tiquidos inflarnables).
• NUNCATRATE de limpiarlas superficies
calientes.Algunos lirnpiadorespfoducen
vaporesnocivos y lospatios y las esponlas
rnolaqaspodrian causar quemadurasper
vapor.
• NUNCA USEropa suelta cuandouse
el homo
• NUNCAUSE unatoallau otto pa5o
abultadocornoagarradera Asegurese que
la agarradera este seca.Las agarraderas
h_medasy las p_os y esponjasmojadas
podrian causar quemadurasper vapor NO
PERMITAdue lasagarraderastoquen los
elementospara calentar
• ASEGORESEQueel homo este instalado
firrnernenteen ungabinete que est#bien
pegado ala pared.
• RASGUI_OSGRANDES 0 IMPACTOS
sobre las superficies de vidrio de las
puertas poddan rompero agrietar el vidrio.
• NOTOQUE lassuperficies para calentar,
_assuperficies cerca deelias o las
superficies interiores,Estaspodrian estar
suficienternentecalientes paraquernar
aunque se veande color escuro. Durantey
despues del use,notoqueo pefrnitaque la
ropao rnaterialesinflarnableshagancontacto
con lassuperficiescalienteshastaquehayan
tenidotiempode enffiarse.Las otras
superficiescerca de lasventanillasde
ventilaciondel homo, puertas,ventanasy
lassuperficiespara cccinar tambienpodflan
estarsuficien[ernentecalientes paracausar
quernaduras,
44
÷
20P3103 SPy02 44 . 2/14/03 2:20 PM I •

I I iiiiiill I ÷ ;iiiiiiiiiMiiiiiill
÷
INSTRUCCIONES
DESEGURIDAD
IMPORTANTES
• COLOQUE LAS PARRILLAS DEL
HORNO en la posici0n deseada mientras
el homo est_ frio. Si las parrillas se deben
mover mientras el homo est_ caliente, no
permits qua la agarradera hags contacto
con el quemador caliente del homo
• DESPUES DE ASAR A LA PARRILLA,
siempre saque la cacerota y la parrilla
pars asar del homo y limpielas. Los
sobrados de grasa en la cacerola para
asar podrian incendiarse la pr0xima vez
qua usted use el homo
• SIEMPRE TENGA cuidado cuando abra
fa puerta del homo, Deje que el sire
caliente yel vapor escapen antes de
mover los alimentos.
• NUNCA USE papel de aluminio para
cubrir el rondo del homo. El USO
]ncorrecto del papal de aluminio podria
empezar un incendio, o podria resultar
en un go4pe de corr]ente,
• NUNCA OBS'rflUYA la abertura de la
ventilac]6n del homo.
• NO USE limpiadores para hornos - No se
debeda usar ninguna class de limpiador
pars hornos o cremas protectoras dentro o
alrededor de cualquier parte del homo.
• SI LA FUNCION DE AUTOLIMPIEZA falla,
apague el homo y desconecle la
electrieidad. Hagateun servicio por un
t#cnico calificado.
;ADVERTENCIA DE
SEGURIDAD IMPORTANTE!
California Safe Drinking Water and Toxic
Enforcement Act requiere qua el
gobernador de Califomia publique una
lima de substancias qua el estedo aepa
que producen defectos de nacimiento u
otros danos reproductivos y requlete qua
los hombres de negocios advledan a sus
clienfes del confacto potenclal a tales
substancias. El alslante de fibre de vidrio
en el homo con autoiimplezaemitir_ una
muy peque_a cardided de monbxldo de
carbono durante el clclo de autolimpieze.
El contacto se puede minimizer ventilando
con uns pusrte o verdana abiarls o
usando unventilador o una csmpana de
ventllacl6n.
IMPORTANTE: La salud de algunoa
pajaros as extremademenfe sensitive a los
vapores producidos por el ciclo de
autolimpisza de cualquier homo. Ponga
los pijaroa an ntm habltecion qua ant6
bien vantilada.
• LIMPIE SOLAMENTE las partes que se
listan en este manual. Siga todas las
instrueciones para la limpieza. Aseg0rese
de sacar la cacerola y la parrilla para asar
anles del ciclo de autolimpieza
• NUNCA FRIFGUE, mueva, limpie o daSe
el selIo de la puerta en los hornos con
autolimpieza. Es eseneial para un buen
sellado
• NUNCA TRATE de limpiar los utensilios,
ollas, partes removibles o la cacerola y la
parrilla pars asar en el alclo de
autolimpieza.
|LEA Y COMPRENDA IESTA
INFORMACION AHORA!
Aseg,',rese qua todos en su hogsr sepan
qub hacer en caso de incendlo. Nunca
use agua sobre un incendio de grass;
esto solamente extender_ las llamas.
FUEGO EN EL HORNO:
iNo bate de mover la cacerola!
1. Cierre la puerta del horno y apague
los conlroles.
2. Si el incendio continua,
cuidadosamente abra la puerta y
arroie soda para cocinar sobre el
fuego, o use un exlintor de quimico
sago, espuma o "halon".
GUARDE ESTAS INSTRUCCIONES
÷
45
i 20P310-3 SPvO2 45 ÷ 2/14/03, 2:20 PM

OPERACION
CARACTERISTICASDE$UHORNO
Ventilacl6n Control Cerrojo
del horno automittlco
rejilla ambos :[
pare
hornos) _ ] (ambos
hornos)
(ambos hornos) Luz del
Cacemla y homo
parrilla (ambos
para asar hornos)
ale parrllla
Elemento
VenUlador y para
elemento de asar a Is
hornear a
convecci6n (ambos
Ubicaci6n del hornos)
n,;mem de Gu_as pare
modelo y parrillas del
{detr_s de la
puerta (ambos
, superior) hornos) ,
Elemento para Intedor del
horned homo con
(debejo del fondo autolimpleza
del horno) (ambos (ambos
hornos) hornos)
Pardllas del
horno
(3 on homo
Sello de la puerta Puerta removible superior,
con autolimpieza del horno 2 en homo
(8mbos homos) (ambos homos) inferior)
Para sacar el adhesivo que queda de la cinta de empaque, use un detergente liquido
normal para platos, aceite mineral o para cocinar. Con un paso suave frote et _rea y
permita que se rernoje, Enjuague y seque bien, Repita el procedimiento usando un
pulidor para estufas para asegurarse que eF homo no se dafie Esto se deberia hacer
antes de encender el homo por primera ve_ La cinta no se puede sac, st una vez que
el homo se haya calentado. La c]nta de empaque se puede encontrar en las siguientes
areas: area del panel de control, manilla de la puerta, moldura de la puerta y area
del horno,
46
i 20P310-3 SPy02 46 . 2/14/03, 2_0 PM

÷
OPERACION
ControlDelHomo,
Relojy CronGmetro
Su nuevo Gonlrolde homo a botones le permtra programar las varas func ones de]
homo con fachdad Mils abalo estan os dtferentes tipos de func ones y la descrpoC)n de
caaa uno.
HORNEAR - Cocna _s al mentos en
homo tradicon_ a una temperatura que
vafia de 170°F a 550°F.
RECORDARS RECETAS (homosuperior)-
Le perm te colocar con anterior dad hasta
_nGo comb nacones de temperatura/
tempo para coctnar. Con esta funci0n
usted puede hornear u hornear/asa a
eonvecc6n cualqu era de cnco recetas
favor_tas srn tener que s_ecc onar
posl_ones cada vez.
NIVELES MULTIPLES (homo super or) -
Le perm te programar el homo para
cocinar sus recetas aue requleran dos
posic ones para temperalura![empo.
ASAR A LA PARRILLA - Asa los
aimentos en ALTO a 550°F o en BAJO a
450°F a calor d]recto del e_mento
superior El asado a _ parr la se debe
hacer con la puerta abierta en _ posrc 6n
de tope para asar a _ parrilla
AUTOLIMPIEZA(homo superior) - Limpla
el intenordel homo. Hay dos opciones de
autolimpleza. Laopc_6nSensa-Clean
determma la suc_ed8denel homo y la flmpia
enel tiempoaproplado Laopci6n sinc_onizada
le permlteselecctona_cuanto durara la
hmplezaautomatica. Cuan_ocualqulera de
los ciclos concluye, el homo se apaga
automat_camente
SELECCIONDELIMPIEZA (homointerior)-
Limpia el &teainteriordel homo per usteda
uno delos tresnlveies 3 horas Lo,4 horas Std
y 5 heras Hi. Cuandoel oi¢lotermma,el horn(]
se apag&'a autom_L_camente.
NOTA:Durante losciclos delimpieza,la puerta
del homo se cerrara,con cerrojo
automa.tlcamenteyel cerrojose abrlrasolo
cuando el homo se haya enfriad&
Hornear con are calentaoo que es
c rcu_do sobre y alrededor de los
al_mentos per el venb_dor de convecc 6n
ub carlo en _ parte trasera del horn&
HORNEADO A CONVECCI(_N CON UNA
PARRILLA - _deal para homear comidas
en una sola bandeja. Bueno para una gran
var_dad de al_mentos
HORNEADO A CONVECCI(_N MUL'IIPLE -
ideal para almentos horneados sobre
parr as mQllp es Bueno para grandes
can_dades de comida.
ASAR A CONVECCION - Bueno para
pedazos de came grandes y blandos,
descub_ertos,
DESHIDRATAR - Disefiado para
Oesh_dratar una vanedad de _imentos
oomo h]erhas, veget_es, frutas y came&
47
÷

I I i ÷ [!
L
÷
OPERACION
ControlDnlHomo,
RelojyCronGmetro
(cont.)
Programa la canlidad de tiempo
en que umteddesea cocinar los
alimentos. El homo se apaga
autom_ticamente al final de
esta cantidad de tiempo
Seleccione la hora del dia
en la cual desea que e! homo
se encienda, El homo se
encender_ automaticamente
a la hora que usted haya
seleccionado. Cuando se
use elTIEMPO COMIENZO
DEMORADO (DELAY START
TIME) con TIEMPO PARA
COCINAR DEL HORNO,
RECORDARS RECETAS,
NIVELES MULTIPLES,
SENSOR PARA
AUTOLIMPIEZA o
SELECCION DE LIMPIFZA1
el homo se apagara
automaticamente al termino
del ciclo para cocinar o fimpiar.
(_ Losbotones con las flechas para
SUBIRy BAJAR la
(_ "NEMPERATURA la
programan
.,+ temperaturadel homo.
Los botones con las fiechas para
_ SUBIR y BAJAR las HOP,AS/
_v MINUTOS programan la hora del
,_,-.+ dla, la cant+dadde tlempo para
cocinar, la cantidad tie tiempo
para limpiar, la hora para un
comienzo demorado y la hora del
cronometro de la cocina.
EIbot(SnSTART debe ser tocado
para activar cualquier funcion det
homo,
/_"_'_ El bot6n CLEAR/OFF se usa
para cancelar cualquier funci(_n
_del homo y el tono de fin de ciclo.
No cancelar_ el Reloj o el
Cronometro de la Cocina.
EIboron KITCHEN TIMER
se usa para encender o apagar
el Cronometro de laCocina, No
controlara ninguna otra funci6n
del homo
_EI se usa para
boron del RELOJ
poner la hora del dia.
El boron LIGHT enciende y
apaga las lucesinleriores del
_,_ horno.
÷
48
I 20P31_3 SPY02 48 . 2/14_3.2:21 pM I [

÷
OPERACIO#
PanelDeControl
Indicador de Indicadores de temperatura
funci6n del homo
n cadores de Indicador de Indicadores de Indicadoms Indicadoms de
funci6n del encendido funci6n del de funci6n de funcl6n del
homo homo tlempo homo
El Dial de Control es una referencia fAcil
para utilizar el control del homo. Mas
abajo est&n las descr]pc]ones para indicar
c6mo funoiona el Dial de Control.
INDICADOR DE LA TEMPERATUBA
DEL HORNO - Este indicador tiene un
prop6sito mL_ltiple.
• Muestm la temperature
• Muestra problemss el homo - 8i el
control pestafiea "F" y un nQmero o
ketra, usted esta experimentando un
problema del horno. Por favor lea la
secc]6n C_)DIGOS-F en su manual.
INDICADOR DE ENCENDIOO - 8e
cncendera cuando se programo una
funcl6n del homo.
INDICADORES DE PROGRAMA- El
]ndicador de programa pestaheara en
combinaci6n con una funci0n del homo o
una funci0n automAtica para avisarle que
necesita prograrnar un tiempo o una
temperatura. Ejemplo: "SET" y "BAKE"
Pesta_ear_n para avisarle que neces]ta
programar la lemperalura del homo
INDICADORES OE FUNCION DE
TIEMPO - Muestra la hora del dia, la
cantidad de t]empo para cocinar, la hora
para comenzar una funci6n demorada
para coc_nar, limpiar, la hora programada
en el cron0metro de la cocina y qu_
funcion de tiempo se establec]&
• Muestra el c6dlgo pare recorder
"PUSH START" - S]el ]ndicador de la
hora del homo pestar3ea las palabras
"PUSH START", entonces usted tiene
que empujar el bot6n START para
activar su program&
INDICADORES DE LAS FUNCIONES
DEL HORNO - Muestran Que funcion ha
sido programada, cuando la puerta del
homo esta enganchada, si la funci6n es
demorada y que elementos se utilizan
÷
49
I '2(}P310-3 SPY02 49 ÷ 2/14,O3, 2_1 PM

iiiiiiiiiiii i!ii!ii!]Miiiii
J
÷
OPERACIOIi
ControlDel Homo,
Reloj y CronGmetro
El reloj debe ponerse a la correcta horadel dia
antes queunafuncion dem(}radadel h(}rno
funcione correctamente La horaqel dia nose
puedecambiar duranteuna funcidn automatica
del f]orn(},per(}se puede cambiar duranteuna
funcion parahomear o pataasar a la parrilla.
COMOPONERELRELOJ
1. Toqueel b(}t6nCLOCK.
2. Toquelos botonescon lasflechas para
SUBIR y/o BA,JARlas HORAS/MINUTOS
para poner la heracorrecta del dla
3. Toqueel boron START.
PARAVOLVERAL RELOJ
Mientraseste usand(}el homo para coc_nar,
toque el boronCLOCK,si deseaver la horadel
dia. Lahora presentedel dia se vera enel dial.
CORTE DECORRIENTE
El h(}rnocuenta con unafuncionque
c(}ntinuaactualizando lahora del reloj del homo
pot tres minutoso m;_scuando sufrauncortede
corriente. Enestecase, la hora noestars.
intermilente cuando se reestablezcala cordente
y no deber_ volver a c(}ntigurarel reloj.
Si hahabido uncorte de corriente y la
hota aparece intermitenteen el dial, significa
que esta incorrecta Vuelvaa programar elrel(}j.
Cualquierfuncidn de cocciqn enproceso
cuando el corte decorriente ocurri6 debe
programarsenuevamente,
El cronC)metro de ta cocina se usa para medir el
tiempo de los procesos para c(}cinar u otras
acLividades del hogar NOcomrola el homo. Se
puede programar hasta 9 horas y 59 minut(}s.
Contara hacia arras en minutos hasta que
Ilegue a los ULTIMOS 60 SEGUNDOS,
enL(}rloes el control soi3ara una vez. Cuando la
cuenta Ileguea CERO,el control sonart{3
veces seguidode unsonid(} cada 6 segundos
hasta queel bot0n KITCHENTIMER setoque.
Elsonido de cada 6 segundos sepuede
eliminar paraciclos futurossi se desea.Para
las instruccionesde comeeliminarestos
sonidos continu(}s,yea TONOSen_ap&g_na
siguiente
COMO PROGRAMAR EL CRON{_METRO
I, Toqueel bot6nKITCHENTIMER
2, Toquelosbotonesc(}nlas flechaspara
SUBIRy/o BAJARlasHORAS/MINUTOS
para poner lahora.
3. Toqueel b(}tonSTART.
4. Cuando tacuenta Ileguea cer(},toque el
boronKITCHENTIMER.
Paracancelar el cronometro durantelacuenta,
toque el b(}tOnKITCHENTIMER DOSVECES.
Elcontrol lepermitira cerrar losbotonesde
irlanera que nose puedan activar cuando los
empuje. Sisepreocupa de dejar el homo sin
supervision,active esteprograma.
(_) (:_ 1. Toqueysostenga, al mismo
tlempo, los botonescon tas
flechas para BAJARlas
HORAS/MINUTOS(HOUR/
MIN) pottressegundos, hasla
queel dial muestre"LOC ON"
(bloquear).
2. Paradesbloquear el control,
t(}quey sostenga,el mismo
tlempo,los b(}tonesde las
flechas para BAJARlas
HORASIMINUTOS(HOUR/
MIN) portres segundos, hasta
queel dial muestre"LOC
OFF" (desbloquear)
Esteprogramase pgede seleccionar
solementecuandoel homo no esbten uso.
Cuando este programaeste activado, est(}s
botonesno funcionar_n. Eldia_mostrara LOC
ON"si se empuja unboton.El ajustesera
relenido enla mem(}riainclusivedespu0s de
unainterrupcidn el servicioenerg0tico.
50
÷
I 20P310-3 SP_]2 50 ÷ 2/14K)3, 2:21 PM

J[ lr l" A' i i i li liiiiiiii i i iiiiiiiiiiiBl"iiiiiiilI I
÷
OPERACION
ControlDelHomo,
Rolojy CronGmotro(cont.)
El nuevo control tiene una serie de tonos
que sonar_n a tiempos diferentes, Estos
tonos pueden sonar mientras usted
programa una funci0n del homo, o al final
de una funci6n del homo. Tambi_n le
awsara s1existe un proPlema con una de
las funciones, Mas abajo est_n los tipos
de tonos y una breve descripci0n de
cada uno.
SONIDOS MIENTRAS SELECCIONA EL
CONTROL- Cuando usted toque un
bot6n, oyera un sonido, Este tono le har_
saber que el bot6n ha sido activado. (Los
botones con las flechas no haGen un
sonido,)
TONO AL FINAL DE UN CICLO
AUTOMATICO - Despu_s de una funci6n
para coc]nar automa.tica, usted escLJChar&
tres tonos cortos seguidos por un tono
cada 6 segundos. El tono de cada 6
segundos seguir_ sonando hasta que
toque el bolon CLEAR/OFF ousted
decida seleccionar el programa especial
par8 cancelar y evitar que el tono de 6
segundos suene al final de un ciclo futuro.
C6MO CANCELAR EL TONO
DE 6 SEGUNDOS
1. Toque y sujete los botones
BAKE y BROIL, al mlsmo tiempo
por 3 segundos, hasta que el dial
muestre "SF"
2. Toque el bot0n KITCHEN TIMER
El dial mostrara "CON BEEP"
(tono continuo).
3. Toque el bot6n KR'CHEN TIMER
nuevamente. El dial mostrara "BEEP"
(tono continuo cancelado)
4. Toque el bot6n START, para cancelar
el tono y salir de este modulo especial.
Si desea regresar a los tonos de 6
segundos, repita los pasos de arriba hasta
que el dial muestre su seleccion y empuje
START (comienzo).
TONO DE ATENCION - Este tono sonata
s1haoe un error u omite algo mientras
programa una funci6n del horno.
Unos ejemplos sedan:
a, Programar un cicle de limpieza y la
puerta del homo no esta bien cerrada.
b, Programar una funcion y no empujar e_
bobn START
c, Toque un boton para una funci6n
adicional sin programar primero la
lemperatura o el tiempo.
Cualquiera de estos se puede identificar
rap]damente con mirar el dial,
TONO BE PRECALENTAMIENTO -
Cuando usted seleccione un modo de
coclnado, ajuste latemperatura del homo
y presione el bot6n para el comienzo
(START), el homo comience a calentar.
Cuando la temperatura dentro del homo
Ilega a la temperatura que usted
program6, sonata un tono para avisarle
que el homo esta Iisto para hornear.
÷
51
20P310-3 SPvC_ 51 2J14/&3, 2:21 PM
il ÷ IF-

II I ÷ liiiiiiiiiiii:--' ,mi ii
÷
OPERACION
ControlDnlHomo,
Rclojy CronGmctro(cont.)
Esta funci0n le permite alustar los
vol¢Jmenes del tone a un nivel mAs
aceptable. Existen tres posibles niveles
de volumen
1. oque los botones BAKE
(hornear) y BROIL (asar)
al mismo tiempo per tres
(_ segundos, hasta que el dial
muestre **SF".
(_2. Toque el bot0n LIGHT E
dial muestra "2 BEFp " Este
es el nivel medio del
volumen.
Toque el bot0n LIGHT
nuevamente. El dial muestra
"3 BEEP". Este es el nivel
mas alto del volumen.
Toque el botOn LIGHT
nuevamente El dia! muestra
"1 BEEP". Este es el nivel
m_s bajo del volumen,
Cada vez que el n]vel
Gamble, escuchara un tone
que le indicarA el nivel del
volumen
Toque el botdn START
(iniciar) para aetivar el hive1
exhibido.
Si el control suena mientras el dial hace
pesta_ear una "F" y un n_Jmeroo letra tal
come "1=4"o "Fd," es posible que ex]sta
un problema con el control o con el homo.
Simplemente empuje el botdn CLEAR/
OFF Si se repite la funcion de los
cC)digos, desconecte toda la electricidad
al aparato per Io meres 30 segundos y
entonces reconecte lacorr]ente. Trate de
programar esa funcidn nuevamente. Si el
cdd]go se repite nuevamente, escriba el
cddigo que pestar_ea y Ilame para un
servlc]o, Digale al tecnico que c0d]go
estaba pestaSeando
÷
52
I 20P310-3 SPy02 52 ÷ 2214/03, 2:21 PM

÷
OPERACIO#
Cot ,oio ParaCociMr
enel Homo
Es normal sent]r un poco de olor cuando
use su homo pot primera vez. Para ayudar
a eliminar este olor, ventlle la habitaci6n
abrlendo una ventena o usando una
campana de verttilaci6n.
IMPORTANTE: Nunca cubra el rondo del
homo o la pardlla del homo con papel de
aluminio. El uso ]nadeouaOo puede
causar una mala circulaci6n del calorl
pobres resultados al hornear, y podda
danar el acabado del homo. Para
prevenir manchas a causa de derrames,
usted podria poner un pedazo de papel
de aluminio o una bandeja para gal[etas
debalo de la comida _ue se podrta subir.
La ventilack_n de] homo esta ubicada
arriba de la puerta, Esta area se podria
calentar mucho durante e] use del homo.
Es normal que salga vapor de la
ventilaci0n y/o que se produzca humedad
debaJo cuando el homo este en uso. La
ventilaoi0n es importante para lacorreota
circulaci6n del aire Nunca obstruya la
venUlaci6n.
Ventilacl6n
Si abre la puerta frecuenlemente para m_rar
los alimentos, causar& una perdida de ca]or
y malos resullados cuando hornee.
El precalentamiento e$ subir la
temperatura del homo a la temperatura
que va a usar cuando hornee. Permita que
el homo se precaliente cuando las recetas
requieren precalentam]ento
La zona de temperatura baja de su
homo (entre 170° y 200°F) estA d]sponible
para mantener los alimentos que se ha
cocinado calientes. Sin embargo, los
alimentos no se deberian mantener a
estas bajas temperaturas por m&s de
2 horas.
Cuando use su conveniente operaci0n de
Comienzo Demorado, los alimentos tales
como producto9 I_cteoa, pescado, ayes,
etc., nunca se deberian deJarexpuestos
por m_s de una honeantes de ser
coclnados La temperatura ambiente y
el calor de la luz de] homo promueven
el crecimiento de bacterias.
Para prolongar la vida del
foco de las luces del homo,
siga estos Gonsejos:
Siempre apague las ]uces cuando el
homo no est# en uso O durante un ciclo
de limpieza Si la luz del homo se deja
encendida por un largo periodo de
tiempo, el homo estara tibio cuando
abra la puerta debido al calor generado
por el foco de las luces del homo.
÷
53

÷
OPERACIO#
ConsejosParaCocinar
onel Homo(coat.)
La mayoria de lab recetas para hornear
han side desarrollagas utilizando
productos con un alto contenido de
manteca tales come mantequilla y
margarina (80% de manteca per peso--el
requerimiento federal para los productos
marcados "margarina_). Usted obtendrA
males resultados s] IQ£queqtJea, pasteles,
tortas, galletas o dulces son hechos con
mantequilla con bajo contenido de
manteca. Las mantequillas y margarinas
con bajo contenido de aceite contienen
menos manteca y mas agua. El alto
contenido de agua de la mantequilla o
margarina afeota la lextura y el saber de
sus recetas para hornear favoritas.
Mientras m&s bale sea el contenido de
manteca de la mantequilla o margarina,
mAs se notarAn estas diferencias. Para
asegurar los mejores resultados, use
margarina, mantequi!la u otras barras de
estos productos que contengan par Io
menos 70% de aceite vegetal
El elemento para hornear estA debajo del
fondo del horno. No colOqLJealimentos
sobre el fondo del homo para cocinarlos.
El Sensor de Temperatura del Homo en la
parle trasera del horno mide y controla
continuamente la temperatura dentro del
homo. Para mantener una temperatura
programada constante, los elementos
haran un ciclo de encendido y apagado
mientras el homo cocina
Los resultados del homeado sera meier si las
cacerolas para hornear estan centradas en el
home Iom_s posible, $i esta homeando con
m&s de un utensilio, colOquelos de manera
que cada uno tenga per Io menos de 1" a
1V2"de espacio de aire a su alrededor S1
est8 horneando cuatro queques al mlsmo
tiempo, coloque dos queques en la parrilla
2 y dos queques en la parrilla 4. Co[oque
los moldes en zigzag para que no queden
d]rectamente uno enc]ma del otro.
LAS BANDFJAS BAJAS, para galletas,
permilen que e[ aire circule alrededor de
las galletas para que se doren en forma
parela.
LOS UTENSILIOS BRILLANTES son
perfectos para que los queques, y panes
rApidos tengan una corteza caf_ derada
LOS UTENSILIOS DE VIDRIO,
CONTRAPEGADURAS O
OSCURECIDOS PeR LA EDAD absorben
calor y pueden ser usados para panes
con levadura, eortezas para pasteles o
alimentos que neces]tan tener una corteza
de color caf_, La temperatura del horno
euando use estos utensilios deberfa ser
reducida en 25°F.
÷
54
201=310-3 8PvO_ 54 _ 2/14/03, 2_1 PM

/Aiiiiiiiiiiiili ÷ :i;:l iiiiii II
÷
OPERACION
ComejosParaCocinarenelHomo
(cont.yr4 mMortarYAL r
Las parriflas del homo estan dise5adas
con topes, una conven]encla y tambien
una precauci6n de seguriqaq, Las gules
tienen un tope para preven_r que las
parrillas se qen vuelta cuando se sacan
del homo Este disefio permite que las
parrillas puedan set ]nsertadas de s61o
iln8 manefa
Tope en
Su homo tiene siete (7) posiciones en el
homo superior (el homo inferior tiene seis
(6) posiciones,) La posici6n de m&s arriba
es s61ouna guia. No pueqe set usada
como posici6n pare parrilla.
Gu(8
Siempm coloque las perrlllas del homo
en In posicl6n correcta cuendo el homo
est6 fno
PRECAUCION: Cuando usted este usando
la parrilla en la posici6n m_s bata (1),
necesitar_ tenor cuidado cuando saque la
parrilla. Recomendamos que tirela parrilla
varias pulgadas hacia afuera y emonces,
usando dos agarraderas, tirela parrJllahacia
afuera sujetandola de los lades La parrilla
esta baja y usted se podrla quemar si coloca
la mano en el modio de la parrilia y la saca
eompletamente hacia afuera Tengaouidado
de no quemarse la mano on la puerta
ouando use unaparrilla en la posici6n m_s
baja (1).
Usted podria pensar que su homo nuevo
cocina diferentemente al homo que
reemplazo Le recomendarnos que use su
horno nuevo por varias semanas pare que
se familiarice m_s con 61,siguiendo los
tiempos que se dan en la receta como
una guia Si cree que su homo estA
funcionando demasiaqo caliente o frio
para su preferencia pare cocinar, yea
Ajustes a la Temperatura-H&galos usted
mismo en la parte de atr&s de este manual
para hacer el ajuste.
1. Toque el boton BAKE
(_) 2. Toque los botones con las
flechas para SUBIR y/o
(_) BAJAR la TEMPERATURA,
T_ para programar la
temperatura del homo que
desea user.
3. Toque el bot6n START
4. uando termine para hornear,
toque el bot6n CLEAR/OFF.
TABLA PARA LA POSICION DE LAS
PARRILLAS PARA HORNEAR
TIPO DE COMIDA POSICIONDEPARRILLA
PasteleBcongelaOos (sobre 3o 4
bandeias para _alletas)
Queque "an£el rood' 1
Queques 2
Pancillos,panes dulces, 3o4
"muffins", "brownies",
galletas, quequitos, tortes,
pasteles
Cacerolas 3o4
Pavoo asado 1
÷
55
20P310-3 SPv02 55 . 2J14t_3, 2:21 PM _i

( i ÷- I!1'[L_
÷
OPERACION
CGmoilornearYAsar
Pare programar que el homodocine por un tiempo
qe|erm_ade y se apag_ _utom_t_carrente
(_ 1. Toqueelbot0nBAKE
(_) 2, ToqueI_ _bnes con Las
llechaspora SUBIRy/oBA_R la
(_) TEMPERAIURApara selecc_nar
z_, la lem_atura del homoque usted
de_ _ar
_ 3.
(D(D 4.
5,
Toque el boron
OVENCOOKING TIME
Toquelosbotonescon las
fie€hasparaSUBIRy/oBAJAR
lasNORAS/MINUTOSpara
seleccionar la oantidad de
tiempo qara cocinar
Toqueel bolEnSTART
Pare programar queel homo se encienda a una hera
postenor del dia, cosine per una cantidad de tiempo
esqeci[ica yse apague aulemat_amente Aseg_rese
queel reloj esta pueslo correctamente
1. Toque el botdn BAKE.
2, Toque los bolones con las flechas
pare SUBIR y/o B/_IAR la
"IEMPERATURApara seleocionar
,_ la temperalura del homo que
prelate usar
3. oque el bot6n OVEN COOKING
TIME
@@4, Toque los botones con las flechas
pare SUBIR o EAJAR las HORAS/
_ v_,_ MINUTOS pare seleccionar la
,_,_.'_ " can_3ad de t_empoen que desea
cocinar los alimentos
5, Toque elbotqn
DELAY START TIME
(_) (_ 6, Toquebsbotonescortlasflechas
para$UBIRo BAJARlasNORAS/
MINUTOSparaseleccionarlahora
_" _,_, "" c_eldiadenqueplefieTequeelh_mo
seeneienda
7, Toqueel bet6nSTART¸
horr_par_r_etfinal_ tiempodacocinado,e
rnenosqueI;ifuncialdeNrvlr c_lientehaya_sido
aclivada&
La funcion"servewarm" (servir caliente) manliene bs
alimento£eooJnadoscalientes hasla por ires horas
desk,s de qua ta_c_n de cecc_n haya
terminado Tambien se puede acllVar oe mane_a
independiente para conservar calienles los alimenles
ya cocinoqos
Para usar esta funeionde farina independienle,
presione el boti)n SERVE WARM (servir caliente) en
el botqn START Pareactivar esla funcioq para use
despues de una funci_n de eoccbn programada,
presbq8 e_bot6q _¢J_ WARM m_n_ras 9ro_rar_a
el homo y antes de presionar el botqn STAR'r
NOTAS IMPORTANTES:
• Losalir_ntos se qeben conservar calientes en sus
contenedores de cosciqn o trasladarsea un plato
d_ sewir rEs_s_En|e_ ca_
• Paralos alimenlos h_imeros,oqbralos con unatapa
resislenle al calor o papel de aluminio
• Abnr la pueda repelidas yeses perrnde que el aire
caliente escape y los alimenlos seenfr'en
• Permiia tiempo aqicional para que la lemper_ura
al inlenor del homo se estabiliee despu_s de
agregar alimenlos
• Con unacarga grande, quizas sea necesanoeubrir
algunos de los alimentos cocloados
• Relire1ascucharas de ser_ir, elc. antes de colocar
recipientes en elherno
• NOusereEipienteso tapas pl_st_cas,o papel
plastico para envolver
PRECAUOI_N: Los _ecipienles pl_sticos, las lapas o
el papel qlastico paraenvolver se _erretir_n si se
eolocan en el homo Esposible queno se pueda
retirar e_pl_stico, y no esta cubiedo per la garanlia
56
÷
2DP31(_3SPy02 56
÷ II

iiiiiiiiiiiii{m ÷ iii ii::m iiiiiiiiiMiiiiii
OPERACION
ConsejosParaHorneara
ConvecciGn(HomoSuperior)
Hornear con age caliente que es circulado
sobre y alrededor de los alimentos per el
ventilador de convecci0n ubicado en ]a parte
trasera del homo.
Cuando use dos parri{las, co{oque las
dos parrillas en las poalciones 2 y 4 y use
Convection Bake Multi.
NORA: Usted oir_. un ventilador mientras
cocina a conveccion. El ventilador Be detendr_.
cuanOo se abra la puerta, pero los elementos
para calentar no se apagara
Debido a que el aire calalnte circula
uniformemente per lode el homo, los alimenlos
se pueden hornear con excelentes resultados
con parrillas mtiltiples a la vez
El horneado con parrillas mt)lt_ptes puede
aumentar el tiempo de coccio, ligeramente
para algunos alimentos pore el resultado
general es tiempo ahorrado. Gattetas, muffins,
panecillos y olros panes tienen muy buenos
resultades al hornear con parrillas multiples.
Cuando use 3 parrillas, coloque las parri{{as
en las poalci0nes 2, 4 y 6 y use Convection
Bake Multi
÷ ÷
• Paradoraralimentesen mtJltfplespoalcienes
de parrillas
• Paraeantidades decemidas grandes.
• Excelenle parahornear panecillos,
"brownies",queques lalianos(angelcakes)
y panes.
AI hornear a convecci0n con s01o una parrilla,
alga las poalctenes recomendadas para la
parrilla en la seccion "C0mo hornear" y use
Horneado a Conveccion con una parrilla.
El horneado de un solo estante es ideal para
coeinar articulos comestibles grandes en un
solo estante. El tiempo de cocinado podda
reducirser asi que usted debe inspeccionar
Io que se encuentre oociendo un poco antes
de Io que indican las instrucciones de la
empaquetadura para cerciorarse de no
cocinarlo en exceso
Cuando se horneaaconveccion, las
temperaturaspara cocinar se deberian reducir
en25°F.La funcion deconversionconveccion
convierteautomaticamenle la temperaturaque
usted seleccione parahorneartradicionalmente
a la temperaturapara horneara convecci0n.
Unavez que se active esla caracteristica,el
dial muestrala temperaturaconvertida real
(reducida), Perelemplo, al ingres5una
temperaturanormalde receta de 350%y
presionael bot0n START(iniciar),el dial
muestra "CON" breviamente yluego la
temperaturaconvertida de325°F
NOTA: Esmfuncion nocenvierte lostiempos
de coccion para horneadoa conveccion,
iJalcamentelas temperaturas.Estafunci0n no
convierte el tiempoo la temperaturapara
asado per convecci0n.
Vet ConversiOnpara conveccion bale
taseccion Comeconfigurarfunciones
especiales, paramayorinformaciOn.
METAL 0 VIDRIO
Cualquiertipo deutenalliosfuncionar&enel
homo a convecci0n. Sinembargo,los ulensilies
de metalse calientan masrs.pidamenley son
recomendados Los utenalliosdevidrio cocman
m&slentamente.
PAPEL Y PL_.STICO
Papel y plastico realstente al calor que se
reoomienda para hornos regulares se puede
usar en su horno de convecei0n
57
I I 20P310-3 SPVO2 57 ÷ 2/14/03, 2:21 PM

.]1 ÷ I _
÷
OPERACION
:nnsejosPareDeshidratar/
vecciGn(HomoSuperior)
Desh_dralac#n (Secede) es un mdtodo para
preservar frutas, vegetales, hierpas, ycarnes que
ot_s_ste en t_r_vet ta hume_ad p_ra _4uo_
paeleria, la levadura, yel moho no puedan creeer y
arruinen sus alimentos Su homo usa un venBlador
convencionol para asistir el elemenlo calentador en
remover la hurnedad de sue alimentos secanpal_ y
preserv&ndolos Nole que es pasible que senece_Jite
mas de 12 harespara secar algunos alimenlos
Informacion fidedigna y complela acerca de la
deshldrataei_ b_sica de los alimentos esta
disponible do su oflcina de servicio de cooparativa
local Para Iocalizar esta oficina en su area, busque
en su director_otelefanico, pap oficinas del gobierno,
en la seccbn de su condade Usled lambert puede
v_itar su sdio en laWeb, wc_v esusda gay
Durante la deshidratad6n, la puerta de su homo
debe permanecer parc_lmente abierla para perm_ir
la circulacbn det aire y la extraccion de fa humedad
Use el tope de puerta para deshidratacidn, que vtene
incluido con su homo Estemantendr_ la puerta
abierta para la deshidratacian
1. Abra la paerta del homo
2. Localieo el interrupter de pulsar de la luz del
homo en la esquina supenor derecha en el
marco det h_mo
3. Coloquo el extreme magnalico del to#e de la
puerta sabreel interrupter de pulsar de la luz del
homo
4. Cierre la pueda del homo, parmitiendo que la
puer_a descarse coqtrael tope _e _apt_a
Coloque el extremo rnagnGtico sobre el
Intetruptor de pulser de Is luz del homo.
Cierre Io puerta contre el tope de le puerte.
NOTAS:
• Solamente use ellope de pueda propercionado
con su homo y use solarnenle el tope de pueda
duranle deshidralac)Sn
• Noalmacene el tope de la pueda en el inlerior del
homo
• Ver laseccidn de C6mo aiuslar los Modesde
convecci_n pare seteccionar esla funcisn
• Recuerde que la inslala¢i_, lratamiento y
almacenado apropiados de la_alimenlOSson
esencialesparalacalidadyseguridaddelas
coT?idesset.as odeshid_t_t,_s
Ideas im_rtlmtls _bre le _shidratlci6n:
• Porc_onesmQltiplesde atimentos pueden secarse
al misme pampa¸
• Eltempo de secede v&rlar_,depa_d_endode
varieslactates
• Cantidad de alime,n_es
• Cantidad do alimenle_ encada perci(_n
• Tamale, farina, y grueso de Io_alimen_os
• Tipe do _a_deps de secede qu_ se _e
• Use tuente_de preservaeian, come su exiension
de servicio de su coeparativa local come unaguia
para selec¢ionar bandelas buenas de secado de
alimentos.
Duranteel asado a convecci_n, et ealor viene del
e_eme_o supent_r £__enf_adorde co_vecc_ hap8
circular el ca!or parejamer_e atrededorde toe
alimentos
I_ascarnes qbe se oocinan en un homo a conveccbn
quedan de un color care obscure per aluera y
blandas yjugosas per dontro En la rnayo_ade bs
cases la cantidad de t_mpo parecocinar sere menor
cuaRdo ase 8 eorlve_cidR
Use las lemperaturas para asar recomendadas No
es necesano precalentar Revise los alimenbs al
final del tiempo sugerido Usted pedria decidir
co(_inar par mas liempo
58
Cuando ase a conveccbn, usted deberia user la
cacerela y 18par'ilia para asar que v_snenconsu
nuevo homo La caceroLase usa para recibir los
derrames do grasa y ia pamlla se usa para prevenir
salpicaduras de grasa
Come user le Cacerole y Io Perrilla:
e, Cobque la parrilla pel homo en la pasicion de
parrilla mas ba]a
b. Coloquo la carne sabre la parrilla pare asar
1 1
÷

OPERACION
CoosejosPernAsara CoovocciGn(HomoSuperior)(coot.)
GUIAS PARA ASAR A CONVECCI(_N
TEMP, *El Departamento de
DEL Agricultura de Estados
C_ MIN/LB HORNO(P) Unidos recomienda
Res Costiltas (3 a 5 Its.) cocinar muy bien las
Crudas* 20 a 24 325° carries y las aves--las
Media cocinadas 24 a 28 325° carnes a par Io menos
Bien cocinadas 28 a 32 325° una temperatura
Costillas sin hueso, "top INTERNA de 160°F y
sirloin" las ayes a par _o menos
Crudo* 20 a 24 325 ° una temperatura
Media cocinados 24 a 28 325 ° iNTERNA de 180°F.
Bien ¢ocinados 28 a 32 3250 Cocinarlas a estas
"Tenderloin" de res temperaturas
Crudo* 10 a 14 325 ° generalmente protege
Media cocinado 14 a 18 325 ° contra enfermedades
Asado a la cacerota (2½a 3 300° causadas par los
Ibs.) '_Chuck', "Rump" 35 a 45 alimentos.
Cerdo Con hueso (3 a 5 Its.) 23 a 27 325 °
Sin hueso (3 a 5 Its.) 23 a 27 325° tEas ayes rellenas
Chuletas de cerdo (½ a I generalmente requleren
pulgada de grueso) 30-45 minutos
2 chuletas 30 a 35 total 325° adieionales de tiempo
4 chuletas 35 a 40 total 325° para asarse, _.
qhuletas 40 a 45 total 32_°
Jam6n Envasado (3 Its, bien cocido) 14 a 18 325° Cubra las ppernas y la
"Butt" (5 Its. bien cocido) 14 a 18 325° pechuga con "foil" para
"Shank" (5 Its. bien cocido) 14 a 18 325o evitar que la piel queue
Cordoro Con hueso (3 a 5 Its.) demasiado dorada y
Media cocinado 17 a 20 325° seca,
Bien cocinado 20 a 24 325°
Sin hueso (3 a 5 Ibs.)
Medio cocinado 17 a 20 325 °
Bien oooinado 20 a 24 325°
ComidaB Pescado, entero (3 a 5 Ibs,) 30 a 40 total 400°
de mar Colas de langosta (6 a 8 Ibs. 20 a 25 total 350 °
cada una)
Ayes Polio entero (2½ a 3Y2 Ibs.) 350°
Gallina "cornish"
Sin relleno (1 a 1½ Its.) 350°
Con relleno (1 a 1½ Ibs.) 350°
Pato nuevo (4 a 5 Ibs.) 325°
Pavo, entero_
Sin relleno (10 a 16 Its.) 325°
Sin relleno (18 a 24 Its.) 325°
Pechuga de pavo (4 a 6 Its.) 325 °
59
59 2]14K)3.Z:21PM
ii ÷ Ir

OPERACION
Modosde CouvecciGns
(HomoSuperior)
Para programar que el homo cocine por
un liempo determinado y se apague
automaticamente:
1. Toque el bot0n
CONVEC'RON SELECT
1. Toque e[ botdn (seleccionar convecci0n)
CONVECTION SELECT para selecoionar la porcion
(seleccionar conveccidn)
de horneado de conveccidn,
para selecc[onar la porciOn multi-horneado de
de horneado de conveccidn, convecci0n, asado de
mulfl-horneado de convecciqn, o deshidratacto.
convecei_n, asado de
conveecidn, o deshidratado. Si usted seleceiona
Oeshidratar, es necesario
Si usted selecciona ]nstalar el tope de la puerta
Deshidratar, es necesario para deshidratackdn entre la
instalar el tope de kapuerla esquina superior derecha
para deshidratacidn entre la qel marco del homo y la
esquina superior derecha de! puerta Ver la seGciqn de
marco del homo y la puerta. Deshiqrataci0n para la
Ver la secci0n de instalacidn apropiada
Deshidratacidn para la
instalaciOnapropiada. (_ 2. Toque el bolon con las
flechas para SUBIR o
(_ 2. Toque el bot(dncon las flecha
para SUBIR o BAJAR la (_ BAJAR TIEMP para
T_ seleccionar la temperatura
(_ TEMPERATURA para del horno que usted desea
r,. programar la temperatura usar
del homo que desea usar
Toque el bot0n START.
4. Cuando termine para (_ {_) 4.
hornear, toque el botdn
CLEAR/OFF,
Toque el bot0n OVEN
COOKING TIME.
Toque los botones con las
flechas para SUBIR o
BAJAR las HORAS/
MINUTOS para seleccionar
la cantidad de tiempo para
cocinar. Eltiempo de
Coeoidn que marque no
incluye el tiempo de
precalentamiento.
Toque el botdn START.
60
20P310-3 SPy02 60 _ 2/14_3, 2:21 PM

I I @7¢iiiiiiiiii]] ÷ iiii
÷
OPERACION
Ayuda$paraTiemposde
Cocinar(HomoSuperior)
Para programar que el homo se encienda a
unahora posterior del dia, coone por una
cantidad de tiempo especifica, y se apague
aulomaticamente Aseg0rese que el reloj
este puesto correctamente
1, oque el botqn CONVECTION
SELECT (seleccionar
convecci0n) para seleccionar
la porci0n de horneado de
convecci0n, rnulti-horneado
de convecci0n, asado de
convecck3n, o deshidratado,
Si usted selecciona
Deshidratar, es necesano
instalar el tope de la puerta
para deshidratac]d,n entre la
esqu_nasuperior qerecha qel
marco del homo y la puerta.
Ver la secciqn de
Deshidrataciqn para la
instalaci0n apropiada
(_ 2. Toque el botqn con las
flechas para SUBIR o
BAJAR la TEMPERATURA
i_, para seleccionar la
ternperatura del homo
que prefiere usar.
3.
C)(E) 4"
G 2)
" _,Te,,"
S,
G®e-
Toque el bot0n OVEN
COOKING TIME.
la hora del dia den que
prefiere que el homo se
encienda
<_7. Toque el botqn START. El
homo se apagara al final de
tiempode cocoon a menos
que se haya activado la
funci0n ServeWarm (servir
caliente)
Usted puede preseleccionar hasta cinco
comb]naoiones de temperaturajcant]dad
de tiempo para cocinar con esta funo]qn,
Usted puede entonces hornear u hornear
o asar a conveeci0R cualqu]era de c]nco
de sus recetas favoritas sin tener que
seleocionar posiciones cada vez.
NOTAS:
• No puede util]zar la funcion Recipe
Recall (recordars recetas) con el ciclo de
Broil (asado), Dehydrate (deshidratar),
Serve Warm (servir caliente) o Self-
Cleaning (auto-lirnpieza).
• Suhomo recordara las preselecciones
de Recordars Recetas inoluso hasta
despues de un corte de corriente.
• El tiempode cocclqnque Ingreseno
incluyeel tlempo de precalentamiento.
AIescuchareltono de precalentamiento,
coloquelOSalimentosenel homo.
Cqmo ahorrar un programa de receta:
Toque los botones con las _ 2,
flechas para SUBIR o
BAJAR las HORASI
MINUTOS para selecc]onar
3.
la cantidad de tiempo en que
desea cocinar los alimentos.
El t]empo de cocci0n que _,,
",,.Z-.-'
marque no inoluye el tiernpo
de precalentam]ento.
Toque el botqn OELAY
START TIME.
61
Toque los botones con las
flechas para SUBIR o
BAJAR las HORAS/
MINUTOS para seleccionar
Toque el boron RECIPE
RECALL (RECOROARS
RECETAS) de una a cinco
veces para encontrar un
espacio en blanco para una
receta
loque el bot0n BAKE o
CONVECTION SELECT.
Toque el botOn con
las flechas para SUBIR o
BAJAR laTEMPERATIJRA
para programar [a
temperatura. (Si no
programa una temperatura,
el homo cocinara a la
ternperatura que se rnueslra
en el control). Caqa vez que
usted toque un bot0n con
una flecha, la temperatura
aurnentar_disminuira en 5°
continO_en la I_tgina slgulente
÷
I I 20P310-3 SP_32 61 , 2/14/03. 2:21 PM

÷
OPERACION
Ayudaspare Tiemposde
Cocinar(HomoSuperior)
(cont.)
QQ s.
Toque el bot6n OVEN
COOKING TIME.
Toque losbotonoscon las
f_echaspare SUBIR o BAJAR
labHORAS/MINUTOSpara
programarlacantidad de
tiempopare oocinar,
loque el bot6n RECIPE
RECALL Eldia_m_est_a
"SAVE,"Toqueel bot6n
RECIPERECALL nuevamente
pare abeTTer
la receta.
<_7, Toqueel boronSTARTsi desea
ernpezara ooclnar
la reoetaque acaba de ahorrar.
o
Toqueel boron CLEAR/OFF
pare ponerel dialen blanco.
C6mo user uns receta:
1. Toqueel boronRECIPE
RECALLde una acinco veces
pareencontrar lareceta que
dosed cocinat.
2. Cuando hayaelegide la receta
quedesea user, toque el bot(_n
START.
CbmocBmbiaro reemplazaruneracers:
1, ll)que el boronRECIPE
RECALLde unaa cinco veces
pSf8 encontrar larecetaque
dOSedcambiar
oreemplazar.
2, Toqt_eLbot6nBAKE o
CONVECTIONSELECT.
(_t 3.
r_
Toqueel botdn con la flecha
pareSUBIRo BAJARla
TEMPERATURApara
programar tatemperaturapare
cocinar (Sino programauna
temperature,el homococinara
ala temperaturequese
muestraen el control) Cada
vez que toqueun botOncon
unaftecha,la temperature
aumentara!disminuiraen 5°.
4. oque el bot6nOVEN
COOKINGTIME,
(_) (_ 5, toque los botone_con las
,t_ flechaspara SUBIRo BAJAR
.._r " lasHORAS/MINUTOSpare
programarta cantidad de
tiempo.
6, Toqueel boronRECIPE
RECALL dosveoespara
ahorrarlos cambJosqueha
hecho.
NOTA:Usted puede programar unaRecorders
Recetaspareque se empiecea cocinar ross
tardesitoca el bot6n DELAy STARTTIME y
los botonesdonlas flechas pareSUBIRy/o _ 1.
BAJAR(a_HORASIMiNUTOS(yea "C6mo
programar uncomienzo demoradocon un
homeado automatico")en la secci6npare
homear.Us_@dpuedeD_ogT_m_unt_rnpo _ 2,
demorado antes o despues de elegirla receta
que desea. LJstedinclusopuede empezer un
comienzo demora_o _espu6s de tocat etboron _ 3.
START.
@'.
7, i no desea empezar Is receta
ahora, toque e{ bot6n CLEAR/
OFF una vez
C6mo I_rrar unelrecets;
Toqueel bot6n RECIPE
RECALL deunea cinco
vecespare encontrarla receta
quedosed borrar.
Toqueel bot_n P.JLEAR/OFF,
"DEL" aparecer&en e!dial,
Toqueel bot6n RECIPE
RECALL pareborrar la
teceta.
Toque el boL6n CLEAR/OFF
pare salir de la funci0n
Recorders Reoelas.
÷
62

÷
OPERACIO#
Ayudaspara Tiemposde
Cocinar(HomoSuperior)
(cont.)
Usted puede programar el homo par8
cocinar sus recetas qua requieren una
preparaciOn a dos niveles. En otras
palabras, si su receta requiere dos
posiciones de temperatura, el control
puede ser programado para camPiar
autom_,tic.amentede la primera pos_i6nde
temperatura!tiempo a la segunda. Usted no
tendr&que volver al homo para programar la
sagunde temperatura y el tiempo El controt
tohace por usted.
NOTA: Sihay unc_rte deetectncidad, usted
tendra que repregramar la cocciGn a nivel
maItipb.
Come programarlacoccidn a nivelm,',ltlple:
Toque el bot6nBAKE
oCONVECT',ONSELECT.
G
3.
OQ
Toqueel botGncon 188llechas
para SBBIRo BAJARla
TEMPERATURApara
pfog_am_[_atemper_,tur_,qua
prefiereusar
Toqueel botGnOVEN
COOKINGTIME
Toque }osbotones con Ias
flechas paraBUBIR o BAJAR
losHORAB/MINBTO$ para
programar lacantidad de
tiempo queprefiere para
cocin_(tos alimentos
5. Toqueel bot6n
MULTI STAGE,
6. Toqueelbot0nBAKE
eCONVECTIONSELECT para
el segundo nivel de su receta.
(_ 7. Toque el botde con los
flechas para SUBIR o
(_ BAJAR TEMP para
programar la temperatura
del homo que prefiere usar.
B. oqueel botGnOVEN
COOKINGTIME
(_ (_ 9. Toque los botones con
las fiechas para SUBIR o
_,. BAJ_R _asHOP,AS/
MINUTOS para
progmmar la cantidad de
tiempo que prefiere para
cocinar los a!imentos
duranle este segunde
nivel de la receta
10, Toque el botSn START.
La cocc=Gna n=vel
mQIt]ple se cancela si no
toca el botGn START, El
control sonar,_ cuando
cambia del pr]mer n]vel
de lareceta al segando
nivel
11, Cuando el control suene
al final de la segunda
cantidad de tiempo para
coctnar, toque el boron
CLEAR/OFF.
NOTAS:
• El tlempode cocci6n que ingreseno
incluyeel tlempode precalentamlento.
AItono de pr,_oalentamier_to,ponga la
com[da en el homo. Cuando el primer
nivel de oocci(}n este completo, el control
mostrara la segunda temperatura y la
cantidad de tTempoque ust_d ha
seleccionado. El homo se apagar_
cuande el segunde nivel de cocciOn se
haya completade, pero el sonide
continuara, hasta que usted toque el
betBn CLEAR/OFF.
• Toque ysujete el botBn MULTI STAGE
durant_ el primer nivel de cocciBn para
volvera la temperalura/tiempo del
segundo nivel de la receta.
• Si usted decide que no desea cocinar la
receta usando las posic[ones de nivel
m_ltiple, toque el boron CLEAR/OFF y
sert=neanceladas.
• Para cocinar en niveles m8ltiples, usted
puede usar una receta que tiene en la
memona para uno o dos niveles para
63
] [ 20P310-3 SPy02 63 _ 2/14/03, 2:21PM [ i--

÷
OPERACION
CGmoAsara la Parrilla
Asar es cocinar al calor directo der
elemento superior. La puerta der homo
deberia permanecer abierta en la posici6n
de tope para asar cuando ase a la parrilla,
No es neoesarro precalentar el homo
cuando ase a F8parrilla. Use la cacerola y
la parrilla para asar que v]ene con su
homo. Ambas estan dise_adas para drenar
adecuadamente la grasa y los liqu]dos.
_ uando use papal de
aluminlo, el papal de
aluminio debe ester
moldeado flrmamente a 18
parrHl8 y los cortes en el papel deben
coincldlr con los cortes de la parrilla.
Esto permite qua la grasa y los
Iiquidos caigan a la cacerola,
evJtando qua ae produzca un incendio
y humo exceslvo.
Slempm saque la cacerola y la parrllla
del homo. Guarder y olvidar una
cacerola peru asar /_
aucia en el homo es un
peiigro pare producir
un incendio o humo.
I #
El Departamento de Agricultura de los
Estados Unidos recomienda cocinar la
came y las ayes completamente--la came
a un calor INTERNO de per Io menos
160°F y las aves a un calor INTERNe de
per Io menos 180°F, Elcoc]nar a eslas
temperaturas generalmente protege contra
enfermedades causadas per los alimentos,
Mientras mas cerca coloque rosal]mentos
del elemento para asar, mas r&pido se
doraran per afuera, pero quedando rote o
rosado en el cenlro,
Colocando las carnes leios del elemento
permitira que las carnes se cocinen en el
centre mientras se dorarl per afuera
Usando estas posiciones, cocine el lade 1
per Io menos 2 minutes masque el lade 2.
Si su homo est_ conectado a 208 voltios,
usted podria usar una posieiOn de parrilla
m&s aita y/o cocinar los alimentos per mt_s
tiempo.
El tamaNo, peso, grosor, temperatura
inicial y su preferencia personal a|ectar_ el
asade a laparrilla. Esta tabla est& basada
en carnes a la temperatura del
refr]gerador,
ALIMENTO
Bietec 1" de
grueso
Tortes de came
molida -
1" de grueso
Chuletas de
cerdo -
f/2" de _lrueao
Pescado
(films)
Polio (presas)
POSICION
DE
PARRILLA
3
3
3
3
2
TIEMPO
TOTAL
{mlnutoa)
9-11
16-18
27-29
11-13
45-55
÷
64
20P310-3 SPy02 64 ÷ 2J14KI3, 2:21 PM I

_ii|'i!i_ii'i_i'ili _ iiiiiiiiiii_iii
OPERAClON
CGneoAsara laParrilla(cont.)
÷
G
la. Toque el bot6n BROIL,
(Esto automatlcamente
programa ASABO en
HI-ALTO.)
lb, Mientras el indicador de
programa pestafiea en el
dial, toque nuevamenle el
bot0n BROIL si prefiere
asar en Bajo (Lo) Ase en
Lo (Bajo) para cocinar
bien alimentos tales como
ayes o cortes de came
gruesos sin que se doren
demasiado.
Toque el bot0n START.
Cuando termine de
asar, toque el bot6n
CLEAR/OFF.
÷
65
20P31(]-3 SPv0_ 65 _ 2J14_, 2:21 PM

OPERACION
C#moSeleccionar
ProgramasEspeciales
Su nuevo control abolones t]ene
caracteristicas adicionales que usted
poqria usar. Despu_s de hacer su
selecci6n, si usted desea cambiar el
programa, siga los pasos hasta que
el dial muestre su seleccion,
1. Toque y sujele, al mismo
Uempo, los botones BAKE y BROIL
par 3 segundos, hasta que el dial
muestre "SF."
2. (a) Empuje los bot0nes BROIL y
OVEN COOKING TIME al mismo
tiempo. El dial del control moslrar_ el
signo para graqo y "F."
(b) Empuje los bot6nes BROIL y
OVEN COOKING TIME al mismo
tiempo nuevamente. Esto cambiara
"F"
(Fahrenheit) a "C" (Centigrado),
3. Toque el baton START
÷
El control se programa automaticamente
para apagarse despu_s de hornear par 12
horas o despues de asar a laparrilla par 3
horas en caso que se le olvide y deje el
homo encendido, Si desea eliminar este
programa:
1. Toque y sujete, al mlsmo
Uempo, los botones BAKE y BROIL
par 3 segundos, hasta que el dial
muestre "SF"
2. Toque el baton DELAy START TIME
El dial muestra "12 Shdn" (apagado
en 12 horas).
Toque el baton DELAY START TIME
nuevamente. El dial mostrar_ "no
8hdn" (no apagado).
3. Toque el baton START.
El control del homo esta programado
para la selecci6n de temperahJras en
Fahrenheit. La mayoda de las recetas se
dan usando la escala Fahrenhe]t, Usted
puede cambiar esto y usar las selecci5nes
en Centfgrados.
Sucontrol esta programado para usar el
reloj en 12 horas. Si usted prefiere usar
Hora Militar de 24 horas o poner el dial en
blanco, se hace asi:
1. Toque y sujete, al mismo tiempo,
los botones BAKE y BROIL
par 3 segundos, hasla que el
dial muestre "SF"
2. (a) Toque el baton CLOCK, El dial
mostrara "12hr." Siesta es su
selection, toque el baton START.
O
(b) Toque el bot0n CLOCK
nuevamente El dial mostrara
"24hr." Ejemplo: 5:00 en el relo]
de 12 horas leera 17:00 en el reloj
de 24 horas. Siesta es su
selecci6n, toque el baton START.
O
(c) Toque el baton CLOCK
nuevamente El dial ahora mostrarA
"OFF" $i esta es su selecei6n,
toque el baton START, La hora no
se mostrara en el dial. (La funci_n
Delay Start Time no funcionar&)
÷
66
] 20P310 3 SP_I2 66 ÷ 2214_3, 2_1 PM I [

IIIIIIIII ....L_///_,_
÷
OPERACIO#
CGmoSeleccionarPrograms
Especiales(cont.)
Este Programa Especial le permitir_
cambiar la velocidad; #1 significa que el
cambio de velocidad es lento hasta #5
que significa que el cambio de velocidad
es rapido. Para seleccionar la veloeidad
que prefiere, siga estos pasos:
1. Toque y sulete, al mismo tlempo,
los botones BAKE y BROIL
por 3 segundos, hasta que
el dial muestre "SF"
2. Toque alg0n boron con la flecha para
SUBIR LA HORA. El dial lemostrar_.
una posicion de velocidad entre 1y 5.
3. Toque algQn botqn con la flecha para
SUBIR LA NORA para aumentar la
velocidad hasta el n_mero 5.
4.
o
Toque alg0n botqn con la flecha para
BAJAR LA NORA para disminuir la
veloeidad hasta el nQmero 1.
Toque el botqn STAR3".
AI usar el horneado a convecci0n,
la funcion de conversion convecciqn
convertira automAticamente la lemperatura
que usled seleco_one para hornear
tradicionalmente a la temperatura para
homear a convecci0n
Una vez que se active esta caracter/stica,
el dial muestra la temperatura convertida
real (reducida). Por ejemplo, si ingres6
una temperatura normal de receta de
350°F y presiona el boron START (iniciar),
el dial mueslra "CON" y la temperatura
converlida de 325°F,
NOTA: Esta funci0n no convierte los
tiempos de cocci0n para horneado a
conveccion, Qnicamente las temperaturas,
Esta funciqn no convierte el fiempo o la
temperatura para asado por convecci6n,
1, Toque los botones BAKE (hornear)
y BROIL (asar) al mismo tiempo por
tres segundos, hasta que el dial
muestre "SF",
2, Presioneel botqn CONVECTION
SELECT (seleccionar conveccidn),
El dial muestra "CON ON." Si el dial
muestra "CON OFF," presione el boron
CONVECTION SELECT nuevamente,
El dial muestra "CON ON."
3. Presione el botqn START.
Para desactivar la funci0n, repita los
pasos 1-3 anteriores, pero presione el
botqn START cuando el dial indique
"CON OFF "
÷
67

i !iiiiii ,iiiiiiili ÷ Jl
÷
OPERAClON
CGmoSeleccionr Programas
Especiales(coM.)
(DIsei_ado pars usar los S_lbados
Judfos y los dias festivos.)
La caracteristica de los Sabados puede
ser usada solamente para hornear/asar.
No puede ser usada para oorlvccciGn.
asado a la parrilla. Iimpieza automatica o
COCCi0nde Inicio Retrasado.
NO1"A: I_ luz del homo se enciende
autom&ticamente (en algunos modelos)
cuando la puerta es abier ta y se apaga
cuando la puerta es cerrada. La bombilla
puede ser removida. Ver la SecciGn sobre
CGmo cambiar la bombilla del homo. En
los modelos con el boron de LIGHT. la luz
del homo podria encenderse y dejarse
encendida.
C(_MO AJUSTAR LA FUNCI(_N
REGULAR DE HORNEADG/ASADO
NOTA: Para entender c0mo trabaja el
control del homo. practique utilizando la
funci6n de horneado regular (na S;_bado)
antes de usar la funci6n del SAbado.
Cerciorese de que el reloj muestra la hora
correcta del dia y de que el homo esta
apagado.
1. Empuje y sostenga
empulados ambos
botones. BAKE
(_ (Horneado) y BROIL
(Asado). al mlsmo
tiempOr hasta que la
pantarla muestre "SF"
2. ]oque el botGn de
DELAY START TIME
hasta que aparezca
"SAb bAtH" en la
pantalla
_) 3. Empuje el bot0n START
y -_ aparecera en la
pantalla.
(_ 4. Toque el bot0n BAKE. No
aparecer& n_nguna serial.
(_ 5. I_ temperatura inicial
preprogramada se
(_) ajustara autom_ticamente
r_ a 350"F. Toque los
botones UP o DOWN que
se set,alan con flechas
para aumentar o disminuir
la temperatura en
incrementos de 5°
La temperatura se puede
aiustar entre 170°F y
550°F. No aparecera
ninguna senal o
temperatura.
6. Empuje el boton START
7. Despues de un periodo
de retraso al azar de
aproximadamente 30
segundos a 1 minuto, las
senales • • apareceran
en la pantalla indicando
que el homo ha siao
aiustado para hornear/
asar. $i las seriales
• no apareoen en la
pantalLa, comience desde
el Paso 4,
Para ajustar la temperatura del homo,
empuje e[ boton BAKE y toque los
botones UP o DOWN que se setlalan
con flechas para aurnentar o disminuir la
temperatura en incrementos de 5° Empule
el bot6n START.
NOTAS:
• Cuando la pantalla muestra _. la
funciGn del Sabado est_ activada
Cuando la pantalla muestra _ •. el
homo esta en la funciGn de horneado/
asado.
• Los botones CLEAR/OFF y OVEN
COOKING TIME estAn activos durante
el uso de la funci0n del Sabado.
÷
68
20P310-3 _*'02 68 ÷ 2J14_3, 2:22 Pi J _

OPERAClON G
C#moSeleccionarPmgramas
Especiales(cont.)
COMO SELECCIONAR EL
HORNEADOIASADO POR TIEMPO-
INICIO INMEDIATO Y PARADA
AUTOMATICA
NOTA: Para entender como el control deJ
homo lrabaja, practique utirizando las
funci6nes de Inic)oInmediato y Parada ./__. _,_
Autom_tica regulares (no Sabado) antes
de usar la funcion del Sabado.
Cerc]6rese de que el reloj muestra la hora
correeta del alia y de que el homo est_
8. La temperatura initial
preprograrnada se
colocar&
automAticamente en
350°F, Toque los
botones UP o DOWN
que se serlalan COD
flechas para aumentar o
disminuir la temperatura
en inerementos de 5°. La
temperatura se puede
ajustar entre 170°F y
550°F No aparecera
nlnguna sepal o
temperatura.
9. Toque el boron START,
10. Despues de un periodo
de retraso al azar de
aproximadamente 30
segundos a 1 minuto,
las se{lales 3 C
apareceran en la
pantalla indicando que
el homo ha siqo
ajustado para hornear/
asar. 8i las senales _ c
no aparecen en la
pantalla, comience
desde el Paso 7
apagado.
1. Toque ysostenga
empujados ambos
botones, BAKE
(_ (Horneado) y BROIL
(Asado), al mismo
tiempo, hasta que la -_
pantalla muestre "SF "
2. Ioque el boron de Para ajustar la temperatura del homo,
DELAY START TIME toque el boron BAKE y toque los botones
hasta que aparezca "SAb UP o DOWN que se se_alan con flechas
bAtt-I" en la pantalla, para aumentar o disminuir latemperatura
3. Empuje el bot6n START en incrementos de 5_,Toque el boron
y _ aparecera en la START
pantalla. NOTAS:
4. Toque el bot6n OVEN • Cuando la pantalla muestra •, la
COOKING -tiME. No funcion del S_ba0o estA activada
aparecera n_nguna seRal. Cuando la pantalla muestra __ C, el
(_ Q 5. Toque los botones UP homo est_ en lafunci6n de homeado/
o DOWN que se set,alan asaqo
_,z con fleshas para entrar el • Cuando ]a cocci6n haya terminaqo, la
tiempo de cocciSn visualizaci6n en la pantalla cambiara
deseado entre 1minuto y de _ • a _ y "0:00" aparecer&,
9 horas y 59 minutos. El inqicando que el homo se ha apagado
tiempo de coccion (OFF), pero que todavfa esta en al
seleccionado aparecera funciSn del Sabado. Remueva los
en la pantalla.
6. Toque el bot0n START.
7, Toque el bot6n BAKE No
aparecer_ ninguna seRal,
69
alimentos cocinados
20P310-3 SPvO2 69 . 2J14KI3, 2:22 PM i •

OPERACIO#
CGmoSeleccionarPrograms
Especiales(cont.)
COMO SALIR DELAFUNCION
DELSABADO
1. Toque er botqn
CLEAR/OFF
2. Si el homo esta cocinando,
espere por un periodo de
tiempo de retraso al azar
de aproximadamente
30 segundos a 1minuto,
hasta que las seflales
• aparezcan en la
pantalla.
(_ 8, Toque ysostenga
empu_ados 8mbes
botones, BAKE
(_ (Horneado) y BROIL, al
÷ mlsmo tlempo, hasta que ÷
la pantalla muestre "SF"
4. Toque el bot6n de DELAY
START TIME hasta que
"12 Shdn" o "no Shdn"
aparezca en la pantalla.
"12 Shdn" ]ndica que el
homo se apagarA
automAticamente despues
de 12 horas. "no Shdn"
inqica que el homo no se
apagar_ autom&ticamente
5, Toque el boron START,
NOTA: Si ocurriera una interrupci6n
del suministro el#ctrico mientras el homo
esta en la funciOn del S_bado, el homo
se apagara automaticamente y
permanecera apagado cuando la
energia sea restablecida. El control
del homo debe set reinioiado.
70
] I 20P318-3 8P_32 70 ÷ 2/14/03, 2:22 pM ! [

,I ÷ IL_
J I
÷
CUIDADOYLIMPIEZA
ElCiclodeAutolimpieza
1. $aque la cacerolay la parrillapara asar,
utensiliosycualquier papel de aluminio
quepodrb,quedar en el borne.
2. Lasparrillas cubiertas deporcelana griB
pueden serguardadas en el homo
duranteel ciclo de limpiezaautomatica.
3. La suciedad Bobreel marco frontal
y afue_ac_elsellodel Teves_imientode la
puerta necesitar_, serlimpiada a mane.
Ltmpieestas_.[eascon agua caliente, lanillaB
con iab6n o limpiadorescome Soft$crubepara
saca.,cualquier suciedad,Enjuaguebiencon
agualimpia y seQu_.
No uselimpiadores de hornos--nlngdn
lirnpiadorde hornos parauses comercialeso
revestimientode protecci6n debeserusadoen
el interioro alrededor del homo.
Msrco frontal
/
\
4. Limpie cualquier derrame pesado eel
[ondo del homo,
5. Nolimpie elselk3de la pue_tadel t_orno.
Elmaterial delibra de vidriodel sello de la
puertadel homo nosoporta laabrasion.
E_esencialque elsello permanezca
intacto.Si noraquese est_gastando o
trizando,deberia serreemplazado.
El sello esta diseSado para que tengz un
espac_o de 10' on el fonOo de la puerta
Esto permite la circulation adecuada
del aire,
Panel de la puerta Sello
t
Reveetimlento de la puerta
Es normal que su homo d_ la apariencia
de no tener url buen sel_osobre el borne.
Eslo se debe al sello La ubicacion del
sello sobre la puerla del homo mantiene la
puerla selLada y previene eualqu_er
p_rdida de oalor
Los utensilios nunca se
deberian deJar derFe'odel
homo durante un ciclo de
limpiezs.
Las p_'rttlss cubiQrtas de porcetsml
gris pusden set limpiedas con
aeguridad en el interior del homo
durante el eiclo de limpieza
automJttica. Ser_ necesarlo pars
engraear los extremos de Is partllla
del homo con una cap_ llgera de
ecelte vegetal despu_s de un ciclo de
Umpiezs. Esto ayudanl a clue se hags
f_cil deSlizar los estantes o rejlllaS en
el homo.
Dursnte el primer ciclo de limpieza,
ventile la hablteci6n con una ventana
I ahierte o una camp/me de
vent eci6n. Esto evltar_ el olor fuerte
ptoducido pot el celentemlento de
LIes partes nusves.
÷
71

÷
CUIDADOYLIMPIEZA
CiclodeAutolimpieza(coM.)
Pan; el homo superior: Con Sons-a-
Clean, el control del homo determina por
usted lacantiqad de sucledaq que hay
en el homo y el tiempo necesarlo para
limpiarlo. La Iimpieza estAndar de 4 horas
esta tambien disponible. Esto permite
configurar un tiempo de Iimpieza desde 3
horas si el homo estA [igeramente sucio,
hasta 5 horas si el homo esta demasiado
sucio,
1. oque el bol6n SENa-A-
CLEAN. El dial muestra
"SEN". Siesta es su
selecci6n deseada,vayaal
paso 3.
O
Toque el bol6n SENS-A-
CLEAN nuevamente. El
dial muestra cualro horas.
Siesta es su seleccion
deseada,vayaal paso 3. De
Iocontrario,vayaal paso 2.
(_ (_ 2. Si desea cambiar el tiempo
de la limpieza est_ndar,
,.-.._..- toque los DOlOReScon las
flechas para B_AR y/o
SUBIR las NORASI
MINUTOS
3. Toque el bot0n START.
Para el homo inferior: ElCiGIo de
limpieza, lncluyendo el tlempo de
enffiamiento ofrece opciones
preseleocionadas de 3, 4 6 5 horas, pero
usted puede cambiar escogiendo
cualquier tiempo entre 3 y 5 horas.
1, Para 3 horas: Toque el
bot6n de SELECT CLEAN
(SELECCI(_N DE
LIMPIEZA). Mostrara 3
horas y "Lo" en el dial,
Esta func]6n es
recomendada para
derrames pequefios
contenidos Pase al paso 3
y presione START
Pan; 4 horas: Toque el
bot6n de SELECT CLEAN 72
{SELECCI_N DE
LIMPIEZA) dos veces. 4
horas y "Std" apareceran
en la pantalla. Esta funci6n
es reoomendada para un
homo normalmente SUClO
Pase al paso 3 y preslone
START.
Pata 5 hora$: Toque el
bot6n de SELECT CLEAN
(SELECCI(_N DE
LIMPIEZA) tres veces.
5 horas y "tt1" apareceran
en la pantalla. Esta funci6n
es recomendada para
hornos attamente sucios
Paseal paso 3 y presione
START.
(_) (_ 2, Toque Io8botches con las
flechas para SUBIR y/o
, _ .. BAJAR las ttORAS/
MINUTOS para seleccionar
la cantidad de tiempo due
usted desee que dure el
ciclo.
<_ 3. Toque el bot6n START.
La puerta se cierra con cerrojo
automaticamente. El dial mostrara el
tiempo de limpieza que queda No serA
posible abrir lapuerta del homo hasla que
la [emperatura caiga m_tsabajo de la
ternperatura de cierre y la luz de LOCKED
(CERROJO) se apague.
Cuando la luz de LOCKED se apague,
abra la puerta.
Laluz de LOCKEDpesta_earan,el dial de
tiempomuesda "door", y el control del homo
dar&unaserialsi usted py el control del
homo dar& una serial si usted programa el
ciclo de fimp_eza y se olvida de cerrar la
puerta del homo.
÷

÷
CUIDADOYLIMPIEZA
CiclodeAutolimpieza(cont.)
Toque el botan CLEAJI_OFE. Usted
necesitara esperar a que la temperatura
del homo baje masque la tamperatura de
enganche (aprox. 1 hora) antes de tratar
de abrir la puerta,
4.
(DG) 5.
Despues del cicIo ustad podria notar un
poco de cenizas blancas en el homo.
Simplemente limpielas con un patio o
esponla h_meda. _ 1.
Si algunas manchas blancas persistan,
frieguelas con una lanilla de acero con
jabOn, Asegt)rese de enjuagar bien Estas
son generalmenta dep(3sitos de sal que no
se pueden saoar qurante el ciclo,
Si su homo esta equipaqo con parrillas 0e
porcelana, serA neoesario para engrasar
los extremos con una capa ligera de aceita
vegetal despues del ciclo de limpieza, Esto (_) Q 2,
ayuqara a que se haga facil deslizar los (_
estantes o reiillas en el homo. ,_--.="
Si por alguna raz6n usted no queda
satisfecho con los resultados de la
Ilmpleza, simplemente repita el clclo.
AsegClrese que el reloj este puesto
correctamente.
Para el homo superior:
1. !oque el bot{)n
SENS-A-CLEAN.
2. Para unaautolimpieza
est&ndar, toque el bot6n
SENS-A-CLEAN
rluevamente. Si esta es su
selecoi0n Oeseada, vaya al
paso 4.
(_(_ 3. St usted deseacamb]ar la
(_)_) cantidad de tiempo para
.... _-,_..- Hmp]ar, toque los botones
con las flechas para SUBIR
y/o BAJAR las HORAS/
MINUTOS.
Toque el boron DELAY
START TIME
Toque los botones con
las flechas para SURIR
o BAJAR las HORASI
MINUTOS para seleccionar
la hora del dia en que
prefiere que el ciclo de
Iirnpieza empiece.
Toque el botan START,
Para el homo inferior:
3.
(_(_ 4.
Toque el botan de SELECT
CLEAN (SELECCI(_N DE
LIMPIEZA), y escoja el nivei
del I]mpieza deseado ya
sea LO (3 horas), Std (4
horas), o Hi (5 horas). Si
una de estas es su opci6n,
paseal paso 3 y escoja el
tiempo de inicio de demora.
Si ustad desea cambiar la
cantidad de tiempo para
limpiar, toque los botones
con las fleGhas para SUBIR
y/o BAJAR las HORAS/
MINUTOS,
Toque el botSn DELAY
START TIME
Toque los botanes con las
flechas para SUBIR y/o
BAJAR las HORASI
MINUTOS para seleccionar
la hora del dia en que
prefiere que el ciclo de
limpieza empiece.
Toque el bot6n START.
73
÷

Aiiiiiiii I ÷ lili!iiiilr i l
CUIDADOYLIMPIE
Cmo Umpiar
MATERIALES DE LIMPIEZA
• Detergente liqu]do para platos
• Agua tibia
• Patio suave
No use limpiadores abrasivos,
limpiadores indust_ales o
blanquedores (cloro).
MATERIALES DE L|MPIEZA
• Delergente liquido para platos
• Agua tibia
• Lan]llas de acero con jab6n
• Limpiador (;omercial para tlornos
COMO LIMPIAR
PARA LIMPIAR
Para limpieza diaria, use un limp]ador
para vidrios y una toalla de papel. Para
suciedad pesada, use una pasta de soda
para hornear y agua. Enjuague bier
MATERIALES DE LIMPIEZA
• Limp]ador abrasivo suave
• Esponja-fregador
No use limpiadores abrasivos fuertes,
limpiadores industriales o cloro.
Umpie con agua tibia con jabon, un
limpiador para acera inoxidable o un
Permita que la cacerola se remoje. Ponga liquido o spray para limpiar para todo
__ prop6site. Siempre friegue en direcci0n de
detergente para platos sobre la parr]Ira y la veta. Enjuague b]en con una esponja o
cubra con un patio o una toalla ht3meda
por un rato. Friegue a medida que sea par3oy agua limpia. Seque con un par3o
necesario. Enjuague y seque bier]. Usted suave y limpio.
tambien podria porter lacacerola y la No use lanillas de acero Ilenas con
parrilla en la lavadora de platos. Jab6n; rayam la supefficie.
Limpie solamente para retocarlas entre
oicIos de limpieza. Use detergentes
liquidos para platos, agua tibia o lanillas
con jab(3n. Enjuague bien despu_s de
limpiar y seque.
NUNCA USE LIMPIADORES PARA
HORNOS DEN'IqROO ALREDEDOR DE
CUALQUIER PARTE OEL HORNO.
Cuando limpie, asegOrese de no doblar o
mover el sensor de la temperatura ub]cado
en la pared trasera del homo.
t Sensor de
_=.,_1 _ gli temperatura
_ del homo
74
20P310-3 SPy02 74 _ 2/14KI3, 2:22 PM i I

]1 :Y iiiiiiiiiiiii!÷ iiiiiii i: : iiiiiiiiiiiiE4i ii
L
÷
CUIDADOYLIMPIEZA
PartesRemovibles
"/'_. PRECAUCION: Usted
debe desconectar el poder
eelin_cl_d_r__tao(_p reInhci°pra/°d:?
circuito o en la caja de los
fusibles antes de tratar de
memplazar los focos de Is luz del
homo. No toque el foco de la luz core
las manos peladas. El foco se
callenta mucho r4pidarnente.
Envuelva tela algod6n o goma de
espuma de p_quete del foco
alrededor del foco pmrala
inMalaci6n. Cuando saque el foco,
espere haste que el foco se haya
enfrlado y use un pa_o seco.
Para dafle la mejor luz posible, su homo
tiene dos luces de focos de halogeno. Los
focos estan en el techo de la cavidad del
homo,
CubierLa
de vidrio
COMO SACAR
I. Usted debe desconectar el poder
el_ctrico hacia el homo en el
interruptor principal del circuito o
en la caja de los fusibles
2, Haga girar la cubierta de viqrio en
direcci0n contra el relol V4de vuelta
hasta que las aletillas de la cubierta de
vidrio salgan de las ranuras del soquete.
3, Tire derecho hacia afuera para sacar
el foco
C0MO COLOCAR
1. Envuelva el foco con un patio seco o
con el material de empaque del foco.
No toque el foco con los dodos,
2.
Empuje completamente el foco
dorecho dentro de! recept&culo, Use
s61ofocos de hal6geno de 120 voltios,
35 watts.
3. Coloque las aletillas de la cubier ta de
vidrio en las ranuras del soquete.
4. Haga gttar la cubierta de vidrio en
direccion de1 reloj Y4 de vuelta.
5, Reconecte la electricidad hacia el
homo en el interruptor del cirGuito
principal o la caja de los fusibles.
MATERIALES DE LIMPIEZA
• Detergentepara plalos
• Agua tibia
• Lanaspara ffegaro lanillacon }abOn
Top_ en
C(_MOSACAR
1. Ti_e_asparrillas hacia afuerahastala
posici6nde tope.
2, Levanteel fren[ede la parrillay deslicela
bajoel tope de la gula para lasparrillas.
COMOLIMPIAR
Limpiecon agua tibiay detergente.Parasacar
manchas duras,friegue levementecon lana
para fregaro con unalanilla con jabon.
Enjuaguebien
Las pam!lascubiertas de porcelanagris
pueden serlimpiac_ascon seguridaden
ei interior del homoduranteelciclo de limpieza
autom&tica,Seranecesario paraengrasarlos
extremosde la parrilladel homocon una capa
ligera deaceite vegetal despues de unciclo de
limpieza.Estoayudar_a que se hagafacil
deslizar losestanteso rejillasenel homo.
COMOCOLOCARNUEVAMENTE
I. Coloque la parte levantada deatr&sde la
parrillasobrelas guias.
2. Levanteel frentede la parrillahasta que_a
partelevantada dealras se deslicepor
debajo del topede las guias.
3. Deslicela parrilla hBstaatt&s.
÷
11,oo3,o. spvo2,° ÷ ,4o3,=P. I

I[ !! l!i ilili!iiiiil,,,,,,,,,,,m' r
÷
CUIDADO Y LIMPIEZA
PartesRemovibles(cont.)
La puerta es muy pesada. Tenga
cuidado cuando remueva y levante la
puerta, No levante la puerta por la
manije.
COMOSACAR
1.
2,
Abralapuerta I| I1_.
completamente.
Tire !os topes de las
bisagras hac]a abajo
haoia el marco de la
puerta, a [a posici0n
de. abierto. Esto
podria requerir un Cerradura de
destarnillador de biSagra
cabeza plana Tire de los cierres
de la blsagra hacia
ai0ajo para abrlr
3.
4,
5,
Tome firmemente -,_
los lados de la
puerta de arriba.
Cierre la puerta a
la posici6n de
saque la cual se
encuentra enlre !a
posici6n
]ntermed]a y
totalmente
cerrada. Poslcl6n
Levante la puerta y haga de _que
un movimiento de extracciOn hasta
que el brazo de la bisagra salga
de ia rarlura,
COMO PONERLA NUEVAMENTE
1,
2.
Tome firmemente S4_r a
los dos lados de de Ill
la puerta de arriba. I/
Con la puerta en el
mismo Angulo de
extracci6n, coloque
la hendidura del
brazo de la bisagra
dentro del borde de]
fondo de la ranura de li_len¢i6n
la bisagra. La muesca
en el brazo de la bisagra debe estar
totalmente asentada en el rondo de la
rantJr_
Puerta removible del homo (cont.)
3. Abracompletamente Bra_[odelablsagm
la puerla, Si la
puerta no abre
completamente,
la hendidura no
esta asentada
correctamente en el
extremo inferiorde la
ranura.
4. Empuje los topes de las Cerradura de
bisagras hacia arriba blsag_l
contra el marco frontal Em_ • delos
de la cavidad del homo, cierres de la
a la posici6n de Gierre. bisagra hacia
arriba para
5. C]erre la puerta cerrar
del homo.
C(_MO LIMPIAR AFUERA DE LA
PUERTA
• Use jab6n y agua para Iimpiar bien la
superficie, lados, y frente de la puerta
del homo Enluague bien. Usted [ambi_,n
podria usar un limpiador de vidrio para
limpiar el vidrio exterior de la puerta No
permita que el agua gotee dentro de las
aberturas de la ventllaci6n.
• Los derrames de salsas para allflar,
jugos de fruta, salsas de tomate, y
mater]ales para sasonar que contengan
Acidos podfian causar una
descoloracion y se deberian nmpiar
]nmediatamente.Cuando la superficie se
enfrie, I]mpie y enjuague,
• No use limp]adores para hornos, polvos
para limpiar, o abras]vos duros en la
parle exterior de lapuerta.
• Si cualquier mancha sobre la moldura
de la ventilaci6n de la puerta persiste,
use un Ilmpiador abrasivo suave y un
fregador de esponja para mejores
resultados.
C(_MO LIMPIAR ADENTRO DE LA
PUERTA
• Debido a que el Area dentro del sello se
Ilmpia duranle el ciclo de autollmpieza,
usted no neces]ta limpiar esto a mano
• El Area afuera del sello y el revest]m]ento
de la puerta se pueden limplar con una
lan]lla Ilena con jab(3n o un fregador de
plast]co, agua caliente, y detergente
Enluague bien con una soluciAn de
v,nagre y agua
76
÷
1120P3, 3 vo ,° ÷ 2: PM I[-

,J :.: ¢4iiiiiiiiiiiiili ÷ iiiiiiiiiii : i Jl
÷
ANTESDELLAMARPARAUNSERVIClO
Para ahorrar tiempo y dinero, antes de Ilamar para un servic_o, revise la Iista de mas abajo
para cualquier problema que usted crea que tiene con el funcionamiento de su homo. $i
el problema es algo qua usted no puede reparar, use los N_meros de Servicio qua se
encuentran a] final de este guia Cuando haga un Ilamado, tenga disponible 81n,',mero
de modelo, n,',rnaro de serle, Ilsta de partes para reparacionas y guia de use
cuidado.
PROBLEMA POSIBLE CAUSA POSIBLE SOLUCION
FI dial del control pesta_ea Usted tiene uncOdigode Ernpujeelbolon CLEAR/OFF.
una "F" segulda pot un errorde funci6n Permitaqueel homo se enfrieper
nt_meroo letra, una herayponga nuevamenteel
homo en funcionarnienlo Siel
problernase repite, llamapara un
servicio
El homo y los controles a, No pasa a. Revise_acala del circuito
del homo rio furlcionan, elec_ricidad o losfusibles.Aseg_rese
al homo. qua e_cordon de la
corrienteest6 enchufado.
b. Elrelojest_ b. Veala seccion de "COme
en la funcion Prog_arnmarFunciones
en blanco. EspeciaJes"en esternanuaL
La temperatura Calibracion del control Vea lasinstruccienespara alustar
del homo no p_rece del homo. la temperaturaqua s_guenesta
estar axacta, seccion.
La puorta del homo Elcielo delimp_ezano LaLemperaturadel home debe caer
no se desengancha, haterrninado. E{homo a menosde la temperaturade
e_taderna,_iadocaliente, enganche antes quese pueda abrir
la puerta.
La luz del homo no a. Elinterrupterde la luz a. Reviseta posici6n del
funciona, esla apagado, interrupter.
b. Elfoco de la luz del b. Reviseo reemplace el foco
homoest,. sueltoo de la luz.
quemado.
El homo no se limpi6 o a. Los controlesnose a. Leala seccionde autolimpleza
los resultados fueton pusieron bien. deeste manual
males, b. El homo estaba b, Losderrarnesgrandes deben
dernasiadosucio, serrernovidosantes (Jeque el
ciclo de IJmpiezainicie.Useel
ciclo rn&sprolongado,Hipafa
loshomes rnB,_sucios.
¢. Elciclo de lirnpiezaestandar es
4 hofas, unciclo delirnpiezaLo
es de3 horas,y unciclo de
limpiezaHi es 5 horas,
c. El ciclo de limpiezarue
interrumpido.
La parrllla del Las parrillas fueron dejadaB Pase un trapo rnojado con un
homo no se en et interior del homo poco de aceite vegetal a los
desliza con durante el proceso de extremes de la parrilla
facilidad, limpieza auiornatica
÷
77

÷
ANTESDELLAMARPARdUN$ERVIClO(cont.)
PROBLEMA POSIBLE CAUSA POSIBLE SOLUCION
Ruido del ven_lador.
Un ventilador de
refr]geraci6n o un
vent lador de conveccon
(dependiendo de la
funciOn que usteO este
usando) se podfia
encender
autom_ticamente.
Esto es normal, El vent]lador ae
refrigeracion se enoender& para
reirigeral las parles intemas, E.I
ventilador podria funcionar por
1 1/2 horas despues de que el
homo se haya apagc,do (QFF},
El ventilador de convecciOn
podfia funcionar hasta que la
tunoi6n termine o hasta q_ [a
puerta sea abierta
Et homo humes.
El homo emite
un olor.
& Homo sucio.
b. Mal uso de papel de
aluminio,
©. Sedej(') la cacerola
para asar COBgrasa
dentra del horr_3.
a. Vea que no hayan derrames
grandes,
b. No se recornienda e] uso del
papel de aluminio.
¢. Limpie la cacerola y [a
parrilla despues de
68(38us,o.
II. El aislante del homo
podria emitir un olor
durante los pnmeros
[JSO8.
b. Falla de limpiar el
exceso de suoiedad.
a. Ponga er horno en un oiclo
de autolimpieza para
acelerar el proceso de
eliminar el olor.
b. Limpie el exceso de
suciedad antes de usar
el horno
Los alimentos
no se hornean
ad_cuadamerlte.
a. El horno no se a,
presalentO Io suficiente.
b. Posi¢i6n incorrecta b.
de 18 parr]lla o la
cacerola.
Asegurese de precalentar
¢uando la recela Iorequiera,
Mantenga un espacio de aire
uniforme alrededor de las
o]las y utens]lios. Vea la
secci6n para conselos para
oocinar en el homo.
c, La ventilaeiOn del c. Mantenga la ventilac]6n
hoena _st_, obsteuida despeiada.
o cubierta.
d. Uso incorrecto del d. No cubra las parrillas cuando
papel de aluminio, homee.
e, Temperatura incorrecta e. Reduzca la temperatura en
para el utensilio usado 25 grados para utens]lios de
vidro, oscuros u opacos
f, Catemperatura del f, Revise la secci6n de ajustes
homo neces]ta ajuste, a la temperatura que s]gue
esta secciOn
g. El horno o la parrilla
del homo na est&n
n]veladas.
I1, Controles del homo
g. Yea las instrucGiones de
instalaci6n para la nive[ac]Sn.
h. Yea la seooi6n para hornear.
real prestos
78
÷
_ i 20P310-3 SP_]_ 78 ÷ 2/14_3, 2:22 PM I _-

ANTESDELLAMARPARAUNSERVICIO(cont.)
PROBLEMA POSIBLE CAUSA POSIBLE SOLUCION
Los allmentos no se
asan adecuadamente a
la parrilla.
a, Posici6n incorrecta de
la parrilla
b. El homo se precalenlO,
c. Mal usa de papel de
aluminio
d. La puerta del homo se
cerro durante el asado
a la parrilla.
e. Voltaje bajo (208
Voltios),
f. Cantidad de tiempo
incorrecta para asar.
g. Controles del homo
msI puesto&
a. Revise la posici6n de las
cacerolas; yea lasecciOn
para asar a la parrilla
b. No precaliente cuanao
ase a la parriila
c. Lea la secc[On para asar a
la parrilla.
d. Abra la puerta a la
posiei_,n de tope para
8£ar.
e. Use posici6n de parrilla
mas alta
f. Vea fa tabl8 para asar en
la section de cOmo asar a
la parrilla.
g. Vea lasecciOn para asar.
÷
÷
79
11. 3,.oPv°2 ,° ÷ IF

J
÷
AJUSTESDE TEMPERATURA-
"HAGALtI$ USTEDMI$MO"
Usted podria pensar que su nuevo homo
cocina diferentemente aFhomo que
reemplaz6. Recomendamos que use su
homo nuevo unas pocas semanas para
que se familiar]ce con all,sigu]endo los
tiempos que se dan en las recetas como
una guia.
Si cree que su nuevo homo esta
funcionando demasiado caliente (quema
la comida) o no calienta Iosuficienle
(la comida no queda bien cociqa), usted
mismo puede ajustar la temperatura. La
a43ariencla y ra textura de los alimentos
son mejores indicadores de la exactitud
de un homo que un term0metro. Estos
termdmetros pueden variar en 20-40
grados de Faverdarer temperatura del
homo. Ademas, la puerta se tiene que
abr]r para leer estos termdmetros. Abr]r Pa
puerta cambiar_ la temperatura del horno.
Para decidir en cuAnto cambiar Ja
temperatura, suba la temperatura del
homo en 25 grados (si tos alimentos no
quedan bien cocidos) o baje la
temperatura en 25 grados (si lacomida
se quema) de la temperatura de la receta,
luego hornee Los resultados de esta
"prueba" le deberian dar una idea de
cu&nto se deberia camb]ar la temperatura.
1. oque y sujete los bolones
BAKF y BROIL por 3
segundos, hasta que el
dial muestre "SF".
2. Para aiustar el homo,
toque el bot6n BAKE Un
numero puesto en fabrica de
dos dig)tos aparecer& en el
dial. generalmente "00".
Si plensa que el homo
no est_ suflclentemento
callente,
(_ 3a. Toque eFboron con
la fiecha para SUBIR la
(_ TEMPERATURA para
_. aumentar (+) la
temperatura hasta +35°F.
Si piensa que el homo
es_ demaslado callente,
(_ 3b. Toque el botdn con la
flecha para BAJAR la
(_ TIEMPERATURA para
_,* bajar (-) la temperatura
hasta -35°F.
<_4. Toque el bot0n START,
Este aumento o disminuckSn en la posici0n
de la temperatura permanecer& en la
memoria hasta que los pasos de arriba
sean repetidos. Un code de corriente no
afectara esta posici0n
Las temperaturas para asar a la parrilla o
para la autolimp]eza no seran afectadas.
Cada cual de los hornos se debedan
ajustar pot separado
÷
80
"1 o3,0 .Pv02 . ÷ ,.o32: o. IF

_$
÷
÷
81
20P310-3 SPvG2 81 _ 2/14/03, 2:22 PM

E L I T E
GARANTiADELHOR#ODE
PAREDEMPOTRADO
rUN AAOCOMPLETODEGARANTIAPARATODASLASPARTES
Si, dentro de un afio de la fecha de instalaci6n, cualquier parte deja de
funcionar adecuadamente debido a un defecto en el material o la obra de
mano, Sears la reparar_t o reemplazar_., a nuestra opci6n, sin costo.
Si este producto es sometido a un use que no sea el familiar privado, la
garantia de arriba es efectiva por solamente 90 alias
EL SERVICIO DE GARANT[A EST/_ DISPONIBLE AL LLAMAR A SEARS
SERVICE AL 1-800_-MY-HOME ®.
Esta garantia le brinda derechos legales especifieos, y usted tambi6n podria
tenet otros derechos que varian de estado a estado.
Sears Roebuck and Co. Dept, 817 WA Hoffman Estates, IL60179
÷
÷
82
I 20P310-3 SPY02 82 ÷ 2J14KI3, 2:22 PM [

] ! IIII "
÷
Contrato de proteccibn
maestra
Felieitaciones por eu compra
inteligente. Su nuevo aparato
Kenmoreeest_ dise_ado y fabricado
para muchos arias de operaci6n
confiable. Sin embargo, al iguat que
todos los productos, puede requerir
de mantenimiento o reparaci6n
preventivas en cualquier momento. Es
ahi euando el contrato de proteeei6n
maestra Is puede ahorrar dinero y
molestias
Adquiera un Contrato de protecci6n
maestra ahora mismo y prot#jaee
contra inconvenientes y gastos
inesperados.
El Contrato de protecci6n maestra
tambi6n le ayuda a ampliar la vida de
su elecLrodom6stico Lo siguiente es
Io que se incluye en el contrato:
€ Serviclo experto per parte de
nuestros 12,000 especialistas
profesionales de reparaci6n
Servlclo ilimltado sin costo por
partes y mane de obra en todas las
reparaciones cubiertas
Garantia total - reposici6n de su
producto cubierto si ocurren mAs
de tree falias del producto dentro
de doce meses
*,"Reposlclbn del producto si el
producto cubierto no se puede
reparar
V Revlsl6n anual de mantenimlento
preventlvo a su solicitud - sin
cargo adicional
Y Ayuda telef6nica rdpida -
asistencia no t_cnica y de
instrucciones sobre los productos
reparados en su case, adem_.s
de una conveniente programaci6n
de reparaciones
t/Proteccidn contra descargas
eldctrlcas pare daSos debido a
fiuctuaciones e!6ctricas
Reembolso por alquner si la
reparaci6n del producto cubierto
tome m_.s tiempo del prometido
Una vez adquiera el contrato, solo
necesita una Ilamada telef6nica para
programar el servicio. Puede Ilamar a
cualquier here del die o de la noche o
programar la citadel servicio por
Internet.
Sears cuenta con m_s de 12,000
especialistas profesionales de
reparaci6n, quienes tienen acceso a
m_.sde 4.5 millones de partes y
accesorios de calidad Este es el tipo
de profesionalismo en el que puede
contra para ayudar a prolongar la
vide de su nueva compra pare los
aSos venideros, iAdquiera el Contrato
de protecci6n maestra boy mismo!
Aplican ciertas Ilmitaciones y
excluslones.
Pare precios e Informacidn
adicional, game al 1-800-827-6655.
Serviclo de Instalacl6n de Sears
Para la inetalacs6nprofesional
garantizada de Sears de
electrodomesticos y artieulos para el
hogar como dispositivos pare abrir
puertas de garaje y calentadores de
agua, en los EE.UU. tlame al
1-800,-4-MY-HOME_'.
÷
83
i! 20P310-3 _ 83 ÷ 2J14/03, 2:22 PM

÷
iiiiiiiiiii
iiiiiiiiiii_
i:_iii
Your Home
For repair-in your home-of all major brand appliances,
lawn and garden equipment, or heating and cooling systems,
no matter who made it, no matter who sold it!
For the replacement parts, accessories and
owner's manuals that you need to do-it-yourself.
For Sears pmfeasional instaflaUon of home appliances
and items like garage door openers and water heaters.
1-8(X)-4-MY-HOME_ (1-eoo-469-4663)
Callanytime,dayor night(U.S.A.and Canada)
www.searz.com ",,,ww.sears.ca
Our Home
For repair of carry-in items like vacuums, lawn equipment,
and eleclronics, call or go on-line for the location of your nearest
Sears Parts & Repair Center.
1-800-488-1222
Callanytime,dayor night (U,S.A, only)
...........................................................w_w_w____'.,.:=....................................................
_, To purchase a protection agreement (U.S.A.)
or maintenance agreement (Canada) on a product serviced by Sears:
1-800-827-6655 (U.S.A.) 1-800-361-6665 (Canada)
Parapedirserviciode reparacibn Au Canada pourserviceen frangais:
a domicilio, y para ordenarpiezas: 1-SitO-LE-FOYERt _c
(1-800-_937)
www.sears.ca
_.:::
÷
® Re0EI]_ TPaO_na_ J r_ Trama_ / _ _tvk:e M_d_ O__ Rosbuck and CO
® Man:a Re_s_ad_/TM MarcadB F_tb_caI aMMa_a de Servk_ode S_ Rotbuc_ and CO
MCMa_quB de C_ _e_ca / eoM_mae d6_o_te de S_ats Roabud_ =*_tCO
_am Roebuck ar_ C_
84
-
 1
1
-
 2
2
-
 3
3
-
 4
4
-
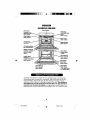 5
5
-
 6
6
-
 7
7
-
 8
8
-
 9
9
-
 10
10
-
 11
11
-
 12
12
-
 13
13
-
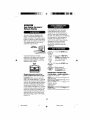 14
14
-
 15
15
-
 16
16
-
 17
17
-
 18
18
-
 19
19
-
 20
20
-
 21
21
-
 22
22
-
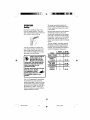 23
23
-
 24
24
-
 25
25
-
 26
26
-
 27
27
-
 28
28
-
 29
29
-
 30
30
-
 31
31
-
 32
32
-
 33
33
-
 34
34
-
 35
35
-
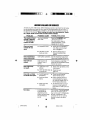 36
36
-
 37
37
-
 38
38
-
 39
39
-
 40
40
-
 41
41
-
 42
42
-
 43
43
-
 44
44
-
 45
45
-
 46
46
-
 47
47
-
 48
48
-
 49
49
-
 50
50
-
 51
51
-
 52
52
-
 53
53
-
 54
54
-
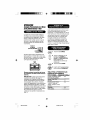 55
55
-
 56
56
-
 57
57
-
 58
58
-
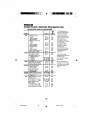 59
59
-
 60
60
-
 61
61
-
 62
62
-
 63
63
-
 64
64
-
 65
65
-
 66
66
-
 67
67
-
 68
68
-
 69
69
-
 70
70
-
 71
71
-
 72
72
-
 73
73
-
 74
74
-
 75
75
-
 76
76
-
 77
77
-
 78
78
-
 79
79
-
 80
80
-
 81
81
-
 82
82
-
 83
83
-
 84
84


Kenmore 91149052200 El manual del propietario
- Categoría
- Hornos
- Tipo
- El manual del propietario
- Este manual también es adecuado para
en otros idiomas
- English: Kenmore 91149052200 Owner's manual
Artículos relacionados
-
Kenmore 91149032100 El manual del propietario
-
Kenmore 911.41885 Series El manual del propietario
-
-
-
-
Kenmore 911.47466 Manual de usuario
-
Kenmore 91147812200 El manual del propietario
-
-
-
Kenmore 91147702201 El manual del propietario