Kenmore
0 WNER'S
MANUAL
MODEL NO.
9tl. 30168_ _0
91t. 30169 _qO
CAUTION:
Read and Follow All Safety
Rules and Operating
hTstructions Before First
Use of This Product
911o 30169
L
• Safety Instructions
o Features
° Operation
° Care and Cleaning
• Problem Solving
° Easy Adjustment
° Consumer Service
Sears_ Roebuck and Co., Hoffrnan Es,a_es, IL 60179 U.S.A.
229c4020P066(SRIO2gl)

Range Safety ............................ 3-4
Features of Your Range ......... 5
Removal of Packing Tape ................. 5
Oven Control ....................... 6-9
Functions ............................. 6
Power Failure ........................ 9
Tones ..................................... 8
F Code ...................................... 8
Display ......................................... 7
To Cancel Tones ..................... 8
How to Set the Clock ................ 9
How to Set the Kitchen Timer ..... 9
Oven CooMng Tips ........... 10-12
Strong Smefl or Odor ............. 10
No Peeking ......................... 10
Aluminum Foil ......................... 10
Preheating ..................... 10
Temperature Sensor ................ I0
Oven Vent ...................... 10
Moisture ................................ 11
Fan Running .................... 11
Bakeware ........................... 1t
Bakeware Placement .......... 11
Burner Cycling ........................... 1t
Oven Racks ........................ 12
Low Temperature Zone ............ 11
Using Delay Start ............... 1t
Oven Temperature Adjustment .....
........................................... 12,21
Oven Burner Ignitiion ................. 12
Power Failure ............................... 12
Baking ................................... I3
How To Set Bake ........................... 13
How To Set Time Bake ................ 13
How To Set Delay Bake ............. 13
Broiling ................................. 14
General Rules .......................... 14
Preparing Meats .................... 14
Oven Rack Position ................... 14
To Set Broil ............................ 14
Specia! Features .............. 15-16
12 Hour Shut-Off .................. 15
Centigrade Selection .............. 15
12 Hour Clock ......................... 15
Cook and Hold ........................... 16
Arrow Speed ......................... 16
Control Panel ............................. 17
Broiler Pan and Grid .................... 17
Oven Racks .................................. 17
Glass ............................................... 17
Oven Bottom ............................... 18
Replacing the Oven Light Bulb ....18
Oven Door .............................. 18
Broiler Drawer ....................... 17
Before Calling for Service .... 19, 20
Consumer Service Numbers ....... 22
Warranty
For your convenience and future reference_ please write down }four model and
serial numbers in the space provided. The), are located on the front frame behind
the oven door.
MODEL NUMBER: SERIAL NUMBER:
i ,, uu,, u .... 2 = "........

&4FETY
injury, ordeath.
To insure safety for yourseff, family and home,
please read ,your Owner's Manual carefully
Keep it handy for reference Pay close
attention to the Safety sections
BE SURE_ your oven is installed and grounded
by a qualified technician
A WARNING
L.P. BURNER ADJUSTMENTS
If you intend to use Liquefied Petroleum
Gas (bottled gas) all L.P. adjustments in
the Installation Instructions must be made
before using your oven.
ff your oven is not properly adjusted,
flames may be too high, or the oven may
use too much fuel, release toxic fumes or
cook poorly.
tlMPORTANT SAFETY NOT_CEt
The Cafifornia Safe Drinking Water and Toxic
Enforcement Act requires the governor of
Cafifornia to publish a list of substances
known to the state to cause birth defects or
other reproductive harm and requires
businesses to warn customers of potential
exposure to such substances.
Gas appliances can cause minor exposure to
four of these substances, namely benzene,
carbon monoxide, formaldehyde and soot,
caused primarily by the incomplete
combustion of natural gas or L.P. fuels.
Properly adjusted appliances, indicated by
the bluish rather than a yellow flame, wilt
minimize incomplete combustion. Exposure
to these substances can be minimized by
further venting with an open window or using
a ventilation fan or hood.
The oven, as shipped from the factory, can
only be operated with natural gas. Do not try
to operate it with L.P. (bottled) gas. High
flames and toxic fumes could cause serious
injury. If you wish to use your oven with L.Po
gas, you must convert the range following
the procedure found in the installation
instructions shipped with your oven.
3 tmportant safety instructions continued

TEACH CHILDREN
Not to play with controls or any part of the
appliance.
• Not to sit, climb or stand on the oven door
NEVER WEAR loose fitting
clothing when using your
appliance.
NEVER USE a towel or other
bulky cloth as a pothotder and
make sure the potholder is
dry. Moist potholders codd
cause steam bums. Keep dish towels, dish
cloths, potholders and other linens a safe
distance away from your appliance
NEVER USE .your
appliance for warming or
heating the room
BE SURE the appliance is securely
installed in a cabinet that is firmly
attached to the house structure.
NEVER STORE items of
interest to children in cabinets
above the appfiance
K_EP THIS book for later user
NF.VER TRY to repair or replace any part of
the appliance unless instructions are given in
this manual. All other work should be done bY
a qualified technician.
A_-_fAY$ KEEP the appliance area free
from things that will bum Food, wooden
utensils and grease buildup could catch fire.
Plastic utensils could melt and canned foods
could explode. Your appliance should never
be used as a storage area
ALWAYS KEEP your appliance clear of
things that will bum (gasoline and other
flammable vapors or liquids).
ALWAYS KEEP combustible wall
coverings, curtains and other linens a safe
distance from the appliance.
SAFETY continued
NEVER HEAT unopened food containers
Pressure buildup can cause the container to
burst and cause injury.
NEVER &EA VE jars or cans of fat or
drippings in or near your appliance.
SOME CLEAN_-'RS produce .r-_
noxlbus fumes and wet cloths or
sponges could cause steam
burns.
PLACE OVEN RACKS in the desired
position while the oven is cool, If racks must
be moved while oven is hot, do not let
potholder contact the hot oven element
AFTER BROH.ING, alwaYs take the broiler
pan and grid out of the oven and clean them,
Leftover grease in the broiler pan could catch
fire next time you use your oven
ALWAYS USE care when opening the oven
door.. Let hot air and steam escape before
moving foods.
NEVER USE aluminum foil to line the oven
bottom Improper use of foil could start a fire.
NOW!
4
Should you ever need it, you will not have
time for reading. Be sure everyone in
your home knows what to do in case of
fire. Never use water on a grease fire; it
will only spread the flames.
....... ,.............. ,,#1
OVEH FIR_ :
Do not t_J to move the pan !
1. Close the oven door and turn
controls off
2. If fire continues, throw baking
soda on the ripe, or use a dry
chemical, foam, or halon type extinguisher

FEATURESOF YOUR
24" GASBUILF/N WALLOVEN
IIlllllllllllllllIlllllllllllllIlllllll
11
To remove the adhesive left from packaging tape, use household dishwashing liquid, mineral oil
or cooking oil, With a soft cloth, rub into the area and aflow to soak, Rinse and dry well Repeat
procedure'using an appliance polish to insure no damage is done to the range surface, This
should be done before the oven is turned on for the first time. The tape cannot
be removed once the oven has heated,
Where can you look for packaging tape?
Door handle Control panel area
Door trim Oven area
5

YourNew OvenControl, Clockand Kitchen Timer
, J ,ll L L
Q QQ
TEMP HOUR MIN
Q GQ
TIMED OVEN KITCHEH
TIMER
Your new touch pad control will allow you to set oven functions with ease Below are the different
types of functions and a description of each
BAKE -- Cook foods in the traditional oven
with a temperature range of 170°F to 550°F
BROIL _ Cooks meat at 550_F hi broil or
450 _ low broil from the direct heat of the
burner, Broiling should be done with the oven
door & broiler drawer closed
OVEN COOKING TIME-- Set the amount
of time you prefer foods to cook and have the
oven turn off automatical!y,
DELAYED BAKE-- Set the amount of time
you prefer foods to cook. Set the time of day
.you prefer the oven to turn on When the
function is finished the oven will turn off
automatically,
v@@
HOUR MIN
®@
@
The HOUR and MIN pads set
the time of day, length of
cooking time, the delayed start
time, and the time set on the
Kitchen Timer
The TEMP pad sets the
temperature used for baking
The STABT pad must be
pressed to activate any oven
function.
The OVEN COOKING TIME
pad is used when setting the
length of cooking time
The DELAY START TIME
pad is used to set the time of day
you prefer the oven to turn on
and start cooking.
The CLEAR/OFF pad is used
to cancel anY oven function and
the end of cycle tone It will
not cancel the Clock or
Kitchen Timer.
6 oven control, clock and timer continued

OVENCONTROL,CLOCKandKITCHEN
CONTROL DISPLAY
continued
OVENTEMPERATURE INDICATORTOLETYOUKNOW
INDICATOR THEOVENHASTURNEDON
_e_# _--_. Zo _.:--Z -T- CLOCK,KITCHENTIMER,DELAY
TOALERTYOUTOSKA"-i TL! L! L! 1_1TL! L! L! L!! START"ME,OVENCOOKINa,OR
TEMPERATUREORATIME ,1DELAYBAKE CLEAN_ STARTCLOCKCLEAMi,, , CLEANINGTiME
_ 8P,OtL\LOCKEODOOR COOK\_TOPt/T[MER_
0VENFUNCTION 0VENFUNCTION
INDICATOR INDICATOR
The display is an easy reference to use while using your control Below are descriptions of how
the display works
OVEN TEMPERA TURE INDICA TOR --
This indicator has a multiple purpose
o Displays the temperature
• Displays an error code -- "ERR" - If
the oven temperature indicator flashes
"ERR'; then you have set an invalid#me or
temperature Press the CLEAR/OFF pad
to clear the control and reset .your oven
function.
, Displays Oven Problems- tf your
control flashes "F" and a number or letter,
.you have experienced an oven problem
Please read the section on F.CODES in
.your manual..
ON lIND#CA TOR -- Will light when the oven
turns on
SET INDICATORS -- The set indicator will
flash in combination with an oven function or
timed function to let you know.you need to set
a time ortemperature, Example,"SET BAKE"
will flash to let .you know ,you need to set the
bake temperature
TIME INDICA TOR -- Displays the time of
day, cooking time, delayed start time or the
time set on the kitchen timer
Displays a reminder code -- "PUSH
START" - If the oven time indicator flashes
the words "PUSH START", then.you need to
press the START pad to activate your setting
OVEN FUNCTION INDICATORS --
Displays which oven function has been set
and if the function is delayed
7 oven control, clock and timer continued

CONTROL,CLOCKandK/TCHEIVTIMER
Your new control has a series of tones that will
sound at different times, These tones may
sound while ,you set the control for an oven
function, or at the end of the oven function. It
will also alert you there may be a problem with
the functions. Below are the types of tones
and a brief description of each
TONES WHILE SETTING THE
CONTROL
When .you press a touch pad you will hear a
beep. This beep will let ,you know you have
placed enough pressure on the pad to
activate it. (The arrow pads do not beep).
END OF TIMED CYCLE TONE
A t the end of a timed cooking function, you will
hear 3 short beeps followed by 1 beep every
6 seconds. This 6 second beep wilt continue
to sound until the CLEAR/OFF pad ispressed
or you may select the special feature to cancel
this 6 second beep from sounding at the end
of future cycle&
TO CANCEL THE 6 SECOND BEEP
t. Press and hold the BAKE and BROIL
pads, at the same time for 3
seconds, until the display shows "SF'.
2. Press the KITCHEN TIMER ON/OFF
pad The display will show "CON BEEP"
(continous beep),
3. Press the KITCHEN TIMER ON/OFF
pad again The display will show"EEEP"
(beep canceled),
4. Press the START pad.
if,you would like to return the 6 second beep,
repeat steps above until the display shows
your choice and press start,
ATTENTION TONE
This tone will sound if you make an error or an
oversight is made while setting an oven
function,
Examples would be;
a. Setting a timed function and not pressing
the start pad,
b. Pressing an additional function pad
without setting a temperature or time first,
Any of these can be quickly identified bY
watching the display,
PRF.HEA T TONE
When you set an oven temperature, the oven
automatically starts to heat When the
temperature inside the oven reaches the
temperature you have set, a tone will sound to
let you know the oven is ready for baking.
If ,you set an oven function and the control
beeps while the display is flashing "F" and a
number "F.4" or letter "FI" there may be a
problem with the control or oven. Simply press
the CLEAR/OFF pad and wait about an hour_
Try setting the function again If the code
repeats, write down the flashing code and call
for service° Tell the technician what the
code was flashing
8 oven control clock and timer continued

, CLOCKand KITCHENTIMER
The clock must be set for the correct time of
day before a delayed oven function can work
properly. The time of day cannot be changed
during a timed oven function, but can be
changed during a bake or broil function,
HOW TO SET THE CLOCK
HOUR Mill
@@
The Kitchen Timer is used to time cooking
processes or other household activities. It
does not control the oven, It can be set for up
to 9 hours and 59 minutes, It wit count down
in minutes until the last 60 seconds is reached
then the control will beep once, When the
countdown reaches zero, the control will beep
3 times followedby one beep every 6seconds
until the KITCHEN TIMER ON/OFF pad is
pressed. This 6 second tone can be canceled
See Tones on the preceding page,,
HOW TO SET' THE TIMER
1. Press the CLOCK pad
2. Press the HOUR and MIN arrow pads to
set the time of day.
3. Press the START pad
TIMER 4,, 4,=
RECALL THE CLOCK
While using ,your oven for cooking, press the
CLOCK pad, if you wish to check the time of
day. The current time of day will show in the
display.
POWER FAILURE
If you have experienced a power failure, the
time flashing in the display will be incorrect.
Reset ,your Clock,
Any oven cooking function that was in process
will need to be reset.
1. Press the KITCHEN "tIMER ON/OFF
pad
2. Press the HOUR and MIN UP and/or
DOWN arrow pads to set time,
3. Press the START pad.
4 When the countdown has reached zero,
press the KITCHEN TIMER ON/OFF
pad
To cancel the timer during the countdown
press the TIMER ON/OFF pad twice
9 oven control, clock and timer continued

OVENCOOKINGTIPS
It is normal to have some odor when using your
oven for the first time, This is caused by the
heating of new parts and insulation_
To help eliminate this odor, ventilate the
room by opening a window or using a
vent hood.
Let the oven preheat thoroughly when recipes
call for preheating Preheating is bringing the
temperature up to the temperature you will be
using during baking When the oven has
reached the preheat temperature, a tone will
sound. Have foods nearby ready to place in
the oven.
IMPORTANT:
Never cover the
oven bottom or
oven rack with
aluminum foil.
Improper use can
cause poor heat
flow, poor baking
results, and may damage the oven finish
In the back of the oven ,you will notice a small
tube, This is a heat sensor that maintains the
temperature of the oven Never move or bend
this tube
OVEN TEMPERATURE SENSOR
The oven vent is located above the oven door
This area could become hot during oven use
The vent is important for proper air circulation,
Never block this vent.
Opening the door often to check foods will
cause heat loss and poor baking results
10 oven cooking tips continued

OVENCOOKIN6TiPS
During any oven operation you may hear a fan
noise This is the intemal cooling fan that
keeps all electrical parts from overheating. It
is not uncommon for this fan to keep running
even after the oven is turned off
As the oven heats, the change in temperature
inside the oven causes water droplets to form
on the oven door glass To prevent this, open
the door momentarily to allow the moist air out.
FLA T COOKIE SHEETS
Flat cookie sheets allow
airtocirculate alt around
the cookies for even
browning,
SHINY PANS
(reflect heat) "X
Shiny pans are perfect for cakes and quick
breads that have a golden brown crust /
GLASS, DARK NON.STICK, OR
DARKENED BY AGE BAKEWARE
If baking with more than one pan, place the
pans so each has at least 1 to 1 1/2" of air
space around it. Place pans so one is not
directly above the other
(absorb heat)
Perfect for yeast breads, pie crust or foods that
have a brown crust. The oven temperature
should be reduced by 25°F
The Oven Temperature Sensor at the back of
the oven continuously senses and controls the
temperature inside the oven. To keep a
constant set tempera ture, the burner will cycle
or tum on and off during cooking
The low temperature zone of your oven
(between 170_and 2OO°F) is available tokeep
hot cooked foods warm However, foods kept
at these temperatures longer than 2 hours
may spoil
When using your convenient Delay Start
operation, foods such as dairy products, fish,
poultry, etc , should never sit more than 1hour
before cooking Room temperatures and the
heat from the oven light promote bacterial
growth
"J"_ oven cooking tips continued

continued
The oven racks
are designed with
stop locks, a
convenience as nz_cK
well as a safety GUIDE""
precaution for
placing foods in or
removing foods
from the oven.
When the racks
are placed correctly in the oven, the guides
have a bump to prevent the racks from tilting,
Your oven has four (4) rack positions that may
be used during cooking..
The top position is only a guide, it
cannot be used as a rack position.
You may feel that your new oven cooks
differently than the oven it replaced. We
recommend that.you use .your new oven a few
weeks to become more familiar with it,
following the times given in your recipes as a
guide See Do It Yourseff Adjustment in back
of this manual to make the adjustment ff you
feel .your oven is too hot or too cool for your
cooking preference
When the oven is set, a glow bar at the back of
the oven heats, When the bar heats to a bright
orange the gas flows to the burner and is
ignited
The oven burner cannot be lit during a power
failure. Never try to light the burner with a
match.
Always place oven r_cks in the proper
position wh_le oven Bs cooH,
12

BAKING
B_ To set the oven to delay the start, cook for a
t, Press the BAKE pad. specific time and turn off automatical!yo
@
TEMP
@
2, Press the Temp UP and
DO WN arrow pads to set
the oven temperature you
prefer to use
3. Press the START pad
@
TEMP
@
1. Press the BAKE pad
2, Press the Temp UP or
DOWN arrow pads to set
the oven temperature you
prefer to use
To set the oven to cook for a specific time and
turn off automatical!y.
1, Press the BAKE pad
@
TEMP
@
2, Press the Temp UP and/or
DOWN arrow pad to set
the oven temperature you
prefer to use
3. Press the OVEN
COOKING TIME pad
@@
HOUR MtN
@@
4, Press the Hour and/or
Minute UP and DOWN
arrow pads to set the
amount of time you prefer
your foods to cook
5. Press the START pad
3. Press the OVEN
COOKING TIME pad
@@
HOUR MIN
@@
u Press the Hour and/or
Minute UP and DOWN
arrow pads to set the
amount of time you prefer
your foods to cook
5, Press the DELAY
START TIME pad
@@
HOUR MIN
@@
6. Press the Hour and/or
Minute UP and DOWN
arrow pads to set the time
of day you prefer the oven
to turn on,
7, Press the START pad
These oven operations may be used
when roasting.
The oven wifl cut off at the end of the cooking
time unless the cook and hold feature has
been activated
13

BROILING
Broiling is cooking by direct
heat from the broil burner
The oven door should remain
closed during broiling.
It is not necessary to preheat
the oven when broiling, Use
the broiler pan and grid that
came with .your range. Both are designed for
proper drainage of fat and fiquids
Foil must be molded tightly
to the grid and silts cut into
the foil to match those of the
grid. This allows fats and
liquids to drain into the
broiler pan, preventing fire
and excessive smoke.
Always remove the pan
and grid from the oven.
Storing or forgetting a
soiled broiler pan in the
oyen is a poten tial smoke
or fire hazard.
* Choose tender cuts of meat at least 3/4"
thick for broiling.
o Trim the outer layer of fat, silt the edges to
keep meats from curling.
o Always use tongs to turn meats Piercing
meat allows juices to escape.
o Salt the first side of meats just before
turning, the second side just before serving
Brush chicken and fish with butter several
times as theY broil.
o Chicken and fish should be placed on the
grid skin side down For fish, lightly grease
the grid to prevent sticking_
The closer.you place foods to the broil burner
the faster foods brown on the outside yet
remain red to pink in the center
The US. Department of Agriculture notes
that meat cooked rare is popular, but meat
cooked to only 140° F (rare) means that some
poisoning organisms may survive.
Moving meats away from the burner wilt allow
the meat to cook to the center while browning
on the outside. Using this positioning, cook
side I at least 2 minutes longer than side 2. Be
sure the sump of the broiler pan is always
facing to the front of the oven.
The size, weight, thickness, startingtemperature
and your preference of the doneness of the meat
will affect broiling.
After placing food on the broiler pan, slide the
pan into the proper rack position in the lower
broiling compartment.
Be sure the sump (grease well) in the pan is to
the front of the range
1, BOTTOM RACK pOSITION
(DIRECTLY UNDER THE 2 TABS) 3 THIRD RACK
_ POSITtON
SECOND RACK
POSITION
la. Press the BROIL pad.
(This wiU automatically
set Hi Broil)
t b. While the indicator is flashing in
the display, press the BRONrL
pad again ff you prefer to use
L0 Broil.
2. Press the START pad
3. When broiling is finished, press
the CLEAR/OFF pad
t4

SPECIAL 81: YOURCOHTROL
Your new touch pad controt has additional features thatyou may choose to use.. After making your
selection, if you want to change the setting, follow the steps until the display shows your choice
The control is automatically set to turn off the
oven after 12 hours baking or 3 hours broiling
should you forget and leave the oven on, If you
want to remove this feature;
1. Press and hold, at the same time, the
BAKE and BROHL pads for 3 seconds,
until the display shows SF.
2. Press the DELAY START TIME pad
The display shows 12shdn (12 hour
shut-off)
Press the DELAY START TIME pad
again, The displaywillshowne shdn (no
shut-off),
3o Press the START pad
Your oven control is set for the Fahrenheit
temperature selection Most recipes are given
using the Fahrenheit scale, You can change
this to use the Centigrade selection
1. Press and hold, at the same time, the
BAKE and BROBL pads for 3 seconds,
until the display shows SF
2. (a) Press the BRORL pad The control
display will show the degrees sign and F
(b) Press the BRORL pad again This will
change F (Fahrenheit) to C (Centigrade)
3. Press the START pad
Your control is set to use the 12 hour clock_ If
.you prefer to use the 24 hour Military Time
clock or black out the display:
t. Press and hold, at the same time, the
BAKE and BROIL pads for 3 seconds,
until the display shows SF.
2. (a) Press the CLOCK pad The display
shows ll 2hr tf this is your choice press
the START pad,
or
(b) Press the CLOCK pad again. The
display wilf show 24hr Example 500 on
the 12 hour clock will show 1Z O0 hours on
the military clock If this is your choice
press the START pad
or
(c) Press the CLOCK pad again The
display will show OFF If this isyour choice
press START. The display wilt not show
time (The delay start feature wilt not
operate)
"_5 special features continued

SETTbYGSPECN L URES
Your new control has a temperature hold
feature that will keep hot cooked foods warm
up to 3 hours after the cooking operation is
finished. To activate this feature
t. Press and hold, at the same time, the
BAKE and BROIL pads for 3 seconds,
until the display shows SF,
2. A. Press the OVEN COOKING TIME
pad, The display will show NLD OFF
B. Press the OVEN COOKING "riME
pad again to activate the feature. The
display will show HLD ON.
3. Press the START pad.
This special Feature will allow .you to change
the speed, #i means speed of change is slow
up to #5 which means speed of change is fast.
To set the speed you prefer, follow these
steps
1. Press and hold, at the same time, the
BAKE and BROIL pads for 3 seconds,
until the display shows SF,
2. Press the UP arrow pad° The display will
show the current set speed
3. Press the UP arrow to increase the speed
up to the number 5
or
Press the DOWN arrow pad to decrease
the speed down to the number 1.
4. Press the START pad
16

C[EANIHG
CLEANING MATEROALS TO USE:
o Dishwashing detergent
. Warm water
. Soft cloth
Do not use abrasive clearaers_ industrfal
cleaners_ or bleach.
CLEANING MATERIALS TO USE:
Glass cleaner
,' Paper towels
e Baking soda
TO CLEAN:
For everyday cleaning, use glass cleaner and
a paper towel For stubborn soil, use paste of
baking soda and water Rinse thoroughly
CLEANING MATERNAe-S TO USE:
o Dishwashing detergent
o Warm water
• Soap-filled steel wool pad
o Commercial oven cleaner
TO CLEAN:
Allow the pan to soak. Sprinkle the grid with
dishwashing detergent and cover with a damp
cloth or paper towel and let stand ,Scour as
needed. Wash, rinse, and dry well, You may
also place both the pan and grid in the
dishwasher_
CLEANING MATERIALS TO USE:
o Dishwashing detergent
• Soap-filled steel wool pad
• Warm water
TO CLEAN:
Wash and rinse well
_'0 REMOVE:
Pull the racks out and up to remove
TO R_P_CE:
Set the raised back of the rack on the pair of
rack guides, Push until you reach the stop
locks, Lift the front of the rack until the back
slides easi!y under the bump Push rack into
the oven,
The removable roll-out broiler can be removed
for easier cleaning
TO REMOVE:
I Pull broiler out until it stops
2 Grasp broilerby the bottom of its sides, pull
broiler up and out
TO REPLACE:
1, Put the rollers under the broiler behind the
miler guides in the range.
2 Hold broiler in slightly raised position as
you shde it part way into the range, then
lower broiler and push completely closed
t7

BULB _ SOCKET
REPLACE THE LIGHT BULB:
Unscrew the light bulb and replace it with a
40-watt home appliance bulbo An appliance
bulb is smaller than a standard 40 watt
household bulb and is made to withstand high
oven temperatures and have a much longer
bulb life
Do not touch a hot oven light
bulb. Do not touch a bulb with
wet hands or wet cloth.
Never touch the electrically
five collar on the bulb when
removing or replacing the
bulb. Do not remove any
screws.
The oven bottom may be removed for cleaning
heavy spillovers or to reach the oven burner.
Be careful not to scratch the oven finish when
removing or replacing the oven bottom.
TO REMOVE:
1, Slide the tab at the center front of the oven
bottom to the left.
2. Lift the oven bottom up and out,
TG F_EPL_CE:
1 Slip the oven bottom into the oven so the
tabs in the rear of the oven bottom fit into
the slots in the oven back,
2 Lower the front of the oven bottom into
place, Slide the tab at the front of the oven
bottom into place
TO REMOVE:
Open the door to the broil
stop position, Grasp the
door on each side and lift
up and off the hinges., DO
NOT LIFT THE. DOOR
BY THE HANDLE.
.... i ....
When the door is
removed and the hinge
arms are in the broil
stop position, do not
bump into the hinge
arms. They could snap
back and cause injury to hands and
damage the porcelain fimsh of the
front frame. Cover the hinge arms
with empty paper towel rolls or
towels while working in the oven area.
TO REPLACE:
Remove the paper towel
rolls or towels Make sure
the hinges are still in the
broil stop position. Grasp
the door on each side, Lift
the door over each hinge
Line the slots at the bottom
of the door with the hinges.
Slide the door down over
the hinges as far as it will
go
18

CALLINGFORSERVICE
To save you time and money, before making a service call, check the list below for any problem
you may feel you have with the performance of your range. If the problem is something you cannot
repair, use the Consumer Service Numbers located at the back of this manual. When making
any calls_ have the model number, repair parts list, use and care manual and the
date of purchase available.
PROBLEM
;,,,..;................ i ....
The display of your
control is flashing
"F" followed by a
number or letter.
Oven will not work;
totally inoperative.
POSSIBLE CAUSE
Range malfunction,
ii , i
No power to range
POSSIBLE SOLUTION
ii i,i ,i ...... i ,,ffllp_
Press the CLEAR/OFF pad Let the range
cool for I hour and place the range back
into an oven operation. If the problem
repeats, call for service.
,q,, ii ,i,, ,i,q
a. Check the household circuit breaker
or fuse box
b. Check to make sure the range is
plugged in
m, ,i ...........
Foods do not bake
properly.
a. Oven isnot preheated
b. Improper rack or pan
placement
a. Be sure to preheat until the tone
sound&
b. Maintain uniform air space around
pans and utensils, See oven cooking
section,
,,, , ..... I,,,u,,i .......
Oven femperature
seems inaccurate,
Oven light does not
work.
c. Oven vent blocked or c. Keep vent clear
covered
d. Improper use of folio d. Racks should not be covered during
baking
e. Improper temperature e. Reduce temperature 25 degrees for
settingforutensilused glass or dull/darkened pans
f. Recipe not followed f. Check recipe and measurement
g. lmproper ovencontrol g. Check the temperature adjustment
calibration following this section
h. Range and oven rack h. Check the installation instructions for
not level leveling
i Ul..... ..... u ...... i
Oven control calibration See oven cooking section
.r i .... i,n,,,,i,,,,H
ao Light switch is in off
position,
b. Bulb needs to be
replaced
,u ,u,uu,,n i, i,rl
a. Check switch setting,
b. Check or replace fight
bulb,
1_ before catting for service continued

continued
PROBLEM POSSIBLE CAUSE
.......... ,,,,;..........................
POSSIBLE SOLUTION
Foods do not
broil properly.
a. Improper rack a.
position.
b. Oven preheated, b.
c. Improper utensil used. c.
d. Improper broiling time d.
e. Oven dooropen, e.
Check broil pan placement, see
broiling section
Do not preheat when broiling,
Use broiler pan and grid supplied with
range.
Check broiling chart in broiling
section.
Close oven door.
i ,i,,i,i ..... ,,, ,ll
Oven smokes. _J
b.
Oirty oven, a. Clean pan and grid after each use,
Broiler pan containing b. Be sure that the sump (grease well) iS
grease left in the to the front of the range when broiling
oven,
Oven burners
do not work
_a
Gas supply not
connected or not
turned on, ff using LP.
gas, tank may be
empty
b. Controls not adjusted
properly
c. Burners not adjusted
properly,
as Check the reducer shut-off valve and
the gas supply shut-off valve to be
sure they are open (see installation
instructions.)
If using L P, gas, is there any gas in the
L,P. tank?
b. Check operating instructions in this
manual
c. See the installation instructions for
adjustments,
2O

"DOiT
TEMPERATUREADJUSTMENT
You may feel that your new oven cooks
differently than the oven it replaced, We
recommend that you use .your new oven a few
weeks to become more familiar with it,
following the times given in your recipes as a
guide,
If you think your new oven is too hot (burning
foods) or not hot enough (foods are
undercooked),you can adjust the temperature
yourself. The appearance and texture of foods
is a better indicator of oven accuracy than an
inexpensive thermometer, such as those found
in grocery stores, to check the temperature
setting of your new oven These thermometers
can vary by 20-40 degrees tn addition, the
oven door must be opened to read these
thermometers, Opening the door will change
the temperature of the oven
To decide how much to change the
temperature, set the oven temperature 25
degrees higher (if foods are undercooked) or
25 degrees lower (if foods are burning) than
the temperature in your recipe, then bake The
results of this "test" should give .you an idea of
howmuch the temperature should be changed
÷
Press and hold down both
theBAKE andBROll.pads
for 3 seconds, until the
display shows SF.
w
Press the BAKE pad A
factory set 2 digit number will
show in the display, usually
00o
@
TEMP
@
_u
If you think the oven is
not hot enough:
Press the TEMP UP arrow
pad to increase (+) the
temperature up to +35°F.
If you think the oven is
too hot:
3b.
4.
Press the T_MP DOWN
arrow pad todecrease (.) the
temperature down to 4,35°F.
Press the START pad,
This increased or decreased temperature
setting will remain in memory until the above
steps are repeated A power failure will not
affect this setting,
The Broil temperature will not be affected
21

Fortherepairorreplacementpartsyouneed
delivereddirectlytoyourhome
Call7 am- 7 pro,7 daysaweek
1.S00o366°PART
(1°800°386-7278)
©
Forin-homemajorbrandrepairservice
Call24 hoursaday,7 daysaweek
t °8OO-4-R
(1-800-473=7247)
Forthelocationofa
SearspartsandRepairCenterinyourarea
Call24 hoursaday,7 daysaweek
1o800o488ol 2
BBBBBB
ForinformationonpurchasingaSears
MaintenanceAgreementortoinquire
aboutanexistingAgreement
Call9am- 5 pm, Monday-Saturday
t °800°827°6655
America's Repair Specialists
22

FULL ONE YEAR WARRANTY ON THE FUNCTIONING OF At.L
PARTS EXCEPT GLASS PARTS
If,wlthln one year from the date of installation, any part, other than a glass part,
fails to function properly due to a defect in material or workmanship, Sears wtll
Dear Customer: repair or replace it, free of charge.
0urconstanteffortsare FULL 30-DAY WARRANTY ON GLASS PARTS AND FINISH OF
dlrectedtowardmaktng PORCELAIN ENAMEL, PAINTED OR BRIGHT METAL FINISHED
PARTS
sure your new Kenmore if, within 30 days from the date of Installation, any glass part or the finish on any
Oven will arrive at your porcelain enamel, painted or bright metal part is defective In material or
home in perfect condl- workmanship, Sears wilt replace the part, free of charge°
tion and will give you FULL 90.DAY WARRANTY ON MECHANICAL ADJUSTMENTS
proper performance. For 90 days from the date of installation, Sears wilt provide, free of charge, any
AS part of these efforts, mechanical adjustments necessary for proper operation of the range, except for
we feel It Isour respon- normal maintenance.
sibility tO provide you tf the range Is subjected to other than private family use, the above warranty
with this warranty for coverage is effective for only 90 days.
your oven. WARRANTY SERVICE IS AVAILABLE BY CONTACTING THE
NEAREST SEARS SERVICE CENTER/DEPARTMENT IN THE UNITED
STATES
This warranty applies onlywhtle this product Is in use in the United States. Thts
warranty gives you specific legal rights, and you may also have other rights
which vary from state to state=.
SEARS, ROEBUCK and CO.
Dept. 720PSO
3333 Beverly Road
Hoffman Estates, IL 60179
WE SERVIICE WHAT WE SELL
"We Service What We Sell" is our assurance to you that you can depend on Sears for service because Sears service Is
nationwide,
Your Kenmore Oven has added value when you consider that Sears has a service unit near you staffed by Sears trained
technicians.., professional technicians specifically trained on Sears appliances, having the parts, tools and equipment
to ensure that we meet our pledge to you -- "We Service What We Sell!"
TO FURTHER ADD TO THE VALUE OF YOUR RANGE, BUY A SEARS MAINTENANCE AGREEMENT.
Kenmore Ovens are designed, manufactured and
tasted for years of dependable operation° Yet, any
modern appliance may require service from time
to time. The Sears Warranty plus the Sears Main.-
tenance Agreement provides protection from un-
expected repair bills and assures you of enjoying
maximum range efficiency.,
Here's a comparative warranty and Maintenance
Agreement chart showing you the benefits of a
Sears Range Maintenance Agreement.
Years of OwnershlpCoverago 1st Year 2ndYear 3rd Year
Rapfacemant of Defective
1 Part°otherthanPorcelain W iVlA NA
or Grass
, ,,,,,, ................. .....
g0 DAYS
2 Mechanical Adlustmertl W MA MA
........... =,, ,,,,,,,,,,:,,,,,,
30 DAYS
3 W MA lVlA
4
Porcatain and Glass Parts
Annual Preventive Malntsn*
anca Check at your request
W ,. Wa_raray MA - MItlnfertenco Agreement
CONTACT YOUR SEARS SALESPERSON OR LOCAL SEARS SERVICE
CENTER TODAY AND PURCHASE A SEARS MAINTENANCE AGREEMENT.
America's Best Selling Appliance Brand
Sold by SEARS, ROEBUCK AND CO°, Hoffman Estates, IL 60179
-- Printed in the United States --

Kenmore
MANUAL DEL
CONSUMIDOR
MODELO NO.
911. 30168 {_q_
911. 30169 _ q-_
PR_CAUCHON:
Lea y siga todas tas reglas
y las instrucciones para el
funcionamiento antes
de usar este producto
por primera vez.
911. 30169
iii iii
oInstrucciones de Seguridad
oCaracteristicas
oFuncionamiento
° Cuidado y Limpieza
° Como Resolver Problemas
° Ajuste Fac#
° Servicio Para el Consumidor
.............. i ii iilll i ill,..
Sears, Roebuck and Co., Hoffman Esfates, lJ. 60179 U.S.A.
,,, iii1,,,i ...........i , , i iiii ill...................... i,ll
22._c4020P066(sR1o291)

Seguridad en e! uso de la estufa,. 3-4
Dispositivo contra volcaduras ........... 4
Caracterfsticas .......................... 5
Cdmo sacar la cinta de empaque 5
Consejos para cocnnar en et
horno ..................................... I0-12
Olor u olor fuerte ............... 10
No mire .............................. t0
Papel de aluminio ................. 10
Precalentamiento ............................ 10
Sensor de temperatura del homo 10
Luz del homo ..................... !0
Ventilacidn del homo .......... t0
Humedad .................................... 11
Funcionamiento de/ventilador ..... t 1
Utensilios .............................. 11
C6mo colocar los utensilios ...... 11
Cicfo de los elementos ................. 11
Parrillas del homo ............. 11
Zona de temperatura baja ........ 12
Cuando use un comienzo
demorado ............................ 12, 21
Ajuste a la temperatura del homo,
........................................... 12,21
Encendido del quemador
del homo ................................. t2
Corte el_ctrico ............................. 12
Cdrno Hornear ........................... 13
Cdmo programar para hornear ...... 13
Cdmo homear autom_ticamente 13
Cdmo homear en forma demorada 13
24"BE
INDICE
C6mo asar a la parrilBa ............. 14
Reglas generates ......................... 14
Cdmo preparar tas cames para asar
a la parrilla ......................................... 14
Posicidn de fas patrillas ................... 14
C6mo asar a la parrifta .................. 14
C6r_e seBeccHe_ar pregran_as
especia_es ............................. 15-16
Apagado en 12 horas .............. 15
Seteccidn de temperatura ................ 15
Retoj t2 horas ....................... 15
Mantencidn de temperatura ......... 16
Cdmo cambiar la velocidad de los
botones con tas flechas .......... 16
Panel de Control .................... 17
Cacerola y parrilla para cocinar 17
Parriflas del homo ...................... 17
Vidno .......................... t 7
Fondo del homo ........................... 18
C6mo reempfazar el foco de la fuz_ 18
Puerta Removibte del Homo .... 18
Caj6n de almacenamiento ......... 17
Antes de llamar para un
servicio ................... 19, 20
N8meros para servicios del
consumidor ............... 21
Garantia
Fara su conveniencia y referencia
serle en el espacio que se provee.
NUMERO DE MODELO:
fu_ura_ par favor escriba el n_mero de rnodelo y
Estdn ubicados en el marco frontal detrds de la
puerta.
NUMERO DE SERIE:
2

$U
t_ A iiADV£RTENCIA!!!S/lamformaci6neneste !_
_! _ _ manual no se sigue exactamento, podda :ii!
!_ _ result_r un incendio, una explosion, o un i!
!_ escape de gas que causen dafio a la ii
propledad, horidas personales, o muerte.
A ADVERTENC/A
AJUSTE A LOS QUEMADORES
DE GAS L.P.
Si usted t/ene la lntenci6n de usar Gas
L/cuado de Petr61eo, (gas embote//ado) todos
los ajustes en las Instrucciones para
instalacldn deben hacerse antes de usar su
homo.
Si su homo no est_ ajustado adecuadamen te,
las llamas podr[an estar demasiado altas, o
el horno podria usar demasiado
combustible, emitiendo vapores t6xicos o
cocfnando maL
.... =t,
P_R_ OAR_N_'_Z_R su seguridad, la de su
familia y fa de su hogar, por favor lea su Manual del
Consumidor cuidadosamente, Mant_ngafo a la
mano para referencias Ponga mucha atencidn a
fas secciones de seguridad, Usted reconocer_
todas las referencias importantes por las letras
oscuras y los sfmbolos a trav_s de su manual,
_SEGURESE que su estufa sea instalada por un
t_cnico especiafizado y que haga tierra
adecuadamente
POR NTE
3
California Safe Drinking Water and Toxic
Enforcement Act requiem que ei gobernador
de California publique una lista de
substancias que el estado sepa que producen
defectos de nacimiento u otros dafios
reproductivos y requiem que los hombres de
negocios adviertan a sus clientes del contacto
potential a tales substancias.
Las estufas a gas po dr[an causar un contacto
menor a cuatro de estas substancias,
nominalmente benceno, mon6xido de
carbono, formalina y oil[n, causados
_rincipalmente por la combustidn lncompleta
del gas natural y el gas llcuado. Las estufas
a]ustadas adecuadamente, lndicado pot una
llama azulada en vez de amarilla, minimizardn
la combustiSn incompleta. El contacto a
estas substancias puede minlmlzarse con
m_s ventilacfdn abriendo las ventanas o
usando un ventilador o una capana de
ventilacl6n.
E1 homo, como sale de f_brica, puede ser
operado solamente con gas natural No trate
de hacerlo funcionar con gas L.Po (gas
embotellado), las llamas altas y los vapores
tdxicos podrian causar serias heridas. Si
desea usar su homo con gas L.P. usted debe
convertir la estufa siguiendo el procedimlento
que se encuentra en las lnstruciones para
Instalaci6n que vienen con el homo.
i -'#
instrucciones impor_a_ltes de seguridad continOan

ENSE_E A LOS N_OS A:
o Nojugarcon los controles o cualquierparte de
la estufao
• No sentarse, subirse o pararse sobre la puerta
del homo_
_unca use ropa suelta
cuando use la estufa, .,_&€ _ l
Nunca use una toalla u otro
parlo abultado como agrraderas
y asegdrese que la agarradera
est# seca, Las agarraders
humedas podrfan causar
quemaduras por vapor, Mantenga fas loallas y tos
pa#os para plato& agarraderas y otros par_os a
una distancia prudente da la estufa,
Nunca use su estufa para
entibiar o calentar una
habitaciiSn
Aseg#rese que el homo est# HnstMado
firmernente en un gaMnette que est# bBen
pegado a la p_red.
Nunca guarde cosas de inter#s
para los nitros en los gabinetes
sobre la estufa
_unca oMien_e contenedores de alimentos
cerrados El aumento de la presidn podrfa causar
que el contenedor explore y cause heridas.
Hunca ¢Be]efrascos o latas de grasa ogoteaduras
sobre o cerca de la estufa
Algur_os Bi_pEadores producen
vapores nocivos los par_os y las __/. _/
esponjas mojadas podr[an causar t._
quemaduras por vapor,
CMoque las parriflas det homo en la posicidn
deseada mientras el horno est# fifo, Si las parrillas
se deben mover mientras el horno estb caliente, no
permita que la agarradera haga contacto con el
quemador caliente del homo.
Despues de asar a ta parrilla, siempre saque fa
cacerola y la parrilfa para asar del homo y Ifmpielas
Los sobrados de grasa en la cacerola para asar
podrfan incendiarse la prdxima vez que usted use
el homo
Siempre tenga cuidado cuando abra la puerta
del homo Deje que el aire caliente y el vapor
escapen antes de mover los alimentos.
Nunca use papel de aluminio para forrar el fondo
del homo. EIuso inadecuado del papel de aluminio
podrfa empezar un incendio.
Guarde este libro para un uso futuro
Nunca trate de reparar o reemplazar una parle
de la estufa a menos que las instrucciones se den
en este manual. Todo otto trabajo deberfa set
hecho por un t#cnico especializado
Siempre Mantenga el _rea de la estufa
despejada de cosas que se podrfan quemar. La
acumulacidn de comida y grasa y los utensilios de
madera se podrfan incendiar Los utensilios de
pl_stico se podrfan derretir y las comidas en
conservas poddan expiotar. Su homo nunca se
debeda usar para aimacenar cosas.
Siempre Mantenga fa estufa despejada de
cosas que se podrfan quemar (gasolina y otros
vapores y Ifquidos inflamables)
Siempre Mantenga los revestimientos com-
bustibles de las paredes, cortinas y otros pa#os a
una distancia prudente de ta estufa
iLEA Y COMPRENDA
ESTA INFORMACllON
AHORA!
$I alguna vez la necesfta, no tendr# tlempc
para leerla. Aseg_rese que todos en su
hogar sepan qu# hacer en caso de lncendlo.
Nunca use agua sobre un lncendio de grasa,
esto solamente extender# llamas.
4
FUEGO EN EL HORNO:
iNo irate de mover I_ cacerola!
t. Cierre la puerta def horno y apague
los controles,
2. Sielincendioconlinua, arroje soda
para cocinar sobre el fuego, o use
un extintor de qufmico, espuma o "halont

IIIIIIIUlIIIIIIIIIIIII
Para sacar el residuo det adhesivo de la cinta de empaque, use detergente Ifquido para platos, aceite
mineral o aceite para cocinar Con un paf_o suave fr6telos sobre el _rea,y permita que se remoje Enjuague
y seque bien Esto se deberia hacer antes de encender la estufa por primera vez. La cinta
no se puede sacar una vez que el homo se haya calentado.
La cinta de empaque se puede encontrar en las siguientes _reas:
Superficie de la cubierta Area del panel de control
Manilla de la puerta Moldura de fa puerta
5

f
@ @@
TEMP HOUR MtH
® ®®
KITCHEN
T_MER
Su nuevo controf a botones le permitir_ programar las funciones del homo con facitidad, M4s abajo est#n
los diferentes tipos de funciones y una descripci6n de cada uno.
NORNEAR Y ASAR. Cocina los alimentos en el
homo tradicional a una temperatura entre 170_Fy
550_F
ASAR A LA PARRILLA. Cocina fa came a
550°F en alto o a 450_F en bajo at calor directo det
elemento superior, Se debe asar a fa parrilla con
la puerta abierta en ta posici6n de tope para asar
TIEMPO DE COCINAR EN EL HORNO.
Seleccione hornear, o limpiar. Programe la
cantidad de tiempo en que desee que los alimentos
se cocinen o que el homo se timpie y que el homo
se apague autom_ticamente,
HOBNEADO DEMOBADO. Sefeccione
hornear Programe la cantidad de tiempo en
que desea cocinar la comida , Ponga la hora del
dfa en que desee que el homo se encienda
Cuando la funcidn termine, el homo se apagarb
autom_ticamente,
@ Los botones UP y DOWN ponen la
hora def dfa, tiempo de coccidn, ,
HOUR MIN hora de comienzo demorado y el
@@tiempoprogramado, latemperaturaen el Crondmetro de la Cocina.
@
TEMP
@
Los botones TEMP programan la
temperatura que se usa para cocinar
Et botdn START debe empujarse
para activar cualquier funci6n del
homo
El bot6n OVEN COOKING TIME
se usa para programar la contidad
de tiempo para cocinar .
El bot(;n DELAY START TllVIE se
usa para programar la hora det dfa
en la cual desea que el homo se
encienda para empezar a cocinar
El bot6n CLEAR/OFF se usa para
cancelar cuatquier funci6n del homo
y el tono de fin de ciclo No
cancelar_ el Reloj o el
Cron6mefro de la Cocina.
El botdn ON/OFF se usa para
encender o apagar el Cron6metro
de la cocina
6 control del homo, reloj y crondmetro continQa

PANEL DE CONTROL
AVISAQUEPROGRAMEUNA
TEMPERATURA0 UN TIEMPO
INDICADDRDE
7EMPERATURA
INDICADORQUELE
AVISAQUEELHOR#O
SEHAENCENDIDO
UBICACIONPARALAHORADELDIA
ENELRELOJ,CRONOMETRODELA
COCINA,HORADECOMIENZO
DEMORADO,COCCIONENELHORNO
0 TIEMPODELIMPIEZA_
INDICADORDEFUNCION
DELHORNO
INDICADORDE FUNCIONES
AUTOMAT/CAS
El panel es una referencia f_cil de usar mientras usa los controles, Abajo estb la descripcidn de c6mo
funcionao
NNDICADOR DE LA TEMPERA TURA DEL
HORNO -- Este indicador tiene un propdsito
mE]ltiple,
• Muesfra la femperatura
• Muestra un c6digo de error --"ERR" - Si
el indicador de temperatura del homo pestar_ea
"ERR", entonces usted ha programado un
tiempo o una temperatura incorrecta Empuje
el bot6n CILEARJOFF para despejar el control
y reprogramar la funcidn del homo.
o Muestra problernas _el borne -- Si el
control pestar_ea "F" y un nE_mero o letra, usted
est_ experimentando un problema del homo,
Por favor lea la seccidn CODIGOS.F en su
manual,
INDICADOR DIEIENCENDNDO--Se encendera
cuando se programe una funci6n del homo
INDICADORIES DIE PROGRAMA --El
indicador de programa pestar_eara en combinacidn
con una funcidn del horno o una funcidn autom_tica
para avisarle que necesita programar un tiempo o
una temperatura Ejemplo: "SIET" y "BAKE"
pestadear_n para avisarle que tiene que programar
la temperatura para homear,
INDICADOR DIE LA HORA -- Muestra la hora
del dfa, tiempo de cocciOn, hora de comienzo
demorado o la hora programada en el
crondmetro de ta cocina
Muestra un c6digo para recordar --"PUSH
START" _ Si et indicador de la hora del homo
pestar_ea las palabras "PUSH START'; entonces
usted tiene que empujar el botdn START para
activar su programa
INDICADORES DIE £AS FUNCIONES DEL
HORNO -- Muestran qu# funci6n ha sido
programada y si fa funci6n es demorada,
7' control del homo, refo] y cron6metro continda

COHTROLD£LHORHO,RELOJ
El nuevo control tiene una serie de tonos que
sonar_n a tiempos diferentes. Estos tonos pueden
sonar mientras usted programa una funciOn del
homo, o al final de una funcidn del homo. TambiOn
le avisar_ si existe un problema con una de las
funciones. Mbs abajo est_n los tipos de tonos y
una breve descripciOn de cada uno
TONOS MIENTRAS PROGRAMA EL
CONTROL
Cuando empuje un boron usted escuchar_ un
tono, Este tono le harb saber que apficO suficiente
presidn sobre el botOn para activarlo
TONO AL FINAL DE UN CICLO
AUTOMA TICO
Despu_s de una funcidn para cocinar autombtica,
usted escuchara tres tonos cortos seguidos pot
un tono cada 6 segundos. El tono de cada 6
segundos seguir_ sonando hasta que empuje el
boron CLEAP./OFF o usted decida seleccionar el
programa especial para cancelar y evitar que el
tono de 6 segundos suene al final de un ciclo
futuro.
COMO CANCEI.AR EL TONO DE 6
SEGUNDOS
1o Empuje y sujete los botones BAKE y BROIL,
a la misma vezpara 3 segundos, hasta que
et dial muestre "SF':
2. Empuje el boron KITCHEN TIMER ON/
OFF. El dial mostrar_ "CON BEEP" (tono
continuo),
3. Empuje el botdn KITCHEN TIMER ON/
OFF nuevamente E! dial mostrarb "BEEP"
(tono cancelado),
4. Empuje el botdn START, para cancelar el
tono y salir de este modulo especial.
Si desea volver a los tonos de cada 6 segundos,
repita Ios pasos de arriba hasta que el dial muestre
su selecciOn .y empuje "start _' (comienzo)
YCRONOMETRODELACOCIHA
TONO DE ATENCION
Este tono sonar_ si hace un error u omite algo
mientras programa una funcidn del homo,
Unos ejemplos serfan:
a. Programar una funciOn y no empuje el botOn
START,
b. Empujar un boron para una funcidn adicional
sin programar primero la temperatura o el
tiempo
Cualquiera de estos se puede identificar
rbpidamente con mirar el dial,
TONO DE PRECAI-ENTAMIENTO
Cuando programa una temperatura en el horno, el
homo empieza a calentarse autom_ticamente.
Cuando la temperatura dentro del homo Ilega a la
temperatura que usted programO, sonar_ un tono
para avisarle que el homo estb listo para hornear.
Si usted programa una funcidn de/homo y el
control hace sonar un tono mientras una "F" y un
nL)mero o "Fr' est_n pesta_eando en el dial,
podrfa existir un problema con el control o homo,
Simplemente empuje el botOn CLEAR/OFF y
espere una hora. -/rate de programar la funciOn
nuevamente, Si el cddigo se repite, escriba el
cddigo que pesta#ea y tlame para un servicio
Dfgafe al t_cnico qu_ codigo estaba pestar]eando.
8 control del homo, reloj y cfondmetro confinOa

CONTROLD£LHORNO,RELOJYCRONOMETROD£LA COCINA
El reloj debe ponerse a la correcta hora del dfa
antes que una funcide demorada del horno funcione
correctamente. La hora del dfa no se puede
cambiar durante una funcidn autom#tica del homo,
pero se puede cambiar durante una funci6n para
homear o asar a la parrilla.
COMO PONER EL RELOJ
@
1. Empuje el botdn CLOCK
2. Empuje los botones con las flechas UP o
DOWN para poner la hora correcta de/dfa
3. Empuje et botdn START
PARA VOLVER AN, RELOJ
Mientras est6 usando ethomo para cocinar, empuje
el boron CLOCK, si desea vet/a hora del dfa La
hora presente del dfa se verd en el dial
CORTE E[ECTRICO
Si ocurre un corte de corriente, /a hora que se
muestra en el dial estar# incorrecta., Ponga
nuevamente el reloj a la hora,
Cualquier funci_n para cocinar de/homo que
estaba en proceso tendrb que set reprogramada,
Et crondmetro de la cocina se usa para medir el
tiempo de los procesos para cocinar u otras
actividades del hogar. No controla el homo,. Se
puede programar hasta 9 horas y 59 minutos.
Contar_ hacia atr_s en minutos hasta clue flegue a
los _;ltimos 6O segundos Cuando la cuenta llegue
a _0, el control sonar_ 3 veces seguido de un
sonido cada 6 segundos hasta que se empuje et
botdn KITCHEN Tff_tlER ON/OFF.
COiVIO F.qOGRAMAR EL
CFtONOMETRO
8-®®
1. Empuje el bot6n KITCHEN TIMER ON/
OFF.
2. Empuje los botones con las flechas UP o
DOWN para poner la hora.
3. Empuje el botdn STARTr
4. Cuando la cuenta l/egue a O, empuje el botdn
KITCHEN TIMER ON/OFF.,
Para cancefar el crondmetro durante la cuenta,
empuje el botdn TIMER ON/OFF dos veces
9

FAP COCINARENELHORNO
Es normal sentir un poco de olor cuando use su
homo por primera vez Esto es causado por el
calentamiento de las partes nue vas y del aistante
Para ayudar a eliminar este olor, ventile la
habitaci6n abriendo una ventana o usando
una campana de ventilaci6n.
Permita que el homo se precaliente bien cuando
las recetas requieren precalentamiento, El
precalentamiento es subir fa temperatura a la
temperatura que va a usar cuandohomee, Cuando
el homo Ilegue a la temperatura de
precatentamiento, sonar_ un tono, Tonga los
alimentos a fa mano y listos para ponerlos en el
homo
IMPORTANT£:
fondo det homo o
faparrilfa det horno
con papet de
aluminioo El uso
inadecuado puede
causar una mata \
circulaci6n del
calor, pobres resuttados al homear, y podrfa dar_ar
el acabado del homo
En la parte trasera del homo usted notara un
pequedo tubo. Esto es un sensor de calor que
mantiene la temperatura del homo, Nunca mueva
o dobte este tubo,
SENSOR DE TEMPERATURA DEL HORNO
La ventifacidn del homo est_ ubicada
inmediatamente sobre la puerta Esta area se
podrfa calentar mucho durante el use del homo
La ventilaci6n es importante para ta correcta
circulacidn del aire, Nunca obstruya la
ventilaci6n.
Si abre la puerta para mirar los alimentos causar,_
una p#rdida de calor. La p#rdida de calor causar_
malos resuftados cuando hornee Use la luz del
homo para revisar los alimentos mientras ese
hornean
t 0 consejos para cocinar en el homo centinOan

COCIN dR
contJnuacidn
Durante cualquier operacidn del horno usted podrfa
ofr un ruido de ventilador. Esto es el ventilador
intemo para enfriar y prevenir que todas las partes
el#ctricas se recatienten. No es poco comdn que
el ventilador siga co-rriendo incluso despu#s que
el homo se haya apagado
Estas son unas pocas recomendacJones para
obtener buenos resultados cuando hornee
A medida que el homo se calienta, el cambio de
temperatura dentro del homo causa que gotas de
agua se formen sobre et vidrio de la puerta del
homo. Para prevenir esto, abra fa puerta per unos
momentos para permitir que salga el aire humedo
BANDEJAS BAJAS PARA GALLETAS (sintados)
Las bandejas bajas
para gafletas permiten
que el aire circule
alrededor de las gafte-
tas para que se doren
en forma pareja
UTENSILIOS/
BRILLANTES
(clue reflejen ca/or)
\
Los utensilios bril/antes son perfectos para que los
queques ypanes rdpidos tengan una corteza caf_
dorada
UTENSILIOS DE VIDRIO, OSCUROS CONTRA
PEGADURAS, U OPACOS POR LA EDAD
(absorven el calor)
Son perfectos para panes con tevadura, cortezas
para pasteles o alimentos que tengan una corteza
caf_. La temperatura del homo se deberfa reducir
en 25°F
Si est_ homeando con mbs de un utensilio, coldquelos
de manera que cada uno tenga por Io menos de 1"
a 1 1/2" de espacio de aire a su alrededor Cofoque
los ulensilios de manera que ninguno quede
directamente encima de otro
El Sensor de Temperatura del Homo en la parle
trasera del homo mide y controla continuamente la
temperatura dentro det horno.. Para mantener una
temperatura programada constante, los elementos
harbn un cicfo de encendido y apagado mientras
el homo cocina
La zona de temperatura baja de su homo (entre
170_ y 2OO°F) estb disponsible para mantener los
alimentos tibios. Sin embargo, los a/imentos que
se mantengan a esta temperatura por m#s de 2
horas se podrfan echar a perder.
Cuando use su conveniente operaci6n de
Comienzo Demorado, los alimentos tales como
productos Ibcteos, pescado, aves, etc., nunoa se
deberfan dejar expuestos por m#s de una hora
antes de ser cocinados La temperatura ambiente
y el cator de /a tuz del homo promueven et
crecimiento de bacterias
1_1 Consejos para cocinar en el homo continuan

CO#SEJO$
COCg#ARE#EL
(continuacidn)
Las parrillas del homo est_n
diser_adas con topes, una
convenienciaytambi_nuna Topt_t_J -_
precaucidn de seguridad _s GU_AS ---
PAPA LAS_.
para colocar o sacar la PARmLLAS
comida del homo, Cuando
las parrilfas est_n puestas
correctamente en et homo,
las gufas tienen un tope
para prevenir que las parrillas se den vuelta
Su homo tiene cuatro (4) posictones para pard#as
que se pueden usar cuando homee
Usted podrfa pensar que su homo nuevo cocina
diferentemente at homo que reemplazd, Le
recomendamos que use su homo nuevo por varias
semanas para que se familiarice mbs con _1,
siguiendo los tiempos que se dan en ta receta
como una gufa Vea Ajustes de Temperatura,
Hbgales usted Mismo, en la pbgina 21 de este
manual para hacer los ajustes si cree que su homo
est_ funcionando demasiado caliente o frfo para
su preferencia
La posici6n de m_s arriba es solamente
una guia. No puede set usada como
posici6n para una parriila.
Cuando el homo se programa, una barra de
calor en faparte posterior del homo se calienta
Cuando la barra se calienta a un color
anaranjado brillante el gas pasa al quemador
y Io enciende
El quemador del homo no puede ser encendido
durante un corte de electricidad Nunca trate
de encender et quemador con un fdsforo
Siempre coloque las parrillas del homo
en ia posicidn cerrecta cuando el
homo esf_ fr[o,
_2

COMOHORNEAR
@
TEMP
@
1. Empuje el botdn BAKE.
2. Empuje los botones con las
flecha UP y DOWN, para
programar la temperatura
det homo que desea usar
3. Empuje el botdn START,,
Para programar que el homo cocine por un tiempo
especffico y se apague autom_ticamente,
Para programar que el homo empiece en forma
demorada, cocine por un tiempo especffico y se
apague autom_ticamente,
1. Empuje el Botdn BAKE,
@
TEMP
@
2.
Empuje los botones Temp
con las flechas UP o
DO WN para seleccionar la
temperatura del homo que
desea usar,
B_ t, Empuje el botdn BAKE
2. Empujeetbotdnconlaflecha
UP o DOWN para
TEMP seleccionar ta temperatura
que desea usar
Gw-
ICOOKINGt
L_T.LEE_J
3. Empuje el botdn OVEN
COOKING TIME
HOUR MIN
@@
4. Empuje los botones con
tas flechas UP o DOWN
para Horas y Minutos para
seleccionar la cantidad de
tiempo en clue desea cocinar
los alimentos.
S. Empuje et botdn START
13
3. Empuje el bot6n OVEN
COOKING TIME
HOUR M]N
@@
B
Empuje los botones con las
flechas UP y DOWN para
Horas y Minutos para
seleccionar fa cantidad de
tiempo en que desea
cocinar los alimentos,
5. Empuje el bot6n DELAY
START TIMEr
@@
HOUR MtN
6, Empuje los botones con las
flechas UP o DOWN para
Horas y Minutos para
programar la hora del dfa
en /a cual desea que et
homo se enciendao
7. Empuje el bot6n START
Estas operaciones del homo se pueden
usar para asar.
El homo se apagar_ al t_rmino del tiempo para
cocinar a menos que el programa para mantencidn
de temperatura se haya activado

COMOASARA
Asar es cocinar al calor directo del
elemento superior. La puerta del
homo deberfa permanecer abierta
en la posicidn de tope para asar
cuando ase a la parrilla
No es necesario precalentar el
homo cuando ase a la parrilla Use la cacerola y
la parrilla para asar que viene con su estufao
Ambas est_n diser_adas para drenar
adecuadamente la grasa y los Ifquidos
E1 papel de aluminto debe ser
moldeado firmemente a la
parrilla y debe hacer cortes en
el papel que est_n alineados
con las ranuras de la parriila.
Esto permite que la grasa y los
liquidos caigan a ia cacerola, evitando que
se produzca un Incendio y humo exceslvo.
Siempresaqueia cacerola
y la parriila de/ homo.
Guardar y olvidar una
cacerolapa_ asarsuciaen
elhomoesunpeligropara
producirunincendioohumo.
El Departamento de Agricultura de los Estados
Unidos nota que las carries cocinadas crudas
son populares, pero que ta came que se cocina
hasta sr_lo 140_F, (cruda) significa que algunos
organismos venenosos podrfan sobrevivir.
Mientras m_s cerca coloque los alimentos del
elemento para asar, m_s rapido se dorar_n pot
afuera, pero quedando rojo o rosado en el centro,
Colocando las cames lejos del elemento permitir_
que las cames se cocinen en el centro mientras se
doran pot afuer& Usando estas posiciones, cocine
el lado 1por Io menos 2 minutes mbs que el lado 2
Si su homo est_ conectado a 208 voltios, usted
podrfa usar una posicidn de parrilla m#s alta y/o
cocinar los atimentos pot m_s tiempo
El tama#o, peso, grosor, temperatura inicial y su
preferencia personal afectar_ el asado a la parrilla,
Esta tabla est_ basada en cames a la temperatura
del refrigerador,
Despu#s de colocar la comida en la cacerola,
ponga ta cacerola en la posici6n de parrilla
adecuada en el compartimiento de m_s abajo
para asar.
Asegurese de que el receptor de grasa de ta
cacerota quede hacia el frente del homo
I POSICION DE FONDO DE LA
PARRILLA(DIRECTAMENTE 3, TERCERA POS1CION DE
BAJO LAS DO_5ALET1LLAS) PARRILLA
2. SEGUNDA POSICION DE
PARRILLA
, Seleccionecodesdecarnesblandasquetengan
por Io menos 3/4" de grueso para asar a ta
parrilla
• Corte el exceso de grasa de las oritlas, haga
codes en las orillas para evitar que la came se
enrosque.
• Siempre use tenazas para dar vuefta la came
Si hace hoyos en ta came, permitir_ que eljugo
se escape.
,, Ponga sal sobre el primer lado de la came
inmediatamente antes de darla vueltao y sobre
el segundo lado inmediatamente antes de
servirla. Apfique mantequilla sobre el pollo y el
pescado con una brocha varias veces mientras
se asan.
. El polio y el pescado deberfan set puestos
sobre la parrilla con la piel hacia abajo, Para el
pescado, aptique un poco de grasa sobre ta
parrilla para evitar que se pegue,
RECEPTOR DE GRASA
14
la. Empuje el botOn BROIL,(Esto automdticamente
programa ASADO en HI-
ALTO)
lb. Mientras el indicador pestar_ea en
el dia!, empuje el bot6n BROIL
nuevamente si usted desea usar
ASADO en BAJO
2. Empuje el botdn START
3. Cuando termine de asar, empuje
el bot6n CLEAR/OFF

El nuevo control a botones tiene programas adicionales que usted puede seleccionaL
El control se programa autom_ticamente para
apagarse despu_s de hornear por t2 horas o
despues de asar a la parrilta por 3 horas en caso
que se le olvide y deje el homo encendido Si
desea eliminar este programa:
lr. Empuje y sujete, al rnlsmo tiernpo, el botdn
BAKE y BROIL para 3 segundos, hasta que
e! dial muestre SF
2. Empuje el bot6n DELAY" START TnME Et
dial muestra 12shdn (apaga do en t2 horas).
Empuje el botdn DELAY START TIME
nuevamente El dial mostrar_ no shdn (no
apagado)
3. Empuje el botdn START,
El control del homo esta programado para ta
seleccidn de temperaturas en Fahrenheit La
mayorfa de las recetas se dan usando ta escafa
Fahrenheit. Usted puede cambiar esto y usar una
selecci6n en Centfgrados Se hace asf
t. Empuje y sujete, a la misrna vez, fosbotones
BAKE y BROIL for 3 segundos, hasta que el
dial muestre SF.
2. (a) Empuje el bot6n BROH.. El dial def control
mostrar,_ el signo para grado y F
(b) Empuje el bot6n BROtlL nuevamente Esto
cambiar_ F (Fahrenheit) a C (Cenffgrado)
3. Empuje el botdn START
Su control est8 programado para usar el retoj en
12 horas Si usted prefiere usar Hora Mifitar de 24
horas o poner el dial en blanco, se hace asZ
1. Empuje y sujete, a ia misrna vez, el botdn
BAKE yBROiL for 3 segundos, hasta que el
dial muestre SF
2. (a) Empuje et botdn OLOCK Et dial mostrarb
f 2hr, Si #sta es su selecci6n, empuje efbotdn
START
o
(b) Empuje el bot6n CLOCK nuevamente Et
dial mostrar_ 24hr Ejemplo 5,O0 en el reloj
de 12horas /eer8 17 OOen e/ reloj de 24 horas
Si 6sta es su sefecci6n, empuje el bot6n
START
0
(c ) Empuje el botdn CLOCK nuevamente. El
dial ahora mostrar_ OFF. (La hora no se
mostrar8 en el dial) Si #sta es su seleccidn,
empuje START La hora no se mostrarb en el
diat
"!5 programas especiales continuan

El nuevo control tiene un programa de mantencidn
de temperatura para cocinar autom_ticamente
sofamente que mantendr_ la comida que ha sido
cocinada tibia hasta 3 horas despu_s que el
cocinado autom_tico termina Para activar este
programa:
1. Empuje y sujete, a la misma vez, los botones
BAKE y BROIL para 3 segundos, hasta que
el dial muestre $F.
2. (a) Empuje el botdn O VEN COOKING THME
El dial mostrar_ HLd OFF,
(b)Empuje el botdn 0 ]YEN CO OKING TiME
nuevamente para activar este
programa. E! dial mostrar_ HLd ON
3. Empuje et botdn STAR?"
Este Programa Especial le permitirb cambiar la
velocidad # 1significa que el cambio de velocidad
es lento hasta #5 que significa que el cambio de
velocidad es r_pido Para seleccionar la velocidad
que prefiere, siga estos pasos:
t o Empujeysujete, a 8a misrna vez, losbotones
BAK_ y f_ROB& para 3 segundos, hasta que
el dial muestre $F.
Empuje el botdn con la flecha UP El dial le
mostrar8 una posici6n de vefocidad entre 1y
5
3. Empuje ta flecha UP para aumentar la
velocidad hasta el numero 5
m
0
Empuje el botcln con la flecha DOWN para
disminuir la velocidad hasta el numero 1
Empuje et botdn START
t6

QUB _A TERIIALES DE LBMPIIEZA USAR:
• Detergente Ifquido para platos,
• Agua tibia,
o Patio suave
No use iimpiadores abrasivos,
nBmpHadores Hndustriales, o bSanquedores
(ctoroJ.
QUE MATERIALES DE LNMPIEZA USAR:
o Limpiador para vidrio
• Toaltas de papet
° Soda para hornear
PAFtA LIMPIAR:
Para fimpieza diaria, use un limpiador para vidrios
y una toalla de papel Para suciedad pesada, use
una pasta de soda para homear y agua Enjuague
bien
QUE MA TERIAL£S DE MMPIEZA USAR:
o Detergente lfquido para pfatos.
_, Agua tibia,
• Lanillas de acero con jabOn..
• Limpiador comerciatpara
hornos..
COMO LPMPIAR:
Permita clue la cacerola se remoje. Ponga
detergente para platos sobre la parrilfa y cubra
con un patio o una toafta hE_meda pot un rato
Friegue a medida que sea necesario Lave,
enjuague, y seque bien Usted tambi_n podrfa
porter la cacerola y la parrilla en la lavadora de
platos.
QUE _iA TERIAL£S DE LiMPiEZ,_ USAR:
° Detergente para platos
* Lanillas de acero con jabOn
* Agua tibia
PARA LIMPIAR:
Lave y enjuague bieno
PARA SACAR:
Tire las parrillas hacia afuera y hacia arriba
PARA CO'LOCARLAS NUEVAMENTE:
Coloque la parte levantada de la parrilla sobre un
par de gufas para pamllas. Empuje hasta que
Ilegue a un tope, tevante el frente de la parrilla
hasta que la parte de atrbs se deslice f_cilmente
bajo el tope. Empuje ta parril/a hacia el homo
El asador sobreruedas se puede sacar para
limpiarse mbs fbcilmente.
COMO SACAR:
1 Tire el asador hasta que se detenga
2 Tome el asador del rondo de los lados,
tirelo hacia arriba y hacia afuera,
COMO COLOCARLO:
1 Coloque las ruedas bajo el asador sobre
las gufas en et homo
2 Sujete etasadoren unaposicidn levemente
levantada a medida que Io desliza
parciafmente dentro del homo, luego baje
el asador y emp djelo compietamente hasta
que se cierre
17

FOCO
SOQUETE
COMO REEMPLAEAR:
1 Deslice el fondo del homo en el homo de
manera que las aletillas en la parte posterior
del fondo cafcen en tas ranuras en la parte de
atrbs del homo
2 Baje el frente del fondo del homo a su Iugar
Desfice la manilta del frente det fondo a su
tugar
CGMO SACAR EL FOCO DE LA LUZ:
Desatornille e! foco de la luz y reemplbcelo
con foco para homos residenciales de 40
watts Un foco para homos es robs pequef_o
que un foco normal de casa y estb hecho para
que soporte las temperaturas altas def homo
y tenga una vida mbs larga
.... =.........
No toque el foco de la luz callente |
de/homo. No toque un foco con I
las manos mojadas o con un pat_o |
mojado. !
Nunca toque el collar con |
electricidad de un foco cuando !o |
saque o Io reemplace. No saque |
ninguno de los tornillos.
1, 1,,11 1,,,11............ 1. J
CERRADO
El fendo del homo se puede sacar para limpiar la
suciedadpesada opara alcanzar el quemador det
homo.
Tenga cuidado de no rayar el acabado del homo
cuando saque o ponga el fondo del homo
COMO SACAR:
1 Deslice la manilla en el cen tro frontafgef fondo
del homo hacia la izquierda
€3
_. Levante el fondo delhorno hacia arfiba y hacia
afuera
COMO SACAR:
Abra la puerta hasta ta
posicidn de tope para asar
a fa parrilta Tome la
puerta de cada tadoy
levbntela de las bisagras
HO LEVANTE LA
PUERTA DE LA
MAHnLLA.
in ; cuando ia puerta se saca
' _ y los brazos de las |
blsagras est_n en la |
posicl6n de tope paraasar I
a la parrilla, no pase a I
' _ Ilevar los brazos de ias |
bisagras. Se podr[an |
devolver de golpe y causarie heridas en I
las manos y dalfar el acabado de |
porcelana en elmarco frontal. Cubra los |
brazos de las blsagras con rolios de |
toallas de papel o toallas mlentras trabaja |
el _rea del homo. J
t8
PARA _EEMPLAZAR:
Saque los tubos de toalfas
vacfos o las toallas
Asegorese que los brazos
de tas bisagras todavfa est#n
en la posici6n de tope para
asar Tome fapuerta de cada
lado Levante fapuerta sobre
cada bisagra Ponga /as
ranuras del rondo de la puerta
en lfnea con las bisagras
Destice tapuerta hacia abajo
sobre las bisagras lo rn,_s
posible

Paraahorrartiempoydinero,antesdeIlamarparaunservicio,reviselatistadem_sabajoparacualquier
problemaqueustedcreaquetieneconelfuncionamientodesuestufa Siefproblemaesalgoqueusted
nopuedereparar,uselos NdmerosdeServicioparael Consumidorqueseencuentranatfinalde este
manual,Cuando haga un llamado, tenga disponible el n_mero de rnodelo, Iista de parses
para reparacienes, manual de uso y cuidado y la fecha de compra.
PROBLEMA
i , ii,
E1 dial del control
pesta_ea una "F"
seguida pot un
n_mero o letra.
POSIBLE CA USA
u,..,,uu
Mal funcionamiento de
la estufa
POSIBL E SOL UCION
............ i , , i , i , m, u ,11
Empuje el bot6n CLEAR/OFF Permita que la
estufa se enfrfe por una hora y ponga
nuevament e el homo en funcionamiento Si el
problema se repite, tlame para un servicio
El homo no No pasa electricidad a
funciona; totatmente /a estufa
inoperante.
, i, u,
a. Revise la caja def circuito de ta casa o los
fusibles
b. Revise y asegEtrese que ta estufa est#
enchufada
LOS alimentos no se
cocinan
adecuadamente.
La temperatura del
homo no parece
estar ex_cta.
La luz del homo no
funciona
a. El homo no se
precalent6
b. Posici6n incorrecta
de la parrilta o fa
a. Asegorese de precalentar hasta que
suene el tono,
b. Mantenga un espacio de aire uniforme
alrededor de las otlas y utensifios Vea la
secci6n para Cocinar en el Homo
¢, Mantenga fa ventifacidn despejada
d. No cubra las parrilfas cuando homee,
e. Reduzca fa temperatura en 25 grados
para utensilios de vidrio, oscuros u
opacos
L Revise la receta y fas medidas,
cacerola
c. La ventifaci6n def
homo est# obstruida
o cubierta,
d. Uso incorrecto del
papef de aluminio
e. Temperatura
incorrecta para el
utensifio usado
f. No se sigui6 fa
receta
g. Mala cafibraci6n del
control del homo
h. La estufa o la parrilla
det homo no est_n
nivetadas
i i,, i,,n ................ i
Calibraci6n del control del
homo
g. Revise la seccidn de ajustes a la
temperatura que sigue esta secci6n
h. Vea fas instrucciones de instalacir_n para
la nivelaci6n
a. Et interruptor de la luz
est,_ apagado
b. El foco necesita ser
reemplazado
n,,,unl,,H i ,nl
Vea la seccidn de c6mo cocinar en el
homo,
u hi,n,, , nn,i,
a, Revise la posicidn del interruptor
b. Revise o reempface et foco
de la luz
t 9 Antes de lfamar para un servicio continOa

continuacidn
PROBLEMA POSIBLE CA USA
POSIBLE SOL UCiON
LOS alin_entos no
se asaN
adecuadamente a
la parrilla.
ao Posici6n incorrecta de la a,
parrilla
b, El homo se precalent6 b,
c, Mat uso de papel de e,
aluminio.
d, La puerla del homo se d,
cerrd durante el asado a
la parritla.
e. Bajo voltage (208 e.
Voltios).
f. Cantidad de tiempo f.
incorrecta para asar.
Revise la posicidn de las cacerolas;
vea la seccidn para asar a la parrilla.
Noprecaliente cuando ase a la parrillao
Lea la seccidn para asar a la parrilla.
Abra ta puerta a la posicidn de tope
para asar
Use posicidn de parrilta m_s alta y/o
ase por m_s tiempo.
Vea la tabla para asar en la secci6n
de cdmo asar a la parrilla
El homo hurnea. a. Homo sucio
b, Mat uso de papel de
aluminio.
c, Se dej6 la cacerola
para asar con grasa
dentro del homo.
a. Vea que no hayan derrames grandes
bo No se recomienda el uso del papel de
aluminie.
c. Limpie la cacerola y la parrilfa despu_s
de cada uso
LOS quemadores
¢_el homo no
funcionan
a. Lfnea del gas no est8 a.
conectada o no est8
abierta; si usa gas L P
el tanque podrfa estar
vacfo
Revise el reductor de la v_lvula de cierre
y la vblvula de paso para estar seguro
que est#n abiertas (vea instrucciones de
instalaci6n).
b. Controles no estbn
ajustados
adeeuadamente
b. Revise las instrucciones de
funcionamiento en este manual.
c. Quemadores no est_n c. Vea las instrucciones de instalaciOn para
ajustados los ajustes
adecuadamente
2,0

AJUSTESDETEMPERATURA= "HAGALOSUSTEBMISMO"
Usted podrfa pensar que su nuevo homo cocina
diferentemente al homo que reemplaz6.
Recomendamos que use su homo nuevo unas
pocas semanas para que se familiarice con _t,
siguiendo los tiempos que se dan en las recetas
como una gufa.
Si cree que su nuevo homo estd funcionando
demasiado caliente (quema la comida) o no
calienta Io suficiente (la comida no queda bien
cocida) ustedmismopuede ajustar la temperatura.
La apariencia y la textura de los alimentos son
mejores indicadores de la exactitud de un homo
que un term6metro barato, como los que se venden
en las tienda& para controlar la posiciOn de la
temperatura de sunuevo homo. Estos term6metros
pueden variar entre 20-40 grados Adem#s, ta
puerta se tiene que abrir para leer estos
term6metros. Abrir ta puerta cambiard fa
temperatura del homo
Para decidir en cu#nto cambiar la temperatura,
suba la temperatura del horno en25 grados (se los
alimentos no quedan bien cocidos) o baje fa
temperatura en 25 grados (si la comida se quema)
de la temperatura de la receta, luego homee Los
resultados de esta "prueba" le deberfan dar una
idea de cu_nto se deberfa cambiar la temperalura
(_ 1. Empuje y sujete los botones
BAKE y BROIL para 3
+ segundos, hasta que el dial
muestre SF,
2. Empuje el bot6n BAKE Un
numero puesto en f_brica de dos
dfgitos aparecerb en el dial,
generafmente oo
Si piensa que el homo no
est_ suficientemente
caliente,
3a. Empuje el bot6n con la fetcha
UP TEMP para aumentar (+) la
temperatura hasta +35°F si usted
cree que el homo no est_
funcionando Io suficientemente
caliente, o
Si piensa que el homo est_
dernasiado caliente,
3b. Empuje el botdn con la ffecha
DOWN TEMPpara bajar (-) la
temperatura hasta -35°F Si
cree que el hornoestb
funcionando demasiado
caliente
4. Empuje el bot6n START
Este aumento o disminuici6n en fa posici6n de la
temperatura permanecer9 en la memoda hasta
que los pasos de arriba sean repetidos Un corte
de corriente no afectar_ esta posicir_n
Las temperaturas para asar a la parrilla o para la
autolimpieza no ser_n afectadas
21

Parapartesdereparacionesode
reemplazoquenecesita
Llamede7am- 7pm,7dfasalasemana
t °800o366oPA
(1-800-366-7278)
Parareparacionesyserviciodernarcas
mayoresensucasa
Llame24 horasaldia,7 dfasa lasemana
1.800-4-R
ParaubicarunCentrodeServicio de
Reparacionesensu_rea
Llame24 horasaldia,7 diasa lasemana
1-800-488-,t
BE]
ParainformacionesacercadeContratosde
MantencionSearso parapreguntasacerca
deunContratoexistente
Llamede 9 am- 5 pm, Lunes-Sdbado
Losespecialbtas dereparacbnes deAmerica
22

GARANTIA
p-
f "-,
Estlmado clients:
Nuestros esfuerzos
constantes estdn
dlrigldos a asegurar
qua su nueva Horno
Kenmore llegue a su
hogar en perfectas
cond|clones y le d_ el
servlcio adecuado.
CoreD parts de estos
esfuerzos, sentimos
qua es responsab|lldad
nuestra proporcionarie
esta garantla para su
homo_
I=,I,,,,,M,, ,1=,H,, ,.== .........................
TODO UH A[_O DE GARANTIA COMPLETA PARA LAS FUHCIONE$ DE
TODAS LAs PARTES EXCEPTO LAS DE VIDRIO
St, dentro del tapso de ua a_o a partir de la fecha de |nstalaci6n, c_alquter parle que no
sea de vidrio, funciona real debido aun defecto en el matertal o en iama no de obra, Sears
fa reparard o la reemplazard, sin costo aiguno.
GARANTIA TOTAL DE 30 DIAS PARA LAS PARTES DE VIDRIO Y EL
ACABADO DE ESMALTE PORCELANIZADO, PARTES DE METAL PINTADO
O BRILLANTE
St_dentro de los treinla diaa poateriores ala instalacl6n, cuatquier parts de vidrto o el
acabado de cualquier esmalte procelanizado o parts de metal pintado o briliante liens
defectos en el materlat o mend de obra, Sears reemplazar_ |a perle, sin eosto aiguno.
GARANTIA TOTAL DE 90 DIAS EN AJUSTES MECANICOS
Duranle 90 dies e partlr de Is fecha de tnstalacl6n, Sears proporcionar_, sin costo
etguno, euelquler sjuste mec_n_co necesario pare la corrects oper_cl6n de la estu|e,
exceptuando el manten|miento normal°
SI Is estufa estd sujeta a otro uso qua no sea el prtvado familiar, la cobertura de la
garent{a menclonada arriba serd electiVe s61o durante 90 dias.
EL SERVICIO DE GARANTIA ESTA DISPONIBLE CON SOLO PONERSE EN
CONTACTO CON EL CENTRO O DEPARTAMENTO DE SERVIClO SEARS MAS
CERCANO EN LOS ESTADOS UNIDOS.
Eats garantia se splice s61ocuando este producto se use en los Estados Untdos, Esta
garantia )e brinda detaches legates especiflcos, y tsmbl_n puede tener otros derechos
que varfan de un estado o otro
SEARS, ROEBUCK and CO.
Dept. 720PSO
3333 Beverly Road
Hoffman Estates_ IL 60179
..J
LE DAMOS SERVICIO A LO QUE VEHDEMOS
"Le demos servlcio a Io qua vendemos" es la manera de asegurarie qua puede depender de Sears pare el servtcfo porque
el serviclo Sears se ofrecs en todD e| pals.
Su Homo Kenmore t|sne un valor agregado cuando usted considers qua Sears poses una unidad de ssrv|c|o cerca de
ustsd, qua cuenta con un equipo Sears de tdcntcos capacitados _• .t_cnicos profesionales especlficamente enlrenados
para mane Jar los aparatos Sears, y que tienen acceso a las partes, herramientas y equipo pare asegurar qua cumplamos
nuestro compromiso con usted: "iLe damos sarvicio a Io qua vendemos!"
PARA AMPLIAR EL VALOR DE SU ESTUFA_ COMPRE UN CONTRATO DE MANTENIMIENTO SEARS.
Las Homo Kenmore estdn dtse_adas, fabricadas
y probadas para brlndarte afios de operaci6n
conflab!e. Stn embargo_ cualquier aparato
moderno puede requerir de elgin servtc|o de vez
an cuando. L3 garantia S_ars, adem_s dsl contrato
de Manten|mlento Sears Is brlndan protecctbn
contra cuentas de reparaciones Inesperadas y le
aseguran qua d|sfrute de |a m_xlms eflciencla en
hornos,
He aqui una garantla comparative y una table de!
contrato de Man tenlm|snto qua te muestra tos
beneficfos de un contrato Mantsnlmiento Sears
para Hornos.
Ahosde coborturade laprop;edecf
1 Roompiazodep_rtesdefectuosas
quenose;zndeporcelanao vtdrto
2 AJ°,,ornoc_nt¢o
3 Patiosdeporcotanay vidr|o
Revistd,nanus]demanlonfmtonto
prevo_tlvoasoltc[tuddeusted
1Drat_o 2_aho 3ora_o
G AM AM
90 DAYS
G AM AM
30DAYS ;
G AM AM
AM AM AM
G ,=GrJmnt(a AM ' Contm_o de Me*r;_a_lml0t*t0
PONGASE EN CONTACTO CON SU VENDEDOR DE SEARS O CON EL CENTRO DE SERVICIO SEARS DE
LA LOCALIDAD HOY MISMO Y COMPRE UN CONTRATO DE MANTENIMIENTO SEARS.
Kenmo e Lamarca_eaparatose,ectrodom_sticosde
mayor venta en America
Vendida pot SEARS, R(}EI3UCK AND CO., Chicago, IL 60684
_lmpreso en Los Estados Unidos
-
 1
1
-
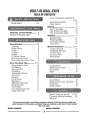 2
2
-
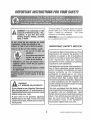 3
3
-
 4
4
-
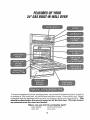 5
5
-
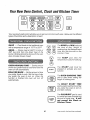 6
6
-
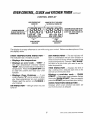 7
7
-
 8
8
-
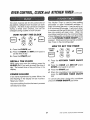 9
9
-
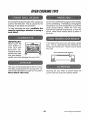 10
10
-
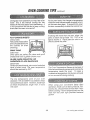 11
11
-
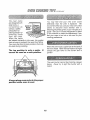 12
12
-
 13
13
-
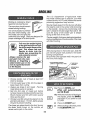 14
14
-
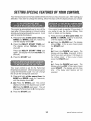 15
15
-
 16
16
-
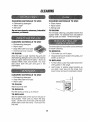 17
17
-
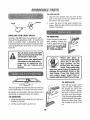 18
18
-
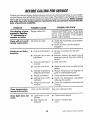 19
19
-
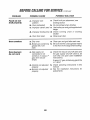 20
20
-
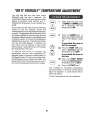 21
21
-
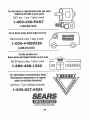 22
22
-
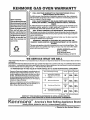 23
23
-
 24
24
-
 25
25
-
 26
26
-
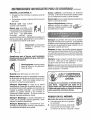 27
27
-
 28
28
-
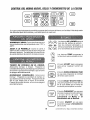 29
29
-
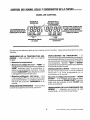 30
30
-
 31
31
-
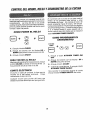 32
32
-
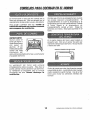 33
33
-
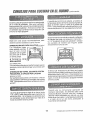 34
34
-
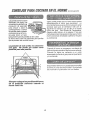 35
35
-
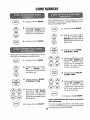 36
36
-
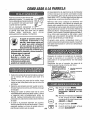 37
37
-
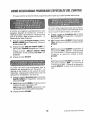 38
38
-
 39
39
-
 40
40
-
 41
41
-
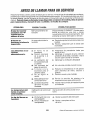 42
42
-
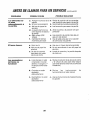 43
43
-
 44
44
-
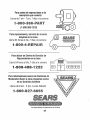 45
45
-
 46
46


Kenmore 911.30169690 El manual del propietario
- Tipo
- El manual del propietario
- Este manual también es adecuado para
en otros idiomas
- English: Kenmore 911.30169690 Owner's manual
Artículos relacionados
-
Kenmore 91147465791 El manual del propietario
-
-
-
-
Kenmore 911.47466 Manual de usuario
-
-
-
-
-