Yamaha DVD-S661 El manual del propietario

Categoría
Reproductores de DVD
Tipo
El manual del propietario
i
DVD PLAYER
P
DVD-S661
1
To assure the finest performance, please read this manual
carefully. Keep it in a safe place for future reference.
2 Install this unit in a well ventilated, cool, dry, clean
place — away from direct sunlight, heat sources,
vibration, dust, moisture, or cold. In a cabinet, allow
about 2.5 cm (1 inch) of free space all around this unit
for adequate ventilation.
3 Locate this unit away from other electrical appliances,
motors, or transformers to avoid humming sounds.
4 Do not expose this unit to sudden temperature changes
from cold to hot, nor locate this unit in an environment
with high humidity (i.e., a room with a humidifier) to
prevent condensation inside this unit, which may cause
an electrical shock, fire, damage to this unit, and/or
personal injury.
5 Avoid installing this unit in a location where foreign
objects may fall onto this unit or where this unit may be
exposed to liquid dripping or splashing. On the top of
this unit, do not place:
Other components, as they may cause damage
and/or discoloration on the surface of this unit.
Burning objects (i.e., candles), as they may cause
fire, damage to this unit, and/or personal injury.
Containers with liquid in them, as they may fall,
spilling the liquid and causing an electrical shock
to the user and/or damage to this unit.
6 Do not cover this unit with a newspaper, tablecloth,
curtain, etc. in order not to obstruct heat radiation. If the
temperature inside this unit rises, it may cause fire,
damage to this unit, and/or personal injury.
7 Do not plug in this unit to a wall outlet until all
connections are complete.
8 Do not operate this unit upside-down. It may overheat,
possibly causing damage.
9 Do not use excessive force on switches, knobs and/or
cords.
10 When disconnecting the power cord from the wall
outlet, grasp the plug; do not pull the cord.
11 Do not clean this unit with chemical solvents; this
might damage the finish. Use a clean, dry cloth.
12 Use only the voltage specified on this unit. Using this
unit with a higher voltage than specified is dangerous
and may cause fire, damage to this unit, and/or personal
injury. Yamaha will not be held responsible for any
damage resulting from use of this unit with a voltage
other than as specified.
13 Do not attempt to modify or fix this unit. Contact
qualified Yamaha service personnel when any service is
needed. The cabinet should never be opened for any
reason.
14 When not planning to use this unit for long periods of
time (i.e., vacation), disconnect the AC power plug
from the wall outlet.
15 Be sure to read the “Troubleshooting” section on
common operating errors before concluding that this
unit is faulty.
16 Before moving this unit, press STANDBY/ON to set
the unit in standby mode, then disconnect the AC power
plug from the wall outlet.
17 Install this unit near the AC outlet and where the AC
power plug can be reached easily.
18 The batteries shall not be exposed to excessive heat
such as sunshine, fire or the like.
LASER SAFETY
This unit employs a laser. Due to possible eye injury, only a
qualified service person should remove the cover or attempt
to service this device.
DANGER
This unit emits visible laser radiation when open. Avoid
direct eye exposure to beam.
When this unit is plugged into a wall outlet, do not place
your eyes close to the opening of the disc tray and other
openings or look inside.
CAUTION: READ THIS BEFORE OPERATING THIS UNIT.
The unit is not disconnected from the AC power source
as long as it is connected to the wall outlet, even if this
unit itself is turned off. This state is called the standby
mode. In this state, this unit is designed to consume a
very small quantity of power.
WARNING
TO REDUCE THE RISK OF FIRE OR ELECTRIC
SHOCK, DO NOT EXPOSE THIS UNIT TO RAIN OR
MOISTURE.
CAUTION
Use of controls or adjustments or performance of
procedures other than those specified herein may result
in hazardous radiation exposure.
AVOID DIRECT EXPOSURE TO THE BEAM
INVISIBLE LASER RADIATION WHEN OPEN
DANGER:
DO NOT STARE INTO BEAM
INVISIBLE LASER RADIATION WHEN OPEN
CAUTION:
Contents
English
1 En
Introduction ..................................3
Supplied accessories .................................3
Region codes ..............................................3
Playable disc formats .................................3
Cleaning discs .............................................4
Patent information ...................................... 4
Functional Overview ....................5
Front panel ..................................................5
Rear panel .................................................... 6
Remote control ............................................7
Connections ..................................8
General notes on connections ..................8
Audio connections ......................................8
Digital connection ..............................................8
Analog connection ..............................................8
Video connections ......................................9
Component video jacks <A> ..............................9
S-video jack <B> ................................................9
Composite video jack <C> .................................9
HDMI connection ....................................... 10
HDMI jack ........................................................10
Other connections ....................................11
USB port ...........................................................11
Remote control jacks ........................................11
Getting Started ...........................12
Step 1: Inserting batteries into
the remote control ....................................12
Using the remote control ..................................12
Step 2: Turning on the power ..................12
Step 3: Setting a TV type/display and
language ....................................................13
Setting a color system for your TV ..................13
Setting an aspect ratio for your TV ..................13
Setting the OSD language ................................14
Setting the audio, subtitle and disc menu
languages (DVD-Video only) ..........................14
Playback Operation ................... 15
Basic operation ......................................... 15
Selecting a track/chapter ..................................15
Searching backward/forward ...........................15
Repeat/Shuffle functions ......................... 15
Repeat/Shuffle playback ..................................15
Repeating a section within a chapter/track ......16
Operations for video playback
(DVD/VCD/SVCD) ...................................... 16
Using the disc menu .........................................16
Playback in slow motion ..................................16
Zooming pictures in/out ...................................16
Resuming playback from the last
stopped point ....................................................16
Using the on-screen display (OSD) .................17
Special DVD features ............................... 18
Playing by title .................................................18
Selecting an audio language/format
and subtitle language ........................................18
Special VCD/SVCD features ..................... 18
Using the playback control (PBC) menu .........18
Playing data discs (MP3/WMA/
JPEG/DivX) ................................................ 18
Selecting a folder and track/file .......................19
Special picture disc features ................... 19
Using the preview function ..............................19
Zooming pictures in/out ...................................19
Playback with multi-angles ..............................20
Playing MP3 music and JPEG picture
simultaneously .................................................20
Special DivX features ............................... 20
Using the interactive menu ..............................20
Selecting an audio/subtitle language ................20
Using a USB device .................................. 21
Supported USB devices ...................................21
Playing data files ..............................................21
Contents
Contents
2 En
Setup Menu .................................22
General setup menu .................................22
Locking/Unlocking the disc for viewing ..........22
Dimming the front panel display ......................22
Programming disc tracks (except MP3/
WMA/JPEG/DivX) ..........................................22
OSD language ..................................................23
Setting the screen saver ....................................23
Setting the sleep timer ......................................24
Setting the auto standby function .....................24
Displaying the DivX
®
VOD
registration code ...............................................24
Audio setup menu .....................................24
Setting the analog output ..................................25
Setting the digital output ..................................25
Turning the HDMI audio on/off .......................25
Turning the night mode on/off .........................26
Setting the lip synchronization .........................26
Video setup menu .....................................26
TV type .............................................................26
Setting the TV display ......................................27
Turning the progressive scan function on/off
...27
Adjusting picture settings .................................28
Setting the HDMI video ...................................29
Preference setup menu ............................30
Audio, subtitle and disc menu ..........................30
Restricting playback with parental control .......30
Selecting playback of VR format .....................30
Selecting the MP3/JPEG menu ........................31
Displaying DivX external subtitle files ............31
Selecting the PBC (playback control)
function .............................................................32
Changing the password ....................................32
Resetting the system .........................................32
Language Codes ........................ 33
Troubleshooting ......................... 34
Glossary ...................................... 37
Specifications ............................. 39
3 En
Introduction
English
Thank you for purchasing this unit. This
owner’s manual explains the basic operation
of this unit.
This manual is printed prior to production.
Design and specifications are subject to
change in part as a result of improvements,
etc. In case of differences between the manual
and the product, the product has priority.
Remote control
Two batteries (AAA, R03, UM-4) for the
remote control
Audio/Video pin cable
Owner’s manual
This unit is designed to support the region
management system. Check the regional code
number on the DVD disc package. If the
number does not match the region code of this
unit (see the table below or the back of this
unit), this unit may be unable to play the disc.
This unit can play the disc types associated
This unit is designed for use with discs having
the logos shown below. Do not attempt to load
any other type of disc into this unit.
This unit can play:
DVD-R/RW/R DL and DVD+R/RW/R DL
discs recorded in DVD-Video compatible
format
DVD-RW discs recorded in VR format
(compatible with CPRM)
MP3, WMA and JPEG files recorded on
CD-R/RW, DVD-R/RW, DVD+R/RW and
USB
KODAK picture CDs, FUJICOLOR CDs
ISO 9660 Level1/Level2 for CD-R/RW
Up to 298 folders per disc/USB device and up
to 648 files per folder with up to 8 hierarchies
•DivX
®
files recorded on CD-R/RW,
DVD-R/RW, DVD+R/RW and USB
Official DivX
®
Ultra Certified product
Plays all versions of DivX
®
video (including
DivX
®
6) with enhanced playback of DivX
®
media files and the DivX
®
Media Format
CD-R/RW, DVD-R/RW
/R DL
and DVD+R/RW
/
R DL
cannot be played unless finalized.
Progressive JPEG and copyright-protected WMA
files cannot be played with this unit.
Only the first session of DVD-R/RW
/R DL and
DVD+R
/R DL
can be played.
Some discs cannot be played depending on disc
characteristics or recording conditions.
Do not use any non-standard shaped discs
(heart-shaped, etc.).
Do not use discs with tape, seals, paste or many
scratches on their surface.
For details about playable formats, see
“Specifications” on page 39.
Supplied accessories
Region codes
Destination
Region
code of
this unit
Playable
discs
U.S.A.,
Canada
U.K.,
Europe
Asia,
Korea
Australia,
Central and
South America
1
1
ALL
2
2
ALL
3
3
ALL
4
4
ALL
Playable disc formats
Notes
Introduction
4 En
Introduction
When a disc becomes dirty, clean it with a cleaning cloth. Wipe the disc from the center out.
Do not wipe in a circular motion.
Do not use solvents such as benzine, thinner, commercially available cleaners, or antistatic
spray intended for analog records.
Manufactured under license from Dolby Laboratories. “Dolby”, “Pro Logic” and the double-D symbol are
trademarks of Dolby Laboratories.
“DTS” and “DTS Digital Out” are registered trademarks of DTS, Inc.
DivX, DivX Ultra Certified, and associated logos are trademarks of DivX, Inc. and are used under license.
HDMI, the HDMI logo and High Definition Multimedia Interface are trademarks or registered trademarks of
HDMI Licensing LLC.
Cleaning discs
Patent information
This product incorporates copyright protection technology that is protected by method claims of certain
U.S. patents and other intellectual property rights owned by Macrovision Corporation and other rights
owners. Use of this copyright protection technology must be authorized by Macrovision Corporation, and
is intended for home and other limited viewing uses only unless otherwise authorized by Macrovision
Corporation. Reverse engineering or disassembly is prohibited.
5 En
Functional Overview
English
1 STANDBY/ON
Turns on this unit or sets it to the standby mode.
2 Disc tray
Loads a disc in the disc tray.
3 OPEN/CLOSE ( )
Opens or closes the disc tray.
4 HDMI indicator
Lights up when an HDMI component is
connected, and signals output via the HDMI
jack of this unit.
5 PROGRESSIVE indicator
Lights up when this unit enters the progressive
mode.
6 Front panel display
Shows the current status of this unit.
7 PLAY ( p )
Starts playback.
8 PAUSE ( )
Pauses playback.
9 STOP ( s )
Stops playback.
0 USB port
Connect to the USB port of your USB device
(see page 11).
Front panel
1 2354 6 7 8 9 0
Functional Overview
6 En
Functional Overview
1 AC power cable
Plug the power cable into the AC wall outlet.
2 REMOTE CONTROL (IN, OUT) jacks
Connect the REMOTE CONTROL (IN) jack of
this unit to the remote control output jack of
your Yamaha AV receiver.
Connect the REMOTE CONTROL (OUT) jack
of this unit to the remote control input jack of
your Yamaha component (see page 11).
3 HDMI jack
Connect to the HDMI input jack of your HDMI
component (see page 10).
4 AUDIO OUT (L, R) jacks
Connect to the audio input jacks of your AV
receiver or stereo system (see page 8).
5 DIGITAL OUT - COAXIAL jack
Connect to the coaxial input jack of your AV
receiver (see page 8).
6 VIDEO OUT - COMPONENT (Y, PB, PR)
jacks
Connect to the component input jacks of your
AV receiver (see page 9).
7 VIDEO OUT - S VIDEO jack
Connect to the S-video input jack of your AV
receiver (see page 9).
8 VIDEO OUT - VIDEO jack
Connect to the composite video input jack of
your AV receiver (see page 9).
Caution: Do not touch the inner pins of the jacks on the rear panel of this unit.
Electrostatic discharge may cause permanent damage to this unit.
Rear panel
REMOTE CONTROL
OUT
HDMI
AUDIO OUT
COMPONENT VIDEO
S VIDEOCOAXIAL
P
R
PB
Y
VIDEO OUTDIGITAL OUT
IN
14567832
7 En
Functional Overview
English
1
Turns on this unit or sets it to the standby mode.
2 TOP MENU/RETURN
Displays the top-level disc menu (DVD).
Moves back to the previous menu (DVD*/VCD)
(see page 18).
3 2 / 3 /5 /a
Selects an item in the currently displayed menu.
Search or slow playback.
ENTER
Confirms the menu selection.
4 MENU
Displays the menu of a disc (DVD/JPEG)
(see pages 16, 18, 19 and 20).
Switches PBC on or off (VCD) (see page 18).
5 l22
Moves to the previous chapter or track.
Searches backward.*
6
7
Stops playback.
Opens the disc tray.*
7 Numeric buttons (0-9)
Selects numbered items in the currently
displayed menu.
8 SUBTITLE
Selects the subtitle language (see pages 18 and
20).
9 ZOOM
Enlarges the video image (see pages 16 and 19).
0 ON SCREEN
Accesses or exits from the on-screen display
(OSD) menu of this unit (see page 17).
q SET UP
Accesses or exits from the setup menu of this
unit (see pages 13 and 22).
w 33l
Moves to the next chapter or track.
Searches forward.*
e 3 / 8
Starts or pauses playback.
r USB
Accesses the contents of the connected USB
device or exits from the USB mode (see
page 21).
t AUDIO
Selects the audio language or format (see
pages 18 and 20).
y REPEAT
Accesses or exits from the repeat/shuffle mode
(see page 15).
u REPEAT A-B
Repeats a specific segment (see page 16).
* Press and hold the button for about two seconds.
Remote control
1
2
3
u
y
t
r
e
w
q
0
5
6
7
8
9
4
8 En
Connections
Be sure to turn off this unit and unplug the
power cable before you make or change
connections.
Depending on the component you want to
connect, there are various ways to make
connections. Possible connections are
described below.
Refer to the manuals supplied with your
other components as necessary to make the
best connections.
Do not connect this unit via your VCR. The
video quality could be distorted by the copy
protection system.
Do not connect the audio out jack of this unit
to the phono in jack of your audio system.
Digital connection
This unit has a digital coaxial output jack.
Connect the DIGITAL OUT - COAXIAL jack
of this unit to your AV receiver equipped with
a Dolby Digital, DTS, or MPEG decoder
using a commercially available coaxial cable.
You need to set [DIGITAL OUTPUT] to [ALL]
(see “DIGITAL OUTPUT” on page 25).
If the audio format of the digital output does not
match the capabilities of your receiver, the
receiver produces a distorted sound or no sound
at all. Make sure to select the appropriate audio
format from the menu screen on the disc.
Pressing AUDIO on the remote control once or
more may change not only the audio languages
but also the audio format. The selected format
appears in the front panel display for several
seconds.
If you want to enjoy Dolby Digital, DTS and
MPEG formats, you must connect this unit to an
AV receiver that supports these formats.
Analog connection
This unit has 2-ch analog output jacks.
Connect the AUDIO OUT (L, R) jacks of this
unit to the corresponding input jacks of your
audio component (such as a stereo amplifier)
using the supplied audio pin cable.
General notes on connections
Audio connections
AUDIO OUT
COMPONENT VIDEO
S VIDEOCOAXIAL
P
R
PB
Y
VIDEO OUTDIGITAL OUT
C
C
This unit
AV receiver
Speakers
Notes
AUDIO OUT
COMPONENT VIDEO
S VIDEOCOAXIAL
P
R
PB
Y
VIDEO OUTDIGITAL OUT
L
R
L
R
R
L
This unit
Stereo
amplifier
Audio pin cable
(supplied)
Speakers
Connections
9 En
Connections
English
If your AV receiver has video output jacks,
connect your receiver and then your TV so
that you can use one TV for several different
video sources (LD, VCR, etc.) by simply
switching the input source selector of your
receiver.
This unit has several types of video output
jacks. Use the one that corresponds to the
input jacks of the component to be connected.
Component video jacks <A>
Component video connections achieve higher
fidelity color reproduction than S-video
connections by transmitting video signals on
separate wires for luminance (Y: green) and
chrominance (P
B: blue, PR: red).
Connect the VIDEO OUT - COMPONENT
(Y, PB, PR) jacks of this unit to component
input jacks of your AV receiver and then to
those of your TV using a commercially
available component cable. Observe the color
of each jack when you make connections.
If your receiver does not have component
output jacks, you can achieve a better video
image by connecting the component output
jacks of this unit directly to the component
input jacks of your TV.
S-video jack <B>
S-video connections achieve a clearer picture
than composite video connections by
transmitting video signals on separate wires
for luminance (Y) and chrominance (C).
Connect the VIDEO OUT - S VIDEO jack of
this unit to an S-video input jack of your AV
receiver and then to that of your TV using a
commercially available S-video cable.
Composite video jack <C>
Connect the VIDEO OUT - VIDEO jack of
this unit to a video input jack of your AV
receiver and then to that of your TV using the
supplied video pin cable.
Video connections
AUDIO OUT
COMPONENT
VIDEO
S VIDEOCOAXIAL
P
R
PB
Y
VIDEO OUTDIGITAL OUT
VIDEO
OUT
VIDEO
IN
S VIDEO
OUT
COMPONENT
VIDEO OUT
COMPONENT
VIDEO IN
S VIDEO
IN
COMPONENT
VIDEO IN
S VIDEO
INPUT
VIDEO
INPUT
<C><B><A>
YPBPR
PR
Y
PB
PR
Y
PB
S
V
S
V
Video pin
cable
(supplied)
AV receiver
TV
This unit
10 En
Connections
HDMI jack
HDMI provides high quality digital audio and
video on a single connection.
Connect the HDMI jack of this unit to an
HDMI input jack of your AV receiver, and
then to that of your TV using a commercially
available HDMI cable.
If your receiver does not have an HDMI input
jack, you can achieve a better video image by
connecting the HDMI jack of this unit directly
to the HDMI input jack of your TV.
This unit can display High-Definition JPEG
images (720p or 1080i) when you connect this
unit to an HDTV via the HDMI jack. For
details, see “HD JPEG” on page 29.
You need to set [HDMI AUDIO] (see page 25)
and [HDMI VIDEO] (see page 29).
You need to make an appropriate audio
connections if the connected component does not
output audio signals (see “Audio connections” on
page 8).
This unit is not compatible with HDCP-
incompatible HDMI or DVI components.
You need a commercially available HDMI/DVI
conversion cable when you connect this unit to
other DVI components. In this case, the HDMI
jack of this unit does not output any audio
signals.
Depending on the connected DVI component,
black and white in the image may not be distinct.
In that case, adjust the picture setting of the
connected DVI component.
Do not disconnect or turn off the power of the
HDMI/DVI component connected to the HDMI
jack of this unit while data is being transferred.
Doing so may disrupt playback or cause noise.
When connecting an HDMI component, refer to
the manual supplied with your component.
HDMI connection
AUDIO OUT
COMPONENT VIDEO
HDMI
S VIDEOCOAXIAL
P
R
PB
Y
VIDEO OUT
DIGITAL OUT
HDMI IN
HDMI OUT
HDMI IN
HDMI cable
TV
This unit
AV receiver
Notes
11 En
Connections
English
USB port
This unit has a USB port and can access MP3,
WMA, DivX and JPEG files saved on your
USB device.
Connect the USB port on the front panel of
this unit to a USB port of your USB device.
This unit may not recognize some USB devices.
For details about the USB features, see “Using a
USB device” on page 21.
Remote control jacks
This unit has remote control input/output
jacks. If your AV receiver is a Yamaha product
and has the capability to transmit of SCENE
control signals, you can use the SCENE
function.
Connect the REMOTE CONTROL (IN) jack
of this unit to a remote control output jack of
your receiver using a commercially available
monaural mini-jack cable so that this unit
starts playback automatically by simply
pressing a button of your receiver.
For details about the SCENE function, refer to the
owner’s manual supplied with your Yamaha AV
receiver.
Other connections
Notes
This unit
USB
device
Note
REMOTE CONTROL
OUT
HDMI
IN
REMOTE OUT
This unit
AV receiver
12 En
Getting Started
1 Open the battery compartment.
2 Insert the two supplied batteries (AAA,
R03, UM-4) following the indications
(+/–) inside the compartment.
3 Close the cover.
Insert batteries correctly according to the polarity
markings (+/–). Batteries inserted in the opposite
orientation may leak.
Replace the exhausted batteries immediately with
new ones to prevent leakage.
Remove the batteries from the compartment if the
remote control is not used for more than a month.
If the batteries have leaked, dispose of them
immediately. Avoid touching the leaked material
or letting it come into contact with clothing, etc.
Clean the battery compartment thoroughly before
installing new batteries.
Do not use old batteries together with new ones.
Do not use different types of batteries (such as
alkaline and manganese batteries) together. Read
the packaging carefully as these different types of
batteries may have the same shape and color.
Dispose of the batteries correctly in accordance
with your local regulations.
Using the remote control
Use the remote control within 6 m of this unit
and point it toward the remote control sensor.
Do not spill water or other liquids on the remote
control.
Do not drop the remote control.
Do not leave or store the remote control in the
following types of conditions:
places of high humidity, such as near a bath
places of high temperature, such as near a
heater or stove
places of extremely low temperature
dusty places
When the remote control works unstably, point it
at an angle upward to the sensor.
1 Plug the power cable into the AC outlet.
2 Turn on your TV and AV receiver.
3 Select the appropriate input source of the
AV receiver (refer to the manual supplied
with your AV receiver).
4 Press STANDBY/ON on the front panel or
on the remote control to turn on this
unit.
The front panel display lights up.
5 Set the TV to the correct video input (refer
to the manual supplied with your TV).
The default screen appears on the TV.
Step 1: Inserting batteries into
the remote control
Notes
2
1
3
2
Notes
Step 2: Turning on the power
Within 6 m
Getting Started
13 En
Getting Started
English
You can customize this unit using the setup
menu displayed on the TV screen.
Unless stated otherwise, all operations described
here are carried out using the supplied remote
control.
To return to the previous menu, press 2 .
To exit from the menu, press SET UP.
Setting a color system for your TV
This unit is compatible with both NTSC and
PAL video formats. Select the color system
that matches your TV.
1 Press SET UP.
2 Press 3 repeatedly to select “VIDEO
SETUP PAGE”.
3 Press 5 /a to highlight [TV TYPE], and
then press 3.
4 Press 5 /a to highlight one of the
following options.
PAL
Select this if the connected TV is a PAL
system TV. It will change the video signals of
NTSC discs and output them in PAL format.
NTSC
Select this if the connected TV is an NTSC
system TV. It will change the video signals of
PAL discs and output them in NTSC format.
MULTI
Select this if the connected TV is compatible
with both NTSC and PAL formats (such as a
multi-system TV).
The output format will be in accordance with
the video signals of the disc.
5 Select an item, and then press ENTER.
Before changing the current TV standard setting,
ensure that your TV supports the selected TV
type.
If the picture is not displayed properly on your
TV, wait for 15 seconds for this unit to activate
automatic recovery.
When making HDMI connections, you cannot
change or select [TV TYPE].
Setting an aspect ratio for your TV
You can set the aspect ratio of this unit to
match your TV. If the aspect ratio of your TV
is 4:3, you do not need to change this setting.
If you have a widescreen TV, change this
setting according to the procedure below.
For details, see “Setting the TV display” on
page 27.
Step 3: Setting a TV type/display
and language
Notes
VIDEO SETUP PAGE
TV TYPE PAL
TV DISPLAY NTSC
PROGRESSIVE MULTI
PICTURE SETTING
HDMI SETUP
Notes
CHANGING NTSC TO PAL :
1. ENSURE THAT YOUR TV SUPPORTS
PAL STANDARD.
2. IF THERE IS A DISTORTED PICTURE
DISPLAYED ON THE TV, WAIT 15
SECONDS FOR AUTO RECOVER.
OK CANCEL
14 En
Getting Started
1 Press SET UP.
2 Press 3 repeatedly to select “VIDEO
SETUP PAGE”.
3 Press 5 /a to highlight [TV DISPLAY],
and then press 3.
4 Press 5 /a to highlight [16:9], and then
press ENTER.
Setting the OSD Language
You can select your own preferred language
for the setup menu. This setting remains once
selected.
1 Press SET UP.
2 Press 2 / 3 to select “GENERAL SETUP
PAGE”.
3 Press 5 /a to highlight [OSD
LANGUAGE], and then press 3.
4 Press 5 /a to select a language, and then
press ENTER.
Setting the audio, subtitle and disc
menu languages (DVD-Video only)
You can select your own preferred language
for the audio, subtitle and disc menu. This unit
automatically switches to the selected
language whenever you load a disc. If the
selected language is not available on the disc,
the default language of the disc will be used
instead.
1 Press
7
twice, and then press SET UP.
2 Press 3 repeatedly to select
“PREFERENCE PAGE”.
3 Press 5/a to highlight one of the options
below, and then press 3 .
AUDIO (audio language)
SUBTITLE (subtitle language)
DISC MENU (disc menu language)
4 Press 5/a to select a language, and then
press ENTER.
5 Repeat steps 3-4 for other language
settings.
To select a language not in the list
1 Select [OTHERS] in [AUDIO] or
[SUBTITLE] or [DISC MENU].
2 Use the numeric buttons (0-9) to enter
the 4-digit language code (see “Language
Codes” on page 33), and then press
ENTER.
VIDEO SETUP PAGE
TV TYPE
TV DISPLAY 4:3 PAN SCAN
PROGRESSIVE 4:3 LETTER BOX
PICTURE SETTING 16:9
HDMI SETUP
GENERAL SETUP PAGE
DISC LOCK
DISPLAY DIM
PROGRAM
OSD LANGUAGE ENGLISH
SCREEN SAVER ESPAÑOL
SLEEP PORTUGUÉS
AUTO STANDBY
DIVX(R) VOD CODE
PREFERENCE PAGE
AUDIO ENGLISH
SUBTITLE CHINESE (SIMP)
DISC MENU FRENCH
PARENTAL SPANISH
VR LIST PORTUGUESE
MP3/JPEG NAV POLISH
DIVX SUBTITLE ITALIAN
PBC TURKISH
15 En
Playback Operation
English
If the prohibited icon ( ) appears on the TV
screen when a button is pressed, the function for
that button is not available on the current disc or
at the current time.
Unless stated otherwise, all operations described
here are carried out using the supplied remote
control.
Depending on the disc, some operations may
operate differently or be restricted. Refer to the
instruction supplied with the disc.
Do not push on the disc tray or put any objects
other than discs on the disc tray. Doing so may
cause this unit to malfunction.
1 Make sure this unit is turned on.
2 Press OPEN/CLOSE ( ) on the front
panel to open the disc tray.
3 Place the disc in the disc tray with the
printed side up.
4 Press OPEN/CLOSE ( ) again to close
the disc tray.
After recognizing the disc, this unit
starts playback automatically.
If you press 3
/ 8 when the disc tray is
open, the disc tray closes and playback
starts automatically.
5 To pause playback, press 3 / 8 during
playback.
Playback is paused and the sound is
muted.
Frame-by-frame playback can be done
by pressing PAUSE (
) on the front
panel repeatedly.
6 To resume normal playback, press 3 / 8
again.
7 To stop playback, press
7
.
Selecting a track/chapter
1 Press l22 / 33l or use the numeric
buttons (0-9) to select a track/chapter
number.
2 During repeated playback, press l22 /
33l to replay the same track/chapter.
Searching backward/forward
1
Press and hold l22 / 33l or press 2 / 3.
2 While searching, press l22 / 33l or
2 / 3 repeatedly to select the desired
speed.
3 To resume normal playback, press 3 / 8 .
•The 2 / 3 key may not be available with some
discs.
For MP3 and WMA, the search function allows
you to search the track currently being played.
Repeat/Shuffle playback
Each time you press REPEAT during
playback, the front panel display changes
as follows:
DVD
RPT ONE (repeat chapter)
RPT TT (repeat title)
RPT ALL (repeat all)
SHUFFLE (shuffle)
RPT SHF (shuffle repeat)
RPT OFF (repeat off)
VCD/SVCD/CD
RPT ONE (repeat track)
RPT ALL (repeat all)
SHUFFLE (shuffle)
RPT SHF (shuffle repeat)
RPT OFF (repeat off)
Notes
Basic operation
Notes
Repeat/Shuffle functions
Playback Operation
16 En
Playback Operation
MP3/WMA/DivX
RPT ONE (repeat track)
RPT FLD (repeat folder)
SHUFFLE (shuffle)
RPT OFF (repeat off)
For VCD, repeat playback is not available when the
PBC mode is on.
Repeating a section within a
chapter/track
1
While playing a disc, press REPEAT A-B
at the desired starting point.
“SET A” appears in the front panel
display.
2 Press REPEAT A-B again at the desired
end point.
A and B can only be set within the same
chapter/track.
“RPT AB” appears in the front panel
display and the selected section repeats
continuously.
3 To exit from the sequence, press REPEAT
A-B.
Using the disc menu
Depending on the disc, a menu may appear on
the TV screen once you load the disc.
To select a playback feature or item
Use 2 / 3 /5 /a or the numeric
buttons (0-9), and then press ENTER to
start playback.
To access or exit from the menu
Press MENU.
Playback in slow motion
You can play back video in slow motion.
1 Press 5 for reverse slow motion or a for
forward slow motion.
2 During slow motion, press 5/a repeatedly
to select the desired speed.
3 To resume normal playback, press 3 / 8 or
ENTER.
For VCD and SVCD, reverse slow motion is not
available.
Zooming pictures in/out
You can enlarge or shrink the picture on the
TV screen and pan through the enlarged
picture.
1 During playback, press ZOOM repeatedly
to display the picture at different scales.
•Use 2 / 3 /5 /a to pan through the
enlarged picture.
Playback continues.
2 Press ZOOM repeatedly to return to the
original size.
Resuming playback from the last
stopped point
You can resume playback of the last ten discs,
even if the discs were ejected or the power of
this unit was turned off.
1 Load one of the last ten discs.
“LOADING” appears on the TV
screen.
2 Press 3 / 8 while “LOADING” is
displayed on the TV screen.
“RESUME PLAY” appears on the TV
screen and the disc is played back from
the last point.
To cancel the resume mode
When playback is stopped, press
7
again.
Note
Operations for video playback
(DVD/VCD/SVCD)
Note
17 En
Playback Operation
English
Using the on-screen display (OSD)
The OSD menu shows disc playback
information (e.g., the title or chapter number,
elapsed playing time or audio/subtitle
language). A number of operations are
possible without interrupting disc playback.
1 During playback, press ON SCREEN.
A list of available disc information
appears on the TV screen.
DVD
VCD/SVCD
2 Press 5 /a to scroll the information, and
then press ENTER to access the selected
item.
3 Use the numeric buttons (0-9) to input
the number/time or press 5 /a to make a
selection, and then press ENTER.
Playback changes to the selected time
or to the selected title/chapter/track.
Title/Chapter/Track selection
(DVD/VCD)
1 Press 5/a to select [TITLE] or
[CHAPTER] (DVD) or [TRACK] (VCD).
2 Press ENTER.
3 Select a title, chapter or track number using
the numeric buttons (0-9).
Time search (DVD/VCD)
1 Press 5/a to select [TT TIME] / [CH
TIME] (DVD) or [TRACK TIME] / [DISC
TIME] (VCD).
[TT TIME] refers to the total time of
the current title, and [CH TIME] refers
to the total time of the current chapter.
2 Press ENTER.
3 Enter hours, minutes and seconds from left
to right using the numeric buttons (0-9)
(e.g. 0:34:27).
Audio/Subtitle/Angle selection
(DVD)
You can change [AUDIO], [SUBTITLE] or
[ANGLE] if these functions are available on
the disc you are playing.
1 Press 5/a to select [AUDIO],
[SUBTITLE] or [ANGLE].
2 Press ENTER.
3 For Audio and Subtitle:
Press 5 /a to highlight your selection, and
then press ENTER.
OR
For Angle:
Select an angle using the numeric
buttons (0-9).
MENU
TITLE 02/14
CHAPTER 02/14
AUDIO 5.1CH
SUBTITLE ENG
BITRATE 16 TITLE ELAPSED 0:02:25
MENU
TRACK 02/14
DISC TIME 0:49:17
TRACK TIME 0:03:43
REPEAT OFF
BITRATE 16 TOTAL ELAPSED 0:02:25
18 En
Playback Operation
Repeat/Time Display (DVD/VCD)
1 Press 5 /a to select [REPEAT] or [TIME
DISP.].
2 Press ENTER.
3 Press 5/a to highlight your selection, and
then press ENTER.
Time display (CD)
Each time you press ON SCREEN, the
time display changes as follows:
Playing by title
1
Press MENU.
The disc title menu appears on the TV
screen.
2 Use 2 / 3/5 /a or the numeric
buttons (0-9) to select a playback option.
3 Press ENTER.
Selecting an audio language/
format and subtitle language
To select an audio language/format
Press AUDIO repeatedly to select an audio
language and/or format.
To select a subtitle language
Press SUBTITLE repeatedly to select a
subtitle language.
Using the playback control (PBC)
menu
For a VCD with a playback control (PBC)
feature (version 2.0 only)
1 Press MENU to toggle between “PBC ON”
and “PBC OFF”.
If you select “PBC ON”, the disc menu
appears (if available) on the TV screen.
2 Use the numeric buttons (0-9) to select
a playback option.
Press l22 / 33l to move to the
previous/next page (if available).
3 During playback, press TOP MENU/
RETURN to return to the menu screen.
To skip the index menu and play
back a disc from the beginning
Press MENU to turn off the PBC function.
1 Load a data disc.
The disc reading time may exceed 30
seconds due to the complexity of the
directory/file configuration.
The data disc menu appears on the TV
screen.
Special DVD features
TOTAL ELAPSED TOTAL REMAIN
SINGLE REMAIN SINGLE ELAPSED
Special VCD/SVCD features
Playing data discs
(MP3/WMA/JPEG/DivX)
00:00 00:00
001/020
Piano
Cello
Jazz
Live
Favorite
MP3
MP3
MP3
MP3
19 En
Playback Operation
English
2 Playback starts automatically. If not, press
3
/ 8 .
3 Press l22 / 33l to select another track/file
in the current folder.
It may not be possible to play certain MP3/
WMA/JPEG/DivX discs due to the configuration
and characteristics of the discs or the recording
conditions.
HD JPEG images may not be displayed correctly
when the first image is displayed or the disc is
ejected. For details about HD JPEG, see “HD
JPEG” on page 29.
Depending on the picture size, HD JPEG images
may appear smaller in size.
Selecting a folder and track/file
1
Press 5 /a to select a folder, and then
press ENTER to open the folder.
2 Press 5 /a to select a track/file.
3 Press ENTER.
Playback starts from the selected file to
the end of the folder.
1 Load a picture disc (JPEG, Kodak Picture
CD or Fujicolor CD).
For JPEG, the picture menu appears on
the TV screen.
For Kodak Picture CD and Fujicolor
CD, the slideshow begins.
For JPEG
2 Press 3 / 8 to start the slideshow.
Using the preview function
This function displays the content of the
current folder or the entire disc.
1 Press
7
during playback.
12 thumbnails appear on the TV screen.
2 Press l22 / 33l to display the other
thumbnails on the previous/next page.
3 Use 2 / 3 /5 /a to highlight one of the
thumbnails, and then press ENTER to start
playback.
OR
Move the cursor to highlight on the
bottom of the page to start playback from
the first thumbnail on the current page.
For JPEG
4 Press MENU to return to the JPEG disc
menu.
Zooming pictures in/out
1 During playback, press ZOOM repeatedly
to display the picture at different scales.
2 Use 2 / 3 /5 /a to pan through the
enlarged picture.
Notes
Special picture disc features
20 En
Playback Operation
Playback with multi-angles
During playback, press 2 / 3/5 /a to
rotate the picture on the TV screen.
2:
rotates the picture counter-clockwise
3: rotates the picture clockwise
5 : flips the picture vertically
a : flips the picture horizontally
For HD JPEG, the 5 /a key is not available.
Playing MP3 music and JPEG
pictures simultaneously
1 Load a disc that contains both MP3 music
and JPEG picture data.
The disc menu appears on the TV
screen.
2 Select an MP3 music track.
3 During MP3 music playback, select a
JPEG picture file from the TV screen, and
then press 3
/ 8 .
The picture files are played back one
after another until the end of the folder.
4 To quit simultaneous playback, press
MENU, and then press
7
.
Some files cannot be played correctly depending
on disc characteristics or recording conditions.
This function is not available when [HD JPEG] is
set to [ON] (see page 29).
DivX files including DMF (DivX Media
Format) features only
Using the interactive menu
1 Load a disc.
The interactive menu appears on the
TV screen.
2 Use 2 / 3 /5 /a to select a chapter.
3 Press ENTER or 3 / 8 to start playback of
the selected chapter.
To access the interactive menu
During playback, press MENU.
To return to the data disc menu
screen
When the interactive menu is displayed,
press
7
.
Selecting an audio/subtitle language
To select an audio language
During playback, press AUDIO to switch
the audio language recorded on the
contents.
To select a subtitle language
During playback, press SUBTITLE to
switch or turn on/off the subtitle language
recorded on the contents.
For information about external subtitle files, see
“Displaying DivX external subtitle files” on
page 31.
Note
Notes
Special DivX features
Note
21 En
Playback Operation
English
You can play back MP3, WMA, JPEG and
DivX files saved on your supported USB
device.
Supported USB devices
This unit supports USB mass storage class
devices (e.g., flash memories, card readers,
portable audio players) using FAT16 or FAT32
format.
Some devices may not work properly even if they
meet the requirements.
If “Device not supported” appears on the TV
screen when you connect the USB device, follow
the procedure below.
Set this unit to the standby mode, and then turn
it on again.
Disconnect the device when this unit is in the
standby mode, then connect it again and turn
on this unit.
Connect the AC adapter if the adapter is
supplied with the device.
If “Device not supported” appears even after you
perform this procedure, the device is not playable
with this unit.
If “USB current protection active. Device not
supported” appears on the TV screen, the device
is not playable with this unit because the power
consumption of the device is too high.
This unit cannot read more than two card reader
slots at once, though it can recognize up to six
slots. The first slot has priority.
For an external hard disk drive, this unit is
compatible with size of 80 GB or less.
Do not connect devices other than USB mass
storage class devices: USB chargers, USB hubs,
PCs, etc.
Playing data files
Yamaha and suppliers accepts no liability for
the loss of data saved on the USB devices
connected to this unit. As a precaution, it is
recommended that the files are tested after
they have been saved on.
1 Connect your USB device to the USB port
of this unit (see “USB port” on page 11).
“Press USB mode key to switch device”
appears on the TV screen.
2 Press USB.
The reading time may exceed 30 seconds
due to the number of files/folders.
The file menu appears on the TV screen.
3
Follow the procedure in “Playing data discs
(MP3/WMA/JPEG/DivX)” on page 18.
To exit from the USB mode
Press
7
to stop playback, and then press
USB.
You cannot access the USB mode while
“LOADING” is displayed on the TV screen.
If you disconnect the USB device or open the disc
tray of this unit, the playback mode is
automatically switched to the disc mode.
For DivX, this unit is compatible with a bit rate
range of 3 Mbps or less.
Some files may not work properly depending on
the USB device specification.
For DivX, the video may freeze shortly or the
sound may break in the segments.
For MP3, the sound may break in the segments
during MP3/JPEG simultaneous playback.
In this case, record the file at a lower bit rate
and/or smaller size so that the file may work
properly.
Copyright-protected files cannot be played.
This unit can display up to 648 files. However,
less than 648 files may be displayed if some files
are not playable with this unit.
If the USB device is partitioned, only the first
partition is displayed.
This unit can play back files of 4 GB in size or
less.
Using a USB device
Notes
Notes
22 En
Setup Menu
Setup is carried out on the TV screen, enabling
you to customize this unit to suit your own
particular requirements.
Unless stated otherwise, all operations described
here are carried out using the supplied remote
control.
To return to the previous menu, press 2 .
To exit from the menu, press SET UP.
1 Press SET UP.
2 Press 2 / 3 to select “GENERAL SETUP
PAGE”.
3 Press ENTER.
Locking/Unlocking the disc for
viewing
Not all discs are rated or coded by the
manufacturer of the disc. You can prevent
playback of a specific disc by locking the disc.
You can lock up to 40 discs on this unit.
1 In “GENERAL SETUP PAGE”, press
5 /a to highlight [DISC LOCK], and then
press 3.
LOCK
Select this to lock playback of the current disc.
Subsequent access to a locked disc requires a
six-digit password.
The default password is “000 000” (see
“Changing the password” on page 32).
UNLOCK
Select this to unlock the disc and allow future
playback.
2 Press 5/a to select a setting, and then
press ENTER.
Dimming the front panel display
You can select different levels of brightness
for the front panel display.
1 In “GENERAL SETUP PAGE”, press
5 /a to highlight [DISPLAY DIM], and
then press 3 .
100%
Select this for full brightness.
70%
Select this for medium brightness.
40%
Select this for dimming display.
2 Press 5/a to select a setting, and then
press ENTER.
Programming disc tracks
(except MP3/WMA/JPEG/DivX)
You can play back the contents of a disc in the
desired order by programming the tracks to be
played. You can store up to 20 tracks per disc
with a maximum of ten discs.
1 In “GENERAL SETUP PAGE”, press
5 /a to highlight [PROGRAM], and then
press 3 to select [INPUT MENU].
Notes
General setup menu
GENERAL SETUP PAGE
DISC LOCK
DISPLAY DIM
PROGRAM
OSD LANGUAGE
SCREEN SAVER
SLEEP
AUTO STANDBY
DIVX(R) VOD CODE
Setup Menu
23 En
Setup Menu
English
2 Press ENTER.
The input menu appears on the TV
screen.
To input your favorite tracks/
chapters
3 Use the numeric buttons (0-9) to enter a
valid track/chapter number.
4 Use 2 / 3/5 /a to move the cursor to the
next position.
If the track/chapter number is more
than ten, press 33l to move to the next
page, and then proceed with
programming.
OR
•Use 2 / 3 /5 /a to highlight [NEXT]
on the program menu, and then press
ENTER.
5 Repeat steps 3-4 to input another track/
chapter number.
To remove a track
6 Use 2 / 3/5 /a to move the cursor to the
track you want to remove.
7 Press ENTER to remove this track from
the program menu.
To start program playback
8 Use 2 / 3 /5 /a to highlight [START] on
the program menu, and then press
ENTER.
Playback starts for the selected tracks in
the programmed sequence.
To exit from program playback
9 Use 2 / 3 /5 /a to highlight [EXIT] on
the program menu, and then press
ENTER.
OSD language
This menu contains various options for the on-
screen display (OSD) language. For details,
see “Setting the OSD Language” on page 14.
Setting the screen saver
This function is used to turn on or off the
screen saver.
1 In “GENERAL SETUP PAGE”, press
5 /a to highlight [SCREEN SAVER], and
then press 3 .
ON
Select this to turn off the TV screen when disc
playback is stopped or paused for more than
15 minutes.
OFF
Select this to disable the screen saver function.
2 Press 5/a to select a setting, and then
press ENTER.
1 04
2 10
3 _ _
4 _ _
5 _ _
6 _ _
7 _ _
8 _ _
9 _ _
10 _ _
PROGRAM: TRACK (01-17)
EXIT START NEXT
24 En
Setup Menu
Setting the sleep timer
This feature automatically sets this unit to the
standby mode after a certain elapsed period.
1 In “GENERAL SETUP PAGE”, press
5 /a to highlight [SLEEP], and then
press 3.
2 Press 5 /a to select a setting.
You can select from 30, 60, 90, 120 and
150 minutes. Select [OFF] to cancel the
sleep timer function.
3 Press ENTER.
Setting the auto standby function
This function is used to turn the auto standby
mode on or off when disc playback is stopped
for more than 30 minutes.
1 In “GENERAL SETUP PAGE”, press
5 /a to highlight [AUTO STANDBY],
and then press 3.
ON
Select this to set this unit to the standby mode
automatically when disc playback is stopped
or paused for more than 30 minutes.
OFF
Select this to disable the auto standby
function.
2 Press 5 /a to select a setting, and then
press ENTER.
Displaying the DivX
®
VOD
registration code
Yamaha provides you with a DivX
®
VOD
(Video On Demand) registration code that
allows you to rent and purchase videos using
the DivX
®
VOD service.
For more information, visit https://
vod.divx.com/.
1 In “GENERAL SETUP PAGE”, press
5 /a to highlight [DIVX(R) VOD CODE],
and then press 3 .
The registration code appears.
2 Press ENTER to exit.
To purchase or rent the videos from DivX
®
VOD
service at https://vod.divx.com/, use the
registration code and download the video onto a
CD-R for playback on this unit.
All of the downloaded videos from DivX
®
VOD
can only be played back on this unit.
For DivX, the time search feature is not available.
1 Press SET UP.
2 Press 2 / 3 to select “AUDIO SETUP
PAGE.
3 Press ENTER.
Notes
Audio setup menu
AUDIO SETUP PAGE
ANALOG OUTPUT
DIGITAL AUDIO
HDMI AUDIO
NIGHT MODE
LIP SYNC
25 En
Setup Menu
English
Setting the analog output
Set the analog output to match the playback
capability of this unit.
1 In “AUDIO SETUP PAGE”, press 5 /a to
highlight [ANALOG OUTPUT], and then
press 3.
STEREO
Select this to change channel output to stereo,
which only delivers sound from the two front
speakers.
LT/RT
Select this if this unit is connected to a Dolby
Pro Logic decoder.
2 Press 5 /a to select a setting, and then
press ENTER.
Setting the digital output
The [DIGITAL AUDIO] options are:
[DIGITAL OUTPUT] and [LPCM OUTPUT].
1 In “AUDIO SETUP PAGE”, press 5 /a to
highlight [DIGITAL AUDIO], and then
press 3.
2 Press 5 /a to highlight an option.
3 Press 3 to open a submenu.
DIGITAL OUTPUT
Set the digital output according to your
optional audio component connections.
OFF
Select this to turn off the digital output.
ALL
Select this if you have connected the digital
audio output jack to a multi-channel decoder/
receiver.
MPEG PCM
Select this if your receiver is not capable of
decoding MPEG audio signals.
PCM ONLY
Select this only if your receiver is not capable
of decoding multi-channel audio signals.
LPCM OUTPUT
Select this if you have connected this unit to a
PCM-compatible receiver via a digital
terminal, such as the coaxial terminal. In this
case, you may need to adjust [LPCM
OUTPUT].
Discs are recorded at a certain sampling rate.
The higher the sampling rate, the better the
sound quality.
48KHz
Select this to play back discs recorded at the
sampling rate of 48 kHz. All 96 kHz PCM data
streams (if available) are converted to the
sampling rate of 48 kHz.
96KHz
Select this to play back discs recorded at the
sampling rate of 96 kHz. If the 96 kHz disc is
copy protected, the digital output is
automatically converted to the sampling rate of
48 kHz.
4 Press 5/a to select a setting, and then
press ENTER.
Turning the HDMI audio on/off
When you connect this unit to an HDMI
compatible component via the HDMI jack,
select to turn on or off the HDMI audio output.
1 In “AUDIO SETUP PAGE”, press 5/a to
highlight [HDMI AUDIO], and then
press 3 .
ON
Select this to turn on the HDMI audio output.
OFF
Select this to turn off the HDMI audio output.
26 En
Setup Menu
If you are not using the HDMI audio output, set
this to [OFF].
If the monitor/receiver connected to this unit
using HDMI does not support HDMI audio signal
input, set this to [OFF].
This unit can output the following audio signals
using HDMI: 32/44.1/48 kHz, 2ch linear PCM
signals and bitstream signals (Dolby Digital, DTS
and MPEG).
When audio signals are being output by HDMI-
compatible components, digital output signals are
muted.
When [DIGITAL OUTPUT] is set to [OFF] on
this unit, HDMI audio is muted even if [HDMI
AUDIO] is set to [ON] and an HDMI connection
is established between the monitor and receiver.
When [DIGITAL OUTPUT] is set to [ALL] on
this unit, PCM signals are still output if the
monitor and receiver only support the PCM
format. However, the audio output is muted when
audio format plays back the DTS source.
Turning the night mode on/off
In the night mode, high volume output is
softened and low volume output is brought
upward to an audible level. It is useful when
you want to watch your favorite action movie
without disturbing others at night.
1 In “AUDIO SETUP PAGE”, press 5/a
to highlight [NIGHT MODE], and then
press 3.
ON
Select this to level out the volume. This
feature is only available for movies with the
Dolby Digital mode.
OFF
Select this when you want to enjoy the full
dynamic range of surround sound.
2 Press 5 /a to select a setting, and then
press ENTER.
Setting the lip synchronization
This feature allows you to delay the sound
output in order to synchronize it with the
video image. This may be necessary when you
use certain LCD monitors or projectors.
1 In “AUDIO SETUP PAGE”, press 2 / 3
to highlight [LIP SYNC], and then
press 3 .
2 Press 2 / 3 to adjust the delay time
(between 00 ms and 200 ms), and then
press ENTER.
1 Press SET UP.
2
Press
2 / 3
to select “VIDEO SETUP
PAGE”.
3 Press ENTER.
TV type
This menu contains the options for selecting
the color system that matches your TV. For
details, see “Setting a color system for your
TV” on page 13.
Notes
Video setup menu
VIDEO SETUP PAGE
TV TYPE
TV DISPLAY
PROGRESSIVE
PICTURE SETTING
HDMI SETUP
27 En
Setup Menu
English
Setting the TV display
Set the aspect ratio of this unit to match your
TV. The format you select must be available
on the disc. Otherwise, the TV display setting
will not affect the picture during playback.
1 In “VIDEO SETUP PAGE”, press 5 /a
to highlight [TV DISPLAY], and then
press 3.
2 Press 5 /a to highlight one of the
following options.
4:3 PAN SCAN
Select this if the aspect ratio of your TV is 4:3
and you want both sides of the picture to be
trimmed or formatted to fit your TV screen.
4:3 LETTER BOX
Select this if the aspect ratio of your TV is 4:3.
In this case, a wide picture with black bands
on the upper and lower portions of the TV
screen are displayed.
16:9
Select this if you have a widescreen TV.
3 Select an item, and then press ENTER.
The relationship between the setting
of this unit and the TV display
When the aspect ratio of your TV is 4:3:
When the aspect ratio of your TV is 16:9
(widescreen):
*1: If the disc is not assigned to playback in
panscan, it is played in letterbox.
*2: The side of the picture may be stretched
depending on the TV. In this case, check the
screen size and aspect ratio of your TV.
Turning the progressive scan
function on/off
This feature is only available if you have
connected this unit to a progressive scan TV
through the component video jacks (see
“Component video jacks <A>” on page 9).
1 In “VIDEO SETUP PAGE”, press 5 /a
to highlight [PROGRESSIVE], and then
press 3 .
OFF
Select this to disable the progressive scan
function.
ON
Select this to enable the progressive scan
function.
2 Press 5/a to select a setting, and then
press ENTER.
Setting
Playback
disc
TV display
4:3 PAN
SCAN
4:3 LETTER
BOX
16:9
4:3
16:9
4:3
*
1
16:9
16:9
4:3
Setting
Playback
disc
TV display
*
2
28 En
Setup Menu
Notes on activating progressive scan:
Ensure that your TV is equipped with
progressive scan.
Connect using a component video cable.
When making HDMI connections, you
cannot select [PROGRESSIVE].
Adjusting picture settings
This unit comes with three predefined sets of
picture color settings and one personal setting
that you can define yourself.
1 In “VIDEO SETUP PAGE”, press 5 /a to
highlight [PICTURE SETTING], and then
press 3.
STANDARD
Select this for the standard picture setting.
BRIGHT
Select this to make the TV picture brighter.
SOFT
Select this to make the TV picture softer.
PERSONAL
Select this to personalize your picture color by
adjusting the brightness, contrast, tint and
color (saturation).
2 Press 5/a to select a setting, and then
press ENTER.
3 If you select [PERSONAL] in step 1,
proceed to steps 4-7.
The “PERSONAL PICTURE SETUP”
menu appears.
4 Press 5/a to select one of the following
options.
BRIGHTNESS
Increase or decrease the value to brighten or
dim the picture. Zero (0) is the average
brightness setting value.
CONTRAST
Increase or decrease the value to sharpen or
dull the picture. Zero (0) is the average contrast
setting value.
TINT
Increase or decrease the value to darken or
lighten the picture. Zero (0) is the average tint
setting value.
COLOR
Increase or decrease the value to enhance or
fade the picture. Zero (0) is the average color
setting value.
5 Press 2 / 3 to adjust the setting that best
suits your personal preference.
6 Repeat steps 4-5 to adjust other color
features.
7 Press ENTER.
All picture settings are not available for HDMI
output.
CONSUMERS SHOULD NOTE THAT NOT ALL
HIGH DEFINITION TELEVISION SETS ARE
FULLY COMPATIBLE WITH THIS PRODUCT
AND MAY CAUSE ARTIFACTS TO BE
DISPLAYED IN THE PICTURE. IN CASE OF 525
OR 625 PROGRESSIVE SCAN PICTURE
PROBLEMS, IT IS RECOMMENDED THAT THE
USER SWITCH THE CONNECTION TO THE
“STANDARD DEFINITION” OUTPUT. IF THERE
ARE QUESTIONS REGARDING OUR VIDEO
MONITOR COMPATIBILITY WITH THIS MODEL
525P AND 625P DVD PLAYER, PLEASE
CONTACT OUR CUSTOMER SERVICE
CENTER.
This unit is compatible with the complete line of
Yamaha products, including the projectors
DPX-1300, DPX-830 and the plasma monitor
PDM-4220.
Note
0
0
0
0
PERSONAL PICTURE SETUP
BRIGHTNESS
CONTRAST
TINT
COLOR
29 En
Setup Menu
English
Setting the HDMI video
When you connect this unit to an HDMI
compatible component via the HDMI jack,
select the following video output settings
depending on the connected component.
1 In “VIDEO SETUP PAGE”, press 5 /a
to highlight [HDMI SETUP], and then
press 3.
2 Press 5 /a to highlight an option.
3 Press 3 to enter a submenu.
WIDE SCREEN FORMAT
Set the aspect ratio of the projected images on
the screen. This feature is only available when
making HDMI connections and [TV
DISPLAY] is set to [16:9] (see page 27).
SUPERWIDE
Select to display a 4:3 image on the 16:9 screen
with non-linear stretching (center position of
screen is stretched less than the sides). This
feature is not available when the resolution is
480p or 576p.
4:3 PILLAR BOX
Select to display a 4:3 image on the 16:9 screen
without stretching. When playing a disc recorded
in the 16:9 image, the image is displayed in its
original aspect ratio (16:9) without pillar boxes.
OFF
No aspect ratio adjustment is made when this
option is selected.
HDMI VIDEO
Set the resolution depending on the monitor
you are using.
480P
480 progressive-scan video
576P
576 progressive-scan video
720P
720 progressive-scan video
1080I
1080 interlace video
AUTO
The resolution is automatically selected to
match the monitor you are using.
For settings other than [AUTO], HDMI video
signals may not be output properly if a resolution
output setting is not supported by the HDMI
component you are using. In that case, follow the
steps below to return to the initial setting.
1 Press OPEN/CLOSE ( ) on the front panel
to open the disc tray.
2 Press 2.
3 Press SUBTITLE.
Do not perform this operation while playing back
a disc on this unit.
You cannot set [TV TYPE] and
[PROGRESSIVE] when making HDMI
connections.
When disconnecting the HDMI cable, the setting
of [TV TYPE] may be changed. If the component
video, S-video or composite video signal is not
output correctly, see “Troubleshooting” on
page 34 to set the correct TV type again.
HD JPEG
This unit can display High-Definition JPEG
images when connecting to an HDMI
component.
ON
Displays JPEG pictures with high quality.
OFF
Displays JPEG pictures with standard quality.
You can select [HD JPEG] when the HDMI video
signals with 720p or 1080i are output.
When [HD JPEG] is set to [ON] and HD JPEG
pictures are displayed, video signals other than
HDMI signals are not output.
You cannot select [HDMI VIDEO] and [HD
JPEG] when HD JPEG pictures are displayed.
Notes
Notes
30 En
Setup Menu
1 Press
7
twice to stop playback
(if necessary), and then press SET UP.
2 Press 2 / 3 to select “PREFERENCE
PAGE”.
3 Press ENTER.
Audio, subtitle and disc menu
These menus contain various language options
for the audio, subtitles and disc menus
recorded on the DVD-Video. For details, see
“Setting the audio, subtitle and disc menu
languages (DVD-Video only)” on page 14.
Restricting playback with parental
control
Some DVDs may have a parental level
assigned to the complete disc or to certain
scenes on the disc. This feature lets you set a
playback limitation level.
The rating levels are from 1 to 8 and are
country dependent. You can prohibit playback
of certain discs that are not suitable for your
children or play certain discs in alternative
scenes.
1 In “PREFERENCE PAGE”, press 5 /a to
highlight [PARENTAL], and then press 3 .
2 Press 5/a to highlight a rating level for
the inserted disc, and then press
ENTER.
To disable parental controls and have
all discs play, select [8 ADULT].
3 Use the numeric buttons (0-9) to enter
the six-digit password (see “Changing the
password” on page 32).
DVD discs that are rated above the
level you selected do not play unless
you enter your six-digit password.
Some DVD discs are not encoded with a rating
though the movie rating may be printed on the disc
cover. The rating level feature does not work for
such discs.
Selecting playback of VR format
There are two ways to play back a disc in VR
(Video Recording) format: ORIGINAL and
PLAY LIST. This feature is not available with
non-VR format discs.
1 In “PREFERENCE PAGE”, press 5 /a to
highlight [VR LIST], and then press 3 .
Preference setup menu
PREFERENCE PAGE
AUDIO
SUBTITLE
DISC MENU
PARENTAL
VR LIST
MP3/JPEG NAV
DIVX SUBTITLE
PBC
Note
PREFERENCE PAGE
AUDIO 1 KID SAFE
SUBTITLE 2 G
DISC MENU 3 PG
PARENTAL 4 PG 13
VR LIST 5 PGR
MP3/JPEG NAV 6 R
DIVX SUBTITLE 7 NC 17
PBC 8 ADULT
31 En
Setup Menu
English
ORIGINAL LIST
Select this to play the originally recorded titles
on the disc.
PLAY LIST
Select this to play the edited version of the
disc. This feature is only available when a play
list has been created.
2 Press 5 /a to highlight a setting, and then
press ENTER.
To play back a disc in VR format
3 Press SET UP to close the setup menu.
4 Press 3 / 8 to begin to play back the disc
with the setting you selected.
Selecting the MP3/JPEG menu
MP3/JPEG navigator can be set only if the
disc was recorded with a menu. It allows you
to select different display menus for easy
navigation.
1 In “PREFERENCE PAGE”, press 5 /a to
highlight [MP3/JPEG NAV], and then
press 3.
WITHOUT MENU
Select this to display all the files contained in
the MP3/Picture CD.
WITH MENU
Select this to display only the folder menu of
the MP3/Picture CD.
2 Press 5 /a to select a setting, and then
press ENTER.
Displaying DivX external subtitle
files
The font sets listed below are available for
DivX external subtitle files. This setting
allows you to see the proper font set on-screen
to match the subtitle file.
1 In “PREFERENCE PAGE”, press 5 /a to
highlight [DIVX SUBTITLE], and then
press 3 .
GROUP1:
Albanian (sq), Basque (eu), Catalan (ca),
Danish (da), Dutch (nl), English (en),
Faroese (fo), Finnish (fi), French (fr),
German (de), Icelandic (is), Irish (ga),
Italian (it), Norwegian (no),
Portuguese (pt), Rhaeto-Romanic (rm),
Scottish (gd), Spanish (es), Swedish (sv)
GROUP2:
Albanian (sq), Croatian (hr), Czech (cs),
Hungarian (hu), Polish (pl), Romanian (ro),
Slovak (sk), Slovenian (sl)
GROUP3:
Bulgarian (bg), Byelorussian (be),
Macedonian (mk), Russian (ru), Serbian (sr),
Ukrainian (uk)
GROUP4:
Hebrew (iw), Yiddish (ji)
GROUP5:
Turkish (tr)
2 Press 5/a to select a group, and then
press ENTER.
Some discs cannot be played depending on disc
characteristics or recording conditions.
Some external subtitle files may be displayed
incorrectly or not at all.
For external subtitle files, the following subtitle
format filename extensions are supported (note
that these files are not shown within the disc
navigation menu): .srt, .sub, .ssa, .smi
The filename of the movie file has to be repeated
at the beginning of the filename for the external
subtitle file.
The number of external subtitle files that can be
switched for the same movie file is limited to a
maximum of ten.
Notes
32 En
Setup Menu
Selecting the PBC (playback control)
function
You can set playback control (PBC) to on or
off. This function is available only on Video
CD 2.0 with the playback control (PBC)
feature.
1 In “PREFERENCE PAGE”, press 5 /a to
highlight [PBC], and then press 3 .
ON
Select this to display a disc menu.
OFF
Select this to not display a disc menu.
Playback starts from the beginning of a disc.
2 Press 5 /a to select a setting, and then
press ENTER.
You can also use the MENU button on the remote
control to turn on or off the playback control (PBC)
function (see “Using the playback control (PBC)
menu” on page 18).
Changing the password
The same password is used for both parental
control and disc lock. Enter your six-digit
password when prompted on the screen. The
default password is 000 000.
1 In “PREFERENCE PAGE”, press 5 /a to
highlight [PASSWORD], and then press 3
to select [CHANGE].
2 Press ENTER to enter the “Password
Change Page”.
3 Use the numeric buttons (0-9) to enter
your old six-digit password.
When doing this for the first time, enter
“000 000”.
If you forget your old six-digit
password, enter “000 000”.
4 Enter the new six-digit password.
5 Enter the new six-digit password again to
confirm the password.
6 Press ENTER to confirm your new
password.
The new six-digit password is now
valid.
Resetting the system
You can reset all options and your personal
settings to the initial factory settings,
excluding your password for [PARENTAL]
and [DISC LOCK].
1 In “PREFERENCE PAGE”, press 5 /a to
highlight [DEFAULT], and then press 3
to select [RESET].
2 Press ENTER.
All settings are reset to the initial
factory settings.
Note
PREFERENCE PAGE
SUBTITLE
DISC MENU
PARENTAL
VR LIST
MP3/JPEG NAV
DIVX SUBTITLE
PBC
PASSWORD CHANGE
OLD PASSWORD
NEW PASSWORD
CONFIRM PWD
OK
33 En
Language Codes
English
These codes can be used to select other languages. This does not affect the options in
“AUDIO”, “SUBTITLE” or “DISC MENU”.
Abkhazian 6566 Gaelic 7168 Macedonian 7775 Sardinian 8367
Afar 6565 Gallegan 7176 Malagasy 7771 Scottish Gaelic 7168
Afrikaans 6570 Georgian 7565 Malay 7783 Serbian 8382
Albanian 8381 German 6869 Malayalam 7776 Shona 8378
Amharic 6577 Gikuyu 7573 Maltese 7784 Sindhi 8368
Arabic 6582 Greek 6976 Manx 7186 Sinhalese 8373
Armenian 7289 Guarani 7178 Maori 7773 Slovak 8375
Assamese 6583 Gujarati 7185 Marathi 7782 Slovenian 8376
Avestan 6569 Hausa 7265 Marshallese 7772 Somali 8379
Aymara 6589 Hebrew 7269 Moldavian 7779 Sotho, Southem 8384
Azerbaijani 6590 Herero 7290 Mongolian 7778 South Ndebele 7882
Bashkir 6665 Hindi 7273 Nauru 7865 Spanish 6983
Basque 6985 Hiri Motu 7279 Navaho 7886 Sundanese 8385
Belarusian 6669 Hungarian 7285 Navajo 7886 Swahili 8387
Bengali 6678 Icelandic 7383 Ndebele, North 7868 Swati 8383
Bihari 6672 Ido 7379 Ndebele, South 7882 Swedish 8386
Bislama 6673 Indonesian 7368 Ndonga 7871 Tagalog 8476
Bokmål, Norwegian 7866
Interlingua (International)
7365 Nepali 7869 Tahitian 8489
Bosnian 6683 Interlingue 7369 Northern Sami 8369 Tajik 8471
Breton 6682 Inuktitut 7385 North Ndebele 7868 Tamil 8465
Bulgarian 6671 Inupiaq 7375 Norwegian 7879 Tatar 8484
Burmese 7789 Irish 7165 Norwegian Bokmål 7866 Telugu 8469
Castilian 6983 Italian 7384 Norwegian Nynorsk 7878 Thai 8472
Catalan 6765 Japanese 7465 Nyanja 7889 Tibetan 6679
Chamorro 6772 Javanese 7486 Nynorsk, Norwegian 7878 Tigrinya 8473
Chechen 6769 Kalaallisut 7576 Occitan (post 1500) 7967 Tonga (Tonga Islands) 8479
Chewa 7889 Kannada 7578 Old Bulgarian 6785 Tsong 8483
Chichewa 7889 Kashmiri 7583 Old Church Slavonic 6785 Tswana 8478
Chinese 9072 Kazakh 7575 Old Slavonic 6785 Turkish 8482
Chuang 9065 Khmer 7577 Oriya 7982 Turkmen 8475
Church Slavic 6785 Kikuyu 7573 Oromo 7977 Twi 8487
Church Slavonic 6785 Kinyarwanda 8287 Ossetian 7983 Uighur 8571
Chuvash 6786 Kirghiz 7589 Ossetic 7983 Ukrainian 8575
Cornish 7587 Komi 7586 Pali 8073 Urdu 8582
Corsican 6779 Korean 7579 Panjabi 8065 Uzbek 8590
Croatian 7282 Kuanyama 7574 Persian 7065 Vietnamese 8673
Czech 6783 Kurdish 7585 Polish 8076 Volapük 8679
Danish 6865 Kwanyama 7574 Portuguese 8084 Walloon 8765
Dutch 7876 Lao 7679 Provençal 7967 Welsh 6789
Dzongkha 6890 Latin 7665 Pushto 8083 Wolof 8779
English 6978 Latvian 7686 Quechua 8185 Xhosa 8872
Esperanto 6979 Letzeburgesch 7666 Raeto-Romance 8277 Yiddish 8973
Estonian 6984 Limburgan 7673 Romanian 8279 Yoruba 8979
Faroese 7079 Limburger 7673 Rundi 8278 Zhuang 9065
Fijian 7074 Limburgish 7673 Russian 8285 Zulu 9085
Finnish 7073 Lingala 7678 Samoan 8377
French 7082 Lithuanian 7684 Sango 8371
Frisian 7089 Luxembourgish 7666 Sanskrit 8365
Language Codes
34 En
Troubleshooting
Refer to the chart below when this unit does not function properly. If the problem you are
experiencing is not listed below or if the instruction below does not help, set this unit to the
standby mode, disconnect the power cable, and contact the nearest authorized Yamaha
dealer or service center.
Problem Solution
No power Connect the AC power cable properly.
Press STANDBY/ON on the front panel to turn on the power.
No picture Refer to the manual supplied with your TV to select the video input
channel correctly. Change the TV channel until you see the DVD
screen.
Turn on your TV.
Check the video connection.
Video signals other than HDMI signals are not output when HD JPEG
pictures are displayed (see “HD JPEG” on page 29).
No picture is displayed when
you make HDMI connections
(using the HDMI jacks)
Follow the steps below to change the [HDMI VIDEO] to [AUTO].
1. Press OPEN/CLOSE () on the front panel or press and hold
7
on the remote control to open the disc tray.
2. Press 2 on the remote control.
3. Press SUBTITLE on the remote control.
No picture is displayed when
you do not use progressive
scan connections (using the
component video jacks)
Follow the steps below to turn off the progressive scan.
1. Press OPEN/CLOSE () on the front panel or press and hold
7
on the remote control to open the disc tray.
2. Press 2 on the remote control.
3. Press ZOOM on the remote control to deactivate the progressive
scan.
Completely distorted picture or
black/white picture or no
picture
Check that the disc is compatible with this unit (see “Playable disc
formats” on page 3).
Check that the TV type of this unit is set to match that of the disc and
your TV (see “Setting a color system for your TV” on page 13). Follow
the steps below to change the setting of [TV TYPE].
1. Press OPEN/CLOSE () on the front panel or press and hold
7
on the remote control to open the disc tray.
2. Press 3 on the remote control.
3. Press AUDIO on the remote control.
Distorted picture Occasionally, a small amount of picture distortion may appear
depending on the disc being played back. This is not a malfunction.
The screen size looks
unnatural, or the caption is
displayed only partially on the
TV monitor or is not displayed
at all
Check that the TV setting of this unit matches the screen size of your
TV (see “Setting the TV display” on page 27).
Change the screen size and the aspect ratio of your TV.
Troubleshooting
35 En
Troubleshooting
English
Problem Solution
No sound or distorted sound Adjust the volume.
Check that the speakers are connected correctly.
For MP3/WMA, check that the sampling rate and bit rate are
compatible with this unit (see “Specifications” on page 39).
No audio at digital output Check the digital connections.
If you are playing a DTS source, check that your receiver can decode
DTS, and that [DIGITAL OUTPUT] is set to [ALL] (see page 25).
If you are playing an MPEG-2 source, check that your receiver can
decode MPEG-2. Otherwise, check that [DIGITAL OUTPUT] is set to
[MPEG PCM] (see page 25).
Check that the audio format of the selected audio language matches
your receiver capabilities.
Disc does not play The CD-R/RW, DVD+R/RW/R DL and DVD-R/RW/R DL must be
finalized.
Check that the disc label is facing up.
Check whether the disc is defective by trying another disc.
If you have recorded a JPEG, MP3 or WMA disc yourself, check that
your disc contains at least ten JPEG picture files or five MP3/WMA
music tracks.
For MP3/WMA, check that the sampling rate and bit rate are
compatible. For JPEG, check that the resolution is compatible (see
“Specifications” on page 39).
Check the region code (see “Region codes” on page 3).
Picture freezes momentarily
during playback
Check the disc for fingerprints/scratches and clean it with a soft cloth
wiping from center to edge.
This unit does not respond to
the remote control
Aim the remote control directly at the remote control sensor on the front
panel.
Reduce the distance of the remote control from this unit.
Replace the batteries in the remote control.
Reinsert the batteries with their polarities (+/– signs) as indicated.
Buttons do not work To completely reset this unit, unplug the AC cord from the AC outlet
for 5-10 seconds.
This unit does not respond to
some operating commands
during playback
Some operations may not be permitted by the disc. Refer to the
instructions of the disc jacket.
The 5 /a key is not available during HD JPEG playback.
This unit cannot read CD or
DVD
Use a commonly available CD/DVD lens cleaner to clean the lens
before sending this unit for repair.
36 En
Troubleshooting
Problem Solution
“NO DISC” appears in the front
panel display
Check that the disc is placed in the disc tray correctly.
“UN DISC” appears in the front
panel display
The disc being loaded is not supported by this unit. Check the disc type
(see “Playable disc formats” on page 3).
Menu items cannot be selected Press
7
twice on the remote control before selecting the setup menu.
Depending on the disc availability, some menu items cannot be
selected.
To select [HD JPEG], check that the HDMI component is connected
correctly and the HDMI video signals with 720p or 1080i are output.
HD JPEG pictures cannot be
displayed
Check that [HD JPEG] is set to [ON] (see page 29).
The disc reading time may exceed 30 seconds.
MP3 music and HD JPEG pictures cannot be played simultaneously.
No sound during DivX movie
playback
The audio code may not be supported by this unit.
The USB device cannot be
recognized
Check that the USB device is connected correctly.
Some devices may not work even if they are USB mass storage class
devices.
Set this unit to the standby mode, and then turn it on again.
Disconnect the device when this unit is in the standby mode, then
connect it again and turn on this unit.
Connect the AC adapter if the adapter is supplied with the device.
If “Device not supported” appears on the TV screen, check whether the
device is supported by this unit (see “Supported USB devices” on
page 21).
If “USB current protection active. Device not supported” appears on the
TV screen, the device is not playable with this unit (see page 21).
37 En
Glossary
English
Analog
Sound that has not been converted into numerical
values. Analog sound varies, while digital sound has
specific numerical values. These jacks send audio
through two channels, the left and right.
Aspect ratio
The ratio of vertical and horizontal sizes of a displayed
image. The horizontal vs. vertical ratio of conventional
TVs is 4:3, and that of widescreens is 16:9.
Audio output jacks
Jacks on the back of the DVD player that send audio to
another system (TV, Stereo, etc.).
Bit rate
The amount of data used to hold a given length of
music, measured in kilobits per seconds, or kbps. Or,
the speed at which you record. Generally, the higher the
bit rate, or the higher the recording speed, the better the
sound quality. However, higher bit rates use more space
on a Disc.
Chapter
Sections of a picture or a music piece on a DVD that are
smaller than titles. A title is composed of several
chapters. Each chapter is assigned a chapter number
enabling you to locate the chapter you want.
Component video output jacks
Jacks on the back of the DVD player that send high-
quality video to a TV that has component video input
jacks (R/G/B, Y/P
B/PR, etc.).
Disc menu
A screen display prepared for allowing selection of
images, sounds, subtitles, multi-angles, etc. recorded on
a DVD.
Digital
Sound that has been converted into numerical values.
Digital sound is available when you use the digital
audio output jacks. These jacks send audio through
multiple channels, instead of just two channels as
analog does.
DivX
DivX is a popular media technology created by DivX,
Inc. DivX media files contain highly compressed video
with high visual quality while maintaining a relatively
small file size. DivX files can also include advanced
media features like menus, subtitles, and alternate audio
tracks. Many DivX media files are available for
download online, and you can create your own using
your personal content and easy-to-use tools from
DivX.com.
DivX Ultra
DivX Ultra Certified products provide enhanced
playback of advanced media features supported by the
DivX Media Format. Key features include interactive
video menus, subtitles, alternate audio tracks, video
tags and chapter points.
DMF (DivX Media Format)
The DivX Media Format supports advanced media
features, adding controls for an interactive media
experience: interactive video menus, chapter points,
multi-language subtitles and alternate audio tracks.
Dolby Digital
A surround sound system developed by Dolby
Laboratories containing up to six channels of digital
audio (front left and right, surround left and right, center
and subwoofer).
DTS
Digital Theatre Systems. This is a surround sound
system, but it is different from Dolby Digital. The
formats were developed by different companies.
HDMI
HDMI (High-Definition Multimedia Interface) is the
first industry-supported, uncompressed, all-digital A/V
(audio/video) interface. Providing an interface between
any A/V source (such as a set-top box or A/V receiver)
and an audio/video monitor (such as a digital television-
DTV), HDMI supports standard, enhanced or high-
definition video as well as multi-channel digital audio
using a single cable. HDMI transmits all ATSC HDTV
standards and supports 8-channel digital audio, with
bandwidth extra to accommodate future enhancements
and requirements.
When used in combination with HDCP (High-
bandwidth Digital Content Protection), HDMI provides
a secure audio/video interface that meets the security
requirements of content providers and system
operations. For further information on HDMI, visit the
HDMI website at “www.hdmi.org/”.
HDCP
HDCP (High-bandwidth Digital Content Protection)
developed by Intel corporation, is a method to encrypt
digital video and audio data for purpose of content
protection. For further information on HDCP, visit the
HDCP website at “www.digital-cp.com”.
HD JPEG
HD (High-Definition) JPEG provides images in their
enhanced resolution via HDMI connection.
Glossary
38 En
Glossary
Interactive menu
Interactive video menus offer unprecedented
convenience and control so you can quickly navigate
between various scenes or bonus features, and select
from audio track and subtitle options.
JPEG
A very common digital still picture format. A still-
picture data compression system proposed by the Joint
Photographic Expert Group, which features small
decrease in image quality in spite of its high
compression ratio.
MP3
A file format with a sound data compression system.
“MP3” is the abbreviation of Motion Picture Experts
Group 1 (or MPEG-1) Audio Layer 3. By using MP3
format, one CD-R or CD-RW can contain about ten
times as much data as a regular CD can.
Parental control
A function of the DVD to limit playback of the disc by
the age of the users according to the limitation level in
each country. The limitation varies from disc to disc;
when it is activated, playback will be prohibited if the
software’s level is higher than the user-set level.
PCM (Pulse Code Modulation)
A system for converting analog sound signals to digital
signals for later processing, with no data compression
used in conversion.
Playback control (PBC)
Refers to the signal recorded on video CDs or SVCDs
for controlling reproduction. By using menu screens
recorded on a Video CD or SVCD that supports PBC,
you can enjoy interactive-type software as well as
software having a search function.
Play list
A list of selected titles to be played back in a specific
order. This option is only available with VR format and
must be created beforehand.
Progressive scan
It displays all the horizontal lines of a picture at one
time, as a signal frame. This system can convert the
interlaced video from DVD into progressive format for
connection to a progressive display. It dramatically
increases the vertical resolution.
Region code
A system for allowing discs to be played back only in
the region designated beforehand. This unit will only
play discs that have compatible region codes. You can
find the region code of your unit by looking on the
product label. Some discs are compatible with more
than one region (or ALL regions).
S-video
Produces a clear picture by sending separate signals for
the luminance and the color. You can use S-video only
if your TV has S-video input jack.
Surround
A system for creating realistic three dimensional sound
fields full of realism by arranging multiple speakers
around the listener.
Title
The longest section of a picture or music feature on
DVD, music, etc., in video software, or the entire album
in audio software. Each title is assigned a title number
enabling you to locate the title you want.
Video output jack
Jack on the back of the DVD player that sends video to
a TV.
VR (Video Recording) format
A format which enables you to create a DVD disc that
can be extensively re-edited.
39 En
Specifications
English
PLAYABLE DISC FORMATS
DVD-Video
DVD-R, DVD-RW, DVD-R DL
DVD+R, DVD+RW, DVD+R DL
Video CD, SVCD
•CD
PICTURE CD
CD-R, CD-RW
MP3 (ISO 9660)
................................. fs 32, 44.1, 48 kHz /
96, 128, 256, 320 kbps (CBR only)
WMA
...................fs 44.1 kHz, 62–192 kbps (CBR only) /
fs 48 kHz, 128–192 kbps (CBR only)
•DivX
JPEG............................................. 3072 x 2048 dpi or less
VIDEO PERFORMANCE
Video (CVBS) output...........................1 Vpp into 75 ohm
S-Video output ................................Y: 1 Vpp into 75 ohm
C: 0.3 Vpp into 75 ohm
Component video output.................Y: 1 Vpp into 75 ohm
P
B PR: 0.7 Vpp into 75 ohm
RGB (Scart) output (U.K. and Europe models only)
..................................................... Y: 0.7 Vpp into 75 ohm
AUDIO FORMAT
•Digital
Dolby Digital, DTS, MPEG.............Compressed digital
PCM....................... fs 44.1, 48, 96 kHz / 16, 20, 24 bits
Analog sound ...........................................................Stereo
AUDIO PERFORMANCE
DA Converter............................................................24 bit
Signal-Noise (1 kHz) ............................................. 105 dB
Dynamic range (1 kHz)............................................ 97 dB
DVD ...........................................fs 96 kHz, 2 Hz-44 kHz /
fs 48 kHz, 2 Hz-22 kHz
SVCD .........................................fs 48 kHz, 2 Hz-22 kHz /
fs 44.1 kHz, 2 Hz-20 kHz
CD, VCD...................................fs 44.1 kHz, 2 Hz-20 kHz
Distortion and Noise (1 kHz) .............................. 0.0035%
MULTIMEDIA APPLICATIONS
Connections...................... USB mass storage class device
Playback formats (USB device)
MP3................................................ fs 32, 44.1, 48 kHz /
96, 128, 256, 320 kbps (CBR only)
WMA
................fs 44.1 kHz, 62–192 kbps (CBR only) /
fs 48 kHz, 128–192 kbps (CBR only)
DivX........................................................ 3 Mbps or less
JPEG ......................................... 3072 x 2048 dpi or less
TV STANDARD
Number of lines ............................. PAL: 625, NTSC: 525
Vertical frequency...................PAL: 50 Hz, NTSC: 60 Hz
Playback................................ Multistandard (PAL/NTSC)
CONNECTIONS
Video output ..............................RCA/Phono x 1 (yellow)
S-video output.................................. Mini DIN, 4 pins x 1
Component video output
Y output ....................................RCA/Phono x 1 (green)
P
B output.....................................RCA/Phono x 1 (blue)
P
R output.......................................RCA/Phono x 1 (red)
SCART (U.K. and Europe models only)
............................................................ Euroconnector x 1
Audio output (L+R) ....... RCA/Phono x 1 pair (white/red)
Digital output
Coaxial.................................................. RCA/Phono x 1
(IEC60958 for CDDA, LPCM /
IEC61937 for MPEG 1/2, Dolby Digital, DTS)
HDMI............................................................Type A x 1
USB..................................................................Type A x 1
Remote Control
Input........................................... 3.5 mm mini jack x 1
Output ........................................ 3.5 mm mini jack x 1
CABINET
Dimensions (W x D x H) ....................435 x 310 x 51 mm
Weight........................................................Approx. 2.6 kg
POWER SUPPLY
Power inlet
U.S.A. and Canada models.................AC 120 V, 60 Hz
U.K. and Europe models.....................AC 230 V, 50 Hz
Australia, Asia, Central and South America models
.......................................AC 110-240 V, 50 Hz/60 Hz
Korea model ................................AC 110-240 V, 60 Hz
Power consumption..................................... Approx. 14 W
Standby power consumption....................... Less than 1 W
Specifications are subject to change without prior
notice.
LASER
Type Semiconductor laser GaAlAs
Wave length 650 nm (DVD)
780 nm (VCD/CD)
Output Power 7 mW (DVD)
10 mW (VCD/CD)
Beam divergence 60 degrees
Specifications
1
Para asegurar el mejor rendimiento de este aparato, lea
atentamente este manual. Y luego guárdelo en un lugar seguro
para poder consultarlo en el futuro en caso de ser necesario.
2 Instale la unidad en un lugar bien ventilado, fresco, seco
y limpio — lejos de la luz solar directa, fuentes de
calor, vibraciones, polvo, humedad, o frío. En el
mueble, deje al menos 2,5 cm de espacio libre alrededor
de la unidad para conseguir una ventilación adecuada.
3
Coloque este aparato lejos de otros aparatos eléctricos, motores
o transformadores, para evitar así los ruidos de zumbido.
4
No exponga este aparato a cambios bruscos de
temperaturas, del frío al calor, ni lo coloque en lugares
muy húmedos (una habitación con deshumidificador, por
ejemplo), para impedir así que se forme condensación en
su interior, lo que podría causar una descarga eléctrica, un
incendio, daños en el aparato y/o lesiones a las personas.
5
Evite instalar este aparato en un lugar donde puedan caerle
encima objetos extraños o donde quede expuesto al goteo o a
la salpicadura de líquidos. Encima de este aparato no ponga:
Otros componentes, porque pueden causar daños
y/o decoloración en la superficie de este aparato.
Objetos con fuego (velas, por ejemplo), porque
pueden causar un incendio, daños en el aparato
y/o lesiones a las personas.
Recipientes con líquidos, porque pueden caerse
y derramar el líquido, causando descargas
eléctricas al usuario y/o dañando el aparato.
6
No tape este aparato con un periódico, mantel, cortina, etc.
para no impedir el escape del calor. Si aumenta la
temperatura en el interior del aparato, esto puede causar un
incendio, daños en el aparato y/o lesiones a las personas.
7 No enchufe este aparato a una toma de corriente hasta
después de haber terminado todas las conexiones.
8 No ponga el aparato al revés. Podría recalentarse y
posiblemente causar daños.
9 No utilice una fuerza excesiva con los conmutadores,
los controles y/o los cables.
10
Cuando desconecte el cable de la alimentación de la toma de
corriente, sujete la clavija y tire de ella; no tire del propio cable
.
11 No limpie este aparato con disolventes químicos porque
podría estropear el acabado. Utilice un paño limpio y
seco para limpiar el aparato.
12
Utilice solamente la tensión especificada en este aparato.
Utilizar el aparato con una tensión superior a la especificada
resulta peligroso y puede producir un incendio, daños en el
aparato y/o lesiones a las personas. Yamaha no se hará
responsable de ningún daño debido al uso de este aparato
con una tensión diferente de la especificada.
13 No intente modificar ni arreglar este aparato. Póngase
en contacto con el personal de servicio Yamaha
cualificado cuando necesite realizar alguna reparación.
La caja no deberá abrirse nunca por ninguna razón.
14
Cuando no piense utilizar este aparato durante mucho tiempo
(es decir, cuando se ausente de casa por vacaciones, etc.)
desconecte el cable de alimentación de la toma de corriente.
15 Asegúrese de leer la sección “Solución de problemas”
antes de dar por concluido que su aparato está averiado.
16 Antes de trasladar este aparato, pulse STANDBY/ON
para ponerlo en el modo de espera, y luego desconecte
el cable de alimentación de CA de la toma de corriente.
17
Instale esta unidad cerca de la toma de CA, donde se pueda
llegar fácilmente a la clavija de alimentación de CA.
18 Las baterías y las pilas no deberán exponerse a un calor
excesivo como, por ejemplo, el que producen los rayos
del sol, el fuego y similares.
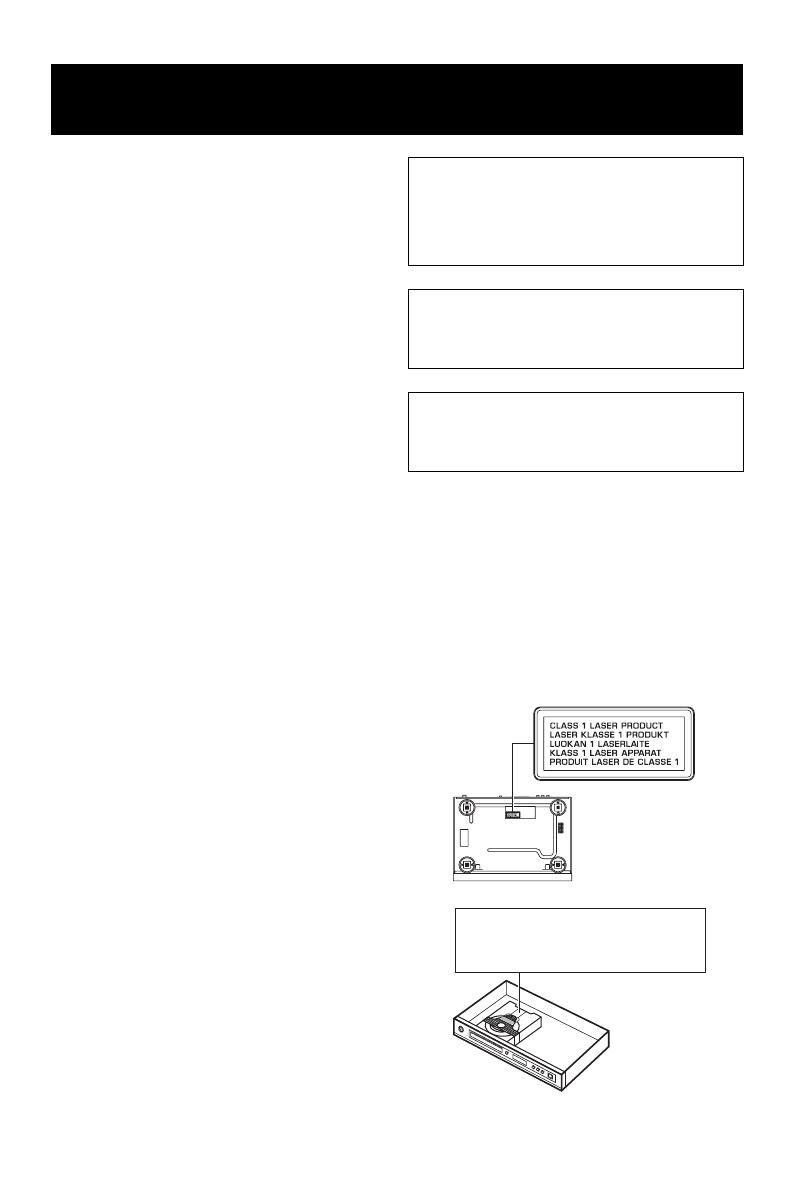
SEGURIDAD CONTRA LA RADIACIÓN LÁSER
Esta unidad utiliza rayos láser. Debido a la posibilidad de
que se produzcan daños en los ojos, la extracción de la
cubierta de la unidad o las reparaciones solamente deberán
ser realizadas por un técnico cualificado.
PELIGRO
Esta unidad emite radiación láser visible cuando se abre.
Evite la exposición directa a los rayos láser.
Cuando esta unidad esté enchufada a una toma de corriente,
no ponga sus ojos cerca de la abertura de la bandeja del
disco ni otras aberturas para mirar al interior.
PRECAUCIÓN: LEA LAS INDICACIONES SIGUIENTES ANTES DE
UTILIZAR ESTE APARATO.
Esta unidad no se desconecta de la fuente de
alimentación de CA si está conectada a una toma de
corriente, aunque la propia unidad esté apagada. A este
estado se le llama modo de espera. En este estado, está
unidad ha sido diseñada para que consuma un cantidad
de corriente muy pequeña.
PRECAUCIÓN
El uso de los controles, los ajustes o los procedimientos
que no se especifican enste manual pueden causar una
exposición peligrosa a la radiación.
ADVERTENCIA
PARA REDUCIR EL RIESGO DE INCENDIO O
DESCARGA ELÉCTRICA, NO EXPONGA ESTA
UNIDAD A LA LLUVIA NI A LA HUMEDAD.
AVOID DIRECT EXPOSURE TO THE BEAM
INVISIBLE LASER RADIATION WHEN OPEN
DANGER:
DO NOT STARE INTO BEAM
INVISIBLE LASER RADIATION WHEN OPEN
CAUTION:
Índice
Español
1 Es
Introducción ..................................3
Accesorios suministrados .........................3
Códigos de región ...................................... 3
Formatos de discos reproducibles ...........3
Limpieza de discos .....................................4
Información de patente ..............................4
Controles de funcionamiento ......5
Panel delantero ...........................................5
Panel trasero ...............................................6
Mando a distancia ....................................... 7
Conexiones ...................................8
Notas generales sobre las conexiones .....8
Conexiones de audio .................................. 8
Conexión digital .................................................8
Conexión analógica ............................................8
Conexiones de vídeo ..................................9
Jacks de vídeo componente <A> ........................9
Jacks de S-vídeo <B> .........................................9
Jack de vídeo compuesto <C> ............................9
Conexión de HDMI ....................................10
Jack HDMI .......................................................10
Otras conexiones ......................................11
Puerto USB .......................................................11
Jacks del mando a distancia .............................11
Primeros pasos ..........................12
Paso 1: Introducción de las pilas en el
mando a distancia .....................................12
Utilización del mando a distancia ....................12
Paso 2: Encendido de esta unidad .......... 12
Paso 3: Ajuste de un tipo/visualización
e idioma de TV ...........................................13
Ajuste de un sistema de color para su TV
...........13
Ajuste de una relación de aspecto para
su TV ................................................................13
Ajuste del idioma OSD ....................................14
Ajuste de idioma de audio, subtítulos y
menú de disco (DVD-Video solamente)
...........14
Operación de reproducción ...... 15
Operación básica ...................................... 15
Selección de una pista/capítulo ........................15
Búsqueda hacia atrás/adelante .........................15
Funciones de repetición/aleatoria ........... 15
Reproducción de repetición/aleatoria ..............15
Repetición de una sección dentro de un
capítulo/pista ....................................................16
Operaciones para la reproducción
de vídeo (DVD/VCD/SVCD) ....................... 16
Utilización del menú de disco ..........................16
Reproducción a cámara lenta ...........................16
Acercamiento/Alejamiento de imágenes
de zoom ............................................................16
Reanudación de la reproducción desde
el último punto donde paró ..............................16
Utilización de la visualización en
pantalla (OSD) .................................................17
Funciones especiales de DVD ................. 18
Reproducción por título ...................................18
Selección de un idioma de audio/formato
y un idioma de subtítulos .................................18
Funciones especiales de VCD/SVCD ...... 18
Utilización del menpu de control
de reproducción (PBC) ....................................18
Reproducción de discos de datos
(MP3/WMA/JPEG/DivX) ............................ 18
Selección de una carpeta y pista/archivo
.............19
Funciones especiales de disco
de imágenes .............................................. 19
Uso de la función de presentación
preliminar .........................................................19
Acercamiento/Alejamiento de imágenes
de zoom ............................................................19
Reproducción con múltiples ángulos ...............20
Reproducción simultánea de música
MP3 e imágenes JPEG .....................................20
Funciones especiales de DivX ................ 20
Utilización del menú interactivo ......................20
Selección de un idioma de
audio/subtítulos ................................................20
Utilización de un dispositivo USB ........... 21
Dispositivos USB compatibles ........................21
Reproducción de archivos de datos ..................21
Índice
Índice
2 Es
Menú de preparación .................22
Menú de preparación general ..................22
Bloqueo/desbloqueo del disco
para reproducirlo ..............................................22
Control de brillo del visualizador del panel
delantero ...........................................................22
Programación de pistas de discos
(excepto MP3/WMA/JPEG/DivX) ..................22
Idioma OSD ......................................................23
Ajuste del salvapantallas ..................................23
Ajuste del temporizador para dormir ...............24
Establecimiento de la función de espera
automática ........................................................24
Visualización del código de registro
DivX
®
VOD .....................................................24
Menú de preparación de audio ................24
Ajuste de la salida analógica ............................25
Ajuste de la salida digital .................................25
Activación/desactivación del audio HDMI ......25
Activación/desactivación del modo nocturno
...26
Sincronización con la imagen de vídeo ............26
Menú de preparación de vídeo ................ 26
Tipo de TV .......................................................26
Ajuste de la visualización del TV ....................27
Activación/desactivación de la función de
exploración progresiva .....................................27
Ajustes de la imagen ........................................28
Ajuste de vídeo HDMI .....................................29
Menú de preparación de preferencias ....30
Menú de audio, subtítulos y disco ....................30
Restricción de reproducción con control
de los padres .....................................................30
Selección de reproducción del formato VR .....30
Selección del menú MP3/JPEG ........................31
Visualización de archivos de subtítulos
externos DivX ..................................................31
Selección de la función PBC
(control de reproducción) .................................32
Cambio de contraseña ......................................32
Restablecimiento del sistema ...........................32
Códigos de idiomas ................... 33
Solución de problemas ............. 34
Glosario ...................................... 37
Especificaciones ........................ 39
3 Es
Introducción
Español
Gracias por haber adquirido esta unidad. Este
manual de instrucciones explica el
funcionamiento básico de esta unidad.
Este manual se imprime antes de la
producción. El diseño y las especificaciones
están sujetos a cambios por motivo de mejoras,
etc. Si hay diferencias entre el manual y el
producto, el producto tiene prioridad.
Mando a distancia
Dos pilas (AAA, R03, UM-4) para el mando
a distancia
Cable con clavijas de audio/vídeo
Manual de instrucciones
Esta unidad ha sido diseñada para soportar el
sistema de administración de regiones.
Compruebe el número del código de región en
la caja del disco DVD. Si el número no coindice
con el número de región de la unidad (vea la
tabla de abajo o la parte posterior de la unidad),
ésta tal vez no pueda reproducir el disco.
Esta unidad ha sido diseñada para reproducir
los discos que tengan los logotipos indicados
más abajo. No intente cargar ningún otro tipo
de disco en esta unidad.
Esta unidad puede reproducir:
Discos DVD-R/RW/R DL y DVD+R/RW/R DL
grabados en formato compatible con DVD-Video
Discos DVD-RW grabados en el formato
VR (compatible con CPRM).
Archivos MP3, WMA y JPEG grabados en
CD-R/RW, DVD-R/RW, DVD+R/RW y USB
CDs de KODAK Picture y de FUJICOLOR
ISO 9660 Level1/Level2 para CD-R/RW
Hasta 298 carpetas por disco/dispositivo USB y 648
archivos por carpeta con un máximo de 8 jerarquías
Archivos DivX
®
grabados en CD-R/RW,
DVD-R/RW, DVD+R/RW y USB
Producto con certificación DivX
®
Ultra
Certified oficial
Reproduce todas las versiones de vídeo
DivX
®
(incluida la versión DivX
®
6) y ofrece
reproducción mejorada de achivos multimedia
DivX
®
y formato de medio DivX
®
Los CD-R/RW, DVD-R/RW
/R DL
y DVD+R/RW
/
R DL
no se pueden reproducir si no están finalizados.
Progressive JPEG y los archivos WMA protegidos por
copyright no se pueden reproducir con esta unidad.
Sólo se puede reproducir la primera sesión de
DVD-R/RW
/R DL y
DVD+R
/R DL
.
Algunos discos no podrán reproducirse, dependiendo
de sus características o condiciones de grabación.
No utilice discos de formas extrañas (en forma de
corazón, etc.).
No utilice discos con cinta, pegatinas, pegamento
o muchos arañazos en sus superficies.
Para conocer detalles de los formatos que se pueden
reproducir, vea “Especificaciones” en la página 39.
Accesorios suministrados
Códigos de región
Destino
Código
de región
de esta
unidad
Discos
reproducibles
EE.UU.,
Canadá
Reino Unido,
Europa
Asia,
Corea
Australia,
Centroamérica
y Sudamérica
1
1
ALL
2
2
ALL
3
3
ALL
4
4
ALL
Formatos de discos reproducibles
Notas
Introducción
4 Es
Introducción
Cuando se ensucie un disco, límpielo con un paño de limpieza. Limpie el disco desde el centro
hacia afuera. No lo limpie en sentido circular.
No utilice disolventes como bencina, diluyente, limpiadores de venta en el comercio o
aerosoles antiestáticos para discos analógicos.
Fabricado bajo licencia de Dolby Laboratories. “Dolby”, “Pro Logic” y el símbolo con una doble D son
marcas registradas de Dolby Laboratories.
“DTS” y “DTS Digital Out” son marcas registradas de DTS, Inc.
DivX, DivX Ultra Certified y los logotipos asociados son marcas comerciales de DivX, Inc. y deben
utilizarse en virtud de una licencia.
HDMI, el logotipo HDMI y High Definition Multimedia Interface son marcas de fábrica o marca registradas
de HDMI Licensing LLC.
Limpieza de discos
Información de patente
Este producto incorpora tecnología de protección del copyright que está protegida por reclamaciones de
métodos de ciertas patentes de los EE.UU. y otros derechos de propiedad intelectual pertenecientes a
Macrovision Corporation y otros propietarios. El uso de esta tecnología de protección del copyright debe
contar con la autorización de Macrovision Corporation, y ha sido diseñada para ser usadas en casa y otros
lugares de visión limitada, a menos que Macrovision Corporation autorice lo contrario. El cambio de
ingeniería o el desmontaje están prohibidos.
5 Es
Controles de funcionamiento
Español
1 STANDBY/ON
Enciende esta unidad o la pone en el modo de
espera.
2 Bandeja de disco
Carga un disco en su bandeja.
3 OPEN/CLOSE ( )
Abre o cierra la bandeja del disco.
4 Indicador HDMI
Se enciende cuando se conecta un componente
HDMI y cuando salen señales por el jack HDMI
de esta unidad.
5 Indicador PROGRESSIVE
Se enciende cuando esta unidad se pone en el
modo progresivo.
6 Visualizador del panel delantero
Muestra el estado actual de esta unidad.
7 PLAY ( p )
Inicia la reproducción.
8 PAUSE ( )
Hace una pausa en la reproducción.
9 STOP ( s )
Detiene la reproducción.
0 Puerto USB
Conéctelo al puerto USB de su dispositivo USB
(vea la página 11).
Panel delantero
1 2354 6 7 8 9 0
Controles de funcionamiento
6 Es
Controles de funcionamiento
1 Conector de alimentación
Conecte el cable de alimentación a una toma de
CA.
2 Jacks REMOTE CONTROL (IN, OUT)
Conecte el jack REMOTE CONTROL (IN) de
esta unidad al jack de salida del mando a
distancia de su receptor AV Yamaha.
Conecte el jack REMOTE CONTROL (OUT)
de esta unidad al jack de entrada del mando a
distancia de su componente Yamaha (vea la
página 11).
3 Jack HDMI
Conéctelo al jack de entrada HDMI de su
componente HDMI (vea la página 10).
4 Jacks AUDIO OUT (L, R)
Conéctelos a los jacks de entrada de audio de su
receptor AV o sistema estéreo (vea la página 8).
5 Jack DIGITAL OUT - COAXIAL
Conéctelo al jack de entrada coaxial de su
receptor AV (vea la página 8).
6 Jacks VIDEO OUT - COMPONENT (Y, PB,
P
R)
Conéctelos a los jacks de entrada componente de
su receptor AV (vea la página 9).
7 Jack VIDEO OUT - S VIDEO
Conéctelo al jack de entrada de S-vídeo de su
receptor AV (vea la página 9).
8 Jack VIDEO OUT - VIDEO
Conéctelo al jack de entrada de vídeo compuesto
de su receptor AV (vea la página 9).
Precaución: No toque las clavijas internas de los jacks del panel trasero de esta unidad.
La descarga electrostática puede dañar permanentemente esta unidad.
Panel trasero
REMOTE CONTROL
OUT
HDMI
AUDIO OUT
COMPONENT VIDEO
S VIDEOCOAXIAL
P
R
PB
Y
VIDEO OUTDIGITAL OUT
IN
14567832
7 Es
Controles de funcionamiento
Español
1
Enciende esta unidad o la pone en el modo de
espera.
2 TOP MENU/RETURN
Visualiza el menú de disco de nivel superior
(DVD).
Retrocede al menú anterior (DVD*/VCD)
(vea la página 18).
3 2 / 3 /5 /a
Selecciona un elemento en el menú actualmente
visualizado.
Búsqueda o reproducción a cámara lenta.
ENTER
Confirma la selección del menú.
4 MENU
Visualiza el menú de un disco (DVD/JPEG)
(vea las páginas 16, 18, 19 y 20).
Activa o desactiva PBC (VCD)
(vea la página 18).
5 l22
Retrocede al capítulo o pista anterior.
Busca hacia atrás.*
6
7
Detiene la reproducción.
Abre la bandeja del disco.*
7 Botones numéricos (0-9)
Selecciona elementos numerados en el me
actualmente visualizado.
8 SUBTITLE
Selecciona el idioma de subtítulos
(vea las páginas 18 y 20).
9 ZOOM
Aumenta la imagen de vídeo
(vea las páginas 16 y 19).
0 ON SCREEN
Accede o sale del menú de visualización en
pantalla (OSD) de esta unidad (vea la página 17).
q SET UP
Accede o sale del menú de configuración de esta
unidad (vea las páginas 13 y 22).
w 33l
Avanza al capítulo o pista siguiente.
Busca hacia adelante.*
e 3 / 8
Inicia la reproducción o hace pausas en ella.
r USB
Accede al contenido del dispositivo USB
conectado o sale del modo USB (vea la página 21).
t AUDIO
Selecciona el idioma o formato de audio (vea las
páginas 18 y 20).
y REPEAT
Para acceder al modo de repetición/
reproducción aleatoria o para salir de él
(vea la
página 15)
.
u REPEAT A-B
Repite un segmento específico (vea la
página 16).
* Mantenga pulsado el botón durante más de dos
segundos.
Mando a distancia
1
2
3
u
y
t
r
e
w
q
0
5
6
7
8
9
4
8 Es
Conexiones
Asegúrese de apagar esta unidad y
desenchufar el cable de alimentación antes de
cambiar las conexiones.
Dependiendo del componente que quiera
conectar, hay varias formas de hacer
conexiones. Las conexiones posibles se
describen más abajo.
Consulte los manuales suministrados con
sus otros componentes para hacer las
mejores conexiones.
No conecte esta unidad a través de su
videograbadora. La calidad de vídeo podría
ser distorsionada por el sistema de
protección contra la copia.
No conecte el jack de salida de audio de esta
unidad al jack de entrada fonográfica de su
sistema de audio.
Conexión digital
Esta unidad tiene un jack coaxial de salida
digital. Conecte el jack DIGITAL OUT -
COAXIAL de esta unidad a su receptor AV
equipado con decodificador Dolby Digital,
DTS o MPEG utilizando un cable coaxial de
venta en el comercio.
Necesita poner [SALIDA DIGITAL] en [TODO]
(vea “SALIDA DIGITAL” en la página 25).
Si el formato de audio de la salida digital no
concuerda con la capacidad de su receptor, el
receptor producirá un sonido distorsionado o no
producirá sonido en absoluto. Asegúrese de
seleccionar el formato de audio apropiado desde
la pantalla de menú del disco.
Al pulsar una vez AUDIO en el mando a distancia
se puede cambiar no sólo el idioma, sino también
el formato de audio. El formato seleccionado
aparece en el visualizador del panel delantero
durante varios segundos.
Si quiere disfrutar de los formatos Dolby Digital,
DTS y MPEG, tendrá que conectar esta unidad a
un receptor AV que soporte estos formatos.
Conexión analógica
Esta unidad tiene jacks de salida analógica de
2 canales.
Conecte los jacks AUDIO OUT (L, R) de esta
unidad a los jacks de entrada correspondientes
de su componente de audio (un amplificador
estéreo, por ejemplo) usando el cable con
clavijas de audio suministrado.
Notas generales sobre las
conexiones
Conexiones de audio
AUDIO OUT
COMPONENT VIDEO
S VIDEOCOAXIAL
P
R
PB
Y
VIDEO OUTDIGITAL OUT
C
C
Esta unidad
Receptor AV
Altavoces
Notas
AUDIO OUT
COMPONENT VIDEO
S VIDEOCOAXIAL
P
R
PB
Y
VIDEO OUTDIGITAL OUT
L
R
L
R
R
L
Esta unidad
Amplificador
estéreo
Cable con clavijas de
audio (suministrada)
Altavoces
Conexiones
9 Es
Conexiones
Español
Si su receptor AV tiene jacks de salida de
vídeo, conecte su receptor y luego su TV para
poder usar un TV para siete fuentes de vídeo
diferentes (LD, videograbadora, etc.)
empleando el selector de entrada de su
receptor.
Esta unidad tiene varios tipos de jacks de
vídeo. Use la que corresponda a los jacks de
entrada del componente que va a conectar.
Jacks de vídeo componente <A>
Las conexiones de vídeo componente logran
una reproducción en color de más alta
fidelidad que las conexiones S-vídeo al
transmitir señales de vídeo por cables
separados para la luminancia (Y: verde) y
crominancia (P
B: azul, PR: rojo).
Conecte los jacks VIDEO OUT -
COMPONENT (Y, P
B, PR) de esta unidad a
los jacks de entrada componente de su
receptor AV y luego a los de su TV utilizando
un cable componente de venta en el comercio.
Fíjese en el color de cada jacks cuando haga
las conexiones.
Si su receptor no tiene jacks de salida
componente, podrá obtener una imagen de
vídeo mejor conectando directamente los
jacks de salida componente de esta unidad a
los jacks de entrada componente de su TV.
Jack de S-vídeo <B>
Las conexiones de S-vídeo proporcionan una
imagen más clara que las conexiones de vídeo
compuesto al transmitir señales de vídeo por
cables separados para la luminancia (Y) y la
crominancia (C).
Conecte el jack VIDEO OUT - S VIDEO de
esta unidad a un jack de entrada de S-vídeo de
su receptor AV y luego al de su TV utilizando
un cable de S-vídeo de venta en el comercio.
Jack de vídeo compuesto <C>
Conecte el jack VIDEO OUT - VIDEO de esta
unidad a un jack de entrada de vídeo de su
receptor AV y luego al de su TV utilizando un
cable con clavija de vídeo suministrado.
Conexiones de vídeo
AUDIO OUT
COMPONENT
VIDEO
S VIDEOCOAXIAL
P
R
PB
Y
VIDEO OUTDIGITAL OUT
VIDEO
OUT
VIDEO
IN
S VIDEO
OUT
COMPONENT
VIDEO OUT
COMPONENT
VIDEO IN
S VIDEO
IN
COMPONENT
VIDEO IN
S VIDEO
INPUT
VIDEO
INPUT
<C><B><A>
YPBPR
PR
Y
PB
PR
Y
PB
S
V
S
V
Cable con
clavijas de
vídeo
(suministrada)
Receptor AV
TV
Esta
unidad
10 Es
Conexiones
Jack HDMI
HDMI proporciona audio y vídeo digital de
alta calidad con una sola conexión.
Conecte el jack HDMI de esta unidad a un
jack de entrada HDMI de su receptor AV y
luego al de su TV utilizando un cable de
HDMI de venta en el comercio.
Si su receptor no tiene un jack de entrada
HDMI, podrá obtener una imagen de vídeo
mejor conectando directamente el jack HDMI
de esta unidad al jack de entrada HDMI de su
TV.
Esta unidad puede visualizar imágenes JPEG
de alta definición (720p o 1080i) cuando la
conecte a un HDTV mediante el jack HDMI.
Para conocer detalles, vea “JPEG HD” en la
página 29.
Necesita establecer [AUDIO HDMI] (vea la
página 25) y [VÍDEO HDMI] (vea la página 29).
Necesitará hacer conexiones de audio apropiadas
si el componente conectado no da salida a señales
de audio (vea “Conexiones de audio” en la
página 8).
Esta unidad no es compatible con los
componentes HDMI o DVI que son
incompatibles con HDCP.
Necesitará un cable de conversión HDMI/DVI de
venta en el comercio cuando conecte esta unidad
a otros componentes DVI. En este caso, el jack
HDMI de esta unidad no dará salida a ninguna
señal de audio.
Dependiendo del componente DVI conectado, los
colores blanco y negro de la imagen pueden no
estar bien definidos. En ese caso, ajuste la
configuración de la imagen del componente DVI
conectado.
No desconecte ni apague la alimentación del
componente HDMI/DVI conectado al jack HDMI
de esta unidad mientras se transfieren datos.
Hacerlo podría distorsionar la reproducción o
causar ruidos.
Cuando conecte un componente HDMI, consulte
su manual de instrucciones.
Conexión de HDMI
AUDIO OUT
COMPONENT VIDEO
HDMI
S VIDEOCOAXIAL
P
R
PB
Y
VIDEO OUT
DIGITAL OUT
HDMI IN
HDMI OUT
HDMI IN
Cable HDMI
TV
Esta unidad
Receptor AV
Notas
11 Es
Conexiones
Español
Puerto USB
Esta unidad tiene un puerto USB y puede
acceder a los archivos MP3, WMA, DivX y
JPEG guardados en su dispositivo USB.
Conecte el puerto USB del panel delantero de
esta unidad a un puerto USB de su dispositivo
USB.
Esta unidad puede que no reconozca algunos
dispositivos USB.
Para conocer detalles acerca de las funciones
USB, vea “Utilización de un dispositivo USB” en
la página 21.
Jacks del mando a distancia
Esta unidad tiene jacks de entrada/salida de
mando a distancia. Si su receptor AV es un
producto Yamaha capaz de transmitir señales
de control SCENE, usted podrá usar la función
SCENE.
Conecte el jack REMOTE CONTROL (IN) de
esta unidad a un jack de salida de control
remoto de su receptor utilizando un cable con
minijack monofónico de venta en el comercio
para que esta unidad inicie automáticamente la
reproducción pulsando simplemente un botón
de su receptor.
Para conocer detalles de la función SCENE,
consulte el manual del propietario suministrado con
su receptor AV de Yamaha.
Otras conexiones
Notas
Esta unidad
Dispositivo
USB
Nota
REMOTE CONTROL
OUT
HDMI
IN
REMOTE OUT
Esta unidad
Receptor AV
12 Es
Primeros pasos
1 Abra el compartimiento de las pilas.
2 Introduzca las pilas suministradas
(AAA, R03, UM-4) siguiendo las
indicaciones (+/–) del interior del
compartimiento.
3 Cierre la tapa.
Introduzca correctamente las pilas según las
marcas de polaridad (+/–). Las pilas introducidas
en sentido opuesto pueden tener fugas.
Cambie inmediatamente las pilas agotadas por
otras nuevas para evitar fugas.
Quite las pilas del compartimiento si el mando a
distancia no se va a utilizar durante más de un
mes.
Si las pilas tienen fugas, tírelas inmediatamente.
Evite tocar el material que sale de las pilas o dejar
que éste entre en contacto con ropas, etc. Limpie
a fondo el compartimiento de las pilas antes de
instalar otras nuevas.
No utilice pilas viejas y nuevas juntas.
No utilice juntas pilas de tipos diferentes
(alcalinas y de manganeso, por ejemplo). Lea las
indicaciones de las pilas con atención porque hay
tipos diferentes que pueden tener la misma forma
y color.
Tire las pilas siguiendo las regulaciones vigentes
en su localidad.
Utilización del mando a distancia
Use el mando a distancia dentro de una
distancia de 6 m de esta unidad y apúntelo
hacia el sensor de mando a distancia.
No derrame agua u otros líquidos en el mando a
distancia.
No deje caer el mando a distancia.
No deje ni guarde el mando a distancia en las
condiciones siguientes:
lugares de humedad alta como, por ejemplo,
cerca de un baño
lugares de alta temperatura como, por ejemplo,
cerca de una calefacción o estufa
lugares de temperaturas muy bajas
lugares polvorientos
Cuando el mando a distancia no funcione bien,
apúntelo inclinándolo hacia arriba, hacia el sensor.
1 Conecte el cable de alimentación a una
toma de CA.
2 Encienda su TV y receptor AV.
3 Seleccione la fuente de entrada apropiada
en el receptor AV (consulte el manual
suministrado con su receptor AV).
4 Pulse STANDBY/ON en el panel
delantero o en el mando a distancia
para encender esta unidad.
El visualizador del panel delantero se
enciende.
5
Prepare el TV para la entrada de vídeo correcta
(consulte el manual suministrado con su TV).
La pantalla predeterminada aparece en el TV.
Paso 1: Introducción de las
pilas en el mando a distancia
Notas
2
1
3
2
Notas
Paso 2: Encendido de esta unidad
Dentro de 6 m
Primeros pasos
13 Es
Primeros pasos
Español
Puede personalizar esta unidad con el menú de
configuración visualizado en la pantalla del
TV.
A menos que se indique lo contrario, todas las
operaciones aquí descritas se realizarán con el
mando a distancia suministrado.
Para volver al menú anterior, pulse 2 .
•Pulse SET UP para salir del menú.
Ajuste de un sistema de color para
su TV
Esta unidad es compatible con los formatos de
vídeo NTSC y PAL. Seleccione el sistema de
color para su TV.
1 Pulse SET UP.
2 Pulse repetidamente 3 para seleccionar
“PÁG. CONF. VÍDEO”.
3 Pulse 5 /a para resaltar [TIPO TV] y
luego pulse 3.
4 Pulse 5 /a para resaltar una de las
opciones siguientes.
PAL
Seleccione esto si el TV conectado es del
sistema PAL. Esto cambiará las señales de
vídeo de los discos NTSC y éstas saldrán en el
formato PAL.
NTSC
Seleccione esto si el TV conectado es del
sistema NTSC. Esto cambiará las señales de
vídeo de los discos PAL y éstas saldrán en el
formato NTSC.
MULTI
Seleccione esto si el TV conectado es
compatible con los formatos NTSC y PAL
(TV multisistema, por ejemplo).
El formato de salida corresponderá a las
señales de vídeo del disco.
5 Seleccione un elemento y luego pulse
ENTER.
Antes de cambiar el estándar de televisión actual,
asegúrese de que su TV soporte el tipo de TV
seleccionado.
Si la imagen no se visualiza correctamente en su
TV, espere unos 15 segundos a que esta unidad
active la recuperación automática.
Cuando haga conexiones HDMI no podrá
cambiar ni seleccionar [TIPO TV].
Ajuste de una relación de aspecto
para su TV
Puede ajustar la relación de aspecto de esta
unidad para que concuerde con la de su TV. Si
la relación de aspecto de su TV es 4:3 no
necesitará cambiar este ajuste. Si su TV es de
pantalla panorámica, cambie este ajuste según
el procedimiento de abajo.
Para conocer detalles, vea “Ajuste de la
visualización del TV” en la página 27.
Paso 3: Ajuste de un tipo/
visualización e idioma de TV
Notas
PÁG. CONF. VÍDEO
TIPO TV PAL
PANTALLA TV NTSC
PROGRESIVA MULTI
AJUSTE COLOR
CONFIGURACIÓN HDMI
Notas
CAMBIANDO NTSC A PAL :
1. COMPRUEBE QUE EL TV ADMITE
PAL ESTÁNDAR.
2. SI HAY IMAGEN DISTORSION. EN EL
TELEVISOR, ESPERE 15 SEG. PARA
AUTORRECUPERACIÓN.
OK CANCEL.
14 Es
Primeros pasos
1 Pulse SET UP.
2 Pulse repetidamente 3 para seleccionar
“PÁG. CONF. VÍDEO”.
3 Pulse 5 /a para resaltar [PANTALLA
TV] y luego pulse 3.
4 Pulse 5 /a para resaltar [16:9] y luego
pulse ENTER.
Ajuste del idioma OSD
Puede seleccionar su idioma preferido para el
menú de configuración. Este ajuste permanece
una vez seleccionado.
1 Pulse SET UP.
2 Pulse 2 / 3 para seleccionar “PÁGINA
CONFIGURACIÓN GENERAL”.
3 Pulse 5 /a para resaltar [IDIOMA
MENÚS] y luego pulse 3.
4 Pulse 5 /a para seleccionar un idioma y
luego pulse ENTER.
Ajuste de idioma de audio, subtítulos y
menú de disco (DVD-Video solamente)
Puede seleccionar su idioma preferido para
audio, subtítulos y menú de disco. Esta unidad
cambiará automáticamente al idioma preferido
siempre que se introduzca un disco. Si el
idioma seleccionado no se encuentra en el
disco, en su lugar se utilizará el idioma
predeterminado que tenga el disco.
1 Pulse
7
dos veces y luego pulse SET UP.
2 Pulse repetidamente 3 para seleccionar
“PÁGINA PREFERENCIAS”.
3 Pulse 5/a para resaltar una de las
opciones de abajo y luego pulse 3 .
AUDIO (idioma de audio)
SUBTÍTULOS (idioma de subtítulos)
MENÚ DE DISCO (idioma de menú de
disco)
4 Pulse 5/a para seleccionar un idioma y
luego pulse ENTER.
5 Repita los pasos 3-4 para otros ajustes de
idioma.
Para seleccionar un dioma que no
está en la lista
1 Seleccione [OTROS] en [AUDIO],
[SUBTÍTULOS] o [MENÚ DE DISCO].
2 Utilice los botones numéricos (0-9)
para introducir el código de idioma de 4
dígitos (vea “Códigos de idiomas” en la
página 33) y luego pulse ENTER.
PÁG. CONF. VÍDEO
TIPO TV
PANTALLA TV 4:3 PANORÁMICO
PROGRESIVA 4:3 BUZÓN
AJUSTE COLOR 16:9
CONFIGURACIÓN HDMI
PÁGINA CONFIGURACIÓN GENERAL
BLOQUEO DISC
ATENUAR PANT.
PROGRAMA
IDIOMA MENÚS ENGLISH
PROT. PANT. ESPAÑOL
DORMIR PORTUGUÉS
ESPERA AUTOMÁTICA
CÓD VAS DIVX(R)
PÁGINA PREFERENCIAS
AUDIO INGLÉS
SUBTÍTULOS CHINO
MENÚ DE DISCO FRANCÉS
PADRES ESPAÑOL
LISTA VR PORTUGUÉS
NAV MP3/JPEG POLACO
SUBTÍTULO DIVX ITALIANO
PBC TURCO
15 Es
Operación de reproducción
Español
Si aparece el icono de prohibición ( ) en la
pantalla del televisor cuando se pulsa un botón, la
función de ese botón no estará disponible en el
disco actual en ese momento.
A menos que se indique lo contrario, todas las
operaciones aquí descritas se realizarán con el
mando a distancia suministrado.
Dependiendo del disco, algunas operaciones
pueden ser diferentes o tal vez no se puedan
hacer. Consulte las instrucciones suministradas
con el disco.
No empuje la bandeja del disco ni ponga otros
objetos que no sean discos en ella. Esto podría
causar fallos en el funcionamiento de esta unidad.
1 Asegúrese de que esta unidad esté
encendida.
2 Pulse OPEN/CLOSE ( ) en el panel
frontal para abrir la bandeja del disco.
3 Ponga el disco en su bandeja con la cara
impresa hacia arriba.
4 Pulse de nuevo OPEN/CLOSE ( ) para
cerrar la bandeja del disco.
Después de reconocer el disco, esta
unidad empieza a reproducir
automáticamente.
Si pulsa 3
/ 8 estando la bandeja del
disco abierta, ésta se cerrará y la
reproducción empezará
automáticamente.
5 Para hacer una pausa, pulse 3 / 8 durante
la reproducción.
La reproducción hace una pausa y el
sonido se silencia.
La reproducción cuadro a cuadro se
puede hacer pulsando repetidamente
PAUSE ( ) en el panel delantero.
6 Pulse de nuevo 3 / 8 para reanudar la
reproducción normal.
7 Para detener la reproducción, pulse
7
.
Selección de una pista/capítulo
1
Pulse l22 / 33l o utilice los botones
numéricos (0-9) para seleccionar un
número de pista/capítulo.
2 Durante la reproducción repetida, pulse
l22 / 33l para reproducir la misma pista/
capítulo.
Búsqueda hacia atrás/adelante
1
Mantenga pulsado l22 / 33l o pulse
2 / 3 .
2 Mientras busca, pulse repetidamente
l22 / 33l o 2 / 3 para seleccionar la
velocidad deseada.
3 Pulse 3 / 8 para reanudar la reproducción
normal.
La tecla 2 / 3 puede que no se encuentre
disponible con algunos discos.
Para MP3 y WMA, la función de búsqueda le
permite buscar la pista que está siendo
reproducida.
Reproducción de repetición/
aleatoria
Cada vez que pulsa REPEAT durante la
reproducción, la visualización del panel
delantero cambia de la forma siguiente:
DVD
RPT ONE (repetición de un capítulo)
RPT TT (repetición de un título)
RPT ALL (repetición de todo)
SHUFFLE (aleatoria)
RPT SHF (repetición aleatoria)
RPT OFF (repetición apagada)
VCD/SVCD/CD
RPT ONE (repetición de una pista)
RPT ALL (repetición de todo)
SHUFFLE (aleatoria)
RPT SHF (repetición aleatoria)
RPT OFF (repetición apagada)
Notas
Operación básica
Notas
Funciones de repetición/aleatoria
Operación de reproducción
16 Es
Operación de reproducción
MP3/WMA/DivX
RPT ONE (repetición de una pista)
RPT FLD (repetición de carpeta)
SHUFFLE (aleatoria)
RPT OFF (repetición apagada)
Para VCD no se dispone de repetición de
reproducción cuando está activado el modo PBC.
Repetición de una sección dentro
de un capítulo/pista
1
Mientras reproduce, pulse REPEAT A-B
en el punto de inicio deseado.
“SET A” aparece en el visualizador del
panel delantero.
2 Pulse de nuevo REPEAT A-B en el punto
de finalización deseado.
A y B sólo se pueden ajustar dentro del
mismo capítulo/pista.
“RPT AB” aparece en el visualizador
del panel delantero y la sección
seleccionada se repite continuamente.
3 Pulse REPEAT A-B para salir de la
secuencia.
Utilización del menú de disco
Dependiendo del disco puede aparecer un
menú en la pantalla del TV una vez
introducido el disco.
Para seleccionar una función o
elemento de reproducción
Utilice 2 / 3/5 /a o los botones
numéricos (0-9) y luego pulse ENTER
para iniciar la reproducción.
Para acceder al menú o salir de él
Pulse MENU.
Reproducción a cámara lenta
Puede reproducir vídeo a cámara lenta.
1 Pulse 5 para retrocer a cámara lenta o a
para avanzar a cámara lenta.
2 Durante el modo de cámara lenta, pulse
repetidamente 5/a para seleccionar la
velocidad deseada.
3 Pulse 3 / 8 o ENTER para reanudar la
reproducción normal.
Para VCD y SVCD no se dispone de reproducción a
cámara lenta en retroceso.
Acercamiento/Alejamiento de
imágenes de zoom
Puede aumentar o reducir la imagen en la pantalla
del televisor y panoramizar la imagen aumentada.
1 Durante la reproduccion, pulse
repetidamente ZOOM para visualizar la
imagen con escalas diferentes.
Utilice 2 / 3 /5 /a para ver una
panorámica de la imagen ampliada.
La reproducción continúa.
2 Pulse repetidamente ZOOM para volver al
tamaño original.
Reanudación de la reproducción
desde el último punto donde paró
Puede reanudar la reproducción de los últimos
diez discos, aunque los discos hayan sido
expulsados o esta unidad esté apagada.
1 Introduzca uno de los últimos diez discos.
“CARGANDO” aparece en la pantalla
del TV.
2 Pulse 3 / 8 mientras “CARGANDO” se
visualiza en la pantalla del TV.
“REANUDAR REPR.” aparece en la
pantalla del TV y el disco se reproduce
desde el último punto donde paró.
Para cancelar el modo de reanudación
Pulse de nuevo
7
en el modo de parada
de reproducción.
Nota
Operaciones para la
reproducción de vídeo
(DVD/VCD/SVCD)
Nota
17 Es
Operación de reproducción
Español
Utilización de la visualización en
pantalla (OSD)
El menú OSD muestra la información de
reproducción del disco (ej., número de título o
capítulo, tiempo de reproducción transcurrido
o idioma de audio/subtítulos). Se pueden hacer
varias operaciones sin interrumpir la
reproducción del disco.
1 Pulse ON SCREEN durante la
reproducción.
En la pantalla del TV aparece una lista
de información del disco disponible.
DVD
VCD/SVCD
2 Pulse 5 /a para desplazar la información y
luego pulse ENTER para acceder al
elemento seleccionado.
3 Utilice los botones numéricos (0-9)
para introducir el número/tiempo o pulse
5 /a para seleccionar, y luego pulse
ENTER.
La reproducción cambiará al tiempo
elegido o al título/capítulo/pista
seleccionado.
Selección de título/capítulo/pista
(DVD/VCD)
1 Pulse 5/a para seleccionar [TÍTUL] o
[CAPÍTULO] (DVD) o [PISTA] (VCD).
2 Pulse ENTER.
3 Seleccione un número de título, capítulo o
pista con los botones numéricos (0-9).
Búsqueda con tiempo (DVD/VCD)
1 Pulse 5/a para seleccionar [TIEMPO
TÍTULO] / [TPO. CAPÍTULO] (DVD) o
[TPO. PISTA] / [TPO. DISCO] (VCD).
[TIEMPO TÍTULO] se refiere al
tiempo total del título actual, y [TPO.
CAPÍTULO] se refiere al tiempo total
del capítulo actual.
2 Pulse ENTER.
3 Introduzca las horas, minutos y segundos
de izquieda a derecha con los botones
numéricos (0-9) (ej., 0:34:27).
Selección de audio/subtítulos/
ángulo (DVD)
Puede cambiar [AUDIO], [SUBTÍTULOS] o
[ÁNG.] si estas funciones se encuentran
disponibles en el disco que está
reproduciendo.
1 Pulse 5/a para seleccionar [AUDIO],
[SUBTÍTULOS] o [ÁNG.].
2 Pulse ENTER.
3 Para audio y subtítulos:
Pulse 5/a para resaltar su selección y
luego pulse ENTER.
O
Para ángulo:
Seleccione un ángulo con los botones
numéricos (0-9).
MENÚ
TÍTUL 02/14
CAPÍTULO 02/14
AUDIO 5.1 C
SUBTÍTULOS ING
VELOC. 16 TRANSC TÍTULO 0:02:25
MENÚ
PISTA 02/14
TPO. DISCO 0:49:17
TPO. PISTA 0:03:43
REPETIR DESACTIVAR
VELOC. 16 TRANSC. TOTAL 0:02:25
18 Es
Operación de reproducción
Visualización de repetición/tiempo
(DVD/VCD)
1 Pulse 5 /a para seleccionar [REPETIR] o
[CONTADOR].
2 Pulse ENTER.
3 Pulse 5 /a para resaltar su selección y
luego pulse ENTER.
Visualización de tiempo (CD)
Cada vez que pulsa ON SCREEN, la
visualización de tiempo cambia de la forma
siguiente:
Reproducción por título
1
Pulse MENU.
El menú de títulos del disco aparece en
la pantalla del TV.
2 Utilice 2 / 3/5 /a o los botones
numéricos (0-9) para seleccionar una
opción de reproducción.
3 Pulse ENTER.
Selección de un idioma de audio/
formato y un idioma de subtítulos
Para seleccionar un idioma de
audio/formato
Pulse repetidamente AUDIO para
seleccionar un idioma de audio y/o
formato.
Para seleccionar un idioma de
subtítulos
Pulse repetidamente SUBTITLE para
seleccionar un idioma de subtítulos.
Utilización del menpu de control de
reproducción (PBC)
Para un VCD con una función de control de
reproducción (PBC) (versión 2.0 solamente)
1 Pulse MENU para cambiar entre “PBC
ACTIVADO” y “PBC DESACTIVADO”.
Si selecciona “PBC ACTIVADO”, el
menú del disco aparece (si está
disponible) en la pantalla del TV.
2
Utilice los
botones numéricos (0-9)
para
seleccionar una opción de reproducción.
Pulse
l22 / 33l para ir a la página
anterior/siguiente (si está disponible).
3 Durante la reproducción, pulse TOP
MENU/RETURN para volver a la pantalla
de menú.
Para omitir el menú de índice y
reproducir un disco desde el comienzo
Pulse
MENU
para desactivar la función PBC.
1 Cargue un disco de datos.
El tiempo de lectura del disco puede
sobrepasar 30 segundos debido a lo complejo
de la configuración del directorio/archivo.
El menú del disco de datos aparece en
la pantalla del TV.
Funciones especiales de DVD
TRANSC. TOTAL
RESTANTE TOTAL
REST. INDIVIDUAL
TRANSC. INDI.
Funciones especiales de
VCD/SVCD
Reproducción de discos de
datos (MP3/WMA/JPEG/DivX)
00:00 00:00
001/020
Piano
Cello
Jazz
Live
Favorite
MP3
MP3
MP3
MP3
19 Es
Operación de reproducción
Español
2 La reproducción empieza
automáticamente. Si no, pulse 3
/ 8 .
3 Pulsar l22 / 33l para seleccionar otra
pista/archivo en la carpeta actual.
Puede no ser posible reproducir ciertos discos
MP3/WMA/JPEG/DivX debido a la
configuración y características de los discos o a
las condiciones de la grabación.
Las imágenes JPEG de HD puede que no se
visualicen correctamente al visualizarse la
primera vez o al expulsarse el disco. Para conocer
detalles de JPEG de HD, vea “JPEG HD” en la
página 29.
Dependiendo del tamaño de la imagen, las
imágenes JPEG de HD pueden aparecer más
pequeñas.
Selección de una carpeta y pista/
archivo
1
Pulse 5 /a para seleccionar una carpeta y
luego pulse ENTER para abrirla.
2 Pulse 5 /a para seleccionar una pista/
archivo.
3 Pulse ENTER.
La reproducción empieza desde el
archivo seleccionado y seguirá hasta el
final de la carpeta.
1 Introduzca un disco de imágenes (JPEG,
CDs de Kodak Picture o de Fujicolor).
Para JPEG, el menú de imágenes
aparece en la pantalla del TV.
Para los CDs de Kodak Picture y de
Fujicolor empiezan los diaporamas.
Para JPEG
2 Pulse 3 / 8 para iniciar el diaporama.
Uso de la función de presentación
preliminar
Esta función le permite visualizar el contenido
de la carpeta actual o todo el disco.
1 Pulse
7
durante la reproducción.
En la pantalla del TV aparecen 12
imágenes miniatura.
2 Pulse l22 / 33l para visualizar otras
imágenes miniatura en la página anterior/
siguiente.
3 Utilice 2 / 3 /5 /a para resaltar una de las
imágenes miniatura y luego pulse ENTER
para iniciar la reproducción.
O
Mueva el cursor para resaltar en la
parte inferior de la página y empezar a
reproducir desde la primera imágen
miniatura de la página actual.
Para JPEG
4 Pulse MENU para volver al menú del disco
JPEG.
Acercamiento/Alejamiento de
imágenes de zoom
1 Durante la reproduccion, pulse
repetidamente ZOOM para visualizar la
imagen con escalas diferentes.
2 Utilice 2 / 3 /5 /a para ver una
panorámica de la imagen ampliada.
Notas
Funciones especiales de disco
de imágenes
20 Es
Operación de reproducción
Reproducción con múltiples
ángulos
Durante la reproducción, pulse
2
/
3
/
5
/
a
para girar la imagen en la pantalla del TV.
2:
gira la imagen hacia la izquierda
3: gira la imagen hacia la derecha
5 : da vuelta a la imagen verticalmente
a : da vuelta a la imagen horizontalmente
Para JPEG de HD no está disponible la tecla 5 /a .
Reproducción simultánea de música
MP3 e imágenes JPEG
1 Introduzca un disco que tenga música MP3
y datos de imagen JPEG.
El menú del disco aparece en la pantalla
del TV.
2 Seleccione una pista de música MP3.
3 Durante la reproducción de música MP3,
seleccione un archivo de imágenes JPEG
desde la pantalla del TV y luego pulse
3
/ 8 .
Los archivos de imágenes se
reproducirán uno tras otro hasta el final
de la carpeta.
4 Para abandonar la reproducción
simultánea, pulse MENU y luego
pulse
7
.
Algunos archivos no podrán reproducirse
correctamente, dependiendo de sus características
o condiciones de grabación.
Esta función no está disponible cuando [JPEG
HD] se pone en [ACTIVAR] (vea la página 29).
Archivos DivX que incluyen funciones
DMF (DivX Media Format) solamente
Utilización del menú interactivo
1 Cargue un disco.
El menú interactivo aparece en la
pantalla del TV.
2 Use 2 / 3 /5 /a para seleccionar un
capítulo.
3 Pulse ENTER o 3 / 8 para iniciar la
reproducción del capítulo seleccionado.
Para acceder al menú interactivo
Pulse MENU durante la reproducción.
Para volver a la pantalla del menú
del disco de datos
Pulse
7
cuando se visualice el menú
interactivo.
Selección de un idioma de audio/
subtítulos
Para seleccionar un idioma de audio
Durante la reproducción, pulse AUDIO
para cambiar el idioma de audio grabado
en el contenido.
Para seleccionar un idioma de
subtítulos
Durante la reproducción, pulse
SUBTITLE para cambiar o encender/
apagar el idioma de subtítulos grabado en
el contenido.
Para conocer información de los archivos de
subtítulos externos, vea “Visualización de archivos
de subtítulos externos DivX” en la página 31.
Nota
Notas
Funciones especiales de DivX
Nota
21 Es
Operación de reproducción
Español
Puede reproducir archivos MP3, WMA, JPEG
y DivX guardados en su dispositivo USB
compatible.
Dispositivos USB compatibles
Esta unidad es compatible con dispositivos de
almacenamiento USB (p. ej., memorias flash,
lectores de tarjetas, reproductores de audio
portátiles) que utilizan el formato FAT16 o
FAT32.
Algunos dispositivos puede que no funcionen
correctamente a pesar de cumplir estos
requerimientos.
Si aparece “No se admite este dispositivo.” en la
pantalla del TV cuando conecta el dispositivo
USB, siga el procedimiento de abajo.
Ponga esta unidad en el modo de espera y
vuelva a encenderla.
Desconecte el dispositivo cuando está unidad
esté en el modo de espera, conéctelo de nuevo
y vuelva a encenderlo.
Conecte el adaptador de CA si éste se
suministra con el dispositivo.
Si aparece “No se admite este dispositivo.”
incluso después de haber seguido este
procedimiento, el dispositivo no podrá reproducir
con esta unidad.
Si aparece “No hay protección USB actual. No se
admite este dispositivo.” en la pantalla del TV, el
dispositivo no puede reproducir con esta unidad
porque su consumo de energía es demasiado alto.
Esta unidad no puede leer más de dos ranuras de
lector de tarjetas a la vez, aunque pueda
reconocer hasta seis ranuras. La primera ranura
tiene prioridad.
Para una unidad de disco duro externa, esta
unidad es compatible con capacidades de 80 GB
o menos.
No conecte dispositivos que no sean de
almacenamiento USB: Cargadores USB, nodos
USB, PCs, etc.
Reproducción de archivos de datos
Yamaha y los proveedores no aceptan ninguna
responsabilidad por la pérdida de datos guardados en
los dispositivos USB conectados a esta unidad. Como
medida de precaución se recomienda que estos archivos
sean verificados después de haber sido guardados.
1
Conecte su dispositivo USB al puerto USB de
esta unidad (vea “Puerto USB” en la página 11).
“Pulse USB para cambiar dispositivo”
aparece en la pantalla del TV.
2 Pulse USB.
El tiempo de lectura puede sobrepasar 30
segundos debido al número de archivos/carpetas.
El menú de archivo aparece en la
pantalla del TV.
3
Siga el procedimiento de “Reproducción de discos
de datos (MP3/WMA/JPEG/DivX)” en la página 18.
Para salir del modo USB
Pulse
7
para detener la reproducción y
luego pulse USB.
No puede acceder al modo USB mientras
“CARGANDO” se visualiza en la pantalla del TV.
Si desconecta el dispositivo USB o abre la bandeja
del disco de esta unidad, el modo de reproducción
cambia automáticamente al modo del disco.
Para DivX, esta unidad es compatible con una
velocidad de bits de 3 Mbps o menos.
Algunos archivos puede que no funcionen correctamente
dependiendo de la especificación del dispositivo USB.
Para DivX, la imagen se puede congelar en breve
tiempo o el sonido se puede romper en los segmentos.
Para MP3, el sonido se puede romper en los segmentos
durante la reproducción simultánea de MP3/JPEG.
En este caso, grabe el archivo con una velocidad de bits
inferior y/o con un tamaño más pequeño para que el
archivo pueda trabajar correctamente.
Los archivos protegidos por copyright no se
pueden reproducir.
Esta unidad puede visualizar hasta 648 archivos. Sin
embargo, si algunos archivos no se pueden reproducir con
esta unidad puede que se visualicen menos de 648 archivos.
Si el dispositivo USB tiene particiones sólo se
visualiza la primer partición.
Esta unidad puede reproducir archivos de 4 GB o menos.
Utilización de un dispositivo
USB
Notas
Notas
22 Es
Menú de preparación
Esta preparación se realiza mediante la
pantalla del TV, permitiéndose personalizar
esta unidad según sus necesidades particulares.
A menos que se indique lo contrario, todas las
operaciones aquí descritas se realizarán con el
mando a distancia suministrado.
Para volver al menú anterior, pulse 2 .
•Pulse SET UP para salir del menú.
1 Pulse SET UP.
2 Pulse 2 / 3 para seleccionar “PÁGINA
CONFIGURACIÓN GENERAL”.
3 Pulse ENTER.
Bloqueo/desbloqueo del disco para
reproducirlo
No todos los discos han sido calificados o
codificados por el fabricante. Usted puede
impedir la reproducción de un disco específico
bloqueándolo. En esta unidad puede bloquear
hasta 40 discos.
1 En “PÁGINA CONFIGURACIÓN
GENERAL”, pulse 5 /a para resaltar
[BLOQUEO DISC] y luego pulse 3.
BLOQUEAR
Seleccione esto para bloquear la reproducción
del disco actual. Para acceder luego a un disco
bloqueado se necesita una contraseña de seis
dígitos.
La contraseña predeterminada es “000 000”
(vea “Cambio de contraseña” en la página 32).
DESBLOQUEAR
Seleccione esto para desbloquear el disco y
permitir reproducirlo en el futuro.
2 Pulse 5/a para seleccionar un ajuste y
luego pulse ENTER.
Control de brillo del visualizador
del panel delantero
Puede seleccionar diferentes niveles de brillo
para el visualizador del panel delantero.
1 En “PÁGINA CONFIGURACIÓN
GENERAL”, pulse 5 /a para resaltar
[ATENUAR PANT.] y luego pulse 3.
100%
Seleccione esto para obtener el máximo brillo.
70%
Seleccione esto para obtener un brillo medio.
40%
Seleccione esto para reducir el brillo.
2 Pulse 5/a para seleccionar un ajuste y
luego pulse ENTER.
Programación de pistas de discos
(excepto MP3/WMA/JPEG/DivX)
Programando las pistas puede reproducir el
contenido de un disco en el orden que usted
quiera. Puede almacenar hasta 20 pistas por
disco, con un máximo de diez discos.
1 En “PÁGINA CONFIGURACIÓN
GENERAL”, pulse 5 /a para resaltar
[PROGRAMA] y luego pulse 3 para
seleccionar [MENÚ INTRO].
Notas
Menú de preparación general
PÁGINA CONFIGURACIÓN GENERAL
BLOQUEO DISC
ATENUAR PANT.
PROGRAMA
IDIOMA MENÚS
PROT. PANT.
DORMIR
ESPERA AUTOMÁTICA
CÓD VAS DIVX(R)
Menú de preparación
23 Es
Menú de preparación
Español
2 Pulse ENTER.
El menú de introducción aparece en la
pantalla del TV.
Para introducir sus pistas/capítulos
favoritos
3 Utilice el botones numéricos (0-9)
para introducir un número válido de pista/
capítulo.
4 Utilice 2 / 3 /5 /a para mover el cursor a
la posición siguiente.
Si el número de pista/capítulo es
superior al diez, pulse 33
l para ir a la
página siguiente y seguir con la
programación.
O
Utilice 2 / 3 /5 /a para resaltar
[SGTE] en el menú de programas y
luego pulse ENTER.
5 Repita los pasos 3-4 para introducir otro
número de pista/capítulo.
Para eliminar una pista
6 Utilice 2 / 3/5 /a para mover el cursor a
la pista que quiera eliminar.
7 Pulse ENTER para eliminar esta pista del
menú de programa.
Para iniciar la reproducción de un
programa
8 Utilice 2 / 3 /5 /a para resaltar
[INICIAR] en el menú de programas y
luego pulse ENTER.
La reproducción empieza por las pists
seleccinadas y sigue en el orden
programado.
Para salir de la reproducción de un
programa
9 Utilice 2 / 3 /5 /a para resaltar [SALIR]
en el menú de programas y luego pulse
ENTER.
Idioma OSD
Este menú contiene varias opciones de
idiomas de visualización en pantalla (OSD).
Para conocer detalles, vea “Ajuste del idioma
OSD” en la página 14.
Ajuste del salvapantallas
Esta función se utiliza para activar o desactivar
el salvapantallas.
1 En “PÁGINA CONFIGURACIÓN
GENERAL”, pulse 5 /a para resaltar
[PROT. PANT.] y luego pulse 3.
ACTIVAR
Seleccione esto para apagar la pantalla del TV
cuando la reproducción del disco se detiene o
está en pausa durante más de 15 minutos.
DESACTIVAR
Seleccione esto para desactivar la función del
salvapantallas.
2 Pulse 5 /a para seleccionar un ajuste y
luego pulse ENTER.
1 04
2 10
3 _ _
4 _ _
5 _ _
6 _ _
7 _ _
8 _ _
9 _ _
10 _ _
PROGR.: PISTA (01-17)
SALIR INICIAR SGTE
24 Es
Menú de preparación
Ajuste del temporizador para
dormir
Esta función pone automáticamente esta
unidad en el modo de espera después de pasar
cierto tiempo.
1 En “PÁGINA CONFIGURACIÓN
GENERAL”, pulse 5 /a para resaltar
[DORMIR] y luego pulse 3 .
2 Pulse 5 /a para seleccionar un ajuste.
Puede seleccionar entre 30, 60, 90, 120
y 150 minutos. Seleccione
[DESACTIVAR] para cancelar la
función del temporizador para dormir.
3 Pulse ENTER.
Establecimiento de la función de
espera automática
Esta función se utiliza para activar o desactivar
el modo de espera automática cuando la
reproducción de un disco se para más de 30
minutos.
1 En “PÁGINA CONFIGURACIÓN
GENERAL”, pulse 5 /a para resaltar
[ESPERA AUTOMÁTICA] y luego
pulse 3.
ACTIVAR
Seleccione esto para poner automáticamente
esta unidad en el modo de espera cuando la
reproducción de un disco se para o hace una
pausa durante más de 30 minutos.
DESACTIVAR
Seleccione esto para desactivar la función de
espera automática.
2 Pulse 5 /a para seleccionar un ajuste y
luego pulse ENTER.
Visualización del código de
registro DivX
®
VOD
Yamaha le proporciona el código de registro
DivX
®
VOD (vídeo sobre demanda) que le
permite alquilar o comprar vídeos utilizando
el servicio DivX
®
VOD.
Para más información, visite https://
vod.divx.com/.
1 En “PÁGINA CONFIGURACIÓN
GENERAL”, pulse 5 /a para resaltar
[CÓD VAS DIVX(R)] y luego pulse 3 .
Aparece el código de registro.
2 Pulse ENTER para salir.
Para comprar o alquilar vídeos del servicio
DivX
®
VOD en https://vod.divx.com/, utilice el
código de registro y descargue el vídeo a un CD-
R para reproducirlo en esta unidad.
Los vídeos descargados de DivX
®
VOD sólo
podrán reproducirse en esta unidad.
Esta función de búsqueda con tiempo no está
disponible para DivX.
1 Pulse SET UP.
2 Pulse 2 / 3 para seleccionar “PÁGINA
CONFIGURACIÓN AUDIO”.
3 Pulse ENTER.
Notas
Menú de preparación de audio
PÁGINA CONFIGURACIÓN AUDIO
SALIDA ANALÓGICA
AUDIO DIGITAL
AUDIO HDMI
MODO NOCTURNO
SINCR. LABIOS
25 Es
Menú de preparación
Español
Ajuste de la salida analógica
Ajuste la salida analógica para que concuerde
con la capacidad de reproducción de esta
unidad.
1 En “PÁGINA CONFIGURACIÓN
AUDIO”, pulse 5 /a para resaltar
[SALIDA ANALÓGICA] y luego
pulse 3.
ESTÉREO
Seleccione esto para cambiar la salida de
canales a estéreo, que sólo reproduce el sonido
por los dos altavoces delanteros.
I/D
Seleccione esto si su unidad está conectada a
un decodificador Dolby Pro Logic.
2 Pulse 5 /a para seleccionar un ajuste y
luego pulse ENTER.
Ajuste de la salida digital
Las opciones [AUDIO DIGITAL] son:
[SALIDA DIGITAL] y [SALIDA LPCM].
1 En “PÁGINA CONFIGURACIÓN
AUDIO”, pulse 5 /a para resaltar
[AUDIO DIGITAL] y luego pulse 3.
2 Pulse 5 /a para resaltar una opción.
3 Pulse 3 para abrir un submenú.
SALIDA DIGITAL
Ajuste la salida digital según las conexiones
de su componente de audio opcional.
DESACTIVAR
Seleccione esto para desactivar la salida digital.
TODO
Seleccione esto si ha conectado el jack de
salida de audio digital a un decodificador/
receptor de múltiples canales.
MPEG PCM
Seleccione esto si su receptor no es capaz de
decodificar señales de audio MPEG.
PCM SÓLO
Seleccione esto sólo si su receptor no es capaz
de decodificar señales de audio de múltiples
canales.
SALIDA LPCM
Seleccione esto si ha conectado esta unidad a
un receptor compatible con PCM a través de
un terminal digital, como el terminal coaxial.
En este caso, puede tener que ajustar
[SALIDA LPCM].
Los discos se graban a cierta frecuencia de
muestreo. Cuanto más alta es la frecuencia de
muestreo, mejor es la calidad del sonido.
48KHz
Seleccione esto para reproducir discos
grabados a la frecuencia de muestreo de
48 kHz. Todas las series de datos PCM de
96 kHz PCM (si están disponibles) se
convierten a la frecuencia de muestreo de
48 kHz.
96KHz
Seleccione esto para reproducir discos
grabados a la frecuencia de muestreo de
96 kHz. Si el disco de 96 kHz está protegido
contra la copia, la salida digital se convertirá
automáticamente a la frecuencia de muestreo
de 48 kHz.
4 Pulse 5/a para seleccionar un ajuste y
luego pulse ENTER.
Activación/desactivación del audio
HDMI
Cuando conecte esta unidad a un componente
compatible con HDMI a través del jack
HDMI, seleccione activar o desactivar la
salida de audio HDMI.
1 En “PÁGINA CONFIGURACIÓN
AUDIO”, pulse 5 /a para resaltar
[AUDIO HDMI] y luego pulse 3.
ACTIVAR
Seleccione esto para activar la salida de audio
HDMI.
DESACTIVAR
Seleccione esto para desactivar la salida de
audio HDMI.
26 Es
Menú de preparación
Si no está utilizando la salida de audio HDMI
ponga esto en [DESACTIVAR].
Si el monitor/receptor conectado a esta unidad
usando HDMI no soporta la entrada de señal de
audio HDMI, ponga esto en [DESACTIVAR].
Esta unidad puede dar salida a las señales de
audio siguientes usando HDMI: Señales de 32/
44,1/48 kHz, PCM lineal de 2 anales y señales de
serie de bits (Dolby Digital, DTS y MPEG).
Cuando salen señales de audio de componentes
compatibles con HDMI, las señales de salida
digitales se silencian.
Cuando [SALIDA DIGITAL] se pone en
[DESACTIVAR] en esta unidad, el audio HDMI
se silencia aunque [AUDIO HDMI] se ponga en
[ACTIVAR] y se establezca una conexión HDMI
entre el monitor y el receptor.
Cuando [SALIDA DIGITAL] se pone en
[TODO] en esta unidad, las señales PCM aún
salen si el monitor y el receptor sólo soportan el
formato PCM. Sin embargo, la salida de audio se
silencia cuando se reproduce el formato de audio
de la fuente DTS.
Activación/desactivación del modo
nocturno
En el modo de escucha nocturna, la salida de
volumen alto bajará y la de volumen bajo
subirá a un nivel audible. Esto es útil para
cuando usted quiere ver sus películas de
acción favoritas sin molestar a otros durante la
noche.
1 En “PÁGINA CONFIGURACIÓN
AUDIO”, pulse 5 /a para resaltar [MODO
NOCTURNO] y luego pulse 3.
ACTIVAR
Seleccione esto para nivelar el volumen. Esta
función sólo está disponible para películas con
el modo Dolby Digital.
DESACTIVAR
Seleccione esto cuando quiera disfrutar de la
gama dinámica completa del sonido surround.
2 Pulse 5 /a para seleccionar un ajuste y
luego pulse ENTER.
Sincronización con la imagen de
vídeo
Esta función le permite retrasar la salida de
sonido para sincronizarla con la imagen. Esto
puede ser necesario cuando utilice ciertos
proyectores o monitores LCD.
1 En “PÁGINA CONFIGURACIÓN
AUDIO”, pulse 2 / 3 para resaltar
[SINCR. LABIOS] y luego pulse 3.
2 Pulse 2 / 3 para ajustar el tiempo de
retardo (entre 00 ms y 200 ms), y luego
pulse ENTER.
1 Pulse SET UP.
2 Pulse 2 / 3 para seleccionar “PÁG.
CONF. VÍDEO”.
3 Pulse ENTER.
Tipo de TV
Este menú tiene las opciones para seleccionar
el sistema de color que concuerda con su TV.
Para conocer detalles, vea “Ajuste de un
sistema de color para su TV” en la página 13.
Notas
Menú de preparación de vídeo
PÁG. CONF. VÍDEO
TIPO TV
PANTALLA TV
PROGRESIVA
AJUSTE COLOR
NIVEL NEGRO
TRANSCRIPCIÓN
CONFIGURACIÓN HDMI
27 Es
Menú de preparación
Español
Ajuste de la visualización del TV
Ajuste la relación de aspecto de esta unidad
para que concuerde con la de su TV. El
formato que seleccione deberá estar en el
disco. Si no, el ajuste de visualización del TV
no afectará a la imagen durante la
reproducción.
1 En “PÁG. CONF. VÍDEO”, pulse 5 /a
para resaltar [PANTALLA TV] y luego
pulse 3.
2 Pulse 5 /a para resaltar una de las
opciones siguientes.
4:3 PANORÁMICO
Seleccione esto si la relación de aspecto de su
TV es 4:3 y usted quiere que ambos lados de
la imagen queden recortados o formateados
para ajustarse a la pantalla de su TV.
4:3 BUZÓN
Seleccione esto si la relación de aspecto de su
TV es 4:3. En este caso se visualizará una
imagen panorámica con bandas negras en las
partes superior e inferior de la pantalla del TV.
16:9
Seleccione esto si tiene un TV de pantalla
panorámica.
3 Seleccione un elemento y luego pulse
ENTER.
La relación entre el ajuste de esta
unidad y la pantalla del TV
Cuando la relación de aspecto de su TV es 4:3:
Cuando la relación de aspecto de su TV es
16:9 (pantalla panorámica):
*1: Si el disco no ha sido asignado para la
reproducción en exploración panorámica se
reproducen en el modo de buzón.
*2: Los lados de la imagen pueden alargarse
dependiendo del TV. En este caso, compruebe
el tamaño de la pantalla y la relación de
aspecto de su TV.
Activación/desactivación de la
función de exploración progresiva
Esta función sólo está disponible si ha
conectado esta unidad a un TV de exploración
progresiva mediante los jacks de vídeo
componente (vea “Jacks de vídeo componente
<A>” en la página 9).
1 En “PÁG. CONF. VÍDEO”, pulse 5 /a
para resaltar [PROGRESIVA] y luego
pulse 3.
DESACTIVAR
Seleccione esto para desactivar la función de
exploración progresiva.
ACTIVAR
Seleccione esto para activar la función de
exploración progresiva.
2 Pulse 5/a para seleccionar un ajuste y
luego pulse ENTER.
Configuración
Disco de
reproducción
Pantalla del TV
4:3
PANORÁMICO
4:3 BUZÓN
16:9
4:3
16:9
4:3
*
1
16:9
16:9
4:3
Configuración
Disco de
reproducción
Pantalla del TV
*
2
28 Es
Menú de preparación
Acerca de activación de la exploración
progresiva:
Asegúrese de que su TV esté equipado con
exploración progresiva.
Conecte con un cable de vídeo componente.
Cuando haga conexiones HDMI no podrá
seleccionar [PROGRESIVA].
Ajustes de la imagen
Esta unidad incluye tres juegos predefinidos
de ajustes de color de imagen y un ajuste
personal que usted mismo puede definir.
1 En “PÁG. CONF. VÍDEO”, pulse 5 /a
para resaltar [AJUSTE COLOR] y luego
pulse 3.
ESTÁNDAR
Seleccione esto para el ajuste de imagen
estándar.
BRILLO
Seleccione esto para que la imagen de TV sea
más brillante.
SUAVE
Seleccione esto para que la imagen de TV sea
más suave.
PERSONAL
Seleccione esto para personalizar el color de la
imagen ajustando el brillo, el contraste, el
matiz y el color (saturación).
2 Pulse 5/a para seleccionar un ajuste y
luego pulse ENTER.
3 Si selecciona [PERSONAL] en el paso 1,
vaya a los pasos 4-7.
Aparece el menú “CONFIG IMAGEN
PERSONAL”.
4 Pulse 5/a para seleccionar una de las
opciones siguientes.
BRILLO
Aumente o disminuya el valor para dar o quitar
brillo a la imagen. El valor medio de ajuste de
brillo es cero (0).
CONTRASTE
Aumente o disminuya el valor para dar o quitar
nitidez a la imagen. El valor medio de ajuste de
contraste es cero (0).
TINTE
Aumente o disminuya el valor para oscurecer o
iluminar la imagen. El valor medio de ajuste de
matiz es cero (0).
COLOR
Aumente o disminuya el valor para realzar o
desvanecer la imagen. El valor de ajuste medio
del color es cero (0).
5
Pulse
2
/
3
para establecer el ajuste que
mejor se adapte a sus preferencias personales.
6 Repita los pasos 4-5 para ajustar otras
características del color.
7 Pulse ENTER.
Para la salida HDMI no se encuentran disponibles
todos los ajustes.
LOS CONSUMIDORES DEBERÁN NOTAR QUE
NO TODOS LOS TELEVISORES DE ALTA
DEFINICIÓN SON TOTALMENTE COMPATIBLES
CON ESTE PRODUCTO Y QUE PUEDEN
APARACER ARTEFACTOS EN LA IMAGEN. DE
TENER PROBLEMAS CON LA IMAGEN DE
EXPLORACIÓN PROGRESIVA 525 O 625, AL
USUARIO SE LE RECOMIENDA CAMBIAR LA
CONEXION A LA SALIDA “DEFINICIÓN
ESTÁNDAR”. SI TIENE PREGUNTAS ACERCA DE
LA COMPATIBILIDAD DE NUESTRO MONITOR
DE VÍDEO CON ESTE MODELO DE
REPRODUCTOR DVD DE 525P Y 625P, PÓNGASE
EN CONTACTO CON NUESTRO CENTRO DE
SERVICIO AL CLIENTE.
Esta unidad es compatible con la línea completa de
productos Yamaha, incluyendo los proyectores DPX-
1300 y DPX-830 y el monitor de plasma PDM-4220.
Nota
0
0
0
0
CONFIG IMAGEN PERSONAL
BRILLO
CONTRASTE
TINTE
COLOR
29 Es
Menú de preparación
Español
Ajuste de vídeo HDMI
Cuando conecte esta unidad a un componente
compatible con HDMI a través del jack HDMI,
seleccione los ajustes de salida de vídeo siguientes
dependiendo del componente conectado.
1 En “PÁG. CONF. VÍDEO”, pulse 5 /a
para resaltar [CONFIGURACIÓN HDMI]
y luego pulse 3.
2 Pulse 5 /a para resaltar una opción.
3 Pulse 3 para introducir un submenú.
FORM. PANT. ANCHA
Ajuste la relación de aspecto de las imágenes
proyectadas en la pantalla. Esta función no
está disponible cuando se hacen conexiones
HDMI y [PANTALLA TV] se pone en [16:9]
(vea la página 27).
PANORÁMICA
Seleccione para visualizar una imagen 4:3 en la
pantalla 16:9 con alargamiento no lineal (la
posición central de la pantalla se alarga menos
que los lados). Esta función no se encuentra
disponible cuando la resolución es 480p o 576p.
4:3 BUZÓN
Seleccione para visualizar una imagen 4:3 en la pantalla
16:9 sin alargamiento. Cuando reproduzca un disco
grabado con imagen 16:9, la imagen se reproducirá con
su relación de aspecto original (16:9) sin buzón.
DESACTIVAR
Cuando se selecciona esta opción no se hace el
ajuste de la relación de aspecto.
VÍDEO HDMI
Ajuste la resolución dependiendo del monitor
que esté usando.
480P
Vídeo de exploración progresiva 480
576P
Vídeo de exploración progresiva 576
720P
Vídeo de exploración progresiva 720
1080I
Vídeo entrelazado 1080
AUTO
La resolución se selecciona automáticamente
según el monitor que usted esté utilizando.
Para otros ajustes que no sean [AUTO], las
señales de vídeo HDMI puede que no salgan
correctamente si un ajuste de salida de resolución
no está soportado por el componente HDMI que
usted está utilizando. En ese caso, siga los pasos
de abajo para volver al ajuste inicial.
1 Pulse OPEN/CLOSE ( ) en el panel
frontal para abrir la bandeja del disco.
2 Pulse 2 .
3 Pulse SUBTITLE.
No haga esta operación mientras reproduce un
disco en esta unidad.
Cuando haga conexiones HDMI no podrá ajustar
[TIPO TV] ni [PROGRESIVA].
El ajuste de [TIPO TV] puede cambiar cuando
desconecte el cable HDMI. Si la señal de vídeo
componente, S-vídeo o vídeo compuesto no sale
correctamente, vea “Solución de problemas” en
la página 34 para establecer de nuevo el tipo de
TV correcto.
JPEG HD
Esta unidad puede visualizar imágenes JPEG
de alta definición cuando se conecta a un
componente HDMI.
ACTIVAR
Visualiza imágenes JPEG con alta calidad.
DESACTIVAR
Visualiza imágenes JPEG con calidad estándar.
Puede seleccionar [JPEG HD] cuando salen
señales de vídeo HDMI con 720p o 1080i.
Cuando [JPEG HD] se ponga en [ACTIVAR] y se
visualicen imágenes JPEG de HD no saldrán
otras señales de vídeo que no sean las señales
HDMI.
No puede seleccionar [VÍDEO HDMI] (vea la
página 29) ni [JPEG HD] cuando se visualicen
las imágenes JPEG de HD.
Notas
Notas
30 Es
Menú de preparación
1 Pulse dos veces
7
para detener la
reproducción (si es necesario) y luego
pulse SET UP.
2 Pulse 2 / 3 para seleccionar “PÁGINA
PREFERENCIAS”.
3 Pulse ENTER.
Menú de audio, subtítulos y disco
Estos menús contienen varias opciones de
idiomas para los menús de audio, subtítulos y
discos que están grabados en el DVD-Vídeo.
Para conocer detalles, vea “Ajuste de idioma
de audio, subtítulos y menú de disco (DVD-
Video solamente)” en la página 14.
Restricción de reproducción con
control de los padres
Algunos DVDs pueden tener un nivel de
control de los padres asignado a todo el disco
o a ciertas escenas del mismo. Esta función le
permite ajustar un nivel de limitación para la
reproducción.
Los niveles de calificación val del 1 al 8 y
dependen de cada país. Usted puede prohibir
la reproducción de ciertos discos no aptos para
sus hijos, o reproducir escenas alternativas
para ciertos discos.
1 En “PÁGINA PREFERENCIAS”, pulse
5 /a para resaltar [PADRES] y luego
pulse 3.
2 Pulse 5/a para resaltar un nivel de
calificación para el disco introducido y
luego pulse ENTER.
Para desactivar el control de los padres
y reproducir todos los discos,
seleccione [8 ADULTOS].
3
Utilice los
botones numéricos (0-9)
para
introducir la contraseña de seis dígitos (vea
“Cambio de contraseña” en la página 32).
Los discos DVD calificados por encima
del nivel que usted seleccione no se
reproducirán a menos que se introduzca
la contraseña de seis dígitos.
Algunos discos DVD no están codificados con
calificación a pesar de que ésta está impresa en la
caja del disco. La función de nivel de calificación no
sirve para algunos discos.
Selección de reproducción del
formato VR
Hay dos formas de reproducir un disco en el
formato VR (grabación de vídeo): LISTA
ORIGINAL y LISTA REPRODUCCIÓN. Esta
función no se encuentra disponible con discos que
no son del formato VR.
1 En “PÁGINA PREFERENCIAS”, pulse
5 /a para resaltar [LISTA VR] y luego
pulse 3.
Menú de preparación de
preferencias
PÁGINA PREFERENCIAS
AUDIO
SUBTÍTULOS
MENÚ DE DISCO
PADRES
LISTA VR
NAV MP3/JPEG
SUBTÍTULO DIVX
PBC
Nota
PÁGINA PREFERENCIAS
AUDIO 1 ESP INF
SUBTÍTULOS 2 T PÚBL
MENÚ DE DISCO 3 DIS PAR
PADRES 4 DP 13
LISTA VR 5 DP REST
NAV MP3/JPEG 6 R
SUBTÍTULO DIVX 7 NR 17
PBC 8 ADULTOS
31 Es
Menú de preparación
Español
LISTA ORIGINAL
Seleccione esto para reproducir los títulos
grabados originalmente en el disco.
LISTA REPROD.
Seleccione esto para reproducir la versión editada
del disco. Esta función sólo está disponible
cuando se ha creado una lista de reproducción.
2 Pulse 5 /a para resaltar un ajuste y luego
pulse ENTER.
Para reproducir un disco en el
formato VR
3 Pulse SET UP para cerrar el menú de
preparación.
4 Pulse 3 / 8 para empezar a reproducir la
opción que usted seleccionó.
Selección del menú MP3/JPEG
El navegador MP3/JPEG sólo puede usarse si
el disco fue grabado con un menú. Esto le
permite seleccionar menús de visualización
diferentes para navegar fácilmente.
1 En “PÁGINA PREFERENCIAS”, pulse
5 /a para resaltar [NAV MP3/JPEG] y
luego pulse 3.
SIN MENÚ
Seleccione esto para visualizar todos los
archivos del MP3/CD de imagen.
CON MENÚ
Seleccione esto para visualizar sólo el menú
de carpeta del MP3/CD de imagen.
2 Pulse 5 /a para seleccionar un ajuste y
luego pulse ENTER.
Visualización de archivos de
subtítulos externos DivX
Para los archivos de subtítulos externos Divx
se encuentran disponibles los juegos de
fuentes listados más abajo. Este ajuste le
permite ver en la pantalla el juego de fuentes
apropiado que concuerda con el archivo de
subtítulos.
1 En “PÁGINA PREFERENCIAS”, pulse
5 /a para resaltar [SUBTÍTULO DIVX] y
luego pulse 3.
GRUPO1:
Albanés (sq), Vascuence (eu), Catalán (ca),
Danés (da), Holandés (nl), Inglés (en),
Feroe (fo), Finlandés (fi), Francés (fr),
Alemán (de), Islandés (is), Irlandés (ga),
Italiano (it), Noruego (no), Portugués (pt),
Romanche (rm), Escocés (gd), Español (es),
Sueco (sv)
GRUPO2:
Albanés (sq), Ccroata (hr), Checo (cs),
Júngaro (hu), Polaco (pl), Rumano (ro),
Eslovaco (sk), Esloveno (sl)
GRUPO3:
Búlgaro (bg), Bielorruso (be),
Macedonio (mk), Ruso (ru), Serbio (sr),
Ucraniano (uk)
GRUPO4:
Hebreo (iw), Yiddish (ji)
GRUPO5:
Turco (tr)
2 Pulse 5/a para seleccionar un grupo y
luego pulse ENTER.
Algunos discos no podrán reproducirse,
dependiendo de sus características o condiciones
de grabación.
Algunos archivos de subtítulos externos pueden
visualizarse mal o no visualizarse en absoluto.
Para los archivos de subtítulos externos se
soportan las extensiones de nombres de archivos
de formato de subtítulos indicados a continuación
(note que estos archivos no se muestran dentro
del menú de navegación del disco): .srt, .sub, .ssa,
.smi
El nombre de archivo del archivo de película
tiene que ser repetido al comienzo del nombre de
archivo para el archivo de subtítulo externo.
El número de archivos de subtítulos externos que
puede ser cambiado para el mismo archivo de
película se limita a un máximo de diez.
Notas
32 Es
Menú de preparación
Selección de la función PBC
(control de reproducción)
Puede activar o desactivar el control de
reproducción (PBC). Esta función sólo está
disponible en Vídeo CD 2.0 con control de
reproducción (PBC).
1 En “PÁGINA PREFERENCIAS”, pulse
5 /a para resaltar [PBC] y luego pulse 3 .
ACTIVAR
Seleccione esto para ver un menú de disco.
DESACTIVAR
Seleccione esto para no visualizar un menú de
disco. La reproducción empieza desde el
principio del disco.
2 Pulse 5 /a para seleccionar un ajuste y
luego pulse ENTER.
También puede utilizar el botón MENU del mando a
distancia para activar o desactivar la función de control
de reproducción (PBC) (vea “Utilización del menpu de
control de reproducción (PBC)” en la página 18).
Cambio de contraseña
Para el control de los padres y el bloqueo del
disco se utiliza la misma contraseña.
Introduzca su contraseña de seis dígitos
cuando se le indique en la pantalla. La
contraseña predeterminada es 000 000.
1 En “PÁGINA PREFERENCIAS”, pulse
5 /a para resaltar [CONTRASEÑA], y
luego pulse 3 para seleccionar
[CAMBIAR].
2 Pulse ENTER para entrar en la “Página de
cambio de contraseña”.
3 Utilice el botones numérico (0-9) para
introducir su contraseña de seis dígitos
antigua.
Cuando haga esto por primera vez,
introduzca “000 000”.
Si olvidó su contraseña antigua de seis
dígitos, introduzca “000 000”.
4 Introduzca la contraseña nueva de seis
dígitos.
5 Introduzca de nuevo la contraseña nueva de
seis dígitos para confirmarla.
6 Pulse ENTER para confirmar su
contraseñal nueva.
La contraseña nueva de seis dígitos es
válida ahora.
Restablecimiento del sistema
Puede reponer todas las opciones y sus ajustes
personales a los ajustes iniciales de fábrica,
excepto su contraseña para [PADRES] y
[BLOQUEO DISC].
1 En “PÁGINA PREFERENCIAS”, pulse
5 /a para resaltar [PREDETERMIN.] y
luego pulse 3 para seleccionar
[RESTABLECER].
2 Pulse ENTER.
Todos los ajustes cambian a los ajustes
iniciales de fábrica.
Nota
PÁGINA PREFERENCIAS
SUBTÍTULOS
MENÚ DE DISCO
PADRES
LISTA VR
NAV MP3/JPEG
SUBTÍTULO DIVX
PBC
CONTRASEÑA CAMBIAR
CONTRSÑ ANT.
NUEVA CONTRSÑ
CONFIRMAR
OK
33 Es
Códigos de idiomas
Español
Estos códigos se pueden utilizar para seleccionar otros idiomas. Eso no afecta a las
opciones de in “AUDIO”, “SUBTÍTULOS” o “MENÚ DE DISCO”.
Abcaciano 6566 Gaélico 7168 Macedonio 7775 Sardo 8367
Afar 6565 Gallego 7176 Malgache 7771 Gaélico escocés 7168
Afrikaans 6570 Georgiano 7565 Malayo 7783 Serbio 8382
Albanés 8381 Alemán 6869 Malayálam 7776 Shona 8378
Amárico 6577 Gikuyu 7573 Maltés 7784 Sindhi 8368
Árabe 6582 Griego 6976 Manx 7186 Cingalés 8373
Armenio 7289 Guaraní 7178 Maorí 7773 Eslovaco 8375
Assamés 6583 Gujarati 7185 Marathi 7782 Esloveno 8376
Avéstico 6569 Hausa 7265 Marshallés 7772 Somalí 8379
Aymará 6589 Hebreo 7269 Moldavo 7779 Sotho, meridional 8384
Azerí 6590 Herero 7290 Mongol 7778 Ndebele del sur 7882
Bashkirio 6665 Hindi 7273 Nauru 7865 Español 6983
Vascuence 6985 Hiri Motu 7279 Navaho 7886 Sundanés 8385
Bielorruso 6669 Húngaro 7285 Navajo 7886 Suahili 8387
Bengalí 6678 Islandés 7383 Ndebele, norte 7868 Swati 8383
Bihari 6672 Ido 7379 Ndebele, sur 7882 Sueco 8386
Bislama 6673 Indonesio 7368 Ndonga 7871 Tagalo 8476
Bokmål, noruego 7866
Interlingua (Internacional)
7365 Nepalí 7869 Tahitiano 8489
Bosnio 6683 Interlingue 7369 Sami septentrional 8369 Tajik 8471
Bretón 6682 Inuktitut 7385 Ndebele del norte 7868 Tamil 8465
Búlgaro 6671 Inupiaq 7375 Noruego 7879 Tártaro 8484
Birmano 7789 Irlandés 7165 Bokmål noruego 7866 Telugu 8469
Castellano 6983 Italiano 7384 Nynorsk noruego 7878 Tailandés 8472
Catalán 6765 Japonés 7465 Nyanja 7889 Tibetano 6679
Chamorro 6772 Javanés 7486 Nynorsk, noruego 7878 Tigriña 8473
Chechen 6769 Kalaallisut 7576 Occitano (post 1500) 7967 Tonga (Islas Tonga) 8479
Chewa 7889 Kannada 7578 Búlgaro antiguo 6785 Tsong 8483
Chichewa 7889 Cachemir 7583
Eslavo de iglesia antiguo
6785 Tswana 8478
Chino 9072 Kazaj 7575 Eslavo antiguo 6785 Turco 8482
Chuang 9065 Khmer 7577 Oriya 7982 Turcomano 8475
Eslavo de iglesia 6785 Kikuyu 7573 Oromo 7977 Twi 8487
Eslavo de iglesia 6785 Kinyarwanda 8287 Oseto 7983 Uighur 8571
Chuvash 6786 Kirguiz 7589 Osético 7983 Ucraniano 8575
Córnico 7587 Komi 7586 Pali 8073 Urdu 8582
Corso 6779 Coreano 7579 Punjabí 8065 Uzbeco 8590
Croata 7282 Kuanyama 7574 Persa 7065 Vietnamita 8673
Checo 6783 Kurdo 7585 Polaco 8076 Volapük 8679
Danés 6865 Kwanyama 7574 Portugués 8084 Walloon 8765
Holandés 7876 Laosiano 7679 Provenzal 7967 Galés 6789
Dzongkha 6890 Latín 7665 Pushto 8083 Wolof 8779
Inglés 6978 Latvio 7686 Quechua 8185 Xhosa 8872
Esperanto 6979 Letzeburgesch 7666 Reto-Romance 8277 Yídish 8973
Estonio 6984 Limburgan 7673 Rumano 8279 Yoruba 8979
Feroe 7079 Limburger 7673 Rundi 8278 Zhuang 9065
Fiyiano 7074 Limburgish 7673 Ruso 8285 Zulú 9085
Finlandés 7073 Lingala 7678 Samoano 8377
Francés 7082 Lituano 7684 Sango 8371
Frisio 7089 Luxemburgués 7666 Sánscrito 8365
Códigos de idiomas
34 Es
Solución de problemas
Consulte la tabla de abajo cuando esta unidad no funcione correctamente. Si el problema
que usted tiene no está en la lista de abajo o las instrucciones no sirven de ayuda, ponga
esta unidad en el modo de espera, desconecte el cable de alimentación y póngase en
contacto con el centro de servicio o concesionario Yamaha autorizado más cercano.
Problema Solución
No se conecta la alimentación Conecte correctamente el cable de alimentación de CA.
Pulse STANDBY/ON en el panel delantero para conectar la
alimentación.
No hay imagen Consulte el manual suministrado con su TV para seleccionar el canal de
entrada de vídeo correcto. Cambie el canal del TV hasta ver la pantalla
del DVD.
Encienda su TV.
Verifique la conexión de vídeo.
Las señales de vídeo que no son señales HDMI no salen cuando se
visualizan imágenes JPEG de HD (vea “JPEG HD” en la página 29).
Cuando hace conexiones HDMI
(usando los jacks HDMI) no se
visualizan imágenes
Siga los pasos de abajo para cambiar [VÍDEO HDMI] a [AUTO].
1. Pulse OPEN/CLOSE () en el panel delantero o mantenga
pulsado
7
en el mando a distancia para abrir la bandeja del disco.
2. Pulse 2 en el mando a distancia.
3. Pulse SUBTITLE en el mando a distancia.
Cuando no utiliza las
conexiones de exploración
progresiva (usando los jacks de
vídeo componente) no se
visualiza imagen
Siga los pasos de abajo para desactivar la exploración progresiva.
1. Pulse OPEN/CLOSE () en el panel delantero o mantenga
pulsado
7
en el mando a distancia para abrir la bandeja del disco.
2. Pulse 2 en el mando a distancia.
3. Pulse ZOOM en el mando a distancia para desactivar la exploración
progresiva.
Imagen completamente
distorsionada o imagen en
blanco y negro o no hay imagen
Compruebe que el disco sea compatible con esta unidad (vea “Formatos
de discos reproducibles” en la página 3).
Compruebe que el tipo de TV de esta unidad esté ajustado para que
concuerde con el del disco y con el de su TV (vea “Ajuste de un sistema
de color para su TV” en la página 13). Siga los pasos de abajo para
cambiar el ajuste de [TIPO TV].
1. Pulse OPEN/CLOSE () en el panel delantero o mantenga
pulsado
7
en el mando a distancia para abrir la bandeja del disco.
2. Pulse 3 en el mando a distancia.
3. Pulse AUDIO en el mando a distancia.
Imagen distorsionada De vez en cuando, puede que aparezca un poco de distorsión en la
imagen dependiendo del disco que esté siendo reproducido. Esto no es
un fallo del funcionamiento.
El tamaño de la pantalla no
parece natural o el subtítulo se
visualiza sólo parcialmente en
el monitor de TV o no se
visualiza en absoluto
Compruebe que el ajuste de TV de esta unidad concuerde con el tamaño
de pantalla de su TV (vea “Ajuste de la visualización del TV” en la
página 27).
Cambie el tamaño de la pantalla y la relación de aspecto de su TV.
Solución de problemas
35 Es
Solución de problemas
Español
Problema Solución
No hay sonido o éste está
distorsionado
Ajuste el volumen.
Verifique que los altavoces estén conectados correctamente.
Para MP3/WMA, compruebe que la frecuencia de muestreo y la
velocidad de bits sean compatibles con esta unidad (vea
“Especificaciones” en la página 39).
No hay audio en la salida digital Verifique las conexiones digitales.
Si está reproduciendo una fuente DTS, compruebe que su receptor
pueda decodificar DTS y que [SALIDA DIGITAL] esté en [TODO]
(vea la página 25).
Si está reproduciendo una fuente MPEG-2, compruebe que su receptor
pueda decodificar MPEG-2. En caso contrario, compruebe que
[SALIDA DIGITAL] esté en [MPEG PCM] (vea la página 25).
Verifique que el formato de audio del idioma de audio seleccionado
concuerde con la capacidad de su receptor.
El disco no se reproduce Los CD-R/RW, DVD+R/RW/R DL y DVD-R/RW/R DL deben estar
finalizados.
Compruebe que la etiqueta del disco esté hacia arriba.
Compruebe si el disco está defectuoso probando con otro disco.
Si ha grabado un disco JPEG, MP3 o WMA usted mismo, compruebe
que su disco contenga un mínimo de diez archivos de imágenes JPEG o
cinco pistas de música MP3/WMA.
Para MP3/WMA, compruebe que la frecuencia de muestreo y la
velocidad de bits sean compatibles. Para JPEG, compruebe que la
resolución sea compatible (vea “Especificaciones” en la página 39).
Comprobación del código de región (vea “Códigos de región” en la
página 3).
La imagen se congela
momentáneamente durante la
reproducción
Compruebe el disco por si tiene huellas dactilares/rayas y límpielo con
un paño blando pasándolo del centro hacia afuera.
Esta unidad no responde al
mando a distancia
Apunte directamente el mando a distancia hacia el sensor de mando a
distancia situado en el panel delantero.
Reduzca la distancia entre el mando a distancia y esta unidad.
Cambie las pilas del mando a distancia.
Vuelva a meter las pilas con sus polaridades (signos +/–) como se
indica.
Los botones no funcionan Para restablecer completamente esta unidad, desenchufe el cable de CA
de la toma de CA entre 5-10 segundos.
Esta unidad no responde a
algunos comandos durante la
reproducción
Puede que el disco no permita hacer algunas operaciones. Consulte las
instrucciones de la caja del disco.
La tecla 5 /a no se encuentra disponible durante la reproducción HD
JPEG.
Esta unidad no puede leer CDs
ni DVDs
Utilice un limpiador de lentes CD/DVD convencional para limpiar la
lente antes de enviar esta unidad a reparar.
36 Es
Solución de problemas
Problema Solución
“NO DISC” aparece en el
visualizador del panel
delantero
Compruebe que el disco esté colocado correctamente en su bandeja.
“UN DISC” aparece en el
visualizador del panel
delantero
El disco cargado no es compatible con esta unidad. Compruebe el tipo
del disco (vea “Formatos de discos reproducibles” en la página 3).
No se pueden seleccionar los
elementos del menú
Pulse dos veces
7
en el mando a distancia antes de seleccionar el
menú de preparación.
Dependiendo de la disponibilidad del disco, algunos elementos de menú
no se podrán seleccionar.
Para seleccionar [JPEG HD], compruebe que el componente HDMI esté
conectado correctamente y que salgan las señales de vídeo HDMI con
720p o 1080i.
Las imágenes HD JPEG no se
pueden visualizar
Compruebe que [JPEG HD] esté en [ACTIVAR] (vea la página 29).
El tiempo de lectura del disco puede sobrepasar 30 segundos.
La música MP3 y las imágenes HD JPEG no se pueden reproducir
simultáneamente.
No hay sonido durante la
reproducción de películas DivX
Puede que esta unidad no soporte el código de audio.
No se puede reconocer el
dispositivo USB
Verifique que el dispositivo USB esté conectado correctamente.
Algunos dispositivos puede que no funcionen a pesar de ser dispositivos
de almacenamiento USB.
Ponga esta unidad en el modo de espera y vuelva a encenderla.
Desconecte el dispositivo cuando está unidad esté en el modo de espera,
conéctelo de nuevo y vuelva a encenderlo.
Conecte el adaptador de CA si éste se suministra con el dispositivo.
Si aparece “No se admite este dispositivo.” en la pantalla del TV,
compruebe si el dispositivo es compatible con esta unidad (vea
“Dispositivos USB compatibles” en la página 21).
Si aparece “No hay protección USB actual. No se admite este
dispositivo.” en la pantalla del TV, el dispositivo no puede reproducir
con esta unidad (vea la página 21).
37 Es
Glosario
Español
Analógico
Sonido que no ha sido convertido a valores numéricos.
El sonido analógico cambia, mientras que el digital
tiene valores digitales específicos. Estos jacks envían
audio por dos canales, el derecho y el izquierdo.
Relación de aspecto
La relación de los tamaños vertical y horizontal de una
imagen visualizada. La relación horizontal a vertical de un
TV convencional es 4:3, y la de uno panorámico es 16:9.
Jacks de salida de audio
Jacks en la parte posterior del reproductor DVD que
envían audio a otro sistema (TV, estéreo, etc.).
Velocidad de bits
La cantidad de datos usada para retener una cantidad
dada de música, medida en kilobits por segundo, o
kbps. O la velocidad a la que usted graba.
Generalmente, cuanto más alta sea la velocidad de bits,
o la velocidad de grabación, mejor será la calidad del
sonido. Sin embargo, las velocidades de bits superiores
utilizan más espacio de un disco.
Capítulo
Secciones de imagen o pieza musical de un DVD que
son más pequeñas que los títulos. Un título se compone
de varios capítulos. A cada capítulo se le asigna un
número para que usted pueda localizarlos fácilmente.
Jacks de salida de vídeo componente
Jacks en la parte posterior del reproductor DVD que
envían vídeo de alta calidad a un TV que tiene jacks de
entrada de vídeo componente (R/G/B, Y/PB/PR, etc.).
Menú de disco
Una visualización en pantalla preparada para elegir
imágenes, sonidos, subtítulos, múltiples ángulos, etc.,
grabados en un DVD.
Digital
Sonido que no ha sido convertido en valores numéricos.
El sonido digital se encuentra disponible cuando usted
utiliza jacks de salida de audio digital. Estos jacks
envían audio por múltiples canales, en lugar de por dos
canales solamente como en el caso del audio analógico.
DivX
DivX es una conocida tecnología de medios creada por
DivX, Inc. Los vídeos de los archivos multimedia DivX
tienen gran calidad de imagen y están sumamente
comprimidos, lo que hace que el tamaño del archivo se
mantenga relativamente pequeño. Los archivos DivX
pueden contar también con caraterísticas multimedia
avanzadas, como menús, subtítulos y pistas de audio
alternas. Es posible descargar una gran variedad de
archivo multimedia DivX que están y crear archivos
propios con contenido personal mediante las
herramientas de fácil manejo disponibles en DivX.com.
DivX Ultra
Los productos DivX Ultra Certified mejoran la
reproducción de las características de los medios
avanzados soportados por DivX Media Format. Entre las
características más importantes se incluyen los menús de
vídeo interactivos, los subtítulos, las pistas de audio
alternativas, las fichas de vídeo y los puntos de capítulos.
DMF (DivX Media Format)
DivX Media Format soporta las características de
medios avanzados, añadiendo controles para disfrutar
de una experiencia de medios interactivos: menús de
vídeo interactivos, puntos de capítulos, subtítulos en
múltiples idiomas y pistas de audio alternativas.
Dolby Digital
Un sistema de sonido surround desarrollado por Dolby
Laboratories que contiene hasta seis canales de audio
digital (delanteros derecho e izquierdo, surround derecho
e izquierdo, central y subgraves).
DTS
Digital Theater Systems Éste es un sistema de sonido
surround, pero es diferente de Dolby Digital. Los
formatos fueron desarrollados por compañías diferentes.
HDMI
HDMI (High-Definition Multimedia Interface) es la
primera interfaz A/V (audio/vídeo) totalmente digital,
sin comprimir, soportada por la industria.
Proporcionando una interfaz entre cualquier fuente de
A/V (un receptor digital multimedia o un receptor A/V)
y un monitor de audio/video (un televisor digital -
DTV), HDMI soporta vídeo estándar, realzado o de alta
definición, así como también audio digital multicanal
empleando un solo cable. HDMI transmite todo tipo de
HDTV ATSC y soporta audio digital de 8 canales, con
ancho de banda extra para acomodar las mejoras y los
requerimientos del futuro.
Cuando se utiliza en combinación con HDCP
(protección de contenido digital de gran ancho de
banda), HDMI proporciona una interfaz de audio/vídeo
segura que satisface los requerimientos de seguridad de
los proveedores de programas y las operaciones del
sistema. Para obtener más información acerca de HDMI,
visite el sitio Web de HDMI en “www.hdmi.org/”.
HDCP
HDCP (protección de contenido digital de gran ancho
de banda) desarrollado por Intel corporation, es un
método que sirve para codificar datos de audio y vídeo
digitales con el fin de proteger el contenido. Para
obtener más información acerca de HDCP, visite el sitio
Web de HDCP en “www.digital-cp.com”.
JPEG de HD
JPEG de HD (alta definición) proporciona imágenes
con resolución realzada mediante la conexión HDMI.
Glosario
38 Es
Glosario
Menú interactivo
Los menús de vídeo interactivos ofrecen una
comodidad y un control sin precedentes para que usted
pueda navegar rápidamente entre varias escenas o
funciones extra, y seleccionar opciones de pistas de
audio o subtítulos.
JPEG
Un formato de imagen fija digital muy común. Un
sistema de compresión de datos de imagen fija
propuesto por Joint Photographic Expert Group que
sobresale por una ligera disminución en la calidad de la
imagen a pesar de su alta relación de compresión.
MP3
Un formato de archivos con un sistema de compresión
de datos de audio. “MP3” es el acrónimo de Motion
Picture Experts Group 1 (o MPEG-1) Audio Layer 3.
Utilizando el formato MP3, un CD-R o CD-RW puede
contener hasta diez veces más datos que un CD
convencional.
Control de los padres
Una función del DVD para limitar la reproducción de
los discos según la edad de los usuarios o el nivel de
limitación de cada país. La limitación cambia de disco a
disco, y cuando se activa, la reproducción se prohibi
si el nivel del software es superior al establecido por el
usuario.
PCM (Modulación por codificación de
impulsos)
Un sistema para convertir señales de sonido analógica
en señales digitales y procesarlas posteriormente, sin
que se use compresión de datos en la conversión.
Control de reproducción (PBC)
Se refiere a la señal grabada en CDs de vídeo o SVCDs
para controlar la reproducción. Utilizando las pantallas
de menús grabadas en un Video CD o SVCD que
soporta PBC, usted puede disfrutar del software
interactivo y del software con función de búsqueda.
Lista de reproducción
Una lista de títulos seleccionados que van a ser
reproducidos en un orden específico. Esta opción sólo se
encuentra disponible con el formato VR y debe ser
creada de antemano.
Exploración progresiva
Esto visualiza todas las líneas horizontales de una
imagen de una vez, como un cuadro de señales. Este
sistema puede convertir el vídeo entrelazado de DVD en
formato progresivo para hacer la conexión a una
pantalla progresiva. Aumenta dramáticamente la
resolución vertical.
Código de región
Un sistema para permitir que los discos sean
reproducidos solamente en la región designada de
antemano. Esta unidad sólo reproduce discos que tienen
códigos de región compatibles. Podrá encontrar el
código de región de su unidad mirando en la etiqueta
del producto. Algunos discos son compatibles con más
de una región (o con ALL las regiones).
S-vídeo
Produce una imagen clara enviando señales separadas
para la luminancia y el color. Sólo puede utilizar
S-vídeo si su TV tiene jack de entrada de S-vídeo.
Surround
Un sistema para crear campos de sonido tridimensional
plenos de realismo disponiendo múltiples altavoces
alrededor del oyente.
Título
La sección más larga de imagen o música de un DVD,
música, etc. en software de vídeo; o el álbum completo
en software de audio. A cada título se le asigna un
número para que usted pueda localizarlos fácilmente.
Jack de salida de vídeo
Jack en la parte posterior del reproductor DVD que
envía vídeo a un TV.
Formato VR (grabación de vídeo)
Un formato que le permite crear un disco DVD que
podrá ser reedidato muchas veces.
39 Es
Especificaciones
Español
FORMATOS DE DISCOS REPRODUCIBLES
DVD-Vídeo
DVD-R, DVD-RW, DVD-R DL
DVD+R, DVD+RW, DVD+R DL
Video CD, SVCD
•CD
PICTURE CD
CD-R, CD-RW
MP3 (ISO 9660)
................................. fs 32, 44,1, 48 kHz /
96, 128, 256, 320 kbps (CBR solamente)
WMA
..........fs 44,1 kHz, 62–192 kbps (CBR CBR solamente)
/
fs 48 kHz, 128–192 kbps (CBR solamente)
•DivX
JPEG.......................................... 3072 x 2048 dpi o menos
RENDIMIENTO DE VÍDEO
Salida de vídeo (CVBS).......................1 Vp-p, 75 ohmios
Salida S-Vídeo ................................Y: 1 Vp-p, 75 ohmios
C: 0,3 Vp-p, 75 ohmios
Salida de vídeo componente ...........Y: 1 Vp-p, 75 ohmios
P
B PR: 0,7 Vp-p, 75 ohmios
Salida RGB (Scart) (Modelos del Reino Unido y Europa
solamente) ................................... Y: 0,7 Vp-p, 75 ohmios
FORMATO DE AUDIO
•Digital
Dolby Digital, DTS, MPEG.............Compressed digital
PCM....................... fs 44,1, 48, 96 kHz / 16, 20, 24 bits
Sonido analógico....................................................Estéreo
RENDIMIENTO DE AUDIO
Convertidor DA....................................................... 24 bits
Señal a ruido (1 kHz) ............................................ 105 dB
Gama dinámica (1 kHz) ........................................... 97 dB
DVD ...........................................fs 96 kHz, 2 Hz-44 kHz /
fs 48 kHz, 2 Hz-22 kHz
SVCD .........................................fs 48 kHz, 2 Hz-22 kHz /
fs 44,1 kHz, 2 Hz-20 kHz
CD, VCD...................................fs 44,1 kHz, 2 Hz-20 kHz
Distorsión y ruido (1 kHz) .................................. 0,0035%
APLICACIONES MULTIMEDIA
Conexiones..............Dispositivo de almacenamiento USB
Formato de reproducción (dispositivo USB)
MP3................................................ fs 32, 44,1, 48 kHz /
96, 128, 256, 320 kbps (CBR solamente)
WMA
......fs 44,1 kHz, 62–192 kbps (CBR CBR solamente)
/
fs 48 kHz, 128–192 kbps (CBR solamente)
DivX..................................................... 3 Mbps o menos
JPEG ...................................... 3072 x 2048 dpi o menos
NORMA DE TV
Número de líneas ...........................PAL: 625, NTSC: 525
Frecuencia vertical..................PAL: 50 Hz, NTSC: 60 Hz
Reproducción ........................ Multiestándar (PAL/NTSC)
CONEXIONES
Salida de vídeo...........................RCA/Fono x 1 (amarilla)
Salida S-vídeo.......................... Mini DIN, 4 contactos x 1
Salida de vídeo componente
Salida Y ......................................RCA/Fono x 1 (verde)
Salida P
B ...................................... RCA/Fono x 1 (azul)
Salida P
R .......................................RCA/Fono x 1 (roja)
SCART (Modelos del R.U. y Europa solamente)
.............................................................. Euroconector x 1
Salida de audio (L+R).....RCA/Fono x 1 par (blanca/roja)
Salida digital
Coaxial.................................................... RCA/Fono x 1
(IEC60958 para CDDA, LPCM /
IEC61937 para MPEG 1/2, Dolby Digital, DTS)
HDMI.............................................................Tipo A x 1
USB...................................................................Tipo A x 1
Mando a distancia
Entrada................................. Minitoma de 3,5 mm x 1
Salida ................................... Minitoma de 3,5 mm x 1
MUEBLE
Dimensiones (An x Prof x Al) ........... 435 x 310 x 51 mm
Peso............................................ 2.6 kg aproximadamente
ALIMENTACIÓN
Entrada de alimentación
Modelos de EE.UU. y Canadá............CA 120 V, 60 Hz
Modelos del R.U. y Europa ................CA 230 V, 50 Hz
Modelos de Australia, Asia, Centroamérica y Sudamérica
.......................................CA 110-240 V, 50 Hz/60 Hz
Modelo de Corea .........................CA 110-240 V, 60 Hz
Consumo ......................................14 W aproximadamente
Consumo en espera .....................................Menos de 1 W
Las especificaciones están sujetas a cambios sin
previo aviso.
LASER
Tipo Semiconductor láser GaAlAs
Longitud de onda 650 nm (DVD)
780 nm (VCD/CD)
Potencia de salida 7 mW (DVD)
10 mW (VCD/CD)
Divergencia de has 60 grados
Especificaciones
©2007 All rights reserved.
YAMAHA ELECTRONICS CORPORATION, USA
6660 ORANGETHORPE AVE., BUENA PARK, CALIF. 90620, U.S.A.
YAMAHA CANADA MUSIC LTD.
135 MILNER AVE., SCARBOROUGH, ONTARIO M1S 3R1, CANADA
YAMAHA ELECTRONIK EUROPA G.m.b.H.
SIEMENSSTR. 22-34, 25462 RELLINGEN BEI HAMBURG, GERMANY
YAMAHA ELECTRONIQUE FRANCE S.A.
RUE AMBROISE CROIZAT BP70 CROISSY-BEAUBOURG 77312 MARNE-LA-VALLEE CEDEX02, FRANCE
YAMAHA ELECTRONICS (UK) LTD.
YAMAHA HOUSE, 200 RICKMANSWORTH ROAD WATFORD, HERTS WD18 7GQ, ENGLAND
YAMAHA SCANDINAVIA A.B.
J A WETTERGRENS GATA 1, BOX 30053, 400 43 VÄSTRA FRÖLUNDA, SWEDEN
YAMAHA MUSIC AUSTRALIA PTY, LTD.
17-33 MARKET ST., SOUTH MELBOURNE, 3205 VIC., AUSTRALIA
Printed in China
3139 245 26121
  • Page 1 1
  • Page 2 2
  • Page 3 3
  • Page 4 4
  • Page 5 5
  • Page 6 6
  • Page 7 7
  • Page 8 8
  • Page 9 9
  • Page 10 10
  • Page 11 11
  • Page 12 12
  • Page 13 13
  • Page 14 14
  • Page 15 15
  • Page 16 16
  • Page 17 17
  • Page 18 18
  • Page 19 19
  • Page 20 20
  • Page 21 21
  • Page 22 22
  • Page 23 23
  • Page 24 24
  • Page 25 25
  • Page 26 26
  • Page 27 27
  • Page 28 28
  • Page 29 29
  • Page 30 30
  • Page 31 31
  • Page 32 32
  • Page 33 33
  • Page 34 34
  • Page 35 35
  • Page 36 36
  • Page 37 37
  • Page 38 38
  • Page 39 39
  • Page 40 40
  • Page 41 41
  • Page 42 42
  • Page 43 43
  • Page 44 44
  • Page 45 45
  • Page 46 46
  • Page 47 47
  • Page 48 48
  • Page 49 49
  • Page 50 50
  • Page 51 51
  • Page 52 52
  • Page 53 53
  • Page 54 54
  • Page 55 55
  • Page 56 56
  • Page 57 57
  • Page 58 58
  • Page 59 59
  • Page 60 60
  • Page 61 61
  • Page 62 62
  • Page 63 63
  • Page 64 64
  • Page 65 65
  • Page 66 66
  • Page 67 67
  • Page 68 68
  • Page 69 69
  • Page 70 70
  • Page 71 71
  • Page 72 72
  • Page 73 73
  • Page 74 74
  • Page 75 75
  • Page 76 76
  • Page 77 77
  • Page 78 78
  • Page 79 79
  • Page 80 80
  • Page 81 81
  • Page 82 82

Yamaha DVD-S661 El manual del propietario

Categoría
Reproductores de DVD
Tipo
El manual del propietario

En otros idiomas