
Before usingyourair-conditioner,please read
this operating instructionscarefully and keepit
forfuture reference.
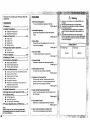
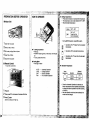
Panasonico
Room Air Conditioner
OPERATINGINSTRUCTIONS
COOLING MODEL :"
Indoor Outdoor
CS-C18B KP _r.g-C18BKP6
CS-C24BKP CU-C24BKP6
ENGLISH ....................,. . P. 1-Rll
ESPAI_IOL...................... R 12 - R 21
For assistance,pleasecall;(866)-292-7292,for
Hawaiiresidentscall(808)-488-7779.
CWF563646

ThankyouforpurchasingourPanesonicRoomAir
Conditioner.
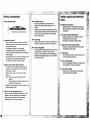
CONTENTS
• Features ..................................................... 1
• Safety Precautions .................................... 2
• installation Precautions
• Operation Precautions
• Name of Each Part ................................ 3,4
• indoor Unit
• Outdoor Unit
• Accessories
• Remote Control
• Preparation Before Operation .................. 5
• Indoor Unit
• Remote Control
• H6w to Operate ...................................... 5-6
• Setting the Timer ....................................... 7
• Convenience Operation ............................ 7
• Sleep Mode Operation
• Economy Mode Operation
• Powerful Mode Operation
• Care and Maintenance .............................. 8
• Cleaning the Indoor Unit and Remote Control
• Cleaning the Air Filter
FEATURES
• Self-illuminating Button
Foryour convenience to operate in the dark.
(Refer page 4)
Automatic Operation
Sense indoortemperature to selectthe optimum
mode,
(Refer page 5)
• Sleep Mode
Prevent the room from gettingtoo hot ortoo cold
while you are sleeping.
(Refer page 7)
• Economy •ode
To reduce electrical power consumption.
(Refer page 7)
• Powerful Mode
Reaches the desired roomtemperature quickly.
(Refer page 7)
• Removable Front Panel
For quick and easy cleaning. (washable)
(Refer page 8)
• Cleaning the Front Panel
• Air Purifying Filters
• Pre-season Inspection
• When the Air Conditioner is Not Used for an
Extended Period ofTime
• Recommended Inspection
Catechin Air Purifying Filter
Filter that can trap dust, tobacco smoke and tiny
particles inthe room. It can also prevent growth of
bacteria and viruses trappedin this filter•
(Refer page 8)
• Helpful Information ................................... 9
• Energy Saving and Operation Hints ........ 9
• Troubleshooting ...................................... 10
• NormalOperation
• AbnormalOperation
• Call the Dealerimmediately
• Product Specification and Reference ...... 11
Note:
Before using your air conditioner, please read
this operating instructions carefully and keep it
for future reference.
Solar Refreshing Deodorizing Filter
Used to remove unpleasant odorand deodorize the
air inthe room•
(Refer page 8)
Auto Restart Control
Restart the unitautomaticallyafter power failure•
(Refer page 9)
Blue Coated Condenser At Outdoor Unit
This isthe most advanced anti-rustcoating.
,/_ Warning
1) Operateyourairconditionerfromastable208/230volts
ACsupply.
2) Usea20 ampstimedelayfuseora circulfbreaker.
3) Disconnectfromthemainbeforeservicingthisappliance.
4) Donotrepairbyyoumelf.
Incaseof malfunctionof thisappliance,donotrepairby
yourself.Contactthesalesdealerorservicedealerfore
repair.
5) Turnoffthepower(Isolationfrom mainpowersupply).
Switchoffthe breaker,orswitchoffthepowerdisconnecting
meantoisolatetheequipmentfromthemainpowersupply
incaseofan emergency.
POWER SUPPLY
Time Delay Fuse: Rated Volts:
20 Amps [ 208/230 V

SAFETY PRECAUTIONS
Before operating, please read the following
"Safety Precautions" carefulTy.
• To prevent persona{ injury, injury to others and
property damage, the following instructions must be
followed.
• Incorrectoperation due to failure to follow instructions
will cause harm or damage, the seriousness ofwhich
is classified as follow:
I /_ Warning
Thissign warns of death or seriousinjury.
I Z_ Caution
Thissign warns of damage to property.
• The instructions to be followed are classified by the
following symbols:
®
This symbol (with awhite background) denotes an
actionthat is PROHIBITED.
These symbols (with a black background) denote
actions that are COMPULSORY.
• installation Precautions
/_ Warning
• DO not install, remove and reinstall the unit by
yooreetl,
Improper installationwill cause leakage, electric
shock or fire. Please engage an authorized dealer
or specialistforthe installationwork.
•/_ Caution
O
• This room air conditioner must be
earthed.
Improper groundingcouldcause
electricshock,
• Ensure that the drainage piping Is
connected properly.
Otherwise, water wirlleak out.
®
Do not Install the unit In a
potentially explosive atmosphere.
Gas leak near the unitcouldcause
fire:
• Operation Precautions
/_k Warning
This signwarns of death or serious injury.
O
• Do not operate with wet hands.
• Do not insert finger or other objects into the
indoorOToutdoor units.
• Do not expose directly to cold air for a long
padod.
• Use specified power cord.
_) • (burnt smell, etc.)
If
abnormal
condition
occurs, switch off the power supply.
• DO not wash the unit with water,
• Do not use for other purposes such as
preservation,
• DO not use any combustible equipment at
airflow direction.
• Do not sit or place anything on the outdoor
unR.
• Switchoff the powersupplybefore cleaning,
• Ventilatethe room regularly.
• Pay attentionas to whetherthe installation
rackis damagedafter longperiodof usage,
• Switchoff the powersupplyif the unitisnot
used fora long pedod.

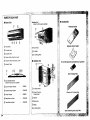
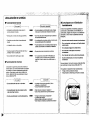
NAME OF EACH PART
• Indoor Unit
[] Front Panel
[] Air Intake Vent
[] Air Outtet Vent
[] Vertical Airflow Direction Louver
[] Horizontal Airflow Direction Louver
[] indicator Panel
[] AutoOperation Button
(when the front panel is opened)
[] Economy Mode nolca[or GREEN
Powerful Mode Indicator ORANGE
Power Indicator GREEN
[] Sleep Mode Indica'cor ORANGE
r6- Timer Mode Indicator ORANGE
• Indoor Unit
(when the frontpanel isopened)
[] Front Panel
[] Air Filters
[] Air PurifyingFilter
• Outdoor Unit
[] Air Intake Vents
[] Ground Terminal
(Inside cover)
[] Conduit
[] Drain Hose
[] Piping
[] Air Outlet Vents
• Accessories
• Remote Control
• Remote Control Holder
• Two RO3 (AAA) dry-cell batteries or equivalent
• Air Purifying Filter
(Catechin Air PurifyingFilter)
(Solar Refreshing Deodorizing Filter)

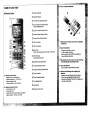
NAME OFEACHPART
• Remote Control
• Remote Control Signal.
• Make sure it is not obstructed.
• Maximum distance : 10 m (32.8 ft.).
• Signal received sound.
One short beep or one tongbeep.
• Notes for Remote Control.
• Do not throw or drop.
• Do not get it wet.
• Certain type of fluorescentlamps may affect
signal reception. Consult your dealer.
[] Signal Transmitter
[] Operation Display
[] Powerful Mode Operation Button
[] Room Temperature Setting Button
(serf-illuminating button)
[] Operation Mode Selection Button
[] Economy Mode Operation Button
[] Vertical AirflowDirection Button
[] ON-Timer Button
[] OFF-Timer Button
[] Reset Point
(Press with fine-tipped object to clearthe memory)
[] OFF/ON Button
(self-illuminating button)
[] Sleep Mode Operation Button
[] Fan Speed Selection Button
[] Horizontal Airflow Direction Button
[] Timer Set Button
[] Timer Cancellation Button
[] Time-Setting Button
[] Clock Button
[] Remote ControlCover
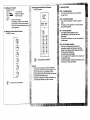
How to Insert the Batteries
2
1 Slide down the remote control cover completely
to remove IL
2 Insert the batteries
- Be sure the direction is correct
- 12.00 at display - flashing
• Set the currenttime (CLOCK) immediately to
prevent battery exhaustion.
3 Re-Install the remote control cover by Inserting it
in the side groves and pushing Inward.
• About the batteries
• Can be used for approximatatyone year,
• Observe the following when replacing the
batteries
• Replace with new batteries ofthe same type.
• Do not use rechargeeble battedas (Ni-Cd).
• Remove the batteries if the unitis not goingto be
used for a long pedod.

. • • i• •¸¸' • • •
PREPARATION BEFORE OPERATION
• Indoor Unit
1 Open the front panel
2 Remove the air filters
3 Fit the air purifying filters in place
4 Insert the air filters
5 Close the front panel
• Remote Control
- To set the current time
1 Press IT].
2 Then press [] to increase or decrease the time.
3 Press [] again,
Settime at display wiJllightup.
HOW TO OPERATE
• To start the operation
• Press[].
• POWER indicator(green) onthe indoor unitwill light
up,
• To stop, press once more.
• Setting Mode
• Press [] to select:-
AUTO - AutomaticOperation
COOL - Cooling Operation
DRY - Soft Dry Operation
FAN - AirCirculation Operation
• Setting Temperature
• Press [] to increase or decrease the temperature.
• The temperature can be set between 60°F ~ 86°F.
• Recommended temperature: •
COOL 75°F ~ 78°F
2°F ~ 4°F
DRY Lowerthan the
room temperature
• DuringAUTO Operation, press [] to select:-
• Operation with 4°F higher than the standard
temperature.
• Operation with the standard temperature.
• Operation with 4°F lower than the standard
temperature.
• Standard Temperature
Indoor Standard
temperature Operation temperature
SoftDry 72°F
• Once the Automatic Operation is selected, the
indoortemperature sensor operates automatically
to select the desired operation mode with Cooling
or Soft Dry.
• After the operation mode has been selected, the
mode does not change.

• Setting the Fan Speed
• Press[] to select:-
FAN • - Low Fan Speed
FAN •HI - Medium Fan Speed
FAN ••IDa - High Fan Speed
AUTO
FAN - Automatic Fan Speed
The speed of the indoorfan is adjusted
automatically accordingto the operation.
The indoor fan stopsoccasionally during
cooling operation.
• Setting the Vertical Airflow Direction
• Press[] to select:-
%
/_o Swing up/down automatically.
• Setting the Horizontal Airflow Direction
• Press [] to select:-
Horizontal
Airflow
O{rection
Remote Indoor
Control Unit
_]* Swingleft/right automatically.
• Notes
• If the unit isnot going tobe used for an extended
period of time, tom off the main powersupply. If it is
left at the ON position, approximately 2.5 W of
electricity willbe used even ifthe indoorunithas been
turned off with the remote control.
If operation isstopped, then restartimmediately,the
unit will resume operation onlyafter 3 minutes
• Operation Details
COOL - Cooling Operation
• To set the room temperature at your preference
coolingcomfort.
AUTO - Automatic Operation
• Sense indoor temperature to select the optimum
mode.
• Temperature is notdisplayed on the remote control
duringAUTO operation.
DRY - Soft Dry Operation
A very gentle Cooling Operation, prior to
dehumiditicetioP,,it does not tOWerthe room
temperature.
DuringSoft Dry operation, the indoor fan operates at
Lowfan speed.
FAN - Air Circulation OPeration
When the roomtemperature reaches the set
temperature,operation_ommenoes at Low airflow
volume. It stops when the roomtemperature drops to
4°F below the settemperature.
(It isusefulwhen using a heater).
• Hi Fen Speed will not operate when using the air
circulationFan mode.
Dudng Autooperation,Vertical AirflowDirectionLouver
willmove up or down automatically.

SETTING THE TIMER
Ensure that the currenttime is correctbefore setting the
timer.The timer cannot be set if the time displayis
flashing.
ON-TIMER Operation
To start the air conditioner operationautomatically.
• Press [] to setthe operation.
• Press [] to increase or decrease the time.
• Then press I_.
• To cancel thisoperation, press I_.
• OFF-TIMER Operation
To stop the air conditioner operationautomatically.
• Press [] to set the operation.
• Press [] to increase or decrease the time.
• Then press [].
• To cancel thisoperation, press [].
Timer Mode Operation Details
• When the ON-Timer is sat, operation willstart
before the actual sat time. This isto enable the
roomtemperature reachesthe settemperature at
the set time.
COOL, 0RY, 15 minutes
AUTO in advance
• Once the ON-Timer isset, operation willstart at the
set time everyday.
• The current time isnot displayedwhen the timers
are set.
• When both timers are used together, the TIMER
mode indicatoron the indoor unitremains lit even
when the operation isstopped by the OFF-TIMER.
CONVENIENCE OPERATION
• Sleep Mode Operation
To obtain acomfortable room temperature while
sleeping:-
. Press r_.
• sleep mode indicator on the indoor unit will light up.
• To cancel thisoperation,press once more.
• Sleep Mode Operation Details
• When the roomtemperature reaches the set
temperature, the airflow volume willchange to low
automatically.
• Sleep Mode Operation time i$8 hours.
• When usedtogether with the timer, the timerhas a
priority,
• Sleep Mode willnot operate in air circulation Fan
Mode.
Temperature
ee
t n-
tP
Sleep
I _ Operation
n a button is
gt
0--1 hour
__ ]ApproX•inctease.1°F
_.APrex I
increase, r
11. C®'iogorSo"O I
1 hour --> I } ( Tittle
aiier approx 8 hours of sleep shift J
operation, it willstop automatically.
• Economy Mode Operation
To save electrical power consumption,
Please use this modewhen the room has reached
your desired temperature.
• Press WI.
Economy mode indicator (green) on the indoorunit
will lightup.
• Press once moreto cancel thisoperation.
• Pov,_rfu| Mode Operation
To obtainthe set temperature quickly.
• Press [].
Powerful mode indicator(orange) onthe indoor
unitwill light up.
Powerful mode will operate for 15 minutes only.
• To cancel this operation,press once more.
• Economy / Powerful Mode Operation Details
• Economy and Powerful operationcannot be
selected simultaneously.
• The changes ofthe temperature and airflowvolume
are automatic.
• The remote controldisplay remains unchanged.
• If sleep button or operation mode buttonis pressed,
economy or powerful operation will be cancelled.
• Dudng FAN - Air circulationoperation, the powerful
and economy operation are not available.
Temperature Airflow
velum6
Economy Mode I°F higher
Operation than sat temp. Super Low
Powerful Mode 5°F lower
Operation than set temp. Super High

CARE AND MAINTENANCE
• Cleaning the Indoor Unit and Remote
Control
• Wipe gentlywitha soft,dry cloth.
• Do not use water hotterthan 104"F or polishingfluid
to clean the unit.
• Cleaning the Air Filter
(Recommendation:- ifthe unitis operated in a dusty
environment, cleanthe filters every two weeks,
continuoususe ofthis dirty filters willreduce cooling
efficiency)
1 Remove dirtusing a vacuum cleaner.
2 Wash back of the air filter with water.
3 if badly soiled, wash it with soap or a mild household
detergent.
4 Let it dry and reinstall it.
Be sure the "FRONT" mark is facing you.
Damaged air filter.
Consult the nearest authorized dealer.
Part No.: CWD001049.
• Do not use benzene, thinner, scouring powder or
clothes soaked in caustic chemical to clean the
unit.
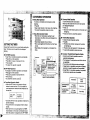
• Cleaning the Front Panel
(Must be removed before washing)
1 Raise the front panel higher than the horizontal and
pull toremove it.
2 Gently wash with water and a sponge.
• Do not press the front panel too hard when washing.
• When use kitchencleaning fluid (neutral detergent),
rinsethroughly,
• Do not dry the front panel under direct sunlight.
3 To fix the front panel, raise the front panel
horizontally,match the protruding portionon the
indoor unit to the fulcrum and pushinto place.
Fulcrum
Protruding portionOnindoor unit
I AirPurifyingFilters
Raise the
front panel
Deodorizing Filter
Catachin Air
Purifying Filter
Remove the air filters
Solar Refreshing Deodorizing Filter
• Used to remove unpleasantodor and deodorize
the air inthe room.
• Reusable.
• Vacuum; place under direct sunlightfor 6 hours and
fit it back in place.
(Recommended : every 6 months)
Catechin Air Purifying Filter
• The filter is coated with catechin to prevent growth
of bacteriaand viruses.
• Reusable.
• Vacuum and fit it back in place
(Recommended : every 6 months)
Recommended to change these filters every 3 years.
Do notreuse damaged filters.
Consultthe nearest authorized dealer to purchasea
new tilter.
Catechin Air PurifyingFilter No.:CZ-SF70P
Solar RefreshingDeodorizing FilterNo.: CZ-SFD70P
If you operate the air conditioner with dirty filters:-
- Air is notpurified
-Cooling capacity decreases
- Foul odorisemitted
• Pre-season Inspection
• Is the discharged air cold?
Operation is normalif 15 minutes after the start of
operation,the difference between the air intake end
outletvents temperature is:-
I COOL - 14*F or above I
• Are the air Intake or outlet vents of the Indoor or
outdoor units obstructed?
• Are the remote control batteries weak?
Ifthe remote controldisplay appears weak, replace
the battedes.
• When the Air Conditioner is Not Used
for an Extended Period of Time
1 Todrythe internal parts ofthe indoorunit, operate
the unitfor2 - 3 hours using:-
I FAN operation !
2 Stop the operation by remote control and switch off
the circuitbreaker.
Note: Ifthe unit is not switched off by the remote
control, it willstart operating when the circuit
breaker isswtched to ON (because the unitis
equipped with Auto Restart Control).
3 Remove the remote controlbatteries.
• Recommended Inspection
• Afterused over several seasons, the unitwill
become dirty and thus decreases the unit's
performance. Depending on the operation
conditions,a dirty unitmay produceodor and dust
may pollute dehumidificationsystem. Therefore, a
seasonal inspection is recommended in addition to
regular cleaning. (Consult an authorized dealer).

HELPFUL INF !I ENERGY SAVING AND OPERATION
• A r t, n B I_!_. , HINTS '
uto Ope a "o 3utton I_i_-i • Auto Restart Control I_.]
I _/ • If power is resumed after a power failure, the I:_1
I_ operationwill restad automatically after 3- 5 1/2 _J • Setting the Tempi_rature . .
_1 minutes. _ ._pproxlmately "1u_'oorelectricity can oesaveo.
[. • Operation willbe restarted automaticallyunder the I_2.'.I " Set the temperature 2°F h,gher than the desired
\ ) • Ra_nt panel and press. P_I previousoperation mode and airflow directionwhen I_l temperature.
t Ii_:1 power isresumed as the operationis not stopped I_._;I .................
k_i b the remotecontr I L_;_l • Air I-utere ano Air vurltylng Pnters
I_.1 y o. I_ I • Clean the air filters every 2 weeks and the Air
d _ _. r - -" I:_1 PurifyingFilters every 6 months
• Automatic Operation I '_il • /im..e _e_lng .......... I_G_I • Dirty filters may reduces cooling efficiency.
• f the remote control fails to function orhas been l iI wnen power ra,ure occurs, tne tnmersetting wmDe I_;_l
misplaced, press th_ation button to start t _ cancelled. Once power ,sresumed, resetthet, mer. I_i' I • Keep All Ooors and Wlndowe Closed
the Automatucoperation. I _:_1 • Thunder and Li.,htnln., I_';-I ° Otherwise, cooling performance will be reduced
• The Automatic operationwill be activated I / _ _ I __1 and electdcitvcost is wasted
imm -i • I nce the Auto ooeration buttonis I n • This air conditioner is equipped with a built-insurge L::_= ", "
eo a_ey o .'eme _u[o operacon ou_Tonis I.• I . . [ . _1
• protectwedevpce.However, in order to further
_pressed. Howe_ cannot be adjusted / ! ............. I_ _1 • Outdoor Unit
• . . " " i ._ pro[ec_your antcone _oner rrom oelng oamageo cy _ ,,_ • ....
• m th=soperat=on. . ............. I | abnormally stronglightningactivity,you may switch I ;/_-I Do not block the a=routlet vents. Otherwuse,=twnll
The power und_c_door unitwillblink until I / . . I '_:1 lowerthe coolingoerformance
........... _ / off the CFrCUUtbreaker• e-.. i '- •
the operatnonmode isselected automatically I :1 LIbel
• TOcancel this operation, press once more. I ' _ I. _ I • Timer and Sleep Mode
/ Ii;; I • TO prevent wastage of electricity, use sleep mode
• Remote Control Signal Receiving Sound ! I I: _i'-I when sleeping or Timer when goingout.
TO switch offthe beep (Signal Receiving Sound), ! ]
press the Auto Operation button for 10 seconds I / I :;_J • Avoid Direct Sunlight
continuouslyor longer. I / I _i !1 ° Keep curtains or drapes closed to avoid direct
"Beep", "beep" sound will be heardat the tenth I _ I '-I sunlightduringcooling operation.
seoonds I, I
Note: "Beep" sound will be heard atthe fifth I I I_:_i
secends; LII
However please press continuouslyuntil you L ii I<i;:?l
heard "beep "beep"sound
• Repeat the abo_f you want to switch on the I:_l I'_J
Signal Reoeivin^g=Soundi_h_z_econdsn,, I !!!l il
• (This is for Servicing purposes only.) / '!;I _
Note: If you press th_ontinuouslyfor 5 to 10 I _ _J
s,eco_ndsTest Run operationwill be performed. A I;I
beep sound will I::{ _
indicatingthe Test Runstarts tooperate !i
S
..;21:
.5
•,?,:
?:5i

TROUBLESHOOTING
• Normal Operation
I _ Is it okay?
• Air conditioner has been restarted, but does not
operate for 3 minutes.
• A sound like water flowing can be heard.
• it seems that fog is coming out from the air
conditioner.
• The room has a peculiar odor.
• During Automatic Vertical Airflow setting,
indoor fan stops occasionally.
• The outdoor unit emits water or steam.
• Abnormal Operation
Check the following points before calling for repairs or
service.
If the malfunction persists, please contact your nearest
servicenter.
For assistance, please call: (866)-292-7292, for Hawaii
residents call (808)-488-7779.
_ls itokay?
• The air conditioner does not operate.
• Air conditioner produces loud noise during
operation.
• The air conditioner does not cool effectively.
I This is the answer !
f
• This is to protect the air conditioner. Wait until the air
conditioner begins to operate.
• This is the sound of refrigerant flowing inside the air
conditioner.
• Condensation occurs when the airflow from the air
conditioner cools the room.
• This may be a damp smell emitted by the wall,
carpet, furniture or clothing in the room.
• This is to remove smell emitted by the surroundings.
• In COOL/DRY operation, moisture in the air
condenses into water on the cool surface of outdoor
unit piping that causes dripping.
_- Please check
• Has the circuit breaker been tdpped?
• Is the timer being used correctly?
• Is the installation work slanted?
• Is the front grille closed properly?
• Has the temperature been set incorrectly?
• Are the filters dirty?
• Are the intake or outlet vents of the outdoor unit
obstructed?
• Are all windows and doors closed?
• Call the Dealer Immediately
If the following conditions occur, tum off the circuit breaker,
and then call your authorized Panasonic dealers or
servicenter.
• Abnormal noise is heard during operation.
• Water or foreign material gets into the remote
control by mistake.
• Water leak from the Indoor unit.
• Switches or buttons do not operate properly.
• The circuit breaker switches off frequently.
• Power supply cord become unusually warm,
Service information can be obtained by calling
(866)-292-7292, for Hawaii residents call (808)-488-7779.
To expedite the repair of your air conditioner:
• Please have your proof of purchase.
• List all symptoms the unit is exhibiting.

D,
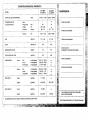
PRODUCT SPECIFICATIONS
CS-C18BKP
Model CU-C18BKP6
COOLING CAPACITY Btu/h 17,700 - 17,700
ELECTRICAL RATING Phase 1
Frequency (Hz) 60
Voltage (V) 208 - 230
Current (Amps) 8.5 - 7.9
input (Watts) 1,740- 1,780
EER (Btu/Watt.h) 10.1 - 9.9
SEER (Btu/Watt.h) 10.3
MOISTURE REMOVAL (Pints/h) 4.2
ROOM AIR CIRCULATION (Cf/min) 470
DIMENSIONS Indoor
Height cm(inches)
Width cm(inches)
Depth cm(inches)
Outdoor
Height cm(inches)
Width cm(inches)
Depth om(inches)
27.5 (10- 13/16)
99.8 (39 - 9/32)
2"1.0(8 - 9/32)
68.5 (26 - 31/32)
80.0 (31 - 1/2)
30.0 (11 - 13/16)
NET WEIGHT Indoor kg(Ib) 11.0 (24)
Outdoor kg(Ib) 48.0 (106)
GROSS WEIGHT Indoor kg(Ib) 13.5 (30)
Outdoor kg(Ib) 54.5 (120) 67.0 (148)
• Specifications are subjectto change without notice for further improvement.
CS-D24BKP
CU-C24BKP6
23,200 - 23,200
<.=,.
13.1 -12.1
2,640 - 2,680
8.7 - 8.6
10.0
6.6
533
60.5 1133)
• REFERENCE
Model Number:
Dealer's Address:
Dearer's Tel :
Serial Number :
(Located onthe side ofunit)
Date of Purchase :
Dealer's Name
r _ _ _ -- _ =,,u ,,1
Please affixyour proof of purchase here for
I future reference. I
L .J
O 2001 Matsushita Electrical Co, Ltd. All Right Reserved.

Muchas gracias por elegir la unidad de Aire
Acondiclonado de Panasonic.
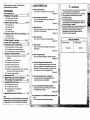
CONTENIDO
• Caracteristicas ....................................... 12
• Medidas De Seguridad ........................... 13
• Precauciones al instalar
• Preoauciones aJoperar
• Nombre De Cada Pieza .................... 14~15
• Unidad Interior
• Unidad Exterior
• Accesorios
• Control Remoto
• Prepaei6n Antes Del Funcionamiento.. 16
• Unidad Interior
• Control Remoto
• C6mo Hacerlo Funcionar ................. 16~17
• Ajuste Del Temporizador ....................... 18
• Funcionamiento Conveniente ............... 18
• Funcionamiento en modo de sueSo
• Funcionamiento en modo econbmico
• Funcionamiento en modo plena potenoia
• Cuidado Y Mantenimiento ..................... 19
• Limpieza de la Unidad Interior y e Control
Remoto
• Limpieza de los Filtros de Aire
• Limpieza del Panel Frontal
• Filtros Purificadores de Airs
• InspecciSn de Pretemporada
• Cuando el Aoondicionador de Aire No se Utilize
Durante un Perlodo Largo de Tiempo
• Inspecci6n Recomendada
• Informsci6n Util ...................................... 20
• Sugerencias Para Ahorrar Energia y
Pars un Mejor Funclonamiento ............. 20
• Localizaci6n De Averlas ........................ 21
• FuncionamientoNormal
• Funcionamiento Anormal
• Comuniquese con el Distribuidor
Inmediatamente
• Especificaciones Del Producto ............. 22
Note:
Antes de user el acondiclonador de aire, sfrvase leer
etentamente estas instrucclones de funolonamlento
rconservarlas como.futuro elemento de consulta.
CARACTER{STICAS
• Bot6n Autoiluminable
Para facilitar su manipulaciUnen la oscuridad.
(Pdgina 15)
Funcionamlento AutomdUco
Tome la temparatura interior para selecoionarel
modo mds apropiado,
(P_tgina16)
Modo De Dormlr
Evita qua la temperatura de la habitaci6nsuba o baje
demasiado mientras duerme.
(Pdgina 18)
• Modo Eoonbmlco
Pars reducirel consumo de energ#ael_ctrica.
(Pdgina 18)
Modo Potenta
Alcanza la temperatura deseada de la habitacibn
rdpidamente.
(Pdgina 18)
• Panel Frontal Extra|ble
Para una limpieza m&sr&pida y sencilla. (lavable)
(Pdgina 19)
• FIItr0 De Cataqulna Purlflcador De Airs
Es unfiltro que puede retener el polvo, el humo de
tabaco y las partfculasmicmsc6picas delaire de la
habitack_n.Tambidn puede evitar el crecimiento de
las bacterias y de losvirus atrapados an _1.
(Pdgina 19)
• Filtro solar desodorizador y refrescante
Sirve para eliminar el olordesagradable y para
desodorizar el airs de la habitaci6n.
(P6gina 19)
• Control Autom=ltlco De Puesta En Marcha
Despuds de unfallode corriente pone en marcha
automdticamente la unidad.
(Pdgina 20)
• Condensador De La Unldad Exterior Revestldo De
Azul
Es el revestimiento anti0xidomds avanzado.
/_ Advertencia
1) Haga funeionarel aparato de airs acondicionadoconect_ndolo
a una fuente estable de CA de 208/230 voltlos.
2) Utilice un fusible de retardo de 20 amperioso un interruptor.
3) Antes de efectuar el mantenimiento de este aparato
desench_felo de la red.
4) No Io repare usted mismo.
En el case de funoionamiento defectuoso de la unidad, no Io
repare ustedmismo. Acuda al repressntantade vsntas 0 al
serviciot_cnioopara su reparackSn.
5) Descooectelaalimentack_n(co_ledelsuministroprincipaldecorriente).
Desconocteel enchufedel tomacorriente,desconecte el
interuptor de eircuitoo desconectela aUmentaci6n
desconectando el equipodel suministroprincipalde
alimentack_n para evitar accidentes,
TOMA DE CORRIENTE
Fusible de retardo: Voltaje _,signado:
20 ampedos 208/230 V

b,
MEDIDAS DE SEGURIDAD
Antes de operar el equipo, per favor lea
cuidadosamente las sigulentes "Medldas de
Seguridad"
•Para prevenir heridas personates, heridasa otras
personas y dafios de la propiedad, se deben seguir
las siguientes instrucciones.
• El use incorrectoper no seguir las instrucciones
puede causar dafios o averfas; su gravedad se
cFasificaconlas indicacionessiguientes:
/'_ Advertencia
Esta indicaci6n muestra la posibilidedde causer
muerte o dafies series.
I cu,a,ol
Esta indicacibn advierte sobrela posibilidad
de dafios ala propiedad,
• Las instrucciones a seguir est_,ncfasificadas
mediante los slmbolos siguientes:
®
Sfmbolo (con el rondo blanco) denota una acci6n
que estd PROHIBIDA.
Sfmbolos(con el fondo negro) denotan una accibn
que es OBUGATORIA de hater.
• Precauciones al Instalar
/_ Advertencla
• No |nstale nl deainstale n| reinstale Is unldad
usted mlsmo.
Una instalaci6n incorrectapuede causar fugas de
agua, descargas eldctricao incendio. Per favor
consulte al distribuidorautodzado o aun
especialista para eltrabajo de instalacibn.
•/_ Cuidado
@
• Este acondlclonador de sire de
hsbitacl_n debe ser conectado a
tlerra.
Puede causer una sacudida el6ctrica
si el contacto a tierra no as perfecto.
• Compruebe que las tuberfas de
drenaje estdn conectsdss
adecuadamente.
Sine habrd p_rdidas de agua.
®
No Instale la unldad en una
atm6sfera potenclalmente
exploslva.
Las fugas de gas cerca de la unidad
pueden causar un incendio.
• Precauciones al Operar
®
Z_Advedencla
Esta indicaci6n muestra la posibilidad
de causar muerte o defies series.
• No opere la unidad con las manes mojadas.
• No Inserte los dedos ni ningt_ntlpo de objetosan
las unidades interne o extema.
• No se exponga diractamente al sire frfo per
touche tiempo.
• Utilica el cable especificado.
• Si detects una situaci6n anormal (per ejemplo,
olor a quemado), pare el acondicionadOrde aire
el suministro de alimentaci6n.
/'_ Cuidado l
Esta indicaci6n muestra la posibilidadde causar datio
o averfa so/amente en la propiedad.
®
• No lave la unidad con agua.
• No utilice e[ aparato pare otrosfines come la
conservacibn de alimentos.
• Dosconecte la unidad antes de limpiada.
• No se siente o coloque objetos sobre ta unidad
exterior.
• Apague el aparato antes de preceder a su limpieza,
• Ventile la habitaci6n regulamente.
• Compruebe si el bastidor de instalacibn eat8
daflado despuds de haber usado el aparato
durante un largo pert'ode,
• Desconactelacordenteslnova autilizerla
unidaddumnteunperfodolargode tiempo,

NOMBRE DE CADA PIEZA
• Unidad Interior
[] Panel Frontal
[] Entrada De Aire
[] Salida De Aire
[] Persiana Vertical Para El Flujo De Aire
[] Persiana Horizontal Para El Flujo Del Aire
[] Panel indicador
[] Botbn de funcionamiento autom_tico
(AI abrirel panel frontal)
[] Indicadorclelmodo econ6mico - VERDE
[] Indicadordel modo de plena potencia - NARANJA
[] Indicador de energfa - VERDE
[] Indicador del modode sueSo - NARANJA
[] Indicador del modo de ternporizador - NARANJA
• Unldad Interior
(al abrire[ panelfrontal)
[] Panel frontal
[] Filtrosde aire
[] Filtrospurificadoresde aire
• Unidad Exterior
[] Entrada de aire
[] Terminal a tierra
(Cobertura interior)
[] Conducto
[] Manguera de drenaje
[] Tuberfa
[] Salida de Aire
• Accesorios
• Control Remoto
• Soporte del control remoto
• Dos PIlas Secas RO3 o su equlvalente
• FIItros Purlflcadores De Aim
(Filtro purificadorde aire de catechin)
(Filtro solar desodorizador y refrescante)

NOMBRE DE CADA PIEZA
• Control Remoto
• SePal del mando a distancia.
• Aseg_rese de que el paso de la seral no estd
obstruido,
• Distanciamdxima: 10 m (32,8 if,).
• Sonido de recepoion de la seSal.
Un pitidocorto o un pitido largo•
• Notas pare el mando a dlstancla.
• NOtire o deje caer e_controlremoto.
• No Io moje.
• Algunostipos de Idmparasfluorescentas puadan
afectar la recepci6n de la serial. Consulte a su
comercianta.
[] Transmisorde serales
[] Visualizaci6n de funciones
[] Botbn de funcionamiento en mooo potente
[] Botbnde ajuste de la temperatura de la habitaciOn
(botbnautoiluminable)
[] Bot6n de se[ecci6n de modode funcionamiento
[] Bot6n de funcionamiento an modo aoonbmico
[] Botbn de direocionamientode flujo deairs ve_ical
[] Botbnde funcionamien-to del modooe dormir
[] Botbnde seleccibnde lavelocidad del ventilador
[] Puntos de reajuste
(Pulsar con un oDjetode punta fina para borrarla
memofia)
[] Bot6n OFF/ON (Conexibn/desconexi6n)
(bot6n autoiluminable)
[] Botbn de conexi6n del temporizador
[] Bot6n de desconexi6n deltemporizador
[] Botbn de direccionamiento de flujode airs horizontal
[] Botbn de ajuste de la hora
[] Botbn de cancelacibn
[] Bot6nde ajuste de lahora
[] Botbndel reloj
[] Tapa del mando a distancia
• C6mo inserter lea plies
2
1Desllce haole abajo por completo la tapa del
mando a dlatancla pare retlrarla.
2 Inserts lea plies
-Compruebe sies la posici6n correcta.
- 12.00 an el visor - parpadeando.
• Ajuste inmediatamsnte lahora actual en el reloj
para evitar el dasgasta de las pilas.(CLOCK)
3 Vuelva a colocar la tape del mando a dlatancla
Inaertdndola an lae ranuraa lateralea y haclendo
preal6n hacla dentro.
• Notes sobre las plies
• Se pueden utilizardurante aproximadamenta un
a_o.
• alga lea slgulentea condlclonea cuando
reemplace las plies
• Lltilicepiles nuevas del mJsmotipo.
• No usepilas recargables (Ni-Cd):
• Retire las piles si no piansa utilizer la unidad
durante un largotiempo.

PREPARACION ANTES DEL
FUNCIONAMIENTO
• Unidad Interior
1 Abra la parrilla delantera
2 Retire los filtros de aire
3 Coloque en su lugar los flitros purificadores de aire
4 Inserte los _tros de aire
5 Cierre el panel frontal
• Control Remoto
- Para poner en hera
1 Preslone IT}.
2 A contlnuaci6n preslone [] pare camblar la hora
en sentido ascendente o descendente.
3 Vuelva a prealone IT].
Lahora actual se iluminarden el visor.
C( MO HACERLO FUNCIONAR
•Para iniclar el funclonamlento
• Presione13"J.
• El indieadorPOWER (energfa) (verde) de la unidad
interior se encenderd.
•Para parar, prasione una vez mds.
• Ajuate del modo
• Prasione [] para seleccionar:-
AUTO- Funcionamiantoen modo automdtico
COOL- Funcionamientoen modo refrigeracibn
DRY - Funcionamientoen modosecado suave
FAN - Funcionamientoen modocirculaci6nde aim
Ajuste de la temperature
• Presione [] pare aumentar o reducir la temperature,
• La temperatura se puede ajustar entre 60°F ON86°F.
• Temperatura recomendada:
I
COOL 75°F ~ 78°F
2°F ~ 4°F
DRY por debaJode la
temperature ambiente
• Durante el funcionamiento en AUTO, presione [] 10am
seleccionar:-
• Funclonamiento a 4°F per encima de la
temperature ambiente.
• Funcionamiento ala temperatura ambiente.
• Funcionamiento a 4°F por debajo de la
temperature ambiente.
• Temperature estdndar
Temperature Temperature
de interior Operaci6n estdndar
Secado Suave 72°F
•Cada vez que el boton de seleccion de mode de funcion
es preslonado, el sensor de tempura interiorfunclona
automaticsmente pare seleccionar el modo de funcion
deseado con Enfriamiento o Secado Suave.
• Una vez seleccionado el mode de funcionamiento, 6ste
no cambia.

• AJuste de la velocidad del ventilador
• Press _ to setect:-
FAN • - Velocidad baja delventilador
FAN ,=ill - Velocidad media de_ventilador
FAN illllJJ • - Velocidad alta del ventilador
AUTO
FAN Velocidad automatica del ventilador
La velocidad de/abanico interior es
ajustada automdticamentede acuerdo
con el funcionamiento. La velocidad del
abanico intedor seapaga temporalmente
durante elfuncionamiento de la
modalidadde refrigeracidn.
• Ajuste de la direccidn vertical del flujo de sire
• Presione[] para seteccionar:o
] • Oscila hacia arriba y hacia abajo
automdticamente.
• Ajuste de la dlreccldn horizontal del flujo de sire
• Presione[] para seleccionar:-
Direccidn
horizontaldel flujo
de aire
Control Unidad
Remoto Interior
_]• Oscila haciaderecha e izquierda
automdticarnente.
• Notes
• Si|a unidad no va a ser utitizadadurante un periodo •
largode tiempo, desconecte el interruptorde
alimentacidn. Si se deja en la posici0nON se
utilizardn aproxim'_damente2,5W de electricidad
incluso si la unidad principal ha siclodesconactada
con el controlremoto.
• Sise pare el funcionamiento,recornience
inmediatamente, la unidad reanudard la operacidn
despuds de 3 minutos.
• Detalles de funcionamlento
COOL - Funcldn de enfrlamlento
• Para fijar la temperatura ambiente en el nivel de |rio
que le resulterods agradable.
AUTO - Funclonamiento Automat•co
• Tome la temperatura interiorpara seleccionsr e|
modo mdsapropiado.
• En el modo de funcionamiento AUTO no aparece la
temperatura en el mando a distancia.
DRY - La Operscldn de Secado Suave
Una refrigeracibnmuy suave previa ala
deshumidificacibnno reduce la temperatura
ambiente.
Dursnte el funcionamientode sacado suave, at
vantllador del intedor funcionarda velocidad lenta.
FAN - Funcldn de Clrculscldn del Aire
• Cuando la temperature ambiente alcanza el nivel
establecido, el func|onamientose inicia.conun
votumen bajo de flujode aire. Se detiene cuando la
temperature se reduce 4°F pot debajo de la
estabtacida. (Es ,',tilcuando se usa la calefaccidn).
La alta valocidad del ventilador no funcionard cuando
utiliceel modo Ventilador de circulacidnde aim.
La tablilla de direccidn del flujo de aire vertical se
mueve hacis arriba o hacia abajo automdticamente
durante el funcionamiento autom,'ttico.

AJUSTE DEL TEMPORIZADOR
Asegdresede qua lahora actuales lacorrectaantesde
ajustarlostemporizadores.Lostemporizadoresnopueden
serajustadossi elvisualizadorde lahora emitedestellos.
• FuncionamlentoON-TIMER(Temporizadorde conexi6n)
Pare poneren marcha automdticamenteel
acondicionadorde aira.
• Presione[] paraprogramarel funcionamiento.
• Presione[] paraaumantaro reducirel tiempo.
• Luegopresione[].
•Para cancelaresta oparaci6n,presioneI_1.
• Funcionamiento OFF-TIMER (Temporizador de
desconexlan)
Para pararautomdticamentaelfuncionamientodef
acondicionadorde aira.
• Presione[] para programarelfuncionamiento.
• Presiona[] paraaumentaro reducir el tiempo.
• Luegopresione[_,
•Para canceler astaoparacian,presione [_].
• Detalles sobre el funcionamiento en modo
temporlzador
• Cuandose ajustaON-Timer, elfuncionamianto
comenzardantesde lahora ajustadaactual. Estoes
para permitirqua la temperaturade lahabitacibn
alcance latemperatureejustadaala hora ajustada.
COOL, DRY, 15 minutos
AUTO an progresian
• Una vez establecido el ON-TfMER, el aparatose
pondrd en marcha diariamente ala hera establecida.
• Lahora actualnose visualiza cuandose ajustanlos
temporizadores.
• Cuandose usanala vez ambostemporizadores,el
indicadorde modo TIMER (temporizador) de la
unidadinteriorpermaneceencendidocuandoel
OFF-TIMER detiena elaparato.
FUNCIONAMIENTO CONVENIENTE
• Funcionamlento en modo de suefio
Se encenderd el indicador de modode suefio de la
unidad interior.
• Presione [].
• Se encenderdel indicadarde rnodode suefio de la
unidad intedor.
•Para cancelar esta operacibn, vuaIva a presionar
otra vez.
Detalles del funclonamlento en modo sueho
• Cuando latemperatura ambiente alcanza el nivel
eatablecido, el volumen de la corriente de aire
cambiard a bajo automdticamente.
• Ettiempodela Funciande Mododedormires de8 horas.
• Cuando se usa junto con el tempodzador, 6ste
tiene prioddad.
• El modo Desactivado no funcionardcon el modo
Ventilacian de circulaciande aire.
Temperature
0-1 Hor_a
__deApr°x'l'F,aument° b._,' fox I
I
=.,,_lf _,ra_o_secadosuaveI
Fund_ de _ I_m evNarel _fflamJento
*-- 1 Hora --) ) Hora
I despuas de aproxlmadanlente 8
horas de la operacibn de camblo a
sueSo se parard automdtlcamente.
• Funcionamlento en modo econamlco
Para ahorrar en el consumo de energfna.
Conviene usar este modo cuando la habitacian ha
alcanzado latemperature deseada.
• Presione f'7"].
El indicadordel modoeconbmico (verde) se
enciende en la unidad interior.
•Para cancelar esta operaci_,n,vuelva a presionar
otravez.
• Funcionamiento en modo plena potencla
Pare conseguir rdpidamente la temperature
establecida.
• Presione[].
•_ El indicadordel modo de plena potencia (varanja)
se enciende en la unidad interior.
El modopotente funcionar&sblo durante 15
minutos.
•Para cancelar esta operacibn, vuelva a presionar
otra vez.
Detalles sobre el funclonamlento del modo
econamlco/plena potencla
• No es posibleseleccioner simultdneamente los
modos Econamico y Potente.
• Los cambiosde la temperatura y del flujo de aire
son autom&ticos.
• El visor del mando a distancia permanece sin
cambios.
• Si se pulsa el botan de suefio o de funcionamiento,
se cancelardn el modode economfa o de mdxima
potencia.
• Durante el FAN funcionamientodel ventilador.
circulaciande aire, losmodos potente y econ_mico
no estdn disponibles.
Temperature,
Voluman de
tluJode aira
Funclonamlentoan I°F porenclmadela
modoecon6ml¢o temderaturaestab_cida. Super Low
Funcionamlentoen 5°Fpotdebajodela
modeplenapotencla temderaturaestablectda, Super High

. L 15 • :.::'_'/ _::;; :'_!i: :__¸ _:!_'_:_
- _'/_ _ •_ _...... _ ........... ._,_i ¸¸
CUIDADO Y MANTENIMIENTO/| • Filtros Purlflcadores De Aire i!i_;;!: • Inspecci6n de Pretemporada
• Limpieza de a Un dad nter or y el t_ii'l _ !_:/
Control Remoto I__ _ l_i_:__
• Limpiesuavementecon un trapo suave y seco. I__1 1_--_----Y_ l:i_
NOuse aguaper enclma de los 104 F nr J_.'_ . -- __ I_,_
abrillantadorespara ,impiar,a unidad. I!_!!_l Levante el .. _
• _i panel frontal "
• Limpleza de los Filtros de Aire I" !i:] _ _
(Recomendaci6n: Si la unidad funciona en un ambiente I I _ _j:?':_
conpolvo, limpielosfiltroscadadossemanas, yaqueel I_] _} L-.--Filtrosola_rdesodorzador _:::_
usocontinuadodeestosfiltrossuciosreducelaeficacia I,/ I --:---:- I!:;;:1
de larafrigeraci6n o la calefaceibn) __ _= y rerre:::n:^ V.i!!!
1 Quite la suciedad utilizando una aspiradora. { _ _=_ Filtro De Catequina I_ill
2 Lavelaparteposteriordelfiltrodeaireconagum I ! _ PurificadorDeAire
3 Siest_nmuysucios, ldvelosconjab6noconun I r \ /^ ]_:_
detergentesuave, j | ) I >' Quite losfiltros do aire !_;. I pilas.
4 Deje secarlos filtros y col6quelosde nuevo.,, _ I l_*{
Aseg0resede que el lade marcado "FRONT se ] -/ I_!
-encuentra haca sdelante _ ! I;,_!_I
Filtro de aire averiado. _ _ • Filtro solar desodorlzador y refrescante I_';_
Con§ulte consucomercranteautonzado mds _:_! • Sirve pars eliminarel olor desagradable y para _'l
prox,mo. [_,_ desodorizar el sire de la habitaci6n _7_!
Peza No"CWD001049 L I " [_'_
• • " - • Reut zab e _
, No use benclna, thinner,desengrasadores ni pa_os If; t , ' . _?;_]
empapadosen productos sdusficospara la limpiar la I / • Asplrelo, col6quelo a la luz d=rectadel soldurante 6 _'_it I
unidad. I: { horasy vuelva a coloearJoen su lugar. _!
' (Recomendado cada 6 meses)
t
• Llmpleza"" del Panel Frontal I | I:il!
(bebe set removido antes de lavarlo) I: _ • Flltro De Catequina Purlficador De Aire I__:_I
1 Levante elpanelfrontalporencimadel horizontalytire I'"l ° El filtro estd revestidocon catechinpara impedir el I_*_::.ll_I
pars extraedo. I_ ] crecimientode bacteriasy virus• I_';t
2 L_velo suavemente con agua y una aspen a. t_,_l • Reutilizable. li_t
• No presione el panel frontal demasiado fuerte I_,il ' Asplrelo y vuelva a colocarloen su lugar
cuando Io lave.. . ; (Recomendado: oada 6 meses) ]'_1
• Cuando use I,mpladores de COclna(detergente I_•f - I_q
neutro),aclare abundantemente. _-:_ • . . • _
..... I:_;,_] Se recomlenda camblarestos fdtros oada 3 a_ios.NO _
• No seque el panelfrontalbaJola luz d=reotadel___soL I_,_= reutilice los filtros da_ados [_r"_
fijar el panelfrontal, levant,eel panelfron__ _=,,= _;_t Consulte al vendedor autorizadorods pr6ximopara la _,
3 Para
horizontamanta, hdgacoincidr sparta sobresalientede ]_ 1 .........
• . . "::, compra oe un nitro nuevo.
_rUn_al_de'f_taer_rcon elpunt°de apoyoyh-aga---Ii_J FiltroDe Catequina PurificadorDe Airs NO:CZ-SF70P
!_!i t Filtro solardesododzador y refrescante. No: CZ_SFD70P
i';_:_it " Si el acond=_ionadorde aire func_onacon filtros I_':_
_ sucios:-
I_ li;:_ii_I -El airs no Sopunfica I_
_]_U_ I _'-'.&F_ _li_n_ _i;J - La capacidad de enfriamiento disminuye 1_
__ Saliente _i- Emitir, olores f,tidos _.
Soporte de ,aunidad interior j___ ........
• Sale frfo el soplo de sire?
Elfuncionamiento es normalsi 15 minutosdespudsde
ponchoen marcha,la diferenciaentrelas temperaturas
de entradade aim y de la persianade aireaci6nesde:-
I . COOL -- 14°F o male I
• Se encuentran obstruldas las ventaolnas de
entrada y eallda de alre de las unldados do
intsrlores y de exterlores?
• Estdn ba as laa plies del control remoto?
S a marca de la bater aen e contro remoto
parpadea o la visualizacibnes d_bil, sustituya las
• Cuando el Acondicionador de Aire no se
Utiliza Durante un Perfodo Largo de Tlempo
1 Para secar las partes intemas de la unidad de
interiorhaga funcionar la unidad durante 2-3 horas
usando:-
FuncionamientoenmodoFAN 1
(ventilador)
2 Detenga el funcionamiento con el control remoto y
desconecte el cortaeircuitos.
Nots: Si no sa desconecta la unidad con el mando
a distancia, empezard a funcionar cuando el
cortacircuitosest6 conectado (porque la unidad
est', equipada con controlde reencendido
autom&tico.)
3 Retire las pilas del controlremoto.
• Inspecci6nRecomendada
• Despuds del use durante varias temporadas, la
unJdadacumula suciedad y pot oso reduce su
rendimiento. Seg0n las condicionesde
funcionamiento, una unidad oon sueiedad
acumulad- puede contaminar el sistema
deshumidificador. PorIo tanto, se recomienda una
revision estacional ademds do la limpieza regular.
(Consulte aun vendedor autorizado).

INFORMACIONUTIL |'i] SUGERENCIASPARAAHORRAR
ENERGfA
trl A • /! Y PARAUN MEJORFUNCIONAMIENTO
• Bot6n de tunc onam ento automttt co • Con o de utorecomlen o | :| . ,'-_._
Si hay uncorte eldctrico,la unidad comenzarda. " ! { • AJuate de a Temperatura "l'
funcionar autom_lhcamentede 3 - 5 1/2 mJnutos . Q '
• . . • Se puede ahorrar aprox_madamenteet 10 Yode
__ ,rr_- despues de que se haya restablecido la comente, elactricidad
_1 _ '"_ • El funcionamianto se reanudard automdticamente _ • Ajuste a temperatura 2°F per encma de a :;lEVI
\ ) • Levanteel panelfrontaly presione, en el mode de funcionamiento previo yen la misma | _ t tuner t ra dasa_da
/ ( dreccbndelchorr0deairecuandoserestablezca | I .e...,-a.u _ . _.j
..... el fluido el_ctrico salvo que se haya interrumpido / / • F tro de A re ""F tro Pur f eador de A re "im
• Funclonam ento automaz_co .... Y _
.......... d_ohefunclonam_antodesde el mando a d_stanca, | | • Limpie el filtrode aire cada dos samanas ycambia _. _:
• _,lel maneo a eJstancfaoeja oe runc_ond_ro na . | | el filtro purificador de a re cada 6 mesas :,_
quedado real colocado, pulse el bot6n e • Ajuete del Temponzador | _ • Los filtrossuciospuedan raducirla aficaciade la _:!_';
func onam ento auto|alice para poner en marcha • Cuando se preducen cortes de Corriente se l ] r_fri"erac 6n _
el aparato, cancelard la configuracibndef temponzador. | _ o _ . i,_ _,
• El funcionamiento automdtico se activard Reajuste e temper zador tan pronto come se _ | • Mantan(te Cerradas Todaa as Puartaa Ventanaa : _
nmad atamente al pulsar el bot6nAuto de restablezca la cornente. | _ • De Io contrario,severd reducido el randimientode _'" _"
funcionamiento. Sinembargo, la temperatura no ] | la rafrigerac bny se usard e ectrcidad i!_ ;_
• n r i'n • Tormentas Electricas ! / innecesarlamente " "':"
puede ajustarse e esta opa ace . . • Esta unidad de aire acondicionado estd equipada | _ " -
• El inclicador de alimentacl6n de !a unldad |tenor con un dispositivo protector Contrasubidasde | | • Unldad Exterior
parpadaar& haste que se selecolone tensi6n incorporado. Sin embargo, pare ofrecer una | :_ • No bloauee las reiillas de salida de aire ya que ::
aufomdticamente el mode de funclonamlento, mayor proteccibn a su unidad de aire | • _ reduoiHa la eficacia de la rafrigeraci6n. -
• Para canceler esta operaci6n, vuelva a presionar acondicionado ante una subida anormal del fluJo | ; I ."
otra vez. e$_ctrico, deber(a desconectar 05cortacircuitos. |' | • Temporlzador y Mode de Dormlr : ;.
l_;J • Para evitarel derroche de elactricidad usa el mode _::_
• Sonido de recepci6n de Is sepal del mando a dorm(do mientras duerma o el temporizadar cuando :_:,_
dlstanela |:_! _1 salga de oasa. ;i)?_!i
• Paradesec vare p do(sondoderecepcbndela 1-_| .... :;;";°_
........ / t • Ev tafa Exposlcf6n a ta tuz _otar utracta ,- ._;_
serial) pulse el _3otonQelunclonamler_o / • I .... ::;.'_
- / ";_ • Mantenga las cortlnas o loscortlnaJescerraoos :;;_
automdtic,o,,per es,pac,o de 10 segund_:slmds. | i_:'! para evitar a uz d recta de so m entras funciona el _i_
El sonido beep , beep se oird pasad 0 _ :::1 refrigerador _!_._
segundos. ,, | _/ .:::.
Nota: :leSOn_:s,beep seoird pasados5 | i_ ' _'_:
pare debe seguir apretando hasta oir el _, ;J :_: :
son do beep beep | .......
• Repita los mismos paso, si desea activar el sonido : ,,:_i'_
de recepclbn de la senal. J,_._J ._;_
• (S_Io para f nes de servlcio tl_cnco) J_l !i;::_
..... _ ;_
Note S pu sa este botbn per espacio de 5 a 10 E._ _,_'
segundos, se pondrd en marcha la prueba de _ i_._.._
funcionamiento,A os 5 segundosse oird un prude
n ciodo ,

LOCALIZACION DE AVERiAS
1 Funcionamiento Normal
• Enciende el acondicionador de aire, pero no
funciona durante 3 minutos.
• Se escucha un sonido como de agua corriendo.
• Parecier_ que sale neblina del acondicionador
de aJre.
• La habitaci6n tiene un olor peculiar.
• Durante el ajuste del Flujo Automdtico de Aire, el
ventilador interior se suele parar.
• De la unidad exterior salen ague o vapor.
• Funcionamiento Anormal
Compruebe los siguientes puntos antes de {{amar al
serviaio teenico. Si continda funcionando real, p6ngase
en contacto con el centro de asistencia t_enica rods
pr6ximo. Pare obtener ayuda, game al tel_fono de
EE.UU.: (866)-292-7292, pare residentes de Hawaii
Ilame al (808)-488-7779.
• El acondicionador de aire no funclona.
• El acondlcionador de aire produce mucho
ruido mientras funciona.
• El aire acondicionado no enfria eflcezmente.
I Esta es la respuestalt
• Espara protegerel acondlcionadorde aire. Espere
rlastaaue eJacondicionadorempiecea tuncionar.
• ES el ruido del paso del refrigerame pot las tuberfas
del aeondiclonador de aire.
• La condensaaiOnse produce cuandoel chorrode alre
del acondicionadorenfrlala habitaci6n
• Puede tratarse del olor a humedad producido por lee
Daredes, las alfombras o las telas de la habitaci(_n.
• Es para quiter el olor producido por el entorno.
• En funcionamiento COOL/DRY (FR/O/SECO), la
humedad del aire se condensa en ague sobre la
superfieie frfa de la tuberla de la unidad exterior y
gotea.
r JL Compruebe _
• Ha saltado el interruptor automdtico? (Se ha
producido un cortocircuito?)
• Usa correctamente el temporizador?
• Estdinclinadoel trabajode instalacion?
• Estd cerradadebidamente la parrilladelantera?
• Ha fijado Jatemperature correctamente?
• Losfiltros estansucios?
• Estala entradaosalidade aire obstruida?
• Estantodaslee vantanasya puertasbiencerradas?
_z
2.*
"1
• Comuniquese con el Distribuldor
Inmediatamente
Si se dan las siguientesclrcunstancias, apague el
cortacircuitosy descon6ctelo de la red eldctrica. A
continuacibn,p6ngase en contacto con un distdbuidor
autorizado o con el centro de asistencia t6cnica de
P_nasonic.
Si escucha ruidoe extran6s durante el funclonamlento,
Sl por un deacuido, vualca ague u otro Ifquldo sobre el
control remoto.
Sl hay escapes de agua de Is unldad Interior.
• SI los botones o Interruptores no funalonan
aorrectamente.
SI el Interruptor de clreulto se actlva frecuentemente.
El cable de allmentael6n y el enchufe se eallentan
normaJmente,
Se puede obtener informacibn IJamando al (866)-292-7292,
pare resldentes de Hawaii Ilame al (808)-488-7779.
Para agilizar la reparaci6n det aire acondicionado:
• Tenga a mano la prueba de compra.
• Indique todos los sfntornas qua muestra la unidad.
rnr_lNm
INr_r_ m
rn r_rn c_

ESPECIFICACIONES DEL PRODUCTO
ModUlo
CAPACIDAD DE ENERIAMIENTO
CLASIFICACION DE
LA IFtLECTRIClDAD
EER
SEER
DI_SHUMIDIFICACION
CIRCULACION DE AIRE
DIMENSIONES Interior
Exterior
Btu/h
Fase
Fr_qcuencia (Hz)
Voltaje (V)
Corriente (Amps)
Potencia (W)
Alto
Ancho
Protundidad
Alto
Ancho
Protundidad
(Stu/W.h)
(Btu/Watt.h)
(pinte/h)
(pie3/min)
cm(poulgadas)
cm(poulgadas)
cm(poulgadas)
cm(poulgadas)
cm(poulgadas)
cm(poulgadas)
CS-C18BKP
CU-C18BKP6
17.700 - 17.700
1
60
208 - 230
8,5 -7,9
1.740 - 1.780
10,1 -9,9
10,3
4,2
470
27,5 (10 - 13/16)
99,8 (39 - 9/32)
21,0 (8 - 9/32)
68,5 (26 - 31/32)
80,0 (31 - 1/2)
30,0 (11 - 13/18)
PESO NETO Interior kg(libras) 11,0 (24)
Exterior kg(libras) 48,0 (106)
PESO BRUTO Interior kg(libras) 13,5 (30) +-
Exterior kg(libras) 54,8 (120) 7,0 (148)
Las especificaciones estan sujetas a eambios por mejoras sin previo aviso.
CS-C24BKP
CU-C24BKP6
23.200 - 23.200
13,1 - 12,1
2.640 - 2.680
8,7-8,6
10,0
6,6
533
60,5 (133)
• REFERENCIA
Numero de modelo:
Nombre delcomerciante:
Telefonodeloomerciante:
Numero de serie:
(Localizadoen elcostadode launidad)
Fecha de adqulsicion:
Nombre delcomerciante:
I
L
I
Favor de pegar la prueba de su compra aqui
i
para su futurareferencia, i
,J
© 2001 Matsushita Electrical Co, Ltd. Derechos Reservados.

PANASONIC CONSUMER ELECTRONICS COMPANY,
DIVISION OF MATSUSHITA ELECTRIC
CORPORATION OF AMERICA
One Panasonlc Way
Secaucus, New Jersey 07094
PANASONIC SALES COMPANY,
DIVISION OF MATSUSHITA ELECTRIC OF PUERTO RICO, INC.,
Ave. 05 de Infanterla, Kin. 9.5
San Gabriel Industrial Park
Carolina, Puerto Rico 00985
Panasonic Split Air Conditioner Products Parts
Limited Warranty
Limited Warranty Coverage
If your productdoes not work properly because of a defect in materialsor workmanshipin a Panasonfc provided part, Panasonic Consumer Electronics Company or Panasonic Sales
Company (collectivelyreferred to as =thewarrantor")will, for the lengthof the periodindicated on the chartbelow, whichstartswiththe date ofpurchase ("warrantyperiod"), at itsoption,
repair or providea replacement for thatpart(s) with new or refurbishedparts.
Product or Part Name
All componentsofSplitAir Conditionerexcept
Compressorand Remote ControlTransmitter
Compressor
Remote ControlTransmitter (inexchange for defective item)
Parts
One (1) Year
Five (5) Year
Ninety(90) Days
Duringthewarranty period,there willbe nocharge forparts. This warranty does not include labor forreplacingdefectiveparts orothercostsincurredforservicingsuch as contractorvisit
orcontractorminimumcharges, installing,removing,shippingor handling.Suchcostmayor may notbe coveredby a separatewarrantyprovided bythe contractorwhoinstalledthe product.
If a part orparts are defective,the contractorwilladvise Penasonic,andPanasonicwillforward the replacementpart(s)tothe contractor.Ifnon-rechargeablebatteries are included,theyare
notwarranted. This limitedwarrantyonlyappliesto productspurchasedandservicedinthe UnitedStates or PuertoRicoand isextended onlyto theoriginalpurchaserofa newproductwhich
was not sold "asis". A purchase receiptor otherproof ofthe odginalpurchase/installationdate isrequiredfor warranty service.
Exercising Your Warranty
TOexerciseyourwarrantyinthe UnitedStates contactthe contractorwho installedtheproductor, in allstatesotherthan Hawaiicall (866)-292-7292; for Hawaii residentscall (808)-488-7779.
Forassistancein PuertoRicocallPanasonicSales Company (787)-750-4300 orfax (787)-768-29t 0.
Limited Warranty Limits And Exclusions
Thiswarranty ONLY COVERS failures due to defects in matedaFsor workmanshipin components provided by Panasonic, and DOES NOT COVER normal wear and tear or cosmeti_
damage. The warl'antyALSO DOES NOT COVER damages whichOccurredinshipment,orfailures whichare causedby productsnotsuppliedby the warrantor,orfailures whichresult from
accidents, misuse, abuse, neglect, mishandling, misapplication,alteration, faulty installation,set-up adjustments, operating the productin a corrosive atmosphere containing chlorine,
fluorine, or any other chemicals, misadjustment of consumer controls,improper maintenance, power line surge, lightningdamage, modification,or service by anyone other than an
authorizedcontractor,or damage that isattdbutabletoacts of God.
THERE ARE NO EXPRESS WARRANTIES EXCEPT AS LISTED UNDER "LIMITED WARRANTY COVERAGE". THE WARRANTOR IS NOT LIABLE FOR INCIDENTAL OR
CONSEQUENTIAL DAMAGES RESULTING FROM THE USE OF THIS PRODUCT, OR ARISING OUT OF ANY BREACH OF THIS WARRANTY. (As examples,thisexcludes damages
for losttime, parts used in connectionwith normalmaintenance such as air filters and owner-required maintenance. The items listedare not exclusive, but are for illustrationonly.) ALL
EXPRESS AND IMPLIED WARRANTIES, INCLUDING THE WARRANTY OF MERCHANTABILITY, ARE LIMITED TO THE PERIOD OF THE LIMITED WARRANTY.
Soma states do notallowthe exclusionor limitationof incidentalor consequential damages, or limitationson how longan impliedwarranty lasts, so the exclusions may not apply to you,
This warranty givesyou specific'legalrights and you may also have other rights which vary from state to state. Ifa problem with this product develops during orafter the warranty period, you
may contactyour authorizedcontractor. Ifthe problem is nothandled to your satisfaction,then write to the warrantor's Consumer Affairs Department at the addresses listed forthe warrantor.
PARTS WHICH ARE NOT COVERED BY THIS LIMITED WARRANTY, INCLUDING WITHOUT LIMITATION THE COST OF AN IN-HOME SERVICE CALL, ARE YOUR
RESPONSIBILITY.
F563646
-
 1
1
-
 2
2
-
 3
3
-
 4
4
-
 5
5
-
 6
6
-
 7
7
-
 8
8
-
 9
9
-
 10
10
-
 11
11
-
 12
12
-
 13
13
-
 14
14
-
 15
15
-
 16
16
-
 17
17
-
 18
18
-
 19
19
-
 20
20
-
 21
21
-
 22
22
-
 23
23
-
 24
24


Panasonic CS-C18BKP El manual del propietario
- Tipo
- El manual del propietario
- Este manual también es adecuado para
en otros idiomas
- English: Panasonic CS-C18BKP Owner's manual
Artículos relacionados
-
Panasonic CS-E9CKP Manual de usuario
-
-
-
Panasonic Air Conditioner CS-A9CKPG Manual de usuario
-
-
-
-
-
