BOMANN KK 6059 CB Instrucciones de operación
- Categoría
- Barbacoas
- Tipo
- Instrucciones de operación

KK 6059 CB
KK6059CB_IM 21.11.22
Bedienungsanleitung
Instruction Manual • Gebruiksaanwijzing • Mode d’emploi
Manual de instrucciones • Istruzioni per l’uso • Instrukcja obsługi / Gwarancja
Használati utasítás • Руководство по эксплуатации •
KLEINKÜCHE
Mini kitchen • Kitchenette • Mini-cuisine
Cocina pequeña • Minicucina • Mini kuchenka
Minikonyha • Малогабаритная электроплита •

KK6059CB_IM 21.11.22
Bedienungsanleitung ....................................................................................Seite 4
Instruction Manual ........................................................................................ Page 9
Gebruiksaanwijzing ................................................................................... Pagina 13
Mode d’emploi............................................................................................... Page 18
Manual de instrucciones .......................................................................... Página 23
Istruzioni per l’uso .....................................................................................Pagina 28
Instrukcja obsługi .......................................................................................Strona 33
Használati utasítás .......................................................................................Oldal 38
Руководство по эксплуатации ..................................................................стр. 42
50 ....................................................................................................................
2

KK6059CB_IM 21.11.22
3
Übersicht der Bedienelemente
Overview of the Components • Overzicht van de bedieningselementen
Liste des différents éléments de commande • Indicación de los elementos de manejo
Elementi di comando • Przegląd elementów obsługi • A kezelőelemek áttekintése
Обзор деталей прибора •

4
KK6059CB_IM 21.11.22
WICHTIG:
Lesen Sie unbedingt zuerst die separat beiliegenden Sicherheits-
hinweise.
Bedienungsanleitung
Vielen Dank, dass Sie sich für unser Produkt entschieden
haben. Wir wünschen Ihnen viel Freude mit dem Gerät.
Lesen Sie vor Inbetriebnahme dieses Gerätes die Be-
dienungsanleitung und die separat beiliegenden Sicher-
heitshinweise sehr sorgfältig durch. Bewahren Sie diese
Unterlagen inkl. Garantieschein, Kassenbon und nach
Möglichkeit den Karton mit Innenverpackung gut auf. Falls
Sie das Gerät an Dritte weitergeben, geben Sie auch immer
alle dazugehörigen Unterlagen mit.
Symbole in dieser Bedienungsanleitung
Wichtige Hinweise für Ihre Sicherheit sind besonders ge-
kennzeichnet. Beachten Sie diese Hinweise unbedingt, um
Unfälle und Schäden am Gerät zu vermeiden:
WARNUNG:
Warnt vor Gefahren für Ihre Gesundheit und zeigt mög-
liche Verletzungsrisiken auf.
ACHTUNG:
Weist auf mögliche Gefährdungen für das Gerät oder
andere Gegenstände hin.
Inhalt
Übersicht der Bedienelemente ..........................................3
Auspacken des Gerätes ..................................................... 4
Übersicht der Bedienelemente / Lieferumfang ................4
Warnhinweise für die Benutzung des Gerätes ................ 5
Anwendungshinweise ........................................................ 5
Symbolik Kochplatten ......................................................5
Symbolik Backofen ..........................................................5
Elektrischer Anschlusswert ..............................................5
Elektrischer Anschluss .....................................................5
Vor der ersten Benutzung ................................................5
Kochgeschirr ....................................................................6
Backofen ..........................................................................6
Entnahmewerkzeuge (17 und 19) ...................................6
Bedienung............................................................................6
Benutzung der Kochplatten .............................................6
Benutzung des Backofens ............................................... 6
Drehspieß .........................................................................6
Betrieb Beenden ..............................................................7
Reinigung .............................................................................7
Kochplatten ......................................................................7
Krümelblech, Backblech, Grillrost, Drehspieß,
Fixierklammern .................................................................7
Innenraum des Backofens ............................................... 7
Gehäuse ...........................................................................7
Aufbewahrung .....................................................................7
Technische Daten ...............................................................7
Entsorgung .......................................................................... 8
Bedeutung des Symbols „Mülltonne“ ...............................8
Auspacken des Gerätes
1. Nehmen Sie das Gerät aus seiner Verpackung.
2. Entfernen Sie sämtliches Verpackungsmaterial, wie Fo-
lien, Füllmaterial, Kabelbinder und Kartonverpackung.
3. Prüfen Sie den Lieferumfang auf Vollständigkeit.
4. Sollte der Verpackungsinhalt unvollständig oder Beschä-
digungen feststellbar sein, nehmen Sie das Gerät nicht in
Betrieb. Bringen Sie es umgehend zum Händler zurück.
5. Entfernen Sie eventuell vorhandene Aufkleber vom
Gerät.
6. Am Gerät können sich noch Staub oder Produktions-
reste benden. Wir empfehlen Ihnen, das Gerät wie
unter „Reinigung“ beschrieben zu säubern.
Übersicht der Bedienelemente /
Lieferumfang
1 Kochplatte, groß
2 Kochplatte, klein
3 Regler kleine Kochplatte
4 Heizkontrollleuchte (kleine Kochplatte)
5 Regler große Kochplatte
6 Heizkontrollleuchte (große Kochplatte)
7 Regler Backofentemperatur
8 Betriebskontrollleuchte
9 Backofenfunktionsschalter
10 Heizelement
11 Glastür
12 Türgriff
13 Hängevorrichtung für Drehspieß
14 Grillrost
15 Backblech / Fettpfanne
16 Krümelblech
17 Entnahmewerkzeug für Grillrost und Backblech
18 Drehspieß
18a Fixierklammern
19 Entnahmewerkzeug für Drehspieß

5
KK6059CB_IM 21.11.22
Warnhinweise für die
Benutzung des Gerätes
WARNUNG:
• Verbrennungsgefahr! Fassen Sie das Gerät nur am
Griff und an den Schaltern an.
• Auch, wenn Sie die Entnahmewerkzeuge für das
Backblech oder den Drehspieß verwenden, schützen
Sie sich mit Handschuhen oder Topappen vor der
Hitze.
• Brandgefahr! Benutzen Sie niemals Behälter aus
Kunststoff, Karton, Papier oder Ähnlichem.
ACHTUNG:
Verwenden Sie keinen Bratschlauch oder Glasbehälter.
Diese könnten platzen.
• Stellen Sie das Gerät auf eine ebene, hitzebeständige
Fläche!
• Halten Sie einen ausreichenden Sicherheitsabstand
zu leicht entzündlichen Gegenständen wie Möbel,
Vorhänge, etc.! Stellen Sie das Gerät auf keinen Fall in
einen Schrank!
• Stellen Sie das Gerät mit der Rückseite vor eine Wand.
• Lassen Sie beim Betrieb des Ofens mindestens 12 cm
Platz auf allen Seiten des Geräts, um eine ausreichende
Luftzirkulation zu ermöglichen.
• Betreiben Sie das Gerät, wegen der aufsteigenden Hitze
und der Dämpfe, nicht unter Hängeschränken.
• Achten Sie während der Benutzung darauf, dass das
Netzkabel nicht in Kontakt mit heißen Teilen des Gerätes
kommt.
• Betreiben Sie das Gerät nur unter Aufsicht. Sehr trocke-
nes Brot kann im Inneren des Gerätes Feuer fangen!
• Stellen Sie während des Betriebs keine Gegenstände
auf das Gerät, die Sie nicht zum Kochen brauchen.
• Dieses Gerät hat eine Tür aus gehärtetem Sicherheits-
glas. Das Glas ist stärker als gewöhnliches Glas und
bruchfester. Vermeiden Sie Kratzer auf der Türober-
äche. Wenn das Türglas einen Kratzer oder eine Kerbe
aufweist, wenden Sie sich an unseren Service oder an
einen Fachmann.
• Bewahren Sie keine anderen Materialien als das vom
Hersteller empfohlene Zubehör in diesem Ofen auf,
wenn er nicht verwendet wird.
Anwendungshinweise
Symbolik Kochplatten
Regler (3) Kleine Kochplatte
Regler (5) Große Kochplatte
Symbolik Backofen
Regler (7) °C Backofentemperatur
Funktionsschalter (9) Backofenfunktion
Aus
Oberhitze
Unterhitze
Ober- und Unterhitze
Ober- und Unterhitze
mit Umluft
Oberhitze
mit Drehspieß und Umluft
Elektrischer Anschlusswert
• Insgesamt kann das Gerät eine Leistung von 3100 W
aufnehmen. Bei diesem Anschlusswert empehlt sich
eine getrennte Zuleitung mit einer Absicherung über
einen 16 A Haushaltsschutzschalter.
• Verwenden Sie keine Mehrfachsteckdosen, da dieses
Gerät zu leistungsstark ist.
• Achtung, Überlastung: Wenn Sie Verlängerungsleitun-
gen benutzen, sollten diese einen Leitungsquerschnitt
von mindestens 1,5 mm2 haben. Kabel mit einem gerin-
geren Leitungsquerschnitt können sich überhitzen.
• Achten Sie darauf, dass das Kabel so verlegt wird, dass
man nicht daran ziehen oder darüber stolpern kann.
Elektrischer Anschluss
1. Drehen Sie alle Regler entgegen dem Uhrzeigersinn bis
zum Anschlag. Den Funktionsschalter stellen Sie auf
Position .
2. Prüfen Sie, ob die Netzspannung, die Sie benutzen
wollen, mit der des Gerätes übereinstimmt. Die Angaben
dazu nden Sie auf dem Typenschild.
3. Verbinden Sie den Netzstecker nur mit einer vorschrifts-
mäßig installierten Schutzkontaktsteckdose.
Vor der ersten Benutzung
An den Kochplatten und an den Heizelementen bendet
sich eine Schutzschicht, die beim Aufheizen des Gerätes
verbrennt. Dadurch kann es bei der Benutzung des Gerätes
zu Rauch- und Geruchsentwicklungen kommen, welche
jedoch nach einigen Nutzungsvorgängen abklingen. Dies
stellt keinen Mangel dar.
• Sie können die Rauchentwicklung minimieren, indem Sie
die Kochplatten und Heizelemente vor der ersten Benut-
zung mit einem leicht angefeuchteten Tuch abwischen.
• Benutzen Sie keine Reinigungsmittel!
• Wischen Sie mit einem trockenen Tuch nach.
• Schalten Sie das Gerät nur in einem vollkommen
trockenen Zustand ein.
• Sorgen Sie immer für ausreichende Belüftung.

6
KK6059CB_IM 21.11.22
• Betreiben Sie das Gerät vor der ersten Benutzung
mehrere Minuten lang separat, damit sich die Schutz-
schichten entfernen können.
1. Schalten Sie beide Kochplatten ein, ohne Kochge-
schirr zu benutzen. Drehen Sie dafür die Regler
und auf die Positionen MAX.
2. Anschließend betreiben Sie den Backofen ohne Zu-
behör und ohne Gargut. Drehen Sie den Regler °C
auf 230 °C. Den Funktionsschalter stellen Sie auf .
Kochgeschirr
• Verwenden Sie nur Kochtöpfe mit ebenem Boden, um
die Energie optimal zu nutzen.
• Der Kochtopf sollte nie kleiner sein als die Kochplatte.
Dadurch geht Energie verloren. Im Extremfall kann sich
die Kochplatte verziehen.
Backofen
• Schieben Sie immer das Krümelblech unter das untere
Heizelement.
• Wir empfehlen, den Ofen circa 10 – 15 Minuten vorzu-
heizen.
• Sparen Sie Energie, indem Sie die Schalterstellungen
mit Umluft nutzen. Dabei wird die erhitzte Luft durch
einen Ventilator im Innern des Ofens schneller und
gleichmäßig verteilt.
• Grillen oder Braten Sie grundsätzlich nur bei eingesetzter
Fettpfanne. So verhindern Sie, dass Fett auf die unteren
Heizelemente tropfen kann.
• Eine Zeitschaltuhr ist bei diesem Backofen nicht vorhan-
den. Sie müssen die Garzeit selbst kontrollieren.
• Ihr Backofen ermöglicht Ihnen umfassende Einstell-
möglichkeiten. Gemäß Ihrem Rezept wählen Sie eine
Temperatur.
Hier einige Beispiele, wofür Sie die Funktionen nutzen
können:
• Oberhitze:
Zum Grillen oder zum Überbacken von Auauf.
• Oberhitze mit Drehspieß und Umluft:
Geügel und größere Bratenstücke werden gleichmäßig
gegart.
• Ober- und Unterhitze mit Umluft:
z. B. für Pizza, Gebäck und Ähnlichem
Entnahmewerkzeuge (17 und 19)
a) Zur Entnahme des Backblechs
b) Zur Entnahme des Grillrost
Benutzen Sie zur Entnahme des Drehspießes das Entnah-
mewerkzeug (19).
Bedienung
• Sie können die Kochplatten und den Backofen separat
oder in Kombination betreiben.
• Bei der gleichzeitigen Benutzung beider Kochplatten und
des Backofens kann sich die Kochzeit etwas verlängern
gegenüber der Benutzung ohne Backofen. Dies ist tech-
nisch bedingt und stellt keinen Mangel dar.
Benutzung der Kochplatten
1. Drehen Sie den Regler und / oder nach rechts,
bis sich die dazugehörige Heizkontrollleuchte einschaltet.
2. Wählen Sie eine Einstellung zwischen 1 und MAX.
Die dazugehörige Heizkontrollleuchte erlischt, wenn die
Platte die Temperatur erreicht hat.
Benutzung des Backofens
1. Wählen Sie mit dem Regler °C eine Temperatur zwi-
schen LOW (niedrig) und 230 °C.
2. Wählen Sie Ihre gewünschte Backofenfunktion mit dem
Backofenfunktionsschalter. Die Kontrollleuchte (8) zeigt
Ihnen an, dass der Ofen in Betrieb ist.
Drehspieß
Wählen Sie kein zu großes Bratenstück. Das Grillgut muss
genug Abstand zu den Innenwänden und den Heizstäben
haben. Es sollte sie auf keinen Fall berühren.
1. Schieben Sie das Backblech / Fettpfanne in die unterste
Schiebeleiste des Backofens.
2. Reiben Sie den Drehspieß und die Fixierklammern mit
Speiseöl ein.
3. Geügel wird vor dem Grillen dressiert. Binden Sie dazu
die Flügel und die Schenkel mit Küchengarn eng an den
Körper.
4. Stecken Sie das dressierte Geügel oder das Braten-
stück vorsichtig auf den Drehspieß. Schieben Sie die Fi-
xierklammern auf den Drehspieß und befestigen Sie den
Braten damit. Schrauben Sie die Fixierklammern mit den
Schrauben fest.
5. Heben Sie den fertig bestückten
Drehspieß mit dem Entnahme-
werkzeug in den Ofen. Dazu
stecken Sie zuerst das Ende
des Drehspießes ohne Kerbe
in den Antrieb an der rechten
Ofenseite. Haken Sie dann das
andere Ende des Drehspießes in die Hängevorrichtung
an der linken Ofenseite.

7
KK6059CB_IM 21.11.22
6. Wählen Sie eine Temperatur und die Funktion . Der
Drehspieß beginnt sich zu drehen. Achten Sie darauf,
dass sich das Bratenstück frei drehen kann.
7. Wenn das Fleisch gar ist, nehmen Sie den Drehspieß mit
Hilfe des Entnahmewerkzeugs heraus.
Betrieb Beenden
1. Drehen Sie alle Regler entgegen dem Uhrzeigersinn bis
zum Anschlag. Den Funktionsschalter stellen Sie auf
Position .
2. Ziehen Sie anschließend den Netzstecker aus der
Steckdose.
Reinigung
WARNUNG:
• Ziehen Sie vor der Reinigung immer den Netzstecker aus der
Steckdose.
• Warten Sie, bis das Gerät vollständig abgekühlt ist.
• Das Gerät auf keinen Fall zum Reinigen in Wasser tauchen.
Dies könnte zu einem elektrischen Schlag oder Brand führen.
ACHTUNG:
• Benutzen Sie keine Drahtbürste oder andere scheu-
ernde Gegenstände.
• Benutzen Sie keine scharfen oder scheuernden
Reinigungsmittel.
Kochplatten
• Reinigen Sie die Kochplatten nur mit einem leicht
feuchten Tuch.
• Bei stärkeren Verschmutzungen verwenden Sie ein Ge-
schirrspülmittel.
Krümelblech, Backblech, Grillrost, Drehspieß,
Fixierklammern
• Unter den Heizelementen bendet sich ein Krümelblech.
Ziehen Sie dieses nach vorne heraus, um es zu ent-
nehmen.
• Reinigen Sie alle Zubehörteile im heißen Spülwasser
unter Zusatz von etwas Spülmittel. Trocknen Sie die
Teile danach gut ab.
Innenraum des Backofens
Halten Sie das Ofeninnere sauber.
1. Spritzer und Speisereste an den Ofenwänden entfernen
Sie mit einem feuchten Tuch unter Zusatz von etwas
Spülmittel.
2. Wischen Sie mit einem trockenen Tuch nach.
3. Legen Sie das Krümelblech und das andere Zubehör
zurück.
Gehäuse
Reinigen Sie das Gehäuse nach der Benutzung mit einem
leicht feuchten Tuch.
Aufbewahrung
• Reinigen Sie das Gerät wie beschrieben. Lassen Sie das
Zubehör vollständig trocknen.
• Wir empfehlen, das Gerät in der Original-Verpackung
aufzubewahren, wenn Sie es über einen längeren Zeit-
raum nicht benutzen möchten.
• Lagern Sie das Gerät immer außerhalb der Reichweite
von Kindern an einem gut belüfteten und trockenen Ort.
Technische Daten
Modell: ................................................................. KK 6059 CB
Spannungsversorgung: ......................220 – 240 V~, 50 / 60 Hz
Leistungsaufnahme:
Gesamtaufnahme: .................................................3100 W
kleine Kochplatte: ..................................................... 600 W
große Kochplatte: ................................................... 1000 W
Ofen Unterhitze: .......................................................700 W
Ofen Oberhitze: ........................................................ 800 W
Schutzklasse: .........................................................................
Nettogewicht: .........................................................ca. 10,2 kg
Technische und gestalterische Änderungen im Zuge stetiger
Produktentwicklungen vorbehalten.
Dieses Gerät wurde nach allen zutreffenden, aktuellen
CE-Richtlinien geprüft und nach den neuesten sicherheits-
technischen Vorschriften gebaut.

8
KK6059CB_IM 21.11.22
Entsorgung
Bedeutung des Symbols „Mülltonne“
Schonen Sie unsere Umwelt, Elektrogeräte ge-
hören nicht in den Hausmüll.
Nutzen Sie die für die Entsorgung von Elektro-
geräten vorgesehenen Sammelstellen und
geben dort Ihre Elektrogeräte ab, die Sie nicht
mehr benutzen werden.
Sie helfen damit die potenziellen Auswirkungen, durch
falsche Entsorgung, auf die Umwelt und die menschliche
Gesundheit zu vermeiden.
Sie leisten damit Ihren Beitrag zur Wiederverwertung, zum
Recycling und zu anderen Formen der Verwertung von
Elektro- und Elektronik-Altgeräten.
Informationen, wo die Geräte zu entsorgen sind, erhalten
Sie über Ihre Kommunen oder die Gemeindeverwaltungen.
Ihr Händler und Vertragspartner ist ebenfalls zur kosten-
freien Rücknahme des Altgerätes verpichtet.

KK6059CB_IM 21.11.22
9
IMPORTANT:
Be sure to read the separately enclosed safety instructions rst.
Instruction Manual
Thank you for choosing our product. We hope you will enjoy
using the appliance.
Read the instruction manual and the separately enclosed
safety instructions very carefully before using this appliance.
Keep these documents, including the warranty certicate,
receipt and, if possible, the box with the inner packaging in
a safe place. If you pass the appliance on to a third party,
always include all the relevant documents.
Symbols in this Instruction Manual
Important information for your safety is specially marked.
It is essential to comply with these instructions in order to
avoid accidents and prevent damage to the appliance:
WARNING:
This warns you of dangers to your health and indicates
possible injury risks.
CAUTION:
This refers to possible hazards to the appliance or other
objects.
Content
Overview of the Components ............................................3
Unpacking the Appliance ...................................................9
Overview of the Components / Scope of Delivery ...........9
Warnings for the Use of the Appliance ............................9
Notes for Use .....................................................................10
Symbolic Cooking Plates ...............................................10
Symbolic Oven ............................................................... 10
Electrical Connected Load ............................................. 10
Electric Connection ........................................................10
Prior to Initial Use ........................................................... 10
Cookware .......................................................................10
Oven ............................................................................... 11
Removal Tools (17 and 19) ............................................ 11
Operation ........................................................................... 11
Using the Cooking Plates............................................... 11
Using the Oven .............................................................. 11
Rotary Spit ...................................................................... 11
End of Use...................................................................... 11
Cleaning ............................................................................. 12
Cooking Plates ............................................................... 12
Crumb Tray, Baking Tray, Grill Rack, Rotary Spit,
Spit Forks .......................................................................12
Interior of the Oven ........................................................12
Housing ..........................................................................12
Storage ............................................................................... 12
Technical Data ...................................................................12
Disposal .............................................................................12
Meaning of the “Dustbin” Symbol ..................................12
Unpacking the Appliance
1. Remove the appliance from its packaging.
2. Remove all packaging material, such as foils, lling
material, cable ties and cardboard packaging.
3. Check the scope of delivery for completeness.
4. If the contents of the packaging are incomplete or if
damage can be detected, do not operate the appliance.
Return it to the dealer immediately.
5. Remove any existing stickers from the appliance.
6. There may still be dust or production residues on the
appliance. We recommend that you clean the appliance
as described under “Cleaning”.
Overview of the Components /
Scope of Delivery
1 Cooking plate, big
2 Cooking plate, small
3 Controller small cooking plate
4 Heating control lamp (small cooking plate)
5 Controller big cooking plate
6 Heating control lamp (big cooking plate)
7 Oven temperature controller
8 Operation control lamp
9 Oven function switch
10 Heating element
11 Glass door
12 Door handle
13 Hanging xture for rotary spit
14 Grill rack
15 Baking tray / drip pan
16 Crumb tray
17 Removal tool for grill rack and baking tray
18 Rotary spit
18a Spit forks
19 Removal tool for rotary spit
Warnings for the Use of the Appliance
WARNING:
• Danger of burns! Only touch the appliance by the
handle and the switches.

KK6059CB_IM 21.11.22
10
WARNING:
• Also, when using the removal tools for the baking tray
or the rotating spit, protect yourself from the heat by
wearing gloves or oven mitts.
• Danger of re! Never use containers made from
plastic, cardboard, paper, or similar.
CAUTION:
Do not use roasting bags or glass containers. These may
burst.
• Place the appliance on a at, heat-resistant surface!
• Keep sufcient distance to highly ammable objects such
as furniture, curtains, etc.! Never place the appliance
inside a cabinet!
• Install the appliance with its back panel facing the wall.
• When using the oven, leave at least 12 cm of space on
all sides of the appliance to allow sufcient air circulation.
• Due to rising heat and vapours do not place the appli-
ance under wall cupboards.
• Ensure that the mains cord does not touch hot parts of
the appliance during operation.
• Always operate the appliance under supervision. Very
dry bread can catch re inside the appliance!
• Do not place any objects on the appliance during use
that you do not need for cooking.
• This appliance has a door made of tempered safety
glass. The glass is stronger than ordinary glass and
more resistant to breakage. Avoid scratches on the
door surface. If the door glass has a scratch or a notch,
contact our service or a professional.
• Do not store any materials other than the accessories
recommended by the manufacturer in this oven when it
is not in use.
Notes for Use
Symbolic Cooking Plates
Controller (3) Small cooking plate
Controller (5) Big cooking plate
Symbolic Oven
Controller (7) °C Oven temperature
Function switch (9) Oven function
Off
Top heat
Bottom heat
Top- and bottom heat
Top- and bottom heat with
convection
Top heat with rotary spit and
convection
Electrical Connected Load
• The appliance is intended for a maximum power intake
of 3100 W. This connected load recommends a separate
input lead secured with a 16 amp protected switch.
• Do not use any multiple sockets, as this appliance is too
powerful.
• Caution, overload: If you use extension leads, these
should have a cable cross-section of at least 1.5 mm².
Cables with a smaller cable cross-section can overheat.
• Make sure that the cable is laid in such a way that it
cannot be pulled or tripped over.
Electric Connection
1. Turn all controls counter-clockwise as far as they will go.
Set the function switch to the position.
2. Check whether the mains voltage that you want to use,
corresponds with that of the appliance. You will nd the
information about it on the rating plate.
3. Connect the mains plug to a properly installed shock-
proof socket only.
Prior to Initial Use
There is a protective layer on the cooking plates and the
heating elements that burns when the appliance heats up.
This may cause smoke and odours to develop when the
appliance is used, but these will disappear after a few uses.
This is not a defect.
• You can minimise smoke development by wiping the
cooking plates and heating elements with a slightly damp
cloth before using them for the rst time.
• Do not use cleaning agents!
• Then wipe it with a dry cloth.
• Only switch on the appliance when it is in a completely
dry state.
• Always ensure adequate ventilation.
• Use the appliance separately for several minutes before
using it for the rst time to allow the protective layers to
remove.
1. Turn on both cooking plates without using any cook-
ware. Turn the controllers and to MAX.
2. Then operate the oven without accessories and with-
out cooking food. Turn the °C controller to 230 °C.
Set the function switch to .
Cookware
• Only use cooking pots with a at footing in order to
optimize the use of energy.

KK6059CB_IM 21.11.22
11
• The pot should never be smaller than the cooking plate.
This would cause a loss of energy. In the worst case the
cooking plate might become distorted.
Oven
• Always slide the crumb tray under the bottom heating
element.
• We recommend to preheat the oven for approx.
10 – 15 minutes.
• Save energy by using the switch settings with convec-
tion. In doing so, the heated air is distributed quicker and
evenly via the fan inside the oven.
• Always use the inserted drip pan when grilling or roast-
ing. This prevents grease from dripping onto the bottom
heating element.
• There is no timer on this oven. You must control the
cooking time yourself.
• Your oven offers you a number of settings. According to
your recipe, choose a temperature.
Here are a Few Examples of How You Can Use the
Functions:
• Top heat:
For grilling or gratinating casserole.
• Top heat with rotary spit and convection:
Poultry and large joints of meat are cooked evenly.
• Top- and bottom heat with convection:
E. g. for pizza, pastries etc.
Removal Tools (17 and 19)
a) To remove the baking tray
b) To remove the grill rack
If you want to remove the rotary
spit, use the removal tool (19).
Operation
• You can operate the cooking plates and the oven sepa-
rately or in combination.
• When using both cooking plates and the oven at the
same time, the cooking time may be slightly longer than
when used without the oven. This is due to technical
reasons and is not a defect.
Using the Cooking Plates
1. Turn the controller and / or to the right until the
associated heating control lamp switches on.
2. Select a setting between 1 and MAX.
The associated heating control lamp goes out when the
plate has reached the temperature.
Using the Oven
1. Use the °C controller to select a temperature between
LOW (low) and 230 °C.
2. Select your desired oven function with the oven function
switch. The control lamp (8) shows you that the oven is
in use.
Rotary Spit
Do not select a roast which is too large. The food being
grilled must be far enough away from the internal walls and
the heating elements and must not touch them.
1. Insert the baking tray / drip pan into the bottom guide
ridge of the oven.
2. Rub edible oil on to the rotary spit and spit forks.
3. Poultry has to be dressed before grilling. To do so, tie
the wings and the legs closely to the body using kitchen
yarn.
4. Place the dressed poultry or the piece of roast meat
carefully on to the rotary spit. Push the spit forks on to
the rotary spit and use them to x the roast meat in
place. Tighten the spit forks by means of the screws.
5. Place the prepared rotary spit
in the oven with the help of the
removal tool. Put the end of the
rotary spit without the notch into
the motor on the right side of
the oven rst. Then hook the
other end of the rotary spit into
the hanger on the left hand side of the oven.
6. Select a temperature and the function . The rotary
spit begins to turn. Make sure that the roast piece can
rotate freely.
7. When the meat is cooked remove the rotary spit using
the handle.
End of Use
1. Turn all controls counterclockwise as far as they will go.
Set the function switch to the position.
2. Then disconnect the mains plug from the socket.

KK6059CB_IM 21.11.22
12
Cleaning
WARNING:
• Always disconnect the mains plug from the socket before clean-
ing.
• Wait until the appliance has cooled down.
• Never immerse the appliance in water. It could result in an elec-
tric shock or re.
CAUTION:
• Do not use any wire brush or other abrasive objects.
• Do not use any acidic or abrasive detergents.
Cooking Plates
• Clean the cooking plates with a damp cloth.
• Use a dishwashing agent in case of heavy staining.
Crumb Tray, Baking Tray, Grill Rack, Rotary Spit,
Spit Forks
• Below the heating elements there is a crumb tray. Pull it
out forwards to remove it.
• Clean all accessories in hot rinsing water with a little
washing-up liquid. Dry the parts well after that.
Interior of the Oven
Keep the interior of the oven clean.
1. Remove splashes and food remains on the oven wall
with a damp cloth together with some detergent.
2. Wipe dry with a dry towel.
3. Put the crumb tray and other accessories back.
Housing
Clean the housing after use with a slightly damp cloth.
Storage
• Clean the appliance as described and let it completely
dry.
• We recommend storing the appliance in the original
packaging if you do not want to use it for long periods
of time.
• Always store the appliance out of the reach of children in
a well-ventilated and dry place.
Technical Data
Model:..................................................................KK 6059 CB
Power supply:.....................................220 – 240 V~, 50 / 60 Hz
Power consumption:
Overall capacity: ..................................................... 3100 W
Small cooking plate: .................................................600 W
Big cooking plate: ................................................... 1000 W
Bottom heat oven: ....................................................700 W
Top heat oven: .......................................................... 800 W
Protection class: .....................................................................
Net weight: ..................................................... approx. 10.2 kg
The right to make technical and design modications in
the course of continuous product development remains
reserved.
This appliance has been tested according to all applicable,
current CE directives and built according to the latest safety
regulations.
Disposal
Meaning of the “Dustbin” Symbol
Protect our environment: do not dispose of elec-
trical equipment in the domestic waste.
Please return any electrical equipment that
you will no longer use to the collection points
provided for their disposal.
This helps avoid the potential effects of incorrect disposal
on the environment and human health.
This will contribute to the recycling and other forms of
re-utilisation of electrical and electronic equipment.
Information concerning where the equipment can be
disposed of can be obtained from your local authority. Your
dealer and contractual partner is also obliged to take back
the old appliance free of charge.

KK6059CB_IM 21.11.22
13
BELANGRIJK:
Lees eerst de apart bijgevoegde veiligheidsinstructies.
Gebruiksaanwijzing
Dank u voor het kiezen van ons product. Wij hopen dat u
het gebruik van het apparaat zult genieten.
Lees de gebruiksaanwijzing en de apart bijgevoegde
veiligheidsinstructies zorgvuldig door voordat u dit apparaat
in gebruik neemt. Bewaar deze documenten, inclusief het
garantiebewijs, de kassabon en, indien mogelijk, de doos
met de binnenverpakking op een veilige plaats. Als u het
apparaat aan een derde doorgeeft, voeg dan altijd alle
relevante documenten bij.
Symbolen in deze gebruiksaanwijzing
Belangrijke aanwijzingen voor uw veiligheid zijn speciaal
gekenmerkt. Neem deze aanwijzingen strikt in acht om
ongevallen en schade aan het apparaat te vermijden:
WAARSCHUWING:
Waarschuwt voor gevaren voor uw gezondheid en toont
mogelijk letsel risico’s.
LET OP:
Wijst op mogelijke gevaren voor het apparaat of andere
voorwerpen.
Inhoud
Overzicht van de bedieningselementen ...........................3
Het apparaat uitpakken ....................................................13
Overzicht van de bedieningselementen /
Omvang van de levering ..................................................13
Waarschuwingen voor het gebruik van het apparaat...14
Opmerkingen voor het gebruik .......................................14
Symbolen kookplaten .....................................................14
Symbolen oven ..............................................................14
Elektrische aangesloten lading ......................................14
Elektrische aansluiting ...................................................14
Voor het eerste gebruik .................................................. 14
Kookgerei .......................................................................15
Oven ............................................................................... 15
Verwijderhulpstuks (17 en 19) .......................................15
Bediening ...........................................................................15
Gebruik van de kookplaten ............................................15
Gebruik van de oven ...................................................... 15
Draaispit .........................................................................15
Einde van het gebruik ....................................................16
Reiniging ............................................................................ 16
Kookplaten .....................................................................16
Kruimellade, bakplaat, grillrooster, draaispit,
spitvorken ....................................................................... 16
Interieur van de oven .....................................................16
Behuizing ........................................................................16
Bewaren .............................................................................16
Technische gegevens .......................................................16
Verwijdering ....................................................................... 16
Betekenis van het symbool “vuilnisemmer” ................... 16
Het apparaat uitpakken
1. Neem het apparaat uit de verpakking.
2. Verwijder al het verpakkingsmateriaal, zoals folies, vul-
materiaal, kabelbinders en kartonnen verpakkingen.
3. Controleer de inhoud van de verpakking op volledigheid.
4. Als de inhoud van de verpakking onvolledig is of als er
beschadigingen kunnen worden vastgesteld, mag u het
apparaat niet in gebruik nemen. Breng het onmiddellijk
terug naar de dealer.
5. Verwijder eventueel aanwezige stickers van het appa-
raat.
6. Er kunnen zich nog stof- of productieresten op het appa-
raat bevinden. Wij adviseren u het apparaat te reinigen
zoals beschreven onder “Reiniging”.
Overzicht van de bedieningselementen /
Omvang van de levering
1 Kookplaat, groot
2 Kookplaat, klein
3 Regelknop kleine kookplaat
4 Verwarmingcontrolelampje (kleine kookplaat)
5 Regelknop grote kookplaat
6 Verwarmingcontrolelampje (grote kookplaat)
7 Oven temperatuurregelknop
8 Bedieningscontrolelampje
9 Schakelaar ovenfunctie
10 Verwarmingselement
11 Glazen deurtje
12 Handgreep deurtje
13 Ophanginrichting voor draaiend spit
14 Grillrooster
15 Bakplaat / vetpan
16 Kruimellade
17 Verwijderhulpstuk voor grillrooster en bakplaat
18 Draaispit
18a Spitvorken
19 Verwijderhulpstuk voor draaispit

KK6059CB_IM 21.11.22
14
Waarschuwingen voor het
gebruik van het apparaat
WAARSCHUWING:
• Gevaar op brandwonden! Raak het apparaat alleen
aan bij de handgreep en de schakelaars.
• Let ook op dat wanneer u de verwijderhulpstukken
voor de bakplaat of the draaispit gebruikt, u uzelf
tegen de hitte beschermt door middel van ovenwanten
of pannenlappen.
• Brandgevaar! Gebruik nooit containers gemaakt van
plastic, karton, papier of dergelijke.
LET OP:
Gebruik geen braadzakken of glazen containers. Deze
kunnen barsten.
• Plaats het apparaat op een vlakke, hittebestendige
oppervlakte!
• Houd voldoende afstand van licht ontvlambare voorwer-
pen, zoals meubels, gordijnen, enz.! Plaats het apparaat
nooit in een kast!
• Plaats het apparaat met het achterpaneel richting de
muur.
• Laat bij gebruik van de oven ten minste 12 cm ruimte
aan alle kanten van het apparaat om voldoende luchtcir-
culatie mogelijk te maken.
• Plaats het apparaat nooit onder keukenkastjes vanwege
rijzende hitte en dampen.
• Zorg ervoor dat de voedingskabel geen hete onderdelen
van het apparaat aanraakt wanneer werkzaam.
• Laat het apparaat alleen onder toezicht van volwasse-
nen gebruiken. Erg droog brood kan vlam vatten in het
apparaat!
• Plaats tijdens het gebruik geen voorwerpen op het appa-
raat die u niet nodig hebt om te koken.
• Dit apparaat heeft een deur van gehard veiligheidsglas.
Het glas is sterker dan gewoon glas en beter bestand
tegen breuk. Voorkom krassen op het deuroppervlak. Als
het deurglas een kras of een inkeping heeft, neem dan
contact op met onze service of een vakman.
• Bewaar geen andere materialen dan de door de fabri-
kant aanbevolen accessoires in deze oven wanneer
deze niet in gebruik is.
Opmerkingen voor het gebruik
Symbolen kookplaten
Regelknop (3) Kleine kookplaat
Regelknop (5) Grote kookplaat
Symbolen oven
Regelknop (7) °C Oventemperatuur
Schakelaar (9) Ovenfunctie
Uit
Bovenwarmte
Onderwarmte
Boven en onderwarmte
Boven- en onderwarmte
met convectie
Bovenwarmte met
draaiend spit en convectie
Elektrische aangesloten lading
• Het apparaat kan maximaal een vermogen van 3100 W
opnemen. Bij een dergelijke aansluitwaarde is het
raadzaam, te voorzien in een gescheiden toevoer met
een zekering via een 16 A veiligheidsschakelaar voor
huishoudelijk gebruik.
• Gebruik géén meervoudige contactdozen omdat dit
apparaat te veel vermogen heeft.
• Let op, overbelasting: Als u verlengkabels gebruikt,
moeten deze een kabeldoorsnede van ten minste
1,5 mm² hebben. Kabels met een kleinere kabeldoor-
snede kunnen oververhit raken.
• Zorg ervoor dat de kabel zo wordt gelegd dat er niet aan
getrokken kan worden of dat er niet over gestruikeld kan
worden.
Elektrische aansluiting
1. Draai alle regelknoppen linksom tot aan de aanslag. Zet
de functieschakelaar in stand .
2. Controleer of de netspanning die u wilt gebruiken over-
eenkomt met die van het apparaat. U vindt de informatie
ervan op het typeplaatje.
3. Steek de netstekker alleen in een goed geïnstalleerd
schokvrij stopcontact.
Voor het eerste gebruik
Op de kookplaten en de verwarmingselementen zit een
beschermlaag die verbrandt wanneer het apparaat op-
warmt. Hierdoor kunnen bij gebruik van het apparaat rook
en geuren ontstaan, die echter na enkele keren gebruik
verdwijnen. Dit is geen defect.
• U kunt de rookontwikkeling minimaliseren door de kook-
platen en verwarmingselementen voor het eerste gebruik
met een licht vochtige doek af te nemen.
• Gebruik geen reinigingsmiddelen!
• Veeg het daarna af met een droge doek.
• Schakel het apparaat pas in als het zich in volledig
droge toestand bevindt.
• Zorg altijd voor voldoende ventilatie.

KK6059CB_IM 21.11.22
15
• Voordat u het apparaat voor het eerst gebruikt, dient u
het enkele minuten apart te gebruiken om de bescher-
mende lagen te verwijderen.
1. Schakel beide kookplaten in zonder kookgerei te
gebruiken. Draai hiertoe de regelknoppen en
in de stand MAX.
2. Gebruik de oven dan zonder accessoires en zonder
voedsel te koken. Draai de regelknop °C naar
230 °C. Zet de functieschakelaar op .
Kookgerei
• Gebruik alleen pannen met een platte bodem om opti-
maal gebruik te maken van de energie.
• De pan mag nooit kleiner zijn dan de kookplaat. Dit ver-
oorzaakt energieverlies. In het ergste kan de kookplaat
vervormd raken.
Oven
• Schuif de kruimellade altijd onder het verwarmingsele-
ment op de bodem.
• Wij raden u aan de oven ongeveer 10 – 15 minuten voor
te verwarmen.
• Bespaar energie door de schakelaarinstellingen met
convectie te gebruiken. Hierdoor wordt de warme lucht
sneller en gelijkmatiger via de ventilator in de oven
verspreid.
• Gebruik altijd de ingebrachte vetbak bij het grillen of
braden. Dit voorkomt dat het vet op het verwarmingsele-
ment op de bodem druipt.
• Er zit geen timer op deze oven. U moet zelf de kooktijd
regelen.
• Uw oven biedt u een aantal instellingen. Kies volgens uw
recept een temperatuur.
Hier zijn een paar voorbeelden van hoe u deze functies:
• Bovenwarmte:
Om te grillen of te gratineren.
• Bovenwarmte met draaiend spit en convectie:
Gevogelte en grote stukken vlees worden gelijkmatig
bereid.
• Boven- en onderwarmte met convectie:
Bijv. voor pizza, gebak enz.
Verwijderhulpstuks (17 en 19)
a) Voor het verwijderen van de
bakplaat
b) Voor het verwijderen van het
grillrooster
Wanneer u de draaispit wilt verwijderen, gebruikt u het
verwijderhulpstuk (19).
Bediening
• U kunt de kookplaten en de oven afzonderlijk of samen
bedienen.
• Bij gelijktijdig gebruik van de kookplaten en de oven kan
de kooktijd iets langer zijn dan bij gebruik zonder oven.
Dit komt door technische redenen en is geen defect.
Gebruik van de kookplaten
1. Draai de regelknop en / of naar rechts totdat het
bijbehorende controlelampje van de verwarming gaat
branden.
2. Kies een instelling tussen 1 en MAX.
Het bijbehorende verwarmingscontrolelampje gaat uit
wanneer de plaat de temperatuur heeft bereikt.
Gebruik van de oven
1. Kies met de regelknop °C een temperatuur tussen
LOW (laag) en 230 °C.
2. Selecteer de gewenste ovenfunctie met de ovenfunctie-
schakelaar. Het controlelampje (8) geeft aan dat de oven
in gebruik is.
Draaispit
Kies geen al te groot braadstuk. Het grilvlees moet vol-
doende afstand hebben tot binnenwanden en verwarmings-
staven. Het mag nergens de wanden of staven raken.
1. Schuif de bakplaat / vetpan op de onderste rail van de
bakoven.
2. Wrijf de draaispit en de spitvorken in met spijsolie.
3. Gevogelte wordt vóór het grillen gegarneerd. Bind de
vleugels en de poten met draad strak tegen het lijf.
4. Steek de gegarneerde vleugels of het braadstuk voor-
zichtig op de draaispit. Schuif de spitvorken op de
draaispit en bevestig daarmee het braadstuk. Draai de
spitvorken vast met de schroeven.
5. Plaats de voorbereidde revol-
ving spit in de oven met behulp
van het verwijderhulpstuk.
Plaats eerst het uiteinde van de
revolving spit zonder inkeping
in de motor aan de rechterkant
van de oven. Haak vervolgens
het andere uiteinde van het draaispit in de hanger aan
de linkerkant van de oven.
6. Kies een temperatuur en de functie . De draaispit
begint te draaien. Let op dat het braadvlees ongehinderd
kan draaien.
7. Als het vlees gaar is, kunt u de draaispit met behulp van
de verwijderhulpstuk uit de oven tillen.

KK6059CB_IM 21.11.22
16
Einde van het gebruik
1. Draai alle regelknoppen linksom tot aan de aanslag. Zet
de functieschakelaar in stand .
2. Haal dan de netstekker uit het stopcontact.
Reiniging
WAARSCHUWING:
• Trek altijd de netstekker uit het stopcontact voordat u gaat reini-
gen.
• Wacht totdat het apparaat is afgekoeld.
• Dompel het apparaat niet onder water. Dit kan leiden tot een
elektrische schok of brand.
LET OP:
• Gebruik geen staalborstels of andere schurende
voorwerpen.
• Gebruik geen agressieve of schurende schoonmaak-
middelen.
Kookplaten
• Reinig de kookplaten met een vochtige doek.
• Gebruik een afwasmiddel in geval van moeilijke vlekken.
Kruimellade, bakplaat, grillrooster, draaispit,
spitvorken
• Onder de verwarmingselementen bevindt zich een
kruimellade. Trek het naar voren eruit.
• Reinig alle accessoires in heet spoelwater met een bé-
tje afwasmiddel. Droog de onderdelen daarna goed af.
Interieur van de oven
Houd de binnenkant van de oven schoon.
1. Verwijder spatten en etensresten op de ovenwand met
een vochtige doek met wat afwasmiddel.
2. Afnemen met een droge doek.
3. Plaats de kruimellade en andere accessoires terug.
Behuizing
Reinig de behuizing na het gebruik met een vochtige doek.
Bewaren
• Reinig het apparaat volgens bovenstaande aanwijzingen
en laat het goed drogen.
• Wij adviseren dat het apparaat in de originele verpakking
wordt bewaard als u het apparaat langere tijd niet
gebruikt.
• Het apparaat altijd buiten bereik van kinderen opslaan en
in een goed geventileerde en droge ruimte.
Technische gegevens
Model:..................................................................KK 6059 CB
Voedingsspanning:.............................220 – 240 V~, 50 / 60 Hz
Opgenomen vermogen:
Totale capaciteit: ....................................................3100 W
Kleine kookplaat: ...................................................... 600 W
Grote kookplaat: ..................................................... 1000 W
Onderste verwarmingselement: ............................... 700 W
Bovenste verwarmingselement: ..............................800 W
Beschermingsklasse: .............................................................
Nettogewicht: ...................................................... ong. 10,2 kg
Het recht om technische en ontwerpaanpassingen te ma-
ken in de loop van voortdurende productontwikkeling blijft
voorbehouden.
Dit apparaat is getest volgens alle van toepassing zijnde,
huidige CE-richtlijnen en gebouwd volgens de meest
recente veiligheidsvoorschriften.
Verwijdering
Betekenis van het symbool “vuilnisemmer”
Bescherm ons milieu, elektrische apparaten ho-
ren niet in het huisafval.
Maak voor het afvoeren van elektrische appara-
ten gebruik van de voorgeschreven verzamel-
punten en geef daar de elektrische apparaten af
die u niet meer gebruikt.
Daardoor helpt u de potentiële effecten te voorkomen
die een verkeerde afvoer op het milieu en de menselijke
gezondheid kunnen hebben.

KK6059CB_IM 21.11.22
17
Op deze wijze levert u uw bijdrage aan het hergebruik, de
recycling en andere verwerkingsvormen voor oude elektro-
nische en elektrische apparaten.
Voor informatie over verzamelpunten voor uw apparaten
kunt u contact opnemen met uw gemeente of gemeen-
teadministratie. Uw dealer en contractpartner is bovendien
verplicht het oude apparaat gratis terug te nemen.

KK6059CB_IM 21.11.22
18
IMPORTANT :
Veillez à lire d’abord les instructions de sécurité jointes séparé-
ment.
Mode d’emploi
Merci d’avoir choisi notre produit. Nous espérons que vous
saurez proter votre appareil.
Lisez très attentivement le mode d’emploi et les consignes
de sécurité jointes séparément avant d’utiliser cet appareil.
Conservez ces documents, y compris le certicat de garan-
tie, le reçu et, si possible, la boîte avec l’emballage intérieur
dans un endroit sûr. Si vous transmettez l’appareil à un
tiers, joignez toujours tous les documents pertinents.
Symboles de ce mode d’emploi
Les informations importantes pour votre sécurité sont
particulièrement indiquées. Veillez à bien respecter ces
indications an d’éviter tout risque d’accident ou d’endom-
magement de l’appareil :
AVERTISSEMENT :
Prévient des risques pour votre santé et des risques
éventuels de blessure.
ATTENTION :
Indique les risques pour l’appareil ou tout autre appareil.
Sommaire
Liste des différents éléments de commande ..................3
Déballage de l’appareil ..................................................... 18
Liste des différents éléments de commande /
Contenu de la livraison ....................................................18
Avertissements pour l’utilisation de l’appareil..............19
Notes d’utilisation ............................................................. 19
Symboles des plaques de cuisson ................................19
Symbole du four ............................................................. 19
Charge électrique connectée ......................................... 19
Connexion électrique .....................................................19
Avant première utilisation ...............................................19
Ustensiles de cuisine .....................................................20
Four ................................................................................20
Outils de retrait (17 et 19) ..............................................20
Utilisation ........................................................................... 20
Utilisation des plaques de cuisson .................................20
Utilisation du four ...........................................................20
Tournebroche .................................................................20
Fin de l’utilisation ............................................................ 21
Nettoyage ...........................................................................21
Plaques chauffantes.......................................................21
Plateau ramasse-miettes, plaque de four, grille,
tournebroche, fourchettes du tournebroche ..................21
Intérieur du four .............................................................. 21
Boîtier .............................................................................21
Stockage ............................................................................21
Données techniques .........................................................22
Élimination .........................................................................22
Signication du symbole « Poubelle » ........................... 22
Déballage de l’appareil
1. Sortez l’appareil de son emballage.
2. Retirez tous les matériaux d’emballage, tels que les
feuilles, les matériaux de remplissage, les attaches de
câbles et les emballages en carton.
3. Vériez que le contenu de la livraison est complet.
4. Si le contenu de l’emballage est incomplet ou si des dom-
mages peuvent être détectés, n’utilisez pas l’appareil.
Retournez-le immédiatement au revendeur.
5. Retirez les autocollants éventuellement présents sur
l’appareil.
6. L’appareil peut encore contenir de la poussière ou
des résidus de production. Nous vous recommandons
de nettoyer l’appareil comme indiqué dans la section
« Nettoyage ».
Liste des différents éléments de
commande / Contenu de la livraison
1 Plaque chauffante, grande
2 Plaque chauffante, petite
3 Bouton de commande de la petite plaque de cuisson
4 Témoin de contrôle de chauffage (petite plaque de
cuisson)
5 Bouton de commande de la grande plaque de cuisson
6 Témoin de contrôle de chauffage (grande plaque de
cuisson)
7 Commande de la température du four
8 Voyant indicateur de fonctionnement
9 Bouton de fonction four
10 Élément chauffant
11 Porte en verre
12 Poignée de la porte
13 Dispositif de suspension pour tournebroche
14 Grille
15 Plaque de four / lèchefrite

KK6059CB_IM 21.11.22
19
16 Plateau ramasse-miettes
17 Outil de retrait de la grille du grill et de la plaque de
cuisson
18 Tournebroche
18a Fourchettes du tournebroche
19 Outil de retrait pour tournebroche
Avertissements pour
l’utilisation de l’appareil
AVERTISSEMENT :
• Risque de brûlures ! Ne touchez l’appareil que par la
poignée et les interrupteurs.
• De même, lorsque vous utilisez les outils de retrait
de la plaque de four ou de la tournebroche, proté-
gez-vous de la chaleur en portant des gants ou des
gants de cuisine.
• Risque d’incendie ! N’utilisez jamais de boîtes en
plastique, carton, papier ou similaire.
ATTENTION :
N’utilisez pas de sacs à rôtir ou de conteneurs en verre.
Ils peuvent exploser.
• Placez l’appareil sur une surface plane et résistante à
la chaleur !
• Maintenez une distance sufsante avec les objets hau-
tement inammables tels que les meubles, les rideaux,
etc. Ne placez jamais l’appareil dans une armoire !
• Installez l’appareil avec son panneau arrière orienté vers
le mur.
• Lorsque vous utilisez le four, laissez un espace d’au
moins 12 cm sur tous les côtés de l’appareil pour per-
mettre une circulation d’air sufsante.
• En raison de la montée de la chaleur et des vapeurs, ne
placez pas l’appareil sous les placards muraux.
• Assurez-vous que le cordon d’alimentation ne touche
pas les parties chaudes de l’appareil pendant utilisation.
• Faites toujours fonctionner l’appareil sous surveillance.
Le pain très sec peut prendre feu à l’intérieur de l’ap-
pareil !
• Pendant l’utilisation, ne placez pas sur l’appareil des
objets dont vous n’avez pas besoin pour cuisiner.
• Cet appareil est doté d’une porte en verre de sécurité
trempé. Ce verre est plus solide que le verre ordinaire
et plus résistant à la casse. Évitez les rayures sur la
surface de la porte. Si la vitre de la porte présente une
rayure ou une entaille, contactez notre service ou un
professionnel.
• Ne stockez pas de matériaux autres que les accessoires
recommandés par le fabricant dans ce four lorsqu’il n’est
pas utilisé.
Notes d’utilisation
Symboles des plaques de cuisson
Régulateur (3) Petite plaque de cuisson
Régulateur (5) Grande plaque de cuisson
Symbole du four
Régulateur (7) °C Température four
Commutateur de
fonction (9) Fonction four
Arrêt
Chaleur supérieure
Chaleur inférieure
Chaleur supérieure et
inférieure
Chaleur supérieure et
inférieure avec convection
Chaleur supérieure avec
tournebroche et convection
Charge électrique connectée
• Au total, l’appareil peut absorber une puissance de
3100 W. Il est conseillé, pour une telle puissance
électrique, d’avoir recours à une canalisation électrique
séparée et une protection par fusibles par disjoncteur
de 16 A.
• N’utilisez pas de prises multiples étant donné que le
présent appareil est trop puissant.
• Attention, surcharge : Lorsque vous utilisez des câbles
de rallonge, celles-ci doivent avoir une section de câble
de 1,5 mm² au minimum. Les câbles dont la section est
plus petite peuvent surchauffer.
• Veillez à ce que le câble soit posé de manière à ce qu’il
ne puisse pas être tiré ou qu’on ne puisse pas trébucher
dessus.
Connexion électrique
1. Tournez toutes les régulateurs dans le sens inverse
des aiguilles d’une montre jusqu’à la butée. Placez le
commutateur de fonction sur la position .
2. Vériez que la tension électrique que vous souhaitez
utiliser, corresponde à celle de l’appareil. Vous trouverez
l’information nécessaire sur la plaque d’identication.
3. Ne branchez la che d’alimentation que sur une prise
correctement installée et résistant aux chocs.
Avant première utilisation
Les plaques de cuisson et les éléments chauffants sont
recouverts d’une couche protectrice qui brûle lorsque
l’appareil chauffe. Cela peut entraîner l’apparition de fumée
et d’odeurs lors de l’utilisation de l’appareil, mais celles-ci

KK6059CB_IM 21.11.22
20
disparaîtront après quelques utilisations. Il ne s’agit pas
d’un défaut.
• Vous pouvez réduire le dégagement de fumée en es-
suyant les plaques de cuisson et les éléments chauffants
avec un chiffon légèrement humide avant la première
utilisation.
• N’utilisez pas de produits de nettoyage !
• Essuyez-le ensuite avec un chiffon sec.
• Ne mettez l’appareil en marche que lorsqu’il est complè-
tement sec.
• Veillez toujours à une ventilation sufsante.
• Avant la première utilisation, utilisez l’appareil séparé-
ment pendant plusieurs minutes pour permettre aux
couches protectrices de s’enlever.
1. Allumez les deux plaques de cuisson sans utiliser
d’ustensile de cuisson. Mettez les régulateurs et
en position MAX.
2. Faites ensuite fonctionner le four sans accessoires
et sans faire cuire d’aliments. Tournez le régulateur
°C sur 230 °C. Placez le commutateur de fonction
sur .
Ustensiles de cuisine
• N’utilisez que des récipients à fond plat an d’optimiser
l’utilisation de l’énergie.
• La casserole ne doit jamais être plus petite que la
plaque de cuisson. Cela entraînerait une perte d’énergie.
Dans le pire des cas, la plaque de cuisson pourrait se
déformer.
Four
• Insérez toujours le plateau ramasse-miettes sous l’élé-
ment chauffant inférieur.
• Nous recommandons de préchauffer le four environ
10 – 15 minutes.
• Économisez de l’électricité en utilisant les réglages avec
convection. De cette façon, l’air chaud est distribué plus
rapidement et uniformément par le ventilateur dans le
four.
• Ne grillez ou ne rôtissez en principe que lorsque la
lèchefrite est en place. Vous éviterez ainsi que de
la graisse ne tombe sur les éléments de chauffage
inférieurs.
• Ce four n’est pas équipé d’une minuterie. Vous devez
contrôler vous-même le temps de cuisson.
• Votre four vous offre un certain nombre de réglages. En
fonction de votre recette, choisissez une température.
Voici quelques exemples de la façon d’utiliser les
fonctions :
• Chaleur supérieure :
Pour griller ou gratiner un gratin.
• Chaleur supérieure avec tournebroche et
convection :
Cuisson uniforme des volailles et des grosses pièces
de viande.
• Chaleur supérieure et inférieure avec convection :
Par exemple pour les pizzas, pâtisseries, etc
Outils de retrait (17 et 19)
a) Pour retirer la plaque de four
b) Pour retirer la grille
Si vous voulez retirer la tournebro-
che, utilisez l’outil de retrait (19).
Utilisation
• Vous pouvez faire fonctionner les plaques de cuisson et
le four séparément ou en combinaison.
• Lorsque vous utilisez les deux plaques de cuisson et le
four en même temps, le temps de cuisson peut être légè-
rement plus long que lorsque vous l’utilisez sans le four.
Ceci est dû à des raisons techniques et ne constitue pas
un défaut.
Utilisation des plaques de cuisson
1. Tournez le régulateur et / ou vers la droite
jusqu’à ce que le voyant de chauffage correspondant
s’allume.
2. Sélectionnez un réglage entre 1 et MAX.
Le témoin de chauffage correspondant s’éteint lorsque la
plaque a atteint la température.
Utilisation du four
1. Utilisez le bouton de commande °C pour sélectionner
une température entre LOW (faible) et 230 °C.
2. Sélectionnez la fonction du four que vous souhaitez uti-
liser à l’aide du sélecteur de fonction du four. Le voyant
lumineux (8) vous indique que le four est en marche.
Tournebroche
Ne prenez pas un morceau de viande trop important. La
pièce de viande à rôtir doit être sufsamment loin des parois
intérieures et de la résistance et ne jamais les toucher.
1. Placez la plaque / le lèchefrite sur le niveau le plus bas
du four.
2. Enduisez la broche et les xations d’huile alimentaire.

KK6059CB_IM 21.11.22
21
3. Les volailles doivent être préparées avant d’être grillées.
Attachez les ailes et les cuisses le long du corps de
l’animal à l’aide d’un l de cuisine.
4. Enlez délicatement la volaille dressée ou le morceau de
rôti sur le tournebroche. Glissez les pinces de xation sur
le tournebroche et xez-les au rôti. Vissez les pinces de
xation avec les vis.
5. Placez le tournebroche prépa-
rée dans le four, en vous aidant
de l’outil de retrait. Placez
l’extrémité de tournebroche
sans l’encoche dans le moteur
sur le côté droit en première.
Puis placez l’autre bout du
tournebroche dans l’encoche du côté gauche du four.
6. Sélectionnez une température et la fonction . Le
tournebroche commence à tourner. Veillez à ce que le
morceau de rôti puisse tourner librement.
7. Lorsque la viande est cuite, retirez le tournebroche à
l’aide de l’outil de retrait.
Fin de l’utilisation
1. Tournez toutes les régulateurs dans le sens inverse
des aiguilles d’une montre jusqu’à la butée. Placez le
commutateur de fonction sur la position .
2. Débranchez ensuite la che d’alimentation de la prise
de courant.
Nettoyage
AVERTISSEMENT :
• Débranchez toujours l’appareil de la prise de courant avant de
le nettoyer.
• Attendez que l’appareil ait refroidi.
• Ne plongez jamais l’appareil dans l’eau. Vous risqueriez de cau-
ser une décharge électrique ou d’incendie.
ATTENTION :
• N’utilisez pas de brosse métallique ou d’autres objets
abrasifs.
• N’utilisez pas de nettoyants agressifs ou abrasifs.
Plaques chauffantes
• Nettoyez les plaques de cuisson à l’aide d’un chiffon
humide.
• Utilisez du liquide vaisselle en cas de tâches persistantes.
Plateau ramasse-miettes, plaque de four, grille,
tournebroche, fourchettes du tournebroche
• Un tiroir ramasse-miettes se situe sous les éléments
chauffants. Enlevez-le en le tirant vers l’avant.
• Nettoyez tous les accessoires dans de l’eau de vaisselle
chaude en y ajoutant un peu de produit vaisselle. Sé-
chez-les ensuite soigneusement.
Intérieur du four
Gardez l’intérieur du four propre.
1. Enlevez les éclaboussures et les résidus alimentaires
des parois du four avec un tissu humide et du détergent.
2. Essuyez avec un torchon sec.
3. Remettez le plateau à miettes et les autres accessoires.
Boîtier
Nettoyer le boîtier après l’utilisation à l’aide d’un chiffon
légèrement humide.
Stockage
• Nettoyez l’appareil comme décrit et laissez-le complète-
ment sécher.
• Nous vous conseillons de ranger l’appareil dans l’embal-
lage d’origine si vous ne souhaitez pas l’utiliser pendant
longtemps.
• Rangez toujours l’appareil hors de la portée des enfants
dans un endroit sec et bien ventilé.

KK6059CB_IM 21.11.22
22
Données techniques
Modèle : ..............................................................KK 6059 CB
Alimentation : .....................................220 – 240 V~, 50 / 60 Hz
Consommation électrique :
Capacité globale : ..................................................3100 W
Petite plaque de cuisson : ........................................ 600 W
Grande plaque de cuisson : ................................... 1000 W
Chauffage du four en bas : ......................................700 W
Chauffage du four en haut : .....................................800 W
Classe de protection : .............................................................
Poids net : ............................................................env. 10,2 kg
Nous nous réservons le droit d’apporter des modications
techniques ainsi que des modications de conception dans
le cadre du développement continu de nos produits.
Cet appareil a été testé conformément à toutes les direc-
tives CE applicables et actuelles et a été construit selon les
dernières réglementations en matière de sécurité.
Élimination
Signication du symbole « Poubelle »
Protégez votre environnement, ne jetez pas vos
appareils électriques avec les ordures ména-
gères.
Utilisez, pour l’élimination de vos appareils
électriques, les bornes de collecte prévues à
cet effet où vous pouvez vous débarrasser des
appareils que vous n’utilisez plus.
Vous contribuez ainsi à éviter les impacts potentiels dans
l’environnement et sur la santé de chacun, causés par une
mauvaise élimination de ces déchets.
Vous contribuez aussi au recyclage sous toutes ses formes
des appareils électriques et électroniques usagés.
Vous trouverez toutes les informations sur les bornes
d’élimination des appareils auprès de votre commune ou
de l’administration de votre communauté. Votre revendeur
et partenaire contractuel est également tenu de reprendre
gratuitement l’ancien appareil.

KK6059CB_IM 21.11.22
23
IMPORTANTE:
Asegúrese de leer primero las instrucciones de seguridad adjun-
tas por separado.
Manual de instrucciones
Le agradecemos la conanza depositada en este producto
y esperamos que disfrute de su uso.
Lea atentamente el manual de instrucciones y las instruc-
ciones de seguridad adjuntas por separado antes de utilizar
este aparato. Guarde estos documentos, incluyendo el
certicado de garantía, el recibo y, si es posible, la caja
con el embalaje interior en un lugar seguro. Si entrega el
aparato a un tercero, incluya siempre todos los documentos
pertinentes.
Símbolos en este manual de instrucciones
Advertencias importantes para su seguridad están seña-
ladas en especial. Siga estas advertencias incondicional-
mente, para evitar accidentes y daños en el aparato:
AVISO:
Advierte ante los peligros para su salud y demuestra
posibles riesgos de herida.
ATENCIÓN:
Indica los posibles riesgos para el aparato u otros
objetos.
Índice
Indicación de los elementos de manejo ..........................3
Desembalaje del aparato..................................................23
Indicación de los elementos de manejo /
Volumen de entrega ..........................................................23
Advertencias para el uso del aparato .............................24
Notas de uso .....................................................................24
Placas de cocción simbólicas ........................................ 24
Símbolos del horno ........................................................24
Carga eléctrica conectada .............................................24
Conexión eléctrica ..........................................................24
Antes del primer uso ......................................................24
Utensilios de cocina .......................................................25
Horno ..............................................................................25
Herramientas de extracción (17 y 19) ...........................25
Manejo ................................................................................ 25
Uso de las placas de cocción ........................................25
Uso del horno ................................................................. 25
Asador giratorio .............................................................. 25
Fin de la utilización .........................................................26
Limpieza ............................................................................. 26
Placas de cocción ..........................................................26
Bandeja para migas, bandeja de horno, rejilla de la
parrilla, asador giratorio, horquillas para escupir ...........26
Interior del horno ............................................................ 26
Carcasa .......................................................................... 26
Almacenamiento ...............................................................26
Datos técnicos ..................................................................27
Eliminación ........................................................................ 27
Signicado del símbolo “Cubo de basura” ....................27
Desembalaje del aparato
1. Saque el aparato de su embalaje.
2. Retire todo el material de embalaje, como las láminas, el
material de relleno, las bridas para cables y el embalaje
de cartón.
3. Compruebe que el volumen de entrega está completo.
4. Si el contenido del embalaje está incompleto o si se
detectan daños, no utilice el aparato. Devuélvalo inme-
diatamente al distribuidor.
5. Retire los adhesivos existentes en el aparato.
6. Es posible que todavía haya polvo o residuos de pro-
ducción en el aparato. Le recomendamos que limpie el
aparato como se describe en el apartado “Limpieza”.
Indicación de los elementos de manejo /
Volumen de entrega
1 Placa de cocción, grande
2 Placa de cocción, pequeña
3 Controlador placa de cocción grande
4 Testigo del control de calentamiento (placa de cocción
pequeña)
5 Controlador placa de cocción grande
6 Testigo del control de calentamiento (placa de cocción
grande)
7 Controlador de temperatura del horno
8 Testigo de funcionamiento
9 Interruptor de función del horno
10 Elemento de calefacción
11 Puerta de cristal
12 Asa de la puerta
13 Accesorio para colgar el asador giratorio
14 Rejilla de la parrilla
15 Bandeja de horno / bandeja para la grasa
16 Bandeja para migas

KK6059CB_IM 21.11.22
24
17 Herramienta de extracción para la rejilla de la parrilla y
la bandeja de horno
18 Asador giratorio
18a Horquillas para escupir
19 Herramienta de extracción para asador giratorio
Advertencias para el uso del aparato
AVISO:
• ¡Riesgo de quemaduras! Toque el aparato sólo por
el asa y los interruptores.
• Además, al utilizar los utensilios de extracción de la
bandeja de horno o el asador giratorio, protéjase del
calor utilizando guantes o manoplas de horno.
• ¡Peligro de incendio! No utilice recipientes de plás-
tico, cartón, papel o similar.
ATENCIÓN:
No utilice las bolsas para grill o recipientes de cristal.
Pueden explotar.
• ¡Coloque el dispositivo sobre una supercie resistente
al calor!
• ¡Mantenga la distancia suciente con respecto a objetos
inamables como muebles, cortinas, etc.! No coloque
nunca el aparato en el interior de un armario.
• Coloque el aparato con el panel trasero de cara a la
pared.
• Cuando utilice el horno, deje al menos 12 cm de espacio
en todos los lados del aparato para permitir una circula-
ción de aire suciente.
• Debido al aumento de calor y a los vapores, no coloque
el aparato debajo de armarios de cocina.
• Asegúrese de que el cable de alimentación no toque las
partes calientes del aparato durante su uso.
• Haga funcionar el aparato siempre bajo supervisión.
¡El pan muy seco puede prenderse fuego dentro del
aparato!
• No coloque sobre el aparato ningún objeto que no nece-
site para cocinar.
• Este aparato tiene una puerta de vidrio templado de
seguridad. El vidrio es más fuerte que el ordinario y más
resistente a la rotura. Evite arañazos en la supercie de
la puerta. Si el cristal de la puerta tiene un arañazo o
una muesca, póngase en contacto con nuestro servicio
técnico o con un profesional.
• No guarde en este horno otros materiales que no sean
los accesorios recomendados por el fabricante cuando
no esté en uso.
Notas de uso
Placas de cocción simbólicas
Controlador (3) Placa de cocción pequeña
Controlador (5) Placa de cocción grande
Símbolos del horno
Controlador (7) °C Temperatura del horno
Interruptor de
función (9) Función de horno
Apagar
Calentamiento superior
Calentamiento inferior
Calentamiento superior e inferior
Calentamiento superior e inferior
con convección
Calentamiento superior con
asador giratorio y convección
Carga eléctrica conectada
• El equipo puede asumir una potencia de 3100 W en to-
tal. Con este consumo nominal es recomendable utilizar
un cable de alimentación separado con una protección
por medio de un conmutador 16 A.
• No utilice enchufes múltiples, como este equipo es
demasiado potente.
• Atención, sobrecarga: Si utiliza alargadores, éstos
deben tener una sección de cable de al menos 1,5 mm².
Los cables con una sección menor pueden sobrecalen-
tarse.
• Asegúrese de que el cable está colocado de forma que
no se pueda tirar de él ni tropezar con él.
Conexión eléctrica
1. Gire todos los mandos en sentido contrario a las agujas
del reloj hasta el tope. Coloque el interruptor de función
en la posición .
2. Compruebe que la tensión eléctrica que vaya a usar
coincide con la del aparato. Encontrará la información
necesaria en la placa de identicación.
3. Conecte el enchufe a una toma resistente a tensión
adecuadamente instalada exclusivamente.
Antes del primer uso
Hay una capa protectora en las placas de cocción y los ele-
mentos de calefacción que se queman cuando el aparato
se calienta. Esto puede provocar la aparición de humo y
olores cuando se utiliza el aparato, pero estos desaparece-
rán después de algunos usos. Esto no es un defecto.
• Puede minimizar el desarrollo de humo limpiando las
placas de cocción y los elementos de calefacción con
un paño ligeramente húmedo antes de utilizarlos por
primera vez.
• No utilice productos de limpieza.
• A continuación, pásele un paño seco.
• Encienda el aparato sólo cuando esté completamente
seco.

KK6059CB_IM 21.11.22
25
• Asegure siempre una ventilación adecuada.
• Utilice el aparato por separado durante varios minutos
antes de usarlo por primera vez para que se eliminen las
capas protectoras.
1. Encienda las dos placas de cocción sin utilizar ningún
utensilio de cocina. Ponga los controladores y
en MAX.
2. A continuación, haga funcionar el horno sin acceso-
rios y sin cocinar alimentos. Ponga el regulador °C
en 230 °C. Ponga el interruptor de función en .
Utensilios de cocina
• Use solamente ollas con base plana para optimizar el
uso de energía.
• La olla nunca debe ser más pequeña que la placa
de cocción. Esto provocaría una pérdida de energía.
En el peor de los casos, la placa de cocción podría
deformarse..
Horno
• Deslice siempre la bandeja para migas bajo el elemento
de calefacción inferior.
• Recomendamos precalentar el horno durante aproxima-
damente 10 a 15 minutos.
• Ahorre energía con los ajustes del interruptor con
convección. Al hacerlo, el aire caliente se distribuye de
manera más rápida y uniforme mediante el ventilador del
interior del horno.
• Utilice siempre la bandeja para la grasa insertada
cuando ase o cocine a la parrilla. Esto evita que la grasa
gotee sobre el elemento de calefacción inferior.
• Este horno no tiene temporizador. Debe controlar usted
mismo el tiempo de cocción.
• El horno ofrece un número de ajustes. De acuerdo con
su receta, elija una temperatura.
Aquí hay unos pocos ejemplos de cómo puede utilizar
las funciones:
• Calentamiento superior:
Para asar o gratinar a la cazuela.
• Calentamiento superior con asador giratorio y
convección:
Pollo y grandes piezas de carne se asan uniformemente.
• Calentamiento superior e inferior por convección:
Ej., para pizza, repostería, etc.
Herramientas de extracción (17 y 19)
a) Para retirar la bandeja de horno
b) Para retirar la rejilla de la parrilla
Si desea retirar el asador giratorio,
utilice la herramienta de extrac-
ción (19).
Manejo
• Puede utilizar las placas de cocción y el horno por sepa-
rado o de forma combinada.
• Cuando se utilizan las placas de cocción y el horno al
mismo tiempo, el tiempo de cocción puede ser ligera-
mente más largo que cuando se utiliza sin el horno. Esto
se debe a razones técnicas y no es un defecto.
Uso de las placas de cocción
1. Gire el regulador y / o hacia la derecha hasta
que se encienda la lámpara testigo de calentamiento
asociada.
2. Seleccione una posición entre 1 y MAX.
La lámpara testigo de calentamiento asociada se apaga
cuando la placa ha alcanzado la temperatura.
Uso del horno
1. Use el controlador °C para seleccionar una temperatura
entre LOW (bajo) y 230 ºC.
2. Seleccione la función deseada del horno con el interrup-
tor de función del horno. La lámpara testigo (8) le indica
que el horno está en funcionamiento.
Asador giratorio
No ponga a asar un trozo grande de asado. La pieza a asar
tiene que tener bastante distancia a las paredes interiores
y las varillas de calefacción. De ninguna manera tiene que
entrar en contacto con usted.
1. Introduzca la bandeja de cocción / bandeja para la grasa
en el reborde guía inferior del horno.
2. Frotar con aceite comestible el asador giratorio y las
horquillas para escupir.
3. Se debe preparar la carne de ave antes de asarla. Para
ello ate con un hilo de cocina las alas y los muslos bien
cerca al cuerpo.
4. Coloque las aves de corral aderezadas o el trozo de
carne asada con cuidado en el asador giratorio. Empuje
las horquillas para escupir en el asador giratorio y
utilícelas para jar la carne asada en su sitio. Apriete las
horquillas para escupir mediante los tornillos.

KK6059CB_IM 21.11.22
26
5. Coloque el asador giratorio
preparado en el horno con la
ayuda de la herramienta de
extracción. Coloque primero el
extremo del asador giratorio sin
la muesca en el motor del lado
derecho del horno. A continua-
ción, enganche el otro extremo del asador giratorio en la
percha situada en el lado izquierdo del horno.
6. Seleccione una temperatura y la función . El asador
giratorio comienza a girar. El pincho rotativo empieza
a rotar. Tenga atención que el trozo de carne a asar se
pueda mover libremente.
7. Cuando la carne esté cocida, retire el asador giratorio
utilizando el asa.
Fin de la utilización
1. Gire todos los mandos en sentido contrario a las agujas
del reloj hasta el tope. Coloque el interruptor de función
en la posición .
2. A continuación, desconecte el enchufe de la toma de
corriente.
Limpieza
AVISO:
• Desconecte siempre el enchufe de la toma de corriente antes
de la limpieza.
• Espere a que el dispositivo se haya enfriado.
• No sumerja nunca el aparato en agua. Podría provocar una
descarga eléctrica o incendio.
ATENCIÓN:
• No use cepillos metálicos ni otros abrasivos.
• No use agentes limpiadores agresivos ni abrasivos.
Placas de cocción
• Limpie las placas de cocción con un paño húmedo.
• Use un agente lavavajillas en caso de manchas persis-
tentes.
Bandeja para migas, bandeja de horno, rejilla de la
parrilla, asador giratorio, horquillas para escupir
• Debajo de los elementos de calefacción hay una ban-
deja para migas. Tire de ella hacia delante para sacarla.
• Limpie todos los accesorios en agua caliente con un
poco de detergente. Después, seque bien las piezas.
Interior del horno
Mantenga limpio el interior del horno.
1. Elimine las salpicaduras y los restos de alimentos que
queden en el horno con un paño húmedo junto con
algún detergente.
2. Seque con una toalla seca.
3. Vuelva a colocar la bandeja para migas y los demás
accesorios.
Carcasa
Después del uso limpie la carcasa con un paño levemente
humedecido.
Almacenamiento
• Limpie el aparato como se ha descrito y deje que se
seque completamente.
• Se recomienda que guarde el aparato en el paquete
original si no piensa utilizarlo durante períodos largos
de tiempo.
• Guarde siempre el aparato fuera del alcance de los
niños, en un lugar seco y bien ventilado.

KK6059CB_IM 21.11.22
27
Datos técnicos
Modelo: ...............................................................KK 6059 CB
Alimentación: ......................................220 – 240 V~, 50 / 60 Hz
Consumo de energía:
Capacidad global: ..................................................3100 W
Placa de cocción pequeña: ...................................... 600 W
Placa de cocción grande:.......................................1000 W
Calentamiento inferior del horno: ............................. 700 W
Calentamiento superior del horno:...........................800 W
Clase de protección: ..............................................................
Peso neto: ........................................................ aprox. 10,2 kg
El derecho de realizar modicaciones técnicas y de diseño
en el curso del desarrollo continuo del producto esta
reservado.
Este aparato ha sido probado de acuerdo con todas las
directivas CE vigentes y construido de acuerdo con las
últimas normas de seguridad.
Eliminación
Signicado del símbolo “Cubo de basura”
Proteja nuestro medio ambiente, aparatos eléc-
tricos no forman parte de la basura doméstica.
Haga uso de los centros de recogida previstos
para la eliminación de aparatos eléctricos y
entregue allí sus aparatos eléctricos que no
vaya a utilizar más.
Ayudará en evitar las potenciales consecuencias, a causa
de una errónea eliminación de desechos, para el medio
ambiente y la salud humana.
Con ello, contribuirá a la recuperación, al reciclado y a otras
formas de reutilización de los aparatos viejos eléctricos y
electrónicos.
La información cómo se debe eliminar los aparatos, se
obtiene en su ayuntamiento o su administración municipal.
Su distribuidor y socio contractual también está obligado a
recuperar el aparato antiguo sin coste alguno.

KK6059CB_IM 21.11.22
28
IMPORTANTE:
Assicuratevi di leggere prima le istruzioni di sicurezza allegate
separatamente.
Istruzioni per l’uso
Grazie per aver scelto il nostro prodotto. Vi auguriamo un
buon utilizzo del dispositivo.
Prima di utilizzare l’apparecchio, leggere attentamente
le istruzioni per l’uso e le istruzioni di sicurezza allegate
separatamente. Conservare questi documenti, compreso il
certificato di garanzia, la ricevuta e, se possibile, la scatola
con l’imballaggio interno in un luogo sicuro. Se si cede
l’apparecchio a terzi, includere sempre tutti i documenti
pertinenti.
Simboli per questo manuale di istruzioni per l’uso
Le indicazioni importanti per la propria sicurezza sono
indicati appropriatamente. Osservare assolutamente queste
indicazioni, per evitare incidenti e danni all’apparecchio:
AVVISO:
Previene i rischi della propria salute ed indica possibili
rischi di ferite.
ATTENZIONE:
Indica possibili pericoli per l’apparecchio o altri oggetti.
Indice
Elementi di comando ..........................................................3
Disimballaggio dell’apparecchio ....................................28
Elementi di comando / Nella fornitura .............................28
Avvertenze per l’uso dell’apparecchio ........................... 29
Note per l’uso ....................................................................29
Piatti da cucina simbolici ................................................ 29
Forno simbolico .............................................................. 29
Carico elettrico collegato ................................................29
Collegamento elettrico ...................................................29
Primo utilizzo .................................................................. 29
Stoviglie .......................................................................... 30
Forno .............................................................................. 30
Strumenti di rimozione (17 e 19) ....................................30
Utilizzo ................................................................................30
Utilizzo delle piastre di cottura .......................................30
Utilizzo del forno .............................................................30
Spiedo rotante ................................................................ 30
Fine dell’utilizzo .............................................................. 31
Pulizia ................................................................................. 31
Piastre di cottura ............................................................31
Vassoio briciole, placca da forno, griglia,
spiedo rotante, spiedi a forchetta ...................................31
Interno del forno ............................................................. 31
L’involucro dell’apparecchio ........................................... 31
Conservazione ..................................................................31
Dati tecnici ......................................................................... 31
Smaltimento ......................................................................32
Significato del simbolo “Eliminazione” ...........................32
Disimballaggio dell’apparecchio
1. Togliere l’apparecchio dal suo imballaggio.
2. Rimuovere tutto il materiale d’imballaggio, come pelli-
cole, materiale di riempimento, fascette e imballaggi di
cartone.
3. Controllare la completezza del contenuto dell’imballaggio.
4. Se il contenuto dell’imballaggio è incompleto o se si
rilevano danni, non mettere in funzione l’apparecchio.
Restituirlo immediatamente al rivenditore.
5. Rimuovere eventuali adesivi dall’apparecchio.
6. Sull’apparecchio potrebbero esserci ancora polvere o
residui di produzione. Si consiglia di pulire l’apparecchio
come descritto al punto “Pulizia”.
Elementi di comando / Nella fornitura
1 Piastra di cottura, grande
2 Piastra di cottura, piccola
3 Manopole di controllo per la cottura
4 Spia luminosa del riscaldamento (piastra di cottura
piccola)
5 Manopole di controllo grande piastra di cottura
6 Spia luminosa del riscaldamento (piastra di cottura
grande)
7 Manopole di controllo della temperatura del forno
8 Spia luminosa di funzionamento
9 Interruttore di funzione del forno
10 Elemento termico
11 Porta in vetro
12 Impugnatura porta
13 Appendino per lo spiedo rotante
14 Griglia
15 Placca da forno / leccarda
16 Vassoio briciole
17 Strumento di rimozione per griglia e vassoio di cottura
18 Spiedo rotante
18a Spiedi a forchetta
19 Strumento di rimozione per spiedo rotante

KK6059CB_IM 21.11.22
29
Avvertenze per l’uso dell’apparecchio
AVVISO:
• Rischio di ustioni! Toccare l’apparecchio solo dall’im-
pugnatura e dagli interruttori.
• Inoltre, quando si utilizzano gli strumenti di rimozione
della placca da forno o dello spiedo rotante, proteg-
gersi dal calore indossando guanti o guanti da forno.
• Rischio di incendio! Non usare mai contenitori in
plastica, cartone, carta o simili.
ATTENZIONE:
Non usare sacchetti per arrostire o contenitori in vetro.
Questi si possono bruciare.
• Posiziona il dispositivo su una superficie resistente al
calore!
• Mantieni una distanza sufficiente per oggetti altamente
infiammabili quali mobili, tende ecc.! Non mettere mai il
dispositivo all’interno di un armadio!
• Installare il dispositivo con il pannello posteriore rivolto
verso la parete.
• Quando si utilizza il forno, lasciare almeno 12 cm di
spazio su tutti i lati dell’apparecchio per consentire una
sufficiente circolazione dell’aria.
• A causa della formazione di calore e vapori, non collo-
care l’apparecchio sotto credenze e scaffali a parete.
• Controllare che l cavo di alimentazione non entri in
contatto con superfici calde dell’apparecchio quando
l’apparecchio é in funzione.
• Metti sempre in funzione l’apparecchio in supervisione. Il
pane molto secco può provocare un incendio all’interno
dell’apparecchio!
• Durante l’uso, non collocare sull’apparecchio oggetti non
necessari per la cottura.
• Questo apparecchio è dotato di una porta in vetro di
sicurezza temperato. Il vetro è più robusto del vetro
comune e più resistente alla rottura. Evitare di graffiare
la superficie della porta. Se il vetro della porta presenta
un graffio o un’incisione, contattare il nostro servizio di
assistenza o un professionista.
• Non riporre in questo forno materiali diversi dagli acces-
sori raccomandati dal produttore quando non è in uso.
Note per l’uso
Piatti da cucina simbolici
Manopole di controllo (3) Piastra di cottura piccola
Manopole di controllo (5) Piastra di cottura grande
Forno simbolico
Manopole di controllo (7) °C Temperatura del forno
Interruttore funzione (9) Funzione forno
Spento
Calore superiore
Calore inferiore
Calore superiore ed
inferiore
Calore superiore e
inferiore con convezione
Calore superiore con
spiedo rotante e conve-
zione
Carico elettrico collegato
• Il consumo totale di energia di questo apparecchio può
arrivare a 3100 W. Con questo carico collegato si racco-
manda una linea di alimentazione separata protetta da
un interruttore di circuito domestico da 16 A.
• Non utilizzare prese multiple, poiché questo apparecchio
è troppo potente.
• Attenzione, sovraccarico: Se si usano prolunghe,
queste dovrebbero avere una sezione del cavo di
almeno 1,5 mm². I cavi con una sezione minore possono
surriscaldarsi.
• Assicurarsi che il cavo sia posato in modo tale da non
poter essere tirato o inciampato.
Collegamento elettrico
1. Ruotare tutti i manopole di controllo in senso antiorario
fino all’arresto. Posizionare l’interruttore di funzione sulla
posizione .
2. Controllare se il voltaggio elettrico che si desidera utiliz-
zare corrisponde a quello del dispositivo. Le informazioni
sono riportate sulla targhetta dell’apparecchio.
3. Infilare la spina soltanto a una presa in materiale antiurto
correttamente installata.
Primo utilizzo
Sulle piastre di cottura e sugli elementi riscaldanti è pre-
sente uno strato protettivo che brucia quando l’apparecchio
si riscalda. Ciò può causare la formazione di fumo e di odori
durante l’uso dell’apparecchio, che però scompaiono dopo
qualche utilizzo. Non si tratta di un difetto.
• È possibile ridurre al minimo lo sviluppo di fumo pulendo
le piastre di cottura e gli elementi riscaldanti con un
panno leggermente umido prima di utilizzarli per la prima
volta.
• Non usare detergenti!
• Poi passarlo con un panno asciutto.

KK6059CB_IM 21.11.22
30
• Accendere l’apparecchio solo quando è completamente
secco.
• Garantire sempre un’adeguata ventilazione.
• Prima di utilizzare l’apparecchio per la prima volta,
lasciarlo in funzione per alcuni minuti per consentire la
rimozione degli strati protettivi.
1. Accendere entrambe le piastre di cottura senza
utilizzare le pentole. Portare i manopole di controllo
e su MAX.
2. Quindi mettere in funzione il forno senza accessori e
senza cuocere i cibi. Portare il manopole di controllo
°C su 230 °C. Posizionare l’interruttore di funzione
su .
Stoviglie
• Utilizzare esclusivamente stoviglie con fondo piano per
ottimizzare il consumo energetico.
• La pentola non deve mai essere più piccola della piastra
di cottura. Ciò causerebbe una perdita di energia. Nel
peggiore dei casi la piastra di cottura potrebbe defor-
marsi.
Forno
• Inserire sempre il vassoio briciole sotto l’elemento riscal-
dante inferiore.
• Si consiglia di preriscaldare il forno per ca. 10 – 15 minuti.
• Risparmiare energia usando le impostazioni con
convezione. Facendo così, l’aria riscaldata è distribuita
più velocemente e regolarmente tramite il ventilatore
all’interno del forno.
• Utilizzare sempre la leccarda inserita quando si griglia
o si arrostisce. In questo modo si evita che il grasso coli
sull’elemento riscaldante inferiore.
• Questo forno non ha un timer. Dovete controllare voi
stessi il tempo di cottura.
• Il forno vi offre una serie di impostazioni. Scegliere la
temperatura in base alla ricetta.
Ecco alcuni esempi di come utilizzare le varie funzioni:
• Calore superiore:
Per grigliare o gratinare la casseruola.
• Calore superiore con spiedo rotante e convezione:
Cottura uniforme per pollame e grandi tagli di carne.
• Calore superiore e inferiore con convezione:
Ad es. per pizza, torte ecc.
Strumenti di rimozione (17 e 19)
a) Per rimuovere la placca da forno
b) Per rimuovere la griglia
Se si desidera rimuovere lo spiedo
rotante, utilizzare lo strumento di
rimozione (19).
Utilizzo
• Le piastre di cottura e il forno possono essere utilizzati
separatamente o in combinazione.
• Quando si utilizzano contemporaneamente le piastre di
cottura e il forno, il tempo di cottura può essere legger-
mente più lungo rispetto all’utilizzo senza il forno. Ciò è
dovuto a motivi tecnici e non costituisce un difetto.
Utilizzo delle piastre di cottura
1. Ruotare il manopole di controllo e / o verso
destra finché non si accende la spia luminosa del riscal-
damento associato.
2. Selezionare un’impostazione tra 1 e MAX.
La spia luminosa del riscaldamento associato si spegne
quando la piastra ha raggiunto la temperatura.
Utilizzo del forno
1. Utilizzare il manopole di controllo °C per selezionare una
temperatura compresa tra LOW (bassa) e 230 °C.
2. Selezionare la funzione del forno desiderata con l’inter-
ruttore di funzione del forno. La spia luminosa (8) indica
che il forno è in funzione.
Spiedo rotante
Scegliere un pezzo di arrosto non troppo grande. La carne
deve essere sufficientemente distante dalle pareti interiori e
dalla superficie riscaldante. Non devono toccarsi in nessun
caso.
1. Inserire la placca da forno / leccarda nella guida inferiore
del forno.
2. Spalmare di olio alimentare lo spiedo rotante e gli spiedi
a forchetta.
3. Ungere e preparare il pollame prima della cottura.
Legare al corpo con fermezza le ali e le cosce con filo
da cucina.
4. Collocare con cautela il pollame o il pezzo di carne arro-
sto sullo spiedo rotante. Spingere gli spiedi a forchetta
sullo spiedo rotante e usarli per ssare l’arrosto in posi-
zione. Stringere gli spiedi a forchetta con le viti.

KK6059CB_IM 21.11.22
31
5. Inserire lo spiedo rotante pre-
parato nel forno con l’aiuto dello
strumento di rimozione. Inserire
prima l’estremità dello spiedo
rotante senza tacca nel motore
sul lato destro del forno. Quindi
agganciare l’altra estremità
dello spiedo rotante al gancio sul lato sinistro del forno.
6. Selezionare una temperatura e il funzionamento . Lo
spiedo rotante inizia a girare. Lo spiedino comincia a gi-
rare. Fare attenzione che la carne non tocchi pareti, ecc.
7. Quando la carne è cotta, rimuovere lo spiedo rotante
utilizzando l’impugnatura.
Fine dell’utilizzo
1. Ruotare tutti i manopole di controllo in senso antiorario
fino all’arresto. Posizionare l’interruttore di funzione sulla
posizione .
2. Scollegare quindi la spina dalla presa di corrente.
Pulizia
AVVISO:
• Prima di procedere alla pulizia, scollegare sempre la spina dalla
presa di corrente.
• Attendere che l’apparecchio si sia raffreddato.
• Non immergere mai il dispositivo in acqua. Può provocare una
scossa elettrica o un incendio.
ATTENZIONE:
• Non utilizzare spazzole od oggetti abrasivi.
• Non utilizzare detergenti forti o abrasivi.
Piastre di cottura
• Pulire le piastre di cottura con un panno umido.
• Utilizzare detersivo per piatti in caso di macchie difficili.
Vassoio briciole, placca da forno, griglia,
spiedo rotante, spiedi a forchetta
• Sotto gli elementi riscaldanti si trova un vassoio briciole.
Tirare in avanti per rimuoverlo.
• Pulire tutti gli accessori con acqua calda e un po’ di
detersivo. Asciugare poi bene le parti.
Interno del forno
Mantieni pulito l’interno del forno.
1. Rimuovere schizzi e rimanenze di cibo dalle pareti del
forno con un panno umido e un po’ di sapone.
2. Pulisci con un panno asciutto.
3. Rimettere a posto il vassoio briciole e gli altri accessori.
L’involucro dell’apparecchio
Dopo l’uso pulire l’apparecchio con un panno leggermente
inumidito.
Conservazione
• Pulisci l’apparecchio come descritto e lascialo asciugare
completamente.
• Consigliamo di conservare l’apparecchio nell’imballaggio
originale se non vuoi usarlo per lunghi periodi di tempo.
• Conserva sempre l’apparecchio fuori dalla portata dei
bambini in un luogo asciutto e ben ventilato.
Dati tecnici
Modello: ............................................................... KK 6059 CB
Tensione di alimentazione: ................220 – 240 V~, 50 / 60 Hz
Ingresso di alimentazione:
Capacità complessiva: ...........................................3100 W
Piastra di cottura piccola: .........................................600 W
Piastra di cottura grande: .......................................1000 W
Potenza del forno calore superiore: ......................... 700 W
Potenza del forno calore inferiore: ........................... 800 W
Classe di protezione: .............................................................
Peso netto: .............................................................ca. 10,2 kg
Si riserva il diritto di apportare modiche tecniche e di
design nel corso dello sviluppo del prodotto.
Questo apparecchio è stato testato secondo tutte le
direttive CE in vigore e costruito secondo le ultime norme
di sicurezza.
Strumenti di rimozione (17 e 19)
a) Per rimuovere la placca da forno
b) Per rimuovere la griglia
Se si desidera rimuovere lo spiedo
rotante, utilizzare lo strumento di
rimozione (19).
Utilizzo
• Le piastre di cottura e il forno possono essere utilizzati
separatamente o in combinazione.
• Quando si utilizzano contemporaneamente le piastre di
cottura e il forno, il tempo di cottura può essere legger-
mente più lungo rispetto all’utilizzo senza il forno. Ciò è
dovuto a motivi tecnici e non costituisce un difetto.
Utilizzo delle piastre di cottura
1. Ruotare il manopole di controllo e / o verso
destra finché non si accende la spia luminosa del riscal-
damento associato.
2. Selezionare un’impostazione tra 1 e MAX.
La spia luminosa del riscaldamento associato si spegne
quando la piastra ha raggiunto la temperatura.
Utilizzo del forno
1. Utilizzare il manopole di controllo °C per selezionare una
temperatura compresa tra LOW (bassa) e 230 °C.
2. Selezionare la funzione del forno desiderata con l’inter-
ruttore di funzione del forno. La spia luminosa (8) indica
che il forno è in funzione.
Spiedo rotante
Scegliere un pezzo di arrosto non troppo grande. La carne
deve essere sufficientemente distante dalle pareti interiori e
dalla superficie riscaldante. Non devono toccarsi in nessun
caso.
1. Inserire la placca da forno / leccarda nella guida inferiore
del forno.
2. Spalmare di olio alimentare lo spiedo rotante e gli spiedi
a forchetta.
3. Ungere e preparare il pollame prima della cottura.
Legare al corpo con fermezza le ali e le cosce con filo
da cucina.
4. Collocare con cautela il pollame o il pezzo di carne arro-
sto sullo spiedo rotante. Spingere gli spiedi a forchetta
sullo spiedo rotante e usarli per ssare l’arrosto in posi-
zione. Stringere gli spiedi a forchetta con le viti.

KK6059CB_IM 21.11.22
32
Smaltimento
Significato del simbolo “Eliminazione”
Salvaguardare l’ambiente, gli elettrodomestici
non vanno eliminati come riuti domestici.
Per l’eliminazione degli elettrodomestici, fare
uso dei posti di raccolta previsti per questo tipo
e porre quegli elettrodomestici che non sono
più in uso.
Si contribuisce così ad evitare un effetto potenziale sull’am-
biente e sulla salute, dovuto magari ad una eliminazione
sbagliata.
Questo signica un contributo personale alla riutilizzazione,
al riciclaggio e altre forme di utilizzazione di elettrodomestici
ed apparecchi elettronici usati.
Si possono trovare le corrispondenti informazioni sugli
appositi luoghi di raccolta, nelle amministrazioni dei comuni.
Il vostro rivenditore e partner contrattuale è anche obbligato
a riprendere gratuitamente il vecchio apparecchio.

KK6059CB_IM 21.11.22
33
WAŻNE:
Najpierw należy zapoznać się z oddzielnie załączoną instrukcją
bezpieczeństwa.
Instrukcja obsługi
Dziękujemy za wybór naszego produktu. Mamy nadzieję, że
korzystanie z urządzenia sprawi państwu radość.
Przed rozpoczęciem użytkowania urządzenia przeczytaj
uważnie instrukcję obsługi oraz oddzielnie załączone
wskazówki bezpieczeństwa. Przechowuj te dokumenty
wraz z kartą gwarancyjną, paragonem i, jeśli to możliwe,
pudełkiem z opakowaniem wewnętrznym w bezpiecznym
miejscu. Jeżeli przekazujesz urządzenie osobom trzecim,
dołącz zawsze wszystkie istotne dokumenty.
Symbole użyte w tej instrukcji obsługi
Ważne informacje dotyczące bezpieczeństwa użytkownika
są specjalnie wyróżnione. Koniecznie stosuj się do tych
wskazówek, aby uniknąć wypadków i uszkodzenia urzą-
dzenia:
OSTRZEŻENIE:
Ostrzega przed zagrożeniami dla zdrowia i wskazuje na
potencjalne ryzyka obrażeń.
UWAGA:
Wskazuje na potencjalne zagrożenia dla urządzenia lub
innych przedmiotów.
Spis treści
Przegląd elementów obsługi .............................................3
Rozpakowanie urządzenia ............................................... 33
Przegląd elementów obsługi / Zakres dostawy..............33
Ostrzeżenia dotyczące użytkowania urządzenia ..........34
Uwagi dotyczące użytkowania ........................................34
Symboliczne płyty do gotowania....................................34
Symbole piekarnika ........................................................34
Podłączone obciążenie elektryczne ..............................34
Połączenie elektryczne ..................................................34
Przed pierwszym użyciem .............................................34
Naczynia do gotowania ..................................................35
Piekarnik .........................................................................35
Przyrządy do wyjmowania (17 i 19) ............................... 35
Obsługa .............................................................................. 35
Używanie płyt do gotowania ..........................................35
Używanie piekarnika ......................................................35
Rożen ............................................................................. 35
Zakończenie używania...................................................36
Czyszczenie ....................................................................... 36
Płyty do gotowania ......................................................... 36
Taca na okruchy, blacha do pieczenia, ruszt grilla,
rożen, widelce szpikulcowe............................................36
Wnętrze piekarnika ........................................................36
Obudowa ........................................................................ 36
Przechowywanie ...............................................................36
Dane techniczne ................................................................36
Warunki gwarancji ............................................................36
Usuwanie ...........................................................................37
Znaczenie symbolu „Pojemnik na śmieci” .....................37
Rozpakowanie urządzenia
1. Wyjmij urządzenie z opakowania.
2. Usuń wszystkie materiały opakowaniowe, takie jak folie,
materiały wypełniające, opaski kablowe i opakowania
kartonowe.
3. Sprawdź, czy zawartość opakowania jest kompletna.
4. Jeżeli zawartość opakowania jest niekompletna lub
jeżeli widoczne są uszkodzenia, nie używaj urządzenia.
Natychmiast zwróć je do sprzedawcy.
5. Usunąć z urządzenia wszelkie istniejące naklejki.
6. Na urządzeniu może nadal znajdować się kurz lub
pozostałości po produkcji. Zalecamy wyczyszczenie
urządzenia zgodnie z opisem w punkcie „Czyszczenie”.
Przegląd elementów obsługi /
Zakres dostawy
1 Płyta gotowania, duża
2 Płyta gotowania, mała
3 Regulator małej płyty grzejnej
4 Kontrolka ogrzewania (mała płytka gotowania)
5 Regulator dużej płyty grzejnej
6 Kontrolka ogrzewania (duża płytka gotowania)
7 Pokrętło temperatury piekarnika
8 Kontrolka pracy
9 Przełącznik funkcyjny piekarnika
10 Element grzejny
11 Szklane drzwiczki
12 Uchwyt drzwiczek
13 Uchwyt do zawieszania rożna obrotowego
14 Ruszt grilla
15 Blacha do pieczenia / miska ociekowa
16 Taca na okruchy
17 Przyrząd do wyjmowania kratki grilla i blachy do
pieczenia

KK6059CB_IM 21.11.22
34
18 Rożen
18a Widelce szpikulcowe
19 Narzędzie do wyjmowania rożna
Ostrzeżenia dotyczące
użytkowania urządzenia
OSTRZEŻENIE:
• Niebezpieczeństwo poparzenia! Urządzenie dotykać
tylko za uchwyt i przełączniki.
• Ponadto podczas używania przyrządów do wyjmowa-
nia blachy do pieczenia lub rożna obrotowego należy
chronić się przed gorącem za pomocą rękawic lub
rękawic kuchennych.
• Ryzyko pożaru! Nie należy nigdy używać pojemników
z plastiku, kartonu, papieru itp.
UWAGA:
Nie wolno używać torebek do pieczenia ani szklanych
pojemników. Mogą pęknąć.
• Ustawiać urządzenie na powierzchni żaroodpornej!
• Utrzymać odpowiednią odległość od łatwopalnych obiek-
tów takich jak meble, zasłony, itp.! Urządzenia nie należy
nigdy instalować w szafce!
• Urządzenie należy ustawić tak, aby jego tylny panel był
skierowany do ściany.
• Podczas korzystania z piekarnika należy pozostawić co
najmniej 12 cm wolnego miejsca po wszystkich stronach
urządzenia, aby umożliwić wystarczającą cyrkulację
powietrza.
• Ze względu na unoszące się ciepło i parę nie należy
ustawiać urządzenia pod szafkami ściennymi.
• Należy uważać, aby przewód zasilający nie stykał się
z gorącymi powierzchniami włączonego urządzenia.
• Zawsze obsługiwać urządzenie pod nadzorem. Bardzo
suchy chleb może zapalić się wewnątrz urządzenia!
• Podczas użytkowania nie umieszczaj na urządzeniu żad-
nych przedmiotów, które nie są potrzebne do gotowania.
• To urządzenie posiada drzwi wykonane z bezpiecznego
szkła hartowanego. Szkło to jest mocniejsze niż zwykłe
szkło i bardziej odporne na stłuczenia. Należy unikać
zarysowań na powierzchni drzwi. Jeśli na szkle drzwi
pojawi się rysa lub nacięcie, należy skontaktować się
z naszym serwisem lub ze specjalistą.
• Nie przechowuj w tym piekarniku żadnych materiałów
innych niż akcesoria zalecane przez producenta, gdy nie
jest on używany.
Uwagi dotyczące użytkowania
Symboliczne płyty do gotowania
Regulator (3) Mała płytka gotowania
Regulator (5) Duża płytka gotowania
Symbole piekarnika
Regulator (7) °C Temperatura piekarnika
Przełącznik
funkcyjny (9) Funkcja piekarnika
Wyłączone
Grzałka górna
Grzałka dolna
Grzałka górna i dolna
Grzanie górne i dolne
z konwekcją
Ogrzewanie górne z rożnem
i konwekcją
Podłączone obciążenie elektryczne
• Urządzenie może pobierać całkowitą moc 3100 W.
W związku z tym wskazane jest podłączenie osobnym
przewodem i zabezpieczenie obwodu bezpiecznikiem
domowym 16 A.
• Nie używaj rozgałęziaczy ze względu na dużą moc
urządzenia.
• Uwaga, przeciążenie: Używane przedłużacze powinny
mieć przewody o przekroju nie mniejszym niż 1,5 mm².
Kable o mniejszym przekroju mogą się przegrzewać.
• Upewnij się, że kabel jest ułożony w taki sposób, aby nie
można było za niego pociągnąć ani się o niego potknąć.
Połączenie elektryczne
1. Wszystkie regulatory przekręcić do oporu w kierunku
przeciwnym do ruchu wskazówek zegara. Ustawić prze-
łącznik funkcji w pozycji .
2. Sprawdzić, czy napięcie sieciowe, którego chcemy użyć
jest zgodne z napięciem urządzenia. Wymagane infor-
macje można znaleźć na tabliczce znamionowej.
3. Włożyć wtyczkę przewodu zasilającego do poprawnie
zainstalowanego, odpornego na wstrząsy, gniazdka.
Przed pierwszym użyciem
Na płytach do gotowania i elementach grzejnych znajduje
się warstwa ochronna, która ulega spaleniu podczas
nagrzewania się urządzenia. Może to powodować powsta-
wanie dymu i zapachów podczas używania urządzenia, ale
znikną one po kilku użyciach. Nie jest to wada.
• Można zminimalizować powstawanie dymu, przecierając
płyty do gotowania i elementy grzejne lekko wilgotną
ściereczką przed pierwszym użyciem.
• Nie należy stosować żadnych środków do czyszczenia!
• Po przetarciu powierzchnię należy wytrzeć suchą
ściereczką.
• Urządzenie można włączyć tylko wtedy, gdy jest zupełnie
suche.
• Należy zapewnić odpowiedni przepływ powietrza!

KK6059CB_IM 21.11.22
35
• Przed pierwszym użyciem urządzenia należy przez kilka
minut używać go oddzielnie, aby umożliwić usunięcie
warstw ochronnych.
1. Włączyć obie płyty do gotowania bez użycia naczyń.
Regulatory i ustawić na MAX.
2. Następnie uruchomić piekarnik bez akcesoriów i bez
gotowania potraw. Regulator °C ustawić na 230 °C.
Ustawić przełącznik funkcji na .
Naczynia do gotowania
• Aby zoptymalizować zużycie energii, należy używać
wyłącznie garnków z płaskim dnem.
• Garnek nigdy nie powinien być mniejszy niż płyta
do gotowania. Spowodowałoby to straty energii. W
najgorszym przypadku płyta do gotowania może ulec
zniekształceniu.
Piekarnik
• Tacę na okruchy należy zawsze wsuwać pod dolny
element grzejny.
• Zalecane jest wstępne nagrzanie piekarnika przez
ok. 10 – 15 minut.
• Korzystanie z ustawień z konwekcją zapewnia oszczęd-
ność energii. W takim przypadku gorące powietrze jest
szybciej i bardziej równomiernie rozprowadzane przez
wentylator wewnątrz piekarnika.
• Podczas grillowania lub pieczenia należy zawsze uży-
wać włożonej miski ociekowej. Dzięki temu tłuszcz nie
będzie ściekał na dolny element grzejny.
• W tym piekarniku nie ma timera. Muszą Państwo sami
kontrolować czas gotowania.
• Piekarnik oferuje szereg ustawień. Zgodnie z przepisem
należy wybrać temperaturę.
Oto kilka przykładów tego, w jaki sposób można uży-
wać wymienionych niżej funkcji:
• Grzałka górna:
Do grillowania lub zapiekanki.
• Ogrzewanie górne z rożnem i konwekcją:
Drób i duże pieczenie mięsa pieką się równomiernie.
• Grzanie górne i dolne z konwekcją:
Np. pizza, ciasta itp.
Przyrządy do wyjmowania (17 i 19)
a) Aby wyjąć blachę do pieczenia
b) Aby zdjąć ruszt grilla
Aby zdjąć rożen, należy użyć przy-
rządu do wyjmowania (19).
Obsługa
• Płyty do gotowania i piekarnik można obsługiwać od-
dzielnie lub łącznie.
• W przypadku jednoczesnego korzystania z płyt do goto-
wania i piekarnika, czas gotowania może być nieco dłuż-
szy niż w przypadku korzystania z nich bez piekarnika.
Wynika to z przyczyn technicznych i nie jest wadą.
Używanie płyt do gotowania
1. Obrócić regulator i / lub w prawo, aż włączy się
kontrolka ogrzewania.
2. Wybrać ustawienie pomiędzy 1 a MAX.
Związana z tym kontrolka ogrzewania gaśnie po osią-
gnięciu przez płytę temperatury.
Używanie piekarnika
1. Za pomocą regulatora °C wybrać temperaturę pomiędzy
LOW (niska) a 230 °C.
2. Wybrać żądaną funkcję piekarnika za pomocą prze-
łącznika funkcyjnego piekarnika. Lampka kontrolna (8)
wskazuje, że piekarnik jest w użyciu.
Rożen
Pieczeń nie powinna być zbyt duża. Grillowana potrawa
musi mieć wystarczający odstęp od ścianek wewnętrznych
i prętów grzejnych. W żadnym wypadku nie może się z nimi
stykać.
1. Włożyć blachę do pieczenia / miskę ociekową do dolnej
prowadnicy piekarnika.
2. Natrzeć rożen i widelce szpikulcowe olejem jadalnym.
3. Przed grillowaniem drobiowi nadaje się kształt gotowy
do serwowania. W tym celu skrzydełka i udka proszę
przywiązać ściśle nicią kuchenną do korpusu.
4. Upieczony drób lub kawałek pieczonego mięsa ostrożnie
umieścić na rożnie. Wsunąć widelce szpikulcowe na ro-
żen i zamocować nimi pieczeń. Dokręcić widelce szpikul-
cowe za pomocą śrub.
5. Umieścić przygotowany
rożen w piekarniku za pomocą
przyrządu do wyjmowania.
Najpierw włożyć koniec rożna
obrotowego bez nacięcia do
silnika po prawej stronie piekar-
nika. Następnie zaczepić drugi
koniec rożna obrotowego do wieszaka po lewej stronie
piekarnika.
6. Wybierz temperaturę i funkcję . Rożen zaczyna się
obracać. Rożen obrotowy zaczyna się kręcić. Proszę
zwrócić uwagę na to, by pieczeń mogła się swobodnie
obracać.
7. Po upieczeniu mięsa wyjąć rożen za pomocą uchwytu.

KK6059CB_IM 21.11.22
36
Zakończenie używania
1. Wszystkie regulatory przekręcić do oporu w kierunku
przeciwnym do ruchu wskazówek zegara. Ustawić prze-
łącznik funkcji w pozycji .
2. Następnie należy wyjąć wtyczkę sieciową z gniazdka.
Czyszczenie
OSTRZEŻENIE:
• Przed czyszczeniem należy zawsze wyjąć wtyczkę z gniazdka.
• Zaczekać, aż urządzenie ostygnie.
• Nie należy nigdy zanurzać urządzenia w wodzie. Może to do-
prowadzić do porażenia prądem lub pożaru.
UWAGA:
• Nie używać szczotek drucianych ani żadnych szorst-
kich przedmiotów do mycia.
• Nie stosować agresywnych ani ściernych środków do
czyszczenia.
Płyty do gotowania
• Płyty do gotowania czyścić wilgotną ściereczką.
• Do czyszczenia elementów stalowych należy używać
płynu do mycia naczyń.
Taca na okruchy, blacha do pieczenia, ruszt grilla,
rożen, widelce szpikulcowe
• Pod elementami grzejnymi znajduje się taca na okruchy.
Trzeba ją ciągnąć do przodu w celu wyjęcia.
• Wyczyść wszystkie akcesoria w gorącej wodzie do
płukania z odrobiną płynu do mycia naczyń. Następnie
dobrze wysuszyć części.
Wnętrze piekarnika
Zachować czystość wewnątrz pieca.
1. Usunąć rozpryski i pozostałości żywności na ścianie
pieca, używając wilgotnej ściereczki zmoczonej w wo-
dzie z dodatkiem środka do mycia naczyń.
2. Wytrzeć do sucha za pomocą suchego ręcznika.
3. Odłóż tacę na okruchy i inne akcesoria.
Obudowa
Po użyciu oczyść obudowę lekko zwilżoną ściereczką.
Przechowywanie
• Wyczyścić urządzenie zgodnie z opisem i poczekać, aż
całkowicie wyschnie.
• Zalecamy przechowywanie urządzenia w oryginalnym
opakowaniu, jeśli nie jest używane przez dłuższe okresy
czasu.
• Zawsze trzymać urządzenie poza zasięgiem dzieci
w dobrze wentylowanym, suchym miejscu.
Dane techniczne
Model:..................................................................KK 6059 CB
Napięcie zasilania: .............................220 – 240 V~, 50 / 60 Hz
Moc wejściowa:
Wydajność całkowita: ............................................. 3100 W
Mała płyta do gotowania: .........................................600 W
Duża płyta do gotowania:.......................................1000 W
Grzałka dolna piekarnika: ........................................700 W
Grzałka górna piekarnika: ........................................800 W
Stopień ochrony: ....................................................................
Waga netto: ............................................................ok. 10,2 kg
Zastrzegamy sobie prawo wprowadzania zmian technicz-
nych i projektowych w trakcie ciągłego rozwoju produktu.
To urządzenie zostało przetestowane zgodnie z wszystkimi
obowiązującymi, aktualnymi dyrektywami CE i zbudowane
zgodnie z najnowszymi przepisami bezpieczeństwa.
Warunki gwarancji
Przyznajemy 24 miesiące gwarancji na produkt licząc od
daty zakupu.
W tym okresie będziemy bezpłatnie usuwać w terminie
14 dni od daty dostarczenia wadliwego sprzętu z kartą
gwarancyjną do miejsca zakupu wszystkie uszkodzenia
powstałe w tym urządzeniu na skutek wady materiałów
lub wadliwego wykonania, naprawiając oraz wymieniając
wadliwe części lub (jeśli uznamy za stosowne) wymieniając
całe urządzenie na nowe.

KK6059CB_IM 21.11.22
37
Sprzęt do naprawy powinien być dostarczony w komplecie
wraz z dowodem zakupu oraz z ważną kartą gwarancyjną
do sprzedawcy w miarę możliwości w oryginalnym opako-
waniu lub innym odpowiednim dla zabezpieczenia przed
uszkodzeniem. W razie braku kompletnego opakowania fa-
brycznego, ryzyko uszkodzenia sprzętu podczas transportu
do i z miejsca zakupu ponosi reklamujący.
Naprawa gwarancyjna nie dotyczy czynności przewidzianych
w instrukcji obsługi, do wykonania których zobowiązany jest
użytkownik we własnym zakresie i na własny koszt.
Gwarancja nie obejmuje:
• mechanicznych, termicznych, chemicznych uszkodzeń
sprzętu i wywołanych nimi wad,
• uszkodzeń powstałych w wyniku działania sił zewnętrz-
nych takich jak wyładowania atmosferyczne, zmiana
napięcia zasilania i innych zdarzeń losowych,
• nieprawidłowego ustawienia wartości napięcia elektrycz-
nego, zasilanie z nieodpowiedniego gniazda zasilania,
• sznurów połączeniowych, sieciowych, żarówek, baterii,
akumulatorów,
• uszkodzeń wyrobu powstałych w wyniku niewłaściwego
lub niezgodnego z instrukcją jego użytkowania, przecho-
wywania, konserwacji, samowolnego zrywania plomb
oraz wszelkich przeróbek i zmian konstrukcyjnych doko-
nanych przez użytkownika lub osoby niepowołane,
• roszczeń z tytułu parametrów technicznych wyrobu, o ile
są one zgodne z podanymi przez producenta,
• prawidłowego zużycia i uszkodzeń, które mają nieistotny
wpływ na wartość lub działanie tego urządzenia.
Karta gwarancyjna bez pieczątki sklepu, daty sprzedaży, nie
wypełniona, źle wypełniona, ze śladami poprawek, nieczy-
telna wskutek zniszczenia, bez możliwości ustalenia miejsca
sprzedaży oraz dołączonego dowodu zakupu jest nieważna.
Korzystanie z usług gwarancyjnych nie jest możliwe po
upływie daty ważności gwarancji. Gwarancja na części lub
całe urządzenie, które są wymieniane kończy się, wraz
z końcem gwarancji na to urządzenie.
Wszystkie inne roszczenia, wliczając w to odszkodowania
są wykluczone chyba, że prawo przewiduje inaczej. Rosz-
czenia wykraczające poza tą umowę nie są uwzględniane
przez tą gwarancję.
Gwarancja na sprzedany towar konsumpcyjny nie wyłącza,
nie ogranicza ani nie zawiesza uprawnień kupującego
wynikających z niezgodności towaru z umową.
Gwarancja oraz zawarte w niej warunki obowiązują na
terenie Rzeczpospolitej Polskiej.
Dystrybutor:
CTC Clatronic Sp. z o.o
Ul. Brzeska 1
45-960 Opole
Usuwanie
Znaczenie symbolu „Pojemnik na śmieci”
Proszę oszczędzać nasze środowisko, sprzęt
elektryczny nie należy do śmieci domowych.
Proszę korzystać z punktów zbiorczych, prze-
widzianych do zdawania sprzętu elektrycznego,
i tam proszę oddawać sprzęt elektryczny,
którego już nie będą Państwo używać.
Tym sposobem pomagają Państwo unikać potencjalnych
następstw niewłaściwego usuwania odpadów, mających
wpływ na środowisko i zdrowie ludzi.
Tą drogą przyczyniają się Państwo do ponownego użycia,
do recyklingu i do innych form wykorzystania starego
sprzętu elektrycznego i elektronicznego.
Informacje, gdzie można zdać sprzęt, otrzymają Państwo
w swoich urzędach komunalnych lub w administracji gminy.
Twój sprzedawca i partner umowny jest również zobowią-
zany do bezpłatnego odbioru starego urządzenia.

KK6059CB_IM 21.11.22
38
FONTOS:
Először feltétlenül olvassa el a külön mellékelt biztonsági utasítá-
sokat.
Használati utasítás
Köszönjük, hogy a termékünket választotta. Reméljük,
elégedetten használja majd a készüléket.
A készülék használata előtt nagyon gyelmesen olvassa
el a használati útmutatót és a külön mellékelt biztonsági
utasításokat. Tartsa ezeket a dokumentumokat, beleértve
a jótállási jegyet, a blokkot és lehetőség szerint a belső
csomagolással ellátott dobozt is, biztonságos helyen. Ha a
készüléket harmadik félnek adja tovább, mindig mellékelje
az összes vonatkozó dokumentumot.
A használati útmutatóban található szimbólumok
Az ön biztonságára vonatkozó utasítások kifejezetten meg
vannak különböztetve. Kérjük, mindenképpen ügyeljen
ezekre annak érdekében, hogy elkerülje a baleseteket és a
készülék károsodását:
FIGYELMEZTETÉS:
Egészségét károsító veszélyforrásokra gyelmeztet és
rámutat a lehetséges sérülési lehetőségekre.
VIGYÁZAT:
Lehetséges veszélyre utal, mely a készülékben vagy más
tárgyakban kárt tehet.
Tartalom
A kezelőelemek áttekintése ...............................................3
A készülék kicsomagolása ..............................................38
A kezelőelemek áttekintése / A csomag tartalma ..........38
A készülék használatára vonatkozó
gyelmeztetések ...............................................................39
Használati megjegyzések ................................................39
Főzőlapok szimbólumai .................................................39
Sütő szimbólumai ...........................................................39
Elektromos csatlakoztatott terhelés ............................... 39
Elektromos csatlakozás .................................................39
Első használat előtt ........................................................ 39
Főzőeszköz .................................................................... 40
Sütő ................................................................................40
Kivehető szerszámok (17 és 19) ...................................40
Működés .............................................................................40
A főzőlapok használata .................................................. 40
A sütő használata ...........................................................40
Forgónyárson ................................................................. 40
A használat befejezése .................................................. 40
Tisztítás .............................................................................. 41
Főzőlapok .......................................................................41
Morzsatálca, sütőtálca, grillrács, forgónyárson,
rögzítő csipeszeket ........................................................41
A sütő belseje ................................................................. 41
Készülékház ................................................................... 41
Tárolás ...............................................................................41
Műszaki adatok .................................................................41
Hulladékkezelés ................................................................41
A „kuka” piktogram jelentése..........................................41
A készülék kicsomagolása
1. Vegye ki a készüléket a csomagolásából.
2. Távolítson el minden csomagolóanyagot, például
fóliákat, töltőanyagot, kábelkötegelőket és kartoncso-
magolást.
3. Ellenőrizze a szállítási terjedelem teljességét.
4. Ha a csomagolás tartalma hiányos, vagy ha sérülések
észlelhetők, ne működtesse a készüléket. Azonnal
juttassa vissza a kereskedőhöz.
5. Távolítsa el a készülékről a meglévő matricákat.
6. A készüléken még lehetnek por- vagy gyártási marad-
ványok. Javasoljuk, hogy tisztítsa meg a készüléket a
„Tisztítás” pontban leírtak szerint.
A kezelőelemek áttekintése /
A csomag tartalma
1 Főzőlap, nagy
2 Főzőlap, kicsi
3 Kis főzőlap szabályozógombja
4 Melegítés jelzőfénye (kis főzőlap)
5 Nagy főzőlap szabályozógombja
6 Melegítés jelzőfénye (nagy főzőlap)
7 Sütő hőmérséklet-szabályozó
8 Működési jelzőfény
9 Sütő üzemmódkapcsolója
10 Fűtőelem
11 Üvegajtór
12 Ajtó fogantyú
13 Felakasztható rögzítőelem a forgó nyárshoz
14 Grillrács
15 Sütőtálca / csepptálca
16 Morzsatálca
17 Kihúzóeszköz a grillrácshoz és a sütőtálcához
18 Forgónyárson
18a Rögzítő csipeszeket
19 Kihúzóeszköz a forgórácshoz

KK6059CB_IM 21.11.22
39
A készülék használatára
vonatkozó gyelmeztetések
FIGYELMEZTETÉS:
• Égési sérülések veszélye! Csak a fogantyúnál és a
kapcsolóknál fogva érintse meg a készüléket.
• Amikor a sütőtálca vagy a nyárs fogantyúját használja,
kesztyű vagy konyhai kendő segítségével védje magát
a hőtől.
• Tűzveszélyesek! Ne használjon műanyagból,
kartonból, papírból vagy hasonló anyagokból készült
edényeket.
VIGYÁZAT:
Ne használjon pörkölőtömlőt vagy üvegedényeket. Ezek
szétrobbanhatnak.
• A készüléket hőálló felszínre helyezze!
• Hagyjon megfelelő távolságot a gyúlékony anyagoktól,
mint például bútorok, függönyök, stb.! Soha ne helyezze
a készüléket egy szekrény belsejébe!
• A készüléket úgy helyezze el, hogy a hátoldala a fal felé
nézzen.
• A sütő használatakor hagyjon legalább 12 cm helyet
a készülék minden oldalán, hogy elegendő levegő
áramolhasson.
• A felfelé szálló hő és gőzök miatt ne helyezze a készülé-
ket fali szekrények alá.
• Ügyeljen arra, hogy a tápkábel a működés során ne
érintkezzen a készülék forró részeivel.
• Ne hagyja felügyelet nélkül a működő készüléket. A
nagyon száraz kenyér lángra kaphat a készüléken belül!
• Használat közben ne helyezzen a készülékre olyan
tárgyakat, amelyekre nincs szüksége a sütéshez.
• A készülék ajtaja edzett biztonsági üvegből készült. Az
üveg erősebb, mint a közönséges üveg, és ellenállóbb
a töréssel szemben. Kerülje a karcolásokat az ajtó
felületén. Ha az ajtó üvegén karcolás vagy bevágás
keletkezik, forduljon szervizünkhöz vagy szakemberhez.
• Ne tároljon a gyártó által ajánlott tartozékokon kívül
más anyagokat ebben a sütőben, amikor az nincs
használatban.
Használati megjegyzések
Főzőlapok szimbólumai
Szabályozógomb (3) Kis főzőlap
Szabályozógomb (5) Nagy főzőlap
Sütő szimbólumai
Szabályozógomb (7) °C Sütő hőmérséklete
Funkció kapcsoló (9) Sütő üzemmódja
Kikapcsolva
Felsőfűtés
Alsófűtés
Felső- és alsófűtés
Felső- és alsófűtés
konvekcióval
Felsőfűtés forgó nyársalással
és konvekcióval
Elektromos csatlakoztatott terhelés
• A készülék 3100 W összteljesítmény felvételére képes.
Ennél a csatlakoztatási értéknél ajánlatos egy külön
tápvezeték, amely egy 16 A - es háztartási védőkapcsolón
keresztül van biztosítva.
• Ne használjon elosztót, mivel ez a készülék nagyon erős
teljesítményű.
• Vigyázat, túlterhelés: Ha hosszabbítót használ, ennek
legalább 1,5 mm² vezetékátmérője legyen. A kisebb
vezetékkeresztmetszetű kábelek túlmelegedhetnek.
• Ügyeljen arra, hogy a kábelt úgy fektesse le, hogy ne
lehessen meghúzni vagy megbotlani benne.
Elektromos csatlakozás
1. Fordítsa el az összes szabályozót az óramutató járá-
sával ellentétes irányba, ameddig csak lehet. Állítsa a
funkciókapcsolót állásba.
2. Ellenőrizze, hogy a használni kívánt hálózati áram
feszültsége megfelel a készüléken feltüntetett értéknek.
A keresett információt a névtáblán találja.
3. Csak megfelelően felszerelt érintésbiztos aljzatba dugja
be a hálózati dugaszt.
Első használat előtt
A főzőlapokon és a fűtőelemeken egy védőréteg található,
amely a készülék felmelegedésekor ég. Ez a készülék
használatakor füst és szagok kialakulását okozhatja, de
ezek néhány használat után megszűnnek. Ez nem hiba.
• A füstképződést minimalizálhatja, ha a főzőlapokat és
a fűtőelemeket az első használat előtt enyhén nedves
ruhával áttörli.
• Ne használjon tisztítószereket!
• Ezután törölje le egy száraz ruhával.
• A készüléket csak teljesen száraz állapotban kapcsolja
be.
• Mindig gondoskodjon a megfelelő szellőzésről.
• A készüléket az első használat előtt néhány percig kü-
lön-külön használja, hogy a védőrétegek eltávolodjanak.
1. Edények felhelyezése nélkül kapcsolja be mindkét fő-
zőlapot. Fordítsa a és szabályozógombokat
MAX állásba.
2. Ezután a sütőt tartozékok nélkül és ételek főzése nél-
kül működtesse. Állítsa a °C szabályozót 230 °C-ra.
Állítsa a funkciókapcsolót állásba.

KK6059CB_IM 21.11.22
40
Főzőeszköz
• Az energiafelhasználás optimalizálása érdekében csak
lapos aljú főzőedényeket használjon.
• A főzőedény soha nem lehet kisebb, mint a főzőlap.
Ez energiaveszteséget okoz. Szélsőséges esetben a
főzőlap elgörbülhet.
Sütő
• Mindig csúsztassa be morzsatálcát az alsó fűtőelem alá.
• Javasoljuk, hogy kb. 10 – 15 percig melegítse elő a sütőt.
• Takarítson meg energiát a konvekciós kapcsolóbeállítá-
sok használatával. Ekkor a felhevített levegő gyorsabban
és egyenletesebben van eloszlatva a sütőben lévő
ventilátor segítségével.
• Grillezéskor vagy sütéskor mindig használja a behelye-
zett zsírtálcát. Ez megakadályozza a zsír alsó fűtőelemre
csepegését.
• Ezen a sütőn nincs időzítő. A sütési időt Önnek magának
kell szabályoznia.
• A sütő számos beállítást kínál. A receptjének megfele-
lően válassza ki a hőmérsékletet.
Íme néhány példa a funkciók használatáról:
• Felsőfűtés:
Grillezéshez vagy gratináláshoz raguhoz.
• Felsőfűtés forgó nyársalással és konvekcióval:
A csirke és a nagy húsdarabok egyenletesen sülnek
meg.
• Felső- és alsófűtés konvekcióval:
Pl. pizzához, süteményekhez, stb.
Kivehető szerszámok (17 és 19)
a) A sütőtálca eltávolításához
b) A grillrács eltávolításához
A forgónyárs kivételéhez használja
a kihúzóeszközt (19).
Működés
• A főzőlapokat és a sütőt külön-külön vagy együttesen is
működtetheti.
• A főzőlapok és a sütő egyidejű használata esetén a
főzési idő kissé hosszabb lehet, mint a sütő nélküli
használat esetén. Ez technikai okokra vezethető vissza,
és nem hiba.
A főzőlapok használata
1. Forgassa a szabályozót és / vagy jobbra, amíg a
hozzá tartozó fűtésszabályozó lámpa fel nem kapcsol.
2. Válasszon egy beállítást 1 és MAX között.
A hozzátartozó fűtésvezérlő lámpa kialszik, amikor a
lemez elérte a hőmérsékletet.
A sütő használata
1. A °C szabályozógomb segítségével állítson be LOW
(alacsony) és 230 °C közötti hőmérsékletet.
2. Válassza ki a kívánt sütőfunkciót a sütőfunkció
kapcsolóval. Az ellenőrző lámpa (8) jelzi, hogy a sütő
használatban van.
Forgónyárson
Ne válasszon túl nagy darabot a sütéshez! Hagyjon a grille-
zendő hús mellett elegendő távolságot a belső falaktól és a
fűtőelemektől! Ezekhez a hús semmi esetre se érjen hozzá.
1. Tolja be a sütőlapot / zsírfelfogó tálat a sütő legalsó
oldallécfokára.
2. Dörzsölje be a forgónyársat és a rögzítő csipeszeket
étolajjal.
3. A szárnyast a nyárson sütéshez elő kell készíteni. Kösse
hozzá a szárnyakat és a combokat erős cérnával szoro-
san a testhez.
4. Óvatosan húzza fel az így előkészített szárnyast a
nyársra! Húzza rá a rögzítő csipeszeket a nyársra, és
rögzítse velük a sültet! Ezután a csavarok meghúzásával
rögzítse a csipeszeket.
5. Helyezze az előkészített forgó-
nyársat a sütőbe a kihúzóesz-
közzel. Először a forgónyárs
bevágás nélküli végét helyezze
be a motorba a sütő jobb olda-
lán. Ezután akassza be a nyárs
másik végét a sütő bal oldalán
lévő akasztóba.
6. Válasszon egy hőmérsékletet és a funkciót. Műkö-
dési idő beállításához. A nyárs forogni kezd. Ügyeljen rá,
hogy a sült szabadon tudjon forogni.
7. Ha a hús átsült, vegye ki a nyársat a nyél segítségével.
A használat befejezése
1. Fordítsa el az összes szabályozót az óramutató járá-
sával ellentétes irányba, ameddig csak lehet. Állítsa a
funkciókapcsolót állásba.
2. Ezután húzza ki a hálózati dugót a konnektorból.

KK6059CB_IM 21.11.22
41
Tisztítás
FIGYELMEZTETÉS:
• Tisztítás előtt mindig húzza ki a hálózati dugót a konnektorból.
• Várjon, amíg a készülék lehűl.
• Soha ne merítse vízbe a készüléket. Elektrosokkhoz vagy tűze-
sethez vezethet.
VIGYÁZAT:
• Ne használjon drótkefét vagy más karcoló tárgyakat.
• Ne használjon agresszív vagy karcoló tisztítószereket.
Főzőlapok
• A főzőlapokat nedves ruhával tisztítsa.
• Makacs foltok esetén használjon mosogatószert.
Morzsatálca, sütőtálca, grillrács, forgónyárson,
rögzítő csipeszeket
• A fűtőelemek alatt egy morzsatálca található. Az eltávolí-
táshoz húzza előre.
• Tisztítson meg minden tartozékot forró öblítővízben,
kevés mosogatószerrel. Ezt követően jól szárítsa meg az
alkatrészeket.
A sütő belseje
Tartsa tisztán a sütő belsejét.
1. Egy nedves ruhával és némi tisztítószerrel távolítsa el a
sütő falára ragadt fröccsenéseket és ételmaradékokat.
2. Törölje szárazra száraz ruhával.
3. Helyezze vissza a morzsatálcát és a többi tartozékot.
Készülékház
Használat után enyhén nedves ruhával tisztítsa meg a
készülékházat.
Tárolás
• A leírt módokon tisztítsa meg a készüléket és hagyja
teljesen megszáradni.
• A készülék tárolását az eredeti csomagolásban javasol-
juk, ha huzamosabb ideig nem fogja használni.
• Mindig gyermekektől távol és jól szellőző helyen tárolja
a készüléket.
Műszaki adatok
Modell: ................................................................. KK 6059 CB
Hálózati feszültség: ............................ 220 – 240 V~, 50 / 60 Hz
Bemeneti teljesítmény:
Összteljesítmény: ................................................... 3100 W
Kis főzőlap: ............................................................... 600 W
Nagy főzőlap: .........................................................1000 W
Sütő alsófűtés: .........................................................700 W
Sütő felsőfűtés: ........................................................800 W
Védelmi osztály: .....................................................................
Nettó súly: ..............................................................kb. 10,2 kg
A műszaki és kivitelezési módosítások jogát a folyamatos
termékfejlesztés miatt fenntartjuk.
Ezt a készüléket az összes vonatkozó, hatályos CE-irány-
elvnek megfelelően tesztelték, és a legújabb biztonsági
előírásoknak megfelelően gyártották.
Hulladékkezelés
A „kuka” piktogram jelentése
Kímélje környezetünket, az elektromos készülé-
kek nem a háztartási szemétbe valók!
Használja az elektromos készülékek ártalmat-
lanítására kijelölt gyűjtőhelyeket, ott adja le
azokat az elektromos készülékeit, amelyeket
többé már nem kíván használni!
Ezzel segítséget nyújt ahhoz, hogy elkerülhetők legyenek
azok a hatások, amelyeket a helytelen „szemétre dobás”
gyakorolhat a környezetre és az emberi egészségre.
Ezzel hozzájárul az újrahasznosításhoz, a recyclinghoz és a
kiöregedett elektromos és elektronikus készülékek értékesí-
tésének egyéb formáihoz.
Az önkormányzatoknál vagy a polgármesteri hivatalokban
tájékoztatást kaphat arról, hogy hova viheti a kiselejtezett
készülékeket. Az Ön kereskedője és szerződéses partnere
köteles a régi készüléket is ingyenesen visszavenni.

KK6059CB_IM 21.11.22
42
ВАЖНО:
Обязательно сначала прочитайте отдельно прилагаемые
инструкции по технике безопасности.
Руководство по эксплуатации
Спасибо за выбор нашего продукта. Надеемся, он вам
понравится.
Перед использованием данного прибора внимательно
прочитайте инструкцию по эксплуатации и отдельно
прилагаемые инструкции по технике безопасности.
Храните эти документы, включая гарантийный талон,
чек и, по возможности, коробку с внутренней упаковкой
в надежном месте. Если вы передаете прибор третьему
лицу, всегда прикладывайте к нему все соответствую-
щие документы.
Символы применяемые в
данном руководстве пользователя
Важные рекомендации для обеспечения вашей без-
опасности обозначены по особенному. Обязательно
следуйте этим рекомендациям, чтобы предотвратить
несчастный случай или поломку изделия:
ПРЕДУПРЕЖДЕНИЕ:
Предупреждает об опасности для здоровья и возмож-
ном риске получения травмы.
ВНИМАНИЕ:
Указывает на возможную опасность для изделия и
других окружающих предметов.
Содержание
Обзор деталей прибора ...................................................3
Распаковка прибора ....................................................... 42
Обзор деталей прибора / Комплект поставки ...........42
Предупреждения по использованию прибора.........43
Примечания по использования ................................... 43
Символы конфорок ......................................................43
Символы печи...............................................................43
Подключенная электрическая нагрузка ..................... 43
Электрическое подключение ......................................43
Перед первым использованием .................................43
Кухонная посуда ........................................................... 44
Духовка .......................................................................... 44
Инструменты для извлечения (17 и 19) .....................44
Использование ................................................................ 44
Использование варочных панелей ............................44
Использование духовки ............................................... 44
Вертел ...........................................................................44
Конец использования...................................................45
Чистка ................................................................................ 45
Варочные поверхности ................................................ 45
Поддон для крошек, поддон для выпечки,
противень гриля, вертел, вилки шампура .................45
Внутренняя часть духовки ...........................................45
Корпус ............................................................................45
Хранение ........................................................................... 45
Технические данные ......................................................46
Утилизация ....................................................................... 46
Значение символа «корзина» .....................................46
Распаковка прибора
1. Извлеките прибор из упаковки.
2. Удалите все упаковочные материалы, такие как
фольга, наполнитель, кабельные стяжки и картонная
упаковка.
3. Проверьте комплект поставки на комплектность.
4. Если содержимое упаковки неполное или если можно
обнаружить повреждения, не эксплуатируйте прибор.
Немедленно верните его дилеру.
5. Удалите все имеющиеся наклейки с прибора.
6. На приборе может оставаться пыль или производ-
ственные остатки. Мы рекомендуем очистить прибор,
как описано в разделе «Чистка».
Обзор деталей прибора /
Комплект поставки
1 Плитка для варки, большая
2 Плитка для варки, малая
3 Регулятор малой конфорки
4 Индикатор нагрева (малая конфорка)
5 Регулятор большой конфорки
6 Индикатор нагрева (большая конфорка)
7 Регулятор температуры духовки
8 Индикатор работы устройства
9 Переключатель функций печи
10 Нагревательный элемент
11 Стеклянная дверца
12 Ручка дверцы
13 Подвесное приспособление для вращающегося
вертела
14 Противень гриля
15 Поддон для выпечки / поддон для сбора проливов
16 Поддон для крошек
17 Захват для сетки гриля и противня

KK6059CB_IM 21.11.22
43
18 Вертел
18a Вилки шампура
19 Захват для вращающегося вертела
Предупреждения по
использованию прибора
ПРЕДУПРЕЖДЕНИЕ:
• Опасность ожога! Прикасайтесь к прибору только
за ручку и переключатели.
• Также используя рукоятки противня или вертел,
надевайте перчатки или берите прихватки, чтобы
не обжечься.
• Риск пожара! Никогда не используйте емкости,
сделанные из пластика, картона, бумаги или
подобных материалов.
ВНИМАНИЕ:
Не используйте мешки для обжаривания или емкости
из стекла. Они могут лопнуть.
• Устанавливайте прибор на жаропрочную поверх-
ность!
• Поддерживайте достаточное расстояние до легко-
воспламеняющихся предметов: мебели, штор и др.!
Никогда не ставьте устройство внутрь шкафа!
• Установите устройство задней панелью к стенке.
• При использовании духовки оставляйте не менее
12 см пространства со всех сторон прибора, чтобы
обеспечить достаточную циркуляцию воздуха.
• Из-за поднимающегося жара и испарений не ставьте
устройство под стенным шкафом.
• Убедитесь, что шнур электропитания не касается
нагретых поверхностей устройства во время его
работы.
• Всегда следите за прибором во время эксплуатации.
Сухой хлеб может загореться внутри прибора!
• Во время использования прибора не кладите на него
предметы, которые не нужны для приготовления
пищи.
• Дверца этого прибора изготовлена из закаленного
безопасного стекла. Это стекло прочнее обычного
стекла и более устойчиво к разрушению. Избегайте
царапин на поверхности дверцы. Если на стекле
дверцы появилась царапина или выемка, обратитесь
в сервисную службу или к специалисту.
• Не храните в этом духовом шкафу, когда он не ис-
пользуется, никакие материалы, кроме аксессуаров,
рекомендованных производителем.
Примечания по использования
Символы конфорок
Регуляторы (3) Малая конфорка
Регуляторы (5) Большая конфорка
Символы печи
Регуляторы (7) °C Температура в печи
Переключатель
функций (9) Режим печи
Выкл
Верхний нагрев
Нижний нагрев
Верхний и нижний нагрев
Верхний и нижний нагрев с
конвекцией
Верхний нагрев с вращающимся
вертелом и конвекцией
Подключенная электрическая нагрузка
• Общее потребление мощности прибора может
достигать 3100 ватт. Такую нагрузку рекомендуется
подключать через отдельную электропроводку, осна-
щенную автоматом отключения на электроток 16 А и
устройством токовой защиты.
• Не пользуйтесь разветвительные штепсельными ро-
зетками, так как этот прибор имеет слишком высокую
мощность.
• Внимание, перегрузка: При пользовании удлини-
тельными кабелями следите за тем, чтобы попереч-
ное сечение кабеля было минимум 1,5 мм². Кабели с
меньшим сечением могут перегреваться.
• Убедитесь, что кабель проложен таким образом, что
его нельзя потянуть или споткнуться о него.
Электрическое подключение
1. Поверните все регуляторы против часовой стрелки
до упора. Установите переключатель функций в
положение .
2. Проверьте, что напряжение сетевого электропита-
ния, которое предполагается использовать, соответ-
ствует номиналу прибора. Требуемую информацию
можно найти на табличке.
3. Подключите штепсель к правильным образом
установленной штепсельной розетке с заземляющим
контактом.
Перед первым использованием
На варочных панелях и нагревательных элементах име-
ется защитный слой, который сгорает при нагревании
прибора. Это может привести к появлению дыма и запа-
хов при использовании прибора, но они исчезнут после
нескольких использований. Это не является дефектом.
• Вы можете минимизировать образование дыма,
протирая варочные панели и нагревательные
элементы слегка влажной тканью перед первым
использованием.

KK6059CB_IM 21.11.22
44
• Запрещается использовать чистящие средства!
• Затем вытрите сухой тканью.
• Включайте прибор только после его полного высы-
хания.
• Всегда обеспечивайте достаточную вентиляцию.
• Перед первым использованием прибора порабо-
тайте с ним отдельно в течение нескольких минут,
чтобы удалить защитные слои.
1. Включите обе плитки для варки без использова-
ния какой-либо посуды. Установите регуляторы
и в положение MAX.
2. Затем эксплуатируйте духовку без принадлежно-
стей и без продуктов. Поверните регулятор °C
на 230 °C. Установите переключатель функций в
положение .
Кухонная посуда
• Для оптимального использования энергии пользуй-
тесь только кастрюлями с ровным дном.
• Кастрюля для приготовления никогда не должна
быть меньше конфорки. Это приводит к потере
энергии. В крайних случаях горячая плита может
деформироваться.
Духовка
• Всегда сдвигайте поддон для крошек под нижний
нагревательный элемент.
• Рекомендуется предварительно разогревать духовку
в течение, примерно, 10 – 15 минут.
• Экономьте энергию, переключаясь на режимы с
конвекцией. Поступая таким образом, разогретый
воздух распространяется быстрее и равномернее, с
помощью вентилятора внутри духовки.
• Всегда используйте вставленный в духовку поддон
для жира при жарке или обжаривании. Это предот-
вращает стекание жира на нижний нагревательный
элемент.
• В этом духовом шкафу нет таймера. Вы должны
сами контролировать время приготовления.
• На вашей печке предусмотрено несколько настроек.
В соответствии с рецептом выберите температуру.
Вот несколько примеров, как вы можете использо-
вать эти функции:
• Верхний нагрев:
Для приготовления запеканки на гриле или гратена.
• Верхний нагрев с вращающимся вертелом и
конвекцией:
Куриное мясо, большие куски мяса прожариваются
равномерно.
• Верхний и нижний нагрев с конвекцией:
Например, для пиццы, выпечки и т.п.
Инструменты для извлечения (17 и 19)
a) Снятие противня для выпечки
b) Снятие поверхности гриля
Используйте инструмент для сня-
тия (19), чтобы снять вертел.
Использование
• Вы можете использовать варочные панели и духовку
отдельно или в комбинации.
• При одновременном использовании варочных
панелей и духовки время приготовления может
быть немного больше, чем при использовании без
духовки. Это связано с техническими причинами и не
является дефектом.
Использование варочных панелей
1. Поверните регулятор и / или вправо, пока
не загорится контрольная лампа соответствующего
нагрева.
2. Выберите настройку от 1 до MAX.
Контрольная лампа нагрева гаснет, когда плита
достигает заданной температуры.
Использование духовки
1. С помощью регулятора °C задайте температуру в
диапазоне от LOW (низкий) до 230 °C.
2. Выберите желаемую функцию духовки с помощью
переключателя функций духовки. Контрольная
лампа (8) показывает, что духовка используется.
Вертел
Не берите слишком большие куски мяса. Поджаривае-
мые продукты должны быть размещены на достаточ-
ном расстоянии от внутренних стенок и нагревательных
элементов печи. В любом случае они не должны их
касаться.
1. Задвиньте противень / поддон для жира в нижнюю
полку печи.
2. Смажьте вертел и фиксаторы растительным маслом.
3. Птицу необходимо подготовить для поджаривания
на гриле. Для этого привяжите крылышки и ножки к
тушке при помощи кухонной нити.

KK6059CB_IM 21.11.22
45
4. Осторожно насадите подготовленную птицу или на-
шпигованный кусок мяса на вертел. Наденьте фикса-
торы и зажмите при их помощи поджариваемый ку-
сок. Крепко затяните винты на фиксаторах.
5. Поднимите готовый вертел в
духовку с помощью инстру-
мента для извлечения. Для
этого сначала вставьте конец
вертела без выемки в привод
на правой стороне духовки.
Затем подсоедините другой
конец вертела к подвесному устройству на левой
стороне духовки.
6. Выберите температуру и режим . Установить ра-
бочее время. Вертел начинает вращаться. Следите
за тем, чтобы он вращался свободно.
7. Когда мясо прожарится снимите вертел при помощи
ручки.
Конец использования
1. Поверните все регуляторы против часовой стрелки
до упора. Установите переключатель функций в
положение .
2. Затем отсоедините сетевую вилку от розетки.
Чистка
ПРЕДУПРЕЖДЕНИЕ:
• Перед чисткой всегда вынимайте сетевую вилку из розетки.
• Подождите, пока устройство остынет.
• Никогда не погружайте устройство в воду. Это может приве-
сти к поражению электрическим током или пожару.
ВНИМАНИЕ:
• Не используйте металлические щетки или другие
абразивные предметы.
• Не используйте агрессивные или абразивные
чистящие средства.
Варочные поверхности
• Очистите конфорки влажной тканью.
• При более стойких загрязнениях используйте сред-
ство для мытья посуды.
Поддон для крошек, поддон для выпечки,
противень гриля, вертел, вилки шампура
• Под нагревательными элементами расположен ло-
ток для крошек. Чтобы извлечь лоток, вытяните его.
• Очистите все принадлежности в горячей воде с
небольшим количеством моющего средства. После
этого хорошо просушите детали.
Внутренняя часть духовки
Поддерживайте внутреннюю часть духовки в чистоте.
1. Удалите брызги и остатки продуктов из печки с
помощью влажной тряпки с небольшим количеством
средства для мытья.
2. Протереть насухо полотенцем.
3. Установите на место поддон для сбора крошек и
другие приспособления.
Корпус
По окончании работы протрите корпус слегка влажной
тряпкой.
Хранение
• Очистите прибор, как описано выше и дайте ему
просохнуть.
• Мы рекомендуем хранить прибор в оригинальной
упаковке, если вы не планируете его использовать
длительное время.
• Всегда храните прибор подальше от детей в хорошо
проветриваемом и сухом месте.

KK6059CB_IM 21.11.22
46
Технические данные
Модель: ..............................................................KK 6059 CB
Подача напряжения: ........................ 220 – 240 В~, 50 / 60 Гц
Мощность на входе:
Общая мощность: ............................................... 3100 Вт
Малая конфорка: ................................................... 600 Вт
Большая конфорка: ............................................. 1000 Вт
Нижний нагрев печи: ............................................. 700 Вт
Верхний нагрев печи: ............................................ 800 Вт
Класс защиты: ......................................................................
Вес нетто: ........................................................прибл. 10,2 кг
Сохранено право на технические и конструкционные
изменения в рамках продолжающейся разработки
продукта.
Данный прибор был протестирован в соответствии со
всеми применимыми действующими директивами CE
и изготовлен в соответствии с последними правилами
безопасности.
Утилизация
Значение символа «корзина»
Защита окружающей среды: не допускается
утилизация электроприборов вместе с быто-
выми отходами.
Утилизация устаревшей техники и неис-
правных электроприборов производится в
городских приёмных пунктах.
Не допускайте неправильной утилизации отходов. Это
наносит вред окружающей среде и оказывает негатив-
ное воздействие на здоровье людей.
Оказывайте содействие программе утилизации и дру-
гим формам переработки электронной и электрической
техники.
Информацию о пунктах утилизации бытовой техники
можно получить в местных органах власти. Ваш дилер
и партнер по договору также обязан бесплатно принять
старый прибор.

KK6059CB_IM 21.11.22
47
•.
•.
•. .
• .
.
.
1 .
.
2 ..
3 ..
.
•.
•.
•.
KK 6059 CB......................................................................................:
60/50 ~ 240–220 .................................................:
:
3100 ..........................................................................:
600.........................................................................:
1000 ........................................................................:
700................................................................:
800................................................................:
I ..................................................................................................:
102 .................................................................:
.
.
« »
:
.
.
.
.
.
.

KK6059CB_IM 21.11.22
48
•.
•. 15–10
• .
.
• .
.
•. .
•. .
:
•:
.
• :
.
• :
.
(19 17)
(a
(b
.(19)
•.
•
. .
1 . /
.
2 ..MAX 1
3 .
.
1 . () LOW C°
. 230
2 . .
. (8)
.
.
1 .. /
2 .
.
3 .. .
4 .
.
. .
5 .
.
.
.
6 . .
. .
.
7 ..
1 .
. .
2 ..
:
•
.
•.
• .
.
:
•.
•.

KK6059CB_IM 21.11.22
49
• . 3100
. 16
•.
• :
. 15
.
•.
1 .
. .
2 .
. .
3 .
.
.
. .
•
.
•!
•.
•.
•.
•
.
1 . .
.MAX
2 . C° .
. 230
•
.
• .
. .
:
• !
.
:
.
.
•!
•
. !
•.
• 12
.
•
.
•
.
• .
!
•
.
• .
.
.
.
•
.
(3)
(5)
C° (7)
(9)

KK6059CB_IM 21.11.22
50
:
.
. .
. .
.
.
.
:
:
.
:
.
3........................................................................
50 .......................................................................
50 ............................................... /
50 ...................................................................
49 .....................................................................
49 ................................................................................
49 ............................................................................................
49 ........................................................................
49 ....................................................................................
49 ........................................................................
49 ..........................................................................................
48 ....................................................................................................
48 ......................................................................... (19 17)
48 ............................................................................................
48 ..........................................................................
48 ......................................................................................
48 .................................................................................................
48 ........................................................................................
48 ............................................................................................
47 .........................................................................................
47 ...
47 ..................................................................................
47 ..................................................................................................
47..............................................................................................
47.....................................................................................
47..............................................................................
47 ............................................................... « »
1 ..
2 .
.
3 ..
4 .
. .
5 ..
6 . .
.«»
/
1
2
3
( ) 4
5
( ) 6
7
8
9
10
11
12
13
14
/ 15
16
17
18
18a
19
:
•. !
•
.

KK6059CB_IM 21.11.22

KK6059CB_IM 21.11.22

KK6059CB_IM 21.11.22

C. Bomann GmbH
Internet: www.bomann-germany.de
Made in P.R.C.
KK 6059 CB
KK6059CB_IM 21.11.22
Stand 11 / 2022
-
 1
1
-
 2
2
-
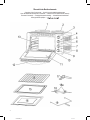 3
3
-
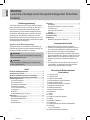 4
4
-
 5
5
-
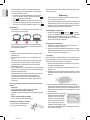 6
6
-
 7
7
-
 8
8
-
 9
9
-
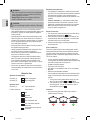 10
10
-
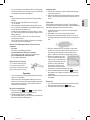 11
11
-
 12
12
-
 13
13
-
 14
14
-
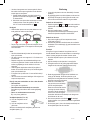 15
15
-
 16
16
-
 17
17
-
 18
18
-
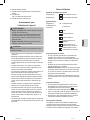 19
19
-
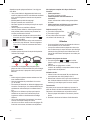 20
20
-
 21
21
-
 22
22
-
 23
23
-
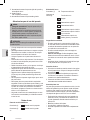 24
24
-
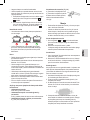 25
25
-
 26
26
-
 27
27
-
 28
28
-
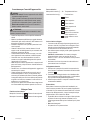 29
29
-
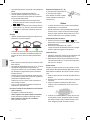 30
30
-
 31
31
-
 32
32
-
 33
33
-
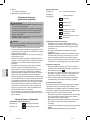 34
34
-
 35
35
-
 36
36
-
 37
37
-
 38
38
-
 39
39
-
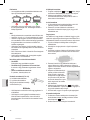 40
40
-
 41
41
-
 42
42
-
 43
43
-
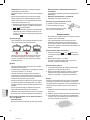 44
44
-
 45
45
-
 46
46
-
 47
47
-
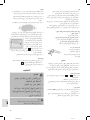 48
48
-
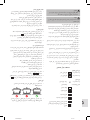 49
49
-
 50
50
-
 51
51
-
 52
52
-
 53
53
-
 54
54


BOMANN KK 6059 CB Instrucciones de operación
- Categoría
- Barbacoas
- Tipo
- Instrucciones de operación
en otros idiomas
- français: BOMANN KK 6059 CB Mode d'emploi
- italiano: BOMANN KK 6059 CB Istruzioni per l'uso
- Deutsch: BOMANN KK 6059 CB Bedienungsanleitung
- polski: BOMANN KK 6059 CB Instrukcja obsługi
Artículos relacionados
Otros documentos
-
Clatronic MBG 3728 Manual de usuario
-
-
SEVERIN TO 2065 Manual de usuario
-
Unold 68885 El manual del propietario
-
Unold 68865 El manual del propietario
-
Silvercrest SGBR 1500 A2 Operating Instructions Manual
-
Silvercrest SGBR 1500 B4 Operating Instructions Manual
-
-
-
PROFI-CARE PC-FR 1200 H Manual de usuario