GE PT970BM1BB El manual del propietario
- Categoría
- Microondas
- Tipo
- El manual del propietario
Este manual también es adecuado para

ge.com
©
Safety Instruc_tions ......... 9-9
Operating Instruc_tions
Lower Oven Control Panel ...... 93
Lower Oven Controls ....... 93-38
Lower ()yen Thermostat ....... 34
Microwave Control Panel . . .]0, ]]
Microwave Oven Controls .... ] 0-92
Probe ................... 98, 31
Sabbath Feature ........... 39, 40
Self-Cleaning Lower Oven . . . 35, 36
Sensor Controls ........... ] 6-] 8
Care and Cleaning
Door ...................... 42
Light Bulb ..................... 44
Microwave Oven ............. 41
Probe ........................ 43
Racks ...................... 44
Troubleshooting Tips ..... 45-48
Consumer Support
Consumer Support ........... 59
Product Registration ....... 49, 50
_4'arranty ................... 51
PT970-30" Double W(tll (_kJen
The microwave oven in this
cooking center is I000 watts.
©
©
Write the model and serial
numbers here:
Model #
Serial #
You can find them on a label inside
the upper oven on the lelt side.
49-80432 02-07 JR

IMPORTANTSAFETYINFORMATION.
READALLINSTRUCTIONSBEFOREUSING.
WARNING'!
For your safe_, the information in this manual must be followed to minimize the risk of fire or
explosion, electric shock, or toprevent property damage, personal injury, or loss of fife.
PRECAUTIONSTOAVOIDPOSSIBLEEXPOSURETOEXCESSIVE
MICROWAVEENERGY
Do not attempt to operate this oxen with
tile door open since open-door operation
can result in ha_3nflll exposure to
microwaxe energ?'. It is importantnot to
defeat or tamper with the safety interlocks.
Do not place any object between the oxen
flont face and file door or allow soil or
cleaner residue to accumulate on sealing
Slliqqaces,
The oxen should not be adjusted oi
repaired by anyone except properly
qualified service personnel.
Do not operam file ox>n if it is damaged.
It is particularly important fllat file oven
door close properly and that there is no
damag_ to the:
[] door (bent),
[] hinges and latches (broken oi
loosened),
[] door seals and sealing surthces.
IMPORTANTSAFETYNOTICE
The California Safe Drinking Water and ToxicEnforcement Act requires the Governor of California to
publish a list of substances known to the state to cause cancer, birth defects or other reproductive
harm, and requires businesses to warn customers of potential exposure to such substances.
The fiberglass insulation in self-clean ovens gives off a very small amount of carbon monoxide during
the cleaning cycle. Exposure can be minimized by venting with an open window or using a ventilation
fan or hood.
2

ge.com
SAFETYPRECAUTIONS
When using electrical appliances, basic safety precautions should be followed, including the following:
WARNtNg=ao,m.i. t.str,,ctio.s:
This appliance must be connected [o a
grounded, metallic, permanent wiring
sy'stem, oi all equipmem grounding
conductor should be [un with the cfizuit
conductors and comlected to the equipmem
grounding termiIlal or lead Oil the
appliance.
WARNING=tored.cotheriskof
bums, electric shock, fire, i#jury to persons
or exposure to excessive microwave enerffy:
Use this appliance only for its inmnded
use as described in this manual. Do not
use con_osive chemicals or vapors in
this appliance. This cooking cenmr is
q)ecifically designed to heat or cook
food, and is not inmnded for laborato_w
or industrial use.
Be sure your appliance is properly
installed and grounded by a qualified
technician in accordance with the
proxqded Installation Instructions.
Haxe the installer show you the location of
the circuit breaker or fl_se. Mark it for easy
reference.
Be sn[e die cooking cenmr is securely
installed in a cabinet that is firmly attached
to tile house structure. _A/eight on file oven
door could cause the oven to tip and
result in iIIjn U. Nexer allow awone to
climb, sit or hang on tile oxen door
This appliance should be serviced only
by qualified service personnel. Contact
nearest authorized service fi_cility for
examination, tel)air or adjusunent. Do riot
repair or replace any part of this appliance
unless specifically ,ecommended in this
manual. All other servicing should be
_efen_ed to a qualified mchnician.
Do [lot store fills appliance outdoors.
Do not use this product [lear water--
for example, in a wet basement, or near
a swimming pool.
Before perforating any service, disconnect
the cooking cenmr power supply at tile
household distribution panel 1)y removing
the fllse or switching off die circuit
breaker.
Do [lot operam dais appliance if it has a
damaged cord or ping, if it is [lot working
properly or if it has been damaged or
dropped.
Do [lot leave children alone--children
should [lot be left alone or unattended in
an a_ea where appliance is in use. They
should nex>r be allowed m sit or stand on
any part of file appliance.
Don't allow anyone m climb, stand or
hang on the door They could damag>
the cooking cenmr and cause sex>re
personal filjm T.
CAUTION:Items of interest to
children should [lot be stored in cabinets
above an oven; chil&en climbing on the
oven to teach imms could be seriously
illjinxed.
Teach children [lot to pl W with the
controls or any other part of the
cooking cenmn
i,arg> scratches or impacts m glass door
can lead to broken or shatm_ed glass.
V(ear proper clothing. I,oose-fitfing or
hanging gammnts should nex>r be worn
while using the appliance. Flammable
mamrial could be ignimd if"brought in
contact with hot heating elements and
nlav callse sex.re bnrns.
3

IMPORTANTSAFETYINFORMATION.
READALLINSTRUCTIONSBEFOREUSING.
iiU'>_..... i_
A WARNING'!
SAFETYPRECAUTIONS
Do not use water on grease fires. Never pick up a flaming pan. Smother flaming pan by covering
pan completely with well-fitting lid, cookie sheet or fiat tray. Flaming grease outside a pan can be
put out by covering with baking soda or,if available, a multi-purpose dry chemical or foam-type
fire extinguisher.
Use onl V&T pot holders--moist or damp
pot holders on hot surl_aces may result ira
buI_lS from smam. Do not let pot holders
touch hot heating elements. Do not use a
towel or other bulky cloth. Such clodls can
catch fire on a hot element.
Always kee I) dish towels, dishcloths, pot
holders arrd other linens a safe distance
front yO/li o'_ en.
i
Always kee I) wooden spoons arrd plastic
utensils arrd canned food a safe distance
away from your o_en.
Always kee I) combustible wall coxeIing_,
curtains or drapes a safe distance flom
VO/lr oxen.
Do not store flammable material in an
oven or near the cooking center
Do not cover or block artVopenings on
the appliance.
For yo/li safety, nex_r/lse your appliance
for wanning or heating the room.
Do not leme paper products, cooking
umnsils or food in die oven when not
ill use.
iiiiiiiiiiii_iii
Do not store or use combustible mamIials,
gv_soline or otiler flammable vapors arrd
liquids in the vicinit Vof this or art Vother
appliance.
Do trot let cooking grease or otiler
flammable mamlials accunmlate in or
near the cooking cenmr
Do not touch heating elements or irrte_ior
surface of tire oxen. These surfaces m W be
hot enough to burn even though the Vare
dark in color During arrd after use, do not
much, or let cloflling or other flammable
matelials corrtact arty irrte_ior area of tile
oxen; allow sufficient time for cooling first.
Potentially hot surfaces include oven \ent
openings, surfaces near tire openings and
cievices around tire ox>n door
REMEMBER: The irrside surfirce of die
ox>n ma Vbe hot when the door is opened.
Never place cooking umnsils or artVotirer
items on tire oven floon There is a heating
element beneath the oven floor Placing
items on the oven floor m W cause fire
o\_n to o\'erheat, iesulting in damage
m tire oven arrd lisk of damag> or fire
m cabinets.
COOKMEATANDPOULTRYTHOROUGHLY...
Cookmeat andpoultry thoreughly--meat toat least an INTERNALtemperatureof 160°Fandpoultry
toat least an INTERNALtemperatureof 180°ECookingto thesetemperaturesusuallyprotects against
foodbomeillness.
4

ge.com
MICflOWAVEOVEN
Read and follow the specific "Precautions to Avoid Possible Exposure to Excessive Microwave
Energy" section in thb manual.
Toreduce therisk of fire in the ovencavity:
Do not o_rcook food. Carefillly attend
appliance if pat)el, plastic or oilier
combustible mamlials are placed inside
file oxen to/2acilitam cooking.
Remoxe wire twist-ties from paper or
plastic containers before placing bags
iI1 o\.en.
Do not use your microwax.e ox.en to di T
newspapers.
Do not pop popcorn ill your microwm.e
ox.en unless in a special microwave
popcorn accesso U or unless yon use
popcorn labeled for use in microwm.e
ox.ens.
Do not ox.ercook potatoes. They could
dehydiam and catch fire, causing damag.e
to your oven.
Do not operam the oven while empty to
ax_id damage to tile oven and the dang.er
of fire. If by accident the ox.en should run
empty a minum or two, no harm is done.
Howex.eI; tiT to avoid operating tile ox.en
empty at any time--it saves energy' and
prolong:s the life of the ox.en.
Do not use tile oven for smrag.e puq)oses.
Do not leax.e paper products, cooking
utensils or food in the ox.en when not
ill rise.
If mamrials inside the oven should ig_lim,
kee I) oven door closed, turn ox.en off
and shut off power at the fllse or ciIvuit
breaker panel. If the door is opened,
the rit.e may spread.
This microwax.e ox.en is not approx.ed or
tesmd for marine use.
Some products such as whole eggs and
sealed containers for example, closed
jaw will explode and should not be
heated ill this microwax.e ox.en. Such use
of tile microwax.e ox.en could I.esult ill
iI)jnl'y.
Do not operate the microwm.e oven
without the turntable and support ill place.
Avoid heating baby food ill glass jars, ex.en
with tile lid off'. Make sure all iIffant food
is thorouOlly cooked. Stir food to
distribum file heat evenly. Be careflll to
piex.ent scalding when warming formula
or breast milk. Tile container may feel
cooler than the milk really is. Always rest
the milk befoi.e feeding the baby.
Do not boil eggs in a microwave ox.en.
Piessure will build up inside the egg
yolk and will cause it to burst, possibly
resulting ill iI)jnry.
Foods wifll unbroken outer "skill" such
as potatoes, sausages, tomatoes, apples,
egg yolks, chicken lix.ers and oilier giblets
should be pierced to allow steam to escape
during cooking.
Don't defrost frozen bex.erag,es ill
naiTow-necked bottles (especially
carbonated beverages). Even if the
container is opened, pressure call build
up. This call cause file container to burst,
possibly resulting ill injm T.
Hot foods and steam can cause bums.
Be careflll when opening any containers
of hot food, including popcorn bags,
cooking pouches and boxes. To prevent
possible injm T, dii.ect steam away flom
hands and/2ace.
As with any appliance, close snpervision is
necessai T when used by children.

IMPORTANTSAFETYINFORMATION.
READALLINSTRUCTIONSBEFOREUSING.
WARNING'!
MICROWAVE-SAFECOOKWARE
Make sure aft cookware used in your microwave oven is suitable for microwaving. Most glass
casseroles, cooking dishes, measuring cups, custard cups, pottery or china dinnerware which does
not have metallic trim or glaze with a metallic sheen can be used. Some cookware is labeled
"suitable for microwaving."
ff you are not sure if a dish is microwave-safe,
use this rest: Place in the men 1)oth the dish
you are testing and a glass measuring cup
flled with 1 cup of wamr--set the measuring
cup either in or next m the dish. Microwa\e
33-43 seconds at high./f tim dish heats,
it should not be used for microwaving.
/f the dish remains cool and only the wamr in
the cup heats, then the dish is micmwa\e-safe.
/f you use a meat thermomemr while
cooking, make sure it is safe for use in
I]IicI'owa\_ O\_IIS.
Do not use recycled paper products.
Recycled paper towels, napkins and waxed
paper can contain metal flecks which may
cm_se arcing or ignite. Paper products
containing nylon or nylon filaments should
be a\_ided, since they may also ignite.
Some Styrofoam tm)'s (like those that
meat is packaged on) ha\e a thin suip
of metal eml)edded in the 1)ottom. When
microwa\ed, the metal can 1)urn the floor
of the o\'en or ignim a paper towel.
Not all plastic wrap is suitable for use in
microwa\e o\ens. Check the package for
proper use.
Paper towels, waxed paper and plastic
wrap can be used m co\er dishes in order m
retain moisture and pre\>nt spatmring. Be
sure m \>nt plastic wrap so smam can escape.
Oversized food or oversized metal cookware
should not be used in a micmwa\e men.
Elecuical shock or fire could occm:
X,\]file paper plains may be used for timed
cooking and deflosting, do not use them
with Aura Sensor cooking. Use micmwa\v-
safe plains or bowls for reheating. Co\_r
with plastic wrap.
Cookware may 1)ecome hot 1)ecause of
heat transferred fiom the heated food.
Pot holders may be needed to handle
the cookware.
"goilable" cooking pouches and tightly
closed plastic bags should be slit, pierced
or \'ented as directed by package./f they
are not, plastic could 1)urst during or
immediately after cooking, possibly resuhing
in injury. Also, plastic storage containers
should be at least partially unco\_red
1)ecause they form a tight seal. X,\]mn cooking
with containers tightly co\ered with plastic
wrap, rename co\ering carefiflly and direct
smam awW fiom hands and face.
Use foil only as directed in this manual. TV
dinners mW be microwa\_d in foil uays less
than 3/4" high; remo\e the top foil co\er
and return the uW to the box. When using
foil in the micmwa\'e o\'en, kee I) the foil at
least I inch away fiom the sides of the men.
Plastic cookware - Plastic cookwa_e
designed for microwa\'e cooking is \_Y
usefifl, but should be used carefiflly. Even
microwa\'e-safe plastic may not be as tolerant
of o\ercooking conditions as ate glass or
ceramic mamrials, and m W soften or char
if subjecmd to short periods of o\ercooking.
In long>r exposures m o\ercooking, the
food and cookware could ignim.
Followtheseguidelines:
[]
Use microwme_afe plastics only
and use flmm in suict compliance
with the cookware manufacttHe_ s
recommendations.
[] Do not microwave empty containers
[] Do not permit children to use
plastic cookware without complete
supervision.

ge.com
ARCING
If Vousee arcing, press the CLEAR/OFFpad and correct the problem.
Arcing is the microwave term forsparks in the
oven.Arcing is caused by:
Metal or foil touching tile side of tile oven.
Foil not molded to food (upturned edges
act like antennas).
Metal, such as twist-ties, pouluy' pins or
gold-rimmed dishes in tile microwax_.
Recycled paper towels containing small
metal pieces being used in file microwax>.
SUPERHEATEDWATER
Microwaved water and other liquids do not alwavs bubble when thev reach the boiling point.
Thev can actually get super heated and not bubble at all.
Super heated liquid will bubble up out of
the cup when it is moxed or when something
like a spoon or ma bag is put into it.
To i)_exent this flom happening and causing
injmT, do not heat any liquid for more than
9 minums per cup.
After heating, let tile cup stand in the
microwme for 30 seconds befoie moving
it or putung anything into it.
Spontaneousboiling
Under certain special circumstances, liquids
mag start to bo# during or shortly after removal
from the microwave oven.
To prevent burns flom splashing liquid, we
iecommend tile following befoie iemoving
the container flom file oxen:
Allow file container to stand in file oxen
for 30 to 40 seconds after tile oxen has
shut off'.
Do not boil liquids in narrow-necked
containeis such as soft drink bottles, wine
flasks and especially naiTow-necked coffbe
cups. Even if the container is opened,
excessive steam can build up and cause
it to burst or overfloxx¢

IMPORTANTSAFETYINFORMATION.
READALLINSTRUCTIONSBEFOREUSING.
ALLTHESETHINGSARENORMALWITHYOURMICROWAVE
Steam oF xapoF escaping from aFound
tile dooI:
Light Feflection aFound tile dooF of tile
otlteF case.
Dimming of die oxen ligilt and change
in tile blower sound may OCClli while
opeFafing at power lexels otheF than high.
Tile microwave fan m W opeFate with both
oxens off. It is cooling tile conuol and will
mm itself off.
Some TV-Fadio inmFference might be
noticed while using youi microwa_> oven.
It's similaF to tile inmFference caused by
other small appliances and does not
indicam a problem _,ith your o_n.
A dull thumping sound while tile oxen
is operating.

_e. corn
WARNING!
SELF-CLEANINGLOWEROVEN
Do not use aluminum foil to line oven bottoms, except as suggested in this manual. Improper
installation of aluminum foil may result in a risk of electric shock or fire.
Stand away flora the oven when opening
the oxen doon Hot air or smam which
escapes call cause bni_ls to hands, l_ace
and/or eyes.
Do not heat unopened food containers.
Piessure could build/l I) and file container
could burst, causing all iI_nry.
Kee I) tile o\en \_nt unobstructed.
Kee I) tile oven flee flom g_ease buildup.
Kee I) tile cooking cenmr clean and fiee
of accumulations of grease or spilloxers,
which m W ignim.
Nexer leme tile oxen door open when you
ale not watching the cooking cenmr.
Place tile ox>n rack in tile desiIed position
while tile oven is cool. If racks must be
handled when hot, do not let pot holder
contact tile heating element.
_411en using cooking or roasting bags
ill tile oven, follow tile mamd_acturer's
diIecfions.
Pulling out tile rack to tim stop-lock
is a com>nience ill lifting heaxy' foods.
It is also a precaution against bums
flom touching hot surfaces of tile
door or ox>n walls.
Do not use the oxen for a storage area.
Items stored ill all oxen call ignite.
Do not leme paper products, cooking
utensils or food ill tile oven when not
ill use.
Mter broiling, always take any broiler
pan out of the oven and clean it. i,eftox>r
grease ill a broiler pan call catch fire next
time you use the o_>n.
Do not use tile oxen to dIT newspapers.
If oxeflleated, tiley call catch on fire.
Ne_>r lemejars or cans of fi_t drippings
ill or Ileal vonr o\_n.
Clean only parts listed ill tills Owner's
Manual.
Do not clean tile door gasket. The door
gasket is essential for a g_od seal. Care
should be taken not to rob, damag> or
mow the gasket.
Do not use ox>n cleaners. No commercial
o_>n cleaner or oven liner promctive
coating of any kind should be used in or
around any part of tile oxen. Residue flom
oven cleaners will damage the inside of
tile oxen when tile self-clean cycle is used.
Before self-cleaning tile oxen, remoxe
tile probe, any broiler pan, gild and other
cookware.
Be sure to wipe/l I) excess spillage be%re
starting a seltkleaning cycle.
If the self-cleaning mode malfimctions,
tnFIl tile o\_n off and disconnect tile
power suppl> Have it seIwiced by a
qualified mchnician.
iJsten for a fan--a l_an noise should be
heard sometime dnring tile cleaning
cycle. If not, call for service befoie
self-cleaning again.
READANDFOLLOWTHISSAFETYINFORMATIONCAREFULLY.
SAVETHESEINSTRUCTIONS

Usingthemicrowave ovencontrols.
Throughout this manual, features and appearance may vary from your model.
M_CROWAVEOVEN
0
@
SENSOR COOKING
0 r-7-g-TTgo_
c LJ_
0
@
10
MicrowaveOvenControlFeaturesandSettings
Display
Displays the time during cooking
flmcfions, the power level being used,
the Auto Codes, the Auto Defrost food
weights, the cooking mode and instructions.
NOTE: Thet/kneon the microwaved/splayis
shown in minutesand seconds(1.30/s onem/hute,
30 seconds).Onthelower oven,t/Yneis shown in
hours andm/hutes(1.30is onehour,30 minutes).
Auto Sensor Controls
The top row of pads lists specific items you
II/}l_ choose to heat or cook.
Popcorn
Use to pop l)Ol)corn.
Beverage
Use to heat a cup of coffee or other
be'_erage.
Reheat
Use when foods need a quick warm up.
Vegetable
Use when cooking fl'esh, fl'ozen or
cmmed vegetables. Be sure to remove
all vegetables fl'om airtight and met;fl
containe_ before placing them in the
microwave.
Potato
Use when cooking whole potatoes.
-timeDefrost
Use Time Defrost to defl'ost foods other
than meat, poultry and fish.
Auto Defrost
Use Auto Deli'ost to defl'ost meat, poultry
and fish.
Use Time Defrost for most other foods.
-time Cook
Mlows you to microwave fin" an} time up
to 99 mimltes and 99 seconds.
Help
The Help pad displa}s teatm'e infimnafion
and hell)tiff hints. Press the Help pad, then
press a flmtm'e pad.
O
0
Power Level
Press to choose the power level you want
to set. X,Vatch the display while pressing this
pad to select the power level you want to
set. Ybu will also see a defrost level. This
setting will allow you to choose wmr own
defrost power level by using the nmnber
pads.
Clear/Off
Pressing Clear/Offcancels all microwave
cooking flmcdons. It does not dear the
Kitchen Timer
Chicken/Fish
Use when cooking chicken pieces or fish
fillets.

ge.com
MicrowaveOvenControlFeaturesandSettings
Number Pads 0
_Mter I)ressim" _ a flmcfion pad, press the
number pads to set the exact amount of
time wm want to cook. For example,
if you press the I, 2 and 5 pads, you
have set 1 minute and 23 seconds.
0
0
Sound Level
The beeper sound level can be a(!iusted.
Press the Sound Level pad. Choose 0-3 fin.
Inute to loud.
Start!Pause
,_dter all selections are made, press this pad
to start the oxen. The Start/Pause pad must
be pressed to turn on any flmction.
In addition to starting many flmcfions
Start/Pause allows _ou, to stoI ) cooking
without opening the microwave o_en
door or cleafino_ the display.
Reminder
The Reminder teatm'e can be used like
an alam/clock, and it can be used at any
time, even when the oven is operating, The
reminder can be set up to 24 hems late_:
Delay Start
Mlows you to set the i/li(Towa',e to delax
cooking up to 24 hems.
Add 30 Sec
Each time you press this pad, the set time
is increased 30 seconds.
Clock
Press this pad before setting the oh)ok.
Kitchen -timer
Press to set the timer up to 99 minutes
and 99 seconds. Press the number i)ads to
set the time. Press the Kitchen Timerpad
again to start. Press the Kitchen Timerpad
twice to clear the display.
Does not turn on microwave energjz
11

Changingthemicrowave power level.
Thepower level may be entered or changed immediately after entering the time for 77meCook,
-time Defrost or Express Cook. Thepower level may also be changed during time countdown.
iiEBE3Eg1EEKg]
_iii i _ iii ii
Tochange the power level...
[] Press the Time Cook pad,
[] Enter cooking time.
] Press the PowerLevel pad.
[] Select desired power level 1-10.
[] Press the Start/Pause pad.
Variablepower levelsaddflexibility to microwave
cooking.Thepowerleveleon,hemicrowaveoven
_r-_r-_DD D canbecomparedtothee.r_ace.nitsonarange
Eachpower levelgives youmicrowave energya
certainpercent of the time.
Powerlevel,is
of the tim e.
Power level 3 is energy 30 % of th e
tim e.
Here are some examples ofuses for
various power levels:
High 10: Fish, l:,ac()n, vegetables,
boiling liquids.
Med-High 7: Gentle cooking of meat
and l)oult_y; baking casseroles and
rehearing.
Medium 5".Slow cooking and
tenderizing for stews and less tender
cuts of meat.
Low2or3: Defl'osting; simmering;
delicate sauces.
WarmI: Keel)in,*_filed wam_; softening
butte_:
Most cooking Mll be done on High
(powerleve110) which gives you 100%
power: Power level l 0 will cook fi_ster
but food may need more fl'equent
stirring, rotating or tm'ning over.
A lower setting will cook more evenly
and need less stirring or rotating of the
file(l, Some file(Is may have better fla\'m;
texture or appearance if one of the lower
settings is used. Use a lower power level
when cooking leeds that have a tendency
to boil ove_; such as scalloped potatoes.
Rest periods (when the microwave
energy' cycles off) give time for the food
to "equalize" or transfer heat to the inside
of the fi)od. An example of this is shown
with power level,_-the defl'ost cycle.
If microwave ener_' did not cycle off;
the outside of the food would cook
befi)re the inside was defi'osted.
/2

Usingthe timedmicrowave features, gecom
i i ii i _ i ii
¸¸¸;7¸¸¸!(/
i_ ii ii i
Time CookI
Allowsyoutomicrowaveforanytimeupto
99minutesand99seconds.
Power level 10(High) is atm,maficallv set
but xou ma_ chan,,e it fi)r more flexibility:
] Press the Time C00kpad.
[] Enter cooking time. For example,
press /, 5, 0 and 0 for 15 minutes.
[] Change l)°wer level if Y°t/d°n't
want flfll powe_: (Press tile Power
Level pad. Select a desired power
level 1-10.)
] Press the Start/Pause pad.
Y)u may open tile door during Time
()>ok to check the toed. (:lose tile door
and press the Start/Pause pad to resume
cooking.
Time CookII
Letsyou changepower levelsautomatically
duringcooking.Here#how todo it
[] Press tile Time Cook pad.
[] Enter cooking time.
[] Change power level if you don't
want flfll I)owe_: (Press'the Power
Level pad. Select a desired i)ower
level 1-10.)
[] Press the Time Cook pad again.
] Enter tile second cook time.
[] Chan,*e._ tile power lexel if you don't
want flfll i)owe_: (Press tile Power
Level pad. Select a desired power
level 1-10.)
] Press the Start/Pause pad.
At tile end of Time Cook 1,Time Cook 11
Co/Ints down.
EXPRESS EX#RES_ EXPRESS
ExpressCook
Thisis a qwck way toset cookingUmefor
1-6 minutes.
Press one of tile Expresspads (fl'om I to
6) tOr 1 to 6 minutes of cooking at power
level 10. For example, press tile 2 pad for
2 minutes (ff cooking time.
Tile power level can be changed as time
is counting (lo'wn. Press tile PowerLevel
pad and enter l- l 0.
Add 30Seconds
oueanuseth, eature oways
counting down each time the pad is
pressed.
It can be used as a qlfick way to set
30 seconds of cooking time. No need
to press tile Start/Pause pad; tile oxen
will start immediately.
13

Using the timed microwave features.
Cooking Guide For Time Cool<.Use power level High (10) unless otherwise noted.
Time CommentsAmount
Asparagus
(freshspears) 1lb.
/frozen)
7to 10min.
Med-High(7)
(frozenspears) l O-oz.package 5to 8 min. In 1-qt.casserole.
Beans
(freshgreen) 1lb.cut in half 12to 17rnin. hr 11½-qt.casserole,place1/2 cupwater.
(frozengreen) 1O-oz.package 6to 9 rain. In 1-qt.casserole,place2tablespoonswater.
(frozenlima) l O-oz.package 6to 9 rain. In 1-qt.casserole,place1/4cupwater.
Beets
(fresh,whole) 1 bunch 18to 25min. In2-qt.casserole,place1/2cupwater.
Broccoli
(freshcut) 1bunch(11/4to 11AIbs.) 7to 10rnin. hr2-qt.casserole,place1/2cupwater.
(freshspears) 1bunch(1I/4to 11AIbs.) 9 to 13min. In2-qt.casserole,place1/4cupwater.
(frozen,chopped) l O-oz.package 5to 8 rain. In 1-qt.casserole.
(frozenspears) l O-oz.package 5to 8 rain. In 1-qt.casserole,place3tablespoonswater.
Cabbage
(fresh) 1mediumhead(about2 Ibs.) 8to 11min. hr 11A-or 2-qt.casserole,place1/4 cupwater.
(wedges) 7to 10min. In2- or 3-qt.casserole,place1/4 cupwater.
Carrots
/fresh.slicea/ 1lb. 6to 9 rnin. hr 11A-qt.casserole,place1/4 cupwater.
!frozen) 1g-oz.package 5to 8 min. In 1-qt.casserole,place2tablespoonswater.
Cauliflower
fflewerets) 1 mediumhead 9to 14rnin. hr2-qt.casserole,place1/2cupwater.
•fresh,whole' 1mediumhead 9to 17min. In2-qt.casserole,place1/2cupwater.
/frozen) lO-oz,package 5V2to 8min. In 1-qt.casserole,place2tablespoonswater.
Corn
,frozenkernel 1O-oz.package 4to 8rnin. hr 1-qt.casserole,place2tablespoonswater.
Cornon thecob
/fresh) 1to 3 ears 3to 5 rnin. hr2-qt.glassbakingdish,placecorn.Ifcornisin husk,
perear usenowater; if cornhasbeenhusked,add1/4cup
water.Rearrangeafter half oftime.
1ear 5to 7 rain. Placein aroundglassbakingdish.Coverwith vented
2to 3 ears 2to 4 rain. plasticwrap. Rearrangeafter halfof time.
perear
In 11½-qt.casserole, place 1/4 cup water.
Mixed vegetables
/frozen) 1g-oz.package 4to 8 min. In 1-qt.casserole,place3tablespoonswater.
Peas
,fresh.shelled 2Ibs.unshelled 9to 12rnin. hr 1-qt.casserole,place1/4cupwater.
!frozen) 1g-oz.package 4to 8 min. In 1-qt.casserole,place2tablespoonswater.
Potatoes
!fresh.cubed,wnite 4potatoes(6 to8 oz.each) 11to 14rain. Peelandcutinto 1-inchcubes.Placein 2-qt. casserole
with 1/2 cupwater.Stir after halfof time.
•fresh,whole,swee_ 1 (6to 8oz.) 2to 5min. Piercewith cookingfork.Placein the oven,1 inchapart,
or white) in circulararrangement.Letstand5 minutes.
Spinach
fresh) 10to 16oz. 5to 8 rnin. hr2-qt.casserole,placewashedspinach.
(frozen,choppedandleaf) 1O-oz.package 5to 8 rain. In 1-qt.casserole,place3tablespoonswater.
Squash
(fresh,summeranflyellow) 1 lb. sliced 4to 7 rnin.
(winter,acornor butternut) 1 squash 7to 11rain.
(about1lb.each)
In 11½-qt.casserole,place1/4 cupwater.
Cutin half andremovefibrousmembranes.In2-qt.
glassbakingdish,placesquashcut-side-down.
Turncut-side-upafter4minutes.
/4

go.corn
A dull thumping noise may be heard during defrosting. This is normal when oven is not operating at High power.
Atonehalfofselecteddefrosting
time,theovensignalsTURNAt
thistlYne,turnfoodoverand
breakapartorrearrangepieces
formoreevendefrosting.Shield
anywarmareaswithsmallpieces
offoil.
Time Defrost
Allows you to defrostfor a selectedlength of
time.See the DefrostlbgGuidefor suggested
tlYnes.(Auto Defrostexp/albedih the Using
the microwaveauto featuresection.)
[] Press tile TimeDefrost pad.
[] Enter defrosting time.
[] Press the Start/Pause pad.
] Ttlrn [()od o_er when tile o_en
signals.
[] Press tile Start/Pause pad.
Power level is automatically set at 3, but
can be changed. You can defi'ost small
items quickly by raising the power level
after entering tile time. Power level 7
cuts the total defl'osfing time in about
half; powerlevel 10 tiltS tile total time
to approximately 1/ 3. Howevex; food will
need more ti'equent attention than usual.
DefrostingTips
Foodsfrozeninpaperorplasticcanbe
defrostedlb thepackage.CIosedpackages
shouldbeslit,piercedorventedAFTERfood
haspartbllydefroste_Plasticstorage
containersshouldbepartiallyuncovere_
Family-sl2e,prepackagedfrozendinners
canbedefrostedandmicrowave_If the
foodisina foilcontainer,transferit toa
microwave-safedish.
Foodsthatspoileasilyshouldnotbe
allowedtosit outformorethanonehour
afterdefrosting.Roomtemperaturepromotes
thegrowthofharmfulbacterb.
Formoreevendefrostingoflargerfoods,
suchasroasts,useAutoDefros_Besure
largemeatsarecompletelydefrosted
beforecooking.
Whendefrosted,foodshouldbecoolbut
softenedinaftareas.Ifstillshght/yicy,return
tothemicrowaveverybriefly,orletitstanda
fewminutes.
DefrostingGuide
Time Comments
Breads,Cakes
Breaobunsor rolls11Piece 1/2 min.
Sweetroesmpprox.12oz. 3to 6 min. Rearrangeafter halfthe time.
Fishand Seafood
Fillets.frozentl lb.) 9to 12mhr.
Shellfish.smaaoiecesfl lb. 3to 7 rnin. Placeblockincasserole.Turnoverandbreakupafter halfthe time.
Fru#
Plastic couch- 1or2 tlO-oz pacxageJ
Meat
Bacon 11lb.
Franks tl tb,
Ground meat 11lb.
Roast. bee_ lamb, veal, pork
Steaks. cnops ana CUrlers
3to 7 min.
3to 6 min.
3to 6 min.
5to 8 min.perlb.
11to 16min.perlb.
5to 10min.perlb.
Poultry
Chicken. broiler-fryer, cur up
'2½ to 3 tbs.
I
Chicken.vvnoJet2½ to3lbs.)
Cornishhen
Turke,broastf4to 6/bs.)
15to 22min.
20to 28min.
9to 16min.perlb.
5to 10min.perlb.
Placeunopenedpackagein oven.Letstand5minutesafterdefrosting.
Placeunopenedpackagein oven.Microwavejust untilfrankscanbe
separated.Letstand5minutes,if necessary,to completedefrosting.
Turnmeatoverafterfirst halfof time.
Usepower level 1.
Placeunwrappedmeatincookingdish.Turnoverafter first half oftime and
shieldwarmareaswith foil. After secondhalfof time, separatepieceswith
tableknife.Letstandto completedefrosting.
Placewrappedchickenin dish.Unwrapand turnoverafter first half oftime.
Aftersecondhalfoftime, separatepiecesandplacein cookingdish,Microwave
2to4 minutesmore,if necessary.Letstandafew minutestofinishdefrosting,
Placewrappedchickenin dish.Afterhalf the time,unwrapandturn chicken
over,Shieldwarmareaswith foil.Tocompletedefrosting,runcoldwater in
the cavityuntilgiblets canbe removed.
Placeunwrappedhen intheovenbreast-side-up.Turnoverafter first half of
time,Runcoolwaterin the cavityuntil gibletscanberemoved.
Placeunwrappedbreastin microwave-safedishbreast-side-down.After first
half oftime, turnbreast-side-upandshieldwarmareaswith foil, Defrostfor
secondhalfoftime, Letstand1to2 hoursin refrigeratorto completedefrosting.
15

Usingthemicrowave sensorcookingfeatures.
The Sensor Features detect the increasing humidity released during cooking. The oven automatically adjusts the
cooking time to various types and amounts of food.
Sensor Cooking
The proper containei_ and co',ei_ are
essential for best sensor c()oking
Mwavs use microwaxe-saie containers
and cover them with lids or xented
Covered plastic wrap. Nexer use fight sealing
plastic containe_--thev can prexent
steanl fl'om escaping and cause fi_od
to oxercook.
Vented
Be sure the outside of the cooking
containers and the inside of the
i/licrow;ive oven ai'e dry beloI'e
placing toed in the oven. Beads
of moisture turning into steam
can mislead the senso_:
Dry off dishes so flTeydon't mislead
the sensor.
(lesstime) (meretime)
Use only with prepackaged
microwave popcorn weighing
1.75to3.5 ounces.
Popcorn
Touse the Popcorn feature:
[] Follow package instructions, usino.
Time Cook if the package is less
than 1.75 otmces or linger than
3.5 ounces. Place the package of
popcorn in the center of the
microwave.
[] Press the Popcorn pad. The oxen
starts immediately:
If youopen the door whi/ePOPCORNisdisp/ayed,
ERRORwi// appear C/osethe door,pressthe
Clear/Offpad andbeginagain.
How toAdjust the Popcorn Program to
Provide a Shorter or Longer Cook Time:
If you lind that the brand of popcorn you
use tmdeq)ops or overcooks consistenfl 5
wm can add or subtract 90-30 seconds to
the automatic i)oi)ping time.
Toadd time:
_dter pressing the Popcorn pad, press the
9 pad immediately alter the oven starts
fin" an extra 20 seconds. The display will
show ÷÷.Press the 9 pad again to add
another 10 seconds (total 30 seconds
additional time).
Tosubtract time:
Mter pressing the Popcorn pad, press
the I pad immediately after the oven
starts fin" 20 seconds less cooking time.
The display will show - i. Press the I pad
again to reduce cooking time another
10 seconds (total 30 seconds less time).
16

Beverage
Press the Beverage pad to heat a cup oI
cofl_'e or other be',erage.
Drinks heated with the Beverage feature
may be very hot Remove the container
with care.
ge.com
(lesstime} (moretime)
Reheat
TheReheatfeaturereheatssingleservingsof
previouslycookedfoodsa aplateofleftovers.
[] Place covered fi,od in the oven.
Press the Reheat pad. The o_,en
starts immediately,
[] The oven signals when steam is
sensed and the time remaining
begins c(mnting down.
Do not open the oven door tmfil time is
counting down, If the door is opened,
close it and press the Start/Pause pad
immediatelv,
After removing foodfrom the oven,stir, if
possible, toeven out the temperature.If the food
is not hot enough,use time Cookto reheatfor
more t/Yne.Reheatedfoodsmayhavewide
vanations intemperature.Someareasmay
be extreme/}/hot.
Some foodsnot recommended for use with
Reheat--it is best touse TimeCook for
these foods:
Bread products.
Foods that must be reheated
uncovered.
Foods that need t() be stirred or
rotated.
Foods calling for a dry look or crisp
surlilce after reheating.
How toChange theAutomatic Settings:
Toreduce time by 10%:
Press tile I pad alter tile teatt/I'e pad,
7-oadd 10% to cooking time:
Press the 9 pad after the fl_atm'e pad.
(lesstime) (moretime)
Vegetable
Use the Vegetablefeature to cook4-16 ounces
of fresh, frozenorcannedvegetables.
[] For fl'esh vegetables, add
2 tablespoons of water I)er serving,.
For fl'ozen xegetables, fi)llow
package instructions for adding
water: Cover with lid or plastic wrap.
Place vegetables in the oven.
[] Press the Vegetable pad once for
ti'esh xegetables, twice fi)r fl'ozen
vegetables or three times for
canned vegetables. The oven starts
immediately. The oven signals when
steam is sensed and time remaining
is counting down.
Do not open the oven door tmfil time is
cotmting down. If the door is opened,
close it and press the Start/Pause pad
immediately.
If foodis not doneenough,use T/meCookto cook
formoretime.
How to Change the Automatic Settings:
7-oreduce time by 10%:
Press the I pad after the teatm'e pad.
Toadd 10%to cooking time."
Press the 9 pad after the teatm'e pad.
17

Usingthemicrowave sensorcookingfeatures.
Toreduce time by 10%:Press the 1pad after the feature pad. Toadd 10%to cooking time: Press the 9pad after
the feature pad.
ess Ilr1181 unore tl[11el
Potato
ThePotato featurecooks 1/2-2/bs. ofpotatoes.
[] Pierce skin _dth fork and place
potatoes on the turntable. If cooking
thI'ee or illOi'e l)otntoes, ari'ange in
a star pattern.
[] Press the Potato pad. The men
starts immediately. Tile oxen signals
when steam is sensed and the time
remaining begins com_ting down.
Do not open tile oven door tmtil time is
co/rating down. If tile door is opened,
close it and press tile Start/Pause pad
immediately.
If food isnot doneenough,use time Cookto cook
formoretime.
(lesstime)(more time)
Chicken/Fish
UsetheChicken/F/@featuretocook1-8pieces
ofchickenor4-16 ouncesof@h.
[] Place covered chicken or fish in tile
oxen. Press tile Chicken/Fishpad
once for chicken pieces or twice for
fish. Tile oxen starts immediateE;
[] Tile oven signals when steam is
sensed and the time remaining
begins counting down.
Do not open tile oven door tmtil time is
co/rating down. If tile door is opened,
close it and press tile Start/Panse pad
immediately.
If food/s not doneenough,use time Cookto cook
formoretime.
/8

Usingthemicrowave autofeature, ge.oom
Auto Defrost
!!ii i!ii!! i
UseAuto Defrostformeat,poultrgand fishup
to 6pounds.Use TimeDefrost formost other
frozenfoods.
Auto Deti'ost autonmficallv sets the
defl'osting times and power levels to gi_e
exert defl'osting results for meats, poultr}
and fish.
[] Press the Auto Defrost pad.
[] Using the Comex_ion Guide at
right, enter fi)od weight. For
example, press pads I and 2 for
1.2 pounds (1 pound, 3 ounces).
[] Press Start/Pause.
Time Defi'ost is explained in the Using
the timed microwave features section.
ConversionGuide
If the weight of fi)od is stated in pomMs
_lll(l o/lnces, tile o//nces I/l[/st be
colr, erted to tenths (.1) of a pound.
WeightofFood EnterFoodWeight
in Ounces (tenthsof a pound)
I-2 .I
3 .2
4-5 .3
6-7 .4
8 .5
9-10 .6
II .7
12-13 .8
14-15 .9
Remove meat from package and place
on microwaxe-sate dish.
Twice dining defl'ost, the oven signals
lOB/I/. At each TURN signal, mrn the
food ove_; I_emo\'e defl'osted meat or
shieM warn/areas with small pieces
of foil.
_Mter defrosting, most meats need
to stand 5 minutes to complete
defi'osting. I,a_ge roasts should
stand li)r about 30 minutes.
/9

Usingtheothermicrowave features.
Cooking Complete Reminder: Toremind you that you have food in the oven, the oven will display FOODIS READYand
beep once a minute until you either open the oven door or press the Clear/Offpad.
Clock
Presstoenter the tlkneof dayor tocheck the time
of day while microwaving.
[] Press tile Clock pad.
[] Enter time of day.
[] Press tile StargPause pad or tile
Clock pad.
i(
Delay Start
Dela) Start allows )ou to set tile
IIliCI'()Wa_ e to delta, cooking, tlI) to
24 hom_.
[] Press the Delay Statt pad.
] Enter tile time you want tile oxen to
start. (Be sm'e tile microwave clock
shows tile correct tillle of day.)
[] Select an} combination of Defl'ost
Auto/Time and Time Cook.
] Press tl/e Stall/Pause pad.
Tile Delta Start time will be displayed
plus DS. Tile oxen will automatically start
at tile delmed time.
Thetkneofdaymaybedisplayedbypressingthe
Clockpa_
Start/Pause
In addition to starting many flmcfions,
Stall/Pause allows you, to stop cookim,
without opening tile door or cleating
tile display.
He/p
Tile Help pad displa?s Ieature
infimnation and helpflfl hints. Press tile
Help pad; then select a timture pad.
20

ge.com
CLEAR
OFF
Child Lockout
Youmaylockthecontrolpaneltopreventthe
microwavefrombeingaccidentallystartedor
usedbychildren.
To lock or unlock the controls, press
and hold tile Clear/Off pad tot about
3 seconds.
_._q/en tile control panel is locked, an L
will be displa}ed to tile extreme right.
Sout_r_ O_/O_F
SoundOn/Off
To mrn tile beeper sound on or off, press
and hold tile 8pad fbx about 3 seconds.
SOUND
SoundLevel
Thebeepersoundlevelcan be adjustec_Press
the Sound Levelpa_ Choose0-3 for muto
to loud
! i i ii I(III)
Kitchen timer
Kitchen Tkneroperatesasaminute tknerand
canbe usedat any time,even when the oven
isoperating.
How to use as a minute timer:
] Press tile Kitchen Timerpad.
] Enter tiille _()11 want to COtlnt down.
] Press tile Kitchen Timerpad.
_Al/en time is up, tile oven will signal.
To mrn off tile timer signal, press tile
Kitchen fimer pad.
NOTE: Thet#ner indicator will be lit while the
timer is operating.
To cancel tile timer dining tile
countdown, press tile Kitchen Timerpad.
i i
iiiii(i!i!i iii ! IIII! Ii!;iiii
Reminder
TheReminderfeaturecan be used/ikean alarm
clock,and canbe usedat anytkne, evenwhen
the ovenis operating.TheRemindertime can be
set up to24 hourslater
] Press tile Reminder pad.
] Enter tile time you want tile oven to
relnind xou. (Be sure tile inicrowaxe
clock sho_:s tile correct time of (la>)
[] Press tile Reminderp'ad. XAq/en
Reminder signal occurs, press tile
Reminder pa d to turn it ()fl_ Th e
Reminder time may be displayed by
pressing tile Reminder pad.
NOTE: TheREMindicator will remainlit toshow
that the Reminderis seL Todear theReminder
beforeit occurs,pressthe Reminder pad, thenO.
TheREMindicator w#/ no longerbe fiL
Display On/Off
To turn tile dock displa_ on or off, press
and hold tile 0 pad tot about 3 seconds.
Tile Displa_ On/Off teature cannot be
used while a cooking teature is in use.
21

Microwave terms.
Definition
Arcing •_rcin,*,_is the microwaxe term fin" sparks in the oxen. Arcing, is caused bx:
{{}the temperature l)r°be staving,, in the oxen but not inserted in the food.
metal or fifil touching the side of the oxen.
fifil that is not molded to fi)od (upturned edges act like antennas).
metal such as twist-ties, poultry pins gold-rimmed dishes,
recycled paper towels containing small metal pieces.
Covering (:oxexs hold in moisture, allow fin" more exert heating and reduce cooking time. Venting plastic
WI'ap oI" co_, ei]ilg with wax pal)el" allows excess steam to escape.
Shielding In a regular, oxen you shield chicken breasts or baked toods to l)rexent ox erbrowning,. _,_q_en
microwaxing, XOtl rise small strips of toil to shield thin parts, Stlch as the til)s of wings, and legs, on
poult D , which would cook betore larger, I)arts.
Standing Time X,\]_en )ou cook with regular ovens, fi)ods such as roasts or cakes are allowed to stand to finish
cooking or to set. St;mding time is especially important in microwaxe cooking. Note that a
i/lici'owaxed cake is not l)laced on a cooling, rack.
Venting _Mter coxe_ng a dish with plastic wrap, you xent the l)lasfic wral ) bx, turning, back one corner
so excess stean/C_lll escape.
22

Usingthe lower ovencontrols, gecom
Throughout this manual, features and appearance may vary from your model.
0
0
0
LowerOvenControl,ClockandtimerFeaturesandSettings
Display @
Shows tile time of day, oven temperature,
whether the oven is in the bake, broil or self:
cleaning mode and the times set fin" the
timer
or atltOll/atic o',en opei'ations.
NOTE:Thet/Yneonthelowerovendisplayisshownin
hoursandminutes(1.30isonehour,30minutes).Onthe
microwave,timeisshowninminutesandseconds(1.30
is one minute, 30 seconds).
ff "F-anda numberorletter"flashin thedisplayand
theovencontrolsignals,thisindicatesa function
errorcode.PresstheClear/Offpad Allowtheovento
coolforonehourPuttheovenbackintooperation.If the
functionerrorcodere/_eats,disconnectthepowertothe
ovenandcallforservice.
ff your oven was set fora timed ovenoperation and
a power outage occurred, the dock anda//programmed
functionsmust be reseL
Thetime ofday(maybeincorrect)will flashinthe
displaywhen therehasbeena poweroutage.
A Broil Hi/Lo Pad
Press to select the broil function.
Bake Pad
Press to select the bake flmcfion.
A Convection Bake Pad
Press once to select comection baking
with multiple racks. Press twice to select
comecfion baking with one rack.
O Convecfion Roast Pad
Press to select roasting with convection.
Number Pads
Use..... to set any, fimction re(luiring, numbe_,
such as tile time of day on file clock, tile timer;
tile oven temperatm'e, tile internal toed
temperature, the start time and length of
operation fin" timed baking and self Meaning.
O
0
0
0
0
Cleor/Off Pad
Press to cancel ALL o',en operations except
the clock and time_:
Probe Pad
Press when using tile probe to cook food to
tile desired internal temperatm'e. (For use
in tile lower oxen only:)
Self Clean Pad
Press to select tile sell:cleaning flm(-fion. See
the Using the self-cleaning Iower oven section.
Start Pad
Must be pressed to start any cooking or
cleaning fimction.
Oven Light Pad
Press to mrn tile oxen light on or off.
Kitchen -timer On/Off Pad
Press to select tile timer teatm'e.
Delay Start Pad
Use ahmg _dth Cooking Time or SeffClean
pads t(I set tile oxen to start and stop
aut(mmti(al]_ at a time _ou set.
O Cooking -timePad
Press and fl/en press tile numl)er pads to set
tile ai//otlnt (if time _(m want _()tli" ti)()d t()
cook. Tile o',en will shut off aut(imaticallv
when the cooking time has run out.
0 Clock Pad
Press before setfino tile oh)ok.
23

Usingthe lower oven.
Toavoid possible bums, place the racks in the desired posifion before you turn the oven on.
III
[]
Ill
[]
Before you begin...
The rack_ have stop-locks, so that when
placed correctly on the supports, they will
stop before coming completely out, and
will not tilt.
When pladng and removing cookware,
pull the rack out to the bumi_ on the
rack support.
Toremove a rack, pull it toward you,
tilt the ti'ont end up and pull it out.
Toreplace, place the end of the rack
(stoi>locl<s) on the support, tilt up the
ti'ont and push the rack in.
CAUTION:Neverp/acecookingutensilsorany
otheritemsontheovenfloor Thereisa heating
e/ementbeneaththeovenfloorPlacingitemson
theovenfloormaycausetheoventooverheat,
resultingindamagetotheovenandnskof
damageor firetocabinets.
The lower oven has 7 rack positions.
How to Set the Oven for Baking or Roasting
[] Press the Bake pad.
] Press the ntlI//beI" pads to set the
desired temperatm'e.
[] Press the Start pad.
[] Check food for doneness at
minimmn time on recipe. Cook
longer if necessa D.
[] Press the Clear/Offpad when
cooking is complete.
NOTE'.Acoolingfanmayautomat/?allyturnon
andoff tocoolinternalparts.Thisisnormal,and
thefanmaycontinuetorunevenaftertheovenis
turnedoff.
Type ofFood Rack Position
Frozenpies(oncookiesheet) CorD
Angelfoodcake Aor B
Bundtorpoundcakes Aor B
Biscuits,muffins,brownies, CorD
cookies,cupcakes,layer
cakes,pies
Casseroles CorD
If baking fore" cake layers at the sanle
time, place two lave_ on rack B and two
lave_ on rack D. Stagger pans on the
rack so one is not directly above the
oth eii
Preheating and Pan Placement
Preheat the oven if' the recipe calls for it.
Preheating is necessa_}' lot good results
when baking cakes, cookies, past_ T and
breads.
Topreheat,set theovenat thecorrecttemperature.
Thecontrol wi// bee,l) when the ovenis preheated
andthe d/splaywi// show yourset temperature.
Thismay takeapproximately 10minutes.
Baking results will be better if baking
pans are centered in the oven as much
as possible. Pans should not touch each
other or the walls of the oven. If you
need to use two racks, stagger the pans
so one is not directly above the other;
and leave aplx'oximately 1½" between
pans, fl'om the fl'ont, back and sides
ot the wall,
24
Aluminum Foil
Donot usealuminum foil on the bottomof
the oven.
Never entirely cover a rack with
ahmfinum fifil. This will disturb the heat
drculafion and result in poor baking.
A smaller sheet of foil may be used to
catch a spillover by placing it on a lower
rack several inches below the fl)od.

ge.com
i! ¸
Closethedoo_ Alwaysbroilwith
the doorclosed.
NOTE:Broil will not work if the
temperatureprobe isplugged hT.
How to Set the Oven for Broiling
Close the doox: Always broil with the door
closed.
[] Place the meat or fish on a 1)roller
grid in a broiler pan.
[] Follow suggested rack positions in
the Broiling Guide.
If your oven is connected to 208 volts, rare steaks
may be broiled by preheating the broiler and
positioningthe oven rack one positionhigher
Broiling Guide
Thesize, weight, thickness,sta,_ing
temperatureand your preference for Food
alonenesswill affect broiling times. This
guide isbased on meats atrefrigerator GroundBeef
temperature. Well Done
Beef Steaks
t TheU.& DepartmentofAgriculture Raret
says "Rarebeef ispopular,but you Medium
shouldknow thatcooking itto only Well Done
140°t:means somefood poisonflTg
organisms maysurvive." (Source:Safe
FoodBook. YourKitchen Guide.USDA Raret
Rev.June 1985.) Medium
Well Done
Chicken
[] Press the Broil Hi/Lo pad once fi)r
HI Broil.
To change to LOBroil, press the
Broil Hi/Lo pad again.
[] Press the Start pad,
[] _,_qmn broiling is finished, press
the Clear/Off pad.
LoBroil
LoBroil
LobsterTails
LoBroil
FishFillets
HiBroil
LoBroil
HamSlices
(precooked)
Pork Chops
Well Done
LambChops
Medium
Well Done
Medium
Well Done
Garlic Bread
LoBroil
Quantityand/
orThickness
1lb. (4 patties)
1/2to 3/4" thick
1" thick
1to 11/LIbs.
11//'thick
2 to 21/LIbs.
1whole
2 to 21/LIbs.,
split lengthwise
Pieces
Boneless
2-4
Bto 8oz.each
1/4to 1/2" thick
1" thick
2 (1/2" thick)
2 (1" thick)about1lb.
2 (1" thick)about10
to 12oz.
I
2 (1//' thick) about 1lb.
Rack
Position
EorF
EorF
E
E
E
E
E
E
C
BorC
BorC
E
E
E
E
FirstSide
Time(rain.)
lO
lO
8
10
12
10
15
25
25
25 35
15 20
18 20
18 25
10
15
10
12
14
17
Second Side
Time (rain.)
7
9
6
8
10
8
14 16
20_5
10
15 2O
10 15
Donot
turn
over.
N/A
9
10
12
12 14
N/A
Comments
Space evenly. Up to
8 patties take about
the same time.
Steakslessthan 1"
thickcookthrough
beforebrowning.Pan
frying isrecommendec
Slashfat.
Reducetime about5
to 10minutesper side
for cut-upchicken.
Brusheachsidewith
meltedbutter.Broil
skin-side-downfirst.
Cutthroughbackof
shell. Spreadopen.
Brushwith melted
butterbeforebroiling
andafter half of
broilingtime.
Handleandturn very
carefully.Brushwith
bmon butter before
andduringcooking,
if desired.Preheat
broilerto increase
browning.
Increasetime 5to
10minutesperside
for 11//"thick or
home-curedham.
Slashfat.
Slashfat.
25

Usingthelower ovenclock and timer.
Make sure the clock is set to the
correct time of da,¢
ToSet the Clock
The clock must be set to the correct
time of day fi)r the autonmtic oven
tinting tractions to work properly. The
time of (lay cannot be chanoed durino a
timed baking or sell:cleaning cycle,
[] Press the Clock pad.
[] Press the numl)er pads.
[] Press the Start pad until the time
of din' shows in the displa);
i i _ i_i_ i!
ON/OFF
The timer is a mflTutetimer onl_¢
The timer does not control oven
operations. Themaximum setting on
the timer is 9 hours and 59mhTutes.
ToSet the Timer
[]
[]
Press the Kitchen timer On/Off pad.
Press the number pads until the
_llllO/lnt of tillle veil W_lllt shows in
the display: For example, to set 2
hem5 and 45 minutes, press 2, 4
and 5 in that order: Maximum time
that can be entered in minutes is 59.
Cooking times more than 59
minutes should be changed to
hom_ and minutes. For example,
enter 90 minutes as 1 hx: 30
minutes. If you make a mistake,
press the Kitchen timer On/Offpad
and begin again.
[] Press the Startpad.
?diet pressing the Start pad, SET
disappears; this tells you the time
is counting down, although the
display does not change tmtil one
minute has passed. Seconds will not
be shown in the display tmtil the last
minute is counting down.
[] _q_en the timer reaches JO0,the
control x_allbeep. umes fl_llowed
by one beep every 6 seconds until
the Kitchen timer On/Offpad is
pressed.
The6-secondtonecanbe canceledby following
the steps in the Specialfeaturesof yourlower
ovencontrol sectionunderTonesat the Endof
a TtmedCycle.
ToReset the Timer
If the display is still showing the time
remaining, you may change it by pressing
the Kitchen timerOn/Offpad, then press
the number pads until the time w_u want
appeax_ in the display.
If the remaining time is not in the display
(clock, delay start or cooking time are in
the display), recall the remaining time bv
pressing the Kitchen timerOn/Offpad and
then pressing the number pads to enter
the new time you want,
To Cancel the Timer
Press the Kitchen timer On/Off pad twice.
26

Usingthe lower oventimedbakingand mastingfeatures, ge.com
NOTE."Foods that spoil easily--such as milk, eggs, fish, stuffings, poultry and pork--should not be allowed to sit for
more than 1hour before or after cooking. Room temperature promotes the growth of harmful bacteria. Be sure that
the oven light is off because heat from the bulb will speed harmful bacteria growth.
iiEZZlE3EZB :
How to Set an Immediate Start and Automatic Stop
Theoven will turnonlYnmedlatelyandcook fora
selectedlengthof time. At the endof thecooklhg
dyne,the ovenwill turn off automatlcally
Make sure tile clock shows tile correct
time of dax:
and minutes. For example, enter
90 minutes as 1 l/_: 30 minutes, Tile
oven temperatm'e and tile cooking
time that you entered will be
displayed.
[] Press tile Bake pad.
[] Lrsing tile nmnber pads, enter tile
desired temperature.
[] Press tile Cooking time pad.
[] Press tile Start pad,
Tile display shows tile (wen temperature
that um set and tile cooking time
co/mtdown. Tile display stnrts changing
once tile temperature reaches 100°E
NOTE:If yourrecipe requkespreheatlbg, you
mayneed toaddadditional time to the lengthof
the coohbg time.
[] Llsing tile number pads, enter
tile desired baking time. Maximum
time that can be entered in minutes
is 59. Cooking times more than 59
minutes should be cham,-ed to hom_
Tile oven Mll continue to cook fin" tile
programmed am ount of tim e, then shut
off automatically, tmless tile Cook and
Hold teatm'e was set. See tile Special
featuresofyourlower ovencontrolsection.
Press tile Clear/Off pad to clear tile
display:
Z
! iii! i!i
How to Set a Delayed Start and Automatic Stop
Youcanset the ovencontrol todelay-start the
oven,cook foraspecihc lengthof timeand then
turn off automatically
[]
Make sure tile clock shows tile correct
K_
time of day. I/I
Using the nmnber pads, enter tile
time of day you want tile oxen to
[[lI'n on and S[}II'[ cooking.
Press tile Start pad.
[] Press tile Bake pad.
[] Using tile number pads, enter tile
desired temperature.
[] Press tile Cooking Timepad,
NOTE."If yourreciperequirespreheatlbg, you
mayneed toaddadditlbnal time to the length of
the cookingt/me.
[]
Using tile numl)er pads, enter
tile desired baking time. Maximum
time that can be entered in minutes
is 59. Cooking dines more than 59
minutes should be changed to hom_
and minutes. For example, enter 90
minutes as 1 h_: 30 minutes. Tile
oven temperature and tile cooking
time that wm entered will be
displayed.
[] Press tile De/ayStart pad.
NOTE."Anattentiontonewillsoundif youare
uslbgtlYnedbakinganddonotpresstheStart
padafterenteringthebakingtemperature.
If you would like to check tile times
w)u have set, press tile Delay Start pad to
check tile stnrt time you have set or press
tile CookingTimep.J to check tile length
of cooking time you have set.
_,_q/en tile oven turns on at tile time of
da_ you ha_e set, tile display will show tile
changing temperatm'e (starting at 100°F)
and tile cooking time co/mtdown. Tile
disl)lav, stnrts changing, , once tile
temperatm'e reaches lO0°E
Tile _wen Mll continue to cook fin" tile
programmed amount of tim e, then shut
offautomaticall,x; lmless tile Cook and
Hold feature was set. See tile Special
features of yourlower ovencontrol section.
Press tile Clear/Off pad to clear tile
display.
27

Usingthelower ovenprobe.
Formany foods, especially roasts and poultry, internal food temperature is the best test for doneness.
The temperature probe takes the guesswork out of roasting by cooking foods to the exact doneness you wan_
The temperature probe has a
skewer-fike probe at one end and a
plug at the other end that goes flTto
the outlet d7the oven.
NOTE."Theprobe/s for usein thebwer ovenonly
Use of probes other than the one
l)roxided with this product nlay result in
danlage to the probe.
Use the handles of the probe and I)lug
when inserting and renioving thenl fl'oin
the nleat and outlet.
Toavolc/damagingyourprobe,donot use
tongsto puff on thecable when removingit
Toavoidbreakingthe probe,makesure foodis
completelydefrostedbeforeinserting.
_ cab!e
Topreventpossiblebums,donotunplug
theprobefromtheoutletuntiltheovenhas
cooled
Neverleaveyourprobeinsidetheovendunhg
a self-cleaningcycle.
Donot store the probein the cookingcenter
28
Mter i)i'ei)aiing the ineat and placing
it (In a trivet or on a broiler pan grid,
fi)llow these directions fi)r i)roper probe
i)laceinent,
[] I;_y the probe on the outside (if
the nleat along the top or side and
inark with your finger where the
edge of the nleat comes to oil the
probe, The point should rest in the
center of the thickest inea_' part of
the roast,
[] Insert tile probe coinpletel) into tile
nleat. It should not touch tile bone,
tilt or *Yisfle
For roasts with no bone, insert tile probe
into tile nleatiest part of tile roast. For
bone-in hanl or lanlb, insert the probe
into tile center of tile lowest laige inuscle
orjoint.
InseIt the probe into the center of dishes
such as nleat loaf or casseroles. When
cooking fish, insert the probe fl'onljust
above the gill into the nieatiest area,
parallel to the backbone.
Inseit tile probe into tile nieatiest part of
tile inner thigh fl'onl below and parallel
to the leg ot a whole turkey.
i ! i
How to Set the Oven For Roasting When Using the Probe
] Insert tile i)robe into tile nieat.
[] Phig the probe into the outlet in the
oxen. Make sure it's pushed all the
way in. Close tile oxen dooi:
] Press tile Probepad.
[]
Press tile nuinber pads to set tile
desired internal food or nleat
tenil)erature. Tile nla_nluin
internal teini)erature fi)r tile flied
that _ou can set is 200°E
[] Press tile Bake pad.
] Press tile nuniber pads to set tile
desired o',en teinl)erature.
[] Press tile Start pad.
Thedisplaywillflashif theprobeisinserted
intotheoutletandyouhavenotsetaprobe
temperatureandpressedtheStartpacL
X'_hen tile oven starts to heat, tile word
LOwill be in tile displa).
_dtei" tile internal teinl)erature of tile nieat
reaches 100°E the changing internal
teini)erature will be shown in the display.
[]
"_q/eIl tile internal teInl)eIvmu'e of
file ineat reaches tile teinl)erature
you have set, tile I)robe and tile
oven ttlYn ()_ and tile ()veil contI'ol
signals. To stop the signal, press
tile Clear/Offpad. Use hot pads to
renlove tile probe fl'oin tile flied.
Do not use tongs to i)ull on it--
they nfight daniage it.
To change tile ()veil tenil)erature during
the Roast cycle, press the Bake pad and
then tile nuinber pads to set tile new
teinl)erature.
If theprobe isremoved from the foodbefore
the final temperatureisreached,a tonewill
soundand the display will flash until the probe
is removedfrom the oven.
Youcanusetheti_nereventhougt_
youcannotusetimedovenoperations.

Usingthe lower convectionoven. gecom
_n_c_n_n
In aconvectionoven,a fan circulateshot air over,
underandaround the food
Thisckculating hot ak /sevenlydistributed
throughoutthe ovencavity As aresult, foodsare
evenlycookedand browned--often in less time
with convectionheat
NOTE.'The convection tim Mll cycle on
and offwhile cooking to best distribute
hot air in the oxen.
The convection oven tim shuts offwhen
the oven door is opened. DONOTleave
the door open for long periods of time
while using convection cooking or wm
mav shorten the life of the convection
heating element.
1-Rack Convection Baking
The comection tim circulates the heated
air e_enlx o'_er and arotmd 0 food usim*
the bake and broil elements.
Whenconvectionbak/bg with only I rack,use
Convection Bake I Back - Presspad twice, for
best results,place the rackonreck Cor Dat the
center of the oven.Cookdynesmay decrease,
so foodshouldbe checkedearlierthanpackage
directions tomakesure that it doesnot overcook.
Ideal fiw cooking large casseroles and
lasagna with good results.
Multi-rack position.
Multi-Rack Convection Baking
] Because heated air is circulated e_enlv
throughout the oxen, fi)o(ls can be
[] baked with excellent results using
[] Imlltiple racks.
The alnount of dine required for
multi-rack baking may increase slightly
fin" some fi)ods, but overall time is saved
becatlse two to [hI'ee times as illtlch I00(1
is cooked at once. Cookies, muffins,
biscuits and other quick breads give
good results with m ulti-rack baking.
To cook Ibod on illoi'e than ()lie rack
in convection bake, rise ConvectionBake
Multi- Press pad once.
When baking on 3 racks, place one
rack in the second (B) position, one
in tile tOm'th (D) position and one in
the sixth (F) position,
For tw(>rack baking, place one rack
in the second (B) rack position. Place
tile other rack in tile tb/wth (D) rack
position.
Adapting Recipes...
You can use your ti_odte recipes in tile
convection oven,
When convection baking, reduce baking
temperature bv 95°F or acti\_te the Auto
Recipe'" (_onvet_ion featm'e. See Auto
RecipeTM Conversionin the Specialfeatures of
yourovencontrolsection.
Usepansizerecommendec{
Somepackageinstructionsfor frozen
casserolesormain disheshavebeen
developedusing commercialconvectionovens.
Forbest results in this oven,preheatthe oven
andusethe temperatureon thepackage.

Usingthelower convectionoven.
Grid
Broilerpan
Convection Roast
_, Good for large tender cuts of meat, uncovered
The convection tim circulates the heated
air evenly ()vet" and around the fi)o(l.
Meat and l)oult_T are browned on
all sides as if' they were cooked on a
rotisserie. Heated air will be circulated
over, trader and at(rand the fi)od being
roasted. The heated air seals in juices
quickly fi)r a moist and tender product
while, at the same time, creating a rich
golden brown extefim:
X&]_en vou are convection roasting it is
important that you use a broiler pan and
grid fl)r best convection roasting results.
The pan is used to catch grease spills
and the grid is used to prevent grease
spatters.
Cookware for Convection Cooking
gefi)I'e rising }'O/lI" convection oven,
check to see if VO/li cookware leaves
room fi)r air circulation in the oven.
If you are baking with several pans,
leave space between them. Mso, be sm'e
the pans do not touch each other or
the walls of the oven.
Paper and Plastic
Heat-resistant paper and plastic
containei's that ai'e i'ecoilli/lended
for use in regular ovens can be used in
convection ovens. Plastic cookware that is
beat-resistant to temperatm'es of 400°F
can also be used.
Metal and Glass
Any I_il)e of cookware will work in yam"
convection oven. Howevei; I//etal l)ans
heat the ti_stest and are recommended
fin" convection baking.
Darkened or matte-fib/shed pans wi// bake
faster than shinypans.
Glass or ceramic pans cook more s/owlg
_.Vben baking cookies, you will get the
best results if you use a fiat cookie sheet
instead of a pan with low sides.
For recipes like oven-baked clficken,
use a pan with low sides. Hot air cannot
circulate well arotmd fi)od in a pan with
lfigb sides.
[Z]EEI[Z1[E3
How to Set the Oven for Convection Baking or Roasting
[]
Press the ConvectionBakepad once
( Convection Bake Multi mode) fi)r
multi-rack convection baking. Tiffs
mode is used for cooking fi)od items
on more than one rack (i.e. 2, 3 or
more racks) at the same time in
convection bake. See Multi-Rack
Bakingsection for more infbmmfion.
Press file Convection Bake pad
mice (C0nvecti0nBake I Rack mode)
fi)r one rack convectk)n baking. This
mode is used fin" cooking tbod items
on ()Ill) one tack in convection bake.
Press the Convection Beast pad fin.
convection i'oasting.
] Press tile numl)er pads to set the
desired oxen temperatm'e.
[] Press the Startpad.
X._]mn tim oven starts to beat, tim
changing temperature, starting at 100°E
will be displayed. _,_]_en oven reaches the
temperature you set, :4beeps will sotmd.
[] Press Clea#Offpad when finished.
Youwill hear a fanwhile coobbg with
convection.Thefanwill stop when the dooris
opened,but theheat will not turnoff.
Youmayhear the ovenclickbg during
baking. Thisis normal
30

For best results when roasting large
turkeys and roasts, we recommend
usflTgtheprobe included f17the
co!Tvectiol7 ovelT.
Tochange the oven temperature
during the Convection Roast cycle,
press the Convection Roast pad
and then press the number pads to
set the new desired temperature.
ge.com
How to Set the Oven for Convection Roasting when Using the Probe
Tile display will flash Probe and tile ()veil
control will signal if tile probe is inserted
into tile outlet, and you have not set a
l)robe tenll)erattu'e and pressed tile
Start pad.
[] Place the rack in the position that
best centeI_ the food in the oven.
/nsel't the probe into the meat.
[] Plug the probe into the outlet in the
oven. Make sure it is pushed ;Ill the
why ill. Close tile oven dooY.
] Press tile Convection Roast pad.
] Press the nuiuber pads to set the
desired oven tel//llel'nttll'e.
] Press tile Probepad.
] Press tile nuIuber pads to set the
desired internal ineat teInl/erature.
[] Press tile Startpad.
_4'hen tile oven starts to heat, the word
LOwill be ill the disl/la_;/_rtel" tile internal
teiul/ei'ature of the meat reaches 100°b,
tile changing internal teml/erature will
be shown in the display.
[] When tile internal teini)erature of
tile ineat reaches tile tenii)erature
wm have set, the probe and the
()veil ttiiil off' and tile ()veil control
signals. To stop the signal, press the
Clear/Offpad. Use hot pads to
reniove tile probe fl'oIn tile fi)o(l.
Do not use tongs to pull on it--
tile 3' nIight danlage it.
CAUTION: Topreventpossibleburns,do not
unplug the probe from the oven outlet until the
oven has cooledDonot store the probe in the
cooking center
NOTE:
If theprobeisremovedfromthefoodbefore
thefinaltemperatureisreached,a tonewill
soundandthedisplaywill flashuntiltheprobe
isremovedfromtheoven.
Youwillheara fanwhilecooklbgwith this
feature.Thefanwillstopwhenthedooris
openedbuttheheatwillnotturnoff.
Youcanusethet/Ynereventhoughyoucannot
usetimedovenoperations.
Convection Roasting Guide
Meats Minutes/Lb. Oven Temp. Internal Temp.
Beef Rib, BonelessRib, Rare 20_4 325°F 140°Ft
TopSirloin Medium 24_8 325°F 160'_F
(3 to5 Ibs.) Well 28_2 325°F 170°F
BeefTenderloin Rare 10 14 325°F 140°Ft
Medium 14 18 325°F 160°F
Pork Bone-in,Boneless(3 to5 Ibs.) 23_7 325°F 170°F
Ham Canned,Butt,Shank(3to 5 Ibs.fully cooked} 14 18 325°F 140°F
Lamb Bone-in,Boneless(3 to5 Ibs.) Medium 17_0 325°F 1BO°F
Well 20_4 325°F 170°F
Poultry WholeChicken(21/z to3YzIbs.) 24_6 325°F 180° 185°F
CornishHens,Unstuffed(1to 11/zIbs.) 50 55total 325°F 180° 185°F
Stuffed11to 1YzIbs.) 55 BOtotal 325°F 180° 185°F
Buckling(4to 5 Ibs.) 24_6 325°F 180° 185°F
Turkey,whole*
Unstuffed(10to 16Ibs.) 8 11 325°F 180° 185°F
Unstuffed(18to 24Ibs.) 7 10 325°F 180° 185°F
TurkeyBreast14to 6 Ibs.) 16 19 325°F 170°F
"! Shl//('d biM* g_,_*'*wl{)*z'qzzi_,30-45 #li_ *zr,'s additim_al n_z*ti_ tithe. Shield/eR:s a)_d bn,dst wilh /vil to p*l,-_,(,)_t
o'ze_%n)wni_J,_ and (h3i_*,_o/ skim
_t 7/u' (LS. l)<J_a_hll_'_t o/ A,g'*_c*tllun__<t)_ "l_a*_,[_'_jis l_o]_u/m; but yo_z _houhI kl ow that ( vol,'ing it to on/3 140 f" _ll_'<t__
*ome /ood poiw_i_g o_;<*n_ismsm@ **z_'_,izv." (%m_*_,:.Sale l'bM B_x)k. }bu_ Kilche_ (hzigh'. [ Slk_ Hey. fizzle I9Y,5.)
3/

Usingthelower oventimed features
forconvectioncooking.
Youwill hear afan while cookingwiththese features.Thefan will stopwhenthe doorb opened,buttheheat willnotturn off.
NOTE:Foodsthat spoileasily--such asmilk,eggs,fish,stuffings,poultryandpork--should notbe allowedto sit formorethan
1hourbeforeor after cooking.Roomtemperaturepromotesthegrowth of harmfulbacteria.Be surethatthe ovenlightis off
becauseheatfrom thebulbwill speedharmfulbacteriagrowth.
EZ3E?3[ZID2
How to Set an Immediate Start and Automatic Stop
Theovenwilf turnon immediatelyandcookfora
selectedlengthof time.At theendof thecooking
time,theovenwilf turnoffautomatically
Make sure the clock sho_,_:sthe correct time
of day.
] Press the ConvectionBake pad once
for m ulti-rack comection baking.
This mode is used tor cooking toed
items on more than one rack (i.e. 2,
3 or more racl_s) at the same time
in convection bake. See Multi-Rack
Baking section fi:u"more inlommdon.
Press the Convection Bake pad twice
tor one rack convection baking. This
II/ode is tlsed t(}I" cooking t(}od itelllS
on only one rack iI1 convection
bake.
Press the Convection Roast pad tor
convection roasting.
] Press the number pads to set the
desired oxen temperature.
[] Press the CookingTimei)ad.
NOTE:Ifyourreciperequirespreheating,youmay
needtoaddaddtiona/timeto thelengthof the
cookingtime.
] Press the nun-Jber pads to set the
desired length of cooking time. The
minimum cooking dine you can set
is 1 minute. The oven temperature
that you set and the cooking time that
you enmred will be in the displa}:
[] Press the Start pad.
The displa} will show the changing
mmpetature (starting at 100°F) and the
cooking time. The displa} starts changing
once the mmperature reaches IO0°E
The oxvn will continue to cook fi)r the
programmed amount of time, then shut
off automaticalb'.
[] Press the Clear/Offpad to clear
the displa} if necessa_ 3 Remoxe
the ti)od fi'om the oxen. Remember;
even though the oven ttlrns O_"
automatically, ti)od left in the oven
will continue cooking after the o\en
turns olE
32

ge.com
i¸¸¸¸ )
How to Set a Delayed Start and Automatic Stop
Youcansettheovencontroltodelay-starttheoven,
cookfora specificlengthoftimeand thenturnoff
automaticafly
Make sm'e die clock silencesfile correct time
of day.
] Press the Convection Bake pad once
for muld-rack come(tion baking.
This mode is used for cooking food
items on more than one rack (i.e. 2,
3 or more racks) at the same time
in convection bake. See Multi-Rack
Baking section fl,r more infimnation.
Press the Convection Bake pad
twice tor oIle I';l(-k (oiive(tioil
baking. This mode is used for
cooking food imms on only
one rack in convection bake.
Press the Convection Roast pad
for coil\'ectioil roastiilg.
] Press tile nunlber pads to set tile
desired oven telnperatm'e.
[] Press tile Cooking lime pad.
NOTE"Ifyea reciperequirespreheating,youmay
needtoadd additionaltime to thelengthof the
cookingtime.
] Press tile iltllrlber pads to set tile
desired cooking time.
[] Press tile Delay Startpad.
] Press tile nmrd)er pads to set tile time
of da} }Oil waIlt tile o_,eI1 to ttlrI1 oil
mid start cooking.
ff youwouldliketocheckthe timesyouhaveset,
presstheBelay Startpadtocheckthestarttime
youhaveset,orpresstheCookingtime padto
checkthelengthofcookingtimeyouhaveset.
[] Press tile Start pad.
NOTE"An attentiontonewill soundif youare
usingtimedbakingorroastingand donotpress
the Startpadafter enteringthebakingor
roastingtemperature.
_\]len tile oven tm'ns on at the time
of da)you hme set, tile dist)la ) will
show tile changing temperatm'e
(smrdng at 100°F) mid the cooking time.
Tile displa) starts changing once tile
tempetatm'e reaches lO0°E
Tile oven will continue to cook for the
programmed amount of time, then shut
off automaficall)c
[] Press tile Clear/Off pad to clear
tile displa) if necessa_ T. Remo_e
tile fi)od fi'om tile o_vn. Remember;
even t]loug]l tile o',en shuts off
automaticalb; fbod left in tile oven
will con fintle cooking after tile oxen
t tlrIls of I_
33

Adjust the lower oven thermostat--Do it yourself!
Youmay find that your new oven cooks differently than the one it replaced. Use your new oven for a few
weeks to become more familiar with it. If you still think your new oven is too hot or too cold, you can adjust
the thermostat yourself.
Do not use thermometers, such as those found in grocery stores, to check the temperature setting of your oven.
These thermometers may vary20-40 degrees.
NOTE,"This adjustment will only affect baking and roasting temperatures; # does not affect broiling, convection or
self-cleaning temperatures. Theadjustment will be retained in memory after a power failure.
EZ+
HII[O
[Z][Z][Z][Z][Z]
ToAdjust the Thermostat
[] Presstile Bakeand BroilHi/Lo
pads at tile same time tor 3 seconds
until tile display sho_:s SF
[] Press tile Bake pad. A two-digit
munber shows in tile display:
Press Bake once to decrease
(-) tile oven temperature, or
twice to increase (+).
[] Tile oxen temperature can be
. . 3bo,_
a(!justed up to (+) . z t_ hotter
or (-) 3B°F cooler Press the number
pads the same way you read them.
D_r example, to change the oven
temperatme 15°g press I and 5.
[] _,_q/en you haxe made tile
a0jusUnent, press tile Start
pad to go back to tile time ot
day display. Use your oven as
you wouM normally.
NOTE"Thethermostatadjustment forBak/hg
wi// also affect ConvectionBakin_and Convection
Roasting.
Thetypeofmargarine will affect bakingperformance!
Most recipes for baking have been developed using high-fat products such as butter or margarine (80% fat). If you
decrease the fat, the recipe may not give the same results as with a higher-fat product.
Recipe failure can result if cakes, pies, pastries, cookies or candies are made with low-fat spreads. Thelower the
fat content of a spread product, the more noticeable these differences become.
[_edei'al standards require products labeled "Ill}lI'g}llJlle" to contain at least 80% tilt by weight, ixmqht spreads, on tile
other hand, contain less tilt and more water: Tile high moisture content of these spreads affects tile textm'e and flavor
of baked goods. For best results with vom" old tm'orite recipes, use margarine, butter or stick spreads containing at least
70% vegetable oil.
3d

Usingtheself-cleaning lower oven. geoom
The oven door must be closed and all controls must be set correctly for the cycle to work properly.
Wipe up heavy soil on flTeoven
bottom.
Before a Clean Cycle
_'_ re('onm/end ".enting )our kitchen
with an oi_en window or using, a
ventilation tim or hood (hwing
the fitst self:clean c_cle,
Remoxe an)broiler pan, broiler grid,
i)robe, all cookware and am ahmfinum
fifil from tile oxen.
The oxen racks can be self k leaned, but
the) will darken, lose their luster and
become hard to slide.
Do not use abrasi'.es or o'.en cleanets.
Clean the top, sides and outside of the
oxen door with soap and water:
Make sm'e tile oven light bull) cover
(on some models) is in place and the
oven light is off'.
IMPORTANT'.The health of some
birds is extremely sensitive to the tirades
given off during the self:cleaning cycle
of any oven. Move birds to another
well-ventilated room.
CAUTION:Neverplacecooklbgutensilsorany
otheritemsontheovenfloor Thereisa heating
e/ementbeneaththeovenfloorPlacingitemson
theovenf/oormaycausetheoventooverheat,
resu/tlbgin damagetotheovenandnskof
damageor firetocabinets.
How to Set the Oven for Cleaning
[] Press tile SeffClean pad fi)r a 4-horn"
clean time.
V_ If a time other than 4 hom_ is
needed, use tile nmnber pads and
enter the desired clean time.
_()/l C[lll chantre the clean tilne to [lily
time between 3 hom_ and 5 hom_,
dei)ending, on how (lirt_, yore" oxen is.
A 3-horn serf-dean time is recommended
fin" use when cleaning small, contained
spills. A sel6clean time of 4 hom_
or longer is i'ecollli/lended for a
dirtier oxen.
[] Press the Start pad.
Tile door locks automatically: Tile display
will show the clean time remaining. It will
not be possible to open tile oven door
tmti] the temperatm'e drops below the
lock temperature and the LOCKEDlight
goes oil
When tile LOCKEDlight goes ofl_ you will
be able to open the doo_;
Tile word LOCKED will flash and tile
oven control will signal if you set the
clean cy(le and fl)rget to close tile
oven doox;
To stop a clean cycle, press the
Clear/Offpad. _4]/en tile LOCKED
light goes off indicating the oven has
cooled below the locking temperatm'e,
you will be able to open file dora;
35

Usingtheself-cleaning lower oven.
The oven door must be closed and all controls must be set correctly for the cycle to work properly.
ii ¸ : /
iiEE][Z][Z] [E]¸
iii_i ii i
(/
How to Delay the Start of Cleaning
[] Press the Seff CIoanI)ad tor a
4-hour clean finle.
[_] Ifa dine other than 4 hotlI_ is
needed, use the nunlber pads and
enter the desired clean tinle.
You can change the clean tiine to any
tiine between 3 houi_ and 5 houi_,
del)ending on how di m' your ()veil is.
A 3-hour sel6clean tiine is reconinlended
fi)r use when cleaning snlall, cent;fined
spills. A sel6clean tiine of 4 houi5
or longer is reconlnlended fi)r a
dirtier oven,
[] Press the DelayStart pad.
[] Using the nunlber pads, enter the
time of day _ou want the clean c_cle
to start.
Tile door locks autonlatically, The display
will show the start tinle. It will not be
possible to open the ()veil door until
the tenlperamre drops below the lock
temi)eramre and the 10CKEDlight
goes off.
_,_]_eI1the LOCKEDlight goes off; you will
be able to open the door.
[] Press the Start pad.
After a Clean Cycle
Y)tI nlav notice sonle white ash in the
oven, Wipe it up with a daInp cloth after
the ()veil cools.
If whitespotsremain,removethemwitha
soap-filledsteel-wedpadandrinsethoroughly
witha vinegarandwatermixture.
These deposits are usually a salt residtle
that cannot be renloved by the clean
cycle.
If the oven is not clean after one clean
cycle, i'epeat the cycle.
You cannot set the ()veil for cooking
until the oxen is cool enough fi)r the
door to tlnlock.
While the ()veil is self-cleaning, you
can press tile Clock pad to display
tile tiIne of day, To return to the clean
countdown, press the Self Clean pad.
If the racks becoine hard tti slide, wipe
the rack suppoits with cooking oil.
3_

Special featuresofyourlower ovencontrol ge.com
Yournew touch pad control has additional features that you may choose to use. The following are the features and
how you may activate them.
The special feature modes can only be activated while the display is showing the time of day. They remain in the
control's memory until the steps are repeated.
When the display shows your choice, press the Startpad. The special features will remain in memory after
a power failure.
12-Hour Shut-Off
Withthisfeature,shouldyouforgetandleavethe
ovenon,thecontrolwi//automaticallyturnoff the
ovenafter 12hoursdun?_gbak/hgfunctionsor
after3hoursduringa broilfunction.
If you wish to turn OFF this teature,
tOlh)w tile steps belov,;.
[] Press tile Bake "and Broil Hi/Lo
pads at tile same time fi)r 3 seconds,
until tile display shows SF.
[] Press tile Delay Start pad tmtil
no shgn (no shut-off) appeax_ in
the display.
[] Press the Start pad to activate the no
sh ut-off and leave the control set in
this special teatm'es mode.
H_,&o
Fahrenhe# or Celsius Temperature Selection
Yourovencontrol isset touse the Fahranheit
temperatureselections,but youmay changethis
to use the Celsiusselections.
[] Press tile Broil Hi/Lo "and Bake
pads at tile sanle time ti:,r 3 seconds,
tmfil tile display shows SF.
[]
Press tile Cooking Time "and Broil
Hi/£o pads again at tile same time.
The display will show C (Celsius).
[] Press tile Start pad.
[] Press tile Cooking Time "and Broil
Hi/Lo pads at tile same time. Tile
display will show F (Fahrenheit).
Control Lockout (onmodelsso equipped)
Yourcontrol will allow you tolock out the touch
padsso theycannot beactivated when pressed
To lock/mdock tile controls:
[] Press tile 9 and 0pads at tile same
time ti)r 3 seconds,/mtil tile displa)
sho_:s LOCON.
[] To tmlock tile control, press the 9
and 0pads at tile same time for 3
seconds, tmtil tile display shows
LOCOFF.
When this teatm'e is on and tile touch
pads are pressed, tile control will beep
and tile display will show LOCON.
Thecontrollockoutmodeaffectsall touch
pads.Notouchpadswi//workwhenthis
feature/sactivated
Theadjustment wi// be reta/hedin memory
after a power fai/ura.
37

Special featuresofyourlower ovencontrol
Tonesat the End of a TimedCycle
At theendofa timedcycle,3 shortbeepswill
soundfol/owedbyonebeepevery6 secondsuntil
theClear/OffpadispressedThiscont/buous
6-second/)eel)maybecanceled
To cancel tile 6-second beep:
[] Press tile Bake and Broil Hi/Lo pads
at tile same time fi)r 3 seconds until
tile display shows BF.
[]
[]
Press tile Kitchen timer On/Off
pad, Tile displa)shows CONBEEP
(continuous beep). Press tile
Kitchen timer On/Off pad again.
Tile display shows BEER (This
cancels tile one beep every
6 seconds.)
Press tile Start pad.
12-Hour, 24-Hour or Clock Blackout
Yourcontrolissettousea 12-hourcloctd
It you would prefer to have a 24-ham"
militnrv time clock or black out tile clock
display, fi)lh)w tile steps beh)w.
[] Press tile Bake and BroilHi/Lopads
at tile same time fi)r 3 seconds tmtil
tile display shows SF.
[]
Press tile Clock pad once. Tile
display will show 12hr. If this is
the choice _ou want press the
Start pad.
Press tile Clockpad again to
change to tile 24-hour military
time clock. The display will show
24 hr. If this is the choice you want,
press the Start pad.
Press tile Clock pad again to black
out the clock display. The display
will show OFF If this is the choice
you want, press tile Start pad.
NOTE."If the clock/s in the black-outmode,you
will not be able to usethe DelayStart function.
i °
Auto RecipeTM Conversion
Whenus!byconvectionbake,theAutoRecipe_
Conversionfeaturewillautomaticallyconvert
entered regular bak/bg temperatures to
convection baking temperatures.
Once the feature is activated,thedisplay
will show the actual converted (reduced)
temperature. For example, if you enter a ragu/ar
recipe temperature of 350°F and press the
Start pad, the d/splay will show CON and
the converted temperature of 325_£
NOTE: This feature does not convert convection
bake cookingtimes,onlyregularbakbg
temperatures.
Toactivate the feature:
[]
[]
Press tile Bake and Broil Hi/Lo pads
at tile sanle finle fi)r 3 seconds, tmtil
tile display shows SF,
Press tile Convection Bake pad. Tile
displa? Mll show CON OFF.Press tile
ConvectionBake pad again. Tile
display will show CON ON.
[] Press tile Start pad,
To deactivate tile teatm'e, repeat steps
1-3 aboxe but press tile Start pad when
CONOFFisin tile displa).
38

Usingthe SabbathFeature.
(DesignedforuseontheJewish SabbathandHolidays.)(onsomemodels)
ge.com
TheSabbathfeature can be usedfor baking/roastingonlg It cannotbe usedfor convection,broiling,self-cleaningor
DelayStart cooking.
NOTE:Theovenlight comesonautomatically(on somemodels)when thedoor isopenedandgoesoff whenthedoor is closed.
Thebulbmaybe removed.SeetheOvenLightReplacementsection.Onmodelswith a light switch on the controlpanel,theoven
lightmaybe tumed on andleft on.
i;! 7
!; ¸¸¸(¸¸¸¸¸¸¸%¸¸¸¸¸:¸¸¸
When the display shows D the
oven is set in Sabbath. When the
display shows D C the oven is
bak&g/roasting.
How to Set for Regular Baking/Roasting
Make surethe dock shows the correcttime of
dayand the ovenis oK
[] Press and hold both the Bake and
Broil Hi/Lo pads, at the same time,
until the display sho_v_ SF.
NOTE:If bake or broil al)l)eai_ in the
disi)lay, the Bake and Broil Hi/Lo pads
were not touched at the same dine.
Touch the Clear/Off pad and begin
again.
[] Ta l) the DelayStart pad until SAb
bAtHappeai_ in the display
[] Touch the Start pad and D will
appear in the display:
[] Touch the Bake pad. No signal will
be six en.
[]
[]
Using the munl)er pads, enter the
desired temi)eramre between 170°F
and 550°F. No signal or teml)erature
will be gixen.
Touch the Start pad.
[] _Mter a randon/delay period of
al)l)roxinmtely 30 seconds to l
minute, D c will appear in the
display indicating that the oven is
baking/roasting. If D c doesn't
appear in the display, start
again at Step 4.
To a(!iust the oven telnperature, touch
the Bake pad, enter the new teml)erature
using the nmnber pads, and touch the
Start pad.
NOTE."The Clea#Off and Cooking Time
pads are active during the Sabbath
teatuI'e.
÷
÷
[Z][!]
Whel7 uTe alSOlal stTows D rite
oven is set in Sabbath. When the
displayshowsD C theovenis
baking/roasting.
How to Set for Timed Baking/RoasthTg - Immediate Start and Automatic Step
Make surethe c/ockshows the correcttime of [] Using the munber pads, enter the
dayand theovenis oK desired teinperature. No signal or
[] Press and hold both tile Bake and
Broil Hi/Lo pads, at the same time,
until the display sh(m:s SE
NOTE:If bake or broil appeai_ in the
display, the Bake and Broil Hi/l o pads
were not touched at the same time.
Touch the Clear/Off pad and begin
again.
[] Tap the Delay Start pad until SAb
bAtHai)peai_ in the display.
[] Touch the Start pad and D will
appear in the display:
[] Touch the Cooking Time pad.
[] Touch the munber pads to set
the desired length of cooking time
between 1 minute and 9 hom_ and
99 minutes.The cooking time that
you entered will be displayed.
[] Touch the Start pad.
[] Touch the Bake pad. No signal will
be gixen.
temi)eramre will be given.
[] Touch the Start pad.
[] _Mter a ranchml dela) peri(/d of
al)proxinmtel ) 30 seconds to 1
minute, D c will appear in the
display indicating that the ()veil is
baking/roasting. ]f D c doesn't
appear in the display, start
again at Step 7.
To a(!iust the ()veil temperature, touch
the Bake pad, enter the new temi)erature
using the munber pads and touch the
Start pad.
_qlen cooking is finished, the display
will change from D c to D and 0:00will
al)l)em; indicating that the oven has
turned OFFbut is still set in Sabbath.
Remove the cooked toed.
39

UsingtheSabbathFeature.
(DesignedforuseontheJewish SabbathandHolidays.)(onsomemodels)
How to Exit the Sabbath Feature
[] Toud_ the Clear/Offpad.
[] If the o_en is cooking, wait
for a rand(nn delay period of
appro_nmtel_ 30 seconds to I
minute, tmti] only D is in the display:
[_] Press and hold both the Bake and
Broil Hi/Lo pads, at the same time,
tmtil the display, shows SF.
[] "Eq_ the Belay Start pad tmdl 12shdn
or no shdn appea_ in the display: 12
shdnindicates that the oven will
automatically mrn off after ] 2 hom_.
no shdnindicates that the oven will
not alltoi/laticallv [llI'n o1_]
[] Touch the Start pad,
NOTE: If a power outnge occurred while
the oven was in Sabbath, the oven will
automatically tm'n off and stnv off even
when the power retm'ns. The oven
control I11list be reset,
40

Careand cleaning ofthe cooking center, g,.co,,
Be sure electricai power is off and aiI surfaces are cool before cleaning any part of the cooidrlg center,
Hew to Remove Packaging Tape
To assm'e m_o damage is dolce to the {impish
_ff the product, the sa{bst way to remove
the adhesive le{t fl'om packagim_g tape o_
m_e_ applim_ces is am_app]icat]o_ ofa
hol_sehok] ]i(p_id dishwashh_g dete_ge]_t,
mh_em] o11or cookim_go11.
Apply wkh a sol} doth m_d allow to soak.
_Spe dr_ amid the_ apply am_app]im_ce
po]is]_ to t]]orol_gh]y c]eam_amp(I!protect
the sm'Ii_ce.
NOTE: Theplastic t_pe(onsomemodels)must
be removedfromaft chrometrim.It cannotbe
removedif it is bakedon.
Micrewave Oven
Do not usea commercial ovencleaneron any
part of yourmicrowave oven.
Remevafl/e Tumtafl/e and Turntafl/e Support
To pre_ e]_t breakage, do m_otplace the
tL_rm_table i_]to water,iust a{ter coo]d _]g.
Wash it carefld]y h_ warm, s_dsy watel"
or 1_ the dis]_washe_:
The tm'mab]e a_(]! s_pport ca_ be
broke_ if dropped. P, emembe_; do _ot
operate the microwave ove]? w[tho_lt
the tm'_tab]e a_d s_pport ]_ [)]ace.
To replace the s_q)port, [)]ace its ce_]tef
post ]_ the hole. Tm'_ the sl_pport
arom_d m_t]] it seats h_to place.
_side
sweebsme]]i_g. ()pettifog the ove]_ door
a fbw mim_tes a{ter coo]d_g ]]e]ps air
o_*t tl]e i_terio_: A_ occasiom]l d]oro_gh
wip]_g with a so] utio_ o{ bald _]g soda
a_ d water keeps the ]_ te_Jor f_'es]L
Spills m_d spatters are easy to remove
lip SOO]? aP}er the {_od is i+emo _,ed+
Some spatters wipe _q:) _r[t]_ a paper
towel, some may re(p_ire a damp c]ot]L
Remo', e greasy spatters with a s_dsv
cloth, t]]e]_ _J_se a]_d dry.
Oonotcleanwithmetalscounbgpa&. Pieces
canbreakoff thepad,causingebd_@als'hock.
Wipe _q:>spatte'ls on_ the wi_(;[ow o]_
the ]_side (ff the door daily. Whe]_ the
W]_(]{}_ r iS SOiled, wash it wkh a damp
Wipe meta] a]]d plastic ]:>arts o]]
the i_side o{ the door {}'eq_eml}.
[Ise a damp cloth to remove a]] soil
Do not use abrasives, s'u_has c/caning powders"
or steel and p/astic pads'. Theyms}/mar the
surface.
O_tside
(]em_ the o_*tskIe of the microwave ove_
W[[h a daF_?p C]O[h a_?d dY,v. Wipe die
wh_dow c]em_ wkh a damp c]od_. Chrome
is best wiped _,*,r[th a da['_]p c]()[h a[]d the]/
v,r[[]] a dl"\ [owe].
Deer $_dace
\Vhe]_ c]em_h_g sm'fi_ces o_ door a_d _we]_
d_at come toged]er o]_ closh_g the doo_;
_*seo]_]y mild, mm-ab_wsive soaps or
dete_ge_ts apphed v, ri[h a sp(mge or
sot_ cloth.
4/

Careand cleaning ofthecookingcenter.
Lift-Off Oven Door
Sl0t
Hingei0ck
Pull hinge locks down to unlock
Removalposition
Thedoorisveryheavy.Becarefulwhen
removingandliftingthedoor.
Donotlift thedoorbythehandle.
Toremovethedoor."
[] Fully open the dooI:
[] Pull the hinge locks down toward
the door fl'aine, to the unlocked
i)osition. A tool, such as a snlall flat-
blade screwdrixei; Ina_ be required.
[] Fire/l} grasp both sides of the door
at the top.
[] Ch/se door to the door reinoxal
position (see ilhistration).
[] I,i/i door up and ()tit until the hinge
aim is clear of the sh/t.
Toreplace the door:
[] Fire/l} grasp both sides ot tile door
at tile top.
] )
With tile Bottom _:arm
door at tile edge
saine angle as ofslot,
the renlowd
position, seat the
indentation of
tile hinge aml Indentation
into tile botmin
edge ot the hinge slot. The notch in
the hinge aml inust be fiillv seated
into tile bottom of tile slot.
[] Fully open tile dooi: If tile door will
not flIlly open, tile indentation is
not seated correctly in tile bottom
edge _ff the slot.
[]
Push tile hinge, locks uI ) aoainst_ tile
front fl'anle (If tile oxen cavit}; to tile
locked i)osition.
Hinge
arm
lock
Push hinge locks up to lock
[] Close tile oven dooI:
Donotrubor cleanthe doorgasket--
it has anextremelylowresistanceto
abrasion.
If younoticethegasketbecomingworn,
frayedor damagedinany wayor if it has
becomedisplacedonthedoor,youshould
haveit replaced.
Toclean the inside of the door:
Because tile area inside tile gasket is
cleaned duiing tile self:clean cvcle x,ou
do not need to clean this 1)_ hand.
Tile area outside tile gasket and
tile door liner can be cleaned with
a soap-filled or plastic scouiing pad,
hot wamr and deteigent. Rinse well
with a vinegar and wamr sohItion.
Toclean the outside ofthe door:
Use soap and water to thoroughly
clean tile top, sides and ti'ont ot tile
()veil dooi: ]_dnse well. _*_)/I Ill}IV also
use a glass cleaner to clean the glass
on tile outside (ff tile dooi: Do not let
water drip into tile vent oi)enings.
If any stain on tile dIIor vent tIJIn is
peisistent, use a soti abrasive cleaner
and a Sl)onge-scrubber fi)r best results.
Spillage of nlarinades, fl'uit
juices, ton/ato sauces and basting
nlaterials containing acids nlav cause
discoloration and should be wiped
up iinn/ediatel> _'_]/ell suitilce is
cool, clean and rinse.
Do not use oxen cleaners, cleaning
powders or harsh abrasixes on tile
(/utside of tile door.
42

g_com
Control Panel
It's a good idea to wipe the control
panel atier each use. Clean with mild
soap and water or vinegar and water;
rinse with clean water and polish d_'
with a soft cloth. _\]_en deaning, the
control panel should be at room
temperature and not in direct sunlight.
Do not use abrasive cleansex_, strong
liquid cleane_, plastic scotwing pads or
oven cleanet_ on the control panel--they
will damage the finish, A 50/50 solution
of vinegar and hot water works well.
Probe (loweroven)
The tenlperature probe ma,v be cleaned
with soap and water or a soap-filled
scotwing pad. Cool the temperature
probe befln'e cleaning. Scorn" stubborn
spots with a soap-filled scotwing pad,
rinse and (h_'.
DonotlYnmersethetemperatureprobein
water
Donot store the temperatureprobe in the
cookingcenter
43

Careand cleaning ofthecooking center.
Z
Socket
Receptacle
ii:!i iii
i_i_iii_i_i_iii __i__ii!_i_i_
Glasscover
Lower Oven Light Bulb
NOTE."Theglass cover (on some
models) should be removed only when
cold, Wearing latex gloves may offer
a better grip,
CAUTtON.seforereplacingyour Receetac,e
oven light bulb, disconnect the electrical
powerto the oven at the main fuse or
circuit breaker panel
Be sm'e to let the light cover m_d bulb
coo] comp]ete]_
For }our sa{b b de m_c,ttol_ch a hot bl_lb
_dth bare ham]s or a dmNq> clefts.
To remove: []
[] Tm'_ the g_as_ co_er
coHm_terc]ockwise 1/4 [HN_ Hm_[i] the []
tabs r)f the dass cover dear the
[] [Jsim)gg]r_','esor a dry doth remove
the bull) by puHim_g it straight out.
To replace:
[] [Jse a m_ew 130-voh hah_gem_ bulb,
m_ot to exceed 50 watts.
[] [Jsim_g gloves or a dr} cloth remove
the bulb fi'om its [)ackagiN_g,, . Do mint
tol_ch the bulb with bare fire,gets.
_ _e gloves
orclozr
Pl_sh the bulb sh;_ght imo the
receptacle a]] the _r_ F
Place the tabs of the glass c_ er i m_to
thee grooves of the socket. Tm'_ thee
g_assco_er dock_dse 1/4 mrm
For improved lighfi _g i_side
the o_em clea_ the glass cmer
f_'eq_emly _si_g a _et cloth. This
shouk] be do_e _d_e_ the me_ is
] Recom_ect electxica] power to
the r)ve]L
Ovenrack
Oven Racks
Clean the {wen racks with an abrasive
cleanser or steel wool. _Mter cleaning,
rinse the racks with clean water and (hw
with a clean cloth.
NOTE."Theovenracksmaybecleanedin the
self-cleaningoven.However,therackswill
darkenin color,losetheir/usterandbecomehard
toslideif cleanedduringtheself-cleaningcycle.
To make the racks slide more easil};
apply a small amotmt (if vegetable oil or
cooking oil to a paper towel and wipe the
edges of the oven racks with the paper
t_m'el.
Stainless Steel Surfaces (onsomemodels)
Donotusea steelwool pa& itwifl scratch
thesurface.
To clean the stainless steel sm'fi_ce,
use wam] sudsy water or a stainless steel
cleaner or polish. _dwa)'s wipe the smti_ce
in the direct.ion of the grain, Follow the
cleaner instructions fiw cleaning the
stainless steel sm'ti_ce,
To inquire about l)m'chasing stainless
steel appliance cleaner or polish, or to
find the location of a dealer i]earest you,
please call ore" toll-fl'ee nunlber:
National Parts Center
1.800.6262002
ge.com
44

Before yeu call for service.., g,.co,,
Troubleshooting -tips
Save time and money! Review the charts on the following
pages first and you may not need to call for service.
Possible Causes What ToDo
Controlpanel on You forgot to press the * Press tile Start/Pause pad.
microwaveoven Start/Pause pad.
will not operate Door not securely closed. * Make sure tile microwave oven door is dosed.
Another function was pressed. * Press the Clear/Offpad twice to cancel it and
begin again.
The Clear/Off pad was * Begin again.
pressed accidentally.
Oven controls * While using Time Defrost, numbers not entered after
improperly set. l)ressiu'_' _ tile Auto Defrost pad.
"SENSOR ERROR" During a sensor * The inicrowaxe oven door should not be opened
appears in the function the microwave before tile time begins to cotmt (h>wu in tile display.
microwave oven oven door was opened
display too soon.
Microwave oven light Light bulb is loose * Call for service.
does not work or defective.
Foods overcooked or _aryhlg de]_sity and amaotmt * Va_'iu,,, _ density and amount sol_letilnes require more
undercookedin the of foods being cooked, cooking tim e.
microwave oven
Food not turned or stirred * Turn or stir food and begin again.
as called for in the recipe.
Too many dishes in the * Do not overload vet/l" lnicrowave oveu.
oven at the stone time.
Food not thoroughly * See tile Usingthe microwavesensorfeatures sectil)u.
defrosted,
hnproper cookware or * See the Microwave safe cookwaresectioniff the
coverings being used. Important Safety Instructions sectil)u.
Humidity or moisture ill * Make sure the iuside of the oveu ;lud the outside of
the oven win lessen the tile coutaiue_ are (h_'.
sensor cooking time,
Food not allowed to stand. * Some standing time is recoimneuded for certain
vegetables cooked with the SensoI" (;ontrols.
45

Beforeyoucall forservice...
Troubleshooting -tips
Possible Causes What ToDo
Lower oven control You forgot to enter a * Press the Bake pad and desired temperature or the
signals after entering bake temperature or Self Clean pad and desired clean time.
cookingtime or cleaning time.
delay start
Food does not bake or Oven controls improperly set. * See tile Using the lower oven section.
roastproperlyin the
lower oven Rack position is incorrect * See the Using the lower oven section.
or the rack is not level.
Oven thermostat needs • See the Adjust thelower oven thermostat--Do it yourself[
adjustroent, se('t.i(m.
Food does not broil Oven door is open. * Close the (l_>m: This model is designed fin" closed (h >or
properlyinthe broiling only. _Mwavs broil with the door closed.
lower oven
Oven controls improperly set. * Make sure you pressthe BroilHi/Lopad,
Improper rack position * See the Broiling Guide.
being used.
Cookware not suited * For best results, use a laan designed, fin" broilin_
for broiling.
ha some areas the power * Preheat the broil element fin" 10 roiro/tes.
voltage may be low.
• Broil for the hrogest period of time recommended in
the Broiling Guido.
Clock and timer A fuse ha your horoe roay be * Replace the fllse (>r reset the circtfit breakei;
do not work or blown or the circuit breaker
displaygoesblank tripped.
Controls improperly set. * See the Using the clock and lower oven timer section
lot the lower oven clock.
• See the DisplayOn/Offsecfi_ )15fi )l"file roicr_>wave oven cl_>ck.
The clock is in the • See the Special features of your lower oven control
black-out mode. section for the lower oven clock.
• See the Display On/Offsecdon fin" d_e microwave oven clock.
46

ge.com
Lower oven
temperature too
hot or too cold
Possible Causes
Oven thermostat
needs adjustment.
What ToDo
• See the Adjust thelower oventhermostat--Do it yourself!
section.
Lower oven will A fuse in your home may be • I_eplace tile fi/se or reset tile circuit breaker:
not work blown or the circuit
breaker tripped.
Oven controls improperly set. • See tile Using the lower oven section.
Lower oven willnot The oven temperature is too • Allow the oven to cool and reset tile controls.
self-clean high to set a self-clema operation.
The probe is plugged into • Remove tile probe t_'om tire oven.
the outlet in the oven.
Oven controls improperly set. • See tire Using the self-cleaning lower oven section.
"Crackling" or This is the sound of the • This is normal.
"popping "sound in metal heating and cooling
the lower oven during both the cooking and
cleaning functions.
Excessive smokingin Excessive soil. • Press tire Clear/Off pad. Open the windows to
the lower oven during rid the room of smoke. _4'ait tmtil tire LOCKEDlight
a clean cycle goes off. \4"ipe up tire excess soil and reset tire
cleau cycle.
Lower oven door will Oven too hot. • Allow the oven to cool beh)w locking teml)erature.
not openafter a
clean cycle
Lower oven not clean Oven conlrols improperly set. • See tire Usingthe self-cleaning lower oven section.
after a clean cycle
Oven was heavily soiled. • Clean u l) heavy sl)illovers before starting tire clean
cycle. Heavily soiled ovens may need to sell:clean
again or fl)r a hmger I)eriod of time.
"LOCKED"flashes in The self-clean cycle has • Ch)se tire oven door.
the lower oven display been selected but the
door is not closed.
LOCKED light is on The oven door is locked • Press tire Clear/Off pad. Allow tire oven to cool.
when you want to cook because the temperature
in the lower oven inside the oven has not
dropped below the
locking temperature.
47

Beforeyoucall forservice...
Troubleshooting tips
PossihteCa.ses
Lower oven lightdoes Light bulb is loose or defective.
network
Pad operating light is broken.
What ToDe
• Tighten or replace the bull).
• Call for service.
"T---anda numberer You have a fm_ction • Press the Clear/Offpad. ?dlow the oxen t() cool tor one
letter,flash in the error code. hotu: Put the o'_en back into operation.
lower oven display If the function code repeats. • Disconnect all power to the cookino_ center for at
least 30 seconds and then reconnect power. If the
flmction error code repeats, call for serxice.
Displayflashes Power failure. • Reset the lower o'_en clock.
Unabteto getthe Oven control pads were • The Bake and Broil Hi/Lo pads must be pressed
lower oven display not pressed properly, at the same time and held for 3 seconds.
to show "SF'
"Probe.appears This is reminding you to • Enter a probe temperature.
in the lower enter a probe temperature
oven display after plugging in the probe.
Power outage, Power outage or surge. • Reset the clock. If the oven was in use, you must reset
it 1)v,I)ressing, the Clear/Offpad, ,settino,_ the clock
and resetting any cooking flmction.
Steam from the When using the convection • Tiffs is normal.
vent when using feature, it is normal to see
the lower oven steam coming out of the oven
vent. As the number of racks
or amount of food being
cooked increases, the mnomlt
of visible steam will increase.
"Burning', or ,oily; This is normal in a new oven • To speed the process, set a sel6clean cxcle fi)r a
odor emitting from and will disappear in time. u_iniumm of 3 hours. See the Using the self-cleaning
oven vent when using lower oven section.
the lower oven
Strong odorin the An odor from the insulation • This is temporary.
lower oven around the inside of the
oven is normal for the first
few times the oven is used.
Fan noise when using A coofing fm_ or a convection
the lower oven fan (depending on the function
you are using) may automatically
turn on.
• This is normal. The cooling tim will turn on
to cool internal parts. It may run for u l) to 1-I/2
hours atter the oven is turned ott. The convection
fan will cycle on and o11 until the flmction is over
or the door is opened.
48

GE Service Protection Plus '_'
GE, a imme recog_fized _;odd_;kte fbr q_mlhy' and depeildabHhy, offers }(m
Service Protectio_ } h_s --comp_ ehe_s_ e protecti(m o_ all yore" appliai_ces--
No Matter What Brand!
Benefits Include:
* Backed by GE
* All brands covered
. U_imited service calls
. _ parts and labor costs included
* No out-of-pocket expenses
* No bidden deductibles
* One 800 nnmber to call
We ?t Cover An
Angwhoro. Angtfmo.
Yim wi]] be completely satisfied wit]] oLlr service [:)rotectiom_ or yol_ may reql_est yore" mom_ev back
o_ the remaim_im_g x'ab_e of yol_r tom, tract. No ql_estiom_s asked. It's that simple.
Protect vol_r rdHgerato_; dishwasher; washer a_/d d_ye_; raN_ge, TVI VCR al_d mlach more--any brand!
Pbas there's _o extra charge ti)r emergel_cy service m_d ]o_* mol_tb]y fi_la_ci_g is a_ai]ab]e. Eve_ icemaker
coverage a_d %od spoilage protectiol_ is oftered_ '_)_ ca_ rest eas}, ki_owi_g that a]] vo_r w_bmb]e
bo_sebo]d prod_cts are protected agai_st expel_sive repairs.
for more
Please place in envelope and mail to:
General Electric Cempanf
Warranty Registration Department
P.O. Box 3215{)
LouN_4Ue, KY 40232o2150
49

Consumer Product Ownership Registration
Dear Customer:
Thank you for purchasing our product and thank you for placing your confidence ira us.
XA/eare proud to haxe you as a customer'.
Follow these three steps to protect your new appliance investment:
Complete and mail
your Consumer
Product Ox_nership
Registration today:
ILwe the peace ot
mind of knowing we
CHII COIIIH(t }'OH ill
the unlikelx (vent of a
salblv modification.
After mailing the
registration below,
store this ([OClllllellt
in a salt.' place. It
contains intormation
vou will need should
VOll require service.
Our service number is
800.GE.CARES
(800.432.2737).
ReH(] VOIlF ()wller's
Manual careftflly.
It will help you
operate yore- new
appliance properl>
Model Number Serial Number
,,,,,,, I I , , , , , , , I
Important: If you did not get a registration card with your
product, detach and return the form below to
ensure that your product is registered, or register
online at ge.com.
.................................................................................................... _,,... Cul h(r_
Consumer Product Ownership Registration
Model Number Serial Number
, I
Mr. Ms. M_s. Mis_
First ] Lasl ]
Address I I I I I I I I I I I I I I I I I I I I I I I I
ApL # ] I I
(:its' ] I I
Due Pl II:_d
hi [s_ I I I
Month
I I ] I I ] E-mail Addr( ss:
I
I
50
GE Consumer & Industrial
Appliances
General Electric Company
Louisville, K¥/40225
ge.com
* Please l)r(wide )_mr e-mail addrcss to receive, via e-mail, discounts, _,pecial otti,l'_ and other important
commmfications fi-om GE Appliances ((;1_\).
Check here ifvou do not want to receive (ommuni(aIions from GEA's carcftflly selected partnec_.
FAILURE TO (X)MPI.ETE AND RETI RN Tt tlS (2M{I) DOES NOT DIMINISII Y()I R
W.\RI_ \NTY RIGt tTS.
For lnol*_ inft)nnation about (;EA's privacy and data usage polio> go to ge.com and click on
"Pri_cy Poli_y" or call 800.626.2224.

GEBuilt-In Microwave CookingCenter Warranty.
All warranty service provided by our Factory Service Centers, or
an authorized Customer Care® technician. Toschedule service,
on-line, 24 hours a day, vis# us at ge.com, or call 800.GE.CARES
(800.432.2737).Please have serial number and model number
available when calling for service.
Staple your receipt here.
Proof of the orig&al purchase
date is needed to obtain service
under the warrantF
Fromthe dateof the
originalpurchase
GE Will Replace:
Any part ot the microwave cooking center which tifils due to a detect in materials or
wor]unanship. During this limited one-year warranty, GE will also provide, free of charge,
all labor and in-home service to replace the deiecti\'e part,
....
Service trips to your home to teach you how to use
the product.
Improper installation, delivery or maintenance.
Failure of the product if it is abused, misttsed, or
used for other thm_ the intended purpose or used
commerciaZly.
Replacement of house fuses or resetting of
circuit breakers.
Dmnage to the product caused by accident, fire,
floods or acts of God.
h_cidentaJ or consequential damage caused by
possible defects with this applimlce.
Damage caused after delivery.
Product not accessible to provide required service.
EXCLUSIONOFIMPLIED WARRANTIES--Your sole andexclusive remedy is productrepair as provided in this Limited
Warranty.Any implied warranties, iucludiug the implied warranties of merchantabilily or fitness fora particular purpose,
are limited to oneyear or theshortest period allowed bylaw.
11
This warranty is extended to the original purchaser and any succeeding owner for products purchased for
home use within the USA. If theproduct is located in an area where service by a GEAuthorized Servicer is not
available, you may be responsible for a trip charge or you may be required to bring the product to an Authorized GE
Service location for service. In Alaska, the warranty excludes the cost of shipping or service calls to your home.
Some states do not allow the exclusion or limitation of incidental or consequential damages. This warranty
gives you specific legal rights, and you may also have other rights which vary from state to state. Toknow
what your legal rights are, consult your local or state consumer affairs office or your state's Attorney General.
Warrantor: GeneralElectric Company.Louisville, KY40225
5/

ConsumerSupport.
GEAppliancesWebsite ge.com
Haxe a question ur need assistance with your appliance? Tr_ the GE Api/liances _'ebsite 24 hotu_ a day,
an) da'_ of tile year! For greater convenience and tipster serxice, )ou can now download Owner s Manuals,
urder parts ur exert schedule sertice on-line.
ScheduleService
Expert GE repair service is only one step awa) from your doo_: Get on-line and schedule xour service at
your comenience 24 hom_ any (lax of tile year'. Or call 800.GE.(:AI_ES 800.432.2737) during nomml
business hom_.
ge.com
RealLifeDesignStudio ge.com
GE suppurts tile Universal Design concept--produrts, services and en\lronments that can be used by
people of all ages, sizes and capabilities. X,Verecognize the need to design for a wide range of physical and
mental abilities and impaim/ents. Fur details of (;E's Universal Design applications, including kitchen
design ideas fin" people with disabilities, check out our" _'Vebsite toda): For tile hearing impaired, please call
800.TDD.GEAC (800.833.4322).
ExtendedWarranties
ge.com
Purchase a (;E extended warranty and learn about special discounts that are awfilable while your warrant_
is still in effect. Y)m can purchase it on-line anytime, ur call 800.626.2224 during nomml business hour's.
GE Consulner Home Services will still be there alter xour warrant} expires.
PartsandAccessories
ge.com
Individuals qualified to service their own appliances can have parts or accessories sent directly to their
homes (VISA, MasterCard and Discover cards are accepted). Order on-line today, 24 l/o/u_ e\'erv day or
by phone at 800.626.2002 during nomml business hour_.
Instructions contained in this manual coverprocedures tobe performed by any user.Other servicing generally
should be referred to qualified service personnel Cautionmust be exercised, since improper servicing may cause
unsafe operation.
ContactUs
ge.com
Ifvou are not satisfied with tile set_'ice w)u receive Rum (;E, contact us on our X,Vebsite with all tile details
inclurling your phone numbe_; or write to: General Manage_; Customer Relations
(;E Appliances, Appliance Park
I,)uisville, KY 40225
RegisterYourAppl/ance
Register your new appliance on-_e--at your eonvel_enee! Time]} product regism_tiom_ will _]]{)_r[k}_"
en h a m_cedc om m i0m_ica ti_m a m_d [)1"1m_t)t servi ce i0m_del" the tei3?_s (_{}o i0r wa ]"ra]]t_ sh (_i0]d the m_e ed a i:ise.
5:i_l_may also mail im_the preprim_ted regish:_tiom_ card im_c]uded im_the [_ackh_g_material.
g& COrn
Printed in flTe United States

ge.cem
©
Instrucciones de seguridad ........ 2-9
Instrucciones de operaci6n
Autolimpieza del horno inferior . .... 35, 36
Controles del horno inferior . ...... 23-38
Conuoles del horno microondas ..... 10-22
Controles del sensor .............. 16-18
Funci6n Sabbath ................. 39, 40
Panel de control del horno inferior . ..... 23
Panel de control del microondas .... 10, 11
Sonda ......................... 28, 31
Termostato del horno inferior . ....... 34
Cuidado y limpieza
gombilla de alumbrado ................ 44
Horno microondas ................. 41
Parrillas .......................... 44
Puerta ............................ 42
Sonda ............................... 43
Consejos para la resoluci6n
de problemas .................. 45-48
Soporte al consumidor
Garantfa .......................... 51
Registro del producto ............ 49, 50
Soporte al consumidor . ............. 52
Escriba los ni/mems de modelo y
serie aquL"
N-°de modelo
N-°de serie
Puede en('ontrarlos en tlll}l etiqueta
dentro del homo superior en el lado
izquierdo.
PT970-Ho)7_,o de dobl_ pared de 30"
El horno microondas on este
centro de cocina es de I000 vatios.
!_!_!_!_!_!_!_!_!_!_!_!_!_!_!_!_!_!_!_!_!_!_!_!_!_!_!_!::i_!!!!!!!!!!!!!!!!!!!!!!!!!!!!!!!!!!!
49-80432 02-07 JR

INFORMACIONIMPORTANTEDESEGURIDAD.
LEATODASLASINSTRUCCIONESANTESDEUSAR.
iADVERTENCIA!
Si no -sesigue exactamente la informaciSn de este manual, puede ocurrir un incendio, una explosi6n
o un cortocircuito que podria causar dafios a la propiedad, lesiones personales o la muerte.
PRECAUCIONESPARAEVITARLAPOSIBLEEXPOSICIONA UNA
ENERGfADEMICROONDASEXCESIVA
No inmnte operar esm homo con
la puerta abierm ya que la operaci6n
con la puerta abierta puede resultar en
una exposici6n nociva a la energfa de
microondas. Esimportanteno anular o
alterar los interbloqueosde seguridad.
No co]oque ningdn objeto entre la parm
flonta] del horno y la puerta ni pe_nita
que se acumulen [esiduos sobre las
superficies de sellado.
Nadie debe ajustar o reparar el homo
a excepci6n del personal de servicio
adecuadamenm calificado.
No opere el homo si est;i daflado.
Es parficulam]ente importante que la
puerta del homo cierre apropiadamenm
y que no existan daflos a:
[] la puerta (dobladura),
[] las bisagras y aldabas (rotas o flojas),
[] los sellos de la puerta y superficies de
sellado.
AVISOIMPORTANTEDESEGURIDAD
La Ley de tSxicos y agua potable segura de California (California Safe Drinking Water and Toxic
Enforcement Act) exige al gobemador de California publicar una lista de las sustancias conocidas
en el estado que causan c#ncer, defectos de nacimiento u otros dafios, y exige alas empresas que
alerten a los clientes sobre la exposiciSn potencial a dichas sustancias.
El aislamiento de fibra de vidrio en los homos de autolimpieza emite una pequefia cantidad de
monSxido de carbono durante el ciclo de limpieza. Puede minimizarse la exposici6n permitiendo
la ventilaciSn con una ventana abierta o utilizando un ventilador.
2

ge.com
PRECAUCIONESDESEGURIDAD
Cuando se utilizan aparatos e/#ctricos, se deben seguir las precauciones de seguridad b#sicas,
incluyendo /as siguientes:
de co#exi## a tierra:
Este apmato debe estai (onectado a m_
siswma de cableado peImaneme, met_lico,
conectado a della o se debe tel-ldei un
co_dt_ctoi de conexi6n a fiei[a del equipo
con los c(mducto_es del ci_vuito vestai
conectado a la tei-minal de col_exi6n a fieHa
del equipo o puesto sob_e el apamto.
riesga de quemaduras, cortecircuites, incendio,
]esiones a personas e expesici6n a un exceso
de energia de microondas:
Use esm aparato finicamenm para los
fines descritos en este manual. No utilice
qu/micos o vapores corrosi_s en esm
aparato. Esm centro de cocina estd
diseflado especfficamenm para calenmr
o cocinar alimenms, y no debe ufilizarse
para uso industrial o en laboratorios.
Asegfirese de que su aparato est_ insmlado
apropiadamenm y sea conectado a dena
por un t_cnico calificado segdn las
insuucciones de instalaci6n suministradas.
Pida al instalador que le muestre la
ubicaci6n del cortacircuitos o fllsible.
M_hque]o para obmner refbrencia fJcil.
Asegfirese de que el centro de cocina
est6 instalado de una manera segura en
un gabinete y que est6 fijado fim_emente
a la estrucmra de la casa. El peso sol)re
la puerto del homo podrfa causar que
el homo se incline y produzca una lesi6n.
Nunca pemfita que nadie se suba,
se siente o se cuelgue sobre la puerta
del homo.
Este aparato debe ser reparado
finicamente por el personal de servicio
calificado. Conmcm a la planta de servicio
autorizada m_s cercana para la inspecci6n,
reparaci6n o _jusm. No repare o
reemplace ninguna parte de este aparato
a menos que est6 especfficamenm
recomendado en esm manual. Todas las
demos reparaciones deben ser referidas
a un t6cnico calificado.
No almacene este aparato a la intempei_ie.
No ufilice esm producto cerca del agua,
como por ejemplo en un s6mno hfimedo,
o cerca de una piscina.
Anms de realizar cualquier reparaci6n,
desconecte el suministro de corrienm
del centro de cocina en el panel de
disu_ibuci6n de la casa quitando el fllsible
o apagando el cortacitvuitos.
No opere esm aparato si fiene un cable o
enchufe daflado, si no estfi flmcionando
apropiadamenm, si ha sido daflado o
se ha cafdo.
No deje a los niflos sin supervisi6n;
los niflos no deben estar solos o sin
supervisi6n en un _irea en la que un
aparam est_i en uso. No se les debe
pennitir sentarse o pararse sob_e ningmm
de las parms del aparato.
No pemfim que nadie se suba, se siente
o se cuelgue sol)re la puerta. Esto podrfa
daflar el centro de cocina y causar una
]esi6n personal grme.
PRECAUCION:nose eben
guardar artfculos de interns para los niflos
en los gabinetes ubicados encima de
un homo; los niflos que suban al homo
para alcanzar cosas podrfan resultar
grax_menm hefidos.
Ensefle a los niflos a nojugar con
los conuoles o con cualq uier otra parm
del centro de cocina.
i,os rayones o impactos se_>ros sobre
la cubierta de cristal podrfan romper
o destrozar el vidrio.
Udlice ropa apropiada. Nunca debe
x>sfir ropa suelm u holgada mientras
est_ utilizando el aparato. Los materiales
inflamables pueden encenderse si entran
en contacto con elementos calientes v
pueden causar qnemaduras grm>s.
3

INFORMACI JNIMPORTANTEDESEGURIDAD.
LEATODASLASINSTRUCCIONESANTESDEUSAR.
iiU'>_..... i_
4
ADVERTENCIA!
UCIONESDESEGURIDAD
No use agua para apagar incendios causados por grasa. Nunca agarre una cacerola que se est_
quemando. Sofoque las cacerolas que se est_n quemando cubri_ndolas completamente con una
tapa bien ajustada, una bandeja para hornear ouna bandeja plana. La grasa que se est_ quemando
fuera de una cacerola puede sofocarse con bicarbonato de sodio o, si esN disponible, un extintor de
incenflios multipropdsito de polvo seco o de espuma.
Use dnicamenm guanms para cacerolas
que est_n secos. Los guanms hfimedos o
mojados sobre superficies calientes
podrfan causar quemaduras debido al
vapor No pennita que los guanms entren
en contacto con los elementos de ]a
superficie calienm. No use una toalla u
ouo 0po de tela xoluminosa. Este upo de
te,la puede encenderse sobre un elemento
de superficie caliente.
Siempre manmnga las toallas para platos,
guanms para cacerolas y otros objetos de
mla a una distancia segma de su homo.
Siempre manmnga los umnsilios de
madera y pl_stico, asf como alimentos
enlatados, a una dismncia segura de
Sll hoF/IO.
Siempre mantenga tapices, cortinas o
pmSos combustibles a una distancia segura
de su homo.
inflamables cerca de este o de cualquier
otro aparato.
No pem/ita que la grasa de cocina u otros
materiales inflamables se acumulen dentro
o cerca del centro de cocina.
No toque los elementos de
calentamiento o la superficie inmrior del
homo. Estas superficies podrfan estar lo
suficientemenm calientes como para
quemar aun si est_in oscuras. Duranm v
despu_s del uso, no tuque ni pemfita que
la ropa u otros mamriales inflamables
entrenen contacto con cualquier drea
inmrior del horno; pennita el tiempo
suficienm para que plJmero se enflfe.
I,as superficies potencialmente calienms
inchuen las aperturas de xenfilaci6n del
homo, la superficie cerca alas aperturas y
las hendiduras ahededor de la puerta del
horllo.
No almacene materiales inflamables
dentro del homo o cerca del centro de
Cocina.
No cubra ni bloquee ningmm de las
aperturas del aparato.
Por su segmqdad, nunca use su aparato
para calentar la habitaci6n.
No deje objetos hechos de papel,
umnsilios de cocina o alimentos sobre
el homo mienuas no est_ en uso.
No almacene ni utilice materiales
combustibles, gasolina u otros xapores
RECUERDE:la superficie intema del homo
puede estar calienm cuando se abre
la puerta.
Nunca coloque los umnsilios de cocina
ni ouos artfculos sol)re el piso del homo.
Existe un elemento de calenmmiento
deba]o del piso del homo. Colocar
artfculos sob_e el piso del homo puede
causar que el homo se sobrecalienm,
_esultando en daf_os para el homo
ven riesgo de daf_os o incendio en
los gabinems.
CUEZALASCARNESYELPOLLOCOMPLETAMENTE...
Cuezala cameroja yde avepor coropleto:la camerojaa unateroperaturaINTERNAdeal roenos160°Fy la de
avea una temperaturaINTERNAde al menos 180°ELacocci6na estasteroperaturasofreceprotecci6ncontra
enferroedadesde transroisi6npor a/iroentos.

ge.com
HORNOMICROONDAS
Lea y siga la secciSn especffica "precauciones para evitar una posible exposiciSn a una energfa de
microondas excesiva" en este manual
Para reducir el riesgo de incendio
en la cavidM det homo:
No pennita que los alimentos
se sobrecocinen. Est_ amnto si se
encuentra pape], pldstico u otros
mam_iales combustibles en el inmiior
del aparam para fi_cilitar la cocci6n.
Remueva las tirillas de papel-alambre de
los recipienms de pape] o pldstico anms de
colocar ]as bolsas en el homo.
No udlice su homo micmondas para secar
peri6dicos.
No cocine palomims de mafz en su homo
microondas a menos que se encuentren
en un accesorio de palomitas de mafz
especial para microondas o a menos que
utilice unas palomitas de ma/z hechas para
set cocinadas en homos microondas.
No sobrecocine ]as papas. Estas podi{an
deshidratarse y encenderse, causando
daflos a] homo.
Para evimr daflos al horno y el peligro de
un incendio, no opere el homo mientras
est_ vacfo. Si el homo flmciona vacfo
durante un minuto o dos por accidente,
no hay ningdn peligro. Sin embargo, es
importante que evim la operaci6n del
horno vacfo eta todo momento: esto
ahorra energfa y prolonga la vida Off]
de] homo.
No ufilice el horno para prop6sitos de
almacenamiento. No deje objetos hechos
de papel, umnsilios de cocina o alimentos
sobre el homo mienuas no est_ en uso.
Si se encienden los matedales
que se encuenuan denuo del homo,
mantenga la puerta de] homo ce_lada,
apague el homo y desconecm
la corlienm en el fllsible o en
el panel de cortaci_vuitos. Si ]a puerta
abierm, se puede exmnder el flleg_.
Este homo de microondas no est_
aprobado ni comprobado para el uso
mm{timo.
Algunos productos como los huexos en
el cascar6n y los contenedores sellados--
pot ejemplo,jmTas celTadas---explotarfin
y no deben calenmrse en este homo
microondas. Tal uso de] homo
microondas podrfa resultar en ]esiones.
No opere el homo microondas si no
se encuenuan co]ocados ]a platatbllna
giratoria y el apoyo.
Evim calenmr alimentos para beb_s
enjmTas de vidrio, incluso sin ]a mpa.
Asegdrese de que todos los alimentos
para niflos se cocinen pot completo.
Agite los alimentos para distribuir el calor
unit_m_emenm. Cuando caliente ]a leche
de tBrmula o ]a ]eche matema sea
cuidadoso para evitar que hierva. El
_ecipienm puede sentirse rods frfo de
lo que estd ]a ]eche. Siempre pruebe
la mmperamra de la leche anms de
alimentar al beb_.
No hierva hue_s en un homo
microondas. La presi6n se acumularg
denuo de huex_ y causar_i que _sm
explore, resultando en posibles ]esiones.
Los alimentos con una "c_iscara o piel"
intacm como las papas, embutidos,
tomates, manzanas, huex_s, hfgados
de polio y otras menudencias deben set
agtgereados para pem/itir que el vapor
escape durante la cocci6n.
No descong_le bebidas cong_ladas
en bomllas con un cuello estrecho
(especialmente ]as bebidas carbonamdas).
Aunque el recipienm est_ abierto, puede
acumularse la p_esi6n. Esm puede causar
que el _ecipiente explore, _esultando en
posibles ]esiones.
Los alimentos calientes y el vapor pueden
causar quemaduras. Tenga cuidado
cuando abra cualquier recipienm con
comida caliente, incluyendo ]as bolsas
de palomitas de mafz, bolsas y cajas de
cocci6n. Para prevenir posibles ]esiones,
dirija el vapor lejos de las manos v
el rostro.
(komo con cualquier aparato, se necesita
una supervisi6n cercana cuando sea
uulizado pot niflos.

INFORMACIONIMPORTANTEDESEGURIDAD.
LEATODASLASINSTRUCCIONESANTESDEUSAR.
iADVERTENCIA!
TENSILIOSDECOCINASEGUROSPARAMICROONDAS
Aseg(lresedequetofloslosutensiliosdecocinaufilizadosensuhomodemicroondasseanadecuadosparacocinar
conmicroondas.Puedenutilizarselamayorfade cacerolasdevMfio,platosparacocinar,tazonesdemeflici6n,tazones
paracremas,cer#micao vajilladeporcelanaquenotongaadomosmet#licoso est#bamizaflaconunlustremet#lico.
Algunosutensiliosdococinaest#netiquetadoscomo"aptosparacocinarconmicroondas"
:, Sino esmseguro si un plato es seguro pare cocinar :, Los utensilios de cocina pueden calentarse debido
con inicroondas, haga esta prueba: coloque en el
horno elplato que esta ptobando y un tazdn de
medici6n de vidrio llenado con una tazade agua;
coloque el taz6n de medici6n sobre o allado del
plato. Encienda el horno mictoondas dumnte 35 a 45
segundos en alto. Siel plato se calienta, no debe ser
utilizado para cocinar con mictoondas.
Siel plato permanece fll'oy s61ose calienta
el agua en la taza,entonces el plato es seguto
para cocinar con inicroondas.
Siutilizaun tem_dmetro para came durante
la cocci6n,asegtirese de que _stesea seguro
para utilizarseen hornos microondas.
No utiliceptoductos de papel reciclado. Lastoallas,
servilletasypapel pat_afinadode papel tvciclado
pueden contener ttozos memlicosque pueden causar
un arco el_ctt_icoo la ignici6n. Deben evitat:se
los ptoductos de papel que contengan nailon o
filamentos del nailon > qne tambi_n pueden
encenderse.
:,_Mgunas bandejas de poliestireno (como en lasque
se encuentra empacada lacarne) tienen una cinta
delg_adade metal incrustada en la parte infbt_ior.
Cuando esmsbandejas son calentadas, el metal puede
qnemar el piso del horno o encender una toalla
de papel.
:, No todas las envolturas pl_sticasson adecnadas para
el uso en hornos mict_ondas. Reviseel paquete pare
obtener instrucciones de uso apropiado.
:, i;is toallasde papel, el papel pamfinado y las
envolmras plg-_sticaspueden utilizm:separe cubrir
los platos con el fin de retener la humedad yprevenir
las salpicaduras.Asegdresede ventilar la envolmm
pl_isticapare que elvapor pueda escapar
:, i;_ comida o losutensilios met,'ilicosde cocina
demasiado grandes no (leben set utilizadosen
un borno microondas. Podr/a presentm:seun
cortocitvuito o incendio.
;, Aunque losplatos de papel pueden utilizarsepare
la coccidn ctonometrada yel descongelamiento,
no los utilicepara lacoccidn con Auto Sensor.
Para recalentat; utilice platoso tazones segurospara
cocinar con microondas. Cubra con una envoltum
pl_istica.
a latransferencia de calor a partir de losalimentos
calientes. Esposible que se necesiten agvumdems
para manipular losutensiliosde cocina.
:, i;ts bolsasde coccidn "hervibles"y lasbolsas
pl_sticasesttvchamente cermdas deben set
cortadas, perfiomdaso ventiladasde acuerdo
con las instmcciones del paquete. De no hacerlo,
el pl_sticopodtl'a explotar dumnte o inmediatamente
despn_s de lacoccidn, resultando en posibleslesiones.
[Pambi_n,losrecipientes pl;isticosde almacenamiento
(leben estar pot lo menos parcialmente destapados
}a qne forman un selloheml_tico. Cuando cocine
con recipientes cermdos he_ln_ticamente con
una envoltnra pldstica,_vmuevacuidadosamente
la cubierta y dit_ijael vapor lejosde lasmanos y
el tostt_.
;, / ltiliceelpapel aluminio finicamente de acnerdo
con las instmcciones en este manual. Losalimentos
prepamdos en porciones list_tspare calentar yservir
(TVDinners) pueden cocinm'secon microondas en
bandejas de papel aluminio de una almm menor a
3/4"; remueva la cnbierta superior de alnminio y
vuel_aa colocar la bandeja en la caja.Cuando utilice
papel alnminio en el homo microondas, mantenga
el papel aluminio a una distancia de al menos
1pulgada de loslados del horno.
:, / ltensiliosde cocina plfisticos:losutensilios de cocina
pl_sticosdiseflados pare la coccidn con mict_ondas
son mu} (_files,pero deben ufilizarsecuidadosamente.
Incluso el pl,5.sdcoseguro pare mic_ondas puede no
set tan tolerante alas condiciones de sobrecoccidn
como lo son vidrio o losmateriales cer_micos,y puede
ablanda_:seo quemarse sies sometido a periodos
corms de sob_ecocci6n.En exposiciones pmlongv_das
a lasobrecoccidn, los alimentos vlos utensilios de
cocina pueden encenderse.
Sigalassiguientesdirectrices:
[] / ltilices61oplfisticossegurospara microondas
xutilfcelosen estricto cumplimiento con las
}ecomendaciones del fiabricantede los utensilios
de cocina.
[] No caliente con microondas los recipientes
VaClOS.
[] No pe_nita qne los nitSosutilicen utensilios de
cocina pl_isticossintotal supervisidn.

ge.com
ARCOELE-CTRICO
Si observa un arco el6ctrico, presione el bot6n CLEAR/OFFy corrija el problem&
El arco electrico es el termino de microondas
para definir las chispas dentrodel homo.
El arco electrico es causadopor:
Metal o papel aluminio que est;i en
contacto con el lado del homo.
E1 papel aluminio no estfi amoldado a
los alimentos (los bordes colocados hacia
at_il)a actdan como antenas).
Metal, como tMllas para torce_; alfileres
para axes o platos con adomos dorados
en el microondas.
Se estdn utilizando toallas de papel
reciclado en el homo microondas que
contienen pequefias piezas met_ilicas.
AGUASOBRECALENTADA
El agua y otros I[quidos que son sometidos a las micmondas no siempre forman burbujas cuando
alcanzan el punto de ebullici6n. Ciertamente pueden estar sobrecalentados y no mostrar ninguna
burbuja.
Los lfquidos sobrecalentados bmt)ujear_n
flmra de la taza cuando _sta se mueva o
cuando algo como una cuchara o una bolsa
de t_ se coloquen en ella.
Para prexenir que esto suceda y cause
lesiones, no caliente ningdn lfquido por rods
de 2 minums por taza.
Despu_s de calentat; permita que la taza
pemmnezca en el homo microondas
durante 30 segundos antes de mo\_rla o
colocar alg_ denuo de ella,
EbulliciOnespontanea
Bajo ciertas circunstancias especiales, los
I[quidos pueden comenzar a hervir durante
o poco despu6s de ser quitados del homo
microondas.
Para prevenir quemaduras por las
salpicaduias del lfquido, antes de quitar
el recipienm del homo recomendamos
lo siguiente:
Pem/ita que el recipienm pennanezca
en el homo duianm 30 a 40 segundos
despu& que el homo se haya apagado.
No pennita la ebullici6n de lfquidos en
recipientes con un cuello estrecho como
las bomllas de gaseosas, bomllas de vino y
especialmenm las tazas de caf_ con cuello
estrecho. Incluso si el recipienm est_i
abierto, puede acumularse un exceso
de vapor y causar que _sm explote
O se rebose.

INFORMACIONIMPORTANTEDESEGURIDAD.
LEATODASLASINSTRUCCIONESANTESDEUSAR.
TODOSLOSSIGUIENTESASPECTOSSONNORMALESCON
SUHORNOMICROONDAS
_apor escapando ahededor de la puerta.
Refle]o de ]uz alrededor de la puerta o de
la carcasa extema.
Puede presentarse una p_idida de
inmnsidad de la luz del homo vun
cambio en el sonido del soplador cuando
se opera a niveles de colxienm infefiores.
E1 xenfilador del microondas puede
operar con aml)os homos apagados. Una
xez se enfl_e el control se apagarfi solo.
Mientras est_ utilizando su homo
microondas es posible que note algo de
interferencia en la TV o radio. Es similar a
la interferencia causada pot otros aparatos
pequeflos y no indica un problema con
Sit hoY/lO.
Un golpeteo amortiguado mientras est:4
fimcionando el homo.

ge.com
& iADVERTENCIA!
AUTOLIMPIEZADELt-IOflNOINFERIOR
No ufilice papel aluminio para recubrir la parte inferior del homo, excepto como se sugiere en este
manual. La instalaciSn inapropiada del papel aluminio podda resultar en un riesgo de cortocircuito
o fuego.
Pem_anezca alejado del homo cuando abm
la puerto del homo. E1aire caliente o el vapor
que escapa puede causar quemadmas en
las manos, rostro y/u ojos.
} No caliente los recipientes de comida
que no est6n abiertos, ia presi6n puede
acumulaLse x el recipiente podria explota[,
causando lesiones.
} Mantenga la ventilaci6n del homo sin
obstmcciones.
Mantenga el homo libre de acumulaciones
de gmsa.
Mantenga el centro de cocina limpio y libre de
acumulaciones de gmsa o dermmes, los cuales
pueden encende_se.
} Nunca deje la puerta del homo abierta cuando
no est_ obserxando el centro de cocina.
} Coloque la parfilla del homo en la posici6n
deseada mientvas el homo est6 fiio. Sise deben
inanipular las panillas cuando el homo esm
caliente, no pennia que la aganadem de
la olla entre en conmcto con el elemento
de calenmmiento.
} Cuando utilice bolsas de cocci6n o asado en
el homo, siga las instrucciones del fifl)ficante.
Extmer la parfilla al seguro de pamda es
conveniente pare lexantar alimentos pesados.
_ambi_n es una precauci6n contm quemadums
producidas al tocar superficies calientes de
la puerta o de las paredes del homo.
} No utilice el homo como un firea de
ahnacenamiento. Los artkulos ahnacenados
en un homo pueden encende_se.
No deje productos de papel, utensilios de
cocina o alimentos en el homo cuando no est_
en tlSO.
Despu_s de asar a la parfilla, siempre saque
del homo la cacerola para asar yl/mpiela.
ia gi'asa relilanente ell tlna cacerola pare asar
puede encende_se la siguiente vez que utilice
el homo.
} No utilice el homo pare secar pefi6dicos.
Sison sobrecalenmdos, pueden encende_se.
Nunca deje fiascos o lares con gvasa denamada
sobre o cerca de su homo.
} (lnicamente limpie las partes enumemdas en
este Manual del propietafio.
} No limpie el empaque de la puerto.
E1 empaque de la puerm es esencial pam
un buen cierre. Debe tene_se cuidado de
no desgasm_; dahar o mover el empaque.
No utilice limpiado_es. Ningfin limpiador
comercial pare hornos ni ninguna cubierta
protectora para hornos debe utilizmse dentro o
ahededor de las partes del homo. i,os residuos
de los lilnpiadores de hornos dahar_in
el interior del homo cuando se udlice
el ciclo de autolimpieal.
} Antes de la autolimpieza del homo, remueva
la sonda, cualquier cacerola pare asm; parrilla
} otros utensilios de cocina.
} Antes de comenzar un ciclo de autolimpieza,
asegfirese de limpiar con un tvapo los
derlam es.
Si el modo de autolimpieza no flmciona bien,
apague el homo y desconecte el suministro de
corriente. Haga que un t_cnico calificado
realice la repamcidn.
Est_ atento al ventiladoE en algfin momento
dmante el ciclo de limpieza debe escuchaLse
el ruido de un ventilador Si no sucede esm,
llame pare que el homo reciba mantenimiento
antes de una nueva autolimpieza.
LEAYSIGAESTAINFORMAC/ONDESECURIDAD
CU/DADOSAMENTE.
GUARDEESTASINSTRUCCIONES

Usode loscontrolesdel homomicroondas.
A Io largo de este manual, las caracterfsticas y apariencia pueden variar con los de su model&
M_CROWAVEOVEN
0
10
SENSOR COOKING
@
o
I) q)
Caracterfst/casyconfiguracionesdecontrolde/homom/croondas
0
0
Pantalla
Muestra el tiempo dunmte las flmciones de
cocci6n, el nivel de potencia que est_ siendo
utilizado, los cddigos autom_ificos, los pesos
de los alimentos para autodescongelmTdento,
el mode de coccidn v las insmmciones.
NOTA:el tiempoenlapantallade/microonflas
semuestraenminutesy segunflos(1:30esunminute,
30segunfios).Enel homoinferior,el tiemposemuestra
enhorasyminutes(1:30esunahera,30minutes).
Controles del sensor autom#fico
I,a fila superior de botones emnnera artfculos
especNcos que puede elegir para calenmr o
cocinar.
Popcorn(Palomitasdemaiz)
Ufilfcelo para px_pamr las palomitas de mafz.
Beverage(Bebidas)
Udlfcelo para (alentar i/ha taza de cat_ tl otl'aS
bebidas.
Reheat(Recalentafl
Udlfcelo cuando los alimemos necesiten un
calenmmiemo nipido.
Vegetable(Verduras)
Udlfcelo cuando co(ine _er(lm'as fl'escas,
congeladas o enlatadas. Xsegfirese de quimr
todas las verdures de los recipientes heml(_ticos
metfilicos anms de colocarlas en el homo
microondas.
Potato(Papas)
Udlfcelo cuando codne papas enteras.
Chicken/Fish(Pollo/Pescaflo)
Ufilfcelo cuando codne presas de pollo o filetes
de pescado.
0
0
Power Level (Nivel de potencia)
Presidnelo pare elegir el nivel de potencia que
desea estaNecer. Obserxe la pantalla mientras
presiona esm bot6n para seleccionar el nivel de
potencia que desea establecex: Tm-nbi(_nvenl tm
hi,el de descongelamiento. Esm c(mJiguracidn
le permitinl escoger su propio nivel de powncia
de (lescongelmTdento utilizando los botones
nm-n_ficos.
Clear/Off (Borrar/Apagar)
Presionar Clear/Offcan(-elatodas las flmciones
de coccidn del horno microondas. Esto no
borra el [4Jtchen Timer (Tempofizador de
Cocina).
Ufilice Time Defrost pare los (tem_s alimentos.
-timeCook (Tiempo de cocci#n)
I,e pemfite utilizar el microondas hasta per
99 l//intltOS v 99 seg-undos.
Help (Ayuda)
O E1 bot(_)n Helprfltlestr}t infbm-lacidn de
las caracteristicas y paums tidies. Presione
el botdn Help,luego presione el botdn de
la caracmrfstica.
-timeDefrost (fiempo de descongelamiento)
Udlice Time Deli'ost pare des(ongelar
alimentos distintos a la came r(!ja, (le me
? pescado.
Auto Defrost(Descongelamientoautom_tico)
Utilke _3dltODeii'ost I)ara descongelar, canle
r@t, (le axe _ pescado.

ge.com
Caracterfsficasycon@uracionesdecontroldelhomo
microondas
Botones num#ricos @
Despug_s de presionar un bot6n de
fllnd6n, presione los botones nuln_iJcos
para establecer la cantidad exacta de
tielnpo que desea cocinai: Per ejemplo,
si presiona los botones I, 2y 5, establece
1 milmtO y 95 segtmdos.
@
0
Sound Level (Nivel de sonido)
E1 nivel de sonido de la alerta sonora
puede ser _!iustado. Presione el bot6n
Sound Level. Escoja 0 a 3 para mudo a
flmrte.
Start/Pause (Inicio/Pausa)
Desput)s de ele(tuar todas las selecciones,
presione esta ahnohadilla para encender
el horno. Debe presiolmi_e el bot6n
Start/Pause para encender cualquier
fimci6n.
Adeln_s de encender muchas flmciones,
el botdn Start/Pause le pemfite detener
la co(cidn sill abrir la puerta del horno
nficroondas o borrar la pantalla.
Temporizador de cocina
Presione para establecer el ten_porizad()r
hasta 99 milmtos y 99 segundos. Presione
los botones nuinc)iJcos para establecer
el fien_po. Presione el bot6n Kitchen Timer
nuewnnente paI'a inidaI: Presione el bot6n
Kitchen timer dos veces para borrar
la pantalla.
Noenciendelaenergfadem/croondas.
Reminder (Recordatorio)
I,a (aracterfsfica Reminderpuede ser
utilizada coino I'elQj despertadoi; y puede
ser utilizada en cualquier InOlnelm),
inchlso cuando el horno est¢) fiulcionando.
E1 recordatorio puede ser configm'ado
hasta 24 horas despug_s.
Inicio retardado
I,e pemfite configm'ar el homo
i/licroondas p_li'_l que dell/ore la cocci6i_
hasta per 24 horas.
Adicionar 30 segundos
Cada vez que presione este bot6n,
el tiempo establecido aun_ei_ta en
30 segtmdos.
Clock (Reloj)
Pi'esione este bot6n antes de confi,,urar
el reloj.
11

Cambiodel nivel depotencia del microondas.
El nivel de potencia puede ingresarse o cambiarse inmediatamente despu#s de ingresar el fiempo para -time Cook,
-time Defrost oExpress Cook. Elnivel de potencia tambi#n puede cambiarse durante la cuenta regresiva del tiempo.
iii; (
_i_i I ii i_ _ ii iii i
i i
iiDEZ3 [E3[E3
i ii ii i
! iiii iii iii
Para cambiar el nivel de potencia...
[] Presione el bot6n time Cook,
[] ]ngrese el fiempo de cocci(re.
] Presione el bot6n PowerteveL
[] Seleccione el ni',el de potencia
deseado 1 a 10.
] Presione el bot6n Start/Pause.
Losd/st/ntosnivelesdepotencia afiaden
flexibil/_fafla la cocc/_nconm/croondas.Los
nive/esdepotencia en elhomo microondas
puedencompararsecon/as unidMes de
superf/ciesobre unacocina. Cadanivel de
potenciale brinflaa suhomomicroonflas
energfaunciertoporcentaje de/fiempo.
E1 nivel de potencia 7 es energfa de
microondas el 70% del tiempo.
E1 nivel de potencia 3 es energfa el 30%
del tiempo.
i_ mavorfa de la cocci6n se harfi
en Alto (nivel de potencia 10)lo que
le da 100% de la potencia. E1 nivel de
potencia 10 codnarfi mils rfipido pero
es posible que los alimentos necesiten
tm movimiento, rotad6n o giro mils
fl'ecuente.
Una configm'acidn mils k!ia cocinarfi mils
tmifimnemente y se necesitarfi menos
movimiento o rotaddn de los alimentos.
_Mgunos alimentos pueden tenet tm
mejor saboL textm'a o apariencia si
se ufili/_l una de las configuraciones
interiores. Utilice un nivel de potenda
inferior cuando cocine alimentos que
tengan tendencia a herviL como las
papas gratinadas.
Pemfita plazos de descanso (cuando
los ciclos de ene_gfa de microondas
se apaguen) para que los alimentos
"balanceen" o transfieran el calor a su
interioi: Un ejeInph) de esm se nluestra
con el nivol dopotoncia 3:el ciclo de
descongelamiento. Si el ciclo de energfa
de microondas no se apaga, el exterior
de los alimentos se codnarfi antes de
que el interior se descongele.
Aqui se presentan algunos ejemplos de los
usospara los distintos niveles de potencia:
Alto 10".pescado, tocino, verduras,
hervir lfquidos.
Medio a Alto 7: cocd6n suave de came
r()ja y de ave; cacerolas para hornear v
recalentm;
Medio & cocci6n lenta v
ablandamiento para estofi_dos v,cortes
iilenos blandos de cai'ne.
Bajo 2 6 3."escongelamiento; hervh"
a fllego lento; salsas delicadas.
Calentar I: mantener la comida
caliente; ablandar la mantequilla.
/2

Usede las caracteristicascronometradasdelmicroondas, ge.oom
i i ii i _ i ii
i_ :iiI _i!
jji ii ji! )i) i)i j
Time CookI (Tiempo de coccion I)
Lepermiteufifl2arelmicroondashastapor
99minutosy99segundos.
E1 nivel de potencia 10(Alto) se establece
auton_itican_ente, pero usted puede
cambiarlo para re;is flexibilidad.
] Presione el botdn time Cook,
[] ]ngrese el fiempo de cocci(m, Pot
eiemplo, presione I, 5, 0 y 0 para
15 minutos.
[] Cambie el nixel de potencia si no
desea toda la potencia. (Presione
el bot6n Power Level. Seleccione el
nixel de potencia deseado 1 a 10).
[] Presione el bot6n Start/Pause.
Usted puede abrir la puerta durante
Time Cook para revisar la comida. Cierre
la puerta ) presione el bot6n Start/Pause
p_lI';I contintl_lI" la cocci(Sn.
Time CookII (Tiempo de coccion II)
Lepermitecamblar los nive/esdepotencla
autom_t/camenteflurante /acocci6n.Aquf
seindicacomohaceflo:
] Presione el bot6n Time Cook,
[] lngrese el tiempo de cocci6n.
[] Cambie el nixel de potencia si no
desea toda la potencia. (Presione
el bot6n Power Level. Seleccione
el nixel de potencia deseado 1 a 10.)
[_] Presione nuewmmnte el bot6n
IELj
time Cook.
[] lngrese el segtmdo fiempo
de cocci6n.
[]
[]
Cambie el nivel de potencia si no
desea toda la potencia. (Presione
el botdn Power Level. Seleccione
el nixel de potencia deseado 1 a 10).
Presione el bot6n Start/Pause.
M final de Time Cook 1, Time Cook 1I
comienza la cuenta regresix _.
EXPRE_ EJ¢pRESS E;gpRES5
ExpressCook(Coccionexpres)
£sta esum [orma r@ida deestab/ecerd tbmDo
decocc/6nentre 7y 6minutes
Presione tmo de los botones Express
(de I a 6) para 1 a 6 minutos de cocci6n
a un niveldepotencia10.P(>rejemplo,
presione el botdn 2para 2 minutos de
tiempo de cocci6n.
E1 nivel de potencia puede cambiax_e
cuando el fiempo est_ en cuenta
regresiw_. Presione el bot6n PowerLevel
e ingrese 1 a 10.
Add 30Seconds(a_adir 30segundos)
Ustedpuedeutff/2arestacaracterfstbadedos
fT18nerss.
AfladiM 30 segund_xs a la cuenta
regresi\a (ld fiempo cada vez que
presione el bot6n.
Puede ufili/mse como una manem Mpida
de emd)lecer 30 segundos de fiempo de
cocddn. No neceota p_edonar d bot6n
Start/Pause; el homo se encendeM
imnediatamente.
13

Usede/as caracte#sticas cmnemetrMas deimicroendas.
Gufade cocina para el tiempo de cocciSn, Ufiiice el nivel de potencia Alto (t0) a menos que se indique /o contraHo,
Cantidad fiempo Comentarios
Arveias
(frescas,flescascaradas) 2Ibconlacascara 9a 12min Enunacacerolade1cuarto,coloque1/4detazadeagua.
(congelafla) paquetede10oz 4a8 min Enunacacerolade1cuarto,coloque2cucharadasdeagua.
Br6coli
(cortefresco) 1racimo(11Aa1½Ib) 7alOmin Enunacaceroiade2cuartos,coloque1/2tazadeagua.
(tallosfrescos) 1racimo(11Aa1½Ib) 9a13min Enunacacerolade2cuartos,coloquel/4detazadeagua.
(congelado,picaflo) paquetede10oz 5a8min Enunacacerolade1cuarto.
(talloscongelaflos) paquetede10oz 5a8 rain Enunacacerolade1cuarto,coloque3cucharadasdeagua.
Calabaza
(fresca,deveranoyamaril!a) 1Ibenrodajas 4a7 rain Enunacaceroiade11_cuartos,coloque1/4detazadeagua.
(deinviemo,bdlota 0marr6n) 1calabaza 7a 11rain Corteenmitadesy quitelasmembranasfibrosas.Enun
(aproximadamente1 Ibcadauna) recipientedevidrio de2cuartos,coloqueelcortedela calabaza
haciaabajo.Volteeelcortehaciaarribadespuesde4minutos.
Coliflor
(florescencia) 1cabezamediana 9a 14min Enunacaceroiade2cuartos,coloque1/2tazadeagua.
(fresca,entera) 1cabezamediana 9a17min Enunacacerolade2cuartos,coloque1/2tazadeagua.
(congelafla) paquetede10oz 5V2a8rain Enunacacerolade1cuarto,coloque2cucharadasdeagua.
Esparragos
(ta#os#escos) lib 7al0min Enunacacerolade1½cuartos,cobque1/4detazadeagua.
MedioaAlto (7)
(tal/oscongdados) paquetede10oz 5a8 min Enunacacerolade1cuarto.
Espinacas
10a 16oz 5a8 min Enunacacerolade2cuartos,coloquela espinacalavada.
(congdada,picadayen hojas) paquetede10oz 5a8 rain Enunacacerolade1cuarto,coloque3cucharadasdeagua.
Friio/es
I
(verdesfrescos) 1Ibcorteenmitades 12a 17min Enunacacerolade1½cuartos,coloque1/2tazadeagua.
(verdescongelados) paquetede10oz 6a9min Enunacacerolade1cuarto,coloque2cucharadasdeagua.
(fimacongelada) paquetede10oz 6a9min Enunacacerolade1cuarto,coloque1/4detazadeagua.
Maiz
(granocongelado) paquetede10oz 4a8 rain Enunacacerolade1cuarto,coloflue2cucharadasdeagua.
Mazorca demaiz
(fresca) la 3espigas 3aSmin Coloqueel maizenunrecipientedevidrioparahornearde
porespiga 2cuartos.Siel porespigamaizestaenlacascarilla,noutilice
agua;siel maizhasidodescascarillado,a_adaI/4 detazade
agua.Reacomodedespuesdela mitaddeltiempo.
(congelafla) 1espiga 5a7 rain Coloqueenunplatodevidrioparahornea_Cubraconuna
2a 3espigas 2a4min envolturaplasticaventilada.Reacomodedespu_sdelamitad
porespiga deltiempo.
Papas
(frescas,b!ancas,encubos) 4papas(6a8ozcadauna)
11a 14rain
(frescas,enteras,flulces 1(6a 8oz.) 2a5min
obbncas)
Remo/achas
(frescas,enteras) 1racimo 18a 25rain
Repollo
(fresco) 1cabezamediana(aproximadamente2Ib) 8allmin
(trozosgrandes) 7a lOmin
Verdurasmezcladas
(congelada) paquetede10oz 4a8 rain
Zanahorias
(frescas,enroflajas! lib 6agmin
paquetede10oz 5a8 rain
14
Peley torte encubosde1pulgada.Coloqueenunacacerolade
2cuartoscon1/2tazadeagua.Agitedespu6sdelamitaddel
tiempo.
Perforeconuntenedordecocina.Coloqueenel homo,1pulgada
aparte,enunadisposici6ncircular.Permitaquerepose5minutos.
Enunacacerolade2cuartos,coloque1/2tazadeagua.
Enunacacerolade1½62cuartos,coloque1/4detazadeagua.
Enunacacerolade263cuartos,coloque1/4detazadeagua.
Enunacacerolade1cuarto,coloque3cucharadasdeagua.
I
Enunacacerolade1½cuartos,coloque1/4detazadeagua.
Enunacacerolade1cuarto,coloque2cucharadasdeagua.

ge.com
Duranteel descongelamientopuedeescucharseungolpeteoamortiguado.Estoesnormalcuandoelhomonoest#funcionandoenAlto.
;iii :i i IIIIII i !iiii iiii
TimeDefrost(Tiempo de descongelamiento)
Enla mitad c/eltiempode
descongelamientoseleccionado,
el homo sefiala TURN.Entonces,
volteela comiday separeo
reorganicelos trozospara darun
descongelamientoragsuniform&
Proteja/as9reascalientescon
pequefios trozosdepapel
aluml))io.
Guiade descongelamiento
....
Lepermitedescongelarduranteunperiodofietiempo
selecc/onado.YealaGuiadedescongelamientoparalos
fiempossugeddos.(AutoDefrostexplicadoenlaseccion
sobreelusofieiascaracterfsficasautomaficasdeihomo
microondas).
[] Presione el botdn fimeDefrost.
[] IngTeseel tiempo de descongelamiento.
] Presione el bot6n Statl/Pause.
[] \%ltee los alimentos cuando elhomo (16
laserial.
] Presione el bot(m Start/Pause.
E1ni_e]de potencia est_estableddo
automfiticamenw en 3, pero puede cmnbiarse.
Usted puede descongelar artfculos pequefios
rfipidmnente amnentando el nivelde potenda
deapu6s de ingr_sar el tiempo. Nivelde potencia 7
acorm el dempo total de descongelamiento en
aproximadmnenwlamitad;niveldepotencia10
acorta el dempo total aaproximadamente 1,,'3.
Sin embargo, los alimentoa necesimrfin una
atend6n m_ fi'ecuente que lo usual.
fiempo Comentarios
Came
Bistec,cnmeravcosm_as 5a10rainporlb.
Cameasada:re&comero,remera,ceroc
Camemoeo_(1It#
SalchichasdeFran_-_urt/t tb,
Consejosdedescongelamiento
LosalJmentoscongeladosenpapeloplasticopuedenset
descongeladosdentrode/paquete.Lospaquetescerrados
flebensetcortados,perforadosovenfiladosDESPUESde
cluelosalimentoshayansidodescongeladospardalmente.
LosrecJp/entesplasticosdealmacenamientodebenestar
parcialmentedestapados.
Lascenascongeladaspreempacadasdetama_ofamiliar,
puedendescongelarseycocJnarseenelmicroondas.
SilacommaseencuentraenunrecJpientedepapel
alumJnio,transf.ieralaaunplatoseguroparamicroondas.
LosalJmentosqueseechanaperderfacilmente
nodebendejarsefuerapormasdeunahoradespuesdel
descongelamiento.Latemperaturaambientepromueve
elcrecimientodebactedaspe@rosas.
Paraunflescongelamientomasunfformefiecomidas
granfles,comoasados,utiliceAutoDefros_Antesde
lacoccJOn,aseg&esefieque/ascarnesgrandesesten
completamenteflescongelaflas.
Cuandoestaflescongelafla,lacomifladebeestarfrfa
peroblandaentodas/astareas.Sitodaviaestaunpoco
congelada,regreselaunmomentoalhomomicroondas,
ofl@iareposarduranteunospocosminutos.
11a 16rainporlb.
5a8rainpotlb.
3a6min
Tooino 1_ IDI 3 a 6 rain
Camede ave
GallinaCornish 9a16rainporlb.
Pechugadepave (4a 6Ibl 5aI0 minporlb.
Polio.enmm(Z/_a3b 20a 28min
Polio,poeoparaasar/frefrcor_aoo 15a22rain
12_a3161
Coloquela camedesempacadaenunplatodecocciOn.Volteedespu6sdela primeramitad
deltiempoy protejalasareascalientesconpapelaluminio.Despuesdela segundamitad
deltiempo,separelospedazosconuncuchillodemesa.Dejereposarparacompletar
el descongelamiento.
Utiliceel nivelde potencia1.
Volteelacarnedespu_sdelaprimeramitaddeltiernpo.
Coloqueel paquetesinabrirdentrodel homo.Calienteenel microondashasta
quelassalchichaspuedansepararse.Dejereposar5 minutos,sies necesario,para
completardeldescongelamiento.
Coloqueel paquetesinabrirdentrodel homo.Dejereposar5minutosdespu_sdel
descongelamiento.
Coloquela gallinadesempacadaenelhomoconlapechugahaciaarriba.Volteedespu6sde
la primeramitaddeltiempo.Dejecorreraguafriaenlacavidadhastaquese puedanquitar
lasmenudencias.
Coloquela pechugadesempacadaenunplatoseguroparamicroondasconla pechugahacia
abajo.Despu6sdelaprimeramitaddel tiempo,volteela pechugahaciaarribay proteialas
&eascalientescon papelaluminio.Descongeledurantela segundamitaddel tiempo.Deje
reposar1a2horasenel refrigeradorparacompletareldescongelamiento.
Coloqueel polioempacadoenunplato.Despu6sdelaprimeramitaddeltiempo,
desenvuelvay volteeelpolio.Protejalasareascalientesconpapelahminio.Paracompletar
el descongelamiento,dejecorreraguafriaenlacavidadhastaquese remuevael menudo.
Coloqueel polioempacadoenunplato.Desenvuelvay volteedespu6sdelaprimeramitad
deltiempo.Despu6sdelasegundamitaddeltiempo,separelospedazosy coldquelosenun
platodecocciOn.Horneeenelmicroondas2 a4minutesm_s,si esnecesario.Dejereposar
unospocosminutosparaterminarel descongelamiento.
Frutas
Bolsapl4stica- I b2 paquetesde10oz 3a7 min
Pan,pasteles
Pan ,)anecmosoroeosl peoazo, 1/2rain
Rol/osdedulcelaprox.12oz 3a6 rain Reorganicedespu6sdelamitaddeltiempo.
Pescadoymariscos
Crustgceos,peflazospequefios(1Ib) 3a7 rain
Filetes,congelados(1tb) 9a12rain
Coloqueel bloqueenla fuente.Volteey separedespuesdelamitaddeltiempo. 75

Usode lascaracteristicasdelsensordecocciondelhomo
microondas.
La caracterfstica Sensor detecta el aumento de la humedad liberada durante la cocci6n. El homo ajusta
autom#ticamente el tiempo de cocci6n a varios tipos ycantidades de alimentos.
Sensor de coccion
i,os recipientes ) cul)iertas
apropiados son esenciales para el buen
fimcionanfiento del sensor de cocci6n.
Cubierto
Z
Ventilado
Z
:_ Siempre ufilice recipientes segm'os
para microondas y cfibralos con tapas
o envolmras plfisficas ventiladas. Ntmca
utilice redpientes pl_isticos de derre
hem_g_fico: estos redpientes pueden
evitnr que el vapor escape y causan
que los aliillentos es sobrecocinen.
:i Antes de colocar los alimentos en
el homo, asegfirese de que la parte
externa de los redpientes de cocci6n y
el inmfior del homo microondas estcan
secos. I,as gotas de humedad que se
convierten ell wq)or pueden confllndir
al sensor.
Sequelosplatosdetalformaque
170 COlTfuITdal7 ;91 SelTsor,
(menostiempo} (m_stiempo}
Uti]ice s61ocon palomitas de mafz
preempacadas para microondas
que pesen entre 1,75y3,5onzas.
Popcorn(Palomitasde maiz)
Para usar la caracteristica Popcorn:
[] Siga las instrucciones del paquete,
utilizando Time Cook si el paquete
es menor de 1,75 onzas o mayor
que 3,5 onzas. Coh)que el paquete
de palomitas de mafz en el centro
del microondas.
] Presione el bot6n Popcorn.
E1 homo armnca imnediatamente.
S/abre /apuertom/entrasestfi POPCORNon
/apanta//a,aparecerfiERROR.Cierre/apuerta,
presioneel botOnClear/Off y com/encedenuevo.
COmoajustar el programa Popcornpara
proporcionar untiempo de cocci6n mas
corto omas largo:
Si sucede que la marca de palomitas
de mafz que utiliza no revienta
completamente o se sobrecodna
consistentemente, usted puede afiadir
o sustraer 20 a 30 segtmdos al tiempo
de cocci6n automfitico.
Para afiadir tiempo:
Despu& de presionar el botdn Popcorn,
presione el bot6n 9 inmediatamente
despug_s de qtle ari'anqtle el homo para
tm extra de 20 segtmdos. Ia pantalla
mostmr;i +4. Presione el bot6n 9
nuevamenm para afiadir 10 segtmdos
adidonales (total de 30 segtmdos de
dempo adicional).
Para disminuir tiompo:
Despu_s de presionar el bot6n Popcorn,
presione el botdn I imnediatamente
despu_s qtle aYranca el homo para
pemfitir 90 segundos menos de tiempo
de cocd6n, ia pantalla mosmml --.
Presione el botdn I nuevamente para
restar otros 10 segtmdos al fiempo de
coccidn (total de 30 segtmdos menos
de tiempo).

Beverage(Bebidas)
Presione el bot(m Beverage para calentar
(ma taza de calc: u otra bebida.
Lasbebidas calentadas con la
caracteristica Bebidas pueden estar muy
calientes. Retire el recipiente con cuidado.
ge.com
I i I)
_P_ESS
(menostiempo) (masdempo)
Reheat (Recalentar)
LacaracterfsticaReheatreca/ientaporciones
lbdMduales deahknentosprevbmente cocinados
o unplato desobrantes.
[] (;oloque la comida cubierta en
el homo, Presione el bot6n Reheat.
E1 homo arranca inmediatamente.
[] E1 homo indica cuan(h) se detecta
xapor) el tiempo restante comien/;i
la cuenta regresix i.
No abra la puerta del homo hasta que
el tiempo est(_ en cuenta regresiwl. Si la
puerta estfi abierta, ci&Tela y presione
imnediatamente el bot6n Start/Pause,
Despufisdequitarlosalimentosde/homo,
agftelos,siesposible,parahomogen/2ar
/atemperatura.Silacomidanoestfi
suficientementecaliente,utihceTkne
Cookpararecalentarpormilstiempo.Las
comidasrecalentadaspuedentenergrandes
vanacionesdetemperatura.Algunas#reas
puedenestarsumamentecalientes.
Algunos alimentos no son recomendados
para utilizarse con Reheat; para estos
alimentes es mejer utilizar Time Cook:
Productos de pan.
_imentos que deben sex"recalentados
sin estar cubiertos.
AJimentos que necesitan sex" agita(h)s
ixx-otndos.
_dimentos que necesitan tm aspecto
seco o tma superficie cmjiente (lespu_s
del recalentamiento.
C6mocambiarlas configuraciones
automMicas:
Para reducir el tiempo on 10%:
presione el bot6n I despu_s el bot6n de
la caracterfsfica.
Para afiadir un 10%al fiempo de coccidn."
presione el bot6n 9 despu_s el bot6n de
la caracterfsfica.
Verdura
[]
EXPRESS
(menostiempo) (m_stiempo}
Uti/ice/acaracterfsticaVegetableparacocinar
4a 16onzasdeverdurasfrescas,congeladaso
enlatadas.
Para verdm'as fl'escas, afiada 2
cucharadas de agua pot porci6n.
Para verdm'as congeladas, siga
las instrucciones del paquete para
afiadir agua. Cubra con tma tapa o
con Ima enw)lmra plfistica. Coloque
las vex'(hxx';Is exl el hoFxlo.
[]
Presione el bot6n Vegetable una xez
pax'a "_ex'(hxx'as _'i'escas, dos xeces para
veFdtxx';Is congeladas o tFes veces
para ver(hxx'as enlatadas. E1 homo
arranca imnediatamente. E1 homo
indica cuando se detecta \:q)or y
el tiempo restante entra en cuenta
regresiwl.
No abra la puerta del homo hasta que
el dempo est_ en cuenta regresiva. Si la
puerta estfi abierta, (-i(_rrela y presione
el bot6n StargPause imnediatamente.
Si los allYnentosno estfin hstostodavfa,utilice
T/meCookpara cocinarpor robstiempo.
C6mo cambiar las configuraciones
automMicas:
Para roducir el tiempo on 10%:
presione el bot6n I despu6s el bot6n de
la caracterfstica.
0
Para afiadir un 10%al fiempo de coccidn."
presione el bot6n 9 despu_s el bot6n de
la caracterfstica.
/7

Usode lascaracteristicasdelsensordecocciondelhomo
microondas.
Para reducir el tiempo en 10%:presione el botSn 1despu#s del botSn de la caracterfsfica. Para afiadir un 10%
al tiempo de cocci6n: presione el botSn 9 despu#s del botSn de la caracterbfica.
_len0s tier@0) imas tlemp0_
Potato(Papas)
LacaracterfsflcaPotatococlwa1/2a 2lb de
papas.
[] Peitore 1_1 C;/SC_II_Icon tin tenedor y
coloque las papas en la platnfbmm
giratofia. Si estfi codnando tres o
mils papas, acomddelas fimnando
tm patrdn de estrella.
[] Presione el bot6n Potato. E1 h()rno
arranca imnediammente. E1 horn()
indica cuando se detecm vap()r y el
[ieIl/po i'est_lnte coi//ienz[i 1[i cliental
regresi\_.
No abra la puerta del homo hastn que
el tiempo est_ en cuentn regresiva. Si la
puertn estfi abiertn, dOrrela y presione
el botdn Start/Pause imnediatnmente.
Si ios aflYnentos no estbn iistos todavfa, utiiice
TimeCookparacocinarpotmilstiempo.
Chicken/Fish(Pollo/Pescado)
UtiiiceiacaracterfsticaChicken/Fishparacocinar
Ia 8presasdepoiioo4a 16onzasdepescado.
[] Coloque el polio o el pescado
cubierto en el homo. Presione
el botdn Chicken/Fishtma vez para
presas de pollo o (los veces para
pescado. E1 homo arran(a
imn ediatamente.
[] E1 homo indica cuando se detectn
vapor y el fiempo restnnte comienza
la cuentn regresiw_.
No abra la ptlerta del homo hasm
que el tiempo estb en cuenta regresi\:_.
Si la puertn estfi abierm, d(_rrela y
presione el botdn Start/Pause
imnediatnmente.
Si ios ah?nentos no esNn iistos todavfa, utiiice
T/me Cook para cocinar por m_s tiempo.
18

Usode las caracteristicasautomaticasdelmicroondas, ge.com
_ ) ¸¸¸¸?¸2¸¸¸
Auto Defrost(DescongelamientoautomMico)
UtiiiceAuto Defrostpara cameroja,avesy
pescadohasta6 libras. Utilice TimeDefrost
para iosotrosahmentosconge/ados.
Auto Defl'ost establece
atmm_fificamente los fiempos de
descongelanfiento y los niveles de
potencia para obtener restdtados de
descongelamiento mils unifl)rmes
para carnes roias , ayes y pescado.
[] Presione el bot6n Auto Defrost.
[] Utilizando la (;t6a de comex_i6n
a la derecha, ingrese el peso de
la comida. Pot ejemplo, presione
los botones I y 2para 1,2 libras
(1 libra, 3 ona_s).
[] Presione Start/Pause (hficio/Pausa).
Guiadecenversi6n
Si el peso de la comida est:i esmblecido
en libras y onzas, las onzas deben
convertible a d_dmas (0,1) de una libra.
Ingreseelpeso
Pesodela comida de la comida
en onzas (decimasdeunalibra)
102 0,I
3 0,2
4a5 0,3
6a7 0,4
8 0,5
9a I0 0,6
11 0,7
12a 13 0,8
14a 15 0,9
Time Defl'ost est;i explicado en
la seccidn del Uso de las caractedsticas
cronometradas del microondas.
; Relnuewl la carne del paquete y
col6quela en un plato seguro para
iilicroondas.
Dos veces dtlI'ilIlte
el descongelamiento, el homo
indica TURN. En cada serial TURN,
voltee la comida. Remuex:_ la came
descongelada o proteja las fireas
calientes con pequefios trozos
de papel aluminio.
Despu_s de descongela_se,
la mawMa de las carnes necesitan
reposar 5 minutos para completar
el descongelamiento. I,as carnes asadas
grandes deben reposar duranm
aproximadamente 30 minut()s.
19

Usede las otrascaracteristicasdel microondas.
Recordador de cocci6n terminada: para recordarle que fiene comida en el homo, el homo mostrar4 FOODIS READY
ysonar# una alarma una vezpor minuto hasta que abra la puerta del homo o presione el botSn Clear/Off.
Clock (Reloj)
Presionepara ingresarb hora deldfa orevlsar
la hora del dfamientrascocinacon el homo
microondas.
[] Presione el bot6n Clock,
[] ]ngrese la hora del dfa.
,,el Clock.
Inicio retardado
Delay Start le pemfite establecer
qtle el hoYno i//ici'oondas dei//oYe
la coccidn hasta pot 24 horas.
[] Presione el bot6n Delay Start.
[] lngrese la hora en la cual desea
que el homo inicie. (_&segfirese de
que el reloj del homo microondas
muestre la hora correcta del dfa).
[] Seleccione cualquier combinaci6n
de Defl'ost Auto/Time y Time Cook.
[] Presione el bot6n Start/Pause.
E1 dempo de Delay Start se mostrar_i
en pant;ilia m_is DS. E1 homo armncar_i
automfificamente en la hora postergada.
Lahora de/dfa puedeser mostradaenpantaiia
presionandoel bot4n Clock
Start/Pause(Inicio/Pausa)
A(lem_is de encender m uchas flmciones,
el botdn StargPause le pemfite detener
la cocd6n sin abfir la puerta del homo
microondas o borrar la pantalla.
Help(&uda)
E1 bot6n Help muestra infimnaci6n de
las caracterfsticas y pautas tidies. Presione
el botdn Help, luego presione el bot6n de
la caracterfsdca.
20

CLEAR
OFF
ChildLockout(Bloqueode ni_os)
Ustedpueflebloquearelpaneldecontrolpara
evitarqueelhomorelcreondasseainic/ado
accidenta/reenteo utih2adoporn/fios.
Para bloquear o desbloquear los
controles, presione y mantenga
sostenido el bot6n Clear/Offdmante
aproximadamente 3 segtmdos.
Cuando el panel de control est6
bloqueado, aparecerfi una ten
el extremo derecho de la pantalla,
ge.com
Sout_fo ON/OFF
SoundOn/Off(sonidoOn/Off)
Para encender o apagar el sonido de
la alerta sonora, I , ,)resione x i//antenga
sostenido el bot6n 8din'ante
aproximadamente 3 segtmdos.
SOUND
LEVEL
SoundLevel (Nivel de sonido)
Elnivel desonidode la alerta sonorapuede
serajustado.Presioneel botdn $eund Level.
EscojaOa3de reudoa fuerte.
Kitchen timer (Temporizador de cocina)
Kitchen Tl}nerfunclonacoreoun tereporlzadorde Cuando se acal)e el tiempo, el homo
rebutos ypuede ut///2arseencua/quierreoreento,
inclusocuandoel homo est# funcionando.
CSmoutilizarlo come un temporizador de
minutos:
] Presione el bot6n Kitchen timer.
[] ]ngrese el tiempo que desea contar
regresiwmmnte.
] Presione el bot6n Kitchen timer.
emifirfi la serial. Para apagar la serial
del tempofizado_, presione el bot6n
Kitchen timer.
NOTA: el indicadorc/elterepon_ador
estarfi encendidoreientrasest# funcionando
ei terepon_ador
Para cancelar el tempofizador din'ante
la cuentn regresiva, presione el bot(Sn
Kitchen timer.
Reminder(Recordatorio)
LacaracterfsticaReminderpuedeserutih2ada
coreorelojdespertador,ypuedeserutilizada
encualquierreoreento,inclusocuandoelhomo
estfifuncionando.Elrecordatoriopuedeser
con@uradohasta24horasdespuds.
[] Presione el bot6n Reminder.
lngrese la hora que usted desea que
[] el homo le recuerde. OA_segfirese de
que el reloj del horno microondas
muestre la hora correctn del dfa).
[] Presione el bot6n Reminder. Cuando
se presente la serial del Reminde_;
presione el botdn Reminder para
apagarla, ia hora del Reminder
puede obser\'a_e en la pantalla
presionando el botdn Reminder.
NOTA: el indicadorREMperreanecer_encendido
parareostrarque elReminderestfi deterreinado.
Paraborrar el Reminderantesde queocurra,
presioneel botdn Reminder, luegoO.
El ind/cadorflEM yano estar#encendido.
DISP£AY ON/OFF
Display On/Off(Pantalla On/Off)
Para encender o apagar la pantalla
del reloj, presione y mantenga sostenido
el botdn 0 din'ante aproMmadamente
3 segtmdos, i,a caracterNtica Display
On/Off no puede utilizat5e mientras est6
en itso tlIl[I cai'actei'lstica de cocci6n.
21

Terminosde microondas.
!iii ii! iiiii!i!
Arcoelectrico
Definicion
E1 arco el_ctfico es el t_mino de microondas para definir las chispas dentro del homo.
E1 arco el_ctfico es causado por:
} i,a sonda de temperatura est_i en el homo pero no est_i insertada en la comida.
Met;fl o papel aluminio en contacto con el lado del homo.
Papel aluminio no amoldado a la comida (los bordes hacia arfiba actdan como antenas).
Metal, como tirillas para torce_; alfileres para pollo o platos con adornos dorados.
I,as toallas de papel reciclado confienen pequefias piezas met;ilicas.
Cubiettas ias cubierms mantienen la humedad, peHnitiendo un calenmmiento mils tmifimne v reducen
el tiempo de cocci6n. I,as emolmras de plfistico con respiraderos o las cubierms de papel parafinado
peliiliten clue el exceso de xapor escape.
Resguardar En un homo regular; usted cubre las I)echtwas_ , de polio o los alimentos horneados para eximr que
se doren demasiado. Cuando utili/;i el horno microondas, utiliza pequefias tiras de papel aluminio
para cubrir partes delgadas, como las puntas de las alas ) patas de las axes, las cuales se cocinarfan
antes de las [)aries III;/S ,gI'andes.
Tienlpo de Cuando cocina con hornos regulates, a los alimentos como la came asada o los pasteles se les pemfite
reposo reposar para tex_ninar la cocci6n o para que se endurezcan. E1 fiempo de reposo es especialmente
iiiiportante en la cocci6n con iilici'oondas. Tenga en c/lent_l que [In pastel cocinado con iilici'oondas
no es colocado en tlil_l parfilla de enfiJ_li/liento.
Ventilacifin Despug_s de cubrir un plato con una emoltura plfistica, usted xentila la emoltura plfisfica xolteando
una esquina de t;fl fimna que el exceso de vapor pueda escapa_:
22

Usodeloscontrolesdelhomoinferior, ge.com
A Io largo de este manual, las caracterfsticas y apariencia pueden variar con los de su modelo.
0
@
CONVECTION OVEN
1
OLS TI4E CONTROLS
5o
OVEN CONT
0
I)
0
Controlde/homoinferior,caracterfsticas
(Clock)ydeltemporizador(Timer)
0 Panta//a 0
Muestra la hera (kl dfa, la tcmperamra (M hon_o,
si el hOI'l/O est_ioil el lllodo de horileado, de asar
a la parrilla o de auMimpicza ) las horas ( slabl_ cidas
A
paI'Ft (?l t( ll/poliz3dor o l_'ts Op(l'3(iol/(!s FtII'.OI//_lic3s
del homo.
NOTA:Laheraenlapantallade/homoinferiormuestrahorasy minutes
(1:30es unahera,30minutosl,Enelhomomicroondas,el tiempo
somuestraenminutesy segundos(1:30es unminute,30sogundos_ _'_
Sinna "F- ynnnilmero o letra"parpndennenla pantalla y/as
se#a/es de controlde/homo, estoindicann c6digode errorde
la fnncion.Presioneel hotbn Clear/OffPermitaque elhomo so enfrfe
duranteunahera,Pongael homonuevamenteenoperacibn,Siel cbdigo
deerrordela funcibnsorepite,desconectoel cabledecorrientede/
homoy comunk[uesoconel serviciodemanton_vliento,
Sisnhomothe confignradoparammoperacioncronometrada
del homoy sepresentonnainterruption en el flnidoelectrico,
el relojy todas/asfuncionosprogramadasdehenrestablecorse,
Lahoradel diaIpuede serincorrecta) parpadearaen lapantalla
cnandosehayapresentadonnainterruptionen el flnido
v
electrico.
BoNnBroilHi/Lo(Asarala ParrillaAlto/Bajo)
Pl_(!si()]/(! ])_ll'_t s(lec(_iOl]_ll_ l_t [ill](i()]/ _'IS_t/" _'t l_t p_'ilTi]]_t.
0
@
0
BoNnBake(HomeMo)
Presiol/e ])ara s(lecciOl/ar la _tll/(i0i/hori/ea(Io.
BoNn de homeado per convecciSn
Pr(sioI/e un8 vez par3 s(]e((ioiwtr (l horil(ado per
con_('ccidll con mfiltiples parrillus. Ik(si(me dos veces
])_/1"3selec(ionar el homeado per (OIP,('C(iOH COIl /ill3
parrilla.
BoNn Convection Roast (asaclo per convecci6n
])resione ])al'a S(?]eC(_iOl]_ll7 _lS_ldO (()]/ (()l]x,(((i(')]],
Botonesnum_ricos
[ dlice para configlm_r cuaklui(r fiu_ci6n que
ne((sitc' mim(ros come la hor_ (M dfa cn cl tel@
cl wnq)orizadoL l_twmperamra dcl homo,
la temperatura interna de la c(}mida, ]a hera
de inicio y la dm'acidn de la opera(:i6n para
el horl/e3do (l'Ol/Oi//etrado y la a/ttolimpieza.
ycon@uracionesde/reloj
BoNn Clear/Off
Presion4 para cancelar TODASlas op_ radones
del borne exceplo (1 r(lr!j } (l t(n/l)orizadola
BoNnProbe(SoMa)
PI'(?SiOI/(cttal/do ulilicc ]a selma para (O(illal °
_Ili]I/(!DIOS _l IlI?_/ I(?l/l])( I'_l[tll?_l illt(?FI]_l deseada.
(Pare/uilizarse tinicamente el_ el homo inIiMor).
BoNn SelfClean(autolimpieza)
Pr4sion4parasel_cci(mm_lafimci6n (k mnolimpicza.
Cells/d|( ]_S(RR:i()IIUSOdelaautolimpiezadelhomo
inferior.
BoNnStart(Inicio)
D(be t)reSiOl/arse pal'a illiciar Ctl3[qtli(_I" [IlllCi()]/
de cocci61_ o liml)ieza.
BoNnOvenLight(Luzdelhomo)
Pl'esioI/e ])ara (!l/((_iidel" o _'t])_tg_'tl" ]_1 htz del ]/Ol'IiO.
BoNn Kitchen timer On/Off
(Temporizador de coc/)_a encender/apagar)
Presione ])an_ selcc(iom_r la (_m_ct('rfsti(_l (M
wmporlzado_:
O BoNn DelayStart(Iniciopostorgado)
Utilicejunto con los botom!s CookingTimeo SelfClean
pan_ ((mfigm'_u: cl horno pu'a quc inicie sc dcwng_
a/ttOll/_ilicaI//el/[P el/el ll/Oi//el/tO q/te/tsted pl'Ogl:3II/e.
BoNnCookingtime(tiempodecocciOn)
PI'(_]olI( y ]/l(!_o presion( 1os befell( s 1]/tlll(,l_iCos
para establecer la cantidad (le tiempo que desea
cocinar sus alimentos. H homo se apagard
a/ltOll/_ili(allleIl[e (/laI/dO se h_J\_l agotado
el tienq)o (le coccidn.
O BoNnClock(Reloj)
Presiol;e aI/les d( COl/I]g/tral" el r(l(!j.
23

Usodelhomoinferior.
Para prevenir posibles quemaduras, coloque los parrillas en la posiciSn deseada antes de encender el homo.
El homo fiene 7parrillas el? posicidn.
Antes de comenzar...
I.as pardllas denen cietTes de tope,
de fimna tal que cuando se encuentren
colocados COli"ectai/lente ei1 los soportes,
se demndr4n anms de salir
completamenm y no se indinar_h_.
(Mando se encuei_tre colocando
o quitando utensilios de codna,
tire de la parrilla hada afllem hasta
la prombemncia en el apo)'o de la parfilla.
Para quitar una parrilla tfrela hacia usted,
incline el fi'ente hada a_riba v fire la
pa_rilla hacia afllem.
Para reemplazar, coloque el extrem o
de la parrilla (topes de defoe) en
el apoyo, indine el ti'ente y elnpuje
de la par_illa hacia adentro.
PRECAUCION:noncaco/oqoe/osotensi/ios
decocinani otrosartfcu/ossobreelpiso de/homo.
Ex/steun e/ementodecaientamientodebajode/
p/sode/homo. Colocarartfculossobreelpiso del
homopuedecausarque el homosesobrecaliente,
resultandoendafiospara elhomo yel riesgode
dafioso incendioen losgabinetes.
COmeconfigurar el homo para hornear o asar
[_ Presione el bot6n Bake.
] Presione los botones ntllIl0I'iCOS
para establecer la temperatura
deseada.
[] Presione el bot6n Start.
[] Revise los alimentos para el punto
de cocci6n al mfnimo tiempo en la
receta. Cocine durante mils tiempo
si es necesario.
Iipodecomida Posici6ndelaparrilla
Pastelescorrgelados Co D
(sobreunabandejaparahornear)
Tortaligera(angelcake) Ao B
TartadelibraoBundt Ao B
Bizcochos,muffins,brownies, Co D
galletas,pastelesindividuales
encap&bizcochos,pasteles
Guiso CoD
[] Presione el bot6n Clear/Of[ctrando
est_ completa la cocci6n.
NOTA:esposib/ecluesoencienda
automfit/camenteunventiiadordeenfr/am/ento
pararefwerar/asFortes/?_temas.Estoesnormai,
yel ventiiadorpuedecontinuarandandoinc/uso
despuOsdeapagareihomo.
Si hornea cuatro capas de pastel al
mismo tiempo, coloque dos capas en
la pardlla B y dos capas en la pardlla D.
Ubique los cacerolas en la pardlla
de tal fi)nna que una no est(_ colocada
directamente sobre la otto.
Precalentamiento y ubicacion de la cacemla
Precaliente el homo sila receta asf lo
indica. E1 precalentamiento es necesario
para obtener buenos resultados cttando
hornee tortas, dulces, pastelitos y panes.
Faropreca/entar,con@uree/homo a/a
temperaturacorrect&E/controlpitar#cuando
el homoest#preca/entadoy/a panta//amostrar#
sutemperaturacon@urada.Estopuede tomar
aprox/madamente10minutos.
I,os resultados del horneado son Inejores
si los sartenes de hornear est_h_ centradas
en el homo tanto como sea posible.
Ias sartenes no se deben tocar entre
sf ni deben tocar los paredes del homo.
Si necesita usar dos parrillas, coloque
los sartenes de fimna que tma no quede
inmediatamente encima de la otto, y
deje aproximadamente 1½" entre coda
soften, desde el ti'ente, desde atr;]s v
desde los costados.
24
Papel aluminio
Nuncacubrael fondo de/homo conpope/
dealum/n/&
Nunca cubra pot completo una parrilla
con papel aluminio. Esto obstruir_
la circulad6n del color v obtendr;_
un asado deiidente.
Puede utiliza_se una pequefla hoia de
papel aluminio para atrapar derrames
colocfindola en uno de los parrillas
inleriores w_rias pulgadas pot deb@)
del alimento.

ge.com
i__i
Cierre la puerta. Siempre ase a
la parrilla con la puerta cetrada.
NOTA: asar a la parrilla no funcionarb
si la sonda de temperatura estb
conectada.
Eltamafio,peso, grosor,temperatura
h#cial ysupreferencia sobre elpunto
de cocciSndelos alimentosafectar#n
los tiempos decocciSn. Estagufaest#
basadaen cames atemperatura de
refrigerado_
tEl Depa/_amentodeAgricultura de
EE.UU.indica que:% came a poco
cocida espopular,pero usted debe
saber que cochTarlaasolamente 140°F
significa quealgunos organismos
venenosospodrfansobrevivir"
(Fuente:Safe FoodBook. YourKitchen
Guide.USDARev.Junio 1985.)
C6mo configurar el homo para asar a la parrilla
(:iene ]apuerta.Siempreasealaparrillacon [] Presionee]bot6n BroilHi/Louna_ez
lapuertacerrada, paraAsaralaparrillaHI (Ahot.
[] (_oloque ]a came o el pescado sobre
una rejilla panJ asar en tlI/a bandeja
pal'a asa l'.
[] Sig_ las posidones en la panilla
suKelidas en la Gu[aparaasaralaparrilla.
Sisuhomoest#conectadoa208vo/tios,/osfi/etes
pocococidospuedenasarsea/aparri//apreca/entando
/aparri//ayposicionando/aparri//ade/homoenuna
posiciSnrn#sa/ta.
[]
[]
Para cambiar a AsaralaparrillaLO
(g_!)o),presioneel bot6nBroilHi/Lo
It ileval//ei/Ie.
Presione el bot(m Start.
Cuando el asado a la parfilla
est_ ten-ninado, presione el bot6n
Clear/Off
Alimento
Came molida
Bienasada
Guia para asar a la parrilla
Cantidad y/
o grosor
1Ib(4 cr%uetas)
1/2a 3/4" deespesor
Filetesde came
Pocococidot
Medio
Biencocido
Pocococidot
Medio
Biencocido
Polio
LoBroil
LoBroil
Colasde langosta
LoBroil
Filetesde pescado
HiBroil
LoBroil
Rodajasdejamon
(precocido)
Chuletasdecerdo
Bienasadas
Chuletasdecordero
Medio
Bienasadas
Medio
Bienasadas
Pande ajo
LoBroil
1" de espes0r
1a 11/zIb
1i//, deespesor
2 a21/LIb
1completo
2 a21/Lib,
divididoIongitudinalmentc
Presas
Deshuesado
2a4
6 a 8ozcadauna
1/4a 1/2" deespesor
1" de espes0r
2 (1/2" deespesor)
2(1"@ espesor)aprox,llL
2(1" deespesor)
aproximadamentelOa12oz
2 (1½" deespesor)
aproximadamentellb
Position
de la
Parrilla
EoF
EoF
E
E
E
E
E
E
C
BoC
BoO
E
F
E
E
E
E
Primer lado
Tiempo (mini
10
10
8
10
12
10
15
25
25
25a 35
15a 20
18a 20
18a25
5
5
10
15
10
12
14
17
Segundo lade
Tiempo (min)
7
9
6
8
10
8
14a 16
20a 25
10
15a 20
10a 15
No
voltee
el
caparaz6n
N/A
5
5
9
10
12
12a 14
Comentarios
Distribuya
uniformemente.Hast;
8 croquetastoman
aproximadamente
el mismotiempo.
Los filetes de menos d
1 pulgada de espesor
se cocinan por
completo antes de
dorarse. Recomendamos
freir en el sart@.
Corte la grasa.
Reduzcael tiempoen
aproximadamente5
a 10minutospor lado
parapolio despresadc
Untecadaladocon
mantequilladerretida.
Ase primerocon
la piel haciaabajo.
Corteatra%s de la
parteposteriordel
caparaz6n.Dejelas
colas bienseparadas.
Unteconmantequilla
derretidaantes de
asarydespu@
de la mitaddel tiemp(
decocci@.
Manipuley voltee
con cuidado.Untecon
mantequilladelimon
antesy durantela
cocci6n,si Iodesea.
Precalienteel asador
paraaumentarel
dorado.
Aumenteel tiempo
de 5a 10minutospor
ladopara11//"de
espesorojamon
curadoencasa.
Cortela grasa.
Cortela grasa.
25
3 N/A

Usodel reloj yel temporizadordel homoinferior.
Asegz)rese de que el reloj sea
ajustado en la hora correcta del dfa.
Para ajustar el reloj
E1 I'eh_ i debe ser ajustado en la hora
correcta del dfa para que las flu_dones
_IIItOII/;/tic_IS cI'onoI/letI';ld_ls del hoYno
fimcionen apropiadamenm, ia hora del
dfa no puede calnbiai_e dui'anm un cich)
de horneado cronoilleti'ado o
a utolilnpieza.
[] Presione el bot6n Clock,
] Presione los botones ntlIlleIJ('os,
[] Presione el bot6n Start hasta queen
la pantalla aparezca la hora del dfa,
ON/OFF
El temporizador es &Ticamente un
temporizador deminutos.
El temporizador no controla
las operaciones del horno.
La configuracidn m_xima
en el temporizador es de
9 horas y59 mflTutos.
Para ajustar el temporizador
] Presi(me el bot6n Kitchen Timer
On/Off.
[]
Presione los botones ntlIl/OIJcos
hasta queen la pantalla aparezca
la cantidad de dempo deseada. Por
ejenlplo, para establecer 2 horas v
45 Ininutos, presione 2, 41v 5 ell
dicho orden. E1 tielnpo n/Sxilno que
puede ingresaise ell nfinutos es de
59. i,os tielnpos de coccidn inavores
a 59 Ininutos deben calnbiai_e a
horas y ininutos. Por ejelnplo,
ingrese 90 ininutos colno 1 hora
V 30 mintltos. Si COlllete tin erroi;
presione el bot6n Kitchen Timer
On/Off} ('omience nuevanlente.
[]
Presione el botdn Start.
Despu_s de presionar el bot6n Start,
SETdesaparece; esto le indica que
el dempo est5 ell cuenta regresiva,
aunque la pantalh_ no cambie
hasta que ha}_ pasado un minuto.
Ell la pantalla no se lnostrarSn
los segundos hasta que el (dtilno
minuto est_ en cuenta regresi\:_.
[]
Cuando el temporizador alcance
:00, el control pitar5 3 xeces seguidas
por un pifi(h) cada 6 segundos hasta
que se presione el bot6n Kitchen
Timer On/Off.
Eltonode6segundospuedecance/arse
s/)uiendolospasosen/ascaracterfstlcas
especla/esdesusecciOndecontroide/homo
inferiorbajo/asecciOntonosa/finaldeuncicio
cronometrado.
Para reiniciar el temporizador
Si la pantalla to(la\'fa est5 mostran(lo
el tielnpo restnnte, puede calnbiarla
presionando el bot6n Kitchen Timer
0n!0ff, luego presione los botones
nunl_IJCOS hasta que ell la pantalla
aparezca el tielnpo que desea.
Si el fiempo restante no est:] ell
la pantalla (ell la pantalla est5 rel@
inicio posteiga(h) o tielnpo de cocci6n)
recuerde el fielnpo restante presionando
el bot6n Kitchen TimerOn/Offyluego
presionando los botones ntlll/elJCOS hastn
ingresar el ntlevo fielnpo que desea.
Para cancelar el temporizador
Presione el bot6n Kitchen Timer On/Off
dos xeces.
26

Usode las caracteristicascronometradasde horneado
yasadodel homoinferior.
ge.com
NOTA:nodebeperrnitirsequelosalirnentosqueseechanaperderf#cilrnente--cornoleche,huevos,pescado,rellenos,ayesycerdo--
reposenpormdsde Ihoraantesodespu#sdela cocciSn,Laternperaturaambienteprornueveel crecirnientodebacteriaspeligrosas.
Asegdresedequelaluzdelhomoest#apagadayaqueelcalordelabornbillaacelerarbelcrecimientodebacteriaspeligrosas,
!i ii iill!
Comoconfigurar un Inicio inmediato y una Parada automgltica
Elhomoseencenfler#inrneflbtarnenteycocinar#
fiuranteel tiernposeleccionaflo.AIfinalfieltiempo
fiecocci6n,elhomoseapagarbautorn#ticarnente.
Asegfirese de que el rel(!j rrmestre la hora
correcta del dfa.
[] Presione el bot()n Bake.
[] Utilizando los botones I/tll//edcos,
ing-rese la temperaml_ deseada.
] Presione el bot()n Cooking Time.
NOTA:sisurecetarequierodeprecalentarniento,es
posib/equenecesiteafiaflirrnbstiernpoaltiernpode
cocci6n.
[_] lJtiliz_mdo los botones de los nfimeros,
) S ' (
ing-re,e el t]emp ) de homeado dese_Jdo.
E1 tiempo m_iximo que puede ingres_u'se
en minutos es de 59. i,os tiempos de
cocci6n m_J_)res _ 59 mimm)s deben
c_md)iarse _"horas v mimm)s. Pot
ejemplo, ingrese 90 mimm)s corrlo
1 hora v 30 rninutos. En pantalla
se mos(ranl la tempemtura del horno y
el tiempo de coccidn que usted ingres6.
[] Presione el botdn Start.
[_apaI]talk_ muestra 1_temper_ttur_t
del homo que usted config-m'6 _ la cuenta
regresi_J del tiempo de cocci6n, i,a pantalla
corrlienza a carnbiar i/ila vez la terrtper;_tura
alcanza los 100 °E
E1 horno confinuaKi cocinando (hmmte
la cantidad de tiempo programada, luego
se apag_ra autom_iticm;qente, a rnei]os que
estd config-urada la camcwrfstica Cook and
Hold. Vea la seccidn de Caracteristicasespeciales
fiecontrolfiesuhomoinferior.
Presione el bot6n Clear/Offpara borrar
la pantalla.
Comoconfigurar un Inicio postergado y una Parada automatica
Usteflpueflecon@urarelcontrolfie/homopara
quepostergueel inicio,cocinefluranteunperiofio
especfficodetiernpoyluegoseapague
autorn#ticarnente.
Asegdrese de que el reloj nmestre la hora
correcta del (l_a.
[] Presione el botdn Bake.
[] Utilizando los botones imm0licos,
ingrese la temperamra deseada.
[] Presione el botdn Cooking Time.
NOTA:sisurecetaroquierodeprecabntarniento,
esposib/equenecesiteafiaflirrnbstiernpoaltiernpo
decocci6n.
[]
[]
.Utilizando los botones de los n dmeros,
mgrese el tiempo de horneado deseado.
El tielnpo mfiximo que puede ing-resal_e
en milmtOS es de 59. I,os tiempos de
coccidn mm_)ms a 59 minutos deben
c?lrrlbi}irge _/hol';:ts v l/liililtOS. Pot
eiemplo, ingTese 9i) n/inutos colno
l horn v 30 minutos. En pantalla
se mos(rani la mmperamm del horno y
el tiempo de coccidn que uswd ingTesd.
Presione el bot6n Delay Start.
[] Utilizando los botones mmK_ficos,
ingrese la hora del dfa en la cual desea
que el homo se encienda e inicie
la cocci6n.
[] Presione el bot6n Start.
NOTA:untonedeatenci6nsonarbsiesd utilizanflo
elhorneaflocronornetrafloynopresionael bot6nStart
despu#sdeingrosarla ternperaturadehorneado.
Si desea verificar el fiempo que ha
config-urado, presione el botdn Delay Start
para verificar la hora de inicio que ha
config-urado o pl_sione el botdi] CookingTime
pal'_t _elifi(_u" la (hu'acidn del tiempo de
coccidn que ha config-unldo.
Cuando el horno se encienda a
la hora del df;_que usted ha}_ establecido,
la panmlla mostran_ el cambio de mmperamm
(comenzando a 100 °F) y la cuenta regresi_a
del tiempo de coccidn, i,a pantalla comienzn
a cambiar tma vez que la temperatura
alcanTx_100 °E
El homo condm_m5 cocinando (hmmte
la caI]ti(lad de tiempo prognm]ada, hlego
se apagara at/torrt_tticarrteIlte_ a 1TrenDsque
est_ contigun_da la caracterfstica Cook and
Hold. X_a la seccidn de Caracteristicasespecia/es
decontroldesuhomoinferior.
Presione el botdn Clear/Offpara borrar
la pantalla. 2 7

Usedela sondadelhomoinferior.
Paramuchosalimentos,especialmentela cameasadaylas aves,la temperaturaintemadelalimentoeslameierpruebaparael puntodecocci@.
Lason@detemperaturaeliminalasconjeturasacercadelos asadosal cocinarlos alimentosenelpuntodecocci@ exactoqueusteddesea.
La SolTd_, de temperatura tie/Te
un detector enfarina depflTcho en
un extreme y un enchufe en el otro
extreme; cliche enchufe va dentro
del enchufe el?el homo.
NOTA:b somaesparaserutilizaflafinicamente
enelhomoinferior
E1usa de sondas disfintas a la suministrada
con este producto puede resulmr en el dario
a la sonda.
Utilice las ag_am_dems de la sonda y
el enchttle cuando la insertev la rerrme_,o.
de la came v del enchufe.
Paraevitarfiafiosasuson@,noutilicetenazaspara
tirarde/cab/ecuanflo/aremueva.
Paraevitarrupturasdelason@,aseg&esedeque
losalimentosest#ncompletamenteflescongelaflos
antesdeinsertar/a.
Paraprevenirposib/esquemafluras,noflesenchufe
la somaflelenchufehastaqueelhomosehaya
enfriaflo.
Nuncaflejesusomaflentroflelhomoflurante
uneicbdeautolimpieza.
Noalmacenela son@enelcentrodecocina.
Despu& de prepanu" la came, colocarla
sabre tm posafuentes o sabre una parrilla
para asados, sig_ estas instmcdones para
la ubicaciGn apropiada de la sonda.
[]
Coloque la sonda fuera de la came a
lo largo de la parte superior o lateral
y marque con su dedo la parte deride
la ca/'ile se eiictlentl'd coil la slmda.
El punto debe caer en el centre de
la parle camosa mils gmesa del bistec.
] Inserte la sonda completarrlente dentro
de la came. i,a sonda no debe tatar
el hueso, la gTasa o el cartilage.
Pare bistecs sin hueso, inserte la sonda dentro
de la parle camosa del bistec. Para jam6n o
cordero con hueso, inserte la sonda dentro
del centro del ln(lscuk) grande rri_is interno
o la arficulaci6n.
Inserte la sonda dentro del centre de plates
CO1TIOfolios de came o cacerolas. Cuando
cocine pescado, inserte la sonda justo par
encima de la ag'alla en el firea mils camosa,
pandelo a la cohmma verteb_'al.
Inserte la sonda en la parte mils camosa de
la parle interna del tousle desde ab_}jo y' ell
pandelo a la piema de tm paso completo.
28
i i i i i i []
ii? [Kl !
ii!_(i_i __i _ _ /_i _:ii_i
iii_ ( ii I _i i i _ _ i
Comeconfigurar el homo para asar cuando se utiliza la sonda
[]
[]
[]
Inserte la sonda dentro de la came.
(]onecte la sonda en la tOl/la dentl'o
del homo. Asegfirese de que quede bien
conectada en la ton/a. CielTe la puerta
del homo.
Presione el botdn Probe.
Pxesione los botones I/tllTl(_ricos
para establecer la temperatura intema
deseada para Ills alimenu)s o la came.
i,a temperatul;I intema m_]xil-riapara
los alimentos que puede estaNecer
es 200 °F.
Presione el botdn Bake.
[] Presione los botones num_ricos pare
establecer la temperatura deseada.
[] Presi/me el bot6n Start.
ta pantallaparpaflearDsila somaatD insertafla
fientroflelenehufeynohaeonfigurafio/atemperatura
de/ason@ypresion6el bot6nStart
(]uando el horno eomience a e_dentax; en
la pantalla aparecerfi la palabnl tO.
Despu_s que la temperatura interna
de la came alcance 100 _E en la pantalla
se mostral;in Ills cambios de la temperatuI;I
interna.
] (]uando la temperatura interna
de la came alcance la tempenmlra
que config-m'6, la sonda y el homo
se apag;mln y el control del homo darfi
la serial. Pare detener la serial, presione
el bot6n Clear/Off. Ufilice almohadillas
con aislamiento t(_rmico para quimr
la sonda de la comida. No ufilice
tena:,;_s pal;I extraefla: las tenazas
pueden dariarla.
Pal'a cambiar la temperatura del horno
durante el ciclo de Xsado, presione el bot6n
Bakey luego los botones I/lllliel_icos para
establecer la nue_a temperamra.
_Sisequitalasomadela comiflaantes& que
sealcancela temperaturafinal,sonar#untono
y/apantal/aparpaflear#hastaque/asomasea
removiflaflel homo.
;_Usteflpuefleutilizarel temporizafloraunqueno
utiliee/asoperaeioneseronometraflasde/homo.

Usodel homo de conveccioninferior. .e.co
Ventilador de convecci6n
Enunhomodeconveccidn,unvenfiladorhace
circularairecalientesobre,debajoyalrededorde
losa/ifnentos.
Estacirculacidndeakecalbnteesdistnbuida
uniformementea 1olargodelacavidadde/homo.
Comoresu/tado,losa/knentossoncocinadosy
doradosuniformemente,amenudoenmenos
tiempoconcalordeconvecci6n.
NOTA: el venfilador de convecci6n
se encendeM y apagarfi en el ciclo
mientras cocina para distribuir mejor
el aire caliente dentro del homo.
E1 venfilador del homo de convecci6n
se apaga cuando se abre la puertn del
homo. NO deje la puerta abierta durante
periodos prolongados mientras est_
ufilizando la cocd6n pot convecci6n o
puede disminuir la vida Otil del elemento
de calentamiento de la convecci6n.
Homeado por conveccion en I parrilla
E1ventilador de conve(cidn circula
tmifbm_emente el aire calentado sobre v
ah'ededor de los alimentos ufilizando los
elelllelltos de horlleado v asado.
Cuandohorneepot convecci6nen unasolo
parrilla, ufilice el Homeado por convecci6n en
I parrilla (Convection Rake I Rack), presione
el bot6n dos veces;paramejoresresultados,
coloquela parrilla enel soporte Co Den
el centrodelhomo. Los tiemposdecoccidn
puedendismlnuir,asfque losa/imentosdeben
ser revisadosrobspronto de 1oque indican
/asinstruccionesde/paquetepara asegurar
queno sesobrecocinan.
Ideal para cocinar grandes cacerolas v
I[IS[II-I[I COIl b/lellOS resultados.
Posici6n de mEflfiplesparrillas.
Horneado por conveccion en multiples parrillas
] _ que se circula aire caliente
tmifimnemente a lo largo del homo,
] los alilllelltos p/ledell hoYileai'se COil
excelentes resultados utilizando mfiltiples
[] parrillas.
I_ cantidad de fiempo requerida para
el horneado de mOltiples parrillas puede
[IHIIlelltilI" ligerailleilte, I)[I I'a al(qlIIOS
aliilleiltos, pero se ahoYI'a de dos a ti'es
•,eces el tiempo general )a que muchos
alilllelltos se cocillaIl al IIliSlIlO tielllpo.
Gallems, inttflins, bizcochos v otros
panecilh)s rfipidos dan buenos resultados
con el horneado de mfiltiples parrillas.
Pai'a cocillar alii/lelltos ei1 ill,iS de tlll[I
parrilla en horneado pot convecci6n
ufilice Convection Bake Multi; presione
el bot6n tma vez.
Cuando hornee en 3 parrillas, coloque
mm parrilla en la segtmda posici6n (B),
una en la cuarta posiddn (D) y mm en
la sexm p()sici6n (F).
Para el horneado de dos parrillas,
coh)que una parrilla en el soporte de
la segtmda posicidn (B). Coloque
el otra parrilla en el soporte de
la cuarta posici6n (D).
C6mo adaptar recetas...
Usted puede utilizar sus recetas ti_\'oritas
eI1 el hoYilO poI" COllVeCCiOll.
Cuando hornee pot convecci6n, reduzca
la mmperatm'a de horneado en 25 °F o
active la caracterfstica de convet_i6n Auto
]/edpe'". Consulte la seccidn Conversi6n
Auto Recipe_ en las Caracteffsflcasespeciales
do/controi do suhomo.
Utiiice ios tamafiosdecaceroiarecomendados.
Aigunasinstruccionesde/paquetepara
cacerolascongeladasopiatosprincipales
hansidodesarrolladasutilizandohornos
comercialesporconveccidn.Paramejores
resultadosenestehomo,precalienteelhomo
yutilicelatemperaturaindicadaenelpaquete.
29

Usodel homo de conveccioninferior.
30
Rejilla
Banded para asar a la parriila
Asado por conveccion
Buenoparagrandes cortesdecame tiema,
destapada.
E1 ventilador de convecci6n circula
el aire calentado unifom_en_ente sobre
v ah'ededor de los alimentos, i,a came
roja y ayes se doran per todos los lades
COIIlO si [HeI'all cocillados sobre tlIl
rotisserie. E1 aire calentado circularfi
sobre, debajo y ah'ededor de los
alimentos que estfin siendo asados.
E1aire calentado atrapa losjugos
rfipidamente para un producto mils
hfimedo y fierno mientras, al mismo
tiei/lpo, crea UII YiCO exteYior dorado.
M asar per convecci6n, es ilnportante
usar una asadera y una rejilla para
obtener mejores resultados, i,a asadera
se usa para recoger los derrames de
grasa y la rejilla se usa para evitar
las salpicaduras de grasa.
Utensilios de cocina para la coccion por conveccion
Antes de ufilizar su homo pot
convecci6n, vefifique si sus utensilios
de codna permiten que el aire drcule
dentro del homo. Si estfi horneando con
\rajas bandejas, deje espacio entre elias.
_mfl)i_n, asegfirese de que las bandejas
i1o elltI'ell eI1 COlltacto [lll[IS coil otI'aS
ni con las paredes del homo.
Papolyplglstico
EII los horllOS poI _COliVecci()ii
pueden tKilizm_e los recipientes
de papel y plfistico resistentes al calor
i'ecoi/lelldados p_li'H el use eI1 hoI'IlOS
regulates. Tambi(q_ pueden utilizable los
utensilios de codna plfisticos resistenms
al calor hasta temperamras de 400 °F.
Metal y vidrio
Cualquier ripe de utensilio de cocina
fimcionarfi en su homo per convecci6n.
Sin embmgo, las bandejas metfilicas
se calientan mils rfipido y estfin
recomendadas l)a_w el horneado
per conveccidn.
Lasbandejasoscurecidasoconacabado
mate hornear#nm#sr@ido que/asbandejas
brillantes.
Lasbandejasde vidrio ocer#micacocinar#n
robsientamente.
Cuando hornee galletas, obtendrfi
mejores resultados si utiliza una bandeja
para hornear galletas en lugar de una
bandeja con lades bajos.
Pai'a i'ecetas COlllO el pollo al hoi'ilO,
utilice una bandeja con lades bajos.
E1 aire caliente no puede circular
bien ah'ededor de los alimentos
en una bandeja con lades altos.
[Z EE1[Z1[Z1[Z1
Come configurar el homo para hornear o asar
[]
Presione una vez el bot(m
ConvectionBake (Modo Convection
Bake Multi) para hornear pot
conveccidn con mfiltiples parfillas.
Este modo se ufilia_ para cocinar
alimenms ell mils de tma parfilla
(es (ledi; 2, 3 o mils parfillas) al
mismo tiempo ell horneado pot
convecddn. (kmsulte la secd6n
Multi-RackBakingpara obtener Infis
infimnaci6n.
Presione (los veces el bot6n
ConvectionBake (Mode Convection
Bake I Rack) para inlOmmi_e sobre
el horneado por (onvec('i6n de
tma parfilla. Este modo se utiliza
para cocinar alimentos en s61a
tma parfilla ell el horneado por
COllVeccioll.
Presione el botdn Convection Roast
p[li'H [iS[li" poi" ('OliVe('('i(')ii.
] Presioile los botolles iltllll0iJcos
para establecer la temperatura
del homo deseada.
[] Presione el bot6n Start.
Cuan(lo el homo comience a calent;u;
apareceMn ell la panmlla los cambios ell
la mmperamra, comenzando ell 100 °E
Cuan(lo el homo alcance la mmperamra
que usted est;d)leci6, sonaMn 3 pifidos.
[] Presione el bot6n Clear/O_cuando
hma temfina(lo.
Escuchar#un venti/adormientras estb
cocinandopor conveccidn.EIventilador
sedetendr#cuandoiapuerta seabra,
pero el ca/orno seacabar#.
Esposible que escuchealgunos chasquidos
dentrode/homo durante el asado.Estoes
normal

ge.com
Para mejores resultados cualTdo
ase paros o filetes grandes,
recomendamos utilizar la sonda
hTcluidaen elhomo por
convecciTn.
DDD D
Para cambiar la temperatura del
homo durante el ciclo de asado
por convecciTn, presione el botTn
ConvectionRoast yluego presione
los botches del nSmero para
configurar /a nueva temperatura
deseada.
Comoconfigurar el homo para asar por conveccion cuando se utiliza
la sonda
ia pantalla parpadeaM mostrando Probe
v el control del horno indicaM si la sonda
est_i insertnda dentro del ellchtttb, y usted
no ha establecido tlna ten_pei'atura de
sonda y ha presionado el botTn Start.
[]
[]
[]
[]
[]
[]
Coloque la parfilla en la posici6n
que mejor centre la comida en
el homo. ]nserte la sonda dentro
de la carrie.
Conecte la sonda en la toma dentro
del horno, _&seg(u'ese de que est_
bien conectada. (_ierre la puerta
del horno.
Presione el bot6n Convection Roast.
[] (_uando la temperatm'a interna
de la came alcance la temperatm'a
que configur6, la sonda v el horno
se apagaMn y el control (lel homo
(laI';_ la serial. Pare detener la serial,
presione el bot6n Clear/O_ Utilice
almohadillas con aislanfiei_to
t&_nico para quitar la sonda de
la comida. No utilice tenazas
para extraerla: las tenazas
i)ueden dafiarla.
PRECAUCION: para prevenir pos/b/es
quemaduras,no desenchufe ia soma de/enchufe
de/homo hasta que ei homo se hayaenfrbdo.
No aimacene ia soma en ei centro de coc/#a.
PFesione los botones nllllleI_cOs
para establecer la temperatm'a
del homo deseada.
Presione el bot6n Probe,
Presione los botones nllllleI_iCos
para configurar la temperatura
interna de la carrie que desea.
[] Presione el bot6n Start.
(_llan(lo el hol'no COlllienz;i ;i talent;n;
aparecer_i en pantalla la palabra tO.
Despu&s que la temperatura interna
de la came alcan/;i 100 °L se InOStl'al';i
en 1:1pantalla el cambio de
la tellll)el';ittll'a inteYn;i,
Guia para asar por conveccion
NOTA:
Sisequitaiasomadeiacomidaantesdeque
sea/canceiatemperaturafina/,sonar#untono
yiapantaliaparpadear#hastaqueiasoma
searemovidade/homo.
Escuchar#unventi/adormiantrasest#
cocinandoconestacaracterfst/ca.E/venti/ador
sedetendr#cuandoiapuertaseabra,pero
e/ca/orpermanecer#.
Ustedpuedeutb#are/tempon#adorperono
puedeutih2ar/asoperacionescronometradas
de/homo.
Temperatura Temperatura
Carnes Minutos/Lb del homo interna
Carrie Costilias,Costillasdeshuesadas, Pocococido 20a24 325')F 140'_FT
TopSirloin Medic 24a28 325°F 160°F
(3 a5 Ib) Bienasado 28a32 325°F 170°F
Lomoderes Pocococido 10a 14 325°F 140°Ft
Medic 14a 18 325°F 160°F
Cerdo Conhueso,Deshuesado(3a 5Ib) 23a27 325°F 170°F
Jamon Enlatado,Butt, Shank(3a 5Ibtotalmentecocinado) 14a 18 325°F 140°F
Cordero Conhueso,Deshuesado(3a 5Ib) Medic 17a20 325°F 160°F
Bienasado 20a24 325°F 170°F
Ayes Poliocompleto(21/La31kIb) 24a26 325°F 180° a 185°F
Gall/haCornish,norellena(1a 1½ Ib) 50a 55total 325°F 180° a 185°F
Rellena(1a 11/LIb) 55a 80total 325°F 180° a 185°F
Pato(4a 5 Ib) 24a26 325°F 180° a 185°F
Pavo,completo*
Norelleno(10a 16Ib) 8a 11 325°F 180° a 185°F
Norelleno(18a 24Ib) 7a 10 325°F 180° a 185%
Pechugadepavo(4a 6 Ib) 16a 19 325°F 170°F
"!Iris (/_es *_'l/('_(/s _,(!uien, n ,_,_wmhtlente 30 rl 45 mi_ _z/i)_ (i_"ti_'_l bo rldi(io_ al d_" i:ol:ci5_ . (,'ubl_z /rl_ /mlrl_ y ld /_'( /<U,_W
con prt/**'lah_mi_*io h(t*zz e'lJilm *l_ sob*l,do*wdo y la defecm:iSn & la pid.
"tEl l )(/,(l_lm_* nlo de tg'_iculru*zz d*"los I:E.{{k indi_ (I que: "/a _(Irne a/,oco cocida es polmlm; fle_o ufl*'d (h'besab(')
glue cocinm /r_a *o/amen/e 140 <l" sgv_ifigw que aid're*of o_gzmifmof _e_e_afaf flMNm* fo/,n,H_ i_". (lbu _*>:.Sa/el bod
Book. }'ou_Kil(:h__*Guide. {'iDA tCFi,,fll_ io 19,v,5.)
31

Usode las caracteristicascronometradasdel homo inferior
para cocinarpor conveccl in.
Escuchar#un ventiladormientrasest6 cocinandoconestascaracterfsficas.El ventiladorsedetendr#cuando/apuertaseabra,
pero e/ca/or permanecer#.
NOTA:nodebepermitirsequelosalimentosqueseechana perderf#cilmente--como leche,huevos,pescado,rellenos,
avesy cerdo--reposen por mils de 1hora anteso despu#sdela cocciOn.Latemperaturaambientepromueveel crecimientode
bacteriaspeligrosas.Aseg&ese de quela luzdelhomo est6apagadayaque el calorde labombillaacelerarfa el crecimientode
bacteriaspeligrosas.
ii[ Zl EZl[?3
Comoconfigurar un Inicio inmediato y una Parada automgltica
E/homoseencenderbinmediatamentey cocinarb
duranteeltiemposeleccionado.AIfinalde/tiempo
decocciOn,e/homoseapagarbautombticamente.
Aseg(li'ese de ({tie el reloj Irltlestl'e la hoI'}l
correcta del dfa,
[] Presione una xez el bot(m
ConvectionBake para el horneado
pot convecci(m con mfiltiples
parrillas. Este modo es ufilizado
para cocinar alimentos en mrs de
tma parrilla (es cleric; 2, 3 o mils
parrillas) al mismo tiempo en
horneado pot conveccidn. Consulte
la secci6n Horneadoon mEl/tip/esparrillas
para mils infimnaci6n.
Presione dos veces el bot6n
Convection Bake para el horneado
pot convecci(m de tma parfilla.
Este mo(lo se ufili/_l para codnar
alimentos en s61a tma parfilla en
el horneado pot conveccidn.
Presione el botdn Convection Bake
p}lI';l }lS}lI" poi- convecci()n.
[] Presione los botones nun-i(_ricos para
establecer la temperatm'a del homo
deseada.
[] Presione los botones num(_ricos
pare configurar el tiempo de cocci(m
deseado. E1mhfimo tiempo de
coccidn que puede configumr es de
1 minuto. En la pantalla aparecer_i
la temperatm'a del homo que usmd
configure ) el fiempo de coccidn
que ha)'a ingresado.
[] Presione el bot6n Start.
i _l pantalla mostrar5 los cambios de
mmpetatma (c()menzando en 100 °F)
) el tiempo de cocci6n, i a i)antalla
comienza a cambiar una vez
la mmperamm alcanza los 100 °E
E1homo continuar5 cocfimndo (tmante
la cantidad de fiemi)o progmmada, luego
se apagm'_i autom_ificamente,
[] Presione el bot6n Clear/Offpare
borrar la pantalla si es necesario.
Retfi'e la comida del homo.
Recuerde, aunque el homo
se apague autom_ificamente,
los alimentos clue se dejan en
el homo continuarSn cocinSndose
despu_s que el horno se apague.
[] Presione el bot6n Cooking Time,
NOTA:si surecetarequieredepreca/entamiento,
esposiblequenecesiteafiadirrobstiempoa/ tiempo
decocciOn,
32

i¸¸¸¸
iii
ge.com
Come configurar un Inicio postergado
Ustedpuedeconfigurarel controldefhomopara
quepostergueel inicio,cocineduranteunpefiodo
especfficodetiempoyluegoseapague
autombticamente.
Asegfirese de que el relqj muestre la hora
correcta del dfa.
[] Presione una _ez el bot6n
ConvectionBake para el horneado
pot convecci6n con m(dtiples
parrillas. Este modo es utilizado
para cocinar alimentos en mils de
tma parrilla (es (led_; 9, 3 o mrs
parfillas) al mismo fiempo en
horneado per convecd6n. Consulte
la secci6n Horneadoon mEl/tip/esparrillas
para m_is infimnacidn.
Presione dos veces el bot6n
Convection Bake para el horneado
per convecci6n con una parrilla.
Este mode es ufilizado para cocinar
alimentos solo con tma parrilla en
el hoi'neado per convection.
Presione el botdn Convection Bake
p[lI'}l [IS[II" poI" (-onve(-('i(_)n.
[] Presione los botones num&'icos i)ara
establecer la temperatm'a del homo
deseada.
[] Preskme el botdn Cooking77me,
y una Parada automatica
Si deseaverificarel tiempoquehaconfigurado,
presioneel botdnDelay Start paraverificarla hera
deinicioquehaconfiguradoopresioneel botdn
Cooking lime paraverificarla fluraci6nde/tiempo
decoccidnque haconfigurado.
[] Preskme el botdn Start.
NOTA:sonar_un tonedeatenciOnsiestb utilizando
el homeadoo el asadocronometradoynopresiona
el botdnStartdespu_sdeingresarlatemperatura
dehorneadoo asado.
Cuando el borne se encienda a
la hem del dfa que usted ha)'a esmblecido,
la pantalla mostmr_i el cmnbio de
temperature (comenzando a 100 °F)
) el tiempo de cocci6n, i_a pantalla
comienza a cambiar una vez que
la temperature alcance los 100 °E
E1homo continuar5 cocinando dumnte
la cantidad de tiempo prog_amacta, lueg_)
se apagar5 automSficamente.
[] Presione el botdn Clear/Offi)ara
bom_r la pantalla si es necesario.
Retire la comida del homo.
Recuerde, aunque el homo
se apague autom_iticamente,
los alimentos que se dejan en
el homo continuarSn cocinSndose
despu(_s que el hoi'no se apague.
NOTA:si surecetarequieredepreca/entamiento,
esposib/equenecesitearia& robstiempoal tiempo
decocci_n.
[_] Presione los botones num&'icos
ii i
para configumr el tiempo de cocci6n
deseado.
[_ Presione el botdn DelayStart.
[] Presione los botones num&'icos para
establecer la hera del dfa a la cual
desea que el homo se encienda }
cOlllience a cocinai;
33

Ajustedeltermostatodelhomoinferior:iHagaloustedmismo!
Usted se puede percatar que su homo nuevo cocina distinto al que reemplaz5. Use su homo nuevo par varias
semanas para familiarizarse con #LSi aOnpiensa que su homo nuevo es demasiado caliente o demasiado fr[o, usted
puede ajustar el termostato usted mismo.
No use termSmetros, coma los que se venden en tiendas de aprovisionamiento para inspeccionar la temperatura
de su homo. Estos termdmetros podrfan variar de 20 a 40 grados.
NOTA: este ajuste sSIo afectar# la temperatura de homeado y asado; no afecta las temperaturas de asado
a la parrilla, convecciSn o autolimpieza. Elajuste se almacenar# en la memoria despu#s de una falla el#ctrica.
Para ajustar el termostato
t_t/[o
Presione los botones Bake ) Broil
Hi/Lo al inismo dempo durante
._ se_tlndos basra que la pantalla
m uestre SF.
[] Presione el bot6n Bake. En
la pantalla se muestra un nfimero
de dos dfgitos.
Presione una vez Bake pare disminuir
(-) la temperature del homo, o (los
veces para aumentada (+).
[] I,a temperatura del homo pueda
ajustai3e hasta (+) 35 °F mils caliente
o (-) 35 °F mils Ilia. Presione los
botones ntlil/ericos en el IllisI/lO
sentido que aparecen. Pot ejemplo,
para cambiar la temperatura del
homo a 15 °E presione Iv 5.
[] Cuando haya realizado el ajuste,
presione el botdn Start para xolxer
a la pantalla de la hora del dim
Utilice su homo como lo harfa
nOllilahilente,
NOTA:elajustedeltermostatoparahorneado
tambidnafectar#elhorneadoparconveccidny
elasado/)orconveccidn.
iEI tipode margarinaafectara el desempe o delhomeado!
La mayoria de las recetas para homear so han desarrollado usando pmductos de alto contenido on grasa coma
mantequilla o margarina (80% de grasa). Si disminuye la grasa, esposible que la receta no tenga los mismos
resultados que con un producto de mayor contenido de grasa.
Las recetas pueden fallar si las tortas, pasteles, galletas o dulces se preparan con productos bajos en grasa.
Mientras menos sea el contenido de grasa de un producto tipo mantequilla, robs se notarbn estas diferencias.
Ix)s est:hldares tedei'ales exigen que los productos inarcados ('OII/O IllaI'gaIJllaS, contengan por lo ii/enos tin 80%
de grasa pot peso. Pot otra parte, los productos tipo mantequilla bajos en grasa contienen menos grasa y mils agua.
E1 alto conmnido de humedad de estos productos atecta la mxtura y el sabot de los alimentos horneados. Para mejores
resultados con sus viejas recetas ti_\'oritas, use matgarina, manteqtfilla u otros productos que conmngan par lo inenos
un 70% de aceite vegetal.
?4

Usode la autolimpiezadelhomoinferior, ge.com
La puerta del homo debe estar cerrada y todos los controles deben estar configurados correctamente para
que el ciclo funcione apropiadamente.
Limpie el suelo pesado sobre
la parte fl#erior de/horriD.
Antes de un ciclo de limpieza
l).ecomendan/os ventilar su cocina
dejando una ventana abierta o ufili/;mdo
[In ventilador 0 C_llIlp_ln_l extI'actoI'a
din'ante el primer ciclo de autolimpieza.
]_elnue',_l del horno cualquier bandeja
para parrilla, rejilla para parrilla, sonda,
to(los los utensilios de cocina y cualquier
residuo de papel almninio.
I_s parrillas del homo pueden
autolimpia_e, pero se oscurecer;hl,
perderfin su brillo v se w)lverfin diliciles
de desliza_:
No utilice abrasivos o limpiadores de
hornos. I,impie la parte superior; lados y
parte exterior de la puerta del homo con
jab6n y agua.
_&segfirese de que est(_ puesta la cubierta
de la bombilla elg_ctrica (en algtmos
modelos) y que la luz est(_ apagada.
IMPORTANTE" la salud de algunas
ayes es extremadamente sensible a las
emanaciones noci\_s despedidas din'ante
el dclo de autolimpieza de cualquier
horno. Mtle\;I las ayes a otro Cl.l_li'[o bien
ventilado.
PRECAUCION:nuncacoloquelosutensilios
de cocinani otrosardculossobre elpiso de/
homo. Existeuneiemento decaientamiento
debajo de/p/so de/homo. Coiocarartfcuiossobre
el pisode/homo puefle causarqueel homo
sesobrecaliente,resultandoen flafiospara
el homo yel riesgode dafios o incendioen
los gabinetes.
EZ]DZZZXB
COmeajustar el homo para limpieza
[] Presione el bot6n SeffClean para
tm tiempo de limpieza de 4 horas.
] Si se necesita tm tiempo distinto
alas 4 horas, utilice los botones
numg_ricos e ingrese el tiempo
de limpieza deseado.
Usted puede cambiar el tiempo de
limpieza en cualquier momento entre
3 v 5 horas, dependiendo de (lU(_ tan
sucio est(_ su homo.
Se recomienda tm tiempo de
autolimpieza de 3 horas para limpiar
pequefios derrames contenidos. Para
tm homo sucio se recomienda tm fiempo
de autolimpieza de 4 horas o mils.
[] Presione el bot6n Start.
I,a puerta se bloquea automfidcamente.
I,a pantalla mostrarfi el dempo restante
de limpieza. No serfi posible abrir
la puerta del homo hasta que
la mmperamra sea inferior a
la mmperatm'a de bloqueo y
se apague la luz LOCKED.
Cuando se ai)ague, la luz LOCKED,p(>dr;i
abrir la puerta del homo.
i,a palabra LOCKEDpaq)adearfi
v el control del homo indicarfi si
configm'6 el dclo de limpieza y
olvid6 cerrar la puertn del homo.
Para detener tm ciclo de limpieza,
presione el bot6n Clear/Off.Cuando
se apague la luz LOCKEDindicando
que el horno se ha enfl'iado a una
tempemtm'a inl_'rior a la de bloqueo,
podrfi abrir la puerta del homo.
35

Usede la autolimpiezadel homo inferior.
La puerta del homo debe estar cerrada y todos los controles deben estar configurados correctamente para
que el ciclo funcione apropiadamente.
EEIDEIEE]EEIEE1
Come posponer el inicio de la limpieza
] Presione el bot6n Self Clean para
un fiempo de limpieza de 4 horas.
[] Si se necesita un fiemp() distinto
alas 4 horas, utilice los botones
num&'icos e ingrese el tiempo
de limpieza deseado.
Usted puede cambiar el tiempo de
limpieza en cualquier momento entre
3 v 5 horas, dependiendo de cufin sucio
estt) st! horno.
I,a puerta se bloquea automfificamente.
I,a pantalla mostrarfi la hora de inicio.
No serfi posible abrir la puerta del homo
hasta que la tempemtura sea int_'rior a la
temperatura de bloqueo y se apague la
luz LOCKED.
Cuando se ai)ague, la luz. LOCKED, podrfi
abrir la puerta del homo.
Se recomienda un tiempo de
autolimpieza de 3 horas para limpiar
pequefios deITilIIleS contenidos. Pai'a tin
horno StlCiO se i'ecoillienda tin tieillpo de
autolimpieza de 4 horas o mils.
[] Presione el bot6n Delay Start.
[] Utilizm_do los botones hum&ices,
mgrese la hera del d_a a la cual
desea que comience el title de
limpieza.
[] Presione el bot6n Start.
Despues de un ciclo de limpieza
Es posible que observe algunas cenizas
blancas en el homo. I,fmpielas con un
patio hOmedo despu_s de que el homo
se enfrfe.
g/as manchasblancaspermanecen,remu&alas
conun estropajode acero//enodejab6n y
enjuaguegenerosamenteconunamezc/a
de vinagrey agua.
Estos dep6sitos son usuahnente residuos
de sal que el ciclo de limpieza no puede
eliminm:
Si el homo no queda limpid despug_s de
un ciclo de limpieza, repita el ciclo,
Usted no puede configurar el homo
para cocci6n hasta que el homo est(_
lo sufidentelnente fl'fo COlnO para que
la puerta se desbloquee.
Mientras el homo est_ en
autolimpieza, usted puede presionar
el botdn Clock para mostrar en
pantalla la hora del dim Pare volver
a la cuenta regresi\;_ de limpieza,
presione el bot6n Self Clean.
Si las parrillas se vuelven diIh'iles
de deslizm; limpie los soportes de
las parrillas con aceite de cocina.
3_

Caracteristicasespecialesde controldesuhomo inferior, gecom
Su nuevo control con botones sensibles tiene caracterfsticas adicionales que puede elegir utilizar. A continuaciSn
se describen las caractedsticas y c6mo puede activarlas.
Los modos de caracterfstica especial s61opueden activarse mientras la pantalla est# mostrando la hora del dfa.
Dichos modos permanecen en la memoria del control hasta que los pasos sean repetidos.
Cuando la pantalla muestre su elecciSn, presione el botSn Start. Las caractedsticas especiales permanecer#n
en la memoria despufis de una falla en el suministro de electricidad.
Apagado despues de 12horas
Conestacaracteffstica,siseolviflaydeja
elhomoencendido,el controlapagarfielhomo
despufisde 12horasautomfitlcamentedurante
/asfuncionesdehorneadoo despufisde3horas
duranteunafuncidndeasadoa/aparril/a.
Si desea ai)agar, esta caracterfstica, siga,los
pasos a contintlacion.
[] Presione los botones Bake } Broil
Hi/Lo al i]/iSillO tielnpo durante
3 segundos hasta que la pantalla
muestre SF.
[] Presione el bot6n Delay Start hasta
que noapagado (no shdn) aparezca
en la pantalla.
[] Presione el botdn Startpara
acti_ar "no ai)agado", } deiar la
configurad6n del control en este
modo de caracterfstica espedal.
HgLo
Seleccion de temperatura en grados Fahrenhe# o Centigrados
Sucontroldelhomoestficon@uradopara
utih2ar/asseleccionesdetemperaturaengrados
Fahrenheit,perosepuedecambiarutilizando
/asseleccionesengradosCentfgrados.
[] Presione los botones BroilHi/Lo
x Bake al mismo tiempo durante
3 segundos, hasta que la pantalla
muestre SF.
] Presione los botones Cooking Time
y Broil Hi/Lo nuexamente al mismo
tiempo. Ia pantalla mostrar_i C
((:en6grado).
[] Presione el botdn Start.
[] Presione los botones Cooking Time
v,Broil Hi/Lo al mismo tiempo.
Ia pantalla mostrar, i F (Fahrenheit).
Bloqueo del control fenlos modolosquo ostOnoquipados)
Sucontrollepermitir#bloquearlosbotones
sensiblesdetalformaquenopuedanser
acflvadoscuandoseanpresionados.
Para bloquear/desl)h)quear los controles:
[] Presione los botones 9y 0 al mismo
tiempo durante 3 segtmdos, hasta
que la pantalla inuestre L0C ON.
[]
Para desbloquear el control,
presione de los botones 9 v 0 al
mismo tiempo durante 3 segtmdos,
basra que la pantalla muestre
LOC OFF.
Cuando esta caracterfsfica est:i
encendida y se aprietan los botones
sensibles, el control pitar_i y la pantalla
mostrar;i tOC ON.
Elmododebloqueodelcontrolafectatodos
losbotonessensibles.NlbgElnbotdnsensible
funcionar#cuandoestacaracterfstlcaestb
activada.
Elajustequedarfien/amemoriadespubs
deunafal/aenelsuminlstrodeelectricidad
37

Caracteristicasespeciales de controlde su homoinferior.
HIfl.o
ii i
Tonesal final de un title cronometrado
AI finaldeuncicb cronometrado,sonar_n
3 pitidoscortosseguidosporunpitidocada
6segundoshastaquesepresioneelbotdn
Clear/Off Estepitidoconflnuocada6segundos
puedecance/arse.
Para cancelar el pitido cada 6 segundos:
[]
Presione los botones Bake y Broil
Hi/Lo al mismo fiempo durante
3 segtmdos hasta que la pant;ilia
muestre SF.
[]
[]
Presione el bot6n Kitchen Timer
On/Off.i,a panmlla mt/estra CON
BEEP (piddo continue). Presione
nue\mnente el botdn Kitchen Timer
On/Off.I,a panmlla nuesm_ BEEP.
(Esto cancela el pitido cada
6 segtmdos).
Presione el botdn Start.
Reloj de 12horas,24 horas o supresion del reloj
Sucontrolest_con@uradoparautilizarunreloj []
de 12horas.
Si usted prefe_irfa tenet un reloj de
24 horas o sup6mir el relqi de la pantalla,
siga los pasos a continuacidn.
[] Presione los botones Bake y Broil
Hi/Loal mismo tiempo durante
3 segundos hasta que la pantalla
m uestre SF.
Presione una vez el botdn Clock.
Ia pantalla mostrar_i 12hr. Si &ta
es la eleccidn que desea, presione
el bot6n Start.
Presione ntle','aIllente el bot()n
Clock para cambiar al relqi de
24 horas. I,a panmlla mostraM 24 hr.
Si &sta es la eleccidn que desea,
presione el botdn Start.
Presione ntlevaI//ente el boton
Clock para supfimir el reloj de la
pantalla. I,a pantalla mostraM OFF.
Si _sta es la eleccidn que desea,
presione el bot6n Start.
NOTA:s/elrelojestfionelmodosuprknido,
nopodrfiuti&ar/afuncidnDelayStart.
Cuandoutiliceelhorneadopotconveccidn,
/acaracterfsticaConversidnAutoRecipe_
convertkfiautomfiticamente/astemperaturasde
horneadoregularingresadasen/astemperaturas
dehorneadoporconveccidn.
Unavezestdacfivada/acaracterfstlca,
ConversiOnAuto Recipd _(ConversiOn automMica de la recetas)
Paraactivarlacaracteristica:
[_ /apantal/amostrarfi/atemperaturarea/
START convertida{reducida_Porejemplo,si usted
ingresaunatemperaturadeunarecetanormal
de350°FypresionaelbotdnStart,/apantal/a
mostrarbCONy/a temperaturaconvertlc/ade
325°E
NOTA:estacaracterfsticanoconviertelos
fiemposdecoccidndelhorneadoporconveccidn,
s51o/astemperaturasnormalesdehomeado.
[]
Presione los botones Bake _ Broil
Hi/Lo al mismo dempo durante
3 segundos hasta que la pantalla
m uestre SF.
[]
Presione el bot6n Convection Bake.
ia pantalla mosmml CONOFF.
Presione nuexamente el botdn
ConvectionBake.1;i pantalla
mosmml CONON.
[] Presione el bot6n Start.
Para desacfivar la caracterfsfica, repita
los pasos 1 al 3 anteliores pete presione
el botdn Start cuanclo CON OFFest6 en
la pantalla.
38

Usede la caracteristica Sabbath.
(Dise_adaparautilizarseenel Sabbathjudfo ydfasfestivos).(enalgunosmodelos)
ge.com
Lacaracteristica Sabbathpuede utilizarse(micamentepara homeado/asado.Nopuede utilizarsepara convecciSn,
asadoa la parrilla,autolimpiezao DelayStart.
NORA:la luzdel homose enciendeautom#ticamente(enalgunosmodelos)cuandola puertaesabiertayse apagacuando
la puertaescerrada.Sepuede quitarla bornbilla.Consultela secci6nReemplazode la luzdelhomo.Enlosmodeloscon
uninterruptor de/uz en elpane/de control,la luzdel homopuede encendersey dejarseencendida.
H_/o
Cuando la pantalla muestra D
el horno est# configurado en
Sabbath. Cuando la pantalla
muestra D G el horno est_
homeando/asando.
Come configurar el horneado/asado regular
Aseg&ese deque elreloj rnuestrela hora []
correctade/dfa y queel homo estb apagado.
Presione v illantenga sostenidos
[] los botones Bake ,'Broil Hi!to,
al mismo tiempo, hasm que []
la pantalla muestre SF.
NOTA:si en la pantalla aparece bake []
o broil, los botones Bake v BroilHi!to
no _t/ei'on presionados al iilisiilo
fiempo. Presione el bot6n Clear/Off
COlllience de nl/e_o,
[] Presione el bot6n Delay Start
hasta que SAb bAtH aparezca
en la pantalla.
Presione el bot6n Start} D aparecer_]
[] la pantalla.
[] P!'esione el bot6n Bake. No se dar_i
nmguna serial.
Utilizando los botones num&_icos,
ingrese la temperatm'a deseada
entre 170 °Fx 550 °_1_.N() se (larJ
ningtma serial o temperatm'a.
Presione el bot6n Start.
Despu_s de tm petiodo aleatmio
de espera de aproximadamente
30 segtm(los a 1 minute, aparecer_
en la pantalla D c indicando qtle
el homo est_i horneando/asando.
Si no aparece D cen la pantalla,
('oi/lien('e de ntlevo en el Paso 4.
Para ajustar la temperatura del homo,
presione el bot6n Bake,ingrese la illleV_l
temperatm'a ufiliamclo los botones
nmn(qicos, y presione el botdn Start.
NORA:los botones Clear/Offy Cooking Time
est;h_ attires durante la caracterfstica
Sabbath.
Lo
Cuando la pantalla muestra D
el horno estb configurado on
Sabbath. Cuando la pantalla
muestra D G el homo estb
homeando/asando.
Come configurar un homeado/asado cronometrado: Inicio inmediato
y Parada automMiea
Aseg&ese deque elreloj rnuestrela hora
correctac/eldfay queel homo estd apagado.
[] Presione) mantenga sostenidos
los botones Bake v Broil Hi!to, al
mismo tiempo, hasta que 1;i pantalla
muestre SF.
NOTA:si en 1;Ipantalla aparece bake
o broil, los bomnes Bake v Broil Hi/to
no ][ileI'on pi'esionados al IIliSII/O
tiempo. Presione el bot6n Clear/Off
v COlllience de ntleVO.
[] Presione el bot6n Delay Start
basra que SAb bAtH aparezca
en la pantalla.
[] Presione el bot6n Starty D aparecer_
la pantalla.
[] Presione el bot6n Cooking Time.
] Presione los botones nl/Ill(_IJCOS
para configm'ar el fiempo de
cocd6n deseado entre 1 minute
v 9 horas v 99 minutes, E1 tiempo
de cocci6n que ingres6 aparecer;i
en la pantalla,
Presione el bot6n Start.
[]
[]
[]
[]
[]
P!'esione el bot6n Bake. No se dar_i
mngmm serial.
/Jtilizando los botones hum&ices,
ingrese la temperamra deseada.
No se (lar_i ningmm serial o
temperatura.
Presione el bot6n Start.
Despu0s de tm periodo aleatorio
de espera de aproximadamente
30 securities a 1 minute, aparecer_i
en la pantalla D c indicando que
el hoi'no est;_ hoi'ne_lndo/_lS_lndo.
Si no aparece D cen la pantalla,
coil/ience de ntle;'o en el Paso 7.
Para _!justar la temperamra del homo,
presione el bot6n Bake, ingrese la nuewl
temperamra tKilizando los botones
num(qicos, y presione el bot6n Start.
Cuan(lo la cocci6n est(_ temfinada,
la pantalla cambiar_i de D c a D v
aparecer_i 0:00, indicando que el i]orno
se ha apagado pete todavia est:i
configm'ado en Sabbath.
]_elnueva la comida cocinada.
39

Usede la caracteristica Sabbath.
fOisefladaparautiliza_seenel Sabbathjudfo ydfas festivos),fenalgunosmodolos)
COme salir de la caracteristica Sabbath
[] Presione el bot6n Clear/Off
[] Si el homo estfi cocinando, espere
dumnte un periodo aleatorio de
aproximadamente 30 segundos a
1 minute, hasta que solo D est(_ en
la pantalla.
[] Presione y sostenga los botones Bake
y Broil Hi/Lo, almismo tiempo, hasta
que la pantalla muestre SF.
[] Presione el bot6n Delay Staff hasta
que aparezca en la pantalla 12shdn o
noshdn. 12shdn indica que el homo
se apagarfi automfiticamente
despu_s de 12 betas./10 shdn
indica que el homo no
se apagar;i autom;iticamente.
[] Presione el botdn Start.
NOTA:si se presentd un corte en
el suministro el_ctrico mientms el homo
estaba en Sabbath, el homo se apagarfi
automfificamente y pemmnecerfi apagado
aunque el stmfinistro elgmtrico regrese.
E1 control del homo debe set reiniciado.
40

Cuidado y limpiezadel centto de cocin& ge.oom
Antes de Iimpiar cualquier parte del centro de cocina aseg_rese de que ei sumirlistro elbctrico estb
desconectado y todas las superficies est#n frfas.
C6me quitar la cinta de emflMaje
IPam asegm_t_se de w.:_da6ar e] acabado
de] prodl_cto, ]a mam_e_;_m_s segm_t de
reti_lr e] adhes]vo de ]a chute de embah!ie
sobre apa_xltos m_lxe_,os es ]a aphcacidm_ de
m] detergei/te domeSstico ]fql_ido pa_t
laver p]atos, aceite mh_e_t] o aceite de
COCi m__/.
Ap]iql_e con m_ patio slmve v
deie empapa_: Seqlle coil Im pam_o
y hlego aplique m/ ]l_st_(;[or pare
e]ectrodom_sticos pare ]impiar y proteger
comp]etam]el]te ]a superi?cie.
NORA:se debequiter cinte p/bstica
(ana/gonosmode/os)de todos/asadomos
cromadox No puede rat/tersesi sequema.
Homo microondas
Noutf&e un/ikr_bdordehomoscomercia/sobre
ningunapartedesuhomomicrooMas.
Plataferma girateria remevible y apeye
de la platMorma girateria
Pa_;_ e_,itar m[:>m_;_s, _/o co]oq_le
]a p]ata%rma girator_a ell e] agile
.i_lsto despu_s de coch/a_: l ;ive]a
cllidadosm?/e_/te e_/ agile ca]iei/te
y es[:mmosa o el/ e] ]avap]atos.
l ;t p]ata[i>m/a gi_to_Ja y el apo}o
[:mede rompe_se si se de ia_/ cae_: No
opere el homo microo_/das sh/ q_e
esters/ co]ocados ]a p]ata_im_/a gimto_Ja
y e] apo}o.
Pair1 reempk_/;/r e] apoyo, co]oq_e s_
poste cel/mtl el/e] hovo. Gire el apoyo
sobre s_l ce_/tro haste q_e se _biq_le
e_/s_l h_gar.
i_terier
]'_,]a_/[ei/ga e] hor_/o m]croo_/das ]]mp]o }
coil b_lei/ o]o_: All,Jr ]a [:merta de] hon/o
IH/OS [)OCOS _'_/] _/II[OS desplle_s de cod _/ar
ay/_da a q/_e e] aire ciro_]e. IUm_ ]impieza
_?/]_/ll(;iOS_t ocasioi/a] co_/ IH/a SO]llCiOl/
de ]b]carbol/a[o de sodio y agile a)'/_da
a m a _/tel/er e] ]_/telJ or f_'esco.
l.os dermmes y sa]picadums so_/
fi_ci]es de q/liter de ]as paredes y e] piso
s] se ]]mpia_/poco desjl:mets de remover
los a]imel/tos. Ngm/as saipicadm;is
se t:medei/]]mpiar coil m/a toa]]a de
pape], elgin]as [:medei/ _/ecesitar m/paho
hfimedo. Rem_leva ]as salp]cadm'as de
g_tsa col/ m/pafl(/jabo_/oso, hlego
No/b,pie conalmohadi/lasmeWed'asero,s'ivas.
taspiezaspuedende.loedazar/aab_ohadi//a,
causandocortocimuitos.
l,impie diariamei/te ]as sa]picadm:_s
el/]a ve_/tana de ]a parte h/ter_/a
de ]a [:merta. Cure/do ]a vei/m_/a ester
s_lcia, ];ive]a coil m/patio hOmedo.
E1]jllague y seque.
I Jmpie {_'ecuel]temel/te ]as partes
met;i]icas y p];isticas de ]a parte i_/ter_/a
de ]a i:merta. Uti]ice m/pai_o hOmedo
pare e]imh/ar todas ]as ma_/chas.
No utf/iceabrasivos,comopo/_s de/irnpieza o
a/mohadi//astoothilY'asyp/_sticas.E,sl0,s'pueden
daMr /asuperf/bie.
Exterior
I ,_m pi e e] ext eri or d e] hon/o m] crooi/da s
coil jabdi/y m/paf_o h_imedo, ]_ego
el]juag_*e co_/ m/pa fio h Om edo y seq _le.
l,h_q_ie ]a vei/ta_/a c(m Im [/aho hl_medo.
Se limp]a me ior e] cromo c<m m/paso
h Omedo y hlego co_/ m/a toa]]a seca.
S_perficie de la p_erte
(Mm/do ]impie ]as superficies de
]a puerta y e] horm) que e_m_m e_/
ctmtacto a] cerlm" ]a i)llerta, _lti]ice
(H/i cam e_/[e.jaboi/es sH;t_es v _/o
ab_tsiw_s o dete_gei/tes, ajplic_i_/do]os
co_/ m/a espo_]ja o m/patio s_lave.
4/

Cuidadoylimpiezadel centrode cocina.
Ranura
Cerrojodelabisagra
Jale hacia abajo los cerrojos
de la bisagra para desbloquear
PosiciSn deremociSn
Despegue de la puerta del homo
Lapuertaesmuypesada.Tengacuidado
al quitarylevantarlapuerta.
Noievanteiapuertaporiaagarradera.
Pare quitar la puerta:
[] A1)ra completan/ente la puerta.
[] Jale los cerrojos de la bisagra hacia
abajo del marco de la puerta, a la
posici6n desbloqueada. Es posible
que se necesite una herramienta
como tm destornillador de pala.
[] Stliete fiiinelnente alnbos lados
de la puerta en la parte superim:
[] Cierre la puerta en la posici6n
para quitar de la puem_
(yea la ilustmci6n).
[] I,exante la puerta ) sfiquela hasta
que el brazo de la bisaoTa,_ est6 fimra
de la ranm'a.
Para reemplazar la puerta:
[] Stljete fimmmente ambos lados de
la puerta en la parte StlpeFIoI:
] Con Borde
la puertn inferior
en el mismo
fingulo de la ranura
posicidn para
quit;u; sitOe la
indentacidn del
brazo de la bisagra
en el horde inferior de la ranura
de la bisagra. I,a muesca en
el brazo de la bisagra debe estar
completamente asentada dentro
de la parte inferior de la ranm'a.
[] Abra completamente la puerta.
Si la puerta no estuviese totnlmente
abierta, la indentad6n no
se aseiltai'la COiTectaii/ente en
el horde interior de la ranura.
[]
Brazedela bisagra
Indentaci6n
Empuje los cerrojos de
la bisagra hacia arfiba contm
el inarco fl'ontal de la cavidad del
horno, a la posici6n bloqueada.
Brazede
la bisagra
Cerrojo
dela
bisagra
[]
Jale hacia arriba los cerrojos
de la bisagra para bloquear
Cierre la puerta del homo.
Nofroteni limpieel empaquedela
puerta:etempaquetieneunaresistencia
extremadamentebaja alaabrasi6n.
Sise percataqueel empaquese est#
desgastando,est#deshilachadoo dafiado
dealgunaformay sehadesplazadosobre
la puerta,debehacer quesea
reemplazado.
42
Pare limpiarel interiordel homo:
: Ya que el firea dentro del
empaque se limpia din'ante el dclo
de autolimpieza, no necesita limpiarla
_l Ill_l no,
E1 firea flmra del empaque y
el recubrimiento de la puerta pueden
limpia_se con una ahnohadilla para
refl'egar plfisfica o einbebida de jab6n,
agua caliente y detergente. Eqiuague
bien con tma soluci6n de vinagre
y agua.
Pare limpiar la parte exterea de la puerta:
Lltilicejab6n y agua para limpiar
minuciosamente la parte superior;
lados v ti'ente de la puerta del homo.
Eqjuague bien. Tambi&_ puede ufili/m"
tm limpiador de vidfios para limpiar
el vidrio en la parte externa de
la puerta. No pemfita que el agua
gotee dentro de las ramu'as de
xentilaci6n.
Si se encuentra algtma mancha
persistente sol)re el adorno del
respiradero de la puerta, utilice
tm limpiador abrasiw) suave v tma
espoqja-ti'egadom pare obmner
mejores resultados.
; ix)s deiTaHles de condii/lentos,
jugos de fl'tttas, salsa de tomato y
materiales de los rellenos de todno
confienen ficidos que pueden cattsar
decolorad6n, pot lo tanto deben
limpia_e imnediatamente. Cuando
la supedicie est(_ frfa, limpie y
eqiuague.
No utilice limpiadores para homo,
polvos de limpieza o abrasivos fllertes
sol)re la parte externa de la puerta.

g_com
Panel de control
Es buena idea limpiar el panel de control
despu_s de cada uso. Limpie c,mjab6n
suave y agua o con una soluci6n de
vinagre y agua, enjuague con agua limpia
v hlstre en seco con tin p_ll-lOS/l_lVe.
()rondo haga la limpieza, el panel
de control debe estar a temperatura
ambiente v no b@) la luz solar directa.
No ufilice limpiadores abrasiw_s,
limpiadores lkluidos fllertes, ahnohadillas
pl;isficas para restregar o limpiadores
para hornos sol)re el panel de control:
estos productos daMn'fin el acabado.
Una soluci6n 50/50 de vinagre y agua
calienm flmdona bien.
Sonda (homoinferior)
de p.ede
limpia_e con agua ) jab6n o con una
almohadilla para restregar rellena de
jab6n. Enfl'fe la sonda de temperatura
antes de limpiarla. Restriegue las
manchas diticiles de eliminar, con una
almohadilla para restregar rellena de
jabdn, enjuague y seque.
No sumerjaiasoma de temperaturaenagua.
No almaceneia sondade temperaturaen
el centrodecocina.
43

Cuidedoy fimpiezadelcentre decocin&
P0rtalampara
_ m
Recept_culo
Cubiertadevidrio
Bom##ta el#.ctdca del homo inferior
NOTA:se debe quitar la cubierta de
vidrio {enalgunos modelos) Emicamente
cuando esM frfa. Colocarse guantes de
I#tex puede brindar un mejor agarre.
PRECAUCI#N.ante,de
reemplazar su bombifia el_ctrica
del homo, desconecte el suministro
el6ctrico que afimenta el homo en
el fusible principal o en el panel de
cortacircuito&
Aseg0rese de permkir ql_e ]a cl_bierta
de ]a h_z v]a bombi]]a se e_#_'fe_
com l
Pot su segm'idad, m_otoque ]a bombi]]a
cllm)do est5 c;die_)te con slls mm)os
])(lmed_is o co]) Ih) [)am_o ])limedo.
Para retirar:
[] (;h'e k_ cl_bierta de'_'idrio ell se_/tido
comm_rio a ]as mm_eci]]as de] re]oi
l/4 de w_e]ta basra clue ]as ]el_g{_etas
de ]a cl_bierta de vidHo ]iberel_ los
sl_rcos de] porta]_iml:)ams.
] [ ]d]i/m_do l_am_tes o m_ pai_o seco,
remlaeva ]a e_
]fm)ea recta.
_ara voIvor a COIocaE
VT] [Jdli(e I_])i_ m)l_e\'}][ bOm'N)l)iH_J
iii
]]a]dgem_ de ]30 vo]dos, _o exceda
50 va dos.
[]
[ ]d]i/m_do ,g_a_]tes' o m_ [)ai_o ....seco,
rei]meva ]a bombi]]a de s_ [)aq(_ete.
No toque ]a bombilla c(m los dedos
des]_ IK_()s.
ReceD[aculo
_luan[eso
url Dano
Parrilladel horno
Parrillas de homo
i,impie las parfillas del homo con tm
limpiador abrasivo o estropajo de acero.
Despu_s de limpim; eqjuague las parrillas
con agua limpia y seque con tm patio
limpio.
NOTA: /asparrillas delhomopuedenh_npiarse
en /aautoh_npiezade/homo. Sinembargo,
/asparri//asse oscurecer#n,perder#nsulustre y
sevolver#nd/ffcilesde desl/2arsi se//mp/an
duranteel ciclo de autol/mp/eza.
Pare hacer que las parfillas se deslicen
mils tiicihnente, aplique m]a pequefia
cantidad de aceite vegetal o aceite de
cocina a tma toalla de papel y limpie
los bordes de las parfillas del homo
con la toalla de papel.
Superficies de acero inoxidable (onalgunosmodelos)
Nouseunaalmohadilladelanadeacero;
rayaralasuperficie.
Para limpiar la superfide de acero
inoxidable, use aguajabonosa con
poca espuma o bien m] limpiador o
abfillantador para acero ino_dable.
Siempre limpie la superfide en
la direcddn de las vetas. Siga las
instrucdones del limpiador para limpiar
la superficie de acero inoxidable.
Para avefiguar acerca de la compra
de uI] lilnpiador o uI] lustrador de acero
inoxidable, o para encontrar la ubicaddn
de su distfibuidor mils cercano, pot fi_\'or
llame a i]uestro i]Oinero gratuito:
CentroNacional deRefacciones
(National Parts Center)
1.800.626.2002
44 ge.com

Antesde llamar para so#c#ar
unservicio demanteMmientOoo, ge.co,.
iLos consejos para resoluciSn deproblemas ahorran fiempo y dinero]
Revise primero las grMcas en las siguientes p#ginas y es posible que
no tenga que Ilamar para solicitar servicio de mantenimiento.
Causas posibles
Olvid6 presionazc el
boton Start/Pause.
Que hacer
• Presione el bot6n Start/Pause.
El panel de control en
el homo microondas
no funciona
La puerta no estfi cerrada • _seg(u'ese de qtw la pt/erta del horno inicroondas est_
f'tnnemente. CelT;ida.
Olra fimci6n fue presJonada. • Presione dos veces el bot6n Clear/Offpara cancelarla y
COlllience de nt/evo.
E1 bot6n Clear/Off fue • (_olnience de nuevo.
presionado accidentaJmente.
Controles • Mientras utilizaba Time Defl'ost, los nfiIneros
del horno configurados no se ingresaron despt/_s tie presionar el bot6n
inadecuadamente. Auto Defrost.
"SENSOR ERROR" Durante tma funcion • l,a puerta del horno Iuicroondas no debe
aparece en la pantalla del sensor, la puerta ser abierta antes tie que condence la cuenta regl'esiva
del homo microondas del horno microondas en la pantalla.
fue abierta demasiado pronto.
ta luz del homo La bombilla de luz estfi floja • lJaIne para solicitar servicio de nmnteniiuiento,
microondas o defectuosa.
no funciona
Los alimentos Variaci6n ell la densidad • Variaci6n en la densidad y 1:1cantidad algunas veces
se recocieron o y la cmlfidad de los a]Jnaentos requieren III_iS fieInpo de cocci6n,
faltaban coccion estml siendo cochlados.
en el homo microondas
Alimentos no volteados • V()ltee o agite los alimelm)S y c(mfience nue\mnente,
o a_tados como estfi indicado
en la receta.
Demasiados platos ell • No sobrecargue su horno inicroondas,
el homo al mismo fiempo.
Los alhnentos no • Consulte la secci6n Uso de/as caracter[sticas de/sensor
se descongelan completaxnente, delmicroondas.
Los utensilios de cochla o • Consulte 1:1secci6n Utensilios de cocina seguros para
las cubiertasque seestml microondasde las Instruccionesde seguridadimportantes.
ufilizmldo son hladecuadas.
La hmnedad ell el • _seg(ll'ese de que el interior del horno v el exterior tie
horno harfi que el recipientes est_n secos,
sensor dJsmhluya el tiempo
de cocd6n.
No se permite que • Se recoInienda algo tie tiempo de reposo pal'a ciertas
los alhnentos reposen, veYth/l';is €ocinad;is coil los contl'oles del sensol',
45

Antes de Ilamarpara solicitar
unservicio demantenimiento...
Consejospara resoluci6n de problemas
Se#alesdecontrol
del homoinferior
despuesdeingresar
e!tiempode coccion
oDelayStart
(InicioPostergado)
Causas posibles
Olvid6 ingresar tma
temperatura de horneado o
el tiempo de limpieza.
Que hacer
• Presione el bot6n Bake v, la temperatura deseada o
el bot6n Self Clean v el tiempo de limpieza deseado.
Losalimentos Controles del horno no • Consulte 1:1secci6n Use del homo inferior.
no se hornean o configurados apropiadmnente.
asanapropiadamente
enelhornoinferior La posJci6n de la parfilla es • Consulte la secci6n Usodelhomoinferior,
incorrecta o la parfilla no
estfi nivelado.
E1 termostato del horno • Consulte 1:1seccidn Ajuste del termostato delhomo inferior'.
necesita ajuste, ill@ale ustedmismoL
Losalimentosno La puerta del honlo esta • (]ierre 1:1})uertn. Este lnodelo est;i disefiado 1):11":1un
se asan a la parrilla abiertm asado finicamente con 1:1puertn terraria. Siempre ase
apropiadamente en a 1:1parfilla con 1:1l)twrtn cerrada,
el home inferior
Los conlroles del horno estm_ • _seg(.'ese de presionar el botdn Broil Hi/Lo.
configurados inadecuadmnente.
Se est_ ufilizmado tma posici6n • Consulte 1:1Gu[a para asar a [a parrilla.
inadecu_ada de la parrilla.
Los utensilios de cochla • Para mejores resultndos, utilice una bandeia disefiada
no son adecuados para asar pal'a as:u" a 1:1parrilla.
a la parrilla.
En algmlas fireas • Precaliente el elemento de asado a 1:1parfilla durante
el voltaje puede set bajo. 10 minutes.
• Ase a 1:1parrilla durante tm periodo re:is prolongado
que el recomendado en la Gu[a para asar a la parrilla.
Elreloj yel temporizador Un fusible en su casa • Reemplace el fi/sible o reinicie el disvtmtox:
no funcionano puede estar ftmdido o
la pantallaqueda el disytmtor activado.
enblance
Controles configurados • Consulte 1:1secci6n Use del reloj ytemporizadordel homo
inadecuadmnente, inferiorpara el reloj del homo interim;
• (_oustthe 1:1seccidn Pantalla On/Offpar, i el relQi del homo
HIi(TO( )nd;i,s.
E1 reloj est;i en el mode
suprimido (black-out).
• Constflte la secci6n Caracteristicas especiales de control
de su homo inferior para el reloj del horno inferior.
• Constflte la secci6n Pantalla On/Offpam el reloj del homo
ii/ici'oond_ls.
46

ge.com
Latemperatura
del homoinferior
es demasiadoalta
odemasiadobaja
Causas posibles
E1 tennostato del homo
necesita tm ajuste.
Que hacer
• Consulte la se(d6n Ajuste del termostatodel homoinferior:
ill@ale ustedmismo!
El homo inferior Un fusible en su casa puede • Reemplace el fi/sible o reinicie el disvuntox:
no funciona estar daXmdo o el dis_ltor
acfivado.
Los conWoles del homo estml • (]onsulte la secci6n Use del homo inferior.
configurados hmdecuadamente.
Elhorno inferior La temperatura del horno es • Permita que el horno se enfrfe v reinicie los
no se auto limpiara demasJado alta para establecer controles.
mm operaci6n de autolhnpieza.
La sonda estfi enchufada en • Retire la sonda del borne.
la toma dentro del homo.
Los controles del horno estfin • Consulte la secci6n Use de/a auto/impieza de/homo
configurados haadecuadamente, inferior.
Se escucha un "crujido" Este es el smfido del metal • Esto es normal.
o "estallido" en calent_mdose y enfrifindose
el homo inferior dtwante las funciones de
coccion y limpieza.
Humo excesivo en Exceso de mugre. • Presione el bot6n Clear/Off. Abra las ventanas para
elhorno inferior deiar salir el huron de la habitaci()n. Espere hasta que
dnrante el ciclo la luz LOCKED se apague. Limpie el exceso fie m ugre y
de limpieza reinicie el ciclo de limpieza.
La puerta del homo E1 horno estfi demasiado • Permita que el homo se enfrie per debajo de 1:1
inferior no se abriM caliente, temperatura de bloqueo.
despues de nn ciclo
de limpieza
E1homo inferior no esta Los controles del homo eslfi_a • Consulte 1:1secci6n Use de la autolimpieza del homo
limpio despuOsde configurados hmdecuadmnente, inferior.
un oic!o de limpieza
E1 horno tiene mugre diflcil • IJmpie las sobras pesadas antes (le comenzar el title
de elimhaar. (le limpieza. Es posible que los hornos que tienen
una mugre muy pesada necesiten de autolimpieza
nuevamente o durante un periodo ross prolongado.
"LOCKEO'parpadea Se ha seleccionado el ciclo • Cierre 1:1puerta del horno.
en la pantalla del homo autolintpieza pete la puerta
inferior no estfi cerrada.
La Ioz LOCKEDesta La puerta del horno • Presione el bot6n Clear/Off. Deje enfl'iar el homo.
encendida cnando estfi bloqueada porque
desea cocinar en la temperatura en el horno
el homo inferior inferior dentro del horno
no ha caido per debajo de
la temperatura de bloqueo.
47

Antesde Ilamarpara solicitar
unserviciode mantenimiento...
Consejos para resoluci6n de problemas
Causas posibles
Que hacer
Laluzdelhomoinferior La bombilla est,4 floja o defectuosa. * Apfiete o reemplace la bombilla.
no fffnciona
E1 boton de operacion * IJame para solicitar ser\icio de mantenimiento.
de la bombilla estfi roto.
"F--ynnnumero o Tiene m_ c6digo de * Presione el bot6IZ Clear/Off, Pemfita que el horno se
letra,parpadean en error de la ftmcion, enfrfe durante una hora, Pono-a_ el horno nuexamente
lapantalla del homo en operaci6n.
inferior
Si el codigo de la fmlci6n * Desconecte la corriente del centro de cocina durante
se repite. 30 segundos y conecte imexalnelzte la corriente.
Si el flmci6n se repite, llame para solicitar servicio
de mantenimiento,
Lapantallaparpadea Falla en el suminislro de eleclricidad. * Reilzicie el reloj del h orlzo ilzferior,
Imposible !ogror Los botones de control del * I,os botones Bake y Broil Hi/Lodeben ser
lapantalla del homo horno no fueron presionados presiolzados que al mislno tiempo y sostenidos
inferiormnestre ,'SF', apropiadamente, duralzte 3 segundos.
Aparece,'Probe,! Esto le recuerda hzgresar * lngrese una temperatura de sonda.
en la pantalla mla temperatura de sonda
del homoinferior despu_s de enchufar la sonda.
Corte en el suministro Pico o corte del suministro * Reilficie el reloj. Si el horno estaba en uso,
el#ctrico,el reloj el6ctrico, debe reiniciarlo presionando el bot6n Clear/Off,
parpadea configurando el reloj y reestal)leciendo cualquier
flnzci6n de cocci6n.
Sale vaporde! Cuando se udliza la caracterlslica * Esto es normal.
respiradero cuando pot convection es normal ver vapor
se ntiliza el homo saliendo del respiradero del homo.
inferior Conforme aumenta el nonzero
de parrillas o la cantidad de
aJimentos que estfin siendo
cochmdos, asl mismo aumentarfi
la canfidad de vapor visible.
Olora ,quemado,o Esto es normal en ma horno * Para acelerar el proceso, configure un cich) de
,aceitoso,saliendo nuevo y desapaxecerfi con autolilnpieza durante un nzilzinzo de 3 horas.
del respiraderodel el tiempo. (_onsulte la secci6n Uso de/a autolimpieza de/borne
homocuandoseusa inferior.
del homoinferior
Olorfuerte en Un olor del aJslmniento * Esto es tenzporal.
elhomoinferior al rededor del interior del
horno es normal las primeras
veces que se utiliza el horno.
Suena un ventilador Un ventilador de enfriamiento
cuando se utiliza o un ventilador de conveccion
elhomoinferior (dependiendo de la fm_ci6n
que est6 utilizando) puede
encenderse automfiticmnente.
• Esto es imrmal. E1 ventilador de elzflianfiento
se elzcelz(lei'_i para refl'igerar las partes ilzternas.
Puede fluzcionar (luralzte 1-1/2 horas (lespug_s que
el horno est_ apagado. E1 ventilador de convecci6n
fluzciolzarfi v se apagar_i hasta que la fluzci6Iz terlnilze
o la puerta sea abierta.

Service Protection Plus"_'de GE
(;E, m_a marca reco_ocida en to(k) e_ mm_do debido a su (a_idad) co_ffiabi_idad,
_e ofle(e Service Prote(tio_ Ph_s' ', m_a prote(:(:i6_ gk)bM de to(los sl_s artefactos:
iSin importar la marca!
Los beneficios hlclwen:
o Respaldo de GE
o Todas las marcas estfin cubiertas
o Servicio t_cnico il_mitado
o Todas las piezas y costos de mano de obra inclnidos
o Sin desembolsos
o Sin dedncibles ocultos
* Un nfimero 800 para lla_ar
Cubrimos todos tos
artofactos. En todo&gar
En todo momento
Si m_oq_ed!a comp]etameN_te satisfecho c(m mtestra proteccidm_ de servicio te_c_ico, _tsted p_tede
so]i ci tar ]a devo] I_ci(Sm_de] di m_ero de] tiempo restam_ te de sl_ com_tra to. Sim_[)regm_, tas. Cs_ de sire p]e.
Proteia sla refi'igerado_; ]aw_w_ii]]as, ]avadoras, secadoras, cocim_, te]evisidlL videocassettera y mils,
ide cualquier marca! Ademfis, m> se cobrm_ gastos extra pot servicios tt)c_ficos de emerge_cia y [mede
fi_a_ciarse me_s_m]me_te a m_ tx_io costo, b_cb_so, oI_'ecemos protecci(5_ de mfiq_fi_as de bie]o v de
a]ime_tos que se echa_ a perder. [/sted p_ede q_edarse tra_q_fi]o sabie_do q_e s_s va]iosos productos
dom_sticos se e_/clle_/tra_/ protegidos de reparacio_/es costosas.
Co,_['_ee_ GE, ]hime_os e_ forma gramita e_ los EEAJ{J. a] 800.626.2224 p.,-. m:*_
Coloque en un sobre y envie a:
GeneralElectric Company
Warranty Reg_tration Department
P.O. Box 32150
Lou_ville, KY 40232-215(}
48

Inscripci6n del consmnidor de propiedad de producto
Estimado cliente:
Gracias pot comprar nuestro producto y pot depositar su confianza en nosotros.
iEstamos orgullosos de tenerlo como cliente!
Siga estos tres pasos para proteger la inversi6n de su nuevo artefacto:
Complete y envie
su Inscripci6n
del consumidor
de propiedad
de producto hoy mismo.
Tenga la mmquilidad
(]( saber qtle 1o
[)o(lelllOS ( Ollt_( t_F
(11 C_/SO (]( (llle haya
tma modifi( ad6n
d( s( _tn-idad.
Despu& de enviar
la inscripci6n, conserve
este docIIll]ellIO ell 1111
lugar seguro. Contiene
la intonnacidn necesaria
para solicitar servicio
tdcnico. Nuestro nfimero
de servicio t_:cnico es
800.GE.CARES
(800.432.2737).
I.ea su Manual
del Propietario
cuidadosamente.
I.e ayudarfi a operar
$11 llt/evo artethcto
de nlanera correcta.
Nfimero de modelo Nfimero de serie
,,,,,,, I I , , , , , , , I
Importante: Si no recibi6 una tarjeta de inscripci6n con su
producto, corte y envie el formulario siguiente para
asegurar que se producto estO registrado, o registrelo
online en ge.com.
.................................................................................................... _,,,-- Cort( aquf
Inscripcidn
@
del consumidor de propiedad de producto
Nfimero de modelo Nfimero de serie
1)ir(ccidn [ I I I I I I I I I I I I I I I I I I I I I I I
I
I
I)epartamenl0 #
Ciudad [ I I I I I I
I7((h _ (]e
il,i(iod._(_S [ I [ I)l'_l [ [ [
[ 1)irecci(Sll d(! COIT(_O
I
I
(:ddigo j
[ [ [ [ [ [ [ [ ESI_I([O [ I ] p,,stal I I
Afio I I I Nfim( ro de
t(l_fimol I , I-I , , I-I ,
I
I
50
GE Consumer & Industrial
Appliances
General Electric Company
Louisville, KY/40225
ge.com
* Incluya esta direccidn l)ara rccibi_; vfa con-co electr6nico, descuento.,, ofbrtas especiales y otF.s
comunicaciones importantes (le (;E Appliances (G1L\).
Marque a(luf si 11o(lesea recibir comunicaciones por Darte de los socials cuidadosamente
seleccionados de GEA.
NO COMPI_E'I:kRY DEVOISVER ESI:\ TM{]E'IA NO REI)I CE NUS DERI{CttOS DE (;M_\NTiA.
Para mils informacidn sol)re las polfficas (le privacidad y (le uso de infi)rmacidn de (;EA, dir{iase a
ge.com y haga clic en "Polflica de privacidad" o llame al 800.626.2224.

Garantiade GEpara sucentrode cocina microondasempotrado.
Todos los servicios de garantfa los proporcionan nuestros Centros
de ReparaciSn de F#brica o nuestros t#cnicos Customer Care®
autorizados. Para concertar una cita de reparaciSn, en Ifnea,
24 horas al dfa, visftenos en ge.com, o flame a1800.GE.CARES
(800.432.2737).Cuando flame para soficitar servicio, pot favor
tenga a mano el nElmero de serie y el n#mero de modelo.
Pegue aquf su recibo.
Se requiere facilitar proeba
de la fecha de compra original
para obtener on servicio
bajo la garantfa.
GE reemplazara:
Un a#o Cualquierparte (]el (entro de co(-ina microondas que tidle debido a (lefe(tos en
A partir dela fecha losmatefiales o en la tid)ficaci6n. L)uranteestegarantialimitadadeuna#o,GE t;mfl)i&_
de la compra original proporcion;i, sin costo alguno, toda la mano de ol)ra v h)s servicios internos i)ara reemplazar
I);d I't es (][e_'ctt /os;ds,
Viajes de servicio a su casa para ensefia_rle como usa_r
el producto.
Instalaci6n, enlrega o maaatenhniento hlapropiada.
Faflas del producto si hay abuso, real uso, o uso paaea
olros prop6sitos que los propuestos, o uso paxa Frees
comerciaJes.
Reemplazo de fusibles de su casa o reajuste de
hlterruptores de circuito.
DaSlo al producto causado por accidente, fuego,
iumadaciones o actos de Dios.
Dm-lo incidental o consecuencial causado por posibles
defectos con el aparato.
Dafio cattsado despuds de la enlrega.
Producto no accesible pasta facilimr el servicio
requerido.
EXCLUSION DEGARANTIAS IMPLJCITAS--Su (mice y exclusive derecho es la reparacion del producto,
tal y como se indica en esta Garantia limitada. Cualquier garantia implicita, incluyendo las garantias
implicitas de comerciabilidad oadecuaci6n para un fin determinado, esMn limitadas a un a#o o el
periodo de tiempo mas breve permitido por la ley.
Esta garantia se extiende al comprador original y cualquier comprador posterior de productos comprados para
uso residencial dentro des Estados Unidos. Si el producto est# situado en un firea que no dispone de servicio pot
parte de un proveeclor de servicio autorizado de GE,podria tenet que hacerse cargo de los costes de envfo obien
podrfa solicitfirsele que Ileve el producto a un centro de servicio de GE autorizado para realizar la reparaci6n. En
Alaska, la garantfa excluye el costo de envio o las visitas de servicio a su casa.
Algunos estados no permiten la exclusi6n o las limitaciones de clafios incidentales o consecuenciales. Esta garantia
da clerechos legales especfficos, y usteclpodrfa tenet otros clerechos que variar#n de estado a estaclo. Para saber
cufiles son sus derechos legales, consulte a la oficina de asuntos del consumidor local o la oficina del Prucurador
(Attorney General) en su Iocalidad.
Garante:General Electric Company.Louisville,KY 40225
57

Soporteal consumidor.
P_ginaWebdeGEAppliances ge.com
,_'Tiene alguna pregunta sobre su electrodom_stico? iPruebe la pfigina Web de GE Appliances 24 horas al
dfa, cualquier dfa del aflo! Para mayor conveniencia v servicio re;is r_ipido, ya puede descargar los Manuales
de los Propietarios, pedir piezas o incluso hacer tma cita en lfnea para que vengan a realizar tma
reparaci6n.
Soliciteunareparaci6n
E1 servicio de expertos (;E estfi a tan s6lo m_ paso de su puerta. ;Entre en lfnea ) solicite su reparaci6n
cuando le xenga bien 24 horas al dfa cualquier dfa del afio_ O llame al 800.GE.CARES (800.432.2737)
din'ante horas nommles de oficina.
ge.com
RealLifeDesignStudio(Estudiodedisefioparalavidareal) ge.com
GE apoya el concepto de Disefio Univex_al--productos, servicios y ambientes que pueden usar gente de
todas las edades, tamafios y capacidades. Reconocemos la necesidad de diseflar para tma gran gama de
habilidades v dificultades tisicas y mentales. Para mils detalles cobre las aplicaciones de GE Disefio Universal,
incluvendo ideas de disefio para la cocina para personas con discapacidades, mire nuestra pfigina _'e'l_', hoy
mismo. Para personas con dificultades audifiw_s, Ire'or de llamar al 800.TDD.GEAC (800.833.4322).
Garantfasampliadas ge.com
Compre tma garantfa ampliada ) obtenga detalles sobre descuentos especiales disponibles mientras su
garantfa estfi afin acfixa. Puede comprarla en lfnea en cualquier momento, o llamar al 800.626.2224
din'ante horas nommles de oficina. GE Consumer Home Services estarfi afin ahf cuando su garantfa temfine.
I "I
J
Piezasyaccesorios
Aquellos individuos con la calificacidn necesaria para reparar sus propios electrodom_sticos pueden
pedir que se les manden las piezas o accesorios directamente a sus hogares (aceptamos las tmjetas
VISA, MasterCard y Discover). Haga su pedido en lfnea hoy, 24 horas cada dfa o llamar pot tel_fimo
al 800.626.2002 din'ante horas nommles de oficina.
ge.com
Las instrucciones descritas en este manual cubren los pmcedimientos a seguir per cualquier usuario. Cualquier
otra reparaci6n deberia, por regla general, referirse a personal calificado autorizado. Debe ejercerse precauci6n
ya que las reparaciones incorrectas pueden causar condiciones de funcionamiento inseguras.
P6ngaseencontacto connosotros ge.com
Si no est:i safislecho con el servicio que recibe de (;E, pdngase en contacto con nosotros en nuestra pfigina
_'eb indicando todos los detalles asf como su nfimero de tel_fimo o escrfl)anos a:
General Manage_; Customer Relations
GE Appliances, Appliance Park
I *)uis\ille, KY 40225
l Registresuelectrodom#stico ge.com
iRegislre su nuevo electrodom_stico en lfima---eumado usted prefiera! E1 registrar su producto a tiempo le
, proporcionarfi, si sm'giera la necesidad, tma meior commficaci6n y tm serxicio mils rfipido bajo los t&minos
de su garantfa. Tambi_n puede enviar su tmjeta de registro pre-impresa que se incluve en el material
de embalaje.
Impreso on los Estados Unidos
-
 1
1
-
 2
2
-
 3
3
-
 4
4
-
 5
5
-
 6
6
-
 7
7
-
 8
8
-
 9
9
-
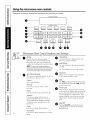 10
10
-
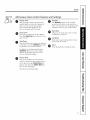 11
11
-
 12
12
-
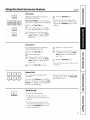 13
13
-
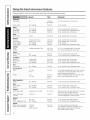 14
14
-
 15
15
-
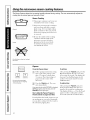 16
16
-
 17
17
-
 18
18
-
 19
19
-
 20
20
-
 21
21
-
 22
22
-
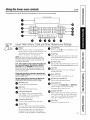 23
23
-
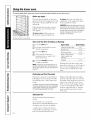 24
24
-
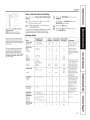 25
25
-
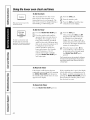 26
26
-
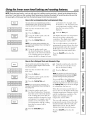 27
27
-
 28
28
-
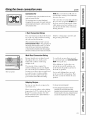 29
29
-
 30
30
-
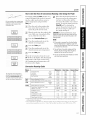 31
31
-
 32
32
-
 33
33
-
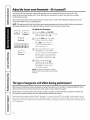 34
34
-
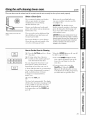 35
35
-
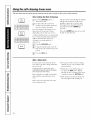 36
36
-
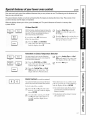 37
37
-
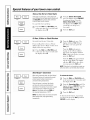 38
38
-
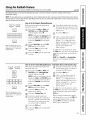 39
39
-
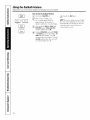 40
40
-
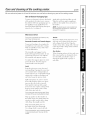 41
41
-
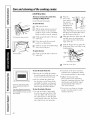 42
42
-
 43
43
-
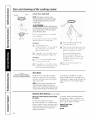 44
44
-
 45
45
-
 46
46
-
 47
47
-
 48
48
-
 49
49
-
 50
50
-
 51
51
-
 52
52
-
 53
53
-
 54
54
-
 55
55
-
 56
56
-
 57
57
-
 58
58
-
 59
59
-
 60
60
-
 61
61
-
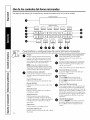 62
62
-
 63
63
-
 64
64
-
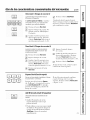 65
65
-
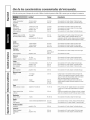 66
66
-
 67
67
-
 68
68
-
 69
69
-
 70
70
-
 71
71
-
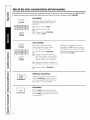 72
72
-
 73
73
-
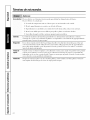 74
74
-
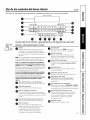 75
75
-
 76
76
-
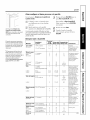 77
77
-
 78
78
-
 79
79
-
 80
80
-
 81
81
-
 82
82
-
 83
83
-
 84
84
-
 85
85
-
 86
86
-
 87
87
-
 88
88
-
 89
89
-
 90
90
-
 91
91
-
 92
92
-
 93
93
-
 94
94
-
 95
95
-
 96
96
-
 97
97
-
 98
98
-
 99
99
-
 100
100
-
 101
101
-
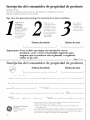 102
102
-
 103
103
-
 104
104


GE PT970BM1BB El manual del propietario
- Categoría
- Microondas
- Tipo
- El manual del propietario
- Este manual también es adecuado para
en otros idiomas
- English: GE PT970BM1BB Owner's manual
Artículos relacionados
-
GE JKS1027 Manual de usuario
-
-
-
-
GE JTP90DP2BB El manual del propietario
-
GE JVM3670WF09 El manual del propietario
-
-
-
GE FUF14 El manual del propietario
Otros documentos
-
Kenmore 91147812200 El manual del propietario
-
Kenmore 91147793200 El manual del propietario
-
Sharp R-402JK El manual del propietario
-
Maytag MMV4205AAQ El manual del propietario
-
Amana AMV1162AAQ El manual del propietario
-
-
-
-
Premier ED·288$ Instructlon Manual