
Artika For Living Inc.
Dorval, Canada H9P 2R2
Customer service
Monday to Friday: 9 AM – 5 PM EST
Service à la clientèle
Lundi au vendredi: 9 h à 17 h, H.N.E
Servicio al cliente
Lunes a Viernes: 9 AM - 5 PM Hora del Este en E.U.A.
1-866-661-9606
support@artika.com
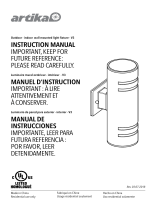
Outdoor - indoor light fixture
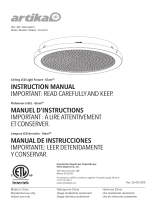
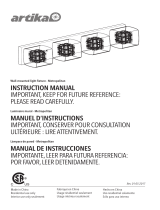
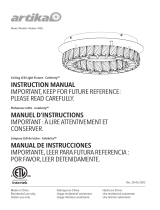
INSTRUCTION MANUAL
IMPORTANT, RETAIN FOR FUTURE REFERENCE. PLEASE READ CAREFULLY.
Luminaire extérieur - intérieur
MANUEL D’INSTRUCTIONS
IMPORTANT, CONSERVER POUR CONSULTATION ULTÉRIEURE: LIRE ATTENTIVEMENT.
Lampara para exterior - interior
MANUAL DE INSTRUCCIONES
IMPORTANTE, CONSERVAR PARA FUTURA REFERENCIA: LEA ATENTAMENTE
For residential and commercial use
Pour usage résidentiel et commercial
Para uso residencial y commercial
Made in China / Fabriqué en Chine / Hecho en China
Rev. 07dec2015

2
What you will need
Vous aurez besoin de Lo que va a necesitar
not included
Sealant
Scellant
Sellador
Screwdriver
Tournevis
Destornillador
non inclus no incluidos
Included
Wire connector
Marrette
Conector de cable
Support screw
Vis de support
Tornillo de soporte
Fixation screw
Vis de xation
Tornillo de jación
IncluidoInclus
x 2 x 2x 3
(b)(a) (c)
NOTE: Please consult your local
hardware store for the proper sealant
and instructions to seal the light to
your wall type.
NOTE : Consultez votre
quincaillerie locale an de vous
procurer le scellant adéquat pour le
luminaire et votre mur.
NOTA: Por favor, consulte con
su tienda de ferretería local para el
sellador apropiado y las instrucciones
para sellar la luminaria de acuerdo al
tipo de su pared.

3
PLEASE READ THE
INSTRUCTION MANUAL
BEFORE STARTING
INSTALLATION
The installer and/or user must read,
understand and follow these
instructions before installing the
product. This product must be
properly installed before it is used.
If instructions are not followed, the
manufacturer will not be held
responsible for any problems or
product malfunctions. Failure to follow
installation instructions and/or
operating instructions voids the
warranty.
We recommend that this product be
installed by a certied electrician. In
some states or provinces, it is a legal
requirement for this type of product to
be connected by a certied electrician,
according to the electrical and Build-
ing Codes effective in the region.
Switch off the main electrical supply
from the fuse box / circuit breaker
before doing any installation or main-
tenance on this unit.
VEUILLEZ LIRE LES
INSTRUCTIONS AVANT
DE COMMENCER
L’INSTALLATION
Avant l’installation de ce produit,
l’utilisateur et/ou l’installateur doit
avoir lu et compris ces instructions.
Cet appareil doit être installé
convenablement avant usage.
Si ces instructions ne sont pas
respectées, le fabricant ne pourra être
tenu responsable d’aucun problème
ou dysfonctionnement du produit. Le
non-respect des instructions
d’installation et / ou d’utilisation
annulera la garantie en vigueur.
Nous recommandons que ce produit
soit installé par un électricien certié.
Dans certains États ou provinces, il
est légalement requis que ce type de
produit soit installé par un électricien
certié conforméments aux codes de
l’électricité et du bâtiment en vigueur.
Il est important de couper
l’alimentation électrique du disjonc-
teur avant de procéder à l’installation
ou à l’entretien.
POR FAVOR, LEA LA HOJA DE
INSTRUCCIONES ANTES DE
EMPEZAR LA INSTALACIÓN
El instalador o usuario debe leer,
entender y seguir estas instrucciones
antes de instalar el producto. Este
producto debe estar instalado
correctamente antes de su uso.
Si no se siguen las instrucciones, el
fabricante no se hace responsable
de ningún problema o mal
funcionamiento del producto. Si no se
siguen las instrucciones y el manual
de instrucciones se anulará la garantía.
Recomendamos que un electricista
certicado se haga cargo de
la instalación del producto. En
algunos estados o provincias la ley
requiere que este tipo de producto
sea conectado por un electricista
certicado, de acuerdo con los
códigos eléctricos y de construcción
vigentes en su región.
Apague el suministro eléctrico
principal del interruptor de la caja de
fusibles/circuitos antes de realizar
cualquier instalación o mantenimiento
de esta unidad.

4
Instructions d’installation Instrucciones de instalaciónInstallation instructions
1. Turn off power at the circuit breaker
and the light switch. Ensure the power
is off before continuing.
2. Remove the mounting bracket
from the xture. Install the bracket
to the junction box. Ensure that the
two xation screws (c) are pointing
away from the wall and are positioned
horizontally (g. 1).
3. Connect the white wire from the
xture to the white supply wire from
the wall using the wire connector
(b). Connect the black wire from
the xture to the black supply wire
from the junction box using the wire
connector. Connect the ground wire
to the copper wire using the wire
connector.
1. Couper le courant au niveau
du disjoncteur et de l’interrupteur.
S’assurer que le courant est bien
éteint avant de continuer.
2. Enlever le support de montage du
luminaire. Installer le support sur le
boîtier de raccordement. Les vis de
xation (c) doivent pointer à l’opposé
du mur et être en position horizontale
(g. 1).
3. Connecter le l blanc du luminaire
au l d’alimentation blanc du
mur à l’aide d’une marrette (b).
Connecter le l noir du luminaire au
l d’alimentation noir du boitier de
raccordement à l’aide d’une marrette.
Connecter le l de mise à terre au l
de cuivre à l’aide d’une marrette.
1. Corte el suministro en la caja de
circuitos y en el interruptor de la luz.
Asegúrese de que el equipo esté
apagado antes de remover la lámpara
usada.
2. Retire el soporte de montaje de
la lámpara. Instale el soporte a la
caja de conexiones. Asegúrese de
que los dos tornillos de jación (c)
apunten a lo opuesto de la pared y
se encuentren en posición horizontal
(g. 1).
3. Conecte el cable blanco de
la lámpara con el cable blanco
proveniente de la caja de conexiones
utilizando el conector de cable (b).
Conecte el cable negro de la lámpara
al cable de suministro negro de la caja
de conexiones. Conecte el cable de
tierra al cable de cobre utilizando el
conector de cable.
Ground wire
Fil de mise à terre
Cable de tierra
Mounting bracket
Support de montage
Soporte de montaje
Support screw
Vis de support
Tornillo de soporte
Wire connector
Marrette
Conector de cable
Supply wire
Fil électrique
Cable eléctrico
Light bulb (not included)
Ampoule (non-incluse)
Bombilla (no incluida)
Junction box
(not included)
Boîtier de raccordement
(non-inclus)
Caja de conexiones
(no incluida)
(a)
(c)
(b)
Fixation screw
Vis de xation
Tornillo de jación
g. 1

5
Changement d’ampoule Reemplazo de la bombillaBulb replacement
1. Pull the end cap off the xture. It
may be necessary to turn it to help
with removal.
2. Screw in the light bulb.
3. Push the end cap onto the xture.
1. Retirer le couvercle. Il peut être
nécessaire de faire un mouvement
circulaire pour faciliter le retrait du
couvercle.
2. Visser l’ampoule à l’intérieur.
3. Remettre le couvercle en place.
1. Abra la tapa de la lámpara. Puede
que sea necesario girarla para retirarla.
2. Enrosque la bombilla.
3. Vuelva a poner la tapa en su sitio.
Instructions d’installationInstallation instructions
4. Gently push the wires into the
junction box. Mount the xture onto
the mounting bracket and secure with
the support screws (a).
5. Install the light bulbs, and
push both end caps into position.
Maximum wattage: 23 watts CFL.
6. Apply sealant to seal the sides
and top of the xture to the wall. DO
NOT SEAL the bottom side of the
backplate in order to allow moisture
to drain (g. 2).
7. Restore electrical power.
4. Enfoncez délicatement les ls
dans le boîtier de raccordement.
Assembler le luminaire sur le support
de montage et le xer en place avec
les vis de support (a).
5. Installer les ampoules et pousser
les deux embouts en place. Ampoules
uocompactes, maximum 23 watts.
6. Appliquer du scellant sur les
côtés et le dessus du luminaire. NE
PAS SCELLER le dessous an de
permettre à l’humidité de s’évacuer
(g. 2).
7. Rétablir le courant électrique.
4. Introduzca los cables en la caja de
conexiones. Monte la lámpara en el
soporte de montaje y asegúrelos con
los tornillos de soporte (a).
5. Instale los bombillos, y empuje
ambas tapas en su posición. Máximo
23 watts CFL.
6. Aplique el sellador para sellar
los lados y la parte de arriba de la
lámpara a la pared. NO SELLE la
parte inferior de la placa trasera
para que pueda permitir drenar la
humedad (g. 2).
7. Restablezca la energía eléctrica.
Instrucciones de instalación
g. 2

6
Pièces de rechange Piezas de repuestoReplacement parts
End cap
Couvercle
La tapa
(d)
TO ORDER REPLACEMENT PARTS, PLEASE CONTACT CUSTOMER SERVICE.
* A copy of your purchase receipt will be required for ALL PARTS REQUESTS.
(Service available only in the USA and Canada.)
POUR COMMANDER DES PIÈCES DE RECHANGE, CONTACTEZ LE SERVICE À LA CLIENTÈLE.
* Une copie de votre reçu d’achat sera exigée pour TOUTE DEMANDE DE PIÈCE.
(Service disponible seulement aux États-Unis et au Canada.)
PARA SOLICITAR REPUESTOS, PÓNGASE EN CONTACTO CON NUESTRO SERVICIO DE ATENCIÓN AL CLIENTE.
*se le pedirá una copia de su recibo de compra en TODAS LAS SOLICITUDES DE PIEZAS.
(Servicio disponible únicamente en los E.U. y en Canadá.)
(b)
Support screw
Vis de support
Tornillo de soporte
(a)
Fixation screw
Vis de xation
Tornillo de jación
(c)
Wire connector
Marrette
Conector de cable
ITEM
PIÈCE
PARTE
STAINLESS STEAL
ARTIKA PART #
NUMÉRO ARTIKA
N.º DE PARTE DE ARTIKA
ACERO INOXIDABLE
AMP70/P4
DESCRIPTION
DESCRIPTION
DESCRIPCIÓN
ACIER INOXIDABLE
Support screw
Vis de support
Tornillo de soporte
AMP70/P3
Wire connector and xation screw
Marrette et vis de xation
Conector de cable y tornillo de jación
AMP70/P5
End cap
Couvercle
La tapa
a
Kit b and c
Ensemble b et c
Junto b y c
d
BLACK NEGRO
AMP71/P4
NOIR
Support screw
Vis de support
Tornillo de soporte
AMP71/P3
Wire connector and xation screw
Marrette et vis de xation
Conector de cable y tornillo de jación
AMP71/P5
End cap
Couvercle
La tapa
a
Kit b and c
Ensemble b et c
Junto b y c
d

7
WARRANTY
Artika For Living Inc. is proud to offer
you a one (1) year warranty. We guarantee
our product to be free of manufacturing
defects in material and workmanship for
a period of one (1) year from the date of
purchase. Should a defect arise within
the warranty period, Artika For Living
Inc. will provide a replacement product or
parts free of charge.
Our warranty does not cover products
installed incorrectly, or subjected to
abnormal use. Normal wear and tear,
misuse, improper maintenance, alteration
of the product, or units not installed in
accordance to the installation manual will
not be covered.
This warranty is valid only on products
installed in accordance with the Building
Code effective in the region where the unit
is used.
Our product is intended for residential and
commercial use. The warranty does not
cover shipping costs, labour costs or any
other cost associated with the installation
or replacement of the product. The
warranty is extended to the original owner.
The amount of the claim cannot exceed
the original purchase price of the item.
Artika For Living Inc. will not be held
responsible for any direct or consequential
damages or injuries related to the use of
this product. The warranty will be nul and
void if any damage or defect could have
been noticed, repaired or avoided prior to
installation.
Artika For Living Inc. is not responsible
for indirect or consequential damages
arising from improper use or installation of
this product.
Warranty only applicable for purchases
made in the USA or Canada.
For more information:
1-866-661-9606
GARANTIE
Artika For Living Inc. est ère de vous
offrir une garantie de un (1) an. Nous
garantissons que notre produit est
exempt de tout défaut de fabrication ou
de matériel pendant une période de un
(1) an suivant la date d’achat. Si notre
produit présente un problème durant la
période de garantie, Artika For Living
Inc. fournira le produit ou les pièces de
rechange sans frais.
Notre garantie ne couvre pas les produits
qui ont été installés incorrectement, ou
un produit sujet à une utilisation anormale.
L’usure normale des pièces, une mauvaise
utilisation, un entretien inadéquat,
l’altération du produit ou un produit
installé à l’encontre des instructions
d’installation ne sont pas couverts.
La garantie est valide seulement pour les
produits installés en conformité avec le
code du bâtiment effectif dans la région
où ils ont été installés.
Notre produit est destiné à un usage
résidentiel et commercial. La garantie
ne couvre pas les frais d’expédition,
les frais de main-d’oeuvre ou tout
autre coût associé à l’installation ou
au remplacement de nos produits. La
garantie est applicable seulement envers
le propriétaire original du produit.
La valeur de l’application de la garantie
ne peut pas excéder la valeur totale du
produit au moment de l’achat.
Artika For Living Inc. se dégage de toute
responsabilité en cas de dommage direct
ou indirect, de tout bris de biens ou de
blessure corporelle. Cette garantie devient
invalide si les défauts de fabrication
avaient pu être découverts, réparés ou
évités avant l’installation.
Artika For Living Inc. ne sera
responsable d’aucun dommage direct
ou indirect causé par une utilisation
inadéquate de ce produit.
Cette garantie s’applique uniquement sur
les produits achetés aux États-Unis et au
Canada.
Pour plus d’informations :
1-866-661-9606
GARANTÍA
Artika For Living Inc. se enorgullece
de ofrecerle un (1) año de garantía.
Garantizamos que nuestro producto
está libre de defectos de fabricación en
material y mano de obra por un período
de un (1) año a partir de la fecha de
compra. En caso de surgir un defecto
dentro del período de la garantía, Artika
For Living Inc. le proporcionará el
reemplazo del producto o las piezas de
forma gratuita.
Nuestra garantía no cubre luminaria
instalada incorrectamente, o que
haya sido usada de forma indebida. El
uso y desgaste normal, uso indebido,
mantenimiento inapropiado, alteración
del producto o las unidades que no se
hayan instalado de acuerdo al manual de
instalación no serán cubiertos.
Esta garantía es válida solamente en los
productos instalados en conformidad con
el código de construcción efectiva en la
región en la que se utiliza la unidad.
Nuestro producto es para uso residencial
y comercial. La garantía no cubre los
gastos de envío, costos de mano de obra
o cualquier otro costo asociado con la
instalación o reemplazo del producto. La
garantía se extiende al propietario original.
El importe de la deuda no puede ser
superior al precio de la compra original
del producto.
Artika For Living Inc. no se hace
responsable de ningún daño o lesión
relacionado con el uso de este producto,
directo o indirecto. La garantía será nula e
invalidada si cualquier daño o defecto se
pudiera notar, reparado o evitar antes de
la instalación.
Artika For Living Inc. no es responsable
por daños indirectos o consecuentes que
surjan del uso o la instalación inapropiada
de esta unidad de iluminación.
Esta garantía se aplica únicamente a
productos comprados en los Estados
Unidos y Canadá.
Para más información:
1-866-661-9606

Artika For Living Inc.
Dorval, Canada H9P 2R2
Customer service
Monday to Friday: 9 AM – 5 PM EST
Service à la clientèle
Lundi au vendredi: 9 h à 17 h, H.N.E
Servicio al cliente
Lunes a Viernes: 9 AM - 5 PM Hora del Este en E.U.A.
1-866-661-9606
support@artika.com
Transcripción de documentos
Outdoor - indoor light fixture INSTRUCTION MANUAL IMPORTANT, RETAIN FOR FUTURE REFERENCE. PLEASE READ CAREFULLY. Luminaire extérieur - intérieur MANUEL D’INSTRUCTIONS IMPORTANT, CONSERVER POUR CONSULTATION ULTÉRIEURE : LIRE ATTENTIVEMENT. Lampara para exterior - interior MANUAL DE INSTRUCCIONES IMPORTANTE, CONSERVAR PARA FUTURA REFERENCIA: LEA ATENTAMENTE For residential and commercial use Pour usage résidentiel et commercial Para uso residencial y commercial Made in China / Fabriqué en Chine / Hecho en China Rev. 07dec2015 Artika For Living Inc. Dorval, Canada H9P 2R2 Customer service Monday to Friday: 9 AM – 5 PM EST 1-866-661-9606 [email protected] Service à la clientèle Lundi au vendredi : 9 h à 17 h, H.N.E Servicio al cliente Lunes a Viernes: 9 AM - 5 PM Hora del Este en E.U.A. Included Inclus (a) Incluido (b) (c) x2 x3 Support screw Vis de support Tornillo de soporte x2 Wire connector Marrette Conector de cable Fixation screw Vis de fixation Tornillo de fijación What you will need Vous aurez besoin de Lo que va a necesitar not included non inclus no incluidos Sealant Scellant Sellador NOTE: Please consult your local hardware store for the proper sealant and instructions to seal the light to your wall type. Screwdriver Tournevis Destornillador NOTE : Consultez votre quincaillerie locale afin de vous procurer le scellant adéquat pour le luminaire et votre mur. 2 NOTA: Por favor, consulte con su tienda de ferretería local para el sellador apropiado y las instrucciones para sellar la luminaria de acuerdo al tipo de su pared. PLEASE READ THE INSTRUCTION MANUAL BEFORE STARTING INSTALLATION VEUILLEZ LIRE LES INSTRUCTIONS AVANT DE COMMENCER L’INSTALLATION The installer and/or user must read, understand and follow these instructions before installing the product. This product must be properly installed before it is used. Avant l’installation de ce produit, l’utilisateur et/ou l’installateur doit avoir lu et compris ces instructions. Cet appareil doit être installé convenablement avant usage. If instructions are not followed, the manufacturer will not be held responsible for any problems or product malfunctions. Failure to follow installation instructions and/or operating instructions voids the warranty. Si ces instructions ne sont pas respectées, le fabricant ne pourra être tenu responsable d’aucun problème ou dysfonctionnement du produit. Le non-respect des instructions d’installation et / ou d’utilisation annulera la garantie en vigueur. We recommend that this product be installed by a certified electrician. In some states or provinces, it is a legal requirement for this type of product to be connected by a certified electrician, according to the electrical and Building Codes effective in the region. Nous recommandons que ce produit soit installé par un électricien certifié. Dans certains États ou provinces, il est légalement requis que ce type de produit soit installé par un électricien certifié conforméments aux codes de l’électricité et du bâtiment en vigueur. Switch off the main electrical supply from the fuse box / circuit breaker before doing any installation or maintenance on this unit. Il est important de couper l’alimentation électrique du disjoncteur avant de procéder à l’installation ou à l’entretien. 3 POR FAVOR, LEA LA HOJA DE INSTRUCCIONES ANTES DE EMPEZAR LA INSTALACIÓN El instalador o usuario debe leer, entender y seguir estas instrucciones antes de instalar el producto. Este producto debe estar instalado correctamente antes de su uso. Si no se siguen las instrucciones, el fabricante no se hace responsable de ningún problema o mal funcionamiento del producto. Si no se siguen las instrucciones y el manual de instrucciones se anulará la garantía. Recomendamos que un electricista certificado se haga cargo de la instalación del producto. En algunos estados o provincias la ley requiere que este tipo de producto sea conectado por un electricista certificado, de acuerdo con los códigos eléctricos y de construcción vigentes en su región. Apague el suministro eléctrico principal del interruptor de la caja de fusibles/circuitos antes de realizar cualquier instalación o mantenimiento de esta unidad. Installation instructions Instructions d’installation Instrucciones de instalación 1. Turn off power at the circuit breaker and the light switch. Ensure the power is off before continuing. 1. Couper le courant au niveau du disjoncteur et de l’interrupteur. S’assurer que le courant est bien éteint avant de continuer. 1. Corte el suministro en la caja de circuitos y en el interruptor de la luz. Asegúrese de que el equipo esté apagado antes de remover la lámpara usada. 2. Remove the mounting bracket from the fixture. Install the bracket to the junction box. Ensure that the two fixation screws (c) are pointing away from the wall and are positioned horizontally (fig. 1). 3. Connect the white wire from the fixture to the white supply wire from the wall using the wire connector (b). Connect the black wire from the fixture to the black supply wire from the junction box using the wire connector. Connect the ground wire to the copper wire using the wire connector. 2. Enlever le support de montage du luminaire. Installer le support sur le boîtier de raccordement. Les vis de fixation (c) doivent pointer à l’opposé du mur et être en position horizontale (fig. 1). 3. Connecter le fil blanc du luminaire au fil d’alimentation blanc du mur à l’aide d’une marrette (b). Connecter le fil noir du luminaire au fil d’alimentation noir du boitier de raccordement à l’aide d’une marrette. Connecter le fil de mise à terre au fil de cuivre à l’aide d’une marrette. 2. Retire el soporte de montaje de la lámpara. Instale el soporte a la caja de conexiones. Asegúrese de que los dos tornillos de fijación (c) apunten a lo opuesto de la pared y se encuentren en posición horizontal (fig. 1). 3. Conecte el cable blanco de la lámpara con el cable blanco proveniente de la caja de conexiones utilizando el conector de cable (b). Conecte el cable negro de la lámpara al cable de suministro negro de la caja de conexiones. Conecte el cable de tierra al cable de cobre utilizando el conector de cable. Light bulb (not included) Ampoule (non-incluse) Bombilla (no incluida) Ground wire Fil de mise à terre Cable de tierra (c) Fixation screw Vis de fixation Tornillo de fijación (a) Support screw Vis de support Tornillo de soporte Junction box (not included) Boîtier de raccordement (non-inclus) Caja de conexiones (no incluida) Mounting bracket Support de montage Soporte de montaje Supply wire Fil électrique Cable eléctrico (b) Wire connector Marrette Conector de cable fig. 1 4 Installation instructions Instructions d’installation Instrucciones de instalación 4. Gently push the wires into the junction box. Mount the fixture onto the mounting bracket and secure with the support screws (a). 4. Enfoncez délicatement les fils dans le boîtier de raccordement. Assembler le luminaire sur le support de montage et le fixer en place avec les vis de support (a). 5. Install the light bulbs, and push both end caps into position. Maximum wattage: 23 watts CFL. 6. Apply sealant to seal the sides and top of the fixture to the wall. DO NOT SEAL the bottom side of the backplate in order to allow moisture to drain (fig. 2). 7. Restore electrical power. 5. Installer les ampoules et pousser les deux embouts en place. Ampoules fluocompactes, maximum 23 watts. 4. Introduzca los cables en la caja de conexiones. Monte la lámpara en el soporte de montaje y asegúrelos con los tornillos de soporte (a). 5. Instale los bombillos, y empuje ambas tapas en su posición. Máximo 23 watts CFL. 6. Appliquer du scellant sur les côtés et le dessus du luminaire. NE PAS SCELLER le dessous afin de permettre à l’humidité de s’évacuer (fig. 2). 6. Aplique el sellador para sellar los lados y la parte de arriba de la lámpara a la pared. NO SELLE la parte inferior de la placa trasera para que pueda permitir drenar la humedad (fig. 2). 7. Rétablir le courant électrique. 7. Restablezca la energía eléctrica. fig. 2 Bulb replacement Changement d’ampoule Reemplazo de la bombilla 1. Pull the end cap off the fixture. It may be necessary to turn it to help with removal. 1. Retirer le couvercle. Il peut être nécessaire de faire un mouvement circulaire pour faciliter le retrait du couvercle. 1. Abra la tapa de la lámpara. Puede que sea necesario girarla para retirarla. 2. Visser l’ampoule à l’intérieur. 3. Vuelva a poner la tapa en su sitio. 2. Enrosque la bombilla. 2. Screw in the light bulb. 3. Push the end cap onto the fixture. 3. Remettre le couvercle en place. 5 Replacement parts (a) Support screw Vis de support Tornillo de soporte Pièces de rechange Piezas de repuesto (b) (c) (d) Wire connector Marrette Conector de cable Fixation screw Vis de fixation Tornillo de fijación End cap Couvercle La tapa ITEM PIÈCE PARTE DESCRIPTION DESCRIPTION DESCRIPCIÓN ARTIKA PART # NUMÉRO ARTIKA N.º DE PARTE DE ARTIKA STAINLESS STEAL ACIER INOXIDABLE ACERO INOXIDABLE a Kit b and c Ensemble b et c Junto b y c d BLACK NOIR a Kit b and c Ensemble b et c Junto b y c d Support screw Vis de support Tornillo de soporte Wire connector and fixation screw Marrette et vis de fixation Conector de cable y tornillo de fijación End cap Couvercle La tapa AMP70/P4 AMP70/P3 AMP70/P5 NEGRO Support screw Vis de support Tornillo de soporte Wire connector and fixation screw Marrette et vis de fixation Conector de cable y tornillo de fijación End cap Couvercle La tapa AMP71/P4 AMP71/P3 AMP71/P5 TO ORDER REPLACEMENT PARTS, PLEASE CONTACT CUSTOMER SERVICE. * A copy of your purchase receipt will be required for ALL PARTS REQUESTS. (Service available only in the USA and Canada.) POUR COMMANDER DES PIÈCES DE RECHANGE, CONTACTEZ LE SERVICE À LA CLIENTÈLE. * Une copie de votre reçu d’achat sera exigée pour TOUTE DEMANDE DE PIÈCE. (Service disponible seulement aux États-Unis et au Canada.) PARA SOLICITAR REPUESTOS, PÓNGASE EN CONTACTO CON NUESTRO SERVICIO DE ATENCIÓN AL CLIENTE. *se le pedirá una copia de su recibo de compra en TODAS LAS SOLICITUDES DE PIEZAS. (Servicio disponible únicamente en los E.U. y en Canadá.) 6 WARRANTY GARANTIE GARANTÍA Artika For Living Inc. is proud to offer you a one (1) year warranty. We guarantee our product to be free of manufacturing defects in material and workmanship for a period of one (1) year from the date of purchase. Should a defect arise within the warranty period, Artika For Living Inc. will provide a replacement product or parts free of charge. Artika For Living Inc. est fière de vous offrir une garantie de un (1) an. Nous garantissons que notre produit est exempt de tout défaut de fabrication ou de matériel pendant une période de un (1) an suivant la date d’achat. Si notre produit présente un problème durant la période de garantie, Artika For Living Inc. fournira le produit ou les pièces de rechange sans frais. Artika For Living Inc. se enorgullece de ofrecerle un (1) año de garantía. Garantizamos que nuestro producto está libre de defectos de fabricación en material y mano de obra por un período de un (1) año a partir de la fecha de compra. En caso de surgir un defecto dentro del período de la garantía, Artika For Living Inc. le proporcionará el reemplazo del producto o las piezas de forma gratuita. Our warranty does not cover products installed incorrectly, or subjected to abnormal use. Normal wear and tear, misuse, improper maintenance, alteration of the product, or units not installed in accordance to the installation manual will not be covered. This warranty is valid only on products installed in accordance with the Building Code effective in the region where the unit is used. Our product is intended for residential and commercial use. The warranty does not cover shipping costs, labour costs or any other cost associated with the installation or replacement of the product. The warranty is extended to the original owner. The amount of the claim cannot exceed the original purchase price of the item. Artika For Living Inc. will not be held responsible for any direct or consequential damages or injuries related to the use of this product. The warranty will be nul and void if any damage or defect could have been noticed, repaired or avoided prior to installation. Artika For Living Inc. is not responsible for indirect or consequential damages arising from improper use or installation of this product. Warranty only applicable for purchases made in the USA or Canada. For more information: 1-866-661-9606 [email protected] Notre garantie ne couvre pas les produits qui ont été installés incorrectement, ou un produit sujet à une utilisation anormale. L’usure normale des pièces, une mauvaise utilisation, un entretien inadéquat, l’altération du produit ou un produit installé à l’encontre des instructions d’installation ne sont pas couverts. La garantie est valide seulement pour les produits installés en conformité avec le code du bâtiment effectif dans la région où ils ont été installés. Notre produit est destiné à un usage résidentiel et commercial. La garantie ne couvre pas les frais d’expédition, les frais de main-d’oeuvre ou tout autre coût associé à l’installation ou au remplacement de nos produits. La garantie est applicable seulement envers le propriétaire original du produit. La valeur de l’application de la garantie ne peut pas excéder la valeur totale du produit au moment de l’achat. Artika For Living Inc. se dégage de toute responsabilité en cas de dommage direct ou indirect, de tout bris de biens ou de blessure corporelle. Cette garantie devient invalide si les défauts de fabrication avaient pu être découverts, réparés ou évités avant l’installation. Artika For Living Inc. ne sera responsable d’aucun dommage direct ou indirect causé par une utilisation inadéquate de ce produit. Cette garantie s’applique uniquement sur les produits achetés aux États-Unis et au Canada. Pour plus d’informations : 1-866-661-9606 [email protected] 7 Nuestra garantía no cubre luminaria instalada incorrectamente, o que haya sido usada de forma indebida. El uso y desgaste normal, uso indebido, mantenimiento inapropiado, alteración del producto o las unidades que no se hayan instalado de acuerdo al manual de instalación no serán cubiertos. Esta garantía es válida solamente en los productos instalados en conformidad con el código de construcción efectiva en la región en la que se utiliza la unidad. Nuestro producto es para uso residencial y comercial. La garantía no cubre los gastos de envío, costos de mano de obra o cualquier otro costo asociado con la instalación o reemplazo del producto. La garantía se extiende al propietario original. El importe de la deuda no puede ser superior al precio de la compra original del producto. Artika For Living Inc. no se hace responsable de ningún daño o lesión relacionado con el uso de este producto, directo o indirecto. La garantía será nula e invalidada si cualquier daño o defecto se pudiera notar, reparado o evitar antes de la instalación. Artika For Living Inc. no es responsable por daños indirectos o consecuentes que surjan del uso o la instalación inapropiada de esta unidad de iluminación. Esta garantía se aplica únicamente a productos comprados en los Estados Unidos y Canadá. Para más información: 1-866-661-9606 [email protected] Artika For Living Inc. Dorval, Canada H9P 2R2 Customer service Monday to Friday: 9 AM – 5 PM EST 1-866-661-9606 [email protected] Service à la clientèle Lundi au vendredi : 9 h à 17 h, H.N.E Servicio al cliente Lunes a Viernes: 9 AM - 5 PM Hora del Este en E.U.A.-
 1
1
-
 2
2
-
 3
3
-
 4
4
-
 5
5
-
 6
6
-
 7
7
-
 8
8


Artika AMP70-HDSSCOM Instrucciones de operación
- Tipo
- Instrucciones de operación
- Este manual también es adecuado para
en otros idiomas
- français: Artika AMP70-HDSSCOM Mode d'emploi
- English: Artika AMP70-HDSSCOM Operating instructions
Artículos relacionados
-
 Artika V3 Manual de usuario
-
 Artika CLGL-HD1 Instrucciones de operación
-
Artika VAN4RA-RN Instrucciones de operación
-
 Artika VAN4M-HD1 Instrucciones de operación
-
 Artika FMGL-C1 Instrucciones de operación
-
 Artika NSBLES-C1 Instrucciones de operación
-
 Artika AMP108-HDCOM Instrucciones de operación
-
 Artika PDT1-CG-HD2BG Champagne Globe 1 Light LED Pendant Manual de usuario
-
 Artika FM-CNT-C1 Instrucciones de operación
-
 Artika PDT-4GL-RN Instrucciones de operación


