Silvercrest 102881 Instrucciones de operación
- Categoría
- Afeitadoras de hombre
- Tipo
- Instrucciones de operación
Este manual también es adecuado para

AFEITADORA ROTATORIA
RASOIO A LAMINA ROTANTE SRR 3.7 A1
IAN 102881
AFEITADORA ROTATORIA
Instrucciones de uso
ROTARY SHAVER
Operating instructions
MÁQUINA
DE BARBEAR ROTATIVA
Manual de instruções
RASOIO A LAMINA ROTANTE
Istruzioni per l'uso
ROTATIONSRASIERER
Bedienungsanleitung

ES Instrucciones de uso Página 1
IT / MT Istruzioni per l'uso Pagina 21
PT Manual de instruções Página 41
GB / MT Operating instructions Page 61
DE / AT / CH Bedienungsanleitung Seite 81
Antes de empezar a leer abra la página que contiene las imágenes y, en
seguida, familiarícese con todas las funciones del dispositivo.
Prima di leggere aprire la pagina con le immagini e prendere confi denza
con le diverse funzioni dell'apparecchio.
Antes de começar a ler abra na página com as imagens e, de seguida,
familiarize-se com todas as funções do aparelho.
Before reading, unfold the page containing the illustrations and familiarise
yourself with all functions of the device.
Klappen Sie vor dem Lesen die Seite mit den Abbildungen aus und machen
Sie sich anschließend mit allen Funktionen des Gerätes vertraut.

A

B

1
SRR 3.7 A1
ES
Índice
Introducción . . . . . . . . . . . . . . . . . . . . . . . . . . . . . . . . . . . 2
Uso previsto . . . . . . . . . . . . . . . . . . . . . . . . . . . . . . . . . . . 2
Volumen de suministro . . . . . . . . . . . . . . . . . . . . . . . . . . 2
Descripción del aparato . . . . . . . . . . . . . . . . . . . . . . . . . 3
Características técnicas . . . . . . . . . . . . . . . . . . . . . . . . . . 4
Indicaciones de seguridad . . . . . . . . . . . . . . . . . . . . . . . 5
Carga de la batería . . . . . . . . . . . . . . . . . . . . . . . . . . . . . 9
Afeitado inalámbrico . . . . . . . . . . . . . . . . . . . . . . . . . .10
Afeitado con adaptador de red . . . . . . . . . . . . . . . . . . 11
Recortadora/Cortadora para pelo largo . . . . . . . . . . 11
Seguro para viajes . . . . . . . . . . . . . . . . . . . . . . . . . . . . 12
Limpieza y mantenimiento . . . . . . . . . . . . . . . . . . . . . . 13
Limpieza con el pincel . . . . . . . . . . . . . . . . . . . . . . . . . . . . . . . . . .13
Limpieza con agua corriente . . . . . . . . . . . . . . . . . . . . . . . . . . . . .14
Limpieza en profundidad . . . . . . . . . . . . . . . . . . . . . . . . . . . . . . . .15
Almacenamiento . . . . . . . . . . . . . . . . . . . . . . . . . . . . . .16
Garantía y asistencia técnica . . . . . . . . . . . . . . . . . . . .17
Desecho . . . . . . . . . . . . . . . . . . . . . . . . . . . . . . . . . . . . . 18
Importador . . . . . . . . . . . . . . . . . . . . . . . . . . . . . . . . . . 19
IB_102881_SRR3.7A1_LB5.indb 1 02.12.14 09:37

ES
2
SRR 3.7 A1
Introducción
Felicidades por la compra de su aparato nuevo.
Ha adquirido un producto de alta calidad. Las instrucciones de uso
forman parte del producto y contienen indicaciones importantes
acerca de la seguridad, el uso y el desecho de este aparato. Antes
de usar el producto, familiarícese con todas las indicaciones de
manejo y de seguridad. Utilice el producto únicamente como se
describe y para los ámbitos de aplicación indicados. Entregue
todos los documentos cuando transfi era el producto a terceros.
Uso previsto
Este aparato está previsto exclusivamente para afeitar y cortar pelo
humano
Este aparato está previsto exclusivamente para su uso doméstico
privado. No lo utilice con fi nes comerciales.
Cualquier otro uso se considera contrario al uso al previsto y puede
provocar daños materiales e incluso lesiones personales.
Volumen de suministro
♦ Afeitadora con unidad de cabezales
♦ Adaptador de red
♦ Unidad recortadora
♦ Caperuza protectora
♦ Pincel
♦ Bolsa
♦ Tarjeta de pedido
♦ Instrucciones de uso
IB_102881_SRR3.7A1_LB5.indb 2 02.12.14 09:37

3
SRR 3.7 A1
ES
INDICACIÓN
Compruebe que el volumen de suministro esté completo y que
carezca de daños después de desembalarlo. En caso necesario,
póngase en contacto con el servicio de asistencia técnica.
Descripción del aparato
Figura A (página delantera desplegable):
1 Eje de accionamiento
2 Unidad de cabezales
3 Botón de desbloqueo
4 Cuello protector
5
Botón de encendido/apagado
6 Cortadora estrecha para pelo largo
7 Unidad recortadora
8 Cortadora ancha para pelo largo
9 Símbolo
(bloqueo)
0 Símbolo
(cargar)
q Indicación de nivel de carga
w Clavija de carga
Figura B (página trasera desplegable):
e Conector
r Adaptador de red
t Pincel
z Caperuza protectora
u Bolsa
IB_102881_SRR3.7A1_LB5.indb 3 02.12.14 09:37

ES
4
SRR 3.7 A1
Características técnicas
Aparato
Tensión de entrada: 5 V
Corriente de entrada: 1000 mA
Batería: Baterías de iones de litio de 3,7 V,
700 mAh
Temperatura ambiente: de 5 °C a 35 °C
Clase de protección: III/
Tiempo de carga: aprox. 90 minutos.
Tiempo de funcionamiento
con batería completamente
cargada: aprox. 60 min.
Tipo: IPX 4
Adaptador de red (tipo PTB-050100EU)
Tensión de entrada: 100 - 240 V ∼
50/60 Hz
Tensión de salida: 5 V
Corriente de salida: 1000 mA
Clase de protección: II /
IB_102881_SRR3.7A1_LB5.indb 4 02.12.14 09:37

5
SRR 3.7 A1
ES
Indicaciones de seguridad
¡PELIGRO DE DESCARGA ELÉCTRICA!
► Antes de usar el aparato, compruebe si hay
signos de daños externos visibles. No ponga
en funcionamiento el aparato si está dañado.
Existe riesgo de electrocución.
► Si se aprecian daños en el cable, adaptador
de red, en la carcasa o en cualquier otra
pieza, debe dejar de utilizarse el aparato.
► Extraiga el adaptador de red de la base de
enchufe
— Si se produce una avería,
— Antes de limpiar el aparato,
— Si no pretende utilizar el aparato durante
un tiempo prolongado,
— Después de cada uso.
Desconecte el adaptador de red directamente
de la clavija de la fuente de alimentación y no
del cable.
► No sumerja nunca el aparato ni el cable con el
adaptador de red en agua ni en otros líquidos.
IB_102881_SRR3.7A1_LB5.indb 5 02.12.14 09:37

ES
6
SRR 3.7 A1
¡PELIGRO DE DESCARGA ELÉCTRICA!
► Si el aparato se cae al agua, desconecte in-
mediatamente el adaptador de red de la base
de enchufe antes de entrar en contacto con el
agua.
► No toque nunca el adaptador de red con las
manos mojadas, especialmente cuando lo
conecte y lo desconecte en la base de enchufe.
¡Existe peligro de descarga eléctrica!
► Revise regularmente el adaptador de red y
el aparato por si presentase algún defecto
mecánico.
► Procure que el cable no quede atrapado por
las puertas de armarios y evite tenderlo sobre
superfi cies calientes. De lo contrario, podría
dañarse el aislamiento del cable.
► El montaje de un interruptor diferencial con
una corriente de disparo de referencia de no
más de 30 mA ofrece una protección adicional
contra una descarga eléctrica. Encargue el
montaje exclusivamente a un técnico electricista.
IB_102881_SRR3.7A1_LB5.indb 6 02.12.14 09:37

7
SRR 3.7 A1
ES
¡PELIGRO DE DESCARGA ELÉCTRICA!
► ATENCIÓN Mantenga el aparato siempre seco.
► ATENCIÓN Extraiga el adaptador de red del
mango cuando lo limpie con agua.
¡ADVERTENCIA – PELIGRO DE LESIONES!
► Este aparato puede ser utilizado por niños a
partir de 8años y por personas cuyas faculta-des
físicas, sensoriales o mentales sean reducidas o
carezcan de los conocimientos y de la expe-
riencia necesaria siempre que sean vigilados
o hayan sido instruidos correctamente sobre el
uso seguro del aparato y hayan comprendido
los peligros que entraña.
► Los niños no deben jugar con el aparato.
► Los niños no deben realizar las tareas de
limpieza y mantenimiento del aparato sin
supervisión.
IB_102881_SRR3.7A1_LB5.indb 7 02.12.14 09:37

ES
8
SRR 3.7 A1
¡ADVERTENCIA – PELIGRO DE LESIONES!
► Las reparaciones en el aparato deben ser reali-
zadas exclusivamente por talleres autorizados
o por el servicio de asistencia técnica. En caso
de reparaciones indebidas, pueden producirse
riesgos considerables para los usuarios.
Además, se anulará la garantía.
► No utilice el aparato si el cabezal de corte
o el accesorio de longitud de corte están
defectuosos, ya que podrían presentar
bordes afi lados. Existe peligro de lesiones.
► Los componentes defectuosos deben sustituirse
exclusivamente por recambios originales. Solo
puede garantizarse el cumplimiento de los
requisitos de seguridad con el uso de estos
recambios.
► Conecte el adaptador de red exclusivamente
a una base de enchufe de fácil acceso para
poder desconectarla rápidamente en caso de
avería.
IB_102881_SRR3.7A1_LB5.indb 8 02.12.14 09:37

9
SRR 3.7 A1
ES
ATENCIÓN: ¡DAÑOS MATERIALES!
► El aparato no debe utilizarse sin supervisión
y debe emplearse según los datos de la
placa de características.
► Utilice exclusivamente el adaptador de red
suministrado (tipo PTB-050100EU) para el
funcionamiento con red.
► No cubra el adaptador de red para evitar un
calentamiento indebido.
Carga de la batería
Antes de utilizar el aparato por primera vez, debe cargarse la batería
durante al menos 90 minutos.
INDICACIÓN
►
Asegúrese de que el aparato esté apagado antes de cargar
la batería.
1) Introduzca el conector e en la clavija de carga w de la
afeitadora.
Tenga en cuenta la polaridad correcta: La varilla guía del cas-
quillo de carga w debe engancharse en el conector e dentro
del raíl. De lo contrario, no podrá introducir el conector e.
2) Enchufe el adaptador de red r al enchufe adecuado según las
especifi caciones del aparato:
La carga de la batería se muestra en la pantalla en porcentajes
(%) (indicación del nivel de carga q). En la pantalla aparecerá
el símbolo
0.
IB_102881_SRR3.7A1_LB5.indb 9 02.12.14 09:37

ES
10
SRR 3.7 A1
♦ En cuanto la batería esté cargada, aparecerá de forma perma-
nente el símbolo
0 en la pantalla y la indicación del nivel
de carga q indica 99%.
♦ Con la batería totalmente cargada, puede utilizarse el aparato duran-
te aprox. 60 minutos sin necesidad de conectarlo a la red eléctrica.
Afeitado inalámbrico
¡ATENCIÓN! ¡PELIGRO DE DAÑOS MATERIALES!
►
Este aparato no está indicado para el afeitado mojado.
También puede utilizar la afeitadora sin cable. En ese caso, deberá
cargarse el aparato antes de usarlo la primera vez (véase el capítulo
"Cargar la batería").
1) En caso de que no esté colocado el cuello protector 4, deberá
insertarse por debajo sobre la unidad de cabezales 2 (véase
la página desplegable).
2) Coloque la unidad de cabezales 2 con el cuello protector inser-
tado 4 sobre el eje de accionamiento 1. Tenga en cuenta que el
cuello protector 4 debe quedar correctamente sobre el mango.
3) Retire la caperuza protectora z.
4) Presione el botón de encendido/apagado 5. La indicación del
nivel de carga q muestra el nivel de carga actual y la afeitadora
se pone en funcionamiento.
INDICACIÓN
►
Los mejores resultados se obtienen con la piel seca.
► Puede que la piel tarde entre dos y tres semanas en acostum-
brarse al sistema de cabezales.
5) Realice movimientos rectos y circulares sobre la piel con los
cabezales.
6) Una vez terminado el afeitado, pulse el botón de encendido/
apagado 5. El aparato se para. Transcurridos aprox. 3 segun-
dos se apagará la pantalla.
IB_102881_SRR3.7A1_LB5.indb 10 02.12.14 09:37

11
SRR 3.7 A1
ES
7) Limpie la afeitadora después de cada afeitado con el pincel
suministrado t.
Para lograr una limpieza en profundidad, lea el capítulo "Limpieza
y conservación".
Afeitado con adaptador de red
¡ATENCIÓN! ¡PELIGRO DE DAÑOS MATERIALES!
►
Este aparato no está indicado para el afeitado mojado.
Si prefi ere utilizar la afeitadora sin cargarla antes, puede utilizarla
directamente con el adaptador de red r:
1) Introduzca el conector e en la clavija de carga w de la afeitadora.
Tenga en cuenta la polaridad correcta: La varilla guía del casquillo
de carga w debe engancharse en el conector e dentro del raíl.
De lo contrario, no podrá introducir el conector e.
2) Conecte la clavija de red a la base de enchufe.
Entonces podrá utilizar la afeitadora.
Recortadora/Cortadora para pelo largo
Para darle forma a su barba, recortar las patillas o las cejas, utilice
la unidad recortadora 7.
1) Retire la unidad de cabezales 2 del mango, si estuviera colocado.
2) Coloque la unidad recortadora 7 sobre el eje de accionamien-
to 1. Cambie de dirección de encaje, en función de si quiere
utilizar la cortadora ancha 8 o estrecha 6:
IB_102881_SRR3.7A1_LB5.indb 11 02.12.14 09:37

ES
12
SRR 3.7 A1
– Si quiere utilizar la cortadora ancha para pelo largo 8,
inserte la unidad recortadora 7 de forma que la cortadora
ancha para pelo largo le quede 8 enfrente.
– Si quiere utilizar la cortadora estrecha para pelo largo 6,
inserte la unidad recortadora 7 de forma que la cortadora
estrecha para pelo largo le quede 6 enfrente.
3) Presione el botón de encendido/apagado 5. La indicación del
nivel de carga q muestra el nivel de carga actual y el aparato
se pone en funcionamiento.
4) En cuanto haya terminado de recortar, vuelva a pulsar el botón
de encendido/apagado 5.
5) Limpie la unidad recortadora 7 con el pincel t suministrado.
Para lograr una limpieza en profundidad, lea el capítulo "Limpieza
y conservación".
Seguro para viajes
A fi n de preservar el aparato de una conexión fortuita, podrá bloquear
el botón de encendido/apagado 5.
■ Pulse y mantenga el botón de encendido/apagado 5 hasta que
aparezca el símbolo
9 en la pantalla.
Si ahora se pulsa el botón de encendido/apagado 5, aparecerá
el símbolo
9 y la indicación del nivel de carga q.
■ No obstante, el aparato no se enciende.
■ Si desea cancelar el bloqueo, mantenga pulsado el botón de
encendido/apagado 5:
– aparecerá el símbolo
9, que comenzará a parpadear.
Ahora podrá volver a encender el aparato.
IB_102881_SRR3.7A1_LB5.indb 12 02.12.14 09:37

13
SRR 3.7 A1
ES
Limpieza y mantenimiento
¡PELIGRO DE DESCARGA ELÉCTRICA!
►
¡Antes de limpiar el aparato, extraiga siempre la clavija de red
de la base de enchufe! ¡Existe riesgo de descarga eléctrica!
¡ATENCIÓN! ¡PELIGRO DE DAÑOS MATERIALES!
►
No utilice productos de limpieza agresivos, químicos ni
abrasivos para limpiar el aparato. De lo contrario, puede
ocasionar daños irreparables en el aparato.
Limpieza con el pincel
Unidad recortadora
Después de cada afeitado, limpie los tres cabezales de la unidad
de cabezales 2 con el pincel t.
1) Pulse el botón de desbloqueo 3 de forma que se suelte la
unidad de cabezales 2.
2) Golpee ligeramente la unidad de cabezales 2 sobre una
superfi cie plana o sople hasta que desaparezcan los últimos
pelitos.
3) Utilice el pincel t para retirar los pelitos más pequeños.
Unidad recortadora
■ Limpie la unidad recortadora después de cada afeitado con
el pincel t.
■ Engrase la cortadora para pelo largo 6/8 aprox. cada
6 meses con unas gotas de aceite para máquinas de coser.
IB_102881_SRR3.7A1_LB5.indb 13 02.12.14 09:37

ES
14
SRR 3.7 A1
Limpieza con agua corriente
La unidad de cabezales 2 puede lavarse debajo del chorro
de agua corriente.
1) Pulse el botón de desbloqueo 3 de forma que se suelte la
unidad de cabezales 2.
2) Mantenga la unidad de cabezales 2 debajo del chorro de agua
de forma que el agua fl uya del interior al exterior atravesando
los cabezales.
¡ATENCIÓN! ¡PELIGRO DE DAÑOS MATERIALES!
Tenga en cuenta que debajo del chorro de agua solo debe
estar la unidad de cabezales 2. El mango de la afeitadora
solo está protegido contra salpicaduras y podría dañarse
irreparablemente si se mantiene debajo del chorro de agua.
3) Espere a que la unidad de cabezales se seque 2 antes de
volver a utilizar la afeitadora.
IB_102881_SRR3.7A1_LB5.indb 14 02.12.14 09:37

15
SRR 3.7 A1
ES
Limpieza en profundidad
Retire los cabezales para lograr una limpieza profunda:
1) Pulse el botón de desbloqueo 3. La unidad de cabezales 2
se soltará.
2) Incline ligeramente para atrás la unidad de cabezales 2 de
forma que pueda extraerse por arriba.
3) Gire con cuidado el bloqueo marcado con fl echas en el sentido
de las fl echas hasta que se pueda levantar el soporte de los
cabezales (véase la fi gura).
4) Limpie todas las piezas debajo del chorro de agua corriente y
espere a que se sequen.
IB_102881_SRR3.7A1_LB5.indb 15 02.12.14 09:37

ES
16
SRR 3.7 A1
5) Vuelva a montar la unidad de cabezales 2.
6) Para fi jarla, gire el bloqueo marcado con fl echas en el sentido
contrario a las fechas de forma que ya no se pueda levantar el
soporte de los cabezales.
7) Elimine los pelos sueltos de la afeitadora con el pincel t.
8) Vuelva a montar la unidad de cabezales 2 en la afeitadora.
Asegúrese de que esté bien encajada.
■ Limpie la carcasa y el adaptador de red r con un paño húmedo.
INDICACIÓN
Si...
– ... empeora la calidad del afeitado,...
– ... tiene que realizar varias pasadas por el mismo punto
para conseguir un buen resultado,...
– ... tarda bastante más en afeitarse,...
– ... hubiera daños visibles en los cabezales,...
... deben cambiarse los cabezales .
En caso de que quiera pedir cabezales de repuesto, póngase
en contacto con el servicio técnico.
Almacenamiento
¡ATENCIÓN! ¡PELIGRO DE DAÑOS MATERIALES!
Nunca guarde la afeitadora en la bolsa u mientras la esté
cargando. ¡Peligro de sobrecalentamiento!
■ Coloque la caperuza de protección z siempre sobre la unidad
de cabezales 2 cuando no vaya usar el aparato.
■ Guarde el aparato limpio y seco, así como las piezas de repuesto,
en la bolsa u suministrada.
■ Guárdelo todo en un lugar limpio, seco y sin polvo.
IB_102881_SRR3.7A1_LB5.indb 16 02.12.14 09:37

17
SRR 3.7 A1
ES
Garantía y asistencia técnica
Este aparato tiene 3 años de garantía desde la fecha de compra.
El aparato ha sido fabricado cuidadosamente y examinado en
profundidad antes de su entrega. Guarde el comprobante de caja
como justifi cante de compra. Si necesitara hacer uso de la garan-
tía, póngase en contacto por teléfono con su punto de servicio
habitual. Este es el único modo de garantizar un envío gratuito.
La garantía cubre los defectos de fabricación o del material, pero no
los daños de transporte, las piezas sujetas a desgaste ni los daños
sufridos por las piezas frágiles (p. ej., interruptores o pilas). Este
producto ha sido diseñado exclusivamente para el uso particular y
no para el uso industrial.
En caso de manipulación indebida e incorrecta, uso de la fuerza
y apertura del aparato por personas ajenas a nuestros centros de
asistencia técnica autorizados, la garantía pierde su validez.
Sus derechos legales no se ven limitados por esta garantía.
La duración de la garantía no se prolonga por hacer uso de ella.
Este principio rige también para las piezas sustituidas y reparadas.
Si después de la compra del aparato, se detecta la existencia de
daños o de defectos al desembalarlo, deben notifi carse de inmediato
o, como muy tarde, dos días después de la fecha de compra.
Cualquier reparación que se realice una vez fi nalizado el plazo de
garantía está sujeta a costes.
Servicio España
Tel.: 902 59 99 22
(0,08 EUR/Min. + 0,11 EUR/llamada (tarifa normal))
(0,05 EUR/Min. + 0,11 EUR/llamada (tarifa reducida))
E-Mail: [email protected]
IAN 102881
Disponibilidad de la línea de atención al cliente:
de lunes a viernes de 8.00 a 20.00 h (CET)
IB_102881_SRR3.7A1_LB5.indb 17 02.12.14 09:37

ES
18
SRR 3.7 A1
Desecho
No deseche nunca el aparato con la basura
doméstica. Este aparato está sujeto a la
Directiva europea 2012/19/EU.
Deseche el aparato en un centro de residuos autorizado o a través
de las instalaciones de desecho de residuos comunitarias. Observe
las normas vigentes. En caso de duda, póngase en contacto con las
instalaciones municipales de desecho de residuos.
Desecho de las pilas/baterías
Para evacuar el aparato de forma respetuosa con el medio ambiente,
deberá retirar previamente la batería del aparato:
¡ATENCIÓN: DAÑOS MATERIALES!
►
¡Retire exclusivamente la batería del aparato si desea des-
echarlo o desguazarlo! ¡El aparato quedará defectuoso en
cuanto desmonte la batería!
1) Para extraer la batería del mango, retire el pequeño tornillo de
la parte posterior del mango con un destornillador Philips.
2) Retire la cubierta trasera del mango.
3) Haga palanca sobre la carcasa interior negra, por ejemplo,
con un destornillador, para extraerla. Puede que tenga que
romper o doblar hacia fuera los soportes interiores antes de
poder sacar la carcasa interior. Para ello, lo mejor es utilizar un
destornillador plano.
4) Cuando haya extraído la carcasa interior:
Rompa los soportes de la cubierta de plástico transparente de
los lados. Presione ligeramente para dentro el encastre inferior de
forma que se pueda abrir la cubierta de plástico transparente.
5) Levante algo la pletina para poder acceder con un destornillador
plano debajo de la batería.
IB_102881_SRR3.7A1_LB5.indb 18 02.12.14 09:37

19
SRR 3.7 A1
ES
6) Haga palanca para sacar la batería.
7) Deseche la batería de forma respetuosa con el medio ambiente.
Las pilas/baterías no deben desecharse con la basura
doméstica. Los consumidores están obligados legalmente
a entregar las pilas en un punto de recogida de residuos
de su municipio/barrio o en un establecimiento. Con esta
obligación se consigue que las pilas o baterías se desechen
de forma respetuosa con el medio ambiente. Devuelva las
pilas exclusivamente en estado descargado.
El embalaje consta de materiales ecológicos que pueden
desecharse a través de los centros de reciclaje locales.
Importador
KOMPERNASS HANDELS GMBH
BURGSTRASSE 21
44867 BOCHUM
GERMANY
www.kompernass.com
IB_102881_SRR3.7A1_LB5.indb 19 02.12.14 09:37

20
SRR 3.7 A1
IB_102881_SRR3.7A1_LB5.indb 20 02.12.14 09:37

21
SRR 3.7 A1
IT
MT
Indice
Introduzione . . . . . . . . . . . . . . . . . . . . . . . . . . . . . . . . . 22
Uso conforme . . . . . . . . . . . . . . . . . . . . . . . . . . . . . . . . 22
Volume della fornitura . . . . . . . . . . . . . . . . . . . . . . . . . 22
Descrizione dell'apparecchio . . . . . . . . . . . . . . . . . . . . 23
Dati tecnici . . . . . . . . . . . . . . . . . . . . . . . . . . . . . . . . . . .24
Indicazioni relative alla sicurezza . . . . . . . . . . . . . . . .25
Ricarica della batteria . . . . . . . . . . . . . . . . . . . . . . . . . . 29
Rasatura senza cavo . . . . . . . . . . . . . . . . . . . . . . . . . . . 30
Rasatura con adattatore di rete . . . . . . . . . . . . . . . . . 31
Rifi nitore/Lama di taglio per peli lunghi . . . . . . . . . . .31
Protezione per viaggio . . . . . . . . . . . . . . . . . . . . . . . . .32
Pulizia e manutenzione . . . . . . . . . . . . . . . . . . . . . . . . 33
Pulizia con il pennello. . . . . . . . . . . . . . . . . . . . . . . . . . . . . . . . . . .33
Pulizia sotto l'acqua corrente . . . . . . . . . . . . . . . . . . . . . . . . . . . . .34
Pulizia a fondo . . . . . . . . . . . . . . . . . . . . . . . . . . . . . . . . . . . . . . . .35
Conservazione . . . . . . . . . . . . . . . . . . . . . . . . . . . . . . . . 36
Garanzia e assistenza . . . . . . . . . . . . . . . . . . . . . . . . . 37
Smaltimento. . . . . . . . . . . . . . . . . . . . . . . . . . . . . . . . . . 38
Importatore . . . . . . . . . . . . . . . . . . . . . . . . . . . . . . . . . . 39
IB_102881_SRR3.7A1_LB5.indb 21 02.12.14 09:37

IT
MT
22
SRR 3.7 A1
Introduzione
Congratulazioni per l'acquisto del Suo nuovo apparecchio.
È stato scelto un prodotto di alta qualità. Il manuale di istruzioni è
parte integrante del presente prodotto. Esso contiene importanti in-
dicazioni per la sicurezza, l'uso e lo smaltimento. Prima di utilizzare
il prodotto, familiarizzare con tutte le indicazioni relative ai comandi
e alla sicurezza. Utilizzare l'apparecchio solo come descritto e per
i campi d'impiego indicati. In caso di cessione del prodotto a terze
persone, consegnare anche tutta la relativa documentazione.
Uso conforme
Il presente apparecchio è previsto esclusivamente per rasare e
tagliare peli umani.
Questo apparecchio è destinato esclusivamente all'uso in ambienti
domestici. Non utilizzarlo per fi ni commerciali.
Qualsiasi altro impiego viene considerato non conforme e può dare
luogo a danni a cose o a persone.
Volume della fornitura
♦ Rasoio con unità di taglio
♦ Adattatore di rete
♦ Rifi nitore
♦ Cappuccio di protezione
♦ Pennello
♦ Astuccio
♦ Tagliando di ordinazione
♦ Istruzioni per l'uso
IB_102881_SRR3.7A1_LB5.indb 22 02.12.14 09:37

23
SRR 3.7 A1
IT
MT
AVVISO
Subito dopo aver disimballato il prodotto, controllare che sia
completo e integro. Se necessario, rivolgersi al servizio clienti.
Descrizione dell'apparecchio
Figura A (pagina apribile sul fronte)
1 Albero motore
2 Unità di taglio
3 Tasto di sbloccaggio
4 Colletto di protezione
5
Tasto ON/OFF
6 Lama di taglio stretta per peli lunghi
7 Rifi nitore
8 Lama di taglio larga per peli lunghi
9 Simbolo
(blocco)
0 Simbolo
(carica)
q Indicazione del livello di carica
w Presa di carica
Figura B (pagina apribile sul retro)
e Connettore
r Adattatore di rete
t Pennello
z Cappuccio di protezione
u Astuccio
IB_102881_SRR3.7A1_LB5.indb 23 02.12.14 09:37

IT
MT
24
SRR 3.7 A1
Dati tecnici
Apparecchio
Tensione
di alimentazione: 5 V
Corrente in ingresso: 1000 mA
Batteria: Batteria agli ioni di litio 3,7 V, 700 mAh
Temperatura ambiente: da 5°C a 35°C
Classe di protezione: III/
Tempo di carica: ca. 90 minuti
Periodo di autonomia
con batteria
completamente carica: ca. 60 minuti
Grado di protezione: IPX 4
Adattatore di rete (modello PTB-050100EU)
Tensione di alimentazione: 100 - 240 V ∼
50/60 Hz
Tensione in uscita: 5 V
Corrente di uscita: 1000 mA
Classe di protezione: II /
IB_102881_SRR3.7A1_LB5.indb 24 02.12.14 09:37

25
SRR 3.7 A1
IT
MT
Indicazioni relative alla sicurezza
PERICOLO DI SCOSSA ELETTRICA!
► Controllare l'apparecchio prima dell'uso per
rilevare eventuali danni visibili. Non mettere in
funzione un apparecchio danneggiato. Sussiste
il pericolo di folgorazione.
► Se dovesse riscontrarsi un danno sul cavo,
sull'adattatore di rete, sull'alloggiamento o su
altre parti, l'apparecchio non deve più venire
utilizzato.
► Staccare l'adattatore di rete dalla presa
− se si riscontra una anomalia,
− prima di pulire l'apparecchio,
− se non si utilizza l'apparecchio per
lungo tempo,
− dopo ogni uso.
Staccare l'adattatore di rete tenendolo ben
saldo e non tirando dal cavo.
► Non immergere mai l'apparecchio o il cavo
con adattatore di rete in acqua o altri liquidi.
IB_102881_SRR3.7A1_LB5.indb 25 02.12.14 09:37

IT
MT
26
SRR 3.7 A1
PERICOLO DI SCOSSA ELETTRICA!
► Se l'apparecchio cade in acqua, staccare asso-
lutamente l'adattatore di rete dalla presa prima
di mettere le mani nell'acqua per recuperarlo.
► Non prendere mai l'adattatore di rete con
le mani bagnate, specialmente quando lo si
inserisce nella presa o lo si stacca dalla presa.
Sussiste il pericolo di folgorazione!
► Controllare periodicamente se l'adattatore di
rete o l'apparecchio presenta eventuali difetti
meccanici.
► Controllare che il cavo non si incastri nelle
porte dell'armadio e non vada a contatto con
superfi ci bollenti. In caso contrario, l'isolamento
del cavo potrebbe danneggiarsi.
► L'installazione di un salvavita con una corrente di
apertura di misurazione non superiore a 30 mA
off re un'ulteriore protezione da una scossa elet-
trica. Fare eseguire l'installazione esclusivamente
da un elettricista specializzato.
IB_102881_SRR3.7A1_LB5.indb 26 02.12.14 09:37

27
SRR 3.7 A1
IT
MT
PERICOLO DI SCOSSA ELETTRICA!
► ATTENZIONE! Tenere l'apparecchio sempre
asciutto!
► ATTENZIONE! Staccare l'adattatore di rete
dalla parte manuale quando si pulisce quest'ul-
tima con acqua!
AVVERTENZA – PERICOLO DI LESIONI!
► Questo apparecchio può essere utilizzato dai
bambini di almeno 8anni di età e da persone
con capacità fi siche, sensoriali o mentali ridotte
o insuffi ciente esperienza o conoscenza, solo
se sorvegliati o istruiti sull'uso sicuro dell'appa-
recchio e qualora ne abbiano compreso i peri-
coli associati.
► I bambini non devono giocare con l'apparecchio.
► La pulizia e la manutenzione a cura dell'utente
non devono essere eseguite da bambini, a
meno che non siano sorvegliati.
IB_102881_SRR3.7A1_LB5.indb 27 02.12.14 09:37

IT
MT
28
SRR 3.7 A1
AVVERTENZA – PERICOLO DI LESIONI!
► Fare eseguire le riparazioni solo da aziende
specializzate o dall'assistenza ai clienti. Le
riparazioni eff ettuate in modo non conforme
possono causare gravi pericoli per l'utente.
Inoltre la garanzia decade.
► Non utilizzare l'apparecchio con testina di
taglio difettosa o accessorio lunghezza di
taglio difettoso, in quanto potrebbe avere
bordi taglienti. Sussiste il pericolo di lesioni!
► I componenti guasti devono venire sostituiti
esclusivamente da pezzi di ricambio originali.
Solo con questi pezzi di ricambio è garantita
la conformità ai requisiti di sicurezza.
► Allacciare l'adattatore di rete solo a una presa
facilmente raggiungibile, affi nché in caso di
guasto dell'adattatore di rete esso possa venire
staccato rapidamente dalla presa.
IB_102881_SRR3.7A1_LB5.indb 28 02.12.14 09:37

29
SRR 3.7 A1
IT
MT
ATTENZIONE– DANNI MATERIALI!
► Non utilizzare mai l'apparecchio senza sor-
veglianza e attenersi alle indicazioni riportate
sulla targhetta.
► Per il funzionamento con collegamento alla
rete elettrica utilizzare esclusivamente l'adat-
tatore di rete fornito in dotazione (modello
PTB-050100EU).
► Per evitare che si surriscaldi, non coprire
l'adattatore di rete.
Ricarica della batteria
Prima del primo utilizzo la batteria deve venire ricaricata per almeno
90minuti.
AVVISO
►
Assicurarsi che l'apparecchio sia spento prima di inserire la
batteria.
1) Inserire il connettore e nella presa w che si trova sul rasoio. Ba-
dare alla corretta polarità: l'asta di guida presente nella presa w
deve inserirsi nel binario di guida che si trova sul connettore e.
Altrimenti non è possibile inserire il connettore e.
2) Inserire l'adattatore di rete r in una presa che risponda a
quanto prescrive l'apparecchio:
La carica della batteria viene visualizzata in percentuale (%)
sul display (indicazione del livello di carica q). Sul display
compare il simbolo
0.
IB_102881_SRR3.7A1_LB5.indb 29 02.12.14 09:37

IT
MT
30
SRR 3.7 A1
♦ Non appena la batteria è completamente carica, compare sul
display il simbolo
0, che rimane illuminato permanentemente,
e l'indicazione del livello di carica q mostra 99%.
♦ Con la batteria completamente carica l'apparecchio può essere
tenuto in funzione per circa 60 minuti senza collegamento alla
rete.
Rasatura senza cavo
ATTENZIONE! PERICOLO DI DANNI MATERIALI!
►
Questo apparecchio non è adatto per la rasatura a umido!
Il rasoio può venire anche utilizzato senza cavo. In questo caso
occorre caricare l'apparecchio prima del primo uso (vedi capitolo
"Ricarica delle batterie").
1) Se non è già inserito, infi lare il colletto di protezione 4 da sotto
sull'unità di taglio 2 (vedi pagina apribile).
2) Infi lare l'unità di taglio 2 con colletto di protezione applicato 4
sull'albero motore 1. Badare che il colletto di protezione 4
poggi correttamente sulla parte manuale.
3) Rimuovere il cappuccio di protezione z.
4) Premere il tasto ON/OFF 5. L'indicazione del livello di carica q
mostra il livello di carica attuale e il rasoio si avvia.
AVVERTENZA
►
I migliori risultati li si ottiene con pelle asciutta.
► Potrebbero essere necessarie da 2 a 3 settimane prima che
la pelle si abitui al sistema di taglio.
5) Far scorrere le testine di taglio lungo la pelle con movimenti diritti e
circolari.
IB_102881_SRR3.7A1_LB5.indb 30 02.12.14 09:37

31
SRR 3.7 A1
IT
MT
6) Quando sono stati trattati tutti i punti da rasare, premere il tasto
ON/OFF 5. L'apparecchio si arresta improvvisamente. Dopo
ca. 3 secondi il display si spegne.
7) Dopo ogni rasatura pulire il rasoio con il pennello t fornito in
dotazione.
Per una pulizia a fondo leggere il capitolo "Pulizia e manuten-
zione".
Rasatura con adattatore di rete
ATTENZIONE! PERICOLO DI DANNI MATERIALI!
►
Questo apparecchio non è adatto per la rasatura a umido!
Se si vuole utilizzare il rasoio senza averlo in precedenza caricato,
ciò è possibile con l'adattatore di rete r:
1) Inserire il connettore e nella presa w che si trova sul rasoio.
Badare alla corretta polarità. L'asta di guida presente nella
presa w deve inserirsi nel binario di guida che si trova sul con-
nettore e. Altrimenti non è possibile inserire il connettore e.
2) Connettere la spina di rete alla presa.
Dopodiché si può utilizzare il rasoio.
Rifi nitore/Lama di taglio per peli lunghi
Per regolare la barba, modellare le basette o rasare le sopracciglia,
utilizzare il rifi nitore 7.
1) Se sull'apparecchio è applicata l'unità di taglio 2, occorre
innanzitutto sfi larla.
2) Inserire il rifi nitore 7 sull'albero motore 1. A seconda se si
intende lavorare con la lama di taglio per peli lunghi larga 8
o stretta 6, cambiare la direzione con cui si infi la l'accessorio:
IB_102881_SRR3.7A1_LB5.indb 31 02.12.14 09:37

IT
MT
32
SRR 3.7 A1
– Se si vuole lavorare con la lama di taglio per peli lunghi
larga 8, infi lare il rifi nitore 7 in modo tale che la lama di
taglio per peli lunghi larga 8 sia rivolta verso l'operatore.
– Se si vuole lavorare con la lama di taglio per peli lunghi
stretta 6, infi lare il rifi nitore 7 in modo tale che la lama di
taglio per peli lunghi larga 6 sia rivolta verso l'operatore.
3) Premere il tasto ON/OFF 5. L'indicazione del livello di carica q
mostra il livello di carica attuale e l'apparecchio si avvia.
4) Quando l'operazione di rifi nitura è terminata, premere nuova-
mente il tasto ON/OFF 5.
5) Pulire il rifi nitore 7 con il pennello t fornito in dotazione. Per
una pulizia a fondo leggere il capitolo "Pulizia e manutenzione".
Protezione per viaggio
Per proteggere l'apparecchio dall'accensione accidentale, si può
bloccare il tasto ON/OFF 5.
■ Premere e tenere premuto il tasto ON/OFF 5 fi ntantoché sul
display non compare il simbolo
9.
Se ora si preme il tasto ON/OFF 5, compaiono il simbolo
9
e l'indicazione del livello di carica q. Ma l'apparecchio non si
accende.
■ Quando lo si desidera nuovamente sbloccare, premere e tenere
premuto il tasto ON/OFF 5.
– A questo punto compare il simbolo
9 e inizia a lampeg-
giare.
Ora è di nuovo possibile accendere l'apparecchio.
IB_102881_SRR3.7A1_LB5.indb 32 02.12.14 09:37

33
SRR 3.7 A1
IT
MT
Pulizia e manutenzione
PERICOLO DI FOLGORAZIONE!
►
Prima della pulizia staccare sempre la spina dalla presa di
rete! Sussiste il pericolo di scossa elettrica!
ATTENZIONE! PERICOLO DI DANNI MATERIALI!
►
Per la pulizia dell'apparecchio non utilizzare detergenti
abrasivi, chimici o corrosivi. Ciò provoca danni irreparabili
all'apparecchio.
Pulizia con il pennello
Sicurezza
Dopo ogni rasatura pulire le 3 tesine di taglio che si trovano sull'unità
di taglio 2 con il pennello t.
1) Premere il tasto di sbloccaggio 3 in modo tale che l'unità di
taglio 2 si apre di scatto.
2) Battere con cautela su una superfi cie piana dell'unità di taglio 2
e soffi are via i peli.
3) Per rimuovere i peli residui, utilizzare il pennello t.
Rifi nitore
■ Dopo ogni rasatura pulire il rifi nitore con il pennello t.
■ Oliare le lame di taglio per peli lunghi 6/8 ca. ogni 6 mesi
con una goccia di olio per macchine da cucire.
IB_102881_SRR3.7A1_LB5.indb 33 02.12.14 09:37

IT
MT
34
SRR 3.7 A1
Pulizia sotto l'acqua corrente
L'unità di taglio 2 è adatta per la pulizia sotto l'acqua
corrente.
1) Premere il tasto di sbloccaggio 3 in modo tale che l'unità di
taglio 2 si apra con scatto.
2) Tenere l'unità di taglio 2 sotto il getto d'acqua in modo tale che
l'acqua scorra dall'interno verso l'esterno attraverso le testine di
taglio.
ATTENZIONE! PERICOLO DI DANNI MATERIALI!
Badare a tenere sotto il getto d'acqua solo l'unità di taglio 2!
La parte manuale del rasoio è protetta solo dagli spruzzi
d'acqua, potrebbe dunque venire danneggiata irreparabil-
mente se viene tenuta sotto l'acqua corrente.
3) Prima di riutilizzare il rasoio, lasciare asciugare l'unità di taglio 2.
IB_102881_SRR3.7A1_LB5.indb 34 02.12.14 09:37

35
SRR 3.7 A1
IT
MT
Pulizia a fondo
Per la pulizia a fondo rimuovere le testine di taglio:
1) premere il tasto di sbloccaggio 3. L'unità di taglio 2 si apre di
scatto.
2) Tendere leggermente l'unità di taglio 2 in modo tale che sia
possibile estrarla verso l'alto.
3) Ruotare con cautela il blocco segnato da frecce in direzione
delle frecce stesse fi no a quando il sostegno delle testine di
taglio non si lascia sollevare (vedi fi gura).
4) Pulire tutte le parti sotto l'acqua corrente e farle asciugare
completamente.
IB_102881_SRR3.7A1_LB5.indb 35 02.12.14 09:37

IT
MT
36
SRR 3.7 A1
5) Ricomporre l'unità di taglio 2.
6) Per fi ssarla ruotare il blocco segnato con le frecce in senso
opposto a quello indicato da queste ultime in modo tale che il
sostegno delle testine di taglio non possa più venire sollevato.
7) Rimuovere dal rasoio i peli sciolti utilizzando il pennello t.
8) Rimettere l'unità di taglio 2 sul rasoio. Badare che scatti in
posizione e sia correttamente e saldamente fi ssata.
■ Pulire l'alloggiamento e l'adattatore di rete r con un panno umido.
AVVERTENZA
Se...
– ... la rasatura peggiora sensibilmente,...
– ... è necessario far passare il rasoio più volte sullo
stesso punto per ottenere un buon risultato,...
– ... la rasatura richiede molto più tempo del solito,...
– ... sono visibili danni alle testine di taglio,...
... occorre sostituire le testine di taglio .
Se si desidera ordinare testine di taglio, rivolgersi al servizio
di assistenza clienti.
Conservazione
ATTENZIONE! PERICOLO DI DANNI MATERIALI!
Non conservare mai il rasoio nell'astuccio u mentre l'appa-
recchio è sotto carica! Pericolo di surriscaldamento!
■ Quando non si utilizza l'apparecchio, infi lare sempre il cappuccio
di protezione z sull'unità di taglio 2.
■ Conservare l'apparecchio pulito e asciutto e i suoi accessori
nell'astuccio u fornito in dotazione.
■ Stoccare l'apparecchio in un luogo pulito, asciutto, privo di
polvere.
IB_102881_SRR3.7A1_LB5.indb 36 02.12.14 09:37

37
SRR 3.7 A1
IT
MT
Garanzia e assistenza
Questo apparecchio è garantito per tre anni a partire dalla data di
acquisto. L'apparecchio è stato prodotto con cura e debitamente col-
laudato prima della consegna. Conservare lo scontrino come prova
di acquisto. Nei casi contemplati dalla garanzia, mettersi in comuni-
cazione telefonicamente con il centro di assistenza più vicino. Solo in
tal modo è possibile garantire una spedizione gratuita della merce.
La garanzia vale solo per difetti del materiale o di fabbricazione,
ma non per i danni da trasporto, danni alle parti soggette a usura o
alle parti fragili, come per es. interruttori o batterie. Il prodotto è de-
stinato esclusivamente all'uso domestico e non a quello commerciale.
La garanzia decade in caso di impiego improprio o manomissione,
uso della forza e interventi non eseguiti dalla nostra fi liale di assistenza
autorizzata.
Questa garanzia non costituisce alcun limite ai diritti legali del
consumatore.
Il periodo di garanzia non viene prolungato da interventi in garanzia.
Ciò vale anche per le parti sostituite e riparate. I danni e difetti even-
tualmente presenti già all'atto dell'acquisto devono venire comunicati
immediatamente dopo il disimballo, e comunque entro e non oltre
due giorni dalla data di acquisto. Le riparazioni eseguite dopo la
scadenza del periodo di garanzia sono a pagamento.
Assistenza Italia
Tel.: 02 36003201
E-Mail: [email protected]
IAN 102881
Assistenza Malta
Tel.: 80062230
E-Mail: [email protected]
IAN 102881
Raggiungibilità della hotline:
dal lunedì al venerdì, dalle 8.00 alle 20.00 (CET)
IB_102881_SRR3.7A1_LB5.indb 37 02.12.14 09:37

IT
MT
38
SRR 3.7 A1
Smaltimento
Non smaltire per alcun motivo l'apparecchio
assieme ai normali rifi uti domestici. Questo
prodotto è soggetto alla Direttiva Europea
2012/19/EU.
Far smaltire l'apparecchio da un'azienda di smaltimento autorizzata
o dall'ente di smaltimento comunale. Rispettare le norme attualmente
in vigore. In caso di dubbi mettersi in contatto con l'ente di smalti-
mento competente.
Smaltimento batterie/pile
Per smaltire ecologicamente l'apparecchio, rimuovere la batteria:
ATTENZIONE - DANNI MATERIALI!
►
Rimuovere la batteria dall'apparecchio solo se si desidera
smaltire l'apparecchio! L'apparecchio è difettoso se la batte-
ria è stata smontata!
1) Per rimuovere la batteria dall'impugnatura, togliere la piccola
vite dal lato posteriore della parte manuale servendosi di un
cacciavite a stella.
2) Sfi lare il coperchio posteriore della parte manuale.
3) Facendo leva, per esempio con un cacciavite, estrarre l'involucro
interno nero. All'occorrenza, prima che si possa sbloccare l'in-
volucro interno, si devono spezzare o piegare verso l'esterno i
sostegni laterali e quelli inferiori. Si consiglia di utilizzare a tale
scopo un cacciavite per viti con intaglio.
4) Quando l'involucro interno è stato estratto:
spezzare i sostegni del coperchio in plastica trasparente che
si trovano sui lati. Premere leggermente l'arresto inferiore verso
l'interno in modo tale che il coperchio in plastica trasparente
possa venire aperto.
IB_102881_SRR3.7A1_LB5.indb 38 02.12.14 09:37

39
SRR 3.7 A1
IT
MT
5) Sollevare leggermente la piastrina in modo da giungere con
un cacciavite per viti con intaglio sotto la batteria.
6) Facendo leva, estrarre la batteria.
7) Smaltire la batteria in modo ecologico.
Pile e/o batterie non devono venire smaltite insieme ai rifi uti
domestici. Ogni utente è obbligato per legge a portare le
pile/batterie presso un centro di raccolta del proprio comu-
ne/quartiere o a restituirle al rivenditore. Questo obbligo è
fi nalizzato allo smaltimento ecologico delle pile e/o delle
batterie. Restituire le pile/le batterie solo se scariche.
L'imballaggio è costituito da materiali ecocompatibili
che possono venire smaltiti tramite gli appositi centri di
raccolta e riciclaggio.
Importatore
KOMPERNASS HANDELS GMBH
BURGSTRASSE 21
44867 BOCHUM
GERMANY
www.kompernass.com
IB_102881_SRR3.7A1_LB5.indb 39 02.12.14 09:37

40
SRR 3.7 A1
IB_102881_SRR3.7A1_LB5.indb 40 02.12.14 09:37

41
SRR 3.7 A1
PT
Índice
Introdução . . . . . . . . . . . . . . . . . . . . . . . . . . . . . . . . . . .42
Utilização correta . . . . . . . . . . . . . . . . . . . . . . . . . . . . .42
Conteúdo da embalagem . . . . . . . . . . . . . . . . . . . . . . .42
Descrição do aparelho . . . . . . . . . . . . . . . . . . . . . . . . . 43
Dados técnicos . . . . . . . . . . . . . . . . . . . . . . . . . . . . . . . . 44
Instruções de segurança . . . . . . . . . . . . . . . . . . . . . . . . 45
Carregamento das baterias . . . . . . . . . . . . . . . . . . . . . 49
Barbear sem cabo . . . . . . . . . . . . . . . . . . . . . . . . . . . . . 50
Barbear com o adaptador de rede . . . . . . . . . . . . . . .51
Aparadores de pelos compridos . . . . . . . . . . . . . . . . . 51
Bloqueio de viagem . . . . . . . . . . . . . . . . . . . . . . . . . . . 52
Limpeza e conservação . . . . . . . . . . . . . . . . . . . . . . . . 53
Limpeza com o pincel. . . . . . . . . . . . . . . . . . . . . . . . . . . . . . . . . . .53
Limpeza em água corrente . . . . . . . . . . . . . . . . . . . . . . . . . . . . . . .54
Limpeza completa . . . . . . . . . . . . . . . . . . . . . . . . . . . . . . . . . . . . .55
Armazenamento . . . . . . . . . . . . . . . . . . . . . . . . . . . . . .56
Garantia e assistência técnica . . . . . . . . . . . . . . . . . . .57
Eliminação . . . . . . . . . . . . . . . . . . . . . . . . . . . . . . . . . . .58
Importador . . . . . . . . . . . . . . . . . . . . . . . . . . . . . . . . . . 59
IB_102881_SRR3.7A1_LB5.indb 41 02.12.14 09:37

PT
42
SRR 3.7 A1
Introdução
Parabéns pela compra do seu novo aparelho.
Optou por um produto de elevada qualidade. O manual de instruções
é parte integrante deste produto. Este contém instruções importantes
para a segurança, utilização e eliminação. Antes de utilizar o produto,
familiarize-se com todas as instruções de operação e segurança.
Utilize o produto apenas como descrito e nas áreas de aplicação
indicadas. Ao transferir o produto para terceiros, entregue todos os
respetivos documentos.
Utilização correta
Este aparelho foi concebido exclusivamente para barbear e cortar
o pelo humano.
Este aparelho destina-se exclusivamente à utilização privada.
Não o utilize para fi ns comerciais.
Qualquer outra utilização é considerada indevida e pode conduzir
a danos materiais ou até pessoais.
Conteúdo da embalagem
♦ Máquina de barbear com unidade de corte
♦ Adaptador de rede
♦ Unidade aparadora
♦ Tampa de proteção
♦ Pincel
♦ Bolsa
♦ Cartão de encomenda
♦ Manual de instruções
IB_102881_SRR3.7A1_LB5.indb 42 02.12.14 09:37

43
SRR 3.7 A1
PT
NOTA
Ao retirar da embalagem, verifi que a integridade do conteúdo
e a existência de eventuais danos. Em caso de necessidade,
contacte a Assistência Técnica.
Descrição do aparelho
Figura A (parte dianteira desdobrável):
1 Eixo de acionamento
2 Unidade de corte
3 Botão de desbloqueio
4 Rebordo de proteção
5
Botão de ligar/desligar
6 Aparador estreito de pelos compridos
7 Unidade de aparo
8 Aparador largo de pelos comprimidos
9 Símbolo
(bloqueio)
0 Símbolo
(carga)
q Indicação do estado de carga
w Tomada de carregamento
Figura B (parte traseira desdobrável):
e Ficha de ligação
r Adaptador de rede
t Pincel
z Tampa de proteção
u Bolsa
IB_102881_SRR3.7A1_LB5.indb 43 02.12.14 09:37

PT
44
SRR 3.7 A1
Dados técnicos
Aparelho
Tensão de entrada: 5 V
Corrente de entrada: 1.000 mA
Bateria: Bateria de iões de lítio 3,7 V, 700 mAh
Temperatura ambiente: Entre 5 °C e 35 °C
Classe de proteção: III/
Tempo de carregamento: aprox. 90 minutos
Tempo de funcionamento
com a bateria carregada: aprox. 60 minutos
Tipo de proteção: IPX 4
Adaptador de rede (tipo PTB-050100EU)
Tensão de entrada: 100 - 240 V ∼
50/60 Hz
Tensão de saída: 5 V
Corrente de saída: 1.000 W
Classe de proteção: II /
IB_102881_SRR3.7A1_LB5.indb 44 02.12.14 09:37

45
SRR 3.7 A1
PT
Instruções de segurança
PERIGO – CHOQUE ELÉTRICO!
► Antes da utilização, verifi que a existência
de eventuais danos visíveis exteriormente no
aparelho. Não coloque em funcionamento um
aparelho danifi cado. Existe perigo de choque
elétrico.
► Caso sejam detetados danos no cabo, no
adaptador de rede, no corpo do aparelho ou
noutras peças, o aparelho não pode continuar
a ser utilizado.
► Retire o adaptador de rede da tomada:
— caso ocorra uma avaria,
— antes de limpar o aparelho,
— se não utilizar o aparelho durante um
período prolongado,
— após cada utilização.
Puxe diretamente pelo adaptador de rede e
não pelo cabo.
► Nunca mergulhe o aparelho, bem como, o
cabo com o adaptador de rede, em água ou
noutros líquidos.
IB_102881_SRR3.7A1_LB5.indb 45 02.12.14 09:37

PT
46
SRR 3.7 A1
PERIGO – CHOQUE ELÉTRICO!
► Caso o aparelho tenha caído na água, retire
primeiro o adaptador de rede da tomada
antes meter a mão na água.
► Nunca agarre no adaptador de rede com as
mãos molhadas, especialmente se o inserir
ou retirar de uma tomada. Perigo de choque
elétrico!
► Verifi que regularmente a existência de eventuais
defeitos mecânicos no adaptador de rede e no
aparelho.
► Certifi que-se de que o cabo não fi ca preso nas
portas dos armários ou é puxado sobre super-
fícies quentes. Caso contrário, o isolamento do
cabo pode fi car danifi cado.
► A instalação de um dispositivo de proteção
de corrente residual com uma corrente de
ativação de dimensionamento não superior a
30 mA oferece mais proteção contra choque
elétrico. A instalação deve ser realizada exclu-
sivamente por um eletricista.
IB_102881_SRR3.7A1_LB5.indb 46 02.12.14 09:37

47
SRR 3.7 A1
PT
PERIGO – CHOQUE ELÉTRICO!
► ATENÇÃO! Mantenha o aparelho seco!
► ATENÇÃO! Desligue o adaptador de rede da
máquina, caso pretenda lavá-la com água!
AVISO – PERIGO DE FERIMENTOS!
► Este aparelho pode ser utilizado por crianças
com idades superiores a 8anos, bem como por
pessoas com capacidades físicas, sensoriais ou
mentais reduzidas, ou com falta de experiência
e/ou conhecimento, caso sejam vigiadas ou
instruídas sobre a utilização segura do apare-
lho e compreendam os perigos daí resultantes.
► As crianças não podem brincar com o aparelho.
► A limpeza e a manutenção pelo utilizador não
podem ser realizadas por crianças não vigiadas.
IB_102881_SRR3.7A1_LB5.indb 47 02.12.14 09:37

PT
48
SRR 3.7 A1
AVISO – PERIGO DE FERIMENTOS!
► Solicite a reparação do aparelho apenas
a empresas autorizadas ou ao Serviço de
Assistência Técnica. Reparações inadequadas
podem originar perigos consideráveis para o
utilizador. Além disso, a garantia extingue-se.
► Não utilize o aparelho com o conjunto de corte
ou o aplicador de comprimento de corte dani-
fi cado, uma vez que podem ter cantos afi ados.
Perigo de ferimentos!
► Os componentes avariados devem ser substituí-
dos apenas por peças de reposição originais.
Apenas a utilização destas peças garante o
cumprimento dos requisitos de segurança.
► Ligue o adaptador de rede apenas a uma to-
mada acessível para que, em caso de avaria,
este possa ser rapidamente retirado da tomada.
IB_102881_SRR3.7A1_LB5.indb 48 02.12.14 09:37

49
SRR 3.7 A1
PT
ATENÇÃO – DANOS MATERIAIS!
► Nunca opere o aparelho sem vigilância e
opere apenas de acordo com os dados na
placa de identifi cação.
► Utilize apenas o adaptador de rede fornecido
para a operação da rede (tipo PTB-050100EU).
► Não cubra o adaptador de rede para evitar
um aquecimento não permitido.
Carregamento das baterias
Antes da primeira utilização, a bateria deve ser carregada durante,
no mínimo, durante 90 minutos.
NOTA
►
Certifi que-se de que o aparelho está desligado antes de
carregar a bateria.
1) Insira a fi cha de ligação e na tomada de carregamento w da
máquina de barbear.
Tenha atenção à polaridade correta. A vareta de guia na
tomada de carregamento w deve encaixar na calha de guia
da fi cha de ligação e. Caso contrário, não é possível inserir a
fi cha de ligação e.
2) Insira o adaptador de rede r numa tomada adequada aos
dados do aparelho:
O carregamento da bateria é visualizado, em percentagem (%),
no visor (indicação do estado de carga q). O símbolo
0
aparece no visor.
IB_102881_SRR3.7A1_LB5.indb 49 02.12.14 09:37

PT
50
SRR 3.7 A1
♦ Logo que a bateria esteja carregada, o símbolo 0 aparece
continuamente no visor e a indicação do estado de carga q
indica 99%.
♦ Com a bateria completamente carregada pode utilizar o apare-
lho durante aprox. 60 minutos sem estar ligado à corrente.
Barbear sem cabo
ATENÇÃO! DANOS MATERIAIS!
►
Este aparelho não é adequado para fazer a barba molhada!
Pode utilizar a máquina de barbear sem cabo. Neste caso, deve
carregar o aparelho antes da primeira utilização (ver capítulo
"Carregamento das baterias").
1) Encaixe o rebordo de proteção 4, caso não esteja encaixado,
por baixo na unidade de corte 2 (ver parte desdobrável).
2) Encaixe a unidade de corte 2, com o rebordo de proteção 4,
no eixo de acionamento 1. Certifi que-se de que o rebordo de
proteção 4 se encontra corretamente colocado na máquina.
3) Retire a tampa de proteção z.
4) Prima o botão de ligar/desligar 5. A indicação do estado
de carga q indica o estado de carga atual e a máquina de
barbear começa a funcionar.
NOTA
►
Obtém os melhores resultados com a pele seca.
► Pode demorar 2 a 3 semanas até que a pele se habitue ao
sistema de corte.
5) Conduza as cabeças de corte com movimentos retos e circulares
sobre a pele.
IB_102881_SRR3.7A1_LB5.indb 50 02.12.14 09:37

51
SRR 3.7 A1
PT
6) Depois de barbear todas as partes pretendidas, prima o botão de
ligar/desligar 5. O aparelho para. Após aprox. 3 segundos, o
visor desliga-se.
7) Limpe a máquina de barbear, após cada barbear, com o pincel
fornecido t.
Para realizar uma limpeza completa, leia o capítulo "Limpeza e
conservação".
Barbear com o adaptador de rede
ATENÇÃO! DANOS MATERIAIS!
►
Este aparelho não é adequado para fazer a barba molhada!
Se pretender utilizar a máquina de barbear sem a carregar primeiro,
também a poderá utilizar diretamente com o adaptador de rede r:
1) Insira a fi cha de ligação e na tomada de carregamento w na
máquina de barbear.
Tenha atenção à polaridade correta. A vareta de guia na
tomada de carregamento w deve encaixar na calha de guia
da fi cha de ligação e. Caso contrário, não é possível inserir a
fi cha de ligação e.
2) Ligue a fi cha a uma tomada.
Pode então utilizar a máquina de barbear.
Aparadores de pelos compridos
Para ter uma barba em forma, modelar as patilhas ou barbear as
sobrancelhas, utilize a unidade de aparo 7.
1) Retire a unidade de corte 2, caso esteja encaixada, da máquina.
2) Encaixe a unidade de aparo 7 no eixo de acionamento 1.
Quer pretenda trabalhar com o aparador largo 8 ou estreito 6
de pelos compridos, mude o sentido de encaixe:
IB_102881_SRR3.7A1_LB5.indb 51 02.12.14 09:37

PT
52
SRR 3.7 A1
– Para trabalhar com o aparador largo de pelos compridos 8,
encaixe a unidade de aparo 7 de forma a que o aparador
estreito de pelos compridos 8 fi que voltado para si.
– Para trabalhar com o aparador estreito de pelos compridos 6,
encaixe a unidade de aparo 7 de forma a que o aparador
estreito de pelos compridos 6 fi que voltado para si.
3) Prima o botão de ligar/desligar 5. A indicação do estado de
carga q indica o estado de carga atual e o aparelho começa
a funcionar.
4) Quando terminar o processo de aparo, prima novamente o
botão de ligar/desligar 5.
5) Limpe a unidade de aparo 7 com o pincel fornecido t.
Para realizar uma limpeza completa, leia o capítulo "Limpeza
e conservação".
Bloqueio de viagem
Para proteger o aparelho contra uma ligação involuntária, pode
bloquear o botão de ligar/desligar 5.
■ Prima e mantenha premido o botão de ligar/desligar 5 até que
o símbolo
9 seja apresentado no visor.
Se o botão de ligar/desligar 5 for agora premido, é visualizado
o símbolo
9 e a indicação do estado de carga q.
■ No entanto, o aparelho não se liga.
■ Caso pretenda voltar a desbloquear o botão, mantenha o botão
ligar/desligar 5 premido:
– o símbolo
9 é visualizado e começa a piscar.
Pode agora voltar a ligar o aparelho.
IB_102881_SRR3.7A1_LB5.indb 52 02.12.14 09:37

53
SRR 3.7 A1
PT
Limpeza e conservação
PERIGO - CHOQUE ELÉTRICO!
►
Antes de cada limpeza, retire a fi cha da tomada de alimenta-
ção elétrica! Perigo de choque elétrico!
ATENÇÃO! DANOS MATERIAIS!
►
Não utilize produtos de limpeza abrasivos, químicos ou ácidos
para limpar o aparelho. Isto provoca danos irreparáveis no
aparelho.
Limpeza com o pincel
Unidade de corte
Após cada barbear, limpe as 3 cabeças de corte 2 com o pincel t.
1) Pressione o botão de desbloqueio 3, de forma a que a unidade
de corte 2 se solte.
2) Esvazie a unidade de corte 2, batendo cuidadosamente com
a mesma numa superfície plana ou sopre para retirar os pelos.
3) Utilize o pincel t para remover pelos que permaneceram na
unidade de corte.
Unidade de aparo
■ Limpe a unidade de aparo, após cada barbear, com o pincel
fornecido t.
■ Lubrifi que os aparadores de pelos compridos 6/8, aprox. a
cada 6 meses, com uma gota de lubrifi cante para máquinas de
costura.
IB_102881_SRR3.7A1_LB5.indb 53 02.12.14 09:37

PT
54
SRR 3.7 A1
Limpeza em água corrente
A unidade de corte 2 pode ser limpa em água corrente.
1) Pressione o botão de desbloqueio 3, de forma a que a unidade
de corte 2 se solte.
2) Mantenha a unidade de corte 2 por baixo do jato de água,
de forma a que a água passe através das cabeças de corte,
do interior para o exterior.
ATENÇÃO! DANOS MATERIAIS!
Certifi que-se de que mantém apenas a unidade de corte 2
sob o jato de água! O corpo da máquina de barbear está
protegido apenas contra salpicos e pode fi car irreparavel-
mente danifi cado se o colocar por baixo de água corrente.
3) Deixe a unidade de corte 2 secar antes de voltar a utilizar a
máquina de barbear.
IB_102881_SRR3.7A1_LB5.indb 54 02.12.14 09:37

55
SRR 3.7 A1
PT
Limpeza completa
Para realizar uma limpeza completa, retire as cabeças de corte:
1) Prima o botão de desbloqueio 3. A unidade de corte 2 solta-se.
2) Estique a unidade de corte 2 um pouco, de modo a que possa
ser puxada para cima.
3) Rode cuidadosamente o bloqueio, marcado com setas, o má-
ximo no sentido da seta, até que o dispositivo de retenção das
cabeças de corte possa ser retirado (ver fi gura).
4) Limpe todas as peças em água corrente e deixe-as secar bem.
IB_102881_SRR3.7A1_LB5.indb 55 02.12.14 09:37

PT
56
SRR 3.7 A1
5) Volte a montar a unidade de corte 2.
6) Para a fi xar, rode o bloqueio, marcado com setas, no sentido
contrário ao da seta, de forma a que o dispositivo de retenção
das cabeças de corte fi que preso.
7) Remova pelos soltos da máquina de barbear com o pincel t.
8) Volte a colocar a unidade de corte 2 na máquina de barbear.
Certifi que-se de que esta encaixa e fi ca presa.
■ Limpe o corpo da máquina e o adaptador de rede r com um
pano húmido.
NOTA
Se...
– ... o barbear se tornar signifi cativamente mais difícil,...
– ... tiver de passar a máquina de barbear várias vezes
sobre a mesma zona para obter um bom resultado,....
– ... o barbear demorar signifi cativamente mais tempo,...
– ... forem visíveis danos nas cabeças de corte,...
... signifi ca que as cabeças de corte devem ser substituídas.
Contacte a Assistência Técnica, caso pretenda encomendar
as cabeças de corte.
Armazenamento
ATENÇÃO! DANOS MATERIAIS!
Nunca guarde a máquina de barbear na bolsa u durante o
carregamento! Perigo de sobreaquecimento!
■ Coloque a tampa de proteção z em cima da unidade de corte 2
sempre que não utilizar o aparelho.
■ Guarde o aparelho seco e os respetivos acessórios na bolsa
fornecida u.
■ Guarde tudo num local seco, limpo e sem pó.
IB_102881_SRR3.7A1_LB5.indb 56 02.12.14 09:37

57
SRR 3.7 A1
PT
Garantia e assistência técnica
Este aparelho tem uma garantia de 3 anos a contar da data de
compra. Este aparelho foi fabricado com o maior cuidado e testa-
do escrupulosamente antes da sua distribuição. Guarde o talão
de compra como comprovativo da compra. Caso deseje acionar
a garantia, telefone para o seu serviço de Assistência Técnica.
Apenas deste modo pode ser garantido um envio gratuito do seu
produto.
A garantia abrange apenas defeitos de material ou de fabrico e
não inclui danos durante o transporte, peças de desgaste ou danos
em peças frágeis, p.ex. interruptores ou acumuladores. O produto
foi concebido apenas para uso privado e não para uso comercial.
A garantia extingue-se em caso de utilização incorreta, uso de força
e intervenções que não tenham sido efetuadas pela nossa Filial de
Assistência Técnica autorizada.
Os seus direitos legais não são limitados por esta garantia.
O período de garantia não é prolongado pelo acionamento da
mesma. Isto também se aplica a peças substituídas e reparadas.
Danos e defeitos que possam eventualmente existir no momento
da compra devem ser imediatamente comunicados, após retirar o
aparelho da embalagem, o mais tardar dois dias após a data de
compra. Expirado o período da garantia, quaisquer reparações
necessárias estão sujeitas a pagamento.
Assistência Portugal
Tel.: 70778 0005 (0,12 EUR/Min.)
E-Mail: [email protected]
IAN 102881
Horário de atendimento da linha de apoio:
Segunda a sexta das 8:00 horas – 20:00 horas (HEC)
IB_102881_SRR3.7A1_LB5.indb 57 02.12.14 09:37

PT
58
SRR 3.7 A1
Eliminação
Nunca deposite o aparelho no lixo doméstico
comum. Este produto está sujeito ao disposto
na Diretiva Europeia 2012/19/EU.
Entregue o aparelho num Ponto Eletrão autorizado ou num Centro
de Receção de REEE do seu município. Respeite os regulamentos
atualmente em vigor. Em caso de dúvida, entre em contacto com o
Centro de Receção de REEE.
Eliminação de pilhas/baterias
Para eliminar o aparelho de forma ecológica, deve retirar a bateria
do aparelho:
ATENÇÃO - DANOS MATERIAIS!
►
Remova a bateria do aparelho apenas se pretender eliminar/
deitar fora o aparelho! O aparelho deixa de funcionar
quando remover a bateria!
1) Para retirar a bateria da máquina, desparafuse o pequeno
parafuso no verso com uma chave Phillips.
2) Retire a cobertura traseira da máquina.
3) Tente levantar o corpo interior preto, por exemplo, com uma
chave de fendas. Eventualmente, terá de partir ou dobrar para
fora os suportes laterais e inferiores antes de poder soltar o
corpo interior. Para tal, utilize preferencialmente uma chave de
fendas.
4) Quando tiver retirado o corpo interior:
parta os suportes nos lados da cobertura de plástico transparente.
Pressione o bloqueio inferior, um pouco para dentro, de forma
a que a cobertura de plástico transparente possa ser aberta.
5) Levante a placa de metal, de modo a aceder por baixo da bateria
com uma chave de fenda.
IB_102881_SRR3.7A1_LB5.indb 58 02.12.14 09:37

59
SRR 3.7 A1
PT
6) Retire a bateria.
7) Elimine a bateria em conformidade com as normas ambientais.
As pilhas/baterias não podem ser depositadas no lixo
doméstico. Todos os consumidores têm a obrigação legal
de colocar as pilhas/baterias num pilhão da sua área de
residência/da sua freguesia ou entregar numa loja que
venda pilhas/baterias. Esta obrigação serve para garantir
que as pilhas/baterias são eliminadas em conformidade
com as normas ambientais. Entregue as pilhas/baterias
apenas quando estiverem completamente descarregadas.
A embalagem é composta por materiais ecológicos que
podem ser depositados nos ecopontos locais.
Importador
KOMPERNASS HANDELS GMBH
BURGSTRASSE 21
44867 BOCHUM
GERMANY
www.kompernass.com
IB_102881_SRR3.7A1_LB5.indb 59 02.12.14 09:37

60
SRR 3.7 A1
IB_102881_SRR3.7A1_LB5.indb 60 02.12.14 09:37

61
SRR 3.7 A1
GB
MT
Contents
Introduction . . . . . . . . . . . . . . . . . . . . . . . . . . . . . . . . . . 62
Intended use . . . . . . . . . . . . . . . . . . . . . . . . . . . . . . . . . 62
Package contents . . . . . . . . . . . . . . . . . . . . . . . . . . . . . 62
Description of the appliance . . . . . . . . . . . . . . . . . . . . .63
Technical data . . . . . . . . . . . . . . . . . . . . . . . . . . . . . . . .64
Safety guidelines . . . . . . . . . . . . . . . . . . . . . . . . . . . . . 65
Charging the batteries . . . . . . . . . . . . . . . . . . . . . . . . .69
Cordless shaving . . . . . . . . . . . . . . . . . . . . . . . . . . . . . .70
Shaving using the mains adapter . . . . . . . . . . . . . . . . 71
Trimmer/long hair trimmer . . . . . . . . . . . . . . . . . . . . . 71
Travel lock . . . . . . . . . . . . . . . . . . . . . . . . . . . . . . . . . . .72
Cleaning and care . . . . . . . . . . . . . . . . . . . . . . . . . . . . . 73
Cleaning with the brush . . . . . . . . . . . . . . . . . . . . . . . . . . . . . . . . .73
Cleaning under running water . . . . . . . . . . . . . . . . . . . . . . . . . . . .74
Thorough cleaning . . . . . . . . . . . . . . . . . . . . . . . . . . . . . . . . . . . . .75
Storage . . . . . . . . . . . . . . . . . . . . . . . . . . . . . . . . . . . . .76
Warranty and service . . . . . . . . . . . . . . . . . . . . . . . . . . 77
Disposal . . . . . . . . . . . . . . . . . . . . . . . . . . . . . . . . . . . . .78
Importer . . . . . . . . . . . . . . . . . . . . . . . . . . . . . . . . . . . . .79
IB_102881_SRR3.7A1_LB5.indb 61 02.12.14 09:37

GB
MT
62
SRR 3.7 A1
Introduction
Congratulations on the purchase of your new appliance.
You have selected a high-quality product. The operating instructions
are part of this product. They contain important information on safety,
usage and disposal. Before using the product, familiarise yourself
with all handling and safety guidelines. Use the product only as
described and for the range of applications specifi ed. Please also
pass these operating instructions on to any future owner(s).
Intended use
This appliance is intended exclusively for shaving and trimming
human hair.
This appliance is intended solely for use in private households.
Do not use it for commercial applications.
All other uses are deemed to be improper and may result in property
damage or even in personal injury.
Package contents
♦ Shaver with shaver unit
♦ Power adapter
♦ Trimmer unit
♦ Protective cap
♦ Brush
♦ Case
♦ Order card
♦ Operating instructions
IB_102881_SRR3.7A1_LB5.indb 62 02.12.14 09:37

63
SRR 3.7 A1
GB
MT
NOTE
Check contents for completeness and damage immediately
after unpacking. Contact Customer Services if necessary.
Description of the appliance
Figure A (front fold-out page):
1 Drive shaft
2 Shaver unit
3 Release button
4 Protective collar
5
On/off button
6 Narrow long-hair trimmer
7 Trimmer unit
8 Broad long-hair trimmer
9
symbol (lock)
0
symbol (charge)
q Battery charge level indicator
w Charging socket
Figure B (rear fold-out page):
e Connection plug
r Mains adapter
t Brush
z Protective cap
u Case
IB_102881_SRR3.7A1_LB5.indb 63 02.12.14 09:37

GB
MT
64
SRR 3.7 A1
Technical data
Appliance
Input voltage: 5 V
Input current: 1000 mA
Battery: 3.7 V / 700 mAh Li-ion battery
Environmental temperature: 5°C up to 35°C
Protection class: III/
Charging time: approx. 90 minutes
Operating time with fully
charged battery: approx. 60 minutes
Protection rating: IPX 4
Power adapter (type PTB-050100EU)
Input voltage: 100 - 240 V ∼
50/60 Hz
Output voltage: 5 V
Output power: 1000 mA
Protection class: II /
IB_102881_SRR3.7A1_LB5.indb 64 02.12.14 09:37

65
SRR 3.7 A1
GB
MT
Safety guidelines
DANGER – RISK OF ELECTRIC SHOCK!
► Prior to use, check the appliance for visible
external damage. Never operate an appliance
that is damaged. There is a risk of electrocution.
► The appliance may no longer be used if there
is any damage to the cable, to the mains power
adapter, the housing or any other components.
► Remove the mains adapter from the power
socket
— if a defect occurs,
— before cleaning the appliance,
— if you do not intend using the appliance
for long periods,
— after every use.
Pull the mains power adapter itself and not the
cable.
► Never submerge the appliance or the cable
with mains adapter in water or other liquids.
IB_102881_SRR3.7A1_LB5.indb 65 02.12.14 09:37

GB
MT
66
SRR 3.7 A1
DANGER – RISK OF ELECTRIC SHOCK!
► If the appliance falls into water, it is imperative
that you pull the mains adapter out of the power
socket before you reach into the water.
► Never touch the mains adapter with wet hands,
especially when plugging it in or unplugging it.
Risk of electrocution!
► Check mains adapter and appliance regularly
for possible mechanical damage.
► Ensure that the cable does not get jammed in
cupboard doors or pulled over hot surfaces.
If this occurs, the cable insulation may be
damaged.
► The installation of a residual current circuit breaker
with a rated tripping current of no more than
30 mA off ers further protection from electric
shocks. Have the installation carried out only
by a qualifi ed electrician.
IB_102881_SRR3.7A1_LB5.indb 66 02.12.14 09:37

67
SRR 3.7 A1
GB
MT
DANGER – RISK OF ELECTRIC SHOCK!
► WARNING! Keep the appliance dry.
► WARNING! Disconnect the mains adapter
from the handset when you clean it with water.
WARNING – RISK OF INJURY!
► This appliance may be used by children aged
8 years and above and by persons with limited
physical, sensory or mental capabilities or lack
of experience and knowledge, provided that
they are under supervision or have been told
how to use the appliance safely and are aware
of the potential risks.
► Children must not use the appliance as a play-
thing.
► Cleaning and user maintenance tasks may not
be carried out by children unless they are super-
vised.
IB_102881_SRR3.7A1_LB5.indb 67 02.12.14 09:37

GB
MT
68
SRR 3.7 A1
WARNING – RISK OF INJURY!
► All repairs must be carried out by authorised
specialist companies or by the Customer Service
department. Improper repairs can pose signifi -
cant risks to the user. They will also invalidate
any warranty claim.
► Do not use the appliance with a defective cutter
attachment or cutting length attachment, since
these may have sharp edges. There is a risk of
personal injury!
► Defective components must always be replaced
with original replacement parts. Compliance
with safety requirements can only be guaran-
teed if original replacement parts are used.
► Only plug the mains adapter into an easily
reachable power socket so that you can pull
the mains adapter out of the power socket
quickly in an emergency.
IB_102881_SRR3.7A1_LB5.indb 68 02.12.14 09:37

69
SRR 3.7 A1
GB
MT
CAUTION – PROPERTY DAMAGE!
► Never operate the appliance unsupervised,
and only in accordance with the information
on the nameplate.
► Use only the supplied mains adapter (type
PTB-050100EU) to power your appliance.
► To avoid damage caused by overheating, do
not cover the mains power adapter.
Charging the batteries
The battery should be charged for at least 90 minutes before fi rst use.
NOTE
►
Ensure that the appliance is switched off before charging the
battery.
1) Plug the connection plug e into the charging socket w on the
shaver.
Ensure the +/- terminals are correctly aligned: the guide rod
in the charging socket w must be in the guide groove on the
connection plug e. Otherwise the connection plug e cannot
be plugged in.
2) Plug the mains adapter r into a mains socket that complies with
the appliance specifi cations.
The battery charge level is shown in percent (%) on the display
(battery charge level indicator q). The
symbol 0 appears
on the display.
IB_102881_SRR3.7A1_LB5.indb 69 02.12.14 09:37

GB
MT
70
SRR 3.7 A1
♦ As soon as the battery is fully charged, the
symbol
0 appears
permanently on the display and the battery charge level indica-
tor q shows 99%.
♦ Once the battery is fully charged, you can use the appliance for
around 60 minutes without connecting it to the power supply.
Cordless shaving
CAUTION! MATERIAL DAMAGE!
►
This appliance is not suitable for wet shaving!
You can use the shaver without the cable. In this case, you must charge
the appliance before fi rst use (see section "Charging the batteries").
1) If it is not already attached, push the protective collar 4 from
below onto the shaver unit 2 (see fold-out page).
2) Attach the shaver unit 2 with the fi tted protective collar 4 onto
the drive shaft 1. Ensure that the protective collar 4 is sitting
correctly on the handset.
3) Remove the protective cap z.
4) Press the on/off button 5. The battery charge level indicator q
shows the current charge level and the shaver starts.
NOTE
►
The best results are achieved if used on dry skin.
► It can take 2 to 3 weeks until the skin is accustomed to the
dry shaving system.
5) Move the shaving heads with straight and circular motions over
the skin.
6) When you have covered all the areas that you want to shave,
press the on/off button 5. The appliance stops. After approx.
3 seconds, the display will switch off .
IB_102881_SRR3.7A1_LB5.indb 70 02.12.14 09:37

71
SRR 3.7 A1
GB
MT
7) Clean the shaver after every use with the supplied brush t.
For a more thorough cleaning, read the section "Cleaning and
care".
Shaving using the mains adapter
CAUTION! MATERIAL DAMAGE!
►
This appliance is not suitable for wet shaving!
If you want to use the shaver to load without charging it, you can
also use it directly with the mains adapter r:
1) Plug the connection plug e into the charging socket w on the
shaver.
Ensure the +/- terminals are correctly aligned. The guide rod
in the charging socket w must be in the guide groove on the
connection plug e. Otherwise the connection plug e cannot
be plugged in.
2) Insert the plug into a mains power socket.
Now you can use the shaver.
Trimmer/long hair trimmer
To shape your beard, form sideburns or shave eyebrows, use the
trimmer unit 7.
1) Pull the shaver unit 2 off the handset (if attached).
2) Attach the trimmer unit 7 to the drive shaft 1. Depending on
whether you want to use the broad 8 or narrow long hair
trimmer 6, change the direction of attachment.
IB_102881_SRR3.7A1_LB5.indb 71 02.12.14 09:37

GB
MT
72
SRR 3.7 A1
– If you want to use the broad long hair trimmer 8, attach the
trimmer unit 7 so that the broad long hair trimmer 8 is facing
towards you.
– If you want to use the narrow long hair trimmer 6, attach the
trimmer unit 7 so that the narrow long hair trimmer 6 is facing
towards you.
3) Press the on/off button 5. The battery charge level indicator q
shows the current charge level and the appliance starts.
4) When you are fi nished trimming, press the on/off switch 5 again.
5) Clean the trimmer unit 7 with the supplied brush t. For a more
thorough cleaning, read the section "Cleaning and care".
Travel lock
To ensure that the appliance cannot switch on accidentally, you can
lock the on/off button 5.
■ Press and hold the on/off button 5 until the
symbol 9 appears
on the display.
If you now press the on/off button 5, the
symbol 9 and the
battery charge level indicator q appear. The appliance will,
however, not switch on.
■ If you want to release the lock, press and hold the on/off button 5:
– the
symbol 9 appears and starts to fl ash.
The appliance can now be switched on.
IB_102881_SRR3.7A1_LB5.indb 72 02.12.14 09:37

73
SRR 3.7 A1
GB
MT
Cleaning and care
DANGER – ELECTRIC SHOCK!
►
Before cleaning the appliance, disconnect the power plug
from the mains power socket! There is a risk of electric shock!
CAUTION! MATERIAL DAMAGE!
►
Do not use abrasive, chemical or caustic cleaning agents to
clean this appliance. This will irreparably damage the appliance.
Cleaning with the brush
Shaver unit
Clean the 3 shaving heads in the shaver unit 2 after every shave
using the brush t.
1) Press the release button 3 so that the shaver unit 2 pops open.
2) Tap the shaver unit 2 on a fl at surface or blow off the hair
cuttings.
3) Use the brush t to remove any remaining hair cuttings.
Trimmer unit
■ Clean the trimmer unit after every use with the supplied brush t.
■ Oil the long hair trimmers 6/8 around every 6 months with a
drop of sewing machine oil.
IB_102881_SRR3.7A1_LB5.indb 73 02.12.14 09:37

GB
MT
74
SRR 3.7 A1
Cleaning under running water
The shaver unit 2 is suitable for cleaning under running
water.
1) Press the release button 3 so that the shaver unit 2 pops open.
2) Hold the shaver unit 2 under the running water so that the water
fl ows through the shaving heads from the inside to the outside.
CAUTION! MATERIAL DAMAGE!
Ensure that only the shaver unit 2 is under the stream of water!
The shaver handset is only protected against water splashes and
can be irreparably damaged if it is held under running water.
3) Allow the shaver unit 2 to dry before you use the shaver again.
IB_102881_SRR3.7A1_LB5.indb 74 02.12.14 09:37

75
SRR 3.7 A1
GB
MT
Thorough cleaning
For a more thorough cleaning, remove the shaving heads:
1) Press the release button 3. The shaver unit 2 pops up.
2) Overstretch the shaver unit 2 a little so it can be pulled upwards
and off .
3) Carefully turn the catch marked with arrows in the direction of
the arrows until the mounting of the shaving heads can be lifted
of (see fi gure).
4) Clean all parts under running water and then allow them to dry
fully.
IB_102881_SRR3.7A1_LB5.indb 75 02.12.14 09:37

GB
MT
76
SRR 3.7 A1
5) Replace the shaver unit 2.
6) To attach it, turn the catch marked with arrows in the opposite
direction to the arrow markings so that the shaving head mount-
ing can no longer be removed.
7) Remove loose hairs from the shaver with the brush t.
8) Replace the shaver unit 2 on the shaver. Ensure that it snaps
into place and is seated fi rmly.
■ Clean the housing and the mains adapter r with a damp cloth.
NOTE
If ...
– ... the shaving result is noticeably poorer, ...
– ... you have to the shave the same spot repeatedly to
achieve a good result, ...
– ... the shave takes much longer than usual, ...
– ... there is visible damage to the shaving heads, ...
... the shaving heads should be changed.
Please contact the Service Centre if you want to order shaving
heads.
Storage
CAUTION! MATERIAL DAMAGE!
Never store the shaver in the case u while the appliance is
charging. Risk of overheating!
■ Always replace the protective cap z on the shaver unit 2 when
you are not using the appliance.
■ Store the cleaned and dried appliance and its accessories in the
supplied case u.
■ Store everything in a clean, dust-free and dry place.
IB_102881_SRR3.7A1_LB5.indb 76 02.12.14 09:37

77
SRR 3.7 A1
GB
MT
Warranty and service
You are provided a 3-year warranty on this appliance, valid from
the date of purchase. This appliance has been manufactured with
care and inspected meticulously prior to delivery. Please retain
your receipt as proof of purchase. In the event of a warranty claim,
please contact your Customer Service unit by telephone.
This is the only way to guarantee free return of your goods.
The warranty only covers claims for material and manufacturing defects,
not for damage sustained during carriage, components subject to wear
and tear or damage to fragile components such as switches or bat-
teries. This appliance is intended solely for private use and not for
commercial purposes.
The warranty shall be deemed void in cases of misuse or improper
handling, use of force and modifi cation which have not been carried
out by one of our authorised Service centres.
Your statutory rights are not restricted by this warranty.
The warranty period is not prolonged by repairs eff ected under the
warranty. This also applies to replaced and repaired components. Any
damage and defects present at the time of purchase must be reported
immediately after unpacking, but no later than two days after the
date of purchase. Repairs carried out after expiry of the warranty
period shall be subject to charge.
Service Great Britain
Tel.: 0871 5000 720 (£ 0.10/Min.)
E-Mail: [email protected]
IAN 102881
Service Malta
Tel.: 80062230
E-Mail: [email protected]
IAN 102881
Hotline availability: Monday to Friday 08:00 - 20:00 (CET)
IB_102881_SRR3.7A1_LB5.indb 77 02.12.14 09:37

GB
MT
78
SRR 3.7 A1
Disposal
Never dispose of the appliance in the
normal domestic waste. This product is
subject to the provisions of European
Directive 2012/19/EU.
Dispose of the appliance via an approved waste disposal company
or your municipal waste disposal facility. Please observe applicable
regulations. Please contact your waste disposal facility if you are in
any doubt.
Disposal of (rechargeable) batteries
To dispose of the appliance in an environmentally friendly way, you
must remove the battery from the appliance:
CAUTION – PROPERTY DAMAGE!
►
Remove the battery from the appliance only if you want to
scrap/dispose of the appliance! The appliance is perman-
ently defective after you have removed the battery!
1) To remove the battery from the handset, remove the small screw
from the rear of the handset with a Phillips screwdriver.
2) Remove the rear cover of the handset.
3) Lever out the black inner housing, for instance with a screwdriver.
Before you remove the inner housing, you may need to break off
the side and bottom brackets or bend them outwards. Preferably,
use a fl at-blade screwdriver to do this.
4) Once you have removed the inner housing:
Break the brackets on the transparent plastic cover on the sides.
Press the lower lock slightly inwards so that the clear plastic
cover can be folded upwards.
IB_102881_SRR3.7A1_LB5.indb 78 02.12.14 09:37

79
SRR 3.7 A1
GB
MT
5) Lift the board slightly so you can get under the battery with a
fl at-blade screwdriver.
6) Lever the batteries out.
7) Dispose of the battery in an environmentally friendly manner.
Used batteries may not be disposed of in household waste.
Consumers are legally obliged to dispose of (rechargeable)
batteries at a collection point in their community/city district
or at a retail store. The purpose of this obligation is to ensure
that batteries are disposed of in an environmentally congru-
ent manner. Only dispose of batteries when they are fully
discharged.
The packaging is made of environmentally friendly
materials which you can dispose of at your local recycling
centre.
Importer
KOMPERNASS HANDELS GMBH
BURGSTRASSE 21
44867 BOCHUM
GERMANY
www.kompernass.com
IB_102881_SRR3.7A1_LB5.indb 79 02.12.14 09:37

80
SRR 3.7 A1
IB_102881_SRR3.7A1_LB5.indb 80 02.12.14 09:37

81
SRR 3.7 A1
DE
AT
CH
Inhaltsverzeichnis
Einleitung . . . . . . . . . . . . . . . . . . . . . . . . . . . . . . . . . . . .82
Bestimmungsgemäßer Gebrauch . . . . . . . . . . . . . . . .82
Lieferumfang . . . . . . . . . . . . . . . . . . . . . . . . . . . . . . . . .82
Gerätebeschreibung . . . . . . . . . . . . . . . . . . . . . . . . . . .83
Technische Daten . . . . . . . . . . . . . . . . . . . . . . . . . . . . . . 84
Sicherheitshinweise . . . . . . . . . . . . . . . . . . . . . . . . . . . . 85
Aufl aden der Akkus . . . . . . . . . . . . . . . . . . . . . . . . . . . 89
Kabelloses Rasieren . . . . . . . . . . . . . . . . . . . . . . . . . . . 90
Rasieren mit Netzadapter . . . . . . . . . . . . . . . . . . . . . . 91
Trimmer/Langhaarschneider . . . . . . . . . . . . . . . . . . . . 91
Reisesicherung . . . . . . . . . . . . . . . . . . . . . . . . . . . . . . . . 92
Reinigung und Pfl ege . . . . . . . . . . . . . . . . . . . . . . . . . .93
Reinigung mit dem Pinsel . . . . . . . . . . . . . . . . . . . . . . . . . . . . . . . .93
Reinigung unter fl ießendem Wasser . . . . . . . . . . . . . . . . . . . . . . . .94
Gründliche Reinigung . . . . . . . . . . . . . . . . . . . . . . . . . . . . . . . . . . .95
Aufbewahrung . . . . . . . . . . . . . . . . . . . . . . . . . . . . . . . 96
Garantie und Service . . . . . . . . . . . . . . . . . . . . . . . . . . 97
Entsorgung . . . . . . . . . . . . . . . . . . . . . . . . . . . . . . . . . . . 98
Importeur . . . . . . . . . . . . . . . . . . . . . . . . . . . . . . . . . . .100
IB_102881_SRR3.7A1_LB5.indb 81 02.12.14 09:37

DE
AT
CH
82
SRR 3.7 A1
Einleitung
Herzlichen Glückwunsch zum Kauf Ihres neuen Gerätes.
Sie haben sich damit für ein hochwertiges Produkt entschieden. Die
Bedienungsanleitung ist Bestandteil dieses Produkts. Sie enthält wich-
tige Hinweise für Sicherheit, Gebrauch und Entsorgung. Machen Sie
sich vor der Benutzung des Produkts mit allen Bedien- und Sicher-
heitshinweisen vertraut. Benutzen Sie das Produkt nur wie beschrie-
ben und für die angegebenen Einsatzbereiche. Händigen Sie alle
Unterlagen bei Weitergabe des Produkts an Dritte mit aus.
Bestimmungsgemäßer Gebrauch
Dieses Gerät ist ausschließlich zum Rasieren und Schneiden von
menschlichen Haaren vorgesehen.
Dieses Gerät ist ausschließlich für die Benutzung in privaten Haushal-
ten bestimmt. Nutzen Sie es nicht gewerblich.
Jede andere Verwendung gilt als nicht bestimmungsgemäß und kann
zu Sachschäden oder sogar zu Personenschäden führen.
Lieferumfang
♦ Rasierer mit Schereinheit
♦ Netzadapter
♦ Trimmereinheit
♦ Schutzkappe
♦ Pinsel
♦ Tasche
♦ Bestellkarte
♦ Bedienungsanleitung
IB_102881_SRR3.7A1_LB5.indb 82 02.12.14 09:37

83
SRR 3.7 A1
DE
AT
CH
HINWEIS
Kontrollieren Sie den Lieferumfang direkt nach dem Auspacken
auf Vollständigkeit und Beschädigungen. Wenden Sie sich,
wenn nötig, an den Service.
Gerätebeschreibung
Abbildung A (vordere Ausklappseite):
1 Antriebswelle
2 Schereinheit
3 Entriegelungstaste
4 Schutzkragen
5 Ein-/Aus-Taste
6 schmaler Langhaarschneider
7 Trimmereinheit
8 breiter Langhaarschneider
9 Symbol
(Sperrung)
0 Symbol
(Laden)
q Ladestandsanzeige
w Ladebuchse
Abbildung B (hintere Ausklappseite):
e Verbindungsstecker
r Netzadapter
t Pinsel
z Schutzkappe
u Tasche
IB_102881_SRR3.7A1_LB5.indb 83 02.12.14 09:37

DE
AT
CH
84
SRR 3.7 A1
Technische Daten
Gerät
Eingangsspannung: 5 V
Eingangsstrom: 1000 mA
Akku: Li-Ion Akku 3,7 V, 700 mAh
Umgebungs-
temperatur: 5°C bis 35°C
Schutzklasse: III/
Ladezeit: ca. 90 Minuten
Laufzeit bei voll
geladenem Akku: ca. 60 Minuten
Schutzart: IPX 4
Netzadapter (Typ PTB-050100EU)
Eingangsspannung: 100 - 240 V ∼
50/60 Hz
Ausgangsspannung: 5 V
Ausgangsstrom: 1000 mA
Schutzklasse: II /
IB_102881_SRR3.7A1_LB5.indb 84 02.12.14 09:37

85
SRR 3.7 A1
DE
AT
CH
Sicherheitshinweise
GEFAHR – ELEKTRISCHER SCHLAG!
► Kontrollieren Sie das Gerät vor der Verwen-
dung auf äußerliche, sichtbare Schäden.
Nehmen Sie ein beschädigtes Gerät nicht in
Betrieb. Es besteht Stromschlaggefahr.
► Sollte ein Schaden am Kabel, am Netz-
adapter, am Gehäuse oder an anderen Teilen
festgestellt werden, darf das Gerät nicht weiter
benutzt werden.
► Ziehen Sie den Netzadapter aus der Steckdose
— wenn eine Störung auftritt,
— bevor Sie das Gerät reinigen,
— wenn Sie das Gerät längere Zeit nicht
benutzen,
— nach jedem Gebrauch.
Ziehen Sie dabei am Netzadapter direkt und
nicht am Kabel.
► Tauchen Sie das Gerät sowie das Kabel mit
Netzadapter niemals in Wasser oder eine
andere Flüssigkeit.
IB_102881_SRR3.7A1_LB5.indb 85 02.12.14 09:37

DE
AT
CH
86
SRR 3.7 A1
GEFAHR – ELEKTRISCHER SCHLAG!
► Falls das Gerät ins Wasser gefallen ist, ziehen
Sie unbedingt zuerst den Netzadapter aus der
Steckdose, bevor Sie ins Wasser greifen.
► Fassen Sie den Netzadapter niemals mit
nassen Händen an, besonders wenn Sie es in
die Steckdose stecken bzw. aus dieser heraus-
ziehen. Es besteht Stromschlaggefahr!
► Prüfen Sie den Netzadapter und das Gerät
regelmäßig auf eventuelle mechanische Defekte.
► Achten Sie darauf, dass das Kabel nicht in
Schranktüren eingeklemmt oder über heiße
Flächen gezogen wird. Es könnte sonst die
Isolierung des Kabels beschädigt werden.
► Der Einbau einer Fehlerstromschutzeinrichtung
mit einem Bemessungsauslösestrom von nicht
mehr als 30 mA bietet weiteren Schutz vor
einem elektrischen Schlag. Lassen Sie den Ein-
bau ausschließlich von einer Elektro-Fachkraft
durchführen.
IB_102881_SRR3.7A1_LB5.indb 86 02.12.14 09:37

87
SRR 3.7 A1
DE
AT
CH
GEFAHR – ELEKTRISCHER SCHLAG!
► ACHTUNG! Das Gerät trocken halten!
► ACHTUNG! Trennen Sie den Netzadapter vom
Handteil, wenn Sie es mit Wasser reinigen!
WARNUNG – VERLETZUNGSGEFAHR!
► Dieses Gerät kann von Kindern ab 8 Jahren
und darüber sowie von Personen mit verringer-
ten physischen, sensorischen oder mentalen
Fähigkeiten oder Mangel an Erfahrung und
Wissen benutzt werden, wenn sie beaufsichtigt
oder bezüglich des sicheren Gebrauchs des
Gerätes unterwiesen wurden und die daraus
resultierenden Gefahren verstehen.
► Kinder dürfen nicht mit dem Gerät spielen.
► Reinigung und Benutzer-Wartung dürfen nicht
von Kindern ohne Beaufsichtigung durchgeführt
werden.
IB_102881_SRR3.7A1_LB5.indb 87 02.12.14 09:37

DE
AT
CH
88
SRR 3.7 A1
WARNUNG – VERLETZUNGSGEFAHR!
► Lassen Sie Reparaturen am Gerät nur von
autorisierten Fachbetrieben oder dem Kunden-
service durchführen. Durch unsachgemäße
Reparaturen können erhebliche Gefahren für
den Benutzer entstehen. Zudem erlischt der
Garantieanspruch.
► Benutzen Sie das Gerät nicht mit defektem
Schneidsatz oder defektem Schnittlängenauf-
satz, da diese scharfe Kanten haben können.
Es besteht Verletzungsgefahr!
► Defekte Bauteile dürfen nur gegen Original-
Ersatzteile ausgetauscht werden. Nur bei
diesen Teilen ist gewährleistet, dass sie die
Sicherheitsanforderungen erfüllen werden.
► Schließen Sie den Netzadapter nur an eine gut
erreichbare Steckdose an, damit im Störungs-
fall der Netzadapter schnell aus der Steckdose
gezogen werden kann.
IB_102881_SRR3.7A1_LB5.indb 88 02.12.14 09:37

89
SRR 3.7 A1
DE
AT
CH
ACHTUNG – SACHSCHADEN!
► Betreiben Sie das Gerät nie unbeaufsich-
tigt und nur gemäß den Angaben auf dem
Typenschild.
► Verwenden Sie für den Netzbetrieb nur
den mitgelieferten Netzadapter (Typ PTB-
050100EU).
► Decken Sie den Netzadapter nicht ab, um
eine unzulässige Erwärmung zu vermeiden.
Aufl aden der Akkus
Vor der ersten Anwendung sollte der Akku mindestens 90 Minuten
aufgeladen werden.
HINWEIS
►
Stellen Sie sicher, dass das Gerät ausgeschaltet ist, bevor
Sie den Akku aufl aden.
1) Stecken Sie den Verbindungsstecker e in die Ladebuchse w
am Rasierapparat.
Achten Sie auf die richtige Polung: Der Führungsstab in der
Ladebuchse w muss in die Führungsschiene am Verbindungsste-
cker e greifen. Sonst lässt sich der Verbindungsstecker e nicht
einstecken.
2) Stecken Sie den Netzadapter r in eine zu den Gerätevorga-
ben passende Steckdose:
Die Akkuladung wird in Prozent (%) im Display angezeigt (Lade-
standsanzeige q). Das Symbol
0 erscheint im Display.
IB_102881_SRR3.7A1_LB5.indb 89 02.12.14 09:37

DE
AT
CH
90
SRR 3.7 A1
♦ Sobald der Akku voll geladen ist, leuchtet das Symbol 0
weiterhin im Display und die Ladestandsanzeige q zeigt 99% an.
♦ Mit voll geladenem Akku können Sie das Gerät bis zu ca. 60
Minuten ohne Anschluss an das Stromnetz betreiben.
Kabelloses Rasieren
ACHTUNG! SACHSCHADEN!
►
Dieses Gerät ist nicht zur Nassrasur geeignet!
Sie können den Rasierer kabellos verwenden. In diesem Fall müssen
Sie das Gerät vor dem ersten Gebrauch aufl aden (siehe Kapitel
„Aufl aden der Akkus“).
1) Stecken Sie, falls nicht aufgesteckt, den Schutzkragen 4 von
unten auf die Schereinheit 2 (siehe Ausklappseite).
2) Stecken Sie, die Schereinheit 2 mit aufgesetztem Schutzkragen 4
auf die Antriebswelle 1. Achten Sie darauf, dass der Schutzkra-
gen 4 korrekt auf dem Handteil aufl iegt.
3) Nehmen Sie die Schutzkappe z ab.
4) Drücken Sie die Ein-/Aus-Taste 5. Die Ladestandsanzeige q
zeigt den aktuellen Ladestand und der Rasierer startet.
HINWEIS
►
Die besten Ergebnisse erzielen Sie bei trockener Haut.
► Es kann 2 bis 3 Wochen dauern, bis sich die Haut an das
Schersystem gewöhnt hat.
5) Führen Sie die Scherköpfe mit geraden und kreisenden Bewe-
gungen über die Haut.
6) Wenn Sie alle zu rasierenden Stellen behandelt haben, drücken
Sie die Ein-/Aus-Taste 5. Das Gerät stoppt. Nach ca. 3 Sekun-
den erlischt das Display.
IB_102881_SRR3.7A1_LB5.indb 90 02.12.14 09:37

91
SRR 3.7 A1
DE
AT
CH
7) Reinigen Sie den Rasierer nach jeder Rasur mit dem mitgeliefer-
ten Pinsel t.
Für eine gründliche Reinigung lesen Sie das Kapitel „Reinigung
und Pfl ege“.
Rasieren mit Netzadapter
ACHTUNG! SACHSCHADEN!
►
Dieses Gerät ist nicht zur Nassrasur geeignet!
Wenn Sie den Rasierer benutzen wollen, ohne ihn vorher zu laden,
können Sie den Rasierer auch direkt mit dem Netzadapter r
verwenden:
1) Stecken Sie den Verbindungsstecker e in die Ladebuchse w
am Rasierapparat.
Achten Sie auf die richtige Polung: Der Führungsstab in der
Ladebuchse w muss in die Führungsschiene am Verbindungsste-
cker e greifen. Sonst lässt sich der Verbindungsstecker e nicht
einstecken.
2) Verbinden Sie den Netzstecker mit einer Netzsteckdose.
Sie können den Rasierer dann verwenden.
Trimmer/Langhaarschneider
Um einen Bart in Form zu bringen, Koteletten zu formen oder Augen-
brauen zu rasieren, benutzen Sie die Trimmereinheit 7.
1) Ziehen Sie die Schereinheit 2, falls aufgesetzt, vom Handgerät
ab.
2) Stecken Sie die Trimmereinheit 7 auf die Antriebswelle 1.
Je nachdem, ob Sie mit dem breiten 8 oder schmalen Lang-
haarschneider 6 arbeiten wollen, wechseln Sie die Aufsteck-
richtung:
IB_102881_SRR3.7A1_LB5.indb 91 02.12.14 09:37

DE
AT
CH
92
SRR 3.7 A1
– Wollen Sie mit dem breiten Langhaarschneider 8 arbeiten,
stecken Sie die Trimmereinheit 7 so auf, dass der breite Lang-
haarschneider 8 zu Ihnen weist.
– Wollen Sie mit dem schmalen Langhaarschneider 6 arbeiten,
stecken Sie die Trimmereinheit 7 so auf, dass der schmale
Langhaarschneider 6 zu Ihnen weist.
3) Drücken Sie die Ein-/Aus-Taste 5. Die Ladestandsanzeige q
zeigt den aktuellen Ladestand an und das Gerät startet.
4) Wenn Sie mit dem Trimmen fertig sind, drücken Sie noch einmal
die Ein-/Aus-Taste 5.
5) Reinigen Sie die Trimmereinheit 7 mit dem mitgelieferten Pinsel t.
Für eine gründliche Reinigung lesen Sie das Kapitel „Reinigung
und Pfl ege“.
Reisesicherung
Um das Gerät vor unbeabsichtigtem Einschalten zu schützen, können
Sie die Ein-/Aus-Taste 5 sperren.
■ Drücken und halten Sie die Ein-/Aus-Taste 5 solange, bis im
Display das Symbol 9 erscheint.
Wenn nun die Ein-/Aus-Taste 5 gedrückt wird, erscheint das
Symbol 9 und die Ladestandsanzeige q. Das Gerät schaltet
sich jedoch nicht ein.
■ Wenn Sie die Sperrung wieder aufheben wollen, drücken und
halten Sie die Ein-/Aus-Taste 5:
– das Symbol 9 erscheint und fängt an zu blinken.
Das Gerät lässt sich nun wieder einschalten.
IB_102881_SRR3.7A1_LB5.indb 92 02.12.14 09:37

93
SRR 3.7 A1
DE
AT
CH
Reinigung und Pfl ege
GEFAHR - ELEKTRISCHER SCHLAG!
►
Ziehen Sie vor jeder Reinigung den Netzstecker aus der
Netzsteckdose! Es besteht die Gefahr eines elektrischen
Schlages!
ACHTUNG! SACHSCHADEN!
►
Benutzen Sie keine scheuernden, chemischen oder ätzenden
Reinigungsmittel um das Gerät zu reinigen. Das führt zu
irreparablen Schäden am Gerät.
Reinigung mit dem Pinsel
Schereinheit
Reinigen Sie nach jeder Rasur die 3 Scherköpfe an der Schereinheit 2
mit dem Pinsel t.
1) Drücken Sie auf die Entriegelungstaste 3, so dass die Scherein-
heit 2 aufspringt.
2) Klopfen Sie die Schereinheit 2 vorsichtig auf einer ebenen
Fläche aus bzw. blasen Sie die Haarteilchen ab.
3) Benutzen Sie den Pinsel t, um verbliebene Haarteilchen zu
entfernen.
Trimmeinheit
■ Reinigen Sie die Trimmeinheit nach jeder Rasur mit dem Pinsel t.
■ Ölen Sie die Langhaarschneider 6/8 ca. alle 6 Monate mit
einem Tropfen Nähmaschinenöl.
IB_102881_SRR3.7A1_LB5.indb 93 02.12.14 09:37

DE
AT
CH
94
SRR 3.7 A1
Reinigung unter fl ießendem Wasser
Die Schereinheit 2 ist zur Reinigung unter fl ießendem Was-
ser geeignet.
1) Drücken Sie auf die Entriegelungstaste 3, so dass die Scherein-
heit 2 aufspringt.
2) Halten Sie die Schereinheit 2 so unter den Wasserstrahl, dass
das Wasser von innen nach außen durch die Scherköpfe fl ießt.
ACHTUNG! SACHSCHADEN!
Achten Sie darauf, nur die Schereinheit 2 unter den Was-
serstrahl zu halten! Das Handteil des Rasierers ist nur gegen
Spritzwasser geschützt und kann irreparabel beschädigt
werden, wenn es unter fl ießendes Wasser gehalten wird.
3) Lassen Sie die Schereinheit 2 trocknen, bevor Sie den Rasierer
wieder benutzen.
IB_102881_SRR3.7A1_LB5.indb 94 02.12.14 09:37

95
SRR 3.7 A1
DE
AT
CH
Gründliche Reinigung
Für die gründliche Reinigung, nehmen Sie die Scherköpfe ab:
1) Drücken Sie auf die Entriegelungstaste 3. Die Schereinheit 2
springt auf.
2) Überstrecken Sie die Schereinheit 2 ein wenig, so dass diese
sich nach oben herausziehen lässt.
3) Drehen Sie vorsichtig die mit Pfeilen markierte Verriegelung
soweit in Pfeilrichtung, bis sich die Halterung der Scherköpfe
abheben lässt (siehe Abbildung).
4) Reinigen Sie alle Teile unter fl ießendem Wasser und lassen Sie
sie vollständig trocknen.
IB_102881_SRR3.7A1_LB5.indb 95 02.12.14 09:37

DE
AT
CH
96
SRR 3.7 A1
5) Bauen Sie die Schereinheit 2 wieder zusammen.
6) Zum Befestigen drehen Sie die mit den Pfeilen markierte Verrie-
gelung entgegen der Pfeilrichtung, dass sich die Halterung der
Scherköpfe nicht mehr abheben lässt.
7) Entfernen Sie lose Haare mit dem Pinsel t aus dem Rasierer.
8) Setzen Sie die Schereinheit 2 wieder auf den Rasierer. Achten
Sie darauf, dass diese einrastet und fest sitzt.
■ Reinigen Sie das Gehäuse und den Netzadapter r mit einem
feuchten Tuch.
HINWEIS
Wenn...
– ... die Rasur spürbar schlechter wird,...
– ... Sie den Rasierer mehrmals über die gleiche Stelle
führen müssen, um ein gutes Ergebnis zu erzielen,...
– ... die Rasur deutlich länger dauert,...
– ... Beschädigungen an den Scherköpfen sichtbar sind,...
... müssen die Scherköpfe gewechselt werden.
Bitte wenden Sie sich an den Service, wenn Sie Scherköpfe
bestellen wollen.
Aufbewahrung
ACHTUNG! SACHSCHADEN!
Bewahren Sie den Rasierer nie in der Tasche u auf, während
das Gerät geladen wird! Überhitzungsgefahr!
■ Stecken Sie immer die Schutzkappe z auf die Schereinheit 2,
wenn Sie das Gerät nicht benutzen.
■ Bewahren Sie das gereinigte und trockene Gerät und seine Zube-
hörteile in der mitgelieferten Tasche u auf.
■ Lagern Sie alles an einem sauberen, staubfreien und trockenen Ort.
IB_102881_SRR3.7A1_LB5.indb 96 02.12.14 09:37

97
SRR 3.7 A1
DE
AT
CH
Garantie und Service
Sie erhalten auf dieses Gerät 3 Jahre Garantie ab Kaufdatum.
Das Gerät wurde sorgfältig produziert und vor Anlieferung
gewissenhaft geprüft. Bitte bewahren Sie den Kassenbon als
Nachweis für den Kauf auf. Bitte setzen Sie sich im Garantiefall
mit Ihrer Servicestelle telefonisch in Verbindung. Nur so kann
eine kostenlose Einsendung Ihrer Ware gewährleistet werden.
Die Garantieleistung gilt nur für Material- oder Fabrikationsfehler,
nicht aber für Transportschäden, Verschleißteile oder für Beschädi-
gungen an zerbrech lichen Teilen, z. B. Schalter oder Akkus. Das
Produkt ist lediglich für den privaten und nicht für den gewerblichen
Gebrauch bestimmt.
Bei missbräuchlicher und unsachgemäßer Behandlung, Gewalt-
anwendung und bei Eingriff en, die nicht von unserer autorisierten
Service-Niederlassung vorgenommen wurden, erlischt die Garantie.
Ihre gesetzlichen Rechte werden durch diese Garantie nicht einge-
schränkt.
Die Garantiezeit wird durch die Gewährleistung nicht verlängert.
Dies gilt auch für ersetzte und reparierte Teile. Eventuell schon beim
Kauf vorhandene Schäden und Mängel müssen sofort nach dem
Auspacken gemeldet werden, spätestens aber zwei Tage nach
Kaufdatum. Nach Ablauf der Garantiezeit anfallende Reparaturen
sind kostenpfl ichtig.
Service Deutschland
Tel.: 0800 5435 111 (Kostenfrei aus dem dt. Festnetz/
Mobilfunknetz)
E-Mail: [email protected]
IAN 102881
IB_102881_SRR3.7A1_LB5.indb 97 02.12.14 09:37

DE
AT
CH
98
SRR 3.7 A1
Service Österreich
Tel.: 0820 201 222 (0,15 EUR/Min.)
E-Mail: [email protected]
IAN 102881
Service Schweiz
Tel.: 0842 665566 (0,08 CHF/Min., Mobilfunk max. 0,40 CHF/
Min.)
E-Mail: [email protected]
IAN 102881
Erreichbarkeit Hotline:
Montag bis Freitag von 8:00 Uhr – 20:00 Uhr (MEZ)
Entsorgung
Werfen Sie das Gerät keinesfalls in den nor-
malen Hausmüll. Dieses Produkt unterliegt
der europäischen Richtlinie 2012/19/EU.
Entsorgen Sie das Gerät über einen zugelassenen Entsorgungsbe-
trieb oder über Ihre kommunale Entsorgungseinrichtung. Beachten
Sie die aktuell geltenden Vorschriften. Setzen Sie sich im Zweifelsfall
mit Ihrer Entsorgungseinrichtung in Verbindung.
IB_102881_SRR3.7A1_LB5.indb 98 02.12.14 09:37

99
SRR 3.7 A1
DE
AT
CH
Batterien/Akkus entsorgen
Um das Gerät umweltgerecht zu entsorgen, müssen Sie den Akku aus
dem Gerät entfernen:
ACHTUNG - SACHSCHADEN!
►
Entnehmen Sie den Akku nur aus dem Gerät, wenn Sie das
Gerät entsorgen/verschrotten wollen! Das Gerät ist defekt,
wenn Sie den Akku ausgebaut haben!
1) Um den Akku aus dem Handgerät zu entfernen, entfernen Sie die
kleine Schraube an der Rückseite des Handgeräts mit einem
Kreuzschlitzschraubendreher.
2) Ziehen Sie die hintere Abdeckung des Handteils ab.
3) Hebeln Sie das schwarze Innengehäuse, zum Beispiel mit einem
Schraubendreher, heraus. Eventuell müssen Sie, bevor sich das
Innengehäuse herauslösen lässt, die seitlichen und die unteren
Halterungen abbrechen oder nach außen biegen. Benutzen Sie
dafür am besten einen Schlitzschraubendreher.
4) Wenn Sie das Innengehäuse herausgenommen haben:
Brechen Sie die Halterungen der durchsichtigen Plastikabdeckung
an den Seiten ab. Drücken Sie die untere Arretierung etwas nach
Innen, so dass die durchsichtige Plastikabdeckung aufgeklappt
werden kann.
5) Heben Sie die Platine etwas an, so dass Sie mit einem Schlitz-
schraubendreher unter die Batterie gelangen.
6) Hebeln Sie den Akku heraus.
7) Entsorgen Sie den Akku umweltgerecht.
IB_102881_SRR3.7A1_LB5.indb 99 02.12.14 09:37

DE
AT
CH
100
SRR 3.7 A1
Batterien/Akkus dürfen nicht im Hausmüll entsorgt werden.
Jeder Verbraucher ist gesetzlich verpfl ichtet, Batterien/Akkus
bei einer Sammelstelle seiner Gemeinde / seines Stadtteils
oder im Handel abzugeben. Diese Verpfl ichtung dient dazu,
dass Batterien/Akkus einer umweltschonenden Entsorgung
zugeführt werden können. Geben Sie Batterien/Akkus nur
im entladenen Zustand zurück.
Die Verpackung besteht aus umweltfreundlichen Materialien,
die Sie über die örtlichen Recyclingstellen entsorgen können.
Importeur
KOMPERNASS HANDELS GMBH
BURGSTRASSE 21
44867 BOCHUM
GERMANY
www.kompernass.com
IB_102881_SRR3.7A1_LB5.indb 100 02.12.14 09:37

IAN 102881
KOMPERNASS HANDELS GMBH
BURGSTRASSE 21
44867 BOCHUM
DEUTSCHLAND / GERMANY
www.kompernass.com
Estado de las informaciones · Versione delle informazioni · Estado
das informações · Last Information Update · Stand der Informationen:
11 / 2014 · Ident.-No.: SRR3.7A1-092014-2
5
Transcripción de documentos
AFEITADORA ROTATORIA RASOIO A LAMINA ROTANTE SRR 3.7 A1 AFEITADORA ROTATORIA RASOIO A LAMINA ROTANTE MÁQUINA DE BARBEAR ROTATIVA ROTARY SHAVER Instrucciones de uso Manual de instruções ROTATIONSRASIERER Bedienungsanleitung IAN 102881 Istruzioni per l'uso Operating instructions Antes de empezar a leer abra la página que contiene las imágenes y, en seguida, familiarícese con todas las funciones del dispositivo. Prima di leggere aprire la pagina con le immagini e prendere confidenza con le diverse funzioni dell'apparecchio. Antes de começar a ler abra na página com as imagens e, de seguida, familiarize-se com todas as funções do aparelho. Before reading, unfold the page containing the illustrations and familiarise yourself with all functions of the device. Klappen Sie vor dem Lesen die Seite mit den Abbildungen aus und machen Sie sich anschließend mit allen Funktionen des Gerätes vertraut. ES IT / MT PT GB / MT DE / AT / CH Instrucciones de uso Istruzioni per l'uso Manual de instruções Operating instructions Bedienungsanleitung Página Pagina Página Page Seite 1 21 41 61 81 A B Índice ES Introducción . . . . . . . . . . . . . . . . . . . . . . . . . . . . . . . . . . . 2 Uso previsto . . . . . . . . . . . . . . . . . . . . . . . . . . . . . . . . . . . 2 Volumen de suministro . . . . . . . . . . . . . . . . . . . . . . . . . . 2 Descripción del aparato . . . . . . . . . . . . . . . . . . . . . . . . . 3 Características técnicas . . . . . . . . . . . . . . . . . . . . . . . . . . 4 Indicaciones de seguridad . . . . . . . . . . . . . . . . . . . . . . . 5 Carga de la batería . . . . . . . . . . . . . . . . . . . . . . . . . . . . . 9 Afeitado inalámbrico . . . . . . . . . . . . . . . . . . . . . . . . . . 10 Afeitado con adaptador de red . . . . . . . . . . . . . . . . . . 11 Recortadora/Cortadora para pelo largo . . . . . . . . . . 11 Seguro para viajes . . . . . . . . . . . . . . . . . . . . . . . . . . . . 12 Limpieza y mantenimiento . . . . . . . . . . . . . . . . . . . . . . 13 Limpieza con el pincel . . . . . . . . . . . . . . . . . . . . . . . . . . . . . . . . . .13 Limpieza con agua corriente . . . . . . . . . . . . . . . . . . . . . . . . . . . . .14 Limpieza en profundidad . . . . . . . . . . . . . . . . . . . . . . . . . . . . . . . .15 Almacenamiento . . . . . . . . . . . . . . . . . . . . . . . . . . . . . . 16 Garantía y asistencia técnica . . . . . . . . . . . . . . . . . . . . 17 Desecho . . . . . . . . . . . . . . . . . . . . . . . . . . . . . . . . . . . . . 18 Importador . . . . . . . . . . . . . . . . . . . . . . . . . . . . . . . . . . 19 SRR 3.7 A1 1 Introducción ES Felicidades por la compra de su aparato nuevo. Ha adquirido un producto de alta calidad. Las instrucciones de uso forman parte del producto y contienen indicaciones importantes acerca de la seguridad, el uso y el desecho de este aparato. Antes de usar el producto, familiarícese con todas las indicaciones de manejo y de seguridad. Utilice el producto únicamente como se describe y para los ámbitos de aplicación indicados. Entregue todos los documentos cuando transfiera el producto a terceros. Uso previsto Este aparato está previsto exclusivamente para afeitar y cortar pelo humano Este aparato está previsto exclusivamente para su uso doméstico privado. No lo utilice con fines comerciales. Cualquier otro uso se considera contrario al uso al previsto y puede provocar daños materiales e incluso lesiones personales. Volumen de suministro ♦ Afeitadora con unidad de cabezales ♦ Adaptador de red ♦ Unidad recortadora ♦ Caperuza protectora ♦ Pincel ♦ Bolsa ♦ Tarjeta de pedido ♦ Instrucciones de uso 2 SRR 3.7 A1 INDICACIÓN ES Compruebe que el volumen de suministro esté completo y que carezca de daños después de desembalarlo. En caso necesario, póngase en contacto con el servicio de asistencia técnica. Descripción del aparato Figura A (página delantera desplegable): 1 Eje de accionamiento 2 Unidad de cabezales 3 Botón de desbloqueo 4 Cuello protector 5 Botón de encendido/apagado 6 Cortadora estrecha para pelo largo 7 Unidad recortadora 8 Cortadora ancha para pelo largo 9 Símbolo (bloqueo) 0 Símbolo (cargar) q Indicación de nivel de carga w Clavija de carga Figura B (página trasera desplegable): e Conector r Adaptador de red t Pincel z Caperuza protectora u Bolsa SRR 3.7 A1 3 Características técnicas ES Aparato Tensión de entrada: 5V Corriente de entrada: 1000 mA Batería: Baterías de iones de litio de 3,7 V, 700 mAh Temperatura ambiente: de 5 °C a 35 °C Clase de protección: III/ Tiempo de carga: aprox. 90 minutos. Tiempo de funcionamiento con batería completamente cargada: aprox. 60 min. Tipo: IPX 4 Adaptador de red (tipo PTB-050100EU) Tensión de entrada: 4 100 - 240 V ∼ 50/60 Hz Tensión de salida: 5V Corriente de salida: 1000 mA Clase de protección: II / SRR 3.7 A1 Indicaciones de seguridad ► ► ► ► ES ¡PELIGRO DE DESCARGA ELÉCTRICA! Antes de usar el aparato, compruebe si hay signos de daños externos visibles. No ponga en funcionamiento el aparato si está dañado. Existe riesgo de electrocución. Si se aprecian daños en el cable, adaptador de red, en la carcasa o en cualquier otra pieza, debe dejar de utilizarse el aparato. Extraiga el adaptador de red de la base de enchufe — Si se produce una avería, — Antes de limpiar el aparato, — Si no pretende utilizar el aparato durante un tiempo prolongado, — Después de cada uso. Desconecte el adaptador de red directamente de la clavija de la fuente de alimentación y no del cable. No sumerja nunca el aparato ni el cable con el adaptador de red en agua ni en otros líquidos. SRR 3.7 A1 5 ES ► ► ► ► ► 6 ¡PELIGRO DE DESCARGA ELÉCTRICA! Si el aparato se cae al agua, desconecte inmediatamente el adaptador de red de la base de enchufe antes de entrar en contacto con el agua. No toque nunca el adaptador de red con las manos mojadas, especialmente cuando lo conecte y lo desconecte en la base de enchufe. ¡Existe peligro de descarga eléctrica! Revise regularmente el adaptador de red y el aparato por si presentase algún defecto mecánico. Procure que el cable no quede atrapado por las puertas de armarios y evite tenderlo sobre superficies calientes. De lo contrario, podría dañarse el aislamiento del cable. El montaje de un interruptor diferencial con una corriente de disparo de referencia de no más de 30 mA ofrece una protección adicional contra una descarga eléctrica. Encargue el montaje exclusivamente a un técnico electricista. SRR 3.7 A1 ► ► ► ► ► ¡PELIGRO DE DESCARGA ELÉCTRICA! ATENCIÓN Mantenga el aparato siempre seco. ATENCIÓN Extraiga el adaptador de red del mango cuando lo limpie con agua. ES ¡ADVERTENCIA – PELIGRO DE LESIONES! Este aparato puede ser utilizado por niños a partir de 8 años y por personas cuyas faculta-des físicas, sensoriales o mentales sean reducidas o carezcan de los conocimientos y de la experiencia necesaria siempre que sean vigilados o hayan sido instruidos correctamente sobre el uso seguro del aparato y hayan comprendido los peligros que entraña. Los niños no deben jugar con el aparato. Los niños no deben realizar las tareas de limpieza y mantenimiento del aparato sin supervisión. SRR 3.7 A1 7 ES ► ► ► ► 8 ¡ADVERTENCIA – PELIGRO DE LESIONES! Las reparaciones en el aparato deben ser realizadas exclusivamente por talleres autorizados o por el servicio de asistencia técnica. En caso de reparaciones indebidas, pueden producirse riesgos considerables para los usuarios. Además, se anulará la garantía. No utilice el aparato si el cabezal de corte o el accesorio de longitud de corte están defectuosos, ya que podrían presentar bordes afilados. Existe peligro de lesiones. Los componentes defectuosos deben sustituirse exclusivamente por recambios originales. Solo puede garantizarse el cumplimiento de los requisitos de seguridad con el uso de estos recambios. Conecte el adaptador de red exclusivamente a una base de enchufe de fácil acceso para poder desconectarla rápidamente en caso de avería. SRR 3.7 A1 ATENCIÓN: ¡DAÑOS MATERIALES! ► El aparato no debe utilizarse sin supervisión y debe emplearse según los datos de la placa de características. ► Utilice exclusivamente el adaptador de red suministrado (tipo PTB-050100EU) para el funcionamiento con red. ► No cubra el adaptador de red para evitar un calentamiento indebido. ES Carga de la batería Antes de utilizar el aparato por primera vez, debe cargarse la batería durante al menos 90 minutos. INDICACIÓN ► Asegúrese de que el aparato esté apagado antes de cargar la batería. 1) Introduzca el conector e en la clavija de carga w de la afeitadora. Tenga en cuenta la polaridad correcta: La varilla guía del casquillo de carga w debe engancharse en el conector e dentro del raíl. De lo contrario, no podrá introducir el conector e. 2) Enchufe el adaptador de red r al enchufe adecuado según las especificaciones del aparato: La carga de la batería se muestra en la pantalla en porcentajes (%) (indicación del nivel de carga q). En la pantalla aparecerá 0. el símbolo SRR 3.7 A1 9 ES ♦ En cuanto la batería esté cargada, aparecerá de forma perma0 en la pantalla y la indicación del nivel nente el símbolo de carga q indica 99 %. ♦ Con la batería totalmente cargada, puede utilizarse el aparato durante aprox. 60 minutos sin necesidad de conectarlo a la red eléctrica. Afeitado inalámbrico ¡ATENCIÓN! ¡PELIGRO DE DAÑOS MATERIALES! ► Este aparato no está indicado para el afeitado mojado. También puede utilizar la afeitadora sin cable. En ese caso, deberá cargarse el aparato antes de usarlo la primera vez (véase el capítulo "Cargar la batería"). 1) En caso de que no esté colocado el cuello protector 4, deberá insertarse por debajo sobre la unidad de cabezales 2 (véase la página desplegable). 2) Coloque la unidad de cabezales 2 con el cuello protector insertado 4 sobre el eje de accionamiento 1. Tenga en cuenta que el cuello protector 4 debe quedar correctamente sobre el mango. 3) Retire la caperuza protectora z. 4) Presione el botón de encendido/apagado 5. La indicación del nivel de carga q muestra el nivel de carga actual y la afeitadora se pone en funcionamiento. INDICACIÓN ► Los mejores resultados se obtienen con la piel seca. ► Puede que la piel tarde entre dos y tres semanas en acostumbrarse al sistema de cabezales. 5) Realice movimientos rectos y circulares sobre la piel con los cabezales. 6) Una vez terminado el afeitado, pulse el botón de encendido/ apagado 5. El aparato se para. Transcurridos aprox. 3 segundos se apagará la pantalla. 10 SRR 3.7 A1 7) Limpie la afeitadora después de cada afeitado con el pincel suministrado t. Para lograr una limpieza en profundidad, lea el capítulo "Limpieza y conservación". ES Afeitado con adaptador de red ¡ATENCIÓN! ¡PELIGRO DE DAÑOS MATERIALES! ► Este aparato no está indicado para el afeitado mojado. Si prefiere utilizar la afeitadora sin cargarla antes, puede utilizarla directamente con el adaptador de red r: 1) Introduzca el conector e en la clavija de carga w de la afeitadora. Tenga en cuenta la polaridad correcta: La varilla guía del casquillo de carga w debe engancharse en el conector e dentro del raíl. De lo contrario, no podrá introducir el conector e. 2) Conecte la clavija de red a la base de enchufe. Entonces podrá utilizar la afeitadora. Recortadora/Cortadora para pelo largo Para darle forma a su barba, recortar las patillas o las cejas, utilice la unidad recortadora 7. 1) Retire la unidad de cabezales 2 del mango, si estuviera colocado. 2) Coloque la unidad recortadora 7 sobre el eje de accionamiento 1. Cambie de dirección de encaje, en función de si quiere utilizar la cortadora ancha 8 o estrecha 6: SRR 3.7 A1 11 ES – Si quiere utilizar la cortadora ancha para pelo largo 8, inserte la unidad recortadora 7 de forma que la cortadora ancha para pelo largo le quede 8 enfrente. – Si quiere utilizar la cortadora estrecha para pelo largo 6, inserte la unidad recortadora 7 de forma que la cortadora estrecha para pelo largo le quede 6 enfrente. 3) Presione el botón de encendido/apagado 5. La indicación del nivel de carga q muestra el nivel de carga actual y el aparato se pone en funcionamiento. 4) En cuanto haya terminado de recortar, vuelva a pulsar el botón de encendido/apagado 5. 5) Limpie la unidad recortadora 7 con el pincel t suministrado. Para lograr una limpieza en profundidad, lea el capítulo "Limpieza y conservación". Seguro para viajes A fin de preservar el aparato de una conexión fortuita, podrá bloquear el botón de encendido/apagado 5. ■ Pulse y mantenga el botón de encendido/apagado 5 hasta que 9 en la pantalla. aparezca el símbolo Si ahora se pulsa el botón de encendido/apagado 5, aparecerá el símbolo 9 y la indicación del nivel de carga q. ■ No obstante, el aparato no se enciende. ■ Si desea cancelar el bloqueo, mantenga pulsado el botón de encendido/apagado 5: 9, que comenzará a parpadear. – aparecerá el símbolo Ahora podrá volver a encender el aparato. 12 SRR 3.7 A1 Limpieza y mantenimiento ES ¡PELIGRO DE DESCARGA ELÉCTRICA! ► ¡Antes de limpiar el aparato, extraiga siempre la clavija de red de la base de enchufe! ¡Existe riesgo de descarga eléctrica! ¡ATENCIÓN! ¡PELIGRO DE DAÑOS MATERIALES! ► No utilice productos de limpieza agresivos, químicos ni abrasivos para limpiar el aparato. De lo contrario, puede ocasionar daños irreparables en el aparato. Limpieza con el pincel Unidad recortadora Después de cada afeitado, limpie los tres cabezales de la unidad de cabezales 2 con el pincel t. 1) Pulse el botón de desbloqueo 3 de forma que se suelte la unidad de cabezales 2. 2) Golpee ligeramente la unidad de cabezales 2 sobre una superficie plana o sople hasta que desaparezcan los últimos pelitos. 3) Utilice el pincel t para retirar los pelitos más pequeños. Unidad recortadora ■ Limpie la unidad recortadora después de cada afeitado con el pincel t. ■ Engrase la cortadora para pelo largo 6/8 aprox. cada 6 meses con unas gotas de aceite para máquinas de coser. SRR 3.7 A1 13 Limpieza con agua corriente ES La unidad de cabezales 2 puede lavarse debajo del chorro de agua corriente. 1) Pulse el botón de desbloqueo 3 de forma que se suelte la unidad de cabezales 2. 2) Mantenga la unidad de cabezales 2 debajo del chorro de agua de forma que el agua fluya del interior al exterior atravesando los cabezales. ¡ATENCIÓN! ¡PELIGRO DE DAÑOS MATERIALES! Tenga en cuenta que debajo del chorro de agua solo debe estar la unidad de cabezales 2. El mango de la afeitadora solo está protegido contra salpicaduras y podría dañarse irreparablemente si se mantiene debajo del chorro de agua. 3) Espere a que la unidad de cabezales se seque 2 antes de volver a utilizar la afeitadora. 14 SRR 3.7 A1 Limpieza en profundidad ES Retire los cabezales para lograr una limpieza profunda: 1) Pulse el botón de desbloqueo 3. La unidad de cabezales 2 se soltará. 2) Incline ligeramente para atrás la unidad de cabezales 2 de forma que pueda extraerse por arriba. 3) Gire con cuidado el bloqueo marcado con flechas en el sentido de las flechas hasta que se pueda levantar el soporte de los cabezales (véase la figura). 4) Limpie todas las piezas debajo del chorro de agua corriente y espere a que se sequen. SRR 3.7 A1 15 5) Vuelva a montar la unidad de cabezales 2. ES 6) Para fijarla, gire el bloqueo marcado con flechas en el sentido contrario a las fechas de forma que ya no se pueda levantar el soporte de los cabezales. 7) Elimine los pelos sueltos de la afeitadora con el pincel t. 8) Vuelva a montar la unidad de cabezales 2 en la afeitadora. Asegúrese de que esté bien encajada. ■ Limpie la carcasa y el adaptador de red r con un paño húmedo. INDICACIÓN Si... – ... empeora la calidad del afeitado,... – ... tiene que realizar varias pasadas por el mismo punto para conseguir un buen resultado,... – ... tarda bastante más en afeitarse,... – ... hubiera daños visibles en los cabezales,... ... deben cambiarse los cabezales . En caso de que quiera pedir cabezales de repuesto, póngase en contacto con el servicio técnico. Almacenamiento ¡ATENCIÓN! ¡PELIGRO DE DAÑOS MATERIALES! Nunca guarde la afeitadora en la bolsa u mientras la esté cargando. ¡Peligro de sobrecalentamiento! ■ Coloque la caperuza de protección z siempre sobre la unidad de cabezales 2 cuando no vaya usar el aparato. ■ Guarde el aparato limpio y seco, así como las piezas de repuesto, en la bolsa u suministrada. ■ Guárdelo todo en un lugar limpio, seco y sin polvo. 16 SRR 3.7 A1 Garantía y asistencia técnica Este aparato tiene 3 años de garantía desde la fecha de compra. El aparato ha sido fabricado cuidadosamente y examinado en profundidad antes de su entrega. Guarde el comprobante de caja como justificante de compra. Si necesitara hacer uso de la garantía, póngase en contacto por teléfono con su punto de servicio habitual. Este es el único modo de garantizar un envío gratuito. La garantía cubre los defectos de fabricación o del material, pero no los daños de transporte, las piezas sujetas a desgaste ni los daños sufridos por las piezas frágiles (p. ej., interruptores o pilas). Este producto ha sido diseñado exclusivamente para el uso particular y no para el uso industrial. En caso de manipulación indebida e incorrecta, uso de la fuerza y apertura del aparato por personas ajenas a nuestros centros de asistencia técnica autorizados, la garantía pierde su validez. Sus derechos legales no se ven limitados por esta garantía. La duración de la garantía no se prolonga por hacer uso de ella. Este principio rige también para las piezas sustituidas y reparadas. Si después de la compra del aparato, se detecta la existencia de daños o de defectos al desembalarlo, deben notificarse de inmediato o, como muy tarde, dos días después de la fecha de compra. Cualquier reparación que se realice una vez finalizado el plazo de garantía está sujeta a costes. Servicio España Tel.: 902 59 99 22 (0,08 EUR/Min. + 0,11 EUR/llamada (tarifa normal)) (0,05 EUR/Min. + 0,11 EUR/llamada (tarifa reducida)) E-Mail: [email protected] IAN 102881 Disponibilidad de la línea de atención al cliente: de lunes a viernes de 8.00 a 20.00 h (CET) SRR 3.7 A1 17 ES ES Desecho No deseche nunca el aparato con la basura doméstica. Este aparato está sujeto a la Directiva europea 2012/19/EU. Deseche el aparato en un centro de residuos autorizado o a través de las instalaciones de desecho de residuos comunitarias. Observe las normas vigentes. En caso de duda, póngase en contacto con las instalaciones municipales de desecho de residuos. Desecho de las pilas/baterías Para evacuar el aparato de forma respetuosa con el medio ambiente, deberá retirar previamente la batería del aparato: ¡ATENCIÓN: DAÑOS MATERIALES! ► ¡Retire exclusivamente la batería del aparato si desea desecharlo o desguazarlo! ¡El aparato quedará defectuoso en cuanto desmonte la batería! 1) Para extraer la batería del mango, retire el pequeño tornillo de la parte posterior del mango con un destornillador Philips. 2) Retire la cubierta trasera del mango. 3) Haga palanca sobre la carcasa interior negra, por ejemplo, con un destornillador, para extraerla. Puede que tenga que romper o doblar hacia fuera los soportes interiores antes de poder sacar la carcasa interior. Para ello, lo mejor es utilizar un destornillador plano. 4) Cuando haya extraído la carcasa interior: Rompa los soportes de la cubierta de plástico transparente de los lados. Presione ligeramente para dentro el encastre inferior de forma que se pueda abrir la cubierta de plástico transparente. 5) Levante algo la pletina para poder acceder con un destornillador plano debajo de la batería. 18 SRR 3.7 A1 6) Haga palanca para sacar la batería. 7) Deseche la batería de forma respetuosa con el medio ambiente. Las pilas/baterías no deben desecharse con la basura doméstica. Los consumidores están obligados legalmente a entregar las pilas en un punto de recogida de residuos de su municipio/barrio o en un establecimiento. Con esta obligación se consigue que las pilas o baterías se desechen de forma respetuosa con el medio ambiente. Devuelva las pilas exclusivamente en estado descargado. El embalaje consta de materiales ecológicos que pueden desecharse a través de los centros de reciclaje locales. Importador KOMPERNASS HANDELS GMBH BURGSTRASSE 21 44867 BOCHUM GERMANY www.kompernass.com SRR 3.7 A1 19 ES 20 SRR 3.7 A1 Indice Introduzione . . . . . . . . . . . . . . . . . . . . . . . . . . . . . . . . . 22 Uso conforme . . . . . . . . . . . . . . . . . . . . . . . . . . . . . . . . 22 Volume della fornitura . . . . . . . . . . . . . . . . . . . . . . . . . 22 Descrizione dell'apparecchio . . . . . . . . . . . . . . . . . . . . 23 Dati tecnici . . . . . . . . . . . . . . . . . . . . . . . . . . . . . . . . . . . 24 Indicazioni relative alla sicurezza . . . . . . . . . . . . . . . . 25 Ricarica della batteria . . . . . . . . . . . . . . . . . . . . . . . . . . 29 Rasatura senza cavo . . . . . . . . . . . . . . . . . . . . . . . . . . . 30 Rasatura con adattatore di rete . . . . . . . . . . . . . . . . . 31 Rifinitore/Lama di taglio per peli lunghi . . . . . . . . . . . 31 Protezione per viaggio . . . . . . . . . . . . . . . . . . . . . . . . . 32 Pulizia e manutenzione . . . . . . . . . . . . . . . . . . . . . . . . 33 Pulizia con il pennello. . . . . . . . . . . . . . . . . . . . . . . . . . . . . . . . . . .33 Pulizia sotto l'acqua corrente . . . . . . . . . . . . . . . . . . . . . . . . . . . . .34 Pulizia a fondo . . . . . . . . . . . . . . . . . . . . . . . . . . . . . . . . . . . . . . . .35 Conservazione . . . . . . . . . . . . . . . . . . . . . . . . . . . . . . . . 36 Garanzia e assistenza . . . . . . . . . . . . . . . . . . . . . . . . . 37 Smaltimento. . . . . . . . . . . . . . . . . . . . . . . . . . . . . . . . . . 38 Importatore . . . . . . . . . . . . . . . . . . . . . . . . . . . . . . . . . . 39 SRR 3.7 A1 21 IT MT Introduzione Congratulazioni per l'acquisto del Suo nuovo apparecchio. IT MT È stato scelto un prodotto di alta qualità. Il manuale di istruzioni è parte integrante del presente prodotto. Esso contiene importanti indicazioni per la sicurezza, l'uso e lo smaltimento. Prima di utilizzare il prodotto, familiarizzare con tutte le indicazioni relative ai comandi e alla sicurezza. Utilizzare l'apparecchio solo come descritto e per i campi d'impiego indicati. In caso di cessione del prodotto a terze persone, consegnare anche tutta la relativa documentazione. Uso conforme Il presente apparecchio è previsto esclusivamente per rasare e tagliare peli umani. Questo apparecchio è destinato esclusivamente all'uso in ambienti domestici. Non utilizzarlo per fini commerciali. Qualsiasi altro impiego viene considerato non conforme e può dare luogo a danni a cose o a persone. Volume della fornitura ♦ Rasoio con unità di taglio ♦ Adattatore di rete ♦ Rifinitore ♦ Cappuccio di protezione ♦ Pennello ♦ Astuccio ♦ Tagliando di ordinazione ♦ Istruzioni per l'uso 22 SRR 3.7 A1 AVVISO Subito dopo aver disimballato il prodotto, controllare che sia completo e integro. Se necessario, rivolgersi al servizio clienti. IT MT Descrizione dell'apparecchio Figura A (pagina apribile sul fronte) 1 Albero motore 2 Unità di taglio 3 Tasto di sbloccaggio 4 Colletto di protezione 5 Tasto ON/OFF 6 Lama di taglio stretta per peli lunghi 7 Rifinitore 8 Lama di taglio larga per peli lunghi 9 Simbolo (blocco) 0 Simbolo (carica) q Indicazione del livello di carica w Presa di carica Figura B (pagina apribile sul retro) e Connettore r Adattatore di rete t Pennello z Cappuccio di protezione u Astuccio SRR 3.7 A1 23 Dati tecnici Apparecchio IT MT Tensione di alimentazione: 5V Corrente in ingresso: 1000 mA Batteria: Batteria agli ioni di litio 3,7 V, 700 mAh Temperatura ambiente: da 5°C a 35°C Classe di protezione: III/ Tempo di carica: ca. 90 minuti Periodo di autonomia con batteria completamente carica: ca. 60 minuti Grado di protezione: IPX 4 Adattatore di rete (modello PTB-050100EU) Tensione di alimentazione: 100 - 240 V ∼ 50/60 Hz Tensione in uscita: 5V Corrente di uscita: 1000 mA Classe di protezione: II / 24 SRR 3.7 A1 Indicazioni relative alla sicurezza ► ► ► ► PERICOLO DI SCOSSA ELETTRICA! Controllare l'apparecchio prima dell'uso per rilevare eventuali danni visibili. Non mettere in funzione un apparecchio danneggiato. Sussiste il pericolo di folgorazione. Se dovesse riscontrarsi un danno sul cavo, sull'adattatore di rete, sull'alloggiamento o su altre parti, l'apparecchio non deve più venire utilizzato. Staccare l'adattatore di rete dalla presa − se si riscontra una anomalia, − prima di pulire l'apparecchio, − se non si utilizza l'apparecchio per lungo tempo, − dopo ogni uso. Staccare l'adattatore di rete tenendolo ben saldo e non tirando dal cavo. Non immergere mai l'apparecchio o il cavo con adattatore di rete in acqua o altri liquidi. SRR 3.7 A1 IT MT 25 ► IT MT ► ► ► ► 26 PERICOLO DI SCOSSA ELETTRICA! Se l'apparecchio cade in acqua, staccare assolutamente l'adattatore di rete dalla presa prima di mettere le mani nell'acqua per recuperarlo. Non prendere mai l'adattatore di rete con le mani bagnate, specialmente quando lo si inserisce nella presa o lo si stacca dalla presa. Sussiste il pericolo di folgorazione! Controllare periodicamente se l'adattatore di rete o l'apparecchio presenta eventuali difetti meccanici. Controllare che il cavo non si incastri nelle porte dell'armadio e non vada a contatto con superfici bollenti. In caso contrario, l'isolamento del cavo potrebbe danneggiarsi. L'installazione di un salvavita con una corrente di apertura di misurazione non superiore a 30 mA offre un'ulteriore protezione da una scossa elettrica. Fare eseguire l'installazione esclusivamente da un elettricista specializzato. SRR 3.7 A1 ► ► ► ► ► PERICOLO DI SCOSSA ELETTRICA! ATTENZIONE! Tenere l'apparecchio sempre asciutto! ATTENZIONE! Staccare l'adattatore di rete dalla parte manuale quando si pulisce quest'ultima con acqua! IT MT AVVERTENZA – PERICOLO DI LESIONI! Questo apparecchio può essere utilizzato dai bambini di almeno 8 anni di età e da persone con capacità fisiche, sensoriali o mentali ridotte o insufficiente esperienza o conoscenza, solo se sorvegliati o istruiti sull'uso sicuro dell'apparecchio e qualora ne abbiano compreso i pericoli associati. I bambini non devono giocare con l'apparecchio. La pulizia e la manutenzione a cura dell'utente non devono essere eseguite da bambini, a meno che non siano sorvegliati. SRR 3.7 A1 27 ► IT MT ► ► ► 28 AVVERTENZA – PERICOLO DI LESIONI! Fare eseguire le riparazioni solo da aziende specializzate o dall'assistenza ai clienti. Le riparazioni effettuate in modo non conforme possono causare gravi pericoli per l'utente. Inoltre la garanzia decade. Non utilizzare l'apparecchio con testina di taglio difettosa o accessorio lunghezza di taglio difettoso, in quanto potrebbe avere bordi taglienti. Sussiste il pericolo di lesioni! I componenti guasti devono venire sostituiti esclusivamente da pezzi di ricambio originali. Solo con questi pezzi di ricambio è garantita la conformità ai requisiti di sicurezza. Allacciare l'adattatore di rete solo a una presa facilmente raggiungibile, affinché in caso di guasto dell'adattatore di rete esso possa venire staccato rapidamente dalla presa. SRR 3.7 A1 ATTENZIONE– DANNI MATERIALI! ► Non utilizzare mai l'apparecchio senza sorveglianza e attenersi alle indicazioni riportate sulla targhetta. ► Per il funzionamento con collegamento alla rete elettrica utilizzare esclusivamente l'adattatore di rete fornito in dotazione (modello PTB-050100EU). ► Per evitare che si surriscaldi, non coprire l'adattatore di rete. IT MT Ricarica della batteria Prima del primo utilizzo la batteria deve venire ricaricata per almeno 90 minuti. AVVISO ► Assicurarsi che l'apparecchio sia spento prima di inserire la batteria. 1) Inserire il connettore e nella presa w che si trova sul rasoio. Badare alla corretta polarità: l'asta di guida presente nella presa w deve inserirsi nel binario di guida che si trova sul connettore e. Altrimenti non è possibile inserire il connettore e. 2) Inserire l'adattatore di rete r in una presa che risponda a quanto prescrive l'apparecchio: La carica della batteria viene visualizzata in percentuale (%) sul display (indicazione del livello di carica q). Sul display compare il simbolo 0. SRR 3.7 A1 29 ♦ Non appena la batteria è completamente carica, compare sul display il simbolo 0, che rimane illuminato permanentemente, e l'indicazione del livello di carica q mostra 99%. IT MT ♦ Con la batteria completamente carica l'apparecchio può essere tenuto in funzione per circa 60 minuti senza collegamento alla rete. Rasatura senza cavo ATTENZIONE! PERICOLO DI DANNI MATERIALI! ► Questo apparecchio non è adatto per la rasatura a umido! Il rasoio può venire anche utilizzato senza cavo. In questo caso occorre caricare l'apparecchio prima del primo uso (vedi capitolo "Ricarica delle batterie"). 1) Se non è già inserito, infilare il colletto di protezione 4 da sotto sull'unità di taglio 2 (vedi pagina apribile). 2) Infilare l'unità di taglio 2 con colletto di protezione applicato 4 sull'albero motore 1. Badare che il colletto di protezione 4 poggi correttamente sulla parte manuale. 3) Rimuovere il cappuccio di protezione z. 4) Premere il tasto ON/OFF 5. L'indicazione del livello di carica q mostra il livello di carica attuale e il rasoio si avvia. AVVERTENZA ► I migliori risultati li si ottiene con pelle asciutta. ► Potrebbero essere necessarie da 2 a 3 settimane prima che la pelle si abitui al sistema di taglio. 5) Far scorrere le testine di taglio lungo la pelle con movimenti diritti e circolari. 30 SRR 3.7 A1 6) Quando sono stati trattati tutti i punti da rasare, premere il tasto ON/OFF 5. L'apparecchio si arresta improvvisamente. Dopo ca. 3 secondi il display si spegne. IT MT 7) Dopo ogni rasatura pulire il rasoio con il pennello t fornito in dotazione. Per una pulizia a fondo leggere il capitolo "Pulizia e manutenzione". Rasatura con adattatore di rete ATTENZIONE! PERICOLO DI DANNI MATERIALI! ► Questo apparecchio non è adatto per la rasatura a umido! Se si vuole utilizzare il rasoio senza averlo in precedenza caricato, ciò è possibile con l'adattatore di rete r: 1) Inserire il connettore e nella presa w che si trova sul rasoio. Badare alla corretta polarità. L'asta di guida presente nella presa w deve inserirsi nel binario di guida che si trova sul connettore e. Altrimenti non è possibile inserire il connettore e. 2) Connettere la spina di rete alla presa. Dopodiché si può utilizzare il rasoio. Rifinitore/Lama di taglio per peli lunghi Per regolare la barba, modellare le basette o rasare le sopracciglia, utilizzare il rifinitore 7. 1) Se sull'apparecchio è applicata l'unità di taglio 2, occorre innanzitutto sfilarla. 2) Inserire il rifinitore 7 sull'albero motore 1. A seconda se si intende lavorare con la lama di taglio per peli lunghi larga 8 o stretta 6, cambiare la direzione con cui si infila l'accessorio: SRR 3.7 A1 31 IT MT – Se si vuole lavorare con la lama di taglio per peli lunghi larga 8, infilare il rifinitore 7 in modo tale che la lama di taglio per peli lunghi larga 8 sia rivolta verso l'operatore. – Se si vuole lavorare con la lama di taglio per peli lunghi stretta 6, infilare il rifinitore 7 in modo tale che la lama di taglio per peli lunghi larga 6 sia rivolta verso l'operatore. 3) Premere il tasto ON/OFF 5. L'indicazione del livello di carica q mostra il livello di carica attuale e l'apparecchio si avvia. 4) Quando l'operazione di rifinitura è terminata, premere nuovamente il tasto ON/OFF 5. 5) Pulire il rifinitore 7 con il pennello t fornito in dotazione. Per una pulizia a fondo leggere il capitolo "Pulizia e manutenzione". Protezione per viaggio Per proteggere l'apparecchio dall'accensione accidentale, si può bloccare il tasto ON/OFF 5. ■ Premere e tenere premuto il tasto ON/OFF 5 fintantoché sul display non compare il simbolo 9. Se ora si preme il tasto ON/OFF 5, compaiono il simbolo 9 e l'indicazione del livello di carica q. Ma l'apparecchio non si accende. ■ Quando lo si desidera nuovamente sbloccare, premere e tenere premuto il tasto ON/OFF 5. 9 e inizia a lampeg– A questo punto compare il simbolo giare. Ora è di nuovo possibile accendere l'apparecchio. 32 SRR 3.7 A1 Pulizia e manutenzione PERICOLO DI FOLGORAZIONE! IT MT ► Prima della pulizia staccare sempre la spina dalla presa di rete! Sussiste il pericolo di scossa elettrica! ATTENZIONE! PERICOLO DI DANNI MATERIALI! ► Per la pulizia dell'apparecchio non utilizzare detergenti abrasivi, chimici o corrosivi. Ciò provoca danni irreparabili all'apparecchio. Pulizia con il pennello Sicurezza Dopo ogni rasatura pulire le 3 tesine di taglio che si trovano sull'unità di taglio 2 con il pennello t. 1) Premere il tasto di sbloccaggio 3 in modo tale che l'unità di taglio 2 si apre di scatto. 2) Battere con cautela su una superficie piana dell'unità di taglio 2 e soffiare via i peli. 3) Per rimuovere i peli residui, utilizzare il pennello t. Rifinitore ■ Dopo ogni rasatura pulire il rifinitore con il pennello t. ■ Oliare le lame di taglio per peli lunghi 6/8 ca. ogni 6 mesi con una goccia di olio per macchine da cucire. SRR 3.7 A1 33 Pulizia sotto l'acqua corrente IT MT L'unità di taglio 2 è adatta per la pulizia sotto l'acqua corrente. 1) Premere il tasto di sbloccaggio 3 in modo tale che l'unità di taglio 2 si apra con scatto. 2) Tenere l'unità di taglio 2 sotto il getto d'acqua in modo tale che l'acqua scorra dall'interno verso l'esterno attraverso le testine di taglio. ATTENZIONE! PERICOLO DI DANNI MATERIALI! Badare a tenere sotto il getto d'acqua solo l'unità di taglio 2! La parte manuale del rasoio è protetta solo dagli spruzzi d'acqua, potrebbe dunque venire danneggiata irreparabilmente se viene tenuta sotto l'acqua corrente. 3) Prima di riutilizzare il rasoio, lasciare asciugare l'unità di taglio 2. 34 SRR 3.7 A1 Pulizia a fondo Per la pulizia a fondo rimuovere le testine di taglio: 1) premere il tasto di sbloccaggio 3. L'unità di taglio 2 si apre di scatto. IT MT 2) Tendere leggermente l'unità di taglio 2 in modo tale che sia possibile estrarla verso l'alto. 3) Ruotare con cautela il blocco segnato da frecce in direzione delle frecce stesse fino a quando il sostegno delle testine di taglio non si lascia sollevare (vedi figura). 4) Pulire tutte le parti sotto l'acqua corrente e farle asciugare completamente. SRR 3.7 A1 35 5) Ricomporre l'unità di taglio 2. IT MT 6) Per fissarla ruotare il blocco segnato con le frecce in senso opposto a quello indicato da queste ultime in modo tale che il sostegno delle testine di taglio non possa più venire sollevato. 7) Rimuovere dal rasoio i peli sciolti utilizzando il pennello t. 8) Rimettere l'unità di taglio 2 sul rasoio. Badare che scatti in posizione e sia correttamente e saldamente fissata. ■ Pulire l'alloggiamento e l'adattatore di rete r con un panno umido. AVVERTENZA Se... – ... la rasatura peggiora sensibilmente,... – ... è necessario far passare il rasoio più volte sullo stesso punto per ottenere un buon risultato,... – ... la rasatura richiede molto più tempo del solito,... – ... sono visibili danni alle testine di taglio,... ... occorre sostituire le testine di taglio . Se si desidera ordinare testine di taglio, rivolgersi al servizio di assistenza clienti. Conservazione ATTENZIONE! PERICOLO DI DANNI MATERIALI! Non conservare mai il rasoio nell'astuccio u mentre l'apparecchio è sotto carica! Pericolo di surriscaldamento! ■ Quando non si utilizza l'apparecchio, infilare sempre il cappuccio di protezione z sull'unità di taglio 2. ■ Conservare l'apparecchio pulito e asciutto e i suoi accessori nell'astuccio u fornito in dotazione. ■ Stoccare l'apparecchio in un luogo pulito, asciutto, privo di polvere. 36 SRR 3.7 A1 Garanzia e assistenza Questo apparecchio è garantito per tre anni a partire dalla data di acquisto. L'apparecchio è stato prodotto con cura e debitamente collaudato prima della consegna. Conservare lo scontrino come prova di acquisto. Nei casi contemplati dalla garanzia, mettersi in comunicazione telefonicamente con il centro di assistenza più vicino. Solo in tal modo è possibile garantire una spedizione gratuita della merce. La garanzia vale solo per difetti del materiale o di fabbricazione, ma non per i danni da trasporto, danni alle parti soggette a usura o alle parti fragili, come per es. interruttori o batterie. Il prodotto è destinato esclusivamente all'uso domestico e non a quello commerciale. La garanzia decade in caso di impiego improprio o manomissione, uso della forza e interventi non eseguiti dalla nostra filiale di assistenza autorizzata. Questa garanzia non costituisce alcun limite ai diritti legali del consumatore. Il periodo di garanzia non viene prolungato da interventi in garanzia. Ciò vale anche per le parti sostituite e riparate. I danni e difetti eventualmente presenti già all'atto dell'acquisto devono venire comunicati immediatamente dopo il disimballo, e comunque entro e non oltre due giorni dalla data di acquisto. Le riparazioni eseguite dopo la scadenza del periodo di garanzia sono a pagamento. Assistenza Italia Tel.: 02 36003201 E-Mail: [email protected] IAN 102881 Assistenza Malta Tel.: 80062230 E-Mail: [email protected] IAN 102881 Raggiungibilità della hotline: dal lunedì al venerdì, dalle 8.00 alle 20.00 (CET) SRR 3.7 A1 37 IT MT Smaltimento Non smaltire per alcun motivo l'apparecchio assieme ai normali rifiuti domestici. Questo prodotto è soggetto alla Direttiva Europea 2012/19/EU. IT MT Far smaltire l'apparecchio da un'azienda di smaltimento autorizzata o dall'ente di smaltimento comunale. Rispettare le norme attualmente in vigore. In caso di dubbi mettersi in contatto con l'ente di smaltimento competente. Smaltimento batterie/pile Per smaltire ecologicamente l'apparecchio, rimuovere la batteria: ATTENZIONE - DANNI MATERIALI! ► Rimuovere la batteria dall'apparecchio solo se si desidera smaltire l'apparecchio! L'apparecchio è difettoso se la batteria è stata smontata! 1) Per rimuovere la batteria dall'impugnatura, togliere la piccola vite dal lato posteriore della parte manuale servendosi di un cacciavite a stella. 2) Sfilare il coperchio posteriore della parte manuale. 3) Facendo leva, per esempio con un cacciavite, estrarre l'involucro interno nero. All'occorrenza, prima che si possa sbloccare l'involucro interno, si devono spezzare o piegare verso l'esterno i sostegni laterali e quelli inferiori. Si consiglia di utilizzare a tale scopo un cacciavite per viti con intaglio. 4) Quando l'involucro interno è stato estratto: spezzare i sostegni del coperchio in plastica trasparente che si trovano sui lati. Premere leggermente l'arresto inferiore verso l'interno in modo tale che il coperchio in plastica trasparente possa venire aperto. 38 SRR 3.7 A1 5) Sollevare leggermente la piastrina in modo da giungere con un cacciavite per viti con intaglio sotto la batteria. 6) Facendo leva, estrarre la batteria. IT MT 7) Smaltire la batteria in modo ecologico. Pile e/o batterie non devono venire smaltite insieme ai rifiuti domestici. Ogni utente è obbligato per legge a portare le pile/batterie presso un centro di raccolta del proprio comune/quartiere o a restituirle al rivenditore. Questo obbligo è finalizzato allo smaltimento ecologico delle pile e/o delle batterie. Restituire le pile/le batterie solo se scariche. L'imballaggio è costituito da materiali ecocompatibili che possono venire smaltiti tramite gli appositi centri di raccolta e riciclaggio. Importatore KOMPERNASS HANDELS GMBH BURGSTRASSE 21 44867 BOCHUM GERMANY www.kompernass.com SRR 3.7 A1 39 40 SRR 3.7 A1 Índice Introdução . . . . . . . . . . . . . . . . . . . . . . . . . . . . . . . . . . . 42 Utilização correta . . . . . . . . . . . . . . . . . . . . . . . . . . . . . 42 Conteúdo da embalagem . . . . . . . . . . . . . . . . . . . . . . . 42 Descrição do aparelho . . . . . . . . . . . . . . . . . . . . . . . . . 43 Dados técnicos . . . . . . . . . . . . . . . . . . . . . . . . . . . . . . . . 44 Instruções de segurança . . . . . . . . . . . . . . . . . . . . . . . . 45 Carregamento das baterias . . . . . . . . . . . . . . . . . . . . . 49 Barbear sem cabo . . . . . . . . . . . . . . . . . . . . . . . . . . . . . 50 Barbear com o adaptador de rede . . . . . . . . . . . . . . . 51 Aparadores de pelos compridos . . . . . . . . . . . . . . . . . 51 Bloqueio de viagem . . . . . . . . . . . . . . . . . . . . . . . . . . . 52 Limpeza e conservação . . . . . . . . . . . . . . . . . . . . . . . . 53 Limpeza com o pincel. . . . . . . . . . . . . . . . . . . . . . . . . . . . . . . . . . .53 Limpeza em água corrente . . . . . . . . . . . . . . . . . . . . . . . . . . . . . . .54 Limpeza completa . . . . . . . . . . . . . . . . . . . . . . . . . . . . . . . . . . . . .55 Armazenamento . . . . . . . . . . . . . . . . . . . . . . . . . . . . . . 56 Garantia e assistência técnica . . . . . . . . . . . . . . . . . . . 57 Eliminação . . . . . . . . . . . . . . . . . . . . . . . . . . . . . . . . . . . 58 Importador . . . . . . . . . . . . . . . . . . . . . . . . . . . . . . . . . . 59 SRR 3.7 A1 41 PT Introdução Parabéns pela compra do seu novo aparelho. PT Optou por um produto de elevada qualidade. O manual de instruções é parte integrante deste produto. Este contém instruções importantes para a segurança, utilização e eliminação. Antes de utilizar o produto, familiarize-se com todas as instruções de operação e segurança. Utilize o produto apenas como descrito e nas áreas de aplicação indicadas. Ao transferir o produto para terceiros, entregue todos os respetivos documentos. Utilização correta Este aparelho foi concebido exclusivamente para barbear e cortar o pelo humano. Este aparelho destina-se exclusivamente à utilização privada. Não o utilize para fins comerciais. Qualquer outra utilização é considerada indevida e pode conduzir a danos materiais ou até pessoais. Conteúdo da embalagem ♦ Máquina de barbear com unidade de corte ♦ Adaptador de rede ♦ Unidade aparadora ♦ Tampa de proteção ♦ Pincel ♦ Bolsa ♦ Cartão de encomenda ♦ Manual de instruções 42 SRR 3.7 A1 NOTA Ao retirar da embalagem, verifique a integridade do conteúdo e a existência de eventuais danos. Em caso de necessidade, contacte a Assistência Técnica. Descrição do aparelho PT Figura A (parte dianteira desdobrável): 1 Eixo de acionamento 2 Unidade de corte 3 Botão de desbloqueio 4 Rebordo de proteção 5 Botão de ligar/desligar 6 Aparador estreito de pelos compridos 7 Unidade de aparo 8 Aparador largo de pelos comprimidos 9 Símbolo (bloqueio) 0 Símbolo (carga) q Indicação do estado de carga w Tomada de carregamento Figura B (parte traseira desdobrável): e Ficha de ligação r Adaptador de rede t Pincel z Tampa de proteção u Bolsa SRR 3.7 A1 43 Dados técnicos Aparelho Tensão de entrada: PT 5V Corrente de entrada: 1.000 mA Bateria: Bateria de iões de lítio 3,7 V, 700 mAh Temperatura ambiente: Entre 5 °C e 35 °C Classe de proteção: III/ Tempo de carregamento: aprox. 90 minutos Tempo de funcionamento com a bateria carregada: aprox. 60 minutos Tipo de proteção: IPX 4 Adaptador de rede (tipo PTB-050100EU) Tensão de entrada: 100 - 240 V ∼ 50/60 Hz Tensão de saída: 5V Corrente de saída: 1.000 W Classe de proteção: II / 44 SRR 3.7 A1 Instruções de segurança ► ► ► ► PERIGO – CHOQUE ELÉTRICO! Antes da utilização, verifique a existência de eventuais danos visíveis exteriormente no aparelho. Não coloque em funcionamento um aparelho danificado. Existe perigo de choque elétrico. Caso sejam detetados danos no cabo, no adaptador de rede, no corpo do aparelho ou noutras peças, o aparelho não pode continuar a ser utilizado. Retire o adaptador de rede da tomada: — caso ocorra uma avaria, — antes de limpar o aparelho, — se não utilizar o aparelho durante um período prolongado, — após cada utilização. Puxe diretamente pelo adaptador de rede e não pelo cabo. Nunca mergulhe o aparelho, bem como, o cabo com o adaptador de rede, em água ou noutros líquidos. SRR 3.7 A1 PT 45 ► PT ► ► ► ► 46 PERIGO – CHOQUE ELÉTRICO! Caso o aparelho tenha caído na água, retire primeiro o adaptador de rede da tomada antes meter a mão na água. Nunca agarre no adaptador de rede com as mãos molhadas, especialmente se o inserir ou retirar de uma tomada. Perigo de choque elétrico! Verifique regularmente a existência de eventuais defeitos mecânicos no adaptador de rede e no aparelho. Certifique-se de que o cabo não fica preso nas portas dos armários ou é puxado sobre superfícies quentes. Caso contrário, o isolamento do cabo pode ficar danificado. A instalação de um dispositivo de proteção de corrente residual com uma corrente de ativação de dimensionamento não superior a 30 mA oferece mais proteção contra choque elétrico. A instalação deve ser realizada exclusivamente por um eletricista. SRR 3.7 A1 ► ► ► ► ► PERIGO – CHOQUE ELÉTRICO! ATENÇÃO! Mantenha o aparelho seco! ATENÇÃO! Desligue o adaptador de rede da máquina, caso pretenda lavá-la com água! PT AVISO – PERIGO DE FERIMENTOS! Este aparelho pode ser utilizado por crianças com idades superiores a 8 anos, bem como por pessoas com capacidades físicas, sensoriais ou mentais reduzidas, ou com falta de experiência e/ou conhecimento, caso sejam vigiadas ou instruídas sobre a utilização segura do aparelho e compreendam os perigos daí resultantes. As crianças não podem brincar com o aparelho. A limpeza e a manutenção pelo utilizador não podem ser realizadas por crianças não vigiadas. SRR 3.7 A1 47 ► PT ► ► ► 48 AVISO – PERIGO DE FERIMENTOS! Solicite a reparação do aparelho apenas a empresas autorizadas ou ao Serviço de Assistência Técnica. Reparações inadequadas podem originar perigos consideráveis para o utilizador. Além disso, a garantia extingue-se. Não utilize o aparelho com o conjunto de corte ou o aplicador de comprimento de corte danificado, uma vez que podem ter cantos afiados. Perigo de ferimentos! Os componentes avariados devem ser substituídos apenas por peças de reposição originais. Apenas a utilização destas peças garante o cumprimento dos requisitos de segurança. Ligue o adaptador de rede apenas a uma tomada acessível para que, em caso de avaria, este possa ser rapidamente retirado da tomada. SRR 3.7 A1 ATENÇÃO – DANOS MATERIAIS! ► Nunca opere o aparelho sem vigilância e opere apenas de acordo com os dados na placa de identificação. ► Utilize apenas o adaptador de rede fornecido para a operação da rede (tipo PTB-050100EU). ► Não cubra o adaptador de rede para evitar um aquecimento não permitido. PT Carregamento das baterias Antes da primeira utilização, a bateria deve ser carregada durante, no mínimo, durante 90 minutos. NOTA ► Certifique-se de que o aparelho está desligado antes de carregar a bateria. 1) Insira a ficha de ligação e na tomada de carregamento w da máquina de barbear. Tenha atenção à polaridade correta. A vareta de guia na tomada de carregamento w deve encaixar na calha de guia da ficha de ligação e. Caso contrário, não é possível inserir a ficha de ligação e. 2) Insira o adaptador de rede r numa tomada adequada aos dados do aparelho: O carregamento da bateria é visualizado, em percentagem (%), no visor (indicação do estado de carga q). O símbolo 0 aparece no visor. SRR 3.7 A1 49 ♦ Logo que a bateria esteja carregada, o símbolo 0 aparece continuamente no visor e a indicação do estado de carga q indica 99%. ♦ Com a bateria completamente carregada pode utilizar o aparelho durante aprox. 60 minutos sem estar ligado à corrente. PT Barbear sem cabo ATENÇÃO! DANOS MATERIAIS! ► Este aparelho não é adequado para fazer a barba molhada! Pode utilizar a máquina de barbear sem cabo. Neste caso, deve carregar o aparelho antes da primeira utilização (ver capítulo "Carregamento das baterias"). 1) Encaixe o rebordo de proteção 4, caso não esteja encaixado, por baixo na unidade de corte 2 (ver parte desdobrável). 2) Encaixe a unidade de corte 2, com o rebordo de proteção 4, no eixo de acionamento 1. Certifique-se de que o rebordo de proteção 4 se encontra corretamente colocado na máquina. 3) Retire a tampa de proteção z. 4) Prima o botão de ligar/desligar 5. A indicação do estado de carga q indica o estado de carga atual e a máquina de barbear começa a funcionar. NOTA ► Obtém os melhores resultados com a pele seca. ► Pode demorar 2 a 3 semanas até que a pele se habitue ao sistema de corte. 5) Conduza as cabeças de corte com movimentos retos e circulares sobre a pele. 50 SRR 3.7 A1 6) Depois de barbear todas as partes pretendidas, prima o botão de ligar/desligar 5. O aparelho para. Após aprox. 3 segundos, o visor desliga-se. 7) Limpe a máquina de barbear, após cada barbear, com o pincel fornecido t. Para realizar uma limpeza completa, leia o capítulo "Limpeza e conservação". PT Barbear com o adaptador de rede ATENÇÃO! DANOS MATERIAIS! ► Este aparelho não é adequado para fazer a barba molhada! Se pretender utilizar a máquina de barbear sem a carregar primeiro, também a poderá utilizar diretamente com o adaptador de rede r: 1) Insira a ficha de ligação e na tomada de carregamento w na máquina de barbear. Tenha atenção à polaridade correta. A vareta de guia na tomada de carregamento w deve encaixar na calha de guia da ficha de ligação e. Caso contrário, não é possível inserir a ficha de ligação e. 2) Ligue a ficha a uma tomada. Pode então utilizar a máquina de barbear. Aparadores de pelos compridos Para ter uma barba em forma, modelar as patilhas ou barbear as sobrancelhas, utilize a unidade de aparo 7. 1) Retire a unidade de corte 2, caso esteja encaixada, da máquina. 2) Encaixe a unidade de aparo 7 no eixo de acionamento 1. Quer pretenda trabalhar com o aparador largo 8 ou estreito 6 de pelos compridos, mude o sentido de encaixe: SRR 3.7 A1 51 PT – Para trabalhar com o aparador largo de pelos compridos 8, encaixe a unidade de aparo 7 de forma a que o aparador estreito de pelos compridos 8 fique voltado para si. – Para trabalhar com o aparador estreito de pelos compridos 6, encaixe a unidade de aparo 7 de forma a que o aparador estreito de pelos compridos 6 fique voltado para si. 3) Prima o botão de ligar/desligar 5. A indicação do estado de carga q indica o estado de carga atual e o aparelho começa a funcionar. 4) Quando terminar o processo de aparo, prima novamente o botão de ligar/desligar 5. 5) Limpe a unidade de aparo 7 com o pincel fornecido t. Para realizar uma limpeza completa, leia o capítulo "Limpeza e conservação". Bloqueio de viagem Para proteger o aparelho contra uma ligação involuntária, pode bloquear o botão de ligar/desligar 5. ■ Prima e mantenha premido o botão de ligar/desligar 5 até que 9 seja apresentado no visor. o símbolo Se o botão de ligar/desligar 5 for agora premido, é visualizado o símbolo 9 e a indicação do estado de carga q. ■ No entanto, o aparelho não se liga. ■ Caso pretenda voltar a desbloquear o botão, mantenha o botão ligar/desligar 5 premido: 9 é visualizado e começa a piscar. – o símbolo Pode agora voltar a ligar o aparelho. 52 SRR 3.7 A1 Limpeza e conservação PERIGO - CHOQUE ELÉTRICO! ► Antes de cada limpeza, retire a ficha da tomada de alimentação elétrica! Perigo de choque elétrico! PT ATENÇÃO! DANOS MATERIAIS! ► Não utilize produtos de limpeza abrasivos, químicos ou ácidos para limpar o aparelho. Isto provoca danos irreparáveis no aparelho. Limpeza com o pincel Unidade de corte Após cada barbear, limpe as 3 cabeças de corte 2 com o pincel t. 1) Pressione o botão de desbloqueio 3, de forma a que a unidade de corte 2 se solte. 2) Esvazie a unidade de corte 2, batendo cuidadosamente com a mesma numa superfície plana ou sopre para retirar os pelos. 3) Utilize o pincel t para remover pelos que permaneceram na unidade de corte. Unidade de aparo ■ Limpe a unidade de aparo, após cada barbear, com o pincel fornecido t. ■ Lubrifique os aparadores de pelos compridos 6/8, aprox. a cada 6 meses, com uma gota de lubrificante para máquinas de costura. SRR 3.7 A1 53 Limpeza em água corrente A unidade de corte 2 pode ser limpa em água corrente. 1) Pressione o botão de desbloqueio 3, de forma a que a unidade de corte 2 se solte. PT 2) Mantenha a unidade de corte 2 por baixo do jato de água, de forma a que a água passe através das cabeças de corte, do interior para o exterior. ATENÇÃO! DANOS MATERIAIS! Certifique-se de que mantém apenas a unidade de corte 2 sob o jato de água! O corpo da máquina de barbear está protegido apenas contra salpicos e pode ficar irreparavelmente danificado se o colocar por baixo de água corrente. 3) Deixe a unidade de corte 2 secar antes de voltar a utilizar a máquina de barbear. 54 SRR 3.7 A1 Limpeza completa Para realizar uma limpeza completa, retire as cabeças de corte: 1) Prima o botão de desbloqueio 3. A unidade de corte 2 solta-se. 2) Estique a unidade de corte 2 um pouco, de modo a que possa ser puxada para cima. 3) Rode cuidadosamente o bloqueio, marcado com setas, o máximo no sentido da seta, até que o dispositivo de retenção das cabeças de corte possa ser retirado (ver figura). PT 4) Limpe todas as peças em água corrente e deixe-as secar bem. SRR 3.7 A1 55 5) Volte a montar a unidade de corte 2. 6) Para a fixar, rode o bloqueio, marcado com setas, no sentido contrário ao da seta, de forma a que o dispositivo de retenção das cabeças de corte fique preso. 7) Remova pelos soltos da máquina de barbear com o pincel t. PT 8) Volte a colocar a unidade de corte 2 na máquina de barbear. Certifique-se de que esta encaixa e fica presa. ■ Limpe o corpo da máquina e o adaptador de rede r com um pano húmido. NOTA Se... – ... o barbear se tornar significativamente mais difícil,... – ... tiver de passar a máquina de barbear várias vezes sobre a mesma zona para obter um bom resultado,.... – ... o barbear demorar significativamente mais tempo,... – ... forem visíveis danos nas cabeças de corte,... ... significa que as cabeças de corte devem ser substituídas. Contacte a Assistência Técnica, caso pretenda encomendar as cabeças de corte. Armazenamento ATENÇÃO! DANOS MATERIAIS! Nunca guarde a máquina de barbear na bolsa u durante o carregamento! Perigo de sobreaquecimento! ■ Coloque a tampa de proteção z em cima da unidade de corte 2 sempre que não utilizar o aparelho. ■ Guarde o aparelho seco e os respetivos acessórios na bolsa fornecida u. ■ Guarde tudo num local seco, limpo e sem pó. 56 SRR 3.7 A1 Garantia e assistência técnica Este aparelho tem uma garantia de 3 anos a contar da data de compra. Este aparelho foi fabricado com o maior cuidado e testado escrupulosamente antes da sua distribuição. Guarde o talão de compra como comprovativo da compra. Caso deseje acionar a garantia, telefone para o seu serviço de Assistência Técnica. Apenas deste modo pode ser garantido um envio gratuito do seu produto. A garantia abrange apenas defeitos de material ou de fabrico e não inclui danos durante o transporte, peças de desgaste ou danos em peças frágeis, p. ex. interruptores ou acumuladores. O produto foi concebido apenas para uso privado e não para uso comercial. A garantia extingue-se em caso de utilização incorreta, uso de força e intervenções que não tenham sido efetuadas pela nossa Filial de Assistência Técnica autorizada. Os seus direitos legais não são limitados por esta garantia. O período de garantia não é prolongado pelo acionamento da mesma. Isto também se aplica a peças substituídas e reparadas. Danos e defeitos que possam eventualmente existir no momento da compra devem ser imediatamente comunicados, após retirar o aparelho da embalagem, o mais tardar dois dias após a data de compra. Expirado o período da garantia, quaisquer reparações necessárias estão sujeitas a pagamento. Assistência Portugal Tel.: 70778 0005 (0,12 EUR/Min.) E-Mail: [email protected] IAN 102881 Horário de atendimento da linha de apoio: Segunda a sexta das 8:00 horas – 20:00 horas (HEC) SRR 3.7 A1 57 PT Eliminação Nunca deposite o aparelho no lixo doméstico comum. Este produto está sujeito ao disposto na Diretiva Europeia 2012/19/EU. PT Entregue o aparelho num Ponto Eletrão autorizado ou num Centro de Receção de REEE do seu município. Respeite os regulamentos atualmente em vigor. Em caso de dúvida, entre em contacto com o Centro de Receção de REEE. Eliminação de pilhas/baterias Para eliminar o aparelho de forma ecológica, deve retirar a bateria do aparelho: ATENÇÃO - DANOS MATERIAIS! ► Remova a bateria do aparelho apenas se pretender eliminar/ deitar fora o aparelho! O aparelho deixa de funcionar quando remover a bateria! 1) Para retirar a bateria da máquina, desparafuse o pequeno parafuso no verso com uma chave Phillips. 2) Retire a cobertura traseira da máquina. 3) Tente levantar o corpo interior preto, por exemplo, com uma chave de fendas. Eventualmente, terá de partir ou dobrar para fora os suportes laterais e inferiores antes de poder soltar o corpo interior. Para tal, utilize preferencialmente uma chave de fendas. 4) Quando tiver retirado o corpo interior: parta os suportes nos lados da cobertura de plástico transparente. Pressione o bloqueio inferior, um pouco para dentro, de forma a que a cobertura de plástico transparente possa ser aberta. 5) Levante a placa de metal, de modo a aceder por baixo da bateria com uma chave de fenda. 58 SRR 3.7 A1 6) Retire a bateria. 7) Elimine a bateria em conformidade com as normas ambientais. As pilhas/baterias não podem ser depositadas no lixo doméstico. Todos os consumidores têm a obrigação legal de colocar as pilhas/baterias num pilhão da sua área de residência/da sua freguesia ou entregar numa loja que venda pilhas/baterias. Esta obrigação serve para garantir que as pilhas/baterias são eliminadas em conformidade com as normas ambientais. Entregue as pilhas/baterias apenas quando estiverem completamente descarregadas. PT A embalagem é composta por materiais ecológicos que podem ser depositados nos ecopontos locais. Importador KOMPERNASS HANDELS GMBH BURGSTRASSE 21 44867 BOCHUM GERMANY www.kompernass.com SRR 3.7 A1 59 60 SRR 3.7 A1 Contents Introduction . . . . . . . . . . . . . . . . . . . . . . . . . . . . . . . . . . 62 Intended use . . . . . . . . . . . . . . . . . . . . . . . . . . . . . . . . . 62 Package contents . . . . . . . . . . . . . . . . . . . . . . . . . . . . . 62 Description of the appliance. . . . . . . . . . . . . . . . . . . . . 63 Technical data . . . . . . . . . . . . . . . . . . . . . . . . . . . . . . . . 64 Safety guidelines . . . . . . . . . . . . . . . . . . . . . . . . . . . . . 65 Charging the batteries . . . . . . . . . . . . . . . . . . . . . . . . . 69 Cordless shaving . . . . . . . . . . . . . . . . . . . . . . . . . . . . . . 70 Shaving using the mains adapter . . . . . . . . . . . . . . . . 71 Trimmer/long hair trimmer . . . . . . . . . . . . . . . . . . . . . 71 Travel lock . . . . . . . . . . . . . . . . . . . . . . . . . . . . . . . . . . . 72 Cleaning and care . . . . . . . . . . . . . . . . . . . . . . . . . . . . . 73 Cleaning with the brush . . . . . . . . . . . . . . . . . . . . . . . . . . . . . . . . .73 Cleaning under running water . . . . . . . . . . . . . . . . . . . . . . . . . . . .74 Thorough cleaning . . . . . . . . . . . . . . . . . . . . . . . . . . . . . . . . . . . . .75 Storage . . . . . . . . . . . . . . . . . . . . . . . . . . . . . . . . . . . . . 76 Warranty and service . . . . . . . . . . . . . . . . . . . . . . . . . . 77 Disposal . . . . . . . . . . . . . . . . . . . . . . . . . . . . . . . . . . . . . 78 Importer . . . . . . . . . . . . . . . . . . . . . . . . . . . . . . . . . . . . . 79 SRR 3.7 A1 61 GB MT Introduction Congratulations on the purchase of your new appliance. GB MT You have selected a high-quality product. The operating instructions are part of this product. They contain important information on safety, usage and disposal. Before using the product, familiarise yourself with all handling and safety guidelines. Use the product only as described and for the range of applications specified. Please also pass these operating instructions on to any future owner(s). Intended use This appliance is intended exclusively for shaving and trimming human hair. This appliance is intended solely for use in private households. Do not use it for commercial applications. All other uses are deemed to be improper and may result in property damage or even in personal injury. Package contents ♦ Shaver with shaver unit ♦ Power adapter ♦ Trimmer unit ♦ Protective cap ♦ Brush ♦ Case ♦ Order card ♦ Operating instructions 62 SRR 3.7 A1 NOTE Check contents for completeness and damage immediately after unpacking. Contact Customer Services if necessary. Description of the appliance Figure A (front fold-out page): 1 Drive shaft 2 Shaver unit 3 Release button 4 Protective collar 5 On/off button 6 Narrow long-hair trimmer 7 Trimmer unit 8 Broad long-hair trimmer 9 GB MT symbol (lock) 0 symbol (charge) q Battery charge level indicator w Charging socket Figure B (rear fold-out page): e Connection plug r Mains adapter t Brush z Protective cap u Case SRR 3.7 A1 63 Technical data Appliance Input voltage: 5V Input current: 1000 mA Battery: 3.7 V / 700 mAh Li-ion battery Environmental temperature: 5°C up to 35°C GB MT Protection class: III/ Charging time: approx. 90 minutes Operating time with fully charged battery: approx. 60 minutes Protection rating: IPX 4 Power adapter (type PTB-050100EU) Input voltage: 100 - 240 V ∼ 50/60 Hz Output voltage: 5V Output power: 1000 mA Protection class: II / 64 SRR 3.7 A1 Safety guidelines ► ► ► ► DANGER – RISK OF ELECTRIC SHOCK! Prior to use, check the appliance for visible external damage. Never operate an appliance that is damaged. There is a risk of electrocution. The appliance may no longer be used if there is any damage to the cable, to the mains power adapter, the housing or any other components. Remove the mains adapter from the power socket — if a defect occurs, — before cleaning the appliance, — if you do not intend using the appliance for long periods, — after every use. Pull the mains power adapter itself and not the cable. Never submerge the appliance or the cable with mains adapter in water or other liquids. SRR 3.7 A1 GB MT 65 ► ► GB MT ► ► ► 66 DANGER – RISK OF ELECTRIC SHOCK! If the appliance falls into water, it is imperative that you pull the mains adapter out of the power socket before you reach into the water. Never touch the mains adapter with wet hands, especially when plugging it in or unplugging it. Risk of electrocution! Check mains adapter and appliance regularly for possible mechanical damage. Ensure that the cable does not get jammed in cupboard doors or pulled over hot surfaces. If this occurs, the cable insulation may be damaged. The installation of a residual current circuit breaker with a rated tripping current of no more than 30 mA offers further protection from electric shocks. Have the installation carried out only by a qualified electrician. SRR 3.7 A1 ► ► ► ► ► DANGER – RISK OF ELECTRIC SHOCK! WARNING! Keep the appliance dry. WARNING! Disconnect the mains adapter from the handset when you clean it with water. WARNING – RISK OF INJURY! This appliance may be used by children aged 8 years and above and by persons with limited physical, sensory or mental capabilities or lack of experience and knowledge, provided that they are under supervision or have been told how to use the appliance safely and are aware of the potential risks. Children must not use the appliance as a plaything. Cleaning and user maintenance tasks may not be carried out by children unless they are supervised. SRR 3.7 A1 GB MT 67 ► GB MT ► ► ► 68 WARNING – RISK OF INJURY! All repairs must be carried out by authorised specialist companies or by the Customer Service department. Improper repairs can pose significant risks to the user. They will also invalidate any warranty claim. Do not use the appliance with a defective cutter attachment or cutting length attachment, since these may have sharp edges. There is a risk of personal injury! Defective components must always be replaced with original replacement parts. Compliance with safety requirements can only be guaranteed if original replacement parts are used. Only plug the mains adapter into an easily reachable power socket so that you can pull the mains adapter out of the power socket quickly in an emergency. SRR 3.7 A1 CAUTION – PROPERTY DAMAGE! ► Never operate the appliance unsupervised, and only in accordance with the information on the nameplate. ► Use only the supplied mains adapter (type PTB-050100EU) to power your appliance. ► To avoid damage caused by overheating, do not cover the mains power adapter. GB MT Charging the batteries The battery should be charged for at least 90 minutes before first use. NOTE ► Ensure that the appliance is switched off before charging the battery. 1) Plug the connection plug e into the charging socket w on the shaver. Ensure the +/- terminals are correctly aligned: the guide rod in the charging socket w must be in the guide groove on the connection plug e. Otherwise the connection plug e cannot be plugged in. 2) Plug the mains adapter r into a mains socket that complies with the appliance specifications. The battery charge level is shown in percent (%) on the display (battery charge level indicator q). The symbol 0 appears on the display. SRR 3.7 A1 69 ♦ As soon as the battery is fully charged, the symbol 0 appears permanently on the display and the battery charge level indicator q shows 99%. ♦ Once the battery is fully charged, you can use the appliance for around 60 minutes without connecting it to the power supply. Cordless shaving CAUTION! MATERIAL DAMAGE! GB MT ► This appliance is not suitable for wet shaving! You can use the shaver without the cable. In this case, you must charge the appliance before first use (see section "Charging the batteries"). 1) If it is not already attached, push the protective collar 4 from below onto the shaver unit 2 (see fold-out page). 2) Attach the shaver unit 2 with the fitted protective collar 4 onto the drive shaft 1. Ensure that the protective collar 4 is sitting correctly on the handset. 3) Remove the protective cap z. 4) Press the on/off button 5. The battery charge level indicator q shows the current charge level and the shaver starts. NOTE ► The best results are achieved if used on dry skin. ► It can take 2 to 3 weeks until the skin is accustomed to the dry shaving system. 5) Move the shaving heads with straight and circular motions over the skin. 6) When you have covered all the areas that you want to shave, press the on/off button 5. The appliance stops. After approx. 3 seconds, the display will switch off. 70 SRR 3.7 A1 7) Clean the shaver after every use with the supplied brush t. For a more thorough cleaning, read the section "Cleaning and care". Shaving using the mains adapter CAUTION! MATERIAL DAMAGE! ► This appliance is not suitable for wet shaving! If you want to use the shaver to load without charging it, you can also use it directly with the mains adapter r: GB MT 1) Plug the connection plug e into the charging socket w on the shaver. Ensure the +/- terminals are correctly aligned. The guide rod in the charging socket w must be in the guide groove on the connection plug e. Otherwise the connection plug e cannot be plugged in. 2) Insert the plug into a mains power socket. Now you can use the shaver. Trimmer/long hair trimmer To shape your beard, form sideburns or shave eyebrows, use the trimmer unit 7. 1) Pull the shaver unit 2 off the handset (if attached). 2) Attach the trimmer unit 7 to the drive shaft 1. Depending on whether you want to use the broad 8 or narrow long hair trimmer 6, change the direction of attachment. SRR 3.7 A1 71 – If you want to use the broad long hair trimmer 8, attach the trimmer unit 7 so that the broad long hair trimmer 8 is facing towards you. – If you want to use the narrow long hair trimmer 6, attach the trimmer unit 7 so that the narrow long hair trimmer 6 is facing towards you. 3) Press the on/off button 5. The battery charge level indicator q shows the current charge level and the appliance starts. GB MT 4) When you are finished trimming, press the on/off switch 5 again. 5) Clean the trimmer unit 7 with the supplied brush t. For a more thorough cleaning, read the section "Cleaning and care". Travel lock To ensure that the appliance cannot switch on accidentally, you can lock the on/off button 5. ■ Press and hold the on/off button 5 until the on the display. symbol 9 appears If you now press the on/off button 5, the symbol 9 and the battery charge level indicator q appear. The appliance will, however, not switch on. ■ If you want to release the lock, press and hold the on/off button 5: symbol 9 appears and starts to flash. – the The appliance can now be switched on. 72 SRR 3.7 A1 Cleaning and care DANGER – ELECTRIC SHOCK! ► Before cleaning the appliance, disconnect the power plug from the mains power socket! There is a risk of electric shock! CAUTION! MATERIAL DAMAGE! ► Do not use abrasive, chemical or caustic cleaning agents to clean this appliance. This will irreparably damage the appliance. GB MT Cleaning with the brush Shaver unit Clean the 3 shaving heads in the shaver unit 2 after every shave using the brush t. 1) Press the release button 3 so that the shaver unit 2 pops open. 2) Tap the shaver unit 2 on a flat surface or blow off the hair cuttings. 3) Use the brush t to remove any remaining hair cuttings. Trimmer unit ■ Clean the trimmer unit after every use with the supplied brush t. ■ Oil the long hair trimmers 6/8 around every 6 months with a drop of sewing machine oil. SRR 3.7 A1 73 Cleaning under running water The shaver unit 2 is suitable for cleaning under running water. 1) Press the release button 3 so that the shaver unit 2 pops open. 2) Hold the shaver unit 2 under the running water so that the water flows through the shaving heads from the inside to the outside. CAUTION! MATERIAL DAMAGE! GB MT Ensure that only the shaver unit 2 is under the stream of water! The shaver handset is only protected against water splashes and can be irreparably damaged if it is held under running water. 3) Allow the shaver unit 2 to dry before you use the shaver again. 74 SRR 3.7 A1 Thorough cleaning For a more thorough cleaning, remove the shaving heads: 1) Press the release button 3. The shaver unit 2 pops up. 2) Overstretch the shaver unit 2 a little so it can be pulled upwards and off. 3) Carefully turn the catch marked with arrows in the direction of the arrows until the mounting of the shaving heads can be lifted of (see figure). GB MT 4) Clean all parts under running water and then allow them to dry fully. SRR 3.7 A1 75 5) Replace the shaver unit 2. 6) To attach it, turn the catch marked with arrows in the opposite direction to the arrow markings so that the shaving head mounting can no longer be removed. 7) Remove loose hairs from the shaver with the brush t. 8) Replace the shaver unit 2 on the shaver. Ensure that it snaps into place and is seated firmly. GB MT ■ Clean the housing and the mains adapter r with a damp cloth. NOTE If ... – ... the shaving result is noticeably poorer, ... – ... you have to the shave the same spot repeatedly to achieve a good result, ... – ... the shave takes much longer than usual, ... – ... there is visible damage to the shaving heads, ... ... the shaving heads should be changed. Please contact the Service Centre if you want to order shaving heads. Storage CAUTION! MATERIAL DAMAGE! Never store the shaver in the case u while the appliance is charging. Risk of overheating! ■ Always replace the protective cap z on the shaver unit 2 when you are not using the appliance. ■ Store the cleaned and dried appliance and its accessories in the supplied case u. ■ Store everything in a clean, dust-free and dry place. 76 SRR 3.7 A1 Warranty and service You are provided a 3-year warranty on this appliance, valid from the date of purchase. This appliance has been manufactured with care and inspected meticulously prior to delivery. Please retain your receipt as proof of purchase. In the event of a warranty claim, please contact your Customer Service unit by telephone. This is the only way to guarantee free return of your goods. The warranty only covers claims for material and manufacturing defects, not for damage sustained during carriage, components subject to wear and tear or damage to fragile components such as switches or batteries. This appliance is intended solely for private use and not for commercial purposes. The warranty shall be deemed void in cases of misuse or improper handling, use of force and modification which have not been carried out by one of our authorised Service centres. Your statutory rights are not restricted by this warranty. The warranty period is not prolonged by repairs effected under the warranty. This also applies to replaced and repaired components. Any damage and defects present at the time of purchase must be reported immediately after unpacking, but no later than two days after the date of purchase. Repairs carried out after expiry of the warranty period shall be subject to charge. Service Great Britain Tel.: 0871 5000 720 (£ 0.10/Min.) E-Mail: [email protected] IAN 102881 Service Malta Tel.: 80062230 E-Mail: [email protected] IAN 102881 Hotline availability: Monday to Friday 08:00 - 20:00 (CET) SRR 3.7 A1 77 GB MT Disposal Never dispose of the appliance in the normal domestic waste. This product is subject to the provisions of European Directive 2012/19/EU. GB MT Dispose of the appliance via an approved waste disposal company or your municipal waste disposal facility. Please observe applicable regulations. Please contact your waste disposal facility if you are in any doubt. Disposal of (rechargeable) batteries To dispose of the appliance in an environmentally friendly way, you must remove the battery from the appliance: CAUTION – PROPERTY DAMAGE! ► Remove the battery from the appliance only if you want to scrap/dispose of the appliance! The appliance is permanently defective after you have removed the battery! 1) To remove the battery from the handset, remove the small screw from the rear of the handset with a Phillips screwdriver. 2) Remove the rear cover of the handset. 3) Lever out the black inner housing, for instance with a screwdriver. Before you remove the inner housing, you may need to break off the side and bottom brackets or bend them outwards. Preferably, use a flat-blade screwdriver to do this. 4) Once you have removed the inner housing: Break the brackets on the transparent plastic cover on the sides. Press the lower lock slightly inwards so that the clear plastic cover can be folded upwards. 78 SRR 3.7 A1 5) Lift the board slightly so you can get under the battery with a flat-blade screwdriver. 6) Lever the batteries out. 7) Dispose of the battery in an environmentally friendly manner. Used batteries may not be disposed of in household waste. Consumers are legally obliged to dispose of (rechargeable) batteries at a collection point in their community/city district or at a retail store. The purpose of this obligation is to ensure that batteries are disposed of in an environmentally congruent manner. Only dispose of batteries when they are fully discharged. The packaging is made of environmentally friendly materials which you can dispose of at your local recycling centre. Importer KOMPERNASS HANDELS GMBH BURGSTRASSE 21 44867 BOCHUM GERMANY www.kompernass.com SRR 3.7 A1 79 GB MT 80 SRR 3.7 A1 Inhaltsverzeichnis Einleitung . . . . . . . . . . . . . . . . . . . . . . . . . . . . . . . . . . . . 82 Bestimmungsgemäßer Gebrauch . . . . . . . . . . . . . . . . 82 Lieferumfang . . . . . . . . . . . . . . . . . . . . . . . . . . . . . . . . . 82 Gerätebeschreibung . . . . . . . . . . . . . . . . . . . . . . . . . . . 83 Technische Daten . . . . . . . . . . . . . . . . . . . . . . . . . . . . . . 84 Sicherheitshinweise. . . . . . . . . . . . . . . . . . . . . . . . . . . . 85 Aufladen der Akkus . . . . . . . . . . . . . . . . . . . . . . . . . . . 89 Kabelloses Rasieren . . . . . . . . . . . . . . . . . . . . . . . . . . . 90 Rasieren mit Netzadapter . . . . . . . . . . . . . . . . . . . . . . 91 Trimmer/Langhaarschneider . . . . . . . . . . . . . . . . . . . . 91 Reisesicherung. . . . . . . . . . . . . . . . . . . . . . . . . . . . . . . . 92 Reinigung und Pflege . . . . . . . . . . . . . . . . . . . . . . . . . . 93 Reinigung mit dem Pinsel . . . . . . . . . . . . . . . . . . . . . . . . . . . . . . . .93 Reinigung unter fließendem Wasser . . . . . . . . . . . . . . . . . . . . . . . .94 Gründliche Reinigung . . . . . . . . . . . . . . . . . . . . . . . . . . . . . . . . . . .95 Aufbewahrung . . . . . . . . . . . . . . . . . . . . . . . . . . . . . . . 96 Garantie und Service . . . . . . . . . . . . . . . . . . . . . . . . . . 97 Entsorgung . . . . . . . . . . . . . . . . . . . . . . . . . . . . . . . . . . . 98 Importeur . . . . . . . . . . . . . . . . . . . . . . . . . . . . . . . . . . .100 SRR 3.7 A1 81 DE AT CH Einleitung Herzlichen Glückwunsch zum Kauf Ihres neuen Gerätes. Sie haben sich damit für ein hochwertiges Produkt entschieden. Die Bedienungsanleitung ist Bestandteil dieses Produkts. Sie enthält wichtige Hinweise für Sicherheit, Gebrauch und Entsorgung. Machen Sie sich vor der Benutzung des Produkts mit allen Bedien- und Sicherheitshinweisen vertraut. Benutzen Sie das Produkt nur wie beschrieben und für die angegebenen Einsatzbereiche. Händigen Sie alle Unterlagen bei Weitergabe des Produkts an Dritte mit aus. DE AT CH Bestimmungsgemäßer Gebrauch Dieses Gerät ist ausschließlich zum Rasieren und Schneiden von menschlichen Haaren vorgesehen. Dieses Gerät ist ausschließlich für die Benutzung in privaten Haushalten bestimmt. Nutzen Sie es nicht gewerblich. Jede andere Verwendung gilt als nicht bestimmungsgemäß und kann zu Sachschäden oder sogar zu Personenschäden führen. Lieferumfang ♦ Rasierer mit Schereinheit ♦ Netzadapter ♦ Trimmereinheit ♦ Schutzkappe ♦ Pinsel ♦ Tasche ♦ Bestellkarte ♦ Bedienungsanleitung 82 SRR 3.7 A1 HINWEIS Kontrollieren Sie den Lieferumfang direkt nach dem Auspacken auf Vollständigkeit und Beschädigungen. Wenden Sie sich, wenn nötig, an den Service. Gerätebeschreibung Abbildung A (vordere Ausklappseite): 1 Antriebswelle 2 Schereinheit 3 Entriegelungstaste 4 Schutzkragen 5 Ein-/Aus-Taste 6 schmaler Langhaarschneider 7 Trimmereinheit 8 breiter Langhaarschneider 9 Symbol (Sperrung) 0 Symbol (Laden) q Ladestandsanzeige w Ladebuchse DE AT CH Abbildung B (hintere Ausklappseite): e Verbindungsstecker r Netzadapter t Pinsel z Schutzkappe u Tasche SRR 3.7 A1 83 Technische Daten Gerät Eingangsspannung: 5 V DE AT CH Eingangsstrom: 1000 mA Akku: Li-Ion Akku 3,7 V, 700 mAh Umgebungstemperatur: 5°C bis 35°C Schutzklasse: III/ Ladezeit: ca. 90 Minuten Laufzeit bei voll geladenem Akku: ca. 60 Minuten Schutzart: IPX 4 Netzadapter (Typ PTB-050100EU) Eingangsspannung: 100 - 240 V ∼ 50/60 Hz Ausgangsspannung: 5 V Ausgangsstrom: 1000 mA Schutzklasse: II / 84 SRR 3.7 A1 Sicherheitshinweise ► ► ► ► GEFAHR – ELEKTRISCHER SCHLAG! Kontrollieren Sie das Gerät vor der Verwendung auf äußerliche, sichtbare Schäden. Nehmen Sie ein beschädigtes Gerät nicht in Betrieb. Es besteht Stromschlaggefahr. Sollte ein Schaden am Kabel, am Netzadapter, am Gehäuse oder an anderen Teilen festgestellt werden, darf das Gerät nicht weiter benutzt werden. Ziehen Sie den Netzadapter aus der Steckdose — wenn eine Störung auftritt, — bevor Sie das Gerät reinigen, — wenn Sie das Gerät längere Zeit nicht benutzen, — nach jedem Gebrauch. Ziehen Sie dabei am Netzadapter direkt und nicht am Kabel. Tauchen Sie das Gerät sowie das Kabel mit Netzadapter niemals in Wasser oder eine andere Flüssigkeit. SRR 3.7 A1 DE AT CH 85 ► ► DE AT CH ► ► ► 86 GEFAHR – ELEKTRISCHER SCHLAG! Falls das Gerät ins Wasser gefallen ist, ziehen Sie unbedingt zuerst den Netzadapter aus der Steckdose, bevor Sie ins Wasser greifen. Fassen Sie den Netzadapter niemals mit nassen Händen an, besonders wenn Sie es in die Steckdose stecken bzw. aus dieser herausziehen. Es besteht Stromschlaggefahr! Prüfen Sie den Netzadapter und das Gerät regelmäßig auf eventuelle mechanische Defekte. Achten Sie darauf, dass das Kabel nicht in Schranktüren eingeklemmt oder über heiße Flächen gezogen wird. Es könnte sonst die Isolierung des Kabels beschädigt werden. Der Einbau einer Fehlerstromschutzeinrichtung mit einem Bemessungsauslösestrom von nicht mehr als 30 mA bietet weiteren Schutz vor einem elektrischen Schlag. Lassen Sie den Einbau ausschließlich von einer Elektro-Fachkraft durchführen. SRR 3.7 A1 ► ► ► ► ► GEFAHR – ELEKTRISCHER SCHLAG! ACHTUNG! Das Gerät trocken halten! ACHTUNG! Trennen Sie den Netzadapter vom Handteil, wenn Sie es mit Wasser reinigen! WARNUNG – VERLETZUNGSGEFAHR! Dieses Gerät kann von Kindern ab 8 Jahren und darüber sowie von Personen mit verringerten physischen, sensorischen oder mentalen Fähigkeiten oder Mangel an Erfahrung und Wissen benutzt werden, wenn sie beaufsichtigt oder bezüglich des sicheren Gebrauchs des Gerätes unterwiesen wurden und die daraus resultierenden Gefahren verstehen. Kinder dürfen nicht mit dem Gerät spielen. Reinigung und Benutzer-Wartung dürfen nicht von Kindern ohne Beaufsichtigung durchgeführt werden. SRR 3.7 A1 DE AT CH 87 ► DE AT CH ► ► ► 88 WARNUNG – VERLETZUNGSGEFAHR! Lassen Sie Reparaturen am Gerät nur von autorisierten Fachbetrieben oder dem Kundenservice durchführen. Durch unsachgemäße Reparaturen können erhebliche Gefahren für den Benutzer entstehen. Zudem erlischt der Garantieanspruch. Benutzen Sie das Gerät nicht mit defektem Schneidsatz oder defektem Schnittlängenaufsatz, da diese scharfe Kanten haben können. Es besteht Verletzungsgefahr! Defekte Bauteile dürfen nur gegen OriginalErsatzteile ausgetauscht werden. Nur bei diesen Teilen ist gewährleistet, dass sie die Sicherheitsanforderungen erfüllen werden. Schließen Sie den Netzadapter nur an eine gut erreichbare Steckdose an, damit im Störungsfall der Netzadapter schnell aus der Steckdose gezogen werden kann. SRR 3.7 A1 ACHTUNG – SACHSCHADEN! ► Betreiben Sie das Gerät nie unbeaufsichtigt und nur gemäß den Angaben auf dem Typenschild. ► Verwenden Sie für den Netzbetrieb nur den mitgelieferten Netzadapter (Typ PTB050100EU). ► Decken Sie den Netzadapter nicht ab, um eine unzulässige Erwärmung zu vermeiden. DE AT CH Aufladen der Akkus Vor der ersten Anwendung sollte der Akku mindestens 90 Minuten aufgeladen werden. HINWEIS ► Stellen Sie sicher, dass das Gerät ausgeschaltet ist, bevor Sie den Akku aufladen. 1) Stecken Sie den Verbindungsstecker e in die Ladebuchse w am Rasierapparat. Achten Sie auf die richtige Polung: Der Führungsstab in der Ladebuchse w muss in die Führungsschiene am Verbindungsstecker e greifen. Sonst lässt sich der Verbindungsstecker e nicht einstecken. 2) Stecken Sie den Netzadapter r in eine zu den Gerätevorgaben passende Steckdose: Die Akkuladung wird in Prozent (%) im Display angezeigt (Ladestandsanzeige q). Das Symbol 0 erscheint im Display. SRR 3.7 A1 89 ♦ Sobald der Akku voll geladen ist, leuchtet das Symbol 0 weiterhin im Display und die Ladestandsanzeige q zeigt 99% an. ♦ Mit voll geladenem Akku können Sie das Gerät bis zu ca. 60 Minuten ohne Anschluss an das Stromnetz betreiben. Kabelloses Rasieren ACHTUNG! SACHSCHADEN! ► Dieses Gerät ist nicht zur Nassrasur geeignet! DE AT CH Sie können den Rasierer kabellos verwenden. In diesem Fall müssen Sie das Gerät vor dem ersten Gebrauch aufladen (siehe Kapitel „Aufladen der Akkus“). 1) Stecken Sie, falls nicht aufgesteckt, den Schutzkragen 4 von unten auf die Schereinheit 2 (siehe Ausklappseite). 2) Stecken Sie, die Schereinheit 2 mit aufgesetztem Schutzkragen 4 auf die Antriebswelle 1. Achten Sie darauf, dass der Schutzkragen 4 korrekt auf dem Handteil aufliegt. 3) Nehmen Sie die Schutzkappe z ab. 4) Drücken Sie die Ein-/Aus-Taste 5. Die Ladestandsanzeige q zeigt den aktuellen Ladestand und der Rasierer startet. HINWEIS ► Die besten Ergebnisse erzielen Sie bei trockener Haut. ► Es kann 2 bis 3 Wochen dauern, bis sich die Haut an das Schersystem gewöhnt hat. 5) Führen Sie die Scherköpfe mit geraden und kreisenden Bewegungen über die Haut. 6) Wenn Sie alle zu rasierenden Stellen behandelt haben, drücken Sie die Ein-/Aus-Taste 5. Das Gerät stoppt. Nach ca. 3 Sekunden erlischt das Display. 90 SRR 3.7 A1 7) Reinigen Sie den Rasierer nach jeder Rasur mit dem mitgelieferten Pinsel t. Für eine gründliche Reinigung lesen Sie das Kapitel „Reinigung und Pflege“. Rasieren mit Netzadapter ACHTUNG! SACHSCHADEN! ► Dieses Gerät ist nicht zur Nassrasur geeignet! Wenn Sie den Rasierer benutzen wollen, ohne ihn vorher zu laden, können Sie den Rasierer auch direkt mit dem Netzadapter r verwenden: DE AT CH 1) Stecken Sie den Verbindungsstecker e in die Ladebuchse w am Rasierapparat. Achten Sie auf die richtige Polung: Der Führungsstab in der Ladebuchse w muss in die Führungsschiene am Verbindungsstecker e greifen. Sonst lässt sich der Verbindungsstecker e nicht einstecken. 2) Verbinden Sie den Netzstecker mit einer Netzsteckdose. Sie können den Rasierer dann verwenden. Trimmer/Langhaarschneider Um einen Bart in Form zu bringen, Koteletten zu formen oder Augenbrauen zu rasieren, benutzen Sie die Trimmereinheit 7. 1) Ziehen Sie die Schereinheit 2, falls aufgesetzt, vom Handgerät ab. 2) Stecken Sie die Trimmereinheit 7 auf die Antriebswelle 1. Je nachdem, ob Sie mit dem breiten 8 oder schmalen Langhaarschneider 6 arbeiten wollen, wechseln Sie die Aufsteckrichtung: SRR 3.7 A1 91 – Wollen Sie mit dem breiten Langhaarschneider 8 arbeiten, stecken Sie die Trimmereinheit 7 so auf, dass der breite Langhaarschneider 8 zu Ihnen weist. – Wollen Sie mit dem schmalen Langhaarschneider 6 arbeiten, stecken Sie die Trimmereinheit 7 so auf, dass der schmale Langhaarschneider 6 zu Ihnen weist. 3) Drücken Sie die Ein-/Aus-Taste 5. Die Ladestandsanzeige q zeigt den aktuellen Ladestand an und das Gerät startet. 4) Wenn Sie mit dem Trimmen fertig sind, drücken Sie noch einmal die Ein-/Aus-Taste 5. DE AT CH 5) Reinigen Sie die Trimmereinheit 7 mit dem mitgelieferten Pinsel t. Für eine gründliche Reinigung lesen Sie das Kapitel „Reinigung und Pflege“. Reisesicherung Um das Gerät vor unbeabsichtigtem Einschalten zu schützen, können Sie die Ein-/Aus-Taste 5 sperren. ■ Drücken und halten Sie die Ein-/Aus-Taste 5 solange, bis im Display das Symbol 9 erscheint. Wenn nun die Ein-/Aus-Taste 5 gedrückt wird, erscheint das Symbol 9 und die Ladestandsanzeige q. Das Gerät schaltet sich jedoch nicht ein. ■ Wenn Sie die Sperrung wieder aufheben wollen, drücken und halten Sie die Ein-/Aus-Taste 5: – das Symbol 9 erscheint und fängt an zu blinken. Das Gerät lässt sich nun wieder einschalten. 92 SRR 3.7 A1 Reinigung und Pflege GEFAHR - ELEKTRISCHER SCHLAG! ► Ziehen Sie vor jeder Reinigung den Netzstecker aus der Netzsteckdose! Es besteht die Gefahr eines elektrischen Schlages! ACHTUNG! SACHSCHADEN! ► Benutzen Sie keine scheuernden, chemischen oder ätzenden Reinigungsmittel um das Gerät zu reinigen. Das führt zu irreparablen Schäden am Gerät. DE AT CH Reinigung mit dem Pinsel Schereinheit Reinigen Sie nach jeder Rasur die 3 Scherköpfe an der Schereinheit 2 mit dem Pinsel t. 1) Drücken Sie auf die Entriegelungstaste 3, so dass die Schereinheit 2 aufspringt. 2) Klopfen Sie die Schereinheit 2 vorsichtig auf einer ebenen Fläche aus bzw. blasen Sie die Haarteilchen ab. 3) Benutzen Sie den Pinsel t, um verbliebene Haarteilchen zu entfernen. Trimmeinheit ■ Reinigen Sie die Trimmeinheit nach jeder Rasur mit dem Pinsel t. ■ Ölen Sie die Langhaarschneider 6/8 ca. alle 6 Monate mit einem Tropfen Nähmaschinenöl. SRR 3.7 A1 93 Reinigung unter fließendem Wasser Die Schereinheit 2 ist zur Reinigung unter fließendem Wasser geeignet. 1) Drücken Sie auf die Entriegelungstaste 3, so dass die Schereinheit 2 aufspringt. 2) Halten Sie die Schereinheit 2 so unter den Wasserstrahl, dass das Wasser von innen nach außen durch die Scherköpfe fließt. ACHTUNG! SACHSCHADEN! DE AT CH Achten Sie darauf, nur die Schereinheit 2 unter den Wasserstrahl zu halten! Das Handteil des Rasierers ist nur gegen Spritzwasser geschützt und kann irreparabel beschädigt werden, wenn es unter fließendes Wasser gehalten wird. 3) Lassen Sie die Schereinheit 2 trocknen, bevor Sie den Rasierer wieder benutzen. 94 SRR 3.7 A1 Gründliche Reinigung Für die gründliche Reinigung, nehmen Sie die Scherköpfe ab: 1) Drücken Sie auf die Entriegelungstaste 3. Die Schereinheit 2 springt auf. 2) Überstrecken Sie die Schereinheit 2 ein wenig, so dass diese sich nach oben herausziehen lässt. 3) Drehen Sie vorsichtig die mit Pfeilen markierte Verriegelung soweit in Pfeilrichtung, bis sich die Halterung der Scherköpfe abheben lässt (siehe Abbildung). DE AT CH 4) Reinigen Sie alle Teile unter fließendem Wasser und lassen Sie sie vollständig trocknen. SRR 3.7 A1 95 5) Bauen Sie die Schereinheit 2 wieder zusammen. 6) Zum Befestigen drehen Sie die mit den Pfeilen markierte Verriegelung entgegen der Pfeilrichtung, dass sich die Halterung der Scherköpfe nicht mehr abheben lässt. 7) Entfernen Sie lose Haare mit dem Pinsel t aus dem Rasierer. 8) Setzen Sie die Schereinheit 2 wieder auf den Rasierer. Achten Sie darauf, dass diese einrastet und fest sitzt. ■ Reinigen Sie das Gehäuse und den Netzadapter r mit einem feuchten Tuch. DE AT CH HINWEIS Wenn... – ... die Rasur spürbar schlechter wird,... – ... Sie den Rasierer mehrmals über die gleiche Stelle führen müssen, um ein gutes Ergebnis zu erzielen,... – ... die Rasur deutlich länger dauert,... – ... Beschädigungen an den Scherköpfen sichtbar sind,... ... müssen die Scherköpfe gewechselt werden. Bitte wenden Sie sich an den Service, wenn Sie Scherköpfe bestellen wollen. Aufbewahrung ACHTUNG! SACHSCHADEN! Bewahren Sie den Rasierer nie in der Tasche u auf, während das Gerät geladen wird! Überhitzungsgefahr! ■ Stecken Sie immer die Schutzkappe z auf die Schereinheit 2, wenn Sie das Gerät nicht benutzen. ■ Bewahren Sie das gereinigte und trockene Gerät und seine Zubehörteile in der mitgelieferten Tasche u auf. ■ Lagern Sie alles an einem sauberen, staubfreien und trockenen Ort. 96 SRR 3.7 A1 Garantie und Service Sie erhalten auf dieses Gerät 3 Jahre Garantie ab Kaufdatum. Das Gerät wurde sorgfältig produziert und vor Anlieferung gewissenhaft geprüft. Bitte bewahren Sie den Kassenbon als Nachweis für den Kauf auf. Bitte setzen Sie sich im Garantiefall mit Ihrer Servicestelle telefonisch in Verbindung. Nur so kann eine kostenlose Einsendung Ihrer Ware gewährleistet werden. Die Garantieleistung gilt nur für Material- oder Fabrikationsfehler, nicht aber für Transportschäden, Verschleißteile oder für Beschädigungen an zerbrechlichen Teilen, z. B. Schalter oder Akkus. Das Produkt ist lediglich für den privaten und nicht für den gewerblichen Gebrauch bestimmt. Bei missbräuchlicher und unsachgemäßer Behandlung, Gewaltanwendung und bei Eingriffen, die nicht von unserer autorisierten Service-Niederlassung vorgenommen wurden, erlischt die Garantie. Ihre gesetzlichen Rechte werden durch diese Garantie nicht eingeschränkt. Die Garantiezeit wird durch die Gewährleistung nicht verlängert. Dies gilt auch für ersetzte und reparierte Teile. Eventuell schon beim Kauf vorhandene Schäden und Mängel müssen sofort nach dem Auspacken gemeldet werden, spätestens aber zwei Tage nach Kaufdatum. Nach Ablauf der Garantiezeit anfallende Reparaturen sind kostenpflichtig. DE AT CH Service Deutschland Tel.: 0800 5435 111 (Kostenfrei aus dem dt. Festnetz/ Mobilfunknetz) E-Mail: [email protected] IAN 102881 SRR 3.7 A1 97 Service Österreich Tel.: 0820 201 222 (0,15 EUR/Min.) E-Mail: [email protected] IAN 102881 Service Schweiz Tel.: 0842 665566 (0,08 CHF/Min., Mobilfunk max. 0,40 CHF/ Min.) E-Mail: [email protected] IAN 102881 DE AT CH Erreichbarkeit Hotline: Montag bis Freitag von 8:00 Uhr – 20:00 Uhr (MEZ) Entsorgung Werfen Sie das Gerät keinesfalls in den normalen Hausmüll. Dieses Produkt unterliegt der europäischen Richtlinie 2012/19/EU. Entsorgen Sie das Gerät über einen zugelassenen Entsorgungsbetrieb oder über Ihre kommunale Entsorgungseinrichtung. Beachten Sie die aktuell geltenden Vorschriften. Setzen Sie sich im Zweifelsfall mit Ihrer Entsorgungseinrichtung in Verbindung. 98 SRR 3.7 A1 Batterien/Akkus entsorgen Um das Gerät umweltgerecht zu entsorgen, müssen Sie den Akku aus dem Gerät entfernen: ACHTUNG - SACHSCHADEN! ► Entnehmen Sie den Akku nur aus dem Gerät, wenn Sie das Gerät entsorgen/verschrotten wollen! Das Gerät ist defekt, wenn Sie den Akku ausgebaut haben! 1) Um den Akku aus dem Handgerät zu entfernen, entfernen Sie die kleine Schraube an der Rückseite des Handgeräts mit einem Kreuzschlitzschraubendreher. DE AT CH 2) Ziehen Sie die hintere Abdeckung des Handteils ab. 3) Hebeln Sie das schwarze Innengehäuse, zum Beispiel mit einem Schraubendreher, heraus. Eventuell müssen Sie, bevor sich das Innengehäuse herauslösen lässt, die seitlichen und die unteren Halterungen abbrechen oder nach außen biegen. Benutzen Sie dafür am besten einen Schlitzschraubendreher. 4) Wenn Sie das Innengehäuse herausgenommen haben: Brechen Sie die Halterungen der durchsichtigen Plastikabdeckung an den Seiten ab. Drücken Sie die untere Arretierung etwas nach Innen, so dass die durchsichtige Plastikabdeckung aufgeklappt werden kann. 5) Heben Sie die Platine etwas an, so dass Sie mit einem Schlitzschraubendreher unter die Batterie gelangen. 6) Hebeln Sie den Akku heraus. 7) Entsorgen Sie den Akku umweltgerecht. SRR 3.7 A1 99 Batterien/Akkus dürfen nicht im Hausmüll entsorgt werden. Jeder Verbraucher ist gesetzlich verpflichtet, Batterien/Akkus bei einer Sammelstelle seiner Gemeinde / seines Stadtteils oder im Handel abzugeben. Diese Verpflichtung dient dazu, dass Batterien/Akkus einer umweltschonenden Entsorgung zugeführt werden können. Geben Sie Batterien/Akkus nur im entladenen Zustand zurück. DE AT CH Die Verpackung besteht aus umweltfreundlichen Materialien, die Sie über die örtlichen Recyclingstellen entsorgen können. Importeur KOMPERNASS HANDELS GMBH BURGSTRASSE 21 44867 BOCHUM GERMANY www.kompernass.com 100 SRR 3.7 A1 KOMPERNASS HANDELS GMBH BURGSTRASSE 21 44867 BOCHUM DEUTSCHLAND / GERMANY www.kompernass.com Estado de las informaciones · Versione delle informazioni · Estado das informações · Last Information Update · Stand der Informationen: 11 / 2014 · Ident.-No.: SRR3.7A1-092014-2 IAN 102881 5-
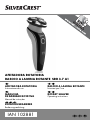 1
1
-
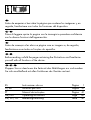 2
2
-
 3
3
-
 4
4
-
 5
5
-
 6
6
-
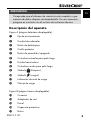 7
7
-
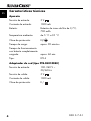 8
8
-
 9
9
-
 10
10
-
 11
11
-
 12
12
-
 13
13
-
 14
14
-
 15
15
-
 16
16
-
 17
17
-
 18
18
-
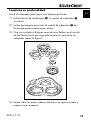 19
19
-
 20
20
-
 21
21
-
 22
22
-
 23
23
-
 24
24
-
 25
25
-
 26
26
-
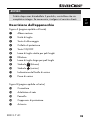 27
27
-
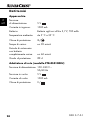 28
28
-
 29
29
-
 30
30
-
 31
31
-
 32
32
-
 33
33
-
 34
34
-
 35
35
-
 36
36
-
 37
37
-
 38
38
-
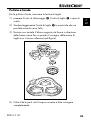 39
39
-
 40
40
-
 41
41
-
 42
42
-
 43
43
-
 44
44
-
 45
45
-
 46
46
-
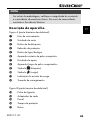 47
47
-
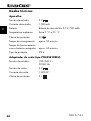 48
48
-
 49
49
-
 50
50
-
 51
51
-
 52
52
-
 53
53
-
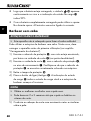 54
54
-
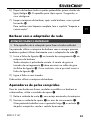 55
55
-
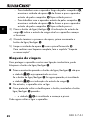 56
56
-
 57
57
-
 58
58
-
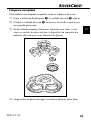 59
59
-
 60
60
-
 61
61
-
 62
62
-
 63
63
-
 64
64
-
 65
65
-
 66
66
-
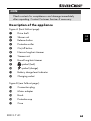 67
67
-
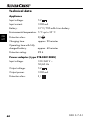 68
68
-
 69
69
-
 70
70
-
 71
71
-
 72
72
-
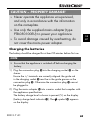 73
73
-
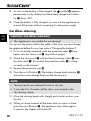 74
74
-
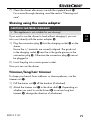 75
75
-
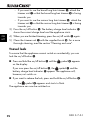 76
76
-
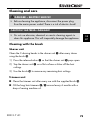 77
77
-
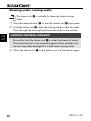 78
78
-
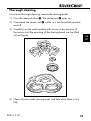 79
79
-
 80
80
-
 81
81
-
 82
82
-
 83
83
-
 84
84
-
 85
85
-
 86
86
-
 87
87
-
 88
88
-
 89
89
-
 90
90
-
 91
91
-
 92
92
-
 93
93
-
 94
94
-
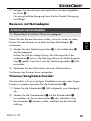 95
95
-
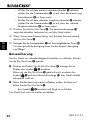 96
96
-
 97
97
-
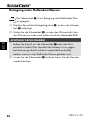 98
98
-
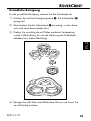 99
99
-
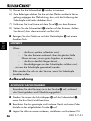 100
100
-
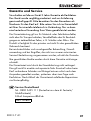 101
101
-
 102
102
-
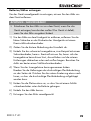 103
103
-
 104
104
-
 105
105


Silvercrest 102881 Instrucciones de operación
- Categoría
- Afeitadoras de hombre
- Tipo
- Instrucciones de operación
- Este manual también es adecuado para
en otros idiomas
- italiano: Silvercrest 102881 Istruzioni per l'uso
- English: Silvercrest 102881 Operating instructions
- Deutsch: Silvercrest 102881 Bedienungsanleitung
- português: Silvercrest 102881 Instruções de operação
Artículos relacionados
-
Silvercrest 340531 El manual del propietario
-
Silvercrest 277761 Instrucciones de operación
-
-
Silvercrest SRR 3.7 C4 Operating Instructions Manual
-
-
-
-
-
Silvercrest SRK 3.7 A1 Instrucciones de operación
-
Silvercrest SHBS 3.7 B1 Operating Instructions Manual