7
Cámara 02 /
5
6
2
1
4
73
8
9
10
11
12 13
14
15
16
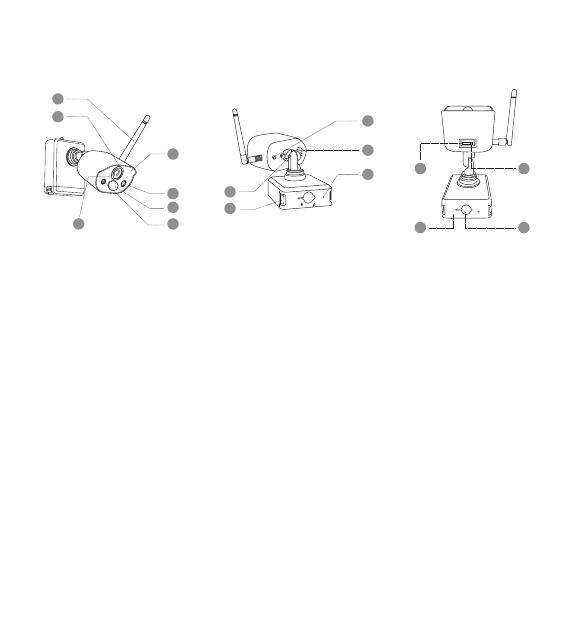
①Antena ⑤Luz indicadora de red ⑨Posición de extracción
de la batería
⑬Ranura para tarjeta micro SD
②Lente ⑥PIR ⑩Botón de encendido ⑭Tornillo de fijación de la
batería
③LED IR ⑦Luz blanca de alarma ⑪Altavoz ⑮Botón de reinicio
④Micrófono ⑧Tornillo de ajuste de
ángulo
⑫Luz indicadora de
carga
⑯Puerto de carga de la batería
Descripción de luz indicadora de red:
Luz azul siempre encendida: la cámara se emparejó o acvó correctamente
Luz roja parpadea de forma connua y lenta: esperando el emparejamiento con el NVR
Luz roja siempre encendida: batería baja
Luz azul y luz roja siempre apagada: en espera
Descripción del botón de la cámara:
Mantenga presionado el botón de encendido durante 1 segundos: encendido o apagado
Mantenga presionado el botón de reinicio durante 3 segundos: reinicie e ingrese al estado de
emparejamiento (la luz roja parpadea de forma connua y lenta después del tono de aviso)


