Crivit 1-LD3814 Usage And Safety Instructions
- Categoría
- Relojes
- Tipo
- Usage And Safety Instructions

IAN
47584
MEDIDOR DE FRECUENCIA CARDÍACA
OROLOGIO DA POLSO CON CARDIOFREQUENZIMETRO
1
/201
4
· Art.
-
Nr.:
1
-
LD
3814
MEDIDOR DE
FRECUENCIA CARDÍACA
Indicaciones sobre su
utilización y su seguridad
OROLOGIO DA
POLSO CON
CARDIOFREQUENZIMETRO
Istruzioni per l’uso e per la sicurezza
HEART RATE MONITOR
Usage and safety instructions
HERZFREQUENZ-MESSUHR
Bedienungs- und Sicherheitshinweise
Indicaciones sobre su utilización y su seguridad .................................. - 1 -
Istruzioni per l’uso e per la sicurezza ...................................... - 24 -
Usage and safety instructions ................................................... - 48 -
Bedienungs- und Sicherheitshinweise ........................... - 71 -
-
1
-
Indicaciones sobre su utilización y su
seguridad
Índice
Índice ........................................................................................................................... - 1 -
Introducción ................................................................................................................ - 3 -
Uso conforme a su propósito .................................................................................... - 3 -
Elementos incluidos en la entrega ............................................................................ - 3 -
Datos técnicos ............................................................................................................. - 4 -
Funciones ..................................................................................................................... - 4 -
Advertencias importantes de seguridad ............................................... - 5 -
- Pilas .................................................................................................................... - 5 -
- No dejar el medidor de frecuencia cardíaca al alcance de niños. ............ - 6 -
Encendido del medidor de frecuencia cardíaca .................................................... - 6 -
Reset ...................................................................................................................... - 7 -
Cambio de la pila del reloj de pulsera ............................................................. - 7 -
Indicador de nivel de batería ............................................................................. - 8 -
Sujeción de la banda pectoral ........................................................................... - 8 -
Transmisión codificada de las frecuencias cardíacas ..................................... - 9 -
Uso del soporte para bicicletas ......................................................................... - 9 -
Iluminación ............................................................................................................... - 10 -
Informaciones importantes relativas a la utilización del
medidor de frecuencia cardíaca ........................................................................... - 10 -
Ajuste rápido ..................................................................................................... - 11 -
Horario y ajustes básicos ....................................................................................... - 11 -
Segunda zona horaria ..................................................................................... - 12 -
Alarma despertador ................................................................................................ - 12 -
Función de repetición ....................................................................................... - 13 -
Temporizador/Timer (máx. 23:59:00) ................................................................ - 13 -
-
2
-
Cronómetro .............................................................................................................. - 14 -
Función de memoria de datos................................................................................ - 14 -
Pulsómetro ................................................................................................................ - 14 -
Señal de alarma ...................................................................................................... - 15 -
Temporizador/Timer .............................................................................................. - 15 -
Función de memoria de datos................................................................................ - 16 -
Zona-objetivo de pulso ........................................................................................... - 16 -
Calorías, quema de grasa e índice de masa corporal IMC .............................. - 17 -
Notas relativas al índice de masa corporal IMC: ......................................... - 18 -
Fitness/En forma ...................................................................................................... - 18 -
Solución de problemas ........................................................................................... - 19 -
El pulso no se indica correctamente ............................................................... - 19 -
Es difícil leer la pantalla / La iluminación no funciona................................. - 19 -
Estanqueidad del reloj de correa .......................................................................... - 19 -
Resistencia al agua de la banda pectoral ............................................................ - 19 -
Nota relativa a la limpieza .................................................................................... - 20 -
Eliminación y reciclaje del medidor de frecuencia cardíaca ............................. - 20 -
Eliminación de las pilas ......................................................................................... - 20 -
Declaración de conformidad ................................................................................. - 20 -
Garantía de digi-tech gmbh ................................................................................... - 20 -
Condiciones de la garantía .................................................................................... - 21 -
Duración de la garantía y derecho de reclamación ........................................... - 21 -
Ámbito de la garantía ............................................................................................. - 21 -
Procedimiento en caso de garantía....................................................................... - 22 -
Servicio técnico........................................................................................................ - 23 -
Proveedor ................................................................................................................. - 23 -

-
3
-
MEDIDOR DE FRECUENCIA CARDÍACA
Introducción
Enhorabuena por la compra de su nuevo medidor de frecuencia cardíaca Se ha
decidido Ud. por un dispositivo de alta calidad. Este manual de instrucciones
forma parte del equipamiento del medidor de frecuencia cardíaca. Contiene
indicaciones importantes sobre a su seguridad, su manejo y su eliminación como
residuo. Antes de comenzar a utilizar su medidor de frecuencia cardíaca,
familiarícese con todas las indicaciones de uso y seguridad. Utilice el medidor de
frecuencia cardíaca únicamente de la forma y para los ámbitos de aplicación
indicados.
En caso de ceder el medidor de frecuencia cardíaca a terceros, entrégueles
también ésta documentación.
Uso conforme a su propósito
El medidor de frecuencia cardíaca está diseñado para indicar la fecha y la hora,
así como para las funciones adicionales que aquí se detallan. La utilización para
cualquier otro propósito o la realización de modificaciones en el medidor de
frecuencia cardíaca no considera adecuada a sus propósitos. El fabricante no se
hace responsable de los daños causados por una utilización no adecuada a sus
propósitos o por una utilización errónea. El medidor de frecuencia cardíaca no es
apto para un uso de carácter comercial o industrial.
Elementos incluidos en la entrega
Recomendación: una vez adquirido el producto, compruebe los elementos
incluidos en la entrega. Asegúrese de que no falta ningún componente y que
estos no presentan defectos.
• Medidor de frecuencia cardíaca, incluida la pila (CR2032)
• Banda pectoral, incluida la pila (CR2032)
• Soporte para bicicleta
• Manual del usuario
-
4
-
Datos técnicos
Medidor de frecuencia cardíaca
Temperatura de funcionamiento 0-50 °C
Dimensiones (sin la banda pectoral) 4,3 x 4,6 cm
Medidas de la pantalla 2,5 x 2,6 cm
Peso 48 g
Pila CR2032/3V
Banda pectoral
Temperatura de funcionamiento 0-50 °C
Medidas 7 x 3,3 x 1,2 cm
Frecuencia de transmisión 110 kHz
Peso 51 g
Pila CR2032/3V
Funciones
Medición del pulso
• Alarma de pulso máximo
• Zona-objetivo de pulso, con temporizador y alarma
(Modo saludable, forma física/Fitness, alto rendimiento y
personalizado)
• Pulso máximo, pulso mínimo, pulso, pulso promedio
• Indicador luminoso de alarma (en caso de sobrepasar los valores
introducidos).
Funciones caloríficas
• Consumo de calorías y quema de grasas durante el entrenamiento
• Cálculo del índice de masa corporal (IMC)
• Nivel de forma física
Cronómetro
-
5
-
• 1/100 segundos con 99 tiempos de vuelta
Cuenta atrás
Funciones horarias
• Hora
• Calendario
• Despertador con función de repetición
• Señal horaria
• Segunda zona horaria
Otras funciones
• Retroiluminación
Advertencias importantes de seguridad
ATENCIÓN! Antes de comenzar con el entrenamiento,
consulte a su médico. Él le podrá indicar cuál es el tipo de
entrenamiento y los valores de ritmo cardíaco más
adecuados para usted. Este medidor de frecuencia cardíaca
no es un instrumento médico y solo sirve como apoyo a la
planificación del entrenamiento.
- Pilas
Introduzca las pilas/ pilas recargables en el sentido correcto y no intente volver a
cargar pilas o abrirlas. No tire nunca pilas al fuego, ya que podrían explotar. No
utilice simultáneamente pilas de diferente tipo (nuevas con usadas, alcalinas con
pilas de carbono, etc.). El uso indebido de las pilas implica peligro de explosión y
de derrame.
En caso de derrame del contenido de las pilas, utilice guantes y limpie el medidor
de frecuencia cardíaca con un paño seco.
-
6
-
- No dejar el medidor de frecuencia cardíaca al alcance de niños.
No deje utilizar el medidor de frecuencia cardíaca a niños sin supervisión. Por lo
general los niños no son conscientes de los posibles peligros.
La ingestión depilas/ pilas recargables puede poner en peligro su vida.
Mantenga las pilas fuera del alcance de niños de corta edad.
En caso de ingestión de una pila, debe solicitarse inmediatamente ayuda médica.
Mantenga también el material de embalaje de este instrumento fuera del alcance
de niños. Puede suponer peligro de asfixia.
Encendido del medidor de frecuencia cardíaca
Con ayuda de una moneda, abra la tapa correspondiente a la pila situada en la
parte trasera de la banda pectoral. Coloque en el hueco la pila de 3V, con el
polo positivo (+) hacia arriba. Vuelva a cerrar la tapa, enroscándola.
Despegue el folio protector que cubre la pantalla del medidor de frecuencia
cardíaca y presione sobre MODE, SEL o SET.
Presionando sobre SEL, podrá elegir entre los idiomas inglés, alemán, francés y
español. Confirme el idioma elegido presionando SET.
Pila: CR2032

-
7
-
De la misma forma, confirme los valores KM-KG según el sistema métrico
METRIC KM - KG KM - KG KM - KG
o los valores millas-libras (M-LB)
IMPERIAL M - LB M - LB M - LB
Concluya el encendido presionando sobre MODE.
Reset
Presionando al mismo tiempo SET y SEL se puede volver a los valores estándar. La
elección de otro idioma solo puede llevarse a cabo tras realizar esta función.
Cambio de la pila del reloj de pulsera
Si lleva el reloj al relojero para cambiar la pila puede solicitar una prueba de
estanqueidad para comprobar la resistencia al agua del reloj. Si prefiere cambiar
la pila usted mismo/a, siga estos pasos: Suelte los tornillos (1, 2, 3 y 4) de la
tapa trasera del reloj con un destornillador pequeño en cruz. Retire la tapa y la
pegatina de la pila.
Sírvase de una herramienta pequeña y plana para abrir el pestillo (5) de la
ranura de la pila. Retire la pila gastada y coloque otra pila CR2032 de 3 V
nueva con el polo (+) hacia arriba. Compruebe que el anillo estanco (6) está
correctamente colocado y vuelva a cerrar el pestillo de la ranura de la pila (5).
Vuelva a pegar la pegatina de la pila, encaje la tapa y atorníllela.
-
8
-
Indicador de nivel de batería
Cuando el nivel de la batería de la banda pectoral sea insuficiente para su
normal funcionamiento, aparecerá en la pantalla:
TXBELT
LO BAT
TXGURT
BATT
SNGLTX
PILE
TXBCIN
BAT BA
Cambie la pila de la banda siguiendo lo indicado en el apartado “banda
pectoral“.
Sujeción de la banda pectoral
Ajuste la banda de tal modo que
quede bien sujeta, justo debajo de
los músculos pectorales.
Humedezca ligeramente las áreas
de contacto de la banda con un
poco de agua o con gel para
electrocardiogramas (que podrá
encontrar en una farmacia).
Asegúrese de que las áreas de
contacto estén siempre en
contacto con la piel.
Coloque la banda siguiendo
las indicaciones de la imagen.
Asegúrese de que la banda esté
bien sujeta al cuerpo. La banda
debe de quedar sujeta al pecho y
ejercer una ligera presión aun
después de haber expirado
completamente. Los tendidos de
alta tensión, las catenarias de
ferrocarril o tranvía o un tráfico fluido de automóviles pueden influir o interferir en
los datos del medidor de frecuencia cardíaca. Téngalo en cuenta a la hora de
elegir el itinerario de su entrenamiento.
Área de contacto
-
9
-
Transmisión codificada de las frecuencias cardíacas
La transmisión de datos desde la banda pectoral se codifica digitalmente para
evitar interferencias si entrena Ud. con un compañero/a que usa otro medidor de
frecuencia cardíaca idéntico al suyo.
Al utilizar por primera vez la banda pectoral, esta elige aleatoriamente un canal
de transmisión. El canal se indica en la parte superior de la pantalla cuando
enciende el indicador de la frecuencia cardíaca. Los canales disponibles son
CH10, CH11, CH12, CH13 y CH14. Puede cambiar el canal de transmisión
retirando la pila de la banda pectoral y volviéndola a colocar. La banda volverá
a elegir aleatoriamente un canal de transmisión. Pasado 1 minuto, se indicará de
nuevo la frecuencia cardíaca y el nuevo canal de transmisión utilizado.
Uso del soporte para bicicletas
Puede colocarse el medidor de frecuencia cardíaca en la muñeca o puede
también sujetarlo al manillar de su bicicleta utilizando el soporte que se incluye en
el equipo.
Presione desde arriba sobre el soporte para colocarlo sobre el manillar de su
bicicleta. En manillares de diámetro especialmente grande puede tener que
-
10
-
presionarse con una cierta fuerza para colocar este soporte. Sujete el medidor de
frecuencia cardíaca al soporte como si se lo colocara en la muñeca.
Para la transmisión de datos a la banda pectoral es necesario no sobrepasar una
distancia de 70 cm entre la banda y el medidor de frecuencia cardíaca.
Iluminación
Presione ligeramente sobre LIGHT para activar momentáneamente la
retroiluminación.
Informaciones importantes relativas a la utilización del
medidor de frecuencia cardíaca
El medidor de frecuencia cardíaca dispone de
3 modos de
funcionamiento.
Presionando sobre MODE puede cambiar el modo de funcionamiento del
medidor de frecuencia cardíaca.
La secuencia de funciones es la siguiente:
Horario y ajustes básicos
TIME ZEIT TEMPS HORA
Cronómetro
CHRONO ST-UHR CHRONO CRONO
Pulsómetro
HRM PULS FC PULSO
Dispone además de ciertas
Funciones adicionales
Puede acceder en todo momento a las funciones adicionales presionando sobre
SEL.

-
11
-
Ajuste rápido
A la hora de ajustar valores numéricos, puede utilizar el modo de ajuste rápido
manteniendo presionado SEL.
Horario y ajustes básicos
Pulse MODE para escojer la función.
TIME ZEIT TEMPS HORA
Presionando sobre SEL puede activar las funciones adicionales correspondientes
al horario.
Horario y ajustes básicos
TIME ZEIT TEMPS HORA
Alarma despertador
ALARM ALARM ALARM ALARMA
Temporizador / Timer
TIMER TIMER COMPTE TIMER
Presione durante 3 segundos sobre SET para entrar en el modo de ajuste.
En la pantalla aparecerá:
HOLD
TO SET
HALTEN=
EINST.
MAINT=
REGLER
MANT=
AJUST
iluminándose intermitentemente el modo de 12 o 24 horas.
Para ajustarlo, presione SEL y confirme el ajuste presionando SET. Ajuste de
idéntica forma los segundos, minutos, las horas, el año, el mes y el día.
A continuación, proceda a los ajustes básicos. En primer lugar aparecerá su año
de nacimiento.
BIRTHDAY GEB-TAG DATNAISS CUMPL-AN
Para ajustar el año, presione sobre SEL y confirme su año presionando SET. Ajuste
de idéntica forma el mes y día correspondientes.
-
12
-
Posteriormente aparecerá el indicador de peso corporal.
WEIGHT GEWICHT POIDS PESO
Ajuste las cifras de su peso corporal presionando sobre SEL y confirme los datos
introducidos con SET.
Seguidamente aparece el indicador de altura corporal.
HEIGHT GROESSE TAILLE TAMANO
Ajuste la cifra de su altura corporal presionando SEL y confirme el dato con SET.
Concluya el modo de ajuste de datos presionando sobre MODE.
Segunda zona horaria
Mantenga presionado SEL durante 3 segundos. El reloj cambiará a la indicación
de la segunda zona horaria, apareciendo la señal T2 en la pantalla. El ajuste de
los datos de la segunda zona horaria se efectúa según las indicaciones del
párrafo anterior. Presione SEL durante 3 segundos para volver a su zona horaria
normal.
Alarma despertador
ALARM ALARM ALARM ALARMA
Mantenga presionado durante 3 segundos SET para entrar en el modo de ajuste.
En la pantalla aparecerá “AL” y los minutos correspondientes a la alarma.
Para ajustar los minutos, presione SEL y confirme los datos con SET. Ajuste de
idéntica forma la hora. Si se desea, se puede ajustar también el mes y el día.
Si no se ajustan ni el mes ni el día, la alarma sonará diariamente. Si se introduce
solamente el día, la alarma sonará mensualmente. Si se ajustan tanto el mes como
el día, la alarma sonará únicamente el día introducido.
En la pantalla aparecerá a continuación el ajuste de la señal horaria.
CHIME STDALARM SIGN HOR HORA AL
-
13
-
Para ajustarla, presione sobre SEL y confirme el ajuste presionando sobre SET
(ON/EIN/ACTIF/ENCENDID=encendido,
OFF/AUS/INACTIF/APAGADO=apagado).
Al activar la señal horaria aparecerá el símbolo de una campana y en cada hora
punta sonará un tono de aviso.
Concluya el modo de ajuste presionando sobre MODE.
Presionando sobre SET puede activar o desactivar la alarma. Con la alarma
activada aparecerá el símbolo .
Al sonar la alarma, presione sobre SET, SEL o MODE para apagarla.
Función de repetición
Si al sonar la alarma no presiona ningún botón, se activará automáticamente tras
30 segundos la función de repetición y aparecerá el símbolo de forma
intermitente en la pantalla. Esta función se repetirá 5 veces.
Temporizador/Timer (máx. 23:59:00)
TIMER TIMER COMPTE TIMER
Presione durante 3 segundos sobre SET para activar el temporizador. En la
pantalla aparecerán intermitentemente los minutos correspondientes al
temporizador.
Para ajustarlos, presione sobre SEL y confirme con SET. Ajuste la hora de idéntica
forma.
A continuación seguirán los ajustes complementarios del temporizador. Presione
sobre SEL para elegir el modo deseado:
Cd r Tras alcanzar 0:00, el temporizador volverá a correr el período
indicado
Cd U Tras alcanzar 0:00, el temporizador correrá hacia adelante
Cd S Tras alcanzar 0:00, el temporizador se detiene
Concluya el modo de ajuste presionando MODE. Puede activar o parar el
temporizador presionando SET. Mantenga presionado SET para volver a ajustar
el temporizador. Al finalizar la temporización sonará una señal.
-
14
-
Cronómetro
Pulse MODE para escojer la función.
CHRONO ST-UHR CHRONO CRONO
Para encender o apagar el cronómetro, presione sobre SET. Con el cronómetro
en marcha, presione SEL para finalizar un tiempo de vuelta. Pueden realizarse
hasta 99 tiempos de vuelta.
Mantenga presionado SET para volver a colocar el cronómetro a cero.
Función de memoria de datos
DATA
RECALL
ANSICHT
DATEN
APPEL
DONNEES
RECUP
DATOS
Con el cronómetro parado, presione sobre SEL y en la pantalla se indicará la
vuelta más rápida. Presione sobre SET para indicar los otros tiempos de vuelta.
Nota: la función de memoria de datos solo se podrá activar si se ha registrado al
menos una vuelta.
Pulsómetro
Pulse MODE para escojer la función.
HRM PULS FC PULSO
El pulsómetro funciona únicamente con utilización de la banda pectoral.
Presionando sobre SEL se pueden activar las funciones adicionales del
pulsómetro:
Temporizador/Timer
TIMER TIMER COMPTE TEMPORIZADOR
Memoria de datos
MEMORY SPEICHER MEMOIRE MEMORIA
Zona-objetivo de pulso
ZONE BEREICH ZONE ZONA

-
15
-
Consumo de calorías, quema de grasas, índice de masa corporal IMC
CALORIE KALORIEN CALORIES CALORIAS
Indice de fitness-estado físico
FITNESS
LEVEL
FITNESS
LEVEL
NIV FORM
PHYSIQ
NIVEL
FIT
Al utilizar la banda pectoral, la pantalla indicará el pulso cardíaco en la línea
central. A la recepción de la frecuencia cardíaca, aparecerá un símbolo en forma
de corazón.
A la derecha del indicador del pulso aparecerá el % de pulso máximo
alcanzado. El pulso máximo se calcula en función de la edad y el peso y la altura
corporales.
Señal de alarma
Si su pulso cardíaco alcanza el 99% del
pulso máximo o sobrepasa este valor, o si
su pulso sobrepasa el valor máximo
introducido (ver zona-objetivo de pulso)
se encenderá una señal de alarma roja,
la alarma sonará.
Temporizador/Timer
TIMER TIMER COMPTE TEMPORIZADOR
En el reglón inferior de la pantalla aparecerá el tiempo de entrenamiento ya
transcurrido. La línea intermedia indica el pulso cardíaco así como el % sobre el
pulso máximo alcanzado.
-
16
-
El temporizador comienza a contar automáticamente a partir del momento en que
se coloca la banda pectoral. El temporizador continuará contando incluso si
cambia Ud. a un modo operativo diferente.
Presione ligeramente sobre SET para elegir el modo de temporizador
TIMER Tiempo total de entrenamiento
Duración del entrenamiento en zona-objetivo de pulso
▲
Duración del entrenamiento sobrepasando la zona-objetivo de pulso
▼
Duración del entrenamiento por debajo de la zona-objetivo de pulso
Mantenga presionado SET para volver a poner a 0 la duración del
entrenamiento.
Función de memoria de datos
MEMORY SPEICHER MEMOIRE MEMORIA
Los datos almacenados se indican en la línea inferior.
pulso máximo alcanzado
HI H FO AL
pulso mínimo alcanzado
LO N FA BA
pulso promedio
AV D MO PR
Mantenga presionado SET para volver a poner a 0 los valores.
Zona-objetivo de pulso
ZONE BEREICH ZONE ZONA
En la línea inferior se indican los valores máximos y mínimos del pulso que se
desea alcanzar.
La forma de entrenamiento elegida se indica en la línea superior.
L- U Personalizada
L-1 Saludable (50-65% del pulso máximo)
L-2 Fitness/En forma (65%-80% del pulso máximo)
L-3 Alto rendimiento (80-95% del pulso máximo)
Mantenga presionado SET durante 3 segundos para entrar en el modo de ajuste.
-
17
-
Presionando SEL, elija la forma de entrenamiento deseada. Optando por “U”
(Personalizada), puede ajustar los valores máximos y mínimos manualmente.
Presione SET. En la pantalla aparecerá intermitentemente el valor mínimo. Ajuste
el valor presionando sobre SEL y confirme el valor con SET.
Ajuste de idéntica forma el valor máximo.
Finalice con el modo de ajuste presionando sobre MODE.
Mantenga presionado SEL para activar la alarma de pulso. Con la alarma de
pulso activada aparecerá en la pantalla el símbolo . Si se sale de la zona-
objetivo de pulso sonará una señal acústica doble ("PIP-PIP... PIP-PIP... PIP-PIP").
Si su pulso alcanza el 99% del pulso máximo o si sobrepasa este valor, sonará la
alarma de tono único correspondiente al pulso máximo (“PIP-PIP-PIP-PIP-PIP…”).
Este tono sonará independientemente de la zona de entrenamiento o de la
alarma de pulso de la zona de entrenamiento.
Calorías, quema de grasa e índice de masa corporal
IMC
CALORIE KALORIEN CALORIES CALORIAS
En la línea inferior se indican las calorías consumidas.
CALORIE KALORIEN CALORIES CALORIAS
Presione SET para obtener la indicación de la quema de grasa en gramos
FAT
BURN
FETT CONSGRAISSES
GRASA
o para cambiar a la indicación del IMC
BMI BMI IMC IMC
Durante la indicación del consumo de calorías o de quema de grasas, puede
volver a colocar a 0 los valores manteniendo presionado SET.
Nota: para conocer con exactitud de los valores de consumo de calorías y de
quema de grasa es necesario que los datos relativos a edad y peso corporal sean
lo más correctos posibles.
-
18
-
Nota: el indicador de quema de grasa se activa solamente con un pulso superior
a 120 latidos por minuto.
Notas relativas al índice de masa corporal IMC:
El IMC es un valor que se utiliza para la evaluación del peso corporal de una
persona. Se considera normal para adultos un valor entre 18,5 y 25. Valores por
debajo de 18,5 se consideran una indicación de falta de peso y los valores por
encima de 25 se suelen entender como indicador de sobrepeso. Un valor por
encima de 30 normalmente indica adiposidad (obesidad).
Sin embargo, el IMC es meramente un valor bruto e indicativo, puesto que no
tiene en la estatura real y la composición especifica del tejido graso y muscular,
que es diferente en cada persona.
Fitness/En forma
FITNESS
LEVEL
FITNESS
LEVEL
NIV FORM
PHYSIQ
NIVEL
FIT
Inmediatamente después de finalizar su entrenamiento, presione sobre SET.
Comenzará una cuenta atrás de 5 minutos (fase de reposo).
En la barra se indicará el tiempo de reposo restante. A la izquierda aparecerá el
pulso inicial y la derecha el pulso actual. En la línea inferior se indica la duración
de la cuenta atrás.
Transcurridos los 5 minutos, aparecerá el estado de su forma física:
Forma física Pulso
6 >130
5 130-120
4 120-110
3 110-105
2 105-100
1 <100

-
19
-
Solución de problemas
El pulso no se indica correctamente
Compruebe que se ha colocado correctamente la banda pectoral y que esta se
ha ajustado adecuadamente al cuerpo. La piel no debería estar demasiado seca
o demasiado fría. Las áreas de contacto con la piel pueden mojarse ligeramente
para mejorar el funcionamiento de la banda pectoral. Las fuentes de emisión
electromagnéticas pueden interferir en la recepción de datos.
La distancia entre la banda pectoral y el medidor de frecuencia cardíaca no debe
superar los 70 cm. Otros medidores de pulso a una distancia menor de 2 metros
pueden interferir en la recepción de datos. Los ordenadores de bicicleta sin cable
pueden interferir en la recepción.
En ocasiones esto puede indicar que es necesaria la sustitución de las pilas.
Es difícil leer la pantalla / La iluminación no funciona
Sustituya las pilas.
Estanqueidad del reloj de correa
Es estanco hasta 3 bares. El valor en bares se refiere a la sobrepresión
atmosférica utilizada en las pruebas de estanqueidad (según DIN8310):
Resistencia al agua de la banda pectoral
Resistencia al agua según norma IEC 60529 IPx7.
-
20
-
Nota relativa a la limpieza
Realice la limpieza del medidor de frecuencia cardíaca utilizando únicamente un
paño seco y sin pelusas, como los utilizados para la limpieza de gafas.
Tras cada uso limpie la cinta pectoral y la correa del reloj con agua tíbia o con
agua jabonosa suave y una esponja. Seque todas las piezas con un paño y
colgue la cinta pectoral para que seque bien. Sudor y suciedad perjudican el
funcionamiento del sensor.
Eliminación y reciclaje del medidor de frecuencia
cardíaca
Este medidor de frecuencia cardíaca no debe eliminarse con los residuos
domésticos. Deseche el medidor de frecuencia cardíaca utilizando un servicio de
reciclaje autorizado o el punto verde de su municipio. En caso de duda, consulte
a su punto de reciclaje.
Eliminación de las pilas
Por favor, deseche las pilas usadas de forma adecuada en los
contendores existentes para tal fin en los comercios. Las pilas no deben
desecharse con los residuos domésticos. Deseche las pilas utilizando un servicio
de reciclaje autorizado o el punto verde de su municipio. Cumpla la normativa
vigente a tal respecto. En caso de duda, consulte con su punto de reciclaje.
Declaración de conformidad
Este producto se corresponde, en la utilización para el mismo establecida, con los
requerimientos básicos del párrafo 3 y demás disposiciones aplicables del FTEG
(Artículo 3, R&TTE).
Puede solicitar la declaración de conformidad en:
conformity@digi-tech-gmbh.com
Garantía de digi-tech gmbh
Con este medidor de frecuencia cardíaca recibe Ud. una garantía con una
validez de 3 años a partir de la fecha de la compra. En caso de defectos de este
-
21
-
medidor de frecuencia le corresponden a Ud. derechos legalmente reconocidos
frente al vendedor. Estos derechos legalmente reconocidos no se ven limitados
por la garantía que se expone a continuación.
Condiciones de la garantía
El período de garantía comienza con la fecha de la compra. Por favor, guarde
cuidadosamente y a tal fin el ticket de compra original. Este documento es
necesario como prueba de la compra. Si en el transcurso de tres años contados a
partir de la fecha de la compra aparecieran en el medidor de frecuencia
cardíaca defectos de material o de fabricación, se procederá (a elección de digi-
tech-gmbh) a la reparación o sustitución del mismo sin coste alguno para Ud. La
prestación de esta garantía se halla supeditada a la presentación, dentro del
plazo de 3 años, del medidor de frecuencia cardíaca defectuoso, de la prueba
de la compra (ticket de compra) y de una corta descripción por escrito del
defecto y del momento de su aparición. En caso de que nuestra garantía cubra el
defecto, recibirá Ud. el medidor de frecuencia cardíaca reparado o uno nuevo. A
la recepción del medidor de frecuencia reparado o de su sustituto nuevo no
comenzará un nuevo período de garantía.
Duración de la garantía y derecho de reclamación
La duración de la garantía no se alarga tras la prestación del servicio
garantizado, lo que se extiende también a piezas reparadas o sustituidas. Los
posibles daños ya existentes en el momento de la compra deberán ser notificados
inmediatamente después del desembalaje. Las reparaciones que se tengan que
efectuar tras la finalización del período de garantía deberán ser abonadas.
Ámbito de la garantía
El medidor de frecuencia cardíaca ha sido fabricado cuidadosamente siguiendo
pautas de calidad muy estrictas y superando un control de calidad previo a su
puesta en venta. Esta garantía se extiende solamente a defectos de material o de
fabricación. Esta garantía no se extiende a piezas componentes del instrumento
sometidas a un proceso de desgaste normal y que por lo tanto puedan ser
consideradas como piezas consumibles, ni sobre desperfectos aparecidos en
-
22
-
partes frágiles como por ejemplo, botones, acumuladores o piezas compuestas
de cristal.
Esta garantía pierde su vigencia si el medidor de frecuencia cardíaca ha sido
dañado, utilizado incorrectamente o sometido a operaciones de mantenimiento
incorrectas. Para una utilización adecuada del medidor de frecuencia cardíaca
deberán observarse estrictamente todas las indicaciones contenidas en el manual
de instrucciones.
Deben evitarse necesariamente usos y manejos desaconsejados en el manual de
instrucciones o de los cuales se haya advertido en el mismo.
El medidor de frecuencia cardíaca está indicado únicamente para su utilización a
título particular y no para un uso comercial o industrial. La garantía pierde su
vigencia en caso de un mal o incorrecto uso del mismo, su utilización de forma
violenta o en caso de operaciones técnicas no efectuadas por alguno de nuestros
servicios técnicos autorizados.
Procedimiento en caso de garantía
Para garantizar un procedimiento rápido de su solicitud, siga por favor las
siguientes instrucciones:
• Para cualquier comunicación, tenga a mano el ticket de compra y el código de
artículo (47584), como prueba de su compra.
• Encontrará el código del artículo bien en una placa indicativa del tipo de
aparato, bien grabada en la carcasa, en la portada del manual de
instrucciones (parte inferior izda.) o en una pegatina en la parte trasera o
inferior del aparato.
• En caso de aparecer defectos de funcionamiento, contacte primero por
teléfono o mediante correo electrónico con el departamento técnico abajo
indicado.
En www.lidl-service.com pueden descargarse este y muchos otros
manuales de instrucciones, videos de productos y software.

-
23
-
Servicio técnico
Razón social: Inter-Quartz GmbH
Dirección.: Valterweg 27A
Localidad: Eppstein 65817
País: Alemania
Correo electrónico: support@inter-quartz.de
Teléfono: 00800 5515 6616
00800 5515 6616
00800 5515 6616
IAN 47584
Proveedor
Esta razón social no se corresponde con ningún servicio técnico. Contacte
primero con la dirección de servicio arriba indicada.
Razón social: digi-tech gmbh
Dirección.: Valterweg 27A
Localidad: Eppstein 65817
País: Alemania
- 24 -
Istruzioni per l’uso e per la sicurezza
Contenuto
Contenuto ................................................................................................................. - 24 -
Introduzione ............................................................................................................. - 26 -
Uso conforme alla destinazione ............................................................................ - 26 -
Oggetti che fanno parte della fornitura ................................................................ - 26 -
Dati tecnici ................................................................................................................ - 27 -
Funzioni .................................................................................................................... - 27 -
Istruzioni importanti per la sicurezza ................................................. - 28 -
- Batterie ........................................................................................................... - 28 -
- Tenere l’orologio da polso con
cardiofrequenzimetro fuori dalla portata dei bambini ................................. - 29 -
Come mettere in funzione l’orologio da polso con cardiofrequenzimetro ....... - 29 -
Reset ................................................................................................................... - 30 -
Sostituire la batteria dell’orologio da polso .................................................. - 30 -
Messaggio di segnalazione dello stato della batteria ................................. - 31 -
Come indossare la cintura pettorale............................................................... - 31 -
Trasmissione codificata della frequenza cardiaca ....................................... - 32 -
Come utilizzare il sostegno per la bicicletta ................................................. - 32 -
Illuminazione ............................................................................................................ - 33 -
Informazioni importanti sull’uso dell’orologio da polso con
cardiofrequenzimetro .............................................................................................. - 33 -
Impostazione veloce ........................................................................................ - 34 -
Ora e impostazioni di base .................................................................................... - 34 -
Secondo fuso orario ......................................................................................... - 35 -
Allarme sveglia ........................................................................................................ - 35 -
Timer (max. 23:59:00) ........................................................................................... - 36 -
Cronometro .............................................................................................................. - 37 -
- 25 -
Funzione memoria ................................................................................................... - 37 -
Misuratore dei battiti del polso .............................................................................. - 37 -
Spia di segnalazione .............................................................................................. - 38 -
Timer ......................................................................................................................... - 38 -
Funzione memoria ................................................................................................... - 39 -
Intervallo obiettivo di frequenza cardiaca............................................................ - 39 -
Calorie, smaltimento dei grassi e IMC (indice di massa corporea) .................. - 40 -
Informazioni relative all’indice di massa corporea (IMC) ........................... - 41 -
Fitness........................................................................................................................ - 41 -
Eliminazione degli errori ......................................................................................... - 42 -
La frequenza cardiaca non viene visualizzata o
viene visualizzata in modo errato. .................................................................. - 42 -
Il quadrante si legge con difficoltà /
L’illuminazione del quadrante non funziona ................................................. - 42 -
Impermeabilità all’acqua dell’orologio da polso ............................................... - 42 -
Impermeabilità all’acqua della cintura pettorale ................................................ - 43 -
Indicazioni per la pulizia ........................................................................................ - 43 -
Smaltimento dell’orologio da polso con cardiofrequenzimetro ........................ - 43 -
Smaltimento delle batterie ...................................................................................... - 43 -
Dichiarazione di conformità ................................................................................... - 44 -
Garanzia della digi-tech gmbh ............................................................................. - 44 -
Condizioni di garanzia ........................................................................................... - 44 -
Periodo di garanzia e diritti di legge sui reclami per difetti ................................ - 45 -
Estensione della garanzia ...................................................................................... - 45 -
Procedura di esecuzione nei casi coperti da garanzia ....................................... - 46 -
Assistenza ................................................................................................................. - 47 -
Fornitore ................................................................................................................... - 47 -
- 26 -
OROLOGIO DA POLSO CON
CARDIOFREQUENZIMETRO
Introduzione
Cordiali congratulazioni per l’acquisto del nuovo orologio da polso con
cardiofrequenzimetro. La scelta si è rivolta ad un apparecchio di pregio. Le
istruzioni per l’uso costituiscono parte essenziale di questo orologio da polso con
cardiofrequenzimetro. Esse contengono importanti istruzioni per la sicurezza, per
l’uso e per lo smaltimento. Prima di usare l’orologio da polso con
cardiofrequenzimetro, è opportuno acquisire familiarità con tutte le istruzioni per
l’uso e per la sicurezza. Usare l’orologio da polso con cardiofrequenzimetro solo
secondo le modalità descritte e per i settori di impiego indicati.
Quando l’orologio da polso con cardiofrequenzimetro viene consegnato a terzi,
è necessario consegnare con l’apparecchio anche tutta la documentazione
corrispondente.
Uso conforme alla destinazione
L’orologio da polso con cardiofrequenzimetro è idoneo per indicare l’ora e per
usare le altre funzioni descritte. Qualsiasi altro uso o variante dell’orologio da
polso con cardiofrequenzimetro deve essere considerato non conforme alla
destinazione. Il costruttore non si assume alcuna responsabilità per danni causati
da un uso non conforme alla destinazione o da operazioni errate. Non è previsto
che l’orologio da polso con cardiofrequenzimetro venga impiegato per usi
commerciali.
Oggetti che fanno parte della fornitura
Segnalazione: Verificare subito dopo l’acquisto gli oggetti che fanno parte
della fornitura. Assicurarsi che tutti gli oggetti siano presenti e che non abbiano
difetti.
• Orologio da polso con cardiofrequenzimetro, compresa la batteria
(CR2032)
• Cintura pettorale, compresa la batteria (CR2032)

- 27 -
• Sostegno per la bicicletta
• Istruzioni per l'uso
Dati tecnici
Orologio da polso con cardiofrequenzimetro
Intervallo della temperatura di esercizio 0-50°C
Dimensioni (escluso il cinturino) 4,3 x 4,6 cm
Dimensioni del quadrante 2,5 x 2,6 cm
Peso
48
g
Batteria CR2032/3V
Cintura pettorale
Intervallo della temperatura di esercizio 0-50°C
Dimensioni (escluso il cinturino) 7 x 3,3 x 1,2 cm
Frequenza di trasmissione 110 kHz
Peso 51 g
Batteria CR2032/3V
Funzioni
Misurazione del numero di battiti del polso
• Allarme causato dal numero massimo di battiti del polso
• Training con timer e allarme per determinare il numero ottimale di
battiti del polso
(salute, fitness, prestazioni e in base a un valore definito dall’utente)
• Numero massimo, minimo, medio di battiti del polso
• Spia di segnalazione (quando vengono superati i valori prestabiliti del
numero di battiti del polso)
Funzioni caloriche
• Consumo calorico e smaltimento dei grassi durante il training
• Calcolo dell’indice di massa corporea (IMC)
• Livello di fitness
- 28 -
Cronometro
• 1/100 di secondo, con 99 escursioni del quadrante
Timer per conto alla rovescia
Funzioni del tempo
• Ora e minuti
• Calendario
• Sveglia con ripetizione della sveglia
• Segnale orario
• Secondo fuso orario
Altre funzioni
• Retroilluminazione
Istruzioni importanti per la sicurezza
ATTENZIONE: Prima dell’inizio del training consultare il
medico. Può ricevere utili spiegazioni sul training più
appropriato, sull’intensità del training e sui valori predefiniti
per il numero di battiti del polso. Questo orologio da polso
con cardiofrequenzimetro non è un apparecchio medico e
serve solo a contribuire all’impostazione del Suo training.
- Batterie
Inserire sempre le batterie facendo attenzione alle corrette polarità e non tentare
di ricaricarle o di aprirle. Non getta mai le batterie nel fuoco, perché possono
esplodere. Non usa mai assieme batterie tra loro diverse (vecchie e nuove,
alcaline e al carbone, ecc.). In caso di uso non appropriato delle batterie, vi è
pericolo di esplosione e di sversamento.
Nel caso si verifichi uno sversamento dalle batterie, usare i guanti e pulire a fondo
con un panno asciutto l’orologio da polso con cardiofrequenzimetro.
- 29 -
- Tenere l’orologio da polso con cardiofrequenzimetro fuori dalla portata dei
bambini
Non lasciare mai che i bambini usino l’orologio da polso con
cardiofrequenzimetro quando non sono sorvegliati. I bambini non sono sempre in
grado di riconoscere correttamente gli eventuali pericoli.
Se le batterie vengono inghiottite, possono diventare un pericolo per la vita.
Tenere le batterie lontane dalla portata dei bambini.
Se un bambino ha inghiottito una batteria, si deve ricorrere immediatamente al
soccorso di un medico.
Tenere anche i fogli usati nell’imballaggio fuori dalla portata dei bambini. Si corre
il pericolo di soffocamento.
Come mettere in funzione l’orologio da polso con
cardiofrequenzimetro
Svitare con una moneta il coperchio dell’alloggiamento della batteria dalla parte
posteriore della cintura pettorale e inserire la batteria da 3 Volt con il segno più
(+) rivolto verso l’alto. Riavvitare il coperchio della batteria.
Batteria: CR2032
- 30 -
Asportare dal quadrante dell’orologio da polso con cardiofrequenzimetro il
foglio di protezione e premere MODE, SEL oppure SET.
Premendo su SEL scegliere quindi la lingua: inglese, tedesco, francese, spagnolo.
Confermare la scelta premendo su SET.
Scegliere allo stesso modo l’unità KM-KG
METRIC KM - KG KM - KG KM - KG
oppure l’unità miglio-libbra (M-LB)
IMPERIAL M - LB M - LB M - LB
Terminare la procedura di avviamento premendo MODE.
Reset
Premendo contemporaneamente SET e SEL, si può resettare l’orologio. Solo dopo
aver resettato l’orologio, si può selezionare un’altra lingua.
Sostituire la batteria dell’orologio da polso
Potete farvi sostituire la batteria da un orologiaio facendogli anche verificare
l’impermeabilità. Se intendete sostituire da soli la batteria, siete pregati di seguire
le seguenti istruzioni:
Allentate con un piccolo cacciavite a croce le viti (1,2,3 e 4) collocate sul retro
dell’orologio da polso. Rimuovete la base dell’alloggiamento e l’etichetta della
batteria. Utilizzate un utensile piccolo e piatto per aprire la barra (5) del supporto
della batteria. Togliete la batteria e inserite una nuova batteria 3V CR2032 con il
simbolo (+)-Pol verso l’alto. Verificate la corretta posizione della rondella (6).
Chiudete il supporto della batteria (5). Incollate nuovamente l’etichetta della
batteria, inserite la base dell’alloggiamento avvitandola.

- 31 -
Messaggio di segnalazione dello stato della batteria
Quando la carica della batteria nella cintura pettorale non è più sufficiente per il
funzionamento normale, sul quadrante dell’orologio compare il messaggio:
TXBELT
LO BAT
TXGURT
BATT
SNGLTX
PILE
TXBCIN
BAT BA
Sostituire la batteria della cintura pettorale, come descritto al capitolo “Cintura
pettorale".
Come indossare la cintura pettorale
Adattare la cintura in modo tale
che si trovi direttamente al di sotto
dei muscoli pettorali. Inumidire
leggermente con acqua o con gel
per elettrocardiogramma (ECG)
(reperibile in farmacia) le superfici
di contatto della cintura.
Assicurarsi che le superfici di
contatto siano sempre a contatto
della pelle.
Posizionare la cintura come
mostrato nella figura seguente.
Fare attenzione che la cintura
pettorale si trovi nella posizione
corretta. Dopo aver espirato del
tutto, la cintura deve ancora
trovarsi sulla gabbia toracica,
sottoposta ad una leggerissima
tensione. Tralicci dell’alta
tensione, linee di corrente
sospese di ferro-tranvie o traffico veicolare in scorrimento possono influire sulla
misura o disturbarla. Si deve quindi scegliere con molta attenzione il percorso.
Superficie di contatto
- 32 -
Trasmissione codificata della frequenza cardiaca
La trasmissione dei dati della cintura pettorale viene codificata in modalità digitale
per evitare che si verifichino disturbi quando una persona esegue il training con un
partner che utilizza un apparecchio di tipo analogo.
Quando si usa la cintura pettorale per la prima volta, viene selezionato un canale
in modo automatico secondo il principio di casualità. Questo canale viene
brevemente visualizzato in alto sul quadrante se si passa alla visualizzazione
della frequenza cardiaca. I canali disponibili sono CH10, CH11, CH12, CH13 e
CH14.
Si può cambiare canale togliendo per un breve tempo la batteria dalla cintura
pettorale e rimettendola nel suo alloggiamento. La cintura seleziona un nuovo
canale sulla base del principio di casualità e, dopo circa 1 minuto, la misura dei
battiti del polso e il nuovo canale vengono visualizzati sul quadrante
dell’orologio.
Come utilizzare il sostegno per la bicicletta
Si può portare l’orologio con cardiofrequenzimetro al polso oppure lo si può
fissare al manubrio della propria bicicletta mediante l’apposito sostegno che
viene fornito.
- 33 -
Premere il sostegno dall’alto sul tubo del manubrio. Se il tubo del manubrio ha un
diametro particolarmente grande, è necessario premere con notevole forza per
fissare il sostegno. A questo punto si può fissare l’orologio da polso con
cardiofrequenzimetro al sostegno, allo stesso modo in cui lo si era fissato al polso.
Nell’uso dell’orologio da polso con cardiofrequenzimetro non si deve superare la
distanza massima di trasmissione di 70 cm dalla cintura pettorale.
Illuminazione
Premendo brevemente LIGHT, si attiva momentaneamente la retroilluminazione.
Informazioni importanti sull’uso dell’orologio da
polso con cardiofrequenzimetro
L’orologio da polso con cardiofrequenzimetro ha disponibili
3
modalità di
funzionamento.
Premendo MODE si può cambiare la modalità di funzionamento dell’orologio da
polso con cardiofrequenzimetro.
La sequenza delle funzioni è la seguente:
Ora e impostazioni di base
TIME ZEIT TEMPS HORA
Cronometro
CHRONO ST-UHR CHRONO CRONO
Misuratore dei battiti del polso
HRM PULS FC PULSO
Inoltre nelle modalità di funzionamento sono disponibili diverse sotto funzioni.
È sempre possibile intervenire sulle sotto funzioni premendo SEL.
- 34 -
Impostazione veloce
Nell’impostazione di valori numerici si può usare l’impostazione veloce premendo
e tenendo premuto SEL.
Ora e impostazioni di base
Prima premere MODE per selezionare la funzione.
TIME ZEIT TEMPS HORA
Premendo SEL si possono richiamare le sotto funzioni della modalità Ora.
Ora e impostazioni di base
TIME ZEIT TEMPS HORA
Allarme sveglia
ALARM ALARM ALARM ALARMA
Timer
TIMER TIMER COMPTE TIMER
Premere e tenere premuto per 3 secondi SET, per passare alla modalità di
impostazione.
Sul quadrante compare
HOLD
TO SET
HALTEN=
EINST.
MAINT=
REGLER
MANT=
AJUST
e si accende a intermittenza l’indicazione della modalità a 12 oppure a 24 ore.
Per l’impostazione premere SEL e confermare l’impostazione premendo SET.
Impostare allo stesso modo i secondi, i minuti, le ore, l’anno, il mese e il giorno.
Seguono ora le impostazioni di base. Compare dapprima l’anno di nascita.
BIRTHDAY GEB-TAG DATNAISS CUMPL-AN
Per l’impostazione premere SEL e per confermare l’impostazione premere SET.
Impostare allo stesso modo il mese e il giorno.

- 35 -
Compare ora l’indicazione del peso.
WEIGHT GEWICHT POIDS PESO
Impostare ciascuna cifra del proprio peso premendo SEL e confermare la cifra
immessa premendo di volta in volta SET.
Compare ora l’indicazione dell’altezza corporea.
HEIGHT GROESSE TAILLE TAMANO
Impostare le singole cifre della propria altezza premendo SEL e confermare la
cifra immessa premendo di volta in volta SET.
Terminare la modalità di impostazione premendo MODE.
Secondo fuso orario
Premere e tenere premuto per 3 secondi SEL. L’orologio passa all’indicazione del
secondo fuso orario e sul quadrante compare T2. L’impostazione del secondo
fuso orario avviene come descritto al punto precedente.
Per ritornare alla normale indicazione dell’ora, premere e tenere premuto SEL per
3 secondi.
Allarme sveglia
ALARM ALARM ALARM ALARMA
Per passare alla modalità di impostazione, tenere premuto SET per 3 secondi.
Sul quadrante compare "AL" e si accendono a intermittenza i minuti della sveglia.
Per l’impostazione premere SEL e confermare questa impostazione premendo
SET. Impostare le ore allo stesso modo.
Se si desidera, si può ora impostare il mese e il giorno.
Se non si imposta né il mese né il giorno, l’allarme suona ogni giorno. Se si
imposta solo il giorno, l’allarme suona ogni mese. Se si imposta sia il mese che il
giorno, l’allarme suona solo alla data impostata.
Sul quadrante compare ora l’impostazione del segnale orario.
CHIME STDALARM SIGN HOR HORA AL
- 36 -
Per l’impostazione premere SEL e confermare l’impostazione premendo SET
(ON/EIN/ACTIF/ENCENDID/ACCESO = attivato,
OFF/AUS/INACTIF/APAGADO/SPENTO = disattivato).
Quando il segnale orario è attivato, compare il simbolo della campana e ad ogni
ora esatta viene emesso un suono di segnalazione.
Terminare la modalità di impostazione premendo MODE.
Premendo SET è possibile attivare o disattivare l’allarme. Quando l’allarme è
attivato, compare il simbolo di allarme .
Per fermare l’allarme quando inizia a suonare, premere SET, SEL o MODE.
Funzione di ripetizione della sveglia
Se quando suona l’allarme non si preme nessun tasto, la funzione di ripetizione
della sveglia si attiva automaticamente dopo 30 secondi e sul quadrante il
simbolo si accende a intermittenza. L’allarme poi si disattiva e suona
nuovamente dopo 2 minuti. Questa sequenza si ripete 5 volte.
Timer (max. 23:59:00)
TIMER TIMER COMPTE TIMER
Per impostare il timer, premere e tenere premuto per 3 secondi SET.
Sul quadrante si accendono a intermittenza le cifre dei minuti del timer.
Per l’impostazione premere SEL e confermare questa impostazione premendo
SET. Impostare allo stesso modo le ore.
Segue ora l’impostazione ulteriore del timer. Premendo SEL, scegliere la modalità
desiderata:
Cd r Dopo aver raggiunto 0:00 il timer esegue il conteggio inverso del
tempo impostato
Cd U Dopo aver raggiunto 0:00 il timer esegue il conteggio in
Avanti
Cd S Dopo aver raggiunto 0:00 il timer si ferma
Terminare la modalità di impostazione premendo MODE.
È possibile avviare o fermare il timer premendo SET.
- 37 -
Per resettare il timer, premere e tenere premuto SET.
Decorso il tempo del timer, viene emesso un suono di segnalazione.
Cronometro
Prima premere MODE per selezionare la funzione.
CHRONO ST-UHR CHRONO CRONO
Premere SET per avviare o fermare il cronometro. Quando il cronometro è in
corsa, premere SET per fermare sul quadrante il tempo di giro. Possono essere
fermati sul quadrante fino a 99 tempi di giro.
Premere e tenere premuto SET, per resettare il cronometro.
Funzione memoria
DATA
RECALL
ANSICHT
DATEN
APPEL
DONNEES
RECUP
DATOS
Dopo aver fermato il cronometro, premere SEL per fare apparire sul quadrante il
giro più veloce. Premere SET per fare comparire gli altri tempi di giro.
Segnalazione: La funzione memoria può essere richiamata solo se è stato
registrato almeno un tempo di giro.
Misuratore dei battiti del polso
Prima premere MODE per selezionare la funzione.
HRM PULS FC PULSO
Il misuratore dei battiti del polso funziona solo se si usa la cintura pettorale.
Premendo SEL si possono richiamare le sotto funzioni del misuratore dei battiti del
polso:
Timer
TIMER TIMER COMPTE TEMPORIZADOR
Funzione memoria
MEMORY SPEICHER MEMOIRE MEMORIA
Intervallo obiettivo di frequenza cardiaca
- 38 -
ZONE BEREICH ZONE ZONA
Consumo calorico, smaltimento dei grassi e indice di massa corporea (IMC)
CALORIE KALORIEN CALORIES CALORIAS
Fitness
FITNESS
LEVEL
FITNESS
LEVEL
NIV FORM
PHYSIQ
NIVEL
FIT
Quando si usa la cintura pettorale, nella riga intermedia del quadrante viene
indicato il numero di battiti del polso. Se viene ricevuto il segnale di frequenza
cardiaca, si accende a intermittenza il simbolo del cuore.
A destra, accanto all’indicazione del numero di battiti del polso, compare la
percentuale raggiunta rispetto al numero massimo di battiti del polso. Il numero
massimo stimato di battiti del polso viene calcolato automaticamente in funzione
dell’età, del peso e dell’altezza corporea.
Spia di segnalazione
Se il numero di battiti del polso raggiunge
il 99 % del numero massimo o se
addirittura supera questo valore oppure se
il numero di battiti del polso supera il
valore limite impostato (vedere “Zona di
frequenza cardiaca a cui arrivare”), si
accende la spia a intermittenza rossa e
l’allarme suona.
Timer
MEMORY SPEICHER MEMOIRE MEMORIA

- 39 -
Nella riga inferiore del quadrante viene visualizzato il tempo di training finora
trascorso. Nella riga intermedia vengono visualizzati il numero di battiti del polso
e la percentuale raggiunta rispetto alla frequenza cardiaca massima.
Il timer esegue automaticamente il conteggio dal momento in cui la cintura
pettorale viene posizionata. Il timer continua il conteggio anche quando si passa
a un’altra modalità.
Per scegliere la modalità del timer, premere brevemente SET:
TIMER Tempo di training complessivo
Tempo di training nell’intervallo obiettivo di frequenza cardiaca
▲ Tempo di training oltre l’intervallo obiettivo di frequenza cardiaca
▼ Tempo di training sotto l’intervallo obiettivo di frequenza cardiaca
Premere e tenere premuto SET, per resettare il tempo di training.
Funzione memoria
MEMORY SPEICHER MEMOIRE MEMORIA
I valori memorizzati vengono visualizzati nella riga inferiore.
Frequenza cardiaca massima raggiunta
HI H FO AL
Frequenza cardiaca minima raggiunta
LO N FA BA
Frequenza cardiaca media
AV D MO PR
Per resettare i valori memorizzati, premere e tenere premuto SET.
Intervallo obiettivo di frequenza cardiaca
ZONE BEREICH ZONE ZONA
Nella riga inferiore vengono visualizzati i valori limite superiore e inferiore
dell’intervallo obiettivo di frequenza cardiaca.
Il tipo di training scelto viene visualizzato nella riga superiore.
L- U Definito dall’utente
- 40 -
L-1 Salute (50-65% della frequenza cardiaca massima)
L-2 Fitness (65-80% della frequenza cardiaca massima)
L-3 Prestazione (80-95% della frequenza cardiaca massima)
Per cambiare la modalità di impostazione, premere e tenere premuto SET per 3
secondi.
Scegliere il tipo di training premendo SEL. Scegliendo "U" (definito dal cliente), i
valori limite possono essere impostati manualmente.
Premere SET. Sul quadrante si accende a intermittenza il valore limite inferiore.
Impostare il valore premendo SEL e confermare questa impostazione premendo
SET.
Impostare allo stesso modo il valore limite superiore.
Terminare la modalità di impostazione premendo MODE.
Premere e tenere premuto SEL per attivare l’allarme sui battiti del polso. Quando è
attivo l’allarme sui battiti del polso, sul quadrante compare il simbolo di allarme
e, quando si esce dall’intervallo obiettivo di frequenza cardiaca, viene
emesso un suono di segnalazione "PIP-PIP... PIP-PIP...PIP-PIP". Se il polso ha
raggiunto il 99 % della frequenza cardiaca massima o ha addirittura superato tale
valore, viene emesso il suono di allarme della frequenza cardiaca massima "PIP-
PIP-PIP-PIP-PIP...". Questo suono non dipende dall’intervallo di training e
dall’allarme di frequenza cardiaca dell’intervallo di training.
Calorie, smaltimento dei grassi e IMC (indice di massa
corporea)
CALORIE KALORIEN CALORIES CALORIAS
Nella riga inferiore sono indicate le calorie utilizzate.
CALORIE KALORIEN CALORIES CALORIAS
Premere SET per passare all’indicazione dello smaltimento dei grassi, espresso in
grammi,
FAT
BURN
FETT CONSGRAISSES
GRASA
- 41 -
oppure all’indicazione dell’indice di massa corporea (IMC).
BMI BMI IMC IMC
Nella visualizzazione del consumo calorico o dello smaltimento dei grassi è
possibile resettare i valori memorizzati premendo e tenendo premuto SET.
Segnalazione: Per migliorare la precisione dei valori di consumo calorico e di
smaltimento dei grassi, età e peso devono essere impostati correttamente.
Segnalazione: Il contatore dello smaltimento dei grassi si attiva solo a partire da
una pulsazione di 120 battiti al minuto.
Informazioni relative all’indice di massa corporea (IMC)
L’indice di massa corporea (IMC) è una costante campionaria che fornisce la
valutazione del peso corporeo di una persona. Un valore compreso tra 18,5 e 25
rappresenta la normalità per un adulto. Per valori inferiori a 18,5 si parla di
sottopeso. Per valori superiori a 25 si parla di sovrappeso. Per valori superiori a
30 si parla di obesità (adiposi).
L’indice di massa corporea (IMC) fornisce solo un valore di riferimento
approssimativo, dal momento che non prende in considerazione la statura di una
persona e la naturale diversa composizione individuale del peso corporeo tra
tessuto grasso e tessuto muscolare.
Fitness
FITNESS
LEVEL
FITNESS
LEVEL
NIV FORM
PHYSIQ
NIVEL
FIT
Subito dopo la conclusione del training, premere SET. Si avvia un conteggio alla
rovescia (countdown) di 5 minuti (fase di riposo).
La barra indica il tempo di attesa ancora rimanente. A sinistra compare la misura
dei battiti del polso all’inizio e a destra la misura dei battiti del polso attuale.
Nella riga inferiore compare il conteggio alla rovescia (countdown).
Decorsi i 5 minuti, compare il grado di fitness.
- 42 -
Grado di fitness Battiti del polso
6 >130
5 130-120
4 120-110
3 110-105
2 105-100
1 <100
Eliminazione degli errori
La frequenza cardiaca non viene visualizzata o viene visualizzata in modo
errato.
Verificare che la cintura pettorale sia nella posizione giusta e sia ben appoggiata.
La pelle di chi esegue il training non deve essere troppo secca o troppo fredda.
Le superfici di contatto possono essere inumidite leggermente per migliorare la
funzionalità della misura.
Le fonti di disturbi elettromagnetici possono alterare la ricezione dei segnali.
La distanza tra la cintura e l’orologio può essere al massimo di 70 cm.
Altri apparecchi di misura della frequenza cardiaca, distanti meno di 2 metri,
possono disturbare la ricezione dei segnali.
Computer sulla bicicletta, funzionanti senza cavi, possono disturbare la ricezione
dei segnali.
Eventualmente è necessario sostituire le batterie.
Il quadrante si legge con difficoltà / L’illuminazione del quadrante non funziona
Sostituire le batterie.
Impermeabilità all’acqua dell’orologio da polso
Impermeabilità fino a 3 bar. Il dato relativo alla pressione in bar si riferisce alla
sovrappressione dell’aria che è stata usata nel corso del collaudo di
impermeabilità all’acqua (norma DIN 8310).

- 43 -
Impermeabilità all’acqua della cintura pettorale
Impermeabilità all’acqua secondo la norma IEC 60529 IPx7.
Indicazioni per la pulizia
Pulire l’ orologio da polso con cardiofrequenzimetro solo con un panno secco e
privo di sfilacciature, come, ad esempio, i fazzoletti per la pulizia delle lenti degli
occhiali.
Dopo ogni uso pulire con una spugna la fascia pettorale e il cinturino
dell’orologio utilizzando acqua tiepida o una soluzione leggera a base di acqua
e sapone. Asciugare i singoli pezzi servendosi di stoffa e appendere la fascia
pettorale per farla ben asciugare. Il sudore e le impurità alterano il corretto
funzionamento del sistema di trasmissione.
Smaltimento dell’orologio da polso con
cardiofrequenzimetro
Questo orologio da polso con cardiofrequenzimetro non può essere
smaltito con i normali rifiuti domestici. Deve essere smaltito attraverso un’impresa
di smaltimento approvata oppure tramite i servizi di smaltimento comunali.
Rispettare le disposizioni in merito, in vigore al momento. In caso di dubbio,
rivolgersi alla Azienda locale di Servizi pubblici di smaltimento.
Smaltimento delle batterie
Smaltire correttamente le batterie nei recipienti in commercio, a questo
scopo appositamente predisposti. Le batterie non devono essere gettate nei rifiuti
- 44 -
domestici. Smaltire le batterie attraverso un’impresa di smaltimento approvata
oppure tramite i servizi di smaltimento comunali. Rispettare le disposizioni in
merito, in vigore al momento. In caso di dubbio, rivolgersi alla Azienda locale di
Servizi pubblici di smaltimento.
Dichiarazione di conformità
Questo prodotto corrisponde, in quanto alla conformità alla destinazione d’uso,
ai requisiti fondamentali del § 3 e alle altre disposizioni relative alle
apparecchiature di radio e telecomunicazione terminale / Funk- und
Telekommunikations-Endgerät (FTEG) (articolo 3 del Radio Equipment &
Telecommunications Terminal Equipment, R&TTE).
È possibile richiedere la Dichiarazione di conformità al seguente indirizzo e-mail:
conformity@digi-tech-gmbh.com
Garanzia della digi-tech gmbh
Su questo orologio da polso con cardiofrequenzimetro, la garanzia ha un
periodo di validità di 3 anni, a partire dalla data di acquisto. Nel caso di difetti di
questo orologio da polso con cardiofrequenzimetro, competono all’acquirente i
diritti di legge nei confronti del venditore del prodotto. Questi diritti di legge non
vengono ridotti dalla nostra garanzia descritta al punto seguente.
Condizioni di garanzia
Il periodo di garanzia decorre dalla data di acquisto. Conservare con cura lo
scontrino originale di cassa. Questo scontrino è indispensabile come prova di
acquisto. Se entro il periodo di tre anni dalla data di acquisto di questo orologio
da polso con cardiofrequenzimetro si verifica un difetto del materiale o un difetto
di fabbricazione, questo orologio da polso con cardiofrequenzimetro viene da
noi – a nostra scelta – o riparato o sostituito gratuitamente. La prestazione di
questa garanzia ha come condizione che l’orologio da polso con
cardiofrequenzimetro difettoso ed il relativo scontrino di acquisto (scontrino di
cassa) vengano presentati entro il termine di tre anni e che venga presentata per
iscritto una breve spiegazione che illustri in che cosa consista il difetto e quando
questo difetto si è verificato. Se il difetto è coperto dalla nostra garanzia,
- 45 -
l’acquirente riceve da noi un orologio da polso con cardiofrequenzimetro o
riparato o nuovo. Con la riparazione o con la sostituzione non ha inizio un nuovo
periodo di garanzia.
Periodo di garanzia e diritti di legge sui reclami per
difetti
Il periodo di garanzia non viene prolungato dalla prestazione della garanzia.
Questo vale anche per le parti sostituite o riparate. Danni e difetti eventualmente
già presenti all’acquisto devono essere dichiarate subito dopo l’apertura
dell’imballaggio. Le riparazioni che avvengono dopo la scadenza del periodo di
garanzia vengono eseguite al costo.
Estensione della garanzia
L’orologio da polso con cardiofrequenzimetro è stato prodotto con cura e
secondo severe norme di qualità ed è stato coscienziosamente collaudato prima
della consegna. La prestazione della garanzia vale per difetti del materiale e per
difetti di fabbricazione. Questa garanzia non si estende ai componenti del
prodotto che sono soggetti a una normale usura e che quindi possono essere
considerati parti di usura e non si estende a danni riportati da componenti
frangibili, quali interruttori, batterie o parti in vetro.
Questa garanzia decade se l’orologio da polso con cardiofrequenzimetro è stato
danneggiato o se è stato utilizzato o manutenuto in modo non appropriato. Per un
uso appropriato dell’orologio da polso con cardiofrequenzimetro devono essere
rispettate con precisione tutte le disposizioni riportate nelle istruzioni per l’uso.
Scopi applicativi e trattamenti, che sono sconsigliati o segnalati come impropri
nelle istruzioni per l’uso, devono essere assolutamente evitati.
L’orologio da polso con cardiofrequenzimetro è destinato esclusivamente all’uso
privato e non all’uso commerciale. Nei casi di abuso e di trattamento indebito, di
applicazione forzosa e di interventi che non sono stati eseguiti da una nostra
Filiale di assistenza autorizzata, la garanzia decade.
- 46 -
Procedura di esecuzione nei casi coperti da garanzia
Per garantire un rapido trattamento delle richieste del cliente, è necessario seguire
la seguente procedura:
• In tutti i casi di richieste rendere disponibili lo scontrino di cassa e il codice
dell’articolo (47584) come prova di acquisto.
• Il numero dell’articolo si può rilevare dalla targhetta che descrive il tipo di
apparecchio, da una incisione, dalla prima pagina delle istruzioni in possesso
del cliente (in basso a sinistra) oppure dall’etichetta autoadesiva sul lato
posteriore o inferiore dell’apparecchio.
• Nel caso si verifichino difetti di funzionamento o altri guasti, è opportuno
contattare dapprima telefonicamente o per e- mail la divisione di Assistenza
sotto riportata.
Dal sito www.lidl-service.com è possibile scaricare questo e molti altri
manuali, video relativi ai prodotti e software.

- 47 -
Assistenza
Nome: Inter-Quartz GmbH
Via.: Valterweg 27A
Città: Eppstein 65817
Paese: Germania
E-mail: support@inter-quartz.de
Telefono: 00800 5515 6616
00800 5515 6616
00800 5515 6616
IAN 47584
Fornitore
Prendere nota che l’indirizzo seguente non è un indirizzo destinato all’assistenza.
Prendere contatto dapprima con il punto di Assistenza precedentemente indicato.
Nome: digi-tech gmbh
Via.: Valterweg 27A
Città: Eppstein 65817
Paese: Germania
- 48 -
Usage and safety instructions
Table of contents
Table of contents...................................................................................................... - 48 -
Preliminary note ....................................................................................................... - 50 -
Intended use ............................................................................................................. - 50 -
Scope of delivery .................................................................................................... - 50 -
Technical specifications .......................................................................................... - 50 -
Features .................................................................................................................... - 51 -
Important safety information................................................................... - 52 -
- Batteries ........................................................................................................... - 52 -
- Electrical devices should not be in the hands of children ........................... - 52 -
Setup of the heart rate monitor............................................................................... - 53 -
Reset ................................................................................................................... - 54 -
Replacing the watch battery ............................................................................ - 54 -
Battery low indicator ........................................................................................ - 54 -
Wearing the chest belt ..................................................................................... - 55 -
Coded transmission .......................................................................................... - 55 -
Using the bicycle holder................................................................................... - 56 -
Light ........................................................................................................................... - 56 -
Important notes on the operation of the wrist watch ............................................ - 56 -
Speed setting ..................................................................................................... - 57 -
Time and basic settings ........................................................................................... - 57 -
Second time zone ............................................................................................. - 58 -
Alarm ........................................................................................................................ - 59 -
Snooze feature .................................................................................................. - 59 -
Timer (max. 23:59:00) ........................................................................................... - 59 -
Stop watch ............................................................................................................... - 60 -
Memory feature ....................................................................................................... - 60 -
Heart rate measurement ......................................................................................... - 60 -
- 49 -
Warning light ........................................................................................................... - 62 -
Timer ......................................................................................................................... - 62 -
Memory feature ....................................................................................................... - 63 -
Target heart rate ...................................................................................................... - 63 -
Calories, fat burn and BMI ..................................................................................... - 64 -
Notes on the BMI .............................................................................................. - 64 -
Fitness........................................................................................................................ - 65 -
Troubleshooting ....................................................................................................... - 66 -
The heart rate is not shown or is shown incorrectly ....................................... - 66 -
The display is unreadable / the light does not work .................................... - 66 -
Water resistance of the heart rate monitor ........................................................... - 66 -
Water resistance of the chest belt .......................................................................... - 66 -
Cleaning instructions ............................................................................................... - 67 -
Disposal of the electronic appliance ..................................................................... - 67 -
Disposal of the batteries.......................................................................................... - 67 -
Declaration of conformity ....................................................................................... - 67 -
digi-tech gmbh warranty ........................................................................................ - 67 -
Warranty conditions ............................................................................................... - 68 -
Warranty period and defects liability ................................................................... - 68 -
Scope of the warranty............................................................................................. - 68 -
Warranty claim procedure ..................................................................................... - 69 -
Service ...................................................................................................................... - 70 -
Supplier .................................................................................................................... - 70 -
- 50 -
HEART RATE MONITOR
Preliminary note
Please read the instruction manual before using the product for the first time- even
if you are experienced at using electronic equipment. Please take special care
when reading the chapter "Important safety information". Keep this instruction
manual so you may use it a reference material in the future. If you sell or give this
product to someone else it is very important to also include this manual.
Intended use
This electronic appliance is intended for time display and the described additional
features. Any other use or modification of the electronic appliance does not
comply with the intended uses. The manufacturer is not liable for damages caused
by improper use or misuse. The device is not intended for commercial use.
Scope of delivery
Please note: Check the scope of delivery after purchase. Please ensure that all
parts are included and undamaged.
• Wrist watch incl. battery (CR2032)
• Chest belt incl. battery (CR2032)
• Bicycle holder
• Instruction manual
Technical specifications
Wrist watch
Operating temperature 0-50°C
Dimensions 4,3 x 4,6 cm
Display 2,5 x 2,6 cm
Weight
48
g
Battery CR 2032/3V

- 51 -
Chest belt
Operating temperature 0-50°C
Dimensions 7 x 3,3 x 1,2 cm
Frequency 110 kHz
Weight 51g
Battery CR 2032/3V
Features
Heart rate measurement
• Alarm for maximum heart rate
• Target heart rate training with timer and alarm
(Health, Fitness, Peformance and user defined)
• Max. heart rate, min. heart rate and average heart rate
• Warning light for high heart rate
Calorie features
• Calories and fat burned during training
• BMI-calculation
• Fitness Level
Stop watch
• 1/100 seconds with 99 lap times
Countdown timer
Time features
• Time
• Calendar
• Alarm with snooze
• Hourly chime
• Second time zone
- 52 -
Other
• Back light
Important safety information
ATTENTION:
Consult your doctor before you begin any
training program. Your doctor can help you choose the
proper training intensity and heart rate guidelines for your
exercises.
This heart rate wrist watch is not a medical device and should
only be used as a guide for your training.
- Batteries
Insert the batteries/ rechargeable batteries in the correct polarity. Don’t try to
recharge non-rechargeable batteries and under no circumstances throw them into
fire. Danger of explosion.
Do not use unequal batteries (old and new, Alkaline and carbon, etc.)
simultaneously. If you will not use the device for a long time, remove the batteries
and store the device in a dry and dust-free place. Improper use of batteries may
cause an explosion or leakage. If the batteries have leaked, use gloves and clean
the appliance thoroughly with a dry cloth.
- Electrical devices should not be in the hands of children
Never let children use electrical devices unsupervised. Children can’t always
recognize the possible dangers properly. Batteries/ rechargeable batteries can
be life threatening when swallowed. Store the batteries where they cannot be
reached by small children. If a battery is swallowed, medical aid must be sought
immediately.
Also keep the packaging foils away from children. Danger of suffocation.
- 53 -
Setup of the heart rate monitor
Use a coin to unscrew the battery cover on the back side of the chest belt and
insert the 3V battery with the (+) sign facing up. Screw the battery compartment
cover back into the case.
Remove the protective film from the display and press MODE, SEL or SET.
Now select English, German, French or Spanish language by pressing SEL and
confirm your setting by pressing SET.
Select the unit KM-KG
METRIC KM - KG KM - KG KM - KG
or Miles/pounds
IMPERIAL M - LB M - LB M - LB
in the same way. Complete the setting procedure by pressing MODE.
battery CR2032
- 54 -
Reset
The watch can be reset by pressing and holding SET and SEL together. Only after
reseting the watch the other language can be selected.
Replacing the watch battery
The battery replacement can be performed by a watch maker in addition to a
water resistance test.
To replace the battery yourself, please read the following instructions first:
Remove the screws (1, 2, 3 and 4) from the back side of the watch with a small
Phillips screwdriver. Remove the caseback and the battery sticker.
Use a small, flat tool to open the latch (5) of the battery holder. Remove the
battery and insert a fresh 3V CR2032 battery with the (+) terminal facing upwards.
Ensure that the gasket (6) is seated correctly. Close the latch of the battery holder.
Replace the battery sticker and the caseback and replace the screws.
Battery low indicator
If the battery voltage on the chest belt battery drops below the voltage required for
normal operation,
TXBELT
LO BAT
TXGURT
BATT
SNGLTX
PILE
TXBCIN
BAT BA
will appear on the display. Replace the battery of the chest belt as described in the
chapter "Chest belt".

- 55 -
Wearing the chest belt
Adjust the chest belt so that it fits
snugly directly below the chest
muscles. Moisten the contact
areas with water or ECG gel
(ECG gel can be purchased at a
pharmacy). Ensure that the
contact areas constantly remain
in skin contact.
Position the chest belt as per the
following illustration.
Please ensure that the chest belt is
seated properly. When you have
exhaled completely the chest belt
should still have very slight
tension pressing it to your chest.
High voltage power lines, Trains
or moving vehicular traffic may
interfere with the heart rate
measurement. Please consider this
when planning your exercise
route.
Coded transmission
The chest belt's transmissions are digitally coded to prevent interference if you are
training with a training partner who is using an identical watch and chest belt.
When using the chest belt for the first time, a random channel is selected
automatically. The channel is briefly displayed at the top of the display upon
entering the heart rate display mode. The available channels are CH10, CH11,
CH12, CH13 and CH14.
The channel can be changed by briefly removing the battery from the chest best
and reinserting it. The chest belt will randomly select a channel and after approx. 1
minute the heart rate and the new channel will appear on the display of the watch.
contact area
- 56 -
Using the bicycle holder
The included bicycle holder can be used to attach the wrist watch to the handlebar
of a bicycle.
Press the bicycle holder onto the top of the handlebar. Handlebars with an
especially large diameter may require the use of additional force to snap on the
bicycle holder. The heart rate monitor can now be attached to the bicycle holder
in the same way that you would attach it to your wrist.
The maximum range of 70cm between the wrist watch and the chest belt should
not be exceeded.
Light
Briefly press LIGHT to temporarily activate the light.
Important notes on the operation of the wrist watch
The watch has
3 different Modes of Operation.
- 57 -
Press MODE to select the mode of operation of the watch.
The order of the modes is as follows:
Time and basic settings
TIME ZEIT TEMPS HORA
Stop watch
CHRONO ST-UHR CHRONO CRONO
Heart rate
HRM PULS FC PULSO
Each mode of operation may have several subfeatures.
The subfeatures can always be accessed by pressing SEL
SELSEL
SEL.
Speed setting
When setting numerical values, press and hold SEL to use the speed setting
feature.
Time and basic settings
Press MODE to select the feature before proceeding.
TIME ZEIT TEMPS HORA
The subfeatures of the time mode can be accessed by pressing SEL.
Time and basic settings
TIME ZEIT TEMPS HORA
Alarm
ALARM ALARM ALARM ALARMA
Timer
TIMER TIMER COMPTE TIMER
- 58 -
Press and hold SET for 3 seconds to access setting mode.
The display will show
HOLD
TO SET
HALTEN=
EINST.
MAINT=
REGLER
MANT=
AJUST
and the 12 or 24 hour selection will blink on the display.
Press SEL to select a setting and confirm your setting by pressing SET. Set the
seconds, minutes, hours, year, month and day in the same way.
Now the basic settings will follow. First the year of the birthday setting will appear
BIRTHDAY GEB-TAG DATNAISS CUMPL-AN
Press SEL to set the year and press SET to confirm your setting. Set the month and
day in the same way.
Now the weight will appear
WEIGHT GEWICHT POIDS PESO
Set the digits of your weight by pressing SEL and confirm each digit by pressing
SET.
Now the height display will appear
HEIGHT GROESSE TAILLE TAMANO
Set each digit of your height by pressing SEL and confirm each digit by pressing
SET.
Exit setting mode by pressing MODE.
Second time zone
Press and hold SEL for 3 seconds. The watch will switch to the second time zone
display and T2 will appear on the display. Setting the second time zone can be
accomplished in the same way as described in the previous paragraph.
Press and hold SEL for 3 seconds to return to normal time mode.

- 59 -
Alarm
ALARM ALARM ALARM ALARMA
Press and hold SET for 3 seconds to enter setting mode.
"AL" will appear on the display and the minutes of the alarm time will blink.
Press SEL to set the minutes and press SET to confirm your setting. Set the hours in
the same way.
You may optionally set the month and day as well.
If neither month nor day are set the alarm will sound daily. If the day is set, the
alarm will sound monthly. If both the month and the day are set the alarm will
sound only at the set date.
The hourly chime setting will now appear on the display
CHIME STDALARM SIGN HOR HORA AL
Press SEL to select a setting and confirm your setting by pressing SET
(ON/EIN/ACTIF/ENCENDID=on,
OFF/AUS/INACTIF/APAGADO=off).
If the chime is activated, the bell symbol will appear and the watch will chime at
the beginning of every hour.
Exit setting mode by pressing MODE. The alarm can be activated or deactivated
by pressing SET. If the alarm is activated the alarm symbol will appear.
When the alarm sounds, press SET, SEL or MODE to stop the alarm.
Snooze feature
If no button is pressed when the alarm sounds, the alarm will shut off after 30
seconds and the symbol will blink on the display. The alarm will stop and will
resume after sounding after 2 minutes. The process will repeat itself 5 times.
Timer (max. 23:59:00)
TIMER TIMER COMPTE TIMER
Press and hold SET for 3 seconds to enter setting mode.
The minutes of the timer time will blink on the display.
- 60 -
Press SEL to set minutes of the timer time and confirm your setting by pressing SET.
Set the hours in the same way.
Now the additional settings for the timer will follow. Press SEL to select the desired
mode:
Cd r After reaching 0:00 the timer will count the set time again
Cd U After reaching 0:00 the timer will count forward
Cd S After reaching 0:00 the timer will stop
Exit setting mode by pressing MODE.
The timer can be started or stopped by pressing SET.
Press and hold SET to reset the timer.
After the timer time is up an alarm will sound.
Stop watch
Press MODE to select the feature before proceeding.
CHRONO ST-UHR CHRONO CRONO
Press SET to start or stop the stop watch. Press SEL while the stop watch is running
to record a lap time. Up to 99 laps can be recorded.
Press and hold SET to reset the stop watch.
Memory feature
DATA
RECALL
ANSICHT
DATEN
APPEL
DONNEES
RECUP
DATOS
Press SEL while the stop watch is stopped to display the fastest lap on the display.
Press SET to display the other lap times.
Please note: The memory feature can only be used if at least one lap time was
recorded.
Heart rate measurement
Press MODE to select the feature before proceeding.
- 61 -
HRM PULS FC PULSO
The subfeatures of the heart rate measurement can only be used when the chest
belt is connected.
Press SEL to access the subfeatures of the heart rate watch.
Timer
TIMER TIMER COMPTE TEMPORIZADOR
Memory feature
MEMORY SPEICHER MEMOIRE MEMORIA
Target heart rate
ZONE BEREICH ZONE ZONA
Calories, fat burn and BMI
CALORIE KALORIEN CALORIES CALORIAS
Fitness
FITNESS
LEVEL
FITNESS
LEVEL
NIV FORM
PHYSIQ
NIVEL
FIT
In the middle row of the display the heart rate is shown while wearing the chest
belt. If the signal is received from the chest belt the heart symbol will flash. To the
right of the heart rate the heart rate in percent of the maximum heart rate is shown.
The maximum heart rate is calculated by evaluating your age, weight and height.
- 62 -
Warning light
If your heart rate reaches or exceeds 99% of
your maximum heart rate, or your heart rate
exceeds the target zone values (see target
zone) the red warning light will blink and an
alarm will sound.
Timer
TIMER TIMER COMPTE TEMPORIZADOR
The bottom row of the display will show the elapsed training time. The middle row
will show your heart rate and the heart rate in percent of the maximum heart rate.
The timer will start automatically when the chest belt starts measuring the heart
rate. The timer will continue counting the time if the feature mode of the watch is
changed.
Press SET to select the timer mode:
TIMER total training time
training time in heart rate target zone
▲ training time with heart rate over target zone
▼ training time with heart rate below target zone
Press and hold SET to reset the training time.

- 63 -
Memory feature
MEMORY SPEICHER MEMOIRE MEMORIA
The stored values are shown in the bottom row of the display.
maximum heart rate during training
HI H FO AL
minimum heart rate during training
LO N FA BA
average heart rate during training
AV D MO PR
Press and hold SET to reset the stored values.
Target heart rate
ZONE BEREICH ZONE ZONA
The bottom row of the display will show the lower and upper limit value of the
target zone.
The selected training type is shown on the top row of the display.
L- U user defined
L-1 Health (50-65% of maximum heart rate)
L-2 Fitness (65-80% of maximum heart rate)
L-3 Performance (80-95% of maximum heart rate)
Press and hold SET for 3 seconds to enter setting mode.
Select the training type by pressing SEL. If "U" is selected (user defined) the lower
and upper limits can be set. Press SET. The display will show the lower limit.
Set the value by pressing SEL and confirm your setting by pressing SET. Set the
upper limit in the same way.
- 64 -
Exit setting mode by pressing MODE. Press and hold SEL to activate the heart rate
alarm. When the heart rate alarm is activated, the alarm symbol will appear
on and an alarm will sound when the measured heart rate is not within the set zone
"BEEP-BEEP...BEEP-BEEP...BEEP-BEEP".
If the measured heart rate is at or above 99% of the maximum heart rate the max.
heart rate alarm will sound. "BEEP-BEEP-BEEP-BEEP-BEEP-BEEP". The max. heart
alarm is independant of the training zone and the heart rate alarm of the training
zone.
Calories, fat burn and BMI
CALORIE KALORIEN CALORIES CALORIAS
The lower row will show the burned calories
CALORIE KALORIEN CALORIES CALORIAS
Press SET to switch to the display of fat burn in gram
FAT
BURN
FETT CONSGRAISSES
GRASA
or to the display of your BMI
BMI BMI IMC IMC
In the display for calorie burn or fat burn the values can be reset by pressing and
holding SET.
Note: To increase the accuracy of the calorie and fat burn displays your age and
weight must be set correctly.
Note: The counter for fat burn is only activated while your heart rate is above 120
beats per minute.
Notes on the BMI
The BMI is a statistical measurement that can be used to judge a persons weight.
For adults, a value between 18.5 and 25 is considered normal. Values below
- 65 -
18.5 are considered "underweight". Values above 25 are considered
"overweight". Values above 30 are considered "Obese".
The BMI is only a coarse guideline because it does not take a persons body type
and body composition into consideration.
Fitness
FITNESS
LEVEL
FITNESS
LEVEL
NIV FORM
PHYSIQ
NIVEL
FIT
After your training, immediately press SET. A 5 minute countdown will start (cool
down phase).
The bar will show the remaining time. On the left side of the display the heart rate
at the beginning of cool down is shown. On the right side of the display the current
heart rate is shown. The countdown time is shown on the bottom row of the
display.
After 5 minutes your fitness level will appear.
Fitness level Heart rate
6 >130
5 130-120
4 120-110
3 110-105
2 105-100
1 <100
- 66 -
Troubleshooting
The heart rate is not shown or is shown incorrectly
Make sure the chest belt is positioned correctly and fits well.
Your skin should not be too dry or too cold.
The contact areas can be slightly moistened to improve function.
Electromagnetic interference may have an adverse effect on reception.
The distance between watch and chest belt must be under 70cm.
Other heart rate measuring devices within a 2m range may also cause
interference.
Wireless bicycle computers may cause interference.
The batteries may be low and require replacing.
The display is unreadable / the light does not work
Replace the batteries.
Water resistance of the heart rate monitor
Water resistant up to 3 bar. The bar value specifies the atmospheric overpressure
which is applied during testing (DIN 8310).
Water resistance of the chest belt
Water resistance according to IEC 60529 IPx7.

- 67 -
Cleaning instructions
Clean the heart rate monitor with a soft, dry and lint-free cloth. A glasses cleaning
cloth is ideal.
After each use, clean the chest belt and the watch strap with a sponge and
lukewarm mild soap water. Dry all parts with a towel and hang the chest belt to
dry. Sweat and contaminants are detrimental to the function of the sensor.
Disposal of the electronic appliance
This electronic appliance may not be disposed of with normal household
waste. Dispose of the unit at an approved disposal facility or at your
local recycling centre. Please observe the current rules and regulations when
disposing of the appliance. Contact the disposal system if in doubt.
Disposal of the batteries
Please dispose of your batteries properly in containers especially set up
at retailers. Batteries do not belong in household waste. Dispose of the batteries at
an approved disposal facility or at your local recycling centre. Contact the
disposal system if in doubt.
Declaration of conformity
If used as intended this product conforms to the basic standards of § 3 and the
other relevant provisions of the FTEG (Section 3 of the R&TTE directive).
You can request the declaration of conformity here:
conformity@digi-tech-gmbh.com
digi-tech gmbh warranty
This watch includes a 3 year warranty starting on the day of purchase. In case of
defects of this heart rate monitor you have, by law, certain rights regarding the
vendor of the heart rate monitor. These rights are not changed by the warranty
which is described in the following paragraphs.
- 68 -
Warranty conditions
The warranty duration starts on the date of purchase. Please keep the original
receipt in a safe place. The receipt is needed as a proof of purchase. If a defect
occurs in the heart rate monitor within 3 years, the heart rate monitor will be
repaired or replaced (according to our choice) free of charge. This warranty
requires that, within the 3 year warranty period, the watch and the receipt can be
made available to us along with a short written description of the defect and when
it occured. If the defect is covered by the warranty, you will receive the repaired
heart rate monitor or a new heart rate monitor. Repair or replacement does not
cause the warranty period to restart.
Warranty period and defects liability
The warranty period is not increased by the defect liability. This also applies to
repaired or replaced parts. If defects are noticed at the time of purchase they must
be reported immediately upon unpacking the item. Paid repair may be available
after the end of the warranty period.
Scope of the warranty
The heart rate monitor was manufactured according to strict quality guidelines and
was carefully inspected before delivery. The warranty does not include parts that
experience normal wear and tear and can thus be seen as wear parts or fragile
parts that are damaged. Examples include Switches, Batteries or parts made of
glass.
This warranty becomes void if the heart rate monitor is damaged, is not used in the
recommended way or is improperly repaired.
For proper use of the heart rate monitor all instructions in this manual must be
adhered to exactly. Use of the heart rate monitor in a way that is discouraged in
the manual must be avoided.
The heart rate monitor not intended for commercial use. Abusive or improper use,
excessive force and changes that are made by non-authorized repair centers will
void the warranty.
- 69 -
Warranty claim procedure
To ensure that your call is processed in a fast and efficient manner please note the
following directions:
• Have your receipt (as proof of purchase) and the article number (47584)
handy.
• The article number can be found on the type label, an engraving, the front
page of the manual (bottom left) or a sticker on the back side or bottom side of
the case.
• In case defects occur, please first contact the service center (see below) by
phone or email.
Visit www.lidl-service.com to download this and many other manuals,
product videos and software.
- 70 -
Service
Name: Inter-Quartz GmbH
Street: Valterweg 27A
Town: Eppstein 65817
Country: Germany
Email: support@inter-quartz.de
Telephone: 00800 5515 6616
00800 5515 6616
00800 5515 6616
IAN 47584
Supplier
Please note that the following address is not a service address.
Please first contact the service address (see above).
Name: digi-tech gmbh
Street: Valterweg 27A
Town: Eppstein 65817
Country: Germany

- 71 -
Bedienungs- und
Sicherheitshinweise
Inhaltsverzeichnis
Inhaltsverzeichnis..................................................................................................... - 71 -
Einleitung .................................................................................................................. - 73 -
Bestimmungsgemäße Verwendung ....................................................................... - 73 -
Lieferumfang............................................................................................................. - 73 -
Technische Daten .................................................................................................... - 74 -
Funktionen ................................................................................................................ - 74 -
Wichtige Sicherheitshinweise .................................................................. - 75 -
- Batterien ......................................................................................................... - 75 -
- Herzfrequenz-Messuhr nicht in Kinderhände ............................................. - 76 -
Inbetriebnahme der Herzfrequenz-Messuhr ........................................................ - 76 -
Reset ................................................................................................................... - 77 -
Die Batterie der Armbanduhr wechseln ......................................................... - 77 -
Batteriestandswarnanzeige ............................................................................. - 78 -
Tragen des Brustgurts ....................................................................................... - 78 -
Kodierte Übertragung der Herzfrequenz ....................................................... - 79 -
Verwenden der Fahrradhalterung .................................................................. - 79 -
Licht ........................................................................................................................... - 80 -
Wichtige Informationen zur Bedienung der Herzfrequenz-Messuhr ................. - 80 -
Schnelleinstellung ............................................................................................. - 80 -
Uhrzeit und Grundeinstellungen ............................................................................ - 81 -
Zweite Zeitzone ................................................................................................ - 82 -
Weckalarm .............................................................................................................. - 82 -
Schlummerfunktion ............................................................................................ - 83 -
Timer (max. 23:59:00) ........................................................................................... - 83 -
Stoppuhr ................................................................................................................... - 83 -
Speicherfunktion ...................................................................................................... - 84 -
- 72 -
Pulsmesser ................................................................................................................ - 84 -
Warnleuchte ............................................................................................................ - 85 -
Timer ......................................................................................................................... - 85 -
Speicherfunktion ...................................................................................................... - 86 -
Zielpulsbereich......................................................................................................... - 86 -
Kalorien, Fettverbrennung und BMI ...................................................................... - 87 -
Hinweise zum BMI ............................................................................................ - 88 -
Fitness........................................................................................................................ - 88 -
Fehlerbehebung ....................................................................................................... - 89 -
Der Puls wird nicht oder nicht korrekt angezeigt ........................................... - 89 -
Das Display ist schlecht lesbar / Die Beleuchtung funktioniert nicht ........... - 89 -
Wasserdichtigkeit der Armbanduhr....................................................................... - 89 -
Wasserbeständigkeit des Brustgurtes .................................................................... - 89 -
Reinigungshinweis ................................................................................................... - 90 -
Entsorgung der Herzfrequenz-Messuhr ................................................................ - 90 -
Entsorgung der Batterien ........................................................................................ - 90 -
Konformitätserklärung ............................................................................................. - 90 -
Garantie der digi-tech gmbh.................................................................................. - 91 -
Garantiebedingungen ............................................................................................ - 91 -
Garantiezeit und gesetzliche Mängelansprüche ................................................. - 91 -
Garantieumfang ...................................................................................................... - 91 -
Abwicklung im Garantiefall .................................................................................... - 92 -
Service ...................................................................................................................... - 93 -
Lieferant .................................................................................................................... - 93 -
- 73 -
HERZFREQUENZ-MESSUHR
Einleitung
Herzlichen Glückwunsch zum Kauf Ihrer neuen Herzfrequenz-Messuhr. Sie haben
sich damit für ein hochwertiges Gerät entschieden. Die Bedienungsanleitung ist
Bestandteil dieser Herzfrequenz-Messuhr. Sie enthält wichtige Hinweise für
Sicherheit, Gebrauch und Entsorgung. Machen Sie sich vor der Benutzung der
Herzfrequenz-Messuhr mit allen Bedien- und Sicherheitshinweisen vertraut.
Benutzen Sie die Herzfrequenz-Messuhr nur wie beschrieben und für die
angegebenen Einsatzbereiche.
Händigen Sie alle Unterlagen bei Weitergabe der Herzfrequenz-Messuhr an
Dritte mit aus.
Bestimmungsgemäße Verwendung
Die Herzfrequenz-Messuhr ist zur Zeitanzeige und zur Verwendung der
beschriebenen Zusatzfunktionen geeignet. Jede andere Verwendung oder
Veränderung der Herzfrequenz-Messuhr gilt als nicht bestimmungsgemäß. Der
Hersteller haftet nicht für Schäden, die durch nicht bestimmungsgemäßen
Gebrauch oder falsche Bedienung verursacht werden. Die Herzfrequenz-Messuhr
ist nicht für den gewerblichen Einsatz vorgesehen.
Lieferumfang
Hinweis: Bitte überprüfen Sie nach dem Kauf den Lieferumfang. Stellen Sie
sicher, dass alle Teile vorhanden und nicht defekt sind.
• Herzfrequenz-Messuhr inkl. Batterie (CR2032)
• Brustgurt inkl. Batterie (CR2032)
• Fahrradhalterung
• Bedienungsanleitung
- 74 -
Technische Daten
Herzfrequenz-Messuhr
Betriebstemperaturbereich 0-50°C
Maße (exkl. Band) 4,3 x 4,6 cm
Displaymaße 2,5 x 2,6 cm
Gewicht 48 g
Batterie CR 2032/3V
Brustgurt
Betriebstemperaturbereich 0-50°C
Maße (exkl. Band) 7 x 3,3 x 1,2 cm
Übertragungsfrequenz 110 kHz
Gewicht 51 g
Batterie CR 2032/3V
Funktionen
Pulsmessung
• Alarm für Maximalpuls
• Zielpulstraining mit Timer und Alarm
(Gesundheit, Fitness, Leistung und benutzerdefiniert)
• Höchster Puls, niedrigster Puls, durchschnittlicher Puls
• Warnleuchte (bei Überschreiten der Pulsvorgaben)
Kalorienfunktionen
• Kalorienverbrauch und Fettverbrennung während des Trainings
• BMI-Berechnung
• Fitness Level
Stoppuhr
• 1/100 Sekunden mit 99 Rundenzeiten

- 75 -
Countdown Timer
Zeitfunktionen
• Zeit
• Kalender
• Weckalarm mit Weckwiederholung
• Stundensignal
• Zweite Zeitzone
Sonstiges
• Hintergrundbeleuchtung
Wichtige Sicherheitshinweise
ACHTUNG:
Sprechen Sie vor Trainingsbeginn mit Ihrem
Arzt. Er kann Sie über das für Sie geeignete Training, die
Trainingsintensität und die Pulsvorgaben aufklären. Diese
Herzfrequenz-Messuhr ist kein medizinisches Gerät und
dient nur zur Unterstützung Ihrer Trainingsgestaltung.
- Batterien
Legen Sie Batterien / Akkus stets polrichtig ein, versuchen Sie nicht, Batterien
wieder aufzuladen oder zu öffnen. Werfen Sie niemals Batterien ins Feuer, da
diese eventuell explodieren können. Verwenden Sie keine unterschiedlichen
Batterien (alte und neue, Alkali und Kohle, usw.) gleichzeitig. Bei unsachgemäßem
Gebrauch der Batterien besteht Explosions- und Auslaufgefahr.
Sollten die Batterien doch einmal ausgelaufen sein, benutzen Sie Handschuhe und
reinigen Sie die Herzfrequenz-Messuhr gründlich mit einem trockenen Tuch.
- 76 -
- Herzfrequenz-Messuhr nicht in Kinderhände
Lassen Sie Kinder niemals unbeaufsichtigt die Herzfrequenz-Messuhr
benutzen. Kinder können mögliche Gefahren nicht immer richtig erkennen.
Batterien/Akkus können bei Verschlucken lebensgefährlich sein. Bewahren Sie die
Batterien für Kleinkinder unerreichbar auf.
Wurde eine Batterie verschluckt, muss sofort medizinische Hilfe in Anspruch
genommen werden.
Halten Sie auch die Verpackungsfolien von Kindern fern. Es besteht
Erstickungsgefahr.
Inbetriebnahme der Herzfrequenz-Messuhr
Schrauben Sie mit einer Münze den Batteriefachdeckel von der Rückseite des
Brustgurts und setzen Sie die 3V Batterie mit dem (+) Plus nach oben ein.
Schrauben Sie den Batteriefachdeckel wieder fest.
Ziehen Sie die Schutzfolie vom Display der Herzfrequenzmessuhr ab und drücken
Sie MODE, SEL oder SET.
Wählen Sie nun durch Druck auf SEL zwischen den Sprachen: Englisch, Deutsch,
Französisch und Spanisch. Bestätigen Sie Ihre Wahl mit Druck auf SET.
Batterie: CR2032
- 77 -
Wählen Sie auf die gleiche Weise die Einheit KM-KG
METRIC KM - KG KM - KG KM - KG
oder Meilen/Pfund (M-LB)
IMPERIAL M - LB M - LB M - LB
Beenden Sie die Inbetriebnahme durch Druck auf MODE.
Reset
Durch gleichzeitigen Druck auf SET und SEL kann die Uhr zurückgesetzt werden.
Erst nach dem Rücksetzen kann die andere Sprache ausgewählt werden.
Die Batterie der Armbanduhr wechseln
Sie können den Batteriewechsel zusammen mit einer Wasserdichtigkeitsprüfung
von einem Uhrmacher durchführen lassen. Um die Batterie selbst zu wechseln,
gehen Sie bitte wie folgt vor:
Lösen Sie die Schrauben (1,2, 3 und 4) auf der Rückseite der Armbanduhr mit
einem kleinen Kreuzschraubendreher. Entfernen Sie den Gehäuseboden und den
Batterieaufkleber.
Verwenden Sie ein kleines, flaches Werkzeug, um den Riegel (5) der
Batteriehalterung zu öffnen. Entnehmen Sie die Batterie und setzen Sie eine neue
3V CR2032 Batterie mit dem (+)-Pol nach oben ein. Prüfen Sie den korrekten Sitz
des Dichtungsringes (6). Verriegeln Sie die Batteriehalterung (5).
Kleben Sie den Batterieaufkleber wieder ein, setzen Sie den Gehäuseboden ein
und schrauben Sie ihn fest.
- 78 -
Batteriestandswarnanzeige
Wenn der Batteriestand des Brustgurtes für den normalen Betrieb nicht mehr
ausreicht, erscheint auf dem Display der Herzfrequenz-Messuhr:
TXBELT
LO BAT
TXGURT
BATT
SNGLTX
PILE
TXBCIN
BAT BA
Wechseln Sie die Batterie des Brustgurtes wie im Kapitel "Brustgurt" beschrieben.
Tragen des Brustgurts
Passen Sie den Gurt so an, dass er
direkt unter den Brustmuskeln eng
anliegt. Befeuchten Sie die
Kontaktflächen des Gurtes leicht
mit Wasser oder EKG-Gel
(welches Sie in der Apotheke
erhalten können). Stellen Sie
sicher, dass die Kontaktflächen
immer Hautkontakt haben.
Positionieren Sie den Gurt wie auf
der folgenden Abbildung.
Achten Sie auf den richtigen Sitz
des Brustgurts. Wenn Sie komplett
ausgeatmet haben, sollte der Gurt
noch mit ganz leichter Spannung
auf dem Brustkorb aufliegen.
Hochspannungsmasten,
Oberleitungen der Bahn oder
fließender Autoverkehr können die
Messung beeinflussen oder stören.
Darauf bei der Auswahl der Laufstrecke achten.
Kontaktfläche

- 79 -
Kodierte Übertragung der Herzfrequenz
Die Datenübertragung des Brustgurtes wird digital kodiert, um zu verhindern, dass
Störungen auftreten, wenn Sie mit einem Trainingspartner trainieren, der ein
baugleiches Gerät verwendet.
Bei der ersten Verwendung des Brustgurtes wird automatisch nach dem
Zufallsprinzip ein Kanal gewählt. Der Kanal wird kurz oben im Display angezeigt,
wenn Sie zur Anzeige der Herzfrequenz wechseln. Die verfügbaren Kanäle sind
CH10, CH11, CH12, CH13 und CH14.
Sie können den Kanal wechseln, indem Sie die Batterie kurz aus dem Brustgurt
entfernen und erneut einsetzen. Der Brustgurt wählt nach dem Zufallsprinzip einen
neuen Kanal und nach ca. 1 Min. werden der Puls und der neue Kanal auf der
Herzfrequenz-Messuhr angezeigt.
Verwenden der Fahrradhalterung
Sie können die Herzfrequenz-Messuhr am Handgelenk tragen oder mit der
mitgelieferten Fahrradhalterung am Lenker Ihres Fahrrads befestigen.
Drücken Sie Fahrradhalterung von oben auf die Lenkstange Ihres Lenkers. Bei
Lenkstangen mit besonders großem Durchmesser ist u.U. ein erhöhter
Kraftaufwand nötig, um die Fahrradhalterung zu befestigen. Sie können die
- 80 -
Herzfrequenz-Messuhr nun auf die gleiche Art wie bei Ihrem Handgelenk an der
Fahrradhalterung befestigen.
Überschreiten Sie zur Verwendung der Herzfrequenz-Messuhr bitte nicht die
maximale Übertragungsdistanz zum Brustgurt von 70 cm.
Licht
Drücken Sie kurz LIGHT, um die Hintergrundbeleuchtung vorübergehend zu
aktivieren.
Wichtige Informationen zur Bedienung der
Herzfrequenz-Messuhr
Die Herzfrequenz-Messuhr verfügt über
3 Funktionsmodi.
Durch Druck auf MODE können Sie den Funktionsmodus der Herzfrequenz-
Messuhr wechseln.
Die Reihenfolge der Funktionen ist:
Uhrzeit und Grundeinstellungen
TIME ZEIT TEMPS HORA
Stoppuhr
CHRONO ST-UHR CHRONO CRONO
Pulsmesser
HRM PULS FC PULSO
Des Weiteren gibt es in den Funktionsmodi verschiedene Unterfunktionen.
Die Unterfunktionen erreichen Sie immer durch Drücken von SEL.
Schnelleinstellung
Bei der Einstellung von numerischen Werten können Sie durch Drücken und Halten
von SEL die Schnelleinstellung verwenden.
- 81 -
Uhrzeit und Grundeinstellungen
Wählen Sie zuerst durch Druck auf MODE die Funktion aus.
TIME ZEIT TEMPS HORA
Durch Druck auf SEL können Sie die Unterfunktionen des Zeitmodus abrufen.
Uhrzeit und Grundeinstellungen
TIME ZEIT TEMPS HORA
Weckalarm
ALARM ALARM ALARM ALARMA
Timer
TIMER TIMER COMPTE TIMER
Drücken und halten Sie 3 Sekunden SET, um in den Einstellungsmodus zu
wechseln.
Auf dem Display erscheint
HOLD
TO SET
HALTEN=
EINST.
MAINT=
REGLER
MANT=
AJUST
und es blinkt die Anzeige des 12 oder 24-Stunden Modus.
Drücken Sie zum Einstellen SEL und bestätigen Sie Ihre Einstellung durch Druck auf
SET. Stellen Sie auf die gleiche Weise die Sekunden, Minuten, Stunden, Jahr,
Monat und Tag ein.
Nun folgen die Grundeinstellungen. Zuerst erscheint das Jahr Ihres Geburtstages.
BIRTHDAY GEB-TAG DATNAISS CUMPL-AN
Drücken Sie zum Einstellen SEL und bestätigen Sie Ihre Einstellung durch Druck auf
SET. Stellen Sie auf die gleiche Weise Monat und Tag ein.
Es erscheint nun die Anzeige des Gewichts.
WEIGHT GEWICHT POIDS PESO
Stellen Sie die Ziffern Ihres Gewichts jeweils durch Druck auf SEL ein und
bestätigen Sie Ihre Eingabe jeweils durch Druck auf SET.
- 82 -
Es erscheint nun die Anzeige der Körpergröße.
HEIGHT GROESSE TAILLE TAMANO
Stellen Sie die Ziffern Ihrer Körpergröße jeweils durch Druck auf SEL ein und
bestätigen Sie Ihre Eingabe jeweils durch Druck auf SET.
Beenden Sie den Einstellungsmodus durch Druck auf MODE.
Zweite Zeitzone
Drücken und halten Sie 3 Sekunden SEL. Die Uhr wechselt zur Anzeige der
zweiten Zeitzone und T2 erscheint auf dem Display. Das Einstellen der zweiten
Zeitzone erfolgt wie im vorherigen Absatz beschrieben.
Drücken und halten Sie 3 Sekunden SEL, um zurück zu der normalen Zeitanzeige
zu wechseln.
Weckalarm
ALARM ALARM ALARM ALARMA
Halten Sie 3 Sekunden SET, um in den Einstellungsmodus zu gelangen.
Auf dem Display erscheint "AL" und es blinken die Minuten der Weckzeit.
Drücken Sie zum Einstellen SEL und bestätigen Sie Ihre Einstellung durch Druck auf
SET. Stellen Sie auf die gleiche Weise die Stunden ein.
Falls gewünscht, stellen Sie nun den Monat und den Tag ein.
Wird weder Monat noch Tag eingestellt, ertönt der Alarm täglich. Wird nur der
Tag eingestellt, ertönt der Alarm monatlich. Wird sowohl Monat als auch Tag
eingestellt, ertönt der Alarm nur an dem eingestellten Datum.
Auf dem Display erscheint nun die Einstellung des Stundensignals.
CHIME STDALARM SIGN HOR HORA AL
Drücken Sie zum Einstellen SEL und bestätigen Sie Ihre Einstellung durch Druck auf
SET (ON/EIN/ACTIF/ENCENDID=an,
OFF/AUS/INACTIF/APAGADO=aus).
Bei aktiviertem Stundensignal erscheint das Glockensymbol und es ertönt zu jeder
vollen Stunde ein Signalton.

- 83 -
Beenden Sie den Einstellungsmodus durch Druck auf MODE.
Sie können den Alarm durch Druck auf SET aktivieren oder deaktiveren. Bei
aktiviertem Alarm erscheint das Alarmsymbol .
Drücken Sie bei Ertönen des Alarms SET, SEL oder MODE, um den Alarm zu
stoppen.
Schlummerfunktion
Drücken Sie bei Ertönen des Weckalarms keine Taste, wird automatisch nach 30
Sekunden die Schlummerfunktion aktiviert und das Symbol blinkt auf dem
Display. Der Alarm verstummt nun und ertönt nach 2 Minuten erneut. Dieser
Vorgang wiederholt sich 5 mal.
Timer (max. 23:59:00)
TIMER TIMER COMPTE TIMER
Drücken und halten Sie 3 Sekunden SET, um den Timer einzustellen.
Auf dem Display blinken die Minuten der Timerzeit.
Drücken Sie zum Einstellen SEL und bestätigen Sie Ihre Einstellung durch Druck auf
SET. Stellen Sie die Stunden auf die gleiche Weise ein.
Nun folgt die Zusatzeinstellung des Timers. Wählen Sie durch Druck auf SEL den
gewünschten Modus:
Cd r Nach Erreichen von 0:00 zählt der Timer die eingestellte Zeit
erneut zurück
Cd U Nach Erreichen von 0:00 zählt der Timer vorwärts
Cd S Nach Erreichen von 0:00 stoppt der Timer
Beenden Sie den Einstellungsmodus durch Druck auf MODE.
Sie können den Timer durch Druck auf SET starten oder stoppen.
Drücken und halten Sie SET, um den Timer zurückzusetzen.
Nach Ablauf der Timerzeit ertönt ein Signalton.
Stoppuhr
Wählen Sie zuerst durch Druck auf MODE die Funktion aus.
- 84 -
CHRONO ST-UHR CHRONO CRONO
Drücken Sie zum Starten oder Stoppen der Stoppuhr SET. Drücken Sie bei
laufender Stoppuhr SEL, um eine Rundenzeit zu stoppen. Es können bis zu 99
Rundenzeiten gestoppt werden.
Drücken und halten Sie SET, um die Stoppuhr zurückzusetzen.
Speicherfunktion
DATA
RECALL
ANSICHT
DATEN
APPEL
DONNEES
RECUP
DATOS
Drücken Sie bei gestoppter Stoppuhr SEL und auf dem Display wird die schnellste
Runde angezeigt. Drücken Sie SET, um die anderen Rundenzeiten anzuzeigen.
Hinweis: Die Speicherfunktion kann nur abgerufen werden, wenn mindestens eine
Rundenzeit aufgezeichnet wurde.
Pulsmesser
Wählen Sie zuerst durch Druck auf MODE die Funktion aus.
HRM PULS FC PULSO
Der Pulsmesser funktioniert nur bei Verwendung des Brustgurtes.
Durch Druck auf SEL können Sie die Unterfunktionen des Pulsmessers abrufen:
Timer
TIMER TIMER COMPTE TEMPORIZADOR
Speicherfunktion
MEMORY SPEICHER MEMOIRE MEMORIA
Zielpuls
ZONE BEREICH ZONE ZONA
Kalorienverbrauch, Fettverbrennung und BMI
CALORIE KALORIEN CALORIES CALORIAS
- 85 -
Fitness
FITNESS
LEVEL
FITNESS
LEVEL
NIV FORM
PHYSIQ
NIVEL
FIT
In der mittleren Zeile des Displays wird bei Verwendung des Brustgurtes der Puls
angezeigt. Wenn das Herzfrequenzsignal empfangen wird, blinkt das Herz
Symbol.
Rechts neben der Pulsanzeige erscheint der erreichte Anteil am Maximalpuls in
Prozent. Der geschätzte Maximalpuls errechnet sich automatisch aus Alter,
Gewicht und Körpergröße.
Warnleuchte
Wenn Ihr Puls 99% des Maximalpuls erreicht
oder diesen Wert sogar überschreitet, oder
der Puls den eingestellten Grenzwert (siehe
"Zielpulsbereich") überschreitet, blinkt die
rote Warnleuchte und es ertönt ein Signalton.
Timer
TIMER TIMER COMPTE TEMPORIZADOR
In der unteren Zeile des Displays wird die bisher verstrichene Trainingszeit
angezeigt. In der mittleren Zeile werden der Puls und der erreichte Anteil am
Maximalpuls in Prozent angezeigt.
- 86 -
Der Timer zählt automatisch ab dem Zeitpunkt, an dem der Brustgurt angelegt
wird. Der Timer zählt auch dann weiter, wenn Sie in einen anderen Modus
wechseln.
Drücken Sie kurz SET, um den Timermodus zu wählen:
TIMER Trainingszeit gesamt
Trainingszeit im Zielpulsbereich
▲ Trainingszeit über Zielpulsbereich
▼ Trainingszeit unter Zielpulsbereich
Drücken und halten Sie SET, um die Trainingszeit zurückzusetzen.
Speicherfunktion
MEMORY SPEICHER MEMOIRE MEMORIA
Die gespeicherten Werte werden in der unteren Zeile angezeigt.
erreichter Maximalpuls
HI H FO AL
erreichter Minimalpuls
LO N FA BA
durchschnittlicher Puls
AV D MO PR
Drücken und halten Sie SET, um die gespeicherten Werte zurückzusetzen.
Zielpulsbereich
ZONE BEREICH ZONE ZONA
In der unteren Zeile werden oberer und unterer Grenzwert des Zielpulsbereichs
angezeigt.
Die gewählte Trainingsart wird in der oberen Zeile angezeigt.
L- U Benutzerdefiniert
L-1 Gesundheit (50-65% des Maximalpuls)
L-2 Fitness (65-80% des Maximalpuls)

- 87 -
L-3 Leistung (80-95% des Maximalpuls)
Drücken und halten Sie 3 Sekunden SET, um in den Einstellungsmodus zu
wechseln.
Wählen Sie die Trainingsart durch Druck auf SEL. Bei Wahl von "U"
(Benutzerdefiniert) können Sie die Grenzwerte manuell einstellen.
Drücken Sie SET. Auf dem Display blinkt der untere Grenzwert. Stellen Sie den
Wert durch Druck auf SEL ein und bestätigen Sie die Einstellung durch Druck auf
SET.
Stellen Sie auf die gleiche Weise den oberen Grenzwert ein.
Beenden Sie den Einstellungsmodus durch Druck auf MODE.
Drücken und halten Sie SEL, um den Pulsalarm zu aktivieren. Bei aktiviertem
Pulsalarm erscheint das Alarmsymbol im Display und bei Verlassen des
Zielpulsbereichs ertönt ein Signalton "PIEP-PIEP... PIEP-PIEP...PIEP-PIEP". Wenn Ihr
Puls 99% des Maximalpuls erreicht oder diesen Wert sogar überschreitet, ertönt
der Alarmton für den Maximalpuls "PIEP-PIEP-PIEP-PIEP-PIEP...". Dieser Ton ist
unabhängig von der Trainingszone und dem Pulsalarm der Trainingszone.
Kalorien, Fettverbrennung und BMI
CALORIE KALORIEN CALORIES CALORIAS
In der unteren Zeile werden die verbrauchten Kalorien angezeigt.
CALORIE KALORIEN CALORIES CALORIAS
Drücken Sie SET, um zur Anzeige der Fettverbrennung in Gramm
FAT
BURN
FETT CONSGRAISSES
GRASA
oder zur Anzeige Ihres BMI zu wechseln.
BMI BMI IMC IMC
In der Anzeige des Kalorienverbrauchs oder der Fettverbrennung können Sie die
gespeicherten Werte durch Drücken und Halten von SET zurücksetzen.
- 88 -
Hinweis: Um die Genauigkeit der Kalorien- und Fettverbrennungsanzeige zu
verbessern, müssen Alter und Gewicht korrekt eingestellt sein.
Hinweis: Der Zähler für die Fettverbrennung wird nur bei einem Puls von über 120
Schlägen pro Minute aktiv.
Hinweise zum BMI
Der BMI ist eine Maßzahl für die Bewertung des Körpergewichts eines Menschen.
Ein Wert zwischen 18,5 und 25 gilt bei Erwachsenen als normal. Bei Werten unter
18,5 spricht man von Untergewicht. Bei Werten über 25 spricht man von
Übergewicht. Bei Werten über 30 spricht man von Adipositas (Fettleibigkeit).
Der BMI gibt lediglich einen groben Richtwert an, da er die Statur eines Menschen
und die individuell verschiedene Zusammensetzung des Körpergewichts aus Fett-
und Muskelgewebe naturgemäß nicht berücksichtigt.
Fitness
FITNESS
LEVEL
FITNESS
LEVEL
NIV FORM
PHYSIQ
NIVEL
FIT
Drücken Sie sofort nach Ihrem Training SET. Ein 5 Minütiger Countdown startet
(Ruhephase). Der Balken zeigt die noch verbleibende Wartezeit an. Links erscheint
der Anfangspuls und rechts der aktuelle Puls. In der unteren Zeile erscheint die
Countdownzeit.
Nach Ablauf der 5 Minuten erscheint der Fitnessgrad.
Fitnessgrad Puls
6 >130
5 130-120
4 120-110
3 110-105
2 105-100
1 <100
- 89 -
Fehlerbehebung
Der Puls wird nicht oder nicht korrekt angezeigt
Achten Sie auf die korrekte Positionierung und den guten Sitz des Brustgurtes.
Ihre Haut sollte nicht zu trocken oder kalt sein. Die Kontaktflächen können leicht
angefeuchtet werden, um die Funktion zu verbessern.
Elektromagnetische Störquellen können den Empfang beeinträchtigen.
Die Distanz zwischen Gurt und Uhr darf max. 70 cm betragen.
Andere Pulsmessgeräte in weniger als 2m Abstand können den Empfang stören.
Kabellose Fahrradcomputer können den Empfang stören.
Evtl. müssen die Batterien ersetzt werden.
Das Display ist schlecht lesbar / Die Beleuchtung funktioniert nicht
Ersetzen Sie die Batterien.
Wasserdichtigkeit der Armbanduhr
Wasserdicht bis 3 bar. Die bar-Angabe bezieht sich auf den Luftüberdruck,
welcher im Rahmen der Wasserdichtigkeitsprüfung angewandt wurde (DIN8310).
Wasserbeständigkeit des Brustgurtes
Wasserbeständigkeit nach IEC 60529 IPx7.
- 90 -
Reinigungshinweis
Reinigen Sie die Herzfrequenz-Messuhr nur mit einem trockenen, fusselfreien Tuch,
wie es z.B. zur Reinigung von Brillengläsern verwendet wird.
Nach jedem Tragen reinigen Sie den Brustgurt und das Uhrenarmband mit
lauwarmen Wasser oder einer milden Seifenwasserlösung und einem Schwamm.
Trocknen Sie alle Teile mit einem Tuch ab und hängen Sie den Gurt zum Trocknen
auf. Schweiß und Verunreinigungen beeinträchtigen die Funktion des Senders.
Entsorgung der Herzfrequenz-Messuhr
Diese Herzfrequenz-Messuhr darf nicht im normalen Hausmüll entsorgt
werden. Entsorgen Sie die Herzfrequenz-Messuhr über einen
zugelassenen Entsorgungsbetrieb oder über Ihre kommunale
Entsorgungseinrichtung. Beachten Sie die aktuell geltenden Vorschriften. Setzen
Sie sich im Zweifelsfall mit Ihrer Entsorgungseinrichtung in Verbindung.
Entsorgung der Batterien
Bitte entsorgen Sie Ihre Batterien sachgerecht in extra hierfür aufgestellten
Gefäßen im Handel. Batterien gehören nicht in den Hausmüll. Entsorgen Sie
Batterien bitte über einen zugelassenen Entsorgungsbetrieb oder über Ihre
kommunale Entsorgungseinrichtung. Beachten Sie die aktuell geltenden
Vorschriften. Setzen Sie sich im Zweifelsfall mit Ihrer Entsorgungseinrichtung in
Verbindung.
Konformitätserklärung
Dieses Produkt entspricht bei bestimmungsgemäßer Verwendung den
grundlegenden Anforderungen des § 3 und den übrigen einschlägigen
Bestimmungen des FTEG (Artikel 3 der R&TTE).
Die Konformitätserklärung können Sie hier anfordern:
conformity@digi-tech-gmbh.com

- 91 -
Garantie der digi-tech gmbh
Sie erhalten auf diese Herzfrequenz-Messuhr 3 Jahre Garantie ab Kaufdatum. Im
Falle von Mängeln dieser Herzfrequenz-Messuhr stehen Ihnen gegen den
Verkäufer des Produkts gesetzliche Rechte zu. Diese gesetzlichen Rechte werden
durch unsere im Folgenden dargestellte Garantie nicht eingeschränkt.
Garantiebedingungen
Die Garantiefrist beginnt mit dem Kaufdatum. Bitte bewahren Sie den Original
Kassenbon gut auf. Diese Unterlage wird als Nachweis für den Kauf benötigt. Tritt
innerhalb von drei Jahren ab dem Kaufdatum dieser Herzfrequenz-Messuhr ein
Material- oder Fabrikationsfehler auf, wird die Herzfrequenz-Messuhr von uns –
nach unserer Wahl – für Sie kostenlos repariert oder ersetzt. Diese
Garantieleistung setzt voraus, dass innerhalb der Drei-Jahres-Frist die defekte
Herzfrequenz-Messuhr und der Kaufbeleg (Kassenbon) vorgelegt und schriftlich
kurz beschrieben wird, worin der Mangel besteht und wann er aufgetreten ist.
Wenn der Defekt von unserer Garantie gedeckt ist, erhalten Sie die reparierte
oder eine neue Herzfrequenz-Messuhr zurück. Mit Reparatur oder Austausch des
Produkts beginnt kein neuer Garantiezeitraum.
Garantiezeit und gesetzliche Mängelansprüche
Die Garantiezeit wird durch die Gewährleistung nicht verlängert. Dies gilt auch für
ersetzte und reparierte Teile. Eventuell schon beim Kauf vorhandene Schäden und
Mängel müssen sofort nach dem Auspacken gemeldet werden. Nach Ablauf der
Garantiezeit anfallende Reparaturen sind kostenpflichtig.
Garantieumfang
Die Herzfrequenz-Messuhr wurde nach strengen Qualitätsrichtlinien sorgfältig
produziert und vor Anlieferung gewissenhaft geprüft. Die Garantieleistung gilt für
Material- oder Fabrikationsfehler. Diese Garantie erstreckt sich nicht auf
Produktteile, die normaler Abnutzung ausgesetzt sind und daher als Verschleißteile
angesehen werden können oder für Beschädigungen an zerbrechlichen Teilen, z.
B. Schalter, Akkus oder die aus Glas gefertigt sind.
- 92 -
Diese Garantie verfällt, wenn die Herzfrequenz-Messuhr beschädigt, nicht
sachgemäß benutzt oder gewartet wurde. Für eine sachgemäße Benutzung der
Herzfrequenz-Messuhr sind alle in der Bedienungsanleitung aufgeführten
Anweisungen genau einzuhalten. Verwendungszwecke und Handlungen, von
denen in der Bedienungsanleitung abgeraten oder vor denen gewarnt wird, sind
unbedingt zu vermeiden.
Die Herzfrequenz-Messuhr ist lediglich für den privaten und nicht für den
gewerblichen Gebrauch bestimmt. Bei missbräuchlicher und unsachgemäßer
Behandlung, Gewaltanwendung und bei Eingriffen, die nicht von unserer
autorisierten Service-Niederlassung vorgenommen wurden, erlischt die Garantie.
Abwicklung im Garantiefall
Um eine schnelle Bearbeitung ihres Anliegens zu gewährleisten, folgen Sie bitte
den folgenden Hinweisen:
• Bitte halten Sie für alle Anfragen den Kassenbon und die Artikelnummer
(47584) als Nachweis für den Kauf bereit.
• Die Artikelnummer entnehmen Sie bitte dem Typenschild, einer Gravur, auf dem
Titelblatt Ihrer Anleitung (unten links) oder als Aufkleber auf der Rück- oder
Unterseite.
• Sollten Funktionsfehler oder sonstige Mängel auftreten kontaktieren Sie
zunächst die nachfolgende Serviceabteilung telefonisch oder per E-Mail.
• Eine als defekt erfasste Herzfrequenz-Messuhr können sie anschließend unter
Beifügung des Kaufbelegs (Kassenbon) und der Angabe, worin der Mangel
besteht und wann er aufgetreten ist, für Sie portofrei an die Ihnen mitgeteilte
Service Anschrift übersenden.
Auf www.lidl-service.com können Sie diese und viele weitere Handbücher,
Produktvideos und Software herunterladen.
- 93 -
Service
Name: Inter-Quartz GmbH
Str.: Valterweg 27A
Stadt: Eppstein 65817
Land: Deutschland
E-Mail: support@inter-quartz.de
Telefon: 00800 5515 6616
00800 5515 6616
00800 5515 6616
IAN 47584
Lieferant
Bitte beachten Sie, dass die folgende Anschrift keine Serviceanschrift ist.
Kontaktieren Sie zunächst die oben benannte Servicestelle.
Name: digi-tech gmbh
Str.: Valterweg 27A
Stadt: Eppstein 65817
Land: Deutschland
IAN
47584
digi-tech gmbh
Valterweg 27A
D-65817 Eppstein
Actualización de las informaciones
Edizione del foglio di informazioni
Stand der Informationen
Last information update:
1/2014 · Art.-Nr.: 1-LD3814

IAN
47584
Transcripción de documentos
MEDIDOR DE FRECUENCIA CARDÍACA OROLOGIO DA POLSO CON CARDIOFREQUENZIMETRO 1/2014 · Art.-Nr.: 1-LD3814 MEDIDOR DE FRECUENCIA CARDÍACA Indicaciones sobre su utilización y su seguridad OROLOGIO DA POLSO CON CARDIOFREQUENZIMETRO Istruzioni per l’uso e per la sicurezza Indicaciones sobre su utilización y su seguridad .................................. - 1 - HEART RATE MONITOR HERZFREQUENZ-MESSUHR Usage and safety instructions Bedienungs- und Sicherheitshinweise Istruzioni per l’uso e per la sicurezza ...................................... - 24 Usage and safety instructions ................................................... - 48 Bedienungs- und Sicherheitshinweise ........................... - 71 - IAN 47584 Indicaciones sobre su utilización y su seguridad Índice Índice ........................................................................................................................... - 1 Introducción ................................................................................................................ - 3 Uso conforme a su propósito .................................................................................... - 3 Elementos incluidos en la entrega ............................................................................ - 3 Datos técnicos ............................................................................................................. - 4 Funciones..................................................................................................................... - 4 Advertencias importantes de seguridad............................................... - 5 - Pilas ....................................................................................................................- 5 - No dejar el medidor de frecuencia cardíaca al alcance de niños.............- 6 Encendido del medidor de frecuencia cardíaca .................................................... - 6 Reset ......................................................................................................................- 7 Cambio de la pila del reloj de pulsera .............................................................- 7 Indicador de nivel de batería .............................................................................- 8 Sujeción de la banda pectoral ...........................................................................- 8 Transmisión codificada de las frecuencias cardíacas .....................................- 9 Uso del soporte para bicicletas .........................................................................- 9 Iluminación ............................................................................................................... - 10 Informaciones importantes relativas a la utilización del medidor de frecuencia cardíaca ........................................................................... - 10 Ajuste rápido ..................................................................................................... - 11 Horario y ajustes básicos ....................................................................................... - 11 Segunda zona horaria ..................................................................................... - 12 Alarma despertador ................................................................................................ - 12 Función de repetición ....................................................................................... - 13 Temporizador/Timer (máx. 23:59:00) ................................................................ - 13 -1 Cronómetro .............................................................................................................. - 14 Función de memoria de datos................................................................................ - 14 Pulsómetro ................................................................................................................ - 14 Señal de alarma ...................................................................................................... - 15 Temporizador/Timer .............................................................................................. - 15 Función de memoria de datos................................................................................ - 16 Zona-objetivo de pulso........................................................................................... - 16 Calorías, quema de grasa e índice de masa corporal IMC .............................. - 17 Notas relativas al índice de masa corporal IMC: ......................................... - 18 Fitness/En forma...................................................................................................... - 18 Solución de problemas ........................................................................................... - 19 El pulso no se indica correctamente ............................................................... - 19 Es difícil leer la pantalla / La iluminación no funciona................................. - 19 Estanqueidad del reloj de correa .......................................................................... - 19 Resistencia al agua de la banda pectoral ............................................................ - 19 Nota relativa a la limpieza .................................................................................... - 20 Eliminación y reciclaje del medidor de frecuencia cardíaca ............................. - 20 Eliminación de las pilas ......................................................................................... - 20 Declaración de conformidad ................................................................................. - 20 Garantía de digi-tech gmbh................................................................................... - 20 Condiciones de la garantía .................................................................................... - 21 Duración de la garantía y derecho de reclamación ........................................... - 21 Ámbito de la garantía ............................................................................................. - 21 Procedimiento en caso de garantía....................................................................... - 22 Servicio técnico........................................................................................................ - 23 Proveedor ................................................................................................................. - 23 - -2 MEDIDOR DE FRECUENCIA CARDÍACA Datos técnicos Introducción Medidor de frecuencia cardíaca Temperatura de funcionamiento Dimensiones (sin la banda pectoral) Medidas de la pantalla Peso Pila Enhorabuena por la compra de su nuevo medidor de frecuencia cardíaca Se ha decidido Ud. por un dispositivo de alta calidad. Este manual de instrucciones forma parte del equipamiento del medidor de frecuencia cardíaca. Contiene indicaciones importantes sobre a su seguridad, su manejo y su eliminación como residuo. Antes de comenzar a utilizar su medidor de frecuencia cardíaca, familiarícese con todas las indicaciones de uso y seguridad. Utilice el medidor de frecuencia cardíaca únicamente de la forma y para los ámbitos de aplicación indicados. En caso de ceder el medidor de frecuencia cardíaca a terceros, entrégueles también ésta documentación. Uso conforme a su propósito El medidor de frecuencia cardíaca está diseñado para indicar la fecha y la hora, así como para las funciones adicionales que aquí se detallan. La utilización para cualquier otro propósito o la realización de modificaciones en el medidor de frecuencia cardíaca no considera adecuada a sus propósitos. El fabricante no se hace responsable de los daños causados por una utilización no adecuada a sus propósitos o por una utilización errónea. El medidor de frecuencia cardíaca no es apto para un uso de carácter comercial o industrial. Elementos incluidos en la entrega Recomendación: una vez adquirido el producto, compruebe los elementos incluidos en la entrega. Asegúrese de que no falta ningún componente y que estos no presentan defectos. • • • • Medidor de frecuencia cardíaca, incluida la pila (CR2032) Banda pectoral, incluida la pila (CR2032) Soporte para bicicleta Manual del usuario -3 • 1/100 segundos con 99 tiempos de vuelta Cuenta atrás Funciones horarias • Hora • Calendario • Despertador con función de repetición • Señal horaria • Segunda zona horaria Otras funciones • Retroiluminación Advertencias importantes de seguridad Banda pectoral Temperatura de funcionamiento Medidas Frecuencia de transmisión Peso Pila 0-50 °C 4,3 x 4,6 cm 2,5 x 2,6 cm 48 g CR2032/3V 0-50 °C 7 x 3,3 x 1,2 cm 110 kHz 51 g CR2032/3V Funciones Medición del pulso • Alarma de pulso máximo • Zona-objetivo de pulso, con temporizador y alarma (Modo saludable, forma física/Fitness, alto rendimiento y personalizado) • Pulso máximo, pulso mínimo, pulso, pulso promedio • Indicador luminoso de alarma (en caso de sobrepasar los valores introducidos). Funciones caloríficas • Consumo de calorías y quema de grasas durante el entrenamiento • Cálculo del índice de masa corporal (IMC) • Nivel de forma física Cronómetro -4 - No dejar el medidor de frecuencia cardíaca al alcance de niños. No deje utilizar el medidor de frecuencia cardíaca a niños sin supervisión. Por lo general los niños no son conscientes de los posibles peligros. La ingestión depilas/ pilas recargables puede poner en peligro su vida. Mantenga las pilas fuera del alcance de niños de corta edad. En caso de ingestión de una pila, debe solicitarse inmediatamente ayuda médica. Mantenga también el material de embalaje de este instrumento fuera del alcance de niños. Puede suponer peligro de asfixia. Encendido del medidor de frecuencia cardíaca Con ayuda de una moneda, abra la tapa correspondiente a la pila situada en la parte trasera de la banda pectoral. Coloque en el hueco la pila de 3V, con el polo positivo (+) hacia arriba. Vuelva a cerrar la tapa, enroscándola. ATENCIÓN! Antes de comenzar con el entrenamiento, consulte a su médico. Él le podrá indicar cuál es el tipo de entrenamiento y los valores de ritmo cardíaco más adecuados para usted. Este medidor de frecuencia cardíaca no es un instrumento médico y solo sirve como apoyo a la planificación del entrenamiento. - Pilas Introduzca las pilas/ pilas recargables en el sentido correcto y no intente volver a cargar pilas o abrirlas. No tire nunca pilas al fuego, ya que podrían explotar. No utilice simultáneamente pilas de diferente tipo (nuevas con usadas, alcalinas con pilas de carbono, etc.). El uso indebido de las pilas implica peligro de explosión y de derrame. En caso de derrame del contenido de las pilas, utilice guantes y limpie el medidor de frecuencia cardíaca con un paño seco. -5 Pila: CR2032 Despegue el folio protector que cubre la pantalla del medidor de frecuencia cardíaca y presione sobre MODE, SEL o SET. Presionando sobre SEL, podrá elegir entre los idiomas inglés, alemán, francés y español. Confirme el idioma elegido presionando SET. -6 De la misma forma, confirme los valores KM-KG según el sistema métrico METRIC KM - KG KM - KG KM - KG o los valores millas-libras (M-LB) IMPERIAL M - LB M - LB M - LB Concluya el encendido presionando sobre MODE. Reset Presionando al mismo tiempo SET y SEL se puede volver a los valores estándar. La elección de otro idioma solo puede llevarse a cabo tras realizar esta función. Cambio de la pila del reloj de pulsera Si lleva el reloj al relojero para cambiar la pila puede solicitar una prueba de estanqueidad para comprobar la resistencia al agua del reloj. Si prefiere cambiar la pila usted mismo/a, siga estos pasos: Suelte los tornillos (1, 2, 3 y 4) de la tapa trasera del reloj con un destornillador pequeño en cruz. Retire la tapa y la pegatina de la pila. Sírvase de una herramienta pequeña y plana para abrir el pestillo (5) de la ranura de la pila. Retire la pila gastada y coloque otra pila CR2032 de 3 V nueva con el polo (+) hacia arriba. Compruebe que el anillo estanco (6) está correctamente colocado y vuelva a cerrar el pestillo de la ranura de la pila (5). Vuelva a pegar la pegatina de la pila, encaje la tapa y atorníllela. Indicador de nivel de batería Cuando el nivel de la batería de la banda pectoral sea insuficiente para su normal funcionamiento, aparecerá en la pantalla: TXBELT TXGURT SNGLTX TXBCIN LO BAT BATT PILE BAT BA Cambie la pila de la banda siguiendo lo indicado en el apartado “banda pectoral“. Sujeción de la banda pectoral Ajuste la banda de tal modo que quede bien sujeta, justo debajo de los músculos pectorales. Humedezca ligeramente las áreas de contacto de la banda con un poco de agua o con gel para electrocardiogramas (que podrá encontrar en una farmacia). Asegúrese de que las áreas de contacto estén siempre en contacto con la piel. Coloque la banda siguiendo las indicaciones de la imagen. Asegúrese de que la banda esté bien sujeta al cuerpo. La banda debe de quedar sujeta al pecho y ejercer una ligera presión aun después de haber expirado completamente. Los tendidos de Área de contacto alta tensión, las catenarias de ferrocarril o tranvía o un tráfico fluido de automóviles pueden influir o interferir en los datos del medidor de frecuencia cardíaca. Téngalo en cuenta a la hora de elegir el itinerario de su entrenamiento. -7 -8 Transmisión codificada de las frecuencias cardíacas La transmisión de datos desde la banda pectoral se codifica digitalmente para evitar interferencias si entrena Ud. con un compañero/a que usa otro medidor de frecuencia cardíaca idéntico al suyo. Al utilizar por primera vez la banda pectoral, esta elige aleatoriamente un canal de transmisión. El canal se indica en la parte superior de la pantalla cuando enciende el indicador de la frecuencia cardíaca. Los canales disponibles son CH10, CH11, CH12, CH13 y CH14. Puede cambiar el canal de transmisión retirando la pila de la banda pectoral y volviéndola a colocar. La banda volverá a elegir aleatoriamente un canal de transmisión. Pasado 1 minuto, se indicará de nuevo la frecuencia cardíaca y el nuevo canal de transmisión utilizado. presionarse con una cierta fuerza para colocar este soporte. Sujete el medidor de frecuencia cardíaca al soporte como si se lo colocara en la muñeca. Uso del soporte para bicicletas Puede colocarse el medidor de frecuencia cardíaca en la muñeca o puede también sujetarlo al manillar de su bicicleta utilizando el soporte que se incluye en el equipo. Para la transmisión de datos a la banda pectoral es necesario no sobrepasar una distancia de 70 cm entre la banda y el medidor de frecuencia cardíaca. Iluminación Presione ligeramente sobre LIGHT para activar momentáneamente la retroiluminación. Informaciones importantes relativas a la utilización del medidor de frecuencia cardíaca El medidor de frecuencia cardíaca dispone de 3 modos de funcionamiento. Presionando sobre MODE puede cambiar el modo de funcionamiento del medidor de frecuencia cardíaca. La secuencia de funciones es la siguiente: Horario y ajustes básicos TIME ZEIT TEMPS HORA ST-UHR CHRONO CRONO PULS FC PULSO Cronómetro CHRONO Pulsómetro HRM Dispone además de ciertas Funciones adicionales Presione desde arriba sobre el soporte para colocarlo sobre el manillar de su bicicleta. En manillares de diámetro especialmente grande puede tener que -9 Puede acceder en todo momento a las funciones adicionales presionando sobre SEL. - 10 Ajuste rápido A la hora de ajustar valores numéricos, puede utilizar el modo de ajuste rápido manteniendo presionado SEL. Posteriormente aparecerá el indicador de peso corporal. WEIGHT GEWICHT POIDS Horario y ajustes básicos Ajuste las cifras de su peso corporal presionando sobre SEL y confirme los datos introducidos con SET. Pulse MODE para escojer la función. TIME ZEIT TEMPS HORA Presionando sobre SEL puede activar las funciones adicionales correspondientes al horario. Horario y ajustes básicos TIME ZEIT TEMPS HORA Alarma despertador ALARM ALARM ALARM ALARMA Temporizador / Timer TIMER TIMER COMPTE TIMER Presione durante 3 segundos sobre SET para entrar en el modo de ajuste. En la pantalla aparecerá: HOLD HALTEN= MAINT= MANT= TO SET EINST. REGLER AJUST iluminándose intermitentemente el modo de 12 o 24 horas. Para ajustarlo, presione SEL y confirme el ajuste presionando SET. Ajuste de idéntica forma los segundos, minutos, las horas, el año, el mes y el día. A continuación, proceda a los ajustes básicos. En primer lugar aparecerá su año de nacimiento. BIRTHDAY GEB-TAG DATNAISS CUMPL-AN Seguidamente aparece el indicador de altura corporal. HEIGHT GROESSE TAILLE PESO TAMANO Ajuste la cifra de su altura corporal presionando SEL y confirme el dato con SET. Concluya el modo de ajuste de datos presionando sobre MODE. Segunda zona horaria Mantenga presionado SEL durante 3 segundos. El reloj cambiará a la indicación de la segunda zona horaria, apareciendo la señal T2 en la pantalla. El ajuste de los datos de la segunda zona horaria se efectúa según las indicaciones del párrafo anterior. Presione SEL durante 3 segundos para volver a su zona horaria normal. Alarma despertador ALARM ALARM ALARM ALARMA Mantenga presionado durante 3 segundos SET para entrar en el modo de ajuste. En la pantalla aparecerá “AL” y los minutos correspondientes a la alarma. Para ajustar los minutos, presione SEL y confirme los datos con SET. Ajuste de idéntica forma la hora. Si se desea, se puede ajustar también el mes y el día. Si no se ajustan ni el mes ni el día, la alarma sonará diariamente. Si se introduce solamente el día, la alarma sonará mensualmente. Si se ajustan tanto el mes como el día, la alarma sonará únicamente el día introducido. En la pantalla aparecerá a continuación el ajuste de la señal horaria. CHIME STDALARM SIGN HOR HORA AL Para ajustar el año, presione sobre SEL y confirme su año presionando SET. Ajuste de idéntica forma el mes y día correspondientes. - 11 - 12 Para ajustarla, presione sobre SEL y confirme el ajuste presionando sobre SET (ON/EIN/ACTIF/ENCENDID=encendido, OFF/AUS/INACTIF/APAGADO=apagado). Al activar la señal horaria aparecerá el símbolo de una campana y en cada hora punta sonará un tono de aviso. Concluya el modo de ajuste presionando sobre MODE. Presionando sobre SET puede activar o desactivar la alarma. Con la alarma activada aparecerá el símbolo . Al sonar la alarma, presione sobre SET, SEL o MODE para apagarla. Cronómetro Función de repetición Si al sonar la alarma no presiona ningún botón, se activará automáticamente tras 30 segundos la función de repetición y aparecerá el símbolo de forma intermitente en la pantalla. Esta función se repetirá 5 veces. DATA ANSICHT APPEL RECUP RECALL DATEN DONNEES DATOS Con el cronómetro parado, presione sobre SEL y en la pantalla se indicará la vuelta más rápida. Presione sobre SET para indicar los otros tiempos de vuelta. Temporizador/Timer (máx. 23:59:00) Nota: la función de memoria de datos solo se podrá activar si se ha registrado al menos una vuelta. TIMER TIMER COMPTE TIMER Presione durante 3 segundos sobre SET para activar el temporizador. En la pantalla aparecerán intermitentemente los minutos correspondientes al temporizador. Para ajustarlos, presione sobre SEL y confirme con SET. Ajuste la hora de idéntica forma. A continuación seguirán los ajustes complementarios del temporizador. Presione sobre SEL para elegir el modo deseado: Cd r Cd U Cd S Tras alcanzar 0:00, el temporizador volverá a correr el período indicado Tras alcanzar 0:00, el temporizador correrá hacia adelante Tras alcanzar 0:00, el temporizador se detiene Concluya el modo de ajuste presionando MODE. Puede activar o parar el temporizador presionando SET. Mantenga presionado SET para volver a ajustar el temporizador. Al finalizar la temporización sonará una señal. - 13 Pulse MODE para escojer la función. CHRONO ST-UHR CHRONO CRONO Para encender o apagar el cronómetro, presione sobre SET. Con el cronómetro en marcha, presione SEL para finalizar un tiempo de vuelta. Pueden realizarse hasta 99 tiempos de vuelta. Mantenga presionado SET para volver a colocar el cronómetro a cero. Función de memoria de datos Pulsómetro Pulse MODE para escojer la función. HRM PULS FC PULSO El pulsómetro funciona únicamente con utilización de la banda pectoral. Presionando sobre SEL se pueden activar las funciones adicionales del pulsómetro: Temporizador/Timer TIMER TIMER COMPTE TEMPORIZADOR Memoria de datos MEMORY SPEICHER Zona-objetivo de pulso ZONE BEREICH - 14 MEMOIRE MEMORIA ZONE ZONA Consumo de calorías, quema de grasas, índice de masa corporal IMC CALORIE KALORIEN CALORIES CALORIAS Indice de fitness-estado físico FITNESS FITNESS LEVEL LEVEL NIV FORM PHYSIQ NIVEL FIT Al utilizar la banda pectoral, la pantalla indicará el pulso cardíaco en la línea central. A la recepción de la frecuencia cardíaca, aparecerá un símbolo en forma de corazón. A la derecha del indicador del pulso aparecerá el % de pulso máximo alcanzado. El pulso máximo se calcula en función de la edad y el peso y la altura corporales. Señal de alarma Si su pulso cardíaco alcanza el 99% del pulso máximo o sobrepasa este valor, o si su pulso sobrepasa el valor máximo introducido (ver zona-objetivo de pulso) se encenderá una señal de alarma roja, la alarma sonará. El temporizador comienza a contar automáticamente a partir del momento en que se coloca la banda pectoral. El temporizador continuará contando incluso si cambia Ud. a un modo operativo diferente. Presione ligeramente sobre SET para elegir el modo de temporizador TIMER Tiempo total de entrenamiento Duración del entrenamiento en zona-objetivo de pulso ▲ Duración del entrenamiento sobrepasando la zona-objetivo de pulso ▼ Duración del entrenamiento por debajo de la zona-objetivo de pulso Mantenga presionado SET para volver a poner a 0 la duración del entrenamiento. Función de memoria de datos MEMORY TIMER TIMER COMPTE TEMPORIZADOR En el reglón inferior de la pantalla aparecerá el tiempo de entrenamiento ya transcurrido. La línea intermedia indica el pulso cardíaco así como el % sobre el pulso máximo alcanzado. - 15 Presionando SEL, elija la forma de entrenamiento deseada. Optando por “U” (Personalizada), puede ajustar los valores máximos y mínimos manualmente. Presione SET. En la pantalla aparecerá intermitentemente el valor mínimo. Ajuste el valor presionando sobre SEL y confirme el valor con SET. Ajuste de idéntica forma el valor máximo. Finalice con el modo de ajuste presionando sobre MODE. Mantenga presionado SEL para activar la alarma de pulso. Con la alarma de pulso activada aparecerá en la pantalla el símbolo . Si se sale de la zonaobjetivo de pulso sonará una señal acústica doble ("PIP-PIP... PIP-PIP... PIP-PIP"). Si su pulso alcanza el 99% del pulso máximo o si sobrepasa este valor, sonará la alarma de tono único correspondiente al pulso máximo (“PIP-PIP-PIP-PIP-PIP…”). Este tono sonará independientemente de la zona de entrenamiento o de la alarma de pulso de la zona de entrenamiento. Calorías, quema de grasa e índice de masa corporal IMC CALORIE KALORIEN CALORIES CALORIAS En la línea inferior se indican las calorías consumidas. CALORIE KALORIEN CALORIES CALORIAS Presione SET para obtener la indicación de la quema de grasa en gramos FAT FETT CONSGRAISSES GRASA BURN o para cambiar a la indicación del IMC BMI BMI IMC IMC Durante la indicación del consumo de calorías o de quema de grasas, puede volver a colocar a 0 los valores manteniendo presionado SET. Nota: para conocer con exactitud de los valores de consumo de calorías y de quema de grasa es necesario que los datos relativos a edad y peso corporal sean lo más correctos posibles. - 17 MEMOIRE MEMORIA AL pulso mínimo alcanzado LO N FA BA pulso promedio AV D MO PR Mantenga presionado SET para volver a poner a 0 los valores. Zona-objetivo de pulso ZONE Temporizador/Timer SPEICHER Los datos almacenados se indican en la línea inferior. pulso máximo alcanzado HI H FO BEREICH ZONE ZONA En la línea inferior se indican los valores máximos y mínimos del pulso que se desea alcanzar. La forma de entrenamiento elegida se indica en la línea superior. L- U Personalizada L-1 Saludable (50-65% del pulso máximo) L-2 Fitness/En forma (65%-80% del pulso máximo) L-3 Alto rendimiento (80-95% del pulso máximo) Mantenga presionado SET durante 3 segundos para entrar en el modo de ajuste. - 16 Nota: el indicador de quema de grasa se activa solamente con un pulso superior a 120 latidos por minuto. Notas relativas al índice de masa corporal IMC: El IMC es un valor que se utiliza para la evaluación del peso corporal de una persona. Se considera normal para adultos un valor entre 18,5 y 25. Valores por debajo de 18,5 se consideran una indicación de falta de peso y los valores por encima de 25 se suelen entender como indicador de sobrepeso. Un valor por encima de 30 normalmente indica adiposidad (obesidad). Sin embargo, el IMC es meramente un valor bruto e indicativo, puesto que no tiene en la estatura real y la composición especifica del tejido graso y muscular, que es diferente en cada persona. Fitness/En forma FITNESS LEVEL FITNESS LEVEL NIV FORM PHYSIQ NIVEL FIT Inmediatamente después de finalizar su entrenamiento, presione sobre SET. Comenzará una cuenta atrás de 5 minutos (fase de reposo). En la barra se indicará el tiempo de reposo restante. A la izquierda aparecerá el pulso inicial y la derecha el pulso actual. En la línea inferior se indica la duración de la cuenta atrás. Transcurridos los 5 minutos, aparecerá el estado de su forma física: Forma física 6 5 4 3 2 1 Pulso >130 130-120 120-110 110-105 105-100 <100 - 18 Solución de problemas Nota relativa a la limpieza El pulso no se indica correctamente Compruebe que se ha colocado correctamente la banda pectoral y que esta se ha ajustado adecuadamente al cuerpo. La piel no debería estar demasiado seca o demasiado fría. Las áreas de contacto con la piel pueden mojarse ligeramente para mejorar el funcionamiento de la banda pectoral. Las fuentes de emisión electromagnéticas pueden interferir en la recepción de datos. La distancia entre la banda pectoral y el medidor de frecuencia cardíaca no debe superar los 70 cm. Otros medidores de pulso a una distancia menor de 2 metros pueden interferir en la recepción de datos. Los ordenadores de bicicleta sin cable pueden interferir en la recepción. En ocasiones esto puede indicar que es necesaria la sustitución de las pilas. Es difícil leer la pantalla / La iluminación no funciona Sustituya las pilas. Estanqueidad del reloj de correa Es estanco hasta 3 bares. El valor en bares se refiere a la sobrepresión atmosférica utilizada en las pruebas de estanqueidad (según DIN8310): Realice la limpieza del medidor de frecuencia cardíaca utilizando únicamente un paño seco y sin pelusas, como los utilizados para la limpieza de gafas. Tras cada uso limpie la cinta pectoral y la correa del reloj con agua tíbia o con agua jabonosa suave y una esponja. Seque todas las piezas con un paño y colgue la cinta pectoral para que seque bien. Sudor y suciedad perjudican el funcionamiento del sensor. Eliminación y reciclaje del medidor de frecuencia cardíaca Este medidor de frecuencia cardíaca no debe eliminarse con los residuos domésticos. Deseche el medidor de frecuencia cardíaca utilizando un servicio de reciclaje autorizado o el punto verde de su municipio. En caso de duda, consulte a su punto de reciclaje. Eliminación de las pilas Por favor, deseche las pilas usadas de forma adecuada en los contendores existentes para tal fin en los comercios. Las pilas no deben desecharse con los residuos domésticos. Deseche las pilas utilizando un servicio de reciclaje autorizado o el punto verde de su municipio. Cumpla la normativa vigente a tal respecto. En caso de duda, consulte con su punto de reciclaje. Declaración de conformidad Este producto se corresponde, en la utilización para el mismo establecida, con los requerimientos básicos del párrafo 3 y demás disposiciones aplicables del FTEG (Artículo 3, R&TTE). Puede solicitar la declaración de conformidad en: [email protected] Resistencia al agua de la banda pectoral Resistencia al agua según norma IEC 60529 IPx7. - 19 medidor de frecuencia le corresponden a Ud. derechos legalmente reconocidos frente al vendedor. Estos derechos legalmente reconocidos no se ven limitados por la garantía que se expone a continuación. Condiciones de la garantía El período de garantía comienza con la fecha de la compra. Por favor, guarde cuidadosamente y a tal fin el ticket de compra original. Este documento es necesario como prueba de la compra. Si en el transcurso de tres años contados a partir de la fecha de la compra aparecieran en el medidor de frecuencia cardíaca defectos de material o de fabricación, se procederá (a elección de digitech-gmbh) a la reparación o sustitución del mismo sin coste alguno para Ud. La prestación de esta garantía se halla supeditada a la presentación, dentro del plazo de 3 años, del medidor de frecuencia cardíaca defectuoso, de la prueba de la compra (ticket de compra) y de una corta descripción por escrito del defecto y del momento de su aparición. En caso de que nuestra garantía cubra el defecto, recibirá Ud. el medidor de frecuencia cardíaca reparado o uno nuevo. A la recepción del medidor de frecuencia reparado o de su sustituto nuevo no comenzará un nuevo período de garantía. Duración de la garantía y derecho de reclamación La duración de la garantía no se alarga tras la prestación del servicio garantizado, lo que se extiende también a piezas reparadas o sustituidas. Los posibles daños ya existentes en el momento de la compra deberán ser notificados inmediatamente después del desembalaje. Las reparaciones que se tengan que efectuar tras la finalización del período de garantía deberán ser abonadas. Ámbito de la garantía El medidor de frecuencia cardíaca ha sido fabricado cuidadosamente siguiendo pautas de calidad muy estrictas y superando un control de calidad previo a su puesta en venta. Esta garantía se extiende solamente a defectos de material o de fabricación. Esta garantía no se extiende a piezas componentes del instrumento sometidas a un proceso de desgaste normal y que por lo tanto puedan ser consideradas como piezas consumibles, ni sobre desperfectos aparecidos en - 21 Garantía de digi-tech gmbh Con este medidor de frecuencia cardíaca recibe Ud. una garantía con una validez de 3 años a partir de la fecha de la compra. En caso de defectos de este - 20 partes frágiles como por ejemplo, botones, acumuladores o piezas compuestas de cristal. Esta garantía pierde su vigencia si el medidor de frecuencia cardíaca ha sido dañado, utilizado incorrectamente o sometido a operaciones de mantenimiento incorrectas. Para una utilización adecuada del medidor de frecuencia cardíaca deberán observarse estrictamente todas las indicaciones contenidas en el manual de instrucciones. Deben evitarse necesariamente usos y manejos desaconsejados en el manual de instrucciones o de los cuales se haya advertido en el mismo. El medidor de frecuencia cardíaca está indicado únicamente para su utilización a título particular y no para un uso comercial o industrial. La garantía pierde su vigencia en caso de un mal o incorrecto uso del mismo, su utilización de forma violenta o en caso de operaciones técnicas no efectuadas por alguno de nuestros servicios técnicos autorizados. Procedimiento en caso de garantía Para garantizar un procedimiento rápido de su solicitud, siga por favor las siguientes instrucciones: • Para cualquier comunicación, tenga a mano el ticket de compra y el código de artículo (47584), como prueba de su compra. • Encontrará el código del artículo bien en una placa indicativa del tipo de aparato, bien grabada en la carcasa, en la portada del manual de instrucciones (parte inferior izda.) o en una pegatina en la parte trasera o inferior del aparato. • En caso de aparecer defectos de funcionamiento, contacte primero por teléfono o mediante correo electrónico con el departamento técnico abajo indicado. En www.lidl-service.com pueden descargarse este y muchos otros manuales de instrucciones, videos de productos y software. - 22 Servicio técnico Istruzioni per l’uso e per la sicurezza Razón social: Inter-Quartz GmbH Dirección.: Valterweg 27A Localidad: Eppstein 65817 País: Alemania Correo electrónico: [email protected] Teléfono: 00800 5515 6616 00800 5515 6616 00800 5515 6616 IAN 47584 Proveedor Esta razón social no se corresponde con ningún servicio técnico. Contacte primero con la dirección de servicio arriba indicada. Razón social: digi-tech gmbh Dirección.: Valterweg 27A Localidad: Eppstein 65817 País: Alemania Contenuto Contenuto ................................................................................................................. - 24 Introduzione ............................................................................................................. - 26 Uso conforme alla destinazione ............................................................................ - 26 Oggetti che fanno parte della fornitura ................................................................ - 26 Dati tecnici ................................................................................................................ - 27 Funzioni .................................................................................................................... - 27 Istruzioni importanti per la sicurezza ................................................. - 28 - Batterie ........................................................................................................... - 28 - Tenere l’orologio da polso con cardiofrequenzimetro fuori dalla portata dei bambini ................................. - 29 Come mettere in funzione l’orologio da polso con cardiofrequenzimetro ....... - 29 Reset ................................................................................................................... - 30 Sostituire la batteria dell’orologio da polso .................................................. - 30 Messaggio di segnalazione dello stato della batteria ................................. - 31 Come indossare la cintura pettorale............................................................... - 31 Trasmissione codificata della frequenza cardiaca ....................................... - 32 Come utilizzare il sostegno per la bicicletta ................................................. - 32 Illuminazione ............................................................................................................ - 33 Informazioni importanti sull’uso dell’orologio da polso con cardiofrequenzimetro.............................................................................................. - 33 Impostazione veloce ........................................................................................ - 34 Ora e impostazioni di base .................................................................................... - 34 Secondo fuso orario ......................................................................................... - 35 Allarme sveglia ........................................................................................................ - 35 Timer (max. 23:59:00) ........................................................................................... - 36 Cronometro .............................................................................................................. - 37 - 24 - - 23 Funzione memoria ................................................................................................... - 37 Misuratore dei battiti del polso .............................................................................. - 37 Spia di segnalazione .............................................................................................. - 38 Timer ......................................................................................................................... - 38 Funzione memoria ................................................................................................... - 39 Intervallo obiettivo di frequenza cardiaca............................................................ - 39 Calorie, smaltimento dei grassi e IMC (indice di massa corporea) .................. - 40 Informazioni relative all’indice di massa corporea (IMC) ........................... - 41 Fitness........................................................................................................................ - 41 Eliminazione degli errori ......................................................................................... - 42 La frequenza cardiaca non viene visualizzata o viene visualizzata in modo errato. .................................................................. - 42 Il quadrante si legge con difficoltà / L’illuminazione del quadrante non funziona ................................................. - 42 Impermeabilità all’acqua dell’orologio da polso ............................................... - 42 Impermeabilità all’acqua della cintura pettorale ................................................ - 43 Indicazioni per la pulizia ........................................................................................ - 43 Smaltimento dell’orologio da polso con cardiofrequenzimetro ........................ - 43 Smaltimento delle batterie ...................................................................................... - 43 Dichiarazione di conformità ................................................................................... - 44 Garanzia della digi-tech gmbh ............................................................................. - 44 Condizioni di garanzia ........................................................................................... - 44 Periodo di garanzia e diritti di legge sui reclami per difetti ................................ - 45 Estensione della garanzia ...................................................................................... - 45 Procedura di esecuzione nei casi coperti da garanzia ....................................... - 46 Assistenza ................................................................................................................. - 47 Fornitore ................................................................................................................... - 47 - - 25 - OROLOGIO DA POLSO CON CARDIOFREQUENZIMETRO Introduzione Cordiali congratulazioni per l’acquisto del nuovo orologio da polso con cardiofrequenzimetro. La scelta si è rivolta ad un apparecchio di pregio. Le istruzioni per l’uso costituiscono parte essenziale di questo orologio da polso con cardiofrequenzimetro. Esse contengono importanti istruzioni per la sicurezza, per l’uso e per lo smaltimento. Prima di usare l’orologio da polso con cardiofrequenzimetro, è opportuno acquisire familiarità con tutte le istruzioni per l’uso e per la sicurezza. Usare l’orologio da polso con cardiofrequenzimetro solo secondo le modalità descritte e per i settori di impiego indicati. Quando l’orologio da polso con cardiofrequenzimetro viene consegnato a terzi, è necessario consegnare con l’apparecchio anche tutta la documentazione corrispondente. Uso conforme alla destinazione L’orologio da polso con cardiofrequenzimetro è idoneo per indicare l’ora e per usare le altre funzioni descritte. Qualsiasi altro uso o variante dell’orologio da polso con cardiofrequenzimetro deve essere considerato non conforme alla destinazione. Il costruttore non si assume alcuna responsabilità per danni causati da un uso non conforme alla destinazione o da operazioni errate. Non è previsto che l’orologio da polso con cardiofrequenzimetro venga impiegato per usi commerciali. Oggetti che fanno parte della fornitura Segnalazione: Verificare subito dopo l’acquisto gli oggetti che fanno parte della fornitura. Assicurarsi che tutti gli oggetti siano presenti e che non abbiano difetti. • Orologio da polso con cardiofrequenzimetro, compresa la batteria (CR2032) • Cintura pettorale, compresa la batteria (CR2032) - 26 - • • Sostegno per la bicicletta Istruzioni per l'uso Cronometro • 1/100 di secondo, con 99 escursioni del quadrante Timer per conto alla rovescia Dati tecnici Orologio da polso con cardiofrequenzimetro Intervallo della temperatura di esercizio Dimensioni (escluso il cinturino) Dimensioni del quadrante Peso Batteria 0-50°C 4,3 x 4,6 cm 2,5 x 2,6 cm 48 g CR2032/3V Cintura pettorale Intervallo della temperatura di esercizio Dimensioni (escluso il cinturino) Frequenza di trasmissione Peso Batteria 0-50°C 7 x 3,3 x 1,2 cm 110 kHz 51 g CR2032/3V Funzioni Misurazione del numero di battiti del polso • Allarme causato dal numero massimo di battiti del polso • Training con timer e allarme per determinare il numero ottimale di battiti del polso (salute, fitness, prestazioni e in base a un valore definito dall’utente) • Numero massimo, minimo, medio di battiti del polso • Spia di segnalazione (quando vengono superati i valori prestabiliti del numero di battiti del polso) Funzioni caloriche • Consumo calorico e smaltimento dei grassi durante il training • Calcolo dell’indice di massa corporea (IMC) • Livello di fitness Funzioni del tempo • Ora e minuti • Calendario • Sveglia con ripetizione della sveglia • Segnale orario • Secondo fuso orario Altre funzioni • Retroilluminazione Istruzioni importanti per la sicurezza ATTENZIONE: Prima dell’inizio del training consultare il medico. Può ricevere utili spiegazioni sul training più appropriato, sull’intensità del training e sui valori predefiniti per il numero di battiti del polso. Questo orologio da polso con cardiofrequenzimetro non è un apparecchio medico e serve solo a contribuire all’impostazione del Suo training. - Batterie Inserire sempre le batterie facendo attenzione alle corrette polarità e non tentare di ricaricarle o di aprirle. Non getta mai le batterie nel fuoco, perché possono esplodere. Non usa mai assieme batterie tra loro diverse (vecchie e nuove, alcaline e al carbone, ecc.). In caso di uso non appropriato delle batterie, vi è pericolo di esplosione e di sversamento. Nel caso si verifichi uno sversamento dalle batterie, usare i guanti e pulire a fondo con un panno asciutto l’orologio da polso con cardiofrequenzimetro. - 27 - - 28 - - Tenere l’orologio da polso con cardiofrequenzimetro fuori dalla portata dei bambini Non lasciare mai che i bambini usino l’orologio da polso con cardiofrequenzimetro quando non sono sorvegliati. I bambini non sono sempre in grado di riconoscere correttamente gli eventuali pericoli. Se le batterie vengono inghiottite, possono diventare un pericolo per la vita. Tenere le batterie lontane dalla portata dei bambini. Se un bambino ha inghiottito una batteria, si deve ricorrere immediatamente al soccorso di un medico. Tenere anche i fogli usati nell’imballaggio fuori dalla portata dei bambini. Si corre il pericolo di soffocamento. Asportare dal quadrante dell’orologio da polso con cardiofrequenzimetro il foglio di protezione e premere MODE, SEL oppure SET. Premendo su SEL scegliere quindi la lingua: inglese, tedesco, francese, spagnolo. Confermare la scelta premendo su SET. Scegliere allo stesso modo l’unità KM-KG METRIC KM - KG KM - KG KM - KG Come mettere in funzione l’orologio da polso con cardiofrequenzimetro Svitare con una moneta il coperchio dell’alloggiamento della batteria dalla parte posteriore della cintura pettorale e inserire la batteria da 3 Volt con il segno più (+) rivolto verso l’alto. Riavvitare il coperchio della batteria. oppure l’unità miglio-libbra (M-LB) IMPERIAL M - LB M - LB Reset Premendo contemporaneamente SET e SEL, si può resettare l’orologio. Solo dopo aver resettato l’orologio, si può selezionare un’altra lingua. Sostituire la batteria dell’orologio da polso Potete farvi sostituire la batteria da un orologiaio facendogli anche verificare l’impermeabilità. Se intendete sostituire da soli la batteria, siete pregati di seguire le seguenti istruzioni: Allentate con un piccolo cacciavite a croce le viti (1,2,3 e 4) collocate sul retro dell’orologio da polso. Rimuovete la base dell’alloggiamento e l’etichetta della batteria. Utilizzate un utensile piccolo e piatto per aprire la barra (5) del supporto della batteria. Togliete la batteria e inserite una nuova batteria 3V CR2032 con il simbolo (+)-Pol verso l’alto. Verificate la corretta posizione della rondella (6). Chiudete il supporto della batteria (5). Incollate nuovamente l’etichetta della batteria, inserite la base dell’alloggiamento avvitandola. Batteria: CR2032 - 29 - M - LB Terminare la procedura di avviamento premendo MODE. - 30 - Messaggio di segnalazione dello stato della batteria Quando la carica della batteria nella cintura pettorale non è più sufficiente per il funzionamento normale, sul quadrante dell’orologio compare il messaggio: TXBELT TXGURT SNGLTX TXBCIN LO BAT BATT PILE BAT BA Sostituire la batteria della cintura pettorale, come descritto al capitolo “Cintura pettorale". Come indossare la cintura pettorale Adattare la cintura in modo tale che si trovi direttamente al di sotto dei muscoli pettorali. Inumidire leggermente con acqua o con gel per elettrocardiogramma (ECG) (reperibile in farmacia) le superfici di contatto della cintura. Assicurarsi che le superfici di contatto siano sempre a contatto della pelle. Posizionare la cintura come mostrato nella figura seguente. Fare attenzione che la cintura pettorale si trovi nella posizione corretta. Dopo aver espirato del tutto, la cintura deve ancora trovarsi sulla gabbia toracica, sottoposta ad una leggerissima tensione. Tralicci dell’alta Superficie di contatto tensione, linee di corrente sospese di ferro-tranvie o traffico veicolare in scorrimento possono influire sulla misura o disturbarla. Si deve quindi scegliere con molta attenzione il percorso. Trasmissione codificata della frequenza cardiaca La trasmissione dei dati della cintura pettorale viene codificata in modalità digitale per evitare che si verifichino disturbi quando una persona esegue il training con un partner che utilizza un apparecchio di tipo analogo. Quando si usa la cintura pettorale per la prima volta, viene selezionato un canale in modo automatico secondo il principio di casualità. Questo canale viene brevemente visualizzato in alto sul quadrante se si passa alla visualizzazione della frequenza cardiaca. I canali disponibili sono CH10, CH11, CH12, CH13 e CH14. Si può cambiare canale togliendo per un breve tempo la batteria dalla cintura pettorale e rimettendola nel suo alloggiamento. La cintura seleziona un nuovo canale sulla base del principio di casualità e, dopo circa 1 minuto, la misura dei battiti del polso e il nuovo canale vengono visualizzati sul quadrante dell’orologio. Come utilizzare il sostegno per la bicicletta Si può portare l’orologio con cardiofrequenzimetro al polso oppure lo si può fissare al manubrio della propria bicicletta mediante l’apposito sostegno che viene fornito. - 31 - - 32 - Premere il sostegno dall’alto sul tubo del manubrio. Se il tubo del manubrio ha un diametro particolarmente grande, è necessario premere con notevole forza per fissare il sostegno. A questo punto si può fissare l’orologio da polso con cardiofrequenzimetro al sostegno, allo stesso modo in cui lo si era fissato al polso. Impostazione veloce Nell’impostazione di valori numerici si può usare l’impostazione veloce premendo e tenendo premuto SEL. Nell’uso dell’orologio da polso con cardiofrequenzimetro non si deve superare la distanza massima di trasmissione di 70 cm dalla cintura pettorale. Ora e impostazioni di base Prima premere MODE per selezionare la funzione. TIME ZEIT TEMPS HORA Illuminazione Premendo brevemente LIGHT, si attiva momentaneamente la retroilluminazione. Informazioni importanti sull’uso dell’orologio da polso con cardiofrequenzimetro L’orologio da polso con cardiofrequenzimetro ha disponibili 3 modalità di funzionamento. Premendo MODE si può cambiare la modalità di funzionamento dell’orologio da polso con cardiofrequenzimetro. La sequenza delle funzioni è la seguente: Ora e impostazioni di base TIME ZEIT TEMPS HORA ST-UHR CHRONO CRONO FC PULSO Cronometro CHRONO Misuratore dei battiti del polso HRM PULS Inoltre nelle modalità di funzionamento sono disponibili diverse sotto funzioni. È sempre possibile intervenire sulle sotto funzioni premendo SEL. - 33 - Premendo SEL si possono richiamare le sotto funzioni della modalità Ora. Ora e impostazioni di base TIME ZEIT TEMPS HORA Allarme sveglia ALARM ALARM ALARM ALARMA TIMER COMPTE TIMER Timer TIMER Premere e tenere premuto per 3 secondi SET, per passare alla modalità di impostazione. Sul quadrante compare HOLD HALTEN= MAINT= MANT= TO SET EINST. REGLER AJUST e si accende a intermittenza l’indicazione della modalità a 12 oppure a 24 ore. Per l’impostazione premere SEL e confermare l’impostazione premendo SET. Impostare allo stesso modo i secondi, i minuti, le ore, l’anno, il mese e il giorno. Seguono ora le impostazioni di base. Compare dapprima l’anno di nascita. BIRTHDAY GEB-TAG DATNAISS CUMPL-AN Per l’impostazione premere SEL e per confermare l’impostazione premere SET. Impostare allo stesso modo il mese e il giorno. - 34 - Compare ora l’indicazione del peso. WEIGHT GEWICHT POIDS PESO Impostare ciascuna cifra del proprio peso premendo SEL e confermare la cifra immessa premendo di volta in volta SET. Compare ora l’indicazione dell’altezza corporea. HEIGHT GROESSE TAILLE TAMANO Impostare le singole cifre della propria altezza premendo SEL e confermare la cifra immessa premendo di volta in volta SET. Terminare la modalità di impostazione premendo MODE. Secondo fuso orario Premere e tenere premuto per 3 secondi SEL. L’orologio passa all’indicazione del secondo fuso orario e sul quadrante compare T2. L’impostazione del secondo fuso orario avviene come descritto al punto precedente. Per ritornare alla normale indicazione dell’ora, premere e tenere premuto SEL per 3 secondi. Per l’impostazione premere SEL e confermare l’impostazione premendo SET (ON/EIN/ACTIF/ENCENDID/ACCESO = attivato, OFF/AUS/INACTIF/APAGADO/SPENTO = disattivato). Quando il segnale orario è attivato, compare il simbolo della campana e ad ogni ora esatta viene emesso un suono di segnalazione. Terminare la modalità di impostazione premendo MODE. Premendo SET è possibile attivare o disattivare l’allarme. Quando l’allarme è attivato, compare il simbolo di allarme . Per fermare l’allarme quando inizia a suonare, premere SET, SEL o MODE. Funzione di ripetizione della sveglia Se quando suona l’allarme non si preme nessun tasto, la funzione di ripetizione della sveglia si attiva automaticamente dopo 30 secondi e sul quadrante il simbolo si accende a intermittenza. L’allarme poi si disattiva e suona nuovamente dopo 2 minuti. Questa sequenza si ripete 5 volte. Timer (max. 23:59:00) TIMER Allarme sveglia ALARM ALARM ALARM ALARMA Per passare alla modalità di impostazione, tenere premuto SET per 3 secondi. Sul quadrante compare "AL" e si accendono a intermittenza i minuti della sveglia. Per l’impostazione premere SEL e confermare questa impostazione premendo SET. Impostare le ore allo stesso modo. Se si desidera, si può ora impostare il mese e il giorno. Se non si imposta né il mese né il giorno, l’allarme suona ogni giorno. Se si imposta solo il giorno, l’allarme suona ogni mese. Se si imposta sia il mese che il giorno, l’allarme suona solo alla data impostata. Cd r HORA AL Cd U - 36 - Per resettare il timer, premere e tenere premuto SET. Decorso il tempo del timer, viene emesso un suono di segnalazione. Cronometro Prima premere MODE per selezionare la funzione. CHRONO ST-UHR CHRONO CRONO Premere SET per avviare o fermare il cronometro. Quando il cronometro è in corsa, premere SET per fermare sul quadrante il tempo di giro. Possono essere fermati sul quadrante fino a 99 tempi di giro. Premere e tenere premuto SET, per resettare il cronometro. Funzione memoria DATA ANSICHT APPEL RECUP RECALL DATEN DONNEES DATOS Dopo aver fermato il cronometro, premere SEL per fare apparire sul quadrante il giro più veloce. Premere SET per fare comparire gli altri tempi di giro. ZONE Fitness FITNESS LEVEL Intervallo obiettivo di frequenza cardiaca - 37 - FITNESS LEVEL NIV FORM PHYSIQ NIVEL FIT Se il numero di battiti del polso raggiunge il 99 % del numero massimo o se addirittura supera questo valore oppure se il numero di battiti del polso supera il valore limite impostato (vedere “Zona di frequenza cardiaca a cui arrivare”), si accende la spia a intermittenza rossa e l’allarme suona. PULSO MEMORIA ZONA Spia di segnalazione Il misuratore dei battiti del polso funziona solo se si usa la cintura pettorale. Premendo SEL si possono richiamare le sotto funzioni del misuratore dei battiti del polso: Timer TIMER TIMER COMPTE TEMPORIZADOR MEMOIRE ZONE Quando si usa la cintura pettorale, nella riga intermedia del quadrante viene indicato il numero di battiti del polso. Se viene ricevuto il segnale di frequenza cardiaca, si accende a intermittenza il simbolo del cuore. A destra, accanto all’indicazione del numero di battiti del polso, compare la percentuale raggiunta rispetto al numero massimo di battiti del polso. Il numero massimo stimato di battiti del polso viene calcolato automaticamente in funzione dell’età, del peso e dell’altezza corporea. Misuratore dei battiti del polso Prima premere MODE per selezionare la funzione. HRM PULS FC BEREICH Consumo calorico, smaltimento dei grassi e indice di massa corporea (IMC) CALORIE KALORIEN CALORIES CALORIAS Segnalazione: La funzione memoria può essere richiamata solo se è stato registrato almeno un tempo di giro. SPEICHER TIMER Terminare la modalità di impostazione premendo MODE. È possibile avviare o fermare il timer premendo SET. - 35 - Funzione memoria MEMORY COMPTE Dopo aver raggiunto 0:00 il timer esegue il conteggio inverso del tempo impostato Dopo aver raggiunto 0:00 il timer esegue il conteggio in Avanti Dopo aver raggiunto 0:00 il timer si ferma Cd S Sul quadrante compare ora l’impostazione del segnale orario. CHIME STDALARM SIGN HOR TIMER Per impostare il timer, premere e tenere premuto per 3 secondi SET. Sul quadrante si accendono a intermittenza le cifre dei minuti del timer. Per l’impostazione premere SEL e confermare questa impostazione premendo SET. Impostare allo stesso modo le ore. Segue ora l’impostazione ulteriore del timer. Premendo SEL, scegliere la modalità desiderata: Timer MEMORY SPEICHER - 38 - MEMOIRE MEMORIA Nella riga inferiore del quadrante viene visualizzato il tempo di training finora trascorso. Nella riga intermedia vengono visualizzati il numero di battiti del polso e la percentuale raggiunta rispetto alla frequenza cardiaca massima. Il timer esegue automaticamente il conteggio dal momento in cui la cintura pettorale viene posizionata. Il timer continua il conteggio anche quando si passa a un’altra modalità. Per scegliere la modalità del timer, premere brevemente SET: TIMER Tempo di training complessivo Tempo di training nell’intervallo obiettivo di frequenza cardiaca ▲ Tempo di training oltre l’intervallo obiettivo di frequenza cardiaca ▼ Tempo di training sotto l’intervallo obiettivo di frequenza cardiaca Premere e tenere premuto SET, per resettare il tempo di training. Funzione memoria MEMORY SPEICHER MEMOIRE MEMORIA I valori memorizzati vengono visualizzati nella riga inferiore. Frequenza cardiaca massima raggiunta HI H FO AL Frequenza cardiaca minima raggiunta LO N FA BA Frequenza cardiaca media AV MO PR D Intervallo obiettivo di frequenza cardiaca BEREICH ZONE Salute (50-65% della frequenza cardiaca massima) Fitness (65-80% della frequenza cardiaca massima) Prestazione (80-95% della frequenza cardiaca massima) Per cambiare la modalità di impostazione, premere e tenere premuto SET per 3 secondi. Scegliere il tipo di training premendo SEL. Scegliendo "U" (definito dal cliente), i valori limite possono essere impostati manualmente. Premere SET. Sul quadrante si accende a intermittenza il valore limite inferiore. Impostare il valore premendo SEL e confermare questa impostazione premendo SET. Impostare allo stesso modo il valore limite superiore. Terminare la modalità di impostazione premendo MODE. Premere e tenere premuto SEL per attivare l’allarme sui battiti del polso. Quando è attivo l’allarme sui battiti del polso, sul quadrante compare il simbolo di allarme e, quando si esce dall’intervallo obiettivo di frequenza cardiaca, viene emesso un suono di segnalazione "PIP-PIP... PIP-PIP...PIP-PIP". Se il polso ha raggiunto il 99 % della frequenza cardiaca massima o ha addirittura superato tale valore, viene emesso il suono di allarme della frequenza cardiaca massima "PIPPIP-PIP-PIP-PIP...". Questo suono non dipende dall’intervallo di training e dall’allarme di frequenza cardiaca dell’intervallo di training. Calorie, smaltimento dei grassi e IMC (indice di massa corporea) CALORIE Per resettare i valori memorizzati, premere e tenere premuto SET. ZONE L-1 L-2 L-3 ZONA Nella riga inferiore vengono visualizzati i valori limite superiore e inferiore dell’intervallo obiettivo di frequenza cardiaca. Il tipo di training scelto viene visualizzato nella riga superiore. L- U Definito dall’utente KALORIEN CALORIES CALORIAS Nella riga inferiore sono indicate le calorie utilizzate. CALORIE KALORIEN CALORIES CALORIAS Premere SET per passare all’indicazione dello smaltimento dei grassi, espresso in grammi, FAT FETT CONSGRAISSES GRASA BURN - 39 - - 40 - oppure all’indicazione dell’indice di massa corporea (IMC). BMI BMI IMC IMC Nella visualizzazione del consumo calorico o dello smaltimento dei grassi è possibile resettare i valori memorizzati premendo e tenendo premuto SET. Segnalazione: Per migliorare la precisione dei valori di consumo calorico e di smaltimento dei grassi, età e peso devono essere impostati correttamente. Segnalazione: Il contatore dello smaltimento dei grassi si attiva solo a partire da una pulsazione di 120 battiti al minuto. Informazioni relative all’indice di massa corporea (IMC) L’indice di massa corporea (IMC) è una costante campionaria che fornisce la valutazione del peso corporeo di una persona. Un valore compreso tra 18,5 e 25 rappresenta la normalità per un adulto. Per valori inferiori a 18,5 si parla di sottopeso. Per valori superiori a 25 si parla di sovrappeso. Per valori superiori a 30 si parla di obesità (adiposi). L’indice di massa corporea (IMC) fornisce solo un valore di riferimento approssimativo, dal momento che non prende in considerazione la statura di una persona e la naturale diversa composizione individuale del peso corporeo tra tessuto grasso e tessuto muscolare. Fitness FITNESS LEVEL FITNESS LEVEL NIV FORM PHYSIQ NIVEL FIT Subito dopo la conclusione del training, premere SET. Si avvia un conteggio alla rovescia (countdown) di 5 minuti (fase di riposo). La barra indica il tempo di attesa ancora rimanente. A sinistra compare la misura dei battiti del polso all’inizio e a destra la misura dei battiti del polso attuale. Nella riga inferiore compare il conteggio alla rovescia (countdown). Decorsi i 5 minuti, compare il grado di fitness. - 41 - Grado di fitness 6 5 4 3 2 1 Battiti del polso >130 130-120 120-110 110-105 105-100 <100 Eliminazione degli errori La frequenza cardiaca non viene visualizzata o viene visualizzata in modo errato. Verificare che la cintura pettorale sia nella posizione giusta e sia ben appoggiata. La pelle di chi esegue il training non deve essere troppo secca o troppo fredda. Le superfici di contatto possono essere inumidite leggermente per migliorare la funzionalità della misura. Le fonti di disturbi elettromagnetici possono alterare la ricezione dei segnali. La distanza tra la cintura e l’orologio può essere al massimo di 70 cm. Altri apparecchi di misura della frequenza cardiaca, distanti meno di 2 metri, possono disturbare la ricezione dei segnali. Computer sulla bicicletta, funzionanti senza cavi, possono disturbare la ricezione dei segnali. Eventualmente è necessario sostituire le batterie. Il quadrante si legge con difficoltà / L’illuminazione del quadrante non funziona Sostituire le batterie. Impermeabilità all’acqua dell’orologio da polso Impermeabilità fino a 3 bar. Il dato relativo alla pressione in bar si riferisce alla sovrappressione dell’aria che è stata usata nel corso del collaudo di impermeabilità all’acqua (norma DIN 8310). - 42 - domestici. Smaltire le batterie attraverso un’impresa di smaltimento approvata oppure tramite i servizi di smaltimento comunali. Rispettare le disposizioni in merito, in vigore al momento. In caso di dubbio, rivolgersi alla Azienda locale di Servizi pubblici di smaltimento. Dichiarazione di conformità Impermeabilità all’acqua della cintura pettorale Impermeabilità all’acqua secondo la norma IEC 60529 IPx7. Indicazioni per la pulizia Pulire l’ orologio da polso con cardiofrequenzimetro solo con un panno secco e privo di sfilacciature, come, ad esempio, i fazzoletti per la pulizia delle lenti degli occhiali. Dopo ogni uso pulire con una spugna la fascia pettorale e il cinturino dell’orologio utilizzando acqua tiepida o una soluzione leggera a base di acqua e sapone. Asciugare i singoli pezzi servendosi di stoffa e appendere la fascia pettorale per farla ben asciugare. Il sudore e le impurità alterano il corretto funzionamento del sistema di trasmissione. Smaltimento dell’orologio da polso con cardiofrequenzimetro Questo orologio da polso con cardiofrequenzimetro non può essere smaltito con i normali rifiuti domestici. Deve essere smaltito attraverso un’impresa di smaltimento approvata oppure tramite i servizi di smaltimento comunali. Rispettare le disposizioni in merito, in vigore al momento. In caso di dubbio, rivolgersi alla Azienda locale di Servizi pubblici di smaltimento. Smaltimento delle batterie Smaltire correttamente le batterie nei recipienti in commercio, a questo scopo appositamente predisposti. Le batterie non devono essere gettate nei rifiuti - 43 - l’acquirente riceve da noi un orologio da polso con cardiofrequenzimetro o riparato o nuovo. Con la riparazione o con la sostituzione non ha inizio un nuovo periodo di garanzia. Periodo di garanzia e diritti di legge sui reclami per difetti Il periodo di garanzia non viene prolungato dalla prestazione della garanzia. Questo vale anche per le parti sostituite o riparate. Danni e difetti eventualmente già presenti all’acquisto devono essere dichiarate subito dopo l’apertura dell’imballaggio. Le riparazioni che avvengono dopo la scadenza del periodo di garanzia vengono eseguite al costo. Estensione della garanzia L’orologio da polso con cardiofrequenzimetro è stato prodotto con cura e secondo severe norme di qualità ed è stato coscienziosamente collaudato prima della consegna. La prestazione della garanzia vale per difetti del materiale e per difetti di fabbricazione. Questa garanzia non si estende ai componenti del prodotto che sono soggetti a una normale usura e che quindi possono essere considerati parti di usura e non si estende a danni riportati da componenti frangibili, quali interruttori, batterie o parti in vetro. Questa garanzia decade se l’orologio da polso con cardiofrequenzimetro è stato danneggiato o se è stato utilizzato o manutenuto in modo non appropriato. Per un uso appropriato dell’orologio da polso con cardiofrequenzimetro devono essere rispettate con precisione tutte le disposizioni riportate nelle istruzioni per l’uso. Scopi applicativi e trattamenti, che sono sconsigliati o segnalati come impropri nelle istruzioni per l’uso, devono essere assolutamente evitati. L’orologio da polso con cardiofrequenzimetro è destinato esclusivamente all’uso privato e non all’uso commerciale. Nei casi di abuso e di trattamento indebito, di applicazione forzosa e di interventi che non sono stati eseguiti da una nostra Filiale di assistenza autorizzata, la garanzia decade. - 45 - Questo prodotto corrisponde, in quanto alla conformità alla destinazione d’uso, ai requisiti fondamentali del § 3 e alle altre disposizioni relative alle apparecchiature di radio e telecomunicazione terminale / Funk- und Telekommunikations-Endgerät (FTEG) (articolo 3 del Radio Equipment & Telecommunications Terminal Equipment, R&TTE). È possibile richiedere la Dichiarazione di conformità al seguente indirizzo e-mail: [email protected] Garanzia della digi-tech gmbh Su questo orologio da polso con cardiofrequenzimetro, la garanzia ha un periodo di validità di 3 anni, a partire dalla data di acquisto. Nel caso di difetti di questo orologio da polso con cardiofrequenzimetro, competono all’acquirente i diritti di legge nei confronti del venditore del prodotto. Questi diritti di legge non vengono ridotti dalla nostra garanzia descritta al punto seguente. Condizioni di garanzia Il periodo di garanzia decorre dalla data di acquisto. Conservare con cura lo scontrino originale di cassa. Questo scontrino è indispensabile come prova di acquisto. Se entro il periodo di tre anni dalla data di acquisto di questo orologio da polso con cardiofrequenzimetro si verifica un difetto del materiale o un difetto di fabbricazione, questo orologio da polso con cardiofrequenzimetro viene da noi – a nostra scelta – o riparato o sostituito gratuitamente. La prestazione di questa garanzia ha come condizione che l’orologio da polso con cardiofrequenzimetro difettoso ed il relativo scontrino di acquisto (scontrino di cassa) vengano presentati entro il termine di tre anni e che venga presentata per iscritto una breve spiegazione che illustri in che cosa consista il difetto e quando questo difetto si è verificato. Se il difetto è coperto dalla nostra garanzia, - 44 - Procedura di esecuzione nei casi coperti da garanzia Per garantire un rapido trattamento delle richieste del cliente, è necessario seguire la seguente procedura: • In tutti i casi di richieste rendere disponibili lo scontrino di cassa e il codice dell’articolo (47584) come prova di acquisto. • Il numero dell’articolo si può rilevare dalla targhetta che descrive il tipo di apparecchio, da una incisione, dalla prima pagina delle istruzioni in possesso del cliente (in basso a sinistra) oppure dall’etichetta autoadesiva sul lato posteriore o inferiore dell’apparecchio. • Nel caso si verifichino difetti di funzionamento o altri guasti, è opportuno contattare dapprima telefonicamente o per e- mail la divisione di Assistenza sotto riportata. Dal sito www.lidl-service.com è possibile scaricare questo e molti altri manuali, video relativi ai prodotti e software. - 46 - Assistenza Usage and safety instructions Nome: Inter-Quartz GmbH Via.: Valterweg 27A Città: Eppstein 65817 Paese: Germania E-mail: [email protected] Telefono: 00800 5515 6616 Table of contents 00800 5515 6616 00800 5515 6616 IAN 47584 Fornitore Prendere nota che l’indirizzo seguente non è un indirizzo destinato all’assistenza. Prendere contatto dapprima con il punto di Assistenza precedentemente indicato. Nome: digi-tech gmbh Via.: Valterweg 27A Città: Eppstein 65817 Paese: Germania Table of contents...................................................................................................... - 48 Preliminary note ....................................................................................................... - 50 Intended use ............................................................................................................. - 50 Scope of delivery .................................................................................................... - 50 Technical specifications .......................................................................................... - 50 Features .................................................................................................................... - 51 Important safety information................................................................... - 52 - Batteries ........................................................................................................... - 52 - Electrical devices should not be in the hands of children ........................... - 52 Setup of the heart rate monitor............................................................................... - 53 Reset ................................................................................................................... - 54 Replacing the watch battery ............................................................................ - 54 Battery low indicator ........................................................................................ - 54 Wearing the chest belt ..................................................................................... - 55 Coded transmission .......................................................................................... - 55 Using the bicycle holder................................................................................... - 56 Light ........................................................................................................................... - 56 Important notes on the operation of the wrist watch ............................................ - 56 Speed setting ..................................................................................................... - 57 Time and basic settings ........................................................................................... - 57 Second time zone ............................................................................................. - 58 Alarm ........................................................................................................................ - 59 Snooze feature .................................................................................................. - 59 Timer (max. 23:59:00) ........................................................................................... - 59 Stop watch ............................................................................................................... - 60 Memory feature ....................................................................................................... - 60 Heart rate measurement ......................................................................................... - 60 - - 47 - Warning light ........................................................................................................... - 62 Timer ......................................................................................................................... - 62 Memory feature ....................................................................................................... - 63 Target heart rate ...................................................................................................... - 63 Calories, fat burn and BMI ..................................................................................... - 64 Notes on the BMI.............................................................................................. - 64 Fitness........................................................................................................................ - 65 Troubleshooting ....................................................................................................... - 66 The heart rate is not shown or is shown incorrectly ....................................... - 66 The display is unreadable / the light does not work .................................... - 66 Water resistance of the heart rate monitor ........................................................... - 66 Water resistance of the chest belt .......................................................................... - 66 Cleaning instructions ............................................................................................... - 67 Disposal of the electronic appliance ..................................................................... - 67 Disposal of the batteries.......................................................................................... - 67 Declaration of conformity ....................................................................................... - 67 digi-tech gmbh warranty ........................................................................................ - 67 Warranty conditions ............................................................................................... - 68 Warranty period and defects liability ................................................................... - 68 Scope of the warranty............................................................................................. - 68 Warranty claim procedure ..................................................................................... - 69 Service ...................................................................................................................... - 70 Supplier .................................................................................................................... - 70 - - 48 - HEART RATE MONITOR Preliminary note Please read the instruction manual before using the product for the first time- even if you are experienced at using electronic equipment. Please take special care when reading the chapter "Important safety information". Keep this instruction manual so you may use it a reference material in the future. If you sell or give this product to someone else it is very important to also include this manual. Intended use This electronic appliance is intended for time display and the described additional features. Any other use or modification of the electronic appliance does not comply with the intended uses. The manufacturer is not liable for damages caused by improper use or misuse. The device is not intended for commercial use. Scope of delivery Please note: Check the scope of delivery after purchase. Please ensure that all parts are included and undamaged. • • • • Wrist watch incl. battery (CR2032) Chest belt incl. battery (CR2032) Bicycle holder Instruction manual Technical specifications Wrist watch Operating temperature Dimensions Display Weight Battery - 49 - 0-50°C 4,3 x 4,6 cm 2,5 x 2,6 cm 48g CR 2032/3V - 50 - Chest belt Operating temperature Dimensions Frequency Weight Battery Other • 0-50°C 7 x 3,3 x 1,2 cm 110 kHz 51g CR 2032/3V Back light Important safety information ATTENTION: Consult your doctor before you begin any training program. Your doctor can help you choose the proper training intensity and heart rate guidelines for your exercises. This heart rate wrist watch is not a medical device and should only be used as a guide for your training. Features Heart rate measurement • Alarm for maximum heart rate • Target heart rate training with timer and alarm (Health, Fitness, Peformance and user defined) • Max. heart rate, min. heart rate and average heart rate • Warning light for high heart rate - Batteries Insert the batteries/ rechargeable batteries in the correct polarity. Don’t try to recharge non-rechargeable batteries and under no circumstances throw them into fire. Danger of explosion. Do not use unequal batteries (old and new, Alkaline and carbon, etc.) simultaneously. If you will not use the device for a long time, remove the batteries and store the device in a dry and dust-free place. Improper use of batteries may cause an explosion or leakage. If the batteries have leaked, use gloves and clean the appliance thoroughly with a dry cloth. Calorie features • Calories and fat burned during training • BMI-calculation • Fitness Level Stop watch • 1/100 seconds with 99 lap times - Electrical devices should not be in the hands of children Never let children use electrical devices unsupervised. Children can’t always recognize the possible dangers properly. Batteries/ rechargeable batteries can be life threatening when swallowed. Store the batteries where they cannot be reached by small children. If a battery is swallowed, medical aid must be sought immediately. Also keep the packaging foils away from children. Danger of suffocation. Countdown timer Time features • Time • Calendar • Alarm with snooze • Hourly chime • Second time zone - 51 - - 52 - Setup of the heart rate monitor Use a coin to unscrew the battery cover on the back side of the chest belt and insert the 3V battery with the (+) sign facing up. Screw the battery compartment cover back into the case. Reset The watch can be reset by pressing and holding SET and SEL together. Only after reseting the watch the other language can be selected. Replacing the watch battery The battery replacement can be performed by a watch maker in addition to a water resistance test. To replace the battery yourself, please read the following instructions first: Remove the screws (1, 2, 3 and 4) from the back side of the watch with a small Phillips screwdriver. Remove the caseback and the battery sticker. Use a small, flat tool to open the latch (5) of the battery holder. Remove the battery and insert a fresh 3V CR2032 battery with the (+) terminal facing upwards. Ensure that the gasket (6) is seated correctly. Close the latch of the battery holder. Replace the battery sticker and the caseback and replace the screws. battery CR2032 Remove the protective film from the display and press MODE, SEL or SET. Now select English, German, French or Spanish language by pressing SEL and confirm your setting by pressing SET. Select the unit KM-KG METRIC or Miles/pounds IMPERIAL KM - KG KM - KG KM - KG M - LB M - LB M - LB in the same way. Complete the setting procedure by pressing MODE. - 53 - Battery low indicator If the battery voltage on the chest belt battery drops below the voltage required for normal operation, TXBELT TXGURT SNGLTX TXBCIN LO BAT BATT PILE BAT BA will appear on the display. Replace the battery of the chest belt as described in the chapter "Chest belt". - 54 - Wearing the chest belt Adjust the chest belt so that it fits snugly directly below the chest muscles. Moisten the contact areas with water or ECG gel (ECG gel can be purchased at a pharmacy). Ensure that the contact areas constantly remain in skin contact. Position the chest belt as per the following illustration. Please ensure that the chest belt is seated properly. When you have exhaled completely the chest belt should still have very slight tension pressing it to your chest. High voltage power lines, Trains or moving vehicular traffic may interfere with the heart rate measurement. Please consider this when planning your exercise route. Using the bicycle holder The included bicycle holder can be used to attach the wrist watch to the handlebar of a bicycle. Press the bicycle holder onto the top of the handlebar. Handlebars with an especially large diameter may require the use of additional force to snap on the bicycle holder. The heart rate monitor can now be attached to the bicycle holder in the same way that you would attach it to your wrist. contact area Coded transmission The chest belt's transmissions are digitally coded to prevent interference if you are training with a training partner who is using an identical watch and chest belt. When using the chest belt for the first time, a random channel is selected automatically. The channel is briefly displayed at the top of the display upon entering the heart rate display mode. The available channels are CH10, CH11, CH12, CH13 and CH14. The channel can be changed by briefly removing the battery from the chest best and reinserting it. The chest belt will randomly select a channel and after approx. 1 minute the heart rate and the new channel will appear on the display of the watch. The maximum range of 70cm between the wrist watch and the chest belt should not be exceeded. Light Briefly press LIGHT to temporarily activate the light. Important notes on the operation of the wrist watch The watch has 3 different Modes of Operation. - 55 - - 56 - Press MODE to select the mode of operation of the watch. The order of the modes is as follows: Press and hold SET for 3 seconds to access setting mode. Time and basic settings TIME ZEIT TEMPS HORA Stop watch CHRONO ST-UHR CHRONO CRONO PULS FC PULSO Heart rate HRM HALTEN= EINST. The subfeatures can always be accessed by pressing SEL. SEL Speed setting When setting numerical values, press and hold SEL to use the speed setting feature. Time and basic settings Press MODE to select the feature before proceeding. TIME ZEIT TEMPS HORA The subfeatures of the time mode can be accessed by pressing SEL. ZEIT TEMPS HORA ALARM ALARM ALARM ALARMA TIMER TIMER COMPTE TIMER Alarm MANT= AJUST and the 12 or 24 hour selection will blink on the display. Press SEL to select a setting and confirm your setting by pressing SET. Set the seconds, minutes, hours, year, month and day in the same way. Now the basic settings will follow. First the year of the birthday setting will appear BIRTHDAY GEB-TAG DATNAISS CUMPL-AN Now the weight will appear WEIGHT GEWICHT POIDS PESO Set the digits of your weight by pressing SEL and confirm each digit by pressing SET. Now the height display will appear HEIGHT GROESSE TAILLE TAMANO Set each digit of your height by pressing SEL and confirm each digit by pressing SET. Exit setting mode by pressing MODE. Second time zone Press and hold SEL for 3 seconds. The watch will switch to the second time zone display and T2 will appear on the display. Setting the second time zone can be accomplished in the same way as described in the previous paragraph. Press and hold SEL for 3 seconds to return to normal time mode. Timer - 57 - MAINT= REGLER Press SEL to set the year and press SET to confirm your setting. Set the month and day in the same way. Each mode of operation may have several subfeatures. Time and basic settings TIME The display will show HOLD TO SET - 58 - Alarm ALARM ALARM ALARM ALARMA Press and hold SET for 3 seconds to enter setting mode. "AL" will appear on the display and the minutes of the alarm time will blink. Press SEL to set the minutes and press SET to confirm your setting. Set the hours in the same way. You may optionally set the month and day as well. If neither month nor day are set the alarm will sound daily. If the day is set, the alarm will sound monthly. If both the month and the day are set the alarm will sound only at the set date. The hourly chime setting will now appear on the display CHIME STDALARM SIGN HOR Press SEL to set minutes of the timer time and confirm your setting by pressing SET. Set the hours in the same way. Now the additional settings for the timer will follow. Press SEL to select the desired mode: Cd r Cd U Cd S After reaching 0:00 the timer will count the set time again After reaching 0:00 the timer will count forward After reaching 0:00 the timer will stop Exit setting mode by pressing MODE. The timer can be started or stopped by pressing SET. Press and hold SET to reset the timer. After the timer time is up an alarm will sound. HORA AL Press SEL to select a setting and confirm your setting by pressing SET (ON/EIN/ACTIF/ENCENDID=on, OFF/AUS/INACTIF/APAGADO=off). If the chime is activated, the bell symbol will appear and the watch will chime at the beginning of every hour. Exit setting mode by pressing MODE. The alarm can be activated or deactivated by pressing SET. If the alarm is activated the alarm symbol will appear. When the alarm sounds, press SET, SEL or MODE to stop the alarm. Stop watch Press MODE to select the feature before proceeding. CHRONO ST-UHR CHRONO CRONO Press SET to start or stop the stop watch. Press SEL while the stop watch is running to record a lap time. Up to 99 laps can be recorded. Press and hold SET to reset the stop watch. Memory feature Snooze feature If no button is pressed when the alarm sounds, the alarm will shut off after 30 seconds and the symbol will blink on the display. The alarm will stop and will resume after sounding after 2 minutes. The process will repeat itself 5 times. DATA ANSICHT APPEL RECUP RECALL DATEN DONNEES DATOS Press SEL while the stop watch is stopped to display the fastest lap on the display. Press SET to display the other lap times. Timer (max. 23:59:00) Please note: The memory feature can only be used if at least one lap time was recorded. TIMER TIMER COMPTE TIMER Heart rate measurement Press and hold SET for 3 seconds to enter setting mode. The minutes of the timer time will blink on the display. Press MODE to select the feature before proceeding. - 59 - HRM PULS - 60 - FC PULSO Warning light The subfeatures of the heart rate measurement can only be used when the chest belt is connected. Press SEL to access the subfeatures of the heart rate watch. If your heart rate reaches or exceeds 99% of your maximum heart rate, or your heart rate exceeds the target zone values (see target zone) the red warning light will blink and an alarm will sound. Timer TIMER TIMER COMPTE TEMPORIZADOR Memory feature MEMORY SPEICHER MEMOIRE MEMORIA Target heart rate ZONE BEREICH ZONE ZONA CALORIES CALORIAS Calories, fat burn and BMI CALORIE KALORIEN Fitness FITNESS LEVEL FITNESS LEVEL Timer NIV FORM PHYSIQ NIVEL FIT In the middle row of the display the heart rate is shown while wearing the chest belt. If the signal is received from the chest belt the heart symbol will flash. To the right of the heart rate the heart rate in percent of the maximum heart rate is shown. The maximum heart rate is calculated by evaluating your age, weight and height. - 61 - TIMER TIMER COMPTE TEMPORIZADOR The bottom row of the display will show the elapsed training time. The middle row will show your heart rate and the heart rate in percent of the maximum heart rate. The timer will start automatically when the chest belt starts measuring the heart rate. The timer will continue counting the time if the feature mode of the watch is changed. Press SET to select the timer mode: TIMER total training time training time in heart rate target zone ▲ training time with heart rate over target zone ▼ training time with heart rate below target zone Press and hold SET to reset the training time. - 62 - Exit setting mode by pressing MODE. Press and hold SEL to activate the heart rate Memory feature MEMORY SPEICHER MEMOIRE MEMORIA The stored values are shown in the bottom row of the display. maximum heart rate during training HI H FO AL minimum heart rate during training LO N FA BA average heart rate during training AV D MO PR alarm. When the heart rate alarm is activated, the alarm symbol will appear on and an alarm will sound when the measured heart rate is not within the set zone "BEEP-BEEP...BEEP-BEEP...BEEP-BEEP". If the measured heart rate is at or above 99% of the maximum heart rate the max. heart rate alarm will sound. "BEEP-BEEP-BEEP-BEEP-BEEP-BEEP". The max. heart alarm is independant of the training zone and the heart rate alarm of the training zone. Calories, fat burn and BMI CALORIES CALORIAS Press and hold SET to reset the stored values. The lower row will show the burned calories CALORIE KALORIEN CALORIES CALORIAS Target heart rate Press SET to switch to the display of fat burn in gram FAT FETT CONSGRAISSES BURN or to the display of your BMI BMI BMI IMC ZONE BEREICH ZONE ZONA The bottom row of the display will show the lower and upper limit value of the target zone. The selected training type is shown on the top row of the display. L- U L-1 L-2 L-3 CALORIE KALORIEN Note: To increase the accuracy of the calorie and fat burn displays your age and weight must be set correctly. Press and hold SET for 3 seconds to enter setting mode. Select the training type by pressing SEL. If "U" is selected (user defined) the lower and upper limits can be set. Press SET. The display will show the lower limit. Set the value by pressing SEL and confirm your setting by pressing SET. Set the upper limit in the same way. Note: The counter for fat burn is only activated while your heart rate is above 120 beats per minute. Notes on the BMI The BMI is a statistical measurement that can be used to judge a persons weight. For adults, a value between 18.5 and 25 is considered normal. Values below - 63 - - 64 - 18.5 are considered "underweight". Values above 25 are considered "overweight". Values above 30 are considered "Obese". The BMI is only a coarse guideline because it does not take a persons body type and body composition into consideration. Fitness FITNESS LEVEL NIV FORM PHYSIQ NIVEL FIT After your training, immediately press SET. A 5 minute countdown will start (cool down phase). The bar will show the remaining time. On the left side of the display the heart rate at the beginning of cool down is shown. On the right side of the display the current heart rate is shown. The countdown time is shown on the bottom row of the display. After 5 minutes your fitness level will appear. Fitness level 6 5 4 3 2 1 Heart rate >130 130-120 120-110 110-105 105-100 <100 IMC In the display for calorie burn or fat burn the values can be reset by pressing and holding SET. user defined Health (50-65% of maximum heart rate) Fitness (65-80% of maximum heart rate) Performance (80-95% of maximum heart rate) FITNESS LEVEL GRASA Troubleshooting The heart rate is not shown or is shown incorrectly Make sure the chest belt is positioned correctly and fits well. Your skin should not be too dry or too cold. The contact areas can be slightly moistened to improve function. Electromagnetic interference may have an adverse effect on reception. The distance between watch and chest belt must be under 70cm. Other heart rate measuring devices within a 2m range may also cause interference. Wireless bicycle computers may cause interference. The batteries may be low and require replacing. The display is unreadable / the light does not work Replace the batteries. Water resistance of the heart rate monitor Water resistant up to 3 bar. The bar value specifies the atmospheric overpressure which is applied during testing (DIN 8310). Water resistance of the chest belt Water resistance according to IEC 60529 IPx7. - 65 - - 66 - Cleaning instructions Warranty conditions Clean the heart rate monitor with a soft, dry and lint-free cloth. A glasses cleaning cloth is ideal. After each use, clean the chest belt and the watch strap with a sponge and lukewarm mild soap water. Dry all parts with a towel and hang the chest belt to dry. Sweat and contaminants are detrimental to the function of the sensor. The warranty duration starts on the date of purchase. Please keep the original receipt in a safe place. The receipt is needed as a proof of purchase. If a defect occurs in the heart rate monitor within 3 years, the heart rate monitor will be repaired or replaced (according to our choice) free of charge. This warranty requires that, within the 3 year warranty period, the watch and the receipt can be made available to us along with a short written description of the defect and when it occured. If the defect is covered by the warranty, you will receive the repaired heart rate monitor or a new heart rate monitor. Repair or replacement does not cause the warranty period to restart. Disposal of the electronic appliance This electronic appliance may not be disposed of with normal household waste. Dispose of the unit at an approved disposal facility or at your local recycling centre. Please observe the current rules and regulations when disposing of the appliance. Contact the disposal system if in doubt. Disposal of the batteries Please dispose of your batteries properly in containers especially set up at retailers. Batteries do not belong in household waste. Dispose of the batteries at an approved disposal facility or at your local recycling centre. Contact the disposal system if in doubt. Declaration of conformity If used as intended this product conforms to the basic standards of § 3 and the other relevant provisions of the FTEG (Section 3 of the R&TTE directive). You can request the declaration of conformity here: [email protected] digi-tech gmbh warranty This watch includes a 3 year warranty starting on the day of purchase. In case of defects of this heart rate monitor you have, by law, certain rights regarding the vendor of the heart rate monitor. These rights are not changed by the warranty which is described in the following paragraphs. Warranty period and defects liability The warranty period is not increased by the defect liability. This also applies to repaired or replaced parts. If defects are noticed at the time of purchase they must be reported immediately upon unpacking the item. Paid repair may be available after the end of the warranty period. Scope of the warranty The heart rate monitor was manufactured according to strict quality guidelines and was carefully inspected before delivery. The warranty does not include parts that experience normal wear and tear and can thus be seen as wear parts or fragile parts that are damaged. Examples include Switches, Batteries or parts made of glass. This warranty becomes void if the heart rate monitor is damaged, is not used in the recommended way or is improperly repaired. For proper use of the heart rate monitor all instructions in this manual must be adhered to exactly. Use of the heart rate monitor in a way that is discouraged in the manual must be avoided. The heart rate monitor not intended for commercial use. Abusive or improper use, excessive force and changes that are made by non-authorized repair centers will void the warranty. - 67 - - 68 - Warranty claim procedure Service To ensure that your call is processed in a fast and efficient manner please note the following directions: • Have your receipt (as proof of purchase) and the article number (47584) handy. • The article number can be found on the type label, an engraving, the front page of the manual (bottom left) or a sticker on the back side or bottom side of the case. • In case defects occur, please first contact the service center (see below) by phone or email. Name: Inter-Quartz GmbH Street: Valterweg 27A Town: Eppstein 65817 Country: Germany Email: [email protected] Telephone: 00800 5515 6616 00800 5515 6616 00800 5515 6616 Visit www.lidl-service.com to download this and many other manuals, product videos and software. IAN 47584 Supplier Please note that the following address is not a service address. Please first contact the service address (see above). Name: digi-tech gmbh Street: Valterweg 27A Town: Eppstein 65817 Country: Germany - 69 - - 70 - Bedienungs- und Sicherheitshinweise Inhaltsverzeichnis Inhaltsverzeichnis..................................................................................................... - 71 Einleitung .................................................................................................................. - 73 Bestimmungsgemäße Verwendung ....................................................................... - 73 Lieferumfang............................................................................................................. - 73 Technische Daten .................................................................................................... - 74 Funktionen ................................................................................................................ - 74 Wichtige Sicherheitshinweise .................................................................. - 75 - Batterien ......................................................................................................... - 75 - Herzfrequenz-Messuhr nicht in Kinderhände ............................................. - 76 Inbetriebnahme der Herzfrequenz-Messuhr ........................................................ - 76 Reset ................................................................................................................... - 77 Die Batterie der Armbanduhr wechseln ......................................................... - 77 Batteriestandswarnanzeige ............................................................................. - 78 Tragen des Brustgurts ....................................................................................... - 78 Kodierte Übertragung der Herzfrequenz ....................................................... - 79 Verwenden der Fahrradhalterung .................................................................. - 79 Licht ........................................................................................................................... - 80 Wichtige Informationen zur Bedienung der Herzfrequenz-Messuhr ................. - 80 Schnelleinstellung ............................................................................................. - 80 Uhrzeit und Grundeinstellungen ............................................................................ - 81 Zweite Zeitzone ................................................................................................ - 82 Weckalarm .............................................................................................................. - 82 Schlummerfunktion............................................................................................ - 83 Timer (max. 23:59:00) ........................................................................................... - 83 Stoppuhr ................................................................................................................... - 83 Speicherfunktion ...................................................................................................... - 84 - Pulsmesser ................................................................................................................ - 84 Warnleuchte ............................................................................................................ - 85 Timer ......................................................................................................................... - 85 Speicherfunktion ...................................................................................................... - 86 Zielpulsbereich......................................................................................................... - 86 Kalorien, Fettverbrennung und BMI ...................................................................... - 87 Hinweise zum BMI ............................................................................................ - 88 Fitness........................................................................................................................ - 88 Fehlerbehebung....................................................................................................... - 89 Der Puls wird nicht oder nicht korrekt angezeigt ........................................... - 89 Das Display ist schlecht lesbar / Die Beleuchtung funktioniert nicht ........... - 89 Wasserdichtigkeit der Armbanduhr....................................................................... - 89 Wasserbeständigkeit des Brustgurtes .................................................................... - 89 Reinigungshinweis ................................................................................................... - 90 Entsorgung der Herzfrequenz-Messuhr ................................................................ - 90 Entsorgung der Batterien ........................................................................................ - 90 Konformitätserklärung ............................................................................................. - 90 Garantie der digi-tech gmbh.................................................................................. - 91 Garantiebedingungen ............................................................................................ - 91 Garantiezeit und gesetzliche Mängelansprüche ................................................. - 91 Garantieumfang ...................................................................................................... - 91 Abwicklung im Garantiefall .................................................................................... - 92 Service ...................................................................................................................... - 93 Lieferant .................................................................................................................... - 93 - - 71 - - 72 - HERZFREQUENZ-MESSUHR Technische Daten Einleitung Herzfrequenz-Messuhr Betriebstemperaturbereich Maße (exkl. Band) Displaymaße Gewicht Batterie 0-50°C 4,3 x 4,6 cm 2,5 x 2,6 cm 48 g CR 2032/3V Brustgurt Betriebstemperaturbereich Maße (exkl. Band) Übertragungsfrequenz Gewicht Batterie 0-50°C 7 x 3,3 x 1,2 cm 110 kHz 51 g CR 2032/3V Herzlichen Glückwunsch zum Kauf Ihrer neuen Herzfrequenz-Messuhr. Sie haben sich damit für ein hochwertiges Gerät entschieden. Die Bedienungsanleitung ist Bestandteil dieser Herzfrequenz-Messuhr. Sie enthält wichtige Hinweise für Sicherheit, Gebrauch und Entsorgung. Machen Sie sich vor der Benutzung der Herzfrequenz-Messuhr mit allen Bedien- und Sicherheitshinweisen vertraut. Benutzen Sie die Herzfrequenz-Messuhr nur wie beschrieben und für die angegebenen Einsatzbereiche. Händigen Sie alle Unterlagen bei Weitergabe der Herzfrequenz-Messuhr an Dritte mit aus. Bestimmungsgemäße Verwendung Die Herzfrequenz-Messuhr ist zur Zeitanzeige und zur Verwendung der beschriebenen Zusatzfunktionen geeignet. Jede andere Verwendung oder Veränderung der Herzfrequenz-Messuhr gilt als nicht bestimmungsgemäß. Der Hersteller haftet nicht für Schäden, die durch nicht bestimmungsgemäßen Gebrauch oder falsche Bedienung verursacht werden. Die Herzfrequenz-Messuhr ist nicht für den gewerblichen Einsatz vorgesehen. Lieferumfang Hinweis: Bitte überprüfen Sie nach dem Kauf den Lieferumfang. Stellen Sie sicher, dass alle Teile vorhanden und nicht defekt sind. • • • • Herzfrequenz-Messuhr inkl. Batterie (CR2032) Brustgurt inkl. Batterie (CR2032) Fahrradhalterung Bedienungsanleitung - 73 - Funktionen Pulsmessung • Alarm für Maximalpuls • Zielpulstraining mit Timer und Alarm (Gesundheit, Fitness, Leistung und benutzerdefiniert) • Höchster Puls, niedrigster Puls, durchschnittlicher Puls • Warnleuchte (bei Überschreiten der Pulsvorgaben) Kalorienfunktionen • Kalorienverbrauch und Fettverbrennung während des Trainings • BMI-Berechnung • Fitness Level Stoppuhr • 1/100 Sekunden mit 99 Rundenzeiten - 74 - - Herzfrequenz-Messuhr nicht in Kinderhände Lassen Sie Kinder niemals unbeaufsichtigt die Herzfrequenz-Messuhr benutzen. Kinder können mögliche Gefahren nicht immer richtig erkennen. Batterien/Akkus können bei Verschlucken lebensgefährlich sein. Bewahren Sie die Batterien für Kleinkinder unerreichbar auf. Wurde eine Batterie verschluckt, muss sofort medizinische Hilfe in Anspruch genommen werden. Halten Sie auch die Verpackungsfolien von Kindern fern. Es besteht Erstickungsgefahr. Countdown Timer Zeitfunktionen • Zeit • Kalender • Weckalarm mit Weckwiederholung • Stundensignal • Zweite Zeitzone Sonstiges • Hintergrundbeleuchtung Inbetriebnahme der Herzfrequenz-Messuhr Wichtige Sicherheitshinweise Schrauben Sie mit einer Münze den Batteriefachdeckel von der Rückseite des Brustgurts und setzen Sie die 3V Batterie mit dem (+) Plus nach oben ein. Schrauben Sie den Batteriefachdeckel wieder fest. ACHTUNG: Sprechen Sie vor Trainingsbeginn mit Ihrem Arzt. Er kann Sie über das für Sie geeignete Training, die Trainingsintensität und die Pulsvorgaben aufklären. Diese Herzfrequenz-Messuhr ist kein medizinisches Gerät und dient nur zur Unterstützung Ihrer Trainingsgestaltung. - Batterien Legen Sie Batterien / Akkus stets polrichtig ein, versuchen Sie nicht, Batterien wieder aufzuladen oder zu öffnen. Werfen Sie niemals Batterien ins Feuer, da diese eventuell explodieren können. Verwenden Sie keine unterschiedlichen Batterien (alte und neue, Alkali und Kohle, usw.) gleichzeitig. Bei unsachgemäßem Gebrauch der Batterien besteht Explosions- und Auslaufgefahr. Sollten die Batterien doch einmal ausgelaufen sein, benutzen Sie Handschuhe und reinigen Sie die Herzfrequenz-Messuhr gründlich mit einem trockenen Tuch. Batterie: CR2032 Ziehen Sie die Schutzfolie vom Display der Herzfrequenzmessuhr ab und drücken Sie MODE, SEL oder SET. Wählen Sie nun durch Druck auf SEL zwischen den Sprachen: Englisch, Deutsch, Französisch und Spanisch. Bestätigen Sie Ihre Wahl mit Druck auf SET. - 75 - - 76 - Wählen Sie auf die gleiche Weise die Einheit KM-KG METRIC KM - KG KM - KG oder Meilen/Pfund (M-LB) IMPERIAL M - LB M - LB KM - KG M - LB Beenden Sie die Inbetriebnahme durch Druck auf MODE. Reset Durch gleichzeitigen Druck auf SET und SEL kann die Uhr zurückgesetzt werden. Erst nach dem Rücksetzen kann die andere Sprache ausgewählt werden. Die Batterie der Armbanduhr wechseln Sie können den Batteriewechsel zusammen mit einer Wasserdichtigkeitsprüfung von einem Uhrmacher durchführen lassen. Um die Batterie selbst zu wechseln, gehen Sie bitte wie folgt vor: Lösen Sie die Schrauben (1,2, 3 und 4) auf der Rückseite der Armbanduhr mit einem kleinen Kreuzschraubendreher. Entfernen Sie den Gehäuseboden und den Batterieaufkleber. Verwenden Sie ein kleines, flaches Werkzeug, um den Riegel (5) der Batteriehalterung zu öffnen. Entnehmen Sie die Batterie und setzen Sie eine neue 3V CR2032 Batterie mit dem (+)-Pol nach oben ein. Prüfen Sie den korrekten Sitz des Dichtungsringes (6). Verriegeln Sie die Batteriehalterung (5). Kleben Sie den Batterieaufkleber wieder ein, setzen Sie den Gehäuseboden ein und schrauben Sie ihn fest. - 77 - Batteriestandswarnanzeige Wenn der Batteriestand des Brustgurtes für den normalen Betrieb nicht mehr ausreicht, erscheint auf dem Display der Herzfrequenz-Messuhr: TXBELT TXGURT SNGLTX TXBCIN LO BAT BATT PILE BAT BA Wechseln Sie die Batterie des Brustgurtes wie im Kapitel "Brustgurt" beschrieben. Tragen des Brustgurts Passen Sie den Gurt so an, dass er direkt unter den Brustmuskeln eng anliegt. Befeuchten Sie die Kontaktflächen des Gurtes leicht mit Wasser oder EKG-Gel (welches Sie in der Apotheke erhalten können). Stellen Sie sicher, dass die Kontaktflächen immer Hautkontakt haben. Positionieren Sie den Gurt wie auf der folgenden Abbildung. Achten Sie auf den richtigen Sitz des Brustgurts. Wenn Sie komplett ausgeatmet haben, sollte der Gurt noch mit ganz leichter Spannung auf dem Brustkorb aufliegen. Hochspannungsmasten, Oberleitungen der Bahn oder fließender Autoverkehr können die Messung beeinflussen oder stören. Darauf bei der Auswahl der Laufstrecke achten. - 78 - Kontaktfläche Kodierte Übertragung der Herzfrequenz Die Datenübertragung des Brustgurtes wird digital kodiert, um zu verhindern, dass Störungen auftreten, wenn Sie mit einem Trainingspartner trainieren, der ein baugleiches Gerät verwendet. Bei der ersten Verwendung des Brustgurtes wird automatisch nach dem Zufallsprinzip ein Kanal gewählt. Der Kanal wird kurz oben im Display angezeigt, wenn Sie zur Anzeige der Herzfrequenz wechseln. Die verfügbaren Kanäle sind CH10, CH11, CH12, CH13 und CH14. Sie können den Kanal wechseln, indem Sie die Batterie kurz aus dem Brustgurt entfernen und erneut einsetzen. Der Brustgurt wählt nach dem Zufallsprinzip einen neuen Kanal und nach ca. 1 Min. werden der Puls und der neue Kanal auf der Herzfrequenz-Messuhr angezeigt. Verwenden der Fahrradhalterung Sie können die Herzfrequenz-Messuhr am Handgelenk tragen oder mit der mitgelieferten Fahrradhalterung am Lenker Ihres Fahrrads befestigen. Herzfrequenz-Messuhr nun auf die gleiche Art wie bei Ihrem Handgelenk an der Fahrradhalterung befestigen. Überschreiten Sie zur Verwendung der Herzfrequenz-Messuhr bitte nicht die maximale Übertragungsdistanz zum Brustgurt von 70 cm. Licht Drücken Sie kurz LIGHT, um die Hintergrundbeleuchtung vorübergehend zu aktivieren. Wichtige Informationen zur Bedienung der Herzfrequenz-Messuhr Die Herzfrequenz-Messuhr verfügt über 3 Funktionsmodi. Durch Druck auf MODE können Sie den Funktionsmodus der HerzfrequenzMessuhr wechseln. Die Reihenfolge der Funktionen ist: Uhrzeit und Grundeinstellungen TIME ZEIT TEMPS HORA ST-UHR CHRONO CRONO PULS FC PULSO Stoppuhr CHRONO Pulsmesser HRM Des Weiteren gibt es in den Funktionsmodi verschiedene Unterfunktionen. Die Unterfunktionen erreichen Sie immer durch Drücken von SEL. Drücken Sie Fahrradhalterung von oben auf die Lenkstange Ihres Lenkers. Bei Lenkstangen mit besonders großem Durchmesser ist u.U. ein erhöhter Kraftaufwand nötig, um die Fahrradhalterung zu befestigen. Sie können die - 79 - HORA Durch Druck auf SEL können Sie die Unterfunktionen des Zeitmodus abrufen. Uhrzeit und Grundeinstellungen TIME ZEIT TEMPS HORA Weckalarm ALARM ALARM ALARM ALARMA TIMER COMPTE TIMER Timer TIMER Drücken und halten Sie 3 Sekunden SET, um in den Einstellungsmodus zu wechseln. Auf dem Display erscheint HOLD HALTEN= MAINT= MANT= TO SET EINST. REGLER AJUST und es blinkt die Anzeige des 12 oder 24-Stunden Modus. Drücken Sie zum Einstellen SEL und bestätigen Sie Ihre Einstellung durch Druck auf SET. Stellen Sie auf die gleiche Weise die Sekunden, Minuten, Stunden, Jahr, Monat und Tag ein. Nun folgen die Grundeinstellungen. Zuerst erscheint das Jahr Ihres Geburtstages. BIRTHDAY GEB-TAG DATNAISS CUMPL-AN Drücken Sie zum Einstellen SEL und bestätigen Sie Ihre Einstellung durch Druck auf SET. Stellen Sie auf die gleiche Weise Monat und Tag ein. Es erscheint nun die Anzeige des Gewichts. WEIGHT GEWICHT POIDS PESO Stellen Sie die Ziffern Ihres Gewichts jeweils durch Druck auf SEL ein und bestätigen Sie Ihre Eingabe jeweils durch Druck auf SET. - 81 - - 80 - Es erscheint nun die Anzeige der Körpergröße. HEIGHT GROESSE TAILLE Uhrzeit und Grundeinstellungen Wählen Sie zuerst durch Druck auf MODE die Funktion aus. TIME ZEIT TEMPS Schnelleinstellung Bei der Einstellung von numerischen Werten können Sie durch Drücken und Halten von SEL die Schnelleinstellung verwenden. TAMANO Stellen Sie die Ziffern Ihrer Körpergröße jeweils durch Druck auf SEL ein und bestätigen Sie Ihre Eingabe jeweils durch Druck auf SET. Beenden Sie den Einstellungsmodus durch Druck auf MODE. Zweite Zeitzone Drücken und halten Sie 3 Sekunden SEL. Die Uhr wechselt zur Anzeige der zweiten Zeitzone und T2 erscheint auf dem Display. Das Einstellen der zweiten Zeitzone erfolgt wie im vorherigen Absatz beschrieben. Drücken und halten Sie 3 Sekunden SEL, um zurück zu der normalen Zeitanzeige zu wechseln. Weckalarm ALARM ALARM ALARM ALARMA Halten Sie 3 Sekunden SET, um in den Einstellungsmodus zu gelangen. Auf dem Display erscheint "AL" und es blinken die Minuten der Weckzeit. Drücken Sie zum Einstellen SEL und bestätigen Sie Ihre Einstellung durch Druck auf SET. Stellen Sie auf die gleiche Weise die Stunden ein. Falls gewünscht, stellen Sie nun den Monat und den Tag ein. Wird weder Monat noch Tag eingestellt, ertönt der Alarm täglich. Wird nur der Tag eingestellt, ertönt der Alarm monatlich. Wird sowohl Monat als auch Tag eingestellt, ertönt der Alarm nur an dem eingestellten Datum. Auf dem Display erscheint nun die Einstellung des Stundensignals. CHIME STDALARM SIGN HOR HORA AL Drücken Sie zum Einstellen SEL und bestätigen Sie Ihre Einstellung durch Druck auf SET (ON/EIN/ACTIF/ENCENDID=an, OFF/AUS/INACTIF/APAGADO=aus). Bei aktiviertem Stundensignal erscheint das Glockensymbol und es ertönt zu jeder vollen Stunde ein Signalton. - 82 - Beenden Sie den Einstellungsmodus durch Druck auf MODE. Sie können den Alarm durch Druck auf SET aktivieren oder deaktiveren. Bei aktiviertem Alarm erscheint das Alarmsymbol . Drücken Sie bei Ertönen des Alarms SET, SEL oder MODE, um den Alarm zu stoppen. Schlummerfunktion Drücken Sie bei Ertönen des Weckalarms keine Taste, wird automatisch nach 30 Sekunden die Schlummerfunktion aktiviert und das Symbol blinkt auf dem Display. Der Alarm verstummt nun und ertönt nach 2 Minuten erneut. Dieser Vorgang wiederholt sich 5 mal. Timer (max. 23:59:00) TIMER TIMER COMPTE TIMER Drücken und halten Sie 3 Sekunden SET, um den Timer einzustellen. Auf dem Display blinken die Minuten der Timerzeit. Drücken Sie zum Einstellen SEL und bestätigen Sie Ihre Einstellung durch Druck auf SET. Stellen Sie die Stunden auf die gleiche Weise ein. Nun folgt die Zusatzeinstellung des Timers. Wählen Sie durch Druck auf SEL den gewünschten Modus: Cd r Nach Erreichen von 0:00 zählt der Timer die eingestellte Zeit erneut zurück Cd U Nach Erreichen von 0:00 zählt der Timer vorwärts Cd S Nach Erreichen von 0:00 stoppt der Timer Beenden Sie den Einstellungsmodus durch Druck auf MODE. Sie können den Timer durch Druck auf SET starten oder stoppen. Drücken und halten Sie SET, um den Timer zurückzusetzen. Nach Ablauf der Timerzeit ertönt ein Signalton. Stoppuhr CHRONO ST-UHR CHRONO CRONO Drücken Sie zum Starten oder Stoppen der Stoppuhr SET. Drücken Sie bei laufender Stoppuhr SEL, um eine Rundenzeit zu stoppen. Es können bis zu 99 Rundenzeiten gestoppt werden. Drücken und halten Sie SET, um die Stoppuhr zurückzusetzen. Speicherfunktion DATA ANSICHT APPEL RECUP RECALL DATEN DONNEES DATOS Drücken Sie bei gestoppter Stoppuhr SEL und auf dem Display wird die schnellste Runde angezeigt. Drücken Sie SET, um die anderen Rundenzeiten anzuzeigen. Hinweis: Die Speicherfunktion kann nur abgerufen werden, wenn mindestens eine Rundenzeit aufgezeichnet wurde. Pulsmesser Wählen Sie zuerst durch Druck auf MODE die Funktion aus. HRM PULS FC PULSO Der Pulsmesser funktioniert nur bei Verwendung des Brustgurtes. Durch Druck auf SEL können Sie die Unterfunktionen des Pulsmessers abrufen: Timer TIMER Speicherfunktion MEMORY Zielpuls ZONE TIMER COMPTE TEMPORIZADOR SPEICHER MEMOIRE MEMORIA BEREICH ZONE ZONA Kalorienverbrauch, Fettverbrennung und BMI CALORIE KALORIEN CALORIES CALORIAS Wählen Sie zuerst durch Druck auf MODE die Funktion aus. - 83 - Fitness FITNESS LEVEL FITNESS LEVEL - 84 - NIV FORM PHYSIQ NIVEL FIT In der mittleren Zeile des Displays wird bei Verwendung des Brustgurtes der Puls angezeigt. Wenn das Herzfrequenzsignal empfangen wird, blinkt das Herz Symbol. Rechts neben der Pulsanzeige erscheint der erreichte Anteil am Maximalpuls in Prozent. Der geschätzte Maximalpuls errechnet sich automatisch aus Alter, Gewicht und Körpergröße. Warnleuchte Der Timer zählt automatisch ab dem Zeitpunkt, an dem der Brustgurt angelegt wird. Der Timer zählt auch dann weiter, wenn Sie in einen anderen Modus wechseln. Drücken Sie kurz SET, um den Timermodus zu wählen: TIMER Trainingszeit gesamt Trainingszeit im Zielpulsbereich ▲ Trainingszeit über Zielpulsbereich ▼ Trainingszeit unter Zielpulsbereich Drücken und halten Sie SET, um die Trainingszeit zurückzusetzen. Speicherfunktion MEMORY Wenn Ihr Puls 99% des Maximalpuls erreicht oder diesen Wert sogar überschreitet, oder der Puls den eingestellten Grenzwert (siehe "Zielpulsbereich") überschreitet, blinkt die rote Warnleuchte und es ertönt ein Signalton. SPEICHER MEMOIRE MEMORIA Die gespeicherten Werte werden in der unteren Zeile angezeigt. erreichter Maximalpuls HI H FO AL erreichter Minimalpuls LO N FA BA durchschnittlicher Puls AV D MO PR Drücken und halten Sie SET, um die gespeicherten Werte zurückzusetzen. Zielpulsbereich Timer TIMER ZONE TIMER COMPTE TEMPORIZADOR In der unteren Zeile des Displays wird die bisher verstrichene Trainingszeit angezeigt. In der mittleren Zeile werden der Puls und der erreichte Anteil am Maximalpuls in Prozent angezeigt. - 85 - BEREICH ZONE ZONA In der unteren Zeile werden oberer und unterer Grenzwert des Zielpulsbereichs angezeigt. Die gewählte Trainingsart wird in der oberen Zeile angezeigt. L- U Benutzerdefiniert L-1 Gesundheit (50-65% des Maximalpuls) L-2 Fitness (65-80% des Maximalpuls) - 86 - L-3 Leistung (80-95% des Maximalpuls) Drücken und halten Sie 3 Sekunden SET, um in den Einstellungsmodus zu wechseln. Wählen Sie die Trainingsart durch Druck auf SEL. Bei Wahl von "U" (Benutzerdefiniert) können Sie die Grenzwerte manuell einstellen. Drücken Sie SET. Auf dem Display blinkt der untere Grenzwert. Stellen Sie den Wert durch Druck auf SEL ein und bestätigen Sie die Einstellung durch Druck auf SET. Stellen Sie auf die gleiche Weise den oberen Grenzwert ein. Beenden Sie den Einstellungsmodus durch Druck auf MODE. Drücken und halten Sie SEL, um den Pulsalarm zu aktivieren. Bei aktiviertem Pulsalarm erscheint das Alarmsymbol im Display und bei Verlassen des Zielpulsbereichs ertönt ein Signalton "PIEP-PIEP... PIEP-PIEP...PIEP-PIEP". Wenn Ihr Puls 99% des Maximalpuls erreicht oder diesen Wert sogar überschreitet, ertönt der Alarmton für den Maximalpuls "PIEP-PIEP-PIEP-PIEP-PIEP...". Dieser Ton ist unabhängig von der Trainingszone und dem Pulsalarm der Trainingszone. Kalorien, Fettverbrennung und BMI CALORIE KALORIEN CALORIES CALORIAS In der unteren Zeile werden die verbrauchten Kalorien angezeigt. CALORIE KALORIEN CALORIES CALORIAS Drücken Sie SET, um zur Anzeige der Fettverbrennung in Gramm FAT FETT CONSGRAISSES BURN oder zur Anzeige Ihres BMI zu wechseln. BMI BMI IMC GRASA IMC In der Anzeige des Kalorienverbrauchs oder der Fettverbrennung können Sie die gespeicherten Werte durch Drücken und Halten von SET zurücksetzen. Hinweis: Um die Genauigkeit der Kalorien- und Fettverbrennungsanzeige zu verbessern, müssen Alter und Gewicht korrekt eingestellt sein. Hinweis: Der Zähler für die Fettverbrennung wird nur bei einem Puls von über 120 Schlägen pro Minute aktiv. Hinweise zum BMI Der BMI ist eine Maßzahl für die Bewertung des Körpergewichts eines Menschen. Ein Wert zwischen 18,5 und 25 gilt bei Erwachsenen als normal. Bei Werten unter 18,5 spricht man von Untergewicht. Bei Werten über 25 spricht man von Übergewicht. Bei Werten über 30 spricht man von Adipositas (Fettleibigkeit). Der BMI gibt lediglich einen groben Richtwert an, da er die Statur eines Menschen und die individuell verschiedene Zusammensetzung des Körpergewichts aus Fettund Muskelgewebe naturgemäß nicht berücksichtigt. Fitness FITNESS LEVEL FITNESS LEVEL NIVEL FIT Drücken Sie sofort nach Ihrem Training SET. Ein 5 Minütiger Countdown startet (Ruhephase). Der Balken zeigt die noch verbleibende Wartezeit an. Links erscheint der Anfangspuls und rechts der aktuelle Puls. In der unteren Zeile erscheint die Countdownzeit. Nach Ablauf der 5 Minuten erscheint der Fitnessgrad. Fitnessgrad 6 5 4 3 2 1 Puls >130 130-120 120-110 110-105 105-100 <100 - 87 - Fehlerbehebung NIV FORM PHYSIQ - 88 - Reinigungshinweis Der Puls wird nicht oder nicht korrekt angezeigt Achten Sie auf die korrekte Positionierung und den guten Sitz des Brustgurtes. Ihre Haut sollte nicht zu trocken oder kalt sein. Die Kontaktflächen können leicht angefeuchtet werden, um die Funktion zu verbessern. Elektromagnetische Störquellen können den Empfang beeinträchtigen. Die Distanz zwischen Gurt und Uhr darf max. 70 cm betragen. Andere Pulsmessgeräte in weniger als 2m Abstand können den Empfang stören. Kabellose Fahrradcomputer können den Empfang stören. Evtl. müssen die Batterien ersetzt werden. Das Display ist schlecht lesbar / Die Beleuchtung funktioniert nicht Ersetzen Sie die Batterien. Wasserdichtigkeit der Armbanduhr Wasserdicht bis 3 bar. Die bar-Angabe bezieht sich auf den Luftüberdruck, welcher im Rahmen der Wasserdichtigkeitsprüfung angewandt wurde (DIN8310). Reinigen Sie die Herzfrequenz-Messuhr nur mit einem trockenen, fusselfreien Tuch, wie es z.B. zur Reinigung von Brillengläsern verwendet wird. Nach jedem Tragen reinigen Sie den Brustgurt und das Uhrenarmband mit lauwarmen Wasser oder einer milden Seifenwasserlösung und einem Schwamm. Trocknen Sie alle Teile mit einem Tuch ab und hängen Sie den Gurt zum Trocknen auf. Schweiß und Verunreinigungen beeinträchtigen die Funktion des Senders. Entsorgung der Herzfrequenz-Messuhr Diese Herzfrequenz-Messuhr darf nicht im normalen Hausmüll entsorgt werden. Entsorgen Sie die Herzfrequenz-Messuhr über einen zugelassenen Entsorgungsbetrieb oder über Ihre kommunale Entsorgungseinrichtung. Beachten Sie die aktuell geltenden Vorschriften. Setzen Sie sich im Zweifelsfall mit Ihrer Entsorgungseinrichtung in Verbindung. Entsorgung der Batterien Bitte entsorgen Sie Ihre Batterien sachgerecht in extra hierfür aufgestellten Gefäßen im Handel. Batterien gehören nicht in den Hausmüll. Entsorgen Sie Batterien bitte über einen zugelassenen Entsorgungsbetrieb oder über Ihre kommunale Entsorgungseinrichtung. Beachten Sie die aktuell geltenden Vorschriften. Setzen Sie sich im Zweifelsfall mit Ihrer Entsorgungseinrichtung in Verbindung. Konformitätserklärung Wasserbeständigkeit des Brustgurtes Wasserbeständigkeit nach IEC 60529 IPx7. - 89 - Dieses Produkt entspricht bei bestimmungsgemäßer Verwendung den grundlegenden Anforderungen des § 3 und den übrigen einschlägigen Bestimmungen des FTEG (Artikel 3 der R&TTE). Die Konformitätserklärung können Sie hier anfordern: [email protected] - 90 - Garantie der digi-tech gmbh Sie erhalten auf diese Herzfrequenz-Messuhr 3 Jahre Garantie ab Kaufdatum. Im Falle von Mängeln dieser Herzfrequenz-Messuhr stehen Ihnen gegen den Verkäufer des Produkts gesetzliche Rechte zu. Diese gesetzlichen Rechte werden durch unsere im Folgenden dargestellte Garantie nicht eingeschränkt. Garantiebedingungen Die Garantiefrist beginnt mit dem Kaufdatum. Bitte bewahren Sie den Original Kassenbon gut auf. Diese Unterlage wird als Nachweis für den Kauf benötigt. Tritt innerhalb von drei Jahren ab dem Kaufdatum dieser Herzfrequenz-Messuhr ein Material- oder Fabrikationsfehler auf, wird die Herzfrequenz-Messuhr von uns – nach unserer Wahl – für Sie kostenlos repariert oder ersetzt. Diese Garantieleistung setzt voraus, dass innerhalb der Drei-Jahres-Frist die defekte Herzfrequenz-Messuhr und der Kaufbeleg (Kassenbon) vorgelegt und schriftlich kurz beschrieben wird, worin der Mangel besteht und wann er aufgetreten ist. Wenn der Defekt von unserer Garantie gedeckt ist, erhalten Sie die reparierte oder eine neue Herzfrequenz-Messuhr zurück. Mit Reparatur oder Austausch des Produkts beginnt kein neuer Garantiezeitraum. Garantiezeit und gesetzliche Mängelansprüche Die Garantiezeit wird durch die Gewährleistung nicht verlängert. Dies gilt auch für ersetzte und reparierte Teile. Eventuell schon beim Kauf vorhandene Schäden und Mängel müssen sofort nach dem Auspacken gemeldet werden. Nach Ablauf der Garantiezeit anfallende Reparaturen sind kostenpflichtig. Garantieumfang Die Herzfrequenz-Messuhr wurde nach strengen Qualitätsrichtlinien sorgfältig produziert und vor Anlieferung gewissenhaft geprüft. Die Garantieleistung gilt für Material- oder Fabrikationsfehler. Diese Garantie erstreckt sich nicht auf Produktteile, die normaler Abnutzung ausgesetzt sind und daher als Verschleißteile angesehen werden können oder für Beschädigungen an zerbrechlichen Teilen, z. B. Schalter, Akkus oder die aus Glas gefertigt sind. Diese Garantie verfällt, wenn die Herzfrequenz-Messuhr beschädigt, nicht sachgemäß benutzt oder gewartet wurde. Für eine sachgemäße Benutzung der Herzfrequenz-Messuhr sind alle in der Bedienungsanleitung aufgeführten Anweisungen genau einzuhalten. Verwendungszwecke und Handlungen, von denen in der Bedienungsanleitung abgeraten oder vor denen gewarnt wird, sind unbedingt zu vermeiden. Die Herzfrequenz-Messuhr ist lediglich für den privaten und nicht für den gewerblichen Gebrauch bestimmt. Bei missbräuchlicher und unsachgemäßer Behandlung, Gewaltanwendung und bei Eingriffen, die nicht von unserer autorisierten Service-Niederlassung vorgenommen wurden, erlischt die Garantie. Abwicklung im Garantiefall Um eine schnelle Bearbeitung ihres Anliegens zu gewährleisten, folgen Sie bitte den folgenden Hinweisen: • Bitte halten Sie für alle Anfragen den Kassenbon und die Artikelnummer (47584) als Nachweis für den Kauf bereit. • Die Artikelnummer entnehmen Sie bitte dem Typenschild, einer Gravur, auf dem Titelblatt Ihrer Anleitung (unten links) oder als Aufkleber auf der Rück- oder Unterseite. • Sollten Funktionsfehler oder sonstige Mängel auftreten kontaktieren Sie zunächst die nachfolgende Serviceabteilung telefonisch oder per E-Mail. • Eine als defekt erfasste Herzfrequenz-Messuhr können sie anschließend unter Beifügung des Kaufbelegs (Kassenbon) und der Angabe, worin der Mangel besteht und wann er aufgetreten ist, für Sie portofrei an die Ihnen mitgeteilte Service Anschrift übersenden. Auf www.lidl-service.com können Sie diese und viele weitere Handbücher, Produktvideos und Software herunterladen. - 91 - - 92 - Service Name: Inter-Quartz GmbH Str.: Valterweg 27A Stadt: Eppstein 65817 Land: Deutschland E-Mail: [email protected] Telefon: 00800 5515 6616 00800 5515 6616 00800 5515 6616 IAN 47584 Lieferant Bitte beachten Sie, dass die folgende Anschrift keine Serviceanschrift ist. Kontaktieren Sie zunächst die oben benannte Servicestelle. Name: digi-tech gmbh Str.: Valterweg 27A Stadt: Eppstein 65817 Land: Deutschland digi-tech gmbh Valterweg 27A D-65817 Eppstein Actualización de las informaciones Edizione del foglio di informazioni Stand der Informationen Last information update: 1/2014 · Art.-Nr.: 1-LD3814 IAN 47584 - 93 - IAN 47584-
 1
1
-
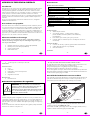 2
2
-
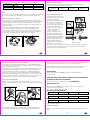 3
3
-
 4
4
-
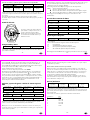 5
5
-
 6
6
-
 7
7
-
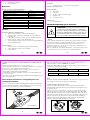 8
8
-
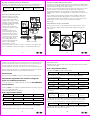 9
9
-
 10
10
-
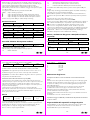 11
11
-
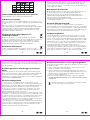 12
12
-
 13
13
-
 14
14
-
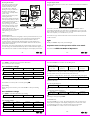 15
15
-
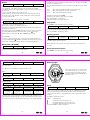 16
16
-
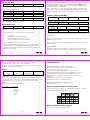 17
17
-
 18
18
-
 19
19
-
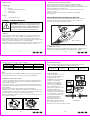 20
20
-
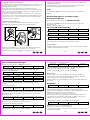 21
21
-
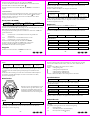 22
22
-
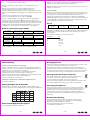 23
23
-
 24
24
-
 25
25


Crivit 1-LD3814 Usage And Safety Instructions
- Categoría
- Relojes
- Tipo
- Usage And Safety Instructions
en otros idiomas
- italiano: Crivit 1-LD3814
- English: Crivit 1-LD3814
- Deutsch: Crivit 1-LD3814
Artículos relacionados
Otros documentos
-
Beurer PM 26 Guía del usuario
-
Beurer PM18 Guía del usuario
-
Beurer PM70 Guía del usuario
-
-
-
Auriol 4-LD4537 Usage And Safety Instructions
-
-
-
Sportline Solo 910 Manual de usuario
-
Hama 00106913 El manual del propietario