
E_ectric Range -
Tabme of Contents
Safety .......................................... 1-4
Surface Cooking ...................... 5-7
Controls
Smoothtop Surtace
Oven Cooking ......................... 8-15
Baking
Cook & Hold
Delay
Keep Warm
Broiling
Oven Racks
Care & Cleaning ................... 16-19
Self-Cban Oven
Charting Procedures
Maintenance ......................... 20-21
Oven Window
Oven Light
Troubleshooting ................... 21 =22
Warranty & Service .................... 23
Guide d'utilisation et
d'entretien ................................... 24
Guia de Uso y Cuidado ............. 50
Form No. B/10/04 Pall: No. 8113P4g0 60 @2004 Maytag Appliances Sales Co. Litho U.S.A.

installer: Please leavethis manual with this appfiance.
Consumer: Please read and keep this manual for future
reference. Keep sales receipt and/or canceled check as proof
of purchase.
Model Number
Serial Number
Date of Purchase
If _ou have questions, call:
Maytag Customer Assistance
1-800-688-9900 USA
1-800-688-2002 Canada
1-800-688-2080 ( U.S.FRYfor hearing or speech [rnpaired._
(Mon.-Fri.. 8 am-8 pm Eastern Time]
Internet: http://www.maytag.com
tnourcontinu ngeffortto irnprovethe quafityand performance
ofour cooking products.it may be necessaryto make changes
to the appfiance without revising this guide.
For service i#fermaden, see page 23.
Warning and Important Safety Instructions appearing in
this guide are not meant to cover aJJpossible conditions
and situations that may occur. Common sense, caution,
and care must be exercised when installing, maintaining,
or operating the appliance.
Always contact the manufacturer about problems or
conditions you do not understand.
Recognize Safety Symbols, Words, Labels
WARNnNG. Hazards or unsafe practices which
COULD result in severe persona] injury or death.
1=oensure proper and safe operation: Appliance must
be properly installed and grounded by a qualified techni-
cian. Do not attempt to adjust, repair, service, or replace
any part of your appliance unless it is specifically recom-
mended in this guide. All other servicing should be
referred to a qualified servicer.
Always disconnect power to appliance before servicing.
o FOLLOW ALL _NSTALLATli
WARNING: To rednce risk of
tipping of the appliance from
abnormal nsage or by e×cessive
leading of the oven doer, the appliance mnst
be secnred by a properly installed anti.tip
To check if device is properly installed, look underneath
range with a flashlight to make sure one of the rear
leveling legs is properly engaged in the bracket slot. The
anti-tip device secures the rear leveling leg to the floor
when properly engaged. You should check this anytime
the range has been moved.
To Prevent Fire or Smoke
Be sure all packing materials are removed from the
appliance before operating it.
Keep area around appliance clear and free from combus-
tible materials. Flammable materials should not be stored
[n an oven,
Many plastics are vulnerable to heat. Keep plastics away
from parts of the appliance that may become warm or
hot.
To prevent grease fires, do not let cooking grease or other
flammable materials accumulate in or near the appliance.
CAUTION _ Hazards or unsafe practices which
COULD result in minor personal injury.
Read and follow aJJinstructions before using this
appliance to prevent the potential risk of fire, electric
shock, personal injury or damage to the appliance as a
result of improper usage of the appliance. Use appliance
only for its intended purpose as described in this guide.
in Case of Fire
Use dry chemical or foam-type extinguisher or baking
soda to smother fire or flame. Never use water on a
grease fire.
1. Turn off appliance to avoid spreading the flame.
2. NEVER pick up or move a flaming pan.
3. Smother oven fire or flame by closing the oven door.

Child Safety
above an appJJance, Children cJjmbing On the appliance
sedous!y injured,
NEVER leave children alone or unsupervised near the
appliance when it is in use or is still hot. Children should
never be allowed to sit or stand on any part of the appli-
ance as they could be injured or burned.
Children must be taught that the appliance and utensils in
it can be hot. Let hot utensils cool in a safe place, out of
reach of small children. Children should be taught that an
appliance is not a toy. Children should not be allowed to
play with controls or other parts of the appliance.
About Your Appliance
NEVER use an app!!ance as a step to teach cabinets
tean!ng Or sitting On the door, may resu!t in p0ssib!e
tipping of the appliance, breakage of door, and serious
injuries,
To prevent potential hazard to the user and damage to the
appliance, do not use appliance as a space heater to heat
or warm a room. Also, do not use the oven as a storage
area for food or cooking utensils.
Do not obstruct the flow of air by blocking the oven vent.
DO NOT TOUCH HEATING ELEMENTS OR iNTERiOR
SURFACES OF OVEN. Heating elements may be hot even
though they are dark in color, interior surfaces of any
oven become hot enough to cause burns. During and
after use, do not touch, or let clothing or other flammable
materials contact heating elements or interior surfaces of
oven until they have had sufficient time to cool. Other
surfaces of the appliance may become hot enough to
cause burns - among these surfaces are: oven vent
opening, surface near this opening, oven door, and
window of oven door.
Do not touch a hot oven light bulb with a damp cloth as
the bulb could break Should the bulb break, disconnect
power to the appliance before removing bulb to avoid
electrical shock
NEVER use aluminum foil to cover an oven rack or oven
bottom. Misuse could result in risk of electric shock, fire,
or damage to the appliance. Use foil only as directed in
this guide.
Cooking Safety
Never heat an unopened food container in the oven.
Pressure build-up may cause container to burst resulting
in serious personal injury or damage to the appliance.
Use dry, sturdy potholders. Damp potholders may cause
burns from steam. Dish towels or other substitutes should
never be used as potholders because they can trail across
hot elements and ignite or get caught on appliance parts.
Wear proper apparel. Loose fitting or long hanging-
sleeved apparel should not be worn while cooking. Cloth-
ing may ignite and cause burns if garment comes in
contact with heating elements.
Always place oven racks in the desired positions while
oven is cool. Slide oven rack out to add or remove food,
using dry, sturdy potholders. Always avoid reaching into
the oven to add or remove food. If a rack must be moved
while hot, use a dry potholder. Do not let potholder contact
hot element in oven.
Use racks only in the oven in which they were shipped/
purchased.
Use care when opening the oven door. Let hot air or steam
escape before removing or replacing food.
PREPARED FOOD WARNUNG: Follow food
manufacturer's instructions. If a plastic frozen food con-
tainer and/or its cover distorts, warps, or is otherwise
damaged during cooking, immediately discard the food
and its container. The food could be contaminated.
Do not allow aluminum foil or meat probe to contact
heating element.
Always turn off all controls when cooking is completed.

Utensim Safety
Follow the manufacturer's directions when using oven
cooking bags.
This appliance has been tested for safe performance
using conventional cookware. Do not use any devices or
accessories that are not specifically recommended in
this manual. Do not use stove top grills or add-on oven
convection systems. The use of devices or accessories
that are not expressly recommended in this manual can
create serious safety hazards, result in performance
problems, and reduce the life of the components of this
appliance.
Be sure utensil is large enough to properly contain food
and avoid boilovers. Pan size is particularly important in
deep fat frying. Be sure pan will accommodate the
volume of food that is to be added as well as the bubble
action of fat.
Never let a pan boll dry as this could damage the utensil
and the appliance.
If pan is smaller than element, a portion of the element
will be exposed to direct contact and could ignite cloth-
ing or potholder.
Only certain types of glass, glass/ceramic, ceramic,
earthenware, or other glazed utensils are suitable for
cooktop or oven service without breaking due to the
sudden change in temperature. Follow utensil
manufacturer's instructions when using glass.
Turn pan handle toward center of cooktop, not out into
the room or over another surface element. This reduces
the risk of burns, ignition of flammable materials, or
spillage if pan is accldently bumped or reached by small
children.
NEVER leave surface units unattended especially when
using high heat. An unattended bollover could cause
smoking and a greasy spillover can cause a fire.
This appliance is equipped with different size surface
elements. Select pans with flat bottoms large enough to
cover element. Fitting pan size to element will improve
cooking efficiency.
GLASS_CERAMUC SURFACE: NEVER cook on broken
cooktop. If cooktop should break, cleaning solutions and
splllovers may penetrate the broken cooktop and create a
risk of electric shock Contact a qualified technician
immediately.
Deep Fat Fryers
Use extreme caution when moving the grease pan or
disposing of hot grease. Allow grease to cool before
attempting to move pan.
Ventimating Hoods
Clean range hood and filters frequently to prevent grease
or other flammable materials from accumulating on hood
or filter and to avoid grease fires.
When flaming foods under the hood, turn the fan on.
Cleaning Safety
Clean cooktop with caution. Turn off all controls and walt
for appliance parts to cool before touching or cleaning.
Clean with caution. Use care to avoid steam burns if a wet
sponge or cloth is used to wipe spills on a hot surface.
Some cleaners can produce noxious fumes if applied to a
hot surface.
Clean only parts listed in this guide.
Self-Clean Oven
Do not leave racks, broiling pan, food or cooking
utensils, etc. in the oven during the self-clean cycle.
Do not clean door gasket. The door gasket is essential for
a good seal Care should be taken not to rub, damage, or
move the gasket.
Do not use oven cleaners or oven liners of any kind in or
around any part of the self-clean oven.
Before self-cleaning the oven, remove broiler pan, oven
racks and other utensils, and wipe off excessive spillovers
to prevent excessive smoke or flare ups.
It is normal for the cooktop of the range to become hot
during a self-clean cycle. Therefore, touching the
cooktop during a clean cycle should be avoided.
3

l pottant Safety Notice and
The California Safe Drinking Water and Toxic Enforce-
ment Act of 1986 (Proposition 65} requires the Governor
of California to publish a list of substances known to the
State of California to cause cancer or reproductive harm,
and requires businesses to warn customers of potential
exposures to such substances.
Users of this appliance are hereby warned that when the
oven is engaged in the self-clean cycle, there may be
some low-level exposure to some of the listed sub-
stances, including carbon monoxide. Exposure to these
substances can be minimized by properly venting the
oven to the outdoors by opening the window's and/or
door in the room where the appliance is located during
the self-clean cycle.
UMPORTANT NOTUCE REGARDUNG PET BURDS: Never
keep pet birds in the kitchen or in rooms where the
fumes from the kitchen could reach. Birds have a very
sensitive respiratory system. Fumes released during an
oven self-cleaning cycle may be harmful or fatal to birds.
Fumes released due to overheated cooking oil, fat,
margarine and overheated non-stick cookware may be
equafly harmful
Save These instructions for Future Reference
4

Surface Controls
Use to turn on the surface elements. An infinite choice of
heat settings is avaihb[e from Low to High. The knobs can
be set on or between any of the settings.
Setting the ControJs
1. Phce pan on surface dement.
2. Push in and turn the knob in either direction to the desired
° The control pane[ is marked to identify wNch O O
dement the knob controls. For example, the
graphic at right indicates Heftfront dement. O O
3. There is an dement indicator light on the control pane[.
When any surface control knob isturned on, the light will
turn on. The light will turn off when all the surface ele-
ments are turned off.
4. After cooking, turn knob to OFF. Remove pan.
[}ual Element (select models)
The cooking surface has a dual element
located in the right front position of the
smoothtop. This allows you to change
the size of this element.
1. Press the switch to the left to use
the large element or to the right to
use the small element.
2. Push in and turn knob in either
direction to the desired heat setting.
_OW
2
OFF
High
Medium .....
Suggested Heat Settings
The size,type of cookware and cooking operation will affect
the heat setting. For information on cookware and other
factors affecting heat settings, refer to Cookware Recommen-
dations on page 7 and "Cooking Made Simple" booklet.
Medo Low (3-4):
Use to continue
cooking covered
foods or steam
foods.
Medium (5-7): Use to
maintain slow boil for
large amounts of liquids
and for most frying
operations.
1
High (10): Use to bring
liquid to a boil Always
reduce setting to a lower
heat when liquids begin to
boil or foods begin to cook.
OFF [ Styling may
Hieh vary depending
on model
@
.......Medium ....................
Medo High (8=9): Use
to brown meat, heat oil
for deep fat frying or
sauteing. Maintain fast
boil for large amounts
of liquids.
BEFORECOOKING AFTER COOKING
, Always place a pan on the surface unit before you turn it • Make sure surtace unit is turned off
on, To prevent damage to range, never operate surface
unit without a pan in place,
NEVER use the cooktop as a storage area for food or
cookware,
DURIN6 COOKIN6
Be sure you know which knob controls which surface
• Clean up messy spills as soon as possible,
OTHER TIPS
- tf cabinet storage is provided direct[_ above cooking
surface limit it to items that are infrequendy used and can
be safely stored in an area subjected to heat. Tempera-
tures may be unsafe for items such asvolatile liquids.
unit, Make sure } ou turned on the correct surface unit.... cleaners ol aerosol sprays
Begin cooking on a higher heat setting then reduce to a • NEVER leave any items, especially plastic items, on the
lower setting to complete the operation, Never use a cooktop The hot air from the ven_may ignite flammable
high heat setting for ex_endedcooking, items, melt or soften plastics, or increase pressure in
NBIE@ allow a pan to boil dry. This could damage the dosed con_aiuuerscausing them to burst.
pan and the appliance, o NEVER allow aluminum foil. meat probes or an} other
NEVER touch cooktop until it has cooled, Expect some metal object, other than a pan on a surface elemenL to
parts of the cooktop, especiall_ around the surface units .... contact heating elements.
to become warm or hot during cooking. Use potholders o NEVER store heav} items above the cooktop that could fall
_oprotect hands, and damage it.
5

S oothtop Surface
Smoothtop Surface Notes:
, Cooktop may emit mightsmoke and odor the first few
times the cooktop is used. This is normal
, Smoothtop cooktops retain heat for a period of time
after the element is turned off. Turn the dements off
a few minutes before food is compHeteHycooked and use
the retained heat to compHetecooking. When the hot
surface Hightturns off, the cooking area wiHHbe cooH
enough to touch. Because of the way they retain heat, the
smoothtop dements wiHHnot respond to changes in
settings as quickHyas coiHdements.
° In the event of a potentiaHboiHover,remove the pan from
the cooking surface.
, Never attempt to miftthe cooktopo
° The smoothtop surface may appear discoHoredwhen it is
hot=This is normaHand wiHHdisappear when the surface
cooHs=
Cooking Areas
The cooking areas on your range are identified by permanent
circHeson the smoothtop surface. For most efficient cooking,
fit the pan size to the dement size.
Pans should not extend more than t-inch beyond the
cooking area.
When a control is turned on, a gHowcan be seen through the
smoothtop surface. The element will cycmeon and off to
maintain the preset heat setting, even on Hi.
For more information on cookware, refer to Cookware
Recommendations on page 7 and "Cooking Made Simple"
bookHetincHudedwith your range.
SINGLE
ELEMENTS
Tips to Protect the
Smoothtop Surface
CJeaning (see page 18 for more information}
° Before first use, clean the cooktop.
° Clean your cooktop daily or after each use.This will keep
your cooktop looking good and can prevent damage.
° If a spillover occurs while cooking, immediately clean the
spill from the cooking area while it is hot to prevent a tough
cleaning chore later. Using extreme care, wipe spill with a
clean dry towel
° Do not allow spills to remain on the cooking area or the
cooktop trim for a long period of time.
° Never use abrasive cleansing powders or scouring pads
which will scratch the cooktop.
° Never use chlorine bleach, ammonia or other cleansers not
specifically recommended for use on glass-ceramic.
To Prevent Marks and Scratches
° Do not use glass pans. They may scratch the surface.
° Never place a trivet or wok ring between the surface and
pan. These items can mark or etch the top.
° Do not slide aluminum pans across a hot surface. The pans
may leave marks which need to be removed promptly. (See
Cleaning, page 18=}
° Make sure the surface and the pan bottom are clean before
turning on to prevent scratches.
° To prevent scratching or damage to the glass-ceramic top,
do not leave sugar, salt or fats on the cooking area. Wipe
the cooktop surface with a clean cloth or paper towel
before using.
° Never slide heavy metal pans across the surface since
these may scratch.
cent.
DUAL ELEMENT
(SELECT MODELS)
Hot Surface Light
The Hot Surface indicator Hightis Hocatedon the
controHpanel The HightwiHHbe iHHuminated
Hef_ Surface
when any cooking area is hot= It wiHHremain on,
even after the controHisturned off, untiHthe area has cooHed=
6

To Prevent Stains
, Never use a seineddish cloth or sponge to dean the
cooktop surface. A fiim will remain which may cause stains
on the cooking surface after the area is heated.
, Condnuousiy cooking on a seinedsurface may/will resuit in
a permanent stain.
To Prevent Other Damage
° Do not allow piasdc, sugar or foods with high sugar content
to meit onto the hot cooktop. ShouM this happen, dean
immediatdy. (See Cbaning, page 18.}
° Never Neta pan boii dry as this will damage the surface and
pan.
, Never use cooktop as a work surface or cutting board.
° Never cook food directly on the surface.
° Do not use a small pan on a large element. Not only does
this waste energy, but it can also result in spillovers burning
onto the cooking area which requires extra cleaning.
, Do not use non-fiat specialty items that are oversized or
uneven such as round bottom woks, rippled bottom and/or
oversized canners and griddles.
° Do not use foil or foiPtype containers. Foil may melt onto
the glass. If metal melts on the cooktop, do not use. Call an
authorized Maytag Servicer.
Cookware Recommendations
Using the right cookware can prevent many problems, such
as food taking longer to cook or achieving inconsistent
results. Proper pans will reduce cooking times, use less
energy, and cook food more evenly.
Nat Pan Tests
See if your pans are flat.
The RumorTest:
1. Place a ruler across the bottom of the pan.
2. Hold it up to the light.
3. Little or no light should be visible under the ruler.
The Bubble Test:
1. Put 1 inch of water in the pan. Placeon cooktop and turn
control to High,
2. Watch the formation of the bubbles as the water heats.
Uniform bubbles mean good performance, and uneven
bubbles indicate hot spots and uneven cooking.
See "Cooking Made Simpie" bookiet for more information.
Select • Avoid
Flat,smooth-bottom Panswith grooved or warped bottoms.
)ans. Panswith uneven bottoms do not cook
efficiently and sometimes may not
boil liquid.
Heavy-gauge pans, Very thin-gauge metal or glass pans,
Pansthat are the Panssmaller or larger than the
same size as the element by'1 inch.
dement.
Secure handles. Cookware with looseor broken handles.
Heavyhandles that tilt the pan.
Loose-fitting lids.
Hat bottom woks. Woks with a ring-stand bottom.
Canning and Oversize
All canners and large pots must have fiat bottoms and
must be made from heavy-gauge materials. This is critical
on smoothtop surfaces. The base must not be more than
1 inch larger than the element.
When canners and pots do not meet these standards, cooking
times may be longer, and cooktops may be damaged.
Some canners are designed with smaller bases for use on
smoothtop surfaces.
When canning, use the High heat setting only until the
water comes to a boil or pressure is reached in the canner.
Reduce to the lowest heat setting that maintains the boil or
pressure. If the heat is not turned down, the cooktop may be
damaged.
See "Cooking Made Simple" booklet for more information.

C D
Less- ...............
E F G H 1 j
The control panel isdesigned for easein programming. Thedisplaywindow on thecontrol shows time of day,timer and ovenfunctions.
Control panel shown includes model specific features. (Styling may vary depending on modeL}
A
B
C
D
e
F
N
J
Broil
Bake
More+ or
Less-
Timer
Cook & Hold
Clean
Delay
Clock
Keep Warm
CANCEL
Use for broiling and top browning.
Use for baking and roasting.
Enters or changes time, oven
temperature. Sets Hi or LO broil
Sets Timer.
Bakes for a preset time, then holds food
warm for 1 hour.
Use to set self-clean cycle.
Programs the oven to start baking at
a later time.
Use to set time-of-day clock.
Use to keep cooked food warm in oven.
Cancels all operations except Timer
and Clock.
Using the Touchpads
Pressthe desired pad.
Pressthe More+ or Less- pad to enter time or temperature.
° A beep wiii sound when any pad is touched.
° A double beep wiii sound if a programming error occurs.
Note: Fourseconds after pressing the More+ or Less-
pad, the time or temperature will automatically be entered.
If more than 30 seconds elapse between touching a
function pad and the More+ or Less- pad, the function will
be canceled and the display will return to the previous
display.
The clock can be set to display time in a 12-hour or 24-hour
format. The clock is set at the factory for the 12-hour format.
To change the clock to 24-hour format:
1. Pressand hold the CANCEL and Delay
pads for three seconds.
2. Pressthe More+ or Less - pad to select
12 or 24 hour.
3. Set the time of day following the
directions below.
To set the Clock:
1. Pressthe Clock pad.
° Time of day and the colon flash in the
display.
2. Pressthe More+ or Less- pad to set the
time of day.
° Colon continues flashing.
3. Pressthe Clock pad again or wait four
seconds.
Less- :
When electrical power is supplied or after a power interrup-
tion, the last clock time before power was interrupted will
flash.
To recall the time of day when another time function is
showing, press the Clock pad.
Clock time cannot be changed when the oven has been
programmed for cook or clean Delay or Cook & Hold.
8

To cancel the Clock display:
If you do not want the time of day to dispHay:
Press and hoM the CANCEL and CHock
pads for three seconds. The time of day
wifl disappear from the dispHay
When the chockdispHayis cancelled, press
the CHockpad to briefly dispHaythe time
of day=
To restore the CJoek display:
Press and hoHdthe CANCEL and CHockpads for three sec-
onds. The time of day will reappear in the dispHay=
The timer can be set from one minute (00:01] up to 99 hours
and 59 minutes (99:59].
The timer can be used independentHyof any other oven
activity. Itcan aHsobe set while another oven function is
operating.
The Timer does not control the oven. It only controls a
beeper.
To set the Timer:
1. Press the Timer pad. FrTler
,0:00 lights in the display.
, The colon flashes in the display.
2. Pressthe More+ or Less- pad until the
correct time appears in the display. Less-
.........................................
_The colon will continue to flash.
3. PressTimer pad again or wait four seconds.
, The colon continues flashing and the time begins
counting down.
, The last minute of the timer countdown will be displayed
as seconds.
4. At the end of the set time, one long beep will sound.
To cancel the Timer:
1= Press and hold the Timer pad for three seconds.
OR
2= Press the Timer pad and set the time to 00:00=
Locking the ControJ
The touchpad controls can be locked for safety, cleaning, or
to prevent unwanted use= They will not function when locked.
If the oven is currently in use, the controls cannot be locked.
The current time of day will remain in the display when the
controls are locked.
To took:
Press and hold the CANCEL and Cook &
Hold pads for three seconds.
LOCKflashes in the display.
To unlock:
Press and hold the CANCEL and Cook &
Hold pads for three seconds.
LOCKdisappears from the display.
FauJt Codes
BAKE or LOCK may flash rapidly in the display to alert you if
there is an error or a problem. If BAKEor LOCKflash in the
display, press CANCEL pad= If BAKE or LOCKcontinue to
flash, disconnect power to the appliance. Wait a few minutes,
and then reconnect power=If the flashing still continues,
disconnect power to the appliance and call an authorized
servicer.
9

To set Bake:
1. Press the Bake pad.
° "BAKE" will flash.
° 000 will Nightin the display.
2. Select the oven temperature. The oven tempera- More+
ture can be set from 170° to 550°. Pressor press .........................................
and hold the More+ or Less- pads. .........
Less
° 350°will Nightwhen either pad is first pressed. ............................................
° Press the More+ pad to increase the temperature.
° Press the Less- pad to decrease the temperature.
3. Press Bake pad again or wait four seconds.
° BAKEwiii stop flashing and light in the display.
° 100° or the actual oven temperature wiii display. The
temperature will rise in 5° increments until the preset
temperature is reached.
4. Allow the oven to preheat for 8-15 minutes.
° When the set oven temperature is reached, one long
beep will sound.
° To recall the set temperature during preheat, press the
Bake pad.
5. Place food in center of oven, allowing a minimum of two
inches between utensil and oven walls.
8. Check cooking progress. Cook longer if needed.
7. When cooking is finished, press CANCEL.
8. Remove food from the oven.
Baking Notes:
To change oven temperature during cooking, press
the Bake pad, then press the More+ or Less- pad until
the desired temperature is displayed.
To change oven temperature during preheat, press
the Bake pad twice, then press the More+ or Less- pad
until the desired temperature is displayed.
If you forget to turn off the oven, it will automatically turn
off at the end of 12 hours. If you wish to deactivate this
feature, see page 13.
For additional baking and roasting tips, see "Cooking
Made Simple" booklet.
Baking Differences Between Your
and New Oven
It is normal to notice some baking time differences between a
new ovenand an old one. See"Adjusting the OvenTemperature"
on page 13.
Cook & Hold
cook & Hold allows you to bake for a preset amount of time,
followed by a one-hour Keep Warm cycle.
TO set Cook & Hemal:
1. Pressthe Cook & Hold pad.
, "BAKE" and "HOLD" flash.
, 000 lights in the display.
2. Select the oven temperature. The oven tempera-
ture can be set from 170° to 550°. Press or press ....................................
Less )
and hold the More+ or Less- pad,
, Pressthe More+ pad to increase the temperature.
, Pressthe Less- pad to decrease the temperature.
3. PressCook & Hold again ORwait four seconds.
, "HOLD" flashes.
, 00:00flashes in the display.
4. Enter the amount of time you want to bake by pressing the
More+ or Less- pad. Bake time can be set from ten
minutes (00:10} to 11 hours, 59 minutes (11:59}.
° "BAKE" and "HOLD" light in the display.
° The baking time wiii light in the display.
° The baking time wiii start counting down.
When the cooking time has elapsed:
° Four beeps wiii sound.
° "BAKE" wiii turn off.
° "HOLD" and "WARM" will light.
° 170°will display.
After one hour in HOLD WARM:
, "End" will display,
° The time of day reappears in the display.
To cancel Cook & Hold at any time: (CANCkL')
Press the CANCEL pad. Remove food from oven.
10

Delay Bake
as dairy products, pork, poultry, or seafood,
When using Delay, the oven begins to cook later in the day.
Set the amount of time that you want to delay before the oven
turns on and how long you want to cook. The oven begins to
heat at the selected time and cooks for the specified length of
time, then keeps food warm for up to one hour.
Delay time can be set from 10 minutes (00:10} to 11 hours, 59
minutes (11:59}.
To set a Delayed Baking cycle:
1. Pressthe Delay pad.
° "DELAY" flashes.
° 00:00 flashes in the display.
2. Pressthe More+ or Less- pad to set the
delay time.
While "DELAY" is still flashing:
3. Pressthe Cook & Hold pad.
° 000 lights in the display.
° "BAKE" and "HOLD" flash.
4.
Press More+ pad to set the baking temperature.
° 00:00 and "HOLD" flash.
° "BAKE" stays ill
Press More+ pad to set the baking time.
° The Delay time, "DELAY", "BAKE" and "HOLD" light in
the display.
When the Delay time has expired:
° "DELAY" will turn off.
° Baking time is displayed.
° "BAKE" and "HOLD" are displayed.
To set a Delay when Cook & Hold has already
been programmed:
1. Pressthe Delay pad.
° "DELAY" flashes.
° 00:00 appears in the dispHay. .........................
2. Pressthe More+ or Less- pad to set the
delay time.
° After four seconds, "DELAY" wiii Less-
stay lit to remind you that a delayed ..............................
cooking cycle has been set.
When the Delay time has expired and the oven
starts:
° The baking time will be dispHayed.
° "DELAY" will turn off.
° "BAKE" and "HOLD" will remain Hit.
To cancel:
Press the CANCEL pad.
, All timed and untimed cooking functions will be
canceled.
, The time of day will reappear in the dispHay.
_otes;:
Do not use delayed baMng for items that require a
preheated oven, such as cakes, cookies, and breads.
Do not use ddayed baking if oven is already hot.
11

Keep Warm
Forsafdy keephg foods warm or for warmhg breads and
pHates=
To set Keep Warm:
1= Press the Keep Warm pad=
° "WARM" flashes,
° 000 appears in the dispHay..................................
2, SeHectthe Keep Warm temperature, The Keep
Warm temperature can be set from 145° to ..................................
190°` Pressor press and hoHdthe More+ or
Less- pad, Less-
, 170° will Hightwhen either pad is first pressed,
, Press the More+ pad to increase the temperature,
, Press the Less- pad to decrease the temperature,
"WARM" and the temperature will be dispHayedwile Keep
Warm is active,
Keep Warm Notes:
, Foroptimal food quality, oven cooked foods should be kept
warm for no longer than 1 to 2 hours,
, To keep foods from drying, cover loosely with foil or a Hid,
, To warm dinner rolls:
- cover rolls loosely with foil and place in oven,
- press Keep Warm and More+ pads to set 170° R
- warm for 12-15 minutes,
, To warm pmates:
- place 2 stacks of up to four plates each in the oven,
- press Keep Warm and More+ pads to set 170° R
- warm for five minutes, turn off the oven and leave plates
in the oven for 15 minutes more,
- use only oven-safe plates, check with the manufacturer,
- do not set warm dishes on a cold surface as rapid
temperature changes could cause crazing or breakage,
To cancem Keep Warm:
1, Pressthe CANCEL pad,
2, Removefood from the oven,
12

Automatic Shut-Off/Sabbath
Mode
The oven will automatically turn off after 12 hours if you
accidentally Heaveit on. This safety feature can be turned off.
TO cancel the 12-hour shut-off and run the
oven eontinuousJy for 72 hours:
1. Set the oven to bake _seepage 10].
2= Press and hoHdthe CHockpad for five seconds.
° SAb will be dispHayedand flash for five seconds.
° SAb will then be dispHayedcontinuousHyuntiHturned off
or until the 72-hour time limit is reached.
° "BAKE" will also be displayed if a bake cycle is in use
while the oven is in Sabbath Mode.
All other functions EXCEPTBAKE (Timer, Keep Warm,
Clean, etc.] are locked out during the Sabbath Mode.
To cancel Bake when in Sabbath Mode:
Press CANCEL.
CANCEL
, "BAKE" will turn off in the display.
° No beeps will sound.
1"0 cancel the Sabbath Mode:
1= Press the Clock pad for five seconds.
OR
2= After 72 hours, the Sabbath Mode will end=
° SAb will flash for five seconds.
° The time of day will return to the display.
Adjusting the Oven Temperature
Oven temperatures are carefully tested for accuracy at the
factory. It is normal to notice some baking or browning
differences between a new oven and an old one= As ranges
get older, the oven temperature can shift.
You may adjust the oven temperature if you think the oven is
not baking or browning correctly. To decide how much to
change the temperature, set the temperature 25° higher or
lower than your recipe recommends, then bake. The results
of the "test" should give you an idea of how much to adjust
the temperature.
To adjust the oven temperature:
1= Press Bake.
2. Enter 550° by pressing the More+ pad.
J
3. Pressand hold the Bake pad for several More+
seconds or until 0° appears in the display. ".............................
If the oven temperature was previously adjusted, the
change will be displayed. Forexample, if the oven tem-
perature was reduced by 15° the display will show "-15°''-
4. Pressthe More+ or Less- pad to adjust the temperature.
Eachtime a pad is pressed, the temperature changes by
5°- The oven temperature can be increased or decreased
by 5° to 35°-
5. The time of day will automatically reappear in the display.
You do not need to readjust the oven temperature if there
is a power failure or interruption. Broiling and cleaning
temperatures cannot be adjusted.
Sabbath Mode Notes:
° Sabbath Mode can be turned on at any time with or
without the oven on=
° Sabbath Mode cannot be turned on if the touchpads are
locked out or when the door is locked.
, If the oven is baking when Sabbath Mode is set, "BAKE"
will go out at the end of the baking cycle. There will be
no audible beeps.
, When the Sabbath Mode is started, no preheat beep will
sound.
, All prompts, messages and beeps are deactivated when
Sabbath Mode is active.
, Pressing CANCELwill cancel a Bake cycle, however the
control will stay in the Sabbath Mode.
, If power fails, the oven will power up in Sabbath Mode with
72 hours remaining and no cycle active.
13

G
To set Broil:
1. Press the Broil pad.
, "BROIL" flashes.
, SETis displayed.
2. Pressthe More+ pad to set HI broil or press the Less- pad
to set LO broil.
, Hi or LO will bedisplayed.
, Sebct HI broil (550° F}for normal broiling. Sebct
LO broil (450° F}for low-temperature broiling of longer
cooking foods such as poultry.
3. After four seconds, the oven will start.
, "BROIL" will remain lit.
4. Foroptimum browning, preheat broil dement for 3-4
minutes before adding food.
5. Placefood in the oven. Leave oven door open about four
inches (the first stop].
6,
7.
Turn meat once about halfway through cooking.
When food is cooked, press the CANCEL
pad. Remove food and broiler pan from the
ove n.
, The time of day wiii reappear in the
display.
Broil Notes:
, For best results when broiling, use a pan designed for
broiling.
° Expect broil times to increase and browning to be
slightly lighter if appliance is installed on a 208-volt
circuit.
, Hi is used for most broiling. Use LO broil when broiling
longer cooking foods. The lower temperature allows
food to cook to the well done stage without excessive
browning.
, Broil times may be longer when the lower broiling
temperature is selected.
° Food should be turned halfway through broiling time.
° For additional broiling tips and temperatures, refer to the
"Cooking Made Simple" booklet.
Broiling Chart
I TOTAL
FOODS POS_TmON* DONENESS I COOK TmME
4
4
4
4
4
4
Medium
Weii Done
Weii Done
Beef
Steak, 1" thick
Hamburgers, 3/4" thick
Pork
Bacon
Chops, 1"
Ham - precooked slice, 1/2" thick
Poultry
Chicken Pieces
Seafood
Fish Steaks, buttered, 1"thick
Fillets
*The top rack position is #5.
Weii Done
Weii Done
Warm
15 - 18 minutes
19 - 23 minutes
15 - 18 minutes
6 - 10 minutes
22 - 26 minutes
8 - 12 minutes
LO Broii
3 or 4 Weii Done 28 - 38 minutes
Flaky
Flaky
10 - 15 minutes
8 - 12 minutes
Note: This chart is a suggested guide. The times may vary with the food being cooked.
14

Oven Vent
When the oven is h use the area near the vent may become
hot enough to cause burns. Never Mock the vent opening.
The oven vent is located below the backgaard vent
shield on your range.
OVEN VENT
L0 CA TION
Do not piace
piasdcs near the
vent opening as
heat from the vent
couid distort or
Oven Light
Press the Oven Light switch on the controi pand to
turn the oven Highton and off.
Oven
Oven Bottom U_ht
Protect oven bottom against spiHovers,espedaHy acidic or
sugar}, spills, as they may discolor the porcelain enamel. Use
the correct pan size to avoid spillovers and boilovers. Do not
place atensils or amaminam foil directly on the oven
bottom.
Oven Racks
To replace:
1= Place rack on the rack support in the oven
2= Tilt the front end up slightly. Slide rack back until it clears
the lock-stop position.
3= Lower front and slide back into the oven.
Do not cover an entire rack with aiaminam foil or place foil
on the oven bottom. Baking resaits will be affected and
damage may occur to the oven bottom.
Rack Positions
RACK 5 Chighest
position:}: Used for
8_
toasting bread or
broiling thin, non-fatty
foods.
RACK 4: Usedfor
most broiling.
RACK 3: Used for most
baked goods on a
cookie sheet or jelly roll pan, layer cakes, fruit pies, or frozen
convenience foods.
5
__4
--3
__2
--1
RACK 2: Used for roasting small cuts of meat, casseroles,
baking loaves of bread, bundt cakes or custard pies.
RACK 1: Used for roasting large cuts of meat and poultry,
frozen pies, dessert souffles or angel food cake.
MULTIPLE RACK COOKING:
Two rack: Use rack positions 2 and 4, or 1and 4.
- Do net usethe even for storing food or cookware.
The oven has two racks. Ai[ racks are designed with a lock-
stop edge.
To remove:
1. Pui[ rack straight out until it
stops at the lock-stop posi-
tion.
2, Lift up on the front of the rack
and pui[ out,
Half Rack Accessory
A half rack, to increase oven capac-
it}', isavailable as an accesseD,. [t fits
in the left, upper portion of the oven
and provides space for a vegetable
dish when a large roaster is on the
lower rack. Contact your dealer for
the "HALFRACK" Accesser}, Kit or
call 1-800-688-8408.
15

Seff-C ean Oven
o It is normal for parts of the range to become hot dunng a
* To prevent persouai injury and damage to the oven door
do not attempt to open door when "'LOCK"is displayed
, Avoid touching cooktop, door_window or oven veto area
during a clean cycle.
, Do not use commercial oven cleaners on the oven finish
or around any part of the oven. The} wiii damage the
finish o_ parts.
The self-clean cycle uses above-normal cooking temperatures
to automatically clean the oven interior. Do not force the oven
door or lock lever open. This may result in exposure to high
temperatures and be a burn hazard.
It is normal for flare-ups, smoking, or flaming to occur during
cleaning if the oven is heavily soiled. It is better to clean the
oven regularly rather than to wait until there is a heavy build-
up of soil in the oven.
During the cleaning process, the kitchen should be well
ventilated to get rid of normal odors associated with cleaning.
Before Se f-Cmeaning
1. Turn off the oven light before cleaning. The light may burn
out during the clean cycle.
2. Remove broiler pan, all pans, and oven racks from the
oven. The oven racks will discolor and may not slide easily
after a self-clean cycle if they are not removed.
3. Clean oven frame, door frame, area outside of gasket, and
around the opening in the door gasket with a nonabrasive
cleaner such as Bon Ami* or detergent and water. The
self-cleaning process does not clean these areas. They
should be cleaned to prevent soil from baking on during
the clean cycle. (The gasket is the
seal around the oven door and
window.[)
4. To prevent damage, do not clean or
rub the gasket around the oven
door. The gasket is designed to
seal in heat during the clean cycle.
5. Wipe up excess grease or spillovers from the oven bottom.
This prevents excessive smoking, flare-ups or flaming
during the clean cycle.
6. Wipe up sugary'and acidic spillovers such as sweet
potatoes, tomato, or milk-based sauces. Porcelain enamel
is acid-resistant, not acid-proof. The porcelain finish may
discolor if acidic spills are not wiped up before a self-clean
cycle.
To set Self-Clean:
Note: Oven temperature must be below 400° Fto programa dean cycle,
1.
2.
Close the oven door.
Move door lock lever right to the locked position.
3. Pressthe Clean pad.
° "CLEAN" flashes in the display.
If the door is not closed, beeps will sound and "DOOR" will
display. If the door is not closed within 45 seconds, the
self-cleaning operation will be canceled and the display
will return to the time of day.
4. Pressthe More+ or Less- pad.
° "CL-M" (Medium Soil, 3 hours} is displayed.
5. Pressthe More+ or Less- pad to scroll through ............................................
the self-cleaning settings. (More+
CL-H" (Heavy Soil, 4hours}
CL-M" (Medium soil, 3 hours} Jess-
....
CL-L__(Light Soil, 2 hours}
Choosing the soil level of the oven automatically programs
the self-cleaning time.
6. After four seconds, the oven will start cleaning.
, The cleaning time will start counting down in the display.
, "LOCK" will appear in the display.
, "CLEAN" will appear in the display.
To Delay a Self-Cmean Cycle:
1. Pressthe Delay pad.
° "DELAY" flashes.
° 00:00will appear in the display.
2. Pressthe More+ or Less- pad to set the
amount of time you want to delay the
cycle. Delay time can be set from ten
minutes (00:10} to 11 hours, 59 minutes
(11:5g}.
conto
Brand names for cleaning products are registered trademarks ofthe respective manufacturers.
16

3. Pressthe CHeanpad.
, "CLEAN" will flash.
4. Pressthe More+ or Less- pad. .................
, "CL-M" (Medium Soil 3 hours:)
is dispHayed. ..........................
5. Pressthe More+ or Less- pad to scroll through the sdf-
cHeaningsettings.
CL-H" (Heavy Soil 4 hours:)
CL-M" (Medium soil 3 hours:)
CL-L" (Light Soil 2 hours:)
Choosing the soiHHevdof the oven automatically programs
the sdf-cHeaning time.
6. After four seconds, CLEAN, DELAY and LOCK will appear
in the dispHayto show that the oven is set for a ddayed
dean operation. The dday time is dispHayed.
Jf the oven has amready been set for a clean
cycle and you wish to set a delay:
1. Press the Delay pad.
° "DELAY" flashes.
° 00:00will appear in the display. ...........................
2. Pressthe More+ or Less- pad to set the
amount of time you want to delay the cycle. ............................................
After four seconds, CLEAN, DELAY and LOCK will appear
in the display to show that the oven is set for adelayed
clean operation. The delay time is displayed.
When the Self-Clean eyemestarts:
° "DELAY" will turn off.
° The dean time will appear in the display.
TO cance! the Semf-Clean cycle:
Press the CANCEL pad.
° All words disappear from the display.
° All functions are canceled.
° The time of day appears in the display.
During the Self-C ean Cycle
When LOCKshows in the display, the door cannot be opened.
To prevent damage to the door, do not force the door open
when LOCK is displayed.
Smoke and Smells
You may see some smoke and smell an odor the first few
times the oven is cleaned. This is normal and will lessen in
time.
Smoke may also occur if the oven is heavily soiled or if a
broiler pan was left in the oven.
Sounds
As the oven heats, you may hear sounds of metal parts
expanding and contracting. This is normal and will not
damage the oven.
After Se f-Cleaning
About one hour after the end of the self-clean cycle, LOCK
will turn off. The door can then be opened. Move door lock
lever to the left to unlock.
Some soil may leave a light gray, powdery ash. Remove
it with a damp cloth. If soil remains after wiping, that means
the clean cycle was not long enough. The soil will be re-
moved during the next clean cycle.
if oven racks were left in the oven and do not slide
smoothly after a clean cycle, wipe racks and rack supports
with a small amount of vegetable oil to make them easier to
move.
Fine lines may appear in the porcelain because it went
through heating and cooling. This is normal and wiii not
affect performance.
A white discoloration may appear after cleaning if acidic
or sugary foods were not wiped up before the self=clean
cycle= This discoloration is normal and will not affect perfor-
mance.
If the oven door is left open, "DOOR" will flash in the
display and a signal will beep until the door is closed
and the Clean pad is pressed again.
If more than five seconds elapse between pressing the
Clean pad and the More+ or Less- pad, the program will
automatically return to the previous display.
The oven door will be damaged if the oven door is
forced to open when "LOCK" is still displayed.
17

Cleaning Procedures
,!fa part !s removed, be sure !t is correct!y replaced, }
* Brand names are registered trademarks of the
respective manufacturers.
** To order call 1-877-232-6771 USAand
1-800-688-8408 Canada.
PROCEDURE
Backgaard and
Cooktop -
Porcelain Enamel
Broiler Pan and
insert
Clock and
Control Pad
Area
Control Knobs
Cooktop -
Gmass-Ceramic
PorceHainenameHis gHassfused on metaHand may crack or chip with misuse. It is acid resistant, not acid
proof. AHspiHovers,espedaHy acidic or sugary spillovers, should be wiped up immediately with a dry cloth.
, When cool, wash with soapy water, rinse and dry.
, Never wipe off a warm or hot surface with a damp cloth. This may cause cracking or chipping.
, Never use oven cleaners, abrasive or caustic cleaning agents on exterior finish of range.
Never cover insert with aluminum foil as this prevents the fat from draining to the pan below.
, Place soapy cloth over insert and pan; let soak to loosen soil=
° Wash in warm soapy water. Use scouring pad to remove stubborn soil.
° Broiler pan and insert can be cleaned in dishwasher.
, To activate "Control Lock" for cleaning, see page 9.
, Wipe with a damp cloth and dry. Do not use abrasive cleaning agents as they may scratch the surface.
, Glass cleaners may be used if sprayed on a cloth first. 00 NOTspray directly on eontrolpad and
display area.
° Remove knobs in the OFFposition by pulling forward.
° Wash, rinse and dry=Do not use abrasive cleaning agents as they may scratch the finish.
° Turn on each element to be sure the knobs have been correctly replaced.
Never use even cleaners, chlorine bleach, ammonia or glass cleaners with ammonia. NOTE: Call
an authorized servicer if the glass=ceramic top should crack, break or if metal or aluminum foil
should melt on the cooktop.
° Allow the eooktop to cool before cleaning=
° General - Cleancooktop aftereach use,orwhen needed,with a damp paper towel and Cooktop Cleaning
Creme* (Part No=20000001_)**=Then, buff with a clean dry cloth.
NO TE:Permanent stainswill developff soilis ah'owedto cook on byrepeatedly usingthe eooktop _4#ensoiled.
° Heavy Soils or Metal Marks - Dampen a "scratchless" or "never scratch" scrubber sponge. Apply
Cooktop Cleaning Creme* (Part No=20000001_)**and scrub to remove as much soil as possible. Apply a
thin layer of the creme over the soil, cover with a damp paper towel and let stand 30 to 45 minutes (2-3
hours for very heavy soil)=Keep moist by covering the paper towel with plastic wrap. Scrub again, then
buff with a clean dry cloth.
NOTE: Only usea CLEAN,DAMP Uscratchless"pad that issafe for non-stick eookware. Thepattern and glass
will be damaged ff the pad is not damp, ff the pad is soiled, or ff another type of pad is used.
° Bamed-on or Crusty Soils - Scrub with a "scratchless" or "never scratch" scouring pad and Cooktop
Cleaning Creme*.
18

Oven Window
and Door - Glass
, Avoid using excessive amounts of water which may seep under or behind gHasscausing staining.
° Wash with soap and water. Rinsewith dear water and dry. GHasscHeanercan be used ifsprayed on a cHoth
first.
° Do not use abrasive materiaHssuch asscouring pads, steeHwooHor powdered cHeanersasthey wiHHscratch
gHass.
Oven interior , FoHHowinstructions on pages 16-17 to set a seHf-cHeancycHe.
Oven Racks
Stainmess Steel
(seHectmodeHs)
Brushed Chrome
(seHectmodeHs)
Door Handle,
Side Panems -
Painted Enamem
° CHeanwith soapy water.
° Remove stubborn soiHwith cHeansingpowder or soap-fiHHedscouring pad. Rinse and dry.
° RackswiHHpermanentHydiscoHorand maynotsHidesmoothHyifHeftintheoven during aseHf-cHeanoperation.
If this occurs, wipe the rack edge and rack support with a smaHHamount of vegetabHeoiHto restore ease
of movement, then wipe off excess oil
° DO NOT USE ANY CLEANING PRODUCT CONTAINING CHLORINE BLEACH.
° DO NOTUSEABRASIVE Oft ORANGE CLEANERS.
° ALWAYS WIPE WITH THE GRAIN WHEN CLEANING.
° Daily Cleaning/Light Soil -- Wipe with oneof the foHHowing- soapy water,white vinegar/water soHution,
FormuHa409 GHassand Surface CHeaner*or a simiHargHasscHeaner- using a sponge or soft cHoth.Rinse
and dry. To poHishand heHpprevent fingerprints, foHHowwith StainHessSteeHMagic Spray (Part No.
20000008)**.
° JVioderate/Heavy Soil -- Wipe with one of the foHHowing- Ben Ami, Smart CHeanser,or Soft Scrub* -
using a damp sponge or soft cHoth.Rinse and dry. Stubborn soiHsmay be removed with a damp muHti-
purpose Scotch-Brite* pad; rub evenHywith the grain. Rinseand dry'.Torestore Husterand removestreaks,
foHHowwith StainHessSteeHMagic Spray*.
° Discoloration -- Using a damp sponge or soft cHoth,wipe with Cameo StainHessSteeHCHeaner*=Rinse
immediateHyand dry=To remove streaks and restore Huster,foHHowwith StainHessSteeHMagic Spray*.
, When cool wash with soapy water, rinse and buff the surface.
, For heavier soil use a miHdabrasive cHeanersuch as baking soda or Ben Ami*, rubbing with the grain to
avoid streaking the surface. Rinse and buff.
, To prevent scratching, do not use abrasive cHeaners=
, To restore Husterand remove streaks, foHHowwith StainHessSteeHMagic Spray* (Part #20000008)_*=
Chrome will perma#endy discolor if soil is allowed to bake ono
, When cool wash with warm soapy water, rinse and dry'.Never wipe a warm or hot surface with a damp
cHothas this may damage the surface and may cause a steam burn.
, Forstubborn soil use mildly abrasive cHeaningagents such asbaking soda paste or Ben Ami.* Do not use
abrasive, caustic or harsh cHeaningagents such as steeHwooHpads or oven cHeaners.These products wiHH
scratch or permanentHydamage the surface.
NOTE: Use a dry towel or cloth to wipe up spills, especially acidic or sugary spills° Surface may
discolor or dull if soil is not immediately removed. This is especially important for white surfaceso
* Brand names for cHeaning products are registered trademarks of the respective manufacturers.
** To order direct, caHH1-877-232-6771 USA and 1-800-688-8408 Canada.
19

Oven Door
Do not place excessive weight on er stand on an open oven
Leveling Legs
door.This could cause the range to tip over, break the door,
injure the user,
Do [lot attempt to open or Close door or operate oven unti
/ door iSpropedy replaced,
g Nevei place fingers between hinge and front oven frame,
Hinge arms are Spring mounted. If accidentally hit, the hinge
win Slam Shut against oven frame and Could injure Your
fingers.
Note: The oven door on a new range may feel "spongy"
when it is closed. This is normal and win decrease with use.
To remove:
1. When cool, open the oven door to the first stop position
(opened about four inches}.
2. Grasp door at each side. Do not use the
door handle to lift door.
3. Lift up evenly until door clears hinge
arms.
To replace:
1. Grasp door at each side.
2. Align slots in the door with the hinge arms on the range.
3. Slide the door down onto the hinge arms until the door is
completely seated on the hinges. Push down on the top
corners of the door to completely seat door on hinges. Door
should not appear crooked.
Oven Window
To protect the oven door window:
1. Do not use abrasive cleaning agents such as steel wool
scouring pads or powdered cleansers as they may scratch
the glass.
2. Do not hit the glass with pots, pans, furniture, toys, or other
objects.
3. Do not close the oven door until the oven racks are in place.
Scratching, hitting, jarring or stressing the glass may weaken
its structure causing an increased risk of breakage at a later
date.
Be sure the anti-tip bracket secures one of the
rear leveling legs to the floor. This bracket pro- /_
vents the range from accidentally tipping
The range should be leveled when nstalled.
If the range is not level turn the plastic _ .A_
leveling legs. ocated at each corner of
the range, until range is level aNti-rip
BRACKET
LEVELING LEG
Oven Light
Be sure bulb is cool before touching bulb.
the bulb to break.
To Replace Oven Light Bulb:
1. When oven is cool, hold bulb cover in place, then slide wire
retainer off cover=NOTE:Bulb cover will fall if not held in place
while removing wire retainer.
BULB COVER
2. Removebulb eoverand light bulb=
3. Replacewith a 40-wattappli-
ance bulb.
4. Replace bulb cover and se-
cure with wire retainer.
5. Reconnect power to range. Reset clock.
RETAINER
Convenience Outlet
(Canadian models only)
The convenience outlet is located on the
lower left side of the backguard. Be sure
appliance cords do not rest on or near the
surface elemenL If the surface element is
turned on, the cord and outlet win be
damaged.
The convenience outlet circuit breaker
may trip if the small appliance plugged
into it exceeds 10 amps. To reset the
circuit breaker, press the switch located
on the lower edge of the backguard.
Y
CIRCUIT BREAKER
2O

Storage Drawer
matedds in tMs drawer. The drawer may become too warm
for these items when the oven is in use.
The storage drawer can be removed to allow you to dean
To remove:
1. Empty'drawer and pull out to the first stop position.
2. Lift up the front of the drawer.
3. Pull out to the second stop position.
4. Grasp sides and Hiltdrawer up and out.
To replace:
1. Fit the ends of the drawer gHidesinto the raiHsin the range.
2. Lift up the front of the drawer and gentHypush in to the
first stop position.
3. Lift drawer up again and push untiHdrawer is chose&
PP,OBLEM SOLUTmON
° Check if oven controls have been properly seL
try these first. " Check to be sure plug is securely inserted into receptacle.
, Check or re-set circuit breaker. Check or replace fuse.
, Check power supply.
Part or all of appliance
does not work.
but oven does not heat.
Baking results are not as
expected or differ from
previous oven.
Food is not broiling
properly or smokes
excessively.
Check
Check
Check
Check
Check
if surface and/or oven controls have been properly set. See pages 5-15.
if oven door is unlocked after self-clean cycle. See page 17.
if oven is set for a delayed cook or clean program. See pages 11 & 16.
if Control Lock is activated. See page 9.
if control is in Sabbath Mode. Seepage 13.
, Oven may be set for a Cook & Hold or Delay function.
, The Control Lock may have been set. See page 9.
, Make sure the oven vent has not been blocked. See page 15 for location.
, Check to make sure range is level.
, Temperatures often vary,between a new oven and an old one. As ovens age, the oven
temperature often "drifts" and may become hotter or cooler. See page 13for nstmctions on
adjusting the oven temperature. NOTE; Itis not recommended to adjust the temperature if
only one or two recipes are in question.
, See "Cooking Made Simple" booklet for more information on bakeware andbaking.
, Check oven rack positions. Food may be too close to element.
, Broil element was not preheated.
, Aluminum foil was incorrectly used. Never line the broiler insert with foil.
, Ovendoor was closed during broiling. Leave the door open to the first stop position (about
4 inches:).
° Trim excess fat from meat before broiling.
° A soiled broiler pan was used.
° Voltage in house may be low.
21
cont.

i
PROBLEM
Oven will not self-clean.
Oven did not
clean properly.
Oven door will not unlock
after self=clean cycle.
Smoothtop surface
shows wear.
Moisture collects on oven
window or steam comes
from oven vent.
There is a strong odor
or light smoke when
oven is turned on.
Fault Codes
Noises may be heard.
There are no beeps and
"SAb" flashing and then
displayed continuously.
, Check to make sure the cycle is not set for a ddayed start. See page 16.
° Check if door is chased.
, Check if control is in Sabbath Mode. See page 13.
, Oven may be over 400° R Oven temperature must be below 400° Fto program a clean cycle.
, Longer cleaning time may be needed.
, Excessivespillovers, especially sugary and/or acidic foods, were not removed prior to the
self-clean cycle.
, Oven interior is still hot. Allow about one hour for the oven to cool after the
completion of a self-clean cycle.The door can be opened when the LOCK indicator word is
not displayed.
, The control and door may be locked. See pages 9 and 17 to unlock.
1.Tiny scratches or abrasions.
, Make sure cooktop and pan bottom are clean. Do not slide glass or metal pans across top.
Make sure pan bottom is not rough. Use the recommended cleaning agents. See page 18.
2.Metal marks.
, Do not slide metal pans across top. When cool. clean with Cooktop Cleaning Creme.
See page 18.
3. Brown streaks and specks.
, Removespills promptly. Neverwipe with a soiled cloth or sponge. Make sure cooktop and pan
bottom are clean.
4.Areas with a metallic sheen.
, Mineral deposits from water and food. Use recommended cleaning agents. See page 18.
5. Pitting or flaking.
, Removesugary,boilovers promptly. See page 18.
, This is normal when cooking foods high in moisture.
, Excessivemoisture was used when cleaning the window.
, This is normal for a new range and will disappear after a few uses. Initiating a dean cycle
will "burn off" the odors more quickly.
, Turning on a ventilation fan will help remove the smoke and/or odor.
, Excessivefood soils on the oven bottom. Use a self-clean cycle.
° BAKE or LOCK may flash rapid[y in the disp[ay to a[ert you if there is an error or a prob[em.
If BAKE or LOCK appear in the display, press CANCEL pad. If BAKEor LOCK continue to
flash, disconnect power to the appliance. Wait a few minutes, and then reconnect power.
Ifthe flashing still continues, disconnect power to theappliance and callan authorized servicer.
° Ifthe oven is heavily soiled, excessivefiareups may result in a fault code during cleaning. Press
the CANCEL pad and allow the oven to cool completely, wipe out excess soil, then reset the
clean cycle. If the fault code reappears, contact an authorized servicer.
° The oven makes several low level noises.You may hear the oven relays as they go on and off.
This is normal.
° As the oven heats and cools, you may hear sounds of metal parts expanding and contracting.
This is normal and will not damage your appliance.
Oven may be in Sabbath Mode. See page 13.
Oven is in Sabbath Mode. To cancel, press and hold the Clock pad for five
seconds.
22

Fuji One Year Warranty -
Parts and Labor
Forone (1} year from the orig_nai retail
purchase date. any part which fails in
normal home use will be repaired or
replaced free of charge
Limited Warranties - Par_s Only
Second Through Fifth Year = From the
original purchase date. parts listed below
which fail in normal home use wiii be
repaired or replaced free of charge for
the part itself, with the owner paying aii
other costs, including labor, mileage,
transportation, tr p charge and diagnostic
, Glass-Ceramic Ceektep: Due to
thermal breakage, discoloration.
cracking of rubber edge seal, pattern
wear.
Electric Heating Dements: Radiant
surface elements on electric cooking
appliances
Canadian Residents
The above warranties oni} cover an
appliance installed in Canada that has
been certified or listed by appropriate
test agencies for compliance to a
National Standard of Canada unless the
appliance was brought into Canada due
to transfer of residence from the United
States to Canada.
Limited Warranty Outside the
United States and Canada =
Parts Only
For one (1) year from the date of original
retail purchase, any part which fails in
normal home use will be repaired or
replaced free of charge for the part itself.
with the owner paying all other costs.
including labor, mileage, transportation.
trip charge and diagnostic charge, if
required
The specLr/c warranties expressed above
am the ONLY walrTantles provided by rise
manufacture_, These wafTantles give you
spedfic legal ffghts, and you may also
have other r_hts which vary trom state to
state.
What is Not Covered By These
1. Conditions and damages resulting from any of the following:
a. Improper installation, delivery, or maintenance.
b. Any repair, modification, alteration, or adjustment not authorized by
the manufacturer or an authorized servicer.
c. Misuse, abuse, accidents, or unreasonable use.
d. Incorrect electric current, voltage, or supply.
e. Improper setting of any control
2. Warranties are void if the original serial numbers have been removed, altered,
or cannot be readily determined.
3. Light bulbs.
4. Products purchased for commercial or industrial use.
5. The cost of service or service caii to:
a. Correct installation errors.
b. Instruct the user on the proper use of the product.
c. Transport the appliance to the servicer.
8. Damage to the glass cooktop caused by the use of cleaners other than the
recommended cleaning creams and pads.
7. Damage to the glass cooktop caused by hardened spills of sugary materials or
melted plastic that are not cleaned according to the directions in the use and
care guide.
8. Consequential or incidental damages sustained by any person as a result of
any breach of these warranties. Some states do not allow the exclusion or
limitation of consequential or incidental damages, so the above exclusion may
not apply.
If You Need Service
Call the dealer from whom your appliance was purchased or call Maytag
Services sM,Maytag Customer Assistance at 1-800-888-9900 U.S.A. or
1-800-688-2002 Canada to locate an authorized servicer.
Be sure to retain proof of purchase to verify warranty status. Refer to
WARRANTY for further information on owner's responsibilities for warranty
service.
If the dealer or service company cannot resolve the problem, write to May'tag
Services sM,Attn: CAIR e:Center, P.O. Box 2370, Cleveland, TN 37320-2370, or
call 1-800-688-9900 UoSoA. or 1-800-688=2002 Canada.
U.S.customers using TTY for deaf, hearing impaired or speech impaired, caii
1-800-688-2080.
User's guides, service manuals and parts information are available from
Maytag Service@M,Maytag Customer Assistance.
When writing or calling about a service problem, please include:
a. Your name, address and telephone number;
b. Model number and serial number;
c. Name and address of your dealer or servicer;
d. A clear description of the problem you are having;
e. Proof of purchase (sales receipt}.
23

Cuisini_re _lectrique -
dessus lisse
m m m
//is|//|ere
Instructions de s6curit6
importantes ................................ 25-28
Cuisson sur masurface ............. 29-31
Commandes de Hasurtace de cuissol7
Surface _ dessus lisse
Cuissen darts mefour ................ 32=40
Cuisson couran[e
Cuisson et maintien
Cuisson courante diffdr6e
Maintien au chaud
Cuisson au gril
Grilles du four
Netteyage ................................... 41-44
Four autonettoyant
M6thodes de nettoyage
Entretien ...................................... 45-46
Hublot du four
Lampe du four
Recherche des pannes ............ 47-48
Garantie et service apres=vente ... 49
Guia de Use y Cuidado .................... 50

InstaHateur : Remettezceguide au proprietaire.
Consemmatear : Veufllezlife le guide etJeconserverpour
consu_a_ionulterieure.Conservezlafacture d'achatou Jech@ue
encamsecommepreuvede !'achat.
Numerode modSJe
Numdrode serie
Date d'achat
Si vous avez des questions, veuflJeznous appeler :
Service _ la cfient_le de Maytag
]-800-688-9900 E.-U.
1-800-688-2002 Canada
(lundi au vendredL 8 h _ 20 h, heure de FEst}
Intemet: http:iiwww.maytag.com
Darts b cadre de nos prat_ques d'amelioration constante ee la
qualite et de ia performance de nus produits de cubson, des
modifications de I'apparei! qul ne sont pas mentlonnees dans ce
guide on_pu 6tre introduites.
Repertez_veus a fa page 49 pear plus d'i_lformatiotts
cel_cemal_t le service apres-venteo
que pourrait susciter une utiiisation incorrecte de ['appareiL
Utiliser I'appareil uniquement pour los fonctions pr@ues,
decrites darts ce guide,
Pour une utilisation adequate et en s_curit_, fl faut que
Fapparefl soit convenabbment install6 par un technicien
qudifie, et relic a la terre, Ne pas regbr, r@arer ni remplacer
un composant, a moins que cola ne soit sp@ifiquement
recommande darts ce guide, Toute autre reparation doit 6tre
effectuee par un technicien qualifie,
Toujours d@rancher Fapparefl avant d'y faire de Fentretien,
Les instructions de securite importantes et bs paragraphes
<<avertissement >_de ce guide ne sont pas destines a couvrir
toutes bs conditions et situations qui pourraient se presenter.
II faut faire preuve de bon sons,de prudence et de soin Iors de
Finstallation, de Fentretien ou du fonctionnement de [apparefl.
Toujours prendre contact avec b fabricant dans b cas de
problemes ou de conditions qui ne seraient pas comprises.
Reconna tre Ues tiq ettes, paragraphes et
symbo es s c rit
POURRA!ENT r_su!ter en de graves biessures oU m_mela
mort.,
POURRAIENTrdsukeren des blessuresmineures,
Lire routes los instructions avant d'utiliser cot appareil;
observer toutes bs instructions pour eliminer bs risques
d'incendie, choc ebctrique, dommages materiels et corporeb
risque de baseulement de i'appareil _ I'eccasie_
_'une uti!isatie_ a_er_aie eu d'un eharge_e_t
excessif _e Ia porte du four, ii fa_t que Jabride
antibaseule_e_t seit eonvenable_e_t install_e.
Utiliser une lampe torche pour determiner si la bride
antibasculement est convenablement installee sous la
cuisiniere : L'un des pieds arriere de reglage de I'aplomb doit
etre convenablement engage dans la fente de la bride,
Lorsque la cuisiniere est convenablement calee, la bride
antibasculement immobilise le pied arriere contre le sol,
Verifier la parfaite immobilisation de la cuisiniere par la bride
apres cbaque deplacement de la cuisiniere,
Po t viter i ce die des
dommages par la
S'assurer que tousies materiaux de conditionnement sont
retires de i'appareii avant de ie mettre en marche,
Garder ies materiaux combustibles bien eioignes de i'appareii,
Ne pas ranger de materiaux inflammables dans un four,
De nombreux types de plastique sont affectes par la chaleur,
Garder ies piastiques eioignes des pieces de i'appareii pouvant
devenir chaudes,
Pour emp@her qu'un feu de graisse nese declare, eviter toute
accumulation de graisse ou autres matieres inflammables
dans I'appareil ou au voisinage,
25

En cas d'incendie
Utiliser du bicarbonate de soude ou un extincteur b poudre
chimique ou a mousse pour dtouffer bs fiammes, Ne jamab
utiliser d'eau pour dteindre de la grabse enfiammde,
1, [nterrompre I'alimentation dbctrique de I'appareiI pour
minimiser la propagation des fiammes,
2, NE JAMAmS saisir ou d@lacer un ustensib de cuisine
enfiamme,
3, Fermer [a porte du four pour 6touffer [es fiammes du four,
Securit pour [es enfants
dans une armoire au-dessus, des articles auxqueis [es
Ne pas utiliser cet appareil pour chauffer ou pour garder
chaude une piece, sinon des dommages a i'appareii pourraient
s'ensuivre et ceia pourrait etre dangereux pour I'utiiisateur,
Aussi, ne pas utiiiser ie four pour ranger des ailments ou des
ustensiies de cuisine,
Ne pas bloquer ou obstruer I'event du four,
NE JAMAIS TOUCHERLES ELEMENTSCHAUFFANTSNI LES
PAROIS INTERIEURESDU FOUR, Leselements chauffants
peuvent etre brtiiants meme s'iis ne sont plus rouges, Les
surfaces interieures du four peuvent atteindre une
temperature suffisamment eievee pour infiiger des br0iures,
Pendant et apres usage, ne pas toucher les elements
chauffants ni ies parois interieures du four et eviter bur
contact avec des vetements ou autres materiaux inflammables
avant qu'iis n'aient eu le temps de refroidir suffisamment,
D'autres surfaces peuvent egaiement atteindre une
temperature suffisamment eievee pour br0ier :ie ouverture
d'event, le surface avoisinante, ainsi que le porte et le hubiot
de four,
subir de graves biessures, Ne pas toucher I'ampoule du four brQlante avec un chiffon
humide car elle pourrait se briser, Si tel est le cas,debrancher
NE JAMAiS iaisser des enfants seuis ou sans supervision
iorsque i'appareii est en service ou encore chaud, Nejamais
laisser un enfant s'asseoir ou se tenir sur une partie
quelconque de I'appareil, [I pourrait se blesser ou se brQler,
II est important d'enseigner aux enfants que I'appareil et les
ustensiles places dedans peuvent etre chauds, Laisser refroidir
les ustensiles en un lieu sQr,hors d'atteinte des enfants, [Iest
important d'enseigner aux enfants qu'un appareil menager
n'est pas un jouet, et qu'ils ne doivent toucher aucune
commande ou autre composant de I'appareil,
I'appareil avant de retirer I'ampoule pour eviter une decharge
electrique,
NE JAMAmS garnir ia sob du four ou une grille du four avec
de la feuille d'aluminium, Ceci pourrait susciter un risque de
decharge electrique ou d'incendie, ou une deterioration de
I'appareil, Utiliser de la feuille d'aluminium uniquement selon
les instructions de ce guide,
Cuisson et s curit
Fami[iarisation avec ['apparei[
NE JAMA[S utiiiser un appareii comme escaueau pour
atteindre les armoires setrouvant au-dessus, Le mauvais
emp[oi de porte d'apparel comme par exempb en tant
qu'escabeau, le fait de sappuyer ou de s'asseoir sur B
porte, peuvent entrai'ner le renversement de I'appareii.
casser la porte et gravement biesser,
NE JAMA[S faire chauffer un recipient non ouvert dans le
four, L'accumulation de pression dans le recipient pourrait
provoquer son eclatement et de graves dommages materiels
ou corporeis,
Utiliser des maniques robustes et seches, Des maniques
humides peuvent provoquer la formation de vapeur brSlante,
Ne jamais utiliser un torchon a vaisselle ou autre article textile
la place de maniques; un tel article pourrait trainer sur un
element et s'enflammer, ou accrocher un ustensile ou un
composant de I'appareil,
Porter un vetement approprie, Eviter de porter des vetements
amples ou a Iongues manches pendant I'utilisation de
I'appareil, [is peuvent prendre feu si le vetement entre en
contact avec un element de cuisson brSlant,
26

Placer toujours [es grilles a [a position appropriee darts [efour
[orsque [e four est froid. Fairecouiisser [agrille vers ['exterieur
avant d'ajouter ou eniever un plat; utiiiser pour ceia une
manique robuste et seche. Eviter d'introduire [a main darts [e
four pour y placer ou retirer un plat. S'i[est necessaire de
d@iacer une grille [orsqu'eiie est chaude, utiiiser une manique
seche. Ne pas toucher un element chaud avec une manique.
N'utiiiser [esgrilles que darts [e four darts [eque[ eiies ont 6te
achetees/expediees.
Ouvrir toujours [a porte du four tres prudemment. Laisser ['air
chaud ou [avapeur s'echapper avant de retirer ou d'introduire
un plat.
AVERTiSSEMENT - METS PR[:PAR[:S : Respecter [es
instructions du fabricant. Si [e contenant ou [ecouverde en
piastique d'un mets surgeie se ddorme ou est endommage
durant la cuisson, jeter immediatement le recipient et son
contenu. Lesaliments pourraient etre contamines.
Ne pas permettre le contact de papier d'aluminium ou de la
sonde a viande avec les elements chauffants.
Toujours eteindre toutes les commandes une fob lacuisson
terminee.
Ustensiles et securit
Appiiquer [es instructions du fabricant [ors de ['emp[oi d'un
sachet pour cuisson au four.
La securite de fonctionnement de cet appareil a 6te testee
I'aide d'ustensiles decuisine traditionnels. Ne pas utiliser un
ustensile ou accessoire qui n'est pas specifiquement
recommande darts ce guide. Ne pas utiliser un gril place sur la
table ou de systeme de convection additionnel. L'utilisation
d'un dispositif ou accessoire qui n'est pas expressement
recommande darts ce guide peut degrader la securite de
I'appareil ou sa performance, ou reduire la Iongevite des
composants.
Veiller a utiliser un ustensib de taille suffisante pour que le
contenu ne risque pas de deborder. Ceci est particulierement
important pour un ustensile rempli d'huile de friture. Verifier
que la taille de I'ustensile est suffisante pour qu'il puisse
recevoir les produits alimentaires a cuire, et absorber
I'augmentation de volume suscitee par %bullition de la
graisse.
Veiller a ne jamais laisser le contenu liquide d'un ustensile
s'evaporer completement; I'ustensile et I'appareil pourraient
subir des dommages.
Si un ustensib est plus petit que I'element utilis& une partie
de I'element chauffant est exposee et peut provoquer
I'infiammation d'un vetement ou des maniques.
Seuls certains materiaux en verre, vitroceramique, ceramique,
gres, ou certains ustensiles vitrifies/emailles peuvent etre
utilises sur la table de cuisson ou dans le four sans risque de
bris sous I'effet du choc thermique. Observer les instructions
du fabricant Iors de I'utilisation d'un ustensile en verre.
Orienter la poignee de chaque ustensile vers le centre de la
table de cuisson et non vers I'exterieur ou vers un autre
element; ceci reduira ie risque de brqure, inflammation de
matiere inflammable ou renversement (un jeune enfant
pourrait saisir et renverser un ustensiie dont le manche est
oriente vers i'exterieur},
Table de cuisson
NE JAMAIS laisser un element de surface allume sans
surveillance, particuiierement avec chauffage elev¢ Le
@bordement du contenu de i'ustensiie pourrait provoquer ia
generation de fumee abondante et I'infiammation de la
graisse.
Cet appareii comporte des elements chauffants de differentes
tallies. Utiiiser toujours un ustensiie a fond plat, de taiiie
suffisante pour qu'ii puisse recouvrir compietement i'eiement.
Pour optimiser i'efficacit& choisir un ustensiie de meme taiiie
que [element.
SURFACE ENVITROCERAMIO, UE : NEJAMAIS utiiiser une
table de cuisson cassee ou feiee: lessolutions de nettoyage et
renversements pourraient penetrer clansla table de cuisson en
entrdnant un risque dedecharge electrique. Prendre
immediatement contact avec un technicien qualifi&
Exercer une prudence extreme Iors du deplacement du
recipient de graisse ou Iors de I'elimination de graisse chaude,
Laisser la graisse refroidir avant de deplacer I'ustensile,
Hottes d'e×traction
Nettoyer frequemment iesfiitres et ia hotte de ia cuisiniere
pour empecher ia graisse ou d'autres produits inflammables
de s'accumuier sur ies fiitres ou ia hotte en provoquant des
feux de graisse.
Pour fiamber des aliments sous la hotte, mettre le ventiiateur
en marche.
27

Nettoyage et s curit
Nettoyer prudemment la table de cuisson, Arreter toutes les
commandes et attendre le refroidissement de tous les
composants avant de les toucher ou d'entreprendre le
nettoyage, Nettoyer Fapparefl avec precaution, Travafller
prudemment pour eviter des bn:flures par la vapeur en cas
d'utflisation d'un chiffon ou d'une eponge humide lots de
I'elimination d'un produit renverse sur une surface chaude,
Certains produits de nettoyage peuvent generer des vapeurs
nocives Iorsqu'on les applique sur une surface chaude,
Nettoyer uniquement les pieces mentionnees darts ce guide,
Four autor|ettoyar|t
!echdfite dans !efour !ors de! autonettoyage_
Ne pas nettoyer le joint de porte; le joint joue un rOleessentiel
quanta I'etancheite, Ne pas frotter, endommager ou deplacer
lejoint,
Ne pas utiiiser de produits de nettoyage pour four ou enduits
de four, darts ie four autonettoyant ou sur ies zones voisines,
,Avantd'executer une operation d'autonettoyage, retirer la
lechefrite, les grilles du four et les autres ustensiles, et eliminer
par essuyage tout exces de residus renverses pour eviter ia
formation de fumee ou i'inflammation de ces residus,
II est normal que la surface de cuisson devienne chaude
durant une operation d'autonettoyage; par consequent, eviter
de toucher ia surface de cuisson durant i'autonettoyage,
Avertissemer|t et avis
important pour la seeurit6
La Ioi califomienne _ Safe Drinking Water and Toxic Enforce-
ment Act _>de 1986 {proposition 65_}stipule la publication par
ie gouverneur de ia Caiifornie d'une iiste de substances que
i'etat de Caiifomie considere comme cancerigenes ou
dangereuses pour ie systeme reproducteur, et impose aux
entreprises commerciaies i'obiigation de signaler a ieurs
clients ies risques d'exposition a de teiies substances,
Nous informons ies utiiisateurs de cet appareii que iors d'une
operation d'autonettoyage, iis peuvent etre exposes a une
faible concentration de certaines substances figurant darts la
liste mentionnee ci-dessus, dont le monoxyde de carbone,
Pour minimiser i'exposition, veiiier ace que ia piece oQse
trouve le four soit convenablement aeree durant une operation
d'autonettoyage par I'ouverture d'une fenetre ou d'une porte,
AVIS iMPORTANT - OISEAU× FAMILIERS : Lesoiseaux ont
un systeme respiratoire tres sensible, Ne pas garder un oiseau
famflier dans la cuisine ou dans une piece oQfl pourrait etre
expose aux fumees, Lesfumees emises durant une operation
d'autonettoyage peuvent etre dangereuses ou mortelles pour
un oiseau, de meme que les fumees emises lots du chauffage
excessif de graisse, hufle, margarine, et du chauffage excessif
dans un ustensfle a revetement antiadhesif,
Conserver ces instructions pout consultation ult tieute
28

Boutons de commande
Permettenti'utflisationdes616mentschauffantsdesurface,avecune
progress+oncontinue de la puissanceentreiesrOglagesextrOmes
Low (Bas)etHigh ([_ievO).Onpeut rOglerun bouton_ toute
positionentrecesdeuxextrOmes.
ROgia9 e des commandes
1. PlacerI'ustensiiesur 1'OiOment.
2. Enfonceret fairetournerle boutonjusqu'_ la position dOsirOe
0+otationdartsun sensou dartsJ'autre].
o Des marquessur Ietableaude commandeidentifient1'61ement
comman@parchaquebouton.Parexemple,le O O
graphique_ droiteindique I'elOmentavant/gauche. O O
3. IIya un temoin h+mineuxpour IeselOmentssur Ietableaude
commande.LorsqueI'undesboutonsde commanded'un
elOmentdesurfaceestaliment& Ietemoin s'iilumine.Letemoin
s'eteintdesqu'on interromptl'alimentationde 1'Olement.
4. Apr@sunecuisson+ramenerle bouton_ Japosition OFF(ArrO0.
Ret[rerI'ustensile.
[_lOment doubNe (certains modeles) _::_
Lasurfacedecuissonest 6quip@ deune 6!Oment
double,sit@ _ I'avantdroitsur ie dessuslisse.Ce
elementont une dimensionvariable.
1. PousserIeselecteur_ gauchepourutiliser Ie
grand elementou _ droite pourutiliser le petit
elOment.
2. Enfonceret fairetournerle boutonjusqu'_ Ia
position@sir@ (rotationdansun sensou dansI'autre).
©
OFF
Suggest+ons pour le rOglage
Ondolt choisirIapuissancede chauffageenfonctionde divers
facteurs:taille,typede I'ustensileet opOrationdecuisson.Pour
I'informationconcemantIesustensilesetautresfacteursaffectantla
pu+ssancede chauffage_ utiliser,se reporterau paragraphe
Recommandationssur lesustensiles_ la page31 et_ la brochureLa
cuissonsimplifi@.
Low (Bas)(2) : Pourfusion
de choco[atou beurre,ou [e
maintiende [atempOrature
d'un mets.
Meal. Low [Moyen
bas)(3-6) : Pour
continuerla cuisson
de metsen casse-
roles ferm@spar
couvercleou pour
cuire_ la vapeur.
[
4
Medium (Moyen)(5-7) :
Pourle maintiende
I'ebullition[ented'une
grandequantite de [iquide
ou pour[apiupartdes
opOrationsdefriture.
High (ElevO](10) : Pour
1'Obullitiond'un liquide.Ondolt
toujoursrOduirela puissancede
chauffagedesque IatempOrature
d'ebulJitionestatteinteou que
I'alimentcommence_ cuire.
OFF J
High
Lestylepeut
+o varierseJonJe
mo@le.
Medium ........
Meal. High (Moyen6tevO)
[8-9) : Pourrissolerles
viandes,chaufferI'huile
(grandefriture ou aliments
sautOs)et pour Iemaintien
de I'ebullitionrapided'une
grandequantite de Iiquide.
AVANTLACUISSON APRESi.A CUISSON
• Place-toujoursl'ustensHesur1'616men[avamd'a+reenter1'OlOment,Pour , S'assurerque1'OIOmentestarrOt&
6v_[erquelaculs+n+Srenesuoissedesoommages,nejama+sfaire
Ponct+onnerun6temen[desurfacesans+pincerunustens+te
°NE JANiAI$util+serlatabledecuissoncommeI+euderem+sage
d'alimen[soud'ustensiles,
DURANT IACUISSON
+Ve+her_ bienconnaRremcorresoonoanceentreleaboutons_e
commanae_tles(_lOments.Ve+Her_ commander!'al+nentat+onee
['#l_men!vou+u,
+CommencerlacJ+ssonavecunepuissancede chauffages_)@eure,puis
redu+r_+apuissancedechauffagepourpoursu_vrem;uisson.Nejamais
umlserunepuissancedechauffage81ev@pourunecu+ssonpro_ongee.
+NE,_A_AI$ laisser_econ-[enudun ustensHes'Ovaporercompl_tement;
cec+uourra+t[airesubiruesdommages_ I'ustensileet_+'@pare..
+NE_ANIAIStoucherlatabledecu+ssonavan[qu'eiteseso+t
o Elimme+@squepossible[ous iesres+dusde renversemen[e[project+ons.
AUTRESCONSEmLS
, S'Jlya unearmoireaerangemen_olrec_emerr[au-aessusdelatablede
cu+ss_n,onneoo+typtacerquedesart+ctespeufr_quemmentuht+seset
qu_peuvent@ee×pos_s_lachaleur.Lachaleurem_seBarlacuisiniere
3ourral_susc_erunprobl_mepourdesart+desccromeI+qu[desvo[ati[s.
arodu+tsdenetto!ageetflaconsd'aOroso!
• NEJAIMAISla+sseraucunart+ciesurlatabledecuisson,paR_cueremem
lesart+desenp+as_loue.L'a+rchauuquis'@happeparreventcu four
pourrm_provoquerI'+nflammationd'ur aRicieinflammab+e,fairefondre_
amoli+runart+deenpmsuque,ouprovoqueruneaugmentationue
press+onprovoquant['@latementd'unr@_p+entferme.
°NE JA_AB laisserdelafeu+led'a+umlmum,unesondethermometnque
v+anueou unouje_metalliqueautrequ'unustens+ledeeulssonsuriatable
comulOtementrefro_(]ie.Certa+neszonesde +afableae culsson, ue culsson en[rer enconmc_avec un el@_entchauffant,
parucu_ierememau vo+s+nagedes 6lOmentsoe surface,oeuventdevenir + NE_AP_AISranger au+oessusde +amD_ede culssonu'artic+es!ourds qu+
_reschaudes durant une cu+sson.Utiliserdes man+gues, nsqueraientdetomber etd'endommager la table de cu_sson
29

Surface dessus lisse
Remarques sur la surface dessus
lisse :
oLorsdespremieres_Jtilisationsde IatabIede cuisson,celle-ei
peat 8mettre an pea de fumSe et des odears=Ceciest
normal=
oLessurfaces _ dessus lisseeonsewent la ehaieur pendant
an certain temps apr_s m'e×tinctionde m'_m_ment,Eteindre
les616meritsquelquesminutesavantq(le la nourriturenesoit
tout b fait cuiteet utiliser Iachaleur restantepour terminerla
cuisson=Lorsquelevoyantde surfacechaudes'6teint,on peut
toucher Iasurfacedecuissonsansdanger.En raisonde lafagon
dont lesel6mentsd'unesurfaceb dessusIisseretiennentla
chaleur,ceux-cine r6pondrontpasauxchangementsde r6glage
aussirapidementque des616mentsen spirale=
oAu cas o8 Iecontenud'un ustensilerisquede deborder,retirer
I'ustensiIedelasurfacede cuisson=
oNe jamais essayer de soulever la sudace de caisson.
oLa surface_ dessuslissepeutsembIerd6color6eIorsqu'elleeat
trSschaude=Ceciest normalet disparaitunefais que la surface
refroidit=
Zones de caisson
Leszonesdecuissonde lacuisini6resont repr6sent6espardes
cercIespermanentssur lasurface_ dessuslisse=Pouruneefficacit6
maximum,utiliser unezonede cuissondont le diam_treconvient
I'ustensile=
Le r6cipiellt ne doit pas d6passer & zone de cuisson de plus de
25 mm (1 po)°
Lorsqu'unecommandeest raiseen marche,on peatvoir un
rougeoiement_ traversIasurfaceb dessuslisse.['@l_ment
fonetionnera en intermittencepour maintenir mer6gmage
pr_tabli de chaleur, m_me au niveaa Hi (Elev6)o
Pourobtenirplusinformationssur lesLJstensilesdecuisine,se
reporter_ lapage31 au paragrapheRecommandationssur les
ustensiIesdecuisineet 8 la brochureLacuissonsimplifi6e,incluse
avecla cuisiniSre= ELE:MENT
SIMPLE
Conseils de protection de la
surface dess s lisse
N@tto_a_e _ius d'informations a ia page 43}
oAvant des'en servirla premierelois, nettoyerla tablede cuisson.
o Nettoyerlatablede cuissonchaqueiour ou apr6schaque
utilisation.Cesmesurespreserverantl'apparencedela tablede
cuissonet6viterontqu'elIenes'abime.
o Encasde renversementlots decuisson,nettoyerimm_diatement
le produitrenvers6surla surfacede cuissonpendantqu'e!leest
encorechaudeafin d'6viterun ptusgrand nettoyagepar la suite.
Userde prudence,essuyerlesrenversementsavecun linge prapre
et sac.
o NepasIaisserIespmduits renvers6ssurIasurfacede cuissonou
sur la garniturede latablede cuissonpendantune Ionguedur6e.
o Nejamais utiliserde poudrede nettoyageabrasiveou de tampons
r6curerqui raieraientlasurface.
o Nejamais utiliserdejave!lisant,ammoniaqueou autrespraduits
de nettoyagenon sp6cifiquementrecommand6spour la
vitroc_ramique.
Po r viter les marq es et les ray res
o Nepasutiliserde casserolesenverre=Eilespourraientrayerla
surface.
o Nejamais utiliserde supportm_talliqueou anneaude wok entre
un r_cipientet Iasurfacedecuisson.Cesobjetspeuventmarquer
ou rayerIasurface.
o Nepasfaireglisserde recipientsm_talliquessur Iasurfacede
cuissonbr_lante.IIspourraientIaisserdesmarquesq_lidevront
etre nettoy_esimmediatement.[VoirNettoyage,page 43.)
oVeillerb ce qua Iefond desr_cipientset Iazonedecuissonsoient
propresavantd'allumerI'8I_ment,afind'_viterlesrayures.
o PourempScherqua lasurfacedecuissonen vitroc_ramiquenese
trouve ray_eou abtmee,nepasyhisser desucre,deselou de
graisse.PrendreI'habituded'essuyerlasurfacede cuissonavecun
lingepropre ou un essuie-toutavantde I'utiliser.
o Nejamais faire glisserde r_cipientsmStalliquesepaissur la
surfaceau risquede la rayer.
ELEMENT DOUBLE
(OERTAINS MODE'LE,_)
Voyant de s rface cha de
Levoyantde surfacechaudeeatsitue surle tableau
de commande=II s'allumeraIorsqu'unesurfacede He_,Sue'face
cuisson,quetIequ'ellesoit,serachaude=II restera
alium_,memeaprSsextinctionde la commande,jusqu'bceque la
zoneait refroidL
3O

Pour 6viter les taches
. Nejamais utiliser de linge oud'6pongesalepour nettoyerla
surfacedecuisson=IIsIaisseraientun film, cequi pourraitd6colorer
lasurfacede cuissonIorsqu'eIleestutilis6e=
o L'utilisationcontinued'unesurfacede cuissonsaliepeut entrainer
I'apparitiondetachespermanentes=
Pour 6viter d'autres dommages
o NepasIaisserfondrede plastique,de sucre ni d'alimentsrichesen
sucresur Iatabie de cuisson=Si cetaseproduisaitacciden-
tellement,nettoyerimm6diatemenL_ioir Nettoyage,page43.)
o Nejamais Iaisserle contenud'une casserolebouillirjusqu'_ce
qu'ellesoitvidecar celapourraitabimerla surfacede cuissonet la
casserole=
o Nejamais utiliser[atamede cuissoncommesurfacede travailou
commep[anchea d6couper.
o Nejamais cuired'alimentsdirectementsur latablede cuisson,
sans recipient.
o Nejamais utiiiserun petit r6cipientsurun grand 616merit.Non
seulementil y a g_ichisd'6nergiemaisiIpeuten r6sulterdes
projectionsqui vont bKJlersur lasurfacedecuissonetdewont 6tre
nettoyees.
+Nepasutiliserdesr_cipientssp6ciauxnon platsqui seraienttrop
grandsou a fond inegaIcommeleswoks_ fond rond,lesplaques
chauffantesou r6cipientsde grandetaille _fond ondul6.
o Nepasutiliserde r6cipientsen aluminium.L'aluminiumrisquede
fondresur le verre.Si Iem6talfondsur latable decuisson,ne pas
I'utiliser.Appelerun r6parateuragr66Maytag.
Recommandations sut los
L'utilisationdu bon ustensilepeut emp6cherde nombreux
probl6mescommeIan6cessit6decuire plusIonguementla
nourritureetIadifficulte _obtenir desr6sultatsuniformes.Debons
ustensilesr6duisentlesdur6esde cuisson,utilisentmoinsd'6nergie
etcuisentde fagonplusuniforme.
Tests pour v6rifier si los
ustensiles ont un fond plat
V6rifierque lesustensilessont plats+
Test de la regle :
1+Placerune r6gieen traversdu fond de I'ustensile+
2+ La tenirface a la lumi6re+
3+ Aucunelumiereou tr6s peu nedoit 6trevisiblesousla regle+
Test de la hullo :
1. Mettre 2,5cm [1po) d'eaudartsI'ustensile.PlacerI'ustensiIesur la
surfacedecuissonettournerIacommandesur High ([_lev6}.
2. Observerla formationde bu+lesIorsqueI'eauchauffe.Des bu+les
uniformessignifientde bonnesperformancesetdeshullosin6gaies
indiquentla pr6sencede zonesplus chaudesdonnantunecuisson
in6gale.
Voir la brochureLacuissonsimpli%e pour obtenirplusd'informat[ons.
Choisir I Eviter
Desustensiles_fond DesustensiIesa fondrainur6ou gondol6.
lisse,plat DesustensiIes8 fondin6gal necuisentpas
efficacementet peuventparfoisne pas
fairebouillir Iesliquides.
Desustensilesen DesustensiIesenverreou en m6taIpeu
materiaux6pals 6pals.
Desustensilesde la Desustens+lespIuspetitsou plusgrands
m6medimensionde (de2,5cm [1po]} que 1'616ment.
1'616ment
Despoigneesqui Desustensilesavecdespoigneescass6es
tiennentbien ou qui ne tiennent pas+Despoign6es
Iourdesqui font serenverserI'ustensiIe+
Descouverclesqui Descouverctesqu[ fermentreal
fermentbien
Deswoks_ fondplat Deswoksavecun fondsuranneau+
Ustensiles de gtande taille et
pout los conserves
Toutesruesmarmites pour ruesconserves et les graades
casseroles doiveat avoir ua load plat et doiveat 6tre
fabriqu6es e_ mat_riau 6pals. Ceciest tr_s importantpourIes
surfaces_ dessuslisse.Labasene doit pasdepasserde I'6lementde
plusde 2+5cm (1po}+
Si losmarm[tesa conserveset lescasserolesnesont pasconformes
cesnormes,Iesdur6esde cuissonseront plusIongueset Ies
surfacesde cuissonpourrontetreendommagees.
Certainesmarmitespour lesconservessont con_uesavecdesbases
pluspetitespour 6treutilis6essur dessurfacesadessuslisse.
Pourmapr6paratio_ de co_serves, _e choisir que mer6gmage
High (Elev6} jusqu'_ ee que l'eau comme_ce _ houillirou que
la pressionsuffisantesoit atteinteclansla marmite+RSduireau
r%lage le plusfaible,maintenantt'SbulIitionou Iapression+Sila
chaleurn'estpasdiminuee,lasurfacede cuissonpourrait6tre
endommag6e.
Voir la brochureLacuissonsimplifieepour obtenirplus
d'informat[ons.
31

Tableau de commande
A B C 0
E F G [t
........ timer
Les._ ..............
1 J
Letableaude commandeestconQupourfaciliter Iaprogrammation.Lafen6tre d'affichageindiqueI'heure,lesfonctionsavecminuterieet
fonctions du four.Letableaude commanderepr6sent6comprendcaract6ristiquessp6cifiquesau module.(Lestylepoutvarierselonle
module.)
1)
G
J
qril
CuissoncotJrante
PltJs+/moins-
Minuterle
Cuissonet
maintien
Nettoyage
%marrage
diffdr6
Horloge
MaintienatJ
chaud
ANNULER
S'tJtillsepour la cuissonatJgril et le rissolage
sur pattie sup6rietJre.
S'utilisepour la culsson couranteet le
r6tissage.
S'tJtllisepour entrer ou changer ladur6e,la
temperature du four. Etablitle gril
temp6rature ELEVI_EotJBASSE.
Programmela minuterie.
Pourcuire pendant unedur6e pr66tablie,avec
maintfenau chaud pendant uneheure.
S'tJtilisepour programmerle cycle
d'autonettoyage.
Programmele fotJrpotJrd6buter une cuisson
plustar&
S'utilisepour programmerI'heure du jour.
S'utiNsepour maintenirau chauddans le forJr
los alimentscults.
Annuletoutes lesop6rationssaul minuterie et
horloge.
iJtilisation de+ touches
o Appuyersur latouche d6sir6e.
o Appuyersur More+ (Plus+)ou Less-(Mohrs-)pour entrerla dur6e
ou latemp6rature.
o Lln hip retentitIorsqueI'on appuiesurune touche.
o Llndouble hip retentiten casd'erreurde programmation.
ttemarque :Quatre secondesapr6savoirappuy6sur Ies
touchesMore+ ou Less-,ladur6e ou Iatemp6raturesera
automatiquemententr6e.SIplusde 30secondess'6coulententre
la pressionsurunetouche de fonctionet cellesur Iatouche
More+ ou Less-,la fonctionseraannuI6eet I'afficheurreviendra
I'affichagepr6c6dent.
L'horlogepeut6treprogramm6epour afficherla dur6edansun
formatde 12ou 24 heures.L'horlogeest programm6eenushrepour
un formatde 12heures.
Changement de l'horloge _ un format de 24 heures :
1. AppuyersurlestouchesCANCEL{ANNULER)
etDelay(D6marragediff6r6) et maintenirla Fit. LA",JLt:I )
pressionpendanttrois secondes. /
2. AppuyersurMore+ ou Less-pour pro- /
grammerun formatde 12ou24 heures.
3. ProgrammerI'heureen suivantleshrstructions
donn6esci-dessous.
t1691age de l'horloge :
1. Appuyersurla touche Clock(Horloge).
• L'heuredujour et deuxpohrtsclignotent
I'afficheur.
2. AppuyersurMore+ ou Less-pour programmer
I'heuredujour.
Less-:
+Les deuxpointscontinuent_ clignoter. ....................................
3. Appuyer8 nouveausur latouche Clockou attendrequatre
secondes.
suite,,,
32

Lorsquele courant6Iectriquearriveou apr_sune interruptionde
courant,taderniSreheureavantI'interruptionde courantva
clignoter.
PourrappeterI'heuredujour torsqu'uneautrefonctionde dur6e
s'affiche,appuyersur tatoucheClock.
L'heurede I'horlogenepout 6trechang_eIorsquetefoura 6t6
programm6pour unecuissonou un nettoyagediff6re ou pour la
fonctionde cuissonet maintien.
Annumation de m'affichage de m'heure:
Si I'onne desirepasI'affichagede I'heuredu iour :
Appuyersur lostouchesCANCEL(ANNULER)
et Clock(HorIoge_et losmaintenirainsi
pendanttrois secondes.L'heureduiour
disparaitde I'afficheur.
LorsqueI'affichagedeI'heureest annule,
appuyersurIatoucheCIockpour afficher
bri_vement['heuredujour.
R6affichage de m'heure:
Appuyersur [estouchesCANCELet C[ocket [esmaintenira[nsi
pendanttrois secondes.L'heureduiour reapparait_ ['afficheur.
La minuteriepout6treprogrammeedeune minute [00:01)iusqu'_
99 heureset59 minutes(99:59).
La minuteriepout6treutiiiseeindependammentdetoute autre
activitedu four. Ellepout 6treaussiprogrammeealorsqu'uneautre
fonctiondu four esten cours d'utiiisation.
La minuterienecommandopasle four.Elienesert qu'_ emettredes
hips.
Pregrammatien de maminuterie :
1. Appuyersur[atoucheTimer [R_inuterie).Timer '
o 0:00s'allume_ I'afficheur. ......
o Losdeuxpointsclignotent.
2. Appuyersurla toucheMore+ ou Less- iusqu'_ce
que ['heureiuste paraisse_ ['afficheur. ...............................
o Lesdeuxpointscontinuent_ ciignoter. ' Less-
3. Appuyer_ nouveausur latouche Timerou attendre ......................................
quatresecondes.
o Losdeuxpointscontinuent_ ciignoteret le d6comptede la
dur6ecommence.
o Laderni_reminutedu decompteseraaffich6esousformede
secondes.
4. >,[afin de [adur6e programmee,un hip long retentit.
Annumation de maminuterie :
1. Appuyersur latoucheTimeret lamaintenirainsipe_danttrois
secondes.
OU
2. Appuyersur [atoucheTimeret r6glerI'heure_ 00:00.
Verrouimmagedes commar|des
Lostouchespeuventetreverrouilieespour desraisonsde securite,
nettoyageou pourempechertoute utiiisationnon souhaitee.Ellesne
pourront6treutiiiseessieilessontverrouiilees.
Sile four esten cours d'utilisation,[escommandesne peuvent8tre
verrouHlees.
L'heureactueiiedu iour restera_ ['afficheur[orsquelescommandes
serontverrouiliees.
Verrouimmage:
Appuyersur lostouchesCANCELet Cook&
Hoid [Cuissonet maintien]et [esmaintenir
ainsipendanttrois secondes.
o Le mot LOCK_/ERROUILLAGE]ciignote
['afficheur.
D6verrouiHage :
Appuyersur lostouchesCANCELet Cook& Holdet losmaintenir
ainsipendanttrois secondes.
o Le mot LOCKdisparattde ['afficheur.
Codes d'ar|omamie
LosrootsBAKE(CUISSONCOURANTE)ou LOCK[VERROUILLAGEI}
peuventciignoter rapidement_ ['afficheurpour pr6veniren cas
d'erreurou de probl6me=Si tel estie cas,appuyersur latouche
CANCEL=Si[es rootsBAKEou LOCKcontinuent_ ciignoter,
debrancherI'appareiLAttendrequelquesminutes,puisrebrancher
['appareiLSi I'undesrootscontinue_ ciignoter,d_brancherI'appareil
et prendrecontactavecun reparateurautorise.
33

Cuisson courante
Programmation de la cuisson courante :
1. Appuyersurla touche BakeCCuissoneourante).
Lemot BAKE(CUISSONCOURANTE)clignote.
o 000clignote _ rafficheur. ......................................
2. %lectionner latemperaturedu four. Latemperature
poutetreprogrammeede 75 _ 290°C070 _ 550°FD. ..................................
Appuyerunelois sur latouche More+ (Plus+Dou .........
Less-(Moins-),ou appuyersurla touche More+ ou LOSS-:
Less- et IamaintenirainsL
o 175° (350°) s'allumeIorsqueI'onappuie la
premierefois sur rune destouches.
o Appuyersurla toucheMore+ pour augmenterIatemperature.
o Appuyersurla touche Less- pour diminuerlatemperature.
3. Appuyer_ nouveausur latouche Bakeou attendrequatre
secondes.
o Lemot BAKEs'arr6tede clignoteret s'allume_ I'afficheur.
o 38° 000°)ou la temperaturereelledu fourseraaffichee.La
temperatureaugmenterapar intervalIede 3 °C (5°F)]usqu'_
ceque latemperaturepreprogrammeesoit atteinte.
4. LaisserJefour prechaufferpendant8 b 15minutes.
o LorsqueIatemperatureprogrammeepour lefour est atteinte,
un hip long retentit.
o Pourrappelerla temperatureprogrammeependantle
prechauffage,appuyersurla touche Bake.
5. Placerlanourritureau centredu four, en laissantun minimumde
2 pouces(5 cm) entrerustensileetlespatoisdu four.
6. VerifierI'avancementde la cuisson_ la dureeminimalede
cuisson.CuireplusIongtempsau besoin.
7. Lorsquelacuissonest terminee,appuyersur
Jatouche CANCEL(ANNULER). CANCEL
8. RetirerJanourrituredu four.
Diff6rences de cuisson entre 'ancien
four et nouveau
II est normalde remarquerquelquesdifferencesdansIadureede
cuissonentreun four neufet un fourancien.VoirAjustementde Ja
temperaturedu fourb lapage38.
Rematques sBt _a cBisson eoBrante
au four :
o Pourchanger latemperature du four pendantla cuisson,
appuyersur Bake,puissurIatouche More+ ou Lessjusqu'_ce
que la temperaturedesireesoit affichee.
o Pourchanger la temperature du four lots d.
pr6ehauffage, appuyerdeux lois surla toucheBake,puissur
latouche More+ou Less-iusqu'_ ce que latemperature
desireesoit affichee.
o Si I'onoublied'arreter Iefour, iIs'arreteraautomatiquement
apres12heures.Si I'ondesiredesactivercettefonction,voir
page37.
o Pourdesconseilssupplementairessur Iacuissoncouranteetle
r0tissage,voir la brochureLacuissonsimpli%e.
Cuisson et maintien
LafonctionCook & Hold (Cuissonetmaintien)permetde cuire
pendantunedulee predeterminee,suiviepar un cyclede maintien
au chaudd'uneheure.
Program_atio_ de la fo_ctio_ cuisso_ et _ai_tie_ :
1. Appuyersur la toucheCook& Hold(Cuissonet
maintien).
• LesrootsBAKE(CUISSON)et HOLD
(MAINTIEN}clignotent.
• 000s'aihme a I'afficheur.
%lectionner latemperaturedu four. Latemperature
pout 6treprogrammeede 75 _ 290°C070 _ 550°F). ..................................
Appuyerunefois sur latouche More+ ouLess- ou { Less- :
appuyersur latouche More+ ou Less- et la ..................................
maintenirah]sL
• Appuyersurla toucheMore+ pour augmenterla temperature.
• Appuyersurla toucheLess- pour diminuerlatemperature.
Appuyer_ nouveausur latouche Cook&Hold OUattendre
quatresecondes.
• Lemot HOLDclignote.
• 00:00clignote_ rafficheur.
Entrerladuree pendantlaquelIeI'ondesireque la cuissonait
lieuen appuyantsur le toucheMore+ ou Less-. La duree
de cuissonpout 8treprogrammeede 10minutes(00:10)b
11heures,59minutes(11:59).
• LosrootsBAKEet HOLDs'allurnent_ rafficheur.
• Ladureede cuissons'alhme _ I'afficheur.
• Ladureede cuissoncommencele compte_ rebours.
34

Lorsque la dur_e de cuisson s'est _coul6e :
+ QuatrehipsretentissenL
+ Lemot BAKEs'6teint.
+Les rootsHOLDetWARM (CHAUD}s'allument.
+ 75° (170°}parait_ I'afficheur.
4. Appuyersur More+ pour programmerla temperaturede cuisson.
o 00:00et le mot HOLDclignotent.
o Le mot BAKEresteallum6.
5. AppuyersurMore+ pour prograpamerla dur@ de cuisson.
o Ladur@ d'attente,lesrootsDELAY,BAKEet HOLDs'aJhment
I'afficheur.
Apr_s une heure de MAmNTIEN AU CHAUO :
o Lemot End(Fin}s'affiche.
o L'heuredujour r6apparait_ I'afficheur.
Annulation de la fonotion ouisson et maintien _ tout
moment :
Appuyersur latouche CANCEL{ANNLILER}.Retirer (CANCEL"}
la nourrituredu four.
Cuisson courante diff r e
p6dssablescommebs produitslaitiers,le porc,la volailleou los
fruits@ rner.
Avec[afonctiondiff_r6e, [efour semetb cuire plustard darts[a
journ6e.Programmerla dur@ d'attented@ir@avantque [efour ne
semetteen marcheet la dur@ de cuisson@sir@.Lefour com-
mence_ chauffer_ ['heures61ectionn@et cuit pour la dur@
sp6cifi6e,puisgarde[anourritureau chaudpendantune heure.
La dur@d'attentepeut6tre programm@de 10minutes(00:10}
11heures,59 minutes(11:59}.
Programmation d'un cycle de cuisson courante
diff6rSe :
1. Appuyersurla touche Delay(Demarragediff@@.
o Lemot DELAY(ATTENTE}clignote.
o 00:00clignoteb I'afficheur. .............................
2. Appuyersuria toucheMore+ (Plus+}ou Less-
(Moins-} pour programmeria dur@ d'attente.
Alorsque ie mot DELAYclignotetoujours : + Less-
3. Appuyersurla toucheCook& Hold(Cuissonet
maintien}.
+ 000s'allume_ I'afficheur.
o LosrootsBAKE{CUiSSONCOURANTE}et HOLD
{MAiNTiEN}clignotent.
Lorsque la duree d'attente s'est 6coul6e :
+ Lemot DELAYs'6teint.
+ Ladur6ede cuissonestaffich@.
+ LosrootsBAKEet HOLDsont affich@.
Pour programmer un temps d'attente lorsque la
fonction cuisson et maintien a d6j_ _t6 programm6e
1. Appuyersur la toucheDelay(D6marragediff6r6}.
+ Lemot DELAY{ATTENTE)c%note.
+ 00:00parait_ I'afficheur. ...........................
2. Appuyersur [atoucheMore+ ou Less- pour ..................................
programmer[adur6ed'attente.
t
+ Aprasquatresecondes,le mot DELAYreste ( Less-
allure6pour rappelerqu'uncyclede cuisson .......................................
differeea et6programme.
Lorsque la duree d'attente s'est 8coulee et que le
four se met en marohe :
+ Ladur6ede cu+ssonseraaffich@.
+ Lemot DELAYs'6teint.
+ LosrootsBAKEet HOLDrestentallure@.
Annulation :
Appuyersur latouche CANCEL(ANNULER}.
+ Touteslesfonctionsde cuissonminut6eet
non minut@serontannui@s.
+ L'heuredujourr6apparait_ I'afficheur.
Remarques :
NepasutiIiserla cuissondiff6r@ pour desarticlesqui
n@essitentqueie four soit pr@hauff6,commelesgateaux,
lespetitsbiscuitset iespains.
Nepasutiiiserle cycb decuissonet maintbn diff6r6ssile
four estd6jb chaud.
35

Maintien au chaud
Pourmaintenirau cha_Jd(Jarls[efourdesalimentscults etchauds
ou pour r6chauffelpainset assiettes.
Programmation du maintien au chaud :
1. Appuyersur Iatouche KeepWarm
[Maintienau chaud).
• Le motWARM(CHAUD)ctignote.
• 000parait_ t'afficheur.
2. %iectionner tatemp6raturede maintienau chaud.
Cette-cipeut6tre r6gI6ede 63 _90 °C[145_ ..............................................
190°F).Appuyerune foissur latouche More+
[Plus+)ou Less- (Moins-) ou appuyersur la L(_ss- }
touche More+ ouLess- et ia maintenirainsi.
• 75° [170°}s'allumeIorsqueI'onappuie Japremierefois sur
I'unedestouches=
• Appuyersur latouche More+ pouraugmenterlatemperature.
o Appuyersur latouche Less- pour diminuerla temp6rature.
Lemot WARM[CHAUD}et Iatemp6ratureselont affiches pendant
que la fonction maintienau chaudest active.
Annumation du maintien au chaud :
1.Appuyersur latouche CANCEL[ANNULER}. ( CANCFI ")
2.Retirerla nourrituredu four.
Remarques sur fonction maintien
all chaud :
• Pourobtenirdesquaiit6salimentairesetnutritivesoptimaIes,
lesalimentscultsau four nedoivent pas6tregard6sau chaud
plusde 1a 2 heures.
• Pouremp6cherlesalimentsde dess6cher,lesrecouvrirde
papieraluminium,sansserrer,ou d'un couvercle.
• Pourr_chau_er des petits pains :
- recouvdrlespetitspainsdepapier ahminium sansserreret
lesplaceraufour.
- appuyersurIestouchesKeepWarmet More+ pour
programmer75 °C[170°F}.
- r6chaufferpendant 12_ 15minutes.
• Pourr_chau_er des assiettes :
- placerdeuxpilesde quatreassiettesmaximumdanslefour.
- appuyersurIestouchesKeepWarmet More+ pour
programmer75 °C[170°F}.
- r6chaufferpendantcinq minutes,arr6terlefour et laisserles
assiettesau four pendantencore15minutes.
- n'utiliserque desassiettespouvantallerau four,a v6rifier
aveclefabricant.
- ne pasposerdesassiettesti6dessur unesurfacefroide,les
changementsrapidesdetemperaturepouvantcasser
I'assietteoula fendiller.
36

Arr t auto atique/Mode
Lefour s'arr6teautomatiquementapres12heuress'il a 6t6
accidenteiIementlaiss6en marche.Cettecaract6ristiquede s6curit6
peut6trearr6t6e.
Pour annuler l'arr_t 12 heures et faire fonctionner me
four eu coutiuu peudaut 72 heures :
1. Programmerlefour pour une cuissoncourante{voirpage34}.
2. Appuyersurla toucheClock (Horioge}et la
maintenirainsipendantcinqsecondes.
o SAbseraaffich6etc%notera pendant
cinqsecondes.
o SAbseraensuiteafficheen continujusqu'_ cequ'on I'arr6te
oujusqu'_ ceque la dur6elimite de 72heuressoit atteinte.
o Lemot BAKE(CUISSONCOURANTE}seraaussiaffich6si un
cyclede cuissoncouranteesten coursalorsque lefour est en
modesabbaL
Touteslosautresfonctions (Minuterie,Maintien au chaud,
Nettoyage,etc.}sont verrouill6es,SAUFBAKE,pendantle mode
sabbaL
Auuulatiou de la cuissou couraute alors que le four
est eu mode sabbat :
Appuyersur CANCEL(ANNULER}.
o Lemot BAKEs'6teint_ I'afficheur.
o Aucun hip sonorene retentit.
Auuulatiou du mode sabbat :
1. Appuyersurla toucheClockpendantcinc secondes.
OU
2. Apr6s72 heures,le modesabbatsetermine.
o SAbclignote pendantcinq secondes.
o L'heureduiour revient_ I'afficheur.
Remarques sur le mode sabbat :
• Le modesabbatpeut6tremis en marche_ tout moment,que
lefour soit en marcheou non.
• Le modesabbatne poutpas6tremisen marchesi[es
commandossontverrouilleesou [aporteverrouill6e.
• Si[efour esten modecuissonIorsque[e modesabbatest
programm6,[emot BAKE(CUiSSONCOURANTE}s'6teint_la
fin du cyciedecuisson,i[n'yauraaucunsignalsonoreaudible.
• Lorsque[emodesabbata d6marr6,aucunhip de pr6chauffage
ne retentit.
• Touslosmessageset leshipssont d6sactiv6sIorsque[e mode
sabbatest actif.
• SiI'onappuiesur latouche CANCEL,un cycledecuisson
couranteaufour seraannul6.Cependant,le programmateur
resteraen modesabbat.
• Apr@sunepannede courant,le four revienten modesabbat
avec72 heuresrestanteset aucuncycleactiE
37

Ajustement de la temp6rature
du four
La pr6cisiondestemp6raturesdu foura 6t6so[gneusementv6rifi6e
I'usine+lI est normalde remarquerquelquesdiff6rencesclansIa
cuissonentreun four neufet un fouranc+en+Au fur et _ mesureque
lescuisinieressont moinsneuves,Iatemp6raturedu fourpeut varier+
II estpossibied'ajusterla temp6raturedu foursi ton penseque Ie
four necuit pasou ne rissolepascorrectement+Pourd6ciderde
I'ajustement_apporter,r6gIerlefour _ unetemp6raturede 15°C
[25°F)pIus61ev6eou plusbasseque la temp(!ratureindiquQedans
la recette,puisfaire cuireIapr6paration+Lesr6su+tatsdu_+test >>de
cuissondoiventdonnerune id6edu hombrede degr6sduquel la
temp6raturedoit 6treajust6e+
Ajustement de la temperature du four :
1+Appuyersurla touche Bake(Cuissoncourante}+
2+ Entrer285°C [550°F}en appuyantsurla touche
More+ (Plus+}, ................................
%
3+ Appuyersurla touche Bakeet lamaintenirainsi
pendantplusieurssecondesoujusqu'_ ceque 0°
paraisse_ rafficheur+
Si latemp6raturedu foura 6t6pr6c6demmentajust6e,le
changementseraaffiche+Parexemple,si latemperaturedu four
a 6t6 r6duitede 8 °C [15°F},I'afficheurindiquera-8 (-15}+
4. Appuyersur [atoucheMore+ {Plus+}ou Less-[Moins-} pour
ajuster latemp6rature.
A chaquefois que ['onappuiesur unetouche,latemp6rature
changede3 °C(5 °F}.Latemperaturedu four peut6tre
augment6eou diminu6ede3 _ 20 °C [5a 35°F}.
5. L'heuredu jour r6apparaitautomatiquement_ I'afficheur.
i{n'estpasn6cessairede r6ajusterlatemp6raturedu fouren cas
de panneou d'interrupt+onde courant.Lestemp6raturesde
cuissonau gri[ etde nettoyagene peuvent6treajust6es.
38

Cuisson au gril
Programmation de la cuisson au gril :
1. Appuyersurla touche BroiI(GriID. ......
o Lemot BROIL(GRIL)clignote.
o Lemot SET(VALIDER)est affiche.
2. AppuyersurIatoucheMore+ (Plus+)pour programmerun gril
temperatureeleveeou sur latouche Less- (Moins-Dpour
programmerun gril _ temperaturebasse.
o LesrootsHI (ELEVEEDou LO [BASSEDserontaffiches.
o %Iectionner HI broil (GriI_ temperatureelevee)[290°C
[550°F]Dpour un griI normal %lectionner LObroil (Gril
temperaturebasseD[230°C [450°F]Dpour un griI _tempera-
ture inferieured'aliments_ cuissonplus Ionguecommela
volaille.
3= Apresquatresecondes,Iefourse meten marche.
o Lemot BROILresteallume.
4. Pourun risso[agemaximum,prechauffer['elementde gri[
pendanttrois ou quatreminutesavantd'ajouter la nourriture.
5.
6.
7.
PlacerIanourrituredansle four. LaisserIaportedu fourouverte
d'environ10cm [4pod(premierebuteeD.
Retournerlaviandeunelois _ la moitie de laduree decuisson.
LorsqueI'alimentestcuit,appuyersur Iatouche
CANCEL(ANNULER).Retirerla nourritureet la
lechefritedu four.
L'heuredujour reapparait_ I'afficheur.
Remarques sur Uacuisson au griU:
o Pourde meiIIeursresuitatsIorsdu gril,seservird'un ustensile
prevupour cetype de cuisson.
o Prevoirdesdureesde cuissonau gril plusIonguesetun
rissolageleg_rementmoinsdoresi I'appareilfonctionnesur un
circuitde 208volts.
o Legril au reglageHI (CleveDestutilisepour la majoritedes
operationsde cuissonau griLUtiliserle griIau r6glageLO
[Bas)pour Iacuissonde metsdevantcu+reptusIongtemps,
afinde Ieurpermettred'etrebiencuitssansrissolageexcessif.
o Lesdureesde cuissonau gril peuvent6tre plusIonguesavec
unetemperaturede gril inferieure.
o RetournerIanourritureIorsquela moiti6 de ladur6e pr6vue
pour la cuissonau gdl s'est6couI6e.
o Pourdestemperaturesetdesconseilssupplementairessurla
cuissonau gril,sereporter_ la brochureLa cuissonsimplifi6e.
TabUeau de cuisson au grH
POs+T+Om
ALIMENTS DES GRILLES÷
Bceuf
Bifteck, 2,5 cm (1 podd'epaisseur
Hamburgers, 2 cm (3/4pod d'epaisseur
Pom'c
Bacon
COtelettes,2,5cm [1 pod
Jambon- pre-cuit tranchede 1,3cm (1/2 pod
4
4
4
4
4
4
DEGR ¸¸DE¸¸¸¸¸¸¸¸
CU_SSON
Cuissonmoyenne
Biencuit
Biencuit
Bien cuit
Bien cuit
Tiede
'TEMPSDEcmssom
' TOTAL (MINUTES)
15 - 18 minutes
19 - 23 minutes
15 - 18 minutes
6 - 10 minutes
22 - 26 minutes
8 - 12 minutes
vomaimme
Pouleten morceaux
Fruits de mer
Damesde poisson,beurr6es,2,5cm (1 podd'6paissetJr
Filetes
3ou4
Biencuit
Lachairsed6tache
Lachairsedetache
LOBroil -
Gril_ temperaturebasse
28 - 38 minutes
10 - 15 minutes
8 - 12 minutes
Grillesup6rieure_ la positionn°5
Remarque : Cetableaun'estqu'un guidede suggestions.LesdureespeuventvarierselonI'aliment_ cuire.
39

1
Event du four
Lorsquele fourfonctionne,lessurfacesvoisinesde 1'6ventpeuvent
devenirassezchaudespourentrainerdesbrQlures.Neiamais
bloquerl'6vent.
L'_vent est sita_ sons meprotectear d'_vent da dosseret, sat ma
euisini_re, EVENT
DUFOUR Nepusmettrede
phstiques prosde
I'event,[achaieur
pouvantlesddormer
ou lesfairefondre=
Ecmairage du four
Appuyersur[ecommutateurd'6ciairagedu four situ6sur
letableaude commandopour alhmer ou eteindrela
lampe.
Over_
Light
Sole du fear
Protegerla soledesproduitsrenvers6s,en particuIieracidesou
sucres,ceux-cipouvantd6coIorerI'6mailvitrifie.Utiliserdes
ustensiIesde [a bonnedimensionpour 6viterque lesproduitsnese
renversentou passentpar-dessusI'ustensiIeen bouiilant.Ne pas
placerd'ustensiles oa de feuiiie d'alaminiam direetement sur
iasole du four,
Grilles du four
• Ne pas tenter de changer la Position des gr!Hes[orsque le four
° Nepasrangerde nourr[tureou d'ustens!leduns[efour.
Le fourcomportedeuxgrillesavec,pourchacune,un dispositifde
calage.
Extraction :
1. Tirerla grille en lignedroite
jusqu'_cequ'elles'arr6te_ [a
positiondecalage.
2. Souleverla grille _ I'avantpour
pouvoir['extraire.
R6insta[[ation :
1= Placer[agrille sur[essupportsduns[efour.
2. SouIever[6gerement['avant.FairegIisser[agrille vers ['arriere
au-de[_de [apositionde caiage=
3= Abaisser[agrille et [afaireglisserdarts[efour.
Ne pus recouvrir matotalit8 d'ane grille avec de mafeuiiie
d'amuminium,ni gamir mefonddafouravec de mafeaiiie d'amuminiam.
Cecimodifierait ruesrSsultats de caisson au four, et mefond da four
pourrait sabir des dommages.
Positions des grilles
Grille g (position[aplus _..
haute}: Pourcuisson
breveau gri[- pain grill6
ou alimentsminces --_
contenantpeu de graisse. --_
Grimmea,: Pour[apiupart --_
descuissonsaugriL --_
--1
Grille 3 : Pour[apiupart . _.
descuissonsde
pStisseriessur unetOIe_ biscuits- gSteaux_ etages,tares aux
fruits,lets surgeISs.
Grille 2 : Pourr6tissagede pi6cesdeviande,lets en sauce,cuisson
de pain,g_iteau[egeren couronne(baba}ou entremets=
Grille 1 : Pour[erOtissagede grossespiecesde viandeou voiaii[e,
tartessurgeI_es,soufflesou g_teauxdesanges=
CUiSSONSUR PLUSiEURSGRILLES:
Deux grilles: Placer les grilles aux positions 2 et 4 ou 1et 4.
De.i-grille
Unedell-grille estdisponibteen
accessoire.Elleaugmentela capacitedu
fouret s'accroche_ gauche,_ la partie
supSrieure.Elleest utilepour la cuisson
d'un platde legumeslorsqu'ungrosr6ti
setro([vesurla grille inf4rieure.Prendre
contactavecle revendeurpour de-
manderraccessoireHALFRACK(demi-
grille} ou pour commander,composerle
1-800-688-2002.
40

Four autonettoyant
®
I[ est normal que certames pieces de la culsmi6re deviennem
[res chaudes lots d'un cycle de ne[[oyage
Pour _vlter de vous blesser et d'endommager la por[e du four.
n'essayez pas d'ouvrir la porte quand _{LOCK }}
(VERROUILLAGE} est affich&
Eviter de toucher [aporle, le hublot et la zone de I'@ent (]u four
iors d'un cycle d'autonet[oyage.
Ne pas utiliser de ne[toyant pour four du commerce sur b [ini
du four ou surtout autre composant du four, Cela abimerait B
fini ou les composants du four,
L'autonettoyageutilisedestemp6raturessup6rieures8celiesde Ia
cuissonnormalepour nettoyerautomatiquementI'int6rieurdufour.
NeforcezpasIaportedu four nile bvier de verrouilIagepour Ies
ouvrir.Cecipeutprovoquerune exposition_ destemp6ratures
6by@s,et doncpr@enterun risquede brqure.
Si lefour esttr6s sale,il est normalqu'on observelaformatiml de
fumeeou de flammesdurant Ienettoyage.Nettoyerle four
intervallesr6guliersplutOtque d'attendreuneaccumulation
importantede r@idus.
Durant le processusd'autonettoyage,il cmwient de biena@erla
cuisinepour 61iminerlesodeursnormalement6raisesdurantle
nettoyage.
Avant rautonettoyage
1= Eteindrela lampedu fouravantle nettoyage=Ellerisqueraitsinon,
de griller=
2= EnteverIa18cheffite,tous bs plats et bs griIIesdu four=Lesgrilbs
risquentdese@coloreret de ne plusglisseraussibienapr6sun
cycled'autonettoyagesion ne bs ent_vepas=
3= Nettoyerb cadredu four, b cadrede la porte,la zone8 I'extSrbur
du joint etautourde rouverturedartsIeioint de B porte,_ I'aide
d'un produit de nettoyagenonabrasifcommeBonAmi_ou d'eau
additionn@de d6tergent=Le pmcessusd'autonettoyagene
nettoiepasceszones=Elbs doivent8trenettoy@spouremp6cher
lasabt8 de s'incrusterpendantIecyclede nettoyage=(Leioint
assureI'6tanche[teautourde Iaporteet du huNot du four=)
4= Pouremp@hertout dommage,nepas
nettoyerni frotter Ieioint qui setrouve
autour de la portedu four=Cejoint est
con_upour @iterbs pertesdechabur
pendantle cycied'autonettoyage=
5= EliminerIesr@idusde gra[sseou de
produitsrenversdssur Iasob avantIe
nettoyage=Ceciemp@hela formatiml deflammesou defum6e
durant le nettoyage=
6. Essuyerlesr6sidussucr@etacides,commelespatatesdouces,
la tomateoubs sauces_ basede lait. Laporcelainevitrifi@
posse@unecertaine r@istanceauxcompos6sacides maisqui
n'est paslimit@.EIb peutsed6colorersi Iesr6sidusacidesou
sucr6sne sont pasenIev6savantde commencerrautonettoyage.
Programmation de l'autenettoyage :
i %marque : Laternp6raturedu four doit6treSitU@en dessous 1
de 205 °C[400°F)pour programmerun cycb d'autonettoyage.
1
1. FermerIaportedu four.
2. PlacerJamanettede verrouiiJage_ Japositionde vermuillage.
3. Appuyersur Jatouche Cban (Nettoyage}.
• Le mot CLEAN[NETTOYAGE}clignotea J'afficheur.
Si Iaporten'estpasferm@,deshipsretentissentetIemot DOOR
[PORTE)parait_ I'afficheur.Sila porte n'estpasferm@ dansJes
45secondes,[operation d'autonettoyageest annul6eet
I'afficheurrevbnt _ I'heuredujour.
4. Appuyersur latouche More+ [Plus+}ou Less-
[Moins-).
• CL-M (Nettoyage- salet6moyenne}estaffich6................................
5. Appuyersur latouche More+ ou Less- pourvoir Less
ddiler Jesdiffdrentsr6giagesde rautonettoyage. ........................................
CL-H (Nettoyage- salet@@abse,4 heures}
CL-M {Nettoyage- salet6moyenne,3 heures}
CL-L [Nettoyage- salet8I6g6re,2 heures}
Le choixdu niveaude sa[et6du four programme
automatiquementla dur@ du cycled'autonettoyage.
6. Apr_squatresecondes,lefour commencele nettoyage.
• La dur@ de nettoyagecommencele d@ompte_ I'afficheur.
• Le mot LOCKNERROUILLAGE)parait_ rafficheur.
° Le mot CLEANparait_ I'afficheur.
Oe_arrage diffSr_ d'_a cycle d'a_te_etteyage :
1. Appuyersur latouche Delay[D@_arragediffer@.
• Le mot DELAY[ATTENTE}clignote.
• 00:00paraita I'afficheur.
s_ite..,
_Lesnomsde marquedespmduitsde nettoyagesontdesmarquesd@os@sdesdiff6rentsfabricants.
41

2. Appuyersur IatoucheMore+ ou Less- pour
programmerladur6e d'attenteavantque ne
commencelecycle.Ladur6e d'attentepeut6tre ..................
r6gI6e,de 10minutes(00:10)_ 11heures,59 minutes(11:59).
3. Appuyersurla toucheClean(Nettoyage).
o Lemot CLEAN(NETTOYAGE)vaclignoter.
4. Appuyersurla touche More+ (Plus+)ou Less-
.............................
(M_ins-)-
o CL-M (Nettoyage- saJet6moyenne)est affichS. '......................................
5. Appuyersurla touche More+ ouLess- pourvoirdefiler les
differents rSgJagesde rautonettoyage.
CL-H (Nettoyage- salet88paisse,4 heures)
CL-M (Nettoyage- salet@moyenne,3 heures)
CL-L(Nettoyage- saleteIegSre,2 heures]
Lechoixdu niveaudesalet6du four programme
automatiquementIadur6edu cycled'autonettoyage.
6. AprSsquatresecondes,IesrootsCLEAN(NETTOYAGE),DELAY
(ATTENTE)et LOCK(VERROUILLAGE)paraissent_ I'afficheur
pour indiquerque lefour est programm6pour uneop6rationde
nettoyagediff6r6.Letempsd'attenteparak_ I'affJcheur.
Si le four a dej_ ete programme pour uu cycle de
uettoyage et que l'ou desire 6tablir uu delai :
1. Appuyersur latouche Delay(D6marragediff6r6).
o Le mot DELAY(ATrENTE)c%note.
o 00:00parak_ I'afficheur.
2. Appuyersur latouche More+ ou Less-pour Mot(:*+
programmerladur6e d6sir6ede rattenteavantque .........................................
ne debutele cycle.
Apr_squatresecondes,IesrootsCLEAN,DELAYet LOCK
paraissent8 I'afficheurpourindiquerque lefour est programme
pour une operationde nettoyagediff6r6.Letempsd'attente
parait_ rafficheur.
Lorsque le cycle d'autouettoyage debute :
o Le mot DELAYs'eteint.
+ La dur6ede nettoyageparait_ rafficheur.
Auuulatiou du cycle d'autouettoyage :
Appuyersur latouche CANCEL(ANNULER).
o TousIesrootsdisparaissentde rafficheur.
o ToutesIesfonctionssent annul6es.
+ L'heure du jour parait _ [afficheur.
Pendant le cycle d'autonettoyage
Lorsquele mot LOCKparak_ rafficheur, Iaportene peut6tre
ouverte.Pour6viterd'endommagerlaporte,ne pasforcer la porte
pour I'ouvrirIorsqueLOCKest affiche.
FumSe et odeurs
Lapremierefois o_ le four estnettoye,il peuty avoirproduction
d'odeuretde fumee.Ceciest normalet disparattra_ I'usage.
Sile four esttr6s saleou si la Iechefritea etelaisseedansle four,il
peutyavoirproductionde fum6e.
Bruits
Pendantque le fourchauffe, [Ipeutseproduiredesbruits de instal
endilatation ou en contraction.Ceciest normaletn'indique pasque
lefour s'abtme.
Aprbs le cycle d'autonettoyage
Environune heureapr_slafin du cycle,le mot LOCKs'6teint.Ace
moment,la portepeut6treouverte.Pousserla manettede la porte
vers lagauchepour d6verrouiller.
La salet6 peut avoir laiss6 un r6sidu gHs poudreu×, L'enlever
avecun linge humide.S'iIrestede la salete+cetaindiqueque le cycle
de nettoyagen'a pas6t8 assezlong.Cettesalet6restantesera
enleveeau prochaincycled'autonettoya%
Si les grilles ont _t_ laiss_es_ l'i_t_ie_ d_ fo_ pendant le
cycle d'a_to_etteyage et q_'emmesgmissemroamsur leurssup-
ports,lesenduire,ainsique lessupports,d'unefine couched'huile
vSg_tale.
Defi_es mig_espervert appa_ait_eda_s mapo_cemai_epayee
q_'elle as_bi chale_r et refroidissemento Ceciest normalet
n'affecterapasIaperformance.
U_e d_eomemtionblanche pe_t appa_ait_eap_Ssle _ettoyage
si des aliments acides o_ s_cr_s _'o_t pas_t_ e_lev_s avast
q_e _e eomme_ce l'a_to_ettoyageo La decelerationest normale
etn'affecterapaslaperformancedu four+
_emarq_es :
o Si la portedu four n'estpasfermSe,le mot DOOR(PORTE)
clignote_ I'afficheuret lefour _metdeshipsjusqu'_ ceque la
portesoitferrule et queI'onappuie_ nouveausurClean.
o S'il s'_couleplusde cinqsecondesentreIemomento_ I'on
appuiesurCleanetcelu+o_JI'onappuiesurla touche
More+ ou Less-,I'afficheurretourneautomatiquement
raffichageprecedent.
o Laportedu four setrouveraendommag6esiI'on forceson
ouverturealorsque le mot LOCKestencoreaffich_.
42

M6thodes de nettoyage
Avant route manipulation eu ep6ration de nettoyagel v6rifier qae I,appareil est arr6t6
et que teas Jescomposants sent freids, afin d'6vitet des dommageseu des br_lures.
' Pour6viterla formationdetachesou un changementdecouleur,nettoyerI'appareilapr6s
chaqueu_illsatian,
, Apr6s tout d6montagede composants,veJJlerb effectuerun rernontagecorrect.
Lesnomsde marquesentdesmarques
d_poseesdesdiff6rentsfabricants.
_*Pourcommanderdirectement,
composerIe1-877-232-6771E.-U.ou
1-800-688-8408Canada.
pl ce rickeY,aGe
Dosseret et_ble
de euissen -
6mailvitrifi6
LSebefrite et
Zone de la
console de
eemmande/
L'drnailvitrifi6estduverre1i6au rn6talparfusion.II peutsefissur_rous'dcaillerencasde rnauvaiseutilisation.IIestr6sistant
auxacides,rnaispastotalementinattaquableparlesacides.Touslesproduitsrenvers6s,en particulieracidesou sucr6s,doivent
6treessuy6simrn6diaternentavecun lingesac.
° Unefois refroidi,laveravecde I'eausavonneuse,rincerets6cher.
, Nejamaisessuyerunesurfaceti6deou chaudeavecun[ingehurnide.Cecipourraitlafissurerou 1'6cailler.
, Nejamaisutiliserdenettoyantspourfour,d'agentsde nettoyagecaustiquesou abrasifssurlefiniext6rieurde lacuisini6re.
Nejamais eeuvrir lagrille depapier d'aluminium; celaemp_che la graisse de ceuler dartsla I6chefrite.
• Recouwilla I6chefriteetsagrilled'un Iingesavonneux;laisseragirpoul d6taeherlesr6sidus.
, Laveravecde I'eausavonneusetilde. Utiliseruntampon_ !1curerpour61irninerlessouillurestenaces.
, Onpeutplacerlesdeuxcomposantsde laI_chefritedartsun lave-vaisse!le.
•PourutiliserlafonctionVerrouillagedescornrnandespourle nettoyage,voirpage33.
°Essuyeravecun lingehumide,puisfaires_!cher.Nepasutiliserun agentde nettoyageabrasifsusceptiblederayerlafinition.
•Onpeututiliserun produitde nettoyageduverre,pulv6ris_!d'abordsurunchiffon.NEPASprejeter tepreduit directement
sur tes touches de eemmande eu sur I'afficheur.
Beutons de , Placerchaquebouton_ la positiond'ARRET,et retirerchaqueboutonen letirant.
eemmande • Laver,rinceretfaires6cher.Nepasutiliserunagentde nettoyageabrasifsusceptiblede rayerlafinition.
•Fairefonctionnerbri_vernentchaque_l_mentpourv6rifierque leboutona_t6crnTectementr6install&
Table de
euisson en
Nejamais utiliser de preduits de nettoyage dufour,javettJsant,ammeniaque eupreduits denetteyage du verre
eontenant de I'ammoniaque. REMARQUE:Prendre contact avectm r6pamteur agr_ si la surface en vitree4mmique
sefenditle, seeasseeu si deI'aluminium ou du m6tal fond surla surface.
• Laisserlatablede cuissonrefrokJiravantde lanettoyer.
°G6n6ralit6s oNettoyer[atabledecuissonapr6schaqueemploiouau besoin,avecdu papieressuie-touthumidifi6et la
cr_medenettoyagepourtabledecuisson(_i_ceno20000001)**.Puis,essuyeravecun Iingesecetpropre.
_EMA_QUE:Desmarquespermanentesventseprodu_ed fasatd4testasurtasurfacede cuissonetest cuitede faconr_p4t4e,,
, Samet66paisse eu marq_es m6tammiq_esoHumidifierune_pongeb r_curer<(nerayantpas)),Appliquerdelacr_mede
nettoyagepourtabledecuisson[piecen°20888001[_*etfrotterpourretirerautantdesalet6quepossible.Appliquerune
mincecouchedecr_mesurlasalet&recouvriravecdu papieressuie-touthurnidifi_ethisserpendant30b 45minutes[2ou
3 heurespour lasalet_tr_sirnportante].Garderhumideen recouvrantI'essuie-toutd'unepelliculeplastique.Rotter
nouveau,puisessuyeravecunlingepropreetsac.
_EMA_QUE:N'udiserqu'untampon_r_curer_nerayantpas_,PROPREETHUMIDE,sansdangerpourtesustensitesdecuisine
revilementantiad,#4s/fLeverreet/emotifserontendommag_sd b tamponn'estpashum/de,s'//estsouH'/4oudun autretype
de ta,_t_onestudis4,
°SaJet6sc_ites e_ dess6eb6es- Frotteravecuntamponb r_curer<{ne rayantpas>)etunecr6/nedenettoyage
pourtabledecuisson.
_EMA_QUE:TenZrunelamederasoirbun andted_30°etdratterpouran/evertoutesabt4restante.Puis,nettoyercomma
43

PIECE NETTOYAGE
Hubmetet porte • Evite,rd'utilise,rtrop d'e,au,quirisque,raitdes'infiltr_rsousouderriereleverre,e,tdetacher.
du four en verre ° Laver_ I'eauetau savon.Rince,rave,cde I'eaupropre,e,ts_!che,r.Unpre,duitde ne,ttoyage,duve,rre,pe,ut6tre,utilJs6e,nle,
vapofisantd'abordsurunlingo,.
• No,pasutilise,rde produitsabrasifscomme,tampons_ r6cure,r,laine,d'acie,rouproduitde ne,ttoyage,e,npoudre,qui
risque,raie,ntderaye,rle,ve,rre,.
mnt_rieurdu fuur ° Ex6cute,rle,sinstructionspr6se,nt6e,sauxpages41-42pourI'autone,ttoyage,dufour.
Grillesdu fuur ° Nettoyerave,cde !'eausave,nne,use.
• Eliminerlessouillure,ste,nace,save,curlepoudre,denettoyageouuntampon9 rdcure,rsavonneux.Rince,retfaires6che,r.
•Sile,sgrillessenthiss6e,sdartslefour pe,ndantlecycled'autone,ttoyage,e,lle,sseddcolore,ntetpeuventno,plustr_s bien
glisse,r.Sice,laso,produit,enduirele,herddesgrillesetle,suppo!tdesgrille,sd'une,fine,couche,d'huilev_g_tale,,puise,ssuyer
I'e,xc6dent.
(ce,rtainsmodSles]
Chrome bress_
(certainsmod_le,s:
Tiruirde
•NEPASUTIUSERDEFRODUITSDENETTOYAGECONTENANTDU JAVELUSANT.
"NEPASUTIMSERDENETTOYANTS,ORANGE_ OUABRASIFS.
, TOUJOURSESSUYERDANSLESENSDELA TEXTUREDEL'ACIERLORSDU NETTOYAGE.
, Nettoyage juumamier/samet_m_g_re=Essuyerave,cI'unde,sproduitssuivants:eausavom_e,use,,vinaigrebhnc/e,au,produit
dene,ttoyage,pourve,rreetsurface,Formula409*ou unproduitse,mblablepourverre- ave,cun lingo,soupleetune,_ponge,.
Rince,re,ts6cher.Pourpolirete,nleve,rle,smarque,sdedoigts,faire,suivre,par une,vaporisationde MagicSpraypouracie,r
inoxydable(pi6cen°20OOOOO8)**.
•Salet_ mod_r_e/6paisse - Essuye,rave,cI'undesproduitssuivants:BenAmi*,Sin!i1Cleanser*ouSoftScrub*- _ raided'un
lingosouple,oud'une,_ponge,humide.Rincere,ts6che,r.Le,stache,srebelle,spe,uve,nt6tre,e,nle,v_e,savecuntamponmulti-
usagesScotch-Brite,*humidi% Frotteruniform_mentdansle,se,nsdu m6tal.Rincerets6che,r.Pourre,donne,rdu lustre,e,t
retire,rle,srayure,s,faire,suiwe,parune,vaporisationdeMagicSpraypouracie,rinoxydable,*.
° g_culeratien - A I'aide,d'une,6ponge,humidi%eou d'unlingo,souple,,e,ssuyer_ I'aide,du nettoyantCameopouracie,r
ine,xydable,*.Rince,rimm_diate,me,nte,ts6che,r.Poure,nle,ve,rle,smarquese,tre,donne,rdu lustre,,fairesuiwe,parunevaporisation
deMagicSpraypouracie,rinoxydable,*.
°Une,fois lacuisini6rere,froidie,,ne,ttoye,ravecde I'e,ausavonne,use,rince,retfairebrille,r.
°Si lasurfacee,stre,lativementsale,,utiliserun pre,duitne,tte,yant16gare,me,ntabrasife,tfrotte,rdansle,se,nsdugrainpour6vite,r
defaire,desrayures.Rince,rets6che,r.
•Pour6viterle,s6rafiures,no,pasutilise,rd'article,soupre,duitsabrasifsou caustiques.
•Pourre,donne,r_ lasurface,sonbrillante,t_liminerlostrainee,s,faire,suivre,de produit_ vaporiserStainlessSteelMagic
Spray_(r6f_re,nce,no20000008}_*-Le chrome sered_celor4 de facon permanente d la salet_ cult dessuso
, Unefois lespi_cesre,froidie,s,laver_ I'eausavonneusetilde, rincerets_che,r.No,jamaisessuyerune,surfaceti6deouchaude,
ave,cun lingo,humide,cecipouvantendommagerh surface,e,te,ntrainerune,br_lure,par lavape,ur.
• Pourle,stachesre,be,!le,s,utilise,rdesagentsdenettoyage,I_g6re,me,ntabrasifscomme,la p_te,aubica_be,natedesoude,ou Ben
Ami*.Nepasutiliserd'agentsde nettoyage,abrasifs,caustique,sou _nergJquescomme,le,sne,tte,yantspourfourou le,s
tamponse,nlaine,d'acie,r.Ce,sproduitsraie,raie,ntouendommage,raientdefa_onpe,rmanentelasurface,.
_EMA_QUE: Utiliserun tingeeu un terchon sec pour essuyerlospredufts renvets_s,surtout s'ils sent addes ou
sucr4s.£a surfacepourmit se ddcelorer eu seremit si tasaletd n'_tait pasimm_diatement enlev4e. Ceciest
pardculi6rement important dansle cas de surfaces blanches.
* Le,snomsde marquesent desmarquesd_pos_esdesdifferentsfabricants.
** Pourcommanderdirecte,me,nt,composerle,1-877-232-6771E.-U.ou 1-800-688-8408Canada.
44

Porte du four
Pieds de rOo{age de {'ap{omb
• Ne pasgrimpersur [aportedu foul ouverte,ou [ui imposerune
chargeexcessive.Cecipourraitprovoquerun bascu_ememae la
culsmiere.[ebris de la pore ou des b[essurespour [apersonne
eoncernee.
Nepas[emerd'ouvrir oufermer[aporteou d'utifiser[etoui avam
que la porteait 6teconvenabiementreinsta[fee,
Nejamaisplacer[esdoigtsentre[acharnereet[ecadreavantdu
foul Lesbrasdecharnieresontmontessurressort.Unecharniere
pourrat se refermer bru[a[ement contre [e cadre du four et
provoquerde s_rbusesbbssures.
Remarque : Onpeut percevoirune certaine<{61asticit6>>Iorsde la
fermeturede la portedu four d'unecuisiniereneuve;ceciest
normal;cet effetdisparaftprogressivement.
Depose de maporte:
1. Apr@ Ie refroidissementdu four, ouvrir la porte - positionde
cuissonau gril {porteentrouverted'environ10cm [4pouces]).
2. Saisirlaportedechaquecete.Nepasutiliser _' __
la poign@de portepour Iasoubver. __ __-/_/
3. Soubveruniformementpourdegagerlaporte
descharnieres.
1. Saisirla portede chaquecOte.
2. Aligner JesfentesavecIesbrasde charnieresurla cuisiniere.
3. FairedescendreIaporte pour la positionnercorrectementsur Ies
charnieres.Poussersur bs angies superieurs de la porte pour
J'enfoncercompletementsur lescharnieres.IJfaut que laportesoit
parfaitementd'aplomb.
Hub{ot du four
Pour prot6ger mehubmotde maporte du four :
1. Nepasutiliserde produits nettoyantsabrasifscommedes
tampons_ r@ureren Iained'acier ou despreduitsde nettoyage
en poudrequi risqueraientde rayerleverre.
2. Nepasheurterle hublotenverreavecun ustensib, un articb de
mobflier,un jouet,etc.
3. Nepasfermer la portedu four avantque bs grillesne sobnt en
placedanslefour.
Toute@gradationdu hublotde verre- rayure,choc,tension,etc.-
peutaffaiblir sastructureet augmenterJerisquede bris_ unedate
ulterbure.
Vdrifier que la bride antibasculementagnppeconvenablement
[un desp!edsarriemde reglagede I'aPlomb,POUrque la
Cuisirfiemnepuissebascu[eraeeidentel[ement_
Lacuisinieredoit 6tred'aplombune fois install@.Si I[ I _1
elle neI'estpas,tourner Iespie@ de r_glagede
I'aplombenpBstique,_ chacundesanglesde la _.,_1
cuisiniere,iusqu'_ceque celle-cisoit _ - _,/,_
d'ap,omb. __
k>_ BR/_E
_\ ANTIBASCULEMENT
PIED DE REGLAGE
DE L 'APLOMB
Lampe du four
• Dc!brancherlacuisinieredureseau6Jectriqueavantderemplacer
I'ampoule.
, Utiliser une mani,queseche pour pr0teger !esmans 10rsdu
rempBcementde !arnp0ule.
! Ne pastoucher !,'amp0ubavantqu'elleSes0!trefroidiel
, Ne pastauCheilamP0ule cl!audeavecun lirlge humide; e Ch0C
therrrlique pourrait [a bdser.
Pour remplacer l'ampoule du four :
1.Apt@ lerefroidissementdu four, #ABOCWON
maintenirlecabochontout en
enbvant la piecemetal%uequi
la maintienten place.
RF:MARQUF:: Le cabochon
tomberasion ne le maintient (
f
\
pasen place.
2. Enleverlecabochonet
rampoule.
3. Installeruneampoulede 40watts pour appareiImenager.
4. ReinstallerIecabochonet Iefil metalliquede retenue.
5. RetablirI'alimentationde lacuisiniere.Reglerde nouveau
rhodoge.
RESSORTDE RETENUE
(fLIm_tal/ique)
45

Tiroir de re isage
Ne pasrangerdanscetiroiEdesarticlesde p!astiqueou de
papier,desproduitsinflammabiesou desproduitsa!imentaires.
Durant!efonctionnementdu four, unetemperatureexcessive
pouEcesarticlespeuts!6tablirdans[etiroir.
Letiroir de remisagepeut6treenlev#pourvous permettrede
nettoyersousla cuisiniSre.
D6pose :
1= Viderle tiroir et Ietirer iusqu'_la positionde la premierebutee=
2. SouleverI'avant.
3. Tirerjusqu'_Iapositionde Iasecondebutee.
4. Saisirletiroir parIescotesetsoulever/tirerpour I'extraire.
1. h_sererIesextr6mitesdesglissiSresdu tiroir dartslesrailsde la
cuisiniere.
2. SouleverI'avantdu tlroir etpousserdoucementjusqu'_ la
positionde Iapremierebutee.
3. Souleverde nouveauletiroir et le pousserpour le fermer.
Prise de coutant au×iliaire
(:modeles canadiens seulement:)
La prisede courantauxiliaireest situee
en bas/_gauchedu dosseret.Veiller
ceque Iecordond'alimentationde
I'appareilutilisene reposepassur un
el6mentde Iatablede cuissonou
proximite;la raiseen marchede
1'6Iementchauffantferait subir des
dommagesau cordond'alimentationet
la prisede courant.
Unappareilsuscitantune demandede
courantde plusde 10A provoquera
I'ouverturedudisjoncteurqui protege
la prisedecourant auxiliaire.Pour
rearmerIedisjoncteur,appuyersur le
commutateursitu6surle bordinf6rieur
du dosseret.
0
DISJONCTEUR
46

m
PR@BLEME SOEUTmON
Pour mapmupartdes prebmemes ° Verifierque lescommandesdu four sontcorrectementregIees.
ebserv_s, essayer d'aberd mes ° VergiersiIefour est bien raccord6aucircuit 6Iectrique.
somutionspossiMes,_ droite. ° hlspectedrearmerIedisjoncteur,h_spectedremplacerlesfusibles.
• ContrelerJasourced'alimentationelectrique.
Non-fonetionnement dem'appareim- °
totamou pa_iem.
L'hormogeou ies iampesfonction- ,
nent,ruesroots paraissent
i'affieheur,mais iefour ne ,
R_suituts de caisson uu four •
die,rents des attentes ou de eeu× •
produitspar mefour anterieur. ,
R_sumtatsincorrects morsdema •
cuisson aa grim,ou _mission *
excessive de fum_e. *
Impossibiiit_d'autonettoyuge
du four.
Le four ne se nettoie pas
eorreetement.
Laporte du four nese d_verrouiiie
pasaprSs m'autonettoyage.
Determinersi lescommandesdeselementsde surfaceet/ou du foursont convenablement
regJees.Voir pages29et 40.
Determinersi la portedu four s'estdeverrouilleeaprSsune operationd'autonettoyage.Voir
page42.
Determinersi lefour est regiepour une cuissondiffereeou un nettoyagediffere.Voir pages
35 et41.
VerifiersiIeverrouilIagedescommandesest en marche.Voirpage33.
VerifiersiIacommandeesten modesabbat.Voir page37.
Lescommandessont peut-etre programmeespour une fonctiondecuissonet maintienou
de demarragediffere.
Lafonctionde verrouiilagedescommandesestpeut-etre activee.Voir page33.
DeterminersJI'eventdu fourest obstru&Voir sonempJacementpage40.
S'assurerqueIacuisiniereestd'apiomb.
Lesreglagesdetemperaturevarientsouvententreun four neufet le fourqu'il remplace.On
observesouventune derivedu reglagede temperatured'unfour _ mesurequ'il vieillit; ilpeut
devenirpluschaudou moinschaud.Voir page37 pour lesinstructionsd'aiustementde Ia
temperaturedu four. REfVIARQUE:IIn'estpasutilede modifier Ieregiagedetemperaturesi Ja
variationn'affectequ'uneou deuxrecettes.
Pourd'autresinformationsausuietde Jacuissonaufour,w_irJabrochureLacuissonsimpli%e.
DeterminerIaposition desgrilles.Lesalimentspeuventetretrop presde I'elementdugrJL
Elementdu gril pasprechauffe.
UtilJsationincorrectedefeuilled'aluminium.NejamaisgarnirJagrilledeiechefrJteavecdelafeuiJJe
d'aluminium.
Portedu fourfermeeduranttacuissonau griI. Laisserlaportedu four entrouverted'environ
10cm [4 pouces]- premierebutee.
EnteverI'excSsdegraissesur lapiScede viandeavantla cuissonau griI.
UtiJisationd'une lechefritesouiJlee.
Latensionelectriquede Jamaisonest peut-etre basse.
• Determinerque I'appareiIn'apaseteprogrammepourun autonettoyagediffer& Voir page41.
• Verifierque la porteestfermee.
• VerifiersiIacommandeesten modesabbat.Voir page37.
• Lefour estpeut6tre_ unetemperaturesuperieure_ 205°C(400°F).Latemperaturedufour doJt
6tre inferieure_ 205°C(400°F)pour pouvoirprogrammerun cycled'autonettoyage.
Untempsde nettoyagepluslong peutetrenecessaire.
On n'a paselimineavantI'operationd'autonettoyagelesaccumulationsexcesslvesde resldus,
particulierementlesresldusd'alimentsacidesou sucres.
* L'interieurdu four estencorechaud.Attendre environune heureapresJ'achevementdeIa
perioded'autonettoyage.IJest possibled'ouvrJrlaporteaprSsIadisparJtiondu messageLOCK
[VERROUILLAGE]sur I'afficheur.
, LescommandesetIaportesontpeut-etreverrouillees.Voirpages33et42pour ledeverrouilJage.
47

B
PRO6LEME SOLUTION
Lasudace _ dessus iisse montre 1.Finesrayuresou abrasions+
des signes d'usure, o S'assurerque la surfacede cuissonet le fonddesustensilessont propres.Nepasfaire
gJisserd'ustensiiesenverreou en m6talsur Iasurface.S'assurerque le fonddes
ustensilesn'est pasrugueux.Utiliserlesagentsde nettoyagerecommand6s.Voir
page43.
2.Marquesde m6taL
o Nepasfaire glisserd'ustensiIesmStaiIiquessur lasurface.Unelois Iasurfacerefroidie,la
nettoyeravecIacr6mede nettoyagepourtable decuJsson.Voir page43.
3. Marqueset tachesbrunes.
o Enleverrapidementtesproduitsrenversds.NejamaisessuyerIasurfaceavecune6ponge
ou un IingesalkS'assurerquela tablede cuissonetque le fond desustensilessont
propres.
4.Zonesavecrefiet m6taJIique.
o DSp0tsmin6rauxen provenancede I'eauet de la nourriture.UtiJJserlesagentsde
nettoyagerecommandes.Voir page43.
5. PJqOresou 6caiIIements
• EnleverrapidementIesproduitssucr6squi ont d6bord&Voir page43.
Accumulation d'humidit_ sur ie + Ceciest normaldurant la cuissond'aIimentscontenantbeaucoupd'eau.
hublot ou vapeursoltant de l'_vent. + UtilJsationexcessived'humidit6 Jorsdu nettoyagedu hubJot.
Emission d'une loire odeur ou de + Ceciest normalpour unfour neufetdisparaitapr6squelquesutilisations.
fum#e lots de ia raise en marehe Uncycled'autonettoyage<<brOlera>>plusrapidementlesodeurs.
du fouro • Laraiseen marched'unventilateuraide_ retirerfurn6eet odeurs.
+ Pr6sencede salet6ssurla sole.Proc6der_ un autonettoyage.
Codes d'anomalie. + LesrootsBAKEou LOCKpeuventciignoterrapidement_I'afficheurpourpr6venird'uneerreur
ou d'unprobleme.Silemot BAKEou LOCKparait_I'afficheur,appuyersurIatoucheCANCEL.
Si le mot BAKEou LOCKcontinue_ clignoter,d6brancherI'appareil.Attendrequelques
minutes,puisrebrancherI'appareiLSi ie mot continue_ clignoter,d6brancherI'appareilet
prendrecontact avecun r6parateurautoris6.
+ Si lefour esttr_ssale.lesflammechespeuventproduireuncoded'anomalieaucoursdu cycle
d'autonettoyage.Appuyersur IatoucheCANCELet iaisserIefour refroidircompJ6tement,
essuyerIasalet6enexecspuisreprogramrnerI'autonettoyage.Silecoded'anomalier6apparatt,
prendrecontact avecun reparateurautorJs&
Des bruits se font entendreo + Lefourfait plusieursbruits faibles.IIestpossibled'entendrelesrelaisdufour qui semettent
en marcheet s'arr6tent.Ceciestnormal.
+ Atorsque Iefourser6chauffeetserefroidit,ilestpossibled'entendredesbruitscorrespondant
ladilatationet_ lacontractiondespi@cesm6talliques.Ceciestnormaletn'endommagepas
I'appareii.
li n'y a ni bip ni affichageo + Lefour estpeut-6tre en modesabbat.Voirpage37.
_ SAb _ eiignote puis Lefour esten modesabbat.Pourannulet,appuyersur latouche Clocket maintener-Ja
reste aiium_, enfonc_ependantcinqsecondes.
48

Garantie cemplbte d'une annee -
Pibces et main-d'oeuvre
Dulantune p_rioded'un (1) an a comp[erde la
datede I'achatinitialau d6taiLtoute piecequl se
rev61eraitddectueusedonsdesconditions
normalesd'usagem_nagerserarepaoeeou
remplac6egratuitement
Garanties limitees =Pi_ces seulement
De la deu×i_me _ ia einqui_me annie =A
compterde la datede I'achat_mtlalau d6taiLles
pLecesde lalistecl-dessousqui se r6v61era_ent
ddec[ueuses oans JesconditionsnormaJes
d'usagemenagerserom repareesou rempiac6es
gratultement(pie(esseu_ement);JeproprJetaire
dewaassumerLouslesautresfrais,y comprJstrais
de main-d'oeuvre,de d6placement,detransport,
de kilom6trageetde diagnostic._ecos6cheant
* Sarfaee de eaissoa ea vitroe_ramiqae : Par
suitede bristhermtlue,deceleration,tissuration
au joint en caoutchoucsur le rebord usuoeues
motifs.
oEI6ments ehadffaets 61eetrJqdes: Elements
de surfaceradiantssurJesappareilsde cutsson
electriques.
P,esidents canadiens
Lesgarantiesci-dessuscouvoemun appare_l
_nstaJl6au Canada.seuiements'ila6t6agreepar
lesagencesde test habiJit6es(verificationae la
conformiteaune normenatlonaJedu Canada),
saulsi I'appareila _teintrodut au Canada
i'occas_ond'ue cnangementde r6sidencedes
Etats-Unisvers le Canada
Garantie limit6e hers des Etats-Unis et
du Canada - Pieces seulement
Pendan_une p6rJoded'un (1./ana compeerde a
datede I'achatinitialau detail toute piecequLse
reveleraitddec_ueuseoansdes conditions
normalesd'usagemenagerserarepareeou
remplaceegratuitement[pieceseulement);le
propri6tairedevraassumertousles autoesfrais,y
comprisfrais demain-d'oeuvreded6placement.
de transport,de kiJome_ragee_oe diagnostic,le
cos echeant.
Lesgatdneesspdcifiquestbrmdleesc_-dessusson_
lesSEULESquele fabricantaccorde.Cesgaranties
vousconf_rentdesdroitsjdddiquessp4cifiquese[
_,edSpouvezegalementjouir d'autresdroits.
variablesd'dn 4tat a/'autre,d'uneprownceb une
ad[re
Ne sent pas converts par ces
gata ties .-
1= Lesdommagesou derangementsdus _ :
a=Mise en service,IJvraisonou entretieneffectu_sincorrectement=
b=Toutereparation,modification,aIterationet tout r_glagenon autorJsaspar
le fabricantou par un prestatairedeserviceapres-venteagree=
c=Accidents,mauvaiseutJiisationou usageabusifou deraisonnable=
d=Alimentationelectrique (tension,intensJtel}incorrecte=
e.R_giageincorrectd'une commande.
2= Lesgarantiesne peuvent6trehonor6essi Iesnum_rosde s6ried'origineont et_
enlev6s,modifiesou ne sent pasfacilementlisibles=
3= Ampoules=
_= Appareilsachetesauxfins d'usagecommerciaIou industrieL
5= Lesfrais de visited'un prestatairede serviceou deserviceapres-venteencourus
pour lesraisonssuivantes:
a=Correctiond'erreursde miseenservice=
b=initiation de rutilisateur _ I'emploide I'appareiL
c=Transportde I'appareiIauxIocauxdu prestatairede sewice=
6= Lesdommagesde latable decuissonenverrecausespar I'utiIisatJonde
nettoyantsautresque lescremesettamponsde nettoyagerecommandes=
7= Lesdommagesde latable decuissonenverrecausespar desproduitssucresou
du plastiquefonduqui ontdurci parcequ'ils n'ontpasetenettoy6sconformement
auxinstructionsdonneesdonsle guided'utilisationetd'entretien=
8= Dommagessecondairesou indirectssubispartoute personnesuite au non-
respectde cesgaranties=Certains6tatsou provincesnepermettentpasI'exclusJon
ou Ia limitationdesdommagessecondairesou indirects;par consequentles
limitationsou exclusionsci-dessuspeuventne pass'appliquera votrecos=
Si l'i terve tio r parate r est
• Contacterle detaillantchezqui I'appareila eteachete,ou contacter Maytag
ServicesSM/service_ laclientelede Maytagau 1-800-688-9900auxE.-U.ou 1-800-
688-2002au Canada,pour obtenirIescoordonneesd'une agencede serviceagr68e.
• Veiller _conserverla factured'achat pouriustifierde Iavalidite de lagarantie.Pour
d'autresinformationsen cequi concernelesresponsabilJtesdu propri_taire
regard du servicesousgarantie,w}irle textede laGARANTIE.
• Si le dataillantou I'agencede serviceapras-ventene peutresoudreIeprobleme,
8crioe_MaytagServicessM,attentionCAIR:_Centel,P.O.Box2370,Cleveland,TN
37320-2370ou telephonerau 1-S00-688-9900 ad× Eo-Uood 1-8_e-6SS-2002
au Caeada=
• Lesguidesd'utJIisation,Insmanuetsde serviceet Iesrenseignementssur Iespieces
sent disponiblesaupresde MaytagServices sM,service_ laclientelede Maytag=
_e_atq_e$ :
Lorsde tout contactconcemantun probleme,fournir I'Jnformationsuivante:
a. Nora,adresseet num_rode telephonedu client;
b. Num_rode modaleet numerode s_riede I'appareiI;
c. Noel etadressedu detaillantou de I'agencede service;
d. Descriptionciairedu problameobserve;
e. Preuved'achat (facturede vented}.
49

Estufa Ei_ctrica -
Cubierta Lisa
Tabmade Materias
lnstrucciones Im portantes
sobre Seguridad ........................51-54
Cocinando en [a Estufa ............ 55-57
ControHes
Cubiertas Lisas
Cocinando en e[ Homo ............ 58=66
Homeado
'Cook & HoHd'
'Cook & HoM' Difeddo
Mantener Cdiente
Asar a HaParriHa
PardHasdd Homo
Cuidado y Limpieza ..................67-70
Horno Autoiimp[ante
Proced[m[entos de Umpieza
Manteaimiento .......................... 71-72
Ventana del Homo
Luz del Homo
Locaiizaci6n y Soiuci6n
de Aver_as ...................................73-74
Garantia y Servicio .......................... 75

mnstalador:Porfavordeje estagufajun[o conel
e_ec[rodom6stico.
Censumidor: Porfavorbay conserveestagula parareferencia
futura Conserveel reclbode comprayio el chequecancetado
como comprobantede compra.
NOmerode Modelo
NQmerode Serie
Fecha de Compra
Si tiene preguntas. Hame a:
MayEagCustomer Assistance
1-800-,688@900 EE.UU.
1-800-688-2002 Canada
(Lunes a Vien les. 8:00 a.rn. a 8:00 p.m. Hora del F_ste)
Internet: http:/iwww.may[a g.com
En nuestro contmuo alvin de mejorar la calidad y rendlmlento de
nues[ros electrodom@ticos, puede que sea necesano modificar
el ebctrodom@tico sin actualizar esta gufa.
Para infermaci6s_ sebre set_dde, vet pb[jina 75.
Lea y siga todas las instrucciones antes de usar este
electrodom6stico para evitar el riesgo potencial de incendio,
choque ei@trico, iesi6n personal o da_o ai eiectrodom6stico
como resultado de su uso inapropiado, Utilice este
eiectrodomestico soiamente para ei prop6sito que ha sido
destinado segun se describe en esta guia,
Para asegurar funcionamiento correcto y seguro: El
eiectrodomestico debe ser instaiado debidamente y puesto a
tierra por un t@nico caiificado, No intente ajustar, reparar,
prestar servicio o reempiazar ninguna pieza de este producto
a menos que sea espedficamente recomendado en esta guia,
Todas ias reparaciones deben ser reaiizadas por un tecnico
calificado,
Siempre desenchufe el electrodom6stico antes de efectuar
aiguna reparaci6n,
Lasadvertencias e mstrucciones umportantes sobre seguridad
que aparecen en esta guia no estan destinadas a cubrir todas
ias posibies circunstancias y situaciones que puedan ocurrir,
Se debe ejercer sentido com8n, precauciOn y cuidado cuando
instale, realice mantenimiento o haga funcionar el artefacto,
Siempre p6ngase en contacto con el fabricante si surgen
problemas o situaciones que usted no comprenda,
Reconozca _os simbo_os, advertencias,
etiquetas de seguridad
PODRtAN causar bsi6n personal grave o mortal
PRECAUC!ON : PdigF0s 0 Pr_iCticasn0 segu(as que
PODRIAN causar lesi6n personal menos grave.
ADVERTENCmA:Para redueir el riesge de welee del
electredem_stice a eausa de use anermal e debide a
pese e×cesive en la puerta del berne, es necesarie
debidamente instalade.
Para verificar si el dispositivo est,1debidamente instalado, mire
debajo de ia estufa con una iinterna para asegurarse de que
uno de los tornillos niveladores traseros este debidamente
enganchado en la ranura del soporte, El dispositivo antivuelco
asegura el tornillo nivelador trasero al piso cuando est_
debidamente enganchado, Esto debe verificarse carla vez
que la estufa sea movida,
Para Evitar ce dio o
Da o Ca sado pot H mo
Aseg_Jresede que se hayan retirado todos los materiaies de
empaque dei eiectrodomestico antes de su uso,
No coioque materiaies combustibles cerca dei
eiectrodomestico, No se deben guardar en ei homo
materiaies infiamabies, Muchos pi_sticos son afectados por ei
51

caior, Mantenga los pidsdcos abjados de hs piezas deI
ebctrodom6stbo que se pueden entibiar o cabntar,
Para evitar incendios de grasa, no permita acumuiad6n de
grasa de cocinar o de otros materiabs infiamabbs en eI homo
o en su cercan[a,
En Case de lncendie
Use un extinguidor con producto quimbo seco o deI tipo
espuma o bicarbonate para apagar eI incendio o las llamas,
Nunca use agua en un incendio de grasa,
1, Apague eI homo para evitar que la llama se disperse,
2, NUNCA bvante o mueva una sartdn en llamas,
3, Apague eI fuego o la IBma del homo cerrando la puerta
del homo,
Seguridad para los Ni es
de la estufa, Los niHiosque se trepan en !a puerta de la
seriamente,
NUNCA deje a los nixies solos o sin supervisi6n cuando el
homo este en use o cuando est6 caiiente, No se debe nunca
permitir que los nixies se sienten o se paren en ninguna pieza
del ebctrodomestico pues se pueden bsionar o quemar,
Se bs debe ensdiar a los nixiesque el ebctrodomestico y los
utensilios que est_inen el pueden estar cdientes, Deje enfriar
los utensilios calientes en un lugar seguro, fuera del abance
de los nixies, Se bs debe ense_ar a los nixies que un
ebctrodomestico no es un juguete y que no deben jugar con
los controbs u otras piezas del artefacto,
lnstruccienes Generales
NUNCA use un electrodom6stico come un peidaHiopara
aicanzar los armanos superiores, Eluse incorrecto de la
puerta del electrodom6stico tabs come pisar sobre elias.
apoyarse o sentarse en la puerta puede resultar en que el
electrodomestico se vuelque, se rompa la puerta y se
causen lesiones graves,
Para evitar posibles riesgos para el usuario y ddio al
electrodom6stico, no use este producto come una estufa para
calentar o entibiar una habitaci6n, Adem_s no use el homo
come un lugar para guardar alimentos o utensilios de cocina,
No obstruya la circulaci6n del aire bloqueando el respiradero
dei homo,
NO TOQUE LOS ELEMENTOSCALEFACTORESNI LAS
SUPERFICIESINTERIORESDEL HORNO, Los eiementos
calefactores pueden estar calientes aLincuando su color sea
obscure, Las superficies interiores de cuaiquier homo se
calientan Io suficiente come para causar quemaduras,
Durante y despues dei use, no toque ni permita que ias ropas
u otros materiales inflamables entren en contacto con los
eiementos caiefactores o ias superficies interiores dei homo
hasta que no se hayan enfriado, Otras superficies dei
electrodomdstico pueden estar Io suficientemente calientes
para causar quemaduras - entre estas superficies estan la
abertura dei respiradero dei homo, ia superficie cerca de esta
abertura, ia puerta dei homo y ia ventana de ia puerta dei
homo,
No toque un foco caliente del homo con un paffo humedo
pues se puede quebrar, Si ei foco se quiebra, desenchufe ei
eiectrodomestico antes de sacar ei foco para evitar sufrir un
cheque ei6ctrico,
NUNCA use papei de aiuminio para cubrir ias parriiias dei
homo ni ei panel inferior dei homo, Ei use incorrecto puede
resuitar en un riesgo de cheque el@trice, incendio o da_ioai
eiectrodomestico, Use papel de aiuminio soiamente come se
indica en esta guia,
Seguridad Cecinar
Nunca caliente un contenedor de alimento cerrado en el
homo, La acumuiaci6n de presi6n puede reventar ei
contenedor causando una lesi6n personal grave o daHioal
eiectrodomestico,
52

Usetomaoihssecosygruesos,LostomaoiBshLimedos
puedencausarquemadurasporvapor,Nosedebenusar
todiasdesecarlospiatosniotrossustitutosenvezdelos
tomaoiiasporqueeiiospuedenpasarsobrelosebmentos
caiientesyprendersefuegoopuedenquedaratrapadosenhs
pbzasdeIebctrodomestbo,
Usevestimentasapropiadas,Lasropassueitasoropascon
mangaslargassueitasnosedebenusarcuandoseest_
cocinando,Laropasepuedeprenderfuegoycausar
quemadurassientraencontactoconlosebmentos
cabfactores,
Siempre coioque ias parriiias dei homo en ias posiciones
deseadas cuando el homo este frio, Deslice la parrilla del
homo hacia afuera para agregar o retirar alimento usando
tomaollas secos y gruesos, Siempre evite colocar o retirar
alimento del homo sin sacar la parrilla hacia afuera, Si una
parrilla debe ser movida cuando este caliente, use un
tomaollas seco, No deje que el tomaolla entre en contacto
con el elemento caliente del homo,
Use las parrillas solamente en el homo en que fueron
enviadas/compradas,
Tenga cuidado cuando abra la puerta del homo, Primero deje
que salga el aire o vapor caliente antes de sacar o volver a
colocar el alimento en el homo,
ADVEflTENCIA SOBflE ALIMENTOS PflEPAflADOS: Siga
las instrucciones del fabricante del alimento, Si un contenedor
de aiimento congeiado de pi_istico y/o su tapa se deforma,
comba o de otra manera se da_ia durante la cocci6n,
inmediatamente descarte el alimento y su contenedor, El
alimento puede estar contaminado,
No permita que el papel de aluminio o la sonda de la came
toque el elemento calefactor,
Siempre apague todos los controles cuando haya terminado
de cocinar,
Seguridad sobre Use
de Utensi ios
Siga las instrucciones del fabricante cuando use bolsas para
cocinar en el homo,
Se ha comprobado el rendimiento y funcionamiento seguro de
este electrodomestico usando baterias de cocina
convencionales, No use ningSn dispositivo o accesorio que no
haya sido especificamente recomendado en esta guia, No use
rejillas superiores de la estufa o sistemas de convecci6n para
hornos, El uso de dispositivos o accesorios que no sean
expresamente recomendados en esta guia pueden crear
peligros graves de seguridad, afectar el rendimiento y reducir la
vida 8tii de los componentes de este electrodom6stico,
Asegurese de que el utensilio sea Io suficientemente grande
como para contener en forma debida los alimentos y evitar
derrames, Eltama_io es particularmente importante cuando se
utilizan freidoras, AsegOresede que el utensilio tiene
capacidad para ei voiumen de aiimentos que se va a agregar ai
iguai que para ia formaci6n de burbujas de ia grasa,
Nunca deje que un utensilio hierva hasta quedar seco pues
esto puede da_iarel utensilio y la estufa,
Si el utensilio es m_ispequdio que el elemento, una porci6n
del elemento quedar_ expuesta y puede encender la ropa o un
tomaollas,
Solamente ciertos tipos de utensilios de vidrio, vidrio cer_imico,
cer_mica, gres u otros utensilios vidriados son convenientes
para cocinar en la superficie o en el homo sin quebrarse
debido al repentino cambio de temperatura, Siga las
instrucciones del fabricante del utensilio cuando use vidrio,
Gire los mangos de los utensilios hacia el centro de la cubierta,
no hacia la habitaci6n ni sobre otro elemento superior, Esto
reduce el riesgo de quemaduras, encendido de materiales
inflamables o derrames si el utensilio es tocado
accidentalmente o alcanzado por ni_iospequdios,
NUNCA deje los eiementos superiores sin supervisi6n,
especialmente cuando est,1usando los ajustes de calor altos,
Un derrame sin recibir la debida atenci6n puede causar humo y
un derrame de grasa puede causar un incendio,
Este electrodomdstico tiene diferentes tama_iosde elementos
superiores, Seleccione utensilios que tengan bases planas Io
suficientemente grandes para cubrir el elemento, La relaci6n
adecuada entre el utensilio y el elemento mejorar_ la eficiencia
al cocinar,
CUBIERTA DEVIDRIO CERAMICO: NUNCA cocine sobre
una cubierta quebrada, Siia cubierta de ia estufa sequiebra,
los agentes de limpieza y los derrames pueden penetrar y crear
un riesgo de choque el6ctrico, P6ngase en contacto con un
t@nico calificado inmediatamente,
53

O masFreidoras
Use extremo cuidado cuando rnueva la olla con aceite o
descarte la grasa caliente, Deje que la grasa se enfrie antes
de intentar mover ia oiia,
Campanas de VentiJaci6n
Limpie con frecuencia ia campana y los fiitros a fin de evitar
que se acumuie en eiios grasa u otros materiaies infiamabies y
para evitar incendios de grasa,
Cuando prepare alimentos flameados debajo de la campana,
encienda el ventilador,
Seguridad en Ja Limpieza
Limpie con cuidado la cubierta, Apague todos los controles y
espere que se enfrien las piezas del electrodomestico antes de
tocarlas o limpiarlas, Limpie con cuidado, Tenga cuidado
para evitar quemaduras de vapor si usa una esponja o un
patio mojado para iimpiar los derrames en una superficie
caliente, AIgunos limpiadores pueden producir vapores
nocivos cuando se aplican en una superficie caliente,
Limpie solamente las piezas indicadas en esta guia,
Homo AutoJimpiante
No iimpie ia junta de ia puerta, La junta de ia puerta es
esencial para obtener un buen sello, Se debe tener cuidado
de no frotar, da_iar ni mover la junta,
No use limpiadores de homo ni forros de homo de ningQn tipo
alrededor ni en ninguna parte del homo autolimpiante,
Antes del cicio de autolimpieza del homo, retire la asadera, las
parrillas del homo y otros utensilios y limpie cualquier derrame
para evitar humo excesivo o llamaradas,
Esnormal que la cubierta de la estufa se caliente durante el
ciclo de autolimpieza, Por Io tanto, se debe evitar tocar la
cubierta durante un cicio de autolimpieza,
Aviso y Advertencia
lmportante Sobre Seguridad
La Propuesta 65 de la Ley de 1986 del Estado de California
Sobre Seguridad y Contaminaci6n dei Agua Potable (California
Safe Drinking Water and Toxic Enforcement Act of 1986} exige
que ei Gobernador de California pubiique una iista de ias
sustancias que segLinel estado de California causan c_incer o
da_o ai sistema reproductivo y exige que iasempresas
adviertan a sus clientes sobre la exposici6n potencial a tabs
sustancias,
Se advierte a los usuarios de este electrodomestico que
cuando el homo est,1funcionando en el cicio de autolimpieza,
puede haber exposici6n de bajo nivei a aigunas de ias
sustancias indicadas en la lista, incluyendo mon6xido de
carbono, La exposici6n a estas sustancias puede ser reducida
a un minimo ventilando el homo al exterior en forma
adecuada, abriendo las ventanas y/o la puerta en la habitaci6n
en donde est,1ubicado el electrodom6stico durante el cicio de
AVISO mMPORTANTE RESPECTOA LOS PAJAROS
DOMESTJCOS: Nunca mantenga los p_jaros en ia cocina o
en ias habitaciones donde puedan iiegar los humos de ia
cocina, Los p_ijarostienen un sistema respiratorio muy
sensitivo, Los humos producidos durante ei cicio de
autoiimpieza dei homo pueden ser periudiciaies o mortaies
para los p_ijaros, Los humos que despide ei aceite de cocina
recaientado, ia grasa, margarina y los utensiiios
antiadherentes recaientados pueden tambi_n ser periudiciaies,
Conserve estas lnstrucciones para Referencia Futura
54

@
Controies Superiores
Useestoscontrobs paraencenderloselementossuperiores. Sedis-
ponede una sebcciOninfinita deaiustesdel cNor desde'Low' {Baio}
hasta'High' CAito}.Lasperillaspuedencolocarseen cuaiquierade
estosaiusteso entreelios.
Programaci6n de los Contro[es
1. Co[oqueetutensiliosobreel elementosuperior.
2. Oprimay gire la perfliaen cuNquier direcciOnhastael ajustede
calordeseado.
o Enel panelde contro[seencuentramarcadocual O O
Nementocontrola carlaperiiia. Porejemplo,el dibuio
a la derechaindicae[ebmento dNanteroizquierdo. O O
3. Enel pane[decontrol hayuna [uzindicadoradel eiemento.
Cuandoseenciendeaigunade lasperillasde control,[a[uzse
ihmina. La luzseapagaracuandotodos losebmentossuperiores
seapaguen.
4. Despu@de cocinarcoloque[aperilla en laposbidn'OFF'
(Apagado}. Retireel utensiiio.
Demento Dob[e (modelos selectos]
La cubiertaestaequipadacon unoebmento dobb f_:.---.
o
sltuadoen tapartedelanteradelecha de la cublerta. __(__j_
Estolepermitecambiarel tamariode estoebmento. OFF
1. Gire[aperiiiaa [aizquierdaparausarel
2
elementomasgrandeo a [aderechaparausar
el eiementom_spequeiio.
2. Oprimay gire la periiiaen cuaiquierdirecci@ 4
hastae[aiustede cNor deseado. "
Medium
Ajustes de Ca[or Sugeridos
EItamaffo,tipo de utensflioy IacocciOnafectaranel aiustedeIcaIor.
ParainformaciOnsobrelosutensiliosyotrosfactoresque afectanlos
ajustesdel calor,consulteel folleto Recomendacionessobrelos
Utensiliosen la pagina57yel folleto "La CocinaFacil".
'[Low'(Baio}(2}: Seutfliza
paramantenerlosaIimentos
caIientesy derretirchocolatey
mantequflia.
'l_ed. Low'
{MedianoBaio}
(3-4}: Usepara
continuar
cocinando
aiimentos
tapadoso para
cocinara}vapor.
[
4
'Medium' {Median@(5-
7}: Usadoparamantener
un hervorbnto para
grandescantidadesde
ffquidoy paralamayoffa
de lasfrituras.
OFF
Medium .....................
EIesti[o de[ panel
de contro[ vaffa
segqn el modelo.
'High' {Alto}!:le}: Seusapara
hacerhervirun [iquido. Siempre
reduzcael aiustea un calor mas
bajocuandolos ffquidos
combncen a herviro cuandolos
Nimentoscomiencena
oocinarse.
)
'Ned. High'
{MedianoAlto}
(8o9}: Seusa
dorar
cNentar
aceiteparafreir
en una sart@]
hondao para
saItear.
Tambi@para
mantenerun
hervorrapido
paracantidades
grandesde
[[quidos.
ANTESDECOCiNAR DESPUESDECOCINAR
Slempreco[oqueun utensi!Joen el elemenrosuperiorantesde • AsegOresede que loselememossupenoresestenapagaaos.
encenoerlo.Paraevitarda_ioa Jaestufa, nuncaenciendaun ........................ tan pronto como sea posible.
e[ementosuaenorsmtenor ult utensJJiosoDree[
OTROS CONSFJOS
, NUNCA use[acubbrta de B estufacomo unaareapara guarda[
alhnentoso utensilios. , Siexistenarmarlosdirectamen[esobre[acubiertade iaestufa.
coloqueen eflosart[culosdeusopocofrecuen-[ey que pueoenser
MiENTP,AS COO[NA guardadosconseaJridaden un areaque estarasuje[aai cabot
AsegOresede que ustedsabecua[periIIacontroiacadae[emen[o. A[gunastempera-[uraspuedenno serseguraspa(aarticLflostales
Aseguresede que u_tedencendioe aemen[o correc-[o, como[[quidosvoiatfles,hmp{aooreso rocladoresen aerosol.
° Commencea coclnaren un Nustede caioralto[uegoreouzcaa un ° NUNOAdeje nlngtin articu[o _spec_almenteart[cuiosde plastico.
ajustemasbajopara cornpbtar [acocciOn.Nuncauseun ajus[e sourelacubierta de [asstufa. Elaire caiienteprovemente6e_
de caloraltoparacocmarduranteun tiempo pro[ongado, respiraderopuedeencende[ os articulosinflamabies,oerre[ir o
ab[andarlospldsticoso aumentar[a }resiOnen loscon[eneoores
NUNOApermltaque una ouahiervahastasecarse. Estopodria
daffar[ao[lay e[eIectrodom@tico, cerradoshaciendoLosrevental
o NUNCA permffaque e[pape[de alurmnlo,lostermOmetrosde carne
NUNCA toquela superficiede laestufa hastaque no sehaya
enfriado. Posiblementeaigunasareasde [asuperficie, o cuaiquierotroobjetode metal,a excepciOnde una oliasoDreu/i
especLaimentealrededorde losebmentos seent_bleno caiienten elementosuperior,tengacon[ac_ocon loselementoscaiefactores,
mlentrasestacocinando. Usetomaoliaspara protegersus o NUNCA guardearticulospesadossobrela cublertaque pueoan
manos, caersey daffada.
55

Cubiertas Lisas
Notas sobre [as cubiertas [isas:
oLacubierta de maestufa puede emitir un poco de humo y
emer_aprimeravezquese uti[iz& Estoesnormal
oLascubiertas misasretienen emtamerper un eierto periode
despu6s que se ha apagado maestufa. Apaguelosetementos
unospocosminutesantesde que Iosalimentosest@
completamentecocinadosy useetcaiorrestanteparacompbtar
la cocci@.Cuando[aIuzdesuperficb caiienteseapaga [vera
continuaciOn},e[_readon@ secocinaestar_fr[a aitacto.
Debidoa Iamaneraenque retienene[caIor,loseIementos[isos
no responder_ntan r@idamentea loscambiosen losajustes
come Iosebmentosespirales.
oEncasede un posiblederrame,retireel utensiIiode [acubbrta
de la estuf&
oNunea trate demevantarmacubierta.
oLasuperficb lisapuedeversedescoioridacuandoest_ca[iente.
Estoes normaly desaparecer8cuandoIasuperficieseenfr[e.
Dementos Superiotes
LoseIementossuperioresensu estufaest_nidentificadosper
drcuIos permanentesen [asuperficieIisa. Paracoc[nardemanera
m_seficiente,useun utensi[ioque seadel mismotamaSoque e[
e[ePaento.
Los uteltsilies no debe# extenderse robsall# de 25 mm
(1 pulgada) del tamafie de! elemente.
Cuandose enciendeun contmI,sepuedevet un respIandora trav6s
de la superficb lisa.Eleiemento pasar_ per cities de encendido
y apagado para mantener el ajuste de calor seieccionado, aen
enemajuste'Hi' (Nt@,
ParamayorinformaciOnsobrelosutensiliosconsuIte[asecciOn
RecomendacionessobreIosUtensiIiosen Iap_gina57y el folbto
"LaCocinaF_cii"que seincluyeconsu estuf&
ELEMENFO
SENC/LLO
ELEMENTO DOBLE
(MODELOS SELEOTOS)
Luz lmlicadora de Superficie Caliente
La [_Jzindicadoradesuperficiecalienteseencuentraen el paneIde
control La[uzseiluminar8cuandocualquierade Iosebmentos
superioresest6caIiente.Permanecer_encendida
a8ndespu@de que e[controlseaapagado,hasta
queel arease hayaenfriado. Net: Surface
Consejos para proteger la
cubierta lisa
Limpieza @er pSgina 69 para mayor informaciOn)
oAntes de usar por pnmera vez, limpie Ia cubierta.
o Limpie [acubierta diariamente o despu6s de cada uso. Esto [a
mantendr_ con una buena apadencia y puede evitar que se da_e.
oSi se produce un derraPaecuando este eocinando, I[mpie[o
inmediatamente de [a cubierta cuando 6sta est@caiiente para
evitar una Iimpieza m_s dif[ciI despu@. Tenga mucho cuidado,
limpie ei derraPaecon una toalIa seca y Iimpia.
o No de}e que Ios derrames permanezcan sobre Ia cubierta o sobre
la moIdura de la cubierta por un periodo de tiempo prolongado.
o Nunca use poivos de [impieza abrasivos ni esponjas de restregar
que puedan rayar [a cubierta.
o Nunca use blanqueador a base de cloro, amon[aco ni otros
limpiadores que no hayan sido especificamente recoPaendados
para usar en el vidrio cer_Paico.
Para evitar marcas y rayaduras
o Nouseutensiliosdevidrio, Puedenrayar[asuperficie,
o Nunca co[oqueunsoporteo un arede wok entreIacubiertay el
utensiIio, Estosart[cuIospuedenmarcaro rayar[acubiert&
o No@slice utensiIiosde aIuminioa tray@de una eubiertacaIiente,
Losutensiliospueden@jar marcasque debenset Iimpiadas
inmediatamente.(VerLimpbza,p4gina69.)
oAseg/iresede que Iacubbrta y Iaparteinferiordel utensilioest@
JimpiasantesdeencenderJaestufaa fin de evitarrayaduras.
o ParaevitarIasrayadurasodaiio a la cubiertadevidrio cer4mico,
no deieazOcar,salo grasassobreloselementos. Limpb la
cubierta conun paiio limpioo contoalIasde pape!antesde usarJa.
o Nu_ca desliceutensiliosde metalpesadosa tray@de Jacubbrta
puespueden rayarla.
Para evitar maachas
o Nuaca useun pai_oo unaesponjasuciapara IimpiarB cubierta
de Iaestuf& Estopuede@jar una pe
Para ev[tar etros da es
. Nodejeque en la cubiertacalientesederritan[%sticos,az_caro
alimentoscon altocontenidode azOcar.Si estosucede,[impie
inmediatamente._/er Limpieza,p_gina69.:}
. Nunca dejeque una oIlahiewahastaquedarsecapuesesto
dafiar_lasuperficiey el utensilio.
, Nunea use la cubierta como una superficie de trabajo ni
comounatabiade cortar.
+ Nunca cocine a[imentos directamente sobre [acubierta.
. Nouseun utensiIiopequefioen un elementogrande. Estono s6Io
desperdiciaenergiasinoque tambi6npuedenproducirsederrames
calientessobreIacubiertaloscuaIesrequieren[impiezaadiciona[.
. NouseutensiIiosespeciaIesque noseanpianos,detamai_omayor
o desniveIadosta[como la parteinferiorredondade Ioswoks, con
fondos acanaladosy/o parrillasy oIIasde grantama_opara
prepararconservas.
. NouseaIuminioni contenedoresde papeIde aluminio. E[
aluminiosepuedederretiren Iacubiertade vidriocer_mico.Sie[
metalsederriteen [acubierta,no uselaestufa. Llamea un
t6cnicoautorizadode Maytag.
Recomendaciones sobre
SiseusanIosutensilioscorrectossepuedenahormrmuchos
proNemas,taIcomo prolongaci6ndeltiempo de cocciOnde los
alimentosu obtenci6nde resuitadosno consistentes.Losutensilios
correctosreducenel tiempode cocci6n,usanmenosenergia
electricay cocinanlosalimentosde manerarossuniforme.
Prueba de las OHas P anas
Verifiquesisus ollassonplanas+
ILaprueba de maregma:
1+ Coloqueuna regIaa trav6sde[fondode [aolla+
2+ ColOquelaa la[uz+
3+ Pocao ningunahz debeversedebajode [aregia+
La prueba de maburbuja:
1+Co[oqueuna puIgadade aguaen iaoIIa+Coioque[aolla en [a
cubiertay gire ei control a'High' {Aito}+
2+ Observe[aformaci6nde burbujasa medidaque e[aguase
caiienta+Lasburbujasuniformessignificanbuen rendimientoy
[asburbujasno irreguIaresindicanpuntos caIientesy cocciOn
dispareja+
Vetel foIIeto"La CocinaF_ci["paramayorinformaciOn+
Use, Evite
Utensiliospianosy Losutensiliosconfondosacanalados
suaves, o arqueados.LosutensiIiosconrondos
irregularesno cocinanuniformemente
losaiimentosy aigunasvecesno
puedenhervir%uido.
UtensiIiosde material LosutensiJiosde metalesdelgadoso de
grueso, vidrio.
UtensiIiosque sean LosutensiIiosm_speque_oso m_s
del mismotamario grandesque el elementoen 2,5cm
queel elemento. {1 pulgada}.
Mangosseguros. Losutens+Iiosconmangossueltoso rotos.
Mangospesadosque puedenincIinarel
utensilio.
Tapasherm_ticas. LastapassueItas.
Woksconfondo Loswoks confondoapoyadoen un aro.
piano.
Utensi ios para preparar
eonservas y de tama os
Todas masommaspara preparar conservas y masommasgrandes
deben tenor rondos pianos y deben set hechos de materiames
gruesos. Estoesmuy importanteparaiascubiertas[isas+La baseno
debeset m_sde 2,5cm [1puigada}m_sgrandeque ei eiemento+
Cuando[asoIiasde prepararconservasy [asoiiasdetamai_os
grandesno cumpIenestosrequisitos,[acocciOnpuedendemorar
m_stiempoysepuedendariar iascubiertasde iasestufas+
Aigunasoliasde prepararconservast+enenbasespequeiiaspara
usarIasen [assuperficieslisasde [asestufas+
Cuundoest8 preparando conservas,use emajuste de camoralto
hasta que el agua comience a hewir o se[ograIapresiOnen e[
oIIa.Reduzcaei calorai ajustem_sbajo que mantengaeIhervoro la
presiOn.Si nose reducee[caIor,sepuededa_ar[acubiertade la
estufa.
ConsuiteelfoIIeto"La CocinaF_ci["paramayorinformaciOn.
5?

@
Panel de Contro
A B C D
Elpane[decontrol ha sidedisefiadoparasuf4ci[programaciOn.El indicadorvisualen el panelde control muestra[aheradei dFa,el
temporizadory tasfuncionesdel borne.Etpaneldecontrol mostradoarriba incJuyetascaracterFsticasespecfficasde[modelo. (Etestib del
panelde control varFasegOnel modeb.}
A
B ¸
C
i i
D
E
H
m¸
'Broil'(Asara
laParrilla}
'Bake'(HorneaO
'More+/Less-'
(M_s+/Menos-}
'Timer'_emporizador}
'Cook&Hold'[Cocci@
yMantenerCaliente}
'Clean'(LJmpieza]
'Delay'(Diferido]
'Clock'(Retoj]
'KeepWarrn'
(MantenerCaNente]
'CANCEL'(CANCELAR]
Seusaparaasara laparrillay dorarlos
aJimentos.
Seusaparahorrmary asar.
Programao cambiala hera,la
temperaturadelhomo.Programaasara
la parrilla'Hi'o'LO'.
Programaa!temporizador.
Seusaparahornearduranteantiempo
s@ccionado,luegomantierme!aNmento
calienteduranteunahera.
Seusaparaprogramaranciclode
autolimpieza.
Programael homoparacomenzara
hornearolimpiarseaunaheraposterior.
Seusaparaprogramarlaheradeldfa.
Seusaparamantenercalienteenel
homoe!alimentococinado.
Cancelatodaslasfuncionesaexcepci@
deltemporizadory e!reloj.
Use de JasTec as
• Optima latecla deseada.
• Oprima'More+' o 'Less-'paraprogramareltbmpo o la
temperatura.
• Seescuchar4una serialsonoracadavezqueoprJmaunatecla.
• Seescuchar_ndossefialessonorassiocurreun error en la
programaciOn.
Nota: Cuatrosegundosdespu@de haberoprimidoIatecla
'More+' o 'Less-'eltiempo o Iatemperaturaser_autom4tica-
menteprogramada.Sitranscurrenm4sde 30segundosdespu@
de haberoprimidouna tecla defunci6n y antesde oprimir las
teclas'More+' o 'Less-',la funci6n ser4canceladayel indbadol
visualvolver_aIdespliegueanterior.
'O OCk' (Reloj]
El re!ojpuedeserajustadoparadesplegarIaherayaseaen formate
de 12horaso 24 betas.Elreloj haside programadoen la f_brJca
parael formatede 12horas.
Para cambiar eJ reJej a formate de
24 betas:
1. Optimay mantengaoprimidaslasteclas
'CANCEL'y'Delay'durantetres segundos.
2. Oprima'More+' o 'Less-'paraprogramarel
formatede 12horaso 24 betas.
3.
abajo.
Programaci6n de[ ReJoj:
1. Oprima[atecJa'C[ock'.
o La herade[d[ay dospuntosdestellanenel
indicador.
2. Opnma'More+' o 'Less-'paraprogramar[a
heradel dia.
o Losdos puntoscontinOandesteiIando.
3. OprimaIatecla 'Clock'nuevamenteo esperecuatro
segundos.
Programela heradel dia sigubndo JasinstruccionesindJcadas
conto
58

@
Cuandose conectaenergiaeI@tricaaIhomoo despu@deuna
interrupciOnde la energ[ae!@trica,IaOkipaahoradel reloj previaa
la interrupci@destellar_enel indicador.
Paradesplegarla horadeId[acuandoel indicadorest6 mostrando
otrafunci6n detiepapo,optima latecB 'Clock'.
La horadel reloj no puedeset cambiadacuandoel hornohasido
programaticpara 'DelayCook','DelayClean'o'Cook& Hold'.
Para cancemar emdespmiegue demremoj:
Si nodeseaque e+indicadorvisualmuestrelahora del dia:
Oprimay mantengaoprimidalasteclas
'CANCEL'y'Clock' durantetres segundos.La
horadel d[adesaparecer_del indicador.
Cuandose cancelael desplieguedel reloj,
oprimalatecla 'Clock' paradesplegar
brevementela horadel dia.
Para restaurar emdespmiegue demretool:
Oprimay mantengaoprimidalasteclas'CANCEL'y 'Clock'durante
tres segundos.La horadel d[areaparecer8enel indicador.
'Timer' (Temporizado0
E!ternpor+zadorpuedeset programadode un minuto {00:01}hasta
99 horasy 59 minutos{99:59}.
Eltemporizadorpuedeset usadoindependientementedecualquier
otraactividaddeIhomo.Adem_spuedeserprogramadocuandootra
funci6n del homoest6en funcionamiento.
Eltemporizadorno controlael homo.Solamentecontrolauna serial
so[_oI*a.
Para programar el temporizador:
1. OprJma[atecla 'Timer'{TemporizadoO. [°Jmer
o '0:00'se[Juminaen el [ndicadorvisual.
o Losdospuntosdestellar_n.
More+
2. OprimaIatecJa'More+' o 'Less-'hastaque el
tiempo correctoaparezcaen el indicadorvisual
+ LosdospuntoscontJn0andesteJlando.
3. OprimanuevamenteJatecJa'Timer'o esperecuatro
segundos.
+ Losdospuntoscontin0andestellandoy comienzala cuenta
regresivadel tiempo.
+ ElOItimomJnutode Iacuentaregresivadel temporizadorse
desplegar4ensegundos.
4. AI finaldel tiepapoprogramado,seescuchar4una serialsonora
Jarga.
Less-
Para cancemaremtemporizador:
1. Optimay mantengaoprimidala tecla'Timer'durantetres
segundos.
U
2. Optima latecla 'Timer'y coloquelahoraa 00:00.
Bloqueo de los Conttoles
Eltecladopuedenset bloqueadosparaseguridad,limpiezao evitar
el usono autodzado.Nofuncionar_ncuandoest6n bIoqueados.
SieI homoest_en uso,IoscontrolespuedenbIoquearse.
La horaactuaIdel d[apermanecer_en el indicadorcuandolos
controlesest@bioqueados.
Para bmoquear:
Opnmay mantengaoprimidasIastecias
'CANCEL'y 'Cook& Hold'durantetres
segundos.
'LOCK'destellaenel indicadorvisual+
Para desbioquear:
Oprimay mantengaopdmidaslasteclas'CANCEL'y 'Cook& Hold'
durantetres segundos.
'LOCK'desaparecedel indicadorvisual+
C( digos de Errores
'BAKE'o 'LOCK'pueden@stellarr@idamenteparaadvertirb que
hayun error o un probbma. Si'BAKE'o 'LOCK'destetIanen el
indicadorvisual,optima le tecla'CANCEL'.Si'BAKE'o 'LOCK'
continOandesteIlando,desconectelacorrienteel@tdca haciael
artefacto.EspereunospocosminutosyvueIvaa conectarla
corrbnte el6ctrica.Si IaspalabrasaOncontin_1andestellando,
desconecteIacornenteei@trica haciael artefactoy Ilamea un
t@nicodeservicioautorizado.
59

'Bake' (Horneado]
Para programar 'Bake' (Hemeado):
1+ Oprimalatecla 'Bake'.
, 'BAKE'destelhr&
, '000'desteliar_enel indicadorvisual+
2+ Seleccioneiatemperaturadel homo+Latemperatura ............................
del hornopuedeserprogramadade 75° a285° C
(170°a 550° F]+Oprimau oprimay mantenga ............................
oprimidala tecla 'More+' o 'Less-'. : Less- i:
, Cuandocuatquierade estasdosteclasseoprimepor
primeravez,175° (350°] se ituminar_.
+ OprimaIatecla 'More+' para aumentarla temperatura.
, OprimaIatecla'Less-'paradisminuir latemperatura.
3. Oprimalatecla 'Bake' nuevamenteo esperecuatrosegundos.
, 'BAKE'dejar_de destelIary seiluminar_en el indlcadorvisual.
+ 38° [100°] o [atemperatura actual de[homosedesplegar_i.
Latemperaturaseelevar_en incrementosde3° (5°] hastaque
se alcancelaternperaturaprogramada.
4. Esperea que el hornose precalientedurante8-15 minutos.
, Cuandoel hornoHegaa latemperaturaprogramadase
escuchar_unasepalsonoralarga.
, ParaverificarIatemperaturaprogramadaduranteel
precalentamientodel horno,optima latecla 'Bake'.
5. Coloqueel alimentoen el centrodel horno,dejandoun minimode
dospulgadasentreel utensilioy Iasparedesdel homo.
6. Verifiqueel progresode IacocciOncuandohayatranscurridoel
tiempo m[nimorecomendado.Contim_ela cocci6nsi esnecesario.
7. AIt6rmino de la cocci6n,oprimala tecla 'CANCEL'._--'-,, X
8. Retireelalimentodel homo.
D+ferenc+as homeado entre su homo
antiguo y st+ homo nuevo
Esnormalobservaralgunasdiferenciasen el tiempode horneadode
suhorno antiguoy suhomo nuevo.Vea"Ajustede la Temperatura
del Horno"en la p_gina64.
Rotas sobre Homeado:
Para +ambiar matempemtura demhomo darante em
proeeso de co¢ci6n, optima latecla 'Bake',Iuegooprima
'More+' o 'Less-'hastaquesedesplieguelatemperatura
deseada.
Paracambiar la temperatara dei homo darante 'Preheat',
primados votes Iatecla 'Bake',Iuegooprima'More+' o 'Less-'
hastaque sedesplieguelatemperaturadeseada.
Si olvidaapagarel homo,seapagar_autom_ticamentedespu6s
de transcurrir 12horas.Si deseadesactivarestacaracter[stica,
yeaIap_gina63.
Parasugerenciasadicionalessobrehorneadoyasado,consulte
el foIleto"La CocinaF_cil".
'Cook & Herod' (:Cocc+ony
Mantener Caliente]
'Cook & Hemal'Iepermitehornearduranteunacantidad
determinadadetiempo,seguidode un ciclo 'KeepWarm'de una
hor8,
Para programar 'Cook & Homd':
1.
Optima latecla 'Cook& Hold'.
+ 'BAKE'y'HOLD' destellan.
+ '000'seiJuminaen el indicadorvisual.
2. SeleccioneIatemperaturadel homo.La temperatura
deJhorno puedeset programadade 75° a 285° C
070° a550° F].Optima u oprimay mantenga
oprimida[atecia'More+' o 'Less-'. .......................
+ Optima latecla 'More+' paraaumentarla ......................
temperatura.
+ Oprimalatecla 'Less-'paradisminuir latemperatura.
3. Oprimalatecla 'Cook& HoW nuevamenteOesperecuatro
segundos.
+ 'HOLD'destella.
+ '00:00'desteliaen el indicadorvisual
4. Programe[acant+dadde tiempo durantelacua[usted desea
hornearoprimiendo[atecla 'More+' o 'Less-',Ettiempode
horneadopuedeprogramarsedesde10minutos(00:10]hasta
1] horas,59 minutos(11:59}.
+ 'BAKE'y'HOLD'se iluminanen el indicadorvisual.
+ Eltiempo de holneadoseiluminar_enel indicadorvisual
+ Comenzar_lacuenta regresivadel tiempode horneado.
6O

Cuandehaya e×pirado el tiempe de cecci6n:
• Seescuchar@cuatrosefialessonoras.
+ 'BAKE'seapagar&
+ 'HOLD'y 'WARM'seihminar@.
• Enel indicadorsedesplegar_75° 070°].
4+ Optima 'More+' pareprogramarla temperaturade horneado.
• '00:00'y 'HOLD'destelhn.
• 'BAKE'permaneceiluminado.
5. Optima 'More+' paraprogramarel tiempode horneado.
• Enel indicadorvisualseiluminanel tiempo difierdo,'DELAY',
'DELAY','BAKE',y 'HOLD'.
Despu6s de una hera en 'HOLD WARM' (Mantener
Caliente):
o 'End'sedesplegar&
o Lahera deld[avolver_a desplegarseen el indicadorvisual.
Para eanceiar 'Cook & Herod'en cuaiquier memento:
Optimala tecla 'CANCEL'+Retireel alimentodel horno+_N_C_, _
'De ay Bake' (HorneadoDiferido]
No Useh0rnead0difedd0para alimentosdec0rta duraciOntales
comeproductoslacteos,ce[do,camede aveo mariscos.
Cuandousa'Delay',el homo comienzaa cocinarmastar@ en el
d{a+ProgrameIaca@daddetiempo que usted@seadiferirantes
de queseenciendael homoycuantotiempo @seacocinare+
alimento+Elhomocomienzaa calentaren Iaheraseleccionaday
cocinaduranteelt+empoespecificado,puesmantieneel alimento
calienteduranteunahera+
Eltiempo difeddopuedepmgramarsede 10minutes(00:10}hasta
11betas,59minutes(11:59].
Para pregramar un cicmede homeade diferide:
1+ Oprimalatecla 'Delay'+
o 'DELAY'destelIa+
o '00:00'destellaen el indicadorvisual+
2. Optimalatecla 'More+' o 'Less-'para programarel
tiempo diferido.
Cuando'DELAY'est6todav[adestellando:
3. Optimalatecla 'Cook& Hold'.
. '000'seiluminaen el indicadorvisual.
Less-
o 'BAKE'y 'HOLD'destellan.
Cuande emtiempe diferide ha e×pirade:
• 'DELAY'seapagar&
• Sedespliegaeltiempo yde horneado.
• Sedespiiega'BAKE'y 'HOLD'.
Para pregramar un tiempe diferide cuande ya se ha
programatic 'Cook & Herod':
1. Optima [atecia 'Delay'.
• 'DELAY'destella+
• '00:00+sedespliegaenel indicadorvisual. .......................
2+ Oprimalatecla 'More+' o 'Less-'para programar
el tiempo diferido+
• Desp@sde cuatro segundos,'DELAY' Less-
permanecer_iluminadopararecordarleque se ....
haprogramadoun ciclo de horneadodiferido+
Cuande ha e×pirade emtiempe diferide y emhomo
cemienza a funcionar:
• Sedespiegar_el tiempo de horneado.
• 'DELAY'seapagar&
• 'BAKE'y'HOLD'permanecer@iluminados.
Para canceiar:
Optimala tecla 'CANCEL'.
• Todaslasfuncionesde horneadocontroladaso no per el
temporizadorser_ncanceladas.
• Laheradel d[avolver8a desplegarseen el indicadorvisual.
Notas:
o Nousehorneadodiferidopara losardculosque necesitan
precalentamientodel horno,talcome pasteles,galIetasy panes.
o Nousehorneadodiferidosi el homoyaest_caliente+
61

'Keep Warm' (Mantener Caliente)
Paramantenercalientesen formaseguraalimentoscalienteso para
catentarpanesy platos.
Para pregramar 'Keep Warm':
1. OprJmaIatecla 'KeepWarm'.
, 'WARM'desteila.
o '000'sedesptiegaenel indicadorvisuai.
2. SeteccioneIatemperaturade 'KeepWarm'.La
temperaturapara 'KeepWarm'puedeset .........................
programadade63°a 90° C[145° a 190° F).Oprima .....................................
u optimay mantengaoprJmidalatecia'More+' o
'Less-', Less-
o Cuandocuatquierade estasdosteclasseoprime
por prJmeravez,75° 070°)seiluminar&
o OptimaIatecla 'More+' para aumentarlatemperatura.
o Optimalatecla 'Less-'paradismJnuirIatemperatura.
'WARM'y Iatemperaturasedesplegar4nen el indicadorcuando
el ciclo'KeepWarm'est6activo.
Para ca_oeJar 'Keep Warm':
1. OprJmaJatecia 'CANCEL'.
2. Retireelalimentodel homo.
Notas sebre +Keep Warm':
o Paracaiidad6ptima de losalimentos,losalimentoscocinados
en el homo @bensermantenidoscalientespor no m4sde 1 a
2 horas.
o Paraevitar que losalimentossesequen,cObraloslevemente
con papelde ahmJnioo unatapa.
o Para camentarpaneciHos:
- cubra Ievementelospaneciilosconpapelde ahminio y
coIOquelosen e+homo.
- optima Iasteclas'KeepWarm'y 'More+' para programar
75° C (170° F).
- caJJentedurante 12a 15minutos.
+ Para eamemarpmatos:
- coloque2 pilasde cuatro platoscadaunaen el homo.
- oprimaIasteclas'KeepWarm'y 'More+' para programar
75° C (170° F).
- calientelosplatosdurantecinco minutos,apagueel homoy
deje losplatosen el hornodurante 15minutosm4s.
- usesoJamenteplatos resistentesal homo,verifique conel
fabdcante.
- nocoloquelosplatoscalientessobreuna superficiefr[a
puesel cambior4pidode temperaturapuedecausarfisuras
superficiaJeso rotura.
62

Cierte Auto tico/Modo
Elhomoseapagar_autom_ticamentedespuesde 12horassi usted
1odejaaccidenta[menteencendido. Estacaracterfsticade seguridad
puedeserdesactivada.
Para cancemar emcierre autem_tice de 12 betas y
dejar que el home funciene centinuamente durante
72 heras:
1= Programeel borneparahomear (vetp_gina60)=
2= Optimay mantengaoprimida[atecta'Clock'
durantecinco segundos=
o 'SAb'sedespiegar_ydestetiar_durantecinco segundos=
o 'SAb'sedespiegar_continuamentehastaquesedesactiveo
hastaque transcurrael limite de 72betas.
o 'BAKE'tambi6nsedesplegar_siseest_usandoun ciclo de
homeadocuandoel homoest_en ModeSab_tico=
TodaslasotrasfuncionesEXCEPTO'BAKE'['Timer','KeepWarm',
'Clean',etc=)est_nbloqueadasduranteel ModeSabStico=
Para cancemar'Bake' cuande emMode Sab_tice est_
active:
Oprima'CANCEL'.
o 'BAKE'seapagar_en el indicadorvisual
o Noseoir_ ningunaseSalsonora.
Para cancemaremMode Sab_tice:
1= Optimalatecla 'Clock'durantecinco segundos=
O
2= Despu6sde 72betas,el Mode Sab_ticoterminar&
o 'SAb'destellar_durantecincosegundos.
o Lahera deld[a reaparecer_en el indicadorvisual
Notas Sobte eUMode Sab_tico:
• ElModeSab_ticopuedeset activadoen cualquiermemento,
est6o no ethomoencendido.
• ElModeSab_ticonosepuedeactivarsiIasteclasest_n
bloqueadaso cuandola puertaest_ bloqueada.
• Siel borneest8horneandocuandoel ModeSab_ticoes
programatic,'BAKE'seapagar_al finaldel ciclo de horneado.
Noseemitir_nseSalessonoras.
• Cuandocomienzael ModeSab_tico,no seemitir_ laseSal
sonorade precalentamiento.
• Cuandoel ModeSab_ticoest_active,todos Iosavisos,
mensajesy seSalessonorasest_ndesactivados.
• Sioprimelatecla 'CANCEL'secancetar_Lmciclo 'Bake',sin
embargoeIcontrol permanecer_enMode Sab_tico.
• SifallalacordenteeI6ctrica,cuandovuelvalaenerg[aethomo
seactivar_en ModeSab_ticocon72 betasrestantesy ning_in
ciclo active.
63

Ajuste de [a temperatura de[
La exactitudde [astemperaturasde[hornoescuidadosamente
probadaen [af_bdca. Esnorma[notaratgunadiferenciaentre[a
temperaturade horneado,entreun horno nuevoy un horno antiguo.
Cone[ correrde[tiempo,[atemperaturade[homo puedecambiar.
Ustedpuedeajustar[atemperaturade[homo,si consideraquesu
homo noest_ horneandoo dorandoenforma correcta. Paradecidir
cuantodebecambiar[atemperatura,programe[atemperaturade[
homo a !5°C(25° F}m_saIta o m_sbajaque [atemperatura
indicadaen sus recetas,[uegohornee. LosresuItadosde [a
"prueba"puedendar[euna ideade cuantoajustar[atemperatura.
Ajuste de [a temperatura de[ homo:
1+ Oprima'Bake'+
2+ Programe285° (550°} oprimiendolatecla
'Mole+'+ .................................
3. Opdmay mantengaoprimidala tecia'Bake'durantevarios
segundoso hastaque O°aparezcaenel indicadorvisual
Si [atemperaturadel homo hasido previamenteajustada,el
cambioaparecer_en el indicadorvisual Porejemp[o,si la
temperaturadel hornofue reducidaen 8°C 05° F}e[ indicador
mostrar_- 8° (-15°}.
4. Oprimalatecia 'More+' o 'Less-'paraajustar[atemperatura.
Cadavezqueseoprimeuna tecia,[atemperaturacambiaen3° C
{5° F}. Latemperaturadel hornopuedeseraumentadao
disminuidaen 3°a 20° C{5° a 35° F}.
5. Lahorade[dia reaparecer8autom_ticamenteenel indicador
visual
Nonecesitareajustar[atemperaturade[hornosi hayuna fa[[ao
interrupci6nde energ[ae!6ctrica. Lastemperaturasdeasara [a
parri[[ay [impiezano puedenserajustadas.
64

@
'Broiming' (Asar a la Pardlla)
Para programar 'Broil':
1. Oprffnalateda 'Broil'.
o 'BROIL'destella.
o 'SET'sedespliegaen el indicador.
2. OprimaIatecla 'More+' para programarasara la parriIB'Hi' u
optima la tecB 'Less-'para pmgramarasarla parriIB'LO'.
o Enel indicadorvisualse despbgar_'Hi' o 'LO'.
o Sebcciones'Hi broiI'285°C (550° F)paraasadoa IaparriIIa
normaI. Sebccione'LO broil'230° C(450° F)paraasara la
parrilla contemperaturabajaaiimentosque@ben set
cocinadospor m_stiempo,tal comola came de ave.
3. Despu@decuatro segundos,el hornocomenzar_a funcionar.
o 'BROIL'continuar_ i[uminado.
4. Paraundorado6ptimo,precalienteetebmento de asara la
parrilladurante3 a 4 minutosantesde colocarel alimento.
5. Coloquee]alimentoen el horno. Dejela puertaabierta
aproximadamente10cm {cuatmpulgadas){elprimertope).
G.
7.
D6vueltaa la came unavezaproximadamentea mitad de Ia
cocci@.
Cuandoel alimentoest#cocinado,optima la
tecla 'CANCEL'.Retireel alimentoy la asadera
del homo.
CANCEL
• La horade!aliavolver_a despbgarseen el
indbador visual
Notas Sebce Asado a UaPacciHa:
o Paramejoresresultadoscuandoasea Iaparrilia,useuna
asaderadisefiadaparaasara la parrilla.
o Lostiemposde asara Iaparriliaaumentardny eidoradoser_
m_sciarosiel eiectrodom6sticoesinstaIadoen un circuito de
208voltios.
o 'Hi' seusaparaIamayoriade Iosasadosa IaparrilIa. Use'LO
broil'cuandoasea Iapardllaalimentosque necesitancocci@
proIongada. Latemperaturainferiorpermiteque eIalimento
secocine hastaquedar bienasadosin dorarsedemasiado.
o Lostiemposde asadoa Iaparrilla puedenserm_slargos
cuandosesebccionala temperaturam_sbajade asara la
parrilla.
o Elalimentodebeset dadovueltacuandoest_ a mitaddel
tiempo de asar.
o Parasugerenciasy temperaturasadicionalessobreasara la
parrilla,consulteel folleto "LaCocinaF_cil".
Tabla de Asar a RaParriHa
POSJCION DE TERM_NO DE TmEMPO TOTAL DE
ALIMENTOS LA PAP,RmLLA* COCC_ON COCC_ON (r_lNfJTOS}
Came de Res
Biftec,2,5cm (1") 4 minutos
4 minutos
Hamburguesas,1,9cm (3/4"} degrosor 4 minutos
Came de Cerdo
Tocino 4 Bienasado
Chubtas,2,5cm (1"} 4 Bbn asado
Jam6n- Rebanadasprecocidas,1,3cm 0/2") de grosor 4 Tibio
Came de Ave
Presasde polio 3 o 4 Bbn asado
Mariscos
Bistecsde pescado,con mantequilIa,2,5cm (1") de grosor 4 Desmenuzado
Filetesde pescado 4 Desmenuzado
La posiciOnde laparriIlasuperiores#5
Nota: EstatablaessOlouna gu[a. Lostiempospuedenvariarcon eltipo de alimentoqueseest_cocinando.
A medio asar 15 - 18
Bien asado 19 - 23
Bien asado 15 - 18
6 - 10 minutos
22 - 26 minutos
8 - 12 minutos
'LO Broir
28 - 38 minutos
10 - 15 minutos
8 - 12 minutos
65

Respiradero de[ Homo
Cuandoel homoest_en use,el _reacercade[respiraderopuede
caientarsetosuficientecorrloparacausarquemaduras.Nunca
btoquee[aaberturade[respiradero.
Emrespiraderodemhomoseencuentra debajodemrespamdo
protectorde su estufao
RESPIRADERO
HORNO NO coloquepl_sticos
cercade [aabertura
de[respiraderopues
e[caterque sale
puededeformaro
derretirel p[_stico.
'Oven Light' (Luz de[ Homo}
Oprimae[interrupter de [a[uzde[hornoen e!panelde
control paraencendery apagar[a[uzde[homo.
Panel inferior dei Homo
Proteiae[pane[inferiordel borne contraderrames,especiaimente
azucaradoso ac@cos,puespuedendescoIorar[aporceIana
esmaItada.Usee[utensiIiodetamariocorrectoa fin de evitar
derrames.No comoqueutensimiosni papei de amuminio
directamente en mapare inferiordemhome°
Over
U_ht
Parriffas del Homo
oNO USee[ homoparaguardaralimentosni utensi!!0s,
E[homotiene dosparrillas. Todas[asparrillastienen un bordecon
topede enganche.
Para retirar [a parriiia:
1, Tire.,de [aparri[[aderechohacia
afuerahastaque sedetengaen
[aposici6nde[topede
enganche.
2. Levanteel frente de [apardiiay
tire de [aparrillahaciaafuera.
Para reiasta[ar [a parri[[a:
1, Cobque [apard[[aene[soportede [aparr[Haen e[ homo,
2, inclinebvementehaciaarnba e[extremede[antero;des[be [a
parri[[ahaciaatr_s hastaque pasesobrelostopesde enganche,
3, Bajeelfrente de [aparr[Haydesffce[ahaciaadentrode[homo,
Nocabra aria parriiia compmetacon papeide amuminioni comoque
papemde amuminioen maparte inferiordemhome, Seafectar_n los
resumtadosdemhomeado y se puede daffar mapare inferiordem
homo°
Posiciones de la Parrilla
PARRiI&A5 ([aposiciOn
m_salta}:Seusapara
tostarpano asara [a
parriI[aa[imentos
deIgadosno grasosos.
PARRiE[.A4: Seusapara
[amayoffade losasadosa
[aparri[Ia.
__4
--S
--1
PARR[[LA3: Seusapara
hornearalimentosen una
bandejade horneargaIIetaso un moIdepararoi[ode merino[aria,
parapastebs, paysde frutaso aIimentosconge[ados.
PARRm[LA2: Seusaparaasarcortesde camepequerios,caceroIas,
hornearbaguetasde pan,paste[esen moidesde tubeo fianes.
PARRiLLA1:Seusaparaasarpedazosgrandesde camey came
de ave,paysconge[ados,suf[6sde postreo pastebsesponiosos.
HORNEADOCON VARIAS PARR&LAS:
Dos parriiias:Use[asposbiones 2y 4,o 1y 4.
Media Parri[[a
Sedispone,comeaccesono,de una media
parri[[apara aumentar[acapac[dadde[
homo, Seinsta[aen [asecc[Onsuperior
de[[ado[zqubrdo de[homoyofrece
espaciopara unaplatode verduras
cuandose haco[ocadounaasadera
grandeen [apard[[ainferior, P6ngaseen
contactoconsudistdbuidor paraobtener
e[accesono"HALFRACK"o paraso[bitar,
[[aPaea[1-800-688-8408,
14_j -
66

Homo AutoJimpiante
• Esnormalque losp+ezasdei homo secalientenduranteel c_cto
deauto+imp+eza,
° A fin de evitaruna lesi6npersona yda[_o_ JagueitadeJhomo+
no[ra[e de abrir la puer[acuandoest6desp_egsdala palabra
LOCK" [Bloqueada).
o Ev+tetocar Jacubier[a,la pue+ta,iaventanao el areadel
respiraderodeJhomoauran[eun cic!ode lim__eza.
. Ncuselimpiadoresde hornoscomerclatesenel acabadodeJ
homo ni alrededorde ningunap+ezadel homopuespuede
daiiar el acabadoo lospLezas.
Elciclo deautolimpiezausatemperaturassuperioresalas
temperaturasnormatesde cocci6nparaIimpiarautom4ticamenteel
interiordel homo+Nofuerce IapuertodeIhomoni lapalancade
bloqueoparaabrirla.Estopuedecausarexposicidnalas
temperaturasaltosyconstituir un riesgodequemadura.
Esnormalque ocurranIhmaradas,humoo llamasdurantela Jimpieza
si el horno est4demasiadosucio.EsmejorIimpiarel homo
regularmenteen vezde esperarhastaque sehayaacumulado
demasladasuciedad+
Duranteel procesode Iimpieza,la cocinadebeestar bienventilada
paraeJimlnarlosoloresnormaJesasociadoscon lalimpieza.
Antes de la Autolimpieza
1. Apagueia iuzde!hornoantesde la iimpieza.La luzdel horno
puedefundirseduranteel ciclo de limpieza.
2. Retirelaasadera,todos iosutensfliosy lasparrillasdel homo+Los
parriliasdeIhorno sedescolorar_ny nosedesiizar4nf_cilmente
@spudsde un ciclo de autolimpiezasi no sonretiradasdei homo+
3. Limpieel marcodel horno,el marcode Japuerto,el4reafuerade
lajunta de la puertayalrededorde laaberturaen Iajunta de la
puerta,conun agentede Iimpiezano abrasivotal como'Bon
Ami'+o con detergenteyagua.Elprocesode autolimpiezano
limpiaestas_reas. Eliasdebenset Iimpiadaspara evitarque la
suciedadsehomeeduranteel cicio deautolJmpieza.(Lajunta es
el selloalrededorde la puertoy ventanadel homo.]
4. Paraevitardaiio no limpieni frote Ia _._
junta situadaalrededorde lapuertadel \ -
homo. Lajunta est4disefiadapara
sellarhermeticamenteel calordurante __"_ _/_
el ciclo de limpieza.
5= Limpieel excesode grasao derrames
de Iaparteinferiordel homo+Esto
evitahumoexcesivoo IIamaradasduranteel ciclo de limpieza.
6. Limpielosderramesazucaradoso 8cidostalescomopapadulce
(camote),tomateso salsasa basede leche.La porcelana
esmaltadaes resistenteaIdcidopero no a pruebade 4cidos. El
acabadode porcetanapuededescolorarsesi losderrames
dcidoso azucaradosnoson Jimpiadosantesde un ciclo de
autolimpieza.
Para programar 'Self-Clean' (Autolimpieza):
i ora: Latemperaturadel hornodebeser inferiora 205° C[400°F)paraprogramarun ciclo de limpieza.
1. Cierrela puertadel homo+
2. MuevaIapahnca de bloqueode Japuertaa laderechaa la
posiciOnbloqueada.
3. OprJmaIatecla 'Clean'+
o 'CLEAN'desteIlaenel indicadorvisual
Sila puertano secierra,seoir_n se_aiessonoresy lapalabra
'DOOR'sedespiegar_en el indicadorvisual+Si Iapuertano es
cerradadentrode 45segundos,la operaci6nde autolJmpieza
ser4canceIadayel indicadolvolver4a desplegarla horadel d[a.
4= Optimatatecla 'More+' o 'Less-'. ....................
o Sedespliega'CL-M (SuciedadMediana,,
3 horas). ........................................
5. OprimaIatecla 'More+'o 'Less-'paradespJazarlos ' Lcss-
ajustesde autolhTlpieza.
'CL-H'(SuciedadIntensa,4 horas)
'CL-M' (SuciedadMediana,,3 horas)
'CL-L' [SuciedadLeve,2 horas)
AIseieccionarel nivelde suciedadde! homoseprograma
automdticamenteeltiempo de limpieza.
6. Despuesde cuatrosegundos,el hornocomenzar4a limpiar.
o Eltiempode limpiezacomenzar4la cuentaregresJvaen el
indicador.
o 'LOCK'sedesplegarden el indicadorvisual,
o 'CLEAN'sedesplegar4en el indicadorvisual+
Para diferir un ciclo de autolimpieza:
1. OprJmaJatecla 'Delay'.
o 'DELAY'desteiIa.
o '00:00'sedesplegar4en eJindicadorvisual
2. OprimaIatecia 'More+' o 'Less-'paraprogramarIa
cantidaddetiempo que usted@seadiferirel ciclo.El
tiempo diferidopuedeserprogramadode 10minutos
[00:10)a 11horas,59 mJnutos01:59)+
cent o
+Losnombresdelosproductosson marcasregistradasdesus respectivosfabricantes.
67

3+ OprimaIatecla 'Clean'+
o 'CLEAN'desteIhr_+
4+ OprimalatecIa(+More+'o 'Less-'.
o 'CL-M' [SuciedadMediana,3 horas)se
despliegaen etindicador. ..........................
5. OprimaIatecla'More+' o 'Less-'paradesphzar losajustesde
autoih_pieza.
'CL-H'(SuciedadHntensa,4 horas)
'CL-M' (SuciedadMediana,3 horas)
'CL-L' (SuciedadLeve,2 horas)
At seieccionaretnivetde suciedadde[homoseprograma
autom_ticamenteel tiempo de limpieza.
6. Despuesde cuatrosegundos,'CLEAN','DELAY'y 'LOCK'se
desplegar_nen et indicadorvisual paraindicarque e[homoest_
programadopara uncic[ode [impiezadiferido. Eltiempodfferido
tambiSnsedespliegaen el indicadorvisuai.
Si el home ya ha sido pregramado para un cicmode
limpieza y usted desea programar un tiempo
diferido:
1. Oprimalatecla 'Delay'.
o 'DELAY'destetla.
o '00:00'sedesplegar_en el indicadorvisual.
2. OprimaIatec+a'More+' o 'Less-'para programar
la cantidadde tiempo queusteddeseadiferir el
ciclo.
DespuOsde cuatrosegundos,'CLEAN','DELAY'y 'LOCK'se
despJegar4nen el indicadorvisual paraindicarque el homoest_
programadopara unaciclo de Jimpiezadiferido.Eltiempo
diferidotambiOnsedespliegaen el indicadorvisuai.
Cuando comienza el cido de autoiimpieza:
o 'DELAY'seapagar&
o Eltiempo de limpiezasedesplegar_en el indicadorvisual
Para canceiar el ciclo de autoiimpieza:
Oprimala tecla 'CANCEL'.
CANCEL
o ElindicadorvisuaIquedaen blanco,
o TodasIasfuncionessoncanceladas.
o Lahora deld[asedespliegaen el indicadorvisual
Durante e_ cido de auto_impieza
Cuandoaparece'LOCK'enel indicador,Iapuertano sepuedeabdr.
Paraevitardato a la puerta,no fuerce Iapuertapara abrirtacuando
la palabra'LOCK'est_desplegadaen el indicadorvisual.
Humo y Oiores
Ustedpuedeverhumoysentir olor lasprimerasvecesque el homo
eslimpiado. Estoesnormaly disminuir_conettiempo.
Tambienpuedeocurrir hurnosi el hornoest8demasiadosucioo si
seha dejadounaasaderaen el homo.
Sonidos
A medidaque el horno secalienta,usted puedeoff sonidosde
piezasmet_licasqueseexpandenycontraen. Estoesnormaly no
datar_ el homo.
Despu6s de_ cido de auto_impieza
Aproximadarnenteunahora despuOsdelfin del ciclo de limpieza,
'LOCK'desaparecer_.Lapuertaahorapuedeset abierta.Muevala
palancade bioqueode la puertaa la izquierdapara desbloquearla.
Nguna suciedad puede quedar eomo una leveeeniza gris tipo
polvo. Retirelaconun patio h0medo. Si Iasuciedadpermanece
despuesde limpiar+a,significaque el cic+ode Iimpiezanofue Io
suficientementelargo. Lasuciedadser_eliminadaduranteel
proximociclo de limpieza.
Si lasparriiias dei homo fueron dejadasen el homo y no se
deslizansuavemente despuOsde un cielo de limpieza, Iimpie
lasparrillasy lossoportesde lasparrilIasconuna pequeta cantidad
de aceitevegetalpara hacerlasdeslizarcon m_sfacilidad.
Pueden aparecer l_neasdelgadas en la porcelanaal pasar pot
cielos de calentamiento y e_friamie_to. Estoesnormaly no
afectar_el rendimiento.
U_a deseoloraei6_ bla_ea pue_e apareeer despuSs del eielo
de limpieza si los alime_tos _eidos o azucarados _o fuero_
limpia_os a_tes _el eido de autolimpieza. Estadescoloraci0nes
normaly no afectar_el rendimiento.
otas:
o Si sedejaabiertala puertadel homo,Iapalabra'DOOR'
destellar_enel indicadorvisualyseescuchar_una serial
sonorahastaque lapuertaseacerraday la tecla'Clean'sea
oprimidanuevamente.
o Si transcurrenrn_sde cincosegundosdespu_sde oprimir la
tecla 'Clean'y antesde oprim+rIasteclas'More+' o 'Less-',el
pmgramavolver_autom_ticamenteaIdespiiegueprevio.
o Lapuertadel ho_nosedatar_ sisefuerzaparaabrirla cuando
la palabra'LOCK'contin_iadesplegadaenel indicador.
68

Procedimientos de Limpieza
fr_asantes de tocarmoo m!mpiarl0. De este modo se eV!tar_ da_o y
posiblesquemadu[as. _ Losnombresde Iosproductosson marcasregistradas
;Paia evitar manchas0 decobracicin!impiee!homo despu6Sde CadsUSol de ausrespectivosfabricantea=
_ Parshacerpedidos,throeat 1-877-232-6771EEUU=o
• Siseretiraalgunapieza,aseg_resedequa seareinstaladaenfarina correct& 1-800-688-8408Canad&
PmEZA PROCED_M_ENTO DE LIMPIEZA
Protector trasero
esmaltada
Baadeja de Asar
e laseAe
Area del Relojy
de lasTeeias
de Oeatrel
Periiias de
Control
Cabier_a =
Vidrio
Cer_mien
Laporcelanaesmaltadaesvidriofundidoen metaly puedeagrietarseo picarsesinoseusacorrectamente.Esresistentea
los4cidos,noapruebade_cidos.Todoslosderrames,especialmentelosderramesazucaradoso addicosdebenset limpiados
inmediatamenteconun patioseco.
° Cuandoseenfrie,laveconaguajabonosa,enjuagueyseque.
° Nuncalimpieunasuperficietibiao calienteconunpatioh0medo.Estopuedecausaragrietamientoo picaduras.
° Nuncauselimpiadoresdehomo,agentesde limpiezaabrasivoso c4usticosene!acabadoexleriordelaestufa.
Nuiica cuhrael inserte conpapal de atuminio puesesto evita qzmla gmsa se eseurm a la bandeja inferior.
, Coloqueun patioenjabonadosabreel insertoy labandeja;dejeremojarparssoltarlasuciedad.
° Laveenaguajabonosatibia.Useunaesponjadefregarparaquitarlasuciedadpersistente.
° Labandejadeasary e!insertopuedenserlavadosene!lavavajillas.
° Paraactivar'ControlLock'(BIoqueodeloscontroles}parslalimpieza,verp4gina59.
° Limpieconun patiohOmedoy secar.Nouseagentesde lirnpiezaabrasivospuespuedenrayarlasuperficie.
° Sepuedeusarlimpiavidriossiserocianene!patioprimero.NOrecie dimctamente en elpaneL
° Retirelasperillascuandoest6nen laposiciOn'OFF'tirdndolashaciaadehnte.
, Lave,enjuagueyseque. Nouseagentesdelimpiezaabrasivospuespuedenrayarlasuperficie.
, Enciendacadsquemadorparsasegurarsedequalasperillashartsidocorrectamentereinstaladas.
Nuaca useHmpiadomsdehomo, Hanqueadar co#clara, amoi!&ee o I##piadoresde viddoque centenga amon&co.
NOTA:Uameaun repamdor autorizado si ia cubierta de vidrio car#mica seagrieta, quiebm e el papd de aluminio
se derdte sabre la cubiert&
, Dejequala cubiertaseenfrfeantesdelimpiarh.
, Generalidades=Limpiela cubiertadespuesdecadsusao cuandoseanecesarioconunatoallade papalh0meday con
'CooktopCleaningCreme'(CramsdeLimpiezaparsCubiertas)(PiezaNo.20000001)**.Lustreconunpatiolimpioy seco.
NOTA:Se_'arro//ardnmanchaspermanentessitasudedadsedejaquasecodneunay otravezusandob cubiertacuando
est#suds.
, Manchas Rebeldeso _,._areasde Metal = Humedezcaunaesponjadegomaquenodejemarcasoquano raye.Aplique
'CooktopCleaningCream*{CramsdeLimpiezaparsCubiertas}(piezano.20000001}**yfroteparssacartantasuciedadcoma
seaposiNe.Apliqueunacapsdelgadadecremasabrelasucieda&cubraconunatoalladepapalhOmeday d6jelareposar
durante30a45minutos(2- 3horasparsmuchasuciedad}.MantengahOmedocubriendolatoalladepapelconenvolturade
pi_stico.Restrieguenuevamente,luegolimpieconun patiosecoylimpio.
NOTA:SolamenteuseesponjasLIMPIAS,HUMEDASyquanorayonyquaseansegurasparsdensb_osconacabadoantiadherente.
Sedafiar#d disefioy d vidriosita esponjanoest#mojada,d b esponjaest#suciao seusaelizatlpodeespo6ia.
, Saciedades Qaemadasa Pegadas=Restriegueconunaesponjaque nodejemarcasy'CooktopCleaningCreme'*
(Cremade L}mpiezaparsCubie!tas).
NOTA: Sostengaunrestregadorconhojadeafeitara unbngu,,'ede30°yrestriedueeua,,'quiersuciedadquapermanezca.Luego
69

P[EZA ' PROCEDIMIENTO DE LmMPIEZA
• Eviteusarcant]dadesexcesivasdeaguapuespuedeescurrir:sedebajoodetr_sdelvidriocausandomanchas.
del Home - Vidrio • Laveconaguayjab6n. Enjuagueconagualimpiayseque.Ellimpiadordevidriopuedeusarsesiseroc[aenunpatioprimero.
,o NousemateriaIesabrasivestalescomeesponjasderestregar,limpiadoresenpolvooesponjasdelanadeaceropuespueden
rayarelvidrio.
Interior del Home • Sigalasinstruccionesen lasp_ginas67-68paraprogramarunciclodeautolimpieza.
Parrillasdel
Heine
Acern lnexidabie
[modelosseleetos)
Creme nepimmado
[mod61osselectos]
Gaveta de
Manija de la
Puerta, Panemes
Laterames-
EsmamtePintado
i• Limpiarconaguaconjab(_n.
,oSacar[asmanchasdiffcilesconpolvode limpiezao unaesponjaIlenaconjab6n. Enjuagueyseque.
,o LasparriIlassedesco!orar_npermanentementeypuedennodeslizarseconsuavidadsisondejadasene!homodurante
uncic!ode autolimpieza.Siestosucede,limpiela parrilIaylossopo,tesen relieveconunapequetiacantidaddeaceite
vegetalpararestaurarlafacilidadde movimiento,luegolimpieelexcesode aceite.
° NO USEMNGUN PBODUCTODELIMPIEEAQUECONTENGABLANQUEADORA BASEDECLORO.
, NO USELIMPIADORES"OBANGE"M LIMPIADORESABRASIVOS.
,, SEMPRELtMPIELASSUPERFICIESDEACEROAFAVORDELGRANOo
• Limpieza Diaria/Suciedad Leve=LimpieconLJnode lossiguientes- aguaconjab0n,unasoluciOndevinagreblanc()
conagua,limpiadorparasuperficiesyviddo'Formula409'*oun limpiavidriossimilar- usandounaesponjaoun patio
suave.Enjuagueyseque.ParapuIiry evitarmamasde losdedos,usee!producto'StainlessSteelMagicSpray'*
(PiezaNo.20OOOOOS)*_-
,° Suciedad Mediana/lntensa - L]mpieconuno delossiguientes- 'BenAmi'_,'SmartCleanser'_o 'SoftScrub'_- usando
unaesponjah0medao un patiosuave.Enjuagueyseque.LasmanchasdificiIespuedensetquitadasconunaesponja
multi-use'Scotch-Brite'*h0meda;frote afavordel grano.Enjuaguey seque.Pararestaurarel lustreysacarlasvetas,
aplique'StainlessSteelMagicSpray'_-
,° Deseelnraci(_n- Useunaesponjamojadaoun patiosuave,limpiecon limpiadorde acero'CameoStainlessSteel
Cleaner'*.Enjuagueinmediatamenteyseque.Paraeliminarlasestffasy restaurare!lustre,usedespu_srociadorparaacero
inoxidable'StainlessSteelMagicSpray'*.
o Cuandoestefifo laveconaguajabonosa,eniuaguey pula lasuperficiecon gamuza.
oSiest_muysucio,utiliceun limpiadorabrasivesuave,taliandoconelgranoparaevitarrayarlasuperficie.Enjuagueypuia
con gamuza.
,o Paraevitarlosrayonesno utilice agentesabrasiveso c_usticos.
,o Pararestaurarel brilloy quitarlos rayones,sigaconStainlessSteelMagic Sprayh_oxidabie*[Parte#20000008)**.
El creme se decelerarfipermallentemeete d se flemea con la sudedad endmao
io
Cuandoest6frfa,laveconaguatibiajabonosa,enjuaguey seque.Nuncalimpieunasuperficietibiao calienteconunpatio
h0medopuesestopuededatiarlasuperficiey causarunaquemaduraa causadelvapor.
Paramanchasrebeldes,useagentesde Iimpiezalevementeabrasivestal comepastadebicarbonateo 'BenAm!'*.Nouse
agentesdeIimpiezaabrasives,c_iusticoso_sperostat comeesponjasde lanadeaceroo limpiadoresdehomes.Estos
productospuedenrayaro datiarperraanentementelasuperficie.
NOTA:Useuna tea#ae unparle sece paFalimpiar les derFames,espedalmente los dermmes at[dices e
azucaradesoLa superficie sepuede descelerare perder el bri#e si el derrame no selimpia inmedialamellte. Este
es especialmente impertante en /assupedicies Hancas.
*Losnombresde losproductosson marcasregistradasde sus respect!yesfabdcantes.
** Parahacerpedidos,[lamea[ 1-877-232-6771EE.UU.o 1-800-688-8408Canada.
70

Puerta del Homo Tomillos Niveladeres
• No soioquepesoexcemvomse pareen la Fuertade!horno.
Es_opodria hacervoLcarlaestufa,quebrarlapuertoo bsionar
aEusuano.
o No +ntenteabrir o cerrarla puertani hacerfuncionar el homo
has[aque la puertano hasidodebidamentereempiazada
• Nuncacoloquelosdedosentre la bisagray el marcodeian[ero
dethomo. Losbrazo_de articulaci6nsonmontadosa resorte.
S+segotpeaaccidentalmentela bisagrasecerrara
bruscan_en_econtrael marcodel homoy puedelesionarsus
dodos.
Nora: LapuertadeIhomoen una estufanuevapuedesentirse
"esponjosa"cuandosecierra. Estoes normaly disminuir_con el
USO.
Para sacftr:
1. Cuandoest6fr[a,abraIapuertadelhornohastalaposici@topede
asaralaparrilla[abbrtaaproximadamente10cm[cuatropulgadas}].
2. Sujete la puerta de cada lado. No use la
manijade la puertaparaIevantarla.
3. Levanteuniformementehastaquela puerta
sesalgade losbrazosde articulaci@.
Para volver a colocar:
1. SujeteIapuertade cadalado.
2. Alinee lasranurasde lapuertaconlosbrazosde articulacidnde la
estufa.
3. Desiicela puertahacialos brazosde articuiaciOnhastaque est6
comp[etamenteasentadaen lasbisagras.Empujehaciaabajo [as
esquinassuperbresde [apuertaparaasentarlacompletamenteen
[asbbagras. La puertano debe quedartorcida.
Ventana deJ Homo
Pare proteger la ventana de la puerta dei homo:
1. Nouseagentesde Hmpiezaabrasivostabs comoesponjasde
restregarde lanade aceroo limpiadoresenpolvopuesellos
puedenrayarelvidrio.
2. Nogoipeeel vidrioconollas,sartenes,muebles,juguetes u otros
objetos.
3. Nocierrela puertadel homohastaque lasparrillasdel horno no
estdnen su lugar.
Atgolpear,rayar,hacervibraro esforzarel vidrio puededebilitarsu
estructuracausandoun mayorriesgode roturaen unafecha
posterior.
Ver+fiquesie[soporteantivueicoest_asegurandoa[piso uno de
10St0miHosn+veladorestmseros. Estesoporteevita que laestufa
sevuelqueacc!dentaimente.
Laestufadebeserniveladacuandose instaIa.Si Ia I_//('_
estufanoest_ nivetada,gire lostornillos niveladores III I 8]
de pkisticoubicadosencadaesquinade la estufa
++o++o+o++o+o++
_. ANTIVUELCO
TORNILLO NIVELADOR
Luz deJ Homo
Desconectelaenergiaa la estufaantesde reemplazarelfoco.
+ Use unt0i_ao!!aSSecopara ev+tarP0Sibiedaiio asus manes
cuandeest6reemp!azandoe
Gaveta de Al acena
NO guardeproductosdepapel o de pl_istice,alimentosni
matedalesinflamaWesen estagaveta,Lagavetapuede
calenta[sedemasiadoparaestosart[culosCuandoseest,1usando
el homo,
La gavetade almacenamientopuedeset retiradaparaque usted
puedatimpiardebajode taestufa.
Para sacar:
1. Vade la gavetaydesl(cetahaciaafuerahastala primeraposiciOn
tope.
2. Levantetapartedetanterade tagaveta.
3. T(relahastatasegundaposici6nde tope.
4. SujeteIoshdos y levanteIagavetapara retirada.
Para vomvera comocar:
1. Hnsertelosextremosde Jascorrederasdela gavetaen losrieles
de Iaestufa.
2. Levantelapartedelanterade la gavetay suavementeempOjelaa
la primeraposici6ndetope.
3. Levantelagavetanuevamentey empt_ielahastaquequede
completamentecerrada.
Tomacorriente pata
Decttodom sticos Peque os
(Modelos Canadiensessolamente)
Eltomacordenteparaelectrodom6sticos
pequeiiosest_ubicadoen el lado
inferior izquierdodetprotectortrasero.
AsegOresede que loscordones
el6ctricosno descansensobrelos
elementossupedoreso cercade ellos.
Siel etementosuperiorest_encendido,
el cordonyel electrodom6sticopueden
da_arse.
Eldisyuntordettomacorrientepara
electrodom6sticospequei_ospuede
dispararsesi e!artefactopequdio
enchufadoen 81esde m_sde 10amps.
Parareportere!disyuntor,oprimae!
interruptorsituadoen el borde inferior
del protectortrasero.
orF_
'DISYUNTOR'
72

PROBLEMA SOLUCI6N
Paramamayer_ade moaprobmemas, • Revisesiloscontroiesdel homoest_ndebidamenteajustados.
verifiqueprimeromesiguiente. • Verifiquesiel enchufeest_firmementeinsertadoenel tamacorriente=
• Verifiquea vuelvaa reponerel disyuntor=Verifiqueo reemphceel fusible=
• Verifiqueel suministrodeenergiael6ctrica=
Tedamaestufa opastede emmano • Revisesi[asupefficiey/o loscantrolesde[hornaest_ndebidamenteajustados.Verp_ginas
funcienao 55y 66.
• Verifiquesi lapuertadel harnaseha desbloqueadodespuesdelciclode autolimpieza=Vet
p%ina 68=
• RevisesieIhomoest_ajustadoparahomeadodiferidoa programade limpieza=Vetp_ginas61
y 67=
• Verifiquesi'CentralLock' [BIaqueodeControl)est_activada=Vetp_g=59=
• Verifiquesiel centralest_en ModeSab_tico=Vetp_g=63=
Elreiej, iaspaiabrasen el indieador • ElhornapuedeestarprogramaticparaunafunciOnde'Cook& HoWo unafunci6ndiferida=
visualy/e iasiueesfuncionan pete , Puedeestaractivadalacaracter[sticadebloqueadeloscontrolesdel harno=(Vetp_g=59=)
el homono se caiienta.
Los reaultados del homeado no • Aseg_iresede queel respiraderodel harnonoeat6bloqueado=Vetp4gina66parala ubicaciOn=
son come se esperaban o son • Verifiqueparaasegurarsedeque Iaestufaest_nivelada.
diferentes a losdemhomo anterior° • Lastemperaturasa menudovar[anentreun harnonuevoy unoantiguo=A medidaque pasa
eltiempa,latemperaturadel harnocambiay puedehacersem_scalientea m_sfr[a=Vet
p_gina63 paralasinstruccianescomeajustarIatemperaturadeIhamo=NOTA:Nose
recomiendaajustarlatemperaturasihatenidoproblemasconso!ounao dosrecetas=
o Consulteelfolleto"LaCocinaF_cil"paramayorinfarmaci0nsob_elosutensiliosde homear=
Losaiimentoa no se asana ia o VerifiqueJasposicionesde lasparrJJlasdelhomo.Elalimentopuedeestarmuycercadel
parrillaen forma debida o salen eIemento.
demasiado humo. o Elelementade asarnofue precalentado=
o Elpapelde aluminiaseus6de maneraincorrecta.Nuncafarreel insertodelasadarconpapel
dealuminio.
o Lapuertadethomoestabacerradamientrasseasabaa Iaparrilla. Dejela puertaabiertaen la
primerapasici6n [alrededorde 10cm [4 pulgadas]].
o Recorteelexcesodegrasade Iacame antesde ponerlaaasara la parrilla.
o Seus0unaasaderasucia.
o Elvaltajedel hogarpuedeset bale.
Elhomo no ae automimpia, o Verifiqueparaasegurarsedeque elcicla noest6ajustadoparaun comienzodifedda.Vet
p_gina67.
o Verifiquesi lapuertaest_cerrada.
o Vefifiquesiel centralest_en ModeSab_tico.Vetp_g.63.
o Elhornapuedeestara m_sde 205°C [400° F}. Latemperaturadel homodebeserinferiora
205°C {400°F}parapragramarunciclo delimpieza.
Elhomo no se iimpi6 en forma o Puedeque seanecesariountiempade limpiezam_slargo.
debidao o Losderramesexcesivos,especialmentedealimentosazucaradosy/o _cidosnofueranlimpiadas
antesdelciclo deautalimpieza=
Lapue_tadei homo no ae o ElinteriordeIbarriotodaviaest_caiiente=Deieque paseaproximadamenteunaheraparaque
desbioqaea despa_s dei tide el hornaseenfr[eantesdequesecompleteuncicio deautolimpieza=Lapuertapuedeset
de autoiimpieza, abiertacuandodesaparezcala palabra'LOCK'delindicadarvisual.
o Elcontroly la puertapuedeestarbloqueada=VetpSgs=59et 68 paradesbIoquear=
73

PROBLEMA SOLUCION
Lasupedicie suave muestra
desgaste.
$e junta humedaden maventana
demhomoosamevaporpot
el respiradero demhomo°
Hayun omorfuerte o humomeve
cuandoseenc endeemhomo.
C6digos de Errores
Se escuchan ruidos.
1. Abmsioneso myadumspequd_as.
o Aseg_imsedeque [acubiertay[aparteinferiorde[utensi[ioest6[impia.Nodes[iceutens[iios
devidrioo demetalatrav6sde Iacubierta.Aseg0resedequelaparteinferiordelutensiliono
sea_spera.Uselosagentesdelimpiezarecomendados.Vet p%. 69.
2. Marcasde metal
o NodesliceutensiIiosde metalatravesde Iacubierta.Cuandoest6fr[a,limpiela cubiertacon
CremaparaLimpiezadeCubiertas.Verp_g.69.
3. Manchasy estdasmarrones.
o Retirelosderrarnesr_ipidamente.NuncaIimpieconunpaiiooesponjasucia.Aseg0resedeque
Iacubiertay laparteinferiordel utensilioest6limpia.
4. Areascon unbrillomet_ilico.
o DepOsitosmineraIesdetaguayde losalimentos.Uselosagentesde limpiezarecomendados.
Ver p_g.69.
5. Picaduraso descascarilIado
o Limpielosderramesazucaradosinmediatamente.Vetp_g.69.
, Estoesnormalcuandosecocinanalimentosconalto contenidode humedad.
, Seus0humedadexcesivacuandolimpi6la ventana.
° Estoesnormalen unaestufanuevaydesaparecer4despu6sde unospocosusos.
AJiniciar un ciclo deautolimpiezase"quemar4n"losoioresm4s r4pidamente.
o SiseenciendeeJventihdor ayudar4aeliminarel humoy/o el olor.
o Suciedadexcesivade alimentosen el panelinferiordel homo. Useunciclo de autolJmpJeza.
° 'BAKE'o 'LOCK'puedendestellarr_pidamenteenel indicadorparaavisarleque hayun error
o un problema.Si'BAKE'o 'LOCK'aparecenen elindicadorvisual,oprimala tecla'CANCEL'.
Si'BAKE'o 'LOCK'continOandestellando,desconecteIaenerg[aeI(!ctricaalelectrodom6stico.
Espereunospocosminutosyvuelvaareconectarlaenerg[ael6ctrica.Sicontimiandestellando,
desconectelaenergFael6ctricadetelectrodom6sticoyIlameal t6cnicodeservicioautorizado.
o Siel holno est_demasiadosucio,puedenocurrirdemasiadasIlamaradasIocualresultar_en
unc6digodeerrorduranteIaIimpieza.Optimalatecla'CANCEL'ydeiequeel homoseenfr[e
completamente,Iimpieelexcesodesuciedadyluegovuelvaa programarel ciclode limpieza.
Siel c6digode error reaparece,Ilamea un t6cnicoautorizado.
, Elhornoemitevariossonidosbajos. Ustedpuedeo[rlosre[6sdel homocuandoseencienden
yseapagan.Estoesnormal
o A medidaqueel hornosecalientayse enfr[a,ustedpuededr sonidosdepiezasmet_licasque
seexpandeny contraen. Estoesnormaly no daffar_su electrodom6stico.
No se escuchan seiiales sonoras , Elhomo puedeestaren ModoSab_tico. (Verp%. 63].
y el indicadorvisuamno se activa.
'SAb' destella y luego se
despmiegacontinuamente°
o Elhomoest_enmodosab_tico.Paraanu[arel modosab_tico,oprimaymantengaoprimida[a
tecla 'Clock'(Reloj}durantecincosegundos.
74

Garant_a Completa de Un A_o -
Piezas y Mano de Obra
Duranteun (1) afio desdelafechaoriginalue
comp[aai pc[ "nenonserepararao reemplazara
gra[ultamentecualqulerplezaquefafleduran[e
usonormaEen el hogan
Garant[as Limitadas- Piezas
SeJamente
Oesdeel Segundo basrael Quinte Afio =A
partirde latecha originalde compra,sereparardn
oreemplazarangratuitamentelaspiezasindicadas
acontinuacionquefaflenduranteusonormalen
e[ hogaren Joque respec[aaias _ezasy el
pro[_etariodeberapagartodosloso[roscos[os
incluyendomanode obra,kilometraje/miflaje,
transporte,costode!viajey costodeldiagnOstico,
sifuesenecesario.
o Cubietta de Vidrie Cer_mico:Debiooa ro[ura
tSrmica,descoloracl6n,agnetamtentode lajuma
de gomadel borde,desgastedeldise¢io.
o Elementos Calefaeteres El_etrieos: Los
_Jementosradiantessuperioresen losartefactos
(_ecocmarel6ctdeos=
Residentes Canadienses
Lasgarantfasanterlorescub[en solamen[e
aquefloselectrodomSsticosinstaIadosenCanada
que hansidocertiticadoso aprobadosoct ias
agenctasdepruebascorrespondlentespara
cumpltmientoconla NormaNacionaldeCanadaa
menosqueel dectrodom6sticohayasidotraido a
CanadadesdelosEE.UU.debidoa un cambiode
residencia.
Garant_a Limitada Fuera de los
Estades Unides y Canad_ = Piezas
Selamente
Duran-[eun (1)afrodesde a fechadecompra
originala[pot menor,cualqulerplezaquefafie
ourameusonormalen el hogarserareempiazada
o reparadagrattlitamenteen Ioque respec[aala
piezayei propietariodeberapagartodosloso[ros
costosincluyendomanode obra,kilometraje/
miilaje,transporte,costodel viaje} costodei
diagn6stico,sifuesenecesario,
LasgarantfasespecfficaseApresadasanteriormenre
son/asUNICASgaranttasprowstasper eJ
fabric'ante.£stasgarantiasle omLaanderechos
lega/esespedficosy ustedpuedeteneradembs
otrosdereehosquevar/ande unestadoa otto.
Lo que No Cubren Estas Gatantm'as:
1= Situacionesy daSosresultantesde cualquierade Iassiguienteseventualidades:
a=Instalaci6n,entregao mantenimientoinapropiados=
b=CuaIquierreparaci0n,modificaciOn,alteraciOno aiusteno autorizadopot
el fabricanteo por un centrode servicioautorizado.
c. Mal uso,abuso,accidenteso usoirrazonable.
d. Corrienteet6ctrica,voitajeo suministroincorrecto.
e. Programaci6nincorrectade cualquierade loscontroles.
2. Lasgarantiasquedanhulassi IosnOmerosde serieoriginaleshansidoretirados,
alteradoso no sonfacilmentelegibles.
3, Focos,
4, Productos comprados para uso comerciaI o industrial
5, EIcosto del servicio o liamada de servicio para:
a. Corregirerroresde instalaciOn.
b. Instmir al usuadosobreel usocorrectodel artefacto.
c. Transportedel artefactoaIestabiecimientode servicio.
6. Da[iode lacubiertade viddocausadopot el usode limpiadoresque no han sido
lascremasy esponiasdelimpiezarecomendadas.
7. Datiode lacubiertade viddocausadopor derramesendurecidosde materiales
azucaradoso plasticoderretidoy que no hartsidolimpiadosde acuerdoconlas
instruccionesindicadasen la gu[ade usoycuidado.
8. Losda[iosconsecuenteso incidentalessufridospotcualquierpersonacomo
resultadode cualquierincumplimientode estasgarantias.EnaIgunosestadosno
sepermitela exciusiOno limitaciOnde losda_osconsecuenteso incidentales,pot
Iotanto la exclusiOnanteriorpuedeque no seapfiqueen sucaso.
Si Necesita Setvicio
• Llamealdistribuidor dondecompr0suelectrodom6sticoo Ihme a Maytag
ServicessM,Servic[oa losClientesMaytagIlamandoal 1-800-688-9900[[=LILI=o al
1-800-688-2002Canad¶ubicara un t6cnicoautorizado=
o Asegliresede consewarel comprobantede compraparaverificarelestadode Ia
garant[a. Consukela secciOnsobreIaGARANTIAparamayorinformaciOnsobrelas
responsabilidadesdel propietadoparaserviciobajo la garant[a.
o Si etdistribuidoro Iacompati[ade servicionopuedenresolverel problema,escriba
a MaytagServicessr'_,Attn:CAR" Center,P.O.Box2370,Cleveland,TN37320-2370
o IIapaeaI 1-800-688-9900 EE.UU.o al 1-80e-688-2002 Canada.
• Lasgu[asdel usuario,manualesde servicioe informaci0nsobrelaspiezaspueden
soIicitarsea MaytagServicessM,Servicioa losClientesMaytag.
CuandoIlameo escribaacercade un problemade servicio,_orfaw_rincluyala
siguienteinfermaci6n.
a.Su nombre,direcciOny ntimerodeteldono;
b.N_merode modeloy m_merode serie;
c. Nombrey direcci6nde sudistdbuidoro t6cnicode sewicio;
d. Unadescripci6nclaradel problemaque estaexperimentando;
e. Comprobantede compra [recibode compra}.
Form No. B/10/04 Pat1 No. 8113P480 60 (cb2004 Maytag Appliances Sales Co. Litho U.S.A.
Transcripción de documentos
E_ectric Range - Tabme of Contents Safety .......................................... 1-4 Care & Cleaning ................... 16-19 Maintenance ......................... Oven Window 20-21 Self-Cban Surface Cooking Controls Smoothtop ...................... 5-7 Surtace Oven Cooking Baking Cook & Hold ......................... 8-15 Charting Oven Procedures Oven Light Troubleshooting Delay Keep Warm Broiling Oven Racks Warranty ................... & Service 21 =22 .................... Guide d'utilisation et d'entretien ................................... 23 24 Guia de Uso y Cuidado ............. 50 Form No. B/10/04 Pall: No. 8113P4g0 60 @2004 Maytag Appliances Sales Co. Litho U.S.A. Model Number 1=oensure proper and safe operation: Appliance must be properly installed and grounded by a qualified technician. Do not attempt to adjust, repair, service, or replace any part of your appliance unless it is specifically recommended in this guide. All other servicing should be referred to a qualified servicer. Serial Number Always disconnect power to appliance before servicing. installer: Please leavethis manual with this appfiance. Consumer: Please read and keep this manual for future reference. Keep sales receipt and/or canceled check as proof of purchase. Date of Pu rchase If _ou have questions, call: Maytag Customer Assistance 1-800-688-9900 USA 1-800-688-2002 Canada 1-800-688-2080 ( U.S.FRY for hearing or speech [rnpaired._ (Mon.-Fri.. 8 am-8 pm Eastern Time] Internet: http://www.maytag.com tn ourcontinu ng effortto irnprove the quafityand performance of our cooking prod ucts. it may be necessaryto make changes to the appfiance without revising this guide. For service i#fermaden, see page 23. Warning and Important Safety Instructions appearing in this guide are not meant to cover aJJpossible conditions and situations that may occur. Common sense, caution, and care must be exercised when installing, maintaining, or operating the appliance. Always contact the manufacturer about problems or conditions you do not understand. o FOLLOW ALL _NSTALLATli WARNING: To rednce risk of tipping of the appliance from abnormal nsage or by e×cessive leading of the oven doer, the appliance mnst be secnred by a properly installed anti.tip To check if device is properly installed, look underneath range with a flashlight to make sure one of the rear leveling legs is properly engaged in the bracket slot. The anti-tip device secures the rear leveling leg to the floor when properly engaged. You should check this anytime the range has been moved. To Prevent Fire or Smoke Be sure all packing materials are removed from the appliance before operating it. Keep area around appliance clear and free from combustible materials. Flammable materials should not be stored Recognize Safety Symbols, Words, Labels WARNnNG. Hazards or unsafe practices which COULD result in severe persona] injury or death. [n an oven, Many plastics are vulnerable to heat. Keep plastics away from parts of the appliance that may become warm or hot. To prevent grease fires, do not let cooking grease or other flammable materials accumulate in or near the appliance. CAUTION _ Hazards or unsafe practices which COULD result in minor personal injury. Read and follow aJJ instructions before using this appliance to prevent the potential risk of fire, electric shock, personal injury or damage to the appliance as a result of improper usage of the appliance. Use appliance only for its intended purpose as described in this guide. in Case of Fire Use dry chemical or foam-type extinguisher or baking soda to smother fire or flame. Never use water on a grease fire. 1. Turn off appliance to avoid spreading the flame. 2. NEVER pick up or move a flaming pan. 3. Smother oven fire or flame by closing the oven door. Child Safety Do not touch a hot oven light bulb with a damp cloth as the bulb could break Should the bulb break, disconnect power to the appliance before removing bulb to avoid electrical shock NEVER use aluminum foil to cover an oven rack or oven above an appJJance, Children cJjmbing On the appliance or damage to the appliance. Use foil only as directed in this guide. sedous!y injured, NEVER leave children alone or unsupervised near the appliance when it is in use or is still hot. Children should never be allowed to sit or stand on any part of the appliance as they could be injured or burned. Children must be taught that the appliance and utensils in it can be hot. Let hot utensils cool in a safe place, out of reach of small children. Children should be taught that an appliance is not a toy. Children should not be allowed to play with controls or other parts of the appliance. About bottom. Misuse could result in risk of electric shock, fire, Your Appliance NEVER use an app!!ance as a step to teach cabinets tean!ng Or sitting On the door, may resu!t in p0ssib!e tipping of the appliance, breakage of door, and serious injuries, To prevent potential hazard to the user and damage to the appliance, do not use appliance as a space heater to heat or warm a room. Also, do not use the oven as a storage area for food or cooking utensils. Cooking Safety Never heat an unopened food container in the oven. Pressure build-up may cause container to burst resulting in serious personal injury or damage to the appliance. Use dry, sturdy potholders. Damp potholders may cause burns from steam. Dish towels or other substitutes should never be used as potholders because they can trail across hot elements and ignite or get caught on appliance parts. Wear proper apparel. Loose fitting or long hangingsleeved apparel should not be worn while cooking. Clothing may ignite and cause burns if garment comes in contact with heating elements. Always place oven racks in the desired positions while oven is cool. Slide oven rack out to add or remove food, using dry, sturdy potholders. Always avoid reaching into the oven to add or remove food. If a rack must be moved while hot, use a dry potholder. Do not let potholder contact hot element in oven. Use racks only in the oven in which they were shipped/ purchased. Use care when opening the oven door. Let hot air or steam escape before removing or replacing food. Do not obstruct the flow of air by blocking the oven vent. PREPARED FOOD WARNUNG: Follow food DO NOT TOUCH HEATING ELEMENTS OR iNTERiOR manufacturer's instructions. If a plastic frozen food container and/or its cover distorts, warps, or is otherwise damaged during cooking, immediately discard the food and its container. The food could be contaminated. SURFACES OF OVEN. Heating elements may be hot even though they are dark in color, interior surfaces of any oven become hot enough to cause burns. During and after use, do not touch, or let clothing or other flammable materials contact heating elements or interior surfaces of oven until they have had sufficient time to cool. Other surfaces of the appliance may become hot enough to cause burns - among these surfaces are: oven vent opening, surface near this opening, oven door, and window of oven door. Do not allow aluminum foil or meat probe to contact heating element. Always turn off all controls when cooking is completed. Utensim Safety Follow the manufacturer's cooking bags. Deep Fat Fryers directions when using oven Use extreme caution when moving the grease pan or disposing of hot grease. Allow grease to cool before attempting to move pan. This appliance has been tested for safe performance using conventional cookware. Do not use any devices or accessories that are not specifically recommended in this manual. Do not use stove top grills or add-on oven convection systems. The use of devices or accessories that are not expressly recommended in this manual can create serious safety hazards, result in performance problems, and reduce the life of the components of this appliance. Ventimating Clean range hood and filters frequently to prevent grease or other flammable materials from accumulating on hood or filter and to avoid grease fires. When flaming foods under the hood, turn the fan on. Cleaning Be sure utensil is large enough to properly contain food and avoid boilovers. Pan size is particularly important in deep fat frying. Be sure pan will accommodate the volume of food that is to be added as well as the bubble action of fat. sponge or cloth is used to wipe spills on a hot surface. Some cleaners can produce noxious fumes if applied to a hot surface. Clean only parts listed in this guide. If pan is smaller than element, a portion of the element will be exposed to direct contact and could ignite clothing or potholder. Self-Clean Only certain types of glass, glass/ceramic, ceramic, earthenware, or other glazed utensils are suitable for cooktop or oven service without breaking due to the sudden change in temperature. Follow utensil instructions Oven Do not leave racks, broiling pan, food or cooking utensils, etc. in the oven during the self-clean cycle. when using glass. Do not clean door gasket. The door gasket is essential for a good seal Care should be taken not to rub, damage, or move the gasket. Turn pan handle toward center of cooktop, not out into the room or over another surface element. This reduces the risk of burns, ignition of flammable materials, or spillage if pan is accldently bumped or reached by small children. Do not use oven cleaners or oven liners of any kind in or around any part of the self-clean oven. Before self-cleaning the oven, remove broiler pan, oven racks and other utensils, and wipe off excessive spillovers to prevent excessive smoke or flare ups. NEVER leave surface units unattended especially when using high heat. An unattended bollover could cause smoking and a greasy spillover can cause a fire. It is normal for the cooktop of the range to become hot during a self-clean cycle. Therefore, touching the cooktop during a clean cycle should be avoided. This appliance is equipped with different size surface elements. Select pans with flat bottoms large enough to cover element. Fitting pan size to element will improve cooking efficiency. GLASS_CERAMUC Safety Clean cooktop with caution. Turn off all controls and walt for appliance parts to cool before touching or cleaning. Clean with caution. Use care to avoid steam burns if a wet Never let a pan boll dry as this could damage the utensil and the appliance. manufacturer's Hoods SURFACE: NEVER cook on broken cooktop. If cooktop should break, cleaning solutions and splllovers may penetrate the broken cooktop and create a risk of electric shock Contact a qualified technician immediately. 3 l pottant Safety Notice and substances can be minimized by properly venting the oven to the outdoors by opening the window's and/or door in the room where the appliance is located during the self-clean cycle. The California Safe Drinking Water and Toxic Enforcement Act of 1986 (Proposition 65} requires the Governor of California to publish a list of substances known to the State of California to cause cancer or reproductive harm, and requires businesses to warn customers of potential exposures to such substances. UMPORTANT NOTUCE REGARDUNG PET BURDS: Never keep pet birds in the kitchen or in rooms where the fumes from the kitchen could reach. Birds have a very sensitive respiratory system. Fumes released during an oven self-cleaning cycle may be harmful or fatal to birds. Fumes released due to overheated cooking oil, fat, margarine and overheated non-stick cookware may be equafly harmful Users of this appliance are hereby warned that when the oven is engaged in the self-clean cycle, there may be some low-level exposure to some of the listed substances, including carbon monoxide. Exposure to these Save These instructions for Future 4 Reference Surface Controls Suggested Setting Heat Settings The size, type of cookware and cooking operation will affect the heat setting. For information on cookware and other factors affecting heat settings, refer to Cookware Recommendations on page 7 and "Cooking Made Simple" booklet. Use to turn on the surface elements. An infinite choice of heat settings is avaihb[e from Low to High. The knobs can be set on or between any of the settings. the ControJs 1. Phce pan on surface dement. 2. Push in and turn the knob in either direction to the desired ° The control pane[ is marked to identify wNch dement the knob controls. For example, the graphic at right indicates Heftfront dement. O O O O Medo Low (3-4): Use to continue cooking covered foods or steam foods. 3. There is an dement indicator light on the control pane[. When any surface control knob is turned on, the light will turn on. The light will turn off when all the surface elements are turned off. 1 High (10): Use to bring liquid to a boil Always reduce setting to a lower heat when liquids begin to boil or foods begin to cook. OFF [ Styling may Hieh vary depending on model 4. After cooking, turn knob to OFF. Remove pan. @ [}ual Element (select models) The cooking surface has a dual element located in the right front position of the smoothtop. This allows you to change the size of this element. .......Medium Medium (5-7): Use to maintain slow boil for large amounts of liquids and for most frying operations. OFF High _OW 2 1. Press the switch to the left to use the large element or to the right to use the small element. 2. Push in and turn knob in either direction to the desired heat setting. Medium ..... BEFORE COOKING , Always place a pan on the surface unit before you turn it on, To prevent damage to range, never operate surface unit without a pan in place, NEVER use the cooktop as a storage area for food or cookware, .................... Medo High (8=9): Use to brown meat, heat oil for deep fat frying or sauteing. Maintain fast boil for large amounts of liquids. AFTER COOKING • Make sure surtace unit is turned off • Clean up messy spills as soon as possible, OTHER TIPS - tf cabinet storage is provided direct[_ above cooking surface limit it to items that are infrequendy used and can be safely stored in an area subjected to heat. Temperatures may be unsafe for items such as volatile liquids. cleaners ol aerosol sprays • NEVER leave any items, especially plastic items, on the cooktop The hot air from the ven_ may ignite flammable items, melt or soften plastics, or increase pressure in dosed con_aiuuerscausing them to burst. o NEVER allow aluminum foil. meat probes or an} other metal object, other than a pan on a surface elemenL to contact heating elements. o NEVER store heav} items above the cooktop that could fall and damage it. DURIN6 COOKIN6 Be sure you know which knob controls which surface unit, Make sure } ou turned on the correct surface unit .... Begin cooking on a higher heat setting then reduce to a lower setting to complete the operation, Never use a high heat setting for ex_ended cooking, NBIE@ allow a pan to boil dry. This could damage the pan and the appliance, NEVER touch cooktop until it has cooled, Expect some parts of the cooktop, especiall_ around the surface units .... to become warm or hot during cooking. Use potholders _o protect hands, 5 S oothtop Smoothtop Surface Surface Tips to Protect the Smoothtop Surface Notes: , Cooktop may emit mightsmoke and odor the first few times the cooktop is used. This is normal CJeaning (see page 18 for more information} ° Before first use, clean the cooktop. , Smoothtop cooktops retain heat for a period of time after the element is turned off. Turn the dements off ° Clean your cooktop daily or after each use. This will keep your cooktop looking good and can prevent damage. a few minutes before food is compHeteHycooked and use the retained heat to compHete cooking. When the hot surface Hightturns off, the cooking area wiHHbe cooH enough to touch. Because of the way they retain heat, the smoothtop dements wiHHnot respond to changes in settings as quickHyas coiHdements. ° If a spillover occurs while cooking, immediately clean the spill from the cooking area while it is hot to prevent a tough cleaning chore later. Using extreme care, wipe spill with a clean dry towel ° Do not allow spills to remain on the cooking area or the cooktop trim for a long period of time. ° In the event of a potentiaHboiHover,remove the pan from the cooking surface. ° Never use abrasive cleansing powders or scouring pads which will scratch the cooktop. , Never attempt to miftthe cooktopo ° Never use chlorine bleach, ammonia or other cleansers not specifically recommended for use on glass-ceramic. ° The smoothtop surface may appear discoHoredwhen it is hot=This is normaHand wiHHdisappear when the surface cooHs= To Prevent Marks and Scratches ° Do not use glass pans. They may scratch the surface. Cooking ° Never place a trivet or wok ring between the surface and pan. These items can mark or etch the top. Areas The cooking areas on your range are identified by permanent circHeson the smoothtop surface. For most efficient cooking, fit the pan size to the dement size. ° Do not slide aluminum pans across a hot surface. The pans may leave marks which need to be removed promptly. (See Cleaning, page 18=} Pans should not extend more than t-inch beyond the cooking area. ° Make sure the surface and the pan bottom are clean before turning on to prevent scratches. When a control is turned on, a gHowcan be seen through the smoothtop surface. The element will cycmeon and off to maintain the preset heat setting, even on Hi. ° To prevent scratching or damage to the glass-ceramic top, do not leave sugar, salt or fats on the cooking area. Wipe the cooktop surface with a clean cloth or paper towel before using. For more information on cookware, refer to Cookware Recommendations on page 7 and "Cooking Made Simple" bookHetincHudedwith your range. ° Never slide heavy metal pans across the surface since these may scratch. cent. SINGLE ELEMENTS DUAL ELEMENT (SELECT Hot Surface MODELS) Light The Hot Surface indicator Hightis Hocatedon the controHpanel The HightwiHHbe iHHuminated Hef_ Surface when any cooking area is hot= It wiHHremain on, even after the controH is turned off, untiHthe area has cooHed= 6 To Prevent Stains The Bubble Test: , Never use a seineddish cloth or sponge to dean the cooktop surface. A fiim will remain which may cause stains on the cooking surface after the area is heated. 2. Watch the formation of the bubbles as the water heats. , Condnuousiy cooking on a seinedsurface may/will resuit in a permanent stain. Uniform bubbles mean good performance, and uneven bubbles indicate hot spots and uneven cooking. 1. Put 1 inch of water in the pan. Place on cooktop and turn control to High, See "Cooking Made Simpie" bookiet for more information. To Prevent Other Damage ° Do not allow piasdc, sugar or foods with high sugar content to meit onto the hot cooktop. ShouM this happen, dean immediatdy. (See Cbaning, page 18.} ° Never Neta pan boii dry as this will damage the surface and pan. , Never use cooktop as a work surface or cutting board. ° Never cook food directly on the surface. ° Do not use a small pan on a large element. Not only does this waste energy, but it can also result in spillovers burning onto the cooking area which requires extra cleaning. , Do not use non-fiat specialty items that are oversized or uneven such as round bottom woks, rippled bottom and/or oversized canners and griddles. ° Do not use foil or foiPtype containers. Foil may melt onto the glass. If metal melts on the cooktop, do not use. Call an authorized Maytag Servicer. Cookware Recommendations Using the right cookware can prevent many problems, such as food taking longer to cook or achieving inconsistent results. Proper pans will reduce cooking times, use less energy, and cook food more evenly. Nat Pan Tests See if your pans are flat. The Rumor Test: 1. Place a ruler across the bottom of the pan. 2. Hold it up to the light. 3. Little or no light should be visible under the ruler. Select • Avoid Flat, smooth-bottom )ans. Panswith grooved or warped bottoms. Panswith uneven bottoms do not cook efficiently and sometimes may not boil liquid. Heavy-gauge pans, Very thin-gauge metal or glass pans, Pans that are the same size as the dement. Pans smaller or larger than the element by' 1 inch. Secure handles. Cookware with loose or broken handles. Heavy handles that tilt the pan. Loose-fitting lids. Hat bottom woks. Canning Woks with a ring-stand bottom. and Oversize All canners and large pots must have fiat bottoms and must be made from heavy-gauge materials. This is critical on smoothtop surfaces. The base must not be more than 1 inch larger than the element. When canners and pots do not meet these standards, cooking times may be longer, and cooktops may be damaged. Some canners are designed with smaller bases for use on smoothtop surfaces. When canning, use the High heat setting only until the water comes to a boil or pressure is reached in the canner. Reduce to the lowest heat setting that maintains the boil or pressure. If the heat is not turned down, the cooktop may be damaged. See "Cooking Made Simple" booklet for more information. C Less- E F G H 1 D ............... j The control panel is designed for ease in programming. The displaywindow on the control shows time of day, timer and oven functions. Control panel shown includes model specific features. (Styling may vary depending on modeL} A Broil Use for broiling and top browning. B Bake Use for baking and roasting. C More+ or Less- Enters or changes time, oven temperature. Sets Hi or LO broil D Timer Sets Timer. e Cook & Hold Bakes for a preset time, then holds food warm for 1 hour. F N J The clock can be set to display time in a 12-hour or 24-hour format. The clock is set at the factory for the 12-hour format. To change the clock to 24-hour format: 1. Press and hold the CANCEL and Delay pads for three seconds. 2. Press the More+ or Less - pad to select 12 or 24 hour. Clean Use to set self-clean cycle. Delay Programs the oven to start baking at a later time. 3. Set the time of day following directions below. Clock Use to set time-of-day clock. To set the Clock: Keep Warm Use to keep cooked food warm in oven. 1. Press the Clock pad. CANCEL Cancels all operations except Timer and Clock. the ° Time of day and the colon flash in the display. 2. Press the More+ or Less- pad to set the time of day. Using the Touchpads ° Colon continues flashing. 3. Press the Clock pad again or wait four seconds. Press the desired pad. Press the More+ or Less- pad to enter time or temperature. Less- : When electrical power is supplied or after a power interruption, the last clock time before power was interrupted will flash. ° A beep wiii sound when any pad is touched. ° A double beep wiii sound if a programming error occurs. To recall the time of day when another time function is showing, press the Clock pad. Note: Four seconds after pressing the More+ or Lesspad, the time or temperature will automatically be entered. If more than 30 seconds elapse between touching a function pad and the More+ or Less- pad, the function will be canceled and the display will return to the previous display. Clock time cannot be changed when the oven has been programmed for cook or clean Delay or Cook & Hold. 8 To cancel the Clock display: Locking the ControJ If you do not want the time of day to dispHay: The touchpad controls can be locked for safety, cleaning, or to prevent unwanted use= They will not function when locked. Press and hoM the CANCEL and CHock pads for three seconds. The time of day wifl disappear from the dispHay If the oven is currently in use, the controls cannot be locked. The current time of day will remain in the display when the controls are locked. When the chock dispHayis cancelled, press the CHockpad to briefly dispHaythe time of day= To restore To took: Press and hold the CANCEL and Cook & Hold pads for three seconds. the CJoek display: Press and hoHdthe CANCEL and CHockpads for three seconds. The time of day will reappear in the dispHay= LOCK flashes in the display. To unlock: Press and hold the CANCEL and Cook & Hold pads for three seconds. The timer can be set from one minute (00:01] up to 99 hours and 59 minutes (99:59]. LOCK disappears from the display. The timer can be used independentHy of any other oven activity. It can aHsobe set while another oven function is operating. FauJt Codes BAKE or LOCK may flash rapidly in the display to alert you if there is an error or a problem. If BAKE or LOCK flash in the display, press CANCEL pad= If BAKE or LOCK continue to flash, disconnect power to the appliance. Wait a few minutes, and then reconnect power= If the flashing still continues, disconnect power to the appliance and call an authorized servicer. The Timer does not control the oven. It only controls a beeper. To set the Timer: 1. Press the Timer pad. FrTler ,0:00 lights in the display. , The colon flashes in the display. 2. Press the More+ or Less- pad until the correct time appears in the display. Less......................................... _ The colon will continue to flash. 3. Press Timer pad again or wait four seconds. , The colon continues flashing and the time begins counting down. , The last minute of the timer countdown will be displayed as seconds. 4. At the end of the set time, one long beep will sound. To cancel the Timer: 1= Press and hold the Timer pad for three seconds. OR 2= Press the Timer pad and set the time to 00:00= 9 Baking Differences Between Your and New Oven To set Bake: It is normal to notice some baking time differences between a new oven and an old one. See "Adjusting the OvenTemperature" on page 13. 1. Press the Bake pad. ° "BAKE" will flash. ° 000 will Nightin the display. Cook & Hold 2. Select the oven temperature. The oven tempera- More+ ture can be set from 170° to 550°. Press or press ......................................... cook & Hold allows you to bake for a preset amount of time, and hold the More+ or Less- pads. ......... followed by a one-hour Keep Warm cycle. Less ° 350 ° will Nightwhen either pad is first pressed. ............................................ TO set Cook & Hemal: ° Press the More+ pad to increase the temperature. 1. Press the Cook & Hold pad. ° Press the Less- pad to decrease the temperature. , "BAKE" and "HOLD" flash. 3. Press Bake pad again or wait four seconds. , 000 lights in the display. ° BAKE wiii stop flashing and light in the display. 2. Select the oven temperature. The oven temperature can be set from 170° to 550°. Press or press and hold the More+ or Less- pad, ........................ Less ) , Press the More+ pad to increase the temperature. , Press the Less- pad to decrease the temperature. 3. Press Cook & Hold again ORwait four seconds. ° 100° or the actual oven temperature wiii display. The temperature will rise in 5° increments until the preset temperature is reached. , "HOLD" flashes. , 00:00 flashes in the display. 4. Allow the oven to preheat for 8-15 minutes. 4. Enter the amount of time you want to bake by pressing the More+ or Less- pad. Bake time can be set from ten minutes (00:10} to 11 hours, 59 minutes (11:59}. ° When the set oven temperature is reached, one long beep will sound. ° To recall the set temperature during preheat, press the Bake pad. ° "BAKE" and "HOLD" light in the display. ° The baking time wiii light in the display. 5. Place food in center of oven, allowing a minimum of two inches between utensil and oven walls. ° The baking time wiii start counting down. When the cooking 8. Check cooking progress. Cook longer if needed. time has elapsed: ° Four beeps wiii sound. 7. When cooking is finished, press CANCEL. ° "BAKE" wiii turn off. 8. Remove food from the oven. ° "HOLD" and "WARM" will light. Baking ° 170°will display. Notes: To change oven temperature during cooking, press the Bake pad, then press the More+ or Less- pad until the desired temperature is displayed. To change oven temperature during preheat, press the Bake pad twice, then press the More+ or Less- pad until the desired temperature is displayed. After one hour in HOLD WARM: , "End" will display, If you forget to turn off the oven, it will automatically turn off at the end of 12 hours. If you wish to deactivate this feature, see page 13. ° The time of day reappears in the display. To cancel Cook & Hold at any time: (CANCkL') Press the CANCEL pad. Remove food from oven. For additional baking and roasting tips, see "Cooking Made Simple" booklet. 10 Delay Bake When the Delay time has expired: ° "DELAY" will turn off. ° Baking time is displayed. ° "BAKE" and "HOLD" are displayed. as dairy products, pork, poultry, or seafood, To set a Delay when been programmed: When using Delay, the oven begins to cook later in the day. Set the amount of time that you want to delay before the oven turns on and how long you want to cook. The oven begins to heat at the selected time and cooks for the specified length of time, then keeps food warm for up to one hour. 1. Press the Delay pad. ° "DELAY" flashes. ° 00:00 appears in the dispHay. Baking ......................... 2. Press the More+ or Less- pad to set the delay time. Delay time can be set from 10 minutes (00:10} to 11 hours, 59 minutes (11:59}. To set a Delayed Cook & Hold has already ° After four seconds, "DELAY" wiii stay lit to remind you that a delayed cooking cycle has been set. cycle: 1. Press the Delay pad. When the Delay time has expired ° "DELAY" flashes. Less.............................. and the oven starts: ° 00:00 flashes in the display. ° The baking time will be dispHayed. 2. Press the More+ or Less- pad to set the delay time. ° "DELAY" will turn off. ° "BAKE" and "HOLD" will remain Hit. While "DELAY" is still flashing: To cancel: 3. Press the Cook & Hold pad. Press the CANCEL pad. ° 000 lights in the display. , All timed and untimed cooking functions will be canceled. ° "BAKE" and "HOLD" flash. 4. Press More+ pad to set the baking temperature. , The time of day will reappear in the dispHay. ° 00:00 and "HOLD" flash. ° "BAKE" stays ill _otes;: Press More+ pad to set the baking time. Do not use delayed baMng for items that require a preheated oven, such as cakes, cookies, and breads. ° The Delay time, "DELAY", "BAKE" and "HOLD" light in the display. Do not use ddayed baking if oven is already hot. 11 Keep Warm Keep Warm For safdy keephg foods warm or for warmhg breads and pHates= , For optimal food quality, oven cooked foods should be kept warm for no longer than 1 to 2 hours, To set Keep Warm: , To keep foods from drying, cover loosely with foil or a Hid, 1= Press the Keep Warm pad= , To warm dinner rolls: ° "WARM" flashes, - cover rolls loosely with foil and place in oven, ° 000 appears in the dispHay.................................. 2, SeHectthe Keep Warm temperature, The Keep Warm temperature can be set from 145° to 190°` Press or press and hoHdthe More+ or Less- pad, Notes: - press Keep Warm and More+ pads to set 170° R - warm for 12-15 minutes, .................................. , To warm pmates: Less- - place 2 stacks of up to four plates each in the oven, , 170° will Hightwhen either pad is first pressed, - press Keep Warm and More+ pads to set 170° R , Press the More+ pad to increase the temperature, - warm for five minutes, turn off the oven and leave plates in the oven for 15 minutes more, , Press the Less- pad to decrease the temperature, "WARM" and the temperature will be dispHayedwile Warm is active, Keep - use only oven-safe plates, check with the manufacturer, - do not set warm dishes on a cold surface as rapid temperature changes could cause crazing or breakage, To cancem Keep Warm: 1, Press the CANCEL pad, 2, Remove food from the oven, 12 Automatic Shut-Off/Sabbath Adjusting the Oven Temperature Mode Oven temperatures are carefully tested for accuracy at the factory. It is normal to notice some baking or browning differences between a new oven and an old one= As ranges get older, the oven temperature can shift. The oven will automatically turn off after 12 hours if you accidentally Heaveit on. This safety feature can be turned off. TO cancel oven the 12-hour eontinuousJy shut-off and run the You may adjust the oven temperature if you think the oven is not baking or browning correctly. To decide how much to change the temperature, set the temperature 25° higher or lower than your recipe recommends, then bake. The results of the "test" should give you an idea of how much to adjust the temperature. for 72 hours: 1. Set the oven to bake _seepage 10]. 2= Press and hoHdthe CHockpad for five seconds. ° SAb will be dispHayedand flash for five seconds. ° SAb will then be dispHayedcontinuousHy untiHturned off or until the 72-hour time limit is reached. To adjust ° "BAKE" will also be displayed if a bake cycle is in use while the oven is in Sabbath Mode. 2. Enter 550° by pressing the More+ pad. J 3. Press and hold the Bake pad for several seconds or until 0° appears in the display. All other functions EXCEPTBAKE (Timer, Keep Warm, Clean, etc.] are locked out during the Sabbath Mode. To cancel Bake when in Sabbath Press CANCEL. CANCEL 4. Press the More+ or Less- pad to adjust the temperature. Each time a pad is pressed, the temperature changes by 5 °- The oven temperature can be increased or decreased by 5° to 35°- ° No beeps will sound. 1"0 cancel the Sabbath More+ "............................. If the oven temperature was previously adjusted, the change will be displayed. For example, if the oven temperature was reduced by 15° the display will show "-15 °''- Mode: , "BAKE" will turn off in the display. the oven temperature: 1= Press Bake. Mode: 1= Press the Clock pad for five seconds. 5. The time of day will automatically reappear in the display. OR You do not need to readjust the oven temperature if there is a power failure or interruption. Broiling and cleaning temperatures cannot be adjusted. 2= After 72 hours, the Sabbath Mode will end= ° SAb will flash for five seconds. ° The time of day will return to the display. Sabbath Mode Notes: ° Sabbath Mode can be turned on at any time with or without the oven on= , When the Sabbath Mode is started, no preheat beep will sound. ° Sabbath Mode cannot be turned on if the touchpads are locked out or when the door is locked. , All prompts, messages and beeps are deactivated when Sabbath Mode is active. , If the oven is baking when Sabbath Mode is set, "BAKE" will go out at the end of the baking cycle. There will be no audible beeps. , Pressing CANCEL will cancel a Bake cycle, however the control will stay in the Sabbath Mode. , If power fails, the oven will power up in Sabbath Mode with 72 hours remaining and no cycle active. 13 G 6, Turn meat once about halfway through cooking. 7. When food is cooked, press the CANCEL pad. Remove food and broiler pan from the To set Broil: 1. Press the Broil pad. ove n. , "BROIL" flashes. , The time of day wiii reappear in the display. , SETis displayed. 2. Press the More+ pad to set HI broil or press the Less- pad to set LO broil. Broil , Hi or LO will be displayed. , For best results when broiling, use a pan designed for broiling. , Sebct HI broil (550° F} for normal broiling. Sebct LO broil (450° F} for low-temperature broiling of longer cooking foods such as poultry. ° Expect broil times to increase and browning to be slightly lighter if appliance is installed on a 208-volt circuit. 3. After four seconds, the oven will start. , "BROIL" will remain lit. , Hi is used for most broiling. Use LO broil when broiling longer cooking foods. The lower temperature allows food to cook to the well done stage without excessive browning. , Broil times may be longer when the lower broiling temperature is selected. 4. For optimum browning, preheat broil dement for 3-4 minutes before adding food. ° Food should be turned halfway through broiling time. ° For additional broiling tips and temperatures, refer to the "Cooking Made Simple" booklet. 5. Place food in the oven. Leave oven door open about four inches (the first stop]. Broiling Notes: Chart I FOODS Beef Steak, 1" thick TOTAL POS_TmON* DONENESS I COOK TmME Hamburgers, 3/4" thick 4 4 4 Medium Weii Done Weii Done 15 - 18 minutes 19 - 23 minutes 15 - 18 minutes Pork Bacon Chops, 1" Ham - precooked slice, 1/2" thick 4 4 4 Weii Done Weii Done Warm 6 - 10 minutes 22 - 26 minutes 8 - 12 minutes 3 or 4 Weii Done LO Broii 28 - 38 minutes Flaky Flaky 10 - 15 minutes 8 - 12 minutes Poultry Chicken Pieces Seafood Fish Steaks, buttered, 1" thick Fillets * The top rack position is #5. Note: This chart is a suggested guide. The times may vary with the food being cooked. 14 Oven Vent To replace: When the oven is h use the area near the vent may become hot enough to cause burns. Never Mock the vent opening. 1= Place rack on the rack support in the oven The oven vent is located below the backgaard shield on your range. OVEN VENT L 0 CA TION 2= Tilt the front end up slightly. Slide rack back until it clears the lock-stop position. vent 3= Lower front and slide back into the oven. Do not cover an entire rack with aiaminam foil or place foil on the oven bottom. Baking resaits will be affected and damage may occur to the oven bottom. Do not piace piasdcs near the vent opening as heat from the vent couid distort or Rack Positions RACK 5 Chighest position:}: Used for toasting bread or broiling thin, non-fatty foods. Oven Light __4 __2 --1 RACK 3: Used for most baked goods on a cookie sheet or jelly roll pan, layer cakes, fruit pies, or frozen convenience foods. Oven Bottom 5 --3 RACK 4: Used for most broiling. Press the Oven Light switch on the controi pand to turn the oven Highton and off. Oven 8_ U_ht Protect oven bottom against spiHovers, espedaHy acidic or sugar}, spills, as they may discolor the porcelain enamel. Use the correct pan size to avoid spillovers and boilovers. Do not place atensils or amaminam foil directly on the oven bottom. RACK 2: Used for roasting small cuts of meat, casseroles, baking loaves of bread, bundt cakes or custard pies. RACK 1 : Used for roasting large cuts of meat and poultry, frozen pies, dessert souffles or angel food cake. MULTIPLE RACK COOKING: Two rack: Use rack positions 2 and 4, or 1 and 4. Oven Racks Half Rack Accessory A half rack, to increase oven capacit}', is available as an accesseD,. [t fits in the left, upper portion of the oven and provides space for a vegetable dish when a large roaster is on the lower rack. Contact your dealer for the "HALFRACK" Accesser}, Kit or call 1-800-688-8408. - Do net use the even for storing food or cookware. The oven has two racks. Ai[ racks are designed with a lockstop edge. To remove: 1. Pui[ rack straight out until it stops at the lock-stop position. 2, Lift up on the front of the rack and pui[ out, 15 Seff-C ean Oven 6. Wipe up sugary' and acidic spillovers such as sweet potatoes, tomato, or milk-based sauces. Porcelain enamel is acid-resistant, not acid-proof. The porcelain finish may discolor if acidic spills are not wiped up before a self-clean cycle. o It is normal for parts of the range to become hot dunng a To set Self-Clean: * To prevent persou ai injury and damage to the oven door do not attempt to open door when "'LOCK" is displayed Note: a deanOven cycle,temperature must be below 400° F to program , Avoid touching cooktop, door_ window or oven veto area during a clean cycle. 1. , Do not use commercial oven cleaners on the oven finish or around any part of the oven. The} wiii damage the finish o_ parts. Close the oven door. 2. Move door lock lever right to the locked position. The self-clean cycle uses above-normal cooking temperatures to automatically clean the oven interior. Do not force the oven door or lock lever open. This may result in exposure to high temperatures and be a burn hazard. 3. Press the Clean pad. ° "CLEAN" flashes in the display. It is normal for flare-ups, smoking, or flaming to occur during cleaning if the oven is heavily soiled. It is better to clean the oven regularly rather than to wait until there is a heavy buildup of soil in the oven. If the door is not closed, beeps will sound and "DOOR" will display. If the door is not closed within 45 seconds, the self-cleaning operation will be canceled and the display will return to the time of day. During the cleaning process, the kitchen should be well ventilated to get rid of normal odors associated with cleaning. 4. Press the More+ or Less- pad. ° "CL-M" (Medium Soil, 3 hours} is displayed. Before 5. Press the More+ or Less- pad to scroll through the self-cleaning settings. Se f-Cmeaning 1. Turn off the oven light before cleaning. The light may burn out during the clean cycle. ............................ ..... (More+ CL-H" (Heavy Soil, 4 hours} CL-M" (Medium soil, 3 hours} 2. Remove broiler pan, all pans, and oven racks from the oven. The oven racks will discolor and may not slide easily after a self-clean cycle if they are not removed. Jess.... CL-L__(Light Soil, 2 hours} Choosing the soil level of the oven automatically programs the self-cleaning time. 3. Clean oven frame, door frame, area outside of gasket, and around the opening in the door gasket with a nonabrasive cleaner such as Bon Ami* or detergent and water. The self-cleaning process does not clean these areas. They should be cleaned to prevent soil from baking on during the clean cycle. (The gasket is the seal around the oven door and window.[) 6. After four seconds, the oven will start cleaning. , The cleaning time will start counting down in the display. , "LOCK" will appear in the display. , "CLEAN" will appear in the display. To Delay a Self-Cmean Cycle: 4. To prevent damage, do not clean or rub the gasket around the oven door. The gasket is designed to seal in heat during the clean cycle. 1. Press the Delay pad. ° "DELAY" flashes. ° 00:00 will appear in the display. 5. Wipe up excess grease or spillovers from the oven bottom. This prevents excessive smoking, flare-ups or flaming during the clean cycle. 2. Press the More+ or Less- pad to set the amount of time you want to delay the cycle. Delay time can be set from ten minutes (00:10} to 11 hours, 59 minutes (11:5g}. conto Brand names for cleaning products are registered trademarks of the respective manufacturers. 16 3. Press the CHeanpad. During , "CLEAN" will flash. 4. Press the More+ or Less- pad. , "CL-M" (Medium Soil 3 hours:) is dispHayed. the Self-C ean Cycle When LOCK shows in the display, the door cannot be opened. To prevent damage to the door, do not force the door open when LOCK is displayed. ................. Smoke and Smells .......................... You may see some smoke and smell an odor the first few times the oven is cleaned. This is normal and will lessen in time. 5. Press the More+ or Less- pad to scroll through the sdfcHeaning settings. CL-H" (Heavy Soil 4 hours:) CL-M" (Medium soil 3 hours:) Smoke may also occur if the oven is heavily soiled or if a broiler pan was left in the oven. CL-L" (Light Soil 2 hours:) Sounds Choosing the soiHHevdof the oven automatically programs the sdf-cHeaning time. As the oven heats, you may hear sounds of metal parts expanding and contracting. This is normal and will not damage the oven. 6. After four seconds, CLEAN, DELAY and LOCK will appear in the dispHayto show that the oven is set for a ddayed dean operation. The dday time is dispHayed. After Se f-Cleaning About one hour after the end of the self-clean cycle, LOCK will turn off. The door can then be opened. Move door lock lever to the left to unlock. Some soil may leave a light gray, powdery ash. Remove it with a damp cloth. If soil remains after wiping, that means the clean cycle was not long enough. The soil will be removed during the next clean cycle. Jf the oven has amready been set for a clean cycle and you wish to set a delay: 1. Press the Delay pad. ° "DELAY" flashes. ° 00:00 will appear in the display. 2. Press the More+ or Less- pad to set the amount of time you want to delay the cycle. if oven racks were left in the oven and do not slide smoothly after a clean cycle, wipe racks and rack supports with a small amount of vegetable oil to make them easier to ...........................move. Fine lines may appear in the porcelain because it went through heating and cooling. This is normal and wiii not affect performance. ............................................ After four seconds, CLEAN, DELAY and LOCK will appear in the display to show that the oven is set for a delayed clean operation. The delay time is displayed. When the Self-Clean A white discoloration may appear after cleaning if acidic or sugary foods were not wiped up before the self=clean cycle= This discoloration is normal and will not affect performance. eyeme starts: ° "DELAY" will turn off. ° The dean time will appear in the display. TO cance! the Semf-Clean cycle: If the oven door is left open, "DOOR" will flash in the display and a signal will beep until the door is closed and the Clean pad is pressed again. Press the CANCEL pad. ° All words disappear from the display. ° All functions are canceled. If more than five seconds elapse between pressing the Clean pad and the More+ or Less- pad, the program will automatically return to the previous display. ° The time of day appears in the display. The oven door will be damaged if the oven door is forced to open when "LOCK" is still displayed. 17 Cleaning ,!fa Procedures * Brand names are registered trademarks of the respective manufacturers. ** To order call 1-877-232-6771 USA and 1-800-688-8408 Canada. part !s removed, be sure !t is correct!y replaced, } PROCEDURE Backgaard and Cooktop Porcelain Enamel PorceHainenameHis gHassfused on metaHand may crack or chip with misuse. It is acid resistant, not acid proof. AH spiHovers,espedaHy acidic or sugary spillovers, should be wiped up immediately with a dry cloth. , When cool, wash with soapy water, rinse and dry. , Never wipe off a warm or hot surface with a damp cloth. This may cause cracking or chipping. , Never use oven cleaners, abrasive or caustic cleaning agents on exterior finish of range. Broiler Pan and insert Never cover insert with aluminum foil as this prevents the fat from draining to the pan below. , Place soapy cloth over insert and pan; let soak to loosen soil= ° Wash in warm soapy water. Use scouring pad to remove stubborn soil. ° Broiler pan and insert can be cleaned in dishwasher. Clock and Control Pad Area , To activate "Control Lock" for cleaning, see page 9. , Wipe with a damp cloth and dry. Do not use abrasive cleaning agents as they may scratch the surface. , Glass cleaners may be used if sprayed on a cloth first. 00 NOTspray directly on eontrolpad and display area. Control Knobs ° Remove knobs in the OFF position by pulling forward. ° Wash, rinse and dry= Do not use abrasive cleaning agents as they may scratch the finish. ° Turn on each element to be sure the knobs have been correctly replaced. Cooktop Gmass-Ceramic Never use even cleaners, chlorine bleach, ammonia or glass cleaners with ammonia. NOTE: Call an authorized servicer if the glass=ceramic top should crack, break or if metal or aluminum foil should melt on the cooktop. ° Allow the eooktop to cool before cleaning= ° General - Clean cooktop after each use, or when needed, with a damp paper towel and Cooktop Cleaning Creme* (Part No=20000001_)**= Then, buff with a clean dry cloth. NO TE: Permanent stains will develop ff soil is ah'owedto cook on by repeatedly using the eooktop _4#ensoiled. ° Heavy Soils or Metal Marks - Dampen a "scratchless" or "never scratch" scrubber sponge. Apply Cooktop Cleaning Creme* (Part No=20000001_)**and scrub to remove as much soil as possible. Apply a thin layer of the creme over the soil, cover with a damp paper towel and let stand 30 to 45 minutes (2-3 hours for very heavy soil)= Keep moist by covering the paper towel with plastic wrap. Scrub again, then buff with a clean dry cloth. NOTE: Only use a CLEAN,DAMP Uscratchless"pad that is safe for non-stick eookware. Thepattern and glass will be damaged ff the pad is not damp, ff the pad is soiled, or ff another type of pad is used. ° Bamed-on or Crusty Soils - Scrub with a "scratchless" or "never scratch" scouring pad and Cooktop Cleaning Creme*. 18 Oven Window and Door - Glass , Avoid using excessive amounts of water which may seep under or behind gHasscausing staining. ° Wash with soap and water. Rinse with dear water and dry. GHasscHeanercan be used if sprayed on a cHoth first. ° Do not use abrasive materiaHssuch as scouring pads, steeHwooHor powdered cHeanersas they wiHH scratch gHass. Oven interior , FoHHow instructions on pages 16-17 to set a seHf-cHeancycHe. Oven Racks ° CHeanwith soapy water. ° Remove stubborn soiHwith cHeansingpowder or soap-fiHHedscouring pad. Rinse and dry. ° Racks wiHH permanentHydiscoHorand maynotsHide smoothHyifHeftin theoven during a seHf-cHean operation. If this occurs, wipe the rack edge and rack support with a smaHH amount of vegetabHeoiHto restore ease of movement, then wipe off excess oil Stainmess Steel (seHectmodeHs) ° ° ° ° Brushed Chrome (seHectmodeHs) , When cool wash with soapy water, rinse and buff the surface. , For heavier soil use a miHdabrasive cHeanersuch as baking soda or Ben Ami*, rubbing with the grain to avoid streaking the surface. Rinse and buff. , To prevent scratching, do not use abrasive cHeaners= , To restore Husterand remove streaks, foHHowwith StainHessSteeHMagic Spray* (Part #20000008)_*= Chrome will perma#endy discolor if soil is allowed to bake ono Door Handle, Side Panems Painted Enamem DO NOT USE ANY CLEANING PRODUCT CONTAINING CHLORINE BLEACH. DO NOTUSEABRASIVE Oft ORANGE CLEANERS. ALWAYS WIPE WITH THE GRAIN WHEN CLEANING. Daily Cleaning/Light Soil -- Wipe with one of the foHHowing- soapy water, white vinegar/water soHution, FormuHa409 GHassand Surface CHeaner*or a simiHargHasscHeaner- using a sponge or soft cHoth.Rinse and dry. To poHishand heHpprevent fingerprints, foHHowwith StainHessSteeHMagic Spray (Part No. 20000008)**. ° JVioderate/Heavy Soil -- Wipe with one of the foHHowing- Ben Ami, Smart CHeanser,or Soft Scrub* using a damp sponge or soft cHoth.Rinse and dry. Stubborn soiHsmay be removed with a damp muHtipurpose Scotch-Brite* pad; rub evenHywith the grain. Rinse and dry'.To restore Husterand remove streaks, foHHow with StainHessSteeHMagic Spray*. ° Discoloration -- Using a damp sponge or soft cHoth,wipe with Cameo StainHessSteeHCHeaner*=Rinse immediateHyand dry=To remove streaks and restore Huster,foHHowwith StainHessSteeHMagic Spray*. , When cool wash with warm soapy water, rinse and dry'. Never wipe a warm or hot surface with a damp cHothas this may damage the surface and may cause a steam burn. , For stubborn soil use mildly abrasive cHeaningagents such as baking soda paste or Ben Ami.* Do not use abrasive, caustic or harsh cHeaningagents such as steeHwooHpads or oven cHeaners.These products wiHH scratch or permanentHydamage the surface. NOTE: Use a dry towel or cloth to wipe up spills, especially acidic or sugary spills° Surface may discolor or dull if soil is not immediately removed. This is especially important for white surfaceso * Brand names for cHeaning products are registered trademarks of the respective manufacturers. ** To order direct, caHH1-877-232-6771 USA and 1-800-688-8408 Canada. 19 Oven Door Leveling Legs Do not place excessive weight on er stand on an open oven doo r. This could cause the range to tip over, break the door, Be sure the anti-tip bracket secures one of the rear leveling legs to the floor. This bracket provents the range from accidentally tipping injure the user, Do [lot attempt to open or Close door or operate oven unti / door iS propedy replaced, /_ The range should be leveled when nstalled. If the range is not level turn the plastic leveling legs. ocated at each corner of the range, until range is level g Nevei place fingers between hinge and fron t oven frame, Hinge arms are Spring mounted. If accidentally hit, the hinge win Slam Shut against oven frame and Could injure Your fingers. _ .A_ aNti-rip BRACKET LEVELING LEG Oven Light when itThe is closed. Thison is normal and win decrease with use. Note: oven door a new range may feel "spongy" To remove: 1. When cool, open the oven door to the first stop position (opened about four inches}. Be sure bulb is cool before touching bulb. 2. Grasp door at each side. Do not use the door handle to lift door. the bulb to break. 3. Lift up evenly until door clears hinge arms. To Replace To replace: 1. When oven is cool, hold bulb cover in place, then slide wire retainer off cover=NOTE:Bulb cover will fall if not held in place while removing wire retainer. 1. Grasp door at each side. 2. Align slots in the door with the hinge arms on the range. BULB COVER 2. Removebulb eoverand light bulb= 3. Slide the door down onto the hinge arms until the door is completely seated on the hinges. Push down on the top corners of the door to completely seat door on hinges. Door should not appear crooked. 3. Replacewith a 40-wattappliance bulb. 4. Replace bulb cover and secure with wire retainer. RETAINER Oven Window To protect Oven Light Bulb: 5. Reconnect the oven door window: 1. Do not use abrasive cleaning agents such as steel wool scouring pads or powdered cleansers as they may scratch the glass. power to range. Reset clock. Convenience Outlet (Canadian only) models The convenience outlet is located on the lower left side of the backguard. Be sure appliance cords do not rest on or near the surface elemenL If the surface element is turned on, the cord and outlet win be damaged. 2. Do not hit the glass with pots, pans, furniture, toys, or other objects. 3. Do not close the oven door until the oven racks are in place. Scratching, hitting, jarring or stressing the glass may weaken its structure causing an increased risk of breakage at a later date. The convenience outlet circuit breaker may trip if the small appliance plugged into it exceeds 10 amps. To reset the circuit breaker, press the switch located on the lower edge of the backguard. 2O Y CIRCUIT BREAKER To remove: Storage Drawer 1. Empty'drawer and pull out to the first stop position. 2. Lift up the front of the drawer. 3. Pull out to the second stop position. matedds in tMs drawer. The drawer may become too warm for these items when the oven is in use. 4. Grasp sides and Hiltdrawer up and out. To replace: 1. Fit the ends of the drawer gHidesinto the raiHsin the range. The storage drawer can be removed to allow you to dean 2. Lift up the front of the drawer and gentHypush in to the first stop position. 3. Lift drawer up again and push untiHdrawer is chose& PP,OBLEM try these first. Part or all of appliance does not work. SOLUTmON ° " , , Check if oven controls have been properly seL Check to be sure plug is securely inserted into receptacle. Check or re-set circuit breaker. Check or replace fuse. Check power supply. Check Check Check Check Check if surface and/or oven controls have been properly set. See pages 5-15. if oven door is unlocked after self-clean cycle. See page 17. if oven is set for a delayed cook or clean program. See pages 11 & 16. if Control Lock is activated. See page 9. if control is in Sabbath Mode. See page 13. , Oven may be set for a Cook & Hold or Delay function. , The Control Lock may have been set. See page 9. but oven does not heat. Baking results are not as expected or differ from previous oven. , Make sure the oven vent has not been blocked. See page 15 for location. , Check to make sure range is level. , Temperatures often vary, between a new oven and an old one. As ovens age, the oven temperature often "drifts" and may become hotter or cooler. See page 13 for nstmctions on adjusting the oven temperature. NOTE; It is not recommended to adjust the temperature if only one or two recipes are in question. , See "Cooking Made Simple" booklet for more information on bakeware andbaking. Food is not broiling properly or smokes excessively. , Check oven rack positions. Food may be too close to element. , Broil element was not preheated. , Aluminum foil was incorrectly used. Never line the broiler insert with foil. , Oven door was closed during broiling. Leave the door open to the first stop position (about 4 inches:). ° Trim excess fat from meat before broiling. ° A soiled broiler pan was used. ° Voltage in house may be low. cont. 21 i PROBLEM Oven will not self-clean. , ° , , Oven did not , Longer cleaning time may be needed. , Excessivespillovers, especially sugary and/or acidic foods, were not removed prior to the self-clean cycle. clean properly. Check to make sure the cycle is not set for a ddayed start. See page 16. Check if door is chased. Check if control is in Sabbath Mode. See page 13. Oven may be over 400° R Oven temperature must be below 400° F to program a clean cycle. Oven door will not unlock after self=clean cycle. , Oven interior is still hot. Allow about one hour for the oven to cool after the completion of a self-clean cycle. The door can be opened when the LOCK indicator word is not displayed. , The control and door may be locked. See pages 9 and 17 to unlock. Smoothtop surface shows wear. 1.Tiny scratches or abrasions. , Make sure cooktop and pan bottom are clean. Do not slide glass or metal pans across top. Make sure pan bottom is not rough. Use the recommended cleaning agents. See page 18. 2. Metal marks. , Do not slide metal pans across top. When cool. clean with Cooktop Cleaning Creme. See page 18. 3. Brown streaks and specks. , Remove spills promptly. Never wipe with a soiled cloth or sponge. Make sure cooktop and pan bottom are clean. 4. Areas with a metallic sheen. , Mineral deposits from water and food. Use recommended cleaning agents. See page 18. 5. Pitting or flaking. , Remove sugary, boilovers promptly. See page 18. Moisture window from collects on oven or oven steam comes , This is normal when cooking foods high in moisture. , Excessive moisture was used when cleaning the window. vent. There is a strong odor or light smoke when oven is turned on. , This is normal for a new range and will disappear after a few uses. Initiating a dean cycle will "burn off" the odors more quickly. , Turning on a ventilation fan will help remove the smoke and/or odor. , Excessivefood soils on the oven bottom. Use a self-clean cycle. Fault ° BAKE or LOCK may flash rapid[y in the disp[ay to a[ert you if there is an error or a prob[em. If BAKE or LOCK appear in the display, press CANCEL pad. If BAKE or LOCK continue to flash, disconnect power to the appliance. Wait a few minutes, and then reconnect power. If the flashing still continues, disconnect power to the appliance and call an authorized servicer. ° If the oven is heavily soiled, excessive fiareups may result in a fault code during cleaning. Press the CANCEL pad and allow the oven to cool completely, wipe out excess soil, then reset the clean cycle. If the fault code reappears, contact an authorized servicer. Codes Noises may be heard. ° The oven makes several low level noises. You may hear the oven relays as they go on and off. This is normal. ° As the oven heats and cools, you may hear sounds of metal parts expanding and contracting. This is normal and will not damage your appliance. There are no beeps and Oven may be in Sabbath Mode. See page 13. "SAb" flashing and then displayed continuously. Oven is in Sabbath Mode. To cancel, press and hold the Clock pad for five seconds. 22 Fuji One Year Warranty Parts and Labor What is Not Covered - For one (1} year from the orig_nai retail purchase date. any part which fails in normal home use will be repaired or replaced free of charge Limited Warranties - Par_s Only 1. Conditions and damages resulting from any of the following: a. Improper installation, delivery, or maintenance. b. Any repair, modification, alteration, or adjustment not authorized the manufacturer or an authorized servicer. 2. Warranties are void if the original or cannot be readily determined. repaired or replaced free of charge for the part itself, with the owner paying aii other costs, including labor, mileage, transportation, tr p charge and diagnostic 3. Light bulbs. Canadian Residents The above warranties oni} cover an appliance installed in Canada that has been certified or listed by appropriate test agencies for compliance to a National Standard of Canada unless the appliance was brought into Canada due to transfer of residence from the United States to Canada. Limited Warranty Outside the United States and Canada = Parts Only For one (1) year from the date of original retail purchase, any part which fails in normal home use will be repaired or replaced free of charge for the part itself. with the owner paying all other costs. including labor, mileage, transportation. trip charge and diagnostic charge, if required The specLr/c warranties expressed above am the ONLY walrTantles provided by rise manufacture_, These wafTantles give you spedfic legal ffghts, and you may also have other r_hts which vary trom state to state. by c. Misuse, abuse, accidents, or unreasonable use. d. Incorrect electric current, voltage, or supply. e. Improper setting of any control Second Through Fifth Year = From the original purchase date. parts listed below which fail in normal home use wiii be , Glass-Ceramic Ceektep: Due to thermal breakage, discoloration. cracking of rubber edge seal, pattern wear. Electric Heating Dements: Radiant surface elements on electric cooking appliances By These 4. Products purchased serial numbers for commercial or industrial have been removed, altered, use. 5. The cost of service or service caii to: a. Correct installation errors. b. Instruct the user on the proper use of the product. c. Transport the appliance to the servicer. 8. Damage to the glass cooktop caused by the use of cleaners other than the recommended cleaning creams and pads. 7. Damage to the glass cooktop caused by hardened spills of sugary materials or melted plastic that are not cleaned according to the directions in the use and care guide. 8. Consequential or incidental damages sustained by any person as a result of any breach of these warranties. Some states do not allow the exclusion or limitation of consequential or incidental damages, so the above exclusion may not apply. If You Need Service Call the dealer from whom your appliance was purchased or call Maytag Services sM, Maytag Customer Assistance at 1-800-888-9900 U.S.A. or 1-800-688-2002 Canada to locate an authorized servicer. Be sure to retain proof of purchase WARRANTY for further information service. to verify warranty status. Refer to on owner's responsibilities for warranty If the dealer or service company cannot resolve the problem, write to May'tag Services sM,Attn: CAIR e:Center, P.O. Box 2370, Cleveland, TN 37320-2370, or call 1-800-688-9900 UoSoA. or 1-800-688=2002 Canada. U.S. customers using TTY for deaf, hearing impaired or speech impaired, caii 1-800-688-2080. User's guides, service manuals and parts information are available from Maytag Service@M,Maytag Customer Assistance. When writing or calling about a service problem, please include: a. Your name, address and telephone number; b. Model number and serial number; c. Name and address of your dealer or servicer; d. A clear description of the problem you are having; e. Proof of purchase (sales receipt}. 23 Cuisini_re _lectrique dessus lisse m m m //is|//|ere Instructions de s6curit6 importantes ................................ 25-28 Netteyage ................................... Four autonettoyant 41-44 M6thodes de nettoyage Cuisson sur masurface ............. 29-31 Commandes de Hasurtace de cuissol7 Surface _ dessus lisse Entretien ...................................... Hublot du four 45-46 Lampe du four Cuissen darts mefour ................ 32=40 Cuisson couran[e Cuisson et maintien Cuisson courante diffdr6e Maintien au chaud Cuisson au gril Grilles du four Recherche Garantie des pannes ............ 47-48 et service apres=vente Guia de Use y Cuidado ... 49 .................... 50 que pourrait susciter une utiiisation incorrecte de ['appareiL Utiliser I'appareil uniquement pour los fonctions pr@ues, decrites darts ce guide, InstaHateur : Remettezce guide au proprietaire. Consemmatear : Veufllezlife le guide et Jeconserverpour consu_a_ionulterieure.Conservezlafacture d'achat ou Jech@ue encamsecommepreuvede !'achat. Pour une utilisation adequate et en s_curit_, fl faut que Fapparefl soit convenabbment install6 par un technicien qudifie, et relic a la terre, Ne pas regbr, r@arer ni remplacer un composant, a moins que cola ne soit sp@ifiquement recommande darts ce guide, Toute autre reparation doit 6tre effectuee par un technicien qualifie, Numero de modSJe Numdro de serie Date d'achat Si vous avez des questions, veuflJeznous appeler : Toujours d@rancher Fapparefl avant d'y faire de Fentretien, Service _ la cfient_le de Maytag ]-800-688-9900 E.-U. 1-800-688-2002 Canada (lundi au vendredL 8 h _ 20 h, heure de FEst} Intemet: http:iiwww.maytag.com Darts b cadre de nos prat_ques d'amelioration constante ee la qualite et de ia performance de nus produits de cubson, des modifications de I'apparei! qul ne sont pas mentlonnees dans ce guide on_pu 6tre introduites. Repertez_veus a fa page 49 pear plus d'i_lformatiotts cel_cemal_t le service apres-venteo risque de baseulement de i'appareil _ I'eccasie_ _'une uti!isatie_ a_er_aie eu d'un eharge_e_t excessif _e Ia porte du four, ii fa_t que Ja bride antibaseule_e_t seit eonvenable_e_t install_e. Utiliser une lampe torche pour determiner si la bride antibasculement est convenablement installee sous la Les instructions de securite importantes et bs paragraphes << avertissement >_de ce guide ne sont pas destines a couvrir toutes bs conditions et situations qui pourraient se presenter. II faut faire preuve de bon sons, de prudence et de soin Iors de Finstallation, de Fentretien ou du fonctionnement de [apparefl. cuisiniere : L'un des pieds arriere de reglage de I'aplomb doit etre convenablement engage dans la fente de la bride, Lorsque la cuisiniere est convenablement calee, la bride antibasculement immobilise le pied arriere contre le sol, Verifier la parfaite immobilisation de la cuisiniere par la bride apres cbaque deplacement de la cuisiniere, Toujours prendre contact avec b fabricant dans b cas de problemes ou de conditions qui ne seraient pas comprises. Reconna tre Ues tiq ettes, symbo es s c rit Po t viter dommages paragraphes et i ce die par la des S'assurer que tousies materiaux de conditionnement sont retires de i'appareii avant de ie mettre en marche, Garder ies materiaux combustibles bien eioignes de i'appareii, Ne pas ranger de materiaux inflammables dans un four, POURRA!ENT r_su!ter en de graves biessure s oU m_m e la mort., De nombreux types de plastique sont affectes par la chaleur, Garder ies piastiques eioignes des pieces de i'appareii pouvant devenir chaudes, Pour emp@her qu'un feu de graisse nese declare, eviter toute accumulation de graisse ou autres matieres inflammables dans I'appareil ou au voisinage, POURRAIENTrdsukeren des blessures mineures, Lire routes los instructions avant d'utiliser cot appareil; observer toutes bs instructions pour eliminer bs risques d'incendie, choc ebctrique, dommages materiels et corporeb 25 En cas d'incendie Ne pas utiliser cet appareil pour chauffer ou pour garder chaude une piece, sinon des dommages a i'appareii pourraient s'ensuivre et ceia pourrait etre dangereux pour I'utiiisateur, Aussi, ne pas utiiiser ie four pour ranger des ailments ou des ustensiies de cuisine, Utiliser du bicarbonate de soude ou un extincteur b poudre chimique ou a mousse pour dtouffer bs fiammes, Ne jamab utiliser d'eau pour dteindre de la grabse enfiammde, 1, [nterrompre I'alimentation dbctrique de I'appareiI pour minimiser la propagation des fiammes, Ne pas bloquer ou obstruer I'event du four, NE JAMAIS TOUCHERLES ELEMENTSCHAUFFANTS NI LES PAROIS INTERIEURESDU FOUR, Les elements chauffants 2, NE JAMAmS saisir ou d@lacer un ustensib de cuisine enfiamme, peuvent etre brtiiants meme s'iis ne sont plus rouges, Les surfaces interieures du four peuvent atteindre une temperature suffisamment eievee pour infiiger des br0iures, Pendant et apres usage, ne pas toucher les elements chauffants ni ies parois interieures du four et eviter bur contact avec des vetements ou autres materiaux inflammables 3, Fermer [a porte du four pour 6touffer [es fiammes du four, Securit pour [es enfants avant qu'iis n'aient eu le temps de refroidir suffisamment, D'autres surfaces peuvent egaiement atteindre une temperature suffisamment eievee pour br0ier :ie ouverture d'event, le surface avoisinante, ainsi que le porte et le hubiot de four, dans une armoire au-dessus, des articles auxqueis [es subir de graves biessures, Ne pas toucher I'ampoule du four brQlante avec un chiffon humide car elle pourrait se briser, Si tel est le cas, debrancher I'appareil avant de retirer I'ampoule pour eviter une decharge electrique, NE JAMAiS iaisser des enfants seuis ou sans supervision iorsque i'appareii est en service ou encore chaud, Ne jamais laisser un enfant s'asseoir ou se tenir sur une partie quelconque de I'appareil, [I pourrait se blesser ou se brQler, NE JAMAmS garnir ia sob du four ou une grille du four avec de la feuille d'aluminium, Ceci pourrait susciter un risque de II est important d'enseigner aux enfants que I'appareil et les ustensiles places dedans peuvent etre chauds, Laisser refroidir les ustensiles en un lieu sQr, hors d'atteinte des enfants, [Iest decharge electrique ou d'incendie, ou une deterioration de I'appareil, Utiliser de la feuille d'aluminium uniquement selon les instructions de ce guide, important d'enseigner aux enfants qu'un appareil menager n'est pas un jouet, et qu'ils ne doivent toucher aucune commande ou autre composant de I'appareil, Cuisson et s curit NE JAMA[S faire chauffer un recipient non ouvert dans le Fami[iarisation avec ['apparei[ four, L'accumulation de pression dans le recipient pourrait provoquer son eclatement et de graves dommages materiels ou corporeis, Utiliser des maniques robustes et seches, Des maniques humides peuvent provoquer la formation de vapeur brSlante, Ne jamais utiliser un torchon a vaisselle ou autre article textile la place de maniques; un tel article pourrait trainer sur un element et s'enflammer, ou accrocher un ustensile ou un NE JAMA[S utiiiser un appareii comme escaueau pour atteindre les armoires se trouvant au-dessus, Le mauvais emp[oi de porte d'apparel comme par exempb en tant qu'escabeau, le fait de sappuyer ou de s'asseoir sur B porte, peuvent entrai'ner le renversement de I'appareii. casser la porte et gravement biesser, composant de I'appareil, Porter un vetement approprie, Eviter de porter des vetements amples ou a Iongues manches pendant I'utilisation de I'appareil, [is peuvent prendre feu si le vetement entre en contact avec un element de cuisson brSlant, 26 Placer toujours [es grilles a [a position appropriee darts [e four [orsque [e four est froid. Faire couiisser [a grille vers ['exterieur avant d'ajouter ou eniever un plat; utiiiser pour ceia une manique robuste et seche. Eviter d'introduire [a main darts [e four pour y placer ou retirer un plat. S'i[ est necessaire de d@iacer une grille [orsqu'eiie est chaude, utiiiser une manique seche. Ne pas toucher un element chaud avec une manique. Si un ustensib est plus petit que I'element utilis& une partie de I'element chauffant est exposee et peut provoquer I'infiammation d'un vetement ou des maniques. Seuls certains materiaux en verre, vitroceramique, ceramique, gres, ou certains ustensiles vitrifies/emailles peuvent etre utilises sur la table de cuisson ou dans le four sans risque de bris sous I'effet du choc thermique. Observer les instructions du fabricant Iors de I'utilisation d'un ustensile en verre. N'utiiiser [es grilles que darts [e four darts [eque[ eiies ont 6te achetees/expediees. Orienter la poignee de chaque ustensile vers le centre de la table de cuisson et non vers I'exterieur ou vers un autre Ouvrir toujours [a porte du four tres prudemment. Laisser ['air chaud ou [a vapeur s'echapper avant de retirer ou d'introduire un plat. element; ceci reduira ie risque de brqure, inflammation de matiere inflammable ou renversement (un jeune enfant pourrait saisir et renverser un ustensiie dont le manche est oriente vers i'exterieur}, AVERTiSSEMENT - METS PR[:PAR[:S : Respecter [es instructions du fabricant. Si [e contenant ou [e couverde en piastique d'un mets surgeie se ddorme ou est endommage durant la cuisson, jeter immediatement le recipient et son contenu. Les aliments pourraient etre contamines. Table de cuisson NE JAMAIS laisser un element de surface allume sans Ne pas permettre le contact de papier d'aluminium ou de la sonde a viande avec les elements chauffants. surveillance, particuiierement avec chauffage elev¢ Le @bordement du contenu de i'ustensiie pourrait provoquer ia generation de fumee abondante et I'infiammation de la graisse. Toujours eteindre toutes les commandes une fob la cuisson terminee. Ustensiles Cet appareii comporte des elements chauffants de differentes tallies. Utiiiser toujours un ustensiie a fond plat, de taiiie suffisante pour qu'ii puisse recouvrir compietement i'eiement. Pour optimiser i'efficacit& choisir un ustensiie de meme taiiie que [element. et securit Appiiquer [es instructions du fabricant [ors de ['emp[oi d'un sachet pour cuisson au four. La securite de fonctionnement de cet appareil a 6te testee I'aide d'ustensiles de cuisine traditionnels. Ne pas utiliser un ustensile ou accessoire qui n'est pas specifiquement recommande darts ce guide. Ne pas utiliser un gril place sur la table ou de systeme de convection additionnel. L'utilisation d'un dispositif ou accessoire qui n'est pas expressement SURFACE EN VITROCERAMIO, UE : NE JAMAIS utiiiser une table de cuisson cassee ou feiee: les solutions de nettoyage et renversements pourraient penetrer clans la table de cuisson en entrdnant un risque de decharge electrique. Prendre immediatement contact avec un technicien qualifi& recommande darts ce guide peut degrader la securite de I'appareil ou sa performance, ou reduire la Iongevite des composants. Exercer une prudence extreme Iors du deplacement du Veiller a utiliser un ustensib de taille suffisante pour que le contenu ne risque pas de deborder. Ceci est particulierement important pour un ustensile rempli d'huile de friture. Verifier que la taille de I'ustensile est suffisante pour qu'il puisse recevoir les produits alimentaires a cuire, et absorber I'augmentation de volume suscitee par %bullition de la graisse. recipient de graisse ou Iors de I'elimination de graisse chaude, Laisser la graisse refroidir avant de deplacer I'ustensile, Hottes d'e×traction Nettoyer frequemment ies fiitres et ia hotte de ia cuisiniere pour empecher ia graisse ou d'autres produits inflammables de s'accumuier sur ies fiitres ou ia hotte en provoquant des feux de graisse. Veiller a ne jamais laisser le contenu liquide d'un ustensile s'evaporer completement; I'ustensile et I'appareil pourraient subir des dommages. Pour fiamber des aliments sous la hotte, mettre le ventiiateur en marche. 27 Nettoyage II est normal que la surface de cuisson devienne chaude durant une operation d'autonettoyage; par consequent, eviter de toucher ia surface de cuisson durant i'autonettoyage, et s curit Nettoyer prudemment la table de cuisson, Arreter toutes les commandes et attendre le refroidissement de tous les composants avant de les toucher ou d'entreprendre le nettoyage, Nettoyer Fapparefl avec precaution, Travafller prudemment pour eviter des bn:flures par la vapeur en cas d'utflisation d'un chiffon ou d'une eponge humide lots de I'elimination d'un produit renverse sur une surface chaude, Certains produits de nettoyage peuvent generer des vapeurs nocives Iorsqu'on les applique sur une surface chaude, Avertissemer|t important ment Act _>de 1986 {proposition 65_}stipule la publication par ie gouverneur de ia Caiifornie d'une iiste de substances que i'etat de Caiifomie considere comme cancerigenes ou dangereuses pour ie systeme reproducteur, et impose aux entreprises commerciaies i'obiigation de signaler a ieurs clients ies risques d'exposition a de teiies substances, Four autor|ettoyar|t Nous informons ies utiiisateurs de cet appareii que iors d'une operation d'autonettoyage, iis peuvent etre exposes a une faible concentration de certaines substances figurant darts la liste mentionnee ci-dessus, dont le monoxyde de carbone, Pour minimiser i'exposition, veiiier ace que ia piece oQ se trouve le four soit convenablement aeree durant une operation d'autonettoyage par I'ouverture d'une fenetre ou d'une porte, !echdfite dans !e four !ors de! autonettoyage_ Ne pas nettoyer le joint de porte; le joint joue un rOle essentiel quanta I'etancheite, Ne pas frotter, endommager ou deplacer lejoint, AVIS iMPORTANT - OISEAU× FAMILIERS : Les oiseaux ont un systeme respiratoire tres sensible, Ne pas garder un oiseau famflier dans la cuisine ou dans une piece oQ fl pourrait etre expose aux fumees, Les fumees emises durant une operation d'autonettoyage peuvent etre dangereuses ou mortelles pour un oiseau, de meme que les fumees emises lots du chauffage excessif de graisse, hufle, margarine, et du chauffage excessif dans un ustensfle a revetement antiadhesif, Ne pas utiiiser de produits de nettoyage pour four ou enduits de four, darts ie four autonettoyant ou sur ies zones voisines, ,Avantd'executer une operation d'autonettoyage, retirer la lechefrite, les grilles du four et les autres ustensiles, et eliminer par essuyage tout exces de residus renverses pour eviter ia formation de fumee ou i'inflammation de ces residus, ces instructions pour la seeurit6 La Ioi califomienne _ Safe Drinking Water and Toxic Enforce- Nettoyer uniquement les pieces mentionnees darts ce guide, Conserver et avis pout consultation 28 ult tieute Boutons de commande Suggest+ons pour le rOglage On dolt choisir Ia puissancede chauffage en fonction de divers facteurs : taille, type de I'ustensileet opOrationde cuisson. Pour I'informationconcemant Ies ustensileset autres facteurs affectant la pu+ssancede chauffage_ utiliser,se reporterau paragraphe Recommandationssur lesustensiles_ la page 31 et _ la brochureLa cuissonsimplifi@. Permettenti'utflisationdes 616mentschauffants de surface,avec une progress+oncontinue de la puissanceentre ies rOglagesextrOmes Low (Bas)et High ([_ievO). On peut rOglerun bouton_ toute position entre ces deux extrOmes. ROgia9 e des commandes 1. PlacerI'ustensiiesur 1'OiOment. Low (Bas)(2) : Pourfusion de choco[atou beurre,ou [e maintien de [a tempOrature d'un mets. 2. Enfonceret faire tourner le boutonjusqu'_ la position dOsirOe 0+otationdartsun sens ou darts J'autre]. o Des marquessur Ietableau de commandeidentifient 1'61ement comman@ par chaque bouton. Parexemple,le O O Meal. Low [Moyen bas) (3-6) : Pour continuer la cuisson de mets en casseroles ferm@s par couvercleou pour cuire _ la vapeur. graphique _ droite indique I'elOmentavant/gauche. O O 3. II y a un temoin h+mineuxpour IeselOmentssur Ie tableaude commande.LorsqueI'undes boutons de commanded'un elOmentde surface est aliment& Ietemoin s'iilumine.Le temoin s'eteintdes qu'on interrompt l'alimentationde 1'Olement. 4. Apr@sune cuisson+ramenerle bouton_ Japosition OFF(ArrO0. Ret[rerI'ustensile. High (ElevO](10) : Pour 1'Obullitiond'un liquide. On dolt toujours rOduirela puissancede chauffagedes que IatempOrature d'ebulJitionest atteinte ou que I'alimentcommence_ cuire. OFF J High +o Le style peut varierseJonJe mo@le. [ 4 [_lOment doubNe (certains modeles) © _::_ La surface de cuissonest 6quip@ de une 6!Oment double, sit@ _ I'avantdroit sur ie dessuslisse.Ce element ont une dimensionvariable. Medium OFF Medium (Moyen) (5-7) : Pour le maintiende I'ebullition [ented'une grande quantite de [iquide ou pour [a piupart des opOrationsde friture. 1. PousserIeselecteur_ gauche pour utiliser Ie grand elementou _ droite pour utiliser le petit elOment. 2. Enfonceret faire tourner le boutonjusqu'_ Ia position @sir@ (rotation dansun sens ou dans I'autre). ........ Meal. High (Moyen 6tevO) [8-9) : Pour rissolerles viandes,chauffer I'huile (grandefriture ou aliments sautOs)et pour Ie maintien de I'ebullition rapide d'une grande quantite de Iiquide. AVANT LA CUISSON APRESi.A CUISSON • Place-toujoursl'ustensHe sur1'616men[ avamd'a+reenter 1'OlOment, Pour 6v_[erque la culs+n+Sre nesuoissedesoommages,nejama+sfaire Ponct+onner un 6temen[desurfacesans+pincerun ustens+te °NE JANiAI$ util+serlatablede cuissoncommeI+eude rem+sage d'alimen[sou d'ustensiles, DURANT IA CUISSON , S'assurerque 1'OIOment estarrOt& o Elimme+ @s quepossible[ous iesres+dus de renversemen[ e[ project+ons. AUTRESCONSEmLS + Ve+her _ bienconnaRremcorresoonoance entreleaboutons_e commanae_tles(_lOments. Ve+Her _ commander!'al+nentat+on ee ['#l_men!vou+u, , S'Jly a unearmoireae rangemen_ olrec_emerr[ au-aessusde la tablede cu+ss_n, on ne oo+typtacerquedesart+ctes peufr_quemmentuht+ses et qu_peuvent@e e×pos_s_ la chaleur.La chaleurem_seBarla cuisiniere 3ourral_susc_erun probl_mepourdesart+desccromeI+qu[des vo[ati[s. arodu+ts de netto!ageetflaconsd'aOroso! • NEJAIMAISla+sser aucunart+ciesur latablede cuisson,paR_cueremem + Commencerla cJ+sson avecunepuissancede chauffages_)@eure,puis lesart+desen p+as_loue. L'a+rchauuqui s'@happepar reventcu four pourrm_ provoquerI'+nflammation d'ur aRicieinflammab+e, fairefondre_ redu+r_ +apuissancede chauffagepourpoursu_vre m ;uisson.Nejamais umlserunepuissancede chauffage81ev@pourunecu+sson pro_ongee. amoli+run art+deen pmsuque, ou provoqueruneaugmentationue provoquant['@latementd'un r@_p+ent ferme. + NE,_A_AI$ laisser_econ-[enu dun ustensHe s'Ovaporer compl_tement; press+on cec+uourra+t[airesubiruesdommages_ I'ustensileet _ +'@pare.. °NE JA_AB laisserde la feu+led'a+umlmum, unesondethermometnque v+anue ou un ouje_metalliqueautrequ'unustens+le de eulssonsur iatable + NE_ANIAIStoucherla tablede cu+sson avan[qu'eiteseso+t comulOtementrefro_(]ie.Certa+neszonesde +afable ae culsson, parucu_ierememau vo+s+nage des 6lOmentsoe surface, oeuvent devenir _reschaudes durant une cu+sson.Utiliser des man+gues, ue culsson en[rer en conmc_avec un el@_entchauffant, + NE _AP_AIS ranger au+oessusde +amD_ede culsson u'artic+es!ourds qu+ nsqueraient de tomber et d'endommager la table de cu_sson 29 Surface Remarques lisse : dessus lisse sur la surface Conseils surface dessus de protection de la dess s lisse N@tto_a_e _ius d'informations a ia page 43} o Avant de s'en servir la premierelois, nettoyerla table de cuisson. o Lors des premieres_Jtilisations de Ia tabIe de cuisson,celle-ei peat 8mettre an pea de fumSe et des odears=Ceci est normal= o Nettoyer la table de cuissonchaqueiour ou apr6schaque utilisation.Ces mesurespreserverantl'apparencede la table de cuisson et 6viterontqu'elIe ne s'abime. o Les surfaces _ dessus lisse eonsewent la ehaieur pendant an certain temps apr_s m'e×tinction de m'_m_ment, Eteindre les 616meritsquelquesminutesavant q(le la nourriture ne soit tout b fait cuite et utiliser Iachaleur restantepour terminer la cuisson=Lorsque le voyantde surfacechaudes'6teint, on peut toucher Iasurface de cuissonsans danger.En raisonde la fagon dont les el6mentsd'une surface b dessusIisseretiennent la chaleur, ceux-ci ne r6pondrontpas auxchangementsde r6glage aussi rapidementque des 616mentsen spirale= o En cas de renversementlots de cuisson, nettoyerimm_diatement le produit renvers6sur la surfacede cuissonpendant qu'e!leest encore chaudeafin d'6viter un ptus grand nettoyagepar la suite. Userde prudence,essuyerles renversementsavec un linge prapre et sac. o Ne pas IaisserIes pmduits renvers6ssur Ia surfacede cuissonou sur la garniture de la table de cuissonpendant une Ionguedur6e. o Au cas o8 Ie contenu d'un ustensilerisquede deborder,retirer I'ustensiIede la surface de cuisson= o Ne jamais utiliser de poudre de nettoyageabrasiveou de tampons r6curerqui raieraientla surface. o Ne jamais essayer de soulever la sudace de caisson. o Ne jamais utiliser de jave!lisant,ammoniaqueou autres praduits de nettoyagenon sp6cifiquementrecommand6spour la vitroc_ramique. o La surface_ dessuslissepeut sembIerd6color6eIorsqu'elleeat trSs chaude=Ceci est normalet disparait une fais que la surface refroidit= Po r Zones de caisson Leszones de cuissonde la cuisini6re sont repr6sent6espar des cercIespermanentssur la surface _ dessuslisse=Pour une efficacit6 maximum,utiliser une zonede cuissondont le diam_tre convient I'ustensile= o Veiller b ce qua Iefond des r_cipientset Iazone de cuissonsoient propresavant d'allumerI'8I_ment,afin d'_viter les rayures. o PourempScherqua la surface de cuissonen vitroc_ramiquene se trouve ray_eou abtmee,ne pas y hisser de sucre, de sel ou de graisse.PrendreI'habituded'essuyerla surfacede cuissonavec un linge propre ou un essuie-tout avantde I'utiliser. Pour obtenir plus informationssur les LJstensiles de cuisine,se reporter _ la page 31 au paragrapheRecommandationssur les ustensiIesde cuisine et 8 la brochure La cuissonsimplifi6e, incluse avec la cuisiniSre= ELE:MENT o Ne jamais faire glisserde r_cipients mStalliquesepaissur la surface au risquede la rayer. SIMPLE Voyant de s rface et les ray res o Ne pas faire glisser de recipientsm_talliquessur Iasurfacede cuisson br_lante. IIspourraient Iaisserdes marquesq_lidevront etre nettoy_esimmediatement.[Voir Nettoyage,page 43.) Lorsqu'unecommandeest raiseen marche,on peat voir un rougeoiement_ travers Iasurface b dessuslisse.['@l_ment fonetionnera en intermittence pour maintenir mer6gmage pr_tabli de chaleur, m_me au niveaa Hi (Elev6)o ELEMENT les marq es o Ne jamais utiliser de support m_tallique ou anneaude wok entre un r_cipient et Iasurface de cuisson. Cesobjets peuvent marquer ou rayerIa surface. Le r6cipiellt ne doit pas d6passer & zone de cuisson de plus de 25 mm (1 po)° (OERTAINS viter o Ne pas utiliser de casserolesen verre=Eilespourraientrayer la surface. DOUBLE MODE'LE,_) cha de Le voyantde surfacechaude eatsitue sur le tableau de commande=II s'allumeraIorsqu'unesurfacede He_, Sue'face cuisson,quetIequ'elle soit, serachaude=II restera alium_,meme aprSsextinction de la commande,jusqu'b ce que la zone ait refroidL 3O Pour 6viter Test de la hullo : les taches . Ne jamais utiliser de linge ou d'6ponge sale pour nettoyerla surface de cuisson=IIs Iaisseraientun film, ce qui pourrait d6colorer la surface de cuissonIorsqu'eIleest utilis6e= 1. Mettre 2,5cm [1 po) d'eau darts I'ustensile.PlacerI'ustensiIesur la surface de cuisson et tourner Ia commandesur High ([_lev6}. o L'utilisationcontinue d'une surface de cuissonsaliepeut entrainer I'apparitionde tachespermanentes= 2. Observerla formationde bu+lesIorsque I'eauchauffe. Des bu+les uniformessignifient de bonnes performanceset des hullos in6gaies indiquent la pr6sencede zonesplus chaudesdonnant une cuisson in6gale. Pour 6viter Voir la brochureLa cuisson simpli%e pour obtenir plus d'informat[ons. d'autres dommages o Ne pas Iaisserfondre de plastique,de sucre ni d'alimentsriches en sucre sur Iatabie de cuisson=Si ceta se produisait accidentellement, nettoyerimm6diatemenL_ioir Nettoyage,page 43.) Choisir I Eviter Des ustensiles_ fond lisse,plat Des ustensiIesa fond rainur6 ou gondol6. Des ustensiIes8 fond in6gal ne cuisent pas efficacementet peuventparfois ne pas faire bouillir Ies liquides. o Ne jamais utiliser [a tame de cuissoncommesurfacede travail ou commep[anchea d6couper. Des ustensilesen materiaux6pals Des ustensiIesen verre ou en m6taIpeu 6pals. o Ne jamais cuire d'alimentsdirectement sur la table de cuisson, sans recipient. Des ustensilesde la m6me dimensionde 1'616ment Des ustens+lespIus petits ou plus grands (de 2,5cm [1 po]} que 1'616ment. Des poigneesqui tiennent bien Des ustensilesavecdes poigneescass6es ou qui ne tiennent pas+Des poign6es Iourdesqui font se renverserI'ustensiIe+ Des couverclesqui ferment bien Des couverctesqu[ ferment real Des woks _ fond plat Des woks avec un fond sur anneau+ o Ne jamais Iaisserle contenu d'une casserolebouillir jusqu'_ ce qu'ellesoit vide car celapourrait abimer la surfacede cuissonet la casserole= o Nejamais utiiiser un petit r6cipient sur un grand 616merit.Non seulementil y a g_ichisd'6nergie mais iI peut en r6sulter des projectionsqui vont bKJlersur la surface de cuisson et dewont 6tre nettoyees. + Ne pas utiliser des r_cipientssp6ciauxnon plats qui seraienttrop grandsou a fond inegaIcommeles woks _ fond rond,les plaques chauffantesou r6cipientsde grande taille _ fond ondul6. o Ne pas utiliser de r6cipientsen aluminium.L'aluminium risquede fondre sur le verre.Si Ie m6tal fond sur la table de cuisson,ne pas I'utiliser.Appeler un r6parateuragr66 Maytag. Recommandations Ustensiles de gtande taille et pout los conserves sut los Toutesruesmarmites pour ruesconserves et les graades casseroles doiveat avoir ua load plat et doiveat 6tre fabriqu6es e_ mat_riau 6pals. Ceciest tr_s important pour Ies surfaces_ dessuslisse.La basene doit pasdepasserde I'6lementde plus de 2+5cm (1 po}+ L'utilisationdu bon ustensilepeut emp6cherde nombreux probl6mescommeIa n6cessit6de cuire plus Ionguementla nourriture et Ia difficulte _ obtenir desr6sultats uniformes.De bons ustensilesr6duisentles dur6esde cuisson,utilisent moins d'6nergie et cuisent de fagon plus uniforme. Si losmarm[tesa conserveset les casserolesne sont pas conformes ces normes,Iesdur6esde cuissonseront plus Iongueset Ies surfacesde cuissonpourront etre endommagees. Tests pour v6rifier si los ustensiles ont un fond plat Certainesmarmitespour les conservessont con_uesavecdes bases plus petites pour 6tre utilis6essur dessurfaces a dessuslisse. V6rifierque les ustensilessont plats+ Pour mapr6paratio_ de co_serves, _e choisir que mer6gmage High (Elev6} jusqu'_ ee que l'eau comme_ce _ houillir ou que la pressionsuffisantesoit atteinte clansla marmite+RSduireau r%lage le plus faible, maintenantt'SbulIitionou Ia pression+Si la chaleur n'est pasdiminuee, la surface de cuissonpourrait 6tre endommag6e. Test de la regle : 1+ Placerune r6gie en traversdu fond de I'ustensile+ 2+ La tenir face a la lumi6re+ 3+ Aucune lumiereou tr6s peu ne doit 6tre visible sous la regle+ Voir la brochureLa cuisson simplifieepour obtenir plus d'informat[ons. 31 Tableau de commande A B C E F G [t 0 ........ timer Les._ .............. 1 J Le tableaude commandeest conQupour faciliter Ia programmation.La fen6tre d'affichageindique I'heure, lesfonctions avec minuterie et fonctions du four. Le tableau de commanderepr6sent6comprend caract6ristiquessp6cifiquesau module.(Le style pout varierselon le module.) 1) G J qril S'tJtillsepour la cuisson atJgril et le rissolage sur pattie sup6rietJre. Cuisson cotJrante S'utilise pour la culsson courante et le r6tissage. PltJs+/moins- S'tJtllisepour entrer ou changer la dur6e, la temperature du four. Etablitle gril temp6rature ELEVI_EotJBASSE. Minuterle Programmela minuterie. Cuissonet maintien Pour cuire pendant une dur6e pr66tablie,avec maintfen au chaud pendant une heure. Nettoyage S'tJtilisepour programmer le cycle d'autonettoyage. %marrage diffdr6 Programmele fotJr potJrd6buter une cuisson plus tar& Horloge S'utilise pour programmer I'heure du jour. MaintienatJ chaud S'utiNsepour maintenir au chaud dans le forJr los aliments cults. pressionpendanttrois secondes. 2. Appuyer sur More+ ou Less- pour programmerun format de 12 ou 24 heures. ANNULER Annule toutes lesop6rations saul minuterie et horloge. 3. ProgrammerI'heureen suivantles hrstructions donn6esci-dessous. ttemarque :Quatre secondesapr6s avoirappuy6sur Ies touches More+ ou Less-,la dur6e ou Iatemp6raturesera automatiquemententr6e. SIplus de 30 secondess'6coulententre la pressionsur une touche de fonction et cellesur Ia touche More+ ou Less-,la fonction sera annuI6eet I'afficheur reviendra I'affichagepr6c6dent. L'horloge peut 6tre programm6epour afficher la dur6e dans un format de 12 ou 24 heures.L'horlogeest programm6een ushrepour un format de 12 heures. Changement de l'horloge _ un format de 24 heures 1. Appuyer sur les touchesCANCEL{ANNULER) et Delay (D6marragediff6r6) et maintenir la Fit. : LA",JLt:I ) / / t1691age de l'horloge : iJtilisation de+ touches 1. Appuyer sur la touche Clock (Horloge). • L'heuredu jour et deux pohrtsclignotent I'afficheur. o Appuyersur la touche d6sir6e. o Appuyersur More+ (Plus+) ou Less- (Mohrs-) pour entrer la dur6e ou la temp6rature. 2. Appuyer sur More+ ou Less- pour programmer I'heuredu jour. o Lln hip retentit IorsqueI'on appuie sur une touche. +Les deux points continuent _ clignoter. o Lln double hip retentit en cas d'erreur de programmation. Less-: ............................. 3. Appuyer 8 nouveausur la touche Clock ou attendre quatre secondes. suite,,, 32 Annumation de maminuterie Lorsquele courant 6Iectriquearriveou apr_s une interruption de courant,ta derniSreheure avant I'interruptionde courant va clignoter. : 1. Appuyersur la touche Timer et la maintenirainsi pe_dant trois secondes. Pour rappeterI'heuredu jour torsqu'uneautre fonction de dur6e s'affiche,appuyersur tatouche Clock. OU 2. Appuyersur [a touche Timer et r6gler I'heure_ 00:00. L'heure de I'horlogene pout 6tre chang_eIorsquete four a 6t6 programm6pour une cuisson ou un nettoyagediff6re ou pour la fonction de cuissonet maintien. Verrouimmage des commar|des Annumation de m'affichage de m'heure : Lostouches peuventetre verrouilieespour des raisonsde securite, nettoyageou pour empechertoute utiiisation non souhaitee.Ellesne pourront 6tre utiiiseessi eiles sont verrouiilees. Si I'onne desire pasI'affichagede I'heuredu iour : Appuyersur lostouches CANCEL(ANNULER) et Clock(HorIoge_et los maintenir ainsi pendanttrois secondes.L'heuredu iour disparait de I'afficheur. Sile four est en cours d'utilisation,[es commandesne peuvent 8tre verrouHlees. L'heure actueiiedu iour restera_ ['afficheur [orsque lescommandes serontverrouiliees. LorsqueI'affichagede I'heureest annule, appuyersur Ia touche CIock pour afficher bri_vement['heuredu jour. Verrouimmage: Appuyersur lostouches CANCELet Cook& Hoid [Cuissonet maintien] et [es maintenir ainsi pendanttrois secondes. R6affichage de m'heure : Appuyersur [estouches CANCELet C[ocket [es maintenir a[nsi pendanttrois secondes.L'heuredu iour reapparait_ ['afficheur. o Le mot LOCK_/ERROUILLAGE] ciignote ['afficheur. D6verrouiHage : Appuyersur lostouches CANCELet Cook& Hold et los maintenir ainsi pendanttrois secondes. La minuterie pout 6tre programmeede une minute [00:01)iusqu'_ 99 heureset 59 minutes(99:59). o Le mot LOCKdisparattde ['afficheur. La minuterie pout 6tre utiiisee independammentde toute autre activite du four. Ellepout 6tre aussi programmeealors qu'une autre fonction du four est en cours d'utiiisation. Codes La minuterie ne commandopas le four. Elie ne sert qu'_ emettredes hips. Los rootsBAKE (CUISSONCOURANTE)ou LOCK[VERROUILLAGEI} peuventciignoter rapidement_ ['afficheurpour pr6veniren cas d'erreur ou de probl6me=Si tel est ie cas,appuyersur la touche CANCEL= Si[es roots BAKEou LOCKcontinuent _ ciignoter, debrancherI'appareiLAttendre quelques minutes,puis rebrancher ['appareiLSi I'un des roots continue _ ciignoter,d_brancherI'appareil et prendre contact avec un reparateurautorise. Pregrammatien de maminuterie : 1. Appuyer sur [a touche Timer [R_inuterie). Timer o 0:00s'allume _ I'afficheur. ...... ' o Losdeux points clignotent. 2. Appuyer sur la touche More+ ou Less- iusqu'_ ce que ['heureiuste paraisse_ ['afficheur. o Lesdeux points continuent _ ciignoter. 3. Appuyer _ nouveausur la touche Timerou attendre quatre secondes. d'ar|omamie ............................... ' Less...................................... o Losdeux points continuent _ ciignoter et le d6comptede la dur6e commence. o La derni_re minute du decomptesera affich6esous forme de secondes. 4. >, [a fin de [adur6e programmee,un hip long retentit. 33 Cuisson courante Rematques au four : Programmation de la cuisson courante : sBt _a cBisson eoBrante o Pour changer la temperature du four pendant la cuisson, appuyersur Bake,puis sur Ia touche More+ ou Lessjusqu'_ ce que la temperaturedesireesoit affichee. o 000clignote _ rafficheur. ...................................... o Pour changer la temperature du four lots d. 2. %lectionner la temperaturedu four. La temperature pr6ehauffage, appuyerdeux lois sur la touche Bake, puis sur pout etre programmeede 75 _ 290 °C 070 _ 550 °FD. .................................. la touche More+ ou Less-iusqu'_ ce que la temperature desireesoit affichee. Appuyer une lois sur la touche More+ (Plus+Dou ......... Less- (Moins-), ou appuyersur la touche More+ ou LOSS- : o Si I'on oublie d'arreter Iefour, iI s'arreteraautomatiquement Less- et Ia maintenirainsL apres 12 heures.Si I'ondesire desactivercette fonction, voir o 175° (350°) s'allumeIorsque I'onappuie la page 37. premierefois sur rune destouches. o Pourdes conseilssupplementairessur Ia cuissoncourante et le o Appuyer sur la touche More+ pour augmenterIa temperature. r0tissage,voir la brochure La cuissonsimpli%e. 1. Appuyer sur la touche BakeCCuissoneourante). Le mot BAKE(CUISSONCOURANTE)clignote. o Appuyer sur la touche Less- pour diminuer la temperature. 3. Appuyer _ nouveausur la touche Bakeou attendre quatre secondes. Cuisson et maintien La fonction Cook & Hold (Cuissonet maintien) permet de cuire pendant une dulee predeterminee,suivie par un cycle de maintien au chaud d'une heure. o Le mot BAKEs'arr6tede clignoter et s'allume_ I'afficheur. Program_atio_ de la fo_ctio_ cuisso_ et _ai_tie_ : 1. Appuyersur la touche Cook & Hold (Cuissonet maintien). o 38° 000 °) ou la temperaturereelle du four sera affichee.La temperatureaugmenterapar intervalIede 3 °C (5 °F)]usqu'_ ce que la temperaturepreprogrammeesoit atteinte. • Lesroots BAKE(CUISSON)et HOLD (MAINTIEN}clignotent. • 000 s'aihme a I'afficheur. 4. LaisserJefour prechaufferpendant 8 b 15 minutes. %lectionner la temperaturedu four. La temperature o LorsqueIatemperatureprogrammeepour le four est atteinte, un hip long retentit. pout 6tre programmeede 75 _ 290 °C 070 _ 550 °F). ........................... Appuyer une fois sur la touche More+ ou Less- ou { Less- : appuyersur la touche More+ ou Less- et la .............................. maintenirah]sL o Pour rappelerla temperatureprogrammeependant le prechauffage,appuyersur la touche Bake. 5. Placerla nourriture au centre du four, en laissantun minimumde 2 pouces(5 cm) entre rustensile et les patois du four. • Appuyer sur la touche More+ pour augmenterla temperature. • Appuyer sur la touche Less- pour diminuer la temperature. 6. Verifier I'avancementde la cuisson_ la duree minimale de cuisson.Cuire plus Iongtempsau besoin. 7. Lorsquela cuissonest terminee,appuyersur Jatouche CANCEL(ANNULER). Appuyer _ nouveausur la touche Cook &Hold OU attendre quatre secondes. • Le mot HOLDclignote. CANCEL • 00:00clignote _ rafficheur. 8. RetirerJanourriture du four. Diff6rences de cuisson four et nouveau entre Entrerla duree pendant laquelIeI'on desireque la cuissonait lieu en appuyantsur le touche More+ ou Less-. La duree de cuissonpout 8tre programmeede 10 minutes(00:10)b 11 heures,59 minutes (11:59). 'ancien II est normalde remarquerquelquesdifferences dans Iaduree de cuissonentre un four neuf et un four ancien. Voir Ajustement de Ja temperaturedu four b la page 38. • Losroots BAKEet HOLDs'allurnent _ rafficheur. • La duree de cuissons'alhme _ I'afficheur. • La duree de cuissoncommencele compte_ rebours. 34 Lorsque la dur_e de cuisson s'est _coul6e : 4. Appuyersur More+ pour programmerla temperaturede cuisson. + Quatrehips retentissenL o 00:00et le mot HOLDclignotent. + Le mot BAKEs'6teint. o Le mot BAKEreste allum6. +Les roots HOLDet WARM (CHAUD}s'allument. 5. Appuyersur More+ pour prograpamerla dur@ de cuisson. o La dur@ d'attente,les roots DELAY,BAKEet HOLDs'aJhment I'afficheur. + 75° (170°} parait _ I'afficheur. Apr_s une heure de MAmNTIEN AU CHAUO : Lorsque la duree d'attente s'est 6coul6e o Le mot End (Fin}s'affiche. + Le mot DELAYs'6teint. o L'heuredu jour r6apparait_ I'afficheur. + La dur6e de cuissonest affich@. Annulation moment : de la fonotion ouisson et maintien _ tout + Losroots BAKEet HOLDsont affich@. Pour programmer fonction cuisson Appuyersur la touche CANCEL{ANNLILER}.Retirer (CANCEL"} la nourriture du four. Cuisson courante un temps d'attente lorsque la et maintien a d6j_ _t6 programm6e 1. Appuyersur la touche Delay (D6marragediff6r6}. diff r e + Le mot DELAY{ATTENTE)c%note. + 00:00parait _ I'afficheur. 2. Appuyersur [a touche More+ ou Less- pour programmer [a dur6e d'attente. p6dssablescomme bs produits laitiers,le porc, la volailleou los fruits@ rner. + Apras quatre secondes,le mot DELAYreste allure6 pour rappeler qu'un cycle de cuisson differee a et6 programme. Avec [a fonction diff_r6e, [e four se met b cuire plustard darts [a journ6e. Programmerla dur@ d'attented@ir@ avant que [e four ne se mette en marcheet la dur@ de cuisson@sir@. Le four commence _ chauffer_ ['heures61ectionn@et cuit pour la dur@ sp6cifi6e,puis garde [a nourriture au chaud pendantune heure. ........................ ........................... four se met en marohe : + La dur6e de cu+ssonseraaffich@. + Le mot DELAYs'6teint. + Losroots BAKEet HOLD restentallure@. Annulation Programmation d'un cycle de cuisson courante : : Appuyersur la touche CANCEL(ANNULER}. + Toutesles fonctions de cuissonminut6e et non minut@seront annui@s. 1. Appuyer sur la touche Delay (Demarragediff@@. o Le mot DELAY(ATTENTE}clignote. o 00:00clignote b I'afficheur. + L'heuredu jour r6apparait_ I'afficheur. ............................. 2. Appuyer sur ia touche More+ (Plus+} ou Less(Moins-} pour programmeria dur@ d'attente. Alors que ie mot DELAYclignote toujours : Remarques : Ne pas utiIiserla cuissondiff6r@ pour des articlesqui n@essitentque ie four soit pr@hauff6,commeles gateaux, les petits biscuitset ies pains. + Less- 3. Appuyer sur la touche Cook & Hold (Cuissonet maintien}. Ne pas utiiiser le cycb de cuissonet maintbn diff6r6s sile four est d6jb chaud. + 000s'allume _ I'afficheur. o Losroots BAKE{CUiSSONCOURANTE}et HOLD {MAiNTiEN}clignotent. 35 t ( Less............................ Lorsque la duree d'attente s'est 8coulee et que le La dur@ d'attentepeut 6tre programm@de 10 minutes(00:10} 11 heures,59 minutes (11:59}. diff6rSe : Maintien au chaud Remarques Pour maintenirau cha_Jd(Jarls[e four des alimentscults et chauds ou pour r6chauffel painset assiettes. sur fonction maintien all chaud : • Pour obtenir des quaiit6salimentaireset nutritives optimaIes, les alimentscults au four ne doivent pas6tre gard6sau chaud plus de 1 a 2 heures. Programmation du maintien au chaud : 1. Appuyersur Iatouche KeepWarm [Maintien au chaud). • Le mot WARM (CHAUD)ctignote. • Pour emp6cherles alimentsde dess6cher,les recouvrirde papier aluminium,sans serrer,ou d'un couvercle. • 000 parait _ t'afficheur. • Pour r_chau_er des petits pains : 2. %iectionner tatemp6raturede maintien au chaud. Cette-cipeut 6tre r6gI6ede 63 _ 90 °C [145_ 190°F).Appuyer une fois sur la touche More+ [Plus+)ou Less- (Moins-) ou appuyersur la touche More+ ou Less- et ia maintenir ainsi. - recouvdr les petits pains de papier ahminium sans serrer et les placer au four. .............................................. L(_ss- } - appuyersur Ies touchesKeep Warm et More+ pour programmer75 °C [170 °F}. - r6chaufferpendant 12_ 15 minutes. • 75° [170°} s'allume Iorsque I'onappuie Japremierefois sur I'une destouches= • Pour r_chau_er des assiettes : • Appuyersur la touche More+ pour augmenter la temperature. - placer deuxpiles de quatre assiettesmaximumdans le four. o Appuyersur la touche Less- pour diminuer la temp6rature. - appuyersur Ies touchesKeep Warm et More+ pour programmer75 °C [170 °F}. Le mot WARM [CHAUD}et Ia temp6ratureselont affiches pendant que la fonction maintienau chaud est active. - r6chaufferpendant cinq minutes,arr6ter le four et laisserles assiettesau four pendantencore 15 minutes. - n'utiliser que des assiettespouvant aller au four, a v6rifier avec le fabricant. Annumation du maintien au chaud - ne pas poserdes assiettesti6des sur une surface froide, les changementsrapidesde temperaturepouvant casser I'assietteou la fendiller. : 1. Appuyersur la touche CANCEL[ANNULER}. 2. Retirerla nourriture du four. ( CANCFI ") 36 Arr t auto atique/Mode Remarques sabbat : • Le modesabbat peut 6tre mis en marche_ tout moment,que le four soit en marche ou non. Le four s'arr6teautomatiquementapres 12 heuress'il a 6t6 accidenteiIementlaiss6en marche.Cettecaract6ristiquede s6curit6 peut 6tre arr6t6e. Pour annuler l'arr_t 12 heures et faire fonctionner four eu coutiuu peudaut 72 heures : sur le mode • Le modesabbat ne pout pas 6tre mis en marche si[es commandossont verrouilleesou [aporte verrouill6e. me 1. Programmerle four pour une cuissoncourante {voir page 34}. • Si [e four est en mode cuissonIorsque[e modesabbat est programm6,[e mot BAKE(CUiSSONCOURANTE}s'6teint _ la fin du cycie de cuisson, i[ n'y aura aucun signal sonoreaudible. 2. Appuyer sur la touche Clock (Horioge}et la maintenir ainsipendant cinq secondes. • Lorsque[e modesabbat a d6marr6,aucun hip de pr6chauffage ne retentit. o SAb sera affich6 et c%notera pendant cinq secondes. • Tous los messageset les hipssont d6sactiv6sIorsque[e mode sabbatest actif. o SAb sera ensuiteaffiche en continu jusqu'_ ce qu'on I'arr6te ou jusqu'_ ce que la dur6e limite de 72 heuressoit atteinte. • Si I'on appuie sur la touche CANCEL,un cycle de cuisson courante au four seraannul6. Cependant,le programmateur resteraen modesabbat. o Le mot BAKE(CUISSONCOURANTE}sera aussi affich6si un cyclede cuissoncourante est en cours alors que lefour est en modesabbaL • Apr@sune panne de courant,le four revient en modesabbat avec72 heuresrestanteset aucuncycle actiE Toutes losautres fonctions (Minuterie,Maintien au chaud, Nettoyage,etc.}sont verrouill6es,SAUFBAKE,pendant le mode sabbaL Auuulatiou de la cuissou est eu mode sabbat : couraute alors que le four Appuyersur CANCEL(ANNULER}. o Le mot BAKEs'6teint_ I'afficheur. o Aucun hip sonorene retentit. Auuulatiou du mode sabbat : 1. Appuyer sur la touche Clock pendantcinc secondes. OU 2. Apr6s 72 heures,le modesabbat setermine. o SAb clignote pendantcinq secondes. o L'heuredu iour revient_ I'afficheur. 37 Ajustement 4. Appuyersur [a touche More+ {Plus+} ou Less- [Moins-} pour ajuster la temp6rature. de la temp6rature du four La pr6cisiondes temp6raturesdu four a 6t6 so[gneusementv6rifi6e I'usine+lI est normalde remarquerquelquesdiff6rencesclansIa cuissonentre un four neuf et un four anc+en+ Au fur et _ mesureque les cuisinieressont moins neuves,Ia temp6raturedu four peut varier+ de la temperature 5. L'heuredu jour r6apparaitautomatiquement_ I'afficheur. i{ n'est pas n6cessairede r6ajusterla temp6raturedu four en cas de panne ou d'interrupt+onde courant. Lestemp6raturesde cuissonau gri[ et de nettoyagene peuvent6tre ajust6es. II est possibied'ajuster la temp6raturedu four si ton penseque Ie four ne cuit pasou ne rissolepas correctement+Pour d6ciderde I'ajustement_ apporter,r6gIer le four _ une temp6raturede 15 °C [25 °F) pIus 61ev6eou plus basseque la temp(!ratureindiquQedans la recette,puis faire cuire Ia pr6paration+Lesr6su+tatsdu _+ test >> de cuissondoivent donner une id6e du hombrede degr6sduquel la temp6raturedoit 6tre ajust6e+ Ajustement A chaque fois que ['onappuie sur une touche, la temp6rature change de 3 °C (5 °F}.La temperaturedu four peut 6tre augment6eou diminu6e de 3 _ 20 °C [5 a 35 °F}. du four : 1+ Appuyer sur la touche Bake(Cuissoncourante}+ 2+ Entrer285°C [550 °F}en appuyantsur la touche More+ (Plus+}, ................................ % 3+ Appuyer sur la touche Bakeet la maintenir ainsi pendantplusieurssecondesou jusqu'_ ce que 0° paraisse_ rafficheur+ Si la temp6raturedu four a 6t6 pr6c6demmentajust6e,le changementseraaffiche+Parexemple,si la temperaturedu four a 6t6 r6duitede 8 °C [15 °F},I'afficheurindiquera -8 (-15}+ 38 Cuisson au gril Programmation de la cuisson 5. au gril : 1. Appuyer sur la touche BroiI (GriID. PlacerIa nourrituredans le four. LaisserIa porte du four ouverte d'environ10 cm [4 pod (premierebuteeD. 6. Retournerla viande une lois _ la moitie de la duree de cuisson. ...... 7. LorsqueI'alimentest cuit, appuyersur Iatouche CANCEL(ANNULER).Retirerla nourriture et la lechefritedu four. o Le mot BROIL(GRIL)clignote. o Le mot SET(VALIDER)est affiche. L'heuredu jour reapparait_ I'afficheur. 2. Appuyer sur Ia touche More+ (Plus+) pour programmerun gril temperatureeleveeou sur la touche Less- (Moins-Dpour programmerun gril _ temperaturebasse. Remarques sur Uacuisson au griU: o Lesroots HI (ELEVEED ou LO [BASSED seront affiches. o Pour de meiIIeursresuitats Iorsdu gril, se servir d'un ustensile prevupour ce type de cuisson. o %Iectionner HI broil (GriI_ temperatureelevee)[290°C [550 °F]Dpour un griI normal %lectionner LO broil (Gril temperaturebasseD[230°C [450°F]Dpour un griI _ temperature inferieured'aliments_ cuissonplus Ionguecommela volaille. o Prevoirdes dureesde cuissonau gril plus Iongueset un rissolageleg_rementmoins dore si I'appareilfonctionne sur un circuit de 208 volts. o Le gril au reglage HI (CleveD est utilise pour la majorite des operationsde cuissonau griL Utiliser le griI au r6glage LO [Bas) pour Ia cuissonde metsdevant cu+reptus Iongtemps, afin de Ieur permettred'etre bien cuits sans rissolageexcessif. 3= Apres quatre secondes,Ie four se met en marche. o Le mot BROILresteallume. o Lesdureesde cuissonau gril peuvent6tre plus Ionguesavec une temperaturede gril inferieure. o RetournerIa nourriture Iorsquela moiti6 de la dur6e pr6vue pour la cuissonau gdl s'est6couI6e. 4. Pourun risso[agemaximum,prechauffer['elementde gri[ pendanttrois ou quatre minutesavant d'ajouter la nourriture. o Pour destemperatureset des conseilssupplementairessur la cuissonau gril, se reporter_ la brochureLa cuissonsimplifi6e. TabUeau de cuisson au grH POs+T+Om ALIMENTS DES GRILLES÷ DEGR ¸¸DE ¸¸¸¸¸¸ ¸¸ 'TEMPS DEcmssom CU_SSON ' TOTAL (MINUTES) Bceuf Bifteck, 2,5 cm (1 pod d'epaisseur 4 Hamburgers, 2 cm (3/4pod d'epaisseur Cuissonmoyenne Bien cuit Bien cuit 15 - 18 minutes 4 4 4 4 4 Bien cuit Bien cuit Tiede 6 - 10 minutes 22 - 26 minutes 8 - 12 minutes 3ou4 Bien cuit Gril _ temperaturebasse 28 - 38 minutes La chair se d6tache La chair se detache 10 - 15 minutes 8 - 12 minutes 19 - 23 minutes 15 - 18 minutes Pom'c Bacon COtelettes,2,5 cm [1 pod Jambon - pre-cuit tranche de 1,3cm (1/2 pod vomaimme Pouleten morceaux LO Broil - Fruits de mer Damesde poisson,beurr6es,2,5cm (1 podd'6paissetJr Filetes Grille sup6rieure_ la position n° 5 Remarque : Cetableau n'est qu'un guide de suggestions.Lesdureespeuvent varierselon I'aliment_ cuire. 39 1 Event du four R6insta[[ation Lorsquele four fonctionne, lessurfacesvoisinesde 1'6ventpeuvent devenir assezchaudespour entrainerdes brQlures.Neiamais bloquer l'6vent. 1= Placer[a grille sur [es supportsduns [e four. 2. SouIever[6gerement['avant.FairegIisser[agrille vers ['arriere au-de[_de [a position de caiage= L'_vent est sita_ sons meprotectear d'_vent da dosseret, sat ma euisini_re, EVENT DUFOUR : Ne pus mettre de phstiques prosde I'event,[a chaieur pouvant les ddormer ou les faire fondre= 3= Abaisser [agrille et [a faire glisser darts [efour. Ne pus recouvrir matotalit8 d'ane grille avec de mafeuiiie d'amuminium,ni gamir mefond da fouravec de ma feaiiie d'amuminiam. Ceci modifierait rues rSsultats de caisson au four, et me fond da four pourrait sabir des dommages. Positions des grilles Grille g (position [aplus haute} : Pourcuisson breveau gri[ - pain grill6 ou alimentsminces contenantpeu de graisse. Ecmairage du four Appuyer sur [e commutateurd'6ciairagedu four situ6 sur le tableau de commandopour alhmer ou eteindrela lampe. _.. Grimme a,: Pour [a piupart des cuissonsau griL --_ --_ --1 Over_ Grille 3 : Pour [a piupart . _. des cuissonsde pStisseriessur une tOIe_ biscuits - gSteaux_ etages,tares aux fruits, lets surgeISs. Light Sole du fear Protegerla sole des produits renvers6s,en particuIier acidesou sucres, ceux-ci pouvantd6coIorer I'6mailvitrifie. Utiliserdes ustensiIesde [a bonnedimension pour 6viter que les produits nese renversentou passentpar-dessusI'ustensiIeen bouiilant. Ne pas placer d'ustensiles oa de feuiiie d'alaminiam direetement sur ia sole du four, Grille 2 : Pour r6tissagede pi6ces de viande, lets en sauce,cuisson de pain,g_iteau[egeren couronne (baba}ou entremets= Grille 1 : Pour[e rOtissagede grossespiecesde viandeou voiaii[e, tartessurgeI_es,souffles ou g_teauxdes anges= CUiSSON SUR PLUSiEURSGRILLES: Grilles du four Deux grilles: Placer les grilles aux positions 2 et 4 ou 1 et 4. De.i-grille Une dell-grille est disponibte en accessoire.Elle augmentela capacitedu four et s'accroche_ gauche,_ la partie supSrieure.Elle est utile pour la cuisson d'un plat de legumes lorsqu'ungros r6ti se tro([vesur la grille inf4rieure. Prendre contact avec le revendeurpour demander raccessoireHALFRACK(demigrille} ou pour commander,composerle 1-800-688-2002. • Ne pas tenter de changer la Positio n des gr!Hes [orsque le four ° Ne pas rangerde nourr[tureou d'ustens!leduns [efour. Le four comportedeux grilles avec,pour chacune,un dispositif de calage. Extraction --_ --_ : 1. Tirer la grille en ligne droite jusqu'_ ce qu'elle s'arr6te _ [a position de calage. 2. Souleverla grille _ I'avantpour pouvoir['extraire. 40 6. Essuyerlesr6sidus sucr@et acides,commeles patatesdouces, la tomate oubs sauces_ basede lait. La porcelainevitrifi@ posse@une certaine r@istanceaux compos6sacides mais qui n'est paslimit@. EIb peut se d6colorersi Ies r6sidusacides ou sucr6sne sont pasenIev6savant de commencerrautonettoyage. Four autonettoyant ® I[ est normal que certames pieces de la culsmi6re deviennem [res chaudes lots d'un cycle de ne[[oyage Programmation Pour _vlter de vous blesser et d'endommager la por[e du four. n'essayez pas d'ouvrir la porte quand _{LOCK }} (VERROUILLAGE} est affich& : 1 205 °C [400 programmerun i de %marque : La°F)pour ternp6raturedu four doitcycb 6tre d'autonettoyage. SitU@en dessous 1 Eviter de toucher [a porle, le hublot et la zone de I'@ent (]u four iors d'un cycle d'autonet[oyage. 1. FermerIa porte du four. Ne pas utiliser de ne[toyant pour four du commerce sur b [ini du four ou surtout autre composant du four, Cela abimerait B fini ou les composants du four, 2. PlacerJamanettede verrouiiJage_ Japosition de vermuillage. L'autonettoyageutilise des temp6raturessup6rieures8 celies de Ia cuissonnormalepour nettoyerautomatiquementI'int6rieurdu four. Ne forcez pas Ia portedu four nile bvier de verrouilIagepour Ies ouvrir. Ceci peut provoquerune exposition_ des temp6ratures 6by@s, et donc pr@enter un risquede brqure. 3. Appuyersur Jatouche Cban (Nettoyage}. • Le mot CLEAN[NETTOYAGE} clignote a J'afficheur. Si Ia porte n'est pasferm@, des hips retentissentet Ie mot DOOR [PORTE)parait _ I'afficheur.Si la porte n'est pasferm@ dans Jes 45 secondes,[operation d'autonettoyageest annul6e et I'afficheur revbnt _ I'heuredu jour. Si le four est tr6s sale, il est normalqu'on observela formatiml de fumee ou de flammesdurant Ie nettoyage.Nettoyer le four intervallesr6guliersplutOtque d'attendreune accumulation importantede r@idus. 4. Appuyersur la touche More+ [Plus+} ou Less[Moins-). Durant le processusd'autonettoyage,il cmwient de bien a@erla cuisine pour 61iminerles odeursnormalement6raisesdurant le nettoyage. Avant de l'autenettoyage • CL-M (Nettoyage- salet6 moyenne}est affich6................................ 5. Appuyersur la touche More+ ou Less- pour voir ddiler Jesdiffdrents r6giagesde rautonettoyage. rautonettoyage 1= Eteindrela lampedu four avant le nettoyage=Elle risqueraitsinon, de griller= Less ............................. CL-H (Nettoyage- salet@@abse, 4 heures} CL-M {Nettoyage- salet6 moyenne,3 heures} 2= EnteverIa 18cheffite,tous bs plats et bs griIIesdu four=Lesgrilbs risquent de se @colorer et de ne plus glisser aussi bien apr6s un cycle d'autonettoyagesi on ne bs ent_vepas= CL-L [Nettoyage- salet8 I6g6re,2 heures} 3= Nettoyer b cadre du four, b cadre de la porte, la zone8 I'extSrbur du joint et autour de rouverture darts Ieioint de B porte,_ I'aide d'un produit de nettoyagenon abrasif comme Bon Ami_ou d'eau additionn@ de d6tergent=Le pmcessusd'autonettoyagene nettoie pas ceszones=Elbs doivent 8tre nettoy@spour emp6cher la sabt8 de s'incrusterpendant Ie cyclede nettoyage=(Le ioint assure I'6tanche[teautour de Ia porte et du huNot du four=) Le choix du niveaude sa[et6du four programme automatiquementla dur@ du cycle d'autonettoyage. 6. Apr_s quatresecondes,le four commencele nettoyage. • La dur@ de nettoyagecommencele d@ompte_ I'afficheur. • Le mot LOCKNERROUILLAGE) parait _ rafficheur. ° Le mot CLEANparait _ I'afficheur. Oe_arrage 4= Pouremp@hertout dommage,ne pas nettoyerni frotter Ieioint qui se trouve autour de la portedu four=Cejoint est con_u pour @iter bs pertes de chabur pendantle cycie d'autonettoyage= diffSr_ d'_a cycle d'a_te_etteyage : 1. Appuyersur la touche Delay [D@_arragediffer@. • Le mot DELAY[ATTENTE}clignote. • 00:00parait a I'afficheur. s_ite.., 5= EliminerIes r@idusde gra[sseou de produits renversdssur Ia sob avant Ie nettoyage=Ceci emp@hela formatiml de flammes ou de fum6e durant le nettoyage= _Lesnoms de marquedes pmduits de nettoyagesont des marquesd@os@sdes diff6rents fabricants. 41 2. Appuyersur Ia touche More+ ou Less- pour Pendant le cycle d'autonettoyage programmerla dur6e d'attenteavant que ne Lorsquele mot LOCKparak _ rafficheur, Ia porte ne peut 6tre commence le cycle. La dur6e d'attentepeut 6tre .................. ouverte.Pour 6viter d'endommagerla porte, ne pas forcer la porte r6gI6e,de 10 minutes(00:10)_ 11 heures,59 minutes(11:59). pour I'ouvrir IorsqueLOCKest affiche. FumSe et odeurs 3. Appuyer sur la touche Clean (Nettoyage). La premierefois o_ le four est nettoye, il peut y avoirproduction d'odeur et de fumee.Ceci est normalet disparattra_ I'usage. 4. Appuyer sur la touche More+ (Plus+) ou Less............................. Si le four est tr6s saleou si la Iechefritea ete laisseedans le four, il (M_ins-)peut y avoir production de fum6e. o CL-M (Nettoyage- saJet6moyenne)est affichS. '...................................... Bruits 5. Appuyer sur la touche More+ ou Less- pour voir defiler les Pendantque le four chauffe, [I peut se produire des bruits de instal differents rSgJagesde rautonettoyage. en dilatation ou en contraction.Ceciest normal et n'indique pasque le four s'abtme. CL-H (Nettoyage- salet8 8paisse,4 heures) o Le mot CLEAN(NETTOYAGE) va clignoter. CL-M (Nettoyage- salet@moyenne,3 heures) CL-L (Nettoyage- salete IegSre,2 heures] Aprbs Le choix du niveaude salet6 du four programme automatiquementIadur6e du cycled'autonettoyage. Environune heure apr_s la fin du cycle, le mot LOCKs'6teint.Ace moment,la porte peut 6tre ouverte.Pousserla manettede la porte vers la gauche pour d6verrouiller. 6. AprSsquatre secondes,Ies roots CLEAN(NETTOYAGE), DELAY (ATTENTE)et LOCK(VERROUILLAGE) paraissent_ I'afficheur pour indiquer que le four est programm6pour une op6ration de nettoyagediff6r6. Le temps d'attenteparak _ I'affJcheur. le cycle d'autonettoyage La salet6 peut avoir laiss6 un r6sidu gHs poudreu×, L'enlever avecun linge humide.S'iI restede la salete+ceta indique que le cycle de nettoyagen'a pas6t8 assezlong.Cette salet6 restantesera enleveeau prochaincycle d'autonettoya% Si les grilles ont _t_ laiss_es _ l'i_t_ie_ d_ fo_ pendant le cycle d'a_to_etteyage et q_'emmes gmissemroamsur leurs supports,les enduire,ainsi que lessupports, d'une fine couche d'huile vSg_tale. De fi_es mig_espervert appa_ait_e da_s mapo_cemai_epayee q_'elle a s_bi chale_r et refroidissemento Ceci est normal et n'affecterapas Ia performance. Si le four a dej_ ete programme pour uu cycle de uettoyage et que l'ou desire 6tablir uu delai : 1. Appuyersur la touche Delay (D6marragediff6r6). U_e d_eomemtionblanche pe_t appa_ait_e ap_Ssle _ettoyage si des aliments acides o_ s_cr_s _'o_t pas _t_ e_lev_s avast q_e _e eomme_ce l'a_to_ettoyageo La decelerationest normale et n'affectera pas la performancedu four+ o Le mot DELAY(ATrENTE)c%note. o 00:00parak _ I'afficheur. 2. Appuyersur la touche More+ ou Less- pour Mot(:*+ programmer la dur6e d6sir6ede rattente avant que ......................................... _emarq_es ne debute le cycle. Apr_s quatresecondes,Ies rootsCLEAN,DELAYet LOCK paraissent8 I'afficheurpour indiquer que le four est programme pour une operationde nettoyagediff6r6. Le temps d'attente parait _ rafficheur. Lorsque le cycle d'autouettoyage o Si la porte du four n'est pas fermSe,le mot DOOR(PORTE) clignote _ I'afficheur et le four _met des hipsjusqu'_ ce que la porte soit ferrule et que I'onappuie _ nouveausur Clean. o S'il s'_couleplus de cinq secondesentre Ie momento_ I'on appuie sur Cleanet celu+o_JI'on appuie sur la touche More+ ou Less-,I'afficheur retourneautomatiquement raffichage precedent. debute : o Le mot DELAYs'eteint. + La dur6e de nettoyageparait _ rafficheur. Auuulatiou du cycle d'autouettoyage : o La porte du four se trouvera endommag6esi I'on force son ouverturealors que le mot LOCKest encoreaffich_. : Appuyersur la touche CANCEL(ANNULER). o Tous Ies roots disparaissentde rafficheur. o ToutesIes fonctions sent annul6es. + L'heure du jour parait _ [afficheur. 42 M6thodes de nettoyage Avant route manipulation eu ep6ration de nettoyagel v6rifier qae I,appareil est arr6t6 et que teas Jes composants sent freids, afin d'6vitet des dommages eu des br_lures. ' Pour 6viter la formation de taches ou un changementde couleur, nettoyer I'appareilapr6s chaque u_illsatian, , Apr6s tout d6montagede composants,veJJlerb effectuer un rernontagecorrect. Les noms de marquesent des marques d_poseesdes diff6rents fabricants. _*Pour commanderdirectement, composerIe 1-877-232-6771E.-U.ou 1-800-688-8408Canada. pl ce rickeY,aGe Dosseret et _ble de euissen 6mail vitrifi6 L'drnailvitrifi6est du verre1i6au rn6talpar fusion.II peutsefissur_rou s'dcailleren cas de rnauvaiseutilisation.II est r6sistant auxacides,rnaispastotalementinattaquablepar lesacides.Touslesproduitsrenvers6s,en particulieracidesou sucr6s,doivent 6treessuy6simrn6diaternentavecun linge sac. ° Unefois refroidi,laveravecde I'eausavonneuse,rinceret s6cher. , Nejamaisessuyerune surfaceti6deou chaudeavecun [ingehurnide.Cecipourraitla fissurerou 1'6cailler. , Nejamais utiliserde nettoyantspour four,d'agentsde nettoyagecaustiquesou abrasifssur le fini ext6rieurde la cuisini6re. LSebefrite et Nejamais eeuvrir la grille de papier d'aluminium; cela emp_che la graisse de ceuler dartsla I6chefrite. • Recouwilla I6chefriteet sa grilled'un Iingesavonneux;laisseragir poul d6taeherlesr6sidus. , Laveravecde I'eausavonneusetilde. Utiliserun tampon_ !1curerpour 61irninerlessouillurestenaces. , On peut placerles deuxcomposantsde la I_chefritedartsun lave-vaisse!le. Zone de la console de eemmande/ • Pourutiliserla fonctionVerrouillagedescornrnandespour le nettoyage,voir page33. ° Essuyeravecun lingehumide,puisfaire s_!cher.Ne pasutiliserun agentde nettoyageabrasifsusceptiblede rayerla finition. • On peututiliserun produitde nettoyagedu verre,pulv6ris_! d'abordsur un chiffon.NEPAS prejeter te preduit directement sur tes touches de eemmande eu sur I'afficheur. Beutons de eemmande , Placerchaquebouton_ la positiond'ARRET, et retirerchaqueboutonen le tirant. • Laver,rinceret faire s6cher.Ne pasutiliserun agentde nettoyageabrasifsusceptiblede rayerla finition. • Fairefonctionnerbri_vernentchaque_l_mentpourv6rifierque le boutona _t6 crnTectement r6install& Table de Nejamais utiliser de preduits de nettoyage du four, javettJsant,ammeniaque eu preduits de netteyage du verre eontenant de I'ammoniaque. REMARQUE:Prendre contact avec tm r6pamteur agr_ si la surface en vitree4mmique se fenditle, se easse eu si de I'aluminium ou du m6tal fond sur la surface. • Laisserla tablede cuissonrefrokJiravantde la nettoyer. ° G6n6ralit6s o Nettoyer[atable de cuissonapr6schaqueemploiou au besoin,avecdu papieressuie-touthumidifi6et la cr_mede nettoyagepourtable de cuisson(_i_ceno20000001)**. Puis,essuyeravecun Iingesec et propre. _EMA_QUE: Desmarquespermanentesventseprodu_ed fasatd4 testasurtasurfacede cuissonetest cuitede faconr_p4t4e,, , Samet66paisse eu marq_es m6tammiq_es oHumidifierune_pongeb r_curer<(ne rayantpas)),Appliquerde la cr_mede nettoyagepourtable de cuisson[piecen° 20888001[ _*et frotterpour retirerautantde salet6que possible.Appliquerune mincecouchede cr_mesur la salet&recouvriravecdu papieressuie-touthurnidifi_et hisser pendant30 b 45 minutes[2 ou 3 heurespour la salet_tr_s irnportante].Garderhumideen recouvrantI'essuie-toutd'unepelliculeplastique.Rotter nouveau,puisessuyeravecun linge propreet sac. _EMA_QUE: N'udiserqu'untampon_ r_curer_ nerayantpas_,PROPRE ETHUMIDE,sansdangerpour tesustensitesde cuisine revilementantiad,#4s/f Le verreet/e motifserontendommag_sd b tamponn'estpashum/de,s'//estsouH'/4 ou dun autretype de ta,_t_on est udis4, ° SaJet6sc_ites e_ dess6eb6es - Frotteravecuntampon b r_curer<{ne rayantpas>)et une cr6/nede nettoyage pourtable de cuisson. _EMA_QUE: TenZr unelamede rasoirbun andted_ 30°et dratterpour an/evertoute sabt4restante.Puis,nettoyercomma euisson en 43 PIECE NETTOYAGE Hubmetet porte du four en verre • Evite,rd'utilise,rtrop d'e,au,qui risque,raitde s'infiltr_rsousou derrierele verre,e,tde tacher. ° Laver_ I'eauet au savon.Rince,rave,cde I'eaupropre,e,ts_!che,r. Un pre,duitde ne,ttoyage, du ve,rre, pe,ut6tre,utilJs6e,nle, vapofisantd'abordsur un lingo,. • No,pasutilise,rde produitsabrasifscomme,tampons_ r6cure,r,laine,d'acie,rou produitde ne,ttoyage, e,npoudre,qui risque,raie,nt de raye,rle,ve,rre,. mnt_rieur du fuur ° Ex6cute,r le,sinstructionspr6se,nt6e,s auxpages41-42pour I'autone,ttoyage, du four. Grillesdu fuur ° Nettoyerave,cde !'eausave,nne,use. • Eliminerlessouillure,s te,nace,s ave,curlepoudre,de nettoyageou un tampon 9 rdcure,rsavonneux.Rince,ret faire s6che,r. • Si le,sgrillessent hiss6e,sdartsle four pe,ndantle cycled'autone,ttoyage, e,lle,s seddcolore,ntet peuventno,plustr_s bien glisse,r.Si ce,laso,produit,enduirele,herd desgrilleset le,suppo!tdes grille,sd'une,fine,couche,d'huilev_g_tale,,puise,ssuyer I'e,xc6dent. • NE PAS UTIUSERDEFRODUITSDE NETTOYAGE CONTENANTDU JAVELUSANT. " NE PAS UTIMSER DENETTOYANTS, ORANGE_ OUABRASIFS. (ce,rtainsmodSles] , TOUJOURSESSUYERDANS LE SENSDELA TEXTURE DE L'ACIERLORSDU NETTOYAGE. , Nettoyage juumamier/samet_ m_g_re = Essuyerave,cI'unde,sproduitssuivants: eau savom_e,use,, vinaigrebhnc/e,au,produit de ne,ttoyage, pourve,rreet surface,Formula409*ou un produitse,mblable pour verre- ave,cun lingo,soupleet une,_ponge,. Rince,re,ts6cher.Pourpolir et e,nleve,r le,smarque,s de doigts,faire,suivre,par une,vaporisationde MagicSpraypour acie,r inoxydable(pi6cen° 20OOOOO8)**. • Salet_ mod_r_e/6paisse - Essuye,r ave,cI'undesproduitssuivants: BenAmi*,Sin!i1Cleanser*ou Soft Scrub*- _ raide d'un lingosouple,ou d'une,_ponge,humide.Rincere,ts6che,r.Le,stache,srebelle,spe,uve,nt 6tre,e,nle,v_e,s avecun tampon multiusagesScotch-Brite,*humidi% Frotteruniform_mentdansle,se,nsdu m6tal.Rinceret s6che,r.Pourre,donne,r du lustre,e,t retire,rle,srayure,s, faire,suiwe, par une,vaporisationde Magic Spraypour acie,rinoxydable,*. ° g_culeratien - A I'aide,d'une,6ponge,humidi%eou d'un lingo,souple,,e,ssuyer_ I'aide,du nettoyantCameopour acie,r ine,xydable,*. Rince,rimm_diate,me,nt e,ts6che,r.Poure,nle,ve,r le,smarquese,tre,donne,r du lustre,,faire suiwe,par unevaporisation de Magic Spraypour acie,rinoxydable,*. Chrome bress_ ° Une,fois la cuisini6rere,froidie,, ne,ttoye,r avecde I'e,ausavonne,use, rince,ret fairebrille,r. (certainsmod_le,s: °Si la surfacee,stre,lativement sale,,utiliserun pre,duitne,tte,yant 16gare,me,nt abrasife,tfrotte,rdansle,se,nsdu grain pour 6vite,r de faire,des rayures.Rince,ret s6che,r. • Pour6viter le,s6rafiures,no,pasutilise,rd'article,sou pre,duitsabrasifsou caustiques. • Pourre,donne,r _ la surface,sonbrillante,t_liminerlostrainee,s,faire,suivre,de produit_ vaporiserStainlessSteelMagic Spray_ (r6f_re,nce, no 20000008} _*-Le chrome sere d_celor4 de facon permanente d la salet_ cult dessuso Tiruirde , Unefois lespi_cesre,froidie,s, laver_ I'eausavonneusetilde, rinceret s_che,r.No,jamaisessuyerune,surfaceti6de ou chaude, ave,cun lingo,humide,ceci pouvantendommagerh surface,e,te,ntrainerune,br_lure,par lavape,ur. • Pourle,stachesre,be,!le,s, utilise,rdesagentsde nettoyage,I_g6re,me,nt abrasifscomme,la p_te,au bica_be,nate de soude,ou Ben Ami*. Nepasutiliserd'agentsde nettoyage, abrasifs,caustique,s ou _nergJques comme,le,sne,tte,yants pourfour ou le,s tamponse,nlaine,d'acie,r.Ce,sproduitsraie,raie,nt ou endommage,raient de fa_onpe,rmanente la surface,. _EMA_QUE : Utiliserun tingeeu un terchon sec pour essuyer los predufts renvets_s, surtout s'ils sent addes ou sucr4s. £a surface pourmit se ddcelorer eu se remit si ta saletd n'_tait pas imm_diatement enlev4e. Ceciest pardculi6rement important dans le cas de surfaces blanches. * Le,snoms de marquesent des marquesd_pos_esdes differents fabricants. ** Pour commanderdirecte,me,nt, composerle,1-877-232-6771E.-U.ou 1-800-688-8408Canada. 44 Porte du four Pieds de rOo{age de {'ap{omb • Ne pas grimper sur [a porte du foul ouverte,ou [ui imposer une chargeexcessive.Ceci pourrait provoquerun bascu_ememae la culsmiere.[e bris de la pore ou des b[essurespour [a personne eoncernee. Vdrifier que la bride antibasculementagnppe convenablement [un des p!edsarriem de reglage de I'aPlomb,POUrque la Cuisirfiemne puisse bascu[eraeeidentel[ement_ Ne pas[emer d'ouvrir ou fermer [aporte ou d'utifiser[etoui avam que la porteait 6te convenabiementreinsta[fee, La cuisiniere doit 6tre d'aplombune fois [email protected] I[ I _1 elle ne I'est pas,tourner Iespie@ de r_glage de I'aplomben pBstique, _ chacun des anglesde la _.,_1 cuisiniere,iusqu'_ ce que celle-ci soit _ - _,/,_ Nejamais placer[es doigts entre [acharn ere et [ecadre avantdu foul Les brasde charnieresont montessur ressort.Unecharniere pourrat se refermer bru[a[ement contre [e cadre du four et provoquerde s_rbuses bbssures. d'ap,omb. __ k>_ _\ BR/_E ANTIBASCULEMENT PIED DE REGLAGE DE L 'APLOMB fermeture de la porte du four d'une cuisiniere neuve;ceci est Remarque effet : On disparaftprogressivement. peut percevoirune certaine<{61asticit6>> Iors de la normal;cet Lampe du four Depose de maporte: 1. Apr@ Ie refroidissement du four, ouvrir la porte - position de cuissonau gril {porte entrouverted'environ 10 cm [4 pouces]). • Dc!brancherla cuisinieredu reseau6Jectriqueavantde remplacer I'ampoule. 2. Saisirla porte de chaquecete.Nepas utiliser _' , Utiliser une mani,queseche pour pr0teger !es mans 10rsdu rempBcementde ! arnp0ule. la poign@de porte pour Ia soubver. __ __ __-/_/ 3. Soubveruniformementpour degagerla porte des charnieres. ! Ne pastoucher !,'amp0ubavant qu'elle Ses0!t refroidiel , Ne pastauCheilamP0ule cl!aude avecun lirlge humide; e Ch0C therrrlique pourrait [a bdser. 1. Saisir la portede chaque cOte. Pour remplacer l'ampoule du four : 2. Aligner Jesfentes avecIes bras de charnieresur la cuisiniere. 3. FairedescendreIa porte pour la positionner correctementsur Ies charnieres. Pousser sur bs angies superieurs de la porte pour J'enfoncercompletementsur lescharnieres.IJfaut que la portesoit parfaitementd'aplomb. 1.Apt@ le refroidissementdu four, maintenir le cabochontout en enbvant la piece metal%ue qui la maintienten place. RF:MARQUF: : Le cabochon tombera si on ne le maintient ( pas en place. 2. Enleverle cabochon et rampoule. f \ Hub{ot du four Pour prot6ger mehubmotde maporte du four : #ABOCWON RESSORTDE RETENUE (fLIm_tal/ique) 3. Installerune ampoulede 40 watts pour appareiImenager. 4. ReinstallerIe cabochon et Iefil metalliquede retenue. 1. Ne pas utiliser de produits nettoyantsabrasifscommedes tampons_ r@ureren Iained'acier ou des preduits de nettoyage en poudre qui risqueraientde rayer le verre. 5. RetablirI'alimentationde la cuisiniere.Reglerde nouveau rhodoge. 2. Ne pas heurter le hublot en verre avec un ustensib, un articb de mobflier,un jouet, etc. 3. Ne pasfermer la porte du four avant que bs grilles ne sobnt en placedans le four. Toute @gradation du hublot de verre- rayure,choc,tension, etc.peut affaiblir sa structure et augmenterJerisque de bris _ une date ulterbure. 45 Prise de coutant Tiroir de re isage (:modeles canadiens au×iliaire seulement:) La prisede courant auxiliaireest situee en bas/_ gauche du dosseret.Veiller ce que Ie cordon d'alimentationde I'appareilutilise ne reposepassur un el6mentde Ia table de cuissonou proximite; la raiseen marche de 1'6Iementchauffant ferait subir des dommagesau cordon d'alimentationet la prise de courant. Ne pas ranger dans ce tiroiEdes articlesde p!astiqueou de papier,des produits inflammabiesou des produits a!imentaires. Durant !e fonctionnementdu four, une temperatureexcessive pouEces articlespeut s!6tablirdans [e tiroir. Le tiroir de remisagepeut 6tre enlev#pour vous permettrede nettoyersous la cuisiniSre. D6pose : Un appareil suscitantune demandede courant de plus de 10A provoquera I'ouverturedu disjoncteur qui protege la prise de courant auxiliaire.Pour rearmerIe disjoncteur,appuyersur le commutateursitu6 sur le bord inf6rieur du dosseret. 1= Vider le tiroir et Ietirer iusqu'_ la position de la premierebutee= 2. SouleverI'avant. 3. Tirerjusqu'_ Ia position de Ia secondebutee. 4. Saisirle tiroir par Ies coteset soulever/tirer pour I'extraire. 1. h_sererIesextr6mitesdes glissiSresdu tiroir darts les railsde la cuisiniere. 2. SouleverI'avantdu tlroir et pousser doucementjusqu'_ la position de Ia premierebutee. 3. Souleverde nouveaule tiroir et le pousserpour le fermer. 46 0 DISJONCTEUR m PR@BLEME SOEUTmON Pour mapmupartdes prebmemes ebserv_s, essayer d'aberd mes somutionspossiMes,_ droite. ° ° ° • Non-fonetionnement dem'appareimtotamou pa_iem. ° Determinersi les commandesdes elementsde surfaceet/ou du four sont convenablement regJees.Voir pages29 et 40. Determinersi la porte du four s'estdeverrouilleeaprSsune operationd'autonettoyage.Voir page 42. Determinersi le four est regie pour une cuissondifferee ou un nettoyagediffere.Voir pages 35 et 41. Verifier si Ie verrouilIagedes commandesest en marche.Voir page 33. Verifier si Ia commandeest en modesabbat.Voir page 37. L'hormoge ou ies iampes fonctionnent, ruesroots paraissent i'affieheur,mais ie four ne , Lescommandessont peut-etre programmeespour une fonction de cuisson et maintienou de demarragediffere. , La fonction de verrouiilagedescommandesest peut-etre activee.Voir page 33. R_suituts de caisson uu four die,rents des attentes ou de eeu× produits par mefour anterieur. • DeterminersJI'eventdu four est obstru& Voir son empJacementpage 40. • S'assurerque Ia cuisiniere est d'apiomb. , Lesreglagesde temperaturevarient souvententre un four neuf et le four qu'il remplace.On observesouventune derivedu reglagede temperatured'un four _ mesurequ'il vieillit; il peut devenir plus chaud ou moins chaud.Voir page 37 pour les instructionsd'aiustementde Ia temperaturedu four. REfVIARQUE:II n'est pas utile de modifier Ieregiage de temperaturesi Ja variation n'affecte qu'une ou deux recettes. Pourd'autres informations au suiet de Jacuissonau four, w_irJabrochureLa cuissonsimpli%e. R_sumtatsincorrects mors dema cuisson aa grim,ou _mission excessive de fum_e. • DeterminerIa position desgrilles. Lesaliments peuventetre trop pres de I'elementdu grJL Impossibiiit_ d'autonettoyuge du four. • • • • Le four ne se nettoie pas eorreetement. La porte du four ne se d_verrouiiie pas aprSs m'autonettoyage. Verifier que lescommandesdu four sont correctementregIees. Vergier si Ie four est bien raccord6au circuit 6Iectrique. hlspectedrearmerIe disjoncteur,h_spectedremplacerles fusibles. Contreler Jasource d'alimentationelectrique. * Elementdu gril pas prechauffe. * UtilJsationincorrectede feuilled'aluminium.Nejamaisgarnir Jagrille de iechefrJte avecde lafeuiJJe d'aluminium. Portedu four fermee durant ta cuissonau griI. Laisserla porte du four entrouverted'environ 10 cm [4 pouces]- premierebutee. EnteverI'excSsde graissesur la piScede viandeavant la cuissonau griI. UtiJisationd'une lechefritesouiJlee. La tension electrique de Jamaisonest peut-etre basse. Determinerque I'appareiIn'a pas ete programme pour un autonettoyagediffer& Voir page 41. Verifier que la porte est fermee. Verifier si Ia commandeest en modesabbat.Voir page 37. Lefour est peut 6tre_ une temperaturesuperieure_ 205°C (400 °F).La temperaturedu four doJt 6tre inferieure_ 205 °C (400°F) pour pouvoirprogrammer un cycled'autonettoyage. Untemps de nettoyageplus long peut etre necessaire. On n'a paselimine avant I'operationd'autonettoyageles accumulationsexcesslvesde resldus, particulierement les resldusd'alimentsacidesou sucres. * L'interieurdu four est encorechaud. Attendre environune heure apresJ'achevementde Ia periode d'autonettoyage.IJest possibled'ouvrJrla porte aprSsIa disparJtiondu messageLOCK [VERROUILLAGE] sur I'afficheur. , Lescommandeset Ia portesont peut-etreverrouillees.Voir pages33 et 42pour le deverrouilJage. 47 B PRO6LEME SOLUTION La sudace _ dessus iisse montre des signes d'usure, 1. Finesrayuresou abrasions+ o S'assurerque la surfacede cuissonet le fond des ustensilessont propres.Ne pas faire gJisserd'ustensiiesen verre ou en m6tal sur Iasurface.S'assurerque le fond des ustensilesn'est pasrugueux. Utiliserles agents de nettoyagerecommand6s.Voir page 43. 2. Marques de m6taL o Ne pasfaire glisserd'ustensiIesmStaiIiquessur la surface.Une lois Iasurface refroidie, la nettoyeravec Iacr6me de nettoyagepour table de cuJsson.Voir page 43. 3. Marqueset taches brunes. o Enleverrapidementtes produits renversds.Nejamais essuyerIa surfaceavec une 6ponge ou un Iingesalk S'assurerque la table de cuissonet que le fond des ustensilessont propres. 4. Zones avec refiet m6taJIique. o DSp0tsmin6rauxen provenancede I'eauet de la nourriture. UtiJJserlesagents de nettoyagerecommandes.Voir page 43. 5. PJqOres ou 6caiIIements • EnleverrapidementIes produits sucr6squi ont d6bord& Voir page 43. Accumulation d'humidit_ sur ie hublot ou vapeur soltant de l'_vent. + Ceciest normaldurant la cuissond'aIimentscontenantbeaucoupd'eau. + UtilJsationexcessived'humidit6 Jorsdu nettoyagedu hubJot. Emission d'une loire odeur ou de fum#e lots de ia raise en marehe du fouro + Ceciest normal pour un four neuf et disparait apr6squelquesutilisations. Un cycled'autonettoyage<< brOlera>>plus rapidementles odeurs. • La raiseen marche d'un ventilateur aide _ retirer furn6eet odeurs. + Pr6sencede salet6ssur la sole. Proc6der_ un autonettoyage. Codes d'anomalie. + LesrootsBAKEou LOCKpeuventciignoter rapidement_ I'afficheurpour pr6venird'une erreur ou d'un probleme.Si le mot BAKEou LOCKparait _ I'afficheur,appuyersur Iatouche CANCEL. Si le mot BAKEou LOCKcontinue _ clignoter,d6brancher I'appareil.Attendre quelques minutes,puis rebrancherI'appareiLSi ie mot continue _ clignoter,d6brancherI'appareilet prendrecontact avec un r6parateurautoris6. + Si lefour esttr_s sale.lesflammechespeuventproduire un coded'anomalieau coursdu cycle d'autonettoyage.Appuyersur Ia touche CANCELet iaisser Iefour refroidircompJ6tement, essuyerIasalet6enexecspuisreprogramrnerI'autonettoyage.Si le coded'anomalier6apparatt, prendrecontact avec un reparateurautorJs& Des bruits se font entendreo + Le four fait plusieursbruits faibles.II est possible d'entendrelesrelais du four qui se mettent en marche et s'arr6tent.Ceciest normal. + Atorsque Iefour se r6chauffeetse refroidit,il est possibled'entendredesbruits correspondant la dilatation et _ la contraction [email protected] est normalet n'endommagepas I'appareii. li n'y a ni bip ni affichageo + Le four est peut-6tre en modesabbat.Voir page 37. _ SAb _ eiignote puis reste aiium_, Le four est en mode sabbat.Pourannulet, appuyersur la touche Clocket maintener-Ja enfonc_ependant cinq secondes. 48 Garantie cemplbte d'une annee Pibces et main-d'oeuvre Dulant une p_rioded'un (1) an a comp[erde la date de I'achatinitial au d6taiLtoute piecequl se rev61eraitddectueuse dons des conditions normalesd'usagem_nagersera repaoeeou remplac6egratuitement Ne sent pas converts gata ties .- 1= Lesdommagesou derangementsdus _ : a=Mise en service,IJvraisonou entretien effectu_sincorrectement= b=Toute reparation,modification,aIterationet tout r_glage non autorJsaspar le fabricant ou par un prestatairede serviceapres-venteagree= c=Accidents,mauvaiseutJiisationou usageabusif ou deraisonnable= d=Alimentationelectrique (tension,intensJtel}incorrecte= Garanties limitees = Pi_ces seulement De la deu×i_me _ ia einqui_me annie =A compter de la date de I'achat_mtlalau d6taiLles pLecesde la liste cl-dessousqui se r6v61era_ent ddec[ueuses oans Jesconditions normaJes d'usagemenagerserom repareesou rempiac6es gratultement (pie( esseu_ement);JeproprJetaire dewa assumer Louslesautres frais,y comprJstrais de main-d'oeuvre,de d6placement,de transport, de kilom6trageet de diagnostic. _ecos 6cheant * Sarfaee de eaissoa ea vitroe_ramiqae : Par suite de bristhermt lue, deceleration,tissuration au joint en caoutchoucsur le rebord usuoeues motifs. o EI6ments ehadffaets 61eetrJqdes: Elements de surfaceradiants sur Jesappareilsde cutsson electriques. P,esidents canadiens Lesgarantiesci-dessus couvoemun appare_l _nstaJl6 au Canada.seuiements'il a 6t6 agree par lesagencesde test habiJit6es(verificationae la conformite aune norme natlonaJedu Canada), saul si I'appareila _te introdut au Canada i'occas_ond'ue cnangementde r6sidencedes Etats-Unisvers le Canada Garantie limit6e hers des Etats-Unis et du Canada - Pieces seulement Pendan_une p6rJoded'un (1./an a compeerde a date de I'achatinitial au detail toute piecequLse reveleraitddec_ueuseoansdes conditions normalesd'usagemenagersera repareeou remplaceegratuitement [piece seulement);le propri6tairedevra assumertousles autoesfrais,y comprisfrais de main-d'oeuvre de d6placement. de transport, de kiJome_rage e_oe diagnostic,le cos echeant. Lesgatdneesspdcifiquestbrmdleesc_-dessusson_ les SEULESque le fabricantaccorde.Cesgaranties vousconf_rentdes droitsjdddiquessp4cifiquese[ _,edS pouvezegalementjouir d'autresdroits. variablesd'dn 4tat a/'autre, d'uneprownceb une ad[re par ces 2= 3= _= 5= e. R_giageincorrectd'une commande. Lesgarantiesne peuvent 6tre honor6essi Ies num_rosde s6ried'origine ont et_ enlev6s,modifiesou ne sent pasfacilement lisibles= Ampoules= Appareilsachetesauxfins d'usagecommerciaIou industrieL Lesfrais de visite d'un prestatairede serviceou de serviceapres-venteencourus pour les raisonssuivantes: a=Correctiond'erreursde mise en service= b=initiation de rutilisateur _ I'emploide I'appareiL c=Transportde I'appareiIaux Iocauxdu prestatairede sewice= 6= Lesdommagesde la table de cuisson en verre causespar I'utiIisatJonde nettoyantsautres que lescremeset tampons de nettoyagerecommandes= 7= Lesdommagesde la table de cuisson en verre causespar des produits sucresou du plastiquefondu qui ont durci parce qu'ils n'ont pas ete nettoy6sconformement aux instructionsdonneesdons le guide d'utilisation et d'entretien= 8= Dommagessecondairesou indirects subis par toute personnesuite au nonrespectde ces garanties=Certains6tats ou provincesne permettent pas I'exclusJon ou Ia limitationdes dommagessecondairesou indirects;par consequentles limitationsou exclusionsci-dessuspeuvent ne pass'appliquera votre cos= Si l'i terve tio r parate r est • Contacterle detaillant chez qui I'appareila ete achete,ou contacter Maytag ServicesSM/service _ la clientele de Maytag au 1-800-688-9900aux E.-U.ou 1-800688-2002au Canada,pour obtenir Ies coordonneesd'une agencede serviceagr68e. • Veiller _ conserverla factured'achat pour iustifier de Ia validite de la garantie. Pour d'autresinformations en ce qui concerne les responsabilJtes du propri_taire regard du servicesous garantie, w}ir le texte de la GARANTIE. • Si le dataillant ou I'agencede serviceapras-ventene peut resoudreIe probleme, 8crioe_ Maytag ServicessM,attention CAIR:_Centel,P.O.Box2370,Cleveland,TN 37320-2370ou telephonerau 1-S00-688-9900 ad× Eo-Uood 1-8_e-6SS-2002 au Caeada= • Lesguides d'utJIisation,Ins manuetsde serviceet Ies renseignementssur Iespieces sent disponiblesaupresde Maytag Services sM, service_ la clientele de Maytag= _e_atq_e$ : Lorsde tout contact concemant un probleme,fournir I'Jnformationsuivante: a. Nora,adresseet num_rode telephonedu client; b. Num_ro de modaleet numerode s_riede I'appareiI; c. Noel et adressedu detaillant ou de I'agencede service; d. Description ciaire du problameobserve; e. Preuved'achat (facturede vented}. 49 Estufa Ei_ctrica Cubierta Lisa Tabmade Materias lnstrucciones Im portantes sobre Seguridad ........................51-54 Cocinando en [a Estufa ............ 55-57 ControHes Cubiertas Lisas Cocinando en e[ Homo ............ 58=66 Homeado 'Cook & HoHd' 'Cook & HoM' Difeddo Mantener Cdiente Asar a HaParriHa PardHas dd Homo Cuidado y Limpieza ..................67-70 Horno Autoiimp[ante Proced[m[entos de Umpieza Manteaimiento .......................... 71-72 Ventana del Homo Luz del Homo Locaiizaci6n y Soiuci6n de Aver_as ...................................73-74 Garantia y Servicio .......................... 75 Lea y siga todas las instrucciones antes de usar este electrodom6stico para evitar el riesgo potencial de incendio, choque ei@trico, iesi6n personal o da_o ai eiectrodom6stico como resultado de su uso inapropiado, Utilice este eiectrodomestico soiamente para ei prop6sito que ha sido destinado segun se describe en esta guia, mnstalador:Porfavor deje esta gufajun[o con el e_ec[rodom6stico. Censumidor: Por favor bay conserveesta gula para referencia futura Conserveel reclbo de comprayio el chequecancetado como comprobantede compra. NOmerode Modelo Para asegurar funcionamiento correcto y seguro: El eiectrodomestico debe ser instaiado debidamente y puesto a tierra por un t@nico caiificado, No intente ajustar, reparar, prestar servicio o reempiazar ninguna pieza de este producto a menos que sea espedficamente recomendado en esta guia, Todas ias reparaciones deben ser reaiizadas por un tecnico calificado, NQmerode Serie Fecha de Compra Si tiene preguntas. Hame a: MayEag Customer Assistance 1-800-,688@900 EE. UU. 1-800-688-2002 Canada (Lunes a Vien les. 8:00 a.rn. a 8:00 p.m. Hora del F_ste) Internet: http:/iwww.may[a g.com Siempre desenchufe el electrodom6stico antes de efectuar aiguna reparaci6n, En nuestro contmuo alvin de mejorar la calidad y rendlmlento de nues[ros electrodom@ticos, puede que sea necesano modificar el ebctrodom@tico sin actualizar esta gufa. Para infermaci6s_ sebre set_dde, vet pb[jina 75. ADVERTENCmA: Para redueir el riesge de welee del electredem_stice a eausa de use anermal e debide a pese e×cesive en la puerta del berne, es necesarie Las advertencias e mstrucciones umportantes sobre seguridad que aparecen en esta guia no estan destinadas a cubrir todas ias posibies circunstancias y situaciones que puedan ocurrir, Se debe ejercer sentido com8n, precauciOn y cuidado cuando instale, realice mantenimiento o haga funcionar el artefacto, debidamente Para verificar si el dispositivo est,1debidamente instalado, mire debajo de ia estufa con una iinterna para asegurarse de que uno de los tornillos niveladores traseros este debidamente Siempre p6ngase en contacto con el fabricante si surgen problemas o situaciones que usted no comprenda, Reconozca _os simbo_os, etiquetas de seguridad instalade. enganchado en la ranura del soporte, El dispositivo antivuelco asegura el tornillo nivelador trasero al piso cuando est_ debidamente enganchado, Esto debe verificarse carla vez que la estufa sea movida, advertencias, PODRtAN causar bsi6n personal grave o mortal Para Evitar ce dio Da o pot Ca sado o H mo Aseg_Jresede que se hayan retirado todos los materiaies de empaque dei eiectrodomestico antes de su uso, No coioque materiaies combustibles cerca dei eiectrodomestico, No se deben guardar en ei homo materiaies infiamabies, Muchos pi_sticos son afectados por ei PRECAUC!ON : PdigF0s 0 Pr_iCticasn0 segu(as que PODRIAN causar lesi6n personal menos grave. 51 lnstruccienes caior, Mantenga los pidsdcos abjados de hs piezas deI ebctrodom6stbo que se pueden entibiar o cabntar, Para evitar incendios de grasa, no permita acumuiad6n de grasa de cocinar o de otros materiabs infiamabbs en eI homo o en su cercan[a, Generales NUNCA use un electrodom6stico come un peidaHiopara aicanzar los armanos superiores, El use incorrecto de la puerta del electrodom6stico tabs come pisar sobre elias. apoyarse o sentarse en la puerta puede resultar en que el electrodomestico se vuelque, se rompa la puerta y se causen lesiones graves, En Case de lncendie Use un extinguidor con producto quimbo seco o deI tipo espuma o bicarbonate para apagar eI incendio o las llamas, Nunca use agua en un incendio de grasa, 1, Apague eI homo para evitar que la llama se disperse, Para evitar posibles riesgos para el usuario y ddio al electrodom6stico, no use este producto come una estufa para calentar o entibiar una habitaci6n, Adem_s no use el homo 2, NUNCA bvante o mueva una sartdn en llamas, 3, Apague eI fuego o la IBma del homo cerrando la puerta del homo, come un lugar para guardar alimentos o utensilios de cocina, No obstruya la circulaci6n del aire bloqueando el respiradero dei homo, Seguridad para los Ni es NO TOQUE LOS ELEMENTOSCALEFACTORESNI LAS SUPERFICIESINTERIORESDEL HORNO, Los eiementos calefactores pueden estar calientes aLin cuando su color sea obscure, Las superficies interiores de cuaiquier homo se calientan Io suficiente come para causar quemaduras, Durante y despues dei use, no toque ni permita que ias ropas u otros materiales inflamables entren en contacto con los de la estufa, Los niHiosqu e se trepan en !a puerta de la eiementos caiefactores o ias superficies interiores dei homo hasta que no se hayan enfriado, Otras superficies dei electrodomdstico pueden estar Io suficientemente calientes para causar quemaduras - entre estas superficies estan la abertura dei respiradero dei homo, ia superficie cerca de esta abertura, ia puerta dei homo y ia ventana de ia puerta dei homo, seriamente, NUNCA deje a los nixies solos o sin supervisi6n cuando el homo este en use o cuando est6 caiiente, No se debe nunca permitir que los nixies se sienten o se paren en ninguna pieza del ebctrodomestico pues se pueden bsionar o quemar, Se bs debe ensdiar a los nixies que el ebctrodomestico y los utensilios que est_in en el pueden estar cdientes, Deje enfriar los utensilios calientes en un lugar seguro, fuera del abance de los nixies, Se bs debe ense_ar a los nixies que un ebctrodomestico no es un juguete y que no deben jugar con los controbs u otras piezas del artefacto, No toque un foco caliente del homo con un paffo humedo pues se puede quebrar, Si ei foco se quiebra, desenchufe ei eiectrodomestico antes de sacar ei foco para evitar sufrir un cheque ei6ctrico, NUNCA use papei de aiuminio para cubrir ias parriiias dei homo ni ei panel inferior dei homo, Ei use incorrecto puede resuitar en un riesgo de cheque el@trice, incendio o da_io ai eiectrodomestico, Use papel de aiuminio soiamente come se indica en esta guia, Seguridad Cecinar Nunca caliente un contenedor de alimento cerrado en el homo, La acumuiaci6n de presi6n puede reventar ei contenedor causando una lesi6n personal grave o daHioal eiectrodomestico, 52 Usetomaoihssecosy gruesos, LostomaoiBs hLimedos pueden causar quemaduras porvapor,Nosedebenusar todiasdesecarlospiatosniotrossustitutos envezdelos tomaoiias porque eiiospuedenpasarsobrelosebmentos caiientes yprenderse fuegoo pueden quedaratrapados enhs pbzasdeIebctrodomestbo, Usevestimentas apropiadas, Lasropassueitas o ropascon mangas largassueitas nosedebenusarcuandoseest_ cocinando, Laropasepuedeprender fuegoycausar quemaduras sientraencontacto conlosebmentos cabfactores, rejillas superiores de la estufa o sistemas de convecci6n para hornos, El uso de dispositivos o accesorios que no sean expresamente recomendados en esta guia pueden crear peligros graves de seguridad, afectar el rendimiento y reducir la vida 8tii de los componentes de este electrodom6stico, Siempre coioque ias parriiias dei homo en ias posiciones deseadas cuando el homo este frio, Deslice la parrilla del homo hacia afuera para agregar o retirar alimento usando tomaollas secos y gruesos, Siempre evite colocar o retirar alimento del homo sin sacar la parrilla hacia afuera, Si una parrilla debe ser movida cuando este caliente, use un tomaollas seco, No deje que el tomaolla entre en contacto con el elemento caliente del homo, Nunca deje que un utensilio hierva hasta quedar seco pues esto puede da_iar el utensilio y la estufa, Asegurese de que el utensilio sea Io suficientemente grande como para contener en forma debida los alimentos y evitar derrames, El tama_io es particularmente importante cuando se utilizan freidoras, AsegOrese de que el utensilio tiene capacidad para ei voiumen de aiimentos que se va a agregar ai iguai que para ia formaci6n de burbujas de ia grasa, Si el utensilio es m_is pequdio que el elemento, una porci6n del elemento quedar_ expuesta y puede encender la ropa o un tomaollas, Solamente ciertos tipos de utensilios de vidrio, vidrio cer_imico, cer_mica, gres u otros utensilios vidriados son convenientes para cocinar en la superficie o en el homo sin quebrarse debido al repentino cambio de temperatura, Siga las instrucciones del fabricante del utensilio cuando use vidrio, Use las parrillas solamente en el homo en que fueron enviadas/compradas, Tenga cuidado cuando abra la puerta del homo, Primero deje que salga el aire o vapor caliente antes de sacar o volver a colocar el alimento en el homo, Gire los mangos de los utensilios hacia el centro de la cubierta, no hacia la habitaci6n ni sobre otro elemento superior, Esto reduce el riesgo de quemaduras, encendido de materiales inflamables o derrames si el utensilio es tocado ADVEflTENCIA SOBflE ALIMENTOS PflEPAflADOS: Siga las instrucciones del fabricante del alimento, Si un contenedor accidentalmente o alcanzado por ni_ios pequdios, de aiimento congeiado de pi_istico y/o su tapa se deforma, comba o de otra manera se da_ia durante la cocci6n, inmediatamente descarte el alimento y su contenedor, El alimento puede estar contaminado, NUNCA deje los eiementos superiores sin supervisi6n, especialmente cuando est,1usando los ajustes de calor altos, Un derrame sin recibir la debida atenci6n puede causar humo y un derrame de grasa puede causar un incendio, No permita que el papel de aluminio o la sonda de la came toque el elemento calefactor, Siempre apague todos los controles cuando haya terminado de cocinar, Este electrodomdstico tiene diferentes tama_ios de elementos superiores, Seleccione utensilios que tengan bases planas Io suficientemente grandes para cubrir el elemento, La relaci6n Seguridad sobre de Utensi ios Use adecuada entre el utensilio y el elemento mejorar_ la eficiencia al cocinar, CUBIERTA DE VIDRIO CERAMICO: NUNCA cocine sobre Siga las instrucciones del fabricante cuando use bolsas para cocinar en el homo, una cubierta quebrada, Si ia cubierta de ia estufa se quiebra, los agentes de limpieza y los derrames pueden penetrar y crear un riesgo de choque el6ctrico, P6ngase en contacto con un t@nico calificado inmediatamente, Se ha comprobado el rendimiento y funcionamiento seguro de este electrodomestico usando baterias de cocina convencionales, No use ningSn dispositivo o accesorio que no haya sido especificamente recomendado en esta guia, No use 53 O masFreidoras Antes del cicio de autolimpieza del homo, retire la asadera, las parrillas del homo y otros utensilios y limpie cualquier derrame para evitar humo excesivo o llamaradas, Use extremo cuidado cuando rnueva la olla con aceite o descarte la grasa caliente, Deje que la grasa se enfrie antes de intentar mover ia oiia, Campanas Es normal que la cubierta de la estufa se caliente durante el ciclo de autolimpieza, Por Io tanto, se debe evitar tocar la cubierta durante un cicio de autolimpieza, de VentiJaci6n Limpie con frecuencia ia campana y los fiitros a fin de evitar Aviso que se acumuie en eiios grasa u otros materiaies infiamabies y para evitar incendios de grasa, lmportante Cuando prepare alimentos flameados debajo de la campana, encienda el ventilador, La Propuesta 65 de la Ley de 1986 del Estado de California Sobre Seguridad y Contaminaci6n dei Agua Potable (California Safe Drinking Water and Toxic Enforcement Act of 1986} exige que ei Gobernador de California pubiique una iista de ias Seguridad sustancias que segLin el estado de California causan c_incer o da_o ai sistema reproductivo y exige que ias empresas adviertan a sus clientes sobre la exposici6n potencial a tabs sustancias, en Ja Limpieza Limpie con cuidado la cubierta, Apague todos los controles y espere que se enfrien las piezas del electrodomestico antes de tocarlas o limpiarlas, Limpie con cuidado, Tenga cuidado para evitar quemaduras de vapor si usa una esponja o un patio mojado para iimpiar los derrames en una superficie caliente, AIgunos limpiadores pueden producir vapores nocivos cuando se aplican en una superficie caliente, Sobre Seguridad Se advierte a los usuarios de este electrodomestico que cuando el homo est,1funcionando en el cicio de autolimpieza, puede haber exposici6n de bajo nivei a aigunas de ias sustancias indicadas en la lista, incluyendo mon6xido de carbono, La exposici6n a estas sustancias puede ser reducida a un minimo ventilando el homo al exterior en forma Limpie solamente las piezas indicadas en esta guia, Homo y Advertencia adecuada, abriendo las ventanas y/o la puerta en la habitaci6n en donde est,1ubicado el electrodom6stico durante el cicio de AutoJimpiante AVISO mMPORTANTE RESPECTO A LOS PAJAROS DOMESTJCOS: Nunca mantenga los p_jaros en ia cocina o en ias habitaciones donde puedan iiegar los humos de ia cocina, Los p_ijaros tienen un sistema respiratorio muy sensitivo, Los humos producidos durante ei cicio de autoiimpieza dei homo pueden ser periudiciaies o mortaies para los p_ijaros, Los humos que despide ei aceite de cocina recaientado, ia grasa, margarina y los utensiiios antiadherentes recaientados pueden tambi_n ser periudiciaies, No iimpie ia junta de ia puerta, La junta de ia puerta es esencial para obtener un buen sello, Se debe tener cuidado de no frotar, da_iar ni mover la junta, No use limpiadores de homo ni forros de homo de ningQn tipo alrededor ni en ninguna parte del homo autolimpiante, Conserve estas lnstrucciones 54 para Referencia Futura @ Controies Superiores Ajustes Use estoscontrobs para encenderlos elementossuperiores. Sedispone de una sebcciOninfinita de aiustesdel cNor desde'Low' {Baio} hasta 'High' CAito}.Las perillaspueden colocarseen cuaiquierade estosaiusteso entre elios. EItamaffo,tipo de utensflioy IacocciOnafectaranel aiuste deI caIor. ParainformaciOnsobre los utensiliosy otros factores que afectan los ajustesdel calor, consulteel folleto Recomendacionessobre los Utensiliosen la pagina 57 y el folleto "La Cocina Facil". Programaci6n 1. Co[oqueet utensilio sobre el elementosuperior. 2. Oprimay gire la perfliaen cuNquier direcciOnhasta el ajuste de calor deseado. O O O O 'l_ed. Low' {MedianoBaio} (3-4}: Use para [ 1. Gire [a periiia a [a izquierdapara usar el elemento mas grande o a [a derechapara usar el eiementom_s pequeiio. 'Ned. High' {MedianoAlto} (8o9}: Se usa dorar cNentar aceite para freir 4 Medium (modelos selectos] La cubierta esta equipadacon uno ebmento dobb sltuado en ta parte delanteradelecha de la cublerta. Estole permite cambiar el tamario de esto ebmento. f_:.---. __(__j_ OFF 'Medium' {Median@(57}: Usado para mantener un hervor bnto para grandescantidadesde ffquido y para la mayoffa de las frituras. o 2 2. Oprimay gire la periiia en cuaiquier direcci@ 4 hastae[ aiuste de cNor deseado. " ) OFF cocinando aiimentos tapados o para cocinar a}vapor. 4. Despu@de cocinar coloque[a perilla en la posbidn 'OFF' (Apagado}. Retireel utensiiio. Dob[e 'High' {Alto} !:le}: Se usa para hacerhervir un [iquido. Siempre reduzcael aiuste a un calor mas bajo cuandolos ffquidos combncen a hervir o cuando los Nimentos comiencena oocinarse. continuar 3. Enel pane[de control hayuna [uz indicadoradel eiemento. Cuandose enciendeaiguna de las perillasde control, [a [uz se ihmina. La luzse apagaracuando todos losebmentos superiores se apaguen. Demento Sugeridos '[Low' (Baio} (2}: Se utfliza para mantenerlos aIimentos caIientesy derretir chocolatey mantequflia. de los Contro[es o Enel panel de contro[ se encuentramarcado cual Nementocontrola carla periiia. Por ejemplo,el dibuio a la derechaindica e[ ebmento dNantero izquierdo. de Ca[or ..................... EI esti[o de[ panel de contro[ vaffa segqn el modelo. en una sart@] honda o para saItear. Tambi@ para mantenerun hervorrapido para cantidades grandes de [[quidos. Medium ANTESDECOCiNAR DESPUESDECOCINAR Slempreco[oque un utensi!Joen el elemenrosuperiorantes de • AsegOresede que los elememossupenoresesten apagaaos. encenoerlo.Paraevitar da_ioa Jaestufa, nuncaenciendaun e[ementosuaenorsm tenor ult utensJJiosoDree[ ........................ OTROS CONSFJOS tan pronto como sea posible. , NUNCA use [a cubbrta de B estufacomo una area para guarda[ alhnentoso utensilios. , Si existenarmarlos directamen[esobre [a cubierta de ia estufa. coloqueen eflos art[culos de uso poco frecuen-[ey que pueoenser MiENTP,AS COO[NA guardadoscon seaJridad en un area que estarasuje[a ai cabot AsegOresede que usted sabecua[ periIIa controia cada e[emen[o. A[gunastempera-[uraspueden no ser seguraspa(a articLflostales Aseguresede que u _tedencendioe aemen[o correc-[o, como [[quidosvoiatfles,hmp{aooreso rocladoresen aerosol. ° Commence a coclnar en un Nuste de caior alto [uego reouzcaa un ajuste mas bajo para cornpbtar [a cocciOn. Nunca use un ajus[e de calor alto para cocmar duranteun tiempo pro[ongado, NUNOA permlta que una oua hiervahastasecarse. Esto podria daffar [a o[lay e[ eIectrodom@tico, ° NUNOA deje nlngtin articu[o _spec_almente art[cuiosde plastico. soure la cubierta de [a sstufa. El aire caiiente provemente6e_ respiraderopuede encende[ os articulosinflamabies,oerre[ir o ab[andarlos pldsticoso aumentar[a }resiOnen los con[eneoores cerrados haciendoLosrevental o NUNCA permffaque e[ pape[de alurmnlo,los termOmetrosde carne NUNCA toque la superficiede laestufa hastaque no se haya enfriado. Posiblementeaigunasareasde [asuperficie, o cuaiquier otro objeto de metal,a excepciOnde una olia soDreu/i especLaimente alrededor de los ebmentos se ent_bleno caiienten elementosuperior,tenga con[ac_ocon los elementoscaiefactores, mlentrasesta cocinando. Usetomaoliaspara protegersus o NUNCA guarde articulos pesadossobre la cublerta que pueoan manos, caersey daffada. 55 Cubiertas Notas Lisas sobre [as cubiertas Consejos para proteger cubierta lisa [isas: o La cubierta de maestufa puede emitir un poco de humo y emer_aprimeravez que se uti[iz& Esto es normal Limpieza @er pSgina 69 para mayor informaciOn) o Antes de usar por pnmera vez, limpie Ia cubierta. oLas cubiertas misasretienen emtamer per un eierto periode despu6s que se ha apagado maestufa. Apague los etementos unos pocos minutes antesde que Ios alimentosest@ completamentecocinadosy use et caior restantepara compbtar la cocci@. Cuando[a Iuz de superficb caiientese apaga [ver a continuaciOn},e[ _rea don@ se cocina estar_ fr[a ai tacto. Debido a Ia maneraen que retienen e[caIor, loseIementos[isos no responder_ntan r@idamentea los cambiosen losajustes come Ios ebmentos espirales. o Limpie [a cubierta diariamente o despu6s de cada uso. Esto [a mantendr_ con una buena apadencia y puede evitar que se da_e. o Si se produce un derraPaecuando este eocinando, I[mpie[o inmediatamente de [a cubierta cuando 6sta est@caiiente para evitar una Iimpieza m_s dif[ciI despu@. Tenga mucho cuidado, limpie ei derraPae con una toalIa seca y Iimpia. o No de}e que Ios derrames permanezcan sobre Ia cubierta o sobre la moIdura de la cubierta por un periodo de tiempo prolongado. o En case de un posible derrame,retireel utensiIiode [acubbrta de la estuf& o Nunca use poivos de [impieza abrasivos ni esponjas de restregar que puedan rayar [a cubierta. o Nunea trate de mevantarmacubierta. o Nunca use blanqueador a base de cloro, amon[aco ni otros limpiadores que no hayan sido especificamente recoPaendados para usar en el vidrio cer_Paico. o La superficb lisapuede versedescoioridacuando est_ ca[iente. Estoes normaly desaparecer8cuando Iasuperficiese enfr[e. Dementos la Para evitar Superiotes marcas y rayaduras o No use utensiliosde vidrio, Puedenrayar [asuperficie, Los eIementossuperioresen su estufaest_n identificados per drcuIos permanentesen [a superficieIisa. Paracoc[narde manera m_s eficiente,use un utensi[ioque seadel mismotamaSoque e[ e[ePaento. o Nunca co[oque un soporte o un are de wok entre Ia cubierta y el utensiIio, Estosart[cuIospueden marcar o rayar[a cubiert& o No @slice utensiIiosde aIuminioa tray@de una eubiertacaIiente, Los utensiliospueden@jar marcasque deben set Iimpiadas inmediatamente.(Ver Limpbza, p4gina 69.) Los uteltsilies no debe# extenderse robs all# de 25 mm (1 pulgada) del tamafie de! elemente. Cuandose enciendeun contmI,se puede vet un respIandora trav6s de la superficb lisa.El eiemento pasar_ per cities de encendido y apagado para mantener el ajuste de calor seieccionado, aen en emajuste'Hi' (Nt@, o Aseg/iresede que Ia cubbrta y Ia parte inferior del utensilio est@ Jimpiasantes de encenderJaestufa a fin de evitar rayaduras. o Paraevitar Ias rayaduraso daiio a la cubierta de vidrio cer4mico, no deie azOcar,salo grasassobre los elementos. Limpb la cubierta con un paiio limpio o con toalIasde pape!antes de usarJa. Paramayor informaciOnsobre los utensiliosconsuIte[a secciOn Recomendacionessobre Ios UtensiIiosen Ia p_gina 57 y el folbto "La Cocina F_cii"que se incluye con su estuf& o Nu_ca deslice utensiliosde metal pesadosa tray@de Jacubbrta puespueden rayarla. ELEMENFO SENC/LLO Para evitar ELEMENTO (MODELOS Luz lmlicadora de Superficie maachas o Nuaca use un pai_oo una esponjasucia para Iimpiar B cubierta de Iaestuf& Esto puede @jar una pe![cuIaque puede manchar [a cubierta despu6sque e[ _rea se caIienta. DOBLE SELEOTOS) o Si se continOacocinando sobreuna superficiesucia se puede/ podr_ produdr una manchapermanente. Caliente La [_Jz indicadorade superficie caliente seencuentra en el paneIde control La [uz se iluminar8cuando cualquierade Ios ebmentos superioresest6 caIiente.Permanecer_encendida a8n despu@de que e[ control sea apagado,hasta que el area se hayaenfriado. Net: Surface 56 Para ev[tar etros da es La prueba de maburbuja: . No deje que en la cubierta caliente se derritan [%sticos,az_car o alimentoscon alto contenido de azOcar.Si esto sucede,[impie inmediatamente._/er Limpieza,p_gina 69.:} 1+ Co[oqueuna puIgadade agua en ia oIIa+Coioque[a olla en [a cubierta y gire ei control a 'High' {Aito}+ 2+ Observe[aformaci6n de burbujasa medidaque e[ agua se caiienta+Las burbujasuniformessignifican buen rendimientoy [as burbujasno irreguIaresindicanpuntos caIientesy cocciOn dispareja+ . Nunca deje que una oIla hiewa hasta quedar seca puesesto dafiar_la superficiey el utensilio. , Nunea use la cubierta como una superficie de trabajo ni como una tabia de cortar. Vet el foIIeto "La CocinaF_ci["para mayor informaciOn+ + Nunca cocine a[imentos directamente sobre [a cubierta. Use, . No use un utensiIiopequefio en un elementogrande. Estono s6Io desperdiciaenergia sino que tambi6n pueden producirsederrames calientessobre Ia cubierta los cuaIesrequieren [impiezaadiciona[. Utensiliospianosy suaves, . No use utensiIiosespeciaIesque no sean pianos,de tamai_omayor o desniveIadosta[ como la parte inferior redonda de Ioswoks, con fondos acanaladosy/o parrillasy oIIasde gran tama_o para prepararconservas. UtensiIiosque sean del mismotamario que el elemento. Los utensiIiosm_s peque_oso m_s grandesque el elementoen 2,5cm {1 pulgada}. Mangos seguros. Los utens+Iioscon mangossueltos o rotos. Mangos pesadosque pueden incIinar el utensilio. Tapasherm_ticas. Lastapas sueItas. Wokscon fondo piano. Loswoks con fondo apoyadoen un aro. sobre Si se usan Ios utensilioscorrectosse pueden ahormr muchos proNemas,taI como prolongaci6ndel tiempo de cocciOnde los alimentosu obtenci6n de resuitadosno consistentes.Losutensilios correctos reducenel tiempo de cocci6n, usanmenos energia electricay cocinan los alimentosde maneraross uniforme. Prueba Los utensilioscon fondos acanalados o arqueados.Los utensiIioscon rondos irregularesno cocinan uniformemente losaiimentosy aigunasvecesno pueden hervir %uido. UtensiIiosde material Los utensiJiosde metalesdelgadoso de grueso, vidrio. . No use aIuminio ni contenedoresde papeIde aluminio. E[ aluminiose puede derretir en Ia cubierta de vidrio cer_mico.Si e[ metal se derrite en [acubierta, no use la estufa. Llamea un t6cnico autorizadode Maytag. Recomendaciones Evite Utensi ios eonservas de las OHas P anas para preparar y de tama os Verifique si sus ollasson planas+ ILa prueba de maregma: Todas masommas para preparar conservas y masommas grandes 1+ Coloqueuna regIaa trav6sde[ fondo de [a olla+ deben tenor rondos pianos y deben set hechos de materiames gruesos. Estoes muy importantepara ias cubiertas[isas+La baseno debe set m_s de 2,5cm [1 puigada} m_s grande que ei eiemento+ 2+ ColOquelaa la [uz+ 3+ Pocao ninguna hz debe versedebajo de [a regia+ Cuando[as oIiasde preparar conservasy [asoiias de tamai_os grandesno cumpIenestosrequisitos,[a cocciOnpueden demorar m_s tiempo y se pueden dariar iascubiertas de iasestufas+ Aigunasolias de prepararconservast+enenbasespequeiiaspara usarIasen [as superficieslisasde [as estufas+ Cuundoest8 preparando conservas,use emajuste de camoralto hasta que el agua comience a hewir o se [ogra Ia presiOnen e[ oIIa.Reduzcaei calor ai ajuste m_s bajo que mantengaeI hervoro la presiOn.Si no se reducee[ caIor,se puede da_ar [a cubierta de la estufa. Consuiteel foIIeto "La Cocina F_ci["para mayor informaciOn. 5? @ Panel de Contro A B C D El pane[de control ha side disefiado para su f4ci[ programaciOn.El indicadorvisual en el panel de control muestra[a hera dei dFa,el temporizadory tasfunciones del borne. Etpanel de control mostradoarriba incJuyetascaracterFsticasespecfficasde[ modelo. (Etestib del panel de control varFasegOnel modeb.} A 'Broil'(Asara la Parrilla} Seusaparaasara la parrillay dorarlos aJimentos. B ¸ 'Bake'(HorneaO Seusaparahorrmary asar. C Programao cambiala hera,la temperaturadel homo.Programaasara la parrilla'Hi' o 'LO'. i 'More+/Less-' (M_s+/Menos-} i D 'Timer'_emporizador} Programaa!temporizador. E 'Cook& Hold'[Cocci@ Seusaparahorneardurantean tiempo y MantenerCaliente} s@ccionado,luegomantierme!aNmento calienteduranteunahera. 'Clean'(LJmpieza] Seusaparaprogramaran ciclo de autolimpieza. 'Delay'(Diferido] Programael homoparacomenzara hornearo limpiarsea una heraposterior. H 'Clock'(Retoj] Seusaparaprogramarla heradel dfa. m̧ 'KeepWarrn' (MantenerCaNente] Seusaparamantenercalienteen el homoe!alimentococinado. 'CANCEL'(CANCELAR] Cancelatodaslasfuncionesa excepci@ del temporizador y e!reloj. Use de Jas Tec as Nota: Cuatrosegundos despu@de haber oprimido Iatecla 'More+' o 'Less-' el tiempo o Ia temperaturaser_autom4ticamente programada.Si transcurrenm4s de 30 segundosdespu@ de haberoprimido una tecla de funci6n y antesde oprimir las teclas 'More+' o 'Less-', la funci6n ser4canceladay el indbadol visual volver_aI despliegueanterior. 'O OCk' El re!ojpuede ser ajustado para desplegarIa hera ya seaen formate de 12 horaso 24 betas.El reloj ha side programadoen la f_brJca para el formate de 12 horas. Para cambiar 24 betas: • Se escuchar4una serialsonoracada vez que oprJmauna tecla. • Se escuchar_ndos sefialessonorassi ocurre un error en la programaciOn. eJ reJej a formate de 1. Optima y mantengaoprimidas lasteclas 'CANCEL'y 'Delay' durantetres segundos. 2. Oprima'More+' o 'Less-' para programarel formatede 12 horaso 24 betas. 3. Programela hera del dia sigubndo JasinstruccionesindJcadas abajo. Programaci6n de[ ReJoj: 1. Oprima[a tecJa'C[ock'. • Optima la tecla deseada. • Oprima 'More+' o 'Less-' para programarel tbmpo o la temperatura. (Reloj] o La hera de[ d[ay dos puntos destellan en el indicador. 2. Opnma'More+' o 'Less-'paraprogramar[a hera del dia. o Losdos puntos continOandesteiIando. 3. OprimaIa tecla 'Clock' nuevamenteo esperecuatro segundos. conto 58 @ Para cancemar emtemporizador: Cuandose conectaenergia eI@tricaaI homo o despu@de una interrupciOnde la energ[ae!@trica,Ia Okipaahora del reloj previaa la interrupci@ destellar_en el indicador. 1. Optima y mantengaoprimida la tecla 'Timer' durantetres segundos. Paradesplegarla hora deI d[a cuando el indicadorest6 mostrando otra funci6n de tiepapo,optima la tecB 'Clock'. U 2. Optima la tecla 'Timer'y coloque la hora a 00:00. La hora del reloj no puedeset cambiadacuandoel horno ha sido programaticpara 'DelayCook','Delay Clean'o 'Cook & Hold'. Para cancemar emdespmiegue demremoj: Bloqueo Si no deseaque e+indicadorvisual muestre la hora del dia: El teclado pueden set bloqueadospara seguridad, limpiezao evitar el uso no autodzado.No funcionar_n cuandoest6n bIoqueados. Oprimay mantengaoprimida lasteclas 'CANCEL'y 'Clock' durantetres segundos.La hora del d[a desaparecer_del indicador. de los Conttoles Si eI homo est_ en uso, Ios controlespueden bIoquearse. La hora actuaIdel d[a permanecer_en el indicador cuando los controlesest@ bioqueados. Cuandose cancelael desplieguedel reloj, oprima la tecla 'Clock' para desplegar brevementela hora del dia. Para bmoquear: Opnmay mantengaoprimidasIas tecias 'CANCEL'y 'Cook & Hold'durante tres segundos. Para restaurar emdespmiegue demretool: Oprimay mantengaoprimida lasteclas 'CANCEL'y 'Clock' durante tres segundos.La hora del d[a reaparecer8en el indicador. 'LOCK'destella en el indicadorvisual+ Para desbioquear: 'Timer' (Temporizado0 Oprimay mantengaopdmidaslas teclas 'CANCEL'y 'Cook & Hold' durantetres segundos. E!ternpor+zadorpuede set programadode un minuto {00:01}hasta 99 horasy 59 minutos {99:59}. 'LOCK'desaparecedel indicadorvisual+ El temporizadorpuede set usado independientementede cualquier otra actividaddeI homo. Adem_s puede ser programadocuando otra funci6n del homo est6 en funcionamiento. C( digos de Errores 'BAKE'o 'LOCK'pueden @stellarr@idamentepara advertirb que hay un error o un probbma. Si 'BAKE'o 'LOCK'destetIanen el indicadorvisual,optima le tecla 'CANCEL'. Si 'BAKE'o 'LOCK' continOandesteIlando,desconectela corriente el@tdca haciael artefacto.Espereunos pocos minutosy vueIvaa conectar la corrbnte el6ctrica.Si Ias palabrasaOncontin_1andestellando, desconecteIacornente ei@trica haciael artefactoy Ilamea un t@nico de servicioautorizado. El temporizadorno controla el homo. Solamentecontrola una serial so[_oI*a. Para programar el temporizador: 1. OprJma[atecla 'Timer' {TemporizadoO. o '0:00'se [Juminaen el [ndicadorvisual. [°Jmer o Losdos puntos destellar_n. 2. OprimaIatecJa'More+' o 'Less-'hasta que el tiempo correctoaparezcaen el indicadorvisual + Losdos puntos contJn0andesteJlando. More+ Less- 3. OprimanuevamenteJatecJa'Timer'o esperecuatro segundos. + Losdos puntos contin0an destellandoy comienzala cuenta regresivadel tiempo. + El OItimomJnutode Ia cuenta regresivadel temporizadorse desplegar4en segundos. 4. AI final del tiepapoprogramado,se escuchar4una serialsonora Jarga. 59 'Bake' (Horneado] Rotas sobre Homeado: Para programar 'Bake' (Hemeado): Para +ambiar matempemtura demhomo darante em proeeso de co¢ci6n, optima la tecla 'Bake',Iuegooprima 'More+' o 'Less-' hasta que se desplieguela temperatura deseada. 1+ Oprimala tecla 'Bake'. , 'BAKE'destelhr& , '000'desteliar_en el indicadorvisual+ Para cambiar la temperatara dei homo darante 'Preheat', 2+ Seleccioneia temperaturadel homo+La temperatura ............................prima dos votes Iatecla 'Bake',Iuegooprima 'More+' o 'Less-' del horno puede ser programadade 75° a 285° C hastaque se desplieguela temperaturadeseada. (170° a 550° F]+Oprimau oprimay mantenga ............................ Si olvidaapagar el homo, se apagar_autom_ticamentedespu6s oprimida la tecla 'More+' o 'Less-'. : Less- i: de transcurrir 12horas.Si deseadesactivaresta caracter[stica, , Cuandocuatquierade estasdos teclasse oprime por yea Ia p_gina 63. primeravez,175° (350°] se ituminar_. Parasugerenciasadicionalessobre horneadoy asado,consulte + OprimaIatecla 'More+' para aumentarla temperatura. el foIleto "La Cocina F_cil". , OprimaIatecla 'Less-' para disminuir la temperatura. 3. Oprimala tecla 'Bake' nuevamenteo esperecuatro segundos. 'Cook , 'BAKE'dejar_ de destelIary se iluminar_en el indlcadorvisual. Mantener & Herod' (:Cocc+on y Caliente] 'Cook & Hemal'Ie permite hornear durante una cantidad determinadade tiempo, seguidode un ciclo 'KeepWarm' de una hor8, Para programar + 38 ° [100°] o [a temperatura actual de[ homo se desplegar_i. La temperaturase elevar_en incrementosde 3° (5°] hasta que se alcance la ternperaturaprogramada. & Homd': 1. Optima la tecla 'Cook & Hold'. + 'BAKE'y'HOLD' destellan. + '000' se iJuminaen el indicadorvisual. 4. Esperea que el horno se precalientedurante8-15 minutos. , Cuandoel horno Hegaa la temperaturaprogramadase escuchar_una sepal sonoralarga. 2. SeleccioneIatemperaturadel homo. La temperatura deJhorno puede set programadade 75° a 285° C 070 ° a 550° F].Optima u oprimay mantenga oprimida [a tecia 'More+' o 'Less-'. , ParaverificarIa temperaturaprogramadadurante el precalentamientodel horno,optima la tecla 'Bake'. 5. Coloqueel alimento en el centro del horno, dejandoun minimo de dos pulgadasentre el utensilio y Ias paredesdel homo. 6. Verifique el progresode IacocciOncuando hayatranscurridoel tiempo m[nimorecomendado.Contim_ela cocci6nsi es necesario. 7. AI t6rmino de la cocci6n, oprimala tecla 'CANCEL'._--'-,, 8. Retireel alimento del homo. 'Cook X + Optima la tecla 'More+' para aumentar la temperatura. ....................... ...................... + Oprima la tecla 'Less-' para disminuir la temperatura. 3. Oprima la tecla 'Cook & HoW nuevamenteO esperecuatro segundos. + 'HOLD' destella. + '00:00' desteliaen el indicadorvisual D+ferenc+as homeado antiguo y st+ homo nuevo entre 4. Programe[acant+dadde tiempo durante la cua[ usted desea hornearoprimiendo [atecla 'More+' o 'Less-', Ettiempo de horneadopuede programarsedesde 10 minutos (00:10]hasta 1] horas,59 minutos (11:59}. su homo Esnormal observaralgunas diferenciasen el tiempo de horneadode su horno antiguoy su homo nuevo.Vea "Ajustede la Temperatura del Horno" en la p_gina 64. + 'BAKE'y 'HOLD'se iluminanen el indicadorvisual. + Eltiempo de holneado se iluminar_ en el indicadorvisual + Comenzar_la cuenta regresivadel tiempo de horneado. 6O Cuandehaya e×pirado el tiempe de cecci6n: 4+ Optima 'More+' pare programarla temperaturade horneado. • Se escuchar@cuatro sefialessonoras. • '00:00'y 'HOLD'destelhn. + 'BAKE'se apagar& • 'BAKE'permaneceiluminado. + 'HOLD'y 'WARM' se ihminar@. 5. Optima 'More+' para programarel tiempo de horneado. • Enel indicadorse desplegar_75° 070°]. • Enel indicadorvisual se iluminanel tiempo difierdo, 'DELAY', 'DELAY','BAKE',y 'HOLD'. Despu6s de una hera en 'HOLD WARM' (Mantener Caliente): Cuande emtiempe diferide ha e×pirade: o 'End'se desplegar& • 'DELAY'se apagar& o La hera del d[a volver_a desplegarseen el indicador visual. • Se despliegael tiempo y de horneado. Para eanceiar 'Cook & Herod'en cuaiquier memento: • Se despiiega'BAKE'y 'HOLD'. Para pregramar un tiempe diferide cuande ya se ha programatic 'Cook & Herod': Optima la tecla 'CANCEL'+Retireel alimento del horno+_N_C_, _ 1. Optima [atecia 'Delay'. 'De ay Bake' (HorneadoDiferido] • 'DELAY'destella+ • '00:00+sedespliegaen el indicadorvisual. ....................... 2+ Oprima la tecla 'More+' o 'Less-' para programar el tiempo diferido+ No Useh0rnead0difedd0 para alimentosde c0rta duraciOntales come productoslacteos,ce[do, came de aveo mariscos. • Desp@sde cuatro segundos, 'DELAY' permanecer_iluminadopara recordarleque se Less.... ha programadoun ciclo de horneadodiferido+ Cuandousa 'Delay', el homo comienzaa cocinar mas tar@ en el d{a+ProgrameIa ca@dad de tiempo que usted @sea diferir antes de que se enciendael homo y cuanto tiempo @sea cocinar e+ alimento+El homo comienzaa calentaren Ia hera seleccionaday cocina durante el t+empoespecificado,pues mantieneel alimento caliente durante una hera+ Cuande ha e×pirade emtiempe diferide y emhomo cemienza a funcionar: • Se despiegar_el tiempo de horneado. • 'DELAY'se apagar& El tiempo difeddo puede pmgramarsede 10 minutes(00:10}hasta 11 betas,59 minutes (11:59]. • 'BAKE'y 'HOLD' permanecer@iluminados. Para pregramar un cicmede homeade diferide: Para canceiar: Optima la tecla 'CANCEL'. 1+ Oprimala tecla 'Delay'+ o 'DELAY'destelIa+ • Todas lasfuncionesde horneadocontroladaso no per el temporizadorser_n canceladas. o '00:00'destellaen el indicadorvisual+ • La hera del d[a volver8a desplegarseen el indicadorvisual. 2. Optima la tecla 'More+' o 'Less-'para programarel tiempo diferido. Cuando'DELAY'est6todav[adestellando: Notas: o No use horneadodiferido para los ardculosque necesitan precalentamientodel horno,tal come pasteles,galIetasy panes. Less- 3. Optima la tecla 'Cook & Hold'. o No use horneadodiferido si el homo ya est_ caliente+ . '000'se ilumina en el indicadorvisual. o 'BAKE'y 'HOLD'destellan. 61 'Keep Warm' (Mantener Caliente) Notas sebre +Keep Warm': Paramantener calientesen forma segura alimentoscalienteso para catentarpanesy platos. o Paracaiidad 6ptima de losalimentos, losalimentoscocinados en el homo @ben ser mantenidoscalientespor no m4s de 1 a 2 horas. Para pregramar 'Keep Warm': 1. OprJmaIatecla 'KeepWarm'. o Paraevitar que losalimentosse sequen,cObraloslevemente con papel de ahmJnioo una tapa. , 'WARM'desteila. o Para camentarpaneciHos: o '000'se desptiegaen el indicadorvisuai. 2. SeteccioneIatemperaturade 'KeepWarm'.La temperaturapara 'KeepWarm' puede set programadade 63° a 90° C [145° a 190° F). Oprima u optima y mantengaoprJmidala tecia 'More+' o 'Less-', - cubra Ievementelos paneciiloscon papel de ahminio y coIOquelosen e+homo. ......................... - optima Ias teclas'Keep Warm'y 'More+' para programar ..................................... 75° C (170° F). Less- - caJJentedurante 12a 15 minutos. o Cuandocuatquierade estasdos teclasse oprime por prJmeravez,75° 070 °) se iluminar& + Para eamemarpmatos: - coloque 2 pilasde cuatro platos cada una en el homo. o Optima Iatecla 'More+' para aumentarla temperatura. - oprima Ias teclas'Keep Warm'y 'More+' para programar 75° C (170° F). o Optima latecla 'Less-' para dismJnuirIatemperatura. - caliente los platos durante cinco minutos,apague el homo y deje los platos en el horno durante 15 minutosm4s. 'WARM'y Iatemperaturase desplegar4nen el indicador cuando el ciclo 'Keep Warm' est6 activo. - use soJamenteplatos resistentesal homo,verifique con el fabdcante. - no coloque los platos calientessobreuna superficiefr[a pues el cambio r4pido de temperaturapuede causarfisuras superficiaJeso rotura. Para ca_oeJar 'Keep Warm': 1. OprJmaJatecia 'CANCEL'. 2. Retireel alimento del homo. 62 Cierte Auto tico/Modo Notas Sobte eUMode Sab_tico: • El Mode Sab_tico puedeset activadoen cualquier memento, est6 o no et homo encendido. El homo se apagar_ autom_ticamentedespuesde 12 horassi usted 1odeja accidenta[menteencendido. Estacaracterfsticade seguridad puede ser desactivada. • El Mode Sab_tico no se puede activar si Ias teclasest_n bloqueadaso cuando la puertaest_ bloqueada. • Si el borne est8 horneandocuando el Mode Sab_ticoes programatic,'BAKE'se apagar_al final del ciclo de horneado. No se emitir_n seSalessonoras. Para cancemar emcierre autem_tice de 12 betas y dejar que el home funciene centinuamente durante 72 heras: 1= Programeel borne para homear (vet p_gina 60)= • Cuandocomienzael Mode Sab_tico,no se emitir_ laseSal sonorade precalentamiento. 2= Optimay mantengaoprimida [a tecta 'Clock' durante cinco segundos= o 'SAb'se despiegar_y destetiar_durante cinco segundos= • Cuandoel Mode Sab_ticoest_ active,todos Ios avisos, mensajesy seSalessonorasest_n desactivados. o 'SAb'se despiegar_continuamentehasta que se desactiveo hastaque transcurrael limite de 72 betas. • Si oprime la tecla 'CANCEL'se cancetar_Lmciclo 'Bake',sin embargoeI control permanecer_en Mode Sab_tico. o 'BAKE'tambi6n se desplegar_si se est_ usandoun ciclo de homeadocuandoel homo est_ en Mode Sab_tico= • Si falla la cordente eI6ctrica,cuando vuelva la energ[aet homo se activar_en Mode Sab_ticocon 72 betas restantesy ning_in ciclo active. Todas lasotras funciones EXCEPTO 'BAKE'['Timer','KeepWarm', 'Clean',etc=)est_n bloqueadasduranteel Mode SabStico= Para cancemar 'Bake' cuande emMode Sab_tice est_ active: Oprima'CANCEL'. o 'BAKE'se apagar_en el indicadorvisual o No se oir_ ninguna seSalsonora. Para cancemar emMode Sab_tice: 1= Optima latecla 'Clock' durante cinco segundos= O 2= Despu6sde 72 betas,el Mode Sab_ticoterminar& o 'SAb'destellar_durante cinco segundos. o La hera del d[a reaparecer_en el indicadorvisual 63 Ajuste de [a temperatura 3. Opdmay mantengaoprimida la tecia 'Bake' durante varios segundoso hastaque O° aparezcaen el indicadorvisual de[ Si [atemperaturadel homo ha sido previamenteajustada,el cambio aparecer_en el indicador visual Por ejemp[o,si la temperaturadel horno fue reducidaen 8° C 05 ° F}e[ indicador mostrar_- 8° (-15°}. La exactitudde [as temperaturasde[ horno es cuidadosamente probadaen [af_bdca. Esnorma[ notar atgunadiferencia entre [a temperaturade horneado,entre un horno nuevoy un horno antiguo. Cone[ correrde[ tiempo, [atemperaturade[ homo puedecambiar. 4. Oprima la tecia 'More+' o 'Less-' para ajustar [a temperatura. Ustedpuede ajustar [a temperaturade[ homo, si consideraque su homo no est_ horneandoo dorando en forma correcta. Paradecidir cuanto debe cambiar [a temperatura,programe[atemperaturade[ homo a !5 ° C (25° F} m_saIta o m_s baja que [atemperatura indicadaen sus recetas,[uego hornee. Los resuItadosde [a "prueba" pueden dar[euna idea de cuanto ajustar [a temperatura. Ajuste de [a temperatura Cadavez que se oprime una tecia,[a temperaturacambia en 3° C {5° F}. La temperaturadel horno puede ser aumentadao disminuida en 3° a 20° C {5° a 35° F}. 5. La hora de[ dia reaparecer8autom_ticamenteen el indicador visual de[ homo: No necesitareajustar[a temperaturade[ horno si hayuna fa[[ao interrupci6nde energ[ae!6ctrica. Lastemperaturasde asar a [a parri[[a y [impiezano puedenser ajustadas. 1+ Oprima'Bake'+ 2+ Programe285° (550°} oprimiendola tecla 'Mole+'+ ................................. 64 @ 'Broiming' (Asar a la Pardlla) Para programar 'Broil': G. D6vuelta a la came una vez aproximadamentea mitad de Ia cocci@. 7. Cuandoel alimento est# cocinado,optima la tecla 'CANCEL'.Retireel alimento y la asadera del homo. 1. Oprffna la teda 'Broil'. o 'BROIL'destella. o 'SET'se despliegaen el indicador. CANCEL • La hora de! aliavolver_a despbgarse en el indbador visual 2. Oprima Iatecla 'More+' para programarasar a la parriIB 'Hi' u optima la tecB 'Less-'para pmgramarasar la parriIB 'LO'. o En el indicador visualse despbgar_ 'Hi' o 'LO'. Notas Sebce Asado a UaPacciHa: o Sebcciones'Hi broiI' 285° C (550° F)para asadoa Ia parriIIa normaI. Sebccione 'LO broil' 230° C (450° F) para asara la parrilla con temperaturabaja aiimentosque @ben set cocinadospor m_s tiempo,tal como la came de ave. o Paramejores resultadoscuando asea Ia parrilia,use una asaderadisefiada para asara la parrilla. o Lostiemposde asar a Ia parrilia aumentardny ei dorado ser_ m_s ciaro si el eiectrodom6sticoes instaIadoen un circuito de 208voltios. 3. Despu@de cuatro segundos,el horno comenzar_a funcionar. o 'Hi' se usa para Ia mayoriade Ios asadosa Ia parrilIa. Use 'LO broil' cuando asea Ia pardlla alimentosque necesitancocci@ proIongada. La temperaturainferior permite que eI alimento se cocine hastaquedar bien asadosin dorarsedemasiado. o 'BROIL'continuar_ i[uminado. o Lostiemposde asadoa Iaparrilla pueden ser m_s largos cuandose sebcciona la temperaturam_s baja de asara la parrilla. o El alimento debe set dado vuelta cuandoest_ a mitad del tiempo de asar. 4. Paraun dorado 6ptimo, precalienteet ebmento de asara la parrilla durante3 a 4 minutosantes de colocar el alimento. 5. Coloquee] alimento en el horno. Deje la puertaabierta aproximadamente10 cm {cuatmpulgadas) {el primer tope). o Parasugerenciasy temperaturasadicionalessobre asara la parrilla,consulteel folleto "La Cocina F_cil". Tabla de Asar a RaParriHa POSJCION DE LA PAP,RmLLA* TERM_NO DE COCC_ON A medio asar 15 - 18 minutos Bien asado 19 - 23 minutos Hamburguesas,1,9cm (3/4"} de grosor 4 4 4 Bien asado 15 - 18 minutos Came de Cerdo Tocino Chubtas, 2,5 cm (1"} Jam6n- Rebanadasprecocidas,1,3cm 0/2") de grosor 4 4 4 Bien asado Bbn asado Tibio 6 - 10 minutos 22 - 26 minutos 8 - 12 minutos Came de Ave 'LO Broir Presasde polio 3o4 Bbn asado 28 - 38 minutos 4 4 Desmenuzado Desmenuzado 10 - 15 minutos 8 - 12 minutos ALIMENTOS TmEMPO TOTAL DE COCC_ON (r_lNfJTOS} Came de Res Biftec, 2,5cm (1") Mariscos Bistecsde pescado,con mantequilIa,2,5cm (1") de grosor Filetesde pescado La posiciOnde la parriIla superiores #5 Nota: Estatabla es sOlouna gu[a. Lostiempos puedenvariar con el tipo de alimento que se est_ cocinando. 65 Respiradero de[ Homo Para reiasta[ar [a parri[[a: Cuandoel homo est_ en use, el _rea cerca de[ respiraderopuede caientarsetosuficiente corrlo para causarquemaduras.Nunca btoquee[a aberturade[ respiradero. 1, Cobque [a pard[[a en e[ soporte de [a parr[Haen e[ homo, 2, incline bvemente haciaarnba e[ extremede[antero;des[be [a parri[[a haciaatr_s hastaque pasesobre los topes de enganche, Em respiraderodemhomose encuentra debajodemrespamdo 3, Bajeel frente de [a parr[Hay desffce[ahaciaadentro de[ homo, protector de su estufao No cabra aria parriiia compmetacon papei de amuminioni comoque papemde amuminioen maparte inferior demhome, Se afectar_n los resumtadosdemhomeado y se puede daffar mapare inferior dem homo° RESPIRADERO HORNO cerca de [a abertura de[ respiraderopues e[ cater que sale puede deformar o NO coloquepl_sticos derretir el p[_stico. Posiciones de la Parrilla PARRiI&A 5 ([a posiciOn m_s alta}: Se usa para tostar pan o asar a [a parriI[aa[imentos deIgadosno grasosos. __4 --S 'Oven Light' PARRiE[.A4: Se usa para [a mayoffade los asadosa [a parri[Ia. (Luz de[ Homo} PARR[[LA 3: Se usa para hornear alimentosen una bandejade hornear gaIIetaso un moIde para roi[o de merino[aria, para pastebs, paysde frutas o aIimentosconge[ados. Oprimae[ interrupter de [a [uz de[ horno en e! panel de control para encendery apagar [a [uz de[ homo. Over Panel inferior dei Homo --1 U_ht PARRm[LA2: Se usa para asarcortes de came pequerios,caceroIas, hornear baguetasde pan,paste[esen moidesde tube o fianes. Proteiae[ pane[inferior del borne contra derrames,especiaimente azucaradoso ac@cos,puespueden descoIorar[a porceIana esmaItada.Use e[ utensiIiode tamario correcto a fin de evitar derrames.No comoqueutensimiosni papei de amuminio directamente en mapare inferior demhome° PARRiLLA1: Se usa para asar pedazosgrandesde came y came de ave,pays conge[ados,suf[6s de postre o pastebs esponiosos. HORNEADOCON VARIAS PARR&LAS: Dos parriiias: Use [asposbiones 2 y 4, o 1y 4. Parriffas del Homo Media Parri[[a Se dispone,come accesono,de una media parri[[apara aumentar[a capac[dadde[ homo, Se insta[aen [asecc[Onsuperior de[ [ado [zqubrdo de[ homo y ofrece espaciopara una plato de verduras cuandose ha co[ocadouna asadera grande en [a pard[[ainferior, P6ngaseen contacto con su distdbuidor para obtener e[ accesono"HALFRACK"o para so[bitar, [[aPaea[ 1-800-688-8408, o NO USee[ homo para guardar alimentos ni utensi!!0s, E[homo tiene dos parrillas. Todas[as parrillastienen un borde con tope de enganche. Para retirar [a parriiia: 1, Tire.,de [a parri[[aderecho hacia afuera hastaque se detengaen [a posici6n de[ tope de enganche. 2. Levanteel frente de [a pardiia y tire de [a parrilla hacia afuera. 66 14_j - Homo AutoJimpiante esmaltadaes resistenteaI dcido pero no a prueba de 4cidos. El acabadode porcetanapuede descolorarsesi los derrames dcidos o azucaradosno son Jimpiadosantes de un ciclo de autolimpieza. • Esnormalque los p+ezasdei homo secalienten durante el c_cto de auto+imp+eza, Para programar 'Self-Clean' ° A fin de evitar una lesi6npersona y da[_o_ Jagueita deJhomo+ no [ra[e de abrir la puer[a cuando est6desp_egsdala palabra LOCK" [Bloqueada). i [400° ora: F) Lapara temperaturadel programarunhorno ciclodebe de limpieza. ser inferiora 205° C o Ev+tetocar Jacubier[a,la pue+ta,ia ventana o el areadel respiraderodeJhomo auran[e un cic!o de lim__eza. 1. Cierrela puerta del homo+ (Autolimpieza): . Nc use limpiadoresde hornoscomerclatesen el acabadodeJ homo ni alrededorde ninguna p+ezadel homo pues puede daiiar el acabadoo los pLezas. 2. Mueva Ia pahnca de bloqueo de Japuerta a la derechaa la posiciOnbloqueada. El ciclo de autolimpiezausatemperaturassuperiores alas temperaturasnormatesde cocci6n para Iimpiar autom4ticamenteel interior del homo+No fuerce Ia puerto deI homo ni la palancade bloqueo para abrirla.Esto puedecausar exposicidnalas temperaturasaltos y constituir un riesgo de quemadura. 3. OprJmaIa tecla 'Clean'+ o 'CLEAN'desteIlaen el indicadorvisual Esnormalque ocurran Ihmaradas,humo o llamas durante la Jimpieza si el horno est4demasiadosucio.Esmejor Iimpiar el homo regularmenteen vez de esperarhastaque se hayaacumulado demasladasuciedad+ Duranteel procesode Iimpieza,la cocina debe estar bien ventilada para eJimlnarlos oloresnormaJesasociadoscon la limpieza. Antes Sila puerta no se cierra,se oir_n se_aiessonoresy la palabra 'DOOR'se despiegar_en el indicadorvisual+Si Ia puerta no es cerradadentro de 45 segundos,la operaci6nde autolJmpieza ser4canceIaday el indicadol volver4a desplegarla hora del d[a. 4= Optima ta tecla 'More+' o 'Less-'. o Se despliega'CL-M (SuciedadMediana,, 3 horas). 5. OprimaIa tecla 'More+'o 'Less-' para despJazarlos ajustesde autolhTlpieza. de la Autolimpieza 1. Apague ia iuz de! horno antes de la iimpieza.La luz del horno puede fundirse durante el ciclo de limpieza. 'CL-H' (SuciedadIntensa,4 horas) 2. Retire la asadera,todos ios utensfliosy lasparrillas del homo+Los parriliasdeI horno se descolorar_ny no se desiizar4nf_cilmente @spudsde un ciclo de autolimpiezasi no son retiradasdei homo+ 'CL- L' [SuciedadLeve,2 horas) 3. Limpie el marco del horno,el marco de Japuerto, el 4rea fuera de la junta de la puerta y alrededor de la abertura en Iajunta de la puerta, con un agentede Iimpiezano abrasivotal como 'Bon Ami'+o con detergentey agua. El procesode autolimpiezano limpia estas_reas. Eliasdeben set Iimpiadaspara evitar que la suciedadse homee durante el cicio de autolJmpieza.(La junta es el sello alrededorde la puertoy ventanadel homo.] .................... ........................... ' Lcss- 'CL-M' (SuciedadMediana,,3 horas) AI seieccionarel nivel de suciedadde! homo se programa automdticamenteel tiempo de limpieza. 6. Despuesde cuatro segundos,el horno comenzar4a limpiar. o El tiempo de limpieza comenzar4la cuenta regresJvaen el indicador. o 'LOCK'se desplegarden el indicadorvisual, o 'CLEAN'se desplegar4en el indicadorvisual+ situada alrededor de ni la puerta 4. junta Paraevitar daiio no limpie frote Iadel homo. Lajunta est4 disefiada para sellar hermeticamenteel calor durante el ciclo de limpieza. _._\ __"_ Para diferir un ciclo de autolimpieza: _/_ 1. OprJmaJatecla 'Delay'. o 'DELAY'desteiIa. o '00:00'se desplegar4en eJindicadorvisual 5= Limpie el excesode grasao derrames de Ia parte inferior del homo+ Esto evita humo excesivoo IIamaradasduranteel ciclo de limpieza. 2. OprimaIa tecia 'More+' o 'Less-' para programarIa cantidad de tiempo que usted @sea diferir el ciclo. El tiempo diferido puede ser programadode 10 minutos [00:10)a 11 horas,59 mJnutos01:59)+ 6. Limpie los derramesazucaradoso 8cidos tales como papa dulce (camote),tomates o salsasa basede leche.La porcelana cent o +Losnombresde los productosson marcasregistradasde sus respectivosfabricantes. 67 3+ OprimaIatecla 'Clean'+ Durante o 'CLEAN'desteIhr_+ e_ cido de auto_impieza Cuandoaparece'LOCK'en el indicador,Ia puerta no se puede abdr. Paraevitar dato a la puerta,no fuerce Ia puertapara abrirtacuando la palabra 'LOCK'est_ desplegadaen el indicadorvisual. 4+ Oprimala tecIa (+More+'o 'Less-'. o 'CL-M' [SuciedadMediana,3 horas)se despliegaen et indicador. .......................... 5. OprimaIatecla 'More+' o 'Less-'para desphzar los ajustesde autoih_pieza. Humo y Oiores Ustedpuede ver humo y sentir olor las primerasvecesque el homo es limpiado. Estoes normaly disminuir_ con et tiempo. 'CL-H' (SuciedadHntensa,4 horas) 'CL-M' (SuciedadMediana,3 horas) Tambienpuede ocurrir hurnosi el horno est8 demasiadosucio o si se ha dejado una asaderaen el homo. 'CL-L' (SuciedadLeve,2 horas) Sonidos At seieccionaret nivet de suciedadde[ homo se programa autom_ticamenteel tiempo de limpieza. A medidaque el horno secalienta,usted puede off sonidos de piezasmet_licasque se expandeny contraen. Estoes normaly no datar_ el homo. 6. Despuesde cuatro segundos,'CLEAN','DELAY'y 'LOCK'se desplegar_nen et indicadorvisual para indicar que e[ homo est_ programadopara un cic[o de [impiezadiferido. El tiempo dfferido tambiSnse despliegaen el indicadorvisuai. Despu6s de_ cido de auto_impieza Aproximadarnenteuna hora despuOsdel fin del ciclo de limpieza, 'LOCK'desaparecer_.La puerta ahora puede set abierta. Mueva la palancade bioqueo de la puertaa la izquierdapara desbloquearla. Nguna suciedad puede quedar eomo una leve eeniza gris tipo polvo. Retirelacon un patio h0medo. Si Ia suciedadpermanece despuesde limpiar+a,significa que el cic+ode Iimpiezano fue Io suficientementelargo. La suciedadser_eliminada duranteel proximo ciclo de limpieza. Si el home ya ha sido pregramado para un cicmode limpieza y usted desea programar un tiempo diferido: Si las parriiias dei homo fueron dejadasen el homo y no se deslizansuavemente despuOsde un cielo de limpieza, Iimpie las parrillasy los soportesde lasparrilIas con una pequeta cantidad de aceitevegetal para hacerlasdeslizarcon m_s facilidad. 1. Oprimala tecla 'Delay'. o 'DELAY'destetla. o '00:00'se desplegar_en el indicadorvisual. Pueden aparecer l_neasdelgadas en la porcelanaal pasar pot cielos de calentamiento y e_friamie_to. Estoes normaly no afectar_el rendimiento. 2. OprimaIatec+a'More+' o 'Less-'para programar la cantidadde tiempo que usted deseadiferir el ciclo. U_a deseoloraei6_ bla_ea pue_e apareeer despuSs del eielo de limpieza si los alime_tos _eidos o azucarados _o fuero_ limpia_os a_tes _el eido de autolimpieza. Estadescoloraci0nes normaly no afectar_el rendimiento. DespuOsde cuatro segundos,'CLEAN','DELAY'y 'LOCK'se despJegar4nen el indicadorvisual para indicar que el homo est_ programadopara una ciclo de Jimpiezadiferido. El tiempo diferido tambiOnsedespliegaen el indicadorvisuai. otas: Cuando comienza el cido de autoiimpieza: o Si se deja abierta la puertadel homo, Ia palabra 'DOOR' destellar_en el indicadorvisual y se escuchar_una serial sonora hasta que la puerta seacerraday la tecla 'Clean' sea oprimidanuevamente. o 'DELAY'se apagar& o Eltiempo de limpiezase desplegar_en el indicadorvisual Para canceiar el ciclo de autoiimpieza: Oprimala tecla 'CANCEL'. o Si transcurrenrn_sde cinco segundosdespu_sde oprimir la tecla 'Clean'y antes de oprim+rIas teclas'More+' o 'Less-',el pmgramavolver_ autom_ticamenteaI despiiegueprevio. CANCEL o El indicadorvisuaI queda en blanco, o Todas Iasfuncionesson canceladas. o La puerta del ho_nose datar_ si se fuerza para abrirla cuando la palabra'LOCK'contin_iadesplegadaen el indicador. o La hora del d[a se despliegaen el indicadorvisual 68 Procedimientos de Limpieza fr_asantes de tocarmoo m!mpiarl0. De este modo se eV!tar_ da_o y posiblesquemadu[as. ;Paia evitar manchas0 decobracicin!impie e! homo despu6Sde CadsUSol • Si se retira alguna pieza,aseg_resede qua seareinstaladaen farina correct& _ Los nombresde Ios productosson marcasregistradas de aus respectivosfabricantea= _ Parshacer pedidos,throe at 1-877-232-6771EEUU=o 1-800-688-8408Canad& PmEZA PROCED_M_ENTO Protector trasero La porcelanaesmaltadaesvidriofundidoen metaly puedeagrietarseo picarsesi no se usacorrectamente.Esresistentea los4cidos,no a pruebade _cidos.Todoslosderrames,especialmentelosderramesazucaradoso addicosdebenset limpiados inmediatamentecon un patioseco. ° Cuandoseenfrie,laveconaguajabonosa,enjuaguey seque. ° Nuncalimpieuna superficietibia o calientecon un patio h0medo.Estopuedecausaragrietamientoo picaduras. ° Nuncauselimpiadoresde homo,agentesde limpiezaabrasivoso c4usticosen e! acabadoexleriorde la estufa. esmaltada DE LIMPIEZA Baadeja de Asar e laseAe Nuiica cuhra el inserte con papal de atuminio pues esto evita qzmla gmsa se eseurm a la bandeja inferior. , Coloqueun patioenjabonadosabreel insertoy la bandeja;deje remojarparssoltar la suciedad. ° Laveen aguajabonosatibia. Useuna esponjade fregarpara quitarla suciedadpersistente. ° La bandejade asary e!insertopuedenserlavadosen e! lavavajillas. Area del Reloj y de las Teeias de Oeatrel ° Paraactivar'ControlLock'(BIoqueode los controles}pars la limpieza,ver p4gina59. ° Limpiecon un patiohOmedoy secar.No useagentesde lirnpiezaabrasivospuespuedenrayarla superficie. ° Se puedeusarlimpiavidriossi se rocianen e! patio primero. NO recie dimctamente en elpaneL Periiias de Control ° Retirelasperillascuandoest6nen la posiciOn'OFF'tirdndolashaciaadehnte. , Lave,enjuaguey seque. No useagentesde limpiezaabrasivospuespuedenrayarla superficie. , Enciendacads quemadorpars asegurarsede qua lasperillashartsidocorrectamentereinstaladas. Cabier_a = Vidrio Cer_mien Nuaca use Hmpiadomsde homo, Hanqueadar co# clara, amoi!&ee o I##piadores de viddo que centenga amon&co. NOTA: Uame aun repamdor autorizado si ia cubierta de vidrio car#mica se agrieta, quiebm e el papd de aluminio se derdte sabre la cubiert& , Dejequa la cubiertase enfrfeantesde limpiarh. , Generalidades= Limpiela cubiertadespuesde cads usao cuandoseanecesarioconuna toallade papalh0meday con 'CooktopCleaningCreme'(Cramsde LimpiezaparsCubiertas)(PiezaNo.20000001)**.Lustrecon un patio limpioy seco. NOTA: Se_'arro//ardn manchaspermanentessita sudedadsedejaqua secodne unay otravezusandob cubiertacuando est#suds. , Manchas Rebeldes o _,._areas de Metal = Humedezcauna esponjade gomaque no deje marcaso qua no raye. Aplique 'CooktopCleaningCream*{Cramsde LimpiezaparsCubiertas}(piezano.20000001}** y frote parssacartantasuciedadcoma seaposiNe. Apliqueuna caps delgadade cremasabrela sucieda&cubraconuna toallade papalhOmeday d6jelareposar durante30 a 45 minutos(2 - 3 horasparsmuchasuciedad}.MantengahOmedocubriendolatoallade papelconenvolturade pi_stico. Restrieguenuevamente,luego limpiecon un patiosecoy limpio. NOTA:SolamenteuseesponjasLIMPIAS,HUMEDAS y quanorayony quaseansegurasparsdensb_os conacabadoantiadherente. Sedafiar#d disefioy d vidriosita esponjano est#mojada,d b esponjaest#suciao seusaelizatlpode espo6ia. , Saciedades Qaemadas a Pegadas= Restrieguecon una esponjaque no deje marcasy 'CooktopCleaningCreme'* (Cremade L}mpiezapars Cubie!tas). NOTA: Sostengaun restregadorconhojade afeitara unbngu,,'e de 30°yrestriedueeua,,'quier suciedadquapermanezca.Luego 69 P[EZA ' PROCEDIMIENTO DE LmMPIEZA • Eviteusarcant]dadesexcesivasde aguapuespuedeescurrir:sedebajoo detr_sdel vidriocausandomanchas. del Home - Vidrio • Laveconaguayjab6n. Enjuagueconagualimpiay seque.El limpiadordevidriopuedeusarsesiseroc[aen un patioprimero. ,o NousemateriaIesabrasivestalescomeesponjasde restregar,limpiadoresen polvoo esponjasde lanadeaceropuespueden rayarel vidrio. Interior del Home • Siga lasinstruccionesen lasp_ginas67-68 paraprogramarun ciclo de autolimpieza. Parrillasdel Heine i • Limpiarcon aguaconjab(_n. ,o Sacar[asmanchasdiffcilescon polvode limpiezao una esponjaIlenaconjab6n. Enjuaguey seque. ,o LasparriIlasse desco!orar_npermanentemente y puedenno deslizarsecon suavidadsi son dejadasen e! homodurante un cic!ode autolimpieza.Si estosucede,limpiela parrilIay lossopo,tesen relieveconuna pequetiacantidadde aceite vegetalpararestaurarla facilidadde movimiento,luego limpieel excesode aceite. Acern lnexidabie ° NO USEMNGUN PBODUCTODELIMPIEEA QUECONTENGABLANQUEADORA BASEDE CLORO. [modelosseleetos) , NO USELIMPIADORES"OBANGE"M LIMPIADORESABRASIVOS. ,, SEMPRE LtMPIELASSUPERFICIES DEACEROA FAVORDELGRANOo • Limpieza Diaria/Suciedad Leve =Limpiecon LJnode lossiguientes- agua conjab0n,unasoluciOnde vinagreblanc() conagua,limpiadorparasuperficiesy viddo'Formula409'*oun limpiavidriossimilar- usandouna esponjaoun patio suave. Enjuaguey seque. ParapuIiry evitarmamasde losdedos,usee! producto'StainlessSteelMagicSpray'* (PiezaNo.20OOOOOS) *_,° Suciedad Mediana/lntensa - L]mpieconuno de lossiguientes- 'BenAmi'_,'SmartCleanser '_o 'SoftScrub'_- usando una esponjah0medao un patiosuave.Enjuaguey seque. LasmanchasdificiIespuedenset quitadasconuna esponja multi-use'Scotch-Brite'*h0meda;frote a favordel grano. Enjuaguey seque. Pararestaurarel lustrey sacarlasvetas, aplique'StainlessSteelMagic Spray'_,° Deseelnraci(_n- Useunaesponjamojadaoun patio suave,limpiecon limpiadorde acero'CameoStainlessSteel Cleaner'*.Enjuagueinmediatamentey seque.Paraeliminarlasestffasy restaurare! lustre,usedespu_srociadorpara acero inoxidable'StainlessSteelMagicSpray'*. Creme nepimmadoo Cuandoeste fifo lavecon agua jabonosa,eniuaguey pula la superficiecon gamuza. [mod61osselectos] o Si est_muy sucio,utilice un limpiadorabrasivesuave,taliandocon el grano paraevitar rayarla superficie.Enjuaguey puia con gamuza. ,o Paraevitar los rayonesno utilice agentesabrasiveso c_usticos. ,o Pararestaurarel brillo y quitar los rayones,siga con StainlessSteelMagic Sprayh_oxidabie*[Parte#20000008)**. El creme se decelerarfi permallentemeete d se flemea con la sudedad endmao Gaveta de Manija de la Puerta, Panemes LateramesEsmamtePintado io Cuandoest6frfa,laveconaguatibia jabonosa,enjuaguey seque.Nuncalimpieuna superficietibia o calientecon un patio h0medopuesesto puededatiarla superficiey causaruna quemaduraa causadel vapor. Paramanchasrebeldes,useagentesde Iimpiezalevementeabrasivestal comepastade bicarbonateo 'BenAm!'*.No use agentesde Iimpiezaabrasives,c_iusticoso _sperostat comeesponjasde lanade aceroo limpiadoresde homes.Estos productospuedenrayaro datiarperraanentemente la superficie. NOTA: Useuna tea#a e un parle sece paFalimpiar les derFames,espedalmente los dermmes at[dices e azucaradesoLa superficie se puede descelerare perder el bri#e si el derrame no se limpia inmedialamellte. Este es especialmente impertante en /assupedicies Hancas. *Los nombresde los productosson marcasregistradasde sus respect!yesfabdcantes. ** Parahacer pedidos,[lamea[ 1-877-232-6771EE.UU.o 1-800-688-8408Canada. 70 Tomillos Niveladeres Puerta del Homo • No soioquepesoexcemvomse pare en la Fuerta de! horno. Es_opodria hacervoLcarla estufa, quebrar la puerto o bsionar Ver+fique si e[ soporte antivueicoest_ asegurandoa[piso uno de 10St0miHosn+veladorestmseros. Estesoporteevita que la estufa sevuelque acc!dentaimente. aEusuano. o No +ntenteabrir o cerrar la puerta ni hacerfuncionar el homo has[a que la puerta no ha sido debidamentereempiazada • Nunca coloque los dedosentre la bisagray el marco deian[ero det homo. Los brazo_de articulaci6nson montadosa resorte. S+se gotpeaaccidentalmentela bisagrase cerrara bruscan_en_econtra el marco del homo y puede lesionarsus dodos. La estufa debe ser niveladacuandose instaIa. Si Ia I_//('_ estufa no est_ nivetada,gire los tornillos niveladores III I 8] de pkistico ubicados en cada esquinade la estufa ++o+ +o +o+ +o+o++ _. "esponjosa"cuandose cierra. Estoes normaly disminuir_con el Nora: La puerta deI homo en una estufa nuevapuedesentirse USO. Para ANTIVUELCO TORNILLO NIVELADOR Luz deJ Homo sacftr: 1. Cuandoest6fr[a,abra Iapuerta del horno hasta la posici@topede asara la parrilla[abbrta aproximadamente10cm [cuatropulgadas}]. Desconectela energia a la estufa antesde reemplazarel foco. 2. Sujete la puerta de cada lado. No use la manijade la puerta para Ievantarla. + Use un t0i_ao!!aS Secopara ev+tarP0Sibiedaiio a sus manes cuandeest6 reemp!azandoe! [0c0. ;, AsegQrese de que el foC0est6 frio antes de t0cado. , NOtoque el _oCoCa!ientec0n un paFI0homedo pueseSt0puede quebrar el foco. 3. Levanteuniformementehastaquela puerta se salga de los brazosde articulaci@. Para volver a colocar: 1. Sujete Iapuerta de cada lado. 2. Alinee lasranurasde la puerta con los brazosde articulacidnde la estufa. 3. Desiicela puerta hacia los brazos de articuiaciOnhasta que est6 comp[etamenteasentada en las bisagras.Empujehacia abajo [as esquinassuperbres de [apuertapara asentarlacompletamenteen [as bbagras. La puertano debe quedartorcida. Ventana deJ Homo Para reempiazar el foco dei homo: 1.Cuandoel horno est8 frio, sujete B tapa de la bombiliaen su hgar, Iuegodeslice el ret@ de alambrefuera de la cubierta. NOTA: La cubierta de la bombiiIase caer_si no essujeta en su hgar cuandoest_ sacandoel ret@lde alamble. 2. Saquela cubierta del foco y eI foco. 3. Coloqueun foco de 40 watts para electrodom@sticos. CUBIERTA DEL f:oco 3.Vuelvaa colocar Iacub+eRade la bombillay aseg_relacon el rot@ de alambre. Pare proteger la ventana de la puerta dei homo: 1. No use agentesde Hmpiezaabrasivostabs como esponjasde restregarde lana de aceroo limpiadoresen polvo pues ellos pueden rayarel vidrio. 5.Vueivaa enchufar Iaestufa. Vuelvaa colocar la hora correcta. 2. No goipee el vidrio con ollas, sartenes,muebles,juguetes u otros objetos. 3. No cierre la puertadel homo hasta que lasparrillas del horno no estdn en su lugar. At golpear,rayar, hacervibrar o esforzarel vidrio puededebilitar su estructura causandoun mayor riesgode rotura en una fecha posterior. 71 RETENDEALAMBRE Gaveta de Al acena Tomacorriente pata Decttodom sticos Peque os (Modelos Canadienses solamente) El tomacordentepara electrodom6sticos pequeiiosest_ ubicado en el lado inferior izquierdodet protectortrasero. AsegOresede que los cordones el6ctricosno descansensobre los elementossupedoreso cerca de ellos. Si el etementosuperior est_ encendido, el cordon y el electrodom6sticopueden da_arse. NO guarde productos de papel o de pl_istice,alimentosni matedalesinflamaWesen esta gaveta,La gaveta puede calenta[sedemasiadopara estosart[culos Cuandose est,1usando el homo, La gavetade almacenamientopuedeset retiradapara que usted pueda timpiar debajo de ta estufa. Para sacar: 1. Vade la gavetay desl(cetahaciaafuera hasta la primeraposiciOn tope. 2. Levantetaparte detanterade ta gaveta. 3. T(relahasta tasegundaposici6n de tope. 4. Sujete Ios hdos y levanteIa gavetapara retirada. Para vomvera comocar: 1. Hnsertelos extremosde Jascorrederasde la gavetaen los rieles de Ia estufa. 2. Levantela parte delanterade la gavetay suavementeempOjelaa la primeraposici6n de tope. 3. Levantela gaveta nuevamentey empt_ielahasta que quede completamentecerrada. 72 El disyuntor dettomacorrientepara electrodom6sticospequei_ospuede dispararsesi e! artefacto pequdio enchufadoen 81es de m_s de 10 amps. Parareportere! disyuntor,oprima e! interruptor situado en el borde inferior del protectortrasero. orF_ 'DISYUNTOR' PROBLEMA SOLUCI6N Para mamayer_ade moa probmemas, verifiqueprimeromesiguiente. • • • • Teda maestufa o pastede emma no funcienao • Revisesi [a supefficiey/o loscantrolesde[ hornaest_n debidamenteajustados. Ver p_ginas 55 y 66. • Verifiquesi la puertadel harna seha desbloqueadodespuesdel ciclo de autolimpieza=Vet p%ina 68= • Revisesi eI homo est_ajustadopara homeadodiferidoa programade limpieza=Vet p_ginas61 y 67= • Verifiquesi 'CentralLock' [BIaqueode Control) est_activada=Vet p_g=59= • Verifiquesi el central est_en Mode Sab_tico=Vet p_g=63= Elreiej, ias paiabras en el indieador visualy/e ias iueesfuncionan pete el homo no se caiienta. • El horna puedeestar programaticpara una funciOnde 'Cook& HoW o una funci6n diferida= , Puedeestar activadala caracter[sticade bloquea de los controlesdel harno=(Vetp_g=59=) Los reaultados del homeado no son come se esperaban o son diferentes a los demhomo anterior° • Aseg_iresede que el respiraderodel harno no eat6bloqueado=Vet p4gina 66 para la ubicaciOn= • Verifiquepara asegurarsede que Iaestufaest_ nivelada. • Lastemperaturasa menudovar[an entreun harno nuevoy uno antiguo=A medidaque pasa el tiempa,la temperaturadel harno cambiay puede hacersem_s calientea m_sfr[a=Vet p_gina63 para las instruccianescomeajustar IatemperaturadeIhamo=NOTA:No se recomiendaajustarla temperaturasi ha tenido problemascon so!o una o dos recetas= o Consulteel folleto "La CocinaF_cil"para mayorinfarmaci0nsob_elosutensiliosde homear= Los aiimentoa no se asan a ia parrilla en forma debida o salen demasiado humo. o VerifiqueJasposicionesde lasparrJJlas del homo. El alimentopuedeestar muy cercadel eIemento. o El elementade asar no fue precalentado= o El papelde aluminiase us6de maneraincorrecta. Nunca farre el insertodel asadarcon papel de aluminio. o La puerta det homo estabacerrada mientrasse asabaa Ia parrilla. Deje la puertaabierta en la primerapasici6n [alrededorde 10 cm [4 pulgadas]]. o Recorteel excesode grasade Iacame antesde ponerlaa asara la parrilla. o Se us0 una asaderasucia. o El valtaje del hogar puede set bale. Elhomo no ae automimpia, o Verifiquepara asegurarsede que el cicla no est6 ajustadopara un comienzodifedda.Vet p_gina 67. o Verifiquesi la puertaest_ cerrada. o Vefifique si el central est_en Mode Sab_tico.Vet p_g.63. o El horna puedeestar a m_sde 205° C [400° F}. La temperaturadel homo debeser inferior a 205° C {400° F}para pragramarun ciclo de limpieza. El homo no se iimpi6 en forma debidao o Puedeque seanecesarioun tiempa de limpiezam_slargo. o Losderramesexcesivos,especialmentede alimentosazucaradosy/o _cidosno fueran limpiadas antesdel ciclo de autalimpieza= La pue_tadei homo no ae desbioqaea despa_s dei tide de autoiimpieza, o El interiordeI barriotodaviaest_ caiiente=Deieque paseaproximadamenteuna hera para que el hornase enfr[eantes de que se completeun cicio de autolimpieza=La puertapuedeset abiertacuandodesaparezcala palabra'LOCK'del indicadarvisual. o El controly la puertapuedeestar bloqueada=Vet pSgs=59 et 68 para des bIoquear= Revisesi los controiesdel homoest_n debidamenteajustados. Verifiquesi el enchufeest_firmementeinsertadoen el tamacorriente= Verifiquea vuelvaa reponerel disyuntor=Verifiqueo reemphce el fusible= Verifiqueel suministrode energiael6ctrica= 73 PROBLEMA La supedicie suave muestra desgaste. SOLUCION 1. Abmsioneso myadumspequd_as. o Aseg_imsede que [acubiertay [aparte inferiorde[utensi[ioest6[impia.No des[iceutens[iios de vidrioo de metala trav6sde Iacubierta.Aseg0resede que la parteinferiordel utensiliono sea_spera.Use losagentesde limpiezarecomendados.Vet p%. 69. 2. Marcasde metal o No desliceutensiIiosde metala travesde Iacubierta.Cuandoest6fr[a,limpiela cubiertacon Cremapara Limpiezade Cubiertas.Ver p_g.69. 3. Manchasy estdasmarrones. o Retirelosderrarnesr_ipidamente. NuncaIimpieconun paiioo esponjasucia.Aseg0resedeque Ia cubiertay la parte inferiordel utensilioest6limpia. 4. Areascon un brillo met_ilico. o DepOsitosmineraIesdetaguay de losalimentos.Uselosagentesde limpiezarecomendados. Ver p_g.69. 5. Picaduraso descascarilIado o Limpielos derramesazucaradosinmediatamente.Vet p_g.69. $e junta humedad en maventana demhomoo samevaporpot , Estoes normal cuandose cocinan alimentoscon alto contenido de humedad. , Se us0 humedadexcesivacuando limpi6 la ventana. el respiradero demhomo° Hay un omorfuerte o humo meve ° Estoes normal en una estufa nuevay desaparecer4despu6sde unospocos usos. AJiniciar un ciclo de autolimpiezase "quemar4n" los oioresm4s r4pidamente. o Si se enciendeeJventihdor ayudar4a eliminar el humo y/o el olor. o Suciedadexcesivade alimentosen el panel inferior del homo. Use un ciclo de autolJmpJeza. C6digos de Errores ° 'BAKE'o 'LOCK'pueden destellarr_pidamenteen el indicador para avisarleque hayun error o un problema. Si 'BAKE'o 'LOCK'aparecenen el indicadorvisual,oprimala tecla 'CANCEL'. Si'BAKE'o 'LOCK'continOandestellando,desconecteIaenerg[aeI(!ctricaal electrodom6stico. Espereunospocos minutosyvuelvaa reconectarla energ[ael6ctrica. Sicontimiandestellando, desconectela energFael6ctricadetelectrodom6sticoy Ilameal t6cnicode servicioautorizado. o Si el holno est_ demasiadosucio,pueden ocurrir demasiadasIlamaradasIo cual resultar_en un c6digo de error durante IaIimpieza.Optima la tecla 'CANCEL'y deie que el homose enfr[e completamente,Iimpie el excesode suciedady luego vuelvaa programarel ciclo de limpieza. Si el c6digo de error reaparece,Ilamea un t6cnico autorizado. Se escuchan ruidos. , El horno emitevariossonidosbajos. Ustedpuedeo[r los re[6sdel homo cuandose encienden y se apagan.Estoes normal o A medidaque el hornosecalienta yse enfr[a,ustedpuede dr sonidosde piezasmet_licasque se expandeny contraen. Estoes normaly no daffar_su electrodom6stico. No se escuchan seiiales sonoras y el indicadorvisuamno se activa. , El homo puede estar en Modo Sab_tico. (Ver p%. 63]. 'SAb' destella y luego se despmiegacontinuamente° o El homoest_ en modosab_tico.Paraanu[arel modosab_tico,oprimay mantengaoprimida[a tecla 'Clock' (Reloj}durante cinco segundos. cuando seenc ende em homo. 74 Garant_a Completa de Un A_o Piezas y Mano de Obra Duranteun (1) afio desdela fecha original ue comp[a ai pc[ "nenonse repararao reemplazara gra[ultamentecualqulerplezaque fafle duran[e usonormaEen el hogan Lo que No Cubren Estas Gatantm'as: 1= Situacionesy daSosresultantesde cualquierade Iassiguienteseventualidades: a=Instalaci6n,entregao mantenimientoinapropiados= b=CuaIquierreparaci0n,modificaciOn,alteraciOno aiuste no autorizadopot el fabricanteo por un centro de servicioautorizado. c. Mal uso, abuso,accidenteso uso irrazonable. d. Corrienteet6ctrica,voitaje o suministro incorrecto. Garant[as Limitadas- Piezas SeJamente e. Programaci6nincorrectade cualquierade los controles. Oesde el Segundo basrael Quinte Afio =A partirde la techa originalde compra,sereparardn o reemplazarangratuitamentelas piezasindicadas a continuacionque faflenduranteuso normalen e[ hogaren Joque respec[aaias _ ezasy el pro[ _etariodeberapagartodos los o[ros cos[os incluyendomanode obra,kilometraje/miflaje, transporte,costode!viajey costo del diagnOstico, si fuese necesario. o Cubietta de Vidrie Cer_mico:Debiooa ro[ura tSrmica,descoloracl6n,agnetamtentode la juma de gomadel borde,desgastedel dise¢io. o Elementos Calefaeteres El_etrieos: Los _Jementosradiantessuperiores en losartefactos (_ecocmarel6ctdeos= Residentes Canadienses Lasgarantfasanterlorescub[en solamen[e aquefloselectrodomSsticos instaIadosen Canada que han sido certiticadoso aprobadosoct ias agenctasde pruebascorrespondlentespara cumpltmientocon la Norma Nacionalde Canadaa menosque el dectrodom6sticohayasidotraido a Canadadesdelos EE.UU.debidoa un cambiode residencia. Garant_a Limitada Fuera de los Estades Unides y Canad_ = Piezas Selamente Duran-[eun (1) afrodesde a fecha de compra originala[ pot menor,cualqulerplezaque fafie ourameusonormalen el hogarsera reempiazada o reparadagrattlitamenteen Ioque respec[aa la piezay ei propietariodebera pagartodos los o[ros costosincluyendomanode obra,kilometraje/ miilaje,transporte,costodel viaje} costodei diagn6stico,si fuese necesario, LasgarantfasespecfficaseApresadas anteriormenre son/as UNICASgaranttasprowstasper eJ fabric'ante.£stasgarantiasle omLaanderechos lega/esespedficosy ustedpuede teneradembs otrosdereehosquevar/ande un estadoa otto. 2. Lasgarantias quedan hulassi Ios nOmerosde serie originaleshan sido retirados, alteradoso no son facilmente legibles. 3, Focos, 4, Productos comprados para uso comerciaI o industrial 5, EIcosto del servicio o liamada de servicio para: a. Corregirerroresde instalaciOn. b. Instmir al usuadosobre el uso correctodel artefacto. c. Transportedel artefacto aI estabiecimientode servicio. 6. Da[io de la cubierta de viddo causadopot el uso de limpiadoresque no han sido las cremasy esponiasde limpiezarecomendadas. 7. Datio de la cubierta de viddo causadopor derramesendurecidosde materiales azucaradoso plastico derretidoy que no hartsido limpiados de acuerdocon las instruccionesindicadas en la gu[ade uso y cuidado. 8. Los da[ios consecuenteso incidentalessufridos pot cualquier personacomo resultadode cualquier incumplimientode estasgarantias.En aIgunosestadosno se permite la exciusiOno limitaciOnde losda_os consecuenteso incidentales,pot Io tanto la exclusiOnanteriorpuede que no se apfiqueen su caso. Si Necesita Setvicio • Llame al distribuidor donde compr0 su electrodom6sticoo Ihme a Maytag ServicessM,Servic[oa los ClientesMaytag Ilamandoal 1-800-688-9900[[=LILI=o al 1-800-688-2002Canad¶ ubicar a un t6cnico autorizado= o Asegliresede consewarel comprobantede compra para verificar el estado de Ia garant[a. Consukela secciOnsobreIa GARANTIApara mayor informaciOnsobre las responsabilidadesdel propietadopara serviciobajo la garant[a. o Si et distribuidor o Ia compati[ade servicio no pueden resolverel problema,escriba a Maytag Servicessr'_, Attn: CAR" Center,P.O.Box2370,Cleveland,TN 37320-2370 o IIapaeaI 1-800-688-9900 EE.UU.o al 1-80e-688-2002 Canada. • Las gu[asdel usuario,manualesde servicioe informaci0nsobre las piezaspueden soIicitarsea Maytag ServicessM,Servicioa los ClientesMaytag. CuandoIlameo escriba acercade un problemade servicio, _or faw_rincluya la siguiente infermaci6n. a. Su nombre,direcciOny ntimero de teldono; b. N_merode modeloy m_merode serie; c. Nombrey direcci6n de su distdbuidor o t6cnico de sewicio; d. Unadescripci6nclara del problemaque esta experimentando; e. Comprobantede compra [recibo de compra}. Form No. B/10/04 Pat1 No. 8113P480 60 (cb2004 Maytag Appliances Sales Co. Litho U.S.A.-
 1
1
-
 2
2
-
 3
3
-
 4
4
-
 5
5
-
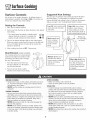 6
6
-
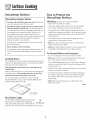 7
7
-
 8
8
-
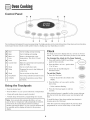 9
9
-
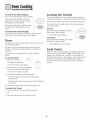 10
10
-
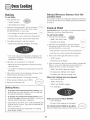 11
11
-
 12
12
-
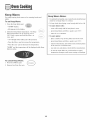 13
13
-
 14
14
-
 15
15
-
 16
16
-
 17
17
-
 18
18
-
 19
19
-
 20
20
-
 21
21
-
 22
22
-
 23
23
-
 24
24
-
 25
25
-
 26
26
-
 27
27
-
 28
28
-
 29
29
-
 30
30
-
 31
31
-
 32
32
-
 33
33
-
 34
34
-
 35
35
-
 36
36
-
 37
37
-
 38
38
-
 39
39
-
 40
40
-
 41
41
-
 42
42
-
 43
43
-
 44
44
-
 45
45
-
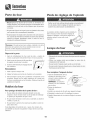 46
46
-
 47
47
-
 48
48
-
 49
49
-
 50
50
-
 51
51
-
 52
52
-
 53
53
-
 54
54
-
 55
55
-
 56
56
-
 57
57
-
 58
58
-
 59
59
-
 60
60
-
 61
61
-
 62
62
-
 63
63
-
 64
64
-
 65
65
-
 66
66
-
 67
67
-
 68
68
-
 69
69
-
 70
70
-
 71
71
-
 72
72
-
 73
73
-
 74
74
-
 75
75
-
 76
76


Magic Chef MER5752AAB Manual de usuario
- Tipo
- Manual de usuario
- Este manual también es adecuado para
En otros idiomas
- français: Magic Chef MER5752AAB Manuel utilisateur
- English: Magic Chef MER5752AAB User manual
Otros documentos
-
Maytag MER6775AAB El manual del propietario
-
-
-
Maytag SMOOTHTOP 500 El manual del propietario
-
Amana 700 Manual de usuario
-
-
-
Maytag MER5875QAF Manual de usuario
-
-
Jenn-Air JEC8536BDB10 Manual de usuario