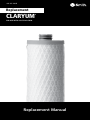
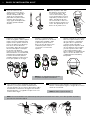
A O Smith CLARYUM es un sistema de filtración de agua que ayuda a mejorar la calidad del agua potable de tu hogar. Es capaz de reducir una variedad de contaminantes del agua, incluidos el cloro, el plomo, los quistes y las bacterias. El sistema también puede ayudar a mejorar el sabor y el olor del agua.
Con una instalación sencilla y un mantenimiento mínimo, A O Smith CLARYUM es una excelente opción para quienes buscan una forma de mejorar la calidad del agua de su hogar.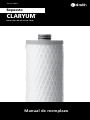


-
 1
1
-
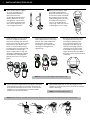 2
2
-
 3
3
-
 4
4
-
 5
5
-
 6
6
-
 7
7
-
 8
8


A O Smith CLARYUM es un sistema de filtración de agua que ayuda a mejorar la calidad del agua potable de tu hogar. Es capaz de reducir una variedad de contaminantes del agua, incluidos el cloro, el plomo, los quistes y las bacterias. El sistema también puede ayudar a mejorar el sabor y el olor del agua.
Con una instalación sencilla y un mantenimiento mínimo, A O Smith CLARYUM es una excelente opción para quienes buscan una forma de mejorar la calidad del agua de su hogar.
en otros idiomas
- English: A O Smith CLARYUM User manual
Otros documentos
-
A.O. Smith AO-CWM Manual de usuario
-
-
-
-
-
A.O. Smith AOW-3000 El manual del propietario
-
-
-
-