GE HEAVY DUTY OUTDOOR DIGITAL STAKE TIMER Manual de usuario
- Categoría
- Temporizadores eléctricos
- Tipo
- Manual de usuario

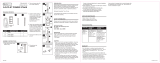
1. 1 outdoor digital power center
HEAVY DUTY OUTDOOR DIGITAL STAKE TIMER
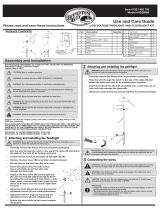
CONTENTS
INSTRUCTIONS
SAFETY INFORMATION
WARNING
Disregarding cautions could cause damage, fire, or fatal shock.
Changes or modifications to this unit not expressly approved by the party responsible for compliance could void the user authority to operate the equipment.
This device complies with Part 15 of the FCC Rules. Operation is subject to the following two conditions: (1) this device may not cause harmful interference,
and (2) this device must accept any interference received, including interference that may cause undesired operation.
NOTE: This equipment has been tested and found to comply with the limits for a Class B digital device, pursuant to Part 15 of the FCC Rules. These limits are
designed to provide reasonable protection against harmful interference in a residential installation. This equipment generates, uses and can radiate radio frequency
energy and, if not installed and used in accordance with the instructions, may cause harmful interference to radio communications.
However, there is no guarantee that interference will not occur in a particular installation. If this equipment does cause harmful interference to radio or television
reception, which can be determined by turning the equipment off and on, the user is encouraged to try to correct the interference by one or more of the following
measures:
1. Reorient or relocate the receiving antenna.
2. Increase the separation between the equipment and receiver.
3. Connect the equipment into an outlet on a circuit different from that to which the receiver is needed.
4. Consult the dealer or an experienced radio/TV technician for help.
CAUTION
1. Risk of Fire. Not for permanent installation. Use only with a total of 15 ampere maximum Christmas-tree or other seasonal lighting products. Do not
install or use this product for more than a 90-day period.
2. If using Christmas tree or decorative-lighting products that are not marked with an ampere rating, connect no more than 140 screw-base lamps (C7 or C9) or 12
strings with midget (push-in) lamps to this cord set.
3. Cord sets shall be plugged into a GFCI-protected receptacle.
4. If using an outdoor-use cord set for an extended period of time (greater than 90 days) consider hard wiring a permanent outdoor-use receptacle rated for
year-round use in the area that power is needed. Please contact a Licensed electrician for proper installation of permanent wiring.
5. After completion of installation, the connector shall be maintained a minimum of 6 inches above ground.
6. Position your Power Stake with Timer away from other light sources. If your Power Stake with Timer is too close to other light sources, or if the photocell is facing
a light source such as a porch light or streetlight, the photocell may turn off the fixture outside of the timed settings. If this happens, relocate the Power Stake
with Timer or eliminate those other light sources. Keep from light source, light can turn outlet off & keep unit and cord out of walkway.
SET THE CURRENT TIME
1. Press the CLOCK button
2. Press the DAY button to set the current day of the week
3. Press the HOUR button to set the current hour. Be sure to take note of AM / PM.
4. Press the MIN button to set the current minute
5. Press the ENTER button to finish setting the time.
Note: If you do not touch any buttons for 10 seconds, it will automatically save the time.
Continue to Digital Timer Mode or Photocell Timer mode below.
To have your lights turn on and off at specific times throughout the week, choose Digital
Timer mode.
To have your lights turn on every day at dusk and off at dawn or after 1-12 hours, choose
Photocell Timer Mode.
DIGITAL TIMER MODE
Note: Be sure to first set the current time as indicated above.
1. Press the Timer/Photocell button to switch between timer modes – to use the digital timer,
press the button until you see TIMER on screen.
2. Press the PROGRAM button once to set a program event. We will start with “Program 1
ON” – we will now set the “On” time for Program 1.
Note: Each program is an On and Off setting. For example, to have your lights turn on and
off the same time every day of the week, you only need to use Program 1.
3. Press the DAY button to set the day of the week for the lights to turn on. Keep pressing
the button until your choice appears. The choices are:
PHOTOCELL TIMER MODE
1. Press the Timer/Photocell button to switch between timer modes – to
use the Photocell Timer, press the button until you see below display
on screen.
2. Press the PROGRAM button to set the Off time:
OFF at Dawn – The timer will turn on at dusk and turn off at dawn. Hours
after Dusk – The timer will turn on at dusk and turn off a set time later
3. If you chose ”Hours after Dusk,” press the HOUR button to choose the
number of hours the timer should stay on, from 1 to 12 hours.
4. When finished setting the program, press ENTER. Note: If you do not
touch any buttons for 10 seconds, it will automatically save the
program.
OVERRIDING TIMER SETTINGS
The ON / OFF buttons override the current programmed events.
To override the current program (either ON or OFF), press the ON/OFF
button.
NOTE: If the timer is not in “Manual” mode, it will obey the next
programmed event. This allows the user to manually turn a light on and
allow the program to shut the light back off at a preset time.
REVIEWING PROGRAMMED EVENTS
In the current time display, press the PROGRAM button repeatedly to
check your settings.
When finished, pressing the ENTER button or leave the unit over 10
seconds to return the display to the time of day.
Resetting the Timer
In case of an operational failure of the timer, press the RESET button to
clear all settings and restart.
4. Press the HOUR button to set the current hour. Be sure to take note of AM / PM.
5. Press the MIN button to set the current minute
6. Press PROGRAM again to set “Program 1 OFF” and set the Off time using steps 3-5.
7. To set additional On/Off programs, repeat the steps above. You can set up to 7 On/Off
events.
8. When finished setting the program, press ENTER. Note: If you do not touch any
buttons for 10 seconds, it will automatically save the program.
SAVE THESE INSTRUCTIONS!
NOTE:
To set up Timer for the first time, plug in the timer for 10 minutes, then insert a
non-metallic sharp pointed object or opened tooth pick into the pin hole marked “Reset”
to clear all settings.
MO – Monday Only
TU – Tuesday Only
WE – Wednesday Only
TH – Thursday Only
SA-SU – Weekends
MO-SA – Monday through Saturday
MO-SU – Every Day
FR – Friday Only
SA – Saturday Only
SU – Sunday Only
MO-FR – Weekdays
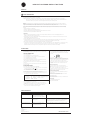
SPECIFICATIONS:
6 ft. (1.8 m) AWG 14/3 SJTW vinyl cord
Rating: 125V/15A/1875W, 60Hz
TROUBLESHOOTING
Problem Possible Cause
Lights do not turn on at dusk
Lights do not turn on, even
when timer is in “ON” position.
Lights are not in “ON” position, lights
are not functioning, or timer is not
receiving power.
Be sure that lights are functional by plugging them directly into the
outlet. Be sure that lights are in “ON” position if they have their own
switch. Be sure that timer is receiving power – the LED should light
up when plugged into an outlet and put in the “ON” position.
Lights are flashing (turning
on and off).
The timer is in Dusk to Dawn mode,
and the light from the plugged-in lights
is affecting the light sensor.
Move the lights away from the timer, or reposition the timer so that
it does not face the lights.
Timer is not in a good area for light
meter to function as there is too
much ambient light to detect darkness.
Move the timer to another location where there is no ambient light.
Corrective Action
15144
Manual Version 1
05/19/10
www.jascoproducts.com

1. 1 Centro digital de alimentación para exteriores
CENTRO DIGITAL DE ALIMENTACIÓN PARA
EXTERIORES PARA TRABAJO PESADO
CONTENIDO
INSTRUCCIONES:
INFORMACIÓN DE SEGURIDAD
ADVERTENCIA
Ignorar las precauciones puede ocasionar daños, un incendio o una descarga eléctrica mortal.
Los cambios o modificaciones a esta unidad que no estén expresamente aprobados por la parte responsable del cumplimiento podrían anular la autorización del usuario
para utilizar el equipo.
Este dispositivo cumple con la Sección 15 de las reglas de la FCC. El funcionamiento está sujeto a las siguientes dosL condiciones: (1) este dispositivo no
debe causar interferencia perjudicial, y (2) debe aceptarL cualquier interferencia recibida, incluida la interferencia que pudiese causar un funcionamiento no
deseado.
NOTA: Este equipo ha sido probado y se ha verificado que cumple con los límites para un dispositivo digital Clase B, conforme a la Sección 15 de las reglas de la
FCC. Estos límites están diseñados para proporcionar protección razonable contra interferencia perjudicial en una instalación residencial. Este equipo genera, utiliza y
puede irradiar energía de radiofrecuencia y, si no se instala y usa de acuerdo con las instrucciones, puede causar interferencia perjudicial a las comunicaciones de
radio.
Sin embargo, no se garantiza que no se producirán interferencias en una instalación en particular. Si este equipo genera interferencia perjudicial a la recepción de radio
o televisión, lo que se puede determinar apagando y encendiendo el equipo, se recomienda al usuario que intente corregir la interferencia con una o más de las
siguientes medidas:
1. Reorientar o reubicar la antena de recepción.
2. Aumentar la separación entre el equipo y el receptor.
3. Conectar el equipo en un tomacorriente de un circuito distinto del que necesita el receptor.
4. Solicitar ayuda al concesionario o a un técnico con experiencia en radio/TV.
PRECAUCIÓN:
1. Riesgo de incendio. No es adecuado para realizar una instalación permanente. Úselo solamente con un árbol de navidad u otros productos de iluminación de
temporada de 13 amperios en total como máximo.
2. Si usa un árbol de navidad o productos decorativos de iluminación que no tienen indicada la clasificación de amperios, no conecte al juego de cable más de 140
lámparas con base de rosca (C7 o C9) o 12 cadenas con lámparas tipo miniatura (a presión).
3. Los cables deben enchufarse en un tomacorriente con interruptor de circuito por falla a tierra (GFCI).
4. Si emplea un juego de cable apto para uso en exteriores durante un período prolongado (superior a 90 días), considere cablear de forma permanente un tomacorri
ente apto para uso en exteriores y durante todo el año en el área en que se necesita electricidad. Póngase en contacto con un electricista calificado para que
realice la instalación adecuada del cableado permanente.
5 .Después de la instalación, el conector debe mantenerse como mínimo a 15 cm del suelo.
6. Coloque la estaca eléctrica con temporizador alejada de otras fuentes de iluminación. Si la estaca eléctrica está demasiado cerca de otras fuentes de iluminación
o si la fotocélula apunta hacia una fuente de iluminación como una lámpara para porche o el alumbrado público, es posible que la fotocélula apague el ensamble
fuera de las configuraciones programadas. Si esto sucede, cambie la ubicación de la estaca eléctrica con temporizador o elimine dichas fuentes de iluminación.
Mantenga alejada de las fuentes de iluminación, ya que la salida puede apagarse, y mantenga la unidad y el cable alejados de los senderos.
¡CONSERVE ESTAS INSTRUCCIONES!
MO – Únicamente lunes
TU – Únicamente Martes
WE – Únicamente
Miércoles
TH – Únicamente Jueves
SA-SU – Fines de semana
MO-SA – De lunes a sábado
MO-SU – Todos los días
FR – Únicamente Viernes
SA – Únicamente Sábado
SU – Únicamente
Domingo
MO-FR – De lunes a
sábado
CONFIGURE LA HORA ACTUAL
1. Presione el botón CLOCK
2. Presione el botón DAY para configurar el día de la semana actual
3. Presione el botón HOUR para configurar la hora actual. Asegúrese de prestar atención a
AM/PM.
4. Presione el botón MIN para configurar los minutos actuales
5. Presione el botón ENTER para terminar de configurar la hora.
Nota: Si no toca ningún botón durante 10 segundos, la hora se guardará automáticamente.
Siga con el modo de temporizador digital o el modo de temporizador de fotocélula a
continuación.
Para que sus luces se enciendan y apaguen en horarios específicos a lo largo de la semana,
elija el modo Digital Timer (Temporizador digital).
Para que sus luces se enciendan todos los días al anochecer y se apaguen al amanecer o
después de 1 a 12 horas, elija el modo Photocell Timer (Temporizador de fotocélula).
MODO DE TEMPORIZADOR DIGITAL
Nota: Asegúrese de configurar primero la hora actual, como se indica anteriormente.
1. Presione el botón Timer/Photocell para alternar entre los modos de temporizador: para
usar el temporizador digital, presione el botón hasta que aparezca TIMER en la
pantalla.
2. Presione el botón PROGRAM una vez para configurar un programa de evento.
Comenzaremos con “Program 1 ON”: ahora configuraremos la hora de encendido para el
programa 1.
Nota: Cada programa es una configuración de encendido y apagado. Por ejemplo, para que
las luces se enciendan y se apaguen a la misma hora todos los días de la semana, sólo
necesita usar el programa 1.
3. Presione el botón DAY para configurar el día de la semana en que se encenderán las
luces. Siga presionando el botón hasta que aparezca su opción. Las opciones son:
4. Presione el botón HOUR para configurar la hora actual. Asegúrese de prestar atención a
AM/PM.
5. Presione el botón MIN para configurar los minutos actuales.
6. Vuelva a presionar PROGRAM para configurar “Program 1 OFF” y configure la hora de
apagado usando los pasos 3 a 5.
7. Repita los pasos anteriores para configurar programas adicionales de encendido/apagado.
Puede configurar hasta 7 eventos de encendido/apagado.
8. Cuando termine de configurar el programa, presione ENTER. Nota: Si no toca ningún
botón durante 10 segundos, el programa se guardará automáticamente.
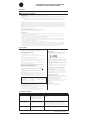
ESPECIFICACIONES:
Cable de vinilo de 1,8 m AWG 14/3 SJTW
Potencia de servicio: 125V/15A/1.875W, 60 Hz
NOTA:
Para configurar el temporizador por primera vez, enchufe el temporizador durante
10 minutos y luego inserte un no metálicos objeto puntiagudo o un palillo en el orificio indicado
con la palabra “Reset” (Restablecer) para borrar todas las configuraciones.
MODO DE TEMPORIZADOR DE
FOTOCÉLULA
1. Presione el botón Timer/Photocell para alternar entre los modos de
temporizador: para usar el temporizador de fotocélula, presione el botón
hasta que aparezca por debajo de la pantalla en la pantalla.
2. Presione el botón PROGRAM una vez para configurar la hora de
apagado:
OFF at Dawn (apagado al amanecer): el temporizador se encenderá al
anochecer y se apagará al amanecer. Hours after Dusk (horas después del
anochecer): el temporizador se encenderá al anochecer y se apagará
después del lapso de tiempo configurado
3. Si elige “Hours after Dusk”, presione el botón HOUR para elegir la
cantidad de horas que debe permanecer encendido el temporizador, de 1
a 12 horas.
4. Cuando termine de configurar el programa, presione ENTER. Nota: Si no
toca ningún botón durante 10 segundos, el programa se guardará
automáticamente.
ANULACIÓN DE LAS CONFIGURACIONES DEL TEMPORIZADOR
Los botones ON/OFF anulan los eventos programados actuales.
Para anular el programa actual (ya sea de ENCENDIDO o APAGADO),
presione el botón ON/OFF.
NOTA: Si el temporizador no está en el modo “Manual”, cumplirá el
siguiente evento programado. Esto le permite al usuario encender una luz
de manera manual y al programa volver a apagar la luz a una hora
preestablecida.
REVISIÓN DE EVENTOS PROGRAMADOS
En la pantalla de hora actual, presione varias veces el botón PROGRAM
para verificar sus configuraciones.
Cuando termine, presionando el botón ENTER o deje la unidad durante 10
segundos para retornar la pantalla a la hora del día.
Restablecimiento del temporizador
En caso de que el temporizador tenga una falla de funcionamiento, presione
el botón RESET para eliminar todas las configuraciones y volver a
comenzar.
SOLUCIÓN DE PROBLEMAS
Accíon correctivaCausa posibleProblema
Las luces no se encienden al
anochecer.
Las luces no se encienden, aun
cuando el temporizador está en
la posición de encendido.
Las luces no están en la posición de
encendido, las luces no funcionan o el
temporizador no recibe alimentación.
Asegúrese de que las luces funcionan enchufándolas directamente
al tomacorriente. Asegúrese de que las luces están en la posición de
encendido si tienen su propio interruptor. Asegúrese de que el
temporizador recibe alimentación: el LED debe encenderse cuando
se conecta en un tomacorriente y se coloca en la posición de encendido.
Las luces destellan (se
encienden y se apagan).
El temporizador está en el modo
anochecer-amanecer y la luz proveniente
de las luces enchufadas está afectando
el sensor de luz.
Aleje las luces del temporizador o reposicione el temporizador para
que no reciba las luces.
El temporizador no está ubicado en un
área adecuada en donde el medidor de
luz pueda funcionar, ya que hay mucha
luz del ambiente y no puede detectar
el anochecer.
Mueva el temporizador a otra ubicación en donde no haya luz
del ambiente.
-
 1
1
-
 2
2


GE HEAVY DUTY OUTDOOR DIGITAL STAKE TIMER Manual de usuario
- Categoría
- Temporizadores eléctricos
- Tipo
- Manual de usuario
en otros idiomas
Artículos relacionados
Otros documentos
-
 Utilitech TM-074 Instrucciones de operación
-
Defiant TM-016-A Manual de usuario
-
 Utilitech UTTNOCD2 Guía de instalación
-
Portfolio JEM1691A Guía de instalación
-
-
 Hampton Bay HD28906AGB Guía de instalación
-
Home Decorators Collection FEU1611LM Instrucciones de operación
-
 Utilitech SP-049 Manual de usuario
-
Prime TNCDTSTK6 Manual de usuario
-
Intermatic HB800 Series Installation And User Instructions Manual


