
1
User
Instruction
Manual
Blood Glucose Monitoring System
™
83-04758B

2
CAUTION:
Before using any product to test your blood sugar (blood glucose),
read all instructions and practice the test. Do all quality control checks
as directed and consult with a diabetes healthcare professional. These
recommendations apply to all blood glucose monitoring systems and
are supported by the American Association of Diabetes Educators, the
American Diabetes Association, the U.S. Food and Drug Administration,
and the Health Industry Manufacturers Association.

3
Introduction . . . . . . . . . . . . . . . . . . . . . . . . . . . . . . . . . . . . . . . . . .6
Intended Use . . . . . . . . . . . . . . . . . . . . . . . . . . . . . . . . . . . . . .7
Important Information ................................8
The ReliOn™ Prime System . . . . . . . . . . . . . . . . . . . . . . . . . . . . . .9
Understanding the ReliOn™ Prime Blood Glucose Meter ......10
Explanation of the Full Display Screen ..................11
ReliOn™ Prime Test Strips .............................12
Testing with ReliOn™ Prime Test Strips . . . . . . . . . . . . . . . . . . . .13
Important Test Strip Information .......................14
Changing the Battery ...............................15
Meter Set Up .....................................18
Setting the Time and Date ...........................18
Blood Glucose Testing .................................22
Obtaining a Drop of Blood ...........................22
Performing a Blood Glucose Test . . . . . . . . . . . . . . . . . . . . . . . . .24
TABLE OF CONTENTS

4
Alternate Site Testing (AST) . . . . . . . . . . . . . . . . . . . . . . . . . . . . .28
Important Information About AST. . . . . . . . . . . . . . . . . . . . . .28
Preparing to Test Your Blood Glucose From an Alternate Site 30
Performing a Blood Glucose Test From an Alternate Site ....31
Using Control Solution ................................36
Recommended Use of Control Solution .................37
Performing a Control Solution Test . . . . . . . . . . . . . . . . . . . . .38
Comparing Control Solution Results . . . . . . . . . . . . . . . . . . . .42
Downloading Test Results to a Computer ..................43
Understanding Test Results . . . . . . . . . . . . . . . . . . . . . . . . . . . . .44
Comparing Meter and Laboratory Results ...............44
Expected Blood Glucose Readings .....................47
High Blood Glucose Readings. . . . . . . . . . . . . . . . . . . . . . . . .47
Low Blood Glucose Readings . . . . . . . . . . . . . . . . . . . . . . . . .48
Diabetes Findings . . . . . . . . . . . . . . . . . . . . . . . . . . . . . . . . . .48
Meter Memory .......................................51

5
Marking Results in the Memory .......................51
Marking Control Solution Tests. . . . . . . . . . . . . . . . . . . . . . . .51
Marking Other Results. . . . . . . . . . . . . . . . . . . . . . . . . . . . . . .52
Recalling Results ...................................52
Display Screen Images. . . . . . . . . . . . . . . . . . . . . . . . . . . . . . . . .56
Caring For Your ReliOn™ Prime Blood Glucose Meter . . . . . . . . .62
Cleaning the Meter ................................62
Storage. . . . . . . . . . . . . . . . . . . . . . . . . . . . . . . . . . . . . . . . . .62
Specications. . . . . . . . . . . . . . . . . . . . . . . . . . . . . . . . . . . . . . . .64
Warnings, Precautions, and Limitations. . . . . . . . . . . . . . . . . . . .65
Warranty. ...........................................67

6
INTRODUCTION
Thank you for choosing the ReliOn™ Prime Blood Glucose Monitoring
System. Frequent blood glucose testing is important. It tells you how your
diabetes is affected by factors such as medication, diet, exercise, and stress
management. Blood glucose test results can also tell you if your diabetes
is changing in ways that affect your treatment plan. Always consult your
diabetes healthcare professional before making any changes. All of the
information needed to use the ReliOn™ Prime Blood Glucose Monitoring
System is included in this manual. Please read it thoroughly before using the
system. If you have any questions, call Customer Service at 855.776.0662.
Contact your healthcare professional with questions if you are unable to
reach Customer Service.

7
Intended Use
The ReliOn™ Prime Blood Glucose Monitoring System is intended for the
quantitative measurement of glucose in fresh capillary whole blood samples
drawn from the ngertips or palm. Testing is done outside the body (In Vitro
Diagnostic Use). It is indicated for use at home (over the counter [OTC]) by
persons with diabetes, or in clinical settings by healthcare professionals, as
an aid to monitor the effectiveness of diabetes control. It is not intended for
the diagnosis of or screening for Diabetes Mellitus, and is not intended for
use on neonates.

8
Important Information
• Test results below 70 mg/dL indicate low blood glucose (hypoglycemia).
• Test results above 240 mg/dL indicate high blood glucose (hyperglycemia).
• If results are below 70 mg/dL or above 240 mg/dL, repeat the test.
• If results continue to measure below 70 mg/dL or above 240 mg/dL consult
your diabetes healthcare professional immediately.
• If symptoms are not consistent with test results AND all the instructions
have been followed carefully, contact your diabetes healthcare professional.
• Before testing, it is important to wash hands with soap and warm water.
Dry hands thoroughly. If you use alcohol wipes to cleanse ngers, make
sure the area is dry before lancing nger. Unwashed hands or residual
alcohol may lead to inaccurate readings.
• Before testing, always make sure the meter is at operating temperature
between 50–104°F (10–40°C). Treat test results obtained outside the
optimum temperature range with caution.
• If the meter has been exposed to extreme temperatures, move the meter to
an area within operating range of 50–104°F (10–40°C).

9
The ReliOn™ Prime System Includes:
• ReliOn™ Prime Meter
• Carrying Case
• User Instruction Manual
• Other materials required but not provided:
• ReliOn™ Prime Test Strips
• Control Solution
• Lancing Device and/or Lancets
THE RELION™ PRIME SYSTEM

10
BACK
Battery Compartment
Cover
UNDERSTANDING THE RELION™ PRIME
BLOOD GLUCOSE METER
FRONT
Display Screen
Back Button
On/Off Button
Forward Button
Test Strip Port
Data
Connection
Port

11
Explanation of the Full Display Screen
Time
Date
Average Test
Reading
Control
Solution Test
Low
Battery
Unit of
Measurement
Temperature
Warning
Test Strip
Apply Blood
Insert/Remove
Test Strip
Memory Mode
Error Code
Result Warning
Main Display:
Test Countdown
Test Results
Error Codes
If any part of the display screen is missing when the meter is turned on call
Customer Service at 855.776.0662.

12
These capillary action test strips require
only 0.5 microliter (µL) of blood and provide
an end-ll sample application tip for easy
blood application. The ReliOn™ Prime Blood
Glucose Monitoring System measures the
amount of glucose (sugar) in fresh capillary
whole blood. When a drop of blood is added
to the sample application tip, the sample is
drawn into the test strip reaction site. The
glucose in the blood reacts with the enzyme
on the test strip. This reaction produces
a current, proportional to the amount of
glucose in the blood. The meter detects the
current and converts it into a blood glucose
reading.
TEST STRIP
Reaction
Site
Test Strip
Contact Bars
Sample Application Tip
(apply blood to end of test strip,
and capillary action will pull
blood to reaction site quickly
and easily)
RELION™ PRIME TEST STRIPS

13
Important Test Strip Information
• Store the test strip bottle in a cool, dry place between 39–86°F (4–30°C).
• Keep away from direct sunlight and heat.
• Do not refrigerate or freeze.
• Do not store or transfer the test strips outside the original bottle.
• As soon as you have removed a test strip, replace the cap securely on
the bottle.
• Use test strips within 90 days (3 months) of opening and not beyond the
expiration date (
).
The ReliOn™ Prime Blood Glucose Monitoring System works
with the ReliOn™ Prime Blood Glucose Test Strips.
TESTING WITH RELION™ PRIME TEST STRIPS

14
Important Test Strip Information
• Write the date of opening on the bottle label to remind you to discard the
strips after 90 days (3 months).
• Do not bend, cut, or alter a test strip.
• Do not reuse a test strip.
• Use only ReliOn™ Prime test strips with the ReliOn™ Prime meter.
• Ensure your hands are clean and dry before handling test strips.

15
NOTE:
Changing the battery should only take a few seconds. If the battery is
changed within 30 seconds, the meter memory is not affected. You will not
lose any past test results and the settings are not affected.
However, if it takes longer than 30 seconds to change the battery, or if the
battery is dead before changing it, the time and date settings may need to
be reset.
The rst time the meter is turned on after changing the battery, you may
see a display screen message (E00). This means you should check that the
time and date are correct. See pages 18–21 for detailed instructions on
changing the time and date.
Changing the Battery
The ReliOn™ Prime blood glucose meter has a CR2032 battery installed.

16
When the battery power is getting low, your meter shows . You have
enough power for about 100 tests before you need to replace the battery.
If the is ashing, there is only enough power for about 20 tests. Replace
the battery as soon as possible.
When the battery has run out, the meter will not work.
CR2032
3V
+
WARNING:
Keep all batteries out of children’s reach. If a battery is swallowed, consult a
doctor immediately.

17
How to Change the Battery
Step 1
Turn the meter off. The battery cover is on the back of the meter.
Step 2
Pull the battery cover up with your nger or ngernail. Remove battery cover.
Step 3
Remove the old battery. If necessary, turn the meter over and tap it gently
against the palm of your hand until the battery falls out. Avoid the use of
sharp objects that may damage the meter.
Step 4
Insert the new battery. The “+” on the battery should be facing up.
Step 5
Replace the battery cover.

18
Meter Setup
Before using the ReliOn™ Prime meter for the rst time, you must set the
time and date. You can choose between the 12-hour format (1–12 o’clock
with am or pm) and the Military 24-hour format (0–23). The date format can
either be displayed as month/day (U.S.A. format) or day/month (International
format). Do not perform a blood glucose test until you have set the meter
correctly.
Setting the Time and Date
Step 1:
Turn on the meter
Press the On/Off button to turn the meter on. The full screen appears briey.
If any part of the display screen is missing (see page 11), call Customer
Service at 855.776.0662. The meter then displays the time, date, unit of
measurement, and the insert test strip symbol.
Step 2:
Enter setup mode
Press and hold down the On/Off button for more than 2 seconds to enter the
setup mode.

19
Step 3:
Set the time format
The time can be displayed in either 24-hour format
or 12-hour format with a.m. and p.m. The meter
displays the current time format. To change format,
press either the Back or Forward button. Press the
On/Off button to select the time format. The date
format then appears on the display.
Step 4:
Set the date format
The date format can either be displayed as month/
day (01/31) or day/month (31/01). The meter displays
the current format. To change format, press either
the Back or Forward button. Press the On/Off button
to select the date format. The hour setting then
ashes on the display.
Month/Day
Format
Day/Month
Format

20
Step 5:
Set the hour
Press and release the Back or Forward button to change the
hour. Hold the Back or Forward button down to scroll through
quickly. When the correct hour is displayed, press the On/Off
button. The minute setting then ashes on the display.
Step 6:
Set the minute
Press and release the Back or Forward button until the correct
minute appears. Hold the Back or Forward button down to
scroll through quickly. When the correct minute is displayed,
press the On/Off button. The month setting then ashes on
the display.
Step 7:
Set the month
(If day/month format is selected, then Step 7 will set day)
Press and release the Back or Forward button until the correct
month appears. Hold the Back or Forward button down to
scroll through quickly. When the correct month is displayed,
press the On/Off button. The day setting then ashes on
the display.
Hour ashing
Minute ashing
Month ashing

21
NOTE:
Pressing the On/Off button for more than 2 seconds at any stage saves
the time and date and exits the set-up mode. The meter automatically
shuts off after 2 minutes if no buttons are pressed. Settings stored up
to that point are saved.
Step 8:
Set the day
(If day/month format is selected, then Step 8 will set
month) Press and release the Back or Forward button until
the correct day appears. Hold the Back or Forward button
down to scroll through quickly. When the correct day is
displayed, press the On/Off button. The year setting then
ashes on the display.
Step 9:
Set the year
Press and release the Back or Forward button until the
correct year appears. Hold the Back or Forward button
down to scroll through quickly. When the correct year is
displayed, press the On/Off button for two seconds to exit
setup mode.
Day ashing
Year ashing

22
BLOOD GLUCOSE TESTING
Obtaining a Drop of Blood
Step 1
Wash hands with soap and warm water. Dry hands
thoroughly. If you use alcohol wipes to cleanse ngers,
make sure the area is dry before lancing nger.
Unwashed hands or residual alcohol may lead to
inaccurate readings.
Step 2
Let the arm hang down for 10 to 15 seconds. Holding the
arm below the heart and massaging the wrist, palm and
nger makes it easier to obtain a blood drop.
Step 3
Choose a site on the side of a ngertip to minimize pain.

23
NOTE:
• Do not use the lancet if the cap is missing or damaged.
• Lancing devices, lancets, and meters are for single-patient use only
and should never be shared with another person, even a family
member.
• This lancing device should not be used for multiple patient testing by
healthcare providers or at healthcare provider sites.
• All parts of the kit are considered biohazardous and can potentially
transmit infectious diseases even after you have performed cleaning
and disinfection.
Step 4
Press the depth adjustment cap to the side of the
ngertip. Push the release button.
Step 5
Set the lancing device aside and wait a few seconds for
a blood drop to form. Keeping the hand warm, lowering
the hand to waist level, and gently massaging your wrist, palm or the base
of the nger helps the ow of blood. Use a different site each time you test
to help prevent soreness and calluses.

24
NOTE:
For Instructions on Alternate Site Testing, refer
to pages 28-35.
Step 1
Insert a ReliOn™ Prime test strip
into the meter. Insert the contact bars
into the test strip port with the reaction
site facing up.
Sample Application Tip
Reaction Site
Contact Bars
Test Strip Port
When the test strip is inserted, the meter turns on
automatically. If any part of the display screen is missing
(see page 11), call Customer Service at 855.776.0662.
PERFORMING A BLOOD GLUCOSE TEST

25
The test strip and ashing blood drop tells you the meter
is ready for you to apply a drop of blood to the sample
application tip at the end of the test strip.
Step 2
Lance your nger using the lancing device. Touch the
sample application tip at the end of the test strip to the
blood drop on your nger. The capillary action will pull
the blood to the reaction site.
DO NOT add blood to the top of the test strip. You may
receive an abnormal (high) result.
‘Apply Blood’ symbol
ashing
INCORRECT
CORRECT

26
IMPORTANT:
• The meter will start to count down showing a ashing dash when it
detects blood that has been applied. Discard the test strip if the meter
does not start to count down after a blood drop is applied.
• The minimum sample volume is 0.5 µL. Smaller samples may not start
the meter or can start the meter count down and provide an “E13” error
message. Ensure blood completely lls reaction site.
Enough
Blood
Not
Enough
Blood
Too
Much
Blood

27
Displaying the Result
The meter will count down showing a ashing dash.
The result is displayed in 7 seconds.
Step 3
Always record your results in your self-testing logbook
along with other information such as insulin dosage, diet,
and exercise. The result is automatically stored in memory
with the time and date.
Step 4
A lancet should be used once. After use, put the protective cap back on and
remove the lancet from the lancing device. Dispose of the lancet in a safe
manner as not to cause accidental injury. Remove the used test strip and
dispose of it carefully. The meter shuts off automatically when the test strip
is removed.

28
Important Information About AST
Sites other than your ngertip may have fewer nerve endings so obtaining a
blood sample from these sites may be less painful. The technique for alternate
site testing (AST) is different from ngertip testing. Blood glucose results from
sites other than your ngertip could be signicantly different due to blood
glucose levels changing rapidly after a meal, insulin, or exercise.
Consult with your diabetes healthcare professional prior to testing from
a site other than your ngertips.
Results obtained from sites other than the ngertip may differ signicantly
as is the case with all blood glucose monitoring systems. Rapidly changing
results are likely to occur after eating. Insulin dosing and physical activity are
shown in the ngertip more quickly than in alternate sites.
On average, blood taken from the palm may give results as much as
5% higher than blood taken from the ngertip.
ALTERNATE SITE TESTING (AST)

29
Consider Alternate Site Testing When:
• Testing before a meal
• You are in a fasting state
• Two hours have passed since a meal
• Two hours have passed since insulin dosing
• Two hours have passed since physical activity
Use Fingertip When Testing:
• Within two hours after a meal
• Within two hours after insulin dosing
• Within two hours after physical activity
• If you have a history of hypoglycemia, are experiencing low blood sugar, or
suffer from hypoglycemic unawareness (you cannot tell when you have low
blood glucose)
• To conrm your blood glucose level if your AST result is not consistent with
how you feel
• During times of stress or illness

30
Ask your diabetes healthcare professional about recommended testing
procedures before operating machinery or driving a car, as ngertip testing is
usually the preferred method of testing under these circumstances.
If bruising occurs, you may choose to lance a ngertip instead.
Preparing to Test Your Blood Glucose From an
Alternate Site
Choose a Site: Select a soft, eshy area on the
palm that is free of visible veins and moles and away from
bone. Wash the area with warm, soapy water. Rinse and
dry completely. If you use alcohol wipes to cleanse the
site, make sure the area is dry before lancing the site.

31
Performing a Blood Glucose Test From an Alternate Site
Step 1
Attach clear cap for AST to lancing
device. Insert lancet and cock
lancing device.
Step 2
a) Insert a test strip into the meter.
Insert contact bars into test strip
port with reaction site facing up.
When the test strip is inserted,
the meter turns on automatically.
Make sure all symbols appear
on the screen (see page 11).
Sample
Application Tip
Reaction Site
Contact Bars
Test Strip Port
Insert into
meter this
way
IMPORTANT!

32
b) Wait until the test strip with ashing blood drop
appears. You now have 2 minutes to apply blood
drop before meter shuts off.
Step 3
a) Vigorously rub the selected area for 5 to 10
seconds until it starts to feel warm to the touch.
b) Firmly hold the cocked lancing device against
the clean skin for 5 to 10 seconds.
c) Press the release button on the lancing device
to lance the skin. Continue to hold the lancing
device rmly against the skin until a 0.5 µL blood
drop forms
d) Once a large enough drop of blood has formed,
remove the lancing device.

33
IMPORTANT:
• Was the sample a deep red color and free of watery uid?
• Was the drop large enough (at least 0.5 µL)?
• Did the reaction site ll with enough blood all at once?
IF NOT, REPEAT TEST.
Step 4
Pick the meter up. Touch the end of the test strip
to the blood sample until the reaction site is full.
Immediately remove the meter and test strip from the
blood drop.

34
Step 5
The meter will count down, showing a ashing dash and
display result in 7 seconds.
CONSIDER YOUR RESULT.
REPEAT ALTERNATE SITE TEST:
• IF the blood sample appeared to be diluted with clear uid
• IF you did not vigorously rub the test site
• IF the blood drop was not large enough to ll the reaction site
• IF the test was accidentally marked as a “Control” result
• IF your result was not consistent with how you feel
Any of the above situations can lead to an inaccurate test result.
Enough
Blood
Not
Enough
Blood
Too
Much
Blood
If the repeated alternate site result is still not consistent with how you feel,
conrm your blood glucose level with ngertip testing.

35
Step 6
Always record your results in your self-testing logbook along with other
information such as insulin dosage, diet, and exercise. The result is
automatically stored in memory with the time and date. If you do not have a
logbook, call 855.776.0662, or visit ReliOn.com to obtain a free copy.
Step 7
Remove the test strip and dispose of it carefully. A lancet should be used
once. After use, put protective cap back on and remove lancet from lancing
device. Dispose lancet in a safe manner as not to cause injury. The meter
shuts off automatically when the test strip is removed.

36
Use control solution to check that the meter and test strips are working
correctly. It is important that you carry out this simple check regularly.
Control solution contains a known amount of glucose that reacts with
the ReliOn™ Prime test strip. Control Solutions are available in two levels:
Normal (Level 1) and High (Level 2).
Compare the control solution test results with the range printed on the test
strip bottle label.
If you do not have control solution, call 855.776.0662, or visit ReliOn.com to
obtain your free bottle.
USING CONTROL SOLUTION

37
It is recommended to use Control Solution:
• When you open a new bottle of test strips.
• Whenever you suspect the meter or test strips may not be functioning
properly.
• If test results appear to be abnormally high or low or are not consistent
with clinical symptoms.
• If the test strip bottle has been left open or has been exposed to light,
temperatures below 39°F (4°C) or above 86°F (30°C), or humidity levels
above 80%.
• To check your technique.
• When the ReliOn™ Prime meter has been dropped or stored below freezing
or above 122°F (50°C).
• Each time the batteries are changed.

38
Performing a Control Solution Test
Before performing a control solution test, always check the expiration date
(
) of the control solution. Do not use control solution if it is past the
expiration date or if the solution has not been stored correctly. When you
open a new bottle of control solution, always write the date of opening on
the control solution label. As soon as you have used the control solution, put
the cap back on the bottle. Always use the control solution within 90 days
(3 months) of rst opening.

39
Step 1
Insert a ReliOn™ Prime test strip into the test
strip port of the meter with contact bars facing
up. The meter turns on automatically.
The full screen appears briey. If any part of
the display screen is missing (see page 11), call
Customer Service at 855.776.0662. The screen
then displays the test strip symbol and ashing
blood drop.
Contact
Bars
Test Strip
Port
Reaction Site
Sample
Application Tip

40
Step 2
You must press the Back or Forward button
BEFORE performing control solution test.
Hold the Back or Forward button until
appears in the upper right corner of the screen.
Verify that
remains displayed on the screen.
If you do not do this, the control solution result
will NOT be valid.
will prompt you to add control solution.
Step 3
Mix control solution by gently inverting control
solution bottle several times. Remove the cap
from the control solution bottle. Place cap on at
surface. Squeeze the bottle and discard the rst
drop. Apply the second drop to the top of the cap.

41
NOTE:
Dye added to control solution may stain surfaces or
fabric. Use with care.
Step 5
Compare the result with the range printed on
the test strip bottle you are using. Values may
vary from bottle to bottle. Verify that the result is
within range of the control solution level that you
are using. If the result falls within the range on
the bottle, the meter is working correctly.
Step 6
Remove the test strip. The meter shuts off automatically when the test
strip is removed.
Dispose of the test strip immediately.
06146A
2016-12
80-120
200-300
Control Solution Range (mg/dL)
(Rango de la solución de control)
Level 1:
Level 2:
Step 4
Bring meter and test strip to the drop. Test strip will draw up the
solution. The meter will show result in 7 seconds.

42
Comparing Control Solution Results
If the result is outside the range printed on the test strip bottle, repeat the test.
One or more of the following may have caused an out-of-range result:
• The meter was not placed in control solution mode before adding control
solution
• The control solution has expired or has been contaminated
• The control solution was stored below 35°F (2°C) or above 86°F (30°C)
• First drop of control solution was not discarded
• The test strip was not stored correctly
• The test strip was used after the expiration date of the bottle
• The test strip bottle was open for more than 90 days (3 months)
• The ReliOn™ Prime meter has been damaged or has malfunctioned
• Contamination due to the tip of the control solution bottle touching the
test strip
Repeat the test, carefully following instructions, using control solution mode
with new control solution or a new test strip, as appropriate. Compare the
result with the range printed on the test strip bottle you are using.

43
DOWNLOADING TEST RESULTS TO A COMPUTER
We offer a diabetes management software system to help you download
your test results to a computer. For more information on the diabetes
management software, call Customer Service at 855.776.0662.
NOTE:
If your control solution result continues to fall outside the required
range, the system may not be working correctly. DO NOT USE the
system to test your blood. If you are unable to resolve the problem, call
Customer Service at 855.776.0662.

44
NOTE:
• The ReliOn™ Prime meter is designed to give results at temperatures
between 41–113°F (5–45°C) and relative humidity (non-condensing)
of 20–80%.
• Before testing, always make sure the meter is at operating temperature
between 50–104°F (10–40°C). Treat test results obtained outside the
optimum temperature range with caution.
• If the meter has been exposed to extreme temperatures, move the meter
to an area within operating range of 50–104°F (10–40°C).
Comparing Meter and Laboratory Results
Your ReliOn™ Prime blood glucose meter is referenced to fresh plasma
blood measurement. This was performed in a clinical laboratory with
glucose standard calibration to the NIST (National Institute of Science and
Technology, Gaithersburg, MD, USA). The results you get from your meter
may differ from the tightly controlled clinical laboratory result. This is due to
normal variation. To make an accurate comparison between the meter and
laboratory results, follow the guidelines that follow.
UNDERSTANDING TEST RESULTS

45
Before You Compare
Perform a control solution test to make sure your meter and test strips are
working correctly. Wait at least 2 hours after a meal or drink (other than
water) before doing comparison blood tests. Fasting is essential if venous
blood is required for the reference analyzer.
When at the Laboratory
The capillary samples for both tests must be taken and tested within 15
minutes of each other. The sample must be collected with anticoagulant
appropriate to the laboratory analyzer. The recommended technique should
be followed. Analysis should be performed following the manufacturer’s
guidelines.
ALWAYS wash hands in warm, soapy water. Rinse and dry them thoroughly
before testing.
ALWAYS use fresh capillary whole blood on meter tests.

46
You may still experience a difference from the laboratory result because
blood glucose levels can change over short periods. This can be for a variety
of reasons, such as food, exercise, medication, hematocrit, stress, or loss of
body uids.
Data analysis should be performed using a clinically acceptable method.
Circulating blood glucose uctuates naturally over time. Test results can vary
over time and can be affected by several factors. Some of these include,
but are not limited to, the following: (1) time of day the test was performed;
(2) food eaten; (3) activities performed; (4) insulin and other medications
taken. If your result does not seem correct after testing your blood, repeat
the test. If abnormally high or low readings persist, contact your healthcare
professional.

47
Expected Blood Glucose Readings
Expected blood glucose levels for people without diabetes:
1,2
High Blood Glucose Readings
If your blood glucose is above 600 mg/dL, you will receive a “Hi.” Repeat
the test with a new test strip. If this message shows again, contact your
healthcare professional immediately!
Contact your physician for advice if test results are very high
3
(above
240 mg/dL) and/or you have symptoms of high blood glucose. These
symptoms include dry mouth, thirst, frequent urination, nausea, vomiting,
blurred vision, sleepiness, or abdominal pain. Symptoms will vary from
person to person. You may have one or all of these symptoms.
mg/dL
Fasting 70–110 mg/dL
2 hours after meals 70–140 mg/dL

48
Low Blood Glucose Readings
If your blood glucose is below 20 mg/dL, you will receive a “Lo.” Repeat
the test with a new test strip. If this message shows again, contact your
healthcare professional immediately.
Contact your physician for advice if test results are very low
4
(below 70 mg/dL)
and/or you have symptoms of low blood glucose. Symptoms of low blood
glucose include sweating, shakiness, trembling, blurred vision, hunger,
headache, confusion, rapid heartbeat, or tingling or numbness around the
mouth or ngertips. Symptoms will vary from person to person. You may
have one or all of these symptoms.
Diabetes Findings
In 1993, the National Institute of Health concluded an extensive long-
term study of people with Type 1 diabetes. This study, called the Diabetes
Control and Complications Trial (DCCT), found that by keeping your blood
glucose close to the levels of people without diabetes you can reduce the
risk of complications involving the eyes, kidneys, and nervous system by
approximately 60%
5
.

49
What This Means for You
Frequent blood glucose testing is the best means you have for keeping
track of how well you are doing with the factors that affect your diabetes-
medication, diet, exercise, and stress management. Blood glucose test
results can also tell you whether your diabetes is changing in ways that might
require an adjustment to your treatment plan. Always consult your healthcare
professional before making any changes in managing your diabetes.
Frequency of Testing
How often you need to test your blood glucose will vary according to your
age, the type of diabetes you have, the medications you are taking, and your
physical and emotional health. Your healthcare professional will guide you.
After deciding when and how often you should test, it is important that you
make testing part of your routine.

50
References
1
“Denition and diagnosis of diabetes mellitus and intermediate hyperglycaemia” World Health Organization, 2006
2
Diabetes Care, vol. 33 Jan;1 S82-86, 2010
3
Krall, L.P. and Beaser R.S.: Joslin Diabetes Manual. Philadelphia: Lea and Fibiger (1989), 261–263.
4
Kahn, R. and Weir, G.: Joslin’s Diabetes Mellitus. Philadelphia: Lea and Fibiger (1994), 489.
5
American Diabetes Association position statement on the Diabetes Control and Complications Trial (1993).
Recommendations for better diabetes control
• Follow the advice of your healthcare professional.
• Follow the exercise and meal plans recommended by your healthcare
professional.
• Take insulin or diabetes medication at your scheduled times.
• Keep in touch with your emotional and physical condition.
• Stress or illness can affect diabetes.
• Watch for symptoms of hypoglycemia (low blood glucose) and
hyperglycemia (high blood glucose).
• Always record your test results in a logbook. A logbook assists you in
keeping a record of your blood glucose results, along with information on
your food intake, exercise, and medication. If you do not have a logbook,
call 855.776.0662, or visit ReliOn.com to obtain a free copy.
• Review your logbook of test results with your healthcare professional
regularly.

51
Marking Results in the Memory
You can mark results in the meter memory in two ways.
Marking Control Solution Tests
You must mark results with the control bottle symbol . Insert test strip into
the meter. Hold the Back or Forward button until
appears in the upper right
corner of the screen. Do this BEFORE performing a control solution test. If
you do not mark control solution tests before applying control solution to the
test strip, the results may not be accurate and control solution test results
will be included in your test result averages.
The meter does not use results marked
when it calculates the 14- and
30-day average. This ensures that your 14- and 30-day average includes only
results from testing your own blood.
To mark a result
, press the Back or Forward button BEFORE testing with
control solution. See page 38 for detailed instructions on testing with control
solution.
METER MEMORY

52
Marking Other Results
You can also mark results with an when you do NOT want to include the
result in your 14- and 30-day average. For example, if someone else used
your meter, or if you believe the test result is incorrect because you applied
blood to the test strip incorrectly, use the exclamation mark to ensure that
your 14- and 30-day average includes only those results from testing your
own blood that you want included in your average. To mark a result with
,
press the Back or Forward button AFTER the meter displays the test result.
Recalling Results
Step 1
Press the On/Off button to turn on the meter.
Then press the Back or Forward button.
Do not insert a test strip to turn on the meter.
is displayed when the memory mode is
entered. The meter displays the most recent test
result stored in the memory.

53
Step 2
Press the Back or Forward button to display the
average of tests over the last 14 days. This can include
1 to 250 results, depending on how frequently you
test. The number at the top (20n) shows the number
of tests that have produced the average.
is displayed when the average is shown.
Step 3
Press the Back or Forward button again to display the
30-day average. The greater the frequency of testing
the higher this number will be.
is displayed when the average is shown.
If no results are stored, or you are using the meter for
the rst time, the meter will display 3 bars.
Displaying the
average (14 day)
Displaying the
average (30 day)
No results stored

54
If a test has not been performed in the last 14 days the
meter will display the 14-day average screen with 3 bars.
This means there are no results stored to produce the
average. If a test has not been performed in the last 30 days
the meter will display the 30-day average screen with 3 bars.
Step 4
Press the Back and Forward buttons to recall other results
stored in the memory. Pressing the Forward button after
the average displays the oldest test in memory. Pressing
the Back button after the average displays the second most
recent test in memory.
The meter displays the time each test was recorded in the
upper left corner. The date of the test appears below the
time.

55
Results marked with when the test was performed are not
included in the average. The marked results can be seen when
you scroll through the results saved in the memory.
The memory mode also displays
if the result was marked
before using control solution. These results are not included
in the 14- and 30-day average.
If the thermometer symbol is ashing when you perform a
test, the thermometer symbol will be displayed in the memory
with the result. These results will not be included in the meter
averages.
Step 5
Press the On/Off button to return to the user mode. If you are not
going to test, press the On/Off button again to shut off the meter.
NOTE:
Results that appear as “LO” are included as 20 mg/dL in the glucose averages.
Results that appear “HI” are included as 600 mg/dL in the glucose averages.

56
A list of all display screen messages is included below.
If you have any questions after reading these messages, or if the meter
displays a message not listed here, call Customer Service at 855.776.0662.
If the display screen shows
, you should be able to clear the error message
yourself. Do not send your meter to your local store without authorization
from a company representative.
Your blood glucose level is less than 20 mg/dL. Repeat the
test using a new test strip. If this message appears again,
contact your healthcare professional immediately.
Your blood glucose level is more than 600 mg/dL. Repeat
the test using a new test strip. If this message appears
again, contact your healthcare professional immediately.
DISPLAY SCREEN MESSAGES

57
The battery has been replaced.
Check that the time and date are set correctly.
A used test strip has been inserted or the meter is
having difculty reading the test strip.
Repeat the test with a new test strip.
The battery power is getting low.
There is enough power for approximately 100 tests
before the battery needs to be replaced.

58
The battery power is low.
There is only enough power for about 20 more
tests. Replace with a new CR2032 battery as soon
as possible.
The battery power is too low for testing.
Replace with a new CR2032 battery.

59
Thermometer ashing.
The meter is outside the optimum temperature range of
50–104°F (10–40°C). Treat test results obtained where
the thermometer is ashing with caution. The ashing
thermometer will be displayed on all screens during
glucose testing until the meter has reached acceptable
temperature. Readings obtained with the ashing
thermometer will show a thermometer when results are
recalled in memory.
• Before testing, always make sure the meter is at operating temperature
between 50-104°F (10-40°C). Treat test results obtained outside the
optimum temperature range with caution.
• If the meter has been exposed to extreme temperatures, move the meter to
an area within operating range of 50-104°F (10-40°C).

60
Thermometer symbol - E6.
Temperature outside of acceptable range of 41–113°F
(5–45°C). You will not obtain a reading. Allow the meter
to warm up or cool down slowly to between 50–104°F
(10–40°C) or at least to 41–113°F (5–45°C).
• Before testing, always make sure the meter is at operating temperature
between 50–104°F (10–40°C). Treat test results obtained outside the
optimum temperature range with caution.
• If the meter has been exposed to extreme temperatures, move the meter to
an area within operating range of 50–104°F (10–40°C).

61
Corrupted memory.
Call Customer Service at 855.776.0662.
Not enough blood was added to the test strip.
Retest with new test strip. Apply at least 0.5 µL of
blood to sample application tip.

62
Cleaning the Meter
The ReliOn™ Prime blood glucose meter is a precise instrument. Please
handle it with care. Clean the outside of the meter with a damp cloth
only. Dirt, dust, blood, control solution, or water entering the meter could
cause damage. Your ReliOn™ Prime blood glucose meter should not need
decontamination as no blood or control solution should come into contact
with the meter if the instructions are followed correctly.
Storage
The ReliOn™ Prime blood glucose meter is designed to be stored within a
32–122°F (0–50°C) temperature range.
• Do not leave your meter in extremely hot or cold places such as near a heat
source (radiator) or in a car in very hot or cold weather.
CARING FOR YOUR RELION™ PRIME
BLOOD GLUCOSE METER

63
• Do not store or use your meter or test strips where they may be exposed to
high humidity, such as in a bathroom or kitchen.
• Never hold the meter or test strips under running water.
• Do not use or store your meter on or near a strong electro-magnetic eld
such as a microwave oven, stereo ampliers, or a mobile phone.
• Do not store your meter or test strips near bleach or cleaners that contain
bleach.

64
TEST STRIPS: RELION™ PRIME BLOOD GLUCOSE TEST STRIPS
RESULT RANGE: 20–600 MG/DL
CALIBRATION: PLASMA REFERENCED
SAMPLE SIZE: MINIMUM 0.5 µL
BLOOD SOURCE: CAPILLARY WHOLE BLOOD
HEMATOCRIT RANGE: 33–52%
TEST TIME: 7 SECONDS
GLUCOSE UNITS: MG/DL
ASSAY METHOD: BIOSENSOR, GLUCOSE OXIDASE (
ASPERGILLUS NIGER
SOURCED)
POWER SOURCE: SINGLE REPLACEMENT 3V (CR2032) BATTERY
BATTERY LIFE: MORE THAN 2,000 TESTS AT 4 TESTS PER DAY
DISPLAY TYPE: LIQUID CRYSTAL DISPLAY (LCD)
MEMORY: 250 RESULTS WITH 14- AND 30-DAY AVERAGING
AUTOMATIC SHUT-OFF: 2 MINUTES AFTER LAST USER ACTION
SIZE: APPROX. 3.3" X 2.2" X 0.6" (83.5 MM X 55.5 MM X 16 MM)
WEIGHT: APPROX. 1.48 OZ. (42 G)
OPTIMUM OPERATING RANGES: 50–104°F (10–40°C)
RELATIVE HUMIDITY: 20–80%
ALTITUDE: 10,000 FT. (3,048 METERS)
SPECIFICATIONS

65
• The ReliOn™ Prime Blood Glucose Monitoring System is not designed to
substitute for pathology laboratory equipment and should not be used for
the diagnosis of diabetes.
• Severe dehydration (excessive water loss) may cause false low results. If
you believe you are suffering from dehydration, consult your healthcare
professional immediately.
• A red blood cell count (hematocrit) that is very high (above 52%) can give
abnormally low results. A very low hematocrit level (below 33%) can give
abnormally high results.
• Inaccurate results may occur in severely hypotensive individuals or patients
in shock.
• Inaccurate low results may occur for individuals experiencing a
hyperglycemic-hyperosmolar state, with or without ketosis.
• Patients undergoing oxygen therapy may yield false results.
• Do not use to test newborns. The system has not been validated for
neonatal use.
WARNINGS, PRECAUTIONS, AND LIMITATIONS

66
• Do not use the ReliOn™ Prime system at altitudes in excess of 10,000 ft
(3,048 m).
• Triglycerides up to 3,300 mg/dL do not signicantly affect test results.
However, glucose values in specimens beyond this triglycerides level
should be interpreted with caution.
• Metabolites of icodextrin (maltose, maltotriose, and maltotetraose) do not
affect test results.
• Use only fresh capillary blood. Do not use serum or plasma or venous
whole blood.
IMPORTANT:
Low or high blood glucose readings can indicate a potentially serious
medical condition. If your blood glucose reading is unusually low or high,
or you do not feel the way your readings indicate, repeat the test using a
new test strip. If your result is still not consistent with your symptoms or if
your blood glucose result is less than 60 mg/dL or higher than 240 mg/dL,
contact your diabetes healthcare professional for advice.

67
You are a valued ReliOn™ customer of. It is important to us that you are
completely satised with your blood glucose meter.
ReliOn™ warrants that your meter will be free from defects in materials and
workmanship for a period of ve years from the date of the original purchase.
If during this time the meter does not work properly because of a defect
in materials or workmanship, ReliOn™ agrees to replace or repair, free of
charge any and all parts proven to be defective and subject to warranty.
This warranty is in lieu of all other warranties, expressed or implied, including
any implied warranty of merchantability or tness for any purpose, other than
stated herein.
This warranty does not apply to the performance of the ReliOn™ Prime meter
that has been damaged by accident or has been altered, misused, tampered
with, or abused in any way. This warranty only applies to the original
purchaser of the meter and/or its agents.
WARRANTY

68
P/N 7957-05
Rev 12/15
RETURNS
You must contact Customer Service at 855.776.0662 before returning your
meter. You will be instructed how to return the meter. Returned meters
without this authorization will not be accepted.
Distributed by:
Wal-Mart Stores, Inc.
Bentonville, AR 72716
855.776.0662
ReliOn.com

Manual de
instrucciones
para el usuario
Sistema de monitoreo de glucosa en sangre
83-04758B
™

2
PRECAUCIÓN:
Antes de usar cualquier producto para hacerse un análisis deazúcar en
sangre (glucosa en sangre, o glucemia), lea todas las instrucciones y
practique la prueba. Lleve a cabo todas las vericaciones de control de
calidad según las indicaciones y consulte con un profesional de atención
diabetológica. Estas recomendaciones se aplican a todos los sistemas
de monitoreo de glucosa en sangre y cuentan con el respaldo de las
siguientes organizaciones: American Association of Diabetes Educators
(Asociación Americana de Educadores en Diabetes), American Diabetes
Association (Asociación Americana de la Diabetes), U.S. Food and
Drug Administration (Administración de Alimentos y Medicamentos de
EE. UU.) y Health Industry Manufacturers Association (Asociación de
Fabricantes de Productos para la Salud).

3
Introducción .........................................6
Uso previsto . . . . . . . . . . . . . . . . . . . . . . . . . . . . . . . . . . . . . . .7
Información importante . . . . . . . . . . . . . . . . . . . . . . . . . . . . . .8
El sistema ReliOn™ Prime . . . . . . . . . . . . . . . . . . . . . . . . . . . . . . .9
Descripción del medidor de glucosa en sangre ReliOn™ Prime. . 10
Explicación de la pantalla completa . . . . . . . . . . . . . . . . . . . .11
Tiras de prueba ReliOn™ Prime . . . . . . . . . . . . . . . . . . . . . . . . . .12
Realización de pruebas con las tiras ReliOn™ Prime . . . . . . . . . .13
Información importante sobre las tiras de prueba .........14
Reemplazo de las pilas . . . . . . . . . . . . . . . . . . . . . . . . . . . . . .15
Conguración del medidor ...........................18
Conguración de la hora y la fecha ....................18
Prueba de glucosa en sangre ...........................22
Obtención de una gota de sangre .....................22
Realización de una prueba de glucosa en sangre ............24
ÍNDICE

4
Pruebas con sangre extraída de lugares alternativos . . . . . . . . . .28
Información importante sobre las pruebas realizadas
con sangre extraída de lugares alternativos ..............28
Preparativos para la prueba de glucosa en sangre
obtenida de un lugar alternativo .......................30
Realización de una prueba de glucosa en sangre
obtenida de un lugar alternativo .......................31
Uso de la solución de control . . . . . . . . . . . . . . . . . . . . . . . . . . . .36
Uso recomendado de la solución de control. . . . . . . . . . . . . .37
Realización de una prueba con solución de control . . . . . . . .38
Comparación de los resultados obtenidos
con la solución de control ............................42
Descarga de los resultados de prueba en una computadora . . . .43
Interpretación de los resultados de la prueba ...............44
Comparación de resultados del medidor
con los de laboratorio ...............................44
Lecturas esperadas de glucosa en sangre ................47
Lecturas altas de glucosa en sangre . . . . . . . . . . . . . . . . . . . .47

5
Lecturas bajas de glucosa en sangre .................. 48
Hallazgos sobre la diabetes ..........................48
Memoria del medidor .................................51
Marcado de los resultados en la memoria ...............51
Marcado de pruebas con la solución de control ...........51
Marcado de otros resultados . . . . . . . . . . . . . . . . . . . . . . . . .52
Visualización de resultados almacenados . . . . . . . . . . . . . . . .52
Mensajes visualizados en la pantalla . . . . . . . . . . . . . . . . . . . . . .56
Cuidado del medidor de glucosa en sangre ReliOn™ Prime . . . .62
Limpieza del medidor ...............................62
Almacenamiento ..................................62
Características técnicas ...............................64
Advertencias, precauciones y limitaciones .................65
Garantía . . . . . . . . . . . . . . . . . . . . . . . . . . . . . . . . . . . . . . . . . . . .67

6
INTRODUCCIÓN
Gracias por haber elegido el sistema de monitoreo de glucosa en sangre
ReliOn™ Prime. Es importante realizar pruebas frecuentes de glucosa
en sangre porque le indican cómo se ve afectada su diabetes por ciertos
factores como los medicamentos, la dieta, el ejercicio y el control del
estrés. Losresultados de las pruebas de glucosa en sangre también pueden
advertirle de cualquier cambio en su diabetes que podría afectar su plan
terapéutico. Consulte siempre a su profesional de atención diabetológica
antes de hacer algún cambio. Este manual contiene toda la información
necesaria para utilizar el sistema de monitoreo de glucosa en sangre
ReliOn™ Prime; sírvase leerlo detenidamente antes de usar el sistema.
Si tiene preguntas, llame al servicio de atención al cliente al 855.776.0662.
Si no logra comunicarse con el departamento de atención al cliente, dirija
sus preguntas a su profesional de la salud.

7
Uso previsto
El sistema de monitoreo de glucosa en sangre ReliOn™ Prime está diseñado
para determinar cuantitativamente la glucosa en muestras de sangre
entera capilar recién obtenida de las yemas de los dedos o la palma de la
mano. Laprueba se efectúa fuera del cuerpo (es decir, el sistema es para
diagnóstico in vitro). El medidor está indicado para uso domiciliario (sin
necesidad de prescripción facultativa) por parte de personas diabéticas o en
entornos clínicos por parte de profesionales de la salud, como auxiliar para
evaluar la ecacia del control de la diabetes. No está destinado a emplearse
para el diagnóstico o la detección de diabetes mellitus, ni tampoco para uso
en recién nacidos.

8
Información importante
• Los resultados de prueba por debajo de 70 mg/dL indican niveles bajos
deglucosa en la sangre (hipoglucemia).
• Los resultados de prueba por encima de 240 mg/dL indican niveles altos
deglucosa en la sangre (hiperglucemia).
• Si obtiene resultados inferiores a 70 mg/dL o superiores a 240 mg/dL, repita
la prueba.
• Si sigue obteniendo resultados inferiores a 70 mg/dL o superiores a240mg/dL,
consulte de inmediato con un profesional de atención diabetológica.
• Si sus síntomas no concuerdan con los resultados de prueba Y usted ha
seguido todas las instrucciones al pie de la letra, comuníquese con un
profesional de atención diabetológica.
• Antes de realizar un a prueba, es importante lavarse las manos con agua tibia
y jabón. Seque las manos bien. Si usa toallitas de alcohol para limpiar los dedos
de la mano, asegúrese de que la piel esté seca antes de puncionar el dedo.
Manos sucias o restos de alcohol puede causar resultados inexactos.
• Antes de realizar una prueba siempre asegúrese de que el medior este a
una temperatura de funcionamiento de entre 50–104ºF (10–40ºC). Tratar los
resultados de prueba obtenidos fuera del rango de temperatura óptima con
precaución.
• Si el medidor se ha expuesto a temperaturas extremas, mueva el medidor en
una zona dentro del rango de funcionamiento de 50–104ºF (10–40ºC).

9
El sistema ReliOn™ Prime consta de los siguientes componentes:
• Medidor ReliOn™ Prime
• Estuche
• Manual de instrucciones para el usuario
• Otros materiales requeridos que no se suministran:
• Tiras de prueba ReliOn™ Prime
• Solución de control
• Dispositivo de punción o lancetas
EL SISTEMA RELION™ PRIME

10
CARA
POSTERIOR
Tapa del
compartimiento
de la pila
DESCRIPCIÓN DEL MEDIDOR DE GLUCOSA EN SANGRE
RELION™ PRIME
CARA
ANTERIOR
Pantalla
Botón de encendido
y apagado
Botón de avance
Botón de
retroceso
Oricio de inserción
de tirasde prueba
Oricio para
la conexión
de datos

11
Explicación de la pantalla completa
Hora
Fecha
Promedio
delecturas
deprueba
Prueba con
soluciónde control
Carga escasa
de las pilas
Unidad
demedida
Advertencia
detemperatura
Tira de prueba
Aplicar la sangre
Introducir/Retirar
la tira de prueba
Modo de memoria
Advertencia
deresultado por
código de error
P antalla principal:
Cuenta regresiva
de la prueba
Resultados deprueba
Códigos de error
Si falta cualquier dato de la pantalla cuando se enciende el medidor,
llame alserviciode atención al cliente al 855.776.0662.

12
Estas tiras de prueba de acción capilar requieren
solo 0.5 microlitros (µL) de sangre; contienen una
punta de aplicación de muestras que se llena por
un extremo, lo que facilita la adición de la sangre.
El sistema de monitoreo de glucosa en sangre
ReliOn™ Prime mide la cantidad de glucosa
(azúcar) en sangre entera capilar recién obtenida.
Cuandose agrega una gota de sangre a la punta
de aplicación, la muestra es atraída al interior de
la zona reactiva de la tira de prueba. Laglucosa
en la muestra de sangre reacciona con la enzima
presente en la tira deprueba. Esta reacción
genera una corriente proporcional a la cantidad
de glucosa contenida en la sangre. El medidor
detecta esta corriente y la convierte en una lectura
deconcentración de glucosa en la sangre.
TIRA DE PRUEBA
Zona
reactiva
Barras de
contacto de la
tira de prueba
Punta de aplicación de muestras
(agregue la sangre al extremo de la tira de
prueba. La acción capilar absorberá la sangre
hacia la zona reactiva.)
TIRAS DE PRUEBA RELION™ PRIME

13
Información importante sobre las tiras de prueba
• Conserve el frasco de tiras de prueba en un lugar fresco y seco,
atemperaturas de 39°F a 86°F (4°C a 30°C).
• Mantenga las tiras resguardadas de la luz solar directa y el calor.
• No refrigere ni congele las tiras.
• No almacene ni transera las tiras de prueba fuera de su frasco original.
• Tan pronto como retire una tira de prueba, tape el frasco herméticamente.
• Utilice las tiras de prueba en los 90 días (3 meses) siguientes a la
apertura del frasco, y absténgase de emplearlas después de su fecha
devencimiento (
).
El sistema de monitoreo de glucosa en sangre ReliOn™ Prime
funciona con las tiras de prueba ReliOn™ Prime.
REALIZACIÓN DE PRUEBAS CON LAS TIRAS
RELION™ PRIME

14
Información importante sobre las tiras de prueba
• Anote la fecha de apertura en la etiqueta del frasco, para recordarque
debe desechar las tiras después de transcurridos 90días (3meses).
• No doble, corte ni altere las tiras de prueba.
• No vuelva a usar ninguna tira de prueba.
• Utilice únicamente tiras de prueba ReliOn™ Prime con el medidor
ReliOn™ Prime.
• Asegúrese de tener las manos limpias y secas antes de tocar las
tirasde prueba.

15
NOTA:
El proceso de cambiar la pila debe llevar solo unos segundos. Si la pila
secambia en un plazo de 30 segundos, la memoria del medidor no se
veráafectada. No se pierde ningún resultado de pruebas anteriores ni
sealteran los ajustes.
Sin embargo, si el proceso de cambiar la pila tarda más de 30 segundos,
osila pila está completamente descargada antes de cambiarla, puede
quesea necesario recongurar la fecha y la hora.
La primera vez que se enciende el medidor después de cambiada la pila,
podría aparecer un mensaje en la pantalla (E00). Esto signica que usted
debe comprobar si la fecha y la hora están correctas. En las páginas 18–21
encontrará instrucciones detalladas sobre cómo cambiar la fecha y la hora.
Reemplazo de las pilas
El medidor de glucosa en sangre ReliOn™ Prime tiene instalada una pila
CR2032.

16
Cuando comienza a descargarse la pila, el medidor muestra . En este
momento queda carga suciente como para efectuar unas 100 pruebas
antes de que sea necesario cambiar la pila.
Si el icono
destella, signica que solo hay suciente carga como
paraefectuar 20 pruebas. Cambie la pila lo antes posible.
El medidor no funcionará si la pila está agotada.
CR2032
3V
+
ADVERTENCIA:
Mantenga todas las pilas fuera del alcance de los niños. Si alguien se traga
una pila, consulte con un médico inmediatamente.

17
Cómo cambiar la pila
Paso 1
Apague el medidor. La tapa del compartimiento de la pila se encuentra
enlaparte posterior del medidor.
Paso 2
Tire de la tapa del compartimiento de la pila con el dedo o una uña. Retire la
tapa del compartimiento de la pila.
Paso 3
Retire la pila usada. Si es necesario, ponga el medidor boca abajo y
golpéelo ligeramente contra la palma de su mano hasta que la pila salga
delcompartimiento. Evite usar objetos alados capaces de dañar el medidor.
Paso 4
Introduzca la pila nueva. El signo “+” de la pila debe quedar orientado
haciaarriba.
Paso 5
Vuelva a colocar la tapa del compartimiento de la pila.

18
Conguración del medidor
Antes de utilizar el medidor ReliOn™ Prime por primera vez, es preciso que
congure la hora y la fecha. Para la hora, puede elegir entre el formato am
ypm (12 horas, de 1 a 12) y el formato militar (24 horas, de 0 a 23). La fecha
se puede visualizar en formato de mes/día (utilizado en EE. UU.) o día/mes
(utilizado en otros países). No se haga una prueba de glucosa en sangre
hasta haber congurado debidamente el medidor.
Conguración de la hora y la fecha
Paso 1: Encienda el medidor.
Oprima el botón de encendido y apagado para activar el medidor.
Aparecebrevemente la pantalla completa. Si falta cualquier dato de la
pantalla(página 11), llame al servicio de atención al cliente, 855.776.0662.
A continuación, el medidor presentará la hora, la fecha, la unidad de medida
y el símbolo paraintroducir tiras de prueba.
Paso 2: Entre en el modo de conguración.
Mantenga oprimido el botón de encendido y apagado durante más
de2segundos para entrar en el modo de conguración.

19
Paso 3: Ajuste el formato de la hora.
La hora puede visualizarse tanto en formato de
reloj militar (24 horas) como en formato de am
ypm (12horas). El medidor muestra el formato
actual delahora. Para cambiar de formato, oprima
el botón de retroceso o avance. Oprima el botón
deencendido y apagado para seleccionar el formato
de la hora. Acontinuación aparecerá el formato
delafecha enlapantalla.
Formato mes/día
Formato día/mes
Paso 4: Ajuste el formato de la fecha.
La fecha se puede visualizar en formato de mes/día
(por ejemplo, 01/31) o día/mes (por ejemplo, 31/01).
El medidor muestra el formato actual. Para cambiar
de formato, oprima el botón de retroceso o avance.
Oprima el botón de encendido y apagado para
seleccionar el formato de la fecha. A continuación
destellará el ajuste de la hora en la pantalla.

Paso 5: Ajuste la hora.
Oprima y suelte el botón de retroceso o avance para cambiar la
hora. Mantenga oprimido el botón de retroceso o avance para
recorrer los valores rápidamente. Cuando aparezca la hora
correcta, oprima el botón de encendido y apagado. Acontinuación
destellará el ajuste de minutos en la pantalla.
Paso 6: Ajuste los minutos.
Oprima y suelte el botón de retroceso o avance hasta que
aparezcan los minutos correctos. Mantenga oprimido el botón
deretroceso o avance para recorrer los valores rápidamente.
Cuando aparezcan los minutos correctos, oprima el botón de
encendido y apagado. A continuación destellará el ajuste de
mesen la pantalla.
Paso 7: Ajuste el mes
(Si se ha seleccionado el formato día/mes,el paso
7 permite ajustar el día).
Oprima y suelte el botón de retroceso o avance hasta que aparezca
el mes correcto. Mantenga oprimido el botón de retroceso o
avance para recorrer los valores rápidamente. Cuando aparezca
el mes correcto, oprima el botón de encendido y apagado.
Acontinuación destellará el ajuste de día en la pantalla.
20
Hora destellando
Minuto destellando
Mes destellando

21
Paso 8: Ajuste el día.
(Si se ha seleccionado el formato día/mes, el paso 8permite
jar el mes). Oprima y suelte el botón de retroceso o avance
hasta que aparezca el día correcto. Mantenga oprimido el botón
de retroceso o avance para recorrer los valores rápidamente.
Cuando aparezca el día correcto, oprima el botón de encendido y
apagado. Acontinuación destellará el ajuste de año en la pantalla.
Paso 9: Ajuste el año.
Oprima y suelte el botón de retroceso o avance hasta que
aparezca el año correcto. Mantenga oprimido el botón de
retroceso o avance para recorrer los valores rápidamente.
Cuando aparezca el año correcto, oprima el botón de encendido
y apagado durante dos segundos para salir delmodo de
conguración.
Año destellando
Día destellando
NOTA:
Oprima el botón de encendido y apagado durante más de 2 segundos
en cualquier etapa para guardar la fecha y la hora y salir del modo de
conguración. Si no se oprime ningún botón, el medidor se apagará
automáticamente al cabo de 2 minutos yse guardarán los ajustes
congurados hasta ese momento.

22
Obtención de una gota de sangre
Paso 1
Lávese las manos con jabón y agua tibia y séqueselas bien.
Si usa toallitas con alcohol para limpiar el dedo, asegúrese de
que la piel esté seca antes de pincharla con la lanceta. Manos
sucias o restos de alcohol puede causar resultados inexactos.
Paso 2
Deje colgar el brazo de 10 a 15 segundos. Puede facilitarse
la obtención de una gota de sangre si se deja el brazo por
debajo del corazón y se masajea la muñeca, la palma de la
mano y el dedo.
Paso 3
Elija un punto en el costado de la yema del dedo,
parareducir al mínimo el dolor.
Paso 4
Empuje la tapa de ajuste de profundidad contra
el costadode la yema del dedo y oprima el botón
de liberación.
PRUEBA DE GLUCOSA EN SANGRE

23
NOTA:
• No utilice la lanceta si la tapa falta o está dañada.
• Los dispositivos de punción, las lancetas y los medidores están
destinados a ser empleados en un solo paciente y no deben compartirse
nunca con ninguana otra persona, ni siquiera con un familiar.
• Este dispositivo depunción no debe ser empleado para realizar pruebas
en múltiples pacientes por partedeproveedores de atención médica o en
centros médicos.
• Todas las partes del kit se consideran un peligro biológico y tienen el
potencial de transmitir enfermedades infecciosas, incluso después de que
se ha realizado la limpieza y desinfeccción.
Paso 5
Retire el dispositivo de punción y espere unos segundos para que se forme
una gota de sangre. Para facilitar el ujo de sangre, mantenga caliente la
mano, baje la mano a la altura de la cadera y masajéese suavemente la
muñeca, la palma de la mano o la base del dedo. Para evitar dolores y la
formación de callos, haga la prueba en un sitio diferente cada vez.

24
NOTA:
En las páginas 28-35 encontrará instrucciones para extraer
sangre de lugares distintos a las yemas de los dedos.
Paso 1
Introduzca una tira de prueba ReliOn™ Prime
en el medidor. Introduzca las barras de
contacto en el oricio de inserción de tiras
de prueba, orientando la zona reactiva
hacia arriba.
Oricio de inserción
de tiras de prueba
Barras de contacto
Zona reactiva
Punta
deaplicación
demuestras
Una vez que la tira de prueba esté insertada, el
medidor se encenderá automáticamente. Si falta
cualquier dato de la pantalla (página 11), llame al
servicio de atención al cliente, 855.776.0662.
REALIZACIÓN DE UNA PRUEBA DE GLUCOSA EN SANGRE

25
El icono de la tira de prueba con la gota de sangre
destellante indica que el medidor está listo para que
seaplique una gota de sangre a la punta de aplicación de
muestras situada en el extremo de la tira.
Símbolo “Aplicar
sangre” destellando
Paso 2
Pínchese el dedo con el dispositivo de punción. Ponga la
gota de sangre de su dedo en contacto con la punta de
aplicación de muestras en el extremo de la tira. La acción
capilar atraerá la sangre a la zona reactiva.
NO debe agregarse sangre a la parte superior de la tira de prueba, ya que
podría obtenerse un resultado anormalmente alto.
INCORRECTO
CORRECTO

26
IMPORTANTE:
• En cuanto detecte que se ha aplicado la sangre, el medidor iniciará una
cuenta regresiva y mostrará un guión destellante. Si el medidor no inicia
la cuenta regresiva después de que se ha aplicado la gota de sangre,
deseche la tira de prueba.
• Se requiere un volumen de muestra mínimo de 0.5 µL. Si se usan
muestras de menor volumen, es posible que el medidor no se inicie o
que haga la cuenta regresiva pero muestre un mensaje de error “E13.”
Asegúrese de que la sangre llene por completo la zona reactiva.
Sangre
suciente
Sangre
insuciente
Demasiada
sangre

27
Visualización del resultado
El medidor hará una cuenta regresiva mostrando un guión
destellante y presenta el resultado al cabo de 7 segundos.
Paso 3
Anote siempre los resultados en su libreta de registro, junto con otra
información como dosis de insulina, dieta y ejercicios. El resultado se
almacena automáticamente en la memoria, junto con la fecha y la hora
de la prueba.
Paso 4
Las lancetas deben utilizarse una sola vez. Después de utilizar una lanceta,
vuelva a colocarle su tapa protectora y retírela del dispositivo de punción;
acontinuación deséchela de forma segura para evitar la posibilidad
de lesiones accidentales. Extraiga la tira de prueba usada y deséchela
cuidadosamente. El medidor se apaga automáticamente cuando se
extraelatira de prueba.

28
Información importante sobre las pruebas realizadas con sangre
extraída de lugares alternativos
Ciertas partes del cuerpo tienen menos terminaciones nerviosas que las yemas
de los dedos, por lo cual obtener una muestra de sangre de esos lugares
podría causar menos dolor. Para extraer sangre de lugares distintos de las
yemas de los dedos debe emplearse una técnica diferente. Además, los
resultados de glucosa en sangre obtenida de lugares diferentes de las yemas
de los dedos podrían ser considerablemente distintos, debido a los cambios
rápidos que sufren los niveles de glucosa después de las comidas, la
administración de insulina o el ejercicio.
Consulte con su profesional de atención diabetológica antes de hacerse
pruebas con sangre extraída de lugares diferentes de las yemas de los dedos.
Igual que en el caso de todos los sistemas de monitoreo de glucosa en sangre,
los resultados obtenidos con sangre extraída de lugares distintos de las yemas
de los dedos podrían mostrar diferencias considerables. Es probable que los
resultados cambien rápidamente después de las comidas; los efectos de la
administración de insulina y la actividad física se maniestan en las yemas de
los dedos con más rapidez que en los lugares alternativos.
PRUEBAS CON SANGRE EXTRAÍDA
DE LUGARES ALTERNATIVOS

29
En promedio, la sangre extraída de la palma de la mano puede dar resultados
hastaun 5% superiores a los de la sangre procedente de la yema de un dedo.
Considere la posibilidad de hacerse pruebas con sangre obtenida
delugares alternativos cuando:
• Vaya a hacerse la prueba antes de comer
• Se encuentre en ayunas
• Hayan transcurrido dos horas desde una comida
• Hayan transcurrido dos horas desde la administración de insulina
• Hayan transcurrido dos horas desde la realización de actividad física
Hágase pruebas con sangre obtenida de las yemas de los dedos:
• En las dos horas siguientes a una comida
• En las dos horas siguientes a una administración de insulina
• En las dos horas siguientes a la realización de actividad física
• Si tiene antecedentes de hipoglucemia, está experimentando una baja
deazúcar en la sangre o sufre de hipoglucemia asintomática (es decir,
noseda cuenta de que tiene una baja de azúcar en la sangre)
• Para conrmar su nivel de glucosa en la sangre, si el resultado que obtuvo
dellugar alternativo no reeja cómo se está sintiendo
• En momentos de estrés o enfermedad

30
Consulte con su profesional de atención diabetológica sobre los
procedimientos de prueba recomendados antes de manejar maquinaria o
vehículos, ya que generalmente en estas circunstancias es preferible hacerse
pruebas con sangre obtenida de la yema de los dedos.
Si le salen moretones, quizás le convenga analizar sangre de la yema del
dedo envez de hacerse pruebas en otro lugar.
Preparativos para la prueba de glucosa en sangre obtenida de un
lugar alternativo
Elija el lugar: Seleccione una zona blanda y carnosa de la palma de la mano
que no tenga venas ni lunares, y que esté alejada del
hueso. Lave el área con agua tibia y jabón; enjuáguela y
séquela completamente. Si usa toallitas con alcohol para
limpiar la zona, asegúrese de que la piel esté seca antes
de perforarla con la lanceta.

Realización de una prueba de glucosa en sangre
obtenida de un lugar alternativo
Paso 1
Coloque la tapa transparente para pruebas
en lugares alternativos en el dispositivo
de punción. Inserte la lanceta y prepare
eldispositivo de punción para disparar.
Paso 2
a) Inserte una tira de prueba en el medidor.
Introduzca las barras de contacto en el
oricio de inserción de tiras de prueba,
orientando la zona reactiva hacia arriba.
Una vez que la tira esté insertada,
el medidor se encenderá
automáticamente. Asegúrese
de que en la pantalla
aparezcan todos los
símbolos (consulte la
página 11).
31
Introduzca
la tira en
elmedidor, en
esta dirección
Punta
deaplicación
demuestras
Zona reactiva
Barras de contacto
Oricio de
inserción de
tiras de prueba
IMPORTANTE

32
b) Espere hasta que aparezca la tira con la gota desangre
destellante. A partir de este momento tiene 2 minutos
para aplicar la gota de sangre antes de que el medidor
se apague.
Paso 3
a) Frote enérgicamente el lugar seleccionado durante
5 a 10 segundos hasta que comience a estar caliente al
tacto.
b) Sujete rmemente el dispositivo de punción preparado
contra la piel limpia durante 5 a 10 segundos.
c) Oprima el botón de liberación del dispositivo de punción
para pinchar la piel. Siga sujetando el dispositivo de
punción rmemente contra la piel hastaque se forme
una gota de sangre de 0.5 µL.
d) Una vez que se haya formado una gota de sangre lo
sucientemente grande, quite el dispositivode punción.

33
Paso 4
Levante el medidor y ponga el extremo de la tira de
prueba en contacto con la muestra de sangre, hasta
que se llene la zona reactiva. Retire inmediatamente
elmedidor y la tira de prueba de la gota de sangre.
IMPORTANTE
• La muestra, ¿era de color rojo intenso y estaba libre de líquido aguado?
• La gota, ¿tenía un volumen suciente (al menos 0.5 μL)?
• La zona reactiva, ¿se llenó con suciente sangre toda de una vez?
EN CASO NEGATIVO, REPITA LA PRUEBA.

34
Paso 5
El medidor hará una cuenta regresiva mostrando un guión
destellante y presentará el resultado al cabo de 7 segundos.
EVALÚE SU RESULTADO.
REPITA LA PRUEBA EN EL LUGAR ALTERNATIVO:
• SI la gota de sangre parecía estar diluida con un líquido transparente
• SI no se frotó enérgicamente el lugar de la prueba
• SI la gota de sangre no era lo sucientemente grande como para llenar la
zona reactiva
• SI se marcó la prueba accidentalmente como resultado de “control”
• SI el resultado no concuerda con sus síntomas
Cualquiera de las situaciones anteriores puede dar lugar a un resultado
de prueba incorrecto.
Sangre
suciente
Sangre
insuciente
Demasiada
sangre
Si el resultado repetido en el lugar alternativo sigue sin concordar con sus
síntomas, conrme su nivel de glucosa haciéndose una prueba con sangre
dela yema de un dedo.

35
Paso 6
Anote siempre los resultados en su libreta de registro de autopruebas, junto
con otra información como dosis de insulina administrada, dieta y ejercicios.
El resultado se almacena automáticamente en la memoria, junto con la fecha
y la hora de la prueba. Si no tiene un libro de registro llame al 855.776.0662,
o visite ReliOn.com para obtener una copia gratis.
Paso 7
Extraiga la tira de prueba y deséchela cuidadosamente. Una lanceta debe
utilizarse una sola vez. Después de utilizar la lanceta, vuelva a colocarle
su tapa protectora y retírela del dispositivo de punción; a continuación
deséchela de forma segura para evitar la posibilidad de lesiones. El medidor
se apaga automáticamente cuando se extrae la tira de prueba.

36
Utilice la solución de control para comprobar que el medidor y las tiras de
prueba están funcionando correctamente. Es importante llevar a cabo esta
sencilla vericación con regularidad.
La solución de control contiene una cantidad conocida de glucosa que
reacciona con las tiras de prueba ReliOn™ Prime. Las soluciones de control
están disponibles en dos niveles: normal (nivel 1) y alto (nivel 2).
Compare los resultados obtenidos con solución de control con el intervalo
impreso en la etiqueta del frasco de tiras de prueba.
Si no tiene solution de control llame al 855.776.0662, o visite ReliOn.com
para obtener una botella gratis.
USO DE LA SOLUCIÓN DE CONTROL

37
Se recomienda que use la solución de control:
• Cuando abra un frasco nuevo de tiras de prueba.
• Siempre que sospeche que el medidor o las tiras de prueba no están
funcionando debidamente.
• Si los resultados parecen anormalmente altos o bajos, o no concuerdan
con los síntomas clínicos.
• Si el frasco de tiras de prueba se ha dejado abierto, o si se ha expuesto a la
luz, a temperaturas menores de 39°F (4°C) o mayores de 86°F (30°C),
o a niveles de humedad mayores de un 80%.
• Para vericar su técnica.
• Si el medidor ReliOn™ Prime se ha dejado caer o se ha guardado por
debajo de la temperatura de congelación o por encima de 122°F (50°C).
• Cada vez que cambie las pilas.

38
Realización de una prueba con solución de control
Antes de efectuar una prueba con solución de control, revise siempre la
fecha de vencimiento (
) que aparece en la etiqueta del frasco. No utilice
solución de control vencida o que haya sido mal almacenada. Cuando abra
un frasco nuevo de solución de control, anote siempre la fecha de apertura
en su etiqueta. Tape el frasco tan pronto haya terminado de usar la solución
de control. Utilice la solución de control dentro de los 90 días (3 meses)
subsiguientes a su apertura inicial.

39
Paso 1
Introduzca una tira de prueba ReliOn™
Prime en su oricio en el medidor,
orientando las barras de contacto
hacia arriba. El medidor se enciende
automáticamente.
Aparece brevemente la pantalla completa.
Sifalta cualquier dato de la pantalla
(página 11), llame al servicio de atención
al cliente, 855.776.0662. A continuación,
en la pantalla apareceelsímbolo de
tira de prueba y la gotade
sangredestellante.
Barras de
contacto
Oricio de
inserción de tiras
de prueba
Zona reactiva
Punta de
aplicación de
muestras

40
Paso 2
Es imprescindible oprimir el botón de retroceso
o avance ANTES de realizar una prueba con
solución de control.
Mantenga oprimido el botón de retroceso o
avance hasta que en la esquina superior derecha
de la pantalla aparezca
. Verique que
permanece en la pantalla. Si no hace esto, el
resultado de la solución de control NO será válido.
le indicará que agregue la solución de control.
Paso 3
Mezcle la solución de control invirtiendo el frasco
suavemente varias veces. Destape el frasco de
solución de control. Coloque la tapa en una supercie
plana. Apriete el frasco y deseche la primera gota.
Aplique la segunda gota a la parte superior de la tapa.

41
NOTA:
El colorante presente en la solución de control puede
manchar las supercies o la ropa. Use la solución
con cuidado.
Paso 5
Compare el resultado con el intervalo impreso en el frasco
de tiras de prueba utilizado. Los valores pueden variar entre
un frasco y otro. Verique que el resultado se encuentre
dentro de los límites correspondientes al nivel de
solución de control que esté utilizando. Si el
resultado se halla dentro de esos límites, signica
que el medidor está funcionando correctamente.
Paso 6
Extraiga la tira de prueba. El medidor se apaga
automáticamente cuando se extrae la tira de prueba.
Deseche de inmediato la tira de prueba.
06146A
2016-12
80-120
200-300
Control Solution Range (mg/dL)
(Rango de la solución de control)
Level 1:
Level 2:
Paso 4
Acerque el medidor y la tira de prueba a la gota. La tira de prueba atraerá la
solución a su interior. El medidor mostrará el resultado al cabo de
7 segundos.

42
Comparación de los resultados obtenidos con la solución de control
Si el resultado sobrepasa el intervalo impreso en el frasco de tiras utilizado,
repita la prueba.
Uno o más de los factores siguientes pueden producir resultados fuera de
los límites:
• El medidor no se colocó en modo de solución de control antes deagregarle
dicha solución.
• La solución de control se ha vencido o contaminado.
• La solución de control se almacenó a menos de 35°F (2°C) o a más de
86°F (30°C).
• No se desechó la primera gota de solución de control.
• La tira de prueba no se almacenó correctamente.
• La tira de prueba se usó después de la fecha de vencimiento impresa
en el frasco.
• El frasco de tiras de prueba ha estado abierto por más de 90 días (3 meses).
• El medidor ReliOn™ Prime está dañado o ha fallado.
• Se contaminó la solución de control porque la punta del frasco tocó la tira
de prueba.

43
DESCARGA DE LOS RESULTADOS DE PRUEBA EN
UNA COMPUTADORA
Ponemos a su disposición software para manejo de la diabetes que le
permitirá descargar sus resultados de prueba en una computadora. Para
obtener más información sobre el software para manejo de la diabetes,
llame al servicio de atención al cliente al 855.776.0662.
NOTA:
Si el resultado de la solución de control sigue sobrepasando los límites
requeridos, signica que posiblemente el sistema no está funcionando
como debe. NO UTILICE el sistema para analizarse la sangre. Si no
logra resolver el problema, llame al servicio de atención al cliente al
855.776.0662.
Repita la prueba con cuidado, siguiendo las instrucciones al pie de la letra;
ponga el medidor en modo de solución de control, y utilice solución de
control fresca o una nueva tira (según corresponda). Compare el resultado
con el intervalo impreso en el frasco de tiras de prueba utilizado.

44
NOTA:
El medidor ReliOn™ Prime está diseñado para producir resultados a
temperaturas entre 41–113°F (5–45°C) y humedades relativas entre 20–80%
(sin condensación).
• Antes de realizar una prueba siempre asegúrese de que el medior este
a una temperatura de funcionamiento de entre 50–104ºF (10–40ºC).
Tratar los resultados de prueba obtenidos fuera del rango de temperatura
óptima con precaución.
• Si el medidor se ha expuesto a temperaturas extremas, mueva el medidor
en una zona dentro del rango de funcionamiento de 50–104ºF (10–40ºC).
Comparación de resultados del medidor con los de laboratorio
El medidor de glucosa en sangre ReliOn™ Prime hace referencia a valores de
glucosa en sangre con plasma recién obtenida. La calibración se realizó en un
laboratorio clínico con un patrón estándar de glucosa NIST (National Institute
of Science and Technology, Gaithersburg, MD, EE. UU.). Los resultados del
medidor podrían diferir de los obtenidos en un laboratorio clínico rigurosamente
controlado a causa de variaciones normales. Para hacer una comparación
precisa entre los resultados del medidor y los de laboratorio, siga las pautas
indicadas a continuación.
INTERPRETACIÓN DE LOS RESULTADOS DE PRUEBA

45
Antes de comparar
Realice una prueba con solución de control para asegurarse de que tanto
el medidor como las tiras estén funcionando debidamente. Antes de hacer
pruebas de comparación con sangre, espere al menos 2 horas después
dehaber comido o bebido cualquier cosa que no sea agua. Es esencial
ayunarsi el analizador de referencia requiere sangre venosa.
En el laboratorio
Las muestras capilares para ambas pruebas deben obtenerse y analizarse
en un intervalo de 15minutos. La muestra se debe recolectar con el
anticoagulante apropiado para el analizador de laboratorio. Debe practicarse
la técnica recomendada. Los análisis se realizarán conforme a las pautas del
fabricante.
Lávese SIEMPRE las manos con agua tibia y jabón. Enjuágueselas
yséqueselas a fondo antes de hacer la prueba.
Utilice SIEMPRE sangre entera capilar recién obtenida para las pruebas
conelmedidor.

46
A pesar de seguir estas pautas, quizás note diferencias respecto al resultado
del laboratorio porque los niveles de glucosa en sangre pueden variar en
poco tiempo. Estas variaciones pueden deberse a múltiples razones, tales
como el consumo de alimentos, el ejercicio, los medicamentos tomados, el
valor del hematocrito, el estrés y la pérdida de líquidos corporales.
El análisis de los datos debe realizarse utilizando un método clínicamente
aceptable.
La cantidad de glucosa que circula en la sangre uctúa de forma natural
conel tiempo. Esto hace que los resultados de prueba también puedan
variar. Losresultados pueden verse afectados por varios factores, entre otros:
(1)la hora del día a la que se efectuó la prueba; (2) los alimentos consumidos;
(3) las actividades realizadas; (4) la insulina y los demás medicamentos
tomados. Si su resultado de la prueba de sangre no parece ser correcto,
repita el análisis. Si sigue obteniendo lecturas anormalmente altas o bajas,
comuníquese con su profesional de la salud.

47
Lecturas esperadas de glucosa en sangre
Niveles de glucosa en sangre esperados en personas sin diabetes:
1,2
Lecturas altas de glucosa en sangre
Si su valor de glucosa en sangre es superior a 600 mg/dL, aparecerá “Hi”.
Repita la prueba con una tira nueva. Si este mensaje vuelve a aparecer,
comuníquese de inmediato con su profesional de la salud.
Consulte con su médico si sus resultados de prueba son muy elevados
3
(superiores a 240 mg/dL) o si tiene síntomas de altas concentraciones de
glucosa en la sangre, Algunos de estos síntomas son: sequedad bucal, sed,
necesidad frecuente de orinar, náuseas, vómitos, visión borrosa, sueño o
dolor abdominal. Los síntomas varían de una persona a otra. Usted podría
experimentar uno o más de ellos.
mg/dl
En ayunas 70–110 mg/dL
2horas después de las comidas
70–140 mg/dL

48
Lecturas bajas de glucosa en sangre
Si su valor de glucosa en sangre es inferior a 20 mg/dL, aparecerá “Lo.”
Repita la prueba con una tira nueva. Si este mensaje vuelve a aparecer,
comuníquese de inmediato con su profesional de la salud.
Consulte con su médico si sus resultados de prueba son muy bajos
4
(inferiores a 70 mg/dL) o usted tiene síntomas de bajas concentraciones
de glucosa en la sangre. Algunos de estos síntomas son: transpiración,
agitación, temblores, visión borrosa, hambre, dolor de cabeza, confusión,
ritmo cardíaco acelerado, y hormigueo o entumecimiento alrededor de la
boca o las yemas de los dedos. Los síntomas varían de una persona a otra.
Usted podría experimentar uno o más de ellos.
Hallazgos sobre la diabetes
En 1993, los Institutos Nacionales de Salud (National Institutes of Health)
concluyeron un estudio a largo plazo de personas con diabetes tipo 1.
En este estudio, denominado Ensayo de Control y Complicaciones de la
Diabetes (Diabetes Control and Complications Trial, o DCCT), se encontró
que si las personas diabéticas mantienen sus niveles de glucosa en sangre
cerca de los valores característicos de personas sin diabetes, es posible
reducir el riesgo de complicaciones que afectan a los ojos, los riñones y el
sistema nervioso en un 60%.
5

49
Lo que esto signica para usted
Hacerse pruebas frecuentes de glucosa en sangre es la mejor manera
de comprobar el efecto de los factores que inuyen en la diabetes:
medicamentos, dieta, ejercicio y control del estrés. Además, los resultados
de las pruebas de glucosa en sangre pueden advertirle de cualquier cambio
en su diabetes que podría requerir un ajuste de su plan terapéutico.
Consultesiempre a su profesional de la salud antes de hacer algún
cambioensu plan de manejo de la diabetes.
Frecuencia de las pruebas
La frecuencia de sus pruebas de glucosa en sangre dependerá de su edad,
el tipo de diabetes que usted tiene, los medicamentos que toma y su salud
física y emocional. Su profesional de la salud puede guiarlo. Después de
decidir cuándo y con qué frecuencia debe hacerse pruebas, es importante
que usted incorpore este proceso en su rutina cotidiana.

50
Bibliografía
1
“Denition and diagnosis of diabetes mellitus and intermediate hyperglycaemia” World Health Organization, 2006
2
Diabetes Care, vol. 33 Enero;1 S82-86, 2010
3
Krall, L.P. and Beaser R.S.: Joslin Diabetes Manual. Filadela: Lea and Fibiger (1989), 261–263.
4
Kahn, R. and Weir, G.: Joslin’s Diabetes Mellitus. Filadela: Lea and Fibiger (1994), 489.
5
Declaración de posición de la Asociación Americana de la Diabetes sobre el ensayo Diabetes Control and Complications Trial (1993).
Recomendaciones para mejorar el control de la diabetes
• Siga las recomendaciones de su profesional de la salud.
• Siga los planes de ejercicio y comidas que le recomiende su profesional de
la salud.
• Póngase la insulina o tome su medicamento para la diabetes a la hora
prevista.
• Esté pendiente de su estado físico y emocional.
• El estrés y las enfermedades pueden afectar la diabetes.
• Vigile la aparición de síntomas de hipoglucemia (glucosa sanguínea baja) e
hiperglucemia (glucosa sanguínea alta).
• Anote siempre sus resultados de prueba en una libreta de registro.
Lalibreta permite mantener un registro de sus resultados de glucosa
ensangre, así como información sobre su consumo de alimentos, ejercicio
y medicamentos.
• Repase regularmente su libreta de registro de resultados de prueba junto
con su profesional de la salud.

51
Marcado de los resultados en la memoria
Los resultados almacenados en la memoria del medidor se pueden marcar
dedos maneras.
Marcado de pruebas con la solución de control
Es preciso que marque los resultados obtenidos con el símbolo del frasco
de control
. Inserte la tira de prueba en el medidor. Mantenga oprimido el
botón de retroceso o avance hasta que en la esquina superior derecha de la
pantalla aparezca
. Haga esto ANTES de realizar una prueba con solución
de control. Si no marca las pruebas de control antes de aplicar la solución
de control a la tira de prueba, los resultados podrían estar incorrectos y se
incluirán en el cálculo de los promedios.
El medidor no utilizará los resultados marcados
al calcular el promedio
de 14 días y 30 días. Esto garantiza que los promedios de 14 días y 30 días
incluyan solo los resultados de los análisis de sangre.
Para marcar un resultado
, oprima el botón de retroceso o avance ANTES
de analizar con solución de control. En la página 38 encontrará instrucciones
detalladas sobre la realización de pruebas con solución de control.
MEMORIA DEL MEDIDOR

52
Marcado de otros resultados
También puede marcar resultados con un cuando NO desee incluirlos en
los promedios de 14 o 30 días. Por ejemplo, si alguna otra persona usó su
medidor o si cree que el resultado de prueba es incorrecto porque aplicó
mal la sangre a la tira de prueba, active la marca del signo de admiración
para garantizar que el promedio de 14 y 30 días contenga solo aquellos
resultados de su propia sangre que usted desee incluir. Para marcar un
resultado con el signo
, oprima el botón de retroceso o avance DESPUÉS
de que el medidor haya mostrado el resultado de prueba.
Visualización de resultados almacenados
Paso 1
Oprima el botón de encendido y apagado
para activar el medidor. Después, oprima
el botón de retroceso o avance. No introduzca
una tira de prueba para encender el medidor.
Cuando se entra en el modo de memoria, en la
pantalla aparece
. El medidor muestra el resultado
de prueba almacenado más recientemente en la memoria.
mg/dL

53
Paso 2
Oprima el botón de retroceso o avance para ver el
promedio de las pruebas realizadas a lo largo de los
últimos 14 días. Este promedio puede incluir entre
1 y 250 resultados, dependiendo de la frecuencia con
que usted se haya hecho pruebas. El número en la
parte superior (20n) representa la cantidad de pruebas
que se han incluido para calcular el promedio.
El promedio se muestra acompañado de
.
Paso 3
Vuelva a oprimir el botón de retroceso o avance para
ver el promedio de 30 días. Cuanto mayor sea la
frecuencia de las pruebas, más alto será este número.
El promedio se muestra acompañado de
.
Si no hay resultados almacenados, o ésta es la
primera vez que usted usa el medidor, en la pantalla
aparecerán tres barras.
Visualización del
promedio (14 días)
Visualización del
promedio (30 días)
No hay resultados
almacenados

54
Si no se ha realizado ninguna prueba en los últimos 14 días,
el medidor mostrará la pantalla de promedio de 14 días
con tres barras. Esto signica que no hay ningún resultado
almacenado para producir el promedio. Si no se ha realizado
ninguna prueba en los últimos 30 días, el medidor mostrará
la pantalla de promedio de 30 días con tres barras.
Paso 4
Oprima el botón de retroceso o avance para visualizar
otros resultados almacenados en la memoria. Oprima el
botón de avance después del promedio para ver la prueba
más antigua en la memoria. Oprima el botón de retroceso
después del promedio para ver la penúltima prueba más
reciente en la memoria.
El medidor muestra la hora de registro de cada prueba en la
esquina superior izquierda, y la fecha de la prueba debajo de
la hora.

55
Los resultados que se marcaron con el signo cuando se realizó
la prueba no se incluyen en el promedio. Es posible ver los
resultados marcados cuando se recorren los valores guardados
en la memoria.
El modo de memoria muestra también
si el resultado se
marcó antes de usar la solución de control. Estos resultados
no se incluyen en los promedios de 14 y 30 días.
Si destella durante la realización de una prueba, el símbolo de
termómetro se visualizará junto con el resultado almacenado en
la memoria. Estos resultados no se incluirán en los promedios
del medidor.
Paso 5
Oprima el botón de encendido y apagado para volver al modo de usuario.
Si no se va a hacer una prueba, oprima este botón una vez más para apagar
el medidor.
NOTA:
En los promedios de glucosa, los resultados que se presentan como
bajos (LO) secuentan como 20 mg/dL.
En los promedios de glucosa, los resultados que se presentan como
altos (HI) secuentan como 600 mg/dL.

56
A continuación se presenta una lista de todos los mensajes que pueden
aparecer en la pantalla.
Si tiene preguntas después de leer estos mensajes, o si el medidor muestra
un mensaje que no se describe aquí, llame al servicio de atención al cliente
al855.776.0662. Si en la pantalla aparece
, signica que el usuario mismo
puede borrar el mensaje de error. Noenvíe su medidor a un distribuidor local
sin antes haber obtenidolaautorización de un representante de la compañía.
Su nivel de glucosa en sangre es inferior a 20 mg/dL. Repita la
prueba con una nueva tira. Si este mensaje vuelve a aparecer,
comuníquese de inmediato con su profesional de la salud.
Su nivel de glucosa en sangre es superior a 600 mg/dL. Repita
la prueba con una nueva tira. Si este mensaje vuelve a aparecer,
comuníquese de inmediato con su profesional de la salud.
MENSAJES VISUALIZADOS EN LA PANTALLA

57
Se ha cambiado la pila.
Compruebe que la hora y la fecha sean las correctas.
La pila se está comenzando a descargar.
Hay suciente carga como para efectuar
unas 100pruebas antes de que sea necesario
cambiarlapila.
Se ha introducido una tira usada o el medidor tiene
problemas para leerla.
Repita la prueba con una tira nueva.

58
Escasea la carga en la pila.
Solo hay suciente carga como para efectuar
unas20 pruebas más.
Cambie la pila por una CR2032 nueva lo
antesposible.
La carga de la pila no alcanza para efectuar pruebas.
Instale una nueva pila CR2032.

59
El termómetro está destellando.
El medidor está fuera de los límites óptimos de
temperatura: 50–104°F (10–40°C). Trate con cautela el
resultado de prueba obtenido cuando el termómetro
destella. Este símbolo destellará en todas las pantallas
durante las pruebas de glucosa hasta que el medidor
alcance una temperatura aceptable; las lecturas
obtenidas en estas circunstancias estarán acompañadas
de un termómetro cuando se visualicen los resultados
almacenados en la memoria.
• Antes de realizar una prueba siempre asegúrese
de que el medior este a una temperatura de
funcionamiento de entre 50–104°F (10–40°C). Tratar
los resultados de prueba obtenidos fuera del rango de
temperatura óptima con precaución.
• Si el medidor se ha expuesto a temperaturas extremas,
mueva el medidor en una zona dentro del rango de
funcionamiento de 50–104°F (10–40°C).

60
Símbolo de termómetro - E6.
La temperatura está fuera de los límites aceptables de
41–113°F (5–45°C). No se obtendrá ninguna lectura.
Deje que el medidor se entibien o enfríen lentamente a
50–104°F (10–40°C) o al menos a 41–113°F (5–45°C).
• Antes de realizar una prueba siempre asegúrese
de que el medior este a una temperatura de
funcionamiento de entre 50–104°F (10–40°C). Tratar
los resultados de prueba obtenidos fuera del rango de
temperatura óptima con precaución.
• Si el medidor se ha expuesto a temperaturas
extremas, mueva el medidor en una zona dentro del
rango de funcionamiento de 50–104°F (10–40°C).

61
La memoria está dañada.
Llame al servicio de atención al cliente al
855.776.0662.
No se agregó suciente sangre a la tira de prueba.
Repita la prueba con una tira nueva. Agregue por lo
menos 0.5 µL de sangre a la punta de aplicación de
muestras.

62
Limpieza del medidor
El medidor de glucosa en sangre ReliOn™ Prime es un instrumento preciso que
debe manejarse con sumo cuidado. Limpie el exterior del medidor únicamente
con un paño húmedo; la suciedad, el polvo, la sangre, la solución de control
y el agua pueden averiarlo. El medidor de glucosa en sangre ReliOn™ Prime
no debería requerir una descontaminación, ya que no entrará en contacto con
sangre ni solución de control si se siguen las instrucciones correctamente.
Almacenamiento
El medidor de glucosa en sangre ReliOn™ Prime está diseñado para ser
almacenado a temperaturas de 32–122°F (0–50°C).
• No deje el medidor en lugares extremadamente calientes o fríos, como por
ejemplo cerca de una fuente de calor (como un radiador), ni en un automóvil
expuesto a temperaturas demasiado altas o bajas.
• No almacene ni utilice el medidor o las tiras de prueba en ambientes que
puedan exponerlos a alta humedad, como en un baño o una cocina.
CUIDADO DEL MEDIDOR DE GLUCOSA EN SANGRE
RELION™ PRIME.

63
• No coloque nunca el medidor ni las tiras de prueba bajo un chorro de agua.
• No utilice ni almacene el medidor en presencia o en las cercanías de
un fuerte campo electromagnético, como por ejemplo un horno de
microondas, amplicadores de equipos de sonido o teléfonos celulares.
• No almacene el medidor ni las tiras de prueba en las cercanías de
blanqueador o limpiadores con cloro.

64
TIRAS DE PRUEBA: TIRAS DE PRUEBA RELION™ PRIME
INTERVALO DE RESULTADOS: 20–600 MG/DL
CALIBRACIÓN: CON REFERENCIA A PLASMA
VOLUMEN DE LA MUESTRA: 0.5 µL COMO MĺNIMO
FUENTE DE SANGRE: SANGRE ENTERA CAPILAR
INTERVALO DE HEMATOCRITO: 33–52%
DURACIÓN DE LA PRUEBA: 7 SEGUNDOS
UNIDADES DE GLUCOSA: MG/DL
MÉTODO DE ENSAYO: BIOSENSOR, GLUCOSA-OXIDASA (OBTENIDA
DE ASPERGILLUS NIGER
)
FUENTE DE ALIMENTACIÓN: PILA ÚNICA DE 3V (CR2032) REEMPLAZABLE
DURACIÓN DE LAS PILAS: MÁS DE 2,000 PRUEBAS A 4 PRUEBAS DIARIAS
TIPO DE PANTALLA: PANTALLA DE CRISTAL LÍQUIDO (LCD)
CAPACIDAD DE LA MEMORIA: 250 RESULTADOS CON PROMEDIOS DE 14 Y 30 DÍAS
APAGADO AUTOMÁTICO: 2 MINUTOS A PARTIR DE LA ÚLTIMA ACCIÓN DEL USUARIO
TAMAÑO: APROX. 3.3 X 2.2 X 0.6 PULG. (83.5 X 55.5 X 16 MM)
PESO: APROX. 1.48 OZ (42 G)
LÍMITES DE FUNCIONAMIENTO ÓPTIMO: 50–104°F (10–40°C)
HUMEDAD RELATIVA: 20–80%
ALTITUD: 10,000 PIES (3,048 METROS)
CARACTERÍSTICAS TÉCNICAS

65
• El sistema de monitoreo de glucosa en sangre ReliOn™ Prime no está
destinado a sustituir el equipo de un laboratorio de patología, y por lo tanto
no debe emplearse para efectuar un diagnóstico de diabetes.
• La deshidratación extrema (pérdida excesiva de agua) puede ocasionar
resultados de prueba falsamente bajos. Si usted cree que tiene
deshidratación, consulte de inmediato a su profesional de la salud.
• Un recuento de glóbulos rojos (hematocrito) excesivamente alto (por
encima de 52%) puede producir resultados anormalmente bajos. Un
nivel de hematocrito excesivamente bajo (inferior al 33%) puede producir
resultados anormalmente altos.
• Podrían obtenerse resultados erróneos en personas con hipotensión grave
o en pacientes en estado de shock.
• Podrían obtenerse resultados erróneamente bajos en personas que
experimentan un estado hiperglucémico-hiperosmolar, con o sin cetosis.
• Los pacientes que reciben oxigenoterapia podrían producir resultados
falsos.
• No utilice este sistema para evaluar a recién nacidos, ya que no está
validado para uso neonatal.
ADVERTENCIAS, PRECAUCIONES Y LIMITACIONES

66
• No utilice el sistema ReliOn™ Prime en lugares por encima de 10,000 pies
(3,048 m) de altitud.
• Lá presencia de triglicéridos en concentraciones de hasta 3,300 mg/dL no
altera signicativamente los resultados de prueba. Sin embárgo, los valores
de glucosa en muestras que contengan más de este nivel de triglicéridos
deben interpretarse con cautela.
• Los metabolitos de la icodextrina (maltosa, maltotriosa y maltotetraosa) no
afectan los resultados de prueba.
• Utilice solo sangre capilar recién obtenida. Absténgase de usar suero,
plasma o sangre venosa entera.
IMPORTANTE:
Las lecturas altas o bajas de glucosa en sangre pueden ser indicio de
una afección médica potencialmente grave. Si usted obtiene una lectura
de glucosa en sangre excepcionalmente baja o alta, o si sus lecturas no
reejan cómo se siente, repita la prueba con una nueva tira. Si el segundo
resultado sigue sin coincidir con sus síntomas, o si usted obtiene otro
resultado de glucosa en sangre menor de 60 mg/dL o mayor de 240 mg/dL,
comuníquese con su profesional de atención diabetológica.

67
En ReliOn™ apreciamos tenerlo como cliente y es importante para nosotros
que usted esté completamente satisfecho con su medidor de glucosa en
sangre.
ReliOn™ garantiza que su medidor estará exento de defectos de materiales
y mano de obra por un plazo de cinco años a partir de la fecha de compra
original. Si durante este plazo el medidor no funciona debidamente porque
tiene defectos en los materiales o la mano de obra, ReliOn™ se compromete
a reemplazar o reparar gratuitamente cualquiera y todos los componentes
que demuestren estar defectuosos y estén sujetos a la garantía.
Esta garantía sustituye a todas las demás garantías, expresas o implícitas,
incluidas las garantías implícitas de comerciabilidad o idoneidad para un n
determinado, aparte de las aquí estipuladas.
Esta garantía no se aplica al rendimiento de un medidor ReliOn™ Prime
que se haya dañado por accidentes, o que haya sido alterado, mal usado,
manipulado indebidamente o maltratado de alguna forma. Esta garantía se
aplica solo al comprador original del medidor o sus representantes.
GARANTÍA

N.o de ref. 7957-05
Rev. 12/15
DEVOLUCIONES
Antes de devolver el medidor, es preciso que llame al servicio de atención
al cliente al 855.776.0662. Se le indicará cómo proceder para devolver el
medidor. No se aceptará ningún medidor devuelto sin autorización.
Distributed by:
Wal-Mart Stores, Inc.
Bentonville, AR 72716
855.776.0662
ReliOn.com
-
 1
1
-
 2
2
-
 3
3
-
 4
4
-
 5
5
-
 6
6
-
 7
7
-
 8
8
-
 9
9
-
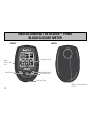 10
10
-
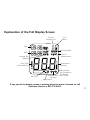 11
11
-
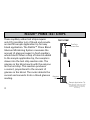 12
12
-
 13
13
-
 14
14
-
 15
15
-
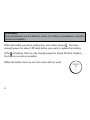 16
16
-
 17
17
-
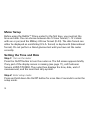 18
18
-
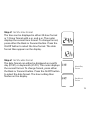 19
19
-
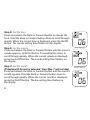 20
20
-
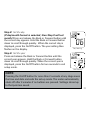 21
21
-
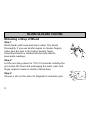 22
22
-
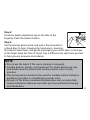 23
23
-
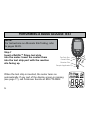 24
24
-
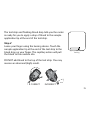 25
25
-
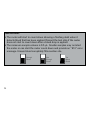 26
26
-
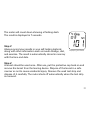 27
27
-
 28
28
-
 29
29
-
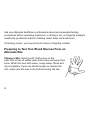 30
30
-
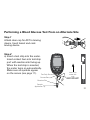 31
31
-
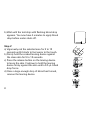 32
32
-
 33
33
-
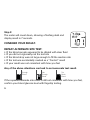 34
34
-
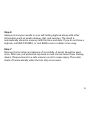 35
35
-
 36
36
-
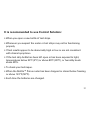 37
37
-
 38
38
-
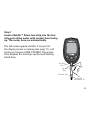 39
39
-
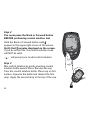 40
40
-
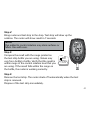 41
41
-
 42
42
-
 43
43
-
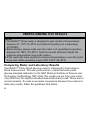 44
44
-
 45
45
-
 46
46
-
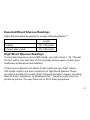 47
47
-
 48
48
-
 49
49
-
 50
50
-
 51
51
-
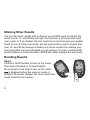 52
52
-
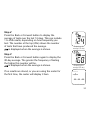 53
53
-
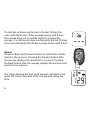 54
54
-
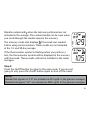 55
55
-
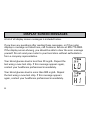 56
56
-
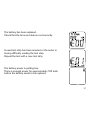 57
57
-
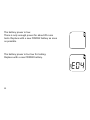 58
58
-
 59
59
-
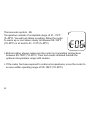 60
60
-
 61
61
-
 62
62
-
 63
63
-
 64
64
-
 65
65
-
 66
66
-
 67
67
-
 68
68
-
 69
69
-
 70
70
-
 71
71
-
 72
72
-
 73
73
-
 74
74
-
 75
75
-
 76
76
-
 77
77
-
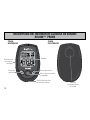 78
78
-
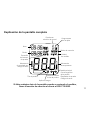 79
79
-
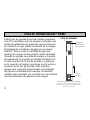 80
80
-
 81
81
-
 82
82
-
 83
83
-
 84
84
-
 85
85
-
 86
86
-
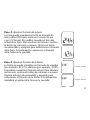 87
87
-
 88
88
-
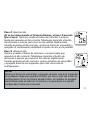 89
89
-
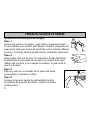 90
90
-
 91
91
-
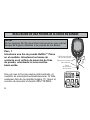 92
92
-
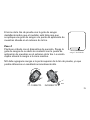 93
93
-
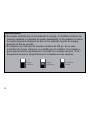 94
94
-
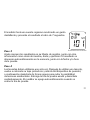 95
95
-
 96
96
-
 97
97
-
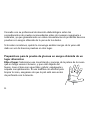 98
98
-
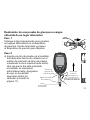 99
99
-
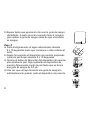 100
100
-
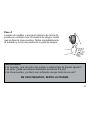 101
101
-
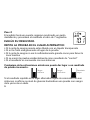 102
102
-
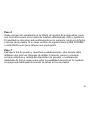 103
103
-
 104
104
-
 105
105
-
 106
106
-
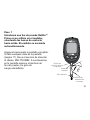 107
107
-
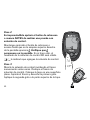 108
108
-
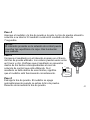 109
109
-
 110
110
-
 111
111
-
 112
112
-
 113
113
-
 114
114
-
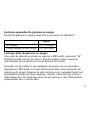 115
115
-
 116
116
-
 117
117
-
 118
118
-
 119
119
-
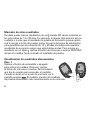 120
120
-
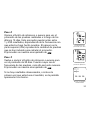 121
121
-
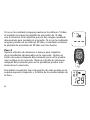 122
122
-
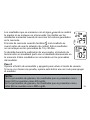 123
123
-
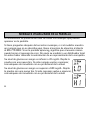 124
124
-
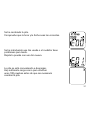 125
125
-
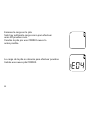 126
126
-
 127
127
-
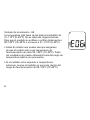 128
128
-
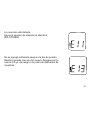 129
129
-
 130
130
-
 131
131
-
 132
132
-
 133
133
-
 134
134
-
 135
135
-
 136
136


en otros idiomas
- English: ReliOn Prime
Artículos relacionados
Otros documentos
-
Prodigy Autocode El manual del propietario
-
 ACONLABS ON CALL EXPRESS Manual de usuario
-
Accu-Chek Accu-Chek Aviva El manual del propietario
-
-
-
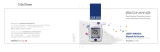 BIONIME Rightest GM300 Manual de usuario
-
-
-
Roche Accutrend Plus Manual de usuario
-
Abbott FreeStyle Lite Owner's Booklet

