Steinberg SBS-KW-1000/10O Manual de usuario
- Categoría
- Medición
- Tipo
- Manual de usuario

BEDIENUNGSANLEITUNG
KRANWAAGE
INSTRUKCJA
WAGA HAKOWA
USER’S GUIDE
ELECTRONIC CRANE SCALE
MANUEL D´UTILISATION
BALANCES À GRUE
ISTRUZIONI D’USO
DINAMOMETRO PER GRU
MANUAL DE INSTRUCCIONES
BALANZAS DE GRÚA
SBS-KW-1000/10O
DE | EN | PL | IT | FR | ES
Produktname: KRANWAAGE
Modell: SBS-KW-1000/10O
Name des Herstellers: emaks spółka z ograniczoną odpowiedzialnością sp.k.
Anschrift des Herstellers: ul. Dekoracyjna 3, 65-155 Zielona Góra

REV. V 2016 REV. V 2016
2
4
18
32
47
62
77
INHALT | TREŚĆ | CONTENT | CONTENU
3

REV. V 2016 REV. V 2016
4
DE
BEDIENUNGSANLEITUNG
Präzise Kranwaage von STEINBERG SYSTEMS
Produktname: KRANWAAGE
Modell: SBS-KW-1000/10O
Name des Herstellers: emaks spółka z ograniczoną odpowiedzialnością sp.k.
Anschrift des Herstellers: ul. Dekoracyjna 3, 65-155 Zielona Góra
Bitte lesen Sie die Anleitung sorgfältig, um bestmögliche Ergebnisse mit der Waage erzielen zu können.
Diese Kranwaage wurde mit moderner, bewährter Mechanik und Technik konzipiert. Sie ist daher vielseitig
einsetzbar, zuverlässig, präzise und leicht zu bedienen.
• Qualität – Produziert nach europäischer CE-Richtlinie
• Funktionalität – Auto-Off-Funktion, Standby-Funktion
• Zuverlässigkeit – Moderne Technik und Schaltkreise für hohe Leistung und Langzeitstabilität
• Breites Anwendungsspektrum – Lagerung, Versand, Transport, etc.
Allgemeine Sicherheitshinweise für den Gebrauch der Kranwaage
Seien Sie stets vorsichtig bei Gebrauch und Wartung der Waage.
Dies gilt insbesondere beim täglichen Gebrauch, um auch nach längerer Zeit genaue Messergebnisse erzielen
zu können.
• Vermeiden Sie während des Gebrauchs Umgebungen mit starken elektrischen oder magne-
tischen Feldern.
• Verwenden Sie diese Waage nicht in Umgebungen mit starken Temperaturschwankungen.
• Bauen Sie die Waage nicht ohne Rücksprache mit dem Kundenservice auseinander – Dadurch
resultierende Schäden werden nicht durch die Gewährleistung abgedeckt.
• Gehen Sie beim Batteriewechsel vorsichtig vor.
• Bitte entfernen Sie vorsorglich die Batterien aus dem Gerät, wenn dieses länger als 4 Wochen
nicht genutzt werden sollte.
• Bitte überladen Sie die Waage nicht. Zu hohe Belastung kann zur Beschädigung der Wiegezellen
führen und die Gewährleistung gefährden.
• Entfernen Sie die Lasten gleich nach dem Wiegevorgang, damit die Messergebnisse nicht nach
teilig beeinusst werden.
• Kontrollieren Sie regelmäßig die Batterien. Sollten diese leer sein, so ersetzen Sie sie oder
laden sie mit einem passenden Ladegerät auf.
• Wenden Sie sich im Schadensfall bitte an Ihren Verkäufer, anstatt die Waage selbstständig zu
reparieren.
VOR DER ERSTEN BENUTZUNG:
Bitte prüfen Sie bei Erhalt der Ware zunächst die Verpackung auf Beschädigungen und öffnen Sie diese an-
schließend, insofern keine Mängel vorliegen. Sollten Beschädigungen vorhanden sein, so kontaktieren Sie bitte
innerhalb von 3 Tagen die Transportgesellschaft und Ihren Vertriebspartner. Dokumentieren Sie so präzise
wie möglich, welche Mängel aufgetreten sind. Stellen Sie das volle Paket nicht verkehrt herum auf! Achten Sie
beim Transport bitte darauf, dass es horizontal und stabil gehalten wird.
Entsorgung der Verpackung
Es wird darum gebeten, das Verpackungsmaterial (Pappe, Plastikbänder und Styropor) aufzubewahren, um im
Servicefall das Gerät bestmöglich geschützt zurücksenden zu können!
5
DE
TECHNISCHE DETAILS
Modell SBS-KW-1000/10O
Präzisionsklasse Class III Entspricht den OIML R76
Tara-Bereich 100% F.S.
Nullierungsbereich ±4% F.S.
Stabilisierungszeit ≤10 sec
Überlastung 100% F.S. + 9e
Sicherheitslast 120% F.S.
Bruchlast 400 % F.S.
Batterie 4 * AA 1.5V
Umgebungstemperatur -10°C ~ +40°C
Umgebungsfeuchtigkeit 20°C ≤90%
Display 25.4 mm – LED
Max. Kapazität 1000 kg
Min. Kapazität 10 kg
Ablesbarkeit 0.5 kg
DISPLAY UND TASTEN
HAUPTDISPLAY
Taste Bezeichnung Funktion
On/Off Drücken Sie diese Taste eine Sekunde lang, um die Waage einzu-
schalten.
Menüpunkt verlassen
Tare Tara
Längeres Gedrückthalten: Zero
Hold Sperren / Freigeben, Bestätigung/ Überleitung
Längeres Gedrückthalten: Wechsel der Gewichtseinheiten

REV. V 2016 REV. V 2016
6
DE
ANZEIGEN
Symbol Bezeichnung Bedeutung
Stable Das Gewicht ist stabil und kann gemessen werden
Zero Das Gewicht ist gleich null
Tared Die Waage ist tariert
Hold Die Tasten sind gesperrt
Lb Die Wiegeeinheit ist auf Pfund eingestellt
Kg Die Wiegeeinheit ist auf Kilogramm eingestellt
FERNBEDIENUNG
Taste Bezeichnung Funktion Taste auf der Waage
Zero Nullierung
Tare Tara
7
DE
Taste Bezeichnung Funktion Taste auf der Waage
Hold Sperren / Freigeben
Bestätigung
Acc. Gewicht addieren, Verminderung des Wertes der
markierten Ziffer
Del. Letzte Messung löschen / alle Messungen löschen,
Bewegung des Cursors nach links
F1 Anzeige des addierten Gewichtes, Eingabe der Kom-
mastelle
F2 Einheitenwechsel
Off Bestätigen und zum Wiegemodus zurückkehren
2nd Funktion „2nd”
ANZEIGE BEI REGULÄRER HANDHABUNG
Symbol Bezeichnung Funktion
Messung läuft
SETUP Benutzerdenierte Einstellungen
BATTERY Batteriestand
END Speichern und Abbrechen
OFF Ausschalten
OVERLOAD Überlastung
ERROR Ungültige Eingabe
ACCUMULATE Gewicht addieren

REV. V 2016 REV. V 2016
8
DE
Symbol Bezeichnung Funktion
DELETE Letzte Messung löschen
CLEAR Alle Messungen löschen
BENUTZUNG
Ein/Ausschalten
Drücken Sie die Taste
für eine Sekunde, um die Waage einzuschalten. Die Waage fährt nun hoch und es
erscheint zwei Mal „0.0.0.0.0“. Anschließend werden die maximale Kapazität 1000 und der Batteriestand
(z.B. bat99) angezeigt. Danach wird das Gewicht geprüft (Anzeige: ------) und eine Nullierung ausgeführt.
Für mehr Informationen bezüglich der automatischen Nullierung, lesen Sie bitte das Kapitel “Systemkon-
guration”.
Drücken Sie oder für eine Sekunde, um die Waage auszuschalten. Der Batteriestand wird ange-
zeigt (z.B. bat99) und |off| erscheint, bevor die Waage herunterfährt.
Nullieren
Drücken Sie oder ,um eine Nullierung vorzunehmen. ZERO leuchtet.
Sollte sich das Gewicht in Bewegung benden, die Tara-Funktion aktiviert sein oder das Gewicht außerhalb
des Bereiches der manuellen Nullierung liegen, so zeigt die Waage |err| an.
Für mehr Informationen bezüglich der manuellen Nullierung, lesen Sie bitte das Kapitel “Systemkongura-
tion”.
Tara
Drücken Sie im Bruttomodus die Taste oder , um in den Tara-Modus zu gelangen. Die Anzeige
TARE leuchtet nun.
Sollte sich das Gewicht in Bewegung, im negativen Bereich oder außerhalb des Tara-Bereichs benden, so
zeigt die Waage |err| an.
Die Tarafunktion reduziert den Überlastungswert der Waage. Beispiel: Wenn ein 1000kg Gewicht bei einer
5000*2k Waage benutzt wird, reduziert sich die maximale Kapazität der Waage auf 4018kg (5000 – 1000 +
9 Einteilungen von 2kg).
Drücken Sie im Nettomodus oder , um den Tara-Modus zu verlassen. Die TARE Anzeige geht
nun aus.
9
DE
Sperren/Freigeben (HOLD-Funktion)
Drücken Sie oder , um die Anzeige zu sperren. HOLD leuchtet.
Drücken Sie oder , um die Anzeige zu entsperren. HOLD geht aus.
Addieren
Drücken Sie , um ein Gewicht zu addieren.
Sobald ein zweites Gewicht aufgenommen wurde, wird |acc| zur Bestätigung angezeigt.
Die Waage addiert je nach Einstellung im Brutto- oder Nettomodus.
Sollte sich das Gewicht in Bewegung oder im negativen Bereich benden, so wird |err| angezeigt. Ebenso,
wenn das Gewicht vorher nicht nulliert wurde.
Ansicht des addierten Gewichtes
Drücken Sie , um in den Ansichtsmodus zu gelangen.
Das Display beginnt zu blinken und zeigt das hinzugefügte Gewicht an.
Drücken Sie oder , um zwischen dem addierten Gewicht und dem Gesamtgewicht zu wechseln.
Drücken Sie oder , um den Ansichtsmodus zu verlassen.
Letzte Messung löschen
Drücken Sie , um den zuletzt hinzugefügten Wert zu löschen.
Zur Bestätigung wird der Hinweis |del| angezeigt. Diese Funktion löscht nur den zuletzt addierten Wert.
Sollte der Wert bereits gelöscht worden sein, so zeigt die Waage |err| an.
Alle Messungen löschen
Drücken Sie und dann , um alle Gewichte zu löschen.
Zur Bestätigung wird der Hinweis |clr| angezeigt.
Einheitenwechsel
Drücken Sie oder , um zwischen den Einheiten kg, lb und benutzerdeniert zu wechseln.
Wählen Sie kg, so leuchtet die kg LED-Diode. Wählen Sie lb, so leuchtet die lb LED-Diode. Wird eine benut-
zerdenierte Einheit benutzt, so leuchtet keine der beiden Dioden.
Für mehr Informationen über benutzerdenierte Einheiten, lesen Sie bitte das Kapitel “Systemeinstellungen”.

REV. V 2016 REV. V 2016
10
DE
BENUTZERDEFINIERTE EINSTELLUNGEN
Benutzerdenierte Einstellungen ermöglichen eine bessere Anpassung der Funktionen an Ihre individuellen
Bedürfnisse.
Die verschiedenen Parameter können nacheinander geändert werden.
Benutzerdenierte Einstellungen öffnen
Drücken Sie und dann oder , um die benutzerdenierten Einstellungen zu öffnen. Nun wird
das Setup angezeigt.
Einstellung der Auto-Off –Zeit
Drücken Sie oder , um die Auto-Off-Zeit anzupassen. Nun wird „Off—“ angezeigt.
Drücken Sie oder und , um die Zeit einzustellen.
Die Einstellungsmöglichkeiten sind: 0(aus), 5 (5min), 10 (10min), 15 (15min), 30 (30min), 60 (60min). Durch die
Auto-Off-Funktion wird die Batterieladung erheblich länger aufrechterhalten, da die Waage sich bei Nichtge-
brauch automatisch abschaltet.
Die eingestellten Minuten bis zum automatischen Ausschalten werden ab dem Moment gezählt, ab dem die
Waage bei stabiler Last nicht benutzt wird.
Ein Tastendruck oder eine Lastbewegung startet den Timer neu.
Helligkeit des Displays
Drücken Sie oder , um die Helligkeit des Displays einzustellen. Es erscheint die Anzeige „br--“.
Drücken Sie oder und , um den Wert anzupassen.
Die LED-Helligkeit kann auf folgende Werte eingestellt werden: 1(dunkel), 2(normal), 3(hell). Geringere Hel-
ligkeitseinstellungen bewirken längere Batterieladung.
Standby-Einstellungen
Drücken Sie oder , um den Standby-Modus einzustellen. Es erscheint die Anzeige „Idl--“.
Drücken Sie oder und , um die Zeiteinstellung anzupassen.
Die Einstellungsmöglichkeiten der Zeit bis zum Standby sind 0 (aus), 5 Sek, 15 Sek, 30 Sek, 60 Sek. Der vor-
eingestellte Standardwert liegt bei 30 Sek.
Um Energie zu sparen, geht die Waage automatisch auf Standby wenn keine Handlung vorgenommen wird
oder die Last über längere Zeit stabil ist.
Im Standby-Modus verbraucht die Waage am wenigsten Strom. Tastendrücke oder Lastbewegungen beenden
den Stand-By-Modus.
Drücken Sie oder , um die benutzerdenierten Einstellungen zu verlassen.
11
DE
SYSTEMKONFIGURATION DER WAAGE
ACHTUNG: Die Parameter der Systemkonguration sind eng mit der Qualität der
Messergebnisse verbunden. Es wird davon abgeraten, diese Parameter zu ändern,
wenn es nicht absolut notwendig ist. Sollten Sie in dieser Hinsicht unsicher sein, kon-
taktieren Sie bitte den Kundenservice um zu prüfen, ob eine Änderung der Parameter
erforderlich ist.
KONFIGURATION DER WAAGE
KONFIGURATIONSMENÜ ÖFFNEN
Drücken Sie zwei Mal , um den Passwortmodus zu öffnen.
Die Waage zeigt P0000 an. Geben Sie das Passwort ein (P0258), indem Sie oder und dann
drücken, um den markierten Wert zu ändern. Um die Position zu wechseln, drücken Sie
oder .
Drücken Sie , um die Eingabe zu bestätigen und in das Kongurationsmenü zu gelangen.
Die Waage zeigt nun SCALE.
RESOLUTION
Die Resolution kann auf folgende Werte eingestellt werden: 0.001, 0.002, 0.005, 0.01, 0.02, 0.05, 0.1, 0.2, 0.5,
1, 2, 5, 10, 20, oder 50.
Drücken Sie um in die Einstellungen zu gelangen. Die Waage zeigt „E---“ an.
Drücken Sie oder und um den Resolutionswert zu ändern.
BEREICH DER AUTOMATISCHEN NULLIERUNG (AUTO-ZERO)
Die Einstellungsmöglichkeiten für den Nullierungsbereich sind: 0 (aus), 2 (±2%FS), 3 (± 3%FS), 4 (±4%FS), 10
(±10%FS), 20 (±20%FS), 50 (±50%FS), 100 (±100%FS) der max. Kapazität. Vom Werk aus ist der Wert ±20%FS
eingestellt.
Drücken Sie
um den Bereich der automatischen Nullierung anzupassen. Die Waage zeigt
an.
Drücken Sie oder und , um den Wert anzupassen.

REV. V 2016 REV. V 2016
12
DE
BEREICH DER MANUELLEN NULLIERUNG
Die Einstellungsmöglichkeiten für den manuellen Nullierungsbereichsind: 0 (aus), 2 (±2%FS), 3 (±3%FS), 4
(±4%FS), 10 (±10%FS), 20 (±20%FS), 50 (±50%FS), 100 (±100%FS) der max. Kapazität.
Drücken Sie um den Bereich der manuellen Nullierung anzupassen.
Die Waage zeigt den Bereich der manuellen Nullierung an, z.B. steht für 4% der maximalen
Kapazität. Die Waage wird nur dann nulliert, wenn das Gewicht im Bereich der manuellen Nullierung liegt.
Drücken Sie oder und , um den Wert anzupassen.
BEREICH DER NULLSUCHE
Die Einstellungsmöglichkeiten sind: 00 (aus), 0.5 (±0.5e), 1.0 (±1.0e), 1.5 (±1.5e), 2.0 (±2.0e), 2.5 (±2.5e), 3.0
(±3.0e), 3.5 (±3.5e), 4.0 (±4.0e), 4.5 (±4.5e), 5.0 (± 5.0e).
Einstellungsveränderungen der Nullsuche können die Betriebstemperatur der Waage erhöhen. Eventuell
wird die Messgenauigkeit dadurch beeinusst!
Drücken Sie ,um den Bereich der Nullsuche anzupassen. Die Waage zeigt dann an.
Die Waage zeigt jeweils den aktiven Wert an, z.B. 0,5 für einen Wert von 0,5e.
Drücken Sie oder und , um den Wert anzupassen.
NULLBEREICH
Der Nullbereich deniert den Bereich, in dem sich die Waage benden muss, bevor eine Addition ausgeführt
werden kann. Sollte die Waage unbelastet sein, so muss das restliche Gewicht leichter als der eingestellte
Wert sein.
Drücken Sie , um in den Nullbereich zu gelangen. wird angezeigt.
Drücken Sie oder und , um den Wert zu ändern. Drücken Sie oder , um die
markierte Ziffer zu wechseln.
Tragen Sie den Wert des Nullbereichs ein. Drücken Sie , um die Kommastelle festzulegen. Der Nullbe-
reich kann im Bereich von 0e bis 3000e eingestellt werden. Die Voreinstellung beträgt 5e.
ZERO-SAVING
Ist Zero-Saving eingeschaltet, so wird die Auto-Zero-Funktion automatisch abgeschaltet.
Die Waage berechnet das Gewicht nun basierend auf der letzten Nullierung. Diese Funktion ist standardmä-
ßig zunächst deaktiviert.
Drücken Sie , um in den Nullbereich zu gelangen. wird angezeigt.
13
DE
Drücken Sie oder und , um die Funktion zuzuschalten („on“) oder abzuschalten („off“).
BEWEGUNGSSENSIBILITÄT
Die Bewegungssensibilität der Waage kompensiert die Bewegung der zu wiegenden Last, damit das Gewicht
auch während einer Bewegung zuverlässig bestimmt werden kann.
Je schwächer die Bewegungssensibilität eingestellt ist, umso schneller zeigt die Waage das Gewicht an.
Die Einstellungsmöglichkeiten der Bewegungssensibilität sind: 0 (aus), 1 (sehr schwach), 2 (schwach), 3 (nor-
mal), 4 (stark) und 5 (sehr stark).
Drücken Sie , um die Einstellungsmöglichkeiten der Bewegungssensibilität aufzurufen.
Der Hinweis erscheint.
Drücken Sie oder und , um den Wert anzupassen.
DYNAMISCHES WIEGEN
Die Funktion des dynamischen Wiegens beschleunigt die Gewichtsbestimmung und eignet sich daher beson-
ders in Fällen, bei denen Stabilität wichtiger als Genauigkeit ist.
Drücken Sie , um die Einstellungsmöglichkeiten des dynamischen Wiegens aufzurufen.
Der Hinweis erscheint.
Drücken Sie oder und , um die Funktion zuzuschalten („on“) oder abzuschalten („off“).
GRAVITATION
Die Waage zeigt den aktiven Wert an, z.B. G9.794, für g = 9.794. Es wird empfohlen, diesen Wert nur dann
zu ändern, wenn die Gravitationsbeschleunigung der Umgebung stark vom eingestellten Wert abweicht.
Drücken Sie , um die Einstellungsmöglichkeiten der Gravitation aufzurufen. „G----“ wird angezeigt.
Drücken Sie oder und , um den Wert anzupassen. Drücken Sie oder ,um den
Cursor zu bewegen. Stellen Sie den Gravitationswert ein. Drücken Sie , um die Kommastelle festzulegen.
BENUTZERDEFINIERTE WIEGEEINHEIT
Der Wert kann zwischen 0.000 und 9.999 eingestellt werden.
Benutzerdenierte Wiegeeinheiten bieten die Möglichkeit, individuelle Einheiten zu denieren, die nicht zu
den Standarteinheiten der Waage zählen.
Benutzerdenierte Einheiten arbeiten proportional zur Systemeinheit: Sollte die benutzerdenierte Einheit
bei 1234 und die Systemeinheit bei kg gesetzt werden, so wird zunächst das Gewicht in kg gemessen (z.B.
1000) und anschließend in die benutzerdenierte Einheit konvertiert (im Beispiel: 1234 USR).

REV. V 2016 REV. V 2016
14
Achten Sie bei der Benutzung von benutzerdenierten Einheiten bitte auf die Maximalbelastung der Waage,
da der angezeigte Wert nicht der tatsächlichen Belastung entspricht.
Drücken Sie , die Einstellungsmöglichkeiten der benutzerdenierten Wiegeeinheit aufzurufen. „U----“
wird angezeigt.
Drücken Sie oder und , um den Wert anzupassen. Drücken Sie oder , um
den Cursor zu bewegen. Geben Sie den gewünschten Wert ein. Drücken Sie , um die Kommastelle
festzulegen.
KALIBRIERUNG
KALIBRIERUNGSMENÜ ÖFFNEN
Drücken Sie zwei Mal , um in den Passwort-Modus zu gelangen.
Die Waage zeigt nun P0000. Drücken Sie oder und , um die gewählte Ziffer zu ändern.
Drücken Sie oder , um den Cursor zu bewegen. Geben Sie das Kalibrierungspasswort (P8416) ein.
Drücken Sie , um die Eingabe zu bestätigen und um in den Kalibrierungsmodus zu gelangen. „CAL“ wird
angezeigt.
SYSTEMEINHEIT
Die Waage zeigt die aktuelle Systemeinheit. Die Systemeinheit kann auf kg oder lb festgelegt werden.
Drücken Sie , um die Einstellungsmöglichkeiten der Systemeinheit zu öffnen. „Un---“ wird angezeigt.
Drücken Sie oder und , um die Systemeinheit zu ändern.
KALIBRIERUNGSGRAVITATION
Die Waage zeigt die Kalibrierungsgravitation an, z.B. G9.794 für g = 9,794.
Drücken Sie , um zu den Gravitationseinstellungen zu gelangen. „G----“ wird angezeigt.
Drücken Sie oder und , um die gewählte Ziffer zu ändern. Drücken Sie oder ,
um den Cursor zu bewegen. Geben Sie den Wert der Gravitationsbeschleunigung ein. Drücken Sie , um
die Kommastelle festzulegen.
MAXIMALE KAPAZITÄT
Bitte überlasten Sie die Waage nicht! Eine Überlastung kann die Waage schwer be-
schädigen.
Drücken Sie
, um die Einstellungen der max. Kapazität aufzurufen. „00000“ wird angezeigt.
DE
15
Drücken Sie oder und , um die gewählte Ziffer zu ändern. Drücken Sie oder ,
um den Cursor zu bewegen. Geben Sie den Wert der max. Kapazität ein. Drücken Sie , um die Kommas-
telle festzulegen.
NULLSUCHE
Drücken Sie , um die Einstellungen der Nullsuche aufzurufen. „LOAD0“ wird angezeigt.
Lassen Sie die Waage unbelastet und drücken Sie , um den Code 12345 anzeigen zu lassen. Nach der
Code-Stabilisierung drücken Sie , um zum nächsten Schritt überzugehen.
MESSUNG DES GEWICHTES 1 (LOAD1)
Die Waage zeigt „LOAD1“ an.
Nutzen Sie ein Prüfgewicht, und drücken Sie . „00000“ wird angezeigt.
Drücken Sie oder und , um die gewählte Ziffer zu ändern. Drücken Sie oder ,
um den Cursor zu bewegen. Geben Sie das Gewicht des Prüfgewichtes ein. Drücken Sie , um die
Kommastelle festzulegen.
Halten Sie die Last stabil und drücken Sie , um den Code 23456 anzeigen zu lassen.
Warten Sie, bis der Code stabil ist. Drücken Sie , um die Gewichtsmessung zu starten.
Sobald die Messung abgeschlossen ist, geht die Waage automatisch zum nächsten Schritt über.
MESSUNG DES GEWICHTES 2 (LOAD2)
Die Waage zeigt „LOAD2“ an.
Nutzen Sie ein Prüfgewicht, und drücken Sie . „00000“ wird angezeigt.
Drücken Sie oder und , um die gewählte Ziffer zu ändern. Drücken Sie oder , um
den Cursor zu bewegen. Geben Sie das Gewicht des Prüfgewichtes ein. Drücken Sie , um die Kommas-
telle festzulegen.
Halten Sie die Last stabil und drücken Sie , um den Code 34567 anzeigen zu lassen.
Warten Sie, bis der Code stabil ist. Drücken Sie , um die Gewichtsmessung zu starten.
Sobald die Messung abgeschlossen ist, geht die Waage automatisch zum nächsten Schritt über.
DE

REV. V 2016 REV. V 2016
16
MESSUNG DES GEWICHTES 3 (LOAD3)
Die Waage zeigt „LOAD3“ an.
Nutzen Sie ein Prüfgewicht und drücken Sie . „00000“ wird angezeigt.
Drücken Sie oder und , um die gewählte Ziffer zu ändern. Drücken Sie oder , um
den Cursor zu bewegen. Geben Sie das Gewicht des Prüfgewichtes ein. Drücken Sie , um die Kommas-
telle festzulegen.
Halten Sie die Last stabil und drücken Sie , um den Code 45678 anzeigen zu lassen.
Warten Sie, bis der Code stabil ist. Drücken Sie , um die Gewichtsmessung zu starten.
Sobald die Messung abgeschlossen ist, speichert die Waage automatisch die Kalibrierung und das Kalibrie-
rungsmenü wird verlassen.
Problem Mögliche Ursache Mögliche Lösung
Die Waage geht nicht
an,
wenn man den
Knopf bedient
Batterie leer / defekt Batterie prüfen und ggf. austauschen
Taste
defekt
Drücken Sie fester und halten Sie die Taste 2
Sek. gedrückt
Platine defekt Setzen Sie sich mit dem Kundenservice in
Verbindung
Display blinkt Batterie leer Batterie auaden / wechseln
Die Waage reagiert nicht
auf einen Tastendruck
Das Programm hängt Waage ausschalten und wieder einschalten
Taste defekt Setzen Sie sich mit dem Kundenservice in
Verbindung
Messergebnis instabil
Last in Bewegung Stabilisieren Sie die Last
Bewegungssensibilität zu schwach
eingestellt
Erhöhen Sie die Bewegungssensibilität
Feuchtigkeit im inneren der
Waage
Trocknen Sie vorsichtig die einzelnen Ele-
mente
Platine defekt Setzen Sie sich mit dem Kundenservice in
Verbindung
Die Waage zeigt ein
Gewicht an, obwohl sie
nicht geladen ist
Batterie leer Batterie auaden / wechseln
Wiegezelle wurde zu lang
benutzt
Pausieren Sie mit der Anwendung
Wiegezelle defekt Setzen Sie sich mit dem Kundenservice in
Verbindung
Grober Messfehler Die Waage wurde vor dem
Wiegen nicht nulliert
Nullieren Sie die Waage manuell
Falsche Wiegeeinheit Ändern Sie die Wiegeeinheit
Kalibrierung nötig Kalibrieren Sie die Waage
Wiegezelle oder Platine defekt Setzen Sie sich mit dem Kundenservice in
Verbindung
DE
17
Die Fernbedienung funktioniert
nur bei geringer Entfernung
Batterie der Fernbedienung
defekt / leer
Batterie der Fernbedienung
erzetzen
REGELMÄSSIGE PRÜFUNG DES GERÄTES
Prüfen Sie regelmäßig, ob Elemente des Gerätes Beschädigungen aufweisen. Sollte dies der Fall sein, darf
das Gerät nicht mehr benutzt werden. Wenden Sie sich umgehend an Ihren Verkäufer, um Nachbesserungen
vornehmen zu lassen.
Was tun im Problemfall?
Kontaktieren Sie Ihren Verkäufer und bereiten Sie folgende Angaben vor:
• Rechnungs- und Seriennummer (letztere nden Sie auf dem Typenschild)
• Ggf. ein Foto des defekten Teils
• Ihr Servicemitarbeiter kann besser eingrenzen worin das Problem besteht, wenn Sie es so präzise wie
möglich beschreiben. Je detaillierter Ihre Angaben sind, umso schneller kann geholfen werden!
ACHTUNG: Öffnen Sie niemals das Gerät ohne Rücksprache mit dem Kundenservice.
Dies kann Ihren Gewährleistungsanspruch beeinträchtigen!
DE

REV. V 2016
EN
Product name: CRANE SCALE
Model: SBS-KW-1000/10O
Manufacturer name: emaks spółka z ograniczoną odpowiedzialnością sp.k.
Manufacturer address: ul. Dekoracyjna 3, 65-155 Zielona Góra
19
USER’S GUIDE
This scale is a combination of sound and proven mechanical design, with today’s most advanced electronics
to provide a superb feature set. It is versatile, reliable, accurate and easy to operate.
• Superb Quality – strictly in accordance with European CE directives.
• Great Safety – Auto-Off function, Standby function
• Strong Reliability – Cutting-edge technology, quality integrated circuit for high perfor
mance and longtime stability.
• Broad Applicability – Popular and applicable in storage, textile, metallurgy industry, and so
forth.
General safety information for the use of our scale
For good performance and precise measurement, be careful with daily operation and maintenance.
• Do NOT overload scale. This will damage load cell and void warranty.
• Do NOT leave load hung on the scale for long. This will decrease scale’s accuracy and shorten
load cell’s life.
• Inspect shackle and hook before using. Check clips, pins and screws regularly.
• Check battery frequently. When scale runs out of power, charge battery with its dedicated
charger or replace it with a full one.
• Rotate load rather than scale if needed.
• Do NOT use scale under thunder or rain.
• Hang scale on shelf in dry and well-ventilated room. Do NOT place scale on the ground directly.
• Do NOT attempt to repair scale yourself. Contact your local representative.
BEFORE FIRST USE
Upon receipt of the goods, check the packaging for integrity and open it. If the packaging is damaged, please
contact your transport company and distributor within 3 days, and document the damages as detailed as
possible. Do not turn the package upside down! When transporting the package, please ensure that it is kept
horizontal and stable. The various items used for packaging (cardboard, plastic straps, polyurethane foam)
should be conserved, so that the device can be sent back to the service centre in the best condition in case
of a problem!
EN

REV. V 2016 REV. V 2016
20
SPECIFICATIONS
Model SBS-KW-1000/10O
Accuracy Class Class III Equivalent to OIML R76
Tare Range 100% F.S.
Zero Range ±4% F.S.
Stable Time ≤10 sec
Overload 100% F.S. + 9e
Safety Load 120% F.S.
Ultimate Load 400 % F.S.
Battery 4 * AA 1.5V
Op. Temp. -10⁰C ~ +40⁰C
Op. Humidity 20⁰C ≤90%
Display 25.4 mm – typu LED
Max. Capacity 1000 kg
Min. Capacity 10 kg
Resolution 0.5 kg
DISPLAY AND KEYS
Main display
Key Name Function
On/Off Press for 1sec to power-on or power-off the scale. Single pressing
will cause exit and return to weighing mode.
Tare Tare. Press for tare. Longer pressing: zero.
Hold lock/unlock, conrmation/move further. Longer pressing: change
the units.
EN
21
INDICATORS
LED Name Note
Stable lit when weight is stable
Zero lit when weight is at zero
Tared lit when scale is tared
Hold lit when scale is locked
lb lit when unit is lb
kg lit when unit is kg
REMOTE CONTROL
Key Name Function Scale key
Zero Zeroing.
Tare Tare .
EN

REV. V 2016 REV. V 2016
22
Key Name Function Scale key
Hold Lock/unlock.
Conrmation.
Acc. Accumulate weight. Decrease digit.
Del. Delete last weight / clear all weight. Left scroll digit
F1 View accumulated weight. Input decimal point.
F2 Unit switch.
Off Press: entering into weighing mode.
Longer pressing: turn the scale off.
2nd „2nd” function.
DISPLAY MESSAGES BY NORMAL USE
Message Stand for Note
detect weight
SETUP user setup menu
BATTERY battery life percentage
END save and exit
OFF power off
OVERLOAD Overloading
ERROR invalid operation
ACCUMULATE accumulate weight
EN
23
Message Stand for Note
DELETE delete last weight
CLEAR delete all weight
OPERATION
POWER ON/OFF
Press
for 1s to power-on scale. Scale perform initialization and power-on test, “0.0.0.0.0” shows twice,
then capacity 1000 shows, battery life percentage bat99 shows, weight detection ----- shows and then auto
zero.
For information about Auto-Zero, refer to Scale Conguration.
Press or for 1s to power-off scale. Battery life percentage bat90 shows, off message |off| shows,
and then cut off power.
Zero
Press or ,to zero. ZERO light on.
If load is in motion, or tared, or out of Manual-Zero Range, |err| shows.
For information about Manual-Zero Range, refer to Scale Conguration.
Tare IN/OUT
In gross mode, press or ,to tare in. TARE light on.
Sollte sich das Gewicht in Bewegung, im negativen Bereich oder außerhalb des Tara-Bereichs benden, so
zeigt die Waage |err| an.
If load is in motion, or negative, or out of Tare Range, |err| shows. Tare will re¬duce the apparent overload
range of scale. For example, if a 5000*2kg scale has a 1000kg container as its tare, the scale will overload at
a new weight of 4018kg (5000 – 1000 + additional 9 divisions).
In net mode, press or , to tare out. TARE light off.
LOCK/UNLOCK
Press or , to lock screen. HOLD light on.
Press or , to unlock screen. HOLD light off.
EN

REV. V 2016 REV. V 2016
24
ACUUMULATE
Press , to accumulate current weight.
|acc| shows, indicating weight is accumulated. Scale uses displayed weight, so gross or net weight is added
into the same accumulator.
If load is in motion, or negative, or does not return to zero before, |err| shows.
VIEW
Press ,to enter View mode.
Display ashes accumulated weight.
Press or , to switch between weight accumulation and total weight.
Press or , to exit View mode.
DELETE LAST WEIGHT
Press , to delete last accumulated weight.
|del| shows, indicating last accumulated weight is deleted. Delete function only deletes the last weight. If last
accumulated weight has been deleted, |err| shows.
CLEAR ALL WEIGHT
Press and then , to clear all accumulated weight.
|clr| shows, indicating all weight is cleared.
UNIT SWITCH
Press or , to switch unit in between kg, lb, and User Unit.
When unit is kg, kg LED light is on. When unit is lb, lb LED light is on. When unit is User unit, kg and lb are
turned off.
For more information about User Unit, refer to Scale Conguration.
USER SETUP
The user setup enables you to x several functions of the scale so that it better ts your expectations by
using it. The different parameter can be determined one after another.
ENTERING THE USER SETUP
Press rst and then press or , to enter user setup menu. SETUP shows.
EN
25
AUTO-OFF TIMING
Press or , to enter Auto-Off Timing. Off-- shows.
Press or and , to change timing value.
Auto-Off Timing can be set to: 0(disabled), 5(5min), 10(10min), 15(15min), 30(30min), 60(60min).
Auto-Off function maximizes scale’s battery life against people’s carelessness not to power off scale when it’s
not working. Auto-Off starts countdown timer when there’s no action or load is stable.
Any key pressing or motion in load restarts countdown timer.
DISPLAY BRIGHTNESS
Press or , to enter Display Brightness. br|| shows.
Press or and , to change brightness value.
Display Brightness can be set to:1(dim), 2(normal), 3(bright).
Dim LED brightness saves battery power.
IDLE MODE TIMING
Press or , to enter Idle Mode Timing. Idl-- shows.
Press or and , to change timing value.
Idle Mode Timing can be set to: 0(disabled), 5(5sec), 10(10sec), 15(15sec), 30(30sec), 60 (60sec). It is 30sec
by default.
To maximize battery life, the scale automatically enters Idle Mode, when there’s no action or the load is
stable. In Idle Mode,
the scale works in low-power consumption status. Any key pressing or motion in load wakes up the scale
from Idle Mode.
Press or , to exit User Setup.
SCALE CONFIGURATION
ATTENTION: The parameters in Scale Conguration are closely related to the scale’s
metrology performance. It is NOT recommended to change any parameters unless
you absolutely need to. In case you´re not sure, please contact the customer service to
check if it is necessary to modify these parameters.
EN

REV. V 2016 REV. V 2016
26
SCALE CONFIGURATION
ENTERING THE MENU
Press twice, to enter Password mode.
The Scale displays P0000. Input Scale Conguration password P0258 . To do so, press or
and to modify the digits. To move the digits, press or .
Press to conrm the input and enter the Scale Conguration.
Scale displays SCALE.
DISPLAY RESOLUTION
The display resolution can be set to: The display resolution can be set to: 0.001, 0.002, 0.005, 0.01, 0.02, 0.05,
0.1, 0.2, 0.5, 1, 2, 5, 10, 20, or 50
Press to enter the Display Resolution. E--- shows.
Press or and to change the resolution value.
AUTO-ZERO RANGE
The Auto-Zero range can be set to: 0% (disabled), 2 (±2%FS), 3 (± 3%FS), 4 (±4%FS), 10 (±10%FS), 20
(±20%FS), 50 (±50%FS), 100 (±100%FS). It is set to ±20%FS by default.
Press
to enter the Auto-Zero range setting.The scale displays .
Press or and , to change the value.
MANUAL ZERO RANGE
The manual zero range can be set to: 0% (disabled), 2 (±2%FS), 3 (±3%FS), 4 (±4%FS), 10 (±10%FS), 20
(±20%FS), 50 (±50%FS), 100 (±100%FS).
Press to enter the Manual-Zero range setting.
The scale displays the Manual-Zero range, indicating 4% F.S. Zero is only allowed when the weight
is within the Manual-Zero range.
Press
or and , to change the value.
ZERO TRACKING RANGE
The Zero-Tracking range can be set to: 0 (disabled), 0.5 (±0.5e), 1.0 (±1.0e), 1.5 (±1.5e), 2.0 (±2.0e), 2.5
(±2.5e), 3.0 (±3.0e), 3.5 (±3.5e), 4.0 (±4.0e), 4.5 (±4.5e), 5.0 (± 5.0e).
Enabling the Zero-Tracking will enhance the scale tempe¬rature and drift the performance!
EN
27
Press , to enter the Zero tracking range setting. The scale displays the Zero-Tracking range
The scale displays active value, e.g. 0.5 for the 0.5e value.
Press or and , to change the value.
ZERO RANGE
Zero Range denes the range that scale must fall into before activating the accu¬mulation operation. When
the load is removed from the scale, the weight left must be lighter than the value set.
Press , to enter the Zero range setting. shows.
Press or and , to change the value. Press or , to move the digit.
Input the Zero Range value. Press , to set the decimal point. Zero Range can be set from 0e to 3000e.
It is set to „5e” by deafult.
ZERO-SAVING
When Zero-saving is enabled, Auto Zero is disabled automatically. Scale calcu¬lates weight based on the last
Zeroing action. It is disabled by default.
Press , to enter Zero Saving. shows.
Press or and , to change the status to „on” (enabled) or „off” (disabled).
ANTI-MOTION
At the cost of measuring time, the Anti-Motion function intelligently settles the determination of weight
when the scale is in motion. The weaker Anti-Motion is, the faster the scale displays the weight, but the longer
it takes to be stable.
Anti-Motion can be set to: 0 (off), 1 (weakest), 2 (weak), 3 (normal), 4 (strong), 5 (strongest).
Press , to enter the Anti-motion setting. shows
Press or and , to change the value.
DYNAMIC WEIGHING
In some special application where the scale´s accuracy is not so important as the scale´s stability for the
weight reading, the dynamic weighing can be a useful function to set the weight reading faster.
Press , to enter the Dynamic Weighing setting. shows.
Press or and , to change the status to „on” (enabled) or „off” (disabled).
EN

REV. V 2016 REV. V 2016
28
GRAVITY
Scale shows active value, e.g. G9.794 for g = 9,794. Only adjust the Gravity when the scale is used in a place
where the acceleration of gravity is greatly different from the place where it was calibrated.
Press , to enter the Gravity setting. G---- shows.
Press or and , to modify the digit. Press or ,o move the digit. Input the Gravity
value. Press , to input the decimal point.
USER UNIT
The User Unit can be set from 0.000 to 9.999.
The User Unit is a named unit which is usually used in the user’s region, but which is not included in the scale
by default. It is a ratio to the System Unit. For example, if the User Unit is set to 1.234 and if the System Unit
is kg, then after switching to User Unit, the scale measures the weight (1000kg), and displays the calculated
value (1234usr).
This means you have to watch up the maximal load hanging on the scale while using the user unit, to not
overload the scale because of a different displayed value!
Press , to enter the User Unit setting. „U----“ shows.
Press or and , to modify the digit. Press or , to move the digit. Input the User
Unit value. Press , to input the decimal point.
CALIBRATION
ENTERING CALIBRATION SETTINGS
Press twiceto enter the Password mode.
The scale displays P0000. Press or and , to modify the digits.
Press or , to move the digit. Input the Calibration password: P8416.
Press , to conrm the input and to enter Calibration. CAL shows.
SYSTEM UNIT
The Scale displays the System Unit. The System Unit can be set to: kg and lb.
Press , to enter the System Unit setting. Un--- shows.
Press or and , to change the System Unit.
EN
29
CALIBRATION GRAVITY
The Scale displays the calibrated gravity, e.g. G9.794 for g = 9,794.
Press , to enter the Gravity setting. G---- shows.
Press or and , to modify the digit. Press or ,
to move the digit. Input the Gravity value. Press , to input the decimal point.
MAX. CAP
Do NOT attempt to set Max. Cap. greater than scale’s actual capacity. Overloading
causes severe harm to scale, and is very dangerous.
Press
, to enter the Max. Cap. setting. 00000 shows.
Press
or and , to modify the digit. Press or , to move the digit. Input the max.
capacity value. Press , to input the decimal point.
ZERO DETECTION
Press , to enter the zero detection. LOAD0 shows.
Keep the scale without load and press , to display the weight code 12345. After the code is stable press
, to go to the next step.
LOAD 1 DETECTION
The scale displays LOAD1.
Load a standard weight, and press . 00000 shows.
Press or and , to modify the digit. Press or ,
to move the digit. Input weight value. Press , to input the decimal point..
Keep the load stable and press , to display the weight code 23456.
Wait until the weight code is stable. Press , o start the weight detection.
Once the detection nished, the scale automatically enters Load2 Detection.
EN

REV. V 2016 REV. V 2016
30
LOAD 2 DETECTION
The scale displays LOAD2.
Load a standard weight, and press . 00000 shows.
Press or and , to modify the digit. Press or , to move the digit. Input weight value.
Press , to input the decimal point.
Keep the load stable and press , to display the weight code 34567.
Wait until the weight code is stable. Press , to start the weight detection.
Once the detection nished, the scale automatically enters Load3 Detection.
LOAD 3 DETECTION
The scale displays LOAD3
Load a standard weight, and press . 00000 shows.
Press or and , to modify the digit. Press or , o move the digit. Input weight value.
Press , to input the decimal point.
Keep the load stable and press , to display the weight code 45678.
Wait until the weight code is stable. Press , to start the weight detection.
Once the detection nished, the scale automatically saves and exits the Calibration mode.
Problem Possible Cause Suggested Solution
not power-on after
is pressed
discharged / defective battery check batteries and charge / exchange
the batteries
defective
key
press harder and keep pressing 2sec
defective power cable open front panel, check power cable
defective mainboard contact service representative
display ashes discharged battery charge / exchange the batteries
no action taken after key
pressed
scale is disturbed Turn off and then turn the scale on
again
defective key contact service representative
EN
31
Problem Possible Cause Suggested Solution
weight reading not stable
load in motion keep load stable
weak Anti-Motion change Anti-Motion level
damped loadcell or mainboard dry loadcell or mainboard
defective mainboard contact service representative
weight reading not zero
when no load
discharged batteries charge / exchange the batteries
load-cell stressed too long ofoad the weight
defective loadcell contact service representative
large error in weight
reading
scale not zeroed before applying
load
manual Zero scale before loading
wrong unit switch to correct unit
scale requires calibration calibrate scale
defective loadcell or mainboard contact service representative
short remote controlling
distance
discharged / defective remote
battery
replace remote controller batteries
REGULAR CONTROL OF THE DEVICE
Control regularly that the device doesn´t present any damage. If there is any damage, please stop using the
device. Please contact your customer service to solve the problem.
What to do in case of a problem?
Please contact your customer service and prepare following information:
• Invoice number and serial number (the latter is to be found on the technical plate on the
device).
• If relevant, a picture of the damaged, broken or defective part.
• It will be easier for your customer service clerk to determine the source of the problem if you give
a detailed and precise description of the matter. The more detailed your information, the better the
customer service will be able to solve your problem rapidly and efciently!
CAUTION: Never open the device without the authorization of your customer ser-
vice. This can lead to a loss of warranty!
EN

REV. V 2016
PL
Nazwa produktu: WAGA HAKOWA
Model produktu: SBS-KW-1000/10O
Nazwa producenta: emaks spółka z ograniczoną odpowiedzialnością sp.k.
Adres producenta: ul. Dekoracyjna 3, 65-155 Zielona Góra
33
INSTRUKCJA OBSŁUGI
WAGA HAKOWA O WYSOKIEJ PRECYZJI rmy STEINBERG SYSTEMS
Prosimy o dokładne przeczytanie instrukcji, aby w każdym czasie uzyskać najlepsze możliwe wyniki Państwa
nowej wagi.
Ta waga łączy nowoczesną i sprawdzoną mechanikę z aktualnymi opracowaniami technicznymi, stanowiąc tym
samym doskonały produkt końcowy. Waga jest wszechstronna, niezawodna, precyzyjna i łatwa w obsłudze.
• Doskonała jakość – wyprodukowano ściśle według europejskiej normy CE.
• Najwyższe bezpieczeństwo – funkcja Auto Off, funkcja Stand-by
• Najlepsza niezawodność – najnowocześniejsza technika, wysokiej jakości obwody,
gwarantujące wysoką wydajność i stabilność w długim czasie.
• Najszersze spektrum zastosowań – do magazynów, wysyłki, transportu itp.
Ogólne wskazówki bezpieczeństwa przy użytkowaniu wagi
Dla dobrej wydajności i dokładnych wyników pomiarów zachować ostrożność przy codziennej pracy i kon-
serwacji.
• Unikać otoczenia z silnymi polami elektrycznymi lub magnetycznymi.
• Nie stosować wagi w otoczeniu o znacznych wahaniach temperatury.
• Nie rozkładać wagi na części – gwarancja nie obejmuje powstałych z tego powodu szkód.
• Nie stosować nadmiernej siły przy wymianie baterii.
• W przypadku nieużywania przez ponad 4 tygodnie wyjąć baterie z wagi.
• Nie przeładowywać wagi. Ogniwa mogą zostać uszkodzone i wyklucza to gwarancję.
• Nigdy nie pozostawiać wagi w stanie obciążonym. Wpływa to trwale na wyniki pomiarów ogniw.
• Regularnie kontrolować baterie. Po ich wyczerpaniu, naładować je odpowiednią ładowarką lub
wymienić.
• Nie próbować samodzielnie naprawiać wagi. W celu naprawy zwrócić się do sprzedawcy.
PRZED PIERWSZYM UŻYCIEM
Kontrola po otrzymaniu towaru
W momencie otrzymania towaru należy sprawdzić opakowanie pod kątem występowania ewentualnych
uszkodzeń i otworzyć je. Jeżeli opakowanie jest
uszkodzone prosimy o skontaktowanie się w przeciągu 3 dni z przedsiębiorstwem transportowym lub
Państwa dystrybutorem oraz o udokumentowanie uszkodzeń w jak najlepszy sposób. Prosimy nie stawiać
pełnego opakowania do góry nogami! Jeżeli opakowanie będzie ponownie transportowane prosimy zadbać o
to, by było ono przewożone w pozycji poziomej i by było stabilne ustawione.
Utylizacja opakowania
Prosimy o zachowanie elementów opakowania (tektury, plastykowych taśm oraz styropianu), aby w razie
konieczności oddania urządzenia do serwisu można go było jak najlepiej ochronić na czas przesyłki!
PL

REV. V 2016 REV. V 2016
34
DANE TECHNICZNE
Model SBS-KW-1000/10O
Klasa precyzji Class III Odpowiada OIML R76
Zakres tary 100% F.S.
Zakres zerowania ±4% F.S.
Czas stabilizacji ≤10 sec
Przeciążenie 100% F.S. + 9e
Obciążenie bezpieczne 120% F.S.
Obciążenie zrywające 400 % F.S.
Zasilanie (baterie) 4 * AA 1.5V
Temperatura otoczenia -10°C ~ +40°C
Wilgotność otoczenia 20°C ≤ 90%
Wyświetlacz 25.4 mm – typu LED
Maksymalne obciążenie 1000 kg
Minimalne obciążenie 10 kg
Rozdzielczość 0.5 kg
WYŚWIETLACZ I PRZYCISKI
GŁÓWNY WYŚWIETLACZ
Przycisk Nazwa Funkcje i właściwości
On/Off Nacisnąć i przytrzymać(ok. 1s) w celu włączenia/wyłączenia wagi.
Samo naciśnięcie spowoduje wyjście i powrót do modułu ważenia.
Tare Tara. Naciśnięcie spowoduje wytarowanie wagi. Dłuższe przytrzy-
manie: Zero.
Hold Naciśnięcie spowoduje: Blokada/zwolnienie, Potwierdzenie/
Przejście dalej. Dłuższe przytrzymanie przycisku spowoduje zmiany
jednostek ważenia
PL
35
WYŚWIETLANIE
LED Nazwa Znaczenie
Stable Ciężar jest stabilny.
Zero Ciężar jest równy zero.
Tared Waga jest starowana.
Hold Wskazanie ciężaru jest zablokowane.
lb Jednostką miary jest funt.
kg Jednostką miary jest kilogram.
OBSŁUGA ZDALNA
Przycisk Nazwa Znaczenie Przycisk na wadze
Zero Zerowanie.
Tare Tarowanie.
PL

REV. V 2016 REV. V 2016
36
Przycisk Nazwa Znaczenie Przycisk na wadze
Hold Blokada/zwolnienie.
Potwierdzanie.
Acc. Dodawanie masy. Zmniejszenie wartości mrugającej
cyfry.
Del. Usuwanie ostatniego pomiaru. Kasowanie wszystkich
zapisanych pomiarów. Poruszenie kursora w lewo.
F1 Wyświetlenie dodanej masy.
F2 Zmiana jednostek ważenia.
Off Naciśnięcie spowoduje przejście do trybu ważenia.
Przytrzymanie przycisku wyłączy wagę.
2nd Funkcja „2nd”.
KOMUNIKATY PRZY REGULARNYM UŻYTKOWANIU
Informacja Znaczenie Uwagi
Wykrywanie ciężaru
SETUP Ustawienia zdeniowane przez użytkownika
BATTERY Procentowy wskaźnik poziomu baterii
END Zapisanie i wyjście z opcji
OFF Wyłączenie wagi
OVERLOAD Przeciążenie
ERROR Nieprawidłowa operacja
ACCUMULATE Zsumowana waga
PL
37
Informacja Znaczenie Uwagi
DELETE Wykasowanie ostatniego pomiaru
CLEAR Wykasowanie wszystkich zapisanych wyników
UŻYTKOWANIE
WŁĄCZANIE/WYŁĄCZANIE
Nacisnąć
przez jedną sekundę w celu włączenia/wyłączenia wagi. Waga załącza się, dwukrotnie
wyświetla “0.0.0.0.0” a następnie maks. obciążenie 1000 i stan baterii (np. bat99), sprawdza masę (wska-
zanie -------) i wykonuje zerowanie.
Więcej informacji o automatycznym zerowaniu w rozdziale „Konguracja systemu“.
Nacisnąć lub przez jedną sekundę w celu wyłączenia wagi. Wyświetla się stan baterii (np. bat99)
i |off| i waga się wyłączy.
Zerowanie
Nacisnąć lub pżeby przeprowadzić zerowanie. Zapala się ZERO.
Jeśli ciężar jest w ruchu lub aktywna jest funkcja tary, albo przedział nie mieści się w ramach ręcznego zero-
wania, waga wskazuje |err|.
Więcej informacji o ręcznym zerowaniu w rozdziale „Konguracja systemu“.
Tara
W trybie brutto nacisnąć lub , żeby przejść w tryb tary. Zapala się TARE.
Jeśli ciężar jest w ruchu lub jest ujemny albo poza przedziałem tary, waga wskaże |err|.
Funkcja tary zredukuje wartość przeciążenia wagi. Przykład: jeśli w przypadku wagi 5 000*2k używa się po-
jemnika 1 000 kg, maksymalne obciążenie wagi redukuje się do 4 018 kg (5 000 - 1 000 + 9 podziałek 2 kg).
W trybie netto nacisnąć lub , żeby wyjść z trybu tary. TARE wyłącza się.
BLOKADA / AKTYWACJA (FUNKCJA HOLD)
Nacisnąć lub , żeby zablokować wyświetlanie. Zapala się HOLD.
Nacisnąć lub ,żeby odblokować wyświetlanie. HOLD wyłącza się.
PL

REV. V 2016 REV. V 2016
38
DODAWANIE
Nacisnąć , żeby dodać masę.
Wyświetla się |acc|, jako potwierdzenie, że zarejestrowano drugi ciężar. Waga dodaje w trybie brutto lub
netto w zależności od tego, co zostało ustawione.
Jeśli ciężar jest w ruchu lub jest ujemny albo został wyzerowany, waga wskaże |err|.
WYŚWIETLENIE DODANEJ MASY
Nacisnąć , żeby przejść do trybu wyświetlania.
Wyświetlacz miga i wskazuje dodaną masę.
Nacisnąć lub , żeby przełączyć się pomiędzy dodawaniem masy a masą całkowitą. .
Nacisnąć lub , żeby przełączyć się w tryb podglądu.
USUWANIE OSTATNIEGO POMIARU
Nacisnąć , żeby usunąć ostatnio dodaną wartość.
Jako potwierdzenie wyświetli się |del|. Funkcja ta kasuje jedynie ostatnio dodaną wartość.
Po wykasowaniu ostatniej masy waga wskazuje |err|
KASOWANIE WSZYSTKICH POMIARÓW
Nacisnąć a następnie , żeby wykasować wszystkie masy
Jako potwierdzenie wyświetli się |clr|.
ZMIANA JEDNOSTKI
Nacisnąć lub , żeby przełączyć jednostkę pomiędzy kg, lb lub jednostką zdeniowaną przez
użytkownika.
W przypadku wyboru kg zaświeci się kg. W przypadku wyboru lb zaświeci się lb. W przypadku korzystania z
jednostki zdeniowanej przez użytkownika obie diody są wyłączone.
Więcej informacji o jednostkach zdeniowanych przez użytkownika znajduje się w rozdziale „Ustawienia
systemowe“.
USTAWIENIA ZDEFINIOWANE PRZEZ UŻYTKOWNIKA
Ustawienia zdeniowane przez użytkownika umożliwiają dopasowanie kilku funkcji wagi, żeby były bardziej
dopasowane do potrzeb. Różne parametry można zmieniać kolejno.
OTWIERANIE USTAWIEŃ ZDEFINIOWANYCH PRZEZ UŻYTKOWNIKA
Nacisnąć a następnie lub ,żeby otworzyć ustawienia zdeniowane przez użytkownika.
Wyświetli się SETUP.
PL
39
USTAWIENIA CZASU AUTO OFF
Nacisnąć lub , żeby dopasować czas automatycznego wyłączania. Wyświetli się off--
Nacisnąć lub i , żeby dopasować czas.
Możliwości ustawień to: 0 (wył.), 5 (5min), 10 (10min), 15 (15min), 30 (30min), 60 (60min).
Funkcja automatycznego wyłączania przedłuża żywotność baterii i zapobiega niepotrzebnemu włączaniu wagi.
Ustawione minuty do automatycznego wyłączenia są liczone od momentu, w którym waga nie jest używana
a ciężar stał się stabilny.
Naciśnięcie przycisku lub poruszenie ciężaru ponownie uruchamia zegar.
JASNOŚĆ WYŚWIETLACZA
Nacisnąć lub , żeby ustawić jasność wyświetlacza. Wyświetli się |br|.
Nacisnąć lub i ,żeby dopasować wartość
Jasność LED można ustawić na następujące wartości: 1 (ciemno), 2 (normalnie), 3 (jasno).
Redukcja jasności LED pozwala oszczędzić baterię.
USTAWIENIA BEZCZYNNOŚCI
Nacisnąć lub , eby ustawić tryb stand by. Wyświetli się Idl--
Nacisnąć lub i , żeby dopasować ustawienia czasu.
Możliwości ustawień to: 0 (wył.), 5 (5 sek.), 10 (10 sek.), 15 (15 sek.), 30 (30 sek.), 60 (60sek.). Opcja ta fab-
rycznie jest ustawiona na 30 sek.
Funkcja automatycznego wyłączania przedłuża żywotność baterii i zapobiega niepotrzebnemu włączaniu wagi.
Ustawione minuty do automatycznego wyłączenia są liczone od momentu, w którym waga nie jest używana
a ciężar stał się stabilny. Naciśnięcie przycisku lub poruszenie ciężaru ponownie uruchamia zegar.
Nacisnąć lub , żeby wyjść z ustawień zdeniowanych przez użytkownika.
KONFIGURACJA SYSTEMU WAGI
UWAGA: Parametry konguracji systemu są ściśle powiązane z jakością wyników po-
miarów. Zaleca się, by nie zmieniać parametrów, o ile nie jest to absolutnie konieczne.
Jeśli będą Państwo mieli wątpliwości, prosimy o kontakt z serwisem klienta w celu
sprawdzenia, czy zmiana parametrów jest konieczna.
KONFIGURACJA WAGI
OTWÓRZ MENU KONFIGURACJI
Nacisnąć dwukrotnie , żeby otworzyć tryb hasła.
PL

REV. V 2016 REV. V 2016
40
Waga wskazuje P0000. Wprowadzić hasło (P0258), naciskając lub i aby zmienić wartość.
Aby zmienić pozycję, nacisnąć lub .
Nacisnąć , żeby potwierdzić wprowadzone dane i przejść do menu konguracji.
Waga wskazuje SCALE.
ROZDZIELCZOŚĆ
Rozdzielczość można ustawić na następujące wartości: 0.001, 0.002, 0.005, 0.01, 0.02, 0.05, 0.1, 0.2, 0.5, 1, 2,
5, 10, 20, albo 50.
Nacisnąć żeby przejść w ustawienia. Waga wskazuje E--- .
Nacisnąć lub i żeby zmienić wartość rozdzielczości.
PRZEDZIAŁ AUTOMATYCZNEGO ZEROWANIA (AUTO-ZERO)
Możliwości ustawienia przedziału zerowania to: 0% (wył.), 2 (±2%FS), 3 (± 3%FS), 4 (±4%FS), 10 (±10%FS), 20
(±20%FS), 50 (±50%FS), 100 (±100%FS) maks. obciążenia. Wartość fabryczna wynosi 20%.
Nacisnąć
żeby dopasować zakres automatycznego zerowania. Waga wskazuje .
Nacisnąć lub i , żeby dopasować wartość.
PRZEDZIAŁ RĘCZNEGO ZEROWANIA
Możliwości ustawienia przedziału ręcznego zerowania to: 0%(wył.), 2 (±2%FS), 3 (±3%FS), 4 (±4%FS), 10
(±10%FS), 20 (±20%FS), 50 (±50%FS) i 100 (±100%FS) maks. obciążenia.
Nacisnąć żeby dopasować zakres ręcznego zerowania.
Waga wskazuje przedział ręcznego zerowania, np dla 4% maks. obciążenia. Waga zostanie wyze-
rowana tylko wówczas, gdy masa znajduje się w przedziale ręcznego zerowania.
Nacisnąć lub i , żeby dopasować wartość.
PRZEDZIAŁ WYSZUKIWANIA ZERA
Możliwości ustawień to: 0 (wył.),0.5 (±0.5e), 1.0 (±1.0e), 1.5 (±1.5e), 2.0 (±2.0e), 2.5 (±2.5e), 3.0 (±3.0e), 3.5
(±3.5e), 4.0 (±4.0e), 4.5 (±4.5e), 5.0 (± 5.0e).
Ustawienia wyszukiwania zera mogą wpływać na zwiększenie temperatury roboczej wagi i dokładność po-
miaru!
Nacisnąć , żeby dopasować przedział pomiaru zera. Waga wskazuje .
PL
41
Waga wskazuje aktywną wartość, np. 0,5 dla wartości 0,5e.
Nacisnąć lub i , żeby dopasować wartość.
PRZEDZIAŁ ZEROWY
Przedział zerowy deniuje przedział, w którym musi znajdować się waga przed wykonaniem dodawania. Jeśli
waga pozostaje bez obciążenia, masa resztkowa musi być lżejsza niż ustawiona wartość.
Nacisnąć , żeby przejść w ustawienia przedziału zerowego. Wyświetli się
Nacisnąć lub i , żeby dopasować wartość. Nacisnąć lub , żeby poruszyć kursorem.
Wprowadzić wartość przedziału zerowego.
Nacisnąć , żeby ustawić miejsce po przecinku. Przedział zerowy może być ustawiony między 0e a 3000e.
Wartość fabryczna wynosi „5e”.
ZAPAMIĘTYWANIE ZERA (ZERO-SAVING)
IJeśli zapamiętywanie zera jest włączone, Automatyczne Zerowanie jest wyłączone.
Waga oblicza obciążenie na podstawie ostatniej operacji zerowania. Fabrycznie zapamiętywanie zera jest
wyłączone.
Nacisnąć , żeby przejść w ustawienia zapamiętywania zera. Wyświetli się .
Nacisnąć lub i , żeby zmienić wartość na „on” (włączone) lub „off” (wyłączone).
WRAŻLIWOŚĆ NA RUCH
Wrażliwość ruchu wagi kompensuje ruch ważonego ciężaru, żeby zagwarantować obliczenie masy mimo
ruchu. Im słabiej ustawiona jest wrażliwość na ruch, tym szybciej waga wskaże masę.
Możliwości ustawienia czułości ruchu to 0 (wył.), 1 (najsłabsza), 2 (słaba), 3 (normalna), 4 (mocna), 5 (naj-
mocniejsza).
Nacisnąć , żeby przejść w ustawienia czułości ruchu. Wyświetli się
Nacisnąć
lub i , żeby dopasować wartość.
WAŻENIE DYNAMICZNE
W niektórych przypadkach, w których dokładność wagi nie jest tak ważna jak stabilność, funkcja dynamiczn-
ego ważenia może okazać się użyteczna, żeby przyspieszyć ustalenie masy.
Nacisnąć , żeby przejść w ustawienia ważenia dynamicznego. Wyświetli się .
Nacisnąć lub i , żeby dopasować wartość na „on” (włączone) lub „off” (wyłączone).
PL

REV. V 2016 REV. V 2016
42
GRAWITACJA
Waga wskazuje aktywną wartość dla np. G9.794 g = 9,794. Gdy używa się wagi w jednym miejscu, gdzie
przyspieszenie grawitacyjne różni się od ustawionego:
Nacisnąć , żeby przejść w ustawienia grawitacji. Wyświetli się G---- .
Nacisnąć lub i , żeby dopasować wartość. Nacisnąć lub ,żeby poruszyć kur
sorem. Wprowadzić wartość ciążenia grawitacyjnego. Nacisnąć , żeby ustawić miejsce po przecinku.
ZDEFINIOWANA PRZEZ UŻYTKOWNIKA JEDNOSTKA MIARY
Wartość można ustawić pomiędzy 0,000 i 9,999.
Funkcja zdeniowanych przez użytkownika jednostek miary umożliwia zdeniowanie jednostki, która jest
użyteczna, jednak nie należy do standardowych jednostek wagi. Jednostka zdeniowana przez użytkownika
jest proporcjonalna do jednostki systemowej: jeśli jednostka systemowa zostanie ustawiona na 1.234 a
jednostką systemową jest kg, waga zważy ciężar (1 000 kg) i przeliczy masę na Państwa jednostkę (1.234
USR).
Oznacza to jednocześnie, że powinni Państwo zwrócić uwagę na maksymalne obciążenie wagi, ponieważ
wyświetlona wartość nie odpowiada faktycznemu obciążeniu!
Nacisnąć , żeby przejść w ustawienia jednostek zdeniowanych przez użytkownika. Wyświetli się U---- .
Nacisnąć lub i , żeby dopasować wartość. Nacisnąć lub , żeby poruszyć kurso
rem. Wprowadzić wartość ciążenia grawitacyjnego. Nacisnąć , żeby ustawić miejsce po przecinku.
KALIBRACJA
OTWIERANIE MENU KALIBRACJI
Nacisnąć dwukrotnie , żeby przejść do trybu hasła.
Waga wskazuje P0000. Nacisnąć lub i , użeby zmienić wybraną liczbę.
Nacisnąć lub , żeby poruszyć kursorem. Wprowadzić hasło kalibracji (P8416).
Nacisnąć , żeby potwierdzić wprowadzone dane i przejść do trybu kalibracji. Wyświetli się CAL.
JEDNOSTKI SYSTEMOWE
Waga wskazuje aktualną jednostkę systemową. Jednostkę systemową można ustawić na kg albo lb.
Nacisnąć , żeby przejść w ustawienia jednostek systemowych. Wyświetli się Un---.
Nacisnąć lub i , żeby zmienić jednostkę systemową.
PL
43
USTAWIENIA GRAWITACJI
Waga wskazuje skalibrowaną grawitację, np. G9.794 dia g = 9,794.
Nacisnąć , żeby przejść do ustawień grawitacji. Wyświetli się G---- .
Nacisnąć lub i , żeby zmienić wybraną cyfrę. Nacisnąć lub ,
żeby poruszyć kursorem. Wprowadzić wartość przyspieszenia grawitacyjnego. Nacisnąć , żeby ustawić
miejsce po przecinku.
MAKS. OBCIĄŻENIE
NIE próbować ustawiać obciążalności wagi wyżej niż przewidziano. Przeciążenie może
znacznie uszkodzić wagę i jest wysoce ryzykowne.
Nacisnąć
, żeby przejść do ustawień wartości maksymalnego obciążania. Wyświetli się. 00000.
Nacisnąć
lub ui , żeby zmienić wybraną cyfrę. Nacisnąć lub , żeby poruszyć kur
sorem. Wprowadzić wartość maks. obciążenia. Nacisnąć ,żeby ustawić miejsce po przecinku.
WYSZUKIWANIE ZERA
Nacisnąć , żeby przejść w ustawienia wyszukiwania zera. Wyświetli się LOAD0.
Pozostawić wagę bez obciążenia i nacisnąć , żeby wyświetlić kod 12345. Po ustabilizowaniu się kodu
nacisnąć , aby przejść do następnego kroku.
POMIAR CIĘŻARU 1 (LOAD 1)
Waga wskazuje LOAD1.
Załadować ciężar kontrolny i nacisnąć . Wyświetli się 00000
Nacisnąć lub i , żeby zmienić wybraną cyfrę. Nacisnąć lub , żeby poruszyć kurso
rem. Wprowadzić masę ciężaru kontrolnego. Nacisnąć , żeby ustawić miejsce po przecinku.
Pozostawić ciężar stabilny i nacisnąć , żeby wyświetlić kod 23456.
Odczekać na ustabilizowanie się kodu. Nacisnąć , żeby uruchomić pomiar.
Po zakończeniu pomiaru waga przejdzie automatycznie do następnego kroku.
POMIAR CIĘŻARU 2 (LOAD 2)
Waga wskazuje LOAD2.
Załadować ciężar kontrolny i nacisnąć . Wyświetli się 00000
PL

REV. V 2016 REV. V 2016
44
Nacisnąć lub i , żeby zmienić wybraną cyfrę. Nacisnąć lub , żeby poruszyć kurso
rem. Wprowadzić masę ciężaru kontrolnego. Nacisnąć , żeby ustawić miejsce po przecinku.
Pozostawić ciężar stabilny i nacisnąć , żeby wyświetlić kod 34567.
Odczekać na ustabilizowanie się kodu. Nacisnąć , żeby uruchomić pomiar.
Po zakończeniu pomiaru waga przejdzie automatycznie do następnego kroku.
POMIAR CIĘŻARU 3 (LOAD 3)
Waga wskazuje LOAD3.
Załadować ciężar kontrolny i nacisnąć . Wyświetli się 00000
Nacisnąć lub i , żeby zmienić wybraną cyfrę. Nacisnąć lub , żeby poruszyć kurso
rem. Wprowadzić masę ciężaru kontrolnego. Nacisnąć , żeby ustawić miejsce po przecinku.
Pozostawić ciężar stabilny i nacisnąć , żeby wyświetlić kod 45678.
Odczekać na ustabilizowanie się kodu. Nacisnąć , żeby uruchomić pomiar.
Po zakończeniu pomiaru waga automatycznie wyjdzie z trybu kalibracji.
Problem Możliwa przyczyna Rozwiązanie
Waga nie uruchamia się
po naciśnięciu przycisku
Baterie puste lub uszkodzone Sprawdzić lub wymienić baterie
Przycisk
uszkodzony
Nacisnąć mocniej i przytrzymać przez
2 sekundy
Kabel uszkodzony Otworzyć wagę i sprawdzić przewód
zasilający.
Płytka drukowana uszkodzona Skontaktować się z serwisem klienta
Wyświetlacz miga Baterie rozładowane Naładować/wymienić baterie
Waga nie reaguje na
przyciśnięcie przycisku
Program zawiesił się Wyłączyć i ponownie włączyć wagę
Przycisk uszkodzony Skontaktować się z serwisem klienta
Niestabilny wynik pomiaru
Ciężar w ruchu Ustabilizować ciężar
Za słabo ustawiona czułość
ciężaru
Zmienić czułość ciężaru
Wilgotność we wnętrzu wagi Ostrożnie osuszyć elementy wagi
Płytka drukowana uszkodzona Skontaktować się z serwisem klienta
Waga wskazuje masę
mimo, że nie jest
obciążona
Rozładowane baterie Naładować/wymienić baterie
Ogniwa były zbyt długo używane Odciążyć wagę
Ogniwa uszkodzone Skontaktować się z serwisem klienta
PL
45
Problem Możliwa przyczyna Rozwiązanie
Poważny błąd pomiaru Waga nie została wyzerowana
przed ważeniem
Wyzerować wagę
Nieprawidłowa jednostka
ważenia
Zmienić jednostkę ważenia
Konieczna kalibracja Skalibrować wagę
Ogniwa lub płytka uszkodzona Skontaktować się z serwisem klienta
Sterowanie zdalne działa
tylko przy niewielkiej
odległości
Bateria sterowania zdalnego
uszkodzona lub pusta
Wymienić baterię sterowania zdalnego
REGULARNA KONTROLA URZĄDZENIA
Należy regularnie sprawdzać, czy elementy urządzenia nie są uszkodzone. Jeżeli tak jest, należy zaprzestać
użytkowania urządzenia. Proszę niezwłocznie zwrócić się do sprzedawcy w celu przeprowadzenia naprawy.
Co należy zrobić w przypadku pojawienia się problemu?
Należy skontaktować się ze sprzedawcą i przygotować następujące dane:
• Numer faktury oraz numer seryjny (nr seryjny podany jest na tabliczce znamionowej).
• Ewentualnie zdjęcie niesprawnej części.
• Pracownik serwisu jest w stanie lepiej ocenić, na czym polega problem, jeżeli opiszą go
Państwo w sposób tak precyzyjny, jak jest to tylko możliwe Im bardziej szczegółowe są dane, tym
szybciej można Państwu pomóc!
UWAGA: Nigdy nie wolno otwierać urządzenia bez konsultacji z serwisem klienta.
Może to prowadzić do utraty gwarancji!
PL

REV. V 2016
46
Instrukcja bezpiecznego usunięcia akumulatorów i baterii.
Instrukcja opracowana zgodnie z ustawą z dnia 24 kwietnia 2009 r. o bateriach i akumulatorach (Dz. U. 2009
nr 79 poz. 666) rozdz. 2 art. 11, nakładającą na producentów urządzeń elektronicznych obowiązek dołączenia
instrukcji demontażu baterii i akumulatorów.
W wadze hakowej SBS-KW-1000/10O zamontowane są baterie AA 1,5V. Przed przystąpieniem do demontażu
należy wyłączyć wagę.
1. Demontaż baterii AA 1,5V znajdujących się w wadze:
Zdemontować klapkę znajdującą się z tyłu urządzenia i wyjąć baterie.
2.Demontaż baterii AA 1,5V znajdujących się w pilocie zdalnego sterowania:
Zdemontować klapkę znajdującą się z tyłu pilota zdalnego sterowania i wyjąć baterie.
Baterie przekazać komórce odpowiedzialnej za utylizację tych materiałów.
Usuwanie zużytych urządzeń.
Po zakończeniu okresu użytkowania nie wolno usuwać niniejszego produktu poprzez normalne odpady
komunalne, lecz należy go oddać do punktu zbiórki i recyklingu urządzeń elektrycznych i elektronicznych.
Informuje o tym symbol, umieszczony na produkcie, instrukcji obsługi lub opakowaniu.
Zastosowane w urządzeniu tworzywa nadają się do powtórnego użycia zgodnie z ich oznaczeniem. Dzięki
powtórnemu użyciu, wykorzystaniu materiałów lub innym formom wykorzystania zużytych urządzeń wnoszą
Państwo istotny wkład w ochronę naszego środowiska.
Informacji o właściwym punkcie usuwania zużytych urządzeń udzieli Państwu administracja gminna.
PL
IT
Nome del prodotto: Bilancia da gru
Modello: SBS-KW-1000/10O
Nome del produttore: odpowiedzialnością sp.k. del ograniczoną di spółka z dei emaks.
Indirizzo del fornitore: ul. Dekoracyjna 3, 65-155 Zielona Góra

REV. V 2016 REV. V 2016
48
ISTRUZIONI PER L‘USO
Bilancia da gru di precisione di STEINBERG SYSTEMS
Si prega di leggere attentamente le istruzioni per ottenere risultati afdabili al 100%.
Il presente dispositivo è stato realizzato in base a principi di meccanica consolidata e tecnologia avanzata. Si
tratta di uno strumento versatile, preciso, afdabile e dai comandi intuitivi.
• Qualità - prodotto secondo le normative CE
• Funzionalità - spegnimento automatico e stand by
• Afdabilità – tecnologia moderna per massime prestazioni e durata
• Ampio campo di applicazione – logistica e trasporti, spedizioni e molto
altro.
Riferimenti generali di sicurezza per l‘uso della bilancia da gru
Procedere con estrema cautela nelle operazioni di manutenzione e utilizzo della bilancia. Questo principio
vale particolarmente in caso di uso quotidiano per garantire sempre misurazioni precise a lungo termine.
• Evitare di usare l´apparecchio in aree caratterizzate da forti campi elettro-magnetici.
• Non utilizzare la bilancia in luoghi con forti sbalzi di temperatura.
• Non smontare mai il dispositivo senza aver ottenuto precise indicazioni dal servizio di assistenza
• eventuali danni non sono coperti da garanzia.
• Procedere con cautela nelle operazioni di sostituzione batterie.
• Se la bilancia non viene utilizzata per 4 settimane, rimuovere con cautela le batterie
dall´alloggiamento.
• NON sovraccaricare la bilancia. Un sovraccarico della bilancia può provocare danni alle celle di pesata,
compromettendo la validità della garanzia.
• Si prega di rimuovere il peso una volta effettuata la pesata, in modo da non inuire negativamen te sulla
precisione di pesata.
• Controllare regolarmente la batteria. se la batteria risulta scarica effettuare la sostituzione o
utilizzare un apposito cavo di alimentazione.
• I n caso di danno rivolgersi al rivenditore prima di effettuare qualsiasi intervento sul dispositivo.
OPERAZIONI DA EFFETTUARE PRIMA DEL PRIMO UTILIZZO
Una volta ricevuto il prodotto, vericare immediatamente le condizioni dell´imballaggio ed estrarre il dispo-
sitivo solo qualora l´imballaggio risulti intatto. Qualora si riscontrassero danni, contattare il rivenditore e la
societá di trasporti entro massimo 3 giorni dalla ricezione del pacco. Si prega di illustrare in maniera piú det-
tagliata possibile i vizi del prodotto. Si prega di non capovolgere la confezione! Prestare attenzione durante il
trasporto del dispositivo e fare in modo che sia sempre in posizione orizzontale e stabile.
Smaltimento dell‘imballaggio
Si prega di conservare l‘intero imballaggio (cartone, nastro adesivo e polistirolo), nel caso in cui fosse neces-
sario rispedire il prodotto al servizio clienti a causa di problemi di funzionamento!
IT
49
DETTAGLI TECNICI
Modello SBS-KW-1000/10O
Classe di precisione Class III (secondo l‘ OIML R76)
Valori di tara 100% F.S
Scala di azzeramento ±4% F.S.
Tempo di stabilizzazione ≤10 secondi
Sovraccarico 100% F.S. + 9e
Carico di sicurezza 120% F.S.
Carico di rottura 400 % F.S.
Batteria 4 * AA 1.5V
Temperatura dell'ambiente -10°C ~ +40°C
Umidità dell'ambiente 20°C ≤90%
Display 25.4 mm – LED
Max. capacità 1000 kg
Capacità minima 10 kg
Leggibilità 0,5 kg
DISPLAY e COMANDI
DISPLAY PRINCIPALE
Tasto Descrizione: Funzione
On/Off Premere questo tasto per un secondo per avviare la bilancia.
Esci dal menu principale
Tare Tara
Premere il tasto per alcuni secondi: ZERO:
Hold Blocco / Sblocco, Conferma / Trasmissione
Premere il tasto per alcuni secondi: Cambio unita‘ peso (kg/lb)
IT

REV. V 2016 REV. V 2016
50
INDICATORI
Simbolo Descrizione Signicato
Stable Il peso è stabile e può essere misurato
Zero Il peso è pari a zero
Tarato La bilancia è tarata
Hold I tasti sono bloccati
Libbra L'unità di peso è impostata in libbre
Kg L'unità di peso è impostata in kg
TELECOMANDO
Tasto Descrizione: Funzione Tasti sulla bilancia
Zero Azzeramento
Tare Tara
IT
51
Tasto Descrizione: Funzione Tasti sulla bilancia
Hold Blocco / Sblocco
Conferma
Acc. Aggiungere peso, diminuire il valore della cifra selezi-
onata
Del. Cancellare l´ultima misurazione / cancellare tutti i
valori, spostare il cursore verso sinistra
F1 Visualöizzare il peso aggiunto, inserimento cifre
decimali
F2 Modica unitá di misura
Off Conferma e torna alla modalità di pesata
2nd Funzione „2nd”
DiSPLAY USO MANUALE STANDARD
Symbol Bezeichnung Funktion
Misurazione in corso
IMPOSTAZIONI Impostazioni denite dall´utente
BATTERIA Stato della batteria
END Salva ed esci
OFF SPENGNIMENTO
OVERLOAD Sovraccarico
ERROR Inserimento non valido
ACCUMULATE Aggiungere peso
IT

REV. V 2016 REV. V 2016
52
Simbolo Descrizione Funzione
DELETE Cancella ultima misurazione
CLEAR Cancella tutti i valori
UTILIZZO
Accensione / Spegnimento
Premere questo tasto
per un secondo per avviare la bilancia. La bilancia viene avviata e appare due
volte il valore „0.0.0.0.0“. in seguito vengono mostrati il valore di portata massima 1000 e lo stato di
carica della batteria (ad es. bat99). Successivamente viene vericato il peso (Display: -----) e viene eseguito
l´azzeramento.
Per ulteriori informazioni circa l’azzeramento automatico leggere il paragrafo „Congurazione del sistema“.
Premere o per un secondo, per spengnere la bilancia. lo stato di carica della batteria viene indicato
(ad es. bat99) e compare la scritta [off] prima che la bilancia si spenga.
Azzerare
Premere o , per eseguire l´annullamento. La scritta ZERO lampeggia.
Se il peso è in movimento, la funzione tara è attiva o il peso si trova al di fuori dell´azzeramento manuale,
verrá segnalata la scritta |err|.
Per ulteriori informazioni circa l´azzeramento manuale leggere il paragrafo „Congurazione del sistema“.
Tara
in modalità pesata al lordo premere il taso o , per visualizzare la modalità di tara. La scritta TARE
lampeggia.
Se il peso è nel movimento, nella scala negativa o al di fuori della gamma di taratura, verrà visualizzata la
scritta |erri|.
La funzione di taratura riduce il valore di sovraccarico del dispositivo. Esempio: Se un peso pari 1000kg viene
misurato con un dispositivo 5000*2k, la portata massima della bilancia è ridotta a 40180 Kg (ovvero 5000 -
1000 + 9 unità da 2Kg).
Durante la modalità netto premere o , per uscire dalla funzione Tara. La scritta TARE si spegne.
Blocco/Sblocco (Funzione HOLD)
Premere o , per bloccare il display. La scritta HOLD lampeggia.
Premere o , per sbloccare il display. La scritta HOLD si spegne.
IT
53
Addizione
Premere , per aggiungere un peso.
non appena viene registrato un secondo valore di peso, viene mostrata la scritta |acc| per conferma.
A seconda delle impostazioni, la bilancia aggiunge il peso sia al lordo sia al netto.
Se il peso è in movimento o si trova nella scala di valori negativi, verrà mostrata la scritta |erri|. Lo stesso
errore si verica se il peso precedente non viene azzerato.
Visualizzazione del peso aggiunto.
Premere , per entrare nella modalità di anteprima.
Il display lampeggia e mostra il valore aggiunto.
Premere o , per passare dall´anteprima del peso aggiunto alla visualizzazione del peso totale.
Premere o , per uscire dalla modalità di anteprima.
Cancella ultima misurazione
Premere , per cancellare l‘ultimo valore aggiunto.
Per confermare l´istruzione apparirà la scritta |del|. Questa funzione cancella esclusivamente l´ultimo valore
aggiunto. Se il valore è già stato cancellato, verrà mostrata la scritta |err|.
Cancella tutti i valori
Premere e successivamente , per cancellare tutti i valori.
Per confermare l´istruzione apparirà la scritta |clr|.
Modica unitá di misura
Premere o , per impostare le unità di misura kg, lb o impostazioni salvate dall´utente.
Se viene selezionata l´unità di misura Kg, il diodo a LED lampeggia. Se viene selezionata l´unità di misura Kg,
il diodo a LED lampeggia. Se viene selezionata l´unità di misurapredenita dall´utente, nessun diodo a LED
lampeggia.
Per ulteriori informazioni sulle unitá di misura predenite dall´utente, leggere il paragrafo „Impostazioni di
sistema“
IMPOSTAZIONI PREDEFINITE DALL´UTENTE
Le impostazioni predenite dall´utente permettono una personalizzazione delle funzioni del dispositivo in
base alle proprie esigenze.
I diversi parametri possono essere modicati in modo sequenziale.
IT

REV. V 2016 REV. V 2016
54
Accedere alle impostazioni predenite dell´utente
Premere e successivamente o , per accedere alle impostazioni predenite dall´utente.
Le impostazioni vengono mostrate sul display.
Impostare il tempo di autospegnimento
Premere o , per impostare il tempo di autospegnimento. Sul display compare la scritta „Off—“
Premere o e , per impostare il tempo.
Le possibilità di impostazioni sono: 0 (off), 5 (5min), 10 (10min), 15 (15min), 30 (30min), 60 (60min). Grazie
alla funzione di autospegnimento la carica della batteria sarà mantenuta più a lungo in quanto la bilancia si
spegne automaticamente se non viene utilizzata.
I minuti impostati per lo spegnimento automatico vengono contati a partire dal momento in cui la bilancia
rileva un peso stabile e non viene più utilizzata.
La pressione di un tasto o il movimento del peso fano ripartire il cronometro dall´inizio.
Luminosità display
Premere o , per impostare la luminosità del display. Appare la scritta „br--“.
Premere o e , per impostare l´intensità.
la luminosità del LED può essere impostata in base ai seguenti valori: 1 (scuro), 2 (normale), 3 (chiaro). Un
grado basso di luminosità permette di mantenere più a lungo la carica della batteria.
impostazioni stand by
Premere o , per impostare la modalità standby. Appare la scritta „ldl--“.
Premere o e , per impostare il tempo.
I parametri di impostazione del tempo per entrare in modalità stand by sono 0 (off), 5 sec., 15 sec., 30 sec.,
60 sec. il tempo standard preimpostato è pari a 30 sec.
Per garantire un efciente risparmio energetico, la bilancia entra automaticamente in modalità stand by se
non viene impostato nessun valore o se il peso è stabile per un certo periodo di tempo.
Nella modalità stand by il consumo energetico è minimo. La perssione dei tasti o il movimento del peso
spengono la modalità stand by e riattivano la bilancia.
Premere o , per uscire dalle impostazioni predenite dall´utente.
IT
55
CONFIGURAZIONE DI SISTEMA DELLA BILANCIA
ATTENZIONE: I parametri della congurazione di sistema sono strettamente legati
alla qualità della misurazione. Si sconsiglia di cambiar questo parametro qualora non
sia strettamente necessario. In caso di insicurezza contattare il servizio clienti per
controllare che sia necessaria una modica del parametro.
KONFIGURATION DER WAAGE
APRIRE IL MENÙ DI CONFIGURAZIONE
Premere due volte , per accedere alla modalità passoword.
La bilancia indica P0000. Inserire la password (P0258), premendo o quindi premer
per cambiare il valore. Per cambiare la posizione, premete o .
Premere , per confermare la digitazione e per accedere al menù di congurazione.
La bilancia mostra ora SCALE.
RISOLUZIONE
La risoluzione può essere impostata sui seguenti valori: 0.001, 0.002, 0.005, 0.01, 0.02, 0.05, 0.1, 0.2, 0.5, 1, 2,
5, 10, 20, o 50.
Premere per accedere alle impostazioni. La bilancia mostra „E---“
Premere o e per cambiare la risoluzione.
PORTATA DELL‘AZZERAMENTO AUTOMATICO (AUTO-ZERO)
Le impossibilità di impostazione dell‘azzeramento sono: 0 (spento), 2 (±2%FS), 3 (± 3%FS), 4 (±4%FS), 10
(±10%FS), 20 (±20%FS), 50 (±50%FS), 100 (±100%FS) della capacità massima. Il valore predenito è ±20%FS.
Premere
per adattare il campo di azzeramento automatico. La bilancia mostra
Premere o e , per adattare il valore
PORTATA DELL‘AZZERAMENTO AUTOMATICO
Le impossibilità di impostazione dell‘azzeramento manuale sono: 0 (spento), 2 (±2%FS), 3 (± 3%FS), 4 (±4%FS),
10 (±10%FS), 20 (±20%FS), 50 (±50%FS), 100 (±100%FS) della capacità massima.
Premere per adattare la portata di azzeramento manuale.
La bilancia mostra la portata dell‘azzeramento manuale, per esempio è 4% della capacità massi
ma. La bilancia viene quindi azzerata se il peso si trova nella portata dell‘azzeramento manuale.
Premere o e , per adattare il valore.
IT

REV. V 2016 REV. V 2016
56
PORTATA DELLA RICERCA DELLO ZERO
Le possibilità di impostazioni sono: 00 (spento), 0.5 (±0.5e), 1.0 (±1.0e), 1.5 (±1.5e), 2.0 (±2.0e), 2.5 (±2.5e),
3.0 (±3.0e), 3.5 (±3.5e), 4.0 (±4.0e), 4.5 (±4.5e), 5.0 (± 5.0e).
Le modiche alle impostazioni della ricerca dello zero possono aumentare la temperatura di funzionamento
della bilancia. Ciò può inuenzare la precisione della misurazione!
Premere , per adattare la portata della ricerca dello zero. La bilancia indica .
La bilancia indica il valore attivo, per esempio 0,5 per un valore di 0,5e.
Premere o e , per impostare il valore.
CAMPO DELLO ZERO
Il campo dello zero denisce il campo in cui la bilancia si deve trovare prima che vengano effettuata la somma.
Nel caso in cui la bilancia non dovesse presentare alcun carico il resto del peso deve essere più leggero del
valore impostato.
Premere , per accedere al campo dello zero. viene mostrato.
Premere o e , per cambiare il valore. Premere o , per cambiare la cifra segnata.
Inserire il valore del campo dello zero. Premere , per stabilire la posizione della virgola. Il campo dello
zero può essere impostato tra 0e e 3000e. L‘impostazione predenita è 5e.
ZERO-SAVING
Se la funzione Zero-Saving è attivatala funzione auto-zero viene spenta automatica si spegne.
La bilancia calcola il peso che si basa sull‘ultimo azzeramento. Questa funzione è già disattivata.
Premere , per accedere al campo dello zero. viene mostrato.
Premere o e , per accendere („on“) o spegnere („off “) la funzione.
SENSIBILITÀ DEL MOVIMENTO
La sensibilità al movimento della bilancia compensa il movimento del peso da misurare in modo che il peso
possa essere misurato in modo preciso.
Più debole è impostata la sensibilità del movimento più velocemente la bilancia sarà in grado di mostrare il
peso.
Le possibilità di impostazione della sensibilità al movimento sono: 0 (spento), 1 (molto debole), 2 (debole), 3
(normale), 4 (forte) e 5 (molto forte).
Premere , per accedere alle possibilità di impostazione della sensibilità al movimento.
IT
57
L‘avviso appare.
Premere o e , per impostare il valore.
PESO DINAMICO
la funzione del peso dinamico accelera la misurazione del peso e si adatta in modo particolare a quei casi in
cui la stabilità è più importante della precisione.
Premere , per accedere alle possibilità di impostazione del peso dinamico.
L‘avviso appare.
Premere o e , per accendere („on“) o spegnere („off “) la funzione.
GRAVITÀ
La bilancia indica il valore attivo, per esempio G9.794, per g = 9,794. Si conssiglia di cambiare questo valore
solo se la velocizzazione della gravità dell‘ambiente circostante si allontana molto rispetto al valore impos-
tato.
Premere , per accedere alle possibilità di impostazione della gravitazione. „G---“ viene mostrato.
Premere o e , per impostare il valore. Premi o , per spostare il cursore.
Premere ,per stabilire la posizione della virgola.
UNITÀ DI MISURA DEFINITA DALL‘UTENTE
Il valore può essere impostato fra 0.000 e 9.999.
Le unità di misura impostate dall‘utente offrono la possibilità di denire le unità individuali che non sono
presenti tra le unità standard della bilancia.
Le unità denite dall‘utente funzionano proporzionalmente all‘unità del sistema: Se l‘unità prestabilita
dall‘utente a 1234 e l‘unità del sistema sono impostate sui kg, il peso viene peso innanzitutto in kg ( per
esempio 1000) e poi convertito nell‘unità scelta dall‘utente (per esempio: 1234 USR).
Durante l‘utilizzo delle unità impostate dall‘utente prestare attenzione al carico massimo della bilancia poiché
il valore mostrato non corrisponde al carico effettivo.
Premere , per accedere le possibilità di impostazione delle unità di misura scelte dall‘utente. „U---“
viene indicato.
Premere o e , per impostare il valore. Premi o , per spostare il cursore.
Inserire il valore desiderato. Premere , per stabilire la posizione della virgola.
IT

REV. V 2016 REV. V 2016
58
CALIBRAZIONE
APERTURA DEL MENÙ DI CALIBRAZIONE
Premere due volte , per accedere alla modalità passowrd.
La bilancia indica P0000. Premere o e , per cambiare la cifra selezionata.
Premere o , per spostare il cursore. Digiti la parola d‘accesso di calibrazione (P8416).
Premere , per confermare la selezione e per accedere alla modalità di calibrazione. „CAL “ viene indicato.
UNITÀ DEL SISTEMA
La bilancia mostra l‘unità corrente del sistema. L‘unità del sistema può essere impostata su kg o lb.
Premere , per aprire le possibilità di impostazione dell‘unità di misura „Un---“ viene indicato.
Premere o e , per cambiare l‘unità del sistema.
GRAVITÀ DI CALIBRAZIONE
La bilancia indica la gravità di calibrazione, per esempio G9.794 per g = 9.794.
Premere , per accedere alle impostazioni della gravità. „G---“ viene mostrato.
Premere o e , per cambiare la cifra selezionata. Premere o , per spostare il
cursore. Digitare il valore della capienza massima. Premere , per stabilire la posizione della virgola.
CAPACITÀ MASSIMA
Non sovraccaricare la bilancia! Un sovraccarico può danneggiare seriamente la bilancia.
Premere
, per impostare la capacità massima. il „00000“ è indicato.
Premere o e , per cambiare la cifra selezionata. Premere o , , per spostare il
cursore. Digitare il valore della capienza massima. Premere , per stabilire la posizione
RICERCA DELLO ZERO
Premere , per accedere alle possibilità di impostazione della ricera dello zero. „LOAD0 “ viene indicato.
Lasciare la bilancia senza peso e premere , per far apparire il codice 12345. Dopo la digitazione del codice
premere , per passare allo step successivo.
IT
59
MISURA DEL PESO 1 (LOAD1)
La bilancia indica „LOAD1 “ .
Utilizzare un peso di calibrazione e premere . „00000“ viene indicato.
Premere o e , per cambiare la cifra selezionata. Premere o , per spostare il
cursore. Digitare il peso del pesetto di calibrazione. Premere , per stabilire la posizione della virgola.
Lasciare la bilancia senza peso e premere , per far apparire il codice 34567.
Attendere no a che il codice sia stabile. Premere , per iniziare la misurazione.
Non appena la misurazione è conclusa la bilancia va automaticamente allo step successivo.
MISURA DEL PESO 1 (LOAD2)
Die Waage zeigt „LOAD2“ an.
Utilizzare un peso di calibrazione e premere . „00000“ viene indicato.
Premere o e , per cambiare la cifra selezionata. Premere o , per spostare il
cursore. Digitare il peso del pesetto di calibrazione. Premere , per stabilire la posizione della virgola.
Lasciare la bilancia senza peso e premere , per far apparire il codice 23456.
Attendere no a che il codice sia stabile. Premere , per iniziare la misurazione.
Non appena la misurazione è conclusa la bilancia va automaticamente allo step successivo.
MISURA DEL PESO 1 (LOAD3)
Die Waage zeigt „LOAD3“ an.
Nutzen Sie ein Prüfgewicht und drücken Sie . „00000“ wird angezeigt.
Utilizzare un peso di calibrazione e premere . „00000“ viene indicato.
Premere o e , per cambiare la cifra selezionata. Premere o , per spostare il
cursore. Digitare il peso del pesetto di calibrazione. Premere , per stabilire la posizione della virgola.
Lasciare la bilancia senza peso e premere , per far apparire il codice 45678.
Attendere no a che il codice sia stabile. Premere , per iniziare la misurazione.
Non appena la misurazione è terminata la bilancia salva automaticamente la calibrazione e il menù di calib-
razione viene chiuso.
IT

REV. V 2016 REV. V 2016
60
Problema Possibile causa Possibile soluzione
La bilancia non si accende
se viene premuto il tasto
.
Batteria vuota/difettosa Controllare la batteria oppure sosti-
tuirla
Tasto
difettoso
Premere più saldamente e tenere
premuti il tasto 2 secondi
Scheda difettosa Mettersi in contatto con il servizio
clienti.
Il display lampeggia Batteria vuota Caricare o cambiare la batteria
La bilancia non reagisce
alla pressione dei tasti
Il programma rimane fermo Spegnere e riaccendere la bilancia
Tasto difettoso Mettersi in contatto con il servizio
clienti.
Risultato della misura
instabile
Carico in movimento Stabilizzare il carico
La sensibilità del movimento è
impostato troppo debole
Aumentare la sensibilità del movi-
mento
Umidità all'interno della bilancia Asciugare con attenzione i diversi
elementi
Scheda difettosa Mettersi in contatto con il servizio
clienti.
La bilancia indica un peso,
anche se non è caricato
Batteria vuota Caricare o cambiare la batteria
La cella di carico è usurata Interrompere l'utilizzo
Cella di carico difettosa Mettersi in contatto con il servizio
clienti.
Errore di misurazione
approssimativo
La bilancia non è stata azzerata
prima della pesata
Azzerare la bilancia manualmente
Unità sbagliata Cambiare unità di peso
Calibrazione necessaria Calibrare la bilancia
Cella di carico o scheda difettosa Mettersi in contatto con il servizio
clienti.
Il telecomando funziona
solo a breve distanza
la batteria del telecomando è
difettosa o vuota
Sostituire la batteria del telecomando
IT
61
REGOLARE CONTROLLO DELL‘APPARECCHIO
Vericare regolarmente che gli elementi dell‘apparecchio non presentino danni. Nel caso si riscontrassero
danni, è severamente vietato qualsiasi impiego del dispositivo. Si prega di contattare il venditore di riferimen-
to afnché vengano effettuate le modiche necessarie.
Cosa fare in caso si verichino problemi?
Contattare il venditore e fornire i seguenti dati:
• Numero di fatturazione e numero di serie (dei quali l‘ultimo si trova sulla targhetta del dispositivo)
• Fornire una foto del pezzo difettoso
• Descrivere il problema nel modo più preciso possibile in modo che il servizio clienti sia in grado di
circoscrivere il problema e di risolverlo. Più dettagliate sono le informazioni da voi fornite, maggiore è
l‘aiuto che possiamo fornirvi!
ATTENZIONE: Non aprire o smontare mai l‘apparecchio senza l‘autorizzazione del
servizio clienti. Questa operazione non autorizzata fa decadere la garanzia!
IT

REV. V 2016
FR
Nom du produit: BALANCE À GRUE
Modèle: SBS-KW-1000/10O
Nom du fabricant: emaks spółka z ograniczoną odpowiedzialnością sp.k.
Adresse du fabricant: ul. Dekoracyjna 3, 65-155 Zielona Góra
63
MANUEL D‘UTILISATION
Balance à grue haute précision STEINBERG SYSTEMS
Veuillez lire ce manuel avec attention pour garantir la précision de vos mesures.
Cette balance à grue fonctionne à partir de technologies et mécanismes très modernes dont l’efcacité n’est
plus à démontrer. Ils en font un outil polyvalent, able, précis et facile à utiliser.
• Qualité – appareil produit dans le respect des normes européennes (CE)
• Fonctionnalité – fonction d‘arrêt automatique, fonction de mise en veille
• Fiabilité – la technologie la plus moderne et des circuits de grande qualité garantissent perfor-
mance et stabilité sur le long terme.
• Polyvalence – pour un usage dans les secteurs du stockage, du transport, du courrier etc.
Consignes générales de sécurité pour l‘utilisation de la balance à grue
Soyez toujours prudent lors de l‘utilisation et de l‘entretien de votre balance à grue. Cela vaut en particulier
lors de l‘utilisation quotidienne de votre balance, an d’en préserver la précision sur le long terme.
• Évitez d‘utiliser l‘appareil dans un environnement traversé de forts champs électriques ou magnétiques.
• Ne l‘utilisez pas non plus dans un environnement soumis à de fortes variations de température.
• Ne démontez jamais votre balance sans l‘accord du service client – Les dommages qui pourraient en
résulter ne sont pas couverts par la garantie.
• Soyez prudent lors du changement des piles.
• Par précaution, retirez les piles de l‘appareil si celui-ci ne doit pas être utilisé pendant plus de 4
semaines.
• Ne surchargez pas la balance. Une surcharge peut endommager les cellules de pesée et mener
à une annulation de la garantie.
• Détachez l‘objet pesé immédiatement après la pesée, an de ne pas fausser les résultats
• Contrôlez régulièrement les piles. Si elles sont vides, remplacez-les par des piles neuves ou
rechargez-les à l‘aide d‘un appareil adapté.
• En cas de panne, veuillez contacter le service client. N‘essayez pas de réparer la balance vous-
même.
AVANT LA PREMIÈRE UTILISATION:
À réception du colis, vériez l‘intégrité de l‘emballage. Ne l‘ouvrez que s‘il est intact. Si l‘emballage est en-
dommagé, prenez contact sous 3 jours avec la société de transport ainsi qu‘avec votre distributeur. Donnez
un maximum de détails concernant les dommages. Ne mettez pas le paquet à l‘envers ! Veillez à maintenir
l‘appareil horizontal et stable lorsque vous le transportez.
CONSERVATION DE L‘EMBALLAGE
Il est recommandé de conserver l‘emballage de l‘appareil (carton, plastique et polystyrène) an de pouvoir
l‘envoyer en réparation, en cas de besoin, dans les meilleures conditions possibles.

REV. V 2016 REV. V 2016
64
DÉTAILS TECHNIQUES
Modèle SBS-KW-1000/10O
Classe de précision Classe III
(correspond au OIML R76)
Plage de zéro ±4% F.S.
Temps de stabilisation ≤10 sec
Surcharge 100% F.S. + 9e
Charge de sécurité 120% F.S
Charge de rupture 400% F.S
Piles 4 * AA 1.5V
Température ambiante -10°C ~ +40°C
Humidité ambiante 20°C ≤90%
Écran 25.4 mm - LED
Capacité max. 1000 kg
Capacité min. 10 kg
Précision 0,5 kg
AFFICHAGE ET TOUCHES
AFFICHAGE PRINCIPAL
Touche Désignation Fonctions
On/Off Appuyez sur cette touche pendant 1 seconde pour allumer la
balance.
Quitter le menu
Tare Tarer
Pression prolongée : Zéro
Hold Verrouiller/ déverrouiller l‘afchage, Conrmer/ transmettre
Pression prolongée: Changement de l‘unité de mesure
FR
65
ANNONCES
Symbole Désignation Signication
Stable Le poids est stable
Zero Le poids équivaut à zéro
Tared La balance est tarée
Hold Les touches sont verrouillées
Lb L'unité de pesée est la livre
Kg L'unité de pesée est le kilogramme
TELECOMMANDE
Touche Désignation Fonction Touches sur la
balance
Zéro Remettre à zéro
Tare Tarer
FR

REV. V 2016 REV. V 2016
66
Touche Désignation Fonction Touches sur la
balance
Hold Verrouiller/ déverrouiller
Conrmer
Acc. Ajouter un poids/ réduire le chiffre afché
Del. Supprimer la dernière mesure/ supprimer toutes les
mesures/ déplacer le curseur vers la gauche
F1 Annonce du poids ajouté, sélection de la décimale
F2 Changement d'unité
Off Conrmer/ retour au mode pesée
2nd Fonction « 2nd »
ANNONCES TYPES
Symbole Désignation Signication
Mesure en cours
SETUP Réglages personnalisés
BATTERY Niveau des piles
END Sauvegarder et Quitter
OFF Arrêter
OVERLOAD Surcharge
ERROR Opération invalide
ACCUMULATE Ajouter un poids
FR
67
Symbol Bezeichnung Funktion
DELETE Supprimer la dernière mesure
CLEAR Supprimer toutes les mesures
UTILISATION
Allumer/ éteindre
Appuyez sur la touche
pendant 1 seconde pour allumer la balance. La balance démarre et il apparaît
deux fois « 0.0.0.0.0 » sur l‘écran. S‘afchent ensuite la capacité maximale 1000 et le niveau des piles (par
ex. bat99). Ensuite, la balance vérie le poids actuel (afchage : « ------ ») puis calibre son zéro.
Pour plus d‘informations relatives au réglage automatique du zéro, reportez-vous au chapitre « Conguration
système ».
Pressez ou pendant 1 seconde pour éteindre la balance. Le niveau des piles est indiqué (par ex.
bat99) et |off| apparaît avant que la balance ne s‘éteigne.
Zéro
Pressez ou pour mettre la balance à zéro. ZERO s‘allume.
Si le poids se trouve en mouvement, si la fonction Tare est activée ou si le poids actuel se trouve hors de la
plage de zéro, la balance indique |err|.
Pour plus d‘informations relatives au réglage manuel du zéro, reportez-vous au chapitre « Conguration
système ».
Tarer
En mode poids brut, pressez la touche ou , our activer le mode tare (poids net). TARE s‘allume.
Si le poids se trouve en mouvement, en négatif ou hors de la plage de tare, la balance indique |err|.
La fonction de tare diminue la limite de surcharge de la balance. Exemple : Si une balance de 5000*2kg est
tarée à 1000kg, sa capacité maximale est réduite à 4018kg (5000 - 1000 + 9 divisions de 2kg).
En mode poids net, pressez ou , pour retourner au mode poids brut. TARE s‘éteint.
Verrouiller/ déverrouiller (fonction HOLD)
Pressez ou pour verrouiller l‘afchage. HOLD s‘allume.
Pressez ou pour déverrouiller l‘afchage. HOLD s‘éteint.
FR

REV. V 2016 REV. V 2016
68
Additionner
Pressez pour ajouter un poids.
Sitôt un poids ajouté, l‘écran conrme en indiquant |acc|.
L‘ajout est effectué selon les réglages actuels (mode poids brut ou poids net).
Si le poids est en mouvement ou en négatif, la balance indique |err|. De même si le zéro n‘a pas été calibré
au préalable.
Afchage du poids ajouté
Pressez pour accéder au mode afchage.
L‘afchage commence à clignoter puis afche le poids ajouté.
Pressez ou pour naviguer entre poids ajouté et poids total.
Pressez ou pour quitter le mode afchage.
Supprimer la dernière mesure
Pressez pour supprimer la valeur ajoutée en dernier.
L‘écran conrme en indiquant |del|. Cette fonction ne supprime que la valeur ajoutée en dernier. Si la valeur
a déjà été supprimée, la balance indique |err|.
Supprimer toutes les mesures
Pressez puis pour supprimer toutes les mesures.
L‘écran conrme en indiquant |del|.
Changement d‘unité
Pressez ou pour choisir entre les unités kg, lb et personnalisée.
Si vous choisissez kg, la LED kg s‘allume. Si vous choisissez lb, la LED lb s‘allume. Si vous choisissez une unité
personnalisée, aucune des deux LED ne s‘allume.
Pour plus d‘informations relatives à la personnalisation des unités de mesure, reportez-vous au chapitre «
Conguration système ».
RÉGLAGES PERSONNALISÉS
Les réglages personnalisés permettent d‘optimiser les fonctions de votre balance selon vos besoins indivi-
duels.
Les différents paramètres peuvent être modiés un à un.
FR
69
Ouvrir les réglages personnalisés
Pressez puis ou pour ouvrir les réglages personnalisés. L‘écran indique « Setup ».
Réglage du délai d‘arrêt automatique
Pressez ou , pour régler le délai d‘arrêt automatique. L‘écran indique « off— ».
Pressez ou et pour ajuster ce délai.
Les possibilités de réglage sont les suivantes: 0 (fonction désactivée), 5 (5min), 10 (10min), 15 (15min), 30
(30min), 60 (60min). Cette fonction permet d‘optimiser la durée de vie des piles en éteignant automatique-
ment la balance lorsqu‘elle est inactive.
Le décompte du délai d‘arrêt automatique commence au moment où la balance, à poids constant, n‘est plus
utilisée.
Une pression sur n‘importe quelle touche ou un changement de poids interrompt le décompte.
Luminosité de l‘écran
Pressez ou pour ajuster la luminosité de l‘écran. L‘écran indique « br-- »
Pressez ou und pour adapter la valeur.
La luminosité des LED peut être ajustée sur les valeurs suivantes: 1 (sombre), 2 (normal), 3 (clair). Une faible
luminosité permet de prolonger la durée de vie des piles.
Réglages du mode veille
Pressez ou pour congurer le mode veille. L‘écran indique « Idl-- ».
Pressez ou et pour ajuster le délai de mise en veille.
Les possibilités de réglage sont les suivantes: 0 (fonction désactivée), 5 sec, 15 sec, 30 sec, 60 sec. Le délai
par défaut est de 30 sec.
Pour économiser de l‘énergie, la balance se met automatiquement en veille lorsqu‘elle reste inactive.
En mode veille, la consommation électrique de l‘appareil est réduite. Une pression sur n‘importe quelle
touche ou un changement de poids met n au mode veille.
Pressez ou pour quitter les réglages personnalisés.
FR

REV. V 2016 REV. V 2016
70
CONFIGURATION SYSTÈME
ATTENTION : Les paramètres de conguration système sont étroitement liés à la
qualité de vos mesures. Il est déconseillé de modier ces paramètres, hors nécessité
absolue. Si vous hésitez, contactez votre service client pour déterminer si une modi-
cation de ces paramètres est nécessaire ou pas.
CONFIGURATION DE LA BALANCE
OUVERTURE DU MENU DE CONFIGURATION
Pressez deux fois pour ouvrir le mode de mot de passe.
La balance indique P0000. Entrez un mot de passe (P0258) en vous aidant des touches ou puis
pour modier la valeur afchée. Pour changer les chiffres de position pressez ou .
Pressez pour conrmer le mot de passe et accéder au menu de conguration.
La balance indique à présent SCALE.
RÉSOLUTION
La résolution peut être ajusté sur les valeurs suivantes : 0.001, 0.002, 0.005, 0.01, 0.02, 0.05, 0.1, 0.2, 0.5, 1, 2,
5, 10, 20, ou 50.
Pressez pour accéder aux réglages. La balance indique «E ---».
Pressez ou et pour modier la valeur de la résolution.
PLAGE DE RÉGLAGE AUTOMATIQUE DU ZÉRO (AUTO-ZERO)
Les options de conguration de la plage de réglage automatique du zéro sont : 0 (fonction désactivée), 2
(±2%FS), 3 (± 3%FS), 4 (±4%FS), 10 (±10%FS), 20 (±20%FS), 50 (±50%FS), 100 (±100%FS) de la capacité ma-
ximale. La valeur par défaut est de ±20%FS.
Pressez pour congurer la plage de réglage automatique du zéro. La balance indique
Pressez ou et pour adapter la valeur.
PLAGE DE RÉGLAGE MANUEL DU ZÉRO
Les options de conguration de la plage de réglage automatique du zéro sont : 0 (fonction désactivée), 2
(±2%FS), 3 (± 3%FS), 4 (±4%FS), 10 (±10%FS), 20 (±20%FS), 50 (±50%FS), 100 (±100%FS) de la capacité
maximale.
Pressez pour congurer la plage de réglage manuel du zéro.
La balance indique alors la plage de réglage manuel du zéro, par exemple pour 4% de la capacité
maximale. Le zéro ne se calibre que lorsque le poids de calibrage se trouve dans la plage de réglage manuel
du zéro.
Pressez ou et pour adapter la valeur.
FR
71
PLAGE DE RECHERCHE ZÉRO
Les options de conguration sont les suivantes : 00 (fonction désactivée), 0.5 (±0.5e), 1.0 (±1.0e), 1.5 (±1.5e),
2.0 (±2.0e), 2.5 (±2.5e), 3.0 (±3.0e), 3.5 (±3.5e), 4.0 (±4.0e), 4.5 (±4.5e), 5.0 (± 5.0e).
Les modications de réglage de la recherche zéro peuvent augmenter la température de fonctionnement de
la balance. Elles peuvent aussi inuencer la précision des mesures !
Pressez pour congurer la plage de recherche zéro. La balance indique alors
La balance indique toujours la valeur actuelle, p. ex. 0,5 pour une valeur de 0,5e.
Pressez ou et pour modier cette valeur.
PLAGE DE ZÉRO
La plage de zéro dénit la plage au sein de laquelle la balance doit se trouver pour pouvoir effectuer une addi-
tion. Lorsque le poids est retiré, le poids restant doit être plus léger que la valeur déterminée lors du réglage.
Pressez , pour procéder au réglage. La balance indique
Pressez ou et pour modier la valeur. Appuyez sur ou pour naviguer entre les
chiffres. Appuyez sur pour sélectionner la décimale. La plage de zéro peut être réglée entre 0e et 3000e.
La valeur par défaut est de 5e.
SAUVEGARDE DU ZÉRO
Lorsque la sauvegarde du zéro est activée, le réglage automatique du zéro est désactivé.
La balance détermine alors le zéro sur la base du calibrage zéro précédent. Par défaut, cette fonction est
désactivée.
Pressez , pour procéder au réglage. La balance indique .
Pressez o et pour l‘activer (« on ») ou la désactiver (« off »).
STABILISATION
La fonction de stabilisation de la balance compense le mouvement du poids à peser, an de garantir une
mesure able même lorsque l‘objet est en mouvement.
Plus le degré de compensation est faible, plus rapide est la mesure.
Les possibilités de réglage de la fonction de stabilisation sont les suivantes : 0 (fonction désactivée), 1 (très
faible), 2 (faible), 3 (normale), 4 (forte) et 5 (très forte).
Pressez , pour accéder aux réglages.
L‘écran indique .
Pressez ou et pour adapter la valeur.
FR

REV. V 2016 REV. V 2016
72
PESÉE DYNAMIQUE
La fonction de pesée dynamique accélère la détermination du poids et convient ainsi particulièrement
lorsque la stabilité est plus importante que la précision.
Pressez pour accéder aux réglages.
L‘écran indique .
Pressez ou et pour l‘activer (« on ») ou la désactiver (« off »).
GRAVITÉ
La balance indique la valeur actuelle, p. ex. G9.794, pour g = 9.794. Il est recommandé de ne modier cette
valeur que lorsque l‘accélération de la pesanteur dévie fortement de la valeur par défaut.
Pressez pour accéder aux réglages de la gravité. L‘écran indique « G---- ».
Pressez ou et pour adapter la valeur. Appuyez sur ou pour déplacer le curseur.
Ajustez la valeur de la gravité. Appuyez sur pour sélectionner la décimale.
UNITÉS DE MESURE PERSONNALISÉES
La valeur peut être réglée entre 0.000 et 9.999.
Les unités de mesure personnalisées permettent de peser en d‘autres unités que les unités standards de la
balance.
Elles sont toujours dénies par rapport aux unités standards: si l‘unité personnalisée est de 1234 et que
l‘unité par défaut est le kg, le poids sera d‘abord mesuré en kg (p. ex. 1000) puis converti dans l‘unité dénie
par l‘utilisateur (dans l‘exemple: 1234 USR).
Si vous recourrez à une unité personnalisée, veuillez tenir compte de la capacité maximale de la balance,
puisque la valeur indiquée ne correspond pas à la charge effective.
Pressez , pour accéder à la personnalisation des unités de mesure. L‘écran indique « U---- ».
Pressez ou et pour adapter la valeur. Appuyez sur ou pour déplacer le curseur.
Entrez la valeur souhaitée. Appuyez sur pour sélectionner la décimale.
CALIBRAGE
OUVERTURE DU MENU DE CALIBRAGE
Pressez deux fois pour ouvrir le mode de mot de passe.
La balance indique P0000. Appuyez sur ou et pour modier le chiffre afché.
Pressez ou pour déplacer le curseur. Entrez le mot de passe de calibrage (P8416).
FR
73
Pressez pour conrmer l‘entrée et accéder au mode de calibrage. L‘écran indique « CAL ».
UNITÉS STANDARDS DE MESURE
La balance indique l‘unité actuelle. Il peut s‘agir du kg ou de la lb.
Pressez
pour choisir cette unité. L‘écran indique « Un--- ».
Pressez ou et pour changer d‘unité.
GRAVITÉ DE CALIBRAGE
La balance indique la gravitation de calibrage, p. ex. G9.794 pour g = 9,794.
Pressez , pour accéder aux réglages. L‘écran indique « G---- ».
Pressez ou et pour modier le nombre afché. Appuyez sur ou pour déplacer
le curseur. Entrez la valeur de l‘accélération de gravitation. Appuyez sur pour sélectionner la décimale.
CAPACITÉ MAXIMALE
Ne surchargez pas la balance. Une surcharge peut endommager gravement la balance.
Pressez
pour procéder au réglage de la capacité max. L‘écran indique « 00000 ».
Appuyez sur ou et pour modier le nombre choisi. Appuyez sur ou , pour
déplacer le curseur. Entrez la capacité max. Appuyez sur pour sélectionner la décimale.
RECHERCHE ZÉRO
Pressez pour procéder au réglage de la recherche zéro. La balance indique « LOAD0 ».
Ne suspendez aucun poids à la balance et appuyez sur pour afcher le code 12345. Après stabilisation
du code, appuyez à nouveau sur pour passer à l’étape suivante.
MESURE DU POIDS 1 (LOAD1)
La balance indique « LOAD1 ».
Utilisez un poids de calibrage et pressez . L’écran indique « 00000 ».
Pressez ou et pour modier les chiffres. Déplacez le curseur à l’aide des touches
ou . Entrez le poids du poids de calibrage.
FR

REV. V 2016 REV. V 2016
74
Appuyez sur pour sélectionner la décimale. Maintenez la charge stable et appuyez sur pour afcher
le code 23456.
Attendez jusqu’à stabilisation du code, puis pressez pour commencer la pesée.
A l’issue de la pesée, la balance passe automatiquement à l’étape suivante.
MESURE DU POIDS 2 (LOAD2)
La balance indique « LOAD2 ».
Utilisez un poids de calibrage et pressez . L’écran indique « 00000 ».
Pressez ou et pour modier les chiffres. Déplacez le curseur à l’aide des touches
ou . Entrez le poids du poids de calibrage. Appuyez sur pour sélectionner la décimale. Maintenez la
charge stable et appuyez sur pour afcher le code 34567.
Attendez jusqu’à stabilisation du code, puis pressez pour commencer la pesée.
A l’issue de la pesée, la balance passe automatiquement à l’étape suivante.
MESURE DU POIDS 3 (LOAD3)
La balance indique « LOAD3 ».
Utilisez un poids de calibrage et pressez . L’écran indique « 00000 ».
Pressez ou et pour modier les chiffres. Déplacez le curseur à l’aide des touches
ou . Entrez le poids du poids de calibrage. Appuyez sur pour sélectionner la décimale. Main-
tenez
la charge stable et appuyez sur pour afcher le code 45678.
Attendez jusqu’à stabilisation du code, puis pressez pour commencer la pesée.
A l’issue de la pesée, la balance sauvegarde automatiquement les valeurs de calibrage et ferme le menu de
calibrage.
FR
75
Problème Cause possible Solution possible
La balance ne s’allume pas
lorsque vous appuyez sur
Piles vides ou défectueuses Vériez les piles et remplacez-les le cas
échéant
La touche
est défectueuse
Appuyez plus fort sur la touche et
maintenez la pression pendant 2
secondes
Platine défectueuse Contactez le service client
L’afchage clignote Piles vides Changez ou rechargez les piles
La balance ne réagit pas à
la pression d’une touche
en particulier
Le programme est bloqué Éteignez la balance et rallumez-la
La touche est défectueuse Contactez le service client
Le poids mesuré ne se
stabilise pas
La charge est en mouvement Immobilisez la charge
La fonction de stabilisation est
réglée à un niveau trop faible
Augmentez la stabilisation
L’intérieur de la balance a été
contaminé par de l’humidité
Séchez avec précaution ses différents
éléments
Platine défectueuse Contactez le service client
La balance indique un
poids à vide
Piles vides Changez ou rechargez les piles
La cellule de pesée a été utilisée
pendant trop longtemps
Interrompez un moment votre utilisati-
on de l‘appareil
La cellule de pesée est défec-
tueuse
Contactez le service client
Erreur grossière de
mesure
La balance n’a pas été remise à
zéro avant la pesée
Remettez la balance à zéro
Mauvaise unité de mesure Changez d’unité de mesure
Calibrage nécessaire Recalibrez la balance
Cellule de pesée ou platine
défectueuse
Contactez le service client
La télécommande ne fon-
ctionne qu‘à une distance
réduite de l’appareil
Les piles de la télécommande
sont vides ou défectueuses
Changez les piles de la télécommande
FR

REV. V 2016
76
EXAMEN RÉGULIER DE L‘APPAREIL
Contrôlez régulièrement le bon état des différents éléments de l‘appareil. En cas de détérioration, l‘appareil
ne doit plus être utilisé. Prenez immédiatement contact avec votre vendeur pour réparer l‘élément endom-
magé.
Que faire en cas de problème?
Prenez contact avec votre vendeur muni des documents suivants :
• Vos numéros de facture et de série (vous trouverez ce dernier sur la plaque signalétique)
• Le cas échéant, une photo de l‘élément endommagé
• Une description précise du problème aidera votre conseiller à en identier la cause. Plus détaillées
seront vos indications, plus rapidement nous serons en mesure de vous aider!
ATTENTION: N‘ouvrez jamais l‘appareil sans l‘accord préalable du service client.
Cela pourrait compromettre votre droit à la garantie!
FR
ES
Nombre del producto Dinamómetro digital
Modelo: SBS-KW-1000/10O
Nombre del fabricante: emaks spółka z ograniczoną odpowiedzialnością sp.k.
Dirección del fabricante: ul. Dekoracyjna 3, 65-155 Zielona Góra

REV. V 2016 REV. V 2016
78
MANUAL DE INSTRUCCIONES
Dinamómetro digital de STEINBERG SYSTEMS
Lea las instrucciones cuidadosamente, para sacar el máximo partido a la balanza.
Este dinamómetro ha sido concebido con mecánica y técnica probadas. Por ello es versátil, able preciso y
fácil de utilizar.
• Calidad - Fabricado conforme a las directivas de la CE
• Funcionalidad - Función Auto-Off, Función Standby
• Fiabilidad - Combina los últimos avances en tecnología con un excelente acabado, para garantizar
su rendimiento y durabilidad.
• Gran versatilidad de uso - almacenaje, envío, transporte, etc.
Advertencias generales de seguridad para el uso del dinamómetro
Vigile constantemente el dinamómetro durante la utilización y mantenimiento. Esto se aplica particularmente
al uso diario, a n poder obtener resultados de pesaje óptimos a largo plazo.
• Durante el uso evite los entornos con campos eléctricos o magnéticos fuertes.
• Evite utilizar este dispositivo en zonas con importantes oscilaciones térmicas.
• No desmonte el dinamómetro sin contactar previamente con el servicio post-venta. En este
caso los daños no serían cubiertos por la garantía.
• Cuando cambie la batería, proceda cuidadosamente.
• Por favor, retire las baterías del dispositivo si no va a utilizarlo durante un periodo superior a 4
semanas.
• Por favor, no sobrecargue la balanza. Una sobrecarga podría ocasionar daños a la célula de
pesaje e invalidar la garantía.
• Retire la carga inmediatamente tras el pesaje, para que los resultados del pesaje no se vean perjudi-
cados.
• Controle regularmente las baterías. En caso de estar vacías, sustitúyalas o cárguelas con un cargador
para tal uso.
• En caso de avería, póngase en contacto con el vendedor, en vez de intentar reparar la balanza
usted mismo.
ANTES DEL PRIMER USO
Por favor, inspeccione el embalaje a la recepción de la mercancía. Ábrala solamente en caso de no hallar
desperfectos. Si hubiera desperfectos, contacte con el transportista y con el vendedor en un plazo máximo
de 3 días. Documente los daños tan detalladamente como sea posible.
¡No ponga el paquete al revés! Si va a transportar el dispositivo, asegúrese de que se mantiene estable y en
posición horizontal.
RETIRADA DEL EMBALAJE
¡Rogamos conserve el embalaje original (cartón, bridas de plástico y poliestireno), para poder devolver el
aparato tan protegido sea posible, en caso de que fuera necesaria una reparación!
ES
79
DATOS TÉCNICOS
Modelo SBS-KW-1000/10O
Clase de precisión Clase III
Conforme a OIML R76
Rango de Tara Conforme a OIML R76
Rango de cero manual ±4% F.S.
Tiempo de la estabilización ≤10 segundos
Sobrecarga 100% F.S. + 9e
Carga de seguridad F.S. 120 %
Carga de rotura F.S. 400 %
Batería 4 * AA 1.5V
Temperatura ambiente -10°C ~ +40°C
Humedad ambiente 20°C ≤90%
Pantalla 25.4 mm – LED
Max. Carga máxima 1000 kg
Min. Capacidad 10 Kg
Precisión de lectura 0.5kg
PANTALLA Y TECLAS
PANTALLA PRINCIPAL
Tecla Nombre Función
On/Off Presione esta tecla durante un segundo para encender el dinamó-
metro.
Abandonar el menú
Tara Tara
Mantener pulsada: Función Zero
Hold Bloquear / Liberar, Conrmar / Conectar
Mantener pulsada: Cambio de la unidad de peso
ES

REV. V 2016 REV. V 2016
80
AVISOS
Símbolo Nombre Signicado
Stable El peso es estable y puede ser medido
Zero El peso es igual a cero
Tared La balanza está tarada
Hold Las teclas están bloqueadas
Lb La unidad de peso es ahora libra.
Kg La unidad de peso es ahora kilogramo.
MANDO A DISTANCIA
Tecla Nombre Función Tecla en la balanza
Zero Cero manual
Tara Tara
ES
81
Tecla Nombre Función Tecla en la balanza
Hold Bloqueo / Desbloqueo
Conrmación
Acc. Añadir peso, disminución del valor de la cifra marcada.
Del. Suprimir la última medición / suprimir todas las medi-
das. Movimiento del cursor hacia la izquierda.
F1 Aviso de peso añadido, entrada decimales
F2 Cambio de unidad
Off Conrmar y volver al modo de pesaje
2nd Función 2nd
AVISO DURANTE USO REGULAR
Símbolo Nombre Función
Durante la medición
SETUP Opciones congurables por el usuario
BATERÍA Estado de la batería
END Memorizar y nalizar
OFF Apagado
OVERLOAD Sobrecarga
ERROR Entrada inválida
ACCUMULATE Añadir peso
ES

REV. V 2016 REV. V 2016
82
Símbolo Nombre Función
DELETE Borrar la última medición
CLEAR Borrar todas las medidas
USO
Apagado / Encendido
Presione la tecla
durante un segundo para encender la balanza. La máquina se inicia y aparece dos
veces „0.0.0.0.0“. A continuación se muestra la capacidad máxima (1000) y el estado de las baterías (por
ejemplo bat99). Después comprobará el peso (aviso: -----) y se pondrá a cero.
Para más información referente a la puesta a cero automática, por favor lea el capítulo „conguración del
sistema“.
Presione o durante un segundo, para apagar el dinamómetro. Se mostrarán el estado de las ba-
terías (ej. bat99) y aparecerá |off|, antes de que el dispositivo se desconecte.
Puesta a cero manual
Presione o , para poner a cero. Muestra ZERO:
Si la balanza estuviera en movimiento, la función Tara estuviera activada o el pesaje estuviera fuera del rango
del cero manual, el dinamómetro mostrará |err|.
Para más información referente a la puesta a cero manual, por favor lea el capítulo „conguración del sis-
tema“.
Tara
En el modo Bruto, presione o , para obtener el modo Tara. Ahora se mostrará el mensaje TARE.
Si el peso estuviera en el movimiento, en negativo o fuera del rango de la Tara, el equipo mostrará |err|.
La función Tara sustrae el sobrepeso que no debe ser medido. Ejemplo: Si un peso de 1000kg se mide con una
balanza de 5000*2c, la capacidad máxima de la balanza se verá reducida a 4018 kg (5000 - 1000 + 9 x 2 kg).
En el modo Neto, presione o , para salir del modo de Tara. El mensaje de TARA desaparece.
Bloquear / Desbloquear (función HOLD)
Presione o , para bloquear el aviso. Aparece HOLD.
Presione o , para desbloquear el aviso. HOLD desaparece.
ES
83
Agregar
Presione , para agregar un peso.
Tan pronto como se mida un segundo peso, aparecerá |acc| para conrmación.
La balanza lo añadirá conforme al ajuste en modo Bruto o Neto.
En caso de que el peso esté en movimiento o en negativo, se mostrará |err|. De igual modo sucede si el peso
no hubiera sido puesto a cero anteriormente.
Vista de peso agregado
Presione , para obtener el modo de vista agregado.
El display empieza a parpadear y muestra el peso añadido.
Presione o , para cambiar entre peso agregado y peso total.
Presione o , para salir de este modo.
Borrar la última medición
Presione , para suprimir el último valor añadido.
Para conrmar aparecerá la indicación |del|. Esta función suprime solamente el último de valor añadido. En
caso de que este valor ya hubiera sido eliminado, se muestra |err|.
Borrar todas las medidas
Presione y después , para suprimir todos los pesajes.
Para conrmar aparecerá la indicación |clr|.
Cambio de unidad
Presione o , para seleccionar kilogramo, libra y medida predenida por el usuario.
Si elige kg. se iluminará el LED kg. Si selecciona Ib, se iluminará el LED libra. Si utiliza una unidad predeter-
minada por el usuario, no se iluminará ninguno de estos dos LEDs.
Para más información sobre unidades predenidas por el usuario, por favor lea el capítulo “ajustes del sis-
tema”.
OPCIONES CONFIGURABLES POR EL USUARIO
Los ajustes predenidos permiten una mejor adaptación a las necesidades individuales de cada usuario.
Los distintos parámetros se pueden programar sucesivamente.
Abrir los ajustes predeterminados
Presione y después o ,para abrir las ajustes predenidos por el usuario. Ahora se muestran
los ajustes.
ES

REV. V 2016 REV. V 2016
84
Ajustes de tiempo de apagado automático (Auto-Off-Zeit).
Presione o , para ajustar el tiempo de apagado automático (Auto-Off-Zeit). Ahora se muestra
„Off—“
Presione o y , para ajustar el tiempo
Las posibilidades de ajuste son: 0 (apagado), 5 (5min), 10 (10min), 15 (15min), 30 (30min), 60 (60min). Me-
diante la función Auto-Off se mantendrá la carga de las baterías por más tiempo, ya que la balanza se apaga
automáticamente cuando no se hace uso de ella.
Los minutos restantes para el apagado automático se contarán desde el momento en que la balanza muestre
un peso continuo y no se utilice.
La presión de una tecla o el movimiento de la carga reinician el contador.
Brillo de la pantalla
Presione o , para regular el brillo de la pantalla. Aparecerá el aviso „br--“.
Presione o y , para introducir el valor.
El brillo del LED se puede ajustar a los siguientes valores: 1 (oscuro), 2 (normal), 3 (brillante). La falta de carga
de las baterías puede inuir en el brillo.
Ajustes de la función Standby (espera)
Presione o , para activar el modo Standby (espera). Aparecerá el aviso „Idl--“.
Presione o y , para ajustar el tiempo.
Las opciones de ajuste del tiempo hasta el Standby son 0 (apagar), 5 seg., 15 seg., 30 seg., 60 seg. El valor
predeterminado es de 30 sec.
A n de ahorrar energía, la balanza entra en modo Standby si no está en uso o si la carga se mantiene estable
durante largo periodo de tiempo.
En el modo Standy se consumirá menor cantidad de energía. El pulsado de las teclas o el movimiento de la
carga desactivan el modo Standby.
Presione o , para abandonar los ajustes predeterminados.
CONFIGURACIÓN DE SISTEMA DEL DINAMÓMETRO
ATENCIÓN: Los parámetros de la conguración de sistema están estrechamente
unidos a la calidad de los resultados de pesaje. Se aconseja no cambiar dichos paráme-
tros, a no ser que sea absolutamente necesario. En caso de no estar seguro al respecto,
contacte con el servicio post-venta y compruebe si los cambios de parámetros son
necesarios.
ES
85
CONFIGURACIÓN DEL DINAMÓMETRO
APERTURA DEL MENÚ DE CONFIGURACIÓN
Presione dos veces , para abrir el modo contraseña.
La balanza indica P0000. Introduzca la contraseña (P0258), presionando o y entonces
para cambiar el valor marcado. Para cambiar la posición, presione o .
Presione para conrmar y volver al menú de conguración.
La balanza muestra ahora SCALE.
RESOLUCIÓN
La resolución puede ajustarse a los siguientes valores: 0.001, 0.002, 0.005, 0.01, 0.02, 0.05, 0.1, 0.2, 0.5, 1, 2, 5,
10, 20, o 50.
Presione para acceder a los ajustes. El dinamómetro muestra „E--“ .
Presione o y para cambiar la resolución.
RANGO DE PUESTA A CERO AUTOMÁTICA (AUTO-ZERO)
Las posibilidades para la puesta a cero automática son: 0 (apagado), 2 (±2%FS), 3 (± 3%FS), 4 (±4%FS), 10
(±10%FS), 20 (±20%FS), 50 (±50%FS), 100 (±100%FS) máximo. El valor de fábrica es ±20%FS.
Para adaptar la puesta a cero automática presione El dinamómetro mostrará
Presione o y , para introducir el valor deseado.
PUESTA A CERO MANUAL
Las posibilidades de puesta a cero manual son: 0 (apagado), 2 (±2%FS), 3 (± 3%FS), 4 (±4%FS), 10 (±10%FS),
20 (±20%FS), 50 (±50%FS), 100 (±100%FS) máximo.
Presione para congurar la puesta a cero manual.
El dinamómetro muestra la gama de la puesta a cero manual, ej. para el 4% de la capacidad má-
xima. La balanza estará entonces a cero, si el peso está en el rango de puesta a cero manual.
Presione o y , para introducir el valor deseado.
RANGO DE RETORNO A CERO
Las posibilidades de ajuste son: 00 (apagado), 0.5 (±0.5e), 1.0 (±1.0e), 1.5 (±1.5e), 2.0 (±2.0e), 2.5 (±2.5e), 3.0
(±3.0e), 3.5 (±3.5e), 4.0 (±4.0e), 4.5 (±4.5e), 5.0 (± 5.0e).
Los cambios en los ajustes del rango de puesta a cero pueden aumentar la temperatura de funcionamiento
de la balanza. ¡La exactitud de la medición se verá posiblemente afectada por ella!
ES

REV. V 2016 REV. V 2016
86
Presione para congurar el retorno a cero. El dinamómetro mostrará
El dinamómetro mostrará por ejemplo 0.5 para un valor de 0,5e.
Presione o y para introducir el valor deseado.
RANGO CERO
El rango cero dene el rango en el que debe estar la balanza, antes de se le añada peso. Si la balanza no mos-
trase valor alguno, esto signica que el peso extra es menor al valor predeterminado.
Presione , para acceder al rango cero. Se indicará
Presione o y para cambiar el valor. Presione o para cambiar la cifra marcado.
Introduzca el valor deseado para el rango cero. Presione para especicar el número de decimales. El
rango cero puede estar entre 0e y 3000e. El ajuste previo es de 5e.
AHORRO CERO
La activación del modo ahorro cero (Zero-Saving) sirve para apagar automáticamente la función de puesta
a cero automática.
La balanza realizará el pesaje a partir de entonces basándose en la última puesta a cero. Esta función está
desactivada de fábrica.
Presione para acceder al rango cero. Se indicará .
Presione o y para activar la encender la función („on “) o apagarla („off“).
SENSIBILIDAD DE MOVIMIENTO
La sensibilidad de movimiento compensa el movimiento de la carga a pesar, a n de poder realizar el pesado
ablemente aún cuando el peso se mueva.
Cuanto inferior sea el valor de sensibilidad de movimiento, más rápido se mostrará el valor del pesaje en la
balanza.
Las posibilidades de ajustes de la sensibilidad de movimiento son: 0 (apagado), 1 (muy débil), 2 (débil), 3
(normal), 4 (fuerte) y 5 (muy fuerte).
Presione ,para acceder a los ajustes de la sensibilidad de movimiento.
Aparece el aviso .
Presione o y , para introducir el valor deseado.
ES
87
PESAJEO DINÁMICO
La función de pesaje dinámico acelera la lectura del peso y es por lo tanto conveniente en los casos, en los
que la estabilidad sea más importante que la precisión.
Presione para acceder a los ajustes de peso dinámico.
Aparece el aviso .
Presione o y ,para activar la encender la función („on “) o apagarla („off“).
GRAVEDAD
La balanza muestra por ejemplo el valor G9.794, para g = 9.794. Se recomienda cambiar este valor, úni-
camente cuando la aceleración gravitatoria de la zona se desvíe considerablemente del valor predenido.
Presione para acceder a los ajustes de la función gravedad. Se mostrará “G---“ .
Presione o y para introducir el valor deseado. Presione o opara mover el
cursor. Fije el valor de la gravedad. Presione para especicar el número de decimales.
AJUSTE DE LA UNIDAD DE PESO PREDETERMINADA
El valor puede estar entre 0.000 y 9.999.
Las unidades denidas para la unida de peso ofrecen la posibilidad de denir unidades, que no estén entre
las unidades estándar de peso.
Las unidades de preso predenidas funcionan proporcionalmente a las unidades del sistema. Si la unidad de-
nida por el usuario fuera 1234 y la unidad del sistema fuera el kilogramo, entonces el peso se medirá primero
kilogramos (ej. 1000) y después se convertirá a la unidad denida por el usario (en el ejemplo: 1234 USR).
Preste la atención a que el uso de unidades predenidas no supere la carga máxima permitida del dinamó-
metro, puesto que en este caso el valor indicado no correspondería al valor real.
Presione para acceder a los ajustes de unidad de peso predeterminada. Se mostrará „U---“ .
Presione o y para introducir el valor deseado. Presione o para mover el cursor.
Introduzca el valor deseado. Presione para especicar el número de decimales.
CALIBRADO
APERTURA DEL MENÚ DE CALIBRACIÓN
Presione dos veces para abrir el modo contraseña.
La balanza muestra ahora P0000. Presione o y para cambiar la cifra seleccionada.
Presione o para mover el cursor. Introduzca la contraseña de calibración (P8416).
ES

REV. V 2016 REV. V 2016
88
Presione para conrmar y acceder en el modo de calibración. Se mostrará „CAL“ .
UNIDAD DE SISTEMA
La balanza muestra la unidad de sistema actual. La unidad de sistema se puede especicar en el kilogramo
o la libra.
Presione
para acceder a los ajustes de unidad del sistema. Se mostrará „Un---“ .
Presione o y para cambiar la unidad de sistema.
CALIBRACIÓN DE LA GRAVEDAD
La balanza muestra la calibración de la gravedad, por ejemplo G9.794 para g = 9.794.
Presione para acceder a los ajustes de la gravitación. Se mostrará “G----“ .
Presione o y para cambiar la cifra. Presione o para mover el cursor.
Introduzca el valor de la aceleración de la gravedad. Presione , para especicar el número de
CAPACIDAD MÁXIMA DE CARGA
¡No sobrecargue la balanza! La sobrecarga puede dañar el equilibrio severamente.
Presione
para acceder a los ajustes de la capacidad máxima de carga. Se indicará „00000 “ .
Presione o y para cambiar la cifra. Presione o , para mover el cursor.
Introduzca el valor máximo de capacidad deseado. Presione , para especicar el número de decimales.
RETORNO A CERO
Presione para acceder a los ajustes de la capacidad máxima de carga. Se mostrará „LOAD0 “ .
Deje la balanza descargada y presione para dejar marcado el código 12345. Después de la estabilización
del código, presione para pasar al paso siguiente.
MEDIDA DEL PESO 1 (LOAD1)
La balanza indicará „LOAD1 “.
Use un peso de prueba y presione . Se indicará „00000 “.
Presione , o y , para cambiar la cifra. Presione o para mover el cursor.
Introduzca el valor correspondiente al peso de prueba. Presione para especicar el número de
decimales. Mantenga la balanza estable y presione para que se muestre el código 23456.
ES
89
Espere hasta que el código esté estable. Presione para iniciar la medida del peso.
Tan pronto se haya realizado la medición, la balanza pasa automáticamente al siguiente paso.
MEDIDA DEL PESO 2 (LOAD2)
La balanza indicará „LOAD2 “ .
Use un peso de prueba y presione
. Se indicará „00000 “.
Presione o y para cambiar la cifra. Presione o para mover el cursor.
Introduzca el valor correspondiente al peso de prueba. Presione
para especicar el número de
decimales. Mantenga la balanza estable y presione para que se muestre el código 23456.
Espere hasta que el código esté estable. Presione para iniciar la medida del peso.
Tan pronto se haya realizado la medición, la balanza pasa automáticamente al siguiente paso.
MEDIDA DEL PESO 3 (LOAD3)
La balanza indicará „LOAD3“.
Use un peso de prueba y presione . Se indicará „00000 “.
Presione
o y para cambiar la cifra. Presione o para mover el cursor.
Introduzca el valor correspondiente al peso de prueba. Presione para especicar el número de
decimales. Mantenga la balanza estable y presione para que se muestre el código 23458.
Espere hasta que el código esté estable. Presione para iniciar la medida del peso.
Tan pronto la medición haya terminado, la balanza memoriza la calibración automáticamente y abandona el
menú de calibración.
ES

REV. V 2016 REV. V 2016
90
Problema Posible causa Posible solución
El dinamómetro no se
enciende, cuando se pulsa
Batería vacía / defectuosa Comprobar baterías y cambiarlas en
caso necesario
tecla
defectuosa
Presione la tecla rmemente y mantén-
gala presionada 2 segundos
Placa defectuosa Contacte con su distribuidor
Parpadeo de la pantalla Batería vacía Carga / cambio de la batería
La balanza no reacciona al
presionar una tecla
No hay reacción alguna Apague y vuelva a encender de nuevo
Tecla defectuosa Contacte con su distribuidor
Medición inestable
Carga en movimiento Estabilice la carga
Ajuste de la sensabilidad insu-
ciente
Aumente la sensibilidad del movi-
miento
Humedad dentro de la balanza Seque cuidadosamente los elementos
individuales
Placa defectuosa Contacte con su distribuidor
El equilibrio indica un
peso, aunque no esté
cargada
Batería vacía Carga / cambio de la batería
La célula de peso ha sido utiliza-
da durante demasiado tiempo
Interrumpa el uso de la misma
Célula de pesaje defectuosa Contacte con su distribuidor
Fallo grave de pesaje La balanza no fue puesta a cero
antes del pesado
Ejecute la función cero manual
Unidad de pesaje incorrecta Cambie la unidad de pesaje
Calibración necesaria Calibre el dinamómetro
Célula o placa de pesado defec-
tuosa
Contacte con su distribuidor
El control remoto funcio-
na solamente en distancias
reducidas
Batería del mando a distancia
vacías
Cambie las baterías
ES
REVISIÓN PERIÓDICA DEL APARATO
Compruebe periódicamente que los componentes del dinamómetro no estén deteriorados. Dado el caso
no debe utilizarse el aparato. Contacte directamente con su distribuidor para realizar las reparaciones
oportunas.
¿Qué hacer en caso de problemas?
Póngase en contacto con el vendedor y prepare la siguiente información:
• Número de factura y de serie (este último lo encontrará en la placa de características técnicas).
• En caso necesario, incluya una foto de la pieza defectuosa.
• El personal del servicio técnico podrá determinar mejor cuál es el problema cuanto más detallada sea
la descripción. Cuanto más detallada y precisa sea la información, más rápido podremos ayudarle.
ATENCIÓN: Nunca intente reparar o abrir el aparato sin consultar previamente con
el servicio técnico. ¡Esto puede conllevar la extinción de la garantía!
91
DE
Hiermit bestätigen wir, dass die hier in dieser Anleitung aufgeführten Geräte CE-konform sind.
EN
We hereby certify that the appliances listed in this manual are CE compliant.
FR
Par la présente, nous conrmons que les appareils présentés dans ce mode d´emploi sont conformes aux
normes Ce.
PL
Niniejszym potwierdzamy, że urządzenia opisane w tej instrukcji są zgodne z deklaracją CE.
IT
Con la presente documentazione si certica che i dispositivi descritti all´interno del manuale sono confor-
mi alle vigenti norme CE.
ES
Por la presente conrmamos que los dispositivos detallados en este manual cumplen con la normativa de
la CE.

www.steinbergsystems.de
Hersteller an Verbraucher
Sehr geehrte Damen und Herren,
gebrauchte Elektro- und Elektronikgeräte dürfen gemäß europäischer Vorgaben [1] nicht zum unsortierten Siedlungsabfall
gegeben werden, sondern müssen getrennt erfasst werden. Das Symbol der Abfalltonne auf Rädern weist auf die Notwendigkeit
der getrennten Sammlung hin. Helfen auch Sie mit beim Umweltschutz. Sorgen Sie dafür, dieses Gerät, wenn Sie es nicht mehr
weiter nutzen wollen, in die hierfür vorgesehenen Systeme der Getrenntsammlung zu geben.
In Deutschland sind Sie gesetzlich [2] verpichtet, ein Altgerät einer vom unsortierten Siedlungsabfall getrennten Erfassung
zuzuführen. Die öffentlich - rechtlichen Entsorgungsträger (Kommunen) haben hierzu Sammelstellen eingerichtet, an denen
Altgeräte aus privaten Haushalten ihres Gebietes für Sie kostenfrei entgegengenommen werden. Möglicherweise holen die
rechtlichen Entsorgungsträger die Altgeräte auch bei den privaten Haushalten ab.
Bitte informieren Sie sich über Ihren lokalen Abfallkalender oder bei Ihrer Stadt- oder Gemeindeverwaltung über die in Ihrem
Gebiet zur Verfügung stehenden Möglichkeiten der Rückgabe oder Sammlung von Altgeräten.
[1] RICHTLINIE 2002/96/EG DES EUROPÄISCHEN PARLAMENTS UND DES RATES
ÜBER ELEKTRO- UND ELEKTRONIK - ALTGERÄTE
[2] Gesetz über das Inverkehrbringen, die Rücknahme und die umweltverträgliche Entsorgung
von Elektro- und Elektronikgeräten (Elektro- und Elektronikgerätegesetz - ElektroG).
Umwelt- und Entsorgungshinweise
CONTACT
emaks spółka z ograniczoną
odpowiedzialnością sp.k.
Ul. Dekoracyjna 3
65-155 Zielona Góra
Nr. kom.: +48 506 06 05 74
E-mail: [email protected]
www.expondo.de
Utylizacja produktu
Produkty elektryczne i elektroniczne po zakończeniu okresu eksploatacji wymagają segregacji i oddania ich do wyznaczo-
nego punktu odbioru. Nie wolno wyrzucać produktów elektrycznych razem z odpadami gospodarstwa domowego. Zgodnie
z dyrektywą WEEE 2012/19/UE obowiązującą w Unii Europejskiej, urządzenia elektryczne i elektroniczne wymagają segre-
gacji i utylizacji w wyznaczonych miejscach. Dbając o prawidłową utylizację, przyczyniasz się do ochrony zasobów naturalnych
i zmniejszasz negatywny wpływ oddziaływania na środowisko, człowieka i otoczenie. Zgodnie z krajowym prawodawstwem,
nieprawidłowe usuwanie odpadów elektrycznych i elektronicznych może być karane!
For the disposal of the device please consider and act according to the national and local rules and regulations.
Transcripción de documentos
BEDIENUNGSANLEITUNG KRANWAAGE INSTRUKCJA WAGA HAKOWA USER’S GUIDE ELECTRONIC CRANE SCALE MANUEL D´UTILISATION BALANCES À GRUE ISTRUZIONI D’USO DINAMOMETRO PER GRU MANUAL DE INSTRUCCIONES BALANZAS DE GRÚA SBS-KW-1000/10O DE | EN | PL | IT | FR | ES Produktname: Modell: Name des Herstellers: Anschrift des Herstellers: KRANWAAGE SBS-KW-1000/10O emaks spółka z ograniczoną odpowiedzialnością sp.k. ul. Dekoracyjna 3, 65-155 Zielona Góra INHALT | TREŚĆ | CONTENT | CONTENU 4 18 32 47 62 77 REV. V 2016 2 REV. V 2016 3 BEDIENUNGSANLEITUNG Präzise Kranwaage von STEINBERG SYSTEMS Produktname: KRANWAAGE Modell: SBS-KW-1000/10O Name des Herstellers: emaks spółka z ograniczoną odpowiedzialnością sp.k. Anschrift des Herstellers: ul. Dekoracyjna 3, 65-155 Zielona Góra Bitte lesen Sie die Anleitung sorgfältig, um bestmögliche Ergebnisse mit der Waage erzielen zu können. Diese Kranwaage wurde mit moderner, bewährter Mechanik und Technik konzipiert. Sie ist daher vielseitig einsetzbar, zuverlässig, präzise und leicht zu bedienen. • • • • DE Qualität – Produziert nach europäischer CE-Richtlinie Funktionalität – Auto-Off-Funktion, Standby-Funktion Zuverlässigkeit – Moderne Technik und Schaltkreise für hohe Leistung und Langzeitstabilität Breites Anwendungsspektrum – Lagerung,Versand, Transport, etc. Allgemeine Sicherheitshinweise für den Gebrauch der Kranwaage Seien Sie stets vorsichtig bei Gebrauch und Wartung der Waage. Dies gilt insbesondere beim täglichen Gebrauch, um auch nach längerer Zeit genaue Messergebnisse erzielen zu können. • Vermeiden Sie während des Gebrauchs Umgebungen mit starken elektrischen oder magne- tischen Feldern. • Verwenden Sie diese Waage nicht in Umgebungen mit starken Temperaturschwankungen. • Bauen Sie die Waage nicht ohne Rücksprache mit dem Kundenservice auseinander – Dadurch resultierende Schäden werden nicht durch die Gewährleistung abgedeckt. • Gehen Sie beim Batteriewechsel vorsichtig vor. • Bitte entfernen Sie vorsorglich die Batterien aus dem Gerät, wenn dieses länger als 4 Wochen nicht genutzt werden sollte. • Bitte überladen Sie die Waage nicht. Zu hohe Belastung kann zur Beschädigung der Wiegezellen führen und die Gewährleistung gefährden. • Entfernen Sie die Lasten gleich nach dem Wiegevorgang, damit die Messergebnisse nicht nach teilig beeinflusst werden. • Kontrollieren Sie regelmäßig die Batterien. Sollten diese leer sein, so ersetzen Sie sie oder laden sie mit einem passenden Ladegerät auf. • Wenden Sie sich im Schadensfall bitte an Ihren Verkäufer, anstatt die Waage selbstständig zu reparieren. VOR DER ERSTEN BENUTZUNG: Bitte prüfen Sie bei Erhalt der Ware zunächst die Verpackung auf Beschädigungen und öffnen Sie diese anschließend, insofern keine Mängel vorliegen. Sollten Beschädigungen vorhanden sein, so kontaktieren Sie bitte innerhalb von 3 Tagen die Transportgesellschaft und Ihren Vertriebspartner. Dokumentieren Sie so präzise wie möglich, welche Mängel aufgetreten sind. Stellen Sie das volle Paket nicht verkehrt herum auf! Achten Sie beim Transport bitte darauf, dass es horizontal und stabil gehalten wird. TECHNISCHE DETAILS Modell SBS-KW-1000/10O Präzisionsklasse Class III Entspricht den OIML R76 Tara-Bereich 100% F.S. Nullierungsbereich ±4% F.S. Stabilisierungszeit ≤10 sec Überlastung 100% F.S. + 9e Sicherheitslast 120% F.S. Bruchlast 400 % F.S. Batterie 4 * AA 1.5V Umgebungstemperatur -10°C ~ +40°C Umgebungsfeuchtigkeit 20°C ≤90% Display 25.4 mm – LED Max. Kapazität 1000 kg Min. Kapazität 10 kg Ablesbarkeit 0.5 kg DISPLAY UND TASTEN Taste 4 Bezeichnung On/Off Funktion Drücken Sie diese Taste eine Sekunde lang, um die Waage einzuschalten. Menüpunkt verlassen Tare Entsorgung der Verpackung Es wird darum gebeten, das Verpackungsmaterial (Pappe, Plastikbänder und Styropor) aufzubewahren, um im Servicefall das Gerät bestmöglich geschützt zurücksenden zu können! REV. V 2016 DE HAUPTDISPLAY Tara Längeres Gedrückthalten: Zero Hold REV. V 2016 Sperren / Freigeben, Bestätigung/ Überleitung Längeres Gedrückthalten: Wechsel der Gewichtseinheiten 5 ANZEIGEN Symbol Taste Bezeichnung Bedeutung Stable Das Gewicht ist stabil und kann gemessen werden Zero Das Gewicht ist gleich null Tared Die Waage ist tariert Hold Die Tasten sind gesperrt Lb Die Wiegeeinheit ist auf Pfund eingestellt Kg Die Wiegeeinheit ist auf Kilogramm eingestellt FERNBEDIENUNG Bezeichnung Funktion Taste auf der Waage Hold Sperren / Freigeben Bestätigung Acc. Gewicht addieren,Verminderung des Wertes der markierten Ziffer Del. Letzte Messung löschen / alle Messungen löschen, Bewegung des Cursors nach links F1 Anzeige des addierten Gewichtes, Eingabe der Kommastelle F2 Einheitenwechsel Off Bestätigen und zum Wiegemodus zurückkehren 2nd Funktion „2nd” DE DE ANZEIGE BEI REGULÄRER HANDHABUNG Symbol Bezeichnung Funktion Messung läuft Taste REV. V 2016 Bezeichnung Funktion Zero Nullierung Tare Tara SETUP Benutzerdefinierte Einstellungen BATTERY Batteriestand END Speichern und Abbrechen OFF Ausschalten OVERLOAD Überlastung ERROR Ungültige Eingabe ACCUMULATE Gewicht addieren Taste auf der Waage 6 REV. V 2016 7 Symbol Bezeichnung Funktion DELETE Letzte Messung löschen CLEAR Alle Messungen löschen Sperren/Freigeben (HOLD-Funktion) Drücken Sie oder , um die Anzeige zu sperren. HOLD leuchtet. Drücken Sie oder , um die Anzeige zu entsperren. HOLD geht aus. Addieren BENUTZUNG Drücken Sie Ein/Ausschalten Sobald ein zweites Gewicht aufgenommen wurde, wird |acc| zur Bestätigung angezeigt. für eine Sekunde, um die Waage einzuschalten. Die Waage fährt nun hoch und es Drücken Sie die Taste erscheint zwei Mal „0.0.0.0.0“. Anschließend werden die maximale Kapazität 1000 und der Batteriestand (z.B. bat99) angezeigt. Danach wird das Gewicht geprüft (Anzeige: ------) und eine Nullierung ausgeführt. Die Waage addiert je nach Einstellung im Brutto- oder Nettomodus. Für mehr Informationen bezüglich der automatischen Nullierung, lesen Sie bitte das Kapitel “Systemkonfiguration”. Drücken Sie oder für eine Sekunde, um die Waage auszuschalten. Der Batteriestand wird angezeigt (z.B. bat99) und |off| erscheint, bevor die Waage herunterfährt. Nullieren DE Drücken Sie oder ,um eine Nullierung vorzunehmen. ZERO leuchtet. Sollte sich das Gewicht in Bewegung befinden, die Tara-Funktion aktiviert sein oder das Gewicht außerhalb des Bereiches der manuellen Nullierung liegen, so zeigt die Waage |err| an. Für mehr Informationen bezüglich der manuellen Nullierung, lesen Sie bitte das Kapitel “Systemkonfiguration”. Tara Drücken Sie im Bruttomodus die Taste TARE leuchtet nun. oder , um in den Tara-Modus zu gelangen. Die Anzeige Sollte sich das Gewicht in Bewegung oder im negativen Bereich befinden, so wird |err| angezeigt. Ebenso, wenn das Gewicht vorher nicht nulliert wurde. Ansicht des addierten Gewichtes Drücken Sie , um in den Ansichtsmodus zu gelangen. Das Display beginnt zu blinken und zeigt das hinzugefügte Gewicht an. Drücken Sie oder , um zwischen dem addierten Gewicht und dem Gesamtgewicht zu wechseln. Drücken Sie oder , um den Ansichtsmodus zu verlassen. Letzte Messung löschen Drücken Sie , um den zuletzt hinzugefügten Wert zu löschen. Zur Bestätigung wird der Hinweis |del| angezeigt. Diese Funktion löscht nur den zuletzt addierten Wert. Sollte der Wert bereits gelöscht worden sein, so zeigt die Waage |err| an. Alle Messungen löschen Drücken Sie Sollte sich das Gewicht in Bewegung, im negativen Bereich oder außerhalb des Tara-Bereichs befinden, so zeigt die Waage |err| an. , um ein Gewicht zu addieren. und dann , um alle Gewichte zu löschen. Zur Bestätigung wird der Hinweis |clr| angezeigt. Die Tarafunktion reduziert den Überlastungswert der Waage. Beispiel: Wenn ein 1000kg Gewicht bei einer 5000*2k Waage benutzt wird, reduziert sich die maximale Kapazität der Waage auf 4018kg (5000 – 1000 + 9 Einteilungen von 2kg). Einheitenwechsel Drücken Sie im Nettomodus nun aus. Wählen Sie kg, so leuchtet die kg LED-Diode. Wählen Sie lb, so leuchtet die lb LED-Diode. Wird eine benutzerdefinierte Einheit benutzt, so leuchtet keine der beiden Dioden. oder , um den Tara-Modus zu verlassen. Die TARE Anzeige geht Drücken Sie oder , um zwischen den Einheiten kg, lb und benutzerdefiniert zu wechseln. Für mehr Informationen über benutzerdefinierte Einheiten, lesen Sie bitte das Kapitel “Systemeinstellungen”. REV. V 2016 8 REV. V 2016 9 DE BENUTZERDEFINIERTE EINSTELLUNGEN SYSTEMKONFIGURATION DER WAAGE Benutzerdefinierte Einstellungen ermöglichen eine bessere Anpassung der Funktionen an Ihre individuellen Bedürfnisse. ACHTUNG: Die Parameter der Systemkonfiguration sind eng mit der Qualität der Messergebnisse verbunden. Es wird davon abgeraten, diese Parameter zu ändern, wenn es nicht absolut notwendig ist. Sollten Sie in dieser Hinsicht unsicher sein, kontaktieren Sie bitte den Kundenservice um zu prüfen, ob eine Änderung der Parameter erforderlich ist. Die verschiedenen Parameter können nacheinander geändert werden. Benutzerdefinierte Einstellungen öffnen KONFIGURATION DER WAAGE Drücken Sie und dann das Setup angezeigt. oder , um die benutzerdefinierten Einstellungen zu öffnen. Nun wird KONFIGURATIONSMENÜ ÖFFNEN Einstellung der Auto-Off –Zeit Drücken Sie zwei Mal Drücken Sie oder Die Waage zeigt P0000 an. Geben Sie das Passwort ein (P0258), indem Sie Drücken Sie oder , um die Auto-Off-Zeit anzupassen. Nun wird „Off—“ angezeigt. und , um die Zeit einzustellen. Die Einstellungsmöglichkeiten sind: 0(aus), 5 (5min), 10 (10min), 15 (15min), 30 (30min), 60 (60min). Durch die Auto-Off-Funktion wird die Batterieladung erheblich länger aufrechterhalten, da die Waage sich bei Nichtgebrauch automatisch abschaltet. Die eingestellten Minuten bis zum automatischen Ausschalten werden ab dem Moment gezählt, ab dem die Waage bei stabiler Last nicht benutzt wird. DE Ein Tastendruck oder eine Lastbewegung startet den Timer neu. oder Drücken Sie oder oder und dann drücken, um den markierten Wert zu ändern. Um die Position zu wechseln, drücken Sie oder . Drücken Sie , um die Eingabe zu bestätigen und in das Konfigurationsmenü zu gelangen. Die Waage zeigt nun SCALE. RESOLUTION DE Die Resolution kann auf folgende Werte eingestellt werden: 0.001, 0.002, 0.005, 0.01, 0.02, 0.05, 0.1, 0.2, 0.5, 1, 2, 5, 10, 20, oder 50. Helligkeit des Displays Drücken Sie , um den Passwortmodus zu öffnen. , um die Helligkeit des Displays einzustellen. Es erscheint die Anzeige „br--“. und , um den Wert anzupassen. Drücken Sie um in die Einstellungen zu gelangen. Die Waage zeigt „E---“ an. oder Drücken Sie und um den Resolutionswert zu ändern. Die LED-Helligkeit kann auf folgende Werte eingestellt werden: 1(dunkel), 2(normal), 3(hell). Geringere Helligkeitseinstellungen bewirken längere Batterieladung. BEREICH DER AUTOMATISCHEN NULLIERUNG (AUTO-ZERO) Standby-Einstellungen Die Einstellungsmöglichkeiten für den Nullierungsbereich sind: 0 (aus), 2 (±2%FS), 3 (± 3%FS), 4 (±4%FS), 10 (±10%FS), 20 (±20%FS), 50 (±50%FS), 100 (±100%FS) der max. Kapazität.Vom Werk aus ist der Wert ±20%FS eingestellt. Drücken Sie Drücken Sie oder oder , um den Standby-Modus einzustellen. Es erscheint die Anzeige „Idl--“. und , um die Zeiteinstellung anzupassen. Drücken Sie an. Die Einstellungsmöglichkeiten der Zeit bis zum Standby sind 0 (aus), 5 Sek, 15 Sek, 30 Sek, 60 Sek. Der voreingestellte Standardwert liegt bei 30 Sek. Um Energie zu sparen, geht die Waage automatisch auf Standby wenn keine Handlung vorgenommen wird oder die Last über längere Zeit stabil ist. um den Bereich der automatischen Nullierung anzupassen. Die Waage zeigt Drücken Sie oder und , um den Wert anzupassen. Im Standby-Modus verbraucht die Waage am wenigsten Strom. Tastendrücke oder Lastbewegungen beenden den Stand-By-Modus. Drücken Sie REV. V 2016 oder , um die benutzerdefinierten Einstellungen zu verlassen. 10 REV. V 2016 11 BEREICH DER MANUELLEN NULLIERUNG Drücken Sie Die Einstellungsmöglichkeiten für den manuellen Nullierungsbereichsind: 0 (aus), 2 (±2%FS), 3 (±3%FS), 4 (±4%FS), 10 (±10%FS), 20 (±20%FS), 50 (±50%FS), 100 (±100%FS) der max. Kapazität. Drücken Sie Die Waage zeigt den Bereich der manuellen Nullierung an, z.B. steht für 4% der maximalen Kapazität. Die Waage wird nur dann nulliert, wenn das Gewicht im Bereich der manuellen Nullierung liegt. oder und , um die Funktion zuzuschalten („on“) oder abzuschalten („off“). BEWEGUNGSSENSIBILITÄT Je schwächer die Bewegungssensibilität eingestellt ist, umso schneller zeigt die Waage das Gewicht an. Die Einstellungsmöglichkeiten der Bewegungssensibilität sind: 0 (aus), 1 (sehr schwach), 2 (schwach), 3 (normal), 4 (stark) und 5 (sehr stark). , um den Wert anzupassen. Drücken Sie BEREICH DER NULLSUCHE Die Einstellungsmöglichkeiten sind: 00 (aus), 0.5 (±0.5e), 1.0 (±1.0e), 1.5 (±1.5e), 2.0 (±2.0e), 2.5 (±2.5e), 3.0 (±3.0e), 3.5 (±3.5e), 4.0 (±4.0e), 4.5 (±4.5e), 5.0 (± 5.0e). , um die Einstellungsmöglichkeiten der Bewegungssensibilität aufzurufen. Der Hinweis erscheint. Drücken Sie oder und , um den Wert anzupassen. Einstellungsveränderungen der Nullsuche können die Betriebstemperatur der Waage erhöhen. Eventuell wird die Messgenauigkeit dadurch beeinflusst! DYNAMISCHES WIEGEN Drücken Sie Die Funktion des dynamischen Wiegens beschleunigt die Gewichtsbestimmung und eignet sich daher besonders in Fällen, bei denen Stabilität wichtiger als Genauigkeit ist. ,um den Bereich der Nullsuche anzupassen. Die Waage zeigt dann an. Die Waage zeigt jeweils den aktiven Wert an, z.B. 0,5 für einen Wert von 0,5e. DE und Die Bewegungssensibilität der Waage kompensiert die Bewegung der zu wiegenden Last, damit das Gewicht auch während einer Bewegung zuverlässig bestimmt werden kann. um den Bereich der manuellen Nullierung anzupassen. Drücken Sie oder Drücken Sie oder und Drücken Sie , um den Wert anzupassen. Der Hinweis Der Nullbereich definiert den Bereich, in dem sich die Waage befinden muss, bevor eine Addition ausgeführt werden kann. Sollte die Waage unbelastet sein, so muss das restliche Gewicht leichter als der eingestellte Wert sein. , um in den Nullbereich zu gelangen. Drücken Sie oder markierte Ziffer zu wechseln. und wird angezeigt. , um den Wert zu ändern. Drücken Sie , um die Tragen Sie den Wert des Nullbereichs ein. Drücken Sie , um die Kommastelle festzulegen. Der Nullbereich kann im Bereich von 0e bis 3000e eingestellt werden. Die Voreinstellung beträgt 5e. ZERO-SAVING Ist Zero-Saving eingeschaltet, so wird die Auto-Zero-Funktion automatisch abgeschaltet. Die Waage berechnet das Gewicht nun basierend auf der letzten Nullierung. Diese Funktion ist standardmäßig zunächst deaktiviert. Drücken Sie REV. V 2016 , um in den Nullbereich zu gelangen. 12 wird angezeigt. oder und , um die Funktion zuzuschalten („on“) oder abzuschalten („off“). GRAVITATION Die Waage zeigt den aktiven Wert an, z.B. G9.794, für g = 9.794. Es wird empfohlen, diesen Wert nur dann zu ändern, wenn die Gravitationsbeschleunigung der Umgebung stark vom eingestellten Wert abweicht. Drücken Sie oder DE erscheint. Drücken Sie NULLBEREICH Drücken Sie , um die Einstellungsmöglichkeiten des dynamischen Wiegens aufzurufen. Drücken Sie , um die Einstellungsmöglichkeiten der Gravitation aufzurufen. „G----“ wird angezeigt. oder und , um den Wert anzupassen. Drücken Sie Cursor zu bewegen. Stellen Sie den Gravitationswert ein. Drücken Sie oder ,um den , um die Kommastelle festzulegen. BENUTZERDEFINIERTE WIEGEEINHEIT Der Wert kann zwischen 0.000 und 9.999 eingestellt werden. Benutzerdefinierte Wiegeeinheiten bieten die Möglichkeit, individuelle Einheiten zu definieren, die nicht zu den Standarteinheiten der Waage zählen. Benutzerdefinierte Einheiten arbeiten proportional zur Systemeinheit: Sollte die benutzerdefinierte Einheit bei 1234 und die Systemeinheit bei kg gesetzt werden, so wird zunächst das Gewicht in kg gemessen (z.B. 1000) und anschließend in die benutzerdefinierte Einheit konvertiert (im Beispiel: 1234 USR). REV. V 2016 13 Achten Sie bei der Benutzung von benutzerdefinierten Einheiten bitte auf die Maximalbelastung der Waage, da der angezeigte Wert nicht der tatsächlichen Belastung entspricht. Drücken Sie Drücken Sie , die Einstellungsmöglichkeiten der benutzerdefinierten Wiegeeinheit aufzurufen. „U----“ wird angezeigt. um den Cursor zu bewegen. Geben Sie den Wert der max. Kapazität ein. Drücken Sie telle festzulegen. Drücken Sie NULLSUCHE oder und , um den Wert anzupassen. Drücken Sie den Cursor zu bewegen. Geben Sie den gewünschten Wert ein. Drücken Sie oder , um , um die Kommastelle festzulegen. Drücken Sie zwei Mal oder oder und , um den Cursor zu bewegen. Geben Sie das Kalibrierungspasswort (P8416) ein. , um die Eingabe zu bestätigen und um in den Kalibrierungsmodus zu gelangen. „CAL“ wird und Nutzen Sie ein Prüfgewicht, und drücken Sie Drücken Sie oder und um den Cursor zu bewegen. Geben Sie das Gewicht des Prüfgewichtes ein. Drücken Sie Kommastelle festzulegen. , um die Systemeinheit zu ändern. Drücken Sie Drücken Sie , um zu den Gravitationseinstellungen zu gelangen. „G----“ wird angezeigt. oder um den Cursor zu bewegen. Geben Sie den Wert der Gravitationsbeschleunigung ein. Drücken Sie , , um Bitte überlasten Sie die Waage nicht! Eine Überlastung kann die Waage schwer beschädigen. , um die Gewichtsmessung zu starten. und , um die gewählte Ziffer zu ändern. Drücken Sie den Cursor zu bewegen. Geben Sie das Gewicht des Prüfgewichtes ein. Drücken Sie telle festzulegen. oder , um die Gewichtsmessung zu starten. Sobald die Messung abgeschlossen ist, geht die Waage automatisch zum nächsten Schritt über. REV. V 2016 15 , um , um die Kommas- , um den Code 34567 anzeigen zu lassen. , um die Einstellungen der max. Kapazität aufzurufen. „00000“ wird angezeigt. 14 DE . „00000“ wird angezeigt. Warten Sie, bis der Code stabil ist. Drücken Sie MAXIMALE KAPAZITÄT REV. V 2016 oder Halten Sie die Last stabil und drücken Sie die Kommastelle festzulegen. Drücken Sie , um die MESSUNG DES GEWICHTES 2 (LOAD2) Nutzen Sie ein Prüfgewicht, und drücken Sie , um die gewählte Ziffer zu ändern. Drücken Sie , Sobald die Messung abgeschlossen ist, geht die Waage automatisch zum nächsten Schritt über. Die Waage zeigt die Kalibrierungsgravitation an, z.B. G9.794 für g = 9,794. und oder , um den Code 23456 anzeigen zu lassen. Die Waage zeigt „LOAD2“ an. oder . „00000“ wird angezeigt. , um die gewählte Ziffer zu ändern. Drücken Sie KALIBRIERUNGSGRAVITATION Drücken Sie , um den Code 12345 anzeigen zu lassen. Nach der Warten Sie, bis der Code stabil ist. Drücken Sie , um die Einstellungsmöglichkeiten der Systemeinheit zu öffnen. „Un---“ wird angezeigt. oder , um die Kommas- , um zum nächsten Schritt überzugehen. Halten Sie die Last stabil und drücken Sie Die Waage zeigt die aktuelle Systemeinheit. Die Systemeinheit kann auf kg oder lb festgelegt werden. Drücken Sie , Die Waage zeigt „LOAD1“ an. , um die gewählte Ziffer zu ändern. SYSTEMEINHEIT Drücken Sie oder MESSUNG DES GEWICHTES 1 (LOAD1) , um in den Passwort-Modus zu gelangen. Die Waage zeigt nun P0000. Drücken Sie DE , um die gewählte Ziffer zu ändern. Drücken Sie , um die Einstellungen der Nullsuche aufzurufen. „LOAD0“ wird angezeigt. Code-Stabilisierung drücken Sie KALIBRIERUNGSMENÜ ÖFFNEN Drücken Sie angezeigt. und Lassen Sie die Waage unbelastet und drücken Sie KALIBRIERUNG Drücken Sie Drücken Sie oder MESSUNG DES GEWICHTES 3 (LOAD3) Die Waage zeigt „LOAD3“ an. Nutzen Sie ein Prüfgewicht und drücken Sie Drücken Sie oder und Die Fernbedienung funktioniert nur bei geringer Entfernung . „00000“ wird angezeigt. Halten Sie die Last stabil und drücken Sie oder , um , um die Kommas- , um den Code 45678 anzeigen zu lassen. Warten Sie, bis der Code stabil ist. Drücken Sie , um die Gewichtsmessung zu starten. Sobald die Messung abgeschlossen ist, speichert die Waage automatisch die Kalibrierung und das Kalibrierungsmenü wird verlassen. DE Problem Mögliche Ursache Mögliche Lösung Die Waage geht nicht an, Batterie leer / defekt Batterie prüfen und ggf. austauschen Taste Drücken Sie fester und halten Sie die Taste 2 Sek. gedrückt defekt wenn man den Knopf bedient Platine defekt Setzen Sie sich mit dem Kundenservice in Verbindung Display blinkt Batterie leer Batterie aufladen / wechseln Das Programm hängt Waage ausschalten und wieder einschalten Taste defekt Setzen Sie sich mit dem Kundenservice in Verbindung Last in Bewegung Stabilisieren Sie die Last Bewegungssensibilität zu schwach eingestellt Erhöhen Sie die Bewegungssensibilität Feuchtigkeit im inneren der Waage Trocknen Sie vorsichtig die einzelnen Elemente Platine defekt Setzen Sie sich mit dem Kundenservice in Verbindung Batterie leer Batterie aufladen / wechseln Wiegezelle wurde zu lang benutzt Pausieren Sie mit der Anwendung Wiegezelle defekt Setzen Sie sich mit dem Kundenservice in Verbindung Die Waage wurde vor dem Wiegen nicht nulliert Nullieren Sie die Waage manuell Falsche Wiegeeinheit Ändern Sie die Wiegeeinheit Kalibrierung nötig Kalibrieren Sie die Waage Wiegezelle oder Platine defekt Setzen Sie sich mit dem Kundenservice in Verbindung Die Waage reagiert nicht auf einen Tastendruck Messergebnis instabil Die Waage zeigt ein Gewicht an, obwohl sie nicht geladen ist Grober Messfehler REV. V 2016 16 Batterie der Fernbedienung erzetzen REGELMÄSSIGE PRÜFUNG DES GERÄTES , um die gewählte Ziffer zu ändern. Drücken Sie den Cursor zu bewegen. Geben Sie das Gewicht des Prüfgewichtes ein. Drücken Sie telle festzulegen. Batterie der Fernbedienung defekt / leer Prüfen Sie regelmäßig, ob Elemente des Gerätes Beschädigungen aufweisen. Sollte dies der Fall sein, darf das Gerät nicht mehr benutzt werden. Wenden Sie sich umgehend an Ihren Verkäufer, um Nachbesserungen vornehmen zu lassen. Was tun im Problemfall? Kontaktieren Sie Ihren Verkäufer und bereiten Sie folgende Angaben vor: • • • Rechnungs- und Seriennummer (letztere finden Sie auf dem Typenschild) Ggf. ein Foto des defekten Teils Ihr Servicemitarbeiter kann besser eingrenzen worin das Problem besteht, wenn Sie es so präzise wie möglich beschreiben. Je detaillierter Ihre Angaben sind, umso schneller kann geholfen werden! ACHTUNG: Öffnen Sie niemals das Gerät ohne Rücksprache mit dem Kundenservice. Dies kann Ihren Gewährleistungsanspruch beeinträchtigen! DE REV. V 2016 17 USER’S GUIDE This scale is a combination of sound and proven mechanical design, with today’s most advanced electronics to provide a superb feature set. It is versatile, reliable, accurate and easy to operate. • • • • Superb Quality – strictly in accordance with European CE directives. Great Safety – Auto-Off function, Standby function Strong Reliability – Cutting-edge technology, quality integrated circuit for high perfor mance and longtime stability. Broad Applicability – Popular and applicable in storage, textile, metallurgy industry, and so forth. General safety information for the use of our scale For good performance and precise measurement, be careful with daily operation and maintenance. • • • • • • • • Do NOT overload scale. This will damage load cell and void warranty. Do NOT leave load hung on the scale for long. This will decrease scale’s accuracy and shorten load cell’s life. Inspect shackle and hook before using. Check clips, pins and screws regularly. Check battery frequently. When scale runs out of power, charge battery with its dedicated charger or replace it with a full one. Rotate load rather than scale if needed. Do NOT use scale under thunder or rain. Hang scale on shelf in dry and well-ventilated room. Do NOT place scale on the ground directly. Do NOT attempt to repair scale yourself. Contact your local representative. BEFORE FIRST USE Upon receipt of the goods, check the packaging for integrity and open it. If the packaging is damaged, please contact your transport company and distributor within 3 days, and document the damages as detailed as possible. Do not turn the package upside down! When transporting the package, please ensure that it is kept horizontal and stable. The various items used for packaging (cardboard, plastic straps, polyurethane foam) should be conserved, so that the device can be sent back to the service centre in the best condition in case of a problem! Product name: CRANE SCALE Model: SBS-KW-1000/10O Manufacturer name: emaks spółka z ograniczoną odpowiedzialnością sp.k. Manufacturer address: ul. Dekoracyjna 3, 65-155 Zielona Góra EN REV. V 2016 19 EN SPECIFICATIONS INDICATORS Model SBS-KW-1000/10O Accuracy Class Class III Equivalent to OIML R76 Tare Range 100% F.S. Zero Range ±4% F.S. Stable Time ≤10 sec Overload 100% F.S. + 9e Safety Load LED Name Note Stable lit when weight is stable Zero lit when weight is at zero Tared lit when scale is tared 120% F.S. Hold lit when scale is locked Ultimate Load 400 % F.S. lb lit when unit is lb Battery 4 * AA 1.5V Op. Temp. -10⁰C ~ +40⁰C kg lit when unit is kg Op. Humidity 20⁰C ≤90% Display 25.4 mm – typu LED Max. Capacity 1000 kg Min. Capacity 10 kg Resolution 0.5 kg REMOTE CONTROL DISPLAY AND KEYS EN EN Main display Key REV. V 2016 Name Function On/Off Press for 1sec to power-on or power-off the scale. Single pressing will cause exit and return to weighing mode. Tare Tare. Press for tare. Longer pressing: zero. Hold lock/unlock, confirmation/move further. Longer pressing: change the units. 20 Key REV. V 2016 Name Function Zero Zeroing. Tare Tare. 21 Scale key Key Name Function Scale key Hold Lock/unlock. Confirmation. Acc. Accumulate weight. Decrease digit. Del. Delete last weight / clear all weight. Left scroll digit Message Stand for Note DELETE delete last weight CLEAR delete all weight OPERATION POWER ON/OFF F1 View accumulated weight. Input decimal point. F2 Unit switch. Off Press: entering into weighing mode. Longer pressing: turn the scale off. 2nd „2nd” function. for 1s to power-on scale. Scale perform initialization and power-on test, “0.0.0.0.0” shows twice, Press then capacity 1000 shows, battery life percentage bat99 shows, weight detection ----- shows and then auto zero. For information about Auto-Zero, refer to Scale Configuration. Press or for 1s to power-off scale. Battery life percentage bat90 shows, off message |off| shows, and then cut off power. Zero Press EN or ,to zero. ZERO light on. If load is in motion, or tared, or out of Manual-Zero Range, |err| shows. DISPLAY MESSAGES BY NORMAL USE Message For information about Manual-Zero Range, refer to Scale Configuration. Stand for Note detect weight Tare IN/OUT In gross mode, press SETUP user setup menu BATTERY battery life percentage END save and exit OFF power off OVERLOAD Overloading ERROR invalid operation or ,to tare in. TARE light on. Sollte sich das Gewicht in Bewegung, im negativen Bereich oder außerhalb des Tara-Bereichs befinden, so zeigt die Waage |err| an. If load is in motion, or negative, or out of Tare Range, |err| shows. Tare will re¬duce the apparent overload range of scale. For example, if a 5000*2kg scale has a 1000kg container as its tare, the scale will overload at a new weight of 4018kg (5000 – 1000 + additional 9 divisions). In net mode, press or , to tare out. TARE light off. LOCK/UNLOCK ACCUMULATE REV. V 2016 Press or , to lock screen. HOLD light on. Press or , to unlock screen. HOLD light off. accumulate weight 22 REV. V 2016 23 EN ACUUMULATE AUTO-OFF TIMING Press Press or Press or , to accumulate current weight. |acc| shows, indicating weight is accumulated. Scale uses displayed weight, so gross or net weight is added into the same accumulator. , to enter Auto-Off Timing. Off-- shows. and , to change timing value. Auto-Off Timing can be set to: 0(disabled), 5(5min), 10(10min), 15(15min), 30(30min), 60(60min). If load is in motion, or negative, or does not return to zero before, |err| shows. Auto-Off function maximizes scale’s battery life against people’s carelessness not to power off scale when it’s not working. Auto-Off starts countdown timer when there’s no action or load is stable. VIEW Press Any key pressing or motion in load restarts countdown timer. ,to enter View mode. Display flashes accumulated weight. DISPLAY BRIGHTNESS Press or , to switch between weight accumulation and total weight. Press or Press or , to exit View mode. Press or and , to change brightness value. Display Brightness can be set to:1(dim), 2(normal), 3(bright). Dim LED brightness saves battery power. DELETE LAST WEIGHT Press , to enter Display Brightness. br|| shows. , to delete last accumulated weight. IDLE MODE TIMING EN |del| shows, indicating last accumulated weight is deleted. Delete function only deletes the last weight. If last accumulated weight has been deleted, |err| shows. Press or CLEAR ALL WEIGHT Press or Press Idle Mode Timing can be set to: 0(disabled), 5(5sec), 10(10sec), 15(15sec), 30(30sec), 60 (60sec). It is 30sec by default. and then , to clear all accumulated weight. , to enter Idle Mode Timing. Idl-- shows. and , to change timing value. |clr| shows, indicating all weight is cleared. To maximize battery life, the scale automatically enters Idle Mode, when there’s no action or the load is stable. In Idle Mode, UNIT SWITCH Press or , to switch unit in between kg, lb, and User Unit. When unit is kg, kg LED light is on. When unit is lb, lb LED light is on. When unit is User unit, kg and lb are turned off. For more information about User Unit, refer to Scale Configuration. the scale works in low-power consumption status. Any key pressing or motion in load wakes up the scale from Idle Mode. Press or , to exit User Setup. SCALE CONFIGURATION USER SETUP The user setup enables you to fix several functions of the scale so that it better fits your expectations by using it. The different parameter can be determined one after another. ATTENTION: The parameters in Scale Configuration are closely related to the scale’s metrology performance. It is NOT recommended to change any parameters unless you absolutely need to. In case you´re not sure, please contact the customer service to check if it is necessary to modify these parameters. ENTERING THE USER SETUP Press REV. V 2016 first and then press or , to enter user setup menu. SETUP shows. 24 REV. V 2016 25 EN SCALE CONFIGURATION Press , to enter the Zero tracking range setting. The scale displays the Zero-Tracking range ENTERING THE MENU Press twice, to enter Password mode. The scale displays active value, e.g. 0.5 for the 0.5e value. The Scale displays P0000. Input Scale Configuration password P0258 . To do so, press and Press to modify the digits. To move the digits, press or or . Press The display resolution can be set to: The display resolution can be set to: 0.001, 0.002, 0.005, 0.01, 0.02, 0.05, 0.1, 0.2, 0.5, 1, 2, 5, 10, 20, or 50 EN to enter the Display Resolution. E--- shows. or and and , to change the value. Zero Range defines the range that scale must fall into before activating the accu¬mulation operation. When the load is removed from the scale, the weight left must be lighter than the value set. DISPLAY RESOLUTION Press or ZERO RANGE to confirm the input and enter the Scale Configuration. Scale displays SCALE. Press Press Press , to enter the Zero range setting. or and shows. , to change the value. Press Input the Zero Range value. Press It is set to „5e” by deafult. or , to move the digit. , to set the decimal point. Zero Range can be set from 0e to 3000e. ZERO-SAVING to change the resolution value. AUTO-ZERO RANGE When Zero-saving is enabled, Auto Zero is disabled automatically. Scale calcu¬lates weight based on the last Zeroing action. It is disabled by default. The Auto-Zero range can be set to: 0% (disabled), 2 (±2%FS), 3 (± 3%FS), 4 (±4%FS), 10 (±10%FS), 20 (±20%FS), 50 (±50%FS), 100 (±100%FS). It is set to ±20%FS by default. Press Press Press Press to enter the Auto-Zero range setting.The scale displays or and . , to change the value. MANUAL ZERO RANGE The manual zero range can be set to: 0% (disabled), 2 (±2%FS), 3 (±3%FS), 4 (±4%FS), 10 (±10%FS), 20 (±20%FS), 50 (±50%FS), 100 (±100%FS). Press The scale displays the Manual-Zero range, is within the Manual-Zero range. Press or and indicating 4% F.S. Zero is only allowed when the weight or and , to change the status to „on” (enabled) or „off” (disabled). At the cost of measuring time, the Anti-Motion function intelligently settles the determination of weight when the scale is in motion.The weaker Anti-Motion is, the faster the scale displays the weight, but the longer it takes to be stable. Anti-Motion can be set to: 0 (off), 1 (weakest), 2 (weak), 3 (normal), 4 (strong), 5 (strongest). Press , to enter the Anti-motion setting. or and shows , to change the value. DYNAMIC WEIGHING , to change the value. ZERO TRACKING RANGE The Zero-Tracking range can be set to: 0 (disabled), 0.5 (±0.5e), 1.0 (±1.0e), 1.5 (±1.5e), 2.0 (±2.0e), 2.5 (±2.5e), 3.0 (±3.0e), 3.5 (±3.5e), 4.0 (±4.0e), 4.5 (±4.5e), 5.0 (± 5.0e). In some special application where the scale´s accuracy is not so important as the scale´s stability for the weight reading, the dynamic weighing can be a useful function to set the weight reading faster. Press Press , to enter the Dynamic Weighing setting. or and shows. , to change the status to „on” (enabled) or „off” (disabled). Enabling the Zero-Tracking will enhance the scale tempe¬rature and drift the performance! REV. V 2016 EN shows. ANTI-MOTION Press to enter the Manual-Zero range setting. , to enter Zero Saving. 26 REV. V 2016 27 GRAVITY CALIBRATION GRAVITY Scale shows active value, e.g. G9.794 for g = 9,794. Only adjust the Gravity when the scale is used in a place where the acceleration of gravity is greatly different from the place where it was calibrated. The Scale displays the calibrated gravity, e.g. G9.794 for g = 9,794. Press Press Press Press or value. Press and , to modify the digit. Press or ,o move the digit. Input the Gravity , to input the decimal point. This means you have to watch up the maximal load hanging on the scale while using the user unit, to not overload the scale because of a different displayed value! EN , to enter the User Unit setting. „U----“ shows. or and Unit value. Press or , to move the digit. Input the User , to input the decimal point. or Press Press , to enter the Max. Cap. setting. 00000 shows. or and capacity value. Press , to modify the digit. Press or , to move the digit. Input the max. , to input the decimal point. ZERO DETECTION , to enter the zero detection. LOAD0 shows. Keep the scale without load and press Load a standard weight, and press and , to modify the digits. Press or Press , to confirm the input and to enter Calibration. CAL shows. , to move the digit. Input the Calibration password: P8416. SYSTEM UNIT , to display the weight code 12345. After the code is stable press Press or and . 00000 shows. , to modify the digit. Press to move the digit. Input weight value. Press Keep the load stable and press , o start the weight detection. Once the detection finished, the scale automatically enters Load2 Detection. , to change the System Unit. 28 , , to input the decimal point.. , to enter the System Unit setting. Un--- shows. and or , to display the weight code 23456. Wait until the weight code is stable. Press The Scale displays the System Unit. The System Unit can be set to: kg and lb. REV. V 2016 , to input the decimal point. The scale displays LOAD1. twiceto enter the Password mode. or , LOAD 1 DETECTION The scale displays P0000. Press Press or , to go to the next step. ENTERING CALIBRATION SETTINGS Press , to modify the digit. Press to move the digit. Input the Gravity value. Press Press , to modify the digit. Press CALIBRATION Press and Do NOT attempt to set Max. Cap. greater than scale’s actual capacity. Overloading causes severe harm to scale, and is very dangerous. The User Unit is a named unit which is usually used in the user’s region, but which is not included in the scale by default. It is a ratio to the System Unit. For example, if the User Unit is set to 1.234 and if the System Unit is kg, then after switching to User Unit, the scale measures the weight (1000kg), and displays the calculated value (1234usr). Press or MAX. CAP USER UNIT The User Unit can be set from 0.000 to 9.999. Press , to enter the Gravity setting. G---- shows. , to enter the Gravity setting. G---- shows. REV. V 2016 29 EN LOAD 2 DETECTION Problem The scale displays LOAD2. Load a standard weight, and press Press Press or and weight reading not stable . 00000 shows. , to modify the digit. Press or , to move the digit. Input weight value. weight reading not zero when no load , to input the decimal point. Keep the load stable and press , to display the weight code 34567. Wait until the weight code is stable. Press large error in weight reading , to start the weight detection. Once the detection finished, the scale automatically enters Load3 Detection. LOAD 3 DETECTION The scale displays LOAD3 Load a standard weight, and press Press EN Press or and short remote controlling distance . 00000 shows. , to modify the digit. Press or , o move the digit. Input weight value. , to display the weight code 45678. Wait until the weight code is stable. Press is pressed display flashes no action taken after key pressed REV. V 2016 Possible Cause Suggested Solution discharged / defective battery check batteries and charge / exchange the batteries defective weak Anti-Motion change Anti-Motion level damped loadcell or mainboard dry loadcell or mainboard defective mainboard contact service representative discharged batteries charge / exchange the batteries load-cell stressed too long offload the weight defective loadcell contact service representative scale not zeroed before applying load manual Zero scale before loading wrong unit switch to correct unit scale requires calibration calibrate scale defective loadcell or mainboard contact service representative discharged / defective remote battery replace remote controller batteries REGULAR CONTROL OF THE DEVICE What to do in case of a problem? Please contact your customer service and prepare following information: • not power-on after keep load stable , to start the weight detection. Once the detection finished, the scale automatically saves and exits the Calibration mode. Problem Suggested Solution load in motion Control regularly that the device doesn´t present any damage. If there is any damage, please stop using the device. Please contact your customer service to solve the problem. , to input the decimal point. Keep the load stable and press Possible Cause press harder and keep pressing 2sec key defective power cable open front panel, check power cable defective mainboard contact service representative discharged battery charge / exchange the batteries scale is disturbed Turn off and then turn the scale on again defective key contact service representative 30 • • Invoice number and serial number (the latter is to be found on the technical plate on the device). If relevant, a picture of the damaged, broken or defective part. It will be easier for your customer service clerk to determine the source of the problem if you give a detailed and precise description of the matter. The more detailed your information, the better the customer service will be able to solve your problem rapidly and efficiently! CAUTION: Never open the device without the authorization of your customer service. This can lead to a loss of warranty! REV. V 2016 31 EN INSTRUKCJA OBSŁUGI WAGA HAKOWA O WYSOKIEJ PRECYZJI firmy STEINBERG SYSTEMS Prosimy o dokładne przeczytanie instrukcji, aby w każdym czasie uzyskać najlepsze możliwe wyniki Państwa nowej wagi. Ta waga łączy nowoczesną i sprawdzoną mechanikę z aktualnymi opracowaniami technicznymi, stanowiąc tym samym doskonały produkt końcowy. Waga jest wszechstronna, niezawodna, precyzyjna i łatwa w obsłudze. • • • • Doskonała jakość – wyprodukowano ściśle według europejskiej normy CE. Najwyższe bezpieczeństwo – funkcja Auto Off, funkcja Stand-by Najlepsza niezawodność – najnowocześniejsza technika, wysokiej jakości obwody, gwarantujące wysoką wydajność i stabilność w długim czasie. Najszersze spektrum zastosowań – do magazynów, wysyłki, transportu itp. Ogólne wskazówki bezpieczeństwa przy użytkowaniu wagi Dla dobrej wydajności i dokładnych wyników pomiarów zachować ostrożność przy codziennej pracy i konserwacji. • Unikać otoczenia z silnymi polami elektrycznymi lub magnetycznymi. • Nie stosować wagi w otoczeniu o znacznych wahaniach temperatury. • Nie rozkładać wagi na części – gwarancja nie obejmuje powstałych z tego powodu szkód. • Nie stosować nadmiernej siły przy wymianie baterii. • W przypadku nieużywania przez ponad 4 tygodnie wyjąć baterie z wagi. • Nie przeładowywać wagi. Ogniwa mogą zostać uszkodzone i wyklucza to gwarancję. • Nigdy nie pozostawiać wagi w stanie obciążonym. Wpływa to trwale na wyniki pomiarów ogniw. • Regularnie kontrolować baterie. Po ich wyczerpaniu, naładować je odpowiednią ładowarką lub wymienić. • Nie próbować samodzielnie naprawiać wagi. W celu naprawy zwrócić się do sprzedawcy. PRZED PIERWSZYM UŻYCIEM Kontrola po otrzymaniu towaru W momencie otrzymania towaru należy sprawdzić opakowanie pod kątem występowania ewentualnych uszkodzeń i otworzyć je. Jeżeli opakowanie jest uszkodzone prosimy o skontaktowanie się w przeciągu 3 dni z przedsiębiorstwem transportowym lub Państwa dystrybutorem oraz o udokumentowanie uszkodzeń w jak najlepszy sposób. Prosimy nie stawiać pełnego opakowania do góry nogami! Jeżeli opakowanie będzie ponownie transportowane prosimy zadbać o to, by było ono przewożone w pozycji poziomej i by było stabilne ustawione. Nazwa produktu: WAGA HAKOWA Model produktu: SBS-KW-1000/10O Nazwa producenta: emaks spółka z ograniczoną odpowiedzialnością sp.k. Adres producenta: ul. Dekoracyjna 3, 65-155 Zielona Góra Utylizacja opakowania Prosimy o zachowanie elementów opakowania (tektury, plastykowych taśm oraz styropianu), aby w razie konieczności oddania urządzenia do serwisu można go było jak najlepiej ochronić na czas przesyłki! PL REV. V 2016 33 PL DANE TECHNICZNE WYŚWIETLANIE Model SBS-KW-1000/10O Klasa precyzji Class III Odpowiada OIML R76 Zakres tary 100% F.S. Zakres zerowania ±4% F.S. Czas stabilizacji ≤10 sec Przeciążenie 100% F.S. + 9e Obciążenie bezpieczne LED Nazwa Znaczenie Stable Ciężar jest stabilny. Zero Ciężar jest równy zero. Tared Waga jest starowana. 120% F.S. Hold Wskazanie ciężaru jest zablokowane. Obciążenie zrywające 400 % F.S. lb Jednostką miary jest funt. Zasilanie (baterie) 4 * AA 1.5V Temperatura otoczenia -10°C ~ +40°C kg Jednostką miary jest kilogram. Wilgotność otoczenia 20°C ≤ 90% Wyświetlacz 25.4 mm – typu LED Maksymalne obciążenie 1000 kg Minimalne obciążenie 10 kg Rozdzielczość 0.5 kg OBSŁUGA ZDALNA WYŚWIETLACZ I PRZYCISKI PL PL GŁÓWNY WYŚWIETLACZ Przycisk REV. V 2016 Nazwa Funkcje i właściwości On/Off Nacisnąć i przytrzymać(ok. 1s) w celu włączenia/wyłączenia wagi. Samo naciśnięcie spowoduje wyjście i powrót do modułu ważenia. Nazwa Znaczenie Tare Tara. Naciśnięcie spowoduje wytarowanie wagi. Dłuższe przytrzymanie: Zero. Zero Zerowanie. Hold Naciśnięcie spowoduje: Blokada/zwolnienie, Potwierdzenie/ Przejście dalej. Dłuższe przytrzymanie przycisku spowoduje zmiany jednostek ważenia Tare Tarowanie. 34 Przycisk REV. V 2016 Przycisk na wadze 35 Przycisk Nazwa Znaczenie Przycisk na wadze Hold Blokada/zwolnienie. Potwierdzanie. Acc. Dodawanie masy. Zmniejszenie wartości mrugającej cyfry. Del. Usuwanie ostatniego pomiaru. Kasowanie wszystkich zapisanych pomiarów. Poruszenie kursora w lewo. Informacja Znaczenie Uwagi DELETE Wykasowanie ostatniego pomiaru CLEAR Wykasowanie wszystkich zapisanych wyników UŻYTKOWANIE WŁĄCZANIE/WYŁĄCZANIE przez jedną sekundę w celu włączenia/wyłączenia wagi. Waga załącza się, dwukrotnie Nacisnąć wyświetla “0.0.0.0.0” a następnie maks. obciążenie 1000 i stan baterii (np. bat99), sprawdza masę (wskazanie -------) i wykonuje zerowanie. F1 Wyświetlenie dodanej masy. F2 Zmiana jednostek ważenia. Off Naciśnięcie spowoduje przejście do trybu ważenia. Przytrzymanie przycisku wyłączy wagę. 2nd Funkcja „2nd”. Więcej informacji o automatycznym zerowaniu w rozdziale „Konfiguracja systemu“. Nacisnąć lub przez jedną sekundę w celu wyłączenia wagi. Wyświetla się stan baterii (np. bat99) i |off| i waga się wyłączy. Zerowanie Nacisnąć PL KOMUNIKATY PRZY REGULARNYM UŻYTKOWANIU lub pżeby przeprowadzić zerowanie. Zapala się ZERO. Jeśli ciężar jest w ruchu lub aktywna jest funkcja tary, albo przedział nie mieści się w ramach ręcznego zerowania, waga wskazuje |err|. Więcej informacji o ręcznym zerowaniu w rozdziale „Konfiguracja systemu“. Informacja Znaczenie Uwagi Wykrywanie ciężaru SETUP Ustawienia zdefiniowane przez użytkownika BATTERY Procentowy wskaźnik poziomu baterii END Zapisanie i wyjście z opcji Tara W trybie brutto nacisnąć lub , żeby przejść w tryb tary. Zapala się TARE. Jeśli ciężar jest w ruchu lub jest ujemny albo poza przedziałem tary, waga wskaże |err|. Funkcja tary zredukuje wartość przeciążenia wagi. Przykład: jeśli w przypadku wagi 5 000*2k używa się pojemnika 1 000 kg, maksymalne obciążenie wagi redukuje się do 4 018 kg (5 000 - 1 000 + 9 podziałek 2 kg). W trybie netto nacisnąć OFF lub , żeby wyjść z trybu tary. TARE wyłącza się. Wyłączenie wagi BLOKADA / AKTYWACJA (FUNKCJA HOLD) REV. V 2016 OVERLOAD Przeciążenie ERROR Nieprawidłowa operacja ACCUMULATE Zsumowana waga 36 Nacisnąć lub , żeby zablokować wyświetlanie. Zapala się HOLD. Nacisnąć lub ,żeby odblokować wyświetlanie. HOLD wyłącza się. REV. V 2016 37 PL DODAWANIE USTAWIENIA CZASU AUTO OFF Nacisnąć Nacisnąć lub Nacisnąć lub , żeby dodać masę. Wyświetla się |acc|, jako potwierdzenie, że zarejestrowano drugi ciężar. Waga dodaje w trybie brutto lub netto w zależności od tego, co zostało ustawione. , żeby dopasować czas automatycznego wyłączania. Wyświetli się off-i , żeby dopasować czas. Możliwości ustawień to: 0 (wył.), 5 (5min), 10 (10min), 15 (15min), 30 (30min), 60 (60min). Jeśli ciężar jest w ruchu lub jest ujemny albo został wyzerowany, waga wskaże |err|. Funkcja automatycznego wyłączania przedłuża żywotność baterii i zapobiega niepotrzebnemu włączaniu wagi. Ustawione minuty do automatycznego wyłączenia są liczone od momentu, w którym waga nie jest używana a ciężar stał się stabilny. WYŚWIETLENIE DODANEJ MASY Nacisnąć , żeby przejść do trybu wyświetlania. Naciśnięcie przycisku lub poruszenie ciężaru ponownie uruchamia zegar. Wyświetlacz miga i wskazuje dodaną masę. JASNOŚĆ WYŚWIETLACZA Nacisnąć lub , żeby przełączyć się pomiędzy dodawaniem masy a masą całkowitą. . Nacisnąć lub , żeby przełączyć się w tryb podglądu. Nacisnąć lub Nacisnąć lub , żeby ustawić jasność wyświetlacza. Wyświetli się |br|. i ,żeby dopasować wartość USUWANIE OSTATNIEGO POMIARU Nacisnąć PL , żeby usunąć ostatnio dodaną wartość. Jako potwierdzenie wyświetli się |del|. Funkcja ta kasuje jedynie ostatnio dodaną wartość. Po wykasowaniu ostatniej masy waga wskazuje |err| Jasność LED można ustawić na następujące wartości: 1 (ciemno), 2 (normalnie), 3 (jasno). Redukcja jasności LED pozwala oszczędzić baterię. USTAWIENIA BEZCZYNNOŚCI Nacisnąć lub Nacisnąć lub , eby ustawić tryb stand by. Wyświetli się Idl-- KASOWANIE WSZYSTKICH POMIARÓW Nacisnąć a następnie ZMIANA JEDNOSTKI lub , żeby dopasować ustawienia czasu. Możliwości ustawień to: 0 (wył.), 5 (5 sek.), 10 (10 sek.), 15 (15 sek.), 30 (30 sek.), 60 (60sek.). Opcja ta fabrycznie jest ustawiona na 30 sek. Jako potwierdzenie wyświetli się |clr|. Nacisnąć użytkownika. i , żeby wykasować wszystkie masy , żeby przełączyć jednostkę pomiędzy kg, lb lub jednostką zdefiniowaną przez Funkcja automatycznego wyłączania przedłuża żywotność baterii i zapobiega niepotrzebnemu włączaniu wagi. Ustawione minuty do automatycznego wyłączenia są liczone od momentu, w którym waga nie jest używana a ciężar stał się stabilny. Naciśnięcie przycisku lub poruszenie ciężaru ponownie uruchamia zegar. Nacisnąć W przypadku wyboru kg zaświeci się kg. W przypadku wyboru lb zaświeci się lb. W przypadku korzystania z jednostki zdefiniowanej przez użytkownika obie diody są wyłączone. Więcej informacji o jednostkach zdefiniowanych przez użytkownika znajduje się w rozdziale „Ustawienia systemowe“. USTAWIENIA ZDEFINIOWANE PRZEZ UŻYTKOWNIKA Ustawienia zdefiniowane przez użytkownika umożliwiają dopasowanie kilku funkcji wagi, żeby były bardziej dopasowane do potrzeb. Różne parametry można zmieniać kolejno. lub , żeby wyjść z ustawień zdefiniowanych przez użytkownika. KONFIGURACJA SYSTEMU WAGI UWAGA: Parametry konfiguracji systemu są ściśle powiązane z jakością wyników pomiarów. Zaleca się, by nie zmieniać parametrów, o ile nie jest to absolutnie konieczne. Jeśli będą Państwo mieli wątpliwości, prosimy o kontakt z serwisem klienta w celu sprawdzenia, czy zmiana parametrów jest konieczna. KONFIGURACJA WAGI OTWÓRZ MENU KONFIGURACJI OTWIERANIE USTAWIEŃ ZDEFINIOWANYCH PRZEZ UŻYTKOWNIKA Nacisnąć dwukrotnie Nacisnąć a następnie Wyświetli się SETUP. REV. V 2016 lub , żeby otworzyć tryb hasła. ,żeby otworzyć ustawienia zdefiniowane przez użytkownika. 38 REV. V 2016 39 PL Waga wskazuje aktywną wartość, np. 0,5 dla wartości 0,5e. Waga wskazuje P0000. Wprowadzić hasło (P0258), naciskając lub i aby zmienić wartość. Nacisnąć Aby zmienić pozycję, nacisnąć lub lub i , żeby dopasować wartość. . PRZEDZIAŁ ZEROWY Nacisnąć , żeby potwierdzić wprowadzone dane i przejść do menu konfiguracji. Waga wskazuje SCALE. Przedział zerowy definiuje przedział, w którym musi znajdować się waga przed wykonaniem dodawania. Jeśli waga pozostaje bez obciążenia, masa resztkowa musi być lżejsza niż ustawiona wartość. ROZDZIELCZOŚĆ Nacisnąć Rozdzielczość można ustawić na następujące wartości: 0.001, 0.002, 0.005, 0.01, 0.02, 0.05, 0.1, 0.2, 0.5, 1, 2, 5, 10, 20, albo 50. Nacisnąć lub i , żeby dopasować wartość. Nacisnąć Wprowadzić wartość przedziału zerowego. Nacisnąć Nacisnąć , żeby ustawić miejsce po przecinku. Przedział zerowy może być ustawiony między 0e a 3000e. Wartość fabryczna wynosi „5e”. Nacisnąć żeby przejść w ustawienia. Waga wskazuje E--- . lub i żeby zmienić wartość rozdzielczości. Nacisnąć żeby dopasować zakres automatycznego zerowania. Waga wskazuje lub i , żeby poruszyć kursorem. IJeśli zapamiętywanie zera jest włączone, Automatyczne Zerowanie jest wyłączone. Możliwości ustawienia przedziału zerowania to: 0% (wył.), 2 (±2%FS), 3 (± 3%FS), 4 (±4%FS), 10 (±10%FS), 20 (±20%FS), 50 (±50%FS), 100 (±100%FS) maks. obciążenia. Wartość fabryczna wynosi 20%. Nacisnąć lub ZAPAMIĘTYWANIE ZERA (ZERO-SAVING) PRZEDZIAŁ AUTOMATYCZNEGO ZEROWANIA (AUTO-ZERO) PL , żeby przejść w ustawienia przedziału zerowego. Wyświetli się . Waga oblicza obciążenie na podstawie ostatniej operacji zerowania. Fabrycznie zapamiętywanie zera jest wyłączone. Nacisnąć Nacisnąć , żeby dopasować wartość. , żeby przejść w ustawienia zapamiętywania zera. Wyświetli się lub i . , żeby zmienić wartość na „on” (włączone) lub „off” (wyłączone). WRAŻLIWOŚĆ NA RUCH PRZEDZIAŁ RĘCZNEGO ZEROWANIA Możliwości ustawienia przedziału ręcznego zerowania to: 0%(wył.), 2 (±2%FS), 3 (±3%FS), 4 (±4%FS), 10 (±10%FS), 20 (±20%FS), 50 (±50%FS) i 100 (±100%FS) maks. obciążenia. Nacisnąć Wrażliwość ruchu wagi kompensuje ruch ważonego ciężaru, żeby zagwarantować obliczenie masy mimo ruchu. Im słabiej ustawiona jest wrażliwość na ruch, tym szybciej waga wskaże masę. Możliwości ustawienia czułości ruchu to 0 (wył.), 1 (najsłabsza), 2 (słaba), 3 (normalna), 4 (mocna), 5 (najmocniejsza). żeby dopasować zakres ręcznego zerowania. Nacisnąć , żeby przejść w ustawienia czułości ruchu. Wyświetli się Waga wskazuje przedział ręcznego zerowania, np dla 4% maks. obciążenia. Waga zostanie wyzerowana tylko wówczas, gdy masa znajduje się w przedziale ręcznego zerowania. Nacisnąć Nacisnąć WAŻENIE DYNAMICZNE lub i , żeby dopasować wartość. Możliwości ustawień to: 0 (wył.),0.5 (±0.5e), 1.0 (±1.0e), 1.5 (±1.5e), 2.0 (±2.0e), 2.5 (±2.5e), 3.0 (±3.0e), 3.5 (±3.5e), 4.0 (±4.0e), 4.5 (±4.5e), 5.0 (± 5.0e). Ustawienia wyszukiwania zera mogą wpływać na zwiększenie temperatury roboczej wagi i dokładność pomiaru! REV. V 2016 i , żeby dopasować wartość. W niektórych przypadkach, w których dokładność wagi nie jest tak ważna jak stabilność, funkcja dynamicznego ważenia może okazać się użyteczna, żeby przyspieszyć ustalenie masy. PRZEDZIAŁ WYSZUKIWANIA ZERA Nacisnąć lub , żeby dopasować przedział pomiaru zera. Waga wskazuje 40 Nacisnąć Nacisnąć , żeby przejść w ustawienia ważenia dynamicznego. Wyświetli się lub i , żeby dopasować wartość na „on” (włączone) lub „off” (wyłączone). . REV. V 2016 . 41 PL GRAWITACJA USTAWIENIA GRAWITACJI Waga wskazuje aktywną wartość dla np. G9.794 g = 9,794. Gdy używa się wagi w jednym miejscu, gdzie przyspieszenie grawitacyjne różni się od ustawionego: Waga wskazuje skalibrowaną grawitację, np. G9.794 dia g = 9,794. Nacisnąć Nacisnąć Nacisnąć Nacisnąć lub i , żeby dopasować wartość. Nacisnąć sorem. Wprowadzić wartość ciążenia grawitacyjnego. Nacisnąć lub lub i , żeby zmienić wybraną cyfrę. Nacisnąć lub , ,żeby poruszyć kur , żeby ustawić miejsce po przecinku. żeby poruszyć kursorem. Wprowadzić wartość przyspieszenia grawitacyjnego. Nacisnąć miejsce po przecinku. , żeby ustawić ZDEFINIOWANA PRZEZ UŻYTKOWNIKA JEDNOSTKA MIARY MAKS. OBCIĄŻENIE Wartość można ustawić pomiędzy 0,000 i 9,999. NIE próbować ustawiać obciążalności wagi wyżej niż przewidziano. Przeciążenie może znacznie uszkodzić wagę i jest wysoce ryzykowne. Funkcja zdefiniowanych przez użytkownika jednostek miary umożliwia zdefiniowanie jednostki, która jest użyteczna, jednak nie należy do standardowych jednostek wagi. Jednostka zdefiniowana przez użytkownika jest proporcjonalna do jednostki systemowej: jeśli jednostka systemowa zostanie ustawiona na 1.234 a jednostką systemową jest kg, waga zważy ciężar (1 000 kg) i przeliczy masę na Państwa jednostkę (1.234 USR). Oznacza to jednocześnie, że powinni Państwo zwrócić uwagę na maksymalne obciążenie wagi, ponieważ wyświetlona wartość nie odpowiada faktycznemu obciążeniu! PL , żeby przejść do ustawień grawitacji. Wyświetli się G---- . , żeby przejść w ustawienia grawitacji. Wyświetli się G---- . Nacisnąć , żeby przejść w ustawienia jednostek zdefiniowanych przez użytkownika.Wyświetli się U---- . Nacisnąć lub i , żeby dopasować wartość. Nacisnąć rem. Wprowadzić wartość ciążenia grawitacyjnego. Nacisnąć lub , żeby poruszyć kurso , żeby ustawić miejsce po przecinku. KALIBRACJA Nacisnąć dwukrotnie lub lub i , użeby zmienić wybraną liczbę. , żeby poruszyć kursorem. Wprowadzić hasło kalibracji (P8416). , żeby potwierdzić wprowadzone dane i przejść do trybu kalibracji. Wyświetli się CAL. , żeby zmienić wybraną cyfrę. Nacisnąć sorem. Wprowadzić wartość maks. obciążenia. Nacisnąć Nacisnąć , żeby poruszyć kur ,żeby ustawić miejsce po przecinku. , żeby przejść w ustawienia wyszukiwania zera. Wyświetli się LOAD0. Pozostawić wagę bez obciążenia i nacisnąć nacisnąć PL , żeby wyświetlić kod 12345. Po ustabilizowaniu się kodu , aby przejść do następnego kroku. , żeby przejść w ustawienia jednostek systemowych. Wyświetli się Un---. lub i Nacisnąć lub i . Wyświetli się 00000 , żeby zmienić wybraną cyfrę. Nacisnąć rem. Wprowadzić masę ciężaru kontrolnego. Nacisnąć Pozostawić ciężar stabilny i nacisnąć , żeby zmienić jednostkę systemową. 42 lub , żeby wyświetlić kod 23456. , żeby uruchomić pomiar. POMIAR CIĘŻARU 2 (LOAD 2) Waga wskazuje LOAD2. REV. V 2016 . Wyświetli się 00000 43 , żeby poruszyć kurso , żeby ustawić miejsce po przecinku. Po zakończeniu pomiaru waga przejdzie automatycznie do następnego kroku. Załadować ciężar kontrolny i nacisnąć REV. V 2016 lub WYSZUKIWANIE ZERA Odczekać na ustabilizowanie się kodu. Nacisnąć Waga wskazuje aktualną jednostkę systemową. Jednostkę systemową można ustawić na kg albo lb. Nacisnąć ui Załadować ciężar kontrolny i nacisnąć JEDNOSTKI SYSTEMOWE Nacisnąć lub Waga wskazuje LOAD1. , żeby przejść do trybu hasła. Waga wskazuje P0000. Nacisnąć Nacisnąć Nacisnąć , żeby przejść do ustawień wartości maksymalnego obciążania. Wyświetli się. 00000. POMIAR CIĘŻARU 1 (LOAD 1) OTWIERANIE MENU KALIBRACJI Nacisnąć Nacisnąć Nacisnąć lub i , żeby zmienić wybraną cyfrę. Nacisnąć rem. Wprowadzić masę ciężaru kontrolnego. Nacisnąć Pozostawić ciężar stabilny i nacisnąć lub , żeby poruszyć kurso Zmienić jednostkę ważenia Konieczna kalibracja Skalibrować wagę Ogniwa lub płytka uszkodzona Skontaktować się z serwisem klienta Bateria sterowania zdalnego uszkodzona lub pusta Wymienić baterię sterowania zdalnego REGULARNA KONTROLA URZĄDZENIA Załadować ciężar kontrolny i nacisnąć i . Wyświetli się 00000 , żeby zmienić wybraną cyfrę. Nacisnąć rem. Wprowadzić masę ciężaru kontrolnego. Nacisnąć Pozostawić ciężar stabilny i nacisnąć lub , żeby poruszyć kurso , żeby ustawić miejsce po przecinku. , żeby wyświetlić kod 45678. Odczekać na ustabilizowanie się kodu. Nacisnąć , żeby uruchomić pomiar. Po zakończeniu pomiaru waga automatycznie wyjdzie z trybu kalibracji. Problem Możliwa przyczyna Rozwiązanie Waga nie uruchamia się po naciśnięciu przycisku Baterie puste lub uszkodzone Sprawdzić lub wymienić baterie Przycisk uszkodzony Nacisnąć mocniej i przytrzymać przez 2 sekundy Kabel uszkodzony Otworzyć wagę i sprawdzić przewód zasilający. Płytka drukowana uszkodzona Skontaktować się z serwisem klienta Wyświetlacz miga Baterie rozładowane Naładować/wymienić baterie Waga nie reaguje na przyciśnięcie przycisku Program zawiesił się Wyłączyć i ponownie włączyć wagę Przycisk uszkodzony Skontaktować się z serwisem klienta Ciężar w ruchu Ustabilizować ciężar Za słabo ustawiona czułość ciężaru Zmienić czułość ciężaru Wilgotność we wnętrzu wagi Ostrożnie osuszyć elementy wagi Płytka drukowana uszkodzona Skontaktować się z serwisem klienta Rozładowane baterie Naładować/wymienić baterie Ogniwa były zbyt długo używane Odciążyć wagę Ogniwa uszkodzone Skontaktować się z serwisem klienta Niestabilny wynik pomiaru REV. V 2016 Nieprawidłowa jednostka ważenia Sterowanie zdalne działa tylko przy niewielkiej odległości Waga wskazuje LOAD3. Waga wskazuje masę mimo, że nie jest obciążona Wyzerować wagę , żeby uruchomić pomiar. POMIAR CIĘŻARU 3 (LOAD 3) PL Rozwiązanie Waga nie została wyzerowana przed ważeniem , żeby ustawić miejsce po przecinku. Po zakończeniu pomiaru waga przejdzie automatycznie do następnego kroku. lub Możliwa przyczyna , żeby wyświetlić kod 34567. Odczekać na ustabilizowanie się kodu. Nacisnąć Nacisnąć Problem Poważny błąd pomiaru 44 Należy regularnie sprawdzać, czy elementy urządzenia nie są uszkodzone. Jeżeli tak jest, należy zaprzestać użytkowania urządzenia. Proszę niezwłocznie zwrócić się do sprzedawcy w celu przeprowadzenia naprawy. Co należy zrobić w przypadku pojawienia się problemu? Należy skontaktować się ze sprzedawcą i przygotować następujące dane: • • • Numer faktury oraz numer seryjny (nr seryjny podany jest na tabliczce znamionowej). Ewentualnie zdjęcie niesprawnej części. Pracownik serwisu jest w stanie lepiej ocenić, na czym polega problem, jeżeli opiszą go Państwo w sposób tak precyzyjny, jak jest to tylko możliwe Im bardziej szczegółowe są dane, tym szybciej można Państwu pomóc! UWAGA: Nigdy nie wolno otwierać urządzenia bez konsultacji z serwisem klienta. Może to prowadzić do utraty gwarancji! REV. V 2016 45 PL Instrukcja bezpiecznego usunięcia akumulatorów i baterii. Instrukcja opracowana zgodnie z ustawą z dnia 24 kwietnia 2009 r. o bateriach i akumulatorach (Dz. U. 2009 nr 79 poz. 666) rozdz. 2 art. 11, nakładającą na producentów urządzeń elektronicznych obowiązek dołączenia instrukcji demontażu baterii i akumulatorów. W wadze hakowej SBS-KW-1000/10O zamontowane są baterie AA 1,5V. Przed przystąpieniem do demontażu należy wyłączyć wagę. 1. Demontaż baterii AA 1,5V znajdujących się w wadze: Zdemontować klapkę znajdującą się z tyłu urządzenia i wyjąć baterie. 2.Demontaż baterii AA 1,5V znajdujących się w pilocie zdalnego sterowania: Zdemontować klapkę znajdującą się z tyłu pilota zdalnego sterowania i wyjąć baterie. Baterie przekazać komórce odpowiedzialnej za utylizację tych materiałów. Usuwanie zużytych urządzeń. PL Po zakończeniu okresu użytkowania nie wolno usuwać niniejszego produktu poprzez normalne odpady komunalne, lecz należy go oddać do punktu zbiórki i recyklingu urządzeń elektrycznych i elektronicznych. Informuje o tym symbol, umieszczony na produkcie, instrukcji obsługi lub opakowaniu. Zastosowane w urządzeniu tworzywa nadają się do powtórnego użycia zgodnie z ich oznaczeniem. Dzięki powtórnemu użyciu, wykorzystaniu materiałów lub innym formom wykorzystania zużytych urządzeń wnoszą Państwo istotny wkład w ochronę naszego środowiska. Informacji o właściwym punkcie usuwania zużytych urządzeń udzieli Państwu administracja gminna. Nome del prodotto: Bilancia da gru Modello: SBS-KW-1000/10O Nome del produttore: odpowiedzialnością sp.k. del ograniczoną di spółka z dei emaks. Indirizzo del fornitore: ul. Dekoracyjna 3, 65-155 Zielona Góra IT REV. V 2016 46 ISTRUZIONI PER L‘USO Bilancia da gru di precisione di STEINBERG SYSTEMS Si prega di leggere attentamente le istruzioni per ottenere risultati affidabili al 100%. Il presente dispositivo è stato realizzato in base a principi di meccanica consolidata e tecnologia avanzata. Si tratta di uno strumento versatile, preciso, affidabile e dai comandi intuitivi. • • • • Qualità - prodotto secondo le normative CE Funzionalità - spegnimento automatico e stand by Affidabilità – tecnologia moderna per massime prestazioni e durata Ampio campo di applicazione – logistica e trasporti, spedizioni e molto altro. Riferimenti generali di sicurezza per l‘uso della bilancia da gru Procedere con estrema cautela nelle operazioni di manutenzione e utilizzo della bilancia. Questo principio vale particolarmente in caso di uso quotidiano per garantire sempre misurazioni precise a lungo termine. IT • • • • • • • • • • Evitare di usare l´apparecchio in aree caratterizzate da forti campi elettro-magnetici. Non utilizzare la bilancia in luoghi con forti sbalzi di temperatura. Non smontare mai il dispositivo senza aver ottenuto precise indicazioni dal servizio di assistenza eventuali danni non sono coperti da garanzia. Procedere con cautela nelle operazioni di sostituzione batterie. Se la bilancia non viene utilizzata per 4 settimane, rimuovere con cautela le batterie dall´alloggiamento. NON sovraccaricare la bilancia. Un sovraccarico della bilancia può provocare danni alle celle di pesata, compromettendo la validità della garanzia. Si prega di rimuovere il peso una volta effettuata la pesata, in modo da non influire negativamen te sulla precisione di pesata. Controllare regolarmente la batteria. se la batteria risulta scarica effettuare la sostituzione o utilizzare un apposito cavo di alimentazione. I n caso di danno rivolgersi al rivenditore prima di effettuare qualsiasi intervento sul dispositivo. DETTAGLI TECNICI Modello SBS-KW-1000/10O Classe di precisione Class III (secondo l‘ OIML R76) Valori di tara 100% F.S Scala di azzeramento ±4% F.S. Tempo di stabilizzazione ≤10 secondi Sovraccarico 100% F.S. + 9e Carico di sicurezza 120% F.S. Carico di rottura 400 % F.S. Batteria 4 * AA 1.5V Temperatura dell'ambiente -10°C ~ +40°C Umidità dell'ambiente 20°C ≤90% Display 25.4 mm – LED Max. capacità 1000 kg Capacità minima 10 kg Leggibilità 0,5 kg DISPLAY e COMANDI IT DISPLAY PRINCIPALE OPERAZIONI DA EFFETTUARE PRIMA DEL PRIMO UTILIZZO Una volta ricevuto il prodotto, verificare immediatamente le condizioni dell´imballaggio ed estrarre il dispositivo solo qualora l´imballaggio risulti intatto. Qualora si riscontrassero danni, contattare il rivenditore e la societá di trasporti entro massimo 3 giorni dalla ricezione del pacco. Si prega di illustrare in maniera piú dettagliata possibile i vizi del prodotto. Si prega di non capovolgere la confezione! Prestare attenzione durante il trasporto del dispositivo e fare in modo che sia sempre in posizione orizzontale e stabile. Tasto Smaltimento dell‘imballaggio Si prega di conservare l‘intero imballaggio (cartone, nastro adesivo e polistirolo), nel caso in cui fosse necessario rispedire il prodotto al servizio clienti a causa di problemi di funzionamento! REV. V 2016 48 Descrizione: On/Off REV. V 2016 Funzione Premere questo tasto per un secondo per avviare la bilancia. Esci dal menu principale Tare Tara Premere il tasto per alcuni secondi: ZERO: Hold Blocco / Sblocco, Conferma / Trasmissione Premere il tasto per alcuni secondi: Cambio unita‘ peso (kg/lb) 49 INDICATORI Simbolo Tasto Descrizione Significato Stable Il peso è stabile e può essere misurato Zero Il peso è pari a zero Tarato La bilancia è tarata Hold I tasti sono bloccati Libbra L'unità di peso è impostata in libbre Kg L'unità di peso è impostata in kg Descrizione: Funzione Hold Blocco / Sblocco Tasti sulla bilancia Conferma TELECOMANDO IT Acc. Aggiungere peso, diminuire il valore della cifra selezionata Del. Cancellare l´ultima misurazione / cancellare tutti i valori, spostare il cursore verso sinistra F1 Visualöizzare il peso aggiunto, inserimento cifre decimali F2 Modifica unitá di misura Off Conferma e torna alla modalità di pesata 2nd Funzione „2nd” IT DiSPLAY USO MANUALE STANDARD Symbol Bezeichnung Funktion Misurazione in corso Tasto REV. V 2016 Descrizione: Funzione Zero Azzeramento Tare Tara IMPOSTAZIONI Impostazioni definite dall´utente BATTERIA Stato della batteria END Salva ed esci OFF SPENGNIMENTO OVERLOAD Sovraccarico ERROR Inserimento non valido ACCUMULATE Aggiungere peso Tasti sulla bilancia 50 REV. V 2016 51 Simbolo Descrizione Funzione DELETE Cancella ultima misurazione CLEAR Cancella tutti i valori Addizione Premere , per aggiungere un peso. non appena viene registrato un secondo valore di peso, viene mostrata la scritta |acc| per conferma. A seconda delle impostazioni, la bilancia aggiunge il peso sia al lordo sia al netto. Se il peso è in movimento o si trova nella scala di valori negativi, verrà mostrata la scritta |erri|. Lo stesso errore si verifica se il peso precedente non viene azzerato. UTILIZZO Accensione / Spegnimento Visualizzazione del peso aggiunto. per un secondo per avviare la bilancia. La bilancia viene avviata e appare due Premere questo tasto volte il valore „0.0.0.0.0“. in seguito vengono mostrati il valore di portata massima 1000 e lo stato di carica della batteria (ad es. bat99). Successivamente viene verificato il peso (Display: -----) e viene eseguito l´azzeramento. Per ulteriori informazioni circa l’azzeramento automatico leggere il paragrafo „Configurazione del sistema“. IT Premere , per entrare nella modalità di anteprima. Il display lampeggia e mostra il valore aggiunto. Premere o , per passare dall´anteprima del peso aggiunto alla visualizzazione del peso totale. Premere o , per uscire dalla modalità di anteprima. Premere o per un secondo, per spengnere la bilancia. lo stato di carica della batteria viene indicato (ad es. bat99) e compare la scritta [off] prima che la bilancia si spenga. Cancella ultima misurazione Azzerare Premere Premere o , per eseguire l´annullamento. La scritta ZERO lampeggia. , per cancellare l‘ultimo valore aggiunto. Per confermare l´istruzione apparirà la scritta |del|. Questa funzione cancella esclusivamente l´ultimo valore aggiunto. Se il valore è già stato cancellato, verrà mostrata la scritta |err|. Se il peso è in movimento, la funzione tara è attiva o il peso si trova al di fuori dell´azzeramento manuale, verrá segnalata la scritta |err|. Cancella tutti i valori Per ulteriori informazioni circa l´azzeramento manuale leggere il paragrafo „Configurazione del sistema“. Premere Tara Per confermare l´istruzione apparirà la scritta |clr|. in modalità pesata al lordo premere il taso lampeggia. o , per visualizzare la modalità di tara. La scritta TARE La funzione di taratura riduce il valore di sovraccarico del dispositivo. Esempio: Se un peso pari 1000kg viene misurato con un dispositivo 5000*2k, la portata massima della bilancia è ridotta a 40180 Kg (ovvero 5000 1000 + 9 unità da 2Kg). Durante la modalità netto premere o , per uscire dalla funzione Tara. La scritta TARE si spegne. o , per impostare le unità di misura kg, lb o impostazioni salvate dall´utente. Se viene selezionata l´unità di misura Kg, il diodo a LED lampeggia. Se viene selezionata l´unità di misura Kg, il diodo a LED lampeggia. Se viene selezionata l´unità di misurapredefinita dall´utente, nessun diodo a LED lampeggia. Per ulteriori informazioni sulle unitá di misura predefinite dall´utente, leggere il paragrafo „Impostazioni di sistema“ IMPOSTAZIONI PREDEFINITE DALL´UTENTE Le impostazioni predefinite dall´utente permettono una personalizzazione delle funzioni del dispositivo in base alle proprie esigenze. Blocco/Sblocco (Funzione HOLD) Premere o , per bloccare il display. La scritta HOLD lampeggia. Premere o , per sbloccare il display. La scritta HOLD si spegne. REV. V 2016 , per cancellare tutti i valori. Modifica unitá di misura Premere Se il peso è nel movimento, nella scala negativa o al di fuori della gamma di taratura, verrà visualizzata la scritta |erri|. e successivamente 52 I diversi parametri possono essere modificati in modo sequenziale. REV. V 2016 53 IT Accedere alle impostazioni predefinite dell´utente CONFIGURAZIONE DI SISTEMA DELLA BILANCIA Premere ATTENZIONE: I parametri della configurazione di sistema sono strettamente legati alla qualità della misurazione. Si sconsiglia di cambiar questo parametro qualora non sia strettamente necessario. In caso di insicurezza contattare il servizio clienti per controllare che sia necessaria una modifica del parametro. e successivamente o , per accedere alle impostazioni predefinite dall´utente. Le impostazioni vengono mostrate sul display. Impostare il tempo di autospegnimento Premere o Premere o , per impostare il tempo di autospegnimento. Sul display compare la scritta „Off—“ e , per impostare il tempo. Le possibilità di impostazioni sono: 0 (off), 5 (5min), 10 (10min), 15 (15min), 30 (30min), 60 (60min). Grazie alla funzione di autospegnimento la carica della batteria sarà mantenuta più a lungo in quanto la bilancia si spegne automaticamente se non viene utilizzata. I minuti impostati per lo spegnimento automatico vengono contati a partire dal momento in cui la bilancia rileva un peso stabile e non viene più utilizzata. KONFIGURATION DER WAAGE APRIRE IL MENÙ DI CONFIGURAZIONE Premere due volte , per accedere alla modalità passoword. La bilancia indica P0000. Inserire la password (P0258), premendo per cambiare il valore. Per cambiare la posizione, premete Premere o o quindi premer . , per confermare la digitazione e per accedere al menù di configurazione. La pressione di un tasto o il movimento del peso fano ripartire il cronometro dall´inizio. La bilancia mostra ora SCALE. Luminosità display RISOLUZIONE IT Premere o Premere o , per impostare la luminosità del display. Appare la scritta „br--“. e , per impostare l´intensità. la luminosità del LED può essere impostata in base ai seguenti valori: 1 (scuro), 2 (normale), 3 (chiaro). Un grado basso di luminosità permette di mantenere più a lungo la carica della batteria. La risoluzione può essere impostata sui seguenti valori: 0.001, 0.002, 0.005, 0.01, 0.02, 0.05, 0.1, 0.2, 0.5, 1, 2, 5, 10, 20, o 50. Premere Premere impostazioni stand by Premere o Premere o o e per cambiare la risoluzione. PORTATA DELL‘AZZERAMENTO AUTOMATICO (AUTO-ZERO) , per impostare la modalità standby. Appare la scritta „ldl--“. e per accedere alle impostazioni. La bilancia mostra „E---“ , per impostare il tempo. I parametri di impostazione del tempo per entrare in modalità stand by sono 0 (off), 5 sec., 15 sec., 30 sec., 60 sec. il tempo standard preimpostato è pari a 30 sec. Le impossibilità di impostazione dell‘azzeramento sono: 0 (spento), 2 (±2%FS), 3 (± 3%FS), 4 (±4%FS), 10 (±10%FS), 20 (±20%FS), 50 (±50%FS), 100 (±100%FS) della capacità massima. Il valore predefinito è ±20%FS. Premere Premere per adattare il campo di azzeramento automatico. La bilancia mostra o e , per adattare il valore Per garantire un efficiente risparmio energetico, la bilancia entra automaticamente in modalità stand by se non viene impostato nessun valore o se il peso è stabile per un certo periodo di tempo. PORTATA DELL‘AZZERAMENTO AUTOMATICO Nella modalità stand by il consumo energetico è minimo. La perssione dei tasti o il movimento del peso spengono la modalità stand by e riattivano la bilancia. Le impossibilità di impostazione dell‘azzeramento manuale sono: 0 (spento), 2 (±2%FS), 3 (± 3%FS), 4 (±4%FS), 10 (±10%FS), 20 (±20%FS), 50 (±50%FS), 100 (±100%FS) della capacità massima. Premere o , per uscire dalle impostazioni predefinite dall´utente. Premere per adattare la portata di azzeramento manuale. La bilancia mostra la portata dell‘azzeramento manuale, per esempio è 4% della capacità massi ma. La bilancia viene quindi azzerata se il peso si trova nella portata dell‘azzeramento manuale. Premere REV. V 2016 54 REV. V 2016 o e , per adattare il valore. 55 IT PORTATA DELLA RICERCA DELLO ZERO Le possibilità di impostazioni sono: 00 (spento), 0.5 (±0.5e), 1.0 (±1.0e), 1.5 (±1.5e), 2.0 (±2.0e), 2.5 (±2.5e), 3.0 (±3.0e), 3.5 (±3.5e), 4.0 (±4.0e), 4.5 (±4.5e), 5.0 (± 5.0e). Le modifiche alle impostazioni della ricerca dello zero possono aumentare la temperatura di funzionamento della bilancia. Ciò può influenzare la precisione della misurazione! Premere , per adattare la portata della ricerca dello zero. La bilancia indica . o e Premere o , per impostare il valore. , per accedere alle possibilità di impostazione del peso dinamico. L‘avviso , per impostare il valore. e la funzione del peso dinamico accelera la misurazione del peso e si adatta in modo particolare a quei casi in cui la stabilità è più importante della precisione. Premere IT appare. PESO DINAMICO Premere La bilancia indica il valore attivo, per esempio 0,5 per un valore di 0,5e. Premere L‘avviso appare. o e , per accendere („on“) o spegnere („off “) la funzione. CAMPO DELLO ZERO GRAVITÀ Il campo dello zero definisce il campo in cui la bilancia si deve trovare prima che vengano effettuata la somma. Nel caso in cui la bilancia non dovesse presentare alcun carico il resto del peso deve essere più leggero del valore impostato. La bilancia indica il valore attivo, per esempio G9.794, per g = 9,794. Si conssiglia di cambiare questo valore solo se la velocizzazione della gravità dell‘ambiente circostante si allontana molto rispetto al valore impostato. Premere Premere Premere , per accedere al campo dello zero. o e viene mostrato. , per cambiare il valore. Premere o , per cambiare la cifra segnata. Premere Inserire il valore del campo dello zero. Premere , per stabilire la posizione della virgola. Il campo dello zero può essere impostato tra 0e e 3000e. L‘impostazione predefinita è 5e. Premere Se la funzione Zero-Saving è attivatala funzione auto-zero viene spenta automatica si spegne. La bilancia calcola il peso che si basa sull‘ultimo azzeramento. Questa funzione è già disattivata. Premere , per accedere al campo dello zero. o e viene mostrato. , per accendere („on“) o spegnere („off “) la funzione. SENSIBILITÀ DEL MOVIMENTO La sensibilità al movimento della bilancia compensa il movimento del peso da misurare in modo che il peso possa essere misurato in modo preciso. Più debole è impostata la sensibilità del movimento più velocemente la bilancia sarà in grado di mostrare il peso. Le possibilità di impostazione della sensibilità al movimento sono: 0 (spento), 1 (molto debole), 2 (debole), 3 (normale), 4 (forte) e 5 (molto forte). Premere REV. V 2016 o e , per impostare il valore. Premi o , per spostare il cursore. ,per stabilire la posizione della virgola. UNITÀ DI MISURA DEFINITA DALL‘UTENTE ZERO-SAVING Premere , per accedere alle possibilità di impostazione della gravitazione. „G---“ viene mostrato. Il valore può essere impostato fra 0.000 e 9.999. Le unità di misura impostate dall‘utente offrono la possibilità di definire le unità individuali che non sono presenti tra le unità standard della bilancia. Le unità definite dall‘utente funzionano proporzionalmente all‘unità del sistema: Se l‘unità prestabilita dall‘utente a 1234 e l‘unità del sistema sono impostate sui kg, il peso viene peso innanzitutto in kg ( per esempio 1000) e poi convertito nell‘unità scelta dall‘utente (per esempio: 1234 USR). Durante l‘utilizzo delle unità impostate dall‘utente prestare attenzione al carico massimo della bilancia poiché il valore mostrato non corrisponde al carico effettivo. , per accedere le possibilità di impostazione delle unità di misura scelte dall‘utente. „U---“ Premere viene indicato. Premere o e , per impostare il valore. Premi Inserire il valore desiderato. Premere REV. V 2016 , per spostare il cursore. , per stabilire la posizione della virgola. , per accedere alle possibilità di impostazione della sensibilità al movimento. 56 o 57 IT CALIBRAZIONE MISURA DEL PESO 1 (LOAD1) APERTURA DEL MENÙ DI CALIBRAZIONE La bilancia indica „LOAD1 “ . Premere due volte Utilizzare un peso di calibrazione e premere , per accedere alla modalità passowrd. La bilancia indica P0000. Premere o e , per cambiare la cifra selezionata. Premere o , per spostare il cursore. Digiti la parola d‘accesso di calibrazione (P8416). Premere , per confermare la selezione e per accedere alla modalità di calibrazione. „CAL “ viene indicato. o e , per cambiare la cifra selezionata. Premere cursore. Digitare il peso del pesetto di calibrazione. Premere Lasciare la bilancia senza peso e premere o , per spostare il , per stabilire la posizione della virgola. , per far apparire il codice 34567. UNITÀ DEL SISTEMA Attendere fino a che il codice sia stabile. Premere La bilancia mostra l‘unità corrente del sistema. L‘unità del sistema può essere impostata su kg o lb. Non appena la misurazione è conclusa la bilancia va automaticamente allo step successivo. Premere MISURA DEL PESO 1 (LOAD2) Premere , per aprire le possibilità di impostazione dell‘unità di misura „Un---“ viene indicato. o e , per cambiare l‘unità del sistema. Utilizzare un peso di calibrazione e premere Premere La bilancia indica la gravità di calibrazione, per esempio G9.794 per g = 9.794. Premere Premere e , per cambiare la cifra selezionata. Premere cursore. Digitare il valore della capienza massima. Premere o o e . „00000“ viene indicato. , per cambiare la cifra selezionata. Premere cursore. Digitare il peso del pesetto di calibrazione. Premere , per accedere alle impostazioni della gravità. „G---“ viene mostrato. o , per iniziare la misurazione. Die Waage zeigt „LOAD2“ an. GRAVITÀ DI CALIBRAZIONE IT Premere . „00000“ viene indicato. , per spostare il , per stabilire la posizione della virgola. Lasciare la bilancia senza peso e premere o , per spostare il , per stabilire la posizione della virgola. , per far apparire il codice 23456. Attendere fino a che il codice sia stabile. Premere , per iniziare la misurazione. Non appena la misurazione è conclusa la bilancia va automaticamente allo step successivo. CAPACITÀ MASSIMA MISURA DEL PESO 1 (LOAD3) Non sovraccaricare la bilancia! Un sovraccarico può danneggiare seriamente la bilancia. Premere Premere , per impostare la capacità massima. il „00000“ è indicato. o e , per cambiare la cifra selezionata. Premere cursore. Digitare il valore della capienza massima. Premere o , , per spostare il , per stabilire la posizione , per accedere alle possibilità di impostazione della ricera dello zero. „LOAD0 “ viene indicato. Lasciare la bilancia senza peso e premere premere REV. V 2016 . „00000“ wird angezeigt. Utilizzare un peso di calibrazione e premere . „00000“ viene indicato. Premere o e , per cambiare la cifra selezionata. Premere cursore. Digitare il peso del pesetto di calibrazione. Premere RICERCA DELLO ZERO Premere Die Waage zeigt „LOAD3“ an. Nutzen Sie ein Prüfgewicht und drücken Sie , per far apparire il codice 12345. Dopo la digitazione del codice Lasciare la bilancia senza peso e premere o , per spostare il , per stabilire la posizione della virgola. , per far apparire il codice 45678. Attendere fino a che il codice sia stabile. Premere , per iniziare la misurazione. Non appena la misurazione è terminata la bilancia salva automaticamente la calibrazione e il menù di calibrazione viene chiuso. , per passare allo step successivo. 58 REV. V 2016 59 IT Problema Possibile causa Possibile soluzione La bilancia non si accende se viene premuto il tasto Batteria vuota/difettosa Controllare la batteria oppure sostituirla . Tasto difettoso Premere più saldamente e tenere premuti il tasto 2 secondi Scheda difettosa Mettersi in contatto con il servizio clienti. Il display lampeggia Batteria vuota Caricare o cambiare la batteria La bilancia non reagisce alla pressione dei tasti Il programma rimane fermo Spegnere e riaccendere la bilancia Tasto difettoso Mettersi in contatto con il servizio clienti. Carico in movimento Stabilizzare il carico La sensibilità del movimento è impostato troppo debole Aumentare la sensibilità del movimento Umidità all'interno della bilancia Asciugare con attenzione i diversi elementi Scheda difettosa Mettersi in contatto con il servizio clienti. Batteria vuota Caricare o cambiare la batteria La cella di carico è usurata Interrompere l'utilizzo Cella di carico difettosa Mettersi in contatto con il servizio clienti. La bilancia non è stata azzerata prima della pesata Azzerare la bilancia manualmente Unità sbagliata Cambiare unità di peso Calibrazione necessaria Calibrare la bilancia Cella di carico o scheda difettosa Mettersi in contatto con il servizio clienti. la batteria del telecomando è difettosa o vuota Sostituire la batteria del telecomando Risultato della misura instabile La bilancia indica un peso, anche se non è caricato IT Errore di misurazione approssimativo Il telecomando funziona solo a breve distanza REV. V 2016 60 REGOLARE CONTROLLO DELL‘APPARECCHIO Verificare regolarmente che gli elementi dell‘apparecchio non presentino danni. Nel caso si riscontrassero danni, è severamente vietato qualsiasi impiego del dispositivo. Si prega di contattare il venditore di riferimento affinché vengano effettuate le modifiche necessarie. Cosa fare in caso si verifichino problemi? Contattare il venditore e fornire i seguenti dati: • • • Numero di fatturazione e numero di serie (dei quali l‘ultimo si trova sulla targhetta del dispositivo) Fornire una foto del pezzo difettoso Descrivere il problema nel modo più preciso possibile in modo che il servizio clienti sia in grado di circoscrivere il problema e di risolverlo. Più dettagliate sono le informazioni da voi fornite, maggiore è l‘aiuto che possiamo fornirvi! ATTENZIONE: Non aprire o smontare mai l‘apparecchio senza l‘autorizzazione del servizio clienti. Questa operazione non autorizzata fa decadere la garanzia! IT REV. V 2016 61 MANUEL D‘UTILISATION Balance à grue haute précision STEINBERG SYSTEMS Veuillez lire ce manuel avec attention pour garantir la précision de vos mesures. Cette balance à grue fonctionne à partir de technologies et mécanismes très modernes dont l’efficacité n’est plus à démontrer. Ils en font un outil polyvalent, fiable, précis et facile à utiliser. • • • • Qualité – appareil produit dans le respect des normes européennes (CE) Fonctionnalité – fonction d‘arrêt automatique, fonction de mise en veille Fiabilité – la technologie la plus moderne et des circuits de grande qualité garantissent performance et stabilité sur le long terme. Polyvalence – pour un usage dans les secteurs du stockage, du transport, du courrier etc. Consignes générales de sécurité pour l‘utilisation de la balance à grue Soyez toujours prudent lors de l‘utilisation et de l‘entretien de votre balance à grue. Cela vaut en particulier lors de l‘utilisation quotidienne de votre balance, afin d’en préserver la précision sur le long terme. • • • • • • • • • Nom du produit: BALANCE À GRUE Modèle: SBS-KW-1000/10O Nom du fabricant: emaks spółka z ograniczoną odpowiedzialnością sp.k. Adresse du fabricant: ul. Dekoracyjna 3, 65-155 Zielona Góra Évitez d‘utiliser l‘appareil dans un environnement traversé de forts champs électriques ou magnétiques. Ne l‘utilisez pas non plus dans un environnement soumis à de fortes variations de température. Ne démontez jamais votre balance sans l‘accord du service client – Les dommages qui pourraient en résulter ne sont pas couverts par la garantie. Soyez prudent lors du changement des piles. Par précaution, retirez les piles de l‘appareil si celui-ci ne doit pas être utilisé pendant plus de 4 semaines. Ne surchargez pas la balance. Une surcharge peut endommager les cellules de pesée et mener à une annulation de la garantie. Détachez l‘objet pesé immédiatement après la pesée, afin de ne pas fausser les résultats Contrôlez régulièrement les piles. Si elles sont vides, remplacez-les par des piles neuves ou rechargez-les à l‘aide d‘un appareil adapté. En cas de panne, veuillez contacter le service client. N‘essayez pas de réparer la balance vous- même. AVANT LA PREMIÈRE UTILISATION: À réception du colis, vérifiez l‘intégrité de l‘emballage. Ne l‘ouvrez que s‘il est intact. Si l‘emballage est endommagé, prenez contact sous 3 jours avec la société de transport ainsi qu‘avec votre distributeur. Donnez un maximum de détails concernant les dommages. Ne mettez pas le paquet à l‘envers ! Veillez à maintenir l‘appareil horizontal et stable lorsque vous le transportez. CONSERVATION DE L‘EMBALLAGE Il est recommandé de conserver l‘emballage de l‘appareil (carton, plastique et polystyrène) afin de pouvoir l‘envoyer en réparation, en cas de besoin, dans les meilleures conditions possibles. FR REV. V 2016 63 DÉTAILS TECHNIQUES ANNONCES Modèle SBS-KW-1000/10O Désignation Signification Classe de précision Classe III (correspond au OIML R76) Symbole Stable Le poids est stable Plage de zéro ±4% F.S. Zero Le poids équivaut à zéro Temps de stabilisation ≤10 sec Surcharge 100% F.S. + 9e Tared La balance est tarée Charge de sécurité 120% F.S Hold Les touches sont verrouillées Charge de rupture 400% F.S Piles 4 * AA 1.5V Lb L'unité de pesée est la livre Température ambiante -10°C ~ +40°C Humidité ambiante 20°C ≤90% Kg L'unité de pesée est le kilogramme Écran 25.4 mm - LED Capacité max. 1000 kg Capacité min. 10 kg Précision 0,5 kg TELECOMMANDE AFFICHAGE ET TOUCHES FR FR AFFICHAGE PRINCIPAL Touche REV. V 2016 Désignation Fonctions On/Off Appuyez sur cette touche pendant 1 seconde pour allumer la balance. Quitter le menu Touche Désignation Fonction Tare Tarer Pression prolongée : Zéro Zéro Remettre à zéro Hold Verrouiller/ déverrouiller l‘affichage, Confirmer/ transmettre Pression prolongée: Changement de l‘unité de mesure Tare Tarer 64 REV. V 2016 Touches sur la balance 65 Touche Désignation Hold Fonction Touches sur la balance Symbol Verrouiller/ déverrouiller Confirmer Bezeichnung Funktion DELETE Supprimer la dernière mesure CLEAR Supprimer toutes les mesures Acc. Ajouter un poids/ réduire le chiffre affiché Del. Supprimer la dernière mesure/ supprimer toutes les mesures/ déplacer le curseur vers la gauche F1 Annonce du poids ajouté, sélection de la décimale F2 Changement d'unité Pour plus d‘informations relatives au réglage automatique du zéro, reportez-vous au chapitre « Configuration système ». Off Confirmer/ retour au mode pesée Pressez ou pendant 1 seconde pour éteindre la balance. Le niveau des piles est indiqué (par ex. bat99) et |off| apparaît avant que la balance ne s‘éteigne. 2nd Fonction « 2nd » Zéro UTILISATION Allumer/ éteindre pendant 1 seconde pour allumer la balance. La balance démarre et il apparaît Appuyez sur la touche deux fois « 0.0.0.0.0 » sur l‘écran. S‘affichent ensuite la capacité maximale 1000 et le niveau des piles (par ex. bat99). Ensuite, la balance vérifie le poids actuel (affichage : « ------ ») puis calibre son zéro. Pressez FR pour mettre la balance à zéro. ZERO s‘allume. Si le poids se trouve en mouvement, si la fonction Tare est activée ou si le poids actuel se trouve hors de la plage de zéro, la balance indique |err|. ANNONCES TYPES Symbole ou Désignation Signification Mesure en cours Pour plus d‘informations relatives au réglage manuel du zéro, reportez-vous au chapitre « Configuration système ». SETUP Réglages personnalisés Tarer BATTERY Niveau des piles END Sauvegarder et Quitter OFF Arrêter En mode poids brut, pressez la touche ou , our activer le mode tare (poids net). TARE s‘allume. Si le poids se trouve en mouvement, en négatif ou hors de la plage de tare, la balance indique |err|. La fonction de tare diminue la limite de surcharge de la balance. Exemple : Si une balance de 5000*2kg est tarée à 1000kg, sa capacité maximale est réduite à 4018kg (5000 - 1000 + 9 divisions de 2kg). En mode poids net, pressez REV. V 2016 OVERLOAD Surcharge ERROR Opération invalide ACCUMULATE Ajouter un poids 66 ou , pour retourner au mode poids brut. TARE s‘éteint. Verrouiller/ déverrouiller (fonction HOLD) Pressez ou pour verrouiller l‘affichage. HOLD s‘allume. Pressez ou pour déverrouiller l‘affichage. HOLD s‘éteint. REV. V 2016 67 FR Additionner Ouvrir les réglages personnalisés Pressez Pressez pour ajouter un poids. puis ou pour ouvrir les réglages personnalisés. L‘écran indique « Setup ». Sitôt un poids ajouté, l‘écran confirme en indiquant |acc|. Réglage du délai d‘arrêt automatique L‘ajout est effectué selon les réglages actuels (mode poids brut ou poids net). Pressez ou Si le poids est en mouvement ou en négatif, la balance indique |err|. De même si le zéro n‘a pas été calibré au préalable. Pressez ou , pour régler le délai d‘arrêt automatique. L‘écran indique « off— ». et pour ajuster ce délai. Les possibilités de réglage sont les suivantes: 0 (fonction désactivée), 5 (5min), 10 (10min), 15 (15min), 30 (30min), 60 (60min). Cette fonction permet d‘optimiser la durée de vie des piles en éteignant automatiquement la balance lorsqu‘elle est inactive. Affichage du poids ajouté Pressez pour accéder au mode affichage. L‘affichage commence à clignoter puis affiche le poids ajouté. Pressez ou pour naviguer entre poids ajouté et poids total. Pressez ou pour quitter le mode affichage. Le décompte du délai d‘arrêt automatique commence au moment où la balance, à poids constant, n‘est plus utilisée. Une pression sur n‘importe quelle touche ou un changement de poids interrompt le décompte. Luminosité de l‘écran Supprimer la dernière mesure Pressez FR Pressez ou Pressez ou pour ajuster la luminosité de l‘écran. L‘écran indique « br-- » pour supprimer la valeur ajoutée en dernier. L‘écran confirme en indiquant |del|. Cette fonction ne supprime que la valeur ajoutée en dernier. Si la valeur a déjà été supprimée, la balance indique |err|. und pour adapter la valeur. La luminosité des LED peut être ajustée sur les valeurs suivantes: 1 (sombre), 2 (normal), 3 (clair). Une faible luminosité permet de prolonger la durée de vie des piles. Supprimer toutes les mesures Réglages du mode veille Pressez puis pour supprimer toutes les mesures. Pressez ou Pressez ou pour configurer le mode veille. L‘écran indique « Idl-- ». L‘écran confirme en indiquant |del|. et pour ajuster le délai de mise en veille. Changement d‘unité Pressez ou pour choisir entre les unités kg, lb et personnalisée. Si vous choisissez kg, la LED kg s‘allume. Si vous choisissez lb, la LED lb s‘allume. Si vous choisissez une unité personnalisée, aucune des deux LED ne s‘allume. Pour plus d‘informations relatives à la personnalisation des unités de mesure, reportez-vous au chapitre « Configuration système ». Les possibilités de réglage sont les suivantes: 0 (fonction désactivée), 5 sec, 15 sec, 30 sec, 60 sec. Le délai par défaut est de 30 sec. Pour économiser de l‘énergie, la balance se met automatiquement en veille lorsqu‘elle reste inactive. En mode veille, la consommation électrique de l‘appareil est réduite. Une pression sur n‘importe quelle touche ou un changement de poids met fin au mode veille. Pressez ou pour quitter les réglages personnalisés. RÉGLAGES PERSONNALISÉS Les réglages personnalisés permettent d‘optimiser les fonctions de votre balance selon vos besoins individuels. Les différents paramètres peuvent être modifiés un à un. REV. V 2016 68 REV. V 2016 69 FR CONFIGURATION SYSTÈME PLAGE DE RECHERCHE ZÉRO ATTENTION : Les paramètres de configuration système sont étroitement liés à la qualité de vos mesures. Il est déconseillé de modifier ces paramètres, hors nécessité absolue. Si vous hésitez, contactez votre service client pour déterminer si une modification de ces paramètres est nécessaire ou pas. Les options de configuration sont les suivantes : 00 (fonction désactivée), 0.5 (±0.5e), 1.0 (±1.0e), 1.5 (±1.5e), 2.0 (±2.0e), 2.5 (±2.5e), 3.0 (±3.0e), 3.5 (±3.5e), 4.0 (±4.0e), 4.5 (±4.5e), 5.0 (± 5.0e). Les modifications de réglage de la recherche zéro peuvent augmenter la température de fonctionnement de la balance. Elles peuvent aussi influencer la précision des mesures ! CONFIGURATION DE LA BALANCE Pressez pour configurer la plage de recherche zéro. La balance indique alors OUVERTURE DU MENU DE CONFIGURATION La balance indique toujours la valeur actuelle, p. ex. 0,5 pour une valeur de 0,5e. Pressez deux fois pour ouvrir le mode de mot de passe. Pressez La balance indique P0000. Entrez un mot de passe (P0258) en vous aidant des touches ou ou et pour modifier cette valeur. puis PLAGE DE ZÉRO pour modifier la valeur affichée. Pour changer les chiffres de position pressez Pressez ou . pour confirmer le mot de passe et accéder au menu de configuration. La balance indique à présent SCALE. Pressez Pressez RÉSOLUTION FR La résolution peut être ajusté sur les valeurs suivantes : 0.001, 0.002, 0.005, 0.01, 0.02, 0.05, 0.1, 0.2, 0.5, 1, 2, 5, 10, 20, ou 50. Pressez Pressez pour accéder aux réglages. La balance indique «E ---». ou La plage de zéro définit la plage au sein de laquelle la balance doit se trouver pour pouvoir effectuer une addition. Lorsque le poids est retiré, le poids restant doit être plus léger que la valeur déterminée lors du réglage. et pour modifier la valeur de la résolution. , pour procéder au réglage. La balance indique ou et pour modifier la valeur. Appuyez sur ou pour naviguer entre les chiffres. Appuyez sur pour sélectionner la décimale. La plage de zéro peut être réglée entre 0e et 3000e. La valeur par défaut est de 5e. SAUVEGARDE DU ZÉRO Lorsque la sauvegarde du zéro est activée, le réglage automatique du zéro est désactivé. PLAGE DE RÉGLAGE AUTOMATIQUE DU ZÉRO (AUTO-ZERO) La balance détermine alors le zéro sur la base du calibrage zéro précédent. Par défaut, cette fonction est désactivée. Les options de configuration de la plage de réglage automatique du zéro sont : 0 (fonction désactivée), 2 (±2%FS), 3 (± 3%FS), 4 (±4%FS), 10 (±10%FS), 20 (±20%FS), 50 (±50%FS), 100 (±100%FS) de la capacité maximale. La valeur par défaut est de ±20%FS. Pressez Pressez Pressez pour configurer la plage de réglage automatique du zéro. La balance indique ou et pour adapter la valeur. PLAGE DE RÉGLAGE MANUEL DU ZÉRO Les options de configuration de la plage de réglage automatique du zéro sont : 0 (fonction désactivée), 2 (±2%FS), 3 (± 3%FS), 4 (±4%FS), 10 (±10%FS), 20 (±20%FS), 50 (±50%FS), 100 (±100%FS) de la capacité maximale. Pressez pour configurer la plage de réglage manuel du zéro. La balance indique alors la plage de réglage manuel du zéro, par exemple pour 4% de la capacité maximale. Le zéro ne se calibre que lorsque le poids de calibrage se trouve dans la plage de réglage manuel du zéro. Pressez REV. V 2016 ou et pour adapter la valeur. 70 Pressez , pour procéder au réglage. La balance indique o et . pour l‘activer (« on ») ou la désactiver (« off »). STABILISATION La fonction de stabilisation de la balance compense le mouvement du poids à peser, afin de garantir une mesure fiable même lorsque l‘objet est en mouvement. Plus le degré de compensation est faible, plus rapide est la mesure. Les possibilités de réglage de la fonction de stabilisation sont les suivantes : 0 (fonction désactivée), 1 (très faible), 2 (faible), 3 (normale), 4 (forte) et 5 (très forte). Pressez , pour accéder aux réglages. L‘écran indique Pressez REV. V 2016 ou . et pour adapter la valeur. 71 FR PESÉE DYNAMIQUE Pressez UNITÉS STANDARDS DE MESURE Pressez La balance indique l‘unité actuelle. Il peut s‘agir du kg ou de la lb. pour accéder aux réglages. L‘écran indique Pressez Pressez . ou et Pressez pour l‘activer (« on ») ou la désactiver (« off »). pour choisir cette unité. L‘écran indique « Un--- ». ou et pour changer d‘unité. GRAVITÉ GRAVITÉ DE CALIBRAGE La balance indique la valeur actuelle, p. ex. G9.794, pour g = 9.794. Il est recommandé de ne modifier cette valeur que lorsque l‘accélération de la pesanteur dévie fortement de la valeur par défaut. La balance indique la gravitation de calibrage, p. ex. G9.794 pour g = 9,794. Pressez Pressez pour accéder aux réglages de la gravité. L‘écran indique « G---- ». Pressez ou et pour adapter la valeur. Appuyez sur Ajustez la valeur de la gravité. Appuyez sur ou pour déplacer le curseur. Pressez , pour accéder aux réglages. L‘écran indique « G---- ». ou et pour modifier le nombre affiché. Appuyez sur le curseur. Entrez la valeur de l‘accélération de gravitation. Appuyez sur pour sélectionner la décimale. Les unités de mesure personnalisées permettent de peser en d‘autres unités que les unités standards de la balance. Pressez ou Appuyez sur et pour modifier le nombre choisi. Appuyez sur déplacer le curseur. Entrez la capacité max. Appuyez sur Si vous recourrez à une unité personnalisée, veuillez tenir compte de la capacité maximale de la balance, puisque la valeur indiquée ne correspond pas à la charge effective. Pressez , pour accéder à la personnalisation des unités de mesure. L‘écran indique « U---- ». ou et pour adapter la valeur. Appuyez sur Entrez la valeur souhaitée. Appuyez sur ou pour déplacer le curseur. pour sélectionner la décimale. Ne suspendez aucun poids à la balance et appuyez sur du code, appuyez à nouveau sur Pressez deux fois Pressez Pressez REV. V 2016 ou pour modifier le chiffre affiché. pour afficher le code 12345. Après stabilisation ou ou et . L’écran indique « 00000 ». pour modifier les chiffres. Déplacez le curseur à l’aide des touches . Entrez le poids du poids de calibrage. pour déplacer le curseur. Entrez le mot de passe de calibrage (P8416). 72 pour sélectionner la décimale. MESURE DU POIDS 1 (LOAD1) Utilisez un poids de calibrage et pressez et , pour pour passer à l’étape suivante. OUVERTURE DU MENU DE CALIBRAGE ou ou pour procéder au réglage de la recherche zéro. La balance indique « LOAD0 ». La balance indique « LOAD1 ». pour ouvrir le mode de mot de passe. FR RECHERCHE ZÉRO CALIBRAGE La balance indique P0000. Appuyez sur pour sélectionner la décimale. pour procéder au réglage de la capacité max. L‘écran indique « 00000 ». Elles sont toujours définies par rapport aux unités standards: si l‘unité personnalisée est de 1234 et que l‘unité par défaut est le kg, le poids sera d‘abord mesuré en kg (p. ex. 1000) puis converti dans l‘unité définie par l‘utilisateur (dans l‘exemple: 1234 USR). Pressez pour déplacer Ne surchargez pas la balance. Une surcharge peut endommager gravement la balance. La valeur peut être réglée entre 0.000 et 9.999. Pressez ou CAPACITÉ MAXIMALE UNITÉS DE MESURE PERSONNALISÉES FR pour confirmer l‘entrée et accéder au mode de calibrage. L‘écran indique « CAL ». La fonction de pesée dynamique accélère la détermination du poids et convient ainsi particulièrement lorsque la stabilité est plus importante que la précision. REV. V 2016 73 Appuyez sur pour sélectionner la décimale. Maintenez la charge stable et appuyez sur pour afficher le code 23456. Attendez jusqu’à stabilisation du code, puis pressez Problème Cause possible Solution possible La balance ne s’allume pas lorsque vous appuyez sur Piles vides ou défectueuses Vérifiez les piles et remplacez-les le cas échéant pour commencer la pesée. La touche A l’issue de la pesée, la balance passe automatiquement à l’étape suivante. Appuyez plus fort sur la touche et maintenez la pression pendant 2 secondes Platine défectueuse Contactez le service client MESURE DU POIDS 2 (LOAD2) L’affichage clignote Piles vides Changez ou rechargez les piles La balance indique « LOAD2 ». La balance ne réagit pas à la pression d’une touche en particulier Le programme est bloqué Éteignez la balance et rallumez-la La touche est défectueuse Contactez le service client La charge est en mouvement Immobilisez la charge La fonction de stabilisation est réglée à un niveau trop faible Augmentez la stabilisation L’intérieur de la balance a été contaminé par de l’humidité Séchez avec précaution ses différents éléments Platine défectueuse Contactez le service client Piles vides Changez ou rechargez les piles A l’issue de la pesée, la balance passe automatiquement à l’étape suivante. La cellule de pesée a été utilisée pendant trop longtemps Interrompez un moment votre utilisation de l‘appareil MESURE DU POIDS 3 (LOAD3) La cellule de pesée est défectueuse Contactez le service client La balance n’a pas été remise à zéro avant la pesée Remettez la balance à zéro Mauvaise unité de mesure Changez d’unité de mesure Calibrage nécessaire Recalibrez la balance Cellule de pesée ou platine défectueuse Contactez le service client Les piles de la télécommande sont vides ou défectueuses Changez les piles de la télécommande Utilisez un poids de calibrage et pressez Pressez ou ou et . L’écran indique « 00000 ». pour modifier les chiffres. Déplacez le curseur à l’aide des touches . Entrez le poids du poids de calibrage. Appuyez sur charge stable et appuyez sur pour sélectionner la décimale. Maintenez la pour commencer la pesée. La balance indique « LOAD3 ». ou tenez ou et . L’écran indique « 00000 ». pour modifier les chiffres. Déplacez le curseur à l’aide des touches . Entrez le poids du poids de calibrage. Appuyez sur la charge stable et appuyez sur La balance indique un poids à vide Erreur grossière de mesure Utilisez un poids de calibrage et pressez Pressez Le poids mesuré ne se stabilise pas pour afficher le code 34567. Attendez jusqu’à stabilisation du code, puis pressez FR est défectueuse pour sélectionner la décimale. Main- pour afficher le code 45678. Attendez jusqu’à stabilisation du code, puis pressez pour commencer la pesée. La télécommande ne fonctionne qu‘à une distance réduite de l’appareil A l’issue de la pesée, la balance sauvegarde automatiquement les valeurs de calibrage et ferme le menu de calibrage. REV. V 2016 74 REV. V 2016 75 FR EXAMEN RÉGULIER DE L‘APPAREIL Contrôlez régulièrement le bon état des différents éléments de l‘appareil. En cas de détérioration, l‘appareil ne doit plus être utilisé. Prenez immédiatement contact avec votre vendeur pour réparer l‘élément endommagé. Que faire en cas de problème? Prenez contact avec votre vendeur muni des documents suivants : • • • Vos numéros de facture et de série (vous trouverez ce dernier sur la plaque signalétique) Le cas échéant, une photo de l‘élément endommagé Une description précise du problème aidera votre conseiller à en identifier la cause. Plus détaillées seront vos indications, plus rapidement nous serons en mesure de vous aider! ATTENTION: N‘ouvrez jamais l‘appareil sans l‘accord préalable du service client. Cela pourrait compromettre votre droit à la garantie! FR Nombre del producto Dinamómetro digital Modelo: SBS-KW-1000/10O Nombre del fabricante: emaks spółka z ograniczoną odpowiedzialnością sp.k. Dirección del fabricante: ul. Dekoracyjna 3, 65-155 Zielona Góra ES REV. V 2016 76 MANUAL DE INSTRUCCIONES Dinamómetro digital de STEINBERG SYSTEMS Lea las instrucciones cuidadosamente, para sacar el máximo partido a la balanza. Este dinamómetro ha sido concebido con mecánica y técnica probadas. Por ello es versátil, fiable preciso y fácil de utilizar. • • • • Calidad - Fabricado conforme a las directivas de la CE Funcionalidad - Función Auto-Off, Función Standby Fiabilidad - Combina los últimos avances en tecnología con un excelente acabado, para garantizar su rendimiento y durabilidad. Gran versatilidad de uso - almacenaje, envío, transporte, etc. Advertencias generales de seguridad para el uso del dinamómetro Vigile constantemente el dinamómetro durante la utilización y mantenimiento. Esto se aplica particularmente al uso diario, a fin poder obtener resultados de pesaje óptimos a largo plazo. ES • • • • • • • • • Durante el uso evite los entornos con campos eléctricos o magnéticos fuertes. Evite utilizar este dispositivo en zonas con importantes oscilaciones térmicas. No desmonte el dinamómetro sin contactar previamente con el servicio post-venta. En este caso los daños no serían cubiertos por la garantía. Cuando cambie la batería, proceda cuidadosamente. Por favor, retire las baterías del dispositivo si no va a utilizarlo durante un periodo superior a 4 semanas. Por favor, no sobrecargue la balanza. Una sobrecarga podría ocasionar daños a la célula de pesaje e invalidar la garantía. Retire la carga inmediatamente tras el pesaje, para que los resultados del pesaje no se vean perjudicados. Controle regularmente las baterías. En caso de estar vacías, sustitúyalas o cárguelas con un cargador para tal uso. En caso de avería, póngase en contacto con el vendedor, en vez de intentar reparar la balanza usted mismo. ANTES DEL PRIMER USO Por favor, inspeccione el embalaje a la recepción de la mercancía. Ábrala solamente en caso de no hallar desperfectos. Si hubiera desperfectos, contacte con el transportista y con el vendedor en un plazo máximo de 3 días. Documente los daños tan detalladamente como sea posible. ¡No ponga el paquete al revés! Si va a transportar el dispositivo, asegúrese de que se mantiene estable y en posición horizontal. DATOS TÉCNICOS Modelo SBS-KW-1000/10O Clase de precisión Clase III Conforme a OIML R76 Rango de Tara Conforme a OIML R76 Rango de cero manual ±4% F.S. Tiempo de la estabilización ≤10 segundos Sobrecarga 100% F.S. + 9e Carga de seguridad F.S. 120 % Carga de rotura F.S. 400 % Batería 4 * AA 1.5V Temperatura ambiente -10°C ~ +40°C Humedad ambiente 20°C ≤90% Pantalla 25.4 mm – LED Max. Carga máxima 1000 kg Min. Capacidad 10 Kg Precisión de lectura 0.5kg PANTALLA Y TECLAS Tecla RETIRADA DEL EMBALAJE ¡Rogamos conserve el embalaje original (cartón, bridas de plástico y poliestireno), para poder devolver el aparato tan protegido sea posible, en caso de que fuera necesaria una reparación! REV. V 2016 78 ES PANTALLA PRINCIPAL REV. V 2016 Nombre Función On/Off Presione esta tecla durante un segundo para encender el dinamómetro. Abandonar el menú Tara Tara Mantener pulsada: Función Zero Hold Bloquear / Liberar, Confirmar / Conectar Mantener pulsada: Cambio de la unidad de peso 79 AVISOS Tecla Símbolo Nombre Significado Stable El peso es estable y puede ser medido Zero El peso es igual a cero Tared La balanza está tarada Hold Las teclas están bloqueadas Lb La unidad de peso es ahora libra. Kg La unidad de peso es ahora kilogramo. MANDO A DISTANCIA ES Nombre Función Tecla en la balanza Hold Bloqueo / Desbloqueo Confirmación Acc. Añadir peso, disminución del valor de la cifra marcada. Del. Suprimir la última medición / suprimir todas las medidas. Movimiento del cursor hacia la izquierda. F1 Aviso de peso añadido, entrada decimales F2 Cambio de unidad Off Confirmar y volver al modo de pesaje 2nd Función 2nd ES AVISO DURANTE USO REGULAR Símbolo Nombre Función Durante la medición Tecla REV. V 2016 Tecla en la balanza SETUP Opciones configurables por el usuario BATERÍA Estado de la batería END Memorizar y finalizar OFF Apagado OVERLOAD Sobrecarga Nombre Función Zero Cero manual ERROR Entrada inválida Tara Tara ACCUMULATE Añadir peso 80 REV. V 2016 81 Símbolo Nombre Función DELETE Borrar la última medición CLEAR Borrar todas las medidas Presione , para agregar un peso. Tan pronto como se mida un segundo peso, aparecerá |acc| para confirmación. USO La balanza lo añadirá conforme al ajuste en modo Bruto o Neto. En caso de que el peso esté en movimiento o en negativo, se mostrará |err|. De igual modo sucede si el peso no hubiera sido puesto a cero anteriormente. Apagado / Encendido Vista de peso agregado durante un segundo para encender la balanza. La máquina se inicia y aparece dos Presione la tecla veces „0.0.0.0.0“. A continuación se muestra la capacidad máxima (1000) y el estado de las baterías (por ejemplo bat99). Después comprobará el peso (aviso: -----) y se pondrá a cero. Presione , para obtener el modo de vista agregado. El display empieza a parpadear y muestra el peso añadido. Para más información referente a la puesta a cero automática, por favor lea el capítulo „configuración del sistema“. Presione o durante un segundo, para apagar el dinamómetro. Se mostrarán el estado de las baterías (ej. bat99) y aparecerá |off|, antes de que el dispositivo se desconecte. Puesta a cero manual ES Agregar Presione o , para poner a cero. Muestra ZERO: Si la balanza estuviera en movimiento, la función Tara estuviera activada o el pesaje estuviera fuera del rango del cero manual, el dinamómetro mostrará |err|. Presione o , para cambiar entre peso agregado y peso total. Presione o , para salir de este modo. Borrar la última medición Presione , para suprimir el último valor añadido. Para confirmar aparecerá la indicación |del|. Esta función suprime solamente el último de valor añadido. En caso de que este valor ya hubiera sido eliminado, se muestra |err|. Borrar todas las medidas Presione y después , para suprimir todos los pesajes. Para más información referente a la puesta a cero manual, por favor lea el capítulo „configuración del sistema“. Para confirmar aparecerá la indicación |clr|. Tara Cambio de unidad En el modo Bruto, presione o , para obtener el modo Tara. Ahora se mostrará el mensaje TARE. Si el peso estuviera en el movimiento, en negativo o fuera del rango de la Tara, el equipo mostrará |err|. La función Tara sustrae el sobrepeso que no debe ser medido. Ejemplo: Si un peso de 1000kg se mide con una balanza de 5000*2c, la capacidad máxima de la balanza se verá reducida a 4018 kg (5000 - 1000 + 9 x 2 kg). En el modo Neto, presione o , para salir del modo de Tara. El mensaje de TARA desaparece. Bloquear / Desbloquear (función HOLD) Presione , para seleccionar kilogramo, libra y medida predefinida por el usuario. Si elige kg. se iluminará el LED kg. Si selecciona Ib, se iluminará el LED libra. Si utiliza una unidad predeterminada por el usuario, no se iluminará ninguno de estos dos LEDs. Para más información sobre unidades predefinidas por el usuario, por favor lea el capítulo “ajustes del sistema”. OPCIONES CONFIGURABLES POR EL USUARIO Los ajustes predefinidos permiten una mejor adaptación a las necesidades individuales de cada usuario. Presione o , para bloquear el aviso. Aparece HOLD. Presione o , para desbloquear el aviso. HOLD desaparece. Los distintos parámetros se pueden programar sucesivamente. Abrir los ajustes predeterminados Presione los ajustes. REV. V 2016 o 82 REV. V 2016 y después o ,para abrir las ajustes predefinidos por el usuario. Ahora se muestran 83 ES Ajustes de tiempo de apagado automático (Auto-Off-Zeit). CONFIGURACIÓN DEL DINAMÓMETRO Presione „Off—“ o APERTURA DEL MENÚ DE CONFIGURACIÓN Presione o , para ajustar el tiempo de apagado automático (Auto-Off-Zeit). Ahora se muestra Presione dos veces y , para abrir el modo contraseña. , para ajustar el tiempo La balanza indica P0000. Introduzca la contraseña (P0258), presionando Las posibilidades de ajuste son: 0 (apagado), 5 (5min), 10 (10min), 15 (15min), 30 (30min), 60 (60min). Mediante la función Auto-Off se mantendrá la carga de las baterías por más tiempo, ya que la balanza se apaga automáticamente cuando no se hace uso de ella. para cambiar el valor marcado. Para cambiar la posición, presione Presione Los minutos restantes para el apagado automático se contarán desde el momento en que la balanza muestre un peso continuo y no se utilice. La presión de una tecla o el movimiento de la carga reinician el contador. Brillo de la pantalla Presione o Presione o , para regular el brillo de la pantalla. Aparecerá el aviso „br--“. y , para introducir el valor. El brillo del LED se puede ajustar a los siguientes valores: 1 (oscuro), 2 (normal), 3 (brillante). La falta de carga de las baterías puede influir en el brillo. ES Ajustes de la función Standby (espera) Presione o Presione o , para activar el modo Standby (espera). Aparecerá el aviso „Idl--“. y , para ajustar el tiempo. Las opciones de ajuste del tiempo hasta el Standby son 0 (apagar), 5 seg., 15 seg., 30 seg., 60 seg. El valor predeterminado es de 30 sec. o o y entonces . para confirmar y volver al menú de configuración. La balanza muestra ahora SCALE. RESOLUCIÓN La resolución puede ajustarse a los siguientes valores: 0.001, 0.002, 0.005, 0.01, 0.02, 0.05, 0.1, 0.2, 0.5, 1, 2, 5, 10, 20, o 50. Presione Presione para acceder a los ajustes. El dinamómetro muestra „E--“ . o y para cambiar la resolución. RANGO DE PUESTA A CERO AUTOMÁTICA (AUTO-ZERO) Las posibilidades para la puesta a cero automática son: 0 (apagado), 2 (±2%FS), 3 (± 3%FS), 4 (±4%FS), 10 (±10%FS), 20 (±20%FS), 50 (±50%FS), 100 (±100%FS) máximo. El valor de fábrica es ±20%FS. Para adaptar la puesta a cero automática presione Presione o y El dinamómetro mostrará , para introducir el valor deseado. PUESTA A CERO MANUAL A fin de ahorrar energía, la balanza entra en modo Standby si no está en uso o si la carga se mantiene estable durante largo periodo de tiempo. Las posibilidades de puesta a cero manual son: 0 (apagado), 2 (±2%FS), 3 (± 3%FS), 4 (±4%FS), 10 (±10%FS), 20 (±20%FS), 50 (±50%FS), 100 (±100%FS) máximo. En el modo Standy se consumirá menor cantidad de energía. El pulsado de las teclas o el movimiento de la carga desactivan el modo Standby. Presione Presione o , para abandonar los ajustes predeterminados. para configurar la puesta a cero manual. El dinamómetro muestra la gama de la puesta a cero manual, ej. para el 4% de la capacidad máxima. La balanza estará entonces a cero, si el peso está en el rango de puesta a cero manual. CONFIGURACIÓN DE SISTEMA DEL DINAMÓMETRO Presione ATENCIÓN: Los parámetros de la configuración de sistema están estrechamente unidos a la calidad de los resultados de pesaje. Se aconseja no cambiar dichos parámetros, a no ser que sea absolutamente necesario. En caso de no estar seguro al respecto, contacte con el servicio post-venta y compruebe si los cambios de parámetros son necesarios. RANGO DE RETORNO A CERO o y , para introducir el valor deseado. Las posibilidades de ajuste son: 00 (apagado), 0.5 (±0.5e), 1.0 (±1.0e), 1.5 (±1.5e), 2.0 (±2.0e), 2.5 (±2.5e), 3.0 (±3.0e), 3.5 (±3.5e), 4.0 (±4.0e), 4.5 (±4.5e), 5.0 (± 5.0e). Los cambios en los ajustes del rango de puesta a cero pueden aumentar la temperatura de funcionamiento de la balanza. ¡La exactitud de la medición se verá posiblemente afectada por ella! REV. V 2016 84 REV. V 2016 85 ES PESAJEO DINÁMICO Presione para configurar el retorno a cero. El dinamómetro mostrará El dinamómetro mostrará por ejemplo 0.5 para un valor de 0,5e. La función de pesaje dinámico acelera la lectura del peso y es por lo tanto conveniente en los casos, en los que la estabilidad sea más importante que la precisión. Presione Presione o y para introducir el valor deseado. RANGO CERO Aparece el aviso El rango cero define el rango en el que debe estar la balanza, antes de se le añada peso. Si la balanza no mostrase valor alguno, esto significa que el peso extra es menor al valor predeterminado. Presione Presione Presione , para acceder al rango cero. Se indicará o y para cambiar el valor. Presione o para cambiar la cifra marcado. Introduzca el valor deseado para el rango cero. Presione para especificar el número de decimales. El rango cero puede estar entre 0e y 3000e. El ajuste previo es de 5e. AHORRO CERO La balanza realizará el pesaje a partir de entonces basándose en la última puesta a cero. Esta función está desactivada de fábrica. Presione o . y ,para activar la encender la función („on “) o apagarla („off“). GRAVEDAD La balanza muestra por ejemplo el valor G9.794, para g = 9.794. Se recomienda cambiar este valor, únicamente cuando la aceleración gravitatoria de la zona se desvíe considerablemente del valor predefinido. Presione para acceder a los ajustes de la función gravedad. Se mostrará “G---“ . Presione o y para introducir el valor deseado. Presione cursor. Fije el valor de la gravedad. Presione La activación del modo ahorro cero (Zero-Saving) sirve para apagar automáticamente la función de puesta a cero automática. ES para acceder a los ajustes de peso dinámico. para acceder al rango cero. Se indicará . o opara mover el para especificar el número de decimales. AJUSTE DE LA UNIDAD DE PESO PREDETERMINADA El valor puede estar entre 0.000 y 9.999. Las unidades definidas para la unida de peso ofrecen la posibilidad de definir unidades, que no estén entre las unidades estándar de peso. SENSIBILIDAD DE MOVIMIENTO Las unidades de preso predefinidas funcionan proporcionalmente a las unidades del sistema. Si la unidad definida por el usuario fuera 1234 y la unidad del sistema fuera el kilogramo, entonces el peso se medirá primero kilogramos (ej. 1000) y después se convertirá a la unidad definida por el usario (en el ejemplo: 1234 USR). La sensibilidad de movimiento compensa el movimiento de la carga a pesar, a fin de poder realizar el pesado fiablemente aún cuando el peso se mueva. Preste la atención a que el uso de unidades predefinidas no supere la carga máxima permitida del dinamómetro, puesto que en este caso el valor indicado no correspondería al valor real. Cuanto inferior sea el valor de sensibilidad de movimiento, más rápido se mostrará el valor del pesaje en la balanza. Presione Presione o y para activar la encender la función („on “) o apagarla („off“). Las posibilidades de ajustes de la sensibilidad de movimiento son: 0 (apagado), 1 (muy débil), 2 (débil), 3 (normal), 4 (fuerte) y 5 (muy fuerte). Presione ,para acceder a los ajustes de la sensibilidad de movimiento. Aparece el aviso Presione o Presione o y para introducir el valor deseado. Presione Introduzca el valor deseado. Presione para mover el cursor. para especificar el número de decimales. CALIBRADO , para introducir el valor deseado. Presione dos veces para abrir el modo contraseña. La balanza muestra ahora P0000. Presione Presione REV. V 2016 o APERTURA DEL MENÚ DE CALIBRACIÓN . y para acceder a los ajustes de unidad de peso predeterminada. Se mostrará „U---“ . 86 REV. V 2016 o o y para cambiar la cifra seleccionada. para mover el cursor. Introduzca la contraseña de calibración (P8416). 87 ES Presione para confirmar y acceder en el modo de calibración. Se mostrará „CAL“ . Espere hasta que el código esté estable. Presione para iniciar la medida del peso. UNIDAD DE SISTEMA Tan pronto se haya realizado la medición, la balanza pasa automáticamente al siguiente paso. La balanza muestra la unidad de sistema actual. La unidad de sistema se puede especificar en el kilogramo o la libra. MEDIDA DEL PESO 2 (LOAD2) La balanza indicará „LOAD2 “ . Presione para acceder a los ajustes de unidad del sistema. Se mostrará „Un---“ . Use un peso de prueba y presione Presione o y Presione CALIBRACIÓN DE LA GRAVEDAD Presione para acceder a los ajustes de la gravitación. Se mostrará “G----“ . o y para cambiar la cifra. Presione Introduzca el valor de la aceleración de la gravedad. Presione ES o y para cambiar la cifra. Presione Introduzca el valor correspondiente al peso de prueba. Presione La balanza muestra la calibración de la gravedad, por ejemplo G9.794 para g = 9.794. Presione o para mover el cursor. , para especificar el número de para iniciar la medida del peso. Tan pronto se haya realizado la medición, la balanza pasa automáticamente al siguiente paso. MEDIDA DEL PESO 3 (LOAD3) Use un peso de prueba y presione o y para cambiar la cifra. Presione o , para mover el cursor. para especificar el número de Espere hasta que el código esté estable. Presione ¡No sobrecargue la balanza! La sobrecarga puede dañar el equilibrio severamente. Presione para mover el cursor. para que se muestre el código 23456. La balanza indicará „LOAD3“. para acceder a los ajustes de la capacidad máxima de carga. Se indicará „00000 “ . o decimales. Mantenga la balanza estable y presione CAPACIDAD MÁXIMA DE CARGA Presione . Se indicará „00000 “. para cambiar la unidad de sistema. Presione o y . Se indicará „00000 “. para cambiar la cifra. Presione Introduzca el valor correspondiente al peso de prueba. Presione ES o para mover el cursor. para especificar el número de decimales. Mantenga la balanza estable y presione para que se muestre el código 23458. RETORNO A CERO Espere hasta que el código esté estable. Presione para iniciar la medida del peso. Presione Tan pronto la medición haya terminado, la balanza memoriza la calibración automáticamente y abandona el menú de calibración. Introduzca el valor máximo de capacidad deseado. Presione , para especificar el número de decimales. para acceder a los ajustes de la capacidad máxima de carga. Se mostrará „LOAD0 “ . Deje la balanza descargada y presione del código, presione para dejar marcado el código 12345. Después de la estabilización para pasar al paso siguiente. MEDIDA DEL PESO 1 (LOAD1) La balanza indicará „LOAD1 “. Use un peso de prueba y presione Presione ,o y . Se indicará „00000 “. , para cambiar la cifra. Presione Introduzca el valor correspondiente al peso de prueba. Presione decimales. Mantenga la balanza estable y presione REV. V 2016 o para mover el cursor. para especificar el número de para que se muestre el código 23456. 88 REV. V 2016 89 Problema Posible causa Posible solución El dinamómetro no se enciende, cuando se pulsa Batería vacía / defectuosa Comprobar baterías y cambiarlas en caso necesario tecla Presione la tecla firmemente y manténgala presionada 2 segundos Placa defectuosa Contacte con su distribuidor Parpadeo de la pantalla Batería vacía Carga / cambio de la batería La balanza no reacciona al presionar una tecla No hay reacción alguna Apague y vuelva a encender de nuevo Tecla defectuosa Contacte con su distribuidor Carga en movimiento Estabilice la carga Ajuste de la sensabilidad insuficiente Aumente la sensibilidad del movimiento Humedad dentro de la balanza Seque cuidadosamente los elementos individuales Placa defectuosa Contacte con su distribuidor Batería vacía Carga / cambio de la batería La célula de peso ha sido utilizada durante demasiado tiempo Interrumpa el uso de la misma Célula de pesaje defectuosa Contacte con su distribuidor La balanza no fue puesta a cero antes del pesado Ejecute la función cero manual Unidad de pesaje incorrecta Cambie la unidad de pesaje Calibración necesaria Calibre el dinamómetro Célula o placa de pesado defectuosa Contacte con su distribuidor Batería del mando a distancia vacías Cambie las baterías Medición inestable El equilibrio indica un peso, aunque no esté cargada ES defectuosa Fallo grave de pesaje El control remoto funciona solamente en distancias reducidas REVISIÓN PERIÓDICA DEL APARATO Compruebe periódicamente que los componentes del dinamómetro no estén deteriorados. Dado el caso no debe utilizarse el aparato. Contacte directamente con su distribuidor para realizar las reparaciones oportunas. ¿Qué hacer en caso de problemas? Póngase en contacto con el vendedor y prepare la siguiente información: • Número de factura y de serie (este último lo encontrará en la placa de características técnicas). • En caso necesario, incluya una foto de la pieza defectuosa. • El personal del servicio técnico podrá determinar mejor cuál es el problema cuanto más detallada sea la descripción. Cuanto más detallada y precisa sea la información, más rápido podremos ayudarle. ATENCIÓN: Nunca intente reparar o abrir el aparato sin consultar previamente con el servicio técnico. ¡Esto puede conllevar la extinción de la garantía! REV. V 2016 90 DE Hiermit bestätigen wir, dass die hier in dieser Anleitung aufgeführten Geräte CE-konform sind. EN We hereby certify that the appliances listed in this manual are CE compliant. FR Par la présente, nous confirmons que les appareils présentés dans ce mode d´emploi sont conformes aux normes Ce. PL Niniejszym potwierdzamy, że urządzenia opisane w tej instrukcji są zgodne z deklaracją CE. IT Con la presente documentazione si certifica che i dispositivi descritti all´interno del manuale sono conformi alle vigenti norme CE. ES Por la presente confirmamos que los dispositivos detallados en este manual cumplen con la normativa de la CE. REV. V 2016 91 Umwelt- und Entsorgungshinweise Hersteller an Verbraucher Sehr geehrte Damen und Herren, gebrauchte Elektro- und Elektronikgeräte dürfen gemäß europäischer Vorgaben [1] nicht zum unsortierten Siedlungsabfall gegeben werden, sondern müssen getrennt erfasst werden. Das Symbol der Abfalltonne auf Rädern weist auf die Notwendigkeit der getrennten Sammlung hin. Helfen auch Sie mit beim Umweltschutz. Sorgen Sie dafür, dieses Gerät, wenn Sie es nicht mehr weiter nutzen wollen, in die hierfür vorgesehenen Systeme der Getrenntsammlung zu geben. In Deutschland sind Sie gesetzlich [2] verpflichtet, ein Altgerät einer vom unsortierten Siedlungsabfall getrennten Erfassung zuzuführen. Die öffentlich - rechtlichen Entsorgungsträger (Kommunen) haben hierzu Sammelstellen eingerichtet, an denen Altgeräte aus privaten Haushalten ihres Gebietes für Sie kostenfrei entgegengenommen werden. Möglicherweise holen die rechtlichen Entsorgungsträger die Altgeräte auch bei den privaten Haushalten ab. Bitte informieren Sie sich über Ihren lokalen Abfallkalender oder bei Ihrer Stadt- oder Gemeindeverwaltung über die in Ihrem Gebiet zur Verfügung stehenden Möglichkeiten der Rückgabe oder Sammlung von Altgeräten. [1] RICHTLINIE 2002/96/EG DES EUROPÄISCHEN PARLAMENTS UND DES RATES ÜBER ELEKTRO- UND ELEKTRONIK - ALTGERÄTE [2] Gesetz über das Inverkehrbringen, die Rücknahme und die umweltverträgliche Entsorgung von Elektro- und Elektronikgeräten (Elektro- und Elektronikgerätegesetz - ElektroG). Utylizacja produktu Produkty elektryczne i elektroniczne po zakończeniu okresu eksploatacji wymagają segregacji i oddania ich do wyznaczonego punktu odbioru. Nie wolno wyrzucać produktów elektrycznych razem z odpadami gospodarstwa domowego. Zgodnie z dyrektywą WEEE 2012/19/UE obowiązującą w Unii Europejskiej, urządzenia elektryczne i elektroniczne wymagają segregacji i utylizacji w wyznaczonych miejscach. Dbając o prawidłową utylizację, przyczyniasz się do ochrony zasobów naturalnych i zmniejszasz negatywny wpływ oddziaływania na środowisko, człowieka i otoczenie. Zgodnie z krajowym prawodawstwem, nieprawidłowe usuwanie odpadów elektrycznych i elektronicznych może być karane! For the disposal of the device please consider and act according to the national and local rules and regulations. CONTACT emaks spółka z ograniczoną odpowiedzialnością sp.k. Ul. Dekoracyjna 3 65-155 Zielona Góra Nr. kom.: +48 506 06 05 74 E-mail: [email protected] w w w. e x p o n d o . d e www.steinbergsystems.de-
 1
1
-
 2
2
-
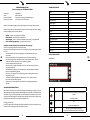 3
3
-
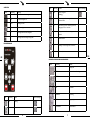 4
4
-
 5
5
-
 6
6
-
 7
7
-
 8
8
-
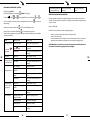 9
9
-
 10
10
-
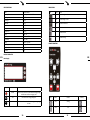 11
11
-
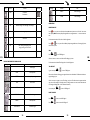 12
12
-
 13
13
-
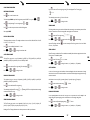 14
14
-
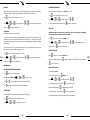 15
15
-
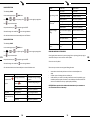 16
16
-
 17
17
-
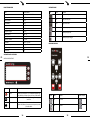 18
18
-
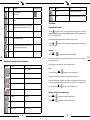 19
19
-
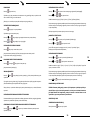 20
20
-
 21
21
-
 22
22
-
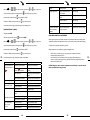 23
23
-
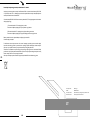 24
24
-
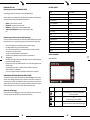 25
25
-
 26
26
-
 27
27
-
 28
28
-
 29
29
-
 30
30
-
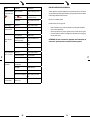 31
31
-
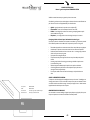 32
32
-
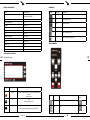 33
33
-
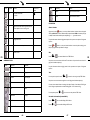 34
34
-
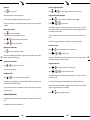 35
35
-
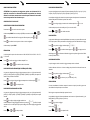 36
36
-
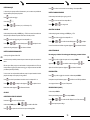 37
37
-
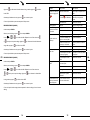 38
38
-
 39
39
-
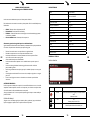 40
40
-
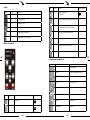 41
41
-
 42
42
-
 43
43
-
 44
44
-
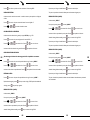 45
45
-
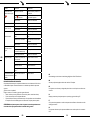 46
46
-
 47
47


Steinberg SBS-KW-1000/10O Manual de usuario
- Categoría
- Medición
- Tipo
- Manual de usuario
en otros idiomas
Artículos relacionados
-
Steinberg Systems 10030128 Manual de usuario
-
Steinberg SBS-PT-50/2 Manual de usuario
-
Steinberg SBS-LW-500/10 WS Manual de usuario
-
Steinberg SBS-KW-300/100 Manual de usuario
-
-
-
-
Steinberg Systems SBS-DL-123 Manual de usuario
Otros documentos
-
Baxtran STP Manual de usuario
-
MasterCool HIGH PRECISION CHARGING SCALE Instrucciones de operación
-
-
Adam Equipment AE402 Manual de usuario
-
Ohaus SKX1202 Manual de usuario
-
-
Vernier OHAUS Scout 420 g Manual de usuario
-