
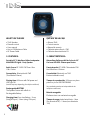
PORTABLE PARTY SPEAKER
SPEAKER DE FIESTA PORTÁTIL
MANUAL DE USUARIO
OWNER'S MANUAL
ENGLISH | ESPAÑOL

PORTABLE PARTY SPEAKER
SPEAKER DE FIESTA PORTÁTIL
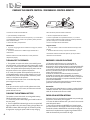
This sign means that there are
important instructions of operation
and handling in the manual that
comes with this device.
Precaución: Para reducir el riesgo de descarga eléctrica,
no abra este dispositivo, no hay piezas reparables para los
clientes. Consulte cualquier mantenimiento o reparación a
personal calificado.
Caution: To reduce the risk of electric shock do not
open this device, there are no serviceable parts for
customers. Please refer any maintenance or repair to
qualified personnel.
DEAR CUSTOMER / ESTIMADO CLIENTE
In order to achieve the best performance of your product, please
read this instruction manual carefully before using, and keep it
for future reference.
Para lograr el mejor rendimiento de su producto, por favor
lea este manual de instrucciones detenidamente antes de usarlo
y consérvelo para futuras referencias.
RISK OF ELECTRIC SHOCK, DO NOT OPEN / RIESGO DE DESCARGA ELÉCTRICA, NO ABRIR
Este signo significa la existencia de
voltaje peligroso dentro de la unidad,
que indica un riesgo de descarga
eléctrica.
Este signo significa que hay
instrucciones importantes de funcio-
namiento y manejo en el manual que
viene con este dispositivo.
This sign means the existence of
dangerous voltage inside the unit,
which states a risk of electric shock.
WARNING
• Never remove the casing of this device.
• Never lubricate any part of this device.
• Never place this device on top of other electrical
equipment.
• Make sure that you always have easy access to the
power cord, or adapter to disconnect the device from the
power.
ADVERTENCIA
• Nunca quite la carcasa de este dispositivo.
• Nunca lubrique ninguna parte de este dispositivo.
• Nunca coloque este dispositivo encima de otros
equipos eléctricos.
• Asegúrese de tener siempre fácil acceso al cable de
alimentación o al adaptador desconecte el dispositivo de
la energía.

IMPORTANT NOTICE
BEFORE USING THIS SPEAKER
• Read these instructions.
• Keep these instructions.
• Read all warnings.
• Follow all warnings.
• Do not use this device near water.
• Clean only with dry cloth.
• Do not block any ventilation openings.
• Install in accordance with the manufacturer’s
instructions.
• Do not install near any heat sources such as
radiators, heat registers, stoves, or other device
(including amplifiers) that produce heat.
• Only use attachments/accessories specified by the
manufacturer.
• Use only with the cart, stand, tripod,
bracket, or table specified by the
manufacturer or sold with the
device. When a cart is used,
use caution when moving the
cart/device combination to avoid
injury from tip-over.
• Unplug this device during lightning storms or
when unused for long periods of time.
• Refer all servicing to qualified service personnel.
Servicing is required when the device has been
damaged in any way. Such as power-supply cord or
plug is damaged, liquid has been spilled or objects
have fallen into the device, the device has
been exposed to rain or moisture, does not operate
normally, or has been dropped.
• Battery usage CAUTION-TO prevent battery leakage
which may result in bodily injury, property damage,
or damage to the remote control.
- Install all batteries correctly,+ and - as marked
on the remote control.
- Do not mix batteries (old and new or carbon
and alkaline, etc.)
- Remove batteries when the remote control is
not used for a long time.
- Batteries (battery pack or batteries excessive
heat such as sunshine, f ire, or the like).
• The device shall not be exposed to dripping or
splashing of liquids.
• Do not place any sources of danger on the
device (e.g. liquid filled objects, lighted candles).
AVISO IMPORTANTE
ANTES DE USAR ESTE ALTAVOZ
• Lea estas instrucciones.
• Conserve estas instrucciones.
• Lea todas las advertencias.
• Siga todas las advertencias.
• No utilice este dispositivo cerca del agua.
• Limpiar solo con un paño seco.
• No bloquee las aberturas de ventilación.
• Instale de acuerdo con las instrucciones del fabricante.
• No lo instale cerca de fuentes de calor como radiadores,
rejillas de calefacción, estufas u otro dispositivo (incluidos los
amplificadores) que producen calor.
• Utilice únicamente los accesorios especificados por el
fabricante.
• Desenchufe este dispositivo durante tormentas eléctricas
o cuando no se utiliza durante mucho tiempo.
• Refiera todos los servicios al personal de servicio califica-
do. Se requiere servicio cuando el dispositivo ha sido dañado
de alguna manera. Por ejemplo, si el cable de alimentación o
el tapón está dañado, o se ha derramado líquido u objetos
han caído en el dispositivo, o el dispositivo ha estado
expuesto a la lluvia o la humedad, o no funciona normal-
mente, o se ha caído.
• Uso de la batería PRECAUCIÓN: PARA evitar fugas de la
batería que puede resultar en lesiones corporales, daños a la
propiedad, o daño al control remoto.
• El dispositivo no debe exponerse a goteos o salpicaduras
de líquidos.
• No coloque ninguna fuente de peligro sobre el dispositivo
(por ejemplo, objetos llenos de líquido, velas encendidas).
1
• Úselo sólo con el carrito, trípode, soporte,
o tabla especificada por el fabricante o
vendido con el dispositivo. Cuando se usa un
carrito, tenga cuidado al mover la combi-
nación del carrito / dispositivo para evitar
una lesión por vuelco.
- Instale todas las baterías correctamente, + y -
como se indica en el mando a distancia.
- No mezcle pilas (viejas y nuevas o de carbono) y
alcalinas, etc.)
- Retire las pilas cuando el mando a distancia esté
no se utiliza durante mucho tiempo.
- Baterías (paquete de baterías o baterías expuestas
excesivamente al calor como la luz del sol, el fuego o
similares).

CONTENTS
What’s in the box . . . . . . . . . . . . . . . . . . . . . . . . . . . . . . . . . . . . . . . . . . . . . . . . . . . . . . . . . . . . . . . . . . . . . . . . . . . . . . . . . . . . . . . . . . . . . . . . . . 2
Qué hay en la caja
Features . . . . . . . . . . . . . . . . . . . . . . . . . . . . . . . . . . . . . . . . . . . . . . . . . . . . . . . . . . . . . . . . . . . . . . . . . . . . . . . . . . . . . . . . . . . . . . . . . . . . . . . . . . 2
Características
Overview of the Top control panel . . . . . . . . . . . . . . . . . . . . . . . . . . . . . . . . . . . . . . . . . . . . . . . . . . . . . . . . . . . . . . . . . . . . . . . . . . . . . . . . . . 3
Descripción general del panel de control superior.
Overview of the Rear panel . . . . . . . . . . . . . . . . . . . . . . . . . . . . . . . . . . . . . . . . . . . . . . . . . . . . . . . . . . . . . . . . . . . . . . . . . . . . . . . . . . . . . . . . 3
Descripción general del panel trasero
Overview of the remote control. . . . . . . . . . . . . . . . . . . . . . . . . . . . . . . . . . . . . . . . . . . . . . . . . . . . . . . . . . . . . . . . . . . . . . . . . . . . . . . . . . . . . 3
Descripción general del mando a distancia
Get started. . . . . . . . . . . . . . . . . . . . . . . . . . . . . . . . . . . . . . . . . . . . . . . . . . . . . . . . . . . . . . . . . . . . . . . . . . . . . . . . . . . . . . . . . . . . . . . . . . . . . . . . 4
Preparación
Connect power . . . . . . . . . . . . . . . . . . . . . . . . . . . . . . . . . . . . . . . . . . . . . . . . . . . . . . . . . . . . . . . . . . . . . . . . . . . . . . . . . . . . . . . . . . . . . . . . . . . . 4
Conecte la electricidad
Prepare the remote control . . . . . . . . . . . . . . . . . . . . . . . . . . . . . . . . . . . . . . . . . . . . . . . . . . . . . . . . . . . . . . . . . . . . . . . . . . . . . . . . . . . . . . . . 5
Prepare el control remoto
Turn ON/OFF the speaker . . . . . . . . . . . . . . . . . . . . . . . . . . . . . . . . . . . . . . . . . . . . . . . . . . . . . . . . . . . . . . . . . . . . . . . . . . . . . . . . . . . . . . . . . . 5
Encienda / apague el altavoz
Charging the internal battery. . . . . . . . . . . . . . . . . . . . . . . . . . . . . . . . . . . . . . . . . . . . . . . . . . . . . . . . . . . . . . . . . . . . . . . . . . . . . . . . . . . . . . . 5
Cargando la batería interna
Internal battery level indicator . . . . . . . . . . . . . . . . . . . . . . . . . . . . . . . . . . . . . . . . . . . . . . . . . . . . . . . . . . . . . . . . . . . . . . . . . . . . . . . . . . . . . 5
Indicador de nivel de batería interno
Basic key play operations . . . . . . . . . . . . . . . . . . . . . . . . . . . . . . . . . . . . . . . . . . . . . . . . . . . . . . . . . . . . . . . . . . . . . . . . . . . . . . . . . . . . . . . . . . 6
Operaciones básicas de reproducción de teclas
Connect with Bluetooth. . . . . . . . . . . . . . . . . . . . . . . . . . . . . . . . . . . . . . . . . . . . . . . . . . . . . . . . . . . . . . . . . . . . . . . . . . . . . . . . . . . . . . . . . . . . 7
Conéctese con Bluetooth
TWS instructions . . . . . . . . . . . . . . . . . . . . . . . . . . . . . . . . . . . . . . . . . . . . . . . . . . . . . . . . . . . . . . . . . . . . . . . . . . . . . . . . . . . . . . . . . . . . . . . . . . 7
Instrucciones TWS
FM Radio instructions . . . . . . . . . . . . . . . . . . . . . . . . . . . . . . . . . . . . . . . . . . . . . . . . . . . . . . . . . . . . . . . . . . . . . . . . . . . . . . . . . . . . . . . . . . . . . 7
Instrucciones de radio FM
Connect with AUX Line-In . . . . . . . . . . . . . . . . . . . . . . . . . . . . . . . . . . . . . . . . . . . . . . . . . . . . . . . . . . . . . . . . . . . . . . . . . . . . . . . . . . . . . . . . . . 7
Conéctese con la entrada de línea AUX
Connect with Wired Microphone/Guitar . . . . . . . . . . . . . . . . . . . . . . . . . . . . . . . . . . . . . . . . . . . . . . . . . . . . . . . . . . . . . . . . . . . . . . . . . . . . 8
Conectar con micrófono / guitarra
Troubleshooting . . . . . . . . . . . . . . . . . . . . . . . . . . . . . . . . . . . . . . . . . . . . . . . . . . . . . . . . . . . . . . . . . . . . . . . . . . . . . . . . . . . . . . . . . . . . . . . . . . 8
Solución de problemas
Specification . . . . . . . . . . . . . . . . . . . . . . . . . . . . . . . . . . . . . . . . . . . . . . . . . . . . . . . . . . . . . . . . . . . . . . . . . . . . . . . . . . . . . . . . . . . . . . . . . . . . . . 9
Especificación
1

WHAT’S IN THE BOX
• TLV6 Speaker
• Remote control
• User manual
• Aux In/ FM Antenna Cable
• AC Power Cable
2. FEATURES:
2
Portable 6.5" 2-Way Bass-Reflex Loudspeaker
With RGB LED Lights - Party Speaker
Audio Source: BT / USB / FM Tuner / Aux
/ Mic / Guitar
Connectivity:
Bluetooth with TWS
(True Wireless Stereo)
Playing time:
3.5 hours with Full power and
LED Ligts ON
(results may vary depending of multiple conditions)
Rechargeable BATTERY
The Speaker Comes with a Built-in
Rechargeable Battery
Charging time:
From Low Battery -1 hour
(Using AC input) - 2 hour (using 12V input)
QUÉ HAY EN LA CAJA
• Altavoz TLV6
• Control remoto
• Manual de usuario
• Cable de antena Aux In / FM
• Cable de alimentación de CA
2. CARACTERÍSTICAS:
Altavoz Bass-Reflex portátil de 2 vías de 6.5 "
Con luces LED RGB - Altavoz para fiestas
Fuente de audio: BT / USB / Sintonizador FM /
Aux/ Micrófono / Guitarra
Conectividad:
Bluetooth con TWS
Estéreo inalámbrico real)
Tiempo de reproducción:
3,5 horas con plena
potencia y Luces LED ENCENDIDAS
(los resultados pueden variar dependiendo de
múltiples condiciones)
Batería recargable:
El altavoz viene con una batería recargable
Tiempo de carga:
desde batería baja -1 hora
(Con entrada de AC) - 2 horas (con entrada de
12V)
LED LIGHTS

CAUTION
Hearing safety
• Listen at a moderate volume.
• Using headphones at a high volume can impair
your hearing.
• Sound can be deceiving. Over time your hearing
comfort level’ adapts to higher volumes of sound.
So after prolonged listening. What sounds
“normal” can be loud and harmful to your hearing.
To guard against this, set your volume to a safe
level before your hearing adapts and leave it
there.
To establish a safe volume level:
• Set your volume control at a low setting.
• Slowly increase the sound until you can hear it
comfortably and clearly without distortion.
Listen for reasonable periods:
• Prolonged exposure to sound, even at normal
“safe” levels, can also cause hearing loss.
• Be sure to use your equipment reasonably and
take appropriate breaks.
Notice
Any changes or modifications made to this device
that are not expressly approved by Consumer
Lifestyle may void the user’s authority to operate
the equipment.
PRECAUCIÓN
Seguridad auditiva
• Escuche a un volumen moderado.
• El uso de auriculares a un volumen alto puede
afectar tu audición.
• El sonido puede ser engañoso. Con el tiempo tu
“zona de confort auditiva” se adapta a volúmenes
de sonido más altos. Así que después de una
escucha prolongada. Lo que suena "Normal" puede
ser fuerte y perjudicial para su audición. Para
protegerse contra esto, ajuste su volumen a un
nivel seguro antes de que su audición se adapte y
déjelo allí.
Para establecer un nivel de volumen seguro:
• Ponga su control de volumen en un nivel bajo.
• Aumente lentamente el sonido hasta que pueda
escucharlo cómoda y claramente sin distorsión.
Escuche durante períodos razonables:
• Exposición prolongada al sonido, incluso en
condiciones normales niveles “seguros”, también
pueden causar pérdida de audición.
• Asegúrese de usar su equipo de manera razon-
able y tome los descansos apropiados.
Aviso
Cualquier cambio o modificación realizado en este
dispositivo que no estén expresamente aprobados
por el estilo de vida del consumidor puede anular la
autoridad del usuario para operar el equipo.
3

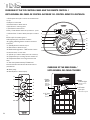
OVERVIEW OF THE TOP CONTROL PANEL AND THE REMOTE CONTROL /
VISTA GENERAL DEL PANEL DE CONTROL SUPERIOR Y EL CONTROL REMOTO A DISTANCIA
1. AUX input 3.5mm jack / Conector de entrada AUX de
3,5 mm
2. USB port / Puerto USB
3. Previous button / Botón anterior
4. Next button / Botón Siguiente
5. Tone button / Botón de tono
6. Play - Pause button / Botón de reproducción - pausa
7. Volume down - button / Botón para bajar el volumen
(-)
8. Guitar jack / Entrada de guitarra
9. Microphone jack / Entrada de micrófono
10. Lighting switching button / Botón de cambio de
iluminación
11. Standby button / Botón de espera
12. Menu button / Botón de menú
13. Mode switching button - TWS function / Botón
de cambio de modo - función TWS
14. Volume up + button / Botón para subir volumen (+)
15. FM pressets up / Preconfiguraciones de FM arriba
16. FM pressets down / Preconfiguraciones de FM
abajo
17. Auto scan presset memory FM stations /
Escaneo automático de estaciones de FM de memoria
preestablecida
18. Mute / Mute
19. Bass EQ effect / Efecto Bajo EQ
OVERVIEW OF THE REAR PANEL /
VISTA GENERAL DEL PANEL TRASERO
2. DC Input
jack
Entrada DC
4. AC Power
Input jack
3. Power
Indicator light
Indicador de luz de
encendido
Entrada de energía AC
1. Power
ON/OFF
Button
Boton de
ENCENDER /
APAGAR
4
1
2
3
4
5
6
7
11
12
4
16
17
18
13
3
14
76
15
5
19
8
9
10
11
12
13
14

3. GET STARTED
Caution
Use of controls or adjustments or performance of
procedures other than herein may result in hazardous
radiation exposure or other unsafe operation.
Always follow the instructions in this chapter in
sequence.
CONNECT POWER
Caution
• Risk of product damage! Ensure that the power supply
voltage corresponds to the voltage printed on back or the
underside of the unit.
• Risk of electric shock! When you unplug the AC power cord,
always pull the plug from the socket. Never pull the cord.
• Before you connect the AC power cord, make sure that you
have completed all other connections:
Connect the power cable to the wall socket:
3. EMPECEMOS
Precaución
El uso de controles, ajustes o la realización de procedimientos
distintos a los incluidos en este documento pueden provocar
radiación peligrosa exposición u otra operación insegura.
Siga siempre las instrucciones de este capítulo en
secuencia.
CONECTE LA ELECTRICIDAD
Precaución
• Riesgo de daños en el producto. Asegúrese de que el voltaje de
la fuente de alimentación corresponda al voltaje impreso en la
parte posterior o en la parte inferior de la unidad.
• ¡Riesgo de shock eléctrico! Cuando desenchufe el cable de
alimentación de AC, desenchufe siempre el enchufe de la toma.
Nunca tire del cable.
• Antes de conectar el cable de alimentación de AC, asegúrese
de haber completado todas las demás conexiones:
Conecte el cable de alimentación a la toma de pared:
5

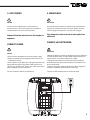
PREPARE THE REMOTE CONTROL / PREPARAR EL CONTROL REMOTO
To insert the remote control batteries:
1. Open the battery compartment.
2. Insert 2 x AAA batteries with correct polarity (+/-) as indicated.
The 2xAAA battery not include in our products, please purchase
from Authorized Seller.
3. Close the battery compartment.
Please Note:
• If you are not going to use the remote for a long time, remove
the batteries.
• Do not use old and new or different type of batteries in
combination.
Batteries contain chemical substances, so they should be
disposed of properly.
TURN ON/OFF THE SPEAKER
1. The speaker can work with either connected AC power
input (AC mode), or DC power by build in battery (DC mode).
2. AC mode, connect the AC power cable provided to a wall
socket. The speaker will be powered by AC power and set
the power switch on rear panel to ON position.
3. DC mode, the speaker will be powered by the built in
rechargeable battery. Use the power adaptor ( not in the
accessories) to power on the speaker and set the power
switch on rear panel to ON position.
4. Use the remote control to turn it into Standby mode,
press it again to power it on.
Caution:
If you do not use this unit for a while, please switch the
"POWER" button to "OFF" status, and disconnect the AC
power cable of this unit.
CHARGING THE INTERNAL BATTERY
The speaker comes with a built-in rechargeable battery,
follow the below steps to charge it:
1. Connect the power cable and plug to the wall socket on
the rear panel.
2. There is a BATTERY indicator light on the rear panel will
light up as RED color, the battery is being charge. When the
BATTERY indicator RED color light off, the battery is fully
charged, then unplug the power cable to stop charging.
Para insertar las pilas del mando a distancia:
1. Abra el compartimento de la batería.
2. Inserte 2 pilas AAA con la polaridad correcta (+/-) como se
indica. La batería 2xAAA no está incluida en nuestros productos,
por favor compre en un vendedor autorizado.
3. Cierre el compartimento de la batería.
Tenga en cuenta:
• Si no va a utilizar el control remoto durante un tiempo, retire
las pilas.
• No utilice baterías nuevas y viejas en combinación.
Las baterías contienen sustancias químicas, por lo que deben
desecharse correctamente.
ENCENDER / APAGAR EL ALTAVOZ
1. El altavoz puede funcionar con una entrada de
alimentación de AC conectada (modo de AC) o con
alimentación de DC mediante batería incorporada (Modo DC).
2. Modo AC, conecte el cable de alimentación AC provisto a
un enchufe de pared. El altavoz se alimentará con corriente
alterna y colocará el interruptor de encendido en el panel
trasero en la posición ON.
3. Modo DC, el altavoz será alimentado por la batería
recargable incorporada. Use el adaptador de corriente (no
está en los accesorios) para encender el altavoz y coloque el
interruptor de encendido en la parte trasera del panel a la
posición de ENCENDIDO.
4. Use el control remoto para ponerlo en modo de espera,
presiónelo nuevamente para encenderlo.
Precaución:
Si no utiliza esta unidad durante un tiempo, cambie el botón
"POWER" al estado "OFF" y desconecte la alimentación de
cable AC de alimentación de esta unidad.
CARGA DE LA BATERÍA INTERNA
El altavoz viene con una batería recargable incorporada, siga
los pasos a continuación para cargarlo:
1. Conecte el cable de alimentación y el enchufe a la toma de
pared del panel trasero.
2. Hay una luz indicadora de BATERÍA en el panel trasero
que se iluminará en color ROJO, la batería se está cargando.
Cuando el indicador de BATERÍA de color ROJO se apaga, la
batería está completamente cargada, luego desenchufe el
cable de alimentación para detener la carga.
3
1
2
6

INTERN AL BATTERY LEVEL INDICATOR
1. There is a battery level indicator on the display, total are
three level of the battery, it will decrease the level when the
battery is running.
2. When you see there is only 1 level of the battery indicator,
please charge the internal battery on time to keep the
battery life.
3. When the speaker sound becomes abnormal, please
charge the internal battery on time to keep the battery life.
Note: please fully charge the product when it is not going to
be used for a long time and charge once a month to keep
longer battery life.
INDICADOR DE NIVEL DE BATERÍA INTERNA
1. Hay un indicador de nivel de batería en la pantalla, el total
son tres niveles de batería, disminuirá el nivel cuando la
batería está funcionando.
2. Cuando vea que solo hay 1 nivel del indicador de batería,
cargue la batería interna a tiempo para mantener la duración
de la batería.
3. Cuando el sonido del altavoz sea anormal, cargue la
batería interna a tiempo para mantener la vida útil de la
batería.
Nota: cargue completamente el producto cuando no se vaya
a utilizar durante mucho tiempo y cárguelo una vez al mes
para mantenga una mayor duración de la batería.
4. BASIC KEY PLAY OPERATIONS / OPERACIONES BÁSICAS
You can control play through following operations. / Puede controlar la reproducción mediante las siguientes operaciones.
7
Key / Boton Function / Función
Insert the 1/4" Jack wire from the microphone / Inserte el cable Jack de 1/4 "del micrófono
Insert a USB Drive up to 64 GB of music / Inserte una unidad USB de hasta 64 GB de música
Insert the 1/4" jack wire from the guitar / Inserte el cable jack de 1/4 "de la guitarra
Press this PREV button for previous track when playing music / Presione este botón ANTERIOR para
la pista anterior al reproducir música
Press this NEXT button for previous track when playing music / Presione este botón SIGUIENTE para
la pista posterior al reproducir música
Press this TONE button first to open the treble or bass volume control, then press the volume-/+ knob to
adjust the sound level of treble or bass. / Presione este botón TONO primero para abrir el control de volumen
de agudos o graves, luego presione la perilla de volumen - / + para ajustar el nivel de sonido de agudos o graves.
Press this button to standby mode / Presione este botón para ponerlo en modo de espera
Press this PLAY/PAUSE button to play or pause the music / Presione este botón REPRODUCIR / PAUSA para
reproducir o pausar la música
Press this button for volume decrease / Presione este botón para bajar el volumen
Press this button for volume increase / Presione este botón para aumentar el volumen
Press this M button for function mode switching between AUX/Bluetooth.
Long press to enter TWS
pairing mode / Presione este botón M para cambiar el modo de función entre AUX / Bluetooth.
Mantenga presionado para ingresar al modo de emparejamiento TWS
Press this LIGHTING button for turn on and off, or switch the light effect / Presione este botón ILUMINACIÓN
para encender y apagar, o cambiar el efecto de luz
Press this MIC-GT Menu to open the treble or bass volume control of microphone, or open the echo
volume control of microphone, or open the bass and treble volume control of microphone, or open
the volume control of guitar / Presione este menú MIC-GT para abrir el control de volumen de graves o agudos
del micrófono, o abra el eco control de volumen del micrófono, o abra el control de volumen de graves y agudos del
micrófono, o abra el control de volumen de la guitarra
MIC
GUITAR
PREV
NEXT
TONE
LIGHTNING
MIC/GT MENU
USB/B

8
5. CONNECT WITH BLUETOOTH
1. Press the M/MODE button on the top control panel or on
the remote control to switch to the BLUETOOTH CONNECT
mode, (bLUE) will be displayed on the screen.
2. Open the Bluetooth on the external device (must have
Bluetooth function), and the name “DS18 TLV6” will show
on the device, please try to connect it.
3. Once connected, you can hear a small sound from the
speaker.
4. You can use the or key on the Top Control panel to
control the tracks of the external device.
Note: This speaker do not need the password.
-
DS18 TLV6; DS18 TLV6-1
M button from any one of
two speaker, then the TWS will pair automatically from both
speaker
4. When the speakers are at TWS mode, long press the
Bluetooth button to disconnect TWS from any one of two
speakers. Long press the Bluetooth again can reconnect the
TWS.
7. FM RADIO INSTRUCTIONS
1. Press M button on the top control panle or press FM on
the remote control to switch to FM mode.
2. Press SCAN or key on the top control panel or on the
remote control to search and save the radio stations
automatically.
3. Press NEXT and PREV to select programmed radio
stations.
8. CONNECT WITH AUX LINE IN
1. Press the M/MODE button on the Top Control panel or on
the remote control to switch to the AUX(Line) mode, (LINE)
will be displayed on the screen.
5. CONECTAR CON BLUETOOTH
1. Presione el botón M / MODE en el panel de control
superior o en el control remoto para cambiar a BLUETOOTH
en el modo CONECTAR, (azul) se mostrará en la pantalla.
2. Abra el Bluetooth en el dispositivo externo (debe tener
función Bluetooth), y el nombre "DS18 TLV6" aparecerá en el
dispositivo, intente conectarlo.
3. Una vez conectado, puede escuchar un pequeño sonido
desde el altavoz.
4. Puede utilizar el o en el panel de control superior
para controlar las pistas del dispositivo externo.
Nota: Este altavoz no necesita la contraseña
Este altavoz para fiestas admite la función de conexión TWS,
compre dos mismos altavoces para disfrutar de esta función.
1. Encienda dos parlantes para fiesta y mantenga ambos
parlantes en modo Bluetooth.
2. Abra el Bluetooth en su dispositivo externo (debe tener la
función Bluetooth), y dos nombres de Bluetooth del DS18
TLV6; DS18 TLV6-1; aparecerá en su dispositivo externo,
conecte cualquiera de ellos.
3. Una vez conectado, mantenga presionado el botón M
desde cualquiera de los dos altavoces, luego el TWS se
emparejará automáticamente de ambos altavoces.
4. Cuando los altavoces estén en modo TWS, mantenga
pulsado el botón Bluetooth para desconectar TWS de
cualquiera de los dos altavoces. Mantenga pulsado el
Bluetooth de nuevo para volver a conectar el TWS.
7. INSTRUCCIONES DE RADIO FM
1. Presione el botón M en el panel de control superior o
presione FM en el control remoto para cambiar al modo FM.
2. Presione SCAN o en el panel de control superior o en el
control remoto para buscar y guardar las estaciones de radio
automáticamente.
3. Presione SIGUIENTE y ANTERIOR para seleccionar
estaciones de radio programadas.
8. CONECTAR CON LA ENTRADA DE LÍNEA
AUX
1. Presione el botón M/MODE en el panel de control superior
o en el control remoto para cambiar al modo AUX (línea),
(LINE) se mostrará en la pantalla.

9. CONNECT WITH WIRED MICROPHONE - GUITAR / CONECTAR CON MICRÓFONO - GUITARRA
When playing with the wired microphone/guitar, please press this knob to adjust
the sound volume level of microphone/guitar.
Cuando reproduzca con el micrófono / guitarra , presione esta perilla para ajustar el nivel de
volumen del sonido del micrófono / guitarra.
1. Press this MIC/GT MENU, you can open the volume control of
microphone/guitar, the display will have corresponding function on
the screen, then press volume-/+ to adjust the sound volume level
of microphone/guitar.
2. Press this MIC/GT MENU, you can open the echo volume control of
microphone, the display will have corresponding function on the
screen, then press volume-/+ to adjust the echo sound volume level
of microphone.
3. Press this MIC/GT MENU, you can open the treble or bass volume
control of microphone, the display will have corresponding function
on the screen, then press volume-/+ to adjust the treble or bass sound
volume level of microphone.
Important Notes / Notas importantes
While using the microphone, avoid being put the microphone opposite the bass of
Speaker,as they may have Whistler Noisy. To get the best singing performance,
keep the micro phone within 5-15cm of the mouth and at a 45 degree angle. When
using the microphone, always pay attention to the battery.
Mientras usa el micrófono, evite que lo coloquen frente a los altavoces graves, ya que
pueden ocasionar ruidos. Para conseguir el mejor rendimiento al cantar, mantenga el
micrófono dentro de 5-15 cm de la boca y a 45 grados de ángulo. Cuando utilice el
micrófono, preste siempre atención a la batería.
If the battery is low, the indicator light will come on and the performance will
progressively become poor.
Si la batería está baja, la luz indicadora se encenderá y el rendimiento desmejora
progresivamente.
Caution: Please do not put the microphone directly face to the speaker, it may
damage the speaker.
Precaución: No coloque el micrófono directamente frente al altavoz, puede dañar el altavoz.
9
2. Connect this speaker to AUX inserting jack and the
external device Earphone jack by provided AUX cable
3. Once connected,turn on your external device music
4. You can use or button on the Top control panel to control
the tracks of the external device.
Caution: Please turn off the unit before connect AUX cable in
order to avoiding unexpected noise.
2. Conecte este altavoz a la entrada AUX y la entrada de auriculares
del dispositivo externo mediante el cable AUX provisto.
3. Una vez conectado, encienda la música de su dispositivo externo.
4. Puede usar el botón o en el panel de control superior para
controlar las pistas del dispositivo externo.
Precaución: Apague la unidad antes de conectar el cable AUX para
evitar ruidos inesperados.
Presione este MENÚ MIC / GT, para abrir el control de volumen de micrófono / guitarra, la
pantalla tendrá la función correspondiente, luego presione volumen - / + para ajustar el
nivel de volumen del sonido de micrófono / guitarra.
Presione este MENÚ MIC / GT, para abrir el control de volumen del eco del micrófono, la
pantalla tendrá la función correspondiente, luego presione volumen - / + para ajustar el
nivel de volumen del sonido del eco del micrófono.
Presione este MENÚ MIC / GT, para abrir el volumen de graves o agudos control del
micrófono, la pantalla tendrá la función correspondiente, luego presione el volumen - / +
para ajustar el sonido de agudos o graves.
Insert 1/4 jack wired microphone
to play with microphone.
Inserte un micrófono con cable jack
de ¼ para reproducir con micrófono.
Insert 1/4 jack wired guitar
to play with guitar.
Insertar guitarra con cable jack
¼ reproducir con la guitarra.
MIC/GT MENU
MENÚ MIC / GT
MIC
GUITAR

If you encounter problems when using this speaker,
check the following points before requesting service.
No power
• Ensure that the AC power plug of the speaker is
connected properly.
• Ensure that there is power at the AC outlet.
No sound or poor sound
• Adjust the volume.
• Disconnect the headphones.
• Check that the speakers are connected correctly.
• Check if the stripped speaker wires are clamped.
10. TROUBLESHOOTING / SOLUCIÓN DE PROBLEMAS
10
No response from the speaker
Disconnect and reconnect the AC power plug, then
turn on the speaker again.
Remote control does not work
• Before you press any function button, first select
the correct source with the remote control instead
of the main unit.
• Reduce the distance between the remote control
and the unit.
• Insert the battery with its polarities(+/- signs)
aligned as indicated.
• Replace the battery.
• Aim the remote control directly at the sensor on
the front of the speaker.
Never remove the casing of this speaker
Warning
Si tiene problemas al utilizar este altavoz, compruebe los
siguientes puntos antes de solicitar servicio.
Sin potencia
• Asegúrese de que el enchufe de alimentación de AC del
altavoz estáconectado correctamente.
• Asegúrese de que haya energía en la toma de AC.
Sin sonido o con un sonido deficiente
• Ajusta el volumen.
• Desconecte los auriculares.
• Compruebe que los altavoces estén conectados
correctamente.
• Compruebe si los cables pelados de los altavoces
están sujetos.
Sin respuesta del altavoz
Desconecte y vuelva a conectar el enchufe de
alimentación de CA, luego encienda el altavoz de nuevo.
El control remoto no funciona
• Antes de presionar cualquier botón de función, primero
seleccione la fuente correcta con el control remoto en
lugar de la unidad principal.
• Reduzca la distancia entre el control remoto y la unidad.
• Inserte la batería con sus polaridades (signos +/-)
alineados como indicado.
• Reemplace la batería.
• Apunte el control remoto directamente al sensor en la
parte delantera del altavoz.
Nunca quite la carcasa de este altavoz
Advertencia

11
11. SPECIFICATIONS
GENERAL FEATURES
System Type Portable 6.5" 2-way bass-reflex Loudspeaker
Maximum SPL Output 105 dB @ 1 Meter
Frequency Range (-10 dB) 40Hz – 20kHz
Frequency Response (-3 dB) 60Hz – 18kHz
Audio Sources BT / USB / FM Tuner / Aux / Mic / Guitar /
Connectivity Bluetooth with TWS (True Wireless Stereo)
Battery type 12V / 4Ah / 20Hr non-spillable (6FM4)
Playing time Full power and LED Ligts ON >3.5 hours (results may vary depending of multiple conditions)
Charging time From Low Battery <1 hour (Using AC input) <2 hour (using 12V input)
AMPLIFIER:
Power Rating 200W Music Program (Max) / 50W Continuous (RMS)
Type Class D
Input Impedance 20k (balanced)
Input Gain Guitar: to +6dBu / Mic: to +6dBu / Aux: to +4dBu
Maximum Input Level Guitar: -20dBu / Mic: -20dBu / Aux: +4dBu
Equalizer 4 presets and flat
Connectors
2 x 1/4” inputs: Mic/Guitar
1 x 3.5mm Stereo Jack input
1 x USB
LED Indicators Rear Red LED (Charging mode), Top Panel Blue Ring (Unit On)
LED Speaker Front RGB LED with color modes (switchable On/Off)
Cooling Passive
AC Power Input 100-120VAC 50/60Hz; 230-240VAC 50/60Hz
DC Input 12V / 2A
SPEAKER:
LF Driver 1 x 6.5" woofer with 1” voice coil, ferrite magnet, paper cone
HF Driver 2 x 2" tweeter, Ferrite magnet, Paper Cone, 0.5" Voice Coil
Coverage Pattern 110 x 110 deggres
Crossover Frequency 2kHz
ENCLOSURE:
Material Polypropylene, black
Handles 1
Grille Preformed Steel Mesh Grill
Dimensions (L x W x H) 10.8" x 12.8" x 13.6" / 275mm x 325mm x 345mm
Weight 12.5lb
FCC Compliance Statement FCC ID: 2AYOQ-TLV6
This device complies with Part 15 fo the FCC Rules. The operation is subject to the following two conditions:
(1)This device may not cause harmful interference,and (2)This device must accept any interference received, including interference that may cause
undesired operation. Note:This equipment has been tested and found to comply with the limits for a class B digital device,pursuant to Part 15 of
the FCC Rules.These equipment generates uses and can radiate radio frequency energy and if not installed and used in accordance with the instructions,
may cause harmful interference to radio communications.However, there is no guarantee that interference will not occur in a particular installation.
If this equipment does cause interference to radio of television reception,which can be determined by turning the equipment off and then on,
the user is encouraged to try to correct the interference by one or more of the following
Measures:
“Reorient or relocate the receiving antenna.” “Increase the separation between the equipment and receiver.” “Connect the equipment to a different
outlet so that the equipment and receiver are on different branch circuits.” “Consult the dealer or an experienced radio/TV technician for help.”

12
11. ESPECIFICACIONES
CARACTERÍSTICAS GENERALES
Tipo de sistema Altavoz bass-reflex portátil de 2 vías y 6.5 "
Salida máxima de SPL
Rango de frecuencia (-10 dB)
Respuesta de frecuencia (-3 dB)
105 dB @ 1 Metro
40Hz – 20kHz
60Hz – 18kHz
Fuentes de audio BT / USB / Sintonizador FM / Auxiliar / Micrófono / Guitarra
Conectividad Bluetooth con TWS (Estéreo inalámbrico real)
Tipo de Batería 12V / 4Ah / 20Hr no derramable (6FM4)
Tiempo de reproducción
Potencia nominal
Impedancia de entrada
Nivel de entrada máximo
Entrada de energía AC
Frecuencia de crossover
Dimensiones (La x An x Al)
Tipo
Plena potencia y luces LED ENCENDIDAS> 3,5 horas (los resultados pueden variar según múltiples
condiciones)
Tiempo de carga Desde batería baja <1 hora (con entrada de AC) <2 horas (con entrada de 12 V)
Programa de música de 200 W (máx.) / 50 W continuo (RMS)
Amplificador Digital
2 entradas de 1/4 ”: Micrófono / Guitarra
LED rojo trasero (modo de carga), anillo azul del panel superior (unidad encendida)
LED RGB frontal con modos de color (activada / desactivada)
1 woofer de 6.5 "con bobina móvil de 1", imán de ferrita, cono de papel
Tweeter de 2 x 2 ", imán de ferrita, cono de papel, bobina móvil de 0,5"
110 x 110 grados
Pasivo
1 entrada jack estéreo de 3,5 mm
1 x USB
20k (equilibrado)
AMPLIFICADOR:
Ganancia de entrada Guitarra: to +6dBu / Mic: to +6dBu / Aux: to +4dBu
Guitarra: -20dBu / Mic: -20dBu / Aux: +4dBu
Ecualizador 4 preajustes y plano
Conectores
Indicadores LED
Altavoz LED
Enfriamiento
100-120VAC 50/60Hz; 230-240VAC 50/60Hz
Entrada DC 12V / 2A
ALTAVOZ:
Conductor LF
Conductor HF
Patrón de cobertura
2kHz
GABINETE:
Material Polipropileno, negro
Manijas 1
Rejilla Parrilla de malla de acero preformada
10.8" x 12.8" x 13.6" / 275mm x 325mm x 345mm
Peso 12.5lb
Declaración de conformidad con la FCC FCC ID: 2AYOQ-TLV6
Este dispositivo cumple con la Parte 15 de las Reglas de la FCC. La operación está sujeta a las siguientes dos condiciones:
(1) Este dispositivo no debe causar interferencias perjudiciales y (2) Este dispositivo debe aceptar cualquier interferencia recibida, incluidas las interferencias
que puedan causar un funcionamiento no deseado.
Nota: Este equipo ha sido probado y se ha determinado que cumple con los límites para un dispositivo digital de clase B, de acuerdo con la Parte 15 de las
Reglas de la FCC. Este equipo genera, utiliza y puede irradiar energía de radiofrecuencia y si no se instala y no se utiliza de acuerdo a las instrucciones,
puede causar interferencia dañina a las comunicaciones de radio. Sin embargo, no hay garantía de que no ocurrirá interferencia en una instalación en
particular. Si este equipo causa interferencia a la recepción de radio o televisión, lo cual se puede determinar apagando el equipo y luego encendiéndolo ,
se recomienda al usuario que intente corregir la interferencia mediante las siguientes
Medidas: "Reorientar o reubicar la antena receptora." "Aumente la separación entre el equipo y el receptor." “Conecte el equipo a una salida diferente para
que el equipo y el receptor estén en circuitos diferentes." “Consulte con el distribuidor o con un técnico de radio / TV experimentado para obtener ayuda."

DS18.COM
V1
-
 1
1
-
 2
2
-
 3
3
-
 4
4
-
 5
5
-
 6
6
-
 7
7
-
 8
8
-
 9
9
-
 10
10
-
 11
11
-
 12
12
-
 13
13
-
 14
14
-
 15
15
-
 16
16


En otros idiomas
- English: DS18 TLV6 Owner's manual
Documentos relacionados
Otros documentos
-
Infiniton K690 El manual del propietario
-
Sharp PS-929 El manual del propietario
-
QFX SBX-412401BTS Bluetooth Cabinet Portable Speaker Manual de usuario
-
-
 Monster Power Rockin Roller X El manual del propietario
-
-
QFX LMS-28 Manual de usuario
-
Sharp PS-949 El manual del propietario
-
Aiwa AWSP15TWL Audio System Manual de usuario
-
 Go-Rock GR-716 El manual del propietario

