
V1.2
Quick Start Guide
快速入门指南
快速入門指南
クイックスタートガイド
퀵 스타트 가이드
Kurzanleitung
Guía de inicio rápido
Guide de démarrage rapide
Guida di avvio rapido
Snelstartgids
Guia de início rápido
Краткое руководство пользователя


Contents
EN
CHS
CHT
JP
KR
DE
ES
FR
IT
RU
NL
PT
Quick Start Guide 3
快速入门指南
7
快速入門指南
11
クイックスタートガイド
15
퀵 스타트 가이드
19
Kurzanleitung 23
Guía de inicio rápido 27
Guide de démarrage rapide 31
Guida di avvio rapido 35
Snelstartgids 39
Guia de início rápido 43
Краткое руководство пользователя 47


A3
/
A3 Pro
Quick Start Guide
EN
©
2017 DJI All Rights Reserved.
3
1. Product Prole
Introduction
The DJI
TM
A3 series is a reliable and robust ight control system that is ideal for a wide range of multi-rotor
aerial platforms. It uses advanced sensor fusion algorithms and a redundant design to maintain complete
stability and integrity of the aerial system.
The A3 series is fully compatible with the DJI Onboard and Mobile SDKs, allowing developers to optimize the
system for specic applications. When used with the DJI Lightbridge 2, it provides direct access to DJI GO
features including Intelligent Flight Modes.
With all essential components integrated into the A3 ight controller (including the IMU, barometer and data
recorder), the device is powerful and highly compact. The A3 can be upgraded to the A3 Pro by installing two
upgrade kits. The A3 Pro’s three GPS modules and IMUs add triple modular redundancy to greatly reduce the
risk of system failure.
Features
Basic Flight Modes
P-Mode (Positioning)
Atti Mode (Attitude)
F-Mode (Function)
Manual mode
DJI GO
App
Intelligent Flight Modes
Waypoints and Point of Interest (POI)
Course Lock and Home Lock
(Requires the DJI GO App and DJI Lightbridge 2.)
DJI SDKs
Fully compatible with the Onboard SDK and
Mobile SDK.
Developers Website:
https://developer.dji.com
Ultimate Reliability
A3 Pro supports triple
modular redundancy.

A3
/
A3 Pro
Quick Start Guide
EN
4
©
2017 DJI All Rights Reserved.
IMU Pro Module
1. Orientation Arrow
The IMU Pro module orientation arrow.
2. Status Indicator
Indicates the status of the IMU Pro module and triple
modular redundancy system.
3. CAN1 GPS Port
Communicates with the GPS-Compass Pro module.
LED Module
1. Flight Status Indicator
Indicates the status of the ight control system.
2. Micro USB Port
Used to congure and upgrade the A3 or A3 Pro via DJI
Assistant 2.
Parts
Flight Controller
1. IMU1 Port
Communicates with the IMU Pro module.
2. CAN1 Port
Dedicated DJI CAN-Bus port. Communicates with the
GPS-Compass Pro module or other DJI devices (e.g. Real Time
Kinematic (RTK) GPS system).
3. Orientation Arrow
The ight controller orientation arrow.
4. Status Indicator
Indicates the status of the ight controller and triple
modular redundancy system.
5. RF Port
Communicates with the DJI Lightbridge 2 Air System.
6. iESC Port
Communicates with the DJI Smart ESC.
7. M1-M8 Pins
Connects to the corresponding ESC PWM port for each
motor.
8. LED Port
Communicates with the LED module.
9. IMU2 Port
Communicates with the IMU Pro module.
10. PMU Port
Derives power from the PMU.
11. CAN2
Communicates with an SDK device.
12. API Port
Communicates with an SDK device.
13. F5-F8 Pins
Multifunction PWM I
/
O ports.
14. F1-F4 Pins
Multifunction PWM output ports.
15. S-Bus Port
Communicates with a DJI DR16 or S-Bus receiver.
GPS-Compass Pro Module
1. Status Indicator
Indicates the status of the GPS-Compass Pro module
and triple modular redundancy system.
2. Orientation Arrow
The GPS-Compass Pro module should be mounted with
the arrow pointing to the aircraft’s nose.
3. Extended CAN1 Port
Dedicated DJI CAN-Bus port. Communicates with a DJI
device (e.g. Real Time Kinematic (RTK) GPS system).
1
2
3
1
3
2
PMU Module
1. Power Port (9V 3A)
Connected to the Flight Controller for power supply.
2. iBAT
Reserved.
3. 3S-12S
Derives power from LiPo battery.
1
3
2
1
2
9
10
12
11
13
14
15
4
5
6
7
8
3
1
2

A3
/
A3 Pro
Quick Start Guide
EN
©
2017 DJI All Rights Reserved.
5
2. Preparation
Check the Items
Read the In the Box sheet and check that all items are in good condition. If there is any missing or
damaged item, please contact DJI Support.
Prepare your Equipment
Ensure you have a suitable airframe, remote controller system, ESCs and battery to use with the A3
or A3 Pro. Below is a list of compatible equipment.
Airframe: DJI S900* or types I4, X4, I6, V6, Y6, IY6, X8, I8, V8
Remote Controller System: DJI Lightbridge 2*, DJI DR16, S-Bus
ESC: ESCs with up to 400 Hz control frequency
Battery: 3S to 12S LiPo battery
Optional Equipment: DJI Intelligent Landing Gear, DJI Zenmuse Z15
*Recommended for the A3 series.
Read the User Manual
The A3 and A3 Pro are powerful systems. To make use of all their
capabilities, read the user manual thoroughly before conguring the system.
http://www.dji.com/product/a3/info#downloads
Download the DJI Assistant 2
DJI Assistant 2 is used to congure the A3 ight control system.
http://www.dji.com/product/a3/info#downloads
●
Supports Windows 7 (or later) or Mac OS X 10.9 (or later).
Download the DJI GO App
This is required if you are using the DJI
Lightbridge 2 video downlink.
Search “DJI GO” on the App Store or Google
Play and install the app on your mobile device.
●
The DJI GO app supports iOS 8.0 (or later) and Android 4.1.2 (or later).
Watch the Video Tutorials
Installation Demo
Connecting the Modules
How to use DJI Assistant 2
http://www.dji.com/product/a3/info#video
DJI GO App Tutorial Videos
DJI
Assistant 2
PDF

A3
/
A3 Pro
Quick Start Guide
EN
6
©
2017 DJI All Rights Reserved.
Strictly follow the provided guidelines.
Failure to do so may lead to unexpected
ight behavior or serious accidents.
3. Installation
Set Up the System
Watch the video tutorial for an overview
of the installation process.
Refer to the “Installation” section of the
user manual for detailed procedures.
Congure the Parameters
Watch the video tutorial for a brief
walkthrough.
Then launch DJI Assistant 2 and follow
the hints.
DJI
Assistant 2
LED Blinking Patterns
Refer to the “LED Indicator” section of the
user manual for a detailed description of
blinking patterns.
Fly Safe
It is important to understand basic ight
guidelines for the safety of both you and those
around you. Refer to the Disclaimer and Safety
Guidelines for more information.
No Fly Zones
More information at:
http://www.dji.com/ysafe/no-y
※
This Quick Start Guide is subject to change without prior notice.
4. Specications
Refer to the “Appendix” section of the user manual for the full specications.
●
Built-in Functions
Basic Flight Modes P-mode (Positioning); Atti mode
/
A-mode (Attitude); F-mode (Function);
Manual mode
Return-to-Home Modes Smart RTH; Low voltage RTH; Failsafe RTH
Safety Features Failsafe mode; Low battery voltage warning; Custom ight altitude and radius
limits; No Fly Zones; Motor Redundancy (for 6 and 8 rotor platforms); Motor
overload detection; Triple modular redundancy (for A3 Pro); Built-in data recorder
DJI GO App
(DJI Lightbridge 2 required)
Beginner mode; Auto takeo and landing; Wireless ight controller conguration;
Flight data OSD; Intelligent Flight Modes: Course Lock, Home Lock, Point of
Interest (POI), Waypoints
Supported DJI Equipment DJI aerial platforms (e.g. S900, S1000, S1000+); DJI gimbal systems (e.g.
Zenmuse X3
/
X5
/
X5R
/
XT, Z15 A7
/
GH4
/
5D
Ⅲ
/
BMPCC); DJI Intelligent Landing
Gear
●
Optimized Flight Performance (Subject to airframe type and payload)
Hovering Accuracy
(In P-Mode)
Vertical: ±0.5 m; Horizontal: ±1.5 m
Max Wind Resistance 10 m/s
Max Yaw Angular Velocity 150°/s
Max Pitch Angle 35°
Max Ascent Velocity 5 m/s
Max Descent Velocity 4 m/s
●
Electrical & Mechanical
Rated Power A3: 5 W; A3 Pro: 10 W
Rated Peak Power A3: 8 W; A3 Pro: 16 W
Operating Temperature 14° to 113° F (-10° to 45° C)

A3 / A3 Pro
快速入门指南
CHS
©
2017 DJI All Rights Reserved.
7
No Fly Zones
More information at:
http://www.dji.com/ysafe/no-y
1. 认识您的 A3 / A3 Pro
简 介
DJI
TM
新一代飞行控制系统,可融合高度集成的多余度冗余硬件,创造业界领先的可靠性和抗风险能力。
丰富的通讯、SDK 接口,可满足专业用途定制的需求。配合使用 DJI Lightbridge 2 高清图传,可支持 DJI
GO App,获得先进的智能飞行功能。
A3 飞行控制系统包含主控器(内置 IMU、数据记录仪和气压计)、GPS-Compass Pro,电源管理模块(PMU)
和 LED 模块。A3 Pro 在 A3 的基础上,外接两套升级套件(内含 IMU Pro 和 GPS-Compass Pro),形成三
余度冗余系统。
功能亮点
多种飞行模式
定位模式、姿态模式、功
能模式和手动模式。
DJI GO
App
智能飞行
配合 DJI Lightbridge 2 高清图传,
可使用 DJI GO App,获得更多智能
飞行功能。
SDK
丰富的 SDK 接口,可满足专业用途
定制的需求。关于 SDK 的开发,请
访问:
https://developer.dji.com
。
高可靠性
A3 可升级至 A3 Pro,实现
三余度冗余系统。

A3 / A3 Pro
快速入门指南
CHS
8
©
2017 DJI All Rights Reserved.
GPS-Compass Pro 模块
1. GPS-CompassPro指示灯
指示模块当前状态和冗余系统状态(A3 Pro)
2. GPS-CompassPro安装标记
指向飞行器机头方向
3. CAN1 扩展接口
CAN Bus 扩展接口(RTK GPS)
模块及端口说明
1. IMU1
IMU Pro 接口
2. CAN1
CAN Bus 接口
(GPS-Compass Pro / RTK GPS)
3. 主控器安装标记
主控器安装标记
4. FC 指示灯
指示模块当前状态和冗余系统状态(A3 Pro)
5. RF
接收机接口(DJI Lightbridge 2)
6. iESC
DJI 智能电调通信接口
7. M1-M8
M1-M8 电调 PWM 接口
8. LED
LED 模块接口
9. IMU2
IMU Pro 接口
10.PMU
PMU 模块(9V 3A)接口
11.CAN2
CAN Bus 接口(SDK)
12.API
串口通信接口(SDK)
13.F5-F8
多功能 PWM 输入
/
输出接口
14.F1-F4
多功能 PWM 输出接口
15.SBus
接收机接口(S-Bus
/
DJI DR16)
主控器 (FC)
IMU Pro 模块
1. IMUPro安装标记
IMU Pro 安装标记
2. IMUPro 指示灯
指示模块当前状态和冗余系统状态(A3 Pro)
3. CAN1GPS 接口
用于连接 GPS-Compass Pro 模块
LED 模块
1. 飞行状态指示灯
指示飞行控制系统状态
2. MicroUSB
飞行控制系统调试接口
1
3
2
PMU 模块
1. 9V3A
连接主控器进行供电
2. iBAT
保留接口
3. 3S-12S
锂电池接口
1
3
2
1
2
1
2
3
9
10
12
11
13
14
15
4
5
6
7
8
3
1
2

A3 / A3 Pro
快速入门指南
CHS
©
2017 DJI All Rights Reserved.
9
2. 安装准备
请依据《物品清单》核对各部件和配件,并下载用户手册和调参助手。如果配备 DJI Lightbridge 2 高清图传,
请下载安装 DJI GO App,以获得更多先进的智能飞行功能。
飞行控制系统的安装和使用具有一定的技术复杂度,请务必下载并仔细阅读《用户手册》。
自备设备
使用 A3/A3 Pro 时,需自行准备飞行器、遥控接收系统、电调和电池等设备 *。
设备支持类型:
多旋翼飞行器类型:
I4、X4 型四旋翼;I6、V6、Y6、IY6 型六旋翼;X8、I8、V8 型八旋翼
接收机类型:
DJI Lightbridge 2;DJI DR16;S-Bus
电调:
输出 400Hz 刷新频率
电池:
3S-12S 锂聚合物电池
推荐与 DJI S900 飞行器和 DJI Lightbridge 2 高清图传一起使用。
* 可以使用其它 DJI 设备进行功能扩展(如:DJI 智能起落架,Zenmuse Z15 云台)。
下载《用户手册》
请访问官网产品专页下载:
http://www.dji.com/cn/product/a3/info#downloads
下载调参助手 DJI Assistant 2
请访问官网产品专页下载:
http://www.dji.com/cn/product/a3/info#downloads
DJI
Assistant 2
●
调参助手需使用 Win7 及以上系统或 Mac OS X 10.9 及以上系统。
下载 DJI GO App
请在软件商店或扫描下方二维码下载。或使用移动
设备访问以下网址:
http://m.dji.net/djigo
观看教学视频
http://www.dji.com/cn/product/a3/info#video
●
需配合 DJI Lightbridge 2 高清图传使用。
●
DJI GO App 要求使用 iOS 8.0 及以上系统或 Android 4.1.2 及以上系统。
DJI GO App
扫描二维码观看
PDF

A3 / A3 Pro
快速入门指南
CHS
10
©
2017 DJI All Rights Reserved.
务必严格按照要求进行安装并正确设置参
数,否则可能无法飞行甚至导致严重安全
事故。
3. 使用指引
安装指引
请观看“安装演示”和“模块连接”
视频,并仔细阅读《用户手册》“安
装”章节。
参数设置
请观看“软件调参”视频,运行调
参助手,依照软件指引和内嵌说明
完成参数设置。
DJI
Assistant 2
指示灯说明
LED 状态指示灯可显示系统状态,详
情请见《用户手册》“附录”章节。
安全指引
飞行安全认识对于您、周围人群与环境的安全
非常重要。
请务必仔细阅读《免责声明和安全操作指引》。
禁飞区
详情请访问以下网址 :
http://www.dji.com/cn/ysafe/no-y
※ 本指南内容如有更新,恕不另行通知。
4. 规 格
全部规格详情请见《用户手册》“附录”章节。
●
功 能
飞行模式 定位模式;姿态模式;功能模式;手动模式
返航功能 智能返航;低电压返航;失控返航
保护功能 失控保护;低电压保护;高度、距离限制;特殊区域飞行限制;输出动
力缺失保护(至少六旋翼);动力保护;A3 Pro 版本支持三余度冗余系统;
内置数据记录仪
App 功能
(需使用 DJI Lightbridge 2)
新手模式;一键起飞 / 降落;远程参数设置;飞行数据 OSD;
智能飞行模式:航向锁定,返航锁定,兴趣点环绕,航点模式
支持的 DJI 设备 DJI 飞行器,如 S900,S1000,S1000
+
等;智能起落架;
Zenmuse X3 / X5 / X5R / XT, Z15 A7 / GH4 / 5D
Ⅲ
/ BMPCC 云台
●
飞行特性(受飞行器类型和负载影响)
悬停精度(P-Mode) 垂直方向:
±
0.5 m;水平方向:
±
1.5 m
最大抗风能力 10 m/s
最大偏航角速度 150
°
/s
最大倾斜角度 35°
最大上升速度 5 m/s
最大下降速度 4 m/s
●
电子机械特性
额定功率 A3:5 W;A3 Pro:10 W
额定峰值功耗 A3:8 W;A3 Pro:16 W
工作环境温度 -10℃ 至 45℃

CHT
A3 / A3 Pro
快速入門指南
©
2017 DJI All Rights Reserved.
11
1. 認識您的 A3 / A3 Pro
簡介
DJI
TM
新一代飛行控制系統,適用於多種多轉子空中載台,其先進的感測器融合演算法及冗置設計,打造世
界領先的可靠性和抗風險能力。
本系列具備豐富的通訊功能及 SDK 接頭,專為專業用途量身訂製,可滿足各種需求。搭配使用 DJI
Lightbridge 2 圖像傳輸系統時,可支援 DJI GO 應用程式,包括智慧飛行模式在內。
A3 飛行控制系統包含飛行控制器 ( 內建 IMU、資料記錄器和氣壓計 )、GPS-Compass Pro,電源管理模
組 (PMU) 和 LED 模組。A3 Pro 以 A3 為基礎,外接兩套升級套件 ( 內含 IMU Pro 和 GPS-Compass
Pro),形成三模組化冗置系統。
特點
多種飛行模式
定位模式、高度模式、功
能模式和手動模式。
DJI GO
App
智慧飛行
搭配 DJI Lightbridge 2 圖像傳輸系
統時,可使用 DJI GO 應用程式,獲
得更多智慧飛行功能。
SDK
本系列具備豐富功能的 SDK 接頭,
專為專業用途量身訂製,可滿足各種
需求。關於 SDK 的開發資訊,請前往:
https://developer.dji.com。
高可靠性
A3 可升級至 A3 Pro,實現
三模組化冗置系統。

CHT
A3 / A3 Pro
快速入門指南
12
©
2017 DJI All Rights Reserved.
GPS-Compass Pro 模組
1. GPS-Compass Pro 指示燈
指示模組當前狀態和冗置系統狀態 (A3 Pro)
2. GPS-Compass Pro 安裝標記
指向航拍機機頭方向
3. CAN1 擴充接頭
CAN Bus 擴充接頭 (RTK GPS)
模組及連接埠說明
1. IMU1
IMU Pro 接頭
2. CAN1
CAN Bus 接頭
(GPS-Compass Pro / RTK GPS)
3. 飛行控制器安裝標記
飛行控制器安裝標記
4. FC 指示燈
指示模組當前狀態和冗置系統狀態 (A3 Pro)
5. RF
接收器接頭 (DJI Lightbridge 2)
6. iESC
DJI Smart ESC 接頭
7. M1-M8
M1-M8 電控 PWM 接頭
8. LED
LED 模組接頭
9. IMU2
IMU Pro 接頭
10. PMU
PMU 模組 (9V 3A) 接頭
11. CAN2
CAN Bus 接頭 (SDK)
12. API
串列通信接頭 (SDK)
13. F5-F8
多功能 PWM 輸入
/
輸出接頭
14. F1-F4
多功能 PWM 輸出接頭
15. SBus
接收器接頭 (S-Bus
/
DJI DR16)
飛行控制器 (FC)
IMU Pro 模組
1. IMU Pro 安裝標記
IMU Pro 安裝標記
2. IMU Pro 指示燈
指示模組當前狀態和冗置系統狀態 (A3 Pro)
3. CAN1 GPS 接頭
用於連接 GPS-Compass Pro 模組
LED 模組
1. 飛行狀態指示燈
指示飛行控制系統狀態
2. Micro USB
飛行控制系統偵錯接頭
1
3
2
PMU 模組
1. 9V 3A
連接飛行控制器進行供電
2. iBAT
預留
3. 3S-12S
鋰聚合物電池接頭
1
3
2
1
2
1
2
3
9
10
12
11
13
14
15
4
5
6
7
8
3
1
2

CHT
A3 / A3 Pro
快速入門指南
©
2017 DJI All Rights Reserved.
13
2. 安裝準備
請依據《組件清單》核對各零組件和配件,並下載使用者手冊和 DJI Assistant 2。如果配備 DJI Lightbridge 2
圖像傳輸系統,請下載安裝 DJI GO 應用程式,以獲得更多先進的智慧飛行功能。
飛行控制系統的安裝和使用具有一定的技術複雜度,請務必下載並仔細閱讀《使用者手冊》。
自備設備
使用 A3/A3 Pro 時,需自行準備航拍機、遙控接收系統、電控和電池等設備 *。
設備支援類型:
多旋翼飛行器類型:
I4、X4 型四旋翼;I6、V6、Y6、IY6 型六旋翼;X8、I8、V8 型八旋翼
接收器類型:
DJI Lightbridge 2
;
DJI DR16
;
S-Bus
電控:
輸出 400Hz 更新頻率
電池:
3S-12S 鋰聚合物電池
建議與 DJI S900 航拍機及 DJI Lightbridge 2 圖像傳輸系統搭配使用。
* 可以使用其它 DJI 設備進行功能擴充 ( 例如:DJI 智慧起落架,Zenmuse Z15 雲台 )。
下載《使用者手冊》
請前往官網產品專頁下載:
http://www.dji.com/product/a3/info#downloads
下載 DJI Assistant 2
請前往官網產品專頁下載:
http://www.dji.com/product/a3/info#downloads
DJI
Assistant 2
●
DJI Assistant 2 需使用 Win7 及以上系統或 Mac OS X 10.9 及以上系統。
下載 DJI GO 應用程式
請前往軟體商店或掃描下方 QR 碼下載。或使用行
動裝置前往以下網址:http://m.dji.net/djigo
觀看教學影片
http://www.dji.com/product/a3/info#video
●
需搭配 DJI Lightbridge 2 圖像傳輸系統使用。
●
DJI GO 應用程式要求使用 iOS 8.0 及以上系統或 Android 4.1.2 及以上系統。
DJI GO 應用程式 掃描 QR 碼觀看
PDF

CHT
A3 / A3 Pro
快速入門指南
14
©
2017 DJI All Rights Reserved.
務必嚴格按照要求進行安裝並正確設定參
數,否則可能無法飛行,甚至導致嚴重安
全事故。
3. 使用指南
安裝指南
請觀看「安裝示範」和「連接模組」
影片,並仔細閱讀《使用者手冊》「安
裝」章節。
設定參數
請觀看 DJI Assistant 2 教學影片並
將其啟動,然後依照指示和內部說
明完成參數設定。
DJI
Assistant 2
指示燈說明
LED 狀態指示燈可顯示系統狀態,詳
情請見《使用者手冊》「附錄」章節。
安全指引
瞭解飛行安全知識對於您、周圍人群與環境的
安全非常重要。
請務必仔細閱讀《免責聲明與安全指導方針》。
禁航區
詳情請參閱以下網站:
http://www.dji.com/flysafe/no-fly
※ 本指南內容如有更新,恕不另行通知。
4. 規格
全部規格詳情請見《使用者手冊》「附錄」章節。
●
功能
飛行模式 定位模式;高度模式;功能模式;手動模式
返航模式 智慧返航;低電壓返航;故障安全返航
保護功能 故障安全模式;低電壓警告;高度;距離限制;特殊區域飛行限制;馬達
冗置保護 ( 至少六旋翼 );動力保護;A3 Pro 版本支援三模組化冗置;內
建資料記錄器
應用程式功能
( 需使用 DJI Lightbridge 2)
初學者模式;自動起飛 / 降落;遠程參數設定;飛行資料 OSD;
智慧飛行模式:航向鎖定、返航鎖定、興趣點環繞、航點模式
支援的 DJI 設備 DJI 航拍機,例如:S900、S1000、S1000
+
等;智慧起落架;
Zenmuse X3/X5/X5R/XT、Z15 A7/GH4/5D Ⅲ /BMPCC 雲台
●
飛行性能 ( 受飛行器類型和負載影響 )
滯空準確度 ( 在 P 模式下 ) 垂直方向:
±
0.5 m;水平方向:
±
1.5 m
最大風阻 10 m/s
最大偏航角速度 150° /s
最大俯仰角 35°
最大上升速度 5 m/s
最大下降速度 4 m/s
●
電子機械特性
額定功率 A3:5 W;A3 Pro:10 W
額定峰值功率 A3:8 W;A3 Pro:16 W
操作溫度 -10℃ 至 45℃

JP
A3
/
A3 Pro
クイックスタートガイド
©
2017 DJI All Rights Reserved.
15
1. 製品の紹介
はじめに
DJI
TM
A3 シリーズは、幅広い種類のマルチローター空撮プラットフォームにとって最適な、信頼性が高く
堅牢なフライトコントロールシステムです。このシステムは、先進のセンサー融合アルゴリズムと冗長設
計を採用し、空撮システムの非常に優れた安定性と完全性を維持しています。
A3 シリーズは、DJI の搭載 SDK およびモバイル SDK と完全な互換性があるため、開発者は特定の用途に合
わせてシステムを最適化することができます。DJI Lightbridge 2 と使用する場合、システムは DJI GO アプ
リでインテリジェントフライトモードなどの機能に直接アクセスできます。
(IMU、気圧計、データレコーダーをはじめとする)すべての主要構成部品を A3 フライトコントローラー
に統合したシステムは、非常に小型でありながら高性能です。A3 は、2つのアップグレードキットをイン
ストールすることで A3 Pro にアップグレード可能です。A3 Pro の 3 組の GPS ユニットと IMU により三重
モデュ―ル式冗長性が付加され、システムの故障のリスクが大幅に低減されています。
機能
標準飛行モード
P モード(場所)、Atti モー
ド(姿勢)、F モード(機能)、
手動モード。
DJI GO
App
インテリジェントフライトモード
コースロック、ウェイポイント、ホー
ムロック、ポイント・オブ・インテレ
スト
(
DJI GO アプリと DJI Lightbridge 2
が必要です。)
DJI SDK
搭載 SDK およびモバイル SDK との完
全な互換性を確保。
開発者ウェブサイト:
https://developer.dji.com
究極の信頼性
A3 Pro は、三重モデュ―ル
式冗長システムに対応して
います。

JP
A3
/
A3 Pro
クイックスタートガイド
16
©
2017 DJI All Rights Reserved.
IMU Pro モデュ―ル
1. 方向矢印 :
IMU Pro 方向矢印。
2. ステータスインジケーター :
IMU Pro モデュ―ルと三重モデュ―ル式冗
長システムの状態を表示します。
3. CAN1 GPS ポート :
GPS-Compass Pro モデュ―ルと通信します。
LED モデュ―ル
1. フライトステータスインジケーター :
フライトコントロールシステムの状態を表示します。
2. Micro USB ポート :
DJI Assistant を用いて A3 や A3 Pro の設定やアップグ
レードに使用します。
GPS-Compass Pro モデュ―ル
1. ステータスインジケーター :
GPS-Compass Pro モデュ―ルと三重モデュ―ル式冗
長システムの状態を表示します。
2. 方向矢印 :
GPS-Compass Pro モデュ―ルは、矢印が機首の方に
向くように取り付ける必要があります。
3. 拡張 CAN1 ポート :
専用 DJI CAN バスポート。(リアルタイムキネマテ
ィック (RTK) GPS システム等)DJI デバイスと通信し
ます。
各部図説
フライトコントローラー
1. IMU1 ポート :
IMU Pro モデュ―ルと通信します。
2. CAN1 ポート :
専用 DJI CAN バスポート。A3 GP-Compass Pro や(リアル
タイムキネマティック (RTK) GPS システム等)他の DJI デ
バイスと通信します。
3. 方向矢印 :
方向矢印。
4. ステータスインジケーター :
フライトコントローラーと三重モデュ―ル式冗長システム
の状態を表示します。
5. RF ポート :
DJI Lightbridge 2 受信機と通信します。
6. iESC ポート :
DJI インテリジェント ESC と通信します。
7. M1-M8 ピン :
各モーターに対応するESC PWMポートに接続します。
8. LED ポート :
LED モデュ―ルと通信します。
9. IMU2 ポート :
IMU Pro モデュ―ルと通信します。
10. PMU ポート
PMU から電源供給を受けます。
11. CAN2:
SDK デバイスと通信します。
12. API ポート :
SDK デバイスと通信します。
13. F5-F8 ポート :
多機能 PWM I/O ポート。
14. F1-F4 ポート :
多機能 PWM 出力ポート。
15. S バスポート :
DJI DR16 または S バス受信機と通信します。
1
3
2
1
3
2
PMU モジュール
1. 電源ポート(9V 3A)
電源供給のためにフライトコントローラに接続されます。
2. iBAT
予備ポート。
3. 3S-12S
LiPo バッテリーから電源供給を受けます。
1
2
1
2
3
9
10
12
11
13
14
15
4
5
6
7
8
3
1
2

JP
A3
/
A3 Pro
クイックスタートガイド
©
2017 DJI All Rights Reserved.
17
2. お使いになる前に
同梱物の確認
同梱物の文書をお読みになり、すべての内容物が良好な状態にあることを確認してください。
欠品や破損しているものがある場合は、DJI サポートにご連絡ください。
機器の準備
必ず、A3 シリーズといっしょに使用する必要な適切な機体、送信機システム、ESC およびバッテ
リーを用意してください。対応機器の一覧は以下の通りです。
機体: DJI S900* または I4 タイプ、X4、I6、V6、Y6、IY6、X8、I8、V8
送信機システム: DJI Lightbridge 2*、DJI DR16、S バス
ESC: 最大 400 Hz の制御周波数の ESC
バッテリー: 3S ~ 12S LiPo バッテリー
オプション機器:DJI インテリジェントランディングギア、DJI Zenmuse Z15
ユーザーマニュアルをお読みください
A3 および A3 Pro は、高性能なシステムです。すべての機能を活用するた
めに、システムを設定する前にユーザーマニュアルをよく読んでください。
http://www.dji.com/product/a3/info#downloads
DJI Assistant 2 のダウンロード
Assistant ソフトウェアは、A3 フライトコントロールシステムの設定に使
用します。
http://www.dji.com/product/a3/info#downloads
DJI GO アプリのダウンロード
DJI Lightbridge 2 ビデオダウンリンクを使用
している場合、このアプリのダウンロードが
必要です。App Store または Google Play で
「DJI GO」を検索し、アプリをお使いのモバ
イルデバイスにインストールしてください。
●
DJI GO アプリは、iOS 8.0 以降と Android 4.1.2 以降に対応しています。
ビデオチュートリアルをご覧ください
インストール方法
モジュールの接続
DJI Assistant2 の使い方
http://www.dji.com/product/a3/info#video
DJI GO App ビデオチュートリアル
DJI
Assistant 2
PDF
●
Windows 7 以降または Mac OS X 10.9 以降に対応しています。
*
A3 シリーズに推奨されます。

JP
A3
/
A3 Pro
クイックスタートガイド
18
©
2017 DJI All Rights Reserved.
付属のガイドラインに厳密に従ってくださ
い。従わない場合、予期せぬ飛行動作や重
大な事故につながることがあります。
3. インストールについて
4. 仕様
システムのセットアップ
インストールプロセスの概要につい
てはビデオチュートリアルをご覧く
ださい。詳細手順についてはユーザ
ーマニュアルの「インストールにつ
いて」の章を参照してください。
パラメータの設定
パラメータの設定方法の簡単な紹介
は、まずビデオチュートリアルをご
覧ください。次に、DJI Assistant 2 を
起動しご自分で設定してください。
LED 点滅表示
点滅表示の詳細については、ユーザ
ーマニュアルの「LED インジケータ
ー」の章を参照してください。
DJI
Assistant 2
仕様の詳細については、ユーザーマニュアルの「付録」のセクションを参照してください。
安全な飛行のために
ご自身ならびに周囲の人たちの安全のため
に基本的な飛行ガイドラインを理解するこ
とが重要です。詳細は、免責事項および安
全ガイドラインを参照してください。
飛行禁止区域
http://www.dji.com/ysafe/no-y
詳細情報は、以下のリンクをご覧ください。
※ クイックスタートガイドは予告なく変更となることがあります。
●
内蔵機能
基本飛行モード P モード
(
場所
)
; Atti モード/ A モード
(
姿勢
)
; F モード
(
機能
)
; 手動モード
帰還(リターントゥホーム)
モード
スマート RTH ; 低電圧 RTH; フェイルセーフ RTH
安全機能 フェイルセーフモード ; 低バッテリー電圧警告 ; 特別設定の飛行高度と半径制
限 ; 飛行禁止区域 ; モーターの冗長性(ローター数が6個と 8 個のプラットフォ
ームの場合); モーター過負荷検知 ; 三重モデュ―ル式冗長性(A3 Pro の場合);
内蔵データレコーダー
DJI GO アプリ
(
DJI Lightbridge 2が必要)
初心者モード ; 自動離陸・着陸 ; 無線フライトコントローラー設定 ; 飛行デー
タ OSD; インテリジェントフライトモード : コースロック , ホームロック , ポ
イント・オブ・インテレスト(POI), ウェイポイント
対応 DJI 機器 DJI 空撮プラットフォーム(S900、S1000、S1000+ 等); DJI ジンバルシステム
(
Zenmuse X3 / X5 / X5R / XT, Z15 A7 / GH4 / 5D Ⅲ / BMPCC 等); DJI インテリジェ
ントランディングギア
●
最適飛行性能(機体の種類および搭載重量により変わります。)
ホバリング精度
(P モード時)
垂直:± 0.5 m; 水平:± 1.5 m
最大風圧抵抗 10 m/s
最大ヨー回転速度 150 °/s
最大ピッチ角度 35°
最大上昇速度 5 m/s
最大下降速度 4 m/s
●
電気的・機械的特性
定格出力 A3:5 W; A3 Pro:10 W
定格ピーク電力 A3:8 W; A3 Pro:16 W
動作環境温度 -10° ~ 45℃(14° ~ 113℉)

A3
/
A3 Pro
빠른 시작 가이드
KR
©
2017 DJI All Rights Reserved.
19
1. 제품 개요
소개
DJI
TM
A3 시리즈는 안정적이고 강력한 비행 제어 시스템으로 다양한 다축 항공기 플랫폼에 이상적입니다 . 고급 센서 퓨전 알
고리즘과 다중화 설계는 항공 시스템의 완벽한 안정성과 무결성을 유지합니다 .
A3 시리즈는 DJI Onboard 및 Mobile SDK 와 완벽하게 호환되므로 개발자는 특정 분야에 맞춰 시스템을 최적화할 수 있습
니다 . DJI Lightbridge 2 와 함께 사용하면 지능형 비행 모드와 같이 DJI GO 앱의 기능을 바로 이용할 수 있습니다 .
IMU, 기압계 및 데이터 기록장치 등 모든 필수 구성요소가 통합된 A3 비행 컨트롤러로 작지만 강력한 성능을 발휘합니다 . 두
가지 업그레이드 키트를 설치하면 A3 에서 A3 Pro 로 업그레이드할 수 있습니다 . A3 Pro 는 3 개의 GPS 장치와 IMU, 그리
고 3 중 모듈식 다중화를 더해 시스템의 고장 위험을 획기적으로 줄였습니다 .
기능
기본 비행 모드
P 모드 ( 포지셔닝 ), Atti 모드 ( 자세 ),
F 모드 ( 기능 ) 및 수동 모드
DJI GO
App
지능형 비행 모드
항로 잠금 , 항로점 , 원위치 잠금 및 관심 지점 모
드를 지원합니다 .
(DJI GO 앱 및 DJI Lightbridge 2 필요 )
DJI SDK
Onboard 및 Mobile SDK 와 완벽하게 호환됩니다 .
개발자 웹 사이트 :
https://developer.dji.com
궁극의 안정성
A3 Pro 는 3 중 모듈식 다
중화를 지원합니다 .

A3
/
A3 Pro
빠른 시작 가이드
KR
20
©
2017 DJI All Rights Reserved.
IMU Pro 모듈
1. 방향 화살표
IMU Pro 방향 화살표 .
2. 상태 표시기
IMU Pro 모듈과 3 중 모듈식 다중화 시스템의 상태를 나타냅니다 .
3. CAN1 GPS 포트
GPS-Compass Pro 모듈과 통신합니다 .
LED 모듈
1. 비행 상태 표시기
비행 제어 시스템의 상태를 나타냅니다 .
2. Micro USB 포트
DJI Assistant 를 통해 A3 또는 A3 Pro 를 구성하고 업그레
이드하는 데 사용됩니다 .
GPS-Compass Pro 모듈
1. 상태 표시기
GPS-Compass Pro 모듈과 3 중 모듈식 다중화 시스템의 상
태를 나타냅니다 .
2. 방향 화살표
GPS-Compass Pro 모듈에는 항공기 기수를 가리키는 화살
표가 부착되어 있습니다 .
3. 확장 CAN1 포트
DJI CAN 버스 전용 포트입니다 . DJI 장치 ( 예 : 실시간 이
동 측량 (RTK) GPS 시스템 ) 와 통신합니다 .
부품
1. IMU1 포트
IMU Pro 모듈과 통신합니다 .
2. CAN1 포트
DJI CAN 버스 전용 포트입니다 . A3 GPS-Compass Pro 또는
기타 DJI 장치 ( 예 : 실시간 이동 측량 (RTK) GPS 시스템 ) 와
통신합니다 .
3. 방향 화살표
방향 화살표 .
4. 상태 표시기
비행 컨트롤러와 3 중 모듈식 다중화 시스템의 상태를 나타냅
니다 .
5. RF 포트
DJI Lightbridge 2 수신기와 통신합니다 .
6. iESC 포트
DJI 지능형 ESC 와 통신합니다 .
7. M1-M8 핀
각 모터에 대응하는 ESC PWM 포트에 연결합니다 .
8. LED 포트
LED 모듈과 통신합니다 .
9. IMU2 포트
IMU Pro 모듈과 통신합니다 .
10. PMU 포트
PMU 에서 전원을 공급받습니다 .
11. CAN2
SDK 장치와 통신합니다 .
12. API 포트
SDK 장치와 통신합니다 .
13. F5-F8 핀
다기능 PWM I/O 포트입니다 .
14. F1-F4 핀
다기능 PWM 출력 포트입니다 .
15. S 버스 포트
DJI DR16 또는 S 버스 수신기와 통신합니다 .
비행 컨트롤러
1
3
2
1
3
2
PMU 모듈
1. 전원 포트 (9V 3A)
전원 공급을 위해 비행 컨트롤러에 연결됩니다 .
2. iBAT
예약 포트 .
3. 3S-12S
LiPo 배터리에서 전원을 공급받습니다 .
1
2
1
2
3
9
10
12
11
13
14
15
4
5
6
7
8
3
1
2

A3
/
A3 Pro
빠른 시작 가이드
KR
©
2017 DJI All Rights Reserved.
21
2. 준비
구성품 확인
구성품 설명서를 읽고 모든 구성품의 상태가 양호한지 확인합니다 .
구성품이 없거나 손상된 경우 DJI 지원팀에 문의하십시오 .
장비 준비
A3 시리즈에 사용할 적합한 기체 , 조종기 시스템 , ESC 및 배터리를 확인합니다 . 호환되는 장비 목록은 아래와 같습니다 .
기체 : DJI S900* 또는 I4, X4, I6, V6, Y6, IY6, X8, I8, V8 유형
조종기 시스템 : DJI Lightbridge 2*, DJI DR16, S 버스
ESC: 최대 400Hz 의 제어 주파수를 사용하는 ESC
배터리 : 3~12 입 LiPo 배터리
옵션 장비 : DJI 지능형 착륙 장치 , DJI Zenmuse Z15
*A3 시리즈에 권장됩니다 .
DJI GO 앱 다운로드
DJI Lightbridge 2 비디오 다운링크를 사용하는 경우에 필
요합니다 .
App Store 또는 Google Play 에서 'DJI GO' 를 검색하여
앱을 모바일 장치에 설치합니다 .
●
DJI GO 앱은 iOS 8.0( 이상 ) 및 Android 4.1.2( 이상 ) 을 지원합니다 .
학습 비디오 시청
Demo 설치하기
모듈에 연결하기
DJI 어시스턴트 2 활용하는 방법
http://www.dji.com/product/a3/info#video
DJI GO App A3 학습 비디오
사용 설명서 읽기
A3 및 A3 Pro 는 강력한 시스템입니다 . 모든 기능을 제대로 활용하려면 장치를 구성하기 전에
사용 설명서를 꼼꼼하게 읽어야 합니다 .
http://www.dji.com/product/a3/info#downloads
DJI Assistant 2 다운로드
Assistant 소프트웨어는 A3 비행 제어 시스템을 구성하는 데 사용됩니다 .
http://www.dji.com/product/a3/info#downloads
●
Windows 7( 이상 ) 또는 Mac OS X 10.9( 이상 ) 를 지원합니다 .
DJI
Assistant 2
PDF

A3
/
A3 Pro
빠른 시작 가이드
KR
22
©
2017 DJI All Rights Reserved.
제공된 지침을 반드시 따라야 합니다 . 지침을 따
르지 않으면 예기치 않은 비행기 작동으로 심각
한 사고가 발생할 수 있습니다 .
3. 설치
시스템 설치
설치 과정에 대한 개요를 보려면 학습 비디오
를 시청합니다 .
세부적인 절차는 사용 설명서의 " 설치 " 섹션
을 참조하십시오 .
매개변수 구성
튜토리얼 영상을 보시고 숙지해보세요 .
DJI 어시스턴트 2 를 시작하신 후 힌트를 따라
가보세요 .
DJI
Assistant 2
LED 점멸 패턴
점멸 패턴에 대한 세부적인 설명은 사용 설명서
의 “LED 표시기” 섹션을 참조하십시오 .
비행 안전
조종사와 주변의 안전을 위해 기본 비행
지침을 반드시 숙지해야 합니다 . 자세
한 내용은 고지 사항 및 안전 가이드를
참조하십시오 .
비행 제한 구역
추가 정보 :
http://www.dji.com/flysafe/no-fly
※ 빠른 시작 가이드는 사전 고지 없이 변경될 수 있습니다 .
4. 사양
세부적인 사양은 사용 설명서의 " 부록 " 섹션을 참조하십시오 .
●
기본 제공 기능
기본 비행 모드 P 모드 ( 포지셔닝 ), Atti 모드 / A 모드 ( 자세 ), F 모드 ( 기능 ), 수동 모드
원위치로 돌아오기 (RTH) 모드 스마트 RTH, 전압 저하 RTH,고장 안전 RTH
안전 기능 고장 안전 모드, 배터리 전압 저하 경고, 사용자 정의 비행 고도 및 반경 제한, 비행 제한 구역,
모터 다중화 (6 중 및 8 중 다축 플랫폼용 ), 모터 과부하 감지, 3 중 모듈식 다중화 (A3 Pro
용 ),기본 제공 데이터 기록장치
DJI GO 앱
(DJI Lightbridge 2 필요 )
초보자 모드, 자동 이륙 및 착륙, 무선 비행 컨트롤러 구성,비행 데이터 OSD, 지능형 비
행 모드 : 항로 잠금, 원위치 잠금, 관심 지점 (POI), 항로점
지원되는 DJI 장비 DJI 항공 플랫폼 ( 예 : S900, S1000, S1000+), DJI 짐벌 시스템 ( 예 : Zenmuse X3
/
X5
/
X5R
/
XT, Z15 A7
/
GH4
/
5D
Ⅲ
/
BMPCC), DJI 지능형 착륙 장치
●
최적화된 비행 성능 ( 기체 유형 및 탑재중량 관련 )
제자리 비행 정확도 (P 모드 ) 수직 : ± 0.5 m, 수평 : ± 1.5 m
최대 바람 저항성 10 m/s
최대 요잉 각속도 150 도 /s
최대 피치각 35°
최대 상승 속도 5 m/s
최대 하강 속도 4 m/s
●
전기 및 기계
정격 전력 A3:5 W, A3 Pro:10 W
정격 피크 전력 A3:8 W, A3 Pro:16 W
작동 온도 14° ~113° F(-10° ~45° C)

A3
/
A3 Pro
Kurzanleitung
DE
©
2017 DJI All Rights Reserved.
23
1. Produktbeschreibung
Einleitung
Die A3-Serie von DJI
TM
ist eine zuverlässiges und robustes Flugsteuerungssystem, das sich ideal für eine
Vielzahl von Multirotor-Flugplattformen eignet. Fortschrittliche Sensor-Fusionsalgorithmen und die redundante
Konstruktion sorgen für maximale Stabilität und Integrität des Flugsystems.
Die A3-Serie ist komplett kompatibel mit den Onboard-und Mobil-SDK von DJI, sodass Entwickler das
System für spezische Anwendungen optimieren können. DJI Lightbridge 2 ermöglicht den direkten Zugri auf
Funktionen in der „DJI GO“-App, wie z. B die Intelligent Flight Modes.
Die A3-Flugsteuerung ist leistungsstark und extrem kompakt, da alle wichtigen Komponenten in das Gerät
integriert sind (einschließlich IMU, Barometer und Datenschreiber). Mit zwei Erweiterungskits lässt sich der
A3 auf A3 Pro aufrüsten. Die drei GPS-Einheiten und die drei IMU des A3 Pro vergrößern die modulare
Redundanz um das Dreifache, wodurch das Risiko eines Systemausfalls drastisch reduziert wird.
Funktionen
Grundlegende Flugmodi
P-Modus (Positionsbestimmung),
Atti Modus (Fluglage), F-Modus
(Funktion) und manueller Modus.
DJI GO
App
Intelligent Flight-Modi
„Course Lock“, „Waypoints“, „Home Lock“
und „Point of Interest“.
(Voraussetzung: „DJI GO“-App und DJI
Lightbridge 2.)
DJI-SDK
Komplett kompatibel mit den Onboard- und
Mobilmodellen.
Entwickler-Website:
https://developer.dji.com
Höchste Zuverlässigkeit
A3 Pro unterstützt dreifache
modulare Redundanz.

A3
/
A3 Pro
Kurzanleitung
DE
24
©
2017 DJI All Rights Reserved.
IMU Pro-Modul
1. Ausrichtungspfeil
Das IMU Pro-Modul ausrichtungspfeil.
2. Statusleuchte
Zeigt den Status des IMU Pro-Moduls und des
dreifachen modularen Redundanzsystems an.
3. CAN1-GPS-Anschluss
Kommuniziert mit dem GPS-Kompass-Pro-Modul.
LED-Modul
1. Statusleuchte des Fluggeräts
Zeigt den Status des Flugsteuerungssystems an.
2. Micro-USB-Anschluss
Wird zur Konguration oder Erweiterung des A3 oder
A3 Pro über den DJI Assistant verwendet.
GPS-Compass-Pro-Modul
1. Statusleuchte
Zeigt den Status des GPS-Kompass-Pro-Moduls und des
dreifachen modularen Redundanzsystems an.
2. Ausrichtungspfeil
Das GPS-Compass-Pro-Modul sollte so montiert werden,
dass die Pfeilspitze zur Nase des Fluggeräts zeigt.
3. Erweiterter CAN1-Anschluss
Spezieller DJI-CAN-Bus-Anschluss. Kommuniziert mit DJI-
Geräten (z. B. dem Echtzeitkinematik (RTK)-GPS-System).
Teile
1. IMU1-Anschluss
Kommuniziert mit dem IMU Pro-Modul.
2. CAN1-Anschluss
Spezieller DJI-CAN-Bus-Anschluss. Kommuniziert mit dem
A3 GPS-Compass Pro oder anderen DJI-Geräten (z. B. dem
Echtzeitkinematik-(RTK)-GPS-System).
3. Ausrichtungspfeil
Ausrichtungspfeil.
4. Statusleuchte
Zeigt den Status des Flugsteuerungssystems und des
dreifachen modularen Redundanzsystems an.
5. RF-Anschluss
Kommuniziert mit dem Empfänger des DJI Lightbridge 2.
6. iESC-Anschluss
Kommuniziert mit dem DJI Intelligent ESC.
7. M1-M8-Stecker
Verbinden den entsprechenden ESC-PWM-Anschluss für
jeden Monitor.
8. LED-Anschluss
Kommuniziert mit dem LED-Modul.
9. IMU2-Anschluss
Kommuniziert mit dem IMU Pro-Modul.
10. PMU-Anschluss
Bezieht Strom von der PMU.
11. CAN2
Kommuniziert mit SDK-Geräten.
12. API-Anschluss
Kommuniziert mit SDK-Geräten.
13. F5-F8-Stecker
Multifunktions-PWM-I/O-Anschlüsse.
14. F1-F4-Stecker
Multifunktions-PWM-Ausgang.
15. S-Bus-Anschluss
Kommuniziert mit dem DJI DR16 oder S-Bus-Empfänger.
Flugsteuerung
1
3
2
1
3
2
PMU-Modul
1. Stromanschluss (9 V, 3 A)
Wird zur Stromversorgung an den Flugcontroller angeschlossen.
2. iBAT
Reservierter Anschluss.
3. 3S-12S
Bezieht Strom von von der LiPo-Akku.
1
2
1
2
3
9
10
12
11
13
14
15
4
5
6
7
8
3
1
2

A3
/
A3 Pro
Kurzanleitung
DE
©
2017 DJI All Rights Reserved.
25
2. Vorbereitung
Artikel überprüfen
Lesen Sie das Informationsblatt Lieferumfang und überprüfen Sie, dass alle Artikel in einem
einwandfreiem Zustand sind.
Wenden Sie sich an den DJI-Kundendienst, falls Artikel fehlen oder beschädigt sind.
Die Ausrüstung vorbereiten
Stellen Sie sicher, dass Sie einen geeigneten Flugrahmen, eine geeignete Fernbedienung, geeignete ESCs
und Akkus für die A3-Serie haben. Untenstehend nden Sie eine Liste mit geeigneter Ausrüstung.
Luftrahmen: DJI S900* oder I4, X4, I6, V6, Y6, IY6, X8, I8, V8
Fernbedienung: DJI Lightbridge 2*, DJI DR16, S-Bus
ESC: ESCs mit einer Steuerfrequenz von bis zu 400 Hz
Akku: 3S bis 12S LiPo-Akku
Zusatzausrüstung: DJI Intelligent Landing Gear, DJI Zenmuse Z15
*Empfohlen für die A3-Serie.
Die „DJI GO“-App herunterladen
Die App wird benötigt, wenn der DJI
Lightbridge 2-Videolink verwendet wird.
Suchen Sie im App Store oder auf Google Play
nach „DJI GO“, und installieren Sie die App auf
Ihrem Mobilgerät.
●
Für die „DJI GO“-App wird iOS 8.0 (oder höher) oder Android 4.1.2 (oder höher) benötigt.
Video-Tutorial
Installationsanleitung
Verbindung die Module
Anleitung DJI Assistant 2
http://www.dji.com/product/a3/info#video
DJI GO App Tutorial-Videos zur A3
Lesen Sie die Bedienungsanleitung
Das A3 und A3 Pro sind leistungsstarke Systeme. Um alle Funktionen des Geräts in
vollem Umfang zu nutzen, lesen Sie sorgfältig die Bedienungsanleitung, bevor Sie
das Gerät kongurieren.
http://www.dji.com/product/a3/info#downloads
DJI Assistant 2 herunterladen
Die Assistant-Software wird zur Konguration des A3-Flugsteuerungssystems
verwendet.
http://www.dji.com/product/a3/info#downloads
●
Unterstützt Windows 7 (oder höher) oder Mac OS X 10.9 (oder höher).
DJI
Assistant 2
PDF

A3
/
A3 Pro
Kurzanleitung
DE
26
©
2017 DJI All Rights Reserved.
Befolgen Sie die angegebenen
Anweisungen. Das Nichtbefolgen führt
unter Umständen zu unerwartetem
Flugverhalten oder schweren Unfällen.
3. Installation
Das System einrichten
Sehen Sie sich das Video-Tutorial an, um
einen Überblick über den Installationsprozess
zu bekommen.
Eine detaillierte Vorgehensweise nden Sie
in der Bedienungsanleitung im Abschnitt
„Installation“.
Die Paramter kongurieren
Sehen Sie sich das Tutorial-Video an.
Dort erhalten Sie eine kurze Einweisung.
Starten Sie dann DJI Assistant 2 und
befolgen Sie die Hinweise.
DJI
Assistant 2
LED-Blinkfolge
Eine detaillierte Beschreibung
der Blinkfolge nden Sie in der
Bedienungsanleitung im Abschnitt „LED-
Anzeige“.
Sicher iegen
Um Ihre eigene Sicherheit und die Sicherheit der
Menschen in Ihrer Umgebung zu gewährleisten, ist es
wichtig, dass Sie die nötigen Grundregeln kennen. Im
Haftungsausschluss und den Sicherheitsvorschriften
nden Sie nähere Informationen.
Flugverbotszonen
Nähere Informationen nden Sie unter:
http://www.dji.com/ysafe/no-y
※
Diese Kurzanleitung kann jederzeit unangekündigt geändert werden.
4.Technische Daten
Weitere technische Daten nden Sie in der Bedienungsanleitung im Anhang.
●
Integrierte Funktionen
Grundlegende Flugmodi Modus „P“ (Positionsbestimmung); Modus „Atti/A“ (Fluglage); Modus „F“ (Funktion);
Manueller Modus
Rückkehr-Modi Intelligente Rückkehrfunktion (RTH); Rückkehr bei niedriger Akkuspannung; Rückkehr
bei Systemfehler
Sicherheitsfunktionen Ausfallsicherer Modus; Warnung bei niedriger Akkuspannung; Benutzerdenierte
Flughöhen- und Flugradiusbegrenzung Flugverbotszonen; Motorredundanz (für 6 und
8 Rotorplattformen); Motorüberlastungserkennung; Dreifache modulare Redundanz (für
A3 Pro); Eingebauter Datenschreiber
„DJI GO“-App
(DJI Lightbridge 2
erforderlich)
Anfängermodus; Automatisches Starten und Landen; Konfiguration der kabellosen
Fernbedienung; Flugdaten-OSD; Intelligent Flight-Modi: Course Lock, Home Lock, Point
of Interest (POI), Waypoints
Unterstützte DJI-Ausrüstung DJI Flugplattformen (z. B. S900, S1000, S1000+); DJI Gimbalsysteme (z. B. Zenmuse X3
/
X5
/
X5R
/
XT,
Z15
A7
/
GH4
/
5D
Ⅲ
/
BMPCC); Intelligentes Landegestell von DJI
●
Optimierte Flugleistung (je nach Luftrahmentyp und Luftzuladung)
Schwebefluggenauigkeit
(im Modus „P“)
Vertikal: ± 0,5 m; Horizontal: ± 1,5 m
Max. Windresistenz 10 m/s
Max. Gierwinkelgeschwindigkeit
150°/s
Max. Neigungswinkel 35°
Max. Steiggeschwindigkeit 5 m/s
Max. Sinkgeschwindigkeit 4 m/s
●
Elektrik und Mechanik
Nennleistung A3: 5 W; A3 Pro: 10 W
Leistungsspitze A3: 8 W; A3 Pro: 16 W
Betriebstemperatur -10 bis +45 °C (14 bis 113 °F)

A3
/
A3 Pro
Guía de inicio rápido
ES
©
2017 DJI All Rights Reserved.
27
1. Perl del producto
Introducción
La serie A3 de DJI
TM
es un sistema de control de vuelo able y resistente que resulta ideal para una gran
variedad de plataformas aéreas multirrotor. Emplea algoritmos avanzados de fusión de sensores y un diseño
redundante para mantener una estabilidad e integridad totales del sistema aéreo.
La serie A3 es totalmente compatible con los kits de desarrollo Onboard SDK y Mobile SDK de DJI, lo que
permite a los desarrolladores optimizar el sistema para aplicaciones específicas. Cuando se utiliza con el
DJI Lightbridge 2, dispone de acceso directo a características de la app DJI GO como los modos de vuelo
inteligente.
Con todos los componentes esenciales integrados en el controlador de vuelo A3 (incluidos IMU, barómetro y
grabador de datos), el dispositivo es potente y muy compacto. El A3 puede convertirse en el A3 Pro instalando
dos kits de ampliación. Las tres unidades GPS e IMU del A3 Pro añaden redundancia modular triple para
reducir considerablemente el riesgo de fallo del sistema.
Funciones
Modos de vuelo básicos
Modo P (Posicionamiento), modo
Atti (Actitud), modo F (Función) y
modo Manual.
DJI GO
App
Modos de vuelo inteligentes
Course Lock, Waypoints, Home Lock y
Point of Interest.
(Necesita la aplicación DJI GO y DJI
Lightbridge 2).
SDK de DJI
Totalmente compatible con Onboard SDK y
Mobile SDK.
Sitio web para desarrolladores:
https://developer.dji.com
Fiabilidad máxima
El A3 Pro incorpora redundancia
modular triple.

A3
/
A3 Pro
Guía de inicio rápido
ES
28
©
2017 DJI All Rights Reserved.
Módulo IMU Pro
1. Flecha de orientación
El echa de orientación.
2. Indicador de estado
Indica el estado del módulo IMU Pro y el sistema de
redundancia modular triple.
3. Puerto CAN1 GPS
Se comunica con el módulo GPS-Compass Pro.
Módulo LED
1. Indicador de estado de vuelo
Indica el estado del sistema de control de vuelo.
2. Puerto MicroUSB
Se usa para congurar y actualizar el A3 o A3 Pro
mediante DJI
Assistant.
Módulo GPS-Compass Pro
1. Indicador de estado
Indica el estado del módulo GPS-Compass Pro y el
sistema de redundancia modular triple.
2. Flecha de orientación
El módulo GPS-Compass Pro se debe montar con la
echa apuntando al morro de la aeronave.
3. Puerto CAN1 ampliado
Puerto especíco de bus CAN DJI. Se comunica con
dispositivos DJI (p. ej., sistema cinemático en tiempo real
(RTK) de GPS).
Piezas
5. Puerto RF
Se comunica con el receptor DJI Lightbridge 2.
6. Puerto iESC
Se comunica con el ESC inteligente DJI.
7. Contactos M1-M8
Conectan con el puerto PWM correspondiente del ESC
de cada motor.
8. Puerto LED
Se comunica con el módulo LED.
9. Puerto IMU2
Se comunica con el módulo IMU Pro.
10. Puerto PMU
Obtiene alimentación de la PMU.
11. CAN2
Se comunica con dispositivos SDK.
12. Puerto API
Se comunica con dispositivos SDK.
13. Contactos F5-F8
Puertos de E/S PWM multifunción.
14. Contactos F1-F4
Puertos de salida PWM multifunción.
15. Puerto S-Bus
Comunica con el receptor DJI DR16 o S-Bus.
1. Puerto IMU1
Se comunica con el módulo IMU Pro.
2. Puerto CAN1
Puerto especíco de bus CAN DJI. Se comunica con el
A3 GPS-Compass Pro u otros dispositivos de DJI (p. ej.,
sistema cinemático en tiempo real (RTK) de GPS).
3. Flecha de orientación
El echa de orientación.
4. Indicador de estado
Indica el estado del controlador de vuelo y el sistema de
redundancia modular triple.
Controlador de vuelo
1
3
2
1
3
2
Módulo PMU
1. Puerto de alimentación (9 V, 3 A)
Conectado al controlador de vuelo para suministro de
alimentación.
2. iBAT
Puerto reservado.
3. 3S-12S
Obtiene alimentación de la batería LiPo.
1
2
1
2
3
9
10
12
11
13
14
15
4
5
6
7
8
3
1
2

A3
/
A3 Pro
Guía de inicio rápido
ES
©
2017 DJI All Rights Reserved.
29
2. Preparación
Compruebe los componentes
Lea el folleto Contenido del embalaje y compruebe que todos los componentes están bien.
Si algún componente falta o está dañado, contacte con Atención al cliente (DJI Support).
Prepare su equipo
Asegúrese de que la estructura de aeronave, el sistema de control remoto, los ESC y la batería son
adecuados para usar con la serie A3. A continuación se muestra una lista de equipo compatible.
Estructura: DJI S900* o tipos I4, X4, I6, V6, Y6, IY6, X8, I8, V8
Sistema de control remoto: DJI Lightbridge 2*, DJI DR16, S-Bus
ESC: ESCs con una frecuencia de control de hasta 400 Hz
Batería: Batería 3S a 12S de LiPo
Equipo opcional: Tren de aterrizaje inteligente DJI, DJI Zenmuse Z15
*Recomendado para la serie A3.
Lea el manual del usuario
El A3 y el A3 Pro son sistemas muy potentes. Para aprovechar todas sus posibilidades,
lea detenidamente el manual del usuario antes de congurar el dispositivo.
http://www.dji.com/product/a3/info#downloads
Descargue DJI Assistant 2
El software Assistant se usa para congurar el sistema de control de vuelo del A3.
http://www.dji.com/product/a3/info#downloads
●
Compatible con Windows 7 (o posterior) o Mac OS X 10.9 (o posterior).
Descargue la aplicación DJI GO
Esto es preciso si va a usar el enlace de transmisión
de vídeo DJI Lightbridge 2.
Busque "DJI GO" en el App Store o en Google Play,
e instale la aplicación en su dispositivo móvil.
●
La aplicación DJI GO es compatible con iOS 8.0 (o posterior) y Android 4.1.2 (o posterior).
Vea el videotutorial
Demo de instalación
Conexión de los módulos
Como usar el DJI Assistant 2
http://www.dji.com/product/a3/info#video
DJI GO App Videotutoriales del A3
DJI
Assistant 2
PDF

A3
/
A3 Pro
Guía de inicio rápido
ES
30
©
2017 DJI All Rights Reserved.
Importante: Siga estrictamente las
directrices indicadas. De lo contrario,
pueden producirse comportamientos de
vuelo imprevisibles y accidentes graves.
3. Instalación
Congure el sistema
Vea el videotutorial para obtener un
resumen del proceso de instalación.
Consulte la sección "Instalación"
del manual del usuario para ver los
procedimientos en detalle.
Congure los parámetros
Visione el video tutorial para una breve
introducción.
A continuación, inicie el DJI Assistant 2
y siga las indicaciones.
DJI
Assistant 2
Patrones de parpadeo de LED
Consulte la sección "Indicador LED"
del manual del usuario para ver una
descripción detallada de los patrones de
parpadeo.
4. Especicaciones
Vuele seguro
Es importante conocer las directrices básicas de vuelo
para su propia seguridad y la de quienes le rodean. Para
más información, consulte los apartados Renuncia de
responsabilidad y Directrices de seguridad.
Zonas de exclusión aérea
Más información en:
http://www.dji.com/ysafe/no-y
※
Esta guía de inicio rápido puede modicarse
sin necesidad de noticarlo con antelación.
Consulte la sección "Apéndice" del manual del usuario para ver más especicaciones.
●
Funciones incorporadas
Modos de vuelo básicos Modo P (posicionamiento); Modo Atti / Modo A (Actitud); Modo F (Función);
Modo Manual
Modos de regreso al
punto de origen
RTH inteligente; RTH por tensión baja; RTH de seguridad
Funciones de seguridad Modo de seguridad; Aviso de RTH por tensión de batería baja; Límites
personalizados de altitud y radio de vuelo; Zonas de exclusión aérea;
Redundancia motriz (para plataformas de 6 y 8 rotores); Detección de
sobrecarga del motor; Redundancia modular triple (para A3 Pro); Grabador de
datos integrado
Aplicación DJI GO
(requiere DJI Lightbridge 2)
Modo principiante; Despegue y aterrizaje automáticos; Conguración de
controlador de vuelo inalámbrico; OSD de datos de vuelo; Modos de vuelo
inteligentes: Course Lock, Home Lock, Point of Interest (POI), Waypoints
Equipo DJI compatible Plataformas aéreas DJI (p.ej. S900, S1000, S1000+); Sistemas de gimbal DJI
(p.ej. Zenmuse X3
/
X5
/
X5R
/
XT, Z15 A7
/
GH4
/
5D Ⅲ
/
BMPCC); Tren de aterrizaje
inteligente DJI
●
Rendimiento de vuelo optimizado (dependiente de tipo de estructura de aeronave y carga útil)
Precisión de vuelo
estacionario (en Modo P)
Vertical: ±0,5 m; Horizontal: ±1,5 m
Resistencia máxima al viento 10 m/s
Velocidad angular máxima de guiñada 150 grados/s
Ángulo de cabeceo máximo 35°
Velocidad ascensional máxima 5 m/s
Velocidad de descenso máxima 4 m/s
●
Datos eléctricos y mecánicos
Indice de Potencia A3: 5 W; A3 Pro: 10 W
Indice de Maxima Potencia A3: 8 W; A3 Pro: 16 W
Temperatura de funcionamiento 14° a 113° F (-10° a 45° C)

A3
/
A3 Pro
Guide de démarrage rapide
FR
©
2017 DJI All Rights Reserved.
31
1. Présentation du produit
Introduction
La gamme A3 de DJI
TM
comprend un système de contrôle de vol able et robuste, idéal pour un large éventail
de plateformes aériennes de multirotors. Ce système utilise des algorithmes avancés de fusion de capteurs et
inclut une conception de redondance pour assurer la stabilité et l'intégrité totales du système aérien.
La gamme A3 est parfaitement compatible avec les Onboard SDK et Mobile SDK de DJI, permettant ainsi
aux développeurs d'optimiser le système pour des applications spéciques. Dans le cas d'une utilisation avec
Lightbridge 2 DJI, elle dispose d'un accès direct aux fonctionnalités de l'application DJI GO, telles que les
modes de vol intelligent (Intelligent Flight).
Grâce à l'ensemble des composants de base intégrés au contrôleur de vol A3 (notamment la IMU, le
baromètre et l'enregistreur de données), l'appareil est puissant et extrêmement compact. Le A3 peut être
transformé en A3 Pro grâce à l'installation de deux kits de mise à niveau. Les trois unités GPS et IMU de A3
Pro ajoutent une triple redondance modulaire pour réduire de manière considérable le risque de panne du
système.
Fonctions
Modes de vol basique
(Basic Flight)
Mode P (positionnement), mode
Atti (attitude), mode F (fonction) et
mode manuel.
DJI GO
App
Modes de vol intelligent
(Intelligent Flight)
Course Lock, Waypoints, Home Lock et
Point of Interest.
(Applications DJI GO et Lightbridge 2 DJI
requises.)
Kits de développement logiciel DJI
Compatibilité totale avec les Onboard SDK
et Mobile SDK.
Site Web des développeurs :
https://developer.dji.com
Fiabilité maximale
A3 Pro prend en charge une triple
redondance modulaire.

A3
/
A3 Pro
Guide de démarrage rapide
FR
32
©
2017 DJI All Rights Reserved.
Module IMU Pro
1. Flèche d'orientation
Le èche d'orientation.
2. Voyant d'état
Indique l'état du module IMU Pro et du système de triple
redondance modulaire.
3. Port GPS CAN1
Communique avec le module GPS-Compass Pro.
Module LED
1. Voyant d'état de vol
Indique l'état du système de contrôle de vol.
2. Port Micro-USB
Utilisé pour congurer et mettre à niveau le A3 ou A3 Pro
via DJI Assistant.
GPS-Compass Pro Module
1. Flèche d'orientation
Le module GPS-Compass Pro doit être monté avec la
èche pointée vers le nez de l'appareil.
2. Voyant d'état
Indique l'état du module GPS-Compass Pro et du
système de triple redondance modulaire.
3. Port CAN1 étendu
Port CAN-Bus dédié de DJI. Communique avec les
appareils DJI (par ex., le système GPS RTK (Real Time
Kinematic)).
Éléments
Contrôleur de vol
1. Port IMU1
Communique avec le module IMU Pro.
2. Port CAN1
Port CAN-Bus dédié de DJI. Communique avec le A3 GPS-
Compass Pro ou d'autres appareils DJI (par ex., le système
GPS RTK (Real Time Kinematic)).
3. Flèche d'orientation
Le èche d'orientation.
4. Voyant d'état
Indique l'état du contrôleur de vol et du système de triple
redondance modulaire.
5. Port RF
Communique avec le récepteur Lightbridge 2 DJI.
6. Port iESC
Communique avec Intelligent ESC de DJI.
7. Broches M1-M8
Se connectent au port PWM du ESC correspondant à
chaque moteur.
8. Port LED
Communique avec le module LED.
9. Port IMU2
Communique avec le module IMU Pro.
10. Port PMU
Tire l'alimentation du PMU.
11. CAN2
Communique avec les appareils SDK.
12. Port API
Communique avec les appareils SDK.
13. Broches F5-F8
Ports d'entrée
/
de sortie PWM multifonctions.
14. Broches F1-F4
Ports de sortie PWM multifonctions.
15. Port S-Bus
Communique avec le récepteur DR16 ou S-Bus DJI.
1
3
2
1
3
2
Module PMU
1. Port d'alimentation (9 V 3 A)
Connecté au contrôleur de vol pour l'alimentation.
2. iBAT
Port réservé.
3. 3S-12S
Tire l'alimentation d'une batterie LiPo.
1
2
1
2
3
9
10
12
11
13
14
15
4
5
6
7
8
3
1
2

A3
/
A3 Pro
Guide de démarrage rapide
FR
©
2017 DJI All Rights Reserved.
33
2. Préparation
Vérication des éléments
Consultez la che Contenu de l'emballage et vériez que tous les éléments sont en bon état.
Si un ou plusieurs éléments sont manquants ou endommagés, contactez l'assistance DJI.
Préparation de votre équipement
Assurez-vous de disposer d'une cellule appropriée, du système de radiocommande, des ESC et de la
batterie à utiliser avec la gamme A3. Vous trouverez ci-dessous la liste des équipements compatibles.
Cellule : DJI S900* ou de type I4, X4, I6, V6, Y6, IY6, X8, I8, V8
Système de radiocommande : Lightbridge 2 DJI*, DR16 DJI, S-Bus
ESC : ESC avec une fréquence de contrôle pouvant aller jusqu'à 400 Hz
Batterie : Batterie LiPo 3S à 12S
Équipement en option : Intelligent Landing Gear DJI, Zenmuse Z15 DJI
*Recommandé pour la gamme A3.
Téléchargement de l'application DJI GO
Cela est nécessaire si vous utilisez la liaison
descendante vidéo Lightbridge 2 DJI.
Recherchez « DJI GO » sur l'App Store ou sur
Google Play et installez l'application sur votre
appareil mobile.
●
L'application DJI GO prend en charge iOS 8.0 (ou versions ultérieures) et Android 4.1.2 (ou versions ultérieures).
Didacticiel vidéo
Démonstration de l'installation
Connection des modules
Utilisation de DJI Assistant 2
http://www.dji.com/product/a3/info#video
DJI GO App Didacticiels vidéo A3
Manuel de l'utilisateur
Les A3 et A3 Pro sont des systèmes puissants. Pour tirer parti de toutes
leurs capacités, lisez attentivement le manuel de l'utilisateur avant de
congurer l'appareil.
http://www.dji.com/product/a3/info#downloads
Téléchargement de DJI Assistant 2
Le logiciel Assistant est utilisé pour congurer le système de contrôle de vol A3.
http://www.dji.com/product/a3/info#downloads
●
Prend en charge Windows 7 (ou versions ultérieures) ou Mac OS X 10.9 (ou versions ultérieures).
DJI
Assistant 2
PDF

A3
/
A3 Pro
Guide de démarrage rapide
FR
34
©
2017 DJI All Rights Reserved.
Suivez strictement les consignes fournies.
Dans le cas contraire, vous risquez de
provoquer un comportement de vol
inattendu ou un accident grave.
3. Installation
Conguration du système
Le didacticiel vidéo donne un aperçu du
processus d'installation.
Reportez-vous à la section « Installation »
du manuel de l'utilisateur pour plus de
détails.
Conguration des paramètres
Le didacticiel vidéo ore une
démonstration rapide.
Lancez DJI Assistant 2 et suivez les
indications.
DJI
Assistant 2
Clignotements des voyants LED
Reportez-vous à la section « Voyants
LED » du manuel de l'utilisateur pour
obtenir une description détaillée des
diérents clignotements.
Voler en toute sécurité
Il est important que vous compreniez les consignes
de vol fondamentales an d'assurer votre sécurité
et celle de votre entourage. Reportez-vous aux
consignes de sécurité et à la clause d'exclusion de
responsabilité pour plus d'informations.
Zones d'exclusion aérienne
Plus d'informations sur :
http://www.dji.com/ysafe/no-y
※ Ce guide de démarrage rapide peut faire l'objet de
modications sans préavis.
4. Caractéristiques techniques
Reportez-vous à la section « Annexe » du manuel de l'utilisateur pour plus de caractéristiques.
●
Fonctions intégrées
Modes de vol basique (Basic Flight) Mode P (positionnement) ; Mode Atti
/
A (attitude) ; Mode F (fonction) ; Mode manuel
Modes Return to Home (RTH, Retour
au point de départ)
RTH intelligent ; RTH en cas de voltage faible ; RTH de sécurité
Fonctionnalités de sécurité Mode Sécurité ; Avertissement de sous-tension de la batterie ; Limites de rayon
et d'altitude de vol personnalisées ; Zones d'exclusion aérienne ; Redondance du
moteur (pour 6 et 8 plateformes de rotors) ; Détection de surcharge de moteur ; Triple
redondance modulaire (pour A3 Pro) ; Enregistreur de données intégré
Application DJI GO
(Lightbridge 2 DJI requis)
Mode Débutant ; Décollage et atterrissage automatiques ; Configuration du
contrôleur de vol sans l ; OSD de données de vol ; Modes de vol intelligent
(Intelligent Flight) : Course Lock, Home Lock, Point of Interest (POI), Waypoints
Supported DJI Equipment Plateformes aériennes DJI (par ex., S900, S1000, S1000+) ; Systèmes de nacelle DJI
(par ex., Zenmuse X3
/
X5
/
X5R
/
XT, Z15 A7
/
GH4
/
5D
Ⅲ
/
BMPCC) ; Intelligent Landing
Gear DJI
●
Performances de vol optimisées (selon le type de cellule et la charge)
Précision du maintien d'un vol
stationnaire (en mode P)
Verticale : ±0,5 m (±1,6 pied) ; Horizontale : ±1,5 m (±4,9 pieds)
Résistance maximale au vent 10 m/s (32 pieds/s)
Vitesse angulaire maximale en lacet 150 degrés/s
Angle d'inclinaison maximal 35°
Vitesse ascensionnelle maximale 5 m/s
Vitesse de descente maximale 4 m/s
●
Caractéristiques électriques et mécaniques
Puissance Nominale A3 : 5 W ; A3 Pro : 10 W
Puissance de Crête A3 : 8 W ; A3 Pro : 16 W
Température de fonctionnement 14° à 113° F (-10° à 45° C)

A3
/
A3 Pro
Guida di avvio rapido
IT
©
2017 DJI All Rights Reserved.
35
1. Prolo del prodotto
Introduzione
Il modello DJI
TM
serie A3 è un sistema di controllo di volo robusto e adabile, ideale per una vasta gamma di
piattaforme aeree multirotore. Esso utilizza avanzati algoritmi di fusione dei dati provenienti dai sensori e una
congurazione ridondante per garantire una stabilità e un'integrità totali del sistema aereo.
La serie A3 è pienamente compatibile con i dispositivi DJI OnBoard SDK e Mobile SDK, consentendo
agli sviluppatori di ottimizzare il sistema per applicazioni speciche. Quando viene utilizzata con il sistema
DJI Lightbridge 2, la serie A3 accede direttamente alle funzioni dell'app DJI GO, come le modalità di volo
intelligente.
Grazie all'integrazione di tutti i componenti essenziali nel sistema di controllo di volo A3 (inclusi IMU, barometro
e registratore dati), il dispositivo è potente e molto compatto. È possibile aggiornare la serie A3 ad A3 Pro
installando due kit di aggiornamento. Le tre unità GPS e IMU della serie A3 Pro aggiungono una tripla
ridondanza modulare che riduce notevolmente il rischio di guasti del sistema.
Funzioni
Modalità di volo di base
P-Mode (modalità
Posizionamento), Atti Mode
(modalità Assetto), F-Mode
(modalità Funzione) e modalità
manuale.
DJI GO
App
Modalità di volo intelligenti
Course Lock (Blocco orientamento),
Waypoints, Home Lock (Blocco posizione
iniziale) e Point of Interest (Punto di interesse).
(Richiede l'app DJI GO e il sistema DJI
Lightbridge 2.)
SDK DJI
Piena compatibilità con i dispositivi
OnBoard SDK e Mobile SDK.
Sito Web per sviluppatori:
https://developer.dji.com
Assoluta adabilità
La versione A3 Pro supporta una
tripla ridondanza modulare.

A3
/
A3 Pro
Guida di avvio rapido
IT
36
©
2017 DJI All Rights Reserved.
Modulo IMU Pro
1. Freccia di orientamento
Il freccia di orientamento.
2. Indicatore di stato
Indica lo stato del modulo IMU Pro e del sistema di tripla
ridondanza modulare.
3. Porta GPS CAN1
Comunica con il modulo GPS-Compass Pro.
Modulo LED
1. Indicatore di stato di volo
Indica lo stato del sistema di controllo di volo.
2. Porta micro-USB
Utilizzata per congurare e aggiornare la versione A3 o
A3 Pro tramite DJI Assistant.
Modulo GPS-Compass Pro
1. Indicatore di stato
Indica lo stato del modulo GPS-Compass Pro e del
sistema di tripla ridondanza modulare.
2. Freccia di orientamento
Il modulo GPS-Compass Pro deve essere montato con
la freccia rivolta verso il muso del velivolo.
3. Porta CAN1 estesa
Porta CAN-Bus DJI dedicata. Comunica con i dispositivi
DJI (ad esempio il sistema GPS Real Time Kinematic
(RTK)).
Parti
1. Porta IMU1
Comunica con il modulo IMU Pro.
2. Porta CAN1
Porta CAN-Bus DJI dedicata. Comunica con l'unità A3
GPS-Compass Pro o altri dispositivi DJI (ad esempio il
sistema GPS Real Time Kinematic (RTK)).
3. Freccia di orientamento
Il freccia di orientamento.
4. Indicatore di stato
Indica lo stato del sistema di controllo di volo e del sistema
di tripla ridondanza modulare.
5. Porta RF
Comunica con il ricevitore DJI Lightbridge 2.
6. Porta iESC
Comunica con il sistema DJI Intelligent ESC.
7. Pin M1 - M8
Collegare alla porta PWM ESC corrispondente per
ciascun motore.
8. Porta LED
Comunica con il modulo LED.
9. Porta IMU2
Comunica con il modulo IMU Pro.
10. Porta PMU
Riceve l’alimentazione dalla PMU.
11. CAN2
Comunica con i dispositivi SDK.
12. Porta API
Comunica con i dispositivi SDK.
13. Pin F5 - F8
Porte di I/O PWM multifunzione.
14. Pin F1 - F4
Porte di uscita PWM multifunzione.
15. Porta S-Bus
Comunica con il ricevitore DJI S-Bus o DR16.
Sistema di controllo di volo
1
3
2
1
3
2
Modulo PMU
1. Porta di alimentazione (9 V 3 A)
Collegata al sistema di controllo di volo per l’alimentazione.
2. iBAT
Porta nascosta.
3. 3S-12S
Riceve l'alimentazione proveniente dalla batteria LiPo.
1
2
1
2
3
9
10
12
11
13
14
15
4
5
6
7
8
3
1
2

A3
/
A3 Pro
Guida di avvio rapido
IT
©
2017 DJI All Rights Reserved.
37
2. Preparazione
Controllare gli articoli
Leggere la scheda Contenuto della confezione e verificare che tutti gli articoli siano in buone
condizioni. Contattare l'assistenza DJI per qualunque articolo mancante o danneggiato.
Preparare l'apparecchiatura
Accertarsi di disporre di una cellula, di un sistema di controllo remoto, di un ESC e di una batteria
adatti per l'uso con la serie A3. Si riporta di seguito un elenco delle apparecchiature compatibili.
Cellula: DJI S900* o i tipi I4, X4, I6, V6, Y6, IY6, X8, I8 e V8
Sistema di controllo remoto: DJI Lightbridge 2*, DJI DR16 e S-Bus
ESC: ESC con frequenza di controllo no a 400 Hz
Batteria: Batteria LiPo da 3S a 12S
Apparecchiature opzionali: Carrello di atterraggio intelligente DJI, Zenmuse Z15 DJI
*Consigliato per la Serie A3.
Leggere il Manuale utente
I modelli A3 e A3 Pro sono sistemi potenti. Per utilizzare appieno tutte le loro capacità,
leggere attentamente il Manuale utente prima di congurare il dispositivo.
http://www.dji.com/product/a3/info#downloads
Scaricare DJI Assistant 2
Il software Assistant viene utilizzato per congurare il sistema di controllo di volo della serie A3.
http://www.dji.com/product/a3/info#downloads
●
Supporta Windows 7 (o successivi) o Mac OS X 10.9 (o successivi).
Scaricare l'app DJI GO
Questa app è necessaria se si utilizza il
downlink video DJI Lightbridge 2.
Cercare "DJI GO" nell'App Store o in Google
Play e installare l'app sul proprio dispositivo
mobile.
●
L'app DJI GO supporta iOS 8.0 (o successivi) e Android 4.1.2 (o successivi).
Guardare il tutorial
Installa il Demo
Connetti i Moduli
Come utilizzare DJI Assistant 2
http://www.dji.com/product/a3/info#video
DJI GO App Tutorial A3
PDF
DJI
Assistant 2

A3
/
A3 Pro
Guida di avvio rapido
IT
38
©
2017 DJI All Rights Reserved.
Importante: attenersi scrupolosamente
alle linee guida fornite. In caso contrario
possono vericarsi comportamenti di volo
imprevisti o incidenti gravi.
3. Installazione
Congurare il sistema
Per una panoramica del processo di
installazione, guardare il tutorial.
Per le procedure dettagliate, fare
riferimento alla sezione "Installazione" del
Manuale utente.
Congurare i parametri
Guarda il video tutorial per una breve
spiegazione.
Poi apri DJI Assistant 2 e segui le
indicazioni.
DJI
Assistant 2
Schemi di lampeggiamento dei LED
Per una descrizione dettagliata degli
schemi di lampeggiamento dei LED, fare
riferimento alla sezione "LED" del Manuale
utente.
4. Caratteristiche tecniche
Sicurezza di volo
Per la sicurezza propria e delle altre persone presenti nelle
vicinanze, è importante comprendere le linee guida di
base del volo. Per ulteriori informazioni, fare riferimento alle
limitazioni della responsabilità e alle direttive sulla sicurezza.
Zone di esclusione aerea
Per ulteriori informazioni,
visitare il sito:
http://www.dji.com/ysafe/no-y
※
Questa Guida di avvio rapido è soggetta a
modica senza preavviso.
Per ulteriori caratteristiche tecniche, fare riferimento alla sezione "Appendice" del Manuale utente.
●
Funzioni incorporate
Modalità di volo di base P-Mode (modalità Posizionamento); Atti Mode / A-Mode (modalità Assetto); F-Mode
(modalità Funzione); Modalità manuale
Modalità di ritorno al punto di partenza
(RTH, Return-To-Home)
RTH intelligente; RTH per batteria scarica; RTH a sicurezza intrinseca
Funzioni di sicurezza Modalità a sicurezza intrinseca; Avvertenza per bassa tensione della batteria;
Limiti personalizzati dell'altitudine di volo e del raggio d'azione; Zone di
esclusione aerea; Ridondanza dei motori elettrici (per le piattaforme a 6 e 8
rotori); Rilevamento del sovraccarico dei motori elettrici; Tripla ridondanza
modulare (per A3 Pro); Registratore dati incorporato
App DJI GO
(è richiesto il sistema DJI Lightbridge 2)
Modalità Principiante; Decollo e atterraggio automatici; Congurazione wireless
del sistema di controllo di volo; OSD dei dati di volo; Modalità di volo intelligenti:
Blocco orientamento, Blocco posizione iniziale, Punto di interesse (PDI),
Waypoint
Apparecchiature DJI supportate Piattaforme aeree DJI (ad esempio S900, S1000 e S1000+); Sistemi di gimbal DJI
(ad esempio Zenmuse X3
/
X5
/
X5R
/
XT, Z15 A7
/
GH4
/
5D Ⅲ
/
BMPCC); Carrello di
atterraggio intelligente DJI
●
Prestazioni di volo ottimizzate (a seconda del tipo di cellula e di carico utile)
Precisione di permanenza in
sospensione (in modalità P)
Verticale: ± 0,5 m; Orizzontale: ± 1,5 m
Resistenza max. al vento 10 m/s
Velocità angolare max. di imbardata 150 gradi/s
Angolo max. di beccheggio 35°
Velocità max. di salita 5 m/s
Velocità max. di discesa 4 m/s
●
Caratteristiche elettriche e meccaniche
Potenza Nominale A3: 5 W; A3 Pro: 10 W
Potenza di picco nominale
A3: 8 W; A3 Pro: 16 W
Temperatura di esercizio Da -10 a 45 °C (da 14 a 113 °F)

NL
A3
/
A3 Pro
Snelstartgids
©
2017 DJI All Rights Reserved.
39
1. Productproel
Inleiding
De DJI
TM
A3-serie is een betrouwbaar en robuust ight control system dat geschikt is voor een breed scala aan
luchtvaartuigen met meerdere rotoren. Het systeem maakt gebruik van geavanceerde sensorfusie-algoritmes
en heeft een redundant ontwerp dat de stabiliteit en integriteit van het luchtvaartuig waarborgt.
De A3-serie is volledig compatibel met de onboard en mobiele SDK's van DJI, waardoor ontwikkelaars het
systeem kunnen optimaliseren voor specieke toepassingen. Bij gebruik in combinatie met de DJI Lightbridge
2 is er directe toegang tot DJI GO-functies, waaronder intelligente vluchtmodi.
Alle belangrijke onderdelen zijn geïntegreerd in de A3-vluchtcontroller (inclusief de IMU, barometer en
datarecorder) waardoor het systeem krachtig en zeer compact is. De A3 kan worden geüpdatet naar A3
Pro door twee upgradekits te installeren. De drie GPS-modules en IMU's van de A3 Pro geven het systeem
drievoudige modulaire redundantie, waardoor het risico op systeemstoringen sterk afneemt.
Eigenschappen
Standaard vluchtmodi
P-mode (Positionering)
Atti-mode (Houding)
F-Mode (Functie)
Handmatige modus
DJI GO
App
Intelligente vluchtmodi
Routepunten en bezienswaardigheden
Koersvergrendeling en basisvergrendeling
(DJI GO App en DJI Lightbridge 2 vereist.)
DJI SDK's
Volledig compatibel met de onboard SDK en
mobiele SDK.
Website ontwikkelaar:
https://developer.dji.com
Ultieme betrouwbaarheid
A3 Pro met drievoudige
modulaire redundantie.

NL
A3
/
A3 Pro
Snelstartgids
40
©
2017 DJI All Rights Reserved.
IMU Pro-module
1. Oriëntatiepijl
De oriëntatiepijl van de IMU Pro-module.
2. Statusindicator
Geeft de status weer van de IMU Pro-module en het
drievoudige modulaire redundantiesysteem.
3. CAN1 GPS-poort
Communiceert met de GPS-Kompas Pro-module.
LED-module
1. Vluchtstatusindicator
Geeft de status weer van het ight control system.
2. Micro-USB-poort
Gebruikt om de A3 of A3 Pro via DJI Assistant 2 te
congureren of upgraden.
Onderdelen
Vluchtcontroller
1. IMU1-poort
Communiceert met de IMU Pro-module.
2. CAN1-poort
Specieke DJI CAN-Bus-poort. Communiceert met de
GPS-Kompas Pro-module of andere DJI-apparaten
(bijv. het Real Time Kinematic (RTK) GPS-systeem).
3. Oriëntatiepijl
De oriëntatiepijl van de vluchtcontroller.
4. Statusindicator
Geeft de status weer van de vluchtcontroller en het
drievoudige modulaire redundantiesysteem.
5. RF-poort
Communiceert met het luchtsysteem van de DJI
Lightbridge 2.
6. iESC-poort
Communiceert met de DJI Smart ESC.
7. M1-M8-pins
Maakt verbinding met de bijbehorende ESC PWM-poort
voor elke motor.
8. LED-poort
Communiceert met de LED-module.
9. IMU2-poort
Communiceert met de IMU Pro-module.
10. PMU-poort
Haalt voeding uit de PMU.
11. CAN2
Communiceert met een SDK-apparaat.
12. API-poort
Communiceert met een SDK-apparaat.
13. F5-F8-pins
Multifunctionele PWM I
/
O-poorten.
14. F1-F4-pins
Multifunctionele PWM-uitgangspoorten.
15. S-Bus-poort
Communiceert met een DJI DR16- of S-Bus-ontvanger.
GPS-Kompas Pro-module
1. Statusindicator
Geeft de status weer van de GPS-Kompas Pro-module
en het drievoudige modulaire redundantiesysteem.
2. Oriëntatiepijl
De GPS-Kompas Pro-module moet worden gemonteerd
met de pijl wijzend in de richting van de neus van het
luchtvaartuig.
3. Uitgebreide CAN1-poort
Specieke DJI CAN-Bus-poort. Communiceert met een
DJI-apparaat (bijv. het Real Time Kinematic (RTK) GPS-
systeem).
1
2
3
1
3
2
PMU-module
1. Voedingspoort (9 V, 3 A)
Voor voeding verbonden met de vluchtcontroller.
2. iBAT
Gereserveerde poort.
3. 3S-12S
Haalt voeding uit de LiPo-accu.
1
3
2
1
2
9
10
12
11
13
14
15
4
5
6
7
8
3
1
2

NL
A3
/
A3 Pro
Snelstartgids
©
2017 DJI All Rights Reserved.
41
2. Voorbereiding
Controleer de onderdelen
Lees de onderdelenlijst en controleer of alle onderdelen in goede staat verkeren. Als er onderdelen
ontbreken of beschadigd zijn, neem dan contact op met DJI.
Je apparatuur voorbereiden
Voor gebruik met de A3 of A3 Pro heb je een geschikt casco en afstandsbedieningssysteem, en de
juiste accu en ESC's nodig. Lijst met compatibele apparatuur.
Casco: DJI S900* of typen I4, X4, I6, V6, Y6, IY6, X8, I8, V8
Afstandsbedieningssysteem: DJI Lightbridge 2*, DJI DR16, S-Bus
ESC: ESC's met besturingsfrequentie van maximaal 400 Hz
Accu: 3S tot 12S LiPo-accu
Optionele apparatuur: DJI Intelligent Landing Gear, DJI Zenmuse Z15
*Aanbevolen voor de A3-serie.
Lees de gebruikershandleiding
De A3 en A3 Pro zijn krachtige systemen. Lees grondig de
gebruikershandleiding voordat je het systeem congureert, om alle
mogelijkheden van het systeem optimaal te kunnen benutten.
http://www.dji.com/product/a3/info#downloads
Download DJI Assistant 2
DJI Assistant 2 wordt gebruikt om het A3 ight control system te congureren.
http://www.dji.com/product/a3/info#downloads
●
Ondersteunt Windows 7 (of nieuwer) of Mac OS X 10.9 (of nieuwer).
Download de DJI GO-app
Dit is vereist als je de DJI Lightbridge 2 video-
downlink gebruikt.
Zoek 'DJI GO' in de App Store of in Google Play
en installeer de app op uw mobiele apparaat.
●
De DJI GO-app ondersteunt iOS 8.0 (of hoger) en Android 4.1.2 (of hoger).
Bekijk de lmpjes met uitleg
Installatiedemo
De modules aansluiten
Hoe wordt DJI Assistant 2 gebruikt
http://www.dji.com/product/a3/info#video
DJI GO-app Filmpjes met uitleg
DJI
Assistant 2
PDF

NL
A3
/
A3 Pro
Snelstartgids
42
©
2017 DJI All Rights Reserved.
Volg de vermelde richtlijnen strikt op. Doe je
dit niet dan kan dat leiden tot onverwacht
vlieggedrag of ernstige ongevallen.
3. Installatie
Het systeem instellen
Bekijk het lmpje met uitleg voor een
overzicht van het installatieproces.
Raadpleeg voor gedetailleerde
procedures het hoofdstuk “Installatie”
in de gebruikshandleiding.
De parameters congureren
Bekijk het lmpje met uitleg voor een
korte stapsgewijze uitleg.
Start vervolgens DJI Assistant 2 op en
volg de hints.
DJI
Assistant 2
Knipperpatronen LED
Raadpleeg het hoofdstuk “LED Indicator”
in de gebruikshandleiding voor een
gedetailleerde beschrijving van de
knipperpatronen.
Vlieg veilig
Het is belangrijk de basisvluchtrichtlijnen
te begrijpen voor je veiligheid en die van je
medemens. Raadpleeg de disclaimer en
veiligheidsrichtlijnen voor meer informatie.
No-y zones (gebieden met een vliegverbod)
Meer informatie op:
http://www.dji.com/ysafe/no-y
※
Deze Snelstartgids is onderhevig aan wijzigingen
zonder voorafgaande kennisgeving.
4. Specicaties
Raadpleeg voor de volledige specicaties het hoofdstuk “Appendix” in de gebruikshandleiding.
● Ingebouwde functies
Standaard vluchtmodi P-mode (Positionering); Atti-mode
/
A-mode (Houding); F-mode (Functie);
Handmatige modus
Modi Terug-naar-Basis (RTH) Smart RTH;
RTH lage spanning; Uitvalbeveiligde RTH
Veiligheidsvoorzieningen Uitvalbeveiligingsmodus: Timeout waarschuwing accuspanning; No-y
zones; Motorredundantie (voor luchtvaartuigen met 6 en 8 rotoren); Detectie
motoroverbelasting; Drievoudige modulaire redundantie (voor A3 Pro); Ingebouwde
datarecorder
DJI GO-app
(DJI Lightbridge 2 vereist)
Beginnermodus; Automatisch opstijgen en landen; Draadloze configuratie
vluchtcontroller; OSD vluchtgegevens; Intelligente vluchtmodi: Koersvergrendeling,
basisvergrendeling, Point of Interest (POI (bezienswaardigheid)), Waypoints
(routepunten)
Ondersteunde
DJI-apparatuur
DJI-luchtvaartuigen (bijv. S900, S1000, S1000+); DJI-gimbalsystemen (bijv. Zenmuse
X3
/
X5
/
X5R
/
XT, Z15 A7
/
GH4
/
5D
Ⅲ
/
BMPCC); DJI Intelligent Landing Gear
● Geoptimaliseerde vlucht-prestaties (Afhankelijk van cascotype en lading)
Zweefprecisie
(In P-modus)
Verticaal: ±0,5 m; Horizontaal: ±1,5 m
Maximale windbestendigheid 10 m/s
Maximale gierhoeksnelheid 150°/s
Maximale hellingshoek 35°
Maximale stijgsnelheid 5 m/s
Maximale daalsnelheid 4 m/s
● Elektrisch & Mechanisch
Nominaal vermogen A3: 5 W; A3 Pro: 10 W
Nominaal piekvermogen A3: 8 W; A3 Pro: 16 W
Bedrijfstemperatuur -10° tot 45 °C (14° tot 113 °F)

PT
A3
/
A3 Pro
Guia de início rápido
©
2017 DJI All Rights Reserved.
43
No-y zones (gebieden met een vliegverbod)
Meer informatie op:
http://www.dji.com/ysafe/no-y
1. Perl do produto
Introdução
O DJI
TM
A3 Series é um sistema de controlo de voo ável e robusto, ideal para uma grande variedade de
plataformas de antena multi rotor. Este sistema utiliza algoritmos avançados de fusão de sensores e um design
redundante para manter a total estabilidade e integridade do sistema da antena.
O A3 é totalmente compatível com o DJI Onboard e os Mobile SDKs, o que permite aos programadores
otimizarem o sistema para aplicações especícas. Quando utilizado com o DJI Lightbridge 2, permite acesso
direto às funcionalidades do DJI GO, incluindo modos de voo inteligentes.
Com todos os componentes essenciais integrados no controlador de voo A3 (incluindo a IMU, o barómetro
e um gravador de dados), o dispositivo é potente e muito compacto. O A3 pode ser atualizado para o A3
Pro instalando dois kits de atualização. Os três módulos GPS e a IMU do A3 Pro vêm acrescentar tripla
redundância modular, reduzindo signicativamente o risco de avaria do sistema.
Características
Modos básicos de voo
Modo P (Positioning)
Modo Atti (Attitude)
Modo F (Function)
Modo Manual
DJI GO
App
Modos de voo inteligentes
Pontos de passagem e ponto de interesse (POI)
Bloqueio de curso e Bloqueio de posição inicial
(Requer a DJI GO App e o DJI Lightbridge 2.)
DJI SDKs
Totalmente compatível com Onboard SDK e
Mobile SDK.
Website para programadores:
https://developer.dji.com
Máxima abilidade
O A3 Pro suporta tripla
redundância modular.

PT
A3
/
A3 Pro
Guia de início rápido
44
©
2017 DJI All Rights Reserved.
Módulo IMU Pro
1. Seta de orientação
A seta de orientação do módulo IMU Pro.
2. Indicador de estado
Indica o estado do módulo IMU Pro e do sistema de tripla
redundância modular.
3. Porta CAN1 GPS
Comunica com o módulo GPS-Compass Pro.
Módulo LED
1. Indicador de estado de voo
Indica o estado de voo do sistema de controlo de voo.
2. Porta micro USB
Utilizada para configurar e atualizar o A3 ou A3 Pro
através do DJI Assistant 2.
Peças
Controlador de voo
1. Porta IMU1
Comunica com o módulo IMU Pro.
2. Porta CAN1
Porta DJI CAN-Bus dedicada. Comunica com o
módulo GPS-Compass Pro ou com outros dispositivos da
DJI (por ex. sistema Real Time Kinematic (RTK) GPS).
3. Seta de orientação
A seta de orientação do controlador de voo.
4. Indicador de estado
Indica o estado do controlador de voo e do sistema de
tripla redundância modular.
5. Porta RF
Comunica com o DJI Lightbridge 2 Air System.
6. Porta iESC
Comunica com o DJI Smart ESC.
7. Pinos M1-M8
Liga-se à porta ESC PWM correspondente de cada
motor.
8. Porta LED
Comunica com o módulo LED.
9. Porta IMU2
Comunica com o módulo IMU Pro.
10. Porta PMU
Obtém energia a partir da PMU.
11. CAN2
Comunica com um dispositivo SDK.
12. Porta API
Comunica com um dispositivo SDK.
13. Pinos F5-F8
Portas PWM I
/
O multifunções.
14. Pinos F1-F4
Portas de saída PWM multifunções.
15. Porta S-Bus
Comunica com um DJI DR16 ou recetor S-Bus.
Módulo GPS-Compass Pro
1. Indicador de estado
Indica o estado do módulo GPS-Compass Pro e do
sistema de tripla redundância modular.
2. Seta de orientação
O módulo GPS-Compass Pro deve ser montado
com a seta virada para o nariz da aeronave.
3. Porta CAN1 alargada
Porta DJI CAN-Bus dedicada. Comunica com um
dispositivo DJI (por ex. com o sistema Real Time
Kinematic (RTK) GPS).
1
2
3
1
3
2
Módulo PMU
1. Porta de alimentação (9V 3A)
Ligada ao controlador de voo para alimentação de corrente.
2. iBAT
Porta reservada.
3. 3S-12S
Obtém energia a partir da bateria LiPo.
1
3
2
1
2
9
10
12
11
13
14
15
4
5
6
7
8
3
1
2

PT
A3
/
A3 Pro
Guia de início rápido
©
2017 DJI All Rights Reserved.
45
2. Preparação
Vericar os itens
Leia a folha Incluído na embalagem e verique se todos os itens estão em boas condições. Se algum
item estiver em falta ou danicado, contacte a assistência da DJI.
Preparar o seu equipamento
Certique-se de que possui uma célula, um sistema de controlo remoto, um ESC e uma bateria
adequados para utilização com o A3 ou A3 Pro. Segue-se uma lista de equipamento compatível.
Célula: DJI S900* ou tipos I4, X4, I6, V6, Y6, IY6, X8, I8, V8
Sistema de controlo remoto: DJI Lightbridge 2*, DJI DR16, S-Bus
ESC: ESCs com frequência de controlo até 400 Hz
Bateria: Bateria LiPo 3S a 12S
Equipamento opcional: DJI Intelligent Landing Gear, DJI Zenmuse Z15
*Recomendada para a série A3.
Ler o manual do utilizador
O A3 e o A3 Pro são sistemas potentes. Para utilizar todas as suas capacidades,
leia cuidadosamente o manual do utilizador antes de congurar o sistema.
http://www.dji.com/product/a3/info#downloads
Transferir o DJI Assistant 2
O DJI Assistant 2 é utilizado para congurar o sistema de controlo de voo A3.
http://www.dji.com/product/a3/info#downloads
●
Compatível com Windows 7 (ou posterior) ou Mac OS X 10.9 (ou posterior).
Transferir a DJI GO App
A transferência é necessária se estiver a utilizar o
link de vídeo DJI Lightbridge 2.
Pesquise “DJI GO” na App Store ou no Google
Play e instale a aplicação no seu dispositivo móvel.
●
A DJI GO app é compatível com iOS 8.0 (ou posterior) e Android 4.1.2 (ou posterior).
Ver os tutoriais de vídeo
Demo de instalação
Ligar os módulos
Como utilizar o DJI Assistant 2
http://www.dji.com/product/a3/info#video
DJI GO App Tutoriais de vídeo
DJI
Assistant 2
PDF

PT
A3
/
A3 Pro
Guia de início rápido
46
©
2017 DJI All Rights Reserved.
Siga cuidadosamente as instruções
fornecidas. Se não o zer, pode provocar
um comportamento de voo inesperado ou
acidentes graves.
3. Instalação
Congurar o sistema
Veja o tutorial de vídeo para obter uma
vista geral do processo de instalação.
Consulte a secção “Instalação” do
manual do utilizador para obter mais
detalhes sobre os procedimentos.
Congurar os parâmetros
Veja o tutorial de vídeo para ter uma
breve visita.
Em seguida, inicie o DJI Assistant 2 e
siga as instruções.
DJI
Assistant 2
Padrões de intermitência do LED
Consulte a secção “Indicador LED” do
manual do utilizador para obter uma
descrição detalhada dos padrões de
intermitência.
Voar com segurança
É importante que compreenda as diretrizes básicas para
a segurança de voo, tanto para o utilizador como para os
que o rodeiam. Consulte a declaração de exoneração de
responsabilidade e as diretrizes de segurança para obter
mais informações.
Zonas de exclusão aérea
Mais informações em:
http://www.dji.com/ysafe/no-y
※
Este guia de início rápido está sujeito a
alterações sem aviso prévio.
4. Especicações
Consulte a secção “Apêndice” do manual do utilizador para obter as especicações completas.
● Funções integradas
Modos básicos de voo Modo P (Positioning); Modo Atti
/
Modo A (Attitude); Modo F (Function);
Modo Manual
Modos Return-to-Home
(Voltar à posição inicial)
Low voltage RTH; Failsafe RTH
Funções de segurança Modo Failsafe (proteção contra falhas); aviso de tensão da bateria baixa; limites de
altitude e raio de voo personalizados; zonas de exclusão aérea; redundância do
motor (para plataformas de 6 e 8 rotores); deteção de sobrecarga do motor; tripla
redundância modular (para A3 Pro); gravador de dados incorporado
DJI GO App
(é necessária a DJI
Lightbridge 2)
Modo de principiante; Descolagem automática e Aterragem automática;
Conguração do controlador de voo sem os; OSD de dados do voo; Modos de voo
inteligentes: Bloqueio de curso, Bloqueio de posição inicial, Ponto de interesse (POI),
Pontos de passagem
Equipamento DJI compatível Plataformas de antena DJI (por ex. S900, S1000, S1000+); sistemas de suspensão
cardã DJI (por ex. Zenmuse X3
/
X5
/
X5R
/
XT, Z15 A7
/
GH4
/
5D
Ⅲ
/
BMPCC); DJI Intelligent
Landing Gear
● Desempenho otimizado do voo (Sujeito ao tipo de célula e à capacidade de carga)
Precisão de voo estacionário
(No modo P)
Vertical: ±0,5 m; Horizontal: ±1,5 m
Resistência máx. ao vento 10 m/s
Velocidade de inclinação da
guinada máx.
150°/s
Ângulo de inclinação máx. 35°
Velocidade de subida máxima 5 m/s
Velocidade de descida máxima 4 m/s
● Características elétricas e mecânicas
Potência nominal A3: 5 W; A3 Pro: 10 W
Pico de corrente nominal A3: 8 W; A3 Pro: 16 W
Temperatura de funcionamento -10 a 45 °C (14 a 113 °F)

RU
A3
/
A3 Pro
Краткое руководство пользователя
©
2017 DJI All Rights Reserved.
47
1. Параметры изделия
Введение
Серия DJI
TM
A3 — это надежная система управления, которая идеально подходит для широкого
спектра различных летательных аппаратов с несколькими несущими винтами. Благодаря передовым
алгоритмам сбора данных и избыточности компонентов конструкции система обеспечивает стабильную
и надежную работу летательного аппарата.
Серия A3 полностью совместима с комплектами для разработки ПО DJI Onboard и Mobile SDK, что
позволит разработчикам оптимизировать систему для необходимых целей. При использовании
системы вместе с DJI Lightbridge 2 пользователь получит непосредственный доступ к функциям
приложения DJI GO, например, к режимам Intelligent Flight.
Система автоматического управления полетом A3 имеет компактный размер и широкую
функциональность. Она оснащена всеми необходимыми средствами — IMU, барометром и
устройством записи данных. С помощью двух комплектов для модернизации систему A3 можно
обновить до A3 Pro. Три модуля GPS и IMU в A3 Pro обеспечивают тройную модульную избыточность и
значительно снижают риск отказа системы.
Функции
Основные режимы полета
Режим P (Позиционирование),
Режим Atti (Пространственное
положение), Режим F (Функции)
и ручной режим.
DJI GO
App
Режимы Intelligent Flight
Course Lock (Фиксация курса), Waypoints
(Точки маршрута), Home Lock (Фиксация
домашней точки) и Point of Interest (Нужная
точка).
(Требуется приложение DJI GO и DJI
Lightbridge 2.)
DJI SDK
Полная совместимость с Onboard и Mobile
SDK.
Веб-сайт разработчика:
https://developer.dji.com
Исключительная надежность
A3 Pro обладает тройной
модульной избыточностью.
Zonas de exclusão aérea
Mais informações em:
http://www.dji.com/ysafe/no-y

RU
A3
/
A3 Pro
Краткое руководство пользователя
48
©
2017 DJI All Rights Reserved.
Модуль IMU Pro
1. Указатель ориентации
Указатель ориентации.
2. Индикатор состояния
Отображает состояние модуля IMU Pro и тройной
модульной системы.
3. Порт CAN1 GPS
Взаимодействует с модулем GPS-Compass Pro.
Светодиодный модуль
1. Индикатор состояния полета
Отображает состояние системы управления полетом.
2. Порт Micro-USB
Используется для настройки и обновления A3 или A3
Pro с помощью DJI Assistant.
Модуль GPS-Compass Pro
1. Индикатор состояния
Отображает состояние модуля GPS-Compass Pro и
тройной модульной системы.
2. Указатель ориентации
Модуль GPS-Compass Pro необходимо устанавливать
так, чтобы стрелка указывала на нос ЛА.
3. Расширенный порт CAN1
Выделенный порт шины CAN DJI. Взаимодействует
с устройствами DJI (например, с системой GPS Real
Time Kinematic (RTK)).
Детали
1. Порт IMU1
Взаимодействует с модулем IMU Pro.
2. Порт CAN1
Выделенный порт шины CAN DJI. Взаимодействует
с A3 GPS-Compass Pro и другими устройствами DJI
(например, с системой GPS Real Time Kinematic (RTK)).
3. Указатель ориентации
Указатель ориентации.
4. Индикатор состояния
Отображает состояние системы автоматического
управления ЛА и тройной модульной системы с
избыточными элементами.
5. Порт RF
Взаимодействует с приемником DJI Lightbridge 2.
6. Порт iESC
Взаимодействует с DJI Intelligent ESC.
7. Контакты M1-M8
Подключение к порту PWM ESC для каждого
двигателя.
8. Порт LED
Взаимодействует с модулем LED.
9. Порт IMU2
Взаимодействует с модулем IMU Pro.
10. Порт PMU
Получает электропитание от PMU.
11. CAN2
Взаимодействует с устройствами SDK.
12. Порт API
Взаимодействует с устройствами SDK.
13. Контакты F5-F8
Многофункциональные порты PWM ввода-вывода.
14. Контакты F1-F4
Многофункциональные выходные порты PWM.
15. Порт S-Bus
Взаимодействует с DJI DR16 или приемником
S-Bus.
Система автоматического управления ЛА
1
3
2
1
3
2
Модуль PMU
1. Порт питания (9 В 3 А)
Подключен к пульту управления для получения
электропитания.
2. iBAT
настраиваемый.
3. 3S-12S
Получает электропитание от аккумуляторной литий-
полимерной аккумуляторной батареи.
1
2
1
2
3
9
10
12
11
13
14
15
4
5
6
7
8
3
1
2

RU
A3
/
A3 Pro
Краткое руководство пользователя
©
2017 DJI All Rights Reserved.
49
2. Подготовка
Проверьте состояние компонентов
Ознакомьтесь со списком Комплект поставки и убедитесь, что все компоненты находятся
в хорошем состоянии. При обнаружении поврежденных компонентов или при отсутствии
компонентов обратитесь в службу поддержки DJI.
Подготовьте оборудование
Убедитесь, что обладаете летательным аппаратом, пультом дистанционного управления,
ESC и аккумуляторной батареей, совместимыми с A3. Ниже приведен список совместимого
оборудования.
Летательные аппараты: DJI S900* или типов I4, X4, I6, V6, Y6, IY6, X8, I8, V8
Пульт дистанционного управления: DJI Lightbridge 2*, DJI DR16, S-Bus
ESC: ESC с управляющей частотой до 400 Гц
Батарея: LiPo от 3S до 12S
Дополнительное оборудование: Интеллектуальное посадочное шасси DJI, DJI Zenmuse z15
*Рекомендуется для серии A3.
Ознакомьтесь с руководством пользователя
Системы A3 и A3 Pro очень мощные. Чтобы воспользоваться всеми их
возможностями, перед тем как приступить к настройке устройства, внимательно
прочтите руководство пользователя.
http://www.dji.com/product/a3/info#downloads
Загрузите DJI Assistant 2
Программное обеспечение Assistant используется для настройки системы
управления полетом A3.
http://www.dji.com/product/a3/info#downloads
●
Поддерживается Windows 7 (или более поздняя версия) или Mac OS X 10.9 (или более поздняя версия).
Загрузите приложение DJI GO
Это необходимо, если вы используете
линию видеосвязи DJI Lightbridge 2.
Найдите приложение «DJI GO» в App Store
или Google Play и установите его на свое
мобильное устройство.
●
Приложение DJI GO поддерживает iOS 8.0 (или более позднюю версию) и Android 4.1.2 (или более
позднюю версию).
Просмотрите обучающий видеоролик
Демонстрация установки
Подключение модулей
Как пользоваться DJI Assistant 2
http://www.dji.com/product/a3/info#video
Приложение DJI GO Обучающие видеоролики по A3
DJI
Assistant 2
PDF

RU
A3
/
A3 Pro
Краткое руководство пользователя
50
©
2017 DJI All Rights Reserved.
Важно: Строго соблюдайте
следующие указания. Невыполнение
этих требований может привести к
непредвиденному поведению ЛА или
серьезным аварийным ситуациям.
3. Установка
Настройка системы
Посмотрите обучающий видеоролик для
получения общих сведений о процедуре
установки. Для получения подробного
описания процедур обратитесь к разделу
«Установка» в руководстве пользователя.
Настройка параметров
Посмотрите пошаговую
видеоинструкцию.
Затем запустите DJI Assistant 2 и
следуйте подсказкам.
DJI
Assistant 2
Характер мигания индикатора
В разделе «Светодиодный индикатор» в
руководстве пользователя содержится
подробное описание характера
мигания.
4. Технические характеристики
Соблюдайте безопасность полетов
Для обеспечения своей безопасности и безопасности
окружающих важно понимать основные принципы
полета. Для получения дополнительной информации
обратитесь к отказу от ответственности и
руководству по технике безопасности.
Зоны, запрещенные для полетов
Более подробную информацию вы
можете получить на веб-сайтах:
http://www.dji.com/ysafe/no-y
※
Это Краткое руководство пользователя может
быть изменено без предварительного уведомления.
Для получения подробных технических характеристик обратитесь к разделу «Приложение» в
руководстве пользователя.
●
Встроенные функции
Основные режимы полета Режим Р (Позиционирование); Режим Atti /
Режим A (Пространственное
положение); Режим F (Функции); Ручной режим
Режимы «возврата домой» Интеллектуальный режим RTH; RTH при низком напряжении; Аварийный
режим RTH
Функции обеспечения
безопасности
Аварийный режим; Предупреждение о низком напряжении батареи;
Устанавливаемые пользователем ограничения высоты и дальности
полета; Зоны, запрещенные для полетов
Избыточность двигателей (для моделей с 6 и 8 несущими винтами);
Обнаружение перегрузки двигателя; Тройная модульная избыточность (для
A3 Pro); Встроенный регистратор данных
Приложение DJI GO
(Требуется DJI Lightbridge 2)
Режим для начинающих; Взлет и посадка в автоматическом режиме:
Настройка беспроводной системы автоматического управления ЛА;
Данные о полетах на OSD; Режимы Intelligent Flight: Фиксация курса,
Фиксация дом. точки, Нужная точка (POI), Точки маршрута
Поддерживаемое оборудование
DJI
Летательные аппараты DJI (например, S900, S1000, S1000+); Системы
подвеса DJI (например, Zenmuse X3
/
X5
/
X5R
/
XT, Z15 A7
/
GH4
/
5D
Ⅲ
/
BMPCC);
Интеллектуальное посадочное шасси DJI
●
Оптимизированные летные характеристики (в зависимости от типа конструкции и массы груза)
Точность зависания (в режиме P) По вертикали: ±0,5 м; По горизонтали: ±1,5 м
Макс. сопротивление ветру 10 м/с
Макс. угловая скорость рыскания 150 град/с
Макс. угол наклона 35°
Макс. скорость подъема 5 м/с
Макс. скорость спуска 4 м/с
●
Электрика и механика
Номинальная мощность A3 :5В; A3 Pro: 10В
Номинальная пиковая мощность
A3 :8В; A3 Pro: 16В
Рабочий диапазон температур 14 °F до +113 °F (от -10° до 45 °C)


If you have any questions about this document, please contact DJI by
sending a message to
.
Printed in China.
Manufactured by:
14th floor, West Wing, Skyworth Semiconductor Design Building NO.18
Gaoxin South 4th Ave, Nanshan District, Shenzhen, Guangdong, China
制 造 商:深圳市大疆创新科技有限公司
地 址:深圳市南山区高新南四道 18 号创维半导体设计大厦西座 14 层
服务热线:400-700-0303
Copyright © 2017 DJI All Rights Reserved.
Copyright © 2017 大疆创新 版权所有
www.dji.com/support
DJI Support
DJI 技术支持
DJI 技術支援
DJI サポート
DJI 고객지원
DJI Support
Servicio de asistencia de DJI
Service client DJI
Assistenza DJI
DJI-ondersteuning
Suporte DJI
Техническая поддержка DJI
YC.BZ.S00238.06


www.dji.com
-
 1
1
-
 2
2
-
 3
3
-
 4
4
-
 5
5
-
 6
6
-
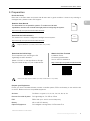 7
7
-
 8
8
-
 9
9
-
 10
10
-
 11
11
-
 12
12
-
 13
13
-
 14
14
-
 15
15
-
 16
16
-
 17
17
-
 18
18
-
 19
19
-
 20
20
-
 21
21
-
 22
22
-
 23
23
-
 24
24
-
 25
25
-
 26
26
-
 27
27
-
 28
28
-
 29
29
-
 30
30
-
 31
31
-
 32
32
-
 33
33
-
 34
34
-
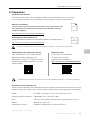 35
35
-
 36
36
-
 37
37
-
 38
38
-
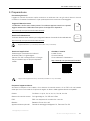 39
39
-
 40
40
-
 41
41
-
 42
42
-
 43
43
-
 44
44
-
 45
45
-
 46
46
-
 47
47
-
 48
48
-
 49
49
-
 50
50
-
 51
51
-
 52
52
-
 53
53
-
 54
54
-
 55
55
-
 56
56


dji A3 Guía de inicio rápido
- Tipo
- Guía de inicio rápido
- Este manual también es adecuado para
en otros idiomas
- français: dji A3 Guide de démarrage rapide
- italiano: dji A3 Guida Rapida
- português: dji A3 Guia rápido
- 日本語: dji A3 クイックスタートガイド
Artículos relacionados
-
dji N3 Guía de inicio rápido
-
dji Zenmuse X5R Guía del usuario
-
dji Go Guía de inicio rápido
-
-
-
-
-
dji MATRICE 300 RTK Guía del usuario
-
dji Matrice 200 Series Guía de inicio rápido
-
dji Phantom 4 Pro Guía del usuario