La página se está cargando...

1
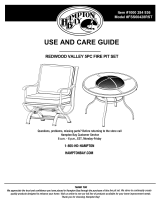
USE AND CARE GUIDE
OUTDOOR FIRE PIT
TIPTON
THANK YOU
We appreciate the trust and confidence you have placed in Hampton Bay through the purchase of this outdoor fire pit. We strive to
continually create quality products designed to enhance your home. Visit us online to see our full line of products available for your home
improvement needs. Thank you for choosing Hampton Bay!
Item # 1001810259
DFC # 1001786751
Model # OFW832S
Questions, problems, missing parts? Before returning to the store,
call Hampton Bay Customer Service 8 a.m. - 7 p.m., EST, Monday - Friday, 9 a.m. - 6 p.m., EST, Saturday
855-HD-HAMPTON
HAMPTONBAY.COM

2
Table of Contents
Table of Contents ...........................2
Safety Information ...........................2
Warranty ...................................3
Pre-Assembly ...............................3
Assembly ..................................5
Care & Cleaning .............................6
Service Parts ...............................7
Safety Information
Please read and understand this entire manual before attempting to
assemble, operate or install the product.
WARNING:
FOR OUTDOOR USE ONLY!
Burning wood and charcoal indoors can kill
you. It gives off carbon monoxide, which has
no odor.
WARNING:
NEVER burn in vehicles, tents or
indoors. CARBON MONOXIDE HAZARD!
WARNING:
NEVER LEAVE FIRE UNATTENDED!
WARNING:
When the fire pit is in use, the handle
on the mesh spark screen can reach extreme
temperatures that can cause serious injury to an
unprotected hand. Use a poker when handling.
WARNING:
DO NOT TOUCH the surface of the
fire pit or the firebox while in use.
CAUTION:
Burn only 7 lbs/3.18kgs of
charcoal, wood or fire logs in the fire pit.
CAUTION:
DO NOT use gasoline or
kerosene to start the fire in your fire pit.
CAUTION:
DO NOT use this unit on a wood
deck, long or dry grass and/or leaves, or on
combustible surfaces.
CAUTION:
Place the fire pit no closer than
8 ft / 2.4 meters from walls or combustibles
during use.
WARNING:
DO NOT allow children or pets near
the fire pit without supervision.
WARNING:
NEVER place a storage cover on fire pit
when in use. Ensure the fire pit and mesh spark screen
have cooled before placing a storage cover over the
fire pit.
CAUTION:
DO NOT place or use the fire pit
under a canopy of trees.
CAUTION:
DO NOT attempt to move the fire
pit while it is hot or in use.
CAUTION:
Always ensure that the mesh spark
screen is secured over the firebox while in use.
CAUTION:
The poker handle may become
hot during and after use.
CAUTION:
Use heat-resistant gloves to
handle hot tools.
CAUTION:
Adequate fire extinguishing material
should be readily available.
WARNING:
Always keep a fire extinguisher close
by when having an open flame.
CALIFORNIA PROPOSITION 65
WARNING:
Fuels used in wood or charcoal
burning appliances, and the products of
combustion of such fuels, can expose you
to chemicals including carbon black, which
is known to the State of California to cause
cancer, and carbon monoxide, which is
known to the State of California to cause birth
defects or other reproductive harm. For more
information go to: www.P65Warnings.ca.gov.

3
1 YEAR LIMITED FRAME WARRANTY
If within one year from the date of original purchase, this item fails due to a defect in material or workmanship, we will replace or repair at our
option, free of charge. This warranty does not cover defects resulting from improper or abnormal use, misuse, accident, or alteration. Failure to
follow all instructions in the owner’s manual will also void this warranty. The manufacturer will not be liable for incidental or consequential damages,
or common erosion of outdoor products. Some states do not allow the exclusion or limitation of incidental or consequential damages, so the
above limitation or exclusion of incidental or consequential damages may not apply to you. This warranty gives you specific legal rights and you
may also have other rights which vary from state to state.
Contact the Customer Service Team at 855-HD-HAMPTON or visit www.hamptonbay.com.
TOOLS REQUIRED
Phillips screwdriver
(Not Included)
Warranty
Pre-Assembly
HAMPTONBAY.COM
Please contact 855-HD-HAMPTON for further assistance.
Carefully remove all pieces from the carton and make sure that you have all parts listed (refer to parts list). If you are missing parts, please contact
855-HD-HAMPTON for further assistance.
ESTIMATED ASSEMBLY TIME
15 minutes
HARDWARE INCLUDED
Part Description Quantity
AA Bolt M6x12mm 12
BB Nut M6 1
CC Wrench 1
AA BB CC

4
PACKAGE CONTENTS
Pre-Assembly (continued)
Part Description
A Mesh Spark Screen Bracket
B Mesh Spark Screen
C Firebox
D Base
E Poker
F Heat Shield
G Storage Cover
A
B
C
D
G
E
F

5
1
Assemble the heat shield
c
Attach the heat shield (F) to the base (D) using four M6x12 mm bolts
(AA).
c
Tighten all bolts with a screwdriver.
4
Assembling the re pit
c
Place the mesh spark screen (B) on top of the firebox assembly.
Assembly
3
Attaching the mesh spark screen bracket
to the mesh spark screen
c
Insert the mesh spark screen bracket (A) over the top of the mesh
spark screen (B). Attach the mesh spark screen bracket with nut (BB).
Tighten with the wrench.
HAMPTONBAY.COM
Please contact 855-HD-HAMPTON for further assistance.
AA
B
BB
B
A
2
Attaching the rebox to the base
c
Attach the firebox (C) to the base (D) using the M6x12 mm bolts
(AA).
c
Tighten all bolts with a screwdriver.
AA
C
D
F

6
Care and Cleaning
c
Allow the fire pit to cool completely before moving the fire pit.
c
Use a soft cloth to wipe the fire pit and the poker.
c
Do not attempt to clean while hot.
c
Clean the firebox after each use once the ashes have cooled.
c
Store in a cool, clean, dry place.
c
Place the storage cover (G) on the fire pit once it has cooled.
How to use the re pit
c
Place the fire pit on dirt, stone, gravel or sand. Do not place on combustible surfaces.
c
Before using, add a 1-1.5 in. layer of sand or about 5 lbs. to the bottom of the firebowl.
This will help against the corrosive nature of the ashes and help radiate the heat upwards.
1
Sand Placement

7
Replacement Parts List
Part Description Part #
A Mesh Spark Screen Bracket 30-01-059
B Mesh Spark Screen 30-01-058
C Firebox 30-01-060
D Base 30-01-061
E Poker 30-01-062
F Heat Shield 30-01-068
G Storage Cover 30-01-063
HWP Hardware Pack 30-09-506
HAMPTONBAY.COM
Please contact 855-HD-HAMPTON for further assistance.
A
B
C
D
G
E
F

8
Questions, problems, missing parts? Before returning to the store,
call Hampton Bay Customer Service 8 a.m. - 7 p.m., EST, Monday - Friday, 9 a.m. - 6 p.m., EST, Saturday
855-HD-HAMPTON
HAMPTONBAY.COM
Retain this manual for future use.
30-10-085

9
Núm. de artículo #1001810259
DFC # 1001786751
Núm. de modelo # OFW832S
GUÍA DE USO Y CUIDADO
FOGÓN PARA EXTERIORES
TIPTON
¿Tiene preguntas, problemas, o faltan piezas? Antes de regresar a la tienda,
llame a EST Hampton Bay cliente servicio 8:00-19:00, EST, del lunes al viernes, 9:00-18:00, EST, el sábado
855-HD-HAMPTON
HAMPTONBAY.COM
GRACIAS
Apreciamos la confianza que ha depositado en Hampton Bay por la compra de esta hoguera para exteriores. Nos esforzamos por crear
continuamente productos de calidad diseñados para mejorar su hogar. Visítenos en internet para ver nuestra línea completa de productos
disponibles para sus necesidades de mejorar su hogar. ¡Gracias por elegir a Hampton Bay!

10
Tabla de contenido
Ensamblaje ................................13
Cuidado y limpieza .........................14
Piezas de repuesto .........................15
Información de seguridad
Por favor, lea y comprenda este manual completo antes de intentar
ensambar, operar o instalar el producto.
ADVERTENCIA:
¡PARA USO EN EXTERIORES
SOLAMENTE! Quemar madera y carbón vegetal en
interiores puede matarlo. Produce monóxido de
carbono que es inodoro.
ADVERTENCIA:
NUNCA la use en vehículos,
tiendas de campaña o interiores. ¡PELIGRO DE
MONÓXIDO DE CARBONO!
ADVERTENCIA:
¡NUNCA DEJE EL FUEGO
DESATENDIDO!
ADVERTENCIA:
Cuando la hoguera se encuentre
en uso, la manija de la cubierta salvachispas puede
alcanzar temperaturas extremas que pueden causar
lesiones a una mano desprotegida. Use un atizador
cuando la manipule.
ADVERTENCIA:
NO TOQUE la superficie de la
hoguera o del cuenco mientras se encuentre en uso.
PRECAUCIÓN:
Quema sólo 7 libras / 3,8kg de carbón
vegetal, madera o troncos en la chimenea el fuego.
PRECAUCIÓN:
NO use gasolina ni queroseno
para encender el fuego en la hoguera.
PRECAUCIÓN:
NO use esta unidad sobre una
terraza de madera, grama larga y seca y/o hojas, o sobre
superficies combustibles.
PRECAUCIÓN:
Coloque la hoguera a más de 8 pies/2.4
metros de paredes o combustibles durante su uso.
ADVERTENCIA:
NO permita que los niños o
mascotas estén cerca de la hoguera sin supervisión.
ADVERTENCIA:
NUNCA coloque una cubierta
de almacenamiento sobre la hoguera cuando esté
en uso. Asegúrese de que la hoguera y la cubierta
salvachispas estén frías antes de colocar una
cubierta de almacenamiento sobre la hoguera.
PRECAUCIÓN:
NO coloque ni use la hoguera debajo
de un dosel o árboles.
PRECAUCIÓN:
NO intente mover la hoguera mientras
está caliente o en uso.
PRECAUCIÓN:
Asegúrese siempre que la cubierta
salvachispas esté asegurada sobre el caja de fuego
mientras está en uso.
PRECAUCIÓN:
El mango del atizador se puede
calentar durante y después de su uso.
PRECAUCIÓN:
Use guantes resistentes al
calor para manejar herramientas calientes.
PRECAUCIÓN:
Debe encontrarse fácilmente
disponible un extintor de incendio.
ADVERTENCIA:
Mantenga siempre un extintor
de incendios cerca de la hoguera cuando tenga
una llama abierta.
Tabla de contenido .........................10
Información de seguridad. . . . . . . . . . . . . . . . . . . . 10
Garantía ..................................11
Pre-ensamblaje ............................11
ADVERTENCIA SOBRE LA PROPOSICIÓN 65
DE CALIFORNIA:
LOS COMBUSTIBLES USADOS
EN EQUIPOS PARA QUEMAR MADERA O CARBÓN,
ASÍ COMO LOS PRODUCTOS DE TAL COMBUSTIÓN,
PUEDEN EXPONERTE A SUSTANCIAS QUÍMICAS,
ENTRE ELLAS EL NEGRO DE HUMO Y EL MONÓXIDO
DE CARBONO, QUE EL ESTADO DE CALIFORNIA
RECONOCE COMO CAUSA, RESPECTIVAMENTE, DE
CÁNCER Y DE MALFORMACIONES CONGÉNITAS Y
OTROS DAÑOS AL SISTEMA REPRODUCTOR.
Para más información, visite: www.P65Warnings.ca.gov

11
GARANTÍA LIMITADA DE 1 AÑO
Si dentro de un año a partir de la fecha de compra original este artículo falla debido a un defecto en materiales o mano de obra, lo
reemplazaremos o repararemos a nuestra opción libre de cargos. Esta garantía no cubre defectos que resulten del uso inapropiado o anormal,
mal uso, accidente o alteración. No seguir todas las instrucciones en el manual de propietario anulará también esta garantía. El fabricante no
se hace responsable de daños incidentales o consecuenciales, o desgaste común de productos de exteriores. Algunos estados no permiten
la exclusión o la limitación de daños incidentales o consecuenciales, por lo tanto, las limitaciones y exclusiones anteriores podrían no aplicar a
usted. Esta garantía le otorga derechos legales específicos y también puede tener otros derechos que varían de un estado a otro.
Póngase en contacto con el Equipo de Servicio al Cliente llamando al 855-HD-HAMPTON o visite www.hamptonbay.com.
Garantía
Pre-ensamblaje
HAMPTONBAY.COM
Póngase en contacto con el 855-HD-HAMPTON
para asistencia adicional.
Herramientas requeridas
Phillips screwdriver
(Not Included)
Cuidadosamente retire todas las piezas de la caja y asegúrese de tener todas las piezas listadas (consulte la lista de piezas). Si hacen falta piezas,
póngase en contacto con el 855-HD-HAMPTON para asistencia adicional.
Tiempo estimado de montaje
15 minutos
Herraje incluido
La parte La descripción La cantidad
AA Perno M6x12 mm Bolt 12
BB La nuez 1
CC La llave inglesa 1
AA BB CC

12
CONTENIDO DEL PAQUETE
Pre-ensamblaje (continuación)
La parte La descripción
A Soporte de cubierta de malla
B Cubierta salvachispas
C Caja de fuego
D Base
E Atizador
F Protector de Calor
G
Cubierta de almacenamiento
A
B
C
D
G
E
F

13
HAMPTONBAY.COM
Póngase en contacto con el 855-HD-HAMPTON
para asistencia adicional.
2
Instalación de la caja de fuego en la base
c
Instale la caja de fuego (C) en la base (D) usando los pernos
M6x12 mm (AA).
c
Apriete todos los pernos con un destornillador.
Ensamblaje
3
Ensamblaje de la hoguera
c
Inserte la soporte de cubierta de malla (A) sobre la parte superior de
la pantalla de malla (B). Fije con la tuerca (BB). Apriete con la llave.
4
Montaje del hoyo de fuego
c
Colocar la malla de chispa (B) sobre el montaje de la cámara de
combustión.
BB
B
A
AA
C
D
B
1
Ensamblaje el protector de calor
c
Instale el protector de calor (F) a la base (D) usando cuatro pernos
de M6x12 mm (AA).
c
Apriete todos los pernos con un destornillador.
AA
F

14
Cuidado y limpieza
c
Deje que la hoguera se enfríe por completo antes de moverla.
c
Use un paño suave para limpiar la hoguera y el atizador.
c
No intente limpiar la hoguera mientras está caliente.
c
Limpie el caja de fuego después de cada uso una vez se hayan enfriado las cenizas.
c
Almacene en un lugar fresco, limpio y seco.
c
Coloque la cubierta de almacenamiento (G) en el pozo de fuego una vez que se haya enfriado.
c
Coloque el brasero sobre tierra, piedra, grava o arena. No lo coloque sobre superficies
combustibles.
c
Antes de utilizar el brasero, agregue una capa de arena de 1 a 1,5 pulg. de espesor o
aproximadamente 5 lb de arena en el fondo del contenedor de brasas. Esto ayudará a
preservar el brasero de la naturaleza corrosiva de las cenizas y a irradiar el calor hacia
arriba.
1
Colocación de arena
Cómo utilizar el brasero

15
Lista de piezas de reemplazo
La parte La descripción La parte #
A Soporte de cubierta de malla 30-01-059
B Pantalla de malla 30-01-058
C La caja de fuegos 30-01-060
D Base 30-01-061
E El atizador 30-01-062
F Protector de calor 30-01-068
G Tapa de almacenamiento 30-01-063
HWP Paquete de hardware 30-09-506
HAMPTONBAY.COM
Póngase en contacto con el 855-HD-HAMPTON
para asistencia adicional.
A
B
C
D
G
E
F

16
¿Tiene preguntas, problemas, o faltan piezas? Antes de regresar a la tienda,
llame a EST Hampton Bay cliente servicio 8:00-19:00, EST, del lunes al viernes, 9:00-18:00, EST, el sábado
855-HD-HAMPTON
HAMPTONBAY.COM
Conserve este manual para uso futuro.
30-10-085
/


