La página se está cargando...

5319341EBL(MagnoliaOak)
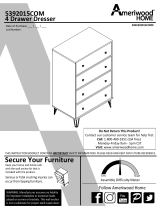
6DrawerDresser
5319340EBL(AndoverOak)
‐Unitcantipovercausingsevereinjuryordeath.
‐Anchorunitto studinwall(ifinstruc te dto).
‐DoNotallowchildrentoclimbonunit.
‐Putheavyitemsonlowershelvesordrawers.
B345319000EBL0
THISINSTRUCTI ONBOOKLETCONTAINS
IMPORTANT
SAFETYINFORM AT ION.PLEASE READANDKEEPFOR FUTUREREFER ENCE.
WARNING
FollowAmeriwoodHome
Tube
You
DateofPurchase___/___/___
LotNumber:
DoNotReturnThisProduct!
Contactourcustomerserviceteamforhelpfirst.
Call:1‐800‐489‐3351(tollfree)
Monday‐Friday9am‐5pmCST
Visit:www.ameriwoodhome.com
AssemblyDifficultyMeter
Easy
Tough

ContactUs!
HelpfulHints
2
ameriwoodhome.com
DoNOTreturnthisproduct!
Contactourfriendlycustomerserviceteamfirstforhelp.
Callus!
1‐800‐489‐3351
Monday‐Friday
9am‐5pmCST
Visitameriwoodhome.com toviewthe
limitedwarrantyvalidintheU.S.andCanada.
AssemblyTips
‐Openyouriteminthe areayo uplantokeepittoavoidexcessiveheavylifting.
‐Identify,sortandcountthepartsbeforeattemptingassembly.
‐Compres sio n dowelsarelight lytappedinwithahammer.
‐Slidesarelab eledwitha
R
(right)and
L
(left)forproperplacement.
‐MakesuretoalwaysfacethepointonthetopoftheCamLocktowardsthe
outeredge.
‐Useallthenailsprovided forthebackpanelandspreadthemoutequally.
‐Backpanelmustbeusedtomakesureyourunitissturdy.
‐Do
NOTuseharshchemicalsorabrasivecleanersonthis item.
‐Neverpush,pull,ordragyourfurniture.
Tube
You
Tube
You
PEOPLENEEDEDFORASSEMBLY:1‐2
ESTIMATEDASSEMBLYTIME:1HOUR

3
ameriwoodhome.com
BeforeYouStart
Q
u
i
c
k
T
ip
A
s
s
e
m
b
l
y
CamLockFasteningSystem
ThisCamLockFasteningSystemwillbeusedthroughouttheassemblyprocess.
1
3
2
4
Tube
You
Readthrougheachstepcarefullyandfollowtheproperorder
Separateand countallyourpartsandhardware
Giveyourselfenoughroomfortheassemblyprocess
Havethefollowingtools:FlatHeadScrewdriver,#2PhillipsHead
ScrewdriverandHammer
Caution:Ifusingapowerdrillorpowerscrewdriverforscrewing,
pleasebeawaretoslowdownandstopwhenscrewistight.
Failuretodosomayresultinstrippingthescrew.

4
ameriwoodhome.com
BoardIdentification
5319340EBL(AndoverOak)PartsList
Tube
You
LeftPanel
35319340010
RightPanel
35319340020
Partition
35319340030
Top
35319340040
A
B
C
D
Bottom
35319340050
LeftFrontMolding
35319340060
RightFrontMolding
35319340070
x2
RearMolding
35319340080
x6
DrawerFront
35319340090
x6
DrawerBottom
35319331100
x6
DrawerBrace
35319000110
x12
DrawerSide
39991167346200C
E
F
G
H
I
J
K
DWR
SIDE

5
ameriwoodhome.com
Tube
You
BoardIdentification
5319341EBL(MagnoliaOak)PartsList
B
A
C
D
F
E
G
H
K
J
I
LeftPanel
35319341010
RightPanel
35319341020
Partition
35319341030
Top
35319341040
Bottom
35319341050
LeftFrontMolding
35319341060
RightFrontMolding
35319341070
x2
RearMolding
35319341080
x12
DrawerSide
39991167346200C
x6
DrawerBrace
35319000110
x6
DrawerBottom
35319331100
x6
DrawerFront
35319341090

6
ameriwoodhome.com
BoardIdentification
Notactualsize
Tube
You
x6
DrawerBack
39991167056150B
BackPanel
K531900000
Thispieceispaperboard
construction.Itisnotmade
fromwood,butisrequiredfor
theassemblyofyourunit.
S
A
B
C
D
E
F
G
H
I
J
K
Drawersides,anddrawerback
arelabeledwiththepart
description.
S
DWR
BACK
DWR
SIDE
DWR
BACK
DWR
SIDE

7
ameriwoodhome.com
PartList
ActualSize
Tube
You
NotActualSize
1
2
3
4
5
6
7
8
9
11
12
13a
13b
13c
13d
14a
14b
14c
14d
(x18)
#A22620
camlock
(x18)
#A22610
cambolt
(x4)
#A22900(white)
#A22920(black)
connector
(x4)
#A22910
connector bolt
(x3)
#A21660
wood dowel
(x6)
#A23030
confirmatscrew
(x60)
#A11080
7/16"flathead
(x48)
#A12120
7/16"panhead
(x12)
#A12930
1‐1/8"panhead
(x36)
#A21970
drivefastener
(x12)
#A17030
5/16"bolt
(x32)
#A21110
nail
LeftCabinetMember
RightCabinetMember
LeftDrawerMember
RightDrawerMember
(x6)
#A56750(black)
#A56770(linen)
DrawerSlideKit
(x1)
#A84050
SafetyBracketKit
(x12)
#A54520
DrawerBracket
(x6)
#A50408
handle
(x4)
#A44410
(AndoverOak)
#A44420
(MagnoliaOak)
foot
(x1)
#A43105(black)
#A43106(white)
plastic
foot
(x2)
#A43490(black)
#A43495(white)
spacer
17
18
19
15
16
10
Note that your unit may contain extra hardware

8
ameriwoodhome.com
STEP
1
Proper orientation of CAM LOCK
Tip
Assembly
Quick
1
3
5
(x2)
#A22620
(x2)
#A22900(white)
#A22920(black)
(x1)
#A21660
Youwillneedtotaptheconnector
(3)withahammertofullyinsert.
Besuretheconnectorispositioned
asshownbeforepushingintohole.
5
1
3
3
A

9
ameriwoodhome.com
STEP2
7
13a
Attachthreeleftcabinetmembers(13a)totheleftpanel(A)withscrews(7)asshown.
(x9)
#A11080
(x3)
#A56750(black)
#A56770(linen)
LeftCabinetMember
Marked with a "L".
7
13a
A

10
ameriwoodhome.com
STEP3
9
9
Attachtherearmolding(H)totheleftpanel(A)withtwoscrews(9)asshown.
Note:Youwillscrewintothegrooveoftherearmolding(H).
Besurethetopedgeoftheleftpanel(A)and
rearmolding(H) areflushwitheachother.
9
A
H
(x2)
#A12930

11
ameriwoodhome.com
STEP
4
Proper orientation of CAM LOCK
Tip
Assembly
Quick
1
3
5
(x2)
#A22620
(x2)
#A22900(white)
#A22920(black)
(x1)
#A21660
Youwillneedtotaptheconnector
(3)withahammertofullyinsert.
Besuretheconnectorispositioned
asshownbeforepushingintohole.
3
5
1
3
B

12
ameriwoodhome.com
STEP
5
7
13b
Attachthreerightcabinetmembers(13b)totherightpanel(B)withscrews(7)asshown.
(x9)
#A11080
(x3)
#A56750(black)
#A56770(linen)
RightCabinetMember
Marked with a "R".
B
7
13b

13
ameriwoodhome.com
STEP6
9
9
B
H
(x2)
#A12930
Attachtherearmolding(H)totherightpanel(B)withtwoscrews(9)asshown.
Note:Youwillscrewintothegrooveoftherearmolding(H).
Besurethetopedgeoftherightpanel(B)and
rearmolding(H)areflushwitheachother.
9

14
ameriwoodhome.com
STEP
7
4
4
Note:Thesmallpilotholeintheleftandright
frontmoldings(F&G)isareferencehole.This
holeindicatesthetopendofthemolding.
4
4
4
(x4)
#A22910
F
G

15
ameriwoodhome.com
STEP8
Presstheleftfrontmolding(F)againsttheleftpanel(A)sotheconnector
bolts(4)engagetheconnectors(3).Turnthescrewinthecenterofthe
connector(3)clockwisetolockinplace.
Notice:Smallreferenceholewill
beatthetopendofthemolding.
Turnthescrewclockwise
tolockinplace.
endview
*rawedgesareshaded
A
F
3

16
ameriwoodhome.com
STEP9
*rawedgesareshaded
endview
Turnthescrewclockwise
tolockinplace.
Notice:Smallreferenceholewill
beatthetopendofthemolding.
Presstherightfrontmolding(G)againsttherightpanel(B)sothe
connectorbolts(4)engagetheconnectors(3).Turnthescrewinthe
centeroftheconnector(3)clockwisetolockinplace.
3
B
G

17
ameriwoodhome.com
STEP10
1
5
7
13a
13b
LeftCabinetMember
RightCabinetMember
(x3)
#A56750(black)
#A56770(linen)
(x18)
#A11080
(x2)
#A22620
(x1)
#A21660
5
1
13a
13b
7
7
Marked with a "L".
Marked with a "R".
finished edge
C
C
right surface
left surface

18
ameriwoodhome.com
STEP
11
2
14b
14a
2
Do not tighten this screw
(x6)
#A22610
(x1)
#A84050
14b
14a
2
2
2
2
2
D

19
ameriwoodhome.com
STEP12
18
19
(x1)
#A43105(black)
#A43106(white)
(x2)
#A43490(black)
#A43495(white)
19
19
18
E
Pressthetwospacers(19)andplasticfoot(18)
intothebottom(E)asshown.Youmayneedto
tapeachonewithahammertosecurelyinsert.

20
ameriwoodhome.com
STEP13
6
6
(x6)
#A23030
6
6
6
6
6
A
B
C
E

21
ameriwoodhome.com
STEP
14
U
N
L
O
C
K
L
O
C
K
A
C
B
D

22
ameriwoodhome.com
STEP
15
9
9
Usingtwoscrews(9)perfoot(17),attachthefourfeet(17)tothebottom(E)asshown.
(x8)
#A12930
(x4)
#A44410(Andoveroak)
#A44420(MagnoliaOak)
17
17
17
17
17
E
9
9
9

23
ameriwoodhome.com
STEP16
(x32)
#A21110
IMPORTANT!
THEBACKPANELISASTRUCTURALPARTOFTHISUNITANDMUSTBEINSTALLEDPROPERLY.
Withthehelpofanotherperson,turntheunitoverasshown.Positionthebackpanel(S)as
shown.Flushthebottomedgeofthebackpanelwiththeedgeofthebottom(D).Assurethatthe
unitissquare.Distancefromcornertocornermustbeequalasshown.Attach
thebackpanelby
nailingstraightintobackedgesasshown.
notch in back panel
12
12
S

24
ameriwoodhome.com
STEP
17
T
Fastenthebracketstotheoppositesurfaceofthesmallmetalslideholes.
x6
x6
(x12)
#A54520
15
15
15
DWR
SIDE
DWR
SIDE
(x24)
#A12120
8
8
8
8
8

25
ameriwoodhome.com
STEP18
Proper orientation of CAM LOCK
Tip
Assembly
Quick
1
2
2
1
(x12)
#A22620
(x12)
#A22610
x6
x6
I
K

26
ameriwoodhome.com
STEP19
U
N
L
O
C
K
L
O
C
K
Youwillbeassemblingsixdrawers.Theyallassembleinthesamemanner.
AttachthedrawersidestotheDrawerFront(I)withscrews(8)asshown.Besurethegrooveinthe
drawersidesarecenteredwiththegrooveinthedrawerfront.Attachonedrawerbrace(K)to
eachdrawer
front(I)asshown.
(x24)
#A12120
DWR
SIDE
x6
DWR
SIDE
8
8
8
I
K

27
ameriwoodhome.com
STEP20
DWR
SIDE
DWR
SIDE
I
K
J
unfinishedsurface
x6

28
ameriwoodhome.com
STEP21
10
DWR
BACK
x6
(x36)
#A21970
DWR
SIDE
DWR
SIDE
10
10
10

29
ameriwoodhome.com
STEP22
7
13c
13d
7
7
(x24)
#A11080
(x6)
#A56750(black)
#A56770(linen)
RightDrawerMember
LeftDrawerMember
Marked with a "R".
Marked with a "L".
x6
13c
13d
DWR
SIDE
DWR
SIDE

30
ameriwoodhome.com
STEP23
11
16
(x12)
#A17030
(x6)
#A50408
11
16
x6

31
ameriwoodhome.com
STEP24
For Masonry, Concrete, or other
wall materials:
Consult your local hardware store
for appropriate anchors to securely
attach the safety bracket.
IMPORTANT:THISUNITMUSTBESECURETOTHEWALLTOHELPPREVENTTIPOVER.FOLLOW
THESEINSTRUCTIONSTOINSTALLTHEANTI‐TIPPINGSAFETYBRACKETPROVIDEDWITHTHIS
PRODUCT.
WARNING
Seriousorfatalcrushinginjuriescan
occurfromfurnituretipover.
Topreventtipover:
*Installtipoverrestraintprovided
*Placeheaviestitemsin
thelowest
drawers
*Unlessspecificallydesignedto
accommodate,donotsetTVsor
otherheavyobjectsonthetopofthis
product
*Neverallowchildrentoclimbor
hangondrawers,door,orshelves
*Neveropenmorethanone
draweratatime
Useoftipoverrestraintsmayonly
reduce,
butnoteliminatetherisk
oftipover.
OPTION1:Attachmentintoawallstud(preferredmethod)
Usingastudfinder,locateastudinth e wa ll.Place yourun itagainstthew all,withthesaf e tybracketaligned
inthislocatio n.Tomakedrivingthe screweasier,youcandrilla1/8"diameterpilot hole(3mm)throughthe
safetybracketintothestud.Drivethescrewthr o ughthe
safetybracketintothewallstud.Tightenthescre w
thatwasnotfullytight enedinstep11.
OPTION2:Attachmentintodrywall
Locateyou runitwheredesiredagainstawallandmarkthewallthroughthesafetybracket,thenmoveyour
unitaside.Dr illa3/16"diameterhole(5mm)intothewallboard.Tapthewallanchorint otheholeuntilitis
flush.Moveyourunitinto locationand fastenthewallbracket
to the wallanchorwiththescrew.Tightenthe
screwtha twasnotfully tig ht e nedinstep 11.
14c
14d
stud
wallboard
hole
14d
14c
(x1)
#A84050

32
ameriwoodhome.com
STEP25
cabinet member
roller
drawer runner
roller
Installthedrawersasshown.
Note:Thedrawerbracketholesareslotted.Drawer
frontscanbeadjustedbylooseningscrews,making
neededadjustmentsandretighteningscrews.

33
ameriwoodhome.com
MaximumLoads
Warning:Riskofinjurytopersons‐donotplaceatelevisiononthisfurniture.Thisfurnitureis
notapprovedforusewithatelevision.
75lbs
34kg
CertificateofConformity
1.ThiscertificateappliestotheDor el Home Fur nishings,Inc.productidentifiedbythisinstructionmanual.
2.Thiscertificateappliestocom plian ceofthisproductwiththeCPSCBanonLe ad ‐ContainingPaint(16CFR1303).
3.Thisproductisdistributedby:DorelHomeFurnishings,Inc.
410EastFirst
StreetSouth
WrightCity,MO63390
636‐745‐3351
4.SiteofManufacture:CornwallON
5.Seefrontpag eofinstructionmanualfordateofmanufacture.
Thisunithasbeendesignedtosupportthemaximumloadsshown.Exceedingtheseloadlimits
couldcausesagging,instability,productcollapse,and/orseriousinjury.
35lbs
15.8kg
(eachdrawer)

34
ameriwoodhome.com
Registeryourproducttoreceivethefollowing:
*Newtrenddetails‐sneakpeekonwhat'snew
*Surveys‐haveavoicewithinourcommunity
*Exclusivedealsanddiscountcodes
*Quickandeasyreplacementpartservice
Toregisteryourproduct,visitameriwoodhome.com
Visityourlocalretailer'swebsite,rateyourpurchased
productandleaveussomefeedback!
Wewouldlike
toextendabig"ThankYou"toallof
ourcustomersfortakingthetimetoassemblethis
AmeriwoodHomeproduct,andtogiveusyour
valuablefeedback.

35
ameriwoodhome.com
CubiertaDelantera
Estelibrodeinstruccionescontieneinformación
IMPORTANTE
deseguridad.Porfavorleaymanténgalo
parareferenciaenelfuturo.
NoRegreseesteproducto!
Comuniqueseconnuestroamistosoequipodeservicioalclienteparaobtener
ayuda.
Llamenosal:1‐800‐489‐3351(Gratis)Lunes‐Viernes9am‐5pmCST
Visitar:
www.ameriwoodhome.com
PRECAUCION
Estemueblepuedevolcarseycausargravesheridasy/omuerte.
Anclarelmuebleaunpostedemaderaenlapared(siestoserequiere).
NoPermitaquelosniñosmontenelmueble.
Mantengalosartículosmáspesadosenloscajonesdeabajo.
ConsejosÚtiles(página2)
‐Abrasuartículoeneláreadondeustedplaneautilizarloparaevitarlevantarymoverlomenos
‐Identificar,ordenarycontarlaspiezasantesdeintentarensamblar
‐Lasclavijasdecompresiónsegolpeanconunmartillo
‐LasdiapositivasestánmarcadasconunaR(derecha)yL(izquierda)paralacolocacióncorrecta
‐
Asegúresedequesiempreesteelpuntolocaizadoenlapartesuperiordebloqueadordeleva
estevolteadohaciabordeexterior
‐Utilizartodoslosclavosparaelpaneldeatrasydistribuirlosporigual
‐Elpaneldeatrasdebeu tili zarseparaasegurarsedequelaunidadquedefijayfirme
‐Nouse
quimicasfuertesnilimpiad oresabrasivosenestearticulo
‐Nuncaempuje,tireniarrastrelosmuebles
AntesdeQueEmpieces(página3)
‐Leacuidadosamenteca dapasoysigaelordencorrecto
‐Separarycontartodassuspiezasyhardware
‐Désesuficienteespacioparaelproce sodeensamble
‐Tengalassiguientesherramientas:destornilladordecabezaplana,#2cabezaPhillips
Destornilladorymartillo
‐Precaución:Siusauntaladroelectrónicooundesto rnilladoreléctricoparaatornillar,
porfavorasegúre se
quedejedeatornillarcuandoeltonillosesteapretado.Fallarhacerestopuedecausarbarrereltornillo.
Sistemadefijarelbloqueodeleva(página3)
Estasistemadefijarelbloqueodelevaserausadoentodoelprocesoensamble.
Página7
Tengaencuentaquesuunidadpue decontenerpiezasadicionales
Español

36
ameriwoodhome.com
Español
Página8
Tendráquedarungolpesuavealconector(3)conunmartilloparainsertarlocompletamente.
Asegúresedequeelconectorestécolocadocomosemuestraantesdeempujarlodentrodelorificio.
Página9
Fijelostreselementosdelacajaizquierda(13a)alpanelizquierdo(A)conlostornillos(7)
comose
muestra.
Marcadoconun"L".
Página10
Fijelaparteposteriordelamoldura(H)alpanelizquierdo(A)conlosdostornillos(9)comosemuestra.
Nota:atornillaráenlaranuradelamolduratrasera(H).
Asegúresedequeelbordesuperiordelpanelizquierdo(A)yelde
lapartetrasera(H)esténalineados
entresí.
Página11
Tendráquedarungolpesuavealconector(3)conunmartilloparainsertarlocompletamente.
Asegúresedequeelconectorestécolocadocomosemuestraantesdeempujarlodentrodelorificio.
Página12
Conectelostreselementosdelacajaderecha (13b)
alpanelderecho(B)conlostornillos(7)comose
muestra.
Marcadoconun"R".
Página13
Fijelapartetraseradelamoldura(H)alpanelderecho(B)conlosdostornillos(9)comosemuestra.
Nota:atornillaráenlaranuradelamolduratrasera(H).
Asegúresedequeelborde
superiordelpanelderecho(B)yeldelapartetrasera(H)esténalineados
entresí.
Página14
Nota:Elpequeñoagujeropilotodelosmoldesdelanterosizquierdoyderecho(F&G)esunagujerode
referencia.Esteagujeroindicaelextremosuperiordelamoldura.
Página15
Presionelamolduradelantera
izquierda(F)contraelpanelizquierdo(A)paraquelospernosde
conexión(4)encajenenlosconectores(3).Gireeltornilloenelcentrodelconector(3)ensentido
horarioparabloquearla.

37
ameriwoodhome.com
Español
Aviso:Elpequeñoagujerodereferenciaestaráenelextremosuperiordelamoldura.
Gireeltornilloensentidohorarioparafijarlo.
Vistadesdeunextremo
Página16
Presionelamolduradelanteraderecha(G)contraelpanelderecho(B)paraquelospernosdeconexión
(4)encajenenlosconectores(3).Gire
eltornilloenelcentrodelconector(3)ensentidohorariopara
bloquearla.
Aviso:Elpequeñoagujerodereferenciaestaráenelextremosuperiordelamoldura.
Gireeltornilloensentidohorarioparafijarlo.
Vistadesdeunextremo
Página18
Noaprieteestetornillo.
Página19
Presionelosdosespaciadores(19)y
elpiedeplástico(18)enlaparteinferior(E)comosemuestra.
Puedequetengaquetocarcadaunoconunmartilloparainsertarconseguridad.
Página22
Condostornillos(9)porpie(17),fijeloscuatropies(17)alaparteinferior(E)comosemuestra.
Página23
¡IMPORTANTE!
ELPANELTRASEROESUNAPARTEESTRUCTURALDEESTAUNIDADYDEBEINSTALARSE
CORRECTAMENTE.
Conlaayudadeotrapersona,girelaunidadcomosemuestra.Coloqueelpaneltrasero(S)comose
muestra.Enjuagueelbordeinferiordelpaneltraseroconelbordedelaparteinferior(D).Asegúresede
quelaunidadescuadrada.Ladistanciadeesquinaaesquinadebeserigualalaquesemuestra.Fijeel
paneltraseroclavandodirectamenteenlosbordestraseroscomosemuestra.
Muescaenelpaneltrasero
Página24
Ajustelossoportesalasuperficieopuestadelospequeñosagujerosdedeslizamientodemetal.

38
ameriwoodhome.com
Español
Página26
Vaamontarseiscajones.Todossemontandelamismamanera.
Fijelosladosdelcajónalapartefrontaldelcajón(I)conlostornillos(8)comosemuestra.Asegúresede
quelaranuraenlosladosdelcajónestécentradaconlaranuradelapartefrontal
delcajón.Coloqueuna
abrazaderadecajón(K)encadapartefrontaldelcajón(I)comosemuestra.
Página31
Paramaterialesdemampostería,hormigónuotrosmaterialesdepared:
Consulteconsuferreteríalocalparaconocerlosanclajesadecuadosparafijarfirmementeelsoportede
seguridad.
IMPORTANTE:ESTAUNIDADDEBEESTAR
SEGURAALAPAREDPARAAYUDARAEVITARELVUELCO.SIGA
ESTASINSTRUCCIONESPARAINSTALARELSOPORTEDESEGURIDADANTIVUELCOSUMINISTRADOCON
ESTEPRODUCTO.
ADVERTENCIA
Puedenproducirselesionesporaplastamientogravesomortalesacausadelvuelcodelosmuebles.
Paraevitarelvuelco:
*Instaleeldispositivodeprevencióndelvuelco
proporcionado
*Coloquelosartículosmáspesadosenloscajonesmásbajos
*Amenosqueestéespecíficamentediseñadoparaalbergarlos,nocoloquetelevisoresuotrosobjetos
pesadosencimadeesteproducto
*Nuncapermitaquelosniñossubanosecuelguendeloscajones,puertasoestantes
*Nuncaabramás
deuncajónalavez
Elusodelasrestriccionesdevuelcosolopuedereducir,peronoeliminarelriesgodevuelco.
OPCIÓN1:Acoplamientoenunpernodepared(métodopreferido)
Medianteun buscadordevigas,ubiqueunpernoenlapared.Coloquelaunidadcontralapared,conel
soportedeseguridadalineadoenestaubicación.Parafacilitarlaconduccióndeltornillo, puedeperforar
unagujeropilotode1/8"(3mm)dediámetroatravésdelsoportedeseguridadenelperno,introducirel
tornilloatravésdelsoportedeseguridadenelpernodelaparedyapretarel
tornilloquenoestaba
totalmenteapretadoenelpaso11.
OPCIÓN2:Accesorioenlapareddeyeso
Localicesuunidaddondedeseeenunaparedymarquelaparedatravésdelsoportede seguridad,luego
muevasuunidadaunlado.Taladreunorificiode3/16"(5mm)dediámetroenelpaneldeyeso.
Introduzcaelanclajede
paredenelagujerohastaqueestéaras.Muevasuunidadhastaesepuntoy
sujeteelsoportedeparedalanclajedeparedconeltornillo.Aprieteeltornilloquenoesté
completamenteapretadoenelpaso11.

39
ameriwoodhome.com
Página32
Instaleloscajonescomosemuestra.
Nota:Losorificiosdelossoportesdelcajónestánranurados.Laspartesfrontalesdelcajónse
puedenajustaraflojandolostornillos,haciendolosajustesnecesariosyvolviendoaapretarlos
tornillos.
Página33
CARGAMAXIMA
Estaunidadhasidodiseñadaparasoportarlacargamáximaanotada.Elexcederestoslímitespuede
causarinestabilidad,colapsarsey/ocausarseriaslesiones.
ADVERTENCIA:Riesgodelesionesalaspersonas‐nocoloqueuntelevisorsobremuebles.Este
mueblenoestáaprobadoparasuusoconuntelevisor.
Página34
Registresuproductopararecibirlosiguiente:
*Detallesdenuevastendencias‐Vistazoalonuevo
*Encuestas‐alecsuvozentresucomunidad
*Códigosdeofertasydescuentosexclusivos
*Fácilyrápidoserviciodepartesderemplace
Pararegistrarsuproducto,visiteameriwoodhome.com
Clasificasiónde5estrellas
Visiteel
sitiowebdesutiendalocal,califiquesucomprado
ydenossuscomentarios!
Nosgustaríaenviarungran"Agradecimiento"atodosnuestrosclientesportomarseeltiempode
ensamblaresteproductodeAmeriwoodHome,ypordarnossusvaliososcomentarios.
Gracias
Español

40
ameriwoodhome.com
CouvertureAvant
CELIVRETD'INSTRUCTIONCONTIENTDESINFORMAT IONS
IMPORTANTES
SURLASÉCURITÉ.VEUILLEZLIRE
ETGARDERPOURUNERÉFÉRENCEFUTURE
Neretournezpasceproduit!
Contacteznotreéquipedeserviceàlaclientèleamicaled'abordpourobtenir
del'aide.
Appelez‐nous:
1‐800‐489‐3351(sansfrais)duLundiauVendredi de9hà 17hHeureCentrale
Visitez:
www.ameriwoodhome.com
ATTENTION
Lemeublepeutbascule retcauserdesblessuresgravesoulamort.
Ancrerlemeubleàuneplanchemuraledanslemur(siindiqué).
Nelaissezpaslesenfantsgrimpersurlemeuble.
Placezlesarticleslourdssurlesétagèresoudanslestiroirsinférieurs.
AstucesUtiles(page2)
‐Ouvrezvotrearticledanslazonequevousprévoyezdelegarderpourmoinsdelevagelourd
‐Identifier,trieretcompterlespiècesavantd'essayerd'assembler
‐LesgoujonsdecompressionsonttaraudésavecunMarteau
‐Lesglissièressontmarquéesd'unR(droit)etd'unL(gauche)pourunbonplacement
‐
Assurez‐voustoujoursdefairefacelapointesituésurlehautdelaSerruredeCameverslebordextérieur
‐Utilisertous lesclousfournispourlepanneauarrièreetlesrépartirégalement
‐Lepanneauarrièredo itêtreutilisépourvousassurerquevotreappareilestrobuste
‐N'utilisezpasde
produitschimiquesagressifsoudenettoyantsabrasifssurcetappareil
‐Nejamaispousser,tirer,oufaireglisservotremeuble
AvantdeCommencer(page3)
‐Lisezattentivementchaqueétapeetsuivezlebonordre
‐Séparezetcompteztoutesvospiècesetmatériaux
‐Donnez‐voussuffisammentdeplacepou r l'assemblage
‐Avoirlesoutilssuivants:tournevisà têteplate,#2tournevisPhillips,etMarteau
‐
Attention:Sivousutilisezuneperceuseélectriqueouuntournevisélectriquepourviss er,veillezàralentir
etarrêterlorsquelavisestbienserrée.Lenon‐respectdecetteconsignepeutendomm agerlavis.
SystèmedeFixationdeCame(page3)
CeSystèmedeFixationdeCameserautilisétoutaulongdel'assemblage
Page7
Notezquevotreappareilpeutcontenirdespiècessupplémentaires
Français

41
ameriwoodhome.com
Français
Page8
Vousdevreztapersurleconnecteur(3)avecunmarteaupourl'insérercomplètement.Assurez‐vous
queleconnecteurestpositionnécommeindiquéavantdel'enfoncer.
Page9
Attacheztroispiècesgauches(13a)surlepanneaugauche(A)avecdesvis(7)commeindiqué.
Marquéesavecun"L".
Page10
Attachezla
moulurearrière(H)surlepanneaugauche(A)avecdeuxvis(9)commeindiqué.
Remarque:Vousvisserezdansl'encochedelamoulurearrière(H).
Assurez‐vousquelebordsupérieurdupanneaugauche(A)etdelamoulurearrière(H)sontbien
alignés.
Page11
Vousdevreztapersurle
connecteur(3)avecunmarteaupourl'insérercomplètement.Assurez‐vous
queleconnecteurestpositionnécommeindiquéavantdel'enfoncer.
Page12
Attacheztroispiècesdroites(13b)surlepanneaudroit(B)avecdesvis(7)commeindiqué.
Marquéesavecun"R".
Page13
Attachezlamoulurearrière(H)surle
panneaudroit(B)avecdeuxvis(9)commeindiqué.
Remarque:Vousvisserezdansl'encochedelamoulurearrière(H).
Assurez‐vousquelebordsupérieurdupanneaudroit(B)etdelamoulurearrière(H)sontbienalignés.
Page14
Remarque:Lepetittroudeguidagesurlesmoulures
avantgaucheetdroite(FetG)estuntroude
référence.Cetrouindiquelalimitesupérieuredelam oulure.
Page15
Plaquezlamoulureavantgauche(F)contrelepanneaugauche(A)pourquelesraccordsdeconnexion
(4)engagentlesconnecteurs(3).Tournezlavisaucentredu
connecteur(3)danslesenshorairepour
verrouillerlaposition.
Remarque:Lepetittroudeguidageseraàlalimitesupérieuredelam oulure.
Tournezlavisdanslesenshorairepourverrouillerlaposition.
Vuedubout

42
ameriwoodhome.com
Français
Page16
Plaquezlamoulureavantdroite(G)contrelepanneaudroit(B)pourquelesraccordsdeconnexion(4)
engagentlesconnecteurs(3).Tournezlavisaucentreduconnecteur(3)danslesenshorairepour
verrouillerlaposition.
Remarque:Lepetittroudeguidageseraàlalimite
supérieuredelamoulure.
Tournezlavisdanslesenshorairepourverrouillerlaposition.
Vuefinale
Page18
Nepasserrercettevis.
Page19
Plaquezlesdeuxrondelles(19)etlepiedenplastique(18)surledessous(E),commeindiqué.Vous
aurezpeut‐êtrebesoind'unmarteaupourl'insérercorrectement.
Page22
Avecdeuxvis(9)parpied(17),attachezlesquatrepieds(17)surledessous(E),commeindiqué.
Page23
IMPORTANT !LEPANNEAUARRIÈREESTUNÉLÉMENTSTRUCTURELETDOITÊTREINSTALLÉ
CORRECTEMENT.
Avecl'aided'uneautrepersonne,tournezlemeublecommeindiqué.Positionnezlepanneauarrière(S)
commeindiqué.
Alignezlebordinférieurdupanneauarrièreaveclebordinférieurdumeuble(D).
Assurez‐vousquel'unitésoitcarrée.Ladistanced'unangleàl'autredoitêtreégale,commeindiqué.
Attachezlepanneauarrièreenleclouantsurlesbordsarrière,commeindiqué.
Encochesurlepanneauarrière
Page24
Fixezlessupportsàlasurfaceopposéedespetits trousdeglissièreenmétal.

43
ameriwoodhome.com
Français
Page26
Vousallezassemblersixtiroirs.Ilss'assemblenttousdelamêmemanière.
Attachezlescôtésdutiroiràlafaceavantdutiroir(I)avecdesvis(8)commeindiqué.Assurez‐vousque
lesencochesàl'intérieurdesparoisdutiroirsontalignéesavecl'encochedelafaceavant.Attachez
un
renfortdetiroir(K)àchaquefaceavant(I)commeindiqué.
Page31
Pourlamaçonnerie,lebétonetlesautresmatériauxmuraux:
Consultezvotredistributeurlocalpourobtenirlesfixationsadaptéesafindesécuriservotreinstallation.
IMPORTANT:CEMEUBLEDOITÊTREFIXEAUMURPOURÉVITERLE
BASCULEMENT.SUIVEZCES
INSTRUCTIONSPOURINSTALLERLESYSTÈMEDESÉCURITÉANTIBASCULEMENTFOURNIAVECCE
PRODUIT.
AVERTISSEMENT
Desblessuresgravesoumortellespeuventêtreoccasionnéesparlebasculementd'unmeuble.
Pouréviterlebasculement:
*Installezlesystèmeantibasculementfourni
*Placezlesobjetslespluslourdsdanslestiroirsles
plusbas
*Nepasinstallerdetélévisionouautresobjetslourdssurceproduitsicelui‐cin'estpasprévupourcette
utilisation
*N'autorisezjamaisunenfantàgrimperous'agripperauxtiroirs,portesouétagères
*N'ouvrezjamaisplusd'untiroiràlafois
L'utilisationdusystèmedefixationréduit
maisn'éliminepaslerisquedebasculement.
OPTION1:Fixationàunpoteaumural( méthoderecomm andée)
Avecundétecteurdemontants,localisezunpoteaumural.Placezlemeublecontrelemur,enalignantle
systèmedefixationaveclemontant.Pourfaciliterl'insertiondelavis,vouspouvezperceruntrou
de
guidagede1/8''(3mm)danslemuràtraverslafixation.Insérezlavisdanslafixationetlepoteaumural.
Serrezlavisquin'avaitpasétécomplètementserréeàl'étape11.
OPTION2:Fixationsurunecloisonsèche
Placezvotremeublecontrelemuràl'endroit
souhaitéetmarquezlemuràtraverslafixationdesécurité,
puisdéplacezlemeuble.Percezuntroude3/16''(5mm)danslemur.Insérezl'ancragemuralpour
l'ajuster.Replacezvotremeubleetattachez lafixationàl'ancragemuralaveclavis.Serrezlavisqui
n'avaitpasétécomplètement
serréeàl'étape11.
Page32
Installezlestiroirscommeindiqué.
Remarque:Lestrousdesfixationsdestiroirssontemboîtés.Lesfacesavantdestiroirspeuventêtre
ajustésendesserrantlesvis,ajustantselonlesbesoinsetresserrantlesvis.

44
ameriwoodhome.com
Page33
CHARGESMAXIMALES
Cemeubleaétéconçupoursupporterleschargesmaximalesindiquées.Enexcédantceslimitesde
charge,lemeublepourraitdevenirinstable,s'effondrer,et/oucauserdesblessuresgraves.
AVERTISSEMENT:Risquedeblessurecorporelle‐nepasplacerunetélévisionsurcemeuble.Cemeuble
n'estpasapprouvépourune
utilisationavecunetélévision.
Page34
Enregistrezvotreproduitpourrecevoirlesélémentssuivantes:
*Détailssurlesnouvellestendances‐unaperçusurlesnouveautés
*Sondages‐avoirunevoixauseindenotrecommunauté
*Offresexclusivesetcodespromo
*Servicedepiècesderechangerapideetfacile
Pourenregistrervotre
produit,visitezameriwoodhome.com
5Étoiles
VisitezlesiteWebdevotredétaillantlocal,évaluezvotreproduit
achetéetlaissez‐nousquelquescommentaires!
Noustenonsàoffrirungrand"Merci"àtousnosclientspouravoirprisletempsd'assemblerceproduit
"AmeriwoodHome",etdenousdonnervoscommentairesprécieux.
Merci
Français
/