La página se está cargando...

1
© 2019. All rights reserved.
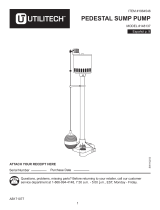
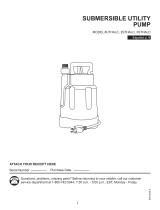
SUBMERSIBLE SUMP
PUMPS
MODEL #1099
Serial Number
Purchase Date
Zoeller
®
is a registered trademark
of Zoeller Co. All Rights Reserved.
Questions, problems, missing parts? Before returning to your retailer, call our customer
service department at 1-800-584-8089, 7:30 a.m. - 5:00 p.m., EST, Monday - Friday.
ATTACH YOUR RECEIPT HERE
SW1202 C
Español p. 11
ZoellerAtHome.com

2
© 2019. All rights reserved.
PACKAGE CONTENTS
SAFETY INFORMATION
DESCRIPTION QUANTITY
Pump 1
Please read and understand this entire manual before attempting to assemble, operate, or install the
product.
NOTE: Pumps with the “UL” Mark and pumps with the “US” mark are tested to UL Standard UL778.
CSA certied pumps are certied to CSA Standard C22.2 No. 108. (CUS.)
DANGER
• FIRE/EXPLOSION HAZARD.
Pump only clear water. Do not pump flammable or explosive fluids such as gasoline, fuel oil,
kerosene, etc. Do not use in a flammable and/or explosive atmosphere. Failure to follow these
warnings could result in death or serious injury and/or property damage.
• RISK OF ELECTRIC SHOCK.
These pumps have not been investigated for use in swimming pool and marine areas.
• RISK OF ELECTRIC SHOCK.
Always disconnect power source before attempting to install, service, or maintain the pump.
Never handle a pump with wet hands or when standing on wet or damp surface or in water. Fatal
electrical shock could occur.
• RISK OF ELECTRIC SHOCK.
Keep pump out of reach of children.

3
© 2019. All rights reserved.
WARNING
• ELECTRICAL SHOCK ALERT.
Before installing this product, have the electrical circuit checked by an electrician to ensure proper
grounding. All electrical installations must conform to the National Electric Code and all local
codes.
• ELECTRICAL SHOCK ALERT.
Connect this product to a properly-grounded 115 volt circuit equipped with a Ground Fault Circuit
Interrupter (GFCI) device. Make sure the electrical supply circuit is equipped with fuses or circuit
breakers with a minimum capacity of 15 amps.
• ELECTRICAL SHOCK ALERT.
Never use an extension cord.
• ELECTRICAL SHOCK ALERT.
These pumps are supplied with a 3-prong grounded plug to help protect you against the possibility
of electrical shock. DO NOT UNDER ANY CIRCUMSTANCES REMOVE THE GROUND PIN.
• ELECTRICAL SHOCK ALERT.
Do not remove or replace the power cord.
• ELECTRICAL SHOCK ALERT.
Protect electrical cord from sharp objects, hot surfaces, oil, and chemicals. Avoid kinking the cord.
• PROP65 WARNING FOR CALIFORNIA RESIDENTS:
Cancer and Reproductive Harm – www.P65Warnings.ca.go
• PERSONAL INJURY ALERT.
This pump contains oil, which becomes hot when operating. Allow 2-1/2 hours after disconnecting
before attempting any service.
CAUTION
• PERSONAL INJURY OR PRODUCT DAMAGE MAY RESULT.
This pump operates on 115 volts. Make certain that the power source conforms to the
requirements of your equipment.
• PRODUCT DAMAGE MAY RESULT.
The continuous operating water temperature for this pump must not exceed 104°F (40°C).
• PRODUCT DAMAGE MAY RESULT.
This pump is designed to pump water only. It has not been evaluated for pumping chemicals or
corrosive materials.
• PRODUCT DAMAGE MAY RESULT.
Inspect the pump regularly for damage and perform routine maintenance as needed. Remove any
debris that may build up around the on/off operation of the float.
• PROPERTY DAMAGE MAY RESULT.
This product requires a 3/16-in vent hole to be drilled in the discharge pipe, level with the top of
the pump. The vent hole should be checked periodically for clogs. It is normal for water to come
out of this vent hole during pump operation.
• PROPERTY OR PRODUCT DAMAGE MAY RESULT.
This pump is not designed for pumping effluent or sewage.
• PRODUCT DAMAGE MAY RESULT.
This pump is not designed for continuous operation.

4
© 2019. All rights reserved.
PREPARATION
Estimated Installation Time: 15 minutes
Materials required for assembly: Sump basin, inlet piping, discharge piping (PVC, poly pipe or
galvanized steel), check valve, and 2-step PVC glue system (primer and sealer).
GENERAL PUMP INFORMATION
This pump is designed to be installed in a sump basin for removing clear drain water and will usually
pass small particles suspended in water. Heavy mud, sand, or pea gravel can clog the pump, which
can usually be cleaned out by back-ushing with a garden hose through the pump discharge.
Dual oat operation:
• The pump will turn on when the large, primary oat
is in the up position and off when the primary oat is
in the down position.
• If the pump runs for more than 25 seconds (primary
oat is high) and the small backup oat is in the
down position, the primary oat will be temporarily
disabled. If the primary oat moves to the down
position, or three minutes have elapsed, the primary
oat is re-enabled.
• If the backup oat moves up, the pump will turn on.
When the backup oat moves down, a 10 second
timer will be enabled. The pump will run until the
primary oat drops down and the 10 second timer
has expired.
A check valve must be installed in the discharge pipe to keep water from draining back into the sump
basin when it is not operating. The sump basin must be at least 18-in deep and 10-in diameter.
NOTES: Before installing pump:
• Have the electrical circuit checked by an electrician to ensure it is on a dedicated circuit with
proper grounding.
• Connect pump to a grounded circuit equipped with a ground fault circuit interruptor (GFCI) device.
• BE CERTAIN the pump power source is disconnected before installing or servicing this unit.
• Be sure the sump basin and piping are clear of sand, dirt, and scale. Debris will clog pump and
void warranty.
• Failure to protect pump and piping from freezing could cause severe damage and will void the
warranty.
• Do not run pump dry.
SPECIFICATIONS
MODEL HP AMPS
PERFORMANCE IN GALLONS PER MINUTE
0 FT. 5 FT. 10 FT. 15 FT. 20 FT.
1099 3/4 9.0 80 72 62 50 35
Primary
float
Backup float
2

5
© 2019. All rights reserved.
INSTALLATION INSTRUCTIONS
2. Connect the discharge pipe, ttings, and check
valve (not provided) to pump discharge. The
discharge pipe should be the same size as the
discharge of pump (1-1/2-in) or larger.
NOTE: Make sure there is enough room in the
basin for the oat to move freely. If the oat is
restricted, the pump will not operate.
3. Drill a 3/16-in vent hole in the discharge pipe,
level with the top of pump. It is normal for
water to spray from this hole when the pump is
operating.
3/16-in
Vent hole
3
Discharge pipe
and ttings
Check
valve
2
1. Make sure the sump basin is cleared of any
debris or sediment, and place the sump pump
on a hard surface inside the basin.
A
IL2016
1

6
© 2019. All rights reserved.
4. B. Position second oat oat at desired ‘on level’
on the discharge pipe.
On level
Discharge
Pipe
Right-angle
Mounting
Bracket
4B
4. C. Attach mounting bracket to the discharge
pipe as shown, using hose clamp (included).
WARNING: DO NOT install high water oat
in direct line of incoming water or close to the
vent hole.
Hose
Clamp
Discharge
Pipe
4C
4. A. Fasten second oat to right-angle mounting
bracket by unthreading plastic nut. Re-tighten
plastic nut after inserting sensor stem in
bracket.
Plastic Nut
Right-angle
Mounting
Bracket
Sensor
Stem
4A
INSTALLATION INSTRUCTIONS

7
© 2019. All rights reserved.
5. Make sure your hands are dry and you are
not standing in water. Connect the pump to a
properly-grounded, GFCI electrical outlet.
WARNING: Do not use an extension cord.
NOTE: Tape the electrical cord to the discharge
pipe to prevent it from interfering with the
motion of the float.
6. Test the operation of the pump by pouring water
into the sump basin.
7. Install a sump basin cover to complete the
installation.
A
A
Sump basin
cover
7
115 V
GFCI outlet
6
115 V
GFCI outlet
5
INSTALLATION INSTRUCTIONS

8
© 2019. All rights reserved.
CARE AND MAINTENANCE
WARNING: Always disconnect pump from power
source before handling.
At least every three months:
Remove any debris that may build up in the
sump basin to prevent it from interfering with the
operation of the float switch.
Clean out the vent hole that was drilled in the
discharge pipe during installation.
Test system for operation.
Clean
vent hole
Remove
debris
1

9
© 2019. All rights reserved.
WARRANTY
This product is warranted for three years from the date of manufacture. Subject to the conditions
hereinafter set forth, the manufacturer will repair or replace to the original consumer any portion of
the product which proves defective due to defective materials or workmanship. To obtain warranty
service, contact the dealer from whom the product was purchased. The manufacturer retains the sole
right and option to determine whether to repair or replace defective equipment, parts, or components.
Damage due to conditions beyond the control of the manufacturer is not covered by this warranty.
THIS WARRANTY WILL NOT APPLY: (a) To defects or malfunctions resulting from failure to properly
install, operate, or maintain the unit in accordance with printed instructions provided; (b) to failures
resulting from abuse, accident, or negligence, or use of inappropriate chemicals or additives in the
water; (c) to normal maintenance services and the parts used in connection with such service; (d)
to units which are not installed in accordance with normal applicable local codes, ordinances, and
good trade practices; and (e) if the unit is used for purposes other than for what it was designed and
manufactured.
RETURN OF WARRANTED COMPONENTS: Any item to be repaired or replaced under this warranty
must be returned to the manufacturer at Kendallville, Indiana or such other place as the manufacturer
may designate, freight prepaid.
THE WARRANTY PROVIDED HEREIN IS IN LIEU OF ALL OTHER EXPRESS WARRANTIES,
AND MAY NOT BE EXTENDED OR MODIFIED BY ANYONE. ANY IMPLIED WARRANTIES SHALL
BE LIMITED TO THE PERIOD OF THE LIMITED WARRANTY AND THEREAFTER ALL SUCH
IMPLIED WARRANTIES ARE DISCLAIMED AND EXCLUDED. THE MANUFACTURER SHALL
NOT, UNDER ANY CIRCUMSTANCES, BE LIABLE FOR INCIDENTAL, CONSEQUENTIAL OR
SPECIAL DAMAGES, SUCH AS, BUT NOT LIMITED TO DAMAGE TO, OR LOSS OF, OTHER
PROPERTY OR EQUIPMENT, LOSS OF PROFITS, INCONVENIENCE, OR OTHER INCIDENTAL
OR CONSEQUENTIAL DAMAGES OF ANY TYPE OR NATURE. THE LIABILITY OF THE
MANUFACTURER SHALL NOT EXCEED THE PRICE OF THE PRODUCT UPON WHICH SUCH
LIABILITY IS BASED.
This warranty gives you specic legal rights, and you may have other rights which vary from state to
state. Some states do not allow limitations on duration of implied warranties or exclusion of incidental
or consequential damages, so the above limitations may not apply to you.
FOR YOUR WARRANTY PROTECTION, THE WARRANTY REGISTRATION MUST BE
COMPLETED AND RETURNED TO THE WARRANTY INFORMATION CENTER WITHIN TEN DAYS
OF INSTALLATION.
In those instances where damages are incurred as a result of an alleged pump failure, the
Homeowner must retain possession of the pump for investigation purposes.

10
© 2019. All rights reserved.
Printed in Taiwan
TROUBLESHOOTING
PROBLEM POSSIBLE CAUSE CORRECTIVE ACTION
Pump will not
start or run.
1. Circuit breaker is off or fuse is blown or
loose.
1. Reset circuit breaker or replace
fuse. If problem continues, contact
a professional electrician or
plumber.
2. Water in sump basin is not high enough
to cause the switch to turn on.
2. Water will turn on when it reaches
the proper level for the pump.
3. Pump is not plugged in or is connected
to a wall switch that has been turned
off.
3. Plug pump securely into GFCI
outlet that cannot be turned off by
a wall switch.
4. Float cannot move freely. 4. Remove any obstructions around
float.
Pump runs, but
does not deliver
water.
1. Make sure check valve is not installed
backwards.
1. Arrow on valve should point away
from pump.
2. Shut-off valve (if used) may be closed. 2. Open shut-off valve.
3. Impeller or pump inlet is clogged. 3. Remove pump from basin and
clean impeller or pump inlet.
4. Pump is air-locked. 4. Clean out vent hole in discharge
pipe.
5. Vertical pumping distance is too high. 5. Reduce the vertical distance to
correspond with the performance
chart in the instructions.
Pump runs
continuously.
1. Float is stuck in the ‘on’ position. 1. Make sure the float can move
freely.
2. Float switch is defective. 2. Replace float switch.
Pump runs, but
delivers little
water.
1. Pump is air-locked. 1. Clean out vent hole in discharge
pipe.
2. Vertical pumping distance is too high. 2. Reduce the vertical distance to
correspond with the performance
chart in the instructions.
3. Impeller or pump inlet is clogged. 3. Remove pump from basin and
clean impeller or pump inlet.
Fuse blows or
circuit breaker
trips when pump
starts.
1. Impeller or pump inlet is clogged. 1. Remove pump from basin and
clean impeller or pump inlet.
2. Fuse size or circuit breaker may be too
small.
2. Electrical circuit capacity must be
15 amps or higher.
RISK OF ELECTRIC SHOCK.
Always disconnect power source before attempting to install, service, or maintain the pump. Never
handle a pump with wet hands or when standing on wet or damp surface or in water. Fatal electrical
shock could occur.
DANGER

1
© 2019. Todos los derechos reservados.
BOMBA DE SUMIDERO
SUMERGIBLE
MODELO #1099
Zoeller
®
es una marca registrada de Zoeller Co.
Todos derechos reservados.
Número de serie
Fecha de compra
¿Preguntas, problemas, partes faltantes? Antes de acudir al minorista, llame a nuestro
departamento de servicio al cliente al 1-800-584-8089, de lunes a viernes de 7:30 a.m. a
5:00 p.m., EST.
ADJUNTE SU RECIBO AQUÍ
SW1202S C
ZoellerAtHome.com

2
© 2019. Todos los derechos reservados.
CONTENIDO DEL PAQUETE
DESCRIPCIÓN CANTIDAD
Bomba 1
INFORMACIÓN DE SEGURIDAD
Lea y comprenda todo el manual antes de intentar ensamblar, operar o instalar el producto.
NOTA: Las bombas que exhiban la marca “UL”, así como aquéllas que exhiban la marca “US”,
satisfacen la norma UL778 de Underwriters Laboratory. Las bombas certicadas por la Asociación
Canadiense de Normalización (CSA) satisfacen la norma C22.2 de la CSA. 108.
PELIGRO
• PELIGRO DE INCENDIO/EXPLOSIÓN.
Pump only clear water. Do not pump flammable or explosive fluids such as gasoline, fuel oil, kerosene,
etc. Do not use in a flammable and/or explosive atmosphere. Failure to follow these warnings could
result in death or serious injury and/or property damage.
• RIESGO DE DESCARGA ELÉCTRICA.
No se ha investigado el uso de estas bombas en áreas marinas y en piscinas.
• RIESGO DE DESCARGA ELÉCTRICA.
Siempre desconecte la alimentación eléctrica antes de instalar la bomba o realizar actividades de
servicio o mantenimiento. Nunca manipule la bomba con las manos mojadas o si está de pie en agua
o sobre una superficie húmeda o mojada, ya que podría ocurrir una electrocución fatal.
• RIESGO DE DESCARGA ELÉCTRICA.
Mantenga la bomba fuera del alcance de los niños.
ADVERTENCIA
• ALERTA DE DESCARGA ELÉCTRICA.
Antes de instalar este producto, haga que un electricista revise su circuito para asegurarse de
que la puesta a tierra sea adecuada. Todas las instalaciones eléctricas deben realizarse de
conformidad con el Código Eléctrico Nacional y todos los códigos locales.
• ALERTA DE DESCARGA ELÉCTRICA.
Conecte este producto a un circuito con la debida puesta a tierra de 115 voltios, equipado con un
interruptor de circuito de fallas de puesta a tierra (GFCI, por sus siglas en inglés). Asegúrese de
que el circuito de suministro eléctrico esté equipado con fusibles o disyuntores con una capacidad
mínima de 15 amperios.

3
© 2019. Todos los derechos reservados.
• ALERTA DE DESCARGA ELÉCTRICA.
Nunca utilice una extensión eléctrica.
• ALERTA DE DESCARGA ELÉCTRICA.
Estas bombas vienen con un enchufe de 3 clavijas, con conexión a tierra, para protegerlo en
caso de una descarga eléctrica. BAJO NINGUNA CIRCUNSTANCIA QUITE EL CONECTOR DE
TIERRA.
• ALERTA DE DESCARGA ELÉCTRICA.
No quite ni reemplace el cable de energía
• ALERTA DE DESCARGA ELÉCTRICA.
Proteja el cable eléctrico de objetos afilados, superficies calientes, aceite y sustancias químicas.
Evite torcer el cable.
• ADVERTENCIA DE PROPOSICIÓN 65 PARA RESIDENTES DE CALIFORNIA
Cáncer y Daño Reproductivo – www.P65Warnings.ca.go
• ALERTA DE LESIONES PERSONALES.
Esta bomba contiene aceite, el cual que se calienta cuando funciona. Antes de proceder con el
mantenimiento, deje que pasen 2 1/2 horas después de desconectarla.
PRECAUCIÓN
• PODRÍAN PRODUCIRSE LESIONES PERSONALES O DAÑOS AL PRODUCTO.
Esta bomba funciona con 115 voltios. Asegúrese de que la fuente de energía cumpla los
requisitos de su equipo.
• SE PUEDE PROVOCAR DAÑO AL PRODUCTO.
La temperatura del agua de funcionamiento continuo para este modelo de bombas no debe
sobrepasar 40°C (104°F).
• SE PUEDE PROVOCAR DAÑO AL PRODUCTO.
Esta bomba está diseñada para bombear agua únicamente. No ha sido evaluada para bombear
químicos ni materiales corrosivos.
• SE PUEDE PROVOCAR DAÑO AL PRODUCTO.
Inspeccione regularmente la bomba en busca de daños y realice el mantenimiento de rutina
según sea necesario. Quite la suciedad que pudiera acumularse alrededor de la operación de
encendido/apagado del flotador.
• SE PUEDE PROVOCAR DAÑO A LA PROPIEDAD.
Se debe perforar un orificio de ventilación de 5 mm (3/16”) en la tubería de descarga nivelado con
la parte superior de la bomba. Periódicamente se deberá revisar que el orificio de ventilación no
esté obstruido. Es normal que salga agua de este orificio de ventilación durante el funcionamiento
de la bomba.
• PODRÍA CAUSAR DAÑOS A LA PROPIEDAD O AL PRODUCTO.
Esta bomba no está diseñada para bombear efluentes o aguas negras.
• PUEDE PROVOCAR DAÑO AL PRODUCTO.
Esta bomba no está diseñada para un funcionamiento continuo.
PREPARACIÓN
Tiempo estimado de instalación: 15 minutos
Materiales requeridos para el ensamblaje: Contenedor para agua de sumidero, tubería de
entrada, tubería de descarga (PVC, tubería de polietileno o acero galvanizado), válvula de retención,
sistema para pegar de PVC de 2 pasos (imprimante y sellador).

4
© 2019. Todos los derechos reservados.
INFORMACIÓN GENERAL ACERCA DE LA BOMBA
Esta bomba está diseñada para ser instalada en un contenedor para agua de sumidero para quitar
el agua de drenaje limpia y habitualmente pasarán por ella partículas suspendidas en el agua. El
lodo pesado, la arena o la gravilla pueden obstruir la bomba, lo que generalmente se puede limpiar
lavando a presión con una manguera de jardín a través de la descarga de la bomba.
Operación de otador doble:
• La bomba se encenderá cuando el otador principal
grande esté en la posición de arriba y se apagará
cuando el otador principal esté en la posición de
abajo.
• Si la bomba funciona durante más de 25 segundos
(el otador principal está alto) y el otador de
seguridad pequeño está abajo, el otador principal
se deshabilitará temporalmente. El otador principal
se vuelve a habilitar si el otador principal se mueve
hacia abajo, o si han transcurrido tres minutos.
• La bomba se encenderá si el otador de
seguridad se mueve hacia arriba. Se habilitará un
temporizador de 10 segundos cuando el otador
de seguridad se mueve hacia abajo. La bomba
funcionará hasta que el otador principal baje y el tiempo del temporizador de 10 segundos se
haya agotado.
Se debe instalar una válvula de retención en la tubería de descarga para evitar que el agua se
devuelva hacia el recipiente del sumidero cuando no esté en funcionamiento. El recipiente del
sumidero debe tener al menos 45,72 cm de profundidad y 25,4 cm de diámetro.
NOTAS: Antes de instalar la bomba:
• Haga que un electricista verique el circuito eléctrico para asegurar que esté en un circuito
exclusivo con la conexión a tierra adecuada.
• Conecte la bomba a un circuito con conexión a tierra equipado con un interruptor de circuito con
protección de falla a tierra (GFCI, por sus siglas en inglés).
• ASEGÚRESE de que la fuente de alimentación de la bomba esté desconectada antes de instalar
o hacer el mantenimiento de esta unidad.
• Asegúrese de que el contenedor para agua de la bomba y la tubería no tengan arena, suciedad y
acumulación. La suciedad obstruirá la bomba y anulará la garantía.
• No proteger la bomba y la tubería del congelamiento podría causar daños graves y anular la
garantía.
• No opere la bomba en seco.
Flotador
principal
Flotador de
seguridad
2
PREPARACIÓN
Especificaciones
MODELO HP AMPERIOS
RENDIMIENTO EN GALONES POR MINUTO
0 PIES 5 PIES 10 PIES 15 PIES 20 PIES
1099 3/4 9.0 80 72 62 50 35

5
© 2019. Todos los derechos reservados.
INSTRUCCIONES DE INSTALACIÓN
2. Conecte la tubería de descarga, los conectores
y la válvula de retención (no se incluye) a la
descarga de la bomba. La tubería de descarga
debe ser del mismo tamaño que la descarga de
la bomba (1-1/2 pulg.) o más grande.
NOTA: Asegúrese de que haya el espacio
suciente en el recipiente para que el otador
se mueva libremente. Si el otador no se puede
mover con libertad, la bomba no funcionará.
3. Taladre un oricio de ventilación de 4,76 mm
en la tubería de descarga, a nivel con la parte
superior de la bomba. Es normal que emane
agua desde este oricio cuando la bomba está
funcionando.
Agujero de
ventilación
de 3/16 pulg.
3
Tubería y conectores
de descarga
Válvula de
retención
2
1. Asegúrese de que el recipiente del sumidero
esté libre de suciedad y sedimentos y luego
coloque la bomba de sumidero sobre una
supercie dura dentro del recipiente.
A
IL2016
1

6
© 2019. Todos los derechos reservados.
4. B. Ponga el otador secundario en el “nivel
de encendido” deseado en la tubería de
descarga.
Nivel de encendido
Tubería
de descarga
Soporte de
montaje
en ángulo
recto
4B
4. C. Fije un soporte de montaje en el tubo de
descarga como se muestra, utilizando una
abrazadera de manguera (incluida).
ADVERTENCIA: NO instale el otador de nivel
de agua alto en línea directa del agua entrante
o cerca del oricio de ventilación.
Abrazadera
de manguera
Tubería
de descarga
4C
4. A. Fije el otador secundario al soporte de
montaje en ángulo recto desenroscando la
tuerca de plástico. Vuelva a apretar la tuerca
de plástico después de insertar el vástago del
sensor en el soporte.
Tuerca de
plástico
Soporte de
montaje en
ángulo recto
Vástago
del sensor
4A
INSTRUCCIONES DE INSTALACIÓN

7
© 2019. Todos los derechos reservados.
5. Asegúrese de tener las manos secas y de no
estar parado sobre agua. Conecte la bomba a
un tomacorriente con interruptor de circuito de
falla de puesta a tierra (GFCI) con la debida
puesta a tierra.
WARNING: Do not use an extension cord.
NOTE: Tape the electrical cord to the discharge
pipe to prevent it from interfering with the
motion of the float.
6. Para probar el funcionamiento de la bomba,
vierta agua en el recipiente del sumidero.
7. Instale una cubierta para el recipiente del
sumidero para completar la instalación.
A
A
Tapa de contenedor
para agua para
sumidero
7
115 V
GFCI outlet
6
Tomacorriente
GFCI de 115 V
5
INSTRUCCIONES DE INSTALACIÓN

8
© 2019. Todos los derechos reservados.
CUIDADO Y MANTENIMIENTO
ADVERTENCIA: siempre desconecte la bomba de
la fuente de alimentación antes de manipularla.
Al menos cada tres meses:
Elimine cualquier desecho que pueda haberse
acumulado en el recipiente del sumidero para
evitar que interfieran con el funcionamiento del
interruptor del flotador.
Limpie el orificio de ventilación que taladró en la
tubería de descarga durante la instalación.
Pruebe el funcionamiento del sistema.
Limpie el
orificio de
ventilación
Elimine la
suciedad
1

9
© 2019. Todos los derechos reservados.
GARANTÍA
Este producto se garantiza por tres años a partir de la fecha de fabricación. Sujeto a las condiciones
indicadas a continuación, el fabricante se compromete a reparar o reemplazar al consumidor
original cualquier parte del producto que resulte defectuosa debido a defectos de materiales o
mano de obra. Para obtener el servicio de garantía, póngase en contacto con el distribuidor al que
le compró el producto. El fabricante se reserva el derecho y la opción exclusivos de determinar si
se deben reparar o sustituir los equipos, piezas o componentes defectuosos. Los daños debidos a
circunstancias ajenas al control del fabricante no están cubiertos por esta garantía.
ESTA GARANTÍA NO APLICARÁ: (a) a defectos o mal funcionamiento ocasionados por no instalar,
operar o mantener la unidad de acuerdo con las instrucciones impresas proporcionadas, (b) a los
fallos resultantes del abuso, accidentes o negligencia o uso inapropiado de productos químicos o
aditivos en el agua, (c) a los servicios normales de mantenimiento y las piezas utilizadas en relación
con dicho servicio; (d) a las unidades que no estén instaladas de acuerdo con los códigos locales,
ordenanzas y buenas prácticas comerciales normalmente aplicables y (e) la unidad se utiliza para
fines distintos a los que fue diseñada y fabricada.
DEVOLUCIÓN DE COMPONENTES EN GARANTÍA: Cualquier elemento a ser reparado o
reemplazado bajo esta garantía debe ser devuelto al fabricante en Kendallville, Indiana o a cualquier
otro lugar que el fabricante pueda designar, con flete prepagado.
LA GARANTÍA AQUÍ CONTENIDA ESTÁ EN LUGAR DE TODAS LAS OTRAS GARANTÍAS
EXPRESAS Y NO PUEDE SER AMPLIADA O MODIFICADA POR NADIE. CUALQUIER GARANTÍA
IMPLÍCITA DEBERÁ LIMITARSE AL PERÍODO DE ESTA GARANTÍA LIMITADA Y A PARTIR
DE ENTONCES TODAS DICHAS GARANTÍAS IMPLÍCITAS QUEDARÁN RECHAZADAS Y
EXCLUIDAS. EL FABRICANTE NO SERÁ RESPONSABLE, BAJO NINGUNA CIRCUNSTANCIA, DE
NINGÚN DAÑO INCIDENTAL, CONSECUENTE O ESPECIAL, COMO, A TÍTULO ENUNCIATIVO
PERO NO RESTRICTIVO, LA PÉRDIDA DE OTROS BIENES O EQUIPOS, LA PÉRDIDA DE
BENEFICIOS, INCONVENIENTES U OTROS DAÑOS INCIDENTALES O CONSECUENTES DE
CUALQUIER TIPO O CARÁCTER. LA RESPONSABILIDAD DEL FABRICANTE NO DEBERÁ
SUPERAR EL PRECIO DEL PRODUCTO EN EL CUAL SE BASE TAL RESPONSABILIDAD.
Esta garantía le otorga a usted derechos legales específicos y podría tener otros derechos que
varían de un estado a otro. Algunos estados no permiten limitaciones en la duración de una garantía
implícita, de forma que la limitación anterior podría no aplicar a usted. Algunos estados no permiten
la exclusión o limitación de daños incidentales o emergentes, de forma que la limitación o exclusión
anterior podría no aplicar a usted.
PARA OBTENER LA PROTECCIÓN DE LA GARANTÍA, EL REGISTRO DE LA GARANTÍA DEBE
COMPLETARSE Y DEVOLVERSE AL CENTRO DE INFORMACIÓN DE LA GARANTÍA DENTRO DE
LOS DIEZ DÍAS DE LA INSTALACIÓN.
En aquellas instancias en que haya daños causados por una presunta falla de la bomba, el
propietario deberá conservar la bomba a fin de investigar dicha falla.

10
© 2019. Todos los derechos reservados.
SOLUCIÓN DE PROBLEMAS
RIESGO DE DESCARGA ELÉCTRICA.
Desconecte siempre la fuente de alimentación antes de instalar, reparar o realizar el mantenimiento
de la bomba. No manipule la bomba con las manos mojadas o cuando esté parado sobre una
superficie mojada, húmeda o con agua. Puede ocurrir una descarga eléctrica mortal.
PELIGRO
PROBLEMA CAUSA POSIBLE ACCIÓN CORRECTIVA
La bomba no
enciende ni
funciona.
1. El disyuntor está apagado o el fusible está
fundido o ojo.
1. Restablezca el disyuntor o reemplace
los fusibles. Si el problema continúa,
comuníquese con un electricista o
plomero profesional.
2. El agua en el contenedor para agua de
sumidero no está lo sucientemente alta como
para que se encienda el interruptor.
2. El agua lo encenderá cuando alcance el
nivel adecuado para su funcionamiento.
3. La bomba no está enchufada o está conectada
a un interruptor de pared que no se encendió.
3. Enchufe la bomba en una toma de
corriente con GFCI que no se pueda
apagar mediante un interruptor de pared.
4. El otador no se puede mover libremente. 4. Quite las obstrucciones alrededor del
otador.
La bomba funciona
pero no sale agua.
1. Asegúrese de que la válvula de retención no
esté instalada al revés.
1. La echa de la válvula debe indicar hacia
afuera de la bomba.
2. La válvula de cierre de descarga (si se está
usando) puede que esté cerrada.
2. Abra la válvula de cierre.
3. El impulsor o la entrada de la bomba está
atascada.
3. Quite la bomba del contenedor para agua
y limpie el impulsor o la entrada de la
bomba.
4. La bomba está bloqueada con aire. 4. Limpie el oricio de ventilación en la
tubería de descarga.
5. La distancia vertical de bombeo es demasiado
grande.
5. Reduzca la distancia vertical para que
coincida con el cuadro de funcionamiento
de las instrucciones.
La bomba funciona
de manera
continua.
1. El otador está atascado en la posición ‘on’
(encendido).
1. Asegúrese de que el otador se pueda
mover libremente.
2. Interruptor de otador está defectuoso. 2. Reemplace el interruptor del otador.
La bomba funciona
pero sale poca
agua.
1. La bomba está bloqueada con aire. 1. Limpie el oricio de ventilación en la
tubería de descarga.
2. La distancia vertical de bombeo es demasiado
grande.
2. Reduzca la distancia vertical para que
coincida con el cuadro de funcionamiento
de las instrucciones.
3. El impulsor o la entrada de la bomba está
atascada.
3. Quite la bomba del contenedor para agua
y limpie el impulsor o la entrada de la
bomba.
Cuando la bomba
arranca, el fusible
se quema o el
interruptor de
circuito se dispara.
1. El impulsor o la entrada de la bomba está
atascada.
1. Quite la bomba del contenedor para agua
y limpie el impulsor o la entrada de la
bomba.
2. La capacidad del fusible o del cortacircuitos
puede ser insuficiente.
2. La capacidad del circuito eléctrico debe
ser de 15 amperios o más.
/