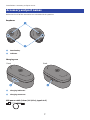
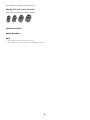
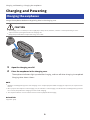
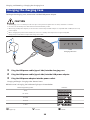
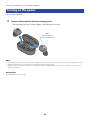
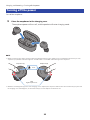
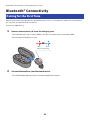
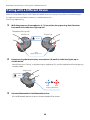
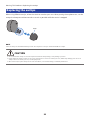
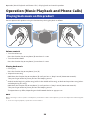
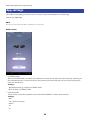
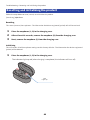
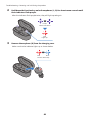
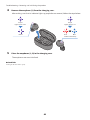
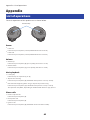
Los Yamaha TW-E3B son unos auriculares inalámbricos con tecnología Bluetooth que ofrecen una experiencia de audio de alta definición, gracias a su compatibilidad con los códecs Qualcomm aptXTM y AAC. Cuentan con la función LISTENING CARE, que te permite disfrutar de un sonido rico incluso a bajo volumen. Además, admiten llamadas telefónicas y control por voz, y tienen una aplicación dedicada, Headphones Controller, para personalizar su configuración.
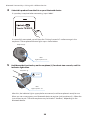
Los Yamaha TW-E3B son unos auriculares inalámbricos con tecnología Bluetooth que ofrecen una experiencia de audio de alta definición, gracias a su compatibilidad con los códecs Qualcomm aptXTM y AAC. Cuentan con la función LISTENING CARE, que te permite disfrutar de un sonido rico incluso a bajo volumen. Además, admiten llamadas telefónicas y control por voz, y tienen una aplicación dedicada, Headphones Controller, para personalizar su configuración.


-
 1
1
-
 2
2
-
 3
3
-
 4
4
-
 5
5
-
 6
6
-
 7
7
-
 8
8
-
 9
9
-
 10
10
-
 11
11
-
 12
12
-
 13
13
-
 14
14
-
 15
15
-
 16
16
-
 17
17
-
 18
18
-
 19
19
-
 20
20
-
 21
21
-
 22
22
-
 23
23
-
 24
24
-
 25
25
-
 26
26
-
 27
27
-
 28
28
-
 29
29
-
 30
30
-
 31
31
-
 32
32
-
 33
33
-
 34
34
-
 35
35
-
 36
36
-
 37
37
-
 38
38
-
 39
39
-
 40
40
-
 41
41
-
 42
42
-
 43
43
-
 44
44
-
 45
45
-
 46
46
-
 47
47
-
 48
48
-
 49
49
-
 50
50
-
 51
51


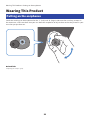
Los Yamaha TW-E3B son unos auriculares inalámbricos con tecnología Bluetooth que ofrecen una experiencia de audio de alta definición, gracias a su compatibilidad con los códecs Qualcomm aptXTM y AAC. Cuentan con la función LISTENING CARE, que te permite disfrutar de un sonido rico incluso a bajo volumen. Además, admiten llamadas telefónicas y control por voz, y tienen una aplicación dedicada, Headphones Controller, para personalizar su configuración.
en otros idiomas
- français: Yamaha TW-E3B Mode d'emploi
- italiano: Yamaha TW-E3B Guida utente
- English: Yamaha TW-E3B User guide
- Deutsch: Yamaha TW-E3B Benutzerhandbuch
- русский: Yamaha TW-E3B Руководство пользователя
- Nederlands: Yamaha TW-E3B Gebruikershandleiding
- português: Yamaha TW-E3B Guia de usuario
- dansk: Yamaha TW-E3B Brugervejledning
- svenska: Yamaha TW-E3B Användarguide
- Türkçe: Yamaha TW-E3B Kullanici rehberi
- suomi: Yamaha TW-E3B Käyttöohjeet
Artículos relacionados
-
Yamaha TW-E5A Guía del usuario
-
-
Yamaha TW-E7A Manual de usuario
-
-
-
-
-
Yamaha YH-E700A Manual de usuario
-
-