Joovy Pootler Manual de usuario
- Categoría
- Cochecitos
- Tipo
- Manual de usuario

Table of Contents
English
Safety and Warnings ........................................................................................................................ 2
Parts List .......................................................................................................................................... 3
Assembly .......................................................................................................................................... 5
Operation .......................................................................................................................................... 6
Care and Maintenance ..................................................................................................................... 8
Team 432 .......................................................................................................................................... 9
Francais
Sécurité et Mise en Gardes ............................................................................................................ 10
Liste des Pièces ............................................................................................................................. 11
Assemblage .................................................................................................................................... 13
Fonctionnement ............................................................................................................................. 14
Soin et entretien ............................................................................................................................. 16
Équipe 432 ..................................................................................................................................... 17
Español
Seguridad y Advertencias .............................................................................................................. 18
Lista de Partes ................................................................................................................................ 19
Montaje ........................................................................................................................................... 21
Funcionamiento .............................................................................................................................. 22
Cuidado y mantenimiento .............................................................................................................. 24
Equipo 432 ..................................................................................................................................... 24
日本語
安全と警告 ...................................................................................................................................... 25
部 品リスト ....................................................................................................................................... 26
アセンブリ ....................................................................................................................................... 28
操作 ................................................................................................................................................ 29
取り扱いおよびメンテナンス ........................................................................................................... 30
チーム432 ....................................................................................................................................... 31

2
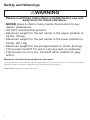
Safety and Warnings
•NEVER place a child or baby inside this product for any
reason whatsoever.
•DONOToverloadthisproduct.
•Maximumweightforthepetcarrierintheupperpositionis
22 lbs. (10 kg).
•Maximumweightforthepetcarrierinthelowerpositionis
50 lbs. (22.7 kg).
•Maximumweightforthestoragebasketis15lbs.(6.8kg).
•ThisproductisNOTforuseincarryingpetsonairplanes.
•Thisproductisnotatoy.DONOTallowchildrentoplay
with it.
Please do not return this product to the store.
Ifyouexperienceanyofdicultywiththeassemblyoruseofthisproduct,orifyouhaveaquestion
regardingtheseinstructions,pleasecontactDepartment432(page9).
Please note: Styles and colors may vary.
IWARNING
Please read these instructions carefully before use and
keep them for future reference.

3
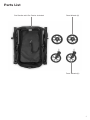
Parts List
Pet Stroller with Pet Carrier Included
Front Wheels (2)
Rear Wheels (2)

4
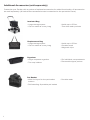
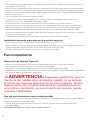
Additional Accessories (sold separately)
Customize your Pootler with a number of optional accessories for added functionality. All accessories
are sold separately. (All below Boot accessories can be attached to the pet stoller frame)
Insulated Bag
•Large storage space
•Can be used as a carry bag
•Holds up to 55 lbs.
•Two side mesh pockets
Replacement Bag
•Large storage space
•Can be used as a carry bag
•Holds up to 55 lbs.
•Durablemesh
•Magnetic clips
Organizer
•Large neoprene organizer
•Two cup holders
Pet Basket
•With 2nd layer for the pet basket
bottom
•Self-standing & portable pet basket
•Sixindividualcompartments
•Removable zipper pocket
•Durablemesh

5
•Holds up to 55 lbs.
•Two side mesh pockets
•Holds up to 55 lbs.
•Durablemesh
•Magnetic clips
•Sixindividualcompartments
•Removable zipper pocket
•Durablemesh
Assembly
IMPORTANT NOTE: Please refer to the end of this manual for all photos
that are referenced in parentheses in the instructions below.
Unpacking the Product
• Removeeverythingfromthebox–petstrollerwithpetcarrierincluded,frontwheels(2),rear
wheels(2),anddocuments(notshown).
•Discardallpackagingmaterialsproperlyincludingplasticcoverings.
•DONOTallowchildrentoplaywithanypackagingmaterials.
IWARNING: Adult assembly is required for this
product.Notoolsrequired.
Unfolding the Pet Stroller
• Orientthepetstrollerwiththehandlefacingupward.(1)
• Removethepetcarrierfromthestrollerandputitasideforlaterassembly.(2)
• Releasethesafetylatchlocatedontheleftsideofthepetstroller.(3)
•Pullupwardsonthehandle.(4) Keep pulling until the pet stroller is fully erected and the locking
mechanism has fully engaged.
•Gentlypushdownwardonthehandletoensurethatthepetstrolleriscompletelyopenedand
lockedbeforeANYuseoftheproduct.
IWARNING: Keep children away from pet stroller
whileunfolding.ALWAYSensurethelockingmechanismis
fully engaged when the pet stroller is in the opened position.
This action will prevent collapse of the pet stroller. Possible
pinchinghazard–Becarefulwhenunfoldingthepet stroller.
Installing/Removing the Front Wheels
• Slideonefrontwheelintothefrontwheelhousinguntilitclicksintoplace.(5) Repeat for the other
wheel. Pull on the wheels to ensure they are installed properly.
• Toremovethewheel,pressthemetalreleasebuttononthebackofthefrontwheelhousingand
pull the wheel away from the pet stroller. (6)
Installing/Removing the Rear Wheels
• Installarearwheelbyslidingtheaxleintotheholeinthewheelhubuntilitclicksintoplace.(7)
Repeat for the other wheel. Pull on the wheels to ensure they are installed properly.
• Toremovethewheel,pushthereleasebuttonontherearwheelhubandpullthewheelfromthe
pet stroller. (8)
Assembling the Pet Carrier
• Forthepetcarrierthatwaspreviouslyputaside,liftuponthesidesofthecarriertofullyexpandit.
(9)
• Keepingitfullyexpanded,gentlyplaceitontheoororatable.(10)
•Removethepadandpadsupportfromthecarrierandputthemaside.
•Openthefabricpocketonthebottomofthecarrierandlocatethesupportlegswiththefabric
loops attached. (11)
• Withonehandbracedagainstthebottomofthecarrier,useyourotherhandtormlypulltheloop
ononeofthesupportlegstowardsoneendofthecarrieruntilthesupportlegtsintothegroove

6
on the bottom panel of the carrier. (12) Repeat for the other support leg. The carrier should now
hold its shape.
• ClosethepocketusingtheVelcro®strips.(13)
• Placethepadsupport(withthezipperaroundit)(14) and the pad inside the carrier with the pocket
side facing down. (15)
The carrier is now ready to use with the pad in the lower position.
• Toattachthecarriertothestrollerframe,holdthecarryhandleandplacethecarrierintotheframe
sothattheU-shapedbracketonbothendsofthecarriertsbetweenthebrackettabsonthe
stroller frame bar. (16)
• Pushdowntheclamponbothsidesofthecarrierframetolockthepetcarriertothestrollerframe.
(17)
•Pulluponthecarriertoensureitissecure.
Setting up the Pet Carrier in the Upper Position
•Removethepadandpadsupportfromthecarrier.
•Attachthepadsupporttothecarrierfabricusingthezipper.Ensurethatthezipperiszippedall
the way around the perimeter of the carrier. (18)
•Replacethepadwiththepocketsidefacingdown.
Rear Wheel Brakes
• Alwaysengagetherearwheelbrakeswhennotpushingthepetstroller.
•Toengage,pushdownonthebrakelever.(19)
•Gentlypushthepetstrollerbackandforthtoensurethebrakesarefullyengaged.
•Torelease,pushdownonthebackofthebrakelever.(20)
IWARNING: Always make sure the wheel brakes
are engaged when the pet stroller is not being pushed so
thatthepetstrollerwillnotrollaway.Neverleave pet stroller
unattended,especiallyonahillorincline,asthepetstrollermay
tip over or slide.
Using the Pet Carrier as a Hand Held Product
• Toremovethecarrierfromthestroller,unlocktheclamponbothsidesofthecarrierframe.(21)
•Holdthecarryhandleandliftitupuntilitiscompletelyoutoftheframe.(22)
IMPORTANT NOTE: The storage basket should never be removed.
IWARNING: Maximumweightforthepetcarrierin
theupperpositionis22lbs.(10kg).).Maximumweightforthe
pet carrier in the lower position is 50 lbs. (22.7 kg). The
maximumweightthatcanbecarriedinthestoragebasketis
15 lbs. (6.8 kg).
Canopy
• Thecanopycanbepositionedbetweenfullyopenedandfullyclosed.
•Toopenthecanopy,unlocktheclamponbothendsofthecanopyandrotatethecanopytothe
desired position. (23)
Operation

7
•Tolockthecanopy,closethecanopyallthewaydownandpushdowntheclamponbothsidesto
secure it to the carrier frame. (24)
Tether
• Thetethershouldneverberemoved.
• Placeyourpetinthecarrierandattachthetethertothecollartosecurethem.(25)
•Thetethercanbeadjustedusingtheslidingplasticring.
Folding the Pet Stroller
• Keepchildrenawayfromthepetstrollerwhilefolding.
•TherearwheelbrakesMUSTbeengagedbeforefoldingthepetstroller.
•ThecarrierMUSTberemovedfromtheframe.
•Pushthefoldingreleaselockonthehandletotheleftandsqueezethebuttonontheinsideofthe
handle in. (26)
•Slowlypushthehandleforwarduntiltheproductiscompletelyfolded(27) and the safety latch has
automatically engaged. (28)
DO NOT force the pet stroller closed.
•Pulluponthehandletoensurethesafetylatchissecure.
CAUTION:Whilefoldingthepetstroller,becarefultokeepyourngersfrombeingpinchedby
moving parts.
Folding the Pet Carrier
•Topreparethecarrierforstorageortravel,removethepadandpadsupportfromthecarrier.
•Openthepocketonthebottomofthecarrier.(29)
•Withonehandbracedagainstthebottomofthecarrier,useyourotherhandtormlypullonthe
loopattachedtooneofthesupportlegsuntilitreleasesfromthegrooveandlaysat.(30) Repeat
for the other side.
•Collapsethecarrierbypushingdownonallsidessothatitliesatforstorageortravel.

8
Care & Maintenance
Maintenance
Allofthettings,snaps,locks,rivets,andotherhardwareandplasticpartsonthepetstrollershouldbe
inspected periodically to ensure that they are secured properly and not damaged or malfunctioning.
All straps and fabric items and their stitching should also be inspected periodically to ensure that they
aresecuredproperlyandnotloose,tornorotherwisedamaged.Allmovingparts,suchaswheels,
brakes,andhingesshouldalsobecheckedperiodicallytoensuretheyareoperatingproperly.
Anymissing,broken,orworncomponentsshouldbereplacedimmediately,andthepetstroller
should not be used until they are replaced. Only original manufacturer’s components should be
used.Ifneeded,pleasecontactJoovyatourtoll-freephonenumber.
Cleaning
Theframeandwheelsshouldalwaysbekeptcleanandfreeofdirtandforeignmatter,especially
after operating the pet strollerinrain,snow,orotherharshenvironments.Useaspongeorcloth
dampened with warm water and a mild detergent cleaner to clean the wheels after such use.
Storage
Directsunlightmayfadefabricanddryoutwheels.Storepet stroller indoors to prolong its
appearance.DONOTstoreoutdoors.Ensurethatthepet stroller is dry before storing for prolonged
periods. Always store the pet stroller in a dry environment. Store the pet stroller in a safe place when
notinuse(i.e.awayfromchildren).DONOTplaceheavyobjectsontopofthepetstroller.DONOT
store the petstrollernearadirectheatsourcesuchasaradiatororopenre.

9
Team 432
Please do not return this product to the store.
Ifyouexperienceanyofdicultywiththeassemblyoruseofthisproduct,orifyouhaveaquestion
regardingtheseinstructions,pleasecontactTeam432:
United States
Joovy
(877)456-5049,8:30am–5:00pmCentralTime
joovy.comLiveChat,8:30am–9:00pmCentralTime
customerservice@joovy.com
Canada
ElfeJuvenileProducts
(800)667-8184,8:30am–5:00pmEasternTime
@joovy

10
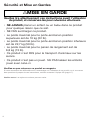
Sécurité et Mise en Gardes
•NE JAMAIS placer un enfant ou un bébé dans ce produit
pour quelque raison que ce soit.
•NEPASsurchargerceproduit.
•Lepoidsmaximalpourleporte-animalenposition
supérieure est de 10 kg (22 lb).
•Lepoidsmaximalpourleporte-animalenpositioninférieure
estde22,7kg(50lb).
•Lepoidsmaximalpourlepanierderangementestde
6,8kg(15lb).
•Ceproduitn'estPASpourletransportd'animauxsurles
avions.
•Ceproduitn’estpasunjouet.NEPASlaisserlesenfants
jouer avec celui-ci.
Veuillez ne pas retourner ce produit en magasin.
Sivousrencontrezdesdicultésavecl’assemblageoul’utilisationdeceproduit,ousivousavez
desquestionsàproposdecesinstructions,veuillezcontacterl'équipe432(page17).
Veuillez noter: Les styles et couleurs peuvent varier.
IMISE EN GARDE
Veuillez lire attentivement ces instructions avant l’utilisation
du produit, et conservez-les pour référence ultérieure.

11
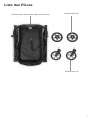
Liste des Pièces
Pousette pour animal avec porte-animal inclus
Roues Avant (2)
Roues Arrière (2))

12
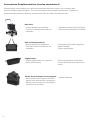
Accessoires Supplémentaires (vendus séparément)
Personnalisezvotreproduitavecdiversaccessoiresoertsenoption,and’obtenirdes
fonctionnalités supplémentaires. Tous les accessoires sont vendus séparément. (Toutes les
accessoiresdebottesci-dessouspeuventêtrexésaucadreduporte-animal)
Sac de Remplacement
•Grand espace de rangement
•Peut être utilisé comme sac de
transport
•Transportejusqu’à24,9kg(55lb).
•Maille durable
•Clips magnétiques
Sac Isolé
• Grand espace de stockage
• Peut être utilisé comme sac de
transport
•Transportejusqu’à24,9kg(55lb).
•Deuxpocheslatéralesenmailles
Organisateur
•Grand organisateur en néoprène
•Deuxporte-tasses
•Sixcompartimentsindividuels
•Poche amovible avec fermeture
•éclair
Panier Pour Animaux de Compagnie
•Avec 2ème couche pour le fond du
panierpouranimauxdecompagnie
•Panierpouranimauxdecompagnie
autonome et portable
•Maille résistante

13
•Transportejusqu’à24,9kg(55lb).
•Maille durable
•Clips magnétiques
•Transportejusqu’à24,9kg(55lb).
•Deuxpocheslatéralesenmailles
•Sixcompartimentsindividuels
•Poche amovible avec fermeture
•éclair
Assemblage
REMARQUE IMPORTANTE : Veuillez consulter la n de ce manuel pour
toutes les photos référencées entre parenthèses dans les instructions
ci-dessous.
Déballer le Produit
•Retireztoutdelaboîte–lapousettepouranimalavecleporte-animalinclus,lesrouesavant(2),
les roues arrière (2) et les documents (non illustrés).
•Éliminezcorrectementtoutlematérield’emballage,ycomprislessacsenplastique.
•NepermettezPASauxenfantsdejoueraveclematérield’emballage.
IMISE EN GARDE: L’assemblage par un adulte
est requis pour ce produit. Aucun outil requis.
Déplier la Poussette Pour Animal
•Orientezlapousettepouranimalaveclapoignéefaisantfaceverslehaut.(1)
•Retirezleporte-animaldelapousette.Mettez-ledecôtépourmontageultérieur.(2)
•Liberezleloquetdesécuritésituésurlecôtégauchedelapousettepouranimal. (3)
•Soulevezlapoignée.(4) Continuezdetirerjusqu'àcequelapousettepouranimalsoit
complètement droite et le mécanisme de blocage complètement engagé.
•Abaissezsoigneusementlapoignéepours'assurerquelapousettepouranimalestcomplètement
ouverte et fermée avant TOUTE utilisation du produit.
IMISE EN GARDE: Gardez les enfants éloignés
de la pousette pour animal lorsque vous la dépliez. Assurez
TOUJOURSquelemécanismedeblocageestcomplètement
engagé lorsque la pousette pour animal est en position
ouverte.Cetteactionempêcheral'eondrementdela
pousettepouranimal.Dangerdepincementpossible-Faites
attention lorsque vous dépliez la poussette pour animal.
Installation/Retrait des Roues Avant
• Faitesglisseruneroueavantdanslecompartimentderoueavantjusqu’àcequ’undéclicse
produise. (5) Répétez l’opération pour l’autre roue. Tirez sur les roues pour vous assurer qu’elles
sont correctement installées.
•Pourretirer,appuyezsurleboutondelibérationenmétalaudosducompartimentderoueavantet
retirez du panier de magasinage. (6)
Installation/Retrait des Roues Arrière
• Installezunerouearrièreenglissantlemoyeudansl’oriceaucentredelarouejusqu’àcequ’elle
se verrouille en place. (7) Répétez pour l’autre roue. Tirez sur les roues pour vous assurer qu’elles
sont correctement installées.
• Pourretirer,appuyezsurleboutondelibérationaucentredelarouearrièreetretirezdupanierde
magasinage the panier de magasinage. (8)
•Maille résistante

14
Freins de Roue Arrière
• Toujoursengagerlesfreinsderouearrièreavantd’utiliserlepanierdemagasinage.
• Pourengager,appuyezsurlelevierdefrein.(19)
• Pourlibérer,poussezsurledosdulevierdefrein.(20)
NOTE: Poussez doucement panier de magasinage d’avant vers l’arrière pour vous assurer que les
freins sont bien engagés.
IMISE EN GARDE: Assurez-vous toujours que
les freins de roue sont engagés lorsque vous n’utilisez pas le
panierdemagasinageand’éviterquelepanierdemagasinage
nesedéplace.Nelaissezjamaislepanierdemagasinage
sanssurveillance,enparticulierdansunecollineouunepente,
car le panier de magasinage pourrait basculer ou glisser.
Utiliser le Porte-animal Comme Produit Portable
Pourretirerletransporteurdelapousette,débloquezlapincesituéedesdeuxcôtésducadredu
transporteur. (21)
•Tenezlapoignéedutransporteuretsoulevez-lajusqu'àcequ'ellesortecomplètementducadre.(22)
REMARQUE IMPORTANTE : Le panier de rangement ne devrait jamais être enlevé.
Fonctionnement
Montage du Porte-animal
• Pourleporte-animalauparavantmisdecôté,levezlescôtésdutransporteurpourl'étendre
complètement. (9)
•Maintenez-lecomplètementétendu.Placez-lesoigneusmentsurleplancherousurunetable.(10)
•Retirezlecoussinetsonsupportdutransporteur.Mettez-lesdecôté.
•Ouvrezlapocheentissusituésurlebasdutransporteur.Localisezlespiedsdesoutienavecles
boucles en tissu attachées. (11)
•Avecunemainembrasséecontrelebasdutransporteur,utilisezl'autremainpourtirerfermement
surlaboucledel'undespiedsdeversl'unedesextrémitésdutransporteurjusqu'àcequelepied
de support entre dans la rainure située sur le panneau du bas du transporteur. (12) Répétez pour
l'autrepieddesupport.Letransporteurdevraitàprésentgardersaforme.
•Fermezlapocheàl'aidedesbandesVelcro®. (13)
•Placezlesupportdecoussin(aveclafermetureéclairautour) (14)etlecoussinàl'intérieurdu
transporteuraveclecôtédelapochefaisantfaceverslebas.(15)
Le transporteur est à présent prêt pour utilisation avec le coussin en position inférieure.
•Pourxerletransporteuraucadredelapousette,tenezlapoignéedetransportetplacez
letransporteurdanslecadredefaçonquelesupportenUsituésurlesdeuxextrémitésdu
transporteurs'ajusteentrelespattesdesupportsituéessurlabarreducadredelapousette. (16)
Abaissezlapincedesdeuxcôtésducadredutransporteurpourbloquerleporte-animalaucadre
de la pousette. (17)
•Tirezenlevantletransporteurpours'assurerqu'ilestbienxéenplace.
Réglage du Porte-animal en Position Supérieure
• Retirezlecoussinetsonsupportdutransporteur.
•Attachezlesupportdecoussinautissudutransporteuràl'aidedelafermeture-éclair.Assurez-
vous que la fermeture éclair est complètement fermée autour du périmètre du transporteur. (18)
•Remettezlecoussinaveclecôtédepochefaisantfaceverslebas

15
IMISE EN GARDE: Lepoidsmaximalpourle
porte-animal en position supérieure est de 10 kg (22 lb). Le
poidsmaximalpourleporte-animalenpositioninférieureestde
22,7kg(50lb).Lepoidsmaximalpourlepanierderangement
estde6,8kg(15lb).
Auvent
• L'auventpeutêtrepositionnéentreunepositioncomplètementouverteetunecomplètement
fermée.
•Pourouvrirl'auvent,débloquezlapincesituéedesdeuxboutsdel'auventettournezl'auventàla
position désirée. (23)
•Pourbloquerl'auvent,fermez-lecomplètementverslebasetpoussezsurlapincesituéedesdeux
côtéspourlaxeraucadredutransporteur. (24)
Attache
• L'attachenedevraitjamaisêtreenlevée.
•Placezvotreanimaldansletransporteur.Fixezl'attacheaucollier.(25)
•L'attachepeutêtrerégléeàl'aidedel'anneauenplastiqueglissant.
Plier la Poussette Pour Animal
•Gardezlesenfantséloignésdelapousettepouranimallorsquevousladépliez.
•LesfreinsderouearrièreDOIVENTêtreengagésavantdedéplierlapousettepouranimal.
•LetransporteurDOITêtreretiréducadre.
•Poussezleblocagedelibérationdepliagesituésurlapoignéeverslagauche.Appuyezsurle
boutonsituéàl'intérieurdelapoignée.(26)
•Poussezlentementlapoignéeversl'avantjusqu'àcequeleproduitsoitcomplètementplié (27) et
le loquet de sécurité automatiquement engagé. (28)
Ne forcez PAS la pousette pour animal lorsqu'elle est fermée.
•Tirezenlevantlapoignéepours'assurerqueleloquetdesécuritéestxéenplace.
ATTENTION : Lorsquevouspliezlapousettepouranimal,faitesattentionàempêchervosdoigts
d'êtrepincésparlespiècesmobiles.
Plier le Porte-Animal
• Pourpréparerletransporteurpourunrangementouundéplacement,retirezlecoussinetson
support du transporteur.
•Ouvrezlapocheentissusituésurlebasdutransporteur. (29)
•Avecunemainembrasséecontrelebasdutransporteur,utilisezl'autremainpourtirerfermement
surlaboucledel'undespiedsdesupportjusqu'àcequ'ilsedégagedelarainureetreposeàplat.
(30)Répétezpourl'autrecôté.
•Fermezletransporteurenpoussantverslebassurtouslescôtésanqu'ilreposeàplatpourson
rangement ou un déplacement.

16
Soin et Entretien
Entretien
Touslesraccords,fermoirs,verrous,rivets,etautrespiècesdequincaillerieetenplastiquesurla
pousettepouranimaldoiventêtreinspectéssurunebasepériodiquepours'assurerqu'ilssontbien
xés,nesontpasendommagésnidysfonctionnels.Leharnaisdesécurité,ainsiquelesautres
sangles,lespiècesentissuetleurscouturesdoiventégalementêtreinspectéspériodiquementpour
vérierleursoliditéets’assurerqu’ilsnesontpasdéchirésouendommagés.Touteslespièces
mobiles,telqueroues,freins,articulations,etc.,doiventaussifairel’objetd’unevéricationrégulière
pour s’assurer qu’elles fonctionnent bien
Toutcomposantmanquant,briséouusédoitêtreremplacéimmédiatement.Lapousettepouranimal
nedevraitpasêtreutiliséjusqu'àleurremplacement.Utilisezuniquementlespiècesoriginales
provenantdufabricant.Aubesoin,communiqueravecJoovyaunumérosansfraisfourni.
Nettoyage
Lecadreetlesrouesdoiventtoujoursêtreconservépropresetexemptsdesaletésoudecorps
étranger.Spécialementaprèsutilisationdelapoussettepouranimalsouslapluie,danslaneige
oud'autresenvironnementsdiciles.Lorsd’unetelleutilisation,nettoyezlesrouesàl’aided’une
épongeoud’unlingehumideavecdel’eautièdeetundétergentdoux.
Entreposage
La lumière directe du soleil peut décolorer le tissu et assécher les roues. Rangez la pousette pour
animalàl'intérieurpourprolongersonapparence.NErangezPASàl'extérieur.Assurez-vousque
lapousettepouranimalestsècheavantdel'entreposerpourdespériodesprolongées.Rangez
toujours la pousette pour animal dans un environnement sec. Rangez la pousette pour animal dans
unendroitsécuritairelorsqu'ellen'estpasenutilisation(loindesenfants).NeplacezPASdesobjets
lourssurlehautdelapousettepouranimal.NerangezPASlapousettepouranimalprèsd'une
sourcedechaleurdirectecommeunradiateurouuneammenue.

17
Équipe 432
Veuillez ne pas retourner ce produit en magasin.
Sivousrencontrezdesdicultésavecl’assemblageoul’utilisationdeceproduit,ousivousavez
desquestionsàproposdecesinstructions,veuillezcontacterl'équipe432:
États-Unis
Joovy
877)456-5049,8h30–17h00pm,heureduCentre
joovy.comClavardageenligne,8h30–21h00,heureduCentre
customerservice@joovy.co
Canada
ElfeJuvenileProducts
(800)667-8184,8h30–17h00,heuredel’Est
@joovy

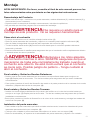
18
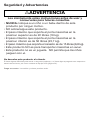
Seguridad y Advertencias
•NUNCA coloque a un niño o un bebé dentro de este
producto por ningún motivo.
•NOsobrecargueesteproducto.
•Elpesomáximoquesoportaelportamascotasenla
posición superior es de 22 libras (10 kg).
•Elpesomáximoquesoportaelportamascotasenla
posicióninferioresde50libras(22,7kg).
•Elpesomáximoquesoportaelcanastoesde15libras(6,8kg).
•EsteproductoNOesparatransportarmascotasenavión.
•Esteproductonoesunjuguete.NOpermitaquelosniños
jueguen con él.
No devuelva este producto a la tienda.
Sitienealgunadicultadparaarmarousaresteproducto,ositienealgunapreguntaconrespectoa
estasinstrucciones,porfavorcontactealEquipo432(página24).
Tenga en cuenta: Los estilos y colores pueden variar.
IADVERTENCIA
Lea atentamente estas instrucciones antes de usar y
consérvelas para futuras consultas.

19
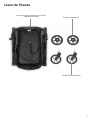
Lista de Piezas
Cochecito para mascotas con porta
mascotas incluido
RuedasDelanteras(2)
Ruedas Traseras (2)

20
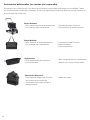
Accesorios adicionales (se venden por separado)
Personalice su cochecito con una serie de accesorios opcionales para mayor funcionalidad. Todos
los accesorios se venden por separado. (Todos los siguientes accesorios Boot se pueden colocar en
la estructura del cochecito)
Bolso Mallado
•Gran espacio de almacenamiento
•Con manijas para transportar
•Transporta hasta 55 libras.
•Malla duradera
•Clips magnéticos
Bolso Aislante
•Gran capacidad de almacenamiento
•Con manijas para transportar
•Transporta hasta 55 libras.
•Dosbolsillosdemallalaterales
Organizador
•Gran organizador de neopreno
•Dosportavasos
•Seis compartimientos individuales
•Bolsillo con cierre desmontable
Cesta Para Mascotas
•Con segunda capa para el fondo
de la cesta para mascotas
•Cestaparamascotasportátile
independiente
•Malla duradera

21
•Transporta hasta 55 libras.
•Malla duradera
•Clips magnéticos
•Transporta hasta 55 libras.
•Dosbolsillosdemallalaterales
•Seis compartimientos individuales
•Bolsillo con cierre desmontable
Montaje
NOTA IMPORTANTE: Por favor, consulte el nal de este manual para ver las
fotos referenciadas entre paréntesis en las siguientes instrucciones.
Desembalaje del Producto
• Retiretododelacaja–cochecitoconportamascotas,ruedasdelanteras(2),ruedastraseras(2)y
documentos (no se muestran).
• Desechetodoelmaterialdeembalajecorrectamente,incluidoslosplásticos.
• NOpermitaquelosniñosjueguenconelmaterialdeembalaje.
IADVERTENCIA: Se requiere un adulto para el
montajedeesteproducto.Noserequierenherramientas.
Cómo abrir el cochecito
• Coloqueelcochecitoconelmanillarmirandohaciaarriba. (1)
•Retireelportamascotasdelcochecitoydéjeloauncostadoparainstalarlomástarde.(2)
•Abralatrabadeseguridadubicadadelladoizquierdodelcochecito. (3)
•Tiredelmanillarhaciaarriba.(4) Continúe tirando hasta que el cochecito quede totalmente
levantado y trabado.
•Presionesuavementeelmanillarparaasegurarsedequeelcochecitoestécompletamenteabierto
y trabado antes de usar el producto.
IADVERTENCIA: Mantenga a los niños alejados
del cochecito mientras lo abre. SIEMPRE asegúrese de que el
mecanismo de traba esté completamente trabado cuando el
cochecitoestéabierto.Deestemodoevitaráqueelcochecito
secierresolo.Posiblepeligrodepellizco–Tengacuidadoal
abrir el cochecito.
Para Instalar y Quitar las Ruedas Delanteras
• Deslice una de las ruedas delantera en la carcasa correspondiente hasta que encaje en su
lugar (5) Repita para la otra rueda. Tire de las ruedas para asegurarse de que estén instaladas
correctamente.
•Paraquitar,presioneelbotóndeliberacióndemetalenlaparteposteriordelacarcasadelarueda
delanteraysáqueladelcarritodecompras.(6)
Para Instalar y Quitar las Ruedas Traseras
• Instaleunaruedatraseradeslizandoelejedentrodeloricioenelcubodelaruedahastaque
encaje en su lugar. (7) Repita para la otra rueda. Tire de las ruedas para asegurarse de que estén
instaladas correctamente.
•Paraquitar,presioneelbotóndeliberaciónenelcubodelaruedatraserayextraigalasruedasdel
carrito de compras. (8)
Instalación del porta mascotas
• Parainstalarelportamascotasquehabíaretiradoanteriormente,levanteloslateralesdelporta
mascotasparaextenderloporcompleto. (9)
•Coloqueconcuidadoelportamascotasextendidoenelsuelooenunamesa. (10)
•Retirelaalmohadillayelsoportedelaalmohadilladelportamascotasydéjelosauncostado.
•Malla duradera

22
Frenos de Las Ruedas Traseras
• Siempreactivelosfrenosdelasruedastraserasantesdeusarelcarritodecompras.
• Paraengranar,empujehaciaabajolapalancadelfreno.(19)
• Paraliberar,empujehaciaabajolapartetraseradelapalancadelfreno.(20)
NOTE: Empujesuavementeelcarritodecomprashaciaadelanteyhaciaatrásparaasegurarsede
que el freno esté completamente engranado.
IADVERTENCIA: Asegúrese siempre de que los
frenos de las ruedas estén activados cuando no se empuja
elcarritodecomprasparaquenosevayarodando.Nunca
dejeelcarritodecomprasdesatendido,especialmenteen
unacolinaopendiente,yaqueelcarritodecomprapuede
volcarse o deslizarse.
Uso del porta mascotas como unidad portátil
Pararetirarelportamascotasdelcochecito,destrabelasabrazaderasqueestánaambosladosde
la estructura del porta mascotas. (21)
•Sostengaelportamascotasporlamanijaylevánteloparasacarlocompletamentedela
estructura. (22)
NOTA IMPORTANTE: El canasto nunca debe retirarse.
Funcionamiento
•Abraelbolsillodetelaqueestáenlabasedelportamascotasybusquelaspatasdeapoyocon
las presillas de tela. (11)
•Conunamanosujetandolabasedelportamascotas,uselaotramanoparatirarrmementede
lapresilladeunadelaspatasdeapoyohaciaunodelosextremosdelportamascotas,hastaque
la pata encaje en la ranura de la base. (12) Repítaloconlaotrapata.Elportamascotasdebería
conservar su forma.
•CierreelbolsilloconlastirasdeVelcro®.(13)
•Coloqueelsoportedelaalmohadilla(conelcierre)(14) y la almohadilla adentro del porta
mascotas,conelladodelbolsillohaciaabajo. (15)
Elportamascotasyaestálistoparausarconlaalmohadillaenlaposicióninferior.
•Parasujetarelportamascotasalaestructuradelcochecito,sostengaelportamascotasporla
manijaycolóqueloenlaestructuraencajandolatrabaenformadeUdeambosextremosdel
porta mascotas entre las pestañas de traba de la barra de la estructura del cochecito. (16)
Presione las abrazaderas de ambos lados del porta mascotas para que se enganchen y traben en
la estructura del cochecito. (17)
•Tiredelportamascotashaciaarribaparaasegurarsedequeestébiensujeto.
Instalación del porta mascotas en la posición superior
• Retirelaalmohadillayelsoportedelaalmohadilladelportamascotas.
•Sujeteelsoportedelaalmohadillaalateladelportamascotasconelcierre.Asegúresedequeel
cierrequedebiencerradoentodoelperímetrodelportamascotas.(18)
•Vuelvaacolocarlaalmohadillaconelladodelbolsillohaciaabajo.

23
IADVERTENCIA: Elpesomáximoquesoporta
el porta mascotas en la posición superior es de 22 libras (10
kg).Elpesomáximoquesoportaelportamascotasenla
posicióninferioresde50libras(22,7kg).Elpesomáximoque
soportaelcanastoesde15libras(6,8kg).
Capota
• Lacapotapuedecolocarseencualquierposición,desdetotalmenteabiertahastatotalmente
cerrada.
•Paraabrirlacapota,destrabelasabrazaderasdeambosextremosdelacapotaygirelacapota
hasta la posición deseada. (23)
•Paratrabarlacapota,ciérrelaporcompletoypresionelasabrazaderasdeambosladosparaque
quede sujeta a la estructura del porta mascotas. (24)
Correa de Sujeción
• Lacorreadesujeciónnuncadeberetirarse.
•Coloqueasumascotaenelportamascotasyenganchelacorreadesujeciónalcollardesu
mascota para sujetarla. (25)
•Lacorreadesujeciónsepuedeajustarusandolosanillosplásticosdeslizables.
Cómo Cerrar el Cochecito
• Mantengaalosniñosalejadosdelcochecitomientraslocierra.
•LosfrenosdelasruedastraserasDEBENestaraccionadosantesdecerrarelcochecito.
•ElportamascotasDEBEquitarsedelaestructuradelcochecito.
•Empujelatrabadecierrequeestádelladoizquierdodelmanillarypresioneelbotónqueestádel
lado de adentro del manillar. (26)
•Empujelentamenteelmanillarhaciaadelantehastaqueelcochecitosecierreporcompleto(27) y
latrabadeseguridadseengancheautomáticamente.(28)
NO haga fuerza para cerrar el cochecito.
•Tiredelmanillarhaciaarribaparaasegurarsedequeelcochecitoestébientrabado.
PRECAUCIÓN: Alcerrarelcochecito,tengacuidadodenopellizcarselosdedosconlaspiezas
móviles.
Cómo Cerrar el Porta Mascotas
• Paraguardarelportamascotasollevarlodeviaje,retirelaalmohadillayelsoportedela
almohadilla.
•Abraelbolsillodelabasedelportamascotas.(29)
•Conunamanosujetandolabasedelportamascotas,uselaotramanoparatirarrmementedela
presilla de una de las patas de apoyo hasta que la pata se desencaje de la ranura y quede plana.
(30) Repítalodelotrolado.
•Cierreelportamascotasempujandosuslateraleshaciaabajohastaquequedeplano.

24
Cuidado y Mantenimiento
Mantenimiento
Reviseperiódicamentetodoslosmecanismosdetraba,ganchos,remachesydemáspiezas
metálicasyplásticasdelcochecitoparavericarqueesténbienajustadas,quenoesténdañadas
yquefuncionencorrectamente.Todaslascorreasyartículosdetelaysuscosturastambién
deben inspeccionarse periódicamente para asegurarse de que estén bien sujetos y que no estén
sueltos,rasgadosodañadosdealgunaotramanera.Todaslaspartesmóviles,comolasruedas,
losfrenosylosfrenos,tambiéndebenrevisarseperiódicamenteparaasegurarsedequefuncionan
correctamente.
Cambiedeinmediatotodosloscomponentesfaltantes,rotosogastadosynouseelcochecito
hasta que no estén cambiados. Solo deben usarse los componentes originales del fabricante. Si es
necesario,comuníqueseconJoovyanuestronúmerodeteléfonogratuito.
Limpieza
Laestructuraylasruedassiempredebenmantenerselimpiasysinpolvonimaterialextraño,
especialmentedespuésdeusarelcochecitoenlalluvia,nieveuotroambientehostil.Useuna
esponja o paño húmedos con agua tibia y un detergente suave para limpiar las ruedas después de
dicho uso.
Almacenamiento
La luz solar directa puede desteñir la tela y secar las ruedas. Guarde el cochecito adentro para prolongar
suaspecto.NOloguardealaintemperie.Asegúresedequeelcochecitoestésecoantesdeguardarlo
porperíodosprolongados.Siempreguardeelcochecitoenunambientesecoyenunlugarseguro
cuandonolouse(esdecir,fueradelalcancedelosniños).NOcoloqueobjetospesadossobreel
cochecito.NOguardeelcochecitocercadeunafuentedecalordirecta,comounradiadorounhogar.
Equipo 432
No devuelva este producto a la tienda.
Sitienealgunadicultadparaarmarousaresteproducto,ositienealgunapreguntaconrespectoa
estasinstrucciones,porfavorcontactealEquipo432.
Estados Unidos
Joovy
(877)456-5049,8:30am–5:00pmHoradelCentro
Chatenvivojoovy.com,8:30am–9:00pmHoradelCentro
customerservice@joovy.com
Canadá
ElfeJuvenileProducts
(800)667-8184,8:30am–5:00pmHoradelEste
@joovy

25
安全と警告
• いかなる理由によっても、小児や乳幼児を本商品の中に入れな
いでください。
•本商品に過重な荷物を乗せないでください。
•上部位置にあるペットキャリアの最大重量は22ポンド(10kg)
です。
•下部位置にあるペットキャリアの最大重量は50ポンド
(22.7kg)です。
•保管用バスケットの最大重量は15ポンド(6.8kg)です。
•本製品は、ペットを飛行機に持ち込むのに使用するためのもの
ではありません。
•子供が本製品をもてあそばないようにしてください。
本商品を店舗に返品しないでください。
本製品の組み立てや使用に問題が発生した場合、またはこれらの指示にご不明な点がある場合は、チー
ム432に連絡してください(31ページ)。
ご 注 意:スタイルとカラーは異なることがあります。
I警告
ご使用前にこの使用説明書をよく読んで、今後の参考にしてください。

26
部 品リスト
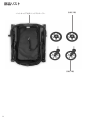
ペットキャリア付きペットストローラー
前輪(2輪)
後輪(2輪)

27
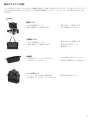
追 加アクセサリ( 別 売)
いくつかのオプションのアクセサリで機能を追加して、乗り心地をカスタマイズしてください。すべてのアク
セサリは別売されます。(以下のすべてのBoot付属品はペットストーラーのフレームに取り付けることが
できます)
交換用バッグ
•大きな収納スペース
•買い物袋として使用できます
•最大55ポンドを運べます。
•耐久性のあるメッシュ
• 磁 気クリップ
断熱バッグ
•大きな収納スペース
•買い物袋として使用できます
•最大55ポンドを運べます。
•2つの網目サイドポケット
主催者
• 大 型 ネ オ プ レ ン・オ ー ガ ナ イ ザ ー
•2つのカップ・ホルダー
•6つの個々のコンパートメント
• 取り外し可能なチャック式ポケット
ペ ット バ ス ケット
•ペットバスケット底の2層目付き
•自立型&ポータブルペットバスケット
•耐久性のあるメッシュ

28
アセンブリ
注意事項 : 以下の手順で括弧内に参照されているすべての写真については、このマニ
ュアルの最後を参照してください。
製 品を取り出 す
• 箱からペットキャリア付きペットストローラー、フロントホイール(2個)、リアホイール(2個)、使用説明書
(図示せず)を取り出します。
• プラスチックのカバーを含むすべての梱包材を適切に廃棄してください。
• 子供が梱包材で遊ばないようにしてください。
I警告: 本商品の組み立ては成人が行ってください。道具
は必要ありません。
ペットストーラーの開き
•ハンドルが上向きになるように、ペットストーラーの方向を合わせます。(1)
•ペットキャリアをペットストーラーから取り外し、後で組み立てるために脇に置きます。(2)
•ペットストーラーの左側にある安全ラッチを解除します。(3)
•ハンドルを上方に引っ張ります。(4)ペットストーラーが完全に直立し、ロック機構がかみ合うまで引っ張
ってください。
•本製品を使用する前に、ペットストーラーが完全に開かれロックされていることを確認し、ハンドルを徐
々に押し下げます。
I警告: 子どもの近くで開かないでください。ペットストーラ
ーが開かれているときは、ロック機構が完全にかみ合っているこ
とを常に確認してください。これはペットストーラーの崩壊を防
ぎます。ペットストーラーを開くときは、指が挟まれないように注
意してください。
前 輪 の 取り付け/ 取り外し
•前輪1個を前輪ハウジングに挿入し、カチッと固定するまで押してください。(5) 他の車輪も同様に取り
付けてください。車輪を引っ張って、しっかり取り付けられていることを確かめてください。
•取り外すには、前輪ハウジングの底についている金属製の解除ボタンを押して、ショッピングカートから
引き離してください。(6)
後 輪 の 取り付け/ 取り外し
•後輪1個を車輪ハブの穴の中に軸を通して、カチッと固定されるまで、押してください。(7)
•他の車輪も同様に取り付けてください。車輪を引っ張って、しっかり取り付けられていることを確かめて
ください。
•取り外すには、後輪ハブの裏側についている解除ボタンを押して、車輪をショッピングカートから引き離
してください。(8)
ペットストーラーの組立
•前に脇に置いていたペットキャリアの側面を持ち上げて完全に広げます。(9)
•完全に広げた状態で、床またはテーブルにそっと置きます。(10)
•パッドとパッドサポートをキャリアから取り外して、脇に置きます。
•キャリアの下部にある布製ポケットを開き、布ループが取り付けられた支持脚を見つけます。(11)
•片手でキャリアの底面を支えている状態で、もう一方の手で支持脚の1つのループをキャリアの一端に
向かってしっかりと引っ張って、支持脚がキャリアの底部パネルにある溝にはまるようにします。(12)他
の支持脚についても同じ操作を繰り返します。キャリアの形状を維持してください。

29
•Velcro®ストラップを使用してポケットを閉じます。(13)
•ポケット側が下方に向くようにして、パッドサポート(チャックが付いている)(14)とパッドをキャリアの内
側に配置します。(15)
これで、パッドが下部位置にある状態でキャリアを使用できるようになりました。
•キャリアをストローラー・フレームに取り付けるには、キャリア・ハンドルを持ち、キャリアの両端にあるU
字型ブラケットがストローラー・フレームバーのブラケット・タブの間に収まるように、キャリアをフレー
ムに取り付けます。(16)
キャリア・フレームの両側にあるクランプを押し下げて、ペットキャリアをストローラー・フレームに固定
します。(17)
•キャリアを上方に引っ張って、しっかりと固定されていることを確認します。
ペットキャリアを上部位置に設置
•パッドとパッドサポートをキャリアから取り外します。
•チャックを使用して、パッドサポートをキャリア布に取り付けます。キャリアのチャックが完全に締められ
ていることを確認します。(18)
•ポケット側が下方に向くようにして、パッドを再び取り付けます。
後輪ブレーキ
•ショッピングカートを使用する前に、必ず後輪ブレーキをかけてください。
•ブレーキをかけるには、ブレーキレバーを下に押してください。(19)
•解除するには、ブレーキレバーの後ろ側を下に押してください。(20)
注意: ショッピングカートを前後にゆっくり動かして、ブレーキがしっかりかかっていることを確かめて
ください。
I警告:ショッピングカートを押していない時は、必ず車輪ブ
レーキがかかっているかどうか確かめ、ショッピングカートが転
がって行かないようにしてください。ショッピングカートを放置し
ないでください。特に、坂道や傾斜のある場所では、ショッピン
グカートが倒れたり、滑り出したりしないようにご注意ください。
ペットキャリアをハンドヘルド製品として使用
ストローラーからキャリアを取り外すには、キャリア・フレームの両側にあるクランプのロックを解除しま
す。(21)
•キャリア・ハンドルを持ち、フレームから完全に取り外されるまで持ち上げます。(22)
注意事項:保管用バスケットを絶対に取り外さないでください。
I警告:上部位置にあるペットキャリアの最大重量は22ポン
ド(10kg)です。下部位置にあるペットキャリアの最大重量は50
ポンド(22.7kg)です。保管用バスケットの最大重量は15ポンド
(6.8kg)です。
キャノピー
• キャノピーは、完全に開いたり、完全に閉じたり、または中間の位置に調整することができます。
•キャノピーを開くには、キャノピーの両端にあるクランプのロックを解除し、キャノピーを目的の位置ま
で回転させます。(23)
•キャノピーをロックするには、キャノピーを完全に閉じ、両側のクランプを押し下げてキャリア・フレーム
に固定します。(24)
操作

30
テザー
• テザーを絶対に取り外さないでください。
•ペットをキャリアに入れ、テザーを首輪に取り付けて固定します。(25)
•テザーは、スライド式のプラスチック製リングを使用して調節できます。
ペットストローラーの折り畳み
• 子どもの近くで折り畳まないでください。
•ペットストローラーを折り畳む前に、リアホイール・ブレーキを接続してください。
•フレームからキャリアを取り外してください。
•ハンドルの折り畳み解除ロックを左方に押し、ハンドルの内側にあるボタンを押し込みます。(26)
•製品が完全に折り畳まれ(27)、安全ラッチが自動的にかみ合うまで、ハンドルをゆっくりと前方に押しま
す。(28)
ストローラーを強制的に畳まないでください。
•ハンドルを引っ張り上げて、安全ラッチが固定されていることを確認します。
注意:ストローラーを折り畳むときは、可動部品に指が挟まれないように注意してください。
ペットストローラーの折り畳み
•保管または旅行のためにキャリアを準備するには、パッドとパッドサポートをキャリアから取り外します。
•キャリアの下部にあるポケットを開きます。(29)
•片手でキャリアの底面を支えている状態で、もう一方の手で、支持脚の1つに取り付けられたループをし
っかりと引っ張って、支持脚が溝から外れて平らに置かれるようにします。(30)反対側にも同じ操作を繰
り返します。
•保管または旅行時には、キャリアが平らに置かれるように、すべての側面を押し下げてキャリアを折り畳
みます。
取り扱いおよびメンテナンス
メンテナンス
ペットストローラーの接続金具、スナップ、ロック、リベット、その他のハードウェアおよびプラスチック部品
がすべて、正確に固定されており、破損していないか、正常に機能するかを定期的に点検してください。全
てのストラップや布製品およびその縫い目も定期的に点検して、しっかり固定され、緩んでいたり、破れて
いたり、それ以外の損害を受けていないことを確かめてください。車輪、ブレーキ、ヒンジなどの全ての可
動部品も定期的に点検して、正しく操作しているか確かめてください。
紛失、破損、または磨耗したコンポーネントは直ちに交換し、コンポーネントを交換するまではペットスト
ローラーを使用しないでください。製造元が提供する部品だけを使用してください。必要であれば、通話
料無料の電話番号でJoovyにご連絡ください。
クリー ニング
特に、雨や雪、その他の過酷な環境でペットストローラーを操作した後は、いつもフレームとホイールをき
れいにしておき、汚れや異物がないようにしてください。その際は、スポンジか布に温水と中性洗剤をつ
けて車輪を洗ってください。
保管
直射日光により、布地が色褪せし、車輪が乾燥するかも知れません。外観を長く維持するために、ペットストロ
ーラーを屋内に保管してください。屋外には保管しないでください。長時間保管する必要がある場合は、ペット
ストローラーが乾燥していることを確認してください。いつもペットストローラーを乾燥した環境に保管してく
ださい。ペットストローラーを使用していないときは、安全な場所(つまり子供から離れている場所)に保管して
ください。ペットストローラーの上に重いものを置かないでください。ペットストローラーをラジエータや暖炉
のような熱源の近くに保管しないでください。

31
チーム432
本商品を店舗に返品しないでください。
本商品の組み立てまたは使用に何らかの問題がある場合、または、この使用説明書に関してご質問がある
場合、部門432に連絡してください。
アメリカ
Joovy
(877)456-5049、午前8時30分~午後5時(中部時間)
joovy.comLiveChat、午前8時半~午後9時(中部時間)
カナダ
ElfeJuvenileProducts
(800)667-8184、午前8時30分~午後5時(東部時間)
@joovy

-
 1
1
-
 2
2
-
 3
3
-
 4
4
-
 5
5
-
 6
6
-
 7
7
-
 8
8
-
 9
9
-
 10
10
-
 11
11
-
 12
12
-
 13
13
-
 14
14
-
 15
15
-
 16
16
-
 17
17
-
 18
18
-
 19
19
-
 20
20
-
 21
21
-
 22
22
-
 23
23
-
 24
24
-
 25
25
-
 26
26
-
 27
27
-
 28
28
-
 29
29
-
 30
30
-
 31
31
-
 32
32


Joovy Pootler Manual de usuario
- Categoría
- Cochecitos
- Tipo
- Manual de usuario
en otros idiomas
- français: Joovy Pootler Manuel utilisateur
- English: Joovy Pootler User manual
- 日本語: Joovy Pootler ユーザーマニュアル
Artículos relacionados
Otros documentos
-
Evenflo Shyft DualRide Carry-All Bag Manual de usuario
-
Baby Jogger SELECT El manual del propietario
-
 Baby Jogger city lite Assembly Instructions Manual
-
 Baby Jogger CITY ELITE SINGLE Assembly Instructions Manual
-
Baby Jogger Summit X3 Double El manual del propietario
-
 Baby Jogger City Mini Single Assembly Instructions Manual
-
 Baby Jogger VUE Assembly Instructions Manual


