
PNI HOUSE IPMAX POE 3LR
POE video surveillance system / POE система за видеонаблюдение / POE-
Videoüberwachungssystem / Sistema de videovigilancia POE / Système
de vidéosurveillance POE / POE videó meggyelő rendszer / Sistema di
videosorveglianza POE / POE videobewakingssysteem / System nadzoru
wideo POE / Kit supraveghere video POE
EN User manual ......................................................... 3
BG Ръководство за употреба ............................. 28
DE Benutzerhandbuch .............................................. 54
ES Manual de usuario ............................................... 80
FR Manuel utilisateur ............................................... 105
HU Használati utasítás .............................................. 130
IT Manuale utente .................................................. 155
NL Handleiding ........................................................ 180
PL Instrukcja obsługi ............................................... 205
RO Manual de utilizare ............................................. 230


3User manual
English
Main functions
• Simultaneous real-time multi-channel recording, remote playback and
configuration
• Supports up to 9 channels with a maximum 4K (8MP) resolution.
• Backup on USB flash memory and external HDD.
• Supports face and human shape detection (depending on the camera)
• Possibility to connect external speaker.
Technical specifications
NVR
Video inputs 4 x RJ45 POE
Video output 1 x VGA / 1 x HDMI
Audio output 1 x 3.5mm
Number of channels 9 x max. 4K (8MP)
Playback resolution Max. 2K (2560 x 1440) on HDMI output
Max. 1080P (1920 x x1080) on VGA output
Ethernet 1 x RJ45 100/100Mbps
Video compression H.265AI/H.265+
Audio compression G.711A
Recording mode Manual, alarm, motion detection, programmed
USB 2 x USB2.0
HDD 1 x HDD SATA (max. 8Tb)
ONVIF Yes
Power voltage 48V / 2A
Dimensions 255 x 220 x 43 mm mm
Working temperature -26°C ~ +80°C
Camera
Resolution 3MP (2304 x 1296)
Lens 3.6mm
LED 4 IR LEDs and floodlight
Power supply POE

User manual 4
English
Dimensions 70 x 190 x 65 mm
Working temperature -26°C ~ +80°C
Instructions for use
Installing the storage unit
Before first use, please install the storage unit. Only one SATA HDD with a
maximum capacity of 14TB can be installed inside the recording unit (HDD is
not included in the package).
• Loosen the screws and open the NVR housing
• Connect the data cables and secure the hard drive with the screws
• Close back the NVR housing
• Connect the power and internet cable to the NVR
Turn on the device
Plug the power cord into a 230V outlet. The NVR will start. The indicator LED
will light up.
If the start time is within the preset schedule for recording, then the recording
function will start automatically.
Notes:
1. Check that the input voltage corresponds to the recommended voltage of the
device. The supply voltage is 230V ± 10% / 50 Hz 2A.
2. We suggest using a UPS device to protect the device from voltage fluctuations.
Turn o the device
There are two ways to turn o the device.
1. Access the main menu (right click on the screen) and select the option
Logout - Shutdown
2. Turn o the power supply.
Special warnings:
1. Restart after power failure. If the device is closed abnormally, it creates a

5User manual
English
backup and restarts from that status after power is restored.
2. Replace the battery on the system board. Before replacing the battery, you
must backup your system settings (see chapter Advanced-Import / Export)
and turn o the power supply. The device time and date must be set again after
the battery is replaced. We recommend that you replace the battery every
year.
Remote control of the device
The NVR can be controlled locally or remotely from both smartphones and
computers with Windows operating system.
Operating system Application Download
Android, iOS XMEye
Android iOS
Windows General CMS
The installation file can
be downloaded from
the CD included in the
package or from the
Download section on the
product web page (www.
pni.ro)
System authentication
After turning on the device, log in to the system.
By default, the admin user is password protected by 1234. If the password is
entered incorrectly 5 times in a row, the account will be blocked. By restarting
the device or after half an hour, the account will be unlocked automatically.
Note: For the security of your system, please change the password after the first
login.

User manual 6
English
Quick setup guide
After starting the device, the quick setup guide will start.
Note: We recommend configuring the system before installing the NVR and
cameras in the final location.
Stept to follow:
1. Set the time, date and time zone.
2. Soon, a popup window will appear on the screen asking you to change the
authentication password in the system. Follow the steps on the screen or
press the ESC key on the NVR to exit the password setting interface.
Note: For the security of your system, we recommend changing the password after
the first login in the system.
3. Set the network parameters manually or activate the DHCP option for
automatic download.
4. Scan the QR code on the screen to install the XMEye application on your
mobile phone. Scan the QR code with the serial number to add the system
to the application.
5. Set the display options and resolution of the monitor connected to the
NVR. Maximum supported resolution 2560x1440 (2K).
Note: Before changing the resolution, make sure that your monitor supports that
resolution. If the set resolution is higher than the resolution of your monitor, nothing
will appear on the monitor and you will not be able to access the menu. If this
happens, however, connect the NVR to a lower resolution monitor, access the menu,
and change the resolution.
6. Press the OK key to complete the basic system configuration.
7. Right click on the screen and access the NetDetect option. Click Diagnose
to test the network configuration.
Note: For the settings to take eect, restart the system. Right click on the screen
- Logout - Reboot.

7User manual
English
The menu
In the main preview interface, right-
click with the mouse to access the
menu.
Main Menu
Options: Playback, Record Conf, Network, Date Time.

User manual 8
English
Playback
The system oers numerous filters and options for identifying the desired
record. You can search by channel number, date and time interval or by file
type.
Record Conf.
The interface allows you to make the following settings: the length of a recording
file, the recording mode (programmed or manual), the period (day and time
interval) and the recording type (normal, motion detection and alarm).

9User manual
English
Network
Manually set the network parameters (IP address, gateway, DNS, port, etc.)
or check the DHCP option for automatic parameter retrieval.
Note: For the settings to take eect, restart the system. Right click on the screen
- Logout - Reboot.
Date time
Set the time zone, date, time and format.

User manual 10
English
System
Options: General, Encode, Backup, Snapshot Config., Display, Account.
General
The interface will allow the following settings: the menu display language, the
behavior in case of a full hard disk (overwrite or stop recording), the session
duration and enable / disable quick configuration guide at system startup.

11 User manual
English
Encode
Displays the technical parameters of the connected cameras (resolution,
frame rate, video compression, quality, etc.).
Backup
The USB memory or external HDD must be installed in the NVR before
starting the backup. Press the Detect button to identify the storage device,
then the Backup button to perform the backup.

User manual 12
English
Snapshot Config
Set to take cyclic captures at a certain time and send them by email, FTP or
store them on your hard disk.
Display
In the local preview mode can be displayed: time, channel name, recording
status, alarm status, transparency and display resolution.
Note: Before changing the resolution, make sure that your monitor supports that
resolution. If the set resolution is higher than the resolution of your monitor, nothing
will appear on the monitor and you will not be able to access the menu. If this
happens, however, connect the NVR to a lower resolution monitor, access the menu,
and change the resolution.

13 User manual
English
Account
The interface allows managing users who have access to the system, adding
users, changing user rights, changing the password, creating user groups and
setting an account security level by registering answers to certain predefined
questions. In case of password reset, the verification code can be sent in the
mobile application or at the set email address. To increase security, you can set
a pattern for accessing the system.

User manual 14
English
Alarm
Options: Intelligent Alert, Abnormality and Traditional alarm (No image, No
video signal, etc.). Alarm input and Intelligent options are not available for this
model.
Intelligent Alert
Set the system behavior in case of motion detection: registration and / or
notification in the application. Also set the level of sensitivity to movement
and the area of action.

15 User manual
English
Abnormality
Set the system behavior in case of: storage device error, lack of space on the
storage device, lack of internet connection or IP conflict. In such situations you
can set to send a notification in the application or an email.
Traditional alarm
Set the system behavior in case of missing image or missing video signal. In
such situations you can set to send a notification in the application or an email,
start recording, make captures or save the alarm recording on an FTP server.

User manual 16
English
Advanced
Options: HDD info, Upgrade, AutoMaintain, Restore, Import / Export,
Digital, LOG, BPS and Version.
HDD info
Set how the hard drive works (read-only or read-write).
Note: In order to save recordings to the hard disk, it must be set to read / write
mode.

17 User manual
English
Upgrade
Insert a USB stick into the NVR that should contain the update file in the
root folder. Select the storage drive and file from the NVR menu and click the
Upgrade button.
AutoMaintain
Set the system to restart on a certain day and time or set the automatic
deletion of files older than a certain period.
Restore
Select the options you want to reset.

User manual 18
English
Import/Export
Export or import system settings.

19 User manual
English
Digital
Options: Digital channels, Channel status and Channel Type.
Digital channels
Add a camera on a specific channel. Click the Add button, then Search to find
all the cameras connected in the same network (same router) with the NVR.

User manual 20
English
Channel status
Displays the status (connected, unconnected or unconfigured) for all 9
channels.
Channel type
Displays the maximum number of cameras and the resolution of the cameras
that can be connected to the system. The PNI IPMAX POE 3 NVR supports
a maximum of 9 IP cameras with a maximum resolution of 4K (8MP).

21 User manual
English
Log
Displays the history of actions performed in the system.
Version
Displays useful information about firmware and QR code with the system
serial number (useful for adding it to the mobile application) and QR code for
downloading the mobile application.

User manual 22
English
Other menu options
Right click on the screen to display
additional options:
Channel Set, Record Mode,
Playback, Face detection, IPC
parameters, Color settings, Split
menu, PTZ Control, Output adjust,
NetDetect, Logout.
Channel set
The interface allows adding and managing the cameras added to the system.
Add cameras interface
1. Select the communication protocol between the NVR and the cameras.
Options: NETIP, ONVIF, Full Netcom.
2. Search. Press the Search key to search for cameras connected to the same
router (same network) as the NVR.
3. Add. From the list of displayed cameras, select the desired cameras and
click Add to add them to the system.
4. Network. Configure network parameters for cameras (IP address,
gateway, etc.)
5. Quick set. Quick addition and configuration of cameras.
6. IP Bulk Modify. Quick change of IP to multiple cameras.
Channels interface
1. Delete. Delete the camera from the selected channel. Click Apply to run.
2. Clear. Delete the information on the selected channel. Click Apply to run.
3. Encode. Displays the technical parameters of the connected cameras
(resolution, frame rate, video compression, quality, etc.).
4. Edit devices. Change IP and port for the selected channel.
5. Bulk upgrade. Firmware update for selected cameras.
6. Network detect. Cloud network and server testing and diagnostics.

23 User manual
English
7. Channel title. Rename cameras.
8. NVR Network. Configure NVR network parameters.
9. Close adaptive. Disables the IP adaptation function for the selected cameras.

User manual 24
English
Record mode
Set the recording mode (manual or programmed) for each channel.
Record mode
Shortcut for accessing the search and playback interface of recordings.
Face detection
The interface is only available for cameras that support this feature.

25 User manual
English
Color settings
Adjust color parameters (brightness, contrast, saturation, etc.) for the camera
viewing interface.
Split menu
Select how to display the cameras on the same screen.
Output Adjust
Set the volume and image.
Net Detect

User manual 26
English
1. Local Net Detect. Camera connection monitoring and diagnostics.
s
2. Remote Net Detect. Monitoring, diagnostics and configuration of network
and Cloud server.
3. Net trac Detect. Monitoring data trac performed by NVR in the

27 User manual
English
network.
Logout
Log out, shut down or restart the system.

Ръководство
Български
28
Основни функции
• Едновременен многоканален запис в реално време,
възпроизвеждане и конфигуриране от разстояние
• Поддържа до 9 канала с максимална разделителна способност 4K
(8MP).
• Архивиране на USB флаш памет и външен твърд диск.
• Поддържа разпознаване на лица и човешка форма (в зависимост
от камерата)
• Възможност за свързване на външен високоговорител .
Технически спецификации
NVR
Видео входове 4 x RJ45 POE
Видео изход 1 x VGA / 1 x HDMI
Аудио изход 1 x 3.5mm
Брой канали 9 x max. 4K (8MP)
Резолюция на
възпроизвеждане
Макс. 2K (2560 x 1440) на HDMI изход
Макс. 1080P (1920 x 1080) на VGA изход
Ethernet 1 x RJ45 100/100Mbps
Видео компресия H.265AI/H.265+
Аудио компресия G.711A
Режим на запис Ръчно, аларма, детекция на движение,
програмирано
USB 2 x USB2.0
HDD 1 x HDD SATA (max. 8Tb)
ONVIF Да
Захранващо
напрежение
48V / 2A
Размери 255 x 220 x 43 mm mm
Работна
температура
-26°C ~ +80°C

Ръководство
Български
29
Камера за видеонаблюдение
Резолюция 3MP (2304 x 1296)
Лещи 3.6mm
LED 4 IR светодиода и прожектор
Захранване POE
Размери 70 x 190 x 65 mm
Работна
температура
-26°C ~ +80°C
Инструкции за употреба
Инсталиране на модула за съхранение
Преди първата употреба, моля, инсталирайте модула за съхранение.
Само един SATA HDD с максимален капацитет от 14TB може да бъде
инсталиран в записващото устройство (HDD не е включен в пакета).
• Разхлабете винтовете и отворете корпуса на NVR
• Свържете кабелите за данни и фиксирайте твърдия диск с
винтовете
• Затворете обратно корпуса на NVR
• Свържете захранващия и интернет кабела към NVR
Включете устройството
Включете захранващия кабел в контакт 230V. NVR ще стартира.
Светодиодът на индикатора ще светне.
Ако времето за стартиране е в рамките на предварително зададения
график за запис, функцията за запис ще стартира автоматично.
Бележки:
1. Проверете дали входното напрежение съответства на препоръчаното
напрежение на устройството. Захранващото напрежение е 230V ± 10%
/ 50 Hz 2A.
2. Препоръчваме да използвате UPS устройство, за да предпазите

Ръководство
Български
30
устройството от колебания на напрежението.
Изключете устройството
Има два начина да изключите устройството.
1. Отворете главното меню (щракнете с десния бутон на екрана) и
изберете опцията Изход - Изключване
2. Изключете захранването.
Специални предупреждения:
1. Рестартирайте след спиране на захранването. Ако устройството е
затворено необичайно, то създава резервно копие и се рестартира от
това състояние след възстановяване на захранването.
2. Сменете батерията на системната платка. Преди да подмените
батерията, трябва да направите резервно копие на системните
настройки (вижте глава Advanced-Import / Export) и да изключите
захранването. Времето и датата на устройството трябва да бъдат
зададени отново след смяната на батерията. Препоръчваме ви да
сменяте батерията всяка година.
Дистанционно управление на устройството
NVR може да се управлява локално или дистанционно както от
смартфони, така и от компютри с операционна система Windows.
Операционна
система Приложение Изтегли
Android, iOS XMEye
Android iOS

Ръководство
Български
31
Windows General CMS
Инсталационният
файл може да
бъде изтеглен от
компактдиска,
включен в пакета,
или от раздела
за изтегляне на
уеб страницата на
продукта (www.pni.bg)
Удостоверяване на системата
След включване на устройството влезте в системата.
По подразбиране потребителят на администратор е защитен с
парола от 1234. Ако паролата е въведена неправилно 5 пъти подред,
акаунтът ще бъде блокиран. Чрез рестартиране на устройството или
след половин час акаунтът ще бъде отключен автоматично.
Забележка: За сигурността на вашата система, моля, променете
паролата след първото влизане.
Ръководство за бърза настройка
След стартиране на устройството ще стартира ръководството за
бърза настройка.
Забележка: Препоръчваме да конфигурирате системата, преди да
инсталирате NVR и камерите на крайното място.
Следвайте стъпки:
1. Задайте час, дата и часова зона.
2. Скоро на екрана ще се появи изскачащ прозорец с молба да
промените паролата за удостоверяване в системата. Следвайте
стъпките на екрана или натиснете клавиша ESC на NVR, за да
излезете от интерфейса за настройка на паролата .
Забележка: За сигурността на вашата система препоръчваме да
промените паролата след първото влизане в системата.
3. Задайте ръчно мрежовите параметри или активирайте DHCP

Ръководство
Български
32
опцията за автоматично изтегляне.
4. Сканирайте QR кода на екрана, за да инсталирате приложението
XMEye на мобилния си телефон. Сканирайте QR кода със серийния
номер, за да добавите системата към приложението.
5. Задайте опциите на дисплея и разделителната способност
на монитора, свързан към NVR. Максимална поддържана
разделителна способност 2560x1440 (2K) .
Забележка: Преди да промените разделителната способност, уверете
се, че мониторът ви поддържа тази разделителна способност. Ако
зададената разделителна способност е по-висока от разделителната
способност на вашия монитор, на монитора няма да се появи нищо и
няма да имате достъп до менюто. Ако това се случи обаче, свържете
NVR към монитор с по-ниска разделителна способност, отворете
менюто и променете разделителната способност .
6. Натиснете бутона OK, за да завършите основната конфигурация
на системата.
7. Щракнете с десния бутон върху екрана и отворете опцията
NetDetect. Щракнете върху Diagnose, за да тествате мрежовата
конфигурация .
Забележка: За да влязат в сила настройките, рестартирайте системата.
Щракнете с десния бутон на екрана - Изход - Рестартиране.

Ръководство
Български
33
Менюто
В основния интерфейс за
визуализация щракнете с десния
бутон на мишката, за да влезете
в менюто.
Main Menu (Главно меню)
Настроики: Playback, Record Conf, Network, Date Time.
Playback (Възпроизвеждане)
Системата предлага множество филтри и опции за идентифициране
на желания запис. Можете да търсите по номер на канал, дата и
интервал от време или по тип файл.

Ръководство
Български
34
Record Conf. (Конфигурация на записа)
Интерфейсът ви позволява да направите следните настройки:
дължината на записващия файл, режимът на запис (програмиран
или ръчен), периодът (ден и интервал от време) и видът на записа
(нормално, детектиране на движение и аларма).
Network (Мрежа)
Задайте ръчно мрежовите параметри (IP адрес, шлюз, DNS, порт и т.н.)
или проверете опцията DHCP за автоматично извличане на параметри.

Ръководство
Български
35
Забележка: За да влязат в сила настройките, рестартирайте системата.
Щракнете с десния бутон върху екрана - Logout - Reboot.
Date me (Дата и час)
Задайте часовата зона, датата, часа и формата.
System (Система)
Настроики: General, Encode, Backup, Snapshot Cong., Display, Account.

Ръководство
Български
36
General (Общ)
Интерфейсът ще позволи следните настройки: език на дисплея
на менюто, поведение в случай на пълен твърд диск (презапис
или спиране на запис), продължителност на сесията и активиране
/ деактивиране на ръководството за бързо конфигуриране при
стартиране на системата.

Ръководство
Български
37
Encode (Кодиране)
Показва техническите параметри на свързаните камери (резолюция,
честота на кадрите, видео компресия, качество и др.).
Backup (Архивиране)
USB паметта или външният твърд диск трябва да бъдат инсталирани
в NVR, преди да стартирате архивирането. Натиснете бутона Detect,
за да идентифицирате устройството за съхранение, след това бутона
Backup, за да извършите архивирането.

Ръководство
Български
38
Snapshot Cong
Настройте да правите циклични заснемания в определено време и
да ги изпращате по имейл, FTP или да ги съхранявате на вашия твърд
диск.
Display (Дисплей)
В режим на локален визуализация могат да се показват: време, име
на канал, състояние на запис, състояние на аларма, прозрачност и
разделителна способност на дисплея.
Забележка: Преди да промените разделителната способност, уверете
се, че мониторът ви поддържа тази разделителна способност. Ако
зададената разделителна способност е по-висока от разделителната
способност на вашия монитор, на монитора няма да се появи нищо и
няма да имате достъп до менюто. Ако това се случи обаче, свържете
NVR към монитор с по-ниска разделителна способност, отворете
менюто и променете разделителната способност.

Ръководство
Български
39
Account (Сметка)
Интерфейсът позволява управление на потребители, които
имат достъп до системата, добавяне на потребители, промяна
на потребителските права, промяна на паролата, създаване на
потребителски групи и задаване на ниво на сигурност на акаунта чрез
регистриране на отговори на определени предварително зададени
въпроси. В случай на нулиране на паролата, кодът за проверка може
да бъде изпратен в мобилното приложение или на зададения имейл
адрес. За да увеличите сигурността, можете да зададете шаблон за
достъп до системата.

Ръководство
Български
40
Alarm (Аларма)
Настроики: Intelligent Alert, Abnormality и Tradional alarm (Няма
изображение, няма видео сигнал и т.н.). Аларма и интелигентни
опции не са налични за този модел.
Intelligent Alert (Интелигентна сигнализация)
Задайте поведението на системата в случай на откриване на движение:
регистрация и / или уведомяване в приложението. Също така задайте

Ръководство
Български
41
нивото на чувствителност към движение и зоната на действие.
Abnormality (Ненормалност)
Задайте поведението на системата в случай на: грешка на устройството
за съхранение, липса на място на устройството за съхранение, липса
на интернет връзка или IP конфликт. В такива ситуации можете да
настроите да изпращате известие в приложението или имейл.

Ръководство
Български
42
Tradional alarm (Традиционна аларма)
Задайте поведението на системата в случай на липсващо изображение
или липсващ видео сигнал. В такива ситуации можете да настроите
да изпращате известие в приложението или имейл, да стартирате
запис, да правите заснемания или да записвате записа на алармата
на FTP сървър.
Advanced (Разширено)
Настроики: HDD info, Upgrade, AutoMaintain, Restore, Import / Export,
Digital, LOG, BPS и Version.

Ръководство
Български
43
HDD info (Информация за HDD)
Задайте как работи твърдият диск (само за четене или за четене и запис).
Забележка: За да запишете записите на твърдия диск, той трябва да
бъде настроен на режим на четене / запис.
Upgrade (Подобряване на)
Поставете USB стик в NVR, който трябва да съдържа файла за
актуализация в основната папка. Изберете устройството за съхранение
и файла от менюто на NVR и щракнете върху бутона Upgrade.

Ръководство
Български
44
AutoMaintain
Настройте системата да се рестартира в определен ден и час или
задайте автоматичното изтриване на файлове, по-стари от определен
период.
Restore (Нулиране)
Изберете опциите, които искате да нулирате.
Import/Export (Внос износ)
Експортиране или импортиране на системни настройки.

Ръководство
Български
45
Digital (Дигитален)
Настроики: Digital channels, Channel status и Channel Type.
Digital channels (Цифрови канали)
Добавете камера към определен канал. Щракнете върху бутона
Добавяне, след това Търсене, за да намерите всички камери, свързани
в една и съща мрежа (един и същ рутер) с NVR.

Ръководство
Български
46
Channel status (Състояние на канала)
Показва състоянието (свързано, несвързано или неконфигурирано) за
всички 9 канала.
Channel Type (Тип канал)
Показва максималния брой камери и разделителната способност
на камерите, които могат да бъдат свързани към системата. PNI
IPMAX POE 3 NVR поддържа максимум 9 IP камери с максимална
разделителна способност 4K (8MP).

Ръководство
Български
47
Log (Исторически)
Показва историята на действията, извършени в системата.
Version (Версия)
Показва полезна информация за фърмуера и QR кода със системния
сериен номер (полезен за добавянето му към мобилното приложение)
и QR кода за изтегляне на мобилното приложение.

Ръководство
Български
48
Други опции на менюто
Щракнете с десния бутон
на екрана, за да се покажат
допълнителни опции:
Channel Set, Record Mode,
Playback, Face detecon, IPC
parameters, Color sengs, Split
menu, PTZ Control, Output adjust,
NetDetect, Logout.
Channel set (Каналът е зададен)
Интерфейсът позволява добавяне и управление на камерите,
добавени към системата.
Добавете интерфейс на камери
1. Изберете протокола за комуникация между NVR и камерите.
Настроики: NETIP, ONVIF, Full Netcom.
2. Search. Натиснете клавиша за търсене, за да търсите камери,
свързани към същия рутер (същата мрежа) като NVR.

Ръководство
Български
49
3. Add. От списъка с показани камери изберете желаните камери и
щракнете върху Добави, за да ги добавите в системата.
4. Network. Конфигуриране на мрежови параметри за камери (IP
адрес, шлюз и др.)
5. Quick set. Бързо добавяне и конфигуриране на камери.
6. IP Bulk Modify. Бърза смяна на IP към множество камери.
Интерфейс на каналите
1. Delete. Изтрийте камерата от избрания канал. Щракнете върху
Приложи, за да стартирате.
2. Clear. Изтрийте информацията от избрания канал. Щракнете върху
Приложи, за да стартирате.
3. Encode. Показва техническите параметри на свързаните камери
(резолюция, честота на кадрите, видео компресия, качество и др.).
4. Edit devices. Променете IP и порт за избрания канал.
5. Bulk upgrade. Актуализация на фърмуера за избрани камери.
6. Network detect. Тестване и диагностика на облачна мрежа и сървър.
7. Channel tle. Преименувайте камерите.
8. NVR Network. Конфигурирайте мрежовите параметри на NVR.
9. Close adapve. Деактивира функцията за IP адаптация за избраните
камери.

Ръководство
Български
50
Record mode (Режим на запис)
Задайте режим на запис (ръчен или програмиран) за всеки канал.

Ръководство
Български
51
Playback (Възпроизвеждане)
Преки пътища за достъп до интерфейса за търсене и възпроизвеждане
на записи.
Face detecon (Разпознаване на лица)
Интерфейсът е достъпен само за камери, които поддържат тази
функция.
Color sengs (Настройки на цвета)
Регулирайте цветовите параметри (яркост, контраст, наситеност и др.)
За интерфейса за гледане на камерата.

Ръководство
Български
52
Split menu (Разделено меню)
Изберете как да се показват камерите на същия екран.
Изходна настройка
Задайте силата на звука и изображението.
Net Detect
1. Local Net Detect. Наблюдение и диагностика на връзката на
камерата.
2. Remote Net Detect. Мониторинг, диагностика и конфигуриране на

Ръководство
Български
53
мрежа и облачен сървър.
3. Net trac Detect. Мониторинг на трафика на данни, извършван от
NVR в мрежата.
Logout (Излез от профила си)
Излезте, изключете или рестартирайте системата.

Benutzerhandbuch
Deutsche
54
Hauptfunktionen
• Gleichzeitige Echtzeit-Mehrkanalaufzeichnung, Remote-Wiedergabe und
-Konfiguration
• Unterstützt bis zu 9 Kanäle mit einer maximalen 4K (8MP)-Auflösung.
• Backup auf USB-Flash-Speicher und externer Festplatte.
• Unterstützt die Erkennung von Gesichtern und menschlichen Formen (je
nach Kamera)
• Möglichkeit zum Anschluss externer Lautsprecher.
Technische Spezifikationen
NVR
Videoeingänge 4 x RJ45 POE
Video-Ausgang 1 x VGA / 1 x HDMI
Audioausgang 1 x 3.5mm
Anzahl der Kanäle 9 x max. 4K (8MP)
Wiedergabeauflösung max. 2K (2560 x 1440) am HDMI-Ausgang
max. 1080P (1920 x x1080) am VGA-Ausgang
Ethernet 1 x RJ45 100/100Mbps
Video-Kompression H.265AI/H.265+
Audiokomprimierung G.711A
Aufnahmemodus Manuell, Alarm, Bewegungserkennung,
programmiert
USB 2 x USB2.0
HDD 1 x HDD SATA (max. 8Tb)
ONVIF Jawohl
Netzspannung 48V / 2A
Maße 255 x 220 x 43 mm mm
Arbeitstemperatur -26°C ~ +80°C
Überwachungskamera
Auflösung 3MP (2304 x 1296)
Linse 3.6mm
LED 4 IR-LEDs und Flutlicht

Benutzerhandbuch
Deutsche
55
Energieversorgung POE
Maße 70 x 190 x 65 mm
Arbeitstemperatur -26°C ~ +80°C
Gebrauchsanweisung
Einbau der Speichereinheit
Bitte installieren Sie vor dem ersten Gebrauch die Speichereinheit. In der
Aufnahmeeinheit kann nur eine SATA-Festplatte mit einer maximalen
Kapazität von 14 TB installiert werden (Festplatte ist nicht im Lieferumfang
enthalten).
• Lösen Sie die Schrauben und önen Sie das NVR-Gehäuse
• Schließen Sie die Datenkabel an und befestigen Sie die Festplatte mit
den Schrauben
• Schließen Sie das NVR-Gehäuse wieder
• Verbinden Sie das Strom- und Internetkabel mit dem NVR
Schalten Sie das Gerät ein
Stecken Sie das Netzkabel in eine 230V-Steckdose. Der NVR wird gestartet.
Die Anzeige-LED leuchtet auf. Standardmäßig werden 9 Kanäle auf dem
Bildschirm angezeigt.
Wenn die Startzeit innerhalb des voreingestellten Aufnahmezeitplans liegt,
startet die Aufnahmefunktion automatisch.
Anmerkungen:
1. Prüfen Sie, ob die Eingangsspannung der empfohlenen Spannung des Geräts
entspricht. Die Versorgungsspannung beträgt 230V ± 10% / 50 Hz 2A.
2. Wir empfehlen die Verwendung eines USV-Geräts, um das Gerät vor
Spannungsschwankungen zu schützen.
Schalten Sie das Gerät aus
Es gibt zwei Möglichkeiten, das Gerät auszuschalten.
1. Rufen Sie das Hauptmenü auf (Rechtsklick auf den Bildschirm) und wählen
Sie die Option Abmelden - Herunterfahren

Benutzerhandbuch
Deutsche
56
2. Schalten Sie die Stromversorgung aus.
Besondere Warnhinweise:
1. Neustart nach Stromausfall. Wenn das Gerät abnormal geschlossen wird,
erstellt es ein Backup und startet von diesem Status aus neu, nachdem die
Stromversorgung wiederhergestellt wurde.
2. Ersetzen Sie die Batterie auf der Systemplatine. Vor dem Batteriewechsel
müssen Sie Ihre Systemeinstellungen sichern (siehe Kapitel Advanced-Import
/ Export) und die Stromversorgung ausschalten. Nach dem Batteriewechsel
müssen Uhrzeit und Datum des Geräts neu eingestellt werden. Wir empfehlen,
die Batterie jedes Jahr auszutauschen.
Fernbedienung des Geräts
Der NVR kann lokal oder aus der Ferne sowohl von Smartphones als auch von
Computern mit Windows-Betriebssystem gesteuert werden.
Betriebssystem Anwendung Herunterladen
Android, iOS XMEye
Android iOS
Windows General CMS
Die Installationsdatei
kann von der im
Paket enthaltenen
CD oder aus dem
Download-Bereich auf
der Produktwebseite
(www.mypni.de)
heruntergeladen werden.

Benutzerhandbuch
Deutsche
57
Systemauthentifizierung
Melden Sie sich nach dem Einschalten des Geräts am System an.
Standardmäßig ist der Admin-Benutzer durch 1234 passwortgeschützt. Wenn
das Passwort 5 Mal hintereinander falsch eingegeben wird, wird das Konto
gesperrt. Durch Neustart des Gerätes oder nach einer halben Stunde wird der
Account automatisch entsperrt.
Hinweis: Bitte ändern Sie zur Sicherheit Ihres Systems das Passwort nach der ersten
Anmeldung.
Kurzanleitung zur Einrichtung
Nach dem Starten des Geräts wird die Kurzanleitung zur Einrichtung gestartet.
Hinweis: Wir empfehlen, das System zu konfigurieren, bevor Sie den NVR und die
Kameras am endgültigen Standort installieren.
Schritte zum folgen:
1. Stellen Sie Uhrzeit, Datum und Zeitzone ein.
2. Bald erscheint auf dem Bildschirm ein Popup-Fenster, in dem Sie
aufgefordert werden, das Authentifizierungskennwort im System zu
ändern. Befolgen Sie die Schritte auf dem Bildschirm oder drücken Sie
die ESC-Taste auf dem NVR, um die Passworteinstellungsoberfläche zu
verlassen.
Hinweis: Zur Sicherheit Ihres Systems empfehlen wir, das Passwort nach der ersten
Anmeldung am System zu ändern .
3. Stellen Sie die Netzwerkparameter manuell ein oder aktivieren Sie die
DHCP-Option für den automatischen Download.
4. Scannen Sie den QR-Code auf dem Bildschirm, um die XMEye-Anwendung
auf Ihrem Mobiltelefon zu installieren. Scannen Sie den QR-Code mit der
Seriennummer, um das System zur Anwendung hinzuzufügen.
5. Stellen Sie die Anzeigeoptionen und die Auflösung des an den NVR
angeschlossenen Monitors ein. Maximal unterstützte Auflösung
2560x1440 (2K) .
Hinweis: Stellen Sie vor dem Ändern der Auflösung sicher, dass Ihr Monitor diese
Auflösung unterstützt. Wenn die eingestellte Auflösung höher als die Auflösung
Ihres Monitors ist, wird nichts auf dem Monitor angezeigt und Sie können nicht auf
das Menü zugreifen. Wenn dies jedoch passiert, schließen Sie den NVR an einen

Benutzerhandbuch
Deutsche
58
Monitor mit niedrigerer Auflösung an, rufen Sie das Menü auf und ändern Sie die
Auflösung .
6. Drücken Sie die OK-Taste, um die grundlegende Systemkonfiguration
abzuschließen.
7. Klicken Sie mit der rechten Maustaste auf den Bildschirm und greifen
Sie auf die Option NetDetect zu. Klicken Sie auf Diagnose, um die
Netzwerkkonfiguration zu testen .
Hinweis: Starten Sie das System neu, damit die Einstellungen wirksam werden.
Rechtsklick auf den Bildschirm - Logout - Reboot.
Das Menü
Klicken Sie in der
Hauptvorschauoberfläche mit der
rechten Maustaste, um auf das Menü
zuzugreifen.

Benutzerhandbuch
Deutsche
59
Main Menu (Hauptmenü)
Optionen: Playback, Record Conf, Network, Date Time.
Playback (Wiedergabe)
Das System bietet zahlreiche Filter und Möglichkeiten zur Identifizierung
des gewünschten Datensatzes. Sie können nach Kanalnummer, Datum und
Zeitintervall oder nach Dateityp suchen.

Benutzerhandbuch
Deutsche
60
Record Conf. (Aufnahmekonfiguration)
Über die Schnittstelle können Sie folgende Einstellungen vornehmen: die
Länge einer Aufnahmedatei, den Aufnahmemodus (programmiert oder
manuell), den Zeitraum (Tag und Zeitintervall) und den Aufnahmetyp (normal,
Bewegungserkennung und Alarm).
Network (Netzwerk)
Stellen Sie die Netzwerkparameter (IP-Adresse, Gateway, DNS, Port usw.)
manuell ein oder aktivieren Sie die DHCP-Option für den automatischen
Parameterabruf.
Hinweis: Starten Sie das System neu, damit die Einstellungen wirksam werden.
Rechtsklick auf den Bildschirm - Abmelden - Neustart.

Benutzerhandbuch
Deutsche
61
Date time (Datum und Uhrzeit)
Stellen Sie Zeitzone, Datum, Uhrzeit und Format ein.
System (System)
Optionen: General, Encode, Backup, Snapshot Config., Display, Account.

Benutzerhandbuch
Deutsche
62
General (Allgemeines)
Die Benutzeroberfläche ermöglicht die folgenden Einstellungen: die Sprache
der Menüanzeige, das Verhalten bei voller Festplatte (Überschreiben
oder Stoppen der Aufzeichnung), die Sitzungsdauer und die Aktivierung /
Deaktivierung der Schnellkonfigurationsanleitung beim Systemstart.
Encode (Kodieren)
Zeigt die technischen Parameter der angeschlossenen Kameras an (Auflösung,
Bildrate, Videokompression, Qualität usw.).

Benutzerhandbuch
Deutsche
63
Backup (Sicherung)
Der USB-Speicher oder die externe Festplatte muss im NVR installiert sein,
bevor die Sicherung gestartet wird. Drücken Sie die Detect-Taste, um das
Speichergerät zu identifizieren, und dann die Backup-Taste, um die Sicherung
durchzuführen.
Snapshot-Konfiguration
Legen Sie fest, dass zyklische Aufnahmen zu einem bestimmten Zeitpunkt

Benutzerhandbuch
Deutsche
64
erstellt und per E-Mail, FTP gesendet oder auf Ihrer Festplatte gespeichert
werden.
Display (Anzeige)
Im lokalen Vorschaumodus können angezeigt werden: Uhrzeit, Kanalname,
Aufnahmestatus, Alarmstatus, Transparenz und Anzeigeauflösung.
Hinweis: Stellen Sie vor dem Ändern der Auflösung sicher, dass Ihr Monitor diese
Auflösung unterstützt. Wenn die eingestellte Auflösung höher als die Auflösung
Ihres Monitors ist, wird nichts auf dem Monitor angezeigt und Sie können nicht auf
das Menü zugreifen. Wenn dies jedoch passiert, schließen Sie den NVR an einen
Monitor mit niedrigerer Auflösung an, rufen Sie das Menü auf und ändern Sie die
Auflösung.

Benutzerhandbuch
Deutsche
65
Account (Konto)
Die Benutzeroberfläche ermöglicht die Verwaltung von Benutzern,
die Zugri auf das System haben, das Hinzufügen von Benutzern, das
Ändern von Benutzerrechten, das Ändern des Passworts, das Erstellen von
Benutzergruppen und das Festlegen einer Kontosicherheitsstufe, indem
Antworten auf bestimmte vordefinierte Fragen registriert werden. Im Falle
einer Passwortzurücksetzung kann der Verifizierungscode in der mobilen
Anwendung oder an die eingestellte E-Mail-Adresse gesendet werden. Um die
Sicherheit zu erhöhen, können Sie ein Muster für den Zugri auf das System
festlegen.

Benutzerhandbuch
Deutsche
66
Alarm (Alarm)
Optionen: Intelligent Alert, Abnormality and Traditional alarm (Kein Bild, kein
Videosignal usw.). Alarmeingang und intelligente Optionen sind für dieses
Modell nicht verfügbar.
Intelligent Alert (Intelligente Warnung)
Stellen Sie das Systemverhalten bei Bewegungserkennung ein: Registrierung
und / oder Benachrichtigung in der Anwendung. Stellen Sie auch die
Bewegungsempfindlichkeit und den Aktionsbereich ein.

Benutzerhandbuch
Deutsche
67
Abnormality (Anomalie)
Legen Sie das Systemverhalten fest bei: Speichergerätefehler, Platzmangel
auf dem Speichergerät, fehlende Internetverbindung oder IP-Konflikt. In
solchen Situationen können Sie festlegen, dass eine Benachrichtigung in der
Anwendung oder eine E-Mail gesendet wird.
Traditional alarm (Traditioneller Wecker)
Stellen Sie das Systemverhalten bei fehlendem Bild oder fehlendem
Videosignal ein. In solchen Situationen können Sie einstellen, dass Sie eine
Benachrichtigung in der Anwendung oder eine E-Mail senden, die Aufnahme
starten, Aufnahmen machen oder die Alarmaufnahme auf einem FTP-Server
speichern.

Benutzerhandbuch
Deutsche
68
Advanced (Fortgeschritten)
Optionen: HDD info, Upgrade, AutoMaintain, Restore, Import / Export,
Digital, LOG, BPS und Version.
HDD info (HDD-Info)
Legen Sie fest, wie die Festplatte funktioniert (nur Lesen oder Lesen/
Schreiben).
Hinweis: Um Aufnahmen auf der Festplatte zu speichern, muss diese auf den Lese-/
Schreibmodus eingestellt sein.

Benutzerhandbuch
Deutsche
69
Upgrade (Aktualisierung)
Stecken Sie einen USB-Stick in den NVR, der die Update-Datei im
Stammordner enthalten sollte. Wählen Sie das Speicherlaufwerk und die Datei
aus dem NVR-Menü aus und klicken Sie auf die Schaltfläche Upgrade.
AutoMaintain
Stellen Sie das System so ein, dass es an einem bestimmten Tag und einer
bestimmten Uhrzeit neu startet oder stellen Sie das automatische Löschen von
Dateien ein, die älter als ein bestimmter Zeitraum sind.
Restore (Zurücksetzen)
Wählen Sie die Optionen aus, die Sie zurücksetzen möchten.

Benutzerhandbuch
Deutsche
70
Import/Export
Systemeinstellungen exportieren oder importieren.

Benutzerhandbuch
Deutsche
71
Digital
Optionen: Digital channels, Channel status und Channel Type.
Digital channels (Digitale Kanäle)
Fügen Sie eine Kamera auf einem bestimmten Kanal hinzu. Klicken Sie auf die
Schaltfläche Hinzufügen und dann auf Suchen, um alle Kameras zu finden, die
im selben Netzwerk (gleicher Router) mit dem NVR verbunden sind.

Benutzerhandbuch
Deutsche
72
Channel status (Kanalstatus)
Zeigt den Status (verbunden, nicht verbunden oder nicht konfiguriert) für alle
9 Kanäle an.
Channel type (Kanaltyp)
Zeigt die maximale Anzahl von Kameras und die Auflösung der Kameras an,
die an das System angeschlossen werden können. Der PNI IPMAX POE 3
NVR unterstützt maximal 9 IP-Kameras mit einer maximalen Auflösung von
4K (8MP).

Benutzerhandbuch
Deutsche
73
Log
Zeigt den Verlauf der im System ausgeführten Aktionen an.
Ausführung
Zeigt nützliche Informationen über Firmware und QR-Code mit der
Seriennummer des Systems (nützlich zum Hinzufügen zur mobilen
Anwendung) und QR-Code zum Herunterladen der mobilen Anwendung an.

Benutzerhandbuch
Deutsche
74
Andere Menüoptionen
Klicken Sie mit der rechten Maustaste
auf den Bildschirm, um zusätzliche
Optionen anzuzeigen:
Channel Set, Record Mode,
Playback, Face detection, IPC
parameters, Color settings, Split
menu, PTZ Control, Output adjust,
NetDetect, Logout.
Channel set (Kanal eingestellt)
Die Schnittstelle ermöglicht das Hinzufügen und Verwalten der zum System
hinzugefügten Kameras.
Kameraschnittstelle hinzufügen
1. Wählen Sie das Kommunikationsprotokoll zwischen dem NVR und den
Kameras aus. Optionen: NETIP, ONVIF, Full Netcom.
2. Search. Drücken Sie die Suchtaste, um nach Kameras zu suchen, die mit
dem gleichen Router (dem gleichen Netzwerk) wie der NVR verbunden sind.
3. Add. Wählen Sie aus der Liste der angezeigten Kameras die gewünschten
Kameras aus und klicken Sie auf Hinzufügen, um sie dem System hinzuzufügen.
4. Network. Konfigurieren Sie Netzwerkparameter für Kameras (IP-Adresse,
Gateway usw.)
5. Quick set. Schnelles Hinzufügen und Konfigurieren von Kameras.
6. IP Bulk Modify. Schneller Wechsel der IP zu mehreren Kameras.
Kanäle-Schnittstelle
1. Delete. Löschen Sie die Kamera aus dem ausgewählten Kanal. Klicken Sie
zum Ausführen auf Übernehmen.
2. Clear. Löschen Sie die Informationen zum ausgewählten Kanal. Klicken Sie
zum Ausführen auf Übernehmen.
3. Encode. Zeigt die technischen Parameter der angeschlossenen Kameras
(Auflösung, Bildrate, Videokompression, Qualität etc.).

Benutzerhandbuch
Deutsche
75
4. Edit devices. IP und Port für den ausgewählten Kanal ändern.
5. Bulk upgrade. Firmware-Update für ausgewählte Kameras.
6. Network detect. Tests und Diagnose von Cloud-Netzwerken und -Servern.
7. Channel title. Kameras umbenennen.
8. NVR Network. Konfigurieren Sie die NVR-Netzwerkparameter.
9. Close adaptive. Deaktiviert die IP-Anpassungsfunktion für die ausgewählten
Kameras.

Benutzerhandbuch
Deutsche
76
Record mode (Aufnahmemodus)
Stellen Sie den Aufnahmemodus (manuell oder programmiert) für jeden Kanal
ein.
Playback (Wiedergabe)
Verknüpfung für den Zugri auf die Such- und Wiedergabeoberfläche von
Aufzeichnungen.
Face detection (Gesichtserkennung)
Die Schnittstelle ist nur für Kameras verfügbar, die diese Funktion unterstützen.

Benutzerhandbuch
Deutsche
77
Farbeinstellungen
Passen Sie die Farbparameter (Helligkeit, Kontrast, Sättigung usw.) für die
Kameraanzeigeschnittstelle an.
Menü aufteilen
Wählen Sie aus, wie die Kameras auf demselben Bildschirm angezeigt werden
sollen.
Output Adjust (Bildeinstellungen)
Stellen Sie die Lautstärke und das Bild ein.

Benutzerhandbuch
Deutsche
78
Net Detect
1. Local Net Detect. Überwachung und Diagnose der Kameraverbindung.
s
2. Remote Net Detect. Überwachung, Diagnose und Konfiguration von
Netzwerk und Cloud-Server.

Benutzerhandbuch
Deutsche
79
3. Net trac Detect. Überwachung des vom NVR durchgeführten
Datenverkehrs im Netzwerk.
Ausloggen
Melden Sie sich ab, fahren Sie das System herunter oder starten Sie es neu.

Manual de usuario
Español
80
Funciones principales
• Grabación simultánea multicanal en tiempo real, reproducción y
configuración remotas
• Admite hasta 9 canales con una resolución máxima de 4K (8MP).
• Copia de seguridad en memoria flash USB y disco duro externo.
• Admite detección de rostros y formas humanas (según la cámara)
• Posibilidad de conectar altavoz externo.
Especificaciones técnicas
NVR
Entradas de video 4 x RJ45 POE
Salida de video 1 x VGA / 1 x HDMI
Salida de audio 1 x 3.5mm
Número de canales 9 x max. 4K (8MP)
Resolución de
reproducción Max. 2K (2560 x 1440) en salida HDMI
Max. 1080P (1920 x x1080) en salida VGA
Ethernet 1 x RJ45 100/100Mbps
Compresión de video H.265AI/H.265+
Compresión de audio G.711A
Modo grabación Manual, alarma, detección de movimiento,
programado
USB 2 x USB2.0
HDD 1 x HDD SATA (max. 8Tb)
ONVIF Si
Voltaje de potencia 48V / 2A
Dimensiones 255 x 220 x 43 mm mm
Temperatura de
trabajo -26°C ~ +80°C
Cámara de vigilancia
Resolución 3MP (2304 x 1296)
Lente 3.6mm
DIRIGIÓ 4 LED IR y reflector

Manual de usuario
Español
81
Fuente de
alimentación POE
Dimensiones 70 x 190 x 65 mm
Temperatura de
trabajo -26°C ~ +80°C
Instrucciones de uso
Instalación de la unidad de almacenamiento
Antes del primer uso, instale la unidad de almacenamiento. Solo se puede
instalar un disco duro SATA con una capacidad máxima de 14 TB dentro de la
unidad de grabación (el disco duro no está incluido en el paquete).
• Afloje los tornillos y abra la carcasa del NVR
• Conecte los cables de datos y asegure el disco duro con los tornillos
• Vuelva a cerrar la carcasa del NVR
• Conecte el cable de alimentación e Internet al NVR
Enciende el dispositivo
Enchufe el cable de alimentación en una toma de 230V. Se iniciará el NVR. El
LED indicador se iluminará. De forma predeterminada, se mostrarán 9 canales
en la pantalla.
Si la hora de inicio está dentro del programa preestablecido para la grabación,
la función de grabación se iniciará automáticamente
Notas:
1. Verifique que el voltaje de entrada corresponda al voltaje recomendado del
dispositivo. La tensión de alimentación es 230V ± 10% / 50 Hz 2A.
2. Sugerimos usar un dispositivo UPS para proteger el dispositivo de las fluctuaciones
de voltaje.
Apagar el dispositivo
Hay dos formas de apagar el dispositivo.
1. Acceda al menú principal (clic derecho en la pantalla) y seleccione la opción
Cerrar sesión - Apagar

Manual de usuario
Español
82
2. Apague la fuente de alimentación.
Advertencias especiales:
1. Reinicie después de un corte de energía. Si el dispositivo se cierra de manera
anormal, crea una copia de seguridad y se reinicia desde ese estado después de
que se restablece la energía.
2. Reemplace la batería en la placa del sistema. Antes de reemplazar la batería,
debe hacer una copia de seguridad de la configuración del sistema (consulte el
capítulo Importación / exportación avanzada) y apagar la fuente de alimentación.
La hora y la fecha del dispositivo se deben configurar nuevamente después de
reemplazar la batería. Le recomendamos que reemplace la batería todos los
años.
Control remoto del dispositivo
El NVR se puede controlar de forma local o remota desde teléfonos inteligentes
y computadoras con sistema operativo Windows.
Sistema operativo Solicitud Descargar
Android, iOS XMEye
Android iOS
Windows General CMS
El archivo de instalación
se puede descargar
desde el CD incluido
en el paquete o desde
la sección de Descargas
en la página web del
producto (www.pni.es)
Autenticación del sistema
Después de encender el dispositivo, inicie sesión en el sistema.

Manual de usuario
Español
83
De forma predeterminada, el usuario administrador está protegido con
contraseña por 1234. Si la contraseña se ingresa incorrectamente 5 veces
seguidas, la cuenta será bloqueada. Al reiniciar el dispositivo o después de
media hora, la cuenta se desbloqueará automáticamente.
Nota: Para la seguridad de su sistema, cambie la contraseña después del primer
inicio de sesión.
Guía de instalación rápida
Después de iniciar el dispositivo, se iniciará la guía de configuración rápida.
Nota: Recomendamos configurar el sistema antes de instalar el NVR y las
cámaras en la ubicación final.
Pasos a seguir:
1. Configure la hora, la fecha y la zona horaria.
2. Pronto, aparecerá una ventana emergente en la pantalla pidiéndole que
cambie la contraseña de autenticación en el sistema. Siga los pasos en la
pantalla o presione la tecla ESC en el NVR para salir de la interfaz de
configuración de contraseña .
Nota: Para la seguridad de su sistema, recomendamos cambiar la contraseña
después del primer inicio de sesión en el sistema.
3. Configure los parámetros de red manualmente o active la opción DHCP
para la descarga automática.
4. Escanee el código QR en la pantalla para instalar la aplicación XMEye en su
teléfono móvil. Escanee el código QR con el número de serie para agregar
el sistema a la aplicación.
5. Configure las opciones de visualización y la resolución del monitor
conectado al NVR. Resolución máxima admitida 2560x1440 (2K).
Nota: antes de cambiar la resolución, asegúrese de que su monitor admita esa
resolución. Si la resolución establecida es superior a la resolución de su monitor,
no aparecerá nada en el monitor y no podrá acceder al menú. Sin embargo, si esto
sucede, conecte el NVR a un monitor de menor resolución, acceda al menú y cambie
la resolución.
6. Presione la tecla OK para completar la configuración básica del sistema.
7. Haga clic derecho en la pantalla y acceda a la opción NetDetect. Haga clic
en Diagnosticar para probar la configuración de red.
Nota: Para que la configuración surta efecto, reinicie el sistema. Haga clic derecho

Manual de usuario
Español
84
en la pantalla - Logout - Reboot.
El menú
En la interfaz de vista previa principal,
haga clic con el botón derecho del
ratón para acceder al menú.
Main Menu (Menú principal)
Opciones: Playback, Record Conf, Network, Date Time.

Manual de usuario
Español
85
Playback (Reproducción)
El sistema ofrece numerosos filtros y opciones para identificar el registro
deseado. Puede buscar por número de canal, fecha e intervalo de tiempo o por
tipo de archivo.
Record Conf. (Configuración de registro)
La interfaz le permite realizar los siguientes ajustes: la duración de un archivo
de grabación, el modo de grabación (programado o manual), el período (día y
intervalo de tiempo) y el tipo de grabación (normal, detección de movimiento

Manual de usuario
Español
86
y alarma).
Network (red)
Configure manualmente los parámetros de red (dirección IP, puerta de enlace,
DNS, puerto, etc.) o marque la opción DHCP para la recuperación automática
de parámetros.
Nota: Para que la configuración surta efecto, reinicie el sistema. Haga clic derecho
en la pantalla - Logout - Reboot.

Manual de usuario
Español
87
Date time (Fecha y hora)
Establezca la zona horaria, la fecha, la hora y el formato.
System (Sistema)
Opciones: General, Encode, Backup, Snapshot Config., Display, Account.
General
La interfaz permitirá las siguientes configuraciones: el idioma de visualización
del menú, el comportamiento en caso de un disco duro lleno (sobrescribir o

Manual de usuario
Español
88
detener la grabación), la duración de la sesión y habilitar / deshabilitar la guía de
configuración rápida al iniciar el sistema.
Encode (Codifica)
Muestra los parámetros técnicos de las cámaras conectadas (resolución,
velocidad de cuadros, compresión de video, calidad, etc.).
Backup (Respaldo)
La memoria USB o el disco duro externo deben estar instalados en el NVR antes

Manual de usuario
Español
89
de iniciar la copia de seguridad. Presione el botón Detectar para identificar el
dispositivo de almacenamiento, luego el botón Copia de seguridad para realizar
la copia de seguridad.
Snapshot Config (Configuración de instantánea)
Configure para tomar capturas cíclicas en un momento determinado y enviarlas
por correo electrónico, FTP o almacenarlas en su disco duro.

Manual de usuario
Español
90
Display (Monitor)
En el modo de vista previa local se puede mostrar: hora, nombre del canal,
estado de grabación, estado de alarma, transparencia y resolución de pantalla.
Nota: antes de cambiar la resolución, asegúrese de que su monitor admita esa
resolución. Si la resolución establecida es superior a la resolución de su monitor,
no aparecerá nada en el monitor y no podrá acceder al menú. Sin embargo, si esto
sucede, conecte el NVR a un monitor de menor resolución, acceda al menú y cambie
la resolución.
Account (Cuenta)
La interfaz permite administrar los usuarios que tienen acceso al sistema,
agregar usuarios, cambiar los derechos de los usuarios, cambiar la contraseña,
crear grupos de usuarios y establecer un nivel de seguridad de la cuenta al
registrar respuestas a ciertas preguntas predefinidas. En caso de restablecer la
contraseña, el código de verificación se puede enviar en la aplicación móvil o
en la dirección de correo electrónico establecida. Para aumentar la seguridad,
puede establecer un patrón para acceder al sistema.

Manual de usuario
Español
91
Alarm (Alarma)
Opciones: Intelligent Alert, Abnormality and Traditional alarm (Sin imagen,
sin señal de video, etc.). La entrada de alarma y las opciones inteligentes no
están disponibles para este modelo.
Intelligent Alert (Alerta inteligente)
Configure el comportamiento del sistema en caso de detección de movimiento:
registro y / o notificación en la aplicación. También configure el nivel de

Manual de usuario
Español
92
sensibilidad al movimiento y el área de acción.
Abnormality (Anomalía)
Configure el comportamiento del sistema en caso de: error del dispositivo de
almacenamiento, falta de espacio en el dispositivo de almacenamiento, falta de
conexión a Internet o conflicto de IP. En tales situaciones, puede configurar
para enviar una notificación en la aplicación o un correo electrónico.
Traditional alarm (Alarma tradicional)
Configure el comportamiento del sistema en caso de que falte una imagen

Manual de usuario
Español
93
o una señal de video. En tales situaciones, puede configurar para enviar una
notificación en la aplicación o un correo electrónico, iniciar la grabación, realizar
capturas o guardar la grabación de alarma en un servidor FTP.
Advanced (Avanzado)
Opciones: HDD info, Upgrade, AutoMaintain, Restore, Import / Export,
Digital, LOG, BPS y Version.
HDD info (Información del disco duro)
Establezca cómo funciona el disco duro (solo lectura o lectura-escritura).
Nota: Para guardar grabaciones en el disco duro, debe configurarse en modo lectura

Manual de usuario
Español
94
/ escritura.
Upgrade
Inserte una memoria USB en el NVR que debe contener el archivo de
actualización en la carpeta raíz. Seleccione la unidad de almacenamiento y el
archivo del menú NVR y haga clic en el botón Actualizar.
AutoMaintain
Configure el sistema para que se reinicie en un día y una hora determinados o

Manual de usuario
Español
95
configure la eliminación automática de archivos con una antigüedad superior a
un determinado período.
Reset
Seleccione las opciones que desea restablecer.
Importación y exportación
Exportar o importar la configuración del sistema.

Manual de usuario
Español
96
Digital
Opciones: Digital channels, Channel status y Channel Type.
Digital channels (Canales digitales)
Agrega una cámara en un canal específico. Haga clic en el botón Agregar,
luego en Buscar para encontrar todas las cámaras conectadas en la misma red
(mismo enrutador) con el NVR.

Manual de usuario
Español
97
Channel status (Estado del canal)
Muestra el estado (conectado, desconectado o no configurado) de los 9
canales.
Channel type (Tipo de canal)
Muestra el número máximo de cámaras y la resolución de las cámaras que se
pueden conectar al sistema. El NVR PNI IPMAX POE 3 admite un máximo
de 9 cámaras IP con una resolución máxima de 4K (8MP).

Manual de usuario
Español
98
Log
Muestra el historial de acciones realizadas en el sistema.
Version (Versión)
Muestra información útil sobre el firmware y el código QR con el número de
serie del sistema (útil para agregarlo a la aplicación móvil) y el código QR para
descargar la aplicación móvil.

Manual de usuario
Español
99
Otras opciones de menú
Haga clic derecho en la pantalla para
mostrar opciones adicionales:
Channel Set, Record Mode,
Playback, Face detection, IPC
parameters, Color settings, Split
menu, PTZ Control, Output adjust,
NetDetect, Logout.
Channel set (Conjunto de canales)
La interfaz permite agregar y administrar las cámaras agregadas al sistema.
Agregar interfaz de cámaras
1. Seleccione el protocolo de comunicación entre el NVR y las cámaras.
Opciones: NETIP, ONVIF, Full Netcom.
2. Search. Presione la tecla Buscar para buscar cámaras conectadas al mismo
enrutador (misma red) que el NVR.
3. Add. De la lista de cámaras mostradas, seleccione las cámaras deseadas y

Manual de usuario
Español
100
haga clic en Agregar para agregarlas al sistema..
4. Network. Configure los parámetros de red para las cámaras (dirección IP,
puerta de enlace, etc.)
5. Quick set. Adición y configuración rápidas de cámaras.
6. IP Bulk Modify. Cambio rápido de IP a múltiples cámaras.
Interfaz de canales
1. Delete. Elimina la cámara del canal seleccionado. Haga clic en Aplicar para
ejecutar.
2. Clear.Elimina la información del canal seleccionado. Haga clic en Aplicar
para ejecutar.
3. Encode. Muestra los parámetros técnicos de las cámaras conectadas
(resolución, velocidad de cuadros, compresión de video, calidad, etc.).
4. Edit devices. Cambiar IP y puerto para el canal seleccionado.
5. Bulk upgrade. Actualización de firmware para cámaras seleccionadas.
6. Network detect. Pruebas y diagnósticos de servidores y redes en la nube.
7. Channel title. Cambiar el nombre de las cámaras.
8. NVR Network. Configurar los parámetros de red del NVR.
9. Close adaptive. Desactiva la función de adaptación de IP para las cámaras
seleccionadas.

Manual de usuario
Español
101
Record mode (Modo de grabación)
Configure el modo de grabación (manual o programado) para cada canal.

Manual de usuario
Español
102
Playback (Reproducción)
Atajo para acceder a la interfaz de búsqueda y reproducción de grabaciones.
Face detection (Detección de rostro)
La interfaz solo está disponible para cámaras que admitan esta función.
Color settings (Configuraciones de color)
Ajuste los parámetros de color (brillo, contraste, saturación, etc.) para la
interfaz de visualización de la cámara.
Split menu (Menú dividido)

Manual de usuario
Español
103
Seleccione cómo mostrar las cámaras en la misma pantalla.
Output Adjust (Ajustes de imagen)
Configure el volumen y la imagen.
Net Detect
1. Local Net Detect. Monitoreo y diagnóstico de la conexión de la cámara.
s
2. Remote Net Detect. Monitorización, diagnóstico y configuración de red y
servidor Cloud.

Manual de usuario
Español
104
3. Net trac Detect. Monitoreo del tráfico de datos realizado por NVR en la
red.

Manuel utilisateur
Français
105
Fonctions principales
• Enregistrement multicanal simultané en temps réel, lecture et configuration
à distance
• Prend en charge jusqu’à 9 canaux avec une résolution maximale de 4K
(8MP).
• Sauvegarde sur mémoire flash USB et disque dur externe.
• Prend en charge la détection de visage et de forme humaine (selon la
caméra)
• Possibilité de connecter un haut-parleur externe.
Spécifications techniques
NVR
Entrées vidéo 4 x RJ45 POE
Sortie vidéo 1 x VGA / 1 x HDMI
Sortie audio 1 x 3.5mm
Nombre de canaux 9 x max. 4K (8MP)
Résolution de lecture Max. 2K (2560 x 1440) sur sortie HDMI
Max. 1080P (1920 x x1080) sur sortie VGA
Ethernet 1 x RJ45 100/100Mbps
Compression de vidéo H.265AI/H.265+
Compression audio G.711A
Mode
d'enregistrement Manuel, alarme, détection de mouvement,
programmé
USB 2 x USB2.0
Disque dur 1 x HDD SATA (max. 8Tb)
ONVIF Oui
Tension d'alimentation 48V / 2A
Dimensions 255 x 220 x 43 mm mm
Température de
fonctionnement -26°C ~ +80°C
Caméra de surveillance
Résolution 3MP (2304 x 1296)

Manuel utilisateur
Français
106
Lentille 3.6mm
LED 4 LED IR et projecteur
Source de courant POE
Dimensions 70 x 190 x 65 mm
Température de
fonctionnement -26°C ~ +80°C
Mode d’emploi
Installation de l’unité de stockage
Avant la première utilisation, veuillez installer l’unité de stockage. Un seul disque
dur SATA d’une capacité maximale de 14 To peut être installé à l’intérieur de
l’unité d’enregistrement (le disque dur n’est pas inclus dans l’emballage).
• Desserrez les vis et ouvrez le boîtier du NVR
• Connectez les câbles de données et fixez le disque dur avec les vis
• Fermez le boîtier du NVR
• Connectez le câble d’alimentation et Internet au NVR
Allumez l’appareil
Branchez le cordon d’alimentation dans une prise 230V. Le NVR démarrera.
L’indicateur LED s’allumera.
Si l’heure de début se situe dans le calendrier prédéfini pour l’enregistrement,
la fonction d’enregistrement démarrera automatiquement.
Remarques:
1. Vérifiez que la tension d’entrée correspond à la tension recommandée de l’appareil.
La tension d’alimentation est de 230V ± 10% / 50 Hz 2A.
2. Nous vous suggérons d’utiliser un onduleur pour protéger l’appareil des fluctuations
de tension.
Éteignez l’appareil
Il existe deux façons d’éteindre l’appareil.
1. Accédez au menu principal (clic droit sur l’écran) et sélectionnez l’option
Déconnexion - Arrêt

Manuel utilisateur
Français
107
2. Coupez l’alimentation.
Mises en garde spéciales:
1. Redémarrez après une panne de courant. Si l’appareil est fermé de manière
anormale, il crée une sauvegarde et redémarre à partir de cet état une fois
l’alimentation rétablie.
2. Remplacez la batterie sur la carte système. Avant de remplacer la batterie,
vous devez sauvegarder les paramètres de votre système (voir chapitre
Advanced-Import / Export) et couper l’alimentation. L’heure et la date de
l’appareil doivent être à nouveau réglées après le remplacement de la batterie.
Nous vous recommandons de remplacer la batterie chaque année.
Télécommande de l’appareil
Le NVR peut être contrôlé localement ou à distance à partir de smartphones
et d’ordinateurs dotés du système d’exploitation Windows.
Système opérateur Application Télécharger
Android, iOS XMEye
Android iOS
Windows General CMS
Le fichier d’installation
peut être téléchargé
à partir du CD inclus
dans l’emballage ou
à partir de la section
Téléchargement de la
page Web du produit
(www.pni.fr)
Authentification du système
Après avoir allumé l’appareil, connectez-vous au système.
Par défaut, l’utilisateur admin est protégé par mot de passe par 1234. Si

Manuel utilisateur
Français
108
le mot de passe est mal saisi 5 fois de suite, le compte sera bloqué. En
redémarrant l’appareil ou après une demi-heure, le compte sera déverrouillé
automatiquement.
Remarque : Pour la sécurité de votre système, veuillez changer le mot de passe après
la première connexion.
Guide d’installation rapide
Après avoir démarré l’appareil, le guide d’installation rapide démarre.
Remarque : nous vous recommandons de configurer le système avant d’installer le
NVR et les caméras à l’emplacement final.
Étapes à suivre:
1. Réglez l’heure, la date et le fuseau horaire.
2. Bientôt, une fenêtre contextuelle apparaîtra à l’écran vous demandant
de modifier le mot de passe d’authentification dans le système. Suivez
les étapes à l’écran ou appuyez sur la touche ESC du NVR pour quitter
l’interface de configuration du mot de passe.
Remarque: Pour la sécurité de votre système, nous vous recommandons de changer
le mot de passe après la première connexion au système.
3. Définissez les paramètres réseau manuellement ou activez l’option DHCP
pour le téléchargement automatique.
4. Scannez le code QR à l’écran pour installer l’application XMEye sur votre
téléphone mobile. Scannez le code QR avec le numéro de série pour
ajouter le système à l’application.
5. Définissez les options d’achage et la résolution du moniteur connecté au
NVR. Résolution maximale prise en charge 2560x1440 (2K).
Remarque: avant de modifier la résolution, assurez-vous que votre moniteur prend
en charge cette résolution. Si la résolution définie est supérieure à la résolution de
votre moniteur, rien n’apparaîtra sur le moniteur et vous ne pourrez pas accéder au
menu. Si cela se produit, connectez le NVR à un moniteur de résolution inférieure,
accédez au menu et modifiez la résolution.
6. Appuyez sur la touche OK pour terminer la configuration de base du
système.
7. Faites un clic droit sur l’écran et accédez à l’option NetDetect. Cliquez sur
Diagnostiquer pour tester la configuration réseau.
Remarque: pour que les paramètres prennent eet, redémarrez le système. clic droit

Manuel utilisateur
Français
109
sur l’écran - Logout - Reboot.
Le menu
Dans l’interface principale de
prévisualisation, faites un clic droit
avec la souris pour accéder au menu.
Main Menu (Menu principal)
Options: Playback, Record Conf, Network, Date Time.

Manuel utilisateur
Français
110
Playback (Relecture)
Le système propose de nombreux filtres et options pour identifier
l’enregistrement souhaité. Vous pouvez rechercher par numéro de chaîne, date
et intervalle de temps ou par type de fichier.
Record Conf. (Configuration enregistrer)
L’interface permet de faire les réglages suivants : la durée d’un fichier
d’enregistrement, le mode d’enregistrement (programmé ou manuel), la
période (jour et intervalle de temps) et le type d’enregistrement (normal,

Manuel utilisateur
Français
111
détection de mouvement et alarme).
Network (Réseau)
Définissez manuellement les paramètres réseau (adresse IP, passerelle, DNS,
port, etc.) ou cochez l’option DHCP pour la récupération automatique des
paramètres.
Remarque : pour que les paramètres prennent eet, redémarrez le système. Clic
droit sur l’écran - Logout - Reboot.

Manuel utilisateur
Français
112
Date time (Date et heure)
Réglez le fuseau horaire, la date, l’heure et le format.
System (Système)
Options: General, Encode, Backup, Snapshot Config., Display, Account.

Manuel utilisateur
Français
113
General (Général)
L’interface permettra les réglages suivants : la langue d’achage du menu, le
comportement en cas de disque dur plein (écraser ou arrêter l’enregistrement),
la durée de la session et activer/désactiver le guide de configuration rapide au
démarrage du système.
Encode (Encoder)
Ache les paramètres techniques des caméras connectées (résolution,
fréquence d’images, compression vidéo, qualité, etc.).

Manuel utilisateur
Français
114
Backup (Sauvegarde)
La mémoire USB ou le disque dur externe doit être installé dans le NVR avant
de démarrer la sauvegarde. Appuyez sur le bouton Détecter pour identifier
le périphérique de stockage, puis sur le bouton Sauvegarder pour eectuer la
sauvegarde.
Snapshot Config (Configuration d’instantané)
Configurez pour eectuer des captures cycliques à un certain moment et les
envoyer par e-mail, FTP ou les stocker sur votre disque dur.

Manuel utilisateur
Français
115
Display (Acher)
Dans le mode de prévisualisation local peuvent être achés : l’heure, le nom
du canal, l’état de l’enregistrement, l’état de l’alarme, la transparence et la
résolution d’achage.
Remarque : avant de modifier la résolution, assurez-vous que votre moniteur prend
en charge cette résolution. Si la résolution définie est supérieure à la résolution de
votre moniteur, rien n’apparaîtra sur le moniteur et vous ne pourrez pas accéder au
menu. Si cela se produit, connectez le NVR à un moniteur de résolution inférieure,
accédez au menu et modifiez la résolution.
Account (Compte)
L’interface permet de gérer les utilisateurs ayant accès au système, d’ajouter
des utilisateurs, de modifier les droits des utilisateurs, de modifier le mot de
passe, de créer des groupes d’utilisateurs et de définir un niveau de sécurité de
compte en enregistrant des réponses à certaines questions prédéfinies. En cas
de réinitialisation du mot de passe, le code de vérification peut être envoyé dans
l’application mobile ou à l’adresse e-mail définie. Pour augmenter la sécurité,
vous pouvez définir un modèle d’accès au système.

Manuel utilisateur
Français
116
Alarm (Alarme)
Options: Intelligent Alert, Abnormality and Traditional alarm (Pas d’image,
Pas de signal vidéo, etc.). L’entrée d’alarme et les options intelligentes ne sont
pas disponibles pour ce modèle.
Intelligent Alert (Alerte intelligente)
Paramétrez le comportement du système en cas de détection de mouvement:
enregistrement et/ou notification dans l’application. Réglez également le

Manuel utilisateur
Français
117
niveau de sensibilité au mouvement et la zone d’action.
Abnormality (Anomalie)
Définissez le comportement du système en cas de : erreur de périphérique
de stockage, manque d’espace sur le périphérique de stockage, manque
de connexion Internet ou conflit IP. Dans de telles situations, vous pouvez
configurer l’envoi d’une notification dans l’application ou par e-mail.
Traditional alarm (Alarme traditionnelle)
Définissez le comportement du système en cas d’image manquante ou de

Manuel utilisateur
Français
118
signal vidéo manquant. Dans de telles situations, vous pouvez configurer l’envoi
d’une notification dans l’application ou un e-mail, démarrer l’enregistrement,
eectuer des captures ou enregistrer l’enregistrement d’alarme sur un serveur
FTP.
Advanced (Avancée)
Options: HDD info, Upgrade, AutoMaintain, Restore, Import / Export,
Digital, LOG, BPS et Version.

Manuel utilisateur
Français
119
HDD info (Informations sur le disque dur)
Définissez le fonctionnement du disque dur (lecture seule ou lecture-écriture).
Remarque : Afin de sauvegarder les enregistrements sur le disque dur, celui-ci doit
être réglé en mode lecture/écriture.
Upgrade
Insérez une clé USB dans le NVR qui doit contenir le fichier de mise à jour
dans le dossier racine. Sélectionnez le lecteur de stockage et le fichier dans le
menu NVR et cliquez sur le bouton Upgrade.

Manuel utilisateur
Français
120
AutoMaintain (Maintenance automatique)
Configurez le système pour qu’il redémarre à un certain jour et à une certaine
heure ou configurez la suppression automatique des fichiers antérieurs à une
certaine période.
Restore (Réinitialiser)
Sélectionnez les options que vous souhaitez réinitialiser.
Import/Export
Exportez ou importez les paramètres système.

Manuel utilisateur
Français
121
Digital (Numérique)
Options: Digital channels, Channel status and Channel Type.
Digital channels (Chaînes numériques)
Ajouter une caméra sur un canal spécifique. Cliquez sur le bouton Ajouter, puis
sur Rechercher pour trouver toutes les caméras connectées au même réseau
(même routeur) avec le NVR.

Manuel utilisateur
Français
122
État du canal
Ache l’état (connecté, non connecté ou non configuré) pour les 9 canaux.
Channel type (Type de canal)
Ache le nombre maximum de caméras et la résolution des caméras pouvant
être connectées au système. Le NVR PNI IPMAX POE 3 prend en charge un
maximum de 9 caméras IP avec une résolution maximale de 4K (8MP).

Manuel utilisateur
Français
123
Log (Journal)
Ache l’historique des actions eectuées dans le système.
Version
Ache des informations utiles sur le firmware et le code QR avec le numéro
de série du système (utile pour l’ajouter à l’application mobile) et le code QR
pour télécharger l’application mobile.

Manuel utilisateur
Français
124
Autres options de menu
Faites un clic droit sur l’écran pour
acher des options supplémentaires:
Channel Set, Record Mode,
Playback, Face detection, IPC
parameters, Color settings, Split
menu, PTZ Control, Output adjust,
NetDetect, Logout.
Channel set (Ensemble de chaînes)
L’interface permet d’ajouter et de gérer les caméras ajoutées au système.
Ajouter de caméras
1. Sélectionnez le protocole de communication entre le NVR et les caméras.
Options: NETIP, ONVIF, Full Netcom.
2. Search. Appuyez sur la touche Rechercher pour rechercher des caméras
connectées au même routeur (même réseau) que le NVR.

Manuel utilisateur
Français
125
3. Add. Dans la liste des caméras achées, sélectionnez les caméras souhaitées
et cliquez sur Ajouter pour les ajouter au système.
4. Network. Configurer les paramètres réseau des caméras (adresse IP,
passerelle, etc.)
5. Quick set. Ajout et configuration rapide de caméras.
6. IP Bulk Modify. Changement rapide d’IP à plusieurs caméras.
Interface des canaux
1. Delete. Supprimez la caméra du canal sélectionné. Cliquez sur Appliquer
pour exécuter.
2. Clear. Supprimez les informations sur la chaîne sélectionnée. Cliquez sur
Appliquer pour exécuter.
3. Encode. Ache les paramètres techniques des caméras connectées
(résolution, fréquence d’images, compression vidéo, qualité, etc.).
4. Edit devices. Changer l’IP et le port pour le canal sélectionné.
5. Bulk upgrade. Mise à jour du firmware pour les caméras sélectionnées.
6. Network detect. Tests et diagnostics du réseau cloud et des serveurs.
7. Channel title. Renommer les caméras.
8. NVR Network. Configurer les paramètres du réseau NVR.
9. Close adaptive. Désactive la fonction d’adaptation IP pour les caméras
sélectionnées.

Manuel utilisateur
Français
126
Record mode (Mode d’enregistrement)
Réglez le mode d’enregistrement (manuel ou programmé) pour chaque canal.

Manuel utilisateur
Français
127
Playback (Relecture)
Raccourci pour accéder à l’interface de recherche et de lecture des
enregistrements.
Face detection (Détection facial)
L’interface n’est disponible que pour les caméras prenant en charge cette
fonctionnalité.
Color settings (Paramètres de couleur)
Ajustez les paramètres de couleur (luminosité, contraste, saturation, etc.) pour
l’interface de visualisation de la caméra.

Manuel utilisateur
Français
128
Split menu
Sélectionnez comment acher les caméras sur le même écran.
Output Adjust
Réglez le volume et l’image.
Net Detect
1. Local Net Detect. Surveillance et diagnostic de la connexion des caméras.
2. Remote Net Detect. Surveillance, diagnostic et configuration du réseau et

Manuel utilisateur
Français
129
du serveur Cloud.
3. Net trac Detect. Surveillance du trafic de données eectué par le NVR
dans le réseau.

Használati utasítás
Magyar
130
Fő funkciók
• Egyidejű valós idejű többcsatornás felvétel, távoli lejátszás és konfigurálás
• Akár 9 csatornát támogat, maximális 4K (8MP) felbontással.
• Biztonsági másolat készítése USB flash memóriára és külső merevlemezre.
• Támogatja az arc és az emberi alak érzékelését (a kamerától függően)
• Külső hangszóró csatlakoztatásának lehetősége
Műszaki adatok
NVR
Videó bemenetek 4 x RJ45 POE
Videó kimenet 1 x VGA / 1 x HDMI
Hang kimenet 1 x 3.5mm
Csatornák száma 9 x max. 4K (8MP)
Lejátszási felbontás Max. 2K (2560 x 1440) a HDMI kimeneten
Max. 1080P (1920 x 1080) VGA kimeneten
Ethernet 1 x RJ45 100/100Mbps
Videó tömörítés H.265AI/H.265+
Hangtömörítés G.711A
Felvételi mód Manuális, riasztó, mozgásérzékelés, programozott
USB 2 x USB2.0
HDD 1 x HDD SATA (max. 8Tb)
ONVIF Igen
Tápfeszültség 48V / 2A
Méretek 255 x 220 x 43 mm mm
Üzemhőmérséklet -26°C ~ +80°C
Térfigyelő kamera
Felbontás 3MP (2304 x 1296)
Lencse 3.6mm
VEZETTE 4 IR LED és reflektor
Tápegység POE
Méretek 70 x 190 x 65 mm

Használati utasítás
Magyar
131
Üzemhőmérséklet -26°C ~ +80°C
Használati útmutató
A tárolóegység telepítése
Az első használat előtt telepítse a tároló egységet. Csak egy SATA HDD-t
lehet beépíteni a maximálisan 14 TB kapacitású felvevőegységbe (a HDD-t
nem tartalmazza a csomag).
• Lazítsa meg a csavarokat, és nyissa ki az NVR házát
• Csatlakoztassa az adatkábeleket és rögzítse a merevlemezt a csavarokkal
• Zárja vissza az NVR házát
• Csatlakoztassa a táp- és internetkábelt az NVR-hez
Kapcsolja be a készüléket
Csatlakoztassa a tápkábelt egy 230 V-os konnektorhoz. Az NVR elindul. A
jelző LED kigyullad.
Ha a kezdési idő a rögzítés előre beállított ütemezésén belül van, akkor a
felvételi funkció automatikusan elindul.
Megjegyzések:
1. Ellenőrizze, hogy a bemeneti feszültség megfelel-e a készülék ajánlott
feszültségének. A tápfeszültség 230V ± 10% / 50 Hz 2A.
2. Javasoljuk, hogy használjon UPS-készüléket, hogy megvédje a készüléket a
feszültségingadozásoktól.
Kapcsolja ki a készüléket
Két módon kapcsolhatja ki az eszközt.
1. Nyissa meg a főmenüt (kattintson a jobb gombbal a képernyőn), és válassza
a Kijelentkezés - Leállítás lehetőséget
2. Kapcsolja ki az áramellátást.
Különleges figyelmeztetések:
1. Áramszünet után indítsa újra. Ha az eszköz rendellenesen zárva van,
biztonsági másolatot hoz létre, és az áramellátás helyreállítása után újraindul

Használati utasítás
Magyar
132
ebből az állapotból.
2. Helyezze vissza az elemet az alaplapra. Az akkumulátor cseréje előtt biztonsági
másolatot kell készítenie a rendszerbeállításokról (lásd: Haladó-Importálás
/ Exportálás fejezet), és kapcsolja ki az áramellátást. Az akkumulátor cseréje
után újra be kell állítani az eszköz dátumát és dátumát. Javasoljuk, hogy minden
évben cserélje ki az akkumulátort.
A készülék távvezérlése
Az NVR helyileg vagy távolról vezérelhető mind okostelefonokról, mind
Windows operációs rendszerrel rendelkező számítógépekről.
Operációs rendszer Alkalmazás Letöltés
Android, iOS XMEye
Android iOS
Windows General CMS
A telepítőfájl letölthető
a csomagban található
CD-ről, vagy a termék
weboldalának (www.pni.
hu) Letöltés részéről.
A rendszer hitelesítése
A készülék bekapcsolása után jelentkezzen be a rendszerbe.
Alapértelmezés szerint az adminisztrátort az 1234. jelszóval védi. Ha a jelszót
egymás után ötször helytelenül adják meg, a fiók blokkolásra kerül. Az eszköz
újraindításával vagy fél óra elteltével a fiók automatikusan feloldódik.
Megjegyzés: A rendszer biztonsága érdekében az első bejelentkezés után módosítsa
a jelszót.

Használati utasítás
Magyar
133
Gyors telepítési útmutató
A készülék elindítása után elindul a gyors telepítési útmutató.
Megjegyzés: Az NVR és a kamerák végleges telepítése előtt javasoljuk a
rendszer konfigurálását.
Követendő lépések:
1. Állítsa be az időt, a dátumot és az időzónát.
2. Hamarosan megjelenik egy felugró ablak a képernyőn, amely arra
kéri, hogy változtassa meg a rendszer hitelesítési jelszavát. Kövesse a
képernyőn megjelenő lépéseket, vagy nyomja meg az NVR ESC gombját
a jelszóbeállítási felületről való kilépéshez .
Megjegyzés: A rendszer biztonsága érdekében javasoljuk a jelszó megváltoztatását
az első bejelentkezés után.
3. Állítsa be manuálisan a hálózati paramétereket, vagy aktiválja a DHCP
opciót az automatikus letöltéshez.
4. Olvassa be a képernyőn található QR-kódot az XMEye alkalmazás
mobiltelefonjára történő telepítéséhez. Olvassa be a QR-kódot a
sorozatszámmal, hogy hozzáadja a rendszert az alkalmazáshoz.
5. Állítsa be az NVR-hez csatlakoztatott monitor megjelenítési opcióit és
felbontását. Maximális támogatott felbontás: 2560x1440 (2K).
Megjegyzés: A felbontás módosítása előtt ellenőrizze, hogy a monitor támogatja-e
ezt a felbontást. Ha a beállított felbontás magasabb, mint a monitor felbontása,
akkor semmi nem jelenik meg a monitoron, és nem fog tudni hozzáférni a menühöz.
Ebben az esetben azonban csatlakoztassa az NVR-t alacsonyabb felbontású
monitorhoz, lépjen be a menübe és változtassa meg a felbontást.
6. Az alapkonfiguráció befejezéséhez nyomja meg az OK gombot.
Kattintson a jobb gombbal a képernyőn, és nyissa meg a NetDetect opciót.
Kattintson a Diagnózis elemre a hálózati konfiguráció teszteléséhez.
Megjegyzés: A beállítások életbe lépéséhez indítsa újra a rendszert. Kattintson a
jobb gombbal a képernyőn - Logout - Reboot.

Használati utasítás
Magyar
134
The menu (A menü)
A fő előnézeti felületen kattintson
a jobb gombbal az egérrel a menü
eléréséhez.
Main Menu (Főmenü)
Opciók: Playback, Record Conf, Network, Date Time.

Használati utasítás
Magyar
135
Playback (Lejátszás)
A rendszer számos szűrőt és lehetőséget kínál a kívánt rekord azonosítására.
Kereshet csatornaszám, dátum és időintervallum vagy fájltípus szerint.
Record Conf. (Rekordkonfiguráció)
Az interfész lehetővé teszi a következő beállítások elvégzését: a felvételi fájl
hossza, a rögzítési mód (programozott vagy manuális), az időszak (nap és
időintervallum) és a felvétel típusa (normál, mozgásérzékelés és riasztás).

Használati utasítás
Magyar
136
Network (Hálózat)
Állítsa be kézzel a hálózati paramétereket (IP-cím, átjáró, DNS, port stb.),
Vagy ellenőrizze a DHCP opciót az automatikus paraméter-visszakereséshez.
Megjegyzés: A beállítások életbe lépéséhez indítsa újra a rendszert. Kattintson a
jobb gombbal a képernyőn - Logout - Reboot.
Date time (Dátum és idő)
Állítsa be az időzónát, a dátumot, az időt és a formátumot.

Használati utasítás
Magyar
137
System (Rendszer)
Opciók: General, Encode, Backup, Snapshot Config., Display, Account.
General (Tábornok)
Az interfész a következő beállításokat teszi lehetővé: a menü megjelenítési
nyelve, a viselkedés teljes merevlemez esetén (felülírja vagy leállítja a felvételt),
a munkamenet időtartama és a rendszerindításkor engedélyezi / letiltja a gyors
konfigurációs útmutatót.

Használati utasítás
Magyar
138
Encode
Megjeleníti a csatlakoztatott kamerák műszaki paramétereit (felbontás,
képkockasebesség, videotömörítés, minőség stb.).
Backup (Biztonsági mentés)
Az USB-memóriát vagy a külső HDD-t a biztonsági mentés megkezdése
előtt telepíteni kell az NVR-be. Nyomja meg a Detect gombot a tárolóeszköz
azonosításához, majd a Backup gombot a biztonsági mentés végrehajtásához.

Használati utasítás
Magyar
139
Snapshot Config (Pillanatkép konfiguráció)
Állítsa be, hogy ciklikus felvételeket készítsen egy adott időpontban, és
e-mailben, FTP-ben küldje el, vagy tárolja a merevlemezen.
Display (Kijelző)
Helyi előnézeti módban megjeleníthető: idő, csatorna neve, felvételi állapot,
riasztási állapot, átlátszóság és a kijelző felbontása.
Megjegyzés: A felbontás módosítása előtt ellenőrizze, hogy a monitor támogatja-e
ezt a felbontást. Ha a beállított felbontás magasabb, mint a monitor felbontása,
akkor semmi nem jelenik meg a monitoron, és nem fog tudni hozzáférni a menühöz.
Ebben az esetben azonban csatlakoztassa az NVR-t alacsonyabb felbontású
monitorhoz, lépjen be a menübe és változtassa meg a felbontást.

Használati utasítás
Magyar
140
Account (Számla)
A felület lehetővé teszi a rendszerhez hozzáféréssel rendelkező felhasználók
kezelését, felhasználók hozzáadását, felhasználói jogok megváltoztatását, jelszó
megváltoztatását, felhasználói csoportok létrehozását és a fiók biztonsági
szintjének beállítását bizonyos előre meghatározott kérdésekre adott válaszok
regisztrálásával. Jelszó alaphelyzetbe állítása esetén az ellenőrző kód elküldhető
a mobilalkalmazásban vagy a megadott e-mail címen. A biztonság növelése
érdekében beállíthat egy mintát a rendszer eléréséhez.

Használati utasítás
Magyar
141
Alarm (Riasztás)
Opciók: Intelligent Alert, Abnormality and Traditional alarm (Nincs kép,
nincs videojel stb.). A riasztás bevitele és az intelligens opciók nem állnak
rendelkezésre ennél a modellnél.
Intelligent Alert (Intelligens riasztás)
Állítsa be a rendszer viselkedését mozgásérzékelés esetén: regisztráció és /
vagy értesítés az alkalmazásban. Állítsa be a mozgásra való érzékenység szintjét
és a cselekvési területet is.

Használati utasítás
Magyar
142
Abnormality (Rendellenesség)
Set the system behavior in case of: storage device error, lack of space on the
storage device, lack of internet connection or IP conflict. In such situations you
can set to send a notification in the application or an email.
Traditional alarm (Hagyományos riasztó)
Állítsa be a rendszer viselkedését hiányzó kép vagy hiányzó videojel esetén.
Ilyen esetekben beállíthatja, hogy értesítést küldjön az alkalmazásban vagy
e-mailt, megkezdje a felvételt, rögzítéseket készítsen vagy elmentse a riasztási
felvételt egy FTP-kiszolgálóra.

Használati utasítás
Magyar
143
Fejlett
Opciók: HDD info, Upgrade, AutoMaintain, Restore, Import / Export, Digital,
LOG, BPS és Version.
HDD info (HDD információk)
Állítsa be a merevlemez működését (csak olvasható vagy írható és írható).
Megjegyzés: A felvételek merevlemezre történő mentéséhez olvasási / írási módra
kell állítani.

Használati utasítás
Magyar
144
Upgrade
Helyezzen egy USB-meghajtót az NVR-be, amelynek tartalmaznia kell a
frissítési fájlt a gyökérmappában. Válassza ki a tároló meghajtót és a fájlt az
NVR menüből, majd kattintson a Frissítés gombra.
AutoMaintain
Állítsa be a rendszert egy adott napon és időpontban történő újraindításra,
vagy állítsa be az adott időtartamnál régebbi fájlok automatikus törlését.
Restore (Visszaállítás)
Válassza ki a visszaállítani kívánt lehetőségeket.

Használati utasítás
Magyar
145
Import/Export
Exportálja vagy importálja a rendszerbeállításokat.

Használati utasítás
Magyar
146
Digital (Digitális)
Opciók: Digital channels, Channel status és Channel Type.
Digitális csatornák
Adjon hozzá kamerát egy adott csatornához. Kattintson a Hozzáadás gombra,
majd a Keresés gombra, hogy megtalálja az NVR-rel ugyanabba a hálózatba
(ugyanazon az útválasztón) csatlakoztatott összes kamerát.

Használati utasítás
Magyar
147
Channel status (Csatorna állapota)
Megjeleníti mind a 9 csatorna állapotát (csatlakoztatva, nem csatlakozva vagy
konfigurálatlanul).
Channel type (Csatorna típusa)
Megjeleníti a kamerák maximális számát és a rendszerhez csatlakoztatható
kamerák felbontását. A PNI IPMAX POE 3 NVR maximum 9 IP kamerát
támogat, maximális felbontása 4K (8MP).

Használati utasítás
Magyar
148
Log (Napló)
Megjeleníti a rendszerben végrehajtott műveletek előzményeit.
Változat
Displays useful information about firmware and QR code with the system
serial number (useful for adding it to the mobile application) and QR code for
downloading the mobile application.

Használati utasítás
Magyar
149
Egyéb menüopciók
Kattintson a jobb gombbal a
képernyőn a további lehetőségek
megjelenítéséhez:
Channel Set, Record Mode,
Playback, Face detection, IPC
parameters, Color settings, Split
menu, PTZ Control, Output adjust,
NetDetect, Logout.
Channel set (Csatorna beállítása)
Az interfész lehetővé teszi a rendszerhez hozzáadott kamerák hozzáadását és
kezelését.
Videokamerák hozzáadása
1. Válassza ki az NVR és a kamerák közötti kommunikációs protokollt.
Opciók: NETIP, ONVIF, Full Netcom.
2. Keresés. Nyomja meg a Keresés gombot az NVR-rel azonos útválasztóhoz
(ugyanahhoz a hálózathoz) csatlakoztatott kamerák kereséséhez.
3. Add hozzá. A megjelenített kamerák listájából válassza ki a kívánt
kamerákat, és kattintson a Hozzáadás gombra, hogy felvegye őket a
rendszerbe.
4. Hálózat. Konfigurálja a kamerák hálózati paramétereit (IP-cím, átjáró stb.)
5. Gyors beállítás. A kamerák gyors hozzáadása és konfigurálása.
6. IP tömeges módosítása. Gyors IP-váltás több kamerára.
Csatornák interfész
1. Törlés. Törölje a kamerát a kiválasztott csatornáról. A futtatáshoz kattintson
az Alkalmaz gombra.
2. Tiszta. Törölje a kiválasztott csatorna adatait. A futtatáshoz kattintson az
Alkalmaz gombra.
3. Kódolás. Megjeleníti a csatlakoztatott kamerák műszaki paramétereit
(felbontás, képkockasebesség, videotömörítés, minőség stb.).

Használati utasítás
Magyar
150
4. Szerkessze az eszközöket. Változtassa meg a kiválasztott csatorna IP-címét
és portját.
5. Tömeges frissítés. Firmware frissítés a kiválasztott kamerákhoz.
6. Hálózati észlelés. Felhő hálózati és szerver tesztelés és diagnosztika.
7. Csatorna címe. Nevezze át a kamerákat.
8. NVR hálózat. Konfigurálja az NVR hálózati paramétereket.
9. Közel alkalmazkodó. Letiltja a kiválasztott kamerák IP-adaptációs funkcióját .

Használati utasítás
Magyar
151
Record mode (Felvétel mód)
Állítsa be az egyes csatornák felvételi módját (manuális vagy programozott).
Playback (Lejátszás)
Parancsikon a felvételek keresési és lejátszási felületének eléréséhez.
Face detection (Arcfelismerés)
Az interfész csak az ezt a funkciót támogató kamerák számára érhető el.

Használati utasítás
Magyar
152
Color settings (Színbeállítások)
Állítsa be a színparamétereket (fényerő, kontraszt, telítettség stb.) A kamera
néző felületéhez.
Split menu
Válassza ki, hogyan jelenítse meg a kamerákat ugyanazon a képernyőn.
Output Adjust
Állítsa be a hangerőt és a képet.

Használati utasítás
Magyar
153
Net Detect
1. Local Net Detect. Kamera csatlakozás figyelése és diagnosztika.
s
2. Remote Net Detect. A hálózat és a Cloud szerver figyelése, diagnosztikája
és konfigurálása.

Használati utasítás
Magyar
154
3. Net trac Detect. Az NVR által a hálózatban végrehajtott adatforgalom
figyelése.
Logout
Jelentkezzen ki, állítsa le vagy indítsa újra a rendszert.

Manuale dell’utente
Italiano
155
Funzioni principali
• Registrazione multicanale simultanea in tempo reale, riproduzione e
configurazione da remoto
• Supporta fino a 9 canali con una risoluzione massima di 4K (8MP).
• Backup su memoria flash USB e HDD esterno.
• Supporta il rilevamento di volti e forme umane (a seconda della telecamera)
• Possibilità di collegare altoparlante esterno
Specifiche tecniche
NVR
Ingressi video 4 x RJ45 POE
Uscita video 1 x VGA / 1 x HDMI
Uscita audio 1 x 3.5mm
Numero di canali 9 x max. 4K (8MP)
Risoluzione di
riproduzione massimo 2K (2560 x 1440) su uscita HDMI
massimo 1080P (1920 x x1080) su uscita VGA
Ethernet 1 x RJ45 100/100Mbps
Compressione video H.265AI/H.265+
Compressione audio G.711A
Modalità di
registrazione Manuale, allarme, rilevamento del movimento,
programmato
USB 2 x USB2.0
Disco fisso 1 x HDD SATA (max. 8Tb)
ONVIF Si
Tensione di
alimentazione 48V / 2A
Dimensioni 255 x 220 x 43 mm mm
Temperatura di lavoro -26°C ~ +80°C
Manuale, allarme, rilevamento del movimento, programmato
Risoluzione 3MP (2304 x 1296)
Lente 3.6mm
GUIDATO 4 IR LEDs and floodlight

Manuale dell’utente
Italiano
156
Alimentazione
elettrica POE
Dimensioni 70 x 190 x 65 mm
Temperatura di lavoro -26°C ~ +80°C
Istruzioni per l’uso
Installazione dell’unità di memorizzazione
Prima del primo utilizzo, installare l’unità di memorizzazione. All’interno
dell’unità di registrazione è possibile installare un solo HDD SATA con una
capacità massima di 14 TB (l’HDD non è incluso nella confezione).
• Allentare le viti e aprire l’alloggiamento dell’NVR
• Collegare i cavi dati e fissare il disco rigido con le viti
• Richiudere l’alloggiamento dell’NVR
• Collegare il cavo di alimentazione e Internet all’NVR
Accendere il dispositivo
Collegare il cavo di alimentazione a una presa da 230V. L’NVR si avvierà. Il
LED indicatore si accenderà.
Se l’ora di inizio rientra nella pianificazione preimpostata per la registrazione, la
funzione di registrazione si avvierà automaticamente.
Appunti:
1. Verificare che la tensione di ingresso corrisponda alla tensione consigliata del
dispositivo. La tensione di alimentazione è 230V ± 10% / 50 Hz 2A.
2. Si consiglia di utilizzare un dispositivo UPS per proteggere il dispositivo dalle
fluttuazioni di tensione.
Spegnere il dispositivo
Esistono due modi per spegnere il dispositivo.
1. Accedere al menu principale (clic destro sullo schermo) e selezionare l’opzione
Logout - Shutdown
2. Spegnere l’alimentazione.
Avvertenze speciali:

Manuale dell’utente
Italiano
157
1. Riavviare dopo un’interruzione di corrente. Se il dispositivo viene chiuso in
modo anomalo, il sistema crea un backup e si riavvia da quello stato dopo il
ripristino dell’alimentazione.
2. Sostituire la batteria sulla scheda di sistema. Prima di sostituire la batteria,
è necessario eseguire il backup delle impostazioni di sistema (vedere il capitolo
Advanced-Import / Export) e disattivare l’alimentazione. L’ora e la data del
dispositivo devono essere reimpostate dopo la sostituzione della batteria. Si
consiglia di sostituire la batteria ogni anno.
Controllo remoto del dispositivo
L’NVR può essere controllato in locale o in remoto sia da smartphone che da
computer con sistema operativo Windows.
Sistema operativo Applicazione Scarica
Android, iOS XMEye
Android iOS
Windows General CMS
Il file di installazione può
essere scaricato dal CD
incluso nella confezione
o dalla sezione Download
nella pagina web del
prodotto (www.pni.it)
Autenticazione del sistema
Dopo aver acceso il dispositivo, accedere al sistema.
Per impostazione predefinita, l’utente amministratore è protetto da password
1234. Se la password viene inserita in modo errato per 5 volte di seguito,
l’account verrà bloccato. Riavviando il dispositivo o dopo mezz’ora, l’account
verrà sbloccato automaticamente.
Nota: per la sicurezza del tuo sistema, cambia la password dopo il primo accesso.

Manuale dell’utente
Italiano
158
Guida rapida alla configurazione
Dopo aver avviato il dispositivo, verrà avviata la guida di installazione rapida.
Nota: si consiglia di configurare il sistema prima di installare l’NVR e le telecamere
nella posizione finale.
Pasi da seguire:
1. Impostare l’ora, la data e il fuso orario.
2. Presto sullo schermo apparirà una finestra popup che ti chiederà di cambiare
la password di autenticazione nel sistema. Seguire i passaggi sullo schermo
o premere il tasto ESC sull’NVR per uscire dall’interfaccia di impostazione
della password.
Nota: per la sicurezza del tuo sistema, ti consigliamo di cambiare la password dopo
il primo accesso al sistema.
3. Impostare manualmente i parametri di rete o attivare l’opzione DHCP per
il download automatico.
4. Scansiona il codice QR sullo schermo per installare l’applicazione XMEye sul
tuo cellulare. Scansiona il codice QR con il numero di serie per aggiungere
il sistema all’applicazione.
5. Imposta le opzioni di visualizzazione e la risoluzione del monitor collegato
all’NVR. Risoluzione massima supportata 2560x1440 (2K).
Nota: prima di modificare la risoluzione, assicurati che il tuo monitor supporti
tale risoluzione. Se la risoluzione impostata è superiore alla risoluzione del tuo
monitor, non apparirà nulla sul monitor e non potrai accedere al menu. In tal caso,
tuttavia, collegare l’NVR a un monitor a risoluzione inferiore, accedere al menu e
modificare la risoluzione.
6. Premere il tasto OK per completare la configurazione di base del sistema.
7. Fare clic con il tasto destro sullo schermo e accedere all’opzione NetDetect.
Fare clic su Diagnostica per testare la configurazione di rete.
Nota: per rendere eettive le impostazioni, riavviare il sistema. Fare clic con il tasto
destro sullo schermo - Logout - Reboot.

Manuale dell’utente
Italiano
159
Il menu
Nell’interfaccia di anteprima
principale, fare clic con il pulsante
destro del mouse per accedere al
menu.
Main Menu (Il emnu principale)
Opzioni: Playback, Record Conf, Network, Date Time.

Manuale dell’utente
Italiano
160
Playback (Riproduzione)
Il sistema ore numerosi filtri e opzioni per identificare il filmino desiderato. È
possibile eettuare la ricerca per numero di canale, data e intervallo di tempo
o per tipo di file.
Record Conf. (Configurazione registrazione)
L’interfaccia consente di eettuare le seguenti impostazioni: la lunghezza di
un file di registrazione, la modalità di registrazione (programmata o manuale),
il periodo (giorno e intervallo di tempo) e il tipo di registrazione (normale,

Manuale dell’utente
Italiano
161
rilevamento del movimento e allarme).
Network (Impostazioni di rete)
Impostare manualmente i parametri di rete (indirizzo IP, gateway, DNS, porta,
ecc.) o selezionare l’opzione DHCP per il recupero automatico dei parametri.
Nota: per rendere eettive le impostazioni, riavviare il sistema. Fare clic con il tasto
destro sullo schermo - Logout - Reboot.
Date time (Data e ora)
Imposta il fuso orario, la data, l’ora e il formato.

Manuale dell’utente
Italiano
162
System (Sistema)
Opzioni: General, Encode, Backup, Snapshot Config., Display, Account.
General (Generale)
L’interfaccia consentirà le seguenti impostazioni: la lingua di visualizzazione
del menu, il comportamento in caso di disco rigido pieno (sovrascrivere
o interrompere la registrazione), la durata della sessione e l’attivazione/
disattivazione della guida di configurazione rapida all’avvio del sistema.

Manuale dell’utente
Italiano
163
Encode (Decodifica)
Visualizza i parametri tecnici delle telecamere collegate (risoluzione, frame
rate, compressione video, qualità, ecc.).
Backup (Copia di sicurezza)
La memoria USB o l’HDD esterno deve essere installato nell’NVR prima di
avviare il backup. Premere il pulsante Rileva per identificare il dispositivo di
archiviazione, quindi il pulsante Backup per eseguire il backup.

Manuale dell’utente
Italiano
164
Snapshot Config (Configurazione salvaschermo)
Imposta per acquisire acquisizioni cicliche in un determinato momento e
inviarle via e-mail, FTP o memorizzarle sul disco rigido.
Display
Nella modalità di anteprima locale possono essere visualizzati: ora, nome del
canale, stato di registrazione, stato di allarme, trasparenza e risoluzione del
display.

Manuale dell’utente
Italiano
165
Nota: prima di modificare la risoluzione, assicurati che il tuo monitor supporti tale
risoluzione. Se la risoluzione impostata è superiore alla risoluzione del tuo monitor,
non apparirà nulla sul monitor e non potrai accedere al menu. In tal caso, tuttavia,
collegare l’NVR a un monitor a risoluzione inferiore, accedere al menu e modificare
la risoluzione.
Account (Conto)
L’interfaccia consente di gestire gli utenti che hanno accesso al sistema,
aggiungere utenti, modificare i diritti utente, modificare la password, creare
gruppi di utenti e impostare un livello di sicurezza dell’account registrando le
risposte a determinate domande predefinite. In caso di reimpostazione della
password, il codice di verifica può essere inviato nell’applicazione mobile o
all’indirizzo e-mail impostato. Per aumentare la sicurezza, è possibile impostare
un modello per l’accesso al sistema.

Manuale dell’utente
Italiano
166
Alarm (Allarme)
Opzioni: Intelligent Alert, Abnormality e Traditional alarm (Nessuna immagine,
nessun segnale video, ecc.). Le opzioni Ingresso allarme e Intelligente non sono
disponibili per questo modello.
Intelligent Alert (Allarme Intelligente)
Imposta il comportamento del sistema in caso di rilevamento del movimento:
registrazione e/o notifica nell’applicazione. Imposta anche il livello di sensibilità

Manuale dell’utente
Italiano
167
al movimento e l’area di azione.
Abnormality (Situazione anomala)
Imposta il comportamento del sistema in caso di: errore del dispositivo di
archiviazione, mancanza di spazio sul dispositivo di archiviazione, mancanza
di connessione Internet o conflitto IP. In tali situazioni è possibile impostare
l’invio di una notifica nell’applicazione o un’e-mail.
Traditional alarm (Allarme tradizionale)
Imposta il comportamento del sistema in caso di immagine mancante o segnale

Manuale dell’utente
Italiano
168
video mancante. In tali situazioni è possibile impostare l’invio di una notifica
nell’applicazione o un’e-mail, avviare la registrazione, eettuare acquisizioni o
salvare la registrazione dell’allarme su un server FTP.
Advanced (Avanzzato)
Opzioni: HDD info, Upgrade, AutoMaintain, Restore, Import / Export, Digital,
LOG, BPS e Version.

Manuale dell’utente
Italiano
169
HDD info (Informazioni sul HDD)
Imposta il funzionamento del disco rigido (sola lettura o lettura-scrittura).
Nota: per salvare le registrazioni sul disco rigido, è necessario impostare la modalità
di lettura/scrittura.
Upgrade (Aggiornamento)
Inserisci una chiavetta USB nell’NVR che dovrebbe contenere il file di
aggiornamento nella cartella principale. Selezionare l’unità di archiviazione e il
file dal menu NVR e fare clic sul pulsante Aggiorna.

Manuale dell’utente
Italiano
170
AutoMaintain (Mantenimento automatico)
Imposta il riavvio del sistema in un determinato giorno e ora o imposta
l’eliminazione automatica dei file più vecchi di un determinato periodo.
Restore (Repristino)
Seleziona le opzioni che desideri ripristinare.
Import/Export (Importa/Esporta)
Esporta o importa le impostazioni di sistema.

Manuale dell’utente
Italiano
171
Digital (Digitale)
Opzioni: Digital channels, Channel status e Channel Type.
Digital channels (Canali digitali)
Aggiungi una telecamera su un canale specifico. Fare clic sul pulsante Aggiungi,
quindi su Cerca per trovare tutte le telecamere collegate alla stessa rete (stesso
router) con l’NVR.

Manuale dell’utente
Italiano
172
Channel status (Stato dei canali)
Visualizza lo stato (connesso, non connesso o non configurato) per tutti i 9
canali.
Channel type (Tipo canale)
Visualizza il numero massimo di telecamere e la risoluzione delle telecamere
collegabili al sistema. L’NVR PNI IPMAX POE 3 supporta un massimo di 9
telecamere IP con una risoluzione massima di 4K (8MP).

Manuale dell’utente
Italiano
173
Log (Storico)
Visualizza la cronologia delle azioni eseguite nel sistema.
Version (Versione)
Visualizza informazioni utili su firmware e codice QR con il numero di serie
del sistema (utile per aggiungerlo all’applicazione mobile) e codice QR per
scaricare l’applicazione mobile.

Manuale dell’utente
Italiano
174
Other menu options (Opzioni aggiuntive)
Fare clic con il pulsante destro del
mouse sullo schermo per visualizzare
opzioni aggiuntive:
Channel Set, Record Mode,
Playback, Face detection, IPC
parameters, Color settings, Split
menu, PTZ Control, Output adjust,
NetDetect, Logout.
Channel set (Impostazione canali)
L’interfaccia permette di aggiungere e gestire le telecamere aggiunte al
sistema.
Interfacia aggiunta telecamere
1. Selezionare il protocollo di comunicazione tra l’NVR e le telecamere.
Opzioni: NETIP, ONVIF, Full Netcom.
2. Search. Premere il tasto Cerca per cercare le telecamere collegate allo
stesso router (stessa rete) dell’NVR.

Manuale dell’utente
Italiano
175
3. Add. Dall’elenco delle telecamere visualizzate, selezionare le telecamere
desiderate e fare clic su Aggiungi per aggiungerle al sistema.
4. Network. Configurare i parametri di rete per le telecamere (indirizzo IP,
gateway, ecc.)
5. Quick set. Aggiunta e configurazione rapida delle telecamere.
6. IP bulk modify. Cambio rapido di IP su più telecamere.
Interfaccia canali
1. Delete. Elimina la telecamera dal canale selezionato. Fare clic su Applica per
eseguire.
2. Clear. Elimina le informazioni sul canale selezionato. Fare clic su Applica per
eseguire.
3. Encode. Visualizza i parametri tecnici delle telecamere collegate (risoluzione,
frame rate, compressione video, qualità, ecc.).
4. Edit devices. Cambia IP e porta per il canale selezionato.
5. Bulk upgrade. Aggiornamento del firmware per le telecamere selezionate.
6. Network detect. Test e diagnostica di rete cloud e server.
7. Channel title. Rinomina le fotocamere.
8. NVR Network. Configura i parametri di rete dell’NVR.
9. Close adaptive. Disabilita la funzione di adattamento IP per le telecamere
selezionate.

Manuale dell’utente
Italiano
176
Record mode (Modalità di registrazione)
Impostare la modalità di registrazione (manuale o programmata) per ciascun
canale.

Manuale dell’utente
Italiano
177
Preview (Anteprima)
Scorciatoia per accedere all’interfaccia di ricerca e riproduzione delle
registrazioni.
Face detection (Rilevamento viso)
L’interfaccia è disponibile solo per le fotocamere che supportano questa
funzione.
Color settings (Impostazione colori)
Regola i parametri del colore (luminosità, contrasto, saturazione, ecc.) per
l’interfaccia di visualizzazione della telecamera.

Manuale dell’utente
Italiano
178
Split menu (Dividi visualizzazione)
Selezionare come visualizzare le telecamere sullo stesso schermo.
Output Adjust (Impostazioni immagine)
Imposta il volume e l’immagine.
Net Detect
1. Local Net Detect. Monitoraggio e diagnostica della connessione della
telecamera.
2. Remote Net Detect. Monitoraggio, diagnostica e configurazione di rete e

Manuale dell’utente
Italiano
179
server Cloud.
3. Net trac Detect. Monitoraggio del traco dati eseguito da NVR in rete.

Gebruikershandleiding
Nederlands
180
Hoofdfuncties
• Gelijktijdige realtime meerkanaalsopname, afspelen op afstand en
configuratie
• Ondersteunt tot 9 kanalen met een maximale 4K (8MP)-resolutie.
• Back-up op USB-flashgeheugen en externe HDD.
• Ondersteunt gezichts- en menselijke vormdetectie (aankelijk van de
camera)
• Mogelijkheid om externe luidspreker aan te sluiten.
Technische specificaties
NVR
Video-ingangen 4 x RJ45 POE
Video uitgang 1 x VGA / 1 x HDMI
Audio uitgang 1 x 3.5mm
Aantal kanalen 9 x max. 4K (8MP)
Afspeelresolutie Maximaal 2K (2560 x 1440) op HDMI-uitgang
Maximaal 1080P (1920 x x1080) op VGA-uitgang
Ethernet 1 x RJ45 100/100Mbps
Video compressie H.265AI/H.265+
Audiocompressie G.711A
Opnamemodus: Handmatig, alarm, bewegingsdetectie,
geprogrammeerd
USB 2 x USB2.0
HDD 1 x HDD SATA (max. 8Tb)
ONVIF Ja
Voedingsspanning: 48V / 2A
Dimensies 255 x 220 x 43 mm mm
Werktemperatuur -26°C ~ +80°C
Beveiligingscamera
Oplossing 3MP (2304 x 1296)
Lens 3.6mm
LED 4 IR LEDs and floodlight

Gebruikershandleiding
Nederlands
181
Stroomvoorziening POE
Dimensies 70 x 190 x 65 mm
Werktemperatuur -26°C ~ +80°C
Gebruiksaanwijzing
De opslagruimte installeren
Installeer de opslagruimte voor het eerste gebruik. Er kan slechts één SATA
HDD met een maximale capaciteit van 14TB in de opname-eenheid worden
geïnstalleerd (HDD is niet inbegrepen in het pakket).
• Draai de schroeven los en open de NVR-behuizing
• Sluit de datakabels aan en zet de harde schijf vast met de schroeven
• Sluit de NVR-behuizing terug
• Sluit de stroom- en internetkabel aan op de NVR
Zet het apparaat aan
Steek de stekker van het netsnoer in een 230V stopcontact. De NVR wordt
gestart. De indicatie-LED gaat branden. Standaard worden 9 kanalen op het
scherm weergegeven.
Als de starttijd binnen het vooraf ingestelde opnameschema valt, wordt de
opnamefunctie automatisch gestart.
Opmerkingen:
1. Controleer of de ingangsspanning overeenkomt met de aanbevolen spanning
van het apparaat. De voedingsspanning is 230V ± 10% / 50 Hz 2A.
2. We raden aan om een UPS-apparaat te gebruiken om het apparaat te
beschermen tegen spanningsschommelingen.
Schakel het apparaat uit
Er zijn twee manieren om het apparaat uit te schakelen.
1. Ga naar het hoofdmenu (klik met de rechtermuisknop op het scherm) en
selecteer de optie Afmelden - Afsluiten
2. Schakel de voeding uit.

Gebruikershandleiding
Nederlands
182
Speciale waarschuwingen:
1. Herstart na stroomuitval. Als het apparaat abnormaal wordt gesloten, maakt
het een back-up en start het opnieuw vanaf die status nadat de stroom is
hersteld.
2. Plaats de batterij terug op het moederbord. Voordat u de batterij vervangt,
moet u een back-up van uw systeeminstellingen maken (zie hoofdstuk
Geavanceerd importeren / exporteren) en de stroomtoevoer uitschakelen. De
tijd en datum van het apparaat moeten opnieuw worden ingesteld nadat de
batterij is vervangen. We raden aan om de batterij elk jaar te vervangen.
Afstandsbediening van het apparaat
De NVR kan lokaal of op afstand worden bediend vanaf zowel smartphones als
computers met Windows-besturingssysteem.
Besturingssysteem Sollicitatie Downloaden
Android, iOS XMEye
Android iOS
Windows General CMS
Het installatiebestand
kan worden
gedownload vanaf de
cd die is meegeleverd
in het pakket of via de
downloadsectie op de
productwebpagina (www.
MyPNI.nl)
Systeemverificatie
Nadat u het apparaat hebt ingeschakeld, logt u in op het systeem.
Standaard is de admin-gebruiker beveiligd met een wachtwoord door 1234.
Als het wachtwoord 5 keer achter elkaar verkeerd wordt ingevoerd, wordt het

Gebruikershandleiding
Nederlands
183
account geblokkeerd. Door het apparaat opnieuw op te starten of na een half
uur wordt het account automatisch ontgrendeld.
Opmerking: Voor de veiligheid van uw systeem dient u het wachtwoord na de
eerste keer inloggen te wijzigen.
Snelle installatiegids
Nadat het apparaat is gestart, wordt de beknopte installatiehandleiding gestart.
Opmerking: we raden aan het systeem te configureren voordat u de NVR en
camera’s op de uiteindelijke locatie installeert.
Te volgen stappen:
1. Stel de tijd, datum en tijdzone in.
2. Binnenkort verschijnt er een pop-upvenster op het scherm waarin u wordt
gevraagd het authenticatiewachtwoord in het systeem te wijzigen. Volg
de stappen op het scherm of druk op de ESC-toets op de NVR om de
interface voor het instellen van het wachtwoord te verlaten.
Opmerking: voor de veiligheid van uw systeem raden we aan het wachtwoord te
wijzigen na de eerste keer inloggen in het systeem.
3. Stel de netwerkparameters handmatig in of activeer de DHCP-optie voor
automatisch downloaden.
4. Scan de QR-code op het scherm om de XMEye-applicatie op uw mobiele
telefoon te installeren. Scan de QR-code met het serienummer om het
systeem aan de applicatie toe te voegen.
5. Stel de weergaveopties en resolutie in van de monitor die is aangesloten op
de NVR. Maximaal ondersteunde resolutie 2560x1440 (2K).
Opmerking: Voordat u de resolutie wijzigt, moet u ervoor zorgen dat uw monitor
die resolutie ondersteunt. Als de ingestelde resolutie hoger is dan de resolutie van
uw monitor, verschijnt er niets op de monitor en kunt u het menu niet openen. Als
dit echter gebeurt, sluit u de NVR aan op een monitor met een lagere resolutie,
opent u het menu en wijzigt u de resolutie.
6. Druk op de OK-toets om de basissysteemconfiguratie te voltooien.
7. Klik met de rechtermuisknop op het scherm en open de NetDetect-optie.
Klik op Diagnose om de netwerkconfiguratie te testen.
Opmerking: Start het systeem opnieuw op om de instellingen van kracht te laten
worden. Klik met de rechtermuisknop op het scherm - Logout - Reboot.

Gebruikershandleiding
Nederlands
184
Het menu
Klik in de hoofdvoorbeeldinterface
met de rechtermuisknop om het
menu te openen.
Main Menu (Hoofdmenu)
Opties: Playback, Record Conf, Network, Date Time.

Gebruikershandleiding
Nederlands
185
Playback (Afspelen)
Het systeem biedt tal van filters en mogelijkheden om het gewenste record te
identificeren. U kunt zoeken op kanaalnummer, datum en tijdsinterval of op
bestandstype.
Record Conf. (Opnameconfiguratie)
Via de interface kunt u de volgende instellingen maken: de lengte van een
opnamebestand, de opnamemodus (geprogrammeerd of handmatig), de
periode (dag en tijdsinterval) en het opnametype (normaal, bewegingsdetectie

Gebruikershandleiding
Nederlands
186
en alarm).
Network (Netwerk)
Stel handmatig de netwerkparameters in (IP-adres, gateway, DNS, poort, enz.)
of vink de DHCP-optie aan voor het automatisch ophalen van parameters.
Opmerking: Start het systeem opnieuw op om de instellingen van kracht te laten
worden. Klik met de rechtermuisknop op het scherm - Logout - Reboot.
Date time (Datum Tijd)
Stel de tijdzone, datum, tijd en formaat in.

Gebruikershandleiding
Nederlands
187
System (Systeem)
Opties: General, Encode, Backup, Snapshot Config., Display, Account.
General (Algemeen)
De interface maakt de volgende instellingen mogelijk: de menuweergavetaal,
het gedrag bij een volle harde schijf (overschrijven of stoppen met opnemen),
de sessieduur en de snelle configuratiegids bij het opstarten van het systeem
in-/uitschakelen.

Gebruikershandleiding
Nederlands
188
Encode
Toont de technische parameters van de aangesloten camera’s (resolutie,
framerate, videocompressie, kwaliteit, enz.).
Backup
Het USB-geheugen of de externe HDD moet in de NVR zijn geïnstalleerd
voordat de back-up wordt gestart. Druk op de knop Detecteren om het
opslagapparaat te identificeren en vervolgens op de knop Back-up om de back-

Gebruikershandleiding
Nederlands
189
up uit te voeren.
Snapshot Config (Momentopnameconfiguratie)
Stel in om op een bepaald tijdstip cyclische opnamen te maken en deze per
e-mail, FTP te verzenden of op uw harde schijf op te slaan.
Display
In de lokale voorbeeldmodus kunnen worden weergegeven: tijd, kanaalnaam,
opnamestatus, alarmstatus, transparantie en schermresolutie.

Gebruikershandleiding
Nederlands
190
Opmerking: Voordat u de resolutie wijzigt, moet u ervoor zorgen dat uw monitor die
resolutie ondersteunt. Als de ingestelde resolutie hoger is dan de resolutie van uw
monitor, verschijnt er niets op de monitor en kunt u het menu niet openen. Als dit
echter gebeurt, sluit u de NVR aan op een monitor met een lagere resolutie, opent
u het menu en wijzigt u de resolutie.
Account (Rekening)
Met de interface kunnen gebruikers die toegang hebben tot het systeem
beheren, gebruikers toevoegen, gebruikersrechten wijzigen, het wachtwoord
wijzigen, gebruikersgroepen maken en een accountbeveiligingsniveau instellen
door antwoorden op bepaalde vooraf gedefinieerde vragen te registreren. In
geval van wachtwoord reset kan de verificatiecode worden verzonden in de
mobiele applicatie of op het ingestelde e-mailadres. Om de beveiliging te
vergroten, kunt u een patroon instellen voor toegang tot het systeem.

Gebruikershandleiding
Nederlands
191
Alarm (Alarm)
Opties: Intelligent Alert, Abnormality en Traditional alarm (Geen beeld, Geen
videosignaal, enz.). Alarmingang en intelligente opties zijn niet beschikbaar
voor dit model.
Intelligent Alert (Intelligente waarschuwing)
Stel het systeemgedrag in bij bewegingsdetectie: registratie en/of melding in de
applicatie. Stel ook het gevoeligheidsniveau voor beweging en het actiegebied

Gebruikershandleiding
Nederlands
192
in.
Abnormality (Afwijking)
Stel het systeemgedrag in in geval van: opslagapparaatfout, gebrek aan ruimte
op het opslagapparaat, geen internetverbinding of IP-conflict. In dergelijke
situaties kunt u instellen om een melding in de applicatie of een e-mail te
sturen.
Traditional alarm (Traditioneel alarm)
Stel het systeemgedrag in bij ontbrekend beeld of ontbrekend videosignaal.
In dergelijke situaties kunt u instellen om een melding in de applicatie of een

Gebruikershandleiding
Nederlands
193
e-mail te sturen, opname te starten, opnames te maken of de alarmopname op
een FTP-server op te slaan.
Advanced (Geavanceerd)
Opties: HDD info, Upgrade, AutoMaintain, Restore, Import / Export, Digital,
LOG, BPS en Version.
HDD info
Stel in hoe de harde schijf werkt (alleen-lezen of lezen-schrijven).
Opmerking: om opnames op de harde schijf op te slaan, moet deze in de lees-/

Gebruikershandleiding
Nederlands
194
schrijfmodus staan.
Upgrade
Plaats een USB-stick in de NVR die het updatebestand in de hoofdmap moet
bevatten. Selecteer het opslagstation en het bestand in het NVR-menu en klik
op de knop Upgrade.
AutoMaintain (Automatisch onderhouden)
Stel het systeem in om op een bepaalde dag en tijd opnieuw op te starten of

Gebruikershandleiding
Nederlands
195
stel het automatisch verwijderen van bestanden die ouder zijn dan een bepaalde
periode in.
Restore (Resetten)
Selecteer de opties die u wilt resetten.
Import/Export (Importeren/Exporteren)
Systeeminstellingen exporteren of importeren.

Gebruikershandleiding
Nederlands
196
Digital (Digitaal)
Opties: Digital channels, Channel status en Channel Type.
Digital channels (Digitale kanalen)
Voeg een camera toe aan een specifiek kanaal. Klik op de knop Toevoegen
en vervolgens op Zoeken om alle camera’s te vinden die op hetzelfde netwerk
(dezelfde router) zijn aangesloten met de NVR.

Gebruikershandleiding
Nederlands
197
Channel status (Kanaalstatus)
Geeft de status weer (aangesloten, niet aangesloten of niet geconfigureerd)
voor alle 9 kanalen.
Channel type (Kanaaltype)
Toont het maximale aantal camera’s en de resolutie van de camera’s die op
het systeem kunnen worden aangesloten. De PNI IPMAX POE 3 NVR
ondersteunt maximaal 9 IP-camera’s met een maximale resolutie van 4K

Gebruikershandleiding
Nederlands
198
(8MP).
Log (Logboek)
Geeft de geschiedenis weer van acties die in het systeem zijn uitgevoerd.
Version (Versie)
Geeft nuttige informatie weer over firmware en QR-code met het serienummer
van het systeem (handig om het toe te voegen aan de mobiele applicatie) en
QR-code om de mobiele applicatie te downloaden.

Gebruikershandleiding
Nederlands
199
Andere menu-opties
Klik met de rechtermuisknop op
het scherm om extra opties weer te
geven:
Channel Set, Record Mode,
Playback, Face detection, IPC
parameters, Color settings, Split
menu, PTZ Control, Output adjust,
NetDetect, Logout.
Channel set (Kanaal ingesteld)
Met de interface kunnen de camera’s die aan het systeem zijn toegevoegd,
worden toegevoegd en beheerd.
Camera-interface toevoegen
1. Selecteer het communicatieprotocol tussen de NVR en de camera’s. Opties:
NETIP, ONVIF, Full Netcom.
2. Search. Druk op de zoektoets om te zoeken naar camera’s die zijn aangesloten

Gebruikershandleiding
Nederlands
200
op dezelfde router (hetzelfde netwerk) als de NVR.
3. Add. Selecteer in de lijst met weergegeven camera’s de gewenste camera’s
en klik op Toevoegen om ze aan het systeem toe te voegen.
4. Network. Configureer netwerkparameters voor camera’s (IP-adres,
gateway, enz.)
5. Quick set. Snelle toevoeging en configuratie van camera’s.
6. IP Bulk Modify. Snelle verandering van IP naar meerdere camera’s.
Kanalen interface
1. Delete. Verwijder de camera van het geselecteerde kanaal. Klik op Toepassen
om te starten.
2. Clear. Verwijder de informatie over het geselecteerde kanaal. Klik op
Toepassen om te starten.
3. Encode. Toont de technische parameters van de aangesloten camera’s
(resolutie, framerate, videocompressie, kwaliteit, enz.).
4. Edit devices. Wijzig IP en poort voor het geselecteerde kanaal.
5. Bulk upgrade. Firmware-update voor geselecteerde camera’s.
6. Network detect. Testen en diagnostiek van cloudnetwerken en servers.
7. Channel title. Camera’s hernoemen.
8. NVR Network. NVR-netwerkparameters configureren.
9. Close adaptive. Schakelt de IP-aanpassingsfunctie uit voor de geselecteerde
camera’s.

Gebruikershandleiding
Nederlands
201
Record mode (Opnamemodus)
Stel de opnamemodus in (handmatig of geprogrammeerd) voor elk kanaal.

Gebruikershandleiding
Nederlands
202
Preview (Voorbeeld)
Snelkoppeling voor toegang tot de zoek- en afspeelinterface van opnamen.
Face detection (Gezichtsherkenning)
De interface is alleen beschikbaar voor camera’s die deze functie ondersteunen.
Color settings (Kleurinstellingen)
Pas de kleurparameters (helderheid, contrast, verzadiging, enz.) aan voor de
cameraweergave-interface.
Split menu (Gesplitste weergave)

Gebruikershandleiding
Nederlands
203
Selecteer hoe de camera’s op hetzelfde scherm moeten worden weergegeven.
Output Adjust
Stel het volume en de aeelding in.
Net Detect
1. Local Net Detect. Bewaking en diagnose van cameraverbindingen.
s
2. Remote Net Detect. Monitoring, diagnose en configuratie van netwerk en
cloudserver.

Gebruikershandleiding
Nederlands
204
3. Net trac Detect. Monitoring van dataverkeer uitgevoerd door NVR in
het netwerk.

Instrukcja obsługi
Polskie
205
Główne funkcje
• Jednoczesne nagrywanie wielokanałowe w czasie rzeczywistym, zdalne
odtwarzanie i konfiguracja
• Obsługuje do 9 kanałów o maksymalnej rozdzielczości 4K (8MP).
• Kopia zapasowa na pamięci flash USB i zewnętrznym dysku twardym.
• Obsługuje wykrywanie twarzy i kształtu ludzkiego (w zależności od aparatu)
• Możliwość podłączenia zewnętrznego głośnika.
Specyfikacja techniczna
NVR
Wejścia wideo 4 x RJ45 POE
Wyjście wideo 1 x VGA / 1 x HDMI
Wyjście audio 1 x 3.5mm
Liczba kanałów 9 x max. 4K (8MP)
Rozdzielczość
odtwarzania Maks. 2K (2560 x 1440) na wyjściu HDMI
Maks. 1080P (1920 x 1080) na wyjściu VGA
Ethernet 1 x RJ45 100/100Mbps
Kompresja wideo H.265AI/H.265+
Kompresja dźwięku G.711A
Tryb nagrywania Ręczny, alarm, detekcja ruchu, zaprogramowany
USB 2 x USB2.0
dysk twardy 1 x HDD SATA (max. 8Tb)
ONVIF YTakes
Napięcie 48V / 2A
Wymiary 255 x 220 x 43 mm mm
Temperatura pracy -26°C ~ +80°C
Kamera
Rezolucja 3MP (2304 x 1296)
Obiektyw 3.6mm
PROWADZONY 4 diody IR i reflektor
Zasilacz POE

Instrukcja obsługi
Polskie
206
Wymiary 70 x 190 x 65 mm
Temperatura pracy -26°C ~ +80°C
Instrukcja użycia
Instalowanie jednostki do przechowywania
Przed pierwszym użyciem zainstaluj schowek. Wewnątrz jednostki nagrywającej
można zainstalować tylko jeden dysk twardy SATA o maksymalnej pojemności
14 TB (dysk twardy nie wchodzi w skład zestawu).
• Poluzuj śruby i otwórz obudowę NVR
• Podłącz kable danych i zabezpiecz dysk twardy śrubami
• Zamknij obudowę NVR
• Podłącz kabel zasilający i internetowy do NVR
Włącz urządzenie
Podłącz przewód zasilający do gniazdka 230V. NVR zostanie uruchomiony.
Zaświeci się wskaźnik LED. Domyślnie na ekranie będzie wyświetlanych 9
kanałów.
Jeśli czas rozpoczęcia mieści się w ustalonym harmonogramie nagrywania,
funkcja nagrywania rozpocznie się automatycznie.
Uwagi:
1. Sprawdź, czy napięcie wejściowe odpowiada zalecanemu napięciu urządzenia.
Napięcie zasilania wynosi 230V ± 10% / 50 Hz 2A.
2. Sugerujemy użycie zasilacza UPS w celu ochrony urządzenia przed wahaniami
napięcia.
Wyłącz urządzenie
Urządzenie można wyłączyć na dwa sposoby.
1. Wejdź do menu głównego (kliknij prawym przyciskiem myszy na ekranie) i
wybierz opcję Wyloguj - Zamknij
2. Wyłącz zasilanie.
Specjalne ostrzeżenia:
1. Uruchom ponownie po awarii zasilania. Jeśli urządzenie zostanie nieprawidłowo

Instrukcja obsługi
Polskie
207
zamknięte, tworzy kopię zapasową i uruchamia się ponownie od tego stanu po
przywróceniu zasilania.
2. Wymień baterię na płycie systemowej. Przed wymianą baterii należy wykonać
kopię zapasową ustawień systemowych (patrz rozdział Zaawansowane-Import
/ Eksport) i wyłączyć zasilanie. Po wymianie baterii należy ponownie ustawić
godzinę i datę urządzenia. Zalecamy wymianę baterii co roku.
Zdalne sterowanie urządzeniem
NVR może być sterowany lokalnie lub zdalnie zarówno ze smartfonów, jak i
komputerów z systemem operacyjnym Windows.
System operacyjny Podanie Pobierać
Android, iOS XMEye
Android iOS
Windows General CMS
Plik instalacyjny można
pobrać z płyty CD
dołączonej do pakietu
lub z sekcji Download na
stronie produktu (www.
pni.pl)
Uwierzytelnianie systemu
Po włączeniu urządzenia zaloguj się do systemu.
Domyślnie administrator jest chroniony hasłem 1234. Jeśli hasło zostanie
wprowadzone niepoprawnie 5 razy z rzędu, konto zostanie zablokowane.
Po ponownym uruchomieniu urządzenia lub po pół godzinie konto zostanie
odblokowane automatycznie.
Uwaga: Dla bezpieczeństwa systemu prosimy o zmianę hasła po pierwszym
logowaniu.

Instrukcja obsługi
Polskie
208
Przewodnik szybkiej konfiguracji
Po uruchomieniu urządzenia uruchomi się przewodnik szybkiej konfiguracji.
Uwaga: Zalecamy skonfigurowanie systemu przed zainstalowaniem NVR i kamer w
docelowej lokalizacji.
Kroki do naśladowania:
1. Ustaw godzinę, datę i strefę czasową.
2. Wkrótce na ekranie pojawi się wyskakujące okienko z prośbą o zmianę
hasła uwierzytelniającego w systemie. Postępuj zgodnie z instrukcjami
wyświetlanymi na ekranie lub naciśnij klawisz ESC na rejestratorze NVR,
aby wyjść z interfejsu ustawiania hasła.
Uwaga: Dla bezpieczeństwa Twojego systemu zalecamy zmianę hasła po pierwszym
logowaniu w systemie.
3. Ustaw parametry sieciowe ręcznie lub aktywuj opcję DHCP w celu
automatycznego pobierania.
4. Zeskanuj kod QR na ekranie, aby zainstalować aplikację XMEye na telefonie
komórkowym. Zeskanuj kod QR z numerem seryjnym, aby dodać system
do aplikacji.
5. Ustaw opcje wyświetlania i rozdzielczość monitora podłączonego do
rejestratora NVR. Maksymalna obsługiwana rozdzielczość 2560x1440
(2K).
Uwaga: Przed zmianą rozdzielczości upewnij się, że monitor obsługuje tę rozdzielczość.
Jeśli ustawiona rozdzielczość jest wyższa niż rozdzielczość monitora, nic nie pojawi
się na monitorze i nie będzie można uzyskać dostępu do menu. Jeśli jednak tak się
stanie, podłącz NVR do monitora o niższej rozdzielczości, wejdź do menu i zmień
rozdzielczość.
6. Naciśnij klawisz OK, aby zakończyć podstawową konfigurację systemu.
7. Kliknij prawym przyciskiem myszy na ekranie i uzyskaj dostęp do opcji
NetDetect. Kliknij Diagnozuj, aby przetestować konfigurację sieci.
Uwaga: aby ustawienia zaczęły obowiązywać, uruchom ponownie system. Kliknij
prawym przyciskiem myszy na ekranie - Logout - Reboot.

Instrukcja obsługi
Polskie
209
Menu
W głównym interfejsie podglądu
kliknij prawym przyciskiem myszy,
aby uzyskać dostęp do menu.
Main Menu (Menu główne)
Opcje: Playback, Record Conf, Network, Date Time.

Instrukcja obsługi
Polskie
210
Playback (Odtwarzanie nagranego dźwięku)
System oferuje liczne filtry i opcje identyfikacji żądanego rekordu. Możesz
wyszukiwać według numeru kanału, daty i przedziału czasowego lub według
typu pliku.
Record Conf. (Konf. rekordów)
Interfejs umożliwia dokonanie następujących ustawień: długość pliku nagrania,
tryb nagrywania (programowany lub ręczny), okres (dzień i interwał czasowy)
oraz typ nagrywania (normalny, detekcja ruchu i alarm).

Instrukcja obsługi
Polskie
211
Network (Sieć)
Ręcznie ustaw parametry sieciowe (adres IP, brama, DNS, port itp.) lub zaznacz
opcję DHCP w celu automatycznego pobierania parametrów.
Uwaga: aby ustawienia zaczęły obowiązywać, uruchom ponownie system. Kliknij
prawym przyciskiem myszy na ekranie - Logout - Reboot.
Date time (Data i godzina)
Ustaw strefę czasową, datę, godzinę i format.

Instrukcja obsługi
Polskie
212
System
Opcje: General, Encode, Backup, Snapshot Config., Display, Account.
General (Ogólny)
Interfejs umożliwi następujące ustawienia: język wyświetlania menu, zachowanie
w przypadku zapełnienia dysku twardego (nadpisanie lub zatrzymanie
nagrywania), czas trwania sesji oraz włączenie/wyłączenie przewodnika szybkiej
konfiguracji przy starcie systemu.

Instrukcja obsługi
Polskie
213
Encode
Wyświetla parametry techniczne podłączonych kamer (rozdzielczość, liczba
klatek na sekundę, kompresja wideo, jakość itp.).
Backup
Pamięć USB lub zewnętrzny dysk twardy musi być zainstalowany w NVR
przed rozpoczęciem tworzenia kopii zapasowej. Naciśnij przycisk Wykryj, aby
zidentyfikować urządzenie pamięci, a następnie przycisk Kopia zapasowa, aby

Instrukcja obsługi
Polskie
214
wykonać kopię zapasową.
Snapshot Config (Konfiguracja zrzutu)
Ustaw, aby robić cykliczne przechwytywanie o określonej godzinie i wysyłać je
e-mailem, FTP lub przechowywać na dysku twardym.
Display (Wyświetlacz)
W trybie podglądu lokalnego mogą być wyświetlane: czas, nazwa kanału, stan
nagrywania, stan alarmów, przezroczystość i rozdzielczość wyświetlania.
Uwaga: przed zmianą rozdzielczości upewnij się, że monitor obsługuje tę rozdzielczość.

Instrukcja obsługi
Polskie
215
Jeśli ustawiona rozdzielczość jest wyższa niż rozdzielczość monitora, nic nie pojawi
się na monitorze i nie będzie można uzyskać dostępu do menu. Jeśli jednak tak się
stanie, podłącz NVR do monitora o niższej rozdzielczości, wejdź do menu i zmień
rozdzielczość.
Account (Konto)
Interfejs umożliwia zarządzanie użytkownikami mającymi dostęp do systemu,
dodawanie użytkowników, zmianę uprawnień użytkowników, zmianę hasła,
tworzenie grup użytkowników oraz ustawianie poziomu bezpieczeństwa konta
poprzez rejestrację odpowiedzi na określone predefiniowane pytania. W
przypadku zresetowania hasła kod weryfikacyjny można wysłać w aplikacji
mobilnej lub na podany adres e-mail. Aby zwiększyć bezpieczeństwo, możesz
ustawić wzór dostępu do systemu.

Instrukcja obsługi
Polskie
216
Alarm
Opcje: Intelligent Alert, Abnormality oraz Traditional alarm (Brak obrazu, brak
sygnału wideo itp.). Wejście alarmowe i opcje inteligentne nie są dostępne w
tym modelu.
Intelligent Alert (Inteligentny alert)
Ustaw zachowanie systemu w przypadku wykrycia ruchu: rejestracja i/lub
powiadomienie w aplikacji. Ustaw również poziom wrażliwości na ruch i obszar

Instrukcja obsługi
Polskie
217
działania.
Abnormality (Nieprawidłowość)
Ustaw zachowanie systemu w przypadku: błędu urządzenia pamięci masowej,
braku miejsca na urządzeniu pamięci masowej, braku połączenia internetowego
lub konfliktu IP. W takich sytuacjach możesz ustawić wysyłanie powiadomienia
w aplikacji lub e-mail.
Traditional alarm (Tradycyjny alarm)
Ustaw zachowanie systemu w przypadku braku obrazu lub braku sygnału wideo.
W takich sytuacjach można ustawić wysłanie powiadomienia w aplikacji lub

Instrukcja obsługi
Polskie
218
e-mail, rozpoczęcie nagrywania, wykonanie przechwytywania lub zapisanie
nagrania alarmowego na serwerze FTP.
Advanced (Zaawansowany)
Opcje: HDD info, Upgrade, AutoMaintain, Restore, Import / Export, Digital,
LOG, BPS oraz Version.
HDD info (Informacje o dysku twardym)
Ustaw sposób działania dysku twardego (tylko do odczytu lub do odczytu i
zapisu).

Instrukcja obsługi
Polskie
219
Uwaga: Aby zapisać nagrania na dysku twardym, należy go ustawić w trybie odczytu
/ zapisu.
Upgrade
Włóż pamięć USB do NVR, która powinna zawierać plik aktualizacji w folderze
głównym. Wybierz dysk i plik z menu NVR i kliknij przycisk Aktualizuj.
AutoMaintain (Autokonserwacja)
Ustaw system, aby uruchamiał się w określonym dniu i godzinie lub ustaw

Instrukcja obsługi
Polskie
220
automatyczne usuwanie plików starszych niż określony okres.
Restore (Resetowanie)
Wybierz opcje, które chcesz zresetować.
Import Eksport
Eksportuj lub importuj ustawienia systemowe.

Instrukcja obsługi
Polskie
221
Digital (Cyfrowy)
Opcje: Digital channels, Channel status oraz Channel Type.
Kanały cyfrowe
Dodaj kamerę na określonym kanale. Kliknij przycisk Dodaj, a następnie
Wyszukaj, aby znaleźć wszystkie kamery podłączone do tej samej sieci (ten sam

Instrukcja obsługi
Polskie
222
router) z rejestratorem NVR.
Stan kanału
Wyświetla stan (podłączony, niepodłączony lub nieskonfigurowany) dla
wszystkich 9 kanałów.
Channel type (Typ kanału)
Wyświetla maksymalną liczbę kamer i rozdzielczość kamer, które można
podłączyć do systemu. Rejestrator PNI IPMAX POE 3 NVR obsługuje

Instrukcja obsługi
Polskie
223
maksymalnie 9 kamer IP o maksymalnej rozdzielczości 4K (8MP).
Log (Dziennik)
Wyświetla historię akcji wykonywanych w systemie.
Version (Wersja)
Wyświetla przydatne informacje o oprogramowaniu i kodzie QR wraz z
numerem seryjnym systemu (przydatne do dodania go do aplikacji mobilnej)

Instrukcja obsługi
Polskie
224
oraz kodem QR do pobrania aplikacji mobilnej.
Inne opcje menu
Kliknij prawym przyciskiem myszy na
ekranie, aby wyświetlić dodatkowe
opcje:
Channel Set, Record Mode,
Playback, Face detection, IPC
parameters, Color settings, Split
menu, PTZ Control, Output adjust,
NetDetect, Logout.
Zestaw kanałów
Interfejs umożliwia dodawanie i zarządzanie kamerami dodanymi do systemu.
Add cameras Dodaj kamery
1. Wybierz protokół komunikacji między NVR a kamerami. Opcje: NETIP,
ONVIF, Full Netcom.

Instrukcja obsługi
Polskie
225
2. Search. Naciśnij klawisz wyszukiwania, aby wyszukać kamery podłączone do
tego samego routera (tej samej sieci), co NVR.
3. Add. Z listy wybierz wybierz system wybierz system i kliknij Dodaj, aby
dodać do systemu.
4. Network. Skonfiguruj parametry sieciowe dla kamer (adres IP, brama itp.)
5. Quick set.Szybkie dodawanie i konfiguracja kamer.
6. IP Bulk Modify. Szybka zmiana IP na wiele kamer.
Interfejs kanałów
1. Delete. Usuń kamerę z wybranego kanału. Kliknij Zastosuj, aby uruchomić.
2. Clear. Usuń informacje o wybranym kanale. Kliknij Zastosuj, aby uruchomić.
3. Encode. Wyświetla parametry techniczne podłączonych kamer (rozdzielczość,
liczba klatek na sekundę, kompresja wideo, jakość itp.).
4. Edit devices. Zmień IP i port dla wybranego kanału.
5. Bulk upgrade. Aktualizacja oprogramowania dla wybranych kamer.
6. Network detect. Testowanie i diagnostyka sieci i serwerów w chmurze.
7. Channel title. Zmień nazwy kamer.
8. NVR Network. Skonfiguruj parametry sieci NVR.
9. Close adaptive. Wyłącza funkcję adaptacji IP dla wybranych kamer.

Instrukcja obsługi
Polskie
226
Record mode (Tryb nagrywania)
Ustaw tryb nagrywania (ręczny lub programowany) dla każdego kanału.

Instrukcja obsługi
Polskie
227
Playback (Odtwarzanie nagranego dźwięku)
Skrót dostępu do interfejsu wyszukiwania i odtwarzania nagrań.
Face detection (Wykrywanie twarzy)
Interfejs jest dostępny tylko dla kamer obsługujących tę funkcję.
Color settings (Ustawienia kolorów)
Dostosuj parametry kolorów (jasność, kontrast, nasycenie itp.) dla interfejsu
podglądu kamery.

Instrukcja obsługi
Polskie
228
Split menu (Podzielony widok)
Select how to display the cameras on the same screen.
Output Adjust
Ustaw głośność i obraz.
Net Detect
1. Local Net Detect. Monitorowanie i diagnostyka połączenia kamery.
2. Remote Net Detect. Monitorowanie, diagnostyka i konfiguracja serwerów

Instrukcja obsługi
Polskie
229
sieciowych i Cloudr.
3. Net trac Detect. Monitorowanie ruchu danych realizowanego przez NVR
w sieci.

Manual de utilizare
Romana
230
Functii principale
• Inregistrare simultana in timp real pe mai multe canale, redare si configurare
de la distanta
• Suporta maxim 9 canale cu o rezolutie maxima 4K (8MP).
• Backup pe stick USB si HDD extern.
• Suporta detectie chip si forma umana (in functie de camera)
• Posibilitate conectare difuzor extern.
Specificatii tehnice
NVR
Intrari video 4 x RJ45 POE
Iesiri video 1 x VGA / 1 x HDMI
Iesire audio 1 x 3.5mm
Numar canale 9 x max. 4K (8MP)
Rezolutie de redare Maxim 2K (2560 x 1440) pe iesirea HDMI
Maxim 1080P (1920 x x1080) pe iesirea VGA
Ethernet 1 x RJ45 100/100Mbps
Compresie video H.265AI/H.265+
Compresie audio G.711A
Mod inregistrare Manual, alarma, detectie miscare, programat
USB 2 x USB2.0
HDD 1 x HDD SATA (maxim 8Tb)
ONVIF Da
Alimentare 48V / 2A
Dimensiuni 255 x 220 x 43 mm mm
Temperatura de lucru -26°C ~ +80°C
Camera
Rezolutie 3MP (2304 x 1296)
Lentila 3.6mm
LED-uri 4 LED-uri IR si floodlight
Alimentare POE

Manual de utilizare
Romana
231
Dimensiuni 70 x 190 x 65 mm
Temperatura de lucru -26°C ~ +80°C
Instructiuni de utilizare
Instalarea unitatii de stocare
Inainte de prima utilizare, va rugam sa instalati unitatea de stocare. In carcasa
unitatii de inregistrare poate fi instalat un singur HDD SATA cu o capacitate
maxima de 8TB (HDD-ul nu este inclus in pachet).
• Desfaceti suruburile si scoateti capacul NVR-ului
• Conectati cablurile de date si fixati hard disk-ul in suruburi
• Puneti capacul NVR-ului la loc
• Conectati la NVR cablul de alimentare si de internet
Pornirea dispozitivului
Introduceti cablul de alimentare intr-o priza 230V. NVR-ul va porni. LED-ul
indicator se va aprinde.
Daca ora de pornire se incadreaza in programul presetat pentru inregistrare,
atunci functia de inregistrare va porni automat.
Note.
1. Verificati daca tensiunea de intrare corespunde cu tensiunea recomandata a
dispozitivului. Tensiunea de alimentare este de 230V±10% / 50 Hz 2A.
2. Va sugeram sa folositi un dispozitiv UPS pentru a proteja dispozitivul de variatiile
de tensiune.
Oprirea dispozitivului
Sunt doua metode de oprire a dispozitivului.
1. Accesati meniul principal (click dreapta pe ecran) si selectati optiunea Logout
- Shutdown (Inchidere)
2. Opriti sursa de alimentare.
Atentionari speciale:
1. Repornirea dupa caderea tensiunii. Daca dispozitivul este inchis anormal,

Manual de utilizare
Romana
232
acesta creeaza o copie de siguranta si reporneste de la acel status dupa revenirea
alimentarii.
2. Inlocuirea bateriei de pe placa de baza. Inainte de inlocuirea bateriei,
trebuie sa salvati setarile sistemului (vezi capitolul Advanced-Import/Export)
si sa opriti sursa de alimentare. Ora dispozitivului trebuie reprogramata dupa
inlocuirea bateriei. Va recomandam sa inlocuiti bateria in fiecare an.
Controlul de la distanta al dispozitivului.
NVR-ul poate fi controlat local sau de la distanta atat de pe smartphone cat si
de pe computere cu sistem de operare Windows.
Sistem de operare Aplicatie Download
Android, iOS XMEye
Android iOS
Windows General CMS
Fisierul de instalare poate
fi descarcat de pe CD-
ul inclus in pachet sau
din sectiunea Download
de pe pagina web a
produsului (www.pni.ro)
Autentificarea in sistem
Dupa pornirea dispozitivului, autentificati-va in sistem.
Implicit, utilizatorul admin este protejat de parola 1234. Daca parola este
introdusa gresit de 5 ori la rand, contul va fi blocat. Prin repornirea dispozitivului
sau dupa o jumatate de ora, contul va fi deblocat automat.
Nota: Pentru securitatea sistemului Dvs. va rugam sa modificati parola dupa prima
autentificare.

Manual de utilizare
Romana
233
Ghid rapid de configurare
Dupa pornirea dispozitivului va porni ghidul de configurare rapida.
Nota: Recomandam configurarea sistemului inainte de instalarea NVR-ului si a
camerelor in locatia finala.
Pasii de urmat:
1. Setati ora, data si fusul orar.
2. In scurt timp, pe ecran va aparea un popup prin care vi se cere sa schimbati
parola de autentificare in sistem. Urmati pasii de pe ecran sau apasati tasta
ESC de pe NVR pentru a iesi din interfata de setare a parolei.
Nota: Pentru siguranta sistemului Dvs., recomandam schimbarea parolei dupa
prima autentificare in sistem.
3. Setati parametrii de retea manual sau activati optiunea DHCP pentru
preluarea automata a acestora.
4. Scanati codul QR de pe ecran pentru a instalata aplicatia XMEye in
telefonul Dvs. mobil. Scanati codul QR cu numarul de serie pentru
adaugarea sistemului in aplicatie.
5. Setati optiunile de afisare si rezolutia monitorului conectat la NVR.
Rezolutie maxima suportata 2560x1440(2K).
Nota: Inainte de a modifica rezolutia, asigurati-va ca monitorul Dvs. suporta
rezolutia respectiva. Daca rezolutia setata este mai mare decat rezolutia monitorului
Dvs., pe monitor nu va aparea nimic si nu veti mai putea accesa meniul. Daca se
intampla, totusi, acest lucru, conectati NVR-ul la un monitor cu o rezolutie mai
mare, accesati meniul si schimbati rezolutia.
6. Apasati tasta OK pentru a finaliza configurarea de baza a sistemului.
7. Faceti click dreapta pe ecran si accesati optiunea NetDetect. Faceti click
pe Diagnose pentru a testa configurarea retelei.
Nota: Pentru ca setarile sa aiba efect, restartati sistemul. Click dreapta pe ecran -
Logout - Reboot.

Manual de utilizare
Romana
234
Meniul
In interfata principala de previzualizare
faceti click dreapta cu mouse-ul
pentru a accesa meniul.
Main Menu (Meniul principal)
Optiuni: Playback (Redare), Record Conf (Configurare inregistrari), Network
(Retea), Date Time (Setare data si ora)

Manual de utilizare
Romana
235
Playback (Redare inregistrari)
Sistemul va ofera numeroase filtre si optiuni pentru identificarea inregistrarii
dorite. Puteti cauta dupa numarul canalului, data si intervalul orar sau dupa
tipul fisierului.
Record Conf. (Configurare inregistrari)
Interfata va permite urmatoarele setari: durata unui fisier de inregistrare,
modul de inregistrare (programat sau manual), a perioadei (zi si interval orar)
si tipul de inregistrare (inregistrare normala, la detectie miscare si la alarma).

Manual de utilizare
Romana
236
Network (Configurari retea)
Setati manual parametrii de retea (adresa IP, gateway, DNS, port etc.) sau
bifati optiunea DHCP pentru preluarea automata a parametrilor.
Nota: Pentru ca setarile sa aiba efect, restartati sistemul. Click dreapta pe ecran -
Logout - Reboot.
Date time (Setare data si ora)
Setati fusul orar, data, ora si formatul.

Manual de utilizare
Romana
237
System (Sistem)
Optiuni: General, Encode, Backup, Snapshot Config. (Configurare capturi
imagine), Display (Afisare), Account (Cont).
General
Interfata va permite urmatoarele setari: setarea limbii de afisare a meniului,
comportamentul in caz de hard disk plin (suprascriere sau oprire inregistrare),
durata unei sesiuni si activare/dezactivare ghid rapid de configurare la pornirea
sistemului.

Manual de utilizare
Romana
238
Encode
Afiseaza parametrii tehnici ai camerelor conectate (rezolutie, frame rate,
compresie video, calitate etc.).
Backup (Copie de siguranta a inregistrarilor)
Memoria USB sau HDD-ul extern trebuie sa fie instalat in NVR inainte de a
porni executia copiei de rezerva. Apasati butonul Detect pentru identificarea
dispozitivului de stocare, apoi butonul Backup pentru executarea copiei de
rezerva.

Manual de utilizare
Romana
239
Snapshot Config (Configurare captura imagine)
Setati realizarea de capturi ciclic la un anumit interval de timp si trimiterea
acestora pe email, FTP sau stocarea acestora pe hard disk.
Display (Afisare)
In modul de previzualizare local pot fi afisate: ora, numele canalului, statusul
inregistrarii, statusul alarmei, transparenta si rezolutia de afisare.
Nota: Inainte de a modifica rezolutia, asigurati-va ca monitorul Dvs. suporta
rezolutia respectiva. Daca rezolutia setata este mai mare decat rezolutia monitorului
Dvs., pe monitor nu va aparea nimic si nu veti mai putea accesa meniul. Daca se
intampla, totusi, acest lucru, conectati NVR-ul la un monitor cu o rezolutie mai
mare, accesati meniul si schimbati rezolutia.

Manual de utilizare
Romana
240
Account (Cont)
Interfata permite gestionarea utilizatorilor care au acces la sistem, adaugarea
de utilizatori, modificarea drepturilor utilizatorilor, modificarea parolei,
creearea de grupuri de utilizatori si setarea unui nivel de securitate a contului
prin inregistrarea unor raspunsuri la anumite intrebari predefinite. In caz de
resetare parola, codul de verificare poate fi trimis in aplicatia de mobil sau la
adresa de email setata. Pentru cresterea gradului de securitate, puteti seta un
pattern (model grafic) pentru accesul la sistem.

Manual de utilizare
Romana
241
Alarm (Alarma)
Optiuni: Intelligent Alert (Alerta inteligenta), Abnormality (Comportament
anormal) si Traditional alarm (Lipsa imagine, Lipsa semnal video etc. ). Optiunile
Alarm input si Intelligent nu sunt disponibile pentru acest model.
Intelligent Alert (Alerta inteligenta)
Setati comportamentul sistemului in caz de detectie miscare: inresistrare si/sau
notificare in aplicatie. Setati, de asemenea, nivelul de sensibilitate la miscare si
zona de actiune.

Manual de utilizare
Romana
242
Abnormality (Comportament anormal)
Setati comportamentul sistemului in caz de: eroare dispozitiv de stocare, lipsa
spatiu pe dispozitivul de stocare, lipsa conexiune la internet sau conflict IP. In
astfel de situatii puteti seta trimiterea unei notificari in aplicatie sau a unui
email.
Traditional alarm (Alarma)
Setati comportamentul sistemului in caz de lipsa imagine sau lipsa semnal
video. In astfel de situatii puteti seta trimitea unei notificari in aplicatie sau a
unui email, pornirea inregistrarii, efectuarea de capturi sau salvarea inregistrarii
de alarma pe un server FTP.

Manual de utilizare
Romana
243
Advanced (Setari avansate)
Optiuni: HDD info, Upgrade, AutoMaintain (mentenanta automata), Restore
(Reset), Import/Export, Digital, LOG, BPS si Version (Versiune).
HDD info (Informatii hard disk)
Setati modul de functionare al hard disk-ului (doar citire sau citire/scriere).
Nota: ca sa puteti salva inregistrarile pe hard disk, acesta trebuie sa fie setat pe
modul citire/scriere.

Manual de utilizare
Romana
244
Upgrade (Actualizare firmware)
Introduceti in NVR un stick USB care trebuie sa contina fisierul de actualizare
in folderul principal (root). Selectati din meniul NVR-ului unitatea de stocare
si fisierul si faceti click pe butonul Upgrade.
AutoMaintain (Mentenanta automata)
Setati repornirea sistemului intr-o anumita zi si ora sau setati stergerea
automata a fisierelor mai vechi de o anumita perioada.
Restore (Reset - revenirea la setarile din fabrica)
Selectati optiunile pe care doriti sa le resetati.

Manual de utilizare
Romana
245
Import/Export
Exportati sau importati setarile sistemului.

Manual de utilizare
Romana
246
Digital
Optiuni: Digital channels (canale digitale), Channel status (status canale) si
Channel Type.
Digital channels (Canale digitale)
Adaugati o camera pe un anumit canal. Faceti click pe butonul Add, apoi pe
Search pentru a gasi toate camerele conectate in aceeasi retea (acelasi router)
cu NVR-ul.

Manual de utilizare
Romana
247
Channel status (Status canale)
Afiseaza statusul (conectat, neconectat sau neconfigurat) pentru toate cele 9
canale.
Channel type (Tip canale)
Afiseaza numarul maxim de camere si rezolutia camerelor care pot fi conectate
la sistem. Sistemul PNI IPMAX POE 3 suporta maxim 9 camere IP cu rezolutie
maxima de 4K (8MP).

Manual de utilizare
Romana
248
Log (Istoric evenimente)
Afiseaza istoricul actiunilor executate in sistem.
Version (Versiune software)
Afiseaza informatii utile despre firmware si cod QR cu numarul de serie al
sistemului (util pentru adaugarea acestuia in aplicatia de mobil) si cod QR
pentru descarcarea aplicatiei de mobil.

Manual de utilizare
Romana
249
Alte optiuni meniu
Click dreapta pe ecran pentru a afisa
optiunile suplimentare:
Channel Set, Record Mode,
Playback, Face detection, IPC
parameters, Color settings, Split
menu, PTZ Control, Output adjust,
NetDetect, Logout.
Channel set
Interfata permite adaugarea si gestionarea camerelor adaugate in sistem.
Zona adaugare camere
1. Selectati protocolul de comunicare intre NVR si camere. Optiuni: NETIP,
ONVIF, Full Netcom.
2. Search. Apasati tasta Search pentru a cauta camerele conectate la acelasi
router (aceeasi retea) cu NVR-ul.
3. Add. Din lista de camere afisate, selectati camerele dorite si dati click pe
Add pentru a le adauga in sistem.
4. Network. Configurati parametrii de retea pentru camere (adresa IP, gateway
etc.)
5. Quick set. Adaugare si configurare rapida a camerelor.
6. IP Bulk Modify. Modificare rapida a IP-ului la mai multe camere.
Zona gestionare canale
1. Delete. Stergeti camera de pe canalul selectat. Click Apply pentru a executa.
2. Clear. Stergeti informatiile de pe canalul selectat. Click Apply pentru a
executa.
3. Encode. Afiseaza parametrii tehnici ai camerelor conectate (rezolutie, frame
rate, compresie video, calitate etc.).
4. Edit devices. Schimbare IP si port pentru canalul selectat.
5. Bulk upgrade. Actualizare firmware pentru camerele selectate.

Manual de utilizare
Romana
250
6. Network detect. Testare si diagnosticare retea si server Cloud.
7. Channel title. Redenumire camere.
8. NVR Network. Configurare parametri retea NVR.
9. Close adaptive. Dezactiveaza functia adaptare IP pentru camerele selectate.

Manual de utilizare
Romana
251
Record mode (Mod inregistrare)
Setati modul de inregistrare (manual sau programat) pentru fiecare canal in
parte.
Record mode (Mod inregistrare)
Scurtatura pentru accesarea interfetei de cautare si redare a inregistrarilor.
Face detection (Detectie chip uman)
Interfata este disponibila doar pentru camerele care suporta aceasta functie.

Manual de utilizare
Romana
252
Color settings (Setari culoare)
Reglati parametrii de culoare (luminozitate, contrast, saturatie etc.) pentru
interfata de vizualizare a camerelor.
Split menu (Mod afisare canale pe ecran)
Selectati modul de afisare a camerelor pe acelasi ecran.
Output Adjust (Reglari interfata afisare)
Setati volumul si imaginea.
Net Detect

Manual de utilizare
Romana
253
1. Local Net Detect. Monitorizare si diagnosticare conexiune camere.
2. Remote Net Detect. Monitorizare, diagnosticare si configurare retea si
server Cloud.
3. Net trac Detect. Monitorizare trafic de date efectuat de NVR in retea.

Manual de utilizare
Romana
254
Logout
Iesiti din cont, inchideti sau reporniti sistemul.

EN:
EU Simplified Declaration of Conformity
SC ONLINESHOP SRL declares that POE video surveillance system PNI House IPMAX
POE 3LR complies with the Directive EMC 2014/30/EU. The full text of the EU declaration
of conformity is available at the following Internet address:
https://www.mypni.eu/products/8460/download/certifications
BG:
Опростена декларация за съответствие на ЕС
SC ONLINESHOP SRL декларира, че POE система за видеонаблюдение PNI
House IPMAX POE 3LR спазва директивата EMC 2014/30/EU. Пълният текст на ЕС
декларацията за съответствие е достъпен на следния интернет адрес:
https://www.mypni.eu/products/8460/download/certifications
DE:
Vereinfachte EU- Konformitätserklärung
SC ONLINESHOP SRL erklärt, dass das POE-Videoüberwachungssystem PNI House
IPMAX POE 3LR der Richtlinie EMC 2014/30/EU. Sie finden den ganzen Text der EU-
Konformitätserklärung an der folgenden Internetadresse:
https://www.mypni.eu/products/8460/download/certifications
ES:
Declaración UE de conformidad simplificada
SC ONLINESHOP SRL declara que el Sistema de videovigilancia POE PNI House IPMAX
POE 3LR cumple con la Directiva EMC 2014/30/EU. El texto completo de la declaración de
conformidad de la UE está disponible en la siguiente dirección de Internet:
https://www.mypni.eu/products/8460/download/certifications
FR
Déclaration de conformité simplifiée de l’UE
SC ONLINESHOP SRL déclare que Système de vidéosurveillance POE PNI House
IPMAX POE 3LR est conforme à la directive EMC 2014/30/EU. Le texte complet de la
déclaration de conformité UE est disponible à l’adresse Internet suivante:
https://www.mypni.eu/products/8460/download/certifications
HU:
Egyszerűsített EU Megfelelési Közlemény
SC ONLINESHOP SRL kijelenti azt, hogy a POE videó meggyelő rendszer PNI House
IPMAX POE 3LR megfelel az EMC 2014/30/EU. Az EU-megfelelőségi nyilatkozat teljes
szövege a következő internetes címen érhető el:
https://www.mypni.eu/products/8460/download/certifications
IT:
Dichiarazione UE di conformità semplificata
SC ONLINESHOP SRL dichiara che il Sistema di videosorveglianza POE PNI House
IPMAX POE 3LR è conforme alla direttiva EMC 2014/30/UE. Il testo completo della
dichiarazione di conformità europea è disponibile al seguente indirizzo Internet:
https://www.mypni.eu/products/8460/download/certifications

NL:
Vereenvoudigde EU-conformiteitsverklaring
SC ONLINESHOP SRL verklaart dat POE videobewakingssysteem PNI House IPMAX
POE 3LR voldoet aan de richtlijn EMC 2014/30/EU. De volledige tekst van de EU-
conformiteitsverklaring is beschikbaar op het volgende internetadres:
https://www.mypni.eu/products/8460/download/certifications
PL:
Uproszczona deklaracja zgodności UE
SC ONLINESHOP SRL oświadcza, że System nadzoru wideo POE PNI House IPMAX
POE 3LR jest zgodny z dyrektywą EMC 2014/30/EU. Pełny tekst deklaracji zgodności UE
dostępny jest pod następującym adresem internetowym:
https://www.mypni.eu/products/8460/download/certifications
RO
Declaratie UE de conformitate simplificata
SC ONLINESHOP SRL declara ca Kit supraveghere video POE PNI House IPMAX POE
3LR este in conformitate cu Directiva EMC 2014/30/EU. Textul integral al declaratiei UE
de conformitate este disponibil la urmatoarea adresa de internet:
https://www.mypni.eu/products/8460/download/certifications


-
 1
1
-
 2
2
-
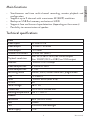 3
3
-
 4
4
-
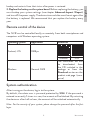 5
5
-
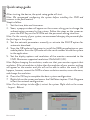 6
6
-
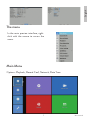 7
7
-
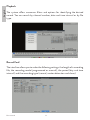 8
8
-
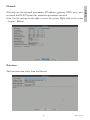 9
9
-
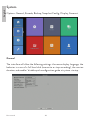 10
10
-
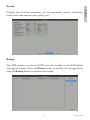 11
11
-
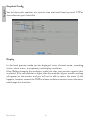 12
12
-
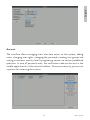 13
13
-
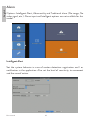 14
14
-
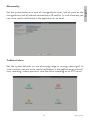 15
15
-
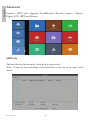 16
16
-
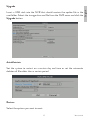 17
17
-
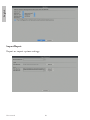 18
18
-
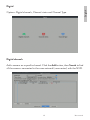 19
19
-
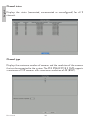 20
20
-
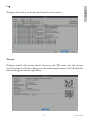 21
21
-
 22
22
-
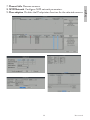 23
23
-
 24
24
-
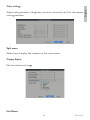 25
25
-
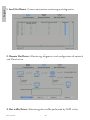 26
26
-
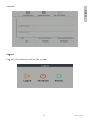 27
27
-
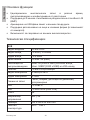 28
28
-
 29
29
-
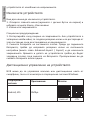 30
30
-
 31
31
-
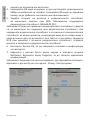 32
32
-
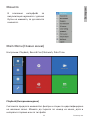 33
33
-
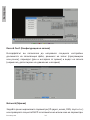 34
34
-
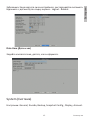 35
35
-
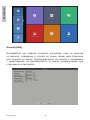 36
36
-
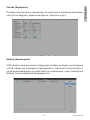 37
37
-
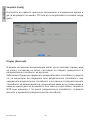 38
38
-
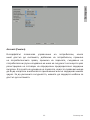 39
39
-
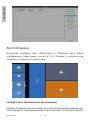 40
40
-
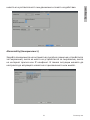 41
41
-
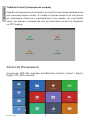 42
42
-
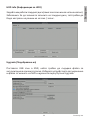 43
43
-
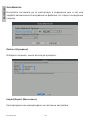 44
44
-
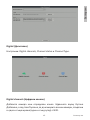 45
45
-
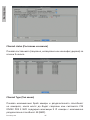 46
46
-
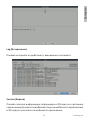 47
47
-
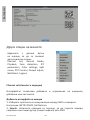 48
48
-
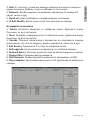 49
49
-
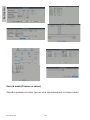 50
50
-
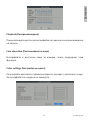 51
51
-
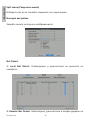 52
52
-
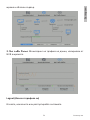 53
53
-
 54
54
-
 55
55
-
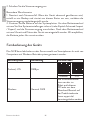 56
56
-
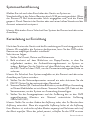 57
57
-
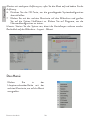 58
58
-
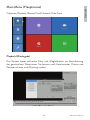 59
59
-
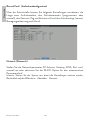 60
60
-
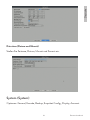 61
61
-
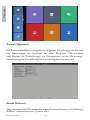 62
62
-
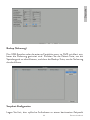 63
63
-
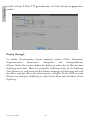 64
64
-
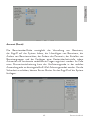 65
65
-
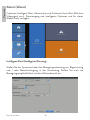 66
66
-
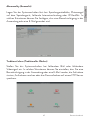 67
67
-
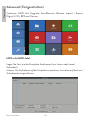 68
68
-
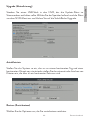 69
69
-
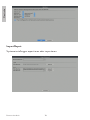 70
70
-
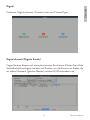 71
71
-
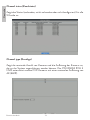 72
72
-
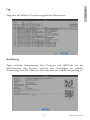 73
73
-
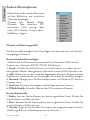 74
74
-
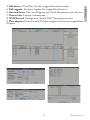 75
75
-
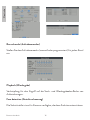 76
76
-
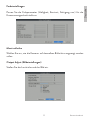 77
77
-
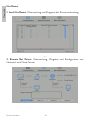 78
78
-
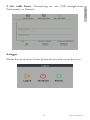 79
79
-
 80
80
-
 81
81
-
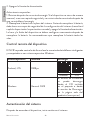 82
82
-
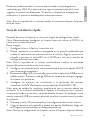 83
83
-
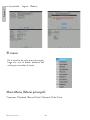 84
84
-
 85
85
-
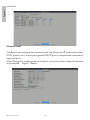 86
86
-
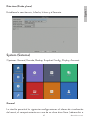 87
87
-
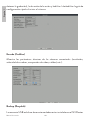 88
88
-
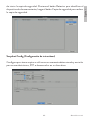 89
89
-
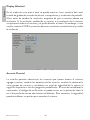 90
90
-
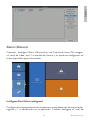 91
91
-
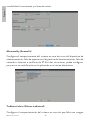 92
92
-
 93
93
-
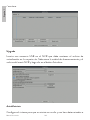 94
94
-
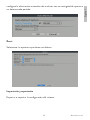 95
95
-
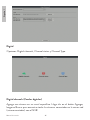 96
96
-
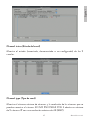 97
97
-
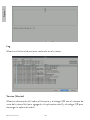 98
98
-
 99
99
-
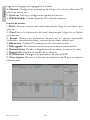 100
100
-
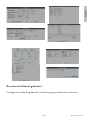 101
101
-
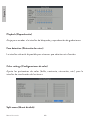 102
102
-
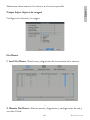 103
103
-
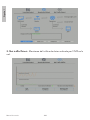 104
104
-
 105
105
-
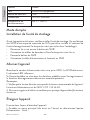 106
106
-
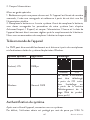 107
107
-
 108
108
-
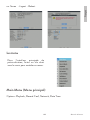 109
109
-
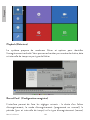 110
110
-
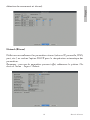 111
111
-
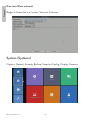 112
112
-
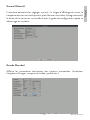 113
113
-
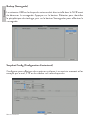 114
114
-
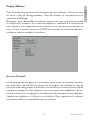 115
115
-
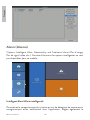 116
116
-
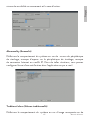 117
117
-
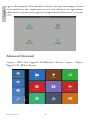 118
118
-
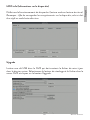 119
119
-
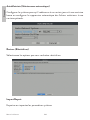 120
120
-
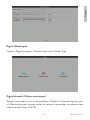 121
121
-
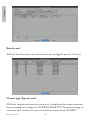 122
122
-
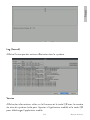 123
123
-
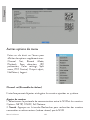 124
124
-
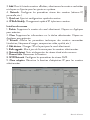 125
125
-
 126
126
-
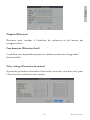 127
127
-
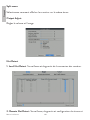 128
128
-
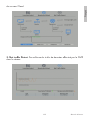 129
129
-
 130
130
-
 131
131
-
 132
132
-
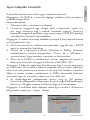 133
133
-
 134
134
-
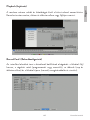 135
135
-
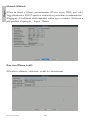 136
136
-
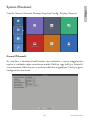 137
137
-
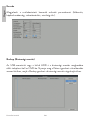 138
138
-
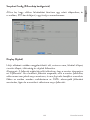 139
139
-
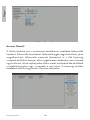 140
140
-
 141
141
-
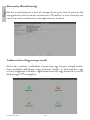 142
142
-
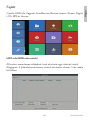 143
143
-
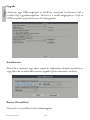 144
144
-
 145
145
-
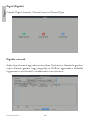 146
146
-
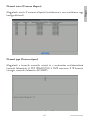 147
147
-
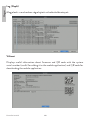 148
148
-
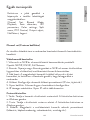 149
149
-
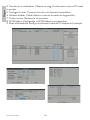 150
150
-
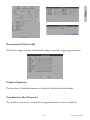 151
151
-
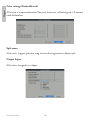 152
152
-
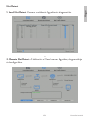 153
153
-
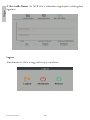 154
154
-
 155
155
-
 156
156
-
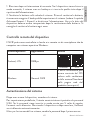 157
157
-
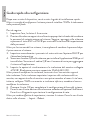 158
158
-
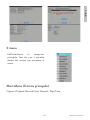 159
159
-
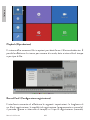 160
160
-
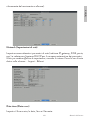 161
161
-
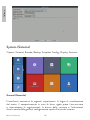 162
162
-
 163
163
-
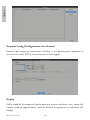 164
164
-
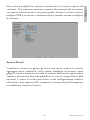 165
165
-
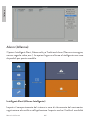 166
166
-
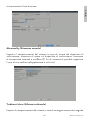 167
167
-
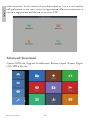 168
168
-
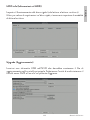 169
169
-
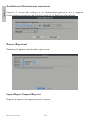 170
170
-
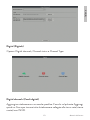 171
171
-
 172
172
-
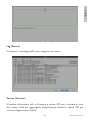 173
173
-
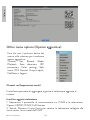 174
174
-
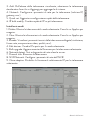 175
175
-
 176
176
-
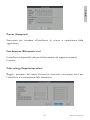 177
177
-
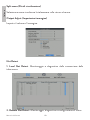 178
178
-
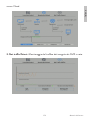 179
179
-
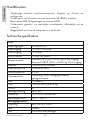 180
180
-
 181
181
-
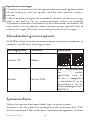 182
182
-
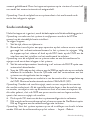 183
183
-
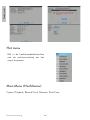 184
184
-
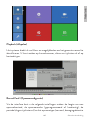 185
185
-
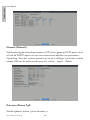 186
186
-
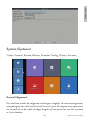 187
187
-
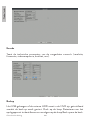 188
188
-
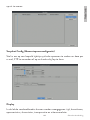 189
189
-
 190
190
-
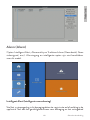 191
191
-
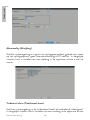 192
192
-
 193
193
-
 194
194
-
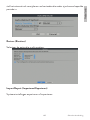 195
195
-
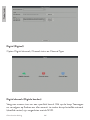 196
196
-
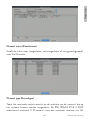 197
197
-
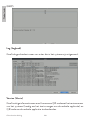 198
198
-
 199
199
-
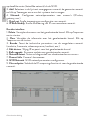 200
200
-
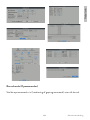 201
201
-
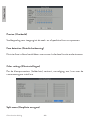 202
202
-
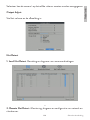 203
203
-
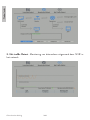 204
204
-
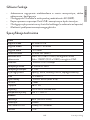 205
205
-
 206
206
-
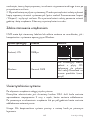 207
207
-
 208
208
-
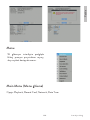 209
209
-
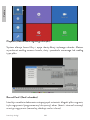 210
210
-
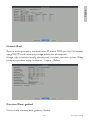 211
211
-
 212
212
-
 213
213
-
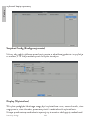 214
214
-
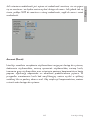 215
215
-
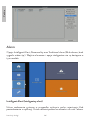 216
216
-
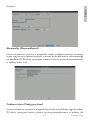 217
217
-
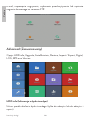 218
218
-
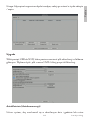 219
219
-
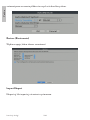 220
220
-
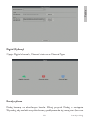 221
221
-
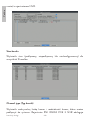 222
222
-
 223
223
-
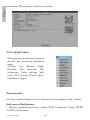 224
224
-
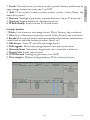 225
225
-
 226
226
-
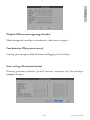 227
227
-
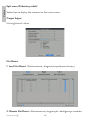 228
228
-
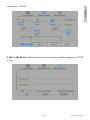 229
229
-
 230
230
-
 231
231
-
 232
232
-
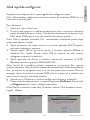 233
233
-
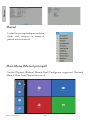 234
234
-
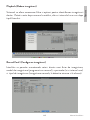 235
235
-
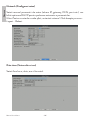 236
236
-
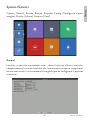 237
237
-
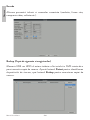 238
238
-
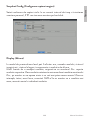 239
239
-
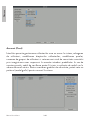 240
240
-
 241
241
-
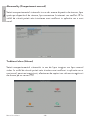 242
242
-
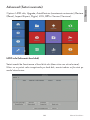 243
243
-
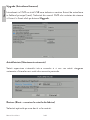 244
244
-
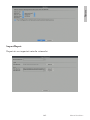 245
245
-
 246
246
-
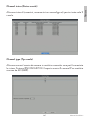 247
247
-
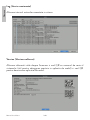 248
248
-
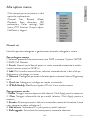 249
249
-
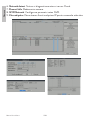 250
250
-
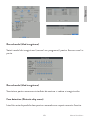 251
251
-
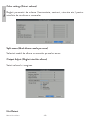 252
252
-
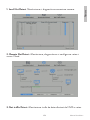 253
253
-
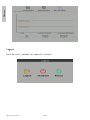 254
254
-
 255
255
-
 256
256
-
 257
257
-
 258
258


En otros idiomas
- français: PNI House IPMAX Manuel utilisateur
- italiano: PNI House IPMAX Manuale utente
- Nederlands: PNI House IPMAX Handleiding
- polski: PNI House IPMAX Instrukcja obsługi
Documentos relacionados
-
PNI IP716 Manual de usuario
-
PNI IP125 Manual de usuario
-
-
PNI House WiFi550 Manual de usuario
-
PNI IP60 live Manual de usuario
-
PNI IP65 live Manual de usuario
-
PNI House AHD32 Manual de usuario
-
PNI Clementine 8428BT Manual de usuario
-
PNI IP575 Manual de usuario
-
PNI IP649 Manual de usuario
Otros documentos
-
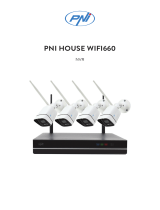 PNI International WIFI660 Manual de usuario
-
Levenhuk 78164 Manual de usuario
-
-
Risco VUpoint RVNVR040020 Guía de instalación
-
Panasonic TXP50XT50E Instrucciones de operación
-
Panasonic TXP50GT50E Guía de inicio rápido
-
-
