Kenmore 36291112003 El manual del propietario
- Categoría
- Cocinas
- Tipo
- El manual del propietario

ELECTRIC RANGE
Us,e & Car,÷ _ '_
COCINA (ESTUFA} ELECTRICA
G_.._apa_ ÷I LJso y CtJidado
Models, Modelos 61101, 61108, 61741, 6t 742, 61748, 62492, 62781,62788,
91112, 91117, 9120'1,91208, 91211, 91218
"l f"
, III J ,r
__..j
,, iI, ,
I'll
Z
u
rf'!
O
183D6379POO4
_R4260) 100 JR
rlr_odz, m_co Sears, Roebuck and Co., Hoffman Estates, IL 60179 U.S.A. www.sears.com

SAFETY INSTRUCTIONS
Important Safety Instructions .............. ,, _2-4
OPERATION
Features of Your Range ..................... 5
Using the Surface Units ....................... 6
Using the Oven ......................... 7-10
CARE & CLEANING
Care and Cleaning ......................... 11-14
INSTALLATION INSTRUCTIONS
Dimensions & Clearances ..................... t5
Electrical Requirements .................... 15
Flooring Requirements ....................... 16
Electrical Connections .................. 16-18
Antiqqp Bracket Installation ................... 19
Level the Range .......................... 19
PROBLEM SOLVING
Before You Call for Service ............... 20, 21
Warranty .................................... 2t
Consumer Services ......................... 44
Repair Services ............................. 44
EN ESPANOL
tnstrucciones en EspaSol ..................... 23
For your convenience and future reference, please write
down your model and serial numbers in the space
provided. The model number and serial number of your
electric range can be found on a label behind the range
door or behind the storage drawer°
MODEL NUMBER:
SERIAL NUMBER:
WARNING!
For your safety the information in this
manual must be followed to minimize the
risk of fire or explosion, electric shock, or to
prevent properbj damage, personal injury, or
loss of life.
WARNING-ANTI-TIP DEVICE
All ranges can tip and injury
could result.
To prevent accidental tipping of the range,
attach it to the wall by installing the Anti-Tip
device supplie&
To check ff the device is installed and engaged
properly, carefully tip the range forward° The
Anti-Tip device should engage and prevent the
range from tipping over.
tf you pull the range out from the wall for any reason,
make sure the device is properly engaged when you
push the range back against the wall, if it is not, there is
a possible risk of the range tipping over and causing
injury if you or a child stand, sit or lean on an open door,
Please refer to the Anti-Tip device information in this
manual, Failure to take this precaution could result in
tipping of the range and injury.
Read all instructions before using
this appliance.
When using electrical appliances, basic safety
precautions should be followed, including the
following:
Use this appliance only for its intended purpose as
described in this Use and Care Guide.
Be sure your appliance is properly installed and
grounded by a qualified technician in accordance with
the provided installationinstructions.
Do not attempt to repair or replace any
part of your range unless it is specifically
recommended in this manual. All other servicing
should be referred to a qualified technician,
Have the installer show you the location of the
circuit breaker or fuse. Mark it for easy reference°
Before performing any service, UNPLUG OR
DISCONNECT THE POWER SUPPLY AT THE
HOUSEHOLD DISTRIBUTION PANEL BY REMOVING
THE FUSE OR SWITCHING OFF THE CIRCUIT
BREAKER.

• Do not leave children alone--_hitdren should not be
left alone or unattended in an area where an appliance
is in use° They should never be allowed to sit or stand
on any part of the appliance.
• Do not allow anyone to climb, stand or hang on
the door, storage drawer, or cooktop. They could
damage the range and even tip it over, causing severe
personal injury°
• Do not store flammable materials in an oven or near
a cooktop.
• CAUTION: ITEMS OF INTEREST TO CHILDREN
SHOULD NOT BE STORED IN CABINETS ABOVE
THE RANGE OR ON THE BACKSPLASH OF A
RANGE--CHILDREN CLIMBING ON THE RANGE
TO REACH ITEMS COULD BE SERIOUSLY INJURED.
• Never wear loose-fitting or hanging garments while
using the appliance. Be careful when reaching for
items stored over the range. Flammable material
could be ignited if brought in contact with hot surface
units or heating elements and may cause severe burns.
- Do not touch the surface units, the heating
elements, or the interior surface of the oven.
These surfaces may be hot enough to burn even
thought they are dark in color. During and after use,
do not touch, or let clothing or other flammable
materials contact, the surface units, areas nearby the
surface units or any interior area of the oven; allow
sufficient time for cooling first.
Potentially hot surfaces include the cooktop, areas
facing the cooktop, oven vent opening, surfaces near
the opening, crevices around the oven door and metal
trim parts above the door.
REMEMBER: The inside surface of the oven may be
hot when the door is opened.
PROTECTING AGAINST
FOODBORNE ILLNESS
• Cook meat and poultry thoroughly-meat to at least
an INTERNAL temperature of 160°1=.and poultry to
at least an INTERNAL temperature of 180°1=.Cooking
to these temperatures usually protects against
foodborne illness.
BASIC SAFETY
PRECAUTIONS
• Use only dry pot holders--moist or damp pot holders
on hot surfaces may result in burns from steam. Do not
let pot holders hot touch surface units or heating
elements. Do not use a towel or other bulky cloth°
° For your safety, never use your appliance for
warming or heating the room.
• Do not store or use combustible materials, gasoline
or other flammable vapors and liquids in the vicinity
of this or any other appliance.
• Keep the hood and grease filters clean to maintain
good venting and to avoid grease fires.
• Do not let cooking grease or other flammable
materials accumulate in or near the range.
• Do not use water on grease fires. Never pick up a
flaming pan. Turn the controls off° Smother a flaming
pan on a surface unit by covering the pan completely
with a well-fitting lid, cookie sheet or flat tray. Use a
multi-purpose dry' chemical or foam-type fire
extinguisher.
Flaming grease outside the pan can be put out by
covering it with baking soda or, if availabfe, by using a
multi-purpose dry chemical or foam-type fire
extinguisher
Flame in the oven can be smothered completely by
closing the oven door or by using a multi-purpose dry
chemical or foam-type fire extinguisher.
3
OVEN SAFETY
° Stand away from the range when opening the oven
door. Hot air or steam which escapes can cause
burns to hands, face and/or eyes.
° Do not heat unopened food containers. Pressure
could build up and the container could burst,
causing an injury.
° Keep the oven vent unobstructed. The vent is under
the right rear surface unit.
° Keep the oven free from grease buildup.
• Place the oven shelf in the desired position while
the oven is cool. If shelves must be handled when
hot, do not let pot holders or oven mitts contact the
heating elements.
• Pulling out the shelf to the stop-lock is a
convenience in lifting heavy foods. It is also a
precaution against burns from touching hot surfaces
of the door or oven walls_
° When using cooking or roasting bags in the oven,
follow the manufacturer's directions.
, Do not use the oven to dry newspapers.
if overheated, they can catch on fire,
- Do not use the oven for a storage area.
Items stored in an oven can ignite.
• Do not leave paper products, cooking utensils or
food in the oven when not in use.

SURFACE UNITS
Use proper pan size--select cookware having flat
bottoms large enough to cover the surface unit heating
element. The use of undersized cookware wil! expose a
portion of the surface lmit to direct contact and may
result in the ignition of clothing, Proper relationship of
cookware to surface unit size will also
improve efficiency.
• Never leave the surface units unattended at
high heat settings. Boilovers cause smoking
and greasy spitlovers that may catch on fire.
° Use little fat for effective shallow or deep fat frying.
Filling the pan too full of fat can cause spillovers when
food is added.
• If a combination of oils or fats will be used in frying,
stir together before heating, or as fats melt slowly_
• Always heat fat slowly, and watch as it heats.
- Only certain types of glass, glass/ceramic,
earthenware or other glazed containers are suitable
for cooktop service; others may break because ofthe
sudden change in temperature°
• To minimize the possibility of burns, ignition of
flammable materials and spillage, the handle of a
container should be turned toward the center of the
range without extending over nearby surface units,
• Always turn the surface units off before removing
cookware.
When preparing flaming foods under the vent hood,
turn the fan on_
Use a deep fat thermometer whenever possible to
prevent overheating fat beyond the smoking point,
Keep an eye on foods being fried at high or medium
high heat settings.
Foods for frying should be as dry as possible. Frost
on frozen foods or moisture on fresh foods can cause
hot fat to bubble up and over the sides of the pan,
Clean the cooktop with caution. If a wet sponge is
used to wipe spills on a hot cooktop, be careful to avoid
steam bums°
To avoid the possibility of a burn or electric shock,
always be certain that the controls for all surface units
are at the OFF position and all coils are cool before
attempting to lift or remove a uniL
Do not immerse or soak the removable surface
units. Do not put them in a dishwasher.
Be sure the drip pans and the vent duct are not
covered and are in place. Their absence during
cooking could damage range parts and wiring.
Do not use aluminum foil to line the drip pans or
anywhere in the oven except as described in this
manual. Misuse could result in a shock, fire hazard or
damage to the range
SAVE THESE INSTRUCTIONS

NOTE: Not all features are on all models_
Oven Light Switch
Surface Unit
Control Knobs (4)
Clock/Timer
Controls and
Display
Oven Control Knob
®®
Oven Vent
(located under right rear surface unit)
Coil Surface Units (4)
Broil Element
Model and Serial Numbers
(found on a label behind the
range door or behind the
storage drawer) [\_...
Storage Drawer
Broiler Pan and Grid
Bake Element

How to Set
Push the knob in and turn in either direction to the setting
you want.
At both OFF and HI the control clicks into position.
You may hear slight clicking sounds during cooking,
indicating the control is keeping the power level you set.
A SURFACE UNIT on indicator light will glow when any
surface unit is on.
NOTE: The SURFACE UNIT on indicator light may glow
between the surface control settings of LO and OFF, but
there is no power to the surface units.
OFF OFF
Selecting types of cookware
Surface Cookware Tips
Use medium- or heavy-weight
cookwareoAluminum cookware
conducts heat faster than other
metals. Cast-iron and coated cast-
iron cookware are slow to absorb
heat, but generally cook evenly at
low to medium heat settings.
Steel pans may cook unevenly if
not combined with other metals.
Not over I inch
For best cooking results, pans
should be flat on the bottom, Match the size of the
saucepan to the size of the surface unit. The pan
should not extend over the edge of the surface unit
more than 1 inch.
Wok Cooking
We recommend that you use only
a flat-bottomed wok° They are
available at your local retail store.
Do not use woks that have
support rings. Use of these types
of woks, with or without the ring
in place, can be dangerous. Placing Useonlyflat-bottomed
woks.
the ring over the surface unit will
cause a build-up of heat that will
damage the porcelain cooktop°
Do not try to use such woks without
the ring. You could be seriously
burned ifthe wok tipped over.
6

Oven Temperature Knob
Turn this knob to the setting
you want°
The oven cycle light glows until
the oven reaches your selected
temperature, then goes off and
on with the oven element(s)
during cooking.
E
L LL;J ,I ,I,I
I ,3n J
Clock and Timer Features (on some models)
1, TIMER ON/OFF Pad
Press this pad to select the timer feature°
2, CLOCK Pad
Press this pad before setting the clock.
3, Display
Shows the time of day and the time set for the timer.
4. SET TIME Ak/ Y Pads
These pads allow you to set the clock and timer°
To Set the Clock:
1. Press the CLOCK pad twice°
2. Press the SET TIME _k/ V pads,
3. Press the CLOCK pad to start,,
Make sure the clock is set to the correct time of day.
To Set the Timer:
1. Pressthe TIMER ON/OFF pad,
2. Press the SET TIME A / Y pads until the amount of
time you want shows in the display, The timer will
start automatically within a few seconds of releasing
- the pad.
3. Press the CLOCK pad to return to the clock
display if desired,, The timer function will retain
the programmed settings,,
The timer is a minute timer only.
The timer does not control oven operations°
The maximum setting on the timer is 9 hours
and 50 minutes
To Reset the Timer:
if the display is still showing the time remaining, you may
change it by pressing the SET TIME A / V pads until the
time you want appears in the display°
If the remaining time is not in the display, recall the
remaining time by pressing the TIMER ON/OFF pad
and then pressing the SET TIME A / V pads until the
new time you want shows in the display.
To Cancel the Timer:
Press the TIMER ON/OFF pad twice°
7

Before you begin...
To avoid possible burns, place the shelves in the
desired position before you turn the oven on.
The shelves have stop-locks,
so that when placed correctly
on the supports, they will stop
before coming completely out,
and will not tilto
When placing and removing
cookware, puff the shelf out
to the bump on the shelf
support.
To remove a shelf, pull it
toward you, tilt the front end
up and pull it out_
To replace, place the end of
the shelf (stop-locks) on the
support, tilt up the front and
push the shelf in,
° il
How to Set the Oven for Baking or Roasting
1, Turn the Oven Temperature knob to the temperature
you desire.
2. Check food for doneness at the minimum time on
the recipe° Cook longer if necessary,
3. Turn the Oven Temperature knob to OFF when
cooking is complete.
0
0
e
O
O
O
The oven has 6 sheff positions,.
Typeof Food
Frozenpies(oncookiesheet)
Angelfood,bundtorpoundcakes
B{scuits,muffins,brownies,cookies,
cupcakes,layercakes,pies
Casseroles
Turkey
Roas_ng
Shelf Position
C
BorC
BorC
BorC
RorA
R,A,orB
Preheating and Pan Placement
Preheat the oven if the recipe calls for it, To preheat, set
the oven at the correct temperature, Preheating is
necessary for good results when baking cakes, cookies,
pastry and bread&
For ovens without a preheat indicator light or tone,
preheat 10 minutes,
Baking results will be better if baking pans are centered
in the oven as much as possible, Pans should not touch
each other or the walls of the oven, If you need to use
two shelves, stagger the pans so one is not directly
above the other, and leave approximately 1Y2 from the
front of the pan to the front of the shelf.
Aluminum Foil
Never entirely cover a shelf with aluminum foil This will
disturb the heat circulation and result in poor baking_
You can use aluminum foil to line
the broiler pan and broiter gri&
However, you must mold the foil
tightly to the grid and cut slits in it
just like the grid.
How to Set the Oven for Broiling
1. Place the food on the broiler grid in the broiler pan°
2. Follow suggested shelf positions in the Broiling Guide.
3. Turn the Oven Temperature
knob to BROIL_
Leave the door open to
the broil stop position,
The door stays open by
itself, yet the proper
temperature is
maintained in the oven.
8

Thesize,weight, thickness, starting
temperature, and your preference of
doneness will affect broiling times.
This guide is based on meats at
refrigerator temperature.
Broiling Guide
Food
Oro"dBeei............
BeefSteaks............
Rarer
Medium
WellDone
Rare!
Medium
Well Done
Chicken
BakeryProduct
Bread(toast)
EnglishMuffin
Quantityand/
or Thickness
1fb (4 patties)
Vzto3i_thick
4tbs.(12patties) ....................
t Vz thick
2 to 2 1/2Ibs,
1 wholecut up
2 to 2 Vzibs.,
split lengthwise
Breast
2to4 slices
2(split)
Shelf First Side
Position Time(min_)
C 13
C t5
E 6
D 8
D t0
C 10
C 15
D 20
B 25
B 25
D
E
B
SecondSide
Time(rain.)
B
11
4
6
8
8
10-I2
20
25
15
3 1
3-4
18-zo =_: Donor
turn
over.
Comments
Space'evenly ........
Steaks[essthan 3h thick aredifficult
to cookrare
Slash fat
Brush each side with melted butter
Broil skin-side-down first
Spaceevenly Place English muffins
cut-side-up and brush
with butter if desired.
Cutthrough back or she& Spread open,
Brush w[t,hmelted butter before broiling
andafter half of broiling t!me_
Handleand turn very carefully Brush with
lemon butter before and duringcooking,
if desired.
........... i ......
LobsterTails 2-4
Fi's_"Fme_......... 1Ib(V,to,/_thick)............. D .... s 5
Salmon
Steaks 2 (1 thick) D 10 5 Turncarefully Do not
Fillets ................ 2 (V2to 3/, thick) D t0 ................ turnskin side d.o.wn, . . . .
Ram Slices _/z thick C 6 6
(precooked) 1 thick C B B
Pod<Chops 2 (V2 thick) C t0 10 Siash fat
Well Done 2 (t thick) about I tb. C 15 15
Lamb Chops
Medium 2 (t thick) about 10 D 7 4 Slash fat
Well Done to 12oz D 10 9
Medium 2 (tVz thick) about ! ib, D 9 6
WeEIDone D 14 t0
t The LL.S.Department of Agriculture says "Rare beef is popular, butyou should know that cooking it to only 140°F. means some food
poisoning organisms may sut'vive_" (Source: Safe...Eood Book. Your Kitchen Guide,. USDA Roy. June 1985)
9

Adjust the Oven Thermostat--Easy to
do yourself!
"Youmay find that your new oven cooks differently than
the one it replaced. Use your new oven for a few weeks
to become more familiar with it..If you still think your
new oven is too hot or too cold, you can adjust the
thermostat yourself.
Do not use thermometers, such as those found in
grocery stores, to check the temperature setting of your
oven, These thermometers may vary by 20-40 degrees.
NOTE: This adjustment will not affect broiling temperatures.
To Adjust the Thermostat
1. Pul! the Oven Temp knob off the shaft, look at the
back of the knob and note the current setting before
making any adjustments,
Loosen both screws on the back of the knob.
=
3.
To increase the oven temperature, move the pointer
toward the words "MAKE HOTTER."
To decrease the oven temperature, turn the pointer
toward the words "MAKE COOLER."
Each notch changes the temperature by 10 degrees
Fahrenheit°
4. Tighten the screws.
5. Replace the knob, matching the flat area of the knob
to the shaft,
Back of OVEN TEMP knob
Front of OVEN TEMP
knob (knob appearance
may vary)
The type of margarine will affect baking
performance!
Most recipes for baking have been developed using
high fat products such as butter or margarine (80%
fat). If you decrease the fat, the recipe may not give
the same results as with a higher fat product,
Recipe failure can result if cakes, pies, pastries, cookies
or candies are made with tow fat spreads.. The lower the
fat content of a spread product, the more noticeable
these differences become.
Federal standards require products labeled "margarine"
to contain at least 80% fat by weight. Low fat spreads,
on the other hand, contain less fat and more water.
The high moisture content of these spreads affects the
texture and flavor of baked goods° For best results with
your old favorite recipes, use margarine, butter or stick
spreads containing at least 70% vegetable oil.
10

If your range is removed for cleaning,
servicing or any reason, be sure the anti-tip
device is re-engaged properly when the
range is replaced. Failure to take this
precaution could result in tipping of the
range and cause injury.
Oven Interior
With proper care, the porcelain enamel finish on the
inside of the oven--top, bottom, sides, back and inside
of the door--will stay new-looking for years.
Let the range cool before cleaning° We recommend that
you wear rubber gloves when cleaning the range.
Soap and water will normally do the job. Heavy spattering
or spillovers may require cleaning with a mild abrasive
cleanero Soap-filled steel wool pads may also be used.
Do not allow food spills with a high sugar or acid content
(such as milk, tomatoes, sauerkraut, fruit juices or pie
filling) to remain on the surface. They may cause a dull
spot even after cleaning.
Household ammonia may make the cleaning job easier.
Place 1/2 cup in a shallow glass or pottery container in
a cold oven overnight. The ammonia fumes will help
loosen the burned-on grease and food°
If necessary, you may use an oven cleaner. Follow the
package directions°
Do not spray oven cleaner on the electrical controls
and switches because it could cause a short circuit
and result in sparking or fire°
Do not allow a film from the cleaner to build up on the
temperature sensor--it could cause the oven to heat
improperly. (The sensor is located at the top of the oven.)
Carefully wipe the sensor clean after each oven cleaning,
being careful not to move the sensor as a change in its
position could affect how the oven bakes.
Do not spray any oven cleaner on the oven door, handles
or any exterior surface of the oven, cabinets or painted
surfaces. The cleaner can damage these surfaces.
Lift-Off Oven Door
The oven door is removable
for cleaning.
Do not lift the door by the
handle. Make sure the oven
is completely cool.
To remove the door, open it to the
special stop positiOnr Grasp firmly
on each side and lift the door
straight up and off the hinges.
Lift the door straight up
and off the hinges
Do not place hands between the hinge and the oven
door frame.
To replace the door, make sure the hinges are in the
special stop position,, Position the slots in the bottom of
the door squarely over the hinges and slowly lower it over
both hinges.
To clean the inside of the door:
Soap and water will normally do the job. Heavy spattering
or spillovers may require cleaning with a mild abrasive
cleaner° Soap-filled steel wool pads may also be used,
Do not allow food spills with a high sugar or acid content
(such as milk, tomatoes, sauerkraut, fruit juices or pie
filling) to remain on the surface. They may cause a dull
spot even after cleaningo
To clean the outside of the door:
Use soap and water to thoroughly clean the top, sides
and front of the oven door. Rinse well. You may also use
a glass cleaner to clean the glass on the outside of the
door. Do not let water drip into the vent openings°
Spillage of marinades, fruit juices, tomato sauces and
basting materials containing acids may cause
discoloration and should be wiped up immediately.
When surface is cool, clean and rinse°
Do not use oven cleaners, cleaning powders or harsh
abrasives on the outside of the door°
11

Oven Heating Elements
Do not clean the bake element or
the broil element+
Any soil wil! burn off when the
elements are heated,.
To clean the oven floor, gently lift
the bake element.. Clean with warm soapy water.
Oven Shelves
Clean the shelves with an abrasive _._ , ,......_+_+--._,
cleanser or steel wool_ _.---,+ ..... +_.... -_
To make the shelves slide more eas+ly apply a small
amount of vegetable oil or cooking oil to a paper towel
and wipe the edges of the oven shelves with the paper
towel.
Oven Light Replacement
(on some models)
CAUTION: Before replacing your
oven light bulb, disconnect the
electrical power to the range at the
main fuse or circuit breaker panel.
Be sure to let the light cover and
bulb cool completely.
To remove the cover:
Wire cover holder
1. Hold a hand under the cover so it doesn't fall when
released. With fingers of the same hand, firmly push
back the wire cover holder. Lift off the cover.
Do not remove any screws to remove the cover.
2. Replace bulb with a 40-watt household appliance
bulbo
To replace the cover:
1. Place it into groove of the light receptacle. Pull wire
forward to the center of the cover until it snaps into
place+
2. Connect electrical power to the range.
Broiler Pan & Grid
After broiling, remove the broiler /7Ft_la_rm','_m_,_\_',
pan from the oven. Remove the (-_)
grid from the pan. Carefully pour After broilingremovethe
out the grease from the pan into a broiler pan from the oven
proper container.
Wash and rinse the broiler pan and grid in hot water with
a soap-filled or plastic scouring pad,,
If food has burned on, sprinkle the grid with detergent
while hot and cover with wet paper towels or a dishcloth_
Soaking the pan will remove burned-on foods.
The broiler pan may be cleaned with a commercial oven
cleaner. If the grid is grey enamel, it can also be cleaned
with an oven cleaner+ If the grid is chrome, do not use an
oven cleaner to clean it.
Both the broiler pan and grid can also be cleaned in
the dishwasher,
Do not store a soiled broiler pan and grid anywhere in
the range,
How to Remove the Storage Drawer to Clean
Under the Range
To remove the storage drawer:
1. Pull the drawer out all the way.
2, Tilt up the front and remove ito
To
1.
2_
3+
replace the storage drawer:
Insert glides at the back of the
drawer beyond the stop on Cleanundertherange,
range glides.
Lift the drawer ff necessary to insert easily+
Let the front of the drawer down, then push
in to close+
12

Porcelain Enamel Cooktop
The porcelain enamel finish is sturdy but breakable ff
misused. This finish isacid-resistanto However, any acidic
foods spilled (such as fruit juices, tomato or vinegar)
should not be permitted to remain on the finish.
If acids spill on the cooktop while it is hot, use a dry
paper towel or cloth to wipe it up right away° When
the surface has cooled, wash with soap and water°
Rinse wello
For other spills such as fat spatterings, wash with soap
and water or cleansing powders after the surface has
cooled,, Rinse welt.. Polish with a dry cloth.
Lift-Up Cooktop
Some models have a cooktop that
can be lifted up for easier cleaning. __
The entire cooktop may be lifted up
and supported in the up position. " /
The surface units do not need to
be removed; however, you may
remove one to make raising the Be sureallsurfaceunits
cooktop easier, There are two side are turned off before
supports that lock into position raisingthe cooktop.
when the cooktop is lifted up..
After cleaning under the cooktop with hot, mild soapy
water and a clean cloth, lower the cooktop.. Be careful
not to pinch your fingers.
To lower the cooktop, push the rods back and gently
lower the cooktop until it rests in place°
Be sure all the controls are turned to OFF and the
surface units are cool before attempting to remove them.
Surface Units
To clean the surface units, turn the
control to the highest setting for a
minute. The coils will burn off any
soil.
Surface untt
To remove a surface unit:
To remove the drip pans for
cleaning, the surface units must be
removed first,
Drip
Receptacle pan
Lift the surface unit about t inch above the drip pan and
pul! it ouL
Do not lift the surface unit more than 1 inch° If you do, it
may not lie fiat on the drip pan when you plug it back ino
Repeated lifting of the surface unit more than 1 inchabove
the drip pan can permanently damage the receptacle,
To replace a surface unit:
Replace the drip pan into the recess in the cooktop, Make
sure the opening in the pan lines up with the receptacle°
Insert the terminals of the surface unit through the
opening in the drip pan and intothe receptacle_
Guide the surface unit into place so it rests evenly.
Do not immerse the surface units in liquids of
any kind°
Do not clean the surface units in a dishwasher_
Do not bend the surface unit plug terminals.
Do not attempt to clean, adjust or in any way repair
the plug-in receptacle.
Drip Pans
Remove the surface unit& Then lift out the drip pans.
For best results, clean the drip pans by han& Place them
in a covered container (or a plastic bag) with 1/4 cup
ammonia to loosen the soil. Then scrub with a soap-filled
scouring pad if necessary° Rinse with clean water and
polish with a clean soft cloth.
The drip pans may also be cleaned in the dishwasher.
Clean the area under the drip pans often° Built-up soil,
especially grease, may catch fire.
Do not cover the drip pans with foil. Using foil so close
to the receptacle could cause shock, fire or damage to
the range°
13

Control Panel and Knobs
Clean up spatters with a damp cloth. __ f-....
Remove heavier soil with warm, _
soapy water.
Do not use abrasives of any kind
on the control panel°
The control knobs may be removed Pulltheknobstraight
for easier cleaning To remove a off the stem.
knob, pull it straight off the stem. Wash the knobs in soap
and water but do not soak.
Oven Vent
Never cover the opening
with aluminum foil or any
other material.
The oven is vented through
an opening under the right
rear surface unit_
Painted Surfaces
Painted surfaces include the sides of the range and the
sides of the door trim_
Clean these with soap and water or a vinegar and water
solution°
Do not use commercial oven cleaners, cleaning powders,
steel wool or harsh abrasives on any painted surface°
Glass Window (on some models)
To clean the outside glass finish, use a glass cleaner,
Rinse and polish with a dry cloth.
14

BEFORE YOU BEGIN
Read these instructions completely and carefully.
IMPORTANT--Save these instructions for the local
electrical inspector's use.
IMPORTANT--Observe all governing codes and
ordinances,
NOTE TO CONSUMER:
Keep this Use and Care Guide for future use,
NOTE TO INSTALLER:
Leave these instructions with the appliance after
installation is completed.
NOTE: This appliance must be properly grounded,
1. Prepare the Opening
Allow 1_,_ spacing from the range to adjacent vertical
walls above cooktop surface°
Allow 30 minimum clearance between surface units
and bottom of unprotected wood or metal top cabinet,
and 15 minimum between countertop and adjacent
cabinet bottom°
EXCEPTION: Installation of a listed microwave
oven or cooking appliance over the cooktop shall
conform to the installation instructions packed
with that appliance.
If cabinet storage is installed, reduce risk by installing
a range hood that projects horizontally a min_ of 5
beyond the bottom of the cabinets, Make sure the wa!l
covering, countertops and cabinets around the range
can withstand heat generated by the range, oven or
cook'top up to 200°E
TOOLS YOU WILL NEED
• Large blade screwdriver
• 1/4 hex head nutdriver
• Channel lock pliers
° 17/_6open end or adjustable wrench
• Tape measure
I _,_ 1 Not less than the
width of the range
Hood
5 Mlno
ELECTRICAL REQUIREMENTS
CAUTION, FOR PERSONAL SAFETY:
DO NOT USE AN EXTENSION CORD WITH THIS
APPLIANCE.
REMOVE HOUSE FUSE OR OPEN CIRCUIT BREAKER
BEFORE BEGINNING INSTALLATION,
This appliance must be supplied with the proper voltage
and frequency, and connected to an individual, properly
grounded branch circuit, protected by a circuit breaker or
time delay fuse, as noted on the rating plate,
Wiring must conform to National Electric Codes.
If the electric service provided does not meet the
above specifications, have a licensed electrician
install an approved outlet°
Because range terminals are not accessible after range is
in position, flexible service conduit or cord must be used,
Install the
outlet box on
either side of
the CL
Locate the outtst
box within either
shaded area.,
15

Flooring Under the Range
Your range, like many other household items,
is heavy and can settle into soft floor coverings
such as cushioned vinyl or carpeting.
When moving the range on this type of flooring, it
should be installed on a i/4 thick sheet of plywood
(or similar material) as follows:
When the floor covering ends at the front of the range,
the area that the range will rest on should be built up
with plywood to the same level or higher than the floor
covering° This wilt allow the range to be moved for
cleaning or servicing.
2. Prepare for Electrical Connection,,
Effective January 1, 1996 the National Electric Code
requires that new construction (not existing) utilize a
4-conductor connection to an electric range.
When installing an electric range in new construction
follow Steps 3 and 5 for 4-wire connection.
Use only a 3-conductor or a 4-conductor UL-listed range
cord, These cords may be provided with ring terminals on
wire and a strain relief device°
A range cord rated at 40 amps with 125/250 minimum
volt range is required. A 50 amp range cord is not
recommended but if used, it should be marked for use
with nominal 1% diameter connection openings. Care
should be taken to center the cable and strain relief
within the knockout hole to keep the edge from damaging
the cabte_
NOTE: A 4-conductor cord is to be used when the
appliance is installed in a mobile home or when local
codes do not permit grounding through the neutral, If
conduit is being used, go to Step 6 or 7.
3_
8.
b.
C.
Power Cord Strain Relief Installation
Remove the lower rear range wiring cover to expose
the connector block and bracket°
Remove the knockout ring (1%) located on bracket
directly below the connector. To remove the knockout,
use a pair of pliers to bend the knockout ring away
from the bracket and twist until ring is removed.
Knockout ring In bracket_
Knockout ring removed.
Assemble the strain relief in the hole_ Insert the power
cord through the strain relief and tighten_ Allow
enough slack to easily attach the cord terminals to the
connector block° If tabs are present at the end of the
winged strain relief, they can be removed for better fit_
NOTE: Do not install the power cord without
a strain relief. The strain relief bracket should
be installed before reinstalling the rear range
wiring cover.
Connector
i
I
Wiring cover
Strain relief bracket
Power cord (Provided with range cord_
Not part of Pangs.)
16

4. 3-Wire Power Cord Installation
WARNING: The neutral or ground wire
of the power cord must be connected to the neutral
terminal located in the center of the connector block.
The power leads must be connected to the outside
(brass colored) terminals.
Remove the 3 wire terminal screws from the connector
block, Insert screws through each power cord terminal
ring and into the connector block until the screws
engage the nuts, Be certain that the center wire is
connected to the center screw of the connector block.
Tighten screws securely,
Do NOT remove ground strap connection.
Connector blbck
5. 4-Wire Power Cord Installation
WARNING: The neutral wire of the
supply circuit is connected to the neutral terminal
located in the center of the connector block. The
power leads must be connected to the outside (brass
colored) terminals. The 4th grounding lead must be
connected to the frame of the range with the
grounding plate and grounding screw.
a. Remove the 3 screws from the connector block,
b_
C.
Remove the grounding screw and strap from the
connector block middle location and the screw
connection to the frame of the range,
Insert screws through each power cord terminal ring
and into connector block until screw engages nut,
Be certain that the center wire is connected
to the center screw of the connector block,
Tighten screws securely.
d. Attach ground wire to the frame of the range,,
Ground strap
Before
Neutral terminal
_ound Strap
(grounding to range)
After
Neutral termlnaD
.._I'_" _ Grounding
Grounding to range
17

6. 3-Wire Conduit Installation
Remove the 3 screws from the connector block, Insert
bare wires between the connector block terminals and
movable nuts, Tighten screws securely, Do not remove
ground strap connection°
WAR NING: ConnectorblockiSapproved
for copper wire connection only. if aluminum
wire is used, see note below.
NOTE: ALUMINUM WIRING
a.
b_
Do not connect aluminum wire to connector block.
Use copper building wire rated for the correct
amperage and voltage to make 3 (three) 3 copper
jumper wires, Connect wire as per Step 6 or 7
depending on number of wires,
Splice copper wires to aluminum wiring using special
connector terminals designed and UL-approved for
joining copper to aluminum and follow the connector
manufacturer's recommended procedure closely.
Wire used, location and enclosure of splices,
etc., must conform to good wiring practices
and local codes.
_,._ _<_ Screw
_.3i'_/-.,_P--Connector block
terminal
Bare wire __
Movable nut__ "_-"_
I Flexible cable
7. 4-Wire Conduit Installation
Remove the 3 screws from the connector block_ Remove
the grounding strap from the connector block middle
location and the screw connecting it to the frame of the
range° Insert bare wires between the connector block
terminals and movable nuts° Tighten screws securely,
Attach ground wire to the frame of the range,
WARNING: Connector block is
approved for copper wire connection only. If
aluminum wire is used, see note below.
NOTE: ALUMINUM WIRING
a.
b_
Do not connect aluminum wire to connector block.
Use copper building wire rated for the correct
amperage and voltage to make 3 (three) 3 copper
jumper wires. Connect wire as per Step 6 or 7
depending on number of wires.
Splice copper wires to aluminum wiring using special
connector terminals designed and UL-approved for
joining copper to aluminum and follow the connector
manufacturer's recommended procedure closely,
Wire used, location and enclosure of splices,
etc., must conform to good wiring practices
and local codes.
Screw
Bare wire ---------_'_",_
Movable nut-.-__
I Flexible cable
Conduit
tips
Connector
block_
Bracket_
Bare wire tips
_-_---_ Grounding plate
-,_---- Conduit
18

8. Installing the Anti-Tip Device
WARNING:
• Range must be secured with an approved Anti-
Tip device_
• Unless properly installed, the range could be
tipped by you or a child standing, sitting or
leaning on an open door.
° After installing the Anti-Tip device, verify that it
is properly installed and engaged by removing
the storage drawer and inspecting the rear
leveling lego Make sure it fits securely into the
slot.
• This range has been designed to meet all
recognized industry tip standards for all normal
conditions.
° The installation of the Anti-Tip device must
meet all local codes for securing the appliance°
• The use of this device does not preclude
tipping of the range when not properly installed°
These Anti-Tip device installation instructions are for
wood or concrete floors and walls. Any other type of
construction may require special installation techniques to
provide adequate fastening of the Anti-Tip device to the
floor and wall.
1. Locate the device against the rear watl and either the
right or left cabinet. If the countertop overhangs the
cabinet, offset the device from the cabinet by the
amount of overhang If there is no adjacent cabinet,
position the edge of the device at the desired location
of the range side panel.
2. Use the device as a template and mark 2 hole
positions on the wall and 2 hole positions on the floor.
Use either the wood or concrete floor set of positions,
depending on your floor type.
AdjacentCabinetor
FinalLocationorRange
SidePanel__: ....
Wall Holes
RearLeveling
LegofRange
Concrete
Floor
Holes
3. For wood construction, drill a 1/_ pilot hole in the
center of each of the pre-marked wood floor and wall
hole positions (a nail or awl may be used if a drill is
not available)_ Fasten the Anti-Tip device with the
4 screws provided°
,
Attachmenttowall
| Anti-Tip Oevlce _ij Wall plate
-- J Screwmustenter I Jl;l J
r_..l_ w°°d _ metal
, ,_\\\\\\\\\\4,,',,,\\\\\\\\\_\
For concrete construction, you will need four 1/4 x
11/_ lag bolts and four 1/20oD sleeve anchors (not
provided). Drill the recommended size hole for the
anchors intothe concrete at the center of each pre-
marked floor and wall hole position, Install the sleeve
anchors into the drilled holes and then install the lag
bolts through the device,
Do not overtighten the bolts.
Slide the range against the wali, and check for proper
installation by removing the storage drawer and
inspecting the rear leveling leg Make sure it fits
securely into the slot on the Anti-Tip device,
9. Level the Range
1. Using the wrench, back out the four leg levelers
at least two turns.
.
3.
.
5,
The range must be level
for proper cooking and
baking.
Install the oven racks°
Use a 17/16 open end
wrench or an adjustable
wrench to equally back
out the four leg levelers
two or three turns each°
Put a spirit level or a
glass measuring cup
partially filled with water
on one of the oven racks.
[_ LOWER
_ RANGE
SPIRIT
LEVEL.
Use the wrench to adjust
the leg levelers until the
range is level.
10. Final Check
Be sure all range controls are in the OFF
position before leaving the range.
19

Problem Possible Causes What To Do
surface units The surface units are not plugged With the controls off, check to make sure the surface
not functioning in solidly, unit is plugged completely into the receptacle_
properly
The surface unit controls Check to see the correct control is set for the surface
are improperly set, unit you are using,
The drip pans are not set securely With the controls off, check to make sure the drip pan is
in the cooktop, in the recess in the cooktop and that the opening in the
pan lines up with the receptacle°
Oven light does Light bulb is loose or defective. Tighten or replace the bu]b_
not work
Switch operating light is broken. Call for service°
Oven will not work Plug on range is not completely Make sure electrical plug is plugged into a live, properly
inserted in the electrical outlet, grounded outtet,
A fuse in your home may be blown Replace fuse or reset circuit breaker_
or the circuit breaker tripped.
Oven controls improperly set. See the Using the oven section.
Food does not bake Oven controls improperly set. See the Using the oven section
or roast properly
Shelf position is incorrect or the See the Using the oven section,
shelf is not level.
Incorrect cookware or coolG,Jare of See the Using the oven section,
improper size being used.
Oven thermostat needs adjustment. See the Adjust the oven thermostat--Easy to do
yourself! section
Food does not Oven is not set at BROIL. Make sure you turn the knob all the way to the
broil properly BROIL position
Door not open to the broil stop See the Using the oven section.
position as recommended.
Improper shelf position being used. See the Broiling guide,
Food being cooked in a hot pan. Use the broiling pan and grid that came with your
range° Make sure it is cool,
Cookware not suited for broiling, Use the broiling pan and grid that came with your range,
See the Using the oven section.Aluminum foil used on the broiling
pan and grid has not been fitted
properly and slit as recommended,
In some areas the power (voltage)
may be low.
Preheat the broil element for 10 minutes.
Broil for the longest period of time recommended in
the Broiling guide
2O

Problem Possible Causes What To Do
Oven temperature Oven thermostat needs See the Adjust the oven thermostat--Easy to do
too hot or too cold adjustment, yourself! section.
Clock and timer do Plug on range is not completely Make sure electrical ptug is plugged into a live, properly
not work inserted in the electrical outlet, grounded outlet°
A fuse in your home may be blown Replace fuse or reset circuit breaker
or the circuit breaker tripped.
Oven controls improperly set, See the Using the clock and timer section°
The display goes Power surge. Disconnect power at the fuse box or circuit breaker for
blank or indicator at least !0 seconds.Turn power on and power up your
lights come on when range.. If the indicator lights are still on, call for service°
range is not in use
Oven door is The door is out of position. Because the oven door is removable, it sometimes gets
crooked out of position during instal_ation_To straighten the door,
push down on the high corner.
Oven makes This is the sound of the heating This is normal_
clicking noise element turning off and on during
cooking functions,
Power outage Power outage or surge,
Some models will automatically resume their setting once
the power is restored_ On models with a clock, you must
reset the clock. If the oven was in use, you must reset it
by turning the Oven Temperature knob back to OFF,
setting the clock and resetting any cooking function_
21

ELECTRICRANGEWARRANTY
/'FULL ONE YEAR WARRANTY ON ALL PARTS
If, within one year from the date of installation, any part fails to function properly due to a defect in
material or workmanship, Sears will repair or replace it, at our option, free of charge.
If this product is subjected to other than private family use, the above warranty is effective for
only 90 days°
WARRANTY SERVICE IS AVAILABLE BY CONTACTING THE NEAREST SEARS SERVICE
CENTER IN THE UNITED STATES.
This warranty gives you specific legal rights, and you may also have other rights which vary from state
to state°
- Sears,Roebuck.andCowDept817WAHoffmanEstates,IL60179 j
To Further Add To The Value Of Your Range, Buy a Sears Maintenance Agreement.
f
Years of Ownership Coverage 1st Year 2nd Year 3rd Year
1. Replacement of Defective Parts W MA MA
2. Annual Preventive Maintenance
Check at your request MA MA MA
W - Warranty MA - Maintenance Agreement
KenmoreAppliancesaredesigned,manufacturedandtested[oryearso[dependableoperationYet,anyappliancemayrequireservice
fromtimeto time TheSearsMaintenanceAgreementoffersyouanoutstandingserviceprogramforyourproduct,
Thetableaboveshowstheadditionalbenefitsa SearsMaintenanceAgreementofferscomparedtoa SearsWarranbj
ContactyourSearsSalesAssociateorlocalSearsSet'€iceCentertopurchaseaSearsMaintenanceAgreement
22

INSTRUCCIONESDESEGURIDAD
Instruccionesde seguridad importantes ..... 24--25
FUNClONAMIENTO
Caracter_sticas de su estufa .................... 26
C6mo usar las unidades de superficie ........... 27
C6mo usar el homo ......................... 29-31
CUIDADO & LIMPIEZA
Cuidado y limpieza ........................ 32-35
INSTRUCCIONES DE INSTALACION
Dimensiones & espacios ..................... 36
Requerimientos el_ctricos .................... 36
Requerimientos de los pisos ................... 37
Conexiones el6ctricas .................... 37-39
InstalaciSn de dispositivo contra volcaduras ..... 40
Nivetaci6n de la estufa ...................... 40
COMO SOLUCIONAR PROBLEMAS
Antes de Ilamar para un servicio ............. 41,42
Garantfa ................................... 43
Servicios para el consumidor ................. 44
Servicios de reparaci6n ...................... 44
Para su conveniencia y referencia futura, por favor
escriba los nL_meros de mode!o y sede en el espacio que
se provee, El nemero de modelo y el nSmero de serie de
su estufa etectrica pueden set encontrados sobre una
etiqueta detr,'is de ta puerta de ta estufa o detr_ts del
caj6n de almacenaje,
NUMERO DE MODELO:
NUMERO DE SERIE:
iADVERTENCIA!
Para su seguridad la informaci6n en este manual
debe set seguida para minimizar el rtesgo de
incendio o explosibn, golpe de corriente, o para
prevenir dafio a la propiedad, heridas personales,
o p_rdida de vida.
ADVERTENCiA-DISPOSITIVO
CONTRA VOLCADURAS
Todas ias estufas se pueden volcar io
cual podr|a resultar en heridas.
Para prevenir una volcadura accidental de la
estufa, p_guela a la pared instalando el
dispositivo contra volcaduras que se provee.
Para revisar si el dispositivo est& instalado y
enganchado adecuadamente, haga ladear la
estufa cuidadosamente hacia adelante_ El
dispositivo contra volcaduras deberfa estar
enganchado para prevenir que la estufa
se vuelqueo
Si usted separa fa estufa de la pared por cualquier raz6n,
aseg_rese que el dispositivo est& adecuadamente
enganchado cuando empuje la estufa contra la pared,
Si no; hay un.posibte-riesgo de que_la,,estufa seovuetque
y cause heridas si usted o un nitro se para, se sienta o
se afirme sobre una puerta abierta.
Por favor haga referencia a la informaci6n del Dispositivo
contra Volcaduras en este manual. La falla de tomar esta
precauci6n podfla resultar en que la estufa se vuelque y
en heridaSo
Lea todas las instrucciones antes de usar
este aparato.
Cuando se usan aparatos el_ctricos, se debe seguir
precauciones de seguridad bbsicas, incluyendo Io
siguiente:
• Use este aparato solamente con el prop6sito para el
cual rue diseSado como se describe en esta Guia de
Uso y Cuidado.
oAsegt3rese de que el aparato estb instalado
adecuadamente por un electricista calificado y que
haga tierra de acuerdo a las instrucciones de
instalaci6n que se proveeno
• No trate de reparar o reemplazar ninguna parte
de su estufa a menos que sea recomendado
especificamente en este manual. Todos los otros
servicios debedan ser referidos a un t_cnico calificado.
• Haga que el instalador le muestre la ubicacibn del
interruptor del circuito o del fusible. M_rquelo para
una referencia f_ciL
• Antes de hacer algt_n servicio, DESENCHUFE O
DESCONECTE EL PASO DE LA ELECTRlClDAD
EN EL PANEL DE DIS'rRIBUClON DE LA CASA
SACANDO EL FUSIBLE O APAGANDO EL
INTERRUPTOR DEL CIRCUITOo
23

. No deje solos a los niSos--los ni_os no se deberian
dejar solos o sin ser vigifados en un &rea donde un
aparato electrodom_stico est& en uso. Nunca seles
debefia permitir sentarse o pararse sobre cualquier
parte de la estufao
• No permita que alguien se suba, se pare o se cuelgue
de la puerta, del caj6n de almacenaje, o la cubierta
para eocinar. Podrfa dafiar la estufa y posiblemente
hacerla voicar, causando severas heridas personales.
• No guarde los materiales inflamables dentro del
horno o cerca la superficie de coccibn,
• PRECAUCION: LOS ARTICULOS DE INTERES PARA
LOS NINOS NO SE DEBERIAN GUARDAR EN LOS
GABINETES QUE ESTAN SOBRE LA ESTUFA O EN
LA PARTE TRASERA DE UNA ESTUFA-LOS NItrOS
QUE SE SUBAN SOBRE LA ESTUFA PARA
ALCANZAR COSAS PODRIAN RESULTAR
SERIAMENTE HERIDOS.
Nunca se ponga ropa sueita o ropa que le quede
colgando cuando use ia estufa. Tenga cuidado
cuando tome cosas guardadas por sobre la estufa.
Los materiales inflamables se podrlan encender si se
ponen en contacto con las unidades calientes de ia
superficie o los elementos calentadores y podrfan
causar graves quemaduras.
PRECAUCiONES BASICAS
DE SEGURIDAD
• Use solamente agarraderas para ollas secas-las
agarraderas para ollas mojadas o hSmedas sobre las
superficies calientes podrfan producir quemaduras por
vapor.,No permita que las agarraderas de las ollas
toquen las unidades de superficie o los elementos
calentadoreso No use una toalla u otro paso abultado.
• Para su seguridad, nunca use su estufa para
entibiar o calentar la habitacibn.
• No guarde o use materiales combustibles, gasolina
u otros vapores o liquidos inflamables cerca de
esta o de cualquier otro aparato electrodom_stico.
• Mantenga los filtros de la campana y para la grasa
limpios para mantener una buena ventilacibn y
evitar incendios de grasa.
• No permita que la grasa u otros materiales
inflamables se acumulen en o cerca de la estufa.
No use agua sobre incendios de grasa. Nunca
tevante una otla en llamas° Apague los controleso
Sofoque una ella en llamas sobre la unidad de
superficie cubriendo completamente la olla con una
tapa que quede bien apretada, bandeja para galletas o
una bandeja ptana. Use un extintor para propSsito
mL_ltiptede qufmico seco o a espuma.
La grasa en llamas afuera de la olla se puede apagar
cubri_ndola con soda para hornear o, si est&
disponible, usando un extintor para prop6sito multiple
de qufmico seco o a espuma,
Las llamas dentro del homo se pueden sofocar
completamente cerrando la puerta del horno o usando
un extintor para prop6sito m_ttiple de qufmico seco o a
espuma.
No toque las unidades de la superficie, los
elementos calentadores, o la superficie interior del
homo° Estas superficies podrfan estar Io
suficientemente caliente para quernar aunque se vean
de color oscuro. Durante y despu_s dei uso, no toque o
permita que la ropa u otros materiales inflamables
hagan contacto con las unidades de superficie, con las
&reas cerca de las unidades de superficie o cualquier
&rea interior del horno; permita suficiente tiempo para
que se enfrfe primeroo
Potencialmente las superficies calientes incluyen la
superficie para cocinar, las &reas que hacen frente a la
superficie para cocinar, las,aberturas de la ventilaci6n
del homo, las superficies cerca de la abertura,
aberturas alrededor de la puerta del homo y las partes
de metal de la moldura arriba de ta puerta.
RECUERDE: La superficie interior dei homo podrla
estar caliente cuando se abre la puerta,
COMO PROTEGER CONTRA
ENFERMEDADES
CAUSADAS POR LAS
COMIDAS
• Cocine bien la came y las aveswla carne a por Io
menos una temperatura INTERNA de 160°F. y las
aves a por !o menos una temperatura INTERNA
de 180°R El cocinar a estas temperaturas
generaimente protege contra las enfermedades
causadas por los alimentos.
SEGURIDAD EN EL USO
DEL HORNO
° Pbrese lejos del homo cuando abra la puerta del
horno. El aire caliente o el vapor que escapa puede
causar quemaduras a las manos, rostro y/u ojos.
• No caliente los envases que est6n cerrados. La
presibn podria aumentar y el envase podria
explotar, causando heridas.
• No obstruya ia ventilaci6n del homo. La ventilaci6n
est& debajo de la unidad de superficie trasera derecha,
• Mantenga el horno libre de acumulacibn de grasa.
• Coloque la parrilla del horno en su posicibn
deseada mientras el homo est6 frio. Si tiene que
tomar las parrillas cuando est_n calientes, no
permita que las agarraderas para las ollas o los
guantes para horno hagan contacto con los
elementos para calentar.
24

• Elsacarla parrillahastalaposicibndetopeesuna
convenienciaparalevantarcomidaspesadas.Es
tambi_n una precauci6n contra quemaduras causadas
al tocar las superficies calientes de la puerta o las
paredes de! horna,
• Cuando use bolsas para cocinar o asar en el homo,
siga las direcciones del fabricante.
• No use el homo para secar peribdicos. Si se
sobrecalientan, se podrian incendiar.
• No use el horno para almacenar cosas.
Los articulos guardados en un homo se
podrian incendiar.
• No deje productos de papel, utensilios de coeina o
comida en el homo cuando no est_ en use.
UNIDADES DE SUPERFICIE
Use el tama_o de ollas adecuado--seleccione /as ollas
que tengan rondo piano Io sLfficientemente grande para
cubrir el elemento calentador de la unidad de superficies,
El uso de ollas de tama_o demasiado peque_o expondr&
una porci6n de la unidad de superficie a un contacto
directo y podrfa resultar en el incendio de la ropao La
relaciSn correcta entre !as ollas y el tama_o de la unidad
de superficie tambi_n mejorar_ la eficiencia.
• Nunca deje las unidades de superficie sin ser
vigiladas cuando est_n en posicibn alta de
temperatura_ Los derrames causan humo y los
derrames de grasa podrfan incendiarse.
Use poca grasa para freir eficientemente en forma
baja o profunda. El llenar demasiado ta ella con
grasa podrfa causar derrames cuando se le agrega
la comida,
Si se usa una combinacibn de aceites o grasas
para frefr, revu_lvalas antes de calentar, o a medida
que la grasa se derrita lentamente,,
Siempre catiente la grasa lentamente y obs_rvela
cuando se calienta.
Sblo ciertos tipos de elias de vidrio, vidrio
cer&mica, piedra u otros tipos de envidriados
se pueden usar para cocinar sobre la cubierta;
otros se podrian quebrar debido a los s_bitos cambios
de temperatura.
Para minimizar la posibilidad de quemaduras,
incendio de materiales inftamables y derrames,
la manitla de una olla deberfa estar dirigida hacia el
centro de la estufa sin que se extienda por sobre las
unidades de superficie que est_n cercao
Siempre apague las unidades de superficie antes
de sacar las elias,
Cuando prepare comidas alas llamas debajo de la
campana de ventilacibn, encienda el ventilador.
Use un term6metro para grasa profundo cuando
sea posible para prevenir sobrecalentar la grasa
mds all& del punto de humo.
Vigile las comidas que se est_n friendo en
posiciones altas o medianas aitas.
Las comidas que se van a freir deberian estar Io
m_s secas posible. El hielo sobre los alimentos
congelados o la humedad sobre las comidas frescas
pueden causar que la grasa haga burbujas hacia arriba
y que caigan hacia los lados de la olla.
Limpie la cubierta para cocinar con cuidado. Si se
usa una esponja mojada para limpiar derrames sebre
una cubierta caliente, tenga cuidado para evitar
quemaduras por vapor.
Para prevenir la posibilidad de una quemadura o
un golpe de corriente, siempre aseg0rese que los
controles de todas las unidades de superficie est_n
en posiciSn OFF (APAGADO) y que todos los
espirales est_n frfos antes de tratar de levantar
o sacar una unidad,
No sumerja o remoje las unidades removibles de la
superficie, No las ponga en una lavadora de plates.
Asegdrese que los bolos para los derrames y los
tubes de la ventilacibn no est6n obstruidos y que
est_n en su lugar. Su ausencia durante el proceso
de cocinar podrla dariar las partes y el alarnbrado de
la estufa_
No use papel aluminio para forrar los bolos para
derrames o en ninguna parte del horno excepto
come se describe en este manual. El real use podria
resultar en un golpe de corriente, un peligro de
incendio o un da_o a la estufa,
GUARDE ESTAS INSTRUCCIONES
25

NOTA: No todas las caracterfsticas est&n en todos los modeloso
Interruptor de ia
iuz del homo
Perillas de control para
unidad de superficie (4)
Controles
del reioji
cron6metro Perilla de control
y dial del horno
Ventilaci6n del homo (Ubicado debajo de
la unidad de superficie trasera derecha)
Espirales de las unidades
de superficle (4)
Elemento para asar
N_meros de modelo y serie
(encontrados sobre una etiqueta
detr_s de la puerta del homo o
detr&s del cajSn de almacena
k,
Elemento para hornear
Cajbn de almacenale
Cacerola y parrilla para asar
26

Cbmo ponerlas en posicibn
Empuje la perilla hacia adentro y h&gala girar en
cualquier direcciSn a la posiciSn que deseao
En ambas posiciones OFF (APAGADO) y Hi (ALTO) la
perilla se engancha en posiciSn., Usted podrfa eschuchar
unos leves sonidos mientras cocina, indicando que et
control est& manteniendo el nivel de poder que usted
seleccionS.
La luz indicadora de UNIDAD DE SUPERFIClE se
encender& cuando cuaiquier unidad de superficie
est_ prendida.
NOTA: La luz indicadora de UNIDAD DE SUPERFICIE
se podrfa encender entre las posiciones de control de
superficie LO (BAJO) y OFF (APAGADO), pero no hay
paso de corriente hacia las unidades de superficie,.
OFF OFF
Cbmo seleccionar los tipos de ollas
Consejos para ollas de superficie
Use ollas de peso medio o peso
pesado_ Las ollas de aluminio
conducen el cator m&s
r_fipidamente que los otros metaleso
Las ollas de hierro forjado o
enchapadas en hierro forjado son
tentas en absorber et calor, pero
generalmente cocinan parejamente
en las posiciones de calor bajas y
medianas. Las oilas de acero
podrlan cocinar desparejamente si
no se combinan con otros metaleso
No m_s de una pulgada
Para mejores resultados de cocina, las ollas deberian
ser de fondo piano. Haga coincidir el tamaSo de las oltas '
con el tama_o de la unidad de superficieo La olla no se
debeda extender m&s de 1 putgada m&s all& def borde
de la unidad de superficie.
Cbmo cocinar en un wok
Recomendamos que usted use
solamente un wok de fondo plano,_
Est&n disponibles en su tienda
local.
Use sotamente woks
de rondo plano_
No use woks que tengan anillos
de soporte., El uso de estos tipos
de woks, con o sin el anillo en sulugar, podfia ser
peligroso_ El colocar el anillo sobre la unidad
de superficie causar& una acumulaci6n de calor
que dar_ar& la cubierta para cocinar de porcelana,
No trate de usar tales woks sin el aniilo. Usted podrfa
quemarse seriamente si el wok se da w_elta_
27

Perilla para la temperatura
dei horno
Haga girar esta perilla a la posici6n
que deseao
La luz del ciclo del homo se
enciende hasta que el homo IIega
a su temperatura seleccionada,
luego se enciende y se apaga con
el elemento(s) del homo durante
el proceso de cocinaro
Cbmo poner el reloj:
1. Empuje el bot6n del CLOCK (RELOJ) dos veces.
2. Empuje los botones SET TIME _/• (PONER
LA HORA),,
3. Empuje el bot6n del CLOCK (RELOJ) para empezar.
Aseg_rese que e/re/oj est_ puesto en /a hora
correcta de/dr&
Caracteristicas del reloj y del cronbmetro
(en algunos modelos)
1. Botbn TIMER ON/OFF (CRONOMETRO
ENCEN DIDO/APAGADO)
Empuje este bot6n para seleccionar la funci6n del
cron6metro.
2. Botbn del CLOCK (RELOJ)
Empuje este bot6n antes de poner el reloj.
3. Dial
Muestra ta hora del d_a y la hora puesta por el
cronSmetro.
4. Botones SET TIME J,/V (PONER LA HORA)
Estos botones le permiten programar el reloj y el
cron6metroo
Cbmo programar el cronbmetro:
1. Ernpuje el bot6n TIMER ON/OFF (CRONOMETRO
ENCENDIDO/APAGADO) o
q
Empuje los botones SET TIME A/V (PONER LA
HORA) hasta que la cantidad de tiempo que desea
se muestre en el dial Et cron6metro empezar&
autom&ticamente dentro de unos pocos segundos
despu6s de soltar el botSn.
3. Empuje el bot6n del CLOCK (RELOJ) para volver ai
dial del reloj si es necesario_ La funci6n del cron6metro
retendr& las posiciones programada&
El cron6metro es un cron6metro para minutos solamente.
El cron6metro no controla las funciones del horno.
La posici6n m_xima del cron6metro es 9 horas y 50
seglmdoso
Cbmo reprogramar el cronbmetro:
Si el dia! todav{a est,. mostrando el tiempo que queda,
usted podrla cambiarlo empujando los botones SET
TIME JkiY (PONER LA HORA) hasta que la cantidad
de tiempo que usted desea aparezca en el dial.
Si el tiempo que queda no aparece en el dial, h&galo
aparecer empujando el botSn TIMER ON/OFF
(CRONOMETRO ENCENDIDO/APAGADO) y luego
empujando los botones SET TIME _k/V (PONER LA
HORA) hasta que la nueva cantidad de tiempo aparezca
en el dial.
Para cancelar el cronbmetro:
Empuje el botSn TIMER ON/OFF (CRONOMETRO
ENCENDIDO/APAGADO) dos veces,
28

Antes de empezar...
Para evitar posibles quemaduras, coloque las
parrillas en la posici6n deseada antes de encender
el horno.
Las parrillas tienen topes, de
manera que cuando est6n
correctamente puestas sobre
los soportes, se detendr&n
antes de salir comptetamente,
y no se dar_,n vuelt&
Cuando ponga y saque las oltas,
tire la parrilla hacia el tope sobre
el soporte de la parritla,,
Para sacar la parrilla, tirela
hacia usted, levante el frente
y t{rela hacia afuera,,
Para reemplazar, coloque la
parte de atr&s de la bandeja
(los topes) sobre el soporte,
levante el frente y empuje la
parrilla hacia adentro,,
C6mo programar el horno pare Hornear y Asar.
1. Haga girar la perilla de temperatura del homo a la
temperatura que desea.
2. Cocine la comida en el tiempo necesario m[nimo de la
receta. Cocine por m_.s tiempo si es necesario.
3. Haga girar la perilta de la temperatura del homo a OFF
(APAGADO) cuando termine de cocinar,,
O
O
G
O
O
O
Precalentamiento y colocaci6n de los utensilios
Precaliente el homo si la receta Io requiereo Para
precalentar, ponga el homo a la temperature correct&
El precalentamiento es necesario para obtener buenos
resultados cuando hornee queques, galletas, pasteles
y pane&
Para hobos sin indicadores de precalentamiento de
luz o tono, precaliente por 10 minutos.
Los resultados del horneado ser&n mejores si los
utensilios para hornear est&n centrados Io m&s posible
en el horno. Los utensilios no se debedan tocar uno a
otro o tas paredes del homo° Si usted necesita usar dos
parrillas, coloque los utensilios de manera que ninguno
quede directamente encima de otro, y deje
aproximadamente l_h desde el frente del utensitio
.hasta el frente de la parrill& _,)
Papel aluminio
Nunca cubra completamente una __,__
parrilla con papel aluminiOo Esto
disturbar& la circulaci6n del calor y
resultar& en un horneado de mala calidad,
Usted puede usar papel aluminio para forrar la cacerola
y ta pardlia para asaroSin embargo, usted debe moldear
el papel aluminio apretadamente a la parrilla y hacer
cortes sobre _1que coinddan con las ranuras de
la parrilla.
Cbmo programar el horno
para asar
1, Coloque la comida sobre ta
parrilla para asar de la
cacerola pare asaro
2. Siga las posiciones de las
parrillas sugeridas en la
Gufa para Asar,
3, Haga girar la perilla de la
temperatura dei homo a
BROIL (ASAR),
Deje abierta la puerta de/
homo en la posici6n de
paro para asar,
La puerta permanece
abierta pot si sol& pero
ta temperature adecuada
se manttene en el homo
El homo tiene 6 posiciones de parrifta.
lipo de comida Posicion de parrilla
Pastelescongelados C
(sobrebandejasparegalletas)
"Angelfood",queques BoC
Pandtos,pastelillos,"brownies",galtet_s, BoC
quequims,termselcapes,pasteles
Cacerolas Bo C
Pavo Ro A
Asado R,AoB
29

El tamaSo, peso, grosor, temperatura
inicial, y su preferencia de grado de
cocci6n afectar& las cantidades de
tiempo pare asar. Esta guIa basada en
carnes a la temperatura del refrigerador.
Guia para asar
Cantidadylo Posici(ln Primer lado Segundolado
Comida grosor deparriila Tiempo (min.)Tiempo (mino) Comentarios
Camemolida 1 Ib (4tortas) C t3 8 Sep,lrelasparejamente
'/za ¥4 grosos
4 Ibs.(t2 tortes) C t5 11
Bislecs
Crudosl"
Medianos
Bien cocidos
Crudost
Medianos
Biencoctdos
Polio
Productosdepanaderfa
Pan(toast)
Pancitosingleses
3/4a] gmsor
1a 1Vzlbs
1V2 grosor
2a2 V21bs
1enterocortado
2a2 V21bs,
cortadoa Iolargo
Pechuga
2a4 rebanadas
2(partidos)
E
D
D
c
c
D
B
B
D
E
6
8
t0
10
15
20
25
25
3
3-4
4
8
8
10-t2
20
2S
15
Losbtstecsdemenosde z/4son
dif(cilesdecocinarcrudos.
Cortelagrasa
Apliquemantequilladerretidaconunabrocha
Aseconpielhaciaabajoprimero
SepareparejamenteColoquepancillos
inglesescortehaciaarribay ponga
..... mantequ!llas!desea:
Colasde langosta 2-4 B 18-20 Node Corteparart,isdela caparazOn.Abra ApiiquE
vuelta mantequifladerretidaconbrochaantesy
durantelacocci0nsi desea.
'Fiietesde'pes'ca[Io....................i'"Ib'('AaV_'d'egrosor)................D ............ 5 5 Tomey d_vueltaconcuidad'o,Api'i'que
D
D
C
C
c
c
D
D
D
D
to
to
6
8
lO
15
7
10
9
14
brochaconmantequllladelim6nantes
. y duramela coccl0n,sidesea, . ..
5 D_vueltacuidadosamenleNod_vuelta
tapielhaciaabajo.
6
B
10 Cortelagrasa
15
4 Cortela grasa
9
6
10
SalmOn
Bistecs
,Filetes ........
Taja{lasdejam(ln
(precocinadas)
Chuletasde cerdo
Biencocidas 2(1 grosor)Aprox.I lb.
Chuletasde cerdem
Medianas 2(t grosor)aprox 10
Biencocidas a 12oz
Me(lianas 2(1V_grosor)aproxt lb..
Biencocidas
2(I grosor)
2 (11za,=14grosor)
V_grosor
I grosor
2(V_grosor)
t El Departamento deAgriculture de 13.S..dice que "La came de res es popular, peru usteddeber[a saber que cocfnerla haste
solamente 140 F significa que algunos organismos venenosos de la comidapodrian sobrevivir. (Fuente: Safe Food Book,
YourKitchen Guide..USDARev. June 1985)
3O

Ajuste el termostato del horno---iFbcil de
hacer por usted mismo!
Usted podria encontrar que su nuevo homo cocina
diferentemente at que reemplaz& Use su homo nuevo
por unas pocas-semanas para famitiarizarse m&s con _1,.
Si usted todavia cree que su homo nuevo est&
funcionando demasiado caliente o fifo, usted mismo
puede ajustar el termostato.
No use term6metros, tales como los que se encuentran
en las tiendas, para revisar la posiciSn de temperatura
de su homo. Estos term6metros poddan variar entre
20-40 gradoso
NOTA: Este ajuste no afectar& las temperaturas
para asar_
Cbmo ajustar el termostato
1, Saque la peri!la de la temperatura del homo de! tallo,
mire la parte de atr&s de la perilla y note la posiciSn
presente antes de hacer cualquier ajusteo
2. Suelte ambos torniltos en la parl:e de atr&s de
la perill&
3. Para subir la temperatura del homo, mueva el
apuntador hacia las palabras "MAKE HOTTER".
Para bajar la temperatura del homo, haga girar el
apuntador hacia las patabras "MAKE COOLER".
Cada marca cambia la temperatura en 10 grados
Fahrenheit°
4. Apriete los torniltos.
5. Coioque nuevamente la perilla, haciendo coincidir la
parte plana de la perilla con la del tallo.
Parte trasera de pedlla de
TEMP de HORNO
Parte delantera de perilfa
de TEMP de HORNO
(apatience podda variar)
iEI tipo de margarina afectarb los resultados del
horneado!
La mayoria de las recetas para hornear se han
desarrollado usando productos de alto contenido
de grasa tales como la mantequilla o margarina
(80% de grasa). Si usted disminuye la grasa, es
posible que la receta no d_ los mismos resultados
como si usara productos de alto contenido de grasa.
La fa!la de una receta podrfa resultar si los queques,
pasteles, galletas y dulces se hacen con productos
de bajo contenido de grasa, Mientras m&s bajo sea
el contenido de grasa del producto, m&s se notar&
la diferencia,
Las normas federales requieren que los productos
marcados "margarina" contengan por Io menos 80%
de grasa por peso° Los productos de bajo contenido
de grasa por otra parte, contienen menos grasa y m&s
aguao El alto contenido de agua de estos productos
afecta la textura y el sabor de las comidas horneadas.
Para mejores resuLtados con sus viejas recetas favoritas,
use margarina, mantequilla u otros productos de este
tipo que contengan por Bomenos 70% de aceite vegetal_
31

Si saca su estufa para limpiarla, hacerle
servicio o per cualquier raz6n, asegdrese
que el dispositivo contra volcaduras se
reengancha adecuadamente cuando
ponga la estufa nuevamente en su lugar.
La falla de no tomar esta precaucibn
podrfa resultar en que la estufa se
vueique y cause heridas.
Interior del horno
Con un buen cuidado, el terminado de esmalte
porcelanizado del interior del horno--techo, fondo, lados,
espalda y parte interior de la puerta--se ver&n nuevos
por ar]os,
Permita que la estufa se enfrfe antes de limpiarla_
Recomendamos que se ponga guantes cuando limpie
la estufao
El jab6n y agua normalmente har&n un buen trabajo.,
Las salpicaduras o derrames pesados podHan requerir
una limpieza con un limpiador abrasivo suave° Las
almohadillas de acero con jab6n tambi_n podrfan
ser usadas
No permita que los derrames de comida con un alto
contenido de azScar y _.cido (tales como la leche,
tomates, chucrut, jugos de fruta o rellenos de pasteles)
permanezcan sobre la superficie. Podrfan causar
una mancha opaca incluso despu6s de que hayan
sido limpiados.
La amonia para uso de casa podrfa facilitar el trabajo
de limpieza. Coloque 1/2 taza en un envase bajo de
vidrio o greda dentro de un homo frfo durante la noche_
Los vapores de la amonia ayudar&n a soltar la grasa
y la comida quemada.
Si es necesafio, usted podrfa usar un limpiador de
hornos. Siga las direcciones del envase..
No rocie el limpiador de hornos sobre los controles y
los interruptores el_ctricos porque podrfa causar un
corto circuito y resuItar en chispas o incendio.
No permita que se acumule una capa del limpiador sobre
el sensor de temperatura--podrfa causar que el homo
se catiente incorrectamente. (El sensor est& ubicado
en la parte de arriba del horno). Cuidadosamente
limpie el sensor despu_s de cada limpieza del homo,
teniendo cuidado de no mover el sensor ya que un
cambio en su posici6n podda afectar ta manera en
que el homo homea.
No rocie ning_n timpiador de homos sobre ta puerta del
homo, manillas o cualquier superficie exterior del homo,
gabinetes o superficies pintadaso
Puerta del horno levantable
La puerta del homo es sacable para
la limpieza,
No levante la puerta tombndola
de la manilla. Asegdrese de que
el horno est6 completamente frio.
Para sacar la puerta, _.brala hasta
la posici6n especial de paroo
T6mela firmemente de cada tado y
levante la puerta derecho hacia
arriba y s&quela de las bisagras,
Levante la puerta derecho
hacia arriba y s_queta de
tas bisagras,
No ponga las manos entre la bisagra y el marco de la
puerta del homo.
Para colocar nuevamente la puerta, asegQrese de
que las bisagras est_n en la posici6n especial de tope..
Co!oque las ranuras del rondo de la puerta
cuadradamente sobre las bisagras y b&jela
lentamente sobre ambas bisagras.
Para limpiar el interior del horno:
_ E! jab6n y agua har&n normalmente un buen trabajoo
Las satpicaduras y los derrames grandes podrfan
requerir una limpieza con un limpiador abrasivo suave.
Las almohadillas de acero con jab6n tambi_n podrlan
ser usadas.
No permita que los derrames de comida con un
alto contenido de az_car o &cido (tales como la
leche, tomates, chucrut, jugos de fruta, o rellenos de
pasteles) permanezcan sobre la supe_cie, Podr[an
causar una mancha opaca incluso despu_s de que
hayan sido limpiados.
Para limpiar el exterior de la puerta:
Use jab6n y agua y fimpie completamente la parte
superior, los lados y el frente de la puerta del homo.
Enjuague bien, Usted tambi_n podrt'ausar un limpiador
de vidrios para limpiar el vidrio exterior de la puerta,
No permita que el agua gotee hacia adentro de las
aberturas de la ventilaci6no
Los derrames de salsas para s_7...onar,jugos de fruta,
salsas de tomate y materiales para sazonar que
contengan &cidos podrfan causar una descoloraci6n
y deberian ser limpiados inmediatamente. Cuando la
superficie est_ iffa, limpie y enjuague
No use limpadores para hornos, polvos para limpiar o
abrasivos fuertes en el exterior del homo°
32

Elementos calentadores del homo
No limpie el elemento para hornear
o el elemento para asar. Cualquiera
suciedad se quemar& cuando los
elementos son calentados°
Para limpiar el fondo del homo,
levante levemente el elemento
para hornearo Limpie con agua
tibia con jab6no
Parrillas del horno
Limpie las parrillas con un limpiador 2,
abrasivo o lanilla de aceroo
Para hacer que ias parrillas se deslicen m&s f&cilmente
aplique una pequefia cantidad de aceite vegetal o aceite
para cocinar a una toalla de papel y ffiegue los bordes
de las parrillas con ia toalla de papeL
Reemplazo de la luz dei horno
(en algunos modeIos)
PREOAUCION= Antes d_ereemplazar et foco de ia luz del
homo, desconecte la electricidad
a la estufa en el fusible principal
o en el panel del interruptor
del circuito,
Asegerese que Ia cubierta de ta
tuz y el foco est_n completamente
frlos_
Para sacar la cubierta:
1.
Cubierta con sujetador
de afambre
Ponga una mano debajo de la cubierta para que
no se caiga cuando se suelte. Con los dedos de
la misma mano, empuje firmemente el sujetador
de atambre de la cubierta, Levante la cubierta,
No saque ninguno de los tornillos para sacar
la cubiertao
2. Reemplace el foco con un foco para aparatos
electrodom_sticos de casa de 40-watt.
Para reemplazar la cubierta:
'1. Col6quela en la ranura del recept&culo de la luz,
Tire el alambre hacia adefante hacia el centro de
la cubierta hasta que caiga en su lugar.
2. Conecte la electricidad hacia la estufa,,
Cacerola y parrilla para asar
Despu_s de asar, saque la
cacerola para asar del homo,
Saque la parrilla de la cacerolao
Cuidadosamente vacie la grasa
de la cacerola en un envase
adecuado_
Despu_sde asarsaque
la cacerola para asar
de/homo
Lave y enjuague la cacerota y la parrilla para asar en
agua caliente con una laniIia para fregar con jab6n o con
una almohadilla para fregar de pl&stico.
Si la comida se ha quemado y pegado, ponga detergente
en la parriila mientras est_ caiiente y cebrala con una
toalla de papel o paso para ptatos, El remojar la cacerola
sacar_, la comida quemada pegadao
•La cacerota para asar podria ser limpiada con un
limpiador de hornos comerciaL Si la parrilla es de
esmalte gris, tambi_n se puede limpiar con un limpiador
de hornos, Si la pardlla es de cromo, no use un limpiador
de hornos para limpiarla.
Arnbos, fa cacerola y ia parrilla para asar, se pueden
limpiar en la m&quina para lavar platos_
No guarde una cacerola o parrilia para asar sucia en
ninguna parte de la estufa.
Cbmo sacar el cajbn de almacenaje para
limpiar debajo de la estufa
Para sacar el cajbn
de almacenaje:
1. Tire el caj6n completamente
hacia afuera.
2. Levante el frente y s_,queloo
Para colocar nuevamente LJmpie debajo de
el cajbn: la estufa,
1. tnserte los deslizadores de atr&s del caj6n m_s all&
de los topes sobre los rieles de la estufa
2, Levante el caj6n si es necesario para meterlo
m_,sf&cilmente.
3. Baje el frente clel caj6n, luego empuje para cerrario.
33

Cubierta para cocinar de
esmalte porcelanizado
El acabado de esmalte porcelanizado es firme pero
quebrable si se usa mal,. Este acabado es resistente at
&cido., Sin embargo, cualquier derrame de comida addico
(tales como jugos de fruta, tomates o vinagre) no se
deberia permitir que permanezca sobre el acabado_
Si &cidos se derraman sobre la cubierta cuando est&
catiente, use una toalla de papel seca o un patio para
Iimpiarlo inmediatamente.. Cuando la superficie se haya
enfriado, lave con jab6n y agua. Enjuague bien.
Para otros derrames tales como salpicaduras de grasa,
lave con jab6n y agua o polvos para limpiar despu_s de
que la superficie se haya enfriado. Enjuague bien. Saque
lustre con un paso seco,.
Cubierta para cocinar levantable
Algunos modelos tienen una
cubierta para cocinar que se
puede tevantar para limpiar m&s
f&cilmente_ La cubierta completa
se puede levantar y ser sujetada
en ta posici6n elevada,
Aseg#rese que todas las
unidades de superficie
est#n apagadas antes
de fevantar la cubterta,,
Las unidades de superficie
no necesitan set sacadas; sin
embargo, usted podrfa sacar
una para levantar la cubierta m_,s
f&cilmenteo Hay dos soportes laterales que se enganchan
en posici6n cuando la cubierta est& levantada.
Despu_s de limpiar debajo de la cubierta con agua
caliente con jab6n suave y un paso limpio, baje la
cubiertao Tenga cuidado de no agarrarse los dedos.
Para bajar la cubierta, empuje las barras de soporte
hacia atr#.s y baje cuidadosamente la cubierta hasta
que quede en su lugar,.
Aseg#rese de que todos los controles est#n
APAGADO$ y que las unidades de superficie
est#n frfas antes de tratar de sacarlaso
Unidades de superficie
Para limpiar las unidades de superficie, haga girar el
control a la posici6n m&s caliente por un minuto_ Los
espirales quemar&n cualquier suciedad,
Para sacar una unidad de superficie:
Para sacar los bolos para derrames
Unldad de superflc|e
para la limpieza, tas unidades de
superficie se deben sacar primero.
Levante fa unidad de superficie
como I pulgada por sobre el bolo
para derrames y tfrela hacia afuerao
No levante la unidad de superficie m&s de 1 pulgad&
Si Io hace, es posible que no que de plana sobre el bolo
cuando la enchufe nuevamenteo
El levantamiento repetido de las unidades de superficie
por m&s de 1 pulgada sobre el bolo para derrames puede
daSar permanentemente el recept#,culo.
Para reemplazar una unidad de superficie:
Coloclue nuevamente el bolo _ara derrames en el hoyo de
la cubierta,.AsegSrese de que la abertura del bolo est# en
Ifnea con el recept&culo,
Inserte los terminales de la unidad de superficie a trav_s
de la abertura del bole para derrames y dentro del
recept&culo.
Guie ta unidad de superficie hacia su lugar para que
quede puesta en forma plan&.
No sumerja las unidades de superficie en I[quidos de
ninguna clase.
No limpie las unidades de superficie en una m&quina
para lavar plato&
No doble los enchufes de los terminates de las unidades
de superficie.
No trate de limpiar, ajustar o de arreglar de alguna
manera el recept&culo del enchufeo
Bolos para derrames
Saque las unidades de superficie_ Luego levante y saque
los bolos para derrames.
Para mejores resultados, limpie los bolos para derrames
a mano. Col6quelos en un envase cubierto (o bolsa de
pl_stioo) con un 1/4 de taza de amonia para soltar la
suciedado Luego friegue con una lanitla para fregar con
jab6n si es necesario° Enjuague con agua limpia y saque
brillo con un patio limpio y suave,
Los bolos para derrames tambi_n pueden ser limpiados
en la m&quina para lavar platos.
Limpie el &rea debajo de los bolos para derrames
frecuentemente, La acumulaci6n de suciedad,
especialmente la grasa, se podria incendiaro
No cubra los bolos para derrames con papel aluminio+
El usar papel aluminio tan cerca del recept&culo podrfa
causar un golpe de corriente, incendio o daSar la estufa.
34

Panel de control y perillas
Limpie tas salpicaduras con un f_..,
patio h_medo_ Saque ta suciedad
pegada agua tibia con jab6n° *,
No use abrasivos de ninguna clase _
sobre el panel de control.
Tire la peritta derecho
Las perittas de controt se pueden hacfa fuera de! _a[[o,
sacar para limpiarlas f&cilmente°
Para sacar una pedlla, tirela derecho hacia fuera del tallo.
Lave las perillas en jab6n y agua pero no las remoje.
Ventilaci6n del horno
Nunca cubra la abertura con
papel aluminio o ningt_n otro
material. _
El homo se ventila a trav6s _--------_"
de una abertura deba]o de
la unidad de superficie
trasera derecha, I _ .... |
f
Superficies pintadas
Las superficies pintadas incluyen fos lados de la estufa
y los lados de la moldura de la puerta.
Limpie estos con jab6n y agua o con una soluci6n de
vinagre y agua,
No use limpiadores de hornos comerciales, polvos para
limpiar, lanillas de acero o abrastvos fuertes sobre
ninguna de las superficies pintadas..
Ventana de vidrio (en algunos modelos)
Para limpiar el acabado exterior del vidrio, use un
limpiador de vidrio_ Enjuague y saque brUlo con un
patio seco,
35

ANTES DE EMPEZAR
Lea las instrucciones completa y cuidadosamente,
IMPORTANTEwGuarde estas instrucciones para su
uso pot el inspector de electricidad local.
IMPORTANTE--Observe todos los c6digos y
ordenanzas gobernantes.
NOTA AL CONSUMIDOR:
Guarde esta Guia de Uso y Cuidado para un
uso futuro.
NOTA AL INSTALADOR:
Deje estas instrucciones con la estufa despu_s de
que la instalacibn est_ completada.
NOTA: Esta estufa debe hacer tierra correctamente,
1. Prepare la abertura
Deje un espacio de 1_A desde la estufa alas
paredes verticales adyacentes arriba de ta superficie
de la cubierta para cocinar,,
Deje un espacio minimo de 30 entre las unidades de
superficie y el fondo desprotegido de madera o metal del
gabinete de arriba, y 15 minimo entre la superficie del
gabinete y el fondo de! gabinete adyacente_
EXCEPCION: La instalacidn de un microondas
aprobado u otro aparato para cocinar por sobre la
cubierta para cocinar cumplir_ con las instrucciones
de instalaci6n empacadas con ese aparato.
Si se instala un gabinete para almacenaje, reduzca
el riesgo instalando una campana de estufa que se
proyecte horizontalmente un min, de 5 m&s all&
del fondo de los gabinetes. AsegSrese de que los
revestimientos de papel de las paredes, superficies
de los gabinetes y gabinetes alrededor de la estufa
puedan soportar el calor generado por la estufa,
homo y cubierta para cocinar, hasta 200°R
HERRAMIENTAS QUE NECESITARA:
. Destornillador de cabeza plana grande
• Apretador de tuercas hexagonal de t/4
• Alicate enganchable
. Llave inglesa abierta de 17/i6 o ajustabte
• Cinta para medir.
I
No menos
-<_ ........
el ancho
la estufa
Campana
5 M{n°
REQUERIMIENTOS ELECTRICOS
PRECAUCION, PARA SEGURIDAD PERSONAL:
NO USE UN CORDON DE EXTENSION CON
ESTA ESTUFA. SAQUE EL FUSIBLE DE
I.A CASA O ABRA EL INTERRUPTOR
DEL CIRCUITO ANTES DE EMPEZAR
LA INSTALACION.
Esta estufa debe ser abastecida con un voltaje y
frecuencia adecuada, y conectada a fa rama de un
circuito individual que haga tierra adecuadamente,
protegido por un interruptor de circuito o por un fusible
de tiempo, como se especifica en fa tabla de valores.
E! alambrado debe cumplir con los Cbdigos
EI6ctricos Nacionales.
Si el servicio e!_ctrico que se provee no cumple con las
especificaciones de arriba, haga que un electricista
licenciado instale un recept_cuto (enchufe) aprobadoo
Debido a que los terminales de la estufa no son
accesibles despu_s de que la estufa est_ en posiciSn,
se debe usar un conducto de servicio o cord6n flexible.
Mino
Instale la
caJa de l
recept_culo
en cualquler
lado de CL
Ublque la caja del
receipt_curo dentro
de cua|qulera de las
_ireas con sombra
36

Piso debajo de la estufa
Su estufa, como muchos otros articulos de hogar, es
pesado y se puede hundir en los cubrepisos suaves
tal como el vinilo acolchonado o la alfombra.
Cuando mueva la estufa a este tipo de piso, deber|a ser
instalada sobre una ptancha de madera terciada de 1/4
(o un material similar) como sigue:
Cuando el cubrepisos termina al frente de la estufa, el
&rea donde descansar& ta estufa debeda ser subido
con madera terciada al mismo nivel o m&s arriba que
el cubrepisos. Esto permitir& que la estufa pueda set
movida pars ser limpiada opara un servicio,
2. Prepare la conexibn el_ctrica
Efectivo el 1 de enero, 1996 el Cbdigo El_ctrico
Nacional requiere que ia nueva construccibn (no
existente) utilice una conexibn de 4 conductores
hacia una estufa el_ctrica.
Cuando instals una estufa el_ctrica en una nueva
construccibn siga los Pasos 3 y 5 para una conexibn
de 4 alambres.
Use solamente un cord6n para estufa de 3 conductores
o de 4 conductores aprobado por UL Estos cordones
podrfan ser provefdos con terminales de aniIIos sobre
el alambre o con un dispositivo contra sobrecargoo
Un cord6n pars estufa con valor de 40 amp. con un valor
minimo de voltaje de 125/250 es requerido. Un cord6n
para estufa de 50 amp. no es recomendado pero si es
usado, debeda estar marcado para uso con aberturas
de conexi6n nominales de 1% de di_metro. Hay que
tener cuidado para centrar e! cable y el disposffivo
contra sobrecargo dentro del hoyo pars evitar que
e! borde dar_e el cable.
NOTA: Un cordbn de 4 conductores debe ser usado
cuando la estufa es instalada en una case movible o
cuando los cbdigos locales no permiten hacer tierra
a travSs de neutral. Si se est_ usando un conducto,
vaya al Paso 6 o 7.
m
a_
b.
Instalacibn del aliviador de presibn del
cordbn el_ctrico
Saque la cubierta de los alambres de la parte de
abajo trasera de la estufa para exponer et bloque
y ta abrazadera de conexi6n.
Saque et anillo (t3/8) ubicado dentro de la abrazadera
directamente debajo del conector., Para sacar el anillo,
use un par de alicates para doblar el anillo y sacarlo
de la abrazadera dobl_ndolo hasta que el anillo salga,
AnWllo dsntro de la abrazadera
Anlllo sacado
C= Coloque e! aliviador de presi6n en et hoyo_ Haga
pasar el cord6n el_ctrico a tray, s del ativiador de
presi6n y apriete. Permita una suficiente soltura pars
conectar f&cilmente los terminales del cordSn al
bloque conector. Si hay aletiltas en la punta del
aliviador de presi6n, se pueden sacar para una
mejor posturao
NOTA: No instals el cordbn el6ctrico sin el
aliviador de presibn. La abrazadera del aliviador
de presibn deberia ser instalada antes de
reinstalar la cubierta de los alambres trasera
de la estufa.
Caja
t
I
Cublerta de cables
(se muestra
secede)
Alivlador de
el&ctrlco
Abrazadera del allvlador
de presl6n (Proveido
con el cordSn el6ctrlcoo
No es parts de la estufa)
37

4. lnstalacibn del cordbn el_ctrico de
3 alambres
ADVERTENCIA: Elalambroneutral
o para hacer tierra dei cordbn el_ctrico debe ser
conectado al terminal neutral ubicado en el centro
del bloque de conexibn. Las puntas del cordbn deben
ser conectadas a los terminales exteriores (color
bronce)o
Saque los tornillos del terminal de 3 alambres del bloque
de conexi6n. Inserte los tornillos a trav_s de cada anillo
de terminal del cable el_ctrico y dentro del bloque de
conexiSn hasta que los tornil!os agarren las tuercaso
AsegSrese de que el alambre del centro est_ conectado
al tornillo del centro del bloque de conexiSno Apriete bien
_ostornillos.
NO saque la conexibn de la tira para hacer tierra.
Terminal neutral
Bloque de conexl6n
J
_F'? 11rapara
hacertlerra
5. lnstalacibn de un cordbn eldctrico de
4 alambres
ADVERTENClA: Elalambreneutral
del circuito de abastecimlento es conectado al
terminal neutral ubicado en el centro del bloque de
conexibn. Las puntas del cordbn el_ctrico deben ser
conectadas a los terminales exteriores (color bronce).
La cuarta punta para hacer tierra debe ser conectada
al marco de la estufa con la placa para hacer tierra y
con el torniilo para hacer tierra.
a_
b.
C_
d_
Saque los 3 tornillos del bloque de conexiSn.
Saque el tomillo y ]a tira para hacer tierra de la
ubicaci6n media del bloque de conexiSn y la
conexiSn del tornillo al marco de la estufa_
lnserte los tornillos a tray, s del anillo del terminal
del cordSn el_ctrico y dentro del bioque de conexiSn
hasta que el tornillo enganche la tuerca. AsegSrese
de que el alambre del centro est_ conectado al
tornillo del centro de! bloque de conexi6no Apriete
bien los tomilloso
Enganche el alambre para hacer tierra af marco
de la estufa,
Antes
Terminal neutral
TIra pare hacer tlerra
(para que estufahaga tlerra)
Despu_s
Terminal neutral
.,,__. Piaca para
hacer tJerm
Para que la estufa haga ttena
38

6. lnstalacibn de un conductor de 3 alambres
Saque los 3 torn|ties del bloque de conexi6n, Inserte los
alambres pelados entre los terminales del bloque de
conexi6n y las tuercas movibleso Apriete bien los torn|lies,
No saque la conexiSn de la tira para hacer tierra
ADVERTENCIA: Elbloque de
conexibn est& aprobado solamente para
conexiones de alambres de cobre. Si se usan
alambres de aluminio, yea la nota de abajo.
NOTA: ALAMBRES DE ALUMINIO
a_ No conecte alambres de aluminio al bloque de
conexibn. Use alambres de construcci6n de cobre
con el valor correcto de amperage y voltage para
hacer 3 (tres) conexiones de alambres de cobra de
3 oConecte los alambres come se muestra en los
Pasos 6 o 7 dependiendo del n_mero de alambres,
b. Conecte los alambres de cobra a alambres de
aluminio usando conectores de terminales especiates
dise_ados y aprobados per UL para unir cobre a
alum|hie y siga bien el procedimiento recomendado
per el fabricante del conductor.
El tipo de alambre usado, la ubicacibn y ta cubierta
de las uniones, etc., deben cumplir con las buenas
pr&cticas de alambrado y de los c6digos locales.
Terminal del bloque
de conexl6n
Alarnbre pBlado_
Cable flexible
movlble i
7. Instalacibn de conductor de 4 alambres
Saque los 3 torn|lies del bloque de conexi6n, Saque la
tira para hacer tierra de la ubicaci6n media del bfoque
de conexi6n y el tom|lie que la conecta al marco de fa
estufao Inserte los alambres pelados entre los terminales
del bloque de conexi6n y las tuercas movibles. Apriete
bien los tornitloso Enganche el alambre para hacer tierra
al marco de ta estufa_
A ADVERTENCIA: E,Uoquede
conexibn est_ aprobado solamente para
conexiones de alambres de cobre. Si se usan
alambres de aluminio, vea la nota de mbs abajo.
NOTA: ALAMBRES DE ALUMINIO
a, No conecte alambres de aluminio al bloque de
conexi6n. Use atambres de construcci6n de cobre
con el "valorcorrecto de amperage y voltage para
hacer 3 (tres) unFonesde alambres de cobra de 3 °
Conecte los alambres come se muestra en los
Pasos 6 o 7 dependiendo del nOmero de alambres,
b_ Conecte los alambres de cobre a los alambres de
aluminio usando conectores de term|hales especiales
diser_ados y aprobados per UL para unir cobre con
atuminio y siga bien el procedimiento recomendado
per el fabricante del conector,
El tipo de alambre usado, la ubicaci6n y la cubierta
de las uniones, etc., deben cumplir con las buenas
prbcticas de alambrado y de los c6digos locales.
(_<_--_Tomlllo
=°"°°
Alambre pelado -------:1=- _:::_
Tuerca ___
movlble i Cable flexible
Bloque de Puntas de
conexl6n a|ambres
.,_ peiados
Puntas de
Bioque de alambres
conexi6n pelados
/
Abrazadera
Placa para
hacm' tterra
Conductor
39

8. C6mo instalar el dispositivo
contra volcaduras
ADVERTENCIA:
• La estufa debe estar asegurada con un dispositivo
contra volcaduras aprobado.
• A menos que est_ correctamente instalada, la estufa
se podrfa volcar si usted o un niSo se para, se
sienta o se apoya sabre una puerta abiertao
• Despu6s de instalar el dispositivo contra volcaduras,
verifique que est& correctamente instalado y
enganchado sacando el cajSn de almacenaje e
inspeccionando la pata niveladora trasera
AsegQrese que est6 bien puesta en la ranura,
• Esta estufa ha side disefiada para cumplir con todas
las normas para volcaduras reconocidas par la
industda pard todas las condiciones normales.
• La instalaciSn del dispositivo contra volcaduras debe
cumplir con todos los cSdigos locales para instalar
bien la estufa.
• El usa de este dispositivo no precluye la
volcadura de la estufa cuando no est6
correctamente instalado.
Todas estas instrucclones de instalacfon para el dispositivo
contra votcaduras son pard pisos y paredes de madera o
concrete, Cuatquier otro tipo de construcci6n podria requerir
t_cnicas especiales de instalaci6n pard proveer un enganche
adecuado del dispositivo contra volcaduras al piso y a ia pared.
1. Coloque el dispositivo contra la pared trasera al lade derecho
o izquierdo del gablnete. Si la supe_cie del gabinete queda
par sabre el gabinete, ajuste el dispositivo desde eI gabinete
par la cantidad de sobretecho_ Si no hay un gabinete
adyacente, coloque el borde del dispositivo en la posici6n
deseada sabre el panel lateral de la estufa.
2. Use e! dispositivo coma molde y marque 2 posiciones de
hayes sabre la pared y 2 posiciones de hayes sabre el piso,
Use las posiciones pard madera o concrete, dependiendo del
tipo de su piso.
Gabineteadyacentooubicact6nfinal
de!panellateraldolaestufa
.... Hoyos on
mapa,'od
HIIil.
_dodoJd,spoSiN;:_IXJ Jl/l
"_'-'_ Hayessabre
plsodeconcrete
Pataniveladora
traseradolaestJda
3. Pard construcci6n de madera, haga un hoyo ptloto de l/a en
el centre de cada hoyo premarcado sabre el piso de madera
y en las posiciones de los hayes sabre ta pared (un clave o
una lezna se podrian usar si no tiene un taladro)o Pegue el
disposffivo contra volcaduras con los 4 tornillos que se
proveen,
4,
9_
1.
2_
3.
Enganchealapared ,
Dispositlvocon;a [ I Placade
I volcaduras----_r_::} lapared
_ metal
Pard construcci6n de concreto, usted necesitar_ cuatro
pernos tipo "lag" de 1/4 x 11/2 y cuatro anclas de ttpo de
mangas OD de _/= (no se proveen)_ Haga los hoyos del
tamafio recomendado para las anclas sobre el concreto en et
centro de cada hoyo premarcado sobre el piso y la pared
Instale las anclas tipo mangas dentro de loshoyos hechos y
luego instale lospernos tipo "lag" a tray, s del dtspositivo_
No apriete demasiado los pemos.
Deslice la estufa hacia la pared, y vea si la instalaci6n est&
correcta sacando el cajSn de almacenaje e inspeccionando la
pata niveladora trasera_ Aseg_rese que quede bien metida
en la ranura del dispositivo contra volcaduras
Nivele la estufa
Usando una tlave inglesa, saque los 4 niveladores de patas
par lo menos dos vueltas,
La estufa debe estar bien
nivelada pard que cocine y
hornee correctamente_
Instale las parrillas
del horno_
Use una llave abierta
de 17/16 o una Ilave
ajustable pard sacar
igualmente los cuatro
niveladores de ]as
patas dos o tres vueltas
cada uno.
NIVELADOR
DE ALCOHOL
PARA
:BAJAR
LA ESTUFA
4. Coloque un nivelador de
alcohol o una taza para
medir Ilena parcialmente de
agua sabre una de
las parritlas
5. Use la Ilave para ajustar los niveladores de las patas hasta
que la estufa quede nivelada
10. Revisibn final
Asegdrese que todos los controles de la estufa
est_n en posici6n de APAGADO (OFF) antes de
dejar sola la estufa.
4O

Problema
Las unidades de
superficie no
funcionan bien
La luz del horno
no funciona
El homo no
funciona
Posibles causas
Las unidades de superficie no
est_n enchufadas sblidamente.
Los controles de las unidades
de superficie estbn mai puestos.
Los bolos para derrames no
estbn bien puestos sobre la
cubierta para cocinar.
El foco estb suelto
o defectivo.
El interruptor de la luz
est(_ malo.
El enchufe de la estufa no estb bien
metido en e! receptbculo el6ctrico.
Qu_ hacer
Con los controles apagados, revise para estar seguro
que las unidades de la superficie est_n enchufadas
completamente en el receptaculo.
Revise para vet si el control correcto est& puesto para
la unit unidad de superficie que est& usandoo
Con los controles apagados, revise para estar seguro
que el bolo para derrames est,. bien puesto en la
cubierta y que la abertura en el bolo est_ en hnea con
el recept_culoo
Apriete o reemplace el foco.
Uame para un servicio_
Aseg_rese que el enchufe el6ctrico est& enchufado '
en un recept_culo con electdcidad que haga tierra
adecuadamente_
Un fusible en su casa estd quemado Reemplace el fusible o reconecte el interruptor
o el interruptor del eircuito de circuito_
est_ abierto.
Los controles del homo estbn Vea la secci6n Cbmo usar el horno.
malpuestos°
La comida no se Los controles del horno estbn Vea la secci6n Cbmo usar el homo.
hornea o asa malpuestos.
adecuadamente La posicibn de la parriila es Vea la secciSn Cbmo usar el horno.
incorrecta o la parrilla no estb
nivelada.
Ollas incorrectas u ollas de tamaSo Vea la secci6n Cbmo usar el horno.
equivocado estbn siendo usadas.
El termostato del horno Vea la secci6n Ajuste el termostato del homo-
necesita ajuste, iFbcil de hacerlo usted mismo!
La comida no se Homo no puesto en BROIL (ASAR). AsegL_rese de hacer girar la perilla completamente
asa adecuadamente a la posici6n BROIL (ASAR).
dL_epuerta no se abre a la posicibn
paro como se recomienda.
Se estb usando una posicibn de
parrilla incorrecta.
La comida se estb cocinando en
una cacerola caliente.
Los utensilios no son adecuados
para asar.
Se usb papel aluminio sobre
la cacerola para asar y el papel
aluminio sobre la p.arrilla no se
ajustb ni se recorto bien como
es recomendado.
En algunas &reas el poder (voltaje)
podna ser bajo.
Vea ta secciSn Cbmo usar el horno.
Vea la Gula para asar.
Use la cacerota y la parrilta para asar que viene
con la estufa. Asegurese que est_ fr[a.
Use la cacerola y la parrilla para asar que viene
con la estufa.
Vea la secci6n Cbmo usar el homo.
Precaliente el etemento para asar por 10 minutoso
Ase por el perl'odo m&s largo del tiempo recomendado
en la Guia para asar.
41

Problema Posibles causas Qu_ hacer
La temperatura del El termostato del horno Vea la secci6n Ajuste el termostato del homo-
horno estb necesita ajustes, iF(_cil de hacerlo usted mismol
demasiado caliente
o fria
Reioj y cronbmetro El enchufe de la estufa no estb AsegSrese que el enchufe el_ctrico est_ enchufado
no funcionan completamente metido en el a un recept_culo el_ctrico vivo que haga tierra
receptaculo electrico, adecuadamente.
Un fusible en su casa podria estar Reemplace el fusible o reconecte el interruptor
quemado o el interruptor del del circuito,,
circuito abierto.
Controles del homo mal puestos.
Golpe de corriente.El dial se pone en
blanco o ias luces
indicadoras se
prenden cuando
la estufa no estb
erl uso
La puerta del horno
esta chueca
El homo hace
sonidos "click"
Corte de corriente
La puerta estb fuera de posici6n.
Este es et sonido del elemento para
calentar que se enciende y apaga
durante las funciones de cocina.
Corte de electricidad o
golpe de corriente.
Vea la seccion C6mo usar el reloj y el cron6metro.
Desconecte la electricidad al fusible o al interruptor
del circuitopor Io menos 10 segundos. Conecte la corriente
a la estufaoSi las luces indicadoras todavfa est&n
encendidas, Ilame para un servicio,
Debido a que la puerta de! homo es sacable, a veces
queda fuera de posiciSn durante la instalaciSn. Para
enderezar la puerta, empuje hacia abajo desde las
esquinas de arriba.
Esto es normal.
Algunos modelos reasumir&n sus posiciones
autom_.ticamente una vez que el poder haya sido
restauradoo En los modelos con reEoj,tendr& que
programar nuevamente el reloj, Si el homo estaba
en uso, debe reprogramarlo poniendo la perilla de
temperatura del homo en OFF (APAGADO),
reprogramando el reloj y reprogramando cualquier
funci6n de cocina.
42

®
GARANTIADE LA ESTUFAELECTRICA
f
UN A_O COMPLETODE GARANTIAPARATODASLASPARTES
Si,desdeunatiodela[echadeinstalaci0n,cualquierpartedejade[uncionaradecuadamentedebidoa underectoenel materialu
obrademano,Searslareparar_o reemplazar_,asuopci6n,libredecosto
Siesteproductoestasuje[oaunusoquenoseaelusoprivadodefamitia,lagarantiaesdectivapor90dfas
EL SERVICIO DE GARANTIAESTADISPONIBLEPOR CONTACTOCONELCENTRODESERVICIOSEARSMAS
CERCANOEN LOSESTADOSUNIDOS.
Estagaran[la le da derechoslegalesespecificos, y ustedtambienpodria tenetotros derechosquevariande
estado a estado,
SearsRoebuckandCo, Dept.817 WAHoffmanEstates,IL 60179
Para agregar valor a su estufa, compre un Contrato de Mantenimiento Sears.
Proteccion de Ahos Primer af/o Segundo ano Tercer afro
de propiedad
1. Reemplazo de las partes defectuosas G C/V/ CM
2. Mantenimiento preventivo anuat
inspecciOn a su pedido CM CM CM
J
G - Garantia CNI. Contrato de Mantenimiento
LosaparatoselectrodomesticosKenmoreestandisertados,fabricadosy probadosparaarlosdefuncionamientoconfiableSinembargo,
cualquieraparatoelectrodomesticopodrlarequerirunserviciodevezencuando.ElContratodeMantenimientoSearsleofrece
unexcelenteprogramadeservicioparasuproducto
Latabladearribale muestralosbeneficiosadicionalesdelContratodeMantenimientoSearscomparadoconlaGarantlaSears.
POngaseencontactoconsurepresentantedeventasSearso conel CentrodeServicioSearslocalparacomprarunContratode
MantenimientoSears
43

For repair of major brand appliances in your own home...
_:i_i_ no matter who made it, no matter who sold it!
1-800-4-MY-H 0 MEsMA°yt_me,day,or night
(1-800-469-4663) :/:ili
www.sears.com
To bring in products such as vacuums, lawn equipment and electronics
for repair, call for the location of your nearest Sears Parts _ Repair Center.
_: :::
?_ 1-800-488-1222 Anytime, day or night
ii
www.sears.com ::::;:::;::::i,:i
:: i :_i::i)?
,_ For the replacement pans, accessories and owner's manuals ....
' that you need to do-it-yourself, call Sears PartsDirectSM!
iili 1-800-366-PART 6 arm.- 11 p.m. CST,
(1-800-366-7278) 7 days a week
:, :j :i:":=: ,:
_:_:_,: www.sears.com/partsdirect
:J}'i ?
:_:_ To purchase or inquire about a Sears Service Agreement:
':_.... 1-800-827-6655 :
_:::; 7 a.rn.- 5 p_m. CST, Mon.- Sat. _::=_
........... i:=:::i;!::
_,::_ Para pedir servicio de reparacidn a domicitio, Au Canada pour service en fran_ais: ii:::i_::
y para ordenar piezas con entrega a domicilio: 1-877-LE-FOYEFI =M
1-888-SU-HOGAR sM (1-877-533-6937)
::'_:::; (1-888-784-6427)
[ H°mecentral J
"rM
Part Number:, 1B306379P004 ® Registered Trademark / Trademark of Sears, Roebuck and Co
© Seam, Roebuck and Co ® Marca Registrada / TM Marca de F&bdca de Sears, Roebuck and Co
-
 1
1
-
 2
2
-
 3
3
-
 4
4
-
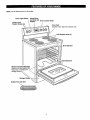 5
5
-
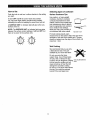 6
6
-
 7
7
-
 8
8
-
 9
9
-
 10
10
-
 11
11
-
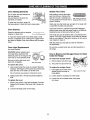 12
12
-
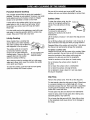 13
13
-
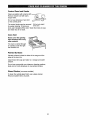 14
14
-
 15
15
-
 16
16
-
 17
17
-
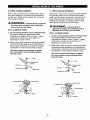 18
18
-
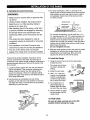 19
19
-
 20
20
-
 21
21
-
 22
22
-
 23
23
-
 24
24
-
 25
25
-
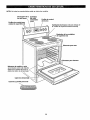 26
26
-
 27
27
-
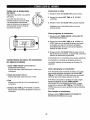 28
28
-
 29
29
-
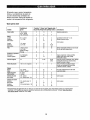 30
30
-
 31
31
-
 32
32
-
 33
33
-
 34
34
-
 35
35
-
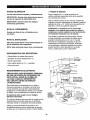 36
36
-
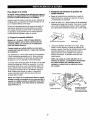 37
37
-
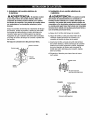 38
38
-
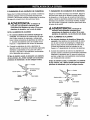 39
39
-
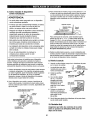 40
40
-
 41
41
-
 42
42
-
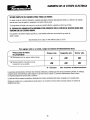 43
43
-
 44
44


Kenmore 36291112003 El manual del propietario
- Categoría
- Cocinas
- Tipo
- El manual del propietario
En otros idiomas
- English: Kenmore 36291112003 Owner's manual
Documentos relacionados
Otros documentos
-
Sears Kenmore 71178 El manual del propietario
-
Hotpoint RB758DP2BB El manual del propietario
-
-
Hotpoint RGA824DED1WW El manual del propietario
-
LG LSES302ST El manual del propietario
-
LG Electronics LRG30355SB Manual de usuario
-
-
GE JGBS09PEFWW El manual del propietario
-
GE JB850SP4SS Guía de instalación
-
Hotpoint RB526DH2WW Guía de instalación