Sylvania 6620LDF El manual del propietario
- Categoría
- Reproductores de DVD
- Tipo
- El manual del propietario

SYLVANIA
OWNER'S MANUAL
IINSTRUCClONES EN ESPABIOL INCLUlDAS. I
(_0 inch)

D ACCESSORIES
Remote Control Unit Batteries Owner's ManuN
( NE240UD ) 2 AA Batteries ( IEMN20477 )
• If you need m replace these accessories, please refer m the PART NO. under the illustrations mid call our
help line memioned on the front page.
• Depending on your antemm system, you may need difl'erent types of Combiners (Mixer) or Separators
(Splitter). Contact your local electronics store for fl]ese items.
The serM number of this product may be fouml on file back of file unit. No other unit has the same serial
number as yours. You should record the number and other vital information here trod retain tiffs book as a per-
manent record of your purchase to aid identification in case of fl]efl. SerM numbers are not kept on file.
Date of Purchase
Dealer Purdmse from
Dealer Address
Dealer Phone No.
Model No.
SerM No.
e
|
SAFEGUARDS
1.Read instructions-All _he satety and opemti_g h]_trnctions
shouM be read beMre the app_i_mce is operated.
2oRe_lin Instructions-The :_atety aud opent_ing instructions
shouM be _mined %r Nmre re%_uce.
NHeed WarnNgs_Ali warnings ou the apNiance and in _he
opemtiug iustrnctions should be adhered m.
4.FMNw lnstructions-AH npemting and use insm_c_kms
shouN be %Howed.
5oCleaNng-Unphlg the umt from the wN] omlet be%re de:u]-
inK. Do not use liquid c_eaners or aerosol ciem]er_. Use a
damp cMth tor deauh]g.
EXCEPTION: A product thin is meant to1 uuintemlpted
service al]d, _hat tor _ome :_pecific ]_asnn, such as the possi-
bility ot the loss ot an mllhorizatioll code %r a CATV cou-
yeomen is uot h]tended to be unpIugged by the user Mr dean-
ing ol auy other purpose, may exclude the i_%1_ce m
nl_Nuggh_g _be apNial]ce in the clezmil]g de:<r_ol} other-
wise requh_d h_ item 5.
6.AttachmenN-Do i}ot u:_eNtt_chmenB i}ot _commel}ded by
the refit manufacturer as they ma_y caHse hazards.
%Water and MMstnre-Do uot lt_e thN m]iI uem" watel-%r
examNe, near a balh mN wash bowl, kitchen siuk, or hnmdry
rob, iHa we_ basement, or near a swimming pool, m_d the like.
8.Accessories-Do _}otp_ace this refit PORTABLECARTWARNING
on an m]staNe cm_, _l;md, tripo&
brackeL or rune. The refit may fall,
causing :_erion:_ iu,juV m :<_menne,
al]d :_erious damage m the apNiance.
Use nnl)_ with a cm't, staud, _ripod,
bracket, or tune recommended by
_he mauuiacturen or sold with the
unit. Auy moul]th]g ni the apNial]ce shoMd %!low Ihe Inal]-
ufacturer's ins_ructious and should use a mouutiug ac'c'es:<)ry
recommeuded by _he mmmtacturer AI_apNim]ce mid cart
combi_mtio_ should be moved with care. Quick stnps, exces-
sive %l_'e_ m_d nl]eveu sm'f_ces may cause the appliance and
Cal_ combiuaioll to ove_3"luq/.
AMEUBLES- Cet appareil ne doit SYMBOLEDAVERTISSEMENTPOURLEsOO_IPOSANTES
_tre placd queft)rceexcessi'_earr_t(leuxensemble,; avec pl_c;mtioll,till meuble "t _)ulette,_.le fabricant'°usanSbrusqne,l'utilisation d'm]el_ulettes)SisurUnvoUSetde'; surfacesrec'c)mm_l_ttol'il_st_]llezsurmeubleddplacez(avecp_tl'les[l_APPAREIL KTMKUBkKANOUkKTTKS_;_
irrOguliOres risquent de dOsmbiliser l'ensemble et de le ren-
verser.
- 2 - EN

9.Ventilation-Slots and openings in the cabinet and the back
or bottom are provided for ventilation and to ensure reliable
operation of the unit and to protect itfrom overheating, and
these openings must not be blocked o1"covered. The open-
ings should never be blocked by placing the unit on abed,
sofa, rug, or other sindlar sud'ace. This unit should never be
placed near or over a radiator or heat register. This unit
should not be placed in a built-in installation sucb as a
bookcase or rack unless proper ventilation is provided or
the manulacturer's instructionshave been adbered to.
10.Power Sources-This unit should be operated only from the
type of power source indicated on tbe marking label. If you
are not sure of tile type of power supply to your borne, con-
sult your appliance dealer or local power company. For the
units intended to operate flora batte W power, or other
somves, refer to the operating instructions.
ll.C, rounding or Polarization-This unit is equipped with a
polarized alternating-current lille plug(a plug having one
blade wider than tbe other). This plug will fit into the
power outlet only one way. This is a safety t)atule. Ifyon
are unable to insert the plug fully into the outlet, try revers-
ing the plug. If the plug should still fail to fit, contact your
electrician to replace your obsolete outlet. Do not defeat the
safety purpose of the polarized plug.
12.Power-Cord Protection-Power-supply cords should be
muted so that they are not likely to be walked on or
pinched by items placed upon or against them, paying par-
ticular attention to cords at plugs, convenience receptacles,
and the point where they exit from the appliance.
13.Outdoor Antenna grounding-If an outside antenna or
cable system is connected to the unit, be sure the antenna
or cable system is grounded so as to provide some protec-
tion against voltage surges and built-up static chai_.es.
Article 81(tof the National Electrical ('ode, ANSI/NFPA
No. 70, provides information with respect to proper
grounding of the mast and supporting structure, grounding
of the lead-in wire to an antenna discbarge unit, size of
grounding conductors, location of antenna-dischai_ze unit,
connection to grounding electrodes, and requirements flor
the grounding electrode. (Fig. A)
FIGURE A
EXAMPLE OF ANTENNA GROUNDING AS PER
NATIONAL ELECTRICAL CODE
ELECTRIC
SERVICE
GROUND
CLAMP_,
LEADIN
WIRE
ANTENNA
DISCHARGE UNIT
{NEC SECTION 810-20)
GROUNDING CONDUCTORS
(NEC SECTION 810-21)
14.Lightning-For added protection for this unit receiver dur-
ing a lightning storm, or when it is left unattended and
unused for long periods of trine, unplug it from tile wall
outlet and disconnect the antenna or cable system. This will
prevent damage to the unit due to lightning and poweMiue
surges.
l&Power Lines-An outside antenna system should not be
located in the vicinity of overhead power lines or other
electric light or power circuits, or where it can fall into
such power lines or circuits. When installing an outside
antenna system, extreme care should be taken to keep from
touching such power lines or cilv'UitSas contact with them
might be fatal.
16.Overloading-Do not overload wall outlets and extension
cords as this call result in a risk of fire or electric shock.
17.Object and Liquid Entry-Never push objects of ally kind
into this unit tbrough openings as they may touch danger-
ous voltage points or short out parts that could result in a
fire or electric shock. Never spill liquid of any kind on tbe
unit.
18.Servicing-Do not attempt to service this unit yourself as
opening or removing covers may expose you to dangerous
voltage or other hazards. Refer all servicing to qualified
service persolmel.
19.Damage Requiring Service-Unplug this unit fl'om the wall
outlet and refer selwicing to qualified service personnel
under the following conditions:
a. Wben the power-supply cord or plug is damaged or fi'ayed.
b. If liquid has been spilled, or objects have fallen into the
unit.
c. If tbe unit has been exposed to rain or water.
d. If tbe unit does not operate normally by following the oper-
ating instructions. Adjust only those controls that are cov-
ered by the operating instructions, as improper adjustment
of other controls may result in damage and will often
require extensive won by a qualified tecbnician to restore
tbe unit to its normal operation.
e. If tbe unit has been dropped or damaged in any way.
f. When the unit exhibits a distinct change in performance,
this indicates a need for service.
20.Replacement Parts-When replacement parts are required,
be sure the service technician has used replacement parts
specified by tile manufacturer that have tbe same character-
istics as the original part. Unauthorized substitutions may
result in fire, electric shock, injury to persons or otber baz-
ards.
21.Safety Check-Upon completion of any service or repairs to
tbis unit, ask the service technician to perform routine sat)-
ty checks to determine that the unit is in proper operating
condition.
22.Heat-This unit product should be situated away fl'om heat
sources such as radiators, beat registers, stoves, or other
products (including amplifiers) that produce heat.
NEC- NATIONAL ELECTRICALCODE
$2898A
ELECTRODE SYSTEM
{NEC ART 250, PART N)
- 3 - EN

IMPORTANT COPYRIGHT INFORMATION
Unauthorized copying, broadcasting, public performance
and lending of discs are prohibited.
This product incorporates copyright protection tectmology
that is protected by U.S. patents and other intellectual prop-
erty rights. Use of this copyright protection technology must
be authorized by Macrovision, and is intended for home and
other limited viewing uses only unless otherwise authorized
by Macrovision. Reverse engineering or disassembly is pro-
hibited.
LASER SAFETY
This unit employs a laser. Only a qualified service person
should remove the cover or attempt to service this device,
due to possible eye injury.
CAUTION: USE OF CONTROLS OR ADJUSTMENTS
OR PERFORMANCE OF PROCEDURES OTHER
THAN THOSE SPECIFIED HEREIN MAY RESULT IN
HAZARDOUS RADIATION EXPOSURE.
FCC WARNING- This equipment may generate or use
radio frequency energy. Changes or modifications to
this equipment nmy cause harmful interference unless
the modifications are expressly approved in the instruc-
tion manual. The user could lose the authority to oper-
ate this equipment if an unauthorized change or nmdi-
fication is made.
RADIO-TV INTERFERENCE
Tiffs equipment has been tested and found to comply with
the limits for a Class B digital device, pursuant to Part 15 of
the FCC Rules. These limits are designed to provide reason-
able protection against harmful interference in a residential
installation. This equipment generates, uses, and call radiate
radio frequency energy and, if not installed and used in
accordance with the instructions, may cause hannfid inter-
ference to radio comnmnications.
However, there is no guarantee that interference will not
occur in a particular installation. If this equipment does
cause lmrmful interference to radio or television reception,
which call be determined by turning the equipment off and
on, the user is encouraged to try to correct tile interference
by one or more of the following measures:
1) Reorient or relocate the receiving antenna.
2) Increase the separation between file equipment and
receiver.
3) Connect the equipment into all outlet on a circuit differ-
ent from that to which the receiver is connected.
4) Consult the dealer or all experienced radio/TV teclmi-
cian for help.
CAUTION: VISIBLE AND INVISIBLE LASER RADIA-
TION WHEN OPEN AND INTERLOCK DEFEATED.
DO NOT STARE INTO BEAM.
LOCATION: INSIDE, NEAR THE DECK MECHA-
NISM.
This Class B digital apparatus complies with Canadian
ICES-003.
Cet appareil num6rique de la classe B est conforme a la
norme NMB-003 du Canada.
CAUTION: TO PREVENT ELECTRIC SHOCK,
MATCH WIDE BLADE OF PLUG TO WIDE SLOT,
FULLY INSERT.
ATTENTION: POUR E,VITER LES CHOC
E,LECTRIQUES, INTRODUIRE LA LAME LA PLUS
LARGE DE LA FICHE DANS LA BORNE CORRE-
SPONDANTE DE LA PRISE ET POUSSER JUSQU'AU
FOND.
A NOTE ABOUT RECYCLING
Batteries should never be thrown away or incinerated but
disposed of ill accordance with your local regulations con-
cerning chemical wastes.
WARNING: TO REDUCE THE RISK OF FIRE OR ELECTRIC SHOCK, DO NOT EXPOSE THIS APPLIANCE
TO RAIN OR MOISTURE.
CAUTION
CAUTION: TO REDUCE THE RISK OF ELECTRIC
SHOCK, DO NOT REMOVE COVER (OR BACK). NO
I USER SERVICEABLE PARTS INSIDE. REFER
l SERVICING TO QUALIFIED SERVICE PERSONNEL.
The caution marking is located on the rear of the cabinet.
THIS SYMBOL INDICATES THAT
DANGEROUS VOLTAGE
CONSTITUTING A RISK OF ELECTRIC
SHOCK IS PRESENT WITHIN THIS UNIT.
THIS SYMBOL INDICATES THAT THERE
ARE IMPORTANT OPERATING AND
MAINTENANCE INSTRUCTIONS IN THE
LITERATURE ACCOMPANYING THE
APPLIANCE.
- 4 - EN

For sale operation _md satisfactory performance of
your unit, keep the following in mind when selecting
a place for its installation:
• Shield it from direct sunlight and keep it away
from sources of intense heat.
,, Avoid dusty or humid places.
,, Avoid places with insufficient ventilation for proper
heat dissipation. Do not block the ventilation holes
at the top or bottom of the unit. Do not place the
unit on a carpet because this will block the ventila-
tion holes.
• Install unit in a horizontal position.
• Avoid locations subject to strong vibration.
• Do not place the unit near strong ma_aetic fields.
• Avoid moving the unit to locations where tempera-
ture differences are extreme.
,, Be sure to remove a disc and unplug the AC power
cord from the outlet before carrying the unit.
The following symbols below appear in some head-
ings in this manual.
: Description refers to playback of DVD video discs
(in the DVD mode).
: Description refers to playback of Audio CDs
(in the DVD mode).
: Description refers to playback of CDs with MP3
files (in the DVD mode).
: Description refers to the items to be set by the
QUICK mode (in the DVD mode).
,, Do not handle the power cord with wet hands.
,, Do not pull on the power cord when disconuecting
it from an AC wall outlet. Grasp it by the plug.
,, If by accident, water is spilled on your unit, unplug
the power cord immediately and take the unit to our
Authorized Service Center for servicing.
,, Do not put your fingers or objects into the unit
disc slot.
• Do not place anything directly on top of the unit.
Moisture condeusation may occur inside the unit
when it is moved from a cold place to a warm place
or after heating a cold room or under conditions of
high humklity. If a DVD is played in a unit which
has moisture, it may damage the DVD and the unit.
Therefore when the condeusation occurs inside the
unit, turn the unit on and allow at least 2 hours for
the unit to dry out.
You can adjust the sttmd to change the tingle of the
TV (-5° to 10°).
- 5 - EN

OF CONTENTS
SUPPLIED ACCESSORIES ....................... 2
IMPORTANT SAFEGUARDS ...................... 2
PRECAUTIONS ................................ 4
LOCATION ................................. 5
AVOID THE HAZARDS OF
ELECTRICAL SHOCK AND FIRE ................ 5
WARNING .................................. 5
SYMBOLS USED IN THIS MANUAL .............. 5
TILT STAND ................................. 5
TABLE OF CONTENTS .......................... 6
FEATURES ................................... 7
OPERATING CONTROLS AND FUNCTIONS .......... 8
INSTALLING THE BATTERIES .................. 9
PREPARATION FOR USE ....................... 10
ANTENNA/CABLE CONNECTION ............... 10
EXTERNAL CONNECTION ..................... 11
SEARCH FUNCTION ........................... 22
TRACK SEARCH ............................ 22
TITLE / CHAPTER SEARCH ................... 22
TIME SEARCH ............................. 23
MARKER SETUP SCREEN .................... 23
SPECIAL PLAYBACK FUNCTION ................. 24
REPEAT .................................. 24
A-B REPEAT ............................... 24
PROGRAM ................................ 25
RANDOM PLAYBACK ........................ 25
CHANGING THE SETTINGS ..................... 26
SUBTITLE LANGUAGE ....................... 26
AUDIO LANGUAGE .......................... 26
STEREO SOUND MODE ...................... 26
CAMERA ANGLE ........................... 27
BLACK LEVEL SETTING ...................... 27
VIRTUAL SURROUND ........................ 27
THE ON-SCREEN INFORMATION ................. 28
CHANG,NGTHEDVDSETUP,TEMS.............. 2,
TV OPERATION AND SETTINGS ................. 12
WATCHING A TV PROGRAM .................. 12
CHANNEL SET UP .......................... 13
PICTU RE CONTROL ......................... 14
BACK LIGHT SETTING ....................... 14
SLEEP TIMER .............................. 14
CLOSED CAPTION SYSTEM .................. 15
MTS (Multi-Channel Television Sound) System ...... 15
V-CHIP SET UP ............................. 16
[] TV RATING SET UP ....................... 16
[] MPAA RATING SET UP .................... 17
[] CHANGE ACCESS CODE .................. 17
MENU LANGUAGE .......................... 17
CUSTOM MENU ............................ 29
[] LANGUAGE SETTING ..................... 29
[] DISPLAY SETTING ........................ 30
[] AUDIO SETTING ......................... 30
[] PARENTAL CONTROL ..................... 31
[] OTHER SETTINGS ........................ 31
INITIALIZE ................................. 32
TROUBLESHOOTING GUIDE .................... 33
MAINTENANCE ............................... 36
DISC HANDLING ............................ 36
SPECIFICATIONS ............................. 37
ESPANOL ................................... 38
WARRANTY .......................... Back Cover
ABOUT THE DISCS ............................ 18
PLAYABLE DISCS ........................... 18
UNPLAYABLE DISCS ........................ 18
PLAYING A DISC .............................. 19
BASIC PLAYBACK ........................... 19
DISC MENU ............................... 20
TITLE MENU ............................... 20
RESUME .................................. 20
PAUSE ................................... 20
STEP BY STEP PLAYBACK ................... 20
FAST FORWARD / FAST REVERSE ............. 21
SLOW FORWARD / SLOW REVERSE ............ 21
ZOOM .................................... 21
- 6 - EN

I TV Mode ]
® MTS/SAP Tuner
® |nfrared remote control
® Trilingual on screen TV setup display available in
English, Spanish or French
® 181 channel capabilRy PLL fi'equency synthesizer
tuner with dh°ect station call (A converter may be
necessary to view scrambled cable clmnnels.)
® (losed Caption Decoder-Yuu may view specially
labeled (cc) TV programs, movies, news, etc. witl_
either a dialogue caption or text display added to
® Auto power off system-[f there is no air signM input
from the antenna termhm_ and no operation _ur 15
mhmtes, the unit will turn itself off automatically.
®Sleep timer-Allows you to have the unit automati-
cally turn off a/a desired time.
®V-CHW-Enables parents to prevent their clfildren
from watc]fing inappropriate material on TV.
I DVD Mode ]
" Dolhy Digital sound "
This unit ctul htmdle Dolby Digital surround sound
having 5.1 channels when connected to a Dolby
Digital decoder. ,,
• Still/fast/slow/step playback
Various playback modes are available inchJding
still pictures, fast forward/reverse, slow motion and .
step frames.
• Random playback for" Audio CD and MP3
This unit ctm shufl]e the order of tracks to play
them in random order.
,, Program playback for Audio CD and MP3
Yuu can program the order of tracks to play them "
in any desired order.
,, DVD menus in a desired language
Yuu can display DVD menus in a desired lan-
guage, if available on a DVD.
* Screen saver"
If the screen saver program is set to ON, it starts
when there is no input frum the unit for 5 minutes
in stop mode.
* Suhtitles in a desired language
Yuu c_m select a desired language for the display
subtitles, if that language is available on a disc.
* Selecting a camera angle •
Yuu can select the desired camera angle, if a disc
contains sequences recorded frum different angles. •
* Choices for audio language and sound nmde
Yuu ctm select the desired audio lzmguage trod
sound mode, if different languages trod modes are
available on a disc.
Parental lock
Yuu can set the control level to limit playback of
discs which may not be suitable for children.
Automatic detection of discs
This unit automatically detects if the loaded disc is
DVD, Audio CD or MP3 on disc.
On-screen display
Information about the current operation ctm be dis-
played on a TV screen, allowing you to confirm
the currently active ffmctions (such as program
playback), on the TV screen using the remote con-
trol.
Search
Chapter search / Title search / Track search / Time
search
,, Repeat
Chapter / Title / Track / Group / All / A-B
* Zoom
Allows you to enlarge video image.
,, Marker
The part designated by user can be called back.
,, Resume Play
User can resume to playback frum the part at
which the play was stopped.
Virtual Surround
Bit rate indication
DRC (Dynamic range control)
You can control the rtmge of sound volume.
- 7 - EN

CONTROLS AND FUNCTIONS
NOTE 1
[ • When you select DVD mode, press [PLAY 1>] or [EJECT ___]first or insert a disc into the disc slot.
[Otherwise, the DVD features are not operated.
-REMOTE CONTROL
1 •
2 ..............
3
4 ....................
5 ..............
7
8
9 .....
10 ....
11
12 ....................
13 .....
14
\
15
16
17
18
19
20
22
23
24
25
26
27
28
29
30
L POWER button (El2)
Press tu turn the power on and off.,
2. PICTURE button (El4)
Press to adjust d3e picture.
3. Number buttons (RJ3)
Press to sdect a desired chaunel number dh'ecfly.
+100 button (For TV mode)
Press [o select chauuds higher than 99.
+10 button (For DVD mode)
Press to enter desh:ed numbers higher than 9.
&SLEEP button (El4)
Press to set the Sleep Time1:
5°SKIP _I/_lJ_l buttons (R22)
Press once to skip chapters/tracks to a desired point.
6. PLAY L> button (Rig)
Press to playback die disc.
7. PAUSE _J button (R2(/)
Press to pause the current disc operation.
8. DISPLAY button
For TV mode (P.15);
Press to disphy the current clmm_el hum ber on
the TV screen.
For DVD mode (R28):
Press tu display the current status on the TV screen,
- 8-
9oSETUP button (P13, R29)
P1Bss to enter or exit the setup menu of TV/DVD.
10o TITLE button (R20)
Press to display d_e dde menu.
11. CLEAR button (Pl2, R22)
Press to clealjcauce_ a setting curreudy entered.
Press to clear "DISC INSIDE" display.
12. MODE button (R25)
Press to call up the prugram/random screen M
stup mode.
Press to call up the Black Level SettMg/Vh:tual
Surround screen during p_ayback.
13. SEARCH MODE button (R22,P23)
Press to locate a desired purer.
14. AUDIO button (R26)
For TV mode (RlS): Press to select TV sound
mode (STEREO/SAP/MONO).
For DVD mode (1_2(;):Press to select a desired
audio h_guage (if avaflaNe).
15, EJECT _ button (Rig)
Press to remove a disc fl:om d_e unit.
16. SELECT button (El2)
Press to select the TV mode, external input mode
or DVD mode.
i7oCH. & / '_ buttons (El2)
Press to select memorized cham_e]s.
18. VOL A / V buttons (R12)
Press tu control the volume level fur the DVD
and TV.
19, MUTE button (El2)
Press tu mute the sound or press it again to
restore sound.
20. ZOOM button (R21)
Press tu enhrge the part of a DVD-reproduced
hnage.
21. REV _ button (R21)
Press to view the IF)VD picture in fi.tst/siow
reverse motion.
FWD _ button (P.21)
Press to view M _ast/sk)w R)rward mution.
22. STOP [] button (Rb))
Press to stop operation of the disc.
23. DiSC MENU button (P.20)
Calls up the DVD menu.
Calls up the file list M MP3 disc.
24. ENTER button (>16)
Press to accept a setting.
25. & (Up) / V (Down) / _ (Left) / I_ (Right) buttons
Press to select or adjus_ meuu items.
EN

26. RETURN button (P.27)
Press to return to the previous screen in the setup
menu,
27. A-B button (R24)
Press to repem the p_ayback of a selected section,
28. ANGLE button (R27)
Press to change file camera angle to see the
sequence being pk_yed back from a di[terent angle
d f avaiBable).
29. REPEAT button (P.24)
Repeats playback of the current disc, tide, chap-
ter. group or track.
30. SUBTITLE button (R26)
Press to select a desh:ed subtide language,
- FRONT PANEL
31 32 33 34 35 36 37 38 39
[Fig. 2]
1 Open the battery compartment cover by
31. STOP D button t[¢19)
Press to stop operation of the disc,
32. NENU button
Press to citer or exit the setup menu of TV/DVD.
33. VOLUME A /V buttons (R[2)
Press to control tl_e volume level for the DVD
and TM.
34. CHANNEL & /V buttons (R12)
Press to select memorized cham]ds,
38. SELECT button (El2)
Press to select to TV mode, external input mode
or DVD mode.
3& POWER bntton (RI2)
Press to turn the power on and off,
37. EJECT _ button (RI9)
Press to remove a disc [rom the unit,
38. Remote sensor window
39. PLAY L> bnttou (P.19)
Press to playback of the disc.
pressing the cover on the remote unit in the
direction of the arrow.
2 Insert 2 "AA" penlight batteries into the bat-
tery compartment in the direction indicated by
the polarity (+/-) markings.
3 Replace the cover.
BATTERY PRECA UTIONS
,, Be sure to follow the correct polarity as indicated
in the battery compartment. Reversed batteries
may cause damage to the device.
,, Do not mix different types of batteries together
(e.g. Alkaline and Carbon-Zinc) or old batteries
with fresh ones.
,, If the device is not to be used for a long period of
time, remove the batteries to prevent damage or
injury from possible battery leakage.
,, Do not try to recharge batteries not intended to be
recharged; they can overheat and rupture.
NOTE
l-We do not recommend the use of universal remote controls. Not all of the functions may be controlled
|with a universal remote control.
|tf you decide to use a universal remote control with this unit, please be aware that the code number given
lmay not operate this unit. In this case, please call the manufacturer of the universal remote control.
- 9 - EN

3N FOR USE
ffNOTE ]
[,Cables used here are commercially available.
[,For your safety and to avoid damages to the unit, unplug the antenna cable from the ANT. jack
Lbefore moving the unit.
- ANTENNA/CABLE CONNECTION
[R_'ar of this u_lkl
IF YOU HAVE A JACK ON THE WALL
Connect the TV to the wall-mounted antenna jack
with on RF cable (commercially available).
IF YOU HAVE A WIRED CABLE
Connect the TV to the wired anteuna cable.
NOTE
• Before plugging the autenua into the ANT. jack of the
unit, check that the pin is not bent. If it is bent,
straighten the pin as illustrated, then plug the pin into
the ANT. jack of the unit.
Bent pin
Plug
(Needs to be (Straight pin)
straightened)
- CABLE/SATELLITE BOX CONNECTION
[Rear of this tmitl
Cable Box
or Satellite Box
WHEN USING CABLE BOX/SATELLITE
BOX
If your cable service supplies you with a converter
box or if you use a satellite system, you can use the
basic connection shown above.
Channel selection must be made with the converter
box or satellite box. This metros that channels ctmnot
be chtmged using the remote control of this unit.
75-ohm
Coaxial Cable
from Cable Company
or Satellite Antenna
NOTE
For CAT¥ system installer:
• This reminder is provkted to call the CATV system installer's attention to Article 820-40 of the NEC that provides
guidelines for proper grounding and in particular, specifies that the cable ground shall be connected to the grounding
system of the building as close to the point of cable entry as practical.
10 EN

AUDIO •
VIDEO2 -
VIDEO1 --
- VIDE01 INPUT
,-- NOTE
Audio (able
] Video Cable
OR
S-\/kleo (able
You can connect this unit to your own Audio/Video
equipment.
• Be sure to turn off the power to all components in
the system before connecting another component.
• Refer to the Owner's Manuals for the equipments
to be connected to the unit,
NOTE
When you use the external input, select "VIDE01" or [
"VIDEO2" by pressing [SELECT]. (Refer to page 12.)[
To use the VIDEO1 inputjacks, select VIDEO1 . [
To use the VIDEO2 inputjacks, select VIDEO2. j
Use this connection if your own A/V equipment (e.g.
VCR) has Video output and Audio out jacks. When
using S-Video cable, better picture is available.
• If 5,ourown equipment is monaural (has only one Audio jack), connect theAudio cable toAUDIO Ljack of this unit. [
• If you connectVideojack and S-VIDEOjack simultaneously,the S-VIDEOjack is given priority over the VIDEOjack.
J
1
Audio (able (OUT
( Or'(lpollellt
Video Cable OUT;
Vkteo (amera
Use this connection if your own A/V equipment (e.g.
video camera, video game) has COMPONENT
Video output (_ Pb, Pr) jacks. You can enjoy the
best picture with this connection.
- AUDIO OUTPUT
You can enjoy DVD sound with more
presence by connecting digital audio
equipment such as Dolby Digital decoder.
DoIb 3 Digital decoder
I NOTE
• TheaudiosourceonadiscinaL1channelDolbyDigitalsurroundfurmatea{motberecordedasdigitalsoundbyanMDorDATdeck.
Ifconnectedtoa DolbyDigitaldecoder,set"DOLBYDIGITAl2to"BITSTREAM"foraudiooutputinthesetupmode.(Refertopage30.)
Unlessconnectedto a DolbyDigitaldecoder,set "DOLBYDIGITAl"to "PCM"for audiooutputin the setupmode.Playing
a unitusing incorrectsettingsmay generatenoise distortionand mayalso damagethe speakers.(Referto page .30.)
Manufactured under license from Dolby Laboratoriesl Dolby and the double'D symbol
are trademarks of Dolby Laboratories. 1
l l EN
Hoille Audio System

OPERATION AND SETTINGS
_._PICTURE
SLEEP +100
_SKIP_ ZOOM MUTE
D,SP
SETUP
CLFAR SEARCHMOOE(REPD_T A B _i
®Shaded buttons are used for following operation.
1 PUugthe power cord into a standard
AC outUet.
9 Press [POWER] to turn on the unit.
3 Press [OH. a, / v] to seUectthe desired chan-
neUnumber.
OR
Press the Number buttons to enter the
desired channeU number.
,-- NOTE
For channel number selection with number
buttons:
®To seled single-digit channel humber,press
[0] first. (e.g. Press[O] [2] tot channel 20
o To select cable Cllannels which are lligller
dmn99, press[+100/+10] firsL
(e.g.Press[+100/+10] [2] [5] for channel 125.)
4 Press [VOL. A 1V] to select the desired voF
ume level.
T
LLTL7
VOWME 2O
llllllmiiiiii.
* Press [MUTE] to h_smnfiy mine die sound.
Press it again to restore the previous v(fiume
level
NOTE
®If you press[OH. A / V] in the DVD mode, ]
you can change the TV channels. Even if you
J
turn off the unit in the DVD mode, when yon
turn it on again it will go into the TV mode.
_lY) WATT3H CABLE OR SATELLITE
CttANNEL
If fl_eunit is connected to a cane box or satellite
box, press [CH. A / V] to seled CH3 or CH4
accordiRg 1o the omput channd setth_g ot the device
and select desired channel on tllat device.
TO WATCH EXTERNAL INPUT
When an external equipment is connected to the t_:ont
AUDIO/VIDEO input jacks, press [SELECT] or
[OH. A / 'V] repeatedly until "VIDEO1" or
"VIDEO2" appears on fl_e screen.
,-- NOTE
*It a disc is h_sidethe unit, "DISC HqSIDE"mes-
sage is displayed on the screen for 10 seconds,
DISC _NSlDE
*_tbclear themessage instantly, press [CLEAR],
- 12 - EN

A UTO CHANNEL PROGRAMMING
As the initial setting, this unit has memorized all
channels, including the ones not available in your
area. This feature automatically puts only available
channels into the memory.
1 Press [SETUP] then press [A] or [v] to point
to "CHANNEL SET UP".
/ \
\ /
CHANNEL SET UP
V.CHIP SET UP
LANGUAGE [ENGLISH]
CAPTION [OFF]
BACK L_GHT [SR_GN_
2 Press [ENTER] then press [,] or [v] to point
to "AUTO PRESET CH".
CHANNEL SET UP
_- ADD / DELETE CH (CATV /
3 Press [ENTER].
° The tuner sctms trod memorizes all the active
channels in your area.
° The tuner stops on the lowest memorized channel.
NOTE
° When "AUTO PRESET CH" is actiwlted
where there is no TV signal input, "NO TV
SIGNAL" will appear on the display after the
completion of channel scamling.
• The unit may recognize CATV ch_mnels to be
TV channels if reception condition is poor. ha
this case, check the tmtenna connection and try
"AUTO PRESET CH" again when reception
conditions are better.
° Channel memory programming is NOT nec-
essary when connected to a cahle box or satel-
lite box. Just select the channel for cahle box
or satellite input (ex. CH3) on the unit, then
select your desired channel on the cable box
or satellite box.
ADDING/DELETING CHANNELS
The chtmnels you no longer receive or seldom watch
c_mbe deleted from the memory. (Of course, you c_m
add the deleted channel into the memory again.)
1 Press [SETUP] then press [,] or [v] to point
to "CHANNEL SET UP".
- TV SET Up-
2
3
4
5
CHANNEL SET UP
_ .maUAGE[_.eUS,1
CAPTION [OFF]
.; BACK UGHT [BRIGHT]
Press [ENTER] then press [_] or [v] to point
to "ADD/DELETE CH".
ADD / DELetE OH (GARY)
Z
Z
Z
o
Press [ENTER] then press the Number but-
tons or [OH. • /T] to select the desired
channel number.
ADD/I)ELET E ......................
Press [ENTER] then the channel number
turned to red. The channel is deleted from
memory. If the channel number turned to
blue, the channel is added into memory.
• To delete another ch_mnel, repeat steps 3 to 4.
• If you press [ENTER] again, the cham_el is
memorized again.
Added channel : Light blue
Deleted channel: Light red
Press [SETUP] to exit the menu.
-f NOTE 1
To confirm that channel(s) has been deleted
or added, press [CH. • / V].
13 EN

SLEEP
_SKIP_ ZOOM MUTE
I
DISPLAY / _
CLEAR SEARCHMODEiR_ AS /
MODE
,, Shaded buttons are used for following operation.
The unit's picture controls, brighmess, contrast,
color, tint and sharpness, are preset to factory speci-
fications. Although they are usually the best, you
may need to make some further adjustments for a
more natural looking image.
1 Press [PICTURE] then press [A] or [T] to
select the desired control "BRIGHTNESS",
"CONTRAST", "COLOR", "TINT" or "SHARP-
NESS".
2 Press [_1] or [1_] to adjust to your desired
level within 5 seconds.
BRIGHTNESS to decrease to increase
brightness brightness
CONTRAST to decrease to increase
contrast contrast
COLOR to pale to brilliant
TINT to purple to green
SHARPNESS to soft to clear
,, Even if there is a power failure of any kind, the
unit will retain its memory for this feature.
,-- NOTE
• The picture control display will disapper automati-
cally after 10 seconds unless yon press any buttons.
• Magnetism from near by appliances and speakers
might affect the color of TV picture. If this hap-
pens, wess [POWER] to turn off the TV and turn
it on again after about 30 minutes.
1 Press [SETUP] then press [A] or [T] to point
to "BACK LIGHT".
2
i TV SET UP -
/ \ ............
U]_ _ Lm_UAaE[ENeUSH1
CAPTION [OFF]
\_ BACK LIGHT [SRIGHq
Press [ENTER] then press [_1] or [1_] to
select to "BRIGHT", "NORMAl" or "DARK".
/(Y]
3 Press [SETUP].
SETUP
The Sleep Timer function turns off the unit without
using [POWER] after a desired period of time.
1 Press [SLEEP].
2 Press [SLEEP] repeatedly until the desired
sleep time is displayed.
,,Each press increases the time by 10 minutes up
to 90 minutes.
• After 5 seconds, the Sleep Timer setting will
disappear automatically.
• If you select "SLEEP 0 MINUTE", Sleep Timer
setting is cancelled.
- 14 - EN

You can view specially labeled (cc) TV programs,
movies, news and pre-recorded tapes with either a
dialogue caption or text display.
CAPTION mode: You can watch dramas, movies and
news while captioning the dialogues trod the contents
of news.
TEXT mode: You c_m watch half screen text informa-
tion if you want.
1-2: You may get these captions or text information
by selecting either "1" or "2". Caption "2" is usually
used for a second language if available.
_.- NOTE
* Not all programs are broadcast with closed cap-
tions. Your unit is designed to provide error free
closed captions from high quality antenna, cable
and VCR signals. Conversely, poor quality sig-
nals are likely to result in caption errors or no
captions at all. Common signal conditions which
may cause caption errors are listed below:
-- Automobile ignition noise
-- Electric motor brash noise
-- Weak snowy reception on TV screen
--Multiplex signal reception displaying picture
ghosts or airplane flutter
* If the unit displays a black box on the TV
screen, this means that the unit is set to the
TEXT mode. To clear screen, select "CAP-
TIONI ", "CAPTION2" or "OFF".
1 Press [SETUP] then press [A] or [v] to point
to "CAPTION".
kTv SET UP- |
/z\ ............
1
_ lANGUAGE E_IL_ ISH]
2 Press [ENTER] repeatedly to select the
desired caption menu "CAPTION1", "CAP-
TION2", "TEXT1" or "TEXT2".
TV SET UP -
CHANNEL SET UP
V CHiP SET UP
lANGUAGE [ENG ISN
CAPTION ICAPTION_]
If you select OFF, Closed Caption System set-
ring is cancelled.
Press [SETUP] to exit the menu.
NOTE 1
[•Even if there is a power failure of any
[kind, the unit will retain its memory for
[,this feature.
TO SELECT TV SOUND MODE
1 Press [AUDIO] repeatedly to select the MTS
output mode.
• The output mode changes as described below
every time you press [AUDIO].
STEREO_ SAP* _ MONO
* Second Audio Program (SAP):
Sometimes broadcasters add _mother channel of
audio to the programs they air. This is usually a
secondary language or perhaps a radio station.
• After 5 seconds, the current audio status will
disappear from the TV screen.
- NOTE ]
The initial setting is "STEREO".
This setting is saved even if the unit is turned
off or the AC cord is unplugged.
TO CHECK THE SOUND STATUS
By pressing [DISPLAY], the stares shown below
will appear on the display when you receive a broad-
cast on the unit tuner channel you are watching.
CH 123
L__%
l ) When a program is broadcast in stereo,
"STEREO" appears on the TV screen.
2) When a program is broadcast in second audio,
"SAP" appears on the TV screen.
3) When a program broadcast both in stereo and sec-
ond audio, "STEREO/SAP" appears on the TV
screen.
#J
09
z
<
z
O
<
w
15 EN

--SLO_ 'J DISC
I//PAUSE MENU _ I
...... il
• Shaded buttons are used for following operation.
[] TV RATING SET UP
Follow steps 1 to 3 in the V-CHIP SET UP.
4 Press [i] or [_'] to select the desired TV rat-
ing to be blocked then press [ENTER] repeat-
edly to set "BLOCK" or "VIEW".
(
TV y7 ( ) [VIEW]
i_ Yv G [VIEW]
[
TV PG( [VIEW]
\ w _4( [vlEw]
TV MA( [VIEW]
Selection Rating Category Explanations
TV-Y Appropriate for all children
TV-Y7 Appropriate for children seven trod older
TV-G General Audience
TV-PG Parental Guidtmce suggested.
TV-14 Unsuitable for children under 14
TV-MA Mature audience only
V-CHIP SET UP
This feature enables parents to prevent their children
from watching inappropriate material on TV. When
you try to access a program which is blocked, "PRO-
TECTED PROGRAM by ..." message appears on
the TV screen.
1 Press [SETUP] then press [A] or [v] to point
to "V-CHIP SET UP".
CAPTION [OFF]
2 Press [ENTER] then press the Number
Buttons to enter the access code.
[_:_ o
¢LT)U2Z-__5
ICT_)_ CT_)
,*For the first time set-up or in the event the unit
has lost power, enter the defatdt code of 0000.
3 Press [M or [v] to select "TV RATING",
"MPAA RATING" or "CHANGE CODE" then
press [ENTER].
V-CH_p SET UP
TV RATING
MPAA RATING
CHANGE CODE
TV RATING: See [] TV RATING SET UP
MPAA RATING: See [] MPAARATINGSETUP
CHANGE CODE: See[] CHANGEACCESSCODE
5
NOTE
,,When you select a rating and set it to
"BLOCK", the higher ratings will be blocked
automatically. The lower ratings will be avail-
able for viewing.
rv Y7 ( } [w_w]
1_/pG (OLSV) [BLOCI<]
TV 14 (DLSV) [I3LOGK]
Yv MA(csv) [8Loct<]
,,When you set the lowest rating to "VIEW", all
other ratings will automatically be available
for viewing.
When you select the ratings of TV-Y7, TV-PG,
TV-14 or TV-MA you will have the option of
setting sub rating categories.
Press [i] or [_'] to select a rating with sub-
ratings you wish to block, then press
[ENTER] twice.
Press [_] or [v] to select a sub-rating, then
press [ENTER] to set it to "BLOCK" or "VIEW".
Selection Rating Category Explanations
TV-Y7
FV Fantasy Violence
TV-PG, TV-14, TV-MA
D Suggestive Dialog (TV-PG,TV-14 only)
L Coarse Lm_guage
S Sexual SitLlation
V Violence
--- NOTE 1
,*The blocked sub-ratings will appear next to
the rating category in the "TV RATING"
• menu.
- 16 - EN

6 Press [SETUP] to exit the menu.
F[ NOTE
IoTo chtmge the rating, the TV ip0ustbe turned
/to tul unprotected program. If PROTECT-
lED PROGRAM by ..." appearson tile
|screen, please change tile channel to a station
Lthat is n0t protected.
[] MPAA RATING SET UP
Follow steps 1 to 3 in tile V-CHIP SET UP oil page
16.
4 Press [A] or [v] to point to your desired item,
then press [ENTER] to select "BLOCK" or
"VIEW".
@/ \
Selection
[v_Ewl
[wEwl
xN_37 IBLOOK3DLOOK]
DLOOK]
Rating Category Explanations
G General Audience
PG Parental Guid_mce suggested.
PC- 13 Unsuitable for children under 13
R Restricted; under 17 requires accompa-
nying parent or adult guardian
NC-17 No one under 17 admitted
X Mature audience only
• When you select a rating and set it to "BLOCK",
the higher ratings will be blocked automatically.
The lower ratings will be available for viewing.
• When you set the lowest rating to "VIEW", all other
ratings will automatically be available for viewing.
5 Press [SETUP] to exit the menu.
[] CHANGE ACCESS CODE
Follow steps 1 to 3 in tile V-CHIP SET UP on page
16.
,, Make sure you enter exactly tile same new code
in tile "CONFIRM CODE" space as one in tile
"NEW CODE" space. If they are different, the
"NEW CODE" space is cleared for redoing.
5 Press [SETUP] to exit the menu.
,-- NOTE
,,Your personal access code will be erased _uld
will return to the default (0000) when a
power failure occurs or when you turn off tile
power using a wall switch. If you have for-
gotten the code, unplug the power cord for 10
seconds to restore the access code to 0000.
1 Press [SETUP] then press [A] or [v] to point
to "LANG UAGE'.
2
L -b
\
\
TV SET UP.
CHANNEL SET UP
V_CH_p SET bp
_" LANGUAG_ {ENGUSH]
CAPTION /_FFi]
BAO_ UGHT [SR_eH_
Press [ENTER] repeatedly to select
"ENGLISH", "ESPANOI'= Spanish or
"FRAN(_AIS"= French.
Press [SETUP] to exit the menu.
--- NOTE
,,This function effects only tile language on tile
screen menu trod not the audio source.
,,If for some reason the menu is in Spmlish or
French, press [SETUP], press [A] or [v] to
point to "IDIOMA [ESPANOL]" or "LAN-
GAGE [FRAN(_AIS]", then press [ENTER]
repeatedly to select desired lzulguage, then
press [SETUP].
Z
uJ
............I
4 Press the number buttons to enter your
desired access code in the "NEW CODE"
space, then enter the same code in the
"CONFIRM CODE" space. When completed,
the menu will return to "V-CHIP SET UP".
NEW CODE
OONF_RM C_pE
- 17 - EN

IT THE DISCS
Playable Mark (logo) Region code
discs
DVO-V,dee []o,[]
* 1.2,4,6,10,11 v_Eo
DVD-RW ::
DVD-R iI
.w
* 1,3,4,5, _
6,7,9,10 ,
DVD+RW
Dvo+R
6,8,9,10
Recorded Disc size Disc type
signals
Digital video i 5 inches
(MPEG2) (12cm)
_le
Title1
Audio CD _i_@
* 4,6,10 .'_'TALAUDm Digital audio
i 5 inches
CD-RW ............. ,_,...... ,o (12cm)
CD-R _ _ Digital audio
* 4,5,6,9,10 or
Audio CD
MP3
is a trademark of DVD Format/Logo Licensing Corporation.
llf vou cannot play- back a disc which bears one of file marks above, check the f'ollowi.g notes.
*] : This unit co_R_Hnsto the NTSC color system, l)b<cs recorded in other color system_ '_uch as PAL camot be played back.
*2: Certain DVD-Video discs do not operate as described in this manual due to the intentions of the disc's producers.
*3: Discs recorded in the VR (Vide() Recording) {brma{ cannot be played back.
*4: Scra(ched or stained discs may not be played back.
*5: Some discs canuo_ be p_ayed back because of incompa(ible recordh_g conditions, characteristics of ff_e
recorder or specia_ properties of discs.
*6: You can play back discs which bear rite marks above. [f you use nonstmldardized discs, this unit may not
play them back. Even if they are played back, die sound or video quality will be compromised.
*7: You may ph3,back the unfitmlized"DVD-R/RW disc recorded itithe video femoraon our bral_d'sI)VD recorder.Howeve!; depetid-
it_gon the recording status of adisc, the disc may t_otbe played back at aHor nul'malEy(the pictulv or sound may t_otbe sm<xtth,
etc.), bt this case,you need to finalize the disc with the DVD recorder.Refer to the mama[ accompanyit_gfileDVD recorder.
*8: Ouly the discs recorded in the video tbrmat and finalized can be played back.
Unt'_nalized discs cannot be p_ayed back. Depeudhlg on {lie recordhlg status of a disc, the disc may not be
played back at all or uormally (the picture or sound may not be smooth, etc.).
'19: If there is too lmtch recordillgspace left on _disc (the ttsed portion is Jessthan 2-3/i(_"(55ram) across), it W lut pay bac¢p( pe y
* 10: Do not glue paper or put stickers on to the disc. These may damage the disc and the uldt may not wad it cortvctly.
"11: The number inside {lie symbol reters 1o a region of {lie world arid a disc encoded in a specific regkm fbr-
mat can onJy be pJayed back on unit wifl_ the same regkm code.
* NEVER play back the [bllowing discs. Otherwise, the unit may result in ma#unction.
DVD-RAM / CD-I / Photo CD / Vide() CD / DVD wiflt region codes o[l_er[l_an ] or ALL /
DTS-CD /DVD-ROM for personal compmers / CD-ROM for persona] compu[ers
®Never insert a disc which is broken or whose form is abnormM (other than 5 inch (12cm) round disc).
®()n the following disc, the sound MAY NOT be beard.
NOTE
fly d_e sound recorded on fi_enormal (7[)_ayer can be ddivered,
_esound recorded on the Mgh density Super Audio CD h_yercauuut be delivered,
®Any other dis'c_"_'itl:_outcompatibifity indications"
-18-
EN

A DmSC
® Shaded buttons are used for following operation,
_- NOTE
. When theDVD modehasbeenswitched to d_e
TV mode,die DVD mode shutsdown tirst and
then d3eTV picture and sound appearsin about
4 seconds. Similarly,-when [POWER] is press
to turn off in the DVD mode, this mode shuts
down first _._dd3enthe unit is mined oft.
® 1_" may appear at the top-light on the TV
screen during operation, warning d3at a pro-
Mbited operation has been encountered by the
DVD or d_e disc.
* With DVDs thai use tides for playback pro-
gram signals, playback may start from d3e
second title or it may skip d3ese titles.
®During file playback of a two layered disc,
pictures may stop for a momenL This happens
when die 1st layer switches to the 2rid Baym:
WMsis not a meltunction.
GET77NG STARTED
Dj MP 3j
Turn on the power or ampHtier and any other compo-
nents, it necessary.
1 Press [POWER] then the power will turn on.
2 Open the disc door manually.
3 Inserta discwith the labelfacingbackof the unitto
start playingit. Bysimplyplacingthe disc gentlyinto
the slot,itwill be loadedautomatically.
®Playbackwillstartfromthe firstchaptelJtrackofthe disc.
* If the playback does not s[art automaticaH y,
press [PLAY b>].
®When you playback a DVD which teamres a
title menu, it may appear on the screen. [n tMs
case, refer to "TITLE MENU" on page 20.
4 Press [STOP 1_] to stop playback,
5 Press [EJECT _] to remove the disc from the unit,
EJECT
-19-
MP3 PLAYBACK
1 In stop mode, press [DISC MENU], then press
[A] or [_'] to select the desired group or track.
LAb
_FO DE [_/ Il
(. al ,,ida,,,_mo2
*) N ,,1_o,,,_mo'
*If a group is selected, press [_] or [ENTER] to go
on to the track selection screen. Press [_] to go
back to previous screen.(except tor the top page.)
®[fa track is selected, press [ENTER] to start
playing tracks. Starting trom the one you've just
chosen the subsequent tracks will be played.
®tf the entire file list cannot be displayed at once
_7 _
on a sc een, a)pea s to go to the next page.
*Press [TITLE] to return to the top file of the
Mghest hierarchy hi the program and file Hst,
2 Press [STOP N] to stop playback,
@@
,'--"NOTE
* Fdders areknow_*asGroups;filesareknownas]Yacks.
* MP3 tiles are accompanied by [] icon.
®Maximum of 255 R)lders can
be recognized.
* Maxnnum of 999 tHes can be recognized.
®Up to 8 hierarchies can be created.
This unit recommends the use of files recorded
at the below specifications:
* Sampling freque_cy: 44.IkHz or 4gkHz
* Constant bit ra_e: 32kbps _ 320kbps
,, For MP3 file recorded h*Variable Bit Rate (VBR),
the unit may not display the actual elapse(]time.
EN
g
09
o
N
Ill
-r-
l--
I--

1 Press [DISC MENU],
DISC
MENU
oThe DVD main metal will appear.
®If the _eature is not availaNe, O symbol may
appear on the TV screen.
®If disc menu is available on the disc, audio lan-
guage, subtitle options, chapters tbr the tide and
other options will appear for selection.
2 Press [,A], [_'], [-,q] or [_,-] to select an item
and press [ENTER] to confirm selection.
C'-)
d,&NN
1 Press [TITLE].
TrrLE
*The title menu will appear.
®If the _eatufe is not available, (_ symbol may
appear on the TV screen.
2 Press [A], [T], [_] or [_] to select an item
then press [ENTER] to confirm selection.
ENTER
CALLLNG UP A MENU SCREEN
DURING PLAYBACK
Press [DISC MENU] to call up the DVD menu or
press [TITLE]to call up the title metal.
_- NOTE
d MP'3j
1 During playback, press [STOP m].
@/s%_\ ..
k..j
iiiiiliii_ll!_ili_)il_i_i_iii_i_!l_l_i_i_i_i_l_llll_lll_l_lll!ll}}}}illlllli
iiiiik, ;,_,i_i
(Example: DVD or Audio CD)
®Resume message will appear on the TV screen.
2 Press [PLAY L>], playback will resume from
the point at which playback was stopped.
*To cancel resume, press [STOP m] twice.
®For MP3, p_ayback will resume from the begin-
ning of the current track.
®The resume hfforma/k)n stays on even when the
power is turned off.
1 During playback, press [PAUSE ml].
®Playback will pauseand soundwill be muted.
2 To continue playback, press [PLAY L>].
2
3
During playback, press [PAUSE ml].
*Playback will pause and sound will be muted.
The disc goes forward by one frame each
time [PAUSE _] is pressed.
To exit step by step playback, press [PLAY L>],
- 20 - EN

¢1 [ /aNFSj
1 During playback, press [FWD _-] or
[REV _].
I SLOW
. "_ 1" or "_ 1" appearson [he screen.
2 To sebct another speed, repeat step 1 until
your required speed number appears on the
screen,
*For DVDs, t?.tst%rward/reverse search speed is
dittcreu[ depending on d_edisc. Approxhua/e
speed is I (x2), 2 (xS), 3 (x20), 4 (x50) and
5 (xl00).
®For Audio CDs and MP3 approximate speed is
I (x2), 2 (xS) and 3 (x30).
3 To return to normal playback, press [PLAY P>].
1 During playback, press [PAUSE I1].
2 Press [FWD _] or [REV_].
I SLOW
®"jjli_ 1" or "_ji 1" appears on d_e screen.
3 To select another speed, repeat step 2 until
your required speed number appears on the
screen.
*Slow torward or reverse speed wuTieswith [he
disc. Approximate speed is I (1/16), 2 (1/8) and
3 (1/2).
4 To return to normal playback, press [PLAY [>].
The Zoom function allows you tu enlarge the video
image and to pan through the enlarged image.
1 Press [ZOOM] during playback.
2
3
4
Press [ZOOM] repeatedly to select the
required zoom factor: ZOOM1, ZOOM2,
ZOOM3 or OFR
Press [_], [_], [-_] or [_1 to move the
zoomed picture across the screen.
C;)
To exit zoom mode, press [ZOOM] to OFR
_'- NOTE
®Zooming tunction does not work wMle disc
Hleuu is SllOW[L
®Zooming tuncfion is no[ available on some
discs.
®It may take several seconds to slide d_e
zoomed picture.
®The picture may be dis[o_ted if you operate
o[her functions mpemedly (ex. [PAUSE | |] or
[REV @@],etc.) in d_ezoom mode.
o
Z
i
i
- 21 - EN

3H FUNCTION
/
If!
o Shaded buttonsareused forfollowingoperation,
There are three ways to begin playback on an Audio
CD and MP3 at a specific m_ck.
1 Press the Number buttons to enter the
desired track number,
d_Dd_bdJD
®Playback will start at the selected track
®To select single-digit track nmnber, press single
nmnbel: (e.g, Press [3] for track number 3.)
®To select track numbers which are higher than 9,
press [+100/+10] first.
(e.g. Press [+100/+10] [21[51 tot track number
25.)
Using [SEARCH MODE]
1 Press [SEARCH MODE],
SEARCHMODE
®The track search diq-4ay appears.
2
Within 30 seconds, select the desired track
number using the Number buttons,
CO(_b@DI
* To sebct singb-digit track number, press [0]
first if tl_e total number of track in d_e disc is 10
or more. (e.g. Press [0] [3] for track number 3.)
®Playback will start a_ d_e selected tracL
During playback, press [SKIP _'_] tu move the next
track Press it repea/edly to skip subsequent tracks.
Press [SKIP I"_'_] to go back to beginning of d_e cur-
reut track. Press it repeatedly to go to the previous
tracks.
tf [SKIP _ / _,¢q] is pressed whib the play-
back is paused, the playback will be paused
again after skipping to the next track
_- NOTE
• [SKIP _tl / _'_] are not operative when
2
Press [SEARCH MODE] once for the Chapter
search, twice for the Title search during play-
back,
F_--} once .> _-_ .........
Within 30 seconds, enter the desired chapter/
title number using the Number buttons.
®Playback will start a_ the selected chapter or
title.
* Press [CLEAR] to erase the incorrect iuput.
®To select single-digit chaptefftide number, press
[0] first if the total number of chapter/fide h_ the
disc 10 or morn. (e.g. Press [0] [2] for
chapter/fide 2.)
- 22 - EN

1 During playback, press [SEARCH MODE]
repeatedly to display the Time Search on the
TV screen,
repeated,y,,
2 Within 3Oseconds, enter a desired disc time
using the Number buttons.
@ L xvx j
®Playback will start N ttle specified dine.
®Press [CLEAR] to erase d_eh_cormct input.
®When ff_ereis no need to enter a number, "0"
appears automaqcaHy, For example,
0 : 0 _ : __" appears h_the Thne Search display
if d_e total dine of the track or title is Jess dmn
l0 mbrutes,
SDv,aw
Use markers to memorize your favorite places on a disc.
1 Press [SEARCH MODE] repeatedly during
playback to display the Marker screen.
2 Press [_1 or [_1 to select 1, 2, 3, 4, 5, 6, 7,
8, 9, or 10 and ensure that"
appears in the display,
When you reach the desired point, press
[ENTER1,
®The Tide or Track and elapsed playing time will
appear in d_e TV screen.
To return to the Marker later, press [SEARCH
MODE] repeatedly during playback to display
the Marker screen, Then press [-,q] or [_] to
choose the desired marker, then press
[_ SF_M_ repeatedly.[-q_[-;_ ,I__NT_
_- NOTE
* Operadons which erase aH Markers:
- Turning off d_e powec
- Ejecting a disctrom the unit,
- Pressh_g [SELECTS
- Selecting "AC" at step 2 and pressing
[ENTERS
_,To clear a marker:
- Press [_] or [_] to select a cursor on 1o[l_e
marker number and press [CLEAR].
* You can mark up to 10 points.
5 Press [SEARCH MODE] or [RETURN] to
exit.
SEARQ4UOOg
([_ L-5
- 23 - EN

;IAL PLAYBACK FUNCTION
CLFAR SEARCHM00E iREPEAT AB -
C_72
MODE
Shaded buttons are used for following operation.
REPEAT is aw_iJaNe on b, during playback.
For DVD-Vs
For MP3
1 Press [REPEAT] during playback,
'REPEAT
(71)
®The repeat mode changes as described below
every time you press the button.
-- NOTE
®Repeat Track/Group setting wilBbe cleared /
when moving to other track or group.
J
1 To activate the repeat function, press
[REPEAT] during playback,
[_ €,REPEAT
®The repeat mode changes as described below
every thne you press the button.
[] CHAPTER_ [] Tree-------'_ I_1OFF
current chapter repeat current t t e repeat repeat off
{
,----NOTE
®RepeatTitle/Chapter is not avaiJaNewith
. :,'CT'tt2 w,,,bec,earedmov,,,
to other titBe or chapter:
For CDs
1 To activate the repeat function, press
[REPEAT] during playback,
_ _y ......
db
®The repeat mode changes as described below
every thne you press the button.
[] TRACK _- []ALL _[] OFF
curr?nttrackrepeat entred sc repeat repeitoff
NOTE
®Repeat Truck setting wilB be cleared when
moving to other track.
®Repeal playback does not function during A-
B repeat playback.
1 Press [A-B] at your chosen starting point,
C_
®"[_q A-" appears briefly on the TV screen.
2 Press [A=B] again at your chosen end point,
®"[_] A-B" appears briefly on the TV screen, and
the repeat sequence begins.
3 To exit the sequence, press [A-B].
--- NOTE
®The A-B repeat section can only be set within
the current tide dbr DVDs) or current track
(for Audio CDs).
• A-Brepeatis notavai]ab]ewithsome scel_esin DVD.
,, To cancel the A poh_twMch was set, press
[CLEAR].
• A-B repeat playback does not function during
title, chapter, track or all repeat playback.
- 24 - EN

'S NP3j
You may determine the order in which tracks will play.
1 Unstop mode, press [NODE].
MODE
* The "PROGRAM" screen will appeal:
2 Press [A] or [V] to seUect a track, then press
S MP'3j
This function shuffles the playing order of tracks
instead of playback in the sequence.
1 In stop mode, press [NODE] twice.
_ twice _i_
®Press [CLEAR] to erase the most recently
entered tmck_
®If the entire Program cam_ot be displayed at
once on a screen, "_,_[" appears t() go to the next
pate and "_'_l'q" appears t() go back to tl_e previ-
ous pate.
While an MP3 folder is open:
®Press [_] when you wan_ to go to the next
®Press ["q] when you want to go back to the
previous hierarchy.
3 Repeat step 2 until you have selected all the
tracks you want to play in the program.
4 Press [PLAY b>] to play the programmed tracks.
,-'- NOTE
o While the program is being p_ayed back,
pressh_ T [STOP lml]works as follows.
o Press [STOP N] once and then [PLAY D]
again, playback will restart from the point where
[STOP N] was pressed (MP3: from the begin-
nin T of the current track). (Program continued)
®Press [STOP m] twice a,d the, [PLAY D]
agah_, playback will restalt from d_e track h_
the usual way. (Program canceled)
• Up to 99 tracks can be entered.
• To erase all tracks in the program at once, select
"ALL CLEAR" at the bottom of the list at step 2.
o If you like to repeat the current track in the
program, press [REPEAT] several times until
"l_q TRACK" appears during playback. [f you
like to repeat the entire program press
[REPEAT] severa_ thnes until "[_ ALE'
appears during playback.
_,"RANDOM" screen appears.
2 Press [PLAY b>] to start random playback,
,--- NOTE
®If you like to repeat the current track in the ran-
dom selection, press [REPEAT] several thnes
until "l_q TRACK" appears during playbad<, tf
you like to repeat the entire random selection
press [REPEAT]several thnes until "[B ALL'
appears during playback.
O
o
L,L
o
<
m
.J
- 25 - EN

31NG THE SETTINGS
C}
SETUP
CLEAR SEARCH_+_OE (REPEAT A+B +_
C-} C-} C-}
MODE FAUDIO SUBTffLE ANGLE
® Shaded buttons are used for following operation,
The unit allows you to seJect a Bmguage during DVD
disc (it muJti Janguages are avaihNe) phyback.
1 Press [AUDIO] during playback,
The unit allows you to select a _anguage R>rsubtides
during DVD disc (it available) playback.
1 Press [SUBTITLE] during playback,
SUBTITLE _ ! _9!_
®The subtide language will appear on tl_e display
bar a_the top of tl_eTV screen.
9 Press [SUBTITLE] repeatedly to select },our
desired subtitle language.
SUBTITLE
3 To turn off subtitles, press [SUBTITLE]
repeatedly until "'OFF" appears,
SUBTITLE
,"- NOTE
Pressing [SUBTmTLE] may not work on
some DVDs with multiple subtide h_guages.
in this case, set it on d_e disc menu.
(Operation varies between discs Reter to fl_e
manual of the disc.)
®If the desired language is not shown after
pressing [SUBTmTLE] several times, the disc
does not have subfides in dmt language.
*When "NOT AVAIl=ABLE"appears on the TV
screen, it means no subfide is recorded on fl_e
scene.
®If you choose a Dnguage that has a 3 letter
kmguage code, the code will be disphyed
every time you change the Subfide language
setting. If you choose any other _anguages,
"---" will be displayed instead. (Refer to pate
29.)
Press [AUDIO] repeatedly to select your
desired language,
,-- NOTE
* Pressing [AUDIO] may not wofi_on some
DVDs with mulfipb audio languages (e.g.
DVDs which allow audio Dnguage se_ting on
fl_edisc menu).
1 Press [AUDIO] repeatedly during playback to
select between "STEREO", "L ch" or "R ch"= = .
_AU_i6
C-}m"
®STERE() - both right and left channels are
active (stereo)
g-ch - only left channel is active
R-ch - only righ_ channel is active
- 26 - EN

SomeDVDdiscscontainsceneswhichhavebeenshot
sim_.dtaneousiy trom wu'ious angbs. You can change
the camera angb when die "_" icon appears on the
screen.
1 Press [ANGLE] during playback,
ANGLg _ _ i];8 1
*The selected angle will be dismayed on the dis-
play bar at the top of the screen.
*If die "ANGLE ICON" setting is "OFF" in die
"OTHERS" menu, the "_" icon wilBnot
appeal: (Refer to page 31.)
2 Press [ANGLE] repeatedly to select your
desired angle,
ANGLg ;
L--2
Adjust tile Black Level Setdngs to make the black
parts of tile picture brighter.
1 Press [MODE] during playback then press
[ENTER] to switch "ON" or "OFF",
==================================================
ON: Makes the dark parts brightec
OFF: Shows the original picture as recorded.
2 Press [MODE] twice or [RETURN] to exit,
MODE RETURN
[_ _-5 twice OR
K NOTE
l.The setting will be saved even ff the unit is
L t_.lmedoff.
)
_OU can eJljoy SUFFou]ld-sou]ld effect ovel7 two speak-
ers on this unit.
1 Press [MODE] repeatedly during playback
then press [ENTER] to set it "1", %" or "OFF".
UOb_ . [_' OFF .@TE>
{_ Q--_} twice ml_ _ .........---__..............
l : Natural effect
2:
()FF: Original Sound
2 Press [MODE] to exit,
MODE
®You can alsoexit the menu by pressing
[RETURN1.
I N?TE
_rCD play ordy:
irmal Surround will not be effective if the
sound mode is set to sometMng other than
STERE(). (Refer to STERE() SOUND
MODE" on pge 26.)
o_
z
E
ILl
O_
ILl
"r
I--
Z
Z
- 27 - EN

THE ON-SCREEN iNFORMATiON
_-"_/ _-_' _- _ I
I
® Shaded but{ons are used for following operatkm.
2
You can check the information about d_e cm:rent disc
by pressi,g [DmSPLAY].
For DVD-Vs
3
1 Press [DmSPLAY] during playback to show
Angleicon,appearsonlywhenavail-
r_able onthe DVD
/
iJl_ Currentplaybackstatus
Remainingtimeofthecurrentchapter
_ Elapsedtimeof thecurrentchapter
CH(Chapter):
Currentchapternumber/Totalchapters
2 Press [DISPLAY] again to show current Title,
Remainingtimeofthecurrenttitle
Elapsedtimeof the currenttitle
TT(Title):
Currenttitlenumber/ Totaltitles
3 Press [DISPLAY] again.
I-rl _Layer numbers,appearsonlywhen
_ playingatwo-layeredDisc
[_ LO:Layer0 isplaying
LI: Layer1 isplaying
Currentrepeatsettingappearsonly
whentherepeatsettingisactive
_C: Chapterrepeat/ _T:Title repeat/
A_B: A-Brepeat
BITRATE:Theamountofaudioand
videodatacurrentlybeingread
4 Press [DISPLAY] again to exit.
Press [DmSPLAY] again to show current Total
Track,
ALL:
i -, , Currenttracknumber/ Totaltracks
II_ 4/12 0:1:45-04540 _'T _ I
--_l_l'_l_current repeatsettingappearsonly
>/- I _I_ whenthe repeatsettingis active
I I _T: Trackrepeat
I I A:AllTracksrepeat
I I A=B:A-B repeat
[ ' Remainingtime oftheentiredisc
_Elapsed timeoftheentiredisc
Press [DmSPLAY] again to exit,
NOTE
®When you are r4aying a Cfisch_PROGRAM /
or RANDOM mode, "_PROGRAM'" (or |
RANDOM) will be dJspJayed at step 2. |
J
For MP3 _._[_J
Press [DmSPLAY] during playback,
IN_ .r_ current playbackstatus
I ' _ Thenameofthefilecurrentlyin play
Y- -- willbedisplayed.
2
3
Press [DmSPLAY] again,
i TR(Track):
1 _/_'°°_:' .G-T.'_'1 Currenttracknumber/Totaltracks
Currentrepeatsetting,if active
_T: Trackrepeat
_G: Group(folder)repeat
A:Discrepeat
Elapsedplayingtimeofthecurrent
track
Press [DmSPLAY] again to show the current°
playback mode,
(Only whell }ou Ire playing a disc in PROGRAM or
RANDOM mode.)
ForAudio CDs 4 Press [DISPLAY] again to exit,
1 Press [DmSPLAY] during playback to show the
current Track.
_ Currentplaybackstatus
Remainingtimeof thecurrenttrack
I ' Elapsedtimeofthecurrenttrack
I
TR(Track):
Currenttracknumber/ Totaltracks
f
- 28 - EN

THE DVD SET UP ITEMS
SETUP
CI FAR SEA_:H ML3_ !REPEAT A-B
. Shaded but[ons are used for following operadon.
You can change die DVD player's settings,
1 In stop mode, press [SETUP] twice, [T'] to
select "CUSTOM" then press [ENTER],
_-_ twice * C_-_q
SETUp E
.].N!T_AUZE
-- NOTE
®If tile menu does not appear, press [PLAY b>]
first, then press [STOP U]. Make sum the
disc is in stop mode, then slowly press
[SETUP] twice.
Press [a,] or [_'] to select the desired item
then press [ENTER] to confirm,
SETUP _
Refer to tile pages below to set up each item.
LANGUAGE: See [] LANGUAGE SETTmNG
DISPLAY: See [] DISPLAY SETTING
AUDIO: See _AUDmO SETTINGS
PARENTAL: See []PARENTAL CONTROL
OTHERS: See _OTHER SETTINGS
LANGUAGE SETTING
FoUJow,steps1to2.1the
3 Press [a,] or [_'] to select the desired item
then press [ENTER].
/ \ ..... _ I|
_ORIGINAL
I_ SUBTITLE OFF JL- I_ @N_
AUDK): Sets the audio h_guage.
SUBTITLE: Sets the subdde language
DiSC MENU: Sets the hlguage for DVD metal
4 Press [,A.]or [_'] to select a setting then press
/ \
\ /
LT__
[LANGUAGE 3
SETUP _
FRENCH
I F&,_R
*If "OTHER" is sdected on file "AUDIO", "SUB-
TITLE" or "DISC MENU" screen, press tbur-
digit number to enter the code tot the desired
®Only d_e languages supported by tile disc can be
selected.
5 Press [SETUP] to exit the menu,
SETUP
r- NOTE
®Language Setting for Audio and Subtide are
not valid for some discs due to deft.robsetting
of die disc. [n rids case, set fflem by pressing
[AUDIO] and [SUBTITLE]. (Reter to page
26.)
* If you sdect a language dlat is not supported
by the disc, subtide will automatically be set
OFF and tile t_rst item of die audio languages
will be automatically set.
I,LI
121
>
t-,t
I,LI
"r
I-
o
z
O
Z
O
i
o
I,l.
Z
i
Z
nl
nl
t_
o
O
- 29 - EN

[] DISPLAY SETTmNG
Followsteps1 to2 i, the o,
page 29.
3 Press [a,] or [T] to select the below items then
press [ENTER],
/ \
@\ "
TV MODE:
You canchangecertain aspectsof the DVD display
screens and on-screen messages on the TV screen.
AUDIO SETTmNG
Choose the appropriate Audio settings fur your equip-
merit as it uuly affects durh]g the pklyback of DVD
discs.
Follow steps 1 to 2 in the on
page 29.
3 Press [A] or [T] to select the below items then
SETUP
" B( TNsTR AM/
DRC (Dynamic Range Control):
*4:3 LETTER BOX (defimh): To show Neck bars
on top and bottom of the screen.
*4:3 PAN & SCAN: To show a tuH height picture
with both sides trimmed.
®To compress the range of soft to k)ud suund.
®The default setthlg is "ON".
DOWN SAMPLING:
STILL MODE:
TMs tmlction aHluwsyou to adjust picture resolu-
tion and quality hi tile still mode.
_Z _"IVMODE 4:3LETTER_._BOX
®AUTO (det?mlt): Automatically select the best
resolutkm setting (FRAME or HELD) based on
tile data characteristics of tile pictures.
®FIELD: Select "FELD" when the pictures are
stilBunstable even if "AUTO" is selected.
FIELD stabilizes the pictures, ahllough tile pic-
ture quality may become coarse due to tile limit-
ed amount of data.
*FRAME: Select "FRAME" to display relatively
motionless pictures hi Mgher resolutkm.
FRAME hllproves the picture quality, altllough it
may unstabiHzefl_e pictures due to simultaneous
output of two fieM data.
4 Press [SETUP] to exit the menu,
SETUP
*ON : Output in 48 kHz. (default)
*OFF : Output the original suund.
When playing disc with copyright Protection
*it you select "OFF", copyright protection win be
activated and sound win be down sampled at
4SkHz.
DOLBY DiGiTAL:
Set tu "BHTSTREAM" when the unit is comlected
to a Dolby Digital Decoder.
®B[TSTREAM: Output a Dolby Digital signal
(defimlt)
®PCM: Convert the Dolby Digital to PCM
(2 chmmel stereo)
?U[CK MENU
Yuu can select the "TV MODE" or "DOLBY DHGHTAUfrom the QUICK menu quickly. To access the
QUICK menu, select "QUICK" instead of "CUSTOM" at step 1 on page 29.
rv SET UP MENU iN DVD MODE ,
* Yuu can access the TV SETUP menu b_ pressing [SETUP] from the DVD mode, and select on b,
"LANGUAGE" and "BACK LIGHT".
- 30 - EN
4 Press [SETUP] to exit the menu,

[] PARENTAL CONTROL
Pareuta_ (iontrol limits d_e disc viewing friar exceed
your setdug (widl a password or playback will stop),
This feature allows you to prevent discs wifll alterna-
tive scenes from being played by your children.
PARENTAL LEVEL
Parental Levd allows you to set file raring level of
your DVD discso P_ayback will stop if file disc's rat-
ings exceed tile level you set.
Follow steps 1 to 2 hi tile ou
page 29.
3 Enter your four-digit password then press
*Press [41, [7], [31, [7] fileu enter your password
if you Rlrget file password.
4 Press [,A] or [_'] to select "PARENTAL LEVEE'
then press [ENTER].
I_ WORD CHANGE
5 Press [_,] or [_'] to select the desired level
then press [ENTER].
/ \
Press [SETUP] to exit the menu.
,-- NOTE
®When doing d3is Rlr the first time, enter any 4
digits. (except for 4737) That number will be
used as the password. (in tile event you forget
tile password, see below)
" To change tile password, press tat or [V] to
select "PASSWORD CHANGE" at step 4
ff_en press [ENTER]. Enter the [i.)ur-digit
password, then press [ENTER[
" Widl some DVDs, it may be difficult to t_ud
if dley are compafi ble with pareulal lock. Be
sure to check if the parental kick function
operates hi die way din/ you have set.
* Record file password in case you tbrget it.
CONTROL LEVELS
* ALL
All parental lock is cancelled.
® Level 8
DVD software of any grade (adult/geueral/cMldreu)
can be played back.
® Levels 7 to 2
Only f)Vf) software intended for general use and
children can be played back,
® Level 1
Only DVD software intended [br children can be
played back, wifl_ dlose intended for adult and gen-
eral use proMbited.
OTHER SETTINGS
Follow steps 1 to 2 in die : on
page 29.
3 Press [,A] or [T] to select the below items then
press [ENTER],
/
I_ SCREEN SAVER OFF
ANGLE iCON:
®Press [ENTER] repeatedly to turn Augb icon
"ON" or "OFF",
®The dethuh setting _s ON .
SCREEN SAVER:
* Press [ENTER[ repeatedly to turn Screen Saver
"ON" or "OFF". =
* The defimlt setdug is "OFF'. If you select "ON",
the screen saver program starts when dlere is no 1_
input from die unit [br 5 mhmtes in stop mode. l:::1
4 Press [SETUP] to exit the
menu.
nl
"1-
I'-
Z
- 31 - EN

SETUP
® Shaded buttons are used for following operation,
This allows you to return all seJections of SETUP
(except R)r "PARENTAL:' and menu language) to
their defauh settings.
1 Press [SETUP] twice in stop mode so that the
"INITIALIZE" menu appears,
SETUP
@o
Press [,&] or [T'] to select "INITIALIZE" then
press [ENTER],
/ \
@\ "
C-;b
3 Press [_.] or [_r] to select "YES" then press
[ENTER] twice,
L-;b
I_ InNNize?
L--_ - t
All tile settings (except tot "PARENTAL:' and
menu language) will be cleared.
®To cancel tile initialization, select "NO".
4 Press [SETUP] to exit the menu,
SETUP
- 32 - EN

L
ROUBLESHOOTmNG GUmDE
[f die unit does not per[brm properly when operated as instructed in dlis Owner's Manual, check the unit, cou-
sultiug the [olk_wiug checklist.
PROBLEM CORRECTIVE ACTION
No power ®Make sure the power plug is connected to an AC outlet.
®Make sure the power is turned on,
No operation by hffrared remote ®Check if the power plug is connected to an AC oudet.
coutrol ®Check the batteries hi the remote control.
®Aim the remote control directly at the remote seusol: If necessary,
remove aH the obstacles between the sensor and tlle remote control.
®You have to be within 23 feet of the unit.
®Check if the correct mode is selected, l[f not switch the mode by
pressh]g [SELECT], wMchever you need.
[ TV Node 1
Sometimes a performance problem can be easily solved by checking seemingly apparent but ofieu overlooked
x)ssibilities. Beff)re arranging Rn: service, check these items. [t could save your time and money.
PROBLEM CORRECTIVE ACTION
No picture or sound ®Make sure the AC cord is connected to an AC oudet.
®Check antenna connection.
®Press [SELECT] to select TV mode.
Then try od]er TV feature.
®Let the unit program its tuner u]emory.
No picture or poor picture ou the * Adjust direction or replace antenna.
unit ®Adjust picture controls.
®Check [or brokeu piu o[ the antenna cable.
No souud or poor souud ®Adjust volume coutrol ou remote coutrol or u]aiu uuit.
®Press [MUTE] to restore sound.
Bars On Screen ®l[f outside antenna is being used, check [or broken wire.
• Check _br loca_ interference.
Picture Distorted or Blurred ®TU a new channel if OK, then possible staqou trouble.
®If outside antenna is beh]g used, check [or broken wire.
Picture Rolls Vertically * Try a new channel if OK, then possible staqou trouble.
Lh]es or Streaks hi Picture ®If outside antenna is beh]g used, check [or broken wh'e.
®Check [br local h]terfereuce.
No Color ®Try a new channel, if OK, then possible station trouble.
®[s antenna connected to jack on the back of file set?
®[f outside antenna is beh]g used, check [or broken wh'e.
• Adjust "COLOR" comrok
Poor Reception on Some Channels ®Try a new channel if OK, then possible statkm trouble.
Ghosts in Picture ®Is antenna connected to jack on die back of tlle set?
®[f outside antenna is being used, check [or broken wire.
®Check [br k_cal h]terfereuce.
Weak Picture ®Try a new channel, if OK, then possible statk)u trouble.
®Is antenna connected to jack on die back of die set?
®[f outside antenna is being used, check [or broken wire.
• Adjust "CONTRAST" & "BRIGHT" coutrol.
- 33 - EN

PROBLEM CORRECTIVE ACTION
Sound OK, Picture Poor * Try a new channel if OK, then possible stakm trouNe.
®Is antenna connected to jack on the back of the set?
®If outside antenna is beh,g used, check [or brokeJ_wire.
®Check tbr local iuter[ereuce.
• Adjust "CONTNAST" & "BF:{IGHT"control.
Picture OK, Sound Poor ®Try a new channel if OK, then possiNe sta/km trouNe.
®Check [br loca_ interference.
No operation by infrared Remote * Make sum the AC cord is connected to an AC outBet.
Control ®Check batteries h_ remote control
Dif[erenl color marks on screen ®Magnetism fiom nearby appliances and geomagaetism might af[ect
the cohl of the TV picture. Move the unit away fi'om the appliances.
the unit can repai r itself automaticall y. If you want to rcpai r immedi-
ately, unplug the powm cord, then pBugit in agah_ 30 minutes JateJ or
so. This automatically Jesets the unit.
CLOSED CAPTION PROBLEM POSSIBLE REMEDY
Misspelling h_captk_ns • Error committed by the closed captioning production company.
Possible in a live broadcast. Not in case of a prerecorded program.
Text is not shown in its entirety or • A few seconds of delay is common for live broadcast.
a delay occurs from what is being • Display capacity may not exceed 220 words per minute. If a dialogue
said. exceeds that rate, selective editing is used to insure that the captions
remain up-to-date with the current TV screen dialogue.
Captions scrambled with white ° Caused by interferences of building, power lines, thunderstorms, etc.
boxes
No captious in a program which ° The broadcast may use a time compression process to speed up the
must contain closed caption program. The decoder cmmot read the compressed inl_wmation mid
captions will be lost.
Black box in the TV screen °You are in TEXT mode. Select a CAPTION mode ("C1 ", "C2") or
Caption "OFF".
- 34 - EN

DVD Mode ]
PROBLEM CORRECTIVE ACTION
* [usert a correct video disc thai p_ays on this unit.
, Press [SELECT] to select DVD mode, theu try other DVD femure.
Disc cannot be played • Insert the disc.
, Clean tile disc.
, Place the disc correctly, with the label side up.
, Cancel the pareutM kick or change tile control level.
No sound • Connect the audio cables firmly.
* Turn the power of the audio componenl on.
, Correct the audio ouq)ut settings.
, Correct the input settings on the audio componeut.
No DTS audio is output • This uuit does not support DTS audio. This is not a malfunction.
, There are some cases where pictures may be slightly distorted, which
are not a sign of a malffmction.
, Although pictures may stop [or a momeut, this is not a malfunctiouo
Audio or subtitle language • The selected language is not available [br audio or subtitles on the
does not match the set up DVD. (This is not a malfunction.)
Tile camera angle camlot be changed • The DVD does not contah_ sequel,ces recorded fl:om different camera
angles. (This is not a malfunction.)
, The DVD does not conlahl audio source or subtitles hi the selected
Banguage. (This is not a malffmctiono)
, That operation is prollibited by file unit or file disc.
(This is not a maHunction.)
, Scratched disc. Replace the disc with an unscratched one.
Audio or subtitBe language cannot be
changed
"Prohibited icon" appears on tile
screeu, prohi biting an operation
CD sound dropout
No CD reproduction
DVD picture dropout
DVD picture }rceze
DVD picture hi mosaic
Disc cauuot be hlser_ed • Check if any disc is ah:eady hi.
Disc camlot be taken out • Unp]ug and plug again the power cord to the outBet, and tlleu press
• Press and hold [EJECT _] on file unit [or more than 5 seconds.
- 35 - EN

31=
CABINET CLEANING
® Wipe the from panel aud other exterior surfaces of
tile unit with a soft clotll humersed ill lukewarm
water aud wruug dry,
® Never use a solvent or alcohol, Do not spray h_sec-
ticide _iquid near tl_e unit, Sudl chemicals may
cause damage aud discoloratiou to the exposed sur-
ti_ces.
SERVICING
® Sllotlkt your nuit become iuoperative, (it) uot try to
correct the proNem by yoursdf. There are uo user-
serviceaNe parts iuside. Trim off, uupMg the power
cord and please call om° hetp line mentioned on
the g'ont page, to locate au Aufl_orized Service
Center:
IF THE LASER OPTICAL PICKUP UNIT
IS DIRTY
® If the unit still does not pertbrm propm_y when it is
opem/ed, while reterriug to tile relevant sectious
and to "TROUBLESHOOTING GUIDE" iu this
Owuer's Manual the laser optical pickup uuit may
be dirty. Consult your deah7 or au Authorized
Service Center fbr h_spectiou aud cleauhlg of tile
laser optical pickup uuit.
® Handle the discs so that fiugerpriuts aud dust do
uot adllere to the surt)._ces of tile discs.
® Always store the disc iu its protective case when it
is uot used.
®To c]eau-ofL use a soft ck)th,
® Do not use a llmXtclotll siuce this will mar the disc.
® Wipe the disc hi a straight ]iue from center to edge.
® Never wipe with a circular motiou.
® Do uot use detelgent or abrasive cleauhlg agents.
- 36 - EN

GENERAL SPECIFICATIONS
LCD :
Television system :
Closed caption system
Cham_el coverage:
VHF:
UHF:
CATV:
Tuning System:
20 inch
NTSC-M
:§15.119/FCC
2-13
14 - 69
2-13, A- W.
W+I - W+84,
A-5- A-I, 5A
181 channel
Channel access:
tuning system
Direct access keyboard,
scan and up/down
Product type:
Discs:
DVD vide(},Audio CD
CD with MP3 files
ELECTRICAL SPECIFICATIONS
2 speakers, 1W. 8 ohm
OTHER SPECIFICATIONS
Terminals
Au_temminput: VHF/UHF/CATV
Mini DIN 4-pin jack
RCA com_ector _4 1
Audio L/R input: RCA com_ector X 4
Component video input:
One pin jack (Y), IVpp (75 ohm)
Two pin jacks (Pr)/(Pb), 700mVpp (75 ohm)
Coaxial digim_ audio output:
One pin jack, 500mmVpp (75 ohm)
Head phone:
Remote comrd:
Operating
temperature:
1/8" stereo (3.5ram)
Digital eJ_coded
infrared Bigh[ system
5 ° C to 40°C
(41°F- 104°F)
AC 120V. 60Hz
(Maximum): 65W
LCD: 20"
Dimensions: H :20-1/16"(510mm)
W:19-1/2" (495mm)
D :14-7/16" (366mm)
Weight: 16.3 1bs. (7Akg)
®Designs and specifications are sub}eet to change without rmtice.
®If there is a discrepancy between languages, the default language will be English.
- 37 - EN

[] INDICE ..................................... 38
[] CONTROLES DE OPERACION Y FUNCIONES ..... 38
PARA INSERTAR LAS PILAS .................... 39
[] PREPARA(JON PARA LA UTILIZACION .......... 40
CONEX1ONES DE ANTENA/CABLE .............. 40
CONEXI()N EXTERNA ......................... 41
SECCION DE TV
[] OPERA(JON DE TV Y A,IUSTES ................. 42
PARA M1RAR UN PROGRAMA DE TV ............ 42
AJUSTE DE CANAL ........................... 43
ID1OMA DE MEN(J ............................ 43
SECC/ON DE DVD
m REPRODUCCION DE UN DISCO ................ 44
REPRODUCC10N BASICA ...................... 44
MEN{5 DE DISCO ............................. 45
REAN UDACION .............................. 45
ONTROLES DE OPERACION Y FUNCIONES
NOTE
h
* Para e]egh" e_ modo de DVD presioue primero [PLAY D] o [EJECT _], o hm:oduzca m_ disco en k_ |
r_nura. De otra manera, eli DVD no fm_cionaM.
3
- MANDO A DiSTANCmA
, Para saber c6mo funciona eJ mando a distancia, c(msMte ]a [Fig.X] de ]a phgina 8.
11° Bot6n CLEAR
Preskme para Cance]ar o borFar Un k_iusge inlro-
ducido ac[uah_,eute.
Presione para borrar ]a pantaHa "DISCO ADEN-
TRO'.
12. Botdn NODE
Preskme pare visuMizar Ja pautaHa de la repro-
duccidn programada o Ja de reproduccidu Meato-
ria eu el modo de parada.
Preskme para visuaHzar [a pautaHa de ajuste dd
uive[ del negro o la pantaHa de souido euvolveute
durame [a reproduccidu.
13. Botdn SEARCH NODE
Preskme para localizar un pumo deseado.
14. Bot6n AUDIO
Para modo TV: Presione para selecdonar el
modo de sonido de TV (ESTEREO/SAP/MONO).
Para modo DVD: Pmsione para sdeccionar un
idkmm de audio deseado (si estfi dispouible).
15+Botdn EJECT
Preskme para extraer tm disco de la tmidad.
16. Botdn SELECT
Preskme para seleccionar e[ modo TV. modo de
emrada extema o modo de DVD.
17. Botones CH. A / V
Presione para selecciouar cauales memorizados.
18° Botones VOL !X / V
Presione para comrolar el uNel de volumen del
DVD y el televisor.
1% Botdn MUTE
Preskme para sileuciar el sonido. Presiduelo de
uuevo pare restablecer e] souido.
20. Botdn ZOOM
Presione para ampliar ]a parte de ]a h_mgeu repro-
ducida en un DVD.
- 38 - ES
1.Bot6n POWER
Presione pare encender y apagar la unidad.
2.Bot6n PICTURE
Presioue para ajustar _a imageu.
3. Botones num6ricos
Presione para se]ecdouar dh:ectamenle el udmero
de canal deseado .
Botdn +100 (para modo TV)
Presioue para sdecck)uar cauales cuyo ufimero
sea superior a 99.
Botdn +10 (para modo DVD)
Presione para iutroducir k)s ufimeros superiores a
9 deseados.
4.Bot6n SLEEP
Presioue para ajustar el temporizador de reposo
5.Botones SKIP _ /_!_[
Preskme una vez para omitir capfiulos o pistas y
desp[azarse a uu pumo especffico.
6.Botdn PLAY D
Presione para reproducir el disco.
7.Botdn PAUSE H
Preskme pare hacer uua pausa eu la reproduccidu
del disco actual.
8. Botdn DISPLAY
Para modo TV :
Presione pm'a visuaHzar el ufimero actual de cauM eu
Para modo DVD :
Presione para visualizar el esmdo actual en la pan-
taHa dd televisoJ:
9. Bot6n SETUP
Presione para enmu" o salir del mend de coufigu-
racidu de] TV/DVD.
I(L Botdn TITLE
Presioue para visualizar el meud de fftulos.

21. Bot6n REV@,_
Presione para ver k) imagen en DVD en retroceso
o en c_mara bnta de retroceso.
Bot6n FWD
Presione pare mover en avance r@ido o en
cdmara bnta en el disc().
22. Botdn STOP []
Preskme para detener ]a reproducci6n de] disc().
23. got6n DiSC BaENU
- Muesmt el menddel DVD,
-Muesmt la lism de arcMvos del disco MP3.
24.Bot6n ENTER
Preskme pare esmblecer un _tiuste.
25°Botones _, (Arriba)/V (Abajo)/_ (_zquierda) /
(Derecha)
Presione para sdeccionar o ajusltar k)S fltemsdel
H)en 0,
26. Bot6n RETURN
Presione para volver a la pantaHa anterior en el
mend de configuraci6n.
27. Bot6n A-B
Presione para repefir kt reproducci6n de una sec-
ci6n sdeccionada.
28. Bot6n ANGLE
Prcsione pare cambiar el £mguk) de kt c£mmray
vet [a secuencia que se est{tl>produciendo desde
un {mguRodi[crente (si existe).
29. Bot6n REPEAT
Repine la reproducci6n del disco, dmlo, capflulo,
grupo O pis_ta acRlaL
3(LBot6n SUBTITLE
Presione para seleccionar el idioma de los subtf-
tulos.
- PANEL FRONTAL
, vet pand fr{mtak vaya a p_gina 9, [Fig. 2].
Para la ilustraei6_l dd la
31. Bot6n STOP D 35. Bot6n SELECT
Presione para detener Bareproducci6n del disco.
32. Bot6n MENU
Presione pare enmu" {}szdir del mend de configu-
racidn de] TV/DVD.
33. Botones VOLUME A / V
Presione para conlro]ar e] hive] de vo]umen de]
DVD y el televisoJ:
34. Botones CHANNEL _, /V
Presione para se]eccionar canales memorizados.
Presione para selecdonar el modo TV. modo de
enm_da extema o modo de DVf).
36. Botdn POWER
Presione pare encender y apagar la unidad.
37. Botdn EJECT
Presione para extraer un disc() de ]a unidad.
38. Ventana de sensor remoto
39. Botdn PLAY _>
Presione para reproducir e] disco.
]
1 Abra la cubierta del compartimiento de las
pilas empujando la cubierta del mando a dis-
tancia en el sentido de la flecha.
Inserte 2 pilas "AA" en el compartimiento de
las pilas, en el sentido indicado por las mar-
cas de polaridad (+/-).
3 Vuelva a porter la cubierta.
PRECA UCIONES A LA HORA DE
INSERTAR LAS PILAS
®Asegdrcse de seguir la polarMad correcta, tal como
se mdica en el comparthniento de las pilas. Si se
colocan las pilas con la poladdad mvertida se
puedenocask)nardafios a Bamfidad.
®No mezcle disfintos dpos de pHas (ej. Mcalhm y de
carbdn-zMc) o pHas vicjas con nuevas.
®Si no va a usarse ]a urfidad durante un perfodo
]argo de tieMpo, qtlite las pHas para prevenh dafios
o lesk)nes ocask)nadas pot posibles fugas de las
pilas.
®No Mtente recargar las pilas que no sea) para
mcargar; pueden sobrecalentarse y estropearse.
]
- 39 - ES

"IN PARA LA UTILIZACION
_- NOTA ]
]oLos cables utilizados aqul est_n disponibles en los comerdos.
] * Para su seguridad y para evitar dafios a la unidad, desconecte el cable de antena de la toma AN3["
_antes de trasladar la unidad°
- CONEXIONES DE ANTENA/CABLE
SI TIENE UNA TOMA DE PARED
Conecte e_ televisor a _a toma de antena de pared con
[Parte posterior de
el cable RF (disponible en los come_vios).
SI _\gENE CABLE DE HILOS
Conecte el televisor al cable de antena.
NOTA
* Antes de conectar la antelmen la toma ANT. de la unidad,
compruebe q_tela patilla no estdtorcida. Si !o est_i,ponga la
patilla recta tal como se muestra e!}la ilustracidn y a co!}tin-
uacid!}conecte la patilla a [a toma ANT. de la umdad.
Patil[atorcida
ColleC[ol
(Debe ponerse
reck_a)
(patilla recta)
- CONEXION CON CAJA DE CONVERTIDOR ICAJA DE SATELITE
[par_e l_osterior de es_e mfidadl
Antena de S it_lile
CUANDO SE USA UNA CAJA DE CON-
VER_ITDOR/CA.IA DE SATELITE
Si su compaMa de teIevisidn pot cable [e suministra
una c_Liade convertidor o si usa un sistema de
satdHte, podr_i utilizar _a conexidn b_sica que se
muestra anteriormente.
La selecd6n de k_s canMes deber5 lmcerse con [a
caja de conver_idor o caja de satdli{e. Es_o sigMfica
que no es posible cambiar de canal u_ilizando el
mando a dis_ancia de la umdad.
[pa NOTA
ra el instalador de sistemas CATV:
Esta _ota _iene ia fi*mlidad de llamar la atencidn del i*_stalador de sistemas CATV para que te_ga en cuema el
Arffculo 820-40 de la NEC, que proporci(ma recome_dacio_es para hacer una co_exidn a tierra apropiada y, e_ par-
_icular, especifica que la tierra del cable debe co_ectarse al sistema de pues_a a tierra del edificio, _a_cerca del punto
de entrada del cable como sea posible,
- 40 - ES

[Parte p(/gterk)t
d_ es[e unkJad
AUDIO •
VIDEO2 -
VIDEO1 -
Puede conectar esta unidad a su equipo de audio/vldeo.
,, AsegOrese de apagar todos los componentes del
sistema antes de conectar otto componente.
,, Consulte los manuales de instmcciones de los
componentes que va a conectar a la unidad.
NOTA
Cuando utilice _as tomas de entrada extema sdec-
done el "AUXI" o AUX2" pmsionando [INPUT
SELECT]. (Co.sulte la p4ghm 42,)
® Para utiHzar la tomas VIDEO1, seleccione
"AUXI".
* Para utilizar _a {omas V]DEO I, seleccione
"AUX2".
- ENTRADA DE VIDEO! Use esm conexidn si st, propio eqaipo A/V (ej.
. videograbadora) _iene _omas de sMida de audk_ y
Clble de audio (SALI[)A) __ video. (Tuando se usa un cane Video-S, se obfiene
Cable de _fdeo _ _ mla h_iagen mej0in
O _ Videoglabadora
CaNe VIDEO-S (SALtDA) {
NOTA
j ® Si su propio equipo es moliofdliico (sd!o fieHeulla toma de audio},conecte d cable de attdio a [atoma AUD]{OL de esta m]idad,|
_® Si conecta la toma VIDE() y la toma S-VIDEO simk4tkieame_lte, seda prioridad a la S-VIDEO., J
- ENT_ADA DE VIDEO2 Use esta conexidn si e_ equipo A/V (ej. videoc,imara
o videojuego) {iene _omas de saHida de vfdeo COM-
_ Cablede ludio, l PONENTE (¥.Pb,Pr). Podr4 disfrmar de una mejot
Videoc4mara imagen con esta conexidn.
Cable de video
compol_e_te (SAL1DA)
- SALIDA DE AUDIO
Atoma de ENTP.ADA
DIGITAL(OAX[AL DE AUDIO
Equlpo dora&rico de audio
Descodific tdor Dolby Diglt t[
Podr4 disfiutar de un sonido de DVD con
m4s presencia desconeciando eJ eqaipo de
audk_ digital tgdcomo e] descodificador
_'-- NOTA
• La R_ente de audio de un disco en un formato de sonido envolvente Dolby Digital de 5,] cana]es no se
puede grabar como sonido digital mediante una pletina MD o DAT.
• Si conecta un descodificador Dolby Digital ajuste la funci6n "DOLBY DIGFAL" a "BITSTREAM"
para salida de audio en el modo de configumcidn. ((7onsuJte la pfghm 30).
• A menos que se haga la conexidn a un decodificador "DOLBY DIGITAL" a "PCM" para salida de audio
en el modo de configuracidn.
La reproduccidn en una unidad udlizando _Liustes h]correc_os puede geaerar ruido y distorsidn, y _ambidr]
puede provocar dafios a los almvoces. (Consuhe la pfigflm 30}.
i Fabricado bajo licencia de DNby Laboratories, '!Dolby" y el s!mb0J0 de JadONe O son marcas C0memia!es de
Do[by Laboral_o['i_,
- 4_ - ES

"}N DE TV Y AJUSTES
_PICTURE
SLEEP +100
L--D
_SKIP_ ZOOM MUTE
DISPLAY
s_oP T,_E\ /REAR.
(_l EAR _RCN MC_/_ [RgPg_T A-R ]
®Losbotonessornbreadosseutiliza_lparalassiguientesoperaciones.
1 Conecte eUcabUede aHmentaci6n de
UauNdad a una toma estfindar CA.
9 Presione [POWER] para encender UauNdad,
3 Presione [CH. a, / T] para seUeccionar eU
numero de canN deseado.
O
Presione Uosbotones numericos para intro-
ducir eUnumero de canN deseado.
/C_J2-__ Cg)
,- NOTA
Para seleecionar el numero de canal medi-
ante los botones num4ricos:
* Data selecckmar tm nfimero de canal de un
sdo d_gito,presioneprimero101(ej.Parael
canal2, presione[0] [2]).
* Para seleccJonarcana[es po cgbe cwos _ti[_eos
sean superioresa 99, presioneprhnero[+100/+10].
(e:i.Para e[ canal 125,presio_e [+100/+10] [2] [5]),
4 Presione [VOL A / V] para seleccionar el
nivel de volumen deseado.
VOLUMEN 20
®Preskme [MUTE] para sHenciar e[ sonido a[ iHstante.
Vudva a presk)nado para restaurar eHniveH de
voRmleJ_ an[erior
1"7. NOTA
I *Si presiona [CH._, / T] en el modo DVD,
|puede cambiar los canales del televisor, [ncluso
|si apaga la unidad en el modo DVD, cuando
l, vuelve a encenderlo se pondr£_en el modo TV.
- 42 -
PARA VER UN CANAL POR CABLE 0
SAJ[_LITE
Si la nnidad est_ conectadaa una caja de convertidor
o caja de satdlite, presk)ne [ell. _, / '_'] para selec-
cionar CH3 o CH4 segOn el ajuste de canal de salida
del apara{o, y sdecckme en dl el canal deseado.
PARA VER SEN'ALES DE ENTRADA DE
[!.iVDISPOStTIVO EXTERNO
(Tuando conecte un equipo extemo alas tomas de
entrada delanteras AUDI[O/VI[DEO, preskme
[SELECT] o [CH. A t V] repefidamen_e has[a que
aparezca en la panmHa "AUX1" o "AUX2".
--- NOTA
* Si hay un disco dentrode la unidad, se visu-
alizarg el mensaje "DISCO ADENTRO" en la
pantalla durante 10 segundos,
olsco ADENT_O
®Para borrarelmeusajea]h_star_te,presione [CLEAN].
ES

PROGRAMACION AUTOMATICA DE CANAL
De acuerdo con ]a configuraci6n de __brica, esta
unidad ha memorizado todos los canMes, incluidos
los que no estAn disponiNes en su localidad. Esta
ftmcidn sdo pone automNicamente en memoria los
1 Presione [SETUP] y a continuacidn presione
[A] o [_] para sefialar "AJUSTE DE CANAE'.
TV Pf_EP
/ \ .............
SETUP _ _ ]Di©MA [EBpAN©L]
TITULO [OFF]
WZ DE FOND© [BRILLO]
1 Presione [SETUP] y a continuacidn presione
[_.] o [_] para seleccionar ei "LANGUAGE".
/ \
\ /
TV ._ETUP
OHANNELSET UP
V CHIP SET U'_ _ ....
BAO_<LIGH"rIt_RIGH"r]
Presione [ENTER] repetidamente para selec-
cionar "ENGLISH" = ingles, "ESPANOL' o
"FRAN_AIS"= frances.
Presione [ENTER] y a continuacidn presione
[A] o [v] para sefialar "PREA. AUTO CA.".
AJUSTE DE CANAL
AG REGAgdBOR RAI:t CA (CATV)
/
3 Presione [ENTER].
®E1 sintonizador expk>ra y memoriza todos los
canales activos de su localidad.
®El sintonizador se defiene en el canal memorizado
inferior.
NOTA
,, Cuando estg acfi_ado "PREA. AUTO CA."
donde l_ohay entra@ de serial de TM apare-
cer_ "NO HAY SENAL DE TV" en Ja pan-
talla despuds de comp_etarse _aexpk_racidn
de k_scmnfies
®La unidad puede reconocer cana[es CATV como
canales de TV si [as condiciones de recepcidn
son ma_as. En este caso, compmebe la conexidn
de [a antena y vuelva a intentar 'PREA. AUTO
CA." cuando las condiciones de recepcidn
l_l ej (;qTen.
®La programacidn de canales memorizados
NO es necesaria cuando la unidad estfi conec-
tada auna caja de convertidor o caja de
sat¢_lite°$61o tiene que seleccionar el canal
para caja de convertidor o entrada de sat4tite
(ej. CH3) de la unidad y a continuacidn selec-
done el canal que desee en la caja de conver-
tidor o la caja de sat¢_lite,
3 Presione [SETUP] para sad del men&
SETUP
r-- NOTA
®Esta funcidn selecciona s61o el idioma del
mend de pantalla; no la fuente de audio_
®Si pot alguna razdn el mend est_ en espafiol o
en franc&, preskme [SETUP], _uego [_] o
[_] para selecckmar "IDIOMA [ESPA1NOL}"
o "LANGAGE [FRAN(]AISJ", y a contin-
uad6n pmsione [ENTER] mpefidamente para
seIecck_nar el idioma deseado y luego pre-
sione [SETUP].
- 43 - ES

3DUCCm6N DE UN [)mSCO
SETUP
* Los bo_ones sombreados se udHzan para Jas sigu-
ientes operaciones,
PARA EMPEZAR
Si es necesario, encienda el amplificador y cuakluier
otto componente.
1 Presione [POWERI para encender la unidad,
Abra la bandeja del disco manualmente,
3 IntrrxJuzcaeldiscoelegidoconlaetiquetahacialapartetraseradela
unidadparareproducirlo,AIpresionarsuavementeeldiscoparaintro-
ducirloenlaranura,sureproducci6nempezaraautomaticamente,
®La reproduccidn empezar4 desde el primer capf-
mlo/pista del disco.
®Si Bareproduccidn no empieza autom4ficamen_e,
presione [PLAY b>].
5
4 Presione [STOP m] para detener la reproduccidn. 9
- 44 -
Precione [EJECT _] para extraer la disco de
la unidad,
EJECT
NOTA
®Cuando d modo DVD seha cambiado al modo
TV. el modo IDVD se desacfiw_ pfimero y a
conthmacidn aparcce la imagen y suena ei
sonido en e] TV al cab() de unos 4 segundos.
De la misma manera, cuando se presk)na
[POWER] para apag_u" la unidad en el modo
DVD, este modo se desactiva primero y a con-
finuacidn se apaga la unktad.
®Puede aparccer" @" en la parte superior
derecha de la pan)alia del TV durante su [un-
donamiento, que avisa de que el DVD o el
disco 1)an encontrado una operacidn proMbida.
®Con los DVD que utilizan tftulos para seJSales
de reproduccidn programada, la reproducddn
puede empezar desde el segundo dtulo y
puede omith: estos tftulos.
®Durante la reproducddn de un disc() de dos
capas, las h))_igenes pueden detenerse durante
un taro. Esto ocurre cuando la l" capa camNa
a la 2L No se m)ta de una anomaHa.
REPRODUCCION DE MP3 _tL_;3_
1 Ene!mododeparada,presione[DISCMENU]y precbne
[a,]o IT] paraseleccionarel grupoo pistaque@see.
LT_}
LISTADf ARCHIVOS
>,,..r_ 11
N°I d)l° do calpot a 2
{_3 Nomblo do alpota 9
I
{_ L [ llomNI do Gal]i6t i I [I
*Si ha sdecciona un gmpo, presJone [_] o
[ENTER] para h:a la panmHa de seleccidn de
pisms. Prcsione [_] pare volver a la pmlaHa
anterior (excepto la p4ghm superior).
*Si ha seleccionado una pista, prcsione [ENTER]
para empezar a mprodudr pistas. Si empieza pot
la que acaba de elegh: se l:eprodLlcilT_l) las [)is[as
®Si no puede visualizarse enseguida en pan)alia la
lista entera de archivos, aparece la '"7"para h a la
p{tghm siguiente, appears to go to the next page.
®Presk)ne [TITLE]para volver al arcMvo superior
de la jerarqufa m_is alta del programa y de la
lista de arcMvos.
Presione [STOP m] para detener la reproducci6n.
ES

-- NOTA
* Las carpetas se conoce_ como grupos; los
archivos, como pistas.
* Los archivos MP3 van acompai:mdos de [] iconos.
* Se puede reconocer un mgiximo de 255 capetas.
* Se puede recol_ocer ul_ m4ximo de 999 archivos.
* Pueden crearse basra 8 jerarqufas.
Se recomienda para esta unidad el uso de archivos
grabados segdll las especificaciol_es siguientes:
* Frecuet_cia de muestreo: 44,1 kHz o 48kHz
* Vc[ocidad de transmisi&l de bits constante:
• , n
®Para alclw,'os MP._grabados eJ_velocidad de
transmisidn de bits variable (VBR), la mfidad
puede no mostrar el tiempo real transcurrido,
1 Presione [DISC MENU],
DISC
MENU
Cb
* Aparccer_ e] mend principal de DVD
®Si es[a tuncidn no est_ disponiNe, (_) el sfmbo-
lo puede aparecer en HapantaHa del tebvisol:
®Si e] mend de disco es[_ disponible en el disc(>,
aparecerfin las opdones de idioma de audio, de
subtfmk>s, capftulos de] tfmk> y otras pare su
seleccidn.
2 Presione [_,], [_], [_] o [_] para sebccionar
un item y presione [ENTER] para confirmar la
sebccidn,
J MF3
1 Durante la reproduccidn, presione [STOP HI,
=j
(Ejempb: DVD o CD audio)
®Aparecer_ el mensaje de reanudacidn en Bapan-
_aHa del TV.
2 Presione [PLAY D], la reproduccidn contin-
uarg_ desde el punto donde se par6 la repro°
duccidn.
®Para cancelar el modo de reanudacidn, presione
dos veces [STOP HI.
®Para MP3, la rcproducci6n se reanudar4 des& el
principk> de ia pism actual.
®La hfformacidn de reanudacidn permanece acd-
vada mcluso cuando apaga el h>terruptor princi-
pal.
- 45 - ES

-46- ES

- 47 - ES

LIMITED WARRANTY
FUNA1 (ORP. will repair this SYLVANIA product, free of chage iu the USA iu the eveut of defect iu materials or
workma_ship as/bllows:
DURATION:
PARTS: FUNAI CORR will )rovide parts to replace dei)ctive parts without charge k)r oue (1) year fl'om the
date of origiuaI retail purchase. Two (2) years tbr Picture Tube. Certaiu pT{rts and LCD image burr>in
are not co{_ered uuder this warrauty.
LABOR: FUNA1 CORR will provide tile labor without chaNe fbr a period of uiuety (90) days h'om tile date of
orighlal retail purchase.
LIMITS AND EXCLUSIONS:
THIS WARRANTY 1S EXTENDED ONLY TO THE ORIGINAL RETAIL PURCHASER. A PURCHASE
RECEIPT OR OTHER PROOF OF ORIGINAL RETAIL PURCHASE WILL BE REQUIRED TOGETHER WITH
THE PRODUCT TO OBTAIN SERVICE UNDER THIS WARRANTY.
This warmmy shall uot be extended to auy othe_ persou or trausfcree.
This warramy is void aud of no effect if ally serial uumbers ou the product arc altered, replaced, del;tced, missing
or if service was attempted by all unauthorized service ceuter. This SYLVANIA Limited warranty does uot apply to
any prodttct not purchased aud used in tile Uuited States.
This warranty_ oulv_ covers failures due to defects in material or workmauship which occms during normal use. It
does uot cover damage which occurs hi shipment, or failures which are caused by repairs, alteratious or product uot
supplied by FUNAI CORR, or damage which results from accident, misuse, abuse, misha_dling, misapplication,
alteratiou, faulty iustallation, improper mainteuance, commercial use such as hotel, rental or office use of this
product or damage which results fl'om fire, flood, lighmiug or other acts of God.
THIS WARRANTY DOES NOT COVER PACKING MATERIALS, ANY ACCESSORIES (EXCEPT REMOTE
CONTROL), ANY COSMETIC PARTS, COMPLETE ASSEMBLY PARTS, DEMO OR FLOOR MODELS.
FUNA1 CORR AN[) ITS REPRESENTATIVES OR AGENTS SHALL IN NO EVENT BE LIABLE FOR ANY
GENERAL, INDIRECT OR CONSEQUENTIAL DAMAGES ARISING OUT OF OR OCCASIONED BY THE
USE OF OR THE INABILITY TO USE THIS PRODUCT. THIS WARRANTY 1S MADE IN LIEU OF ALL
OTHER WARRANTIES, EXPRESS OR IMPLIED, AN[) OF ALL OTHER LIABILITIES ON THE PART OF
FUNAI, ALL OTHER WARRANTIES INCLUDING THE WARRANTY (IF MERCHANTABILITY AND
FITNESS FOR A PARTICULAR PURPOSE, ARE HEREBY DISCLAIMED BY FUNAI AND ITS
REPRESENTATIVES 1N THE UNITED STATES.
ALL WARRANTY INSPECTIONS AN[) REPAIRS MUST BE PERFORMED BY A FUNA1 AUTHORIZED
SERVICE CENTER. THIS WARRANTY IS ONLY VALID WHEN THE UNIT 1S CARRIED-IN TO A FUNA1
AUTHORIZED SERVICE FACILITY.
IMPORTANT:
THIS LIMITED WARRANTY GIVES YOU SPECIFIC LEGAL RIGHTS. YOU MAY HAVE OTHER RIGHTS
THAT VARY FROM STATE TO STATE. IK AT ANY TIME DURING THE WARRANTY PERIOD, YOU ARE
UNABLE TO OBTAIN SATISFACTION WITH THE REPAIR OF THIS PRODUCT, PLEASE CONTACT FUNA1
CORR
ATTENTION:
FUNAI CORE RESERVES THE RIGHT TO MODIFY ANY DESIGN OF THIS PRODUCT
WITHOUT PRIOR NOTICE.
To locate vour nearest Authorized Service Center or for general service inquiries, please call or
wri_.e to II{e following:
FUNAI CORPORATION, INC.
SERVK;E (ENTER
19900 Van Ness Aveu.e, Torrauce, CA 90501
Tel :1-800-968-3429
Printed hi China 1EMN20477
L3250UA _
-
 1
1
-
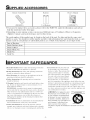 2
2
-
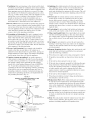 3
3
-
 4
4
-
 5
5
-
 6
6
-
 7
7
-
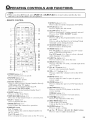 8
8
-
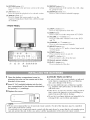 9
9
-
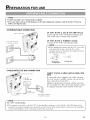 10
10
-
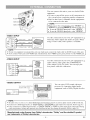 11
11
-
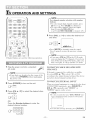 12
12
-
 13
13
-
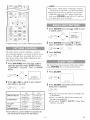 14
14
-
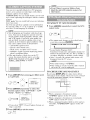 15
15
-
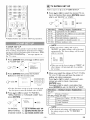 16
16
-
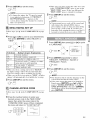 17
17
-
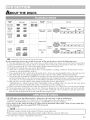 18
18
-
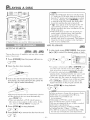 19
19
-
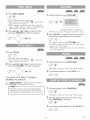 20
20
-
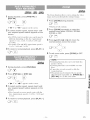 21
21
-
 22
22
-
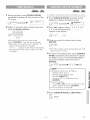 23
23
-
 24
24
-
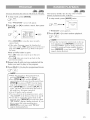 25
25
-
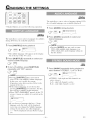 26
26
-
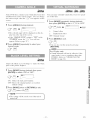 27
27
-
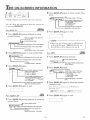 28
28
-
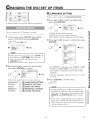 29
29
-
 30
30
-
 31
31
-
 32
32
-
 33
33
-
 34
34
-
 35
35
-
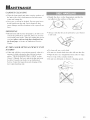 36
36
-
 37
37
-
 38
38
-
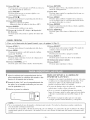 39
39
-
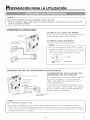 40
40
-
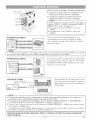 41
41
-
 42
42
-
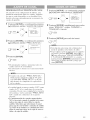 43
43
-
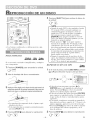 44
44
-
 45
45
-
 46
46
-
 47
47
-
 48
48


Sylvania 6620LDF El manual del propietario
- Categoría
- Reproductores de DVD
- Tipo
- El manual del propietario
En otros idiomas
- English: Sylvania 6620LDF Owner's manual