La página se está cargando...

FRONT
Instructive
Fold the instructive
sheet and put it
inside the color box.
TECHNICAL DATA
IMAGES / LINKS
SOFTWARE: Illustrator CC
MAC & PC Platform compatible
27.9 x 21.6 cm
Instructive
INKS & die cuts
Packaging:
Dimensions:
CUT-LINE
(Do not print)
BENT-LINE
(Do not print)
PANTONE Blue 072 C
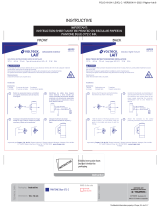
IMPORTANT:
INSTRUCTION SHEET MUST BE PRINTED ON REGULAR PAPER IN
PANTONE BLUE 072 C INK.
L N
47275
ARB-902S
Lea este instructivo por completo antes de
utilizar el aparato y guárdelo para futuras
referencias.
Arbotante de seguridad
ATENCIÓN
ATENCIÓN
Si usted no está familiarizado con las
instalaciones eléctricas, debe contratar los
servicios de un electricista calificado que le
instalará la unidad de acuerdo con las
normas y reglamentos de electricidad locales
y nacionales. Evite exponer la unidad a la
lluvia. Se recomienda usar lámparas que no
excedan en conjunto 300 W (150 W x 2)
Antes de instalar, interrumpa el paso de
energía mediante el interruptor de circuito
o fusible. Asegúrese que el circuito no esté
energizado y que el área esté libre de
humedad antes de iniciar la instalación.
INSTRUCCIONES
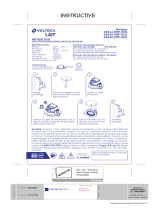
Seleccione la posición específica de
instalación según el diagrama siguiente.
• Ángulo de detección 180º
• Campo intenso de detección (la flecha
indica la dirección del movimiento)
• Campo débil de detección (a los laterales)
• Distancia y campo de detección
• Evite instalarlo donde le alcance el
brillo del sol, corrientes de aire o
temperatura que altere su
desempeño.
• Evite tocar la ventana de detección
con objetos filosos o con agentes
abrasivos.
• Para obtener máxima cobertura del
área, la unidad debe ser montada a
una altura de 1.8 m - 2.5 m sobre el
piso. Si no es posible, se puede
montar a menor altura, sin embargo
la efectividad del campo de detección
va a ser diferente a la especificada.
• La unidad funciona detectando
fuentes móviles de calor en áreas
grandes. Para mejor desempeño, el
sensor y los focos deben ser
ajustados apuntando ligeramente
hacia abajo.
Confirme que los focos no se ajusten
apuntando directamente al PIR (sensor
infrarrojo) o cerca del sensor ya que el
calor del foco puede afectarlo.
FUNCIONES
Se puede regular para que opere sólo
de noche y estar apagada de día. Su
característica de luz ambiente se puede
ajustar según las necesidades del
usuario.
La función de tiempo retardado se
puede ajustar según sea necesario.
Esta función suma continuamente las
veces que alguien se mueve dentro del
campo de detección y la computariza
en base a la última vez que hubo
movimiento por lo que retrasa
automáticamente el tiempo de
encendido.
VERIFICACIÓN
Después de instalar el luminario y antes
de encenderlo, déle la vuelta a la perilla
de TIEMPO (2) en sentido contrario a las
manecillas del reloj hacia la posición de
mínimo. Dé vuelta a la perilla de LUZ (3)
en sentido contrario a las manecillas del
reloj a la posición de máximo.
Retire la tapa posterior del
luminario. Fije la base a la
pared.
Conecte la energía eléctrica
de acuerdo al señalamiento
de cableado que se indica en
la base.
Fije el luminario en la base.
Para ajustar la dirección de
los portalámparas:
• Afloje los tornillos que fijan
los portalámparas.
• Ajuste la dirección según
sus necesidades.
• Vuelva a apretar los tornillos
para fijar los portalámparas.
ADVERTENCIA
INSTRUCTIVO DE INSTALACIÓN
120 V~ 60 Hz 2.5 A
300 W máx. Base E26 / E27
IP44
1
2
3
4
Al conectarlo a la energía eléctrica, el
luminario va a encender durante 30
segundos para autocalibrarse.
Después, pase la mano frente a la
ventana de detección, el luminario
debe encenderse al detectar este
movimiento. Una vez comprobado
que el luminario opera correctamente,
ajuste las funciones del luminario de
acuerdo a sus necesidades.
El luminario cuenta con las siguientes
funciones:
LUX. Ajusta sensibilidad el nivel de luz,
girando la perilla hacia las luces se
encenderan en condiciones mas
claras, si gira la perilla hacia las luces
se encenderan cuando haya menor
luz en el ambiente.
TIME: Ajusta el tiempo que las luces
permaneceran encendidas.
SENS: Ajusta la sensibilidad para
detectar movimiento.
ADVERTENCIAS
Altura de instalación
1.8 m mínimo
10 m
180º
180˚
Ángulo
de detección
SENS
(1)
TIEMPO
(2)
LUZ
(3)
SENS TIME LUX
BACK
L N
47275
ARB-902S
Read this instruction manual completely
before using the unit and keep it for future
reference.
Security light
ATTENTION CAUTION
If you are not familiar with electrical
installations, you should engage the services
of a qualified electrician who will install the
unit in accordance with local and national
electrical rules and regulations. Avoid
exposing the unit to rain. It is recommended
to use lamps that do not exceed a total of
300 W (150 W x 2).
Before installing, shut off power at the
circuit breaker or fuse. Make sure the circuit
is not energized and the area is free of
moisture before starting the installation.
INSTRUCTIONS
Select the specific installation position
according to the diagram below.
• Detection angle 180º
• Intense field of detection (arrow
indicates the direction of movement)
• Weak detection field (to the sides)
• Detection distance and field of detection
• Avoid installing it where it is exposed
to sunlight, air currents or
temperatures that alter its
performance.
• Avoid touching the detection window
with sharp objects or abrasive agents.
• For maximum area coverage, the unit
should be mounted at a height of 1.8
m - 2.5 m above the floor. If this is
not possible, it can be mounted at a
lower height, however the
effectiveness of the detection field
will be different from that specified.
• The unit works by detecting moving
heat sources in large areas. For best
performance, the sensor and
spotlights should be adjusted
pointing slightly downward.
Check that the spotlights are not
adjusted pointing directly at the PIR
(infrared sensor) or close to the sensor
as the heat from the spotlight may
affect the sensor.
FUNCTIONS
It can be dimmed to operate only at
night and be off during the day. Its
ambient light feature can be adjusted
according to the user's needs.
The time delay function can be
adjusted as needed. This function
continuously adds up the times when
someone moves within the detection
field and computes it based on the last
time there was movement so it
automatically delays the on time.
CHECK
After installing the luminaire and before
turning it on, turn the TIME knob (2)
counterclockwise to the minimum
position. Turn the LIGHT knob (3)
counterclockwise to the maximum
position.
When connected to electrical power,
the luminaire will turn on for 30
Remove the back cover of
the luminaire. Attach the base
to the wall.
Connect the power according
to the wiring indicated on the
base.
Attach the luminaire to the
base.
To adjust the direction of the
lamp holders:
• Loosen the screws securing
the lamp holders.
• Adjust the direction
according to your needs.
• Retighten the screws to fix
the lamp holders.
WARNING
INSTALLATION INSTRUCTIONS
120 V~ 60 Hz 2.5 A
300 W máx. Base E26 / E27
IP44
Warranty. Duration: 1 year. Coverage: parts,
components and workmanship against
manufacturing or operating defects, except if
used under conditions other than normal; when
it was not operated in accordance with the
instructive; was altered or repaired by personnel
not authorized by Truper®. To make the
warranty valid, present the product, stamped
policy or invoice or receipt or voucher, in the
establishment where you bought it or in
Corregidora 22, Centro, Cuauhtémoc, CDMX,
06060, where you can also purchase parts,
components, consumables and accessories. It
includes the costs of transportation of the
product that derive from its fulfillment of its
service network. Phone number 800-018-7873.
Made in China. Imported by Truper, S.A. de C.V.
Parque Industrial 1, Parque Industrial Jilotepec,
Jilotepec, Edo. de Méx. C.P. 54257, Phone
number 761 782 9100.
seconds to self-calibrate. Then, wave
your hand in front of the detection
window, the luminaire should turn on
when it detects this movement.
Once you have verified that the
luminaire is operating correctly,
adjust the luminaire functions
according to your needs.
The luminaire has the following
functions:
LUX. Adjusts the sensitivity of the
light level, turning the knob towards
the lights will turn them on in brighter
conditions, turning the knob towards
the lights will turn them on when
there is less light in the environment.
TIME: Adjusts the time the lights will
stay on.
SENS: Adjusts the sensitivity to
detect motion.
WARNINGS
Installation height
1.8m minimum
10 m
180º
180˚
Detection
angle
Stamp of the business.
Delivery date:
10-2022
Garantía. Duración: 1 año. Cobertura: piezas,
componentes y mano de obra contra defectos
de fabricación o funcionamiento, excepto si se
usó en condiciones distintas a las normales;
cuando no fue operado conforme instructivo;
fue alterado o reparado por personal no
autorizado por Truper®. Para hacer efectiva la
garantía presente el producto, póliza sellada o
factura o recibo o comprobante, en el
establecimiento donde lo compró o en
Corregidora 22, Centro, Cuauhtémoc, CDMX,
06060, donde también podrá adquirir partes,
componentes, consumibles y accesorios. Incluye
los gastos de transportación del producto que
deriven de su cumplimiento de su red de
servicio. Tel. 800-018-7873. Made in/Hecho
en China. Importador Truper, S.A. de C.V. Parque
Industrial 1, Parque Industrial Jilotepec, Jilotepec,
Edo. de Méx. C.P. 54257, Tel. 761 782 9100.
Sello del establecimiento comercial.
Fecha de entrega:
10-2022
SENS
(1)
TIEMPO
(2)
LUZ
(3)
SENS TIME LUX
1
2
3
4
/
