STIHL ADG 2 Manual de usuario

Tipo
Manual de usuario
{
STIHL ADG 2
Warning!
Read and follow all safety
precautions in Instruction Manual –
improper use can cause serious or
fatal injury.
Advertencia!
Lea y siga todas las precauciones
de seguridad dadas en el manual
de instrucciones – el uso incorrecto
puede causar lesiones graves o
mortales.
Instruction Manual
Manual de instrucciones
Instruction Manual
1 - 13
Manual de instrucciones
14 - 27
Original Instruction ManualPrinted on chlorine-free paper
Printing inks contain vegetable oils, paper can be recycled.
© ANDREAS STIHL AG & Co. KG, 2012
0458-757-8621-A. VA2.G12.
0000004282_003_GB
ADG 2
English
1
{
This instruction manual is protected by copyright. All rights reserved, especially the rights to reproduce, translate and process
with electronic systems.
Contents
Allow only persons who fully understand
this manual to operate your analyzer.
This manual contains safety and
operating instructions for STIHL
cordless power tool analyzer ADG 2. It is
important that you read, understand and
follow the safety precautions and the
operating and maintenance instructions
in chapter "Safety Precautions and
Working Techniques" before using your
analyzer. For further information you can
go to www.stihlusa.com.
Contact your STIHL dealer or the STIHL
distributor for your area if you do not
understand any of the instructions in this
manual.
Guide to Using this Manual 2
Safety Precautions and Working
Techniques 2
Connecting Analyzer to Power
Supply 4
Selecting Language 4
Updating Analyzer 5
Testing Cordless Power Tool 5
Light Emitting Diodes (LED) on
Battery 8
Light Emitting Diodes (LEDs) on
Analyzer 9
Diagnostic software 9
Installing Diagnostic Software 10
Connecting Analyzer to Computer 10
Updating Diagnostic Software 11
Using the Unit 11
Storing the Analyzer 12
Main Parts 12
Specifications 13
Troubleshooting 13
Disposal 13
ADG 2
English
2
Pictograms
All the pictograms attached to or
embossed on the machine are shown
and explained in this manual.
Symbols in Text
Many operating and safety instructions
are supported by illustrations.
The individual steps or procedures
described in the manual may be marked
in different ways:
N A bullet marks a step or procedure.
A description of a step or procedure that
refers directly to an illustration may
contain item numbers that appear in the
illustration. Example:
N Loosen the screw (1).
N Lever (2) ...
In addition to the operating instructions,
this manual may contain paragraphs
that require your special attention. Such
paragraphs are marked with the
symbols and signal words described
below:
DANGER
Indicates an imminent risk of severe or
fatal injury.
WARNING
Indicates a hazardous situation which, if
not avoided, could result in severe or
fatal injury.
NOTICE
Indicates a risk of property damage,
including damage to the machine or its
individual components.
Engineering Improvements
STIHL’s philosophy is to continually
improve all of its products. As a result,
engineering changes and improvements
are made from time to time. Therefore,
some changes, modifications and
improvements may not be covered in
this manual. If the operating
characteristics or the appearance of
your machine differs from those
described in this manual, please contact
your STIHL dealer for assistance.
WARNING
Do not lend or rent the analyzer without
the instruction manual. Be sure that
anyone using it understands the
information contained in this manual.
WARNING
Minors should never be allowed to use
this analyzer.
Servicing dealers can use the STIHL
ADG 2 analyzer to test STIHL cordless
power tools. A STIHL type AP battery is
required for the test. Use only
Guide to Using this Manual Safety Precautions and
Working Techniques
Because this analyzer is
powered by electricity,
special safety precau
-
tions must be observed to
reduce the risk of per
-
sonal injury.
It is important that you
read, fully understand
and observe the following
safety precautions and
warnings. Read the
instruction manual and
the safety precautions
periodically. Careless or
improper use may cause
serious or fatal injury.
Always read and observe
the instruction manual of
the cordless power tool to
be tested.
ADG 2
English
3
geometrically matching STIHL type AP
batteries with a maximum capacity of
10 Ah and a maximum voltage of 42 V.
WARNING
Do not use it for other purposes because
of the increased risk of personal injury
and damage to the analyzer. Never
attempt to modify the analyzer in any
way since this may result in accidents or
damage to the analyzer.
WARNING
The cordless power tool's motor runs
during the test. Before starting the test,
always take precautions to eliminate the
risk of accidents and injury from contact
with or the operation of the power tool's
attachment.
WARNING
To reduce the risk of injury, no other
person may stand in the area of the
power tool's motor during the test.
WARNING
Before using your analyzer, read and
fully understand all safety precautions
and instructions for the STIHL AP
battery and the STIHL cordless power
tool you are analyzing.
Do not use defective, leaking or
deformed batteries with the analyzer.
WARNING
To reduce the risk of personal injury, do
not operate the analyzer if it is damaged
or not properly assembled. Never use an
analyzer with a defective housing,
adapter or connecting cord to the power
tool or a defective power cord. Do not
operate the analyzer if it has received a
sharp blow or been dropped until it has
been properly checked.
Store analyzer out of the reach of
children.
Connect the analyzer only to an easily
accessible wall outlet with the voltage
and frequency specified on the rating
plate.
Operate analyzer at ambient
temperatures between 41 °F (5 °C) and
104 °F (40 °C).
Never bridge the contacts of the
analyzer with metallic objects (e.g. nails,
coins, jewelry) – short circuit. The
analyzer may be damaged by a short
circuit.
In the event of smoke or fire in the
analyzer, disconnect it from the wall
outlet immediately.
WARNING
To reduce the risk of electric shock do
not insert any objects in the analyzer's
cooling slots.
WARNING
Do not operate in a hazardous location,
i.e. in a location where there are
combustible liquids (fumes), vapors or
dusts. Analyzers can produce sparks,
which may ignite the dust or vapors –
risk of explosion.
Never jerk the power cord to disconnect
it from the wall outlet. To unplug, grasp
the plug, not the cord. Have a damaged
power cord repaired by an experienced
electrician.
Do not use the power cord or connecting
cord for any other purpose, e.g. for
carrying or hanging up the analyzer.
Never use power cords that do not
comply with regulations.
Make sure the power cord is located
and/or marked so that it will not be
stepped on, tripped over, come in
contact with sharp edges or moving
parts or otherwise subjected to damage
or stress.
An extension cord should not be used
unless absolutely necessary. If an
extension cord must be used, plug the
analyzer into a properly wired 16 gauge
(AWG 16) or heavier gauge extension
cord with blades that are the same
number, size and shapes as the blades
on the analyzer.
Protect from rain and
dampness. Keep dry.
Use and store only
indoors in dry rooms.
Check the analyzer's
power cord, plug, con
-
necting cord and adapter
regularly for damage. If
the power cord or plug is
damaged, immediately
disconnect the plug from
the wall outlet to avoid
the risk of electric shock.
ADG 2
English
4
To reduce the risk of electric shock:
Always connect the analyzer to a
properly installed wall outlet.
Make sure the insulation of the
power cord and plug is in good
condition.
Before leaving the analyzer unattended,
transporting or storing it, remove the
battery and take the adapter out of the
cordless power tool.
Unplug the power cord from the outlet
when analyzer is not in use.
Never store the battery in the analyzer.
Clean plastic components with a cloth.
Do not use aggressive detergents. They
may damage the plastic.
Mains voltage and operating voltage of
the analyzer must be the same.
N Insert the mains plug (1) in the wall
outlet (2).
The display shows the following
information as soon as the analyzer is
connected to the wall outlet:
The analyzer then performs a self test.
During this process the light emitting
diode (3) on the analyzer glows green
for about 1 second, then yellow, then red
and goes off again.
When self test is completed:
N Insert the battery in the analyzer –
see "Testing Cordless Power Tool".
N Connect the analyzer to the power
supply – mains voltage and
operating voltage of the analyzer
must be the same – see
"Connecting Analyzer to Power
Supply".
N Wait for analyzer to run self test –
there is no need to insert a battery in
the analyzer to select a language.
N Press the lower button on the
analyzer – see "Main Parts" – for
about 3 seconds to activate
language selection.
N Select required language by briefly
pressing the upper or lower button.
N To confirm the language selected,
press and hold down the lower
button on the analyzer for about 3
seconds.
The language can be changed at any
time.
Connecting Analyzer to
Power Supply
Analyzer
ADG 2
Self test
Insert battery
3
2
1
7BA001 KN
Selecting Language
ADG 2
English
5
The analyzer must be updated to cover
the latest cordless power tools or new
batteries and additional diagnostic
functions. The update can be performed
as described below.
Direct update with diagnostic software
and internet access
Computer with diagnostic software has
access to internet – see "Diagnostic
Software":
N Connect analyzer to the computer
with the USB cable.
In the menu, click on button "Check for
updates... ". The diagnostic software
checks whether an update is available. If
yes, the update is performed
automatically.
Indirect update (without computer)
Data for updating the analyzer is
supplied by the subsidiary.
N Connect the analyzer to the power
supply – see "Connecting Analyzer
to Power Supply".
Operate the analyzer only in enclosed
and dry rooms at ambient temperatures
between 41°F (5°C) and 104°F (40°C).
Operating instructions
The analyzer is operated with two
pushbuttons (1):
To confirm procedures during test
To scroll between display pages
during test
To select language
To clear the fault memory
Insert battery
A STIHL type AP battery with a minimum
charge of 80% is required to test the
cordless power tool. The battery
supplies the cordless power tool with the
power needed for the test.
N Push the battery (1) into the
analyzer (2) until you feel noticeable
resistance – then push it as far as
stop.
The contacts on the battery and
analyzer must be clean.
The test continues automatically when
the battery is inserted. If the test does
not continue, the reason may be:
No contact between battery and
analyzer – remove the battery and
refit it.
Fault in battery – test with STIHL
ADG 1 battery analyzer if
necessary.
If the battery's state of charge is too low,
the analyzer's display shows:
N Use a properly charged battery.
Insert adapter
Inserting the adapter connects the
cordless power tool to the battery. The
cordless power tool is ready for
operation.
Updating Analyzer Testing Cordless Power Tool
1
7BA005 KN
State of charge too low
2
7BA002 KN
ADG 2
English
6
The cordless power tool's motor starts to
run during the test. Before starting the
test, always take precautions to avoid
the risk of injury from contact with the
attachment or operation of the power
tool.
The following instructions appear on the
display:
N Eliminate risk from tool – see
Technical Information bulletins on
ADG 2 analyzer and the cordless
power tool being tested.
N Press the lower button to confirm.
N Insert adapter (1) in power tool's
battery compartment – the adapter
slides into position – press it in until
it engages audibly. The adapter
must be flush with the top of the
housing.
N Press the lower button to confirm.
Data transfer
The cordless power tool and analyzer
communicate with each other. The
analyzer can test the cordless power
tool only if this data exchange functions.
N Switch on the cordless power tool
for about 3 seconds – see power
tool's instruction manual.
If there is no data exchange between the
power tool and the analyzer, the
problem is in the connection to the
power tool – refer to Technical
Information bulletins on ADG 2 analyzer
and the power tool concerned.
N Switch on cordless power tool again
for about 3 seconds – the test is
started.
Checking operation of controls
The controls differ according to the
cordless power tool being tested. The
following procedure describes the
trigger switch on the FSA 85 cordless
trimmer as an example.
The display always shows the current
position of the control:
N Operate trigger switch
Release trigger switch after a few
seconds. If the trigger switch is
depressed for longer the test results
may be falsified or the analyzer may
shut down automatically.
If the switch is in order, the display
changes when the trigger is operated
and the light emitting diode on the
analyzer glows green:
If the display does not change or a value
of 100% is not reached with the control
fully depressed, there is a fault in the
control – refer to troubleshooting
procedure in Technical Information
bulletins on ADG 2 analyzer and the
power tool concerned.
N For further fault display, press the
lower button.
Fault display
If there are no faults in the cordless
power tool ...
The light emitting diode on the analyzer
glows continuously green.
The test is restarted by pressing the
lower button.
Eliminate risk from tool
Insert adapter
CAUTION: Motor may start
1
7BA003 KN
Switch on unit
Data transfer
Switch unit on again
Operate trigger switch
OFF 0%
Operate trigger switch
ON 100%
No fault
End of test
ADG 2
English
7
If there is a fault in the cordless power
tool ...
Depending on the fault, the light emitting
diode on the analyzer glows
continuously yellow or red:
Red continuous light: Active fault,
cordless power tool not ready for
operation – a damage code is
displayed.
Yellow continuous light: Intermittent
fault in the past (e.g. loose contact),
cordless power tool ready for
operation – the fault can be called
up in the power tool's fault memory.
The two-digit code on the display
(shown as XX in the description)
indicates the cause of the fault in the
cordless power tool. In case of claims,
always quote the code on the warranty
request form.
Always remove the adapter from the
power tool before starting repair.
N Press in both locking tabs (1) at the
same time to unlock the adapter (2).
N Take the adapter (2) out of the
housing.
N Press the lower button to confirm.
The data of the cordless power tool
remains stored in the analyzer for about
30 minutes.
When the adapter is removed, any
active faults and entries in the fault
memory are shown. Scroll between the
displays with the analyzer's
pushbuttons. For repair procedure, see
Technical Information bulletins on
ADG 2 analyzer and the cordless power
tool concerned.
Clearing the fault memory
The fault memory may be cleared after
completing the repair.
N After viewing last entry in fault
memory, press the lower button.
N Press and hold down both buttons
for about 3 seconds.
N Press the lower button to confirm
that the fault memory should be
cleared.
N Insert the adapter in the cordless
power tool.
N Switch on the cordless power tool
see power tool's instruction manual.
Fault memory is cleared. To avoid
damage to the electronic module, the
adapter must not be removed from the
cordless power tool and the battery must
not be removed from the analyzer while
the memory is being cleared.
On completion, the analyzer's display
confirms that the memory has been
cleared.
The test is restarted by pressing the
lower button.
After the test
N Remove the battery from the
analyzer.
When the battery is removed, the data of
the cordless power tool that has been
tested is deleted from the analyzer. The
analyzer can then be used to test further
cordless power tools.
Damage code
XX
Remove adapter before
repair
Clear memory?
Press both buttons
Clear: no
Clear: yes
2
1
7BA004 KN
1
Insert adapter,
switch on unit
Do not remove unit
Memory cleared
End of test
ADG 2
English
8
Four light emitting diodes indicate the
condition of the battery.
N Press button (1) to activate the
display – the display goes off
automatically after 5 seconds.
The light emitting diodes can glow or
flash green or red.
If the green light emitting diodes glow /
flash
The green light emitting diodes indicate
the battery's state of charge by glowing
and flashing continuously.
If the red light emitting diodes glow /
flash
Light Emitting Diodes (LED)
on Battery
Light emitting diode glows con
-
tinuously green.
Light emitting diode flashes
green.
Light emitting diode glows con
-
tinuously red.
Light emitting diode flashes red.
1
3901BA010 KN
3901BA016 KN
80 - 100 %
60 - 80 %
40 - 60 %
20 - 40 %
0 - 20 %
1 light emitting diode
glows continuously
red:
Battery too
hot/cold
1)
1)
Remove the battery from the
analyzer to cool it down/warm it up.
After cooling down/warming up,
restart the test – insert the battery
in the analyzer.
2)
Take the battery out of the analyzer
and refit it again – if the LEDs still
flash, the analyzer is faulty and
must be replaced.
4 light emitting diodes
flash red:
Fault in battery
2)
4901BA008 KN
ADG 2
English
9
The light emitting diode (1) on the
analyzer can glow or flash green, yellow
or red.
Green continuous light
Cordless power tool or function in
order.
Yellow continuous light
Intermittent fault in cordless power
tool in the past (e.g. loose contact),
power tool ready for operation at the
moment the fault can be called up
in the power tool's fault memory.
Red continuous light
Active fault in cordless power tool,
power tool is not ready for operation
at the moment – a fault code is
displayed.
Problem – see "Troubleshooting"
Red flashing light
... may mean the following:
Observe safety information on
display
Fault in analyzer (analyzer's display
remains blank) – software update
required.
STIHL diagnostic software can be used
only with the MDG 1, ADG 1 and ADG 2
analyzers.
System Requirements
Install STIHL diagnostic software only
on a computer that meets the system
requirements. You must have
administrator rights to install the
software on a computer running
Microsoft
®
Windows
®
, contact your
system administrator if necessary.
Operating System
Microsoft
®
Windows
®
XP SP 3 or
Microsoft
®
Windows Vista
®
or
Microsoft
®
Windows
®
7
Software Requirements
Microsoft
®
.NET 3.5 or higher
Adobe
®
Acrobat
®
Reader 9 or
higher
Hardware Requirements
Minimum requirements
CPU 1 GHz
256 MB free memory
minimum of 100 MB hard disk
space
Resolution – SVGA monitor
(minimum resolution 1024 x 768)
USB interface 1.1 or higher
CD-ROM or DVD drive
Recommended configuration
CPU 2 GHz
512 MB free memory
minimum of 100 MB hard disk
space
Resolution SVGA monitor
(minimum resolution 1024 x 768)
USB interface 1.1 or higher
CD-ROM or DVD drive
Light Emitting Diodes (LEDs)
on Analyzer
1
7BA006 KN
Diagnostic software
ADG 2
English
10
Sequence
It is essential to observe the sequence of
the steps described. Only then will the
STIHL diagnostic software be properly
installed on the computer and the
analyzer connected to the computer.
1 Check system requirements – see
"Diagnostic Software".
2 Place CD-ROM in the compueter's
CD-ROM or DVD drive and start the
setup program – see "Installation of
STIHL Diagnostic Software".
3 Connect analyzer to power supply
see "Connecting Analyzer to Power
Supply".
4 Plug in and connect the USB cable
– see "Connecting Analyzer to
Computer".
5 Start STIHL diagnostic software –
see "Connecting Analyzer to
Computer".
Installation of STIHL Diagnostic
Software
Place the CD-ROM in the computer's
CD-ROM or DVD drive.
Automatic start
The automatic start functions only if the
computer supports automatic starting of
a program from a CD-ROM
(AUTORUN). If the setup program on
the computer does not start
automatically, start it manually.
Manual start
Open "My Computer" and select
computer's CD-ROM or DVD-ROM
drive. Launch installation with double-
click on "SDSSetup.exe".
Installation via Internet
The diagnostic software is also available
from
https://download.stihl.com/sds/sdssetup
.exe
Login data
User name: _stihl_sds_user
Password: STIHL_diagnose_download!
Connect the analyzer to the computer
only after installing the STIHL diagnostic
software.
A USB cable is used to connect the
analyzer to the computer. The USB
cable is included with the analyzer.
N Connect analyzer to the computer
with the USB cable.
Hardware assistant appears.
N Check – "No, not this time" – click
"Next".
N Check – "Install software from a list
or other source" – click "Next".
N Check – "Also search following
source" – click "Search".
The following directory must be selected
for drivers: Installation
Directory\STIHL\SDS\ Driver\ ADG2\
N Select installation directory, e.g.
Microsoft
®
Windows
®
XP Standard
Installation Directory:
C:\Programs\STIHL\SDS\Driver\AD
G2\) – click "OK"
N ADG 2 driver is installed. Exit
assistant with "Finish".
N Start STIHL diagnostic software.
The status bar shows
N Clicking on "ADG 2" graphic
changes view on screen to
"Initializing".
Installing Diagnostic
Software
Connecting Analyzer to
Computer
ADG 2 connected
ADG 2
English
11
N Now follow the operating
instructons for the STIHL diagnostic
software – observe safety
precautions in STIHL diagnostic
software during operation.
The introduction of new power tools and
additions to diagnostic functions
necessitate a software update. The
update can be performed as described
below.
Direct update via internet
Computer with diagnostic software has
access to internet:
In the menu, click on button "Check for
updates... ". The diagnostic software
checks whether an update is available. If
yes, the update is performed
automatically.
Indirect update (without internet access)
Computer with diagnostic software does
not have access to internet:
Data for updating the diagnostic
software is supplied by the subsidiary.
Country-specific safety precautions
and the safety instructions in the
user manuals must be observed
when the analyzer is operated.
To reduce the risk of personal injury,
do not operate the analyzer if it is
damaged or not properly
assembled.
Use the analyzer only for testing
STIHL cordless power tools.
Visual inspection – check cordless
power tool for signs of damage.
Before starting the test, always take
precautions to reduce the risk of
accidents and injury from contact
with the power tool's attachment.
Position cordless power tool
accordingly and mount safety
devices or accessories (e.g.
cutterless chain) if necessary.
Wear personal protective
equipment.
No user entries can be made on the
computer while the test is running.
Updating Diagnostic
Software
Using the Unit
ADG 2
English
12
N Take the analyzer's adapter out of
the cordless power tool.
N Remove the battery from the
analyzer.
N Disconnect the plug from the wall
outlet.
N Disconnect USB cable from
analyzer.
N Store analyzer and USB cable in a
dry, locked location. Keep out of the
reach of children and other
unauthorized persons and
protected from contamination.
1 Analyzer
2 Battery
3 Adapter
4 Connecting cord to cordless power
tool
5 Power cord
6 Display
7 Light emitting diode (LED)
8 Lower pushbutton
9 Upper pushbutton
10 Contacts
11 USB
-
interface
12 USB
-
cable
# Rating plate
Storing the Analyzer Main Parts
11
1
5
9
8
6
#
7BA008 KN
10
7
4
12
ADG 2
English
13
Analyzer
Battery
The analyzer can be operated with
original STIHL rechargeable batteries.
Operating problems during the test are
shown on the analyzer's display.
For repair procedures on the displayed
operating problems, see Technical
Information bulletins on ADG 2 analyzer
and the cordless power tool concerned.
Observe all country-specific waste
disposal rules and regulations.
Electrical appliances must not be thrown
in the garbage can. Take the power tool,
accessories and packaging to an
approved disposal site for environment-
friendly recycling.
Contact your STIHL servicing dealer for
the latest information on waste disposal.
Specifications
Voltage: 120 V
Frequency: 50-60 Hz
Power consumption: 8 W
Insulation: II, E
Overvoltage category: II
Pollution degree: 2
Max. operating altitude: 6600 ft.
(2000 m)
Max. relative humidity: 80 %
Max. tolerance of mains
voltage: + / - 10 %
Type: Lithium-ion
Troubleshooting Disposal
000BA073 KN
Manual de instrucciones original Impreso en papel libre de cloro.
Las tintas contienen aceites vegetales, el papel es reciclable.
© ANDREAS STIHL AG & Co. KG, 2012
0458-757-8621-A. VA2.G12.
0000004282_003_EA
ADG 2
español / EE.UU
14
{
Este manual de instrucciones está protegido por derechos de propiedad intelectual. Todos los derechos reservados, especial
-
mente los derechos de reproducción, traducción y procesamiento con sistemas electrónicos.
Contenido
Solamente las personas que
comprenden este manual por completo
deberán manejar el analizador.
Este manual contiene instrucciones de
seguridad y uso del analizador de
herramientas inalámbricas STIHL
ADG 2. Es importante leer, comprender
y atenerse a las precauciones y a las
instrucciones de uso y mantenimiento
dadas en el capitulo "Precauciones de
seguridad y técnicas de trabajo" antes
de usar el analizador. Para obtener
información adicional, visite
www.stihlusa.com.
Comuníquese con su representante de
STIHL o el distribuidor de STIHL para su
zona si no se entiende alguna de las
instrucciones dadas en el presente
manual.
Acerca de este manual de
instrucciones 15
Medidas de seguridad y técnicas
de manejo 15
Conexión del analizador al
suministro de energía eléctrica 17
Selección del idioma 18
Actualización del analizador 18
Prueba de herramienta inalámbrica 18
Diodos fotoemisores (LED) de la
batería 21
Diodos fotoemisores (LED) del
analizador 22
Software de diagnóstico 23
Instalación del software de
diagnóstico 24
Conexión del analizador a la
computadora 24
Actualización de software de
diagnóstico 25
Uso 25
Almacenamiento del analizador 26
Componentes importantes 26
Especificaciones 27
Localización de averías 27
Desecho 27
ADG 2
español / EE.UU
15
Pictogramas
Todos los pictogramas que se
encuentran fijados o grabados en la
máquina se muestran y explican en este
manual.
Símbolos en el texto
Muchas de las instrucciones de uso y
seguridad vienen acompañadas de
ilustraciones.
Los pasos individuales o
procedimientos descritos en el manual
pueden estar señalados en diferentes
maneras:
N Se usa un punto para denotar un
paso o procedimiento.
Una descripción de un paso o
procedimiento que se refiere
directamente a una ilustración puede
contener números de referencia que
aparecen en la ilustración. Ejemplo:
N Suelte el tornillo (1).
N Palanca (2) ...
Además de las instrucciones de uso, en
este manual pueden encontrarse
párrafos a los que usted debe prestar
atención especial. Tales párrafos están
marcados con los símbolos y las
palabras identificadoras que se
describen a continuación.
PELIGRO
Indica un riesgo inminente de lesiones
graves o mortales.
ADVERTENCIA
Identifica una situación de peligro que,
al no evitarse, puede resultar en
lesiones graves o mortales.
AVISO
Indica el riesgo de daños a la propiedad,
incluyendo a la máquina o sus
componentes.
Mejoramientos técnicos
La filosofía de STIHL es mejorar
continuamente todos sus productos.
Como resultado de ello, periódicamente
se introducen cambios de diseño y
mejoras. Por lo tanto, es posible que
algunos cambios, modificaciones y
mejoras no se describen en este
manual. Si las características de
funcionamiento o la apariencia de su
máquina difieren de las descritas en
este manual, comuníquese con el
concesionario STIHL para obtener la
ayuda que requiera.
ADVERTENCIA
No preste ni alquile nunca el analizador
sin entregar el manual de instrucciones.
Asegúrese que todas las personas que
utilicen la máquina lean y comprendan
la información contenida en este
manual.
ADVERTENCIA
Nunca se debe permitir a los niños que
usen este analizador.
Acerca de este manual de
instrucciones
Medidas de seguridad y
técnicas de manejo
Debido a que el analiza
-
dor se acciona por
electricidad, deben
seguirse medidas de
seguridad especiales
para reducir el riesgo de
lesiones personales.
Es importante que usted
lea, comprenda bien y
respete las siguientes
advertencias y medidas
de seguridad. Lea el
manual de instrucciones
y las precauciones de
seguridad
periódicamente. El uso
descuidado o inadecuado
puede causar lesiones
graves o incluso morta
-
les. Siempre lea y
aténgase a las indicacio
-
nes del manual de la
herramienta inalámbrica
sometida a prueba.
ADG 2
español / EE.UU
16
Los concesionarios pueden utilizar el
analizador STIHL ADG 2 para probar las
herramienta inalámbricas STIHL. Se
requiere el uso de una batería tipo AP
de STIHL para efectuar la prueba.
Utilice únicamente baterías con forma
geométrica correspondiente STIHL
tipo AP, con una capacidad máxima de
10 Ah y un voltaje máximo de 42 V.
ADVERTENCIA
No lo use para otros propósitos debido
al alto riesgo de lesiones personales y
daños al analizador. Nunca intente
modificar el analizador de modo alguno
ya que esto podría resultar en
accidentes o daños.
ADVERTENCIA
El motor de la herramienta inalámbrica
se pone en marcha durante la prueba.
Antes de iniciar la prueba, siempre tome
medidas para eliminar el riesgo de
accidentes y lesiones por el contacto
con la herramienta o la marcha del
accesorio.
ADVERTENCIA
Para reducir el riesgo de lesiones,
ninguna otra persona deberá hallarse
en la zona del motor de la herramienta
durante la prueba.
ADVERTENCIA
Antes de usar el analizador, lea y
comprenda todas las precauciones de
seguridad e instrucciones de la batería
AP de STIHL y de la herramienta
inalámbrica STIHL sometida a análisis.
No utilice baterías defectuosas, con
fugas o deformadas con el analizador.
ADVERTENCIA
Para reducir el riesgo de lesiones
personales, no use el analizador si está
dañado o si no ha sido debidamente
armado. Nunca utilice el analizador si
tiene averías en su caja, adaptador o
cordón de conexión de la herramienta, o
en el cordón eléctrico. Si el analizador
ha recibido un golpe fuerte o se ha
caído, no lo utilice sin antes revisarlo
debidamente.
Guarde el analizador fuera del alcance
de los niños.
Conecte el analizador sólo a un
tomacorriente de pared fácilmente
accesible con el voltaje y la frecuencia
especificados en la placa de capacidad
nominal.
Utilice el analizador a temperaturas de
5 °C (41 °F) a 40 °C (104 °F).
Nunca coloque un puente entre los
contactos del analizador con objetos
metálicos (por ejemplo, clavos,
monedas, joyas) – cortocircuito. El
analizador podría dañarse debido a un
cortocircuito.
En el caso de humo o fuego en el
analizador, desconéctelo del
tomacorriente de la pared de inmediato.
ADVERTENCIA
Para reducir el riesgo de choques
eléctricos o cortocircuito, no inserte
ningún objeto en las ranuras de
enfriamiento del analizador.
ADVERTENCIA
No trabaje en un lugar peligroso, por
ejemplo, en un lugar donde haya
líquidos combustibles (gases), vapores
o polvo. Los analizadores pueden
producir chispas, las cuales son
capaces de encender el polvo o los
vapores - riesgo de explosión.
Nunca tire del cordón eléctrico para
desconectar el enchufe del
tomacorriente de pared. Para
desenchufarlo, sujete el enchufe y no el
cordón. El cordón eléctrico dañado debe
ser reparado por un electricista
experimentado.
No use el cordón eléctrico para ningún
otro fin, p. ej. para trasladar o sostener
la unidad.
Nunca use cordones eléctricos que no
cumplan con los reglamentos.
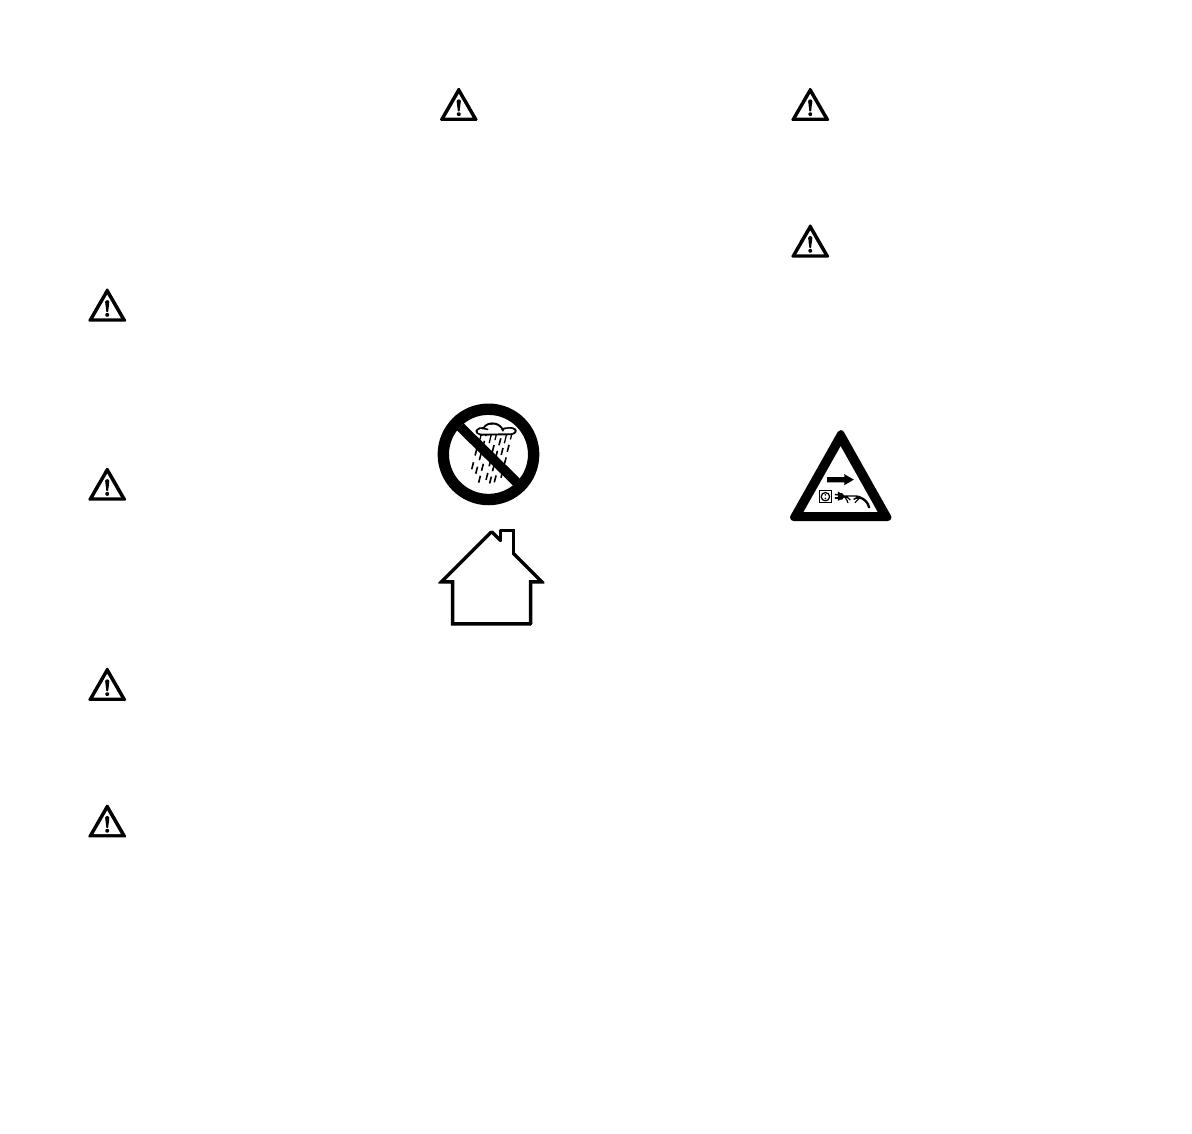
Protéjalo de la lluvia y la
humedad. Manténgalo
seco.
Úselo y guárdelo bajo
techo y en recintos
secos.
Revise el cordón
eléctrico, enchufe,
cordón de conexión y
adaptador del analizador
periódicamente en busca
de daños. Si el cordón
eléctrico o el enchufe
están dañados, desco
-
necte de inmediato el
enchufe del tomaco
-
rriente de la pared para
evitar el riesgo de choque
eléctrica.
ADG 2
español / EE.UU
17
Asegúrese que el cordón eléctrico esté
ubicado y/o marcado como para que no
se lo pise, se lo lleve por delante, esté
en contacto con bordes cortantes o
partes móviles o de otro modo sujeto a
daño o esfuerzo.
No debería usarse un alargador a
menos que sea absolutamente
necesario. Si es imprescindible
utilizarlo, enchufe el analizador en un
cordón de extensión debidamente
formado con alambres calibre 16
(AWG 16) o de mayor calibre, con
clavijas que sean del mismo número,
tamaño y forma que las del cargador.
Para reducir el riesgo de choque
eléctrico:
Siempre conecte el analizador a un
tomacorriente de pared instalado
correctamente.
Asegúrese de que el aislamiento
del cordón eléctrico y del enchufe
esté en buenas condiciones.
Antes de dejar el analizador
desatendido, de transportarlo o
almacenarlo, sáquele la batería y quite
el adaptador de la herramienta
inalámbrica.
Desenchufe el cordón eléctrico del
tomacorriente cuando el analizador no
esté en uso.
Nunca guarde la batería en el
analizador.
Limpie los componentes de plástico con
un trapo. No use detergentes abrasivos.
Éstos pueden dañar el plástico.
El suministro de voltaje debe ser igual al
voltaje de funcionamiento del
analizador.
N Inserte el enchufe de
alimentación (1) en el tomacorriente
de pared (2).
La pantalla muestra lo siguiente tan
pronto como se conecta el analizador al
tomacorriente:
El analizador luego ejecuta una
autoprueba. Durante este proceso el
diodo fotoemisor (3) del analizador se
ilumina verde durante 1 segundo
aproximadamente, luego rojo y luego se
apaga.
Cuando finaliza la autoprueba:
N Inserte la batería en el analizador –
vea "Prueba de herramienta
inalámbrica".
Conexión del analizador al
suministro de energía
eléctrica
Analizador
ADG 2
Autoprueba
Inserte batería
3
2
1
7BA001 KN
ADG 2
español / EE.UU
18
N Conecte el cargador al suministro
de energía eléctrica – el voltaje de
suministro debe ser igual al voltaje
de funcionamiento del analizador –
vea "Conexión del analizador al
suministro de energía eléctrica".
N Espere a que la unidad realice la
autoprueba – no es necesario
insertar una batería en el analizador
para seleccionar un idioma.
N Presione el botón inferior del
analizador – vea "Piezas
principales" – durante unos 3
segundos para activar la selección
del idioma.
N Seleccione el idioma deseado por
medio de pulsar el botón superior o
inferior.
N Para confirmar la selección del
idioma, mantenga pulsado el botón
inferior por aproximadamente 3
segundos.
El idioma puede cambiarse en cualquier
momento.
Es necesario actualizar el analizador
para que admita las herramientas
motorizadas inalámbricas más recientes
o modelos nuevos de baterías, al igual
que funciones de diagnóstico
adicionales. La actualización puede
efectuarse de la manera descrita a
continuación.
Actualización directa con software de
diagnóstico y acceso a Internet
La computadora con el software de
diagnóstico tiene acceso a Internet –
vea "Software de diagnóstico":
N Conecte el analizador a la
computadora usando el cable USB
para ello.
En el menú, haga clic en el botón
"Check for updates... ". El software de
diagnóstico revisa si hay alguna
actualización disponible. En caso
afirmativo, la actualización de efectúa
de modo automático.
Actualización indirecta (sin
computadora)
Los datos para actualizar el analizador
son suministrados por la filial.
N Conecte el analizador a la fuente de
alimentación – vea "Conexión al
suministro de energía eléctrica".
Use el analizador sólo en recintos
cerrados y secos, a temperaturas
ambiente de entre 5 °C y 40 °C (41°F-
104 °F).
Instrucciones de manejo
El analizador se maneja con dos
botones (1):
Para confirmar los procedimientos
durante la prueba
Para avanzar entre páginas en la
pantalla durante la prueba
Para seleccionar el idioma
Para borrar la memoria de fallas
Inserte la batería
Se necesita una batería tipo AP de
STIHL con una carga mínima de 80%
para probar la herramienta inalámbrica.
La batería suministra la alimentación
eléctrica necesaria a la herramienta
para la prueba.
Selección del idioma Actualización del analizador Prueba de herramienta
inalámbrica
1
7BA005 KN
ADG 2
español / EE.UU
19
N Coloque la batería (1) en el
analizador (2) hasta que perciba
una resistencia notable – luego
presione hasta el tope.
Los contactos de la batería y del
analizador deberán estar limpios.
La prueba continúa automáticamente
cuando se inserta la batería. Si la
prueba no continúa, la razón de ello
puede ser:
No hay contacto entre la batería y el
analizador – saque la batería y
vuélvala a colocar.
Falla en la batería – pruébela con el
analizador de baterías ADG 1 de
STIHL, de ser necesario.
Si la batería tiene carga insuficiente, la
pantalla del analizador indica:
N Utilice una batería debidamente
cargada.
Inserte el adaptador
El adaptador conecta la herramienta
inalámbrica con la batería. La
herramienta inalámbrica está lista para
funcionar.
El motor de la herramienta se pone en
marcha durante la prueba. Antes de
iniciar la prueba, siempre tome
precauciones para evitar el riesgo de
lesionarse por el contacto con el
accesorio o el funcionamiento de la
herramienta.
Las instrucciones siguientes aparecen
en la pantalla:
N Elimine riesgos de herramienta –
vea los boletines técnicos sobre el
analizador ADG 2 y la herramienta
inalámbrica sometida a prueba.
N Pulse el botón inferior para
confirmar.
N Inserte el adaptador (1) en el
compartimiento de batería de la
herramienta – el adaptador se
desliza a su posición – presiónelo
hasta que se escuche que encaja.
El adaptador debe quedar a ras con
la parte superior de la caja.
N Pulse el botón inferior para
confirmar.
N Pulse el botón inferior para
confirmar.
Transferencia de datos
La herramienta inalámbrica y el
analizador se comunican mutuamente.
El analizador puede realizar la prueba
de la herramienta sólo si este
intercambio de datos funciona.
N Encienda la herramienta
inalámbrica por aproximadamente 3
segundos – vea el manual de la
herramienta.
Si no hay intercambio de datos entre el
analizador y la herramienta, el problema
se encuentra en la conexión con la
herramienta – consulte los boletines
técnicos referentes al analizador ADG 2
y la herramienta..
N Vuelva a encender la herramienta
por unos 3 segundos la prueba se
inicia.
Carga muy baja
2
7BA002 KN
Elimine riesgos de
herramienta
Inserte adaptador
1
7BA003 KN
PRECAUCIÓN: El motor
puede arrancar
Encienda la unidad
Transferencia de datos
Vuelva a encender
la unidad
ADG 2
español / EE.UU
20
Revisión del funcionamiento de los
controles
Los controles varían según la
herramienta inalámbrica probada. El
procedimiento siguiente describe el
gatillo de la motoguadaña
inalámbricaFSA 85 a manera de
ejemplo.
La pantalla siempre muestra la posición
actual del control:
N Accione palanca mando
Suelte el gatillo luego de unos cuantos
segundos. Si el gatillo se mantiene
oprimido por un tiempo excesivo, los
resultados de la prueba podrían ser
falsos o el analizador podría apagarse
automáticamente.
Si el interruptor está en buenas
condiciones, la pantalla cambia al
oprimirlo y el diodo fotoemisor del
analizador se ilumina verde:
Si la pantalla no indica el valor 100%
cuando se oprime el gatillo por
completo, hay una avería en el mismo
consulte el procedimiento de
localización de averías en los boletines
técnicos del analizador ADG 2 y de la
herramienta.
N Para indicaciones adicionales de
falla, pulse el botón inferior.
Indicaciones de fallas
Si la herramienta inalámbrica no tiene
fallas ...
El diodo fotoemisor del analizador se
ilumina continuamente en verde.
La prueba puede reiniciarse pulsando el
botón inferior.
Si hay una falla en la herramienta
inalámbrica...
Según el tipo de falla, el diodo
fotoemisor se ilumina continuamente en
amarillo o rojo:
Luz roja continua: Falla activa;
herramienta no lista para usarse –
se indica un código de avería.
Luz amarilla continua Falla
intermitente ocurrida (ej.: contactos
sueltos); la herramienta puede
usarse – la falla puede recuperarse
en la memoria de fallas de la
herramienta.
El código de dos dígitos que aparece en
la pantalla (se expresa "XX" en la
descripción) indica la causa de la falla
de la herramienta. En caso de reclamos,
siempre indique el código en el
formulario de solicitud de garantía.
Siempre saque el adaptador de la
herramienta antes de iniciar las
reparaciones.
N Presione ambas lengüetas de
traba (1) al mismo tiempo para
desbloquear el adaptador (2).
N Extraiga el adaptador (2) de la caja.
N Pulse el botón inferior para
confirmar.
Los datos de la herramienta inalámbrica
permanecen almacenados en el
analizador por aproximadamente 30
minutos.
Cuando se saca el adaptador, se borran
las fallas activas y registros en la
memoria de falla. Utilice los botones del
analizador para avanzar por las vistas
del analizador. Para el procedimiento de
reparación, consulte los boletines
técnicos del analizador ADG 2 y de la
herramienta inalámbrica.
Borrado de la memoria de fallas
La falla de memorias puede borrarse
después de terminar las reparaciones.
N Después de ver el último registro en
la memoria de fallas, pulse el botón
inferior.
Accione palanca mando
DESACT 0%
Accione palanca mando
ACT 100%
Sin falla
Fin de prueba
Código de daños
XX
Retire el adaptador
antes de la reparación
2
1
7BA004 KN
1
ADG 2
español / EE.UU
21
N Mantenga pulsados los dos botones
por unos 3 segundos.
N Pulse el botón inferior para
confirmar que desea borrar la
memoria de fallas.
N Inserte el adaptador en la
herramienta inalámbrica.
N Encienda la herramienta
inalámbrica - consulte el manual de
la herramienta.
La memoria de fallas se borra. Para
evitar dañar el módulo electrónico, no
desconecte el adaptador de la
herramienta inalámbrica ni saque la
batería del analizador mientras se está
borrando la memoria.
Al terminal, la pantalla del analizador
confirma que se ha borrado la memoria.
La prueba puede reiniciarse pulsando el
botón inferior.
Después de la prueba
N Saque la batería del analizador.
Cuando se saca la batería, los datos de
la herramienta inalámbrica sometida a
prueba se borran del analizador. El
analizador entonces puede emplearse
para probar otras herramientas
inalámbricas.
Cuatro diodos fotoemisores indican el
estado de la batería.
N Presione el botón (1) para activar la
pantalla – la pantalla se apaga
automáticamente después de 5
segundos.
Los diodos fotoemisores pueden
encenderse o destellar en verde o rojo.
Borrar memoria?
Pulse ambas teclas
Borrar: no
Borrar:
Inserte adaptador,
encienda la unidad
No retire unidad
Memoria borrada
Fin de prueba
Diodos fotoemisores (LED)
de la batería
El diodo fotoemisor se enciende
en verde continuamente.
El diodo fotoemisor destella en
verde.
El diodo fotoemisor se enciende
en rojo continuamente.
El diodo fotoemisor destella en
rojo.
1
3901BA010 KN
ADG 2
español / EE.UU
22
Si los diodos fotoemisores verdes se
encienden continuamente/destellan
Los diodos fotoemisores verdes indican
el estado de carga de la batería cuando
se encienden y destellan en forma
continua.
Si los diodos fotoemisores rojos se
encienden/destellan
El diodo fotoemisor (1) del analizador
puede iluminarse o destellar verde,
amarillo o rojo.
Luz verde continua
Herramienta inalámbrica o función
en buenas condiciones.
Luz amarilla continua
Falla intermitente en herramienta
ocurrida (ej.: contacto suelto),
herramienta puede funcionar por el
momento – la falla puede
recuperarse en la memoria de fallas
de la herramienta.
Luz roja continua
Falla activa en herramienta
inalámbrica; herramienta no lista
para funcionar – se despliega
código de falla.
Problema – vea "Localización de
averías"
3901BA016 KN
80 - 100 %
60 - 80 %
40 - 60 %
20 - 40 %
0 - 20 %
1 El diodo fotoemisor
se enciende en rojo
continuamente:
Batería muy
caliente/fría
1)
1)
Quite la batería del analizador para
enfriarla/calentarla. Luego de
enfriarla/calentarla, vuelva a iniciar
la prueba – inserte la batería en el
analizador.
2)
Saque la batería de la herramienta
y vuelva a instalarla – si los diodos
fotoemisores vuelven a destellar, el
analizador está defectuoso y es
necesario sustituirlo.
Cuatro diodos fotoe
-
misores destellan en
rojo:
Defecto en la
batería
2)
4901BA008 KN
Diodos fotoemisores (LED)
del analizador
1
7BA006 KN
ADG 2
español / EE.UU
23
Luz roja destellante
... puede significar lo siguiente:
Observe la información de
seguridad en pantalla
Falla del analizador (pantalla
permanece en blanco) – requiere
actualización de software.
El software de diagnóstico de STIHL
puede utilizarse únicamente con los
analizadores MDG 1, ADG 1 y ADG 2.
Requisitos del sistema
Instale el software de diagnóstico de
STIHL únicamente en una computadora
que satisfaga los requisitos del sistema.
Le será necesario poseer derechos de
administrador para poder instalar el
software en una computadora que utiliza
Microsoft
®
Windows
®
, comuníquese
con su administrador de ser necesario.
Sistema operativo
Microsoft
®
Windows
®
XP SP 3 o
Microsoft
®
Windows Vista
®
o
Microsoft
®
Windows
®
7
Requisitos de software
Microsoft
®
.NET 3.5 o posterior
Adobe
®
Acrobat
®
Reader 9 o
posterior
Requisitos de equipo físico
Requisitos mínimos
CPU 1 GHz
256 MB de memoria desocupada
mínimo de 100 MB de espacio libre
en disco fijo
Definición – monitor SVGA
(definición mínima de 1024 x 768)
Interface de USB 1.1 o posterior
Unidad de CD-ROM o DVD
Configuración recomendada
CPU 2 GHz
512 MB de memoria desocupada
mínimo de 100 MB de espacio libre
en disco fijo
Definición – monitor SVGA
(definición mínima de 1024 x 768)
Interface de USB 1.1 o posterior
Unidad de CD-ROM o DVD
Software de diagnóstico
ADG 2
español / EE.UU
24
Secuencia
Es de importancia esencial respetar la
secuencia de los pasos que se
describen. Sólo entonces el software de
diagnóstico STIHL quedainstalado de
modo correcto en la computadora y en
el analizador que está conectado con la
computadora.
1 Verifique los requisitos del sistema
– vea "Software de diagnóstico".
2 Coloque el CD en la unidad de CD-
ROM o DVD de la computadora e
inicie el programa de instalación -
vea "Instalación del software de
diagnóstico STIHL".
3 Conecte el analizador a la fuente de
alimentación – vea "Conexión del
analizador al suministro de energía
eléctrica".
4 Enchufe y conecte el cable de USB
– vea "Conexión del analizador a la
computadora".
5 Inicie el software de diagnóstico
STIHL – vea "Conexión del
analizador a la computadora".
Instalación del software de diagnóstico
STIHL
Coloque el disco en la unidad CD-ROM
o DVD de la computadora.
Arranque automático
El arranque automático funciona
únicamente si la computadora admite el
arranque automático de un programa
contenido en CD-ROM (AUTORUN). Si
el programa de instalación no arranca
automáticamente en la computadora,
arránquelo manualmente.
Arranque manual
Abra "Mi computadora" y seleccione la
unidad de CD-ROM o DVD-ROM. Inicie
la instalación haciendo doble clic en el
archivo "SDSSetup.exe".
Instalación a través de Internet
El software de diagnóstico también está
disponible en
https://download.stihl.com/sds/sdssetup
.exe
Datos para abrir sesión
Nombre de usuario: _stihl_sds_user
Contraseña:
STIHL_diagnose_download!
Conecte el analizador a la computadora
después de haber instalado el software
de diagnóstico de STIHL.
Se usa un cable de USB para conectar
el analizador a la computadora. El cable
de USB se incluye con el analizador.
N Conecte el analizador a la
computadora usando el cable USB
para ello.
El asistente de equipo físico aparece.
N Marque "No, not this time" (No
ahora) y luego haga clic en "Next"
(siguiente).
N Marque "Install software from a list
or other source" (Instalar software
de una lista o de otra fuente) y haga
clic en "Next" (Siguiente).
N Marque "Also search following
source" (También buscar en la
fuente siguiente) y haga clic en
"Search" (Buscar).
Busque archivos de control en el
directorio siguiente: <Directorio de
instalación>\STIHL\SDS\ Driver\ ADG2\
N Seleccione el directorio de
instalación, por ejemplo, el
directorio de instalación estándar
de Microsoft
®
Windows
®
XP:
C:\Programs\STIHL\SDS\Driver\AD
G2\) – haga clic en "OK" (Aceptar)
N Se instala el archivo de control de
ADG 2. Salga del asistente
pulsando "Finish" (Terminar).
N Inicie el software de diagnóstico
STIHL.
Instalación del software de
diagnóstico
Conexión del analizador a la
computadora
ADG 2
español / EE.UU
25
La barra de estado indica
N Si se hace clic en el gráfico de "ADG
2" la vista en la pantalla cambia a
"Inicializándose".
N Ahora siga las instrucciones de uso
del software de diagnóstico de
STIHL – aténgase a las
precauciones de seguridad del
software de diagnóstico STIHL
durante el uso.
La introducción de las nuevas
herramientas motorizadas y la
expansión de funciones de diagnóstico
han hecho necesaria la actualización del
software. La actualización puede
efectuarse de la manera descrita a
continuación.
Actualización directa por medio de
Internet
La computadora que tiene el software
de diagnóstico tiene acceso a Internet:
En el menú, haga clic en el botón
"Check for updates... ". El software de
diagnóstico revisa si hay alguna
actualización disponible. En caso
afirmativo, la actualización de efectúa
de modo automático.
Actualización indirecta (sin acceso a
Internet)
La computadora que tiene el software
de diagnóstico no tiene acceso a
Internet:
Los datos para actualizar el software de
diagnóstico son suministrados por la
filial.
Es necesario atenerse a
precauciones de seguridad del país
específico y las precauciones de
seguridad dadas ene l manual del
operador cuando se usa el
analizador.
Para reducir el riesgo de lesiones
personales, no use el analizador si
está dañado o si no ha sido
debidamente armado.
Utilice el analizador únicamente
para probar las herramientas
motorizadas inalámbricas STIHL.
Inspección visual – revise la
herramienta mecánica inalámbrica
en busca de señales de daños.
Antes de iniciar la prueba, siempre
tome medidas para reducir el riesgo
de accidentes y lesiones por el
contacto con la herramienta
motorizada. Colocar la herramienta
motorizada inalámbrica de modo
correspondiente y monte
dispositivos de seguridad o
accesorios (por ejemplo, cadena sin
picas), de ser necesario.
Use equipo protector personal.
El usuario no puede introducir datos
en la computadora mientras la
prueba está en marcha.
ADG 2 conectado
Actualización de software de
diagnóstico
Uso
ADG 2
español / EE.UU
26
N Saque el adaptador del analizador
de la herramienta.
N Saque la batería del analizador.
N Desconecte el enchufe del
tomacorriente de pared.
N Desconecte el cable de USB del
analizador.
N Almacene el analizador y el cable
de en un lugar seco y bajo llave.
Manténgalos fuera del alcance de
los niños y de otras personas no
autorizadas, y protegidos de la
contaminación.
1 Analizador
2 Batería
3 Adaptador
4 Conexión del cordón a la
herramienta inalámbrica
5 Cordón eléctrico
6 Pantalla
7 Diodo fotoemisor (LED)
8 Botón inferior
9 Botón superior
10 Contactos
11 Interface de USB
12 Cable de USB
# Placa de capacidad nominal
Almacenamiento del
analizador
Componentes importantes
11
1
5
9
8
6
#
7BA008 KN
10
7
4
12
ADG 2
español / EE.UU
27
Analizador
Batería
El analizador puede usarse con baterías
recargables STIHL originales.
Los problemas detectados durante la
prueba se muestran en la pantalla del
analizador.
Para los procedimientos de reparación
de los problemas indicados, consulte los
boletines técnicos referentes al
analizador ADG 2 y la herramienta
inalámbrica.
Respete todas las leyes y los
reglamentos sobre eliminación de
desechos que correspondan a su país.
No se debe tirar los aparatos eléctricos
en el basurero. Lleve la herramienta
motorizada, los accesorios y el embalaje
a un vertedero autorizado para
reciclarlos y contribuir al cuidado del
medio ambiente.
Comuníquese con un concesionario de
servicio de STIHL para obtener la
información más actualizada sobre la
eliminación de desechos.
Especificaciones
Voltaje: 120 V
Frecuencia: 50-60 Hz
Consumo de potencia: 8 W
Aislamiento: II, E
Categoría de
sobrevoltaje: II
Nivel de contaminación: 2
Altura máx. de
funcionamiento::
2000 m
(6600 pies)
Humedad relativa máx.: 80 %
Tolerancia máx. de sumi
-
nistro de voltaje: + / - 10 %
Tipo: Iones de litio
Localización de averías Desecho
000BA073 KN
ADG 2
español / EE.UU
28
www.stihl.com
*04587578621A*
0458-757-8621-A
0458-757-8621-A
englisch / spanisch USA
G U
! WARNING!
This product contains chemicals
known to the State of California to cause
cancer, birth defects
or other reproductive harm.
! WARNING! ! ADVERTENCIA!
Este producto contiene sustancias químicas
consideradas por el Estado de California
como causantes de cáncer, defectos de
nacimiento u otra toxicidad reproductora.
englisch / spanisch USA
U
  • Page 1 1
  • Page 2 2
  • Page 3 3
  • Page 4 4
  • Page 5 5
  • Page 6 6
  • Page 7 7
  • Page 8 8
  • Page 9 9
  • Page 10 10
  • Page 11 11
  • Page 12 12
  • Page 13 13
  • Page 14 14
  • Page 15 15
  • Page 16 16
  • Page 17 17
  • Page 18 18
  • Page 19 19
  • Page 20 20
  • Page 21 21
  • Page 22 22
  • Page 23 23
  • Page 24 24
  • Page 25 25
  • Page 26 26
  • Page 27 27
  • Page 28 28
  • Page 29 29
  • Page 30 30
  • Page 31 31
  • Page 32 32

STIHL ADG 2 Manual de usuario

Tipo
Manual de usuario

En otros idiomas