Teufel CINEBAR 11 Surround "4.1-Set" Guía de inicio rápido
- Categoría
- Altavoces de la barra de sonido
- Tipo
- Guía de inicio rápido

EN – Quick Start – 2
DE – Kurzanleitung – 4
ES – Guía rápida – 6
FR – Quick Start – 8
IT – Quick Start – 10
NL – Quick Start – 12
PL – Szybki start – 14
EN – Declaration of Conformity – 16
Functions
Button/switch Status LED Meaning
Briefly push the
PAIRING button (1).
Flashes in white. Pairing mode. Device is searching for a
compatible soundbar.
Push and hold the
PAIRING button (1).
Flashes alternating be-
tween red and white.
Subwoofer is reset to the factory default
and switches to pairing mode afterwards.
Change the setting of the
ROOM PLACEMENT switch (2).
Pulses in white once. This indicates the switching process.
Change the volume with the
SUB VOLUME LEVEL control (3).
+10 dB: 100 % brightness
0 dB: 60 % brightness
–10 dB: 20 % brightness
This indicates the set volume.
The subwoofer should be „easily heard“.
However, it should not drone.
• Switch your subwoofer and your wireless-compatible
soundbar or also the subconnect transmitter on.
The STATUS LED (5) will blink and the devices will now
automatically connect. An existing connection is indicated
by the continuously illuminated STATUS LED (5).
• If the connection is not established automatically or the
connection is interrupted, push the PAIRING button (1).
The STATUS LED (5) blinks.
• Perform the corresponding steps for your soundbar to estab-
lish the connection.
• Insert the small plug of the mains cord in the input jack(4)
and the big plug in a mains socket (220–240 V ~ / 50 Hz).
The STATUS LED (5) pulses in white.
If the subwoofer was already connected to a device,
the connection will be re-established. Otherwise,
the subwoofer will automatically switch to pairing mode.
Operational controls
Connecting the subwoofers
Establish a wireless connection
EN – 2
Operational controls
1 PAIRING button: Establish a wireless connection to the external player.
2 ROOM PLACEMENT switch: Select the ideal equalizer setting depending on the setup location.
3 SUB VOLUME LEVEL control: Adjust the volume of the subwoofer.
4 POWER: Input jack for the mains cord
5 STATUS LED: Indicates the current operational mode.
• Schalten Sie Ihren Subwoofer und Ihre wireless-kompatible
Soundbar bzw. auch den Subconnect-Transmitter ein.
Die STATUS-LED (5) blinkt und die Geräte verbinden sich nun
automatisch. Eine bestehende Verbindung erkennen Sie an
der dauerhaft leuchtenden STATUS-LED (5).
• Sollte die Verbindung nicht automatisch erfolgen oder ein-
mal unterbrochen sein, drücken Sie die PAIRING-Taste (1).
Die STATUS-LED (5) blinkt.
• Führen Sie dann die entsprechenden Schritte an Ihrer
Soundbar aus, um die Verbindung herzustellen.
DE – 4
• Stecken Sie den kleinen Stecker des Netzkabels in
die Eingangsbuchse(4), den großen Stecker in eine
Netzsteck dose (220–240 V ~ / 50 Hz).
Die STATUS-LED (5) pulsiert weiß.
Wenn bereits eine Verbindung zu einem Gerät bestanden
hat, wird diese wieder hergestellt. Anderenfalls wechselt der
Subwoofer automatisch in den Pairing-Modus.
Subwoofer anschließen
Wireless-Verbindung herstellen
5
21
3
4
Bedienelemente
Funktionen
Taste/Schalter Status-LED Bedeutung
PAIRING-Taste (1) kurz
drücken.
Blinkt weiß. Pairing-Modus. Gerät sucht eine kompatible
Soundbar.
PAIRING-Taste (1)
lange gedrückt halten.
Blinkt abwechselnd rot
und weiß.
Subwoofer wird auf Werkseinstellung zurückge-
setzt und wechselt dann in den Pairing-Modus.
Einstellung des
ROOM-PLACEMENT-
Schalters (2) ändern.
Pulsiert einmal weiß. Das Umschalten wird so angezeigt.
Lautstärke mit dem
SUB- VOLUME- LEVEL-
Regler (3) ändern.
+10 dB: 100 % Helligkeit
0 dB: 60 % Helligkeit
–10 dB: 20 % Helligkeit
Die eingestellte Lautstärke wird so angezeigt.
Der Subwoofer sollte „gut hörbar“ sein, aber
nicht dröhnen.
Bedienelemente
1 PAIRING-Taste: Wireless-Verbindung zum Zuspieler herstellen.
2 ROOM-PLACEMENT-Schalter: Je nach Aufstellungsort die optimale Equalizer-Einstellung wählen.
3
SUB-VOLUME-LEVEL-Regler: Lautstärke des Subwoofers einstellen.
4 POWER: Eingangsbuchse für das Netzkabel
5 STATUS-LED: Zeigt den aktuellen Betriebsmodus an.
5
21
3
4
• Encienda el subwoofer y la barra de sonido inalámbrica o
también el transmisor Subconnect.
El LED STATUS (5) parpadea y los equipos se conectan
automáticamente. Reconocerá la conexión porque el
LED STATUS (5) se queda encendido.
• Si la conexión no se establece automáticamente o se
interrumpe, presione el botón PAIRING (1).
El LED STATUS (5) parpadea.
• Ejecute entonces los pasos pertinentes en la barra de
sonido para establecer la conexión.
ES – 6
• Inserte el conector pequeño del cable de red en la toma
de entrada(4), y el grande en la toma de
corriente (220–240 V ~ / 50Hz).
El LED STATUS (5) parpadea en blanco.
Si ya existe una conexión con un equipo, esta se restable-
cerá. De lo contrario, el subwoofer pasa automáticamente
al modo de sincronización.
Conexión del subwoofer
Establecimiento de la conexión
inalámbrica
5
21
3
4
Elementos de control
Funciones
Botón/interruptor LED de estado Significado
Presione brevemente
el botón PAIRING (1).
Parpadea en blanco. Modo de sincronización. El equipo busca una
barra de sonido compatible.
Mantenga presionado
el botón PAIRING (1).
Parpadea en rojo y blanco. El subwoofer se restablece a la configuración de fá-
brica y cambia entonces al modo de sincronización.
Modifique el ajuste
del interruptor
ROOM PLACEMENT (2).
Parpadea una vez en
blanco.
El cambio se muestra así.
Modifique el volumen
con el regulador SUB
VOLUME LEVEL (3).
+10 dB: 100% brillo
0 dB: 60 % brillo
–10 dB: 20 % brillo
El volumen ajustado se muestra así.
El subwoofer debería escucharse bien, sin llegar
a retumbar.
Elementos de control
1 Botón PAIRING: Establece la conexión inalámbrica con el reproductor.
2 Interruptor ROOM PLACEMENT: Elija la configuración óptima del ecualizador en función del lugar de uso.
3 Regulador SUB VOLUME LEVEL: Ajuste el volumen del subwoofer.
4 POWER: Toma de entrada del cable de red
5 LED STATUS: Muestra el modo operativo en ese momento.
• Allumez votre subwoofer et votre barre de son compatible
sans fil ou même le Subconnect Transmitter.
La LED D’ÉTAT (5) clignote et les appareils se connectent
automatiquement. Une connexion existante est indiquée par
la LED D’ÉTAT (5) allumée en permanence.
• Si la connexion n’est pas automatique ou est interrompue,
appuyez sur la touche PAIRING (1).
La LED D’ÉTAT (5) clignote.
• Effectuez ensuite les démarches appropriées sur votre
barre de son pour établir la connexion.
FR – 8
• Branchez la petite fiche du câble d’alimentation sur la
prise d’entrée(4), la grande fiche sur une prise de courant
(220–240 V ~ / 50 Hz).
La LED D’ÉTAT (5) clignote en blanc par pulsions.
Si une connexion à un appareil a déjà été établie, elle est
rétablie. Sinon, le subwoofer passe automatiquement en
mode Pairing.
Brancher le subwoofer
Établir la connexion sans fil
5
21
3
4
Éléments de commande
Fonctions
Touche/bouton LED d’état Signification
Appuyer brièvement sur la
touche PAIRING (1).
Clignote en blanc. Mode Pairing. L’appareil recherche une
barre de son compatible.
Appuyer de façon prolongée
sur la touche PAIRING (1).
Clignote alternativement
en rouge et en blanc.
Le subwoofer est réinitialisé aux réglages par
défaut et passe ensuite en mode Pairing.
Modifier le réglage du bouton
ROOM PLACEMENT (2).
Une pulsation blanche. La commutation est indiquée comme suit.
Modifier le volume avec le
régulateur SUB VOLUME
LEVEL (3).
+10 dB: 100 % luminosité
0 dB: 60 % luminosité
–10 dB: 20 % luminosité
Le volume réglé est affiché ainsi. Le
subwoofer doit être «bien audible»,
sans vrombissement.
Éléments de commande
1 Touche PAIRING: établir la connexion sans fil vers le lecteur.
2 Bouton ROOM PLACEMENT: choisir le réglage optimal de l’égaliseur en fonction du lieu d’installation.
3 Régulateur SUB VOLUME LEVEL: régler le volume du subwoofer.
4 POWER: prise d’entrée pour le câble d’alimentation
5 LED D’ÉTAT: affiche le mode de fonctionnement actuel.
IT – 10
Collegamento del subwoofer
• Collegare la spina piccola del cavo di alimentazione alla
presa di ingresso(4) e la spina grande a una presa di
corrente (220–240 V ~ / 50 Hz).
Il LED di STATO (5) lampeggia di colore bianco.
Se è già stata stabilita una connessione a un dispositivo,
questa verrà ristabilita. In caso contrario, il subwoofer
passerà automaticamente alla modalità di associazione.
Determinazione di una
connessione wireless
• Accendere il subwoofer e la soundbar compatibile con il
wireless o il trasmettitore Subconnect.
Il LED di STATO (5) lampeggia e i dispositivi si connettono
automaticamente. È possibile riconoscere una connessio-
ne esistente dal LED di STATO (5) costantemente acceso.
• Se la connessione non avviene automaticamente o viene
interrotta una volta, premere il pulsante PAIRING (1).
Il LED di STATO (5) lampeggia.
• Quindi seguire i passaggi appropriati sulla soundbar per
effettuare la connessione.
5
21
3
4
Elementi di comando
Funzioni
Pulsante/interruttore LED di stato Significato
Premere brevemente il
pulsante PAIRING (1).
Luce bianca lampeggiante. Modalità di associazione. Il dispositivo sta
cercando una soundbar compatibile.
Tenere premuto a lungo
il pulsante PAIRING (1).
Luce lampeggiante alternati-
vamente in rosso e bianco.
Il subwoofer viene ripristinato alle imposta-
zioni di fabbrica e quindi passa alla modalità
di associazione.
Modificare le imposta-
zioni dell’interruttore
ROOM-PLACEMENT (2).
Lampeggia una volta con
colore bianco.
La commutazione è indicata in questo modo.
Modificare il volume
con il controllo
SUB-VOLUME-LEVEL (3).
+10 dB: Luminosità al 100%
0 dB: Luminosità al 60%
–10 dB: Luminosità al 20%
Il volume impostato viene visualizzato in
questo modo. Il subwoofer dovrebbe essere
“chiaramente udibile”, senza rimbombare.
Elementi di comando
1 Pulsante PAIRING (ASSOCIAZIONE): Stabilisce una connessione wireless con il lettore.
2 Interruttore ROOM-PLACEMENT (LUOGO DI INSTALLAZIONE): Seleziona l’impostazione
dell’equalizzatore ottimale in base alla posizione di installazione.
3 Controllo SUB-VOLUME-LEVEL (LIVELLO VOLUME): Regola il volume del subwoofer.
4 POWER (ALIMENTAZIONE): Presa di ingresso per il cavo di alimentazione
5 LED di STATO: Visualizza la modalità operativa corrente.
NL – 12
Subwoofer aansluiten
• Steek de kleine stekker van de netkabel in de ingangs-
bus(4), de grote stekker in een contactdoos
(220–240 V ~ / 50 Hz).
De STATUS-LED (5) licht wit op.
Als er al een verbinding was met een apparaat, wordt deze
opnieuw gerealiseerd. In het andere geval schakelt de
subwoofer automatisch over op de pairing-modus.
Wireless-verbinding realiseren
• Schakel uw subwoofer en uw wireless-compatibele
soundbar of ook de subconnect-transmitter in.
De STATUS-LED (5) knippert en de apparaten worden nu auto-
matisch verbonden. Een bestaande verbinding herkent u aan
de continu brandende STATUS-LED (5).
• Als de verbinding niet automatisch plaatsvindt of een keer
onderbroken is, duwt u op de PAIRING-toets (1).
De STATUS-LED (5) knippert.
• Voer dan de passende stappen uit op uw soundbar om de
verbinding te maken.
5
21
3
4
Bedieningselementen
Functies
Toets/schakelaar Status-LED Betekenis
PAIRING-toets (1)
kort indrukken.
Knippert wit. Pairing-modus. Apparaat zoekt naar een
compatibele soundbar.
PAIRING-toets (1) lang
ingedrukt houden.
Knippert afwisselend
rood en wit.
Subwoofer wordt teruggezet op de fabrieksinstel-
ling en schakelt dan over op de pairing-modus.
Instelling van de
ROOM-PLACEMENT-
schakelaar (2) wijzigen.
Brandt één keer wit. De overschakeling wordt zo aangegeven.
Volume wijzigen met de
SUB-VOLUME-LEVEL-
regelknop (3).
+10 dB: 100 % helderheid
0 dB: 60 % helderheid
–10 dB: 20 % helderheid
Het ingestelde volume wordt zo weergegeven.
De subwoofer moet “goed hoorbaar” zijn,
maar geen dreunend geluid maken.
Bedieningselementen
1 PAIRING-toets: Wireless-verbinding met het afspeelapparaat maken.
2 ROOM-PLACEMENT-schakelaar: Kies naargelang van de plaats van opstelling de optimale
equalizer-instelling.
3 SUB-VOLUME-LEVEL-regelknop: Volume van de subwoofer instellen.
4 POWER: Ingangsbus voor de netkabel
5 STATUS-LED: Toont de actuele bedrijfsmodus.
PL – 14
Podłączanie subwoofera
• Włożyć małą wtyczkę przewodu zasilającego do gniazda
wejściowego(4), a dużą wtyczkę do gniazdka sieciowego
(220–240 V ~ / 50 Hz).
Dioda TRYBU (5) pulsuje na biało.
Jeśli połączenie z urządzeniem zostało już nawiązane,
zostanie przywrócone. W przeciwnym razie subwoofer
automatycznie przełączy się do trybu parowania.
Tworzenie bezprzewodowego
połączenia
• Włączyć subwoofer i kompatybilny z bezprzewodowym
Soundbar lub nadajnik Subconnect.
Dioda TRYBU (5) miga, a urządzenia łączą się teraz
automatycznie. Istniejące połączenie można rozpoznać po
stale świecącej się diodzie TRYBU (5).
• Jeśli połączenie nie nastąpi automatycznie lub jeśli zosta-
nie przerwane, należy nacisnąć przycisk PAIRING (1).
Dioda TRYBU (5) miga.
• Następnie wykonać odpowiednie czynności na Soundbar,
aby nawiązać połączenie.
5
21
3
4
Element eksploatacyjny
Funkcje
Przycisk/przełącznik Dioda TRYBU Znaczenie
Nacisnąć krótko
przycisk PAIRING (1).
Miga na biało. Tryb parowania. Urządzenie wyszukuje
kompatybilny Soundbar.
Przytrzymać wciśnięty
przycisk PAIRING (1).
Miga na przemian na
czerwono i na biało.
Subwoofer zostanie zresetowany do ustawień
fabrycznych, a następnie przełączy się do trybu
parowania.
Zmienić ustawienie prze-
łącznika
ROOM-PLACEMENT (2).
Miga raz na biało. Przełączanie jest oznaczone w ten sposób.
Zmienić głośność za pomo-
cą regulatora
SUB-VOLUME-LEVEL (3).
+10 dB: Jasność 100%
0 dB: Jasność 60%
–10 dB: Jasność 20%
Wyświetli się ustawiona głośność. Subwoofer
powinien być „wyraźnie słyszalny”, ale nie
powinien buczeć.
Element eksploatacyjny
1 Przycisk PAIRING: Nawiązuje bezprzewodowe połączenie z odtwarzaczem.
2 Przełącznik ROOM-PLACEMENT: Wybiera optymalne ustawienie w zależności od miejsca instalacji.
3 Regulator SUB-VOLUME-LEVEL: Dostosowuje głośność subwoofera.
4 POWER: Gniazdo wejściowe na przewód zasilający
5 Dioda TRYBU: Wyświetla aktualny tryb pracy.
Lautsprecher Teufel GmbH
BIKINI Berlin
Budapester Straße 44
10787 Berlin (Germany)
Manual no.:
HCHAM / 198583 20201201
EN – 3
DE – 5
ES – 7 FR – 9
IT – 11 NL – 13 PL – 15
Universal Subwoofer T6
Declaration Of Conformity
Lautsprecher Teufel GmbH hereby declares that this product complies with the require-
ments of the directives 2014/30/EU, 2014/35/EU and 2014/53/EU to the extent they are
installed and used in accordance with the instructions of the manufacturer.
The full text of the EU declaration of conformity is available at the following Internet address:
www.teufelaudio.com/konformitaetserklaerungen.html
EN – 16
You can find an extensive
user manual online at
h t t p :// teufelaudio.com/T6-support
You can find more information online at ht t p:// teufelaudio.com/T6-support
Weitere Informationen finden Sie online unter http://teufel.de/T6-Support Tiene más información online en h t t p ://teufelaudio.es/T6-support
Vous trouverez d’autres informations en ligne sur h t t p:// teufelaudio.fr/T6-support
Ulteriori informazioni sono disponibili online all’indirizzo h t t p:// teufelaudio.it/T6-support
Meer informatie vindt u online op h t t p:// teufelaudio.nl/T6-support
Więcej informacji podano online na stronie ht t p://teufelaudio.pl/T6-support
Transcripción de documentos
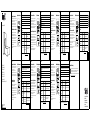
EN – 2 Connecting the subwoofers Universal Subwoofer T6 • Insert the small plug of the mains cord in the input jack (4) and the big plug in a mains socket (220–240 V ~ / 50 Hz). The STATUS LED (5) pulses in white. If the subwoofer was already connected to a device, the connection will be re-established. Otherwise, the subwoofer will automatically switch to pairing mode. DE – 4 EN – 3 Operational controls 5 1 2 3 Establish a wireless connection • Switch your subwoofer and your wireless-compatible soundbar or also the subconnect transmitter on. The STATUS LED (5) will blink and the devices will now automatically connect. An existing connection is indicated by the continuously illuminated STATUS LED (5). • If the connection is not established automatically or the connection is interrupted, push the PAIRING button (1). The STATUS LED (5) blinks. 4 • Perform the corresponding steps for your soundbar to establish the connection. Operational controls 1 PAIRING button: Establish a wireless connection to the external player. 2 ROOM PLACEMENT switch: Select the ideal equalizer setting depending on the setup location. 3 SUB VOLUME LEVEL control: Adjust the volume of the subwoofer. 4 POWER: Input jack for the mains cord 5 STATUS LED: Indicates the current operational mode. Functions Button/switch Briefly push the PAIRING button (1). Push and hold the PAIRING button (1). Change the setting of the ROOM PLACEMENT switch (2). Change the volume with the SUB VOLUME LEVEL control (3). Status LED Flashes in white. Flashes alternating between red and white. Pulses in white once. Meaning Pairing mode. Device is searching for a compatible soundbar. Subwoofer is reset to the factory default and switches to pairing mode afterwards. This indicates the switching process. +10 dB: 100 % brightness This indicates the set volume. The subwoofer should be „easily heard“. 0 dB: 60 % brightness However, it should not drone. –10 dB: 20 % brightness Subwoofer anschließen • Stecken Sie den kleinen Stecker des Netzkabels in die Eingangsbuchse (4), den großen Stecker in eine Netzsteckdose (220–240 V ~ / 50 Hz). Die STATUS-LED (5) pulsiert weiß. Wenn bereits eine Verbindung zu einem Gerät bestanden hat, wird diese wieder hergestellt. Anderenfalls wechselt der Subwoofer automatisch in den Pairing-Modus. DE – 5 Bedienelemente 5 Bedienelemente 1 PAIRING-Taste: Wireless-Verbindung zum Zuspieler herstellen. 2 ROOM-PLACEMENT-Schalter: Je nach Aufstellungsort die optimale Equalizer-Einstellung wählen. 1 2 3 SUB-VOLUME-LEVEL-Regler: Lautstärke des Subwoofers einstellen. 4 POWER: Eingangsbuchse für das Netzkabel 5 STATUS-LED: Zeigt den aktuellen Betriebsmodus an. 3 Wireless-Verbindung herstellen • Schalten Sie Ihren Subwoofer und Ihre wireless-kompatible Soundbar bzw. auch den Subconnect-Transmitter ein. Die STATUS-LED (5) blinkt und die Geräte verbinden sich nun automatisch. Eine bestehende Verbindung erkennen Sie an der dauerhaft leuchtenden STATUS-LED (5). • Sollte die Verbindung nicht automatisch erfolgen oder einmal unterbrochen sein, drücken Sie die PAIRING-Taste (1). Die STATUS-LED (5) blinkt. 4 • Führen Sie dann die entsprechenden Schritte an Ihrer Soundbar aus, um die Verbindung herzustellen. EN – Quick Start – 2 DE – Kurzanleitung – 4 ES – Guía rápida – 6 FR – Quick Start – 8 IT – Quick Start – 10 NL – Quick Start – 12 PL – Szybki start – 14 EN – Declaration of Conformity – 16 • Collegare la spina piccola del cavo di alimentazione alla presa di ingresso (4) e la spina grande a una presa di corrente (220–240 V ~ / 50 Hz). Il LED di STATO (5) lampeggia di colore bianco. Se è già stata stabilita una connessione a un dispositivo, questa verrà ristabilita. In caso contrario, il subwoofer passerà automaticamente alla modalità di associazione. 5 1 2 3 Determinazione di una connessione wireless • Accendere il subwoofer e la soundbar compatibile con il wireless o il trasmettitore Subconnect. Il LED di STATO (5) lampeggia e i dispositivi si connettono automaticamente. È possibile riconoscere una connessione esistente dal LED di STATO (5) costantemente acceso. • Se la connessione non avviene automaticamente o viene interrotta una volta, premere il pulsante PAIRING (1). Il LED di STATO (5) lampeggia. • Quindi seguire i passaggi appropriati sulla soundbar per effettuare la connessione. You can find an extensive user manual online at http://teufelaudio.com/T6-support Elementi di comando 4 IT – 11 Elementi di comando 1 Pulsante PAIRING (ASSOCIAZIONE): Stabilisce una connessione wireless con il lettore. 2 Interruttore ROOM-PLACEMENT (LUOGO DI INSTALLAZIONE): Seleziona l’impostazione dell’equalizzatore ottimale in base alla posizione di installazione. 3 Controllo SUB-VOLUME-LEVEL (LIVELLO VOLUME): Regola il volume del subwoofer. 4 POWER (ALIMENTAZIONE): Presa di ingresso per il cavo di alimentazione 5 LED di STATO: Visualizza la modalità operativa corrente. Funzioni Pulsante/interruttore Premere brevemente il pulsante PAIRING (1). Tenere premuto a lungo il pulsante PAIRING (1). LED di stato Luce bianca lampeggiante. Modificare le impostazioni dell’interruttore ROOM-PLACEMENT (2). Modificare il volume con il controllo SUB-VOLUME-LEVEL (3). Lampeggia una volta con colore bianco. Luce lampeggiante alternativamente in rosso e bianco. Significato Modalità di associazione. Il dispositivo sta cercando una soundbar compatibile. Il subwoofer viene ripristinato alle impostazioni di fabbrica e quindi passa alla modalità di associazione. La commutazione è indicata in questo modo. Luminosità al 100 % Il volume impostato viene visualizzato in 0 dB: Luminosità al 60 % questo modo. Il subwoofer dovrebbe essere “chiaramente udibile”, senza rimbombare. –10 dB: Luminosità al 20 % +10 dB: Ulteriori informazioni sono disponibili online all’indirizzo http://teufelaudio.it/T6-support Funktionen Taste/Schalter PAIRING-Taste (1) kurz drücken. PAIRING-Taste (1) lange gedrückt halten. Einstellung des ROOM-PLACEMENTSchalters (2) ändern. Lautstärke mit dem SUB- VOLUME- LEVELRegler (3) ändern. Status-LED Blinkt weiß. Blinkt abwechselnd rot und weiß. Pulsiert einmal weiß. Bedeutung Pairing-Modus. Gerät sucht eine kompatible Soundbar. Subwoofer wird auf Werkseinstellung zurückgesetzt und wechselt dann in den Pairing-Modus. Das Umschalten wird so angezeigt. +10 dB: 100 % Helligkeit 0 dB: 60 % Helligkeit –10 dB: 20 % Helligkeit Die eingestellte Lautstärke wird so angezeigt. Der Subwoofer sollte „gut hörbar“ sein, aber nicht dröhnen. Conexión del subwoofer • Inserte el conector pequeño del cable de red en la toma de entrada (4), y el grande en la toma de corriente (220–240 V ~ / 50 Hz). El LED STATUS (5) parpadea en blanco. Si ya existe una conexión con un equipo, esta se restablecerá. De lo contrario, el subwoofer pasa automáticamente al modo de sincronización. NL – 12 Subwoofer aansluiten • Steek de kleine stekker van de netkabel in de ingangsbus (4), de grote stekker in een contactdoos (220–240 V ~ / 50 Hz). De STATUS-LED (5) licht wit op. Als er al een verbinding was met een apparaat, wordt deze opnieuw gerealiseerd. In het andere geval schakelt de subwoofer automatisch over op de pairing-modus. Bedieningselementen 5 1 2 3 Wireless-verbinding realiseren • Schakel uw subwoofer en uw wireless-compatibele soundbar of ook de subconnect-transmitter in. De STATUS-LED (5) knippert en de apparaten worden nu automatisch verbonden. Een bestaande verbinding herkent u aan de continu brandende STATUS-LED (5). • Als de verbinding niet automatisch plaatsvindt of een keer onderbroken is, duwt u op de PAIRING-toets (1). De STATUS-LED (5) knippert. • Voer dan de passende stappen uit op uw soundbar om de verbinding te maken. 4 NL – 13 Bedieningselementen 1 PAIRING-toets: Wireless-verbinding met het afspeelapparaat maken. 2 ROOM-PLACEMENT-schakelaar: Kies naargelang van de plaats van opstelling de optimale equalizer-instelling. 3 SUB-VOLUME-LEVEL-regelknop: Volume van de subwoofer instellen. 4 POWER: Ingangsbus voor de netkabel 5 STATUS-LED: Toont de actuele bedrijfsmodus. Functies Toets/schakelaar PAIRING-toets (1) kort indrukken. PAIRING-toets (1) lang ingedrukt houden. Instelling van de ROOM-PLACEMENTschakelaar (2) wijzigen. Volume wijzigen met de SUB-VOLUME-LEVELregelknop (3). Status-LED Knippert wit. Knippert afwisselend rood en wit. Brandt één keer wit. Betekenis Pairing-modus. Apparaat zoekt naar een compatibele soundbar. Subwoofer wordt teruggezet op de fabrieksinstelling en schakelt dan over op de pairing-modus. De overschakeling wordt zo aangegeven. 100 % helderheid Het ingestelde volume wordt zo weergegeven. 0 dB: 60 % helderheid De subwoofer moet “goed hoorbaar” zijn, maar geen dreunend geluid maken. –10 dB: 20 % helderheid +10 dB: Meer informatie vindt u online op http://teufelaudio.nl/T6-support FR – 8 ES – 7 Elementos de control 5 1 2 Elementos de control 1 Botón PAIRING: Establece la conexión inalámbrica con el reproductor. 2 Interruptor ROOM PLACEMENT: Elija la configuración óptima del ecualizador en función del lugar de uso. 3 Regulador SUB VOLUME LEVEL: Ajuste el volumen del subwoofer. 4 POWER: Toma de entrada del cable de red 5 LED STATUS: Muestra el modo operativo en ese momento. 3 Establecimiento de la conexión inalámbrica • Encienda el subwoofer y la barra de sonido inalámbrica o también el transmisor Subconnect. El LED STATUS (5) parpadea y los equipos se conectan automáticamente. Reconocerá la conexión porque el LED STATUS (5) se queda encendido. • Si la conexión no se establece automáticamente o se interrumpe, presione el botón PAIRING (1). El LED STATUS (5) parpadea. 4 • Ejecute entonces los pasos pertinentes en la barra de sonido para establecer la conexión. Weitere Informationen finden Sie online unter http://teufel.de/T6-Support You can find more information online at http://teufelaudio.com/T6-support IT – 10 Collegamento del subwoofer ES – 6 Funciones Botón/interruptor Presione brevemente el botón PAIRING (1). Mantenga presionado el botón PAIRING (1). Modifique el ajuste del interruptor ROOM PLACEMENT (2). Modifique el volumen con el regulador SUB VOLUME LEVEL (3). FR – 9 Brancher le subwoofer • Branchez la petite fiche du câble d’alimentation sur la prise d’entrée (4), la grande fiche sur une prise de courant (220–240 V ~ / 50 Hz). La LED D’ÉTAT (5) clignote en blanc par pulsions. Si une connexion à un appareil a déjà été établie, elle est rétablie. Sinon, le subwoofer passe automatiquement en mode Pairing. Établir la connexion sans fil LED de estado Parpadea en blanco. Significado Modo de sincronización. El equipo busca una barra de sonido compatible. Parpadea en rojo y blanco. El subwoofer se restablece a la configuración de fábrica y cambia entonces al modo de sincronización. Parpadea una vez en El cambio se muestra así. blanco. +10 dB: 100 % brillo 0 dB: 60 % brillo –10 dB: 20 % brillo El volumen ajustado se muestra así. El subwoofer debería escucharse bien, sin llegar a retumbar. Éléments de commande 5 1 2 3 Régulateur SUB VOLUME LEVEL : régler le volume du subwoofer. 4 POWER : prise d’entrée pour le câble d’alimentation 5 LED D’ÉTAT : affiche le mode de fonctionnement actuel. 3 • Allumez votre subwoofer et votre barre de son compatible sans fil ou même le Subconnect Transmitter. La LED D’ÉTAT (5) clignote et les appareils se connectent automatiquement. Une connexion existante est indiquée par la LED D’ÉTAT (5) allumée en permanence. • Si la connexion n’est pas automatique ou est interrompue, appuyez sur la touche PAIRING (1). La LED D’ÉTAT (5) clignote. • Włożyć małą wtyczkę przewodu zasilającego do gniazda wejściowego (4), a dużą wtyczkę do gniazdka sieciowego (220–240 V ~ / 50 Hz). Dioda TRYBU (5) pulsuje na biało. Jeśli połączenie z urządzeniem zostało już nawiązane, zostanie przywrócone. W przeciwnym razie subwoofer automatycznie przełączy się do trybu parowania. Element eksploatacyjny 5 1 2 4 • Effectuez ensuite les démarches appropriées sur votre barre de son pour établir la connexion. • Jeśli połączenie nie nastąpi automatycznie lub jeśli zostanie przerwane, należy nacisnąć przycisk PAIRING (1). Dioda TRYBU (5) miga. • Następnie wykonać odpowiednie czynności na Soundbar, aby nawiązać połączenie. Element eksploatacyjny 1 Przycisk PAIRING: Nawiązuje bezprzewodowe połączenie z odtwarzaczem. 2 Przełącznik ROOM-PLACEMENT: Wybiera optymalne ustawienie w zależności od miejsca instalacji. 4 POWER: Gniazdo wejściowe na przewód zasilający 5 Dioda TRYBU: Wyświetla aktualny tryb pracy. 3 Funkcje Przycisk/przełącznik Nacisnąć krótko przycisk PAIRING (1). Przytrzymać wciśnięty przycisk PAIRING (1). 4 LED d’état Clignote en blanc. Clignote alternativement en rouge et en blanc. Modifier le réglage du bouton Une pulsation blanche. ROOM PLACEMENT (2). Modifier le volume avec le régulateur SUB VOLUME LEVEL (3). Signification Mode Pairing. L’appareil recherche une barre de son compatible. Le subwoofer est réinitialisé aux réglages par défaut et passe ensuite en mode Pairing. La commutation est indiquée comme suit. +10 dB : 100 % luminosité Le volume réglé est affiché ainsi. Le 0 dB : 60 % luminosité subwoofer doit être « bien audible », sans vrombissement. –10 dB : 20 % luminosité Vous trouverez d’autres informations en ligne sur http://teufelaudio.fr/T6-support EN – 16 3 Regulator SUB-VOLUME-LEVEL: Dostosowuje głośność subwoofera. Tworzenie bezprzewodowego połączenia • Włączyć subwoofer i kompatybilny z bezprzewodowym Soundbar lub nadajnik Subconnect. Dioda TRYBU (5) miga, a urządzenia łączą się teraz automatycznie. Istniejące połączenie można rozpoznać po stale świecącej się diodzie TRYBU (5). PL – 15 Fonctions Touche/bouton Appuyer brièvement sur la touche PAIRING (1). Appuyer de façon prolongée sur la touche PAIRING (1). Tiene más información online en http://teufelaudio.es/T6-support PL – 14 Podłączanie subwoofera Éléments de commande 1 Touche PAIRING : établir la connexion sans fil vers le lecteur. 2 Bouton ROOM PLACEMENT : choisir le réglage optimal de l’égaliseur en fonction du lieu d’installation. Dioda TRYBU Miga na biało. Miga na przemian na czerwono i na biało. Zmienić ustawienie przeMiga raz na biało. łącznika ROOM-PLACEMENT (2). Zmienić głośność za pomo- +10 dB: Jasność 100 % cą regulatora 0 dB: Jasność 60 % SUB-VOLUME-LEVEL (3). –10 dB: Jasność 20 % Declaration Of Conformity Lautsprecher Teufel GmbH hereby declares that this product complies with the requirements of the directives 2014/30/EU, 2014/35/EU and 2014/53/EU to the extent they are installed and used in accordance with the instructions of the manufacturer. The full text of the EU declaration of conformity is available at the following Internet address: www.teufelaudio.com/konformitaetserklaerungen.html Znaczenie Tryb parowania. Urządzenie wyszukuje kompatybilny Soundbar. Subwoofer zostanie zresetowany do ustawień fabrycznych, a następnie przełączy się do trybu parowania. Przełączanie jest oznaczone w ten sposób. Wyświetli się ustawiona głośność. Subwoofer powinien być „wyraźnie słyszalny”, ale nie powinien buczeć. Więcej informacji podano online na stronie http://teufelaudio.pl/T6-support Lautsprecher Teufel GmbH BIKINI Berlin Budapester Straße 44 10787 Berlin (Germany) Manual no.: HCHAM / 198583 20201201-
 1
1

Teufel CINEBAR 11 Surround "4.1-Set" Guía de inicio rápido
- Categoría
- Altavoces de la barra de sonido
- Tipo
- Guía de inicio rápido
en otros idiomas
- français: Teufel CINEBAR 11 Surround "4.1-Set" Guide de démarrage rapide
- italiano: Teufel CINEBAR 11 Surround "4.1-Set" Guida Rapida
- English: Teufel CINEBAR 11 Surround "4.1-Set" Quick start guide
- Deutsch: Teufel CINEBAR 11 Surround "4.1-Set" Schnellstartanleitung
- Nederlands: Teufel CINEBAR 11 Surround "4.1-Set" Snelstartgids
- polski: Teufel CINEBAR 11 Surround "4.1-Set" Skrócona instrukcja obsługi
Artículos relacionados
Otros documentos
-
Sharp HT-SBW160 El manual del propietario
-
Sony HT-CT291 El manual del propietario
-
Sony HT-CT60BT El manual del propietario
-
Sharp HT-SBW110 El manual del propietario
-
Sony HT-RT4 El manual del propietario
-
Sony HT-CT770 Sound Bar El manual del propietario
-
-
Yamaha NS-NSW100 El manual del propietario
-
Yamaha YAS-203 El manual del propietario